Jump to content
Email-only Log-Ins Coming in December ×

  • entries
    24
  • comments
    15
  • views
    9,141

About this blog

Entries in this blog

Stripped radio fascia captive nut- make your own replacement

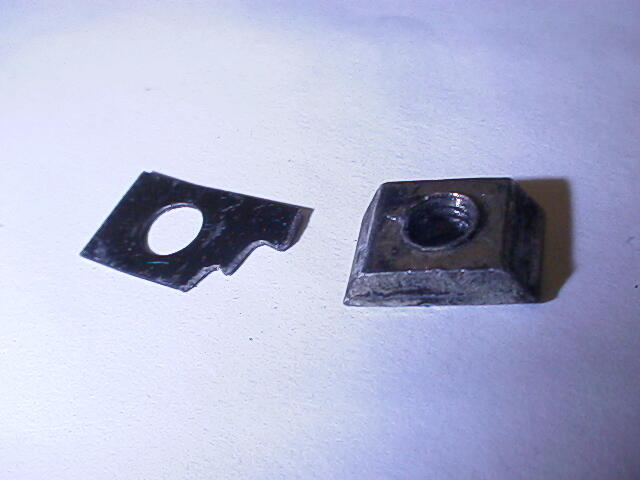
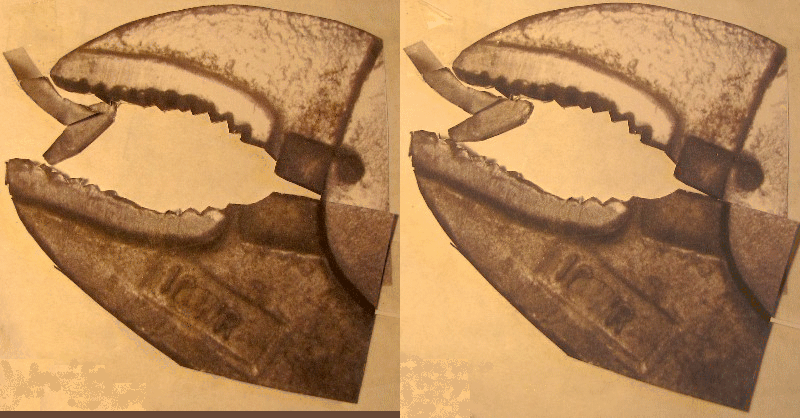
This is the original fascia nut and odd looking squarish washer that came out with it: One of the captive nuts on the fascia on my car was stripped out so to fix that I made my own captive nut by cutting a rectangle shape out of a repair metal from Thrifty hardware and drilling and tapping it for the 4MM original machine screw. I used a bench grinder to make the new nut have the same size as the original and to have the beveled edges the original has. The existing machine screw size is

Mikes Z car

Mikes Z car

Rear frame rail interiors anti rust spray

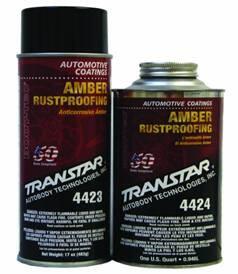
Hi all, I sprayed all interior channels of the rear frame rails and interior of wheel wells of a 240Z with two cans of Transtar amber anti corrosion material using existing holes where possible. The front frame rails are more likely to rust but I had already sprayed the interior of the front rails on my car. A thread describing how I did the front frame rails is here: http://www.classiczcars.com/forums/body-paint-s30/40048-two-frame-rails-tc-rod-there-floor-between-them.html The Transtar

Mikes Z car

Mikes Z car

Glove box liner- make your own

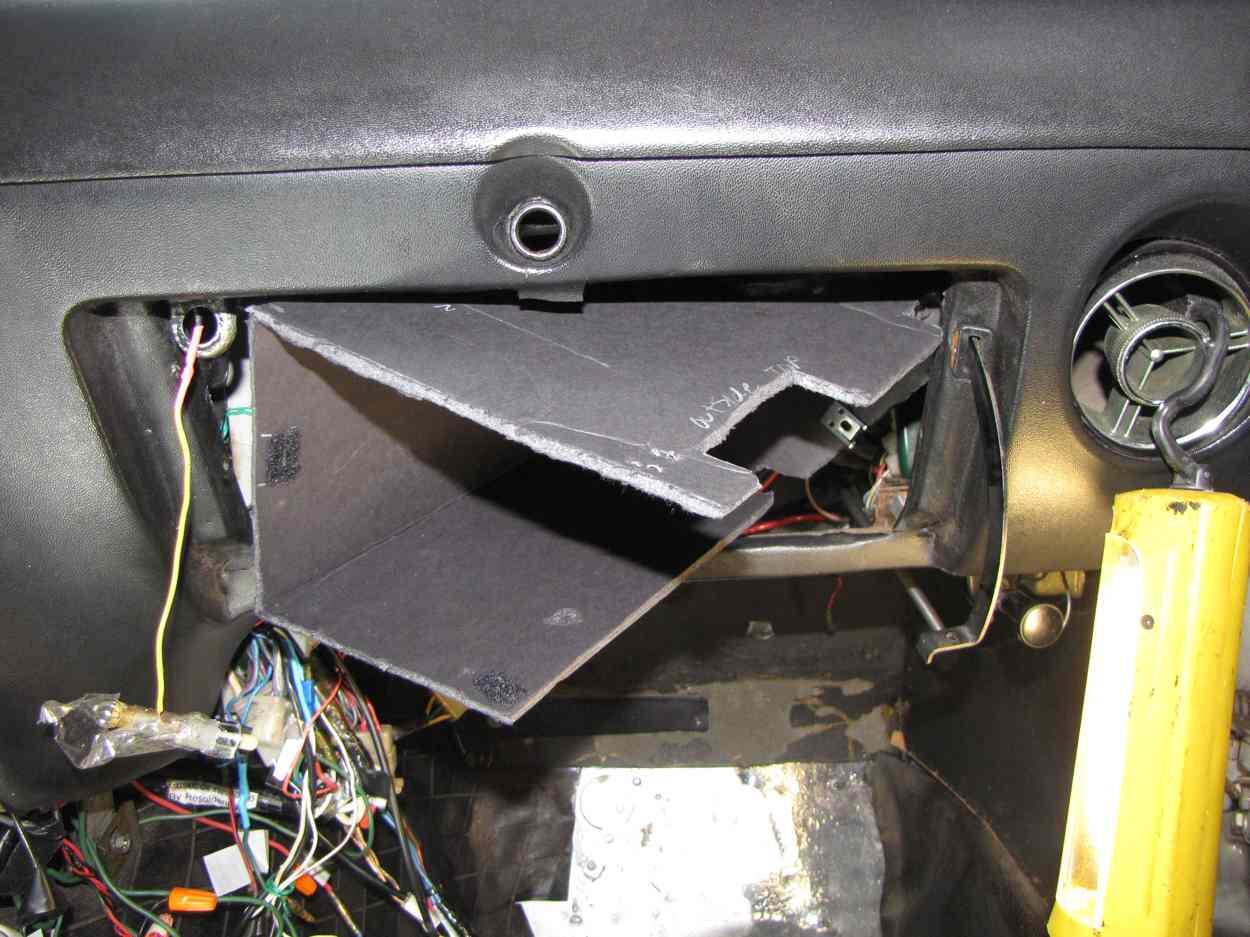
This describes how I made a two part glove box liner for a 240Z using 3/16" thick foam board. The two parts make it easy to install: Replacement glove box liners are available from classiczcars.com vendors however I like making things so I thought I would fabricate a new liner. I considered making this out of metal but my metal working skills are not that good so I thought I would use an easier to work with cardboard like material. After I made the liner I cut it in half 3 1/2" from

Mikes Z car

Mikes Z car

Turn switch relay mod

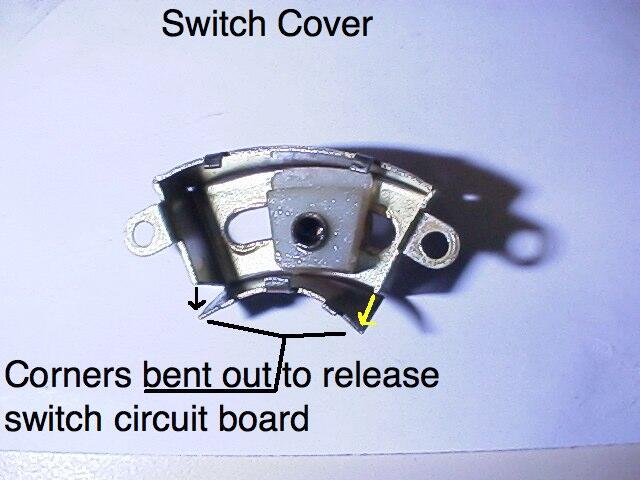
Hi all, I added relays to the turn switch to take the current load off the switch by copying the idea on the website below. The mod is reversible and by doing so will leave only hidden soldered wires inside the clamshell as the only evidence it was done unless holes were drilled to mount the relays. With this setup the heavy current still flows through the fusebox but only a small current flows through the turn switch itself. I followed this website posting but I used a different brand of

Mikes Z car

Mikes Z car

Heater blower motor squeal stop

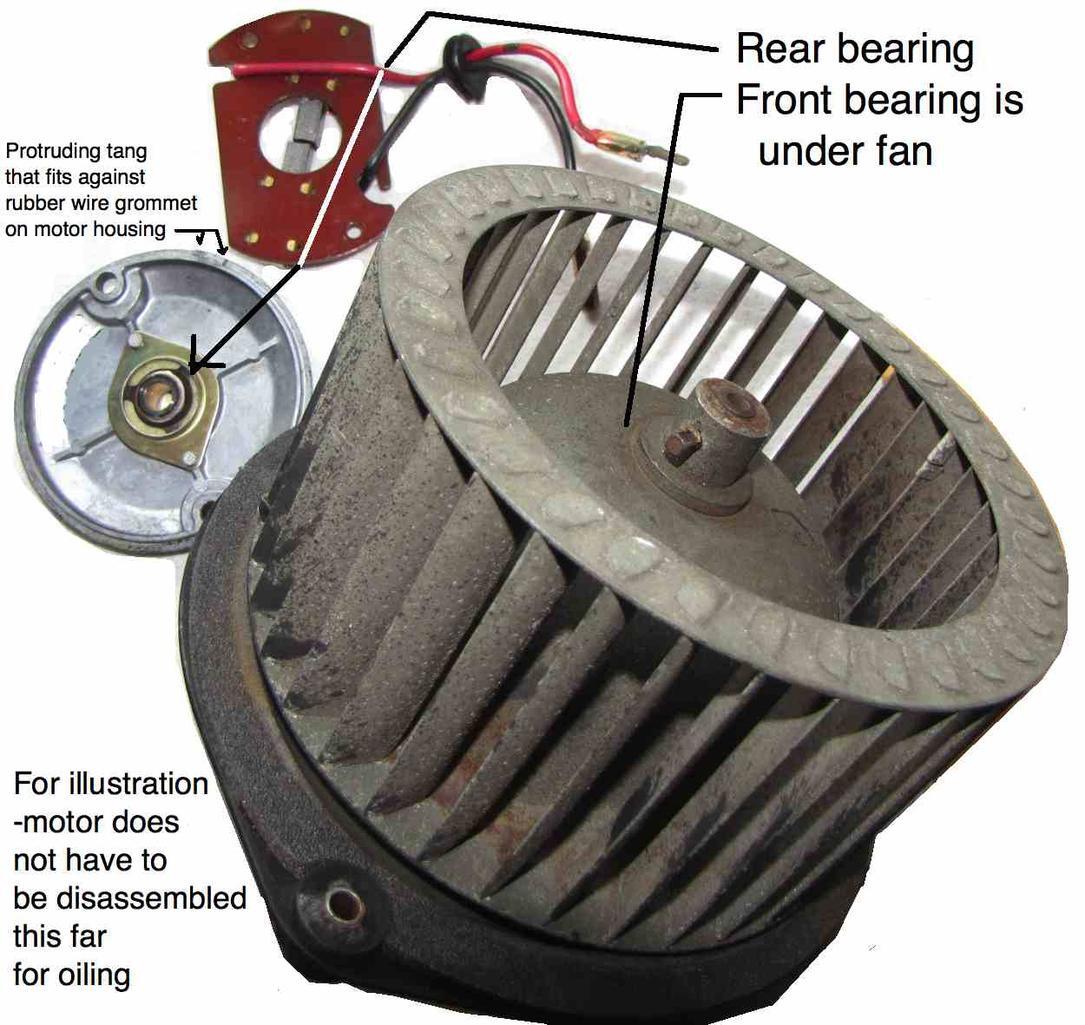
It is possible to lubricate both blower motor bearings without taking the motor out of the car to stop squeals or other noises related to motor bearings. I realized this after I had taken the motor out to lubricate the bearings. Many have opted to replace the existing blower motor and fan with a Honda civic heater fan. I like to fix things so I oiled the old motor because it was turning slowly and was squealing. Oiling both bearings with the fan in place in the car can be done by taki

Mikes Z car

Mikes Z car

Firewall insulation pattern for 1/1972 240Z

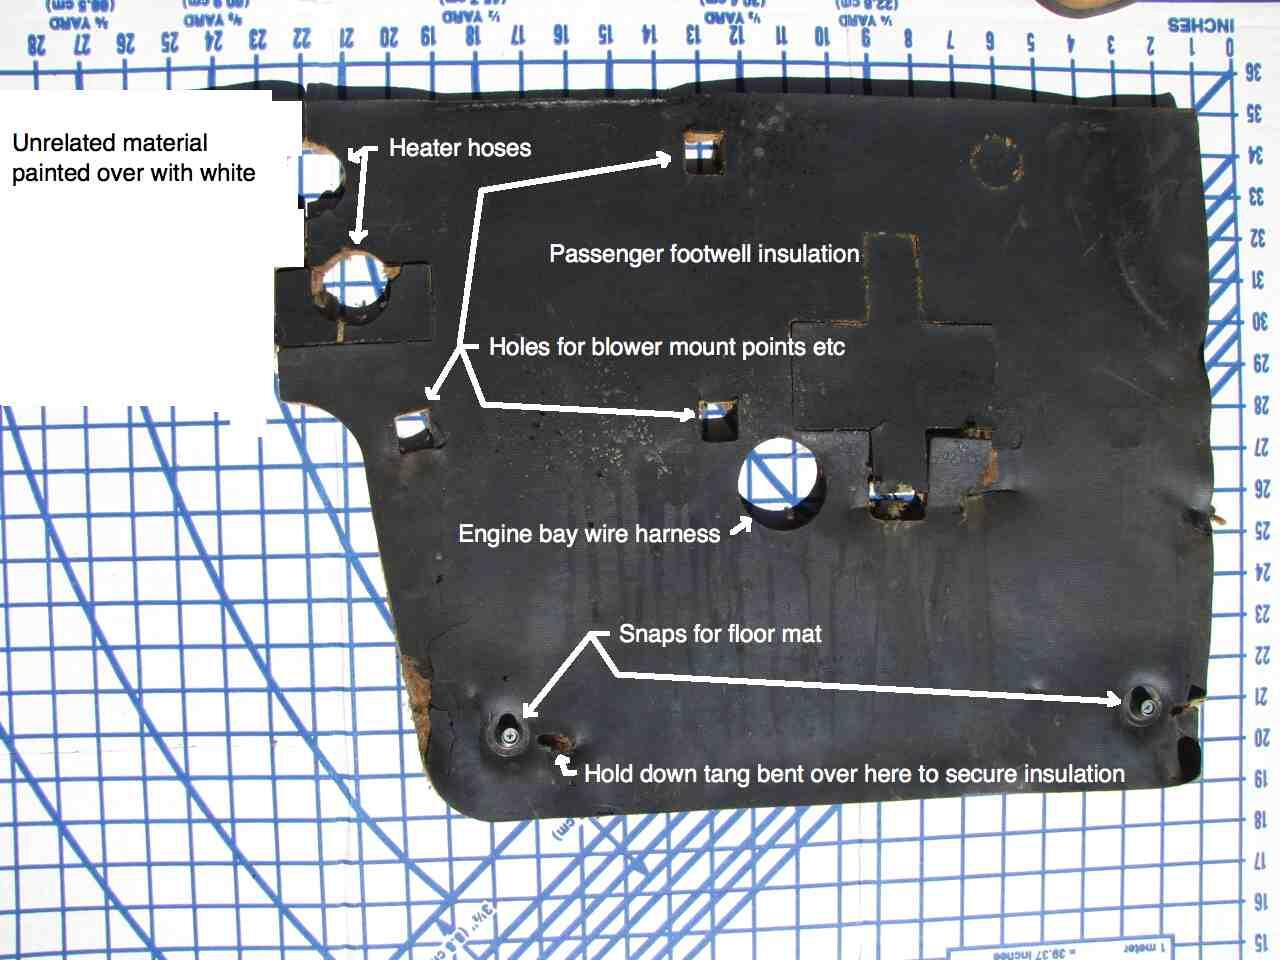
Here are pictures of the firewall insulation of a 1/1972 240Z on a "fabric board" with lines 1 inch apart going both ways to allow duplication if for some reason someone wanted to. Note that the top edge of all three pieces of the insulation are lined up with a blue line on the fabric board. Pictures were taken in full sun and have shadows. To clarify where the black insulation poster board ends and the shadow begins white dashed lines have been drawn. This could be printed out and the blue

Mikes Z car

Mikes Z car

Throttle jerk fix

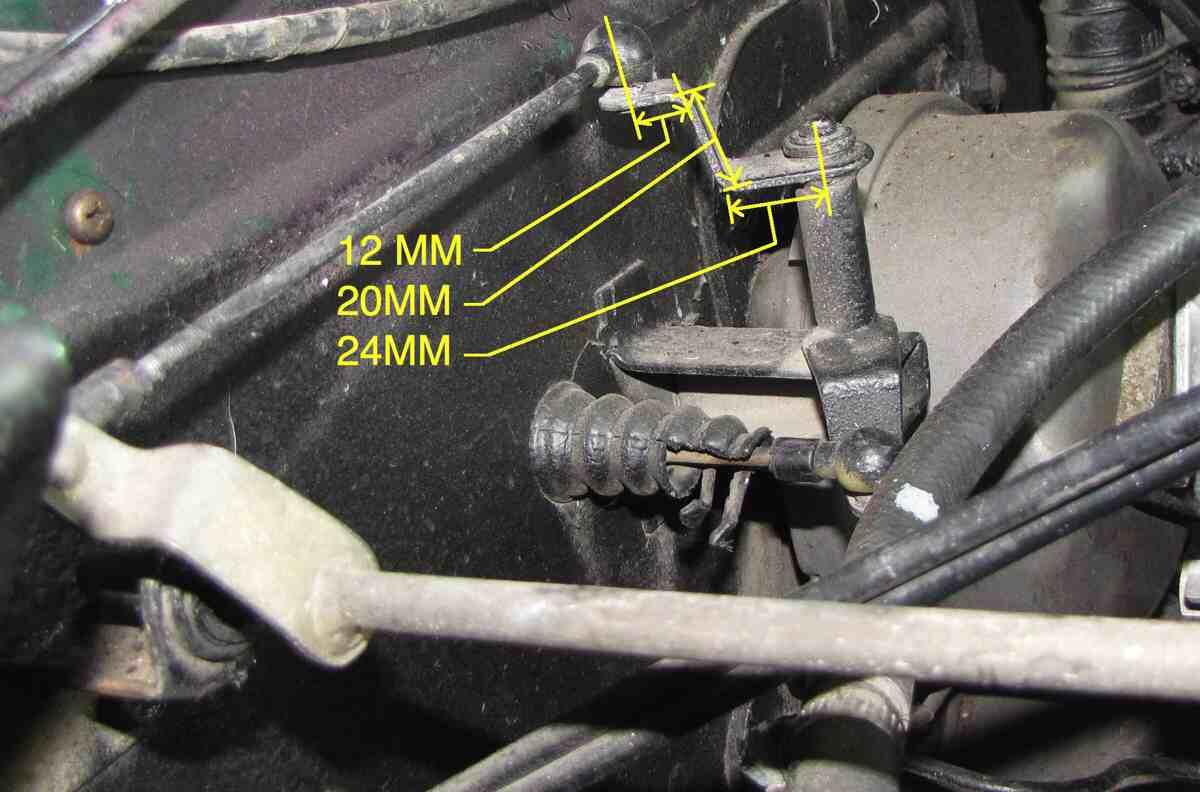
Hi all, This mod eliminates MOST of the throttle jerk but not ALL of it. I owned the car for 4 years before I noticed it still has a small amount of throttle jerk. The previous owner of my 240Z reduced throttle jerk from idle to take off by bending the upper arm of the "turnstyle" as seen in the attached pictures to a stair step shape effectively shortening it. This mod is no cost, possibly reversible and requires no welding, drilling or adding parts. The connecting rod with a nylon bal

Mikes Z car

Mikes Z car

Cowl leaf screen

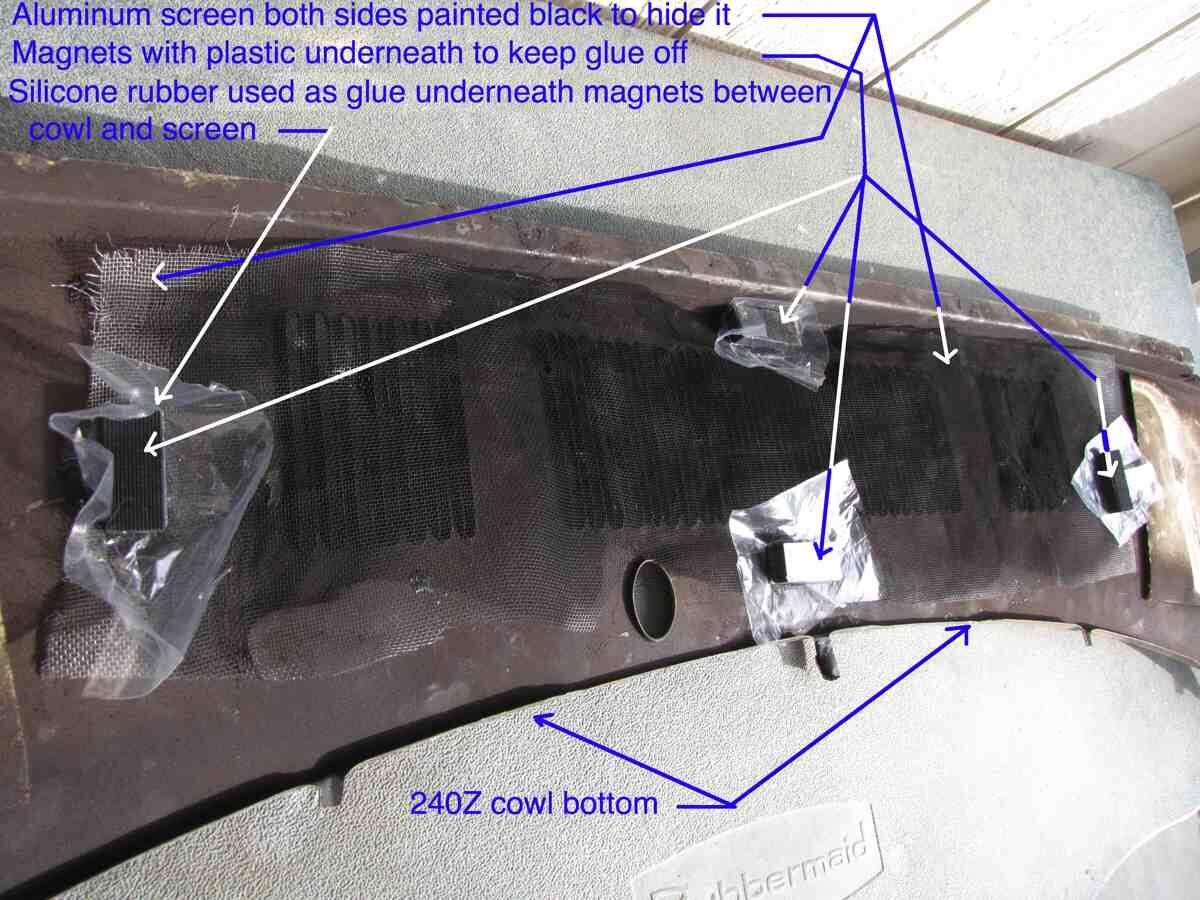
This mod is reversible leaving no trace. Using silicone rubber sealant I glued a piece of aluminum window screen I spray painted black onto the bottom of the cowl where the holes are to keep leaves and other debris out. The screen helps prevent corrosion from debris trapping moisture in the area where the windshield wiper motor is. Mike Looking at bottom of cowl, screen being glued on:

Mikes Z car

Mikes Z car

Hood emergency release (plus handle mount stripped threads fix)

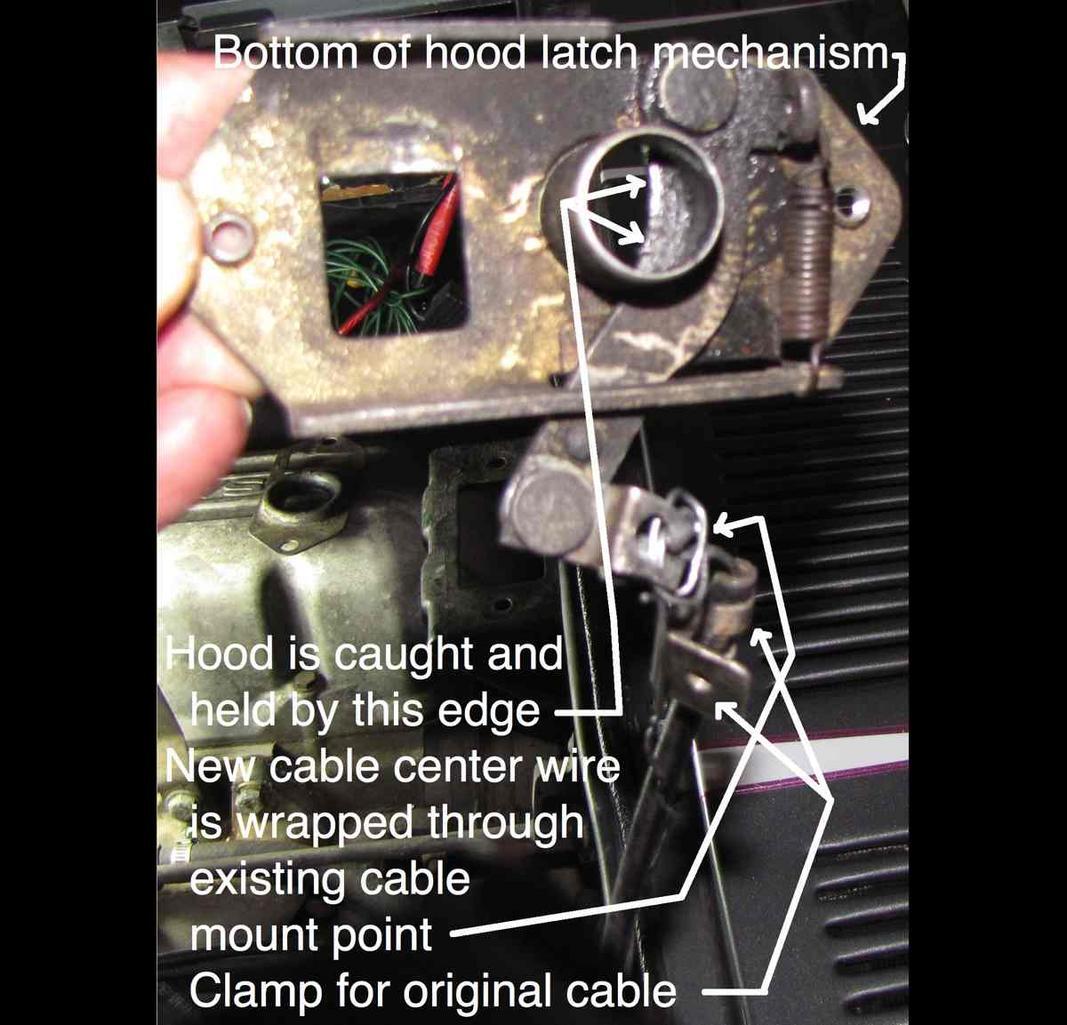
Hi all, This has been done before by others, the following is my experience. I added a second hood release cable so now I have two of them in case the original cable breaks. Getting the hood open after the cable breaks is not particularly easy in my view of how others have done this. The easiest way to do this IMO is to do what someone else did, loop a steel wire through where the original hood release cable attaches to the latch under the hood, run it through the firewall grommet for the

Mikes Z car

Mikes Z car

240Z frame drawing sketchup

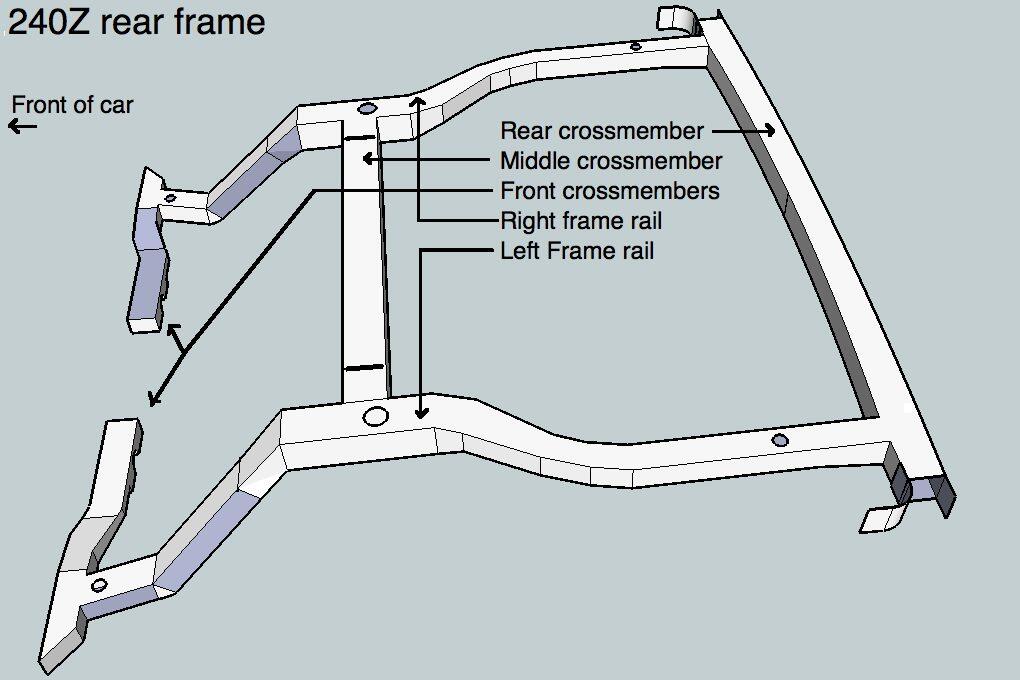
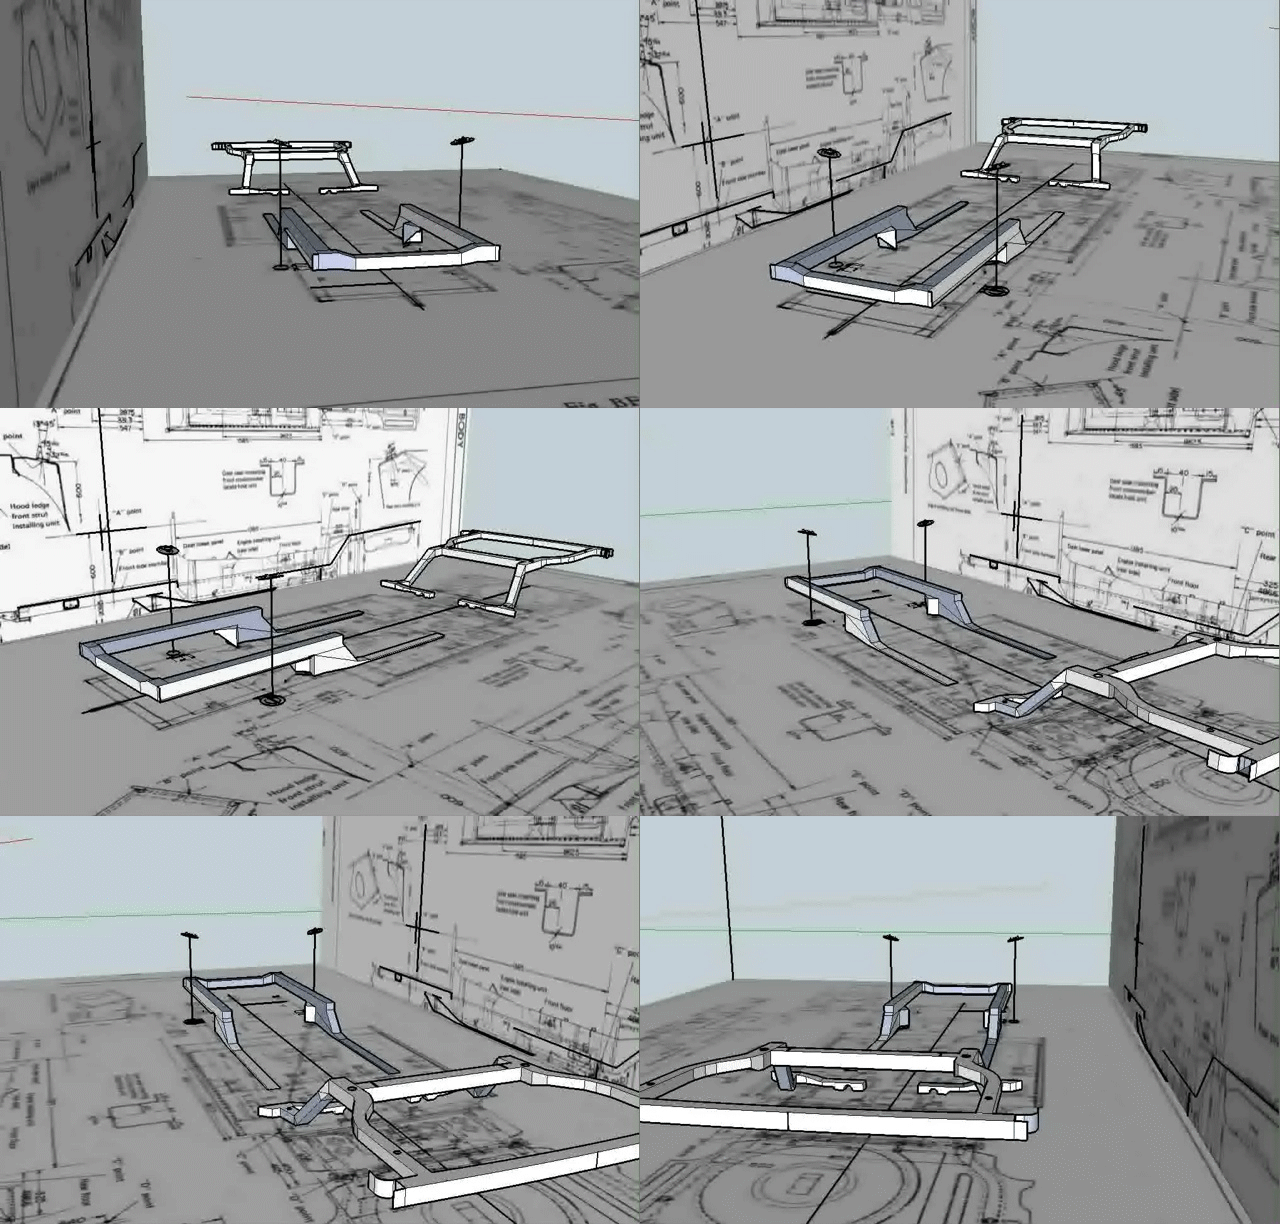
Updated 30 Mar 2014: Screenshots: Rotating view (click to zoom in): Front frame rails: Rear frame rails looking towards front of car: Sketchup drawing for download: 240Z frame rails whole car 20 Mar 2014.skp.zip Sketchup drawing viewer can be downloaded here: Download | SketchUp Revision history: 2013 Dec- Updated drawing includes holes I noticed in the frame behind the seats. (Holes are now in correct location if you happened to have viewed this drawing the first couple of week

Mikes Z car

Mikes Z car

Engine bay light lens- make your own replacement

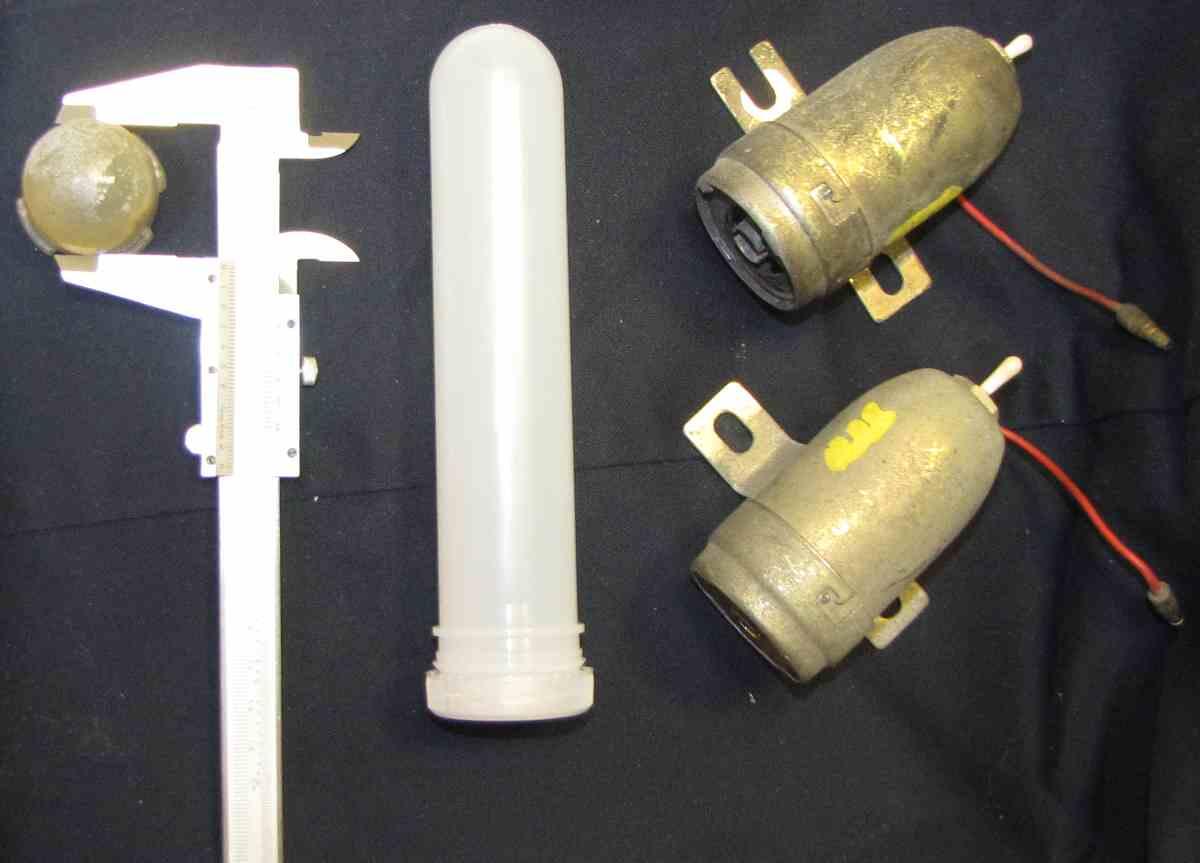
Hi all, I made a new engine bay light lens out of an empty nutrition drink tube that looks like a large translucent white test tube with a tube DIA of 33.8 MM, though it does not have to be exactly that to work. The nutrition drink is called Energize and has the words "Hardcore Energize bullet" on it with the word "Energize" much larger than the other words (Thank you to SteveJ for identifying the brand of drink for me since I had thrown away the wrapper). It is sold by Wall Mart here and I

Mikes Z car

Mikes Z car

Clock replacement for 240Z (Quartz)

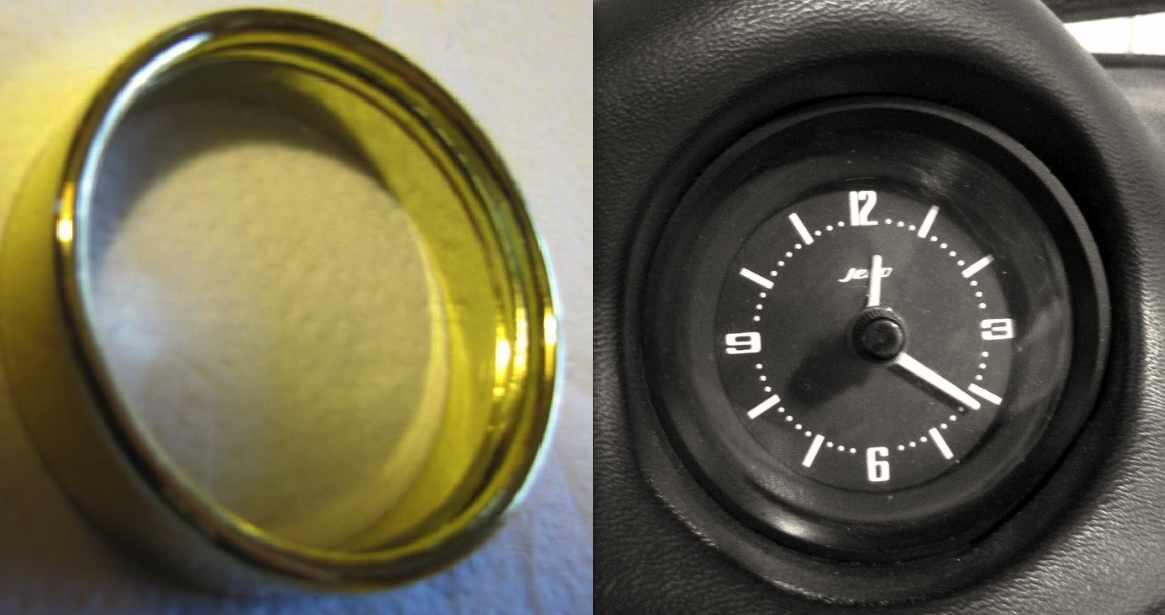
Hi all, I got a quartz clock from Michael's (arts and craft store in USA) and replaced the mechanical clock mechanism in my 1970 240Z (my clock face says JECO). There is a thread where someone else used this same clock for their Z, the following is my experience. The easiest way to do this IMO is to use the hands from the new clock and to wrap wires onto the new clock battery connections to remote the battery location to perhaps the fuse box. I didn't install that way as I wanted the clock

Mikes Z car

Mikes Z car

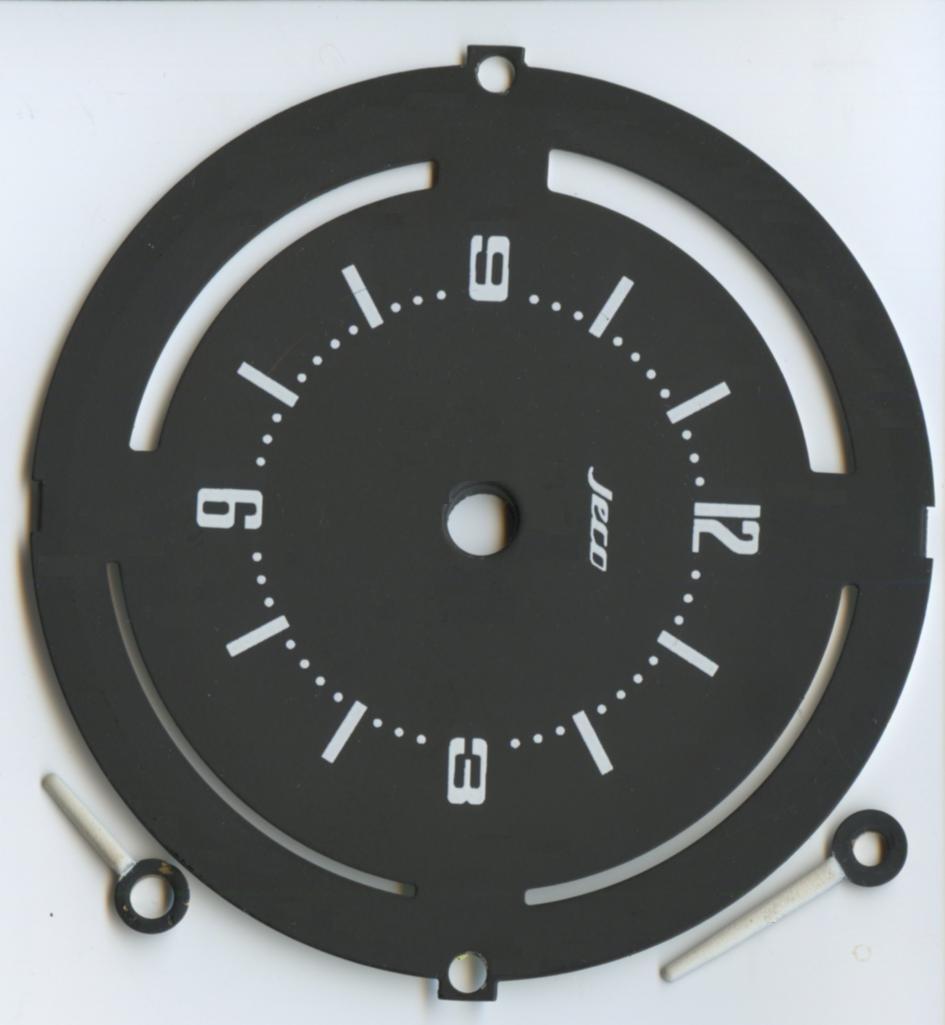
Clock face scanned in for 240Z series 1

BE SURE TO SAVE THE FOLLOWING ZIP FILE PICTURE FOR PRINTING NOT THE ONE VISIBLE ON THE SCREEN (keeps DPI correct to print to original size): clock face 240Z series 1 scan cleaned.jpg.zip For viewing but not for printing: The attached .ZIP file clock face is a scan of a 240Z series 1 clock. The original clock face was removed from the clock and placed on a scanner so there should be no perspective distortion. It could be printed out for a creative project if someone were so inclined and p

Mikes Z car

Mikes Z car

Access door for fuel vapor hose

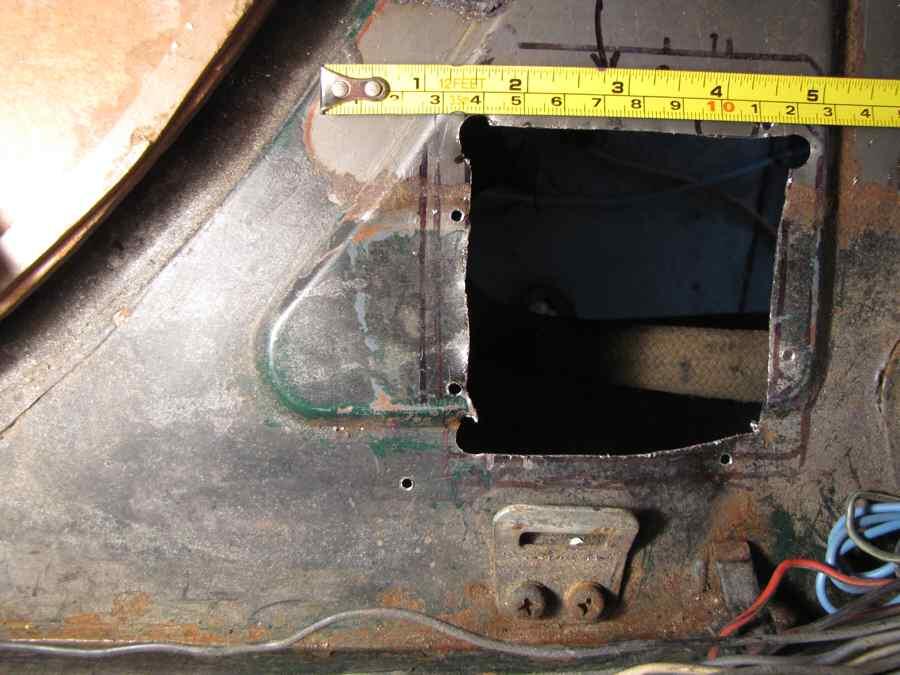
Hi all, I put in an access door for the large fuel vapor hose that connects on top of the back of the gas tank making it easier to change out the hose. After dropping the tank to change that leaking hose I realized I wanted easier access to that hose though I recognize it might be a while before it needs replacing again. I figure anything that makes upkeep easier prolongs the life of the car. I put an aluminum rod approx 1/4" DIA about 10 inches long into the part of the hose that connec

Mikes Z car

Mikes Z car

Gas Tank sealing with POR 15 standard tank seal

Many thanks to Jeff G 78 and postings by others for help with this. I noticed the instructions on the standard tank seal can called for thoroughly stirring the tank seal which I thought I had done but when I poured the seal in the tank there were a few lumps. If you look closely at the flat surface on the right (tank baffle) in the completed picture below you can see a couple of small lumps likely from lack of stirring. I used a pint and a half which is a half pint more than what POR says you

Mikes Z car

Mikes Z car

Hatch anti corrosion interior passageways

Hi all, I went to spray the interior metal passageways of my 240Z hatch with a Transtar Amber anti corrosion spray can and noticed there is a reinforcement plate on both sides and top of the hatch. To spray the two passageways created by this plate on the sides was easy as I just had to guide with my hand the 3 foot long spray wand above and then below the reinforcement plate as you can feel the end of the plate with your hand. See drawings. After I did this on both sides I drilled a cou

Mikes Z car

Mikes Z car

Map light stuck fix

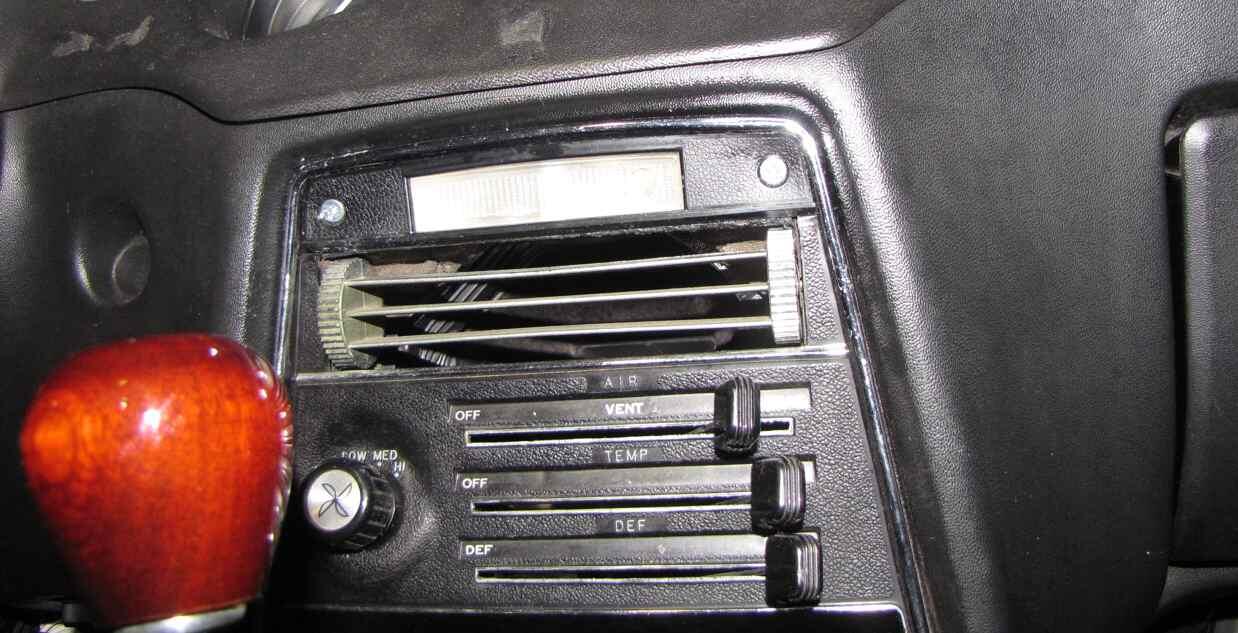
Hi all, The map light in my 240Z got stuck so that when the switch was pushed in to make it turn on or off it would push in and wouldn't pop back out. This was largely due to the top and bottom of the assembly pushing in on the clear plastic switch cover causing the clear plastic to drag. To cure this I glued in a sawed off ordinary lead pencil to bow out the top and bottom of the assembly reducing the friction on the clear plastic switch. The pencil length that worked well for me was appr

Mikes Z car

Mikes Z car

Glove Box latch fix and prevent door warp solution part 2 of 2

This will describe the lock latch modification only and will not address the door warping issue further. I noticed the glove box door on my 240Z would not always stay latched. The first thing I tried was to slide the lock mechanism fore and aft after loosening the two screws that hold it on as they are in long slots. I had previously modified the latch on the door to stay in position better using a cotter pin (see part 1 of 2 blog post on this) but the half with the locking mechanism need

Mikes Z car

Mikes Z car

Horn Button DATSUN label printed

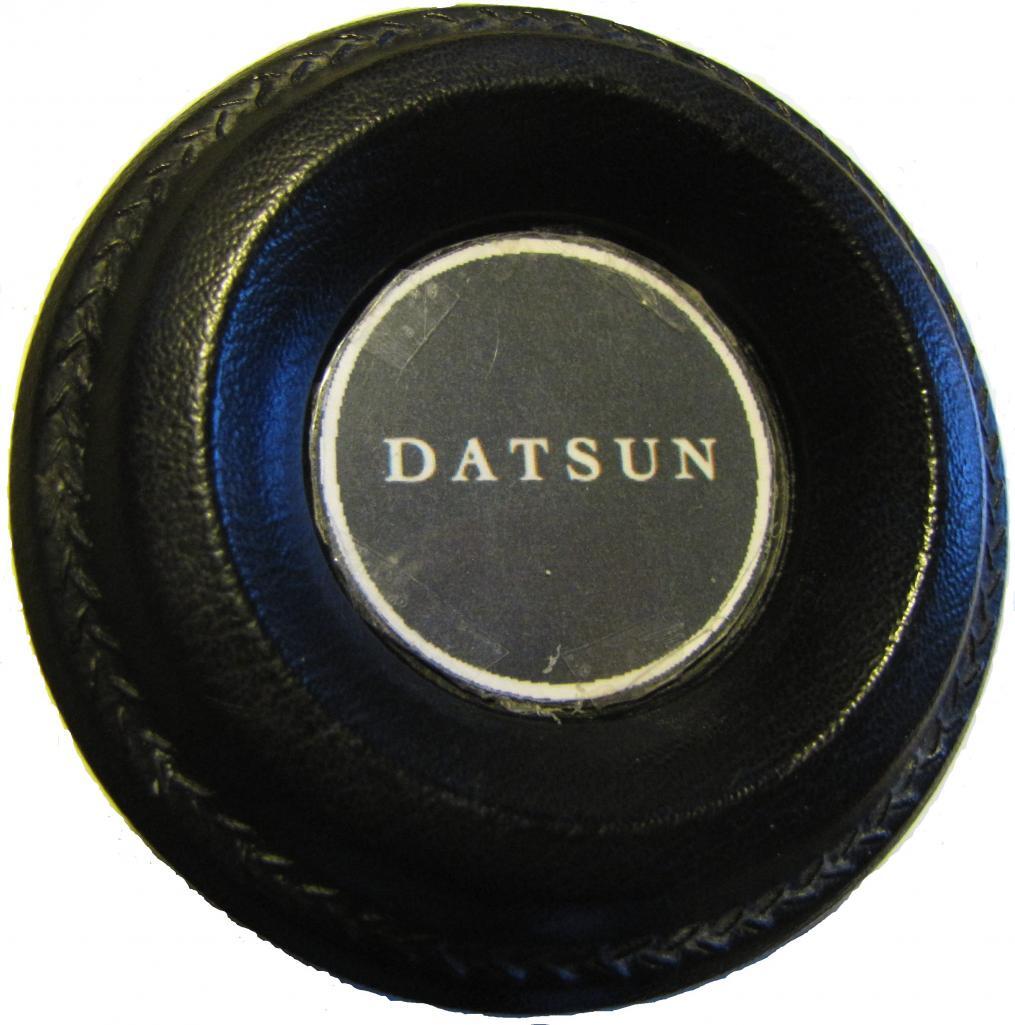
I had a horn button but no badge on it with the word "DATSUN" so I selected a font similar to a real badge and resized it to print at the right diameter to tape to the horn button. See below the asterisks for another print option using a scan of a real badge that I obtained after I originally wrote this. Continuing here, the font selection came out okay, see attached picture of result and the file I printed the word "DATSUN" with. Printing the label on photo paper if your printer supports t

Mikes Z car

Mikes Z car

Glove Box latch fix and prevent door warp solution part 1 of 2

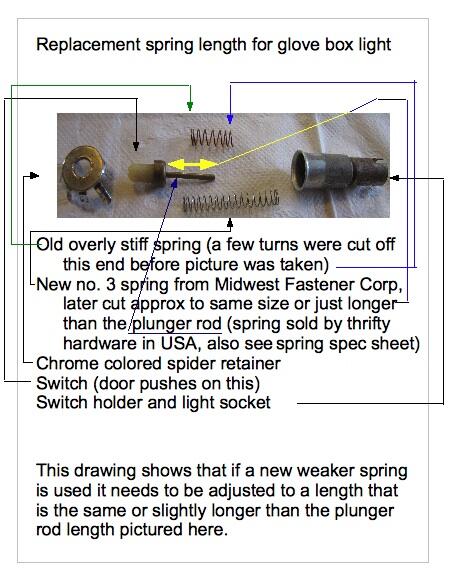
Glove box latch fix and door warp prevention (see part 2 of 2 of this blog post for bending the latch tang on the upper half of the door latch on the body of the car to make the latch click solidly every time) I wanted to make the glove box latch work right and to stop the door warp by weakening the overly strong light switch spring. Note that ZULAYTR posted in a thread: http://www.classiczcars.com/forums/interior-s30/19881-glove-box-door-light-switch.html as to how to straighten out you

Mikes Z car

Mikes Z car

3 July 2009 copy of 240z registry

Attached is a copy of the 240Z, 260Z, 280Z and 280ZX registry from 3 July 2009. If this is a copyright thing or another kind of violation I will delete it just let me know. Mike Z Car Registry.xls

Mikes Z car

Mikes Z car

Five floor board holes repaired

This weekend I had the 5 floorboard sheetmetal pieces welded in to repair rust holes. Also the driver's side floor pan frame rail was straightened as it had been used by a floor jack. Unremoved rust makes the mig welder spit sparks. First I drew on the floor with a marks a lot around the holes using straight lines to make the cutting and fitting of the new pieces easier. After I cut along the straight lines using an angle grinder I made cardboard templates from the floor holes. I bought a p

Mikes Z car

Mikes Z car

Fusebox 3D drawing (sketchup) for early 70 240Z-detailed

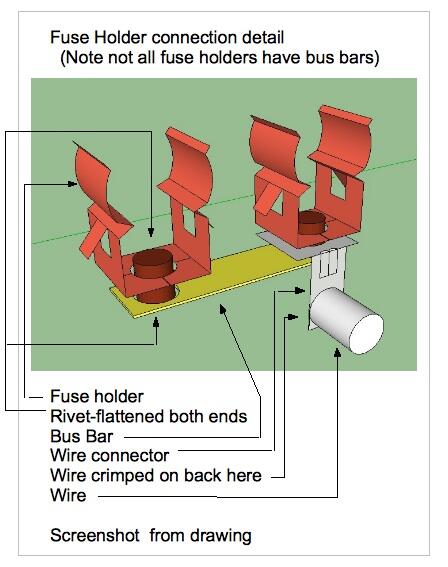
Hi all, I soldered both ends of all rivets and all wire crimps to fix fuse box overheating. Rivet and crimp location shown here: Other screenshots from drawing: Drawing: 240Z_fusebox_early_1970_final.skp.zip I pulled the fuse holders from the fuze box before soldering to prevent melting. Sanding or cleaning the fuse holders with copper cleaner and bending the fuse holder together to tighten the grip on the fuse also can help with overheating. You will need sketchup or sketchu

Mikes Z car

Mikes Z car

Gas Tank sending unit modification

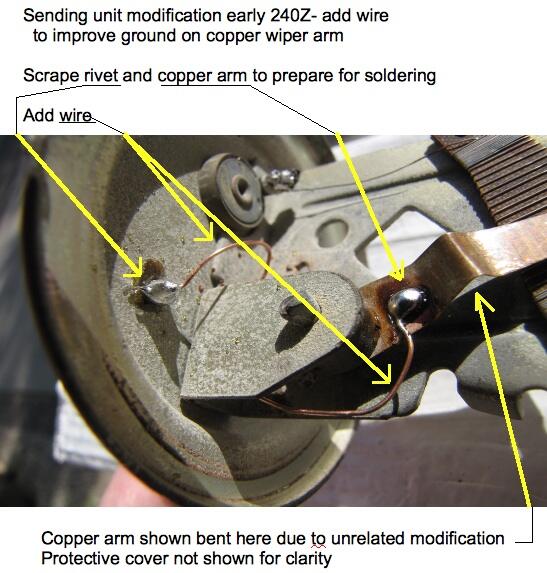
This mod has been in my car for 5 years, works great. Before/After modification (click for animation): I noticed low gas gauge readings. When I looked at the sending unit in my 240Z gas tank I saw that it has a worn curved track across the coil of resistance wire where the copper float arm connector slides across the coil. The sending unit I have must be original gauging from the large amount of wear on the wire. Since the rest of the unit looked good I figured I could significantly incre

Mikes Z car

Mikes Z car


  • Blog Statistics

    • Total Blogs
      167
    • Total Entries
      251
  • Blog Comments

    • I'm still waiting on a hoist to free up before I can start bolting the new brake parts on my Z, but I did make the drill jig today.  I started with a 12mm thick Mustang wheel spacer with a pilot.  I then made a drawing to layout the holes needed.  I transfered the drawing onto the spacer and I drilled three new 1/8" holes through the jig (spacer) so I'd have the correct 4x114.3mm holes.  One hole is shared from the original 5 lug rotor.  I then bolted the jig onto the Mustang rotor and simply dr
    • Local radiator repair shops used to be plentiful but getting harder to find.  Some of them just specialize in big truck-heavy equipment radiators.  I will be needing to do the same for my project.  I have heard good reports on gas tank RENU but there are none of those franchises in my area.  Good luck, John-Lugoff, SC
    • Decided to go with the 240sx conversion. Main reason is it’s strictly for the street and the parts were easy to source. What I didn’t realize was the 14” wheels won’t clear the caliper. Now looking for a set of 4 lug 15” rims and tires I can use during the build process. Can anyone recommend a temporary solution as far as make and model preferably a steel wheel that I can use until I’m ready to buy the wheel and tire combination at the end of the project? Thanks again for all the help out there.
    • There are several reasons to use the S197 rear brakes.  The rotors are larger diameter than the SVO rotors and they are vented.  The calipers have larger pistons to give them more power.  The big beef with the Maxima rears is that they don't offer as much stopping power as the stock drums.  The S197 rears allow the addition of an adjustable proportioning valve.  The Maxima rears cannot utilize an adjustable prop since the prop needs to be all the way open to get close to enough rear bias. 
    • Any particular reason to use S197 Mustang 5-lug brakes?  The Fox body SVO Mustangs had rear discs with 4-lug.  It's a popular swap to use SVO or T-bird Turbo Coupe rear brakes to retrofit discs to other Fox body Mustangs.  These parts are still pretty common (probably available as a kit).  Might be worth checking to see if they'll fit.
  • Upcoming Events

  • Images

×
×
  • Create New...

Important Information

By using this site, you agree to our Privacy Policy and Guidelines. We have placed cookies on your device to help make this website better. You can adjust your cookie settings, otherwise we'll assume you're okay to continue.