


All Activity
- Today
-
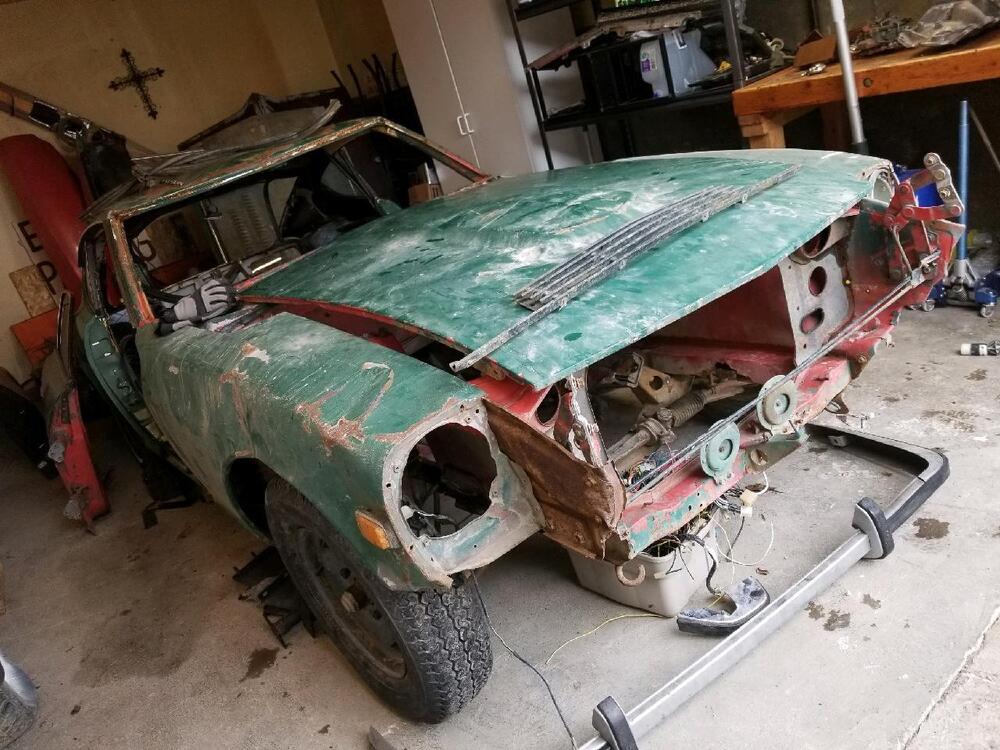
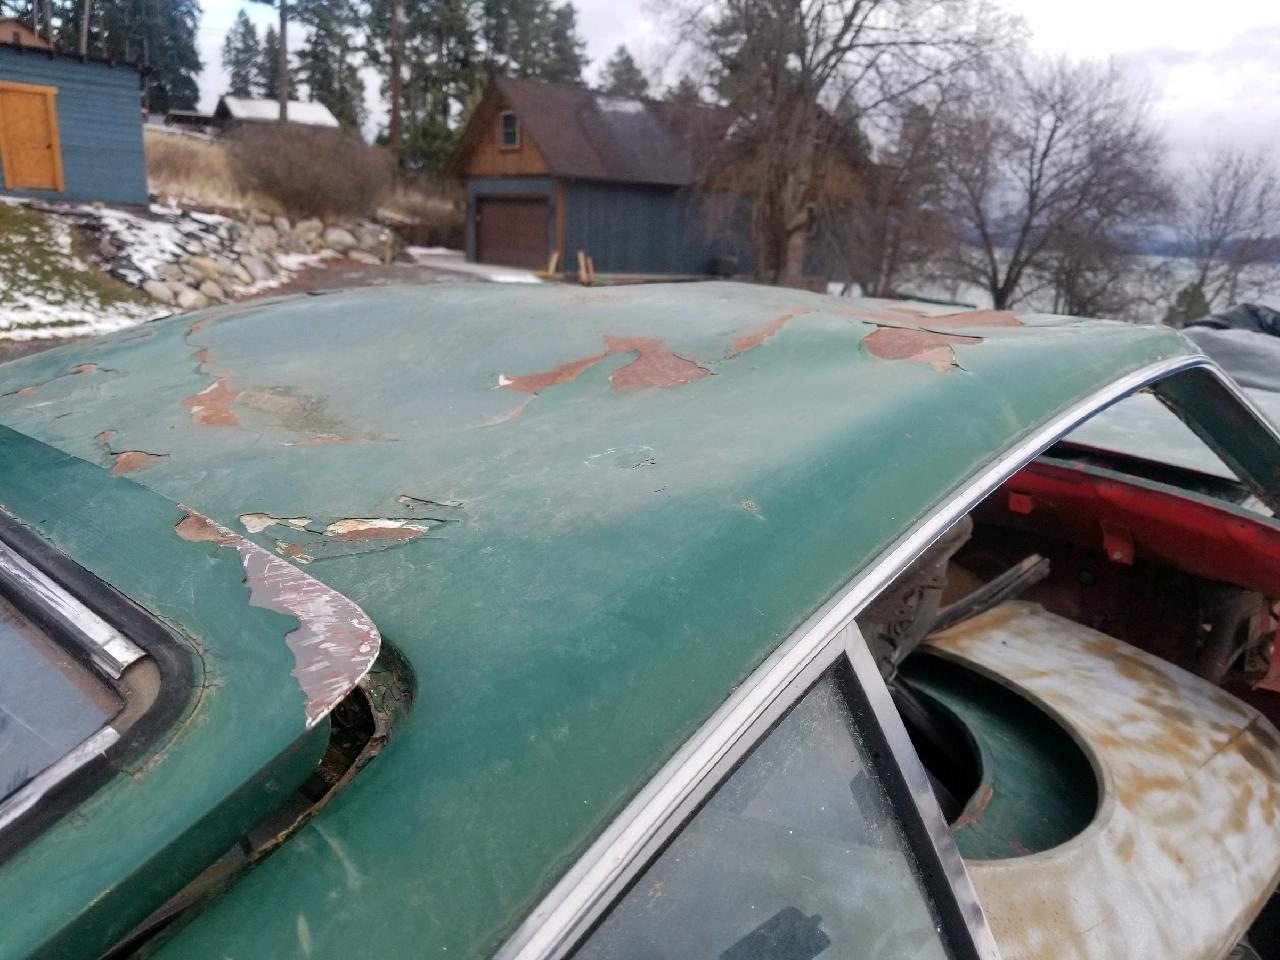
 The story goes a doctor had this green car, he wrecked it, then someone welded the back half of another car to it. he wrecked it again, then decided to make an electric Z. took most of the interior out of this one, and stuck it in his barn. Meanwhile the electric Z caught fire in his garage and burned his garage down. Along side this green car was this 65 Datsun pickup. I thought why not, Merry Christmas to me
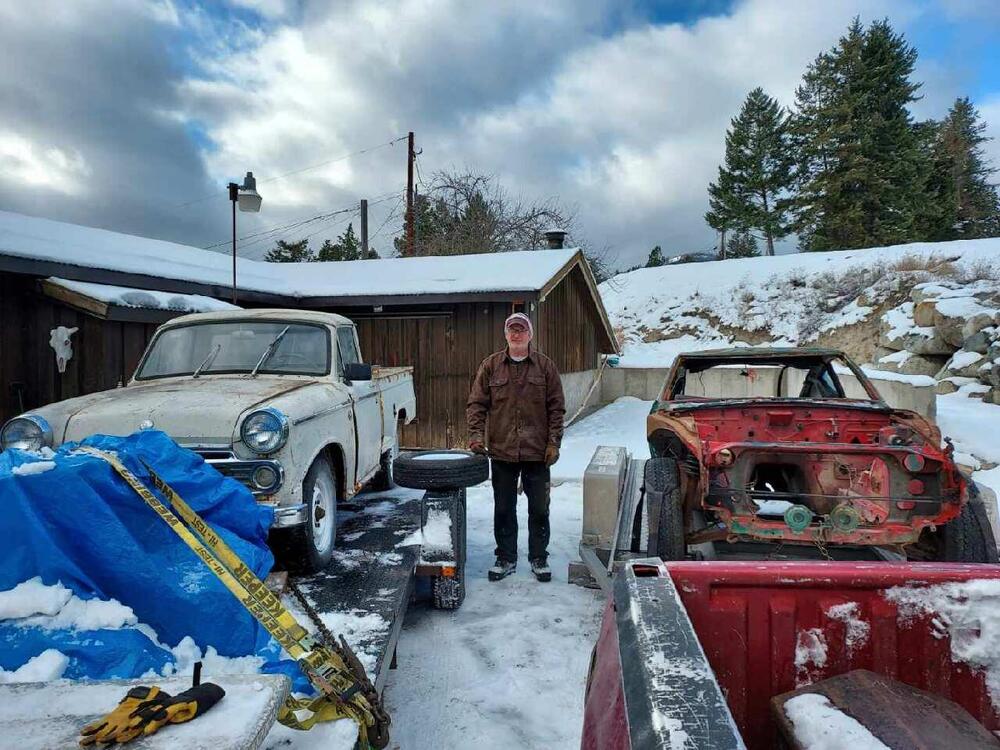

-
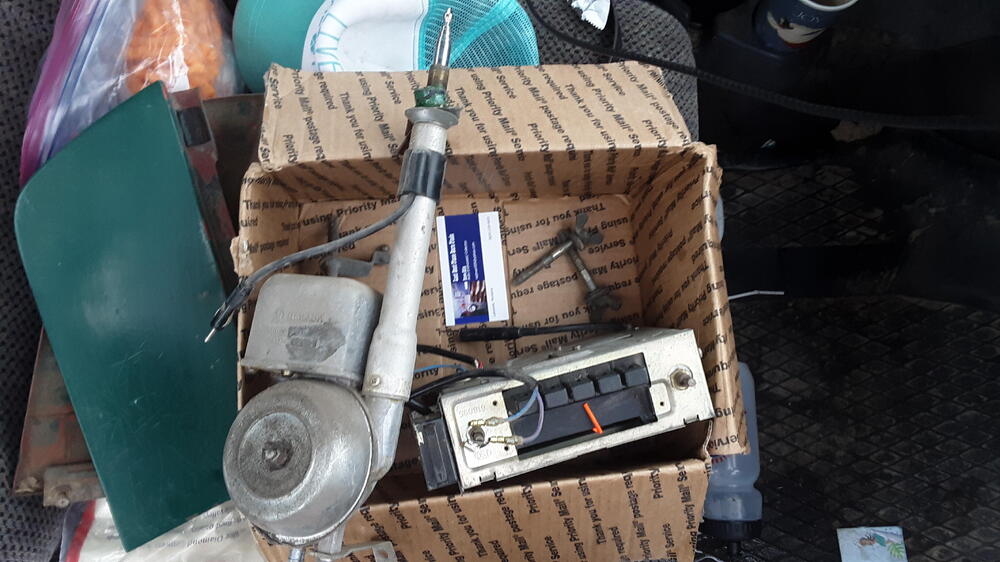
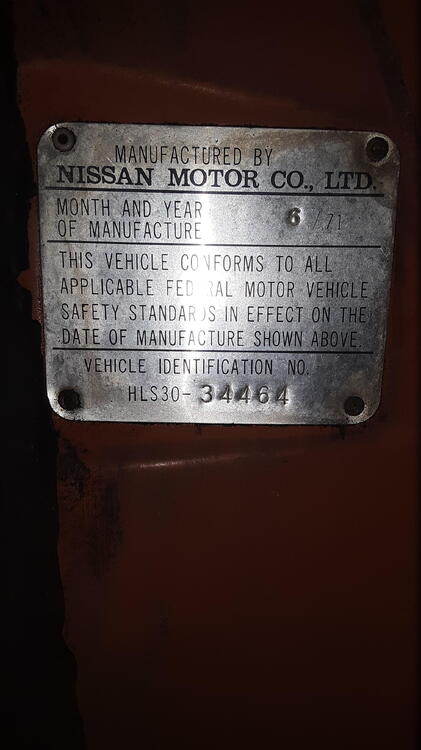
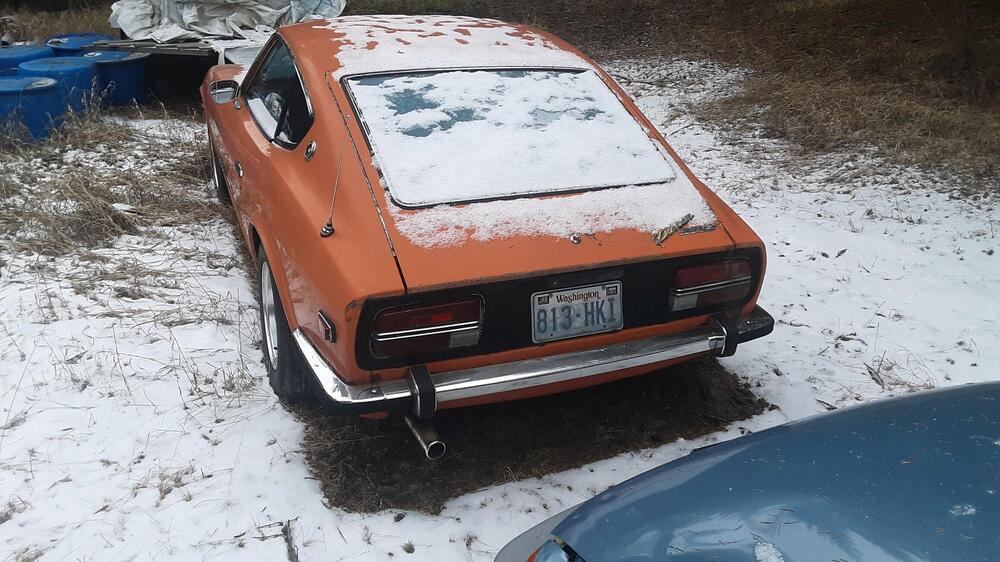
meanwhile, while studying up on these cars, I realized most of this car was here! Except the 2 things that most of them are missing, the wheels and hubcaps and radio. About that time I get on Craigslist, "I never get on Craigslist" and did a local search for 240z. what? here's one for sale near Kalispell. Funny but sad story attached to it. So I notice it's a 1/70 car wrecked and wrecked again but it had topy wheels. I ask if there's a radio somewhere, he sends me a picture of a box of parts with a radio, I said I'll be right down. 60 miles later, this thing is actually 2 cars welded together, the front of a 1/70 and the rear of an 11/71 judging by the unused spare. But, a couple rims were dated 12/69 and 2 were 5/70 and it had a nice bullet tip antenna. I bought it for the radio. Got my money back selling the rims and got a complete engine too and many other parts. Now I think all I'm missing are the correct dated rims and D hubcaps.

-
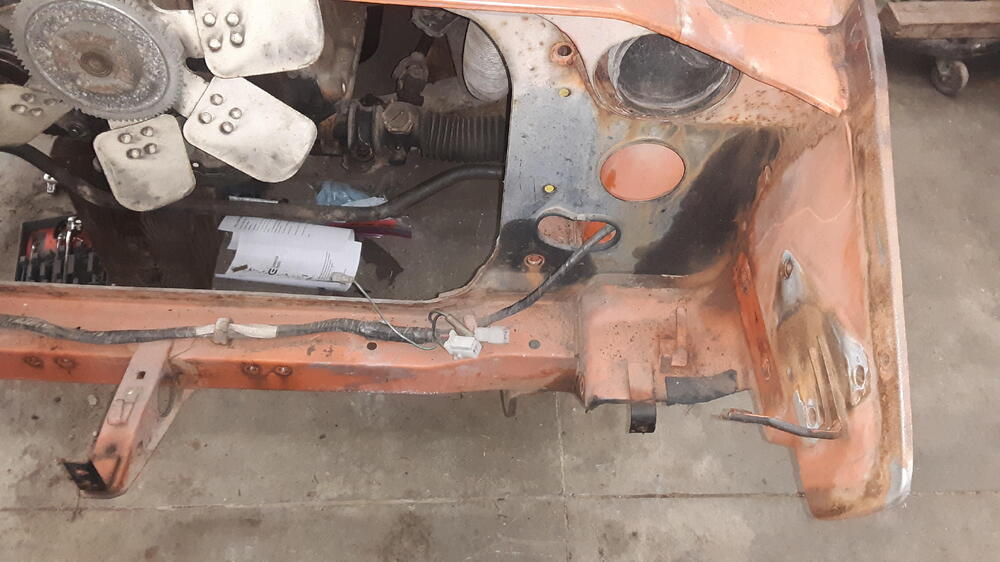
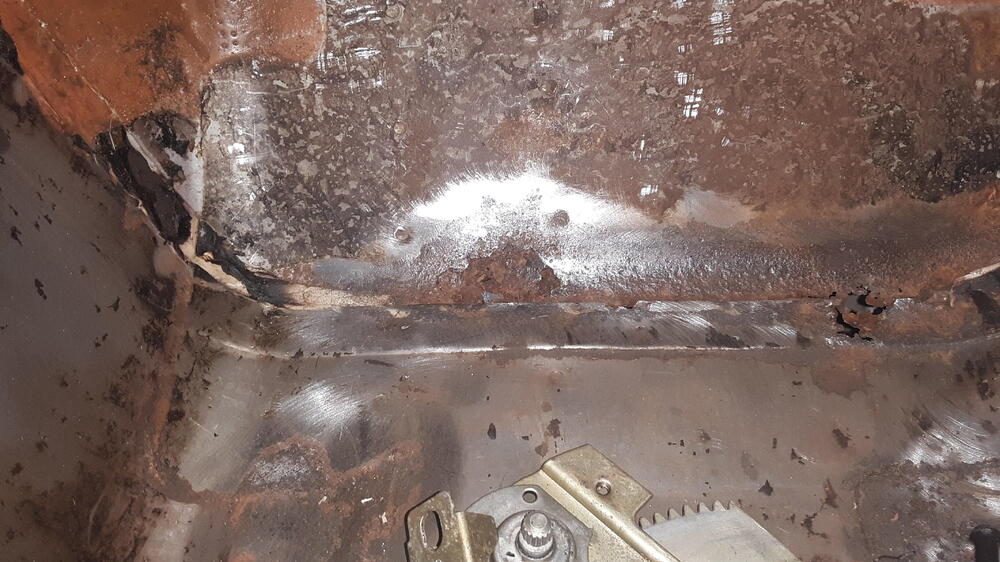
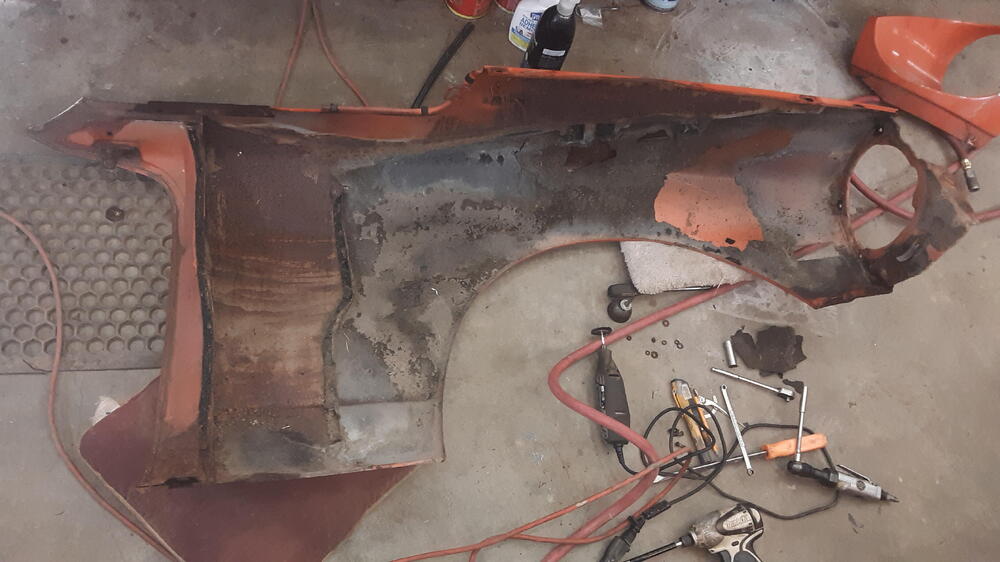
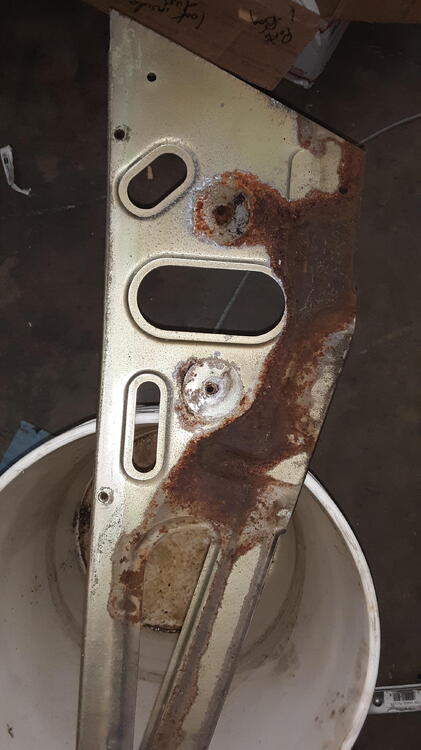
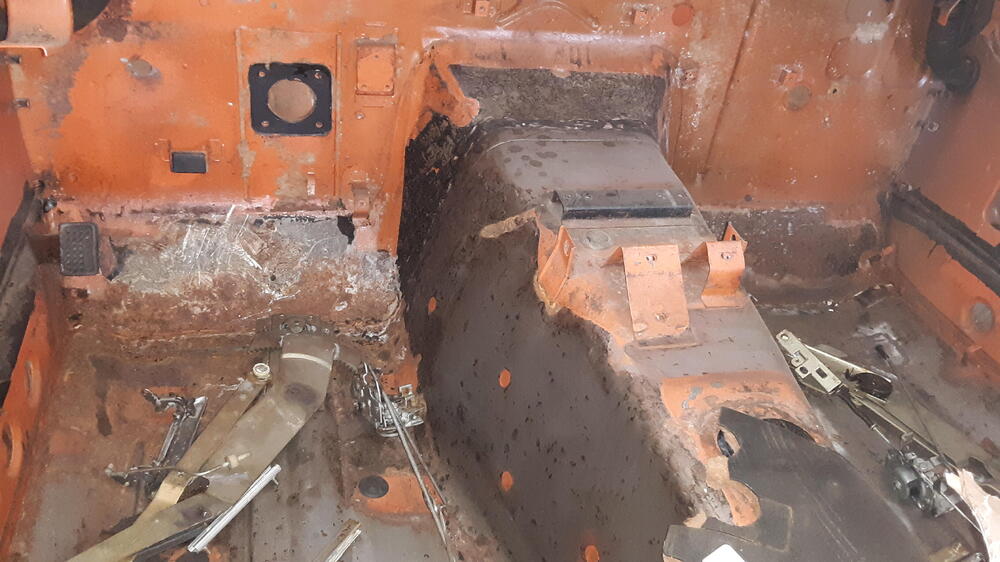
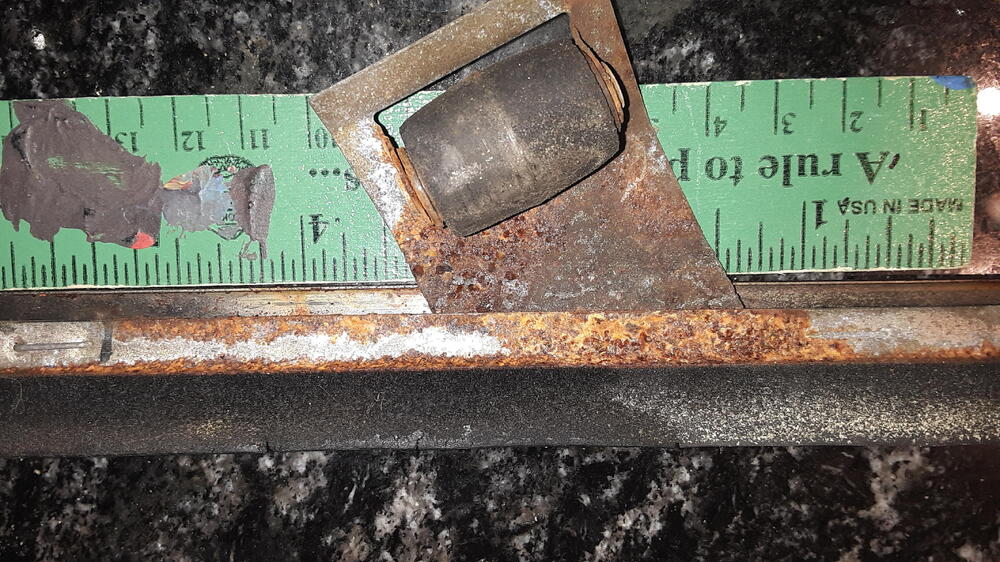
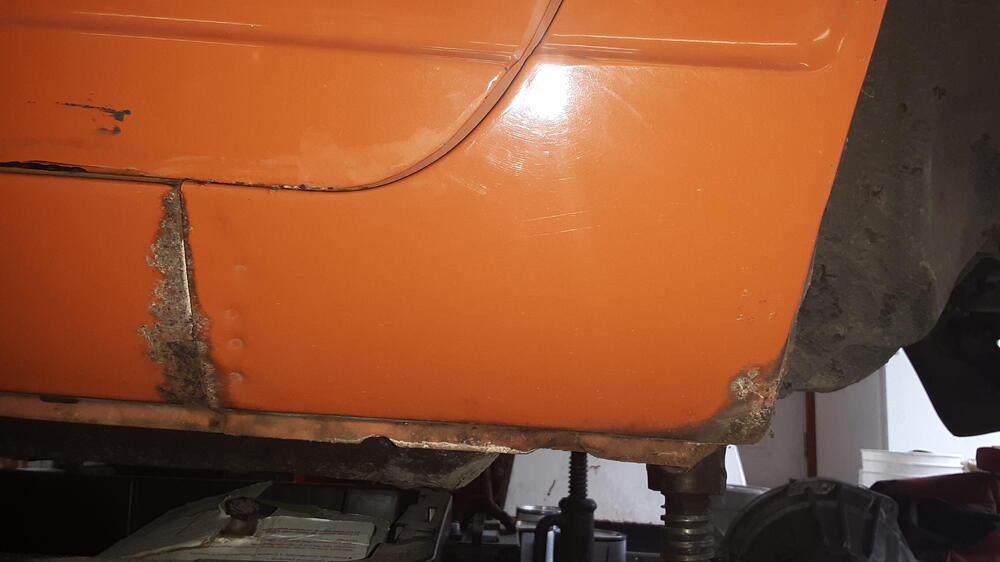
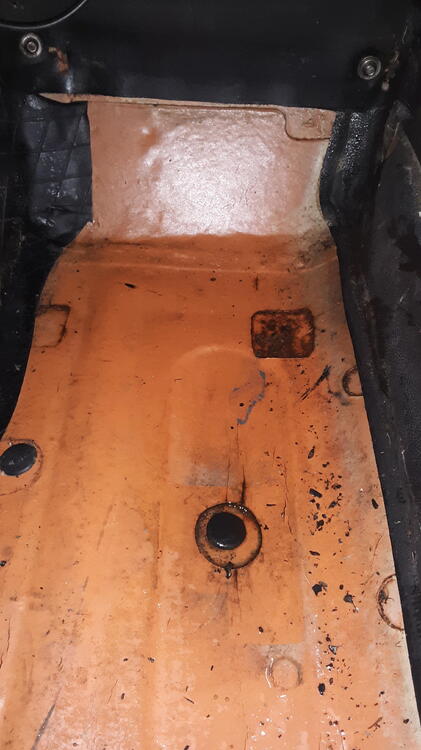
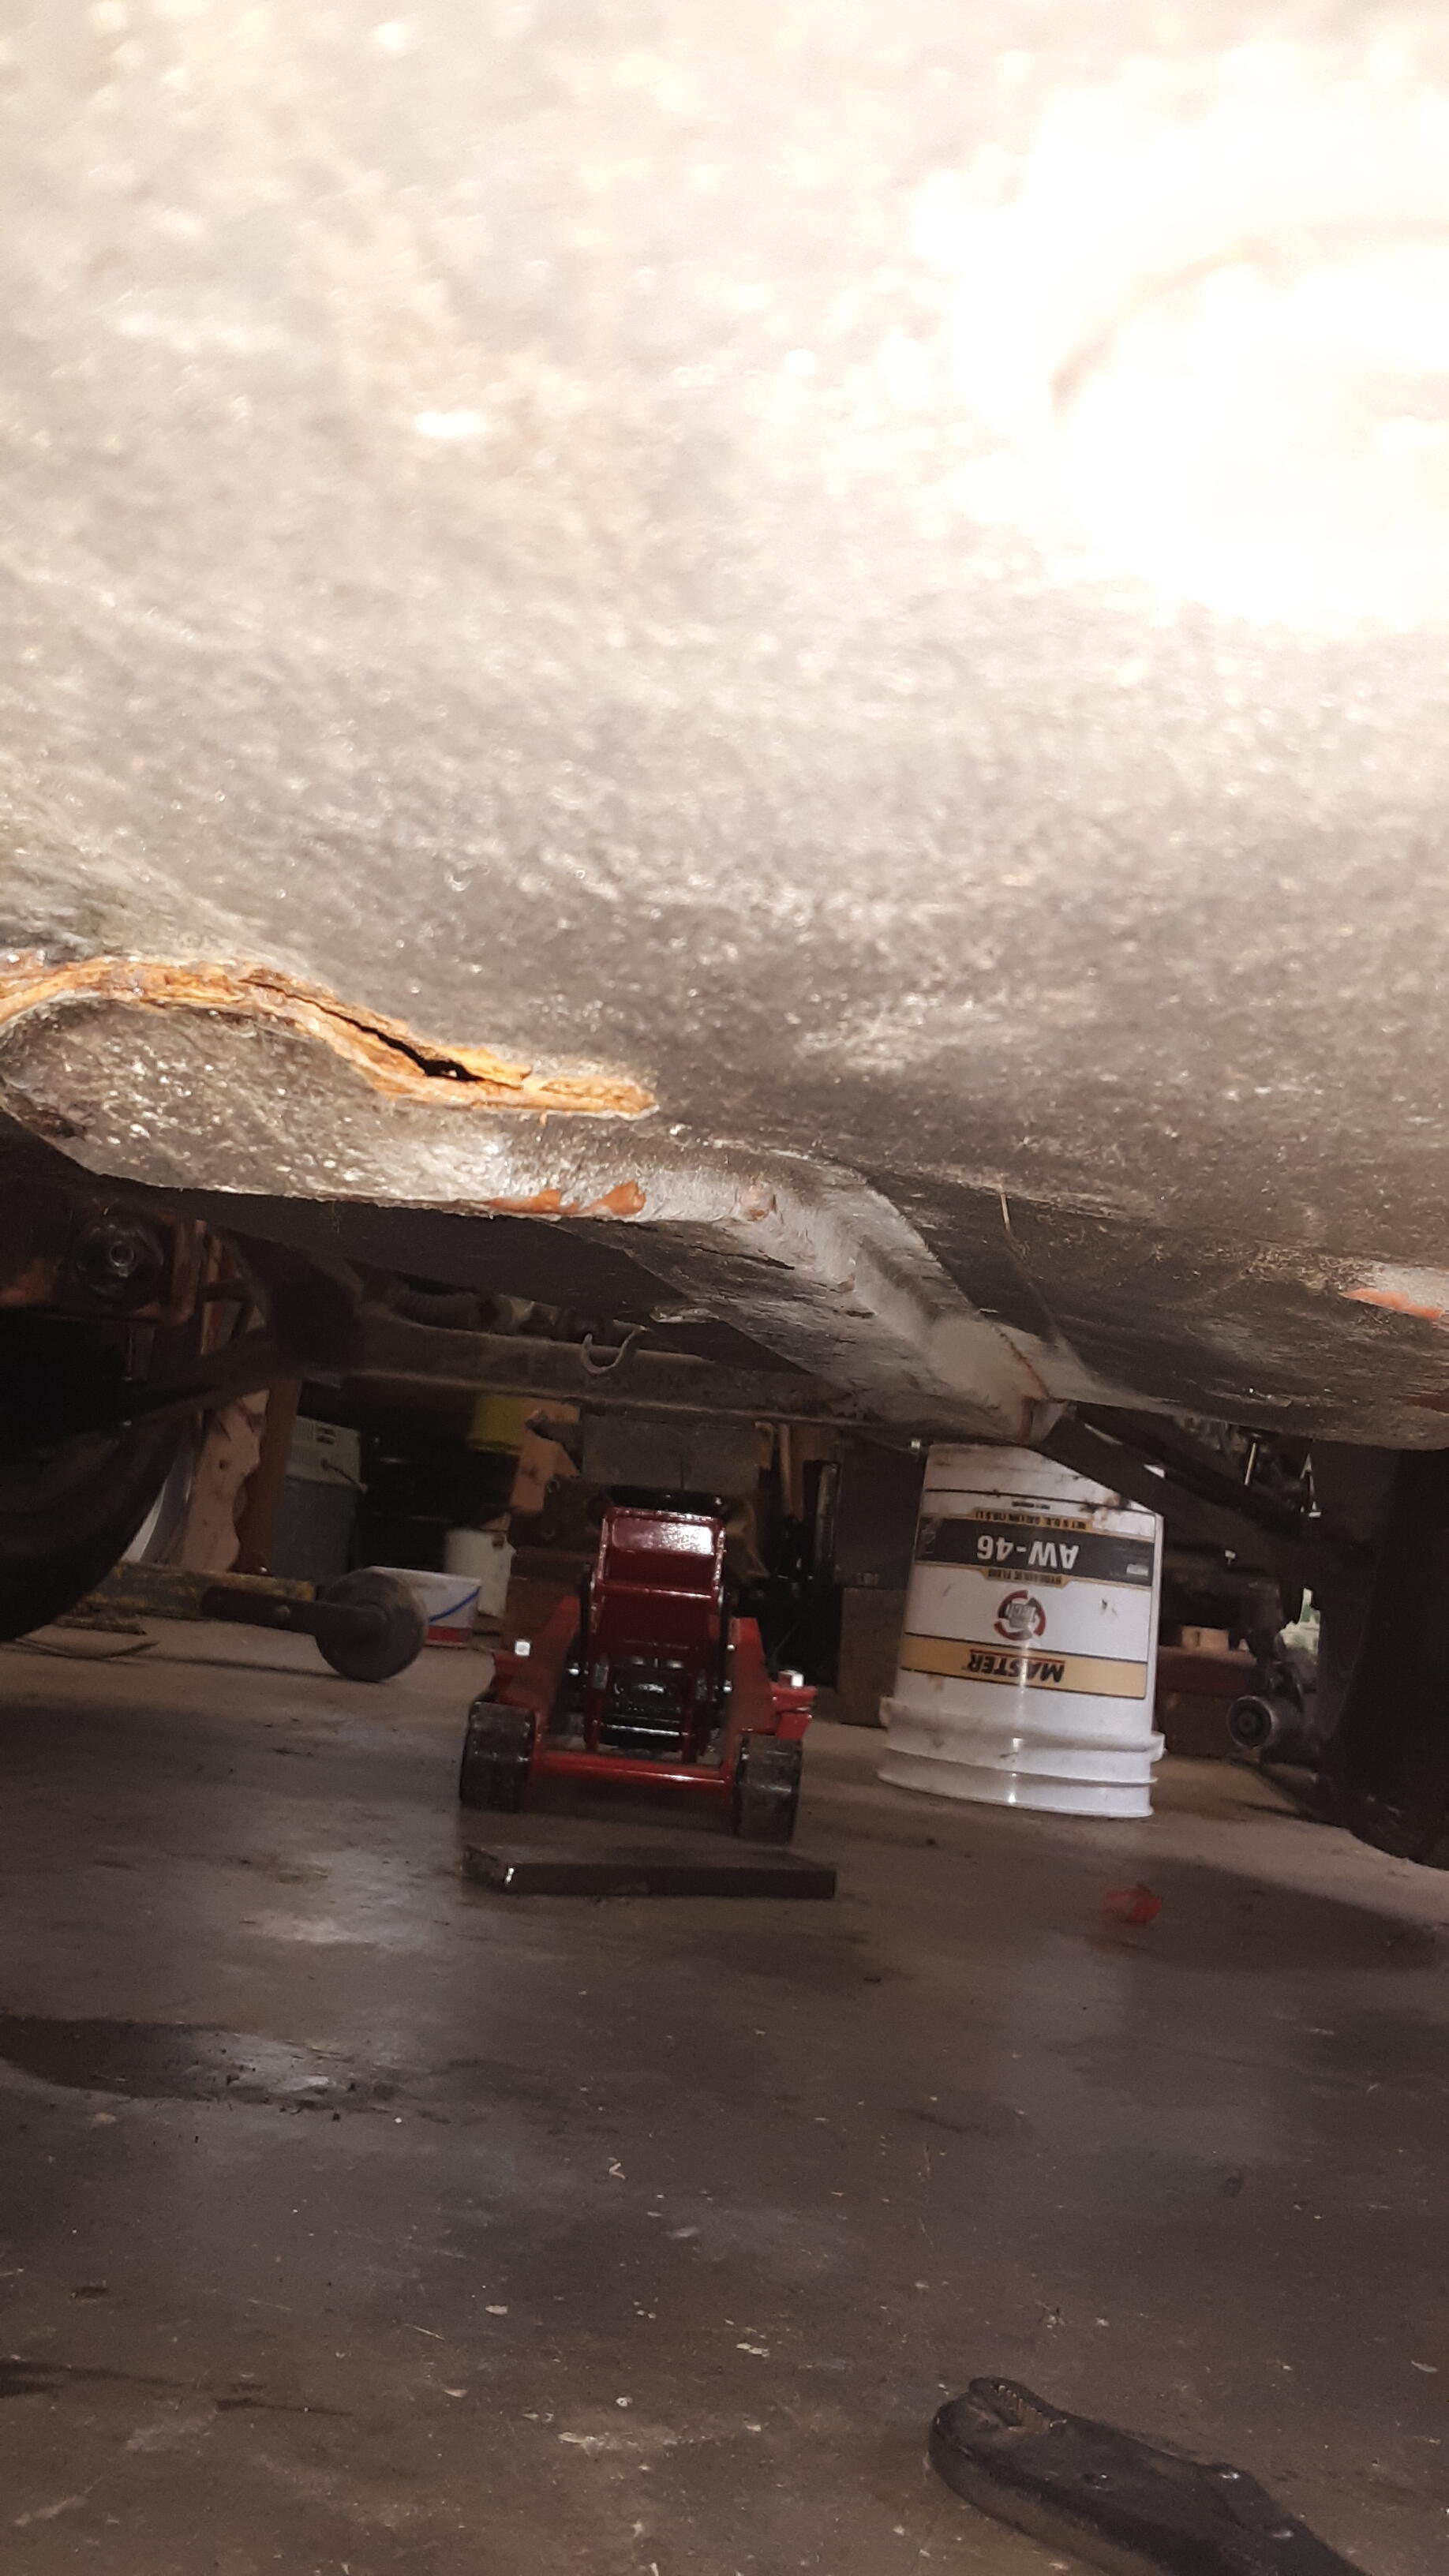
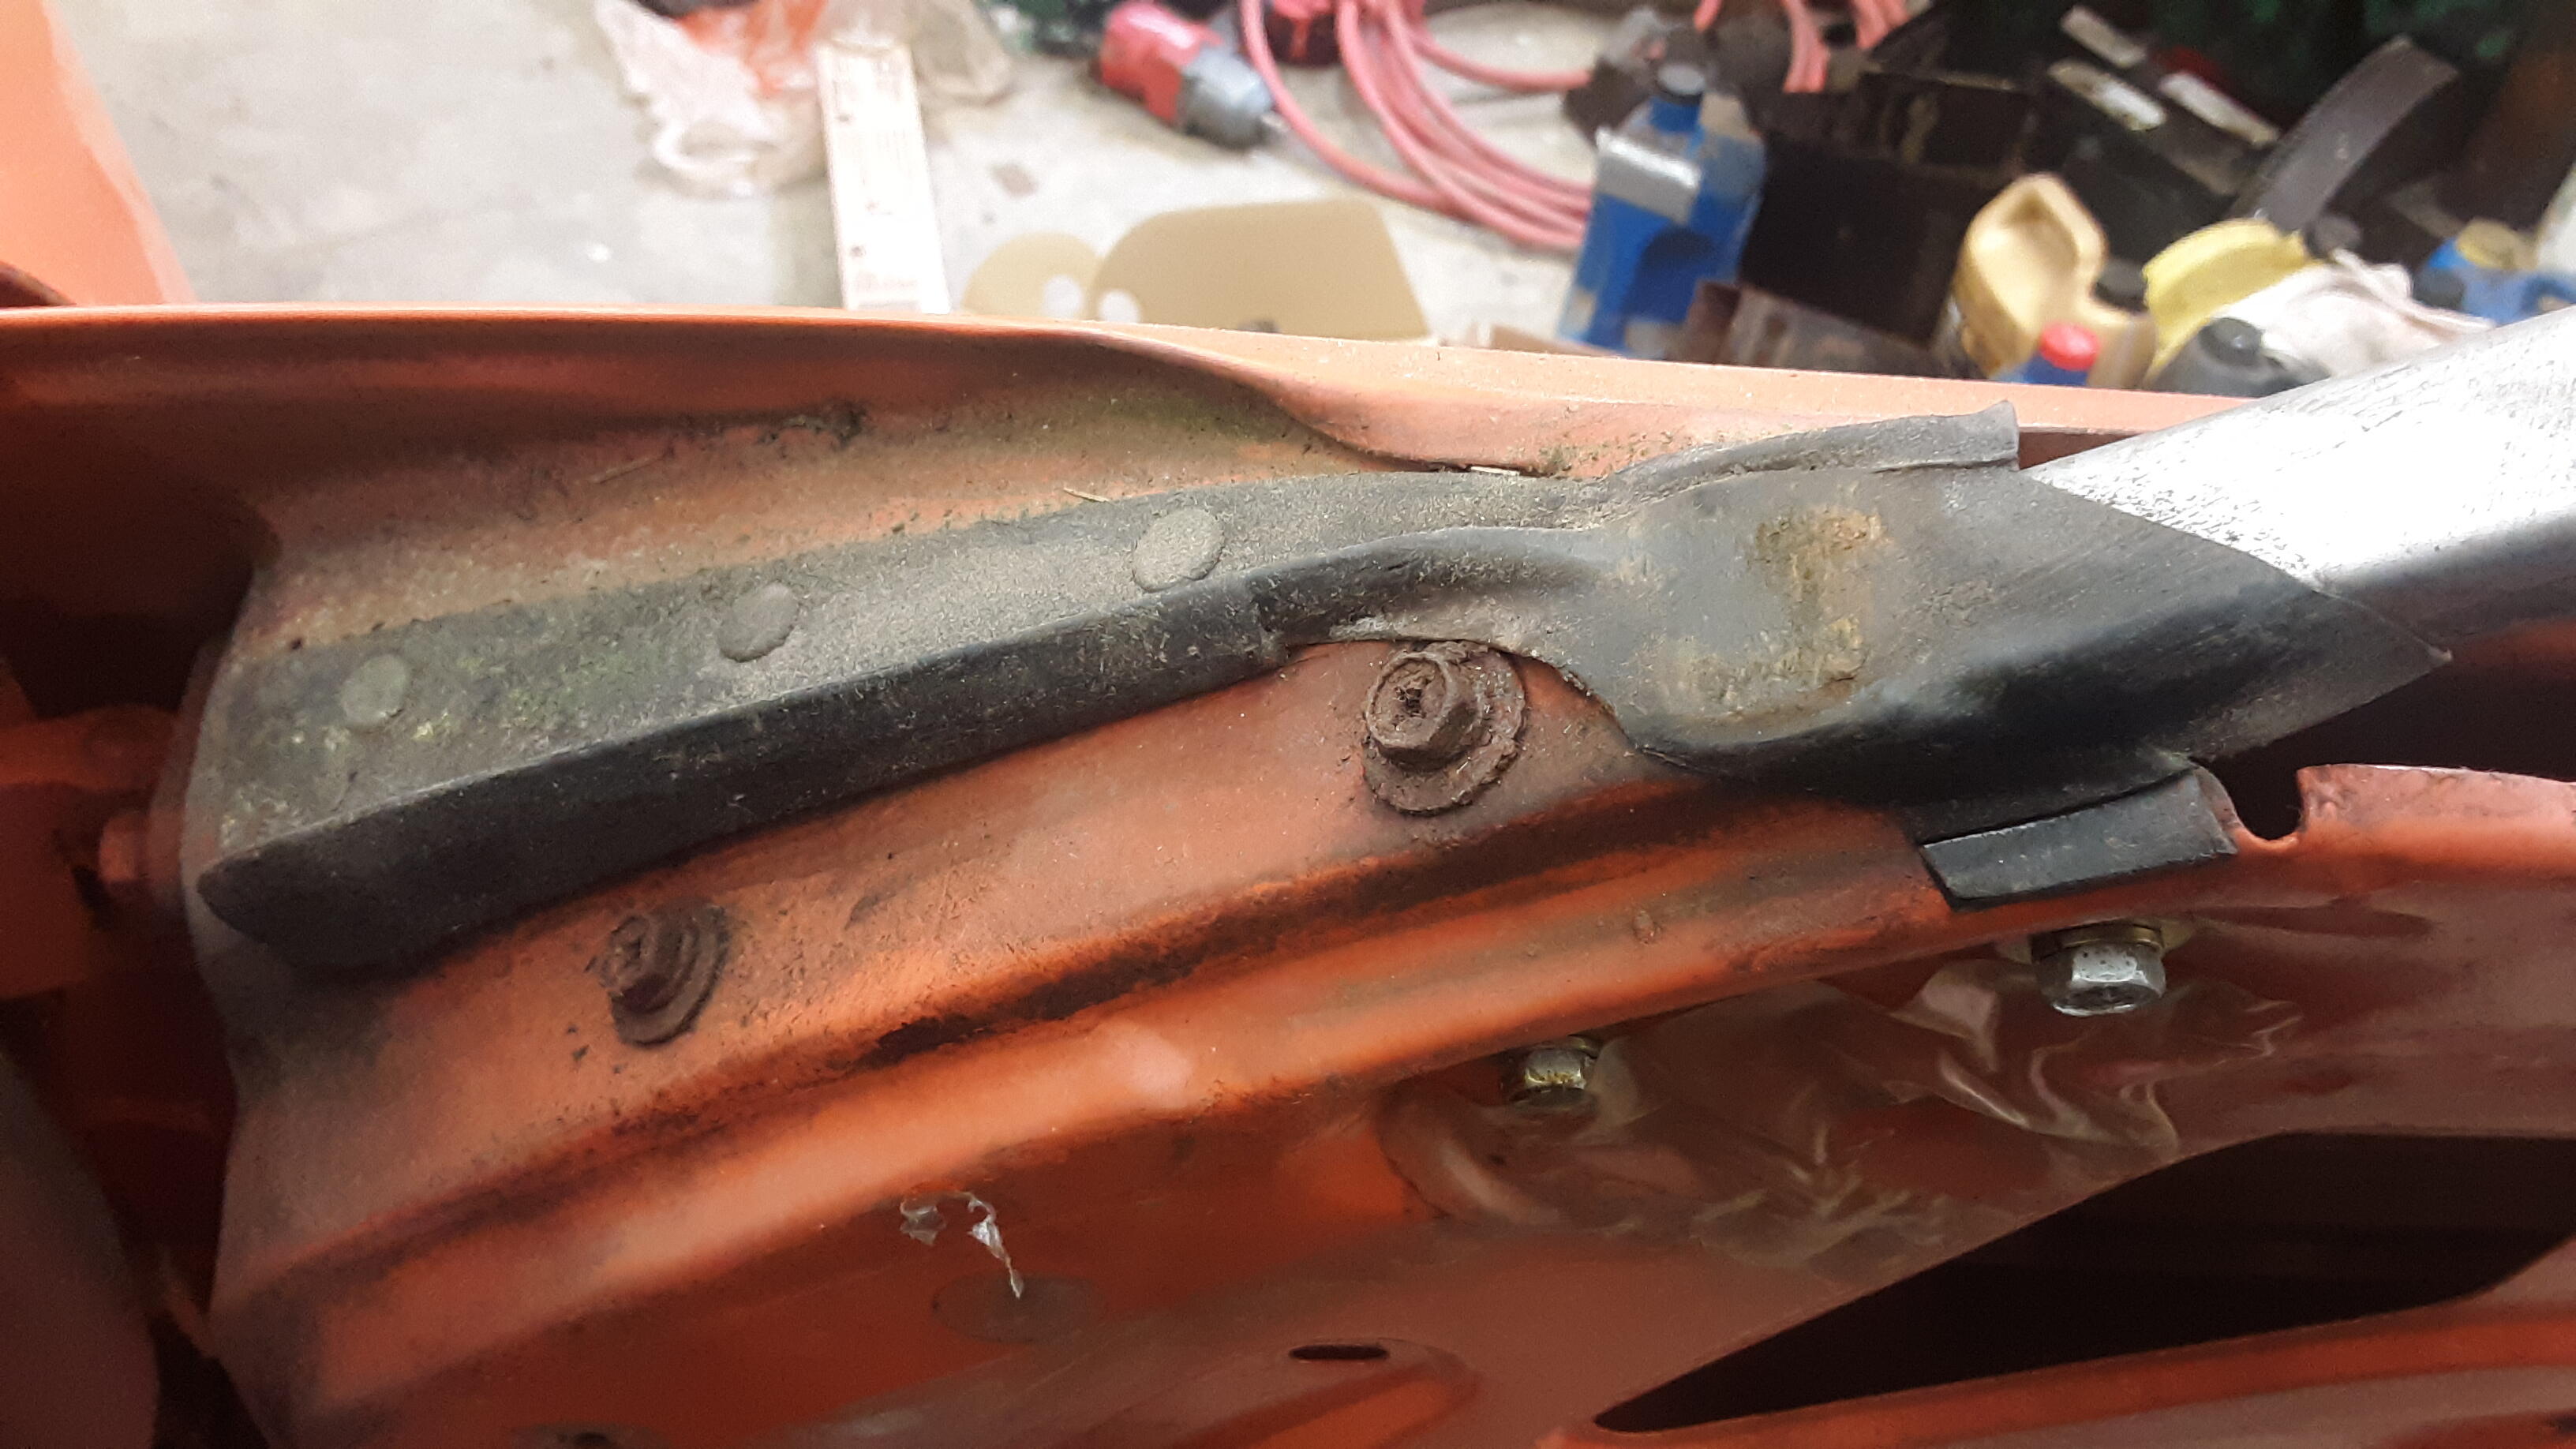
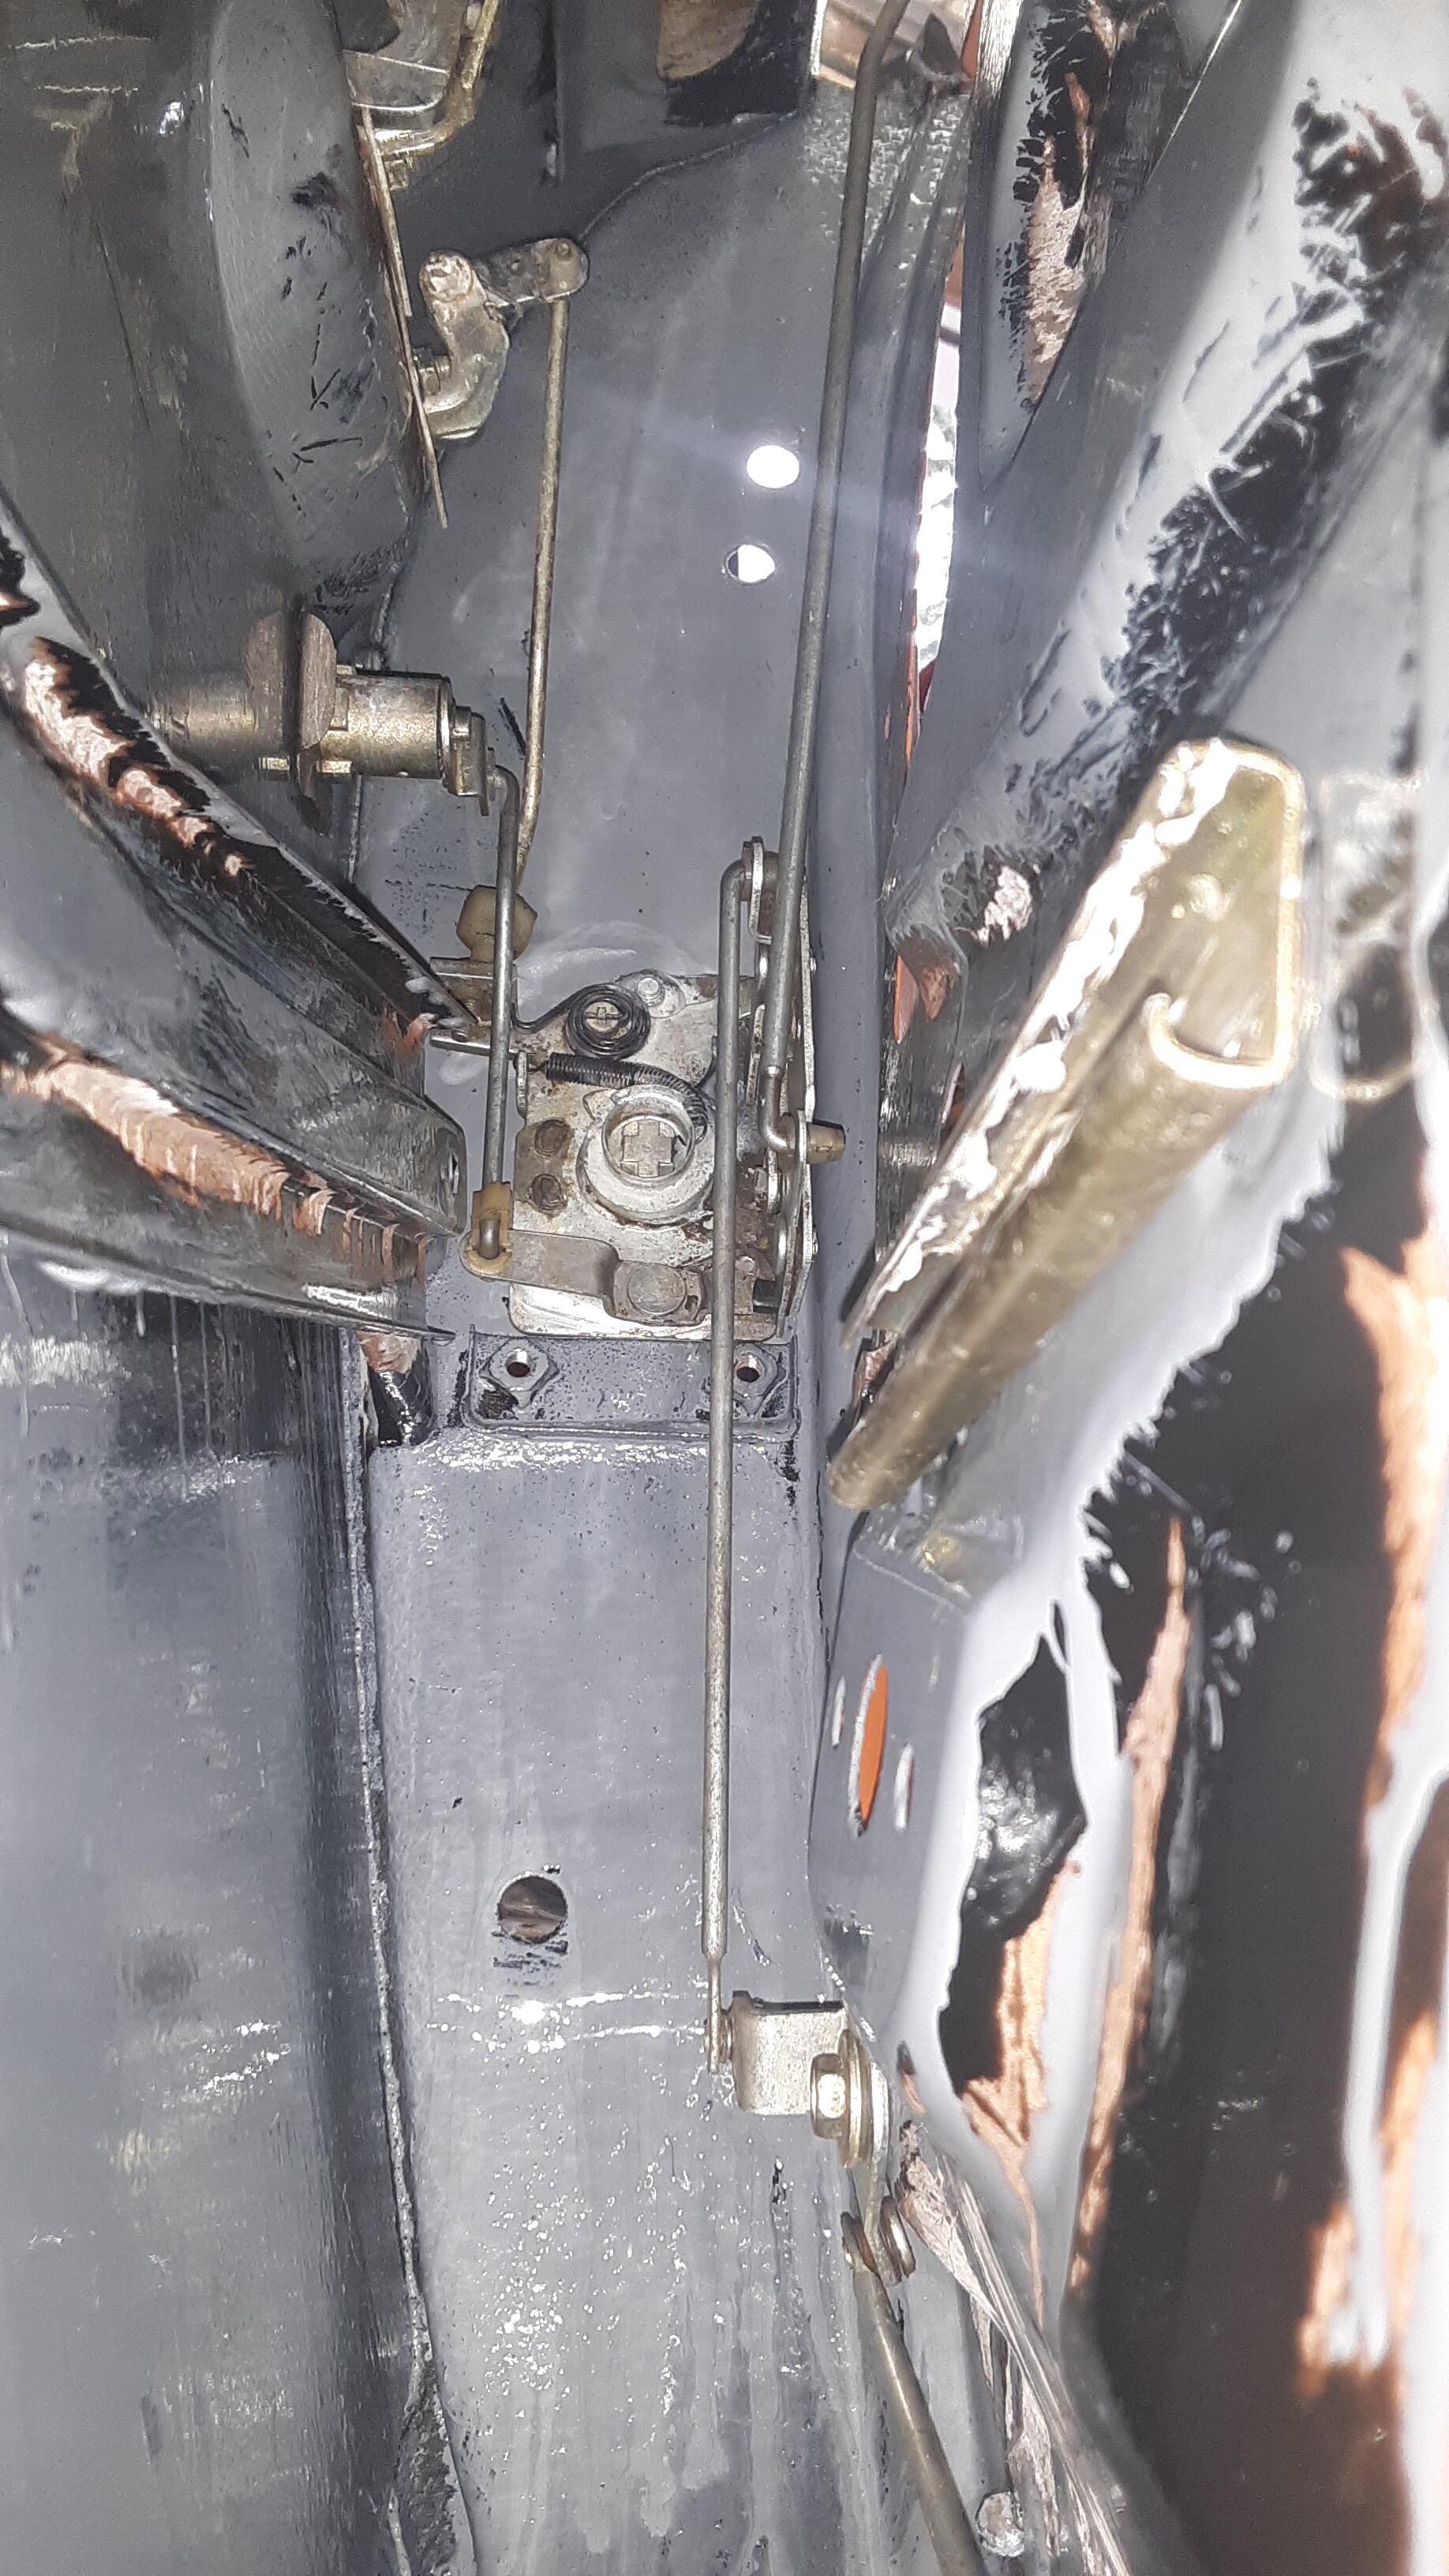
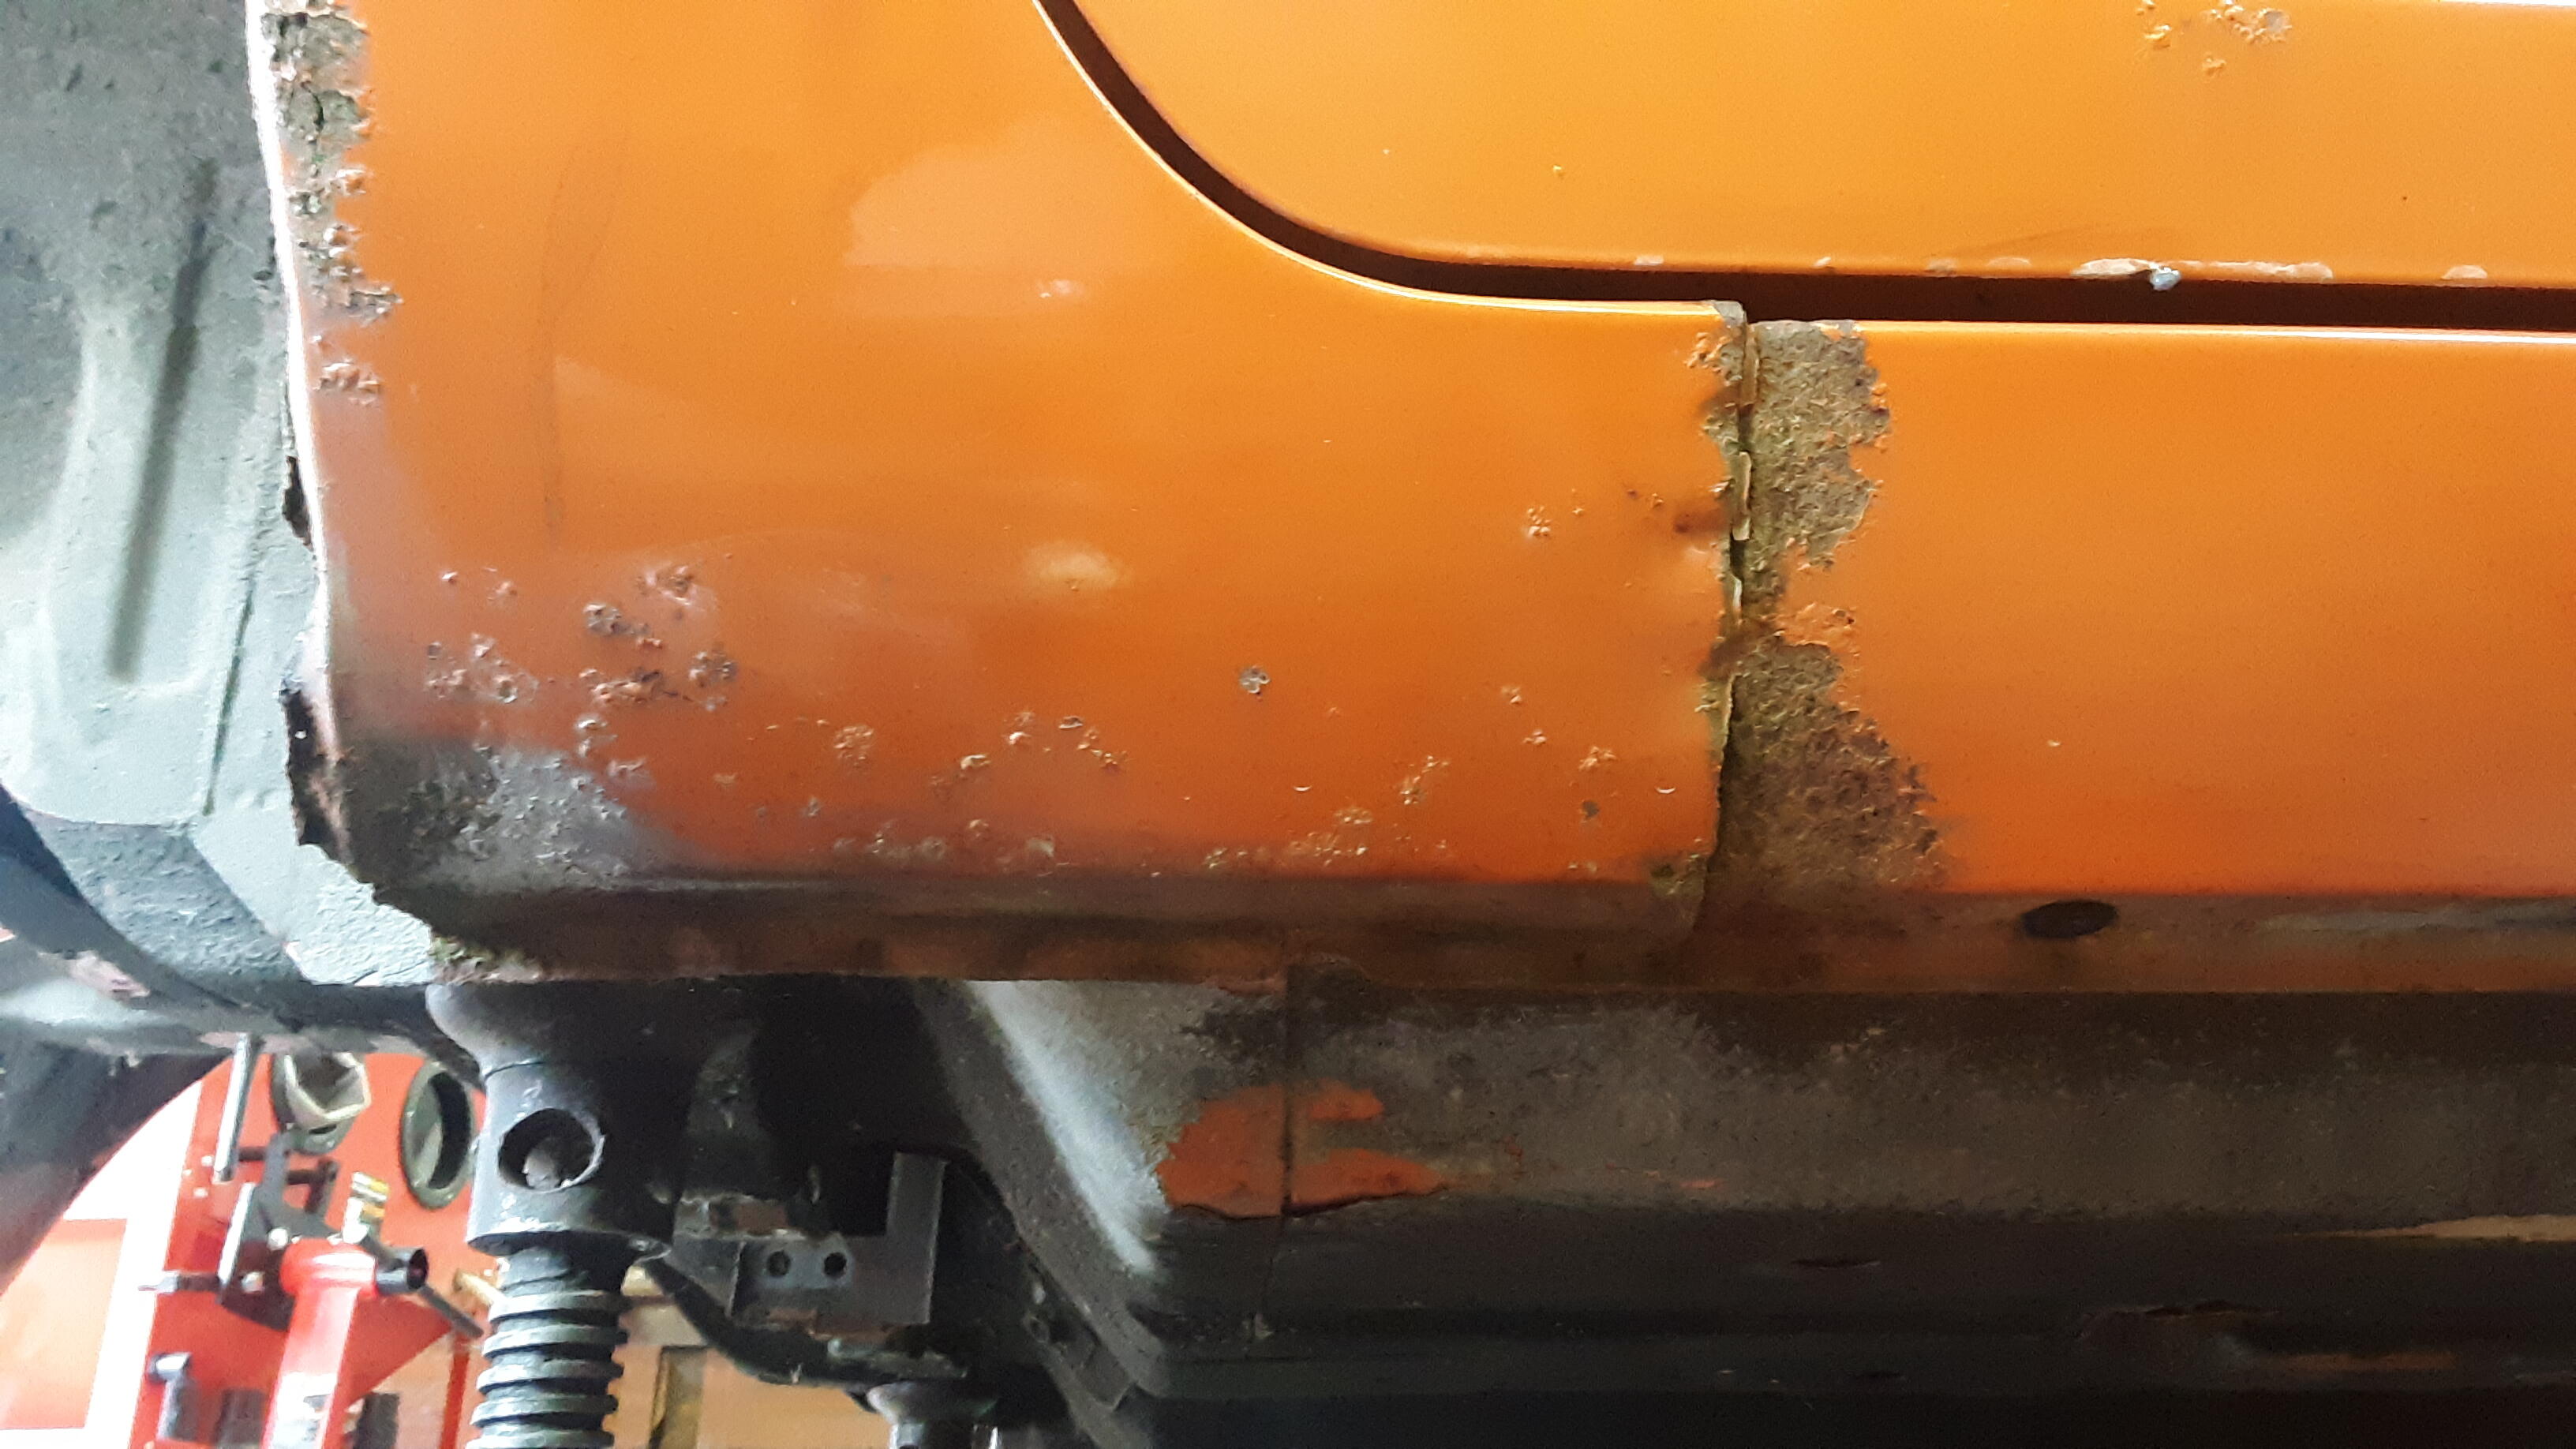
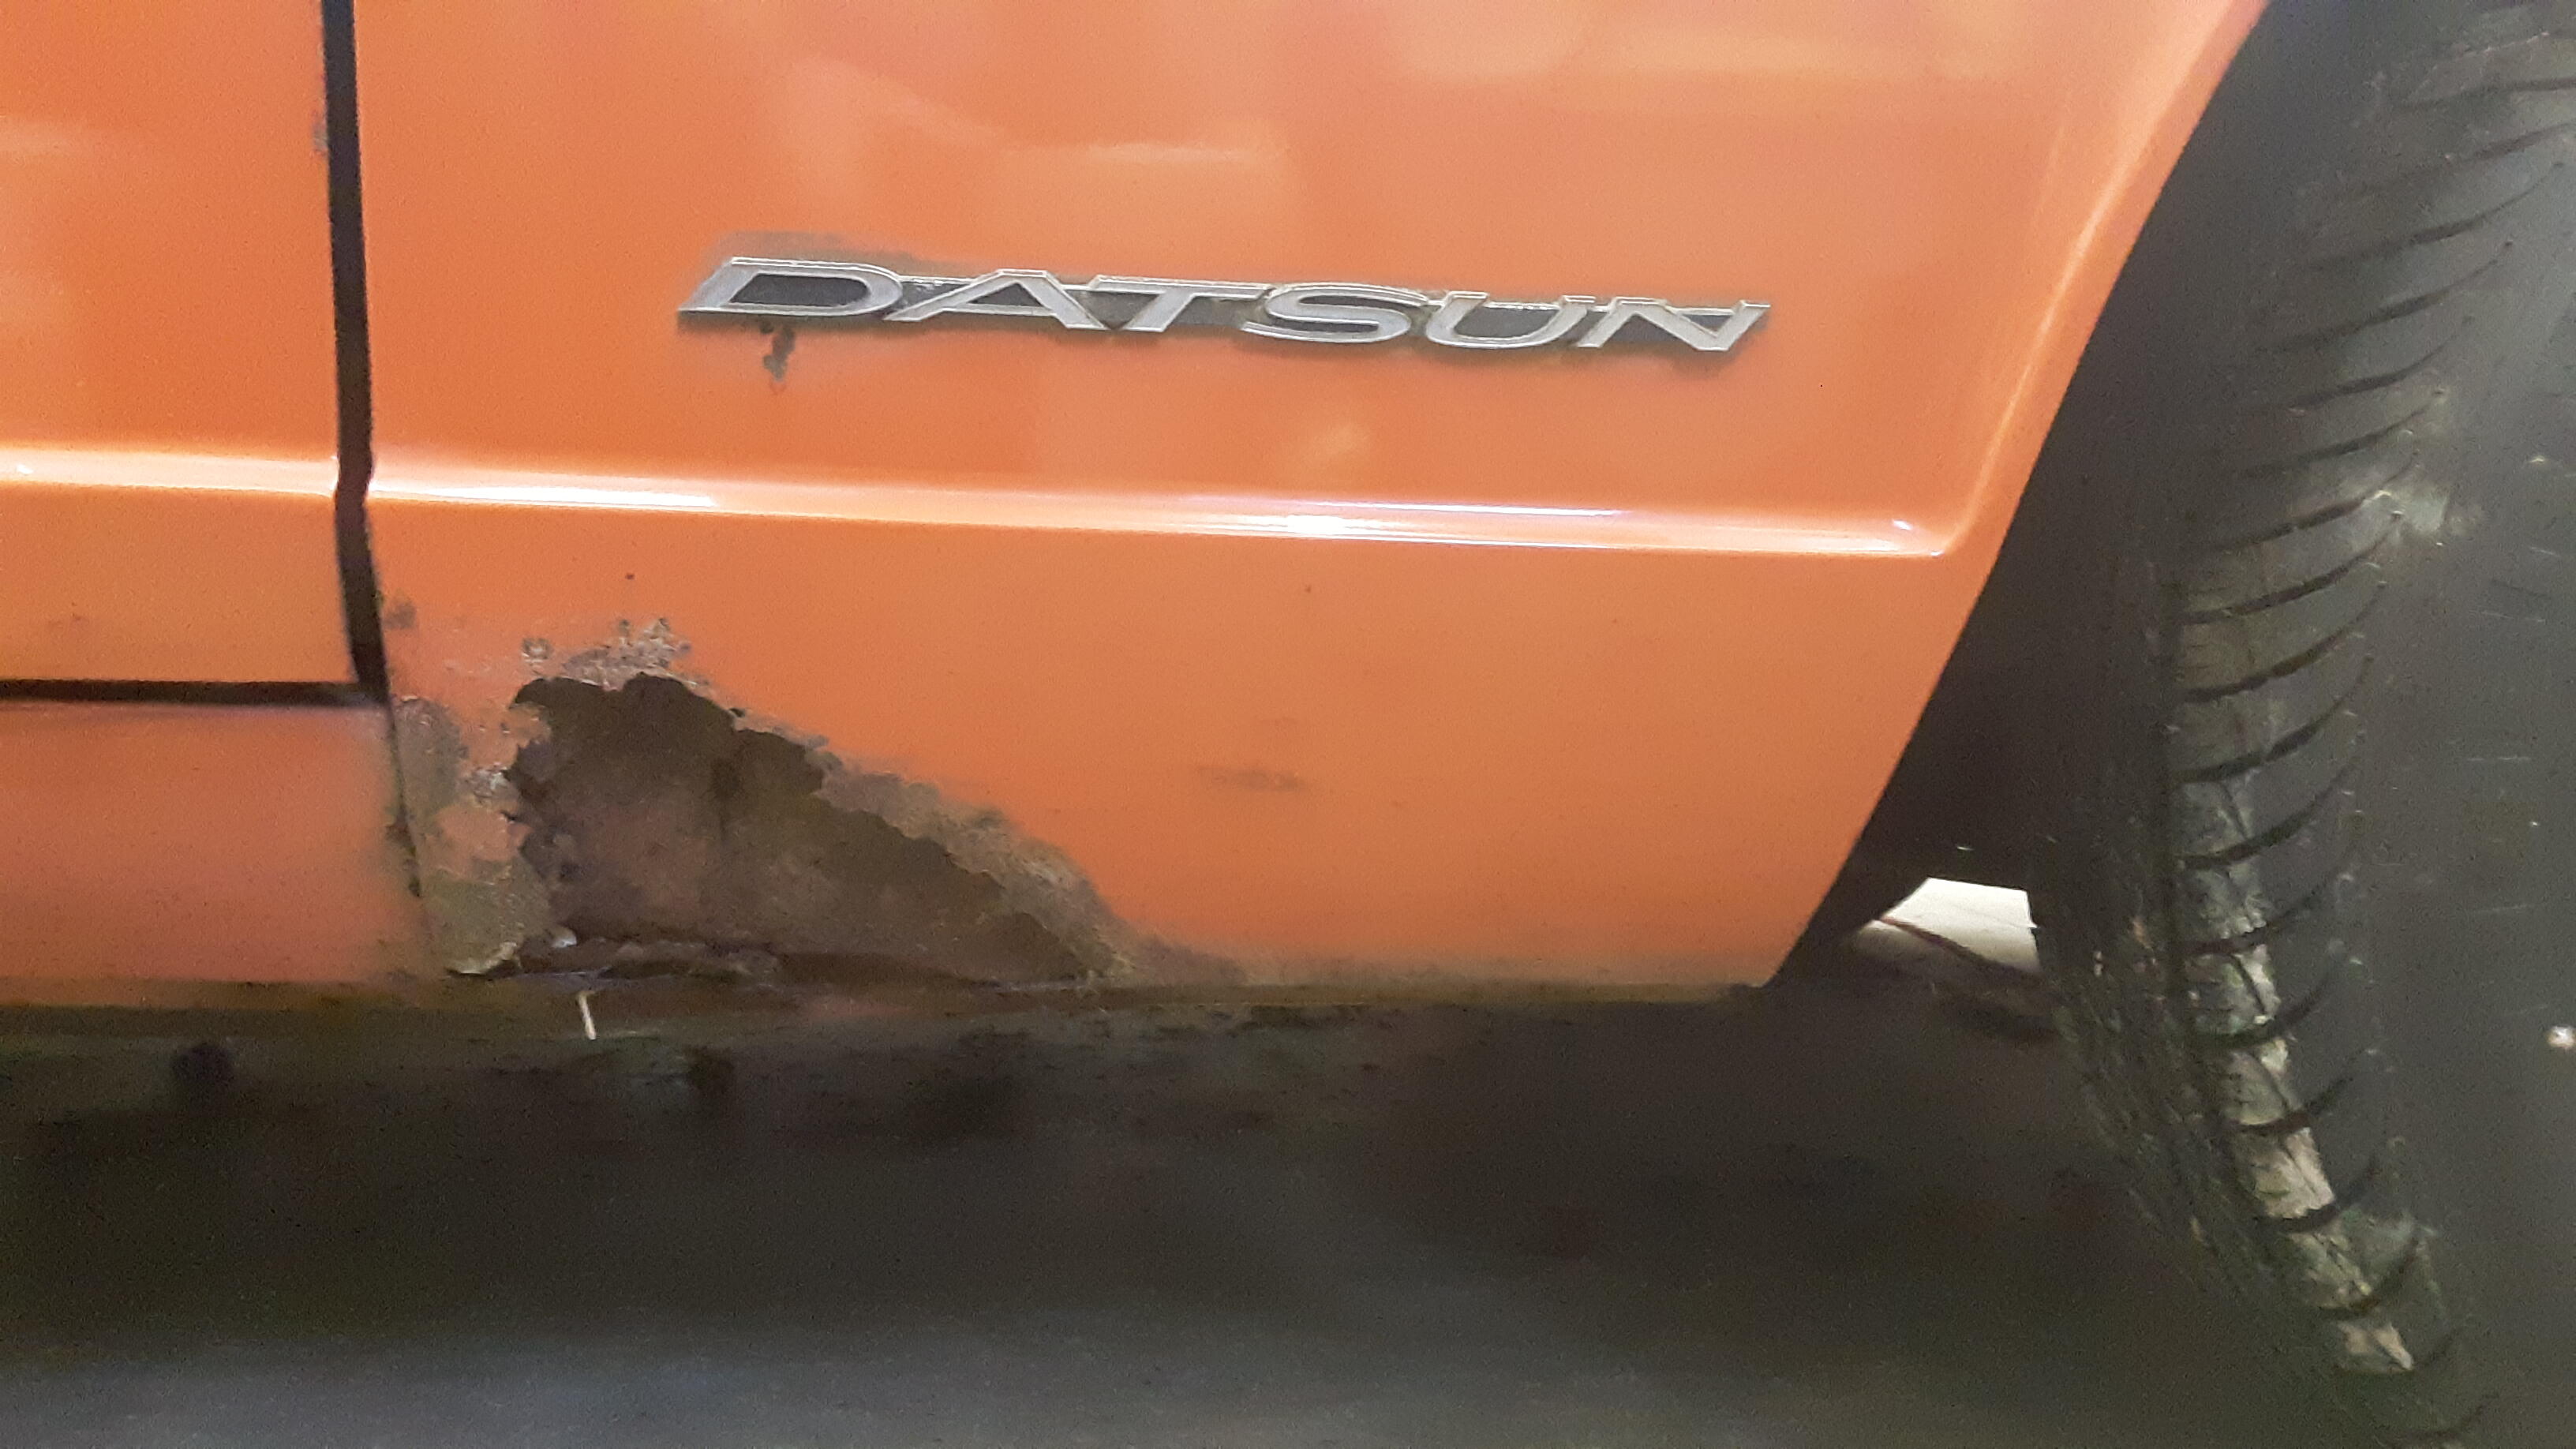
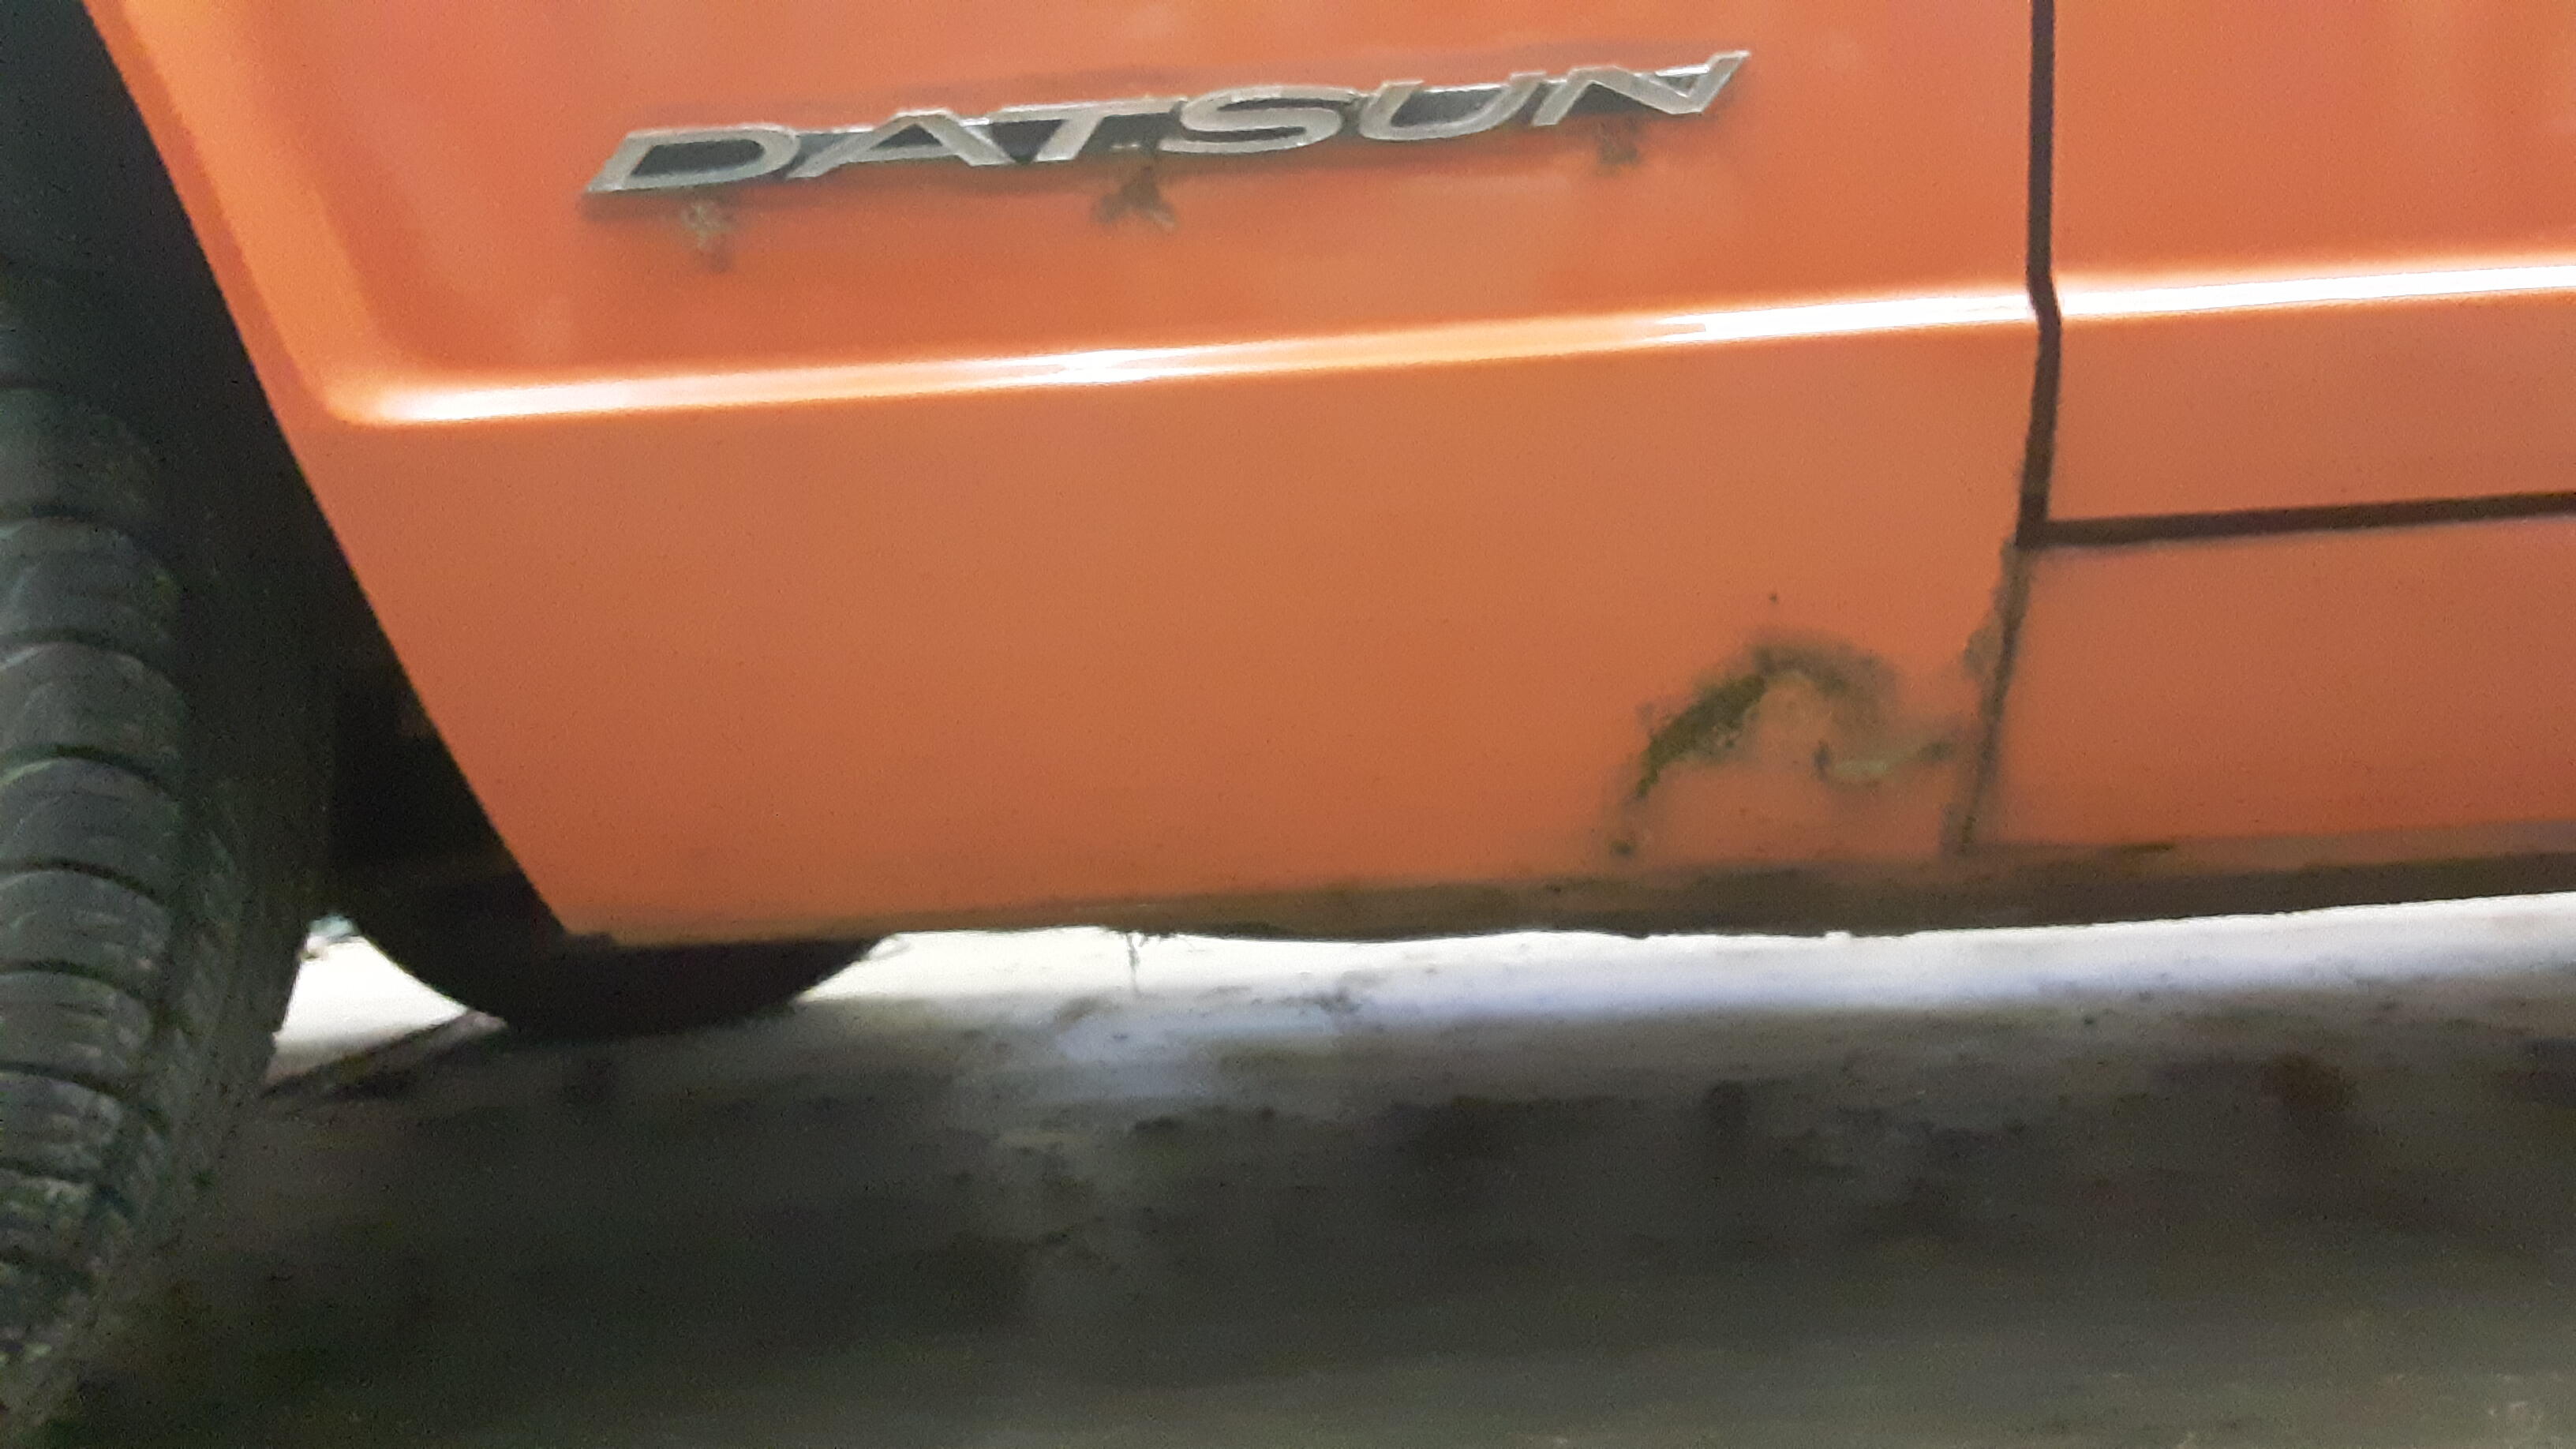
Close up of passenger side floor I guess I gotta keep going.... Did you notice? Junkyard Jenny said it's wearing a 72 bumper. also 1 rear finisher clip is broken.


-

-
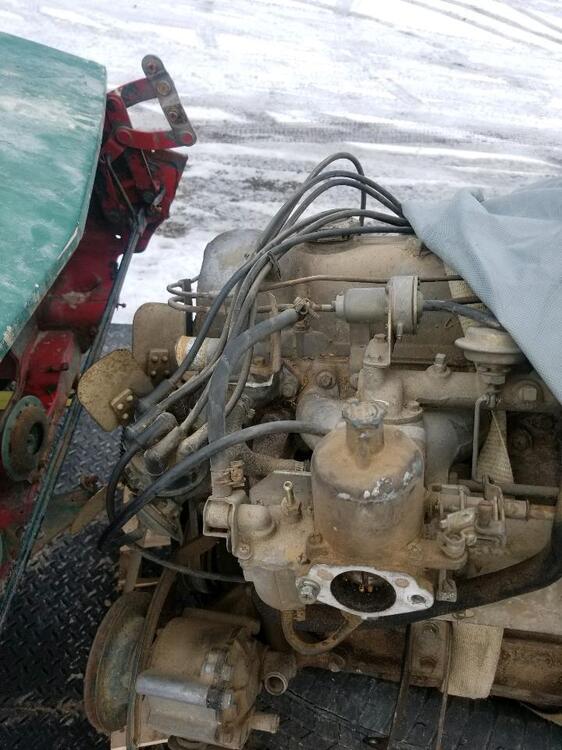
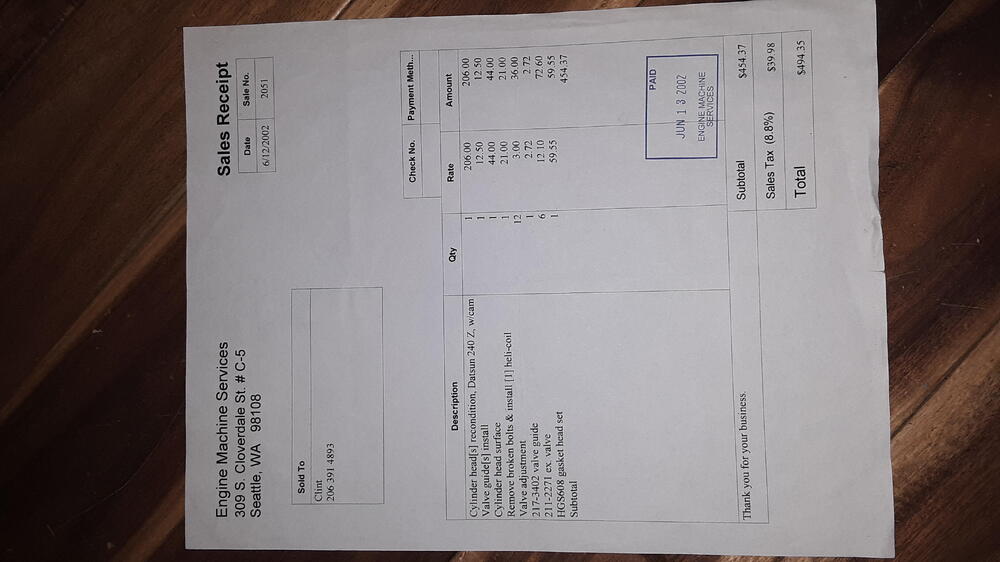
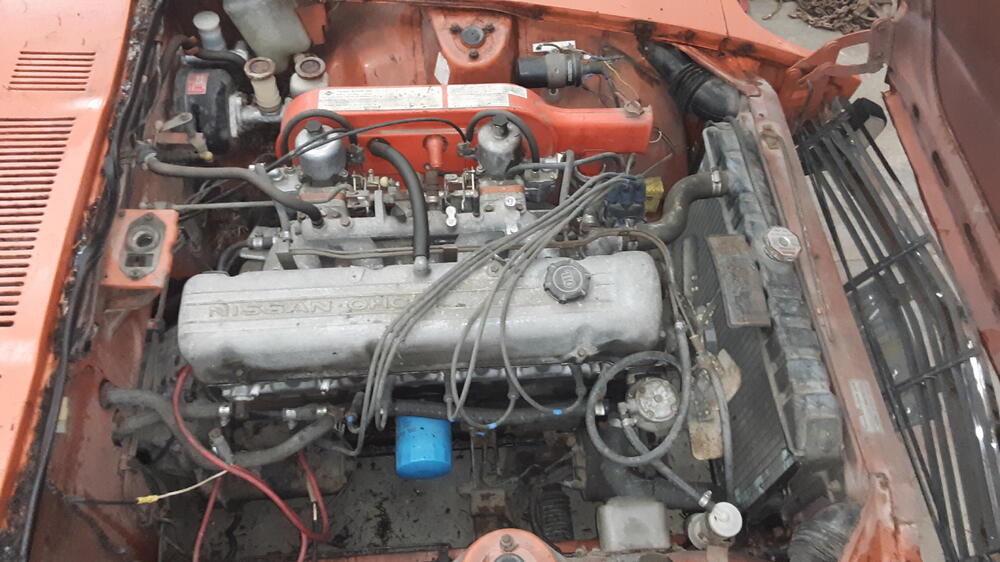
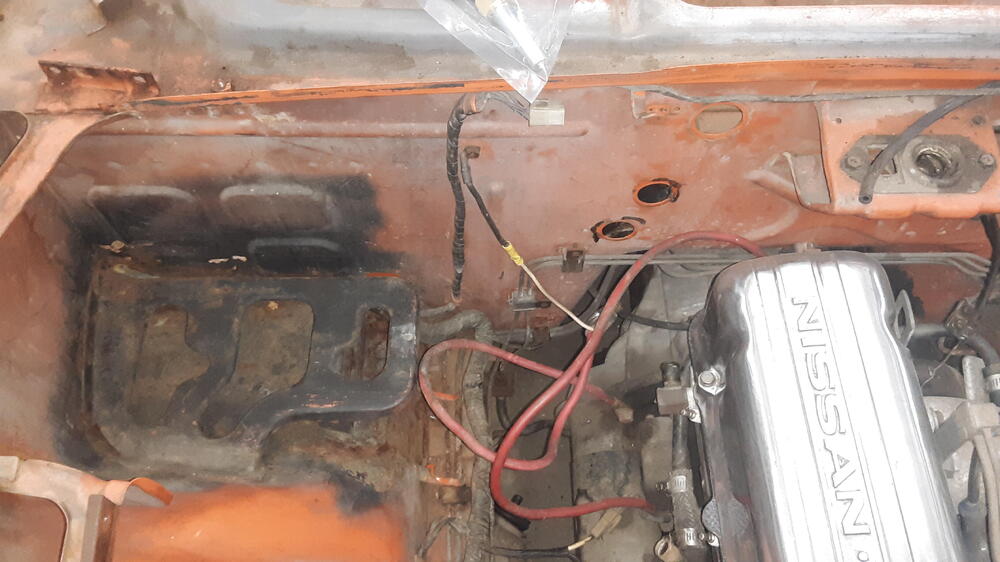
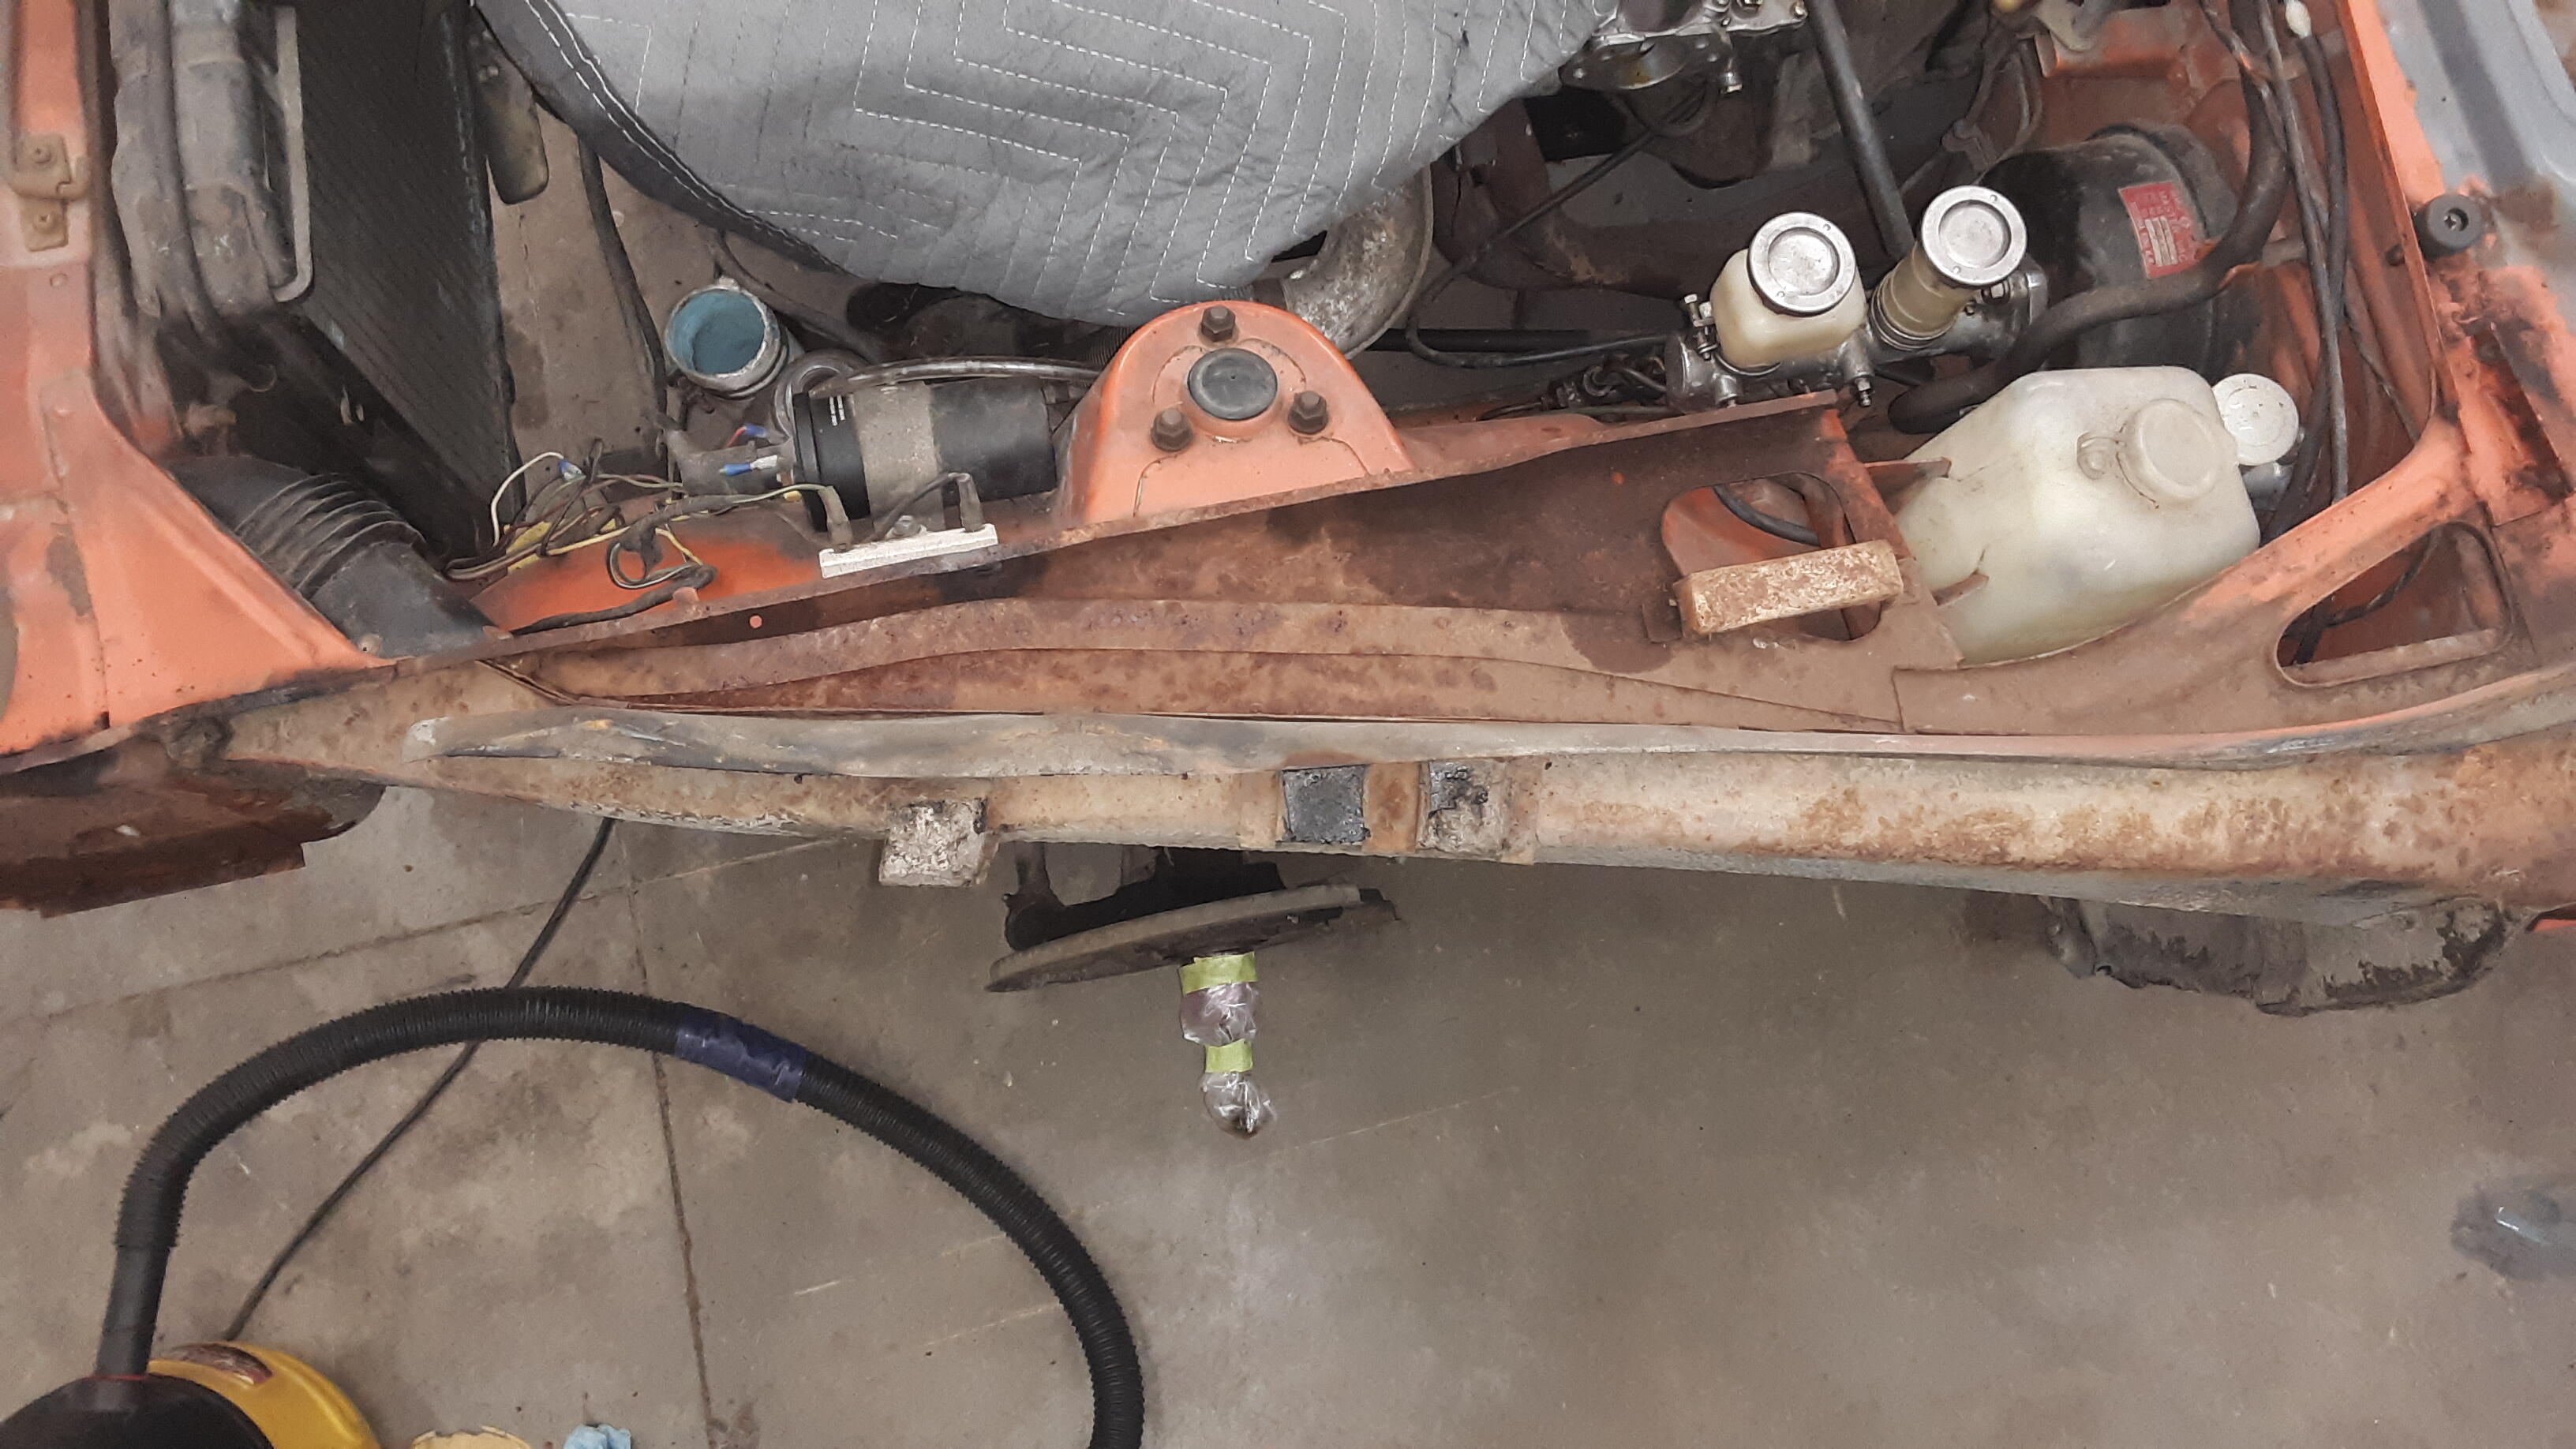
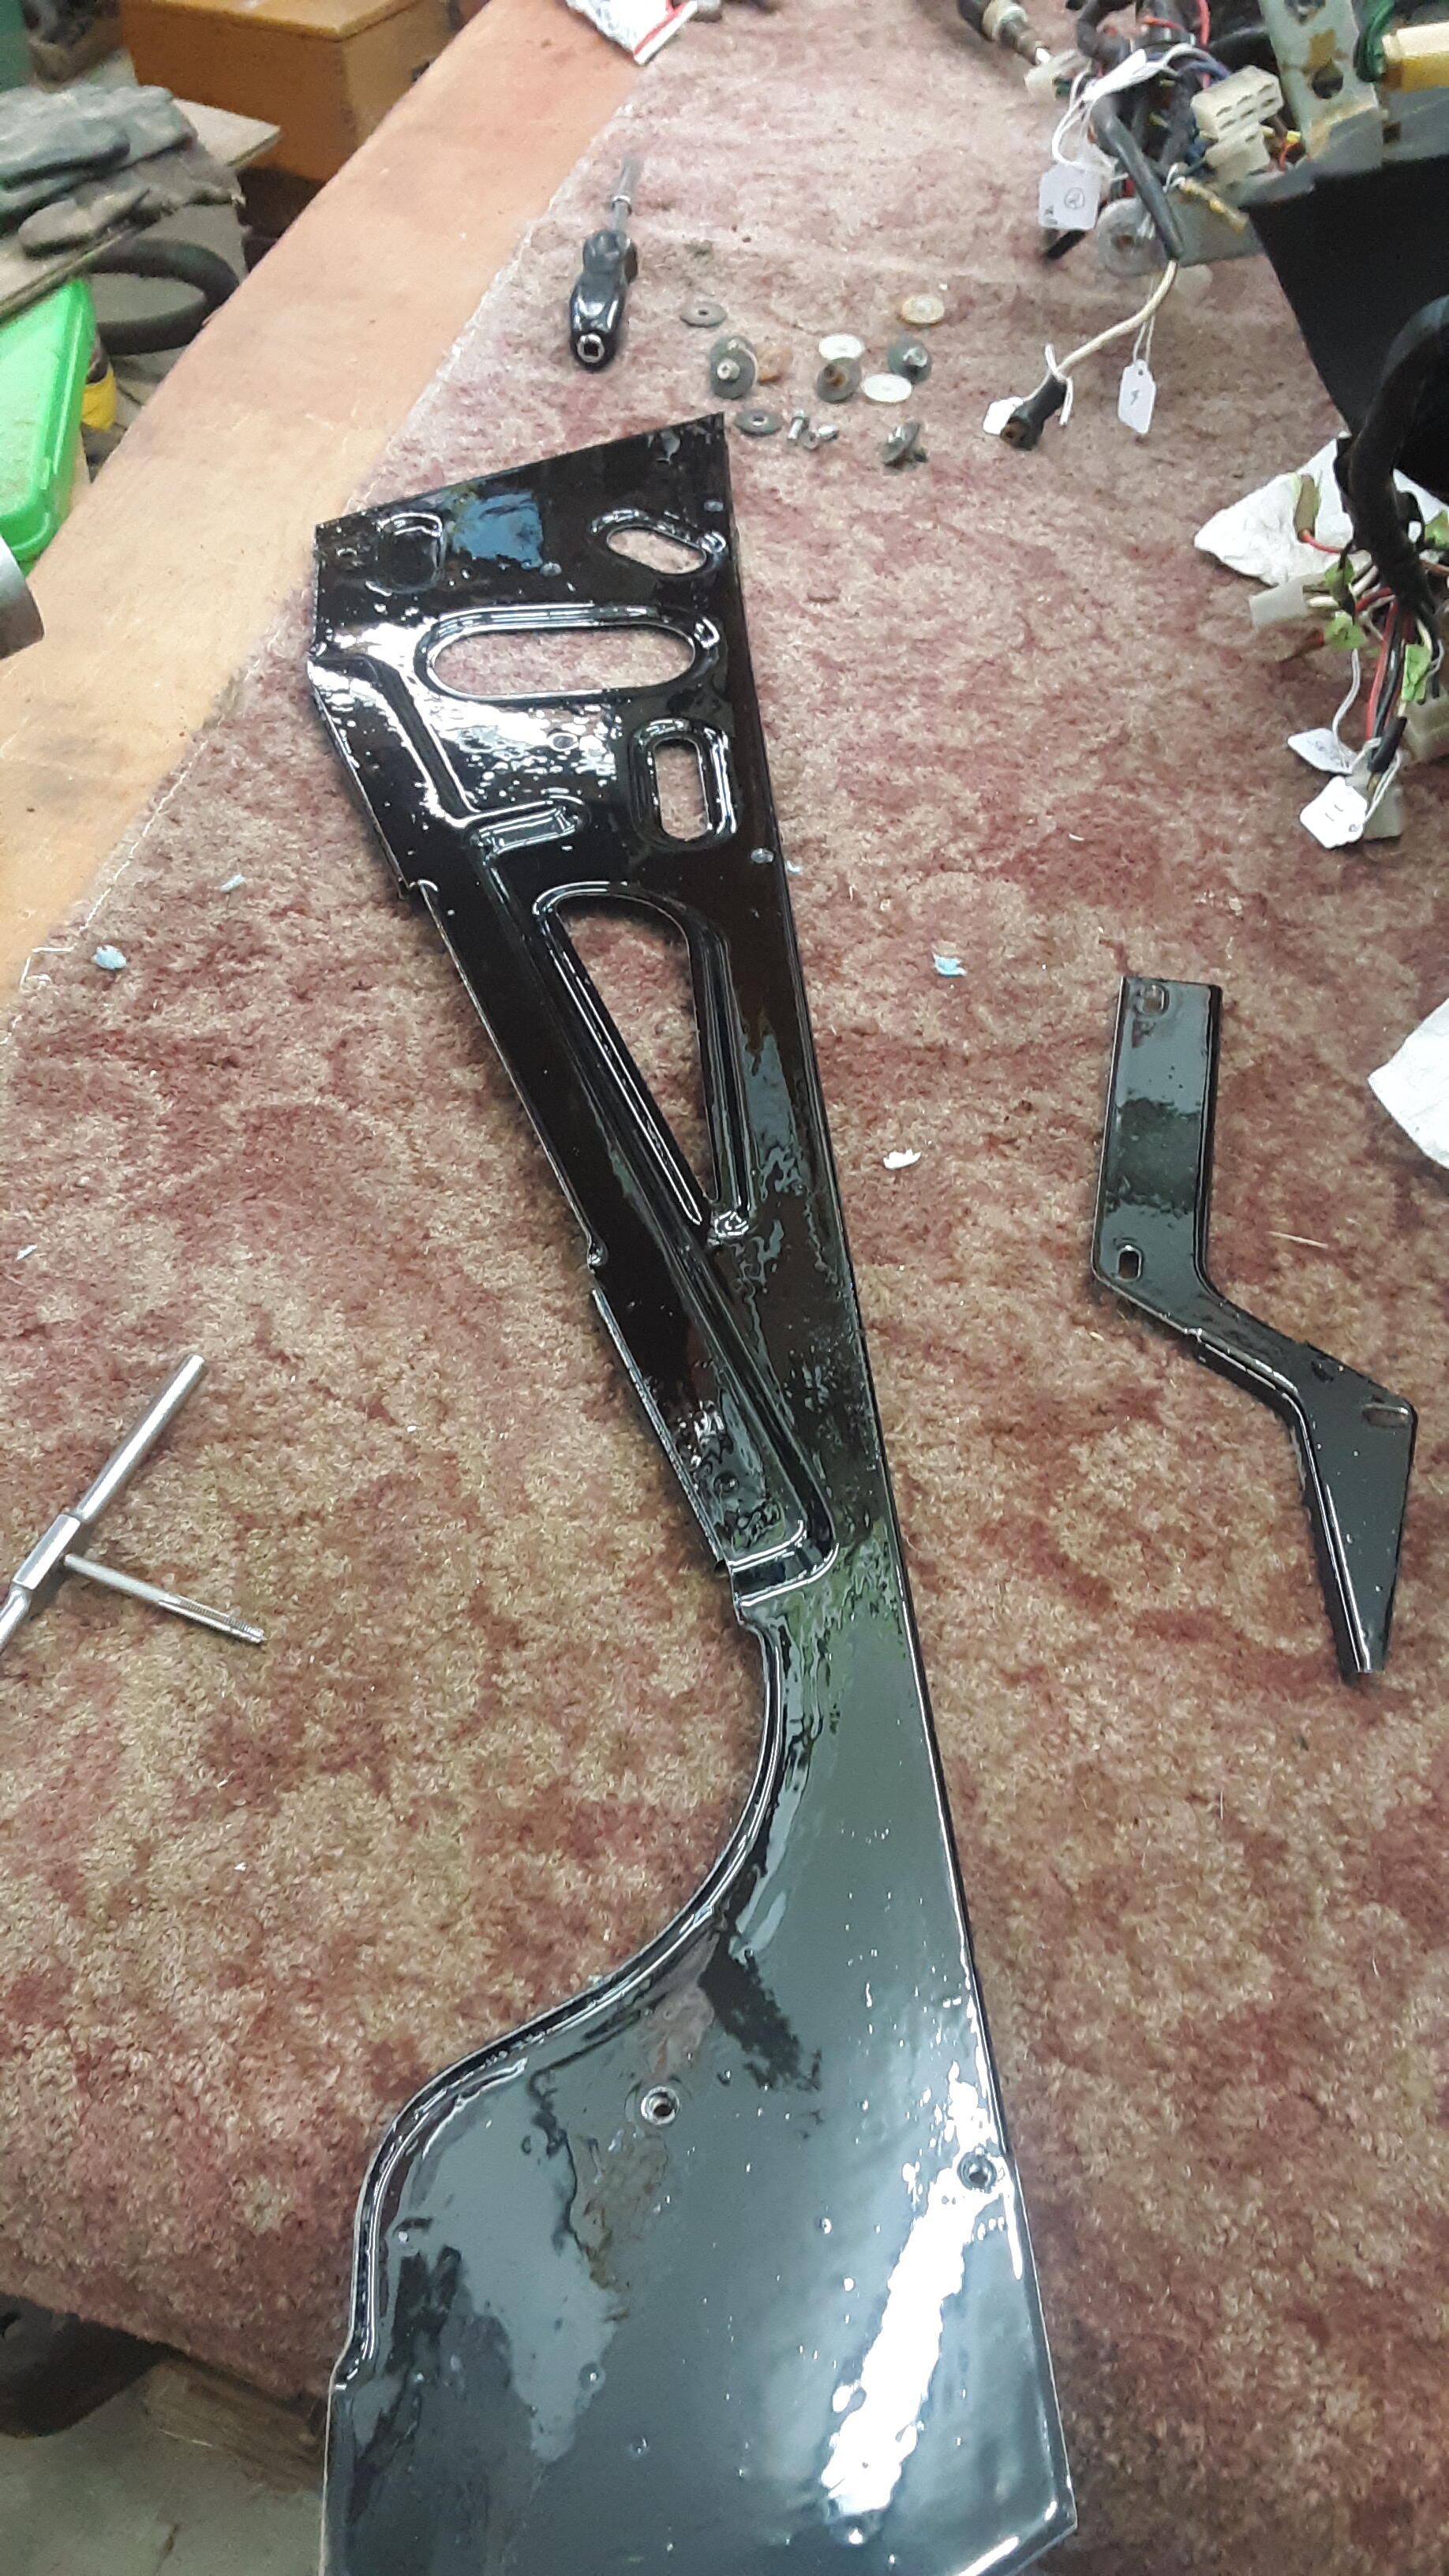
Engine bay: Carbs were done by Ztherapy in 8/2000 and cylinder head was done in 2002 The inside of the doors were a bit under the weather, the belt moulding rubber was toast, all the rubber on this car was past it's prime. I decided to treat the doors with POR.


-
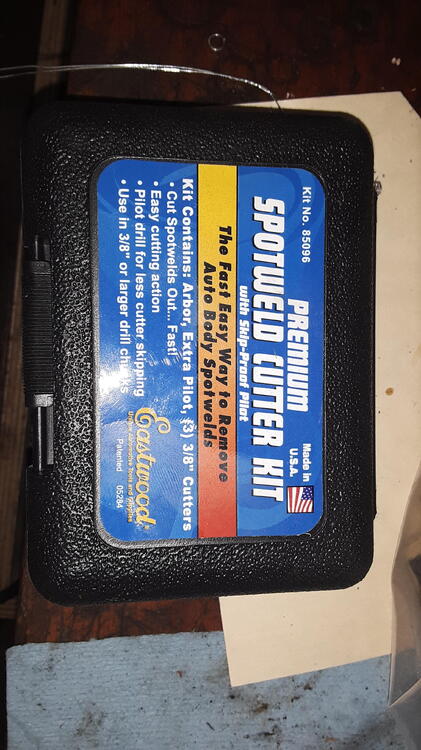
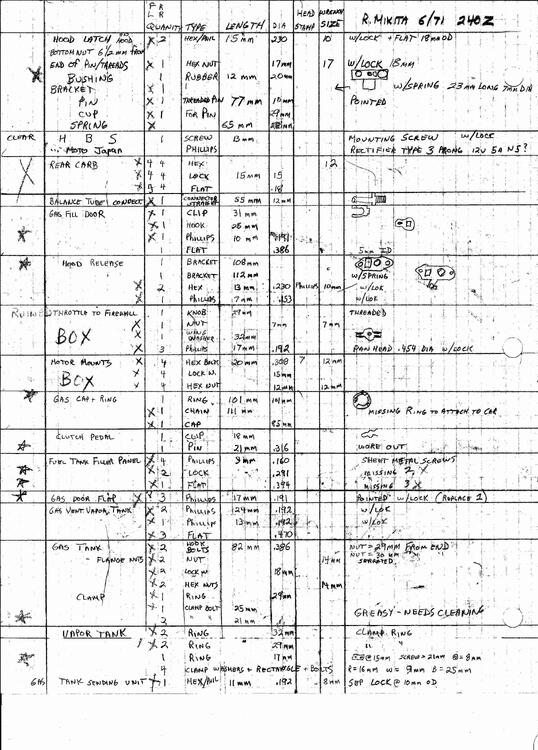
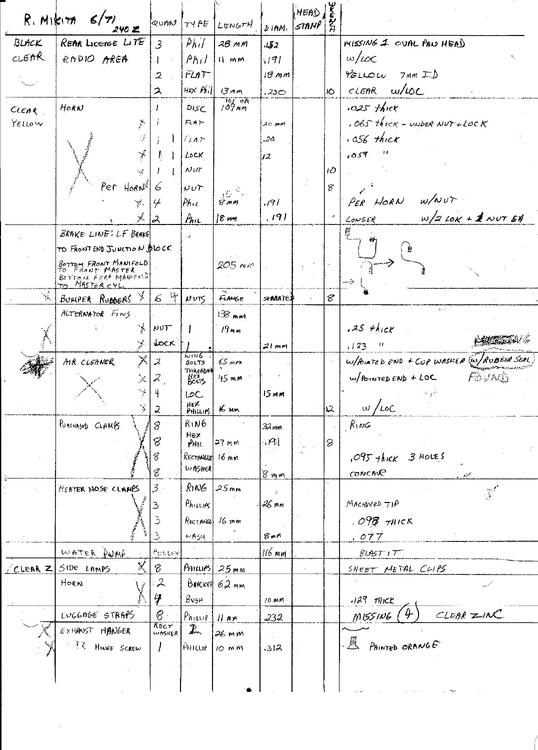
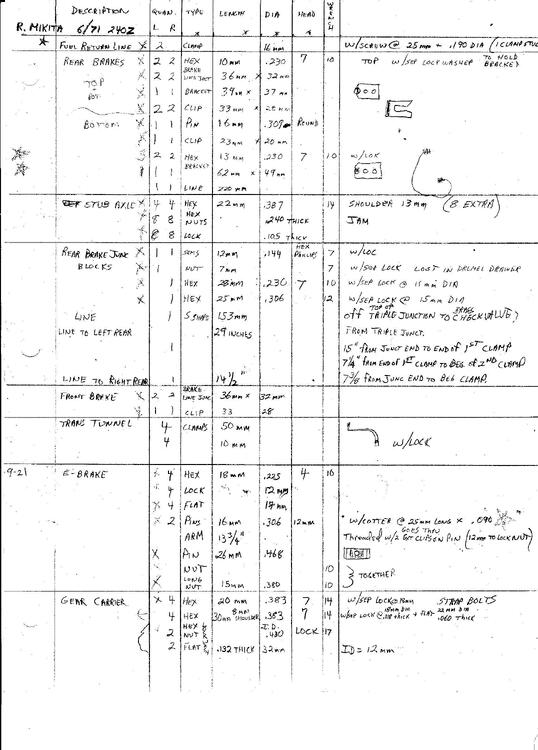
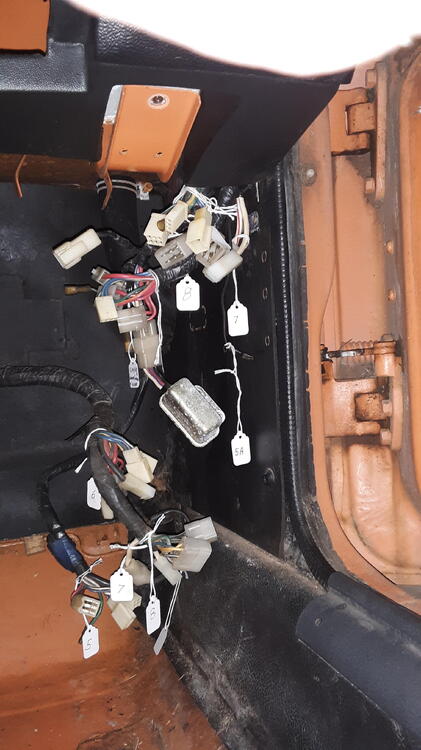
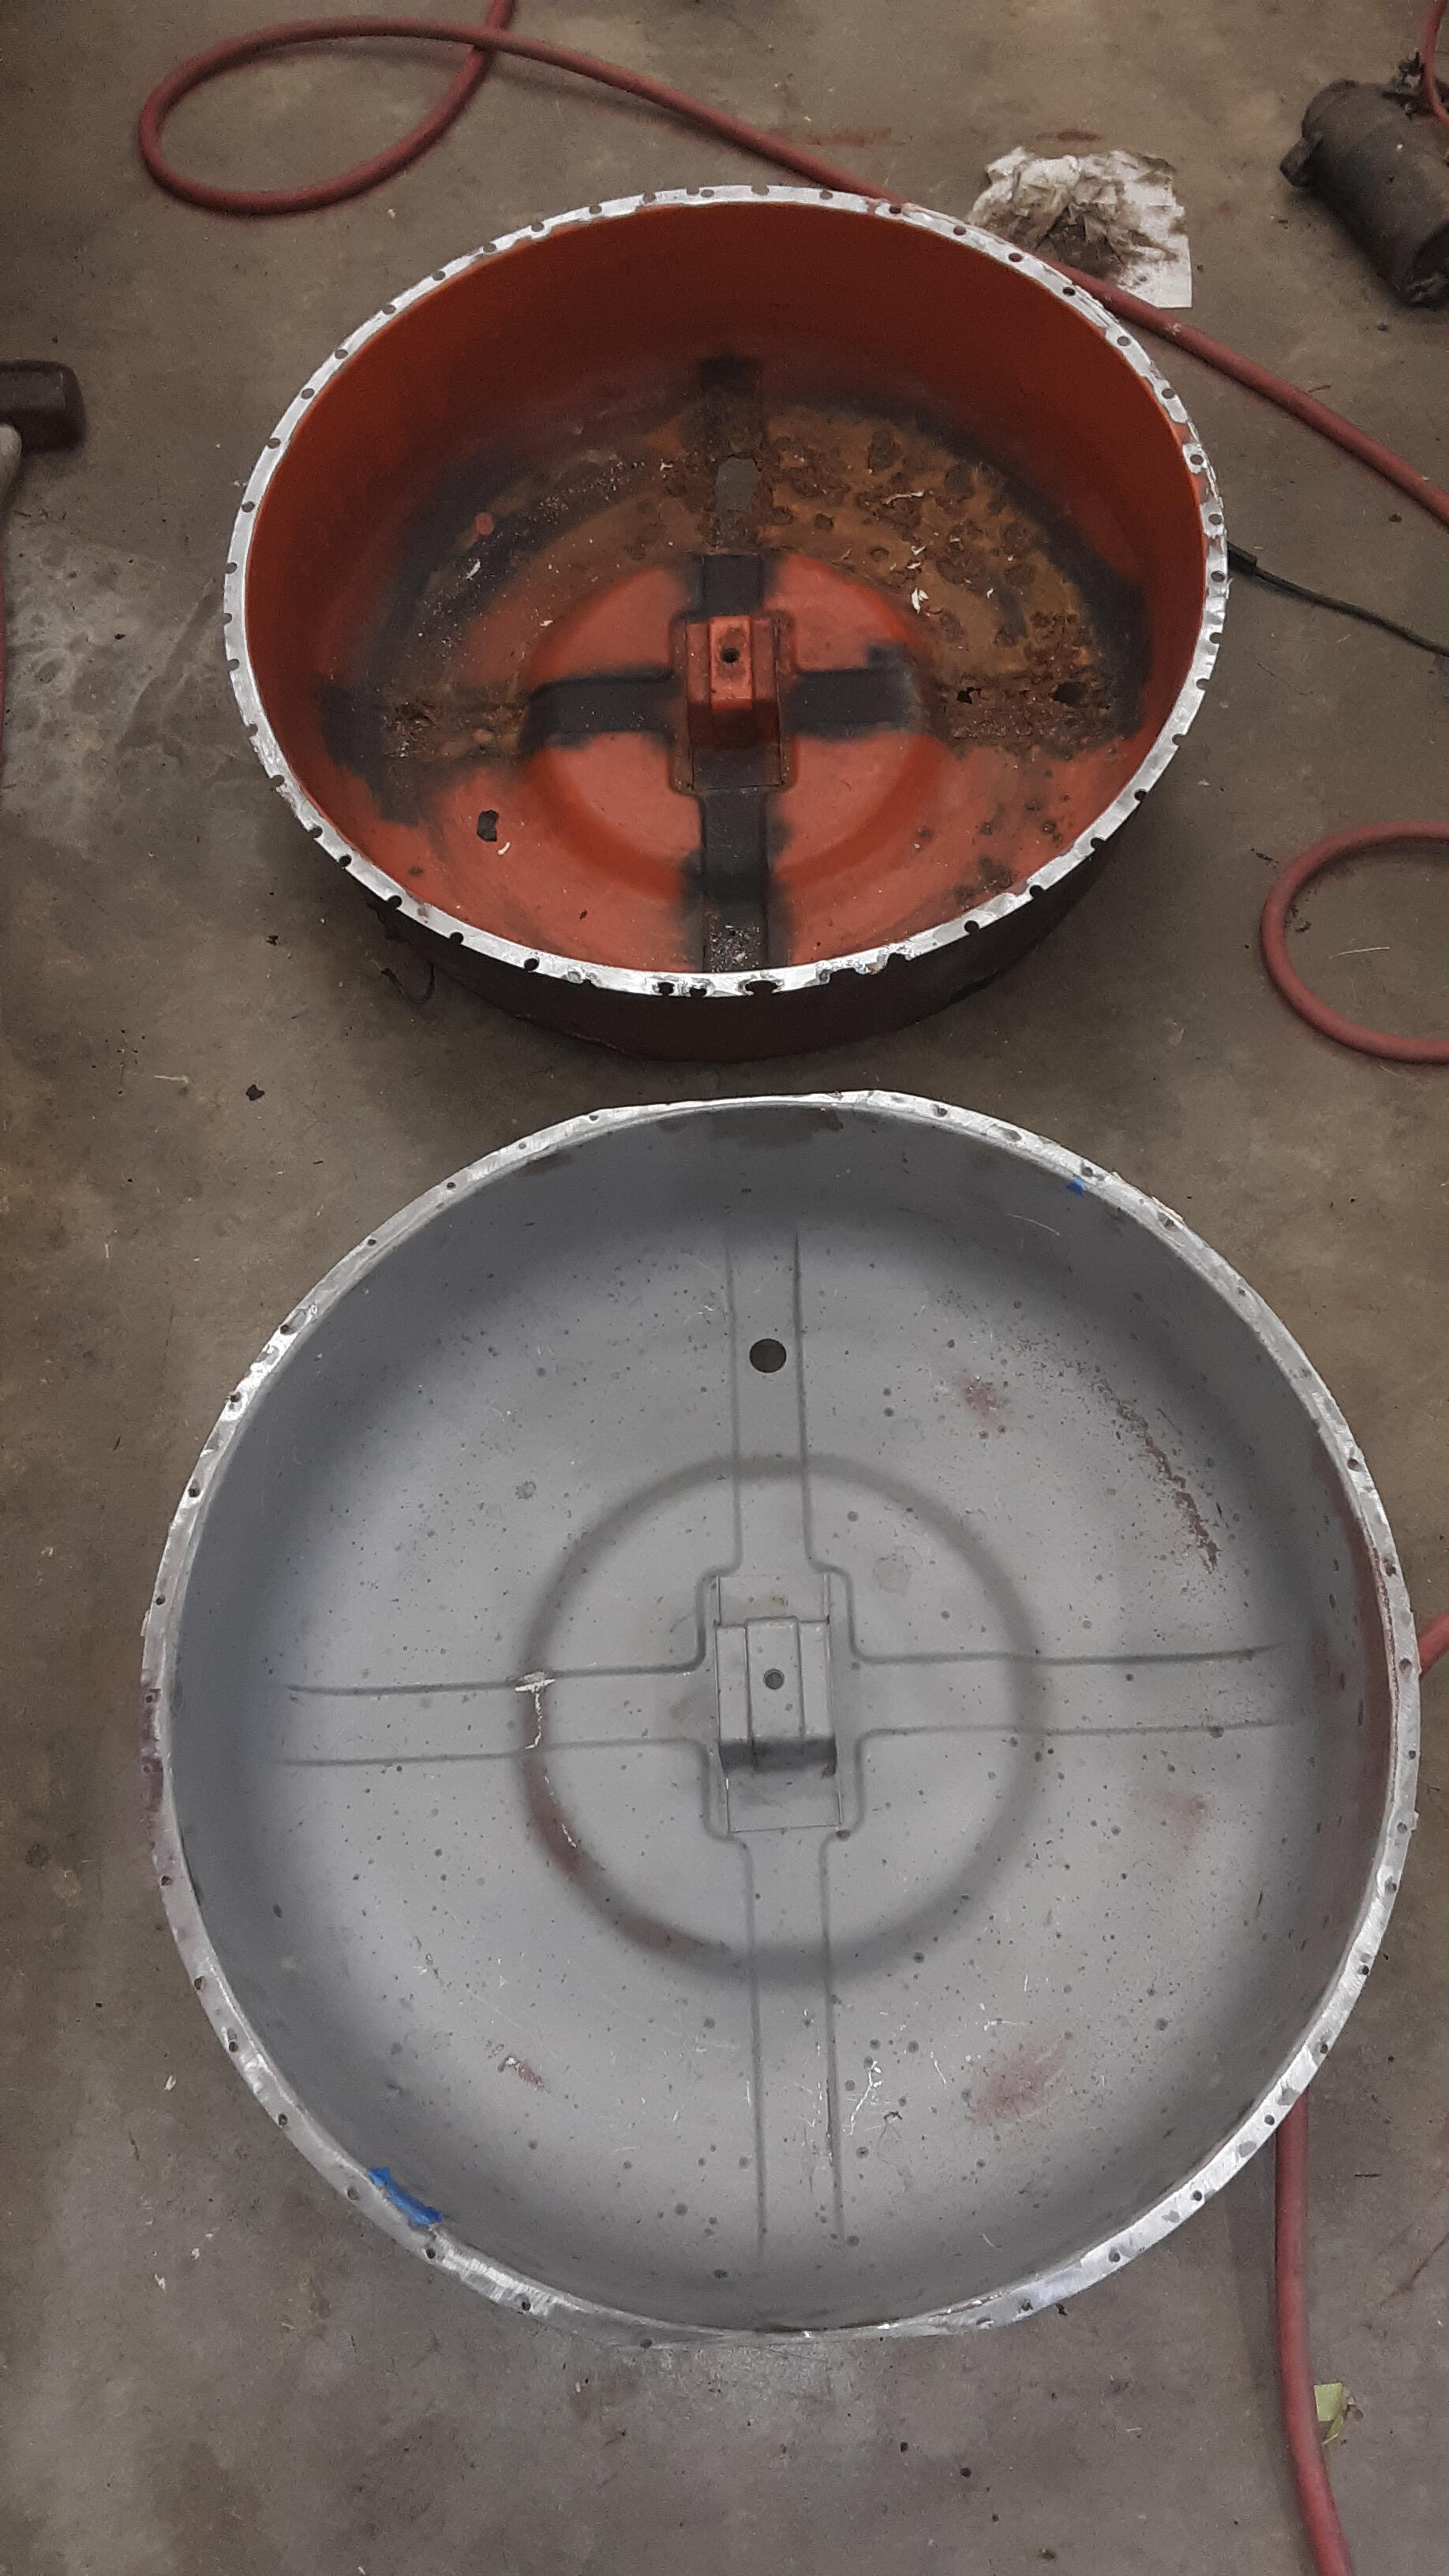
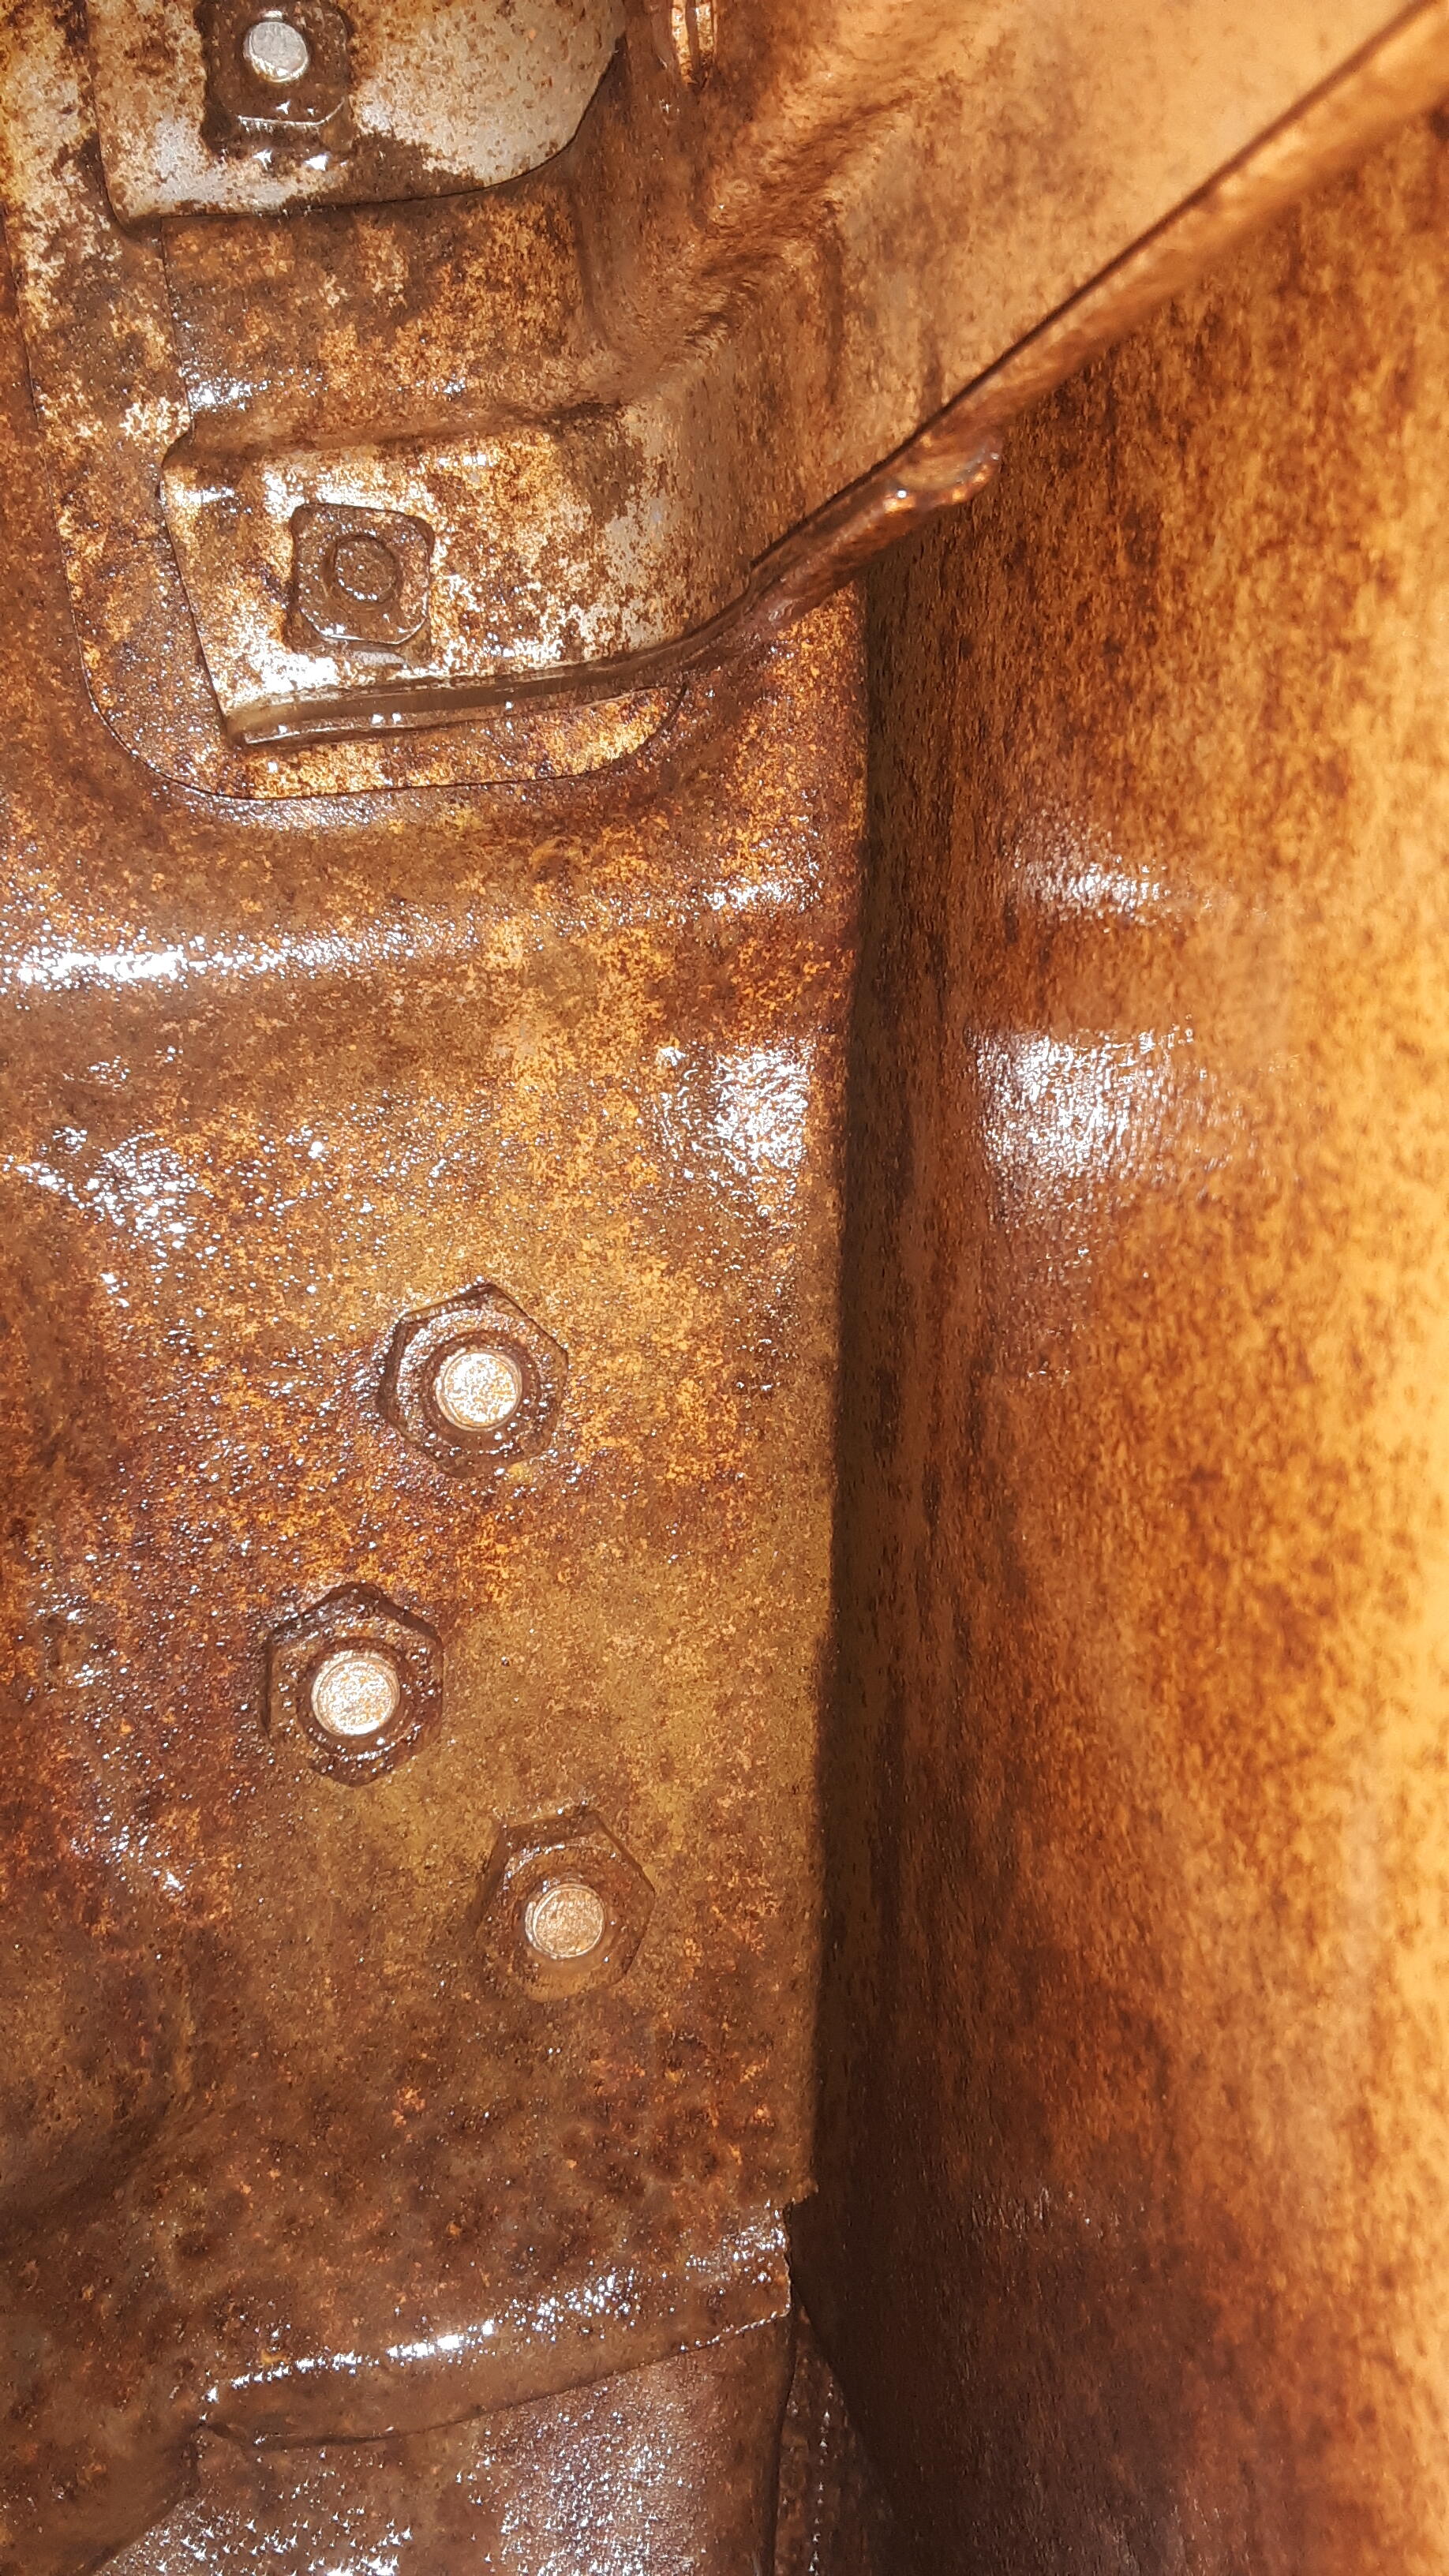
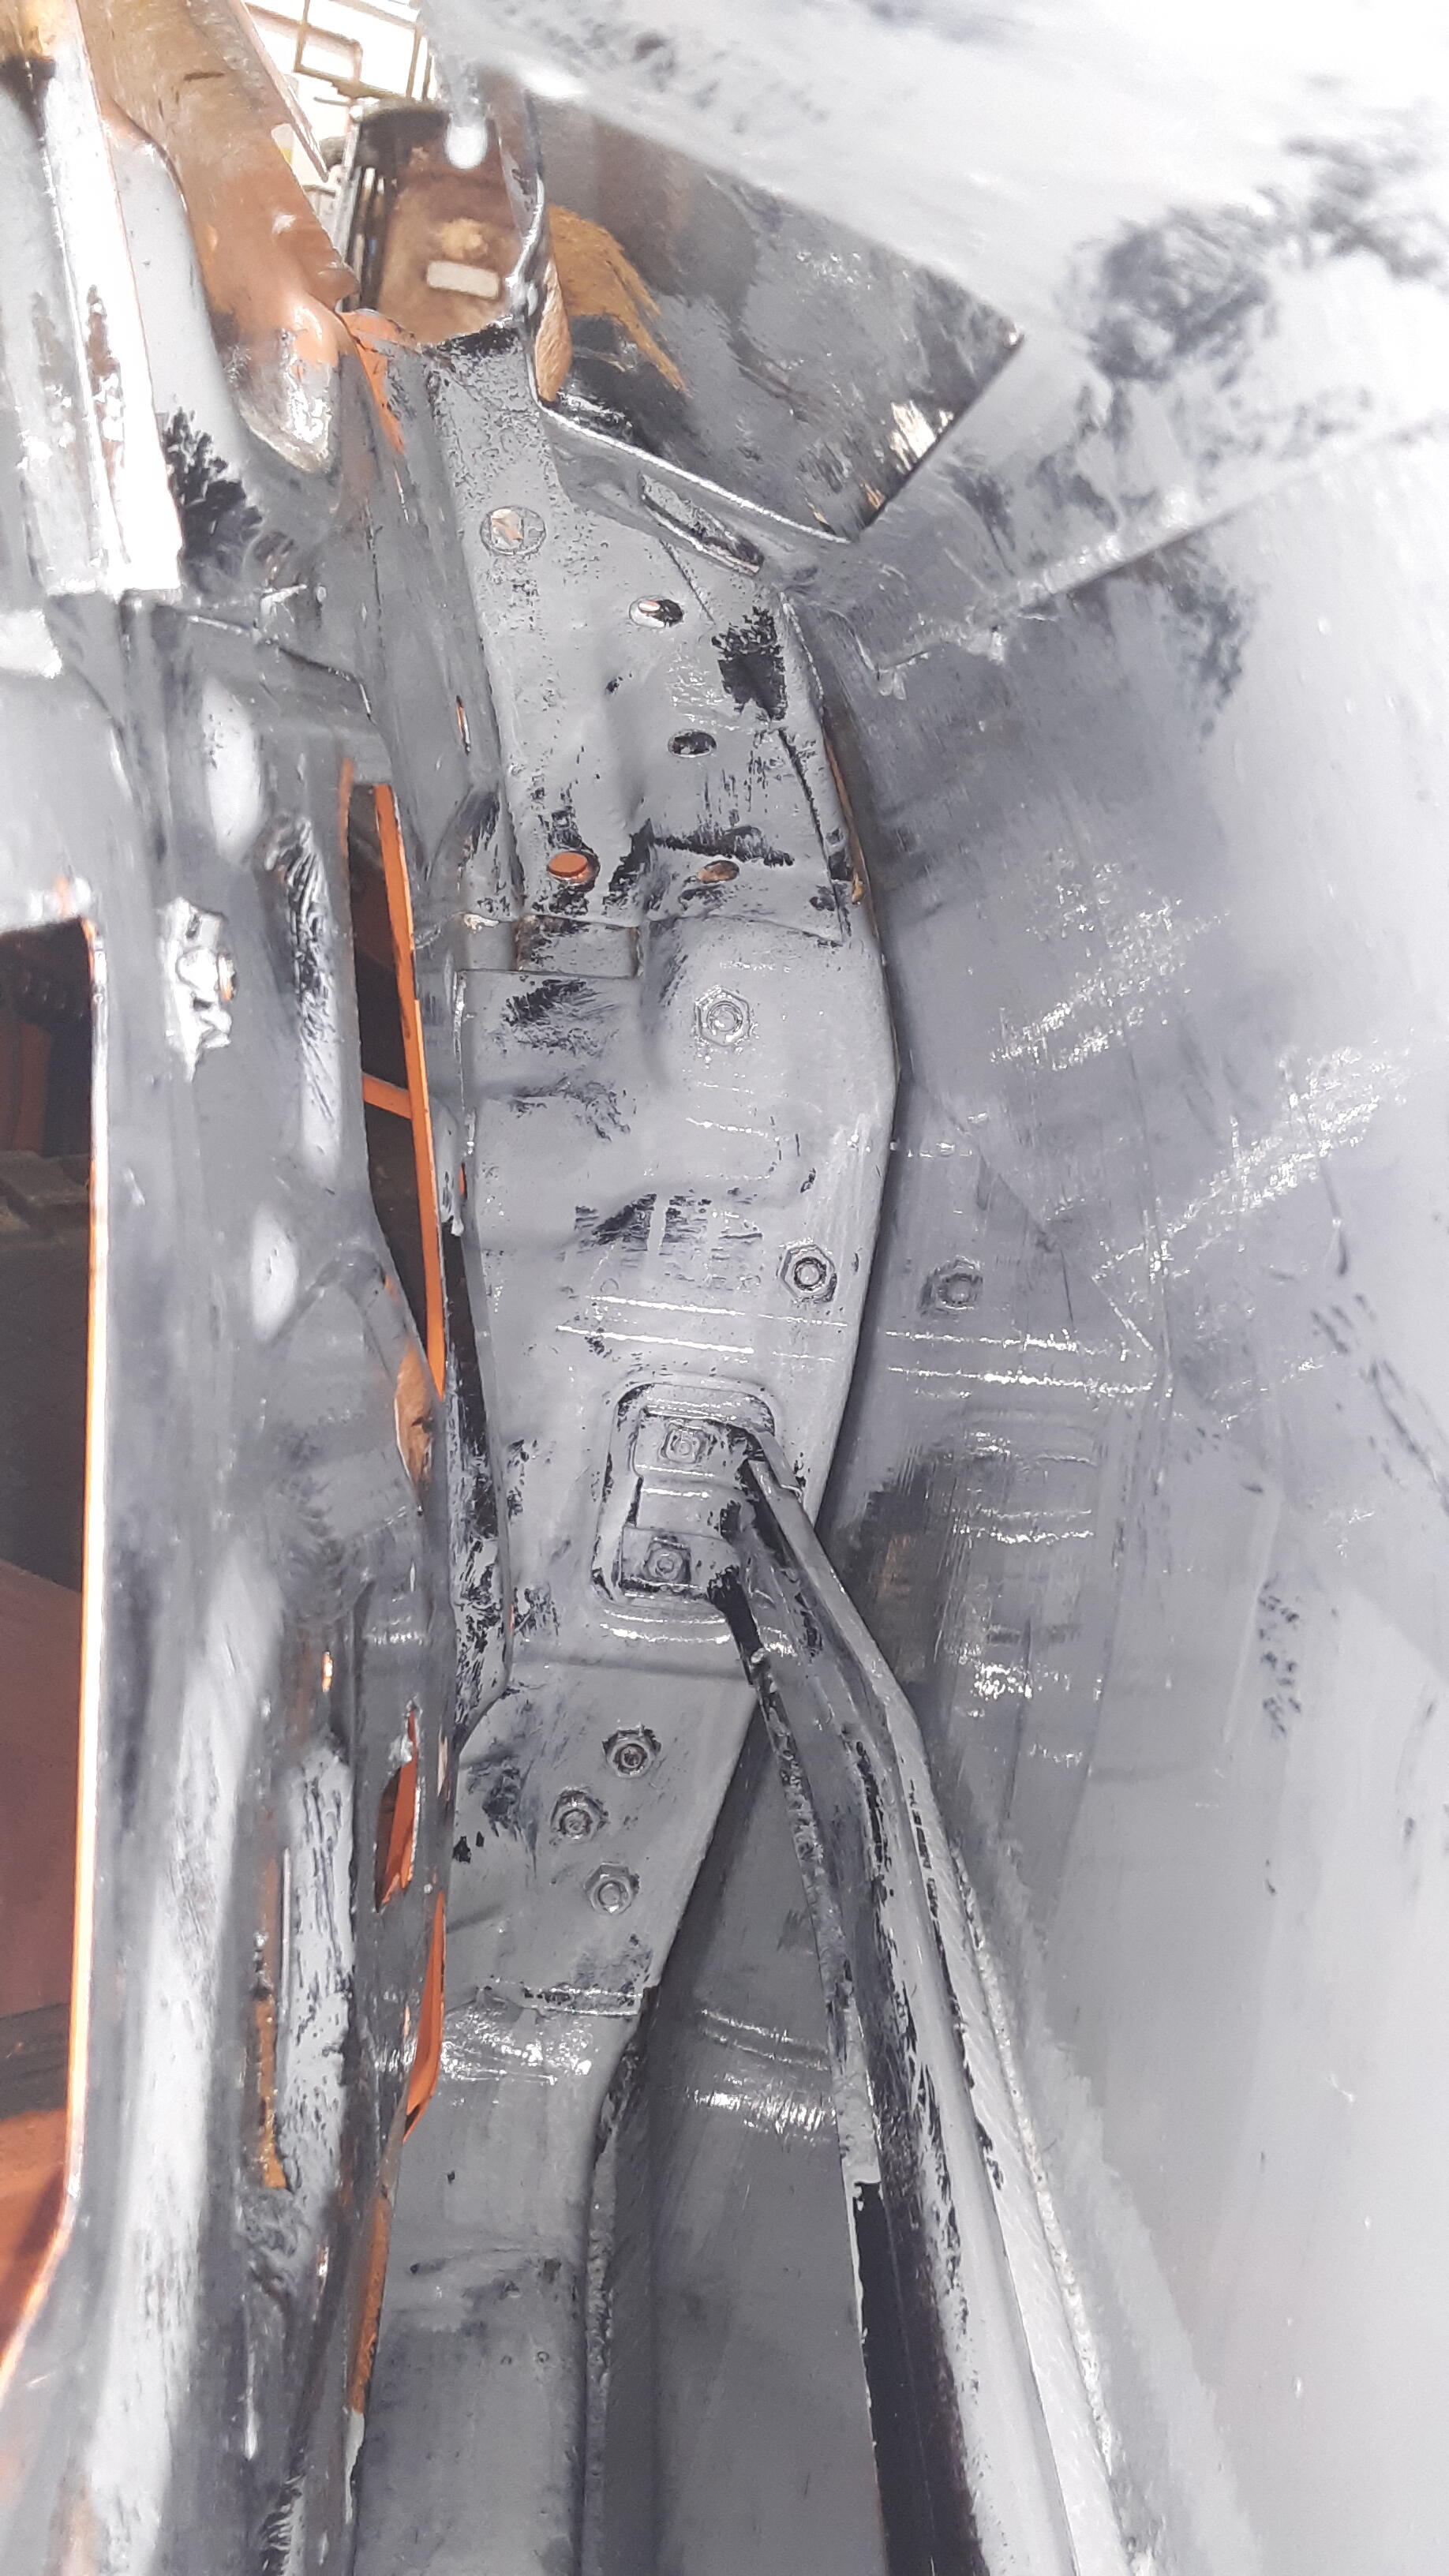
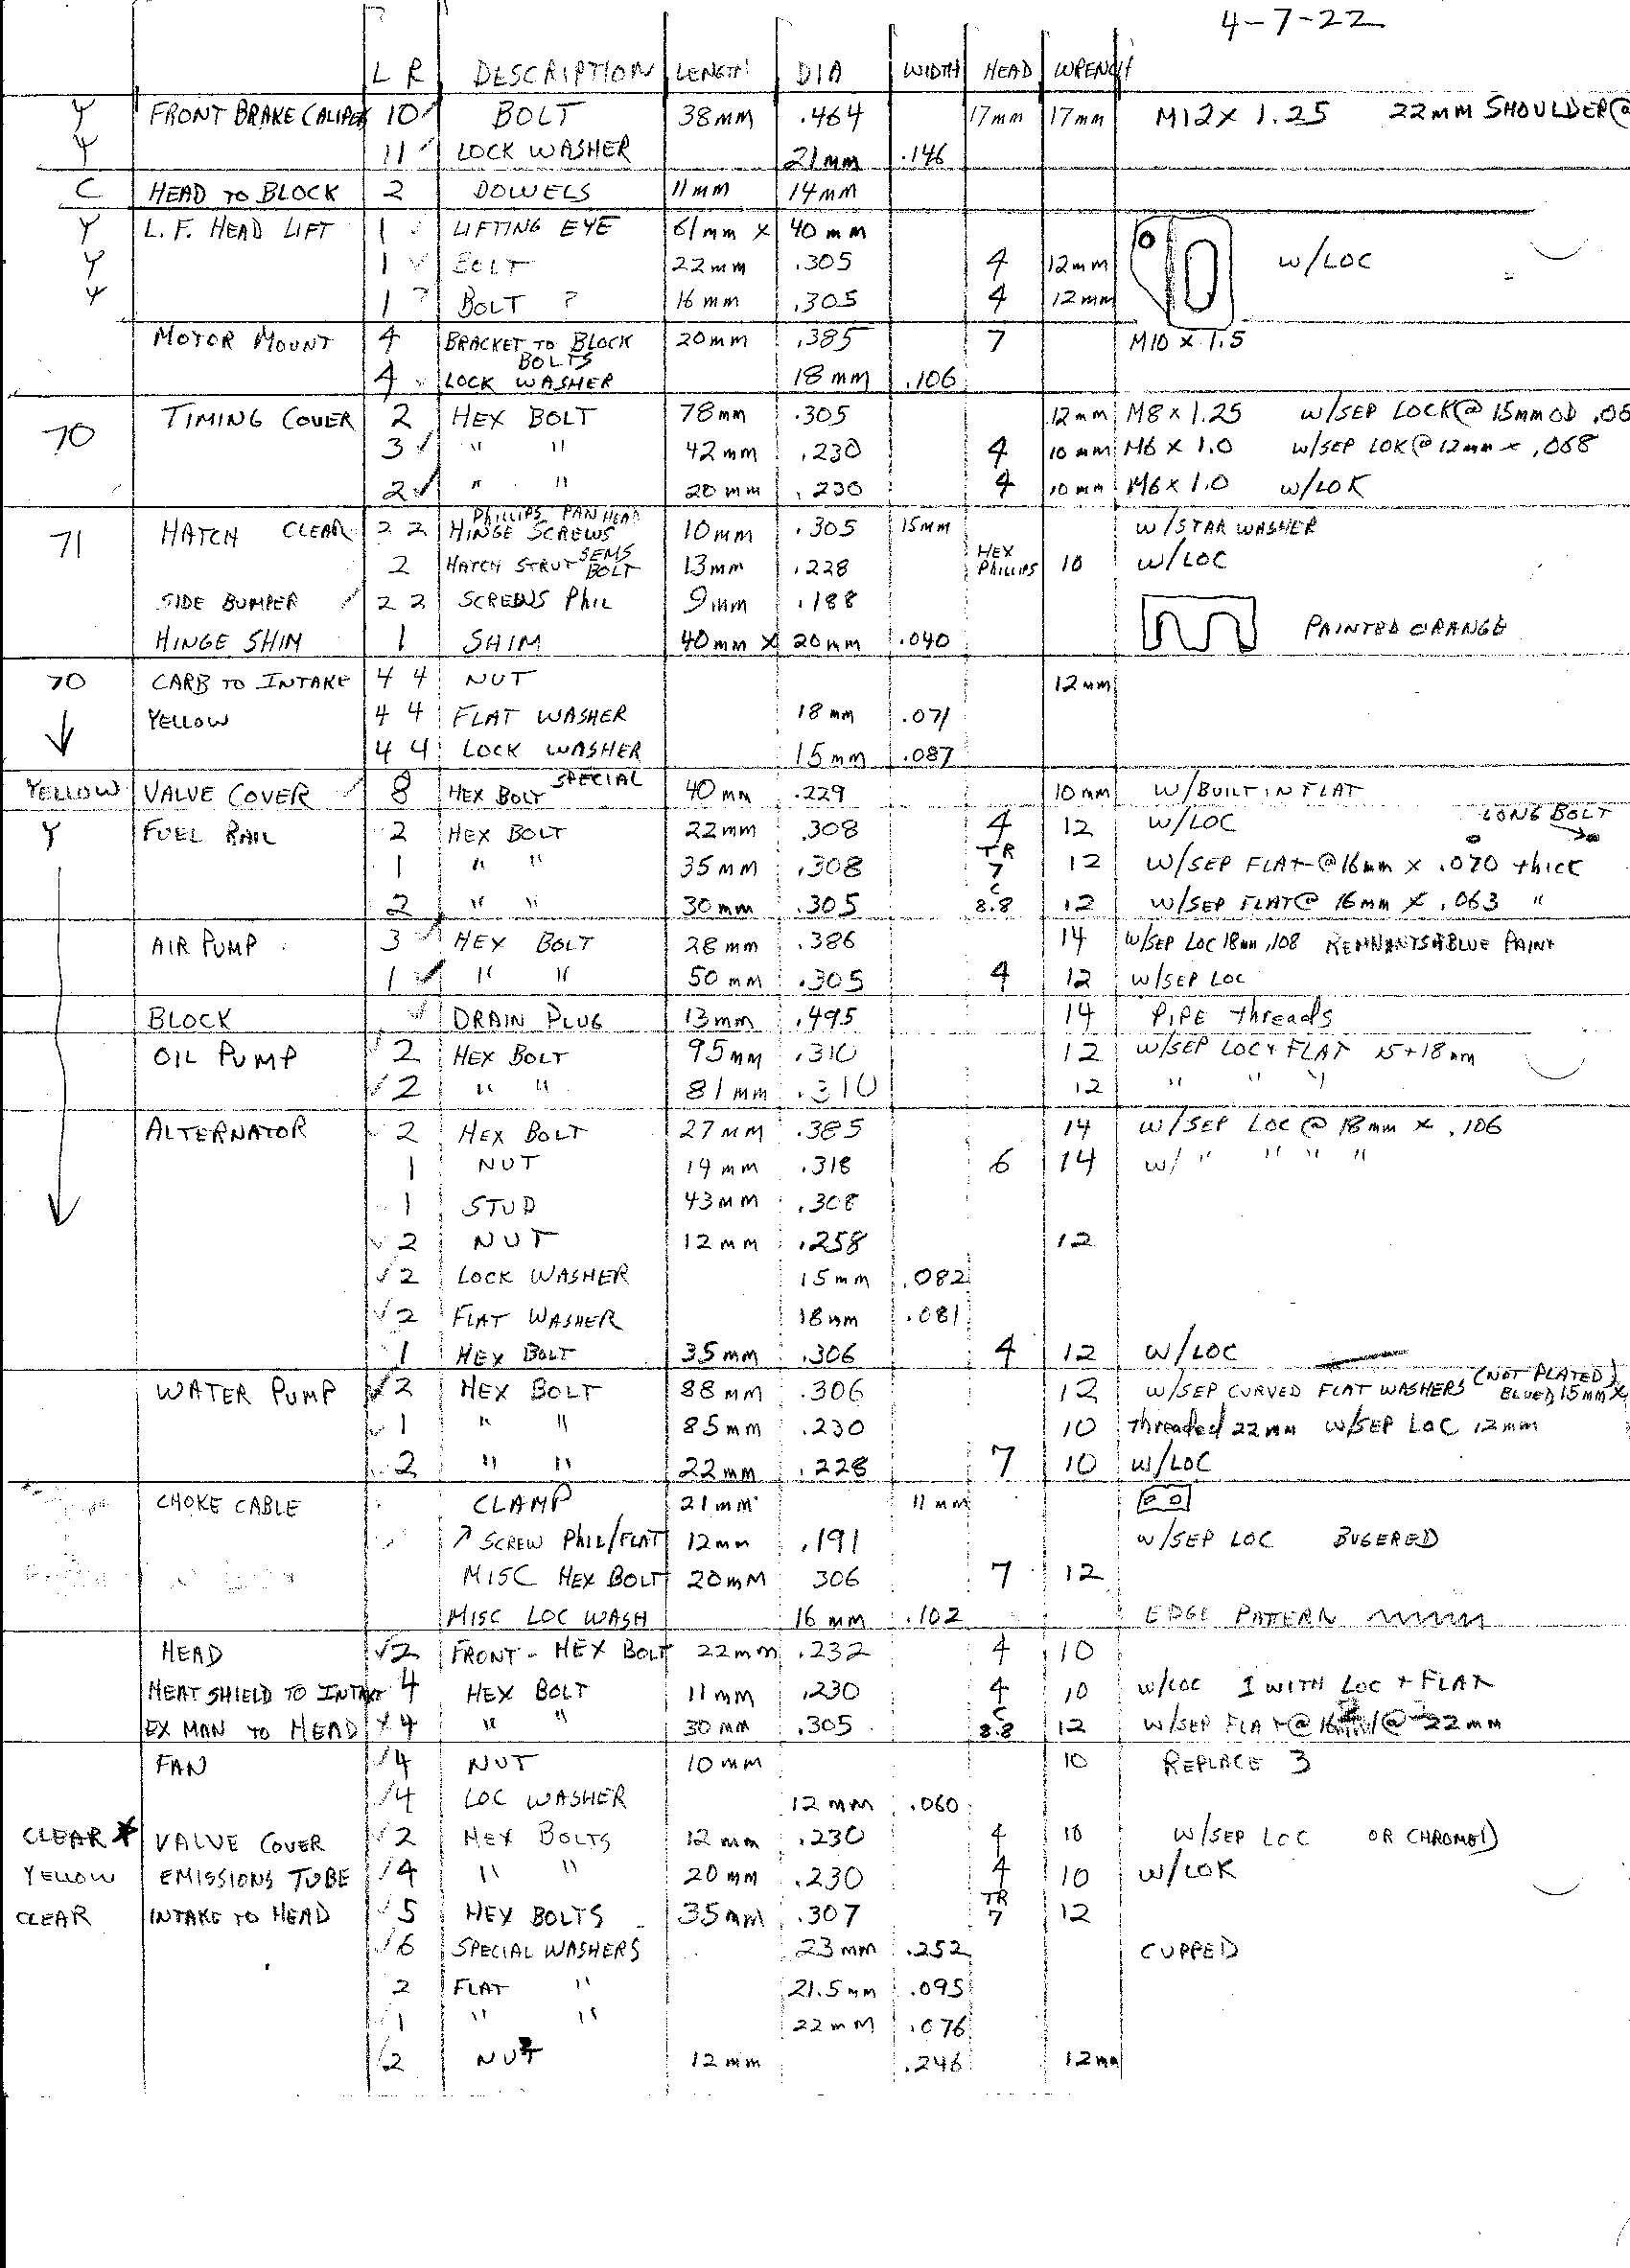
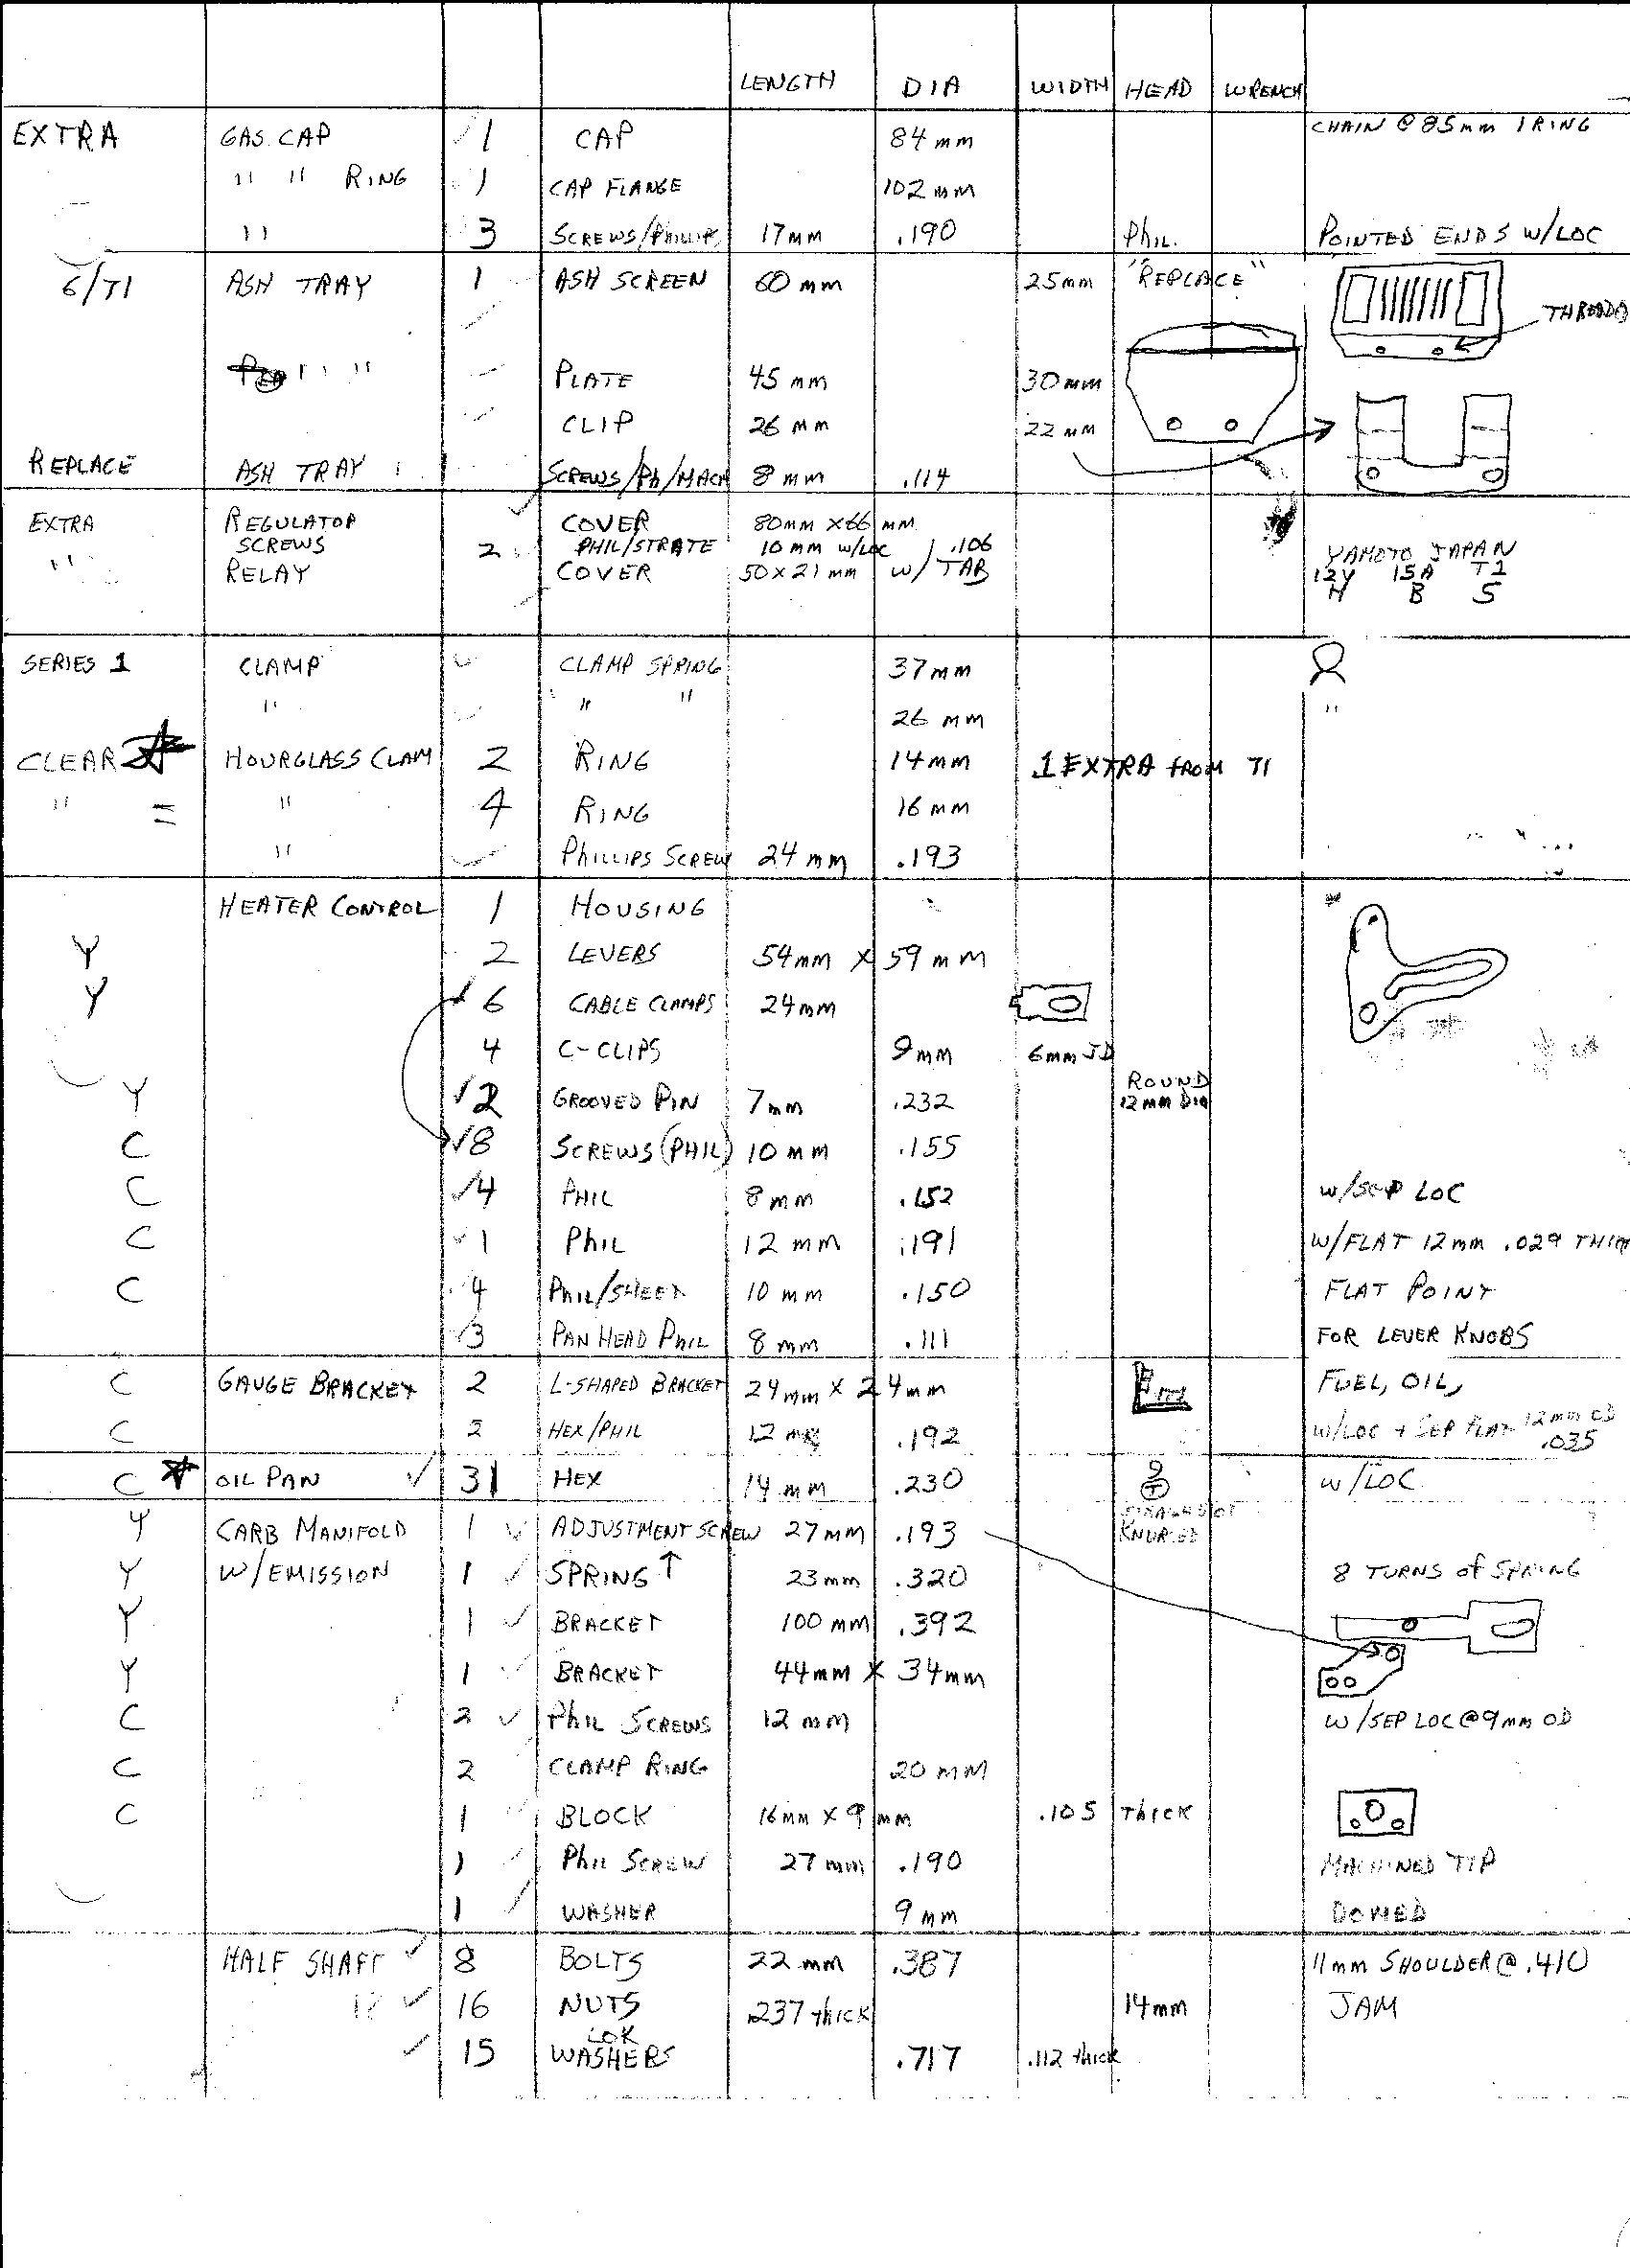
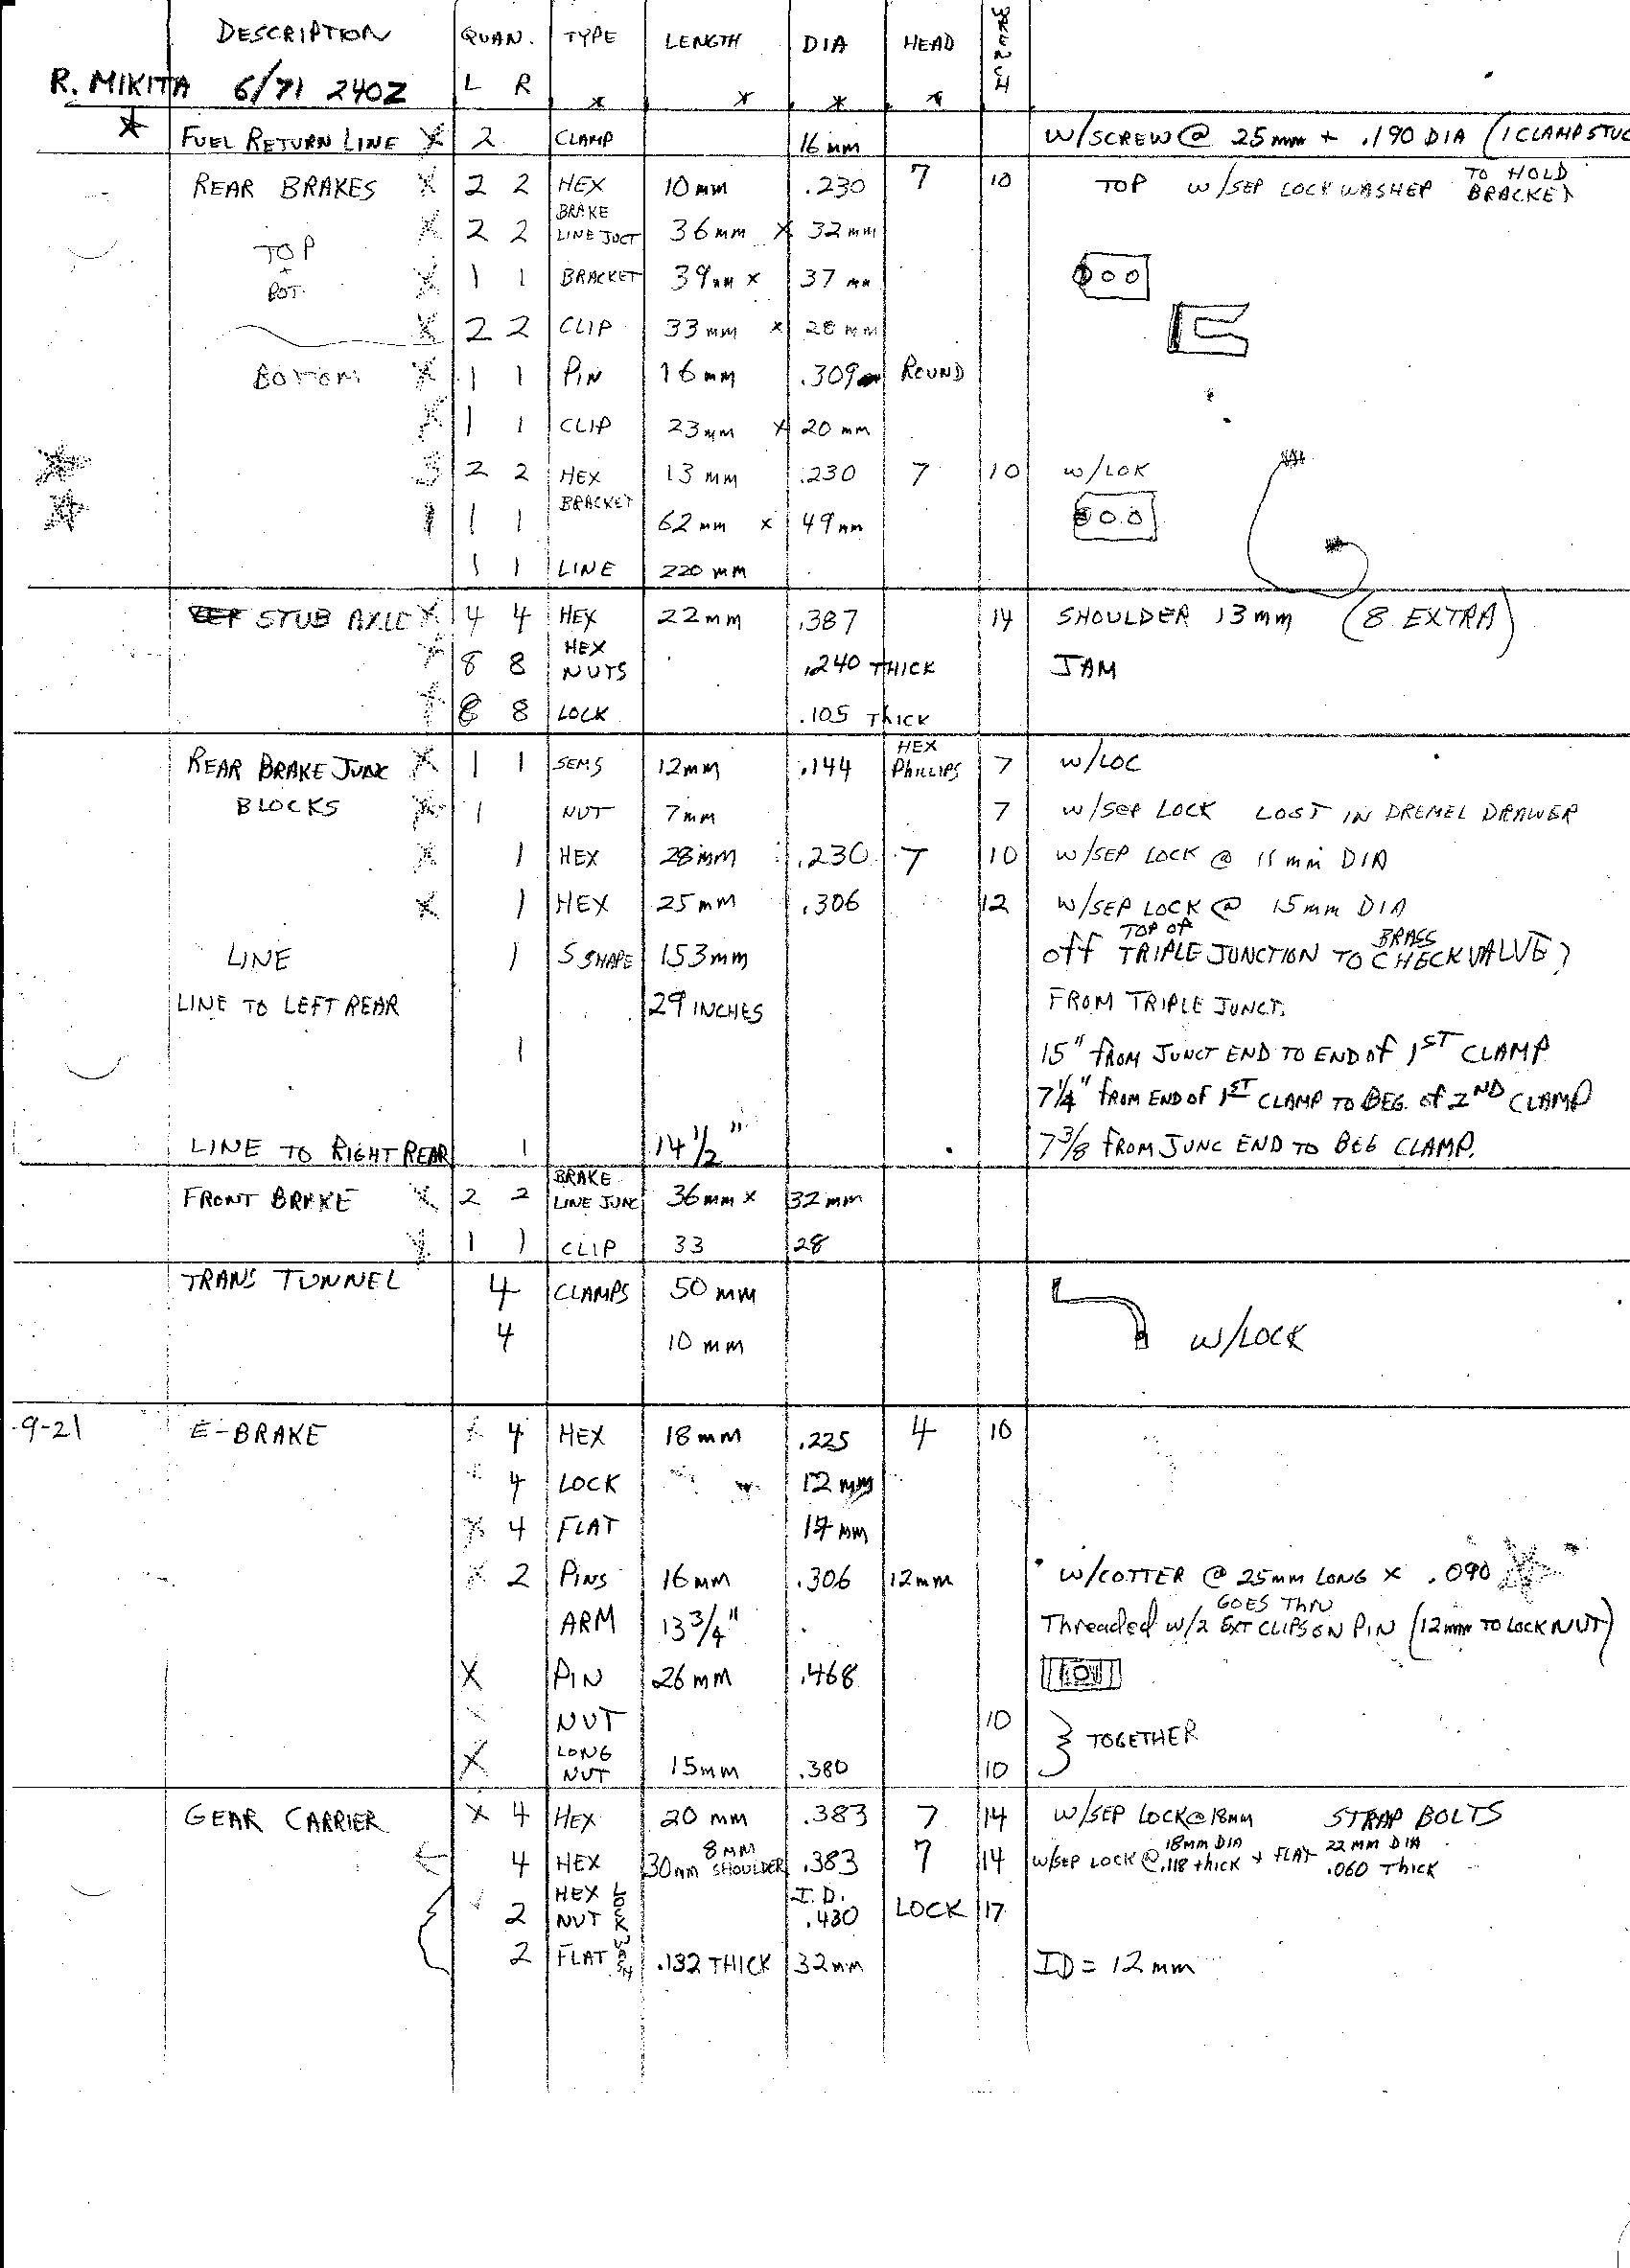
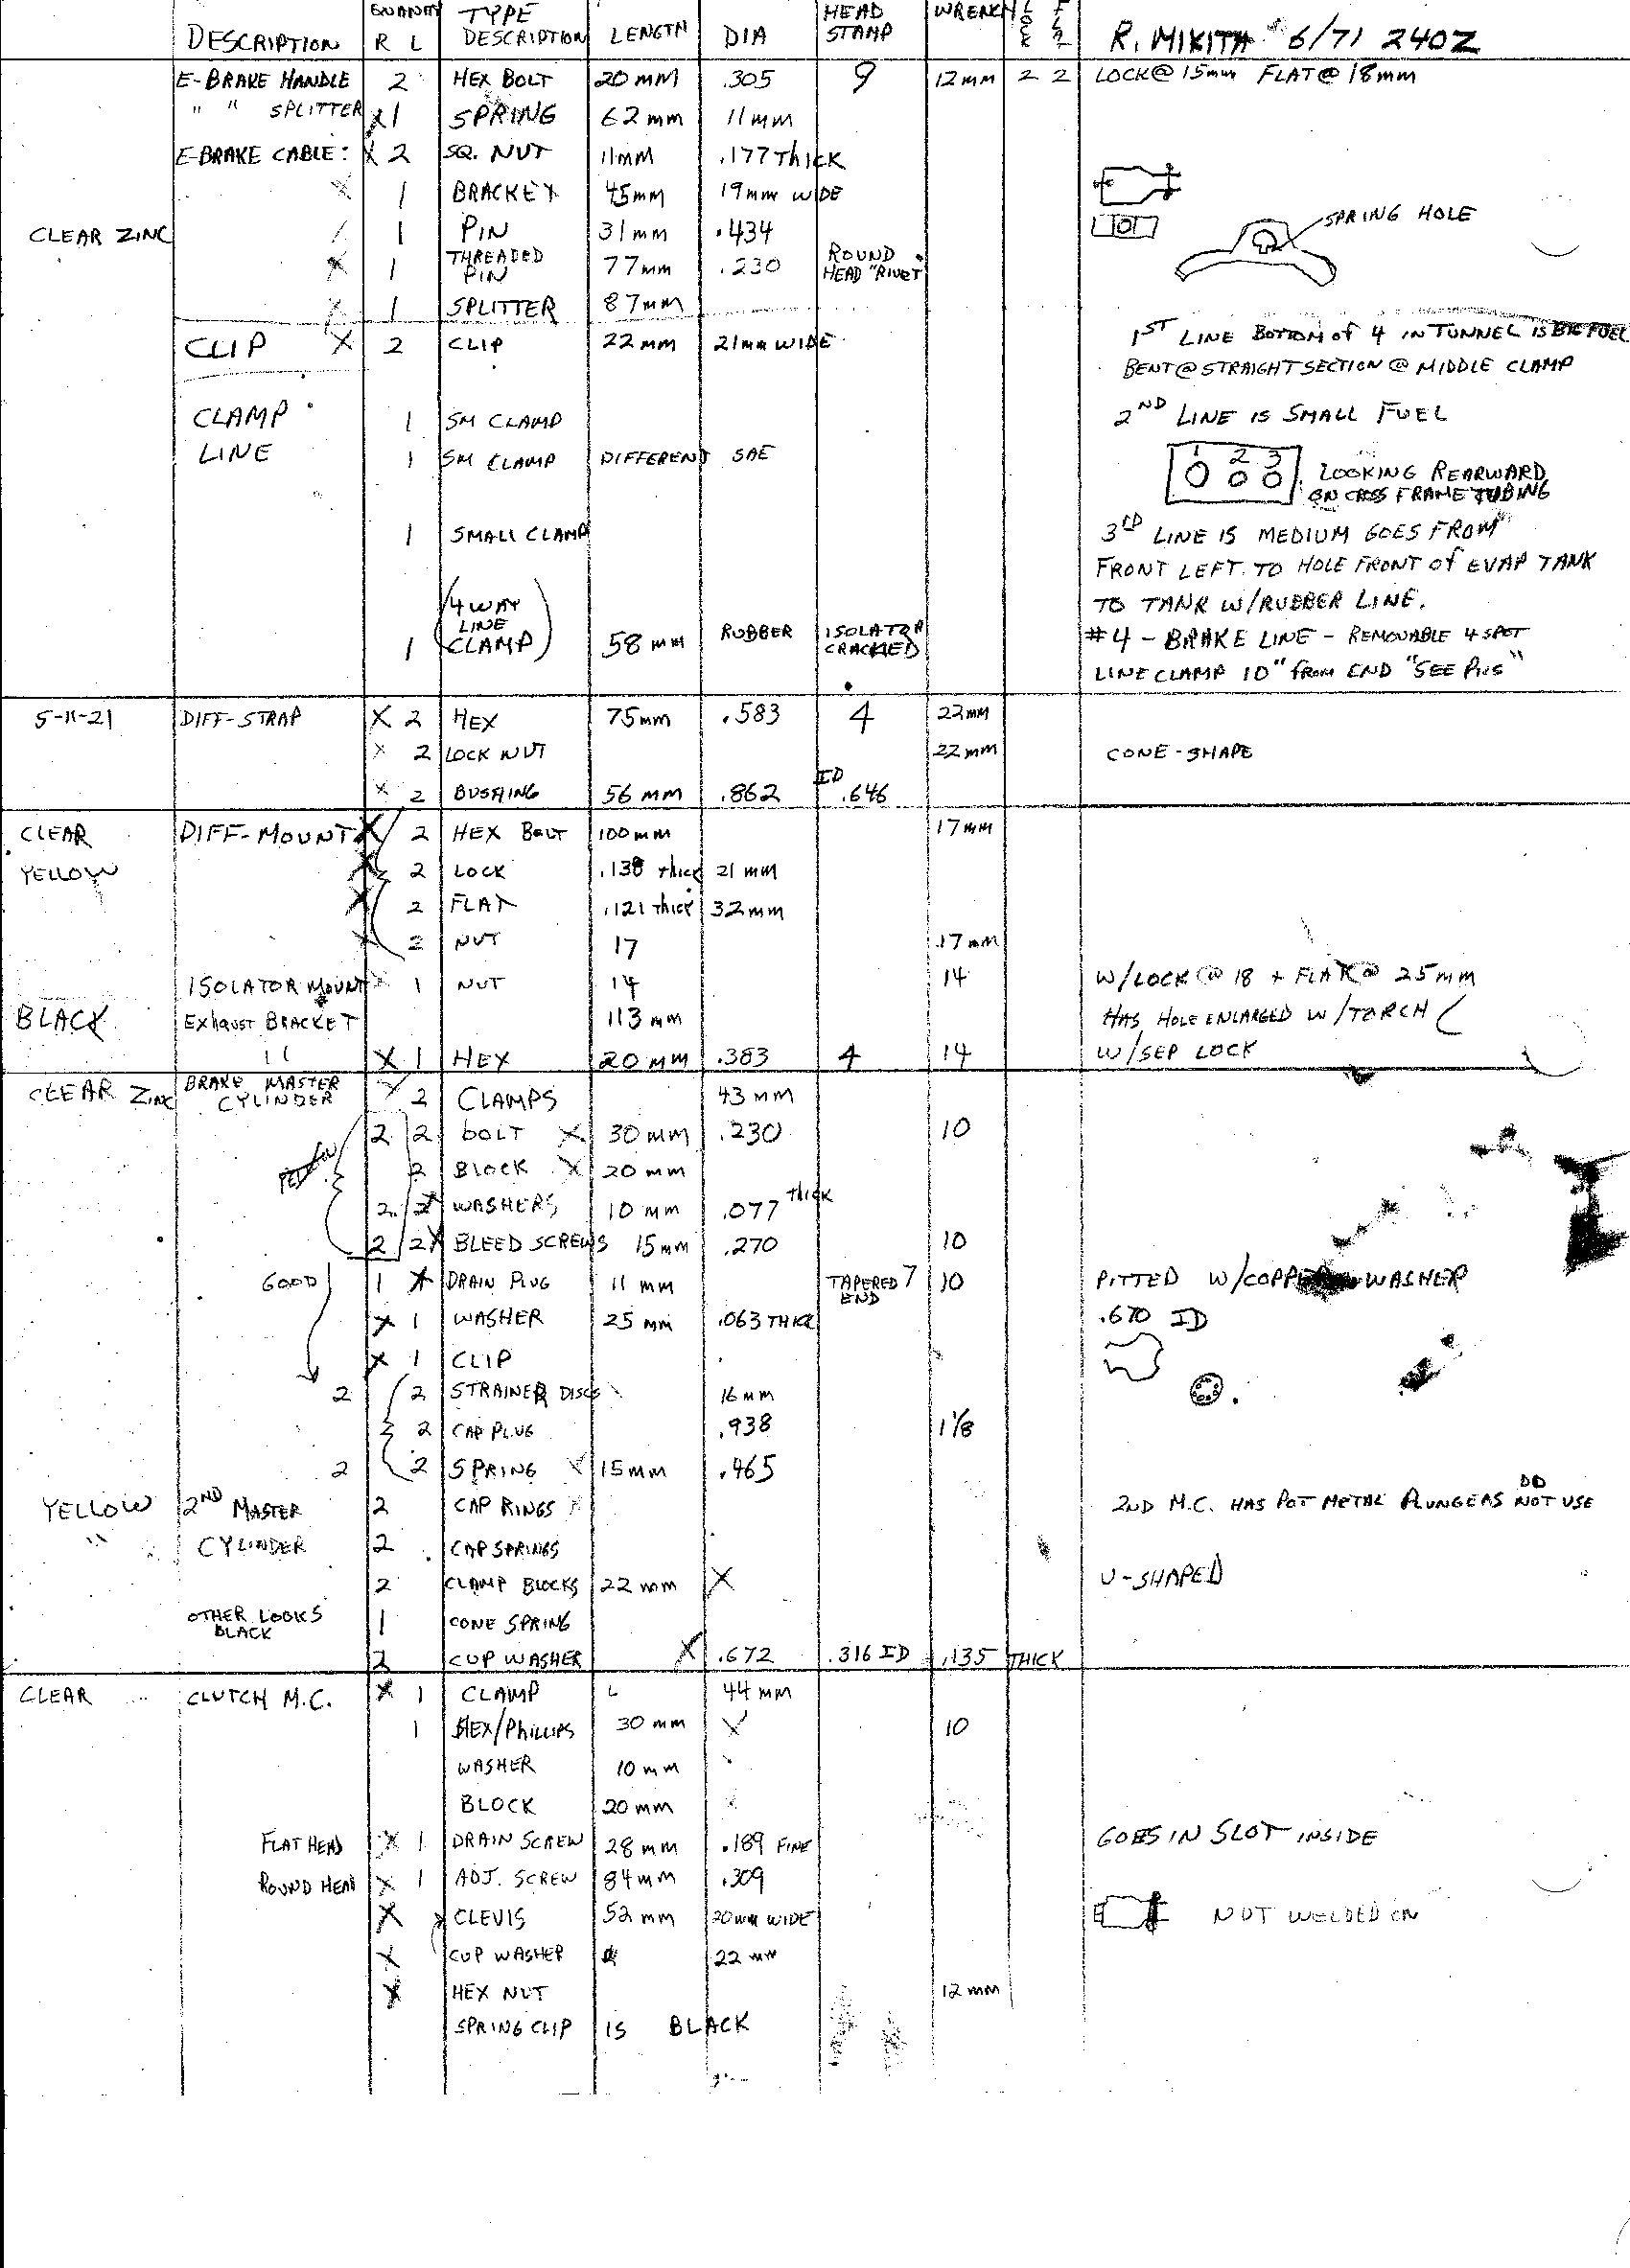
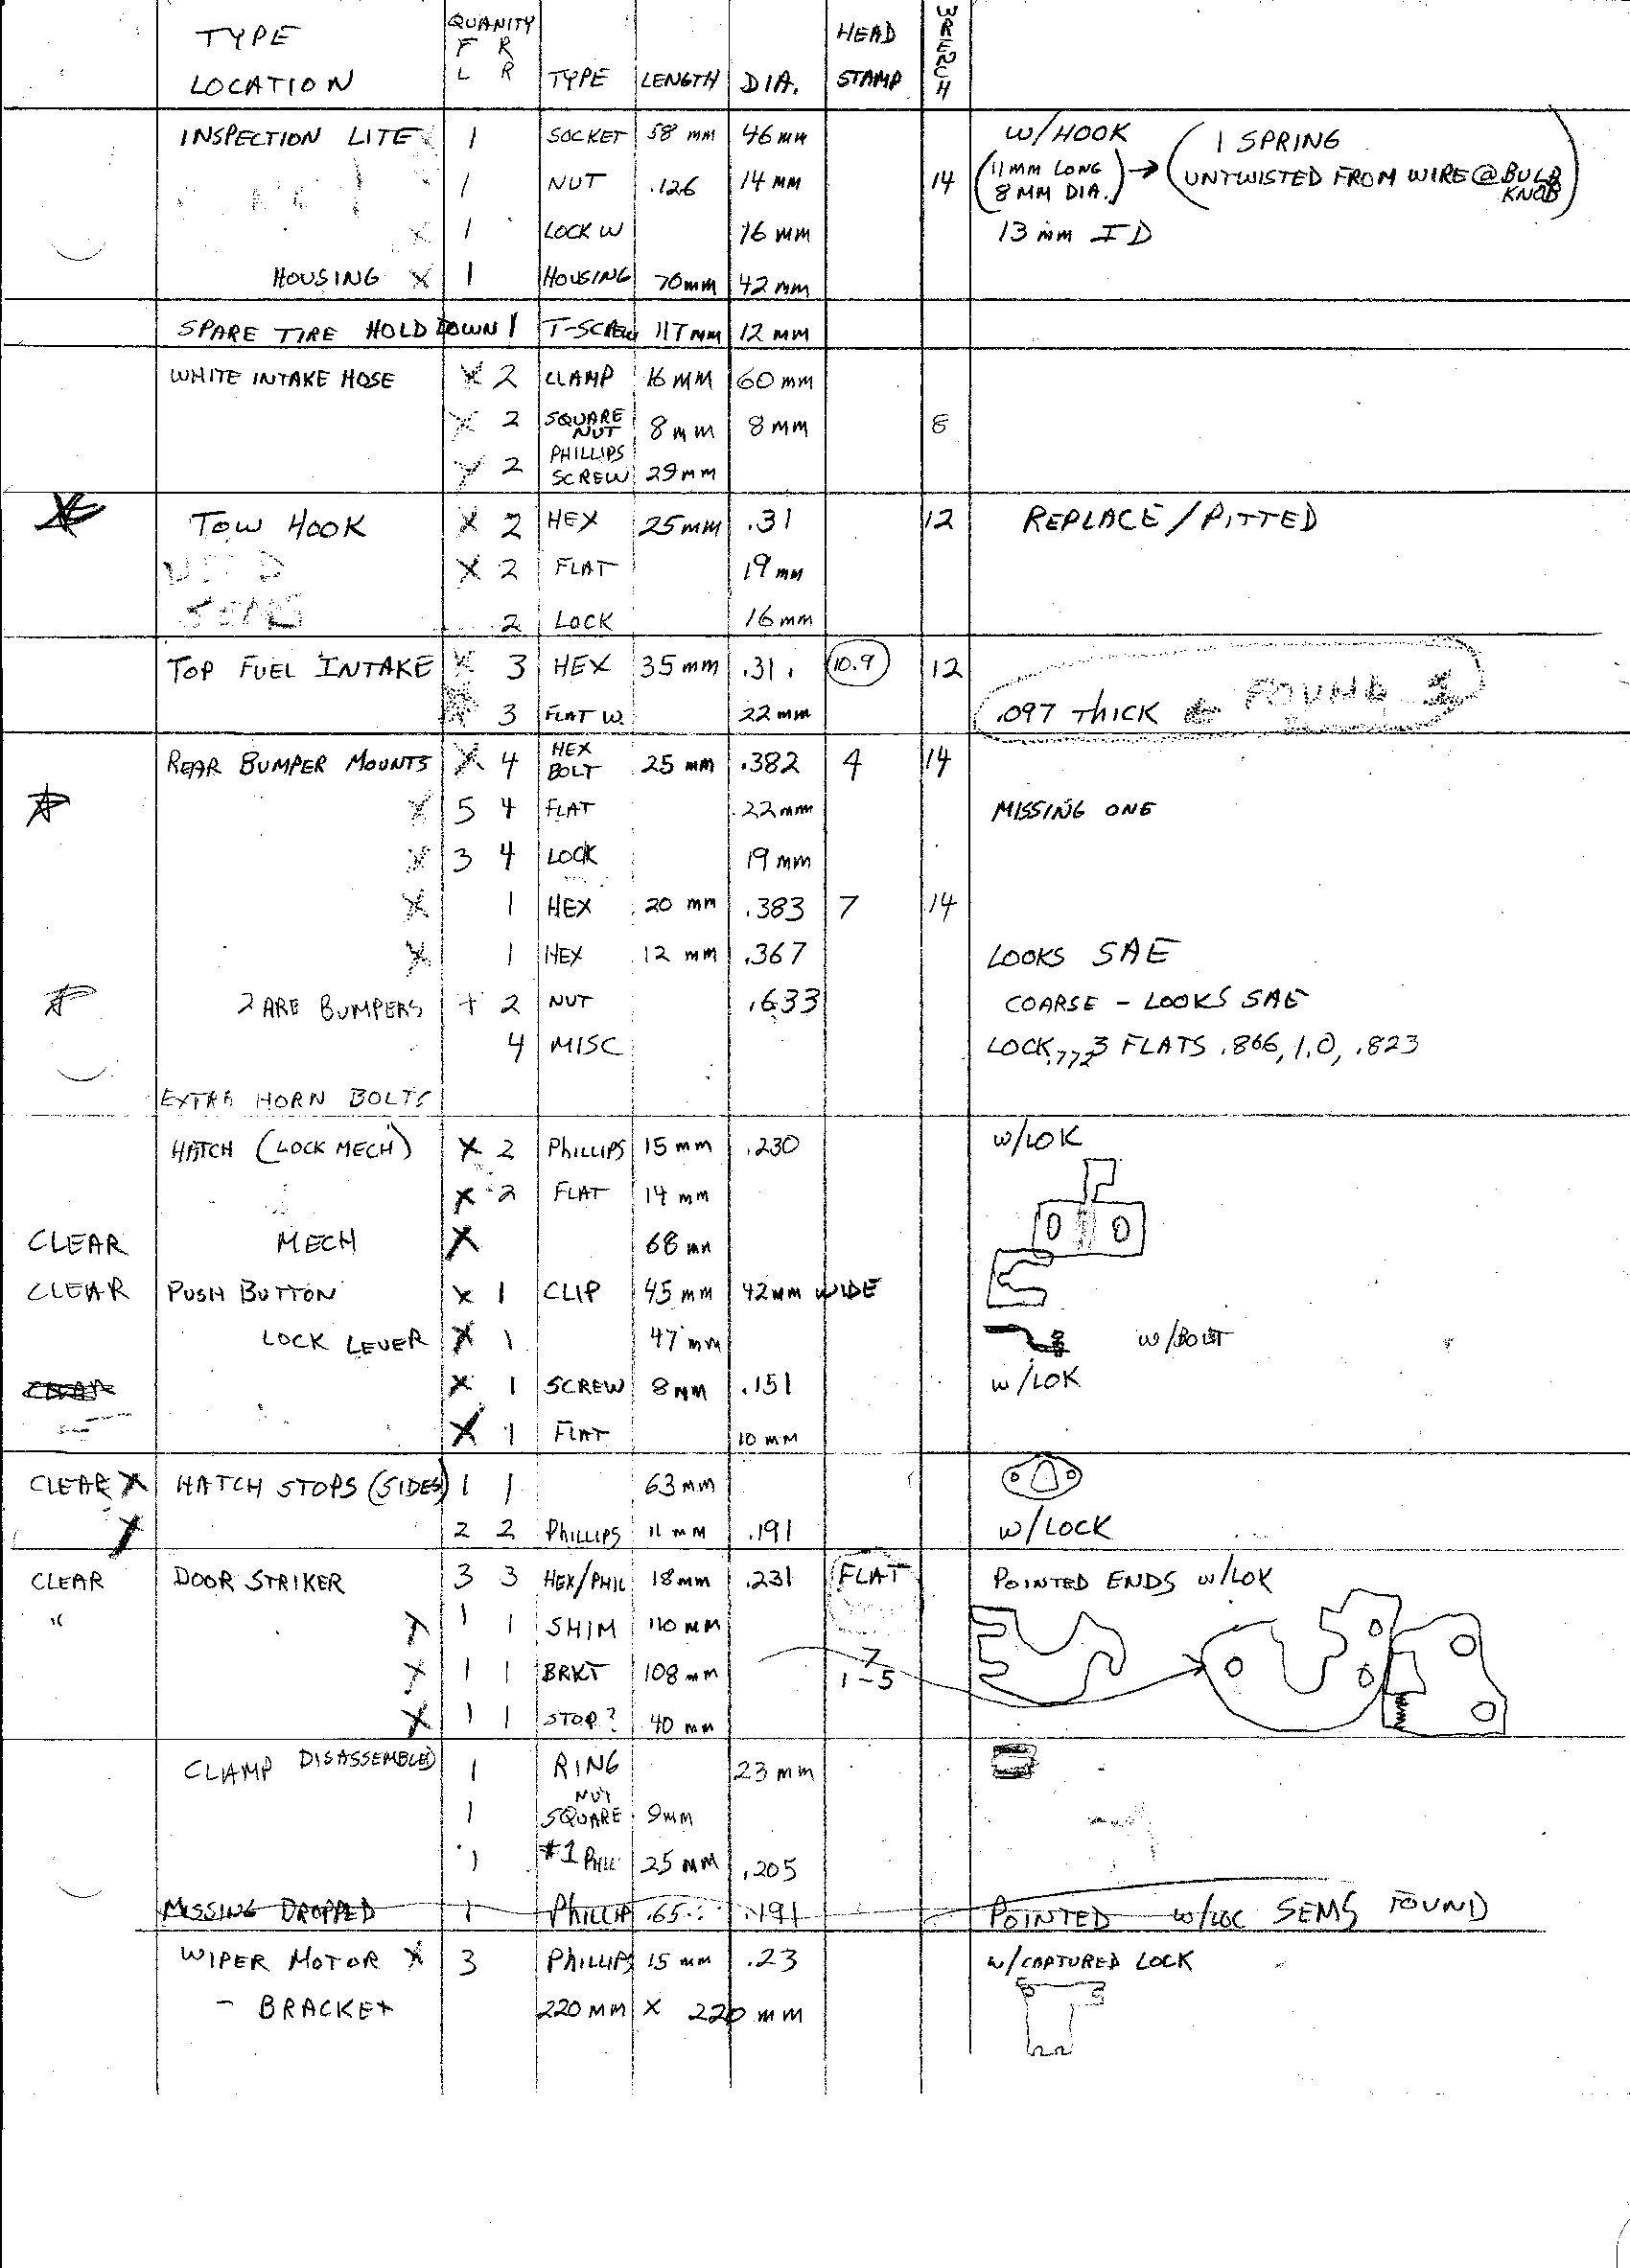
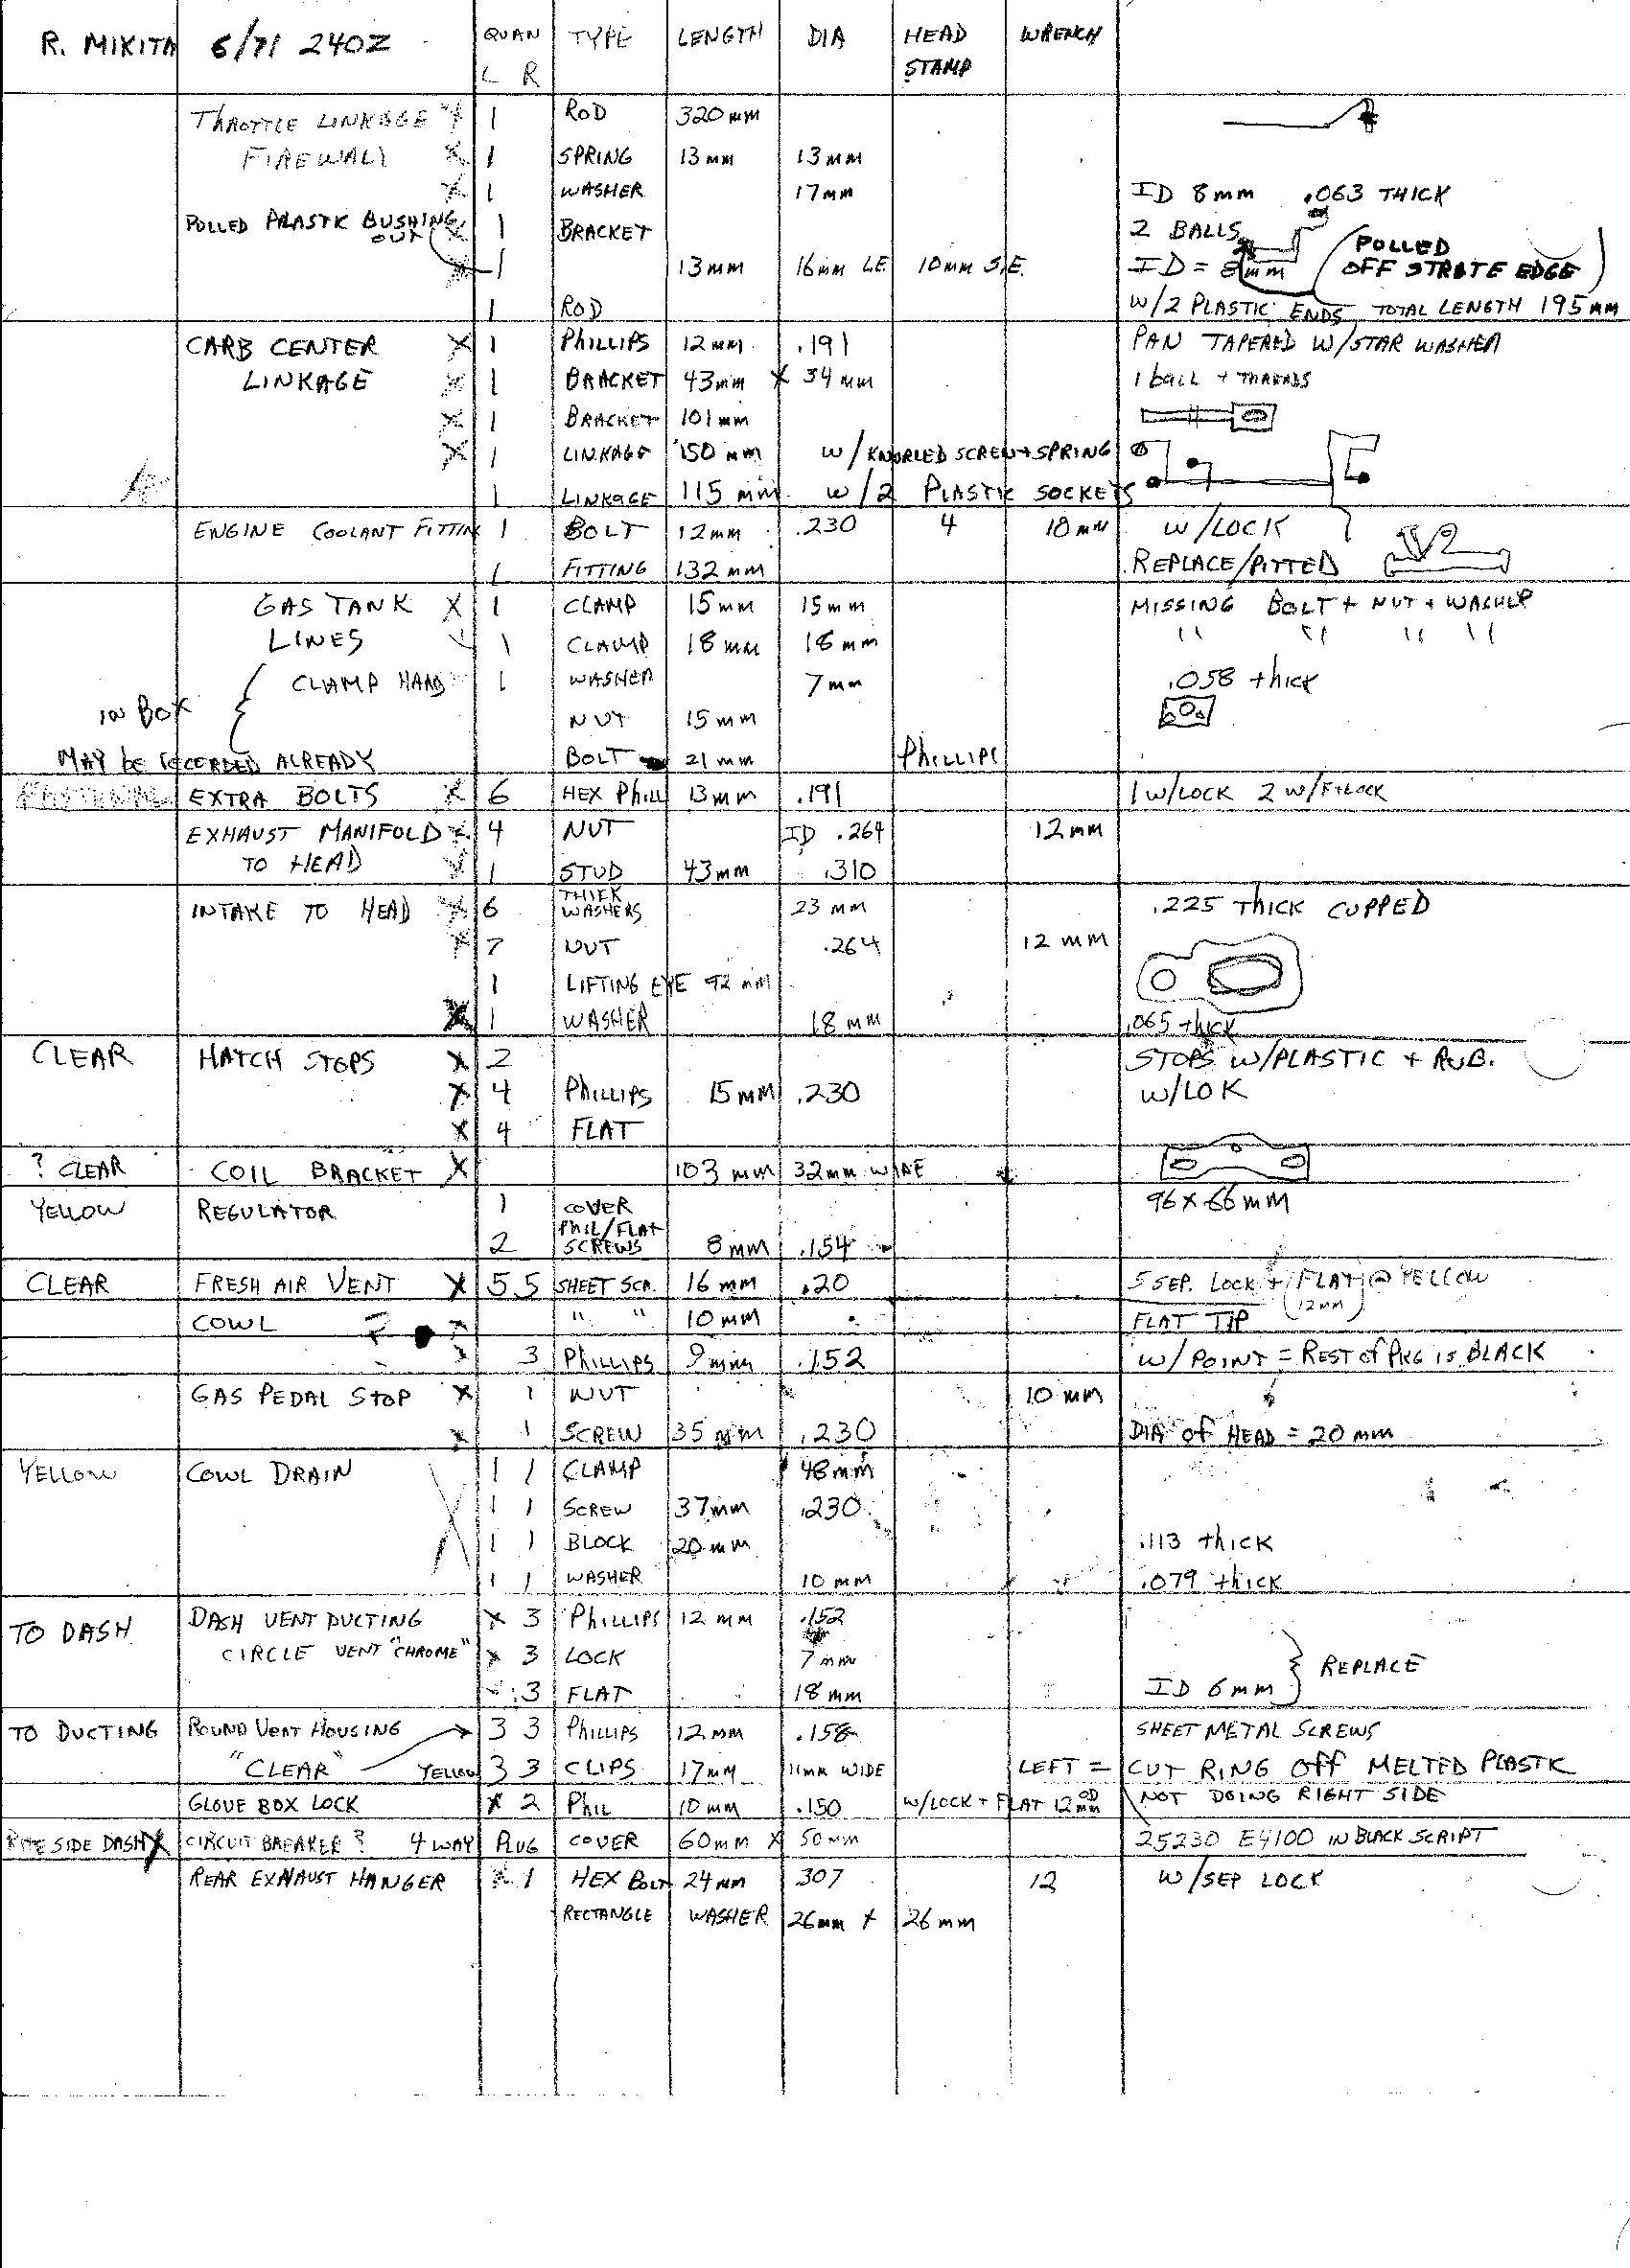
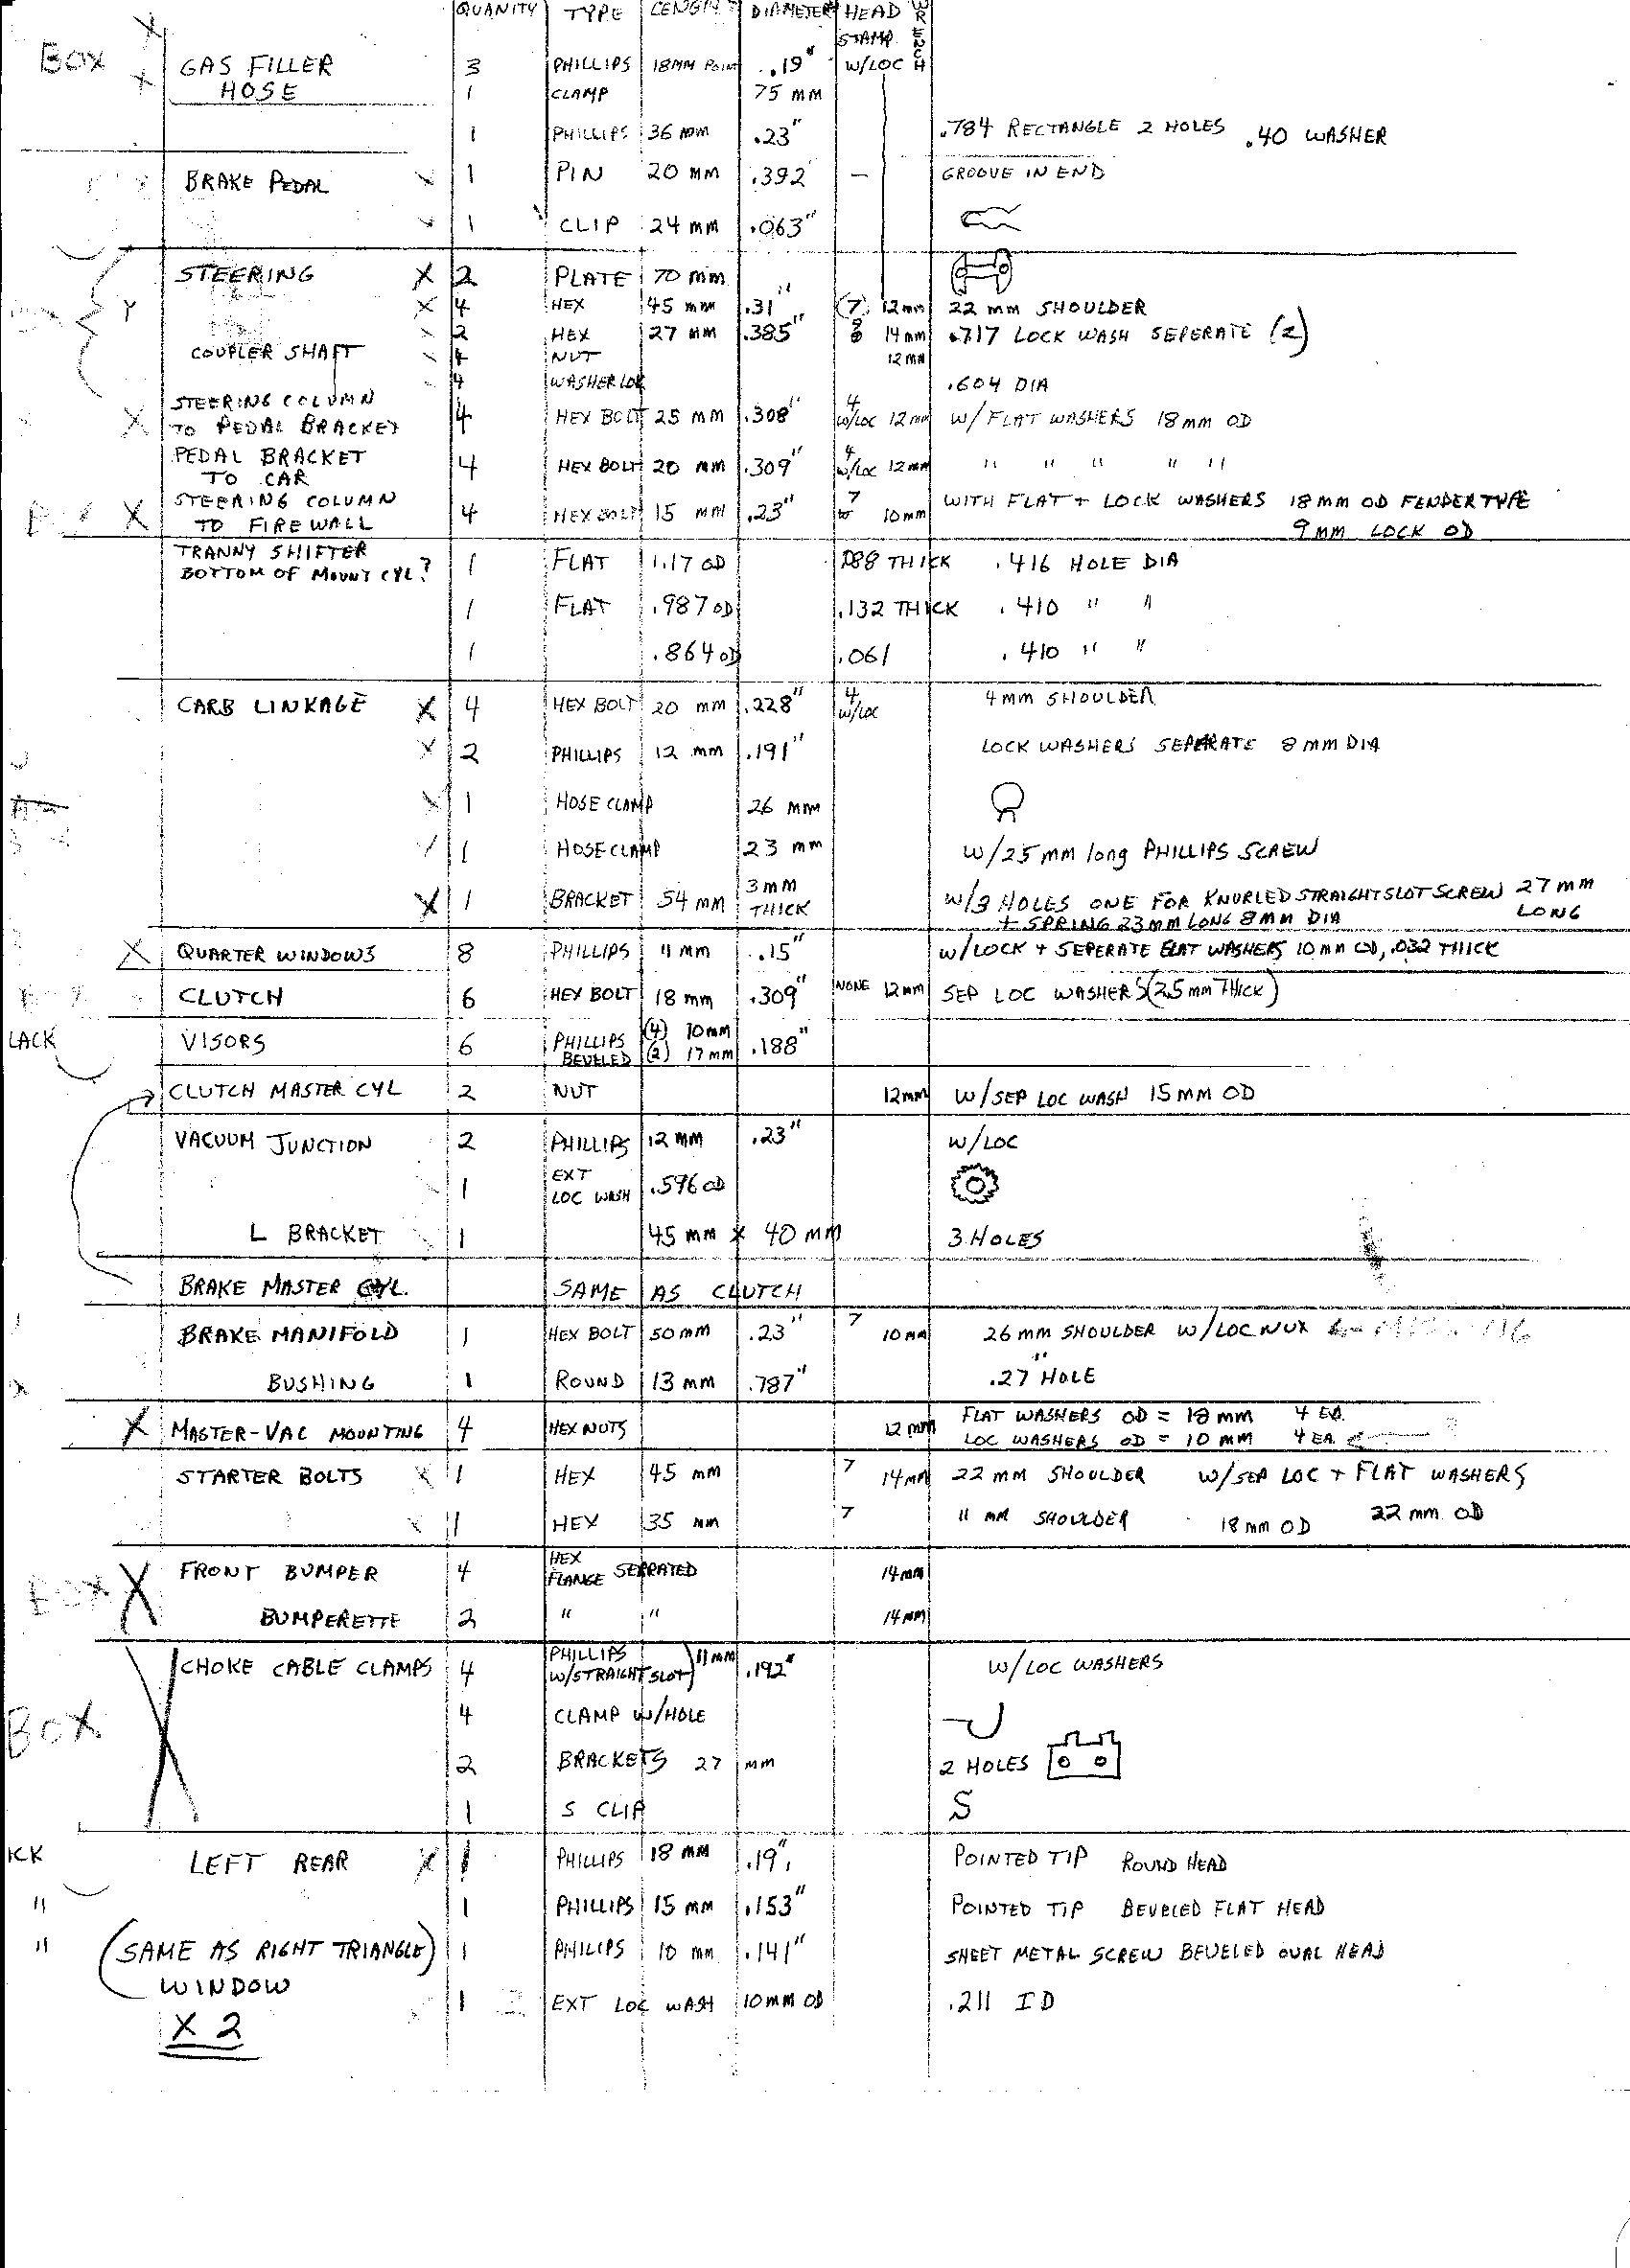
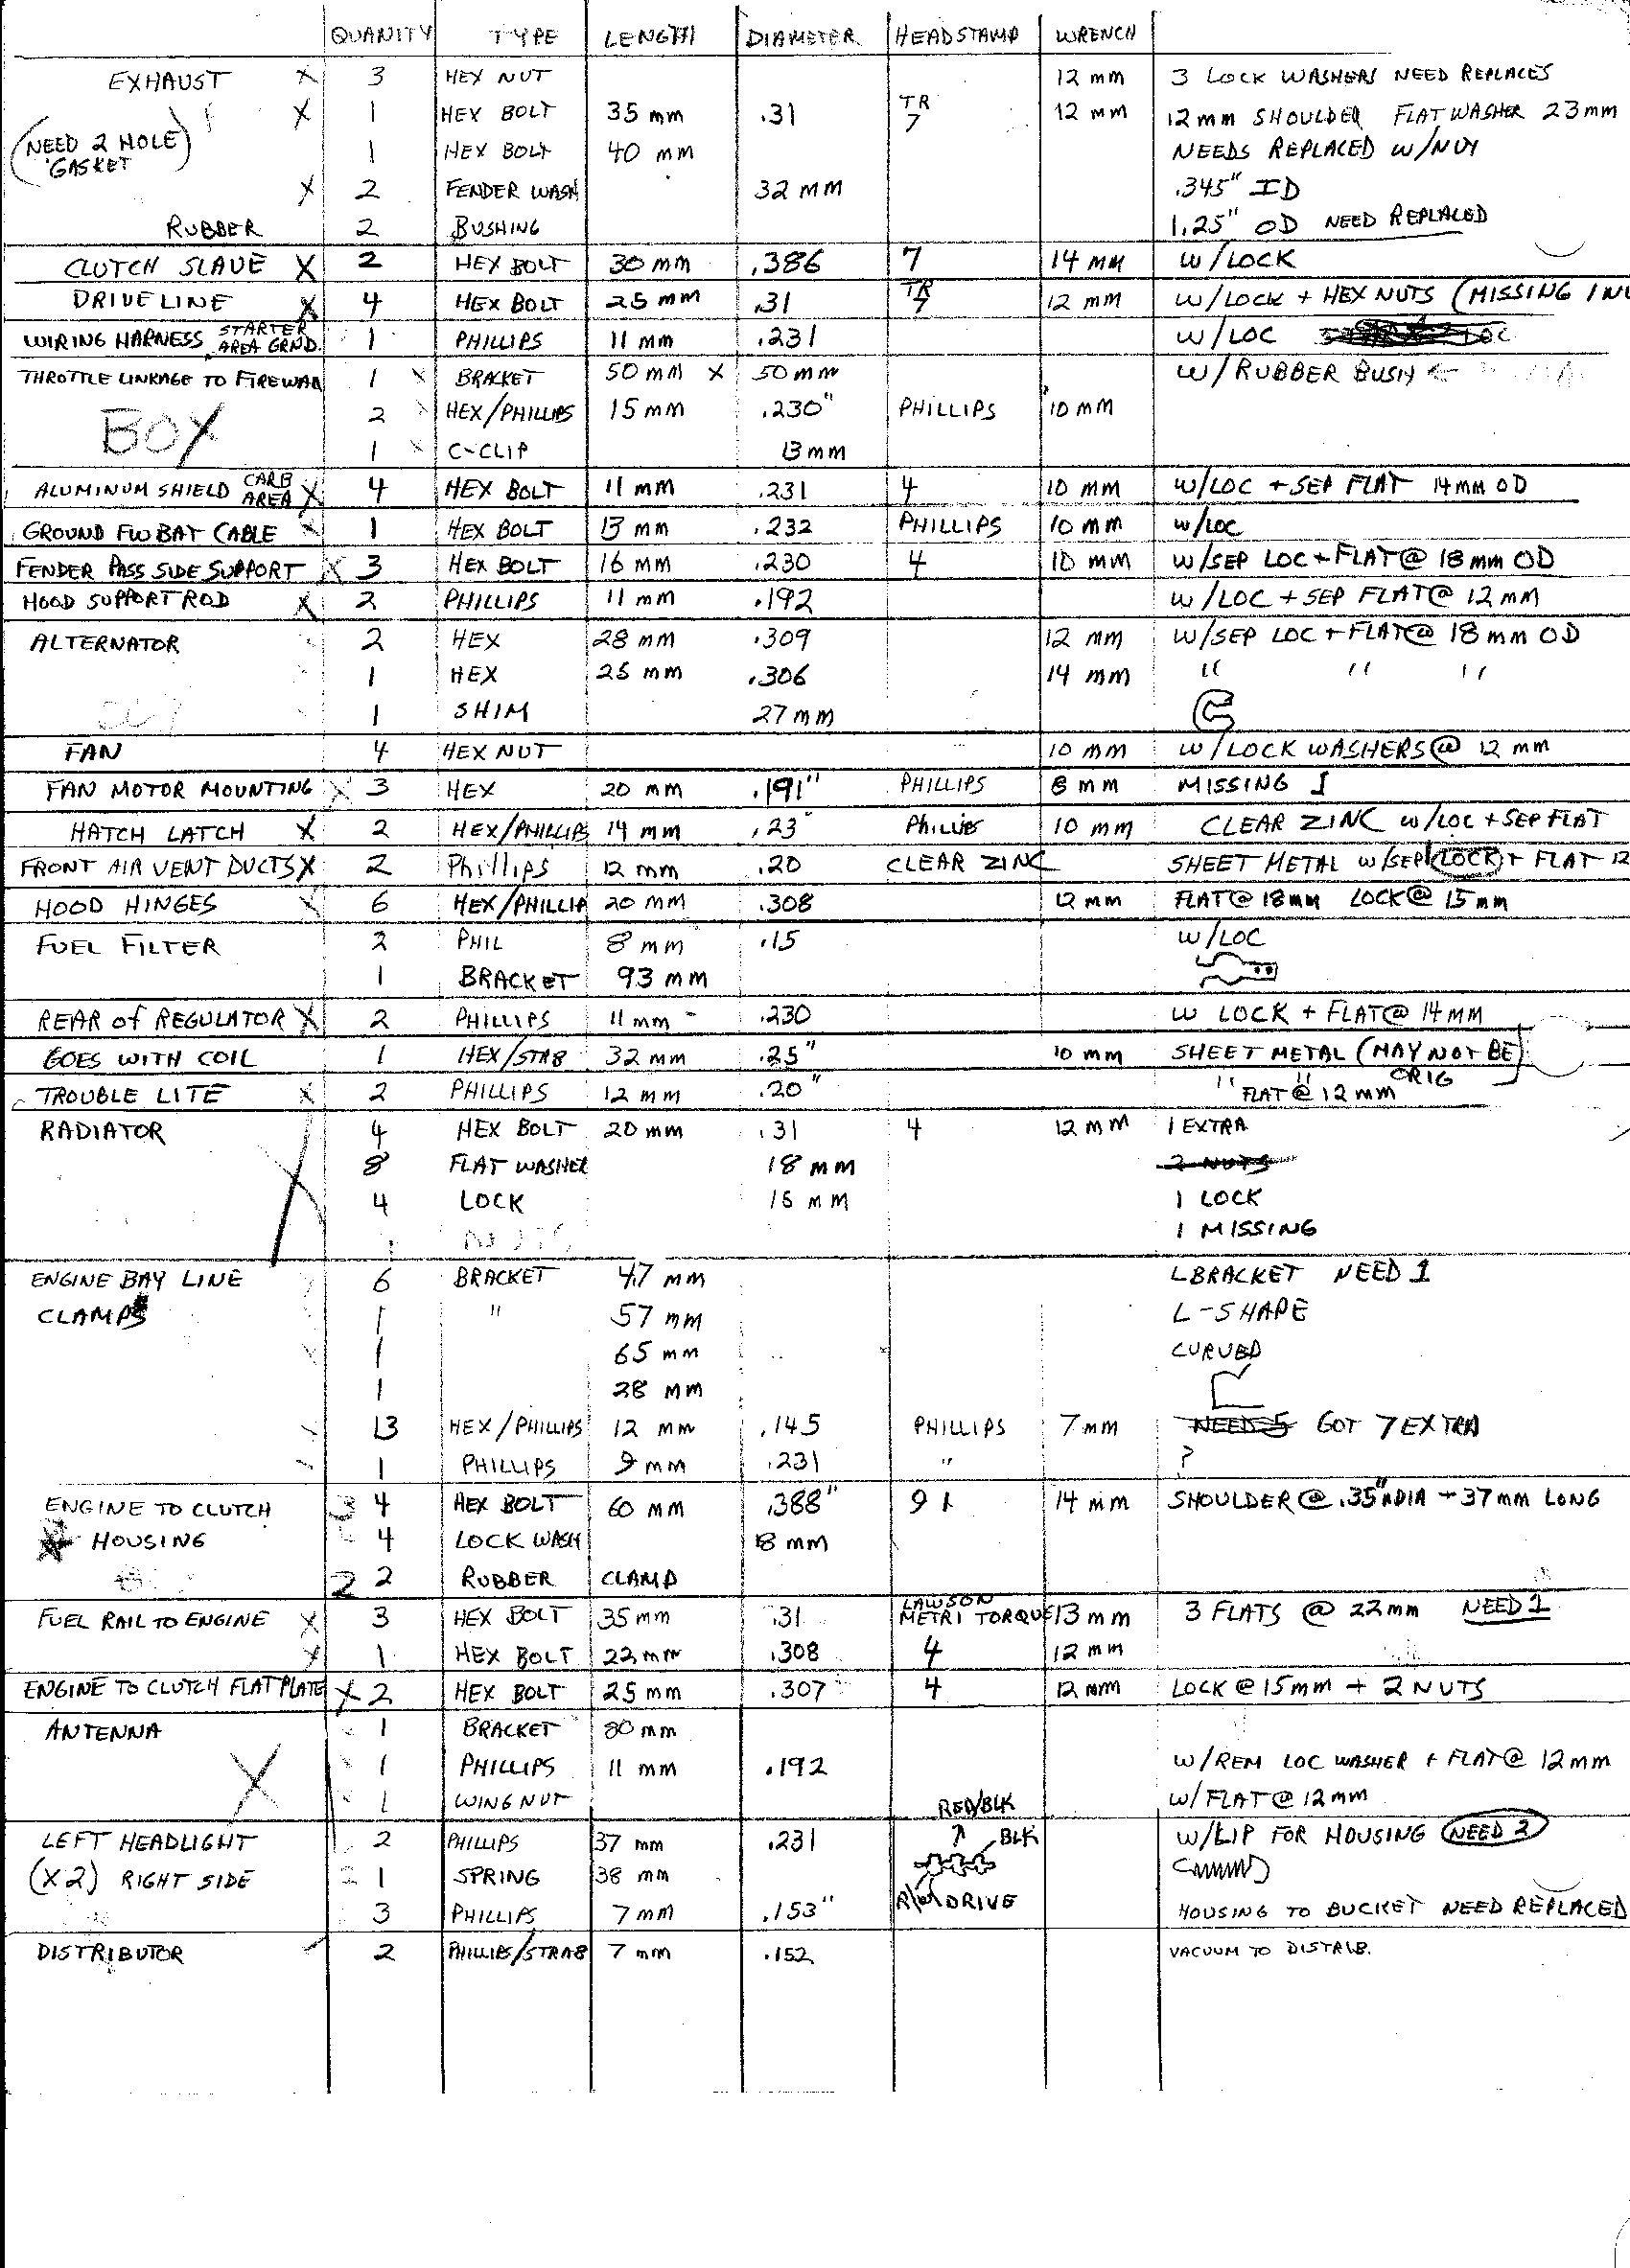
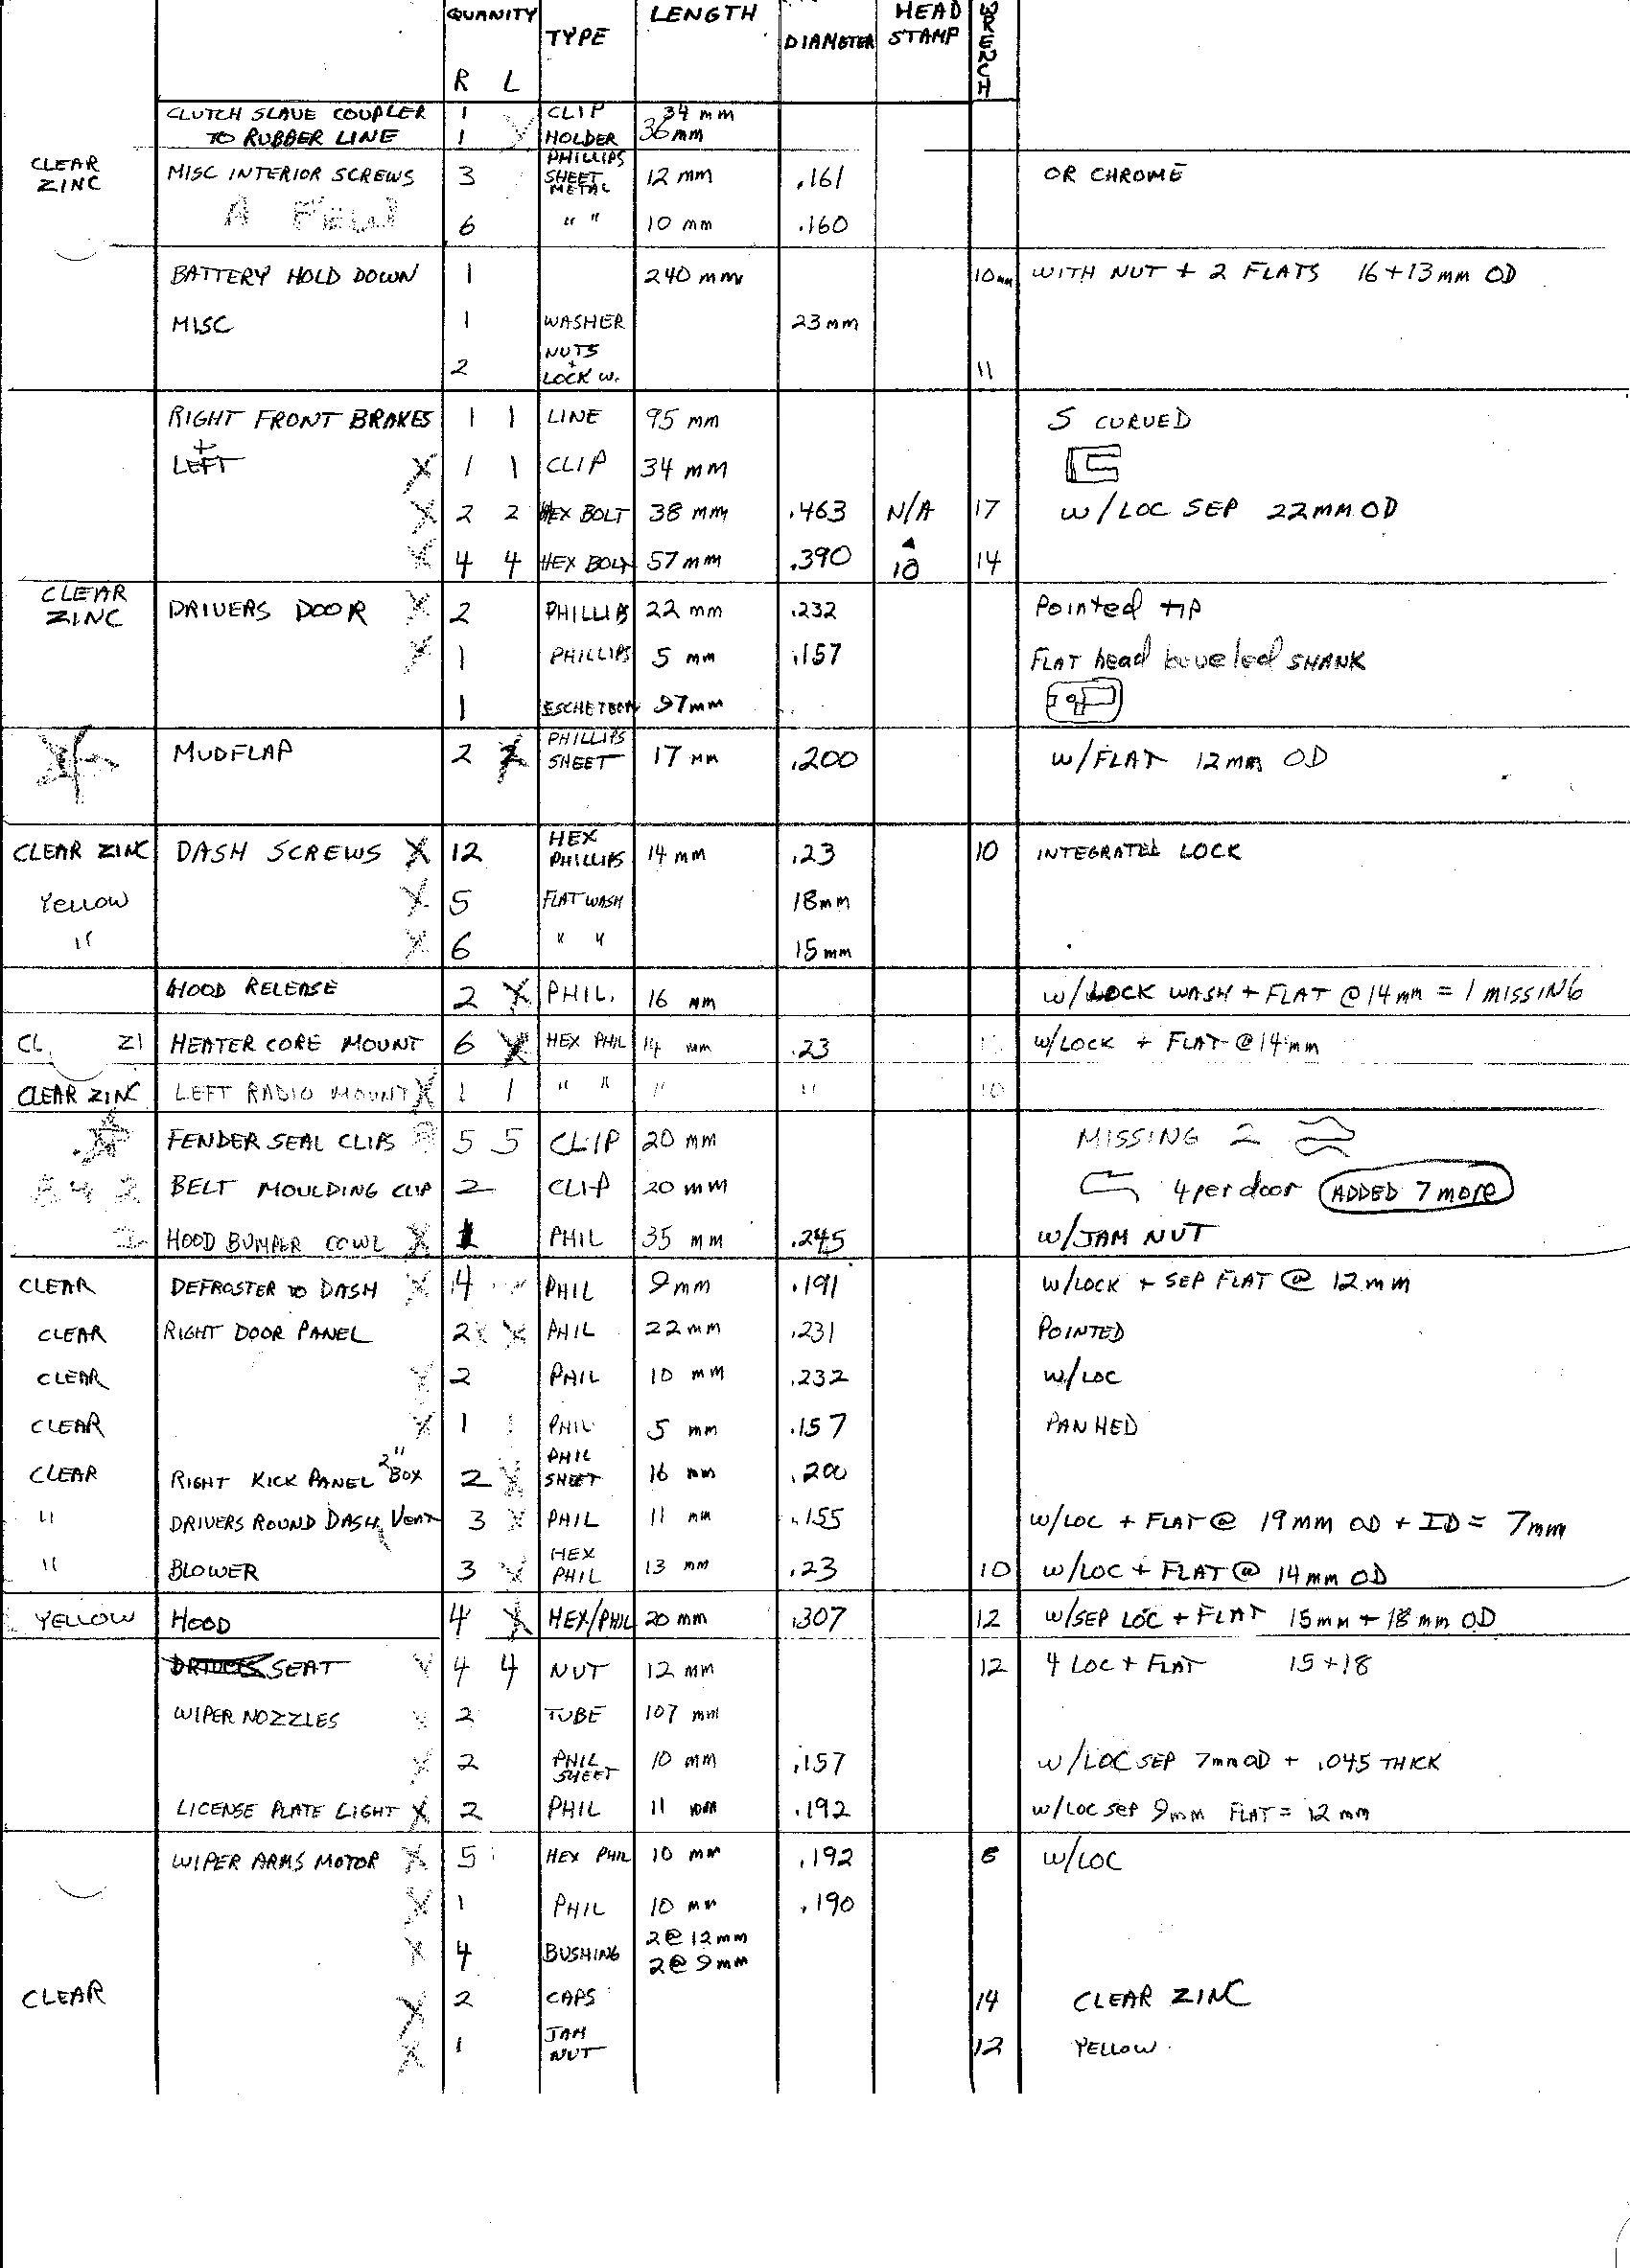
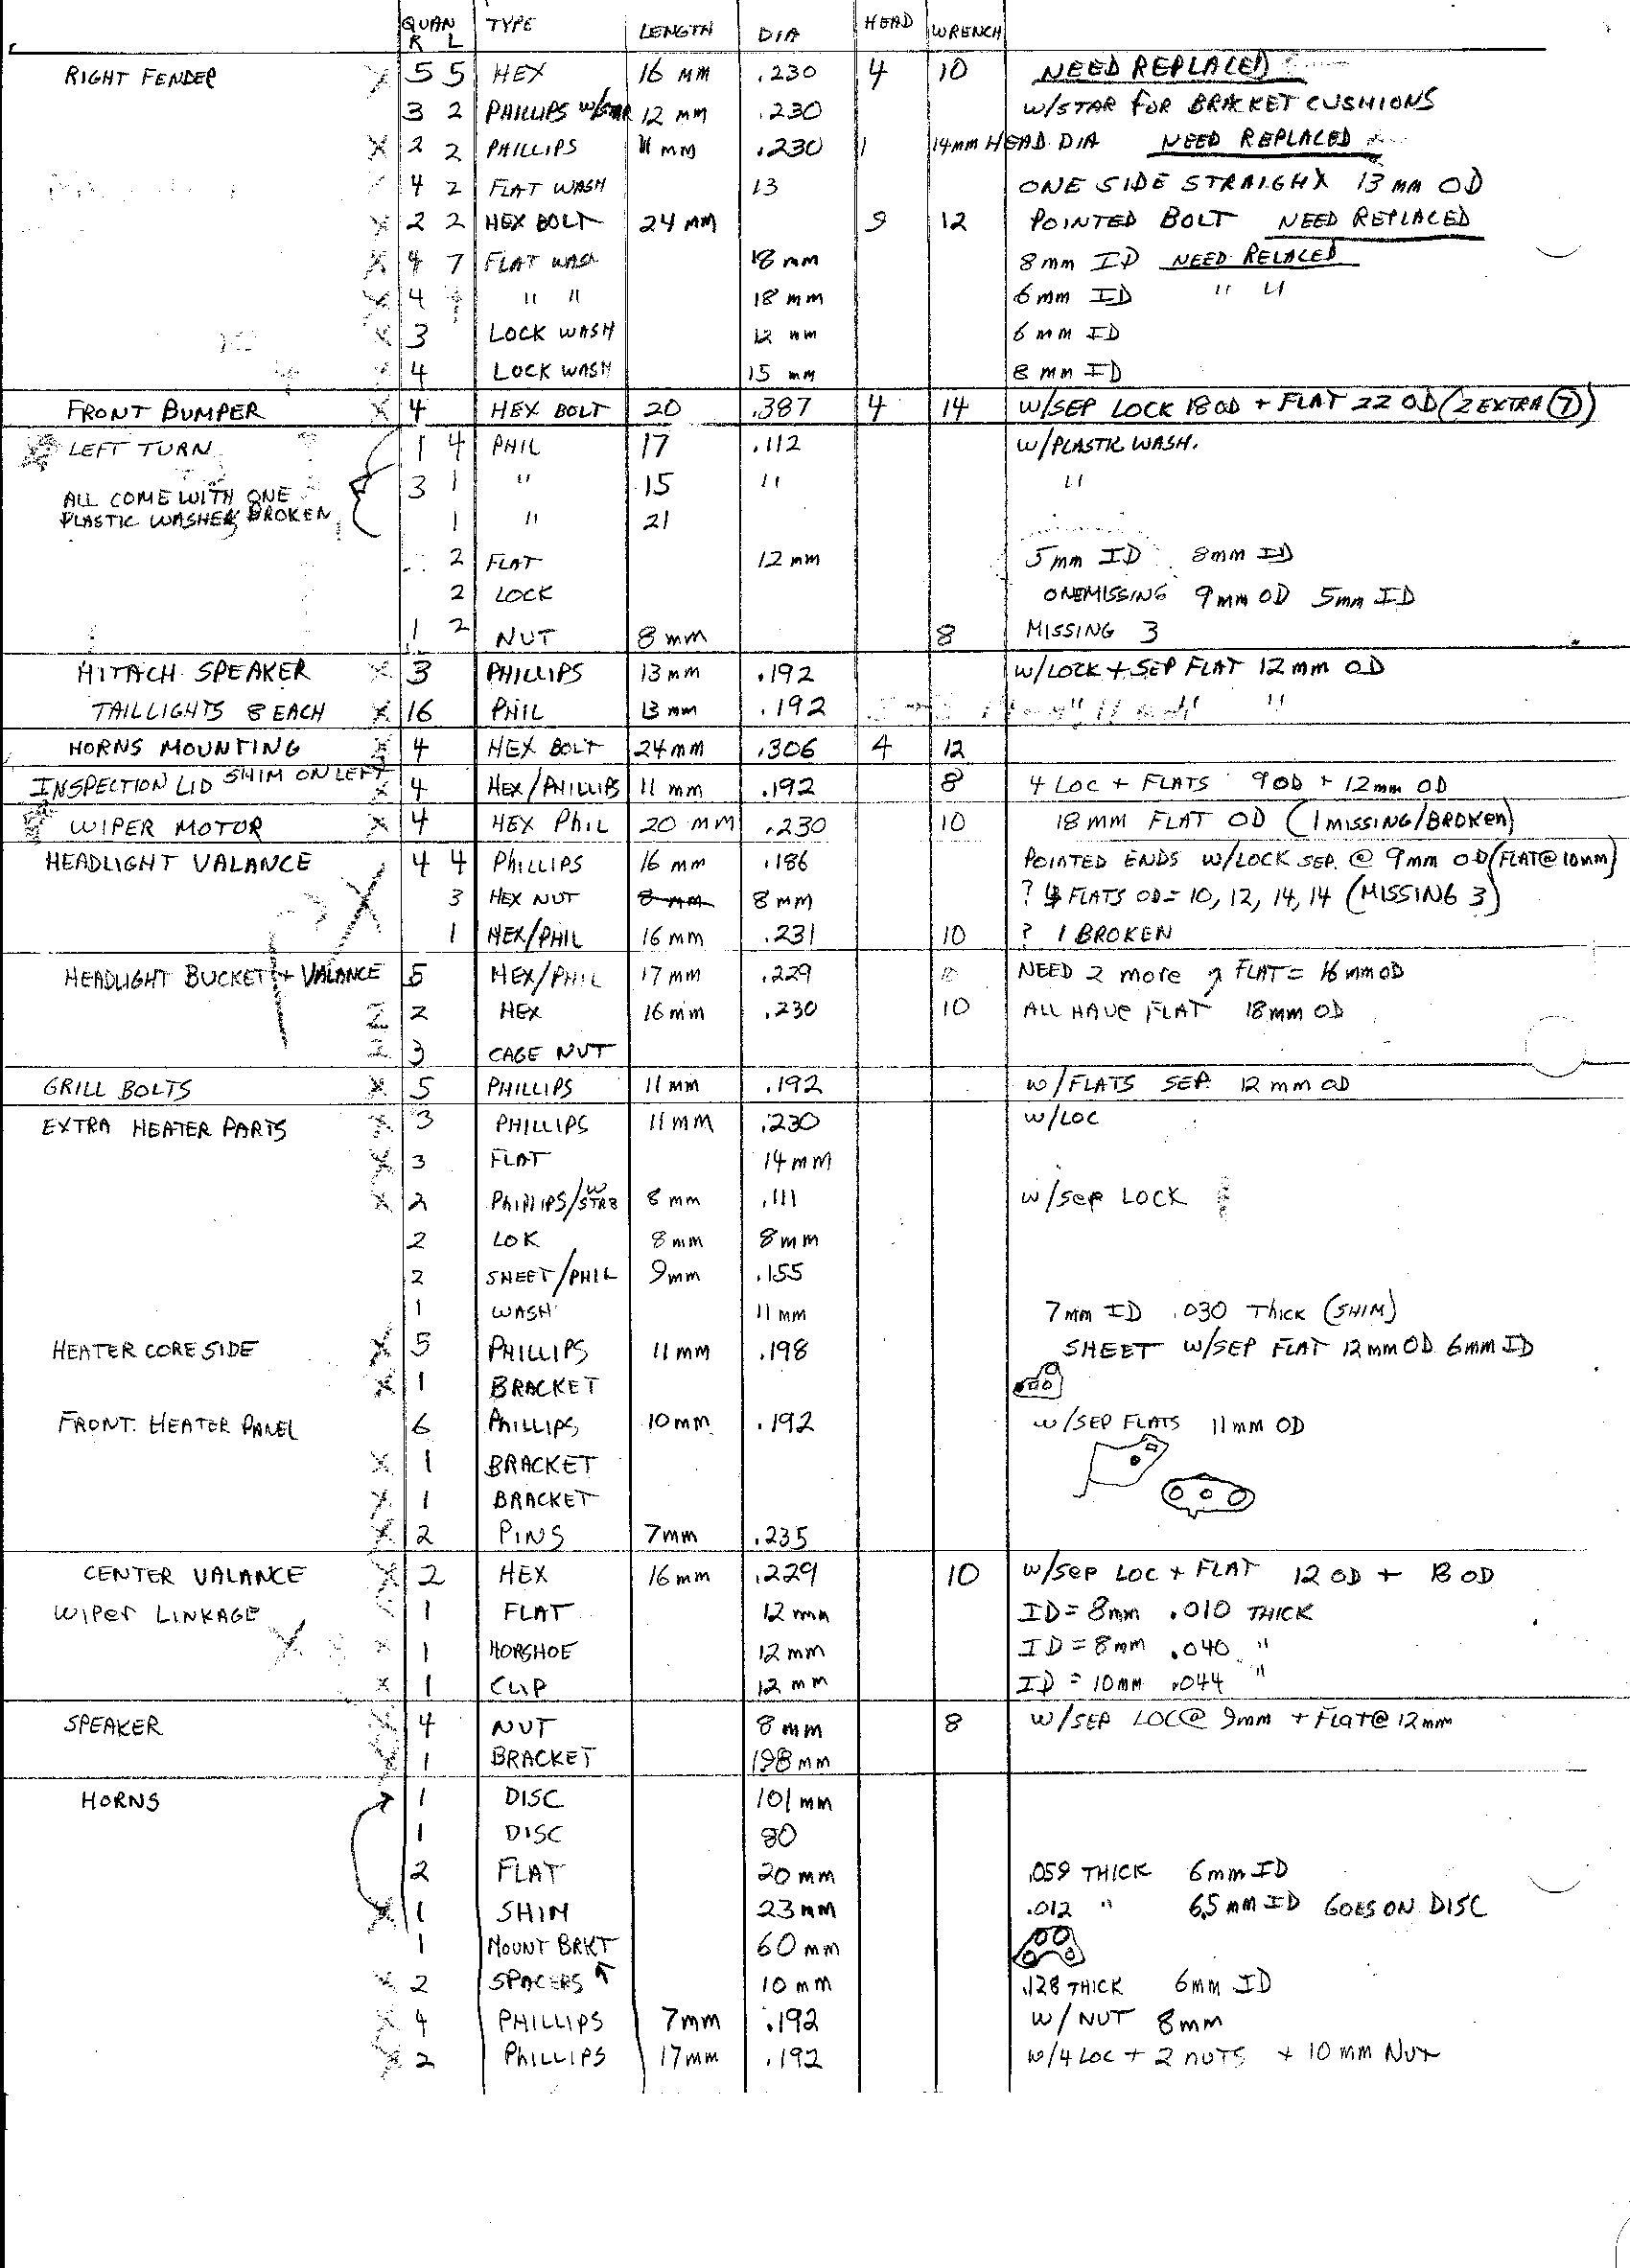
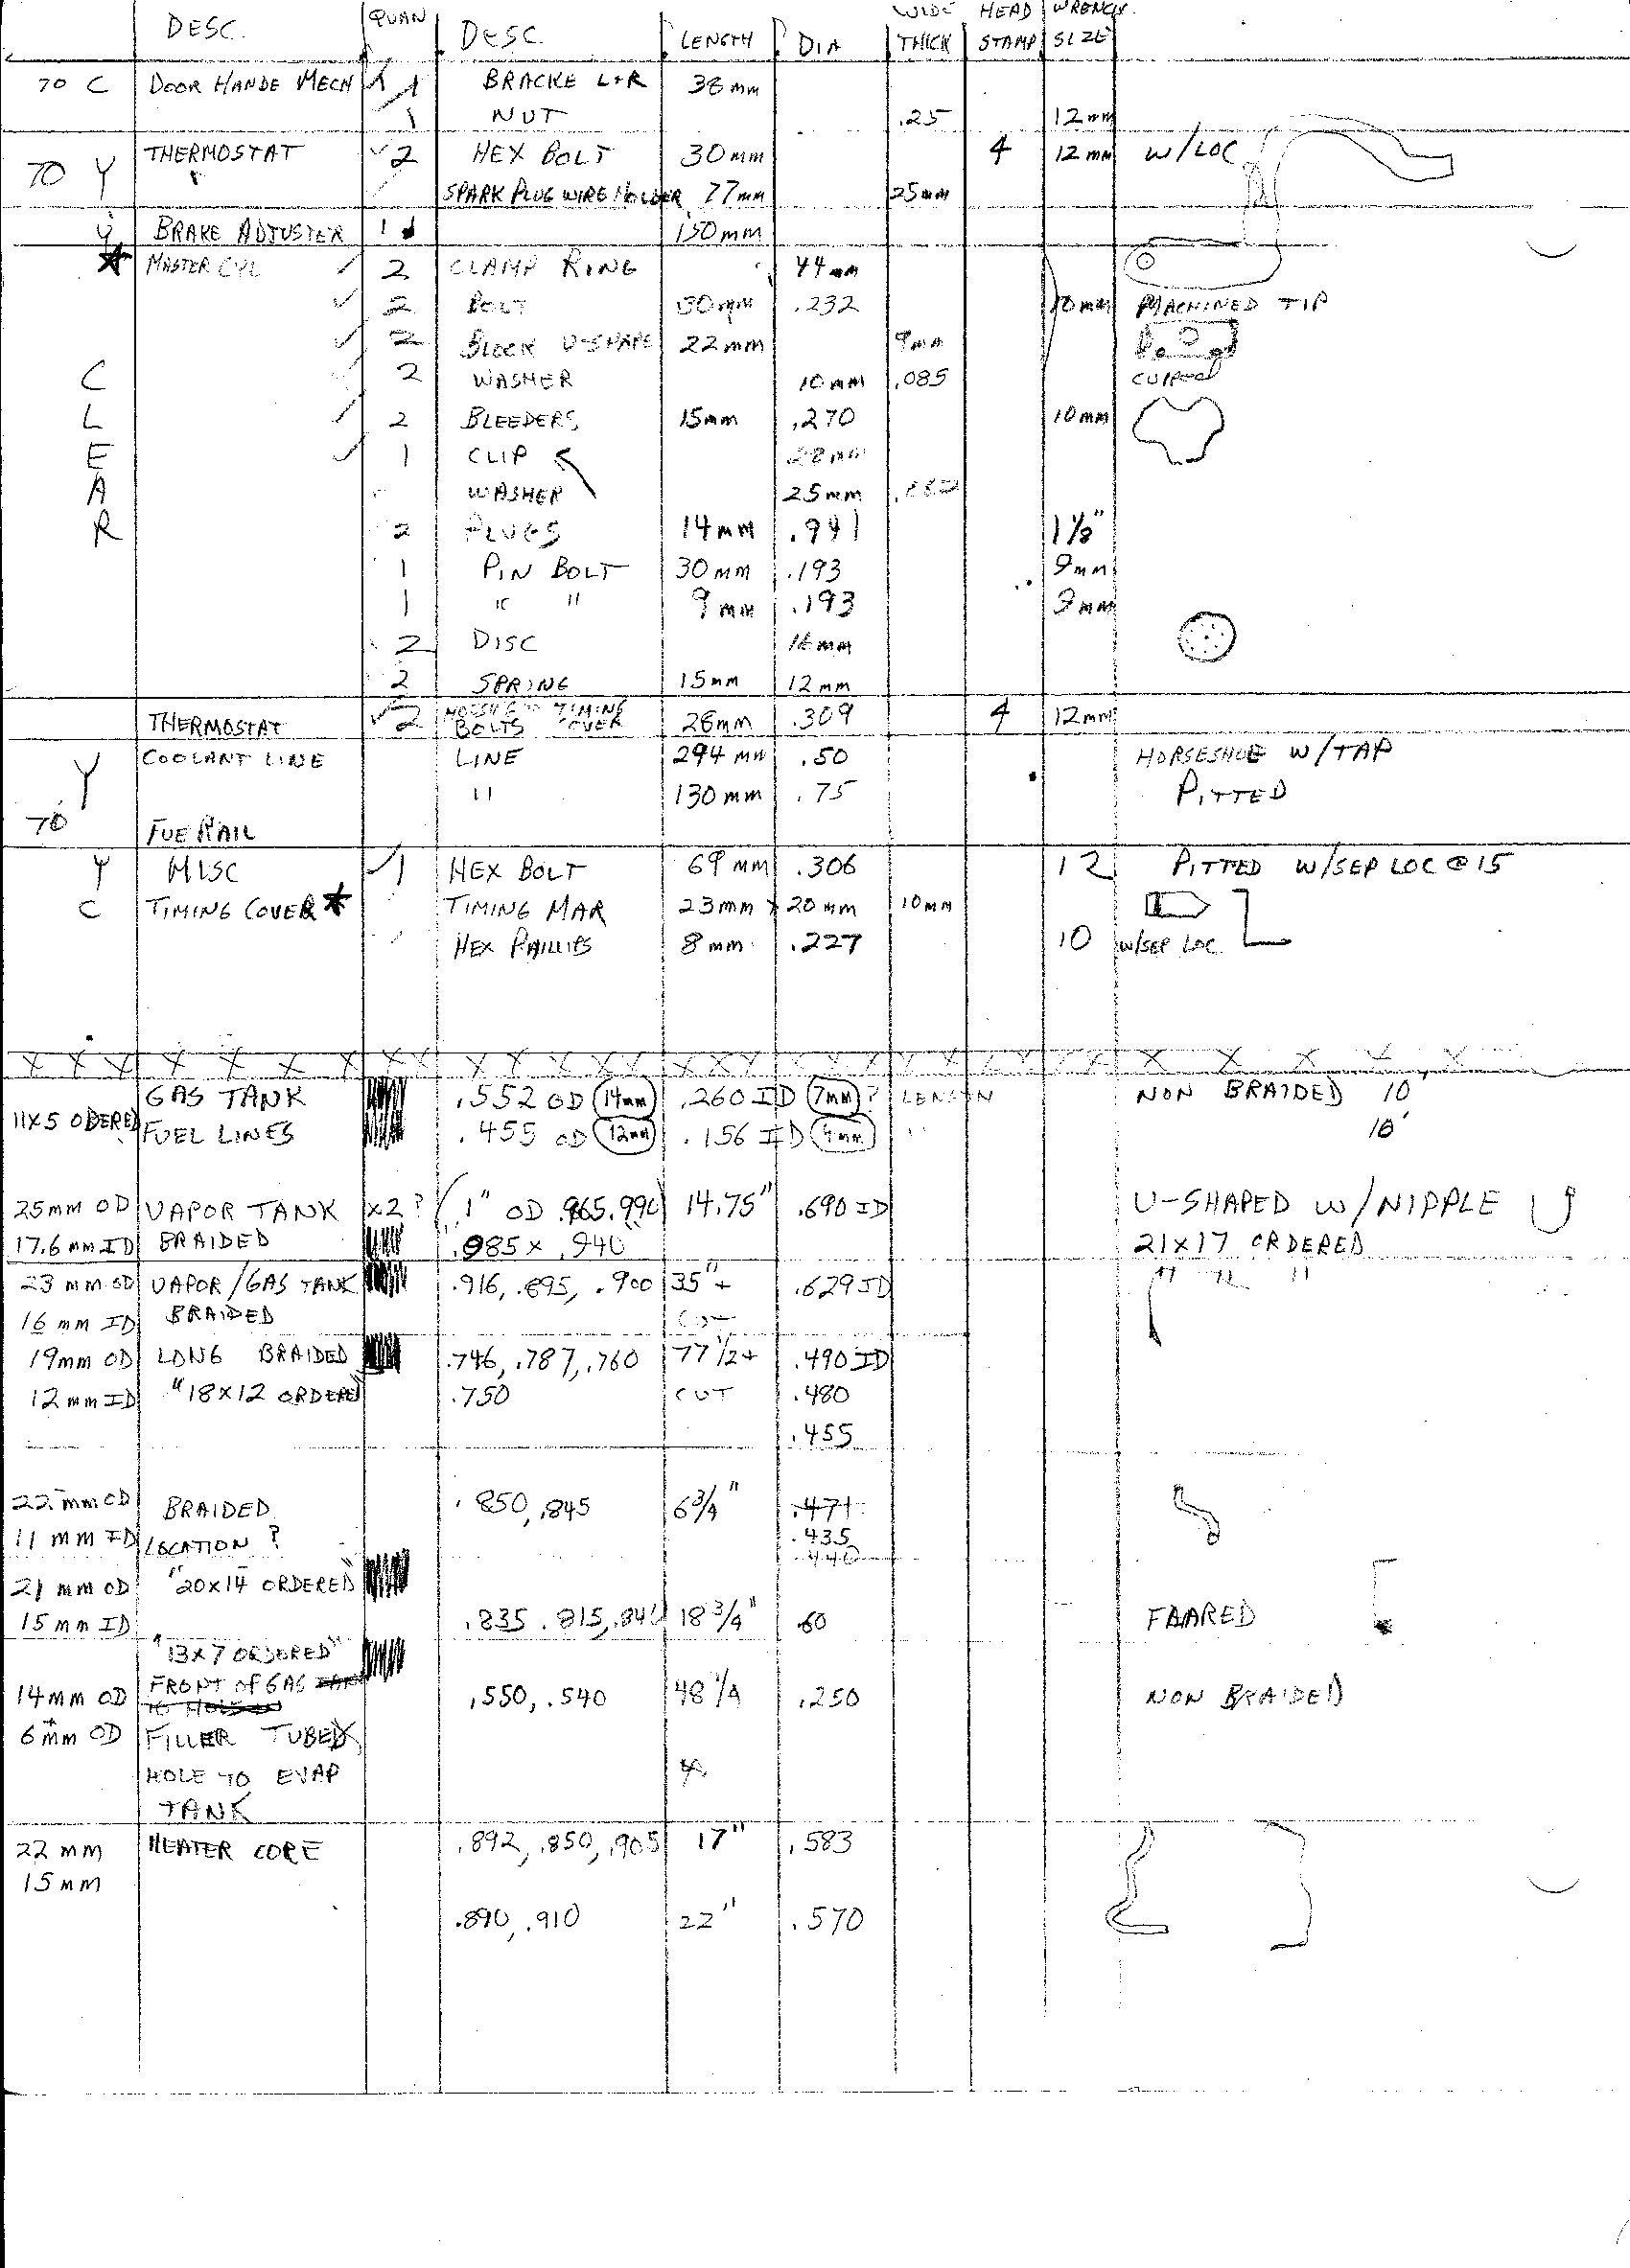
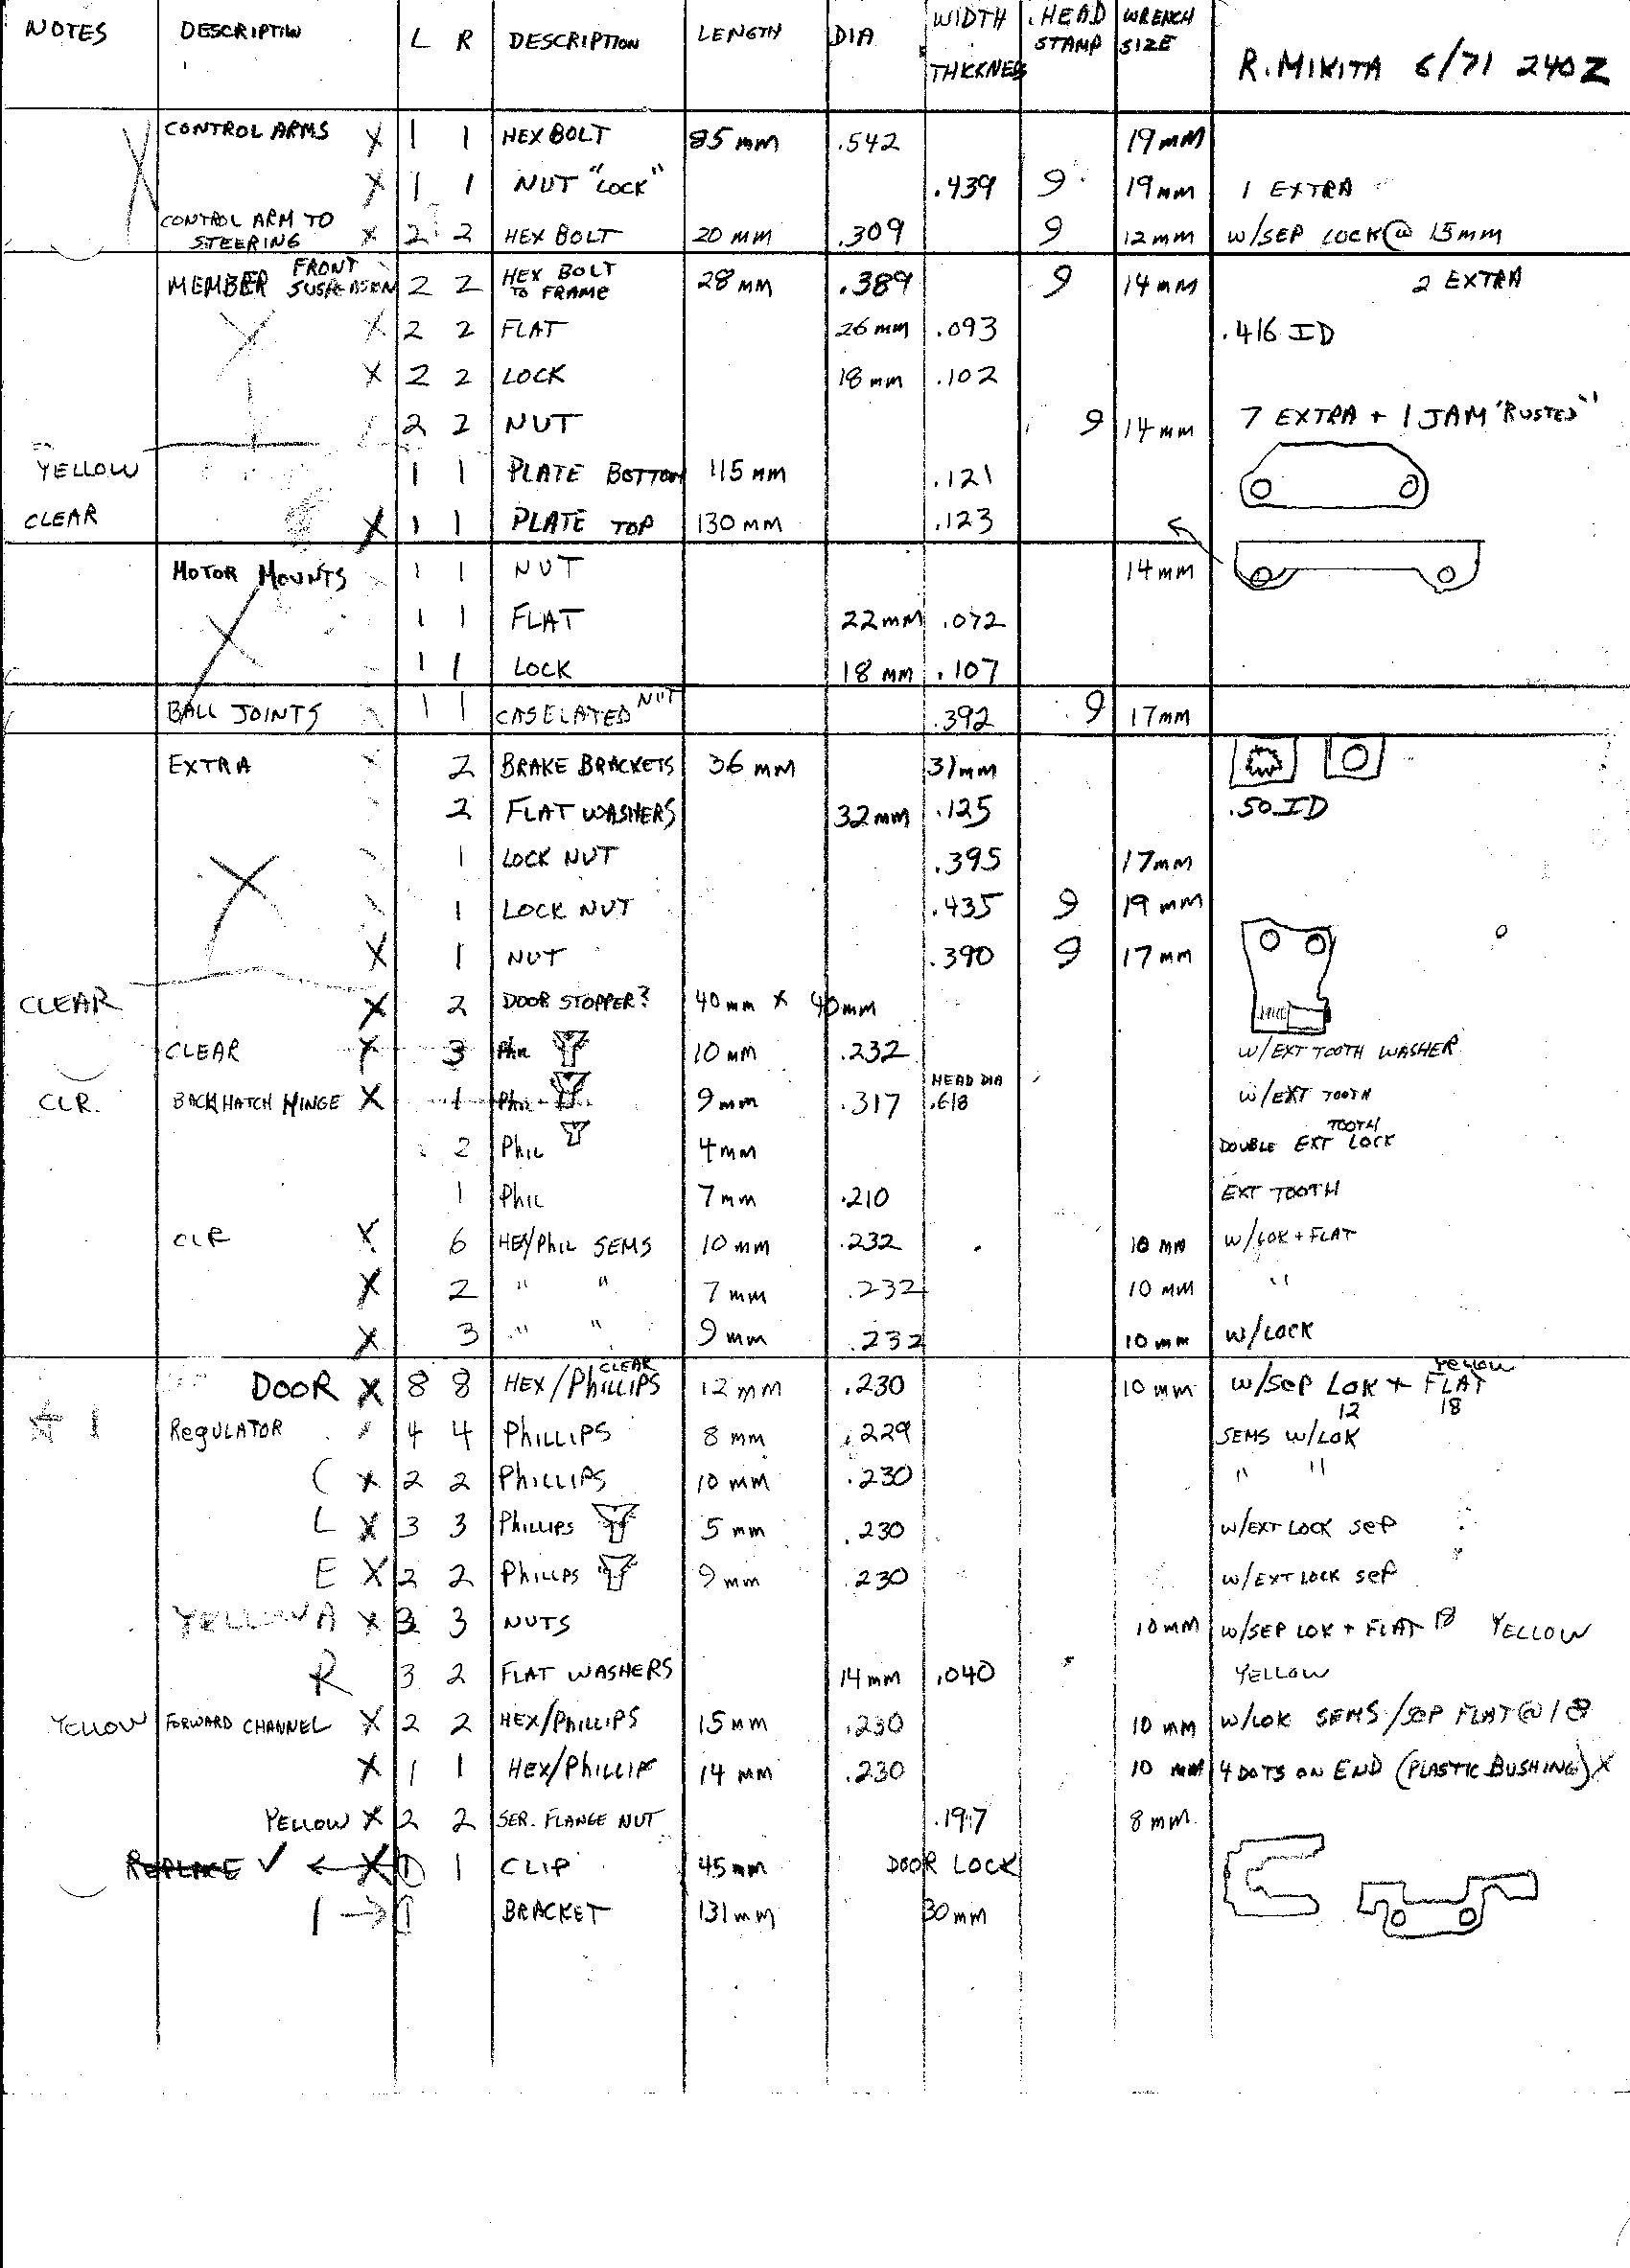
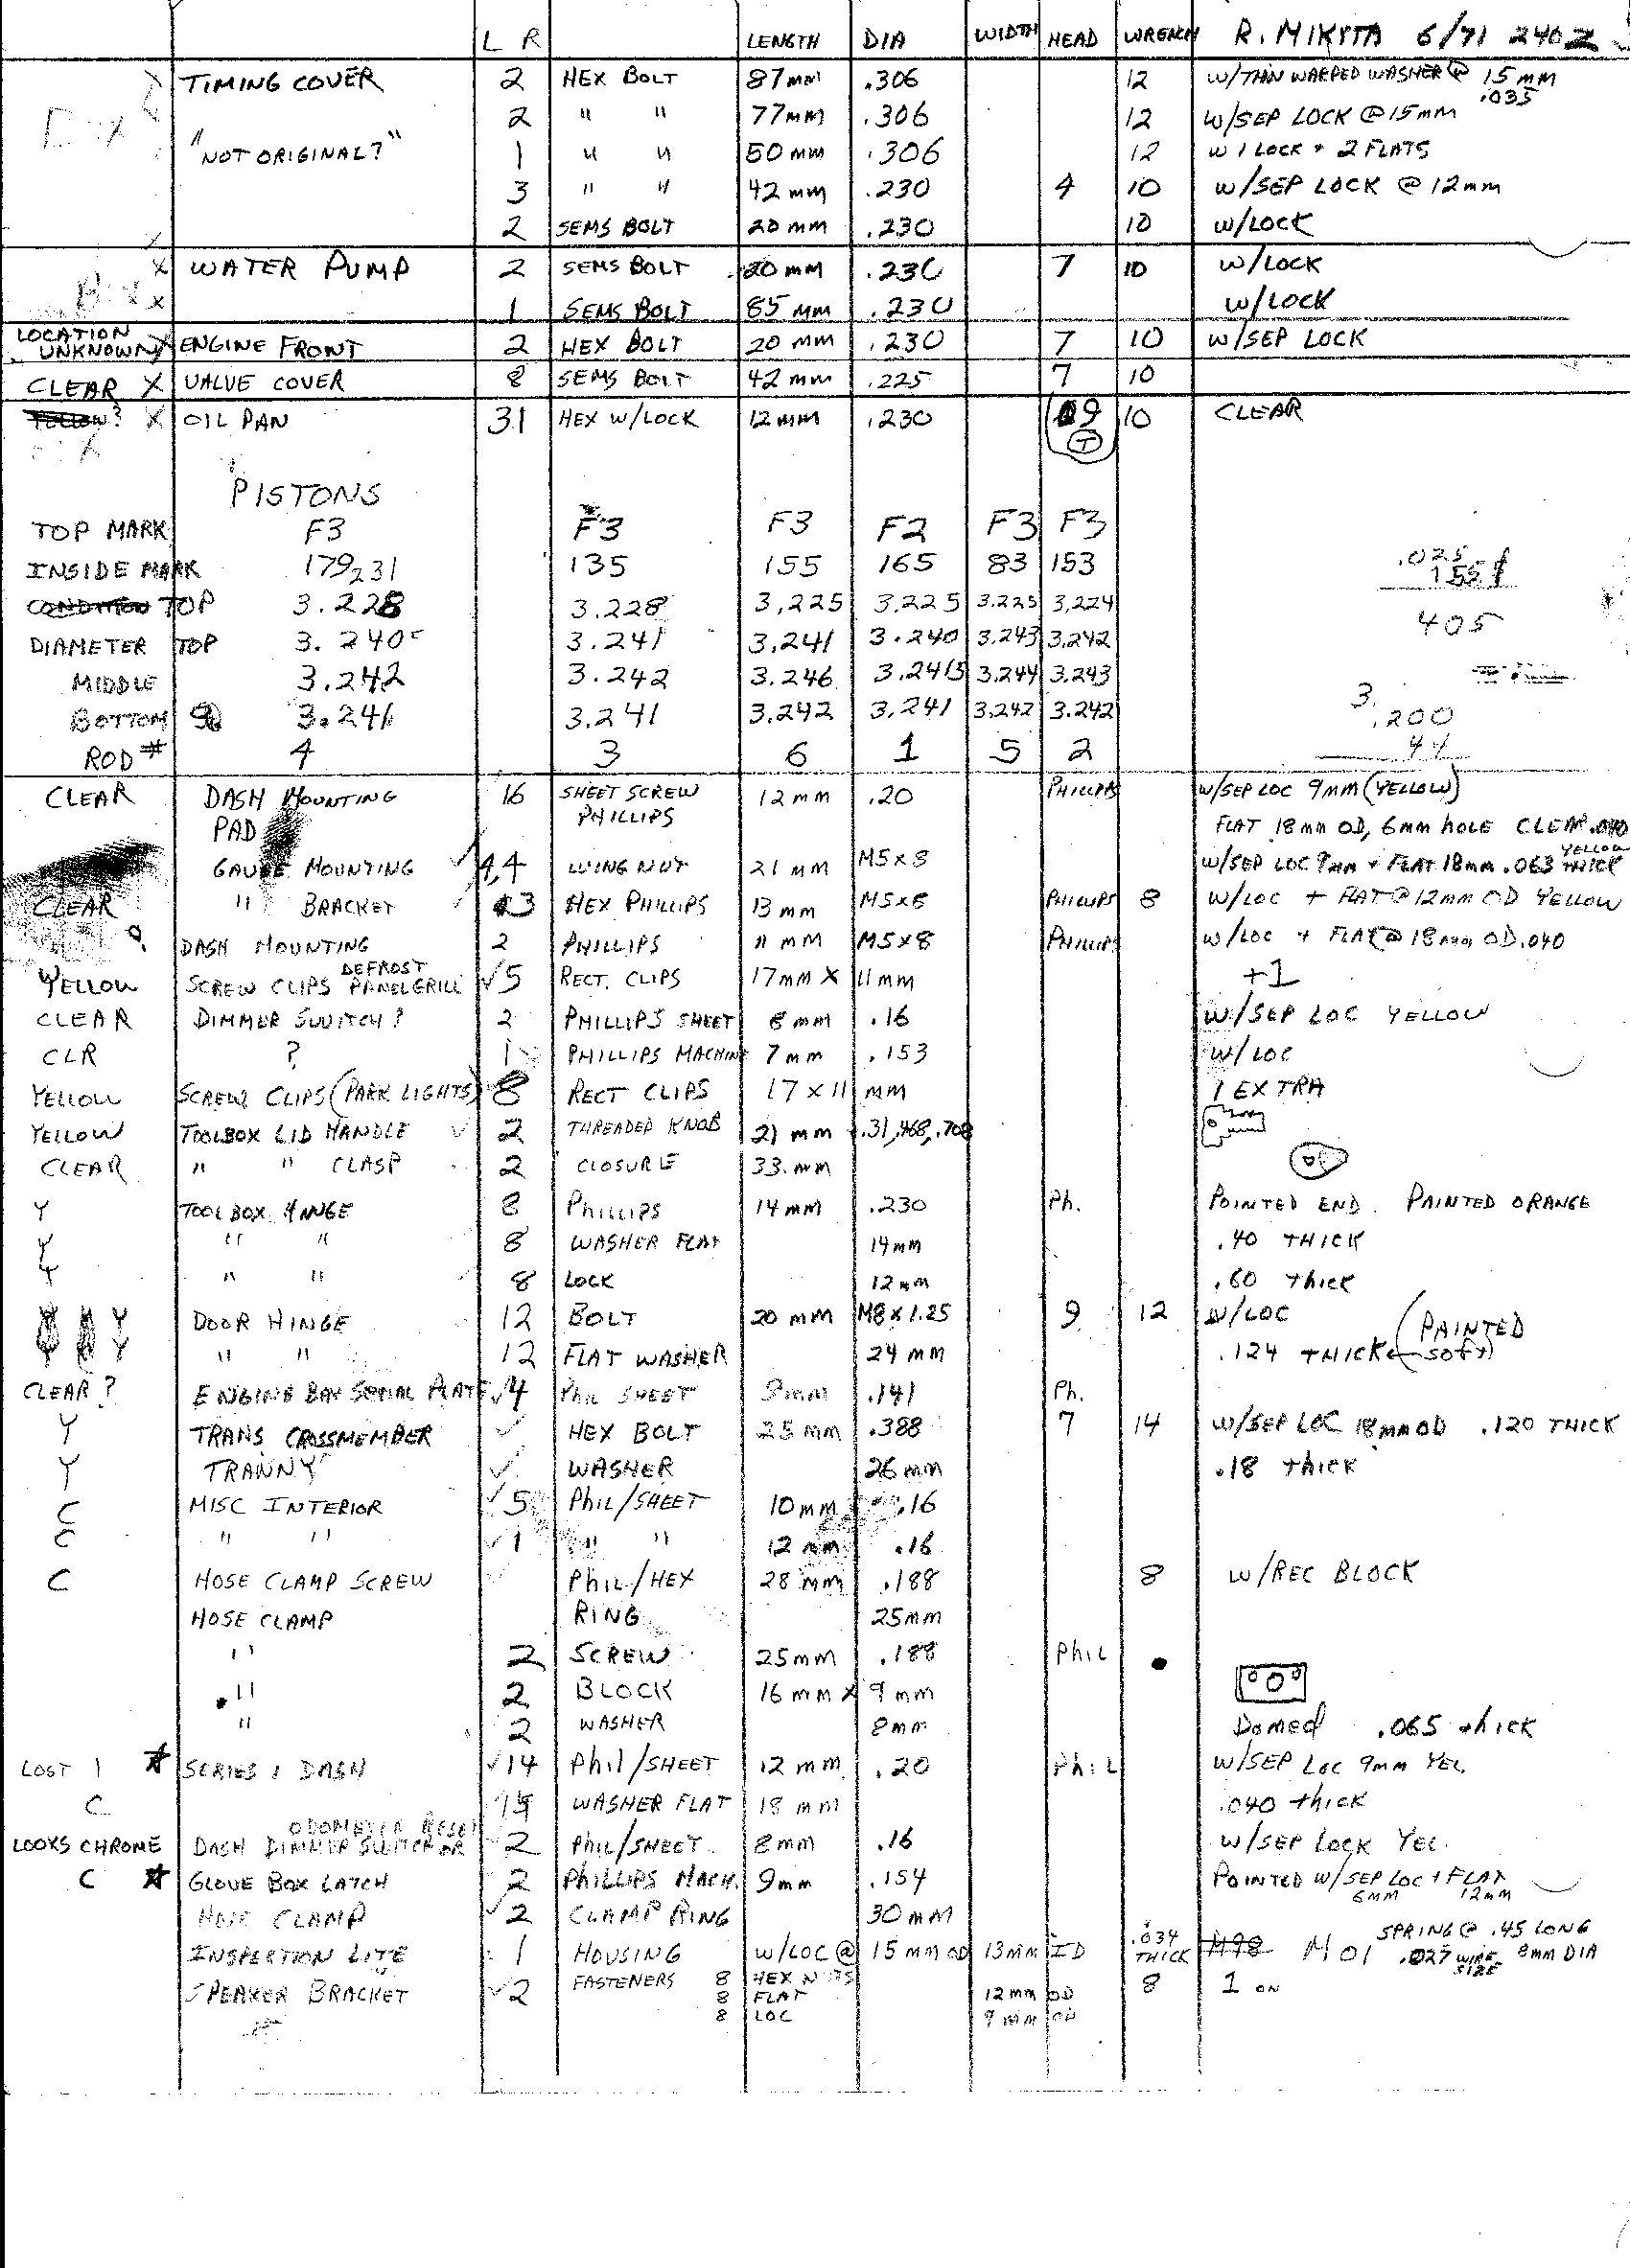
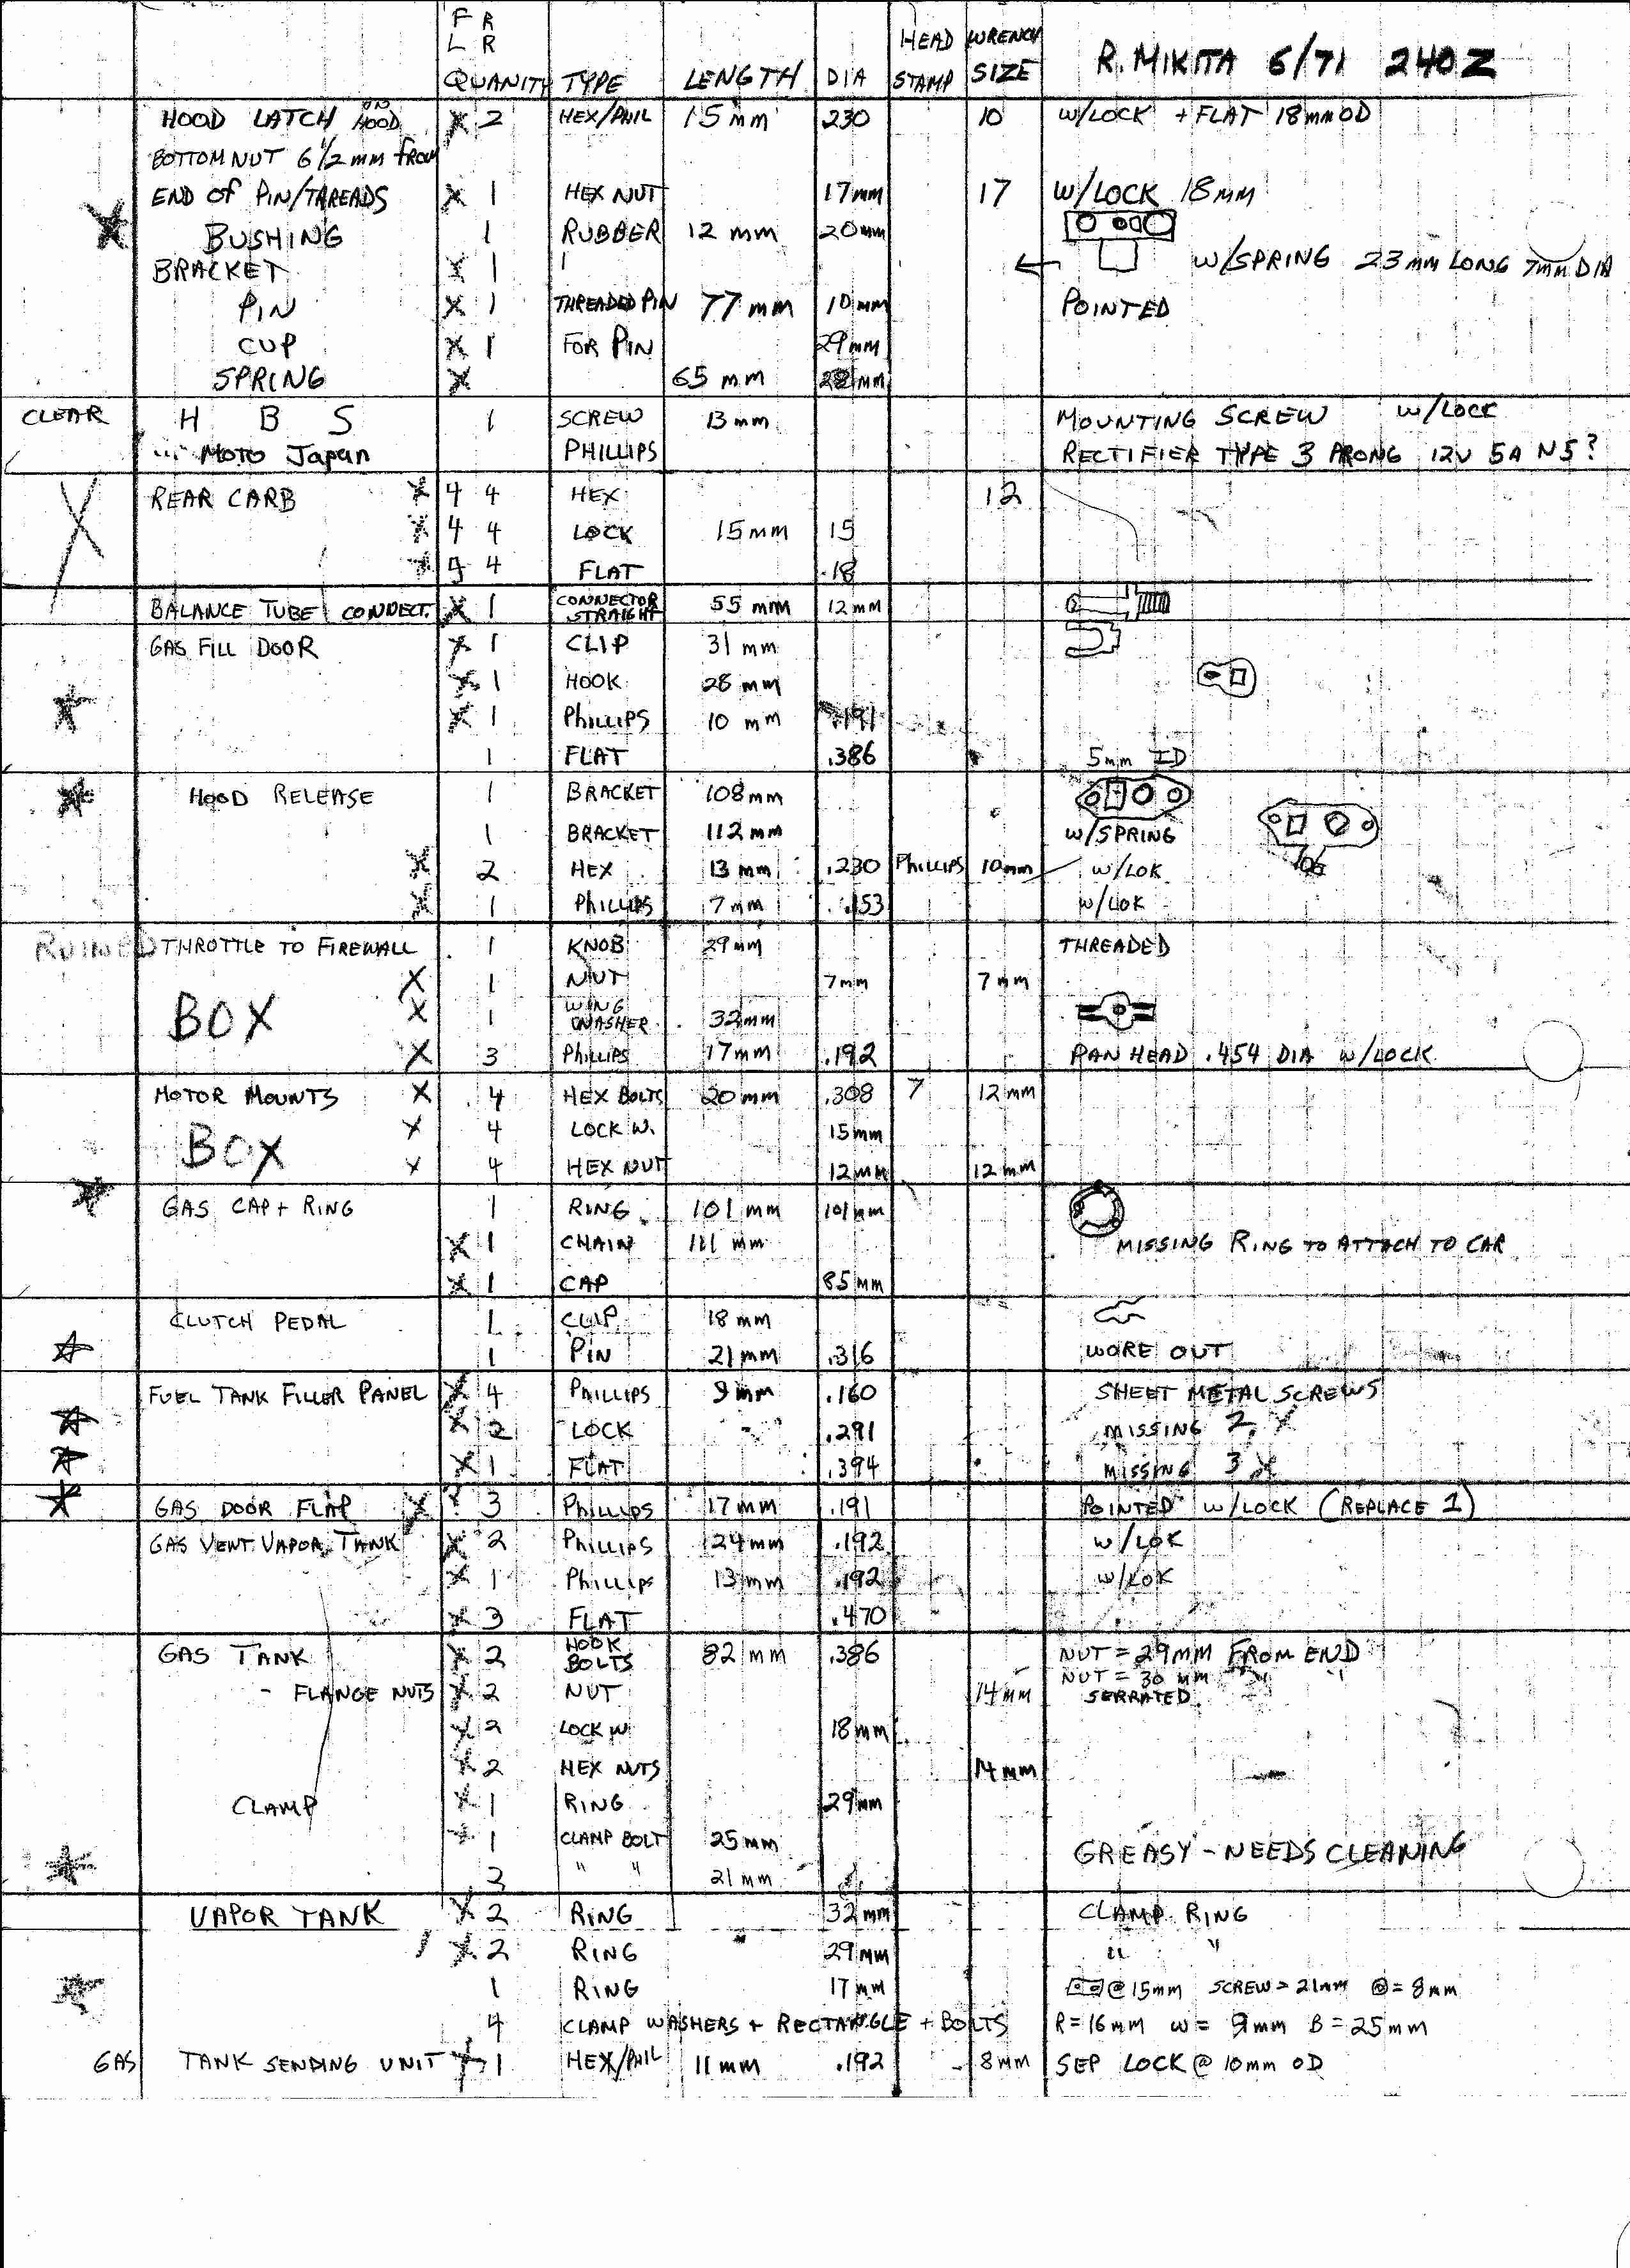
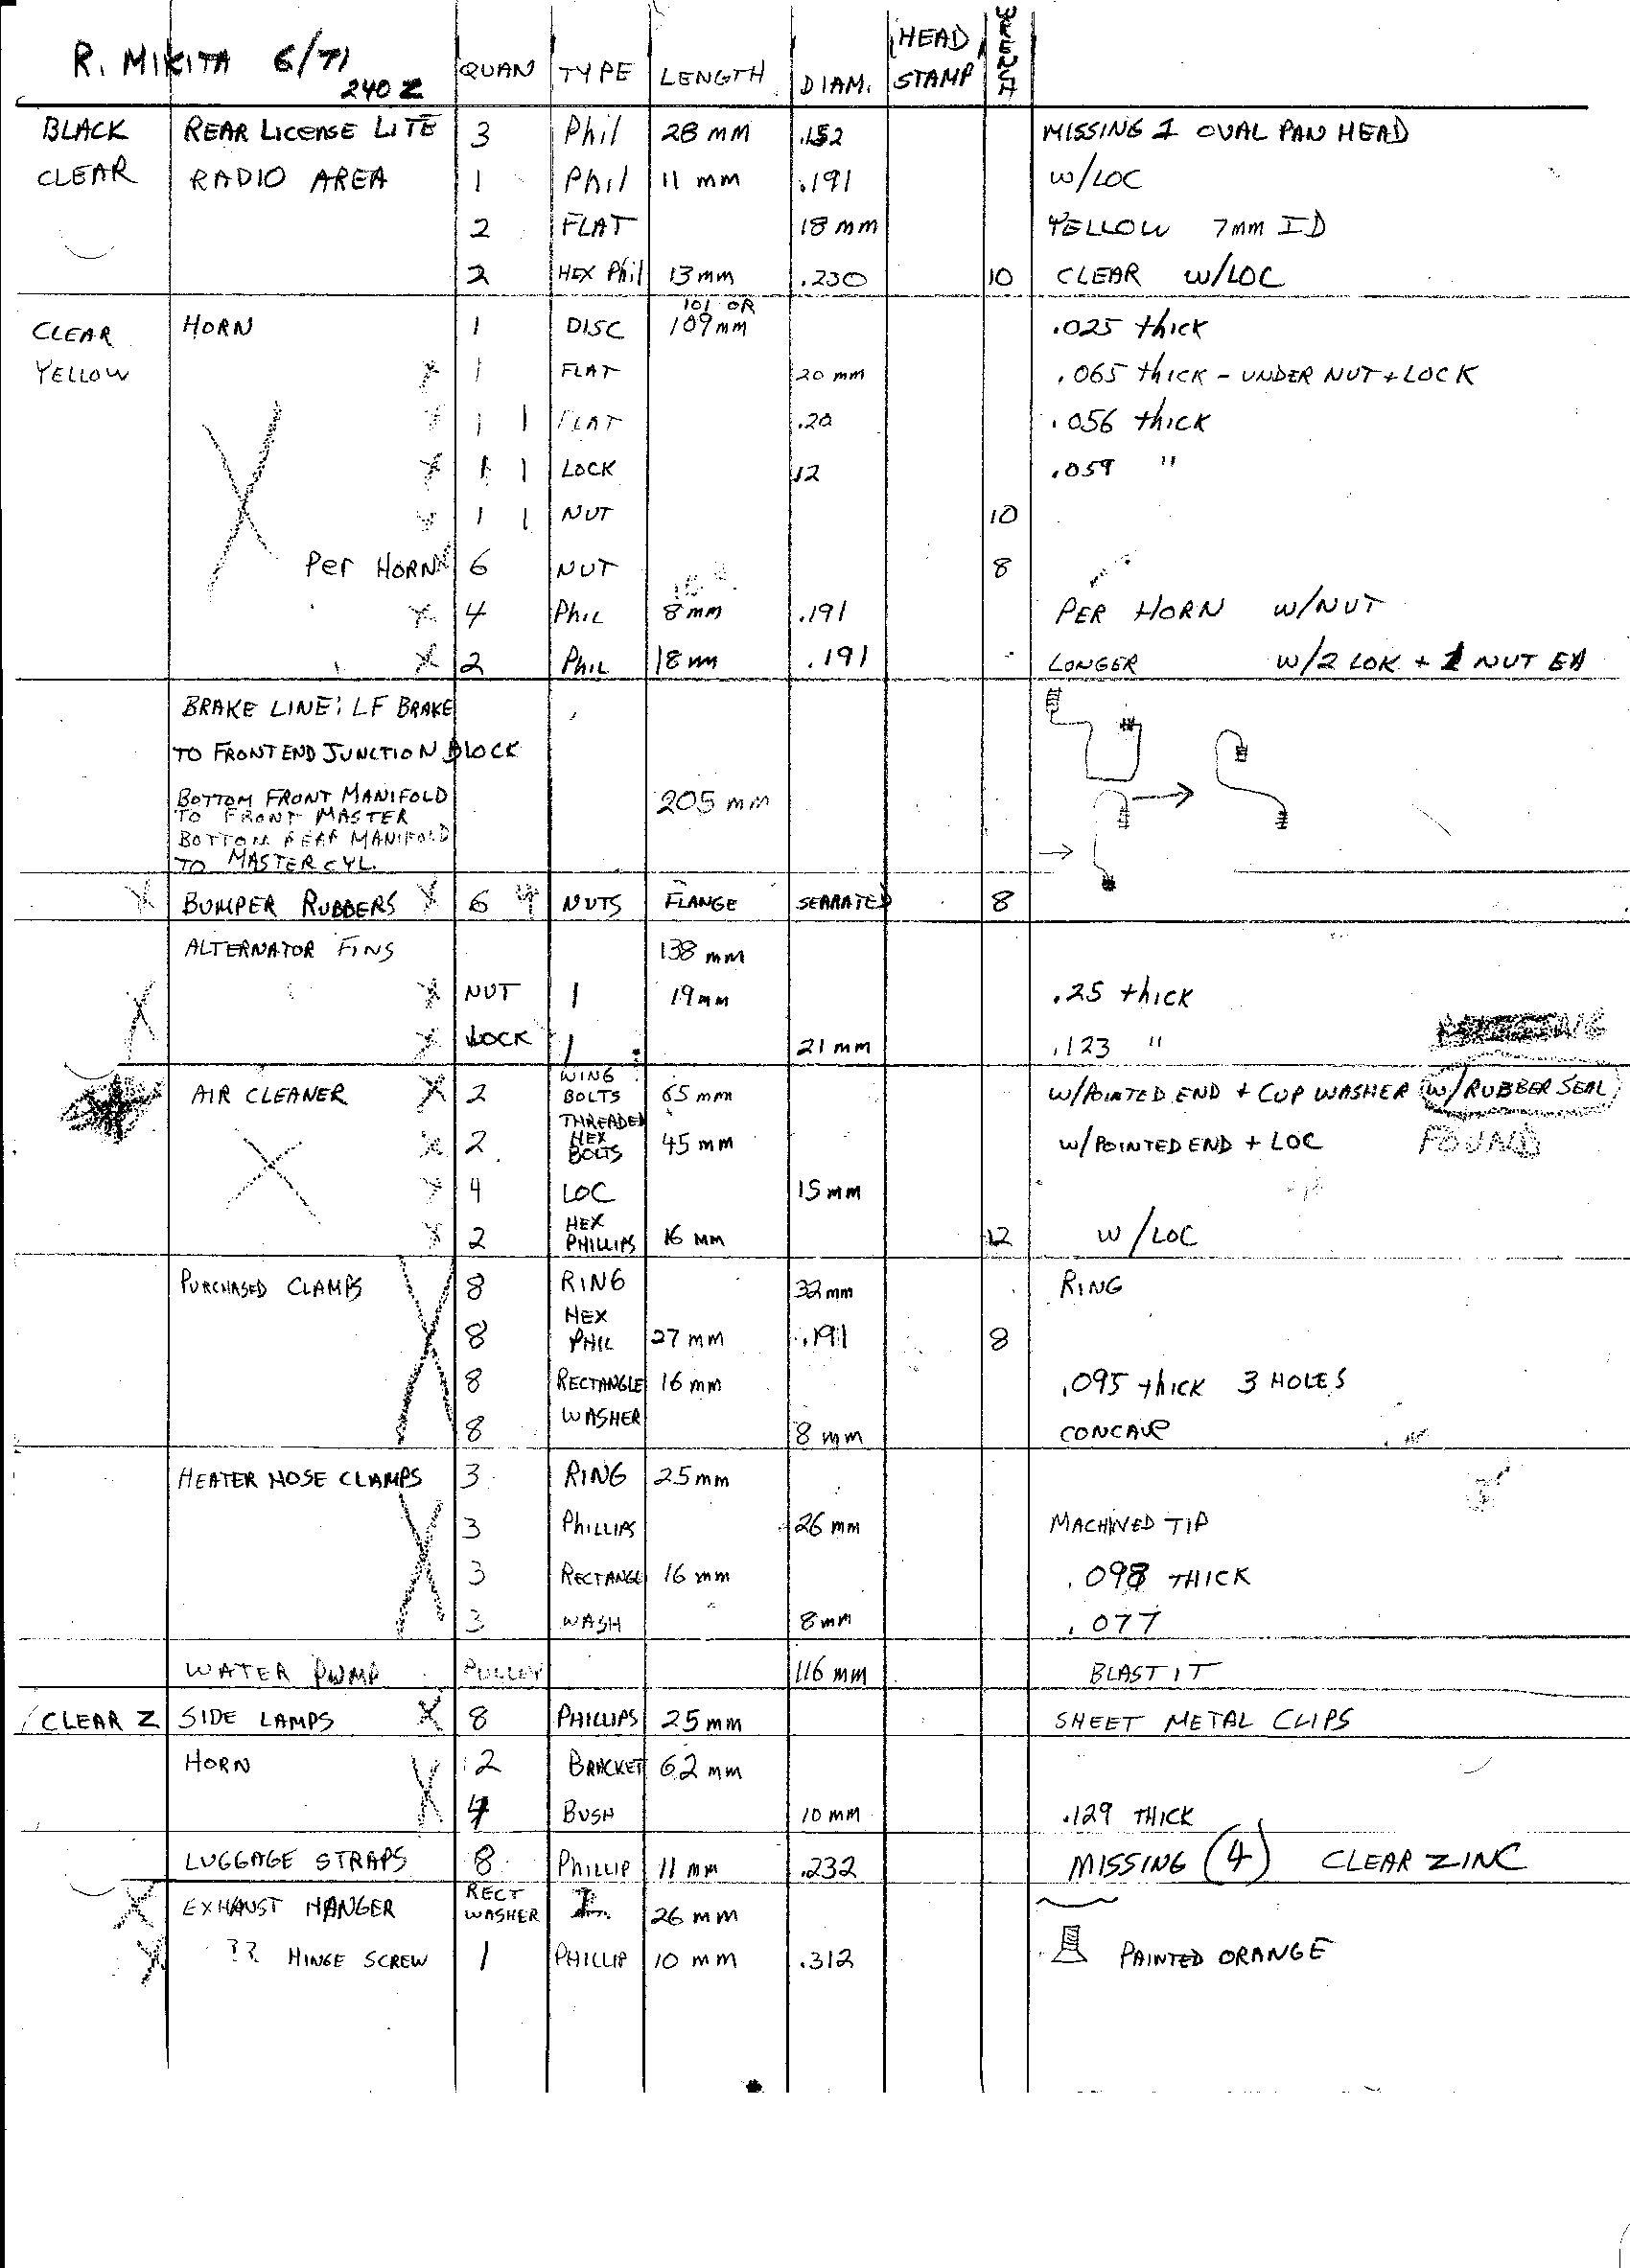
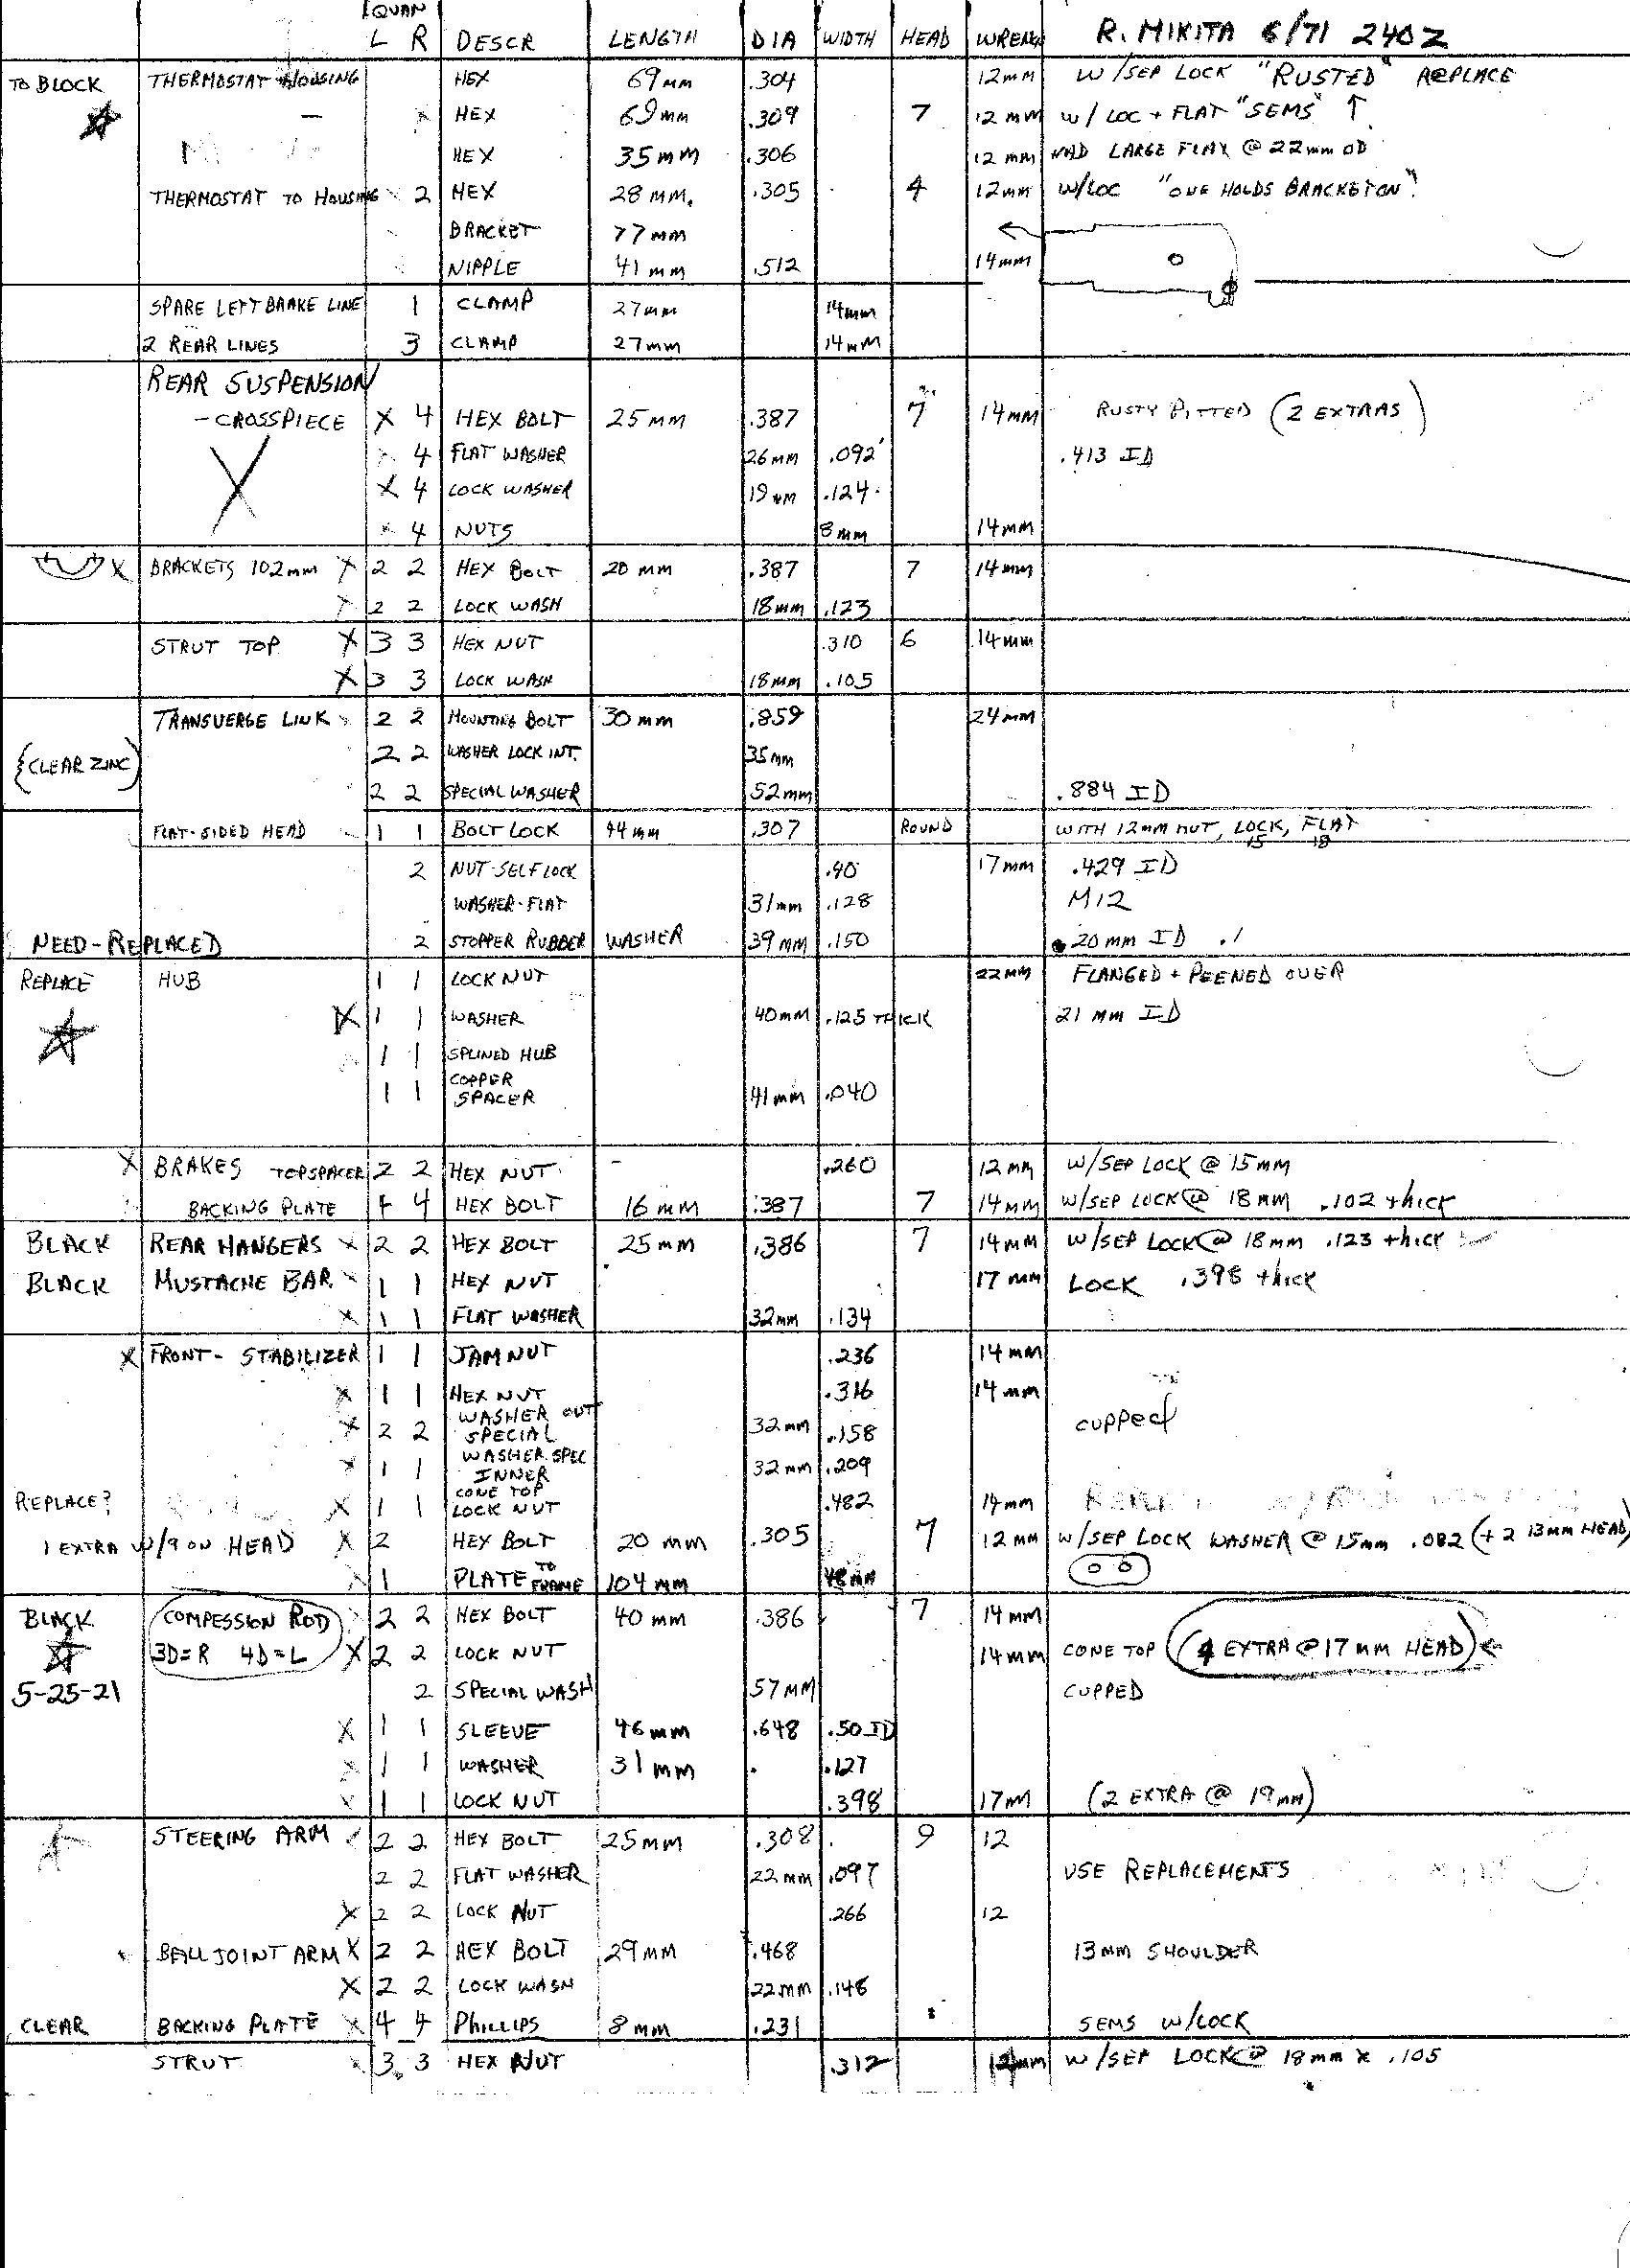
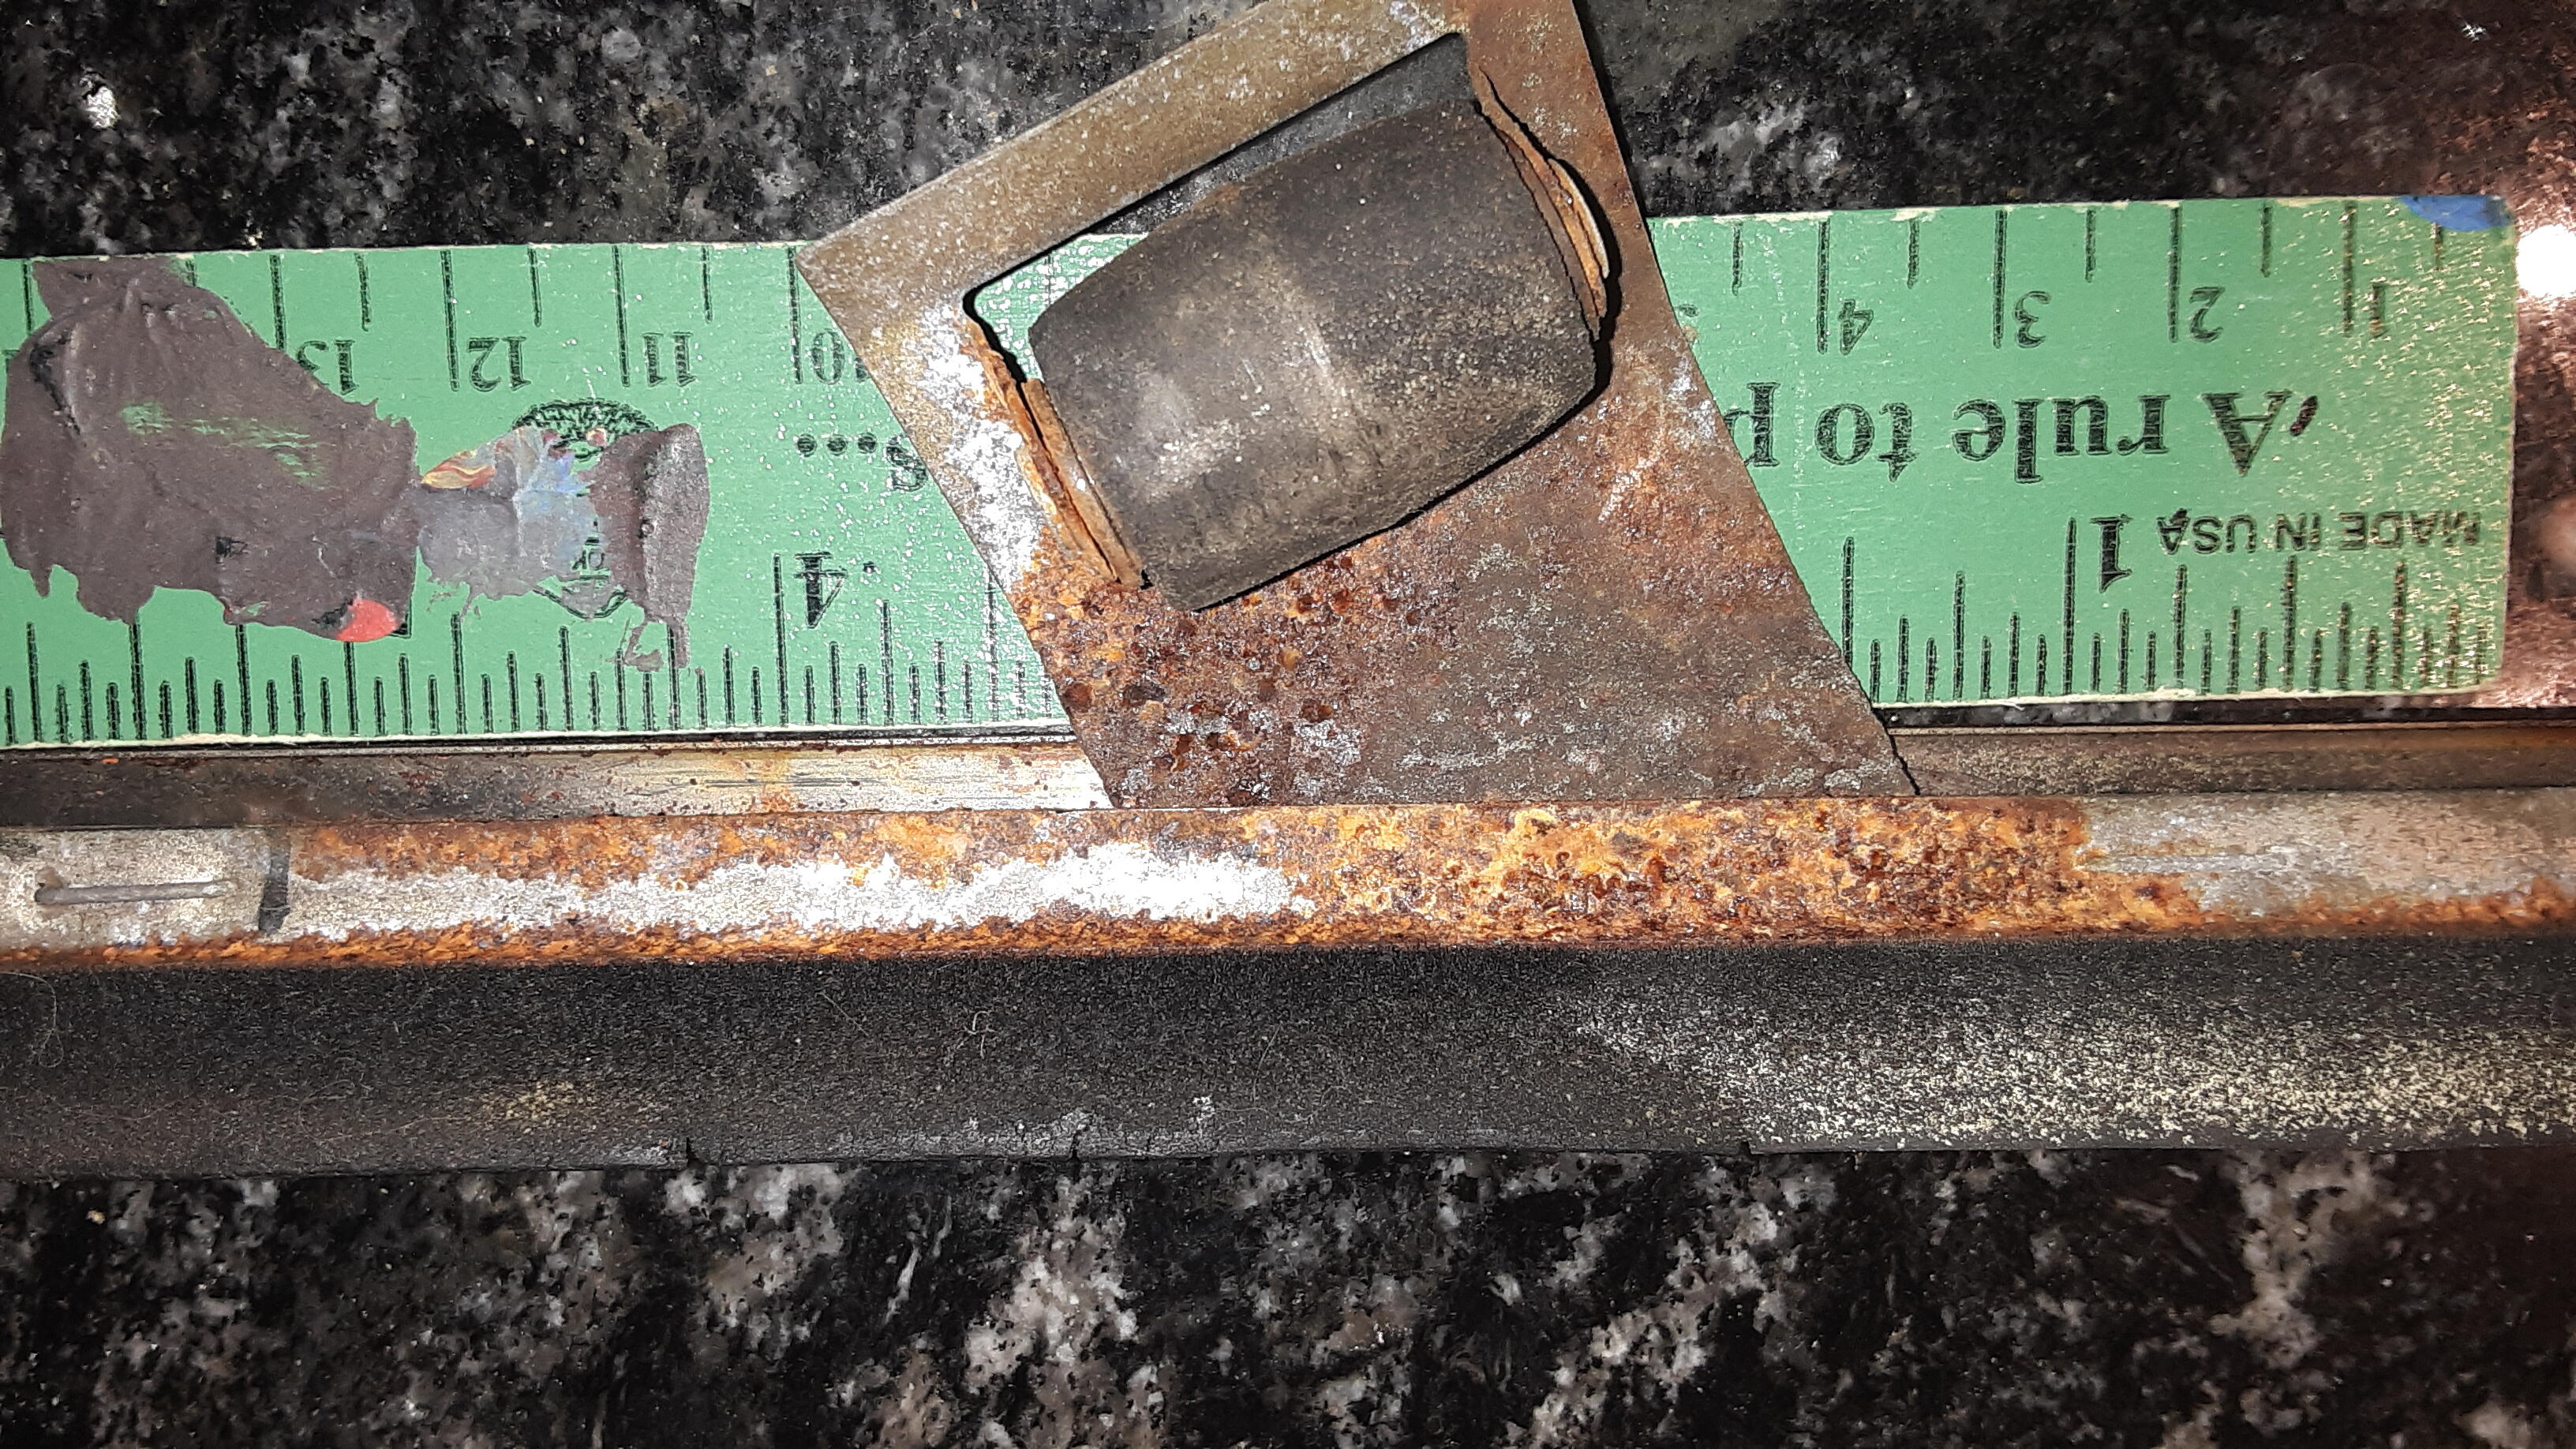
This car had some moisture, condensation from sitting in the weather all these years. Hot summers, cold winters, all kinds of weather. It was at this time I got one of my favorite tools, a harbor freight blast cabinet which I upgraded to a foot pedal etc. More tools included a spot weld cutter bit, a welded for welding thin metal. I have welders, but they're for heavy logging equipment, not this. As I took the car apart, I carefully bagged up the parts in separate labeled bags. About this time, I started reading Motorman's "the Orange" and "Deja vu" threads. It really inspired me to think "hey, I can do that!" But then realized to get parts plated, I needed to throw everything into a box together. Now my memory isn't that good, and getting worse every year, so, I decided to measure and record everything. It took days. The thickness and diameters I measured with a micrometer, lengths in millimeters. I wasn't to familiar with metric....so if these can help anyone, here they are. I had a couple shipments to Sav-On plating and parts of another car in these. As far as clear zinc or yellow, in some cases I may have gotten it wrong as these things were powdery/rusty color. I think this car was pretty much unmolested. datsun invent 6 001.bmp


 I have driven the car two times since the last post. Indeed, the AFR at idle is now higher - it is about 15.4 at 850 RPM. Cruise at 50 in fourth gear on flat road (2800 RPM) is about 15.8 AFR (much higher). While at full throttle in first and second gears, the AFR is about 13.1 to 13.2 (also much higher). No other changes were made. I just tightened the four nuts holding the carburetor bodies to the manifold, and each of the nuts holding the header and the lower half of the intake manifold to the engine and the 6 bolts holding the top of the intake manifold to the head. I also tightened the bolts that hold the intake balance tube to the intake manifold. I don't understand what I am seeing now. Perhaps tightening these, I have introduced a vacuum leak? What is odd though is that the engine seems to have more power. Oh... here is a thought: perhaps the engine is still breaking in! I only have 384 miles on it. Maybe as the cylinders seal a bit better, the combustion is more complete, and that is changing the AFR. I am going to put some more miles on it to get to about 500, and then do a leak down test and record the numbers. If the numbers confirm it is broken in, I will change out the break in oil. Then I will pick up with AFR testing.
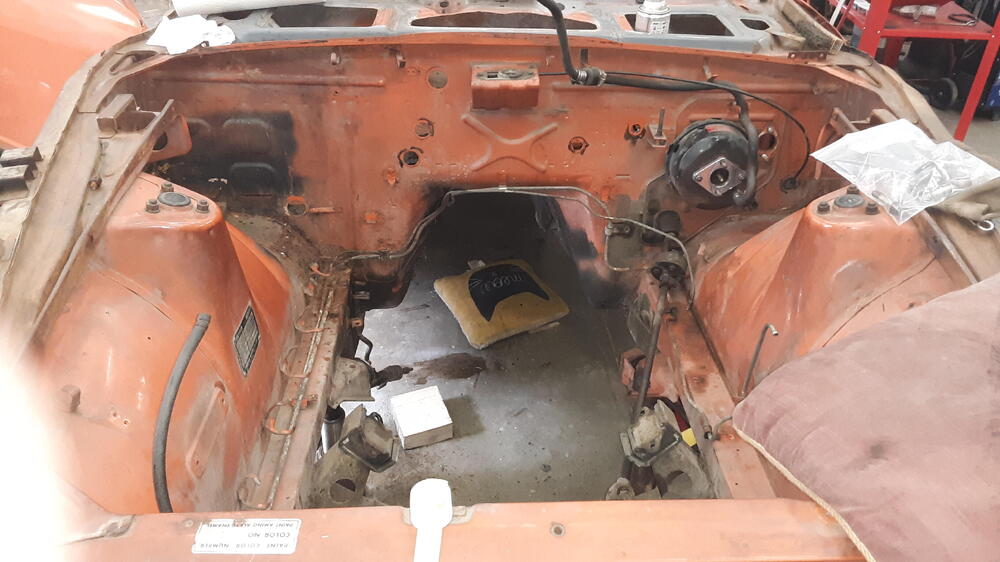
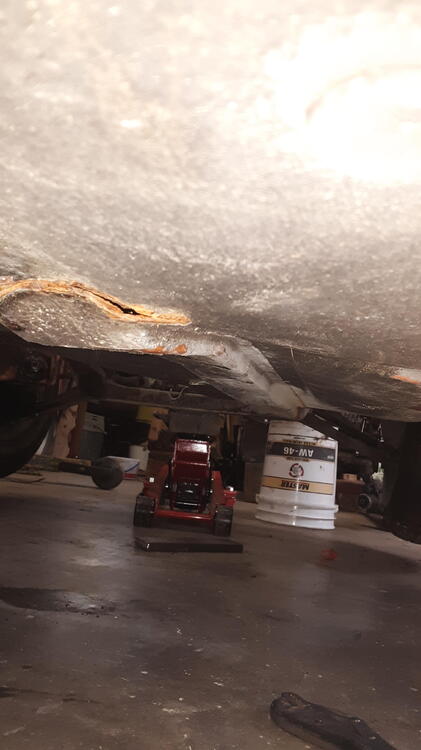
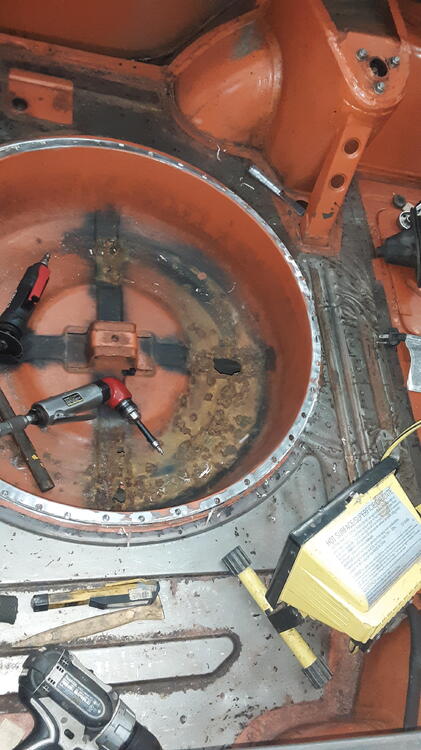
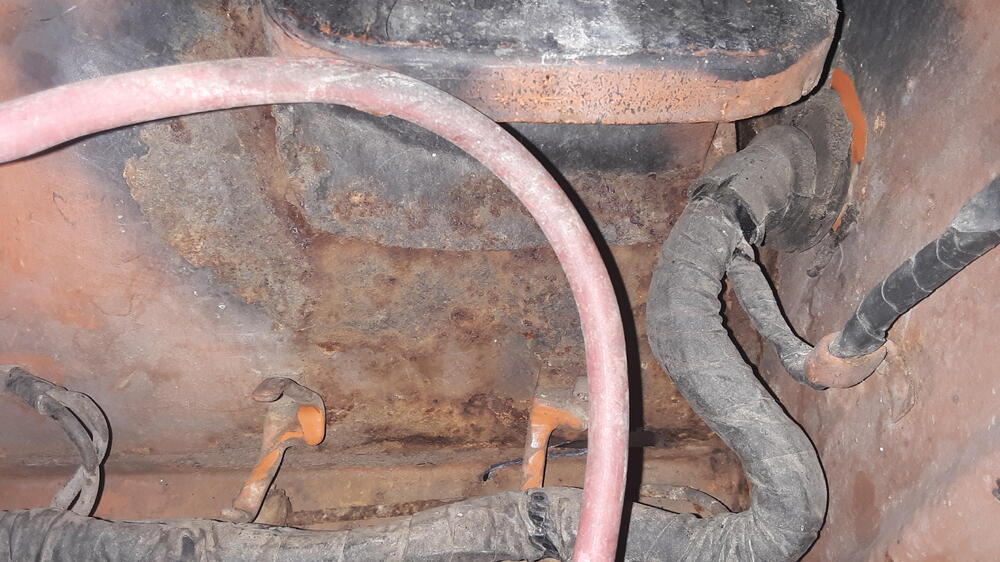
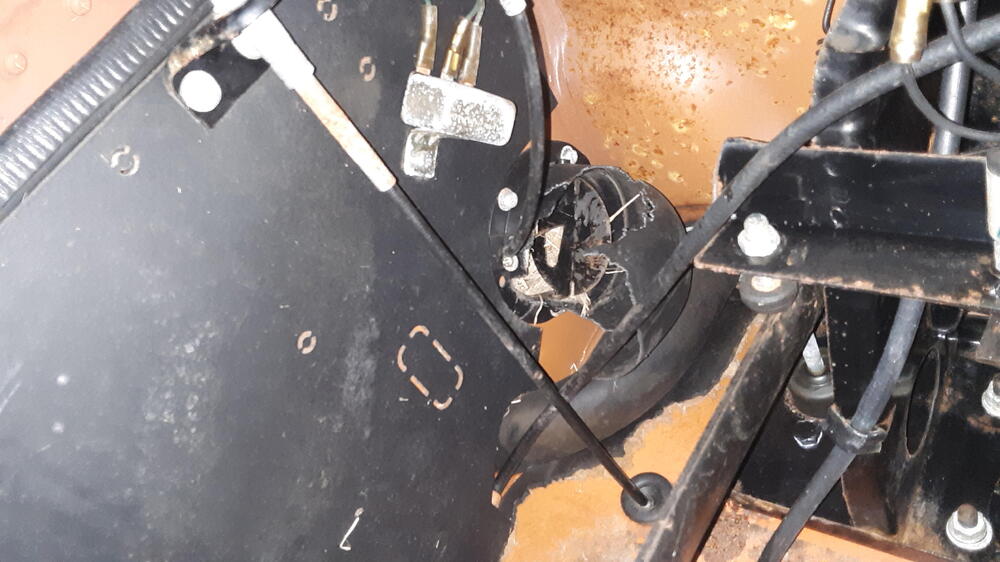
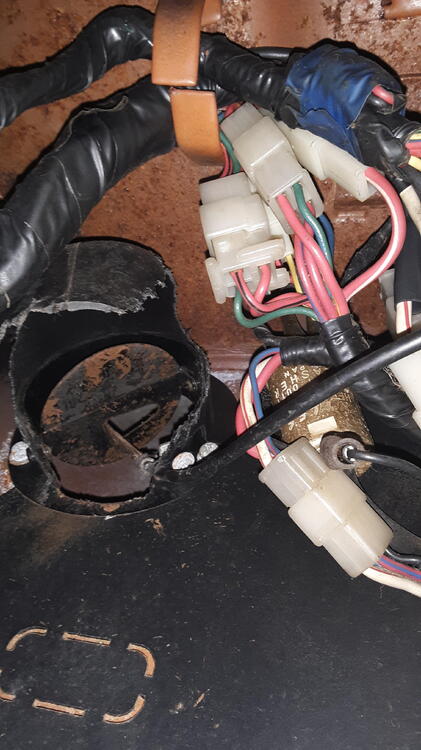
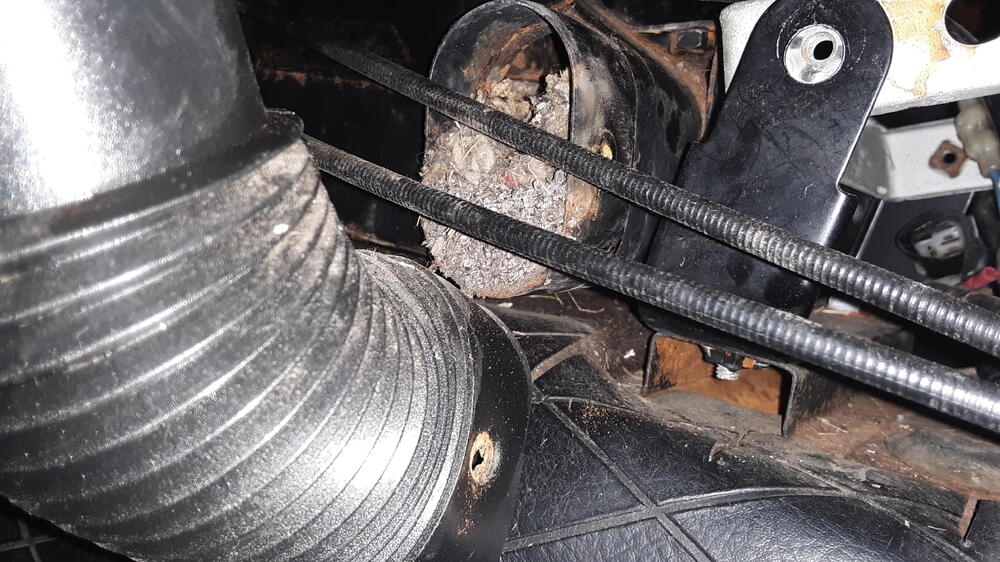
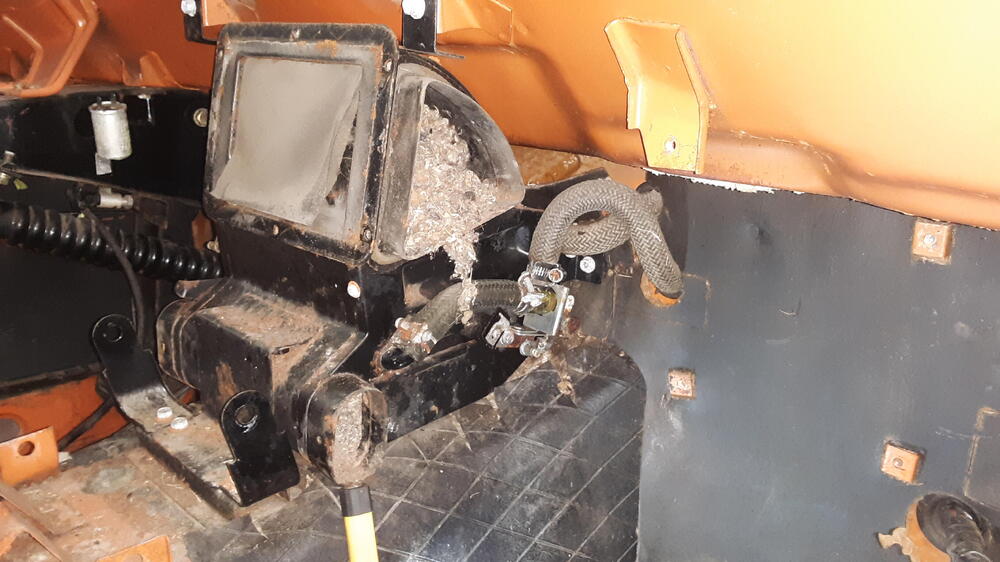
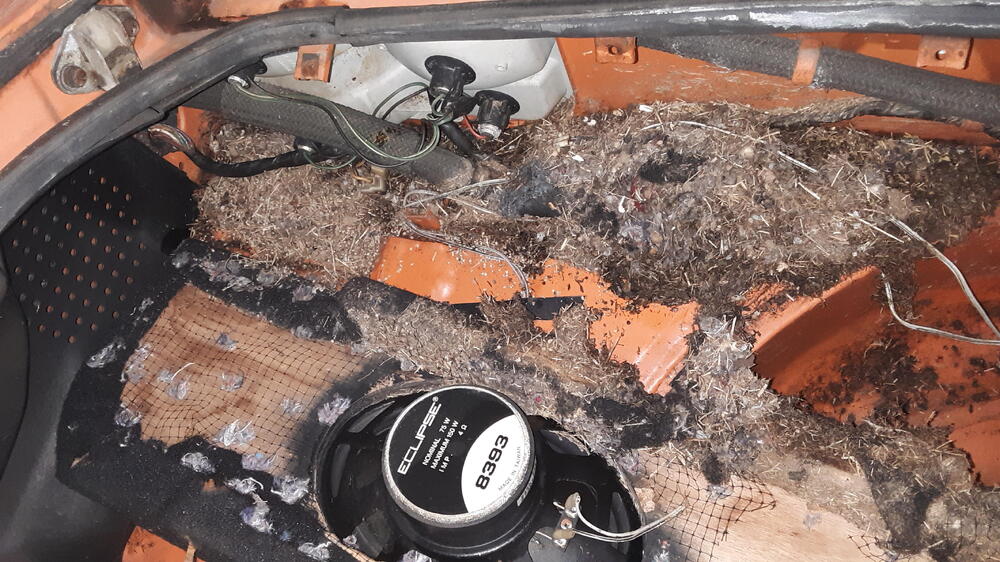
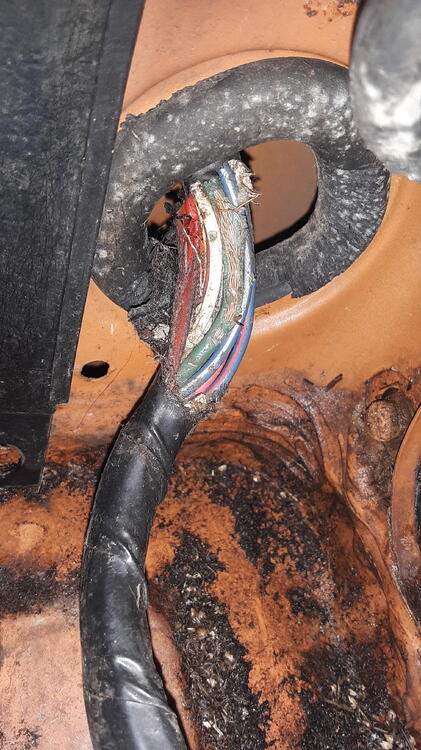
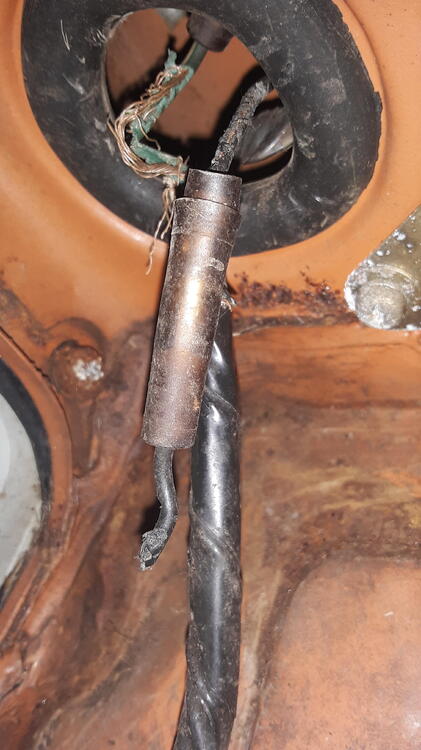
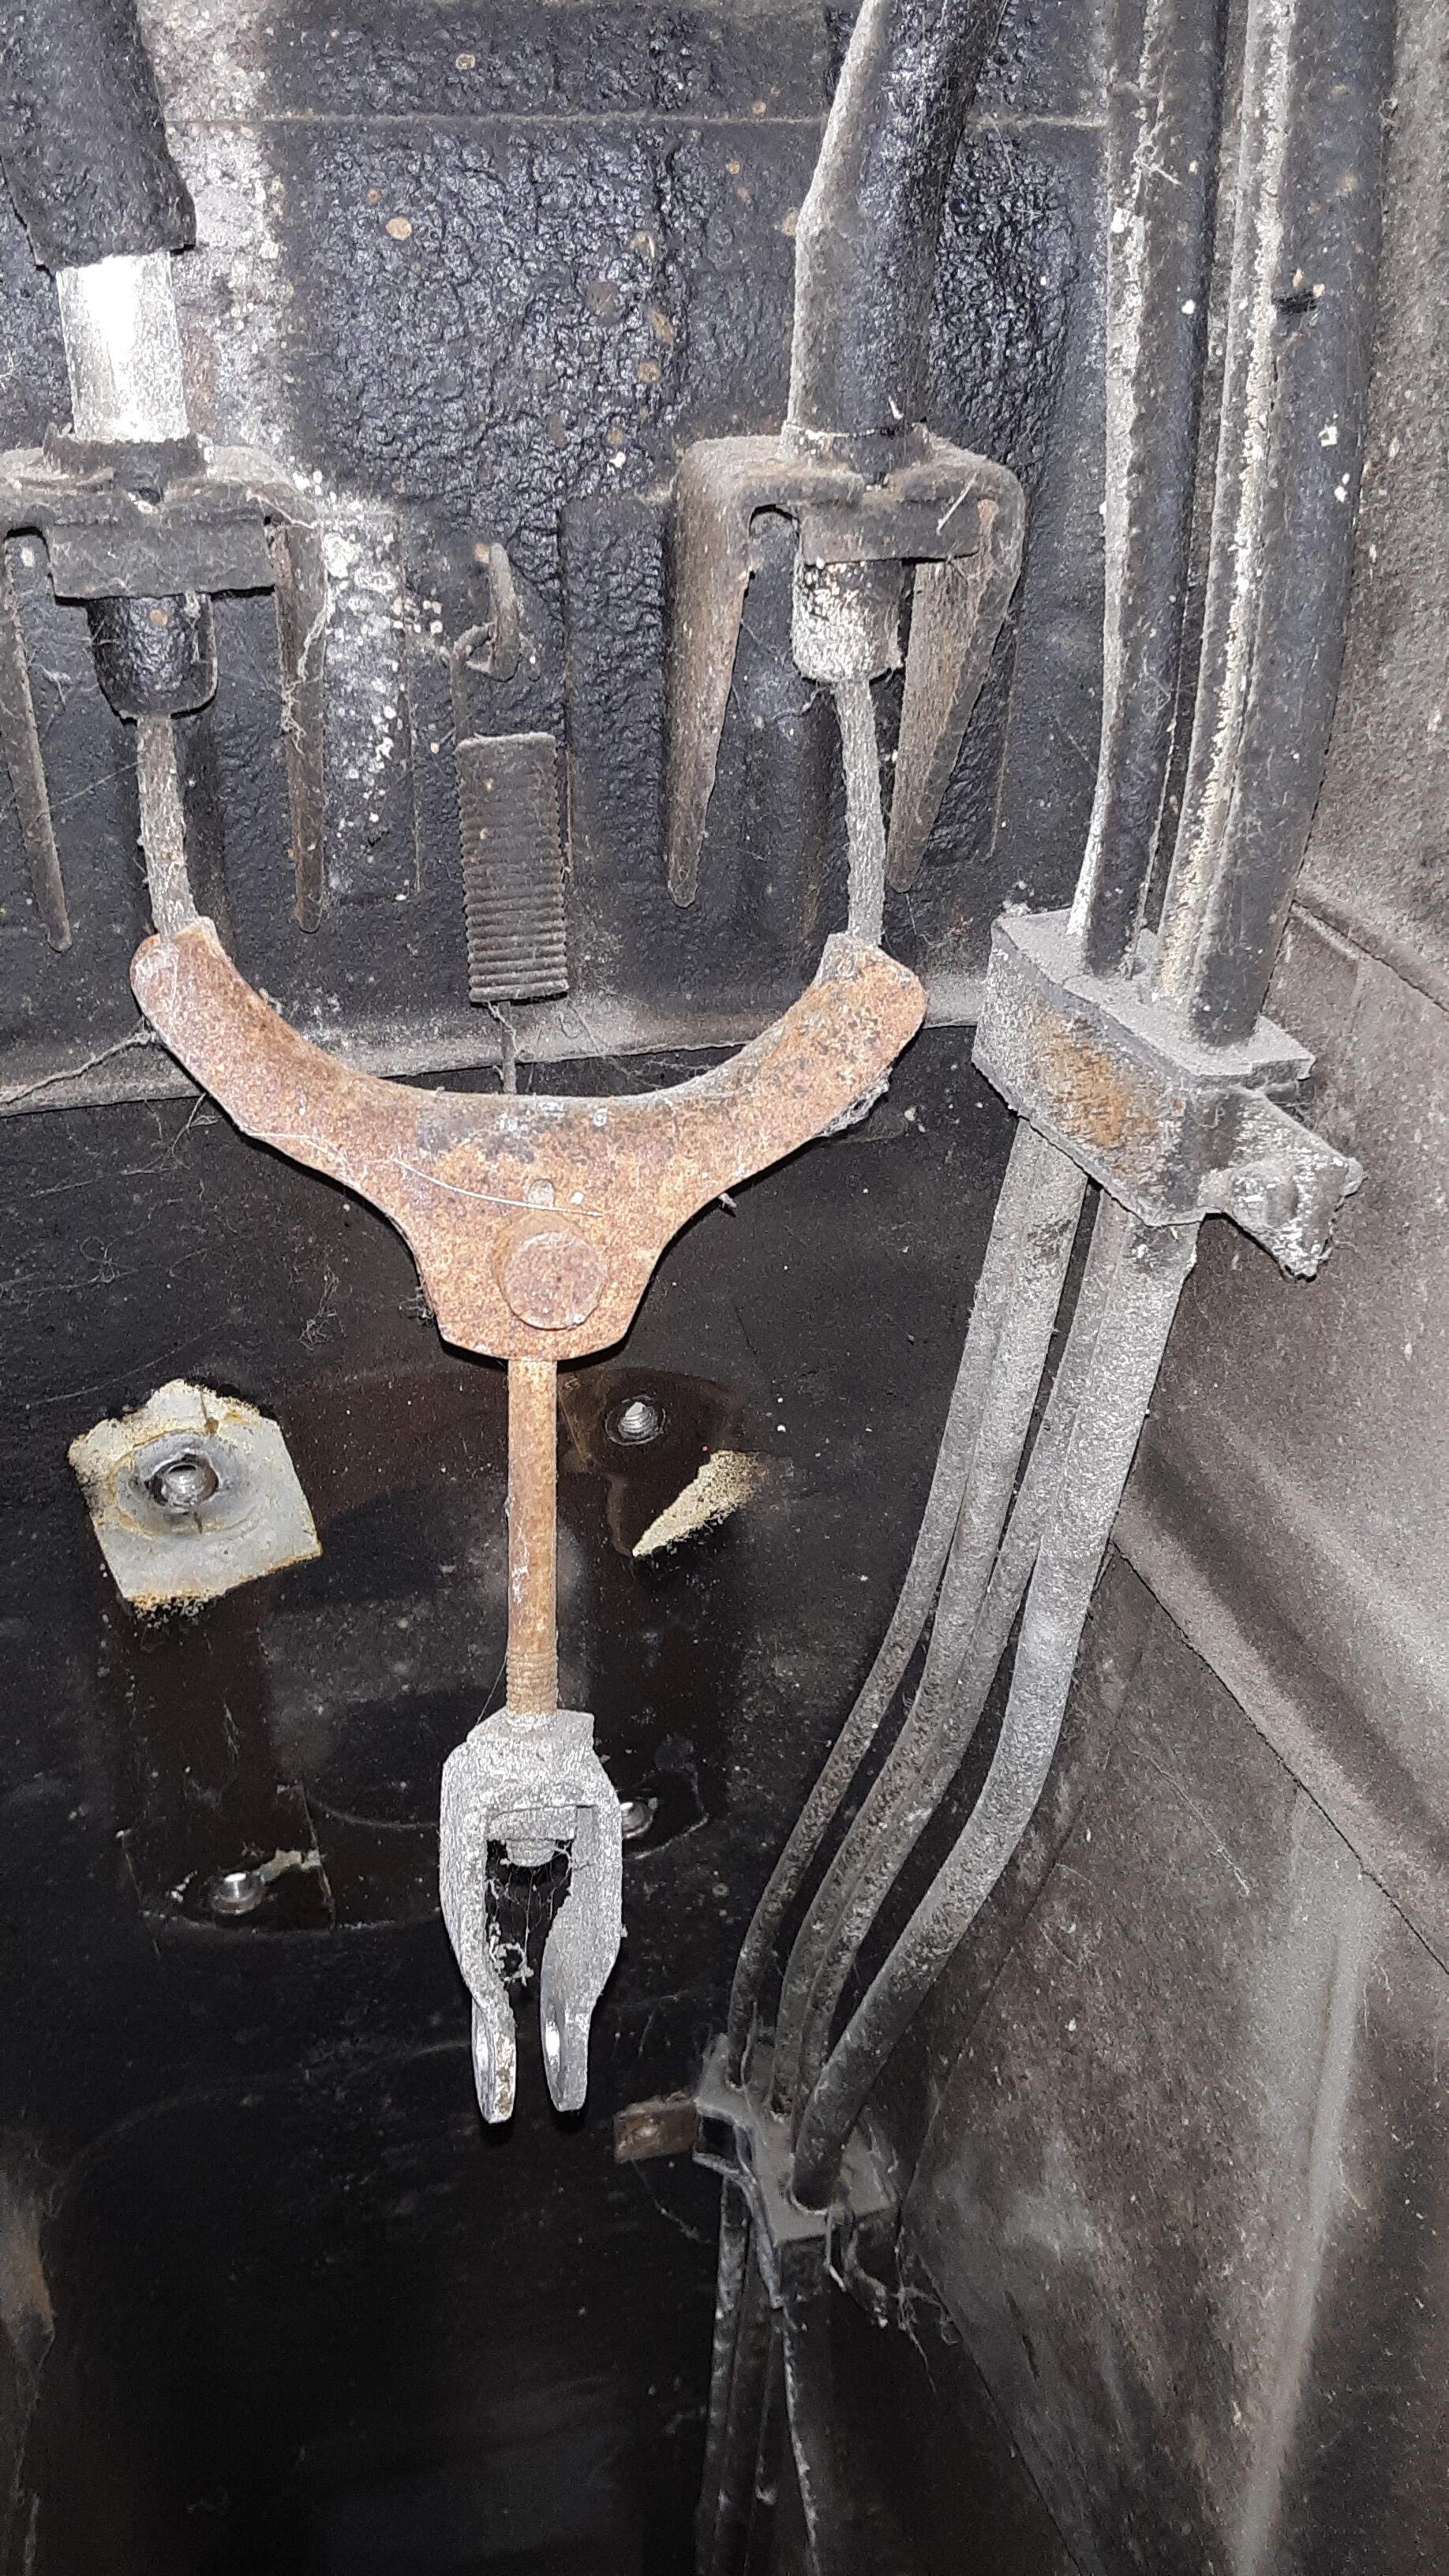
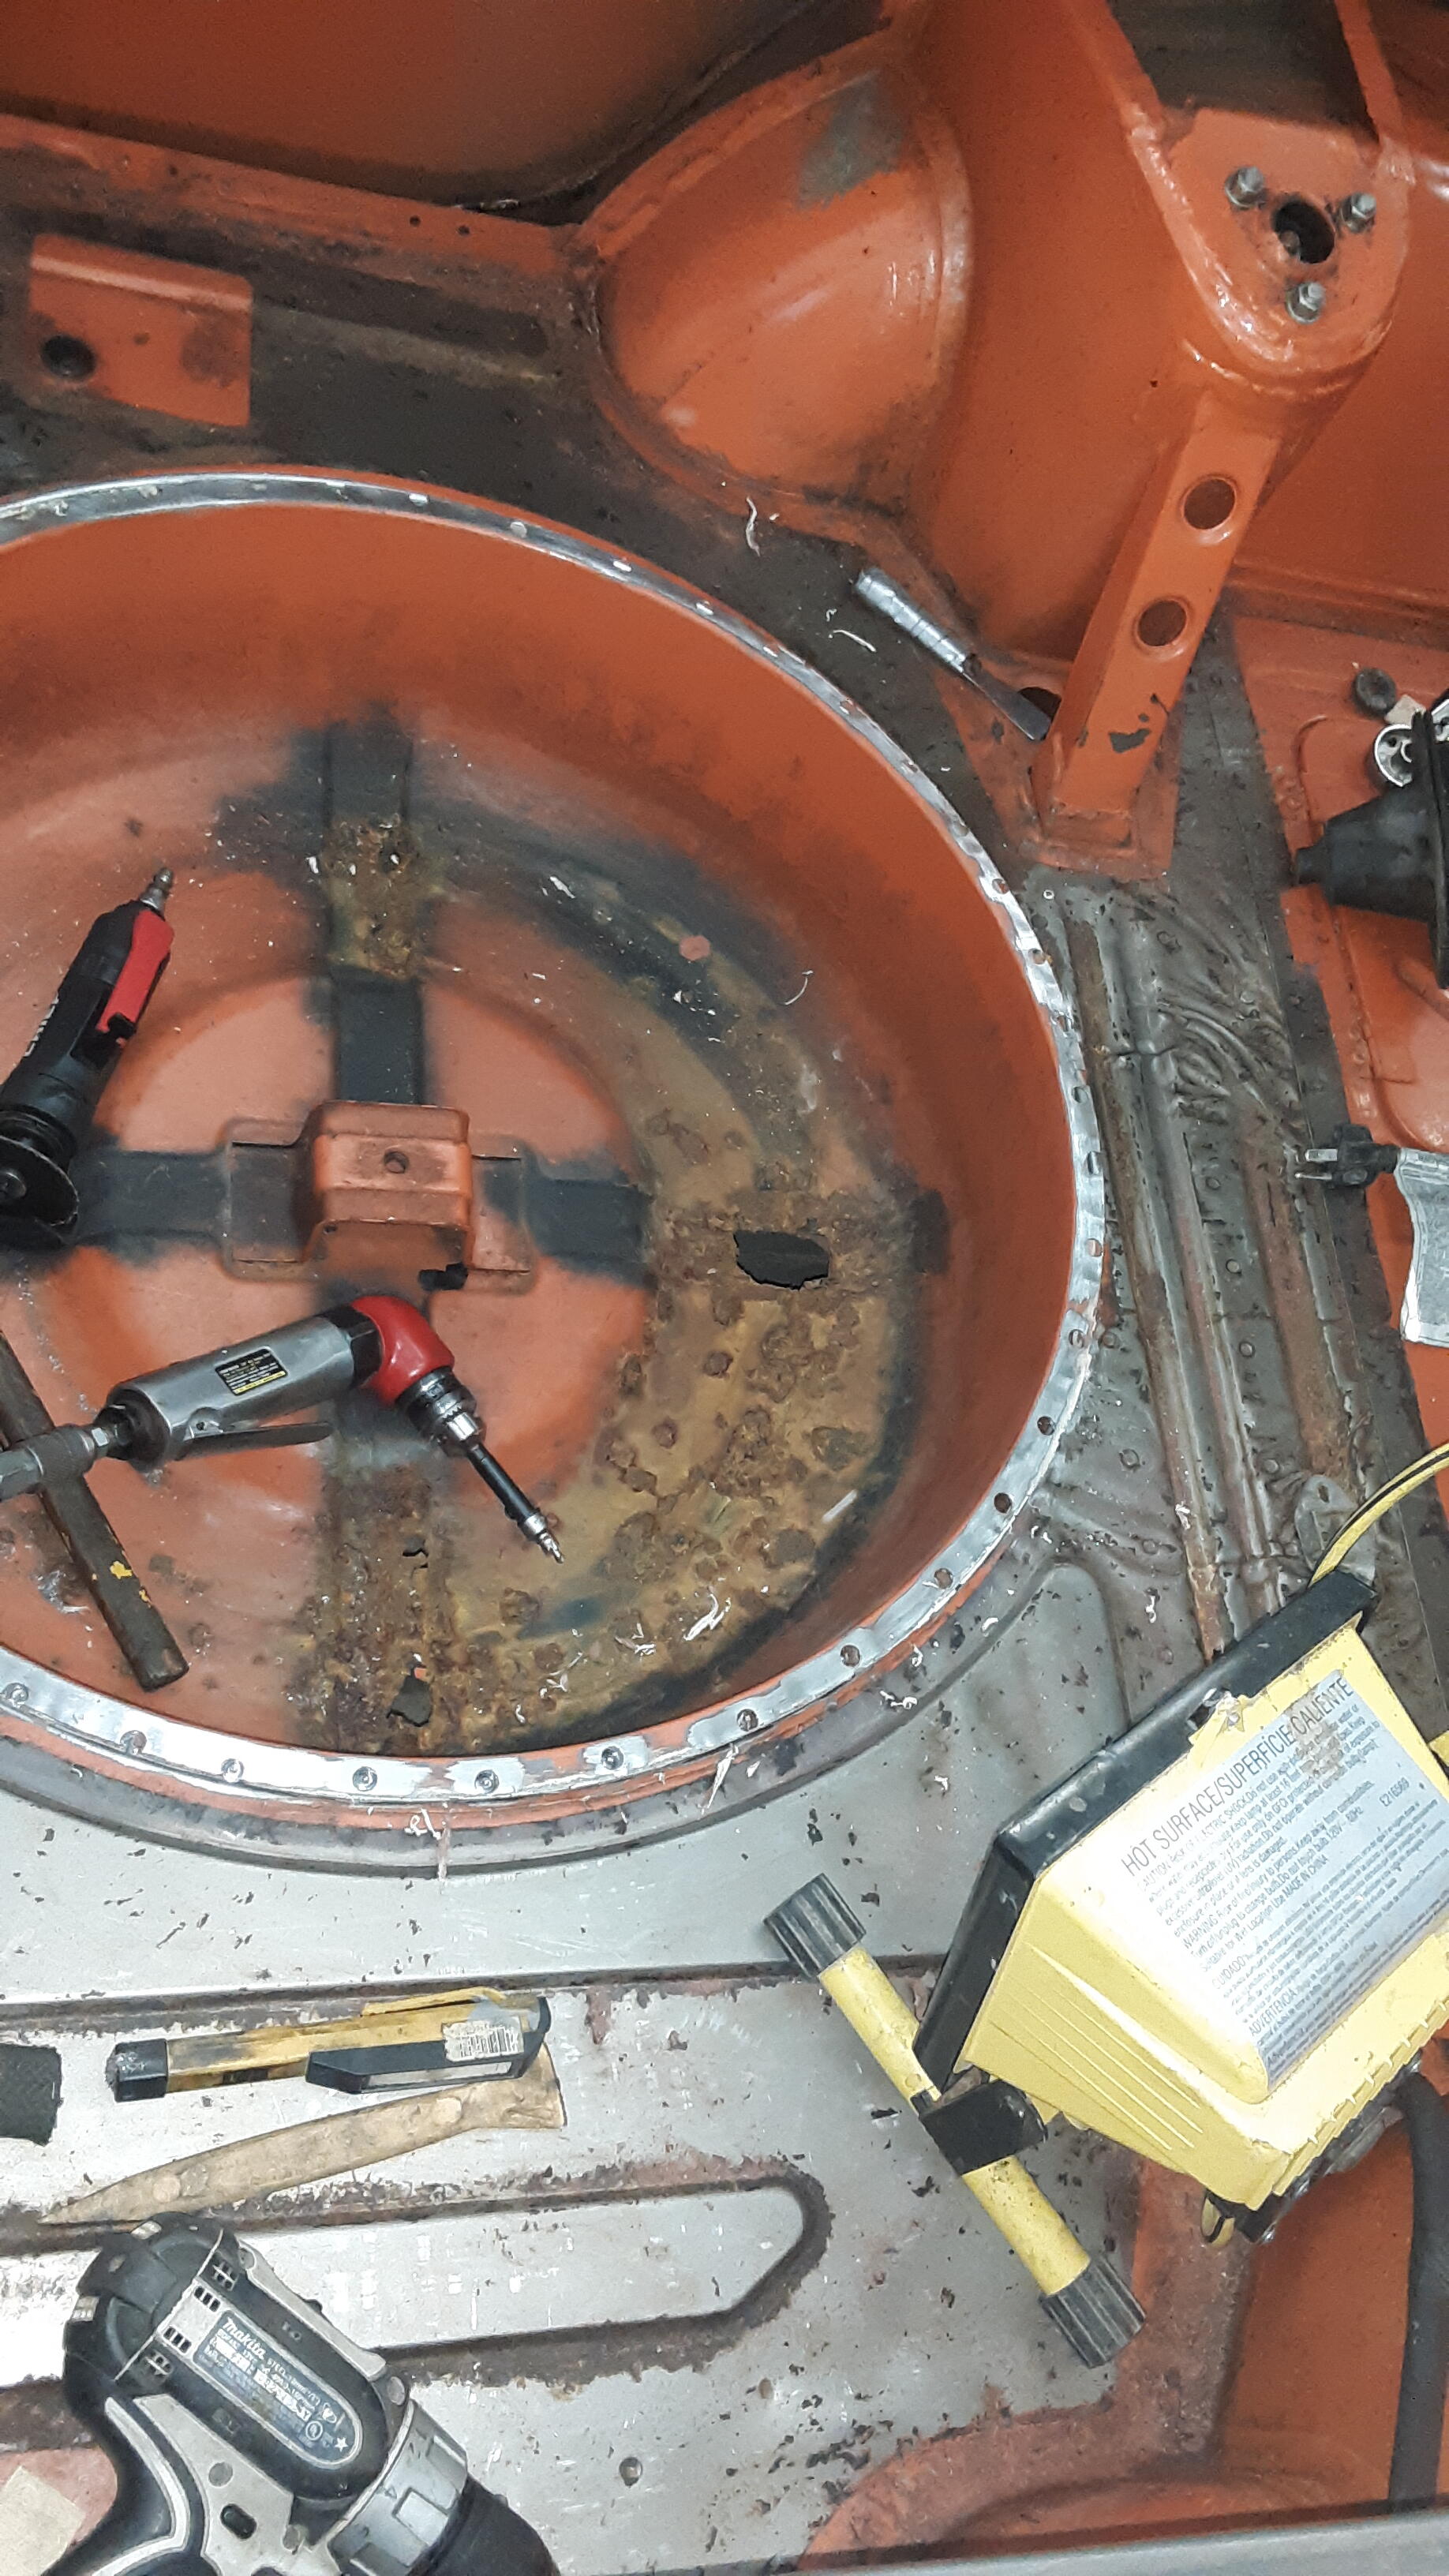
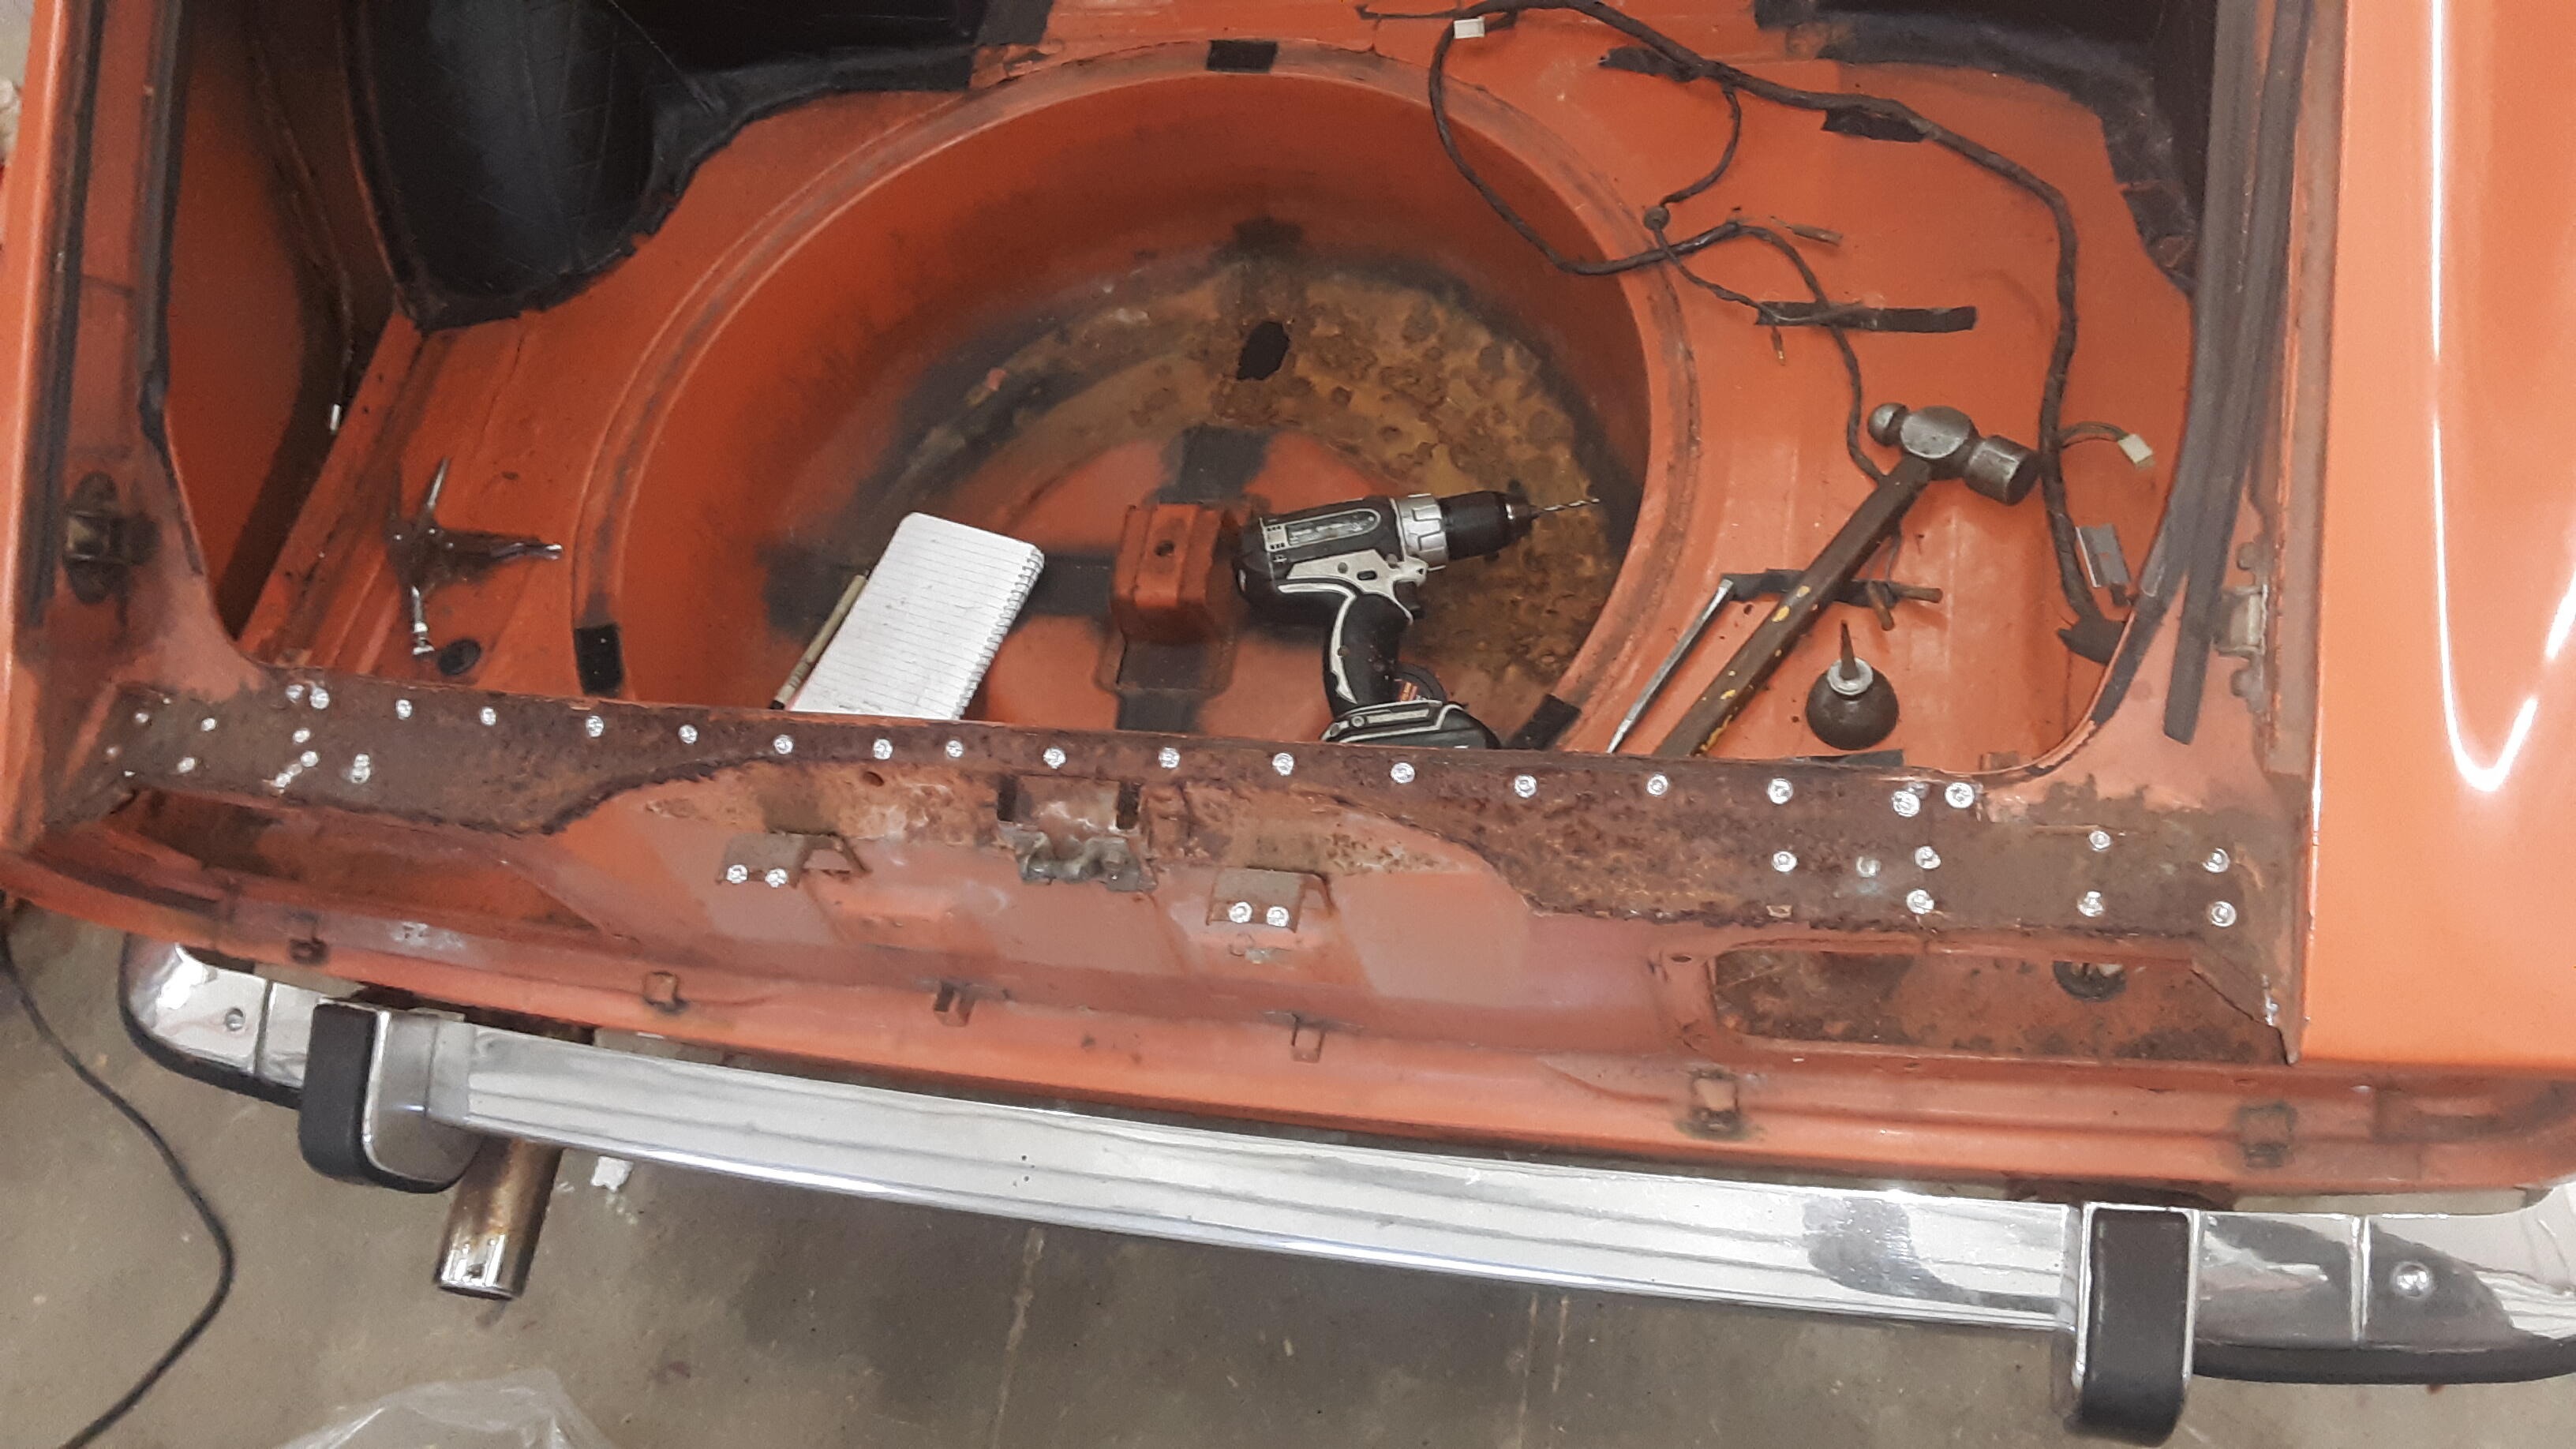
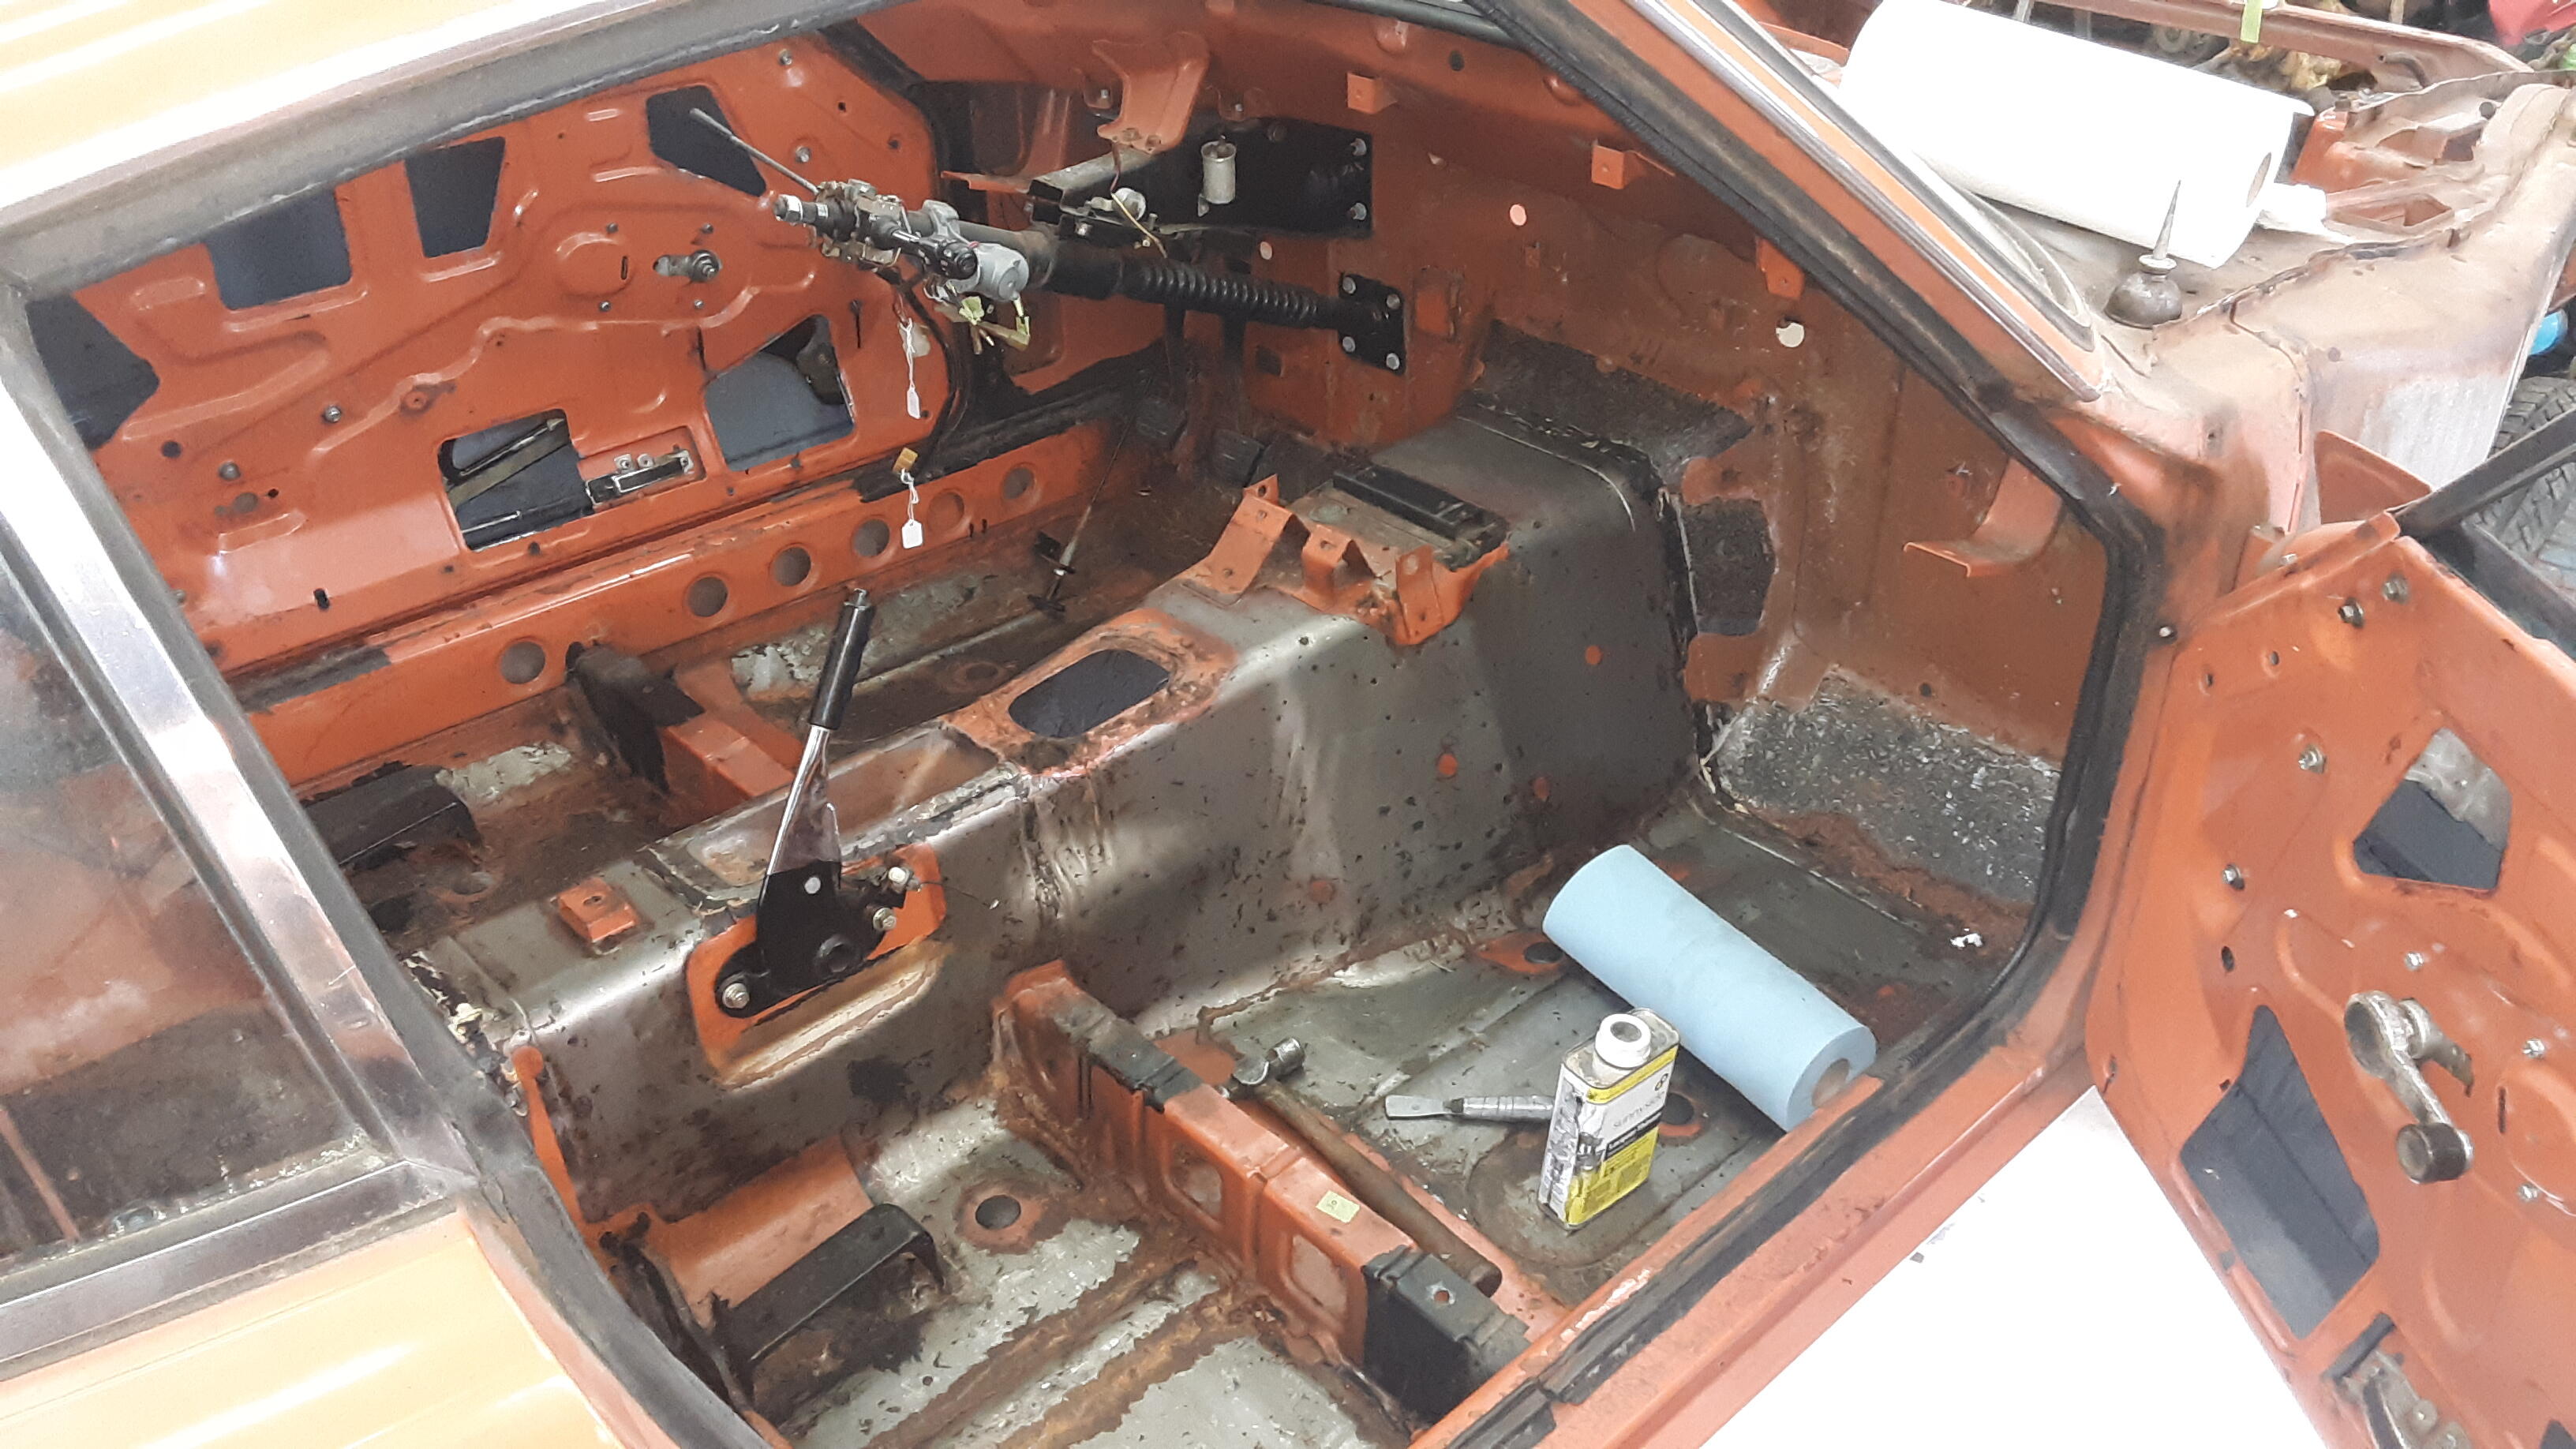
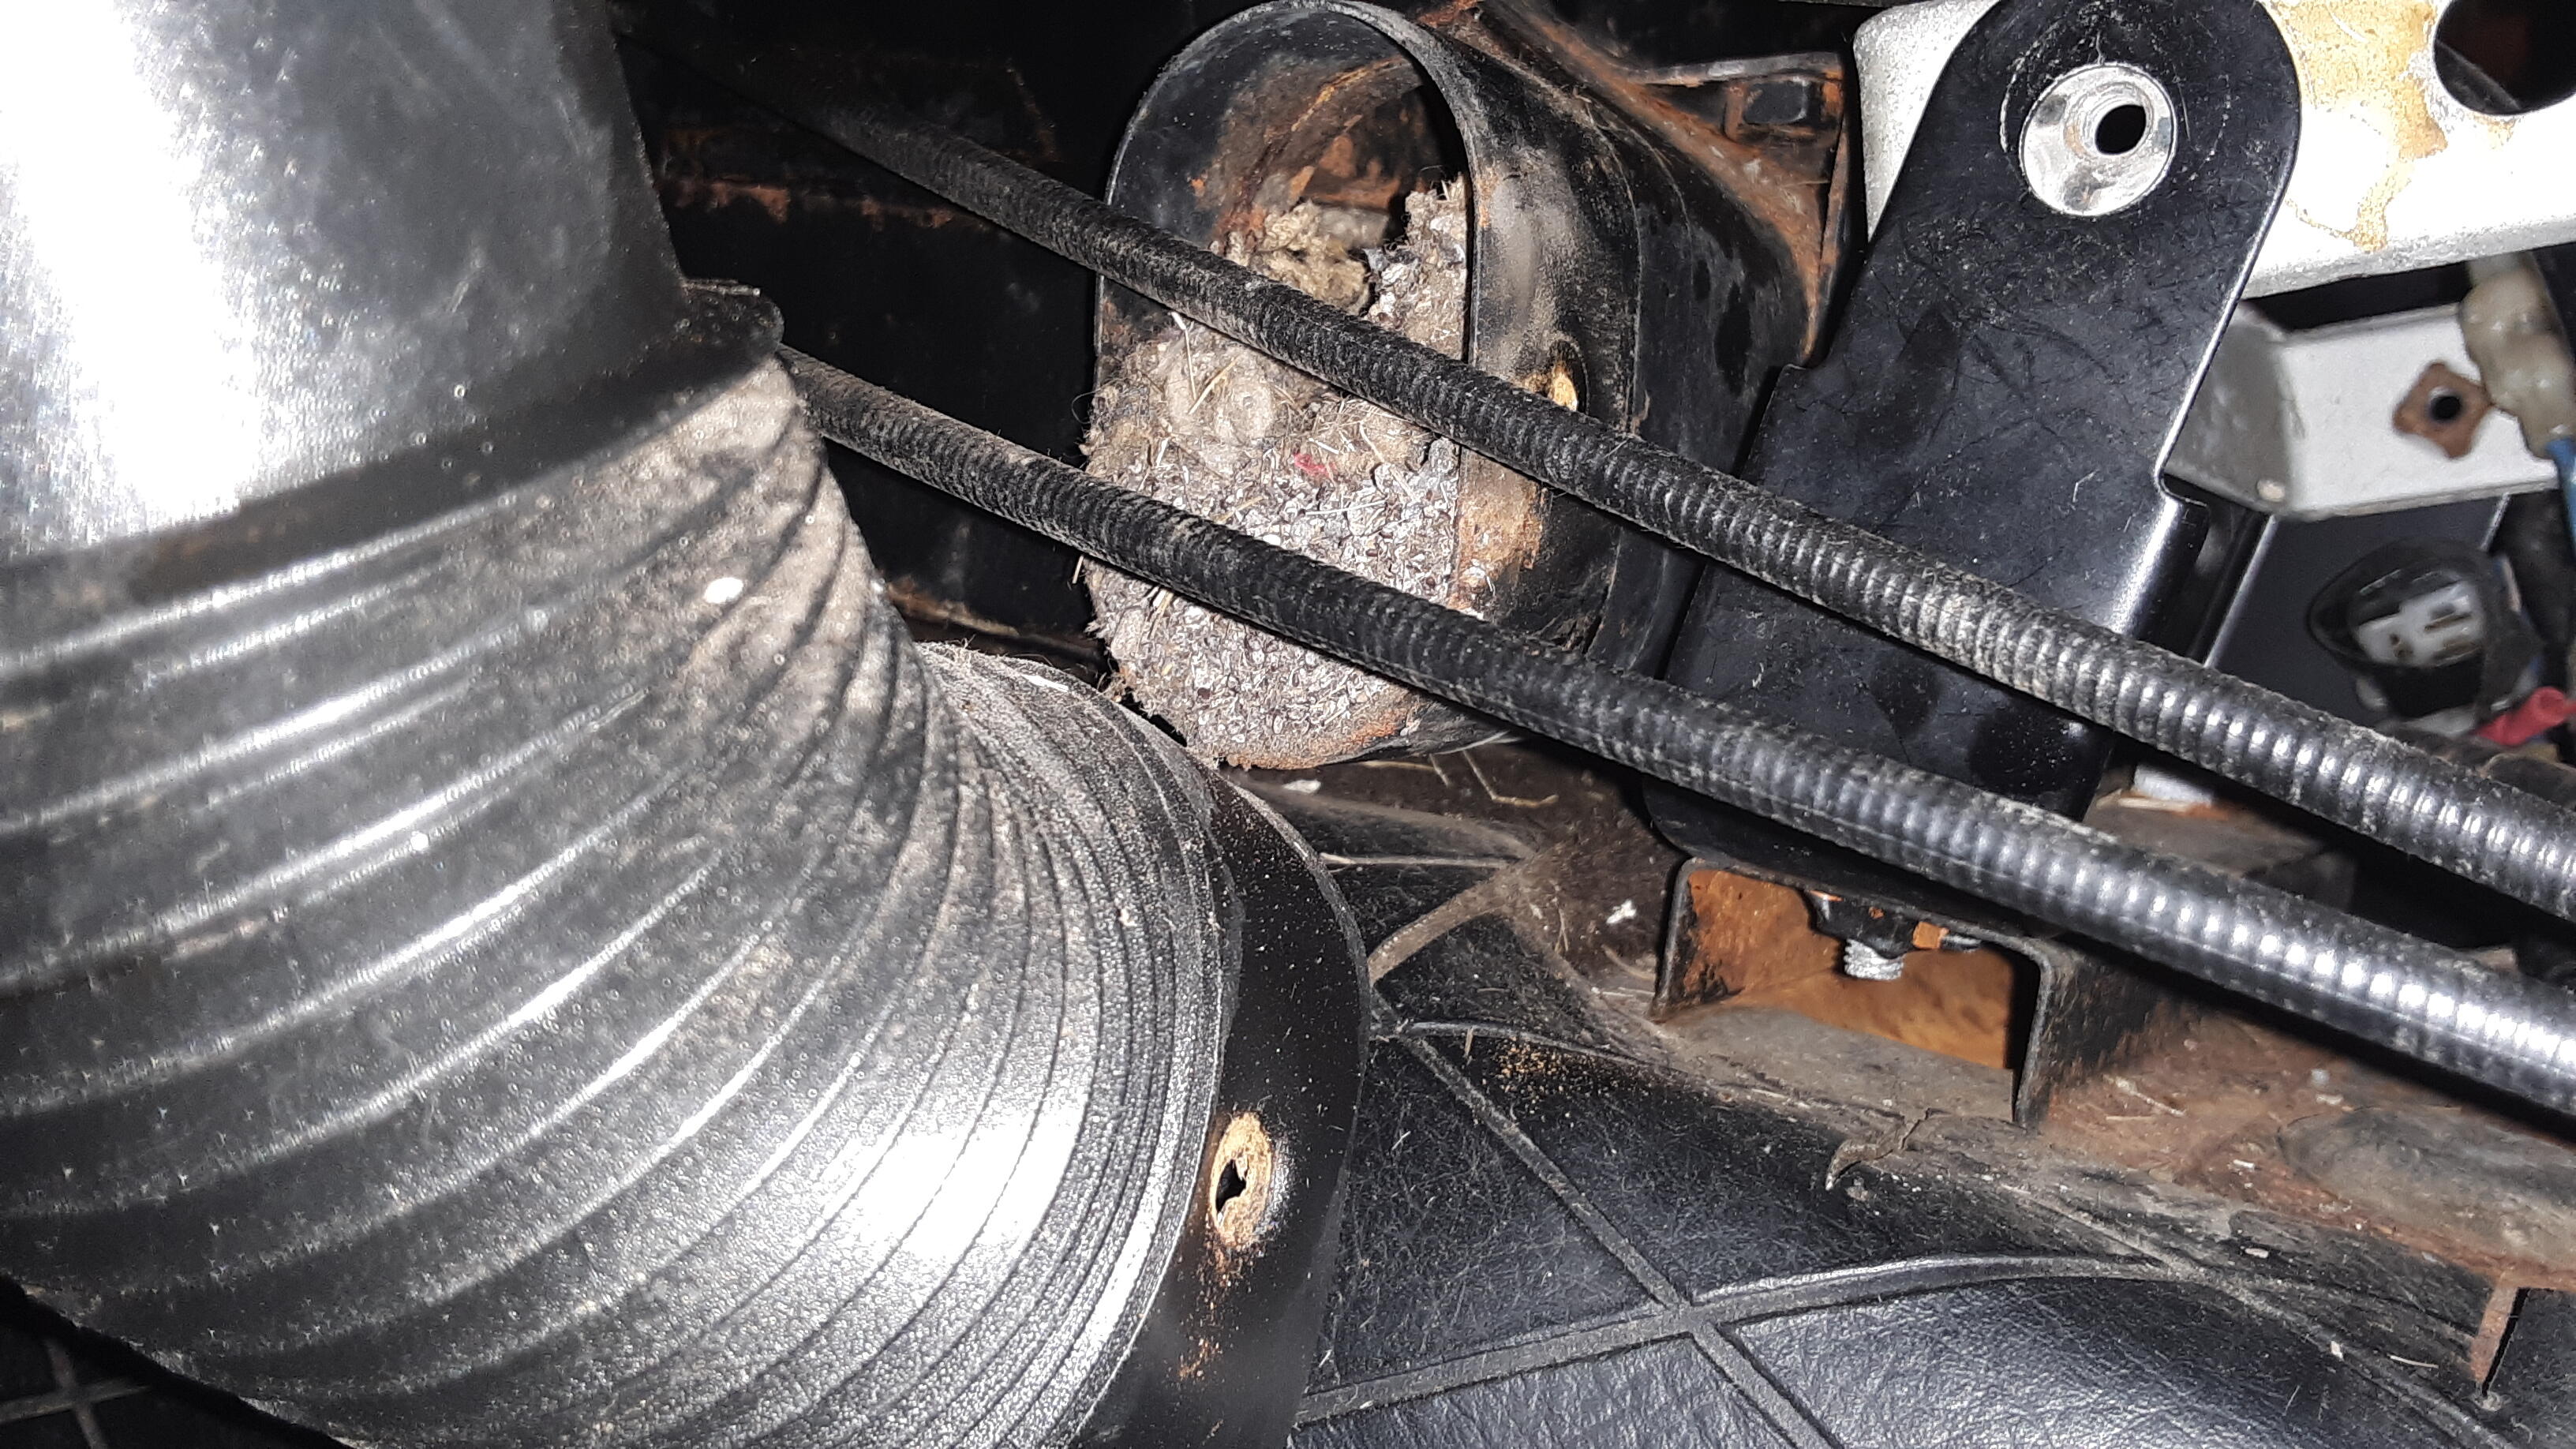
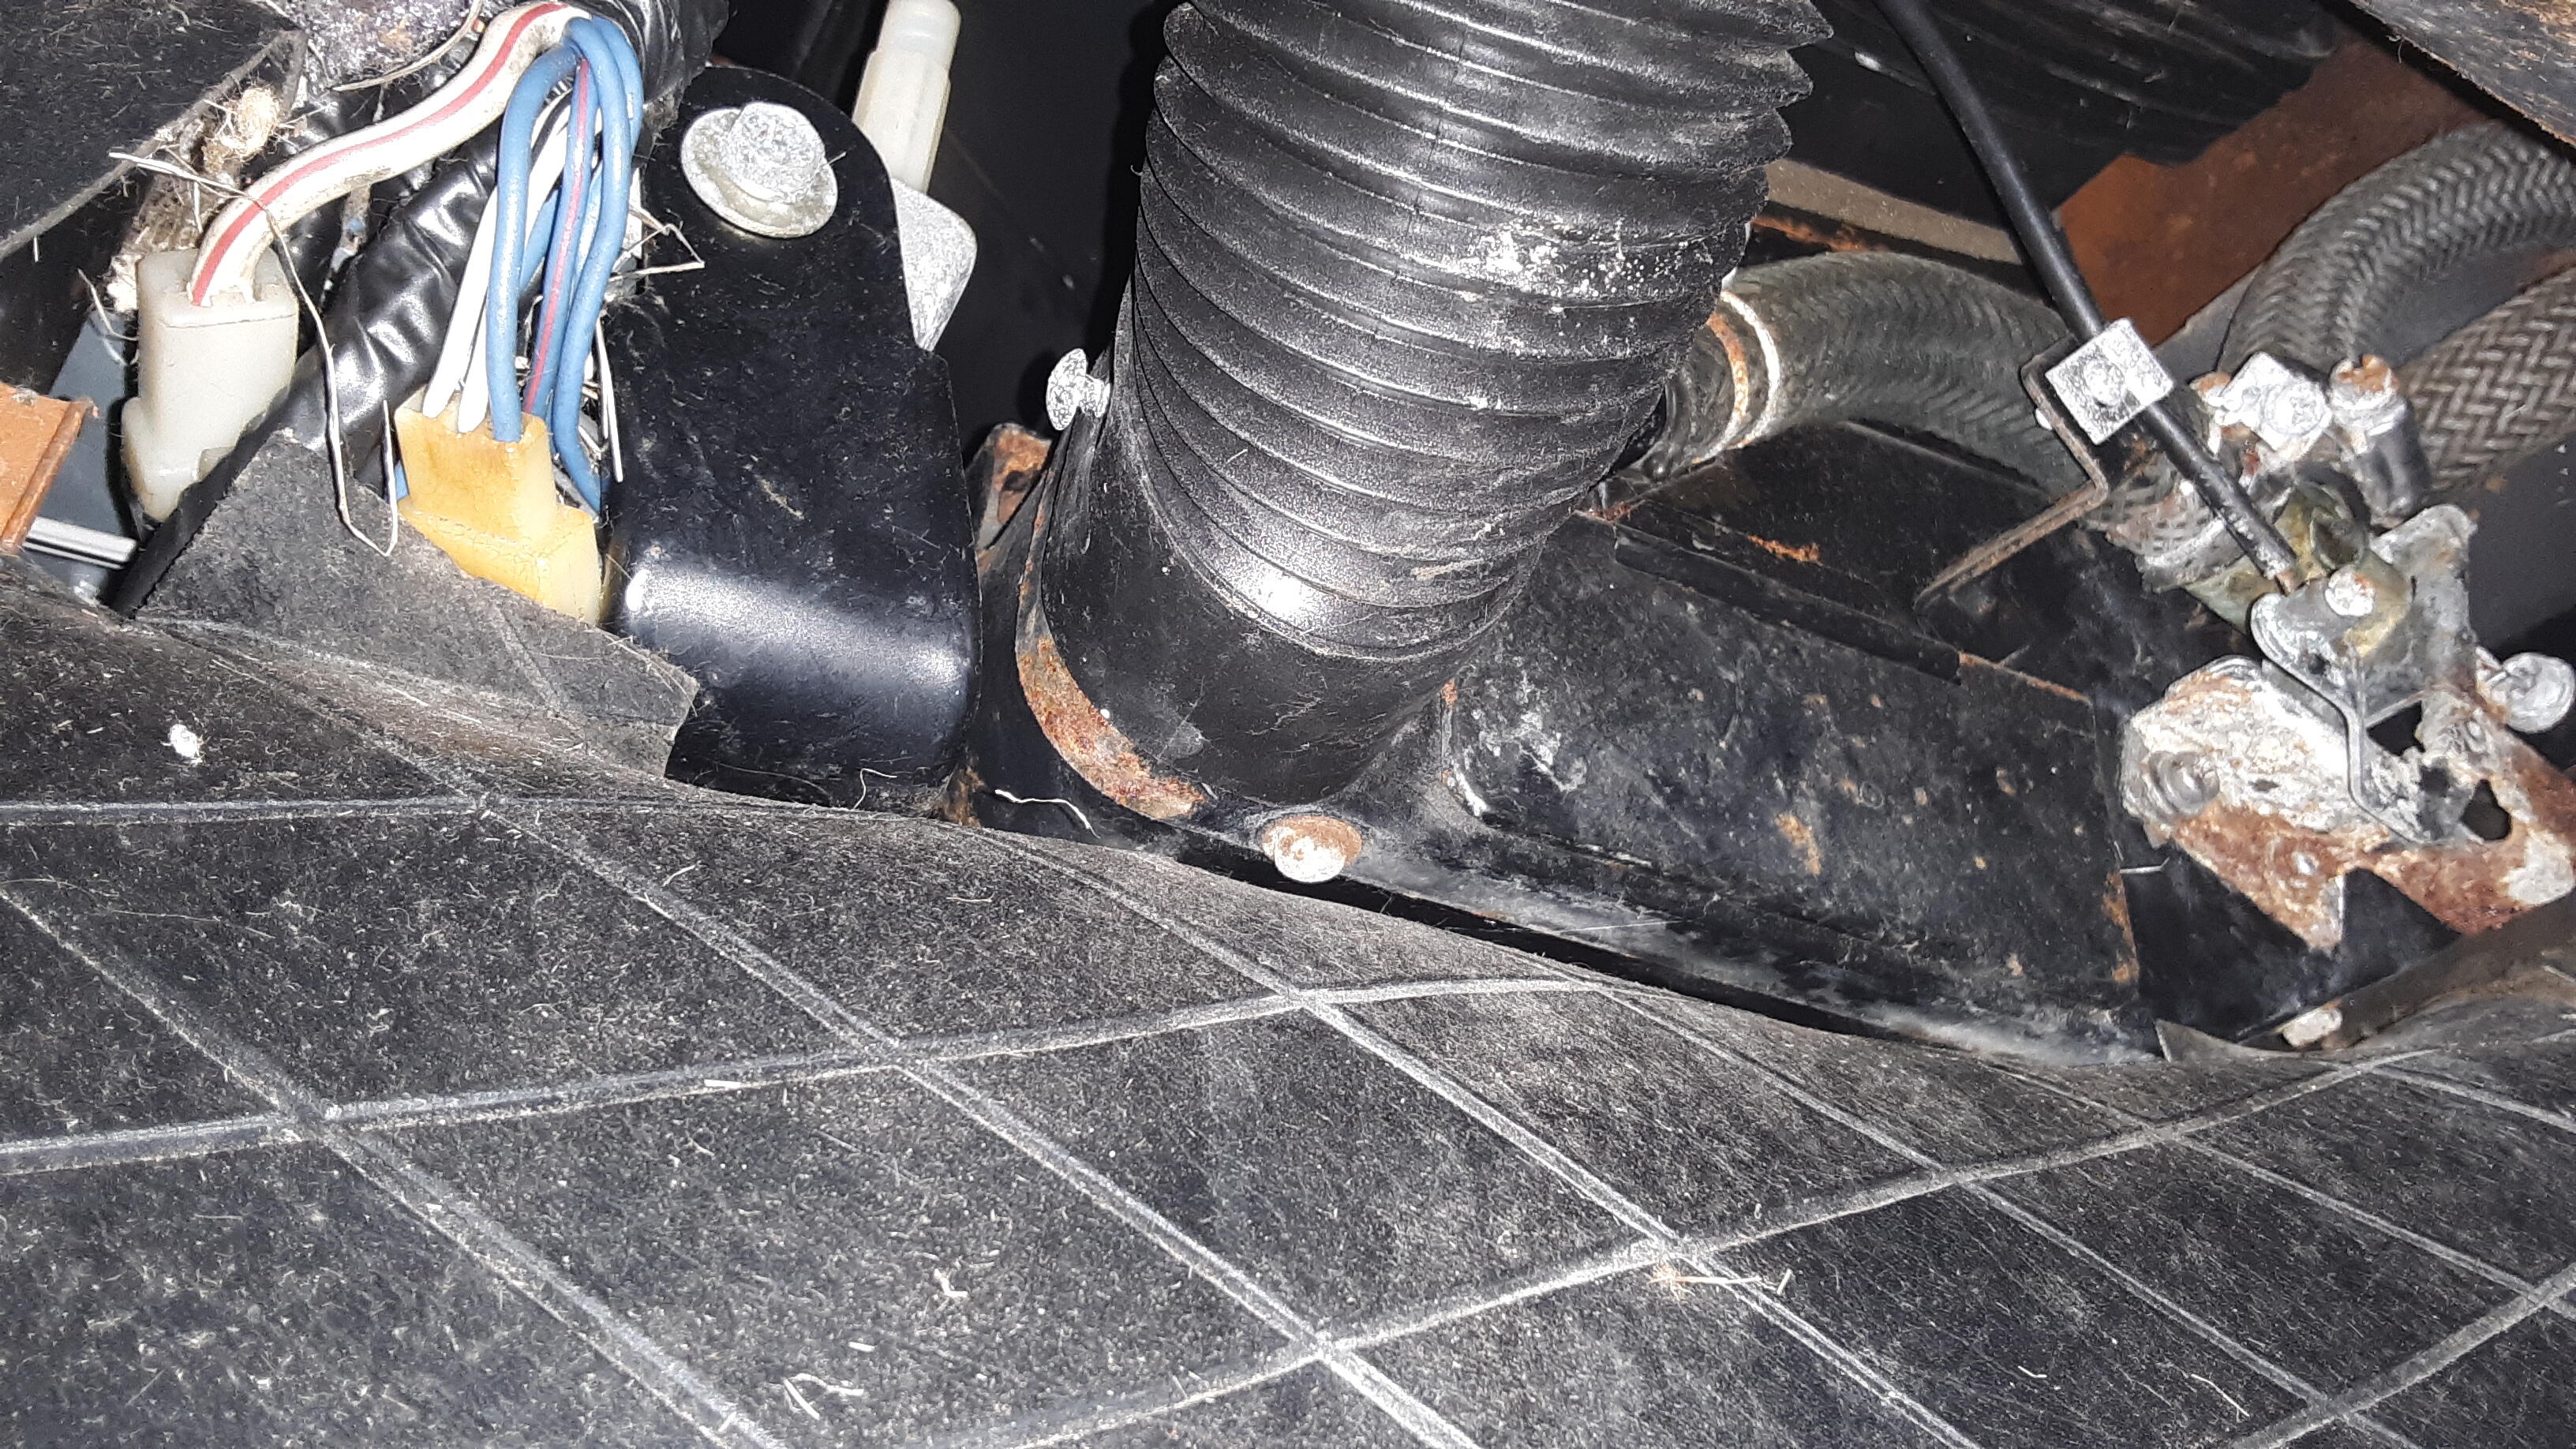
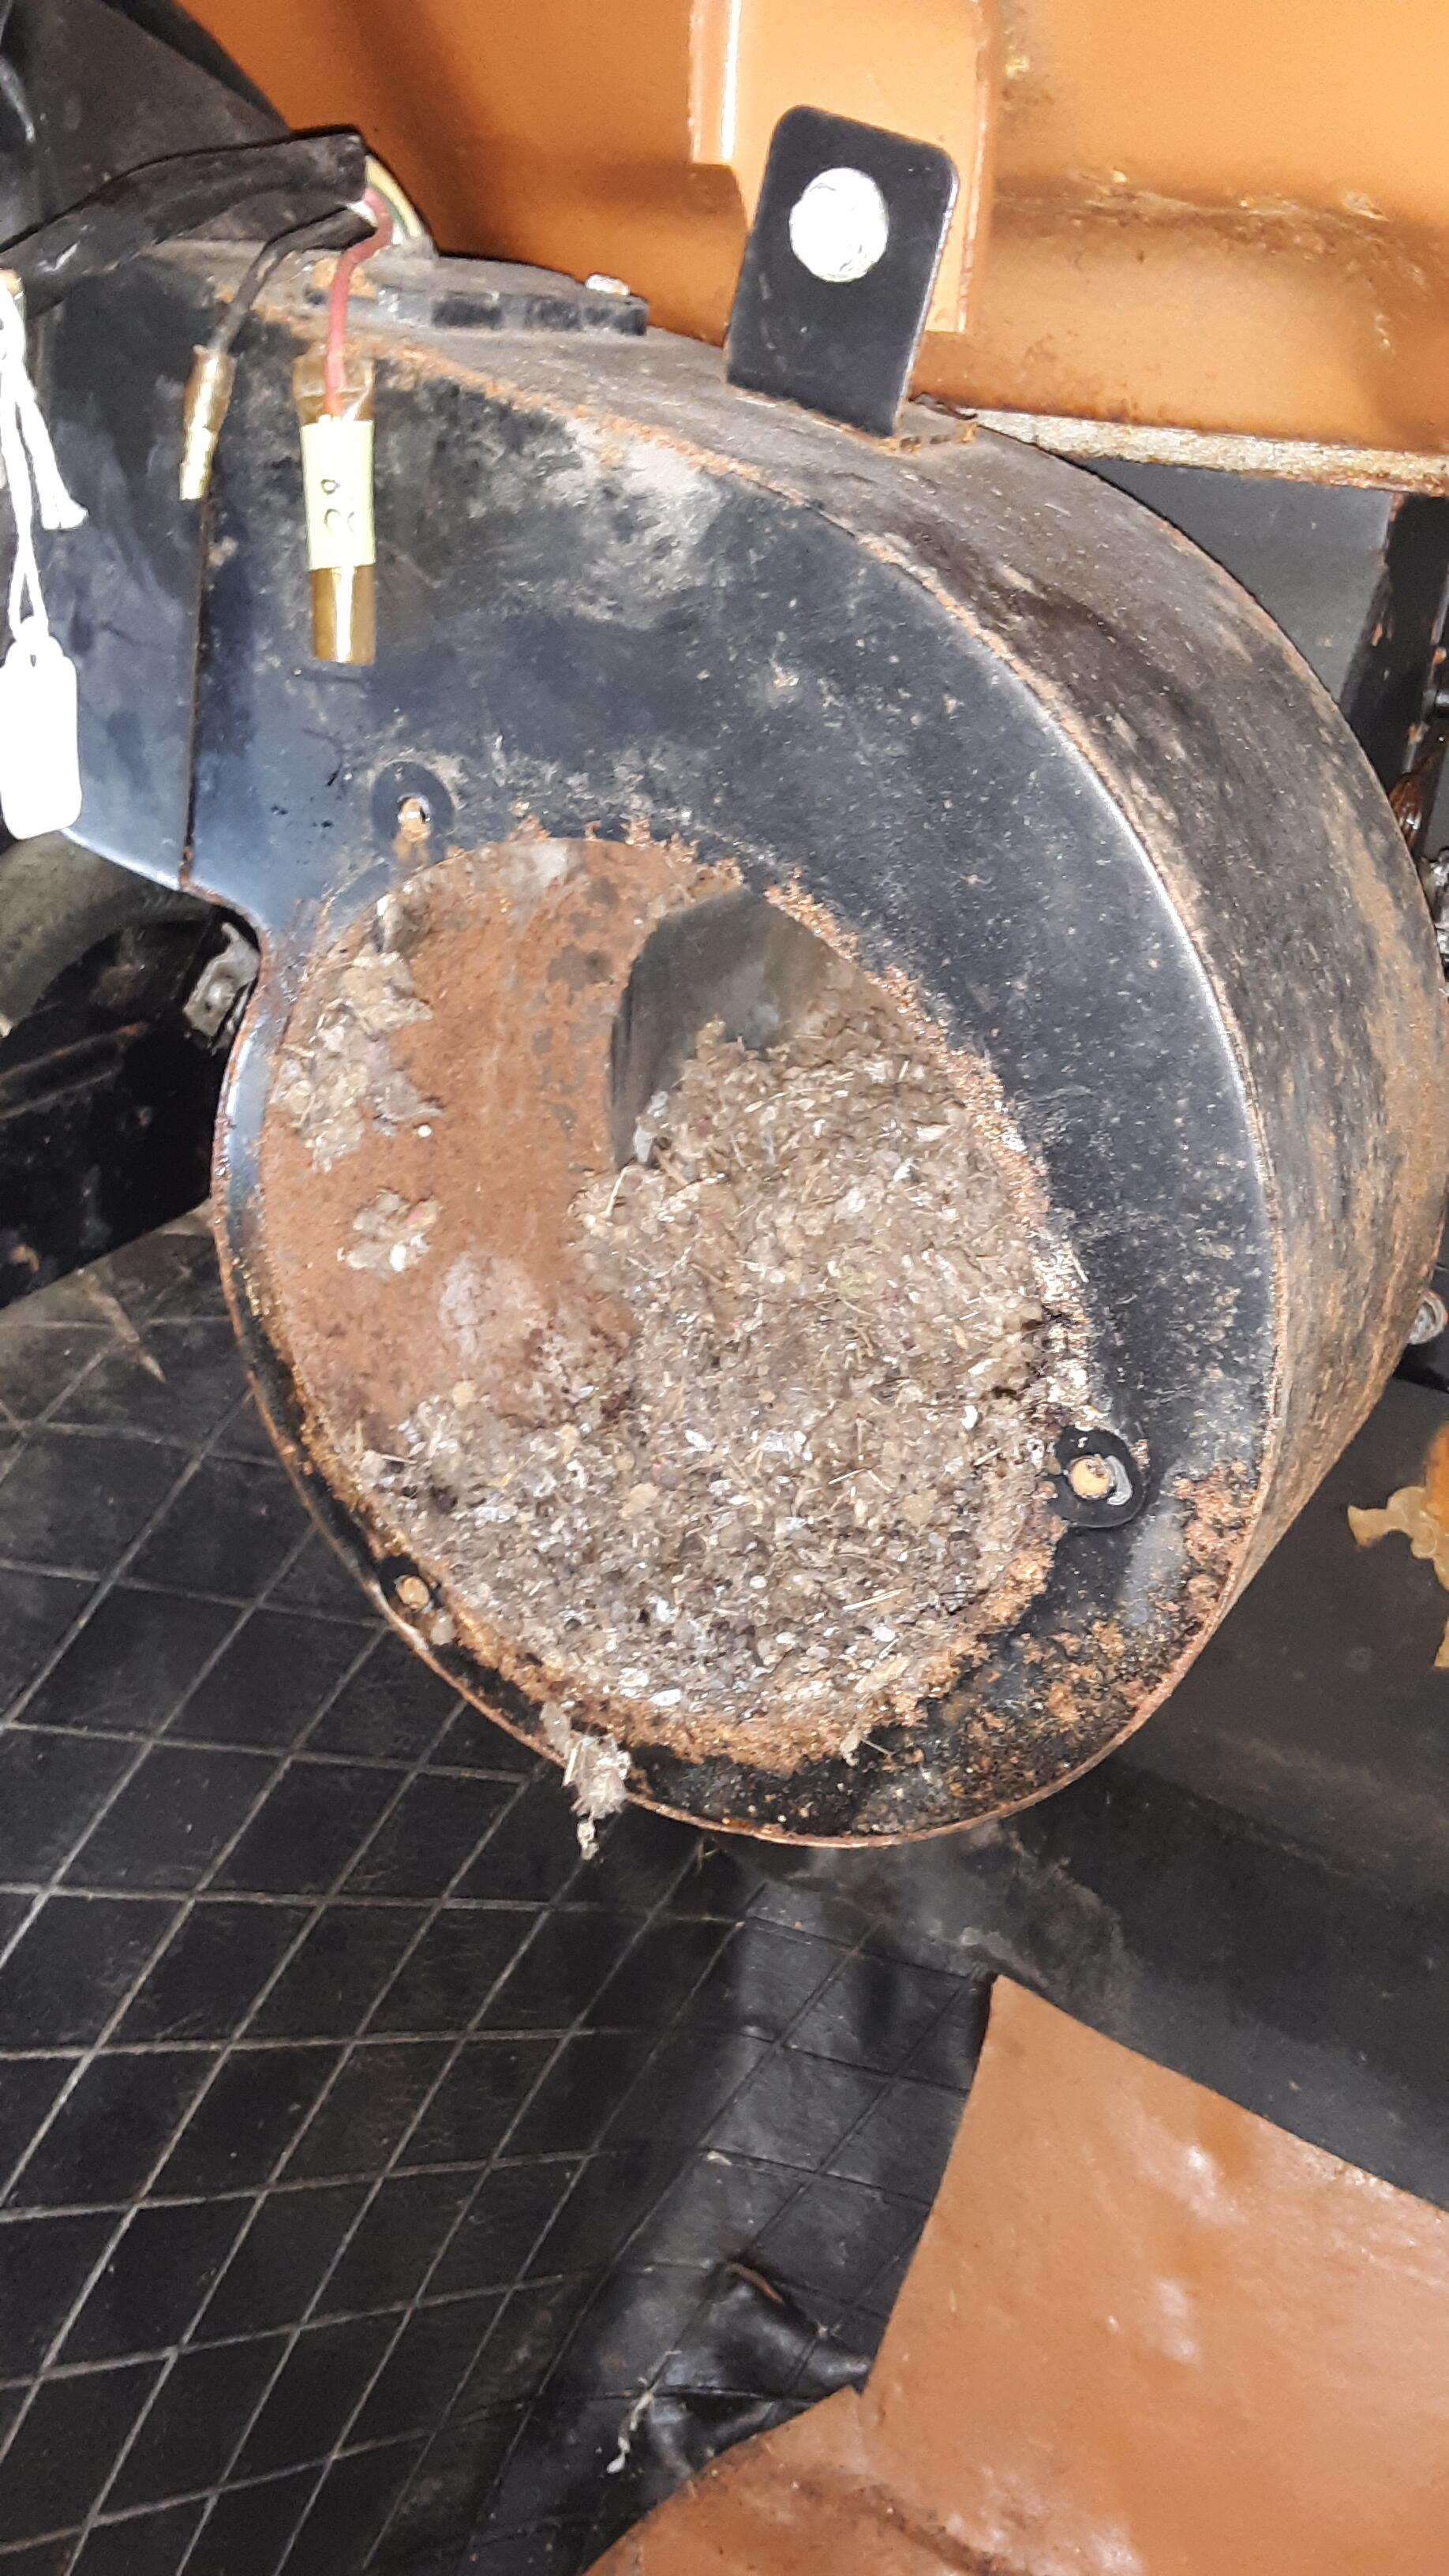
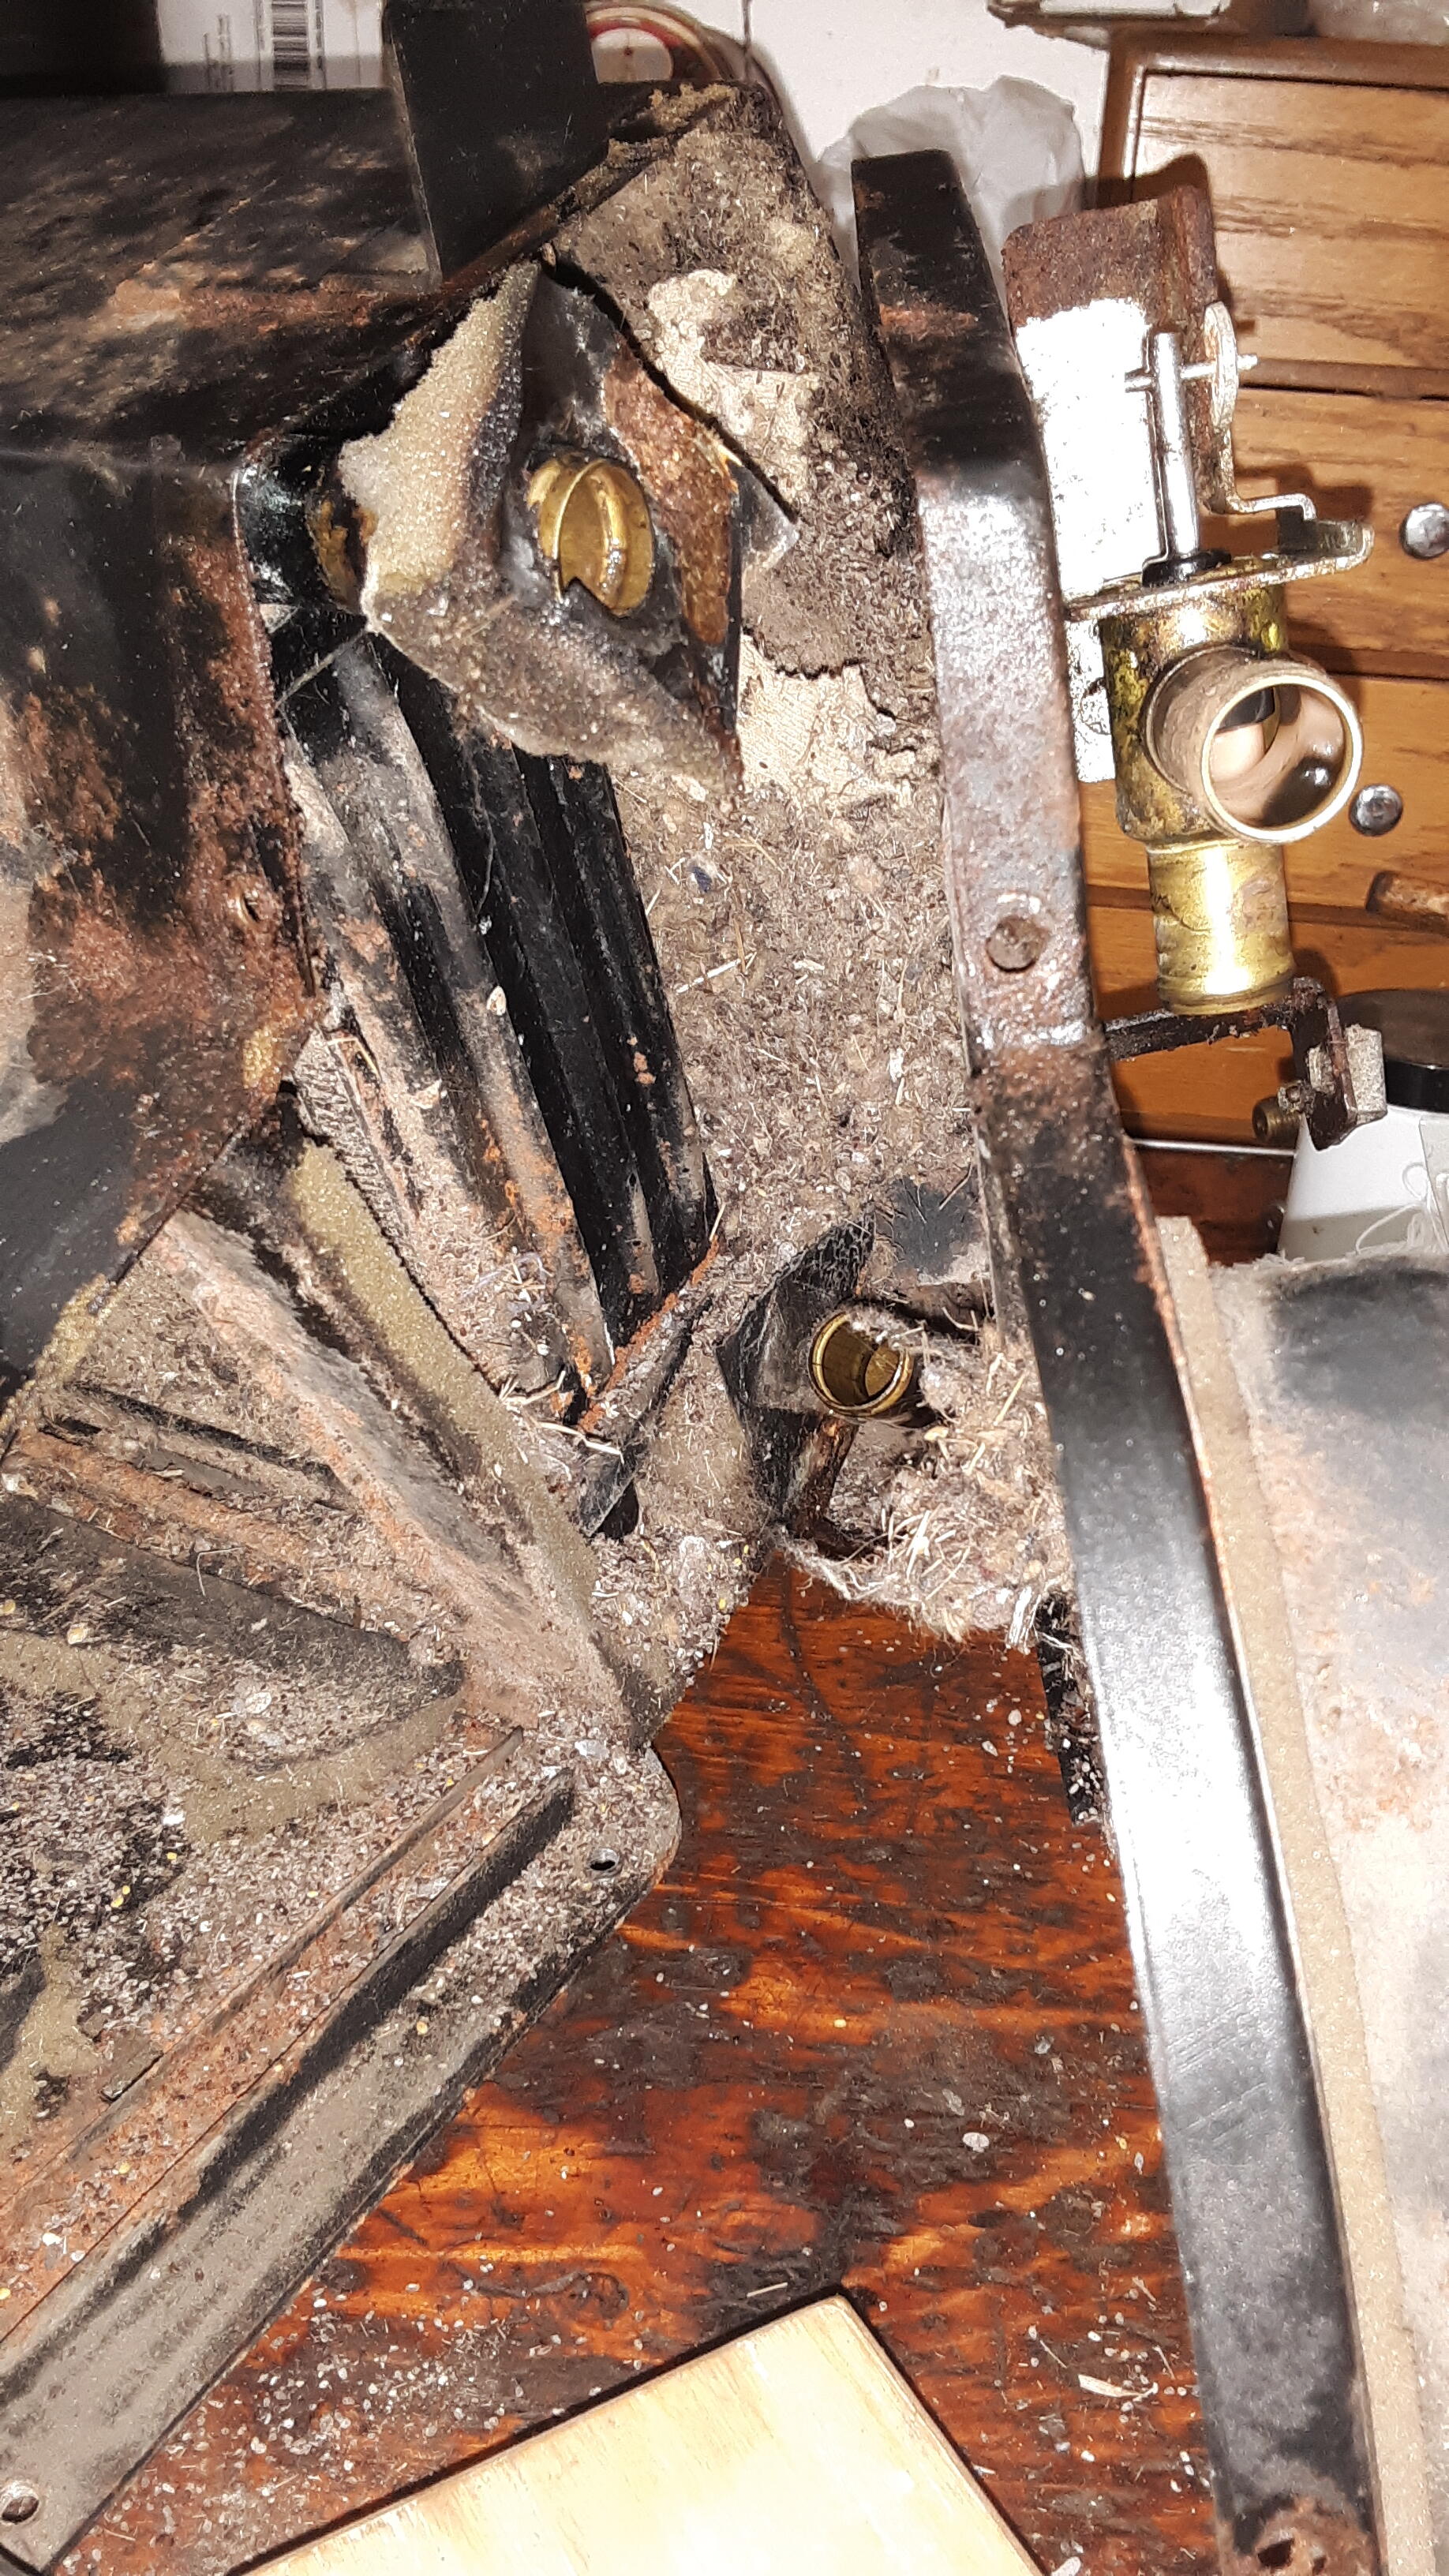
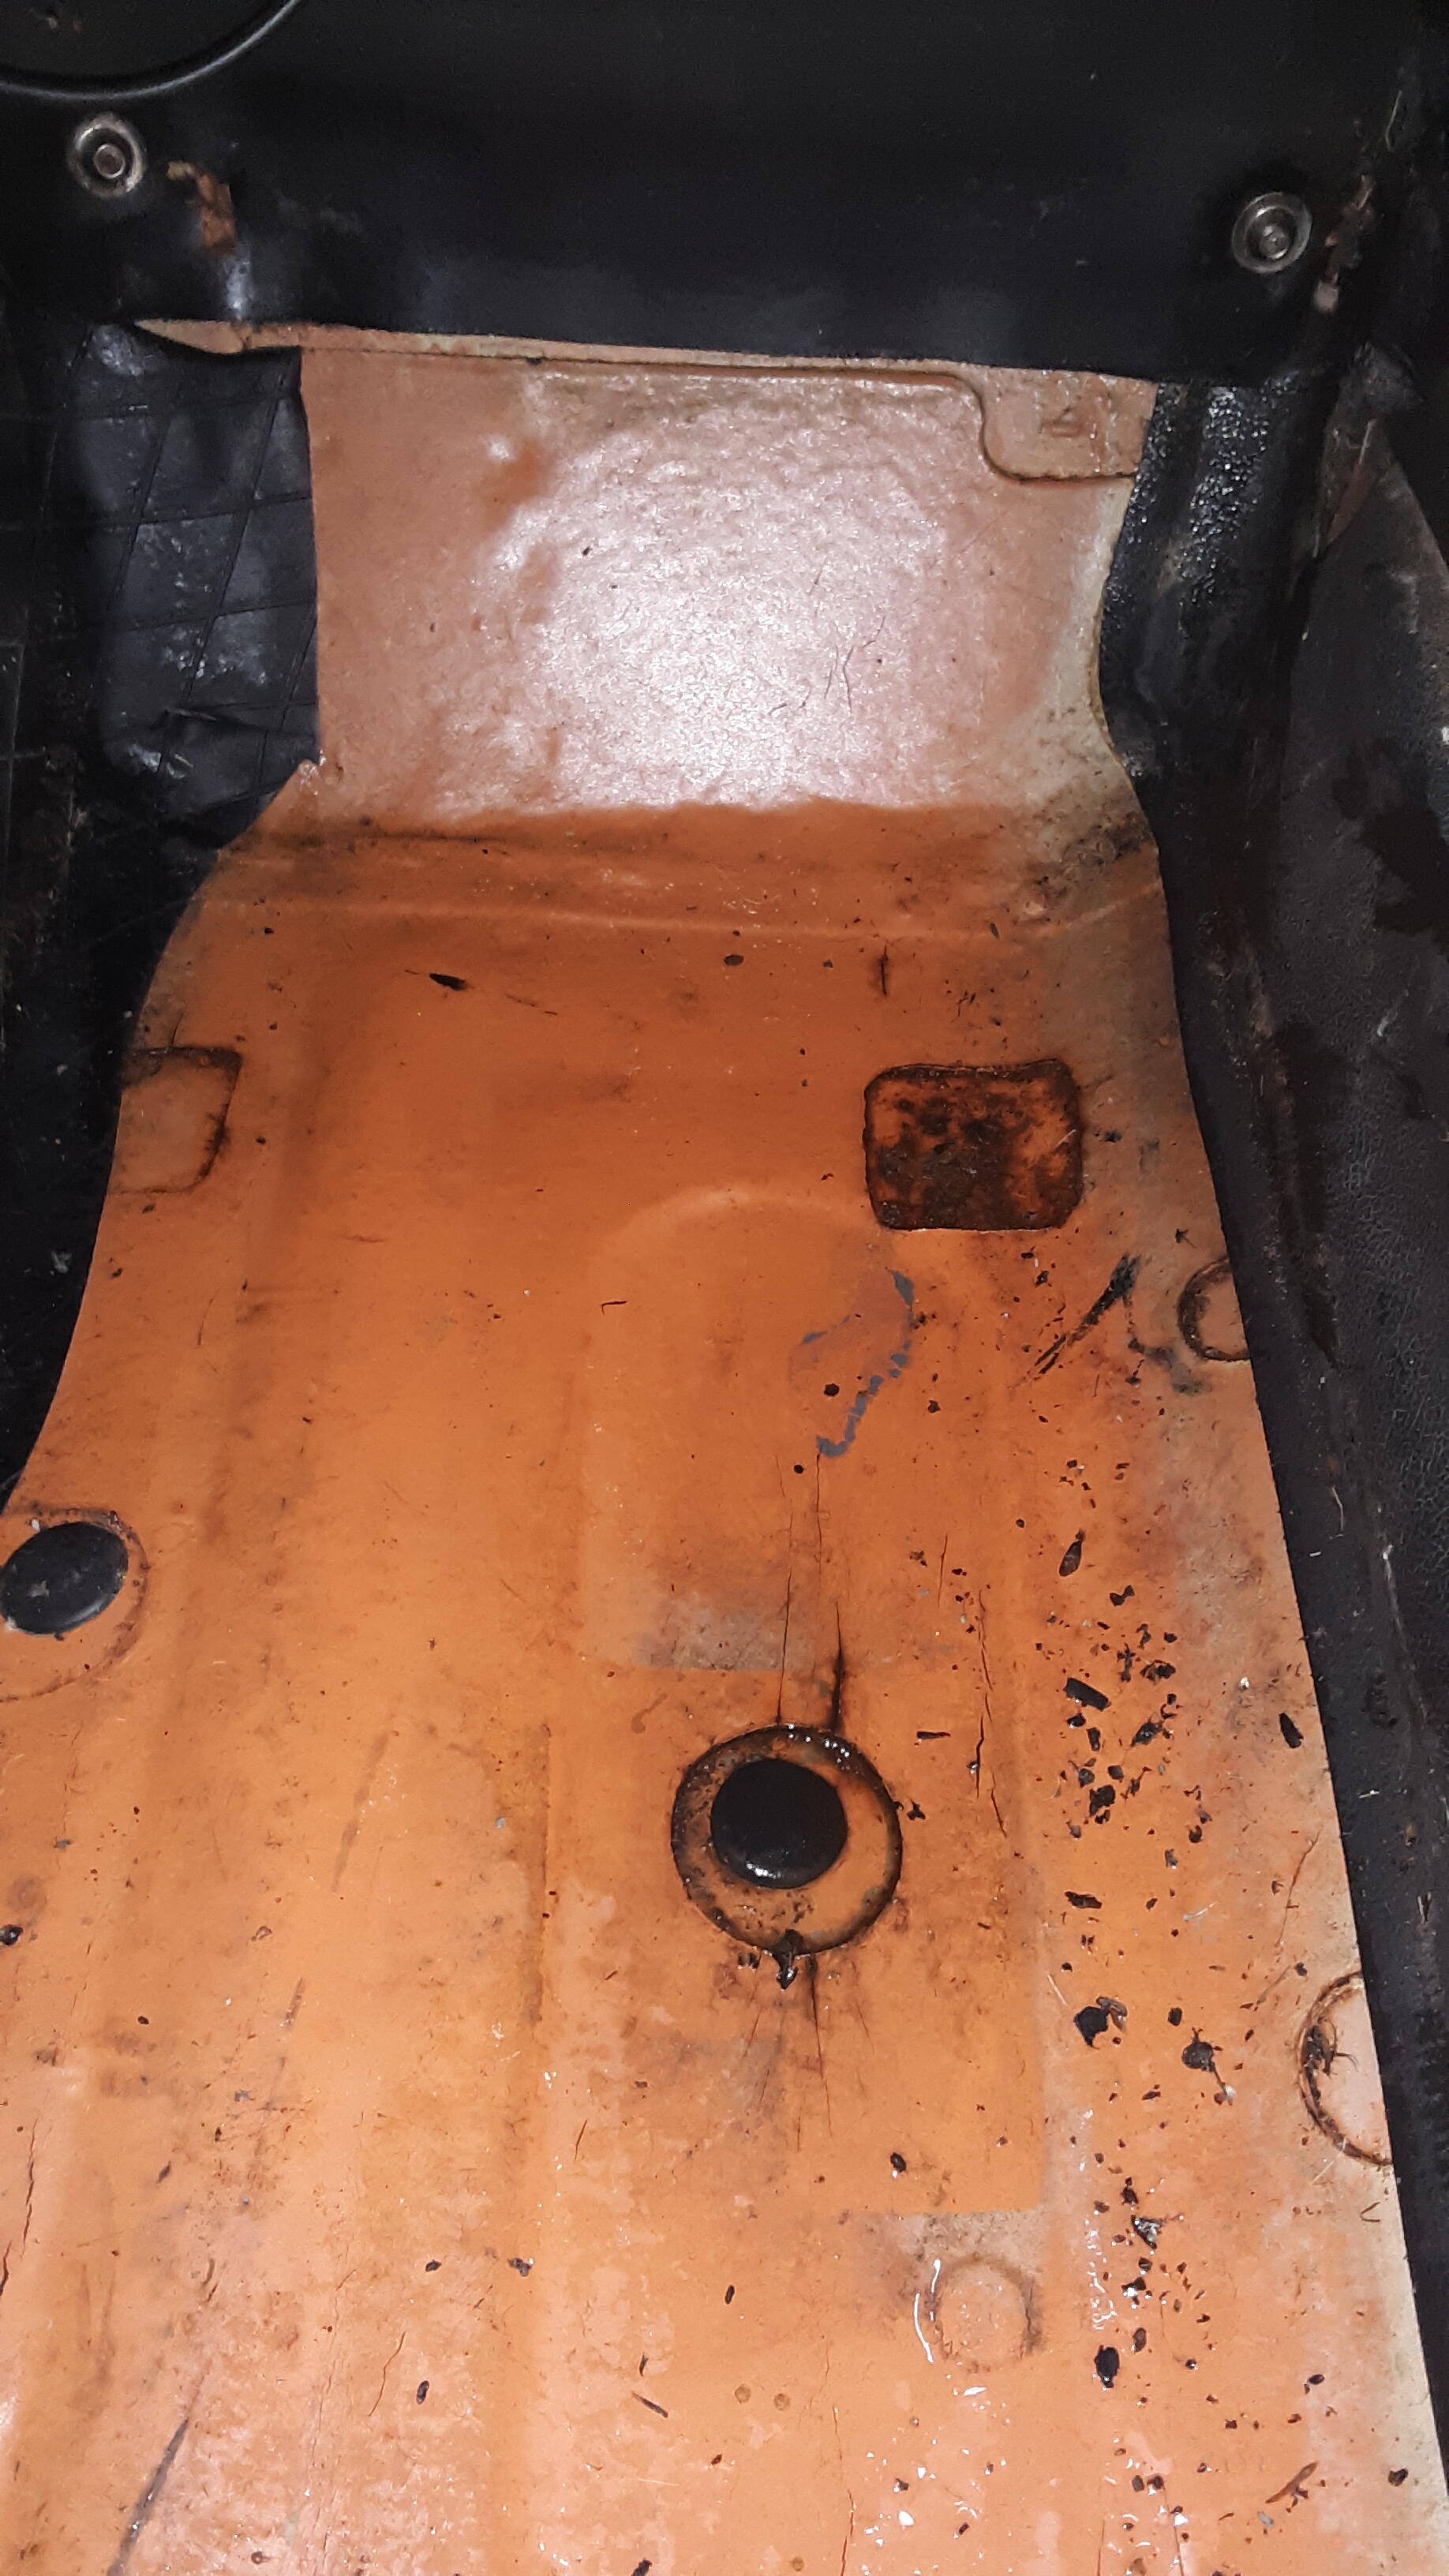
Fortunately, no wires were chewed under the dash or in that vicinity. They preferred the firewall pad, glove box liner, vents, jute, they had enough to nibble on....This is when I found Junkyard Jenny used parts, send me a heater box, fan, etc. About now was when I realized I'm looking at tarmat on the floor, not the floor....Went to town, got some dry ice, what a pain it was. Took 2 days to remove it. It wasn't too bad, the worst being passenger side footwell, which turned out to be much larger than I first saw. It's close proximity to the battery tray area.
I have driven the car two times since the last post. Indeed, the AFR at idle is now higher - it is about 15.4 at 850 RPM. Cruise at 50 in fourth gear on flat road (2800 RPM) is about 15.8 AFR (much higher). While at full throttle in first and second gears, the AFR is about 13.1 to 13.2 (also much higher). No other changes were made. I just tightened the four nuts holding the carburetor bodies to the manifold, and each of the nuts holding the header and the lower half of the intake manifold to the engine and the 6 bolts holding the top of the intake manifold to the head. I also tightened the bolts that hold the intake balance tube to the intake manifold. I don't understand what I am seeing now. Perhaps tightening these, I have introduced a vacuum leak? What is odd though is that the engine seems to have more power. Oh... here is a thought: perhaps the engine is still breaking in! I only have 384 miles on it. Maybe as the cylinders seal a bit better, the combustion is more complete, and that is changing the AFR. I am going to put some more miles on it to get to about 500, and then do a leak down test and record the numbers. If the numbers confirm it is broken in, I will change out the break in oil. Then I will pick up with AFR testing.
Fortunately, no wires were chewed under the dash or in that vicinity. They preferred the firewall pad, glove box liner, vents, jute, they had enough to nibble on....This is when I found Junkyard Jenny used parts, send me a heater box, fan, etc. About now was when I realized I'm looking at tarmat on the floor, not the floor....Went to town, got some dry ice, what a pain it was. Took 2 days to remove it. It wasn't too bad, the worst being passenger side footwell, which turned out to be much larger than I first saw. It's close proximity to the battery tray area.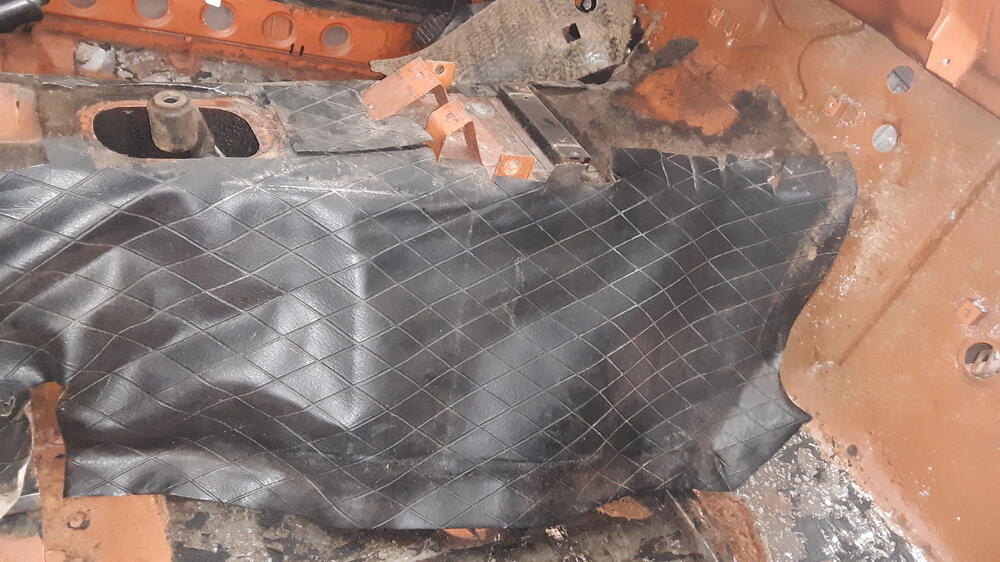

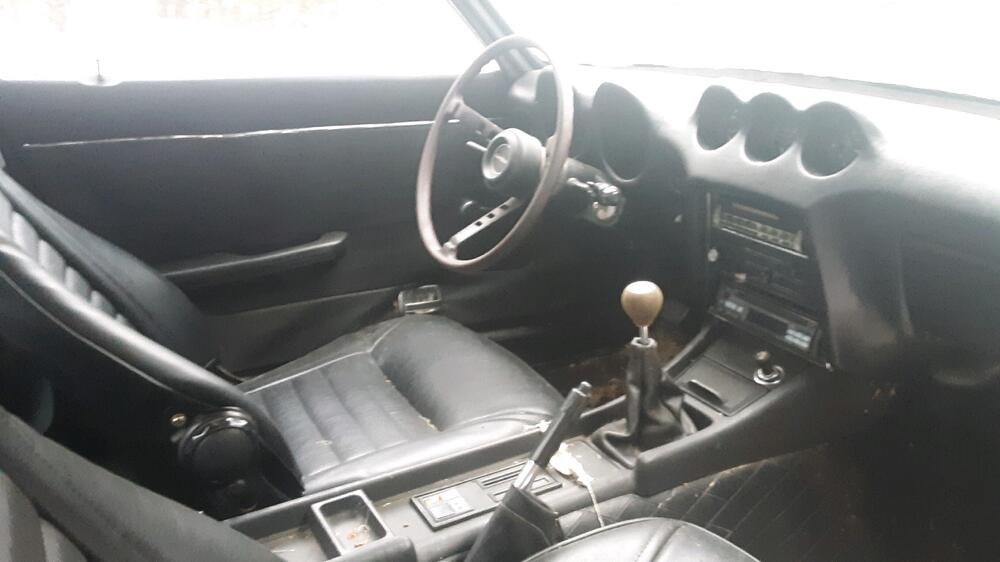
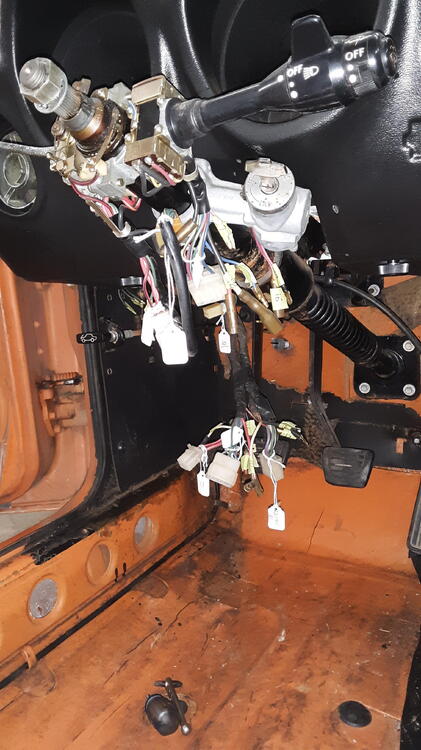
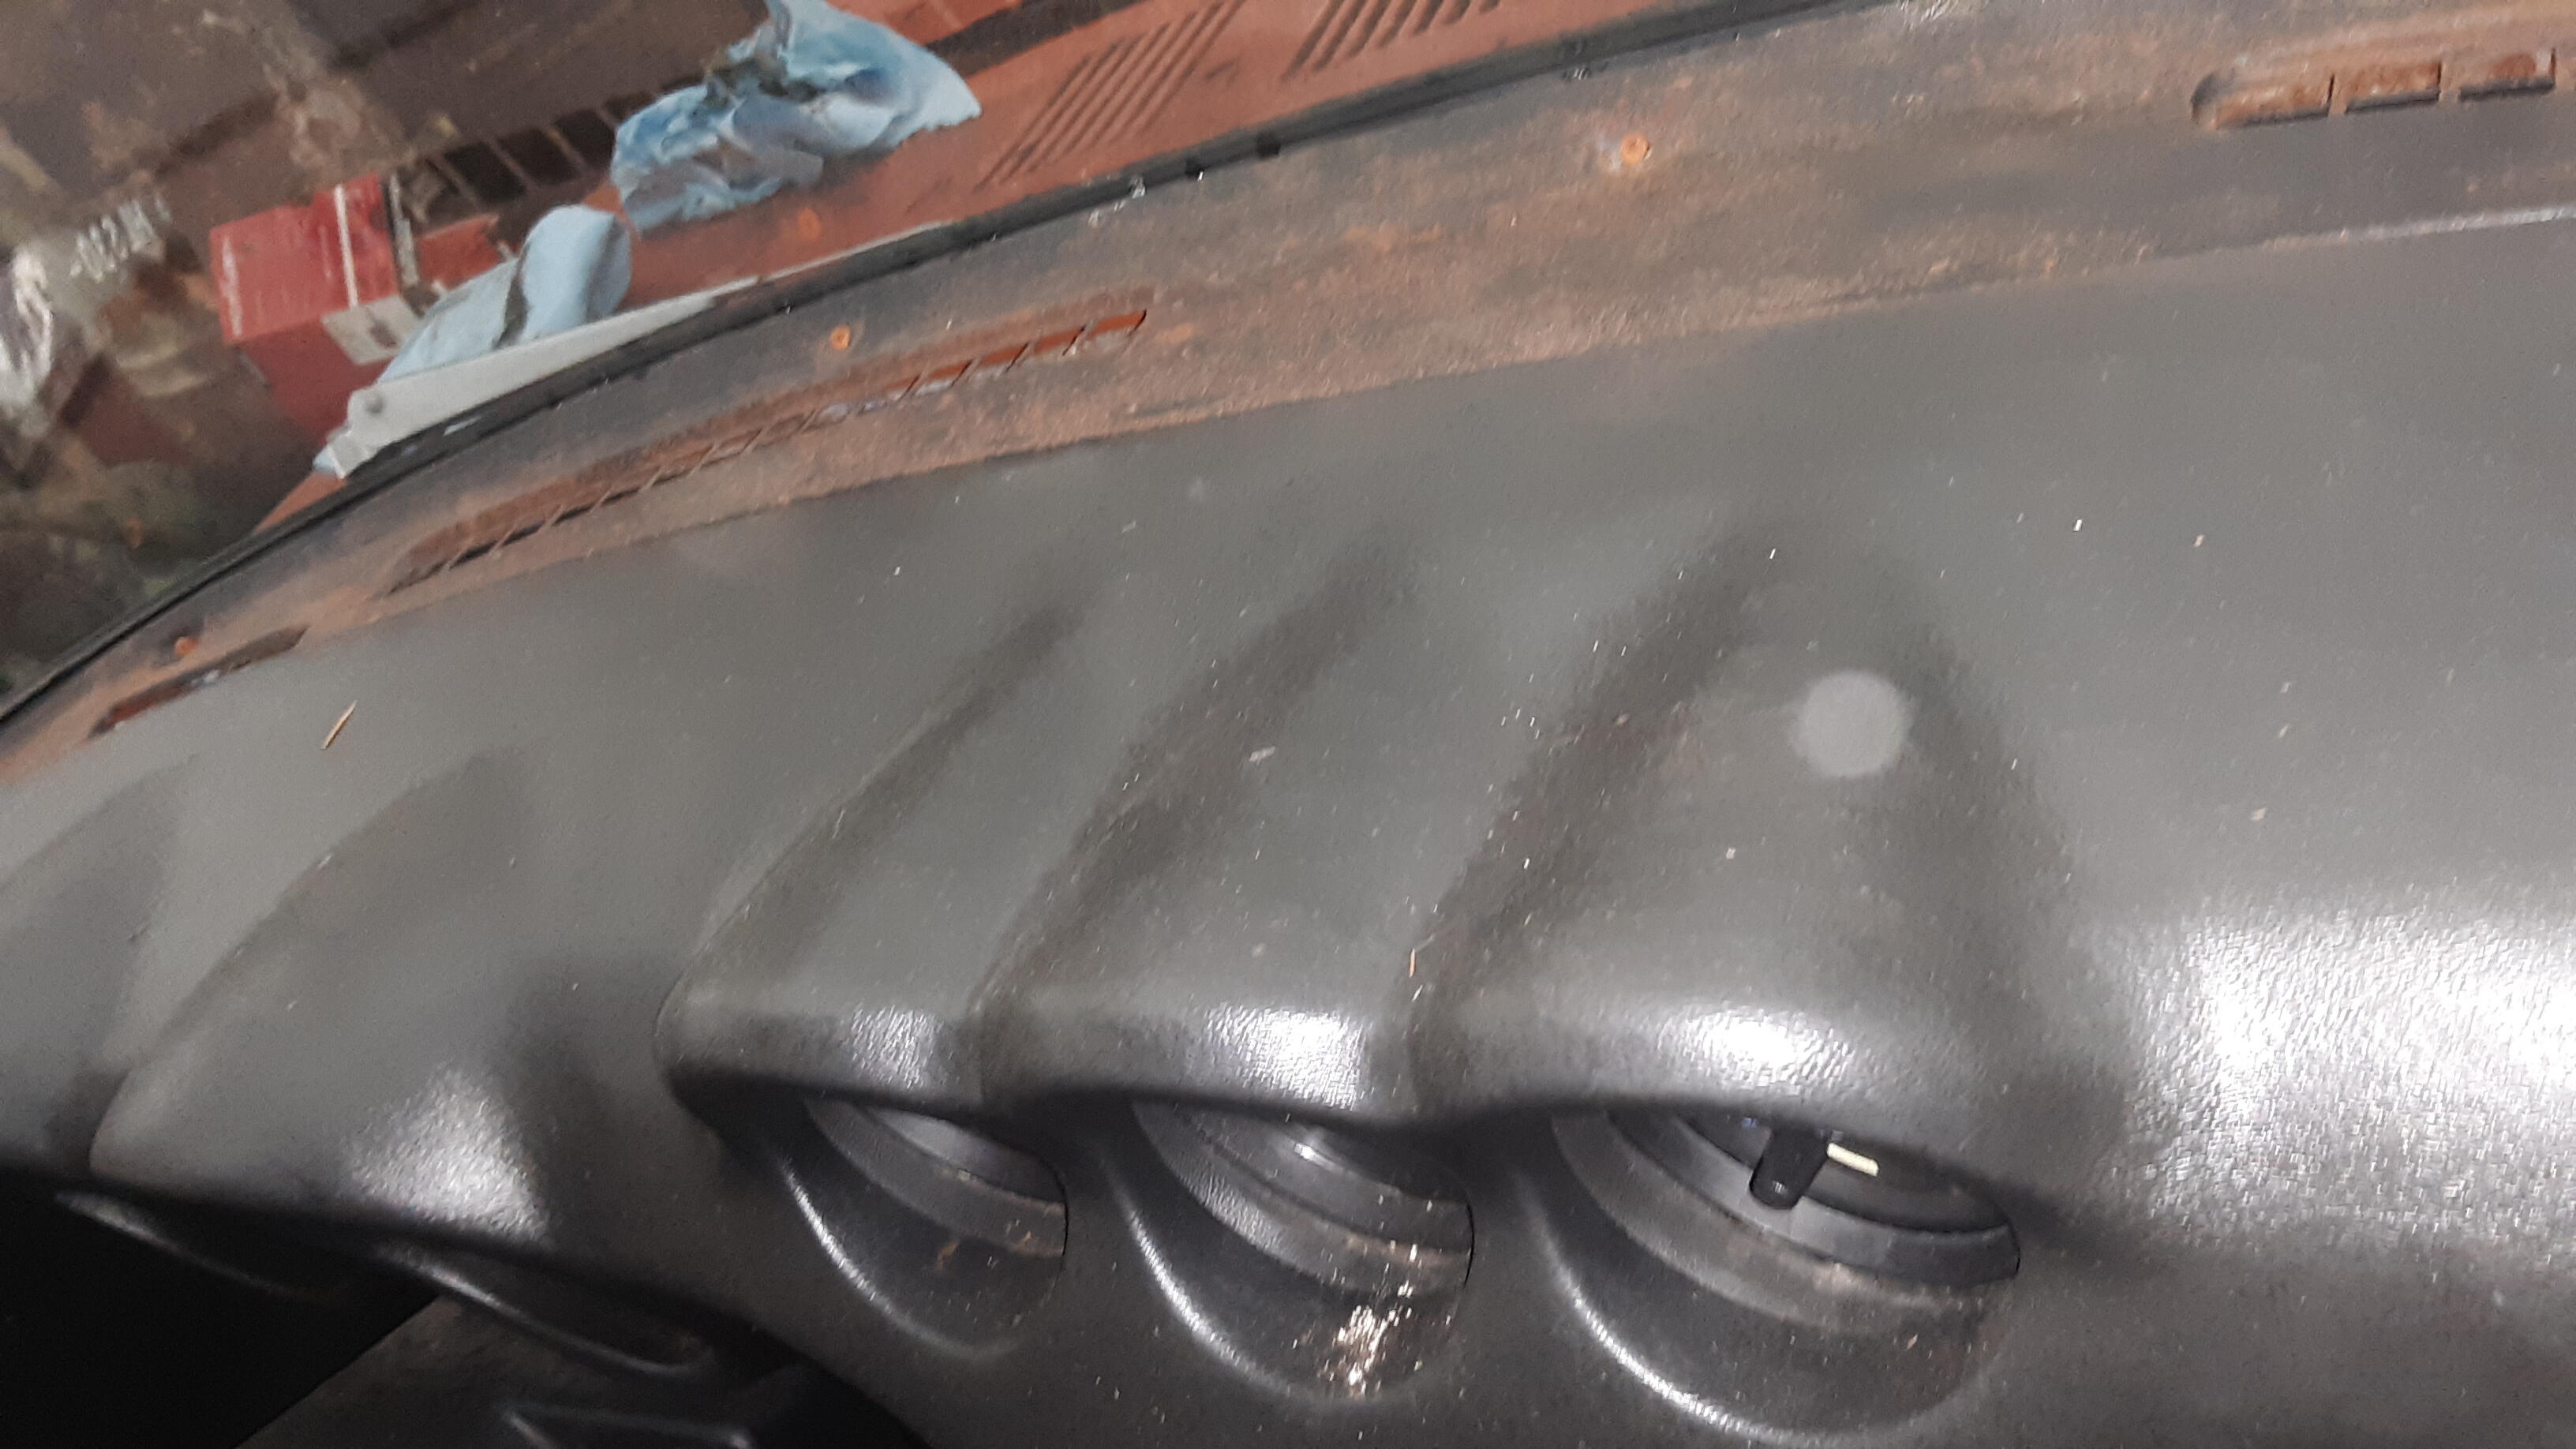
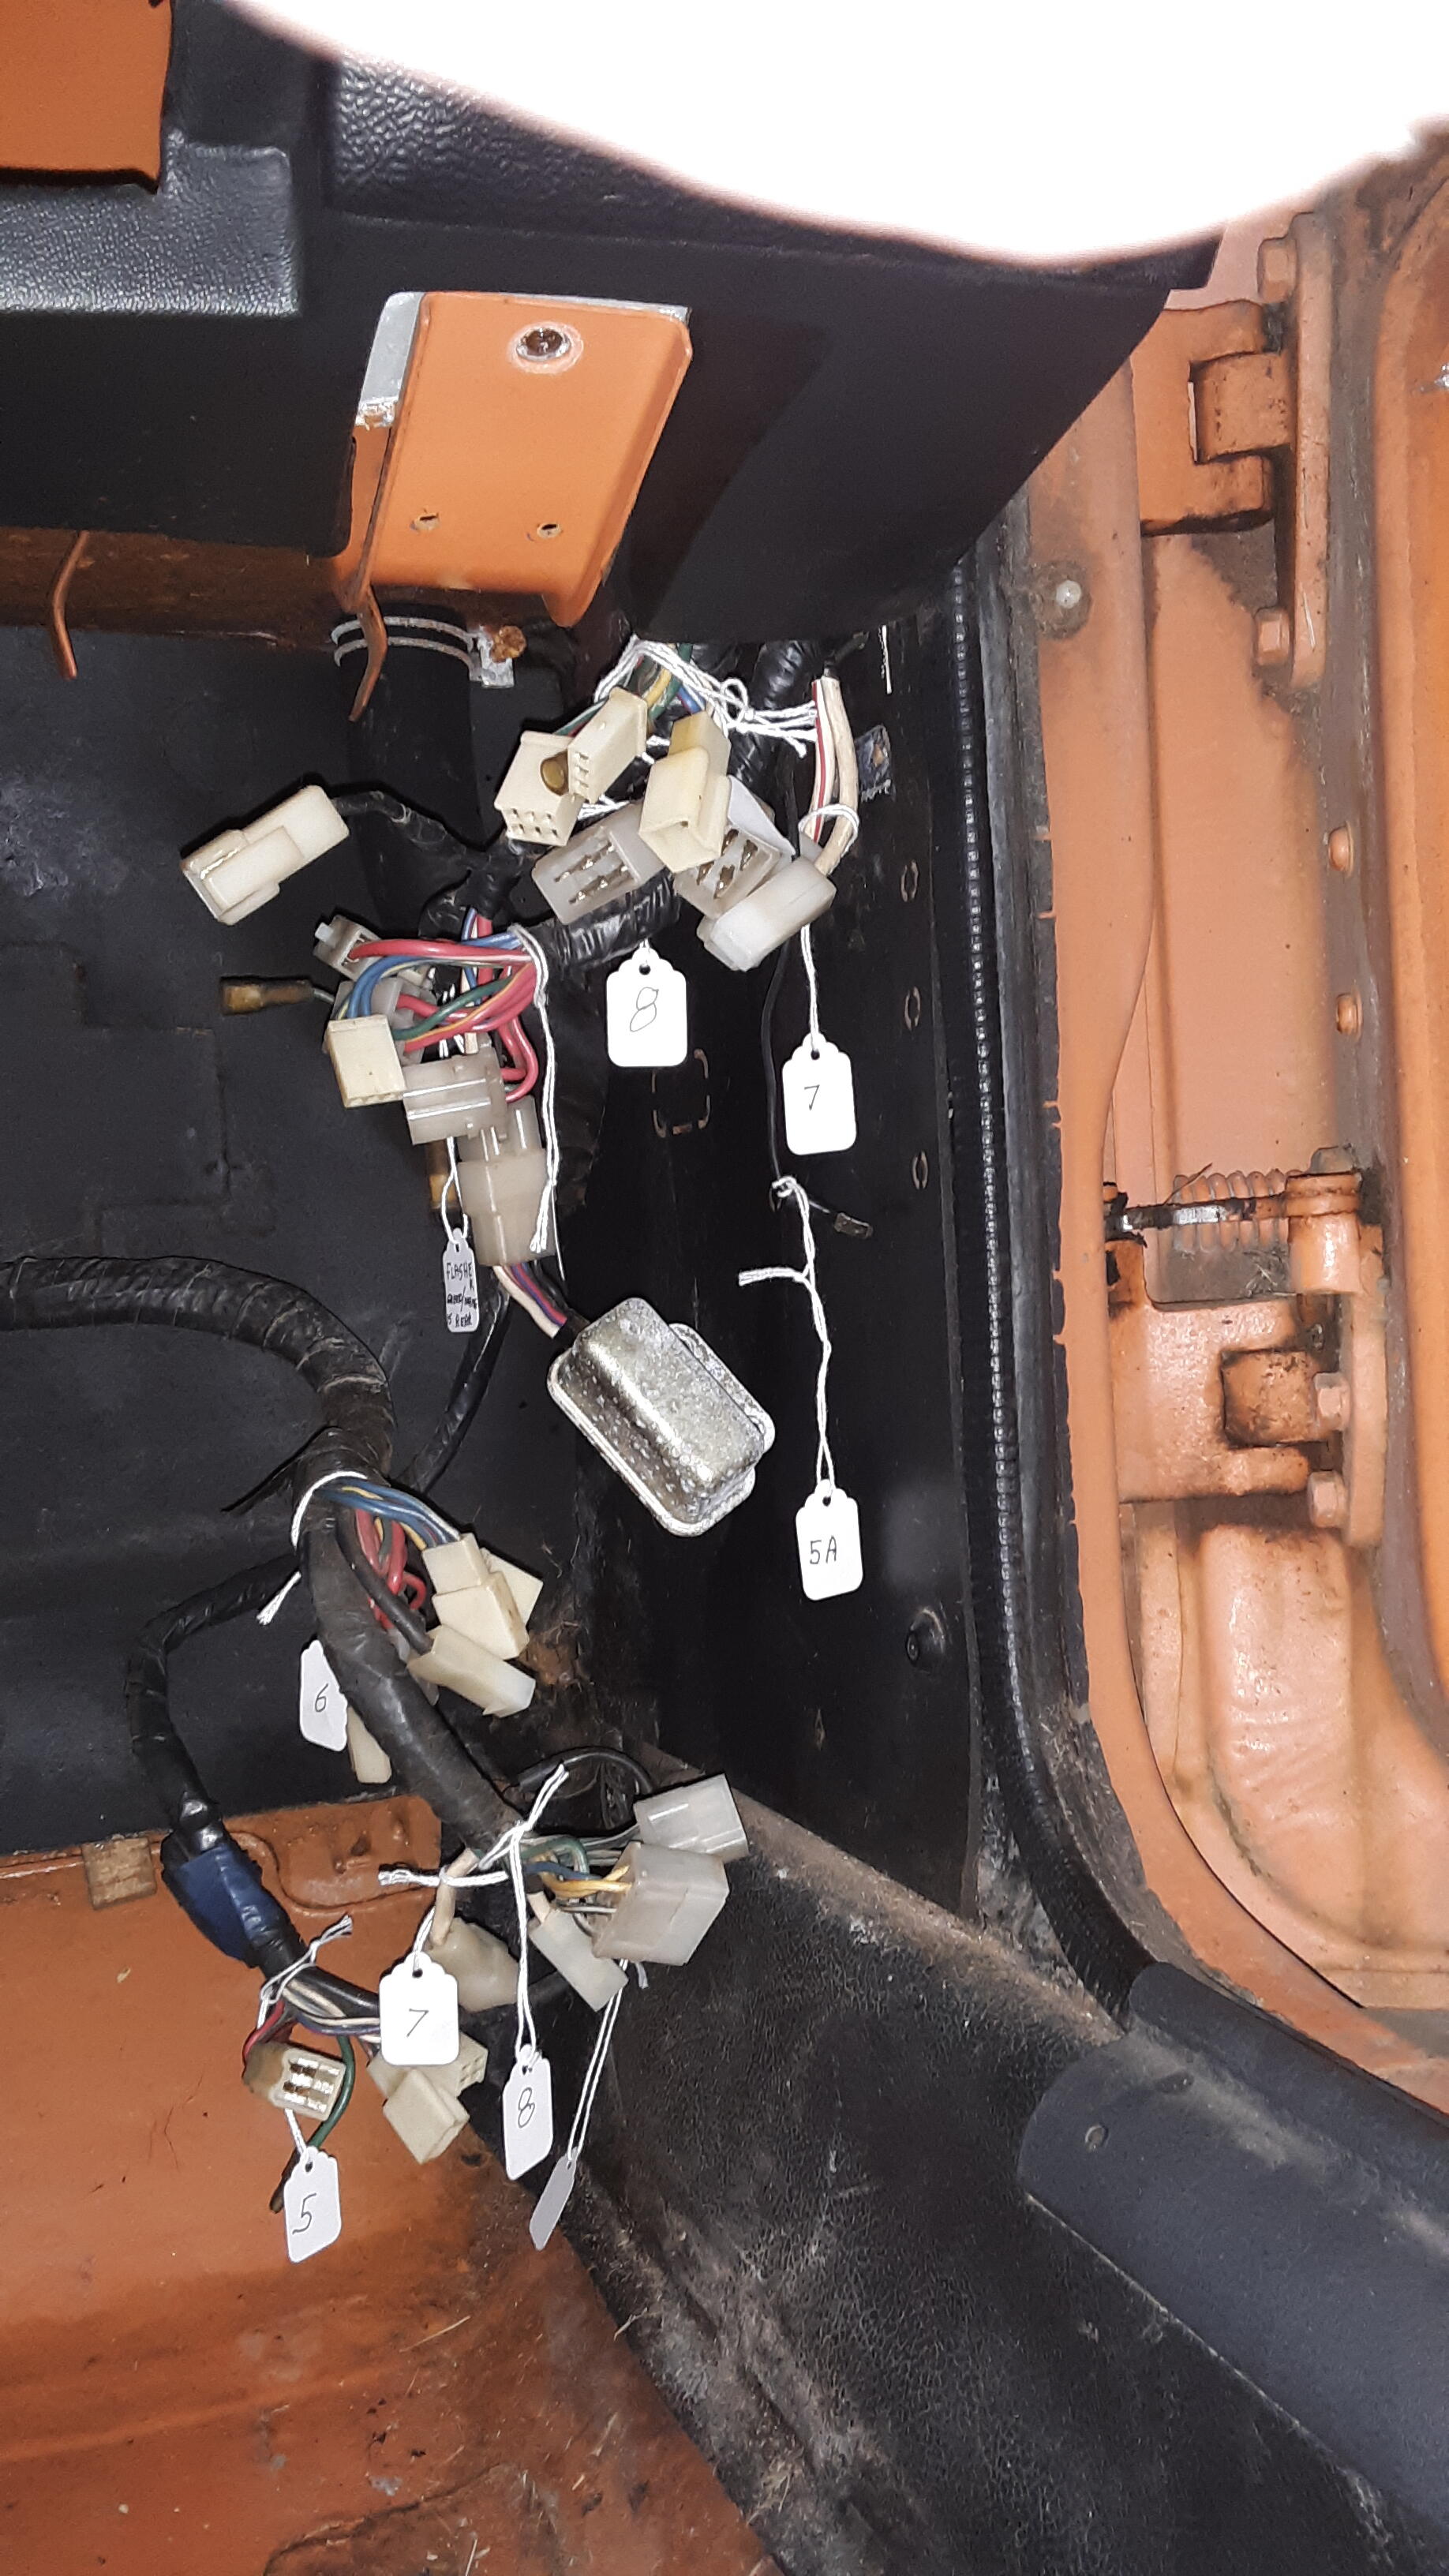
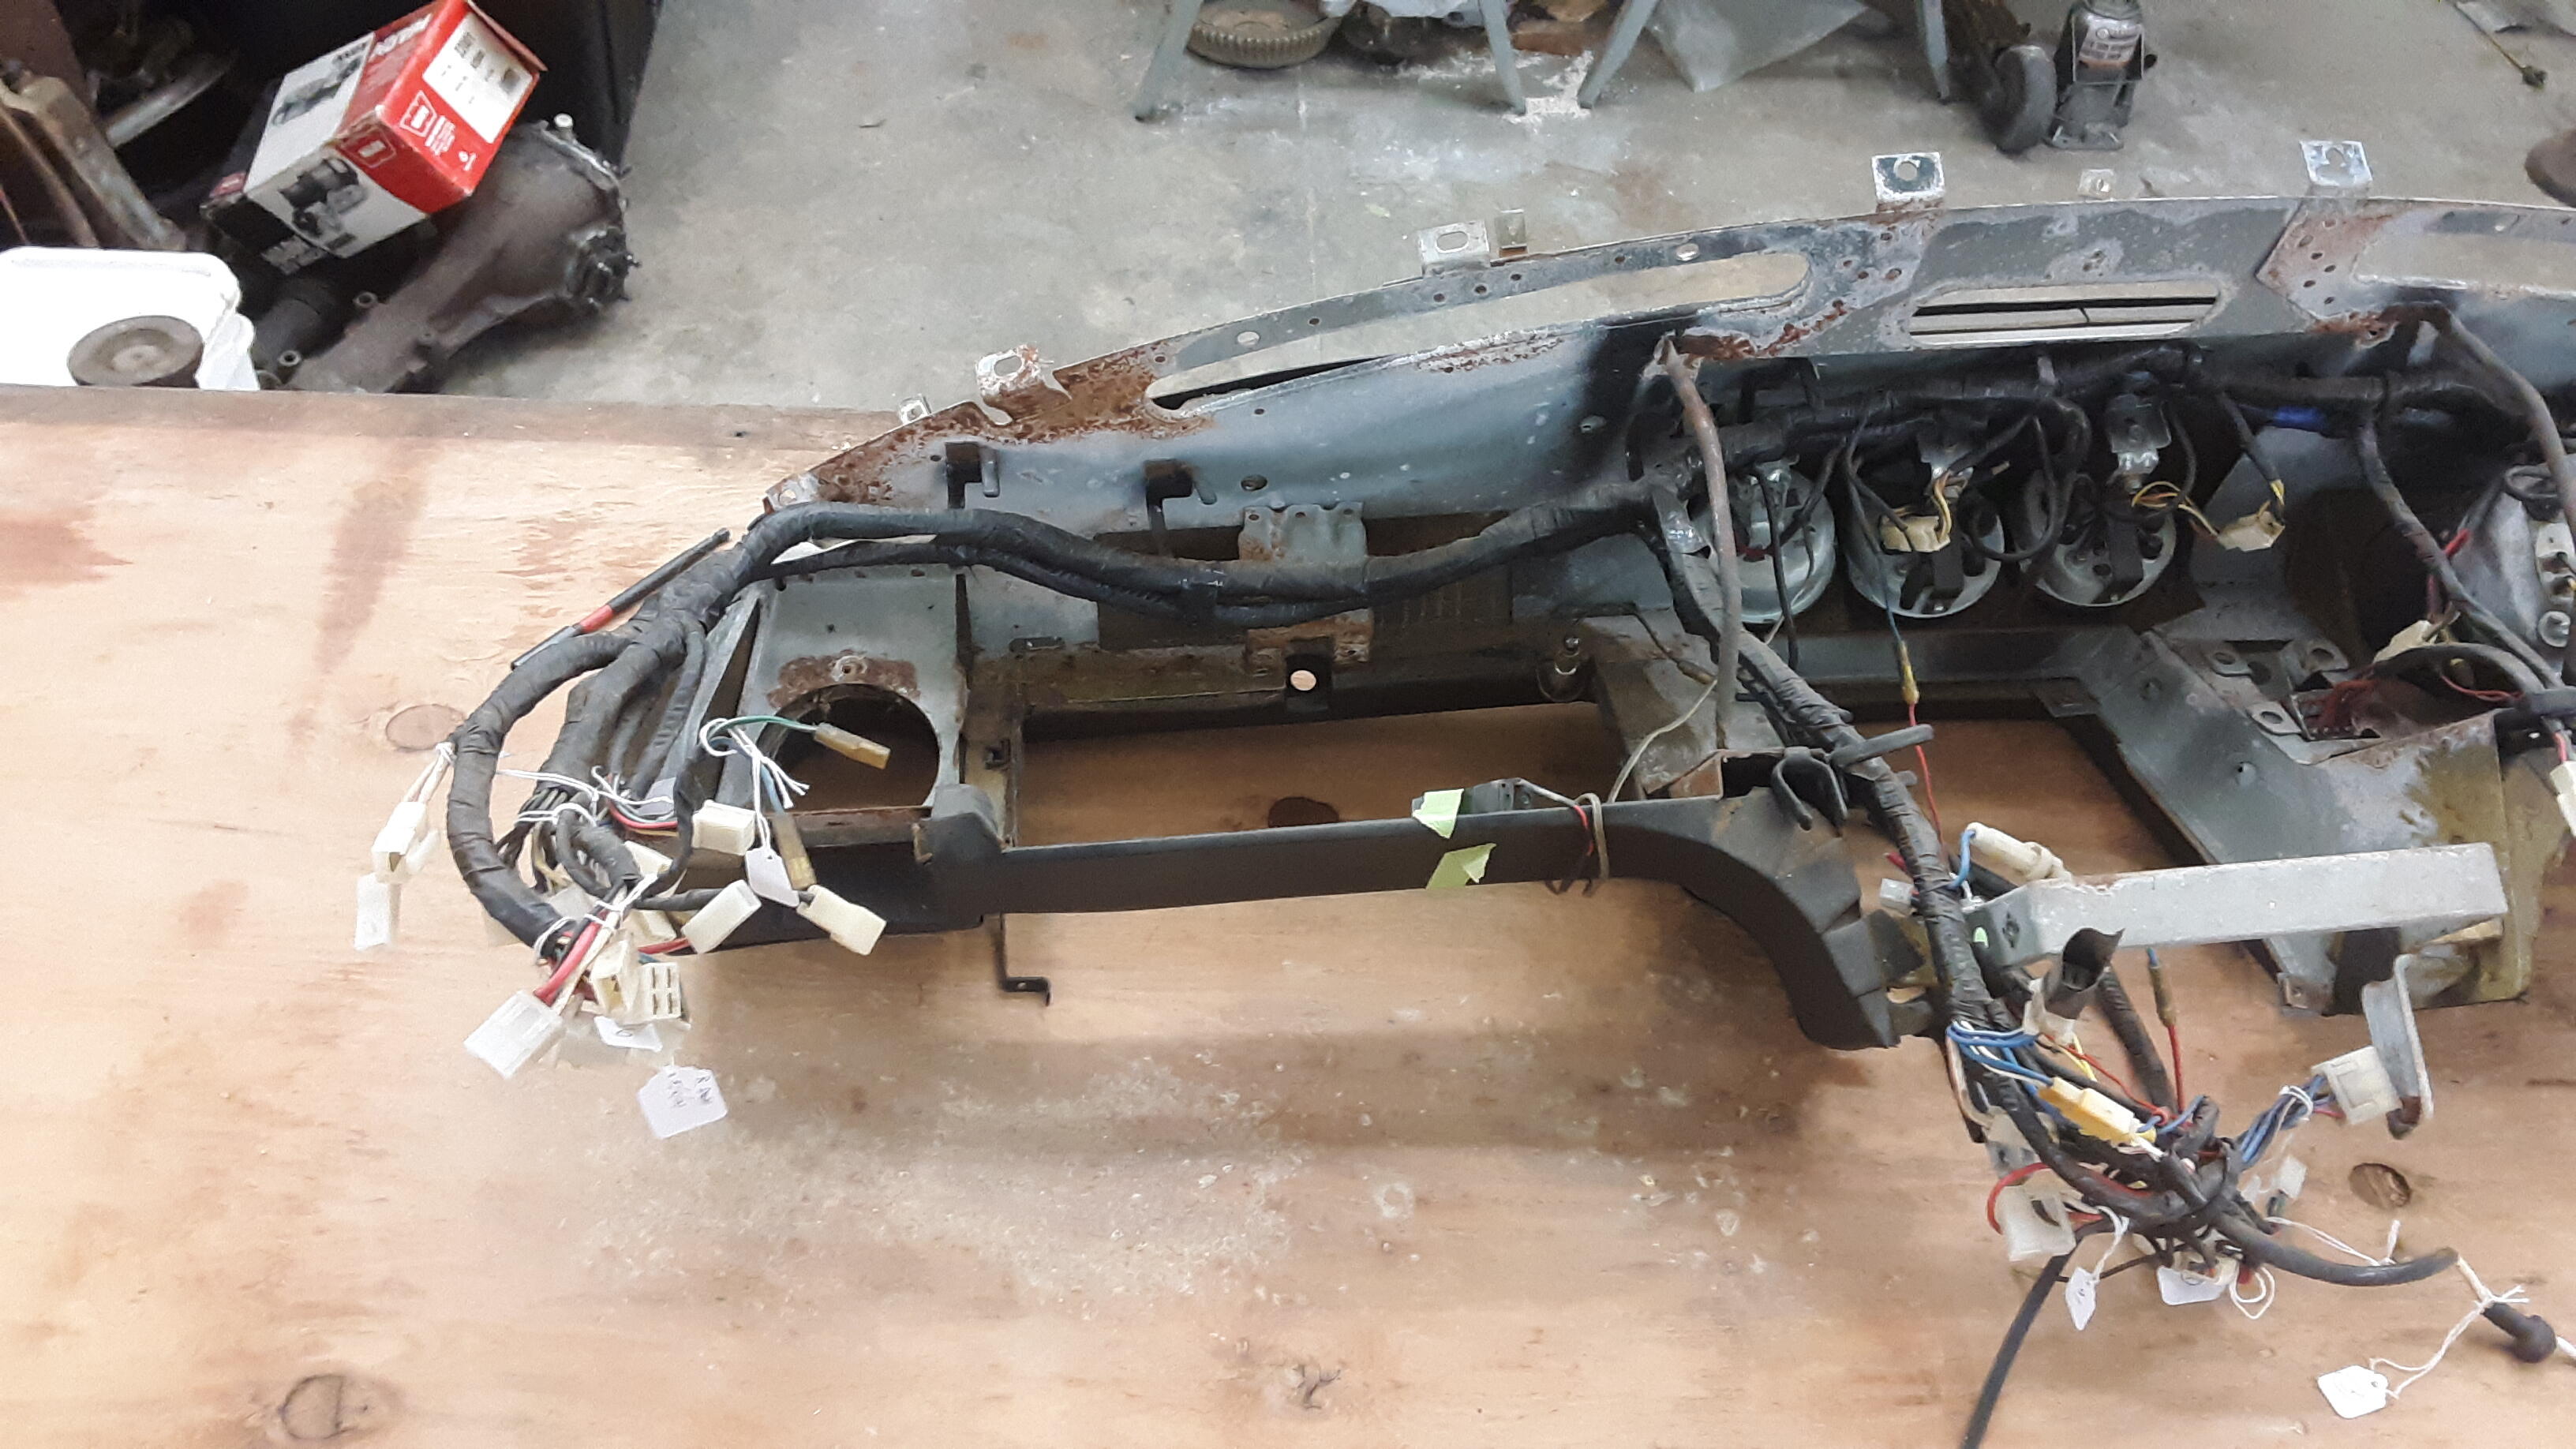
 Time to attack the interior a little more.......Okay Wow, the dash isn't even cracked! 🙄 Look at the sweat on the dash finisher. Time to remove the dash. Went to town and bought a bunch of labels for marking wires, as per suggestions on this site. oh, here's the interior as I found it. more evidence of mice Glad I pulled the dash, look at this! He wasn't kidding about the mice. I believe they got in through the fresh air vents, because later I found it stuffed with pine cones.
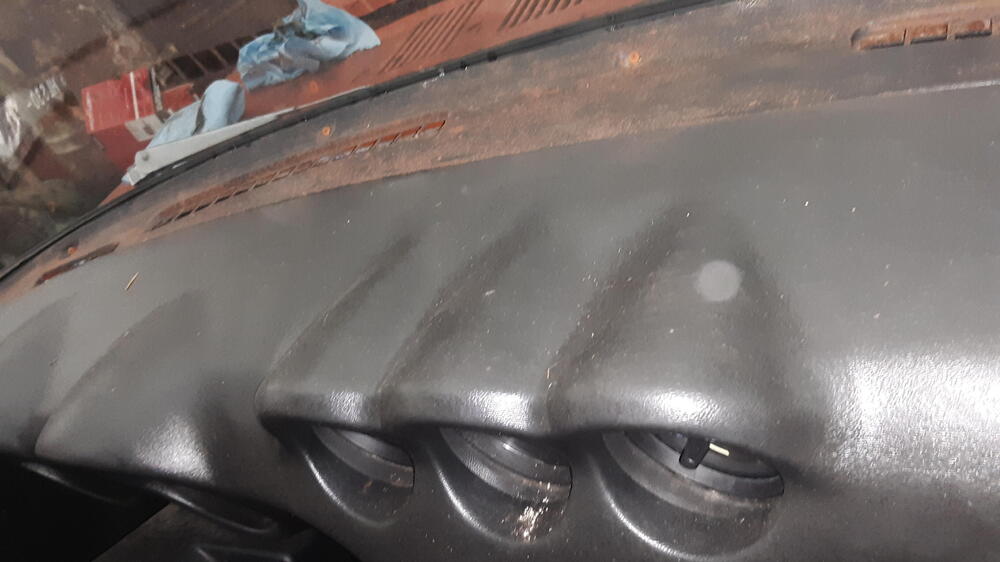


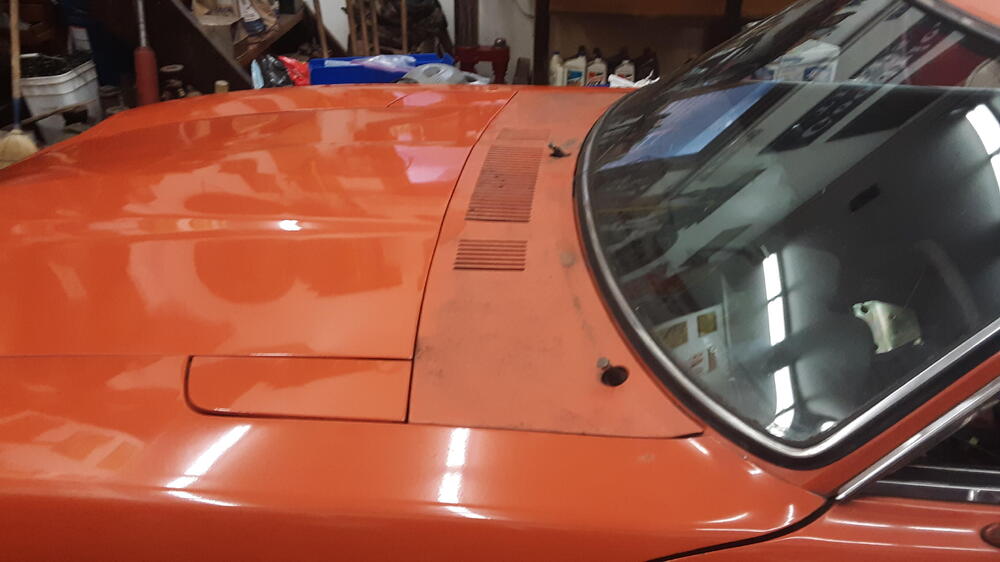
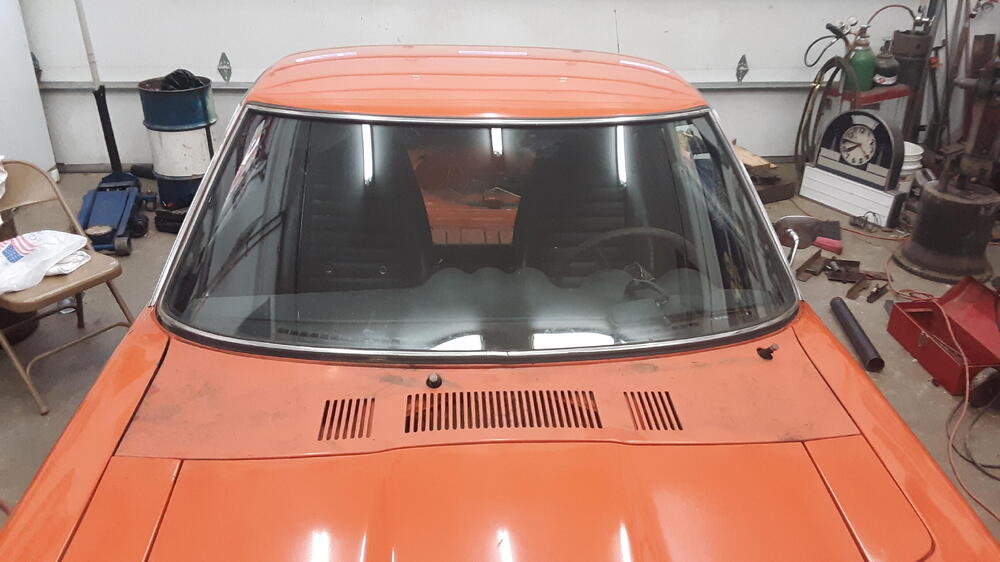
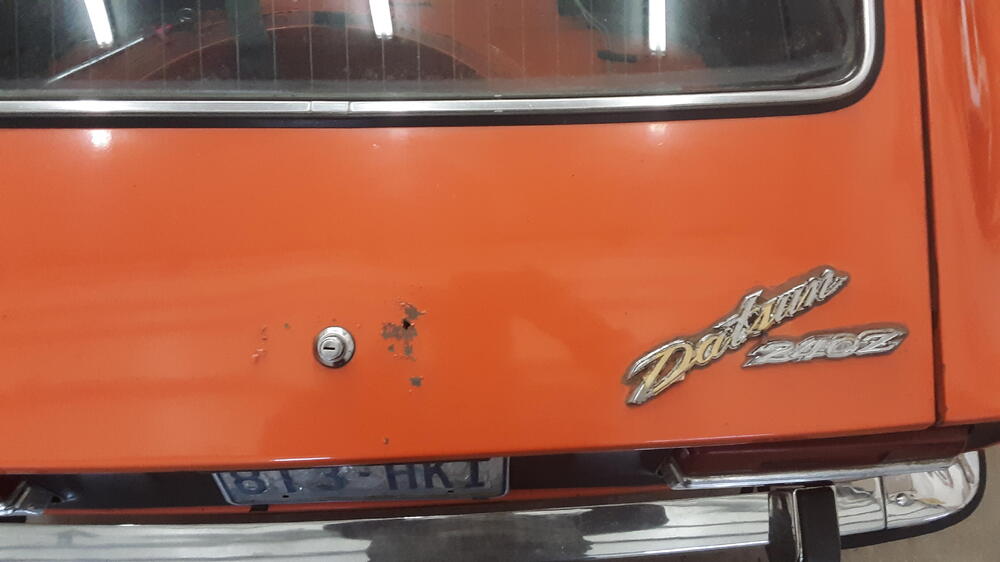
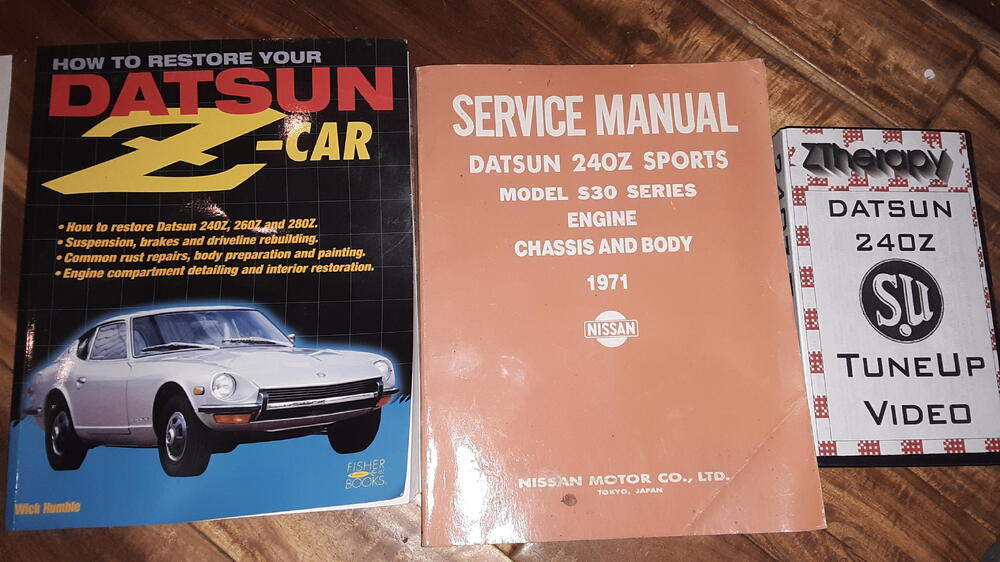
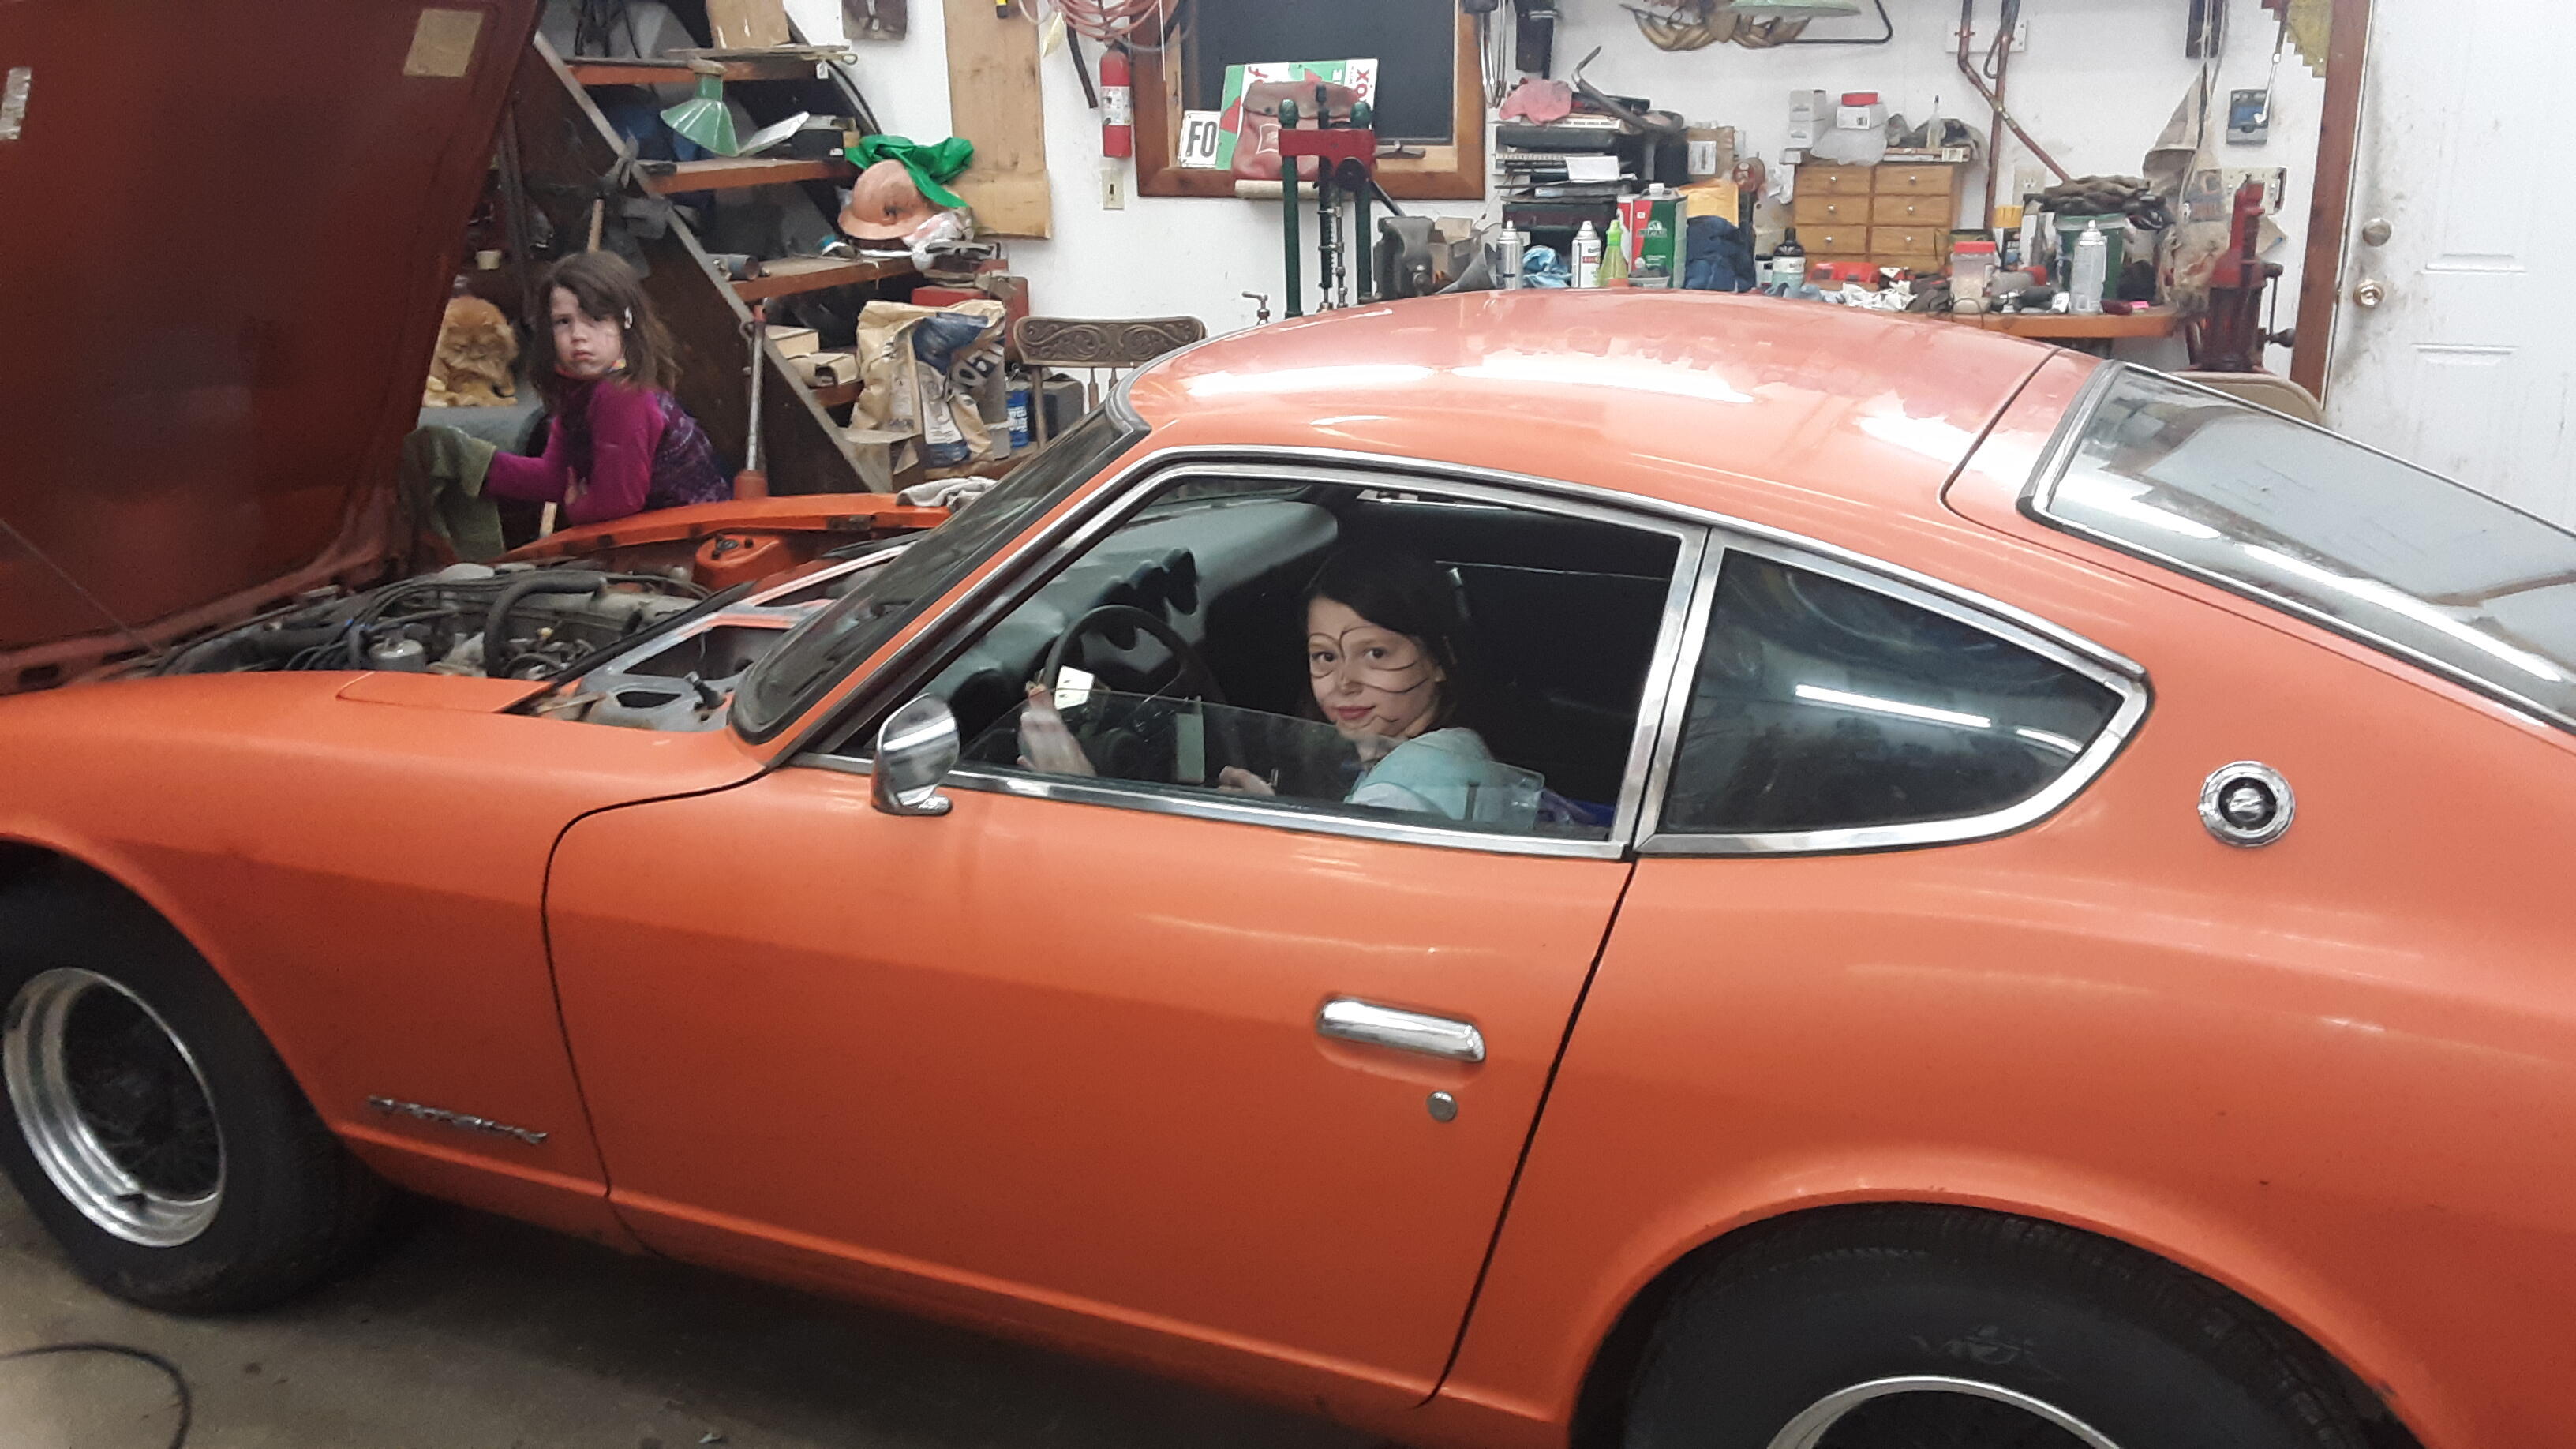
 I looked at the book I got with the car "how to restore your Z-car" and said to myself, I am not doing that, way over my head. So I got some polish and my girls started helping me shine it up. That's when I started noticing some rust. I started reading more and more and learned how deceiving these cars can be.


 Notplayn joined the community
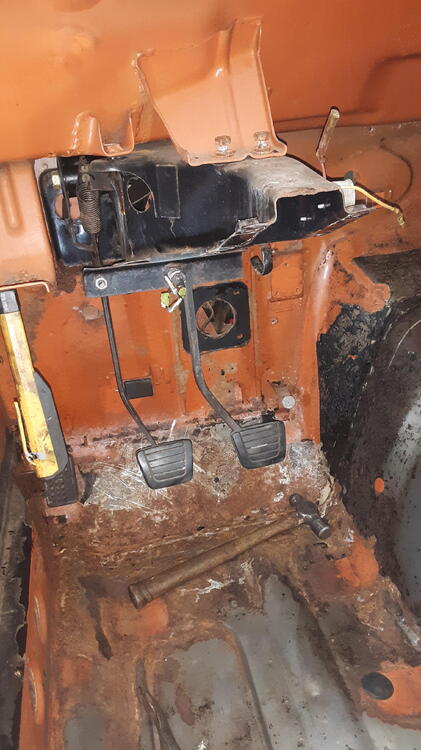
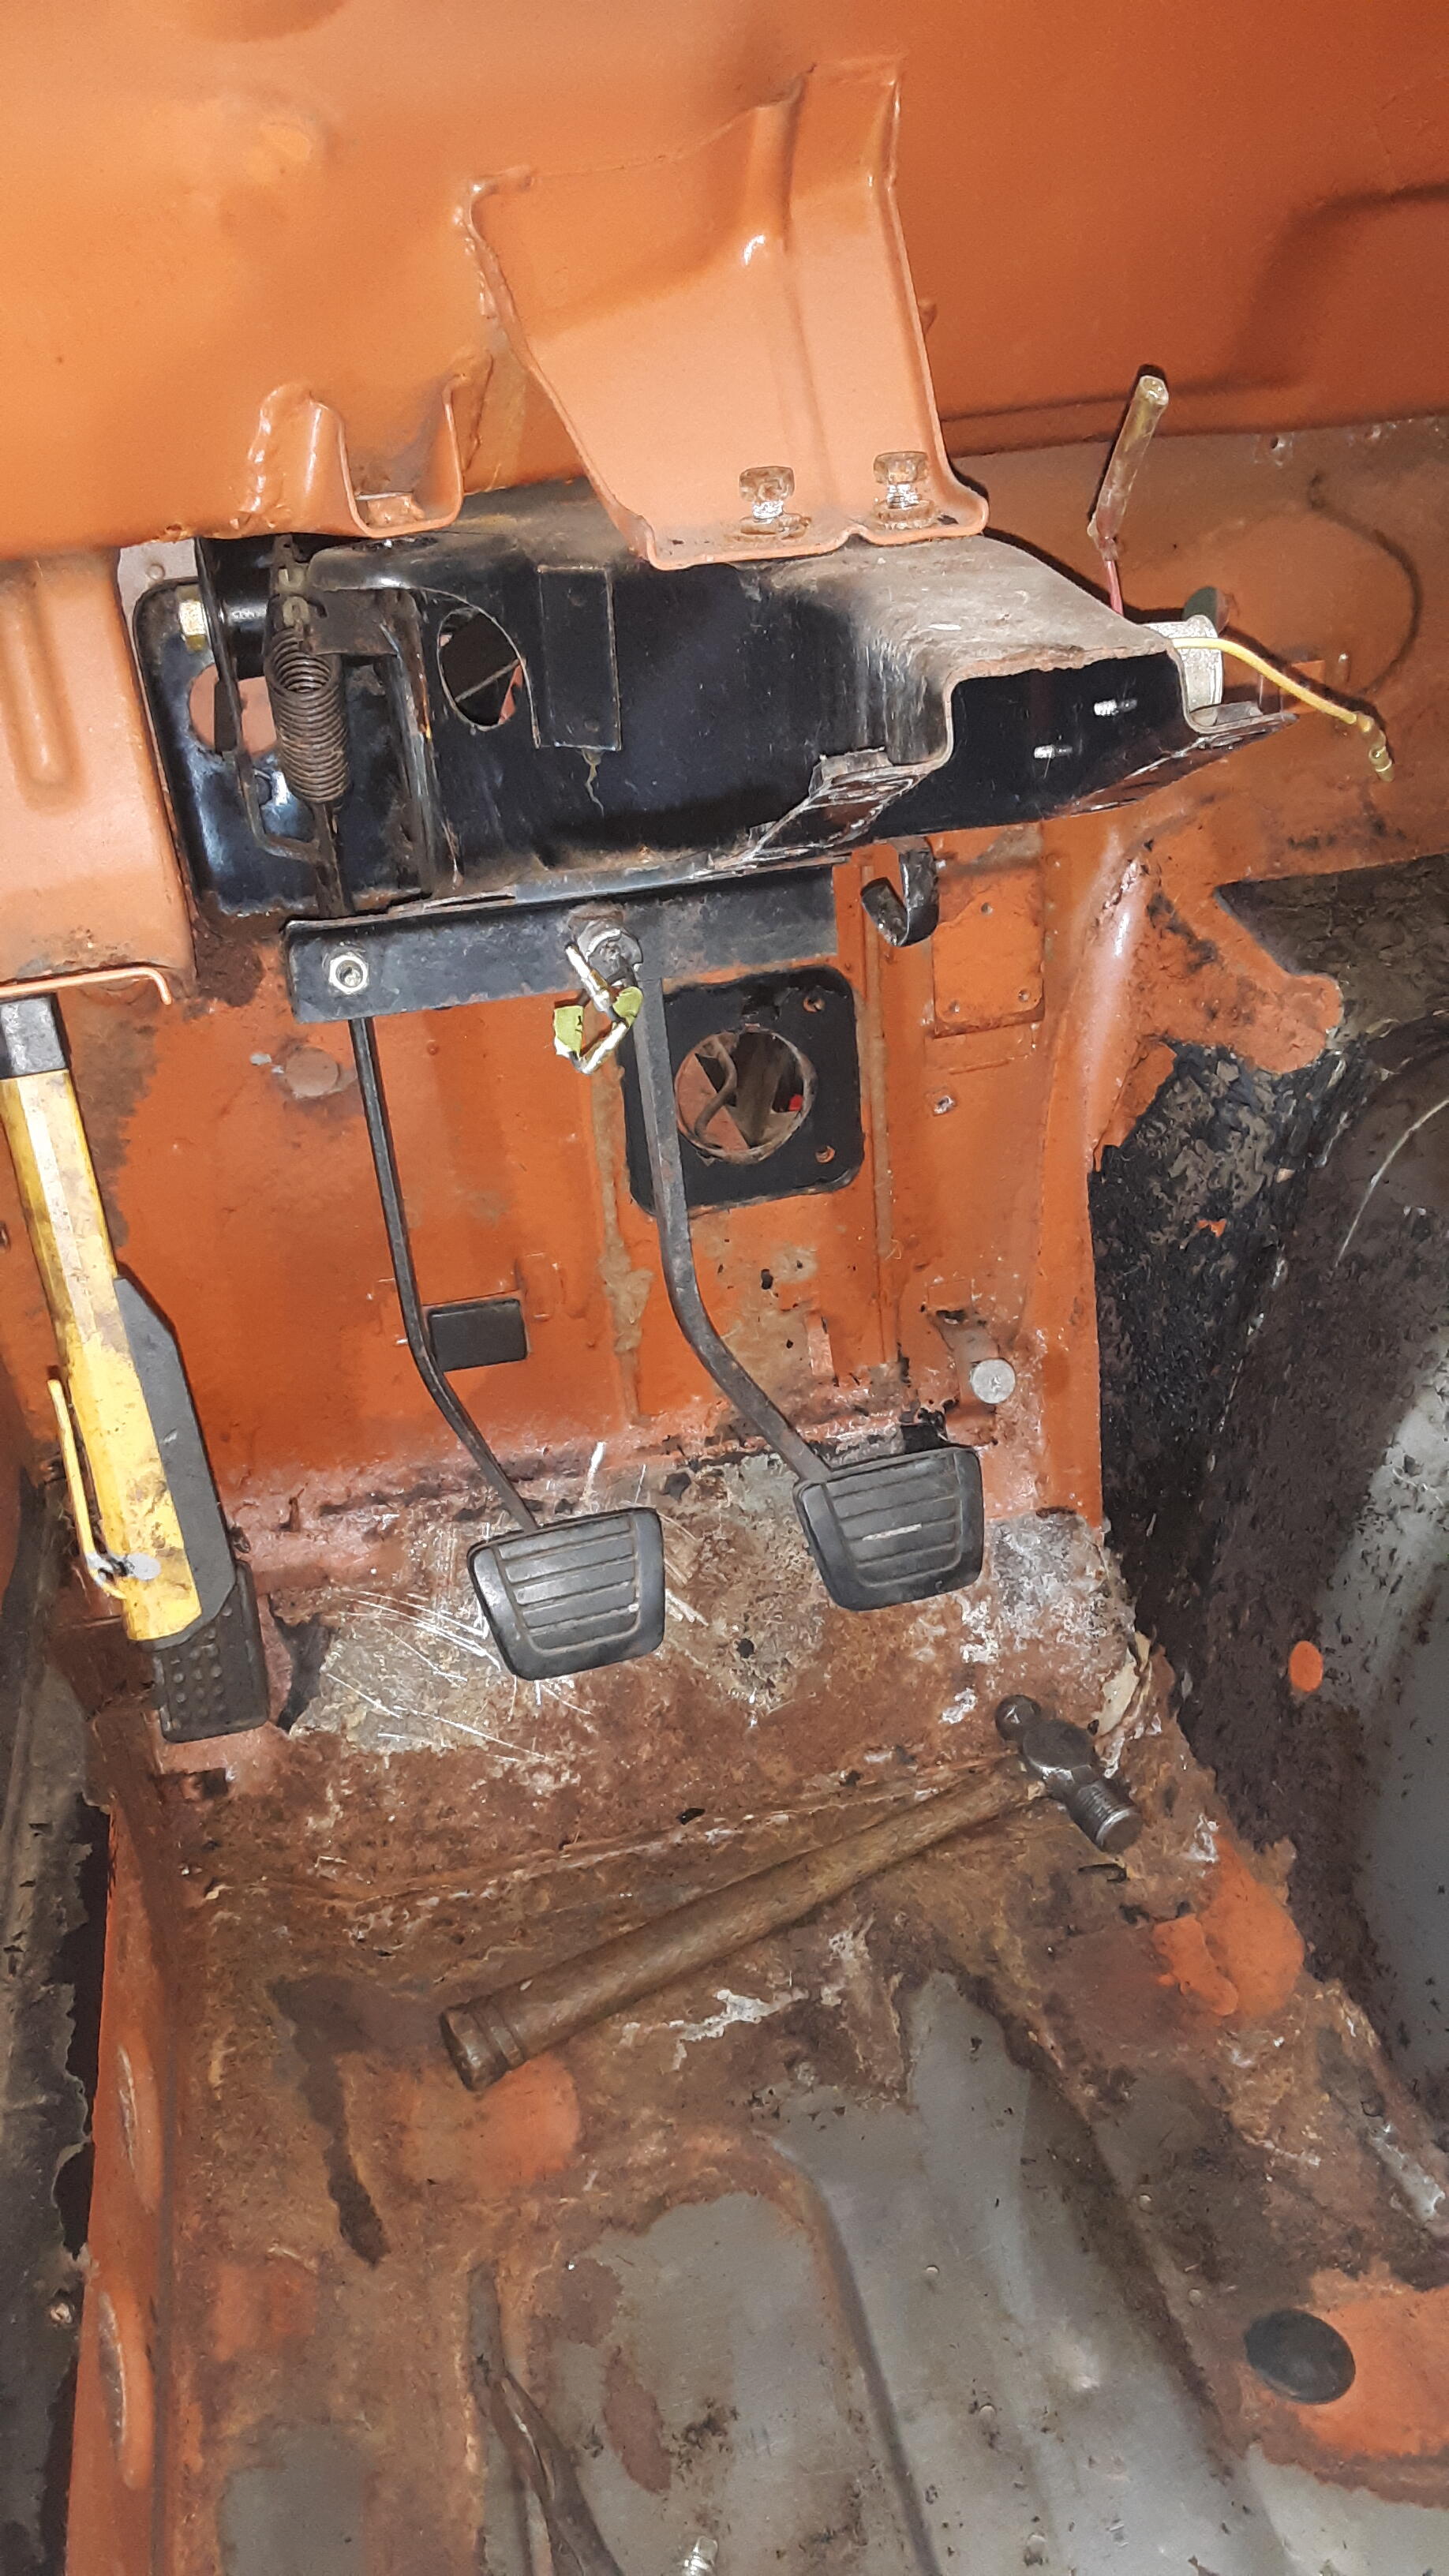
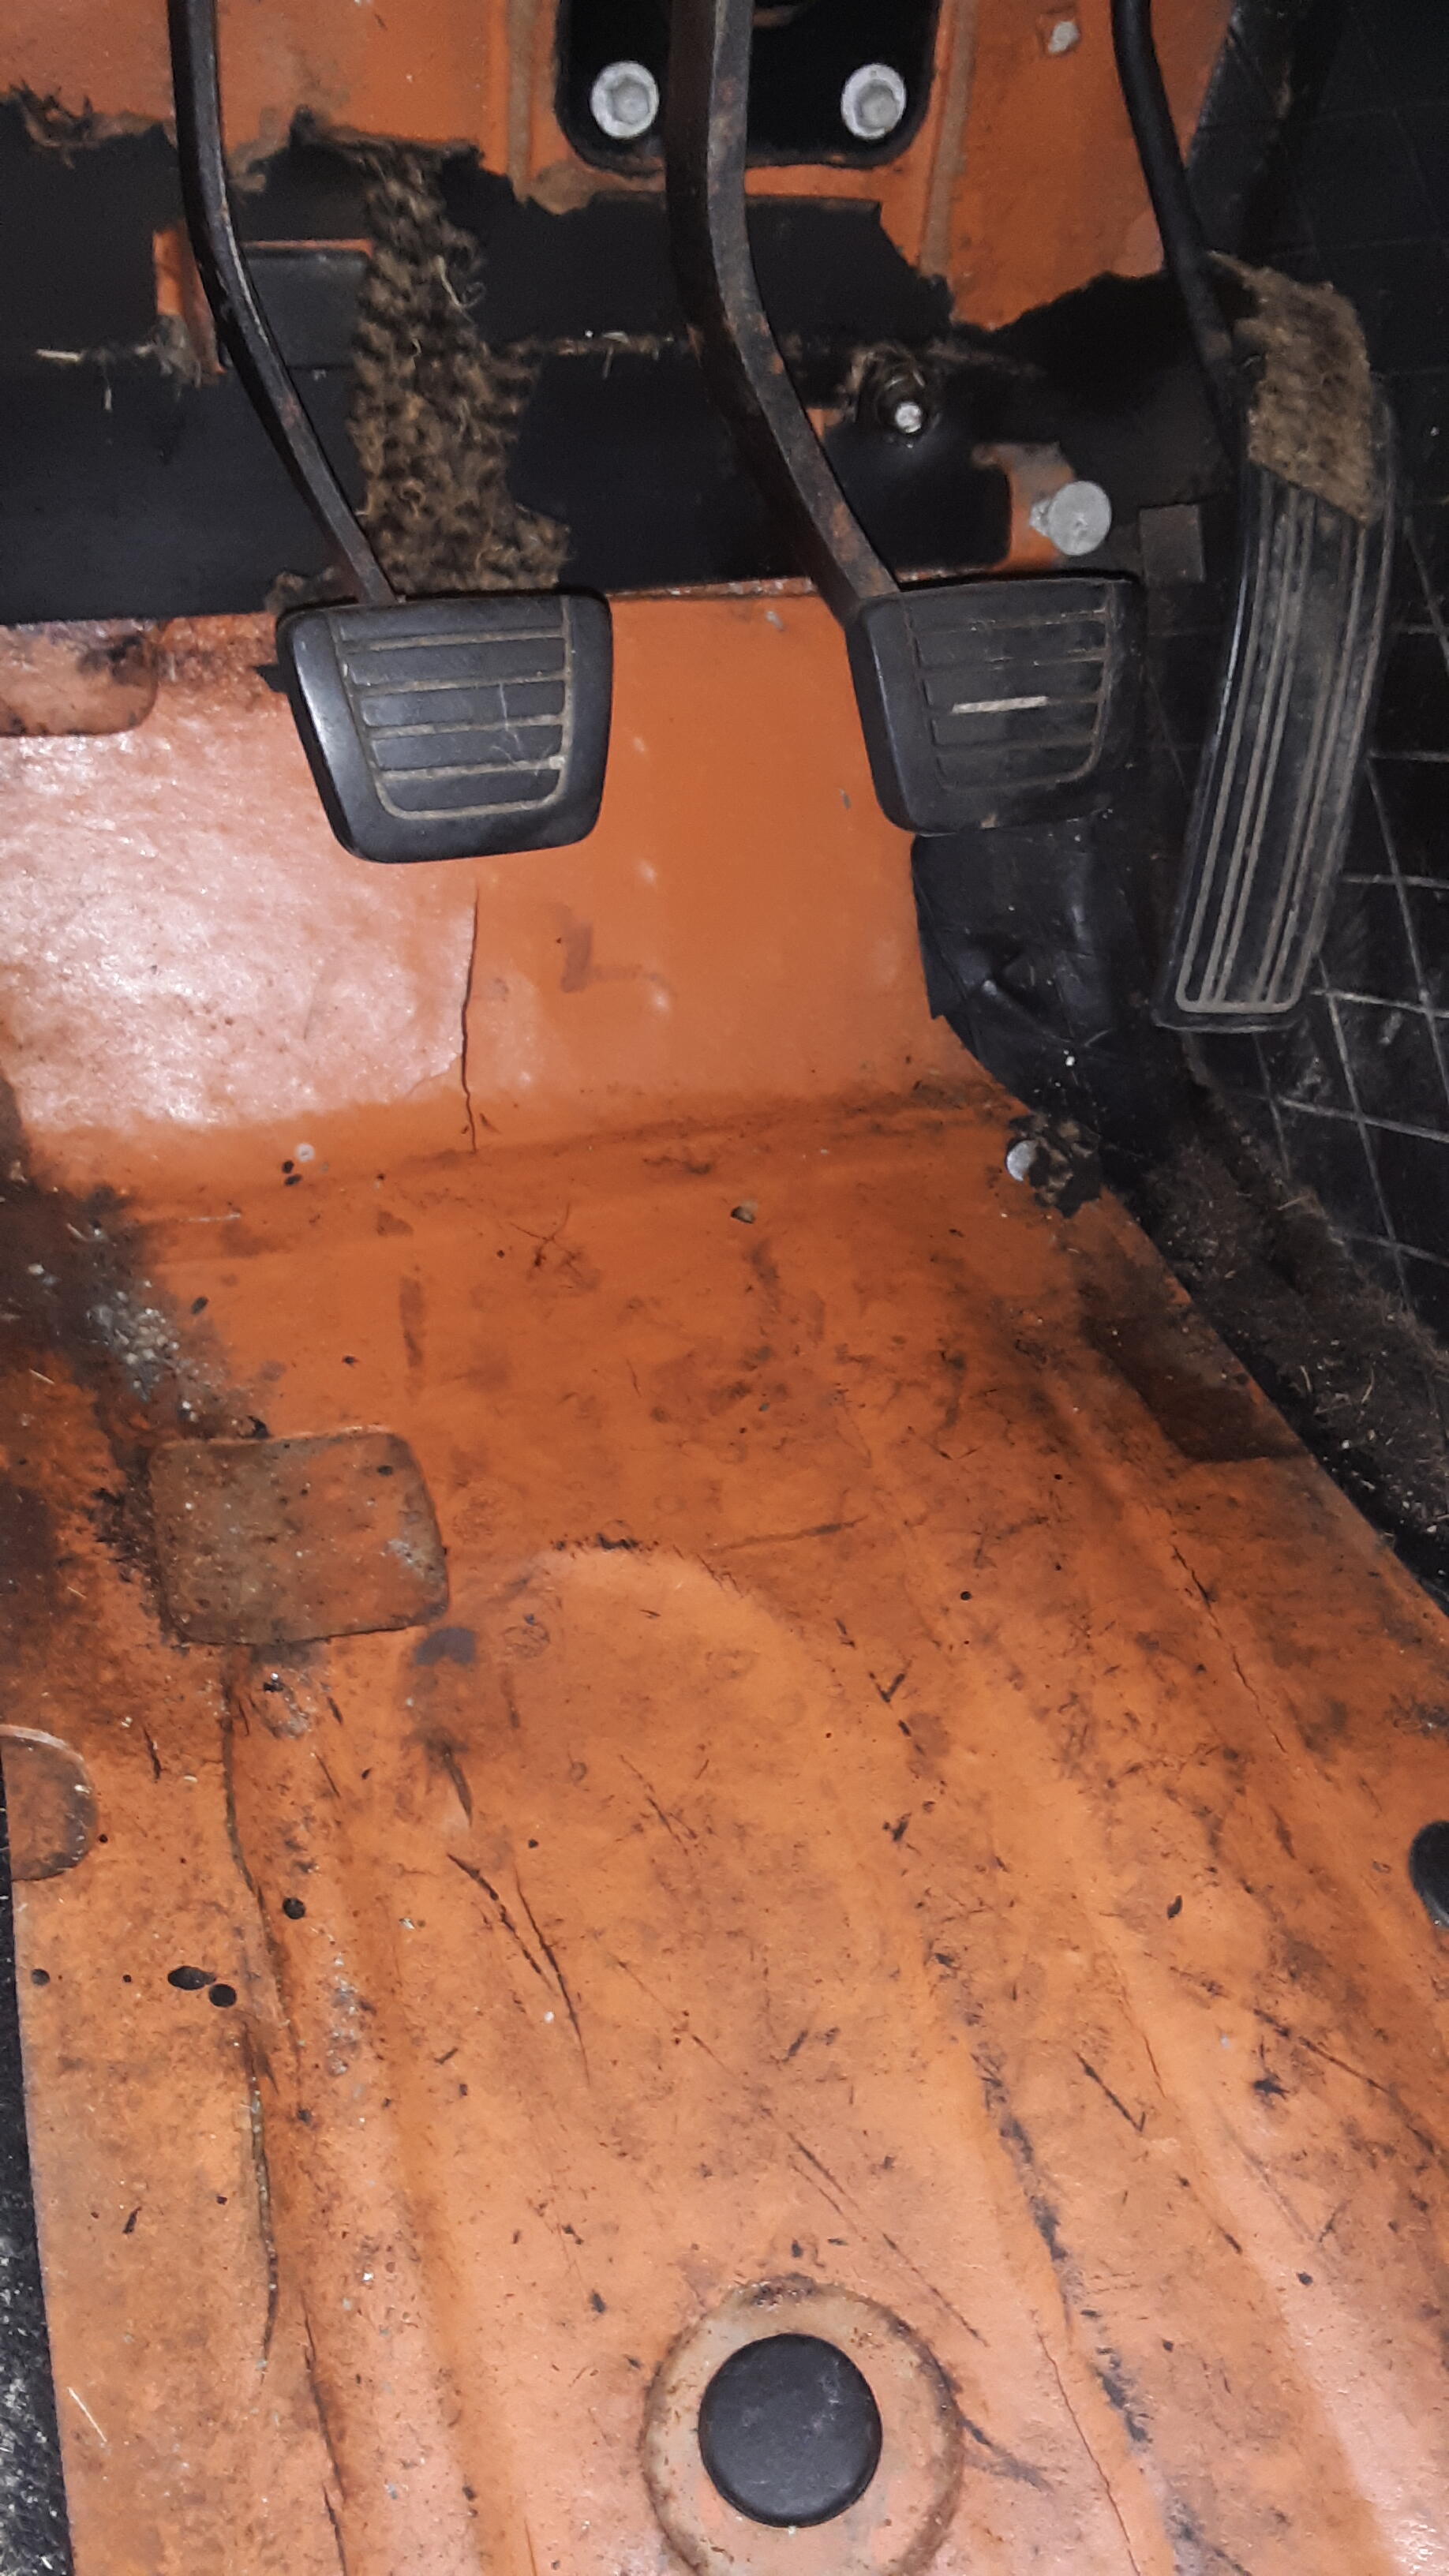
 Is it a 1971 249Z? I see a clutch pedal with low wear, a sign that it's low mileage. Must be a manual transmission. Any more details? Looks like a fun project. There'a thread on the forum, I think it's called "waking the beast" or something like that. You should find it and read it before even spinning the engine. It's possible that it might not be too rusty inside. But unlikely. One of those bore scopes will tell you a lot. Good luck. Edit - found some details on your profile.
- Yesterday
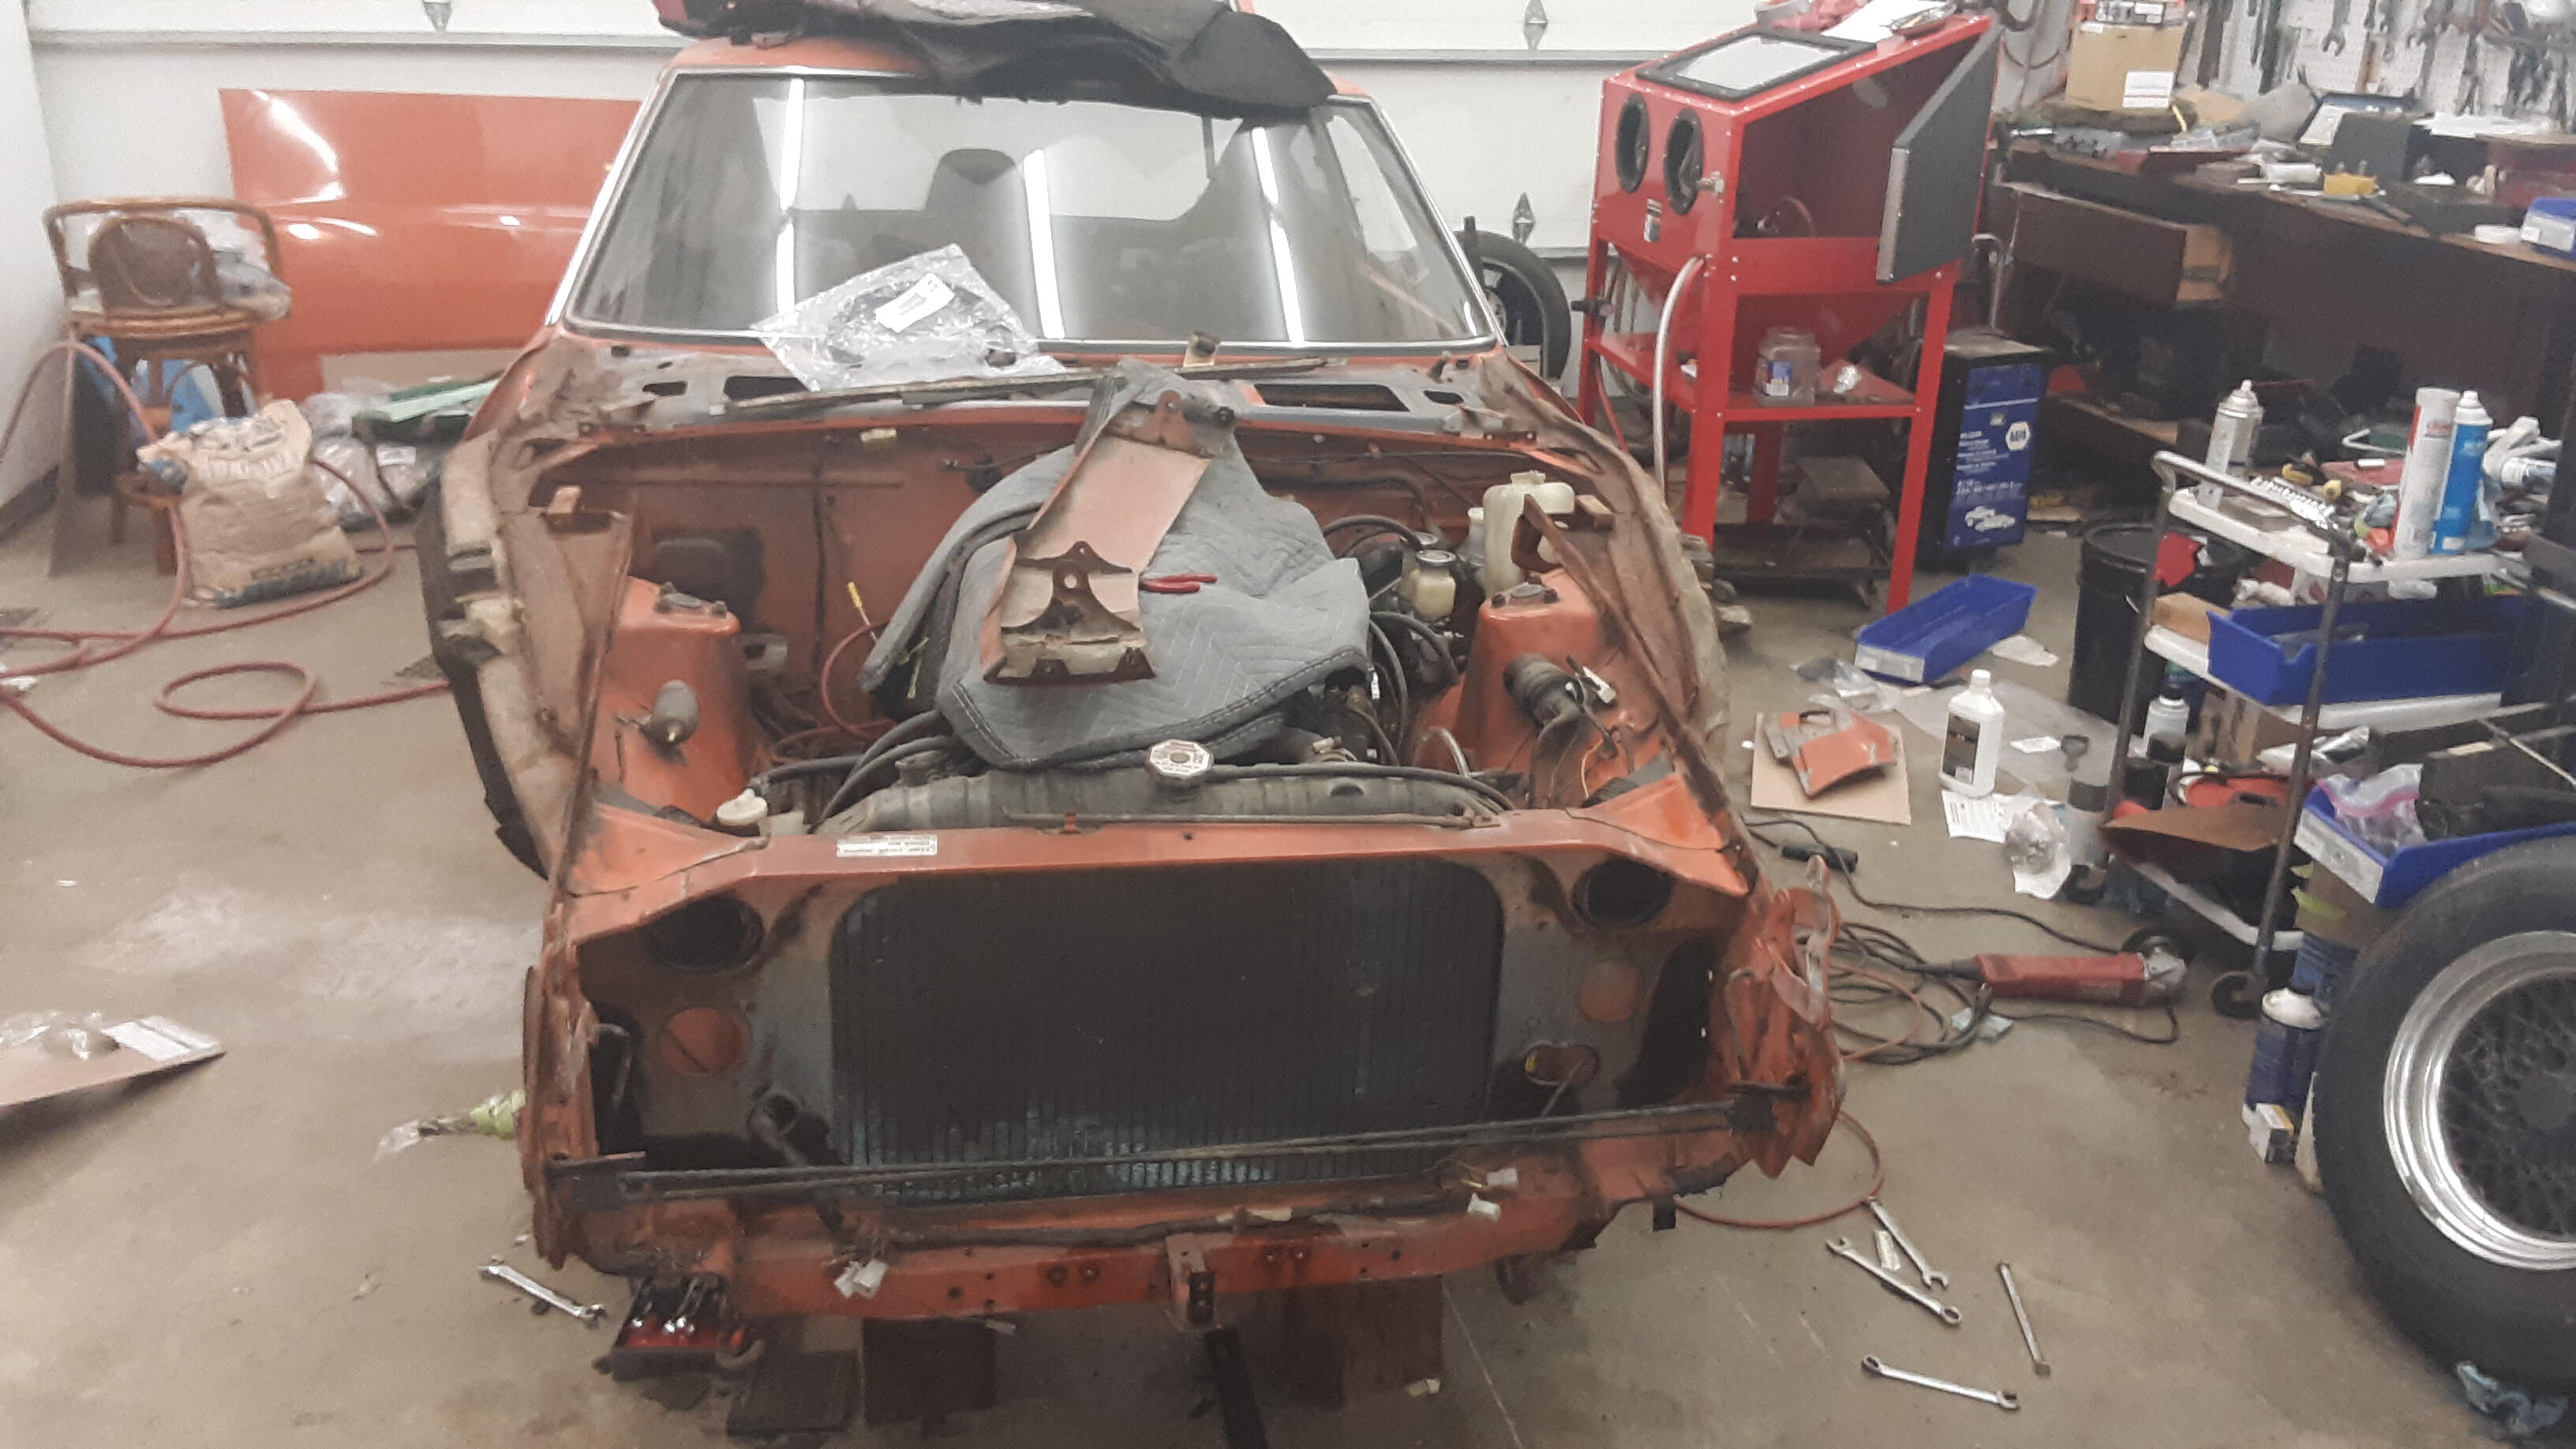
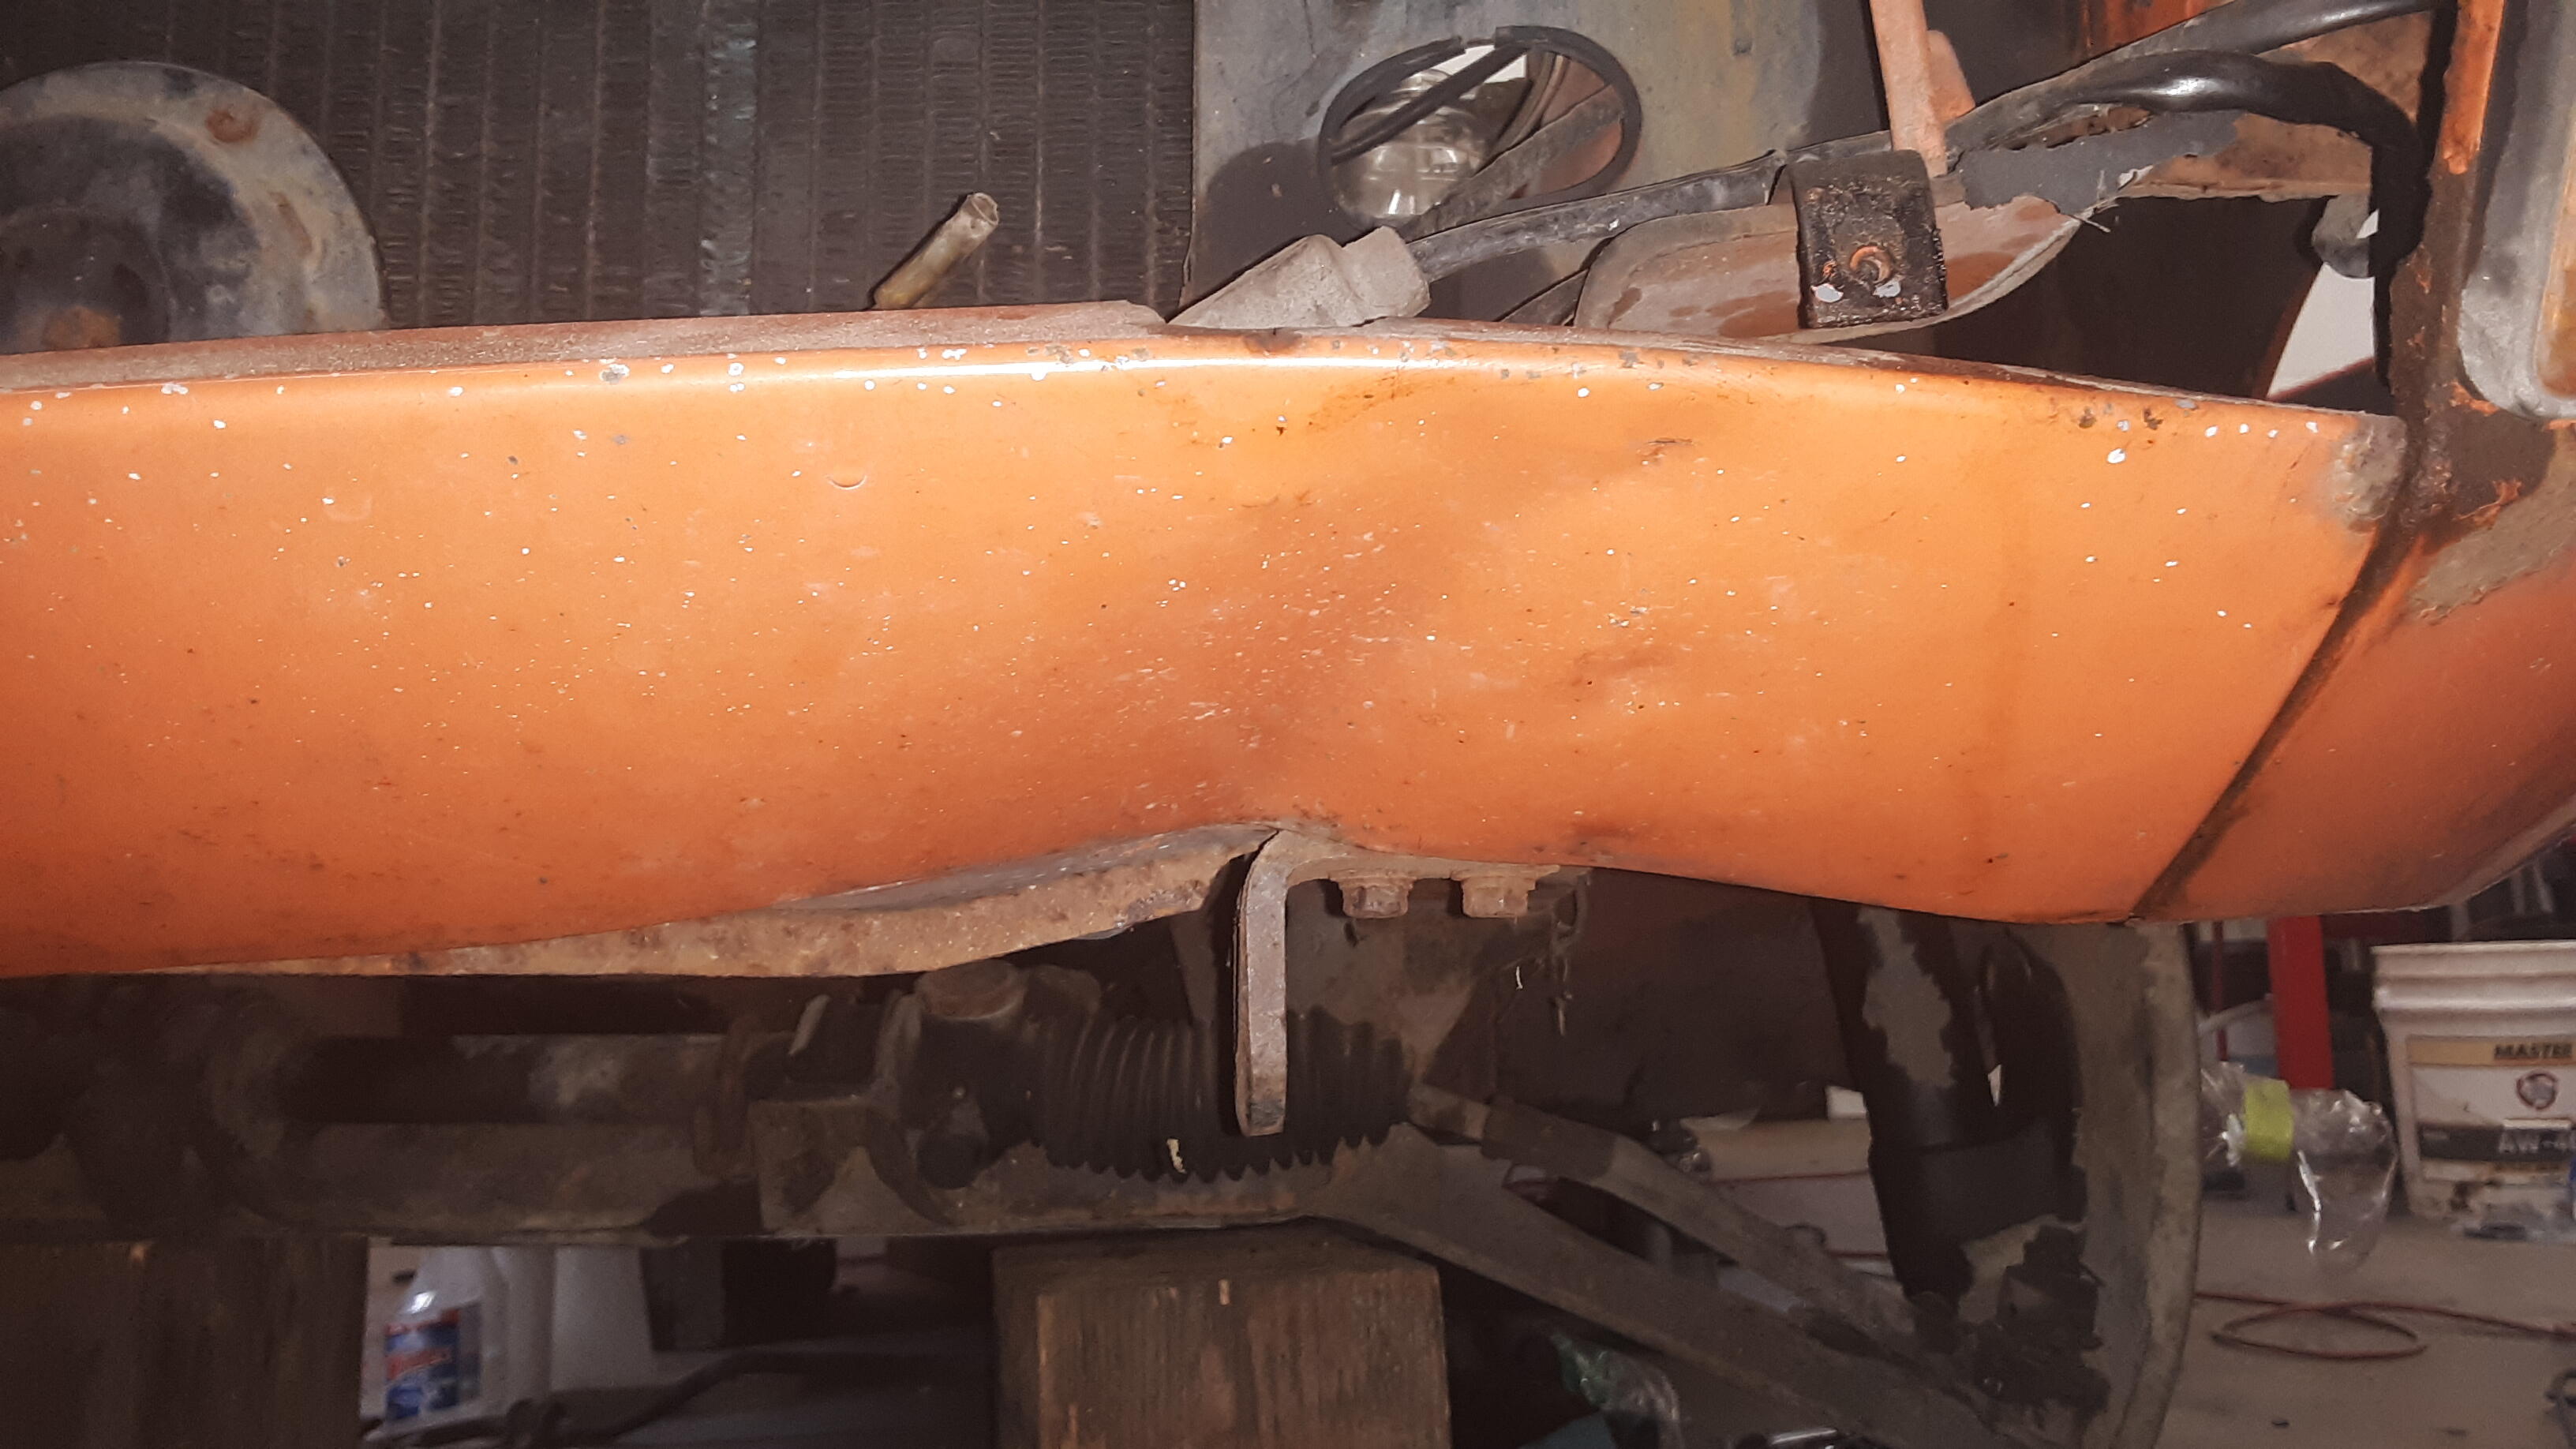
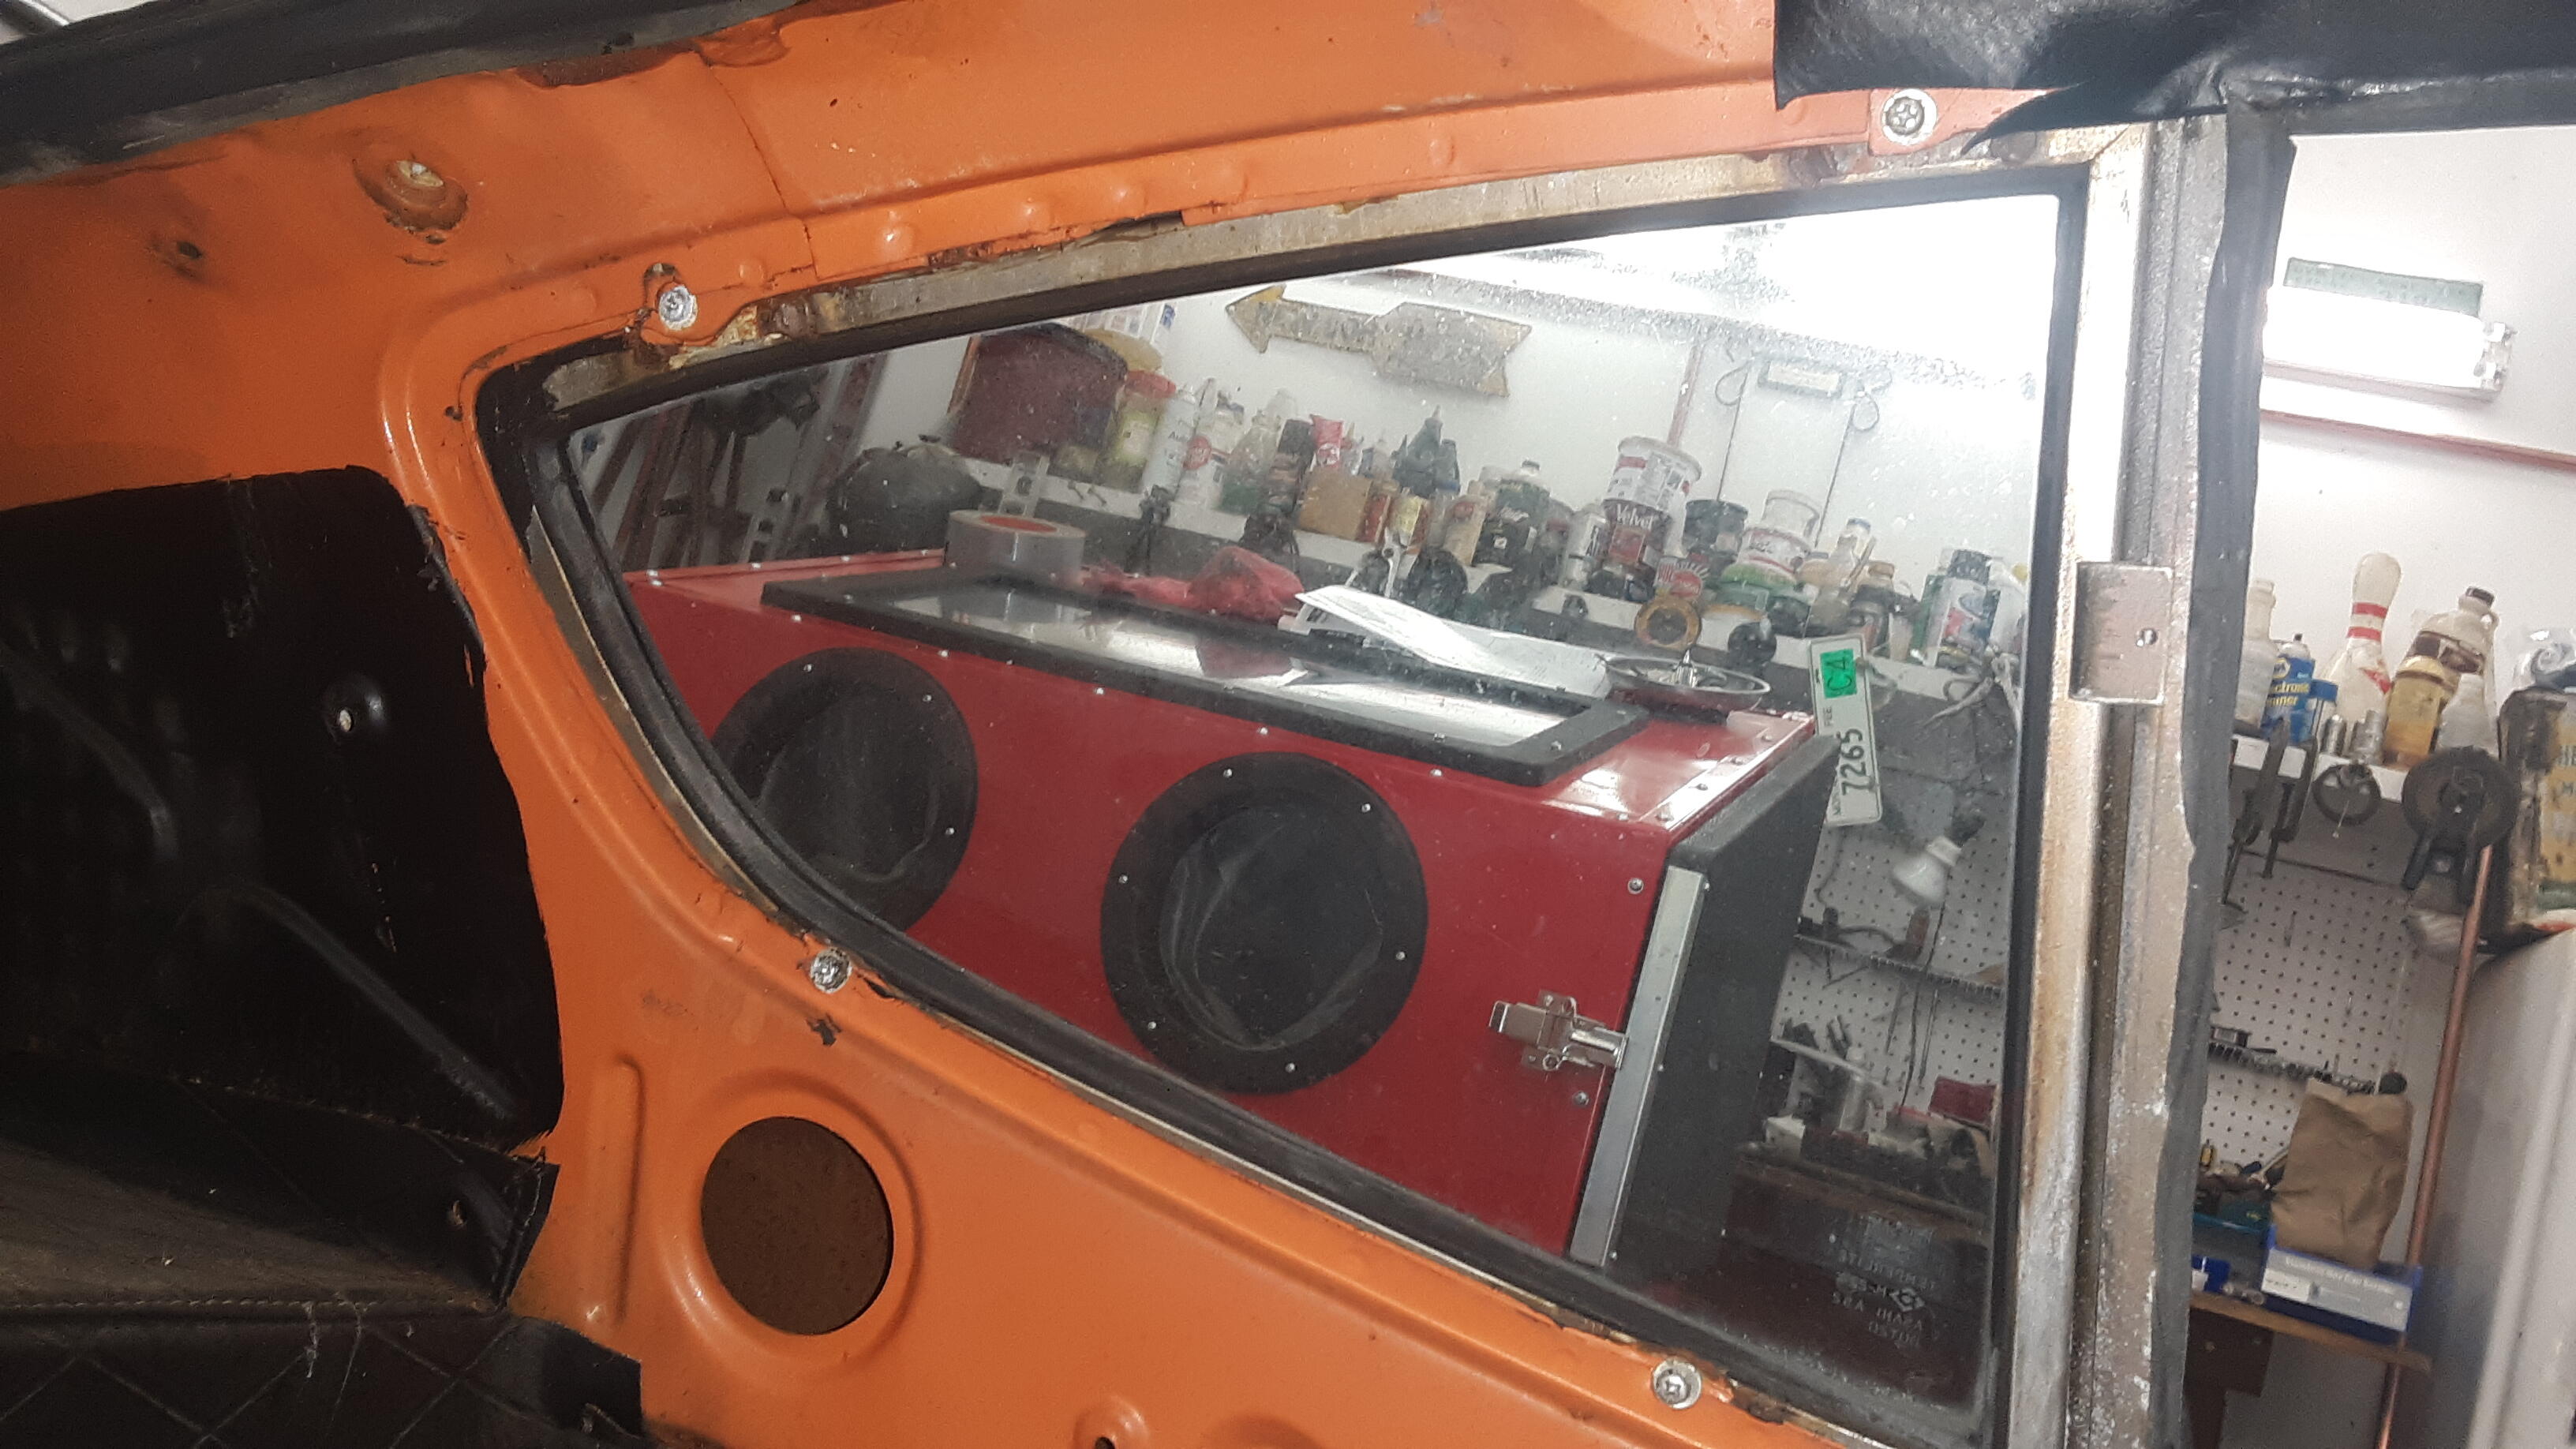
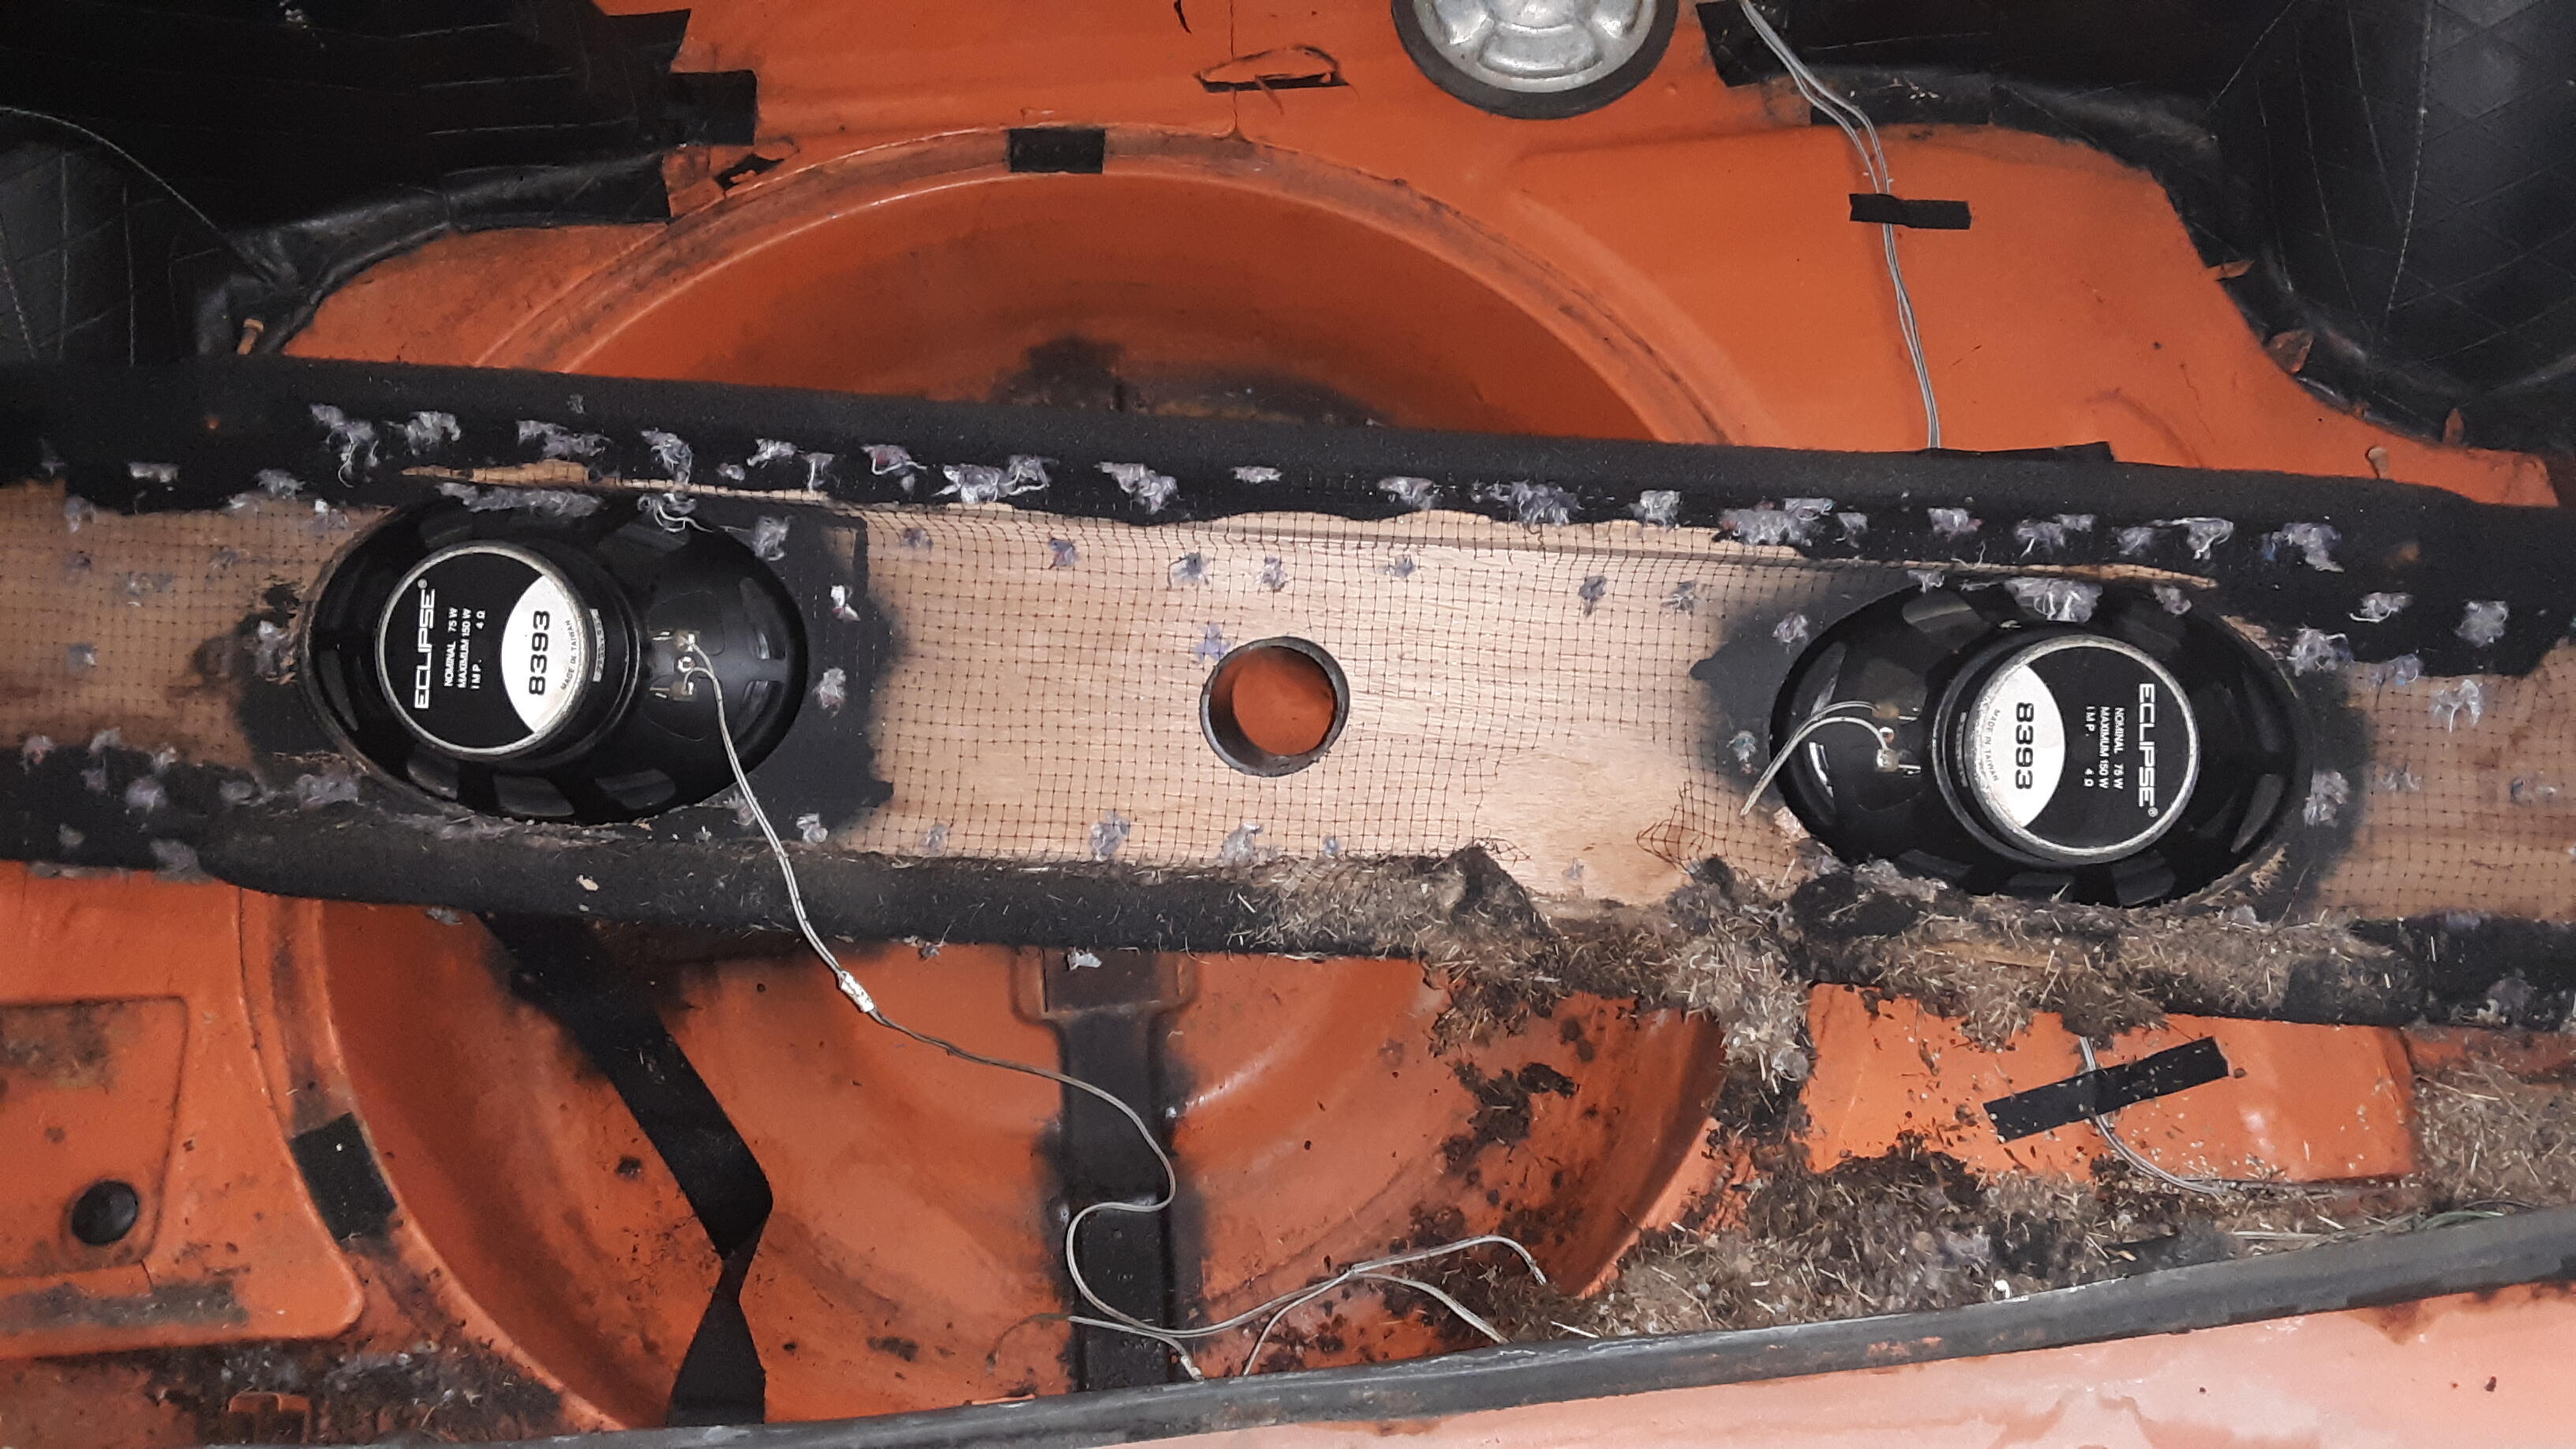
After getting it in my shop, I started removing things, carpet, etc and at first glance, being naive as I was, Wow, this car has no rust! I didn't know that what I was looking at was painted tarmat at the time. But, it looked pretty good. Water continued to run down the passenger side floorboard for several days, where is this coming from? He had a homemade speaker box in the back and when I removed it and the spare tire and found what he was talking about, MICE!

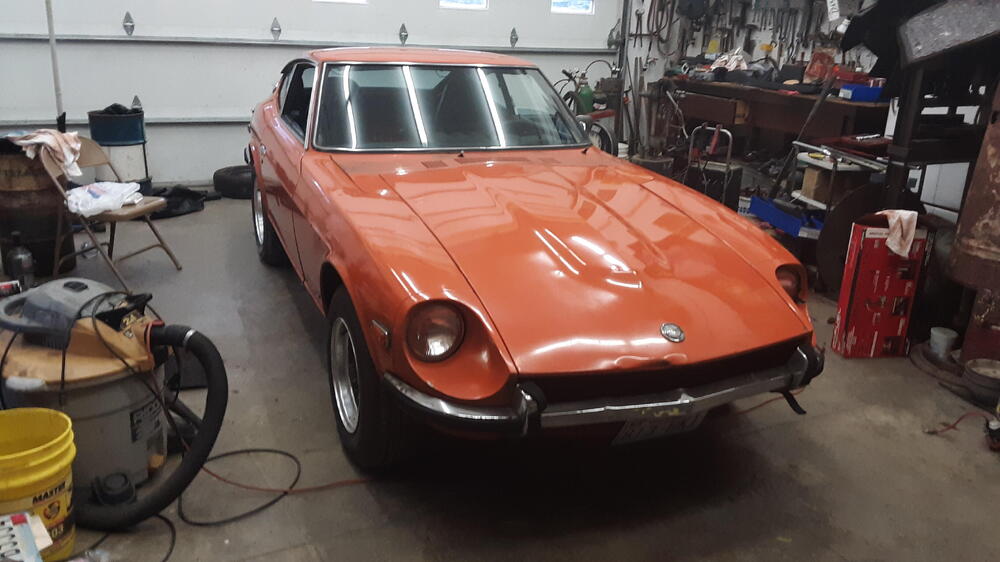
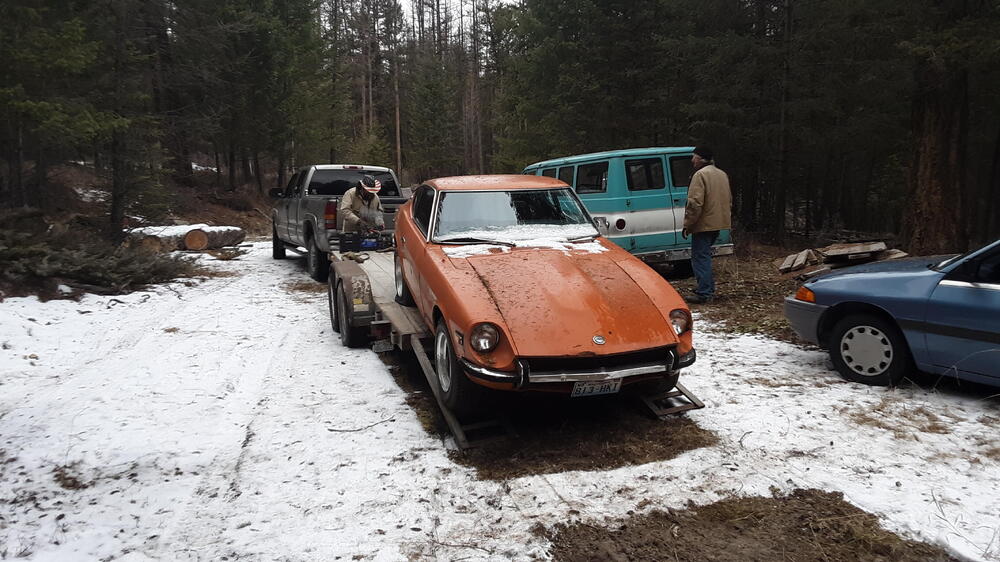
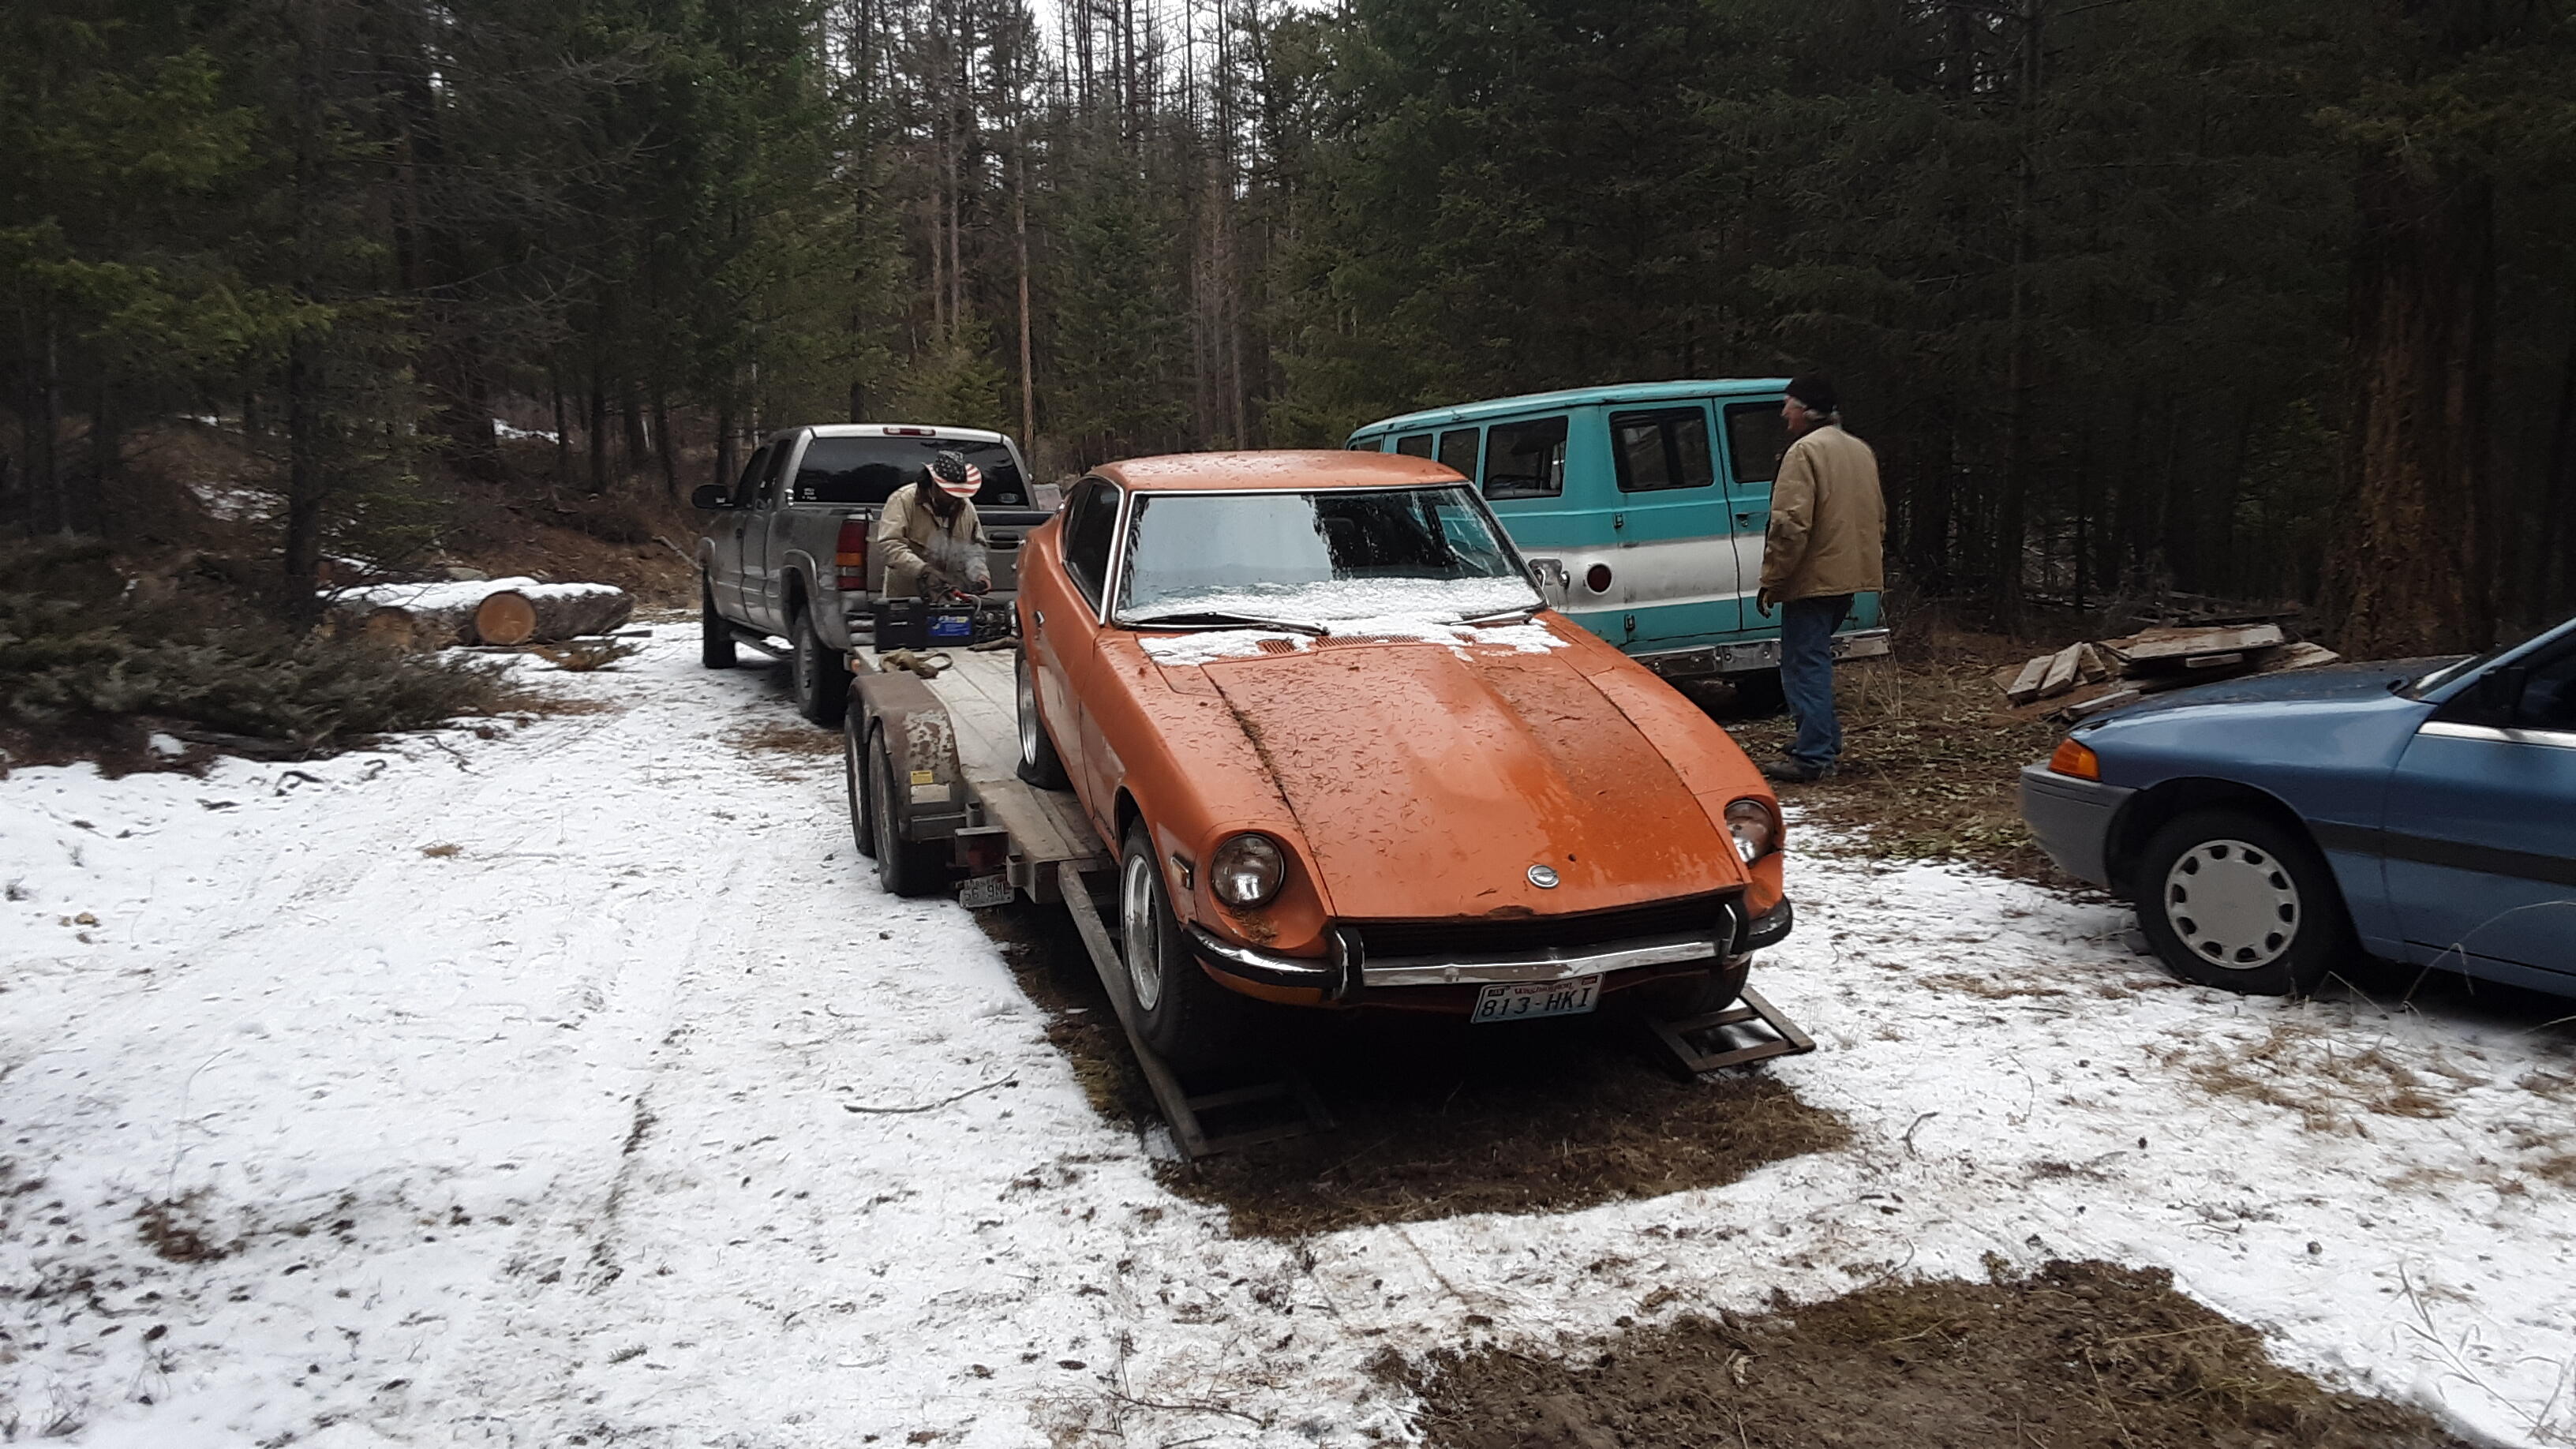
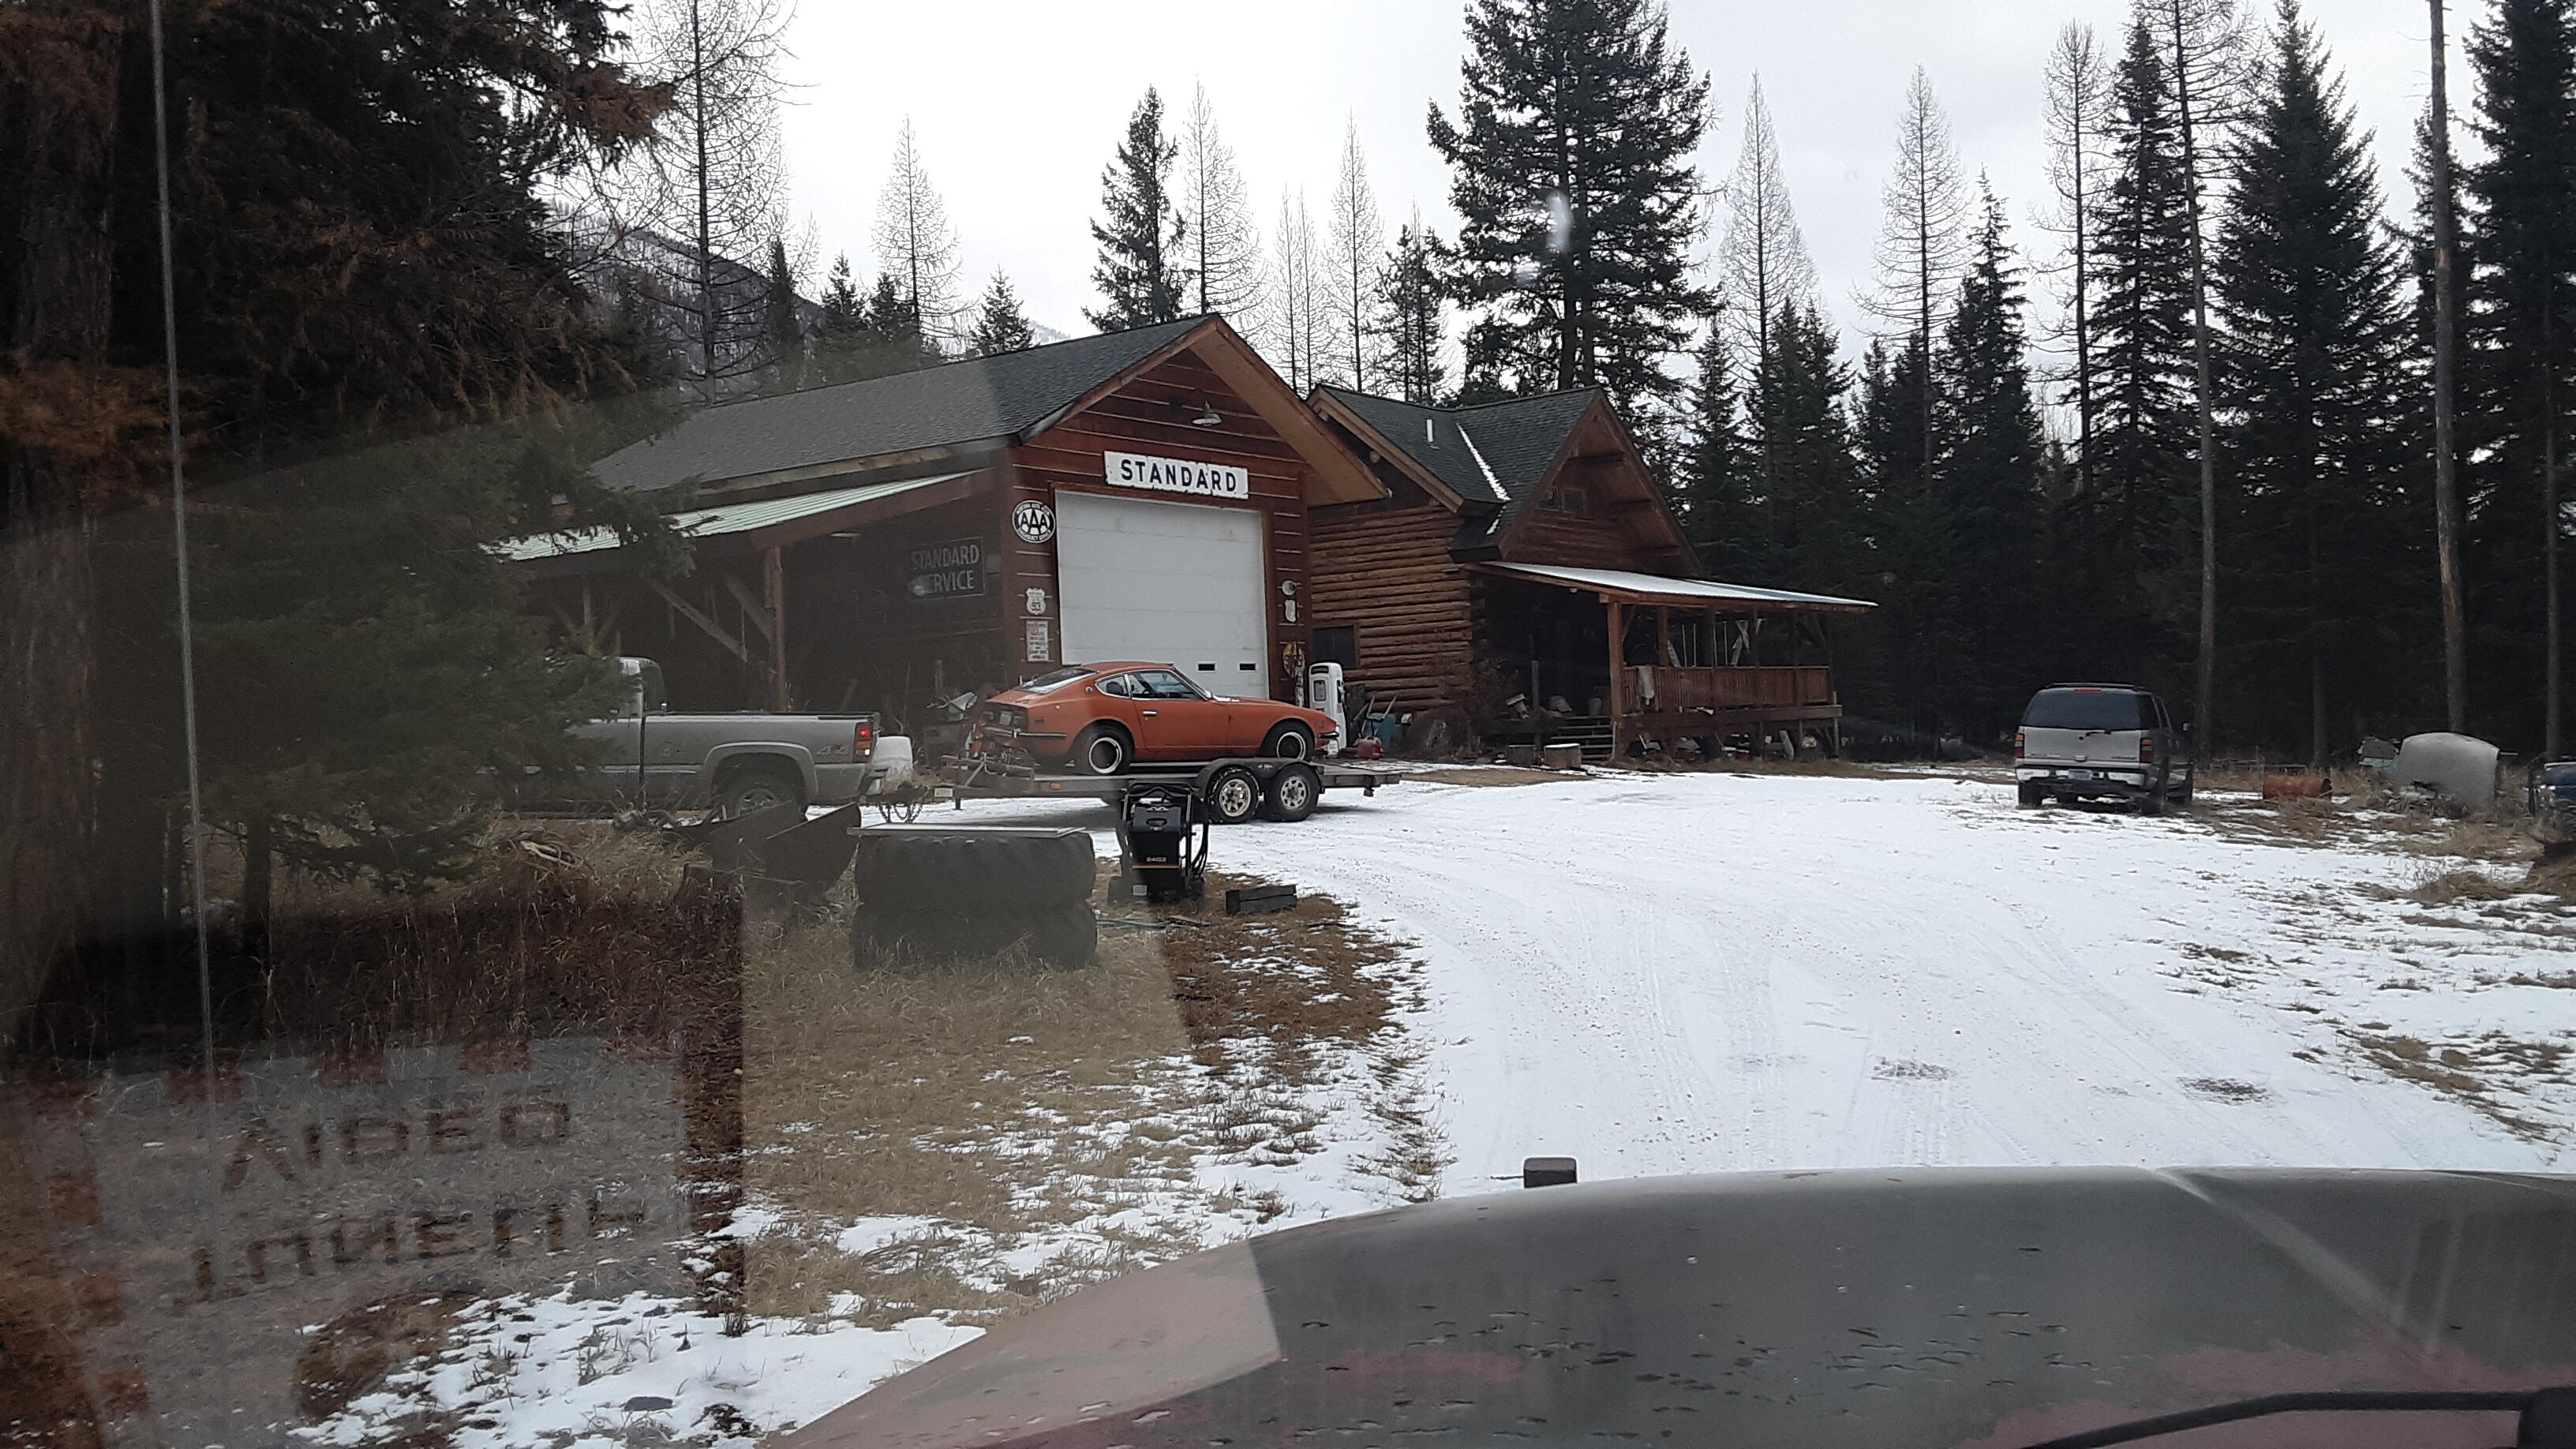
 Hi Everybody! First off I have to say, what a great site this is and thank you to all who contribute to it. I stumbled upon this car in January of 2021 while logging my neighbors property about 1/2 mile away. The owner, who moved here in 2003 to help his aging parents on their small ranch, brought this with him from the Seattle area. He offloaded it here in the woods, and it remained there until he showed it to me. He kept mentioning something about the darn squirrels and mice getting in a car, and he was kind of sad about it. "What kind of car is it?" I ask. Oh, "It's a Zcar". Hmmm, I remember those in high School in the late 70's, my friend had one. Let's go look at it! So off through the forest we go, and wow! this is cool! I opened the hood and was immediately in awe. Then, when I opened the inspection lids, This is really cool. He started talking about side draft carburetors and I was lost, but he thought they were amazing. Life on the ranch became overwhelming and time just got away from the gentleman, he is now in his mid 70's and it's been 18 years since he parked it. He tells me he found it on Vashon Island completely buried in blackberry bushes, along with an old VW, back in the late 1990's. So he rescued it, got it running, and his wife drove it for 2 years before it ended up here. I went home, did some research on 240z's and couldn't sleep. I had to save this car! I went back the next day to work and made a deal with him, brought it home. What did I just do? Along with the car, he had a few things, books and a few parts. Back in 1999, you could go to a Nissan dealer and pretty much still order anything you want for these cars.
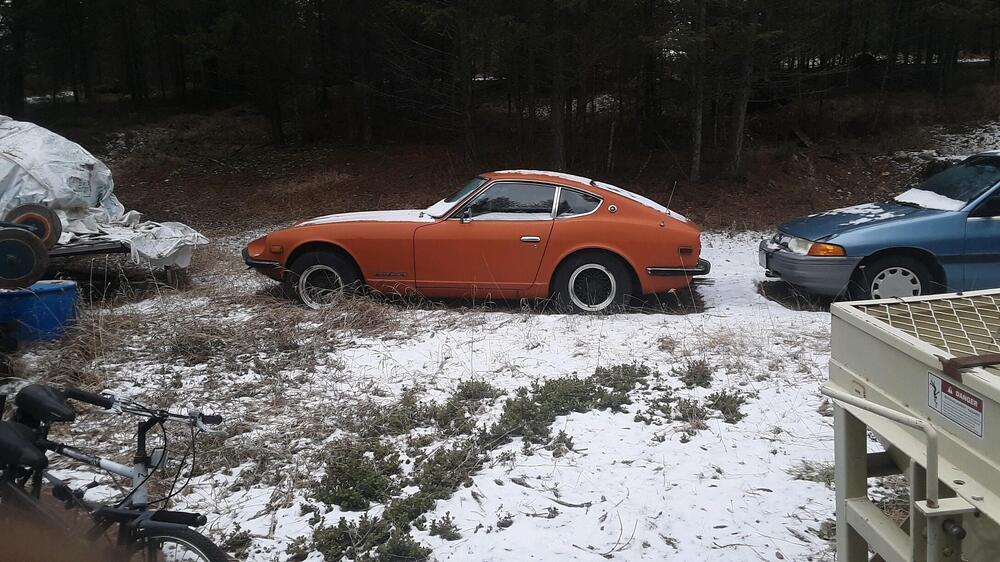


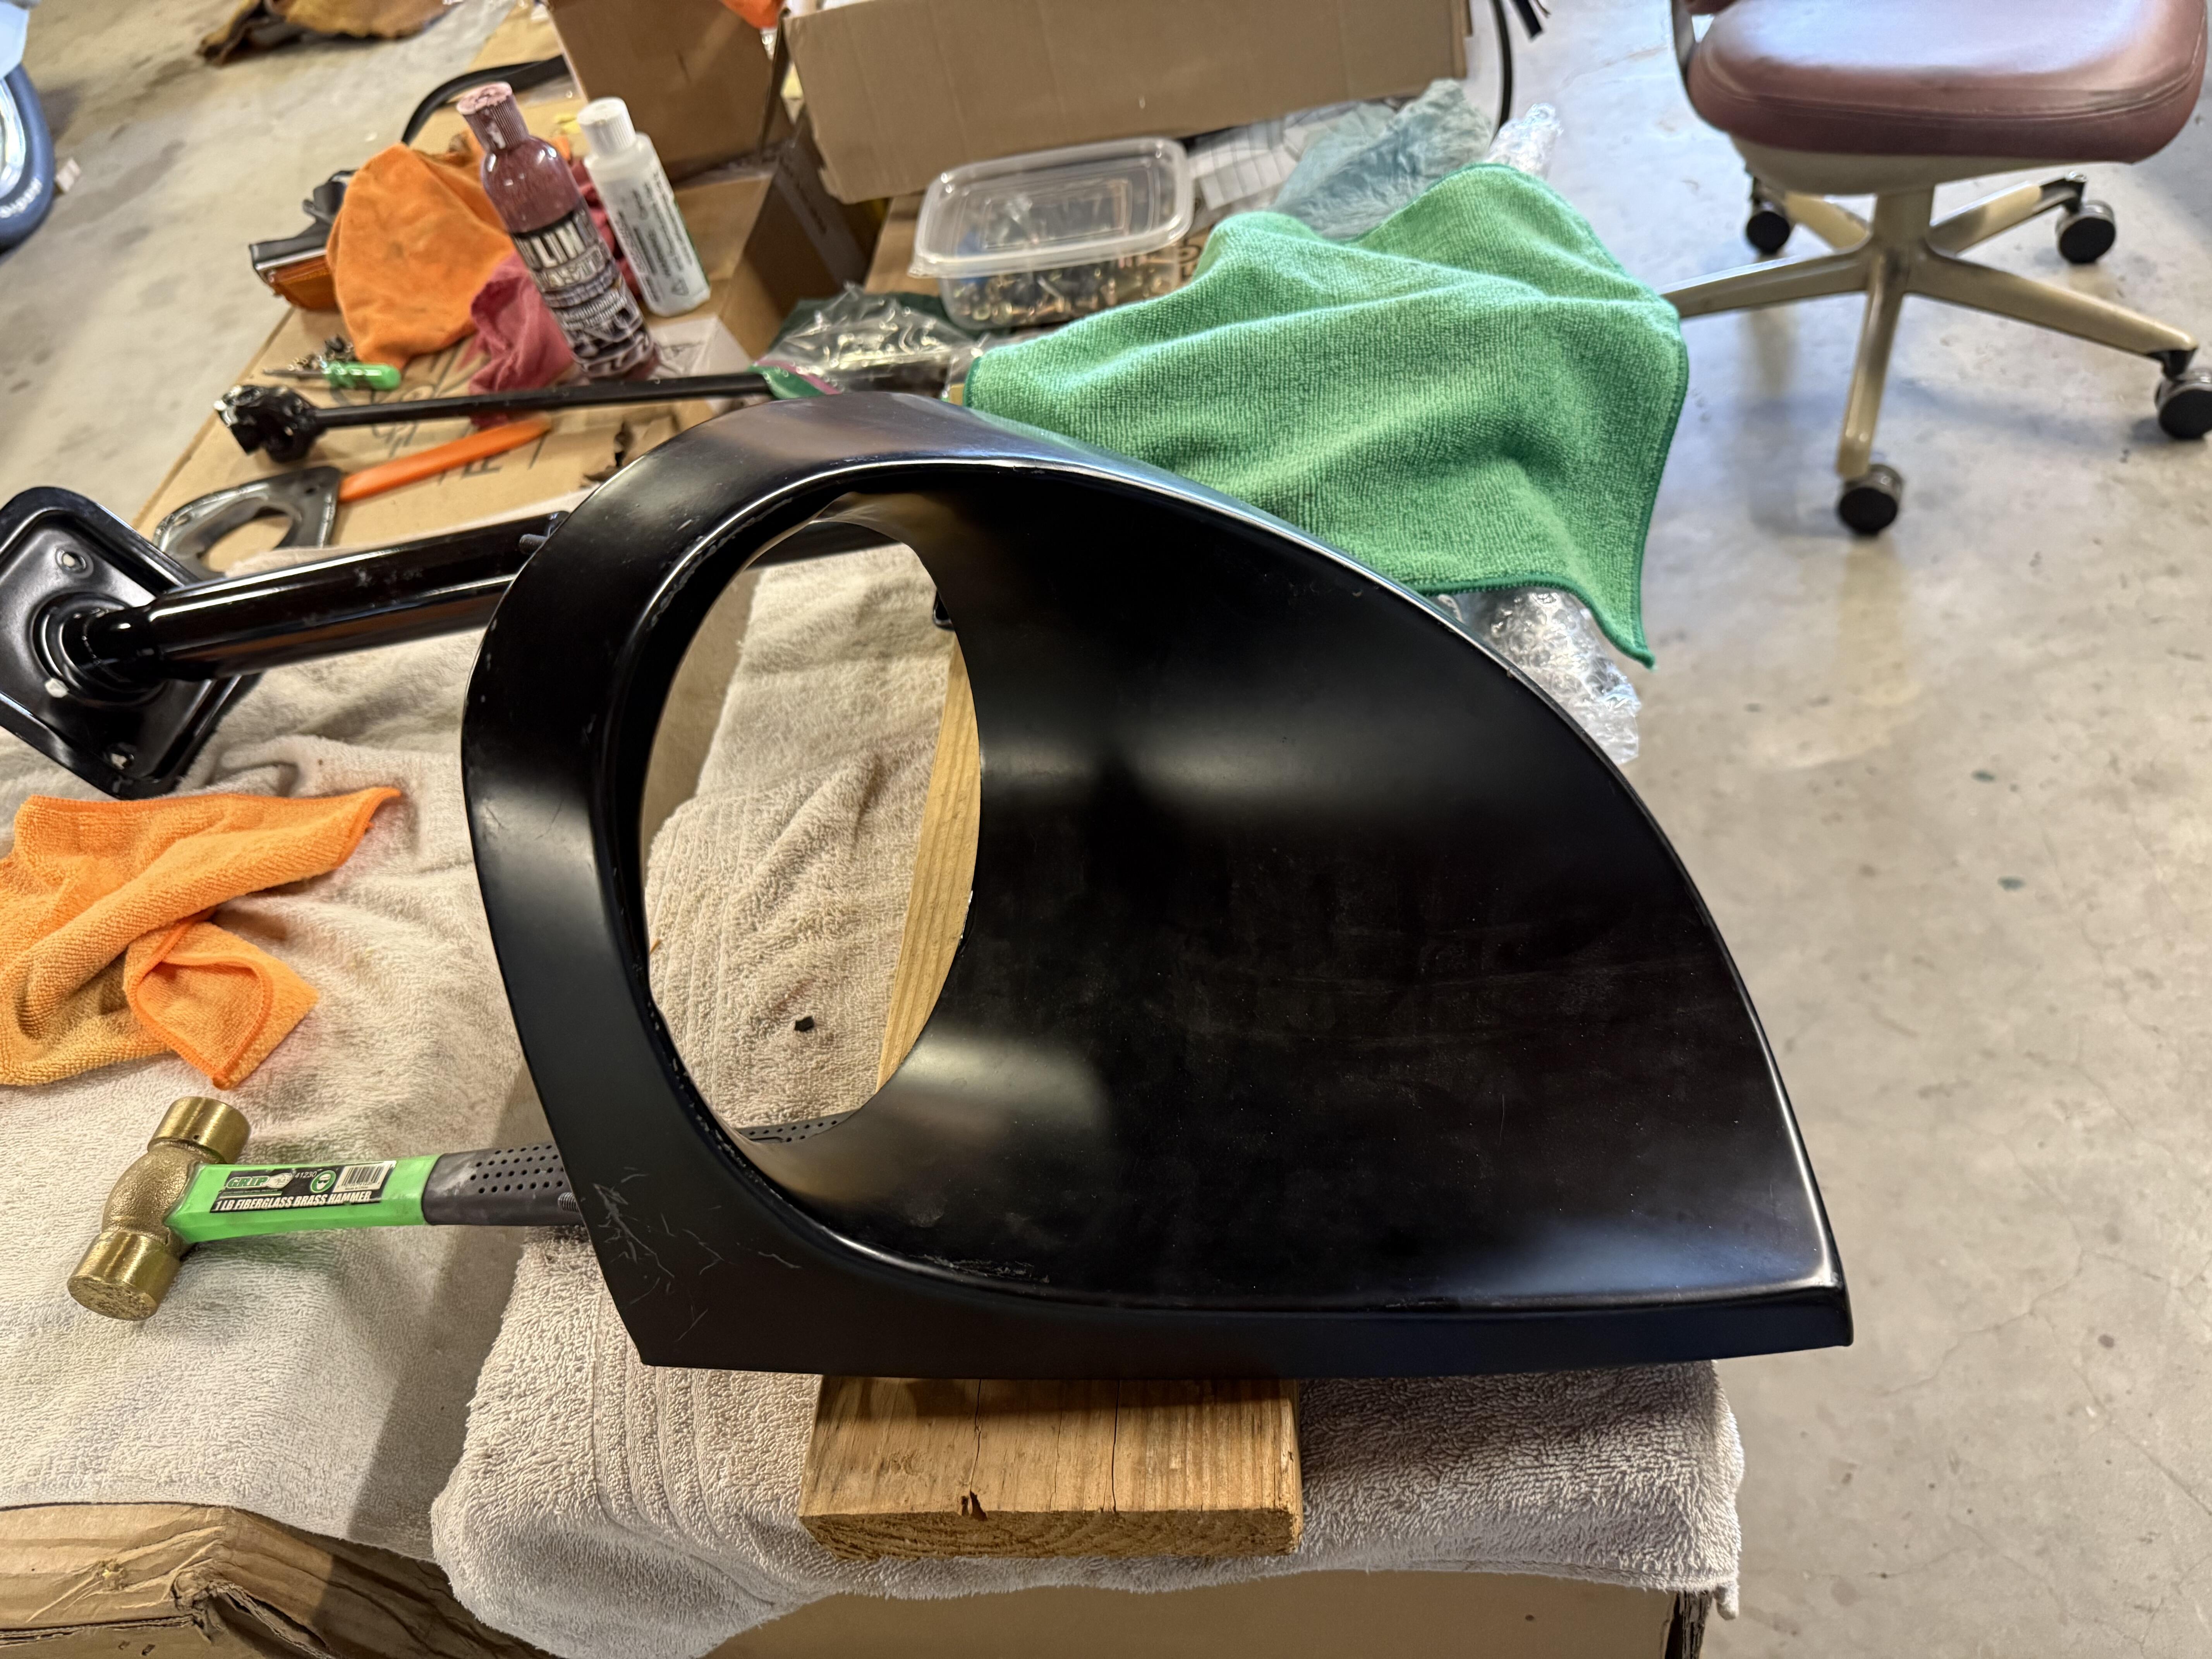
 I've found that fiberglass repair is relatively easy and forgiving compared to repairing metal body work. You could do the scoops on your dining room table. Give it a try.
 I haven't heard of these guys before. They missed the boat on the ZX distributor swap. SkillardSkillardFind what you need to build your vision at Skillard.com We specialize in aftermarket parts for the Datsun and Nissan automotive enthusiast communities. Custom car parts, designed and manufactured i...
 Lagartijo007 joined the community
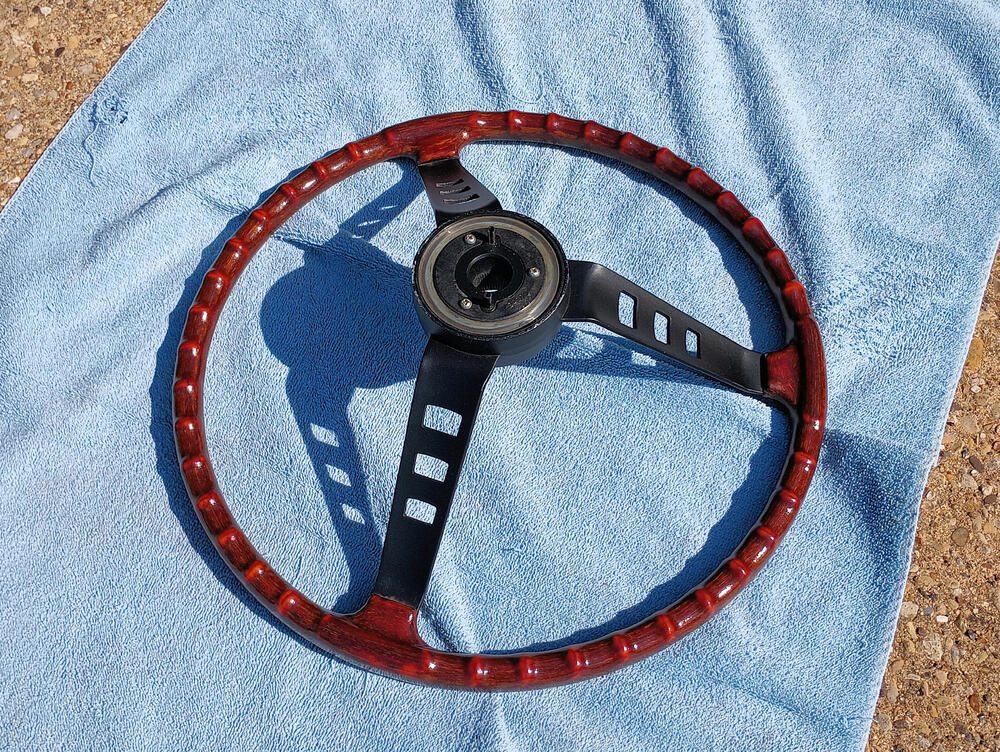
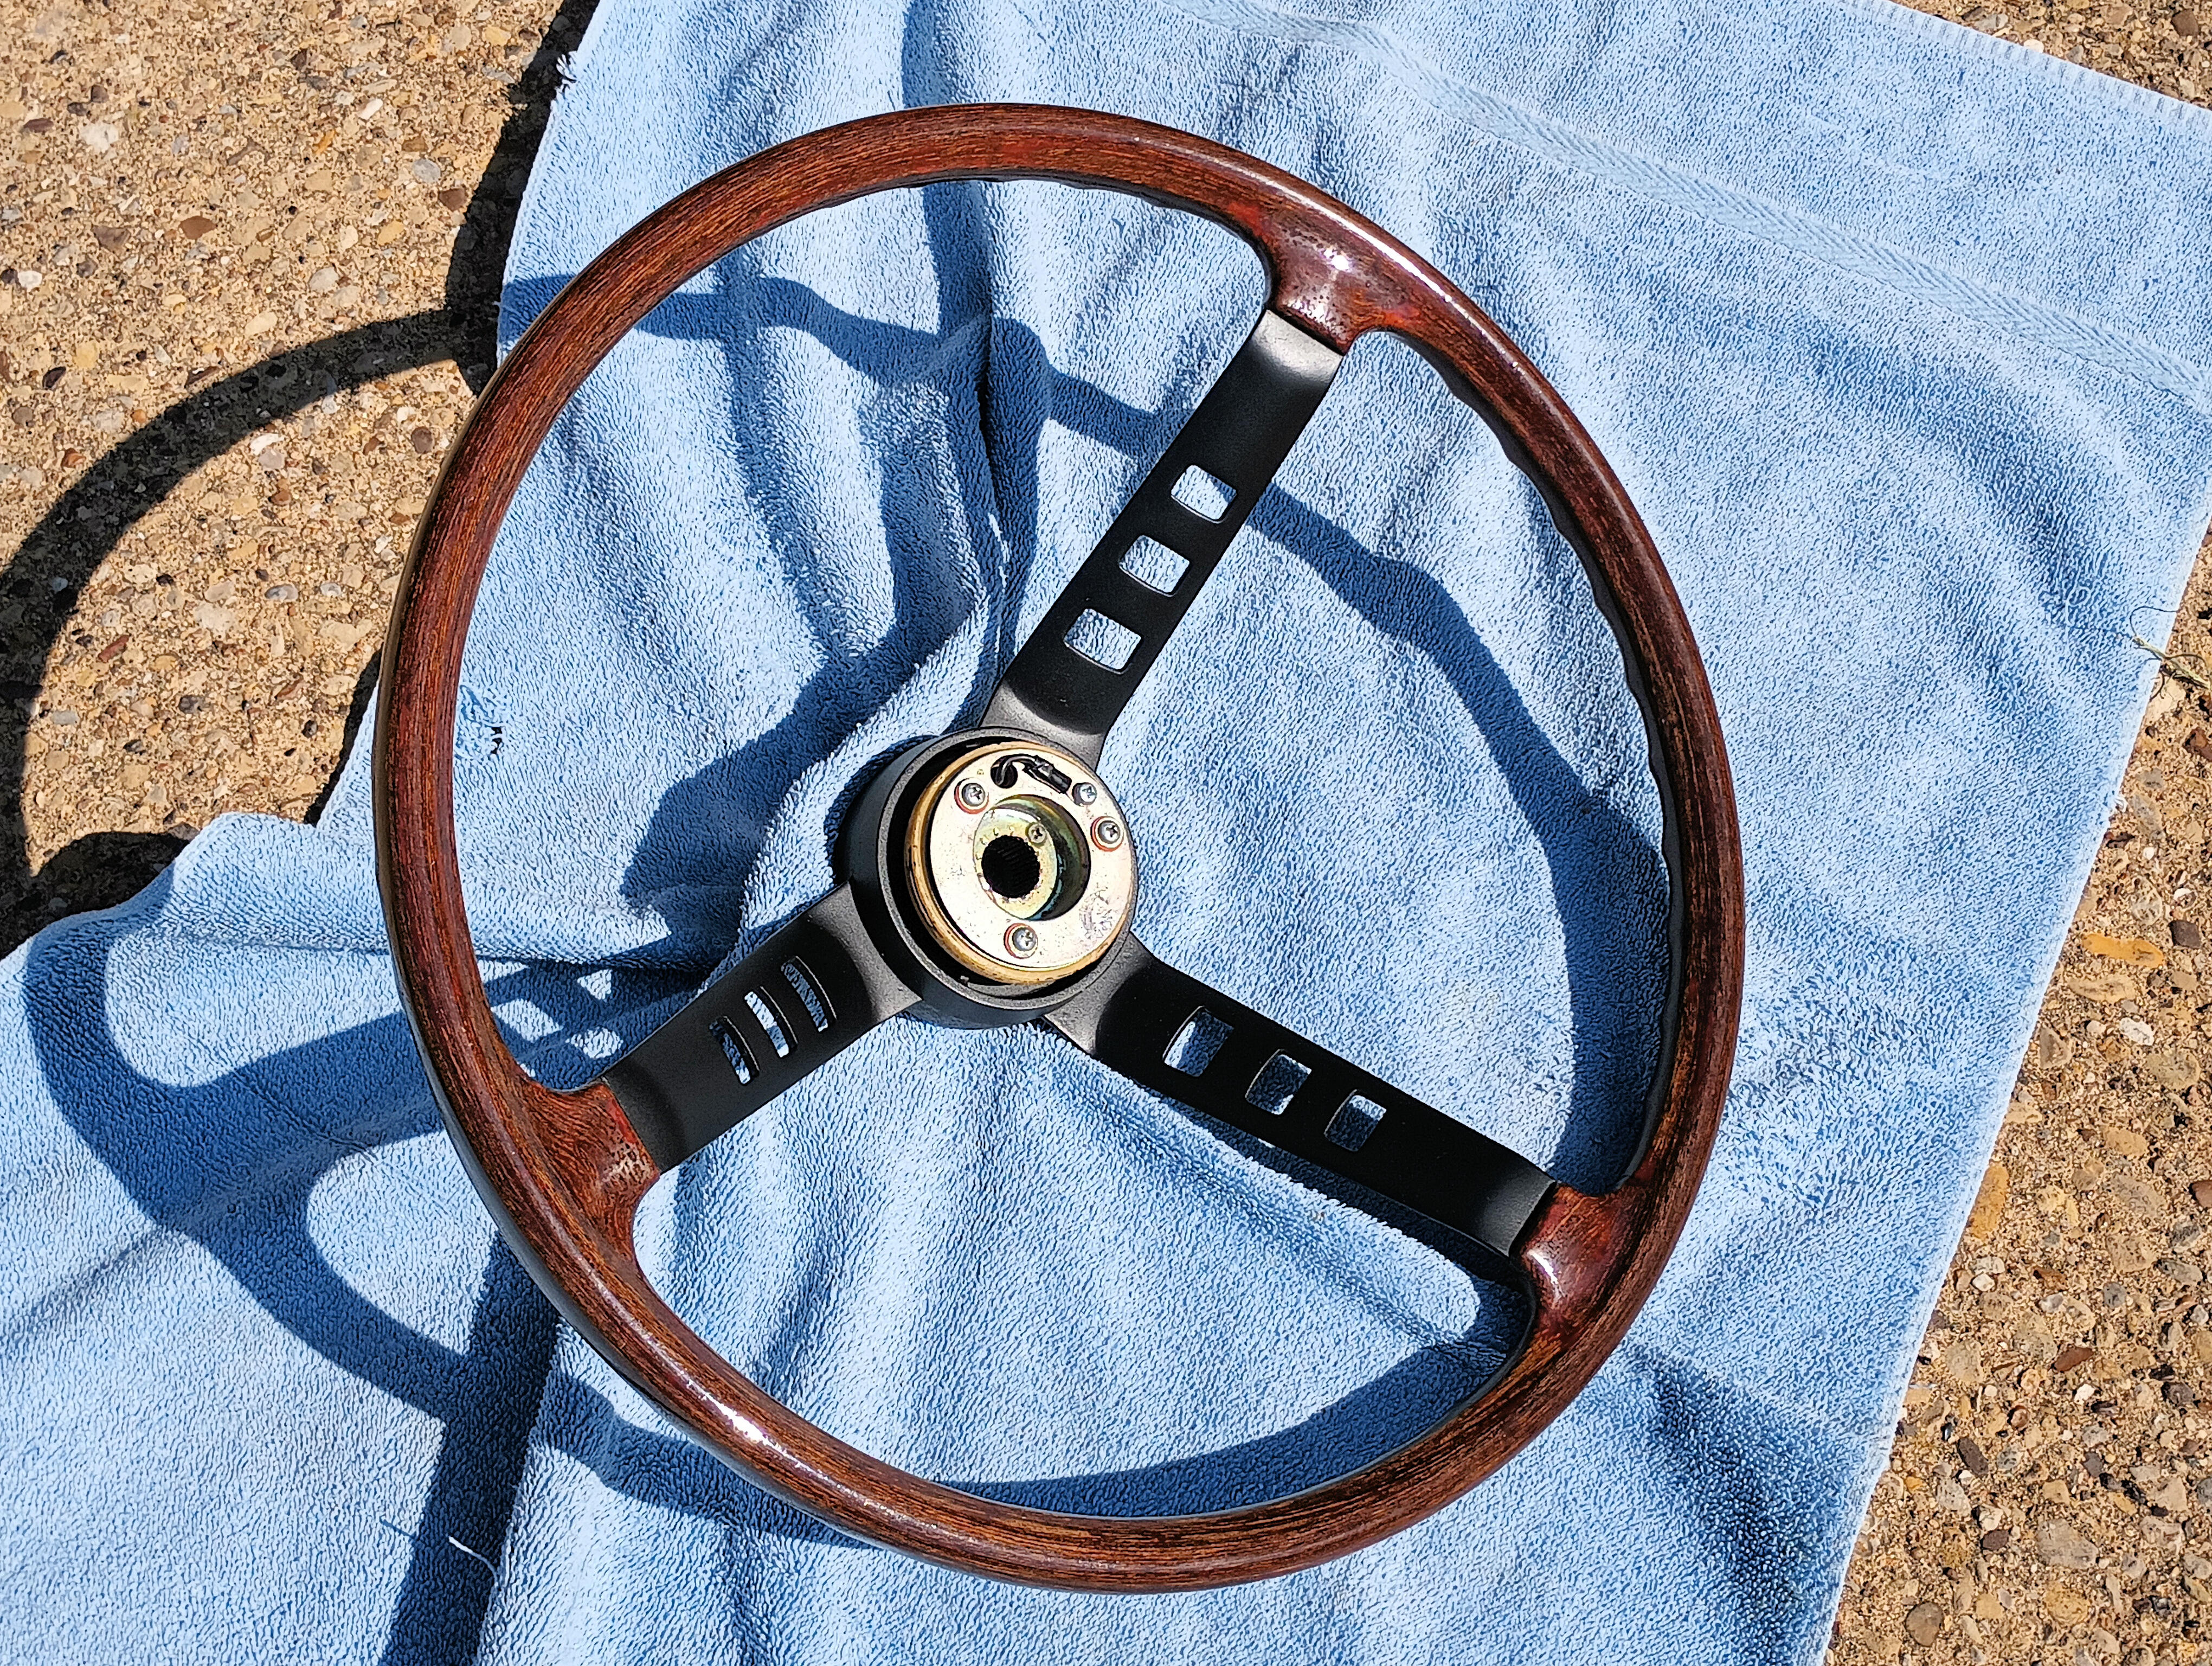
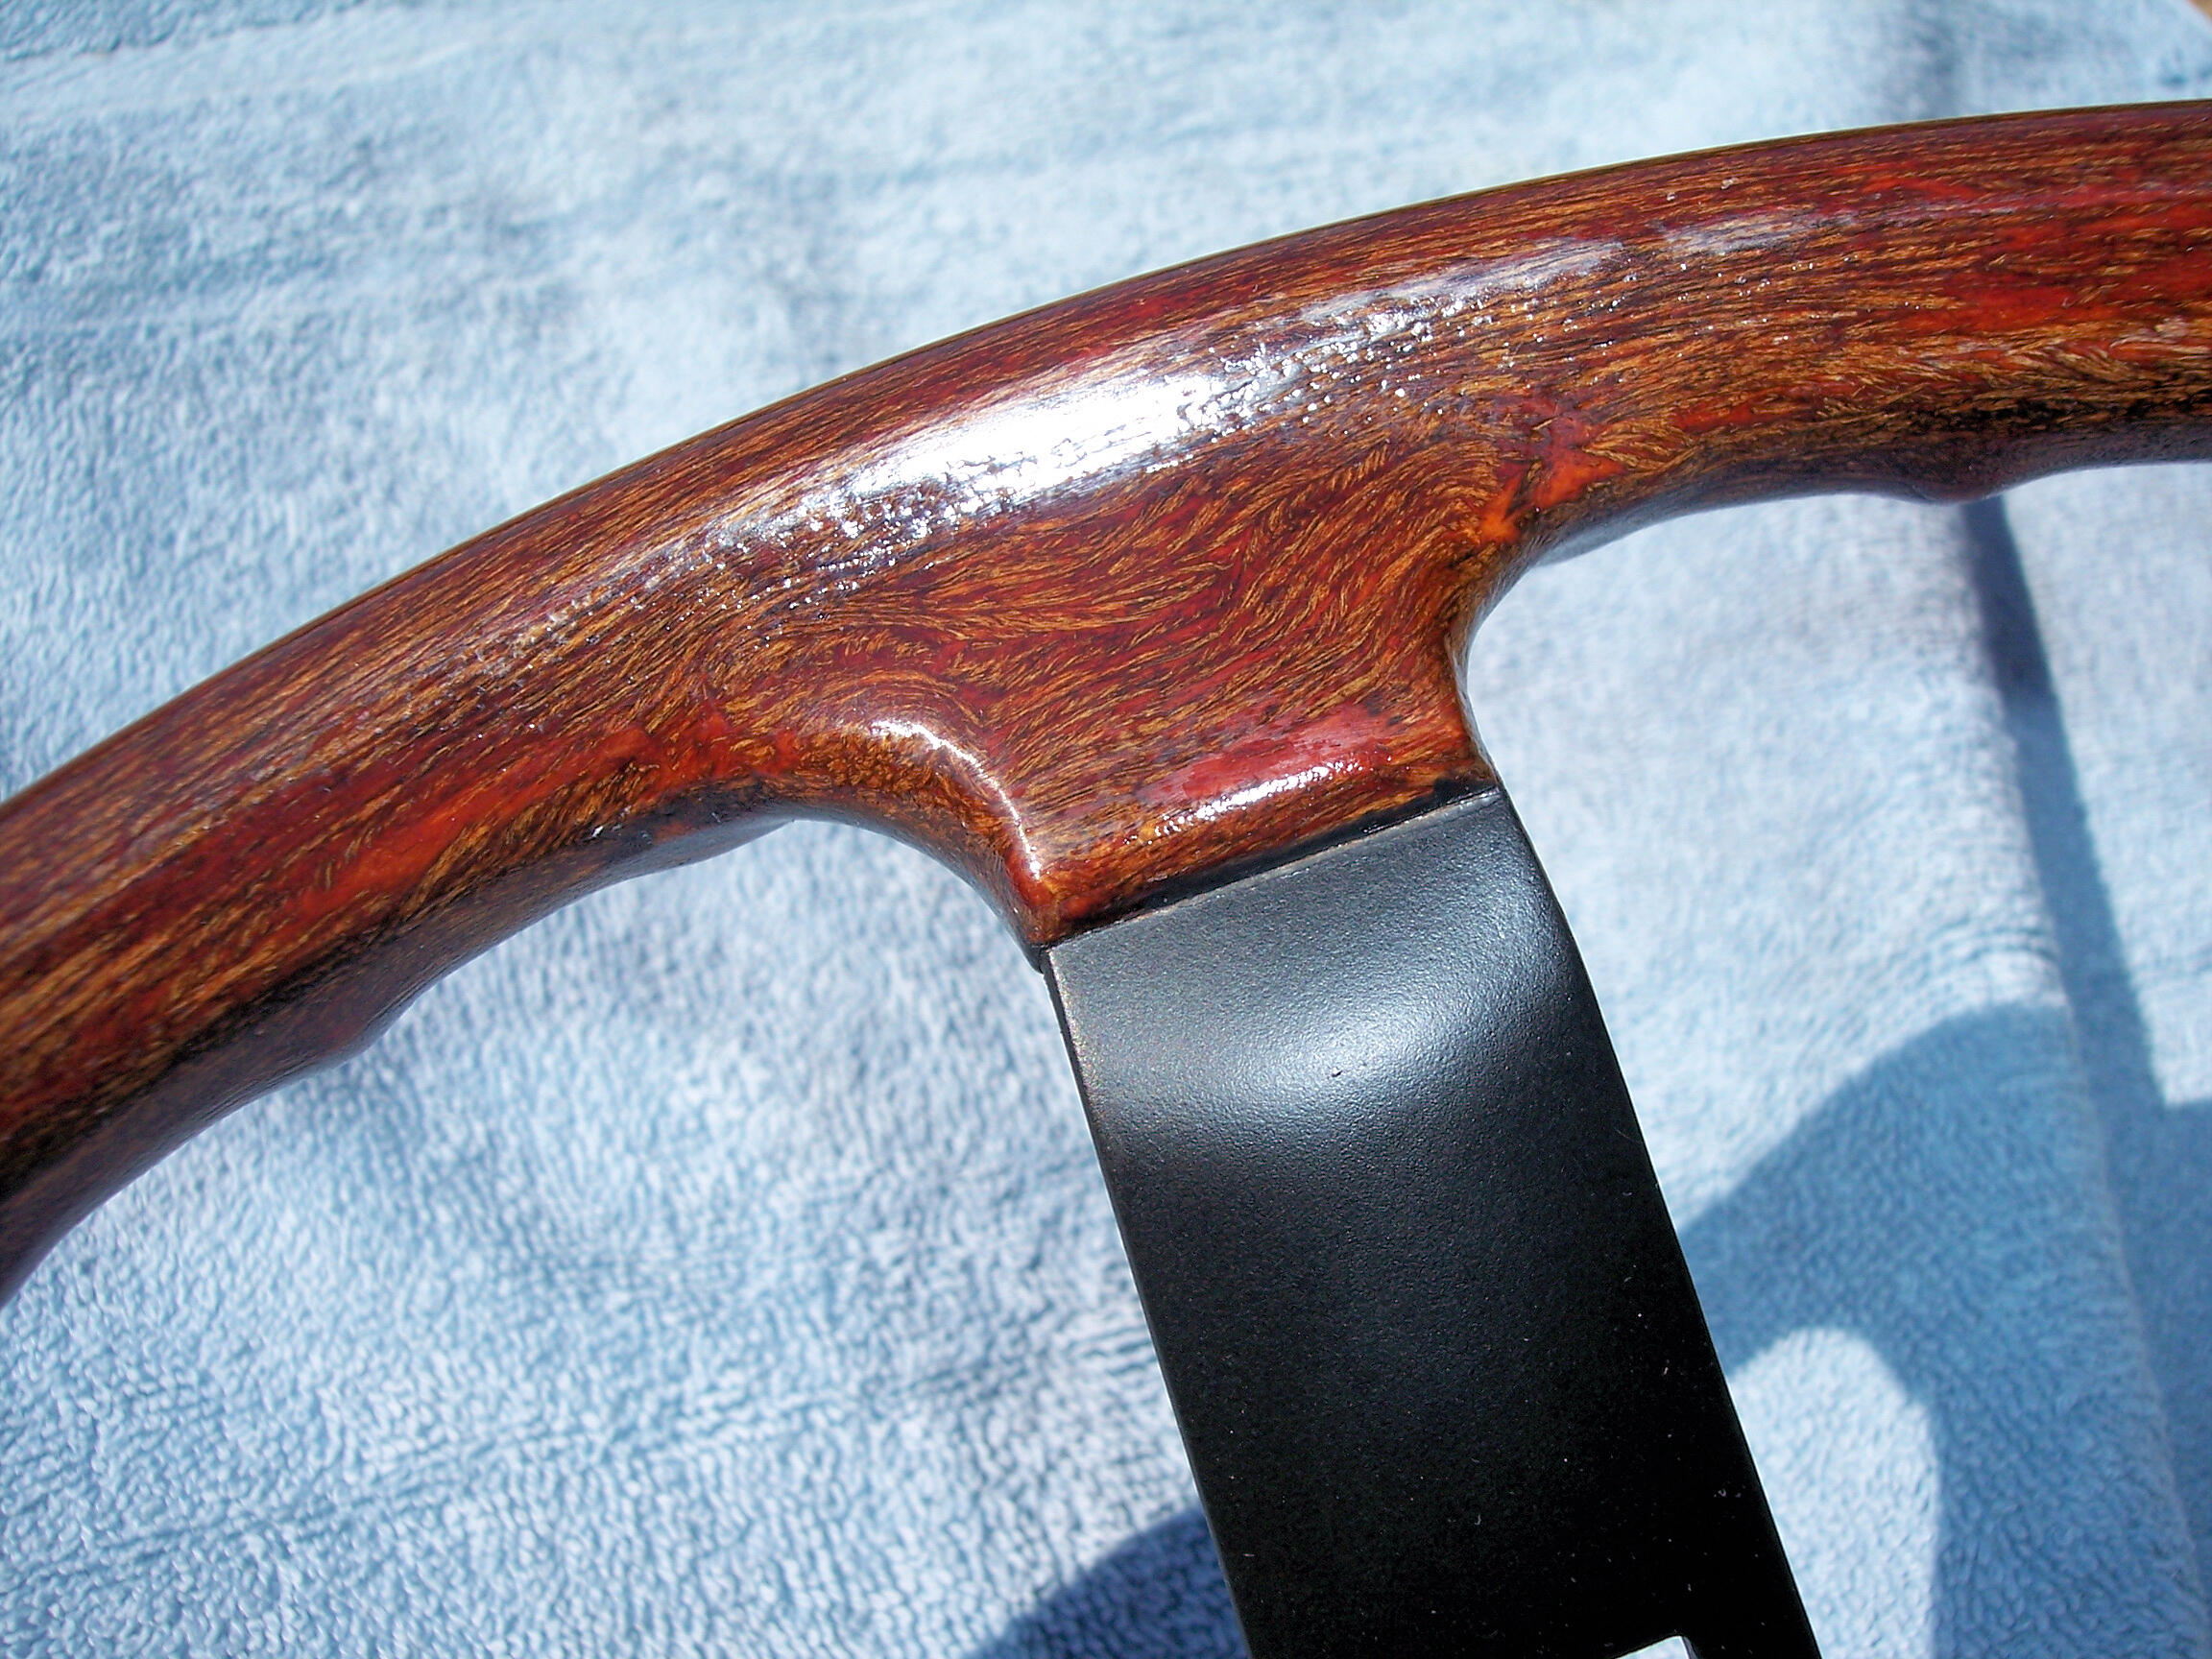
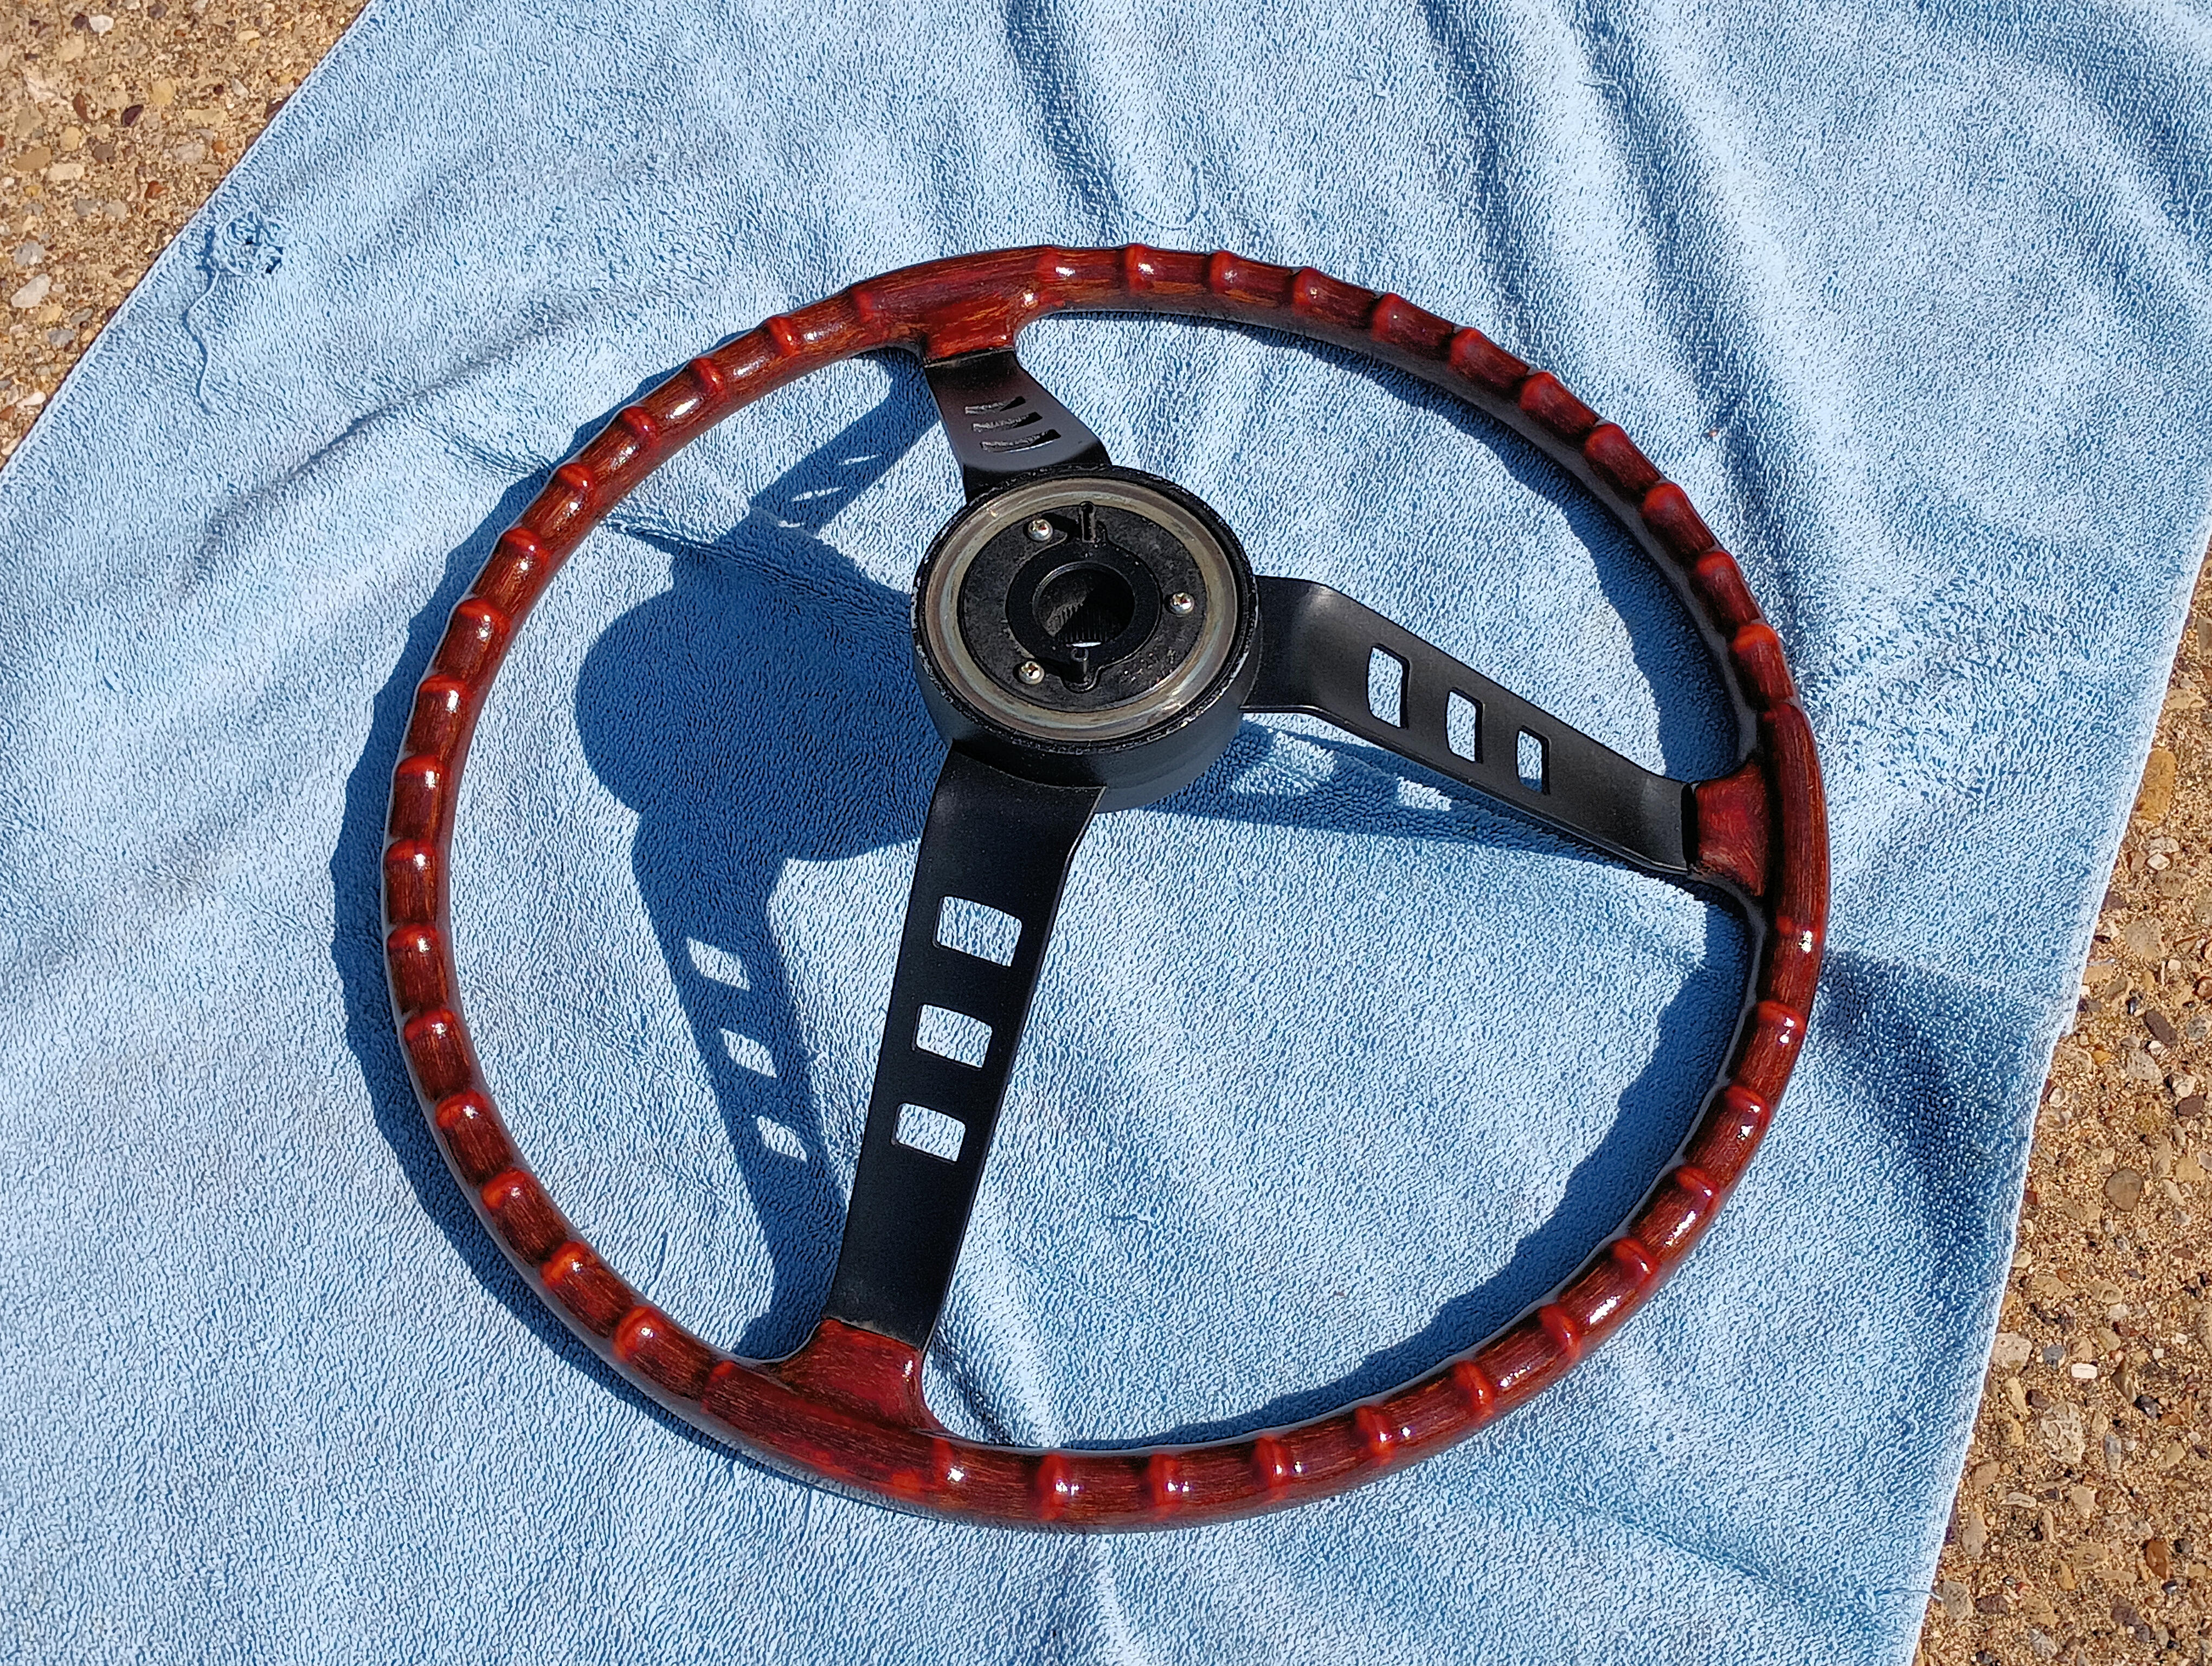
 Carefully stripped of previous finish to preserve wood fibers in the rim. No cracks, scratches, or gouges. The rim was refinshed with two coats of hand-rubbed, oil-based stain, topped with two coats of gloss spar urethane, wet sanded amd hand polished. The spokes and hub are refinshed in two coats of SEM Satin Black. The horn mechanism is original and in very good condition (no horm pad). $385 includes standard domestic shipping, payment via PayPal.


 The spares I have I bought with a set of fenders and did not use. They are both metal and are new. I don’t know where they originated from but I suspect it might be Black Dragon. Let me know if you are still interested. If so send me a pm and will go from there.
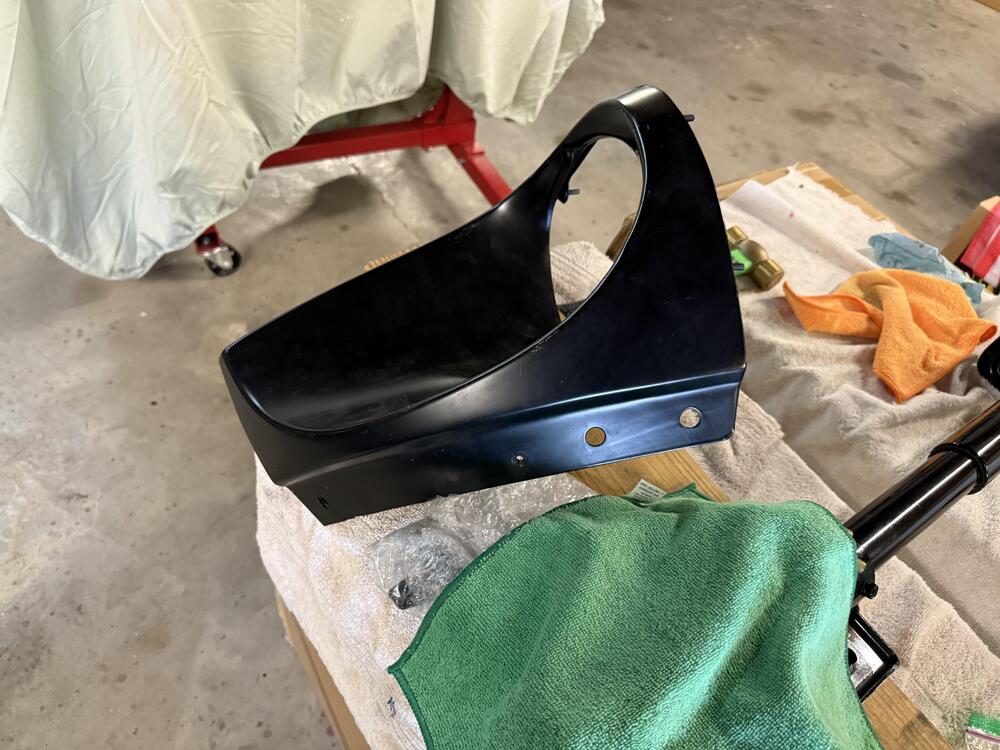

 I've never done this sort of repair, but I'm confident that I could do it if I had to. These days there's so much good material out there on the internet (interspersed with the other stuff) that you can learn to do almost anything if you're at all handy, and are willing to put in the time. I'm not worried about the mounting studs. One of my original ones was broken and a fix looked pretty straightforward. Of course, I might have the luxury of sourcing one that doesn't require any work, and I might take the lazy path if it's available! I moved to a condo a couple of years ago, so I no longer have my three car garage or my enormous basement to work in. ☹️
No problem. I really appreciate you guys doing what you do to help out. This, among other things, is what makes this particular forum so great!
I've never done this sort of repair, but I'm confident that I could do it if I had to. These days there's so much good material out there on the internet (interspersed with the other stuff) that you can learn to do almost anything if you're at all handy, and are willing to put in the time. I'm not worried about the mounting studs. One of my original ones was broken and a fix looked pretty straightforward. Of course, I might have the luxury of sourcing one that doesn't require any work, and I might take the lazy path if it's available! I moved to a condo a couple of years ago, so I no longer have my three car garage or my enormous basement to work in. ☹️
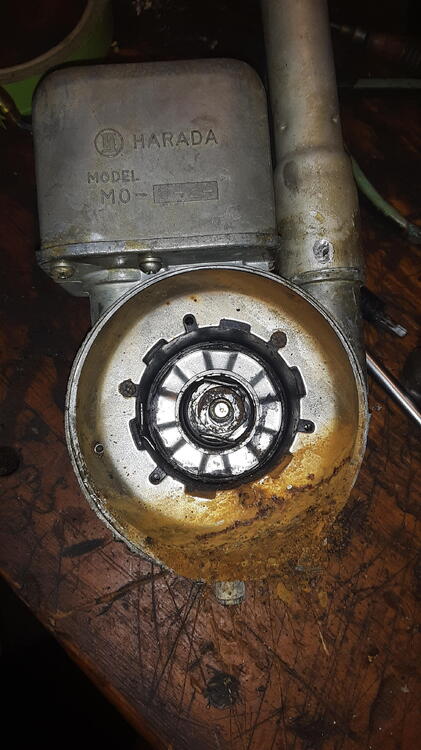
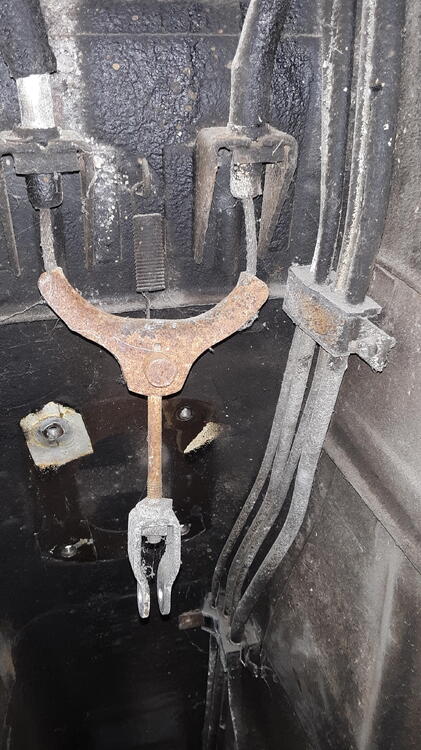
No problem. I really appreciate you guys doing what you do to help out. This, among other things, is what makes this particular forum so great! I've been busy dealing with life recently, but that doesn't mean I forget spending money on more or less useless automobilia :-) First, the Japanese L-series Service manual. I have it in various language, but never had "the original" one from JP. And since it popped up for a reasonable price, I had to have it. Then i got another Datsun Switzerland price list. This time from April 1980. As usual, you can find all of them scanned in high-resolution for free download, here Some may know my List of various Japanese L6 Intake manifolds, carb kits and Turbo / Surge tank kits. And thanks to a hint, I recently acquired this lovely Japanese printed ad from the very first FET / HKS Turbo Kit. You can read a lot about it in my Intake / Turbo surge tank post, here. Thanks to a hint from Mymechanix, i got a beautiful Differential strap. The originals are usually worn out, and this replacement belt from Aliexpress has the perfect fitments and dimensions. All other alternatives come either in a leather look or rubber, this one is much closer to the original design. Unfortunately the surface is glossy and has some prints on it (see the one on the left) so i will try to sand it down, to get as close to the original look as possible.
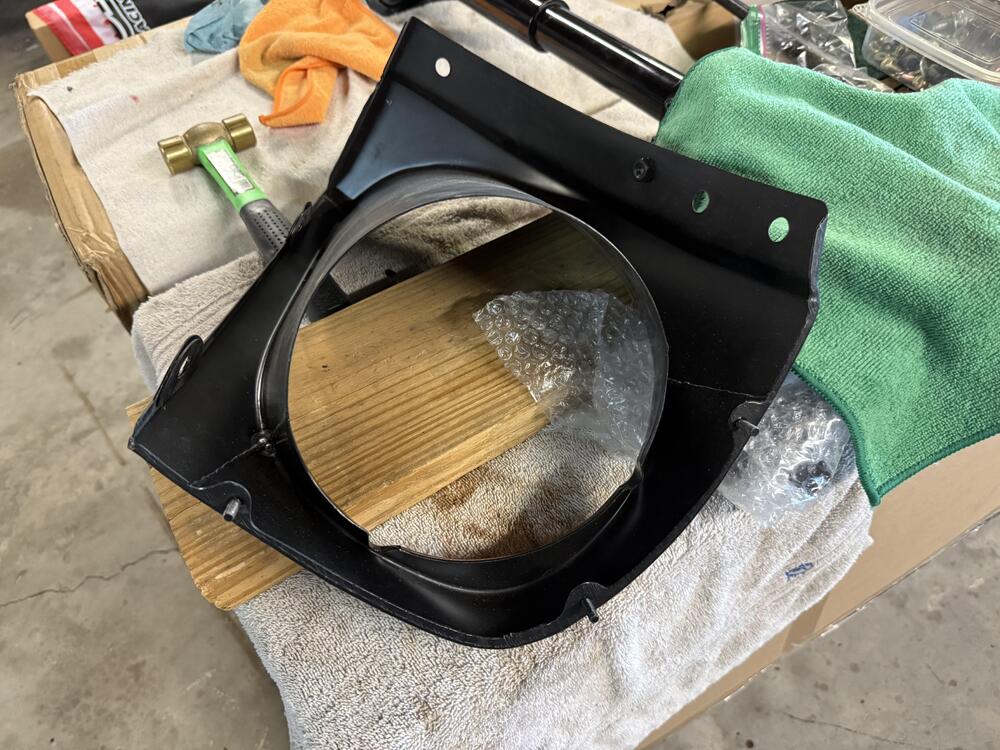
Fiberglass repairs on the early scoops are very easy as is replacement of broken mounting studs. I've done several. I currently have one I'm prepping for JDM style headlight covers that has a few cracks that I'll cover with fiberglass cloth before moving ahead.
I've been busy dealing with life recently, but that doesn't mean I forget spending money on more or less useless automobilia :-) First, the Japanese L-series Service manual. I have it in various language, but never had "the original" one from JP. And since it popped up for a reasonable price, I had to have it. Then i got another Datsun Switzerland price list. This time from April 1980. As usual, you can find all of them scanned in high-resolution for free download, here Some may know my List of various Japanese L6 Intake manifolds, carb kits and Turbo / Surge tank kits. And thanks to a hint, I recently acquired this lovely Japanese printed ad from the very first FET / HKS Turbo Kit. You can read a lot about it in my Intake / Turbo surge tank post, here. Thanks to a hint from Mymechanix, i got a beautiful Differential strap. The originals are usually worn out, and this replacement belt from Aliexpress has the perfect fitments and dimensions. All other alternatives come either in a leather look or rubber, this one is much closer to the original design. Unfortunately the surface is glossy and has some prints on it (see the one on the left) so i will try to sand it down, to get as close to the original look as possible.
Fiberglass repairs on the early scoops are very easy as is replacement of broken mounting studs. I've done several. I currently have one I'm prepping for JDM style headlight covers that has a few cracks that I'll cover with fiberglass cloth before moving ahead. JonSmiths joined the community
Sorry about that friend. It slipped my my mind. I’ll make a note to check it today.
JonSmiths joined the community
Sorry about that friend. It slipped my my mind. I’ll make a note to check it today.


Important Information
By using this site, you agree to our Privacy Policy and Guidelines. We have placed cookies on your device to help make this website better. You can adjust your cookie settings, otherwise we'll assume you're okay to continue.