Jump to content
Email-only Log-Ins Coming in December ×

IGNORED

Hardway's 1971 240z #8011 - Build and Repair Thread


Hardway

Recommended Posts

With the mornings being a little cooler in the Austin I decided to work on replacing the non-functioning Pioneer 8-track that came in my 240z. I already picked up a replacement heater control panel off of the Datsun Parts for Sale Facebook page. The one in the car was in very sad shape and probably not restore-able.

Old8Track01.jpg

I knew I was in for a treat when I saw pieces of wood holding up the 8-track unit.

Old8Track02.jpg

Based on the helpful how-to threads here on the site I got the panel pulled out to access the wiring. To do so I needed to get to all the control cables which mean getting around the blower motor housing. However with the ARA A/C box in the car this was impossible. Out came the glove box liner that was on its last leg and then the ARA box. It was strange to see a coat hanger snaked around the back of the dash as if it was helping hold up the ARA box.

ARA01.jpg Old8Track03.jpg

A wiring connections and things to fiddle with and she finally came out.

Old8Track04.jpg

HeaterPanel01.jpg

It was at this point I was reminded of how sketchy the wiring is on this car and knew this was the time to address. My car has the typical parking light circuit burn hole which now serves as a routing point for an in-line fused wire that replaces it. In addition a blown fuse has been circumvented with a piece of wire wrapped around it. This entire cluster will be addressed but I am still trying to decide which direction to go. New fuse box from MSA for $200 or possibly put something together myself for less?

Fusebox01.jpg

With the heater panel components disassembled and cleaned using my Shop-Vac with a brush attachment I inspected the control lever assembly. As expected it was dry as a bone and one of the cables on the bottom was distorted while the other was missing entirely. I will be sourcing new cables as these are very rough.

Selector01.jpg

Setting the control levers aside and adding to the parts list I took some time to inspect the blower motor. A quick 12 volts to the primary wires proved the motor worked but being 40 years old it drew a lot of amps to run. With everything on the bench now is the time to do the Honda blower motor upgrade. I will be sourcing these parts over the next few days as well as cleaning up the box and giving it some fresh paint. For now, it was nice to get rid of all the nasty oily foam and the expanding foam. Within a few minutes it was much nicer to look at and handle.

Blower01.jpg

Blower02.jpg

Blower06.jpg

Blower04.jpg

Blower05.jpg

That is all for now. Time to do some more parts research and shopping!

Link to comment
Share on other sites


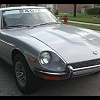
Now that the hood opens I wanted to change the oil, bleed the brakes, and possibly bleed the clutch. Before I could get to those items, the next item on the list unfortunately is a new radiator. I did not notice the two pin holes in the middle of the radiator core until I got it home and was taking pictures of the car. Only under the light of the camera flash did the shallow puddle of coolant in the lower radiator flange appear. A quick check with a bright flashlight confirmed it had been slowly leaking for quite some time. I do not knock the seller or myself for this because neither one of us saw it even when the car was on the rack at the seller’s shop. Cough it up to “comes with the territory”

RadLeak01.jpg

I noticed that there are two brackets, outside of the horns, on your lower rad support. Did a PO add these for fog lights? I ask because a PO of my car must have added these strange brackets to mine which I can only guess were used to hang lights from, they look like they are shelf brackets from a hardware store. I do plan to remove them.

Mike

post-8626-14150830043196_thumb.jpg

Link to comment
Share on other sites

Good eye Mike! To be honest, I don't know what the brackets are for. They do appear to be factory mounts as they look to be factory spot welds. Just glancing at them I wonder if the horns are actually supposed to be mounted on them since they have threaded holes. I am sure others will chime in but if needed I can take some more pictures of them this evening.

Link to comment
Share on other sites

Wow, another "I ain't not never seed nuttin' like that b'for" moment. I'd swear those were factory looking spot welds holding them brackets. No average anybody would use welds like that to add brackets like that.

Even the captured nut in the center looks factory. If its a square nut tacked on its four corners, that would just about settle it.

Please, some worthy Z historian chime in and tell us "yup, seen those a thousand times on Z's from...." or the like and put us out of our questioning misery!

And CanTechZ, I just love your brackets too. Some real engineering there with those interlinked springs. Vibration dampers??

Edited by zKars
Link to comment
Share on other sites

Jeff,

I've been folllowing the progress of your new Z and appreciate the level of detail you've put into the improvements! I bought a Series I ash tray from the same place as your heater control panel. Originally they didn't want to ship parts, but seeing your response on Facebook prompted me to inquire about shipping again. Thankfully they were able to send me a nice ash tray and I can finally stop looking for a replacement.

Keep up the great work!

Robert S.

Link to comment
Share on other sites

Thank you for the compliments EhlersRS! Yeah, I was really happy Shane was willing to ship some of the smaller parts. The ability to get parts outside of Ebay from other states at very fair prices is definitely providing support for the classic Z community.

I must admit, the mysterious front brackets have me intrigued. I looked in my ’71 FSM and there are no pictures or mention of the brackets anywhere. I am sure there is a reasonable explanation for them and I would love to hear it. For now, here are some more pictures of the brackets.

01.jpg

02.jpg

03.jpg

And one from under the car even though the valance panel is covering 95% of it.

05.jpg

Link to comment
Share on other sites

Blue, what does that mean, 'non-series' ?

Hi Rob,

Series 1 is a slang term for grouping the first North American HLS30 models made between Oct 69 and Jan 71. The typical way to identify a car in the group is to look for the hatch vents that were later replaced by B pillar vents ~February 71.

note: there were many changes between 69 and 71 so there are differences in the Series 1 group. The north american 240z's production continued into 73.

Link to comment
Share on other sites

Create an account or sign in to comment

You need to be a member in order to leave a comment

Create an account

Sign up for a new account in our community. It's easy!

Register a new account

Sign in

Already have an account? Sign in here.

Sign In Now
  • Recently Browsing   0 members

    • No registered users viewing this page.
  • Who's Online   0 Members, 1 Anonymous, 612 Guests (See full list)

    • There are no registered users currently online
×
×
  • Create New...

Important Information

By using this site, you agree to our Privacy Policy and Guidelines. We have placed cookies on your device to help make this website better. You can adjust your cookie settings, otherwise we'll assume you're okay to continue.