Leaderboard
-

Hodgimus-maximus
Member1Points119Posts -

Dr. 240Z
Member1Points298Posts -

Marine240z
Member1Points95Posts -

grannyknot
Member1Points5,158Posts
Popular Content
Showing content with the highest reputation on 08/12/2015 in all areas
-
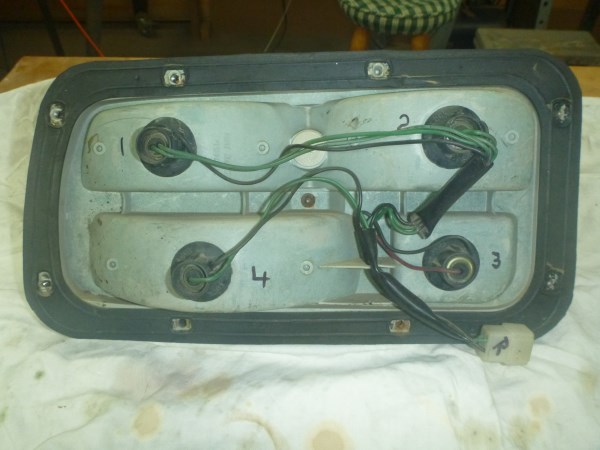
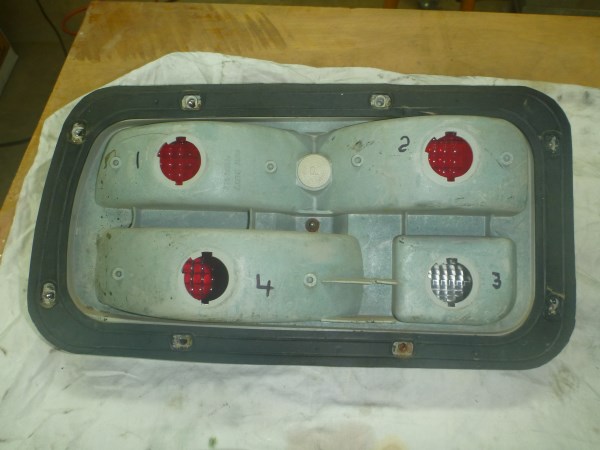
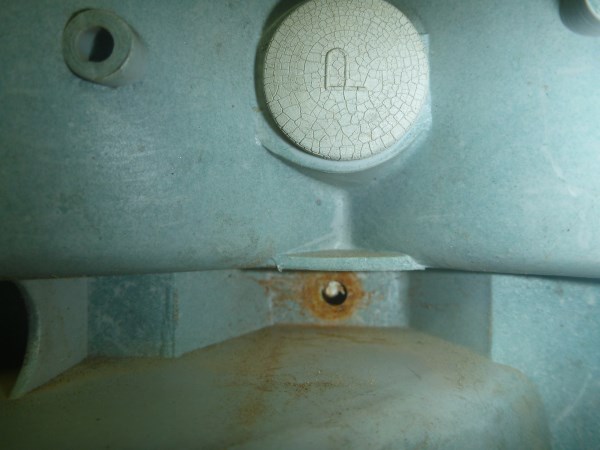
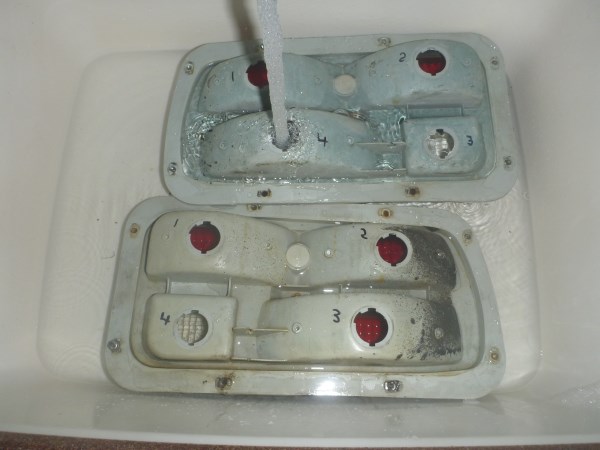
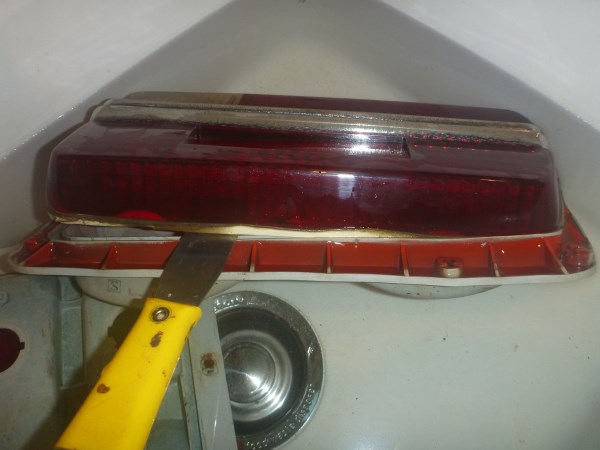
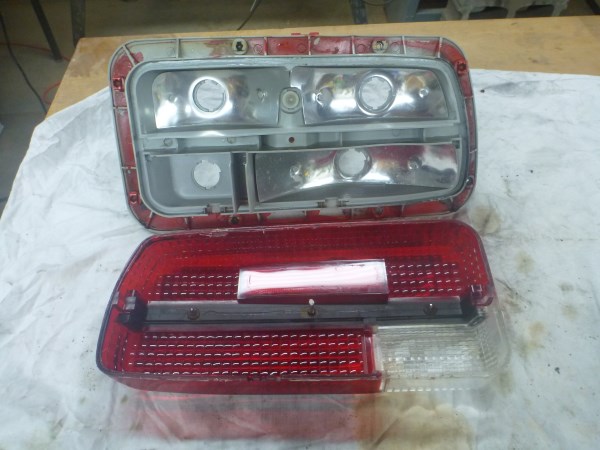
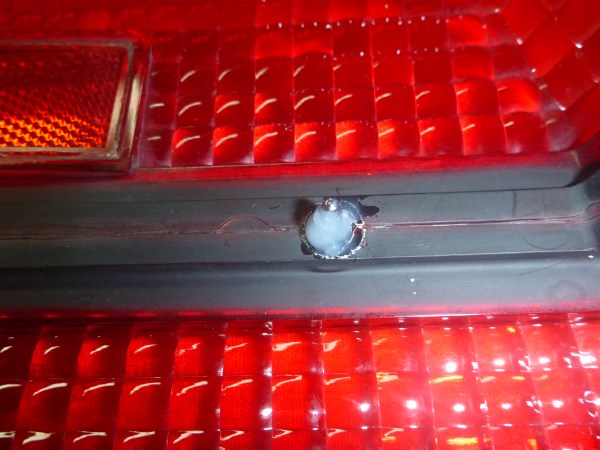
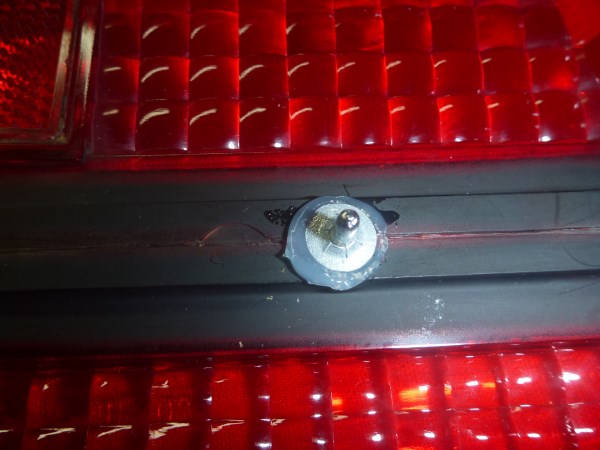
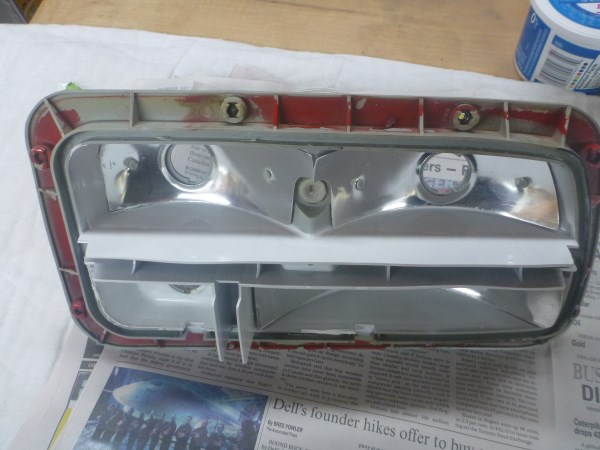
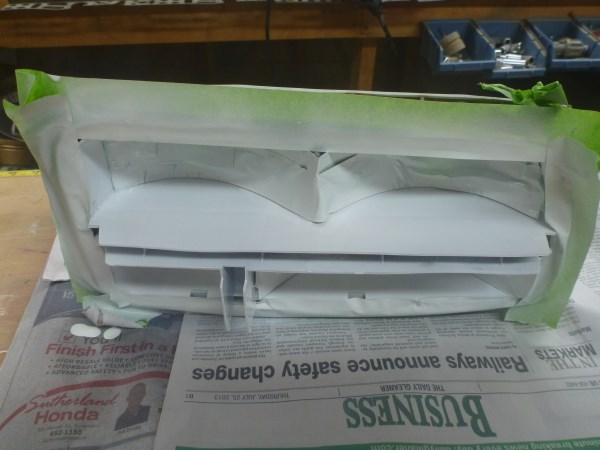
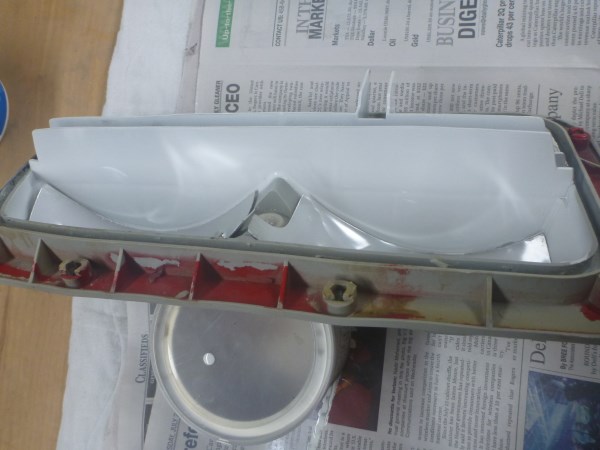
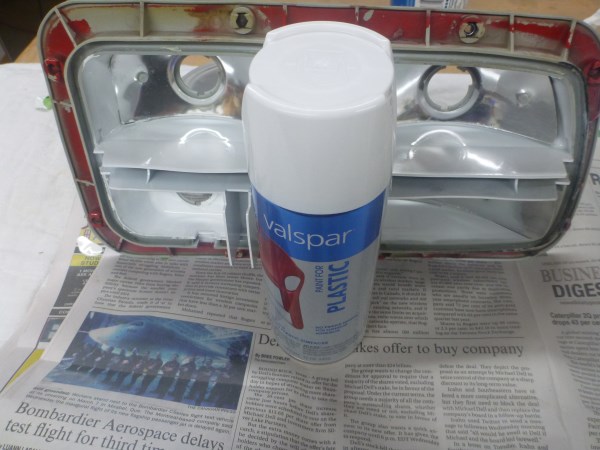
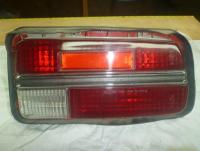
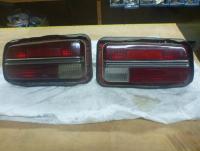
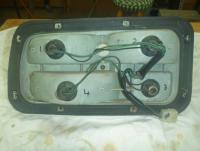
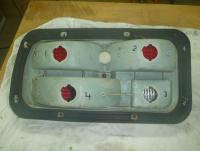
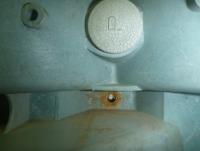
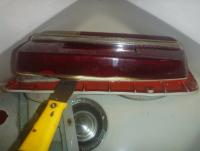
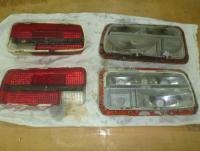
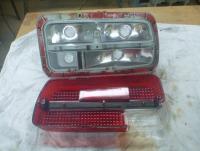
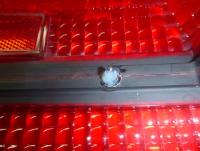
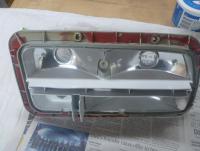
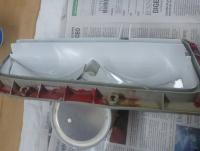
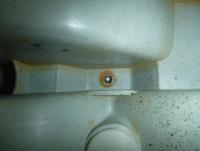
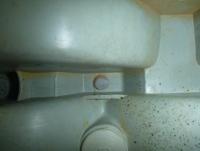
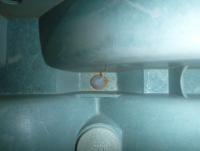
1 pointIf interested in refurbishing your 40+ year old tail light lens here are the steps I took with mine after removing the exterior rubber gasket: 1) Before disassembly of the light unit (lens from body), mark the wiring harness left and right. Then number the individual plugs. 2) Remove the bulbs. 3) Remove the metal retainer from the light bar center post as it protrudes from the backside of the body. Please not that if you are planning on reusing the bar, removal of the retainer might require ruining it for reuse. On the other hand, if you are going to replace the bar with a new one, just do what you have to do to get it off. 4) In a sink filled with hot water fully submerge the light unit for 10 minutes. 5) Remove the felt plugs (2) on the bottom side of each unit and set them aside carefully. 6) Slowly pry the lens away from the body using a small flat bladed screw driver. Once enough of the edge of the lens is exposed from the recess, slide a small putty knife along the cement line. 7) Clean up any of the remaining putty by scraping the blade of a small screwdriver over the warm putty. This can take some time. Warm putty is easier to remove than either cold or hot. 8) Wash the lens and body in hot soapy water. Dish soap works well. 9) Now out of the sink and dry, go over the internal plastic with a commercial cleaner. I used ‘Tuff Stuff’ made by STP and it worked well. 10) Polish the reflectors with a metal polish such as ‘Autosol’. 11) Mask the reflectors with painters tape. 12) Paint the internal grey plastic with shiny white paint suitable for this application. 13) Replace the tail light lens bar. Before pressing on the retainers to the outside posts, place a dab of silicone over the protruded end to ensure a good seal. Ensure that you have a good fit of the bar to the lens. 14) Insert the two small pieces of felt in the lens edge just as they were before disassembly. 15) Lay a bead of clear silicone in the recess of the body that accommodates the edge of the lens. 16) Place the lens over the body and press it slowly but firmly into the recess until you feel it bottom out, fully positioned. 17) Place a dab of silicone over the protruded part of the center post of the lens bar as it exits through the body. Now press the retainer into position. I found that a safe and easy way to place these retainers was by use of a socket sized slightly less than the circumference of the retainer. 18) Reposition the wiring harness and secure the bulbs in their sockets 19) Shine up the lens with a paste car wax.


 1 point
 -
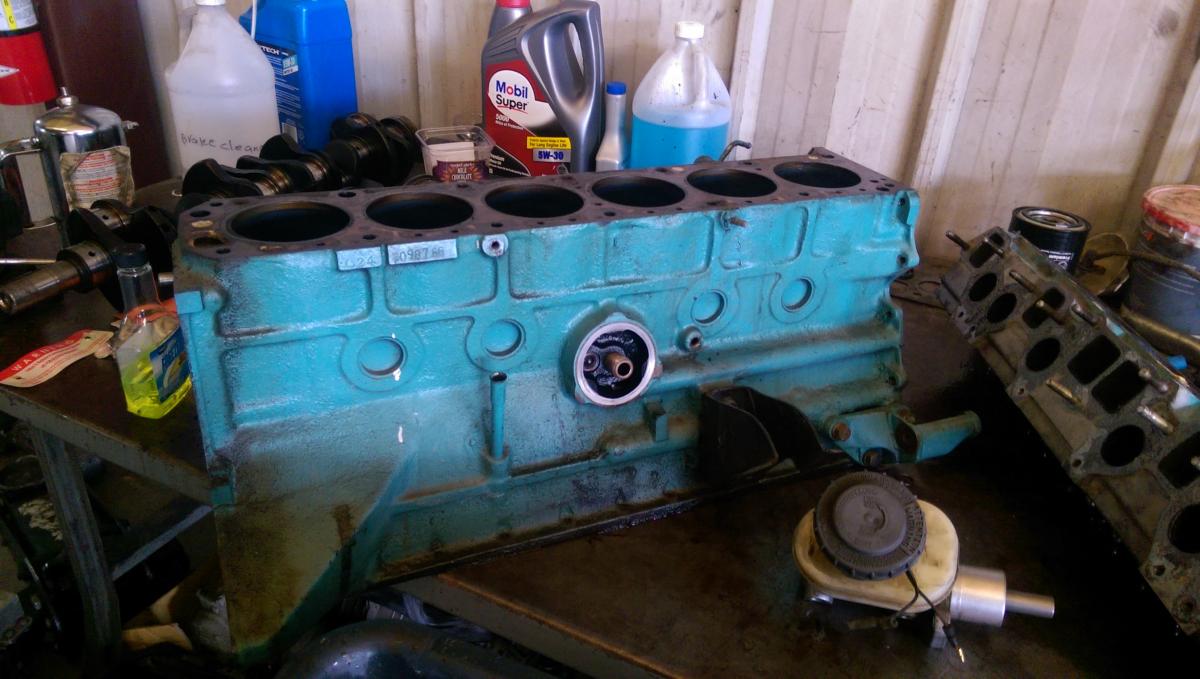
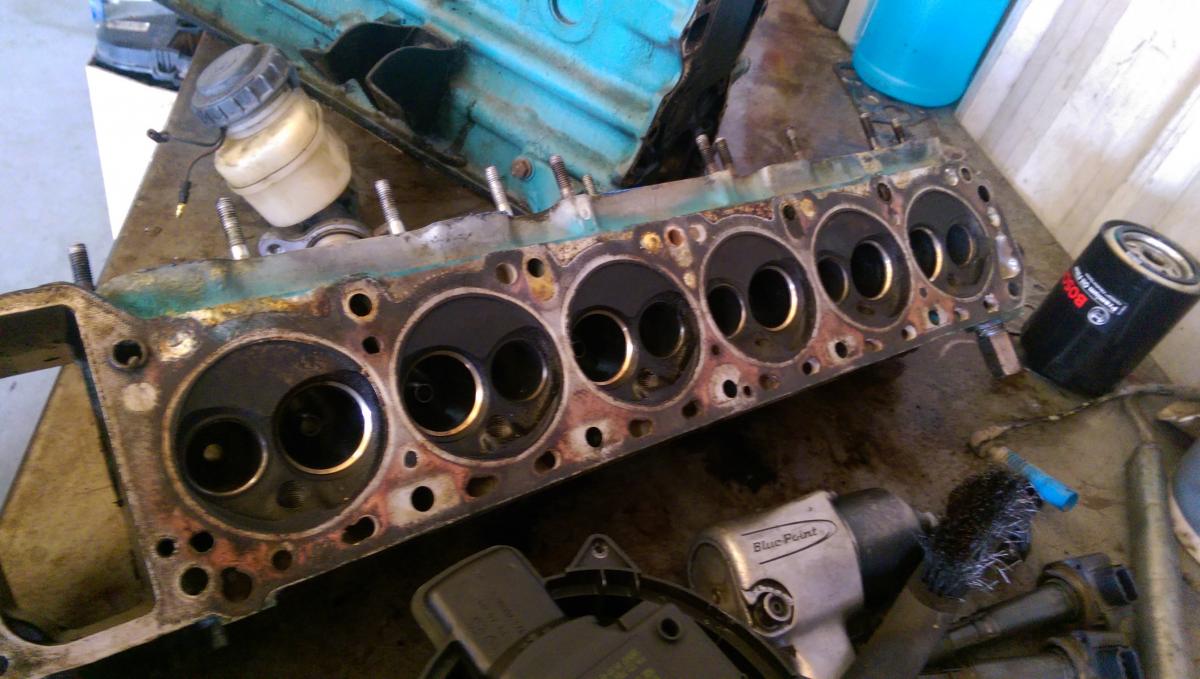
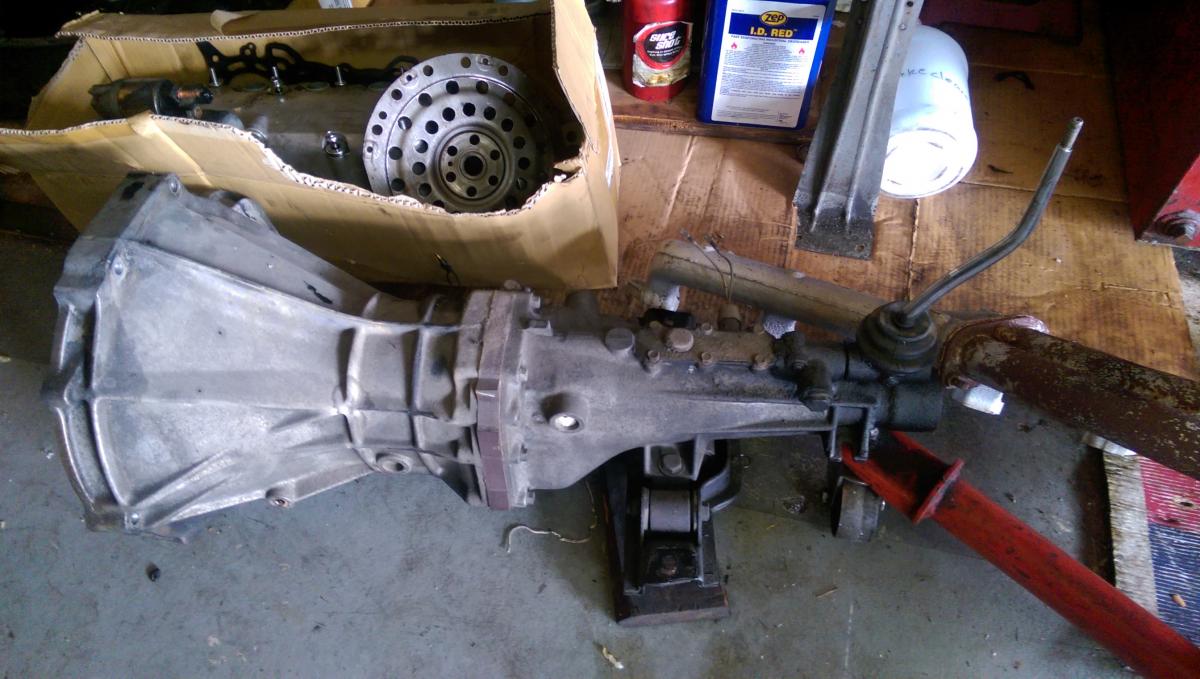
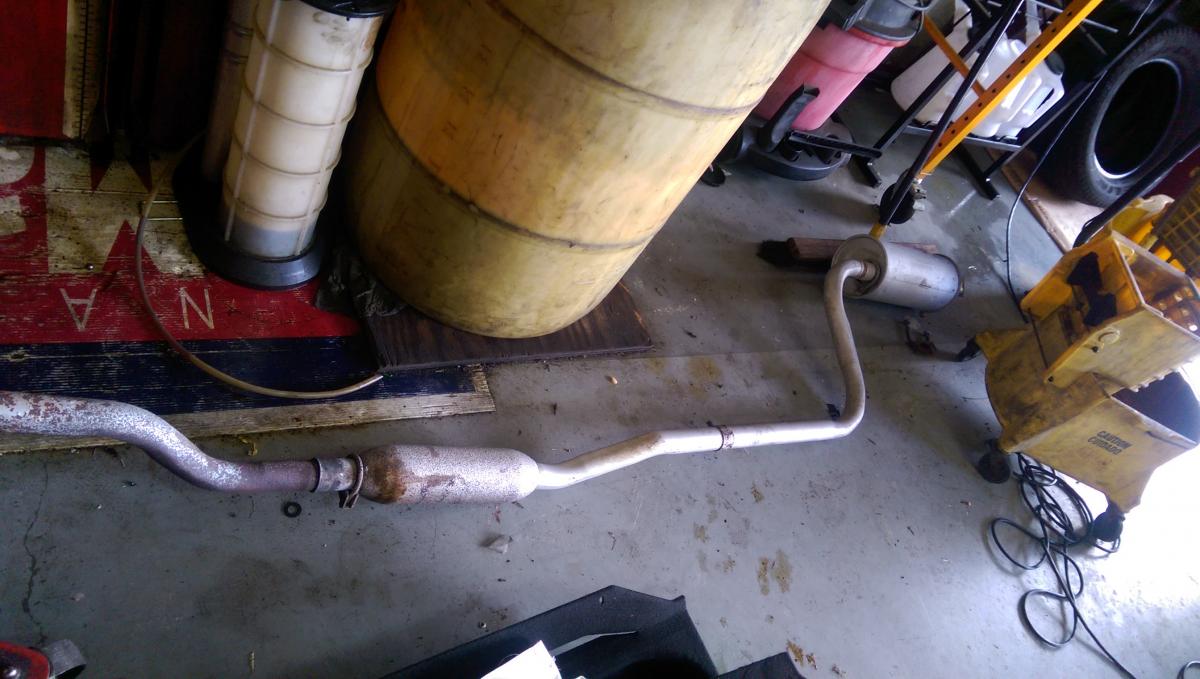
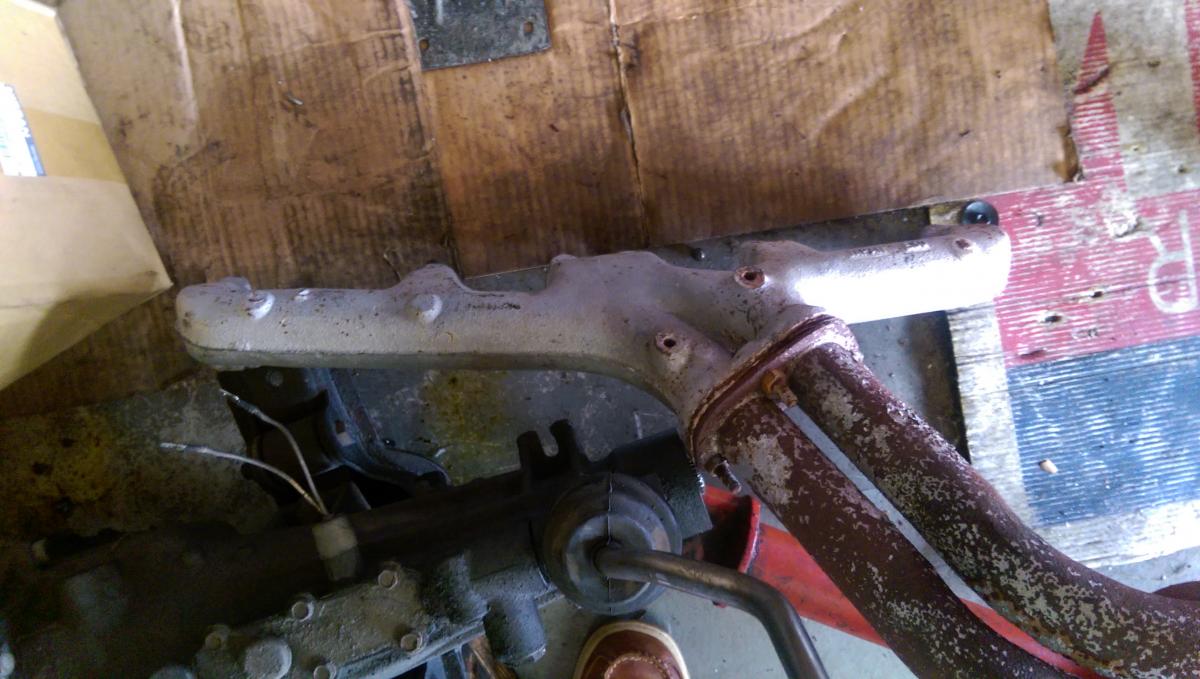
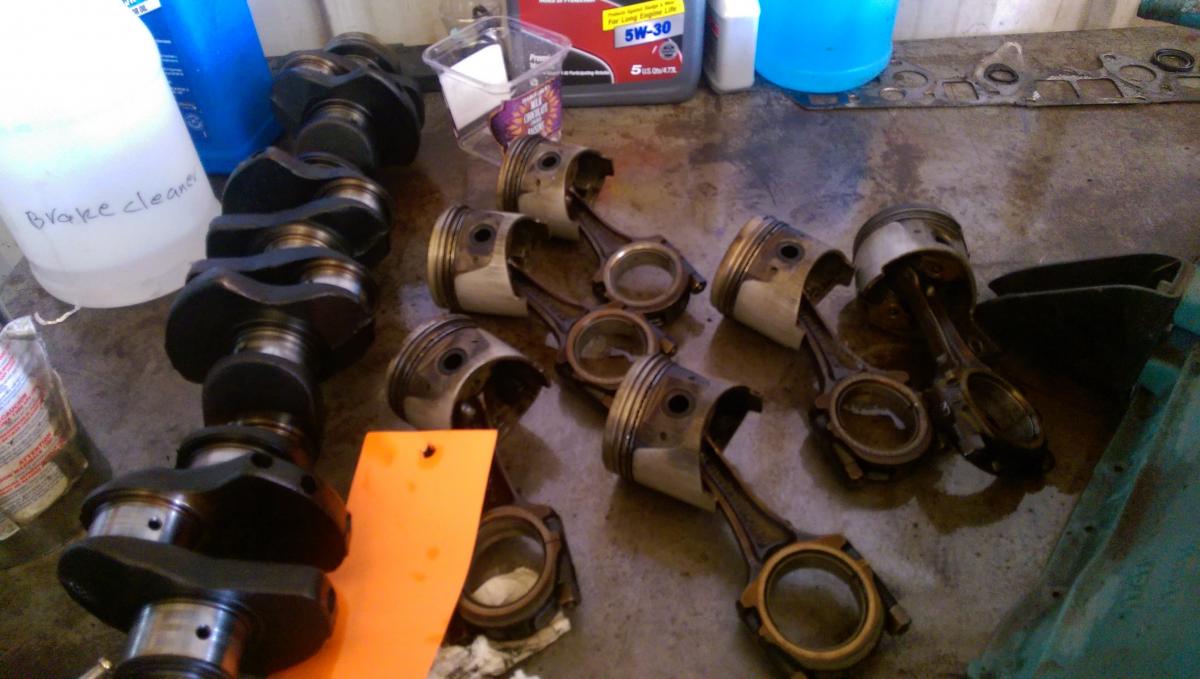
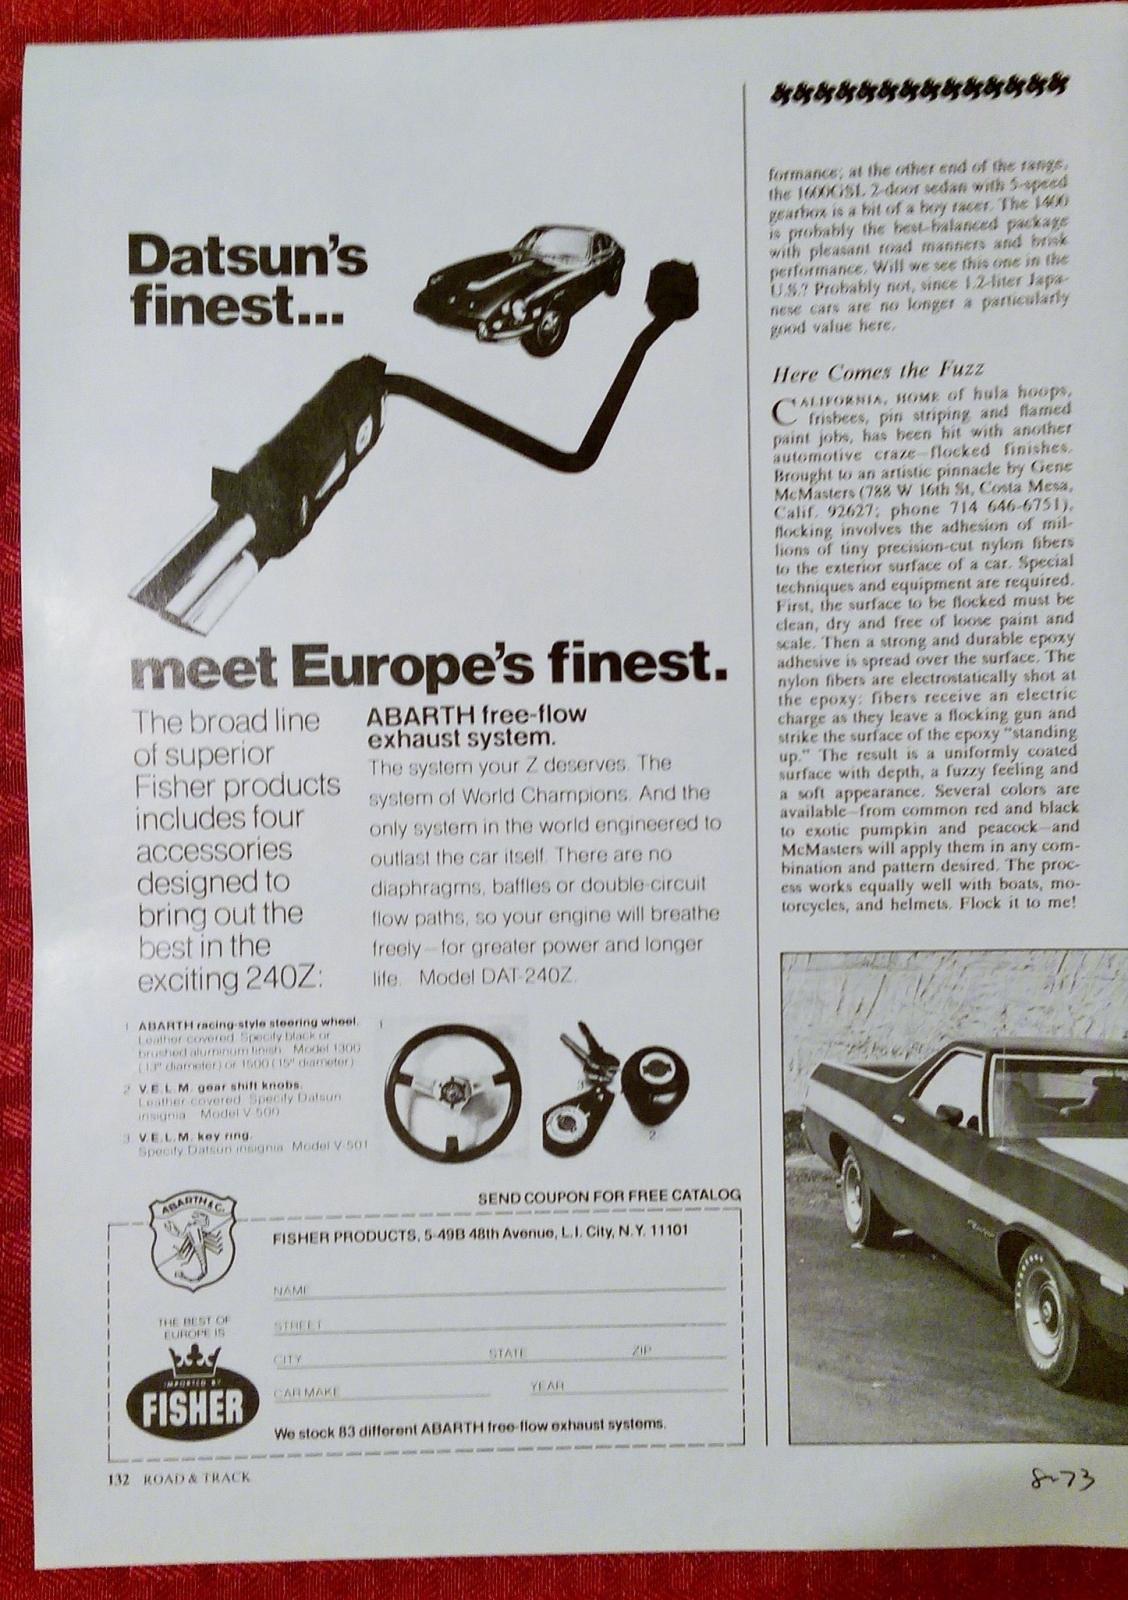
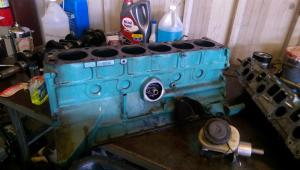
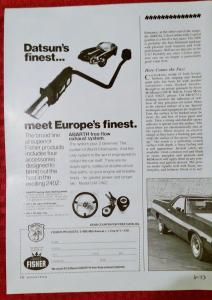
1 pointHi everyone, I am in the final stages of a complete rebuild of my 72 Z. 133 thousand miles on the odo. Transmission is complete, head done with a midly agressive cam, block refinished and bored to .030, crank polished, ground and balanced. I had ordered a "complete" engine kit including fuel, oil water pump, all gaskets pistons, rings. This kit was ordered from a well known z car parts supplier. I received the kit and a thourough inspection by me and my trusted mechanic exposed the following issues: 1. Head gasket was too thick and did not fit correctly. 2. Pistons were ITM make and skirts ( bottom) was 0.5-1mm wider than the piston head. They were also 26-30 grams heavier than the stock ones I removed. ( I know, the were 83.75 vs 83.00). Two of pistons weighed 1.5 grams more than the others, and one weighed 2.1 gram more. 487 grams was the base weight. 3. oil pump did not rotate completly 4. Timing chain guides had 1 small air bubble underneath the rubber coating 5. Timing chain was thin and not as robust as the stock one removed. After an exhaustive internet search, the following corrective action(s) were taken: 1. Felpro oem gasket ordered ( $56.00) vs $22.00 kit Fits perfectly. 2. New " Silv-O-Lite pistons ordered from United Engine & Machine Company, Carson, Nevada. They have been in business since 1922. I also ordered new " perfect circle" rings from Mahle sizes 2mm 2mm 4mm. The web site for the pistons is: uempistons.com 2-5. New oil pump and timing chain kit from Beck Arnley The pistons and rings should arrive Friday so I will update at that time. Attached are a few picks I will also downloads more soon, and document rebuild as much as possible. Also am replacing the stock exhaust with a new 35 year old original "new old stock" ABARTH. See attached ad from the August 1973 Road & Track magazine. Lon


 1 point
 -
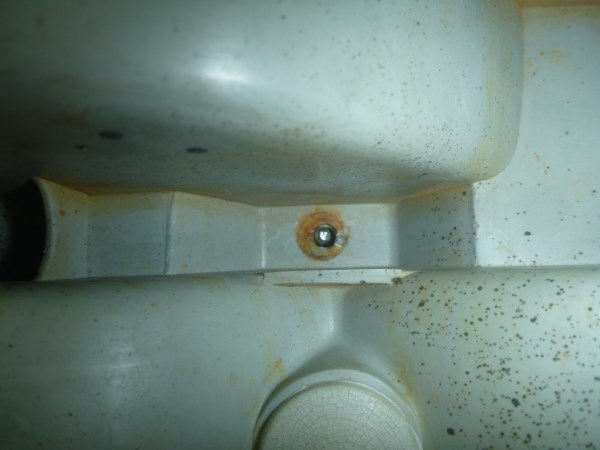
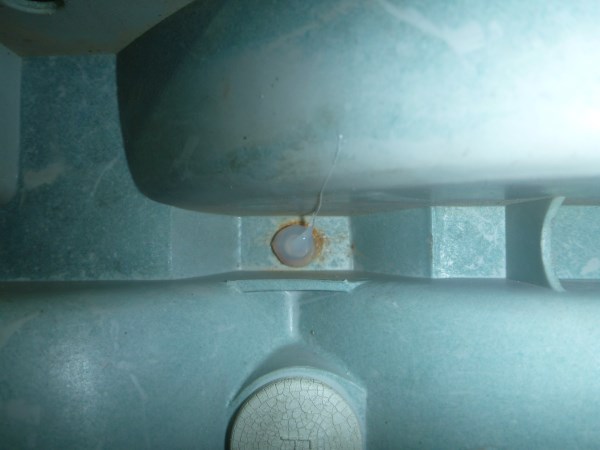
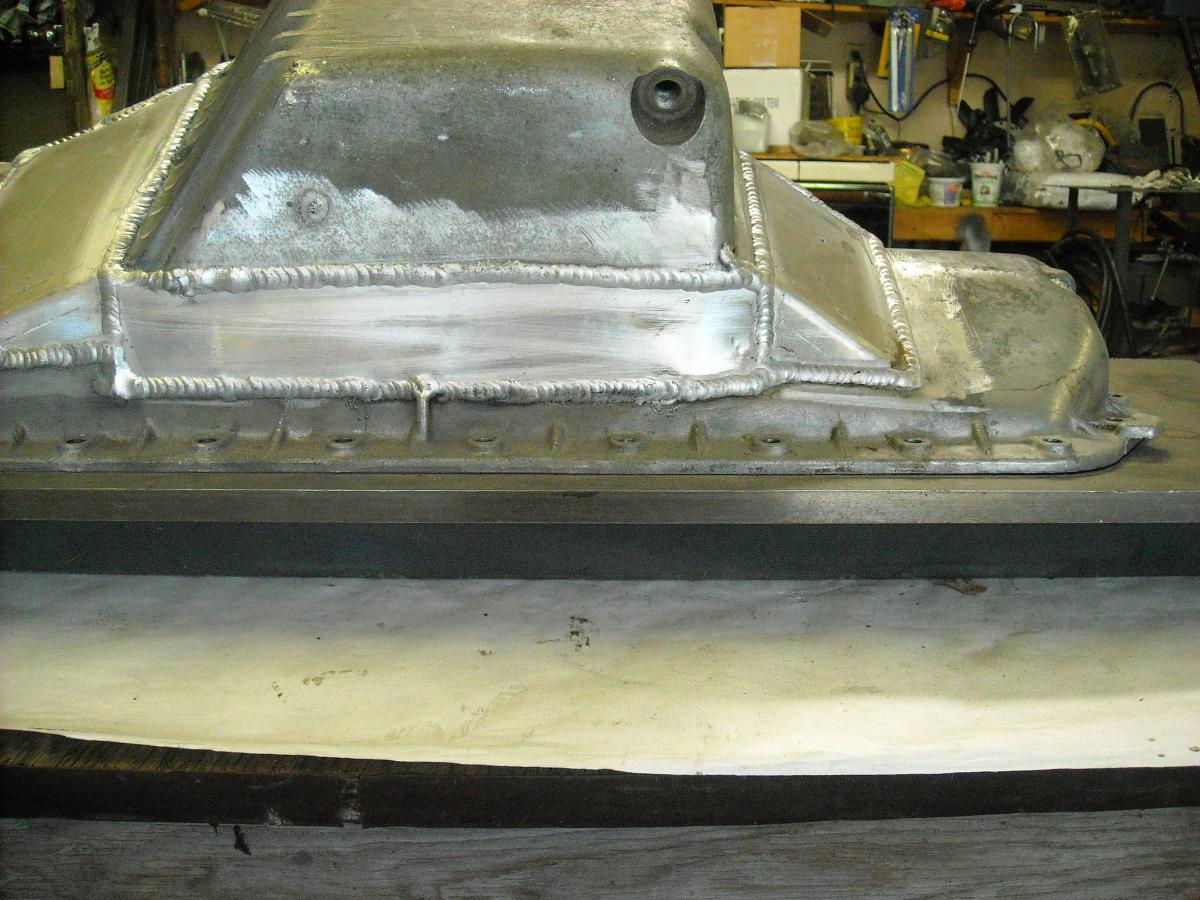
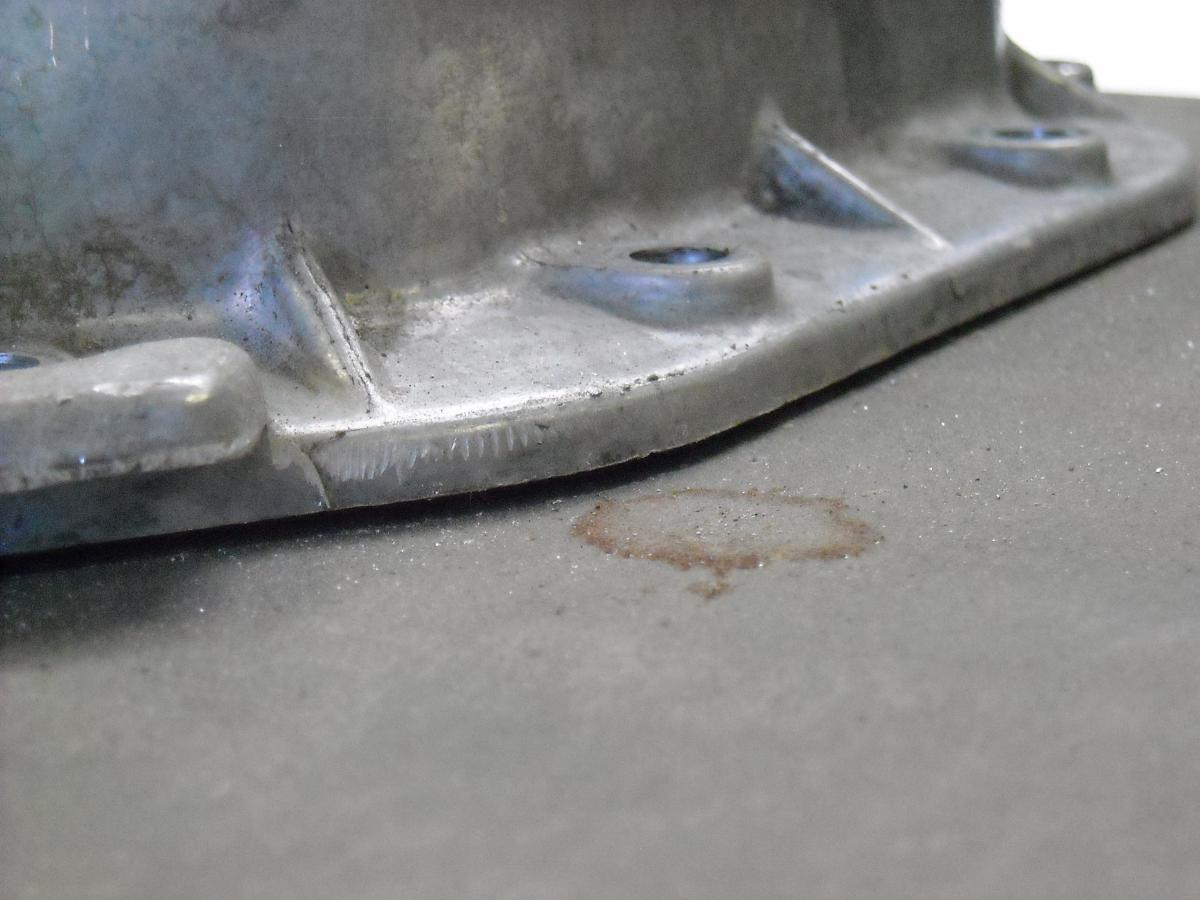
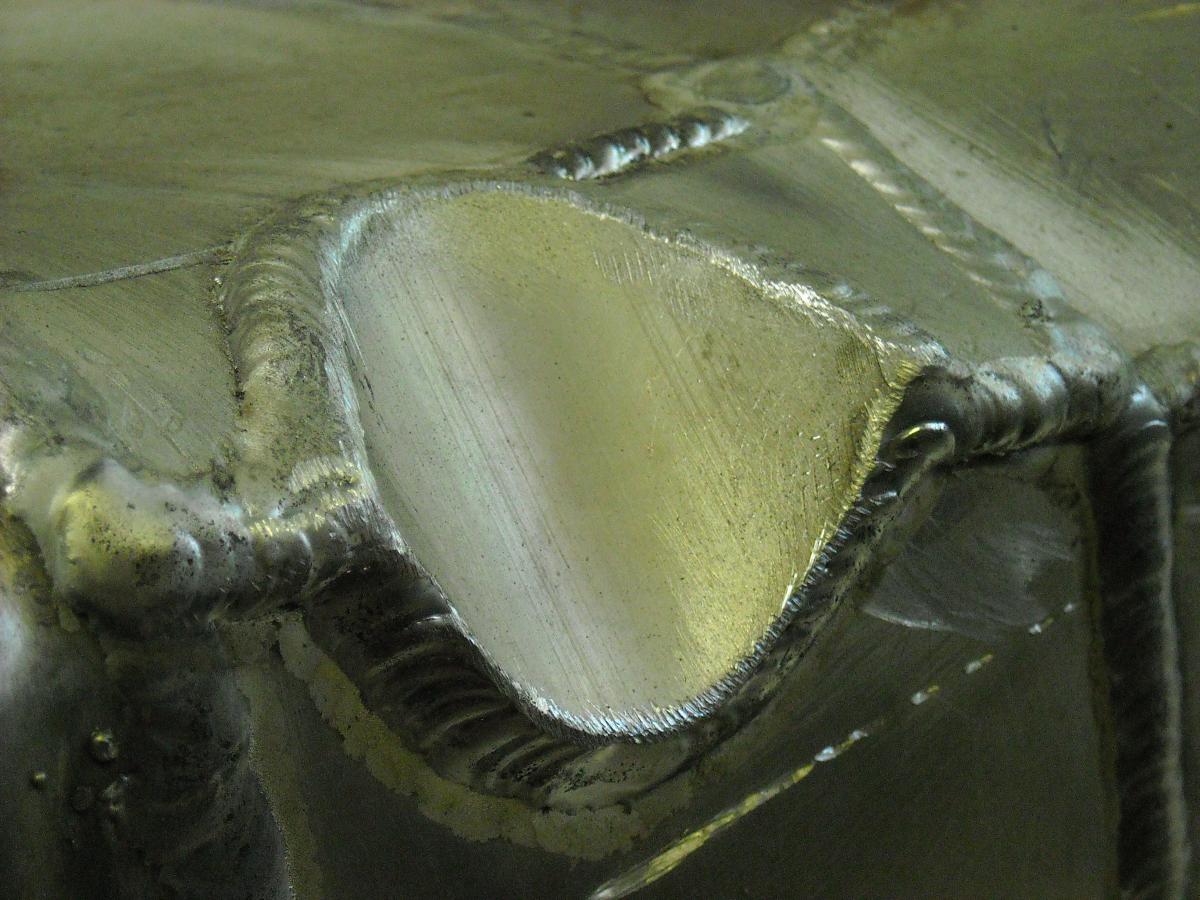
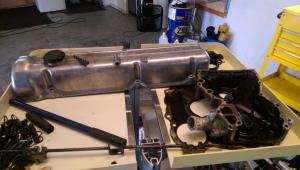
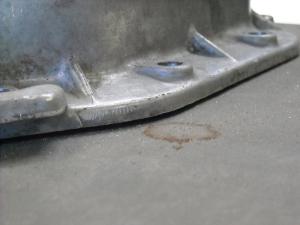
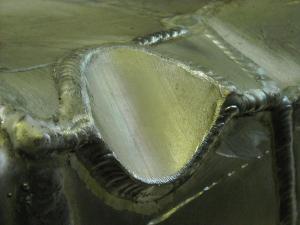
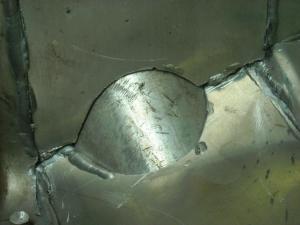
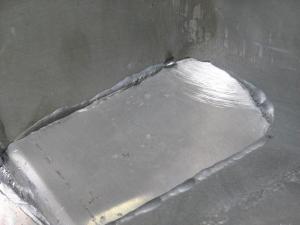
Finally got the pan back from the Powder Coaters, he wasn't coating it though. I had him take the pan up to 650*F for a couple of hrs and then turn off the oven and let it cool slowly over a 14 hr period. Now I don't for sure that it helped ease any stress in the aluminum but when I unbolted the pan from the steel plate there was only about 1 mm difference from one end to the other, I'm pretty happy about that! I did the test with methyl hydrate and also with hot water, no leaks of any kind I'm tempted to cover the steel plate I was using with emery cloth and work the pan back and forth until it is truly flat again. The first two pics are with no bolts holding the pan down. I'm also wondering if I should fill the inside seams with a flexible sealer of some kind. Chris

 1 point
 -
1 pointDo any of you wonder what happened to the days when scammers used to put real effort into their scams so you could at least appreciate the amount of effort they put in to relieve you of your money Sent from my iPhone using Tapatalk1 point