


Leaderboard
Popular Content
Showing content with the highest reputation on 08/11/2016 in all areas
-
 Hi Blue... Sorry to hear about your neighbors dog, give them condolences for me. Our pets are "not just a pet", but beloved family members. Losing them is hard. My Deanna may be beating the odds. When she was diagnosed, I immediately put her on organic food, an herbal supplement, a fish oil, and a Homeopathic remedy. Plus what her vet recommended. I include prayer for her too, it does work miracles. Part of her treatment was every other day sub q fluids since Oct. Two months ago it was reduced to once a week for a month, and now she has been fully off them for a month. Even tho I was told by the vet that Deanna would be on the sub q fluids For The REST OF HER LIFE, her illness was to be terminal. Her vet says now she is STABLE! Praise God!!! We go again for another blood checkup later this month, and I am praying she will still be stable. Of course this could change, I accept that. But for now Deanna is healthy and enjoying life again, that is all I can ask for. And I am relishing every extra day I have been given with her in good health. Yahoo!!! By the way, Deanna is an avid Z car lover. Loves to go everywhere with me! Who could ask for more? Jai
 2 points
 -
 2 points2 points
 2 points
 1 pointI found a rubber grommet from the firewall of a 90s Chevy Camaro that was an almost perfect fit. Used black silicone sealer to get the rest of the way. Has been working great to this day.1 point
 1 pointTo set the level to be the same on both carbs when I can't measure fuel depth, I hold the lid assembly upside down and blow into the fuel port. While doing this I rotate the float and note where it shuts off the air flow, I then bend the tab and repeat until the air stops when the float beam is parallel with the lid (see picture below to see the parallelism). It is important that the beam and float on Hitachi carbs are not twisted (the beam and float top should also be parallel). Doing this method is easy because the assembly is literally in front of your nose. It seems to do the job reasonably well.
 1 point
 1 pointNo need to apologize to me, I have no idea what i am doing. My car is 13 years older that I am, and I have yet to get it properly running. I'm like you, read a lot and hope I can make sense of it when I get it in front of me.1 point
 You might want to look at this one: http://tinyurl.com/hnyfcrc It retracts fully and has a key to secure it. No tempting antenna shaft sticking up to break off when you remember to put it down. I have a similar one on my '70 Porsche. Dennis1 point
 I usually pull a critical part ( or two ) that is not obvious and will disable the car. Had to Park the Z at an Airport Lot on a recent vacation. My other car ( Audi ) was down for a while. Airport Security check had a WTF moment when they saw some mysterious electrical devices in my luggage. Fortunately one of them was a car guy and understood why I had these weird relays and things in my luggage. Took some 'splainin' though!!!1 point
1 pointGot Bruce @ Ztherapy to chime in on this. Few things that have made a lot of sense to me. Maybe others know this, but it was news to me. First off, he said to ignore the SU DVD about setting the float level, as it is outdated. (at least in regards to the method) Ztherapy no longer uses grose jets, they use a simple needle and seat. This means that there is no way that needle and seat could support the weight of the float when inverted. And if the float is resting on anything it would be the retaining spring which is obviously not the desired effect. Because it cannot support the weight, you must do your adjustments upside down (like I did). Let the needle and seat hang, lift the float up until the valve would shut off, and set that height (between float top and float housing cover bottom) to .55". This is exactly what I did, so I should be in good shape to begin my tuning. Also, he mentioned they only sell 1 length of needle and seat, and apparently he had only seen one version of carburetors that had different heights of the grose jets. He was unsure as to why this was, but had no comments or concerns whatsoever about the front and rear carb adjustments being anything other than exactly the same. Now that said, it would appear that some of the other more robust ways to set the float level talked about in this thread would probably still be the best advice. (Backing it down 10 turns and checking for fuel level etc) I will probably employ these if I don't have good luck with my initial float setting. Thanks all1 point
1 point
I usually pull a critical part ( or two ) that is not obvious and will disable the car. Had to Park the Z at an Airport Lot on a recent vacation. My other car ( Audi ) was down for a while. Airport Security check had a WTF moment when they saw some mysterious electrical devices in my luggage. Fortunately one of them was a car guy and understood why I had these weird relays and things in my luggage. Took some 'splainin' though!!!1 point
1 pointGot Bruce @ Ztherapy to chime in on this. Few things that have made a lot of sense to me. Maybe others know this, but it was news to me. First off, he said to ignore the SU DVD about setting the float level, as it is outdated. (at least in regards to the method) Ztherapy no longer uses grose jets, they use a simple needle and seat. This means that there is no way that needle and seat could support the weight of the float when inverted. And if the float is resting on anything it would be the retaining spring which is obviously not the desired effect. Because it cannot support the weight, you must do your adjustments upside down (like I did). Let the needle and seat hang, lift the float up until the valve would shut off, and set that height (between float top and float housing cover bottom) to .55". This is exactly what I did, so I should be in good shape to begin my tuning. Also, he mentioned they only sell 1 length of needle and seat, and apparently he had only seen one version of carburetors that had different heights of the grose jets. He was unsure as to why this was, but had no comments or concerns whatsoever about the front and rear carb adjustments being anything other than exactly the same. Now that said, it would appear that some of the other more robust ways to set the float level talked about in this thread would probably still be the best advice. (Backing it down 10 turns and checking for fuel level etc) I will probably employ these if I don't have good luck with my initial float setting. Thanks all1 point
1 point 1 pointThe numbness may never go away completely. I've mangled fingers bad enough to require stiches a couple times and I think it all depends on what gets cut. All of mine have gotten "good enough" over the years, but never back to stock. Worst one was probably an electric hedge trimmer. Dr. in the emergency room muttering things like "I can't really tell what to stitch to", and "hamburger". I don't think I was supposed to hear any of that... Tis but a scratch. As I'm sure you already know (from what I've heard about your motorcycle history) that the external injuries pale in complexity to the internal issues. Glad you're almost out of the woods. Now clean that house and do some laundry.1 point
 1 pointHalf of an obscenely large Italian sausage could be substituted for the hot dog for posthumus bragging rights.1 point
1 point
1 pointHalf of an obscenely large Italian sausage could be substituted for the hot dog for posthumus bragging rights.1 point
1 point 1 point***Note to self and friends*** ... "DO NOT let siteunseen do your vasectomy"1 point
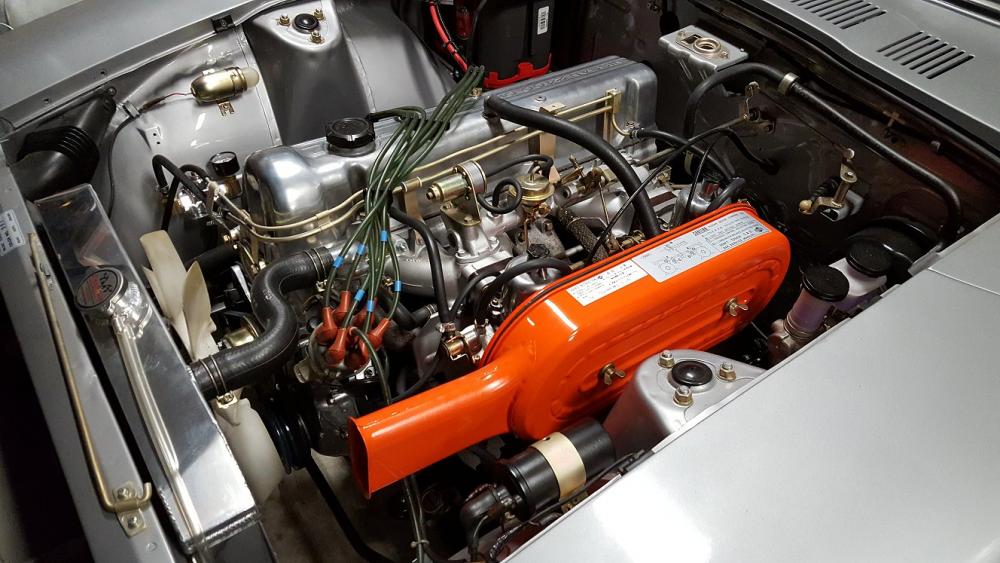
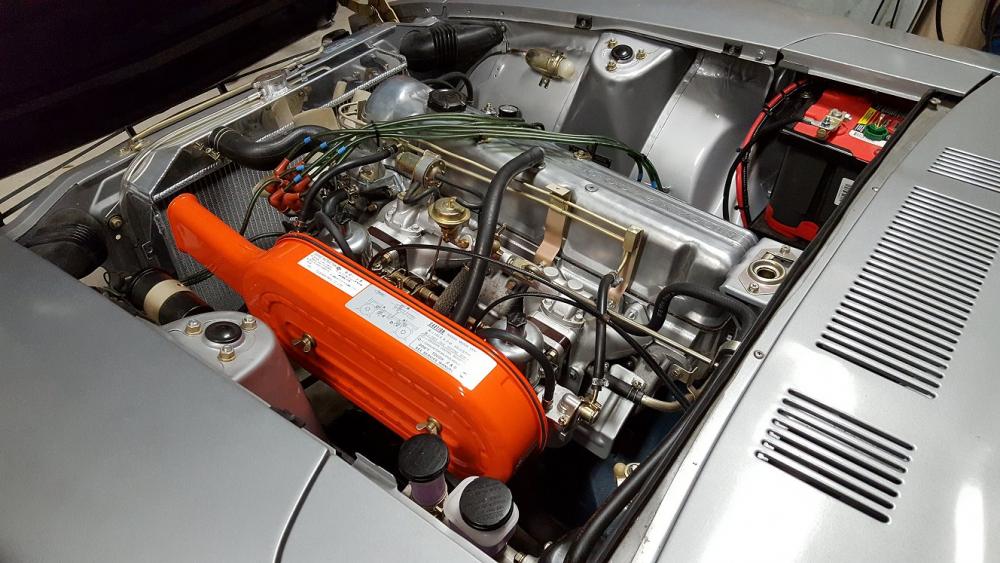
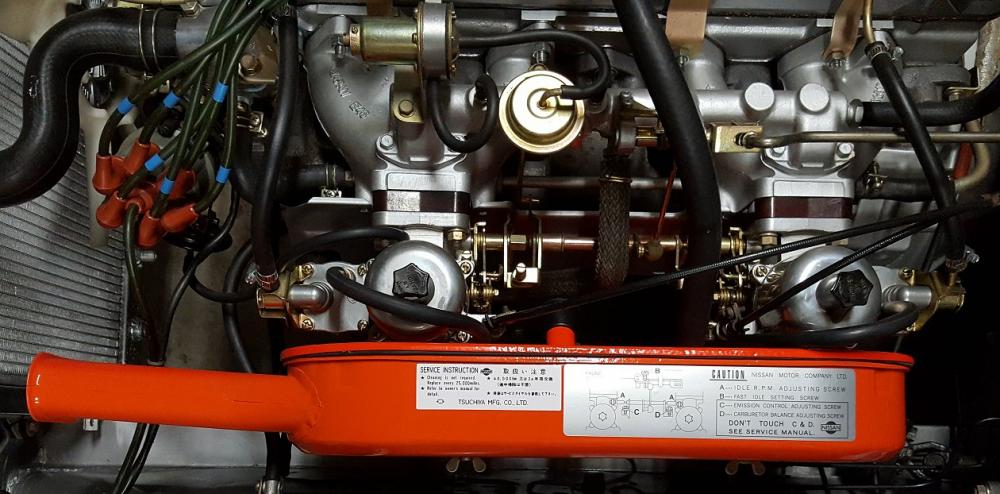
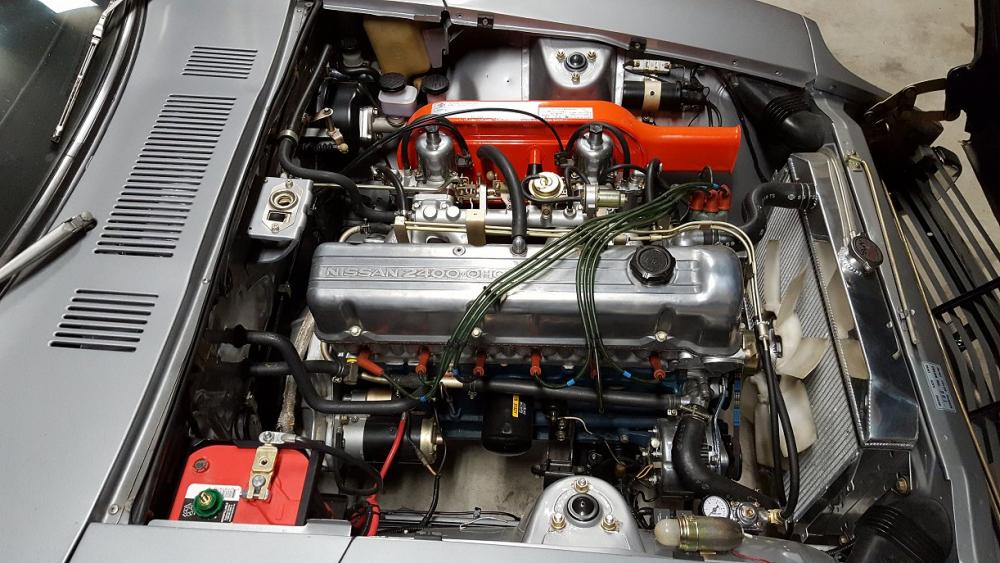
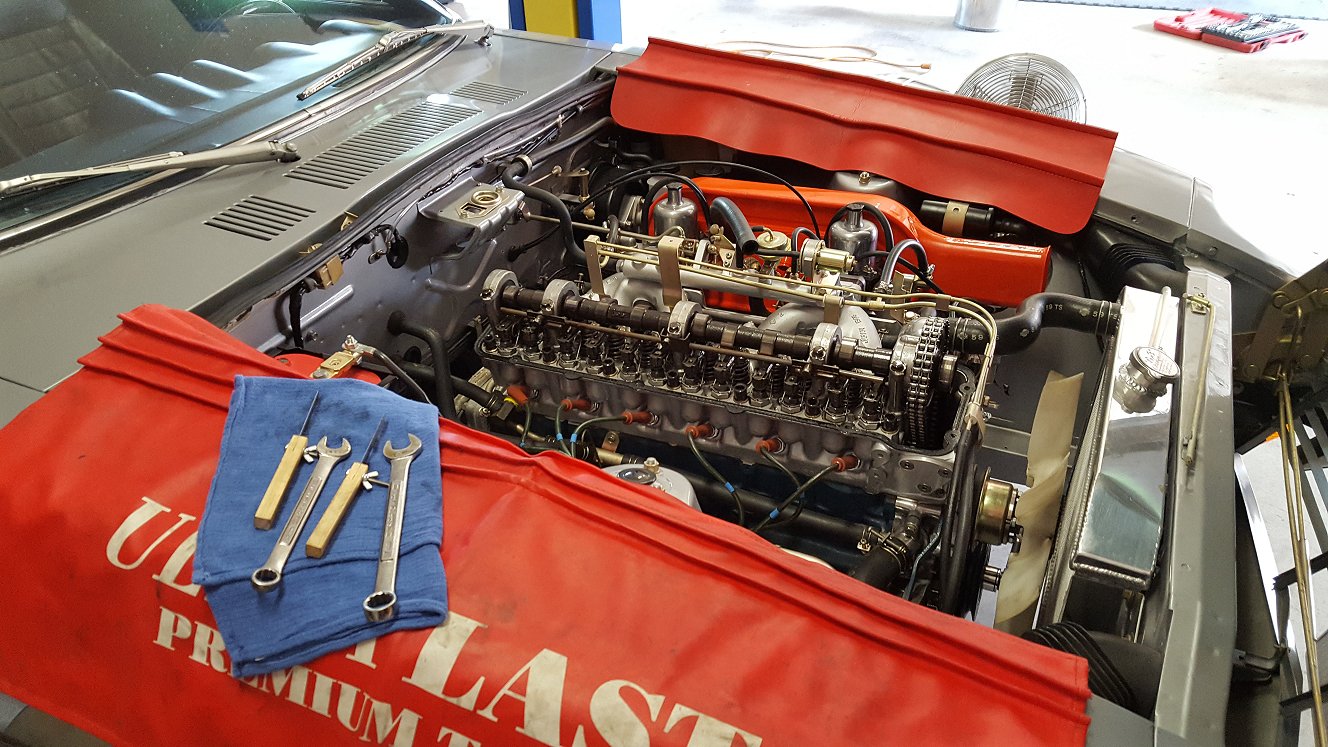
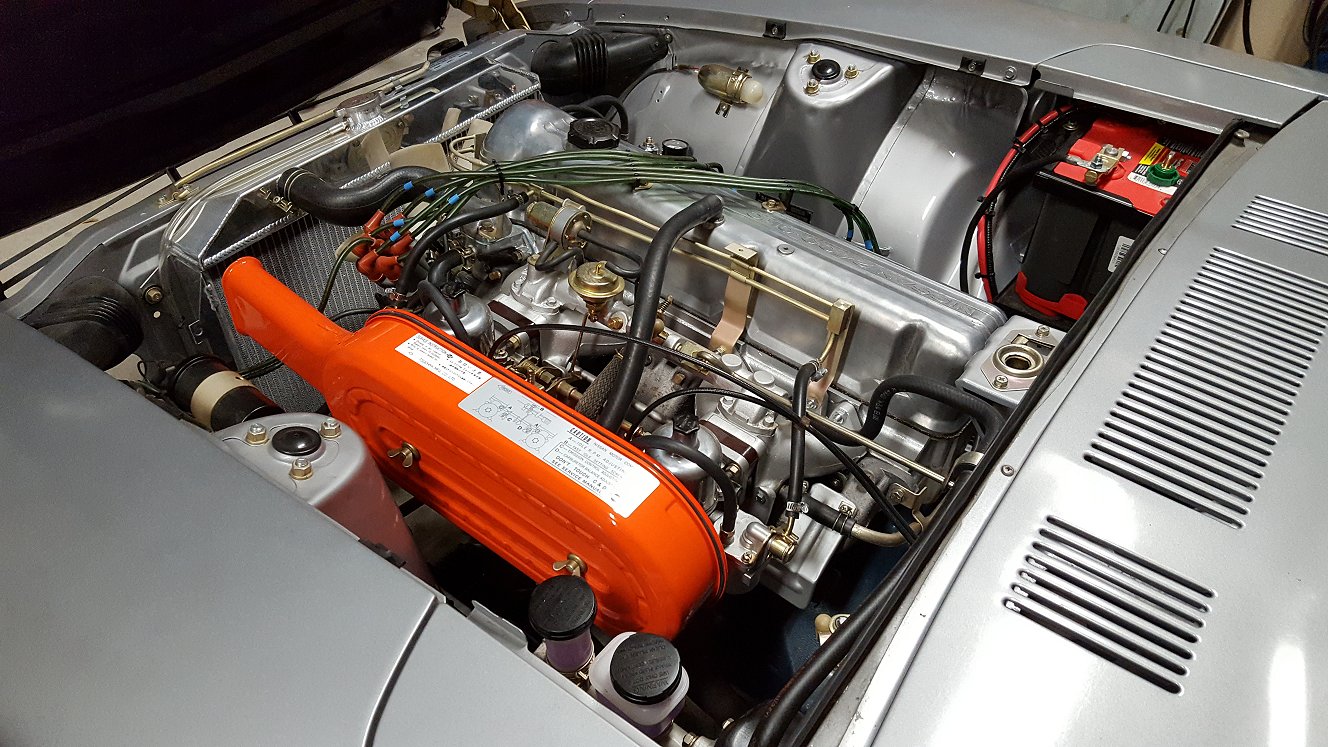
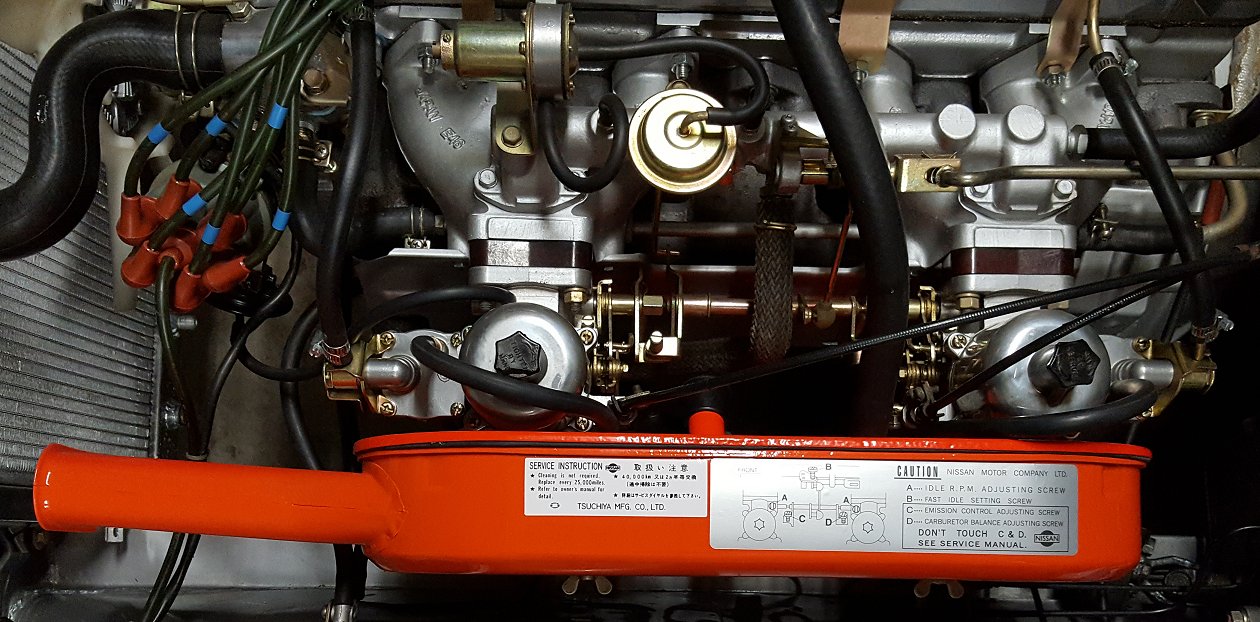
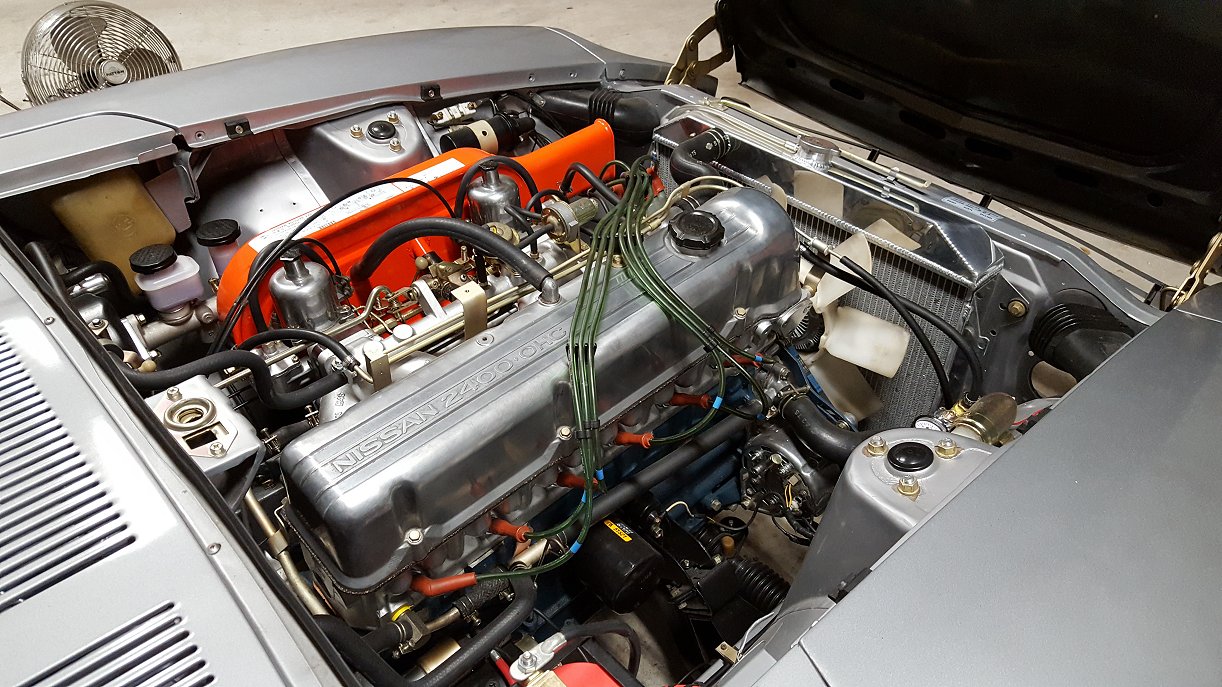
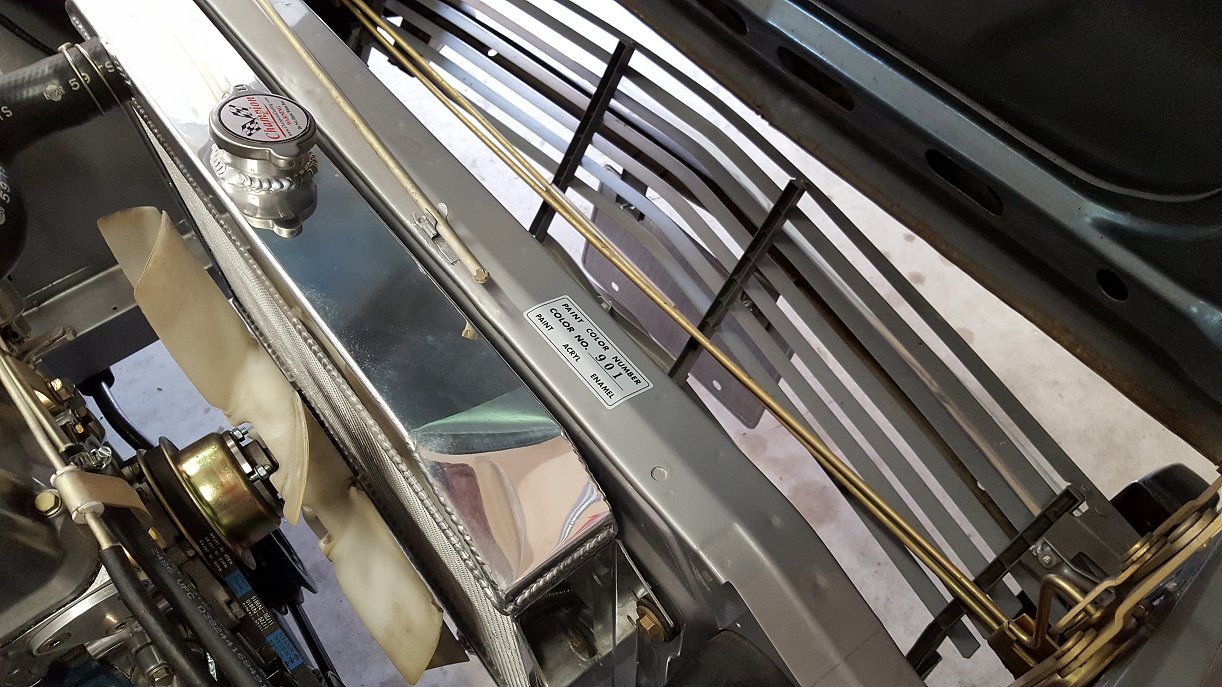
 The July 4th weekend was very productive for getting work done on the Z. I wrapped up the restoration and paint work on my series-1 air cleaner. The full write up can be seen here -> http://www.classiczcars.com/forums/topic/55771-series-1-air-cleaner-restoration-lots-of-pics/ With the air cleaner on and the old valve cover off I figured I would do a valve adjustment as I had noticed a little valve train noise the last time I drove the car. Sure enough, 4 valves were a bit on the loose side. All in all, a 20 minute job well done. The 2400 valve cover and new cork gasket went on followed by the decals for the air cleaner. The new paint and decals on the air cleaner really elevate the engine bay's level of cleanliness and accuracy. Overall I am very happy with the way it came out considering the condition it was in when I started. The crown jewel of the engine is the 2400 valve cover. I cleaned and polished it a little but I like the natural aged look of the aluminum. Given the state of the rest of the engine bay I think it looks right at home. The final detail to be added is the paint code decal. The car is an original 901 silver car. Since the engine bay has already been stripped and re-sprayed I wanted to add this final touch. All of the decals are very sharp and beautiful in their own way. Mike at Banzai Motorworks is the man! I know the community appreciates all of the work he does to make these small yet significant parts available. It has been very rewarding to add the last two key components that make the engine bay "more correct". Many of you already know these parts are not cheap and not easy to come by. However, with some patience and elbow grease the final result is nothing short of impressive. That is all for now!

 1 point


Important Information
By using this site, you agree to our Privacy Policy and Guidelines. We have placed cookies on your device to help make this website better. You can adjust your cookie settings, otherwise we'll assume you're okay to continue.