


Leaderboard
-
djwarner
Free Member5Points718Posts -
Patcon
 Subscriber
 4Points11,185Posts
 -

siteunseen
Free Member3Points15,175Posts -
Captain Obvious
Free Member2Points10,111Posts


Popular Content
Showing content with the highest reputation on 08/13/2016 in all areas
-
5 pointsPlease remember the window frame is adjustable as well as the latch. If the frame is tilted inward, it will compress the top portion of the gasket first and binding before the latch completely catches. Lower the window, loosen the frame bolts and close the door. Ignoring the window frame,is the door flush with the aft body? Uniformly flush top and bottom? Is the gap uniform top to bottom? Front gap as well as the aft? If all is to your liking, the hinges and latches are aligned properly. Remember to check the dove tails under the latches. Next, open the door and slowly close it. Stop if you feel it binding against the rubber gasket. If it is binding, rub the gasket with sidewalk art chalk and slowly close the door again, stopping when it binds. Open the door to see where it is rubbing. If by any chance the chalk made things better, you may need some dry lube on the gasket to prevent sticking. Many of the newer after market gaskets are too thick or too hard making the door hard to close. If the door is properly aligned, this may be the case and adjustment may be impossible. The OEM gaskets were quite soft when new. When all else is done, snug the window frame bolts up, close the door and position the frame for the dollar bill test. Open the door and tighten the bolts. Check your work, windows down and then up. If all this fails, others have written about using KIA door seals that are much softer.5 points
-
Here in the deep south a lot of people carry and make counter offers...3 points
-
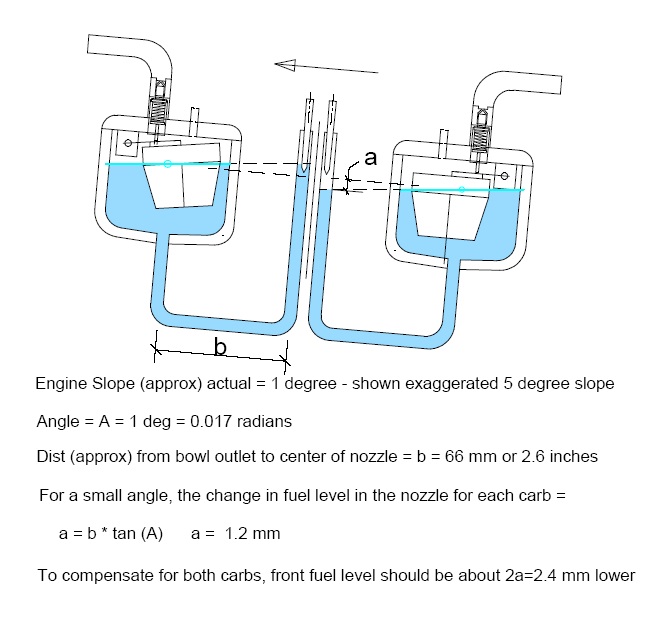
2 points2 pointsI think this is it. There is a link in one of the posts to one by Enrique.2 points1 pointMore discussion equals more thoughts. The brain, use it or lose it. That's why I love this forum, you gotta think a little. With the exception of our "tell me what I want" members.1 point1 point1 pointWhile messing around with the diff straps, I noticed what may be some obscure Z car trivia... Here are the two belts I have. Top is from my old 260 (stamped with P/N 55425-E4100), and the bottom is the one that I just took off my 280 (stamped with P/N 55425-N4300): I wanted to know the circumferences of the two, so I put some tape on the inside like this: And then peeled the tape off and measured the length like this. It's not an extremely accurate way to make this measurement, but was probably good enough. The measurements I got showed that the 260 belt was a little longer than 21 inches in circumference while the 280 belt was a little shorter than 21 inches circumference: But the neat potential trivia part is that there are numbers molded into the ID side of each belt. The 260 belt has a "537" molded in: And the 280 has a "529" molded into it: And if you interpret those molded numbers as millimeters, you'll find that the math works out almost perfect. So I don't know for sure if those molded-in numbers were in fact the circumference length from the factory, but it sure appears that way to me. It's also interesting to note that the 280 belt seems to be designed a little shorter than the earlier belts, even though it's for a R200 instead of a R180?:1 point1 pointThe fuel sloshes to the back of the bowl on acceleration and sloshes to the front when changing gears and braking. It sloshes side to side when turning, It is very dynamic. If you are in a Hurricane chasing an ME-109E, you can't push negative G's to give chase because the floats lift and shut off fuel.1 point1 pointIf you get as far as me you are welcome to the guest house...We are gonna plan on Austin...1 point1 pointFound this CAD drawing I did a couple years ago to help understand the tilt / fuel level issue - why different levels in the bowls are required to get equal fuel height in both nozzles. In my opinion this is why Nissan changed the ears and valve length on the front carb for the 3-screws in 1972. I've got the 72 engine manual, but it doesn't mention different settings, and as far as I know there was not technical report about it. Wonder why. Maybe it was a time-line thing, since the carbs were changed to flattops in 73. The first time I opened the front float bowl I found a really bent-up float. Maybe some previous mechanic got mad and used the "ignorance and brute strength" method on it. I've used that method myself, with mixed results. inh
 1 pointDiseazd , I went with the stock type system because it's just simple and easy. I really didn't want to drop the diff, and while I've heard that installing the RT mount is possible with the diff in place, I've also heard that it's way easier if you pull the diff first. Doing what I did, I didn't have to pull the diff or mess with any of the driveshafts. My thinking is that the original stock mount lasted the first forty years and if I use a tight strap to keep the front of the diff from lifting, I should be able to get the next forty years out of the new OEM lower mount I just put in. And with that in mind... sweatybetty, Where did I get a new strap? I sewed myself a new one! As proof of concept, I bought some cheap blue nylon webbing at the local hardware store and sewed loops on the ends. I'm no seamstress, so please be kind... Sewed a loop on one end: Here's how the loops fits over the mounting rod: In order to determine where to put the other end loop, I installed it in the car and measured for length by looping around both end mounts and removing the slack. If you look carefully, you can see my Sharpie marks: After measuring for proper length, I sewed the loop on the second end and it looks like this. Like I said, I'm no seamstress. I was focused more on strength than looks: Wrapped around both end mounting points and installed above the diff, it looks like this: Summary... Here's all my parts. Old mount stuff on the right, new on the left: That lightweight blue webbing strap got me to Zcon and back, but it's really a temporary install. It's a thin gauge webbing of unknown origin and specification. Since making the original strap, I've purchased some known quality webbing from McMaster and I will make a second strap to replace it. Here's the better webbing from McMaster: So I don't have any data as to the longevity of my strap solution, but I can tell you that cheapie blue one has been in there for about a month and is still going strong. I can also tell you that it's doing a whole lot more for retaining the diff nose than my original stretched out crispy factory strap.1 pointI had the same problem initially but found these shorter bulbs at Pep Boys for $20 a pair. Nice and bright, too.
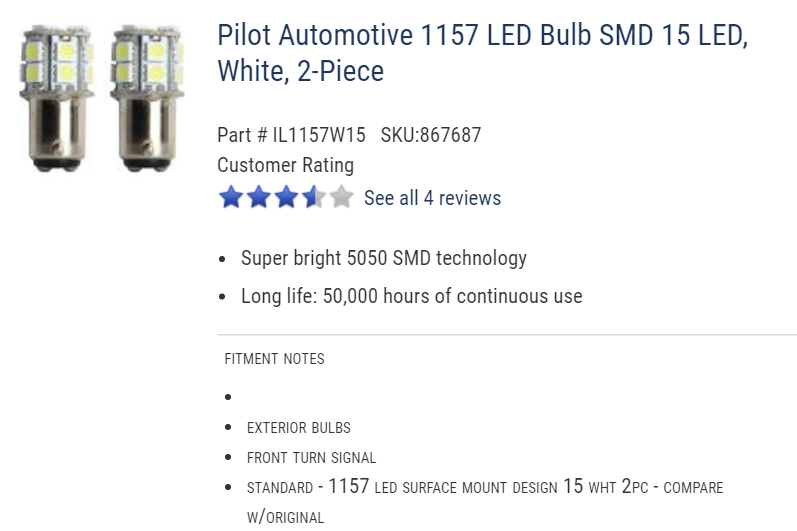 1 point1 pointWe do have a great deal in common. July 7th. 1967. One month after H.S. graduation, 18 years old. I was driving a Euclid (no power steering) dump truck in a rock quarry. Thanks Dad. Simple job, transfer rock from the blasting zone to the crushing operation and dump it down a steep hill. Backed into position to dump, raised the bed and the crest of the hill caved in. Over backward we (the truck & I) went. When the dust settled and I pushed the seat off of my body, I was looking at the sole of my boot and it was laying in my armpit. I remember thinking "I'm not that flexible." Broken femur. 2 1/2 months in the hospital, leg in traction, flat on my back, period. All they'll let me do is sit up. Hottest Summer on record. No AC. Friends would smuggle in ice cold beer and combustibles. Never smoked out a hospital room though. We were much more discreet. We thought the Nurses didn't know. Yeah Right! The younger ones said keep it down to appropriate levels and times. The older nurses just scowled to show their disgust. Leg didn't heal in the 2 1/2 months. Next was a Hip Spica Cast. Body cast. Armpits down to the toes on the broken leg, down to just above the knee on the other, with a brace in between. No flexibility whatsoever but at least I was home. 2 1/2 months in that cast, leg still had not healed. December, Swedish Hospital, Seattle. A bone graft from my hip and two plates screwed into my femur and I was free at last. The settlement said to me "GO RACING". Bought a rolling dragster chassis and a trailer. 144" wheelbase, front engine. Halibrand mags, M&H Racemaster wrinkle walls, quick change early ford rear end with a one piece open tube axle. Spokes up front. Found a 327 engine built for a Jimmy 671 blower cheap. Found a 671 and manifold cheap, a few odds and ends and it was off to the Saturday night drags at Thun Field in Puyallup with a friend who had a blown 289 dragster. Sooo many memories.1 pointAlways thought the locks on the gas doors look hellaciously ugly. I really like zKars solution, but I'm tapped out for S30 spending this year. Maybe in the Spring, if any are left1 pointMy 1971 Fairlady Z has a locking gas door. Chuck1 pointAlan, please don't take too much offense at this, but I find your frequent reminders about the world-wide nature of the S30 somewhat tiring, especially when posted in a thread whose context (like this one) is almost solely US-spec 240Z centered. A large portion of this thread has been discussing the particular oddities of the carpets as delivered in the US 240Zs. In that context, Mr. Pilati's statement was correct. For you to grab it out of context, and then 'correct' it can appear petty and almost spiteful. Frankly, I am in awe of the breadth of your knowledge on the S30s, and have learned much from your posts here. But at times, your efforts to broaden discussions that started as US-240Z topic into a world-wide topic seems somewhat off-base. My opinion only. I don't expect others to agree.1 point


Important Information
By using this site, you agree to our Privacy Policy and Guidelines. We have placed cookies on your device to help make this website better. You can adjust your cookie settings, otherwise we'll assume you're okay to continue.