Leaderboard


.JPG.cfcada9cf1c1b502df3f5f2f2ca3ff36.JPG)
Popular Content
Showing content with the highest reputation on 02/07/2017 in all areas
-
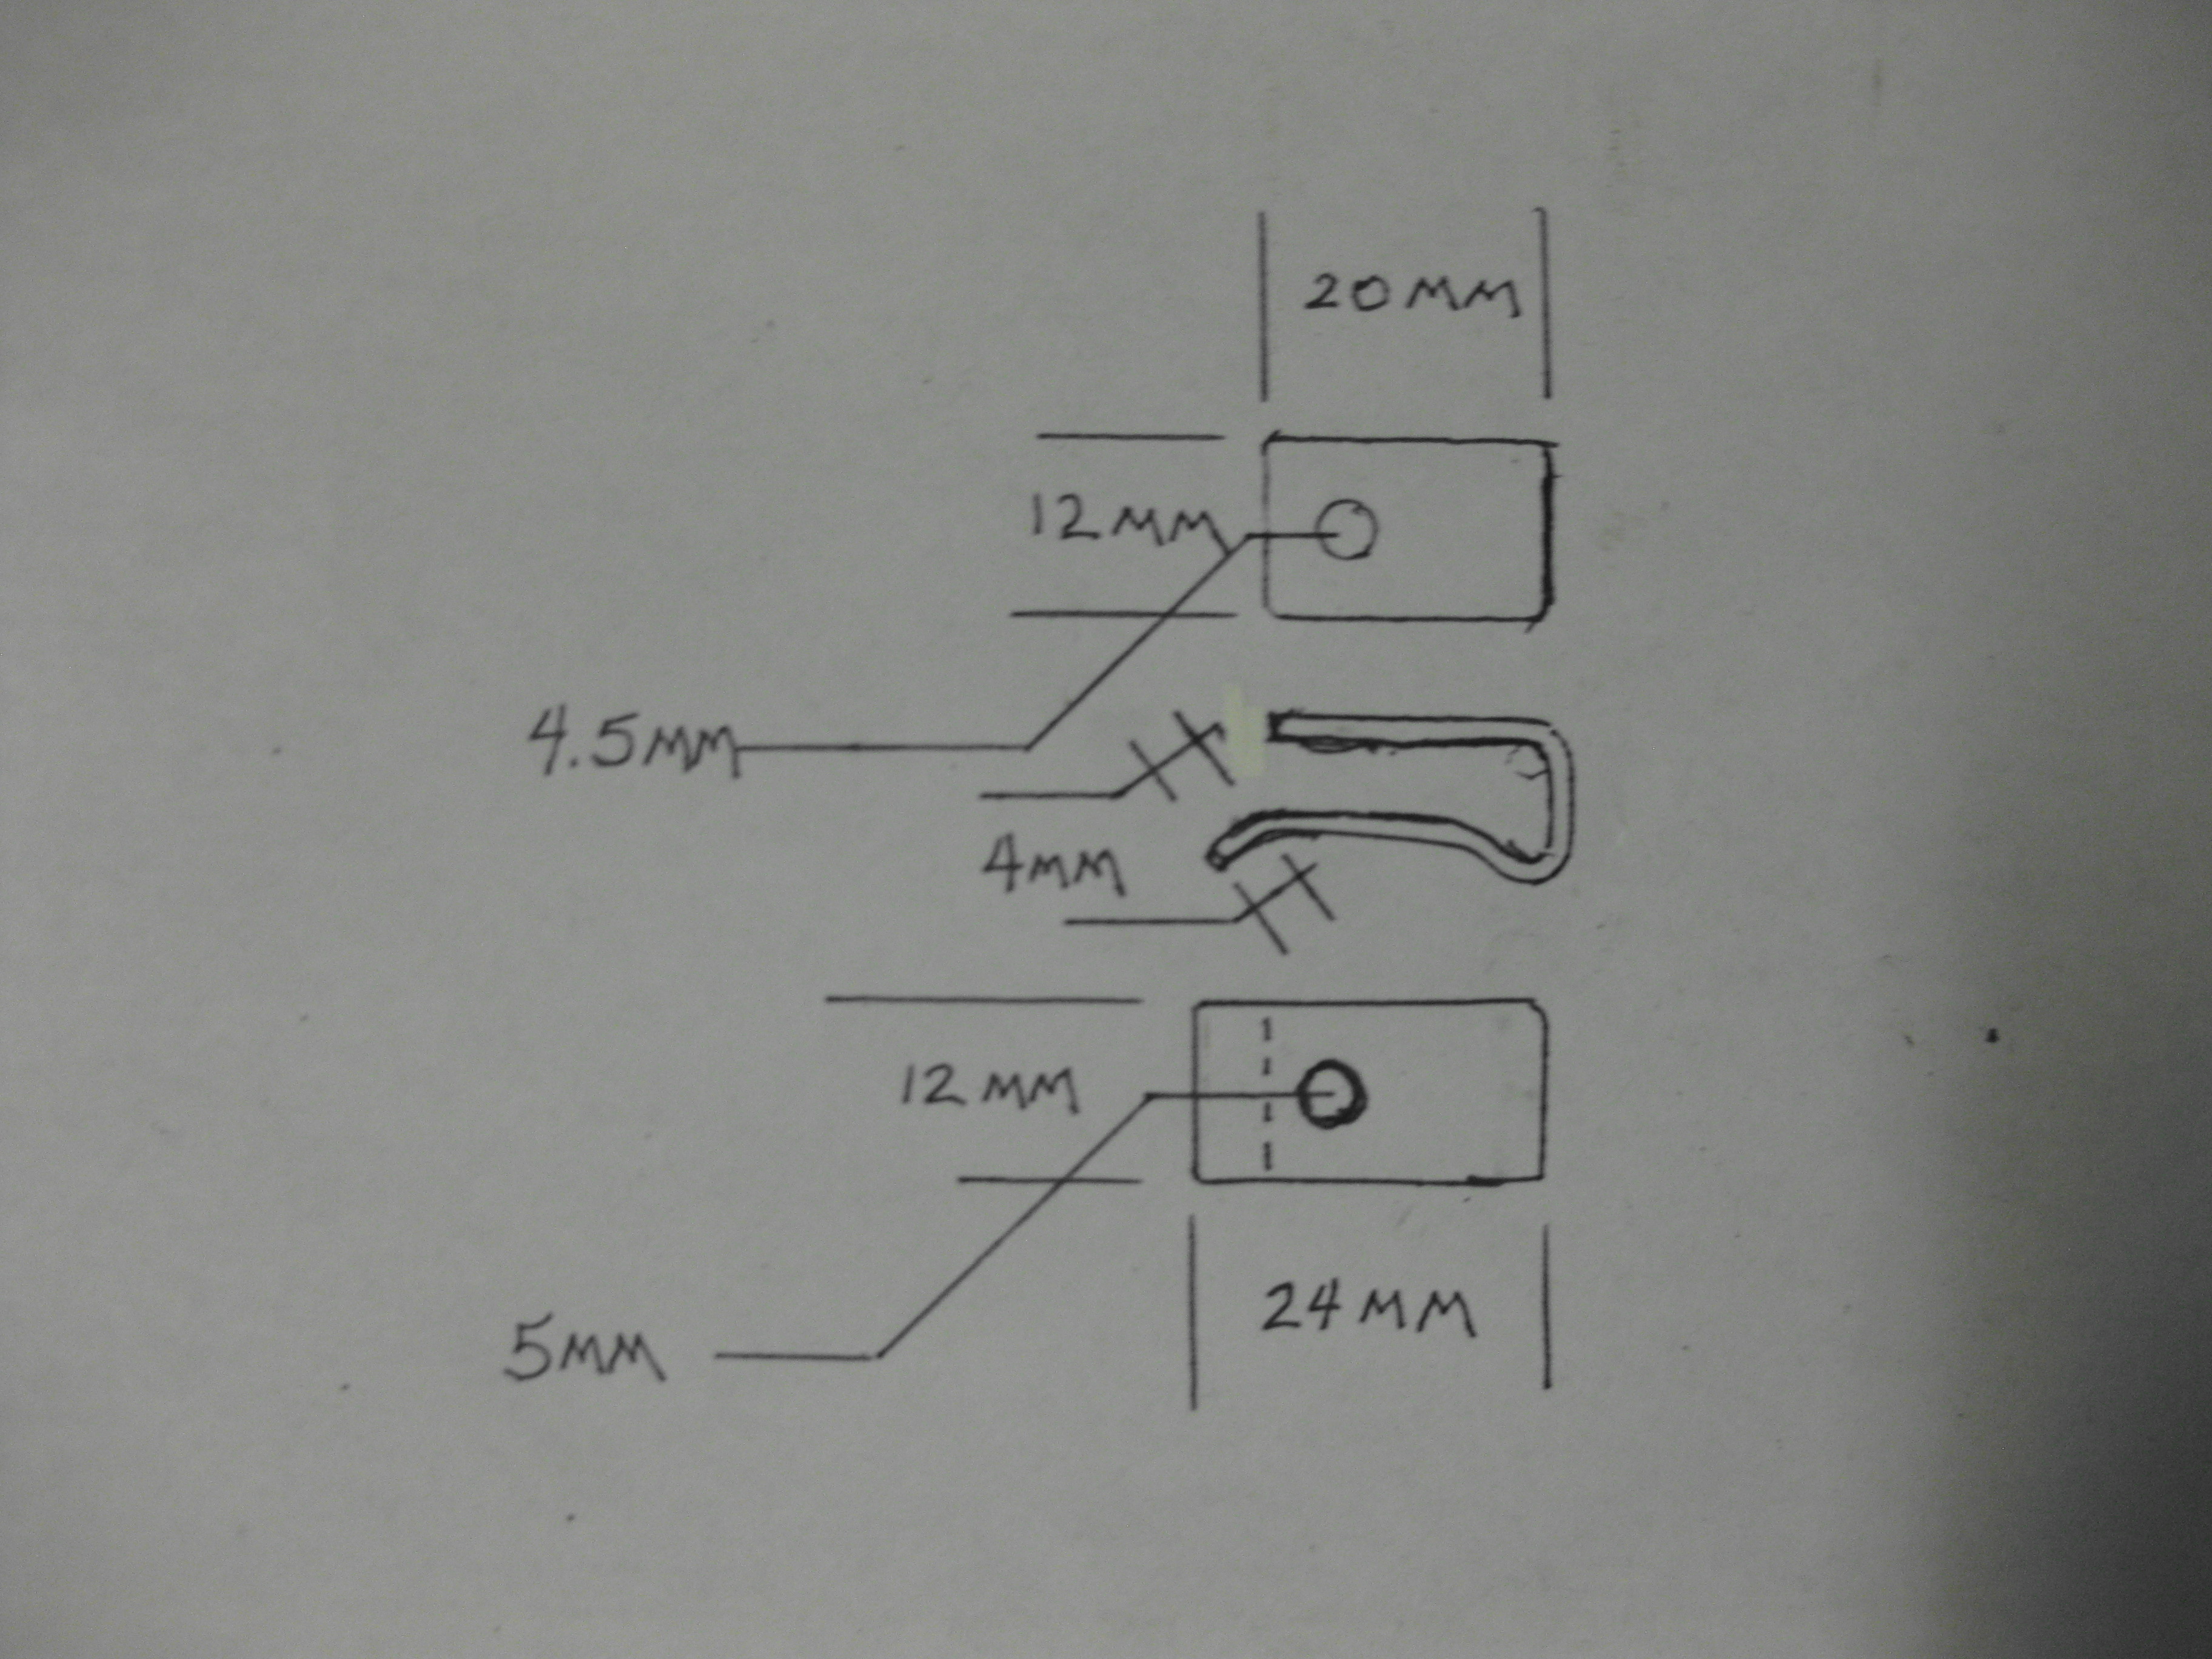
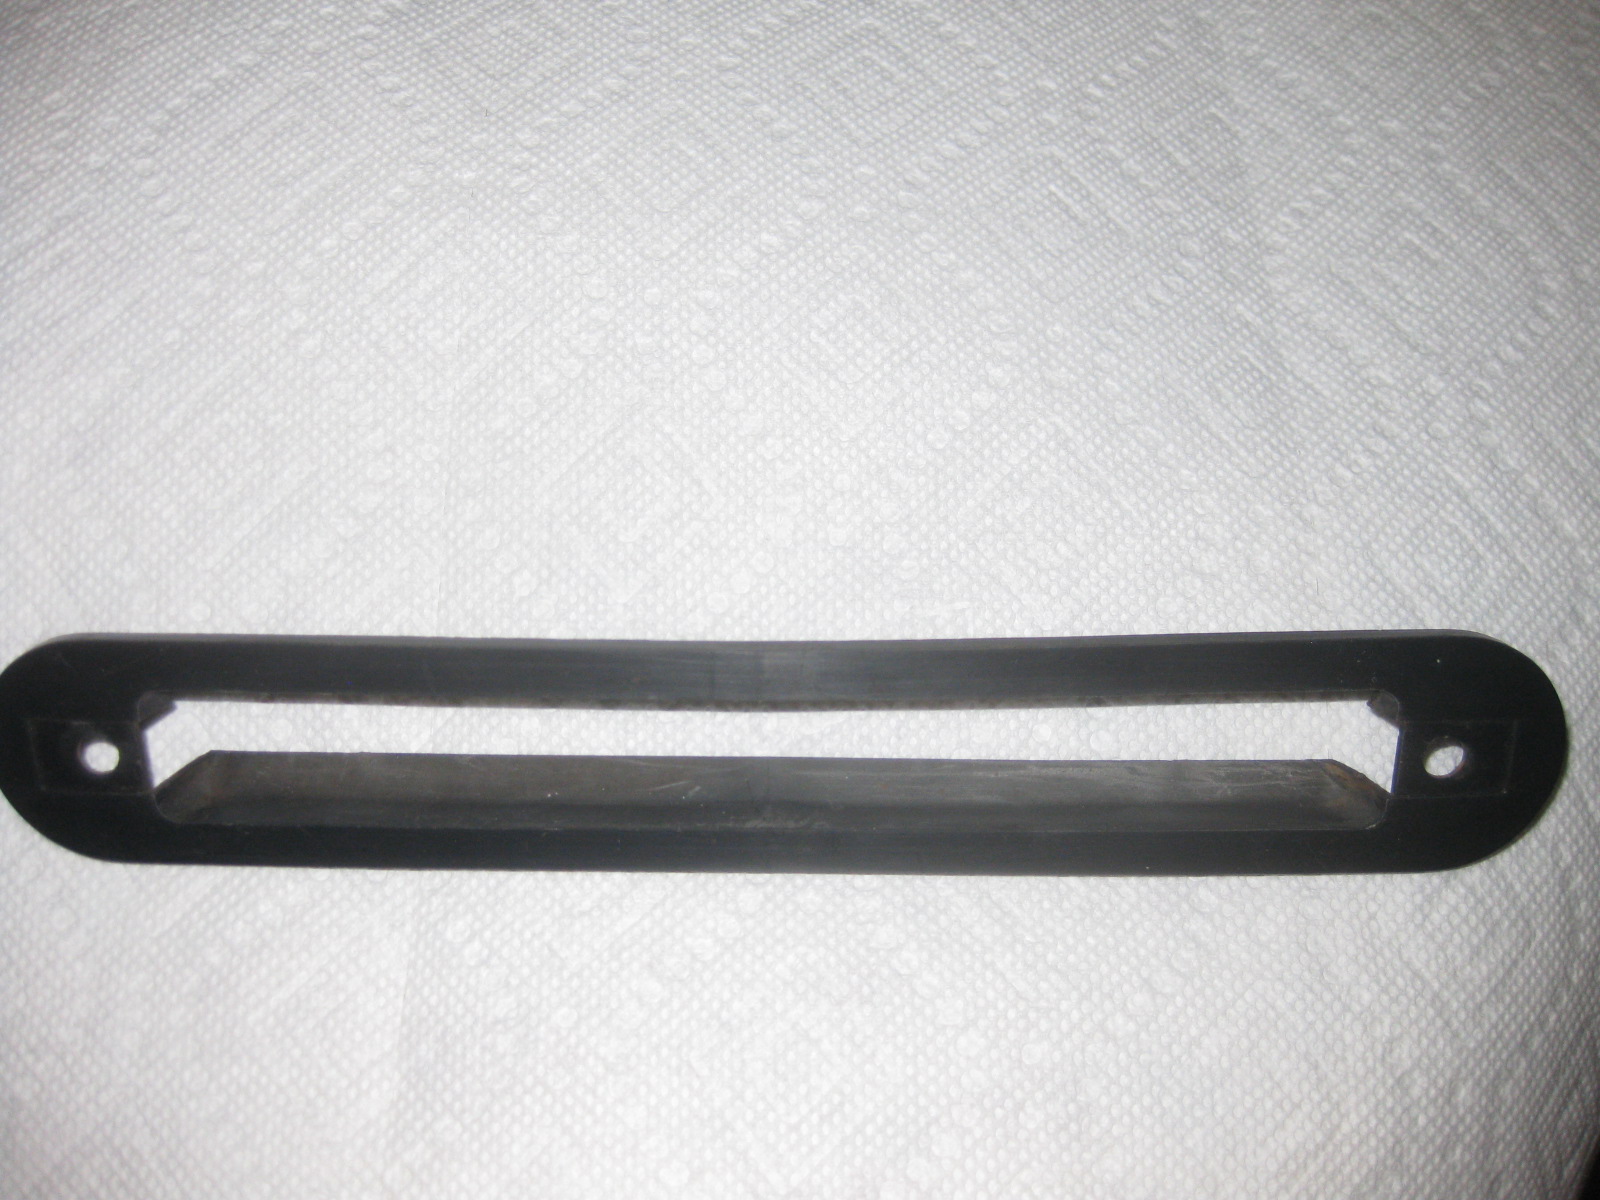
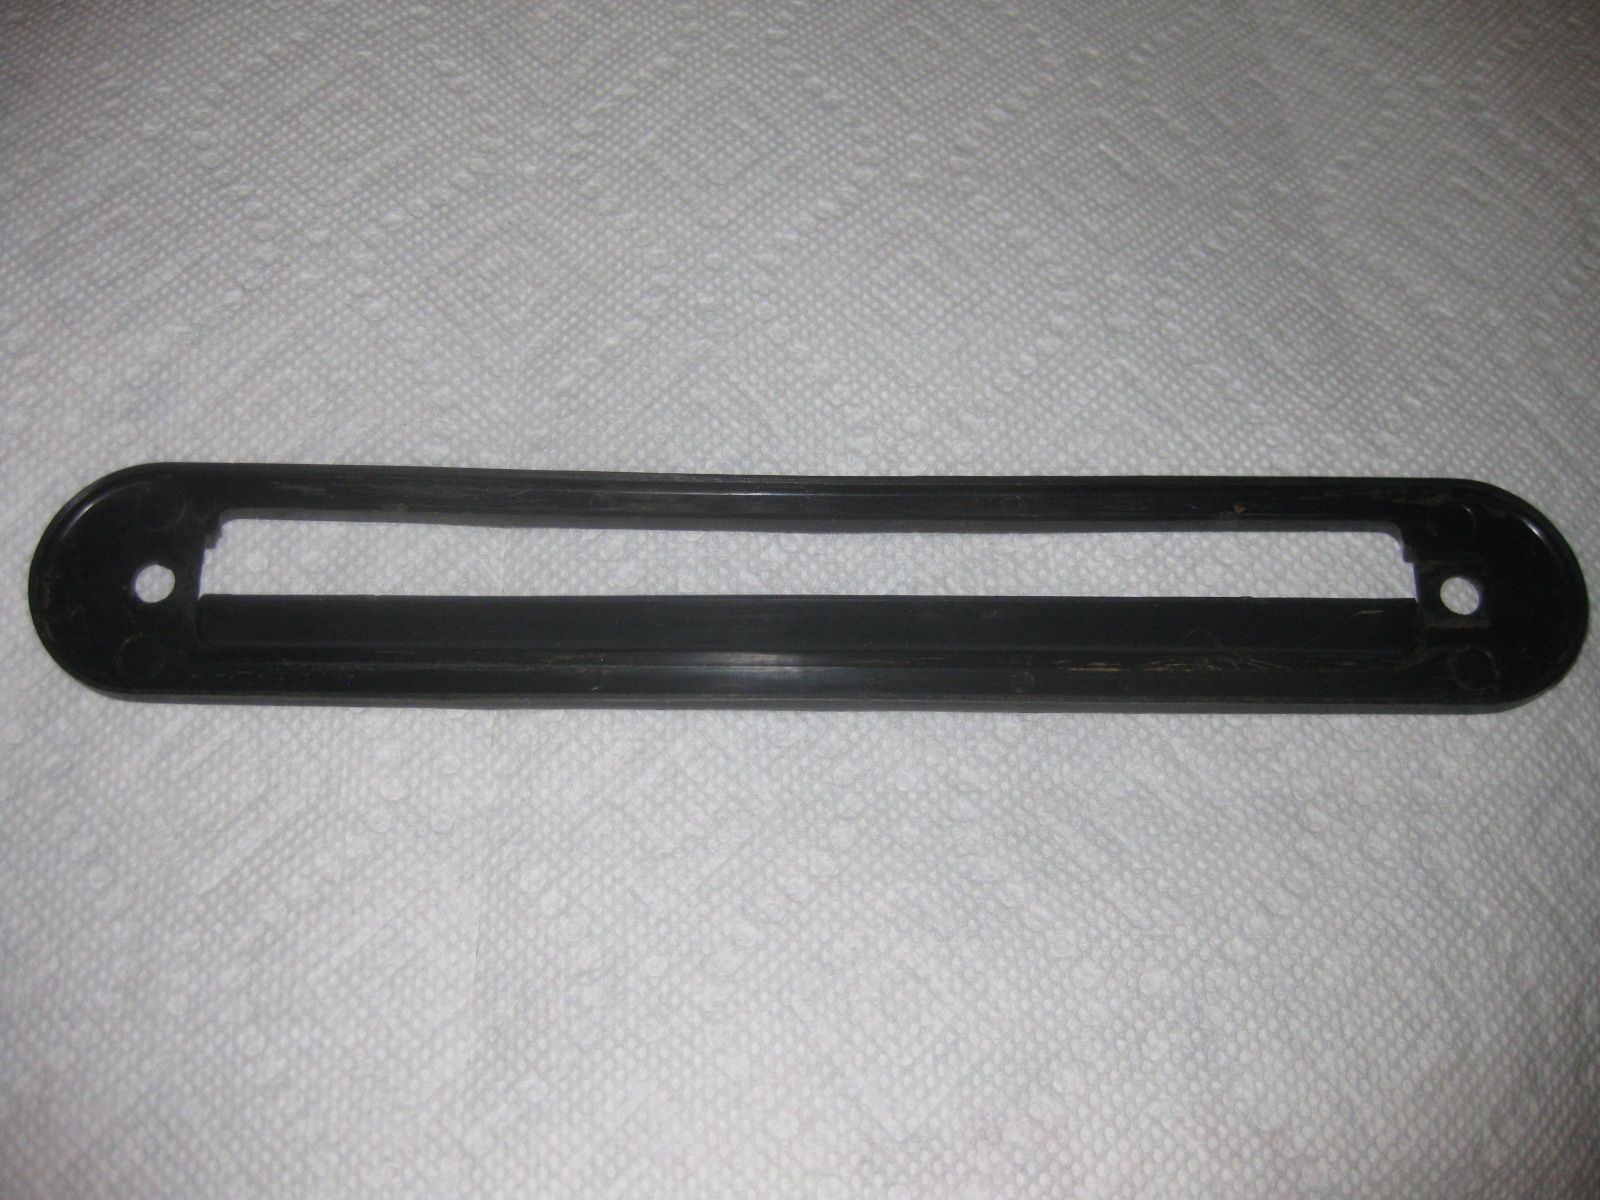
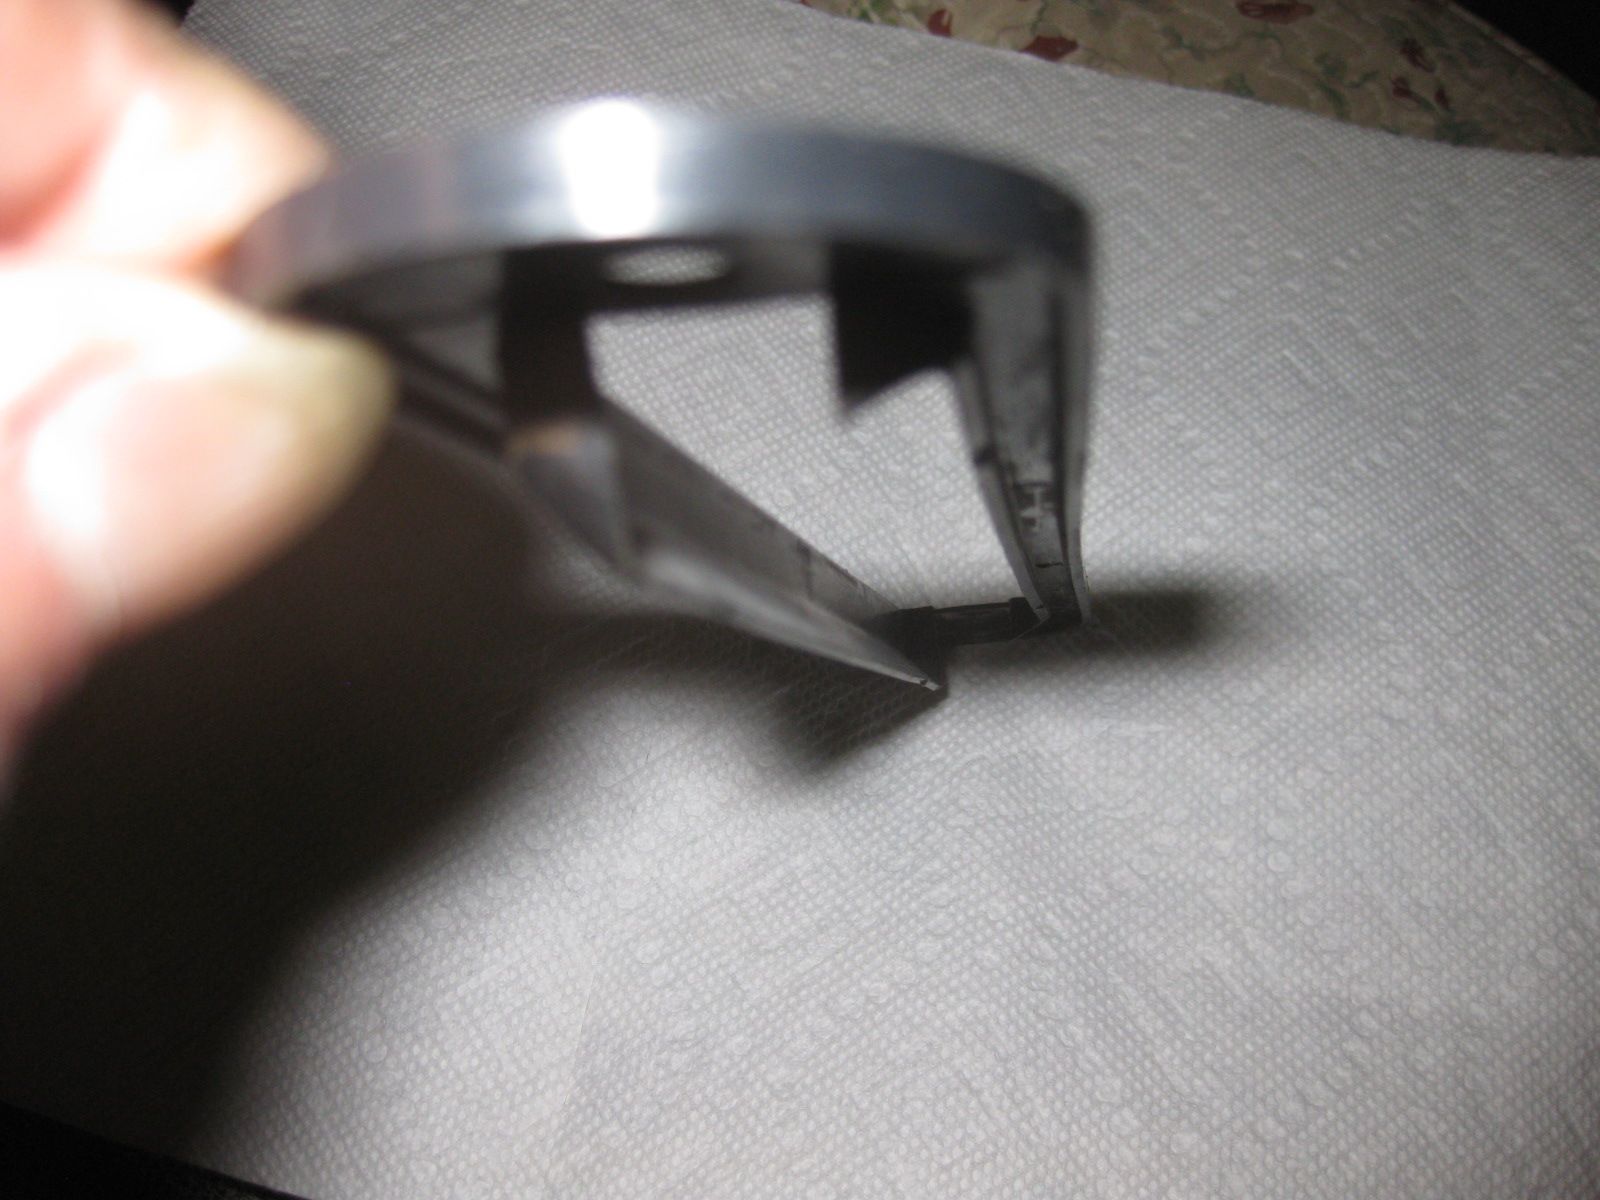
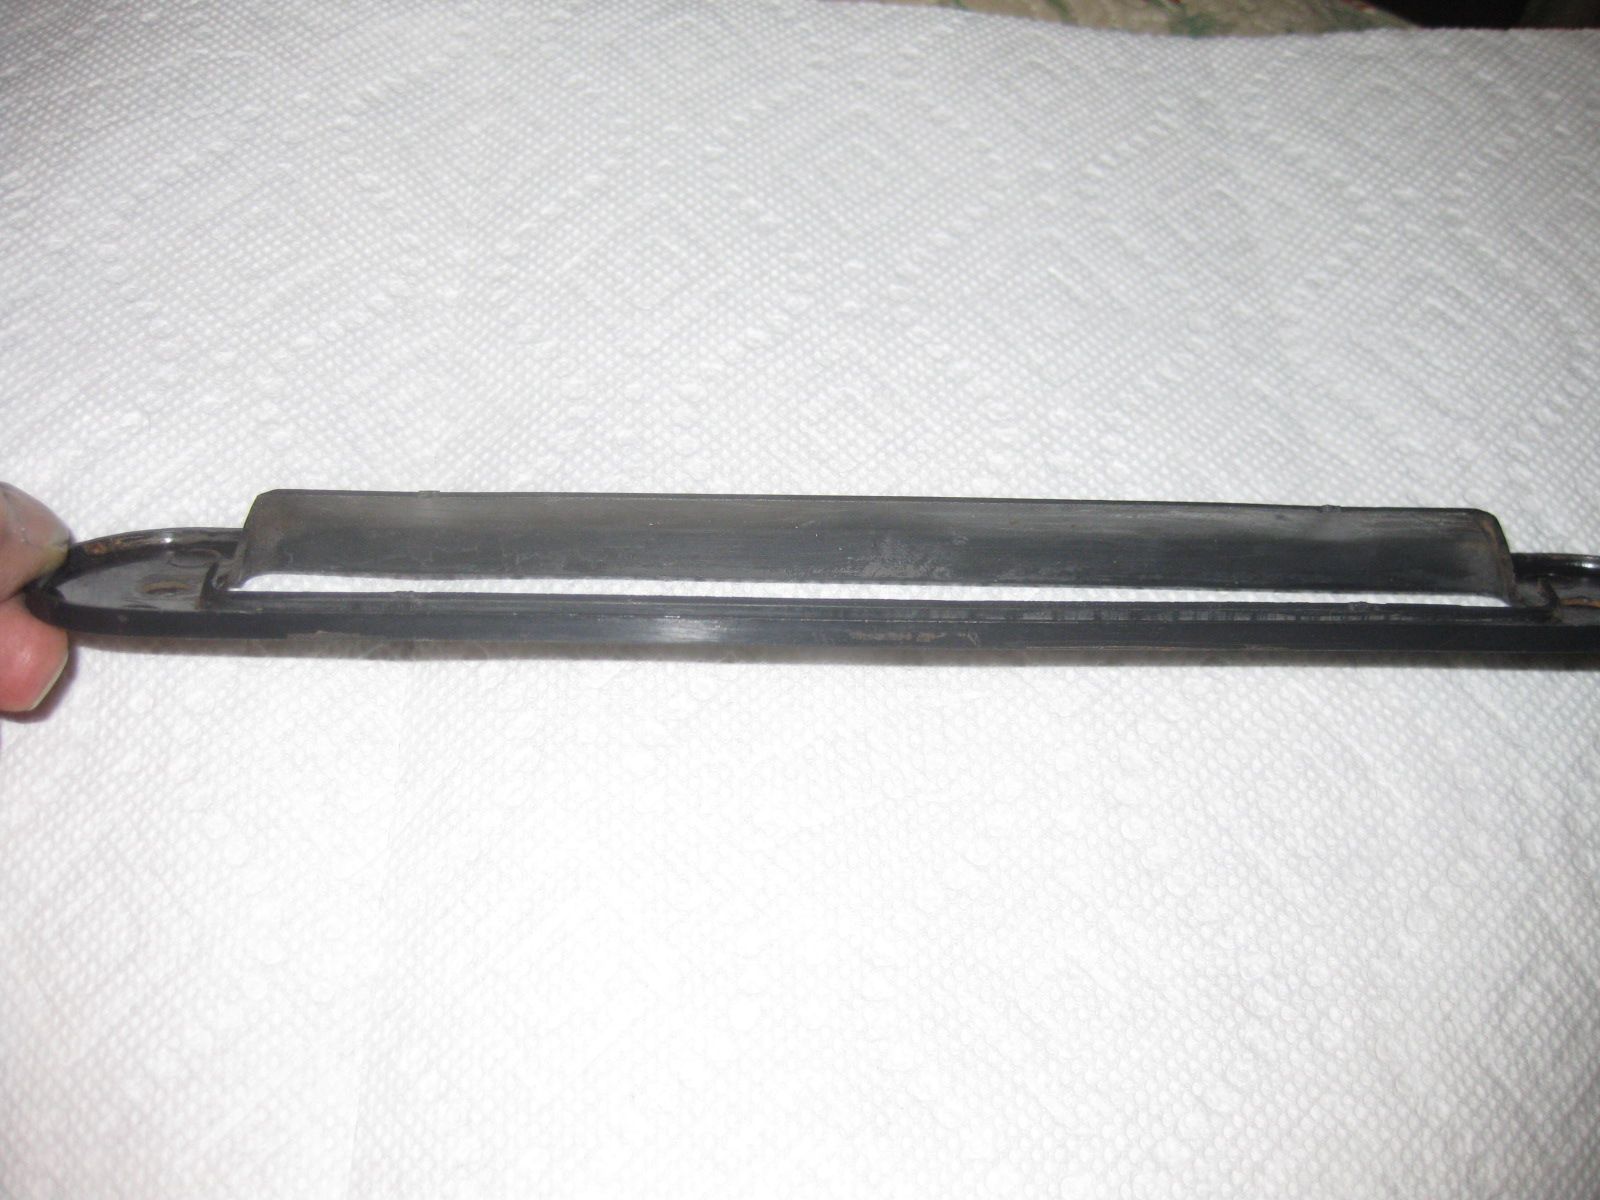
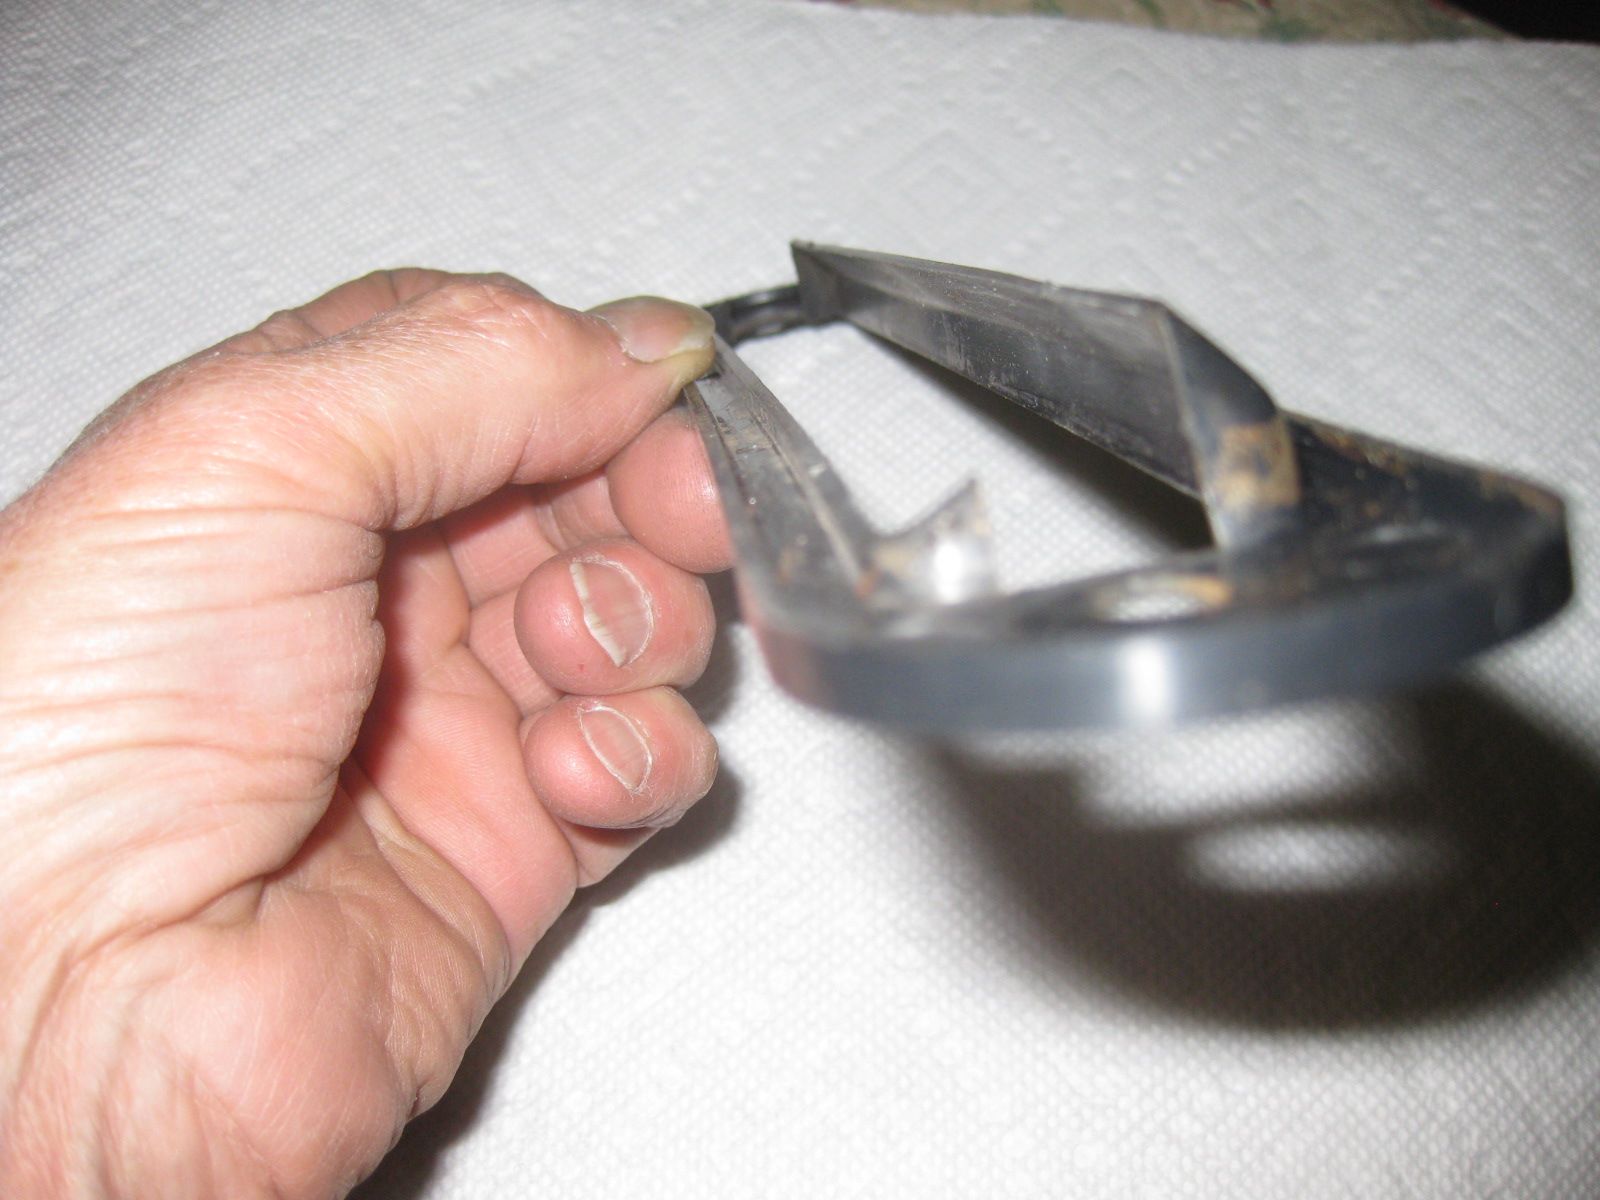
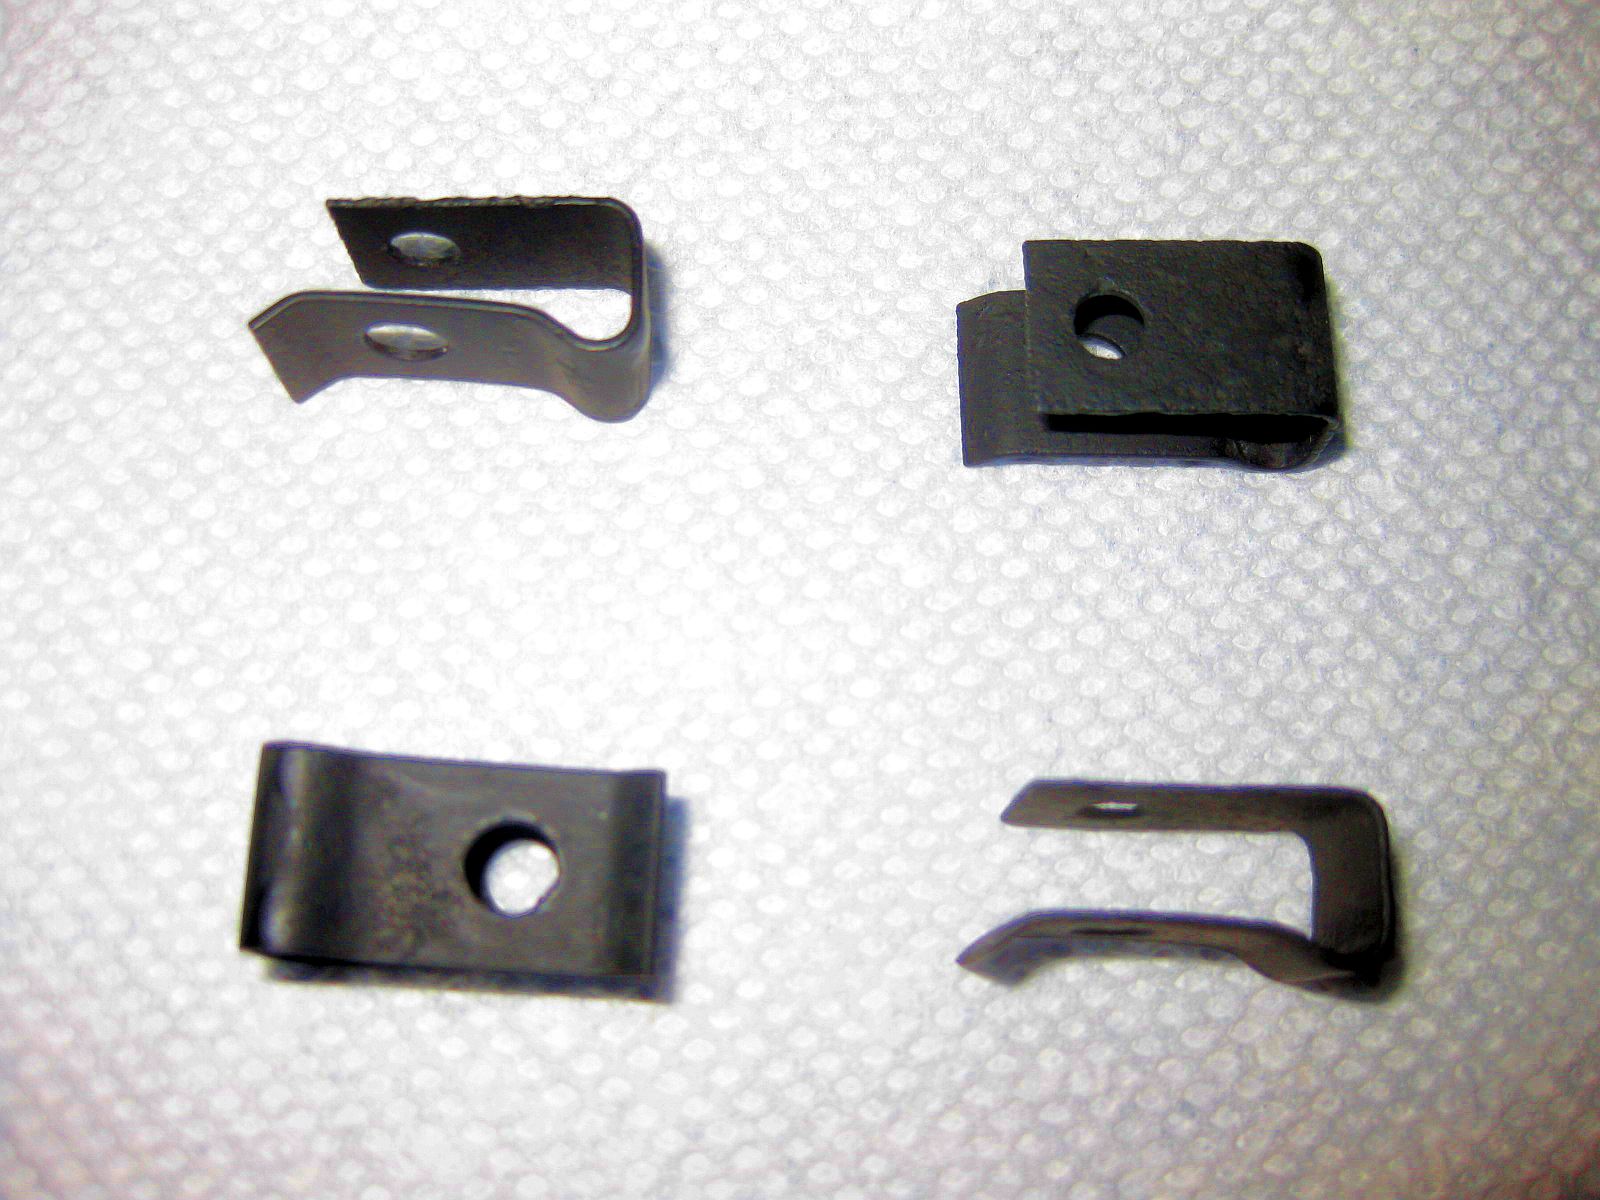
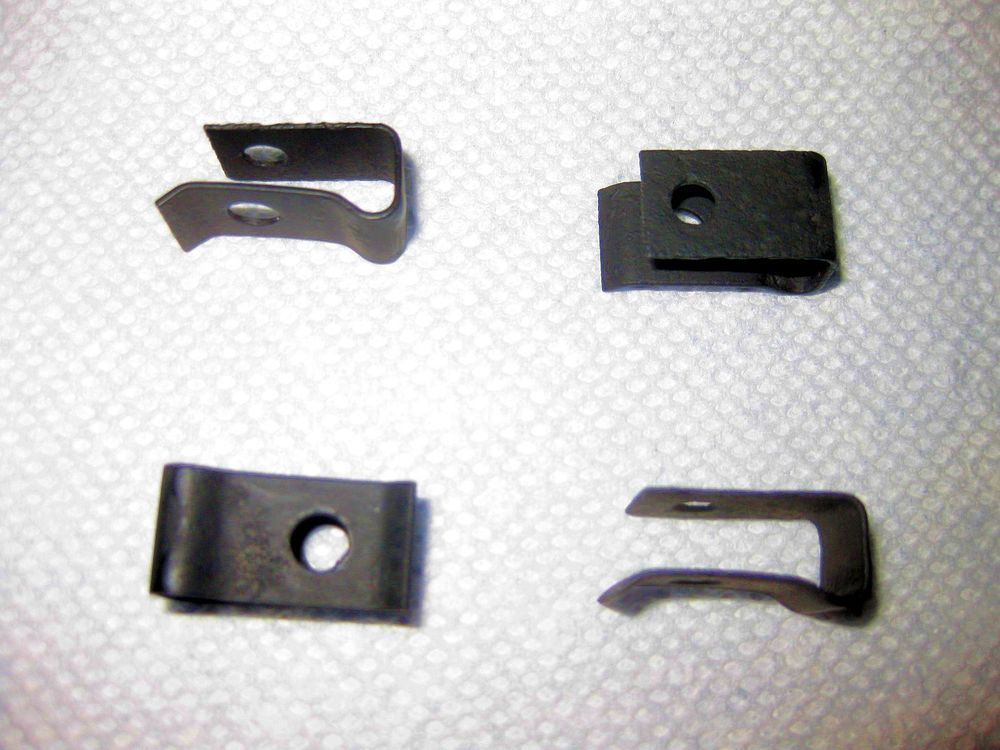
 As Jim @jfa.series1 said above, the clips hold the entire assembly including the hatch trims to the hatch and position it properly. The barrel clips that are commonly used to mount the emblems are attached to the trim pins and inserted into the smaller holes of the clips after the ductwork/diverter assembly has been installed onto the hatch. Here are photos of the clips I have intended for my 7/70 and additional photos of the diverters, where you can make out the curved profile. Also, a photo of a quick tracing of the clip with associated dimensions in MM. My ductwork assemblies are in storage across town, so I won't be able to add them to this topic until the coming weekend. I'll photo the assembly and post to this thread, as it would be a good bit easier to understand than these ramblings. As I said, Steve Nixon @nix240z makes these diverters now, and he would certainly be the one to reproduce the clips (maybe in stainless) The originals were made of spring steel to ensure that they would fit tightly, even after the frustrating hassle of spreading them while mounting the assembly to the hatch. Jim D. "Zup"


 2 points
 -
 1 pointNeed a little TLC....... Some mild overheating!! https://seattle.craigslist.org/skc/cto/5993336834.html and no it is not my sale.......1 point
 -
 For our Maple leaf friends / pour nos amis, les prix en dollars Canadien ! Prices in CAN$
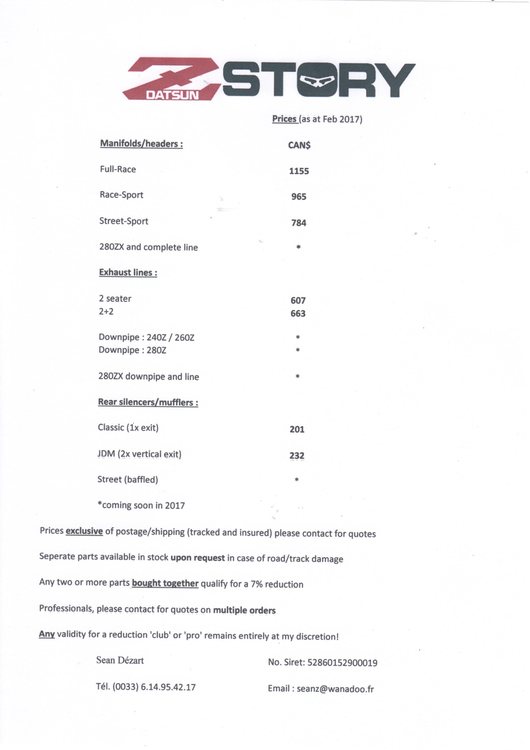 1 point
 -
I hope Steve re-pops them---- they would be identical to original and perfect. Anyone who is restoring an early car would need them, and many of us do not have the skills you have shown for fabrication. I am planning on using 2mm closed cell foam sheeting cut to the shape of the diverter and placed between it and the underside of the hatch. (use contact cement to attach it to the diverter first) You can get the foam sheeting at Walmart or any crafts store. Usually found over near school supplies or sewing. This weekend I'll post photos of the assembly before installation.1 point
-
 1 pointI applaud you getting it all done, just one thing. Try it between each thing, try after plugs then try again after ECU clean, again after any other corrective actions. The idea is not to create a new problem, not likely but possible. so if the plugs get it working, then do the ECU, should still work, etc... Also assuming you get it going, check the plugs again after say 20-30 miles on it. You want to see if the fouling is due to a chronic long term slightly rich OR something drastic that will cause issues quickly. If the latter then you know you still have problem, the former, just keep in mind to check plugs maybe after 1 year as it may not be a problem at all.1 point
 -
 1 pointNow it rings a bell. You'll probably need a 1/2" gasket. I seem to recall that is the size I needed. The extra 0.52 mm clearance is needed to get past the threads easily.1 point
 -
 1 pointStanley's correct. It's the port for the coolant transfer tube that links the front and rear intake manifolds. A rubber O-ring is used at the base of each hole to provide an additional seal. These holes are tapped for a BSPT (British Standard Pipe Thread) fitting. That's not a metric thread, by the way. The threaded plugs you ordered from the Amazon supplier probably use the American pipe thread design. They won't work (as you've discovered). Given that someone has already removed the coolant transfer tube (and thrown it away?), it appears likely that your car has this secondary coolant circuit completely disabled (it's designed to assist engine cold start and warm-up and many Z owners have found it unnecessary for the climate conditions where they drive) . As such, there's doesn't seem to be any need -- other than aesthetics -- to block off these open holes at all. The coolant passages within the intake manifold don't connect to any air passages, so whether these coolant ports are open or blocked should have no effect on the operation of the engine. That said, if it was my car, I'd find the correct BSPT fittings and install them. You'll need two plugs for each manifold (total of 4).1 point
 -
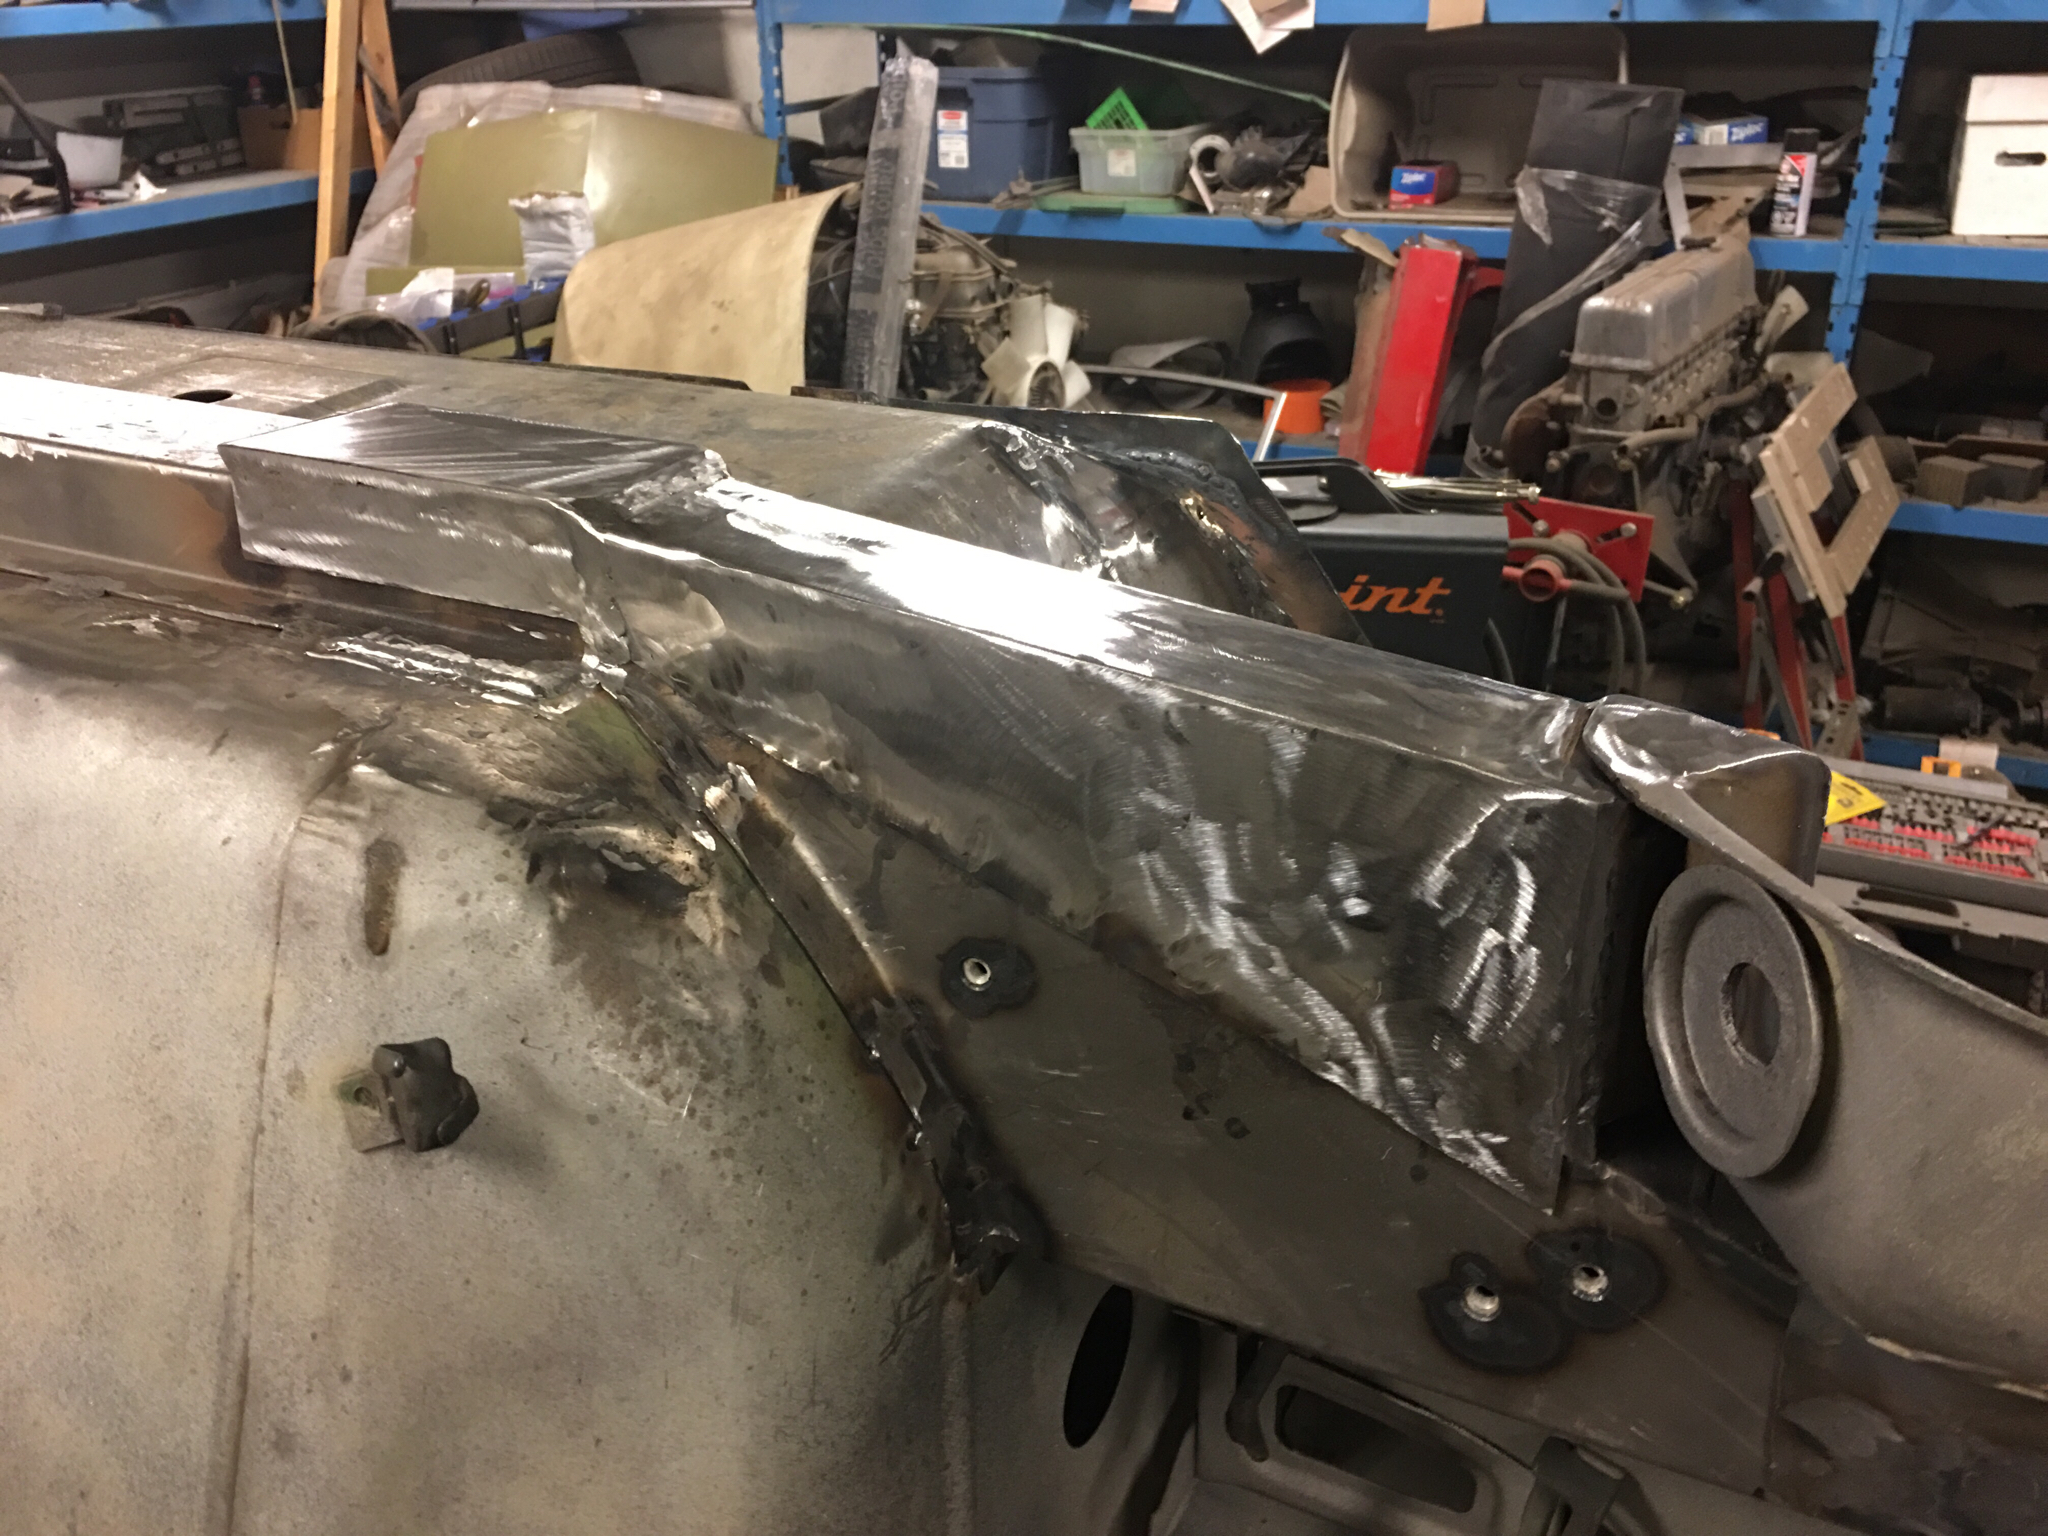
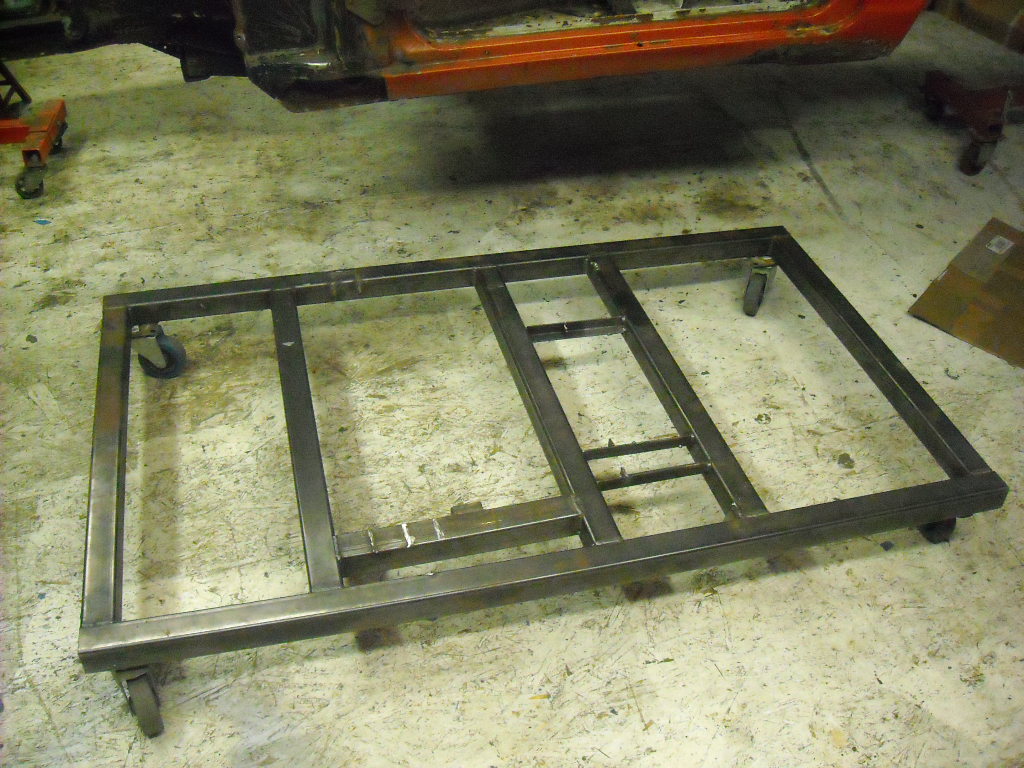
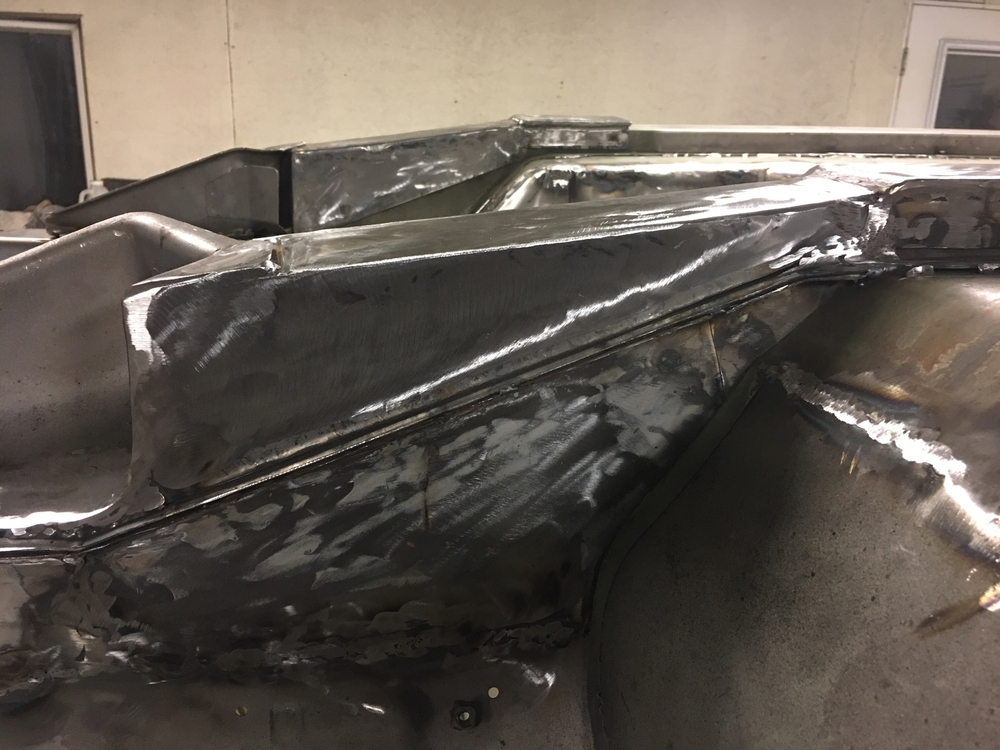
 1 pointFinished the frame rail support. Finished the welds and cleaned things up. Doesn't look like a lot of progress but it was a couple hours of welding and grinding!
 1 point
 -
 1 pointYou know us Z guys are cheap! Well I'd be cheap even if I wasn't a Z guy. Hard to offer without a pic. I've thrown these away in the past along with an E31 head. No comment.1 point
 -
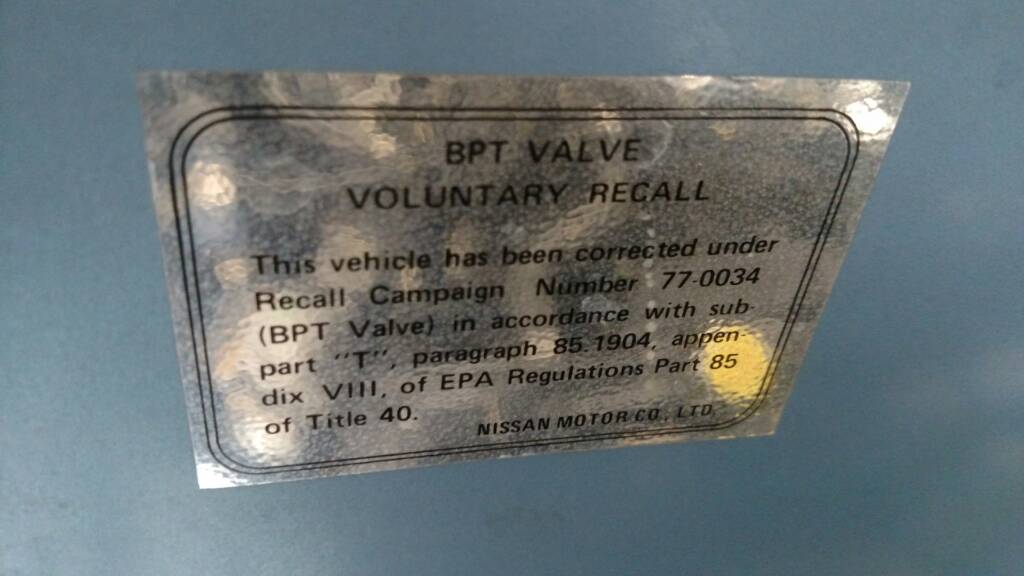
 I didn't have much time to work on the car tonight. But I had a few minutes to poke around. The EGR/BPT recall has been done on my car (see photo of sticker). I used a mirror and looked under the intake. I didn't see any holes; not even any surface corrosion. I picked up a remote starting switch, too. It'll come in handy for compression testing. Sent from my XT1254 using Classic Zcar Club mobile
 1 point
 -
 The "C" clips perform dual duty: they hold the plenum/gasket assembly against the underside of the hatch and the holes in the "C" clips are the receivers for the pins on the silver grills.1 point
 -
Home for lunch so no time at the moment, but I will post up tonight with measurements and additional photos. Steve Nixon has reproduced the hatch vent rain deflectors that I sent him and offers them for sale on his website. I think you should really replace yours, as they appear to be as deteriorated as most I have seen. The curvature of the deflector to channel and divert water flow is quite important at these hatch openings. Jim D. "Zup"1 point
-
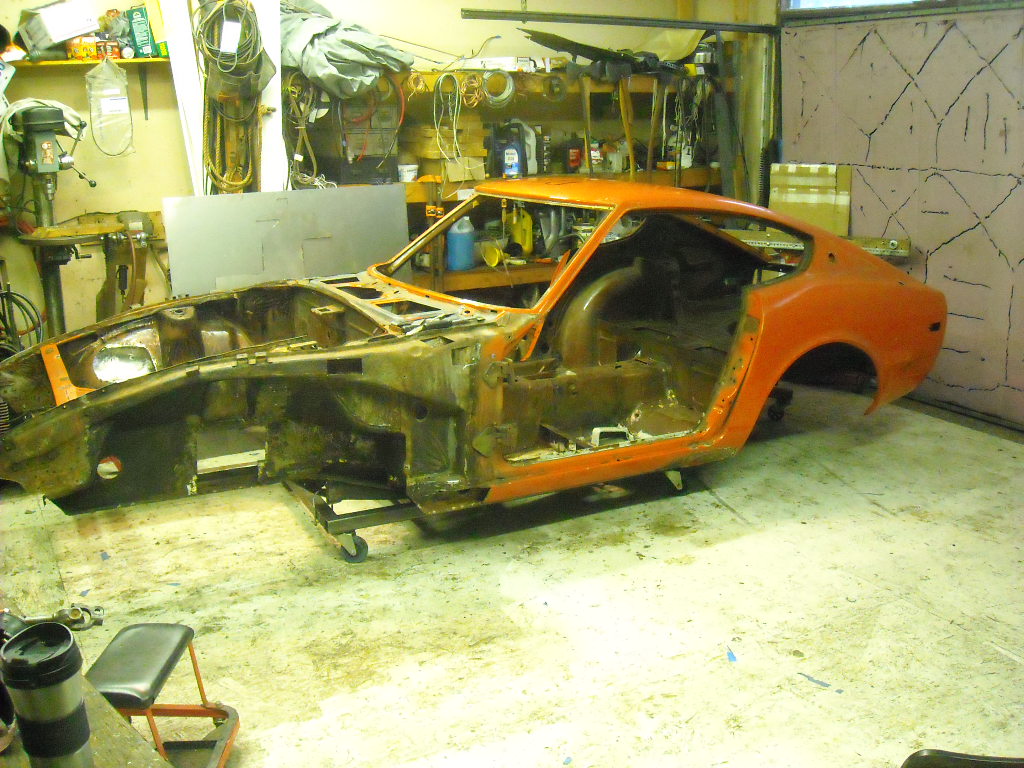
 yes heater box and blower go in first then dash. Well, I'm not sure how much extra threads need to be cut, I just ran the the threading die down the adjusting rod an 1 1/2" to be on the safe side. I would never presume know what the Capt. is talking about but there is a small return spring in the hand brake handle and the larger return springs on the disc brake calipers to release the pads from the park position. CO, I'm going to lay on the charm and do my best to get those shots of the car being submerged but I won't be surprised if there is some legal stipulation preventing me. When I was there in the summer to get the gas tank cleaned I looked over to the dipping tank area and it was dim, steamy and grungy. Cooling my heels for a few days as the trailer service I have hired to do the 4 transports can't fit me in until Wed. This is the engine test stand from last summer with all of the upright supports cut off, it will now be the transport dolly until the drivetrain is installed. Technostrip mostly deals with industrial hardware and American classic cars so I thought a bit of cheap insurance was in order,

 1 point
 -
 1 pointI think that several guys from CZCC were out there a while ago and ran through the EFI tests at the ECU connector. That's the place to start, the ECU connector, I'd say. Then dig deeper if the numbers are off. Still, Jai said that she never changed the plugs after the ECU replacement. So the earlier suggestion of a complete tune-up before getting carried away still seems reasonable.1 point
 -
 1 pointi have an E31 head. i dont think that this is the original block, though. my car is an early 72 and i have a E31 block.1 point