


Leaderboard
-

grannyknot
Free Member2Points5,158Posts -

Blufc3s
Free Member2Points14Posts -

JLPurcell
Free Member2Points1,670Posts -

jfa.series1
 Subscriber
 2Points2,686Posts
Popular Content
Showing content with the highest reputation on 05/15/2017 in all areas
-
2 pointsBe sure to get the correct protective clothing for your new mid-life adventure - something like this comes to mind:
 2 points
 -
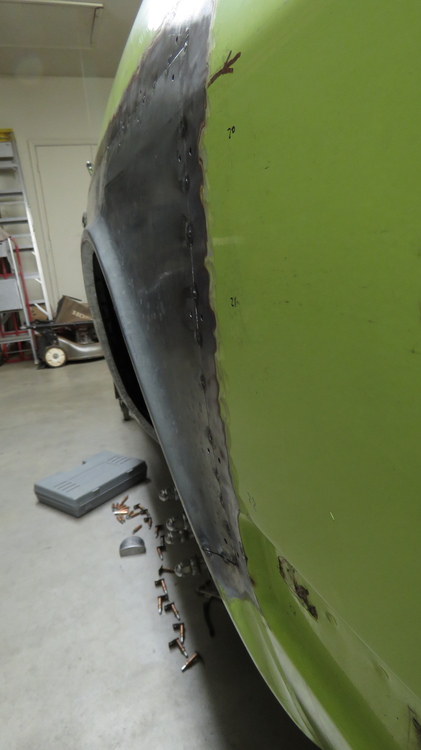
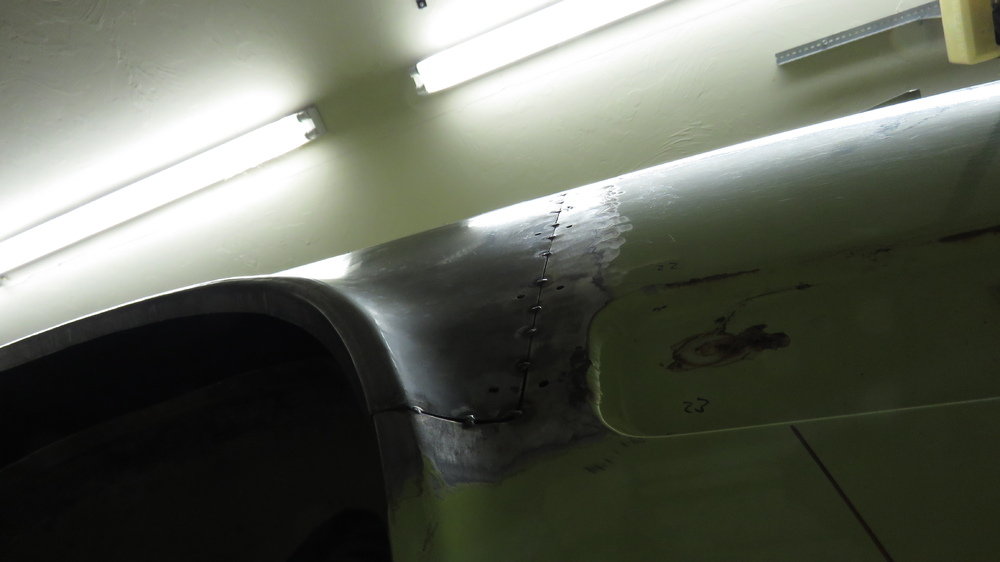
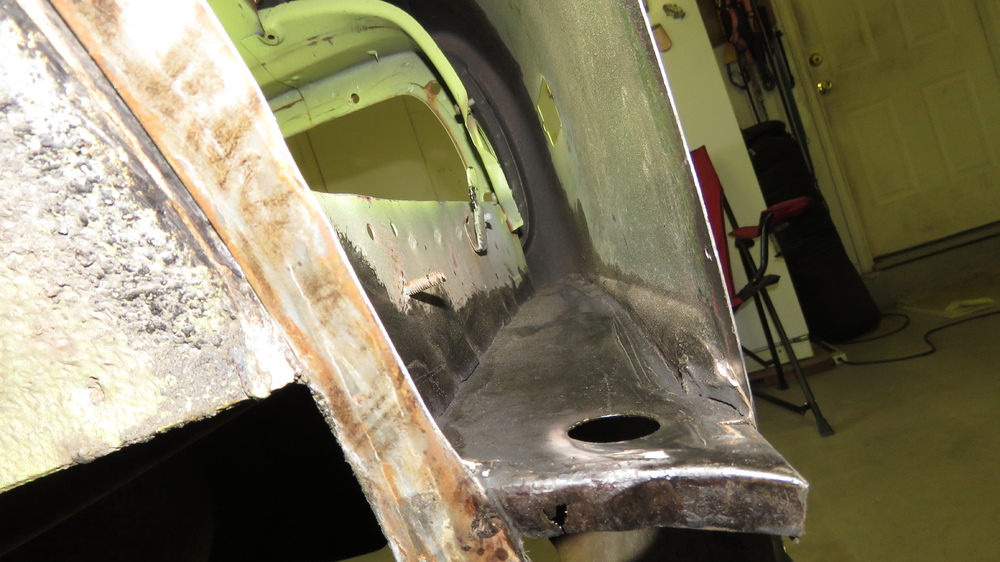
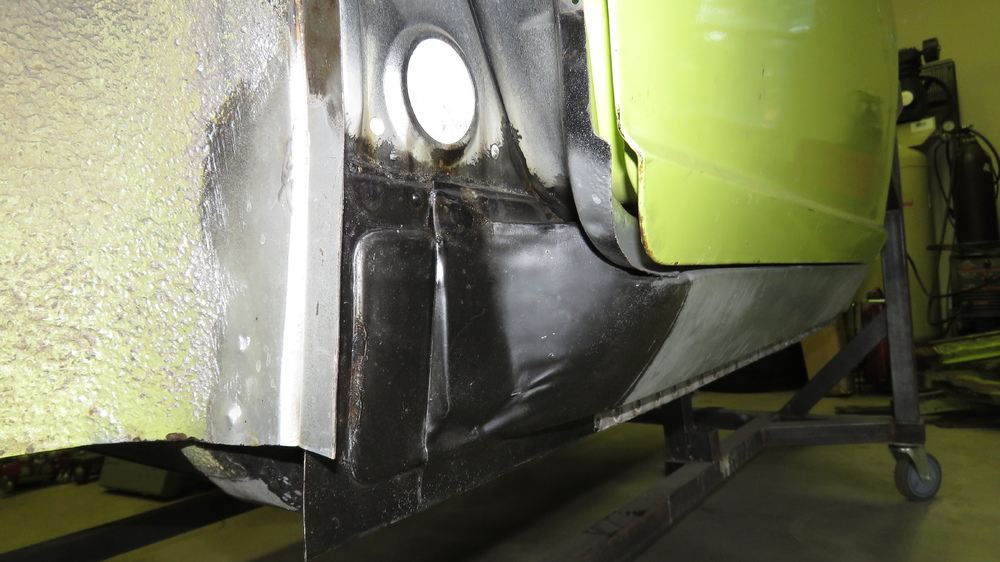
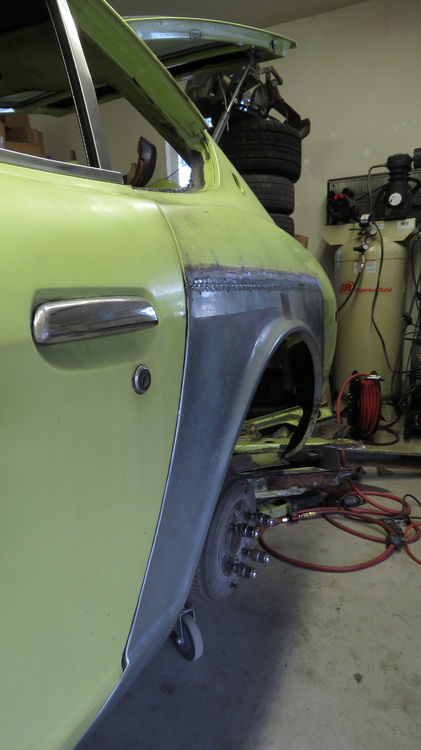
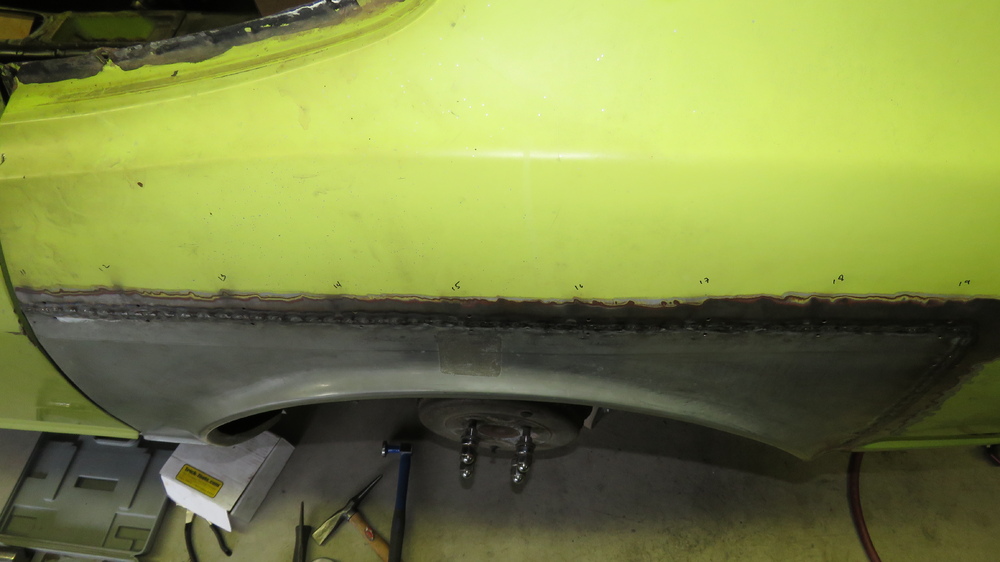
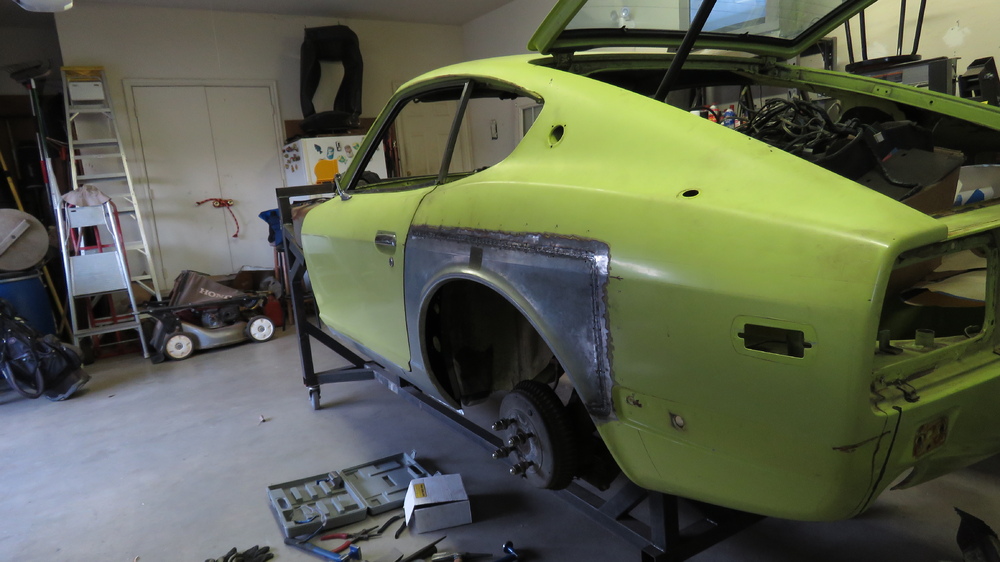
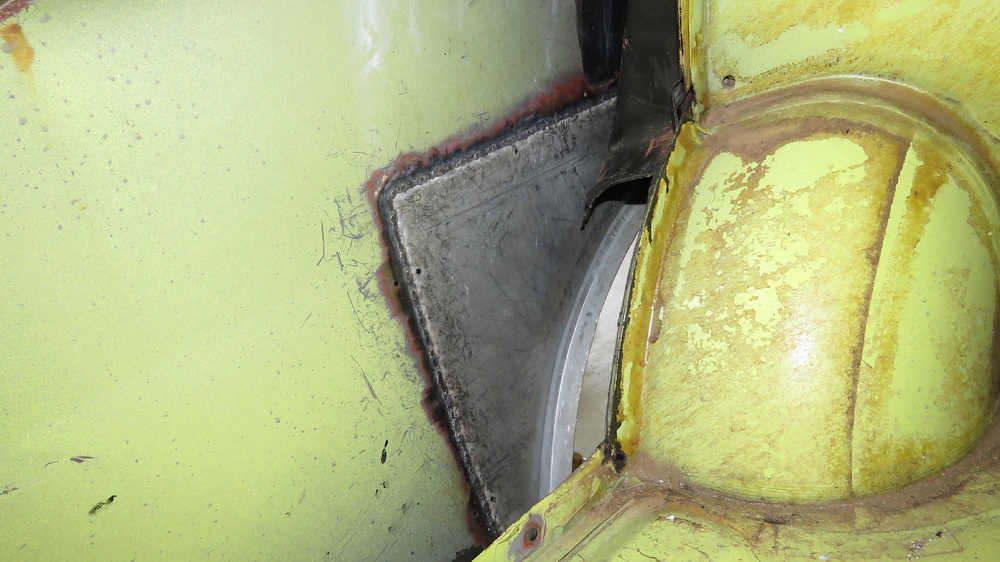
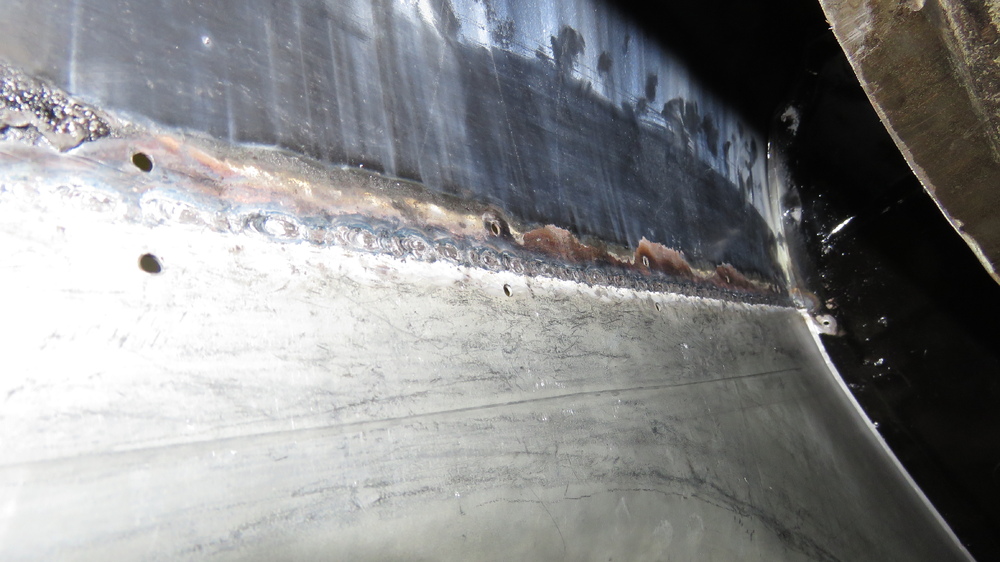
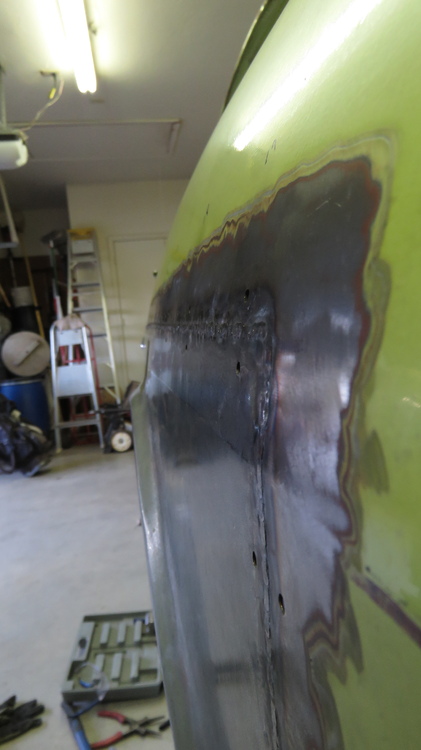
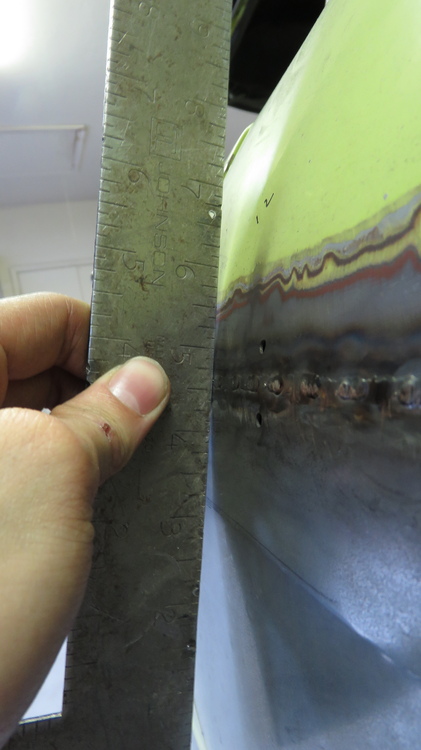
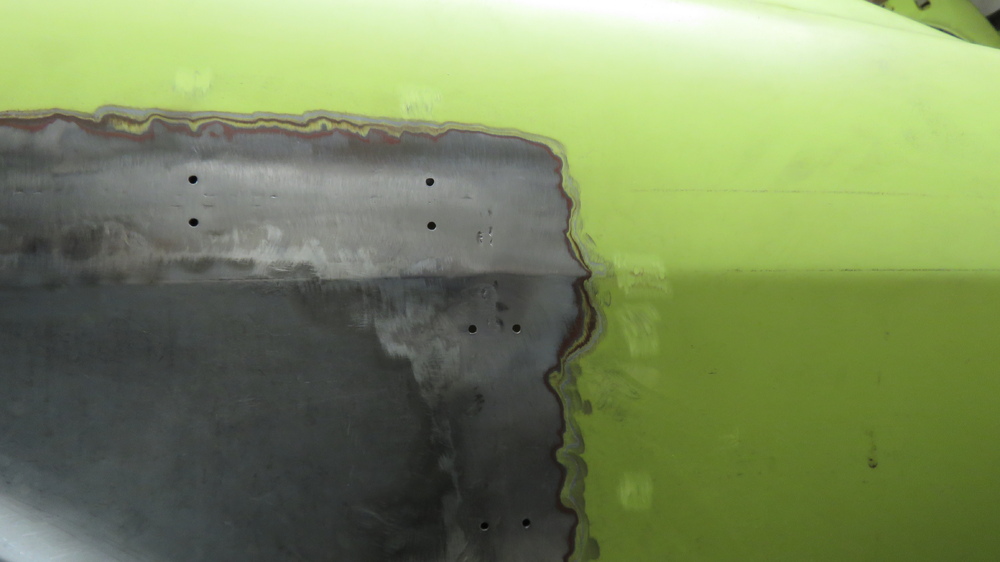
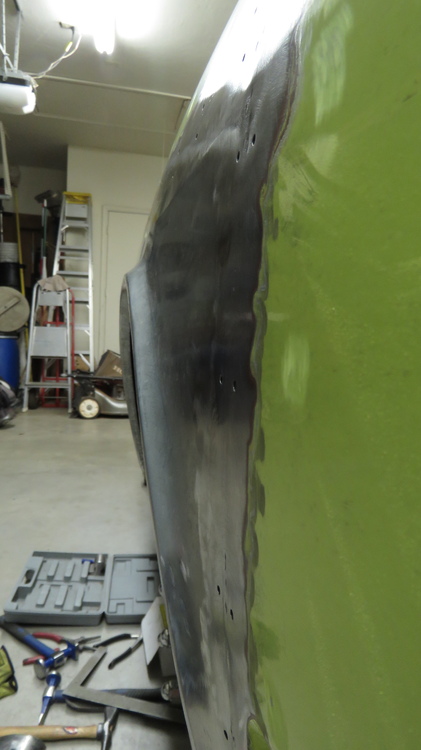
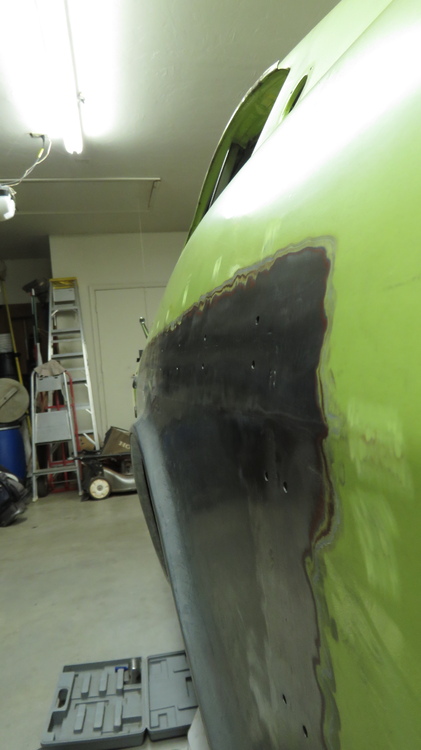
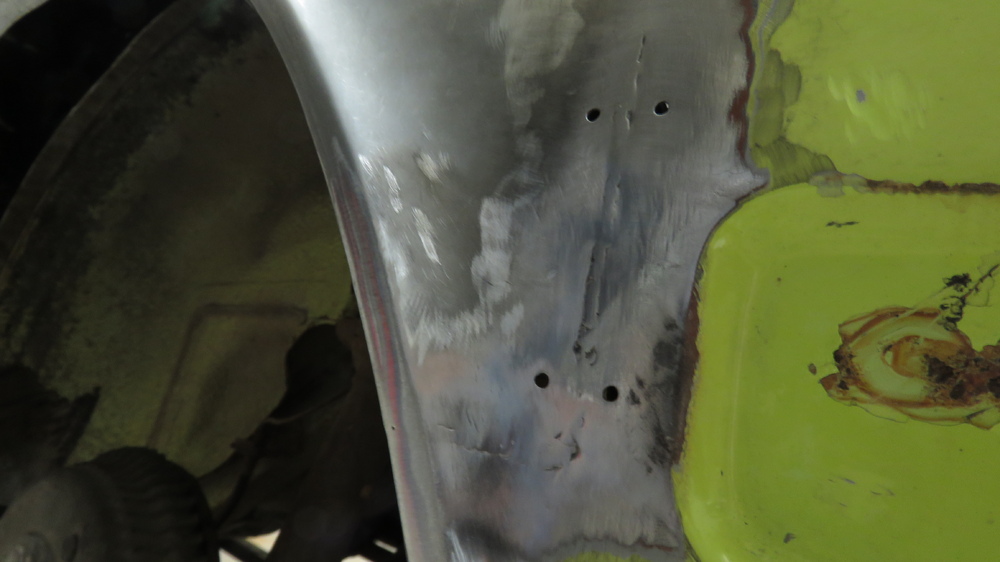
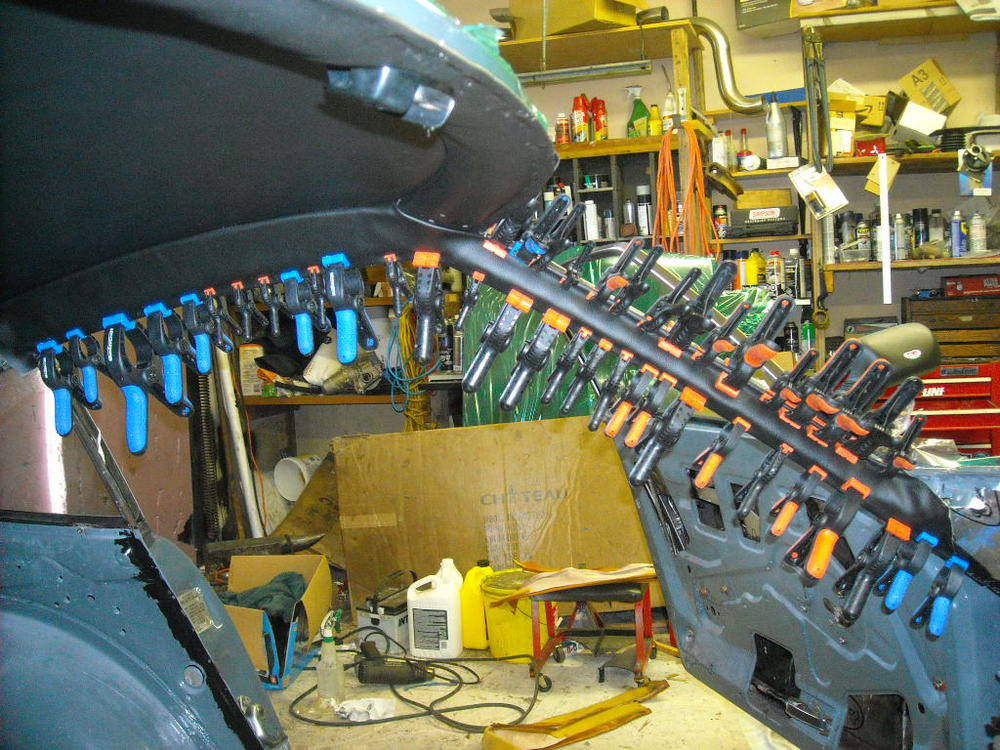
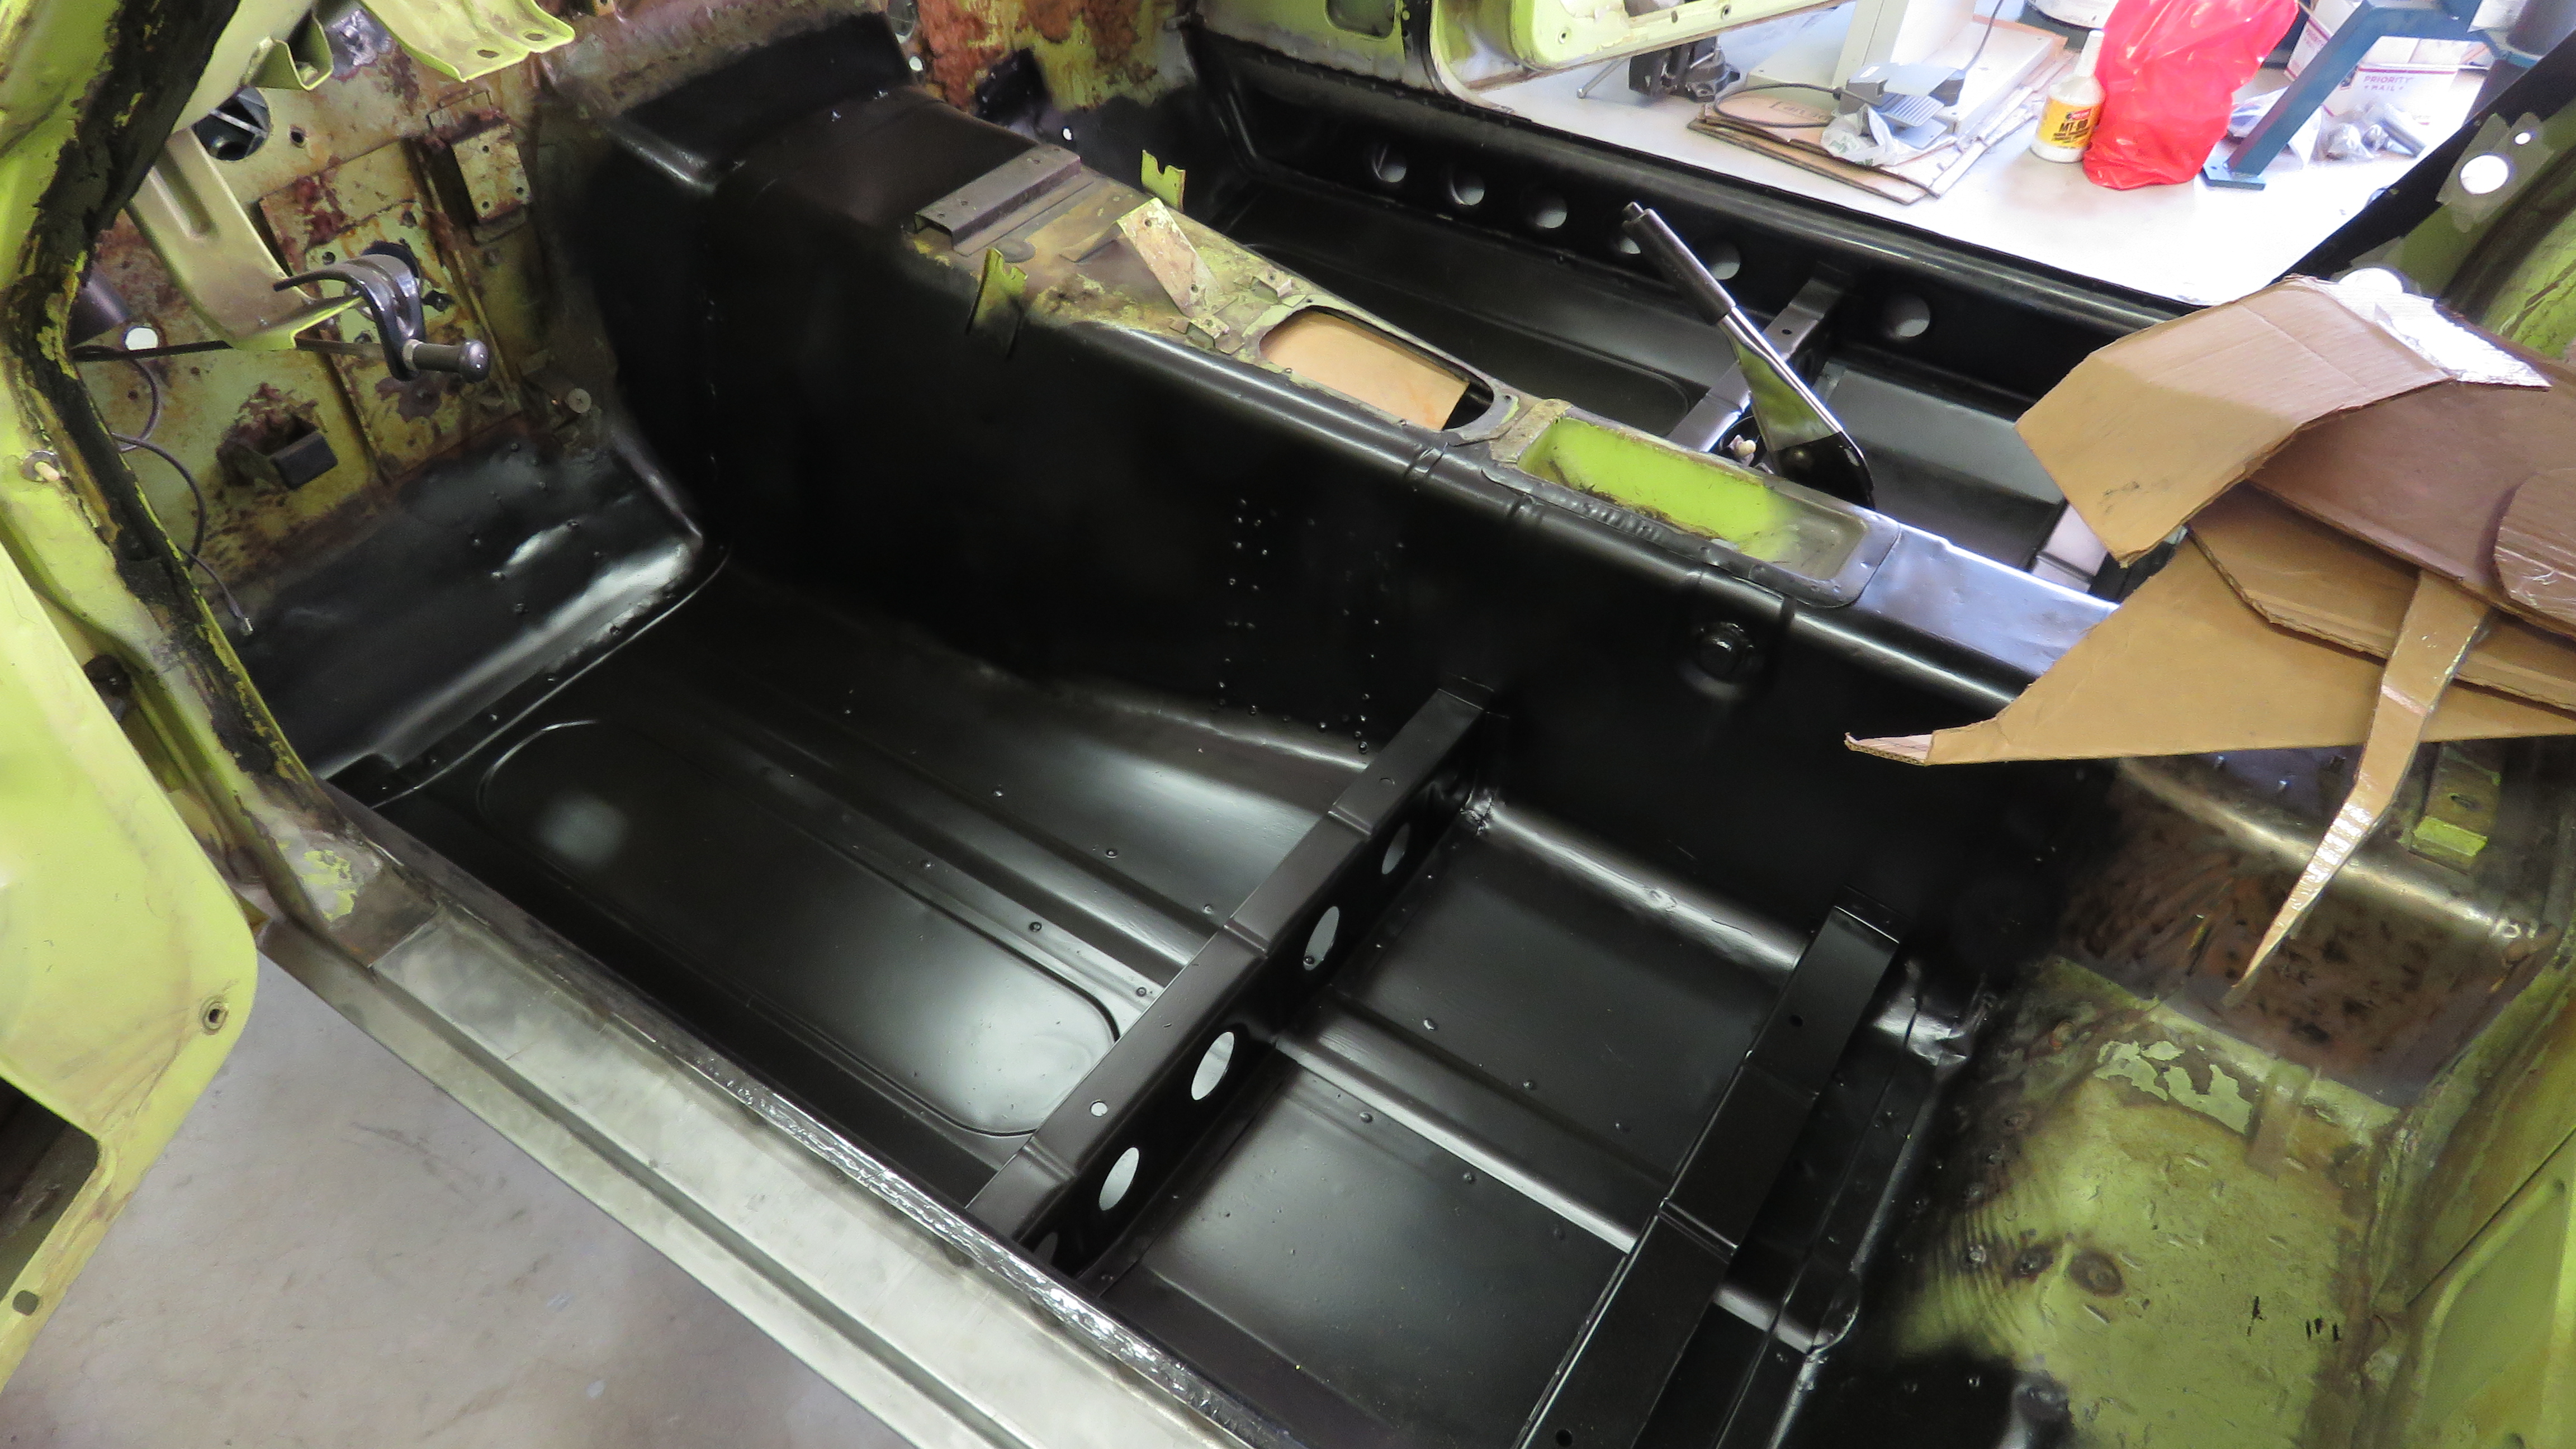
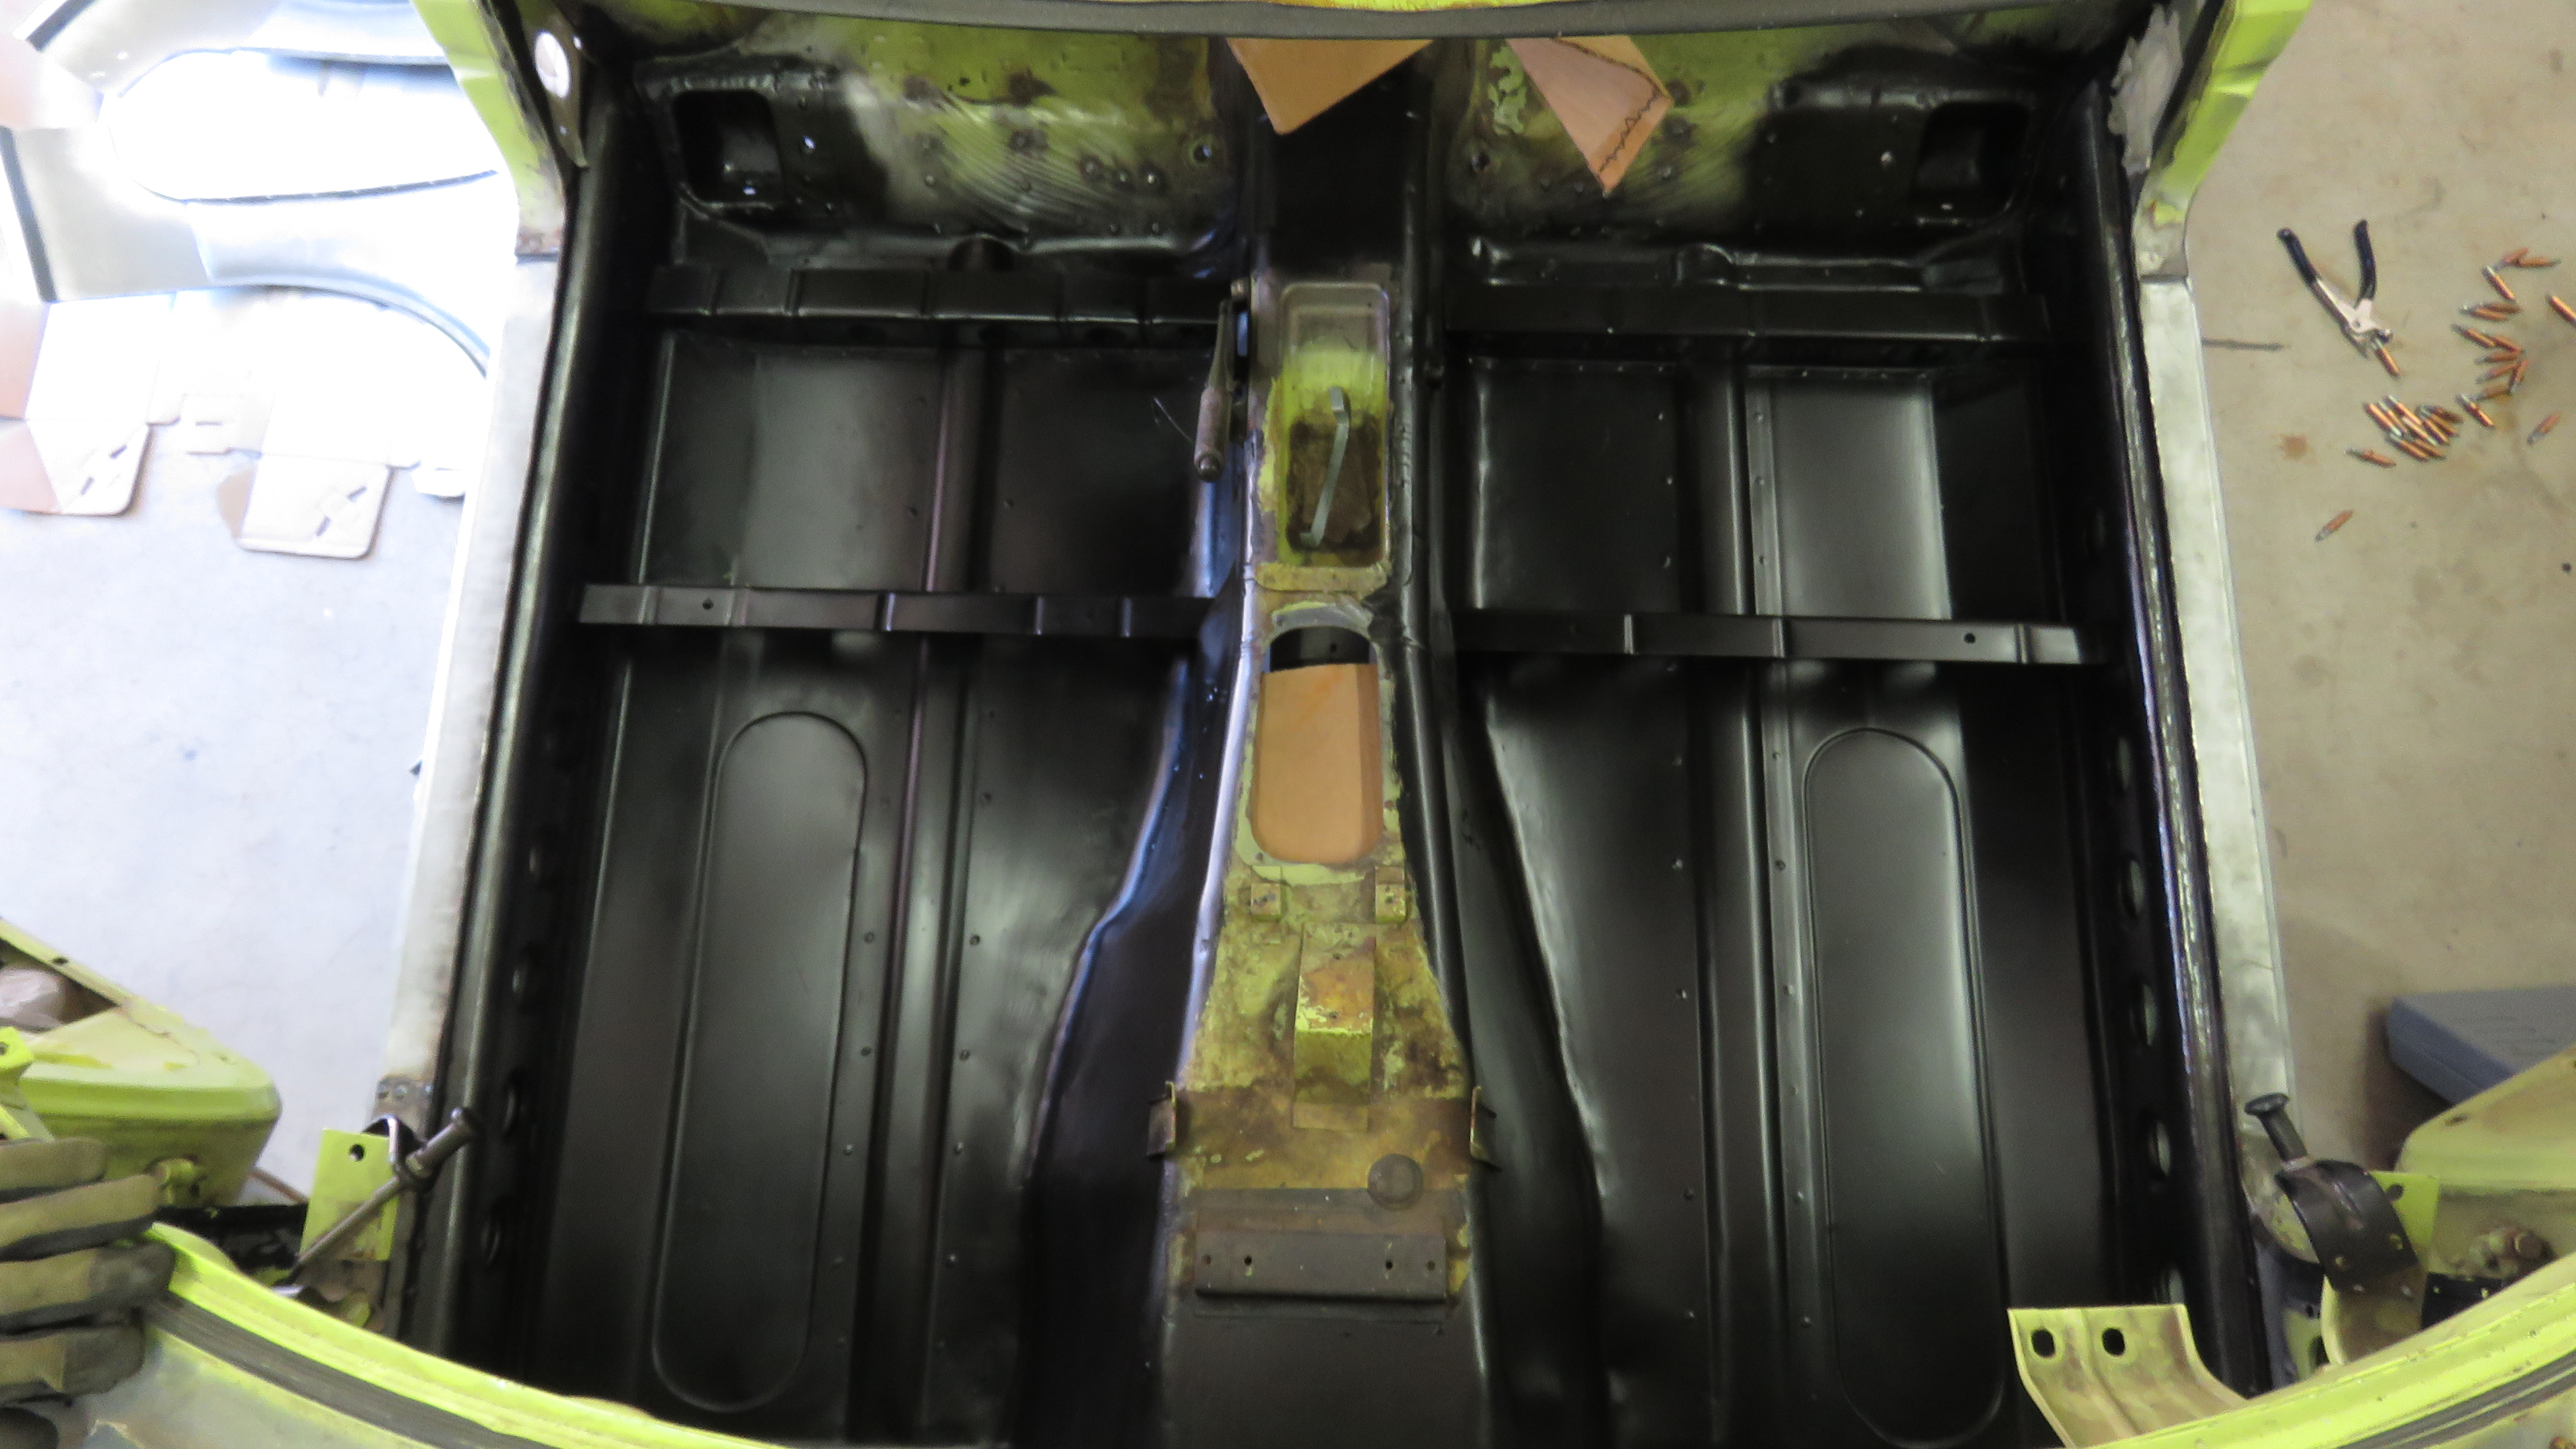
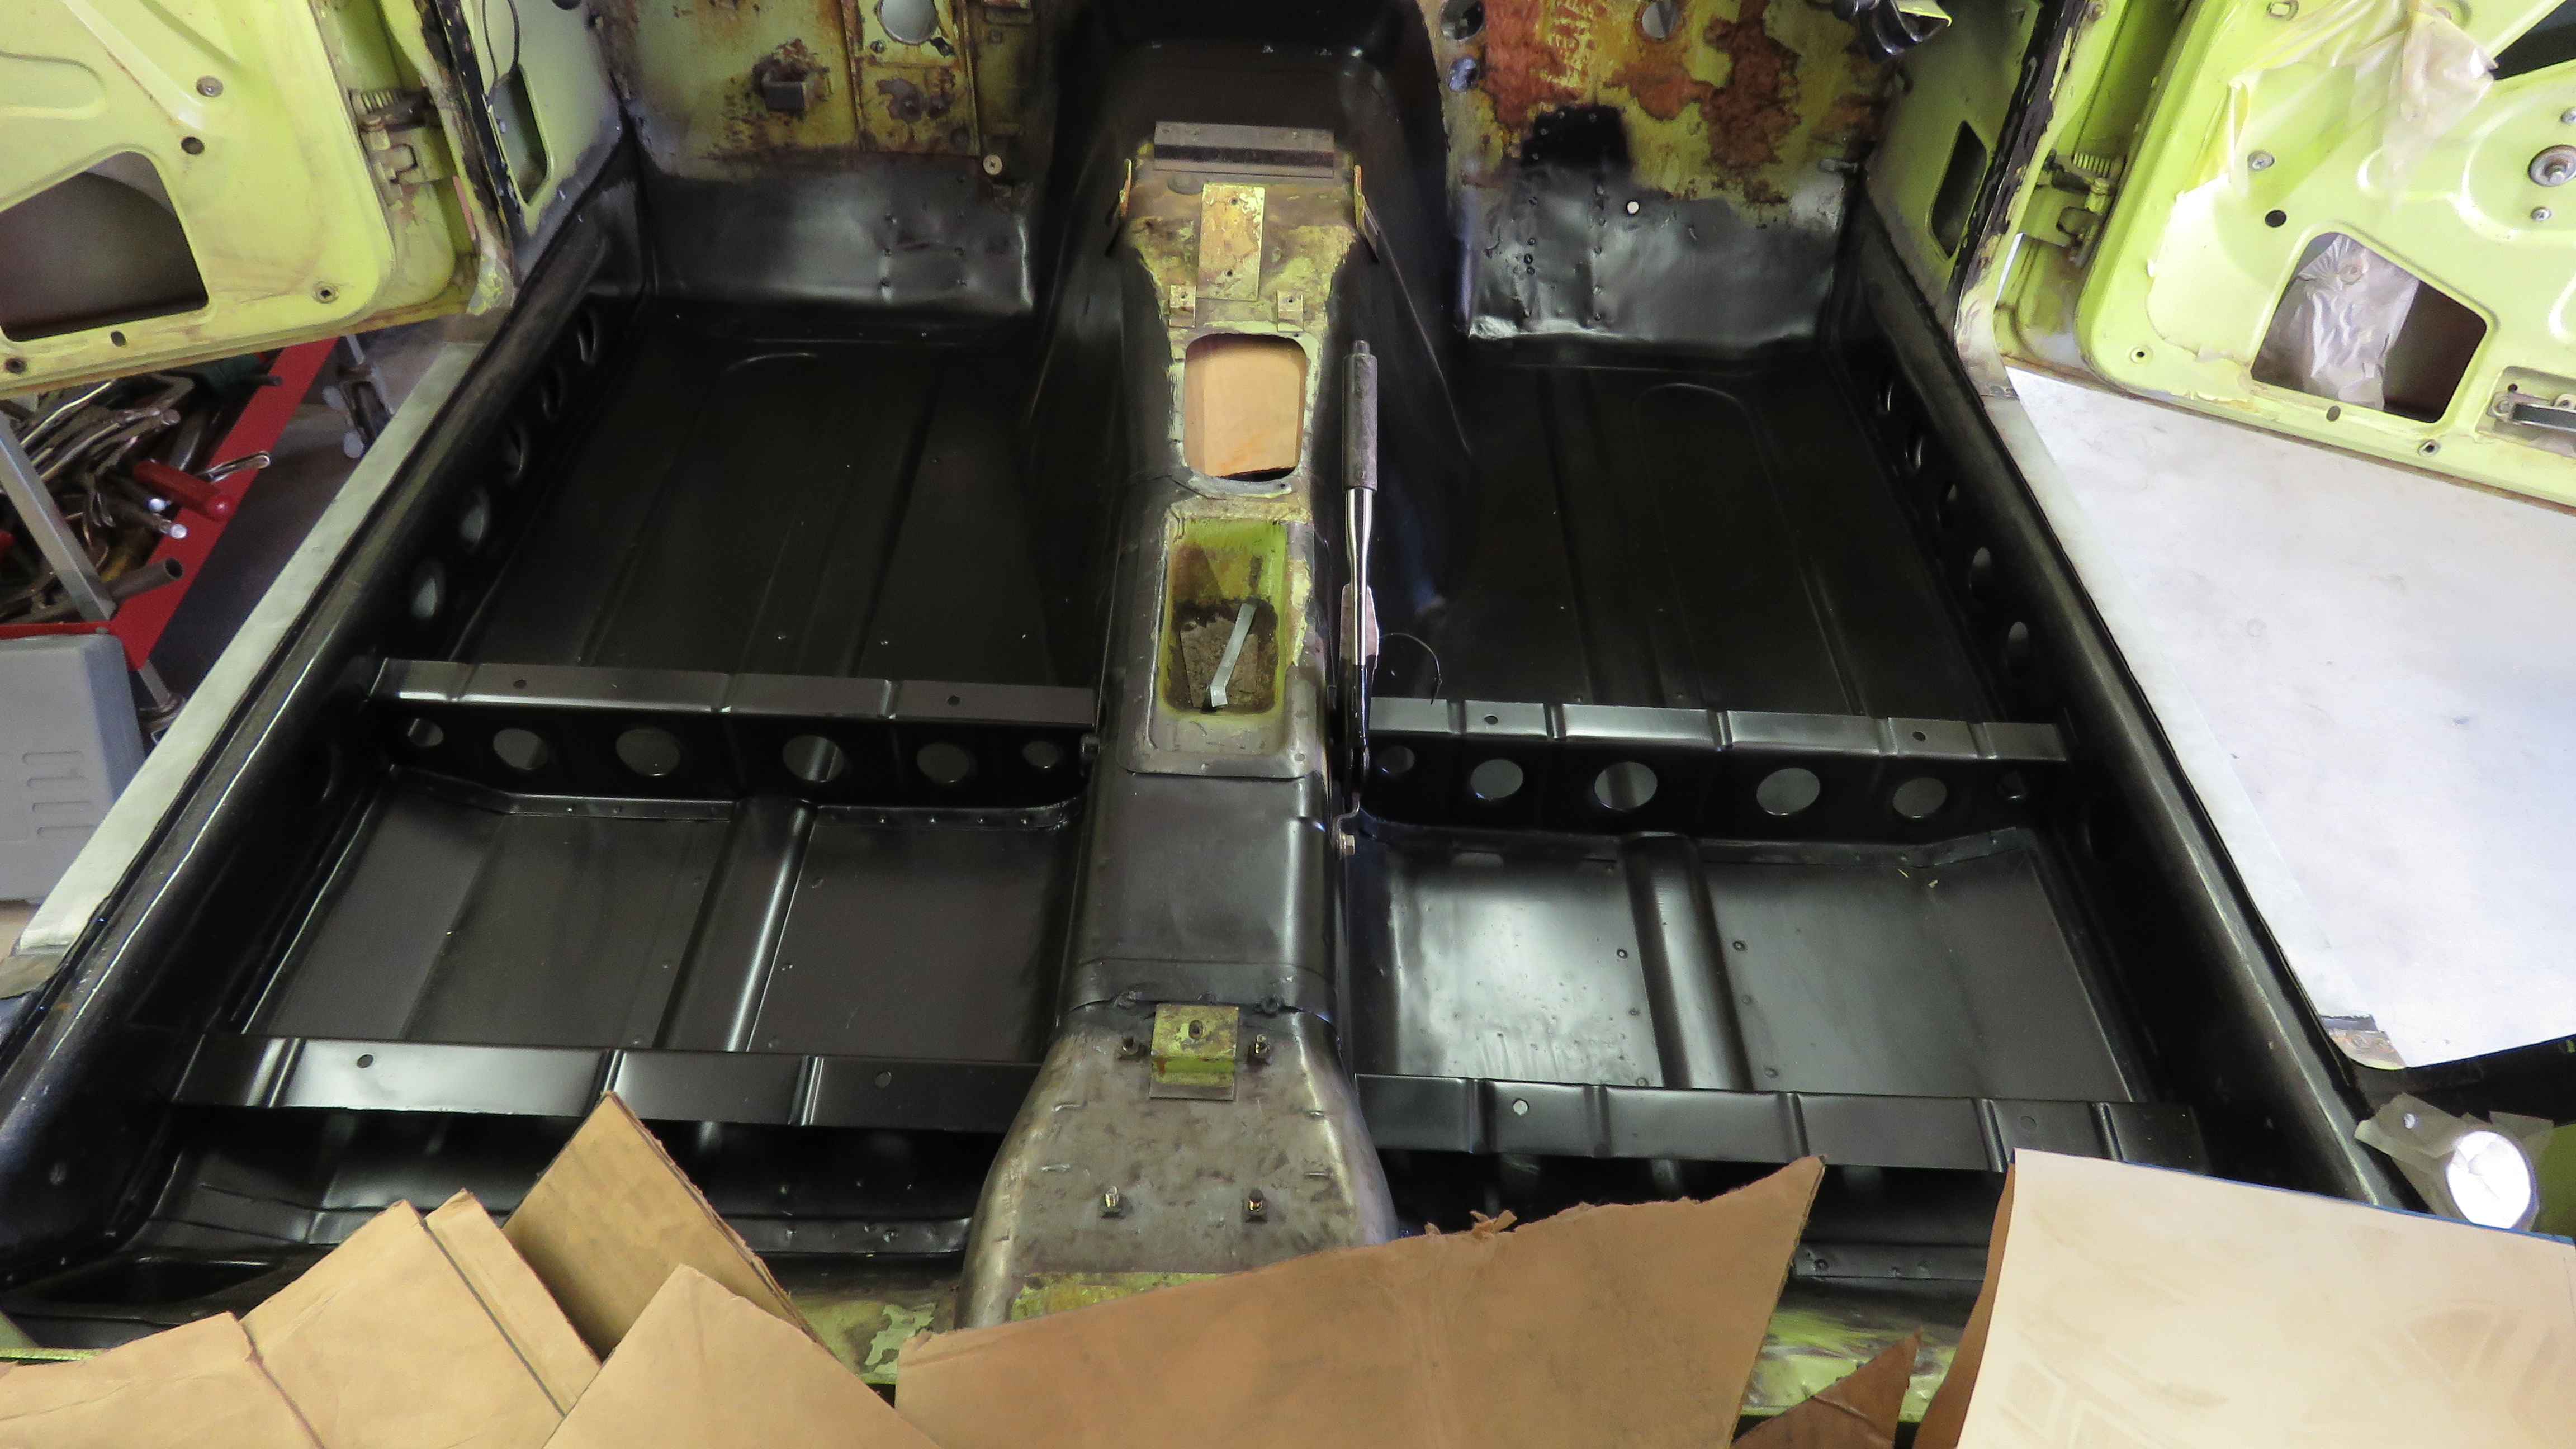
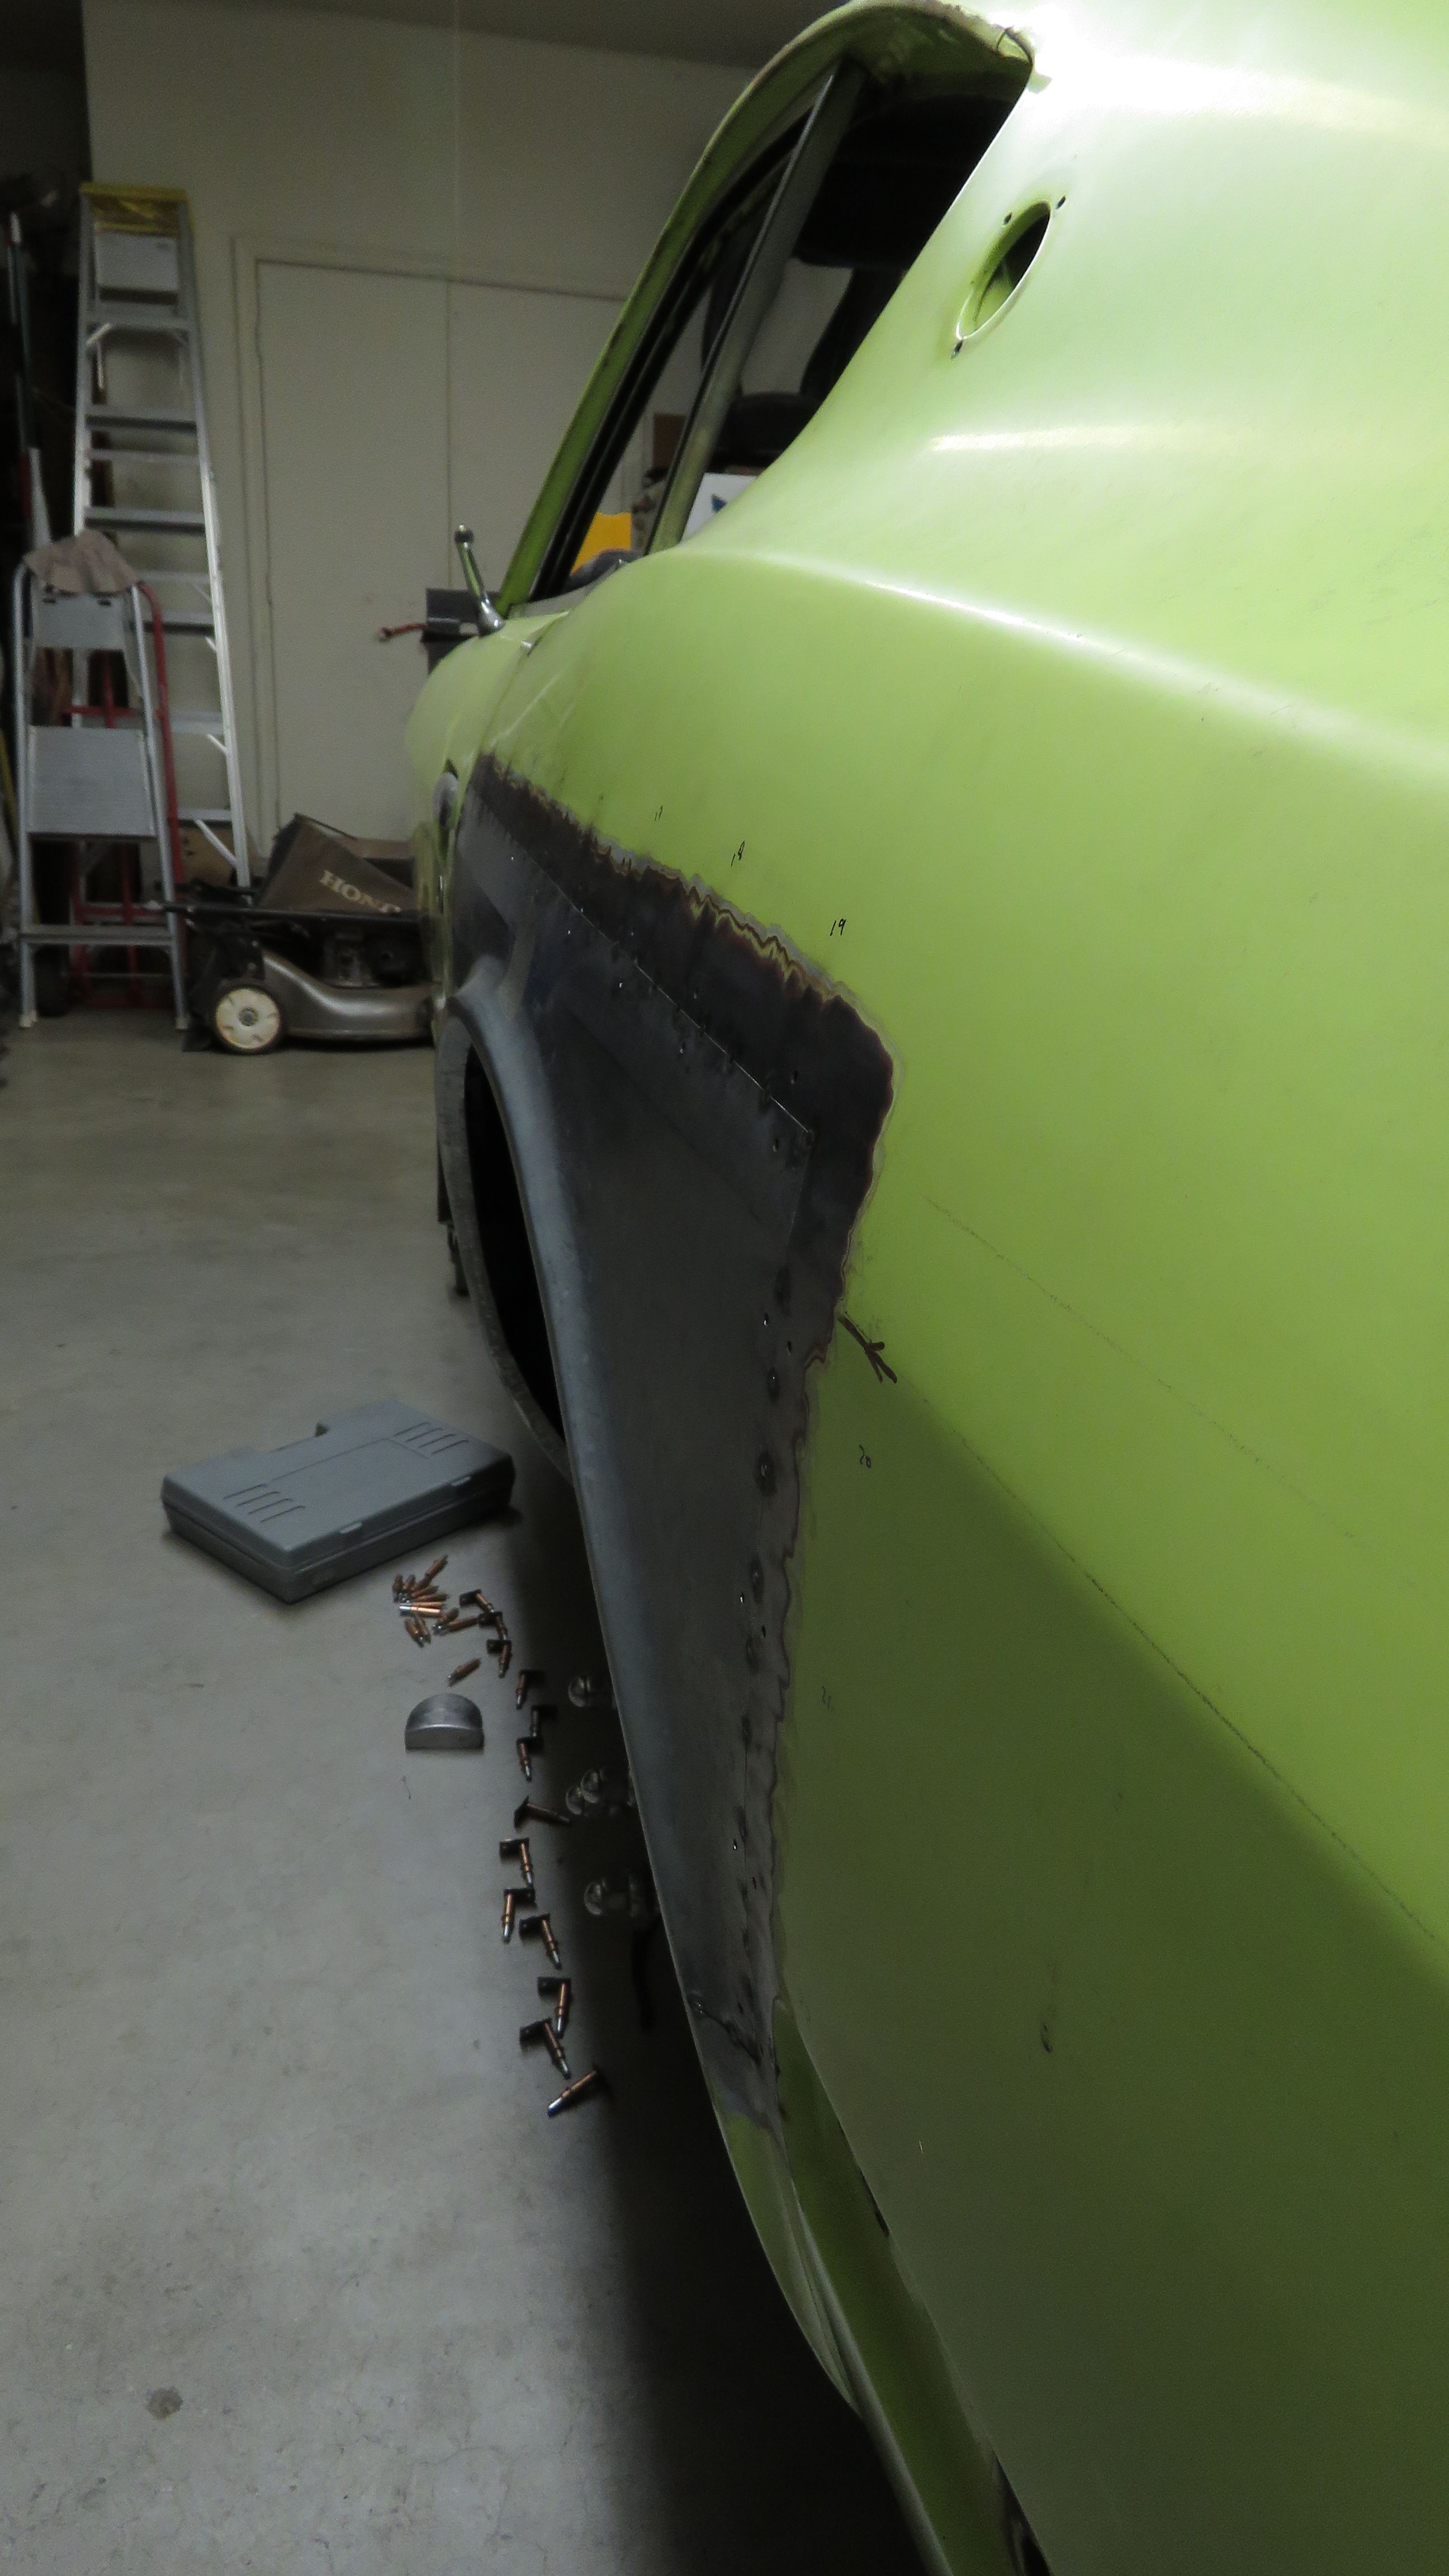
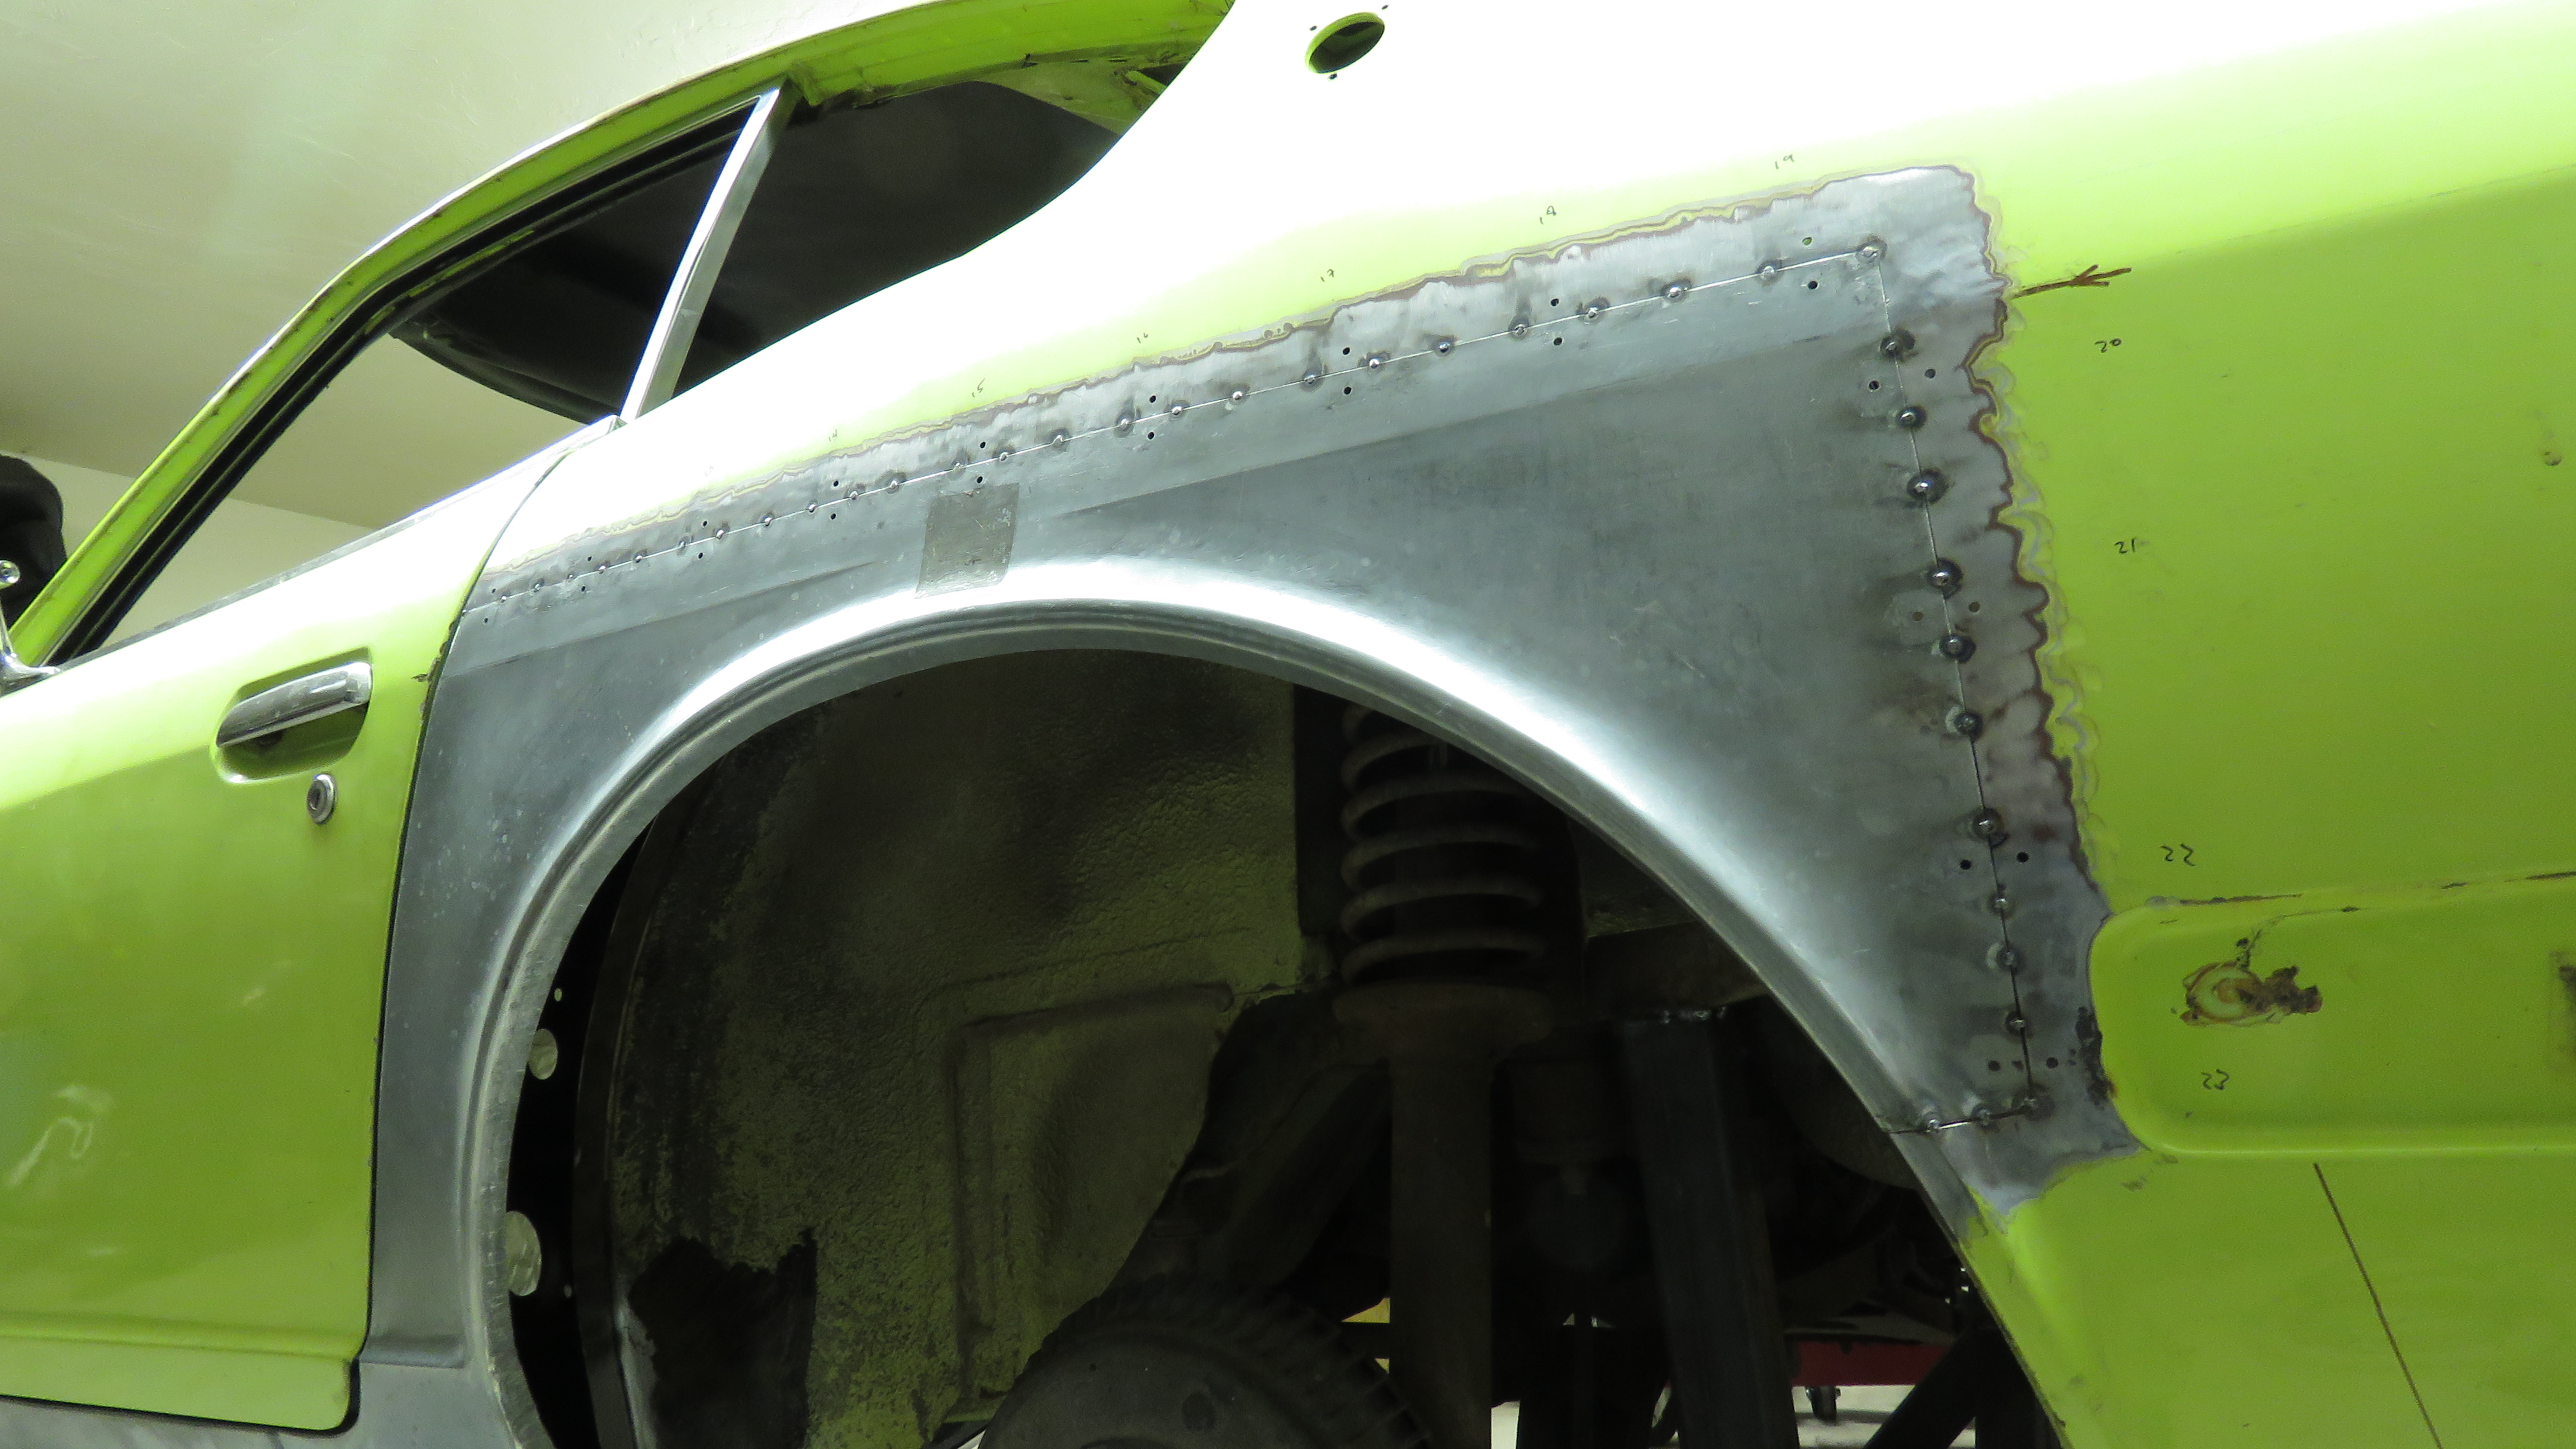
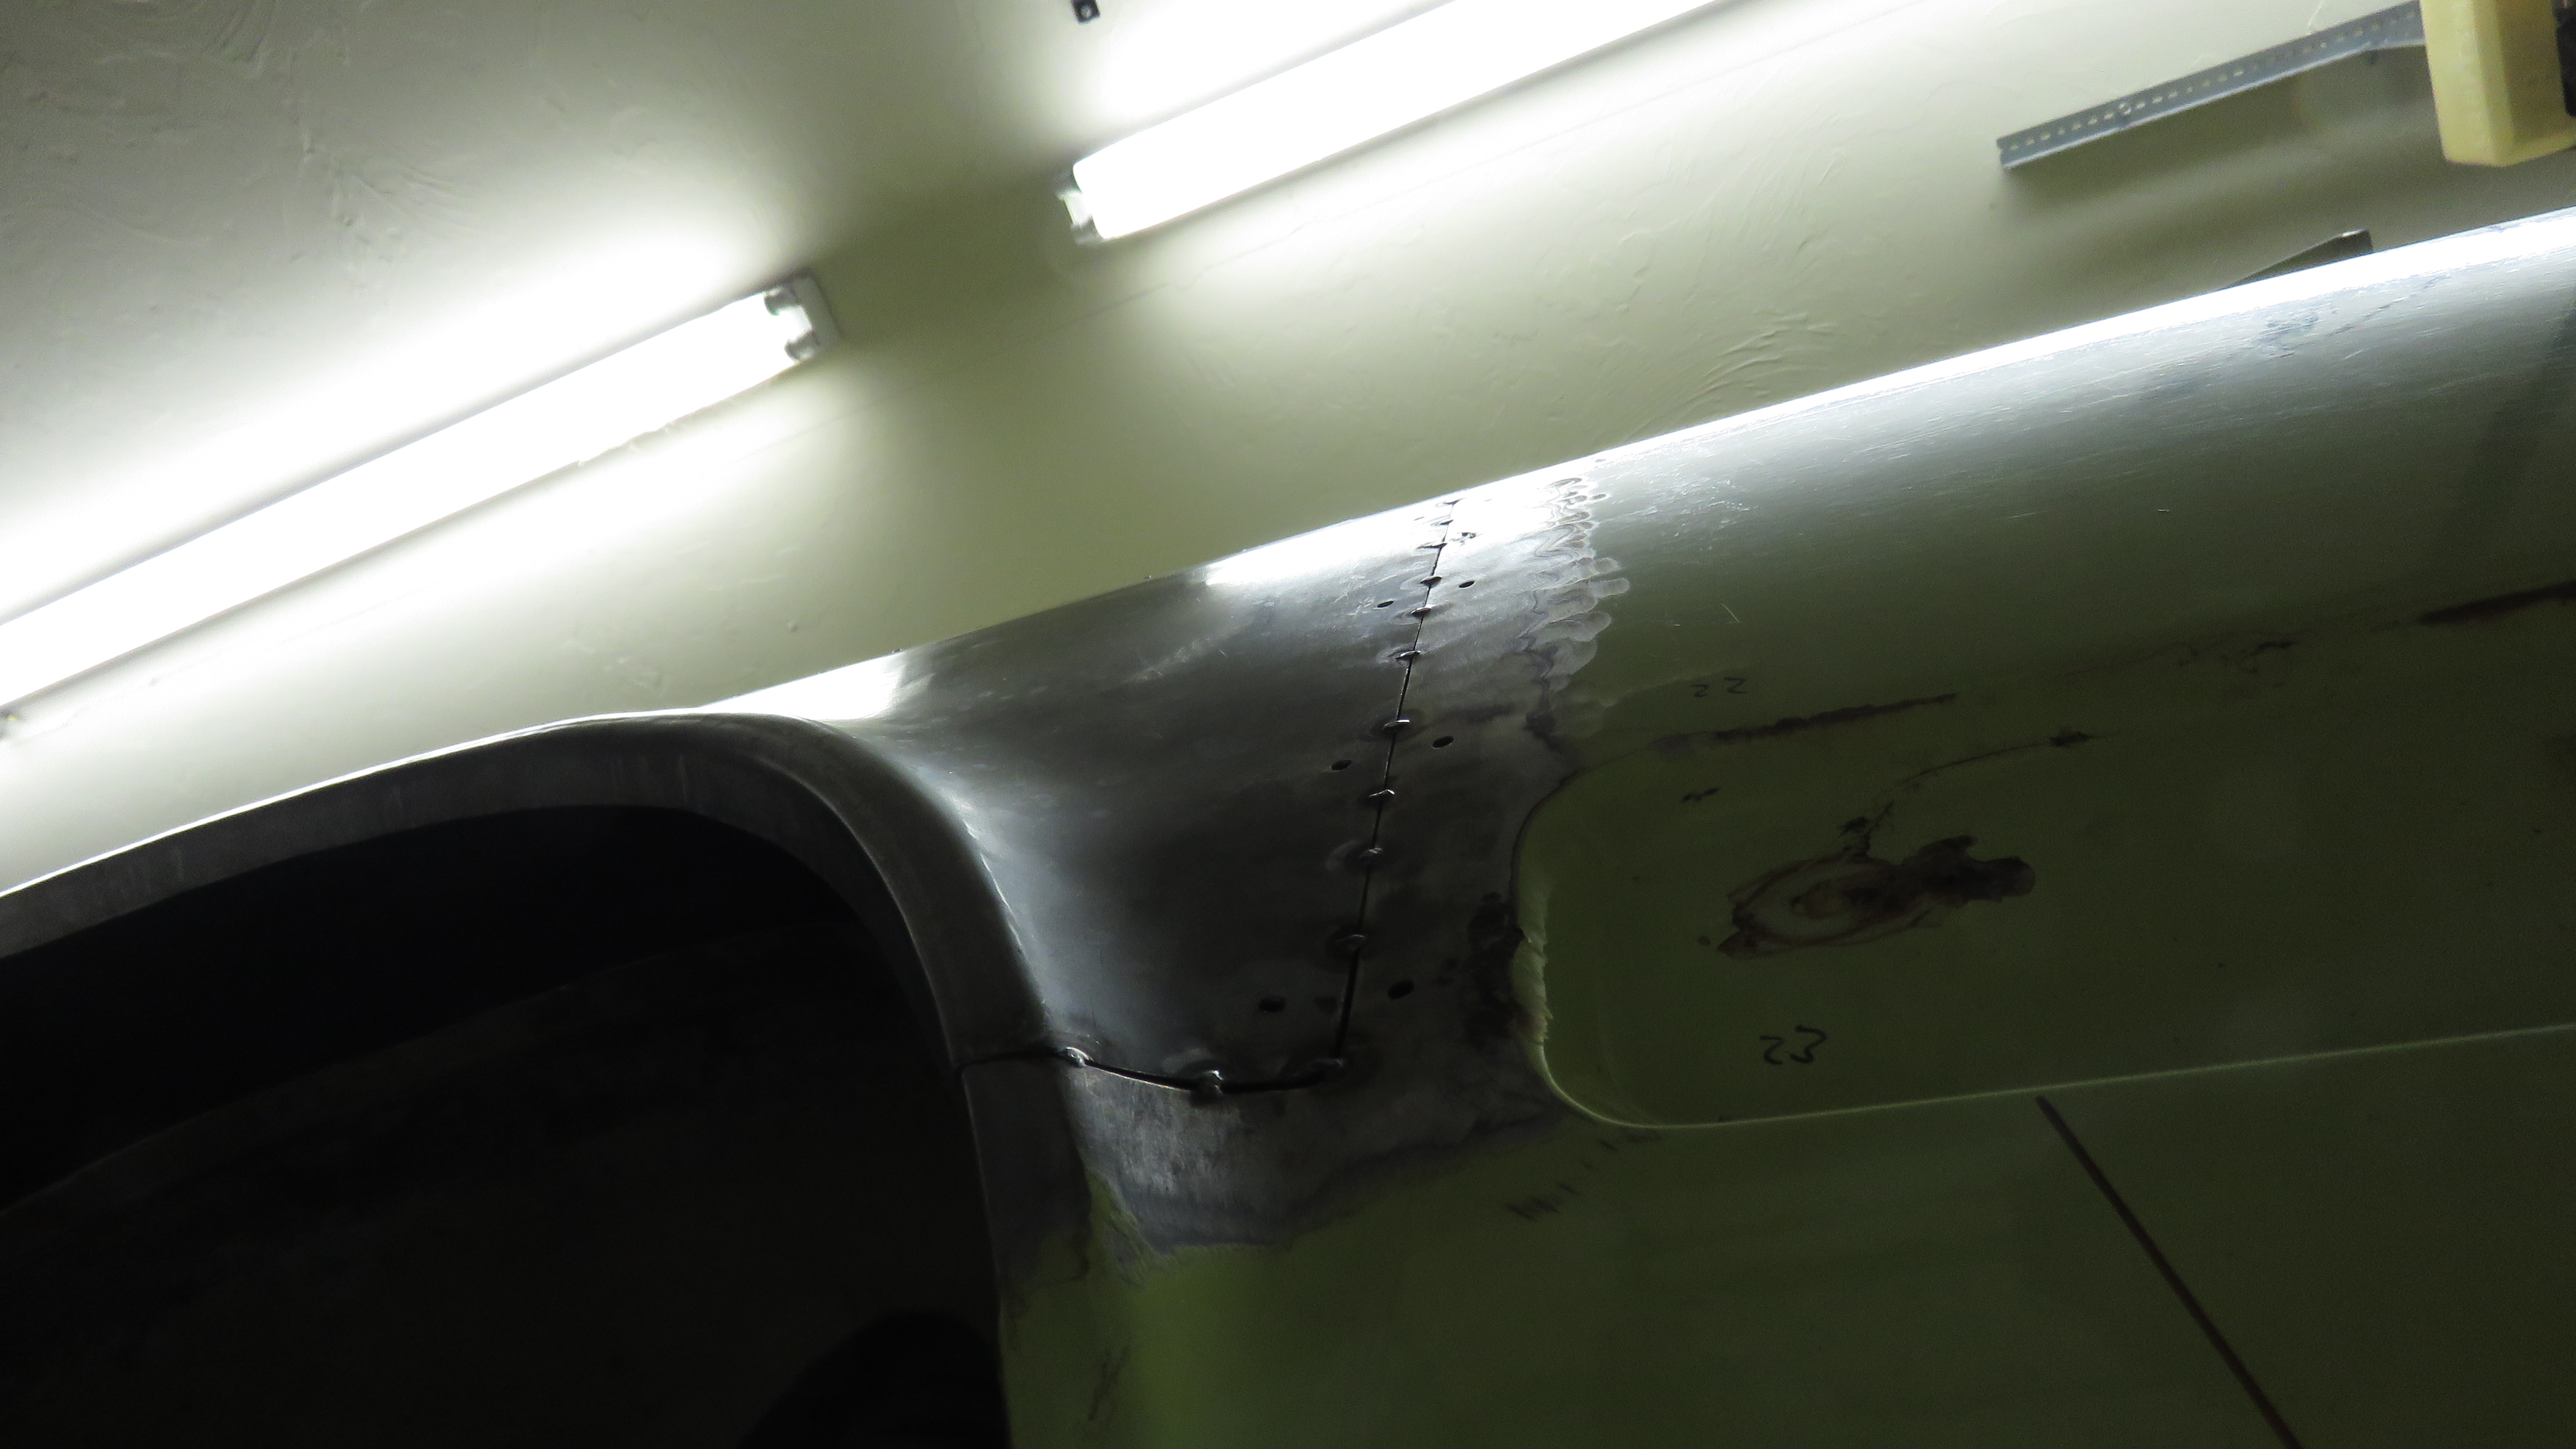
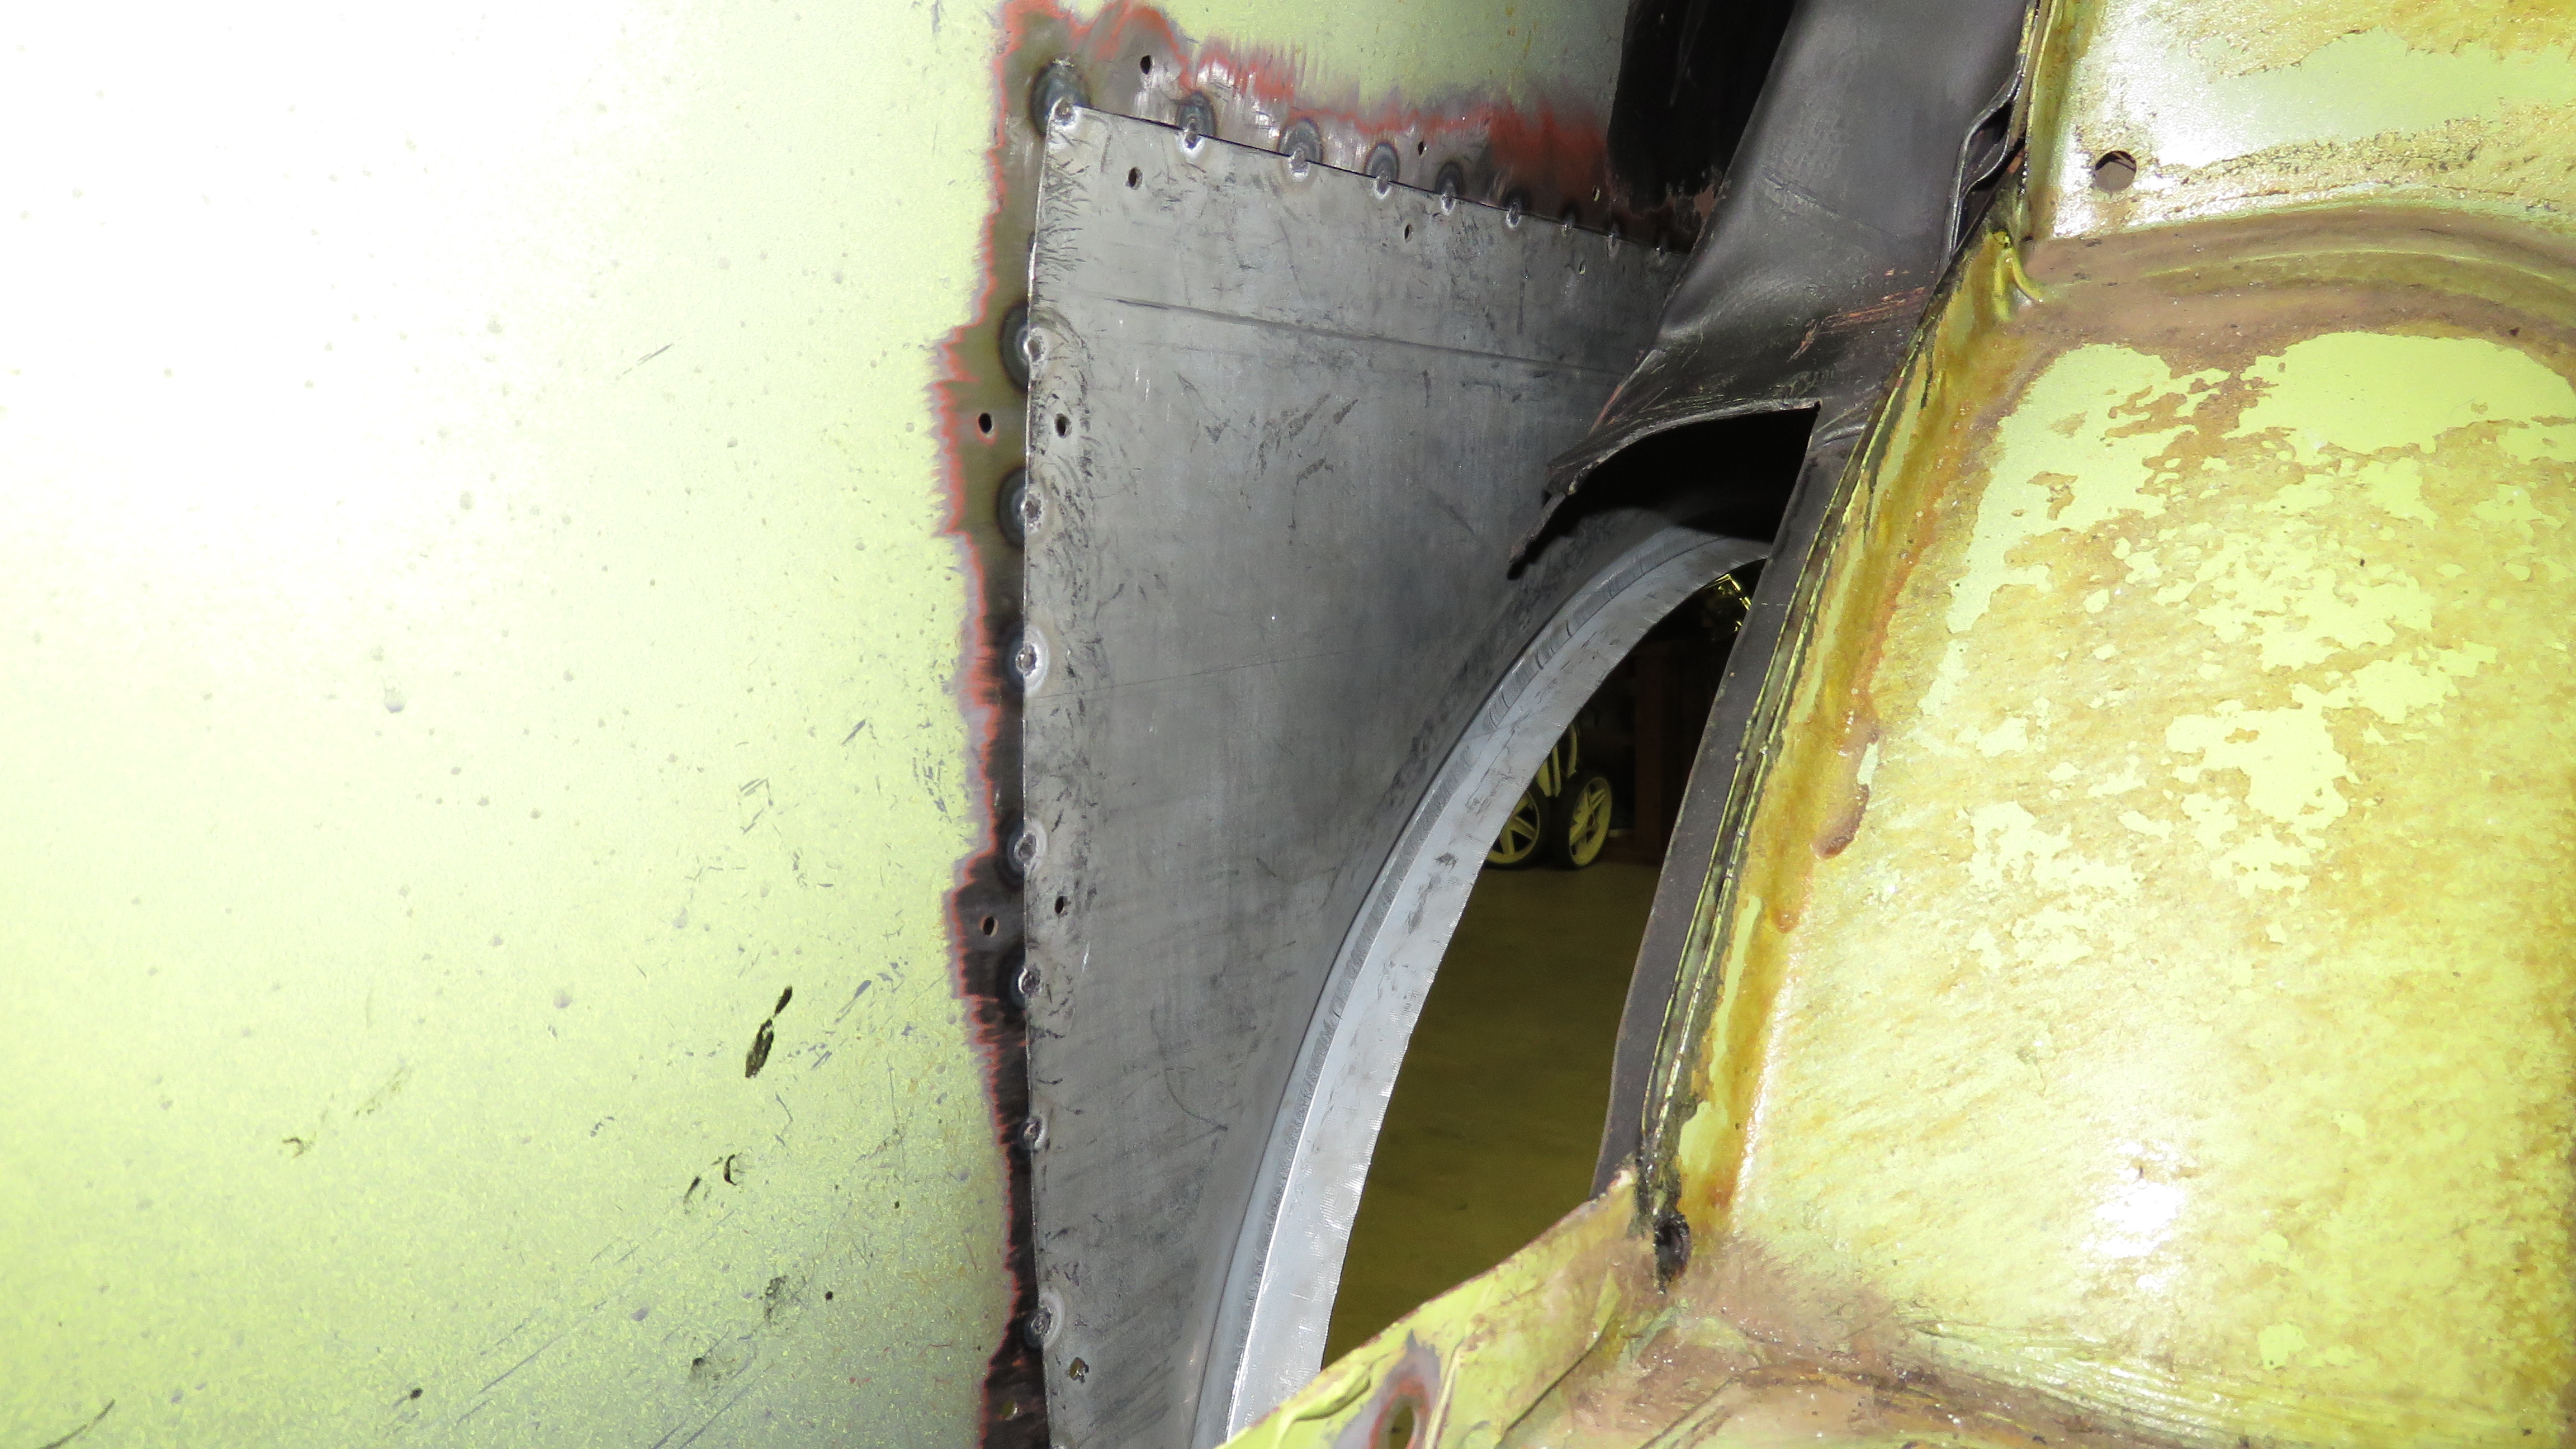
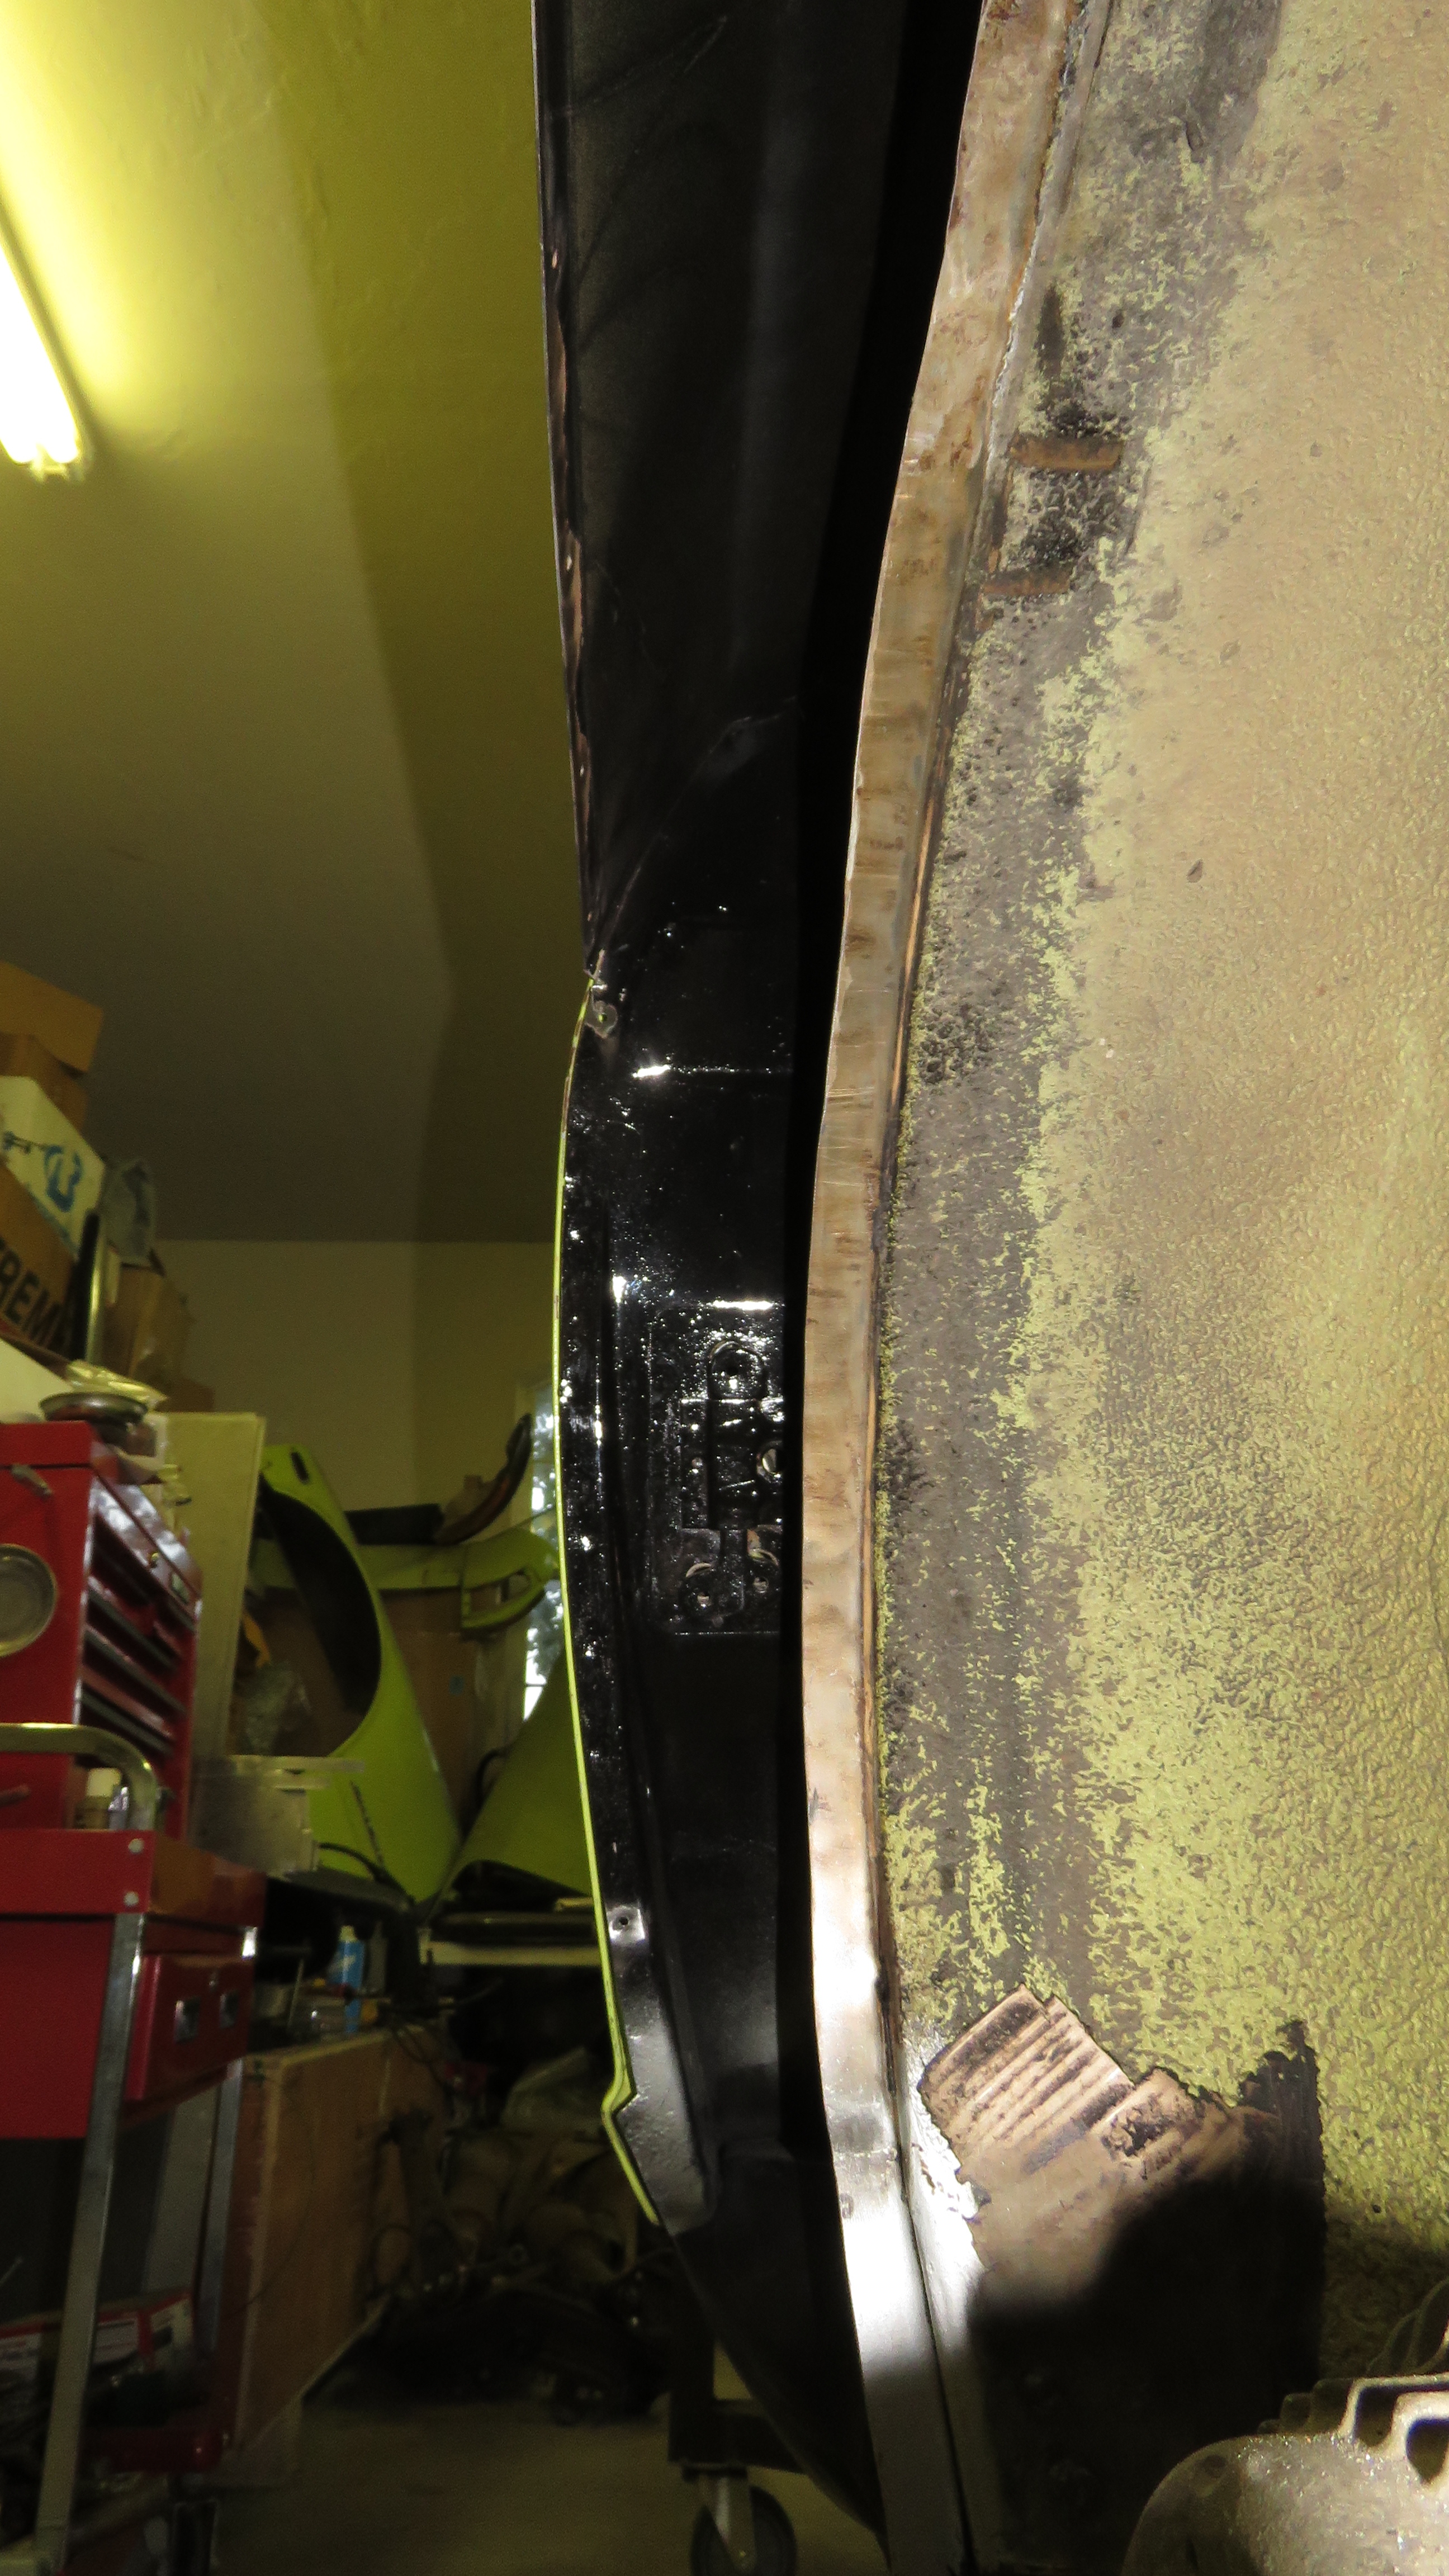
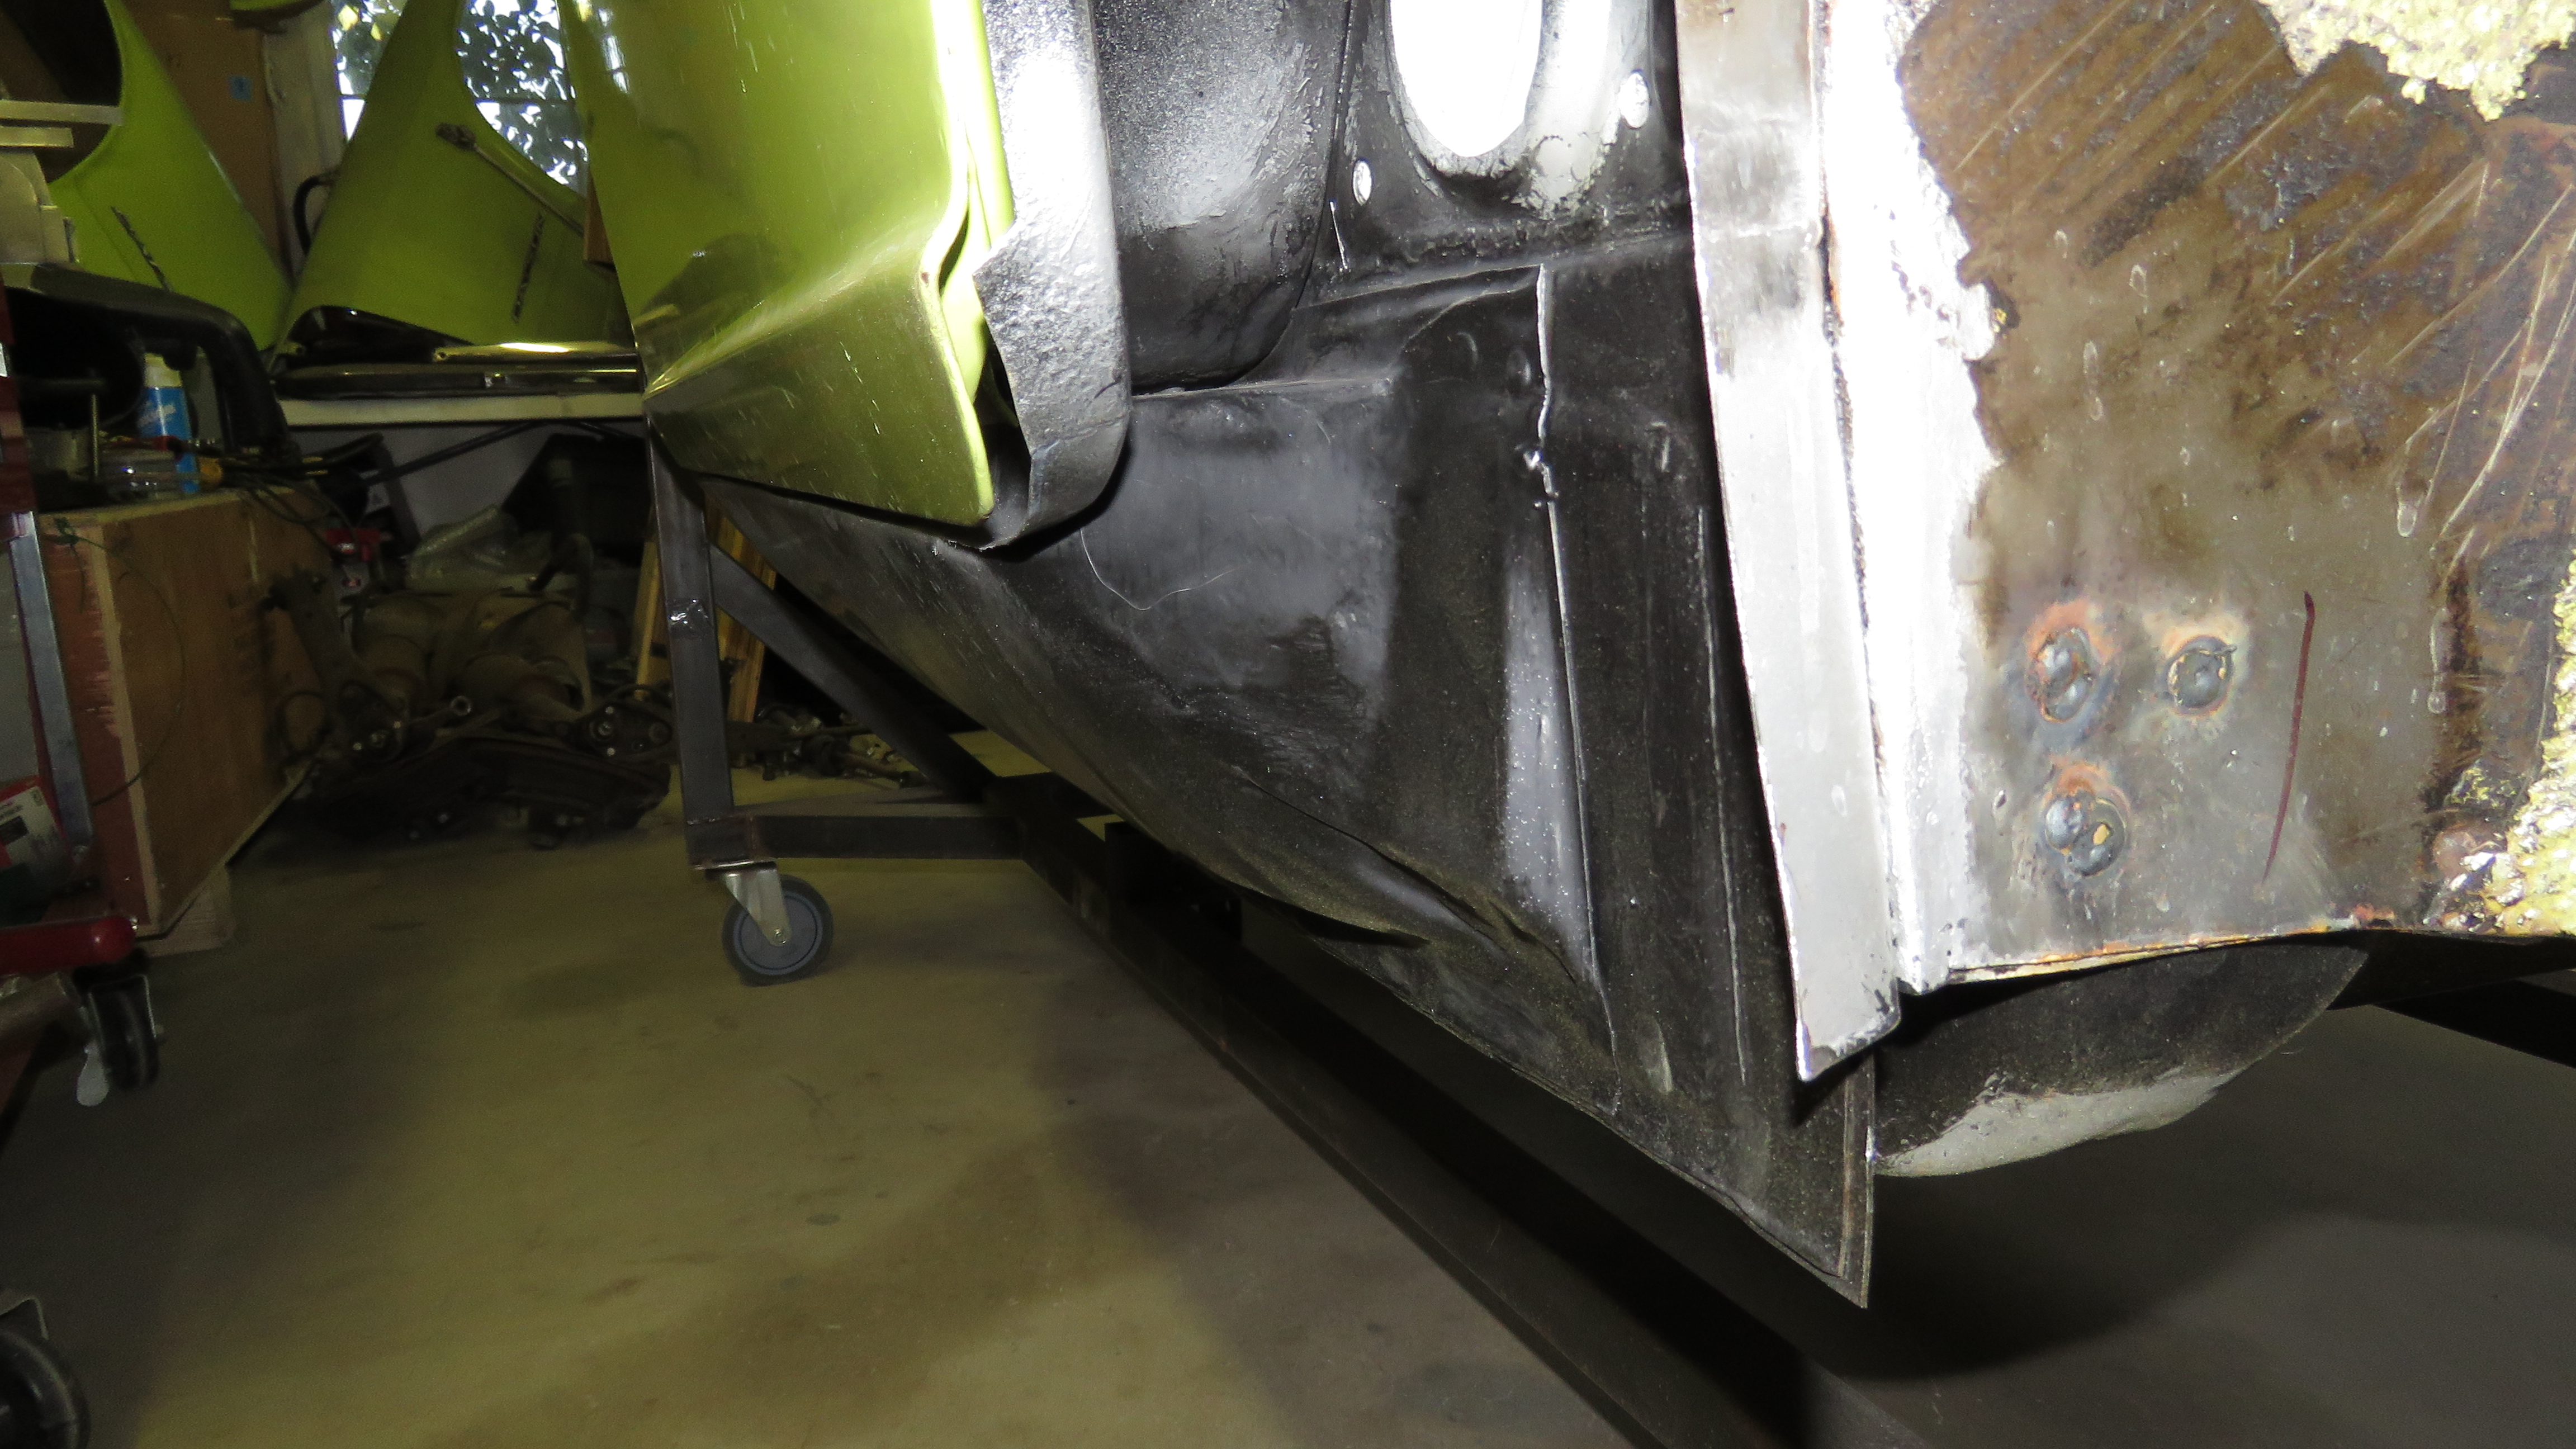
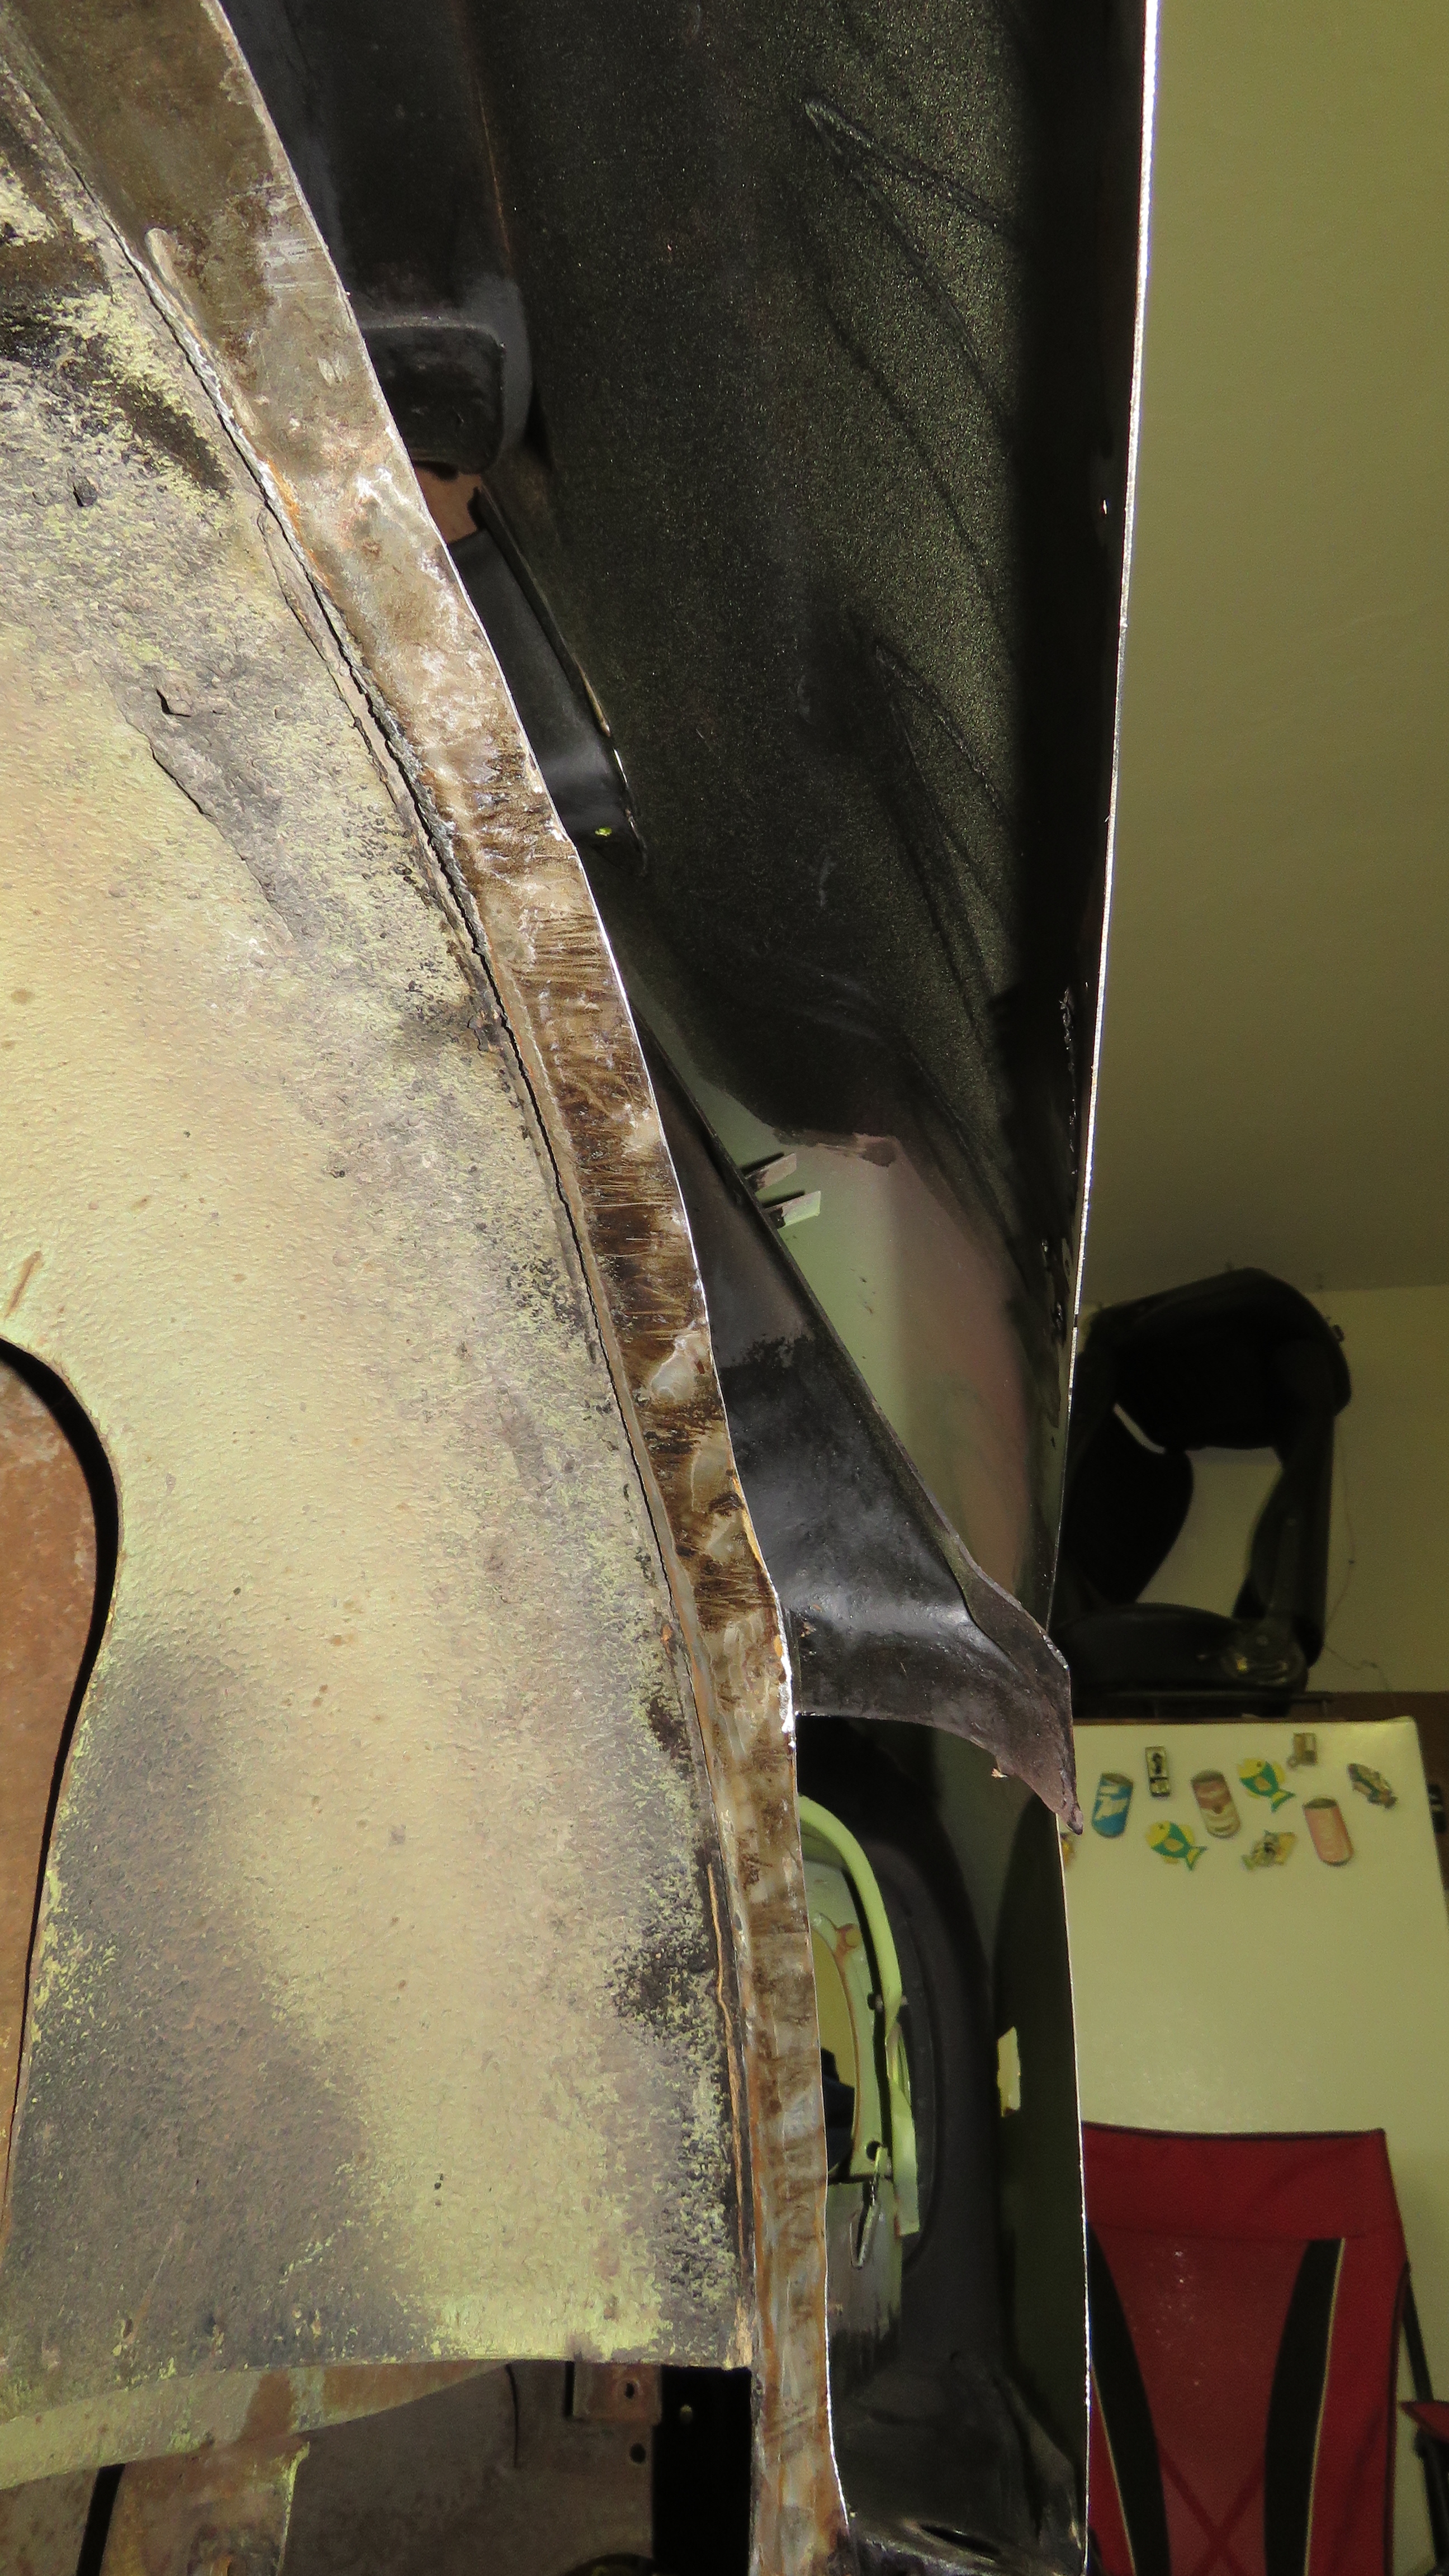
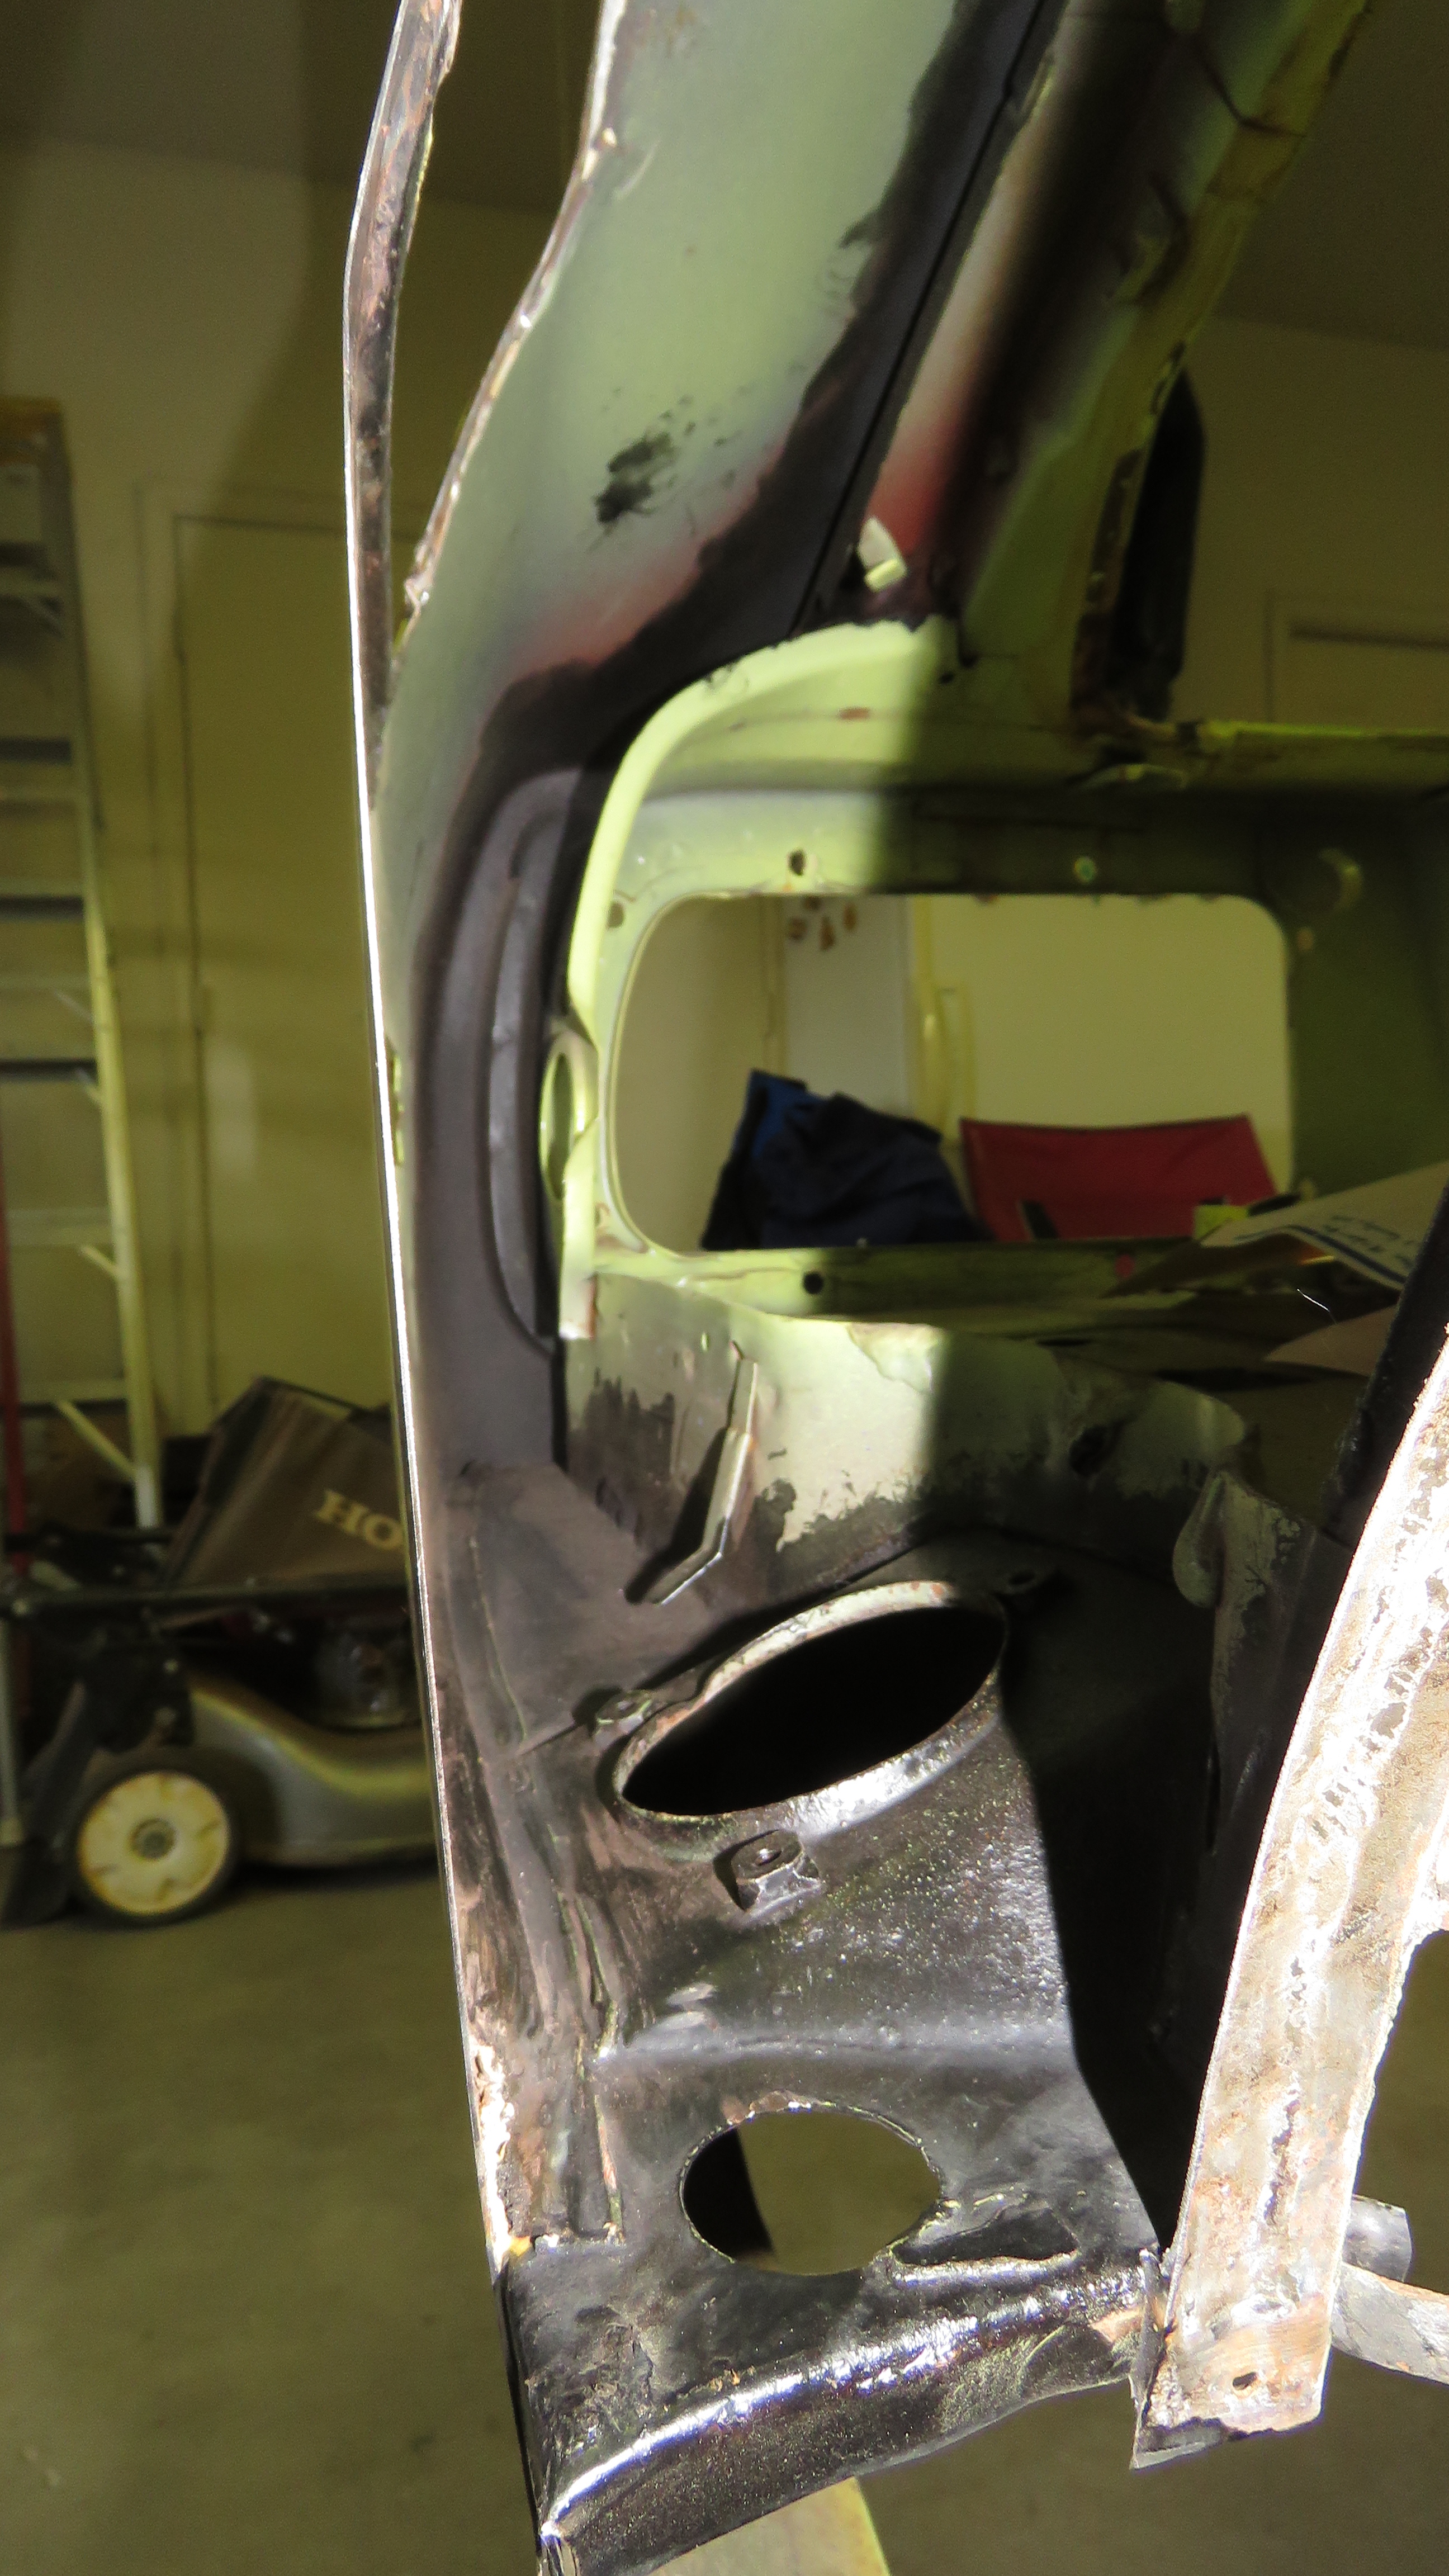
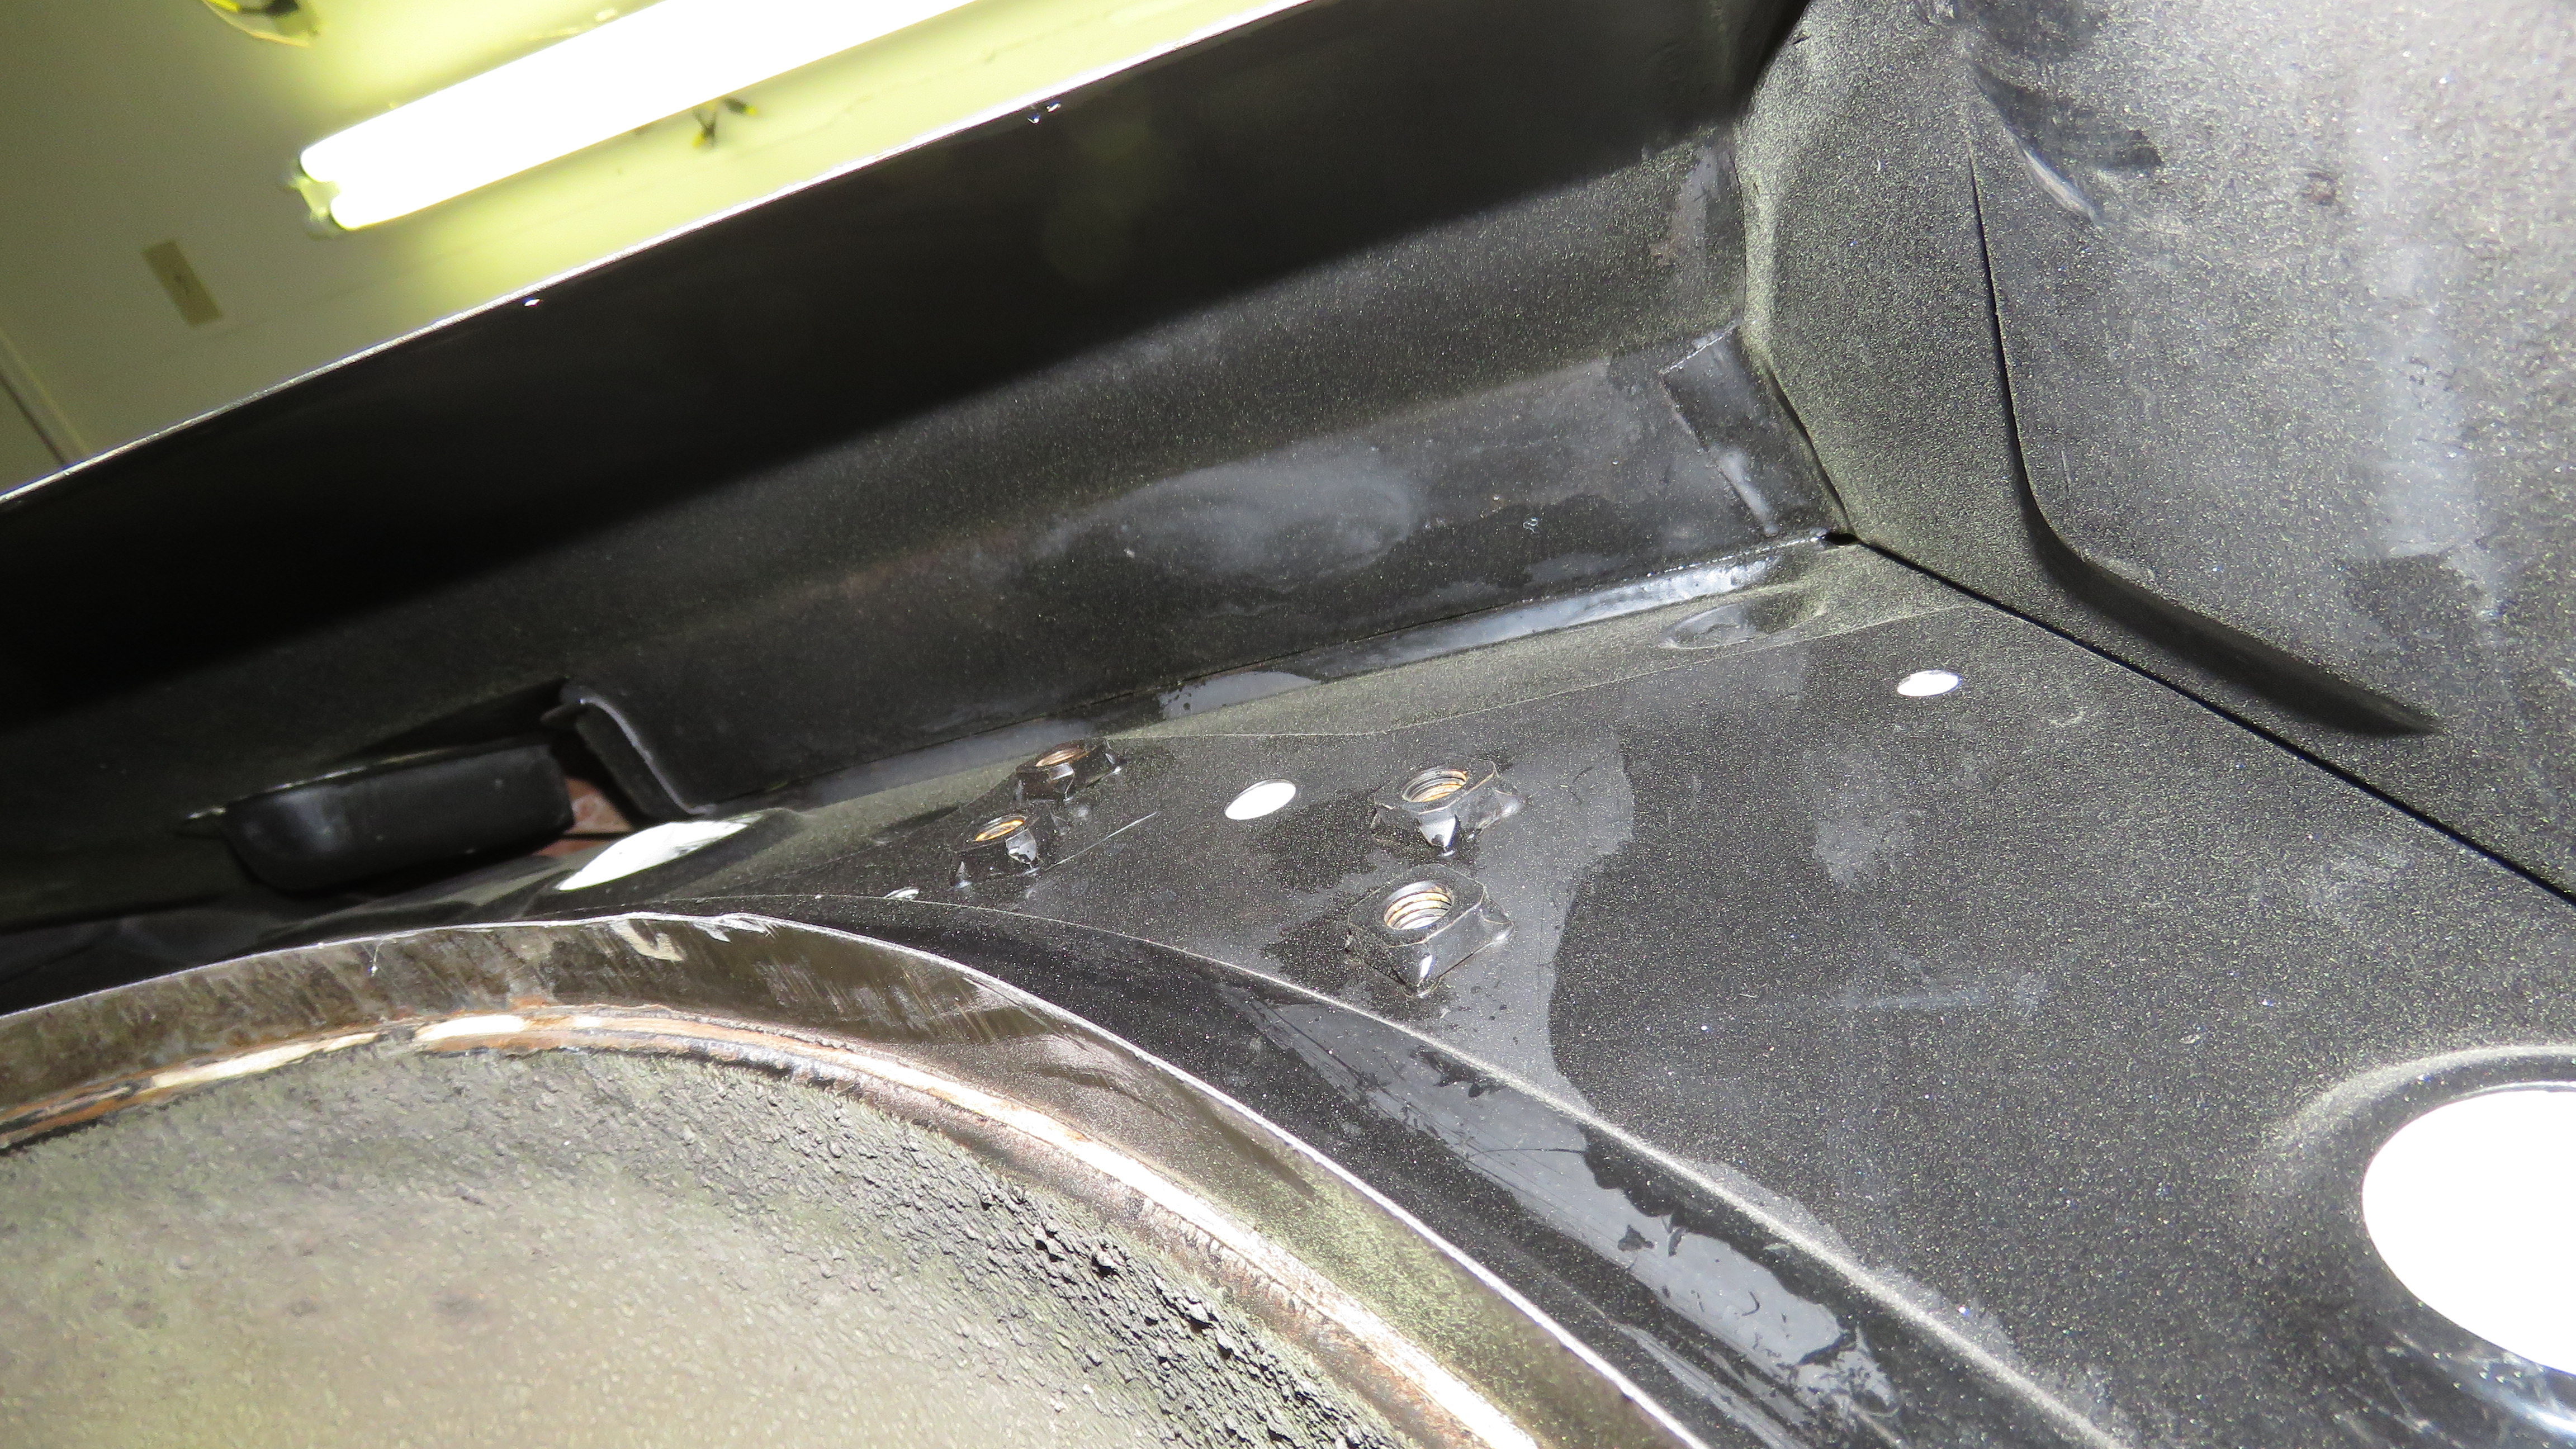
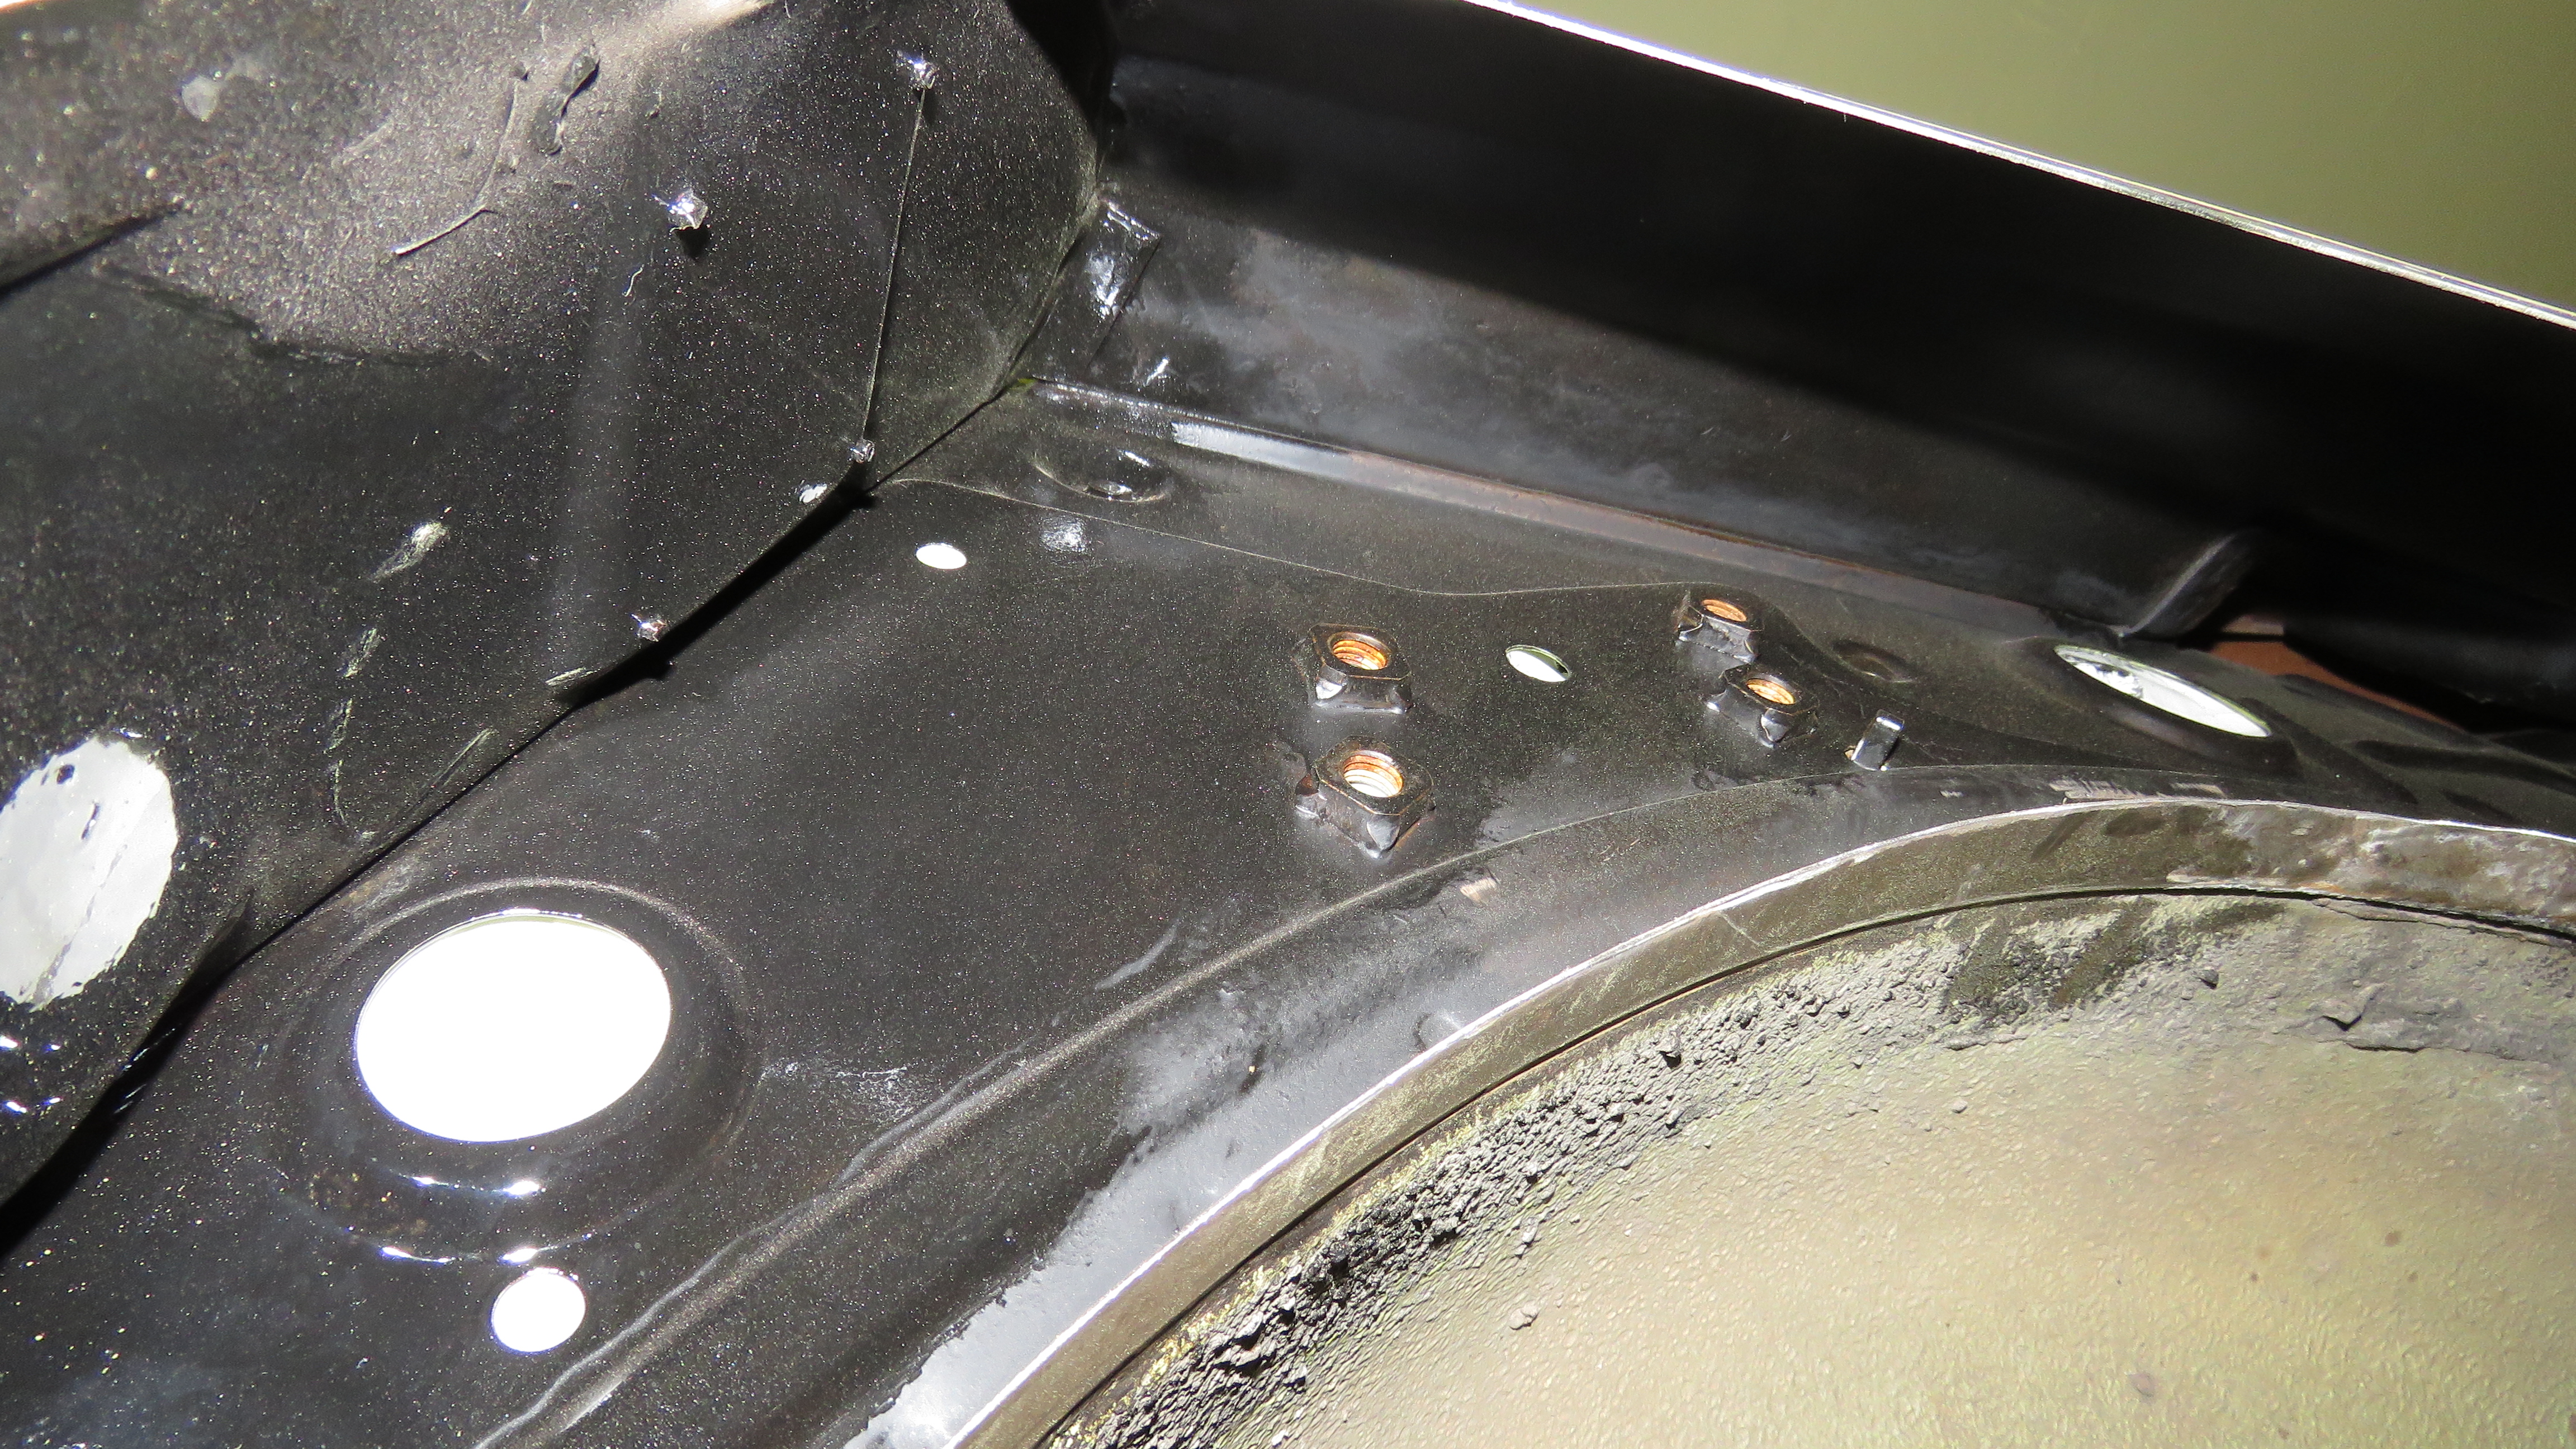
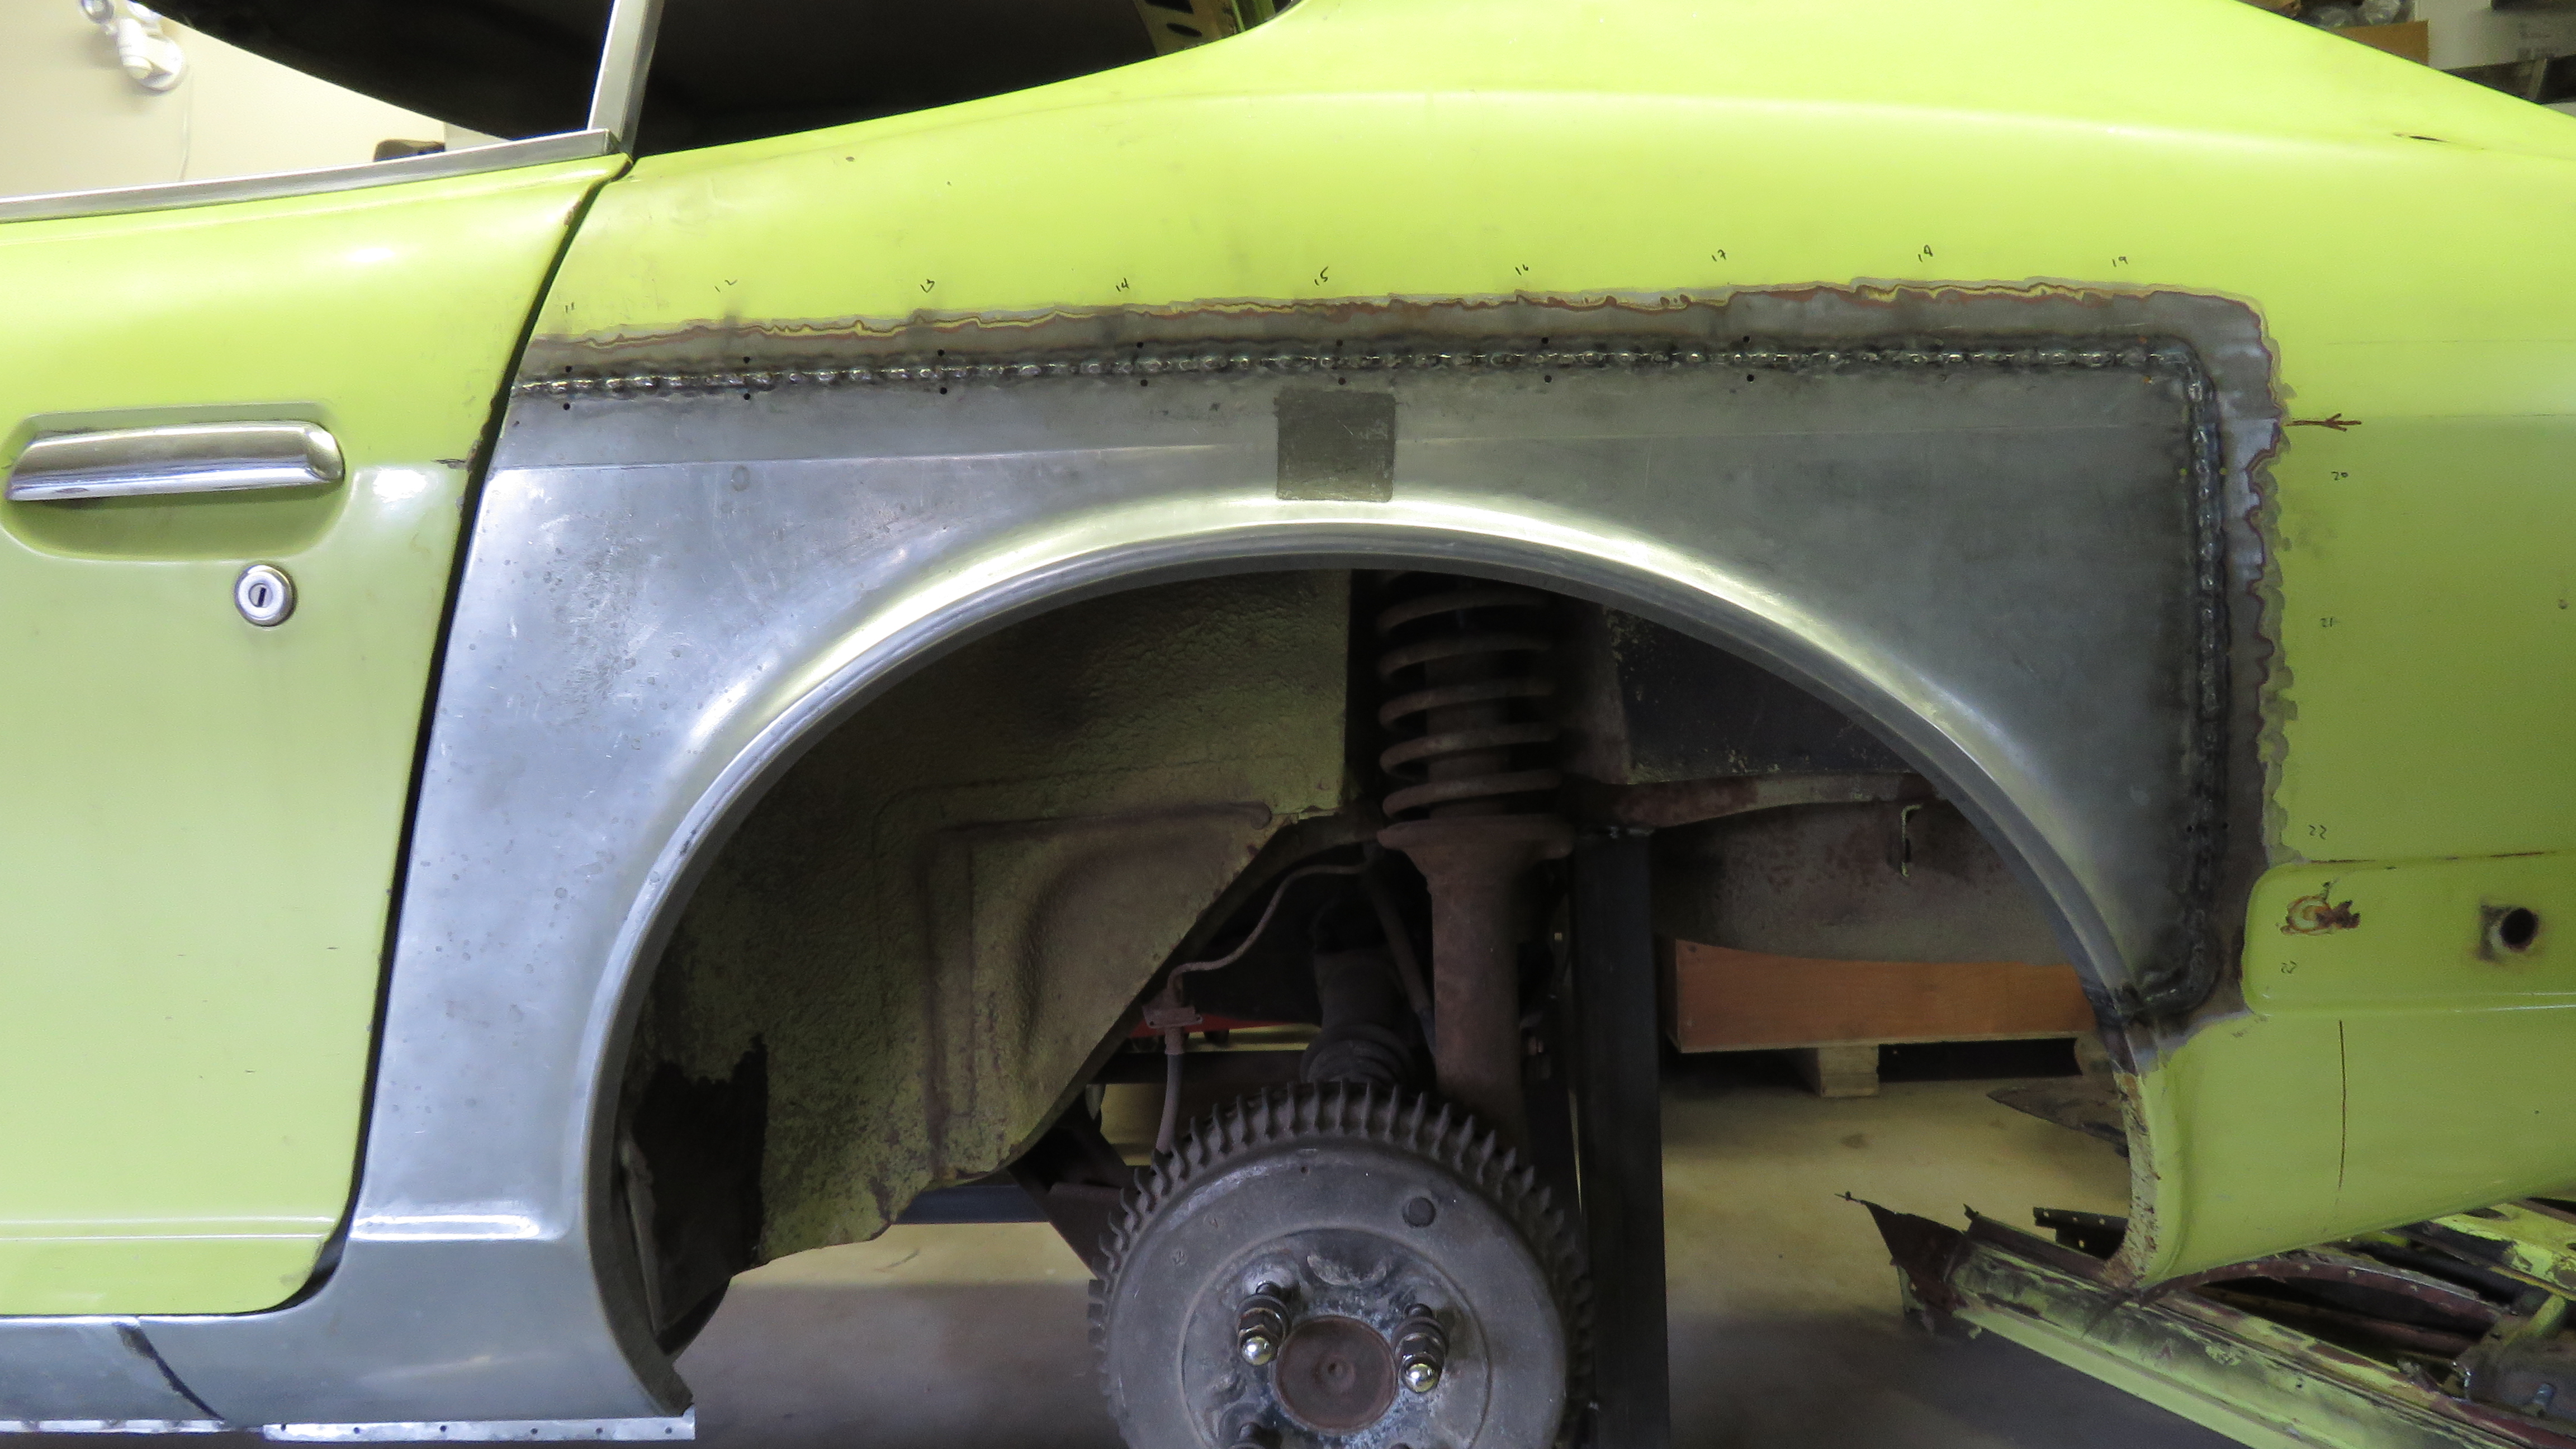
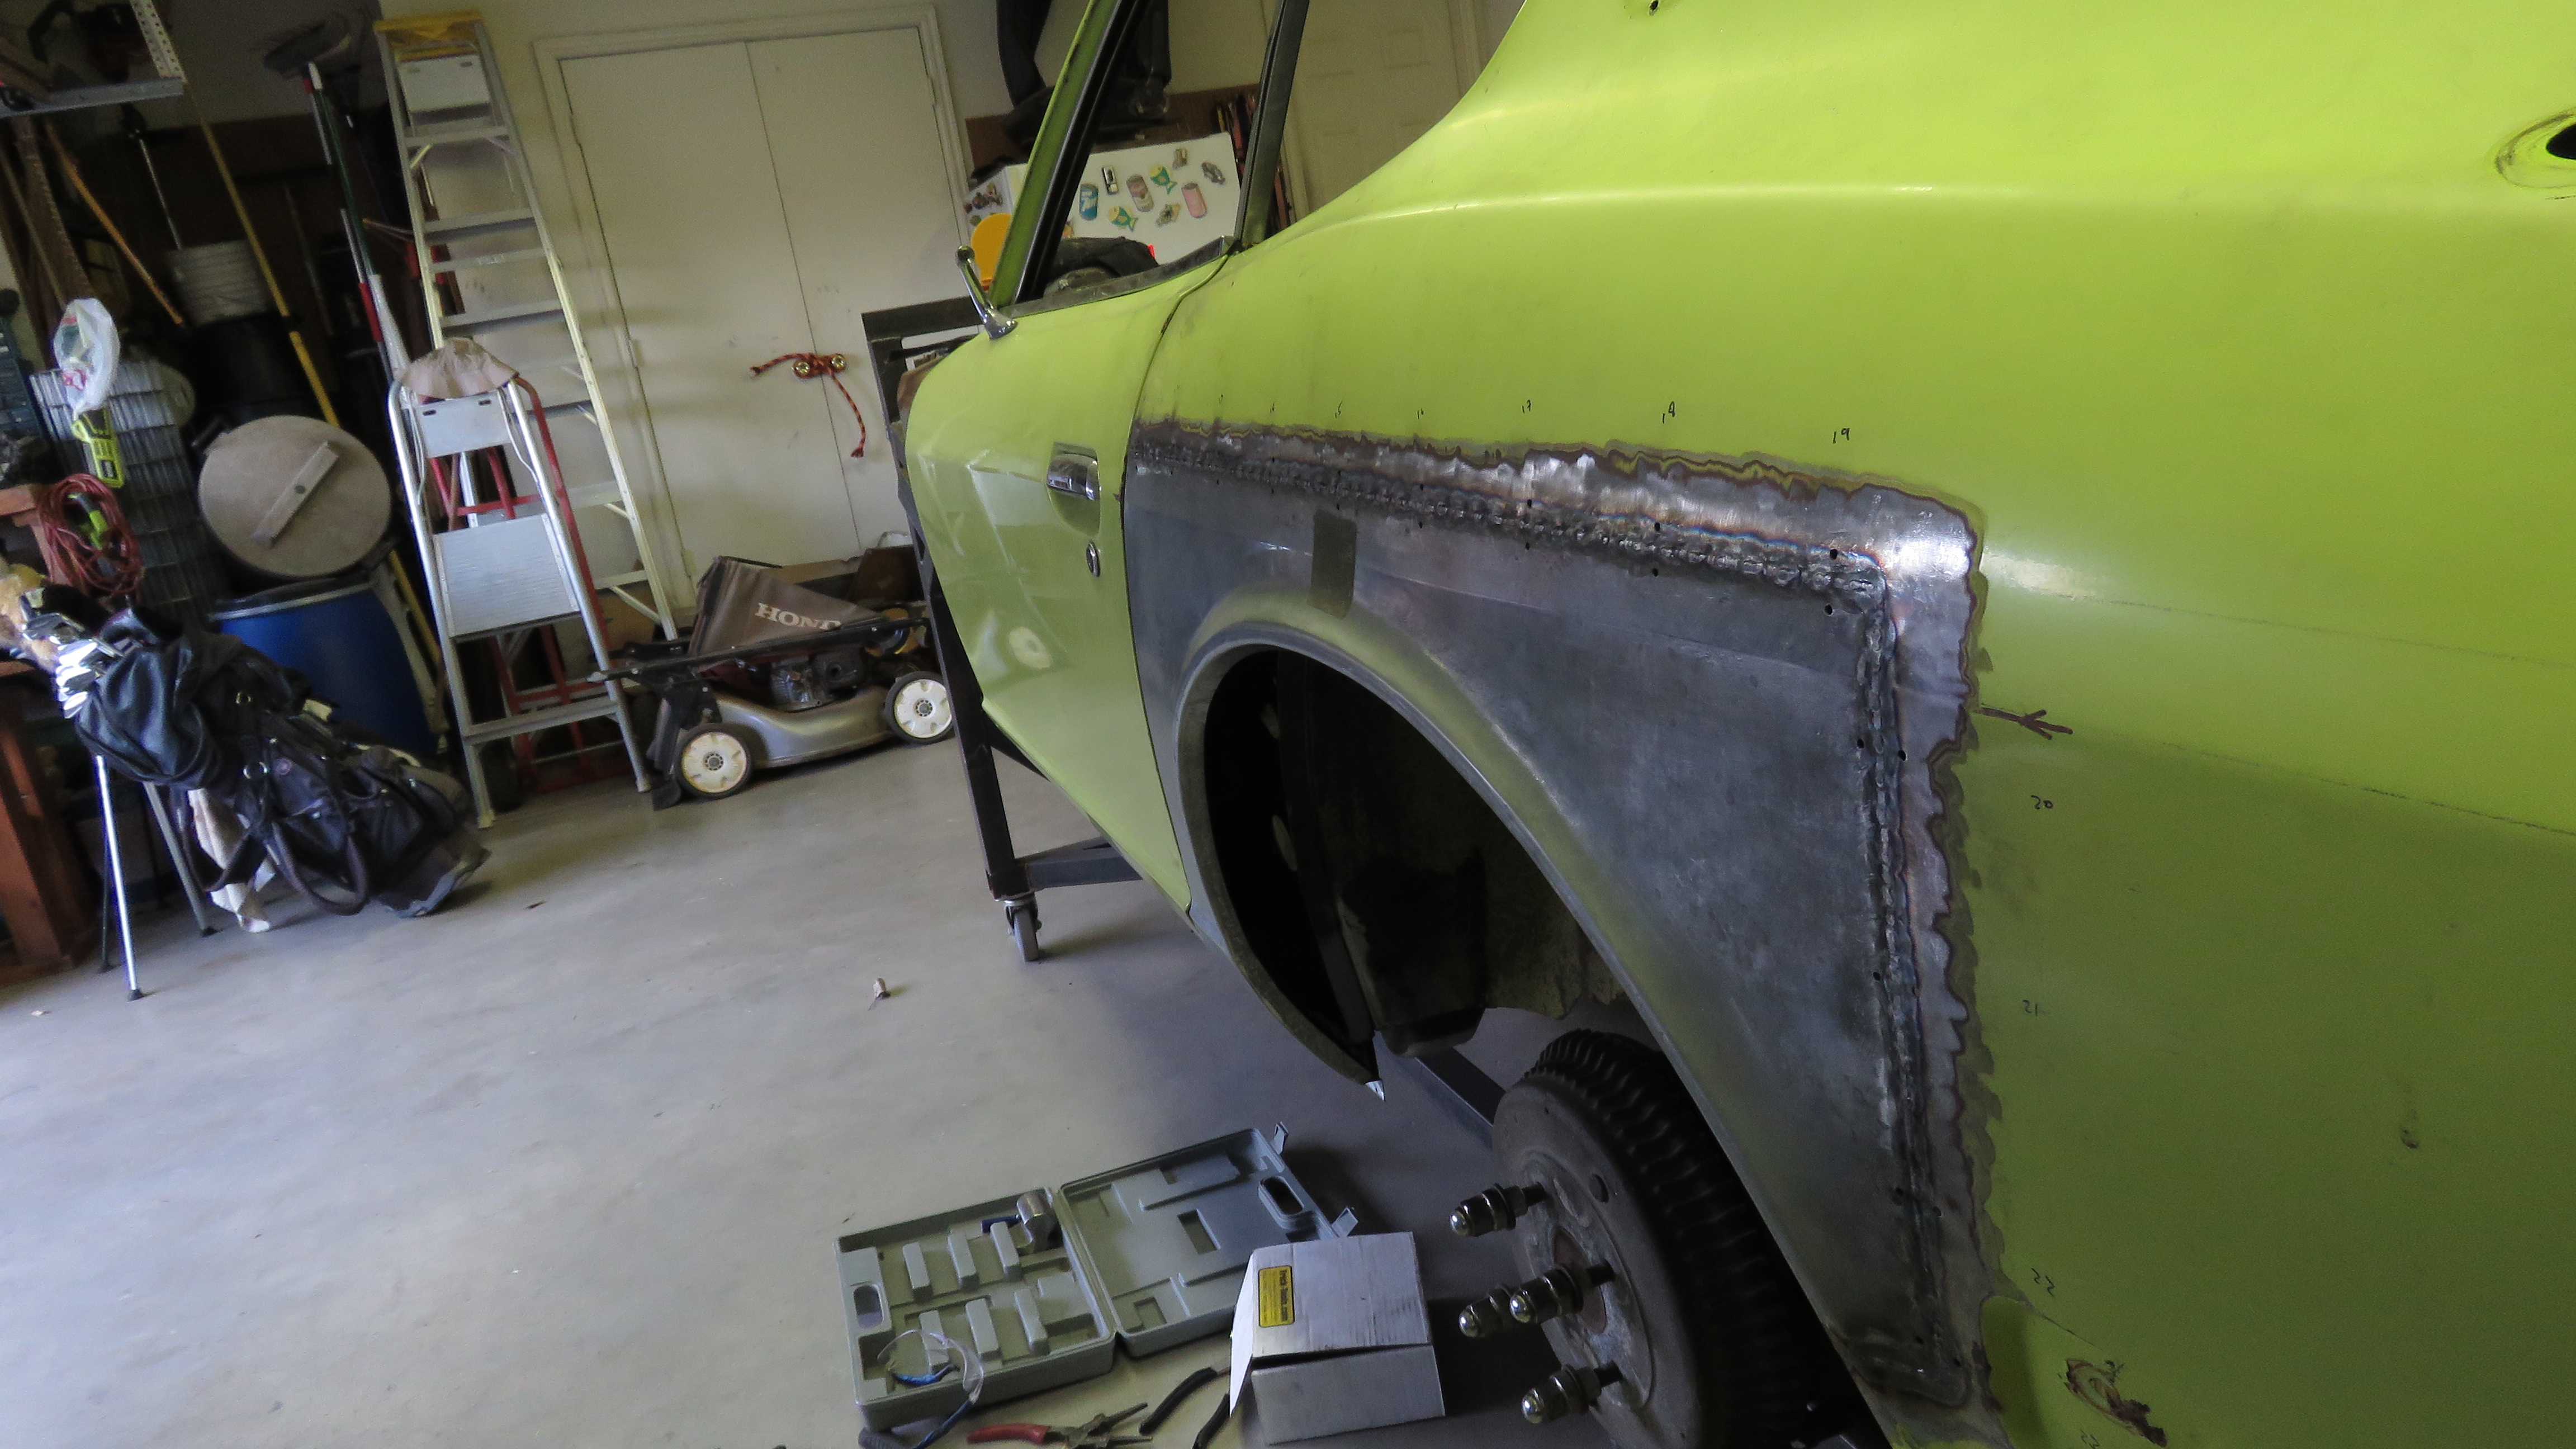
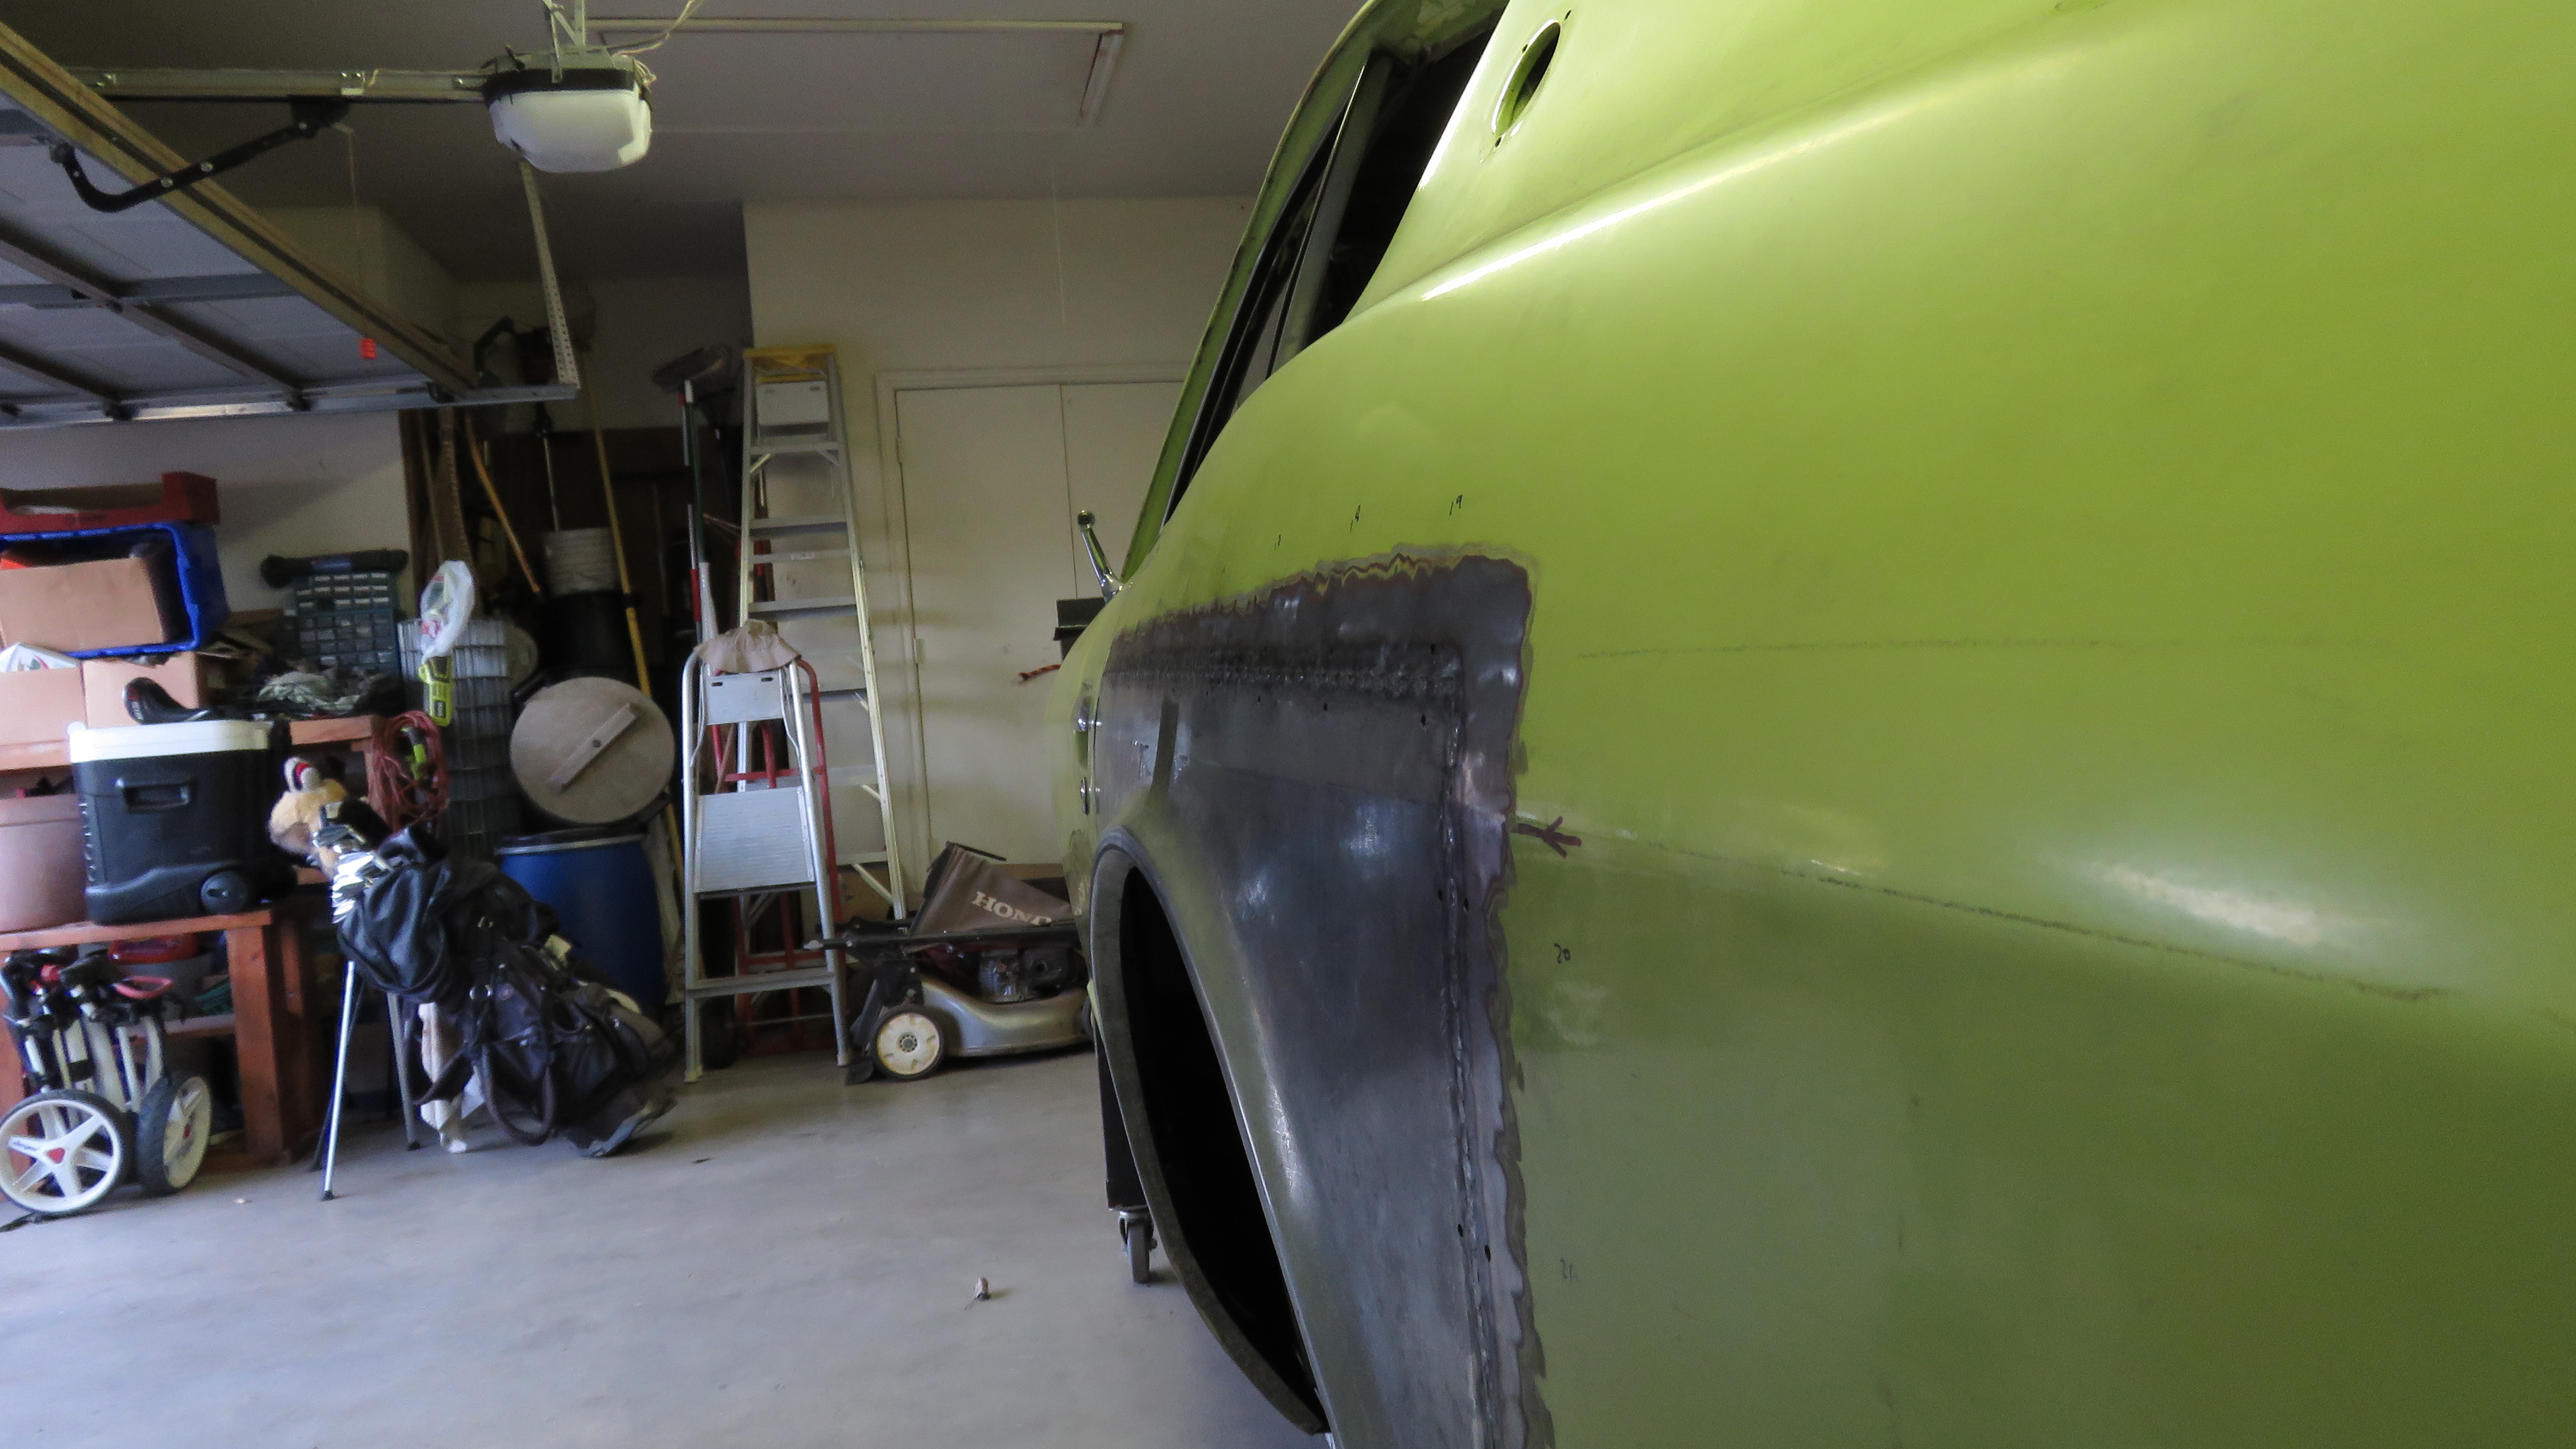
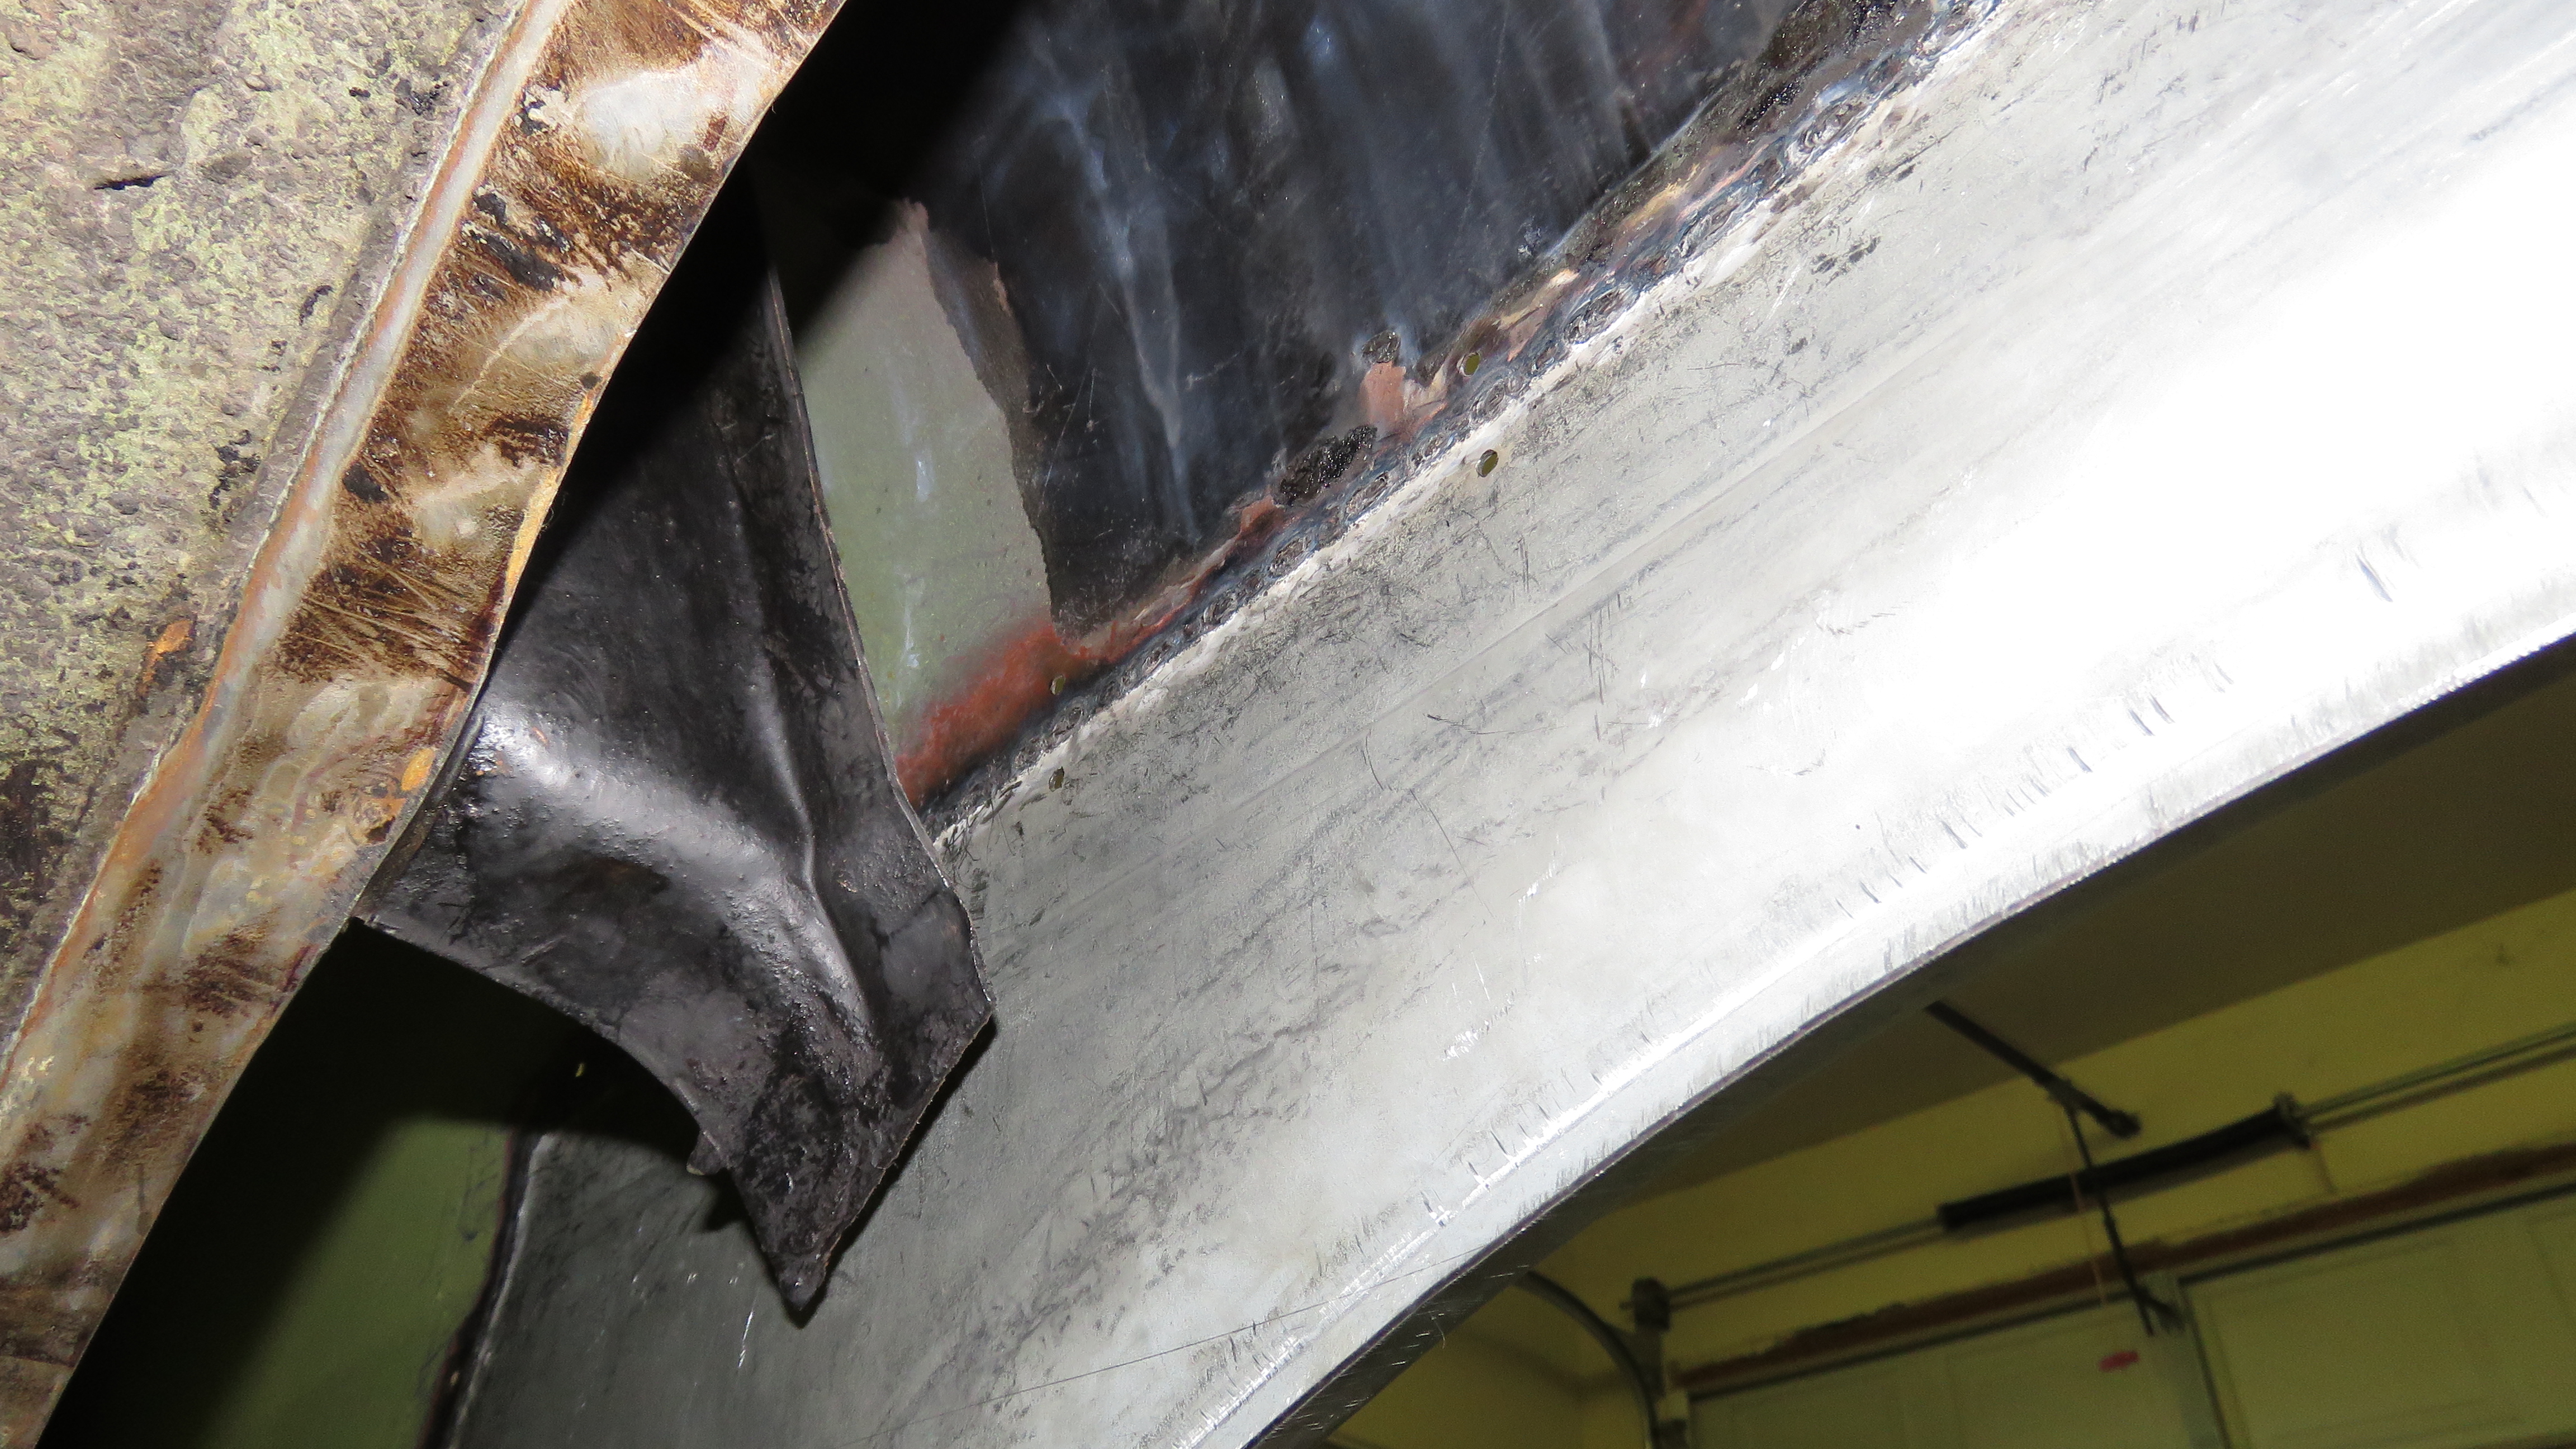
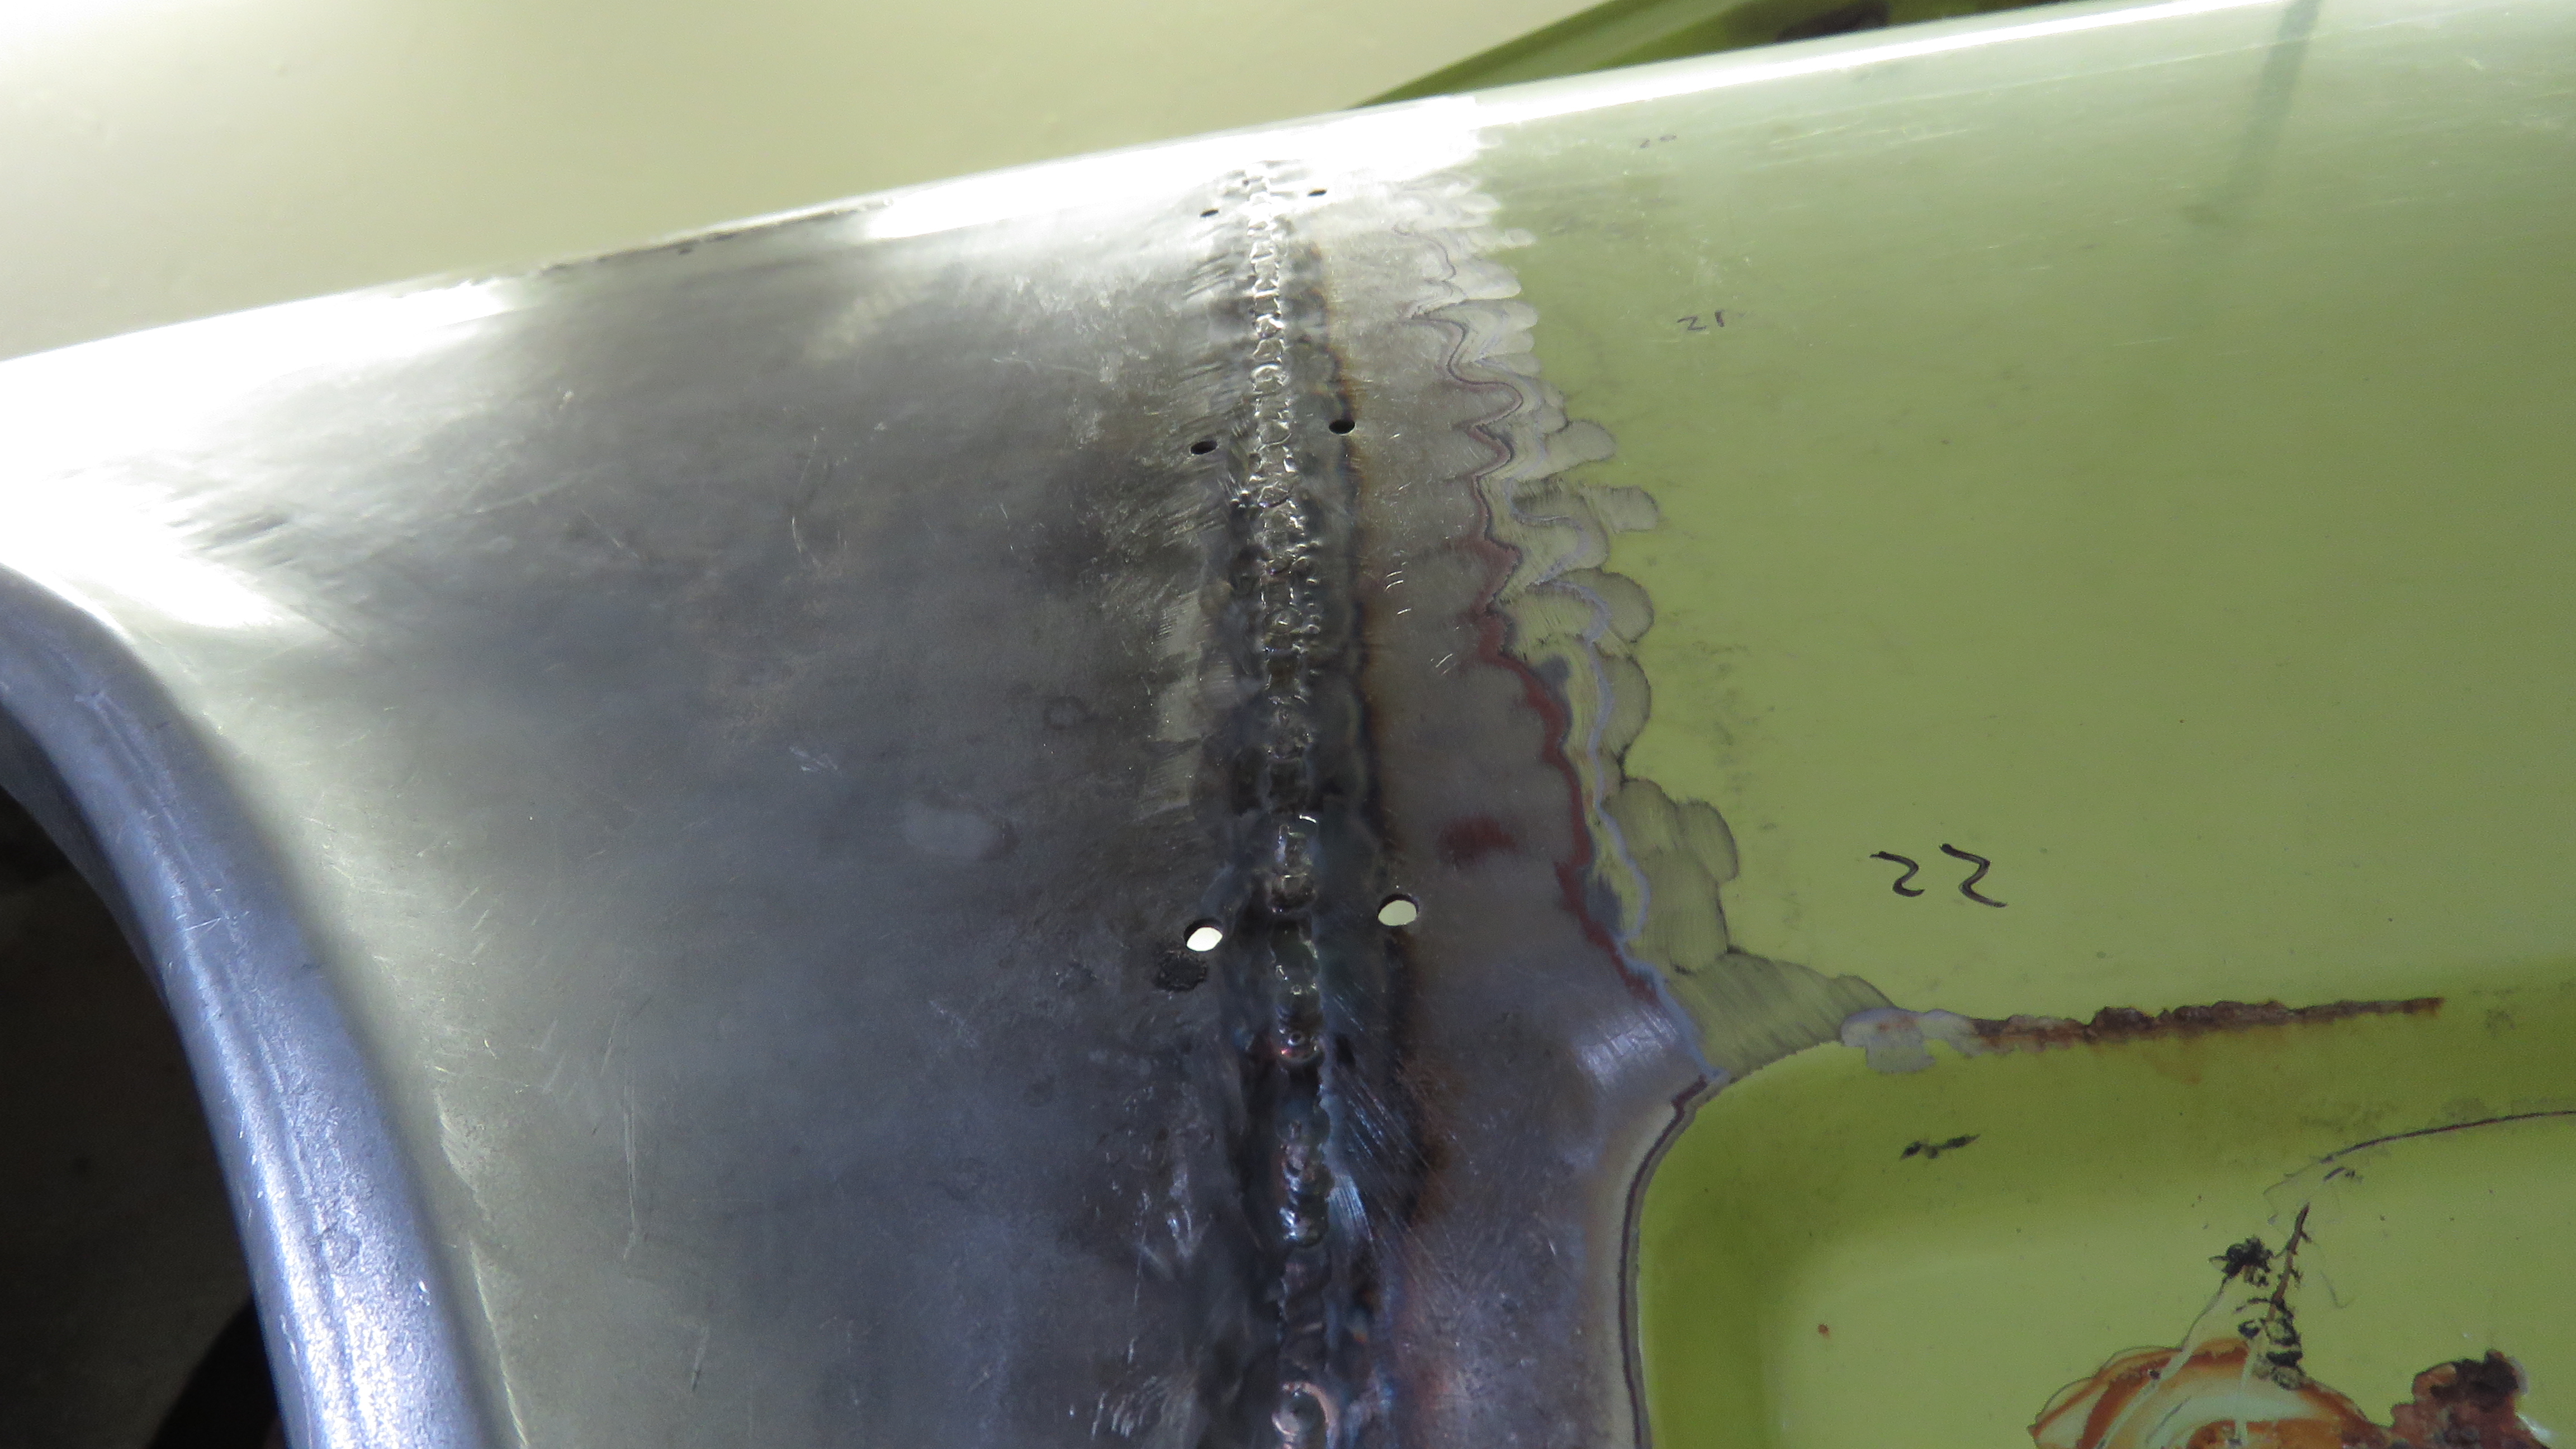
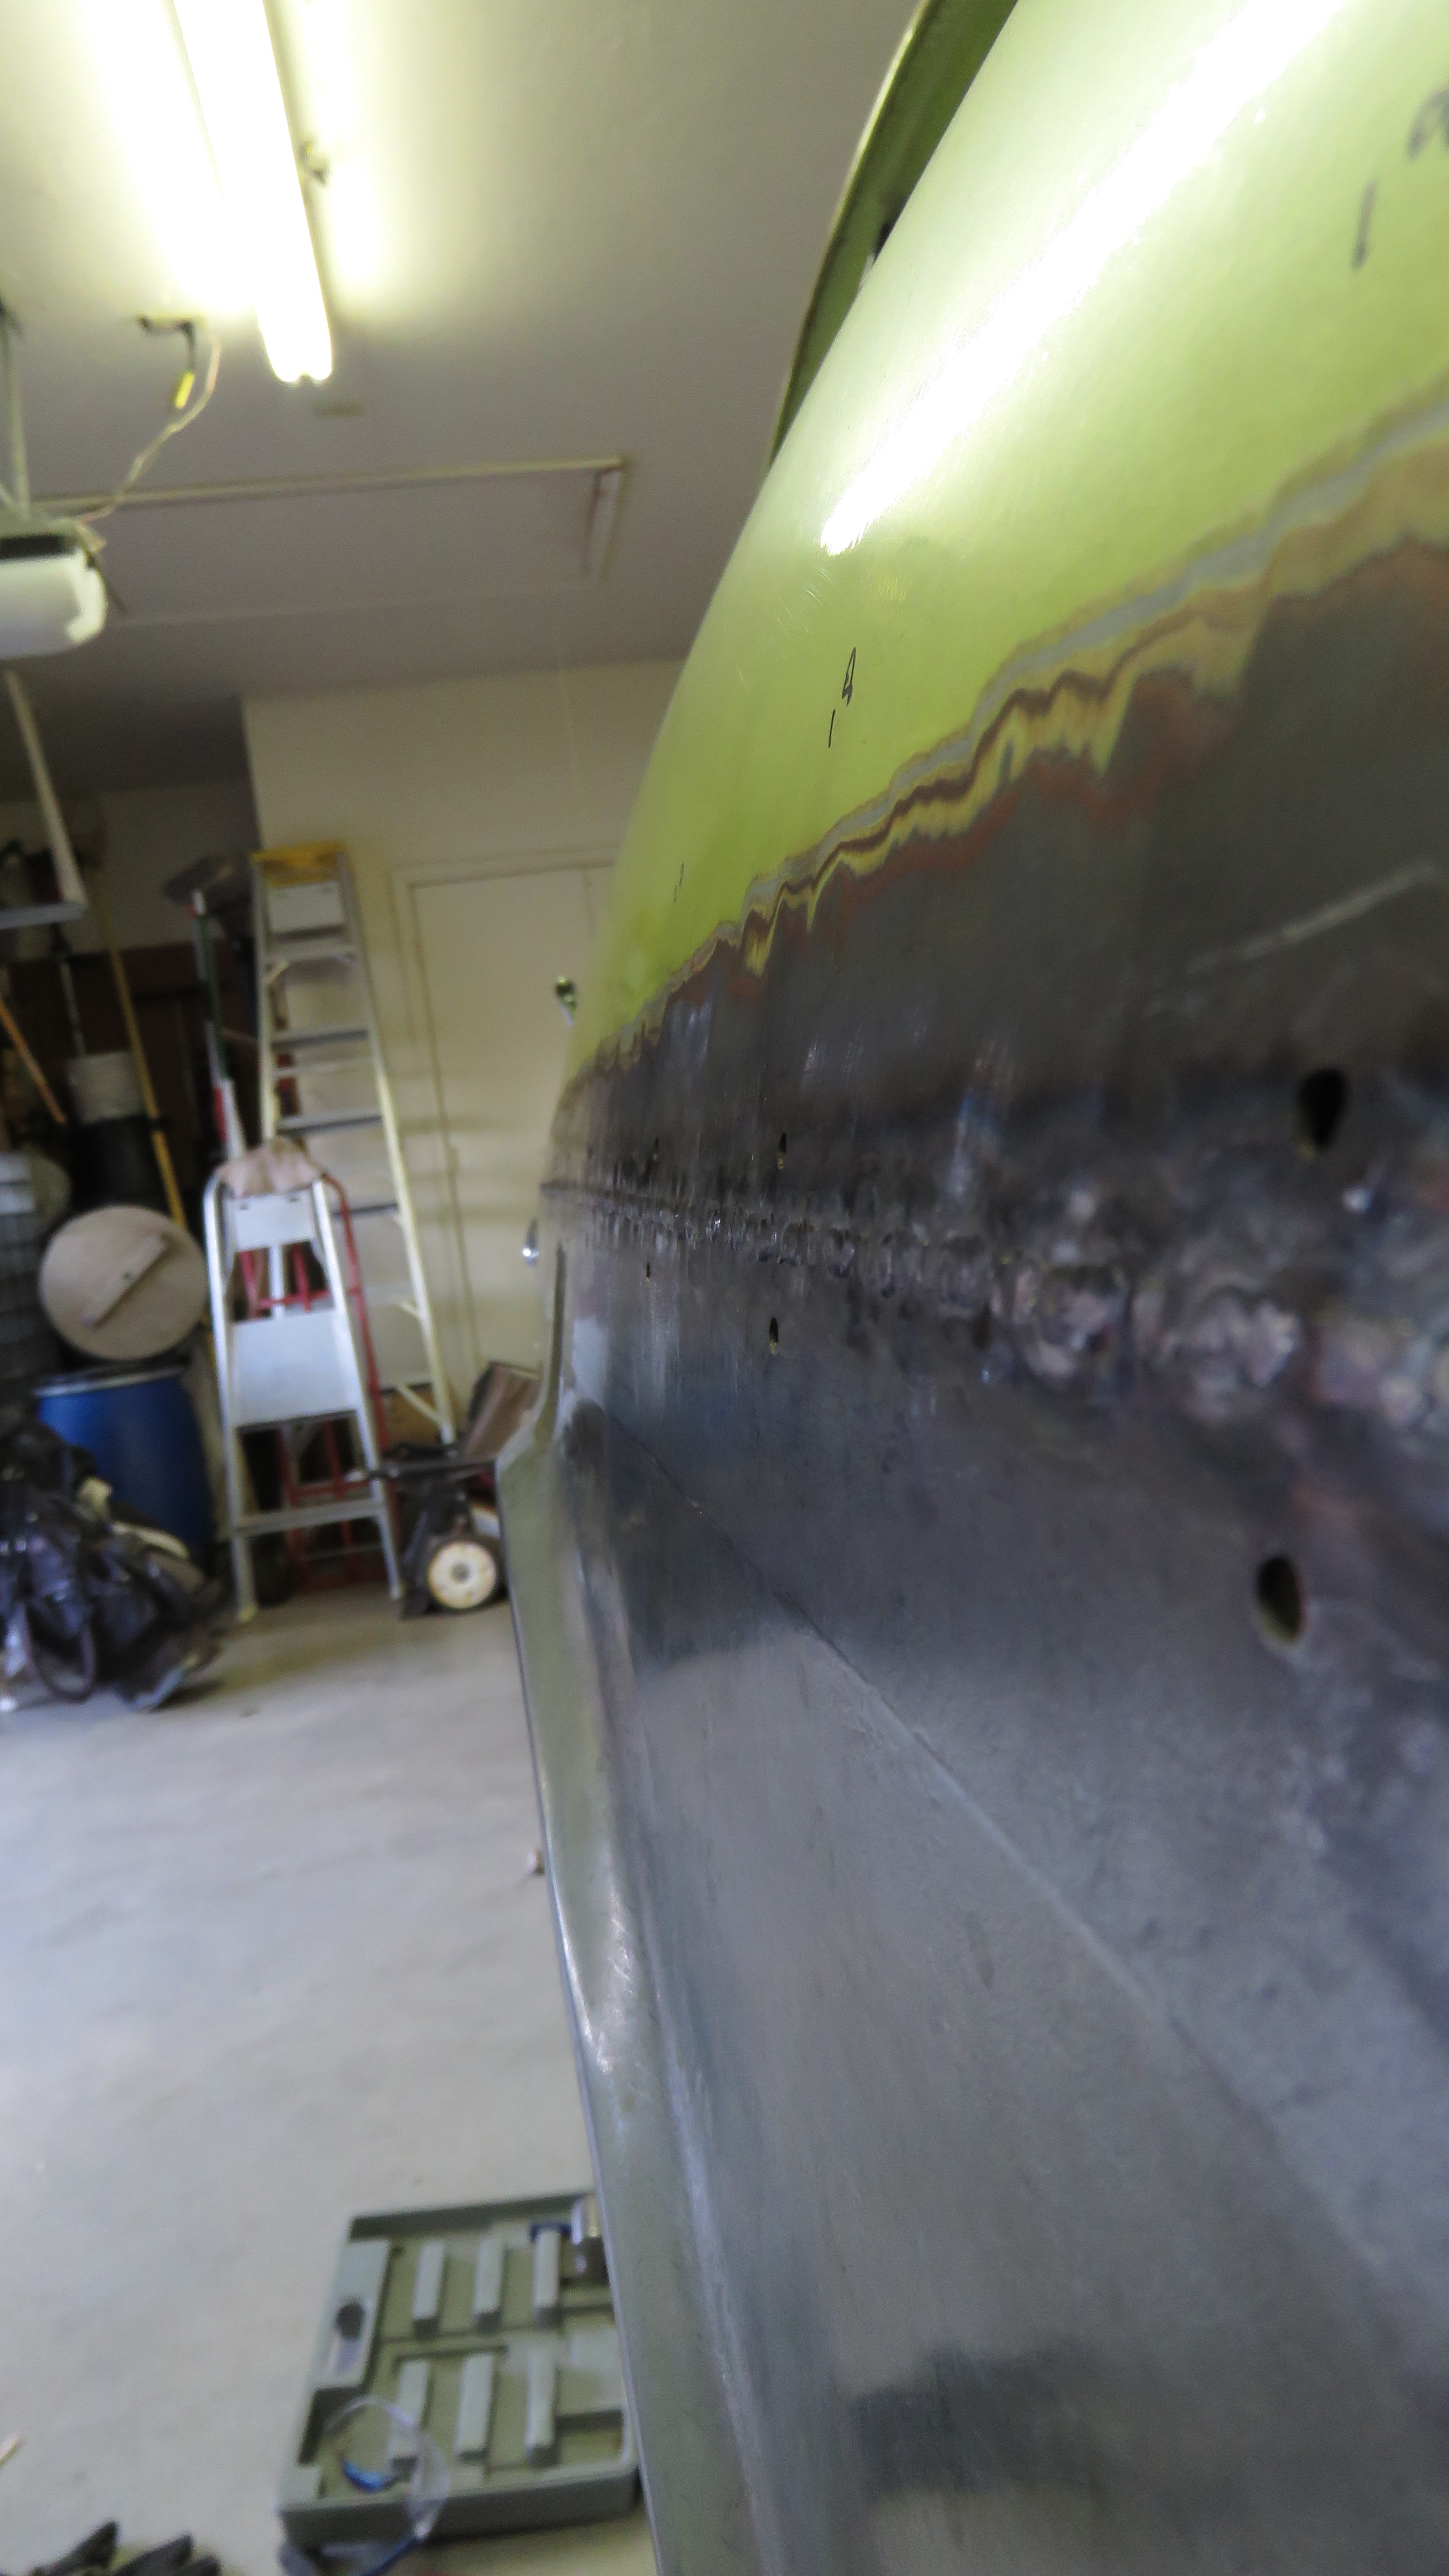
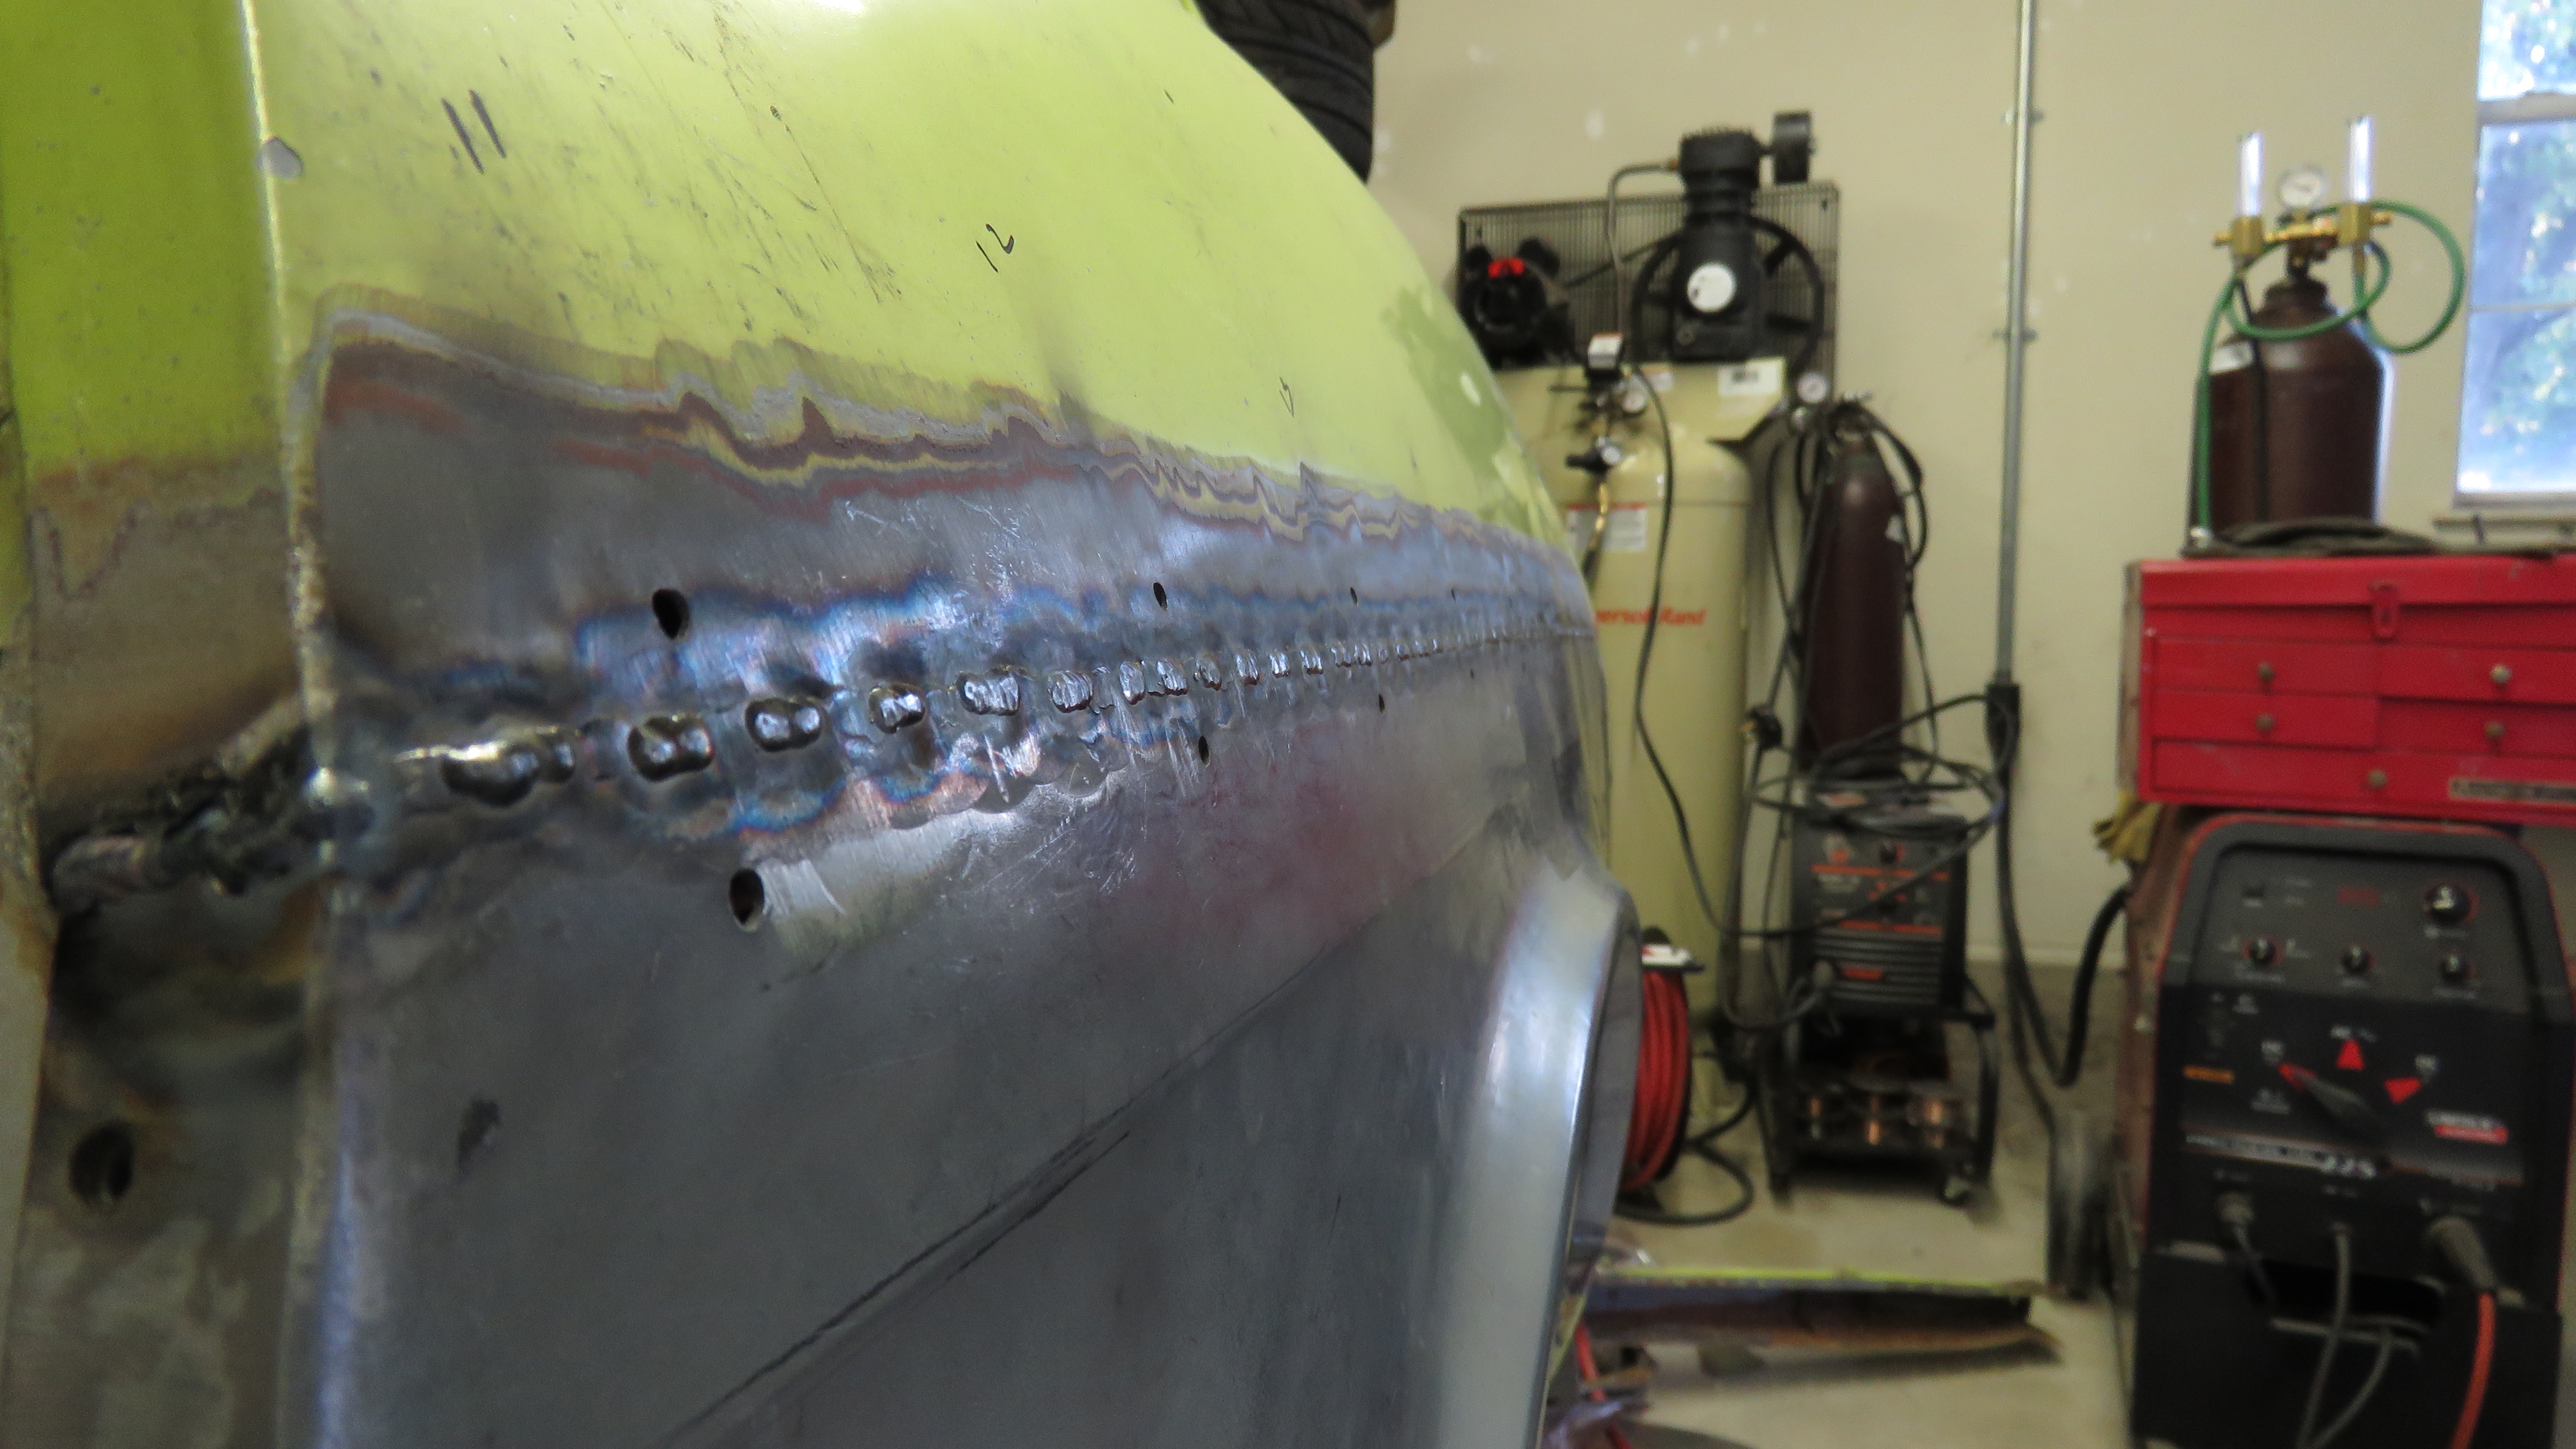
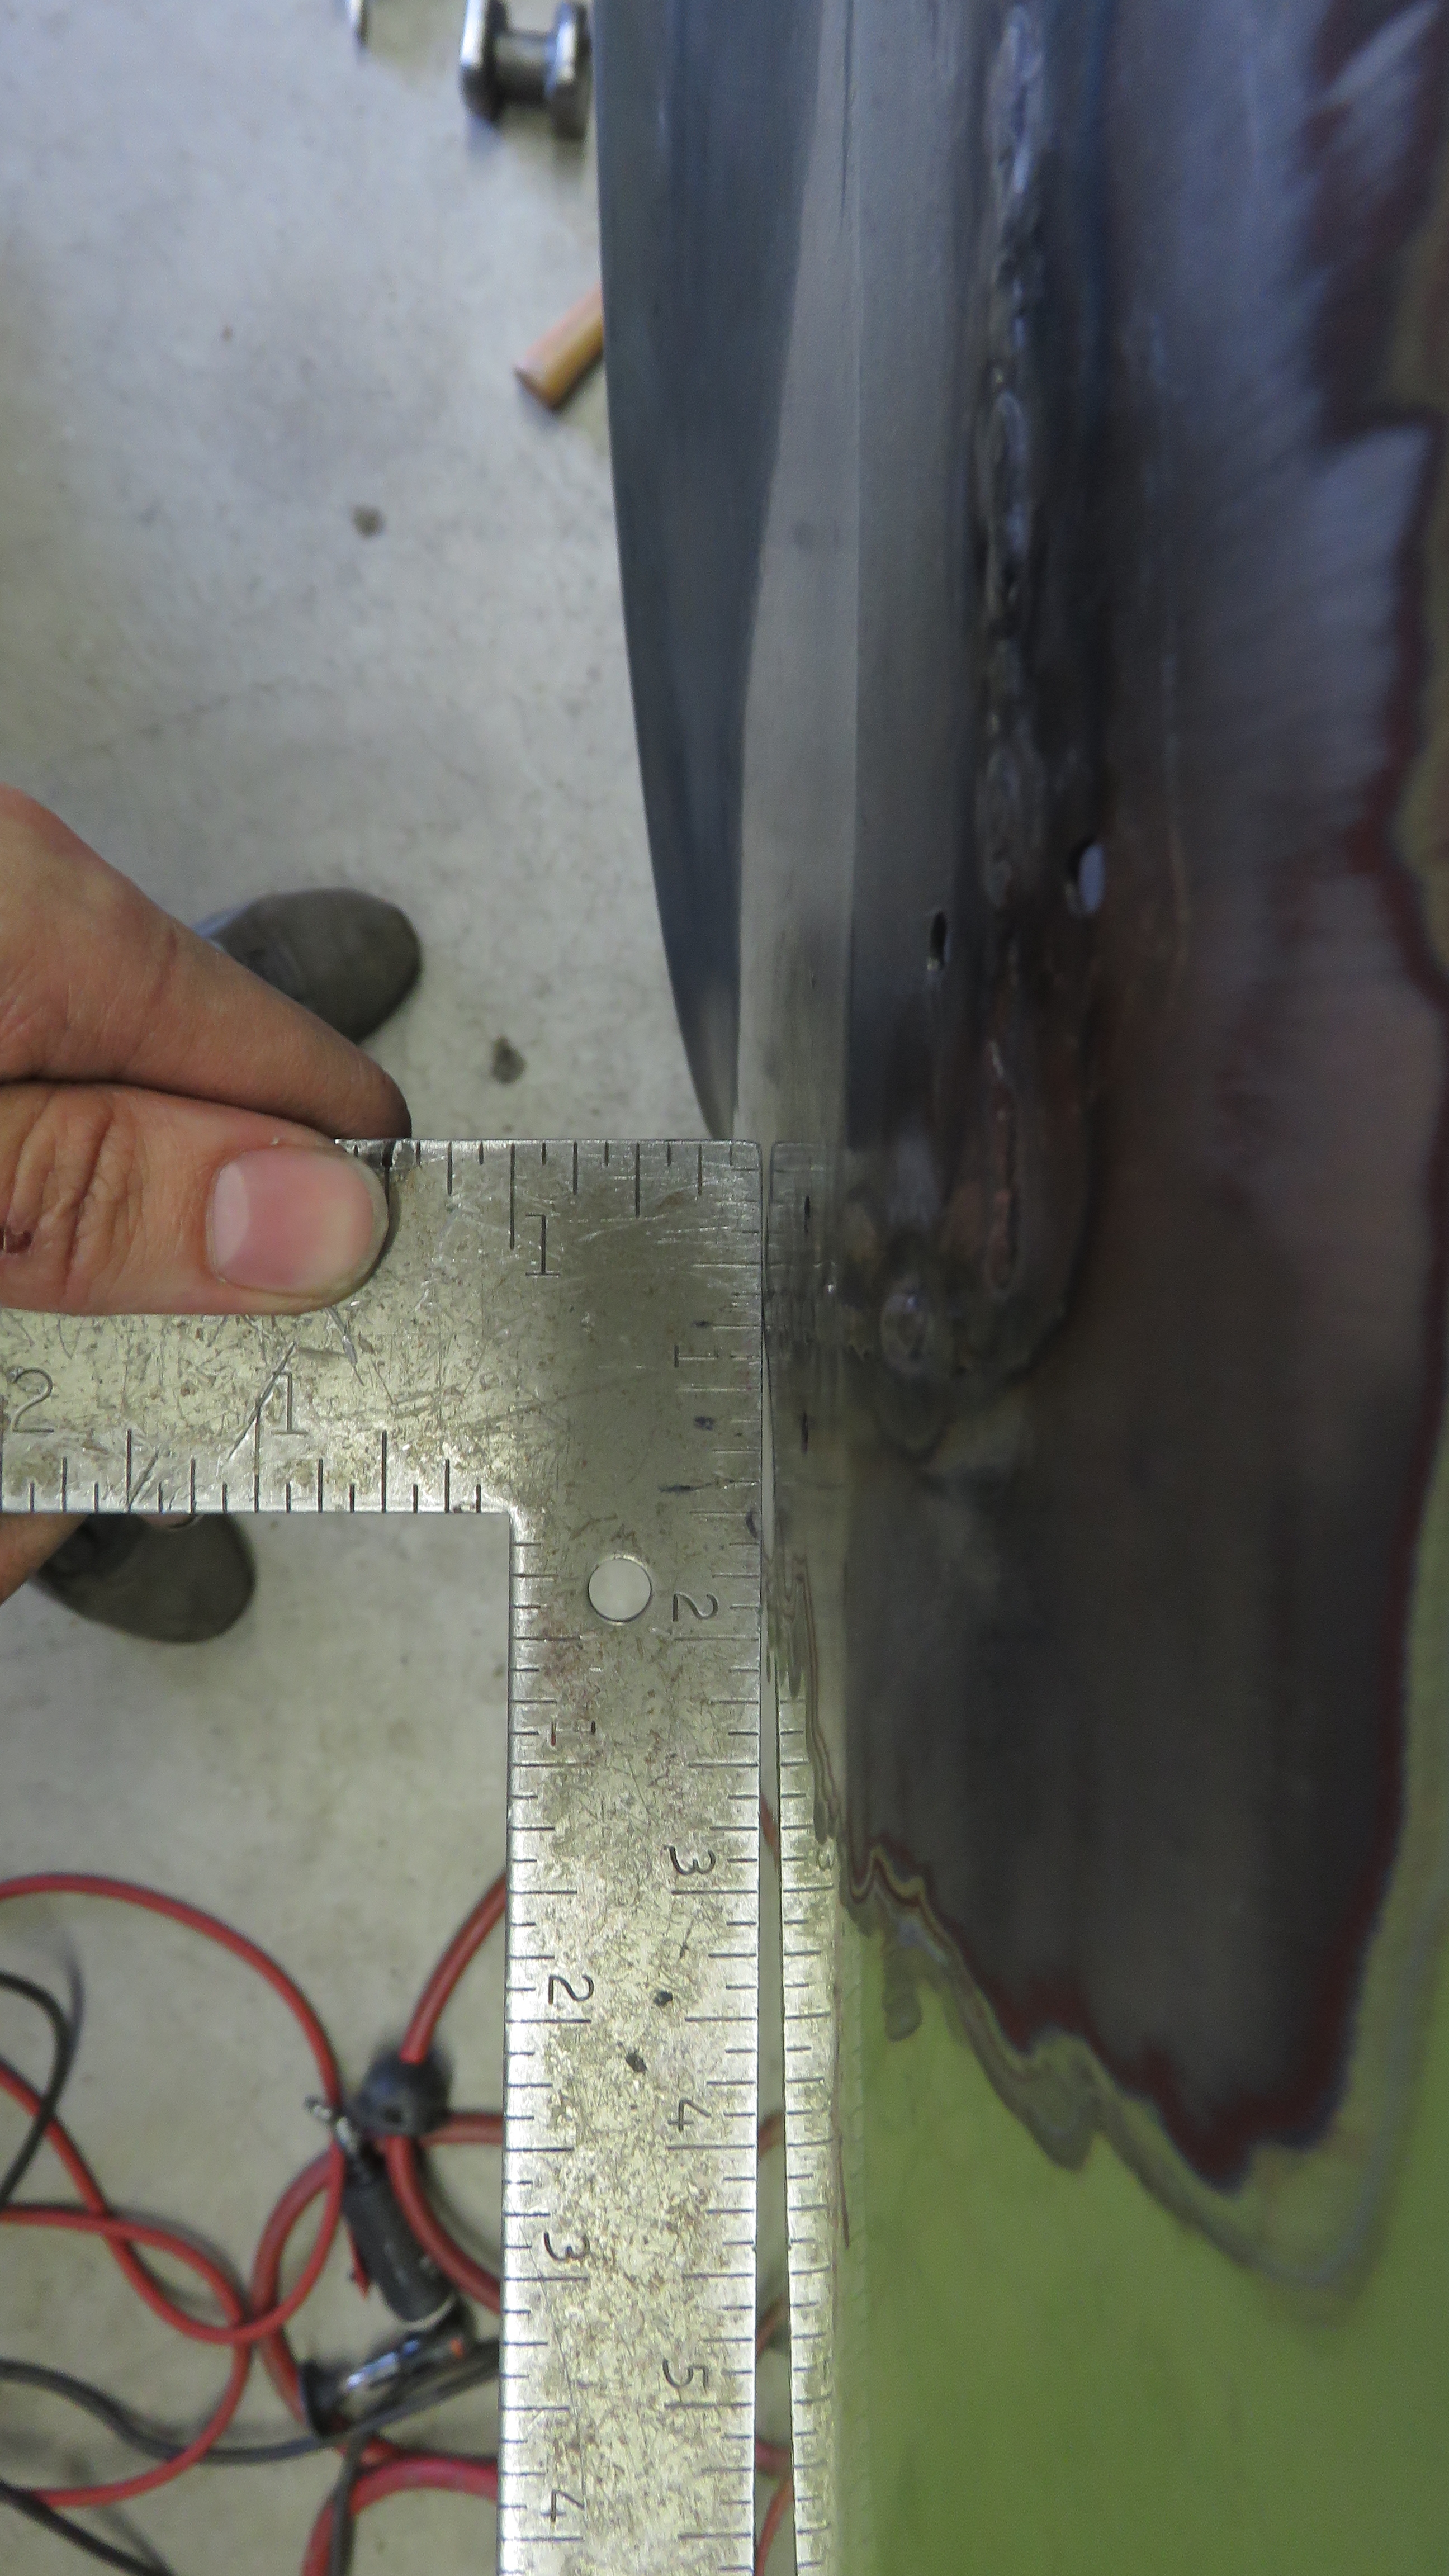
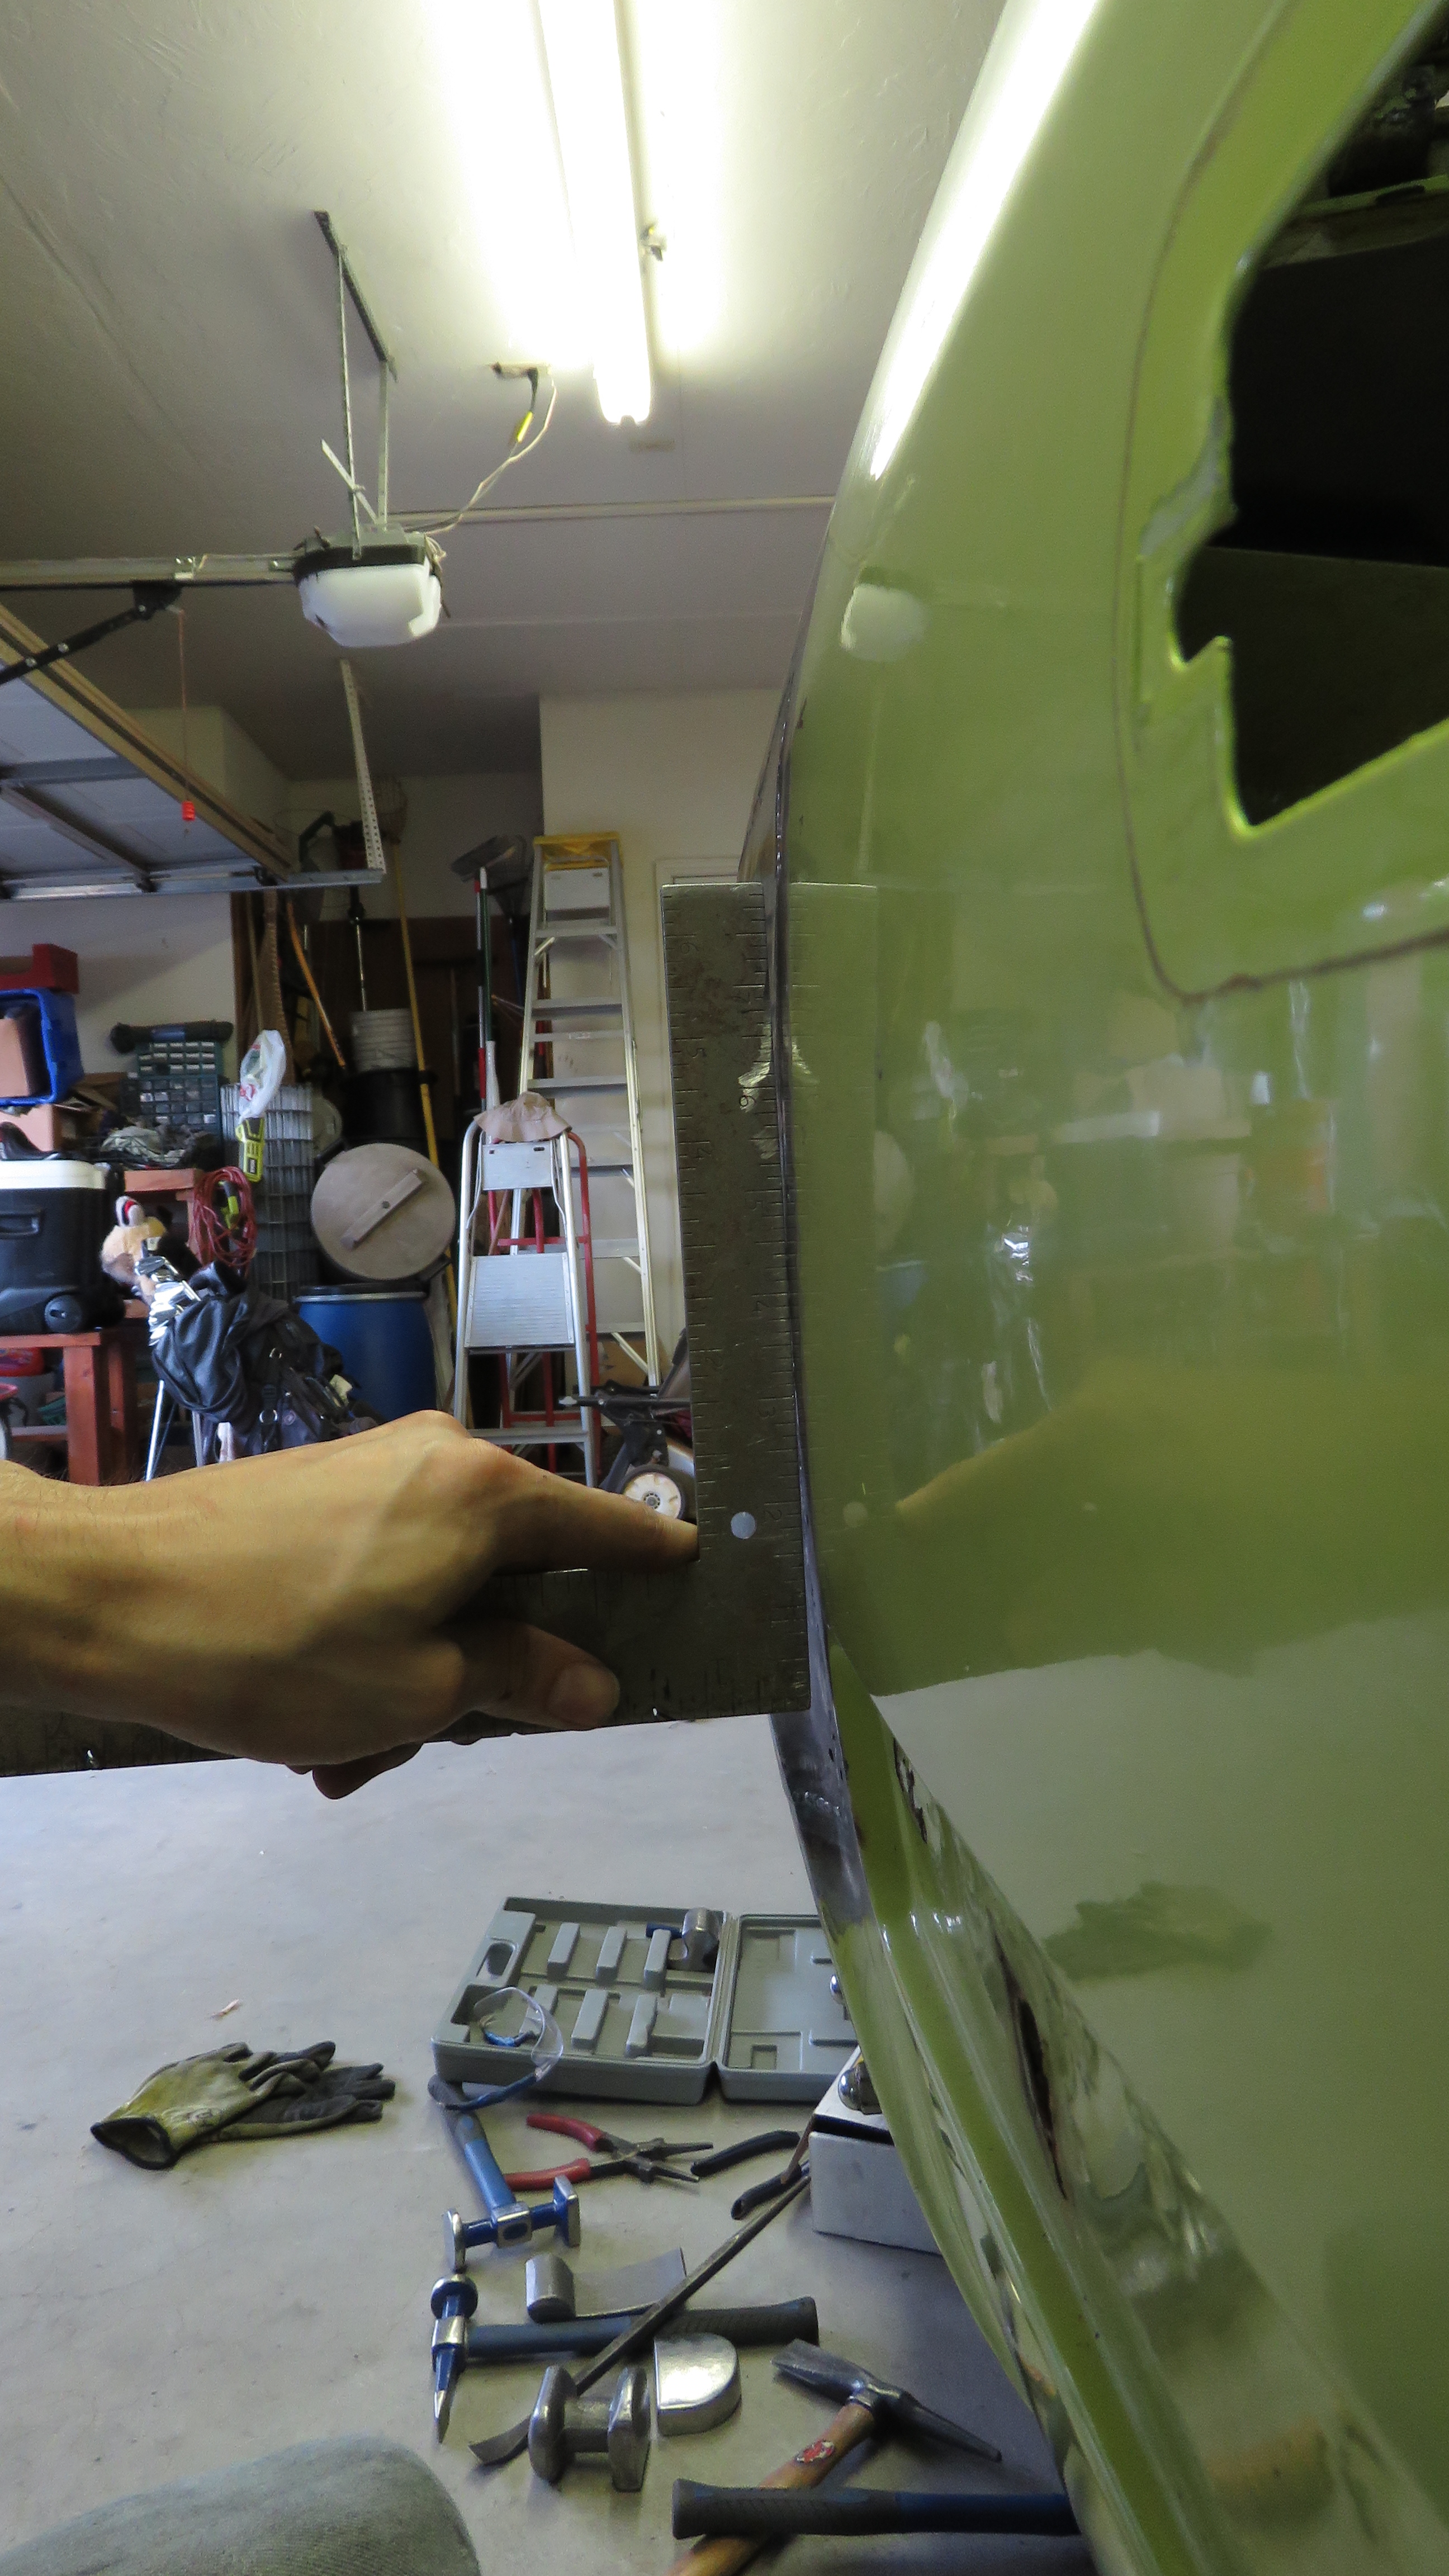
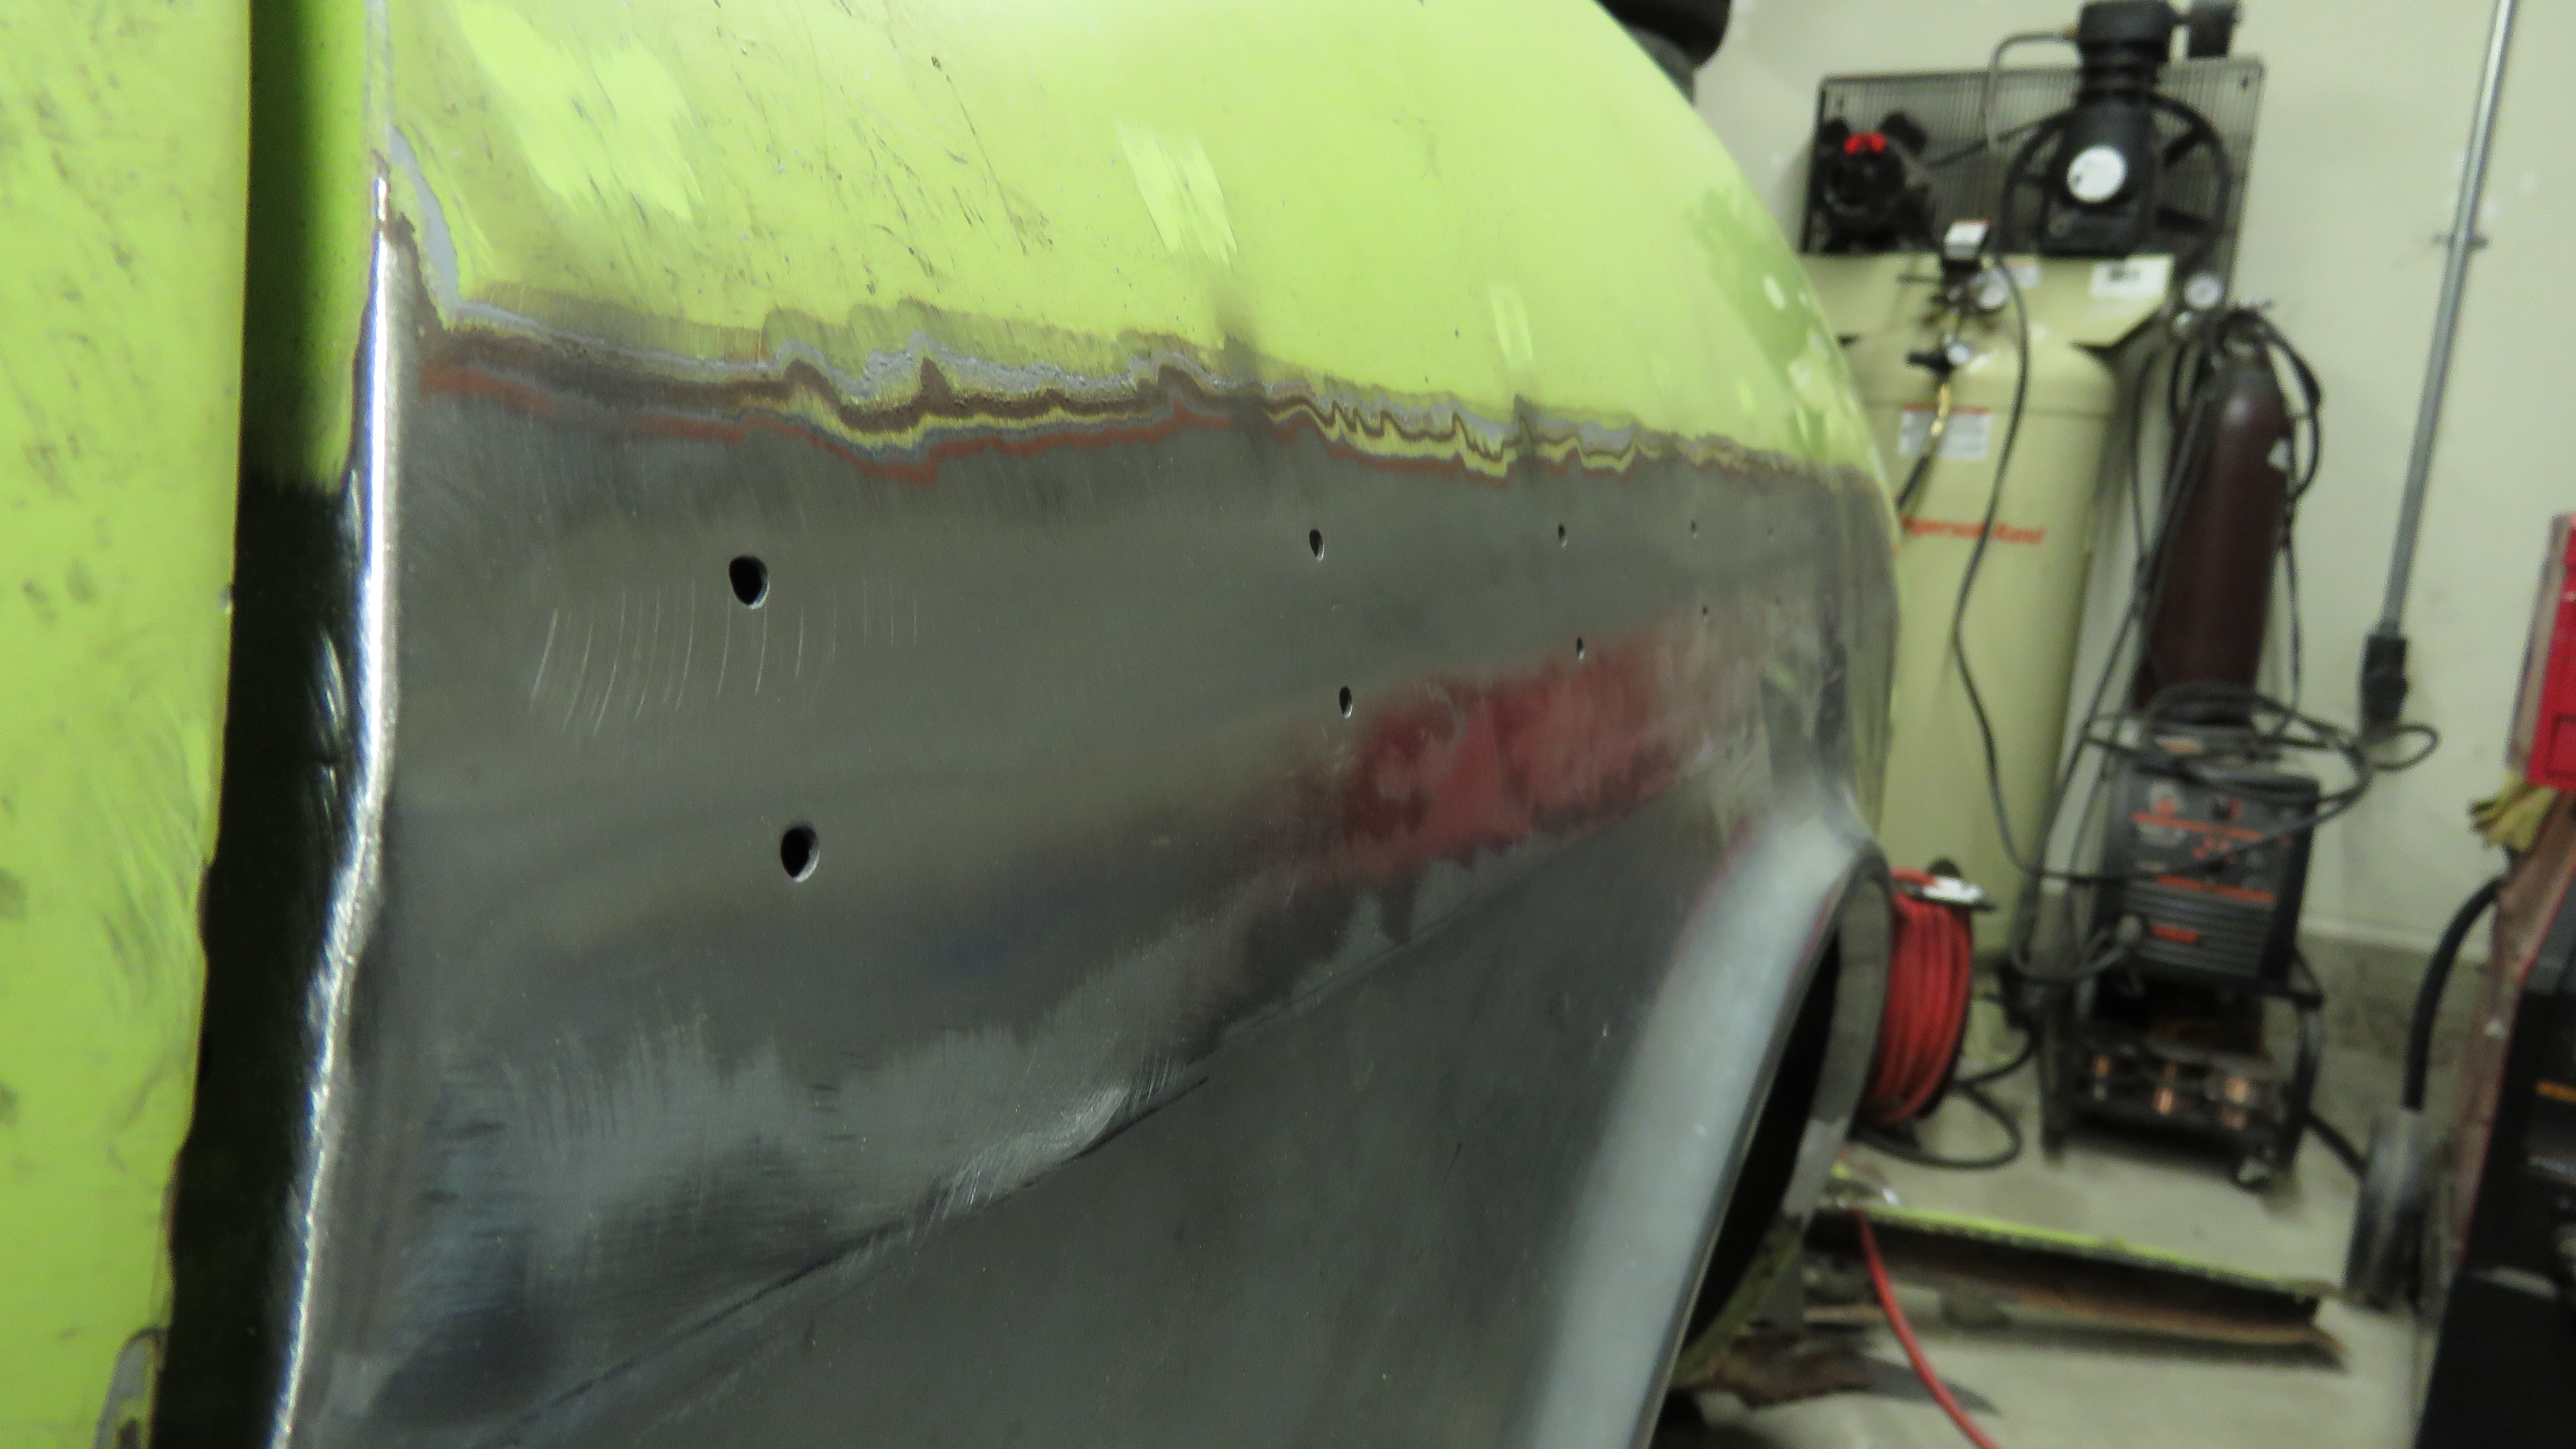
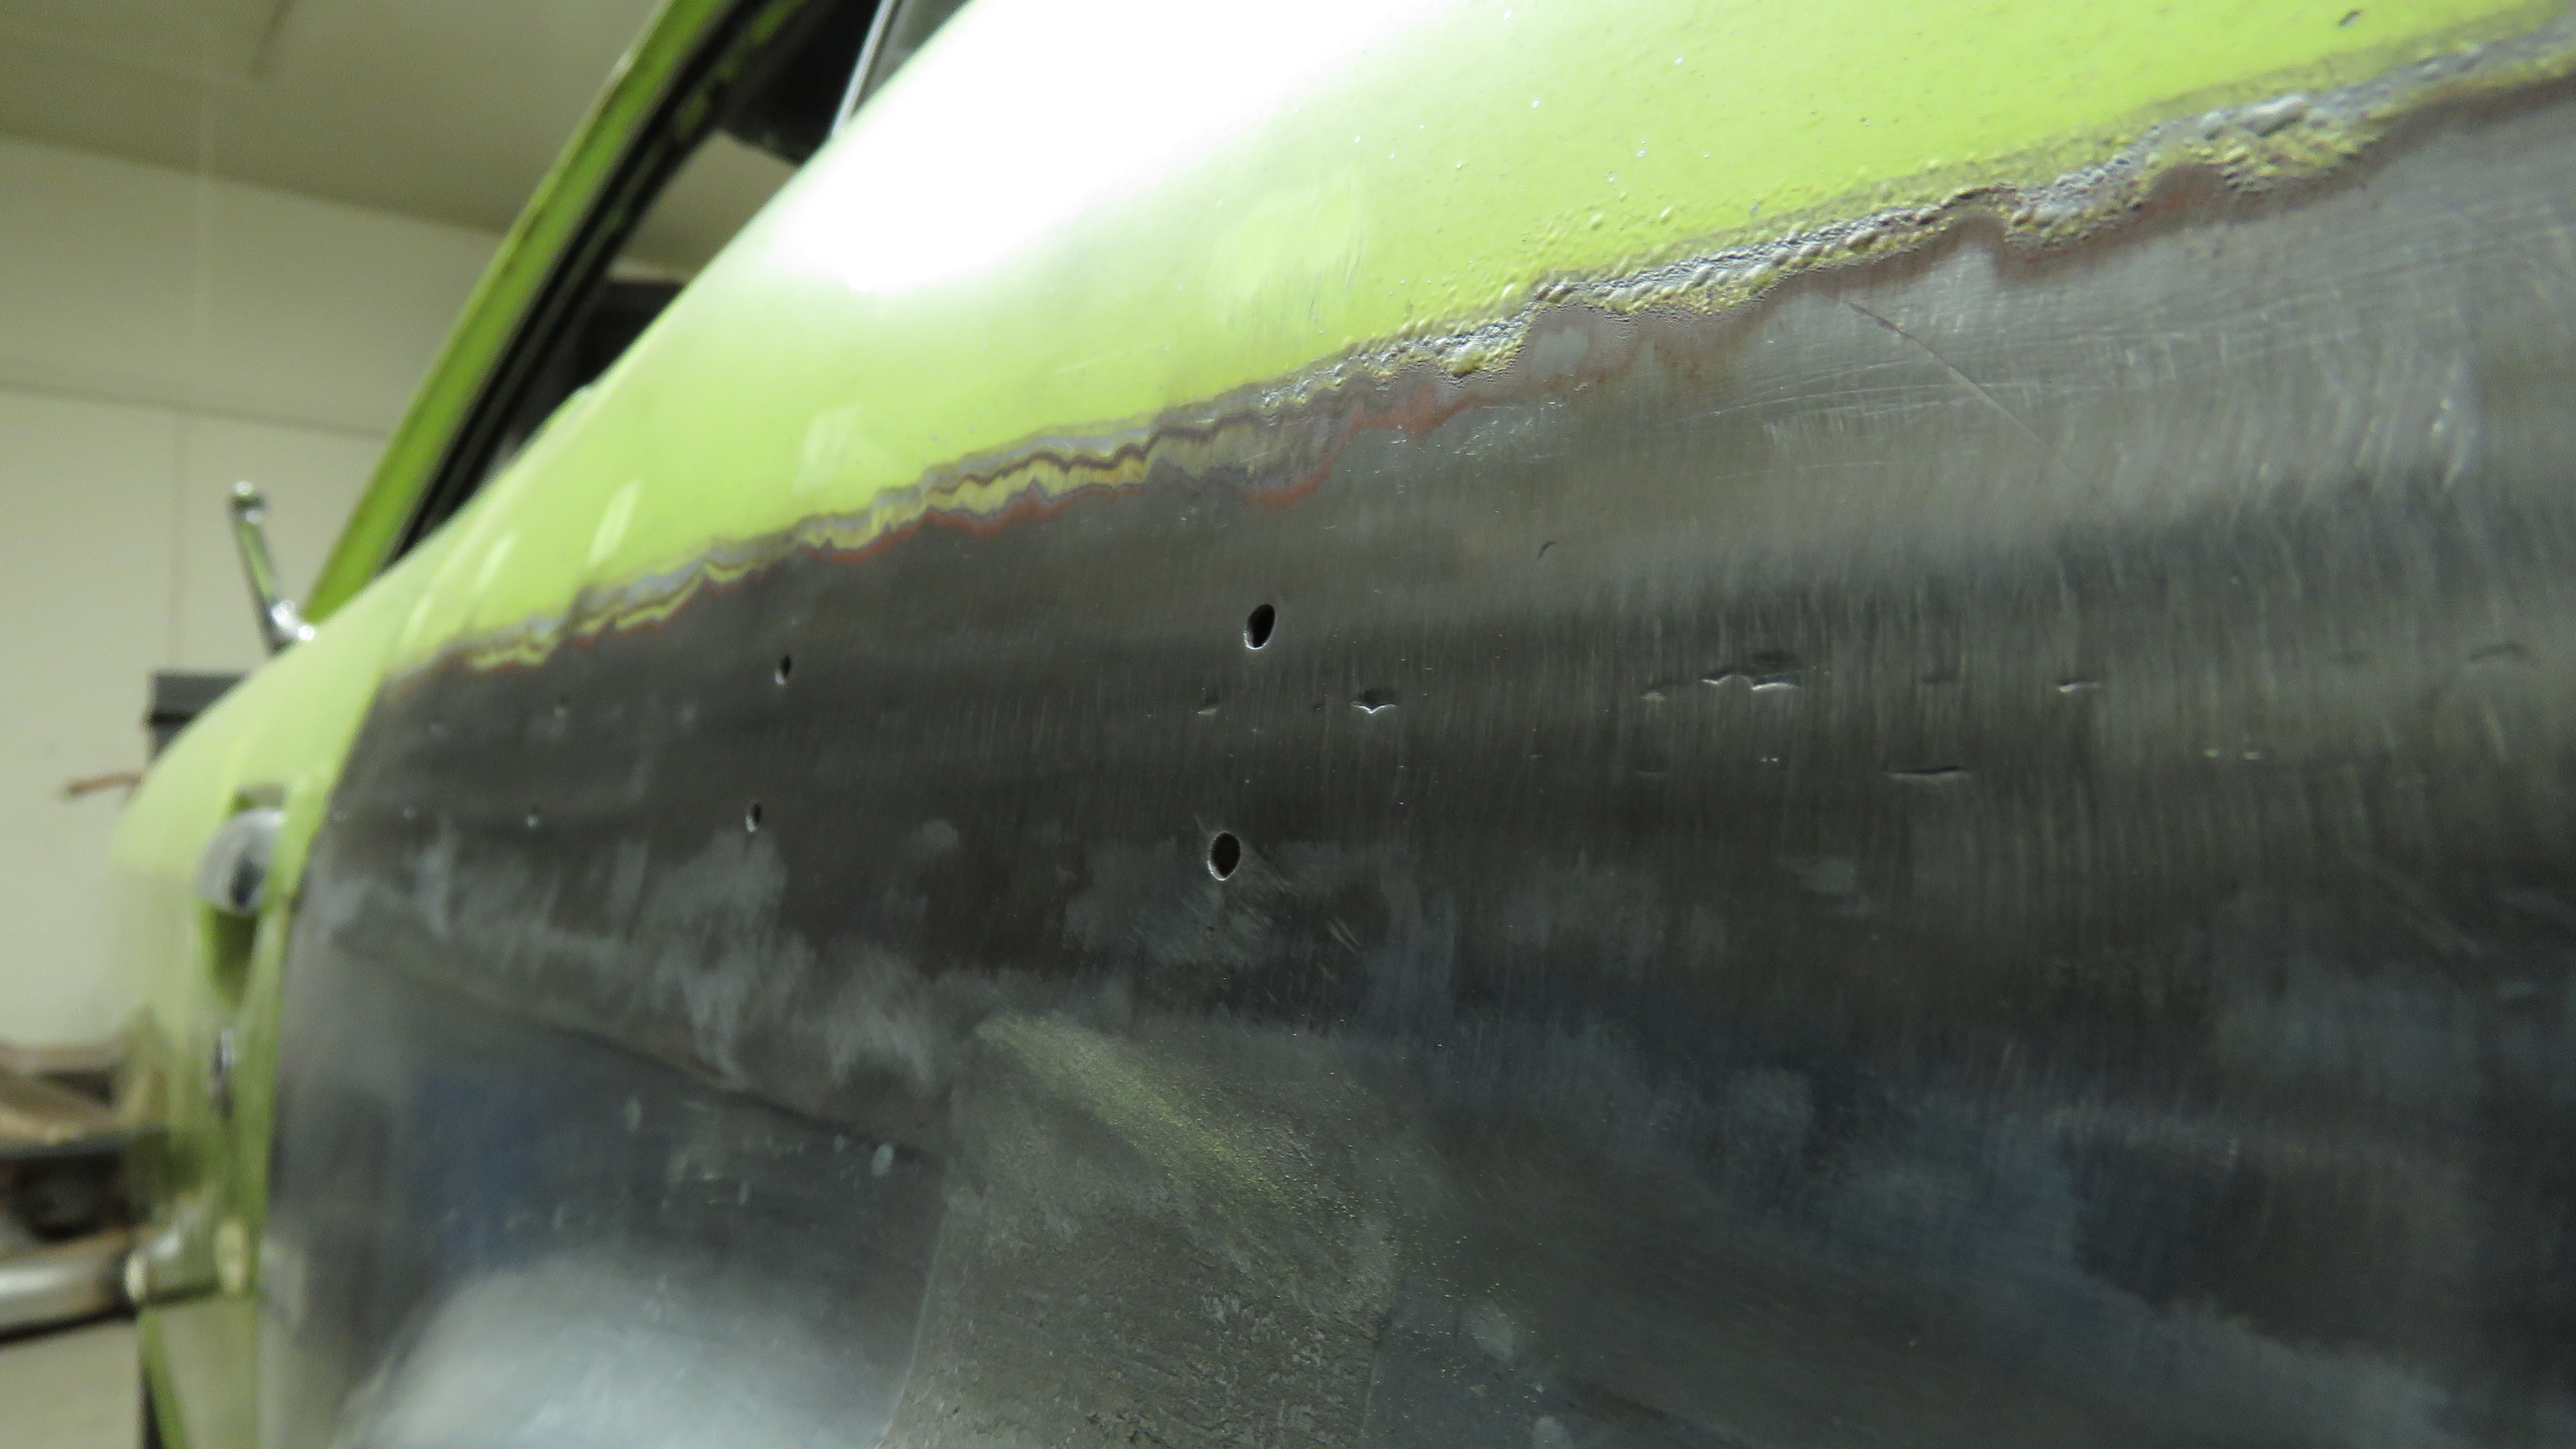
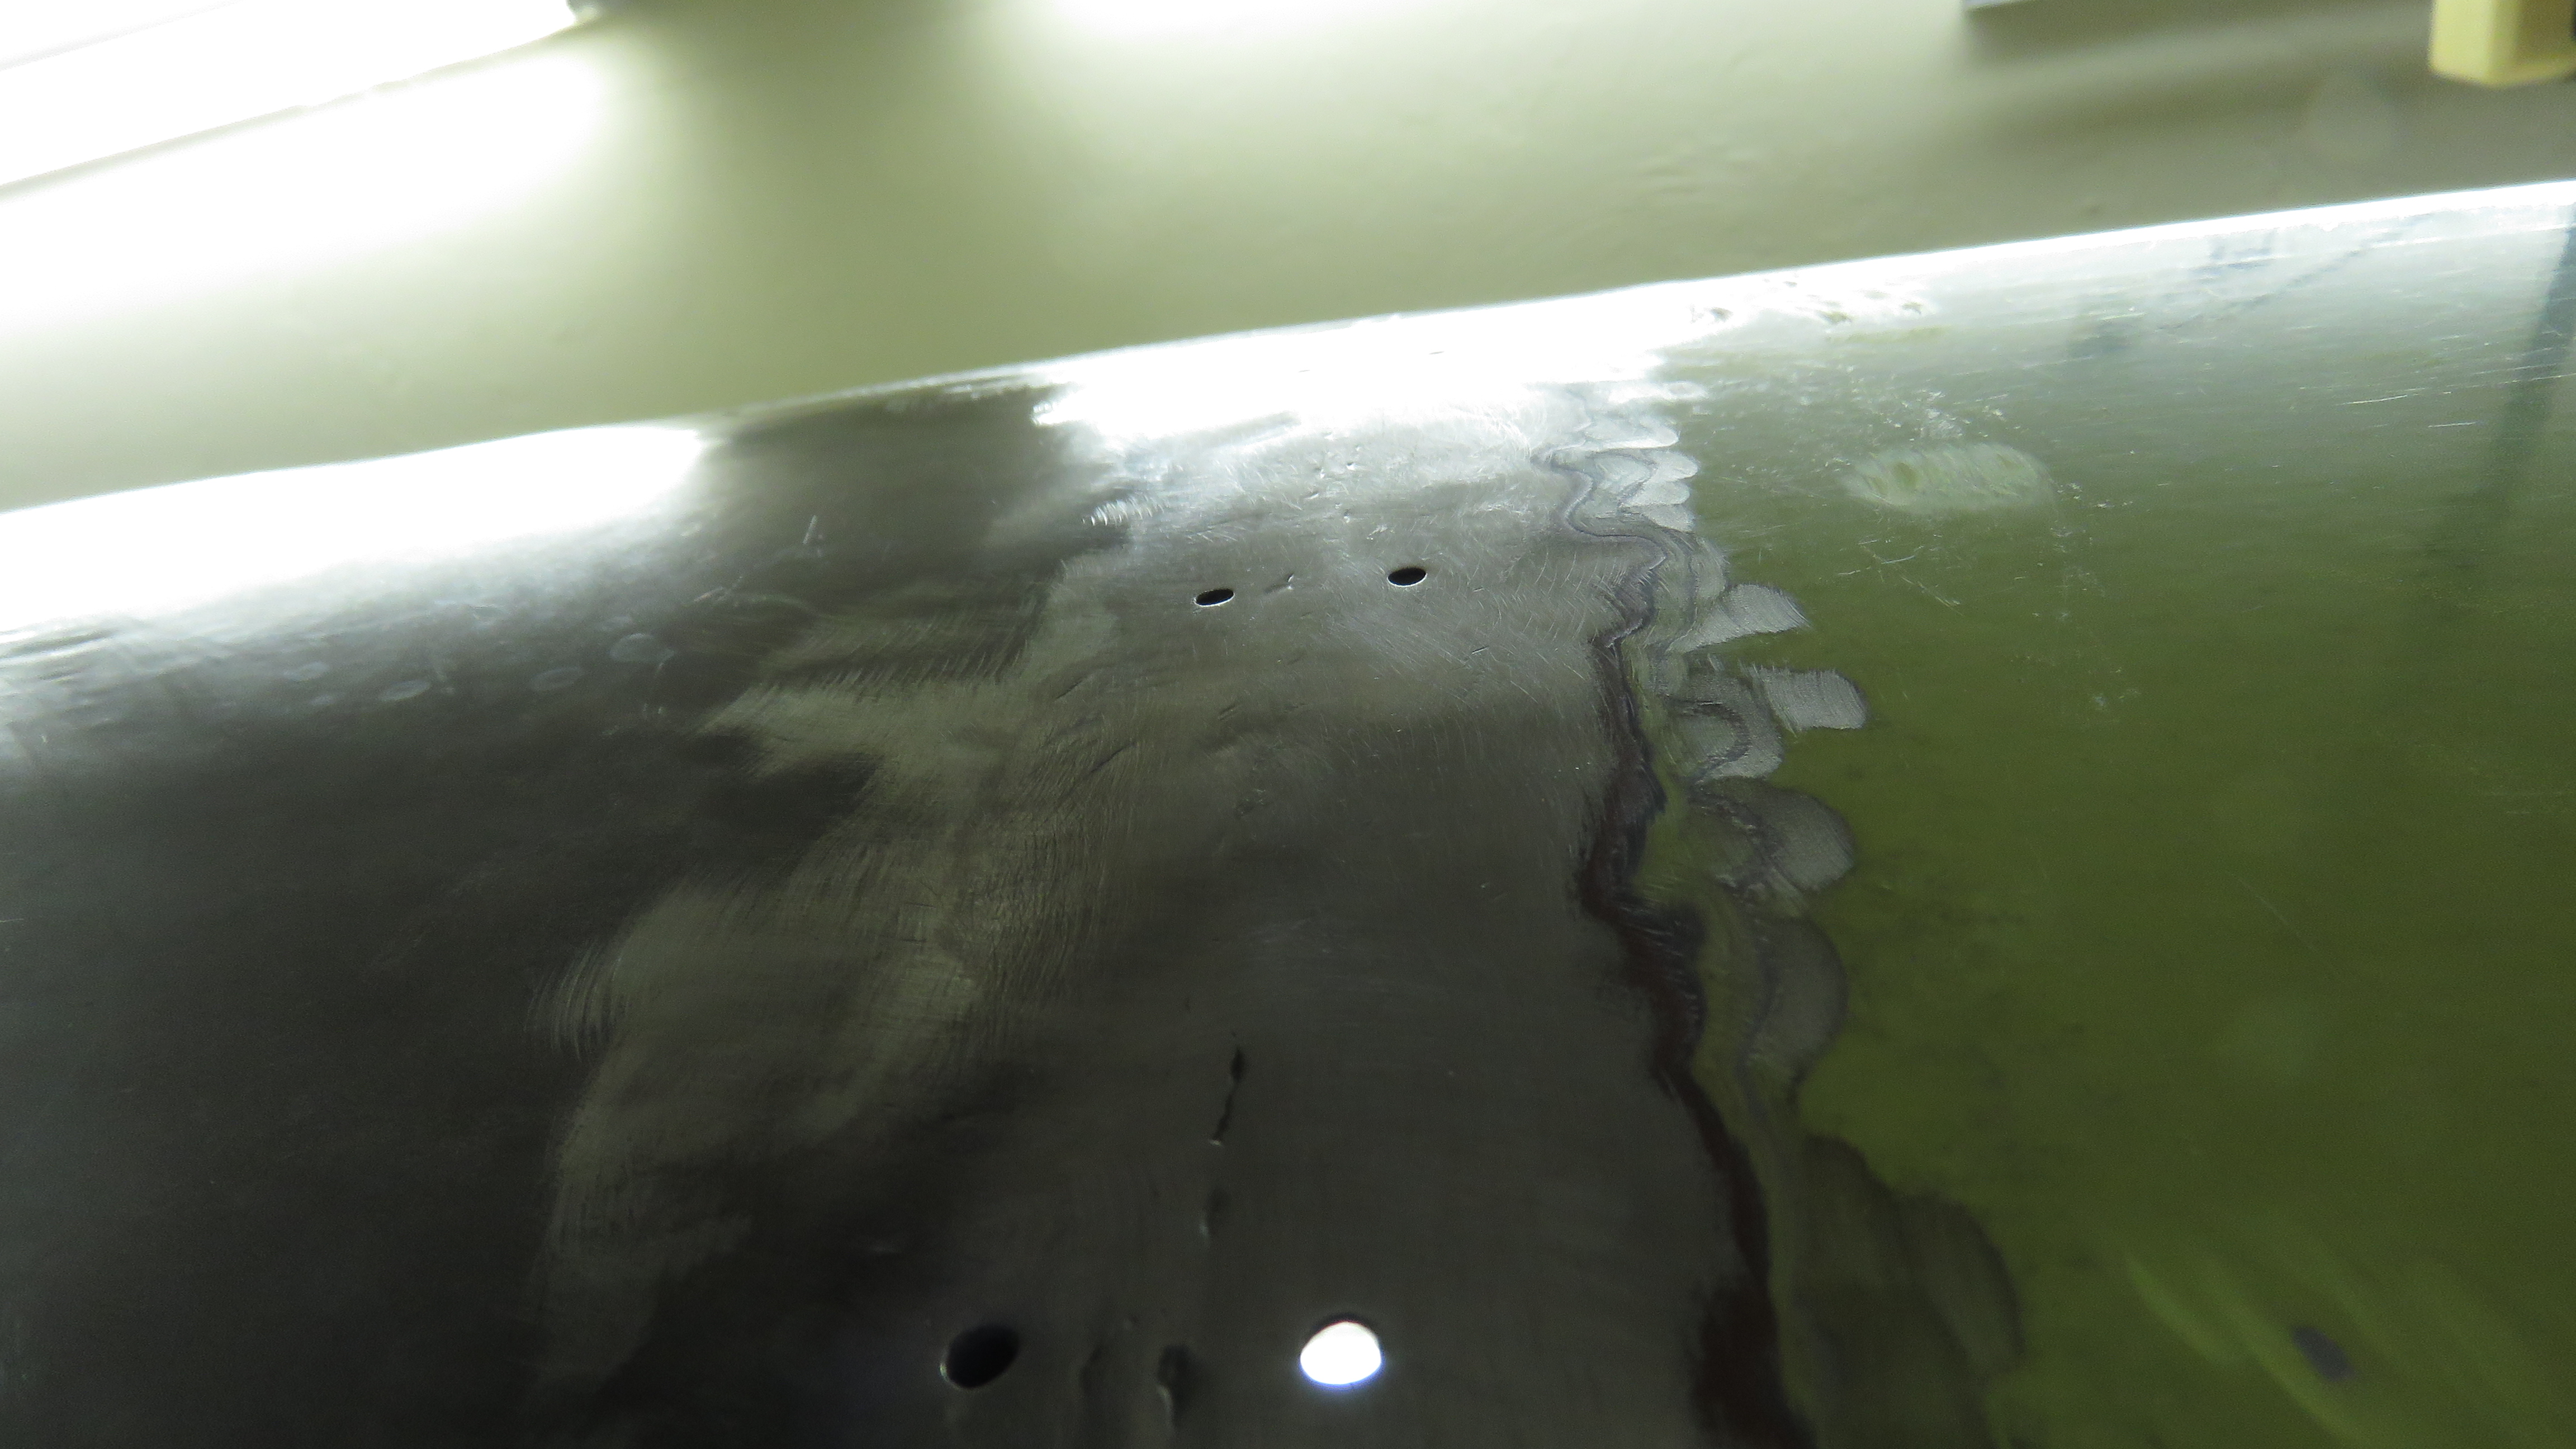
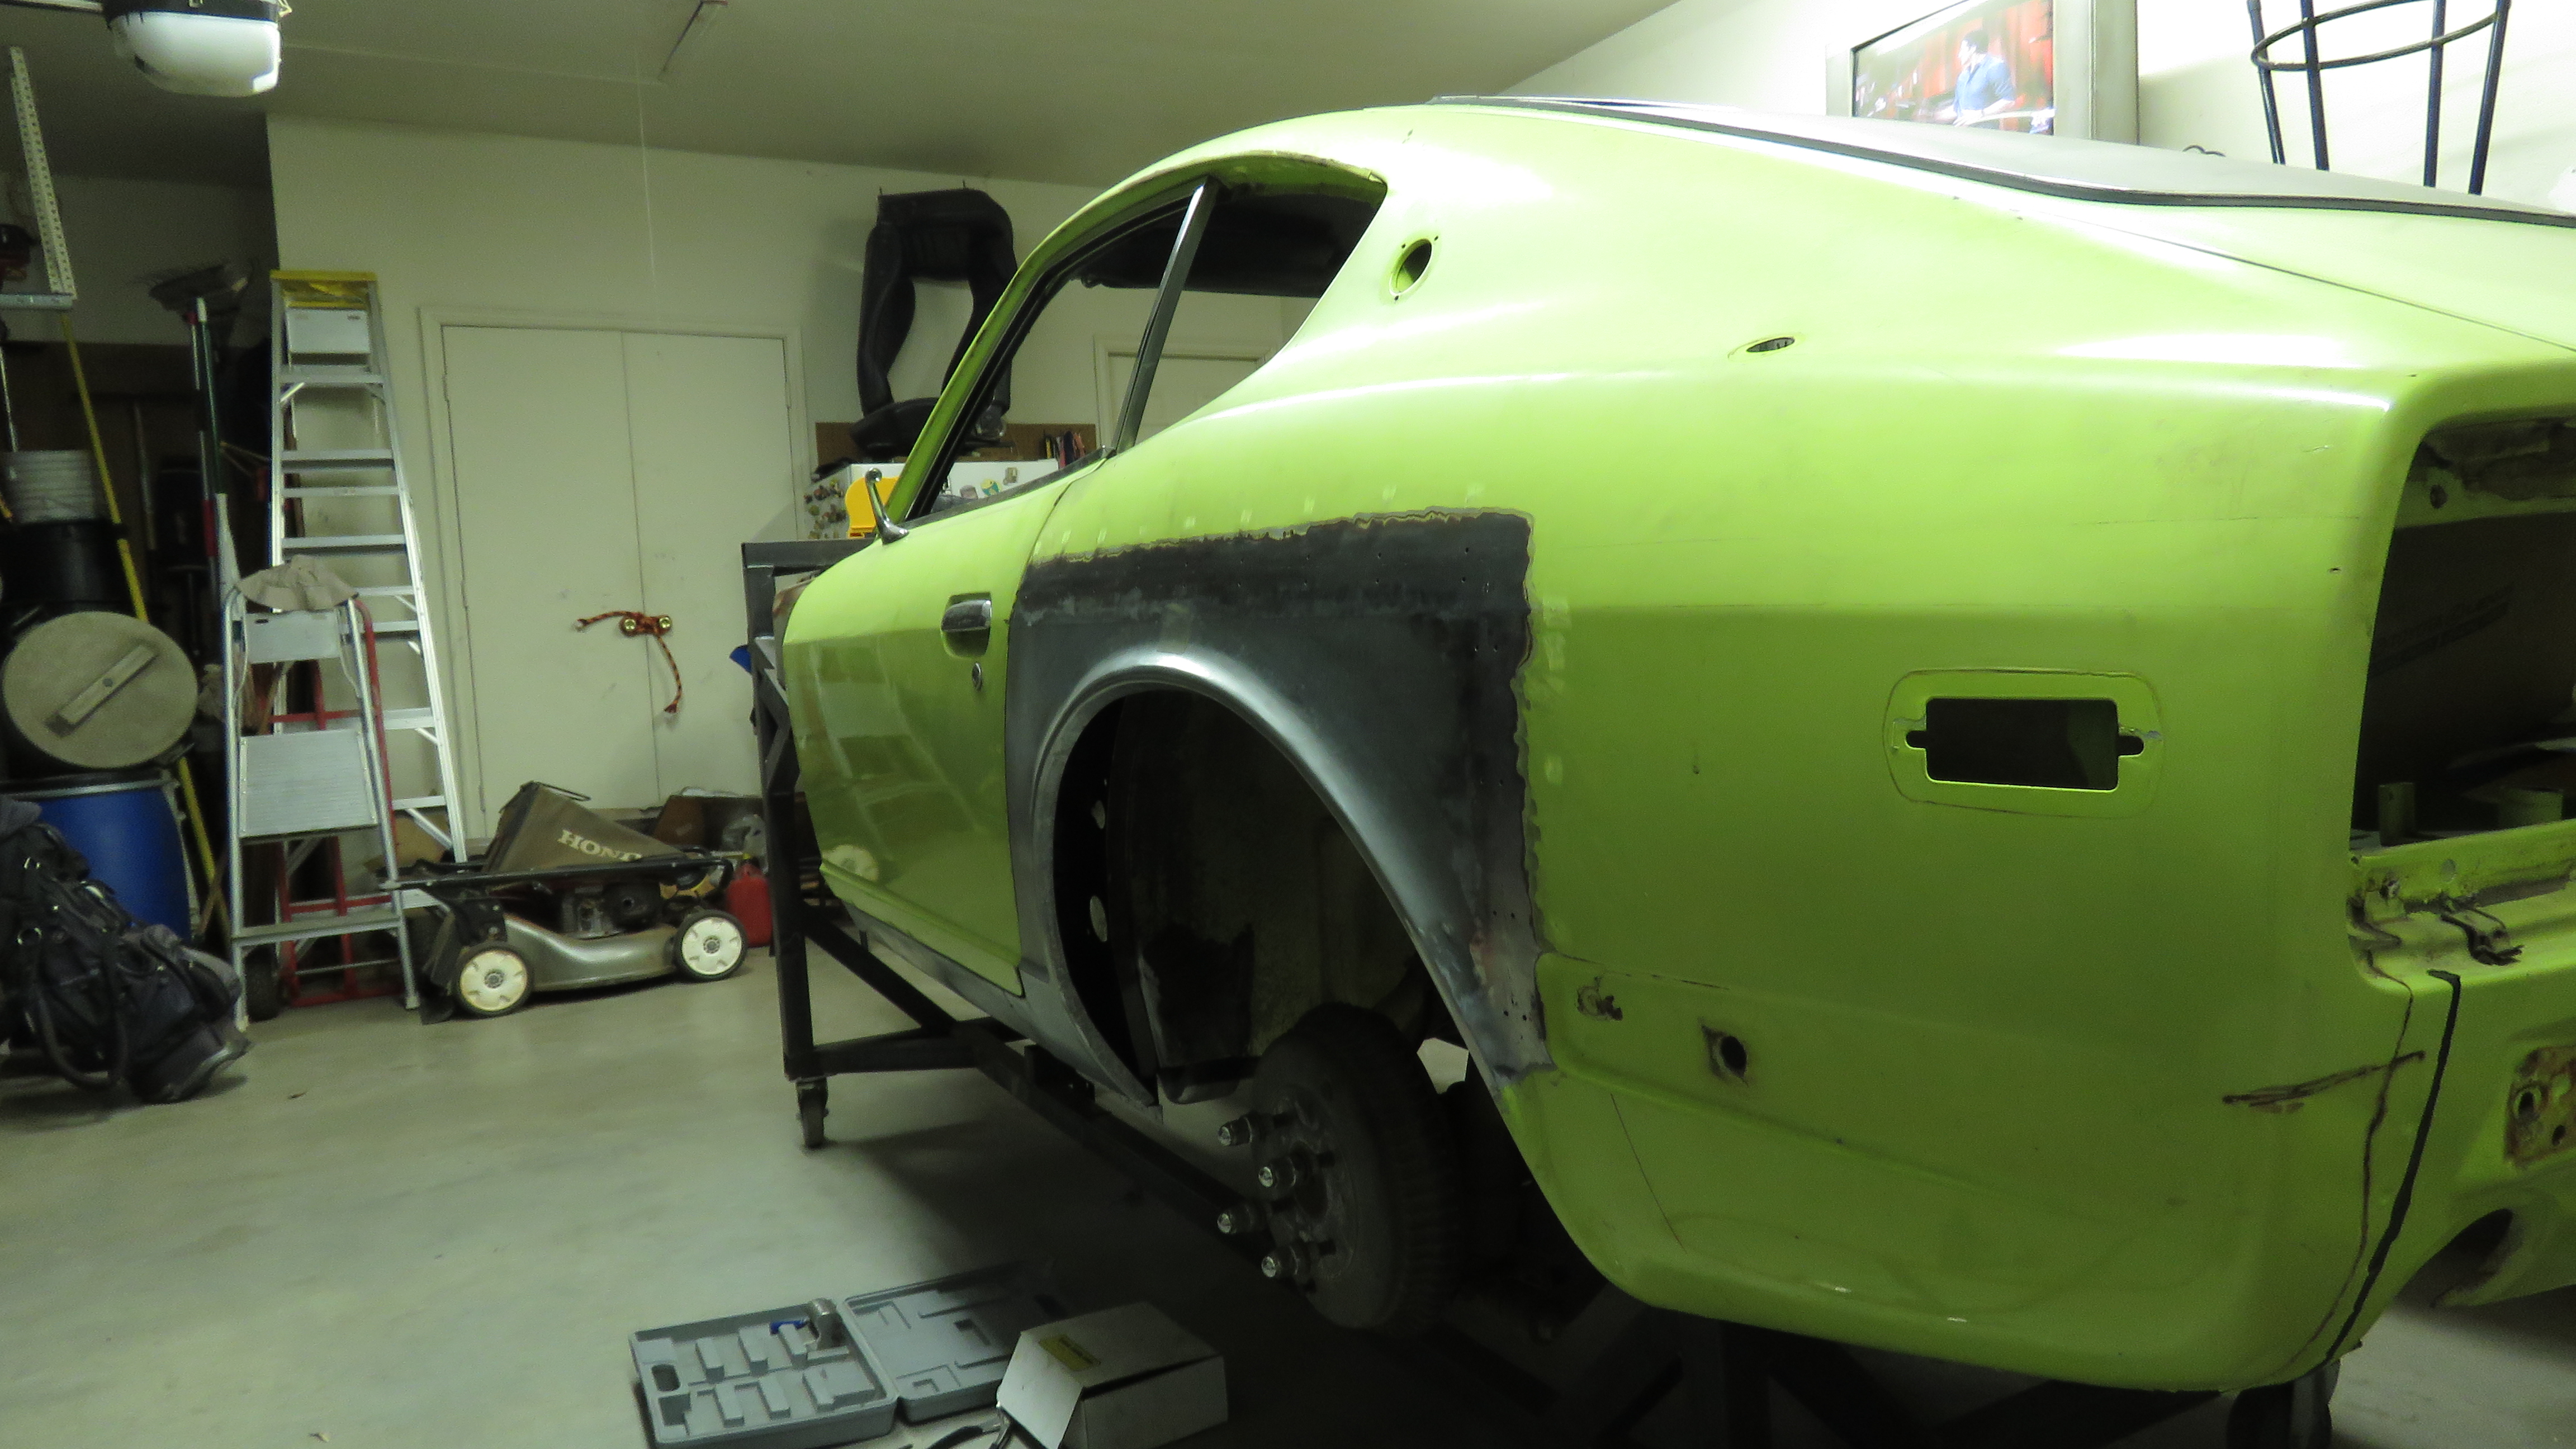
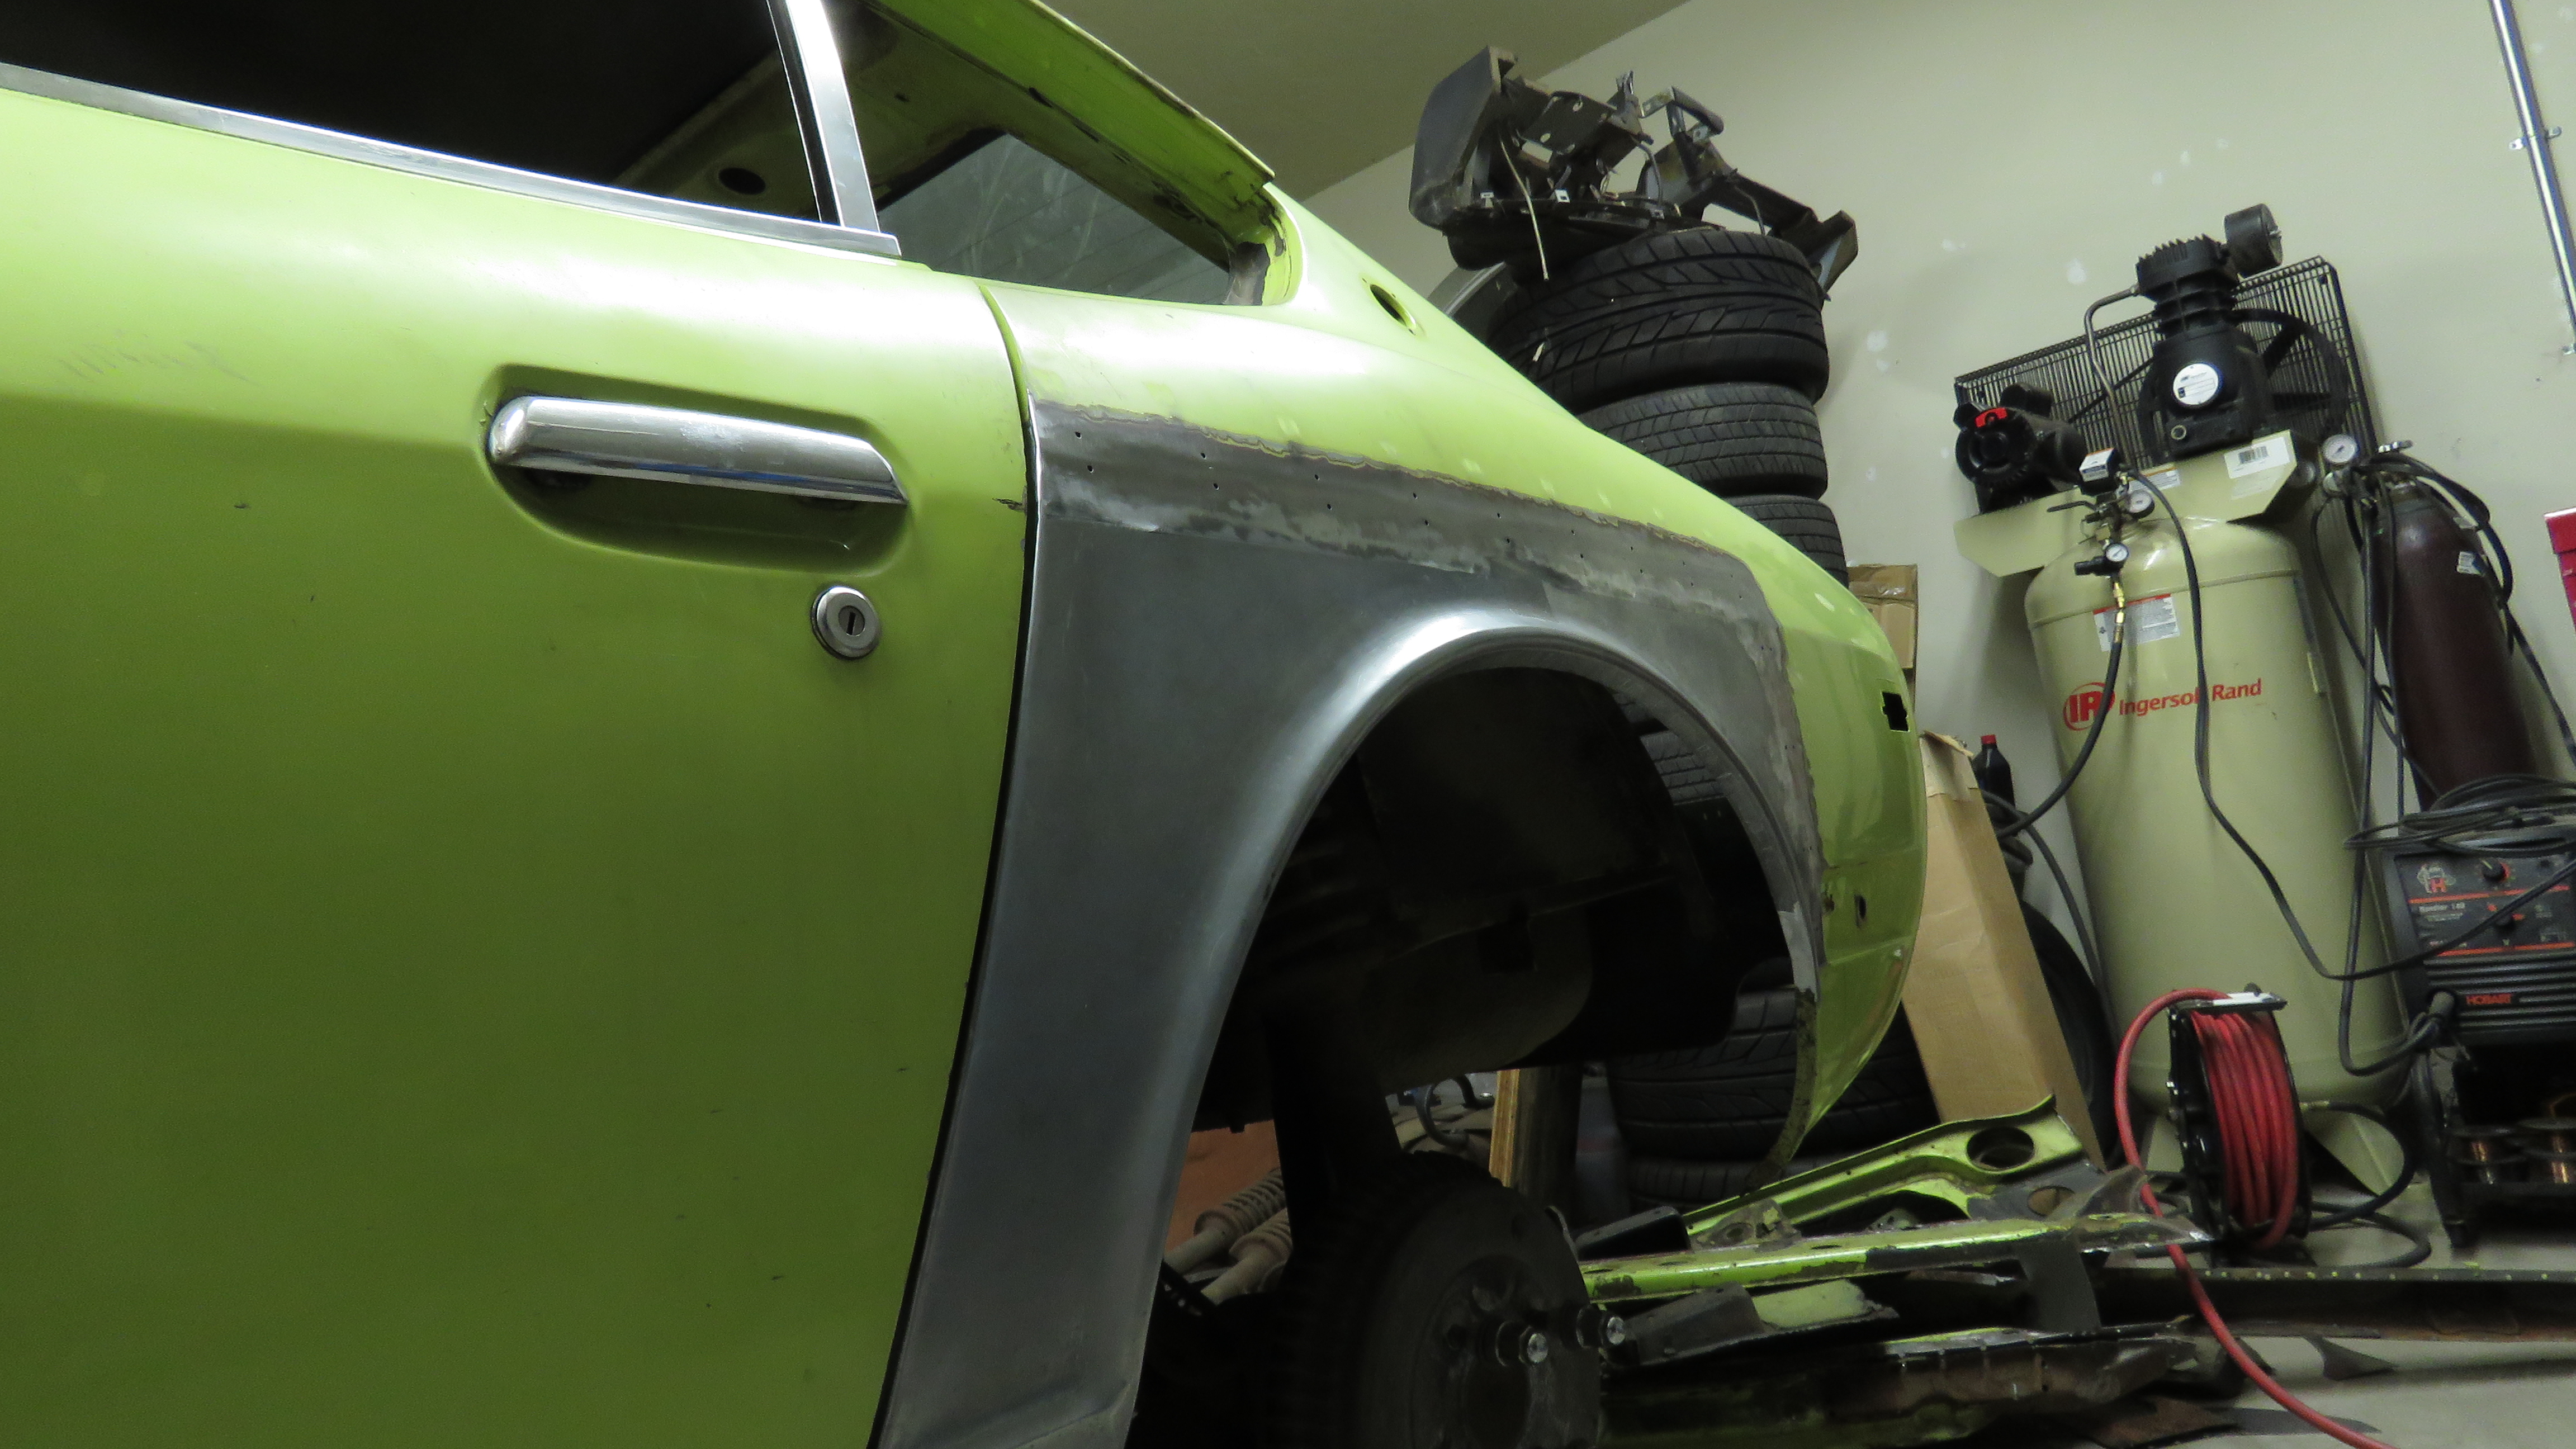
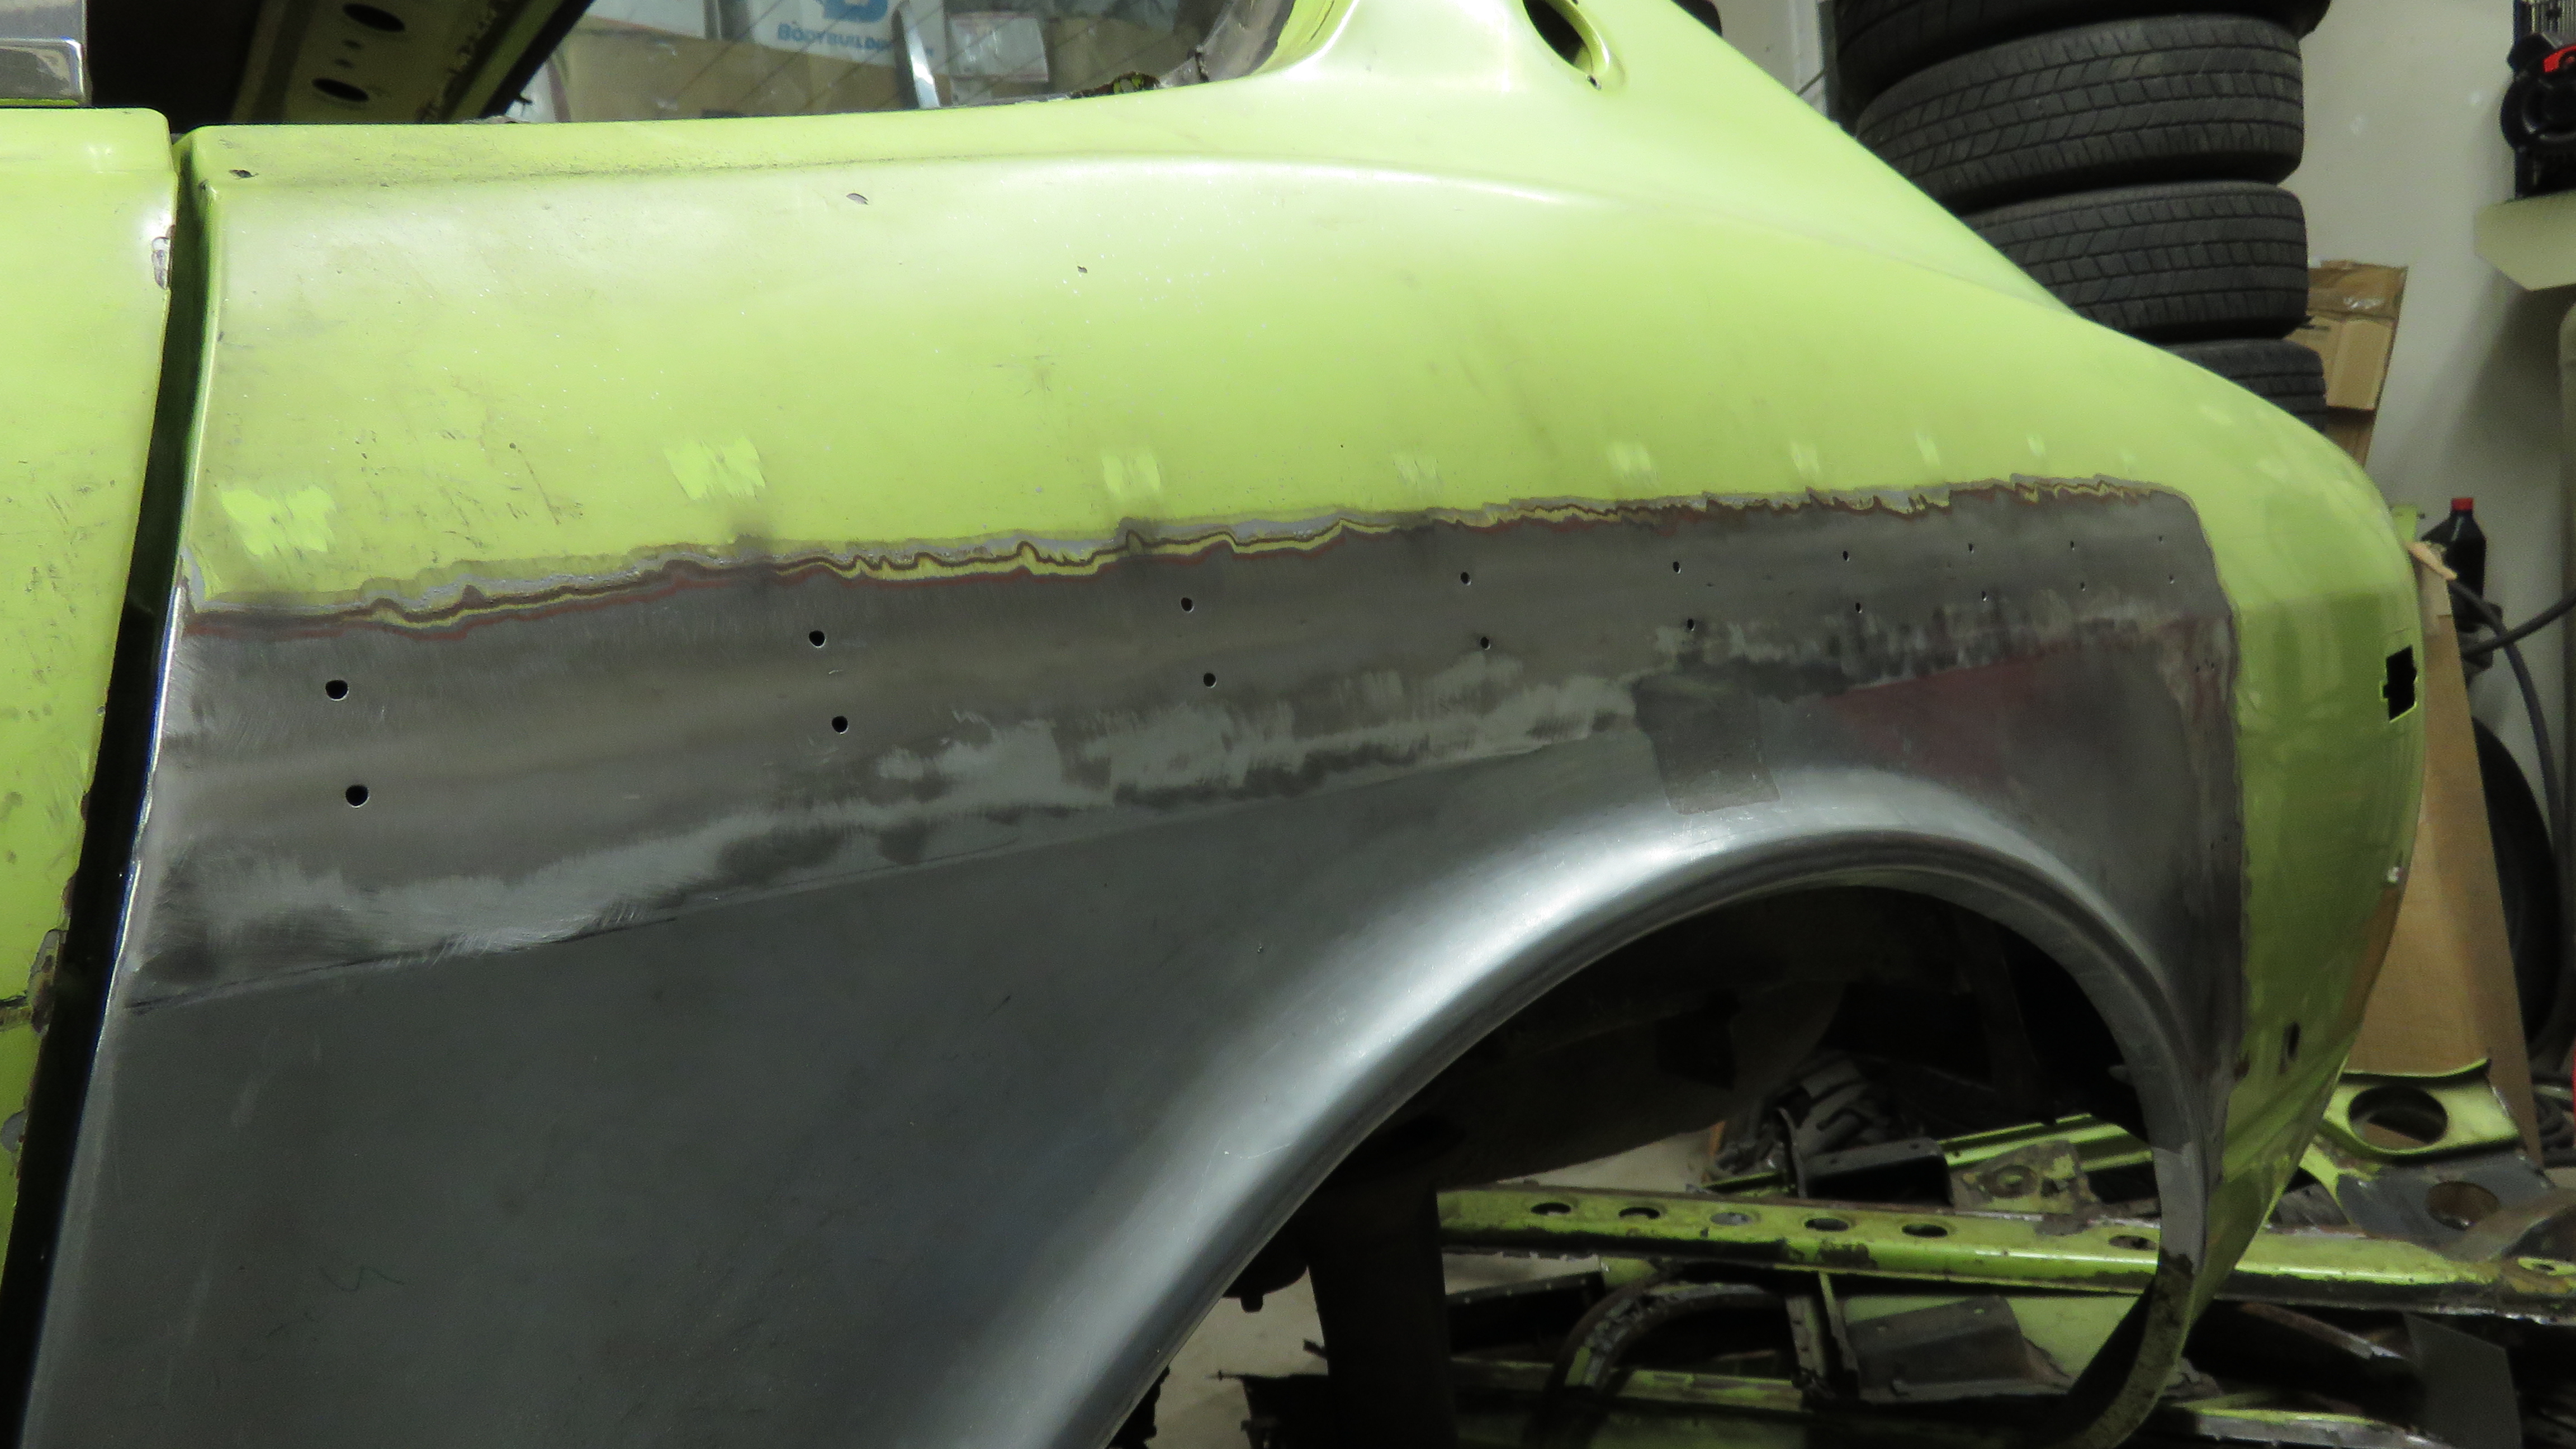
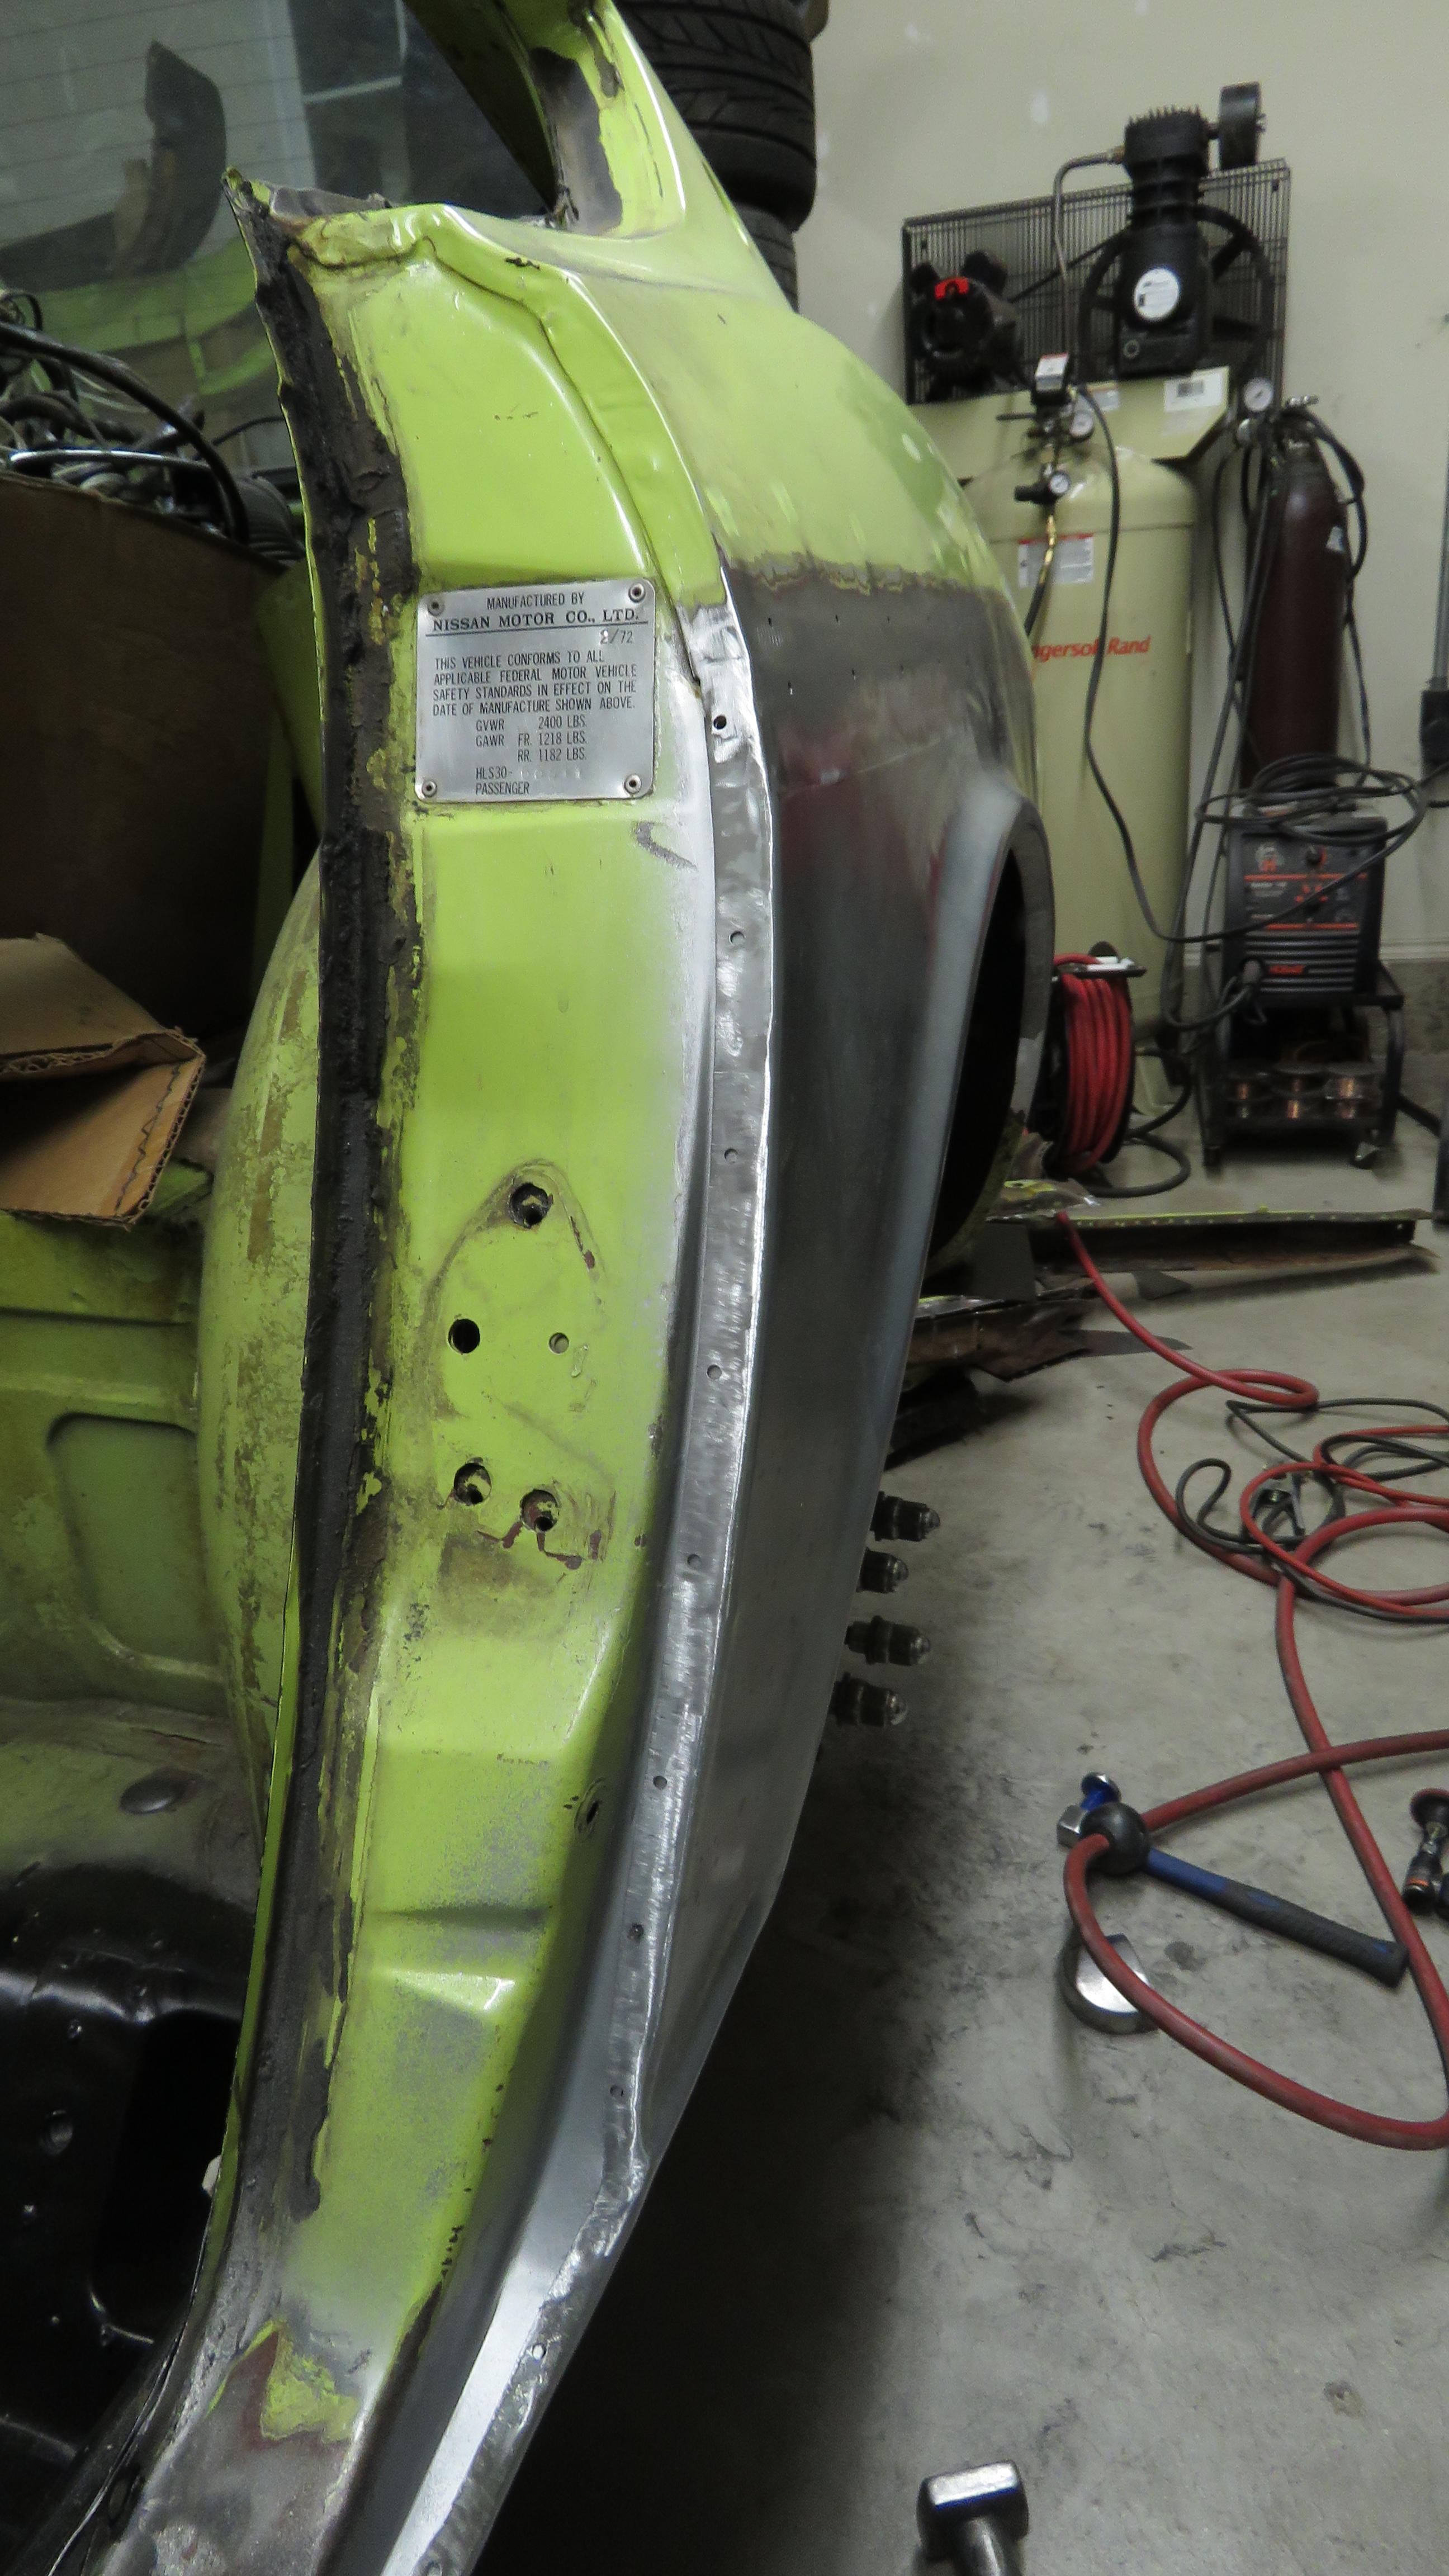
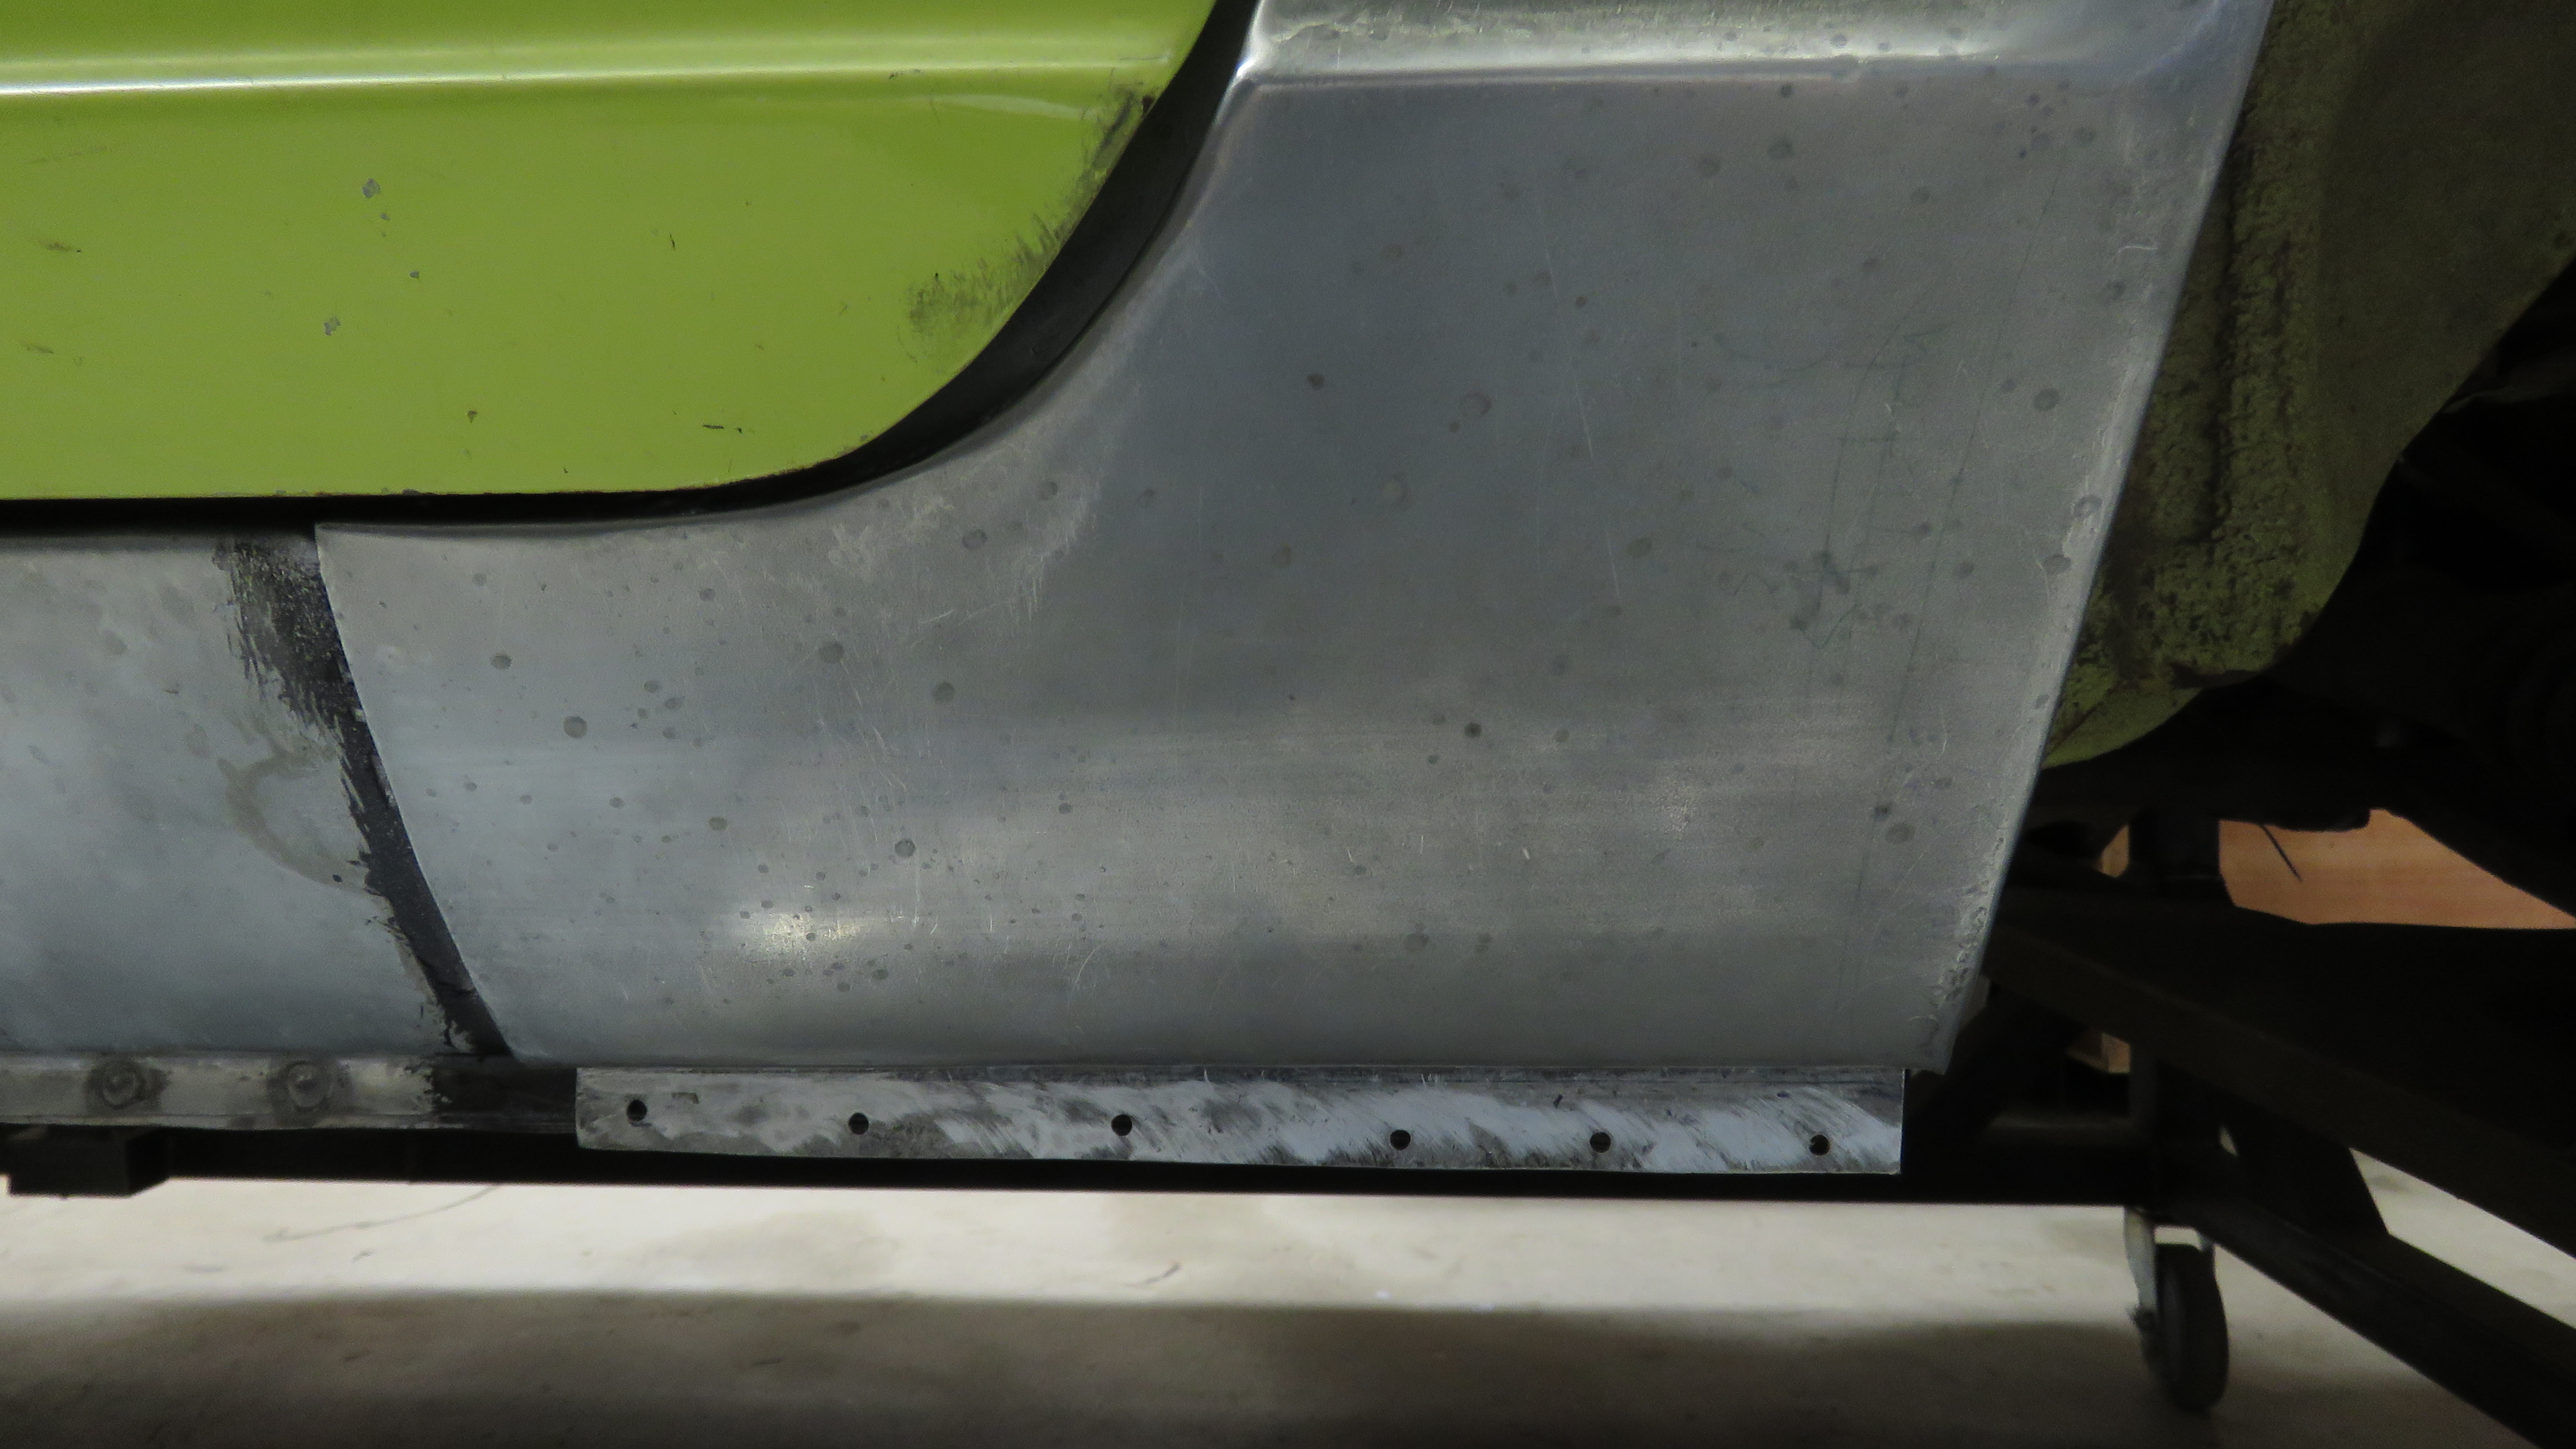
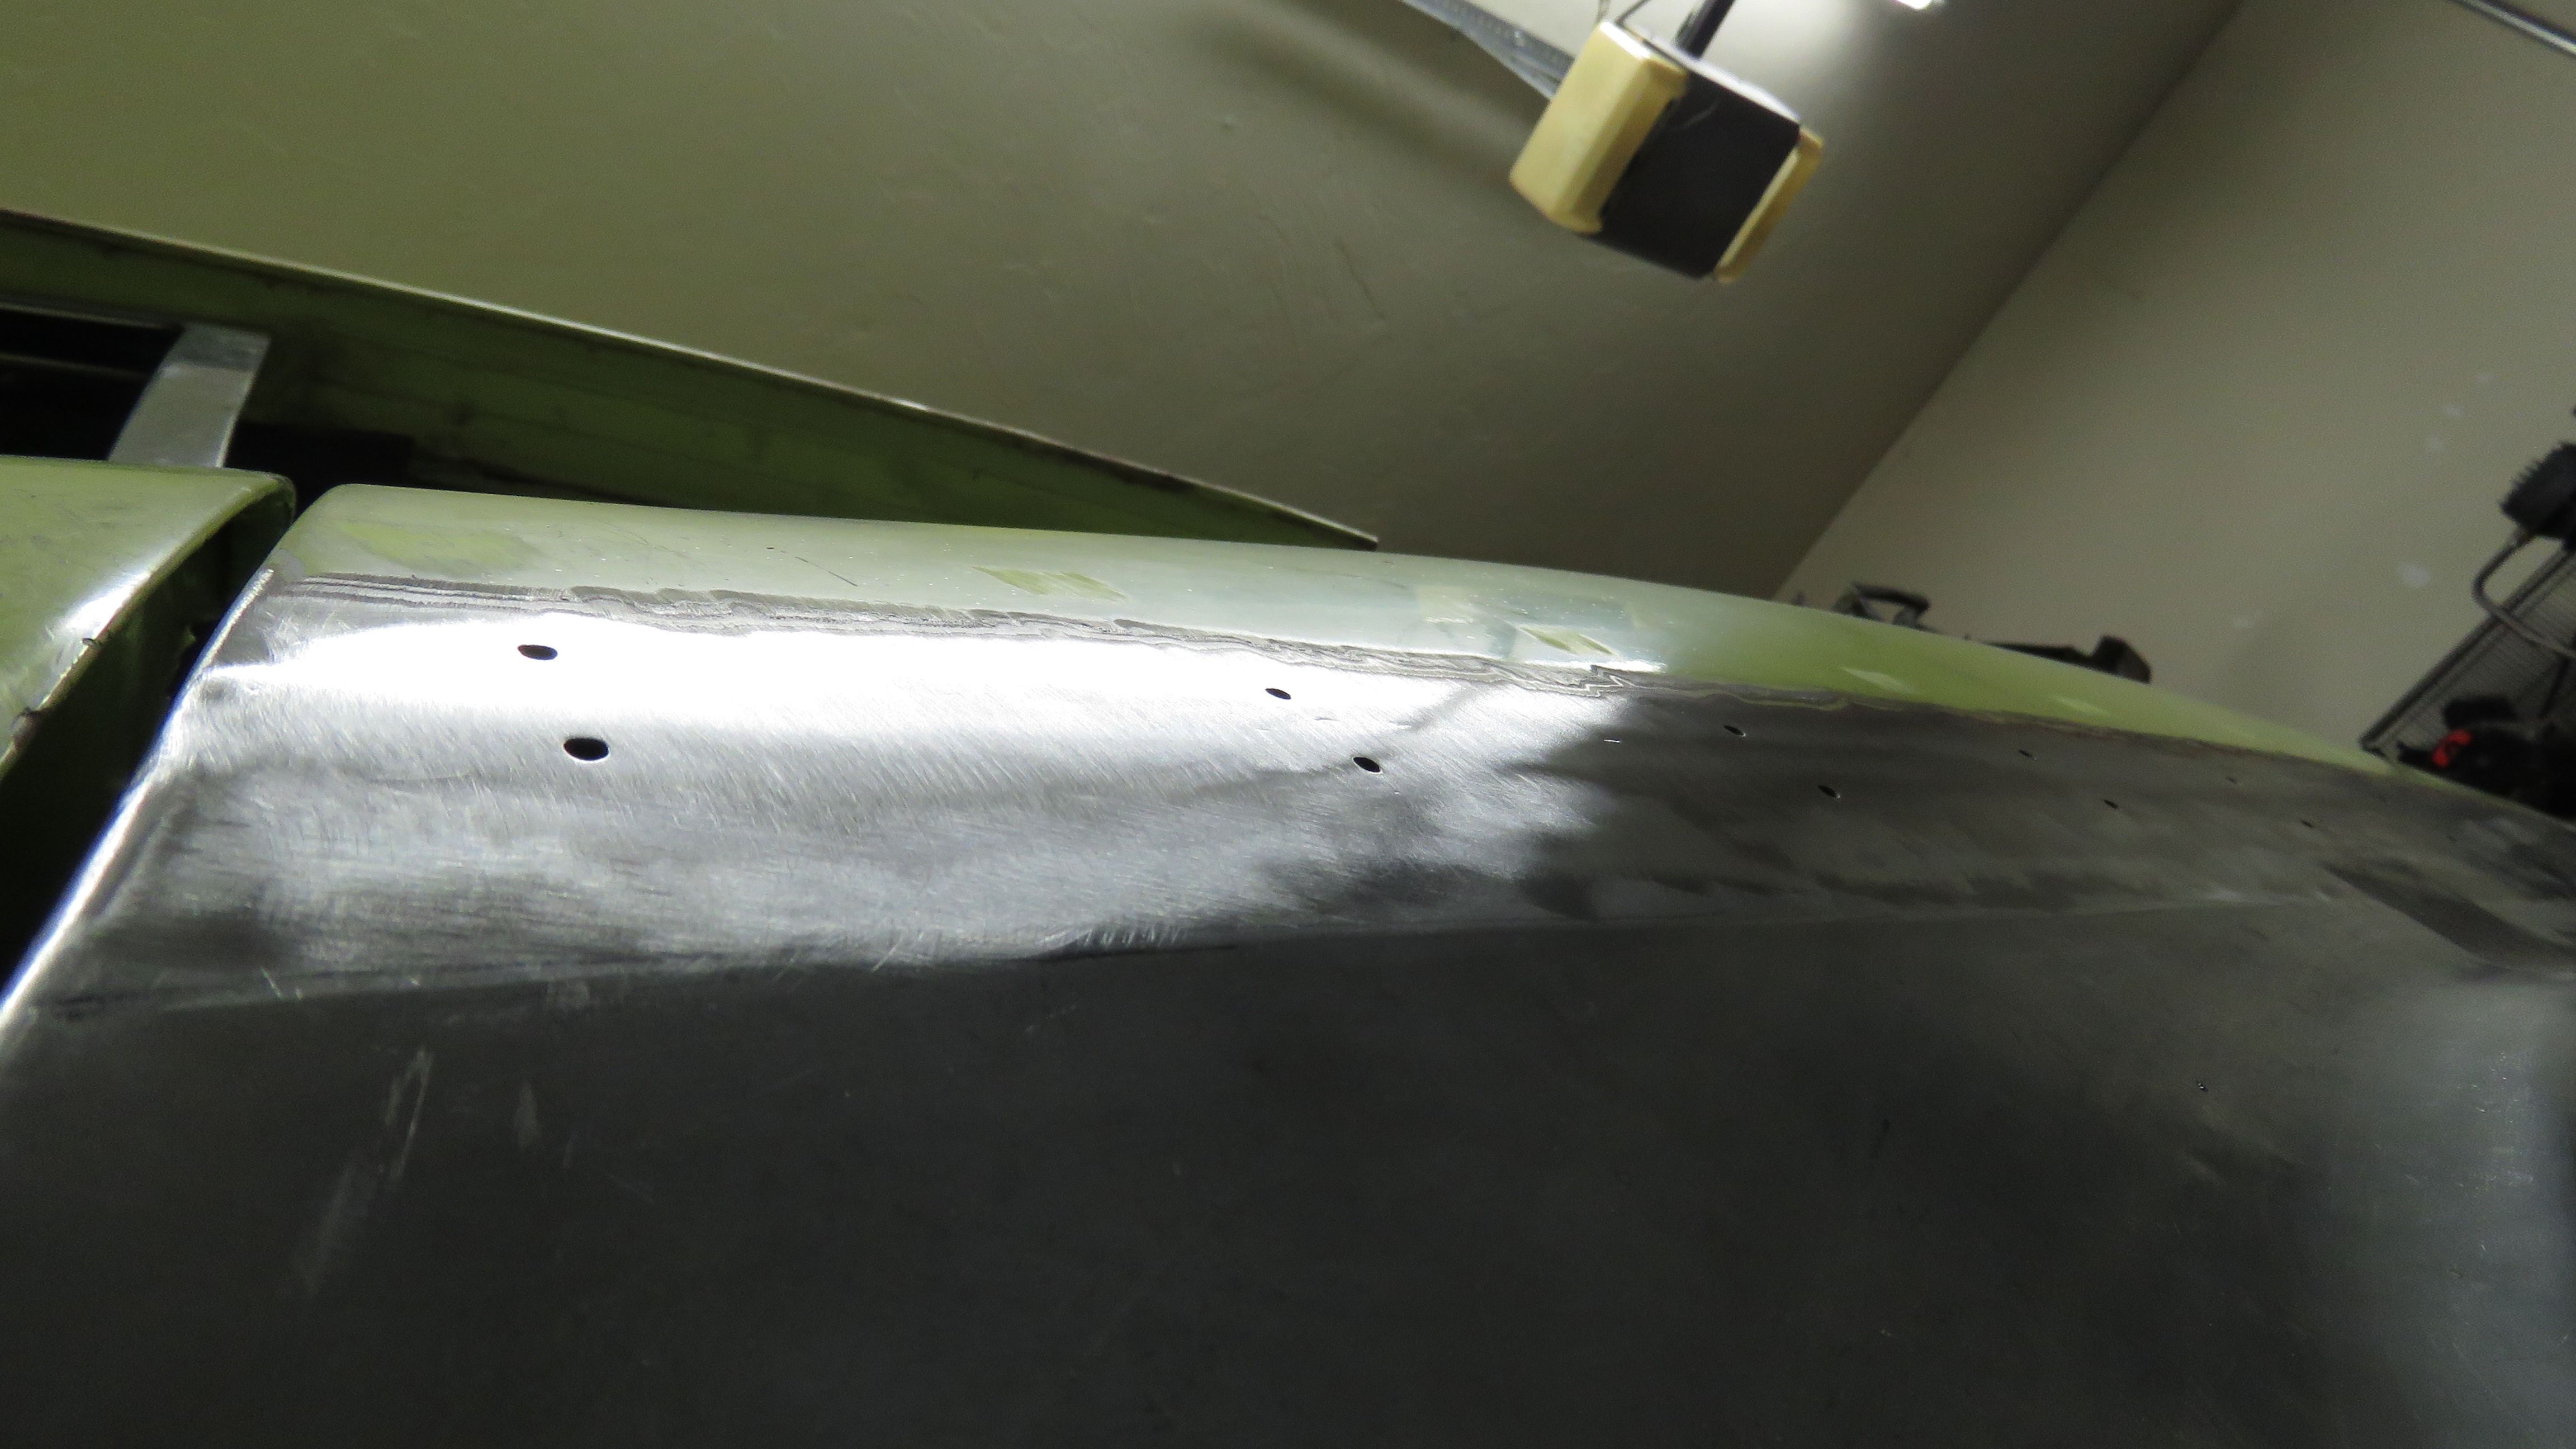
 2 pointsAnother Update!! Progress has be extremely slow at a snail pace, but going at least. Now that is pretty much summer here in Oklahoma, the humidity has be attacking the exposed metal on my car. The floor pans stated to rust, so figured since this car will have full interior when all finished, I might as well coat with with some POR15. The bottom is alright, will coat the underneath of the car later. Had some Chassis Black Colored POR15 left and finished it off with a semi black top coat. Will coat the back end of the floor later to match. Finally it was about time I stopped being lazy and got to work on the freaking quarter panels. Started with getting the inside of them cleaned and coated. The supports for the rear section of the quarters where still in good shaped, So I just cleaned them best I could and coated. Worked on the Driver side quarter panel yesterday. All tacked and some hammer and dolly work to get everything aligned. I also did another two rounds of tack welds and hammered and dollied all the welds to stretch them out so the panel can go back to its original shape. All welded up and again hammered and dollied the welds to relieve tension/stress on the panel so it can return to its original shape/position. Used a straight edge to check for any flat spots and gaps. Welds smooth out. There are some pits/low spots, thought about filling it with weld, but dont feel like it. Will leave it up to the painter to smooth it all out with bondo. There is one small area near the back end of the panel that dips in a little where the support bracket for the wheel well is on the inside. Because of it, I cant really get behind and stretch out the weld in that area. Tried my best to work with it from the outside. Hopefully not much bondo is needed to blend it in by the looks of it. Also the lower rear corner of the panel I couldnt get to either because of the support bracket for the quarter panel. Looks like POO, and again, hopefully not much bondo is need to smooth all that out. The creased line needs to be blended in with bondo as well. I got careless and over sanded on the lower end of the crease. Now just need to fill in the hols and plug weld the flanges. I decided not to add material on the flange of the door jam side, dont feel like spending time on it when its just gonna get covered up with sealant. Thats it for now. I may do some more hammer and dolly work to smooth out some areas. Passenger side should go a bit smoother as the fitment of the panel is better.


 2 points
 -
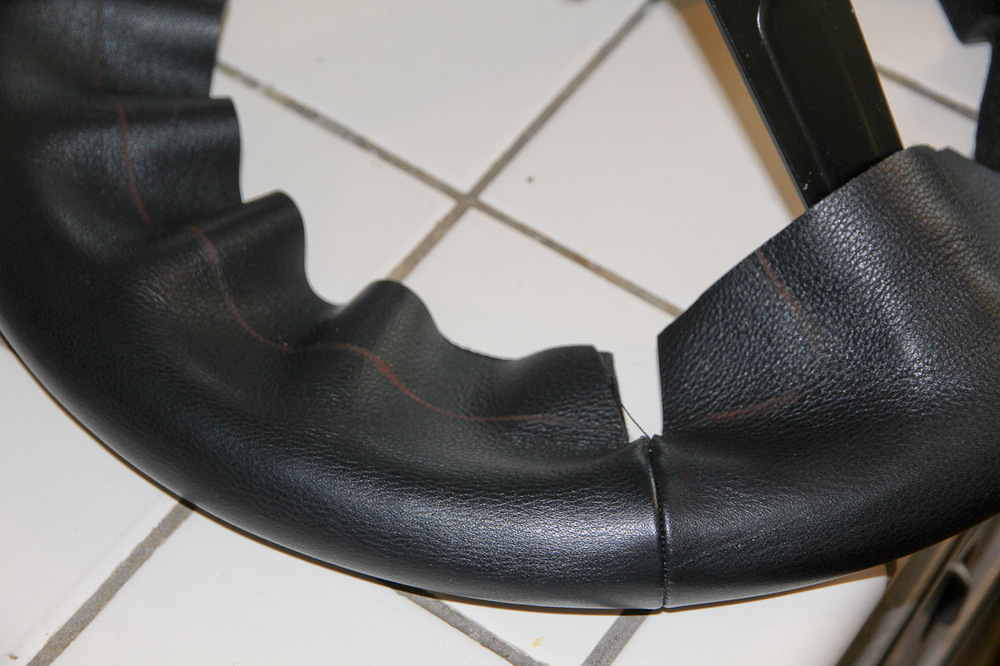
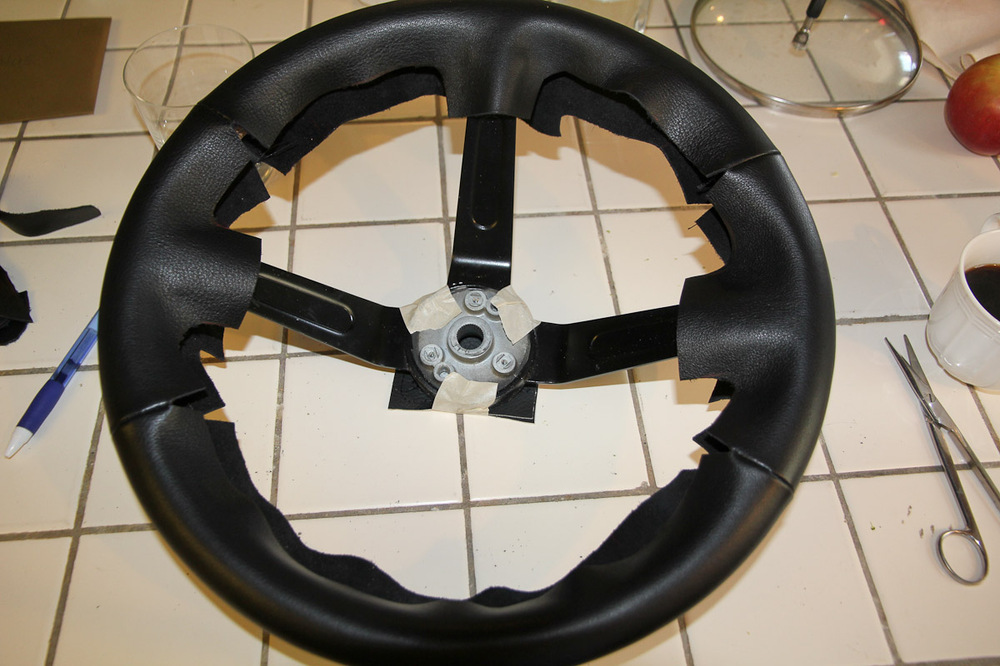
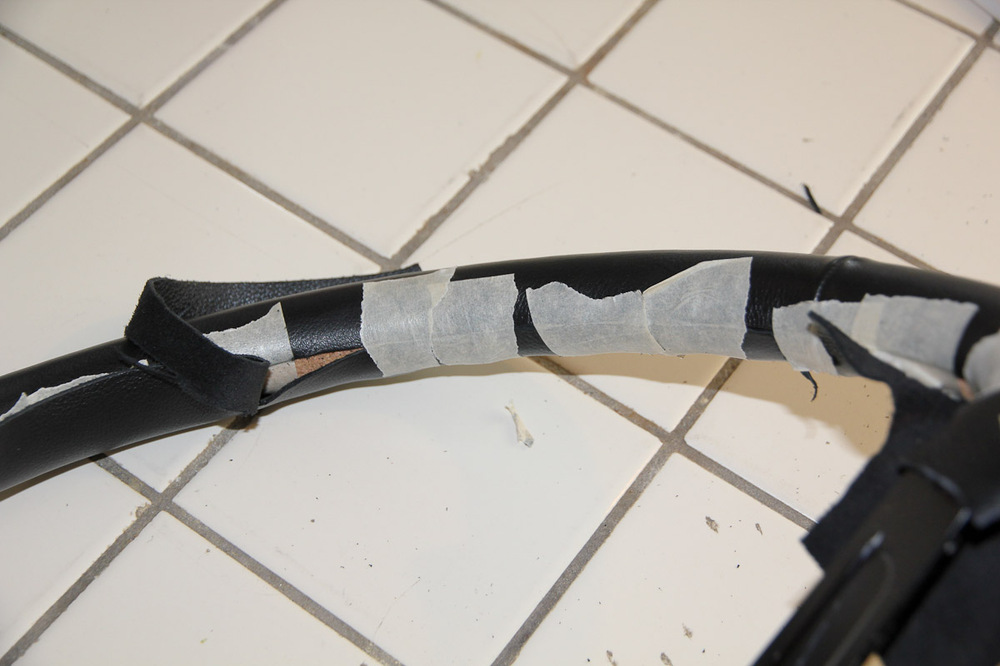
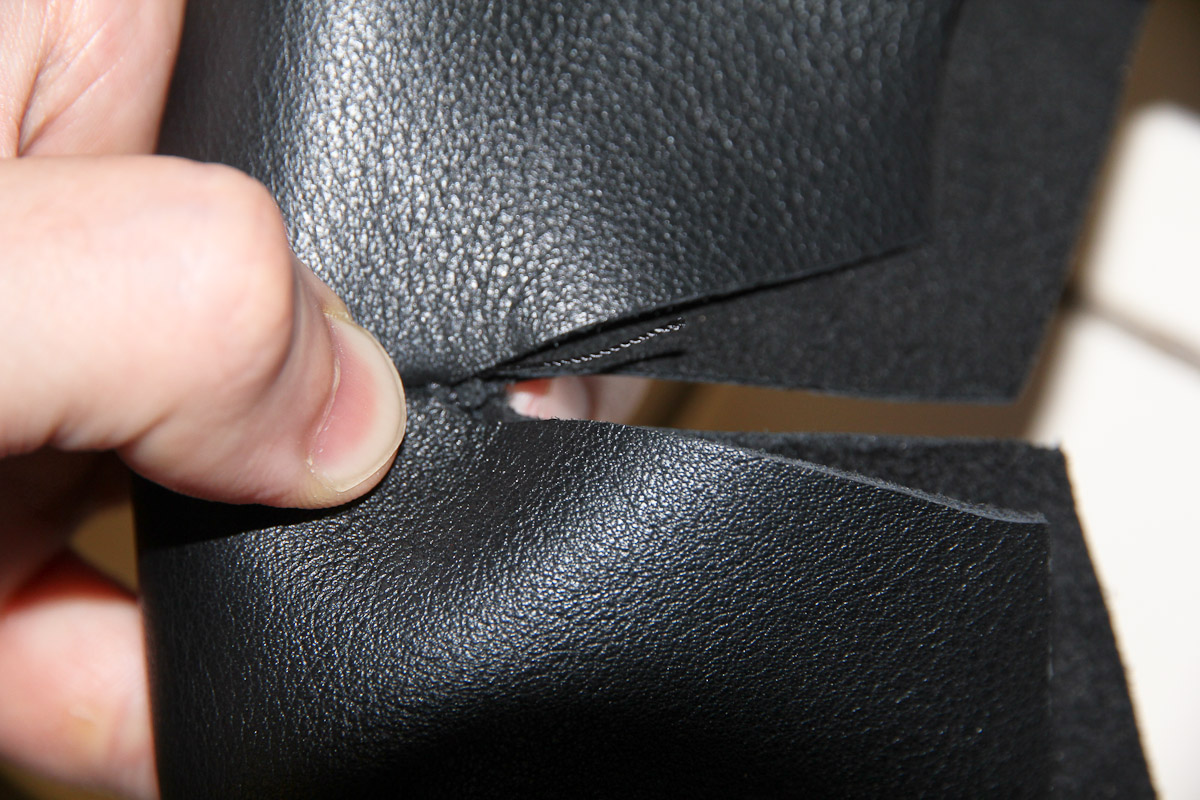
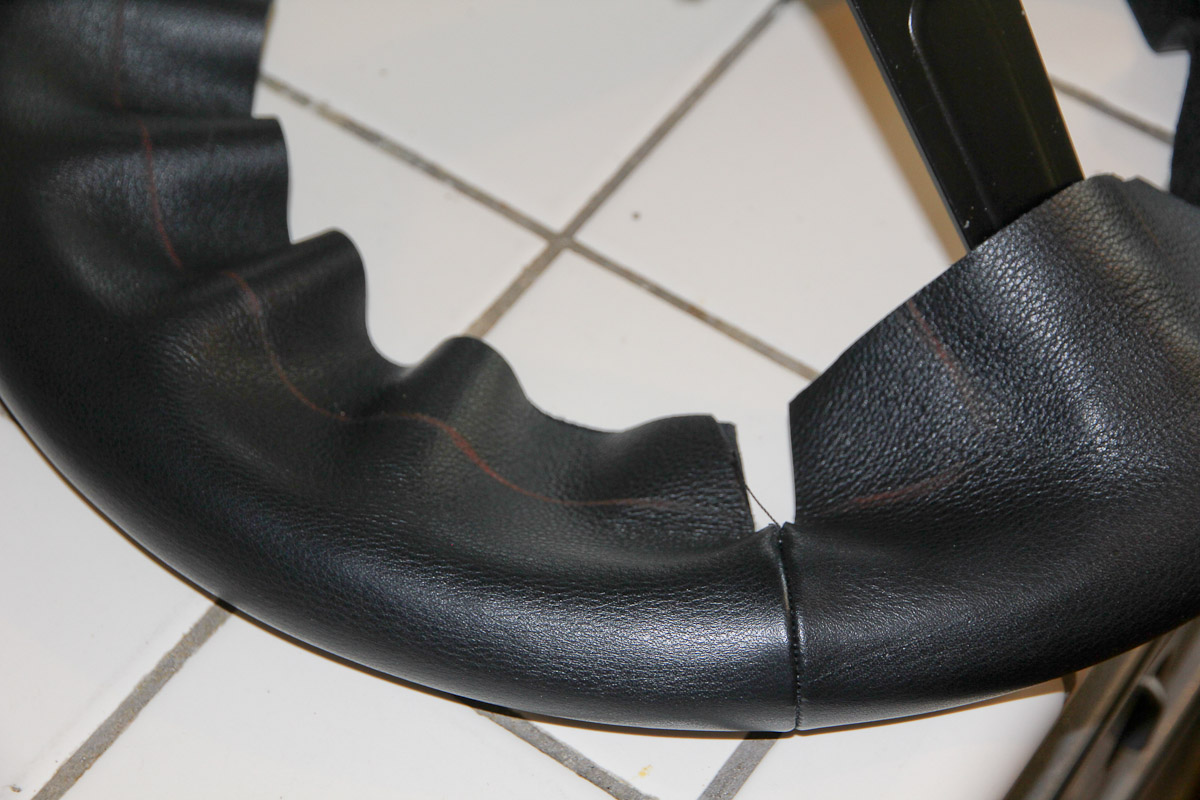
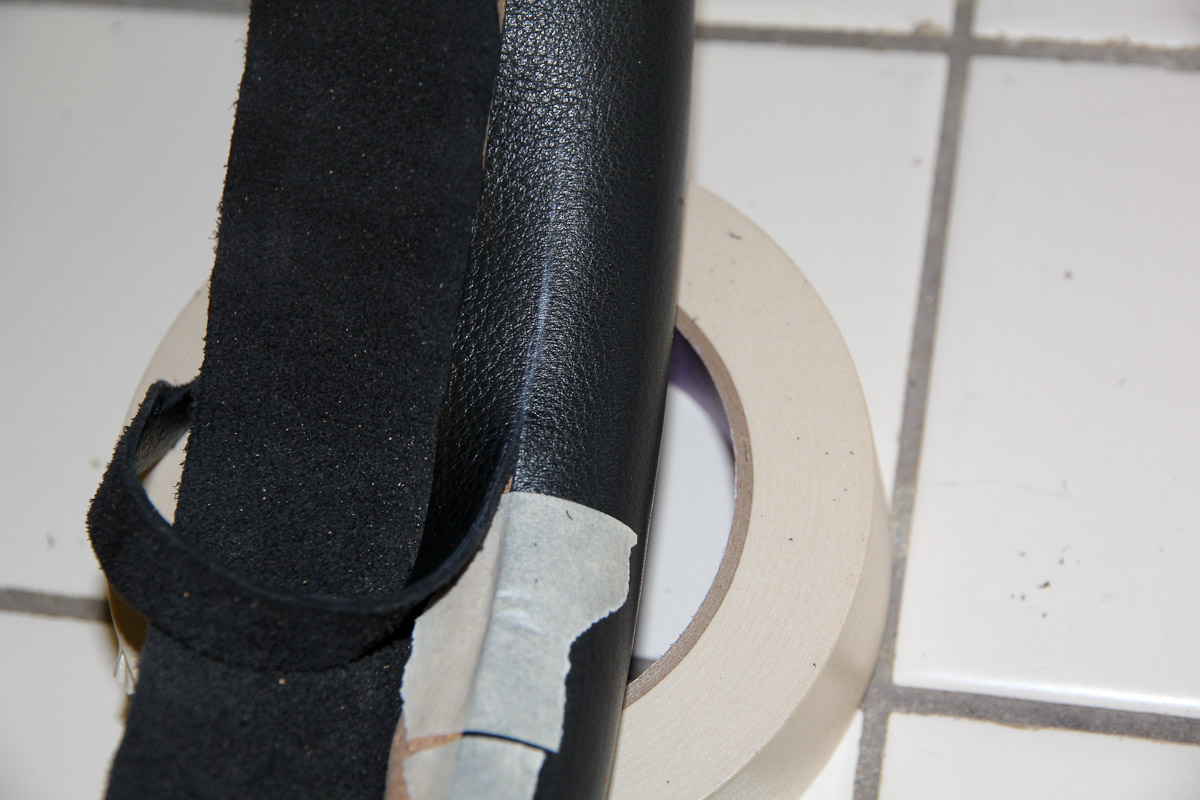
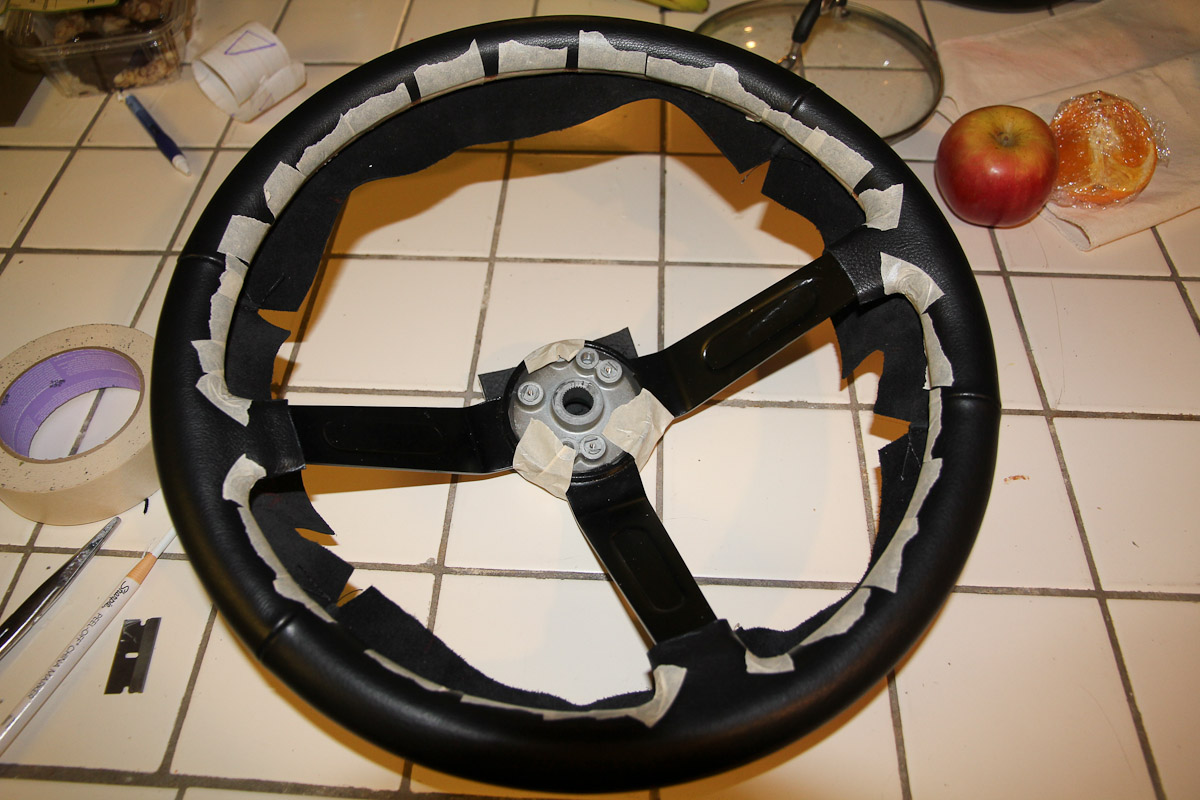
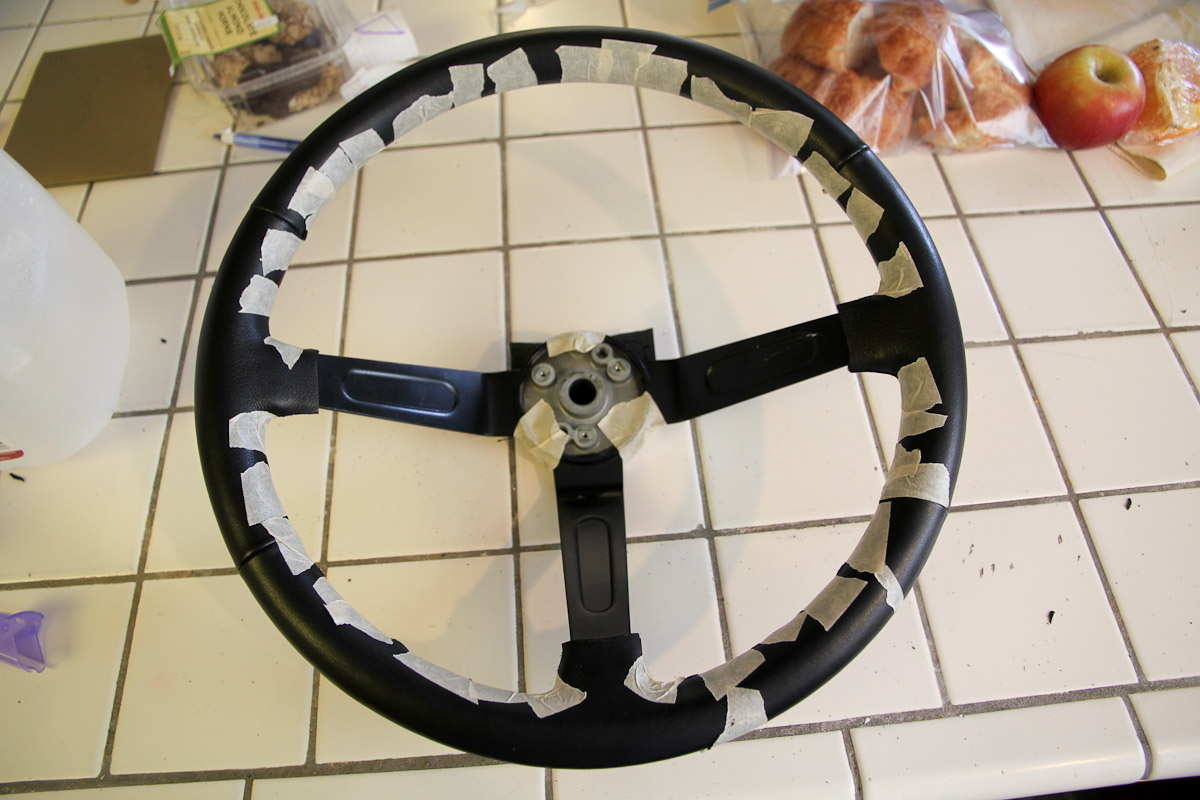
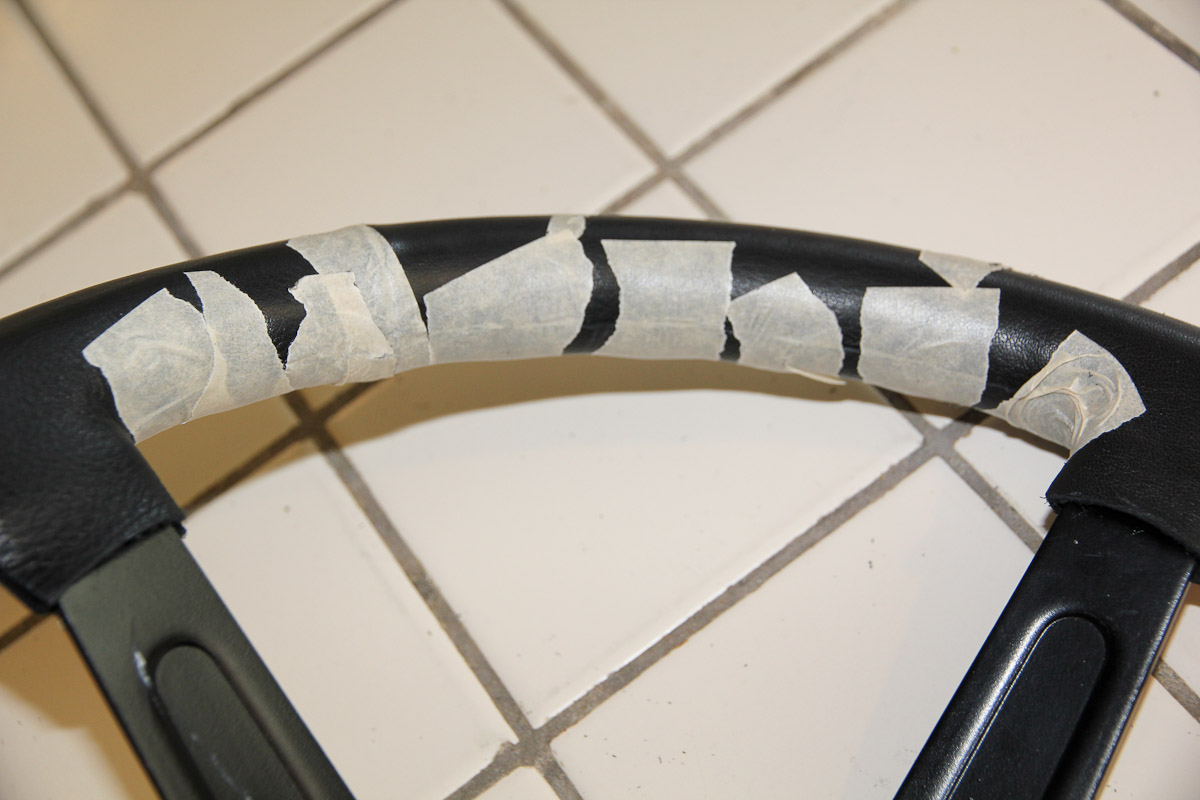
 Moving along with the wheel...so the problem I ran into was that the leather band was a little too wide for the size of the grip. You can kind of see in the photo, but I had about 1-2mm of overlap where I stitched the pieces together. I ended up putting another layer of the cork sheet around the outside edge of the wheel, and that was just enough to make up the difference. It's maybe just a bit thicker than I'd have liked, but the wrap fits better, so that's a trade-off that I'm willing to make. That done, the next step is trimming. First, a rough trim to remove the bulk of the excess material. Then, painstakingly making my way around the the whole wheel, cutting the leather back so it meets up with the line I scribed at the beginning. Check and recheck, taping everything along the way. And repeat on the back side. The edge of the leather helps as a guide, but it's still slow going. I didn't check the time, but I'm certain the trimming alone took 3-4 hours over the weekend. I'm starting to think this might really work...it actually looks like a real steering wheel cover!
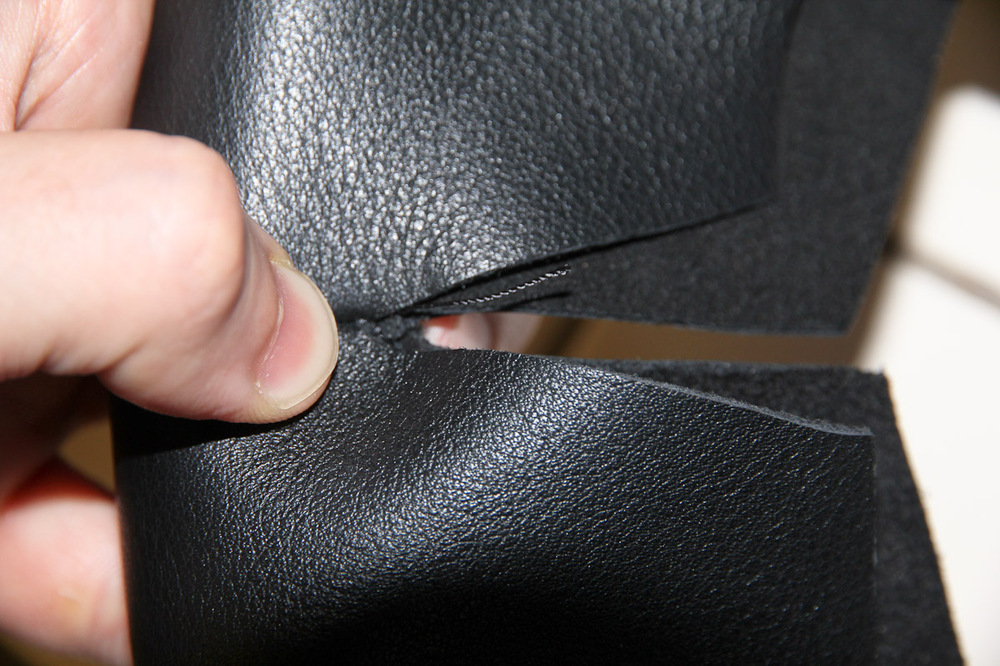


 2 points
 -
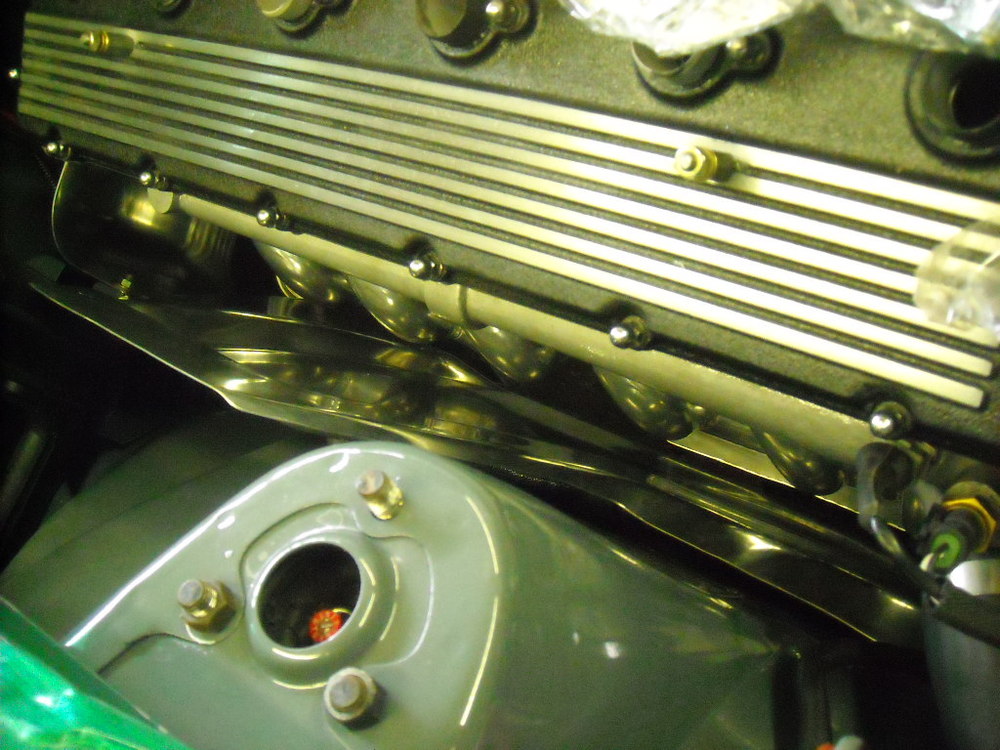
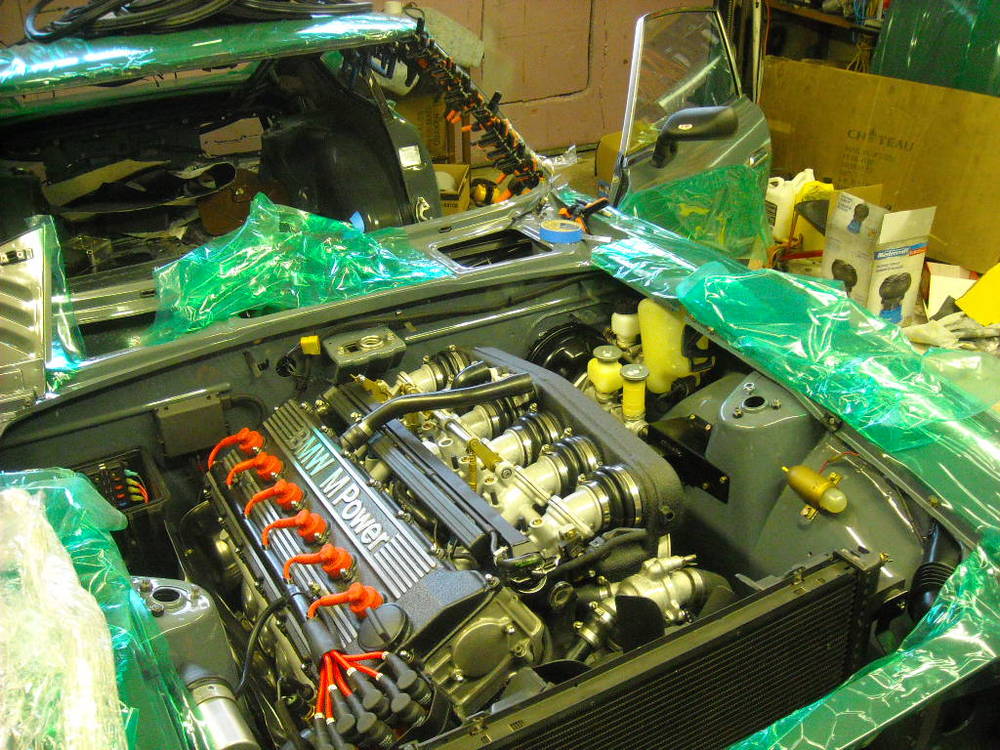
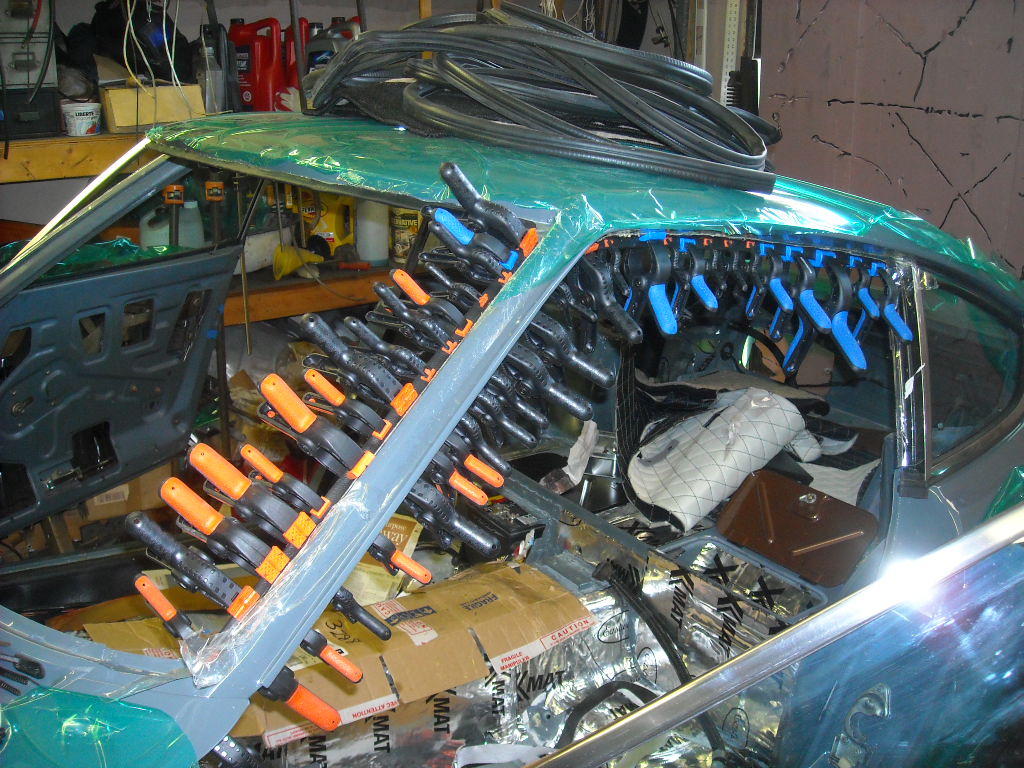
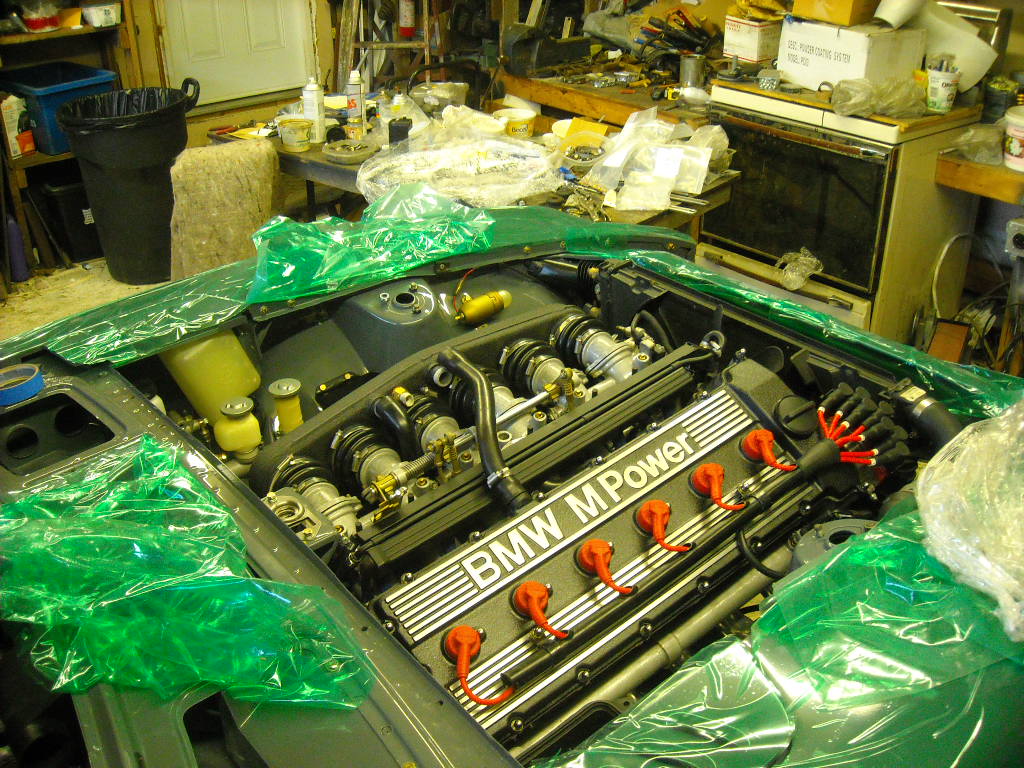
I got the header heat shields in, the D/S side rail vinyl done and installed some of the pretty bits in the engine bay.


 2 points
 -
1 pointHi I have a 76 280z with a 82 280zx turbo drive train, manual transmission. My backup light switch is bad so I ordered one from rock auto. It didn't fit. In the fsm it states the transmission is part FS5W71B. It turns out my transmission is FS5R90A. It appears that transmission was 1 of 2 types that came in the 83 280ZX Turbo. My problem is I can't seem to find a listing for the FS5R90A back up switch. Does anyone know where I can find this switch? TIA. Sent from my iPad using Classic Zcar Club mobile1 point
-
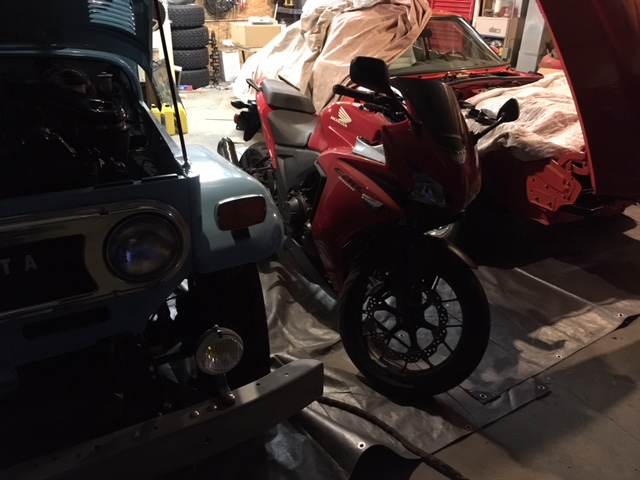
1 pointAdded two wheels to my garage this weekend. This is a first for me, but it just looked like fun!
 1 point
 -
 1 point
 -
1 pointThanks to everyone who answered this post I now have backup lights. I bought a switch for a 84 mustang, assuming the studs were threaded, however they were "push on" studs. I ended up soldering some connectors on, heat shrinking them and tape, so it's fine. I should have used the GM switch as Stevej suggested. Sent from my iPad using Classic Zcar Club mobile1 point
-
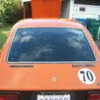
1 pointAnother this week went on EBAY- $568.00 http://www.ebay.com/itm/192181079253?_trksid=p2055119.m1438.l2649&ssPageName=STRK%3AMEBIDX%3AIT1 point
-
 1 pointOh boy! Is it a 1,000cc or a 600? Looks like a 1 liter as tall as it is. You'll have trouble with your face getting hit by the handlebars all the way through third gear. That's one helluva beginners bike.1 point
 -
 1 pointIn any case it's from the right Brand! Have fun with it.. don't park it with to much speed against a tree (Like i ones did...pfff...) I drove a fireblade ones and had to rebuild it three times.. luckily all at low speeds, ones i braked so hard it wend over the top. i walked away from it.. but a lot of damage to the bike.. these days i drive a mobile sofa.. also known as a GoldWing HAHAHA..... with his 400+ kg ,1832cc, 6 cilinder, 170Nm of torque it's a nice bike to cruise..1 point
 -
 1 pointThey did. We got a replacement but never installed it, and I've bought spares since I got home. I still need to install replacement and get body work fixed. Glad that I stayed. Despite there being only 14 cars in the race, it was the best racing that I had all weekend. Ended up 6th overall.1 point
 -
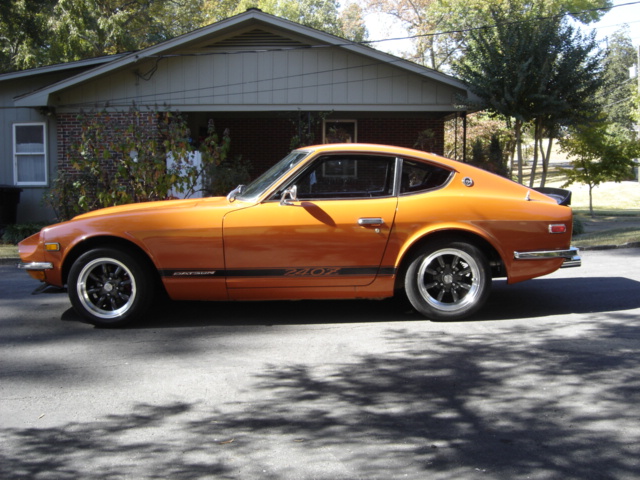
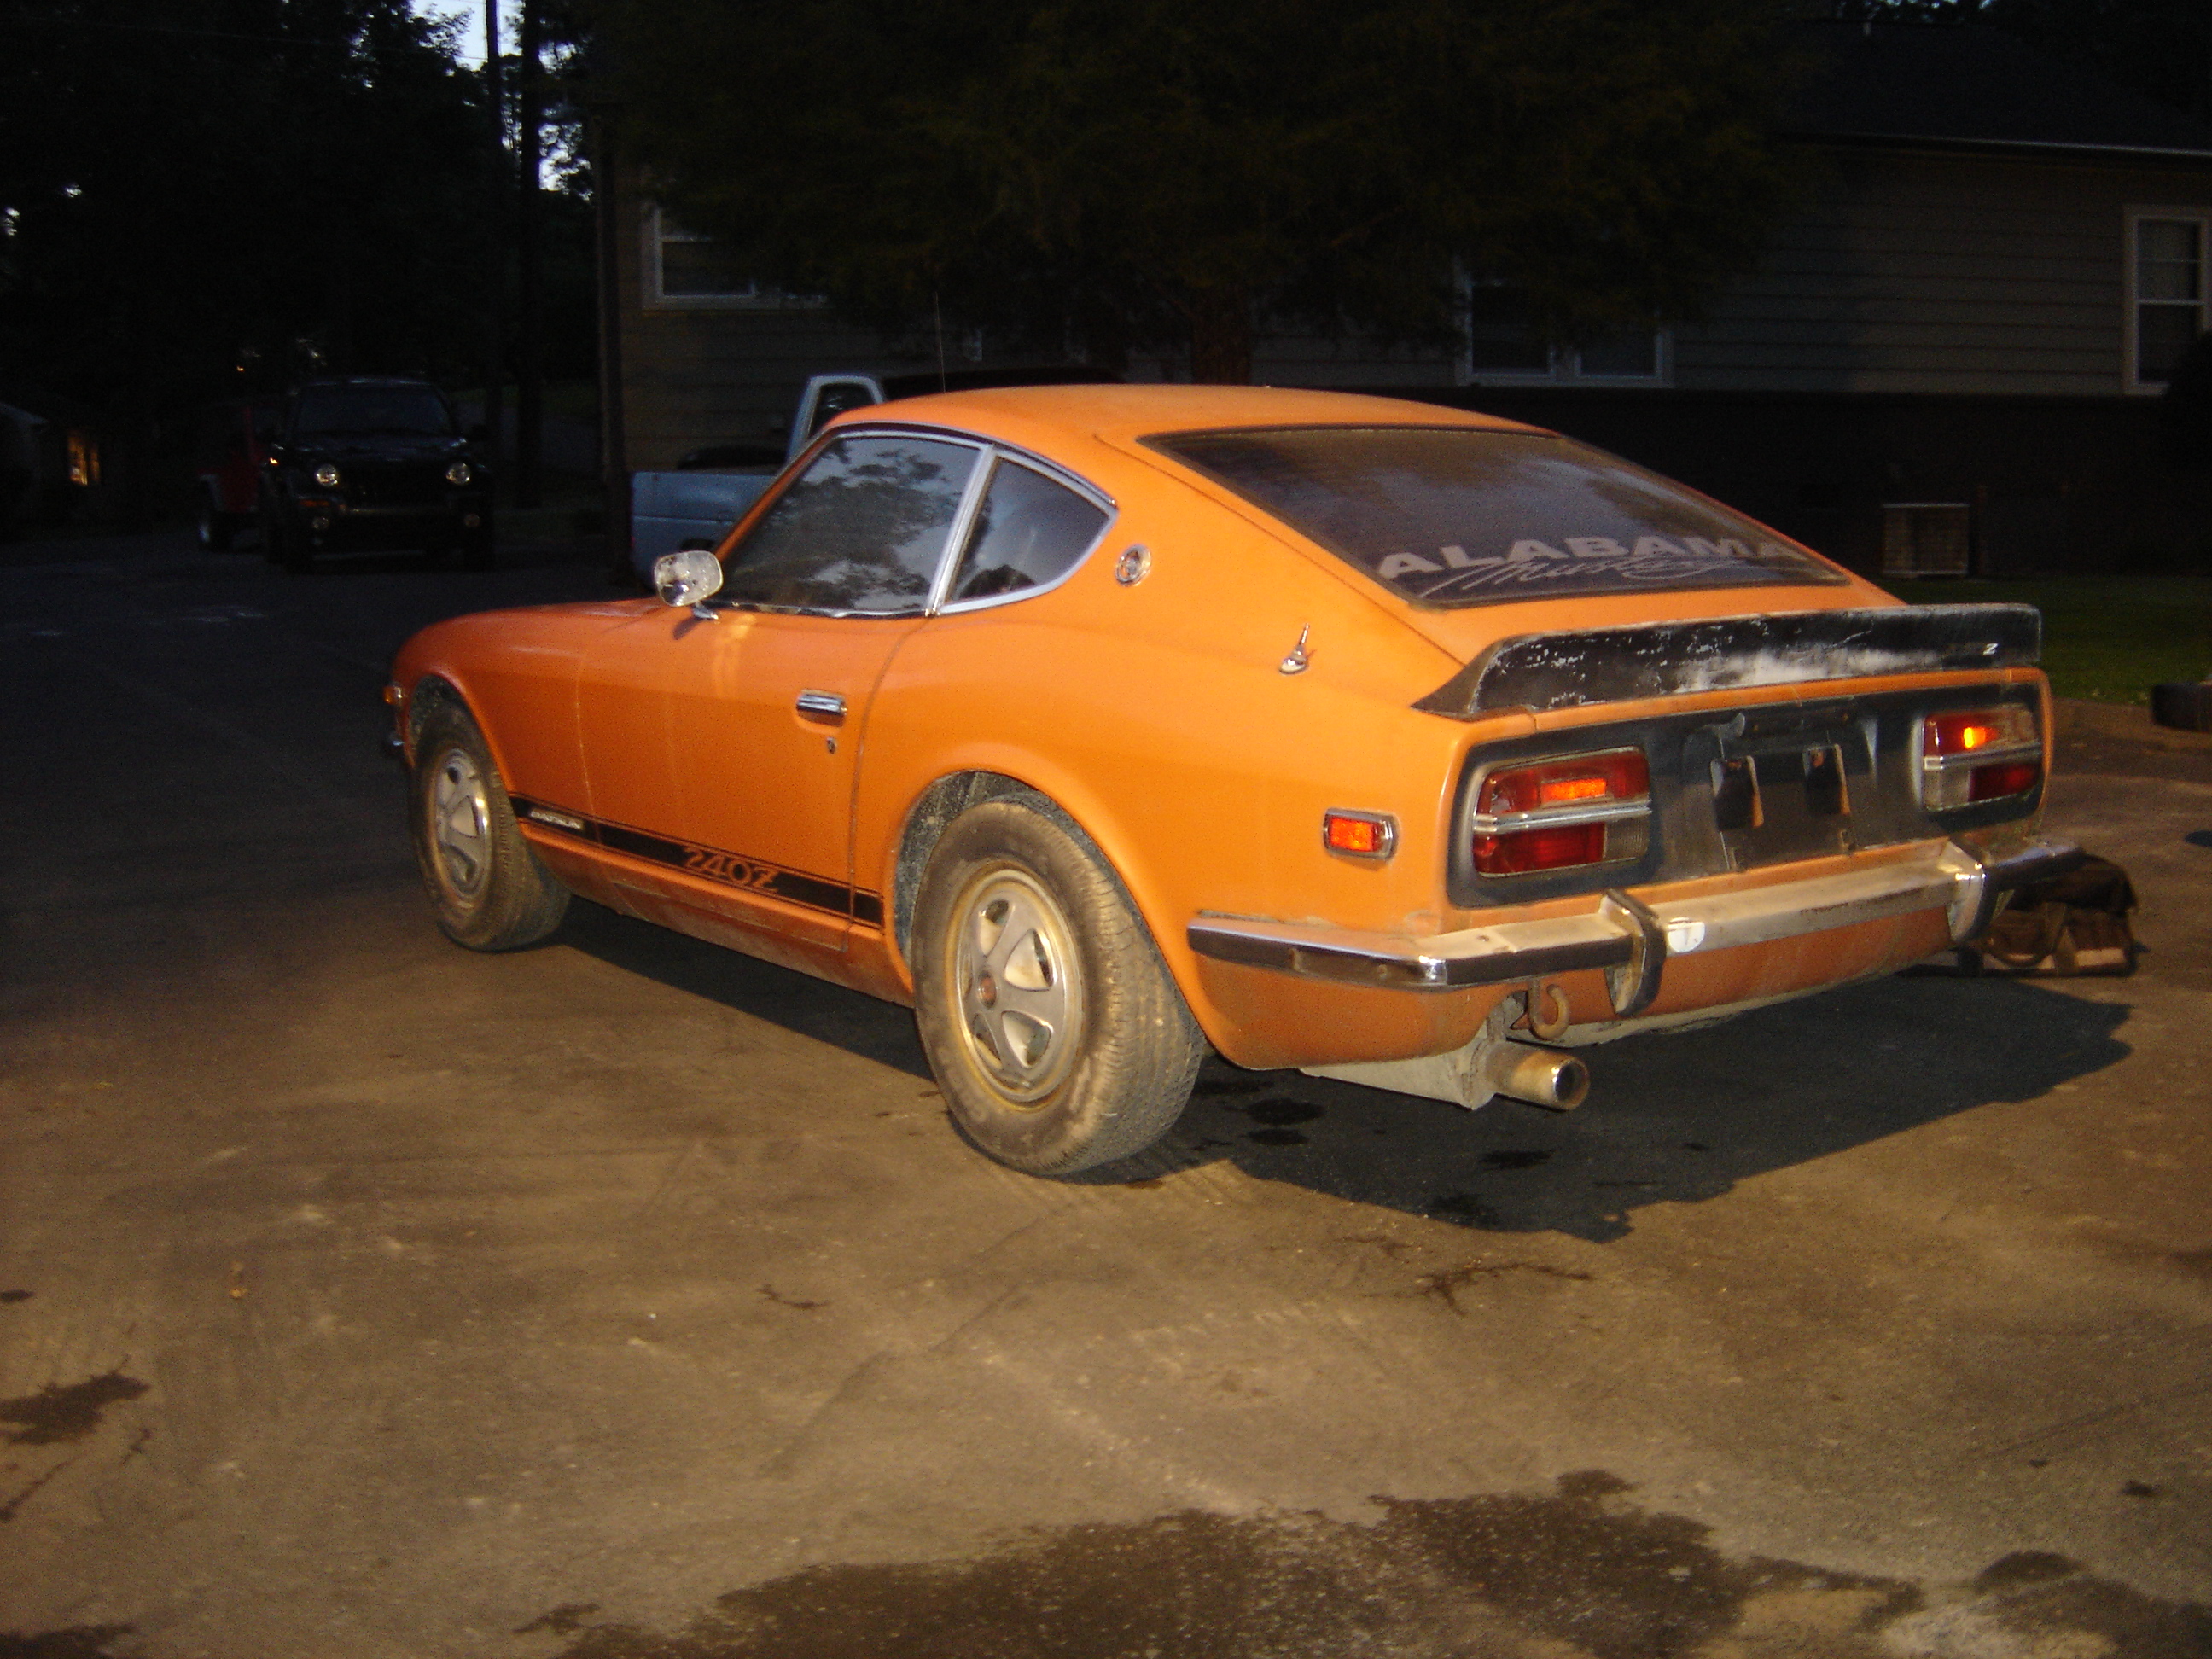
1 pointEDIT: Oh yeah, the whole reason I posted was to say I think your original paint will shine like a new nickel and I love #920 Safari Gold, it's my favorite behind #918 Orange I agree with Jonathan on the original paint, from what I can see of the pictures. I found some touch up paint from amazon.com, talked to the guy and told him how old the car was and he sent me an almost exact match. I washed mine a few times then did the touch ups and had it wheeled down. The guy that cut the paint offered to buy the car for double what I paid. The night I got it home After a lot of elbow grease and soap After the wheeling and polishing by a pro

.thumb.JPG.b42fa0a1539fbd3ccab98e0cb3b204f0.JPG)
 1 point
 -
 1 pointHi all, Had a setback recently with brakes. I have installed: new hoses, hard lines at the drumps, pads, rotors, calipers, rebuilt the drums, and a new master cylinder. I have bled brakes before and as usual started with the furthest from the master cylinder (start with the rear left, then rear right, front right, front left). My issue is starting with the rear right, I'm not getting any fluid to pump from the master cylinder to the bleeder. Even when completely disconnected this doesn't work. I am assuming that I have a blockage in the hard lines and wanted some advice on clearing it. I am using the old school method of pumping the pedal and want to know if investing in a pressure bleeder might work or if I'm missing something altogether. I DID bleed the master cylinder without issue. Chris1 point
 -
 1 pointI will give you my method. This is for when the system is drained empty from doing work such as you did. It took me a very long time to figure this out on my own. I was doing what you are doing with poor results. First remember the front and rear are separate systems. You can start wherever you want & on which side you want. The farthest bleeder is a myth in my opinion. Using the pedal to bleed an empty system is not only time consuming but is also fruitless in getting a good pedal. Start by filling the master cylinder which is already completed in your case. Next pick either the front or the rear and open one of the bleeders and gravity drain keeping an eye on the master cylinder level. Then close bleeder and go to the other side and repeat. Do not touch the brake pedal yet. This is what ruins the process. Next go to the opposite end you started (front or rear) and repeat the same process. On an empty system you will go through about one and a half cans. Now with all the bleeders closed, try the brake pedal. If you have drained enough fluid through you should now have a rock hard pedal. Try it out. Cannot hurt a thing. I have not used a hand vacuum pump instead of gravity but that should work good as well.1 point
 -
 1 pointDoes the pedal pump up, but no fluid will come out of the open rear brake line no matter how hard you push? Or does the pedal just never pump up? The first would be an indicator of a blockage, the second, a blockage and a pressure build problem. You might bleed the fronts well to allow easier pressure buildup and see if that will blow any junk out of the line.1 point


.JPG.0c40e1cf9a0b460a7cd2910ece48ea40.JPG)