Leaderboard


Popular Content
Showing content with the highest reputation on 05/16/2017 in all areas
-
 Bruce and Z Therapy don't have them. I'm the manufacturer and sell them on Ebay for $69.95. I had the same issue as many others so I designed this product. The nice thing about them is that you can check fuel levels with the running or not3 points
 -
 2 pointsI would say it is a bit more than 30 minutes, closer to an hour or two based on your skill level. For me, the most difficult part of the dash removal is removing the heater panel and it's associated cables, the radio, and the wires that go to the fuse box. It is probably easiest to remove the fuse box along with the dash harness instead of unscrewing the two wires that attach to the bottom of the box. The rest of the removal is easy by comparison in my opinion. Also, you will want to take a lot of pics of the smaller individual wire connections. There are several that change color and this can be a bit tricky when re-installing. The larger connections are basic. Also, I would recommend 'Just Dashes' over purchasing an uncracked or NOS dash. There is no telling the condition of an old dash and how old the plastic is and what it has been exposed to. Just my thoughts.2 points
 -
 2 points
 -
 1 pointThat made me start thinking about the condition on the flex hoses, are you sure they are all in good condition? An interesting test would be to clamp all four hoses right up next to the hard lines and see how the pedal feels then clamp them on the other end of the flex line so you can feel how the flex line affects the pedal feel.1 point
 -
 1 pointYou could reverse the power and ground wires. It's a DC motor and will run fine backward, I'd assume (might even get more life from the brushes). The blades are designed to create a pressure differential from the inside to the outside, I don't think direction matters as to how it happens..1 point
 -
 1 pointThanks for all of the responses. I'm going to jump in and lift the valve cover. Since the engine was solid back in 03, and the tapping just started when I restarted it, I'm going to hope that is where the issue lies. With 0 compression in one cylinder and 50 percent in the another ill keep my fingers crossed its there. The original miles are about 87k so I'm hoping the rings are solid. I at least have hope that since It's body spent most of its life in so cal and solid that the engine is worth the work.1 point
 -
 1 pointThank you Nick! Order placed, $11.60 shipped. Should be here in a few days.1 point
 -
 1 pointJust finished up my front and rears 73 Sent from my iPhone using Classic Zcar Club mobile1 point
 -
 Car is Up and running again. Msd 6425 Box was the problem. Wired around the box and Installed the old ignition module on the zx distributor again as I had it before. Car started right up. No more msd box for me.1 point
 -
1 pointYou underestimate yourself but in the overall picture, you have a great attitude. Wish you were closer.... I'd be a fly on your wall any day!1 point
-

-
 1 pointOn the to do list with my delayed 72 restoration. Each fastener will be measured, photographed, and catalogued on line. Below is a somewhat related Nissan fastener document General-Datsun Torque Specifications.pdf1 point
 -
1 point
-
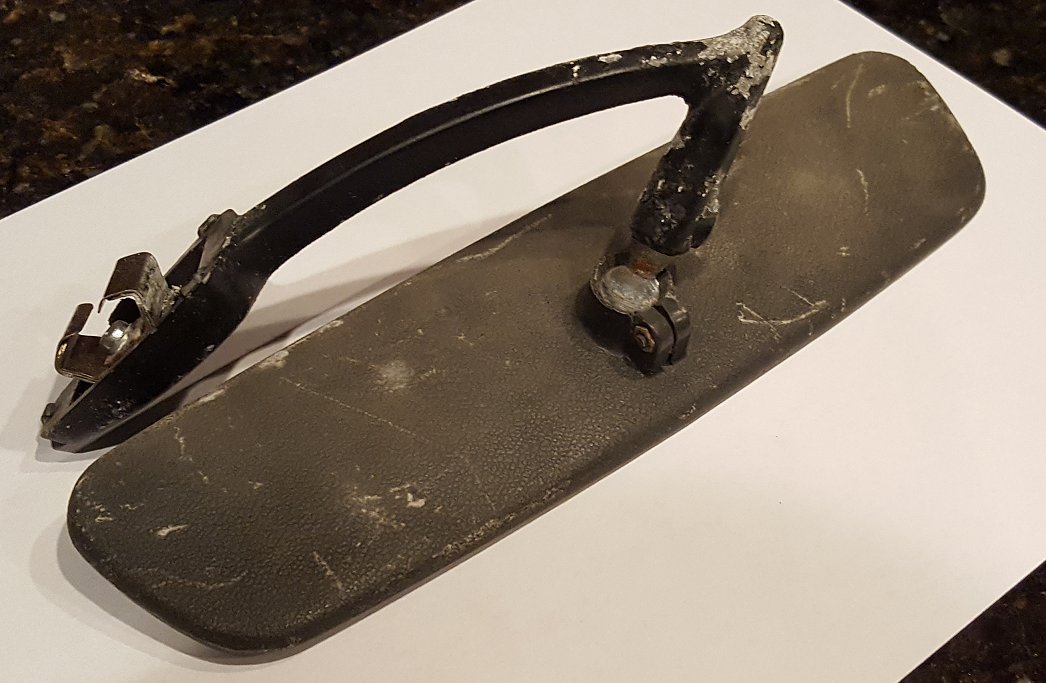
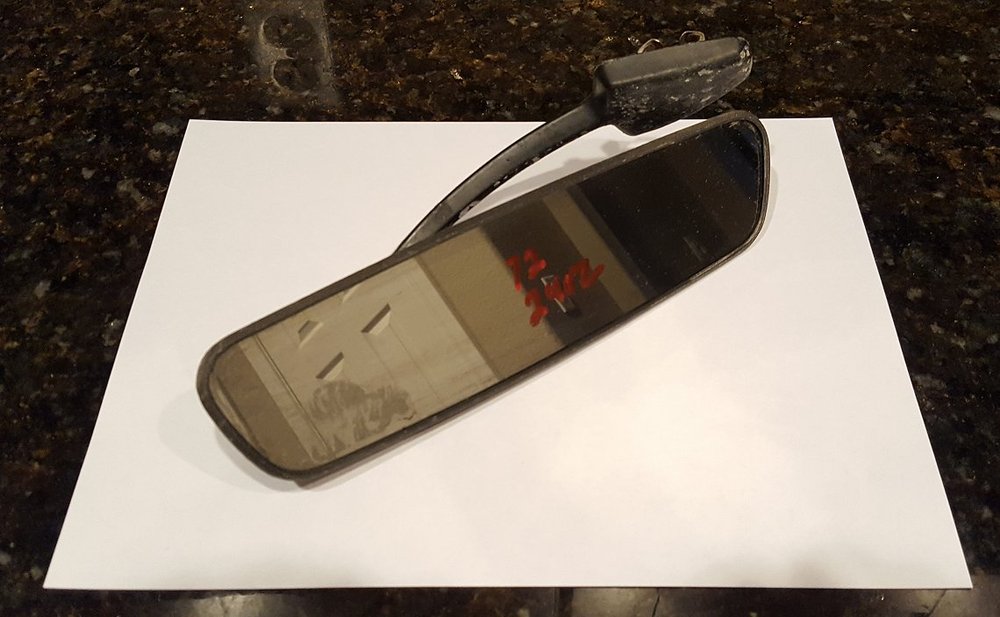
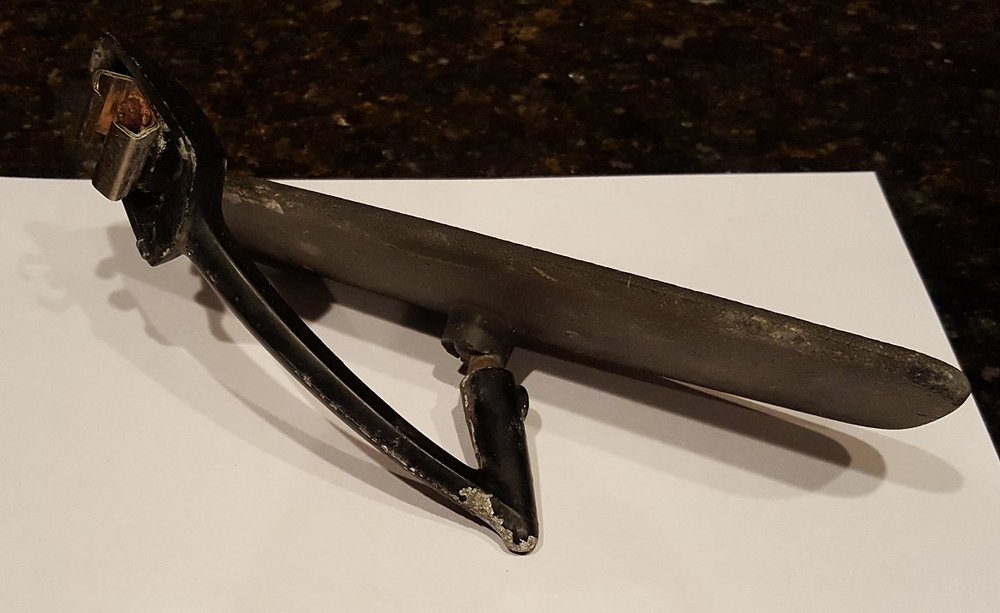
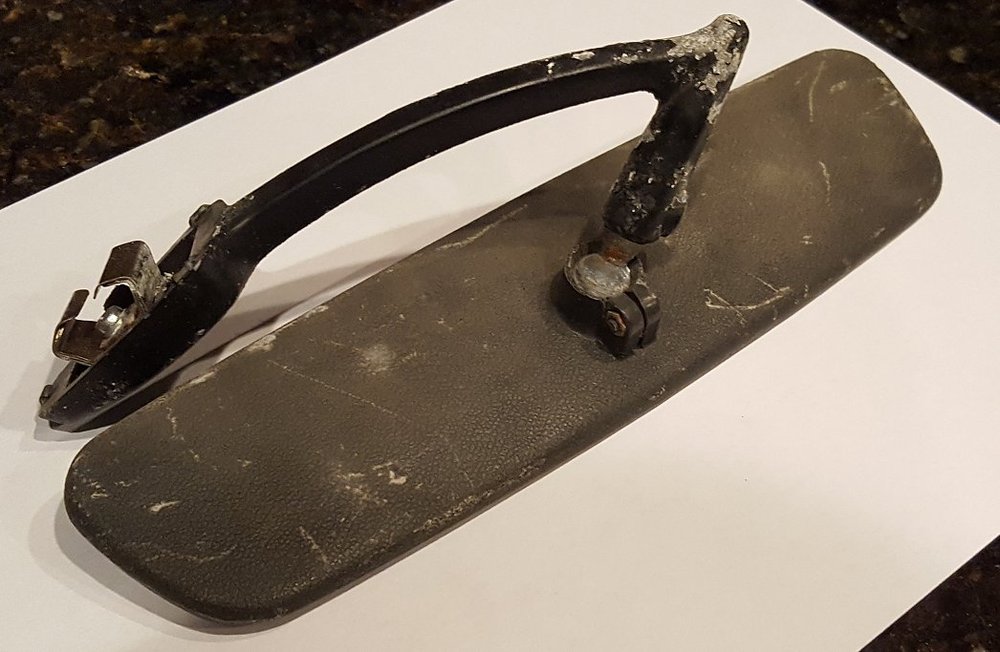
240260280's mirror arrived today and I will transfer custody to him at ZCON. Attached are some better pictures of it. The arm is better shape than the picture lets on but the mirror itself does not look like it has been swiveled in a long time. Car will need to be taken when disassembling it. Interesting to hold such a rare artifact of these cars in my hands. I too will be interested to see the restoration work he does on it. Enjoy the pictures!
 1 point
 -
1 pointhttp://www.ebay.com/itm/Datsun-nissan-240z-260z-280z-280zx-RARE-ABS-valve-cover-JDM-1970-1971-1972-1973-/252459745803?hash=item3ac7c6020b:g:H94AAOSwp5JWZ6Qw&vxp=mtr1 point
-
 1 pointBe sure to get the correct protective clothing for your new mid-life adventure - something like this comes to mind:
 1 point
 -
 1 pointI know a lot of words to come up with, such as need more practice, could of done that or this, should of done this or that, hehe. Haha, its actually a great car to build up some skills and get practice. Give me a handful more projects and tons of years more experience and maybe ill be ready to tackle on priceless antiques and high end cars.1 point
 -
 Haha! That's exactly how most of my projects go: "And then a completely unprofitable huge amount of time later, I have this...."1 point
 -
1 pointIncredible. You are working on the wrong kind of car. I know this isn't the "day job", but you should consider changing focus to doing metal restoration work on Ferraris or Maseratis. Something with a higher price tag than old Datsuns. There are people out there willing to pay for that level of work.1 point
-
1 pointI see. I like the idea of just sacrificing a nut over taking a chance on the stud. I bought a wrecking yard manifold as a spare and spent a lot of time and effort removing a broken stud and that was on the bench, with a torch, and PB Blaster, and a hole drilled through to get the Blaster in behind, and good leverage. It was kind of incredible how stuck if t was. It would only budge when the manifold was hot. I wonder if a cutoff wheel would be easier. Cut up what you can reach and chisel off the rest. Or maybe a different type of nut-buster. I don't know what's out there. I still have a nut stuck on a stud that I use as a bolt on my currently in-use exhaust manifold. It all went together right in the beginning but later the nut and stud came out together. I just use them in the hole they came out of that way.1 point