Leaderboard
-


Zed Head
Member1Points18,728Posts -

Captain Obvious
Member1Points9,805Posts -

Hardway
Member1Points1,332Posts -

rossiz
Member1Points1,109Posts
Popular Content
Showing content with the highest reputation on 11/10/2017 in all areas
-
 1 pointAs Site says head work is not cheap, but that's where the most "bang for the buck" is. The reason it's so expensive is it is very labor intensive with hours of careful work by someone who knows what he is doing. I got lucky in that a friend of mine had done all the work and installed a Delta stage II cam. He sold it to me complete with an MSA 6-1 header and exhaust system for $800. He had moved on to turbo-charging as he had found a ZX turbo motor that had been removed from a car that had been stolen and wrecked new from a dealer. The motor and tranny had been just stored in a garage for many years. I put the N 42 cylinder head on an F54 block from an '83 ZX N/A. The combo of the N 42 head with the F 54 block produced a 10-1 compression ratio which requires premium gas. Cheers, Mike1 point
 -
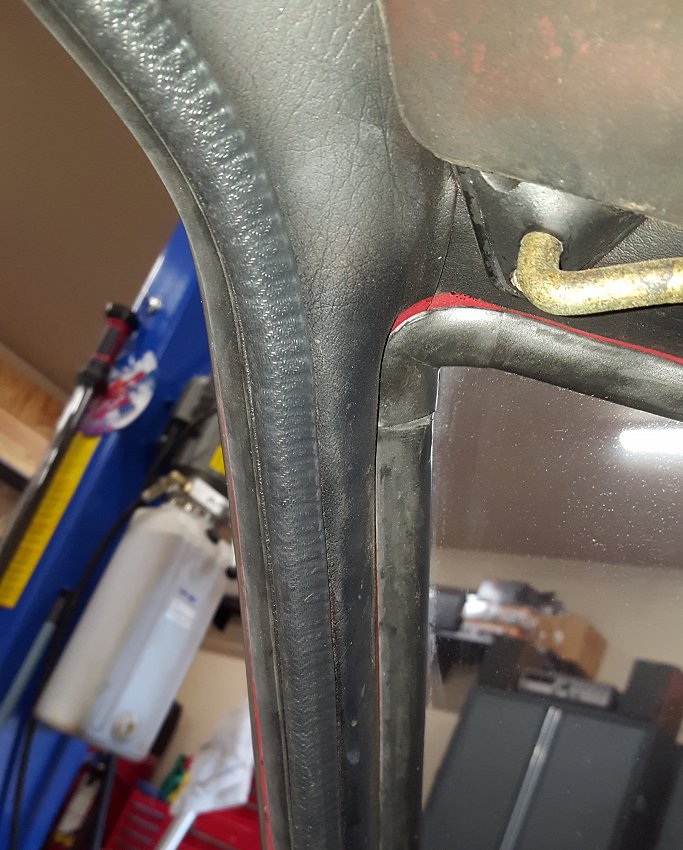
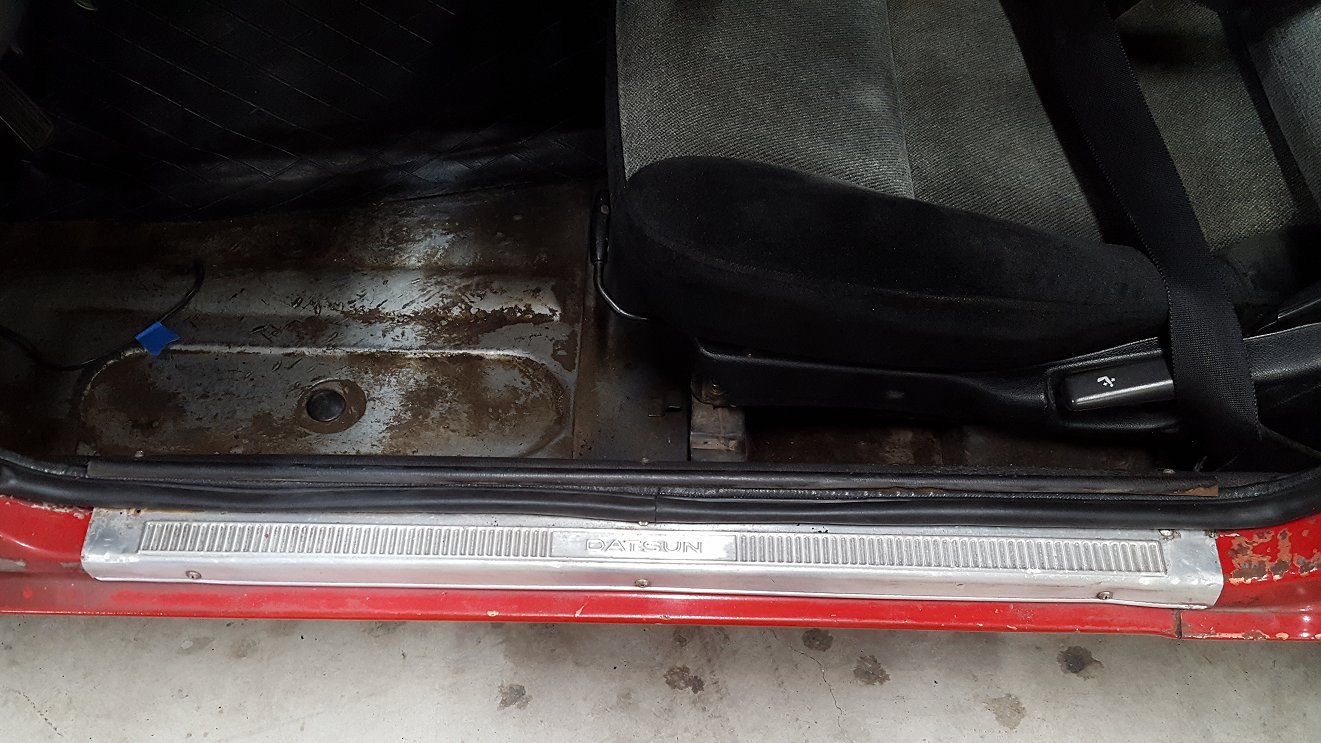
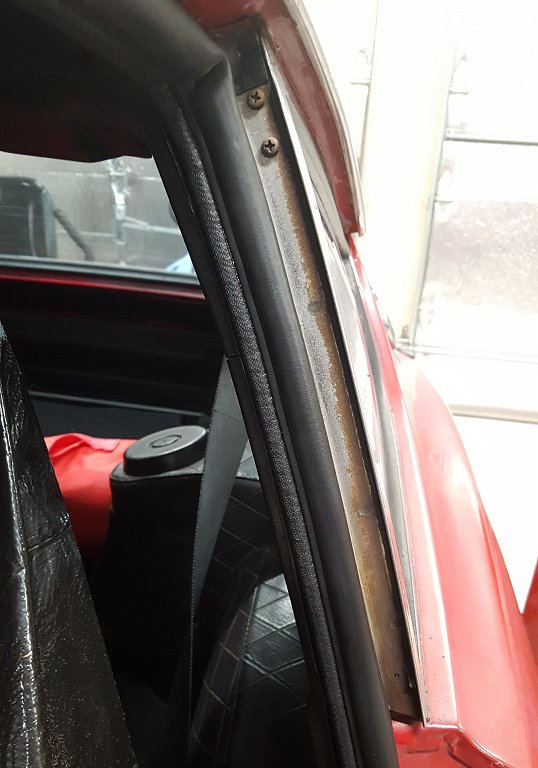
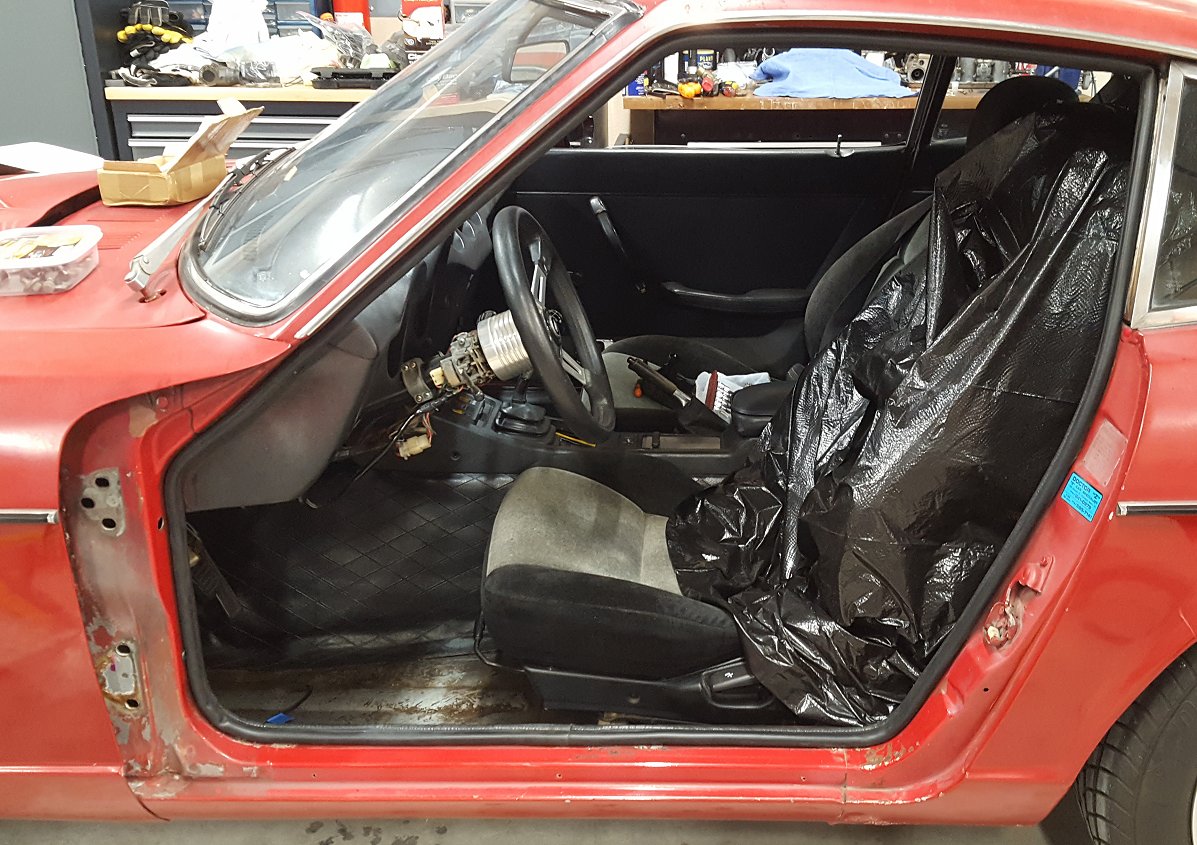
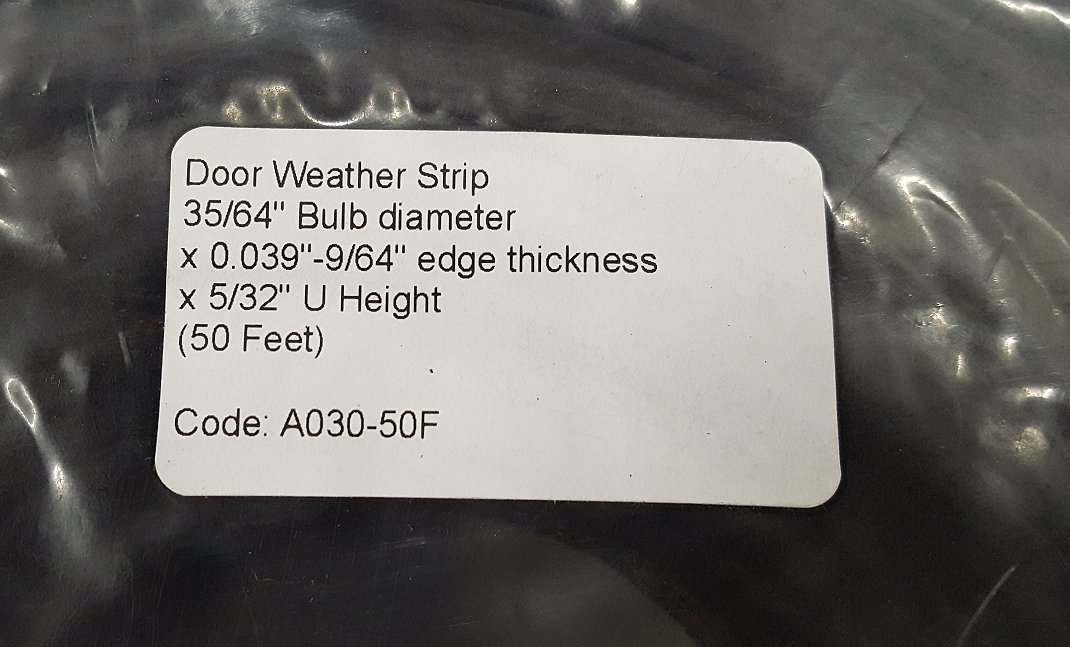
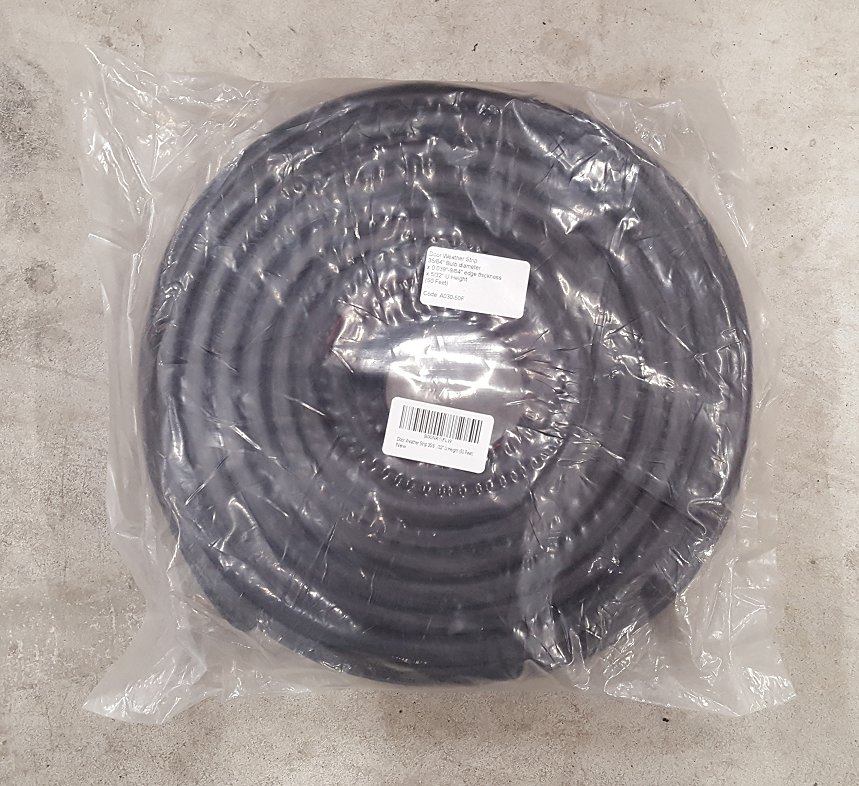
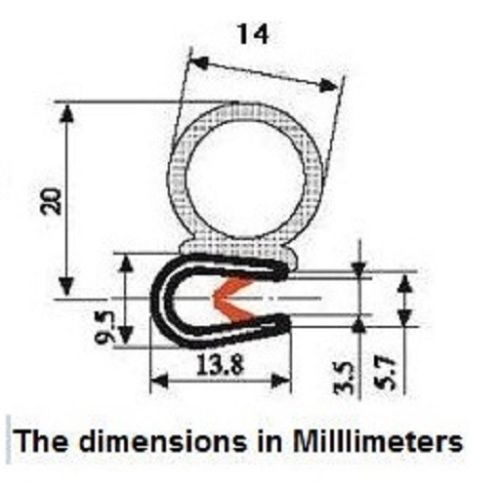
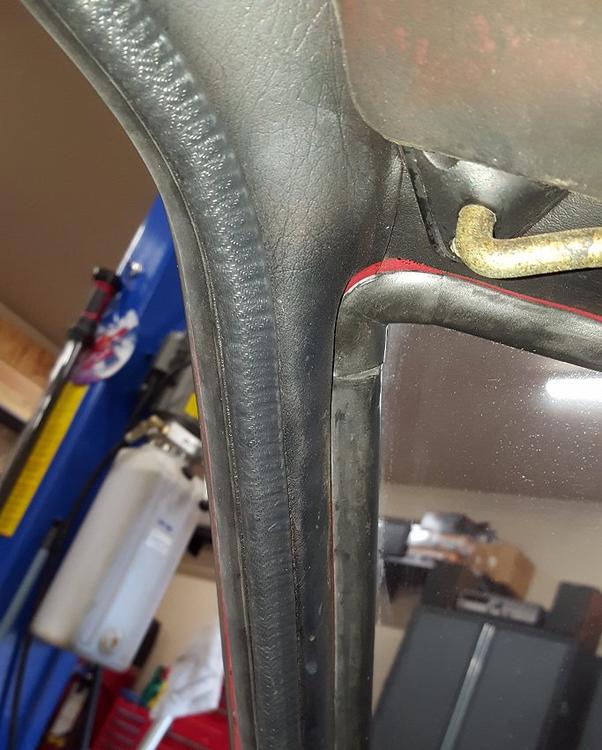
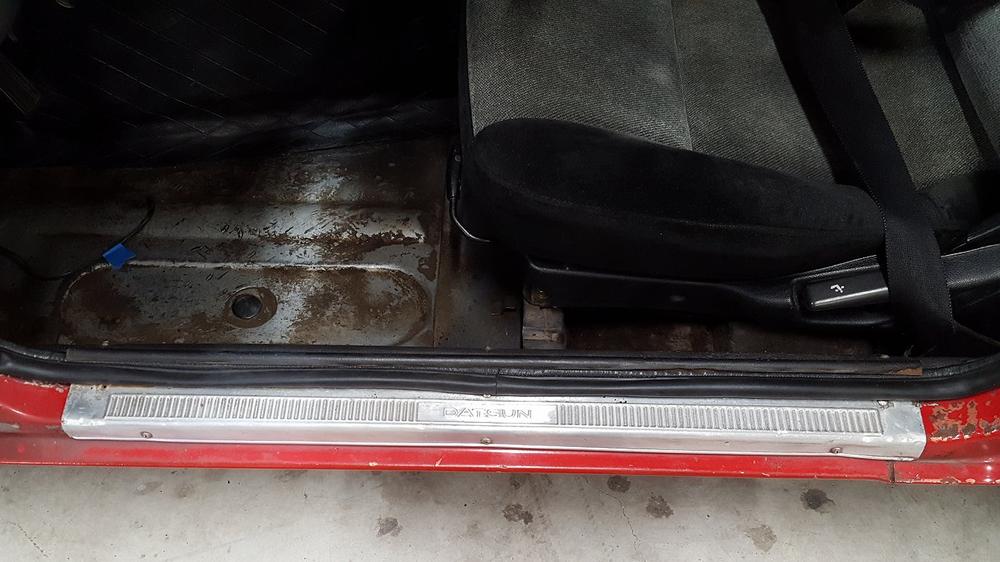
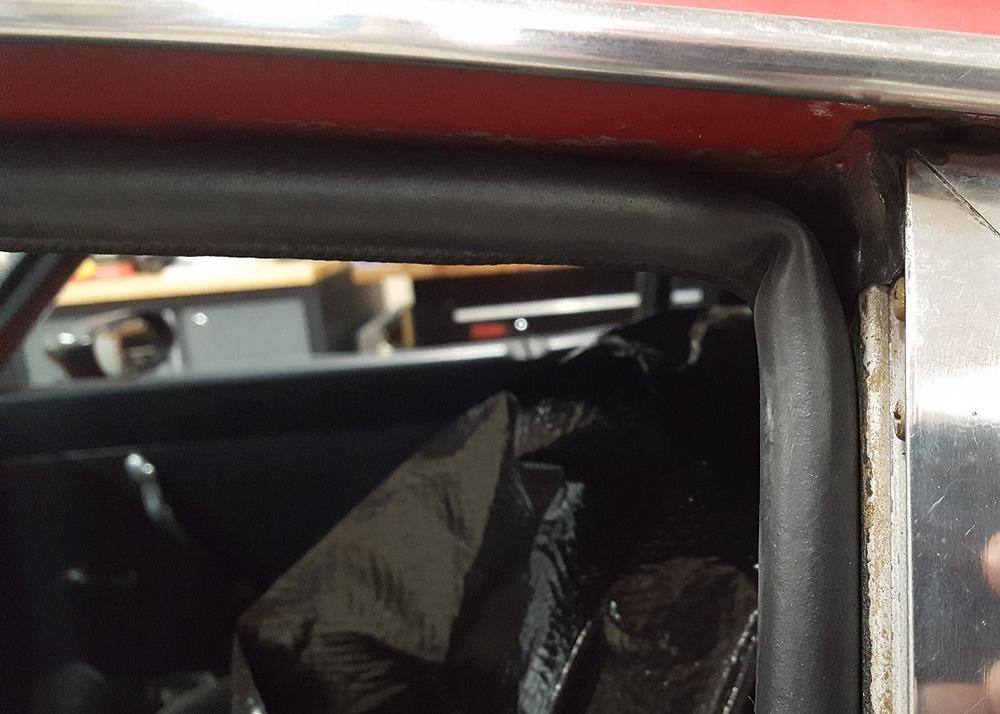
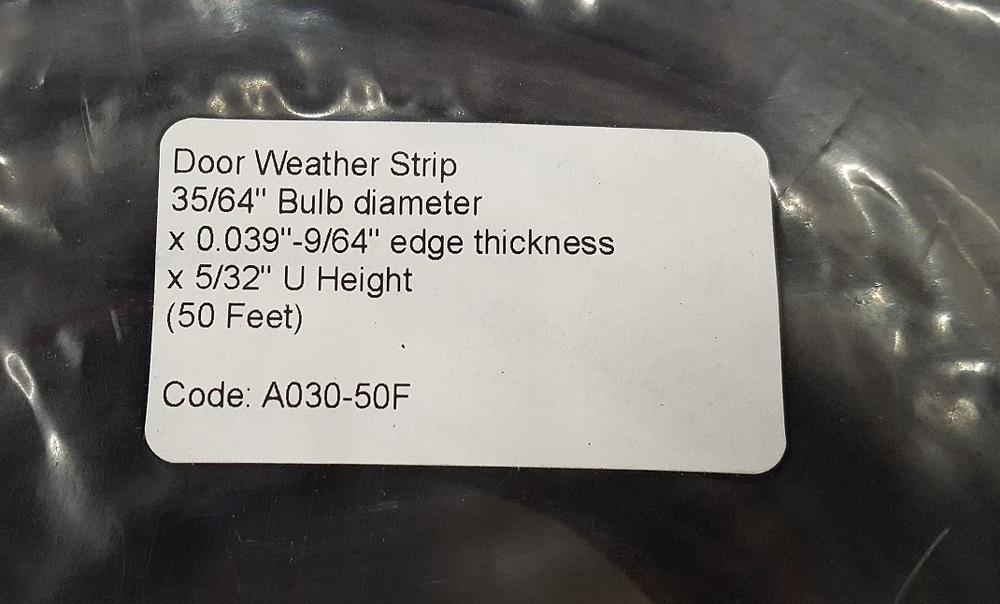
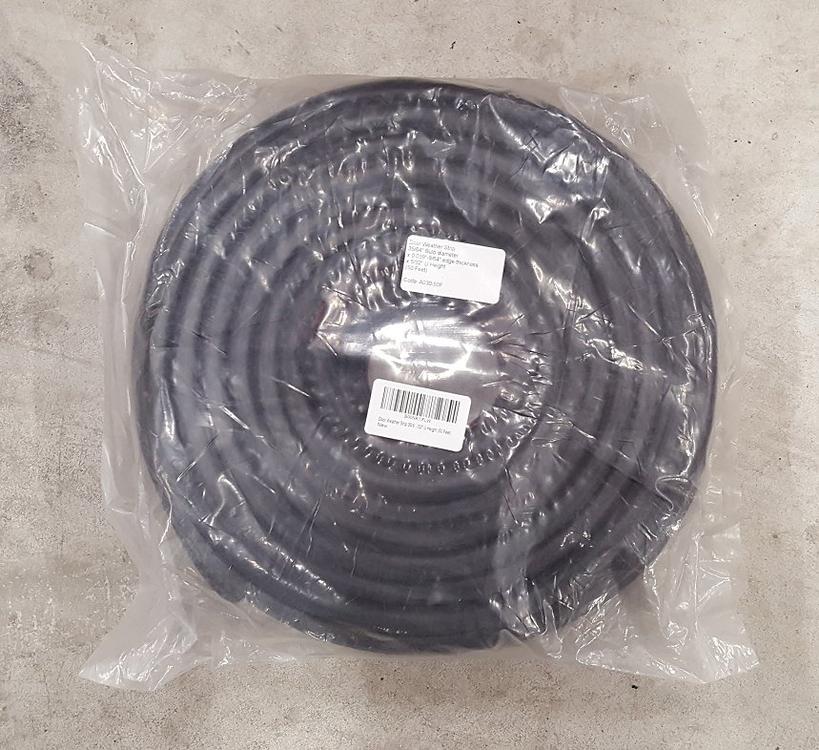
My direction for the weatherstripping was to simply replace it with something that could get me by for awhile as anything was better than the rock hard crumbling stuff that I pulled off. Used KIA Sportege seals are no more due to age and new ones after shipping from Korea run about $50/each. I started researching some universal options that was not too big as the pinch weld is right at 13mm tall. I found some universal bulb type weatherstripping on eBay from a seller that sold it by the foot. I wanted something that including the U-channel and I didn't want to glue it on so I ordered 35ft from the seller. At $1.50/ft + $3.00 S&H I was in it for $55.50. To my surprise when the box arrived it was from Amazon and had an entire 50ft roll in it. For anyone that is interested the seller is m.m-rubber and the item number is 141008758040. The rubber bulb is very soft and easily collapses. I won't know if its too big until I get the door back on but for now it looks miles better than before. Below are some pictures from the eBay auction that give a close up and tech specs of the weatherstripping. I really had to work the weatherstripping to make it turn at 90 degrees at the top. It seems tight but only time will tell if it will stay. While I had the door sill plate off I took some fine steel wool to remove the red over spray and give it some shine. I also located the missing screw later in the day. I had to work the sill back on as it kept getting caught on the weather stripping. Once the door is back on and closed everything should even back out along the bottom.


 1 point
 -
 Thanks Carl, i would add Ontario, Canada to that statement as I understand they got the VRS even in 1970 but the rest of Canada did not follow suit until the 1971 model.1 point
 -
 Hi For vehicles manufactured in 1969 and early 1970, California CARB was the only requirement for gasoline vapor recovery on cars sold in California. Of course at that time California was the single largest market for Datsun in the USA as well. The Federal EPA was expected to follow California's lead in this area - and it did sometime the following year (1970). So from a production perspective it made sense to make gasoline vapor recovery standard equipment on all Datsun 240Z's at some point. Nonetheless, any 240Z's not equipped with gasoline vapor recovery systems - could have been legally sold in States outside California. Interesting side note: The early 1970 Factory Service Manual - Chassis and Body - On page FE-4, Figure FE-9 (a picture of the fuel tank) is noted: "Fuel Tank For California" - and is shown with the Evap. Recovery System. "A reservoir as shown in FIG FE-9 is provided so as to relief expansion and bubbles due to heating (for California, USA). The Service Manual only identified HLS30-U as being for USA/Canada. FWIW, Carl B.1 point
 -
 So this chapter is now closed for the winter. I finished the mechanical/electrical stuff to make it operational and mostly safe, then put it in storage until next spring. We'll see how I feel about its fate then. Restore, flip, pass on to friends (^). Fun to find all the Canadian UN specific stuff (or lack of stuff) on this one. Hope to find others. I have another 510 project to work on this winter and couple of friends with strip/paint/re-assemble projects and the usual quicky stuff that happens, and that's enough. Keep tuned spring 2018.1 point
 -
 1 pointWhat sells here are 240Zs, don't worry with 'series 1s', there's no premium here for having an early one.1 point
 -
 Found them on Ebay of all Things I Initially bought it to remove paint from bolts and stuff. That didn't work out well. Paint seems to hard to remove and needs blasting or paint-stripper. Then switched to the Delfir-chips which worked really well to remove dust, grease and rust from small parts. Also had to figure out that a 4:1 mix of Chips to water (with a few drops of dishwashing-soap) doesn't create too much of a foam or mess, but works well enough to remove the grease and so on. and last but not least i figured out that you need approx 12hours for all parts until they're mostly clean. If you prepare the very rusty parts with a wire-wheel brush the results get even better.1 point
 -
Bumping, just because $12,280 is pretty good for a 76 280Z. Hagerty numbers make somewhere in the 20's seem reachable. Polish those treads... Six days. https://www.hagerty.com/apps/valuationtools/1976-datsun-280z1 point
-
 1 pointGreat pictures and outstanding job bringing this classic back to life. My "71 Series I is a sister to yours and spends too many months in garage without activity. But it still starts and runs good after 188,000 miles without major engine overhaul. Did have to move it 2 weeks ago to get access to hurricane shutters in prep for Irma
 1 point
 -
1 pointYes, I turned the small sides in. I found I liked the fit better with the short sides inboard towards the strut body. I found that if I reversed the bushings and centered them in the arms, I ended up with too small of a gap where the strut knuckle fit between the two bushings. Of course, since it's just rubber, I could have forced the bushing centers apart a little and forced the strut body between them, but I figured if things lined up naturally without having to do that, it would be better. With the small sides in, when I centered the bushings in the receiving cylinders in the arms, it worked out almost perfect such that the distance between the two bushings was very very close to the width of the strut housing. Seemed to perfect to be coincidental. So I don't know if they were really designed to be that way, but it worked for me. And if you're seeing the same small difference on OEM bushings as I saw on aftermarket MOOG, then I'm starting to believe it really might be intentional. Hark... Did I stumble across something that isn't even in the repair manuals?? If you haven't already pressed your old rear bushings out yet, measure the distance between the two of them, and compare that to the width of the strut body. As for how to fixture the press... I've done so many press operations over the last few years that I don't remember specifically what I used, but it was probably a long bolt passing through one of the bushings to press against the other bushing. Either that, or I managed to fit the control arm down between the parts of the press and straddled the anvil? I don't think I have enough room on my press to fit the arm down inside, so it was probably a long bolt. Something just a little smaller OD than a spindle pin.1 point