Leaderboard
-
nix240z
Free Member2Points468Posts -


siteunseen
Free Member2Points14,903Posts -


wheee!
Free Member1Points4,607Posts -


Zed Head
Free Member1Points18,785Posts
Popular Content
Showing content with the highest reputation on 01/30/2018 in all areas
-
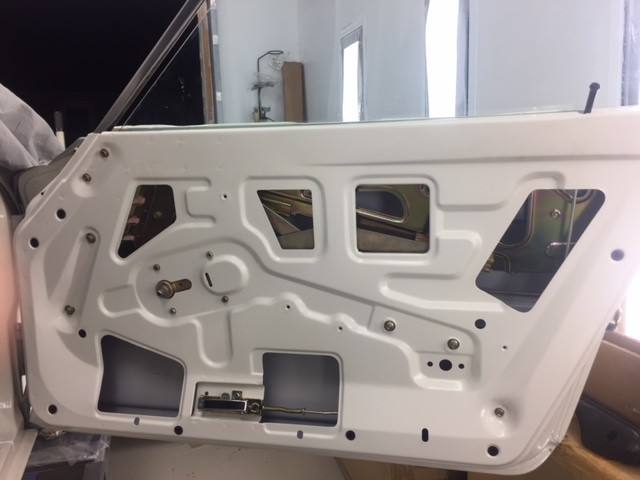
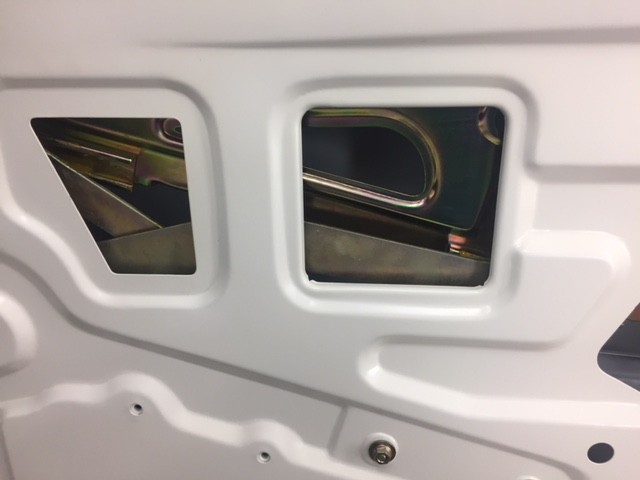
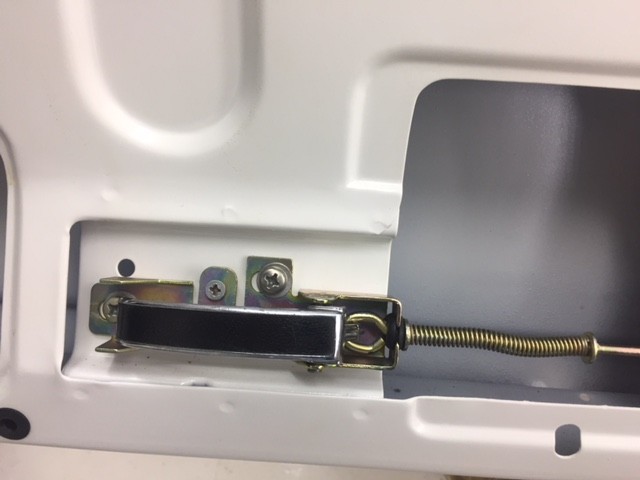
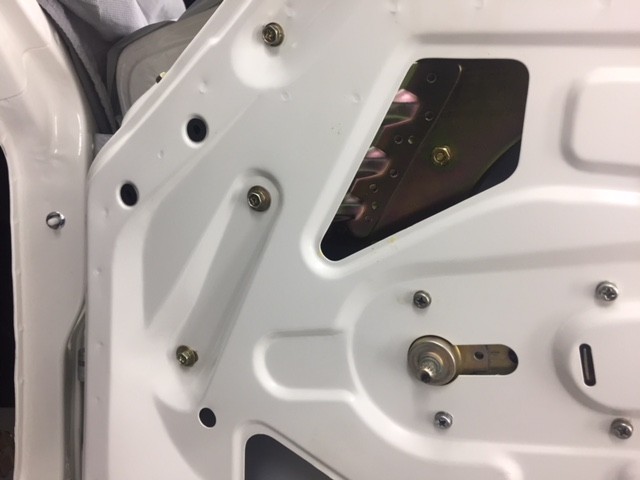
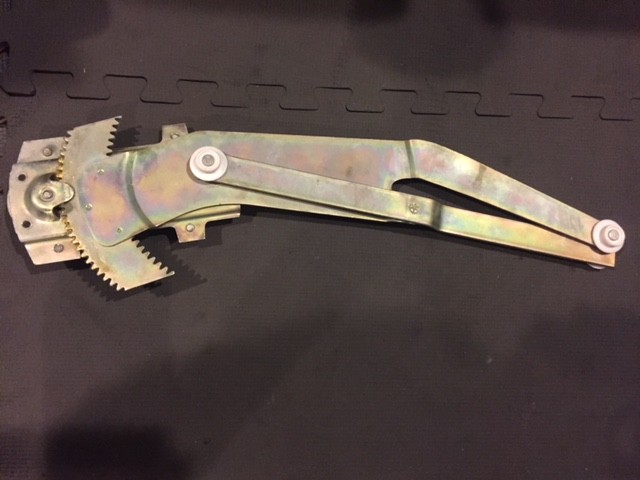
1 pointLooking for a picture of the original factory installed 240z inner door plastic vapor barrier. I have been so busy the last 3 years with www.240zrubberparts.com helping out other owners with their projects, my project has been stalled out. I started working on getting the doors back together today. Everything has been replated and installed new window rollers and cups.
 1 point
 -
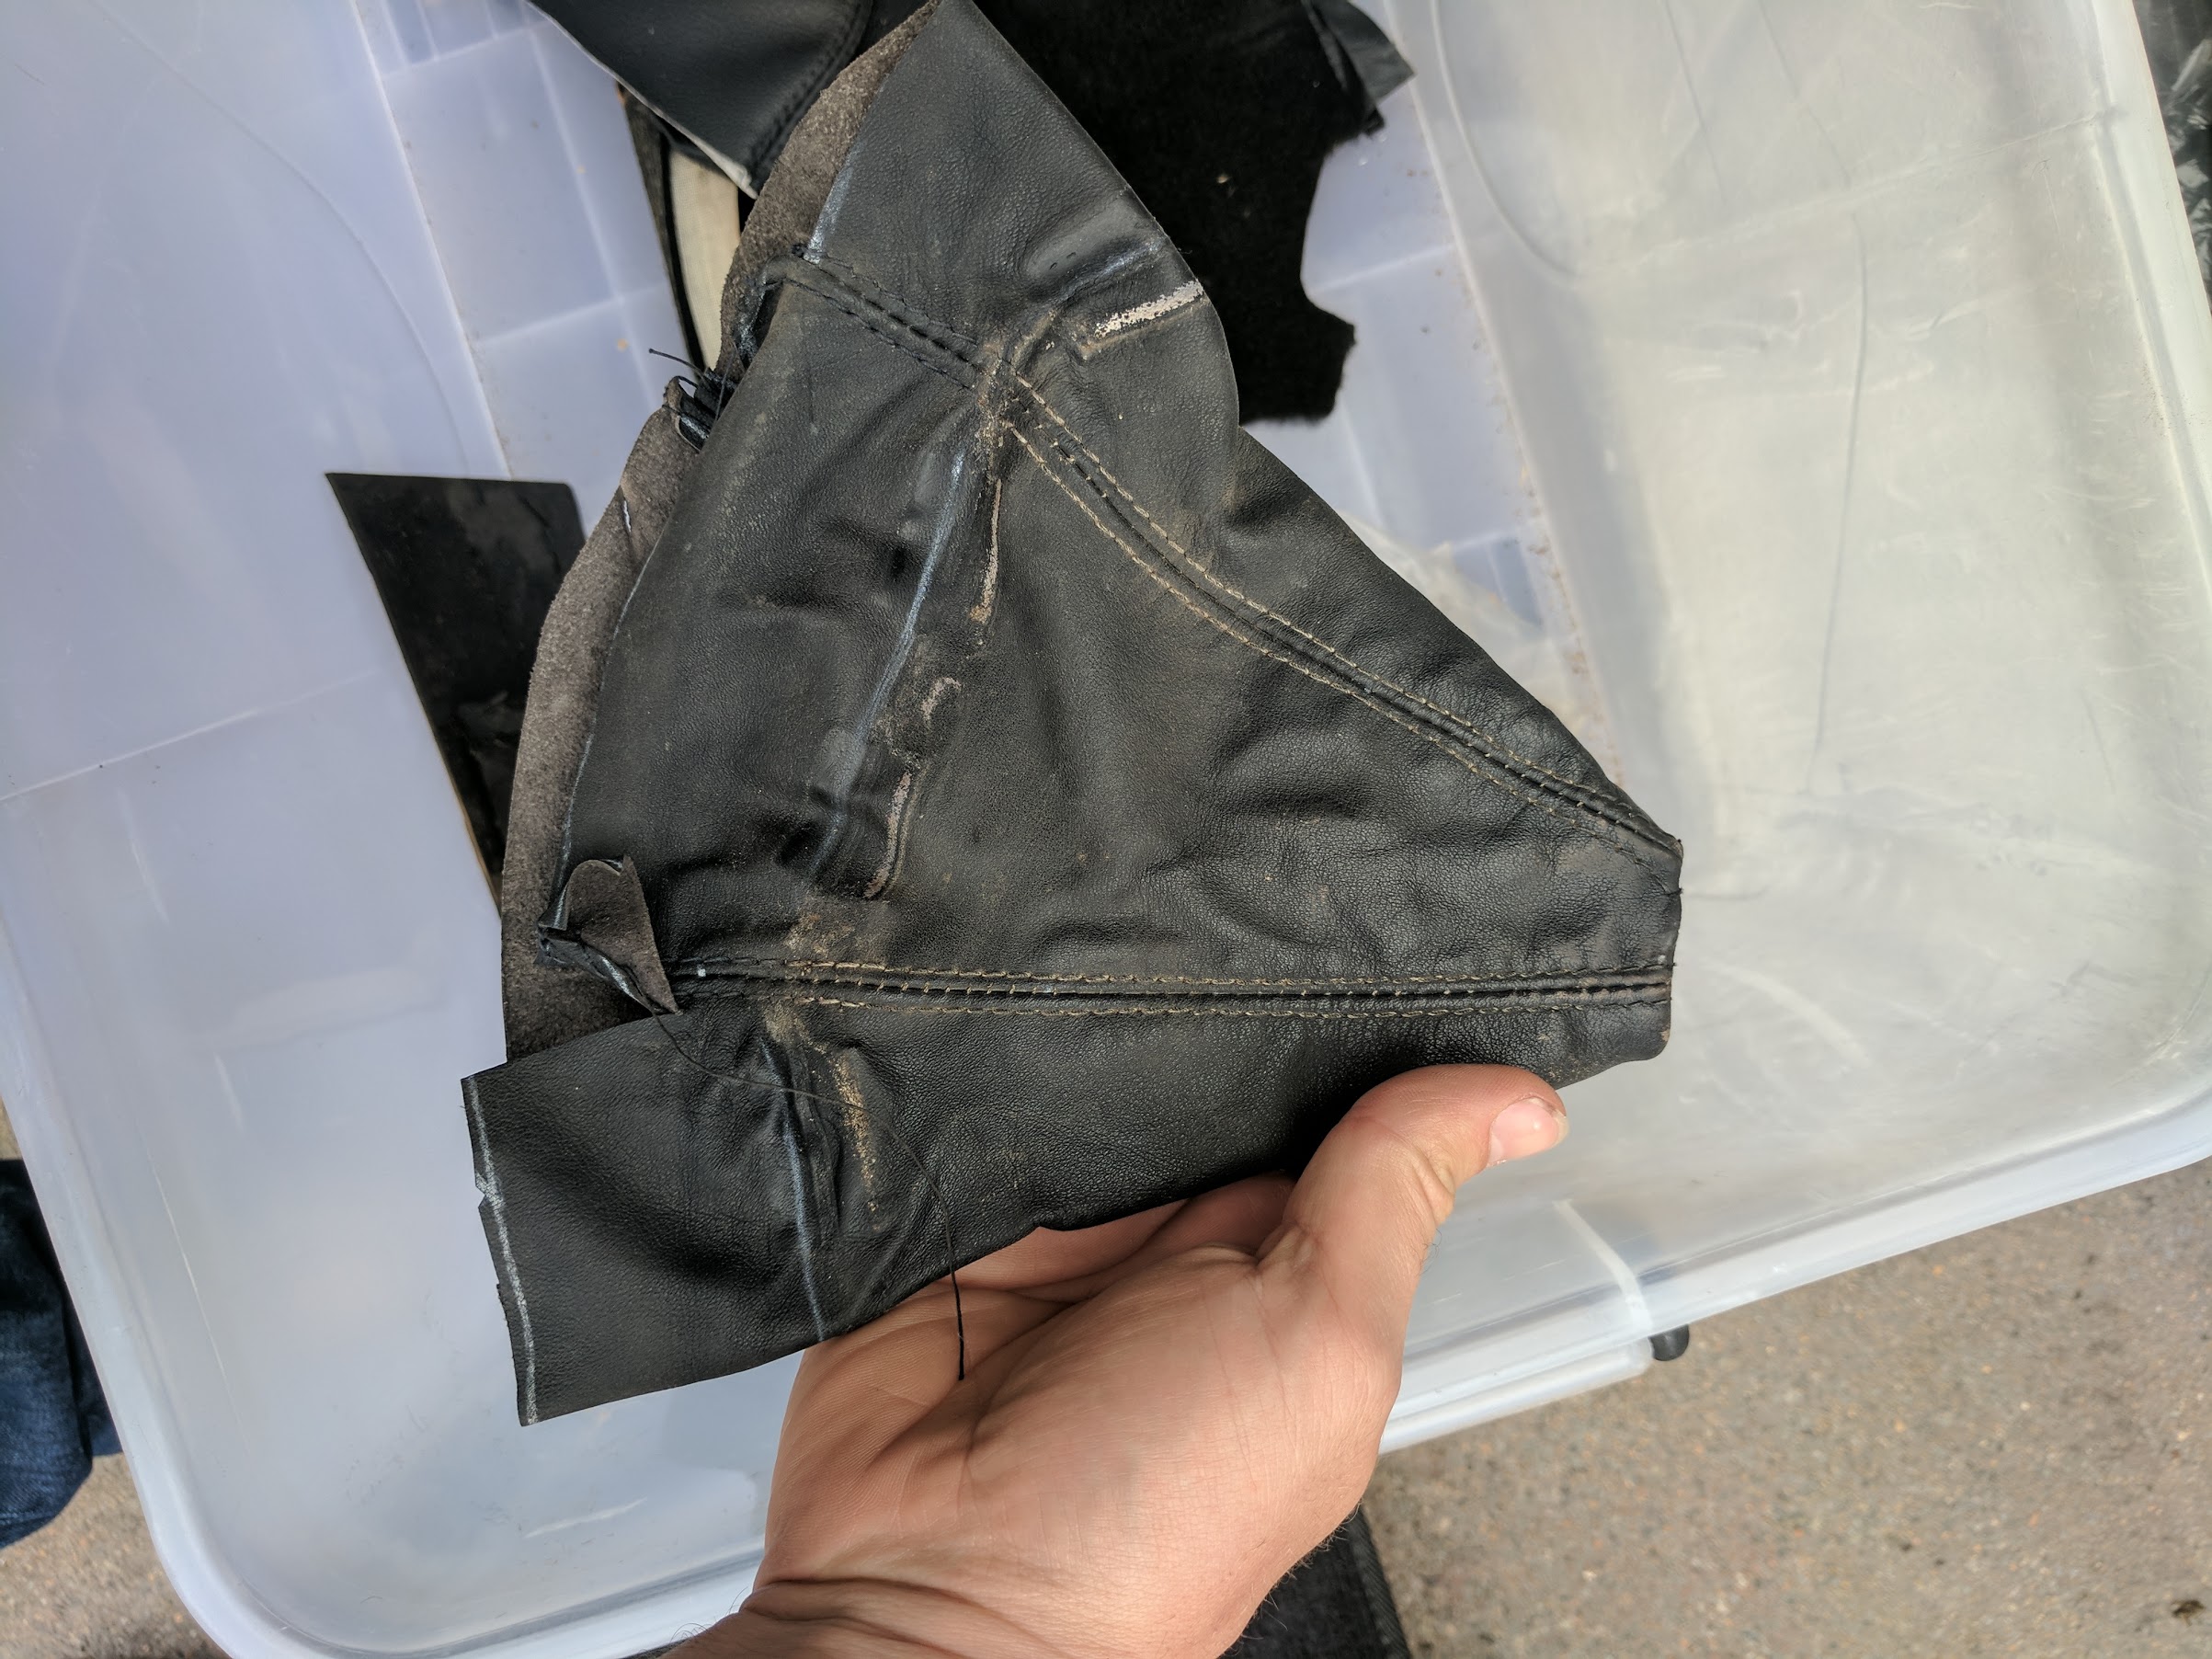
 1 pointHi Kats, I found 2 more photos of the boot after it was removed from the car. Perhaps it's not OEM as you say and aftermarket? I always thought it was original but now I think you may be correct?
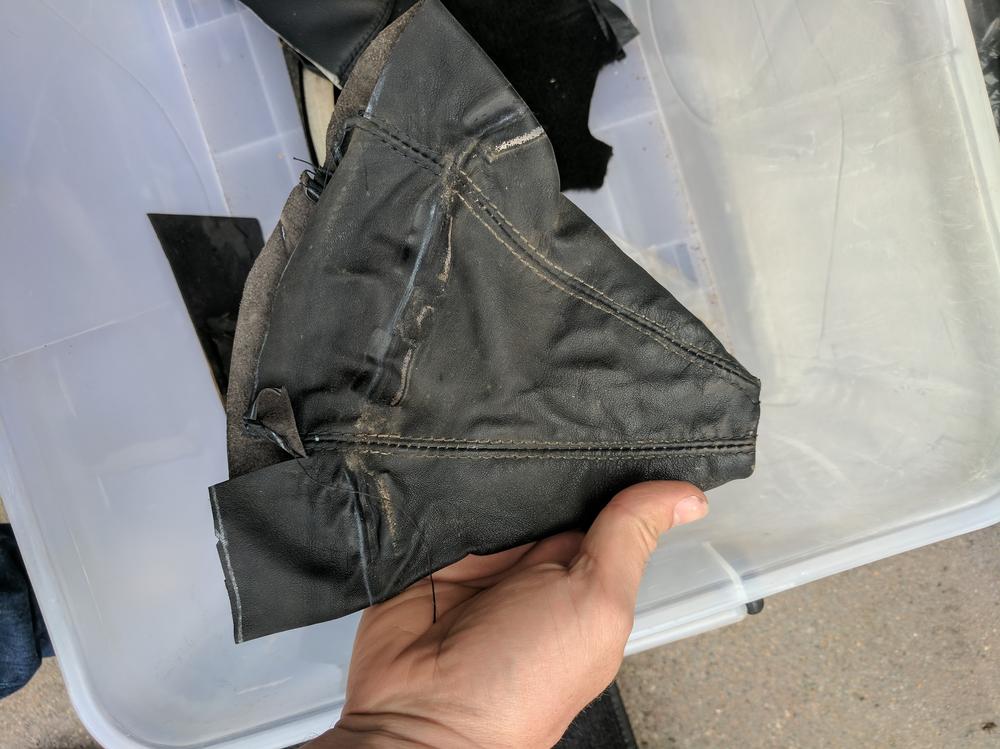
 1 point
 -
They're on "back order" now but you could call and ask about an ETA. http://www.futofab.com/index.php?option=com_content&view=article&id=131&Itemid=118#a_frontb I put these on mine and am very happy with them. He has a sale at Christmas and probably hasn't gotten his stock back up yet? Good luck.1 point
-
 1 pointI had something very similar a few years back, I tried everything including rebuilding the transmission, a year and a half later I tracked it down to the stick shift knob, there was just enough room between the threads of the shifter and the insert in the knob that it would vibrate at speed and sound like a ringing, A couple of turns of plumbers teflon tape fixed it. I spent a lot of money and lost a lot of hair figuring that one out, hope it works for you.1 point
 -
1 pointHere's something interesting. An F54 block dip stick is 6 7/8" inches from the High mark to the rubber seat. An N42 block dip stick is 7 1/4". So if you had a 280Z dip stick in an F54 block you'd be low on oil, because the High mark would be lower. Probably a lot more than a fraction of a quart though. Looking at the dip sticks does make me question their accuracy though. It's just a rubber seat on a piece of metal.1 point
-
1 point
-
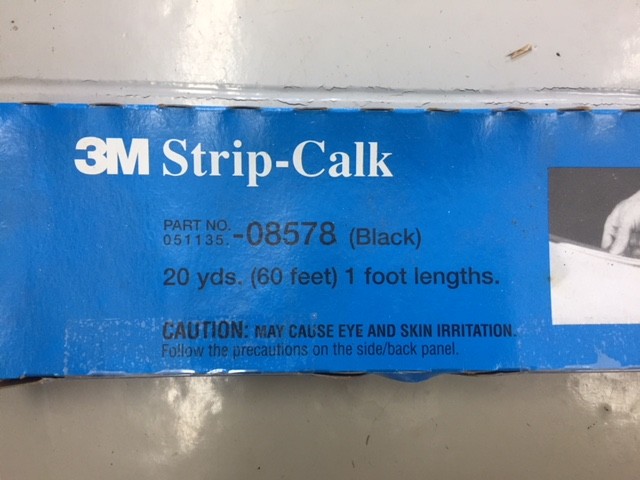
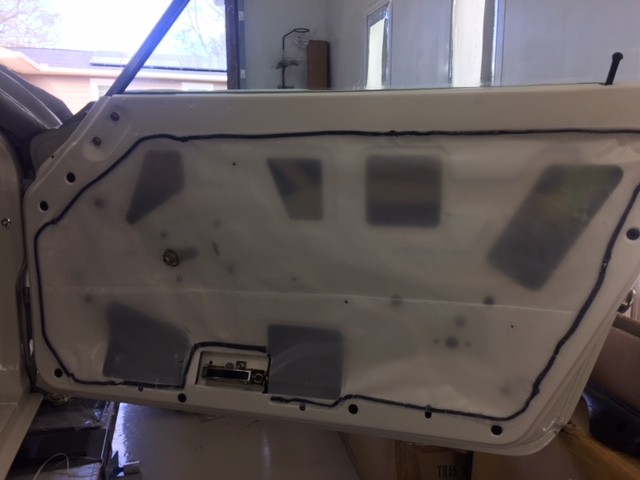
1 pointThanks for the tip... I used 4 mill plastic sheet and 3m strip-calk.
 1 point
 -
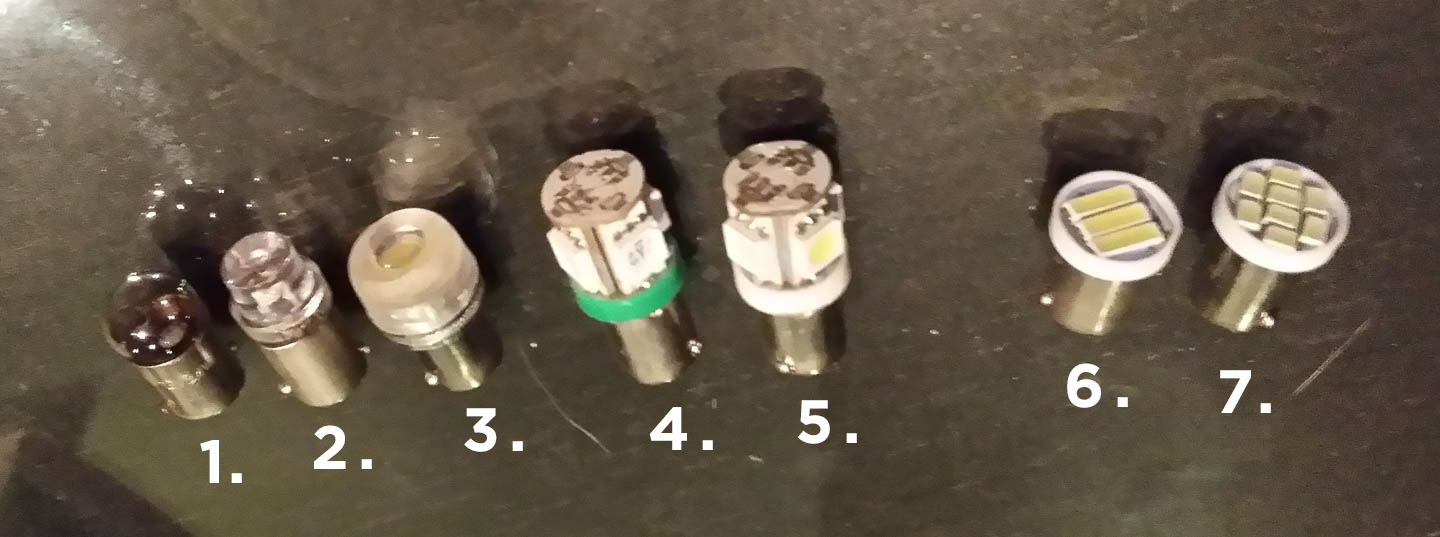
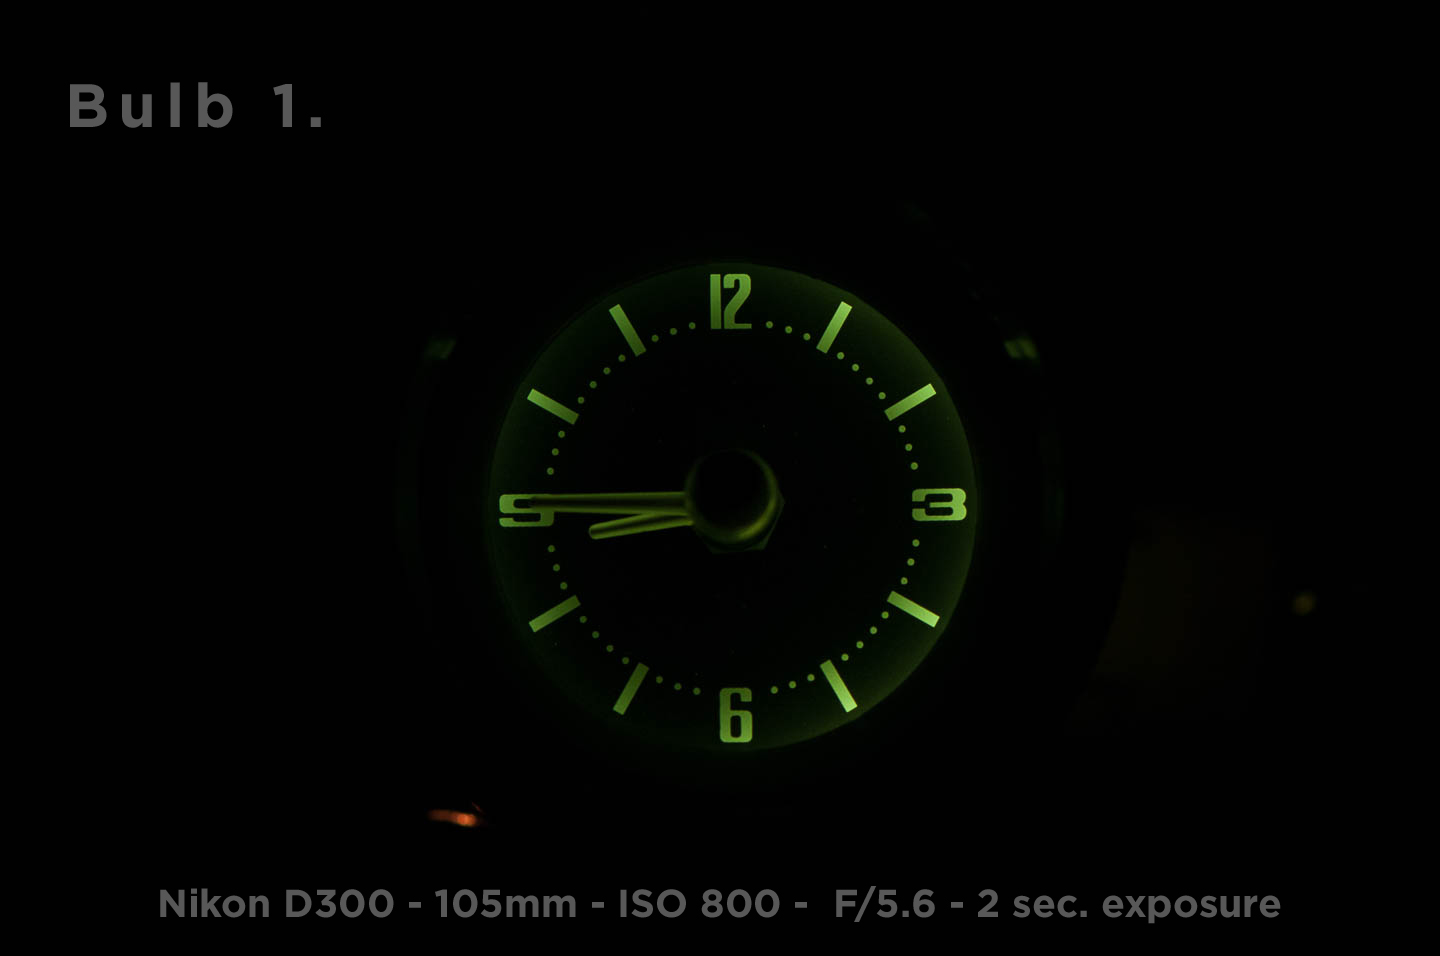
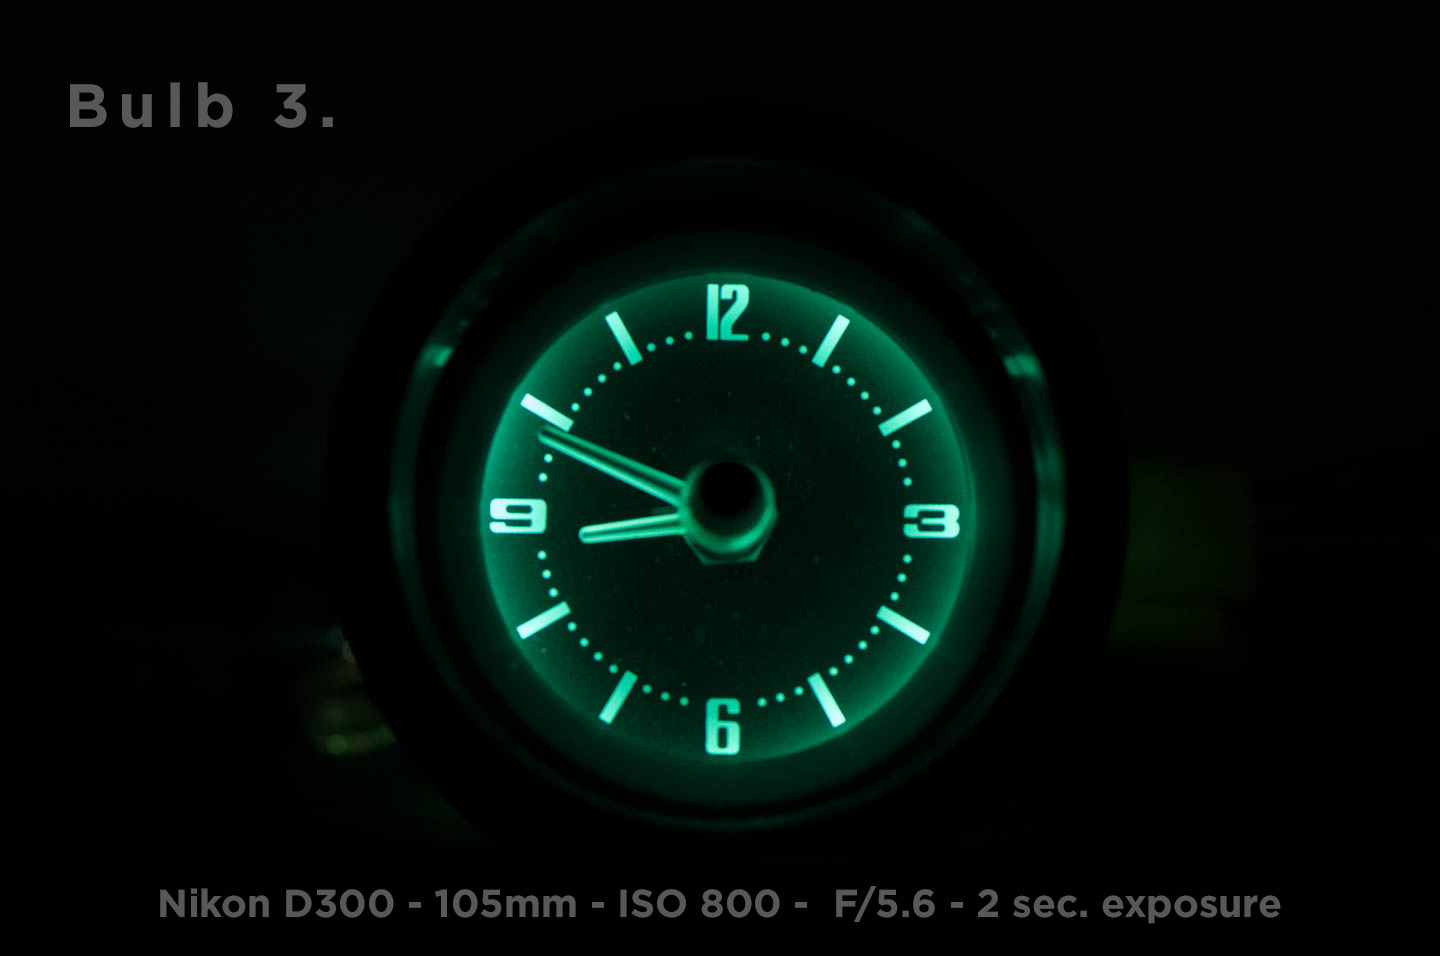
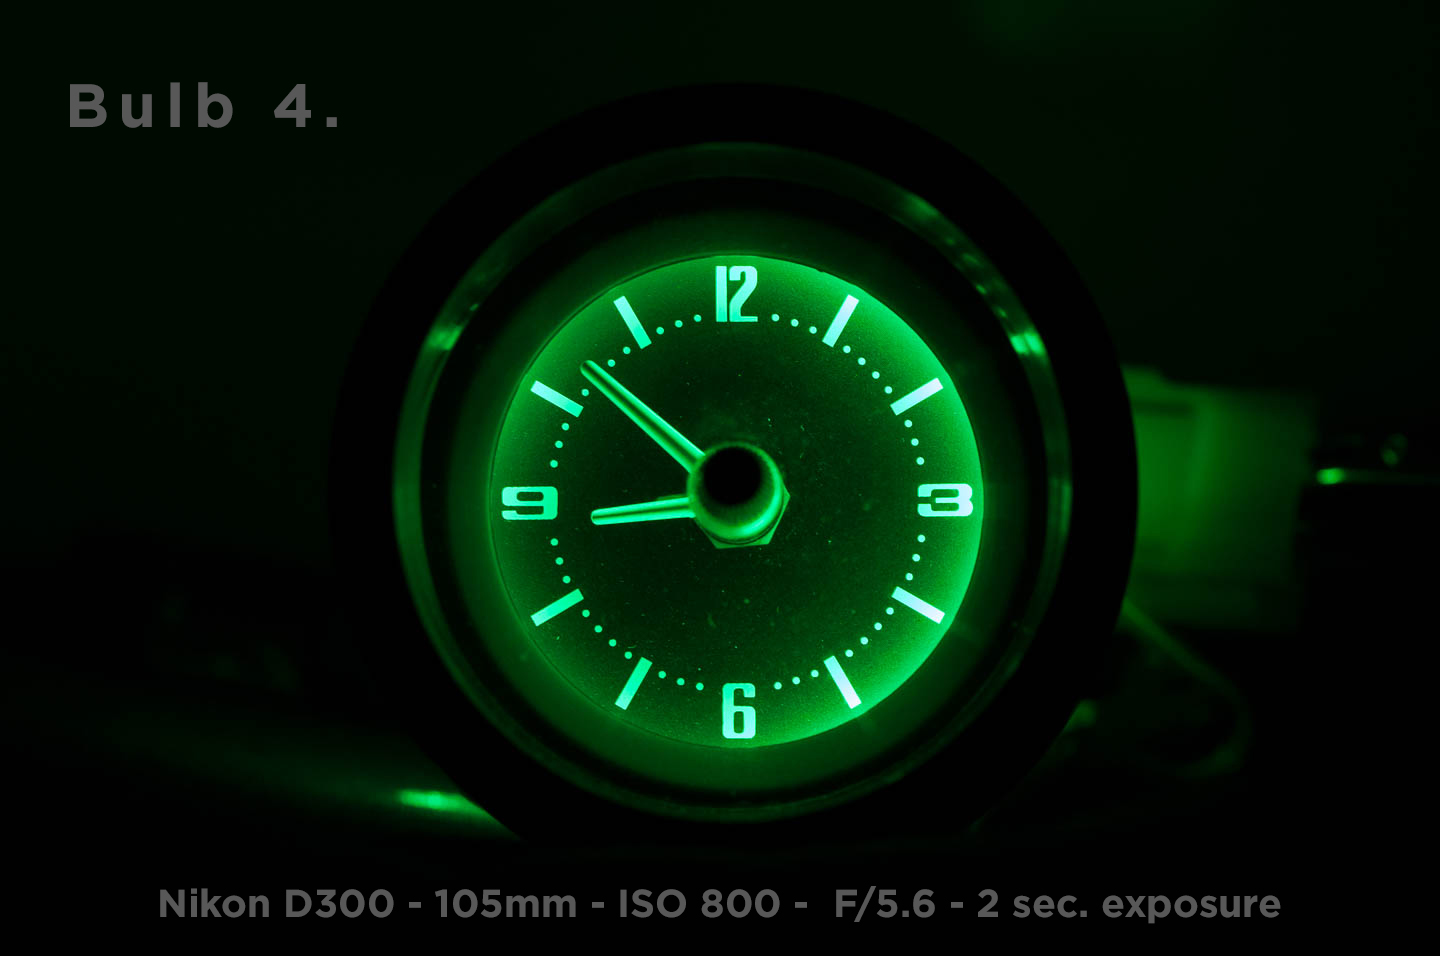
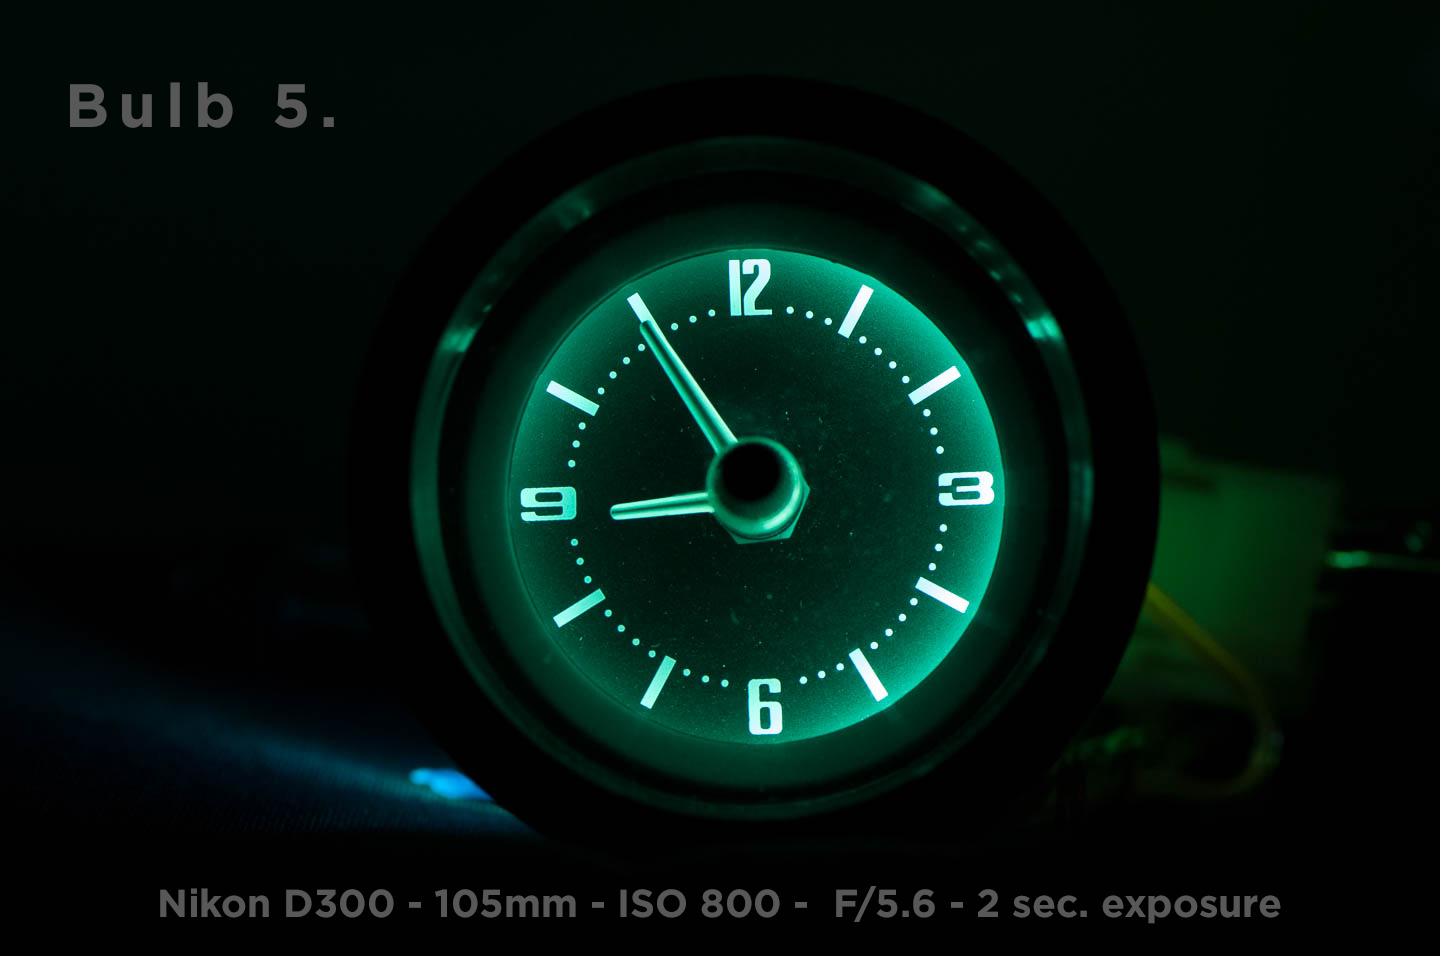
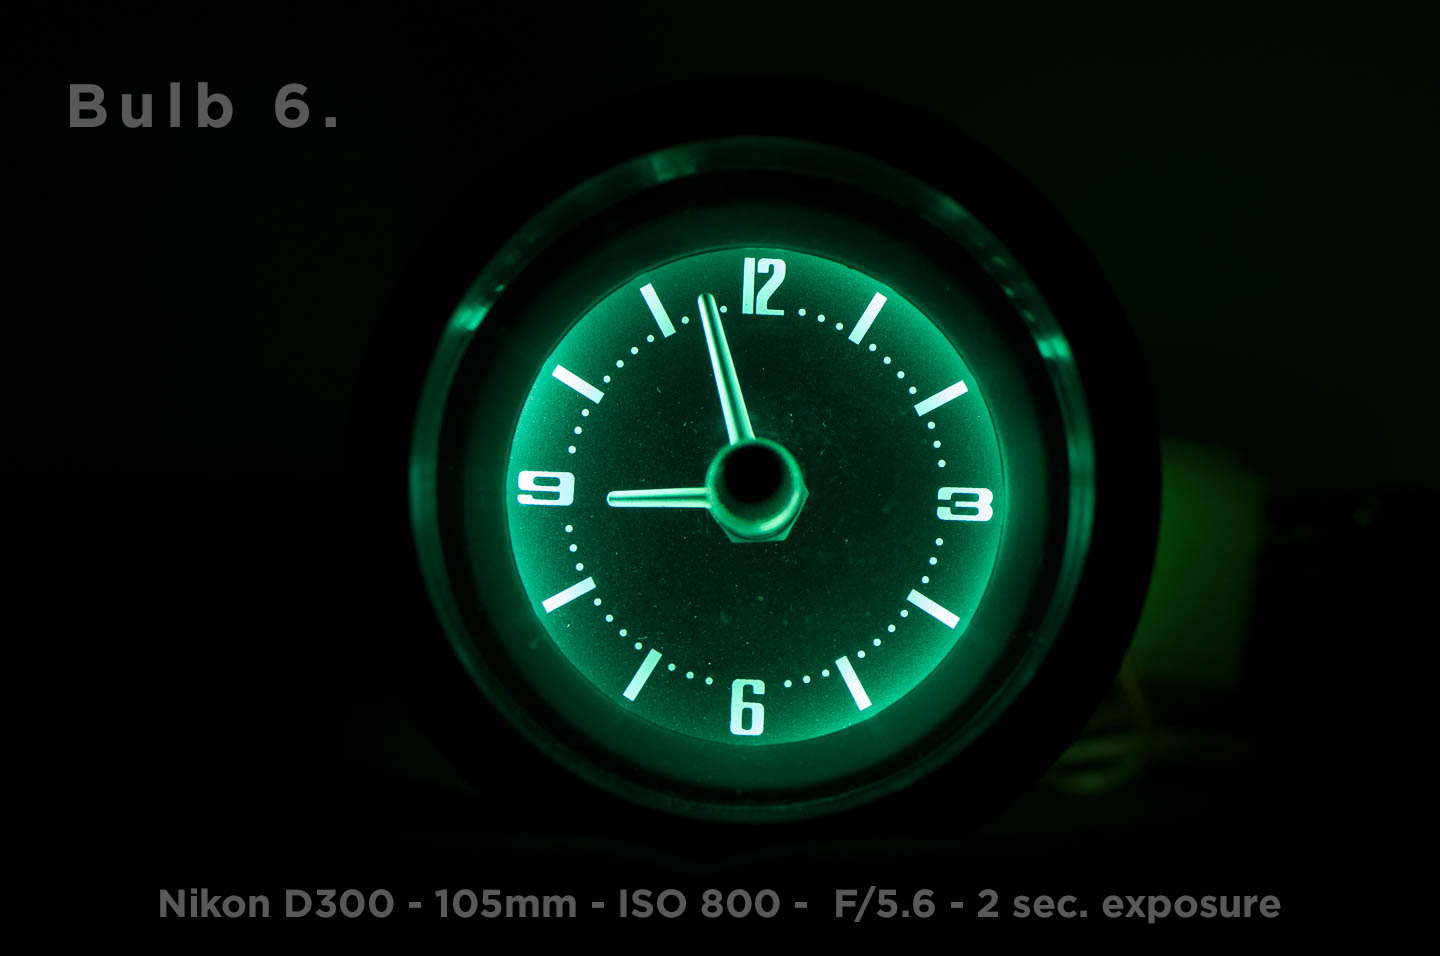
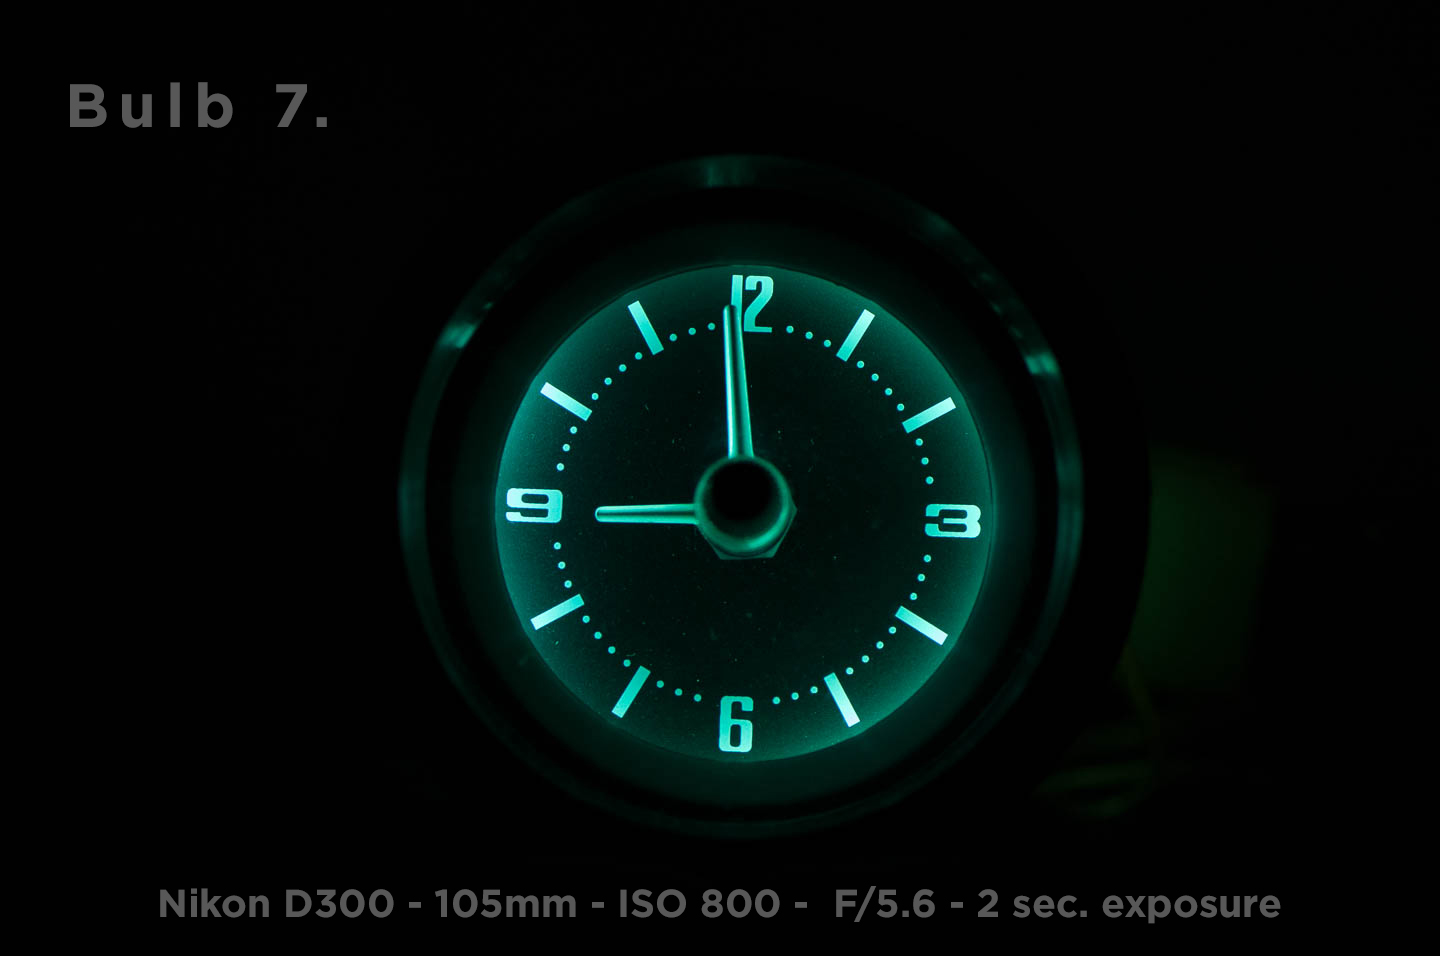
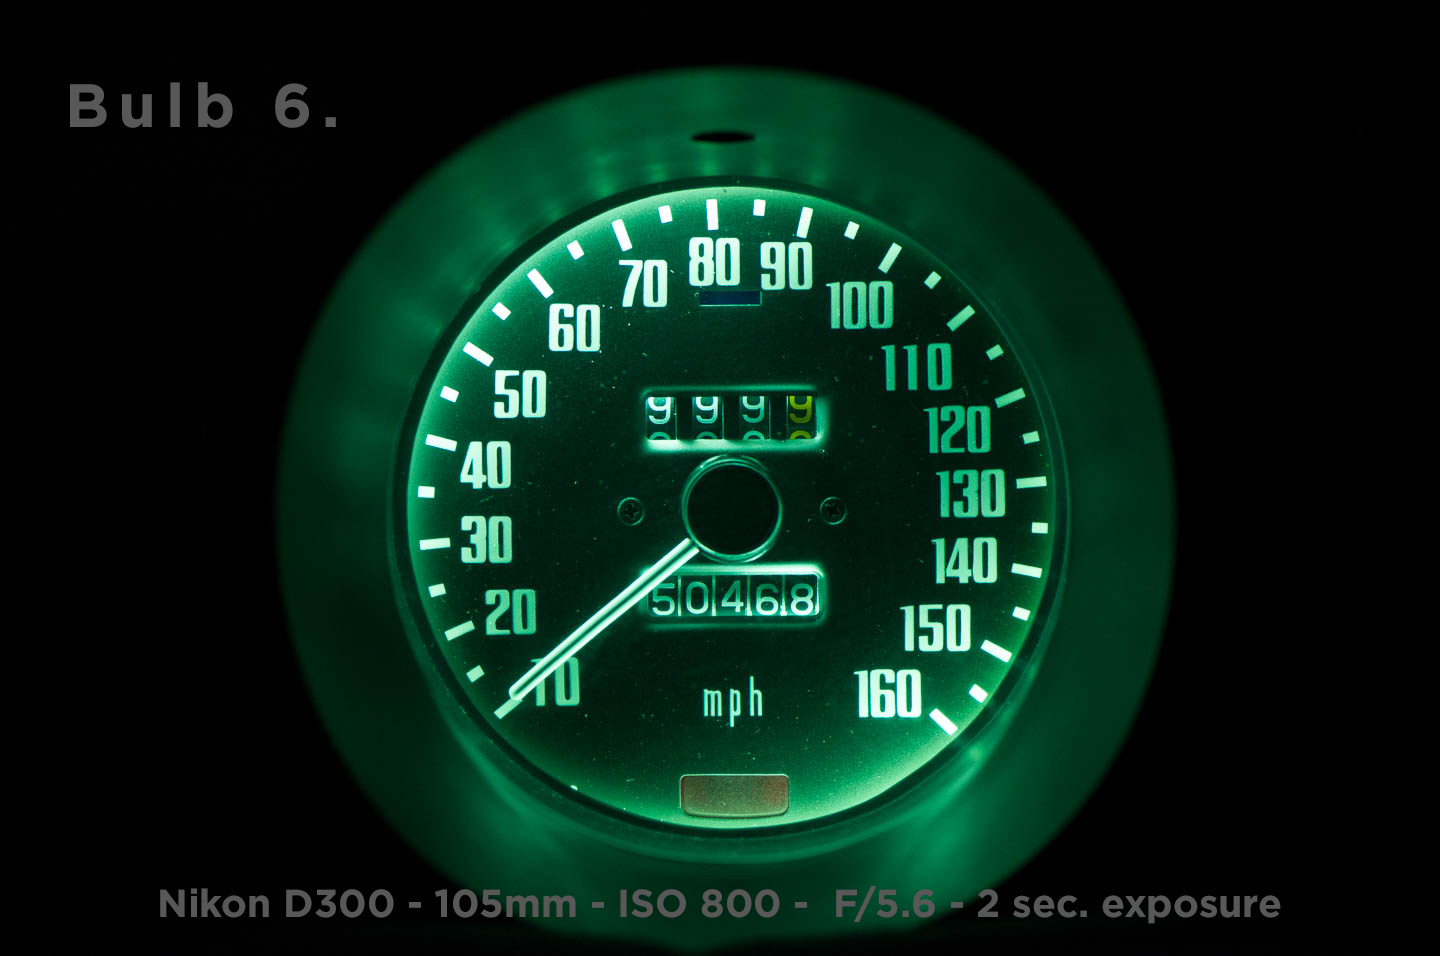
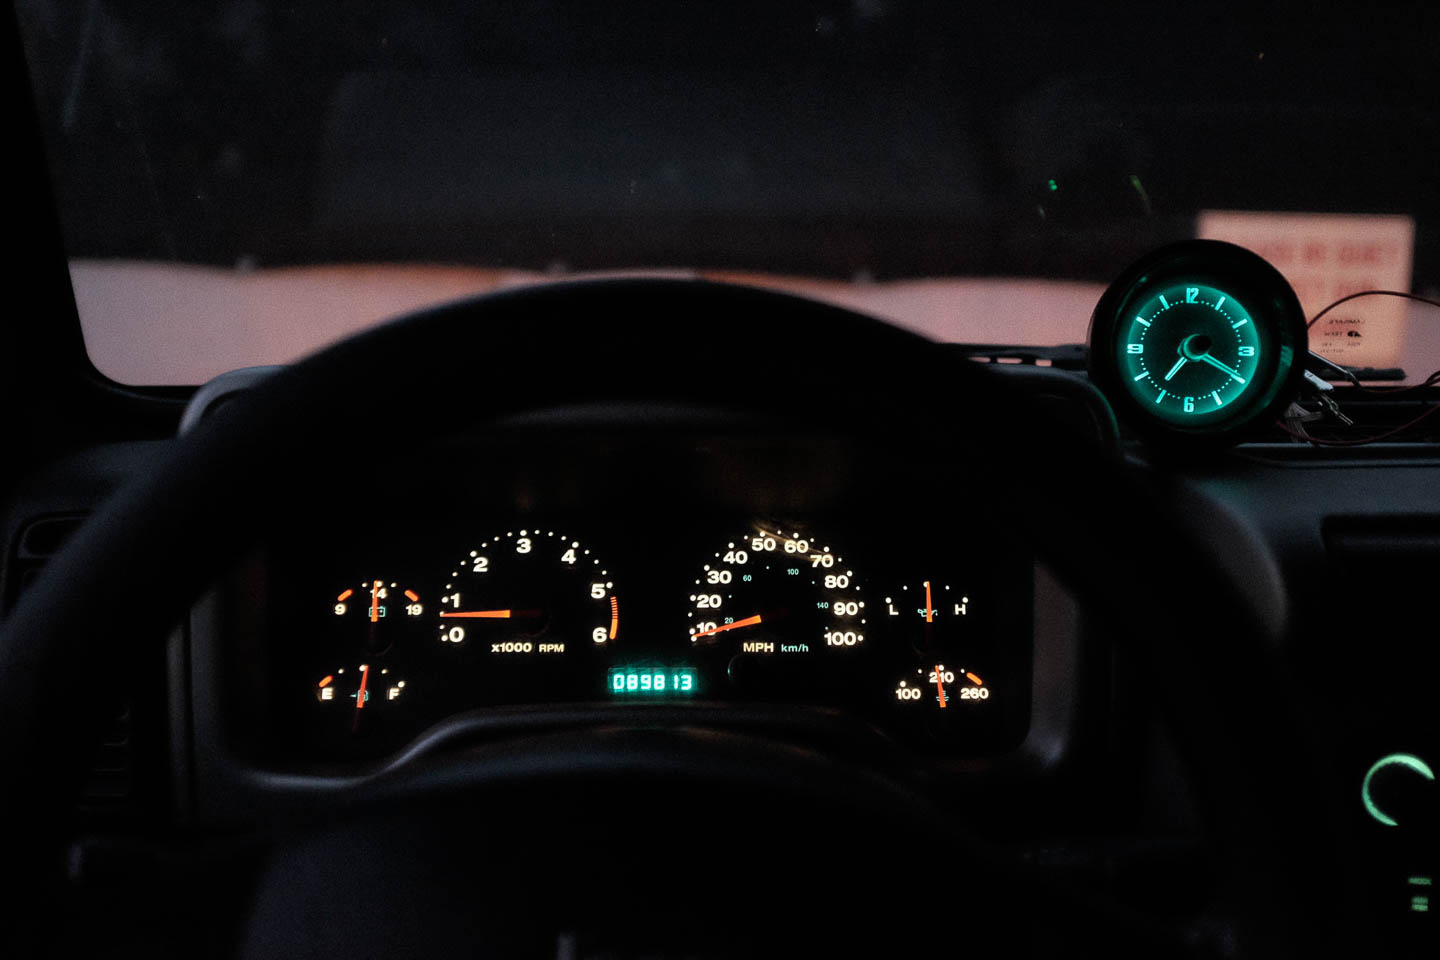
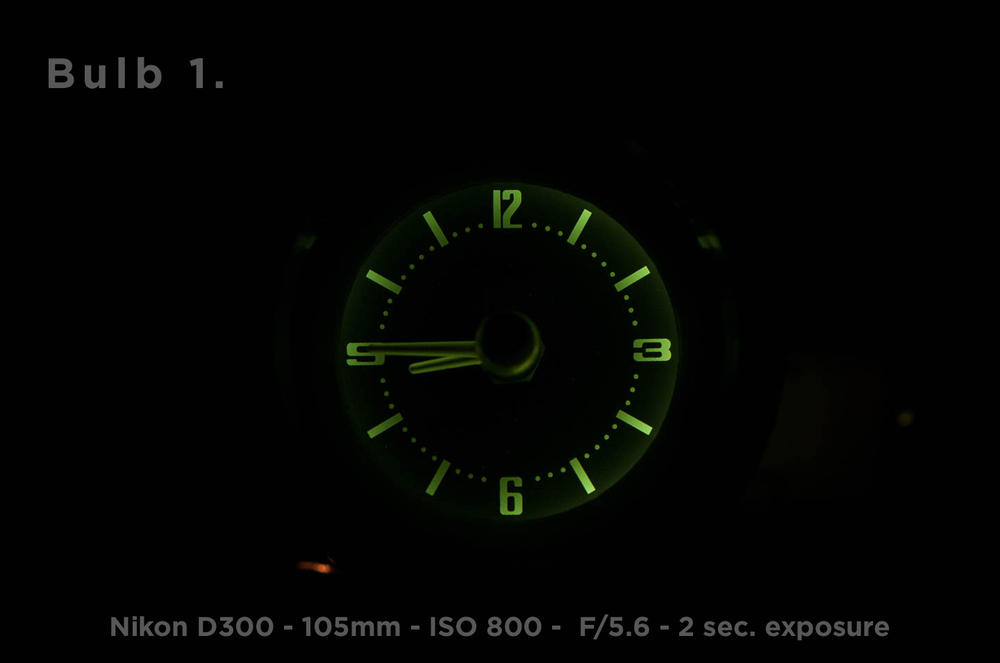
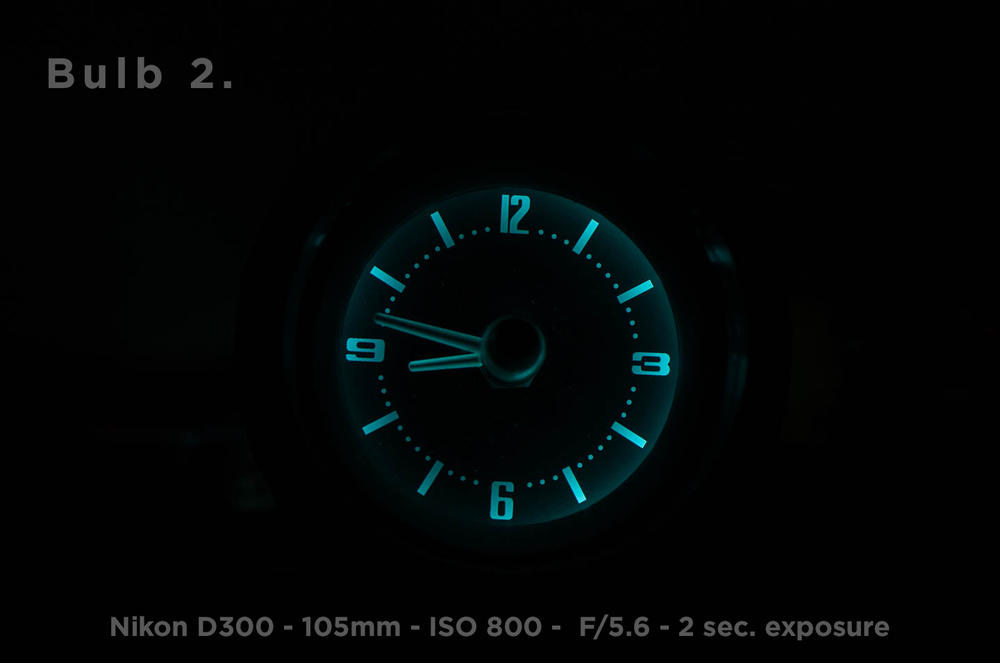
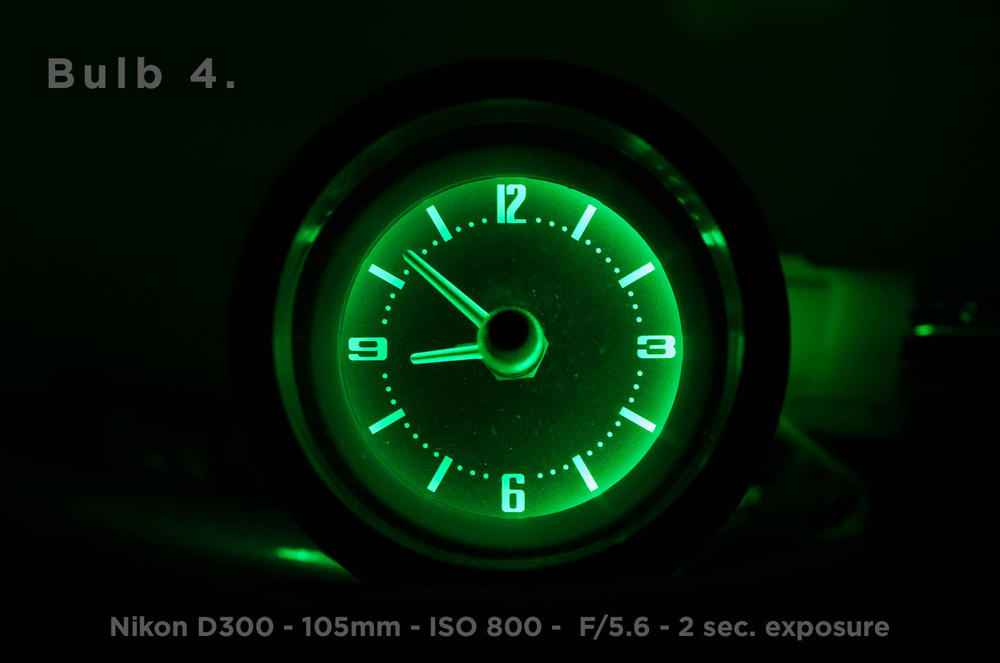
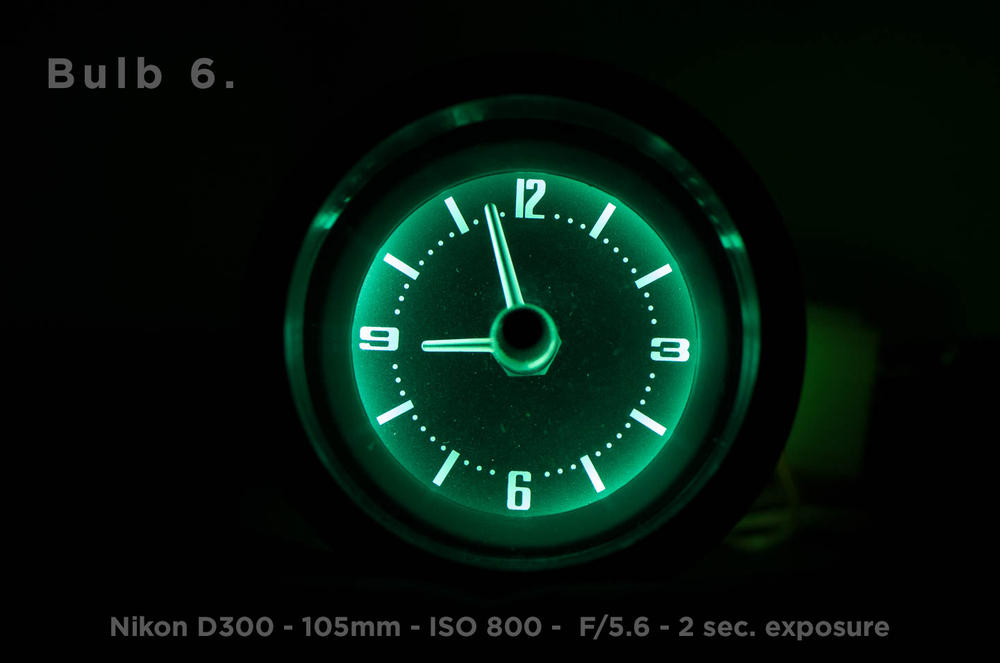
 1 pointI’ve read all the threads on LED lights for the interior, and here’s what I ended up doing. I got a bunch of different LEDs and tested them out with the clock. To keep it simple so I did not remove the green domes, or alter the inside of the gauges in any way. I set up the camera on a tripod and used an 8AA battery pack to power the light bulbs. I shot in RAW, the color temp is 5000K. I used the same exposure values for every shot. Here’s a picture of all the bulbs I ended up testing. Bulb 1 This picture is the bulb that was in the clock. Regular stock tungsten filament bulb. It might even be original. It’s pretty dim. The surprising thing is how hot the base of the bulb got when powered up for a short time. Bulb 2 The second picture shows a bulb from superbrightleds.com. Cool 7000K 120° 4 Lumens. BA9s https://www.superbrightleds.com/moreinfo/ba9s-ba7s/ba9s-led-bulb-1-led-ba9s-retrofit-car/3/ It’s noticeably brighter than the stock bulb. Bulb 3 The third picture shows a bulb from superbrightleds.com. Cool 5500K 270° 40 Lumens. BA9s https://www.superbrightleds.com/moreinfo/ba9s-ba7s/ba9s-led-bulb-1-led-ba9s-retrofit-car/958/2359/ I shaved the plastic end down with a Dremel so the bulb would fit inside the green dome. Looks pretty good. Bulb 4 The fourth picture shows a bulb from superbrightleds.com. Green 40 Lumens. BA9s https://www.superbrightleds.com/moreinfo/ba9s-ba7s/ba9s-led-bulb-5-smd-led-tower-ba9s-retrofit-car/2077/ This bulb did not fit inside the green plastic dome. To take the picture I taped it in place with as much of the bulb in the dome as possible. The color was too green for my taste. Bulb 5 The fifth picture shows a bulb from superbrightleds.com. Cool 6100K 96 Lumens. BA9s https://www.superbrightleds.com/moreinfo/ba9s-ba7s/ba9s-led-bulb-5-smd-led-tower-ba9s-retrofit-car/2077/#/attributes/10855 This bulb is the same as the previous bulb, but cool white instead of green. To take the picture I taped it in place with as much of the bulb in the dome as possible. Bulb 6 The sixth picture shows a bulb from amazon.com White. BA9s https://www.amazon.com/64111-3-7020-Lights-Extremely-Bright/dp/B01MEFGAAI/ref=sr_1_3?ie=UTF8&qid=1505518231&sr=8-3&keywords=ba9s+LED This bulb came in a four pack. I decided to try this bulb since it was cheap. It’s nice and bright. Close to the same brightness as the 96 Lumen white bulb from superbrightleds.com. It surprised me how evenly this style of bulb illuminated the clock. I like this one the best so far. Bulb 7 The seventh picture shows a bulb from amazon.com White. BA9s https://www.amazon.com/gp/product/B01MQOXU74/ref=oh_aui_detailpage_o01_s01?ie=UTF8&psc=1 This bulb came in a 10 pack. It is bright but not as bright as the bulb in the sixth picture. Bulb 6 in the speedometer Overall I went with bulb number six. Here’s a picture of my speedometer with that bulb. It lights up nice and bright. Here’s a picture of the clock powered up and resting on the dash of my jeep. Overall it’s about the same brightness feel to the jeep gauges on full brightness setting. The dimmer in my 280z did not dim the LED bulbs at all. It’s either full brightness or off. I also put LED bulbs in the turn signal indicators, high beam indicator, and brake warning light in the gauges. I tried a couple different bulbs but forgot to take pictures. I don’t have everything put back together yet, but when I do I’ll update with a pic of all the gauges lit up in the car.
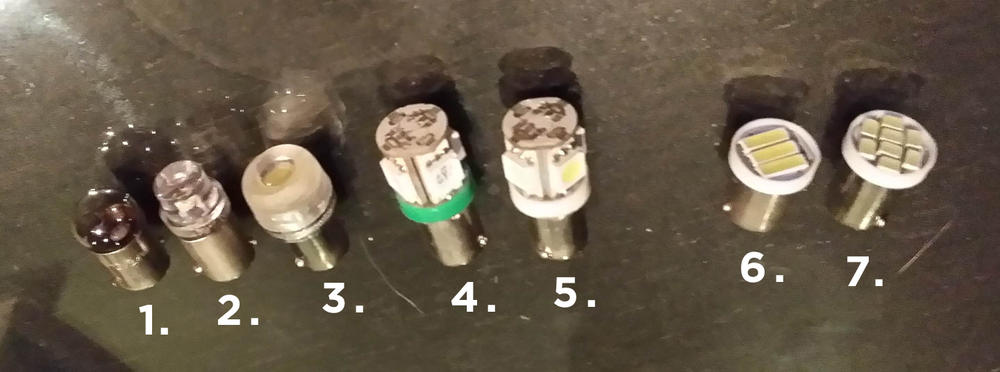


 1 point