


Leaderboard
-


Zed Head
Free Member4Points18,785Posts -


240260280
Free Member4Points4,441Posts -

grannyknot
Free Member3Points5,158Posts -

Patcon
 Subscriber
 3Points10,919Posts
Popular Content
Showing content with the highest reputation on 05/01/2018 in all areas
-
3 pointsStep A. 1. Pour gas into bowls through vent holes. Don't worry if you spill some. 2. Start the car. Hopefully it will run long enough to prime the pump Step B. If it only runs until the fuel in the bowl is consumed, then your problem is upstream of the carbs and bowls 1. Get a can of fuel and put it next to the front passenger wheel. 2. Run a fuel hose from the can to the bottom of the fuel filter. 3. Repeat Step A. Step C. If the car does not run off the fuel in the can then your problem is the fuel pump or fuel filter, or fuel rail. If the car runs from the fuel can in step B then your problem is upstream from the pump & filter. 1. Move the fuel can to the back of the car next to the passenger wheel. 2. Connect a hose from the fuel can to the larger hard line where it starts just in front of the fuel tank. 3. Repeat Step A. Step D. If the car does not run off the fuel in the can then your problem is the fuel line from the back of the car to the front. If the car runs from the fuel can in step B then your problem is the tank or hose to the tank.3 points
-
 If I were you, I'd make a wood buck in the shape of the air horn, and then get some sheet metal and start hammering it over. Learn how to shrink and stretch. Could be a fun learning experience.2 points
 -
 Gotcha. Yes, I think we have the knowledge with you. Brakes are sounding and working fantastically now. Thanks to the great advice from people on the forum and some elbow grease I think the front brakes are an item we can add to our knowledge toolbox. Sent from my iPhone using Classic Zcar Club mobile2 points
 -
 " sole remaining original BRE 240Z " What?! Is Carl Beck's car chopped liver? Anyhow, I'm glad to hear you all had so much fun. Glad to hear you had good weather! Sounds like this was a good Mitty (except for the VW guy, glad he's ok). Would have liked to have taken in the show at Randy Jaffe's car. Reminds me of "the good-old days", Randy. T h a t ' s racin'! Would have been nice to see John Morton again. Thanks for the pictures and conversation - great thread1 point
 -
 Great, I’ll be on the look out and grab all I can that looks good. I guess I can sell what I don’t need. Sent from my iPad using Tapatalk1 point
 -
I have made quick and cheap pushers/pullers with threaded rod an a turn buckle. That's what I would call high level fabrication, would love to do that kind of thing but I would probably stretch the hell out of the thing.1 point
-
I have used this on an S10 I own. We have put 80k on it. No real issues. FWIW It could be a clue though to your fluid loss. Might not be a new condition...1 point
-
1 point
-
People like the early intake manifolds too. The AFM might be worth getting. Distributor if it's in good shape. The whole engine if you have space for it. Rear struts. TC rods (you might break one some day). EFI/fuel pump combined relay (by the hood latch, inside, they're hard to find and do go bad).1 point
-
1 pointNobody wants to look at the picture? It's a big one. Or just set their meter up to beep and put the transmission in reverse? Just curious what's going on here. Am I missing something?1 point
-
 Woody’s buddies were giving him some friendly ribbing after your podium finish.....”well at least now you know it’s not the car Woody!” Guy1 point
 -
1 point
-
 That's bronze radiator stop leak. https://www.google.com/search?q=bronze+radiator+stop+leak&rlz=1C1BOFA_enUS494US494&source=lnms&sa=X&ved=0ahUKEwi906et7OTaAhVvTt8KHUhDBzcQ_AUICSgA&biw=1280&bih=615&dpr=1.251 point
 -
 1 pointA trick that@siteunseen taught me was to cover the input, output, gear selector areas with plumbing pipe end caps, clamped with hose style clamps. Then cover it with oven cleaner for an hour or so. Once its soaked in spray it down with high pressure water. It works great. You can then easily detail the remaining gunk with a wire brush. Sent from my [device_name] using http://Classic Zcar Club mobile1 point
 -
You really do need a box structure in that area, plate won't do the job. Building a complete boxed arch like that is pretty high level fabrication but if you don't care what it looks like under the fender you could build it in bite size sections adding each one on to the other and the inner fender at the same time. It might not be pretty but it will work. With that kind of rot your car may have already sagged a bit, I would support the car under the sub frame only taking cross directional measurements as you go.1 point
-
 1 point
 -
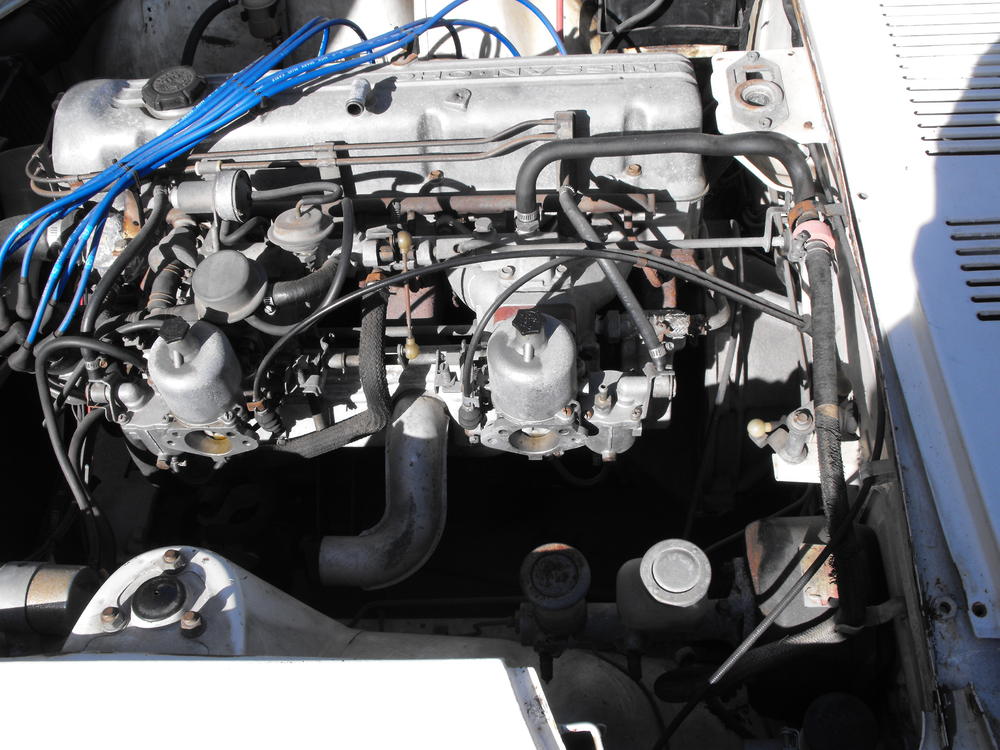
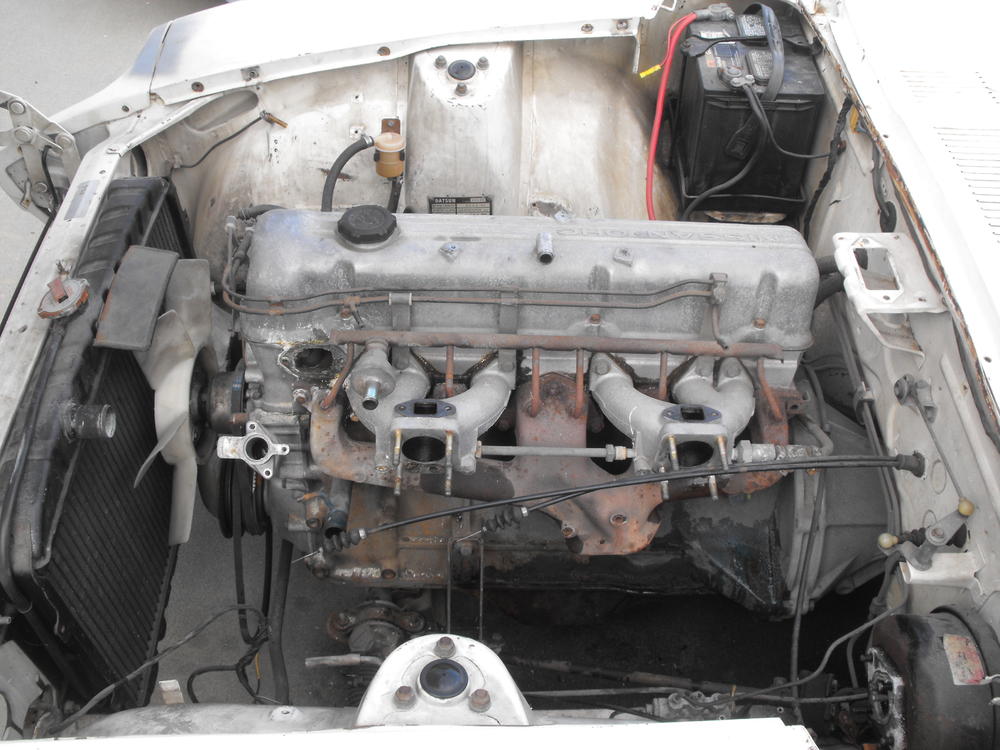
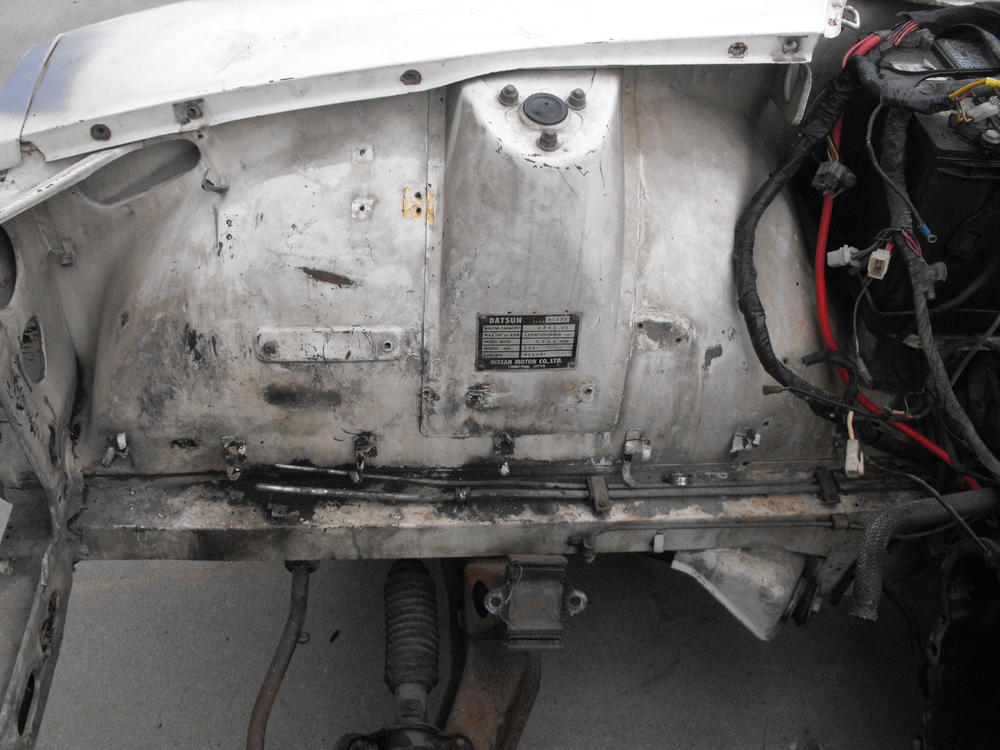
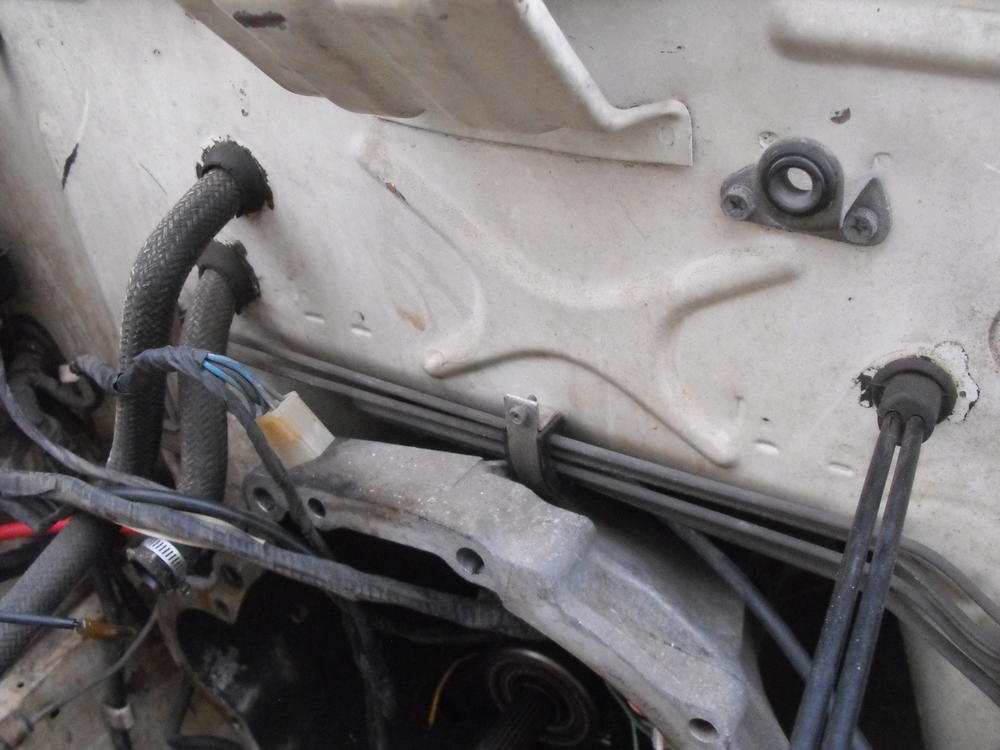
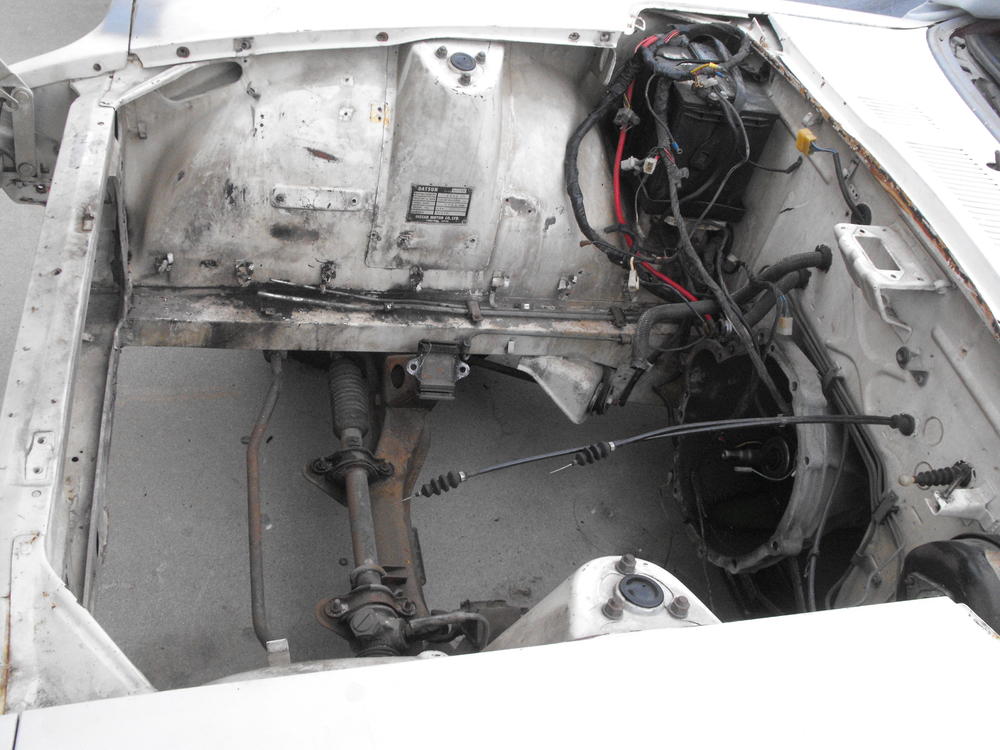
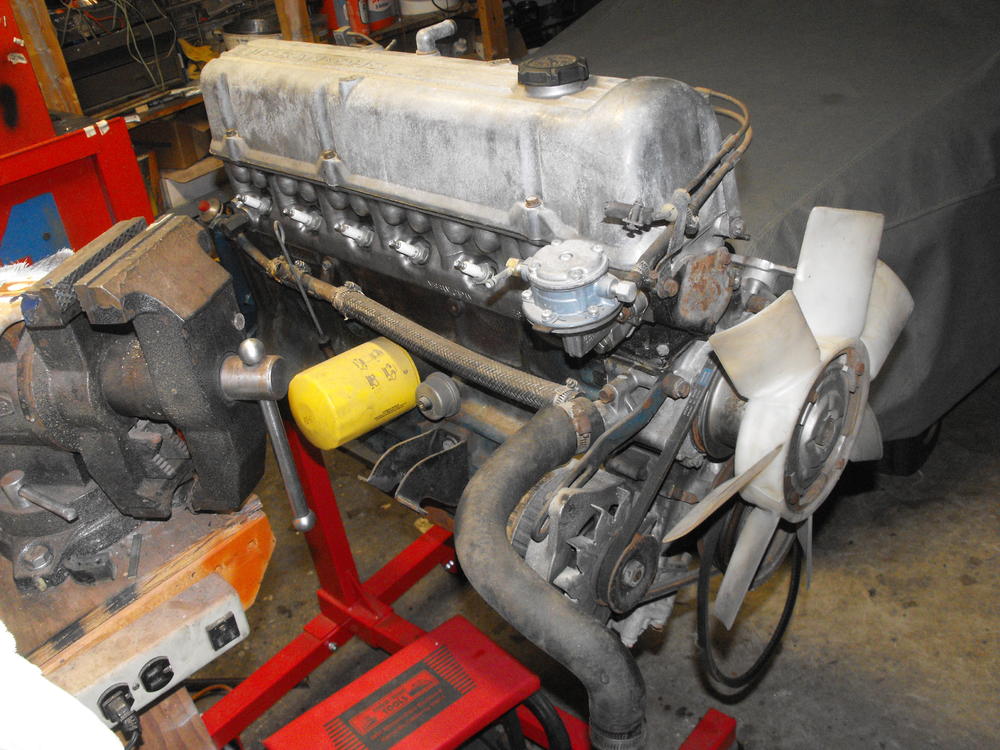
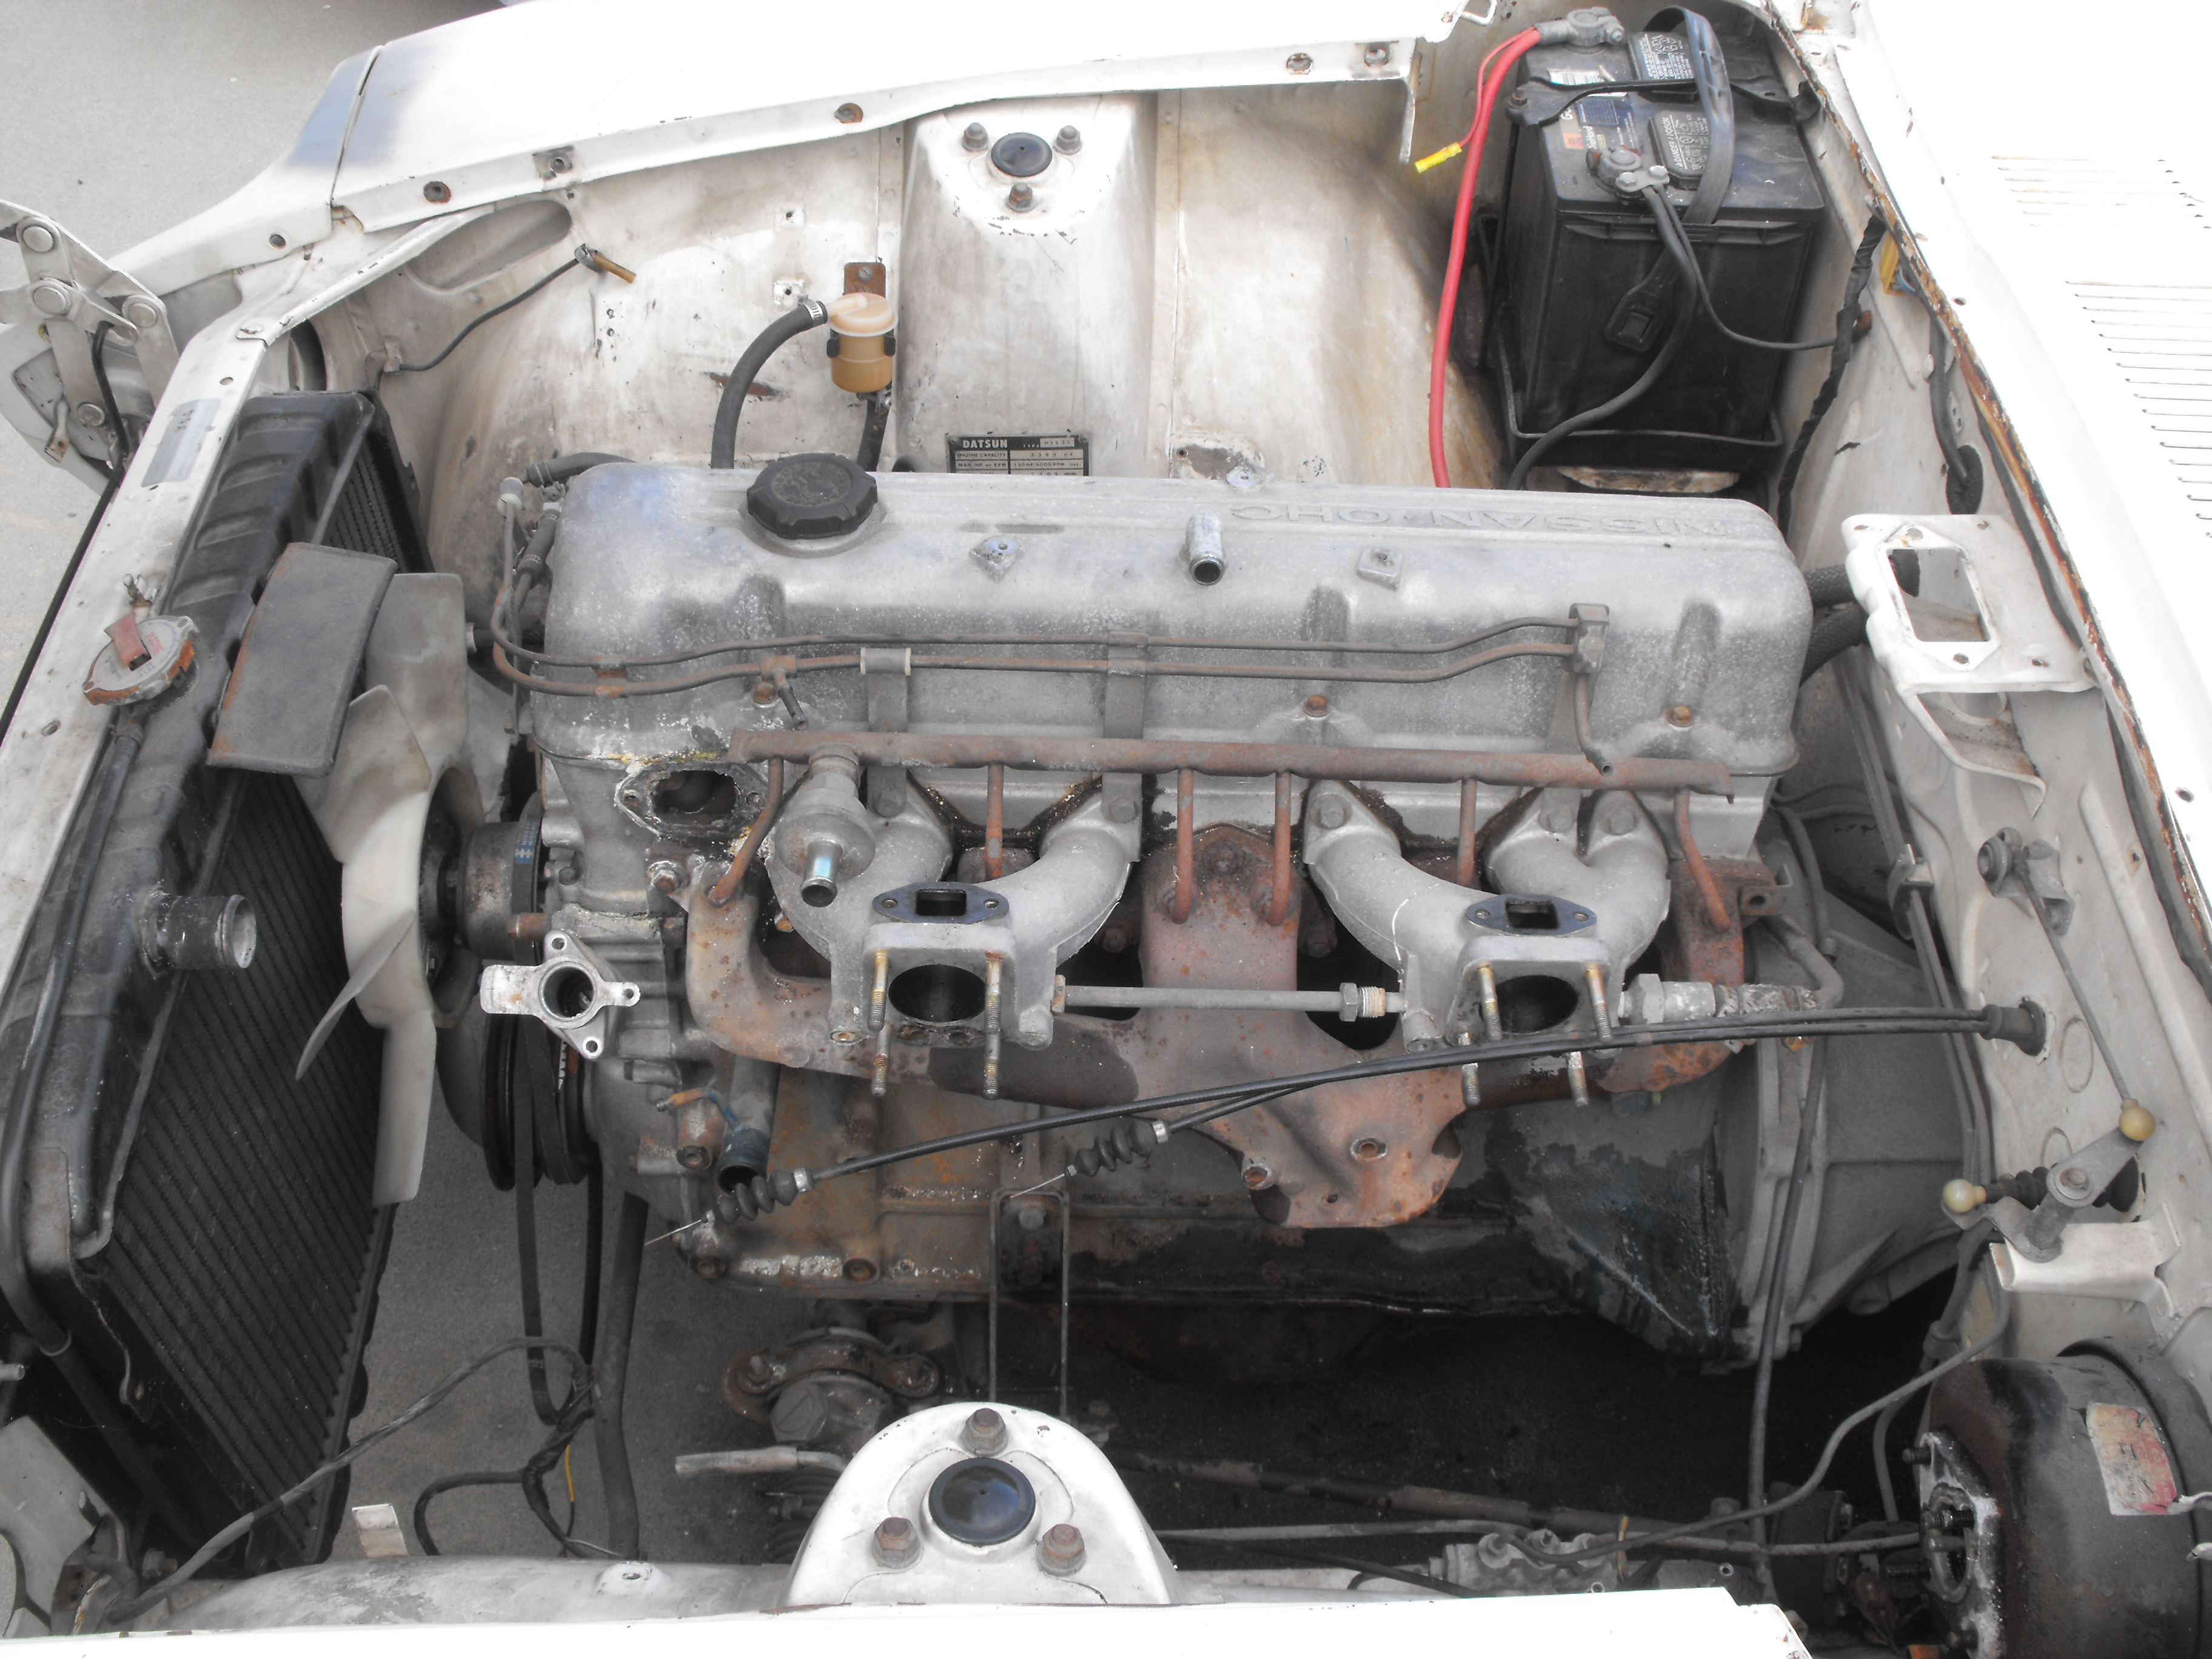
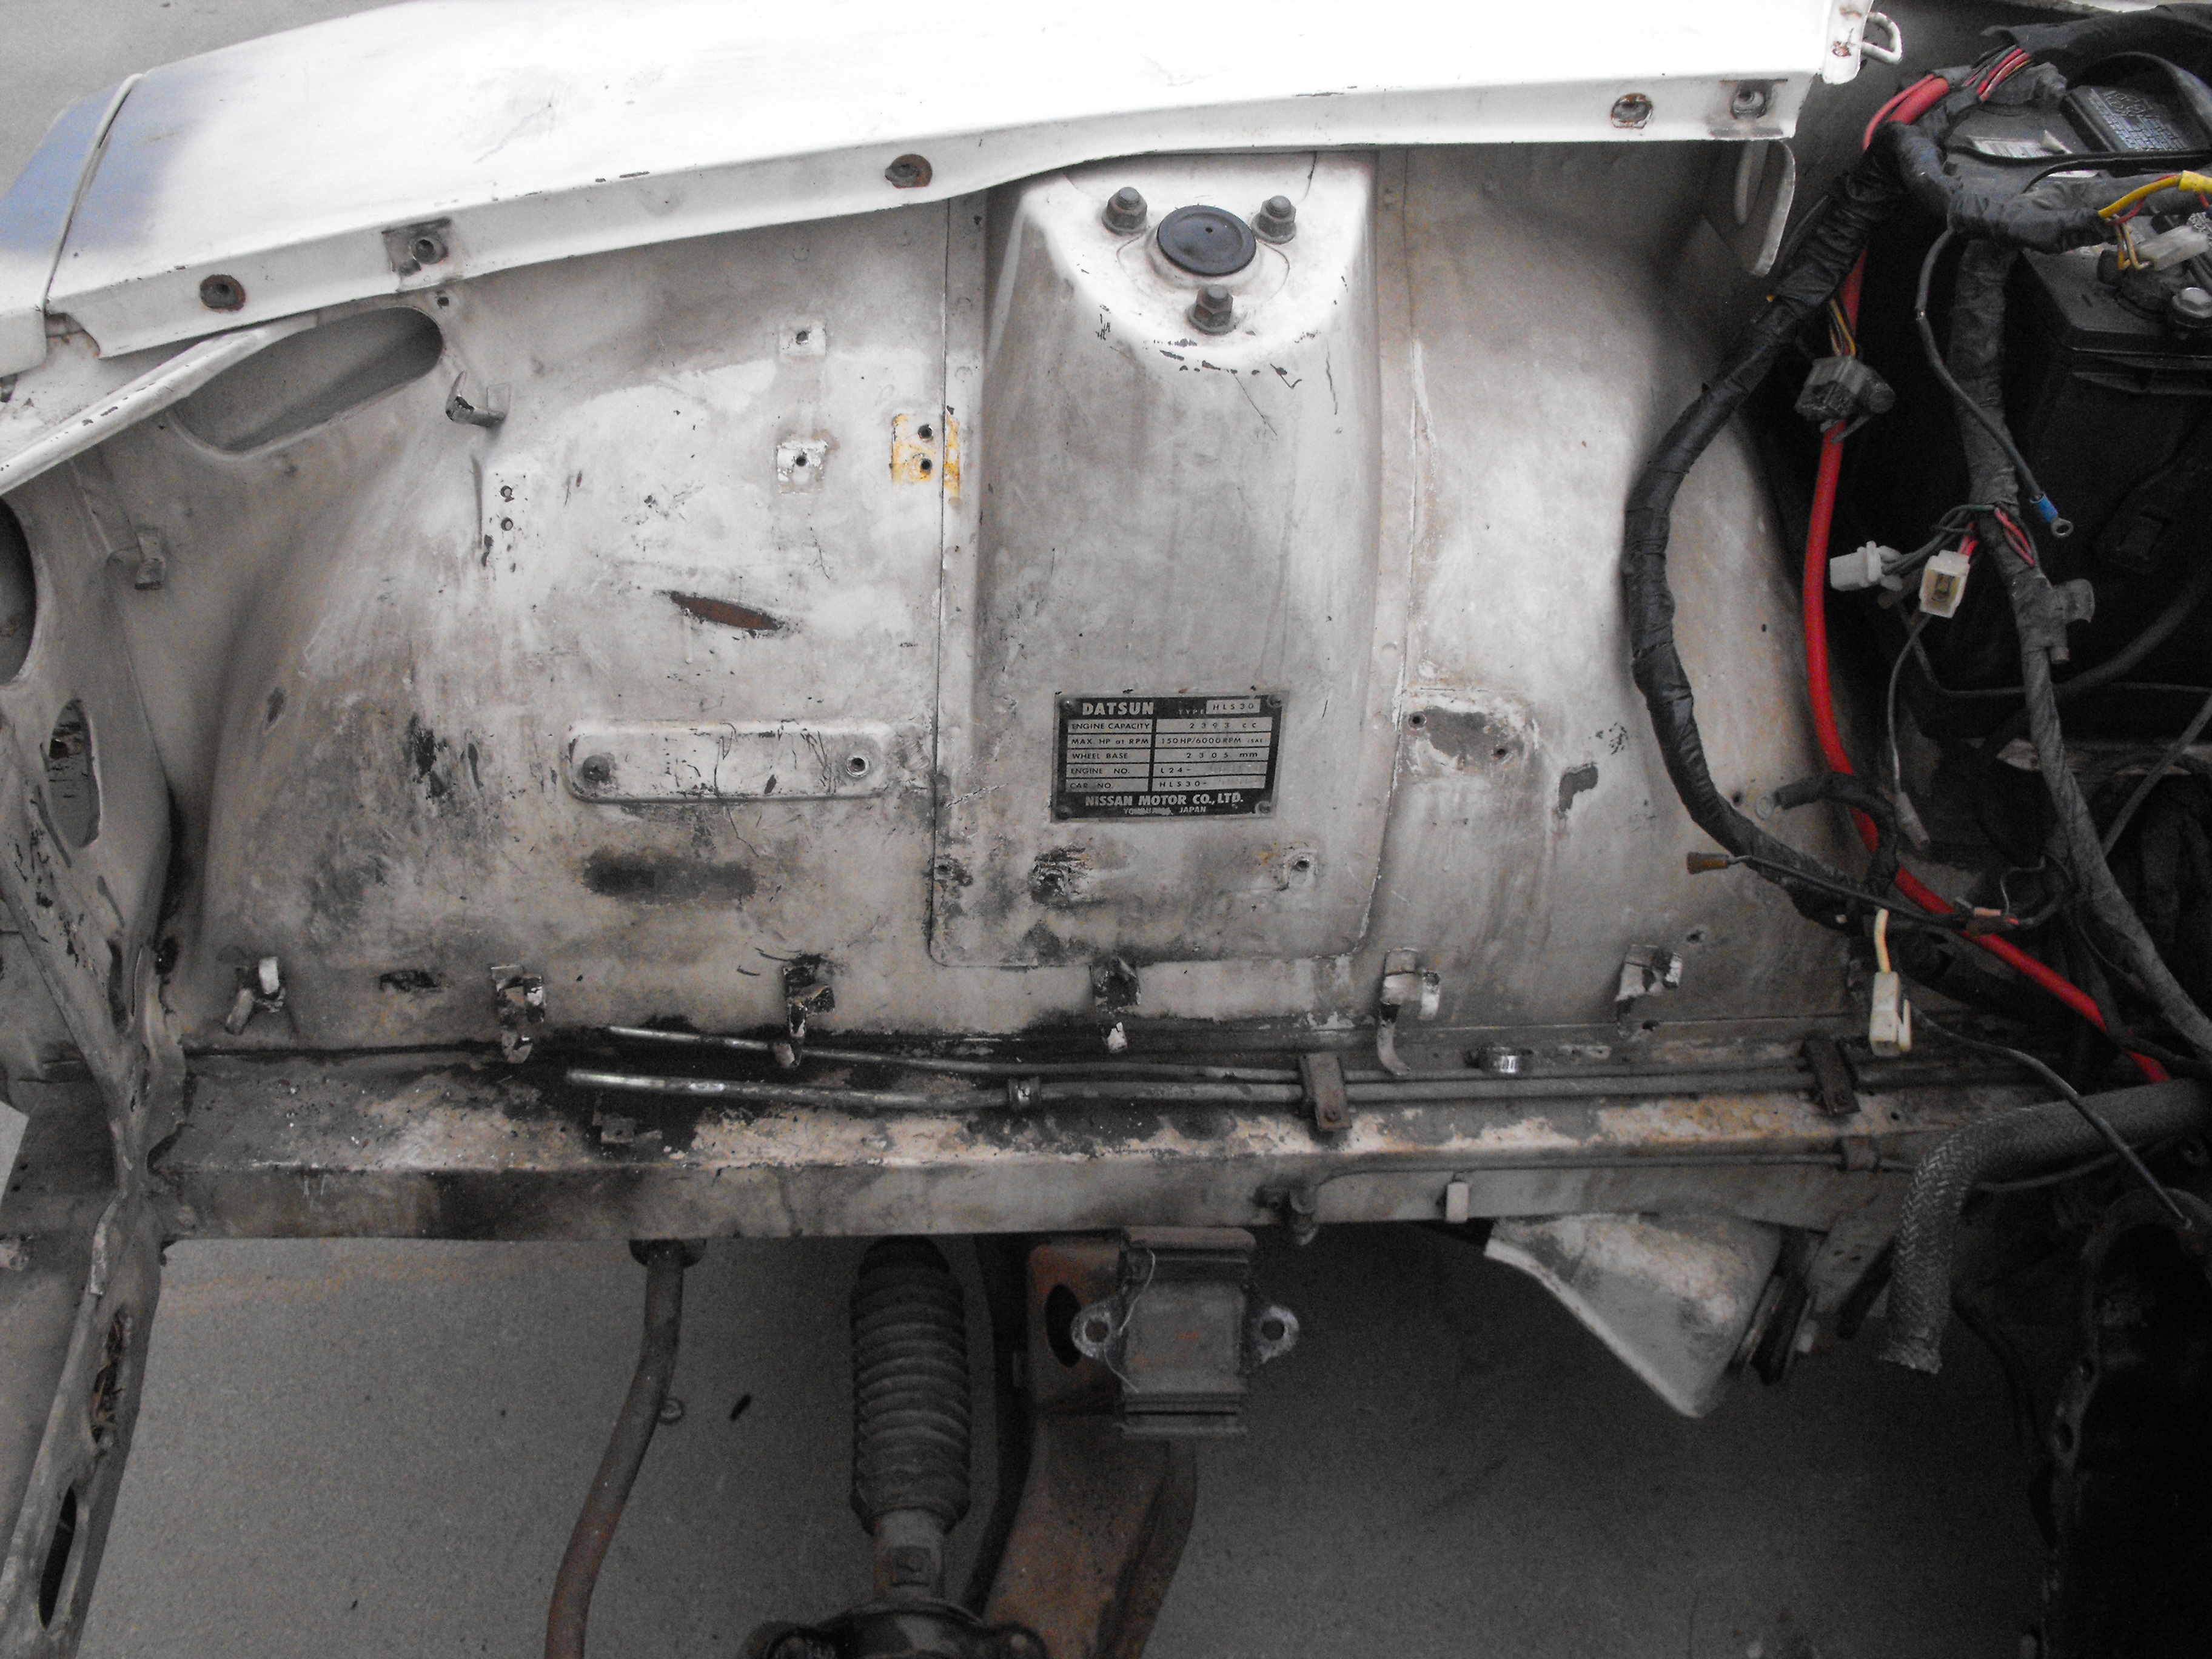
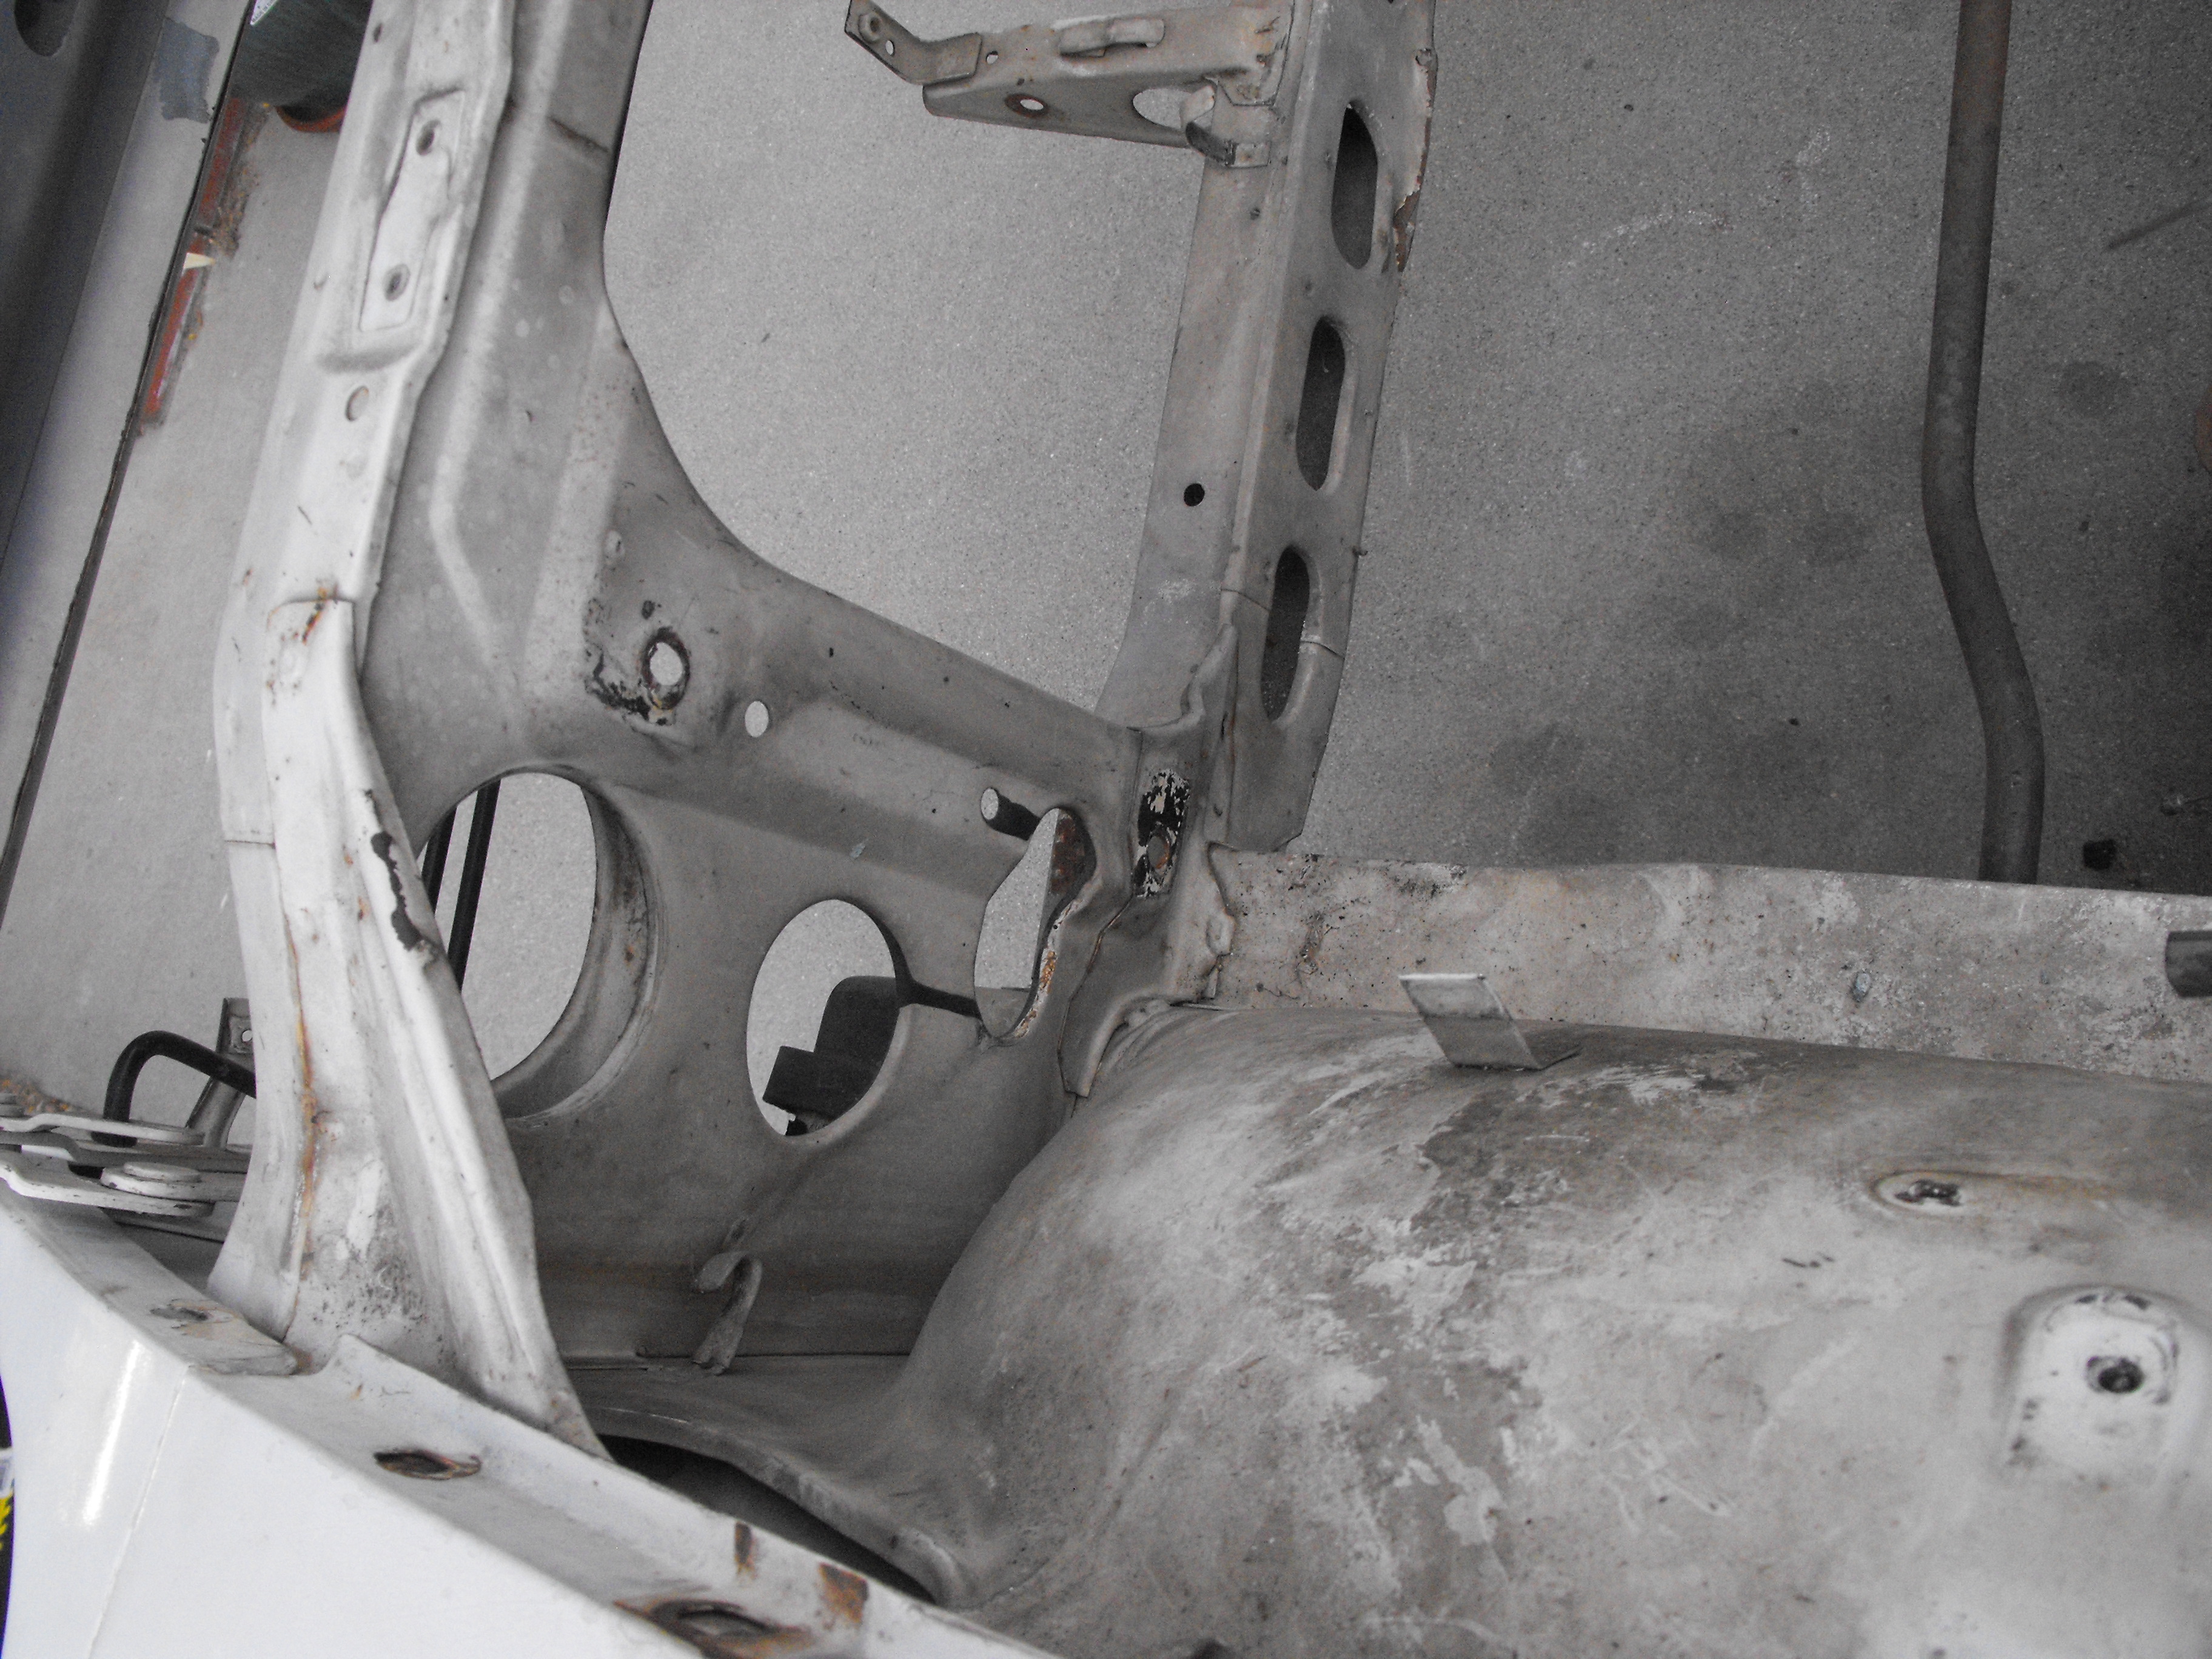
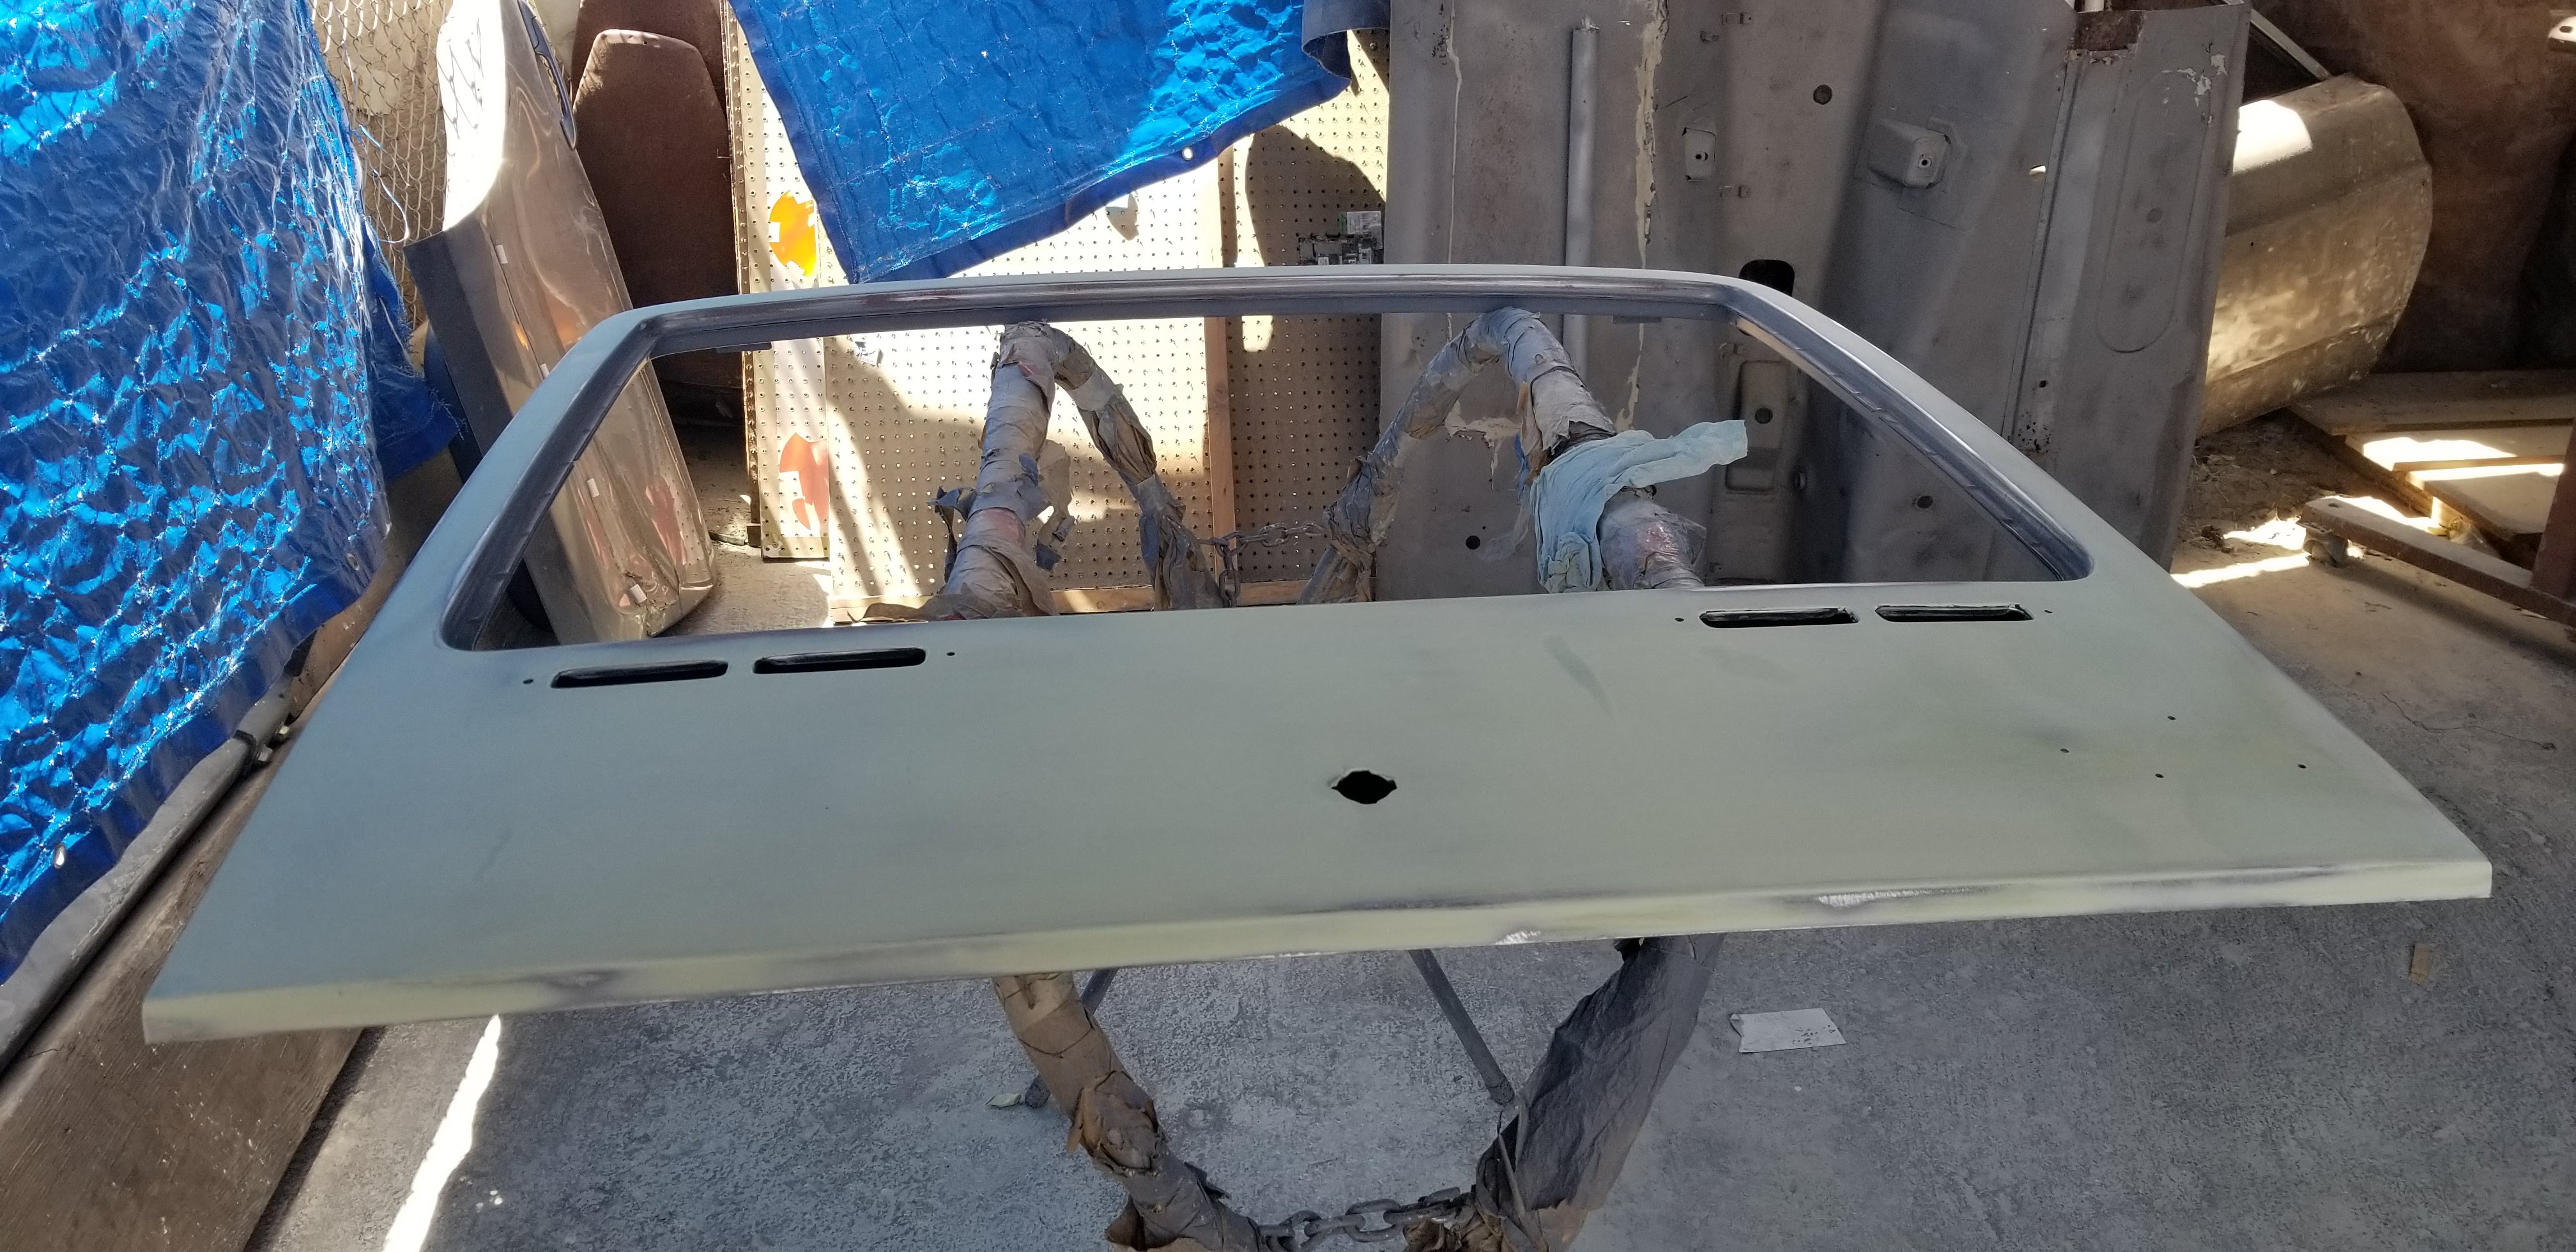
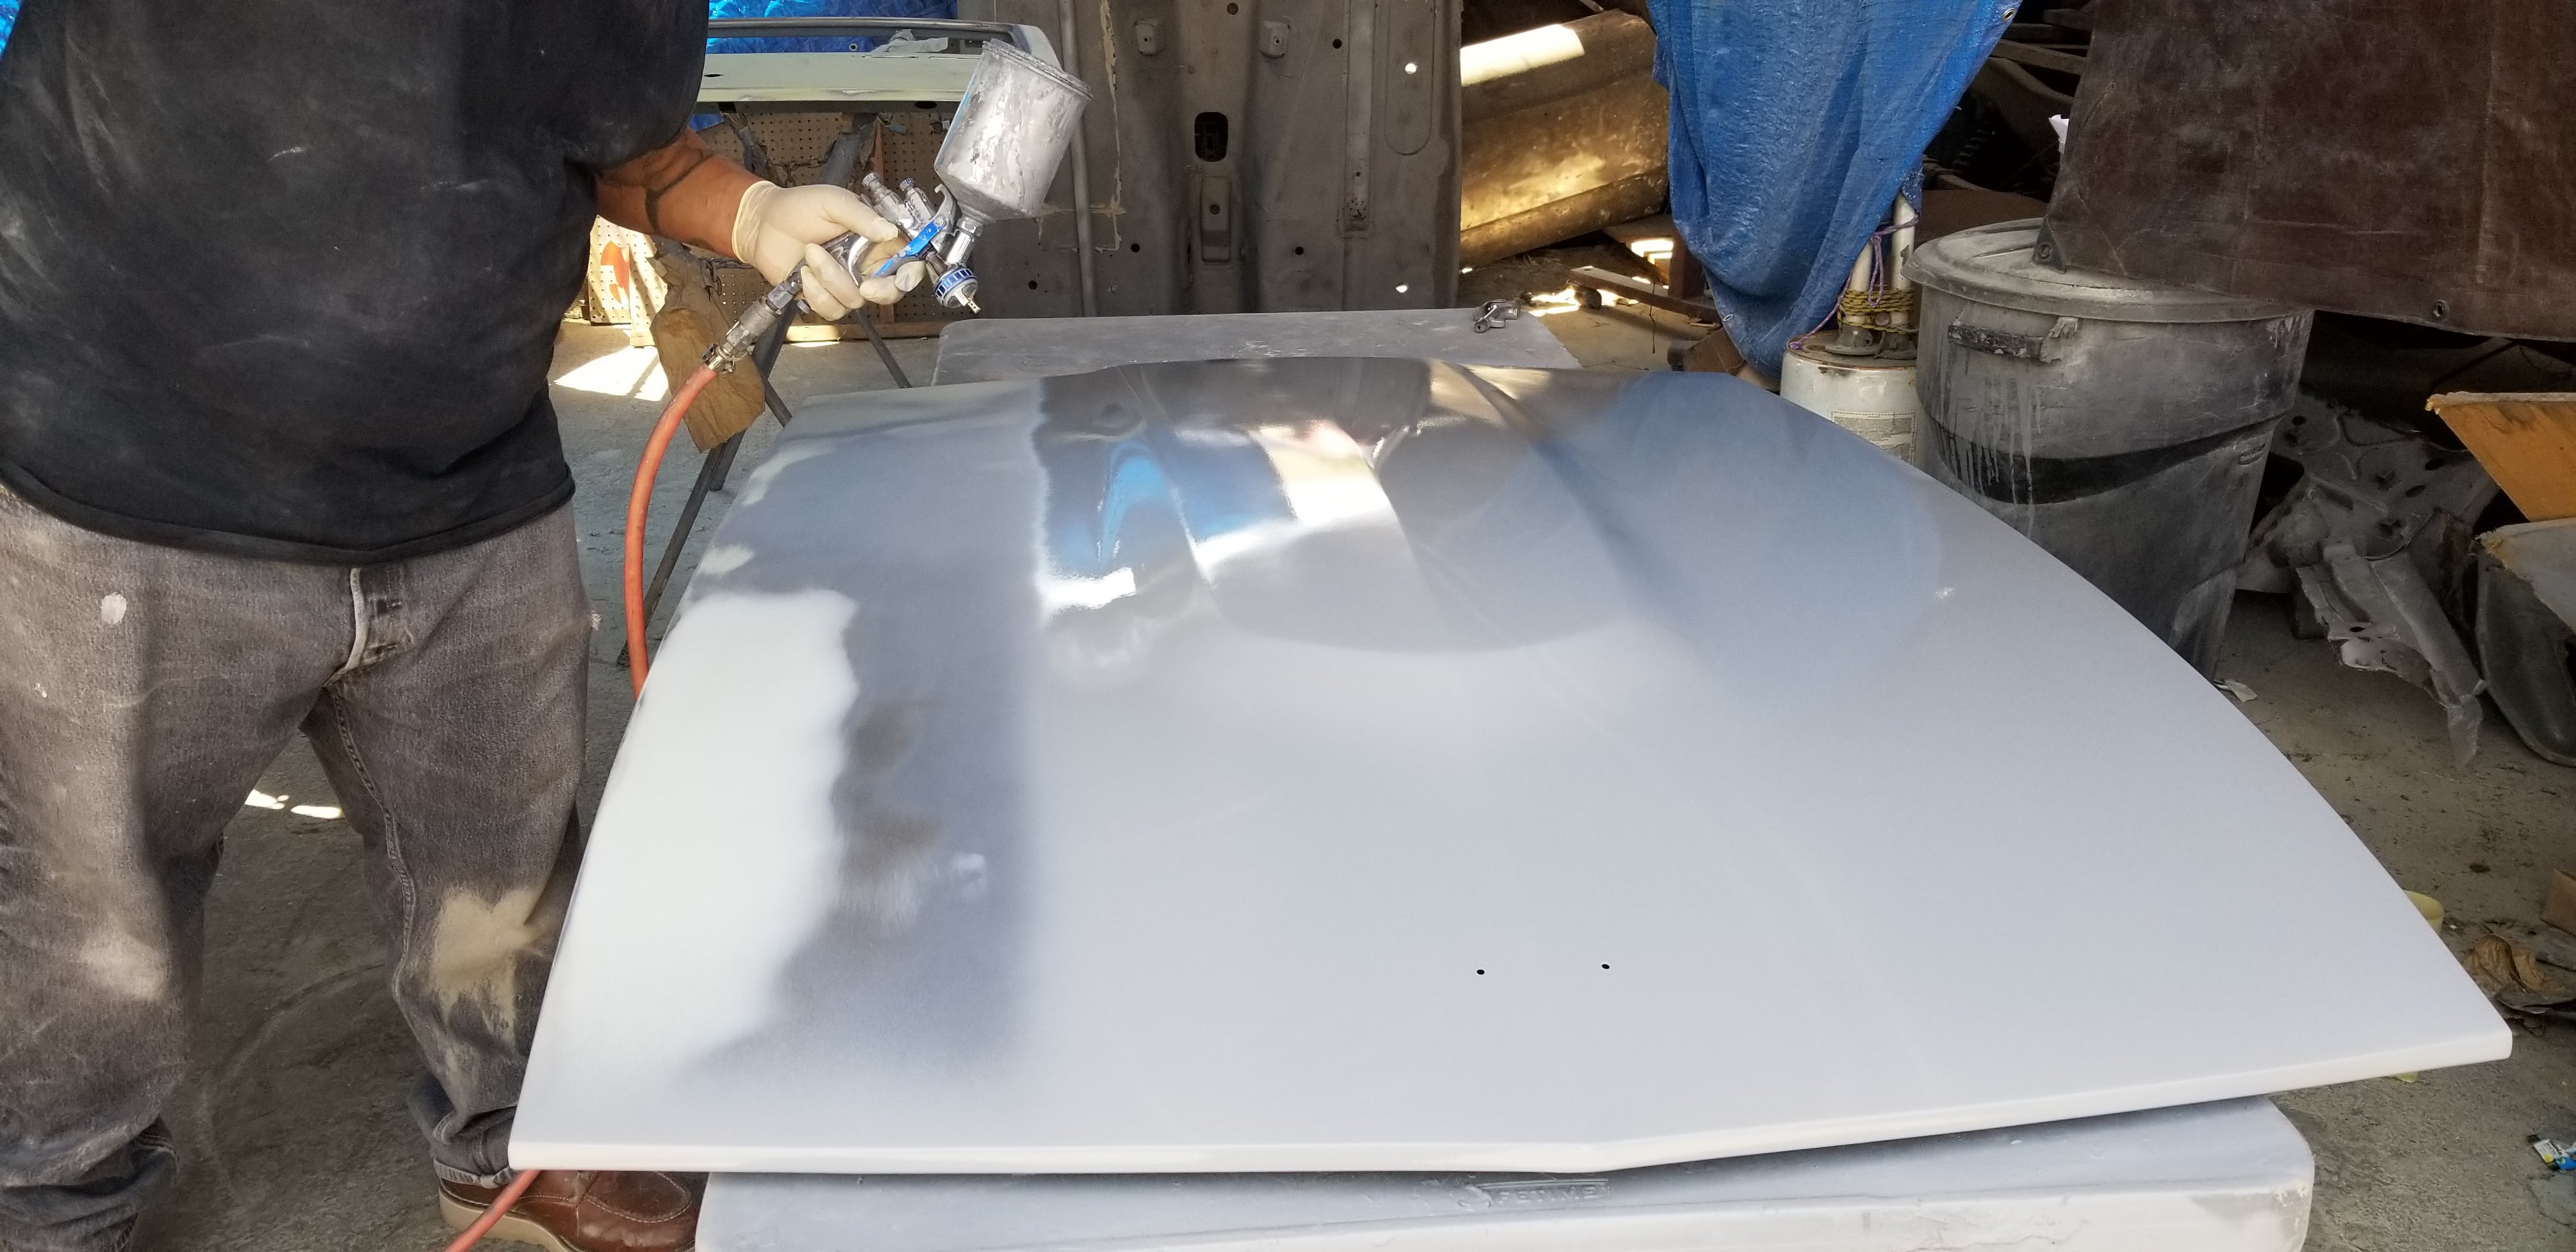
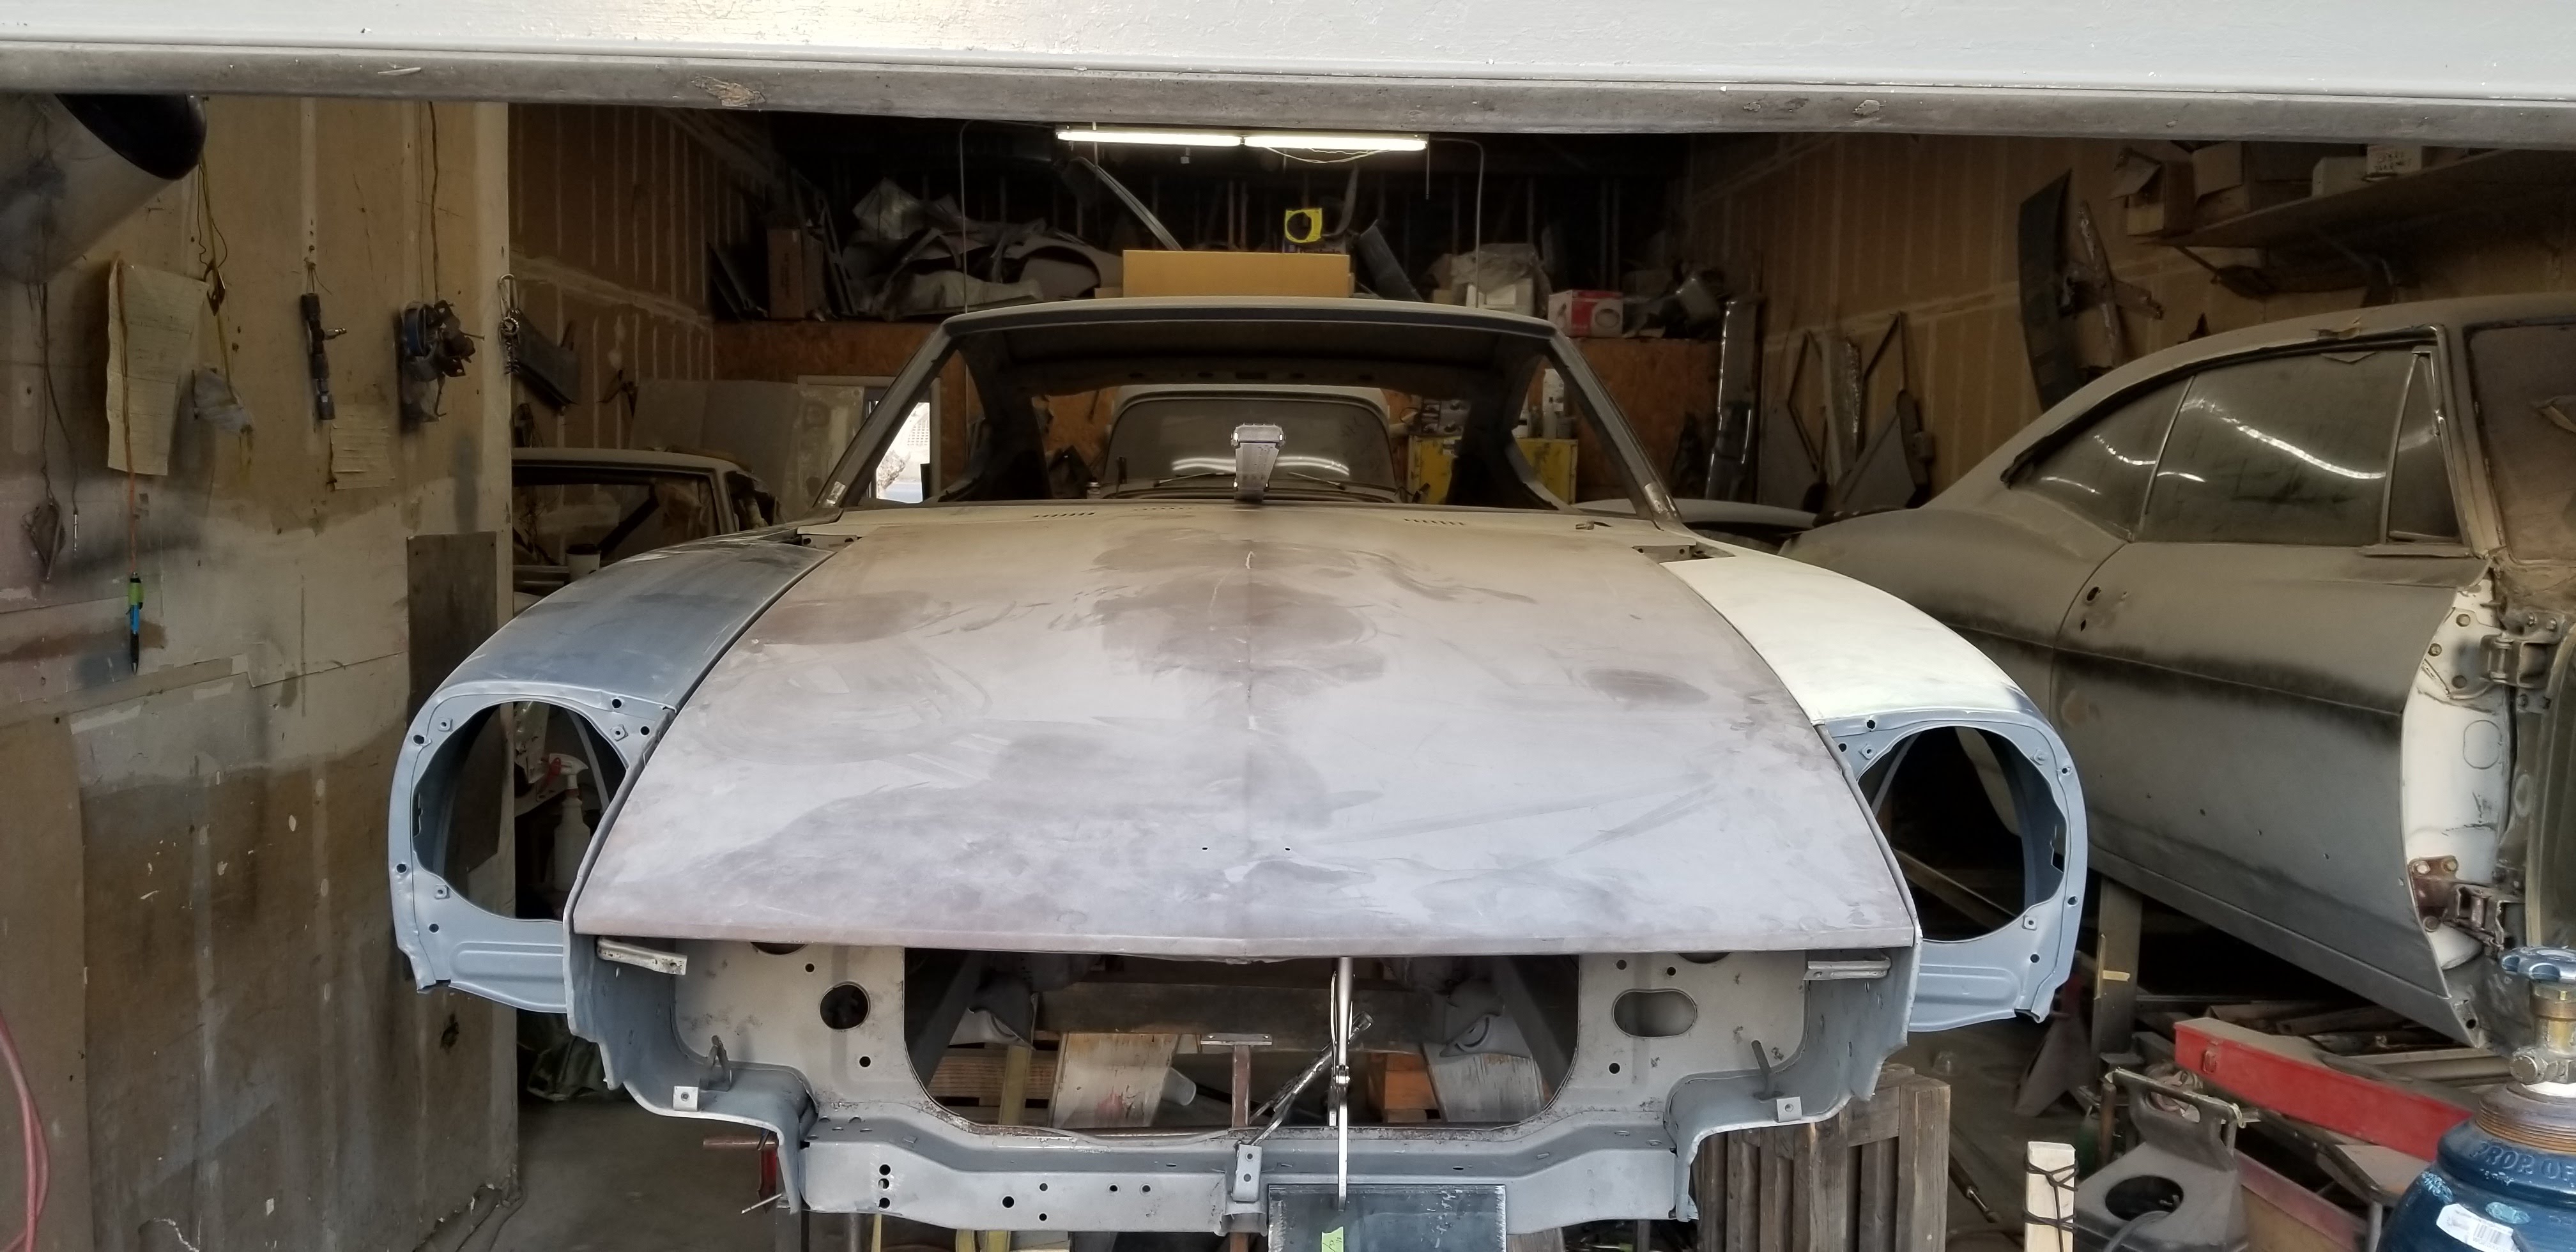
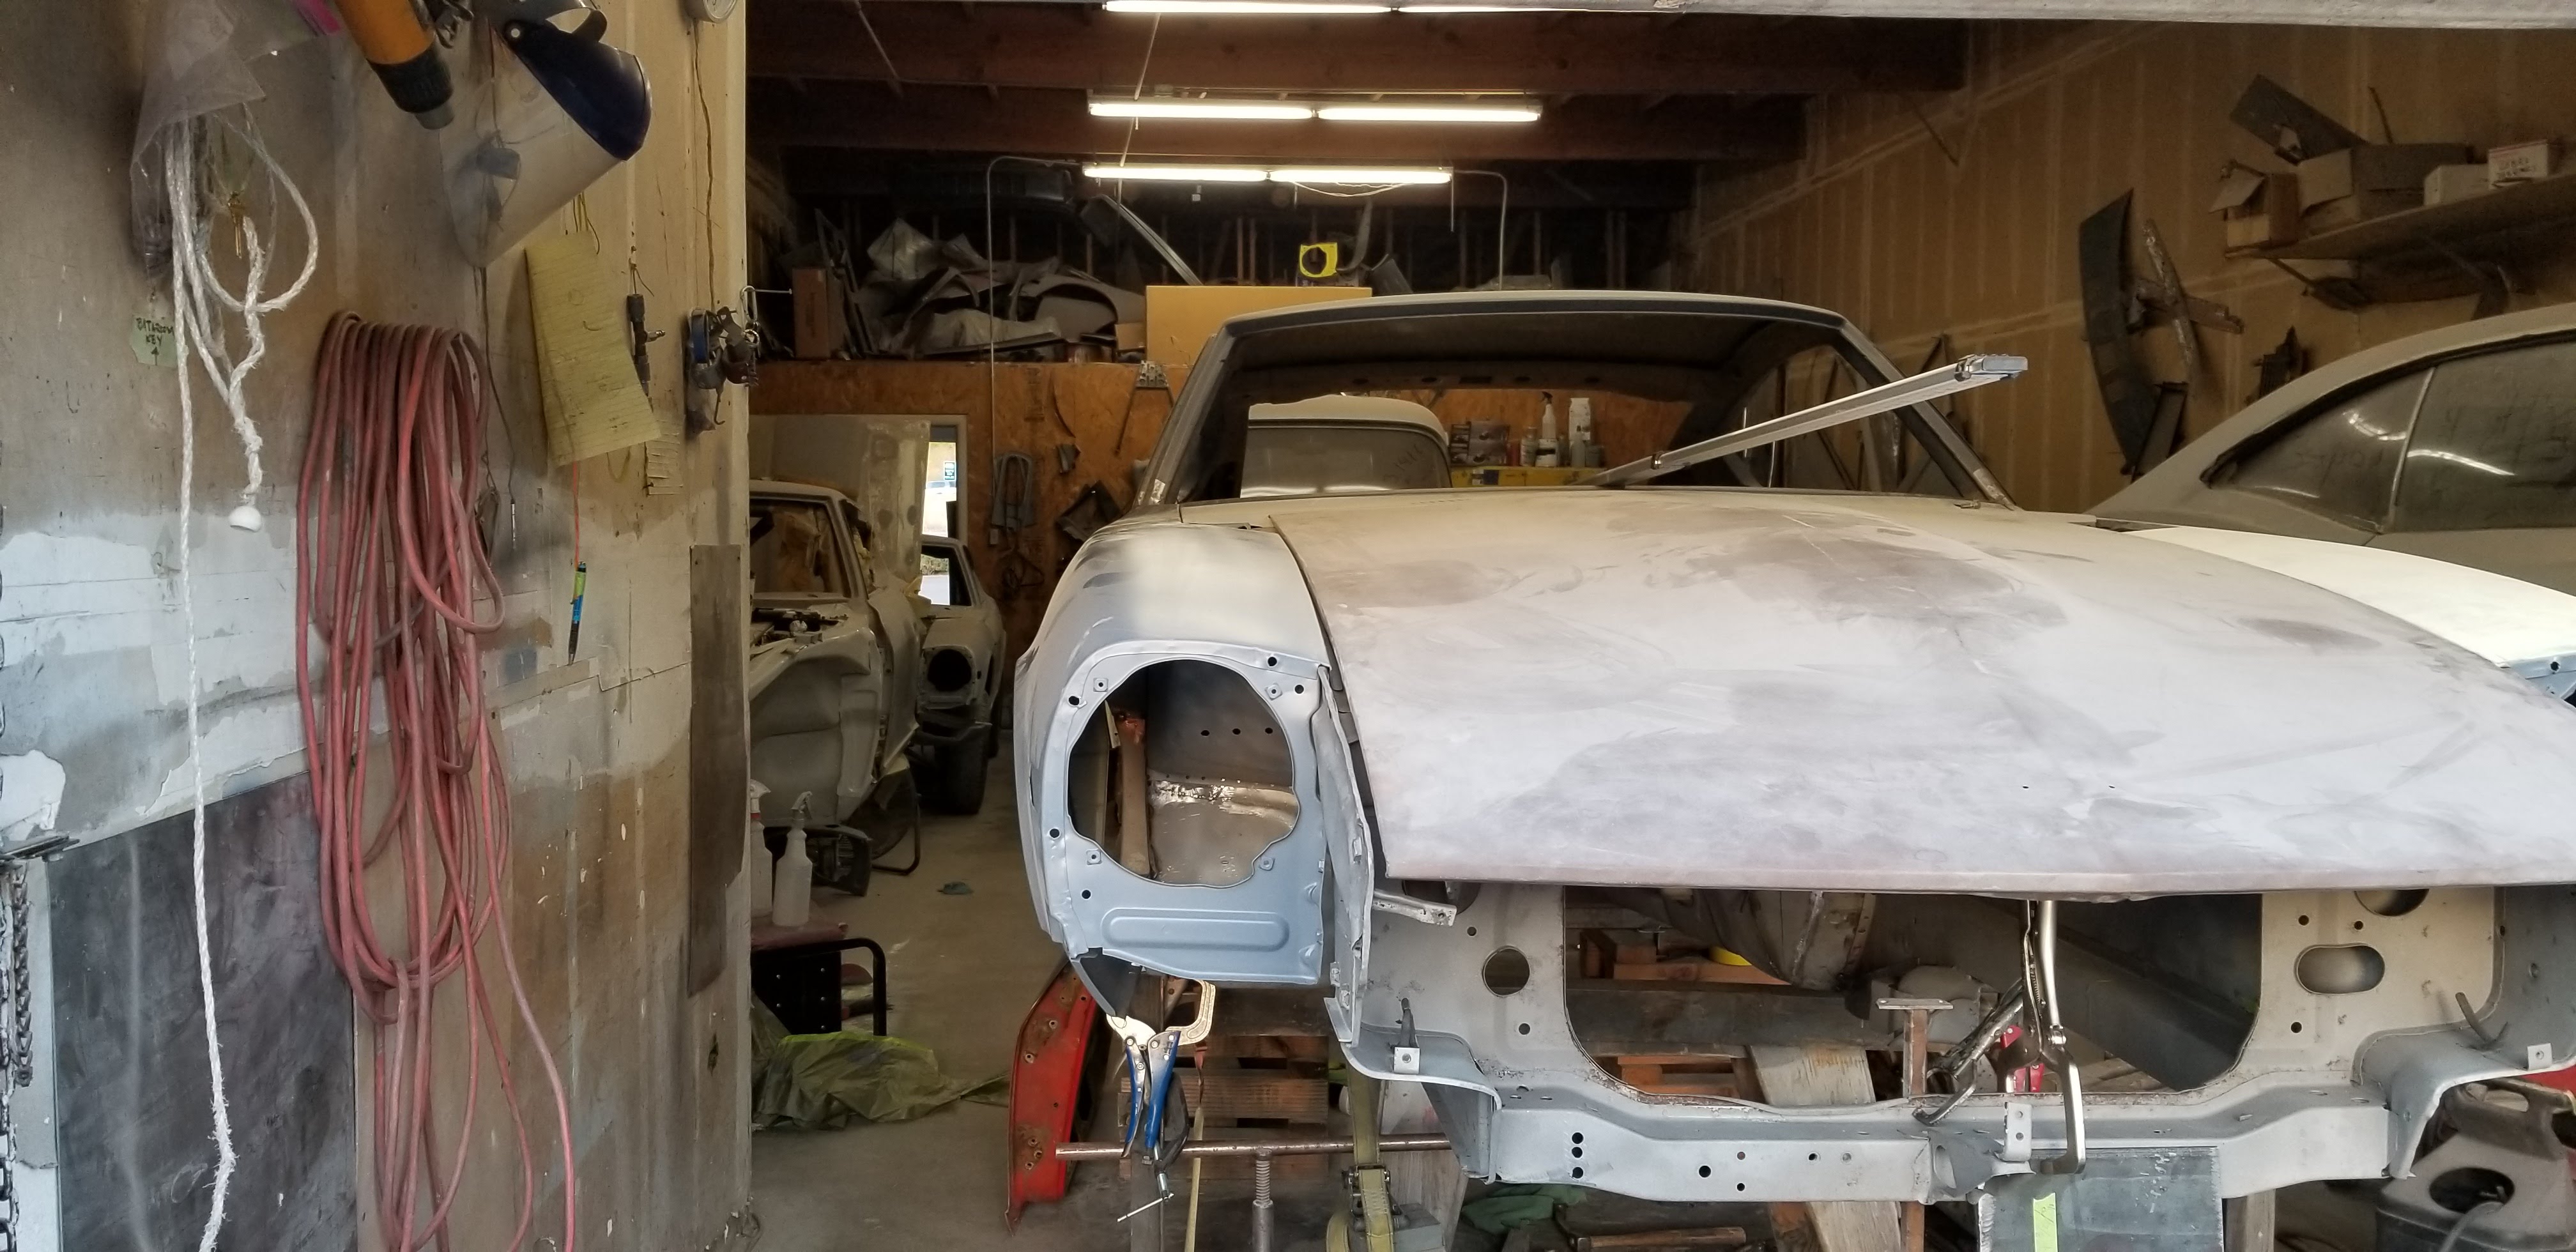
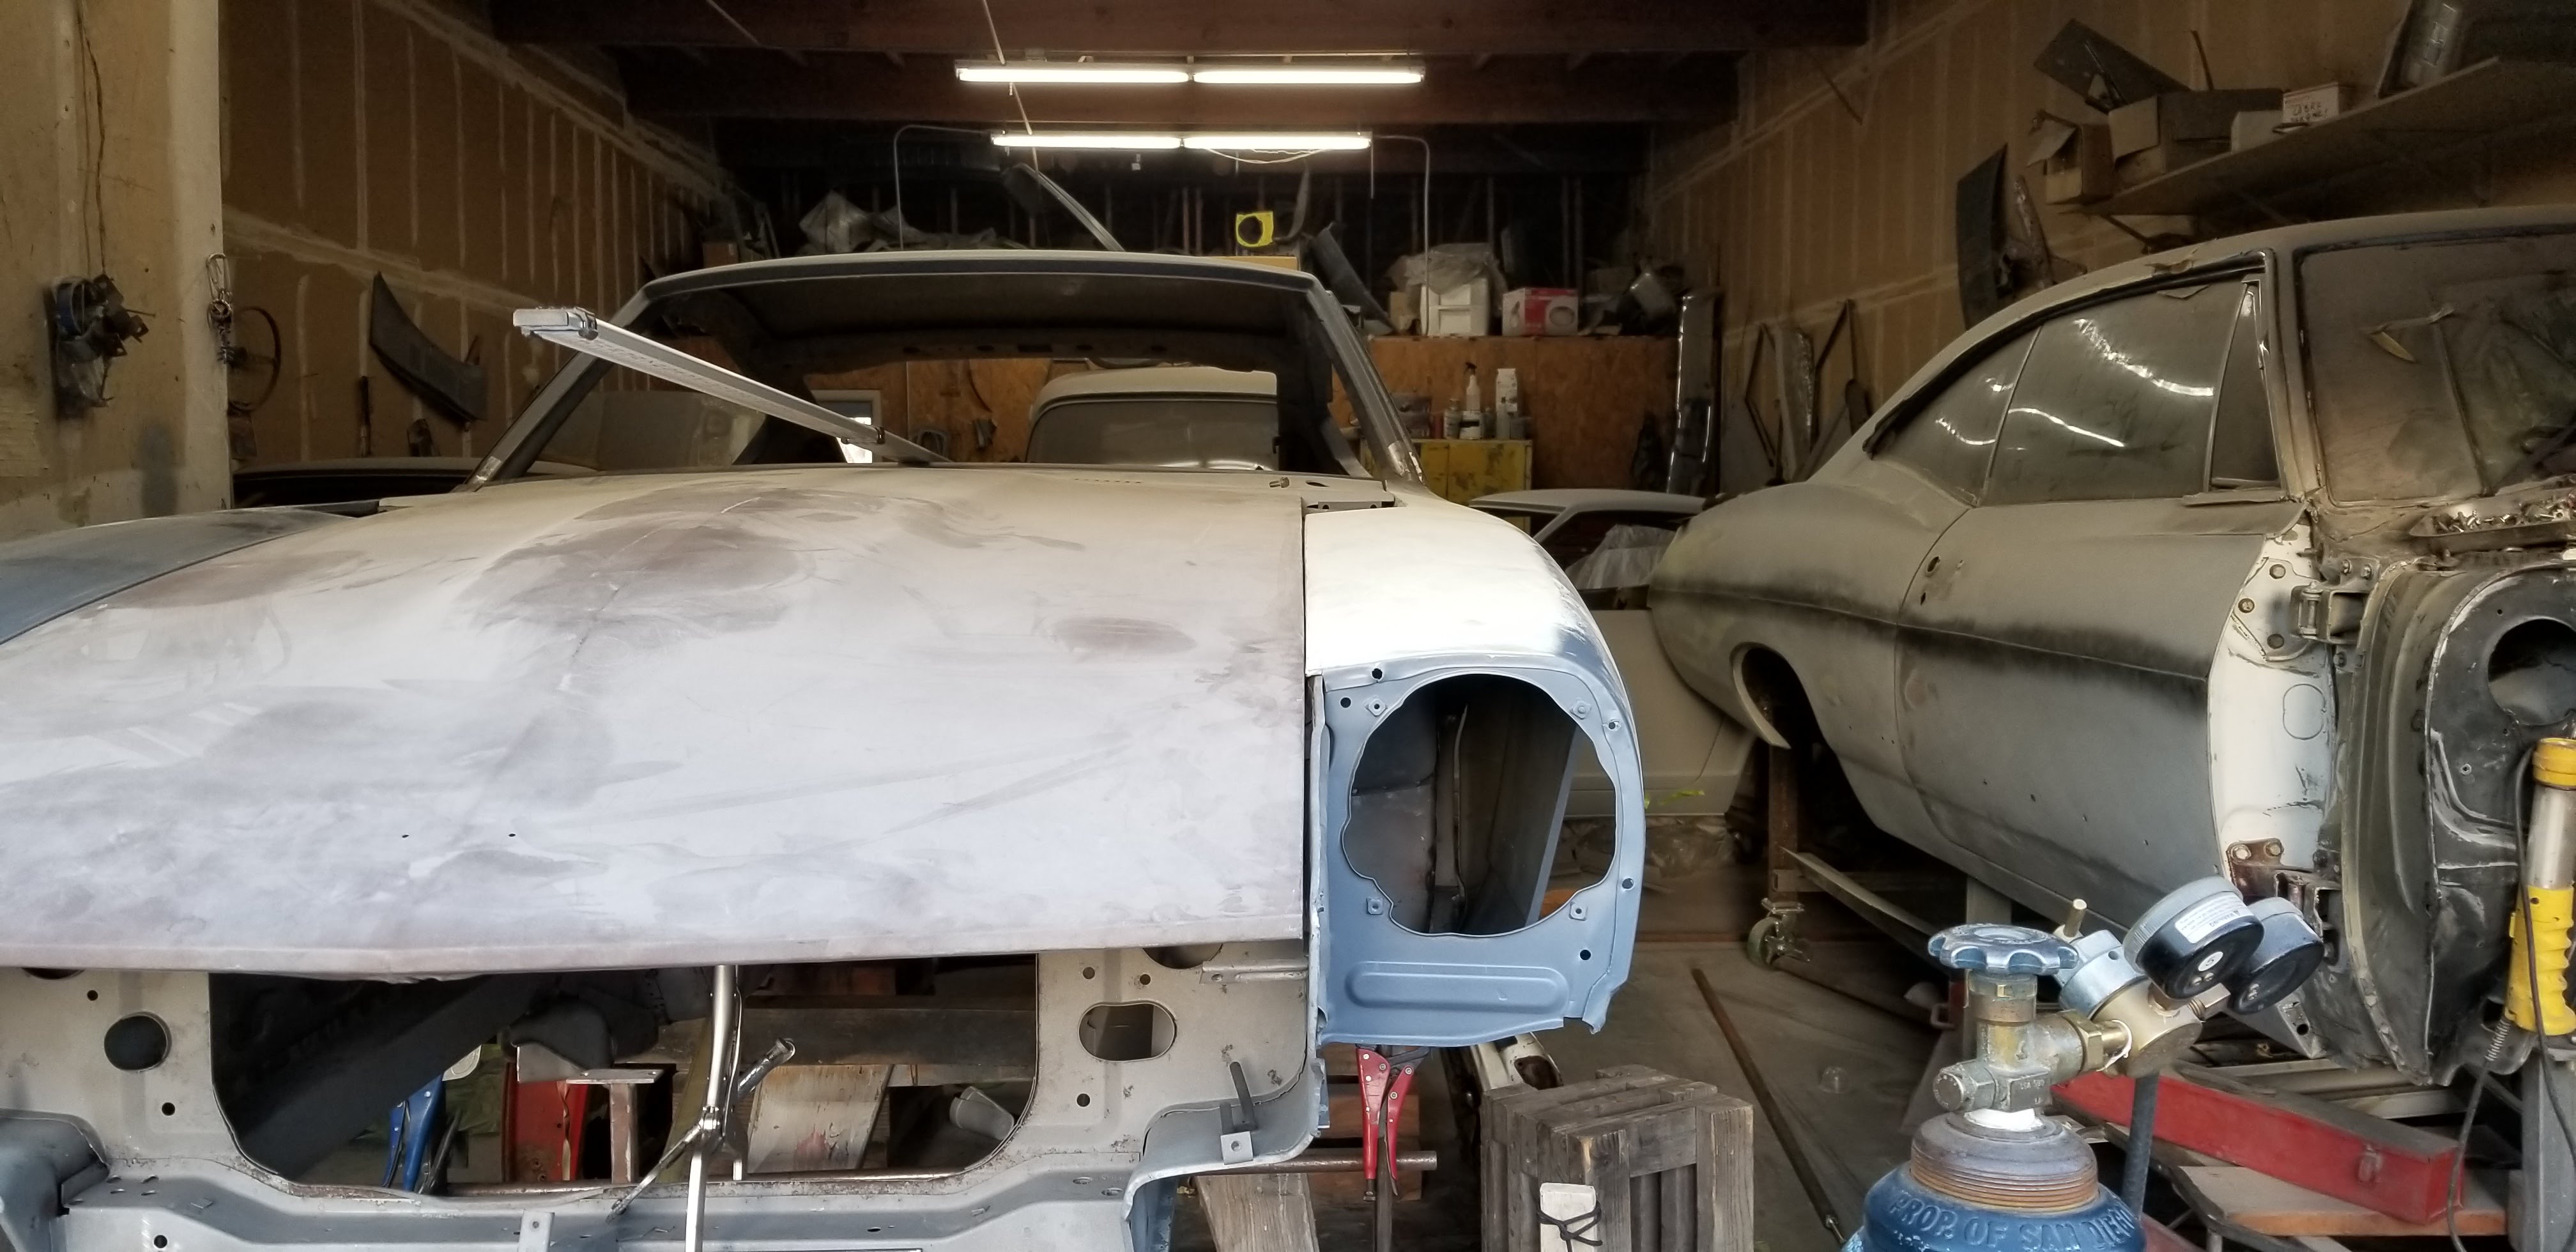
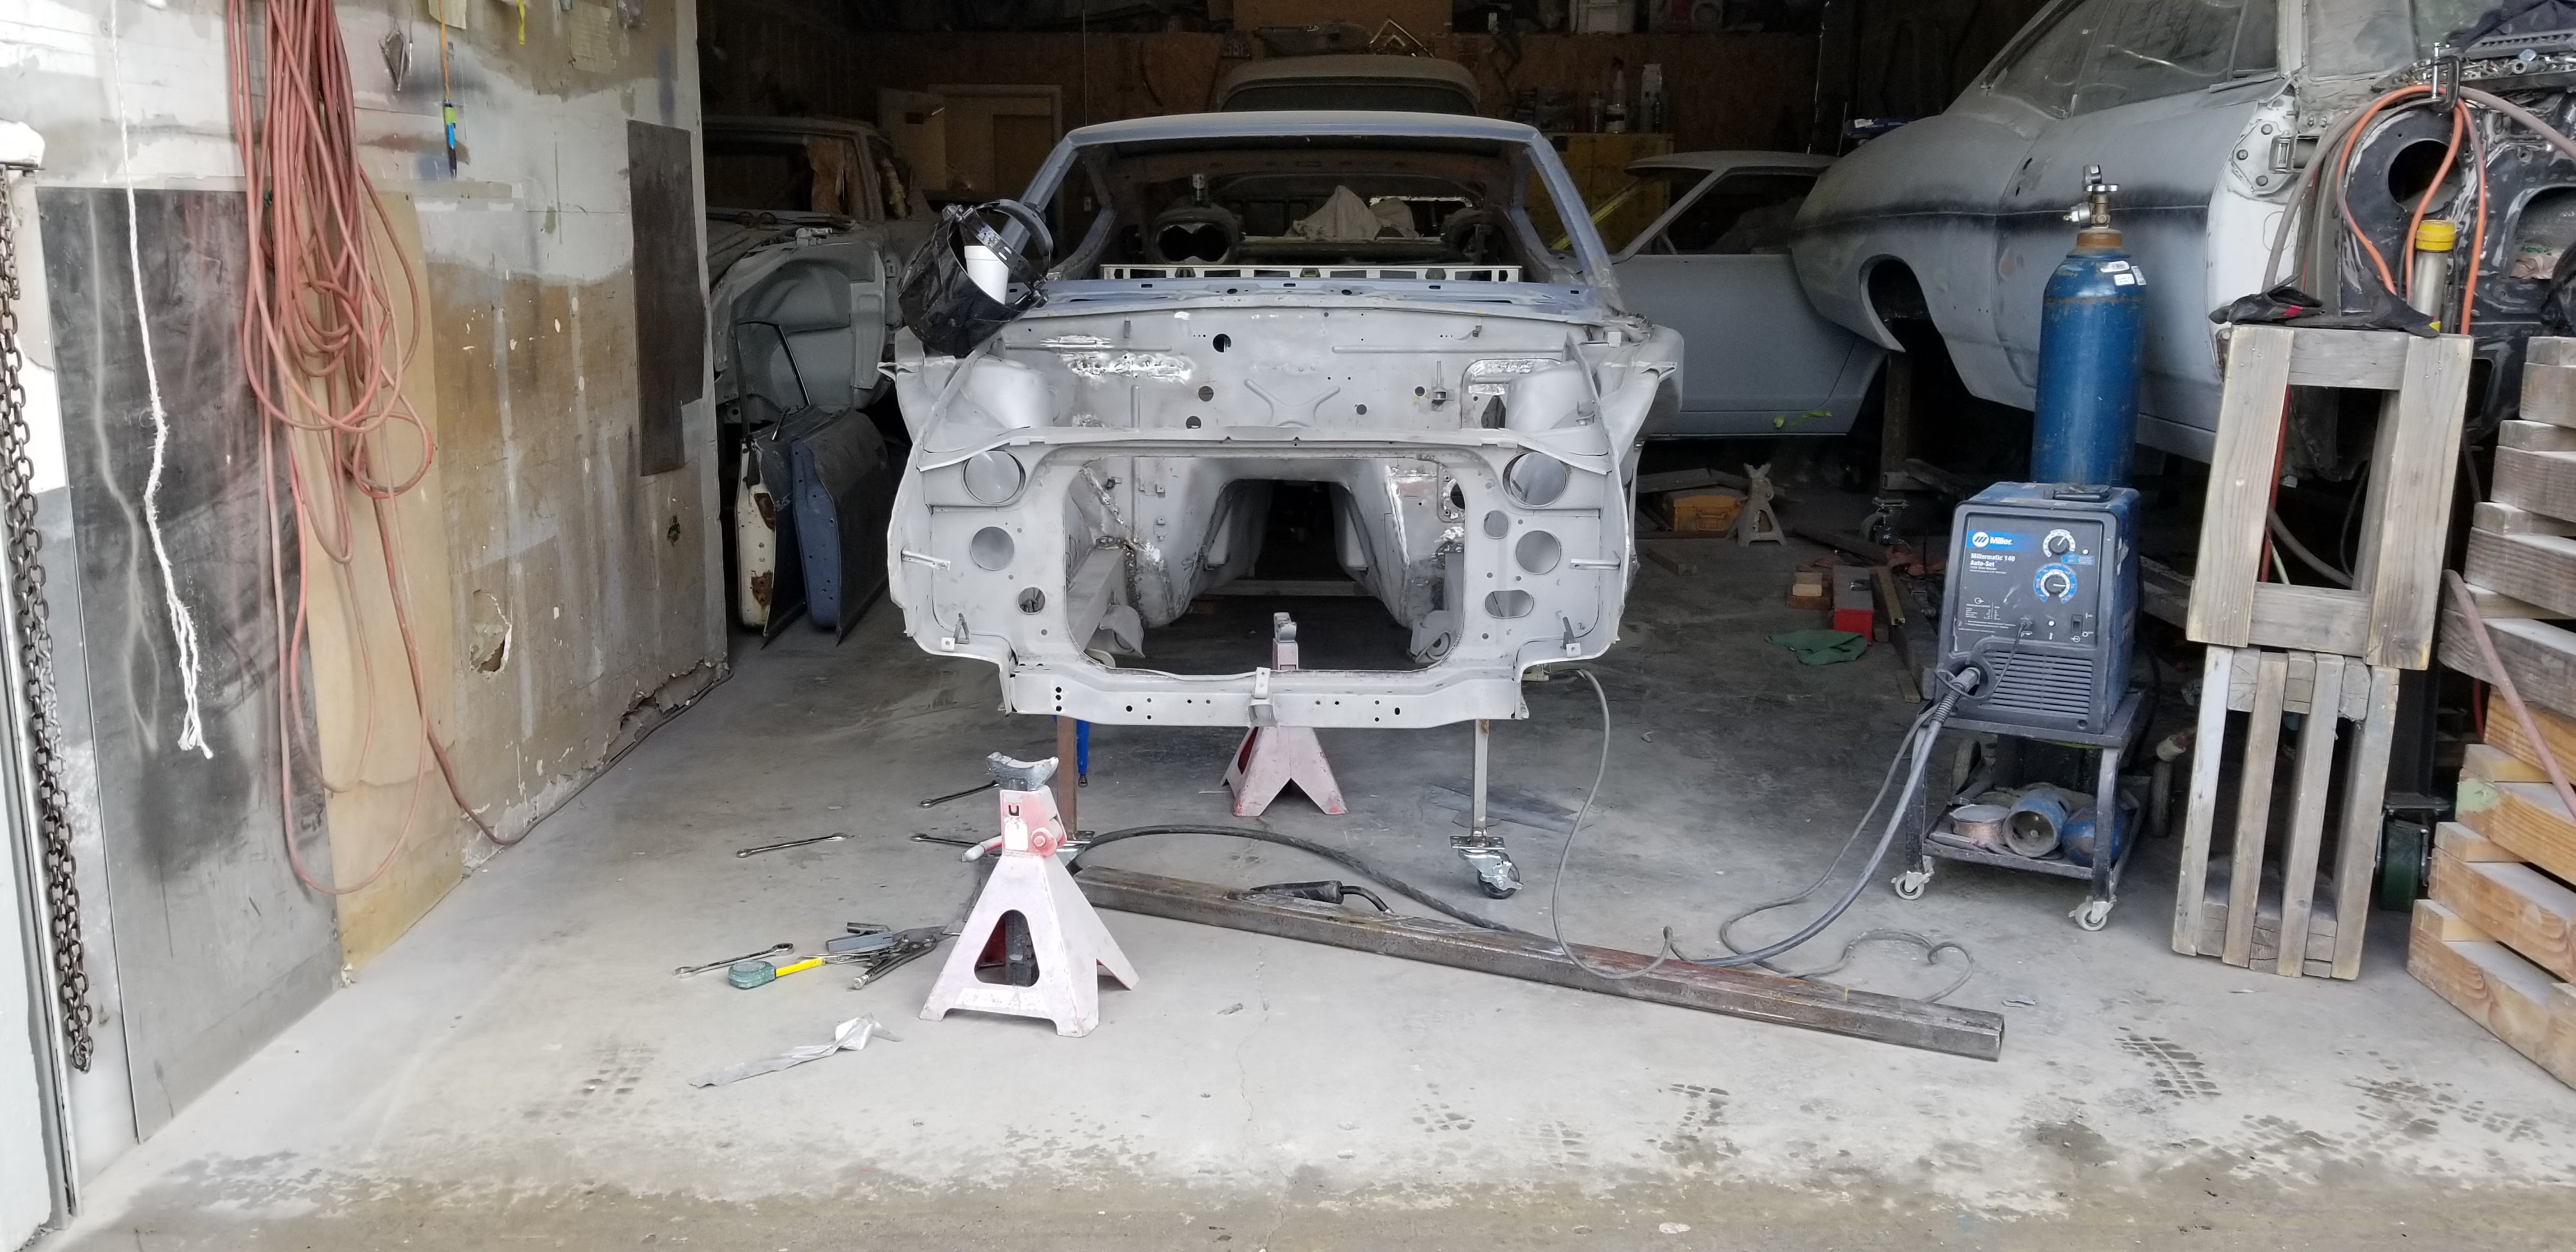
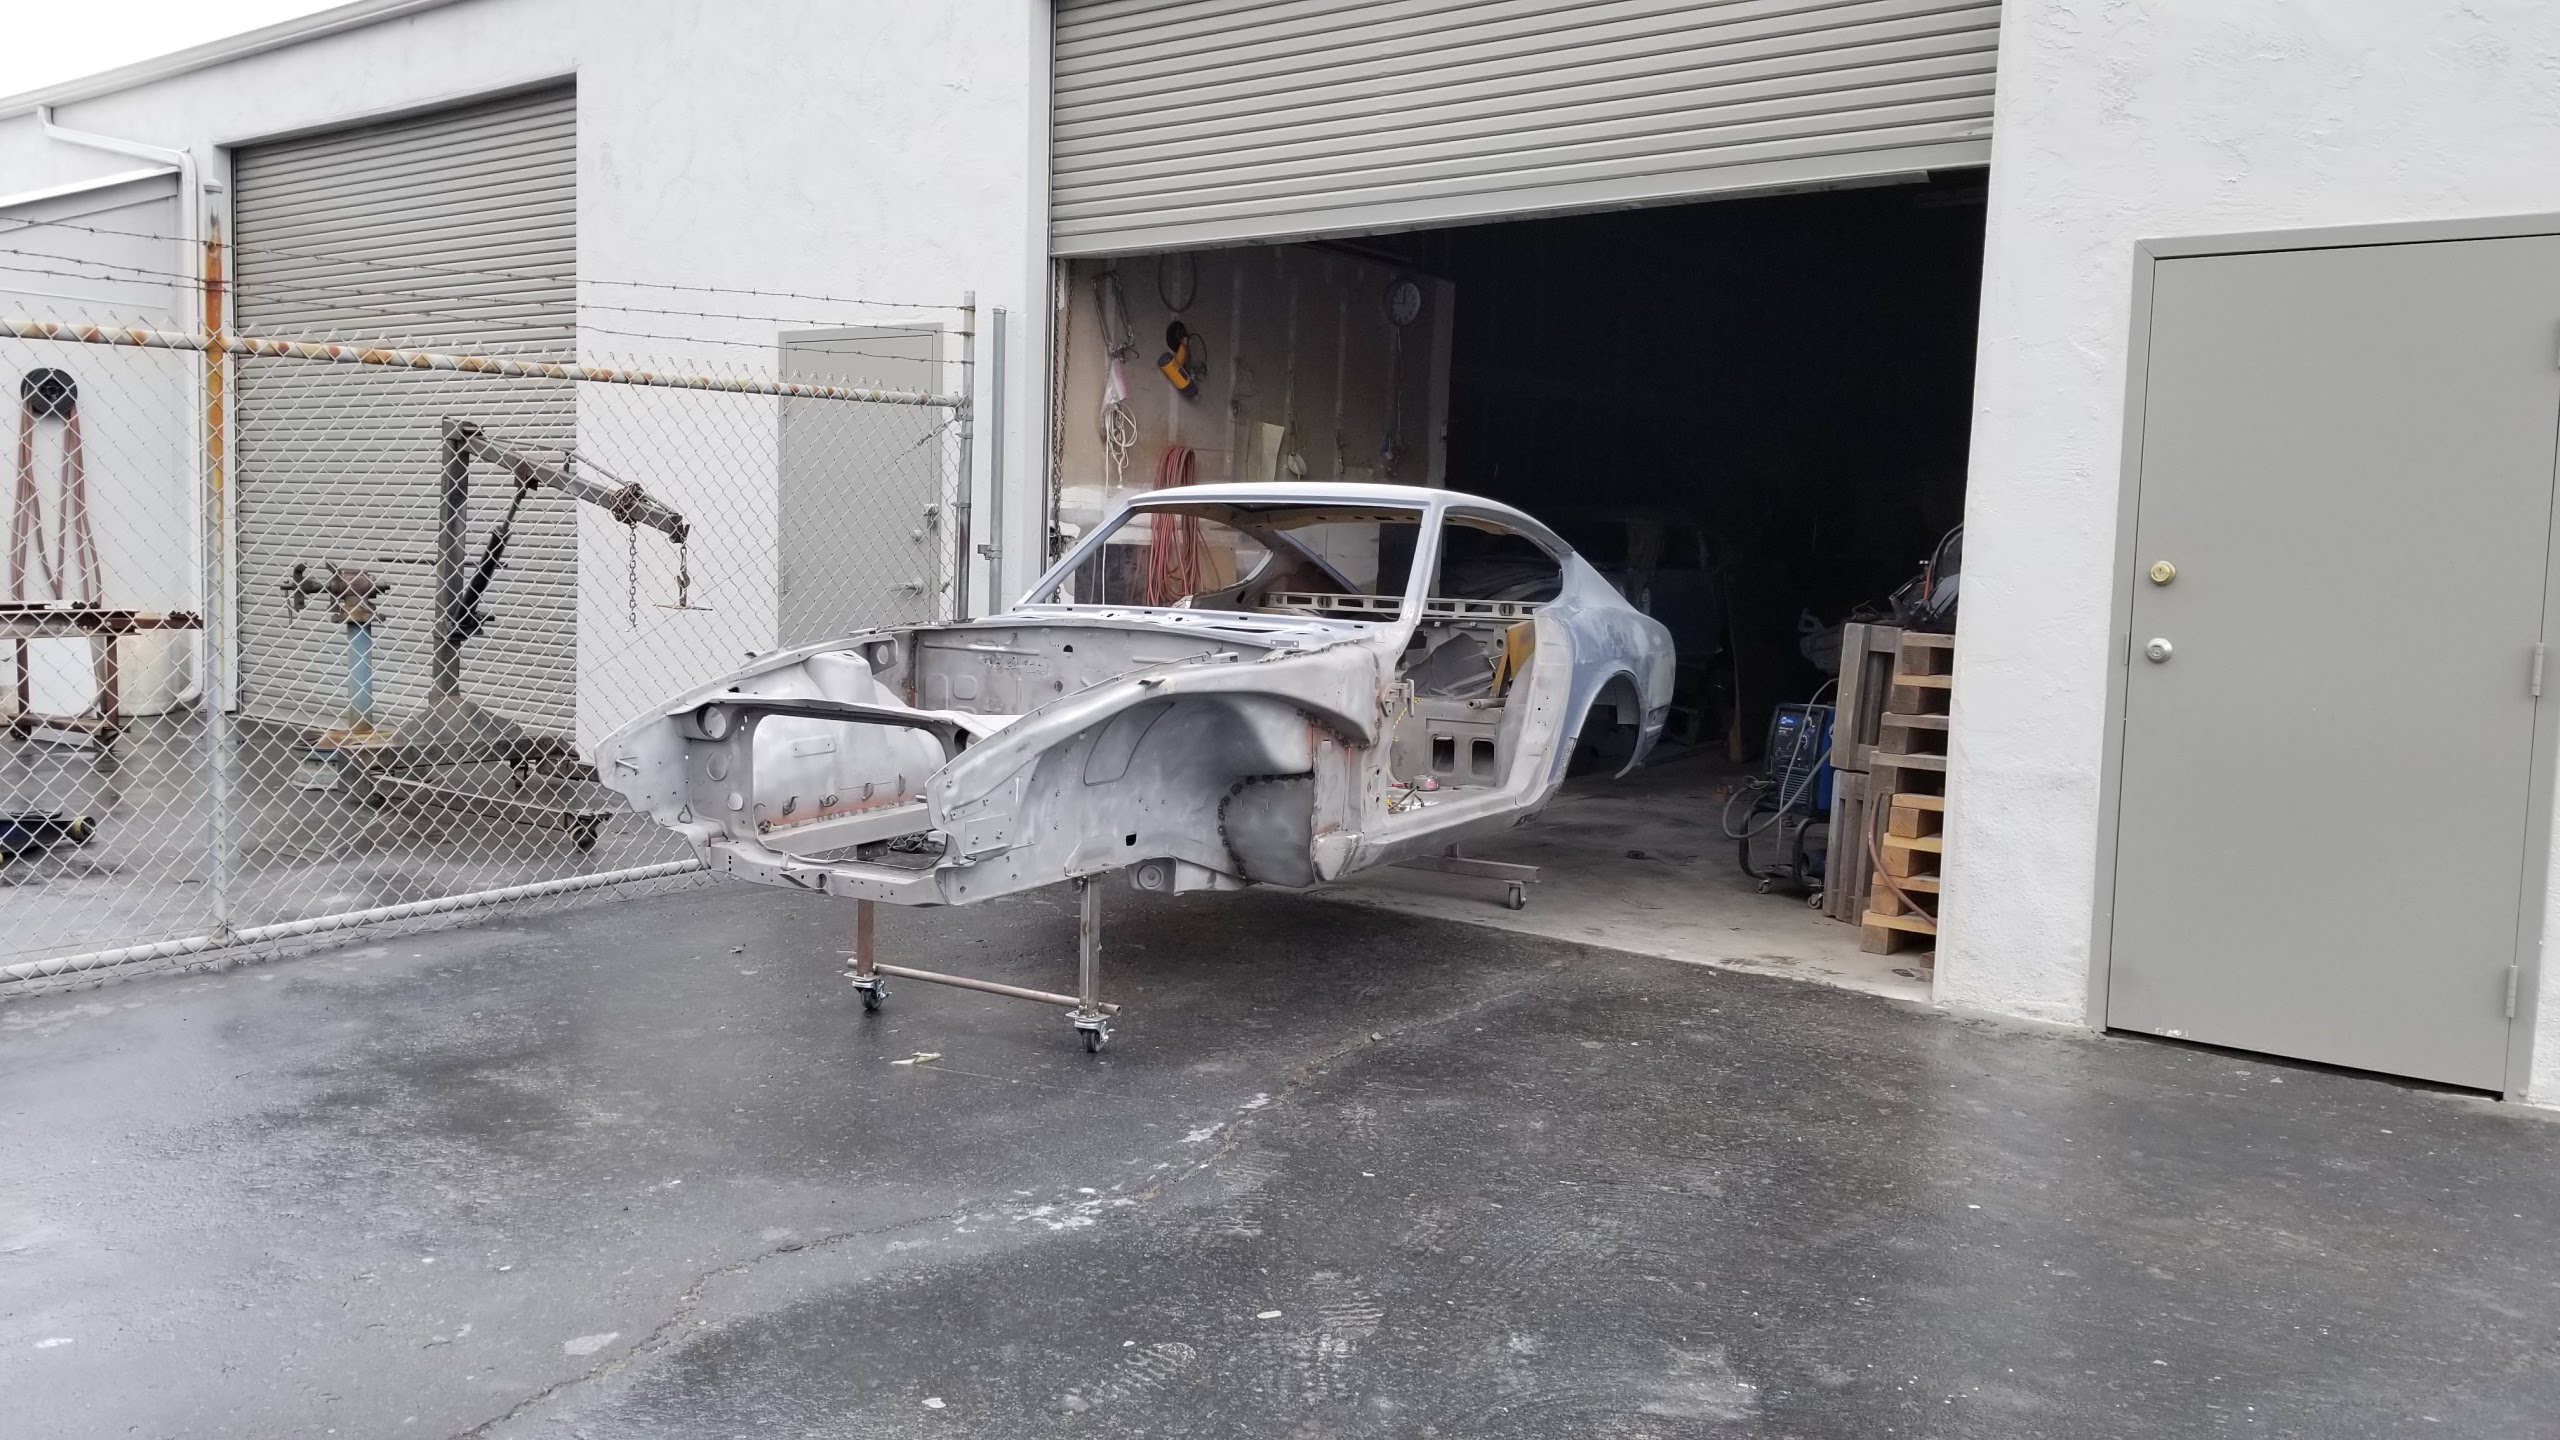
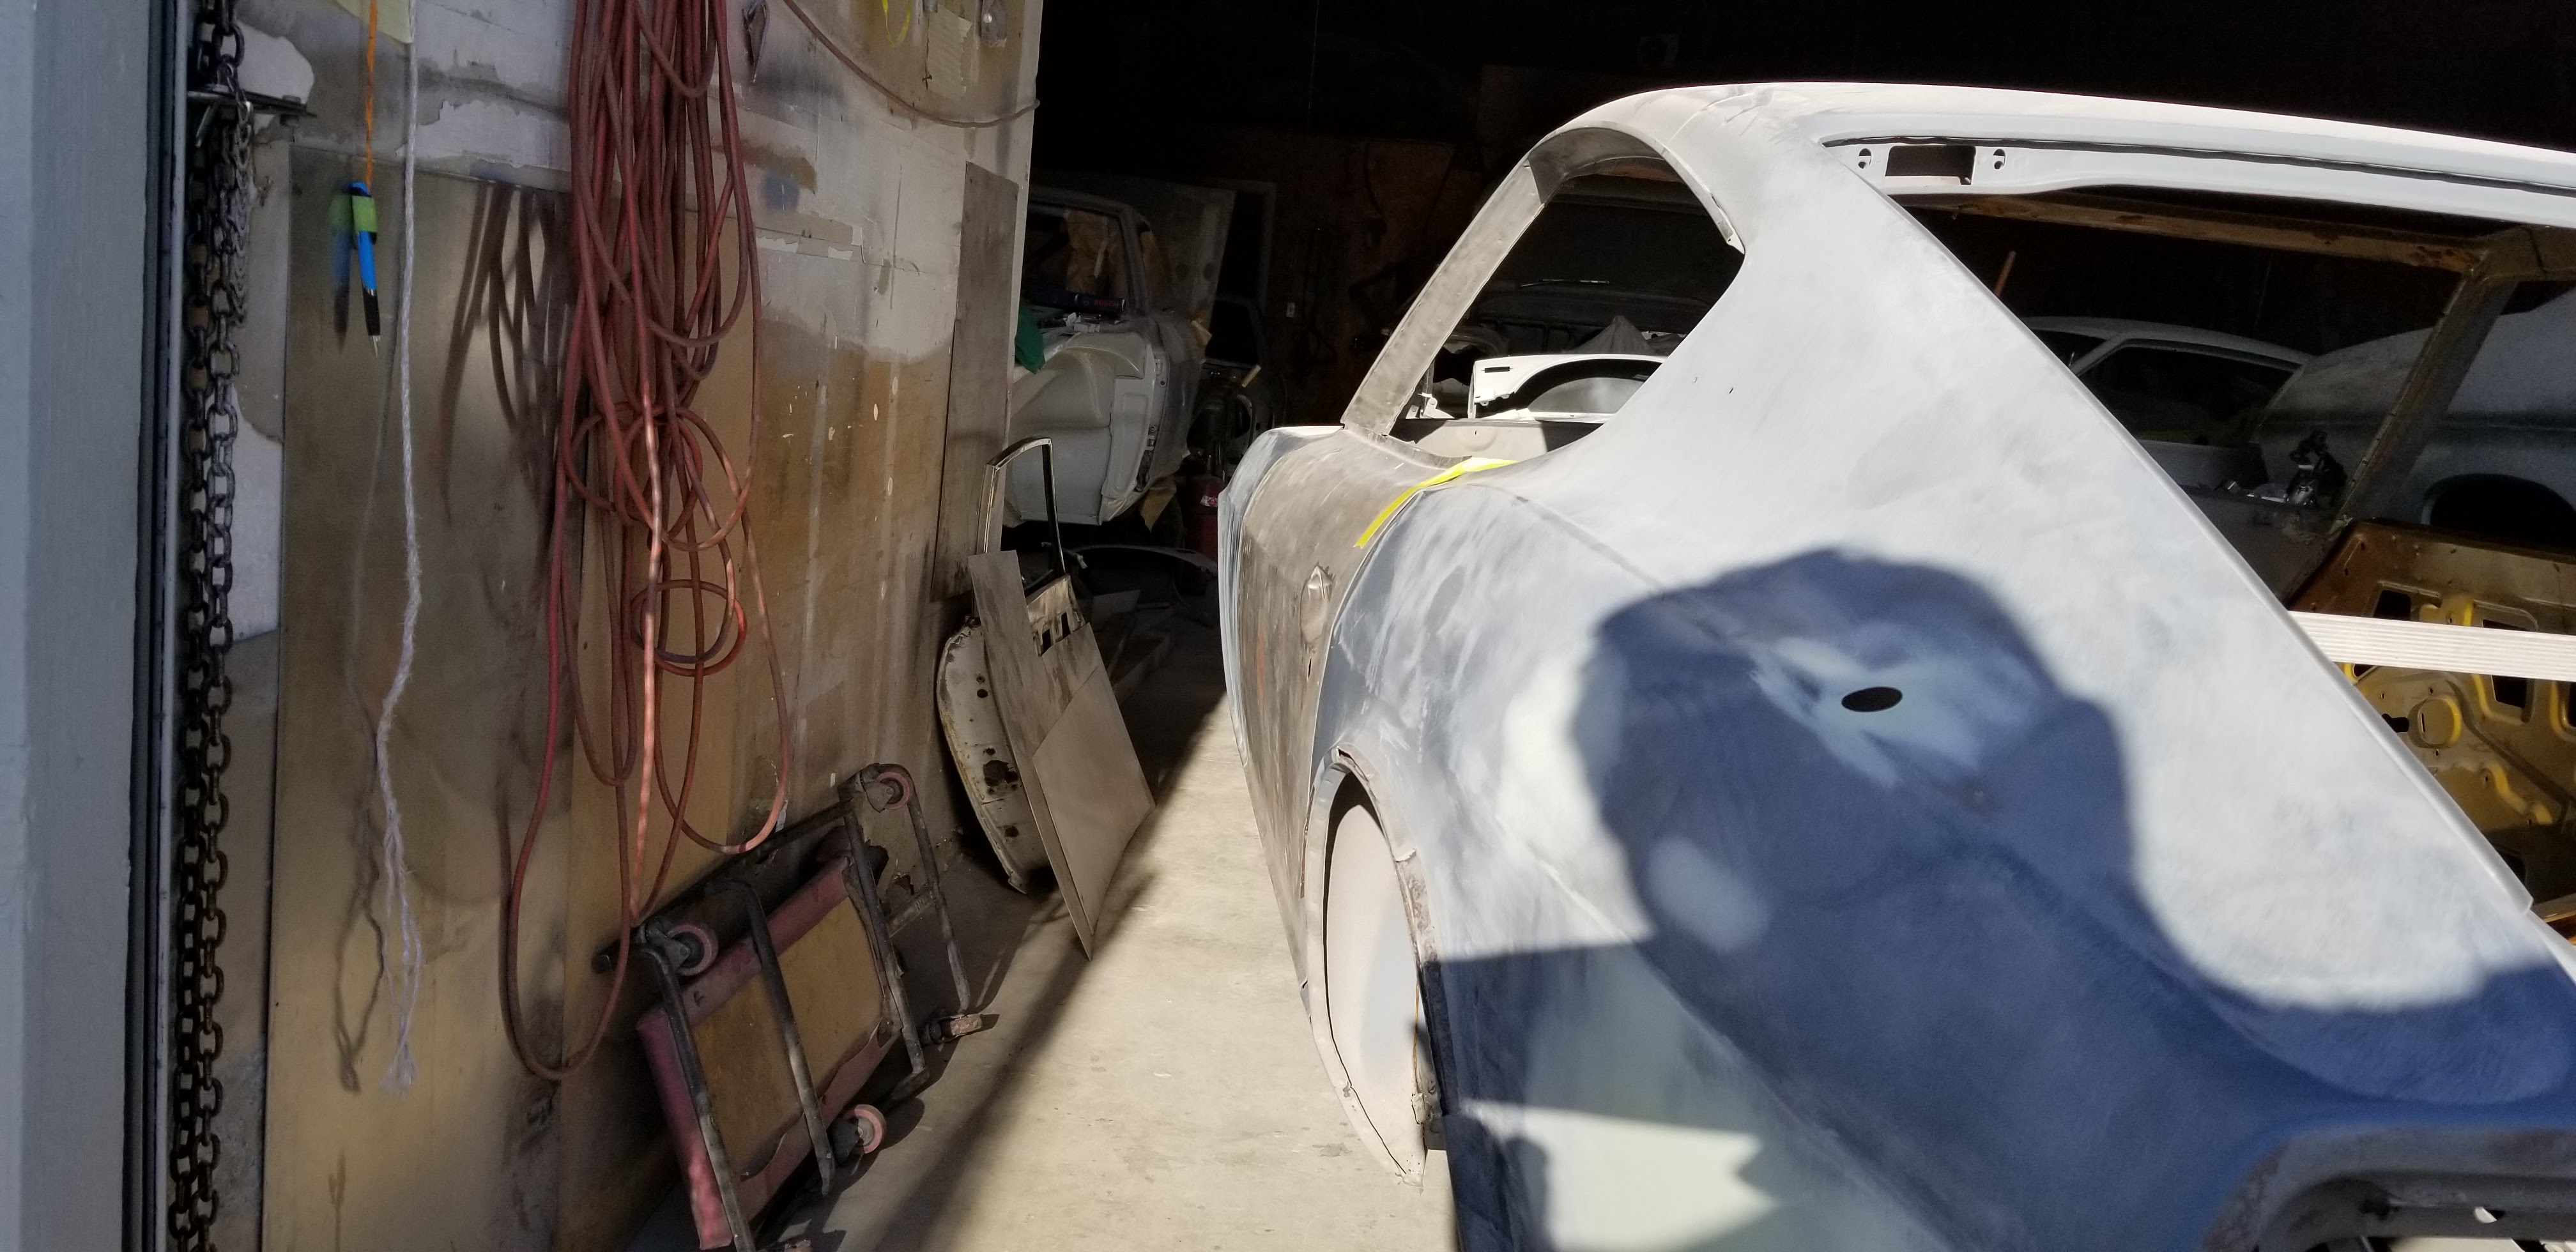
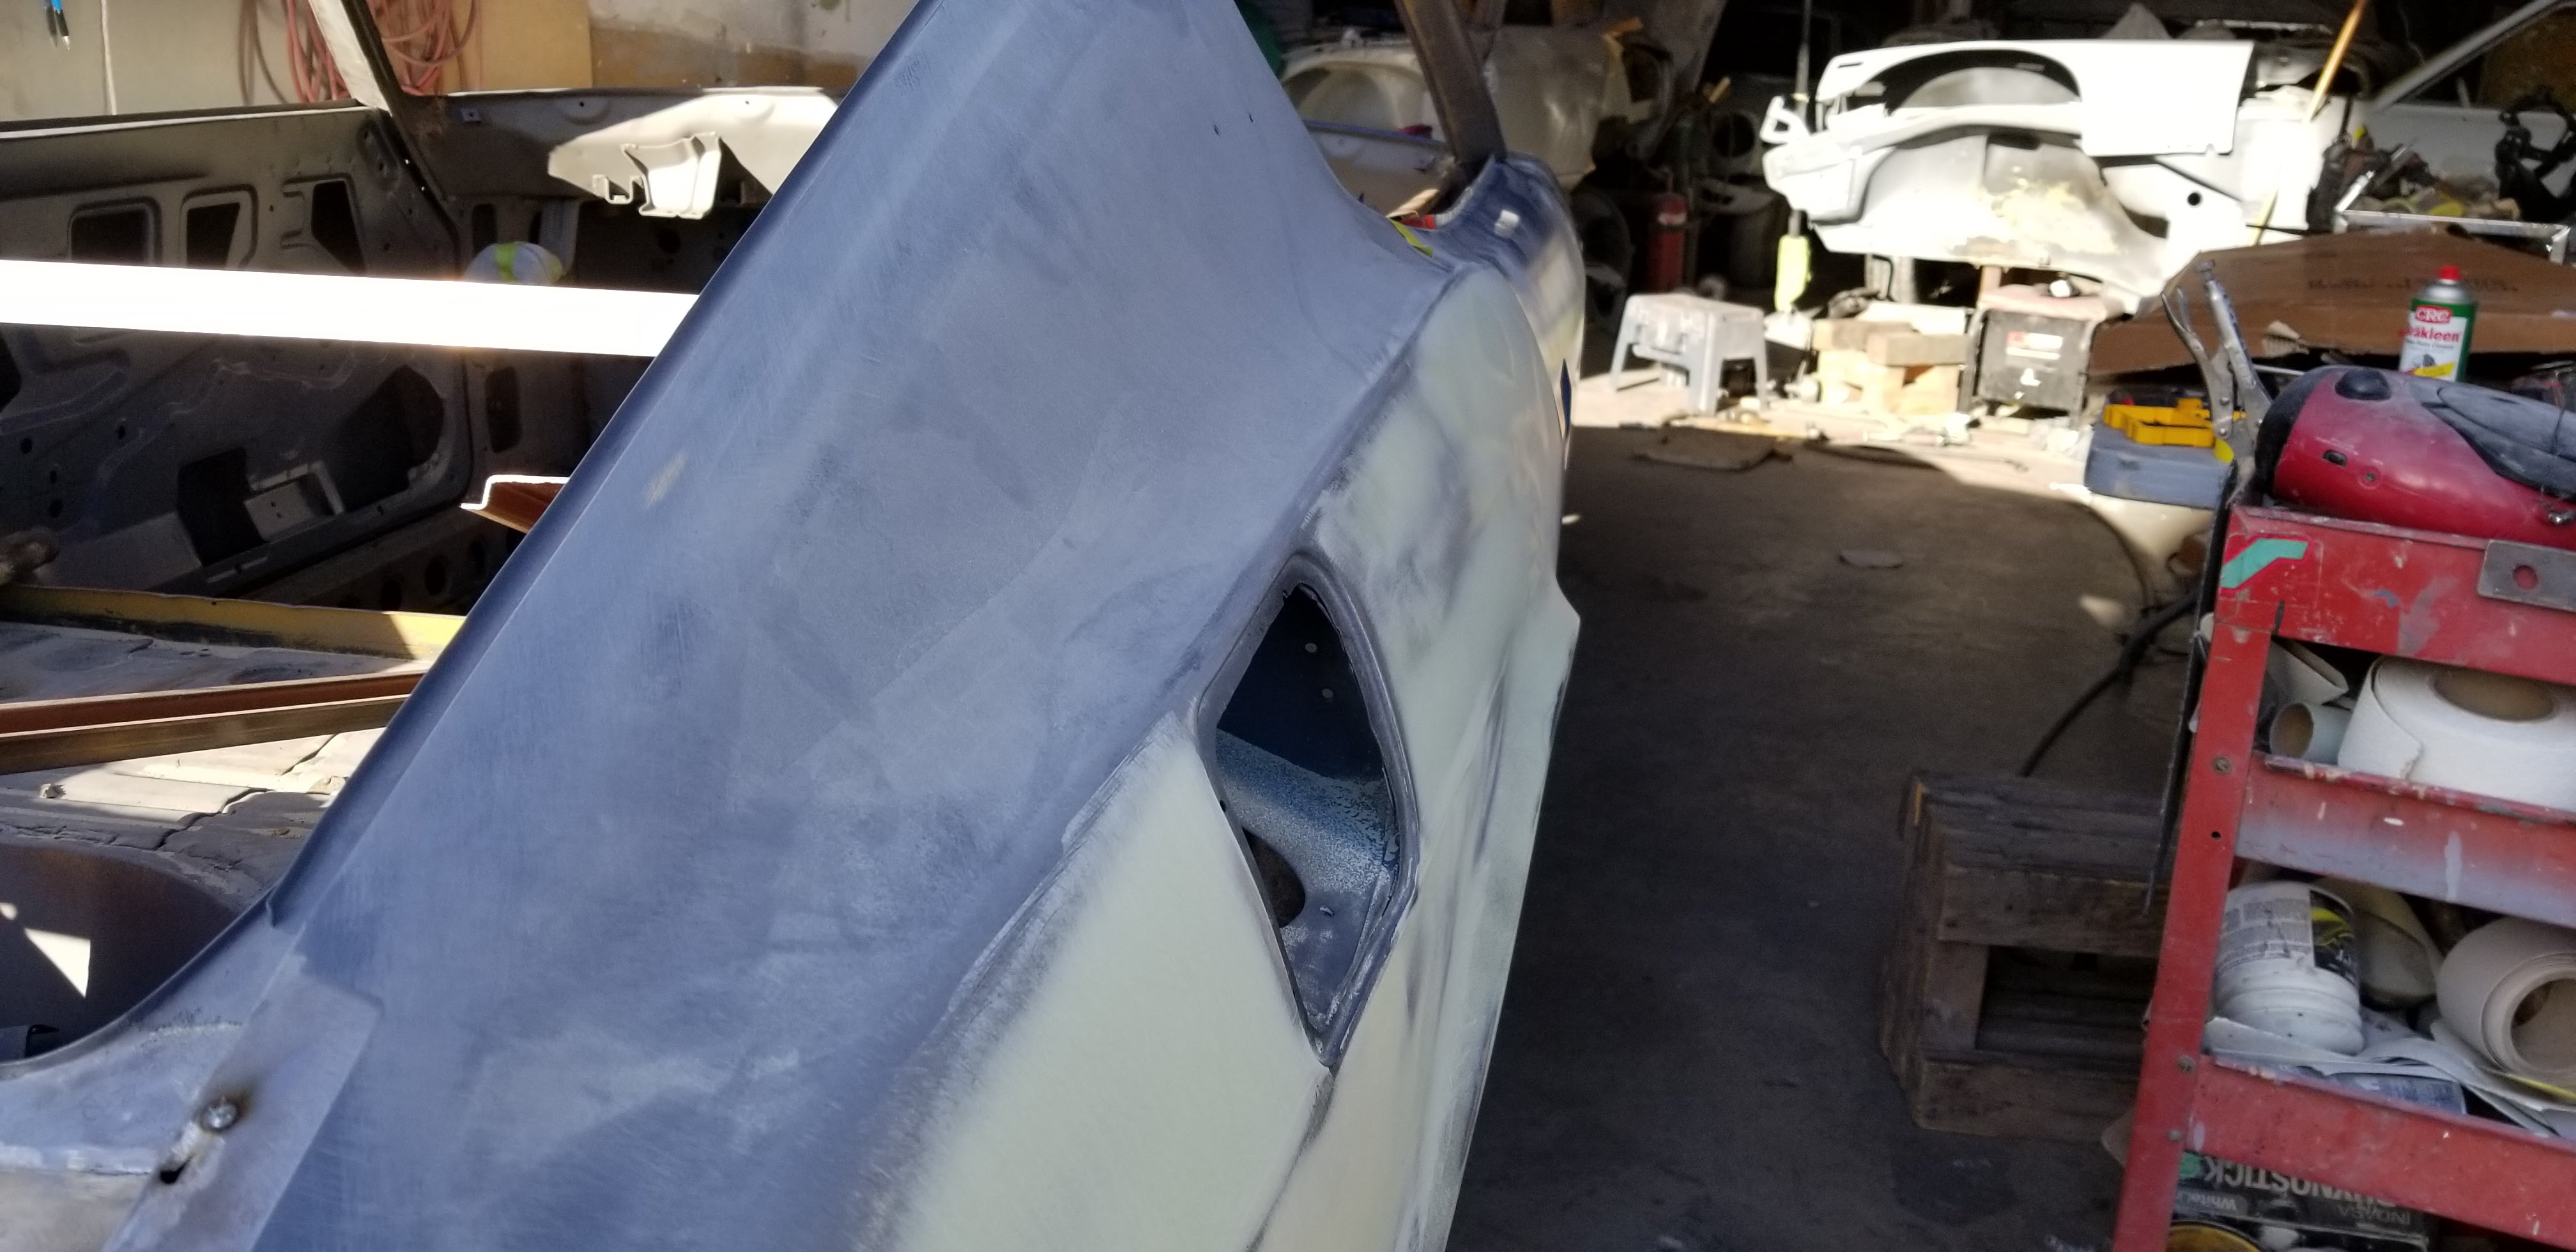
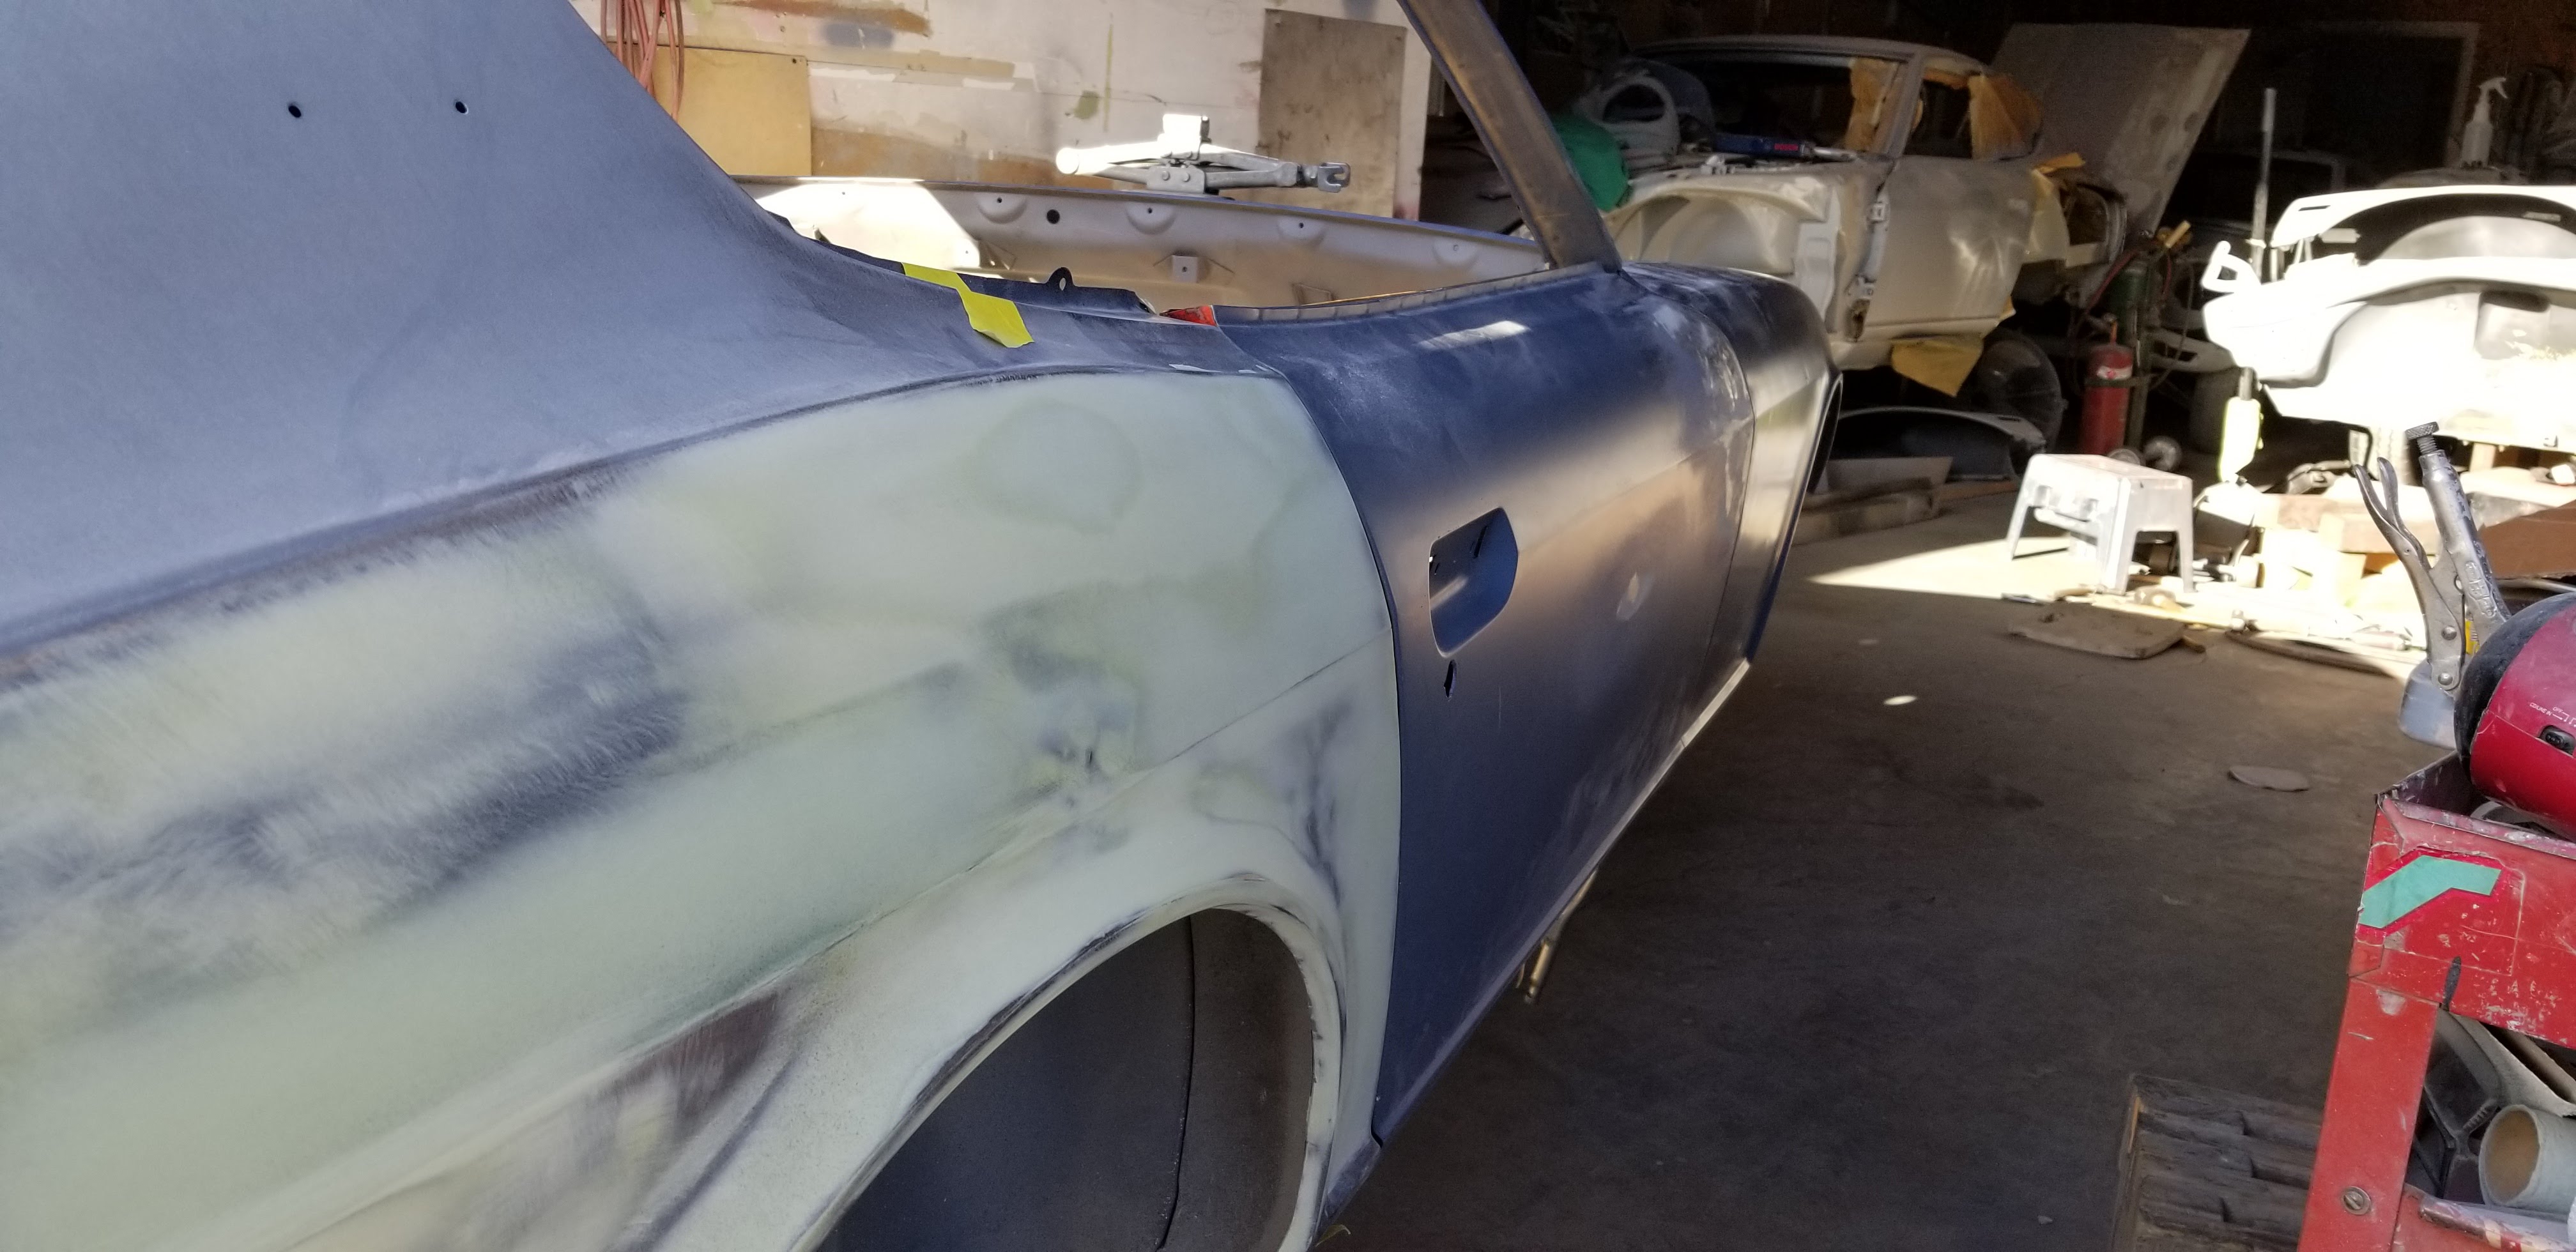
 So, I am actually starting work on this guy again. Slow, but it's coming along. I was sidetracked for a bit with the 'Deja Vu' project and also had some house stuff to fix up. (I actually built a nice custom shed to store stuff in, like car parts. I will get pictures of the shed later. Very happy with how it turned out.) Anyway, I am starting the tear down as you can see in the pics. I have learned that the key to this is to have nicely marked tubs to put your parts in. Engine parts go in the engine tub, interior parts in the interior tub, parts to be zinced go in the zinc tub. And as always, take lots of pics. I love how original the car is; lots of the original wire clamps, heater hoses, smog hoses, bolts that have never been removed and are in good condition. This has been very easy to disassemble so far. Took out the original antenna and bench tested; it works great. Got the motor pulled out last weekend with the help of @Montezuma. Hopefully, I will have this stripped in a month or two, then off to Miguel's for paint. Here are some pics.
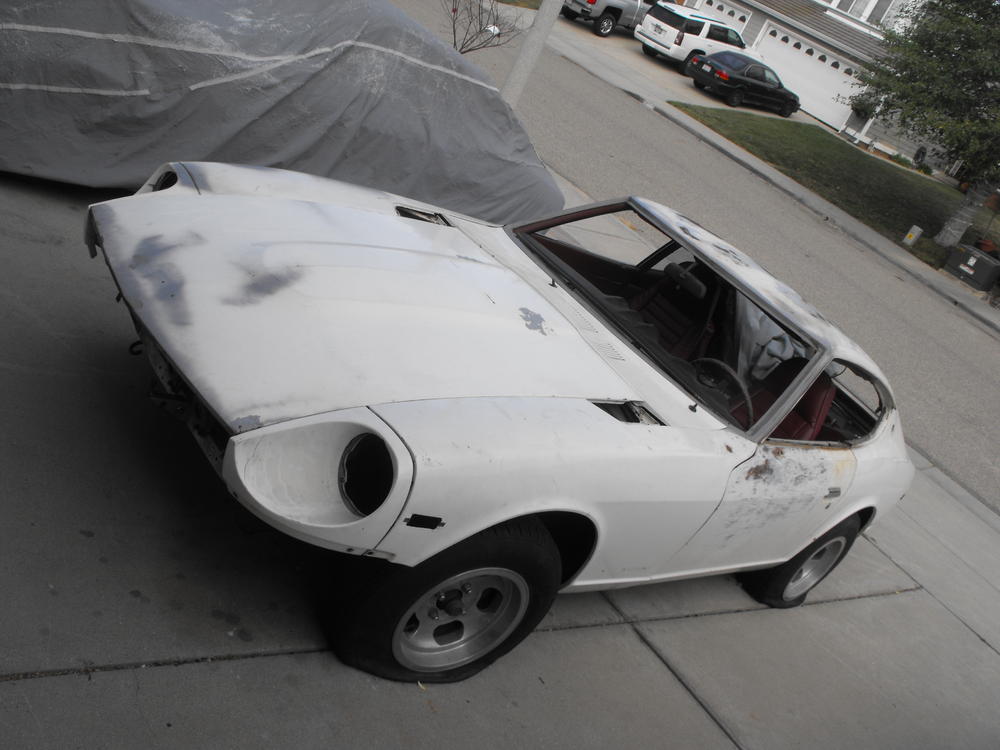

 1 point
 -
That's a really bad idea! They are much stronger as tube type assemblies. If it was that easy to make it right, the factory wouldn't have gone to all the trouble in the first place. Always remember, car manufacturers are notoriously cheap. The don't install "extra" or "unnecessary" parts1 point
-
1 pointYou learn the most when the weird things happen. Forces you to focus on the basics of how things work.1 point
-
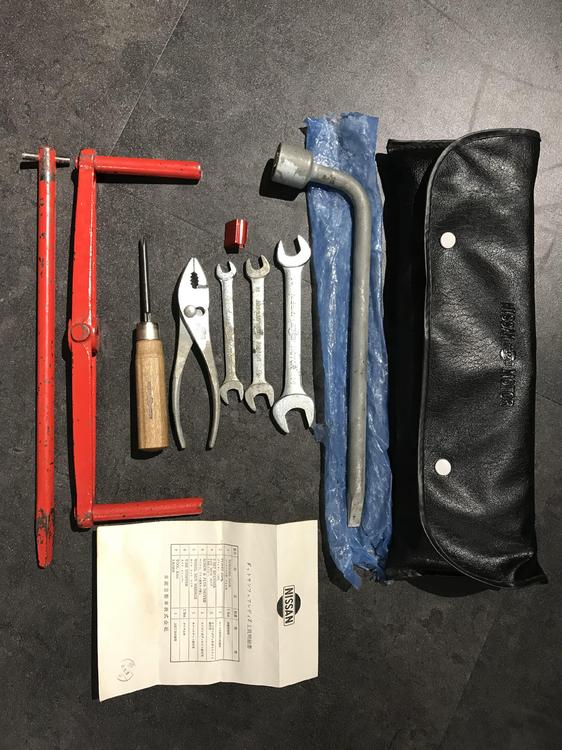
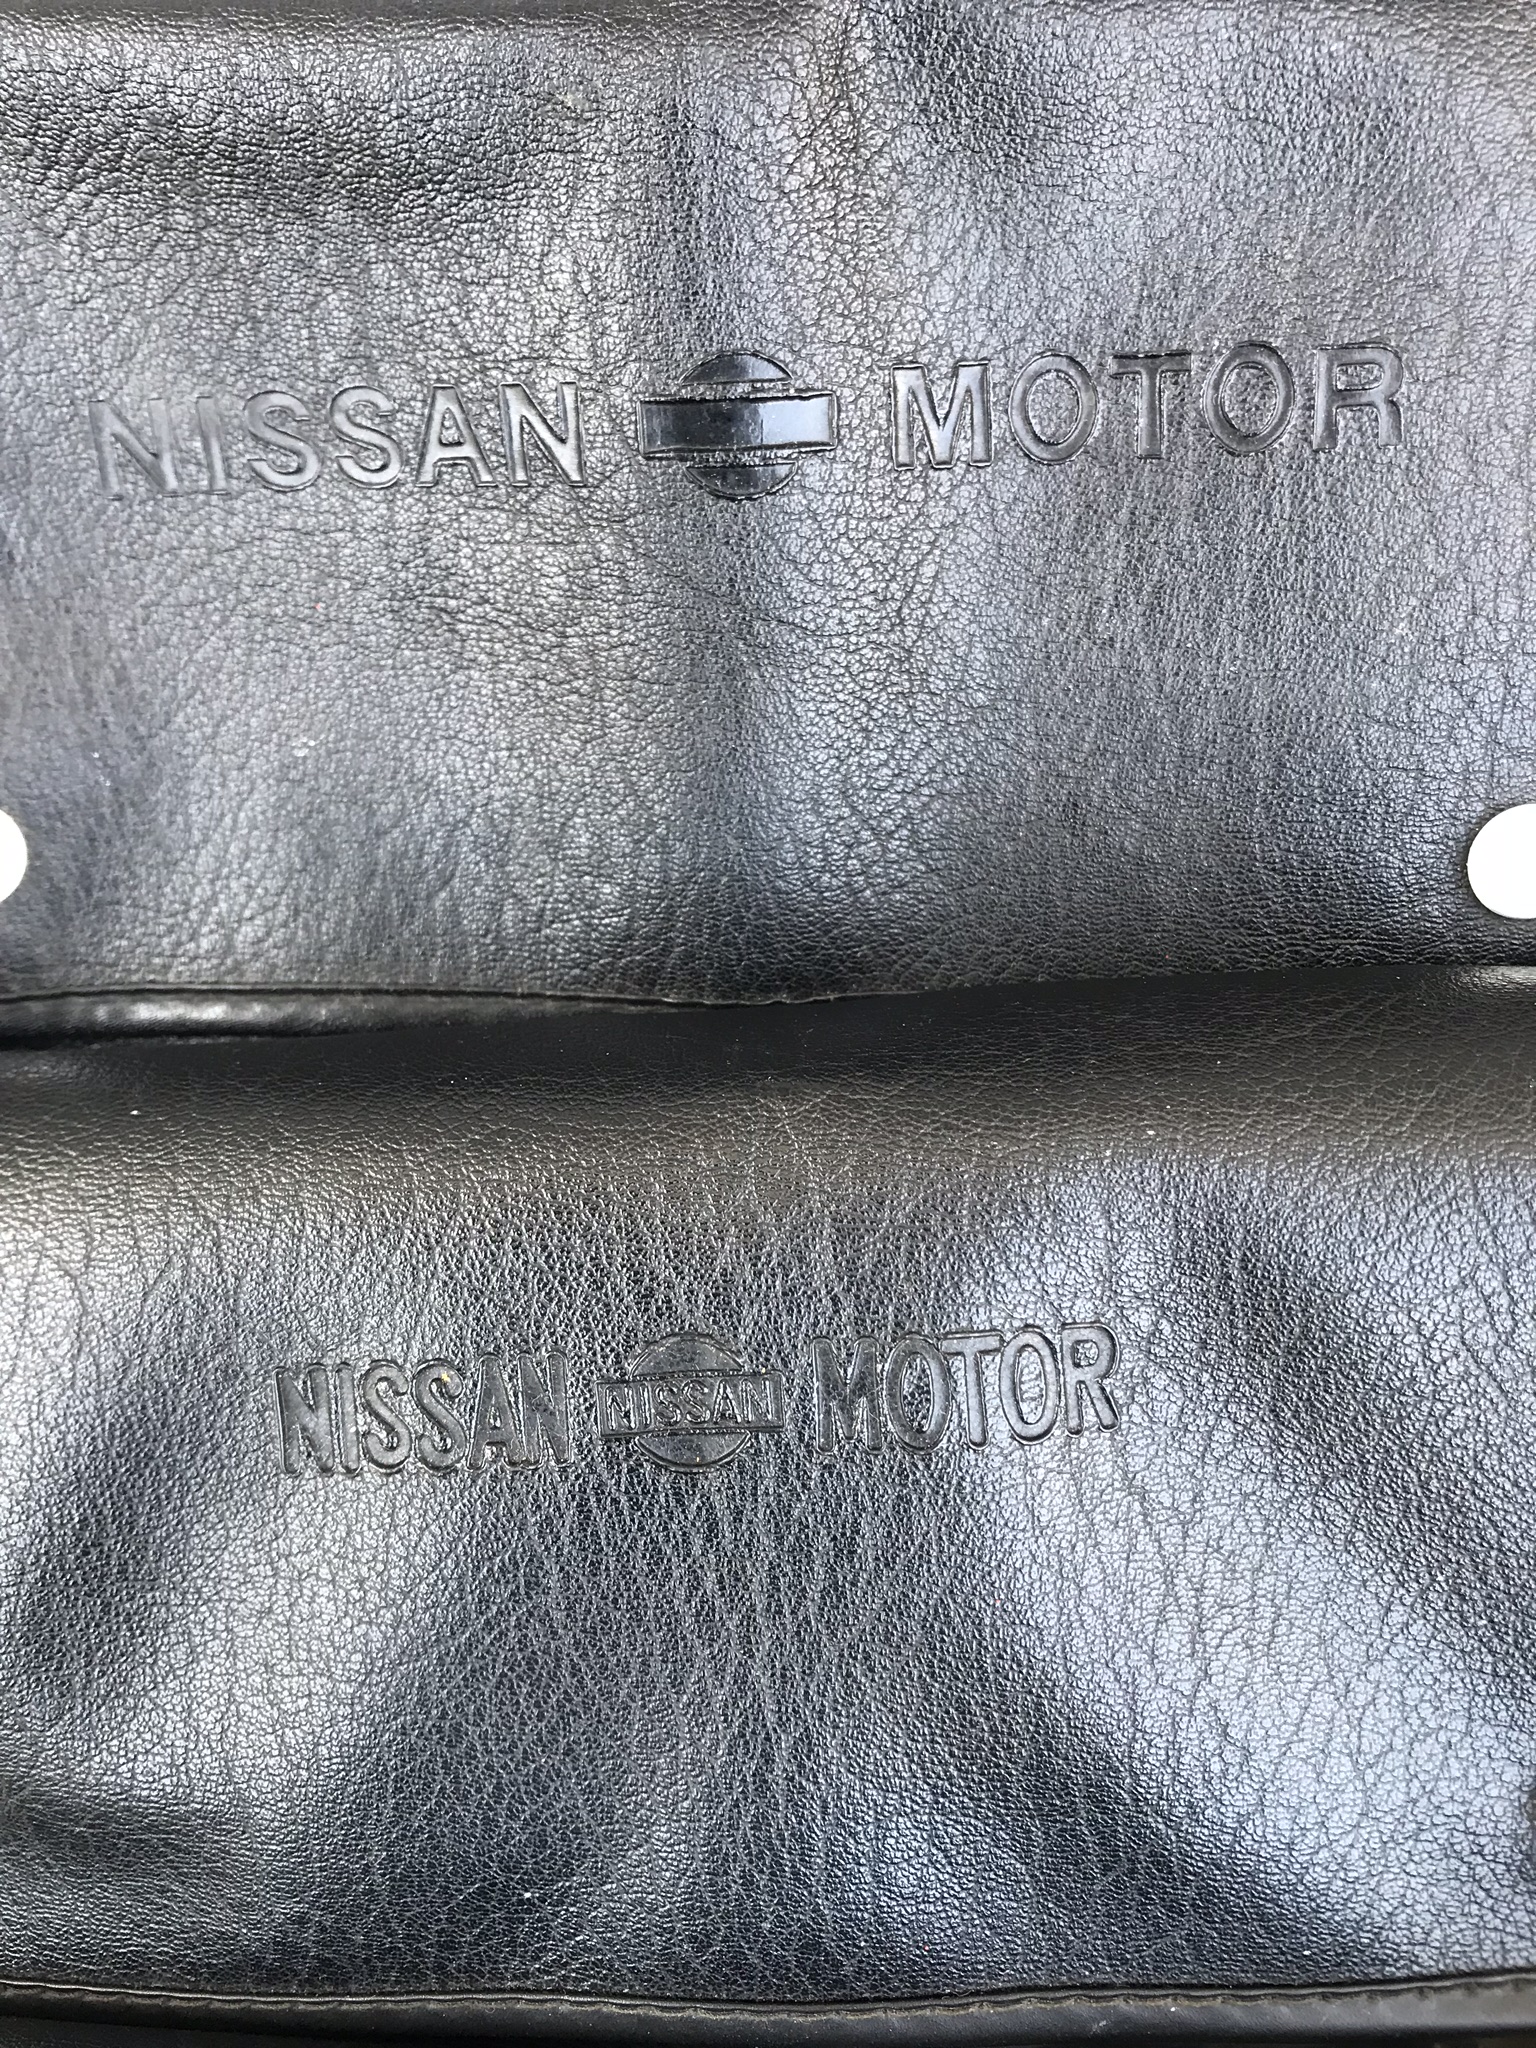
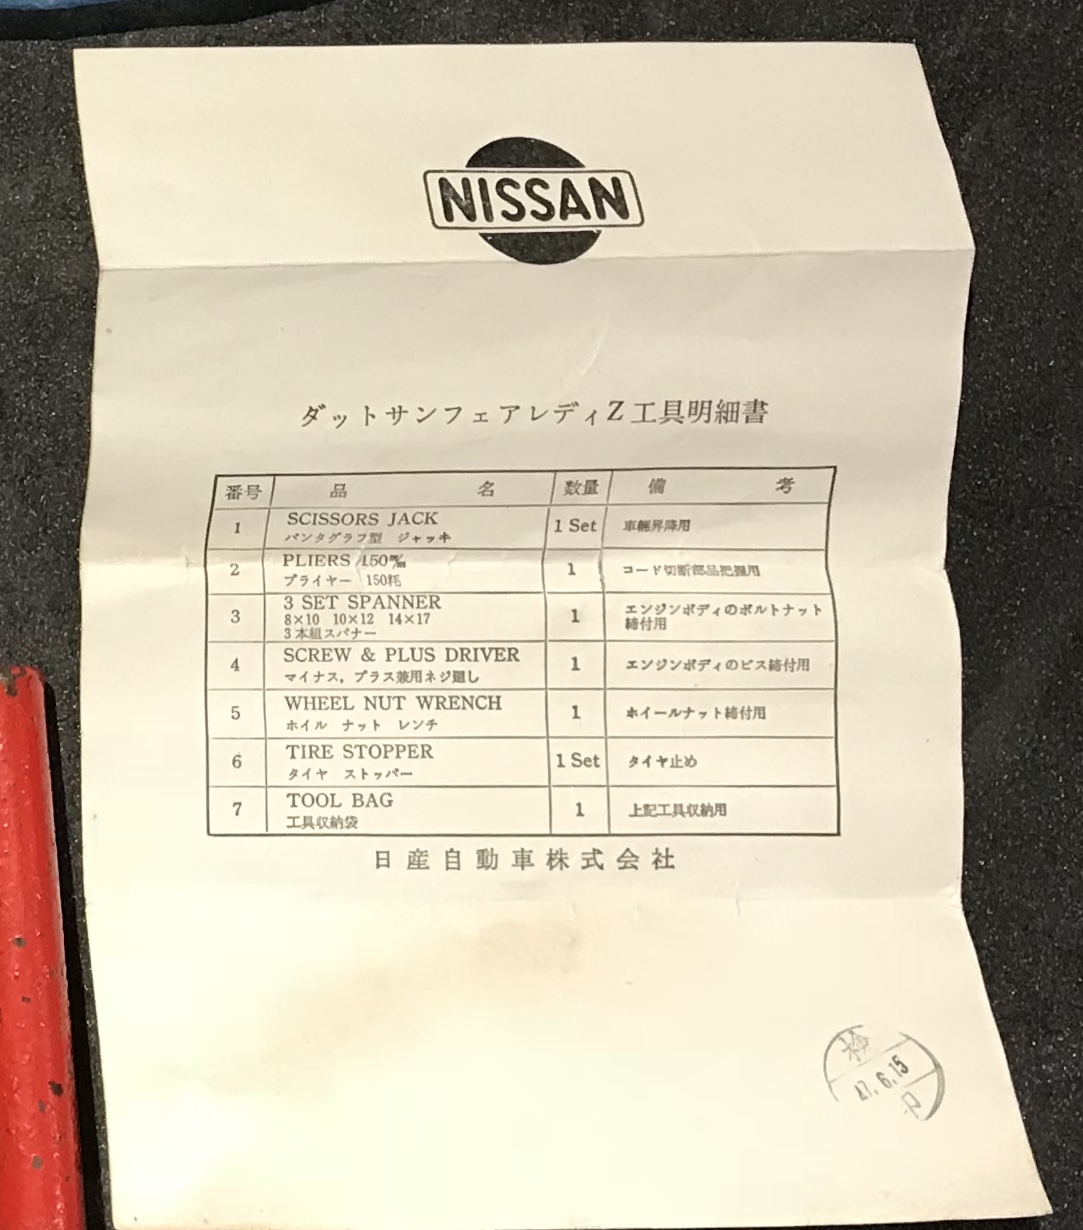
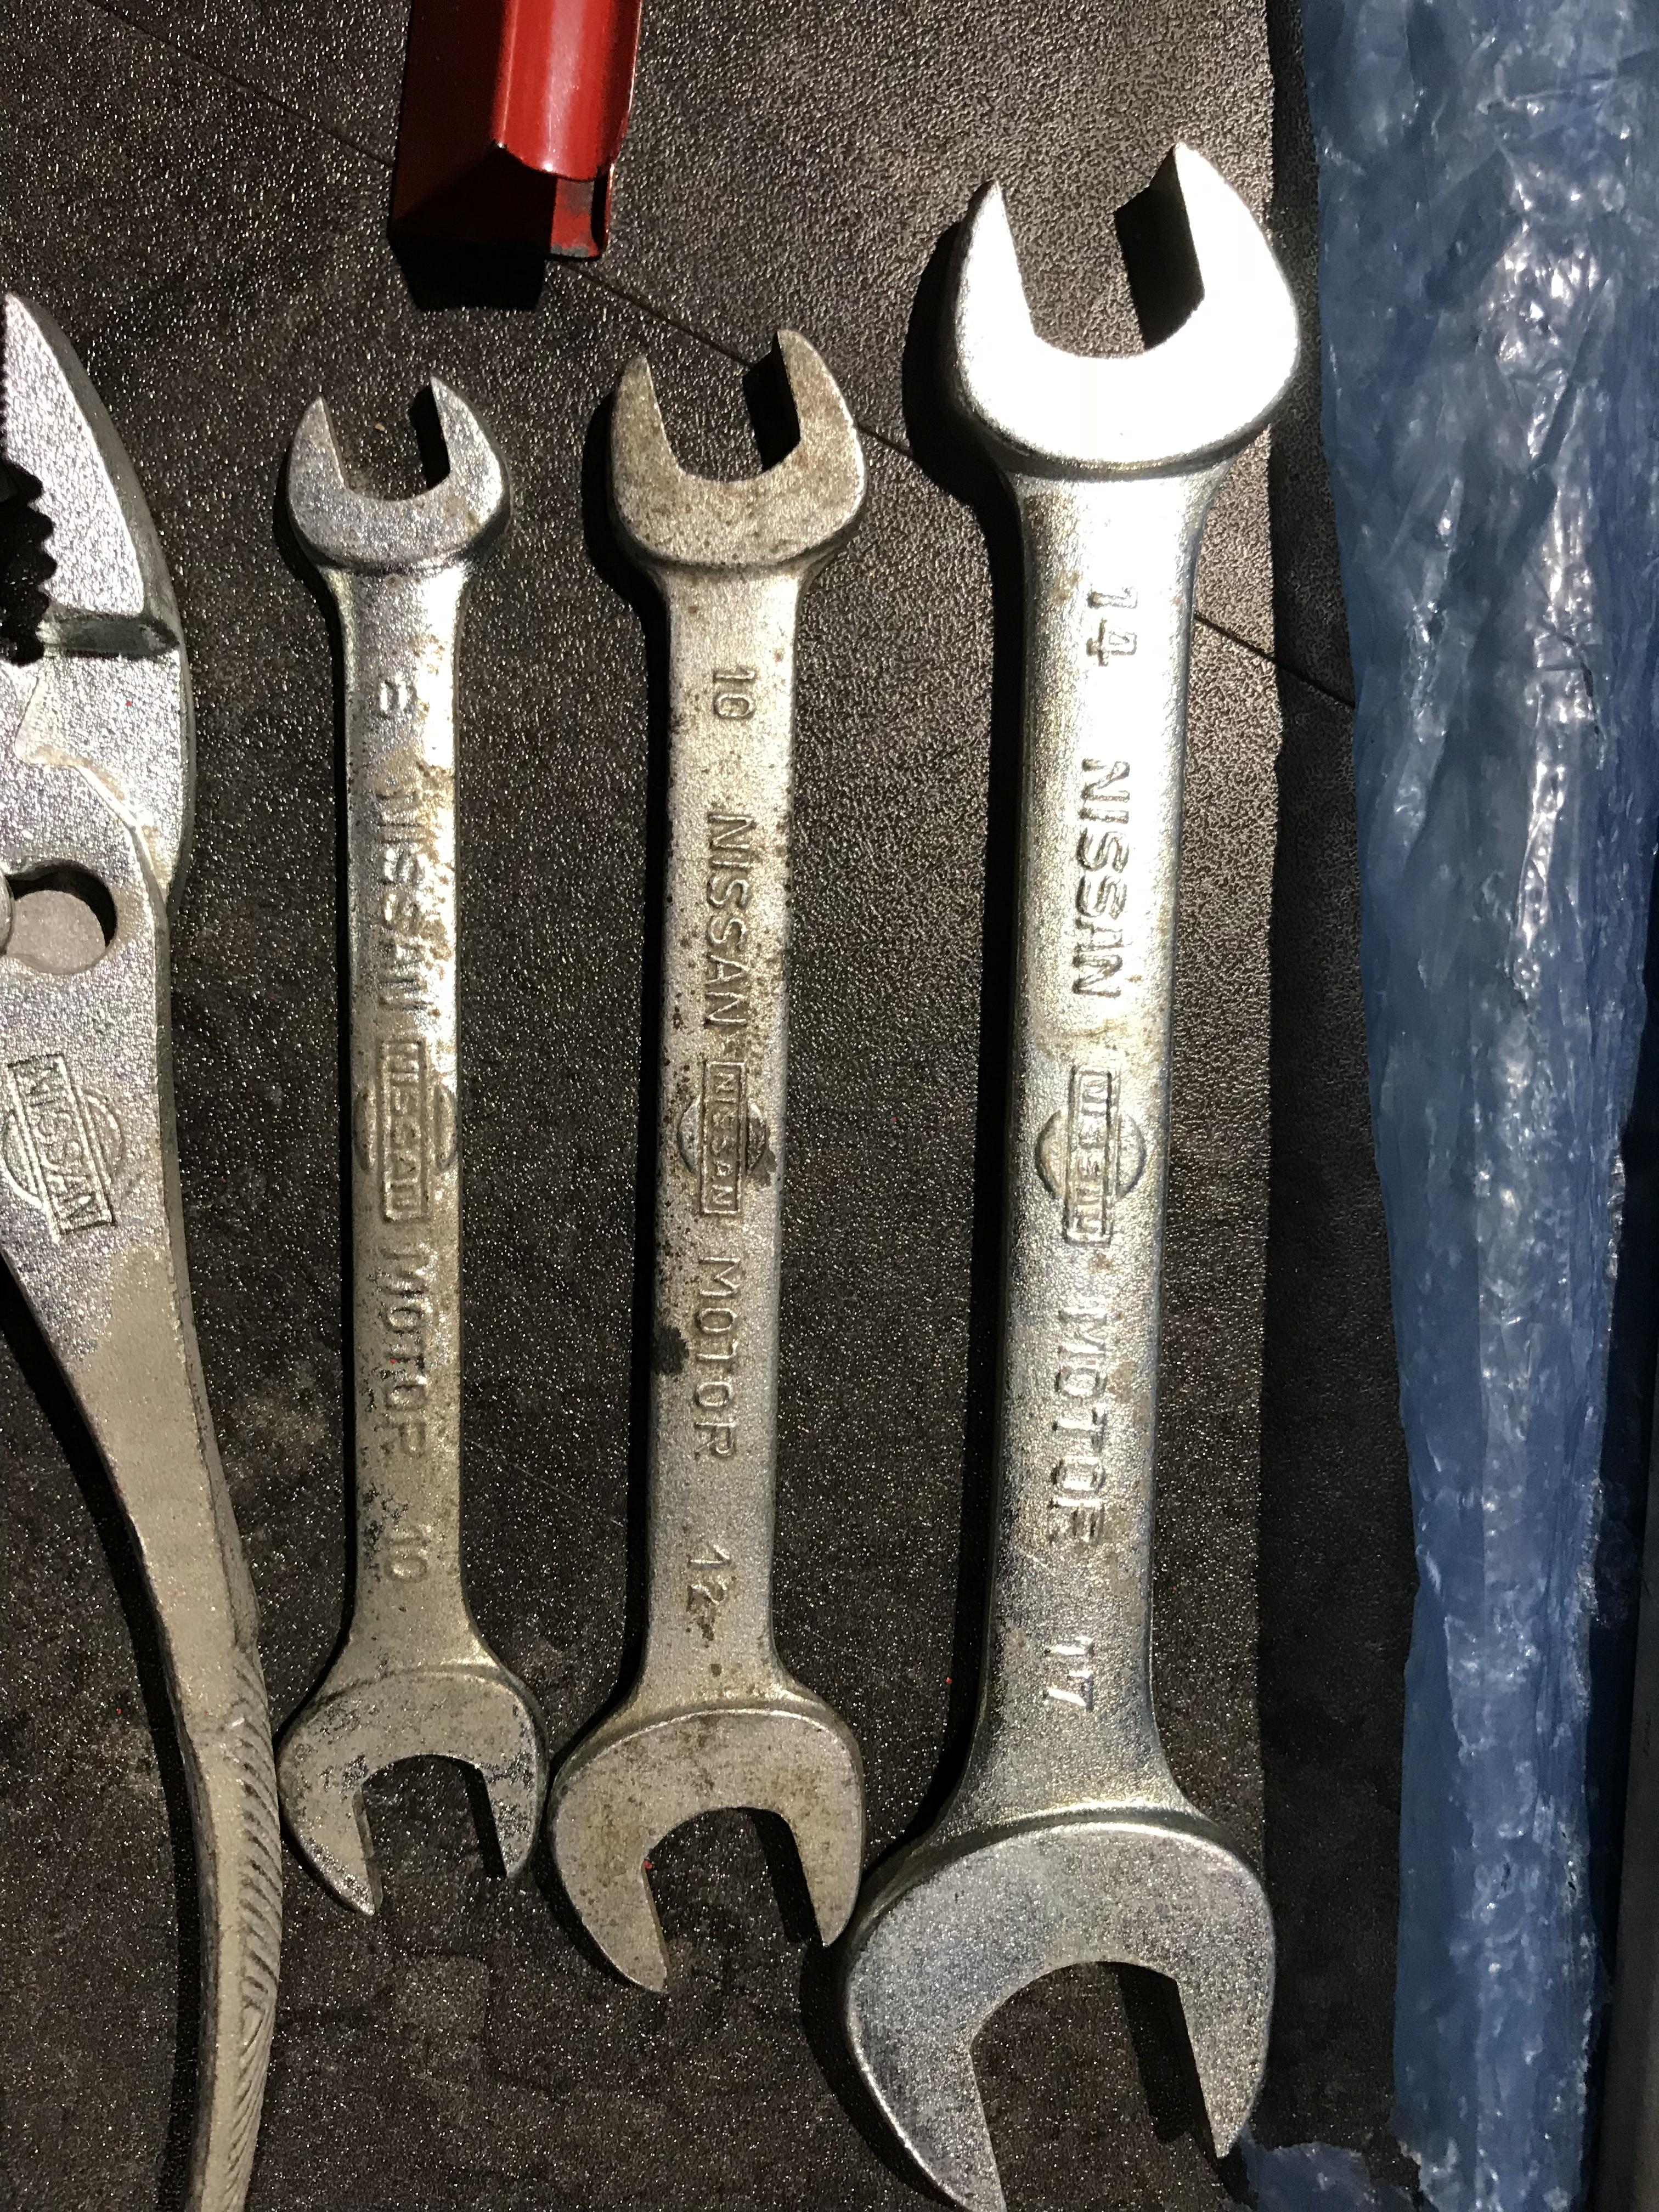
 The difference of NISSAN hamburger, Early one has “ NISSAN “ in the hamburger, later one doesn’t. I want tools contents paper for my Z432. I will make a replica of it. Mike, please help me out ! Kats
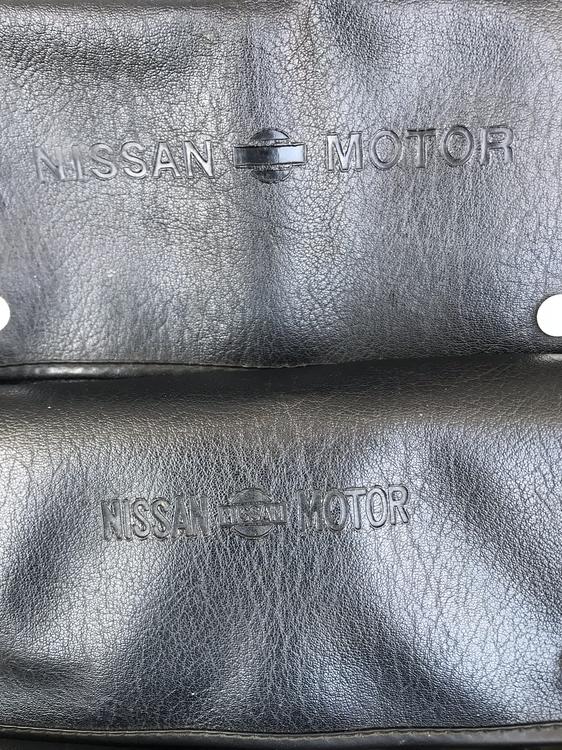

 1 point
 -
 This is probably one of the more interesting shots from the weekend. The cars on either side had just split apart, and the silver 944 shot through. The location is right at the entrance to Turn 10B. I should add that they all made it through cleanly.
 1 point
 -
 1 pointLooks smog exempt Sent from my [device_name] using http://Classic Zcar Club mobile1 point
 -
1 pointThe ground wires for all the lights in the back are incorporated into the sockets and it's not uncommon to find them corroded or pulled out enough so they are not making contact anymore. But you say the signal is working so it might just be the brake light filament that has blown in that bulb, if you can't see a broken filament in the bulb, switch the right and left bulbs to test it. Hope it's a simple fix.1 point
-
1 pointMost likely the emergency lights switch.. your brake wiring is going through this switch.. (an American car has a 9 (!)pole em.switch where a euro style has only three 3 !!! )1 point
-
 1 point1 point
 1 pointI would think the old washers you have would last for all eternity. Unless you lost a couple of course.1 point
 1 pointYou're looking at the wrong end. picture, Dr. of Ears, Nose and Throat NOT Dr. of Proctology. Get back under the hood where the problem is. If you have doubts about the fuel pump?s, do a pressure and volume test and then get back to the floats. Don't keep buying new pumps.1 point
I brought a surprise Z home once. It was in the backyard for about a month before she noticed...1 point
1 pointYou're looking at the wrong end. picture, Dr. of Ears, Nose and Throat NOT Dr. of Proctology. Get back under the hood where the problem is. If you have doubts about the fuel pump?s, do a pressure and volume test and then get back to the floats. Don't keep buying new pumps.1 point
I brought a surprise Z home once. It was in the backyard for about a month before she noticed...1 point


Important Information
By using this site, you agree to our Privacy Policy and Guidelines. We have placed cookies on your device to help make this website better. You can adjust your cookie settings, otherwise we'll assume you're okay to continue.