
Leaderboard


 Subscriber


Popular Content
Showing content with the highest reputation on 05/03/2018 in all areas
-
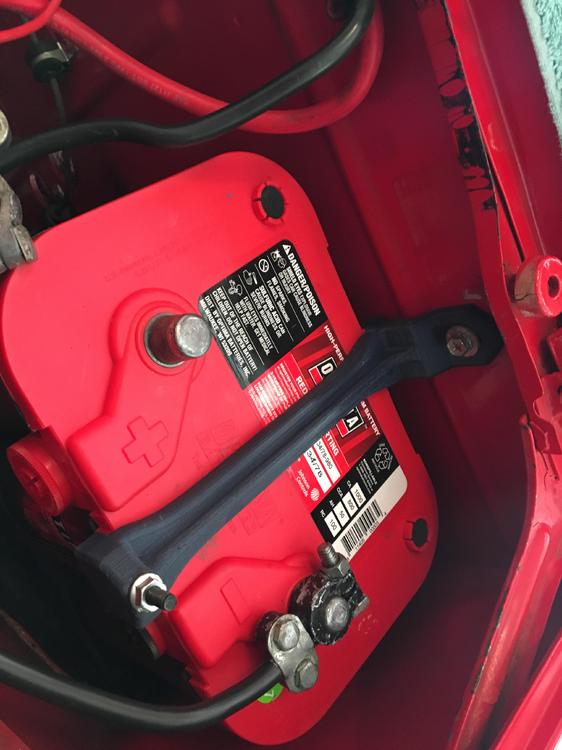
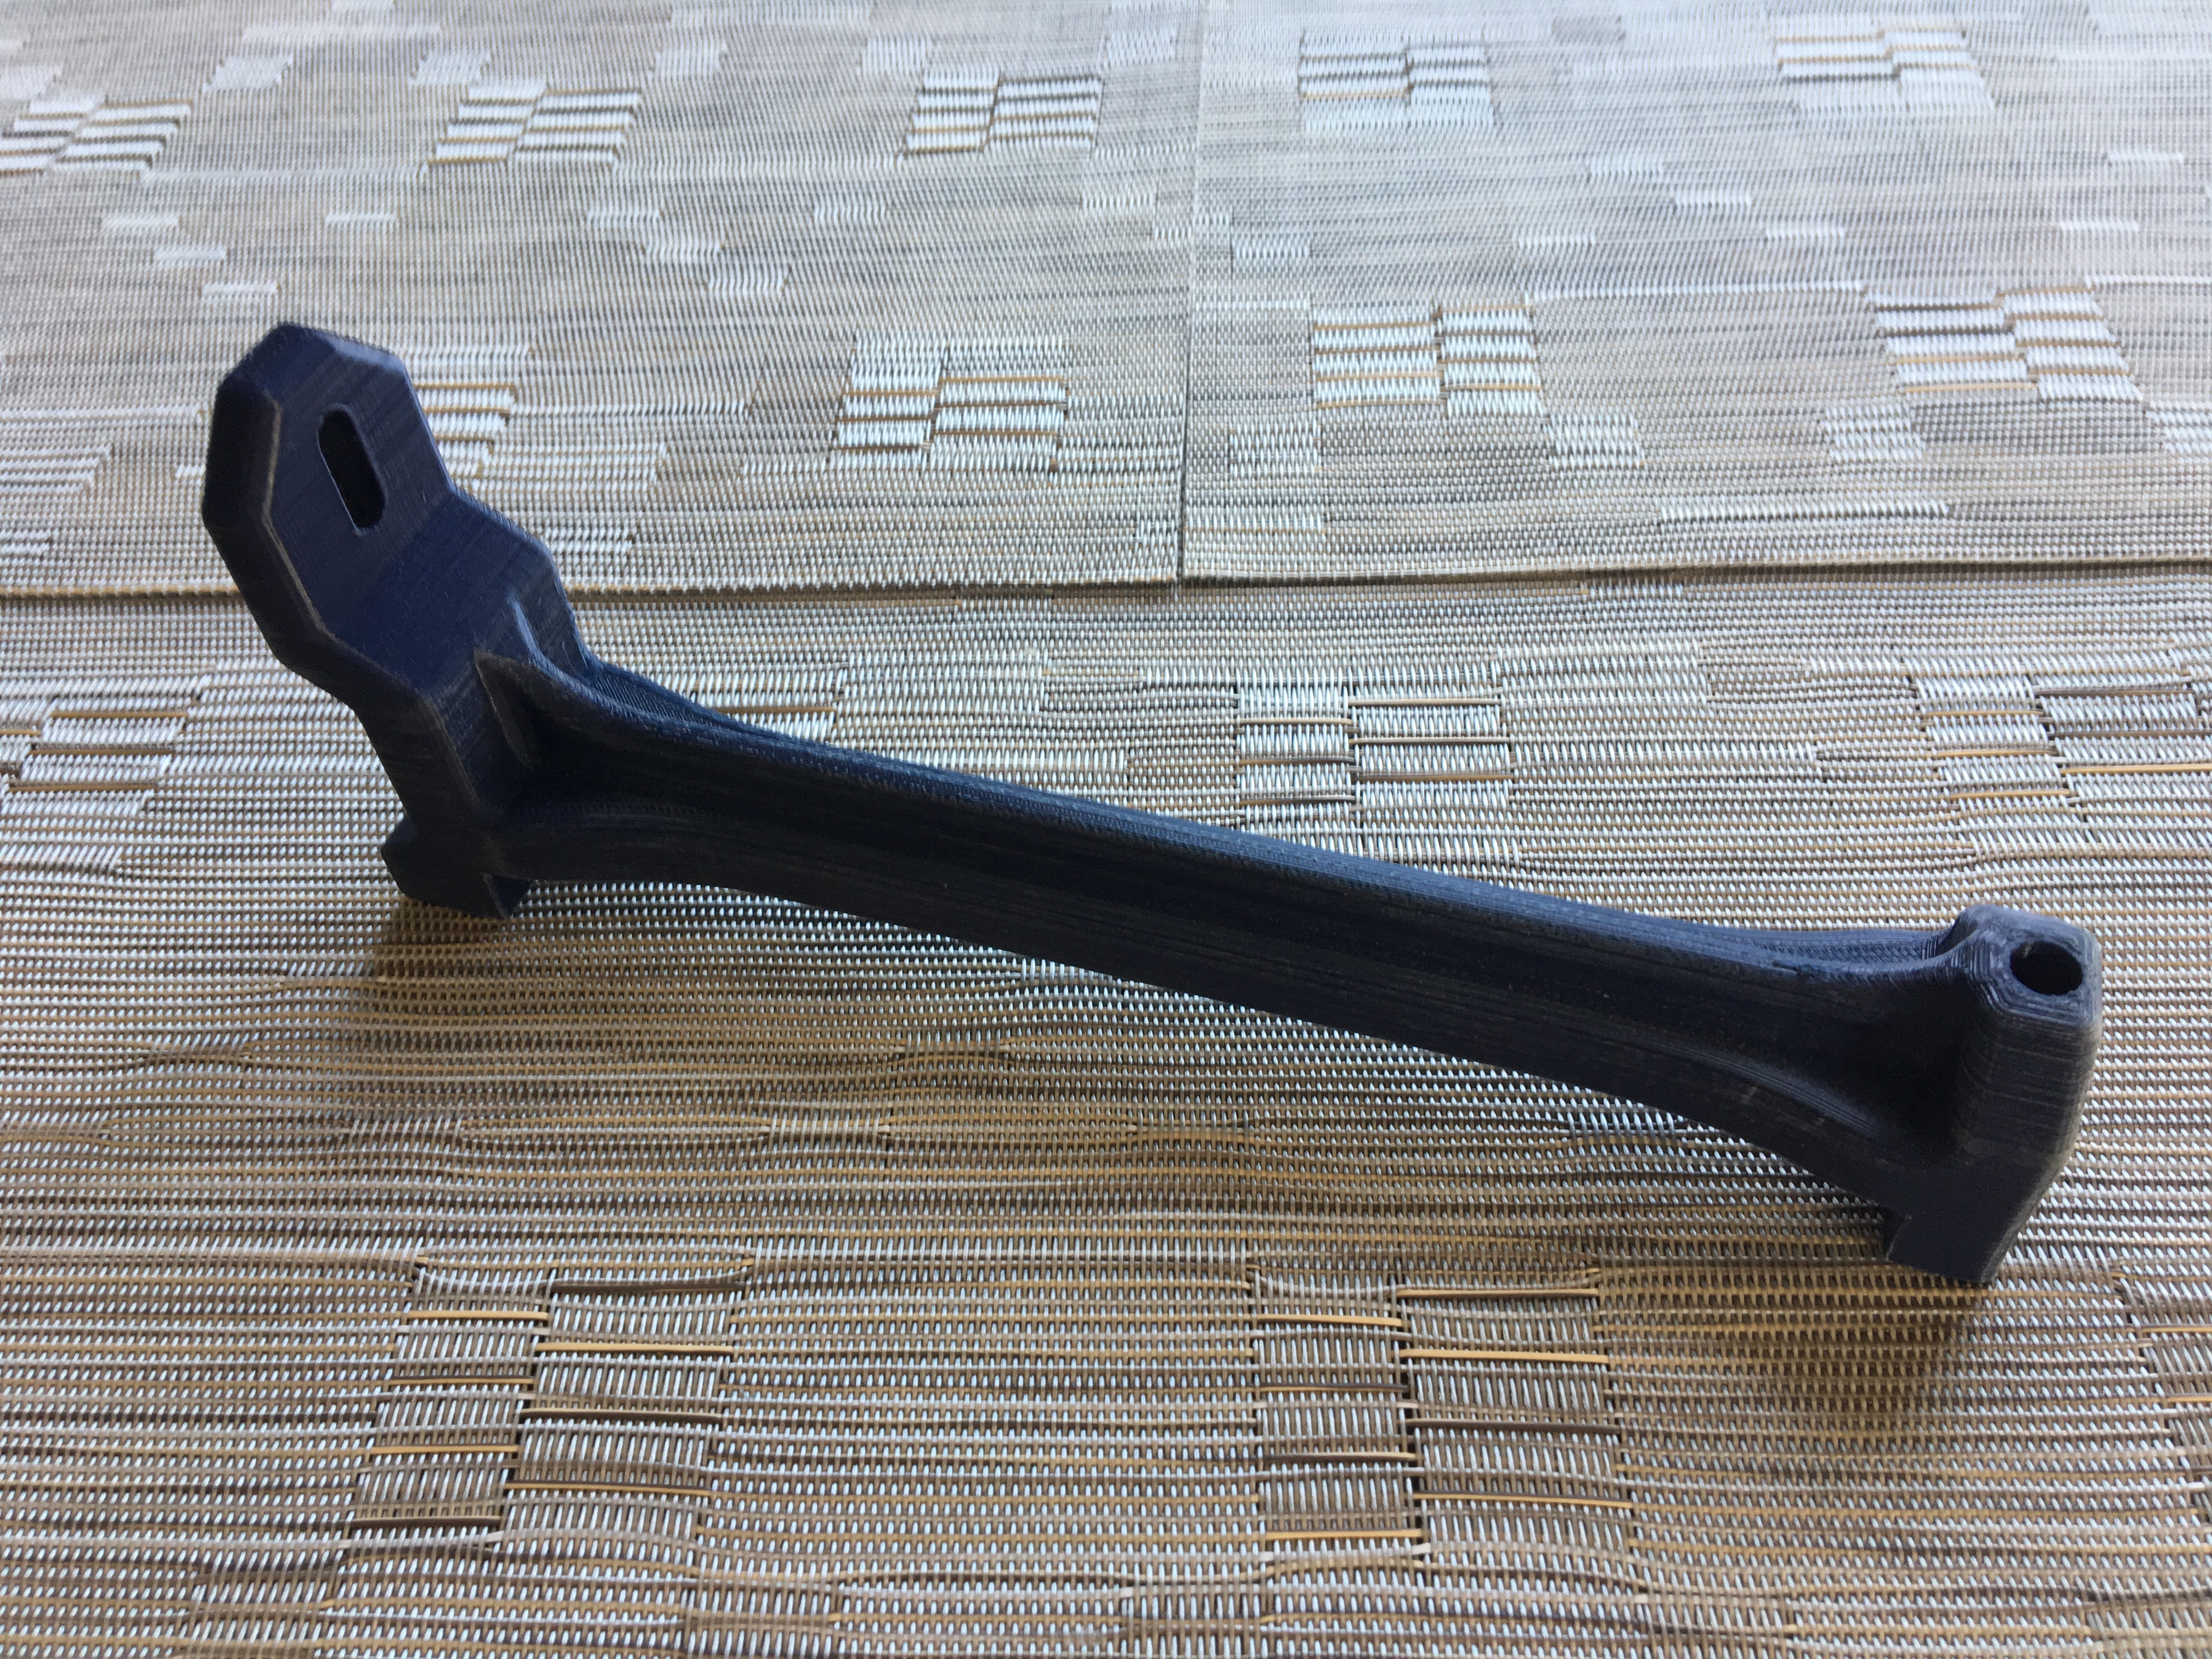
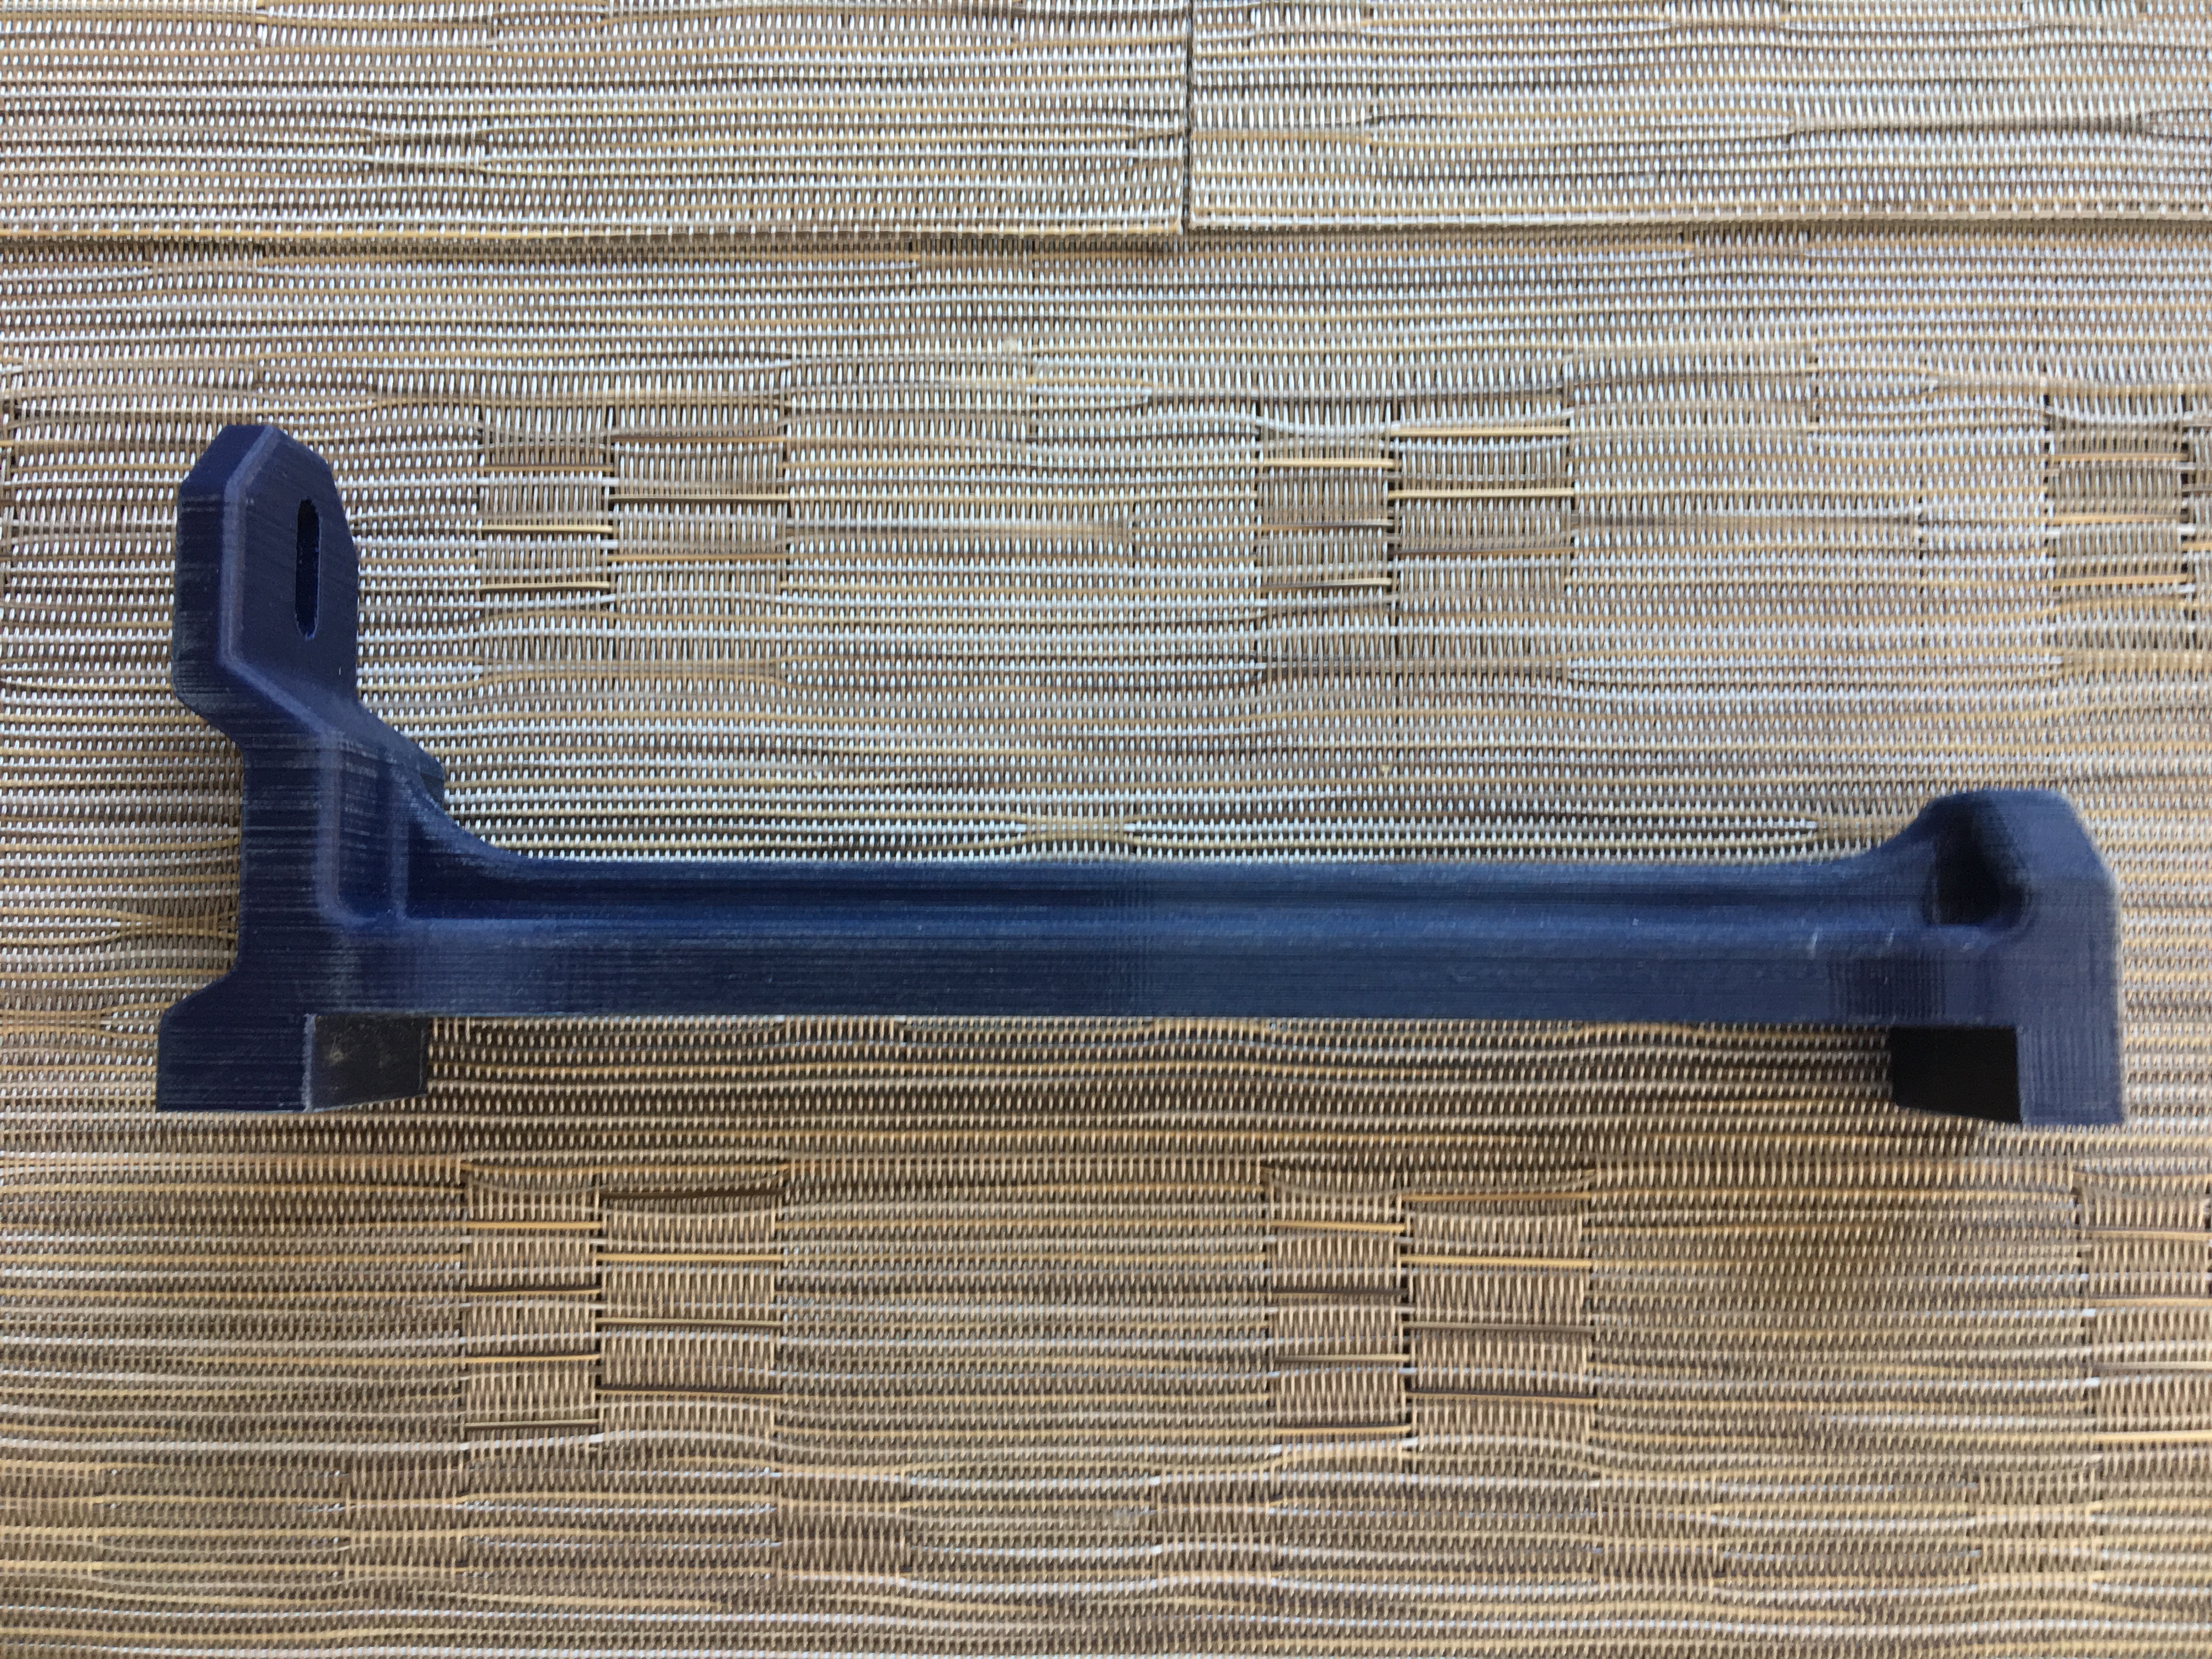
I got a new battery for my Fairlady Z. Given the battery was smaller than stock the OEM bracket would not work. A quick design in fusion 360, a quick print of a prototype. then some tweaking before the final print. Works perfectly.


 3 points
 -
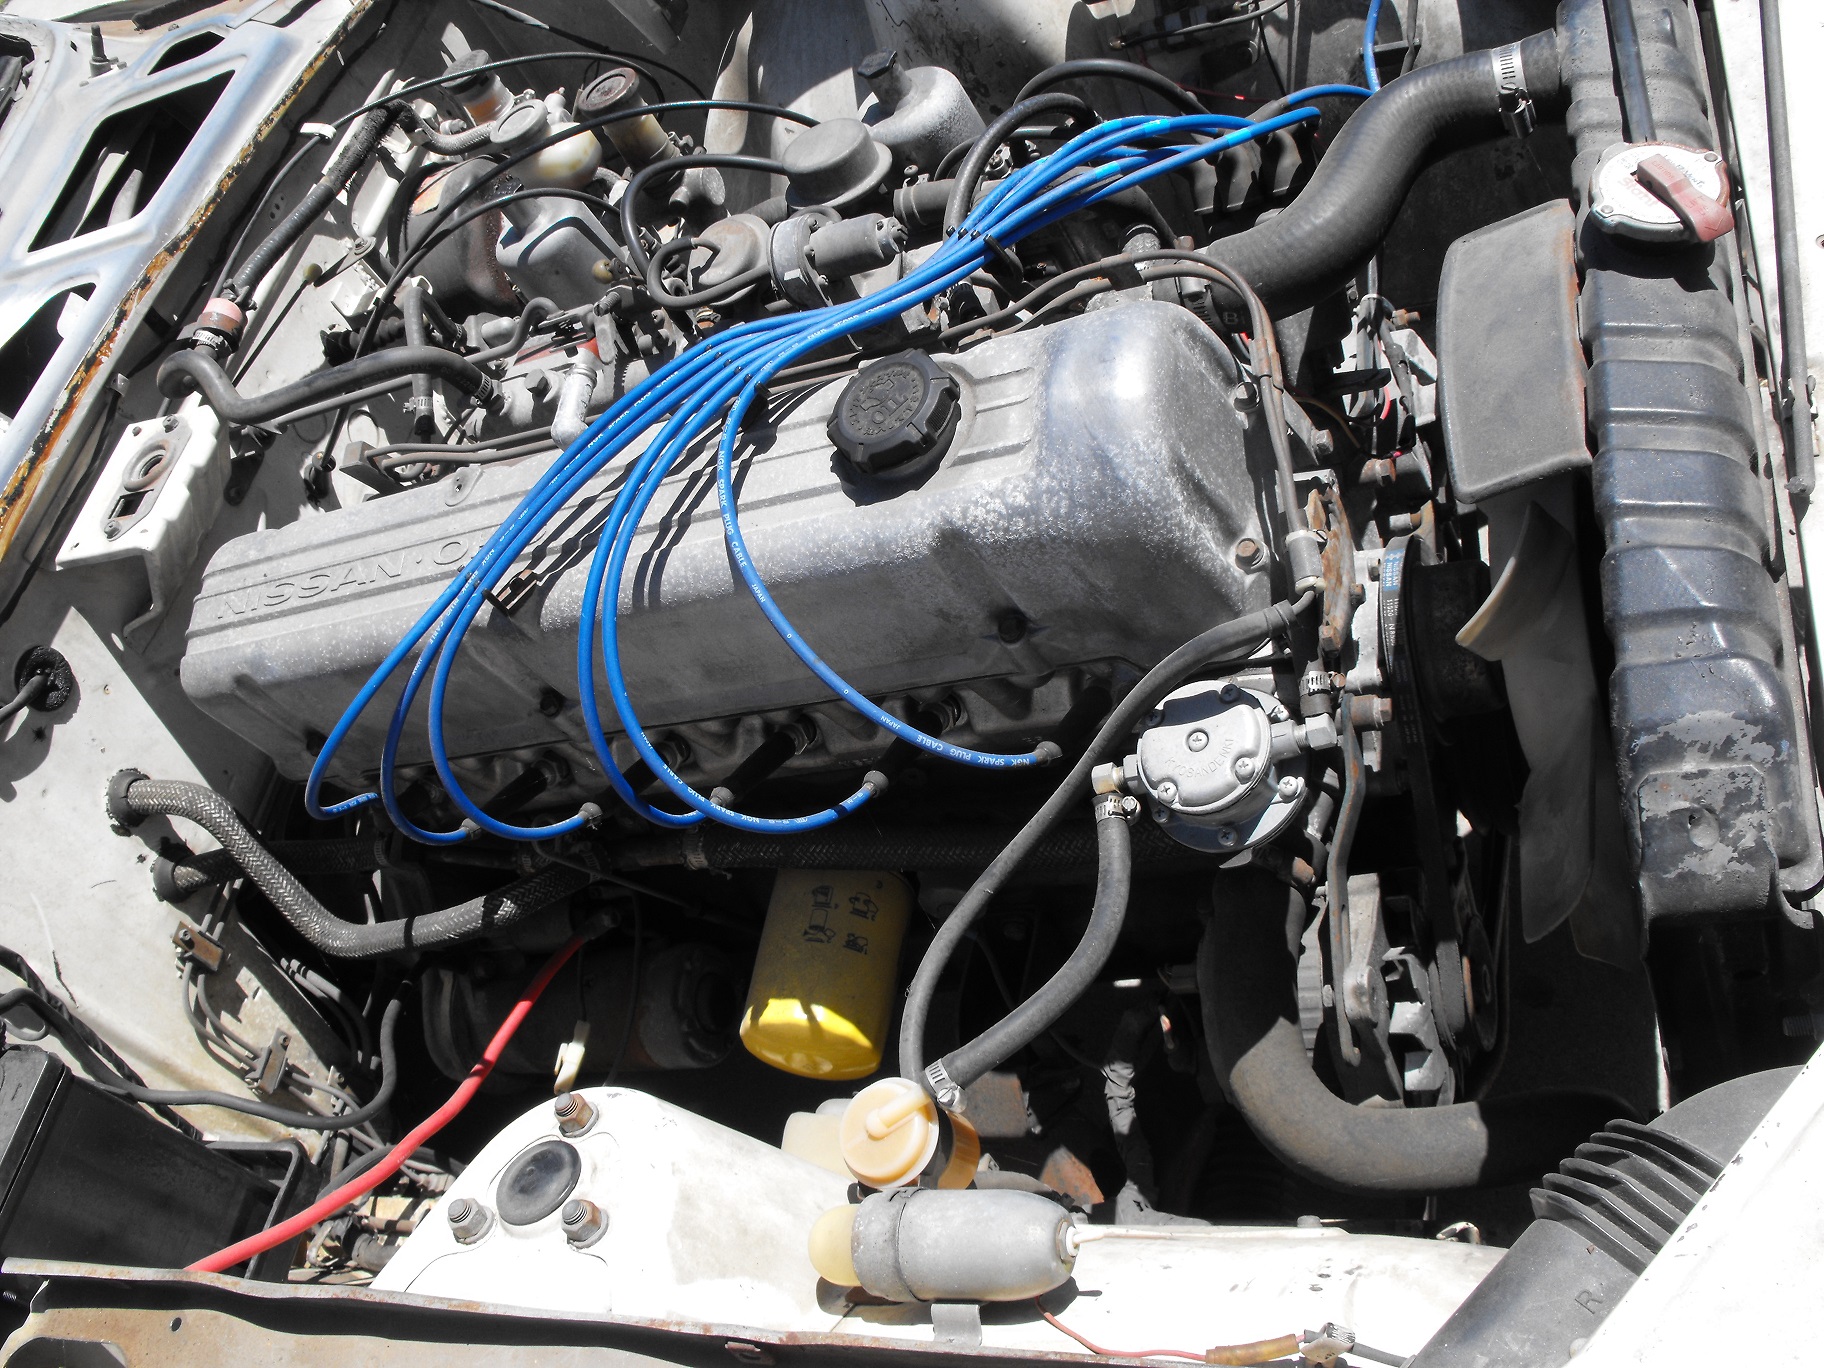
Happy to say I now have 5 forward gears!!! Shifts well, no noise, whine or any vibration from the car. Noticed it accelerates a bit better due to the different ratios between the 4 and 5 speed. Also got up to 70-72mph @ ~2600rpm in 5th. To have the same speed out of the old trans I'd be at 3100-3200rpm. Another plus is that the leaking trans, diff, slave cylinder and hose are now gone. Looked like I was drill crude oil under the car. Thanks everyone for your help, feedback and tips throughout the process!2 points
-
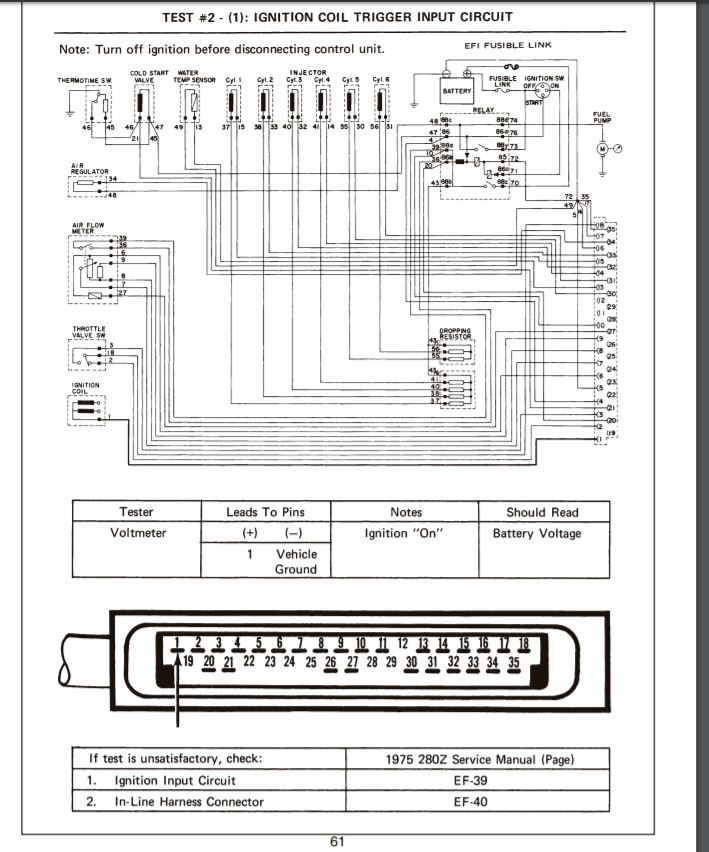
The problem has been solved, indeed it was a disconnected wire from the ignition coil. Might have become loose while we took the engine out to replace all gaskets. However to provide a solution to future viewers, let me share some more information. My car is a 1976 RHD 260Z with a L20 ET engine. I came to the above solution after reading page 61 of the EFI bible. Yes Pin #1 on the ECU connects directly to the negative terminal of the ignition coil.
 2 points
 -
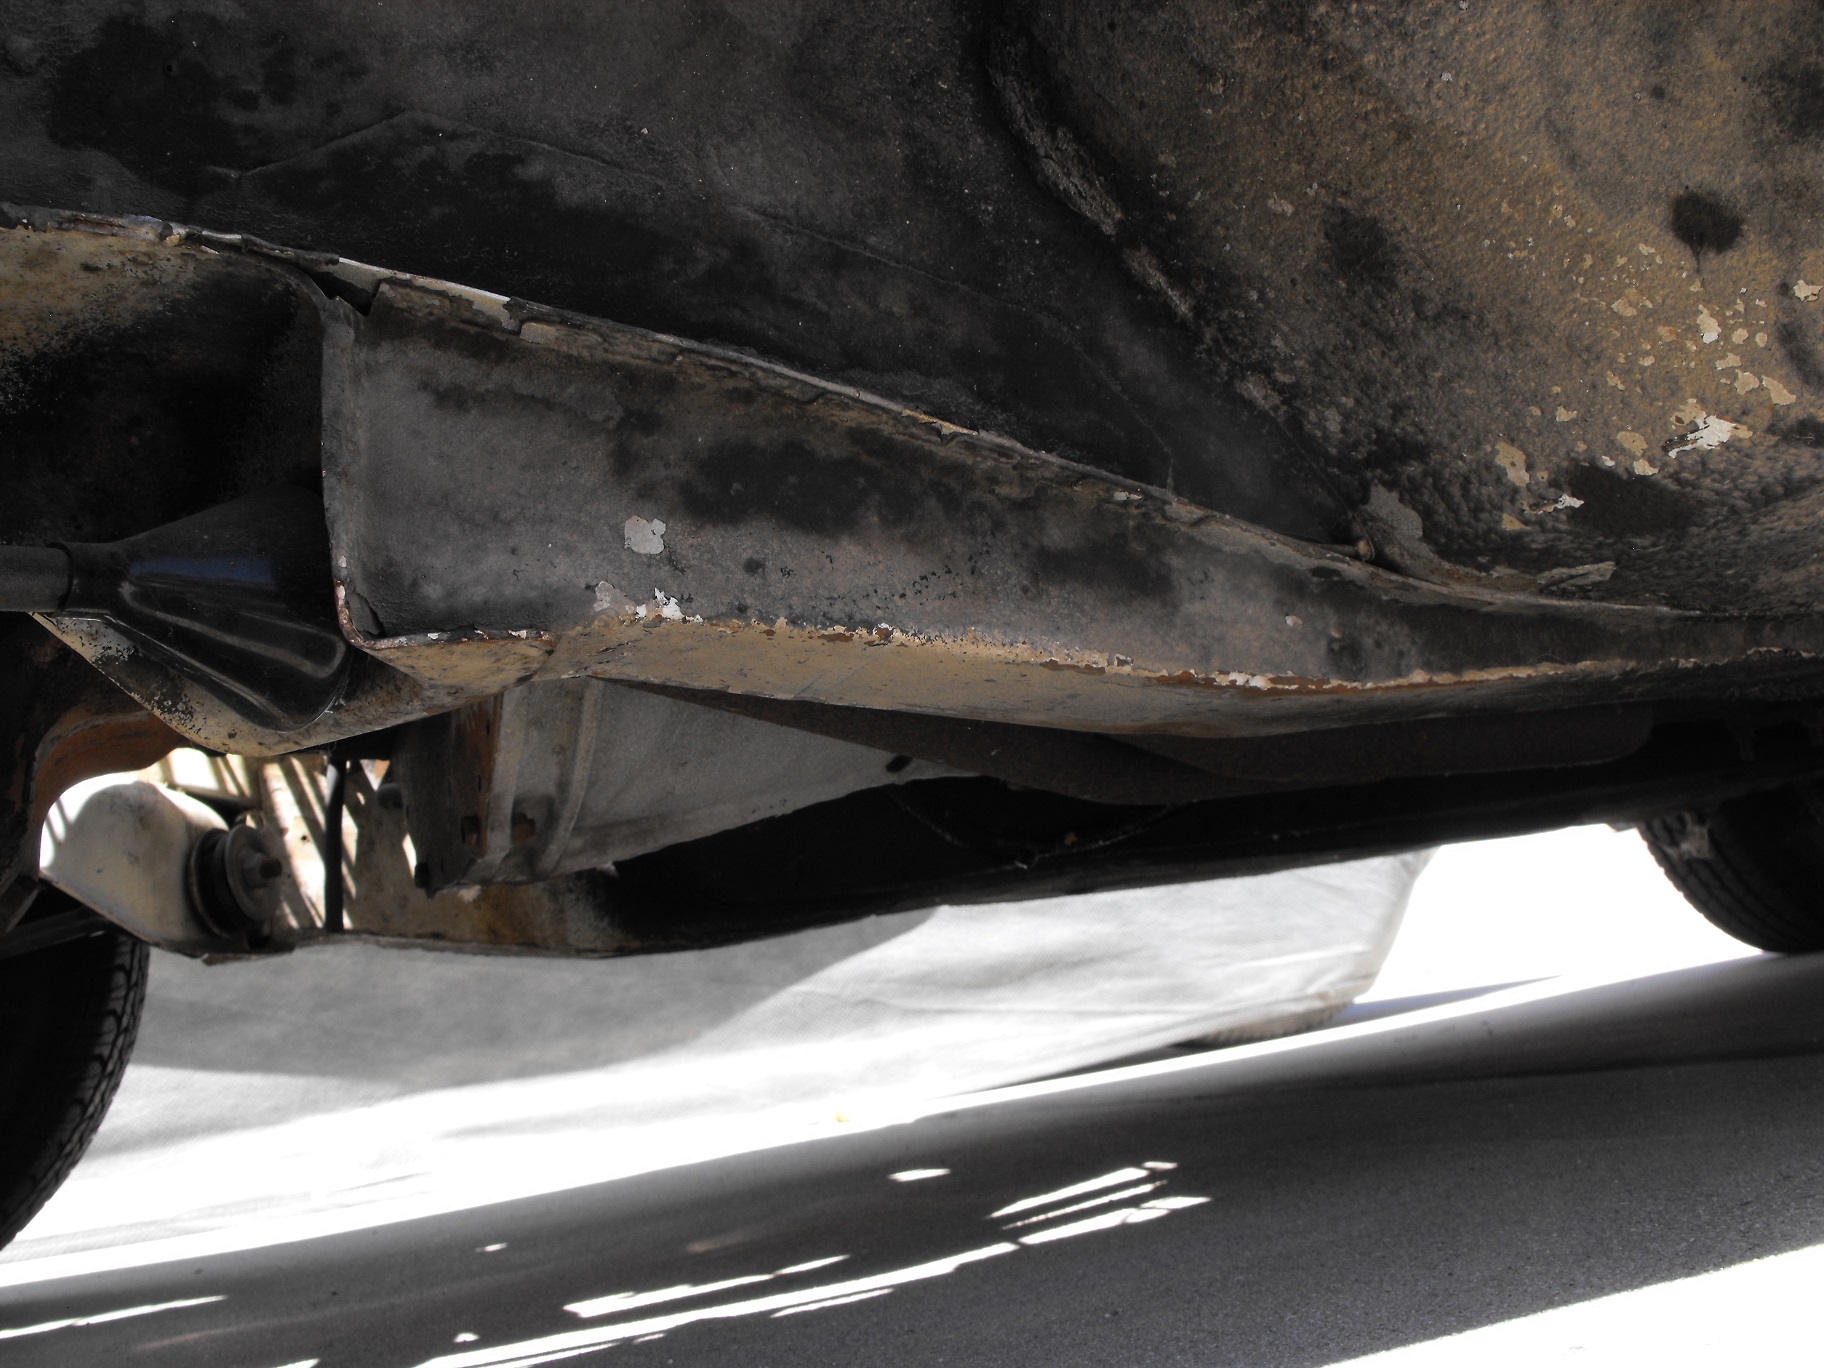
Made the new recesses for the cross member. Ill be triple measureung and comparing tomorrow before I center punch any holes. I'll probably cut in the sub frame connectors too and then weld it on the bench. I've got a center line and plumb bobs off the strut towers for reference measurement. BUT i do have a discrepancy of 7mm or about 5/16 of an inch on the dimension between towers. I think tomorrow I will fab a bar and bolt it in there to hold em at the 913mm spec while I build all this Sent from my SM-N950W using Tapatalk2 points
-
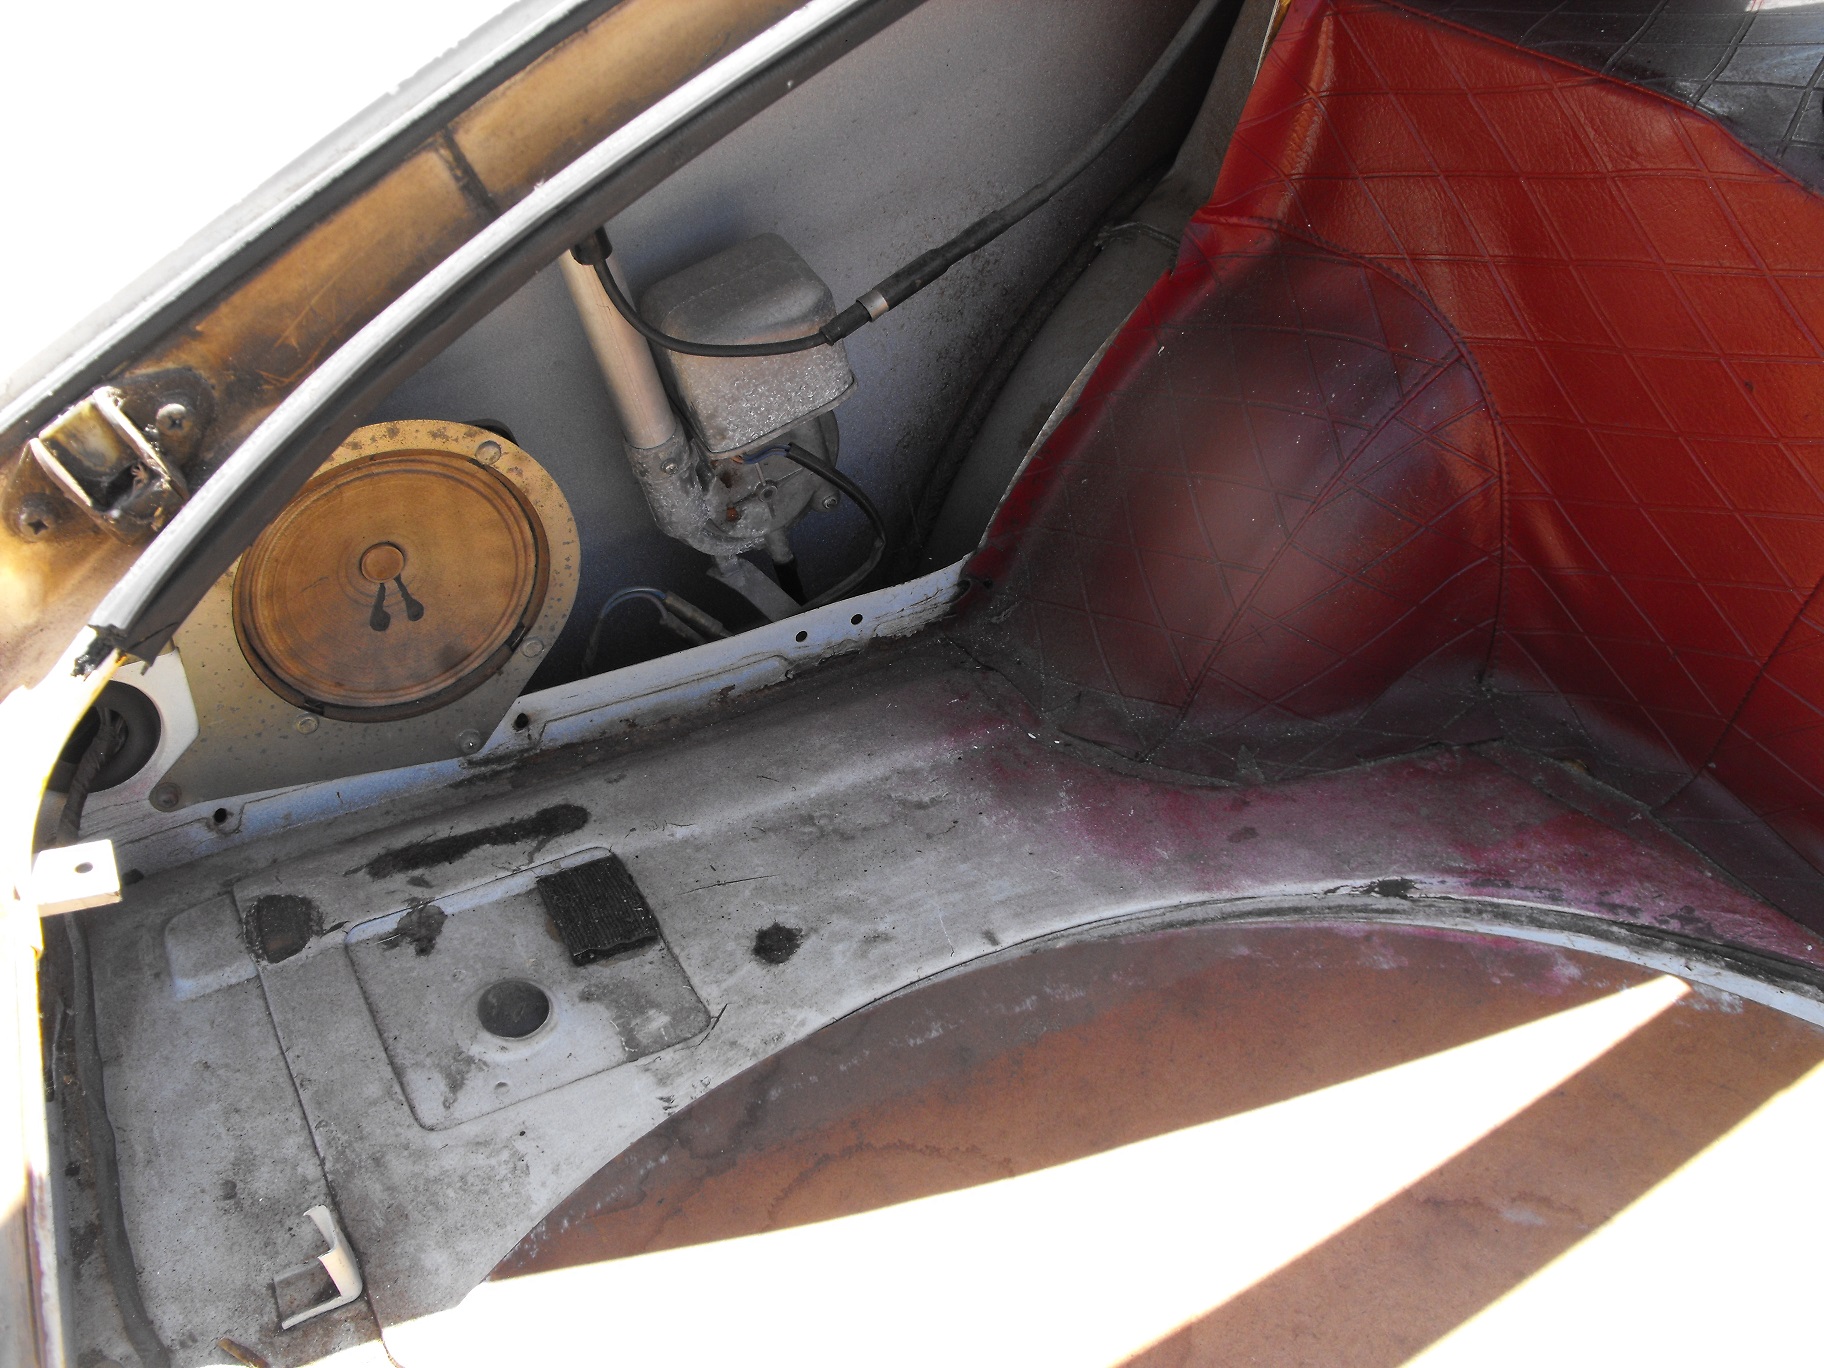
I deleted my stuff because the tube coupler from the exhaust to the intakes underside tunnel had gotten loose long ago and rotted a hole in the aluminum creating a huge vacuum leak. Plus as Dave says above just to lessen potential failure points. We have no smog test here and it gave me a lot cleaner looking topside. I'm not a bells and whistles type, simple is my preference. Plus my thermal vacuum switch was broken just like yours and I wasn't able to figure out a way around that so I started "the rippin' and the tearin'"1 point
-
SLANE We were all once where you are now. AN ENTHUSIAST.....with limited knowledge, not super rich, and have lives. My 2 cents. I would not buy someone else's modifications even if I were an ace mechanic. 5K is not a bad price considering what you are getting, spare parts included. If you really want an S30 find one that is as close to unmodified as possible. It is important to know how these cars came so you know what you need if indeed something is needed. A heavily modified powerplant can be quite troublesome even with good mechanical skills. Look long and hard before purchase. No one wants you to end up with a PINK ELEPHANT that you can't stand. A much less modified car will provide many hours of driving and tinkering pleasure. This may seem like a deal too good to pass up but do us all a favor and shop wisely. With limit knowledge of clutch and fuel pedal interaction and an engine that might not be the easiest to manage in traffic this could turn out to be a decision you could very well rue. BY ALL MEANS........DO NOT BUY A CAR SIGHT UNSEEN. Give it the most thorough inspection you can and if possible take someone with intricate knowledge of S30's with you. My suggestion...........KEEP LOOKING!1 point
-
Gents, thanks for the info. I’ll grab all that stuff unless they charge me an arm and leg and if you want it I’ll get it to you. BTW when is ZCon next Atlanta. Working on my Z today. Installing the fuel tank that was refinished. Hopefully she’ll fire up.1 point
-
Any chance you'd do one for me?1 point
-
Not sure where you got that picture, but that's not the spec for an old 280Z or 280ZX 5 speed. The MT90 will work great, the Synchromesh probably will too. Here's the 1983 280ZX spec.
 1 point
 -
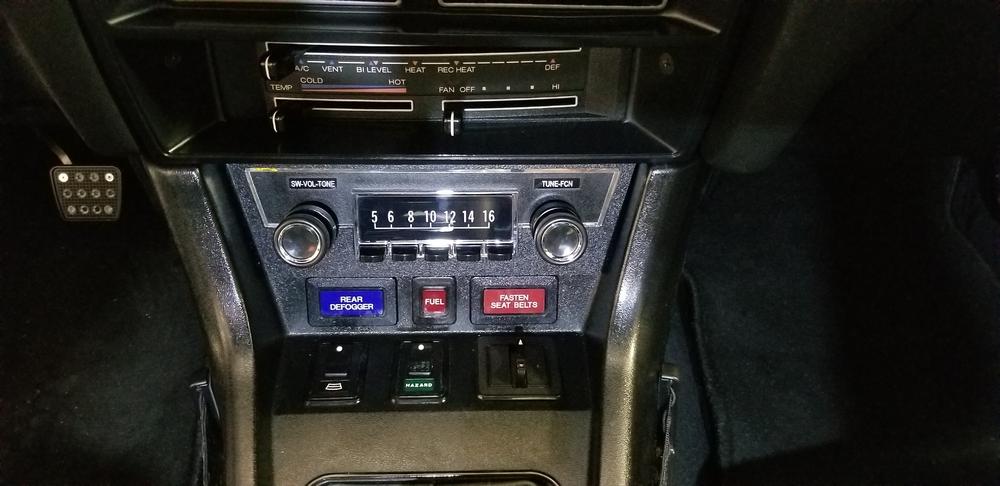
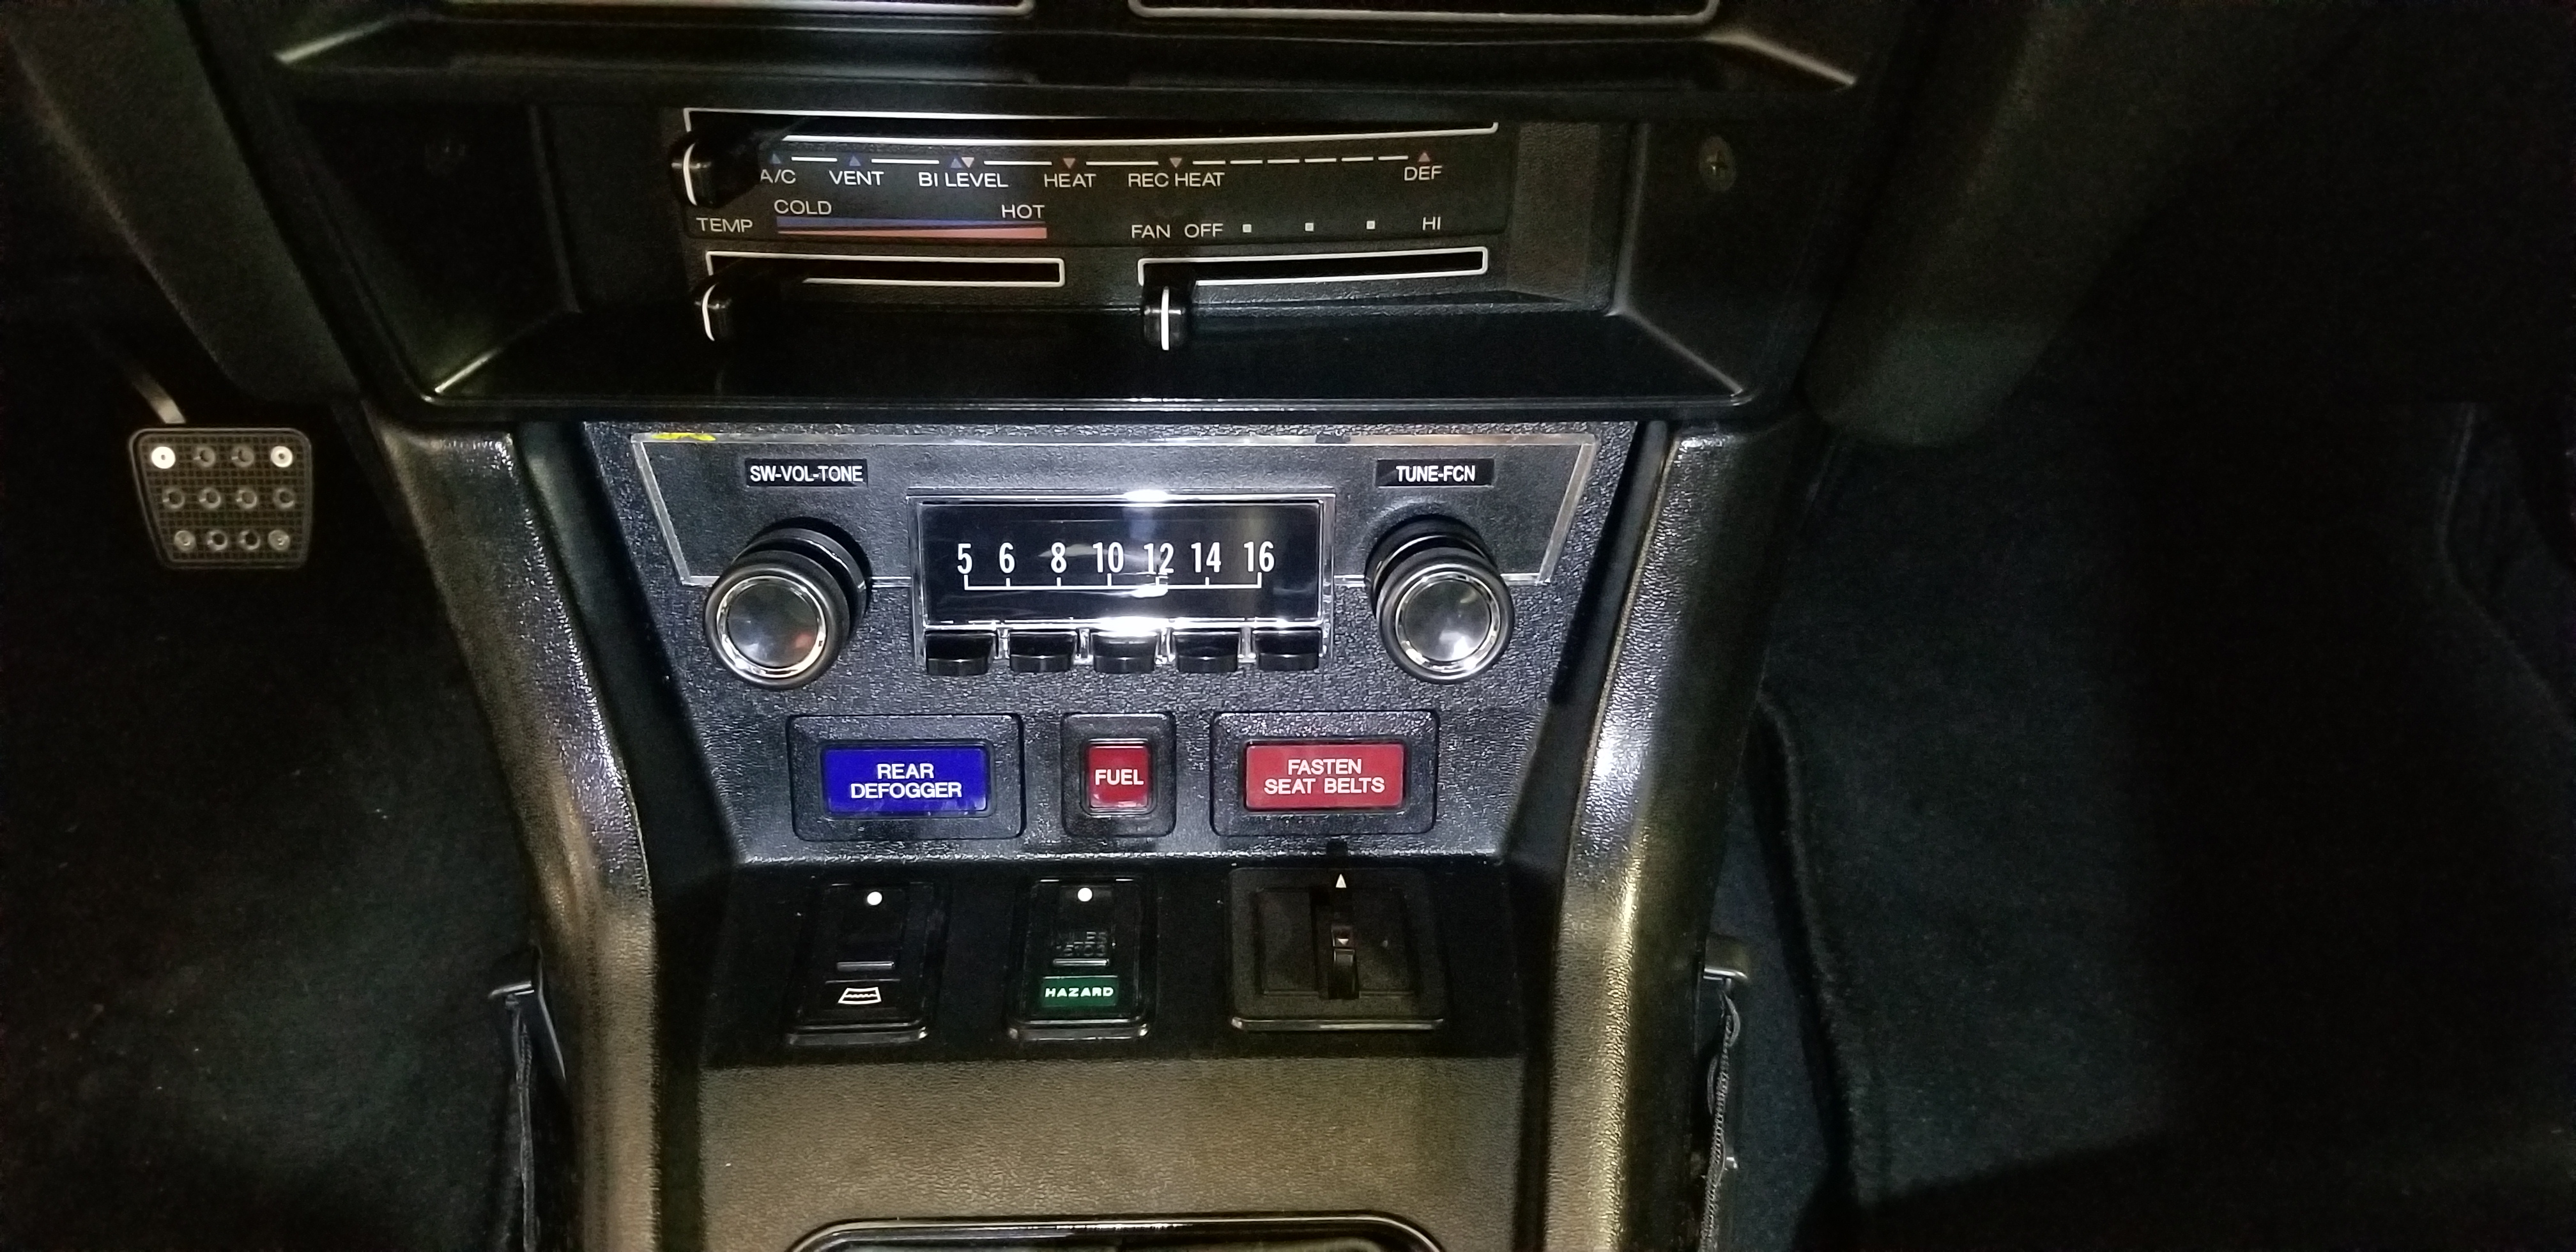
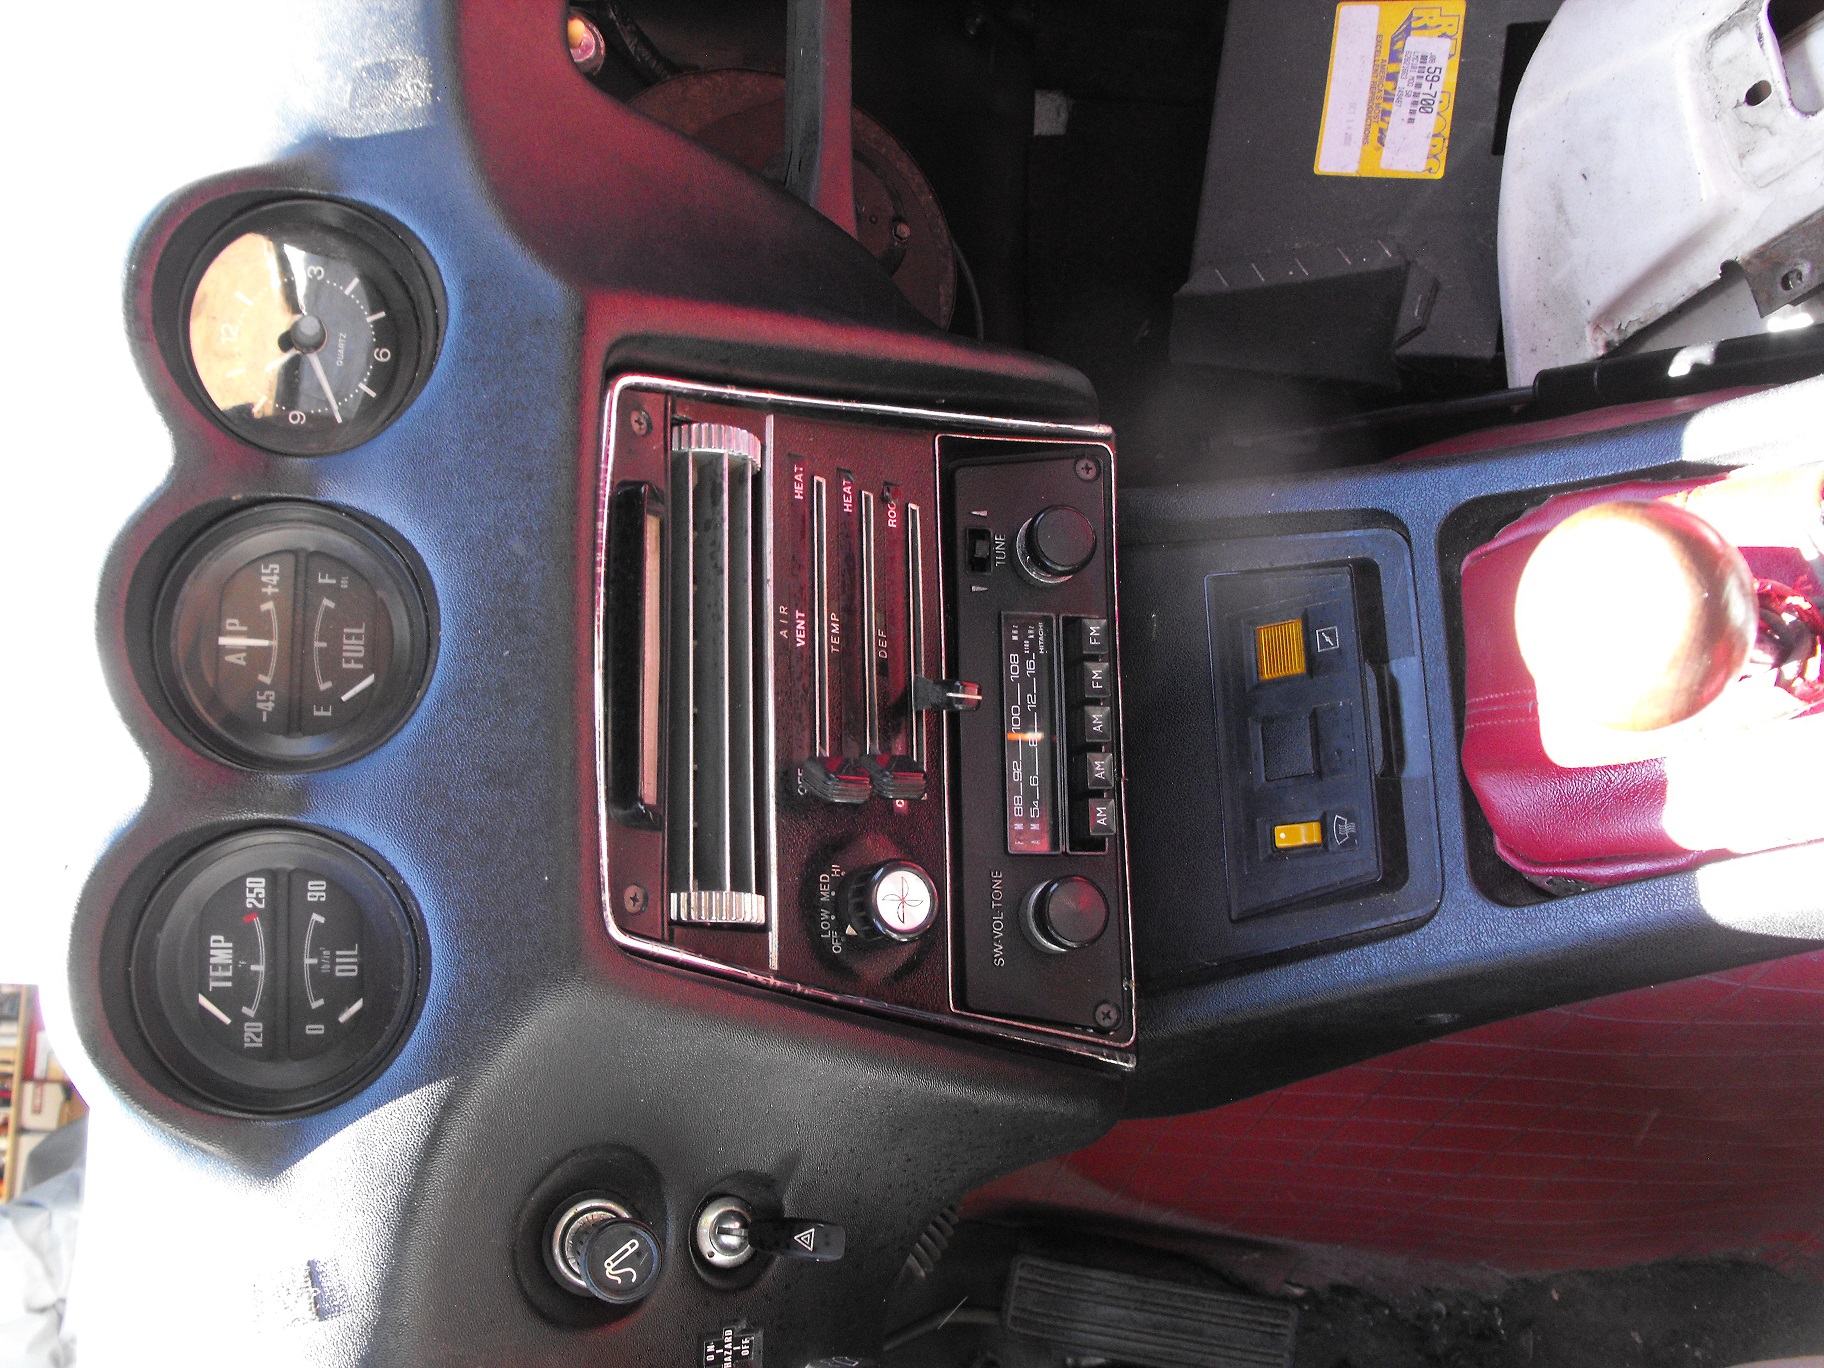
Finally got around to placing the lettering labels on the radio faceplate. I think it looks much better than without it. It almost makes the Retrosound radio look stock. Here's a pic.
 1 point
 -
(Post starts on page before) Despite feeling somewhat rubbish having been getting over a virus we were accepted to take part in the members parade on Saturday morning, which while it was very much a parade was good fun. I got to at least open the car up along the pit straight out of the chicane and we heard our car being talked out over the radio so will be on the look out for the days coverage when it gets released by Goodwood. We also managed to blag circuit parking on the Sunday given how shocking the car park fields were there was no way we wanted to go anywhere near them so the car got some more expose and a fair bit of attention as well. With the weekends awful weather it was also the first snow the car has seen with us which made for some good pictures! IMG_5355 by Mark Woodrow, on Flickr IMG_5408 by Mark Woodrow, on Flickr IMG_5410 by Mark Woodrow, on Flickr IMG_5437 by Mark Woodrow, on Flickr IMG_5422 by Mark Woodrow, on Flickr IMG_5464 by Mark Woodrow, on Flickr IMG_5465 by Mark Woodrow, on Flickr All cleaned up briefly from the weekend before being put away IMG_5468 by Mark Woodrow, on Flickr Its fair to say the cars handling has transformed beyond belief and can now attack corners with far more speed and confidence, the BC's are set at very soft settings to keep things compliant so overall we're very happy with the results. Also having the adjustability that comes with the T3 control arms has meant the car is really sharp and responsive in a way that it never was. The only issues now to combat are the 1cm of play in the steering, which is linked to a worn lower UJ in the steering column. Some squeaky polybushes from the rear control arms are driving me made though! With the weather being the way it has though we've still not had a proper opportunity to really take the car out and put it more through its paces to get dialed in and familiarise ourselves with the changes. We had hoped to add anti roll bars in at the same time however unfortunately couldn't tie them in with the planned works, given the delay I've been talked into now going with Suspension Techniques anti roll bar kit which mounts off of the rear diff. In hindsight this seemed more appropriate rather than drilling holes in the chassis with no rear mounts fitted being an earlier car. On that note a big shout out to Mike and Chris on here who are both helping me out big time with getting them across the atlantic without incurring the extortionate postage quote that I received! They'll get put on in the coming months with other planned work. Any thoughts on the ride height? I'm thinking the rear could come still down a tad? IMG_5294 by Mark Woodrow, on Flickr As usual I've said enough so I'll stop here, I am already working on the next stage of the project so more details will follow shortly!1 point
-
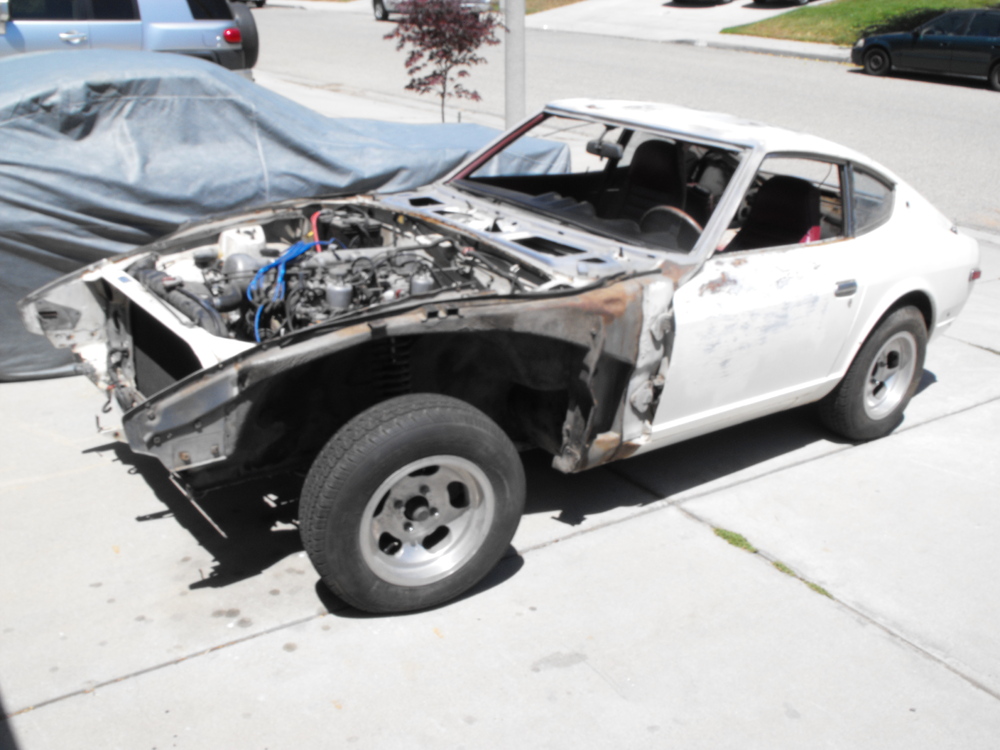
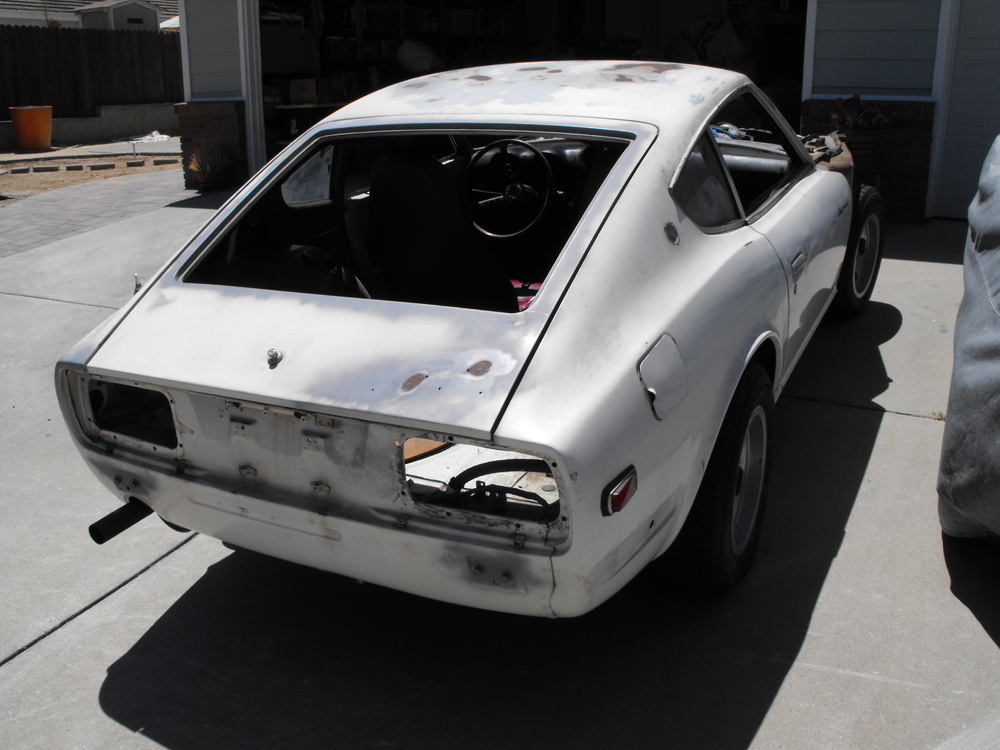
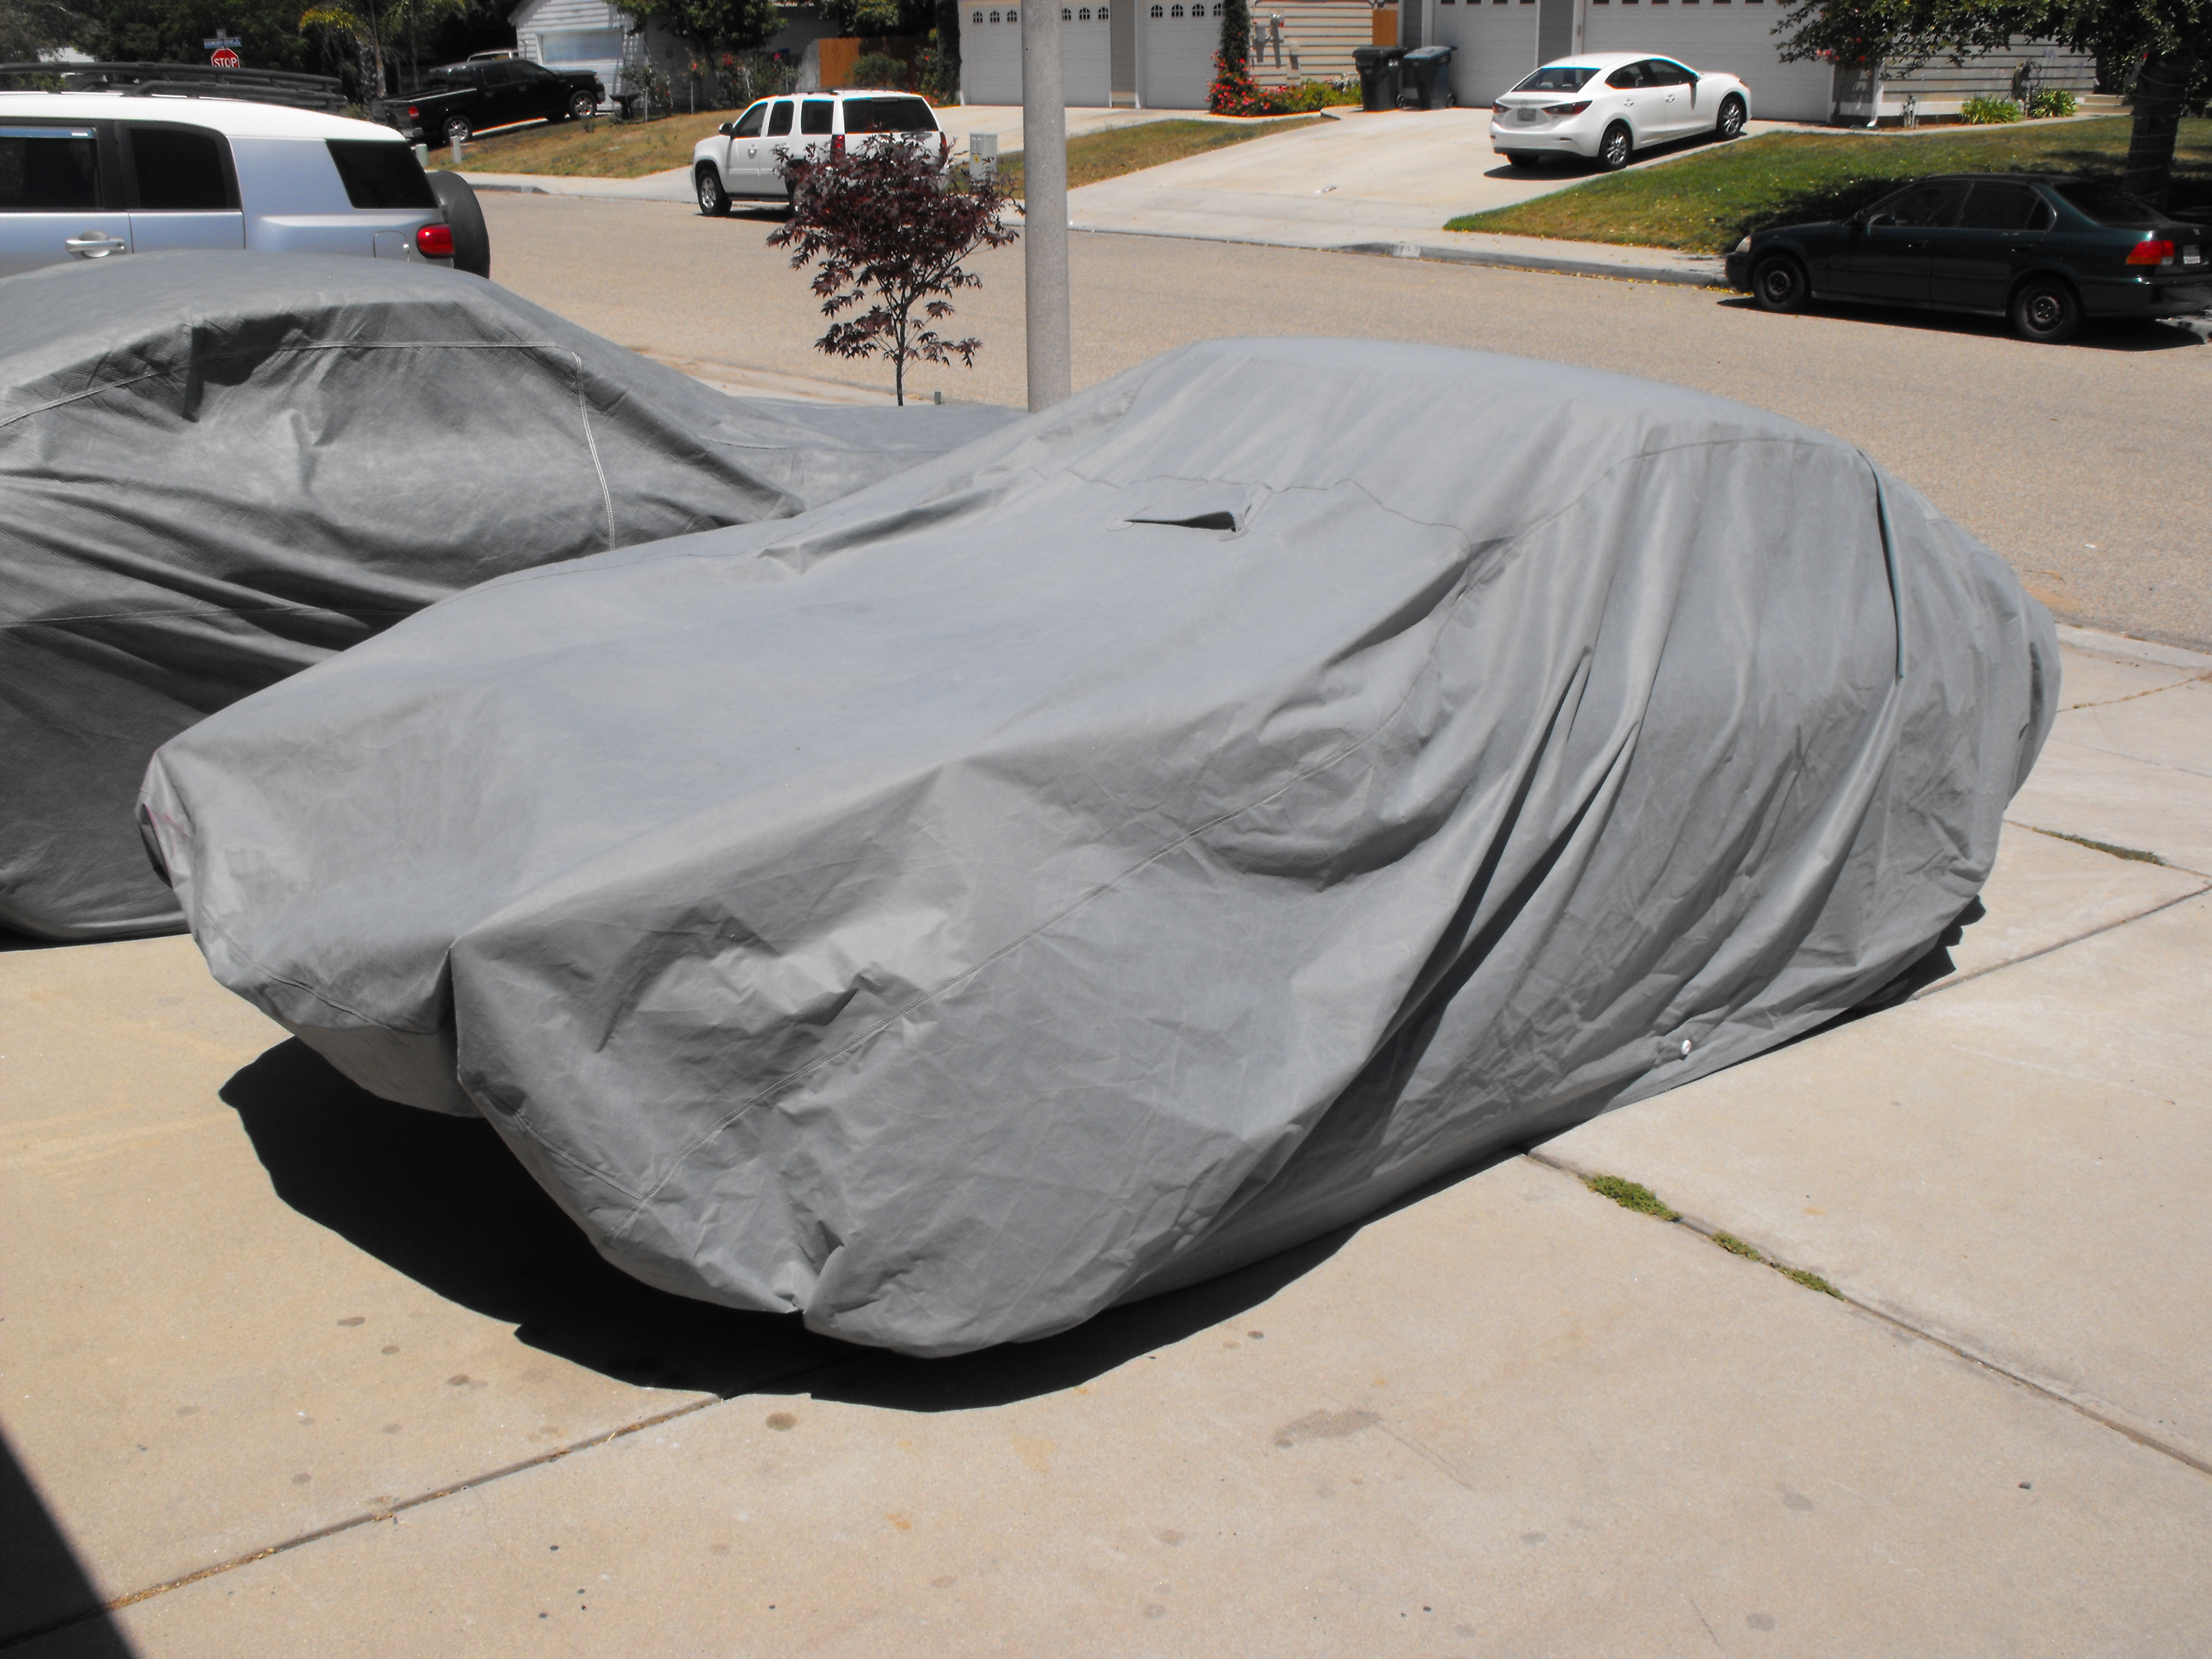
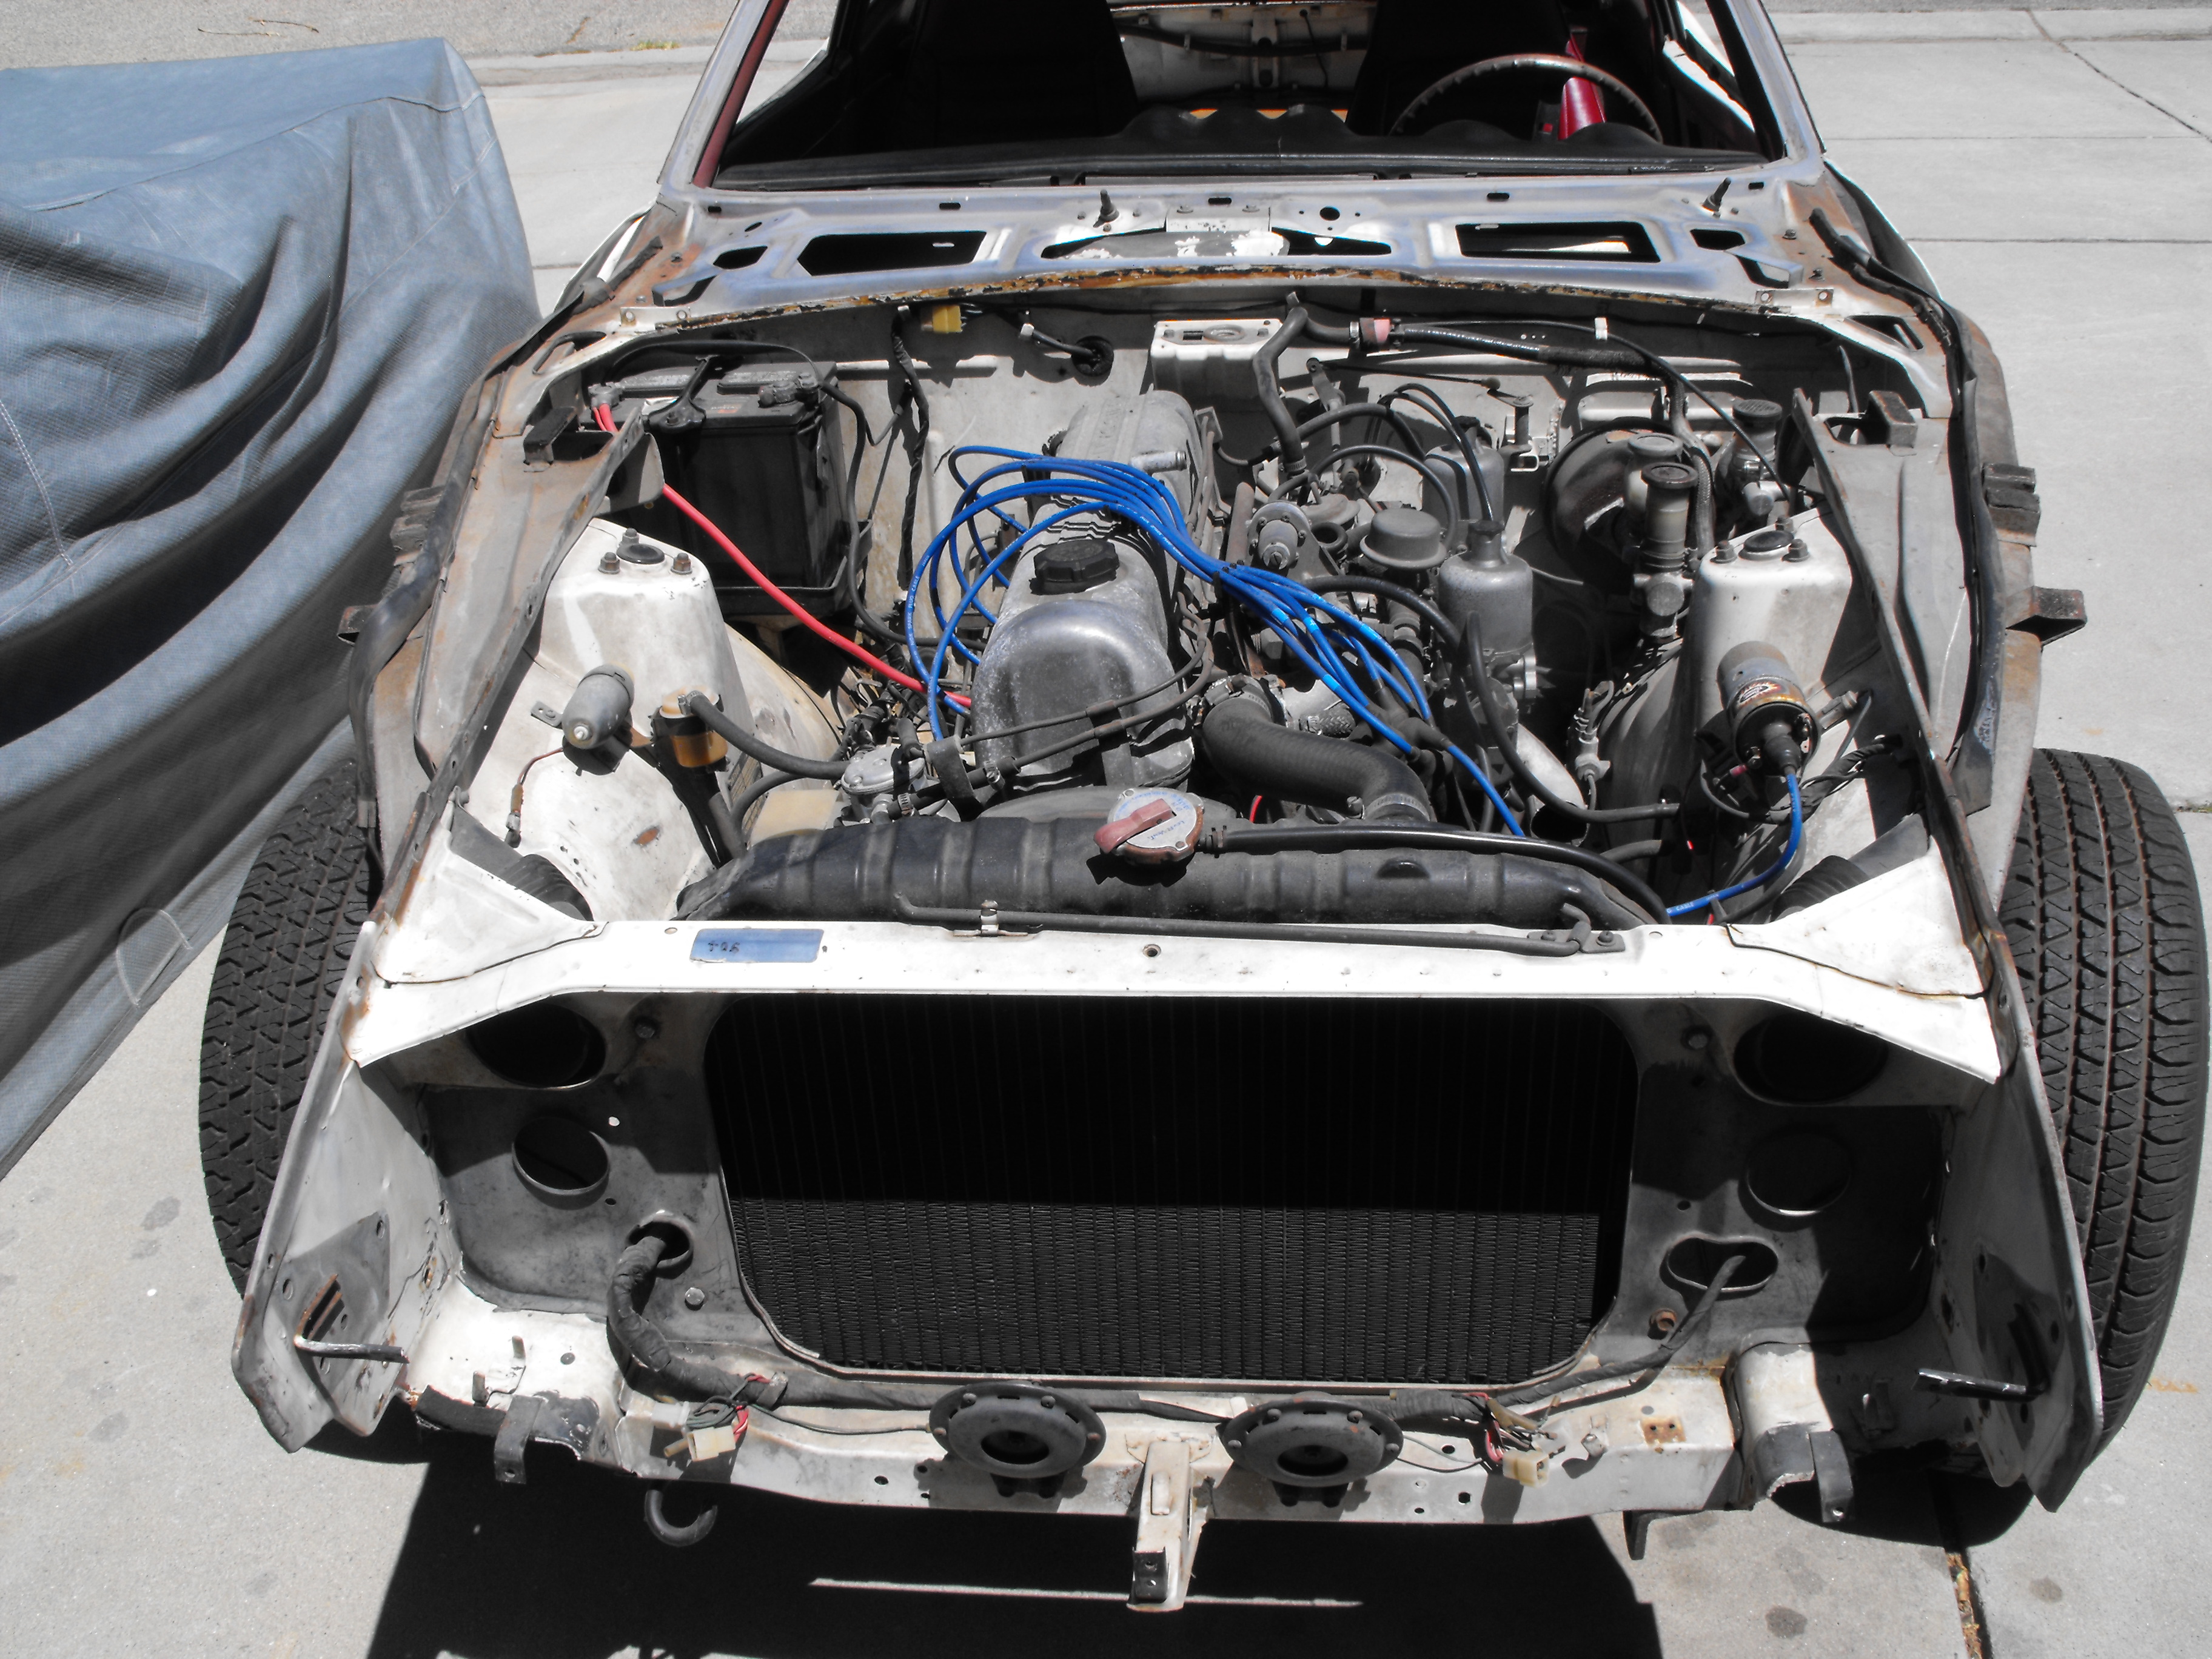
Here are some pics of the new '72. I boxed up most of the parts and took them to the storage garage. I still have things that I need to pick up from the PO like fenders, hood, bumpers, 5 speed trans, brake lines, etc. This will have to sit for a bit while I finish other cars but I may dink on it here and there. Oh yes, and it came with the car cover, nice.


 1 point
 -
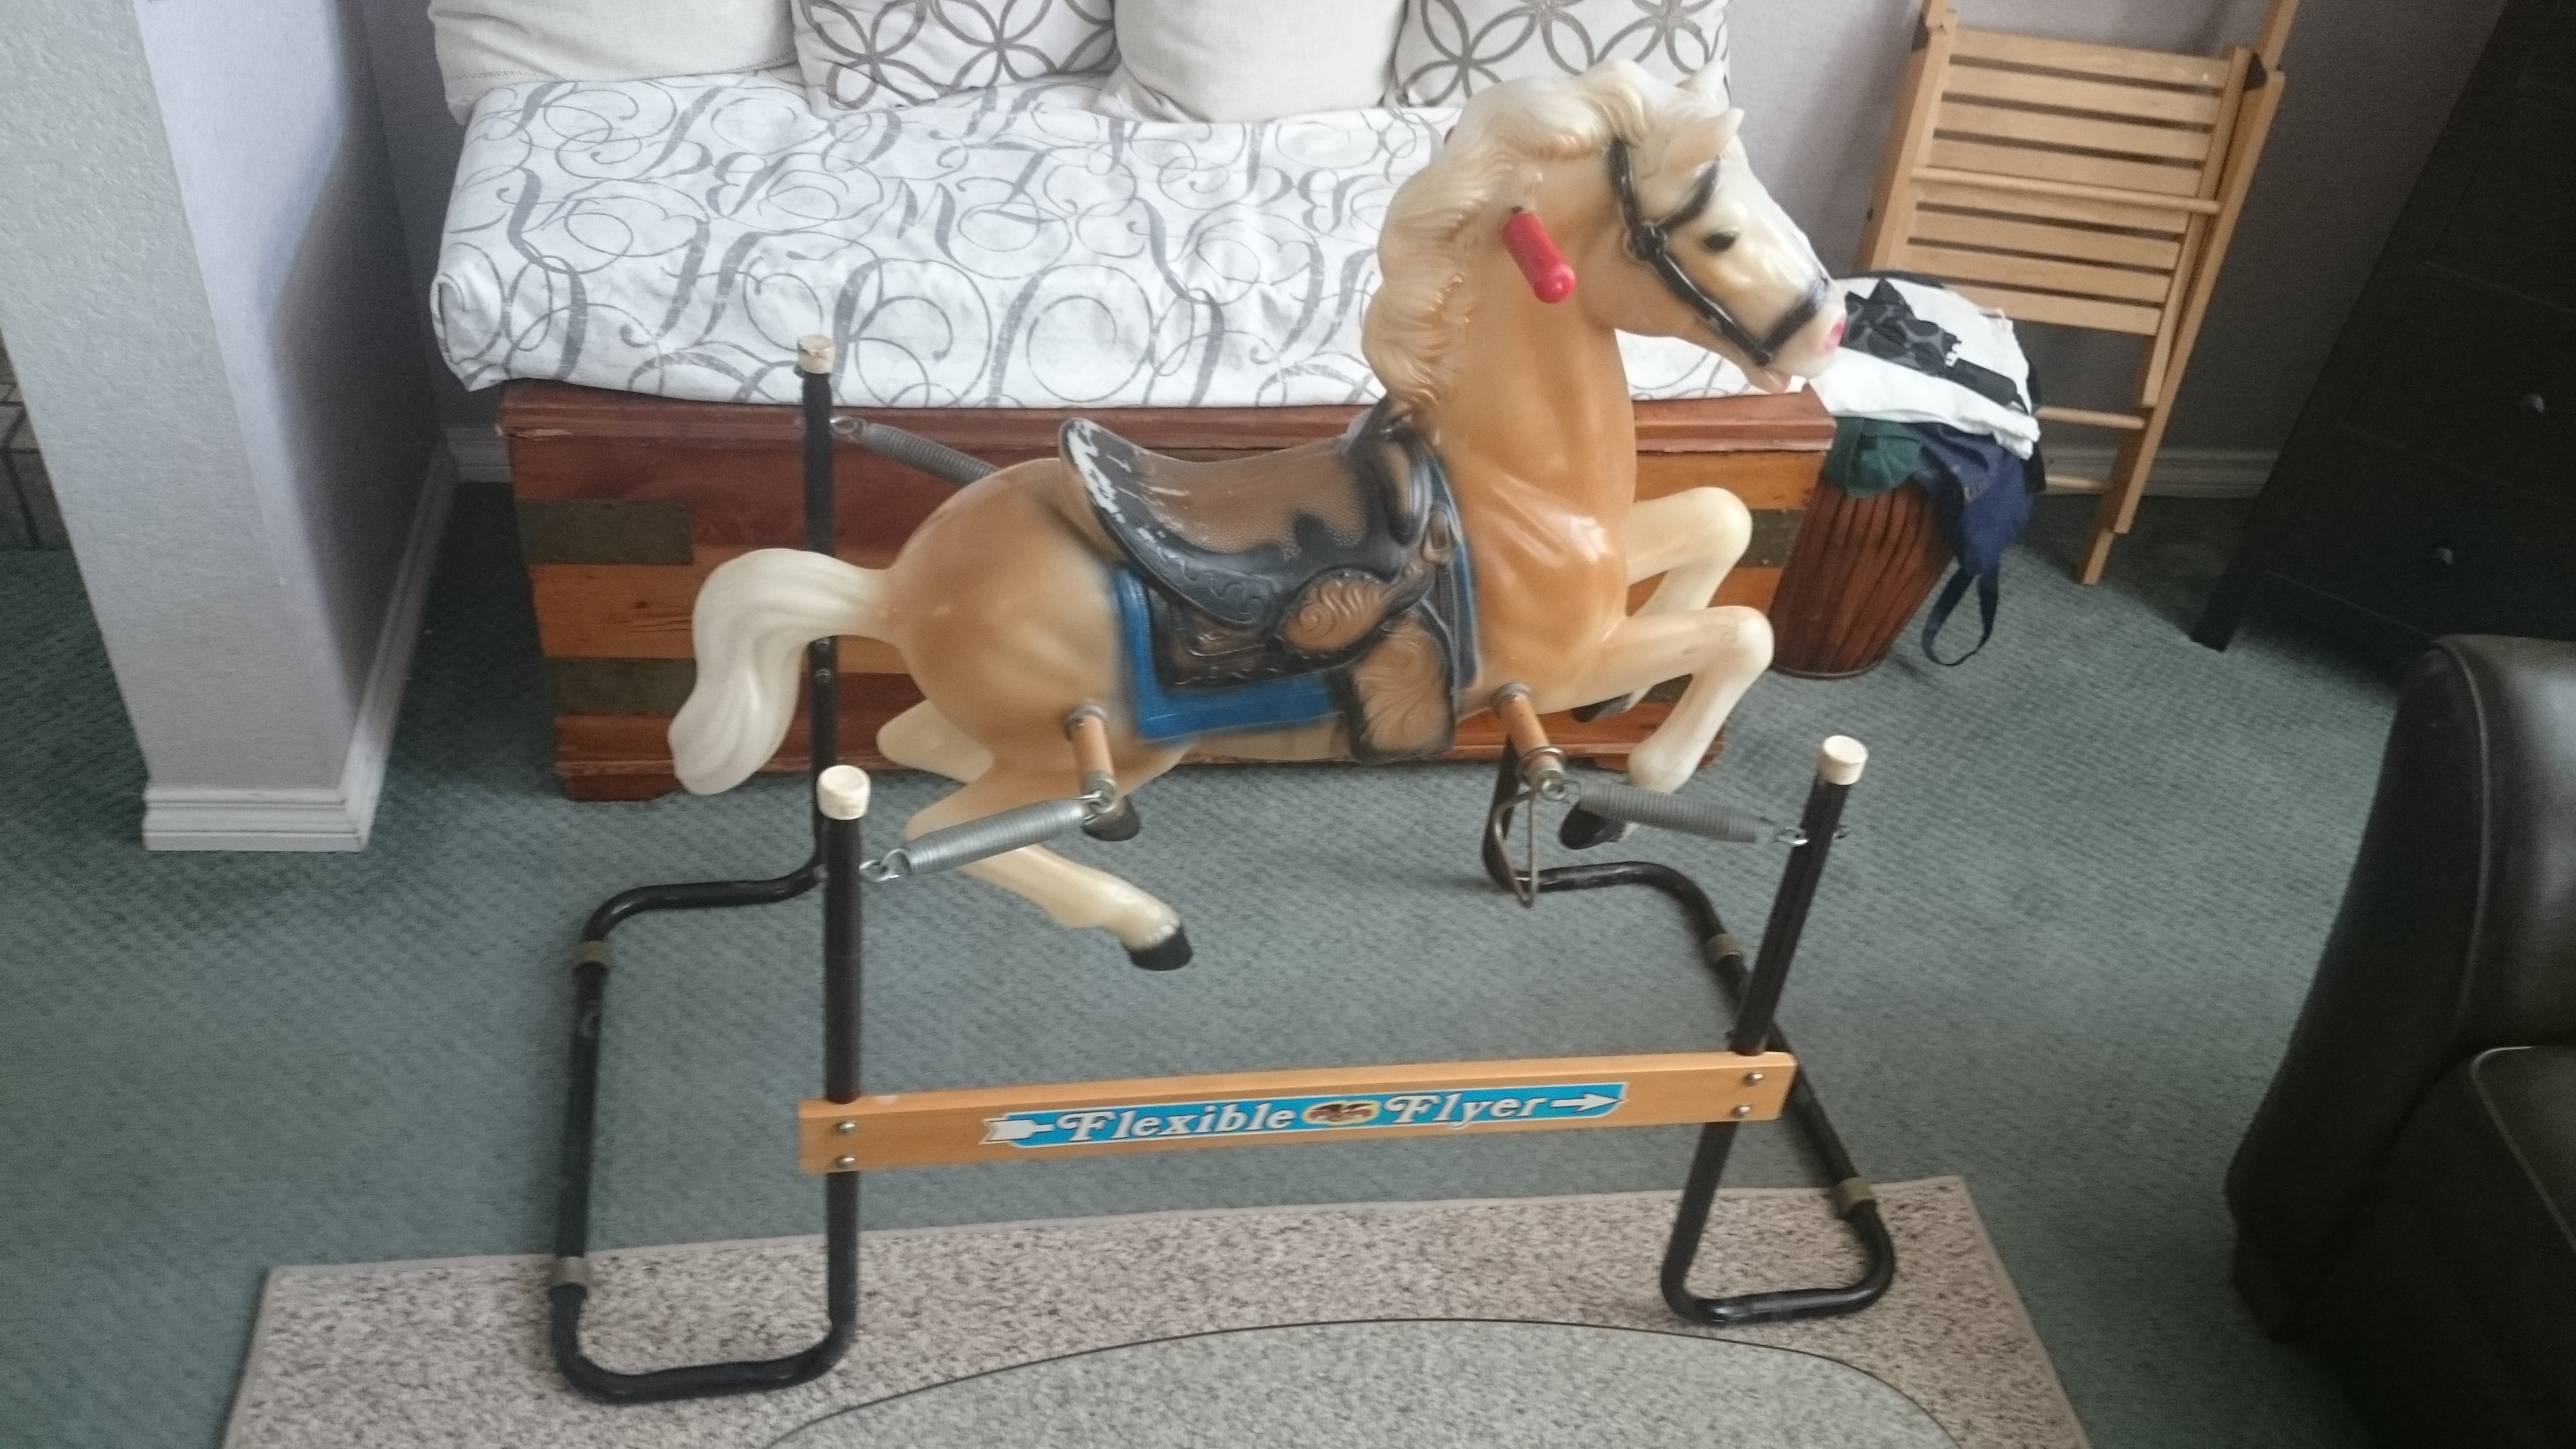
Well, It looks like we are good for me to pick up this Z. I will need to contact the owner and work out arrangements....aahhh the concessions. She said that I should see if i can put a deposit down on the car and pick it up in a couple months when we have more room. If not, I will have to see about working out a storage location with Montezuma. And she want some house upgrades done as well....concessions, So, I have to be completely honest here. The love of my wife's life is her 1 year old grand nephew. We are not grandparents ...yet...so I guess she is practicing with the grand nephew. She asked about putting together our kids old hobby horse which had been stored for years, in pieces, up in the garage rafters. She wants to give it to her grand nephew for his first birthday. So instead of doing car stuff on Sunday, I surprised her with the completely restored hobby horse. I even put clear plastic over the springs to prevent finger pinch. Anyway, she was just thrilled to death about this. I figured this was necessary to make sure she was in a very good mood. I showed her pics of the car this AM and she really liked it. So, very happy with all this. I will try and work out some time where we can drive out to the sellers place in the roadster and see the car. Maybe next weekend. Will keep things updated as it progresses here. .
 1 point
 -
Good read. I've had the glove-box sitting in the garage for a few months now, and have been wondering how it's going to go in there. Even in terms of depth it doesn't look feasible; part of the dash wiring harness is right there. I'll give it a shot using some of these tips. Thanks.1 point
-
I found it was easiest to lower the fan unit and install the glovebox from below. Thanks all for the help and advice. vincesf
 1 point
 -
Darrel, not on my 71 240Z. The early boxes are made of cardboard and must go in from the backside. Stupid design! There are at least three bolts/nuts holding the fan box to the firewall. There is also the control cable for the fresh air vent and the wiring for the fan motor. I vaguely recall screws holding the glovebox on either side of the opening too. All of this needs to be removed to get the glovebox in properly. It is a PITA! I haven't tried it but you made be able to replace it with a later plastic box that does slide in from the front with a little effort and/or mods. The simpliest things seem to be be the hardest sometimes. Good luck.1 point


-
-
Forum Statistics
-
Total Topics66.4k
-
Total Posts664.7k
-
-
Gallery Statistics
-
Blog Statistics
-
Total Blogs167
-
Total Entries251
-
-
Download Statistics
-
Vehicles Statistics
