Leaderboard

 Subscriber
Popular Content
Showing content with the highest reputation on 05/11/2018 in all areas
-
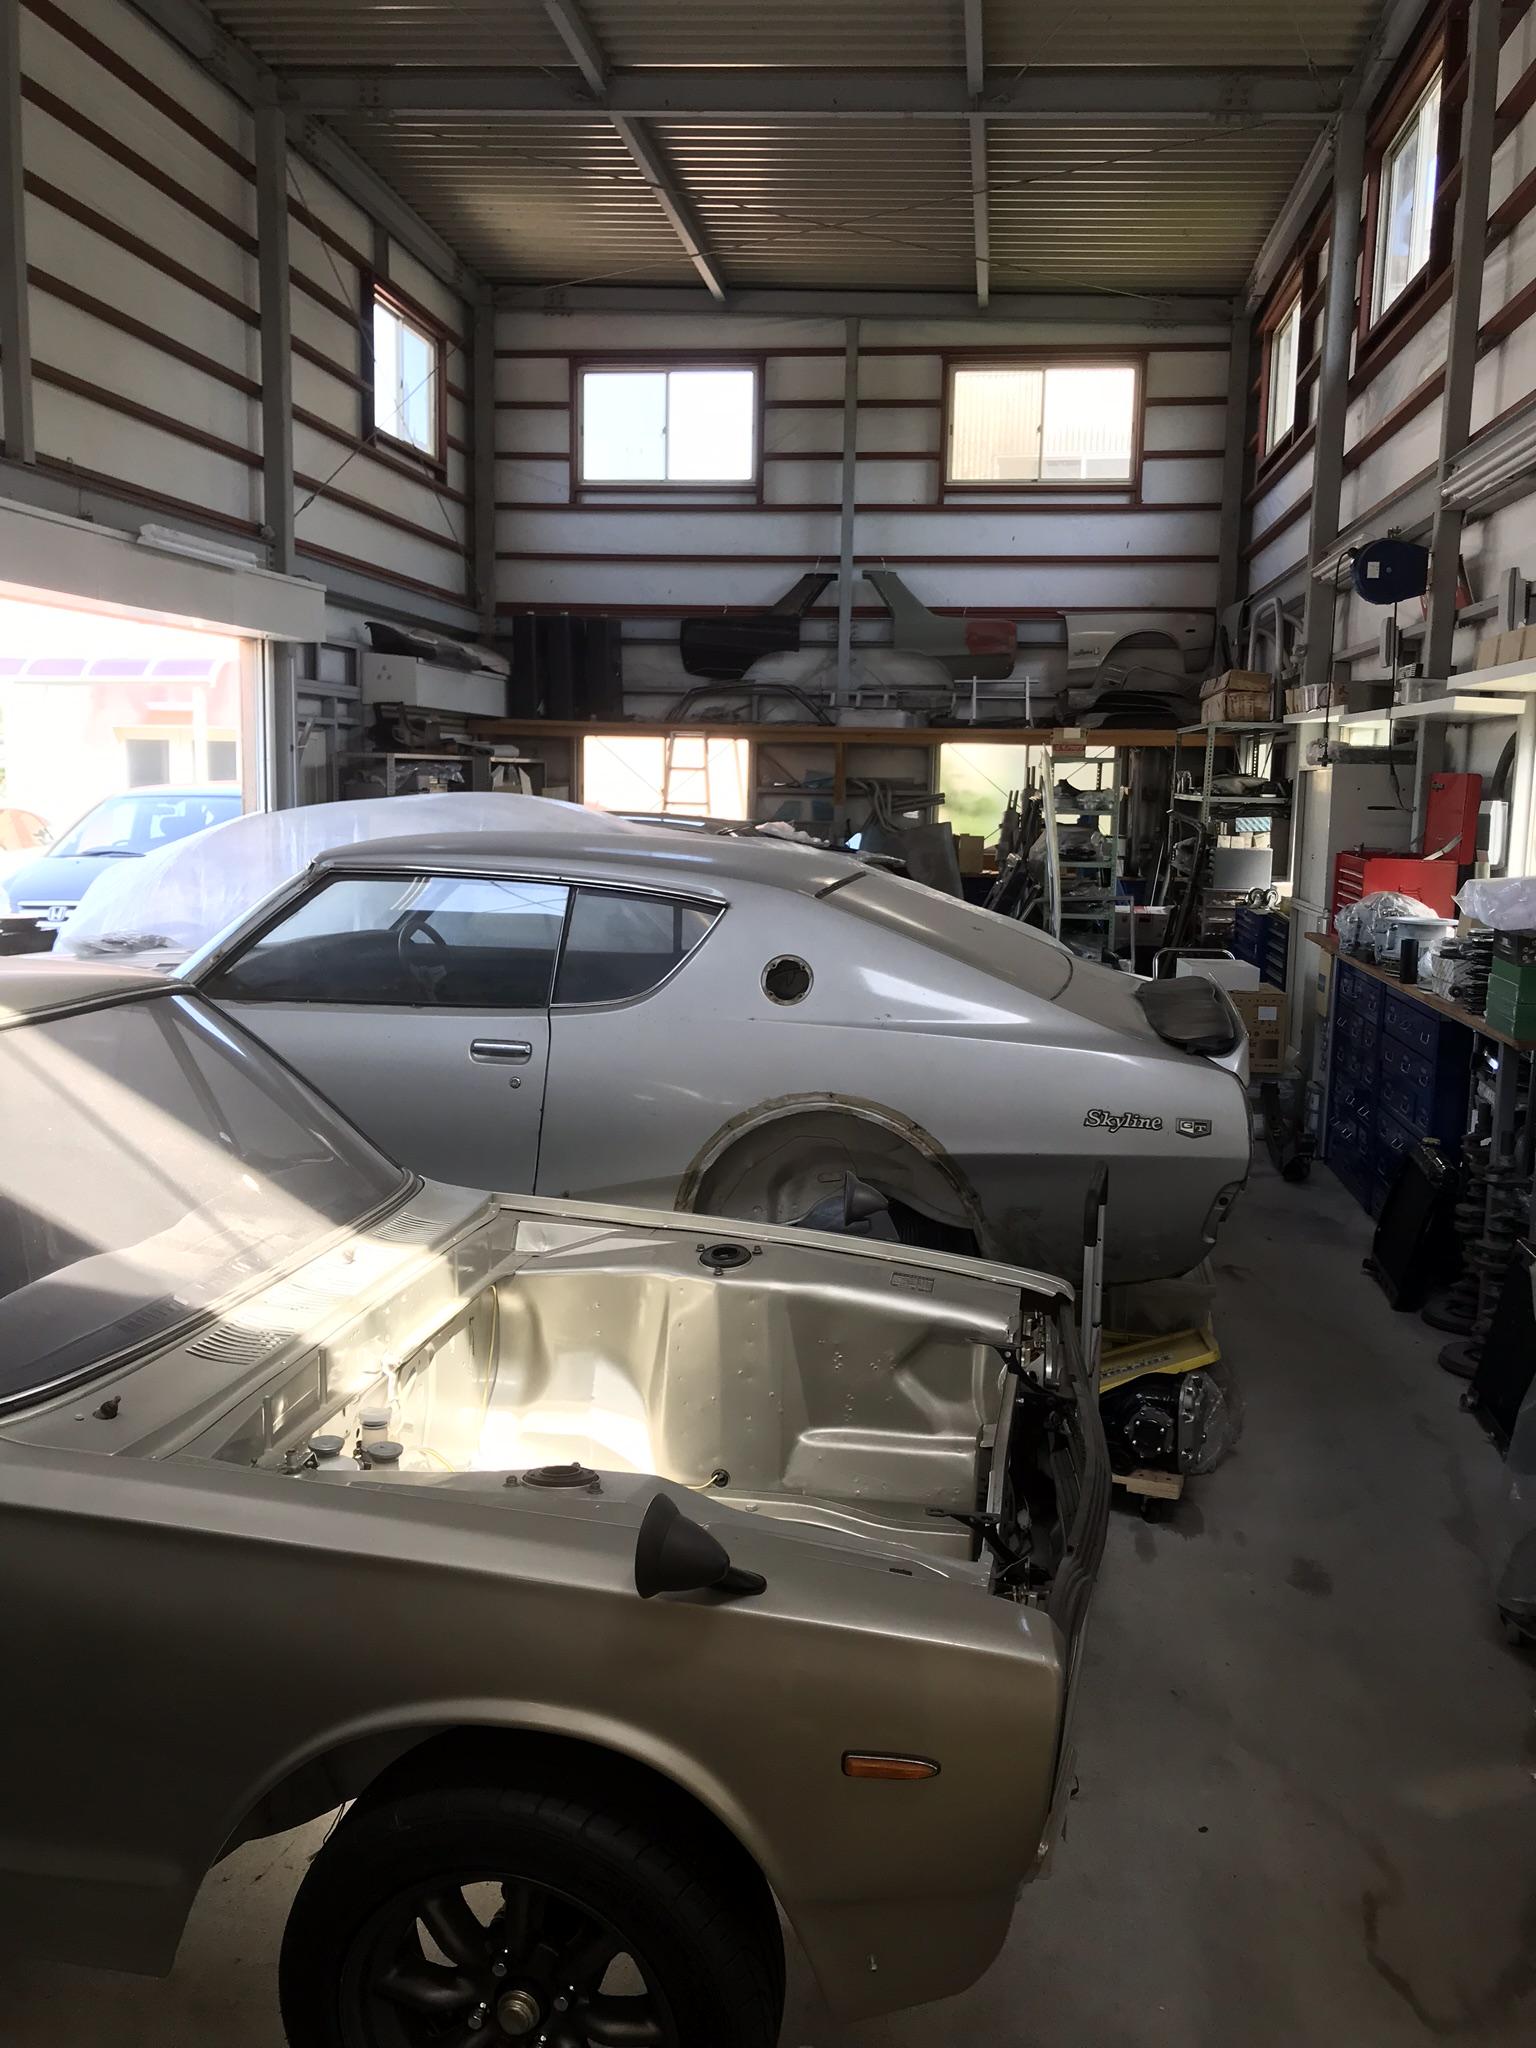
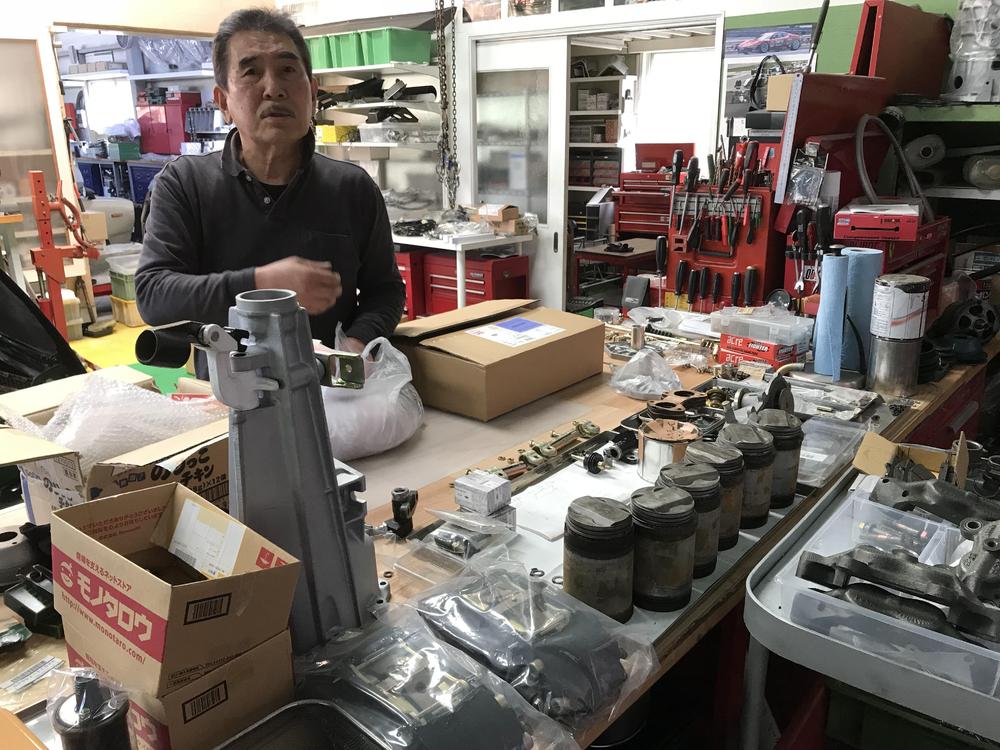
 4 pointsMr.Watanabe has a lot of experience with S20 engine, especially Skyline GTR. He was a driver , then turned to be a mechanic. I saw so many S20 engines, 71A transmissions, R192 diffs, etc etc . I found S20- 000001 ! ! And also he keeps the last S20 engine , 002722 !! Even more, special works engine, parts , prototype engine, etc etc .. Kats
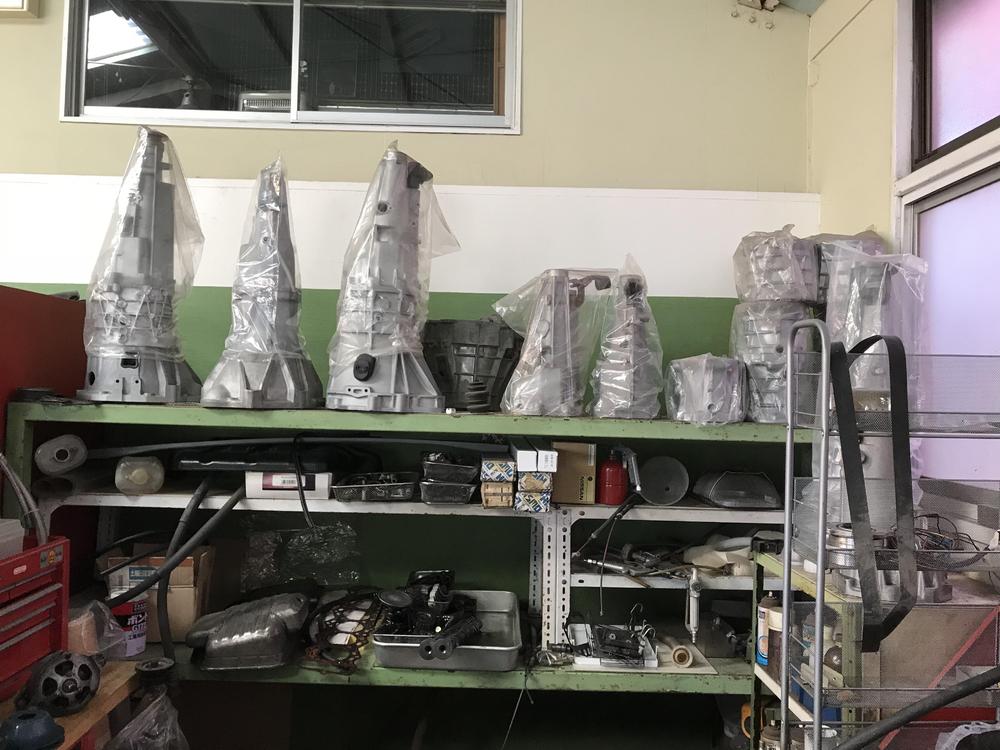


 4 points
 -
 It is a bit of a puzzle. Many have struggled with this. You sort of have to hold the filter into the housing, drop the rear a bit, and slip the rear of the filter past the rear air horn to get it all out. Yes the front bolt has to stay in the housing while you do this. When you finally get the housing clear, turn it upside down and spill the bolt onto the floor where it will roll under neath the car. At least that's how I do it. Once you get the technique, you'll wonder what all the fuse was about.3 points
 -
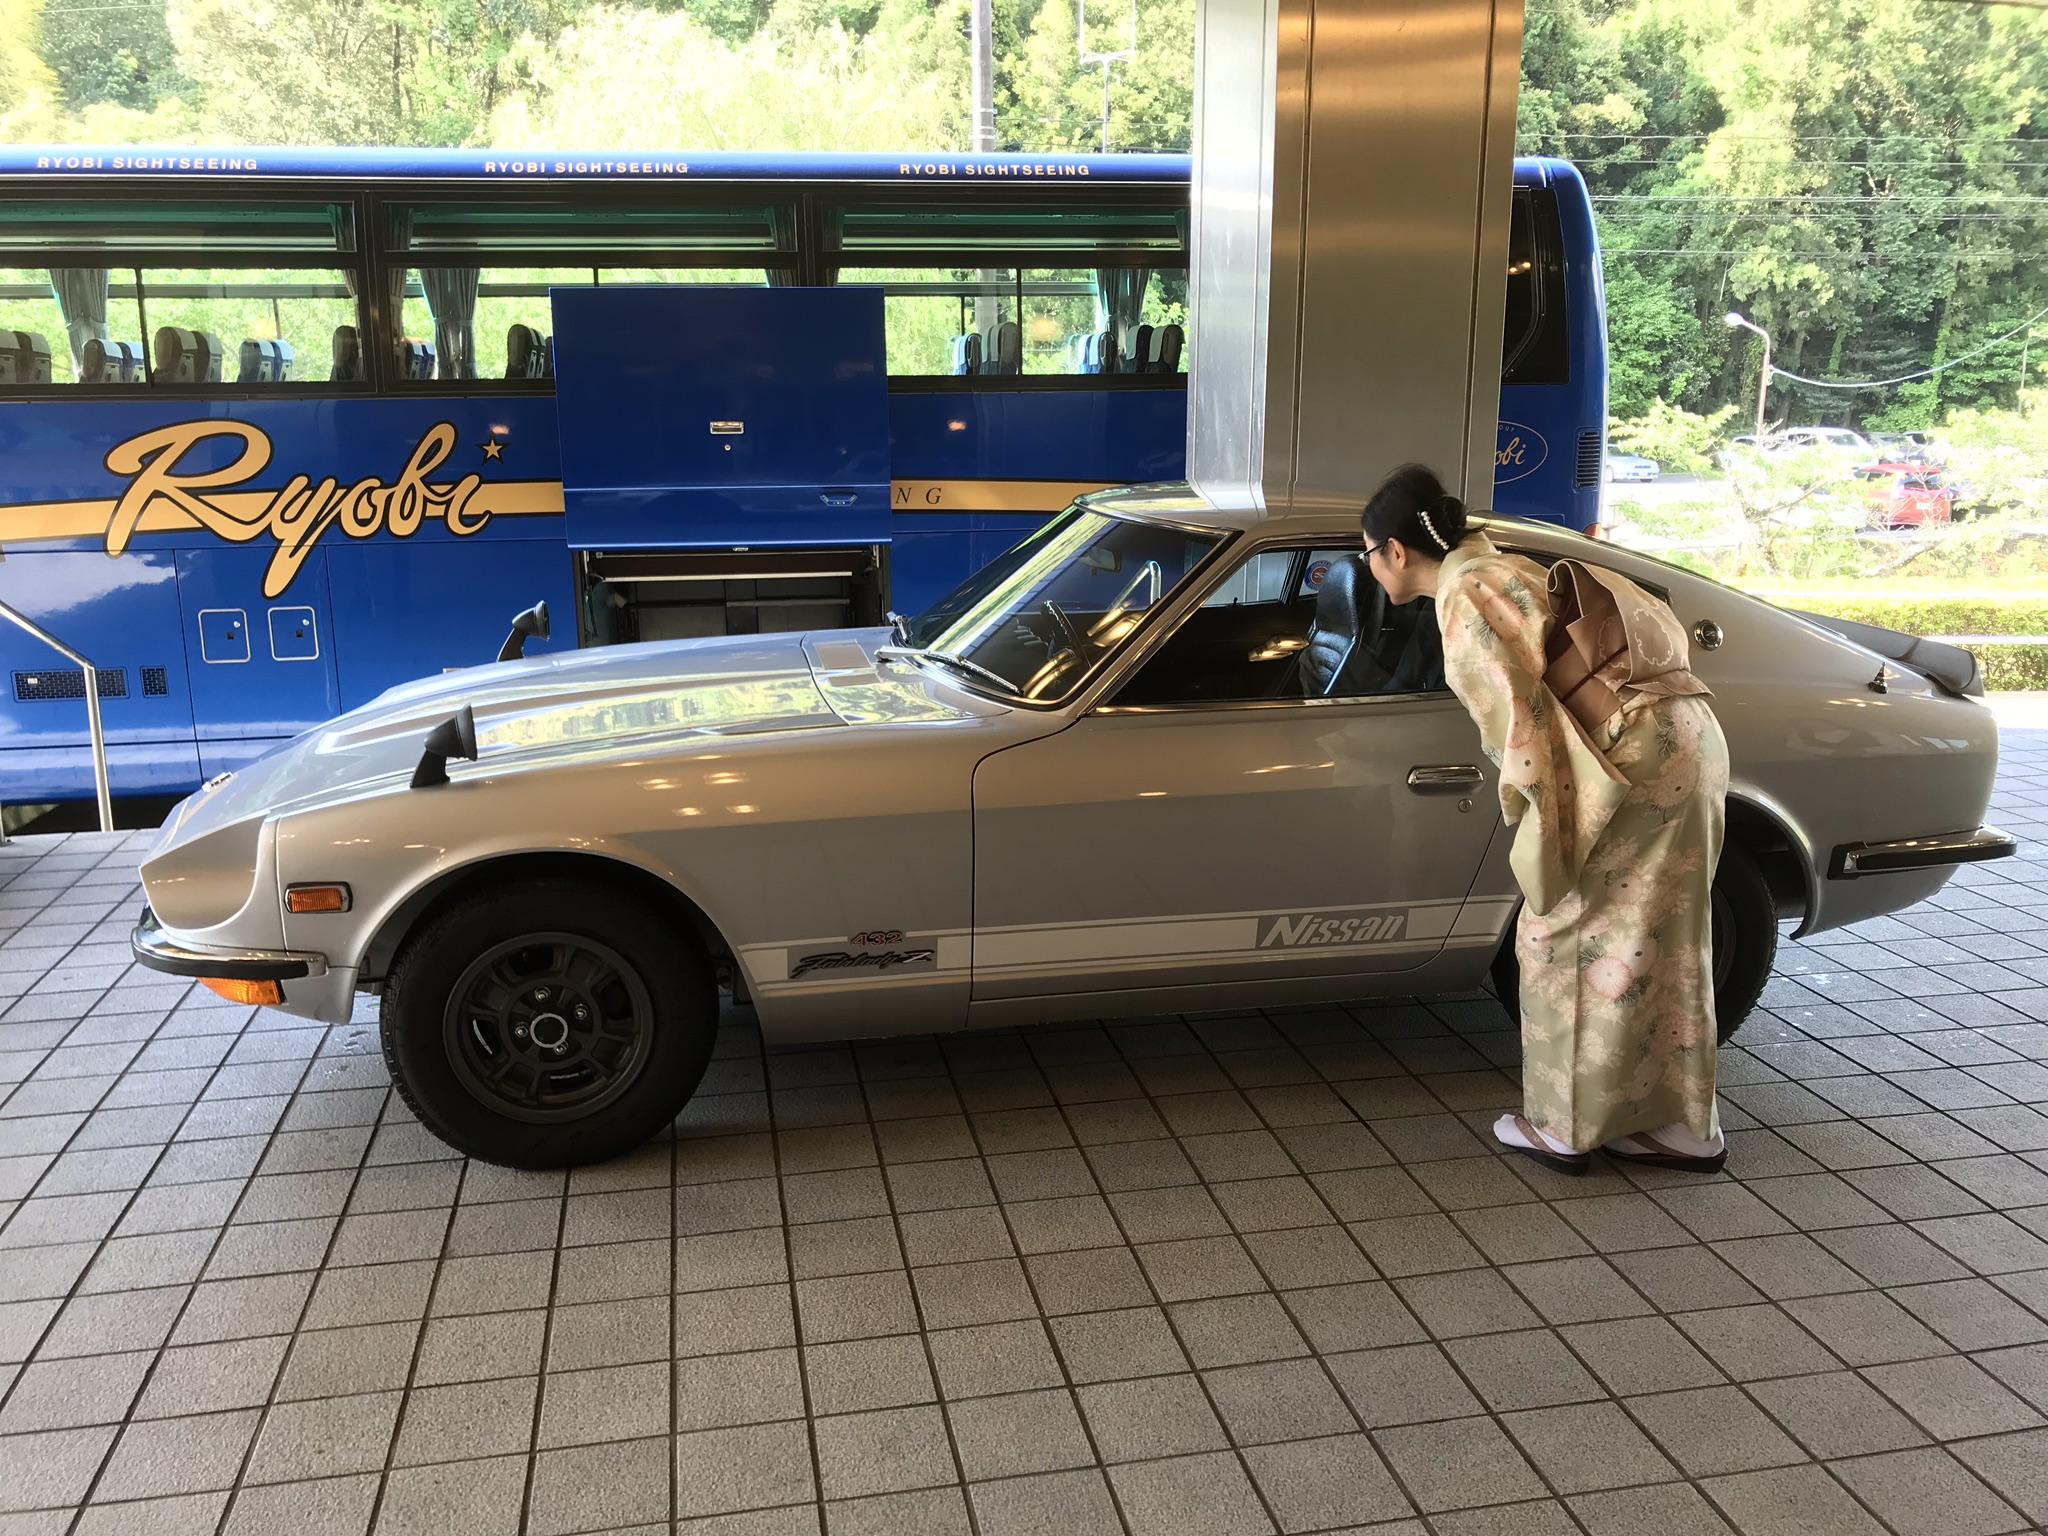
3 pointsOn the way to the heaven , I stayed at Onsen Ryokan (hot springs hotel) , a female manager was very interested in my car , she said it is so beautiful. I am glad to hear that !


 3 points
 -
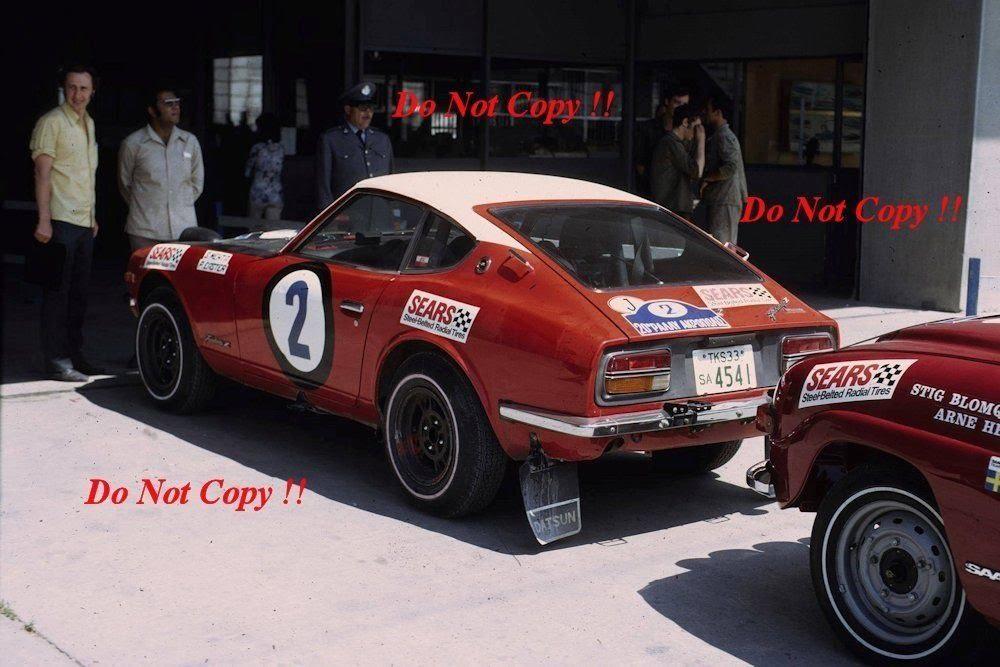
 2 pointsGav, The caption doesn't fit with the event there. The photo is '4541' (originally part of a batch of Works cars built for the 1972 East African Safari Rally, which started in March) on the 1972 Acropolis Rally in Greece (it took place in May). It was an entry in a "borrowed" Works car co-ordinated by Cal Withers, and Shekhar Mehta had negotiated a tyre sponsorship deal with Sears Roebuck. Apparently the tyres were not the best tools for the job (to say the least...) but the money was right. The white roof was an attempt to reflect some of the strong Greek sunlight and keep things a little cooler inside. I doubt it had all that much effect. The data from the Tour Of Dean website for this car relates to when those Tour Of Dean rally stages were used as part of the 1972 RAC Rally (December), where the car had start number 26. It still had the white roof and some of the white banded Sears tyres...2 points
 -
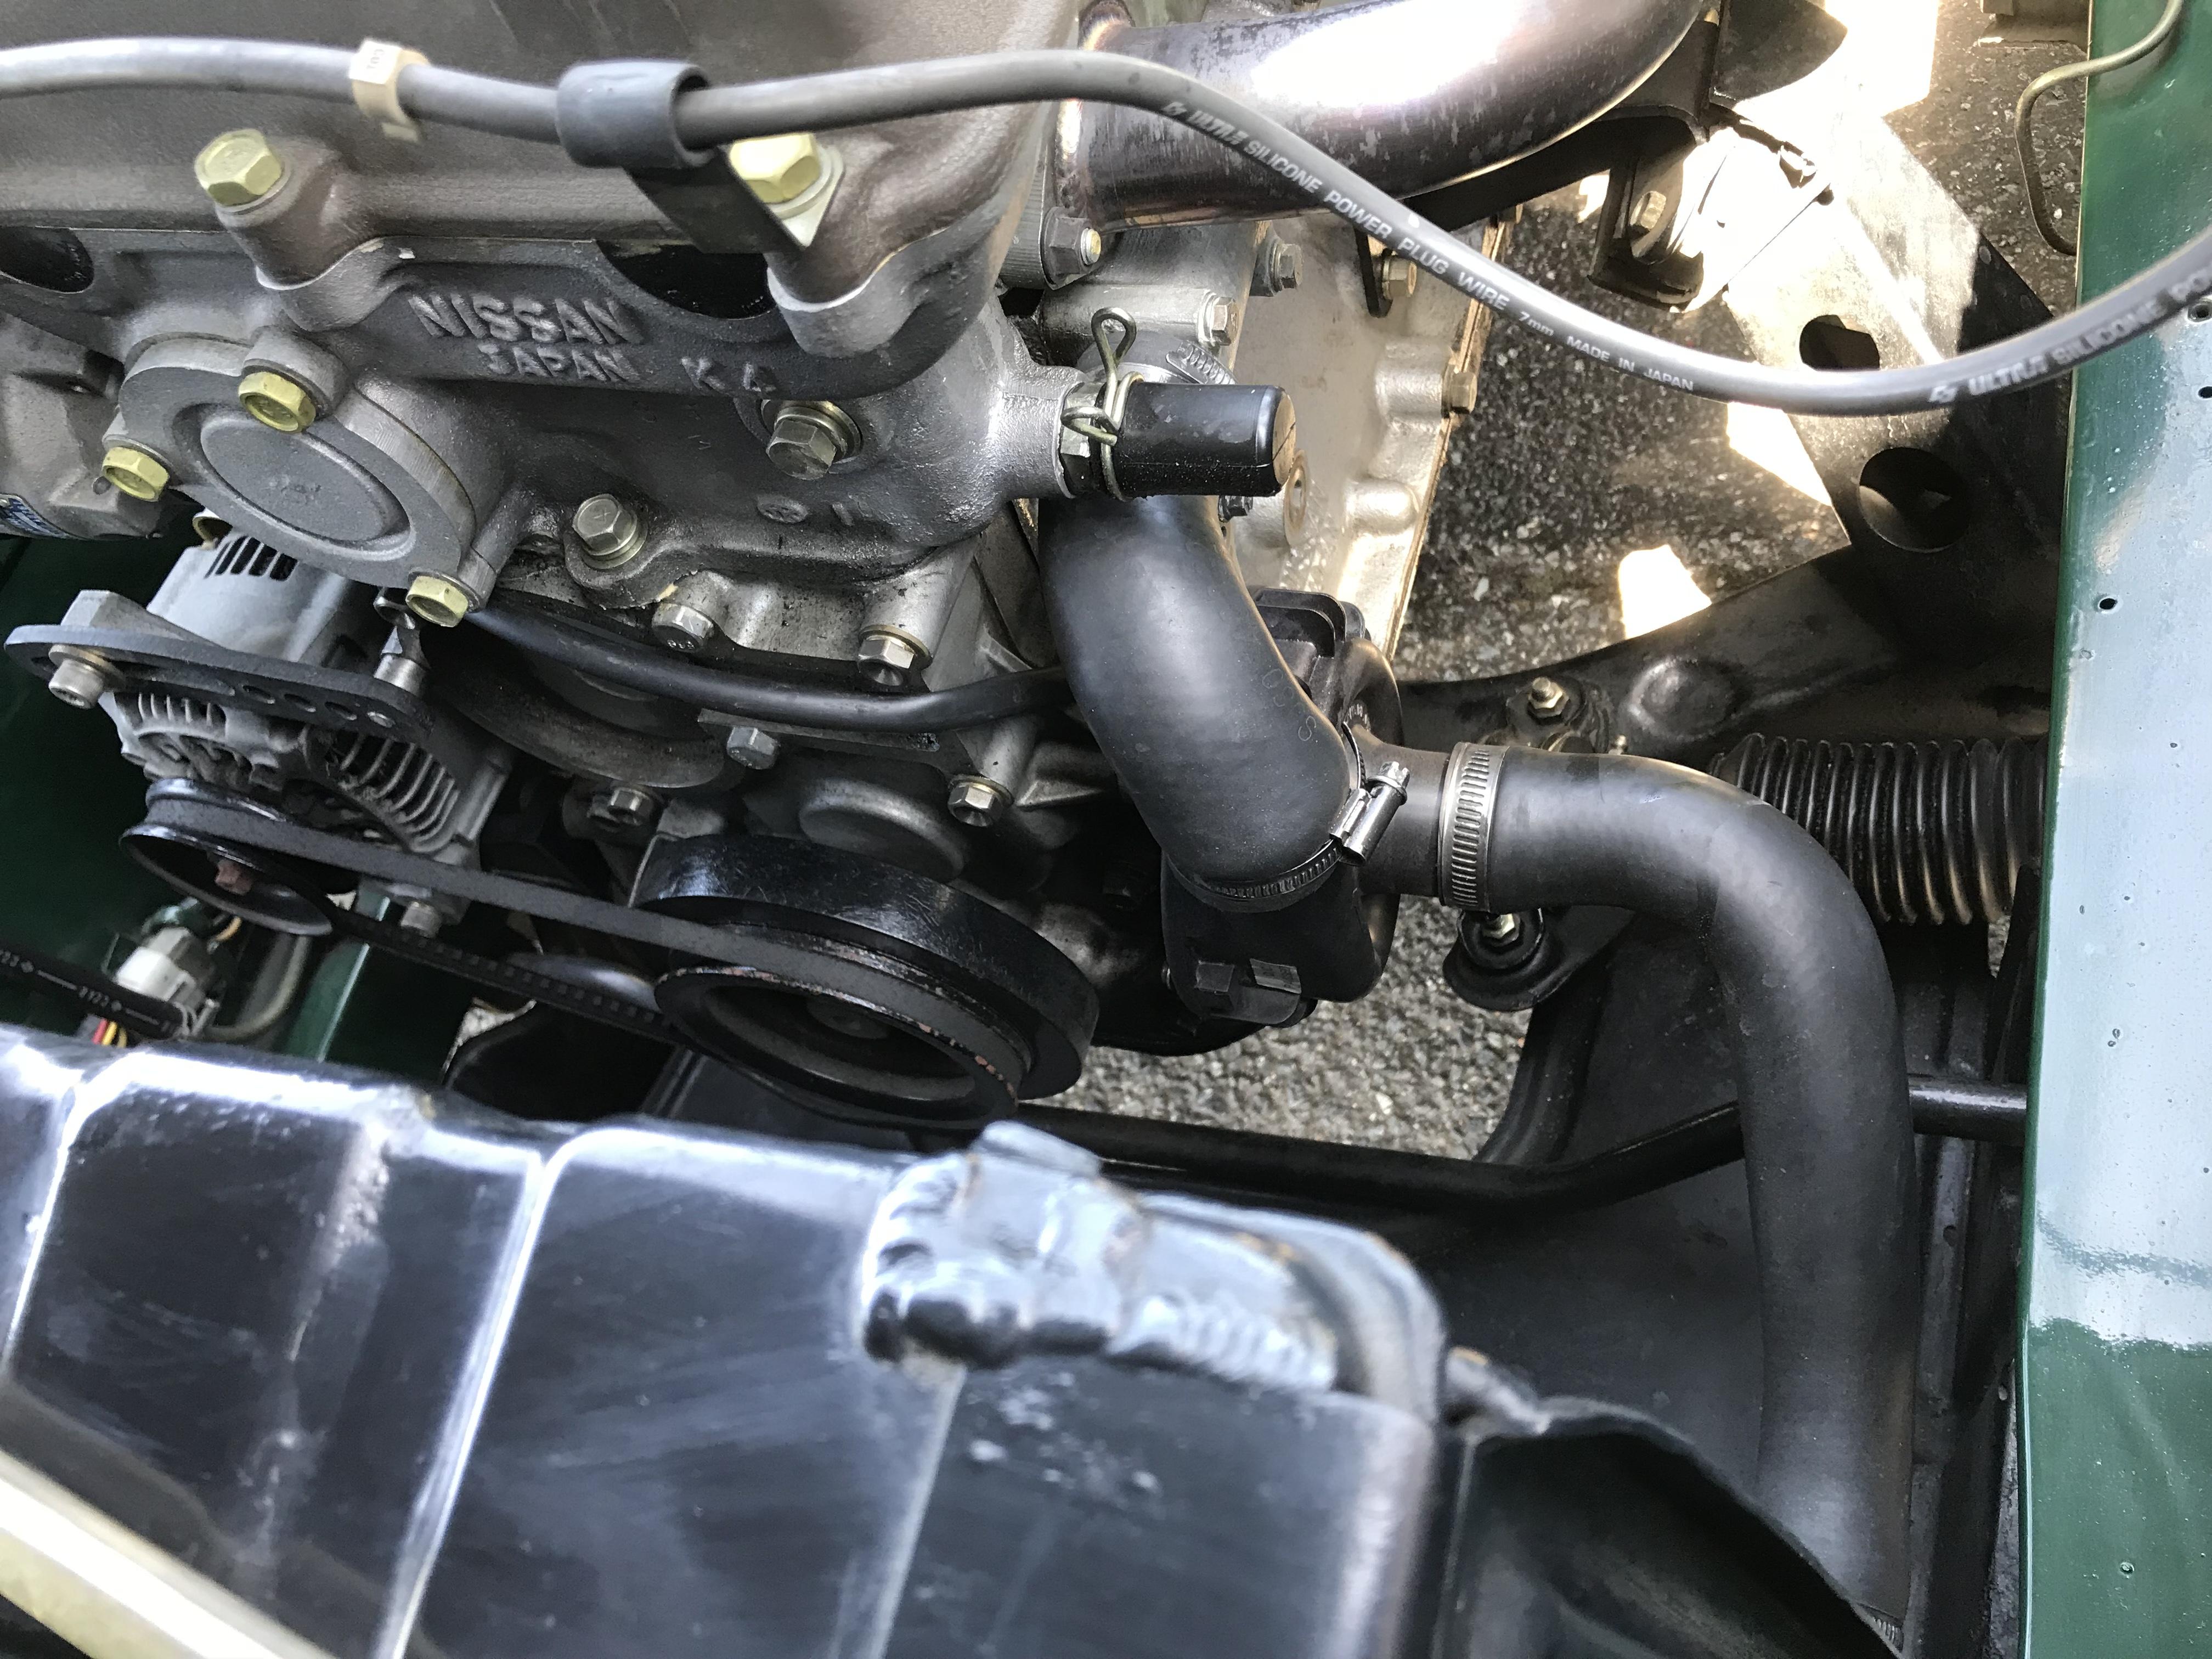
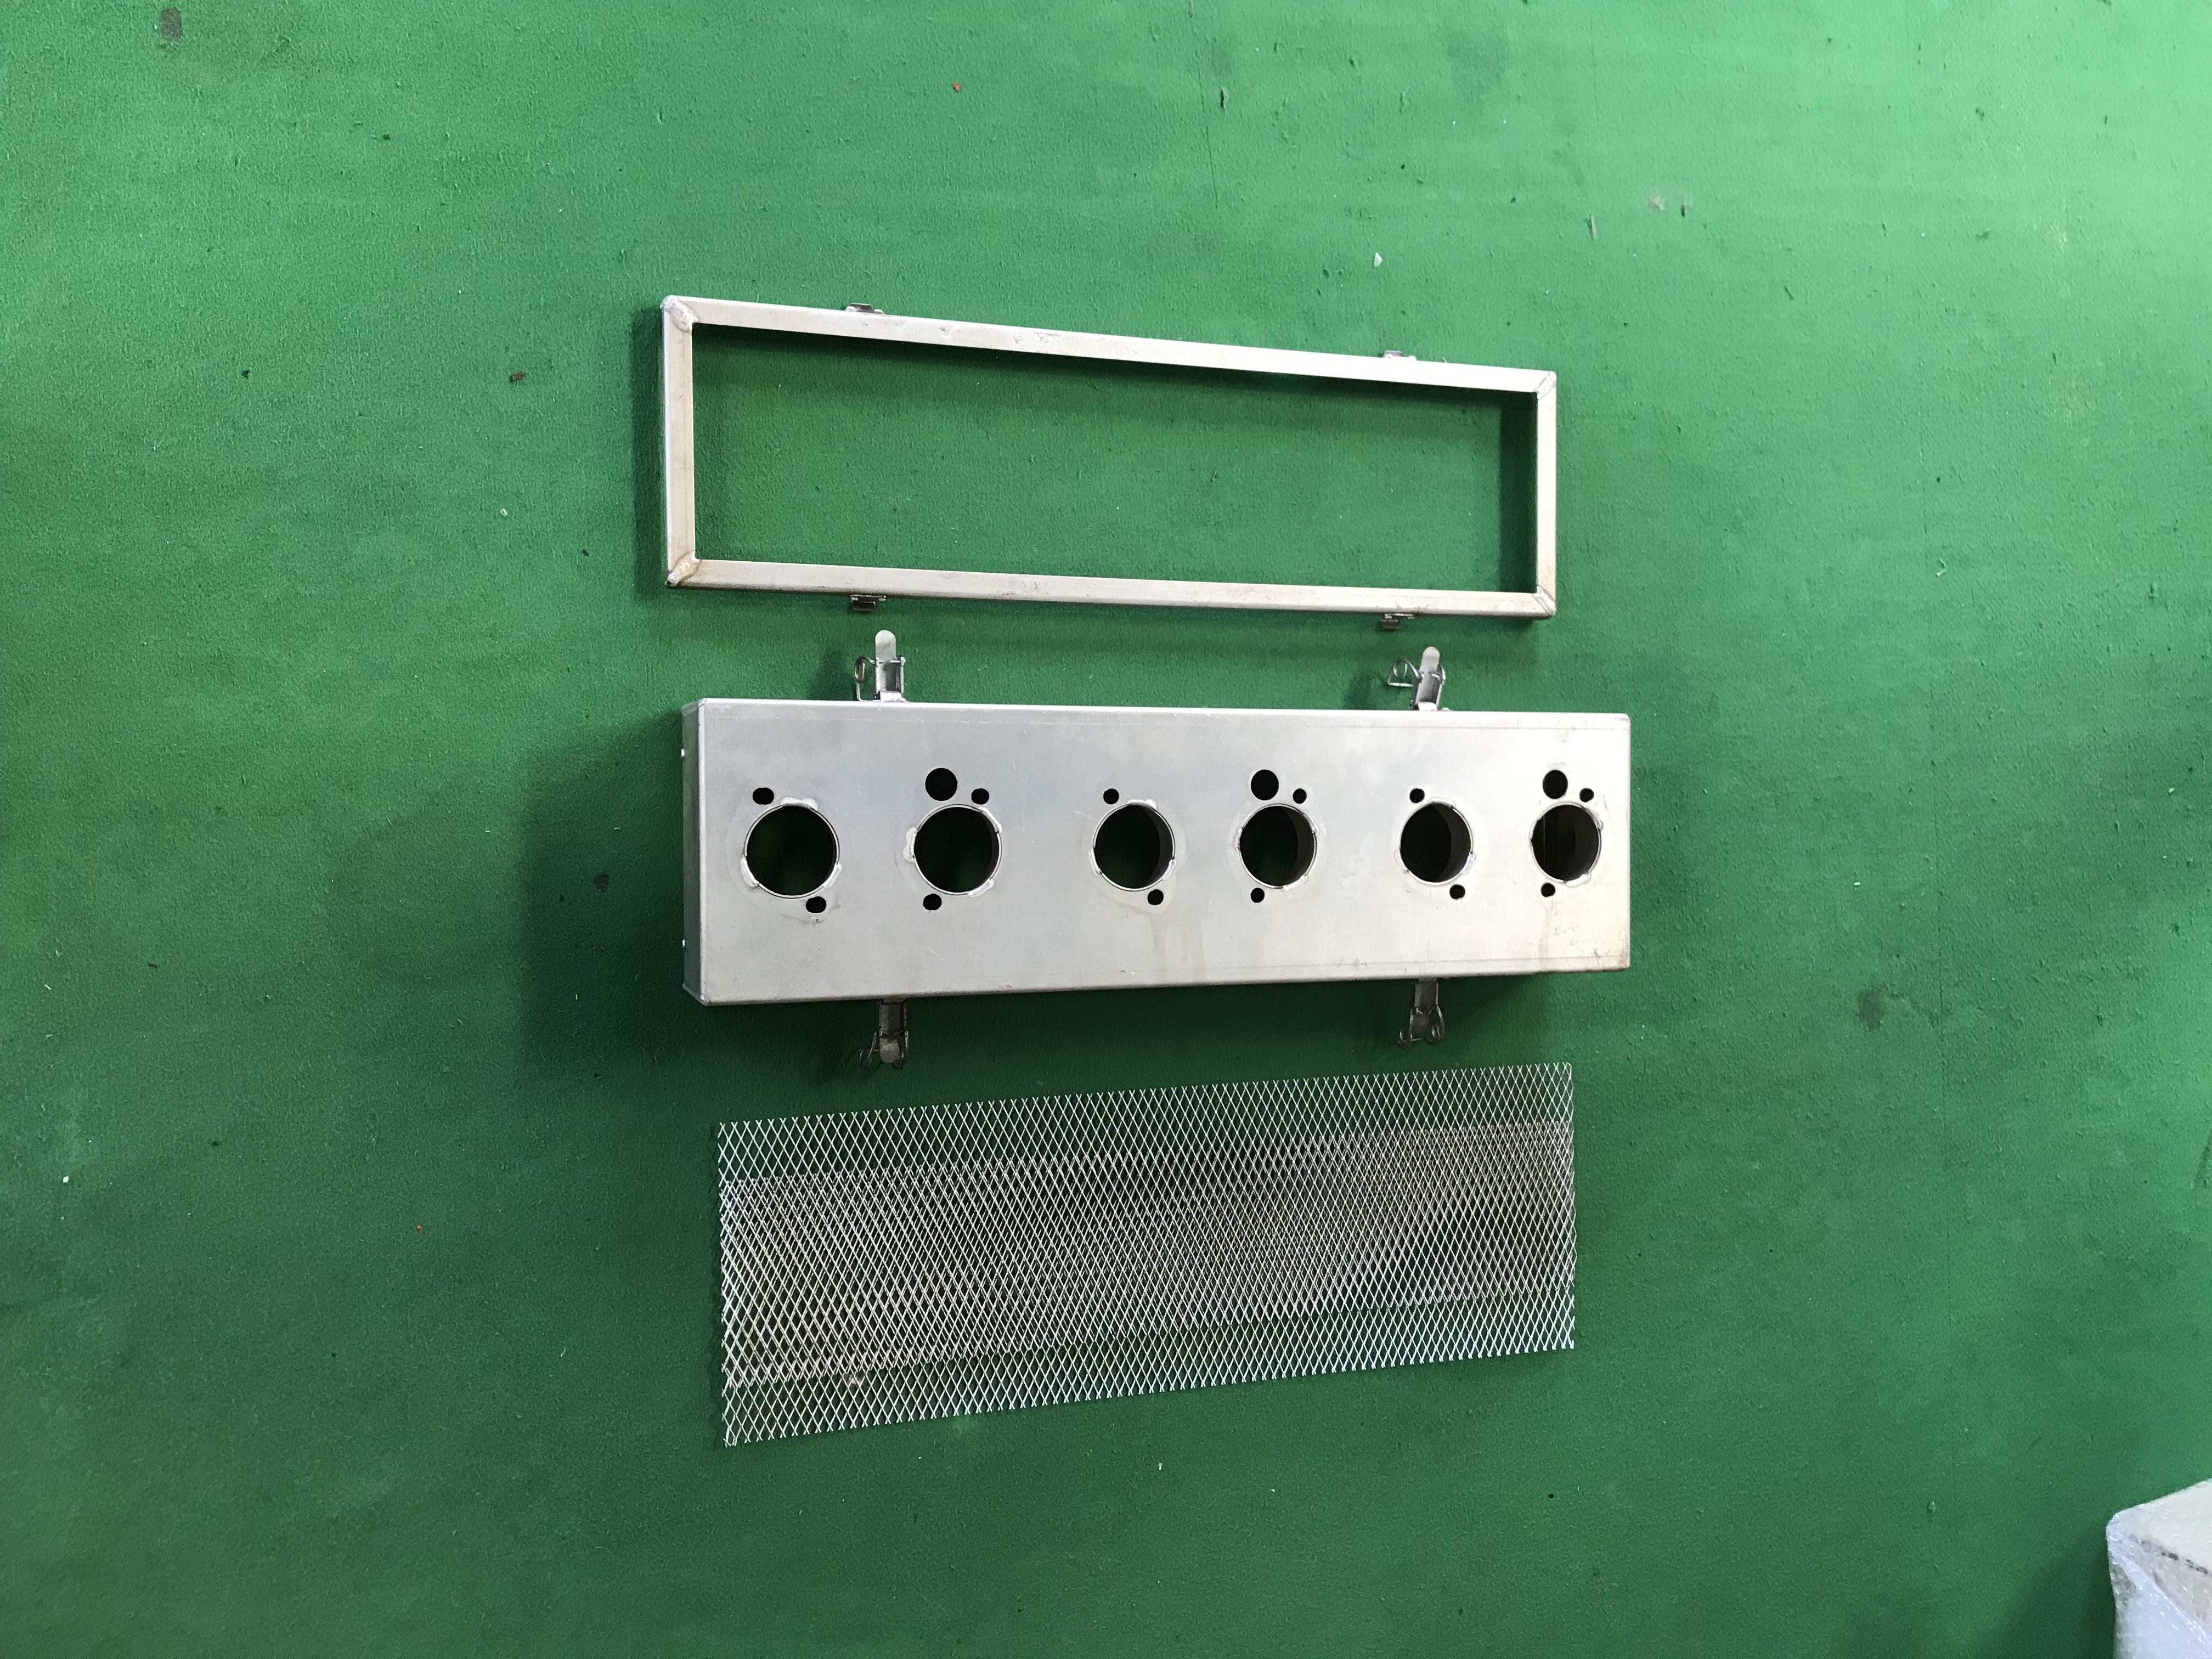
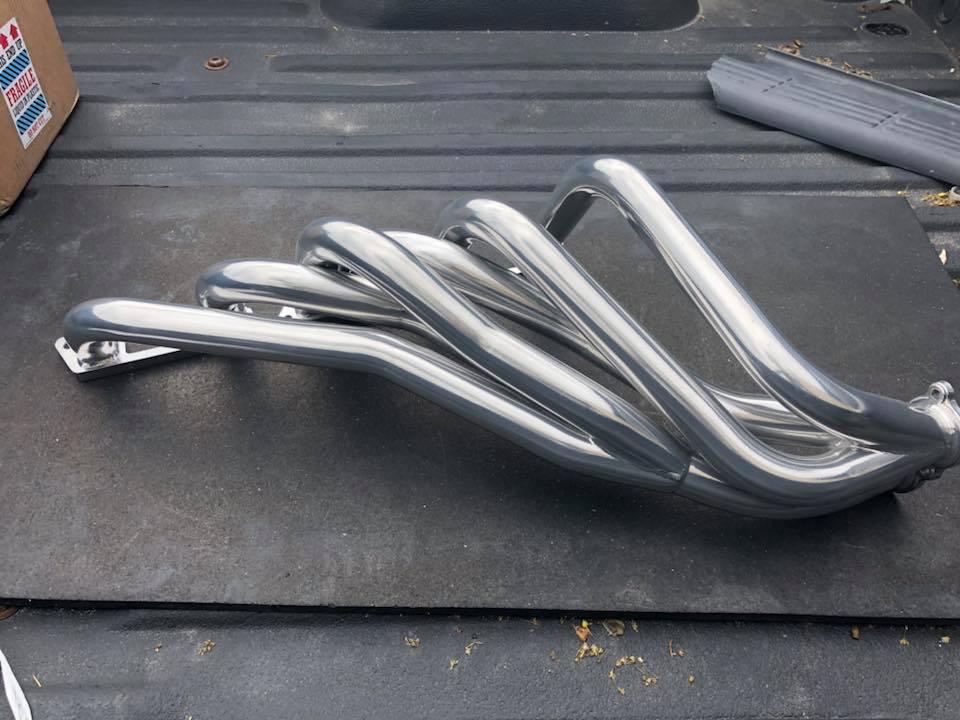
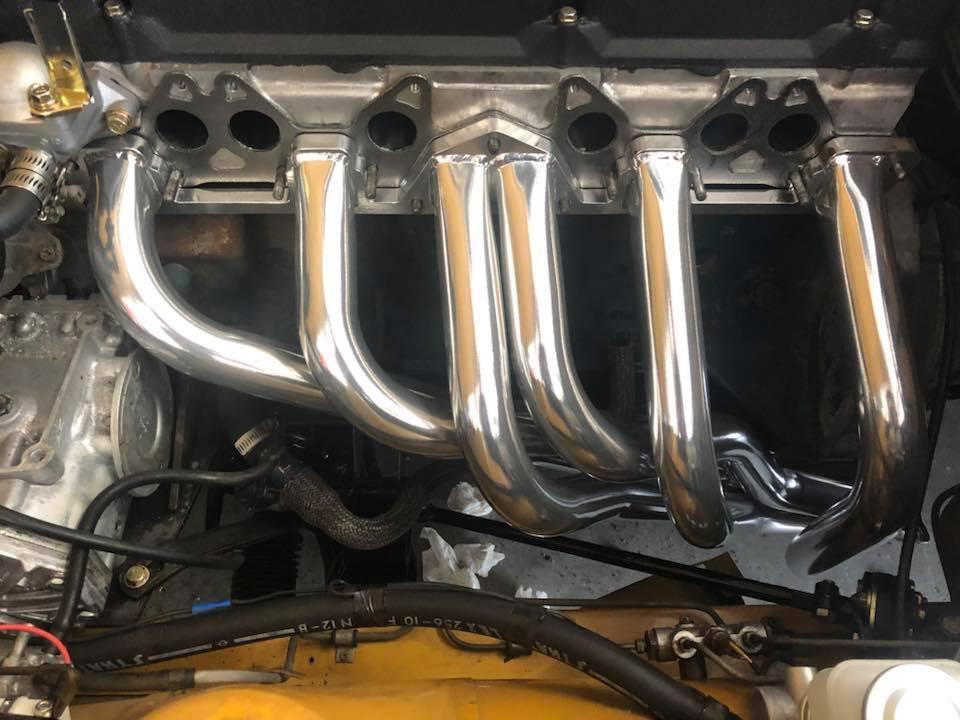
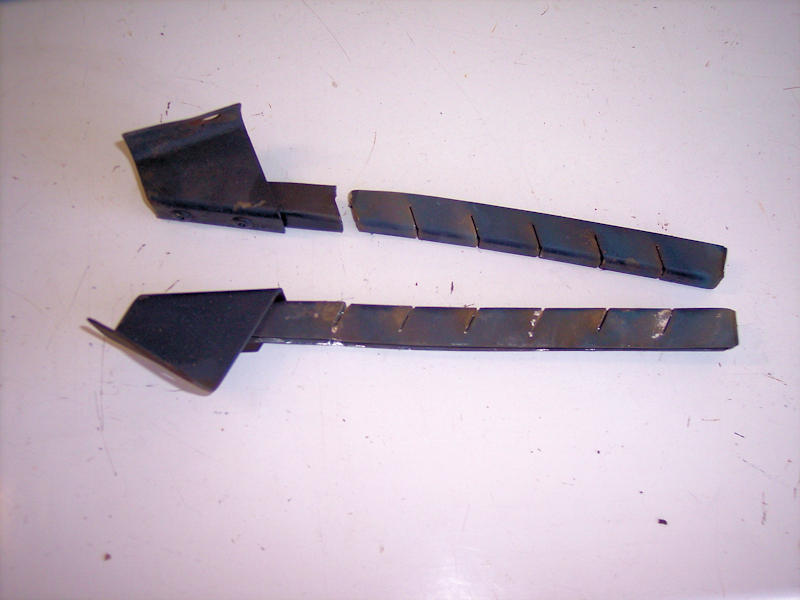
 New Fujitsubo header is in! Well mostly. It’s coated in chromex ceramic coating inside and out for heat reduction. Clears steering well. Also my series 1 heat shield could be bent up to clear
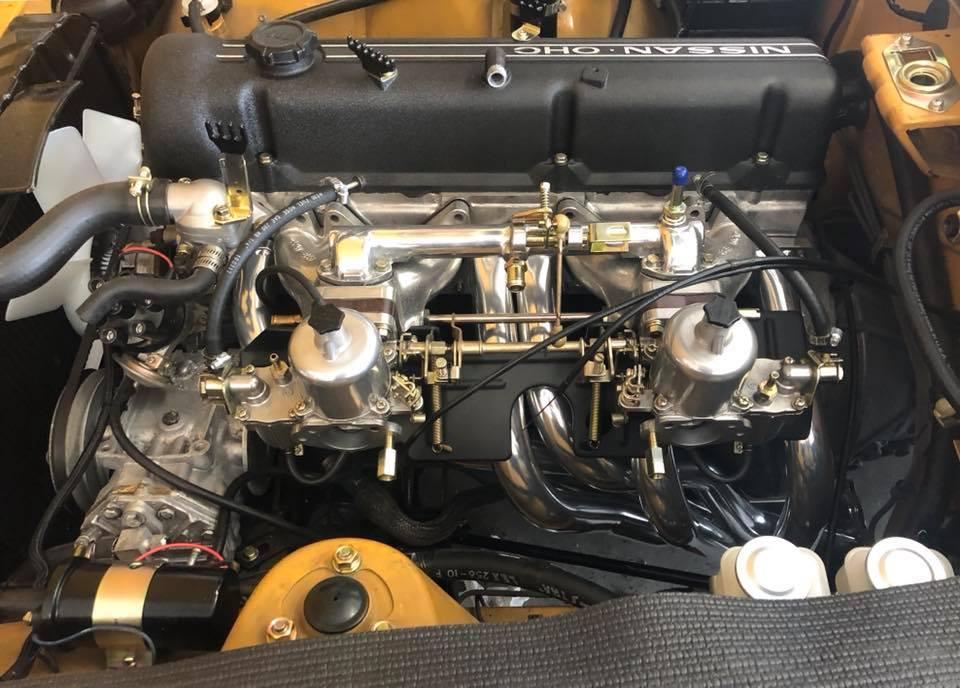
 1 point
 -
 1 point
 -
 Great followup from Alvin and the Z Car Garage gang: http://www.zcarblog.com/2018/05/11/events/racing-datsun-heroics-at-the-2018-mitty.html1 point
 -
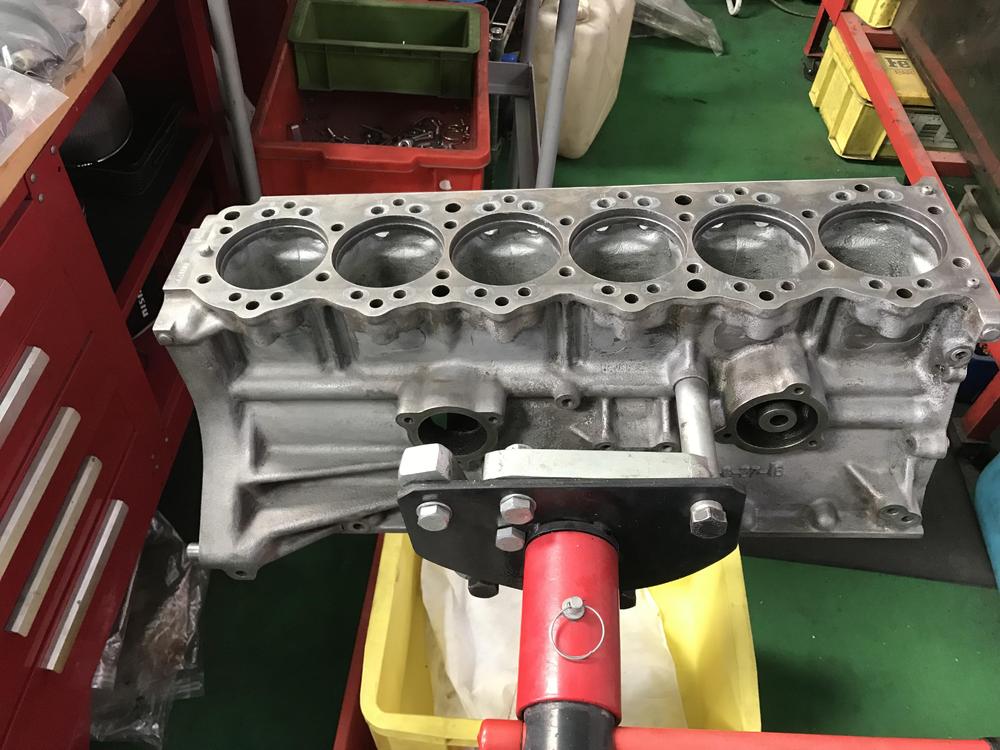
 1 pointThat side mount engine stand is the way to go. A friend here has one for L24 26 28 engines.1 point
 -
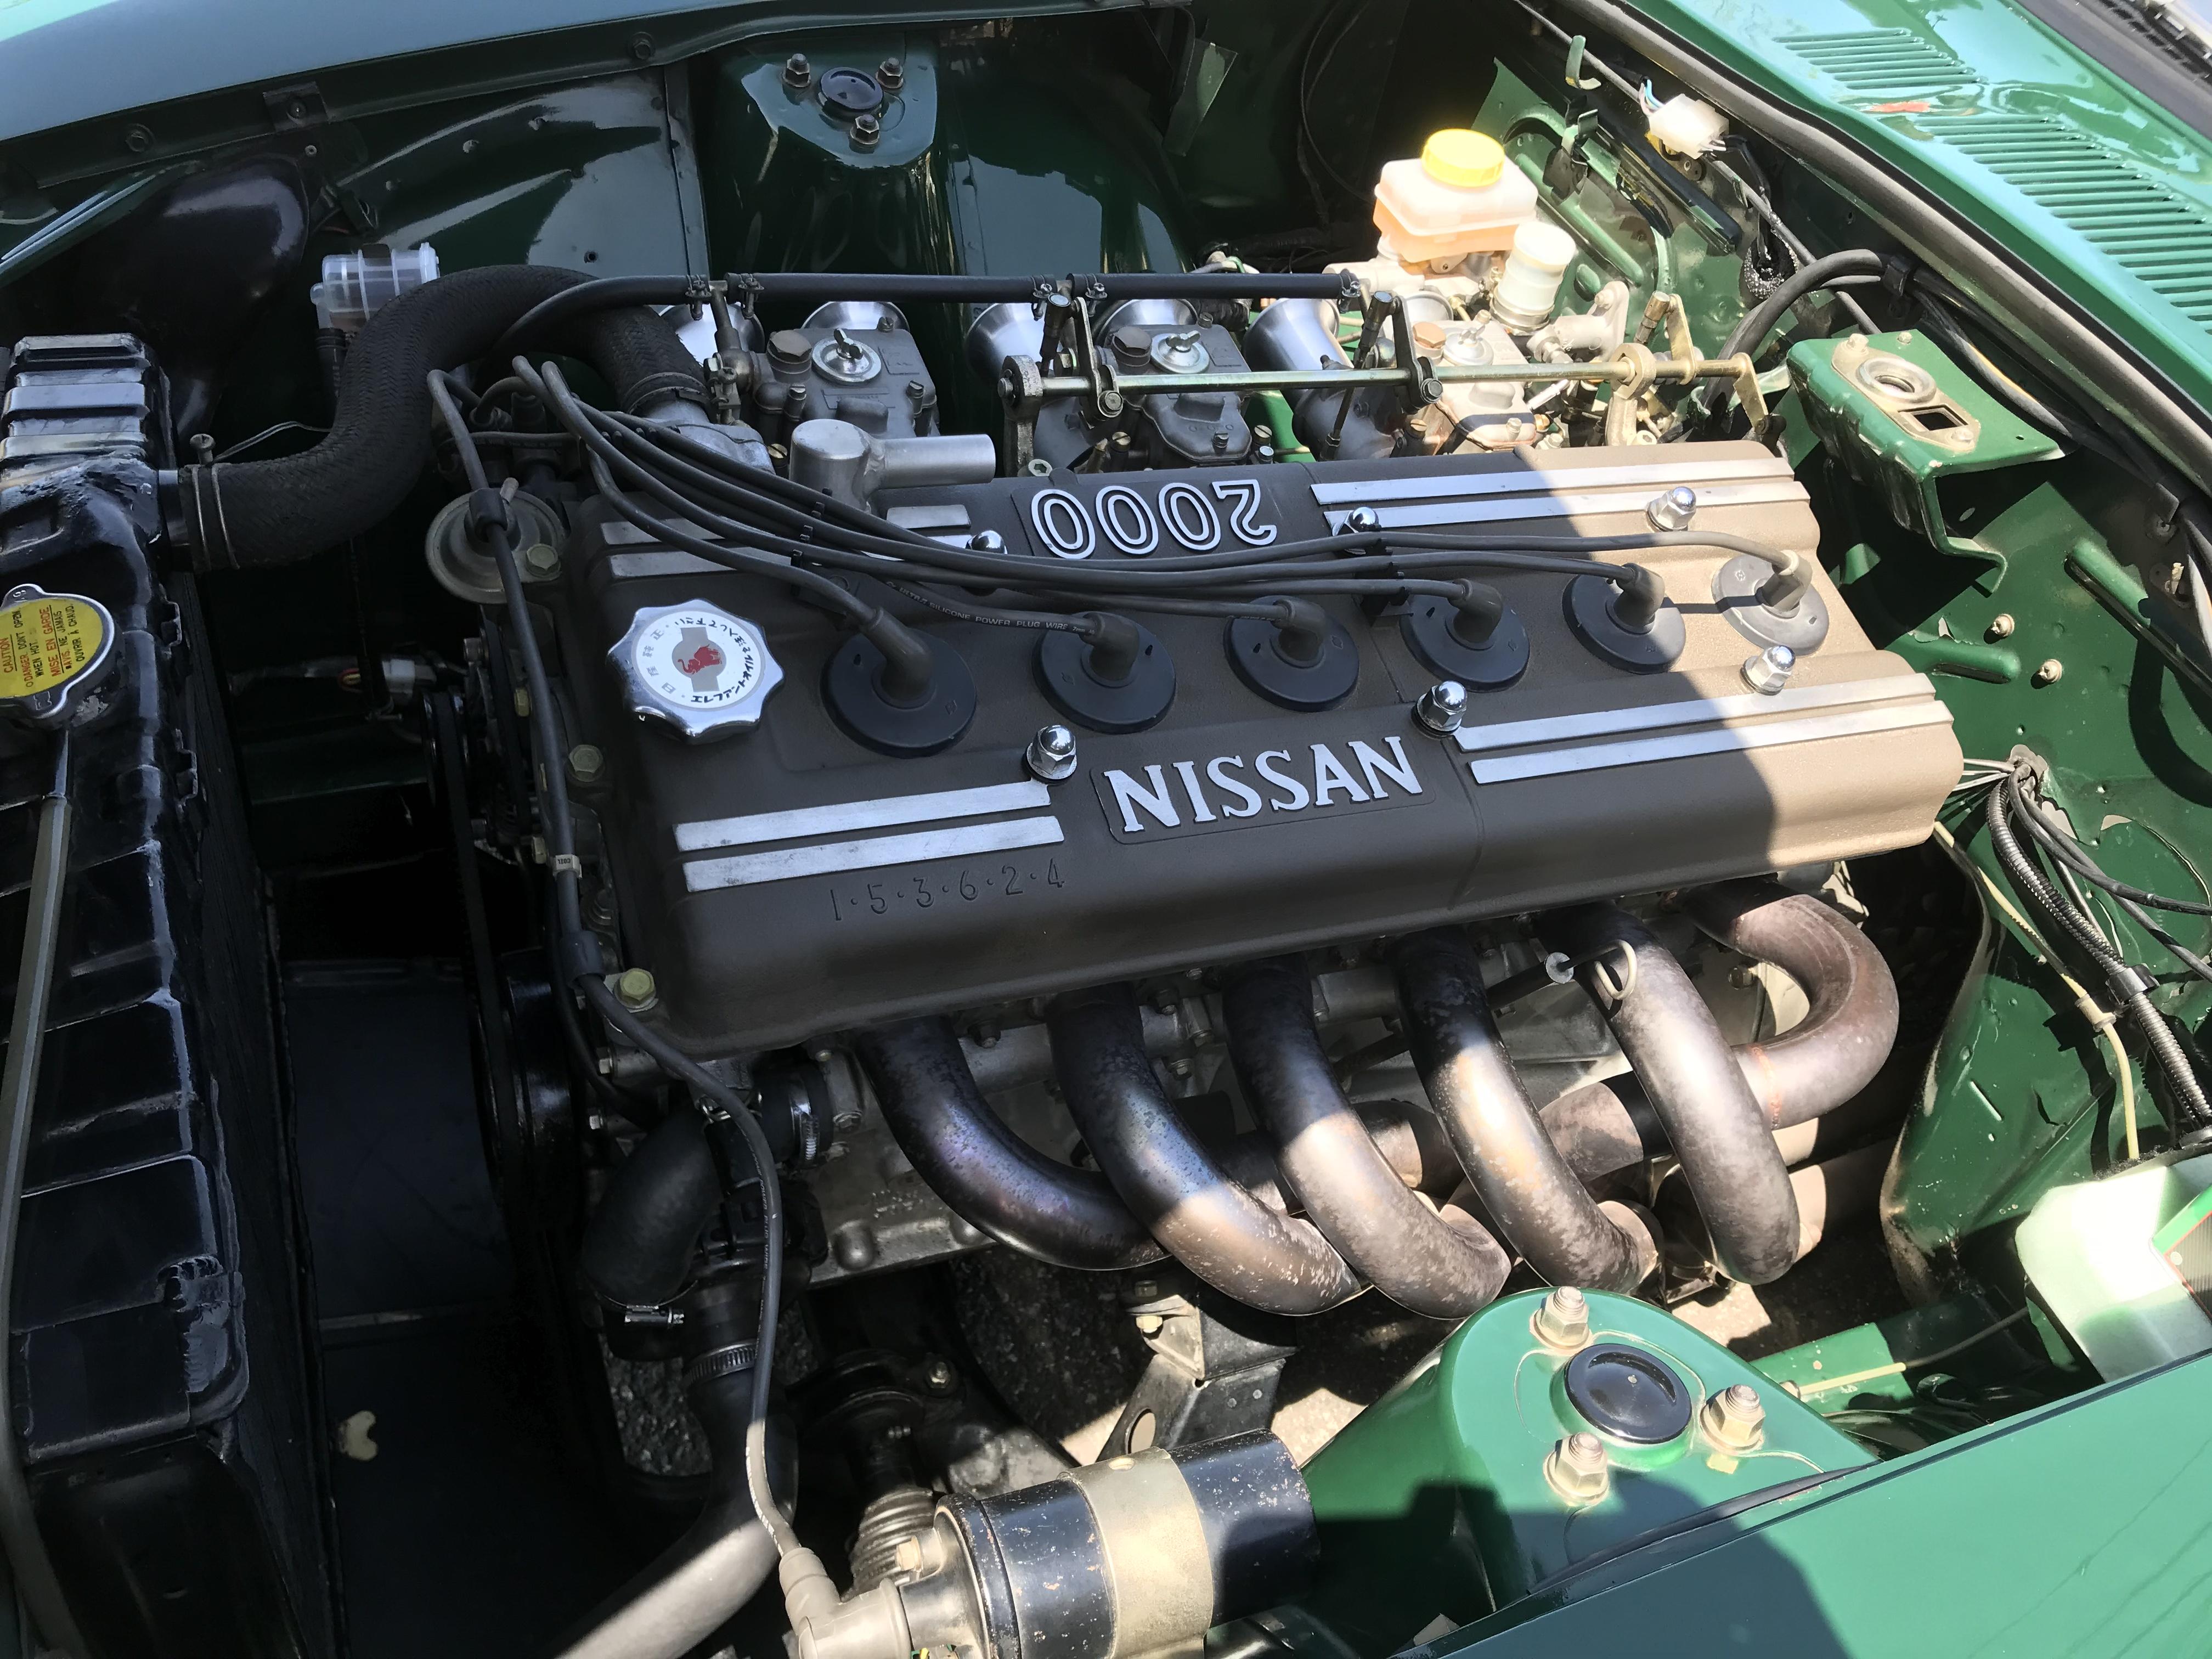
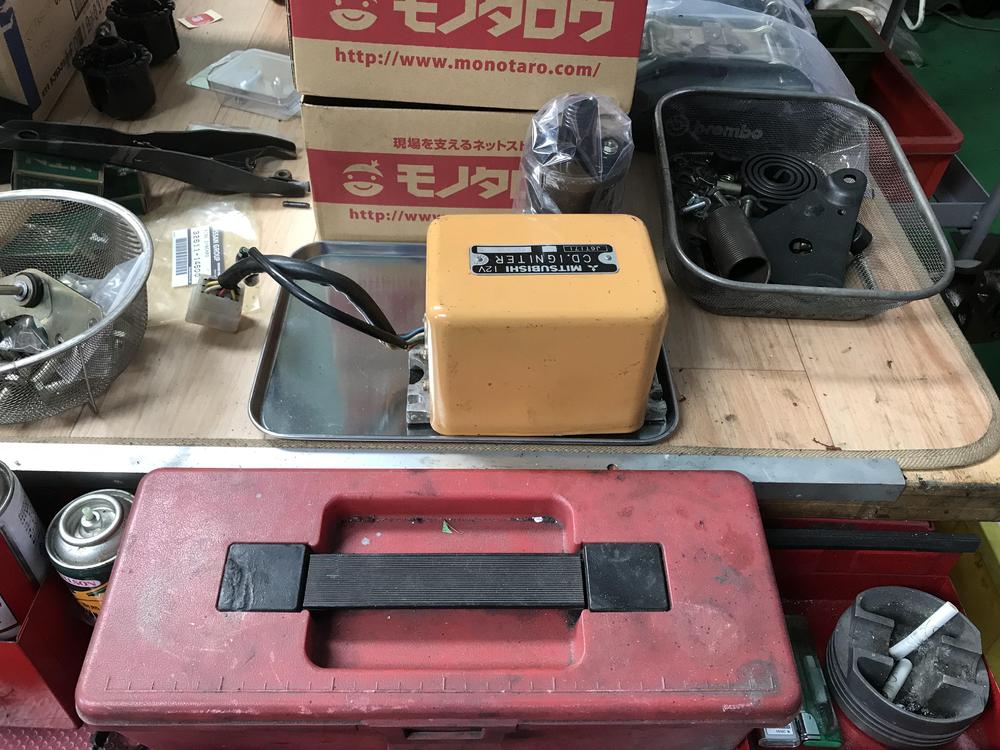
1 pointHi moelk , you nailed it ! Maybe an aerodynamics policy ? Alan , you have everything ! ! The electric water pump is totally unique for me, Mr. Watanabe really likes “ less weight , more power “ for everything. Kats1 point
-
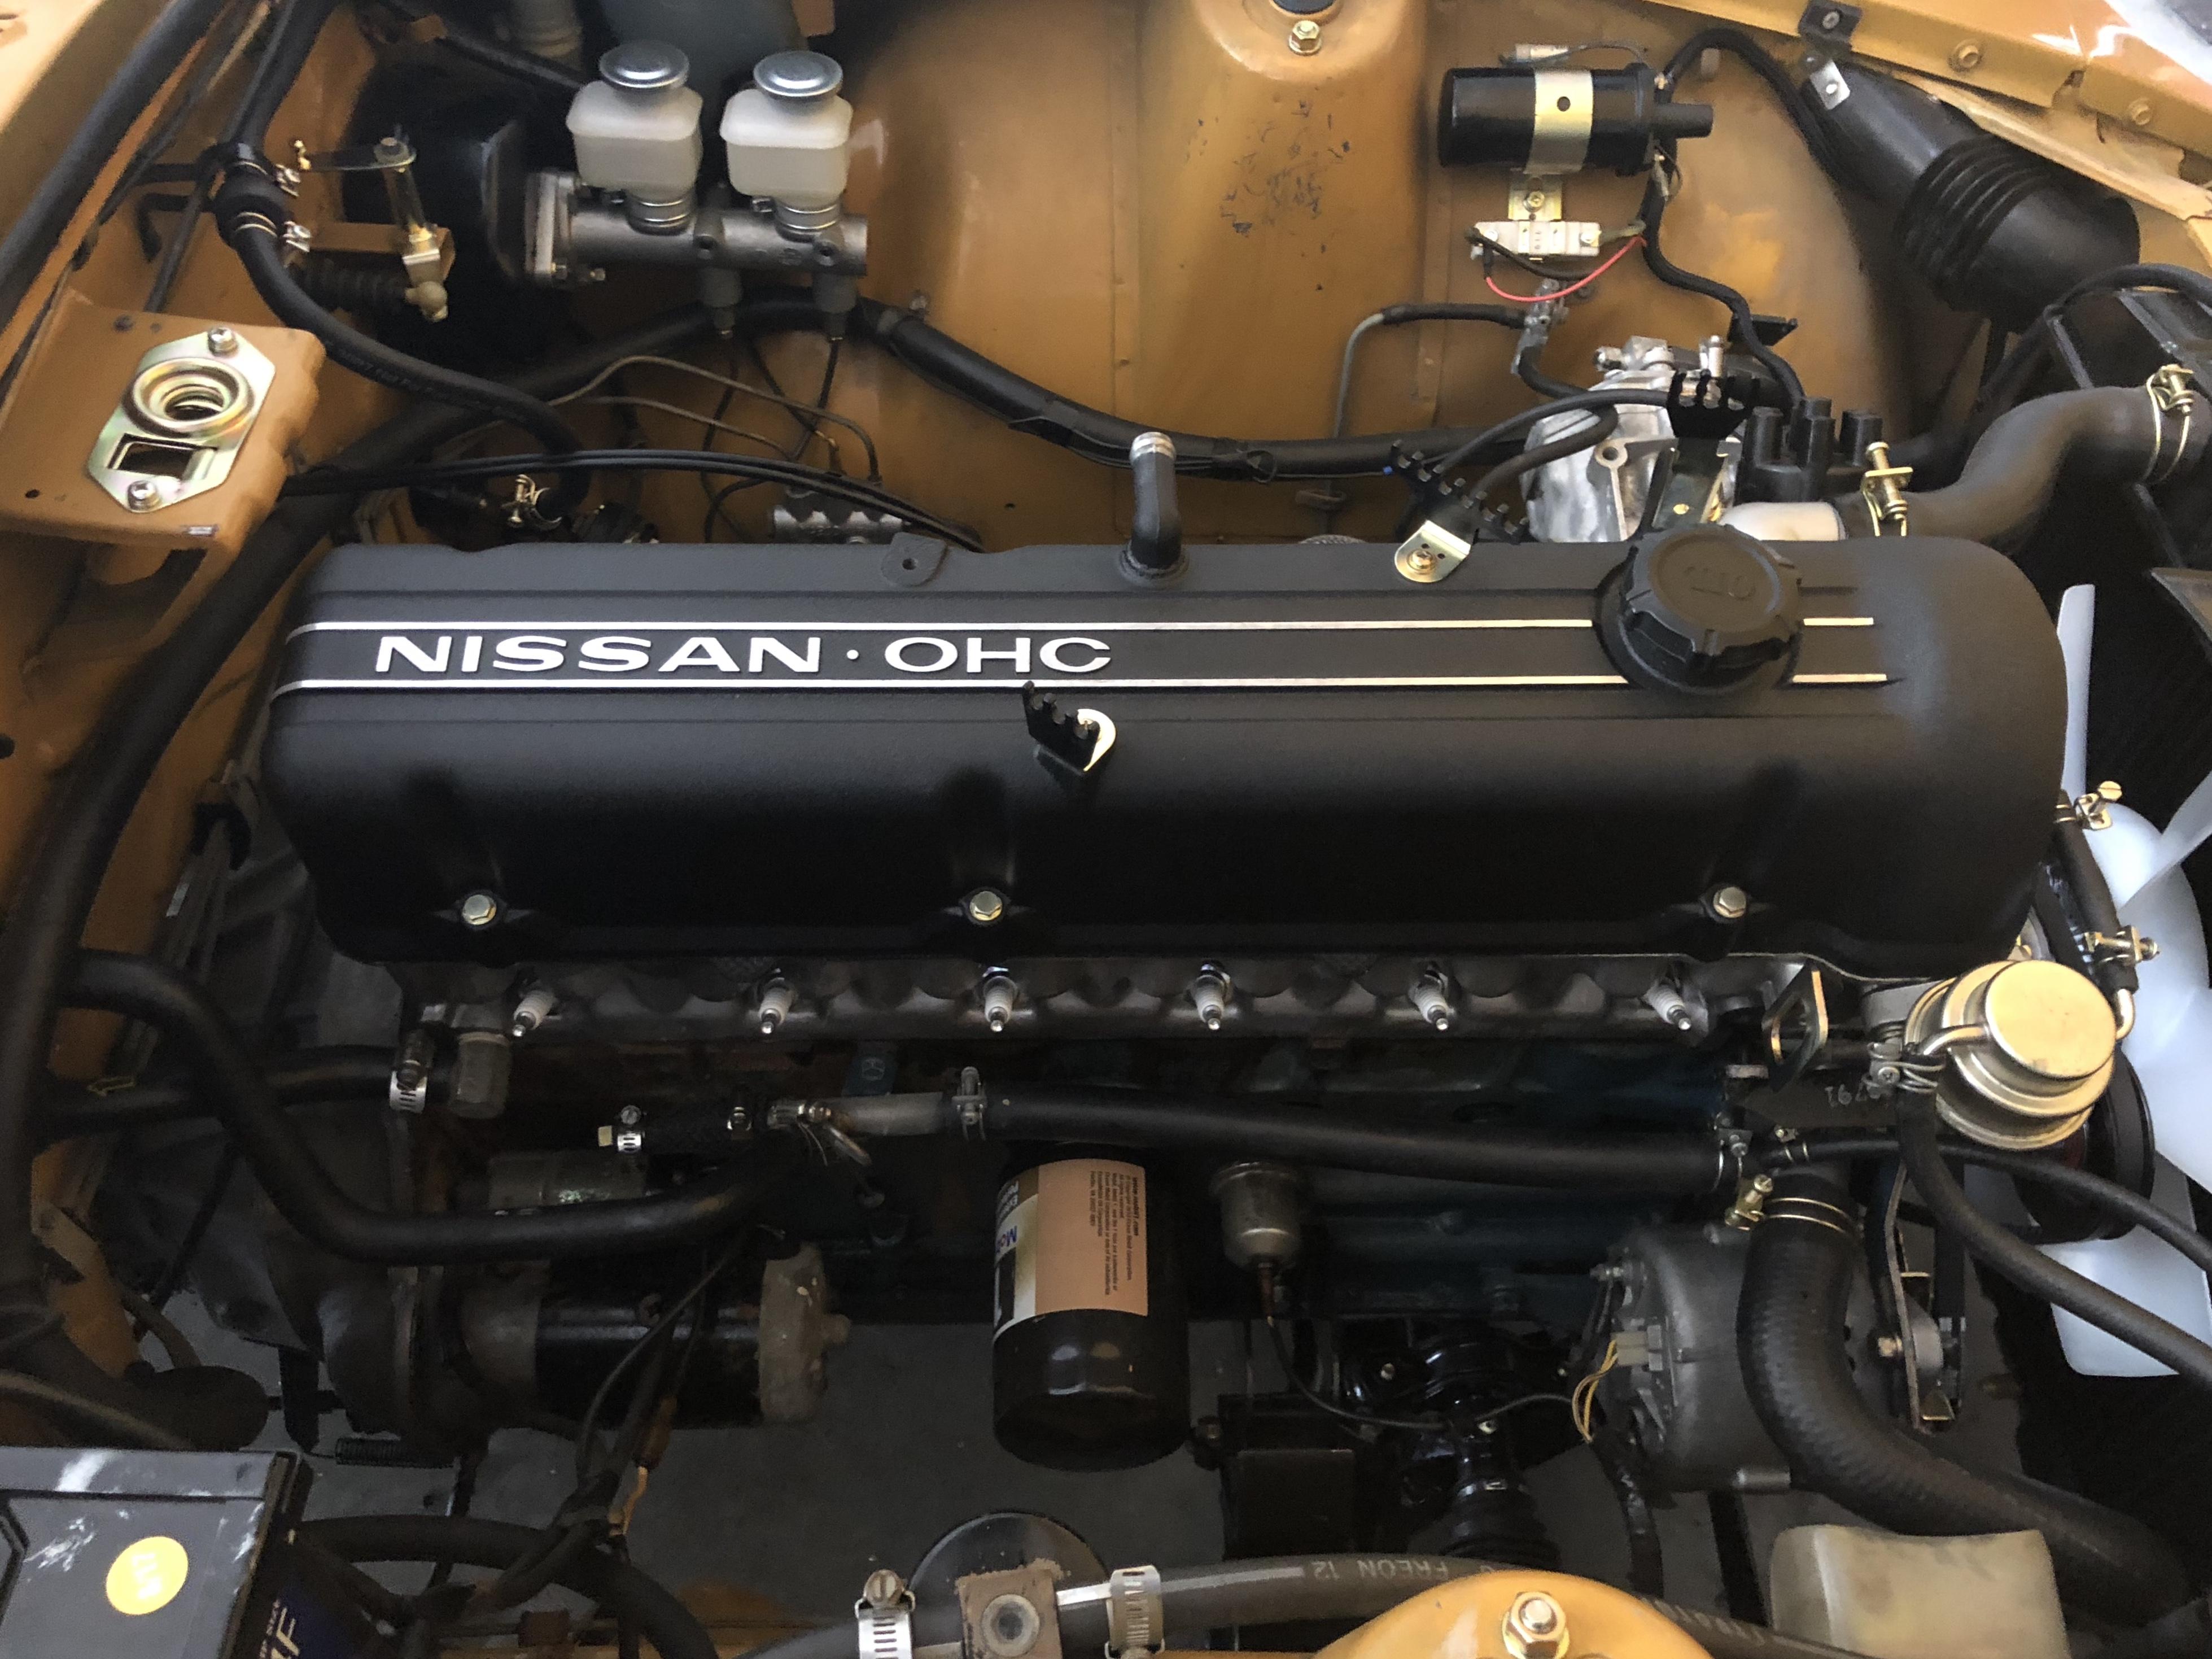
1 pointStock water pump delete! Love the 'Orange Box', and the Magnesium valve cover must be a Works item. Fantastic!1 point
-
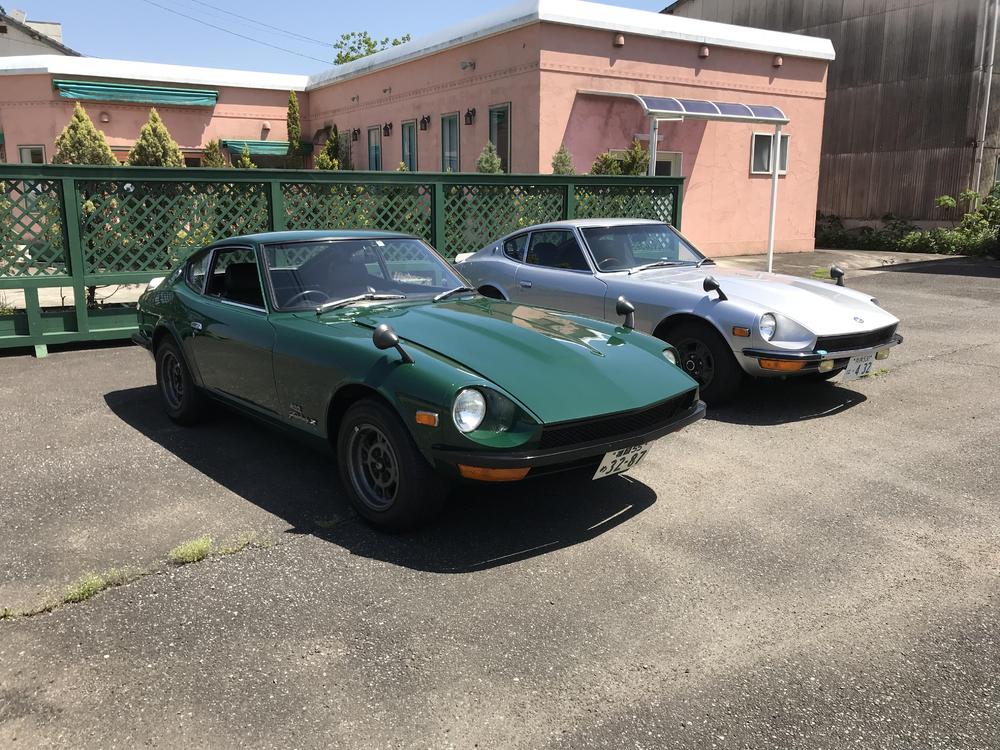
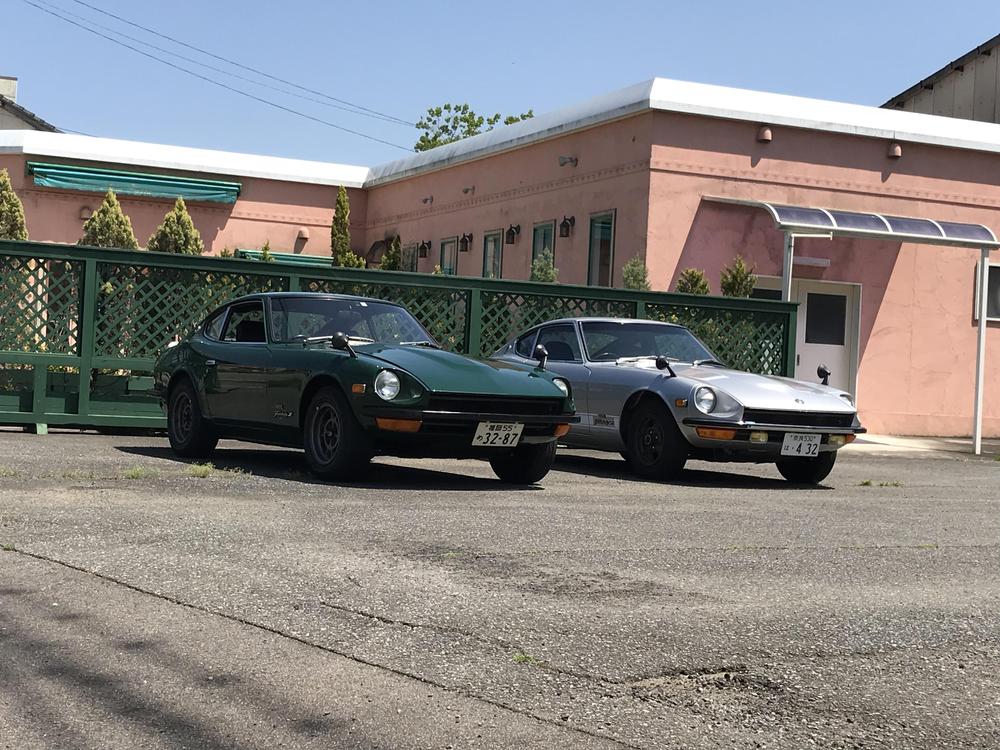
 1 pointLove the rally wheels, i really want a set for my car. Fantastic looking cars...... looks like the green car have the drivers side marking lamp mounted 180 degrees wrong ; ) //Andreas1 point
 -
1 pointNissan Sports/Race Option exhaust manifold! Just like mine. Hand made! Lovely...1 point
-
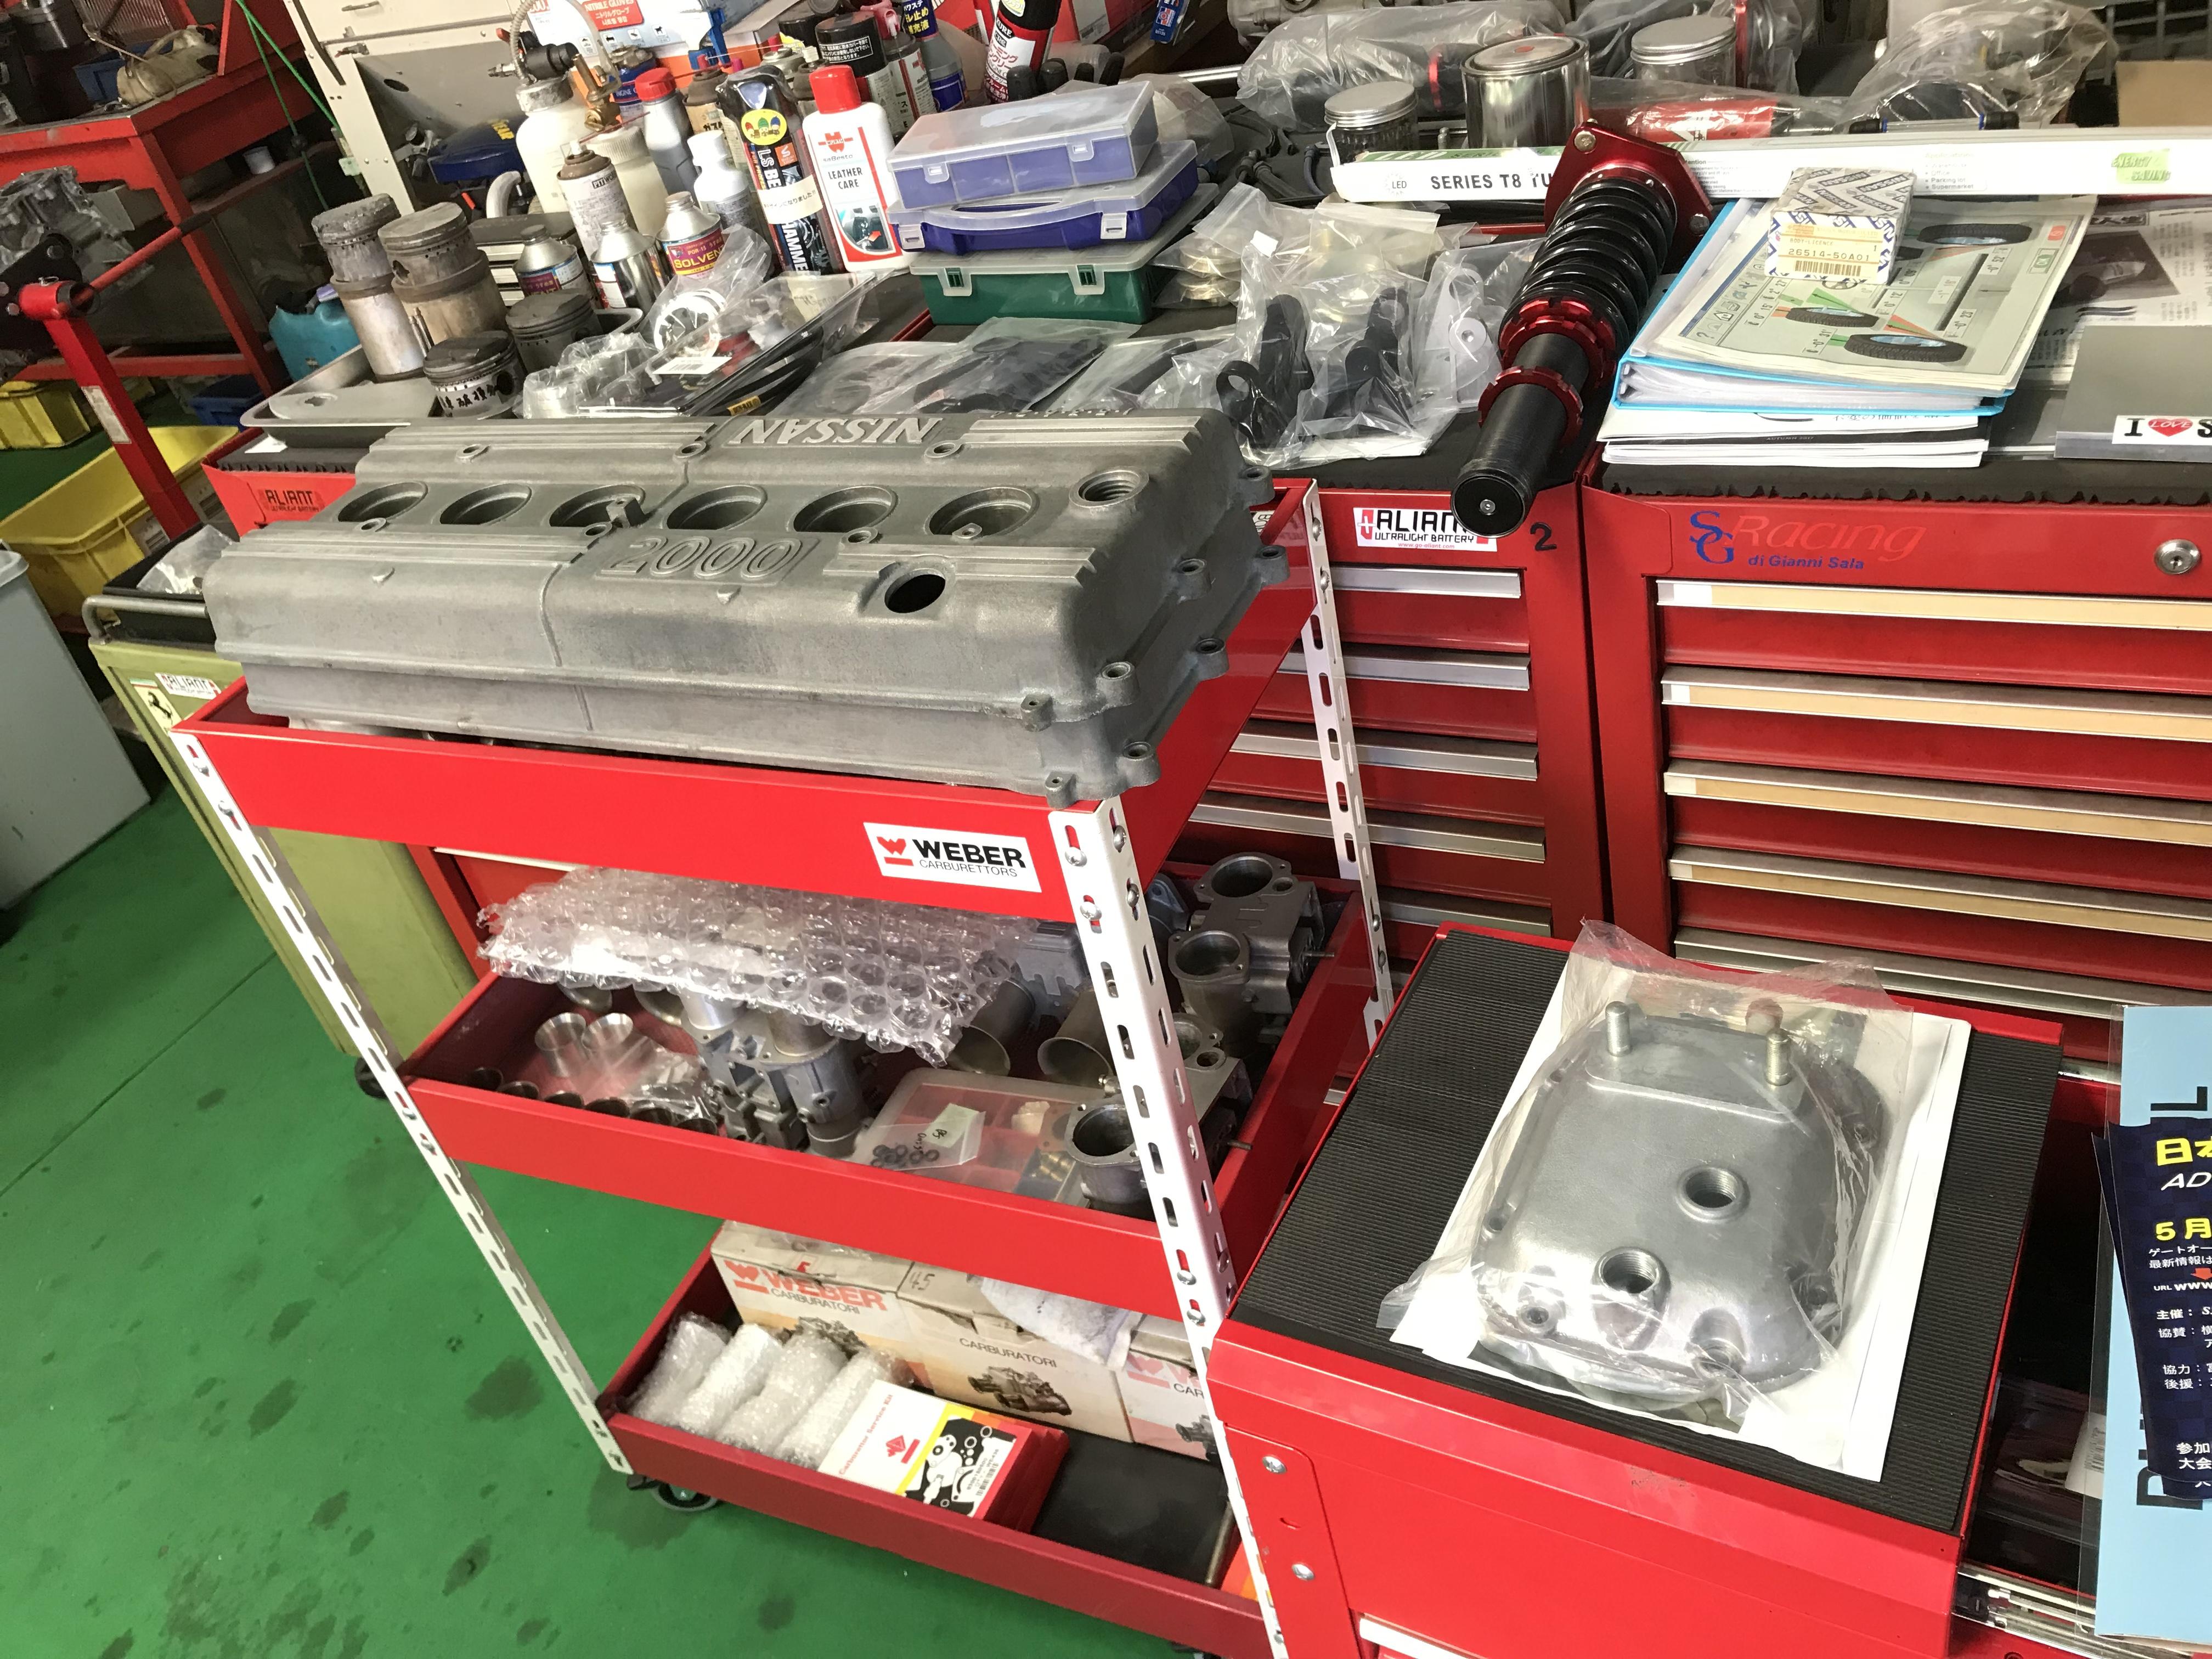
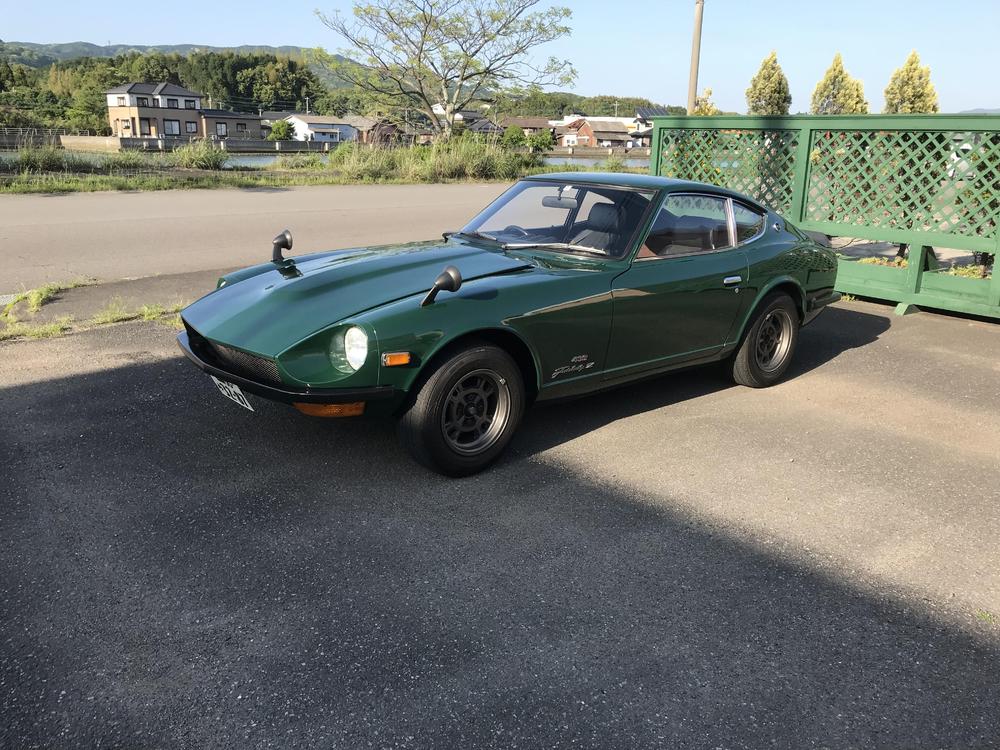
1 pointI am glad that my car has got its engine tuned by Mr.Watanabe , float level ,ignition timing , spark plugs, and carburetor balancing. The S20 became so much smooth, and sounds beautiful. I met Mr. Mouri , his green car was built by Mr.Watanabe , 250 bhp and FRP body panels all around . And it’s got real rally magnesium wheels !! It is daily shoes for his car , yes the car is his daily driver. Oh, and you see the valve cover , that is made of magnesium too. Kats


 1 point
 -
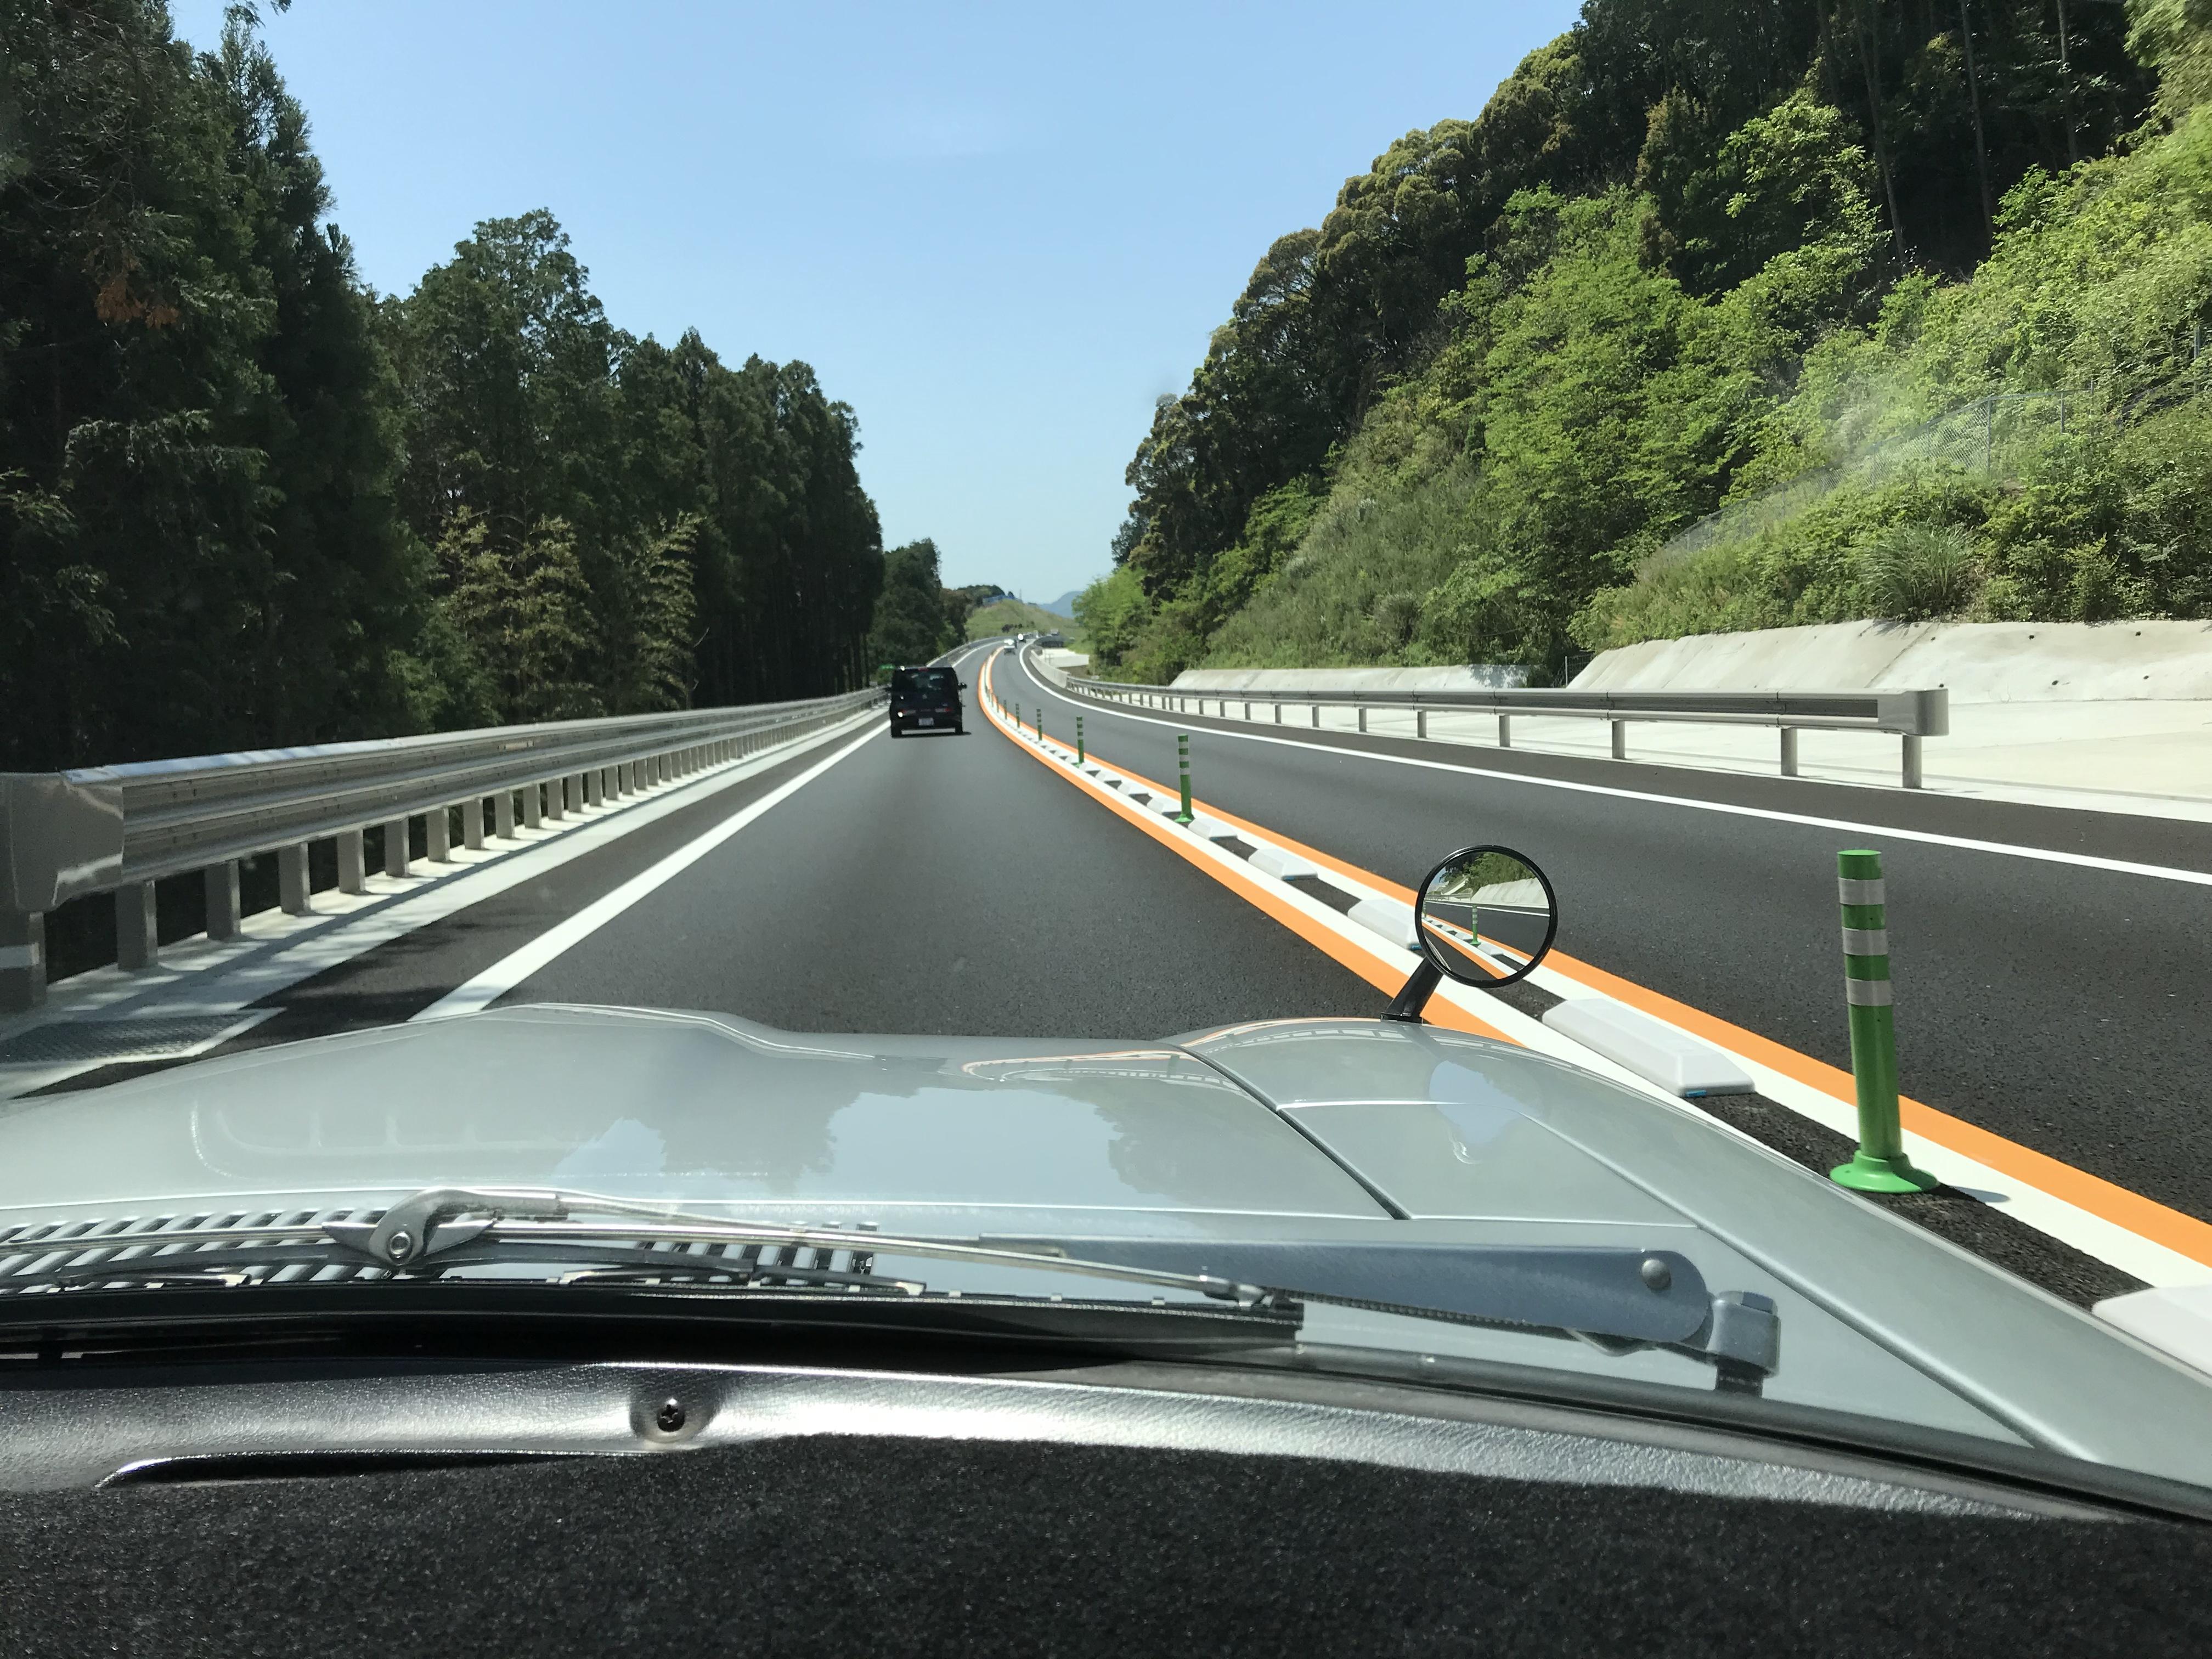
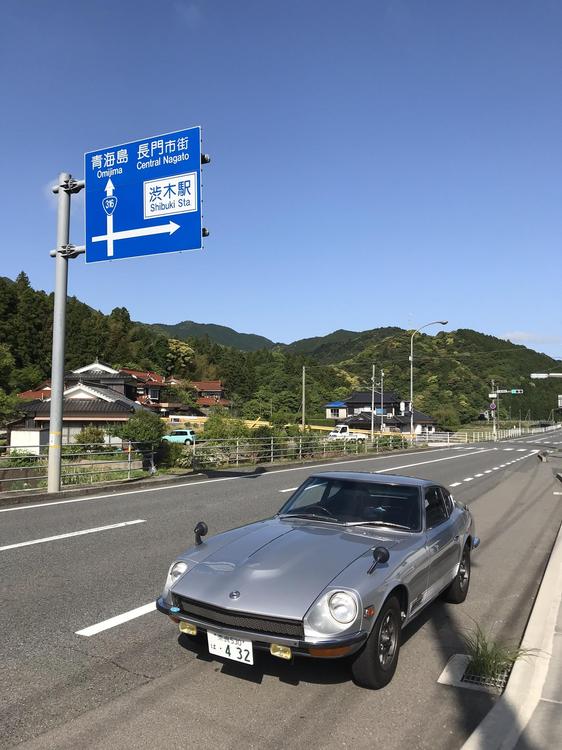
1 pointHi , Recently I tripped 3600 km for total with in two weeks .First , I took my 180SX heading north to my mother’s house then took my orange 240Z to my house, that was 1800 km trip. Weather was not good , but 240Z’s AC worked quite good , and automatic transmission was easy when I was in a traffic jam . And today I have just arrived home, I have been to the heaven, S20 heaven . It was also 1800 km trip , I took my Z432 just to show it to the master , Mr.Watanabe . Kats
 1 point
 -
1 pointWorks rally car identities, race entries, crews, start numbers and all the rest of it are a real minefield. Lots of the photos you can find on the 'net are mis-captioned or don't tell the whole story, and even some of the protagonists themselves don't remember as well as would be ideal... Case in point is with Shekhar Mehta on the 1971 and 1972 RAC rallies. Both times he was in a car with start number 26, but they were different cars that often get mixed up. The car he drove on the '71 RAC had also been a 1970 RAC Rally car, so plenty of scope for confusion. Big topic.1 point
-
 1 pointThanks Alan, it was the only information I could find on that registration. I was wondering what the "vinyl" roof was all about.1 point
 -
1 pointHey Kats, That wheel pic reminds me of this (what I assume is a "works rally 240z" with the Kobe Seiko Magnesium alloys and white wall tyre). I found this photo on an eBay listing. Never seen it before. I quite like the look.. Driver: Mehta Shekar Rally: Tour of Dean 09/01/1972 Co-Driver: Holmes Martin V W REG: TKS 33 SA4541 Start: 26 Sponsor / Entrant: Withers Castrol Based on this: http://www.thedeanrallies.info/images/stories/M_-_R.pdf
 1 point
 -
 Just unscrew.. leave 'em in and take the housing off. The bolts don't come out. If there is not enough place, maybe your enginemount is defect and the engine is tilted to that side.. there should be enough place to get it out.. can't believe i answer these questions..1 point
 -
1 pointI got the newer type spray bar back from being sonic cleaned and got the valve cover installed. Wow I love the black and zinc look. This is Prismatic powder coating PWS 4344 Splatter Black
 1 point
 -
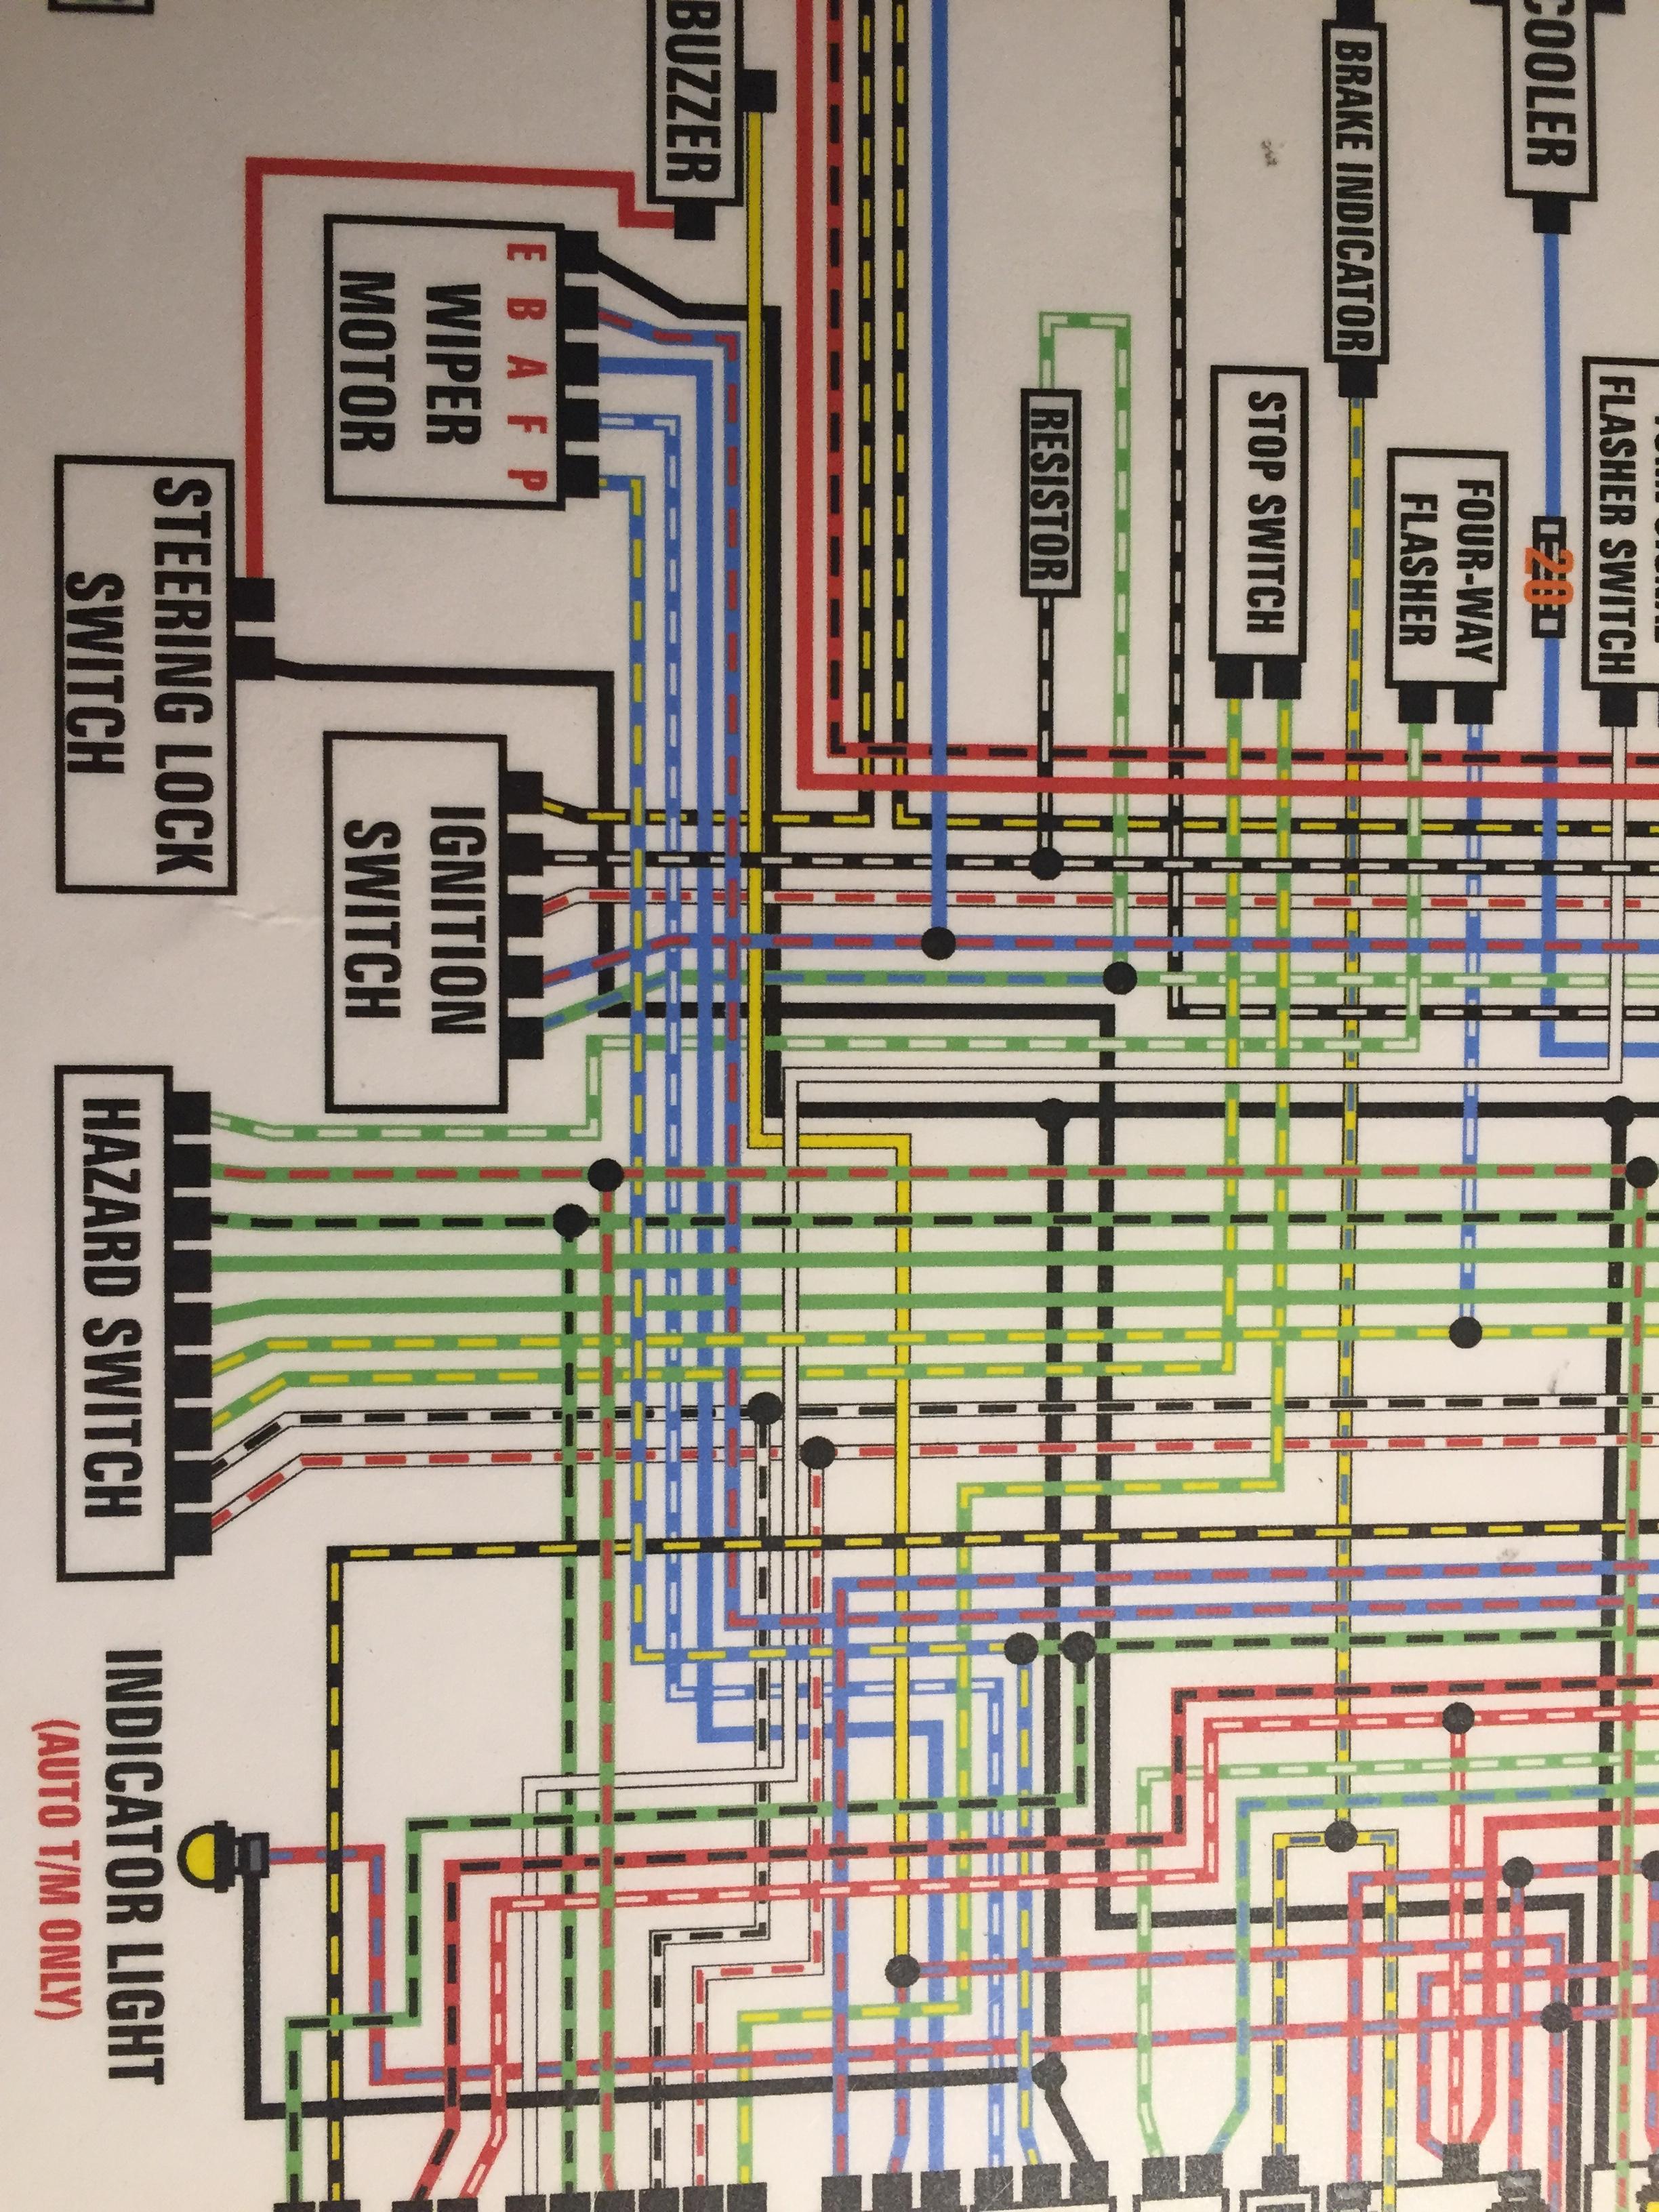
 1 pointHere is a photo a wire diagram I have used for sometime now. Here is a section that shows the Hazard and ignition switch area and shows a Green/white wire. Maybe it will help. Could that connector go to the Flasher?
 1 point
 -
 1 pointGotcha. So when you go back, pull off the brake master cylinder first. Easy-peasy and no flight suit required. Easy job up in the engine compartment. Once the M/C is off, take a look at the area where the master bolts to the booster... If it's clean and dry inside and not wet with brake fluid, then we're a GO. If it's all rusty and paint a-peelin from brake fluid, then just leave it. But if it is clean and dry, then the rest of the work is done down by the pedals. One pin with retaining clip, and four nuts. I've been able to reach all that stuff kneeling outside the car. I haven't had to resort to laying down face-up on the car floor. Not that bad. A bad day at the junkyard beats a good day at work. And much thanks if you grab one for me!!1 point
 -
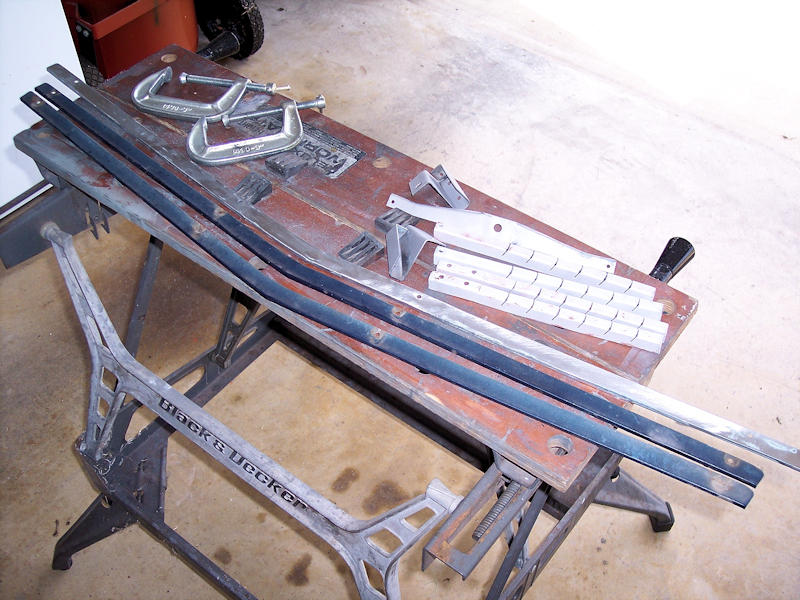
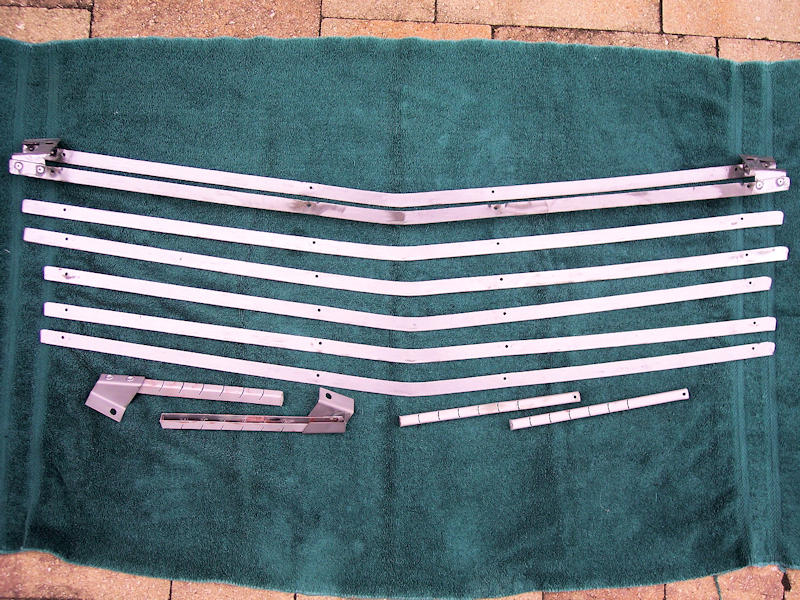
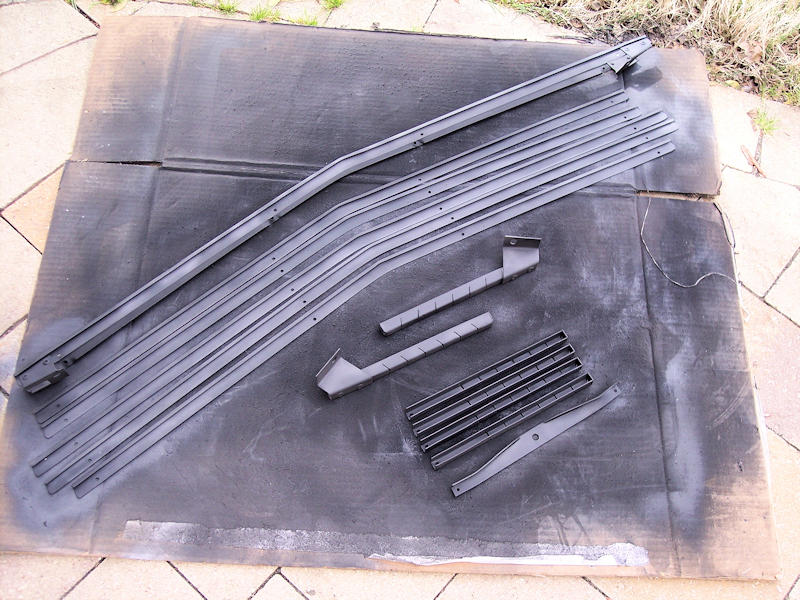
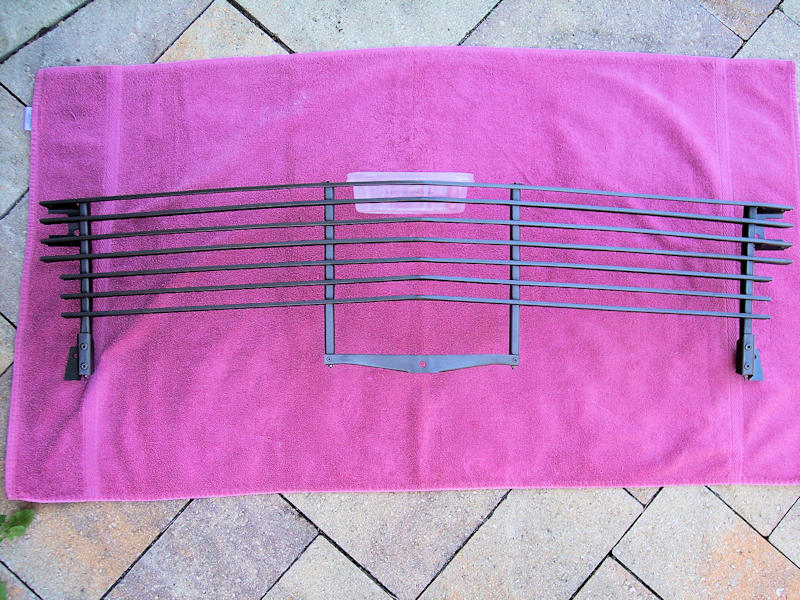
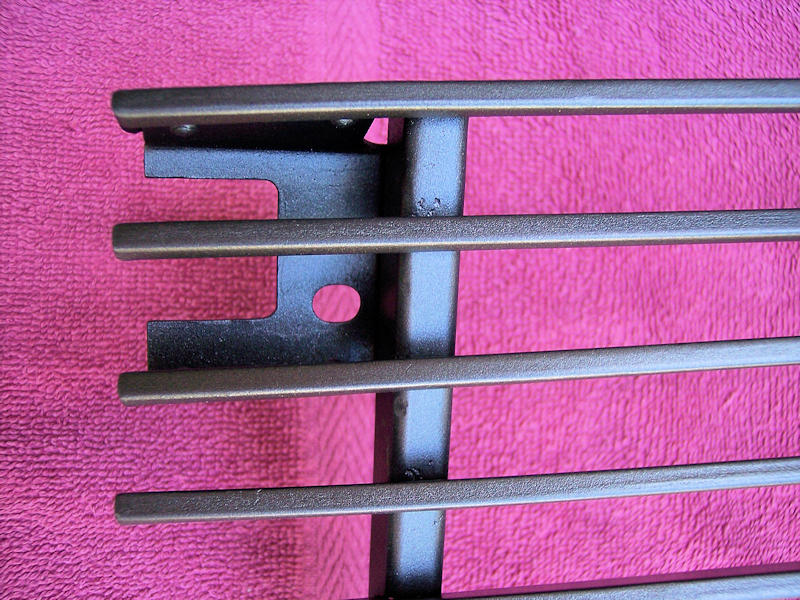
 Not my car but one of my R&R (Rescue & Refurb) projects: a 240Z grill retrieved from a salvage yard car. Full disassembly, damaged vertical struts were replaced with parts purchased from another member, stripped to bare metal, multiple primer coats. wet sanding, assembly, color and clear coats. Whew! This one will go up for sale at some point. Many thanks to @CanTechZ for all the research on the OE-like finish for the grill and rear finisher, see this thread:
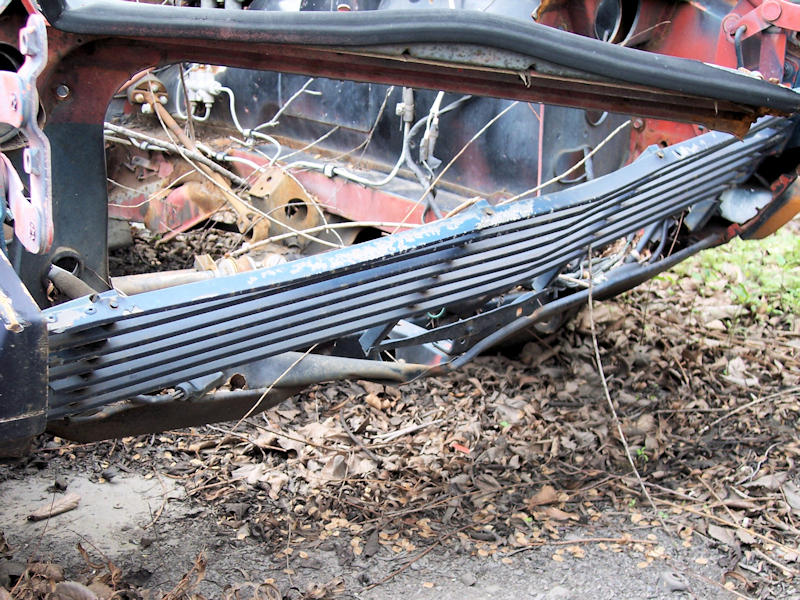
 1 point
 -
 1 pointCapt Obvious that was some impressive research on the TVV. You are a true lover of these cars....thanks for that. So I got my fuel tank back today ($350 later) they had to redo the entire boiling and sealing process. Will install when I return to Memphis on Sunday. I’ve debated pulling the rear bumper off now with the tank out but I’ll still have that drip edge that welded that might look odd. You guys think I should pull the bumper now or wait and pull the tank at a future date. I’m hoping the car starts with a fresh tank and clean fuel. If it doesn’t I’ll need to serious help as what to do next.1 point
 -
1 pointKats, I have had SO many people over the years tell me that my ZG was "damaged" or "wrong" because of this detail. They haven't seen genuine OEM parts before. I was always reassured to see 'the gap'. It was a semi-secret way of telling OEM parts from replicas. Thank you!1 point
-
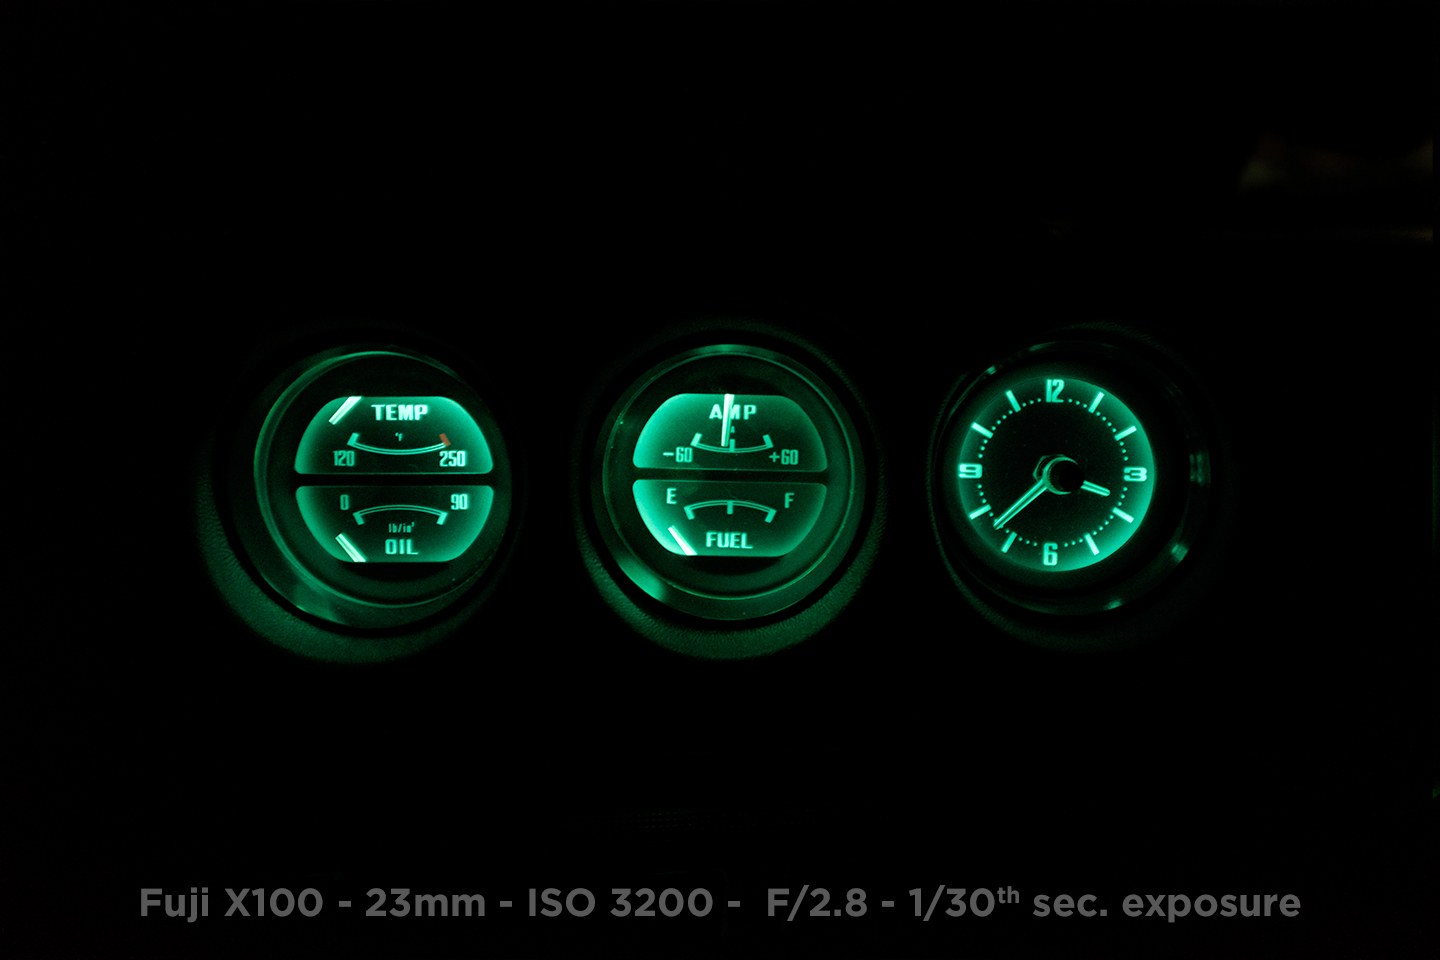
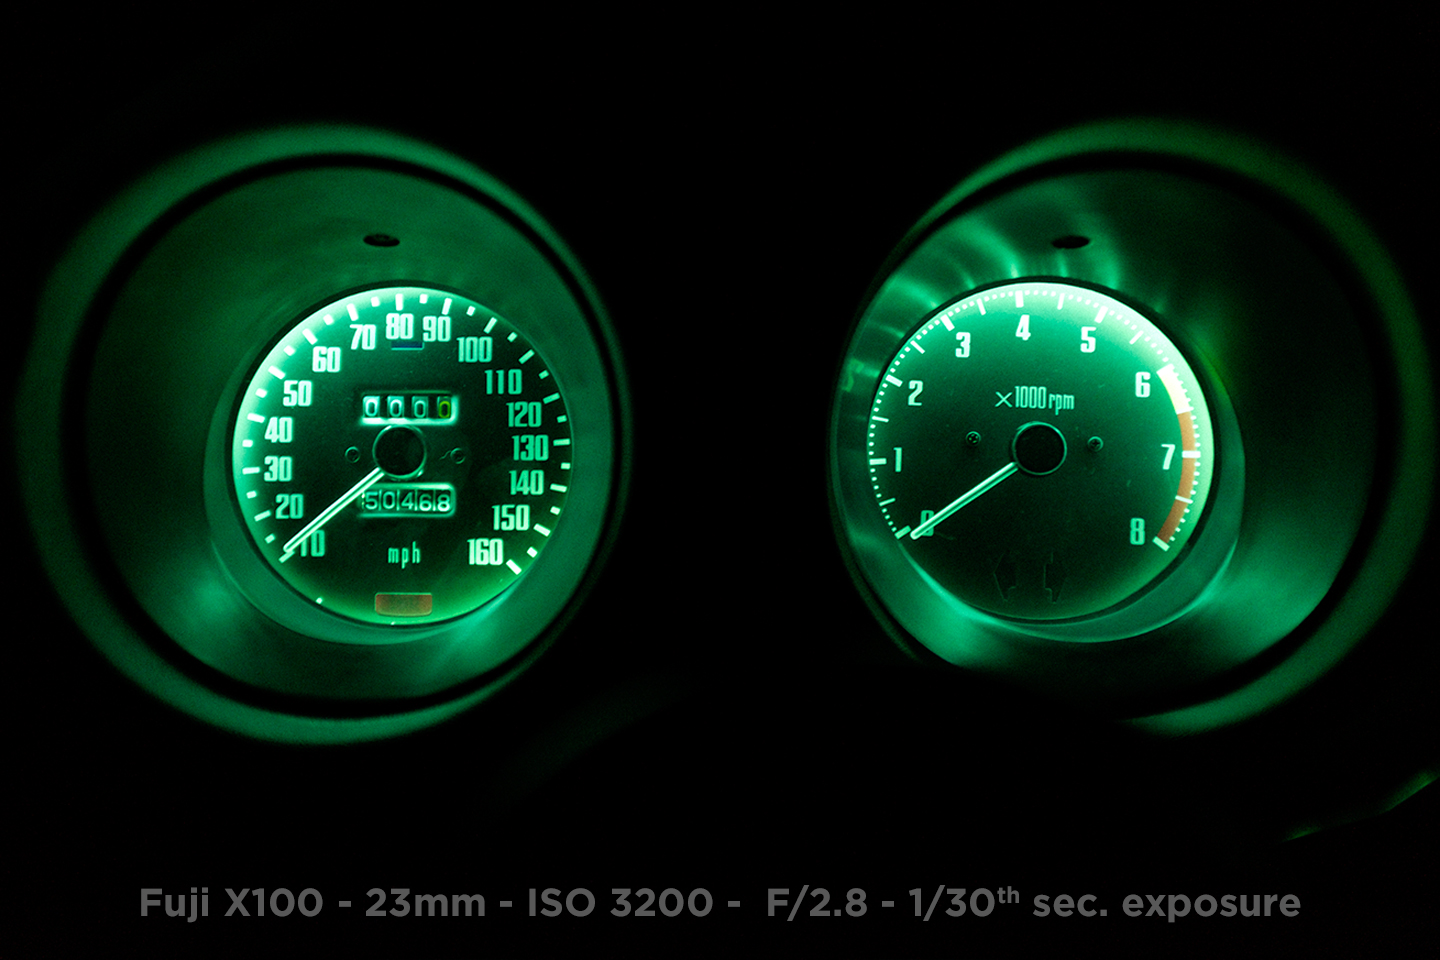
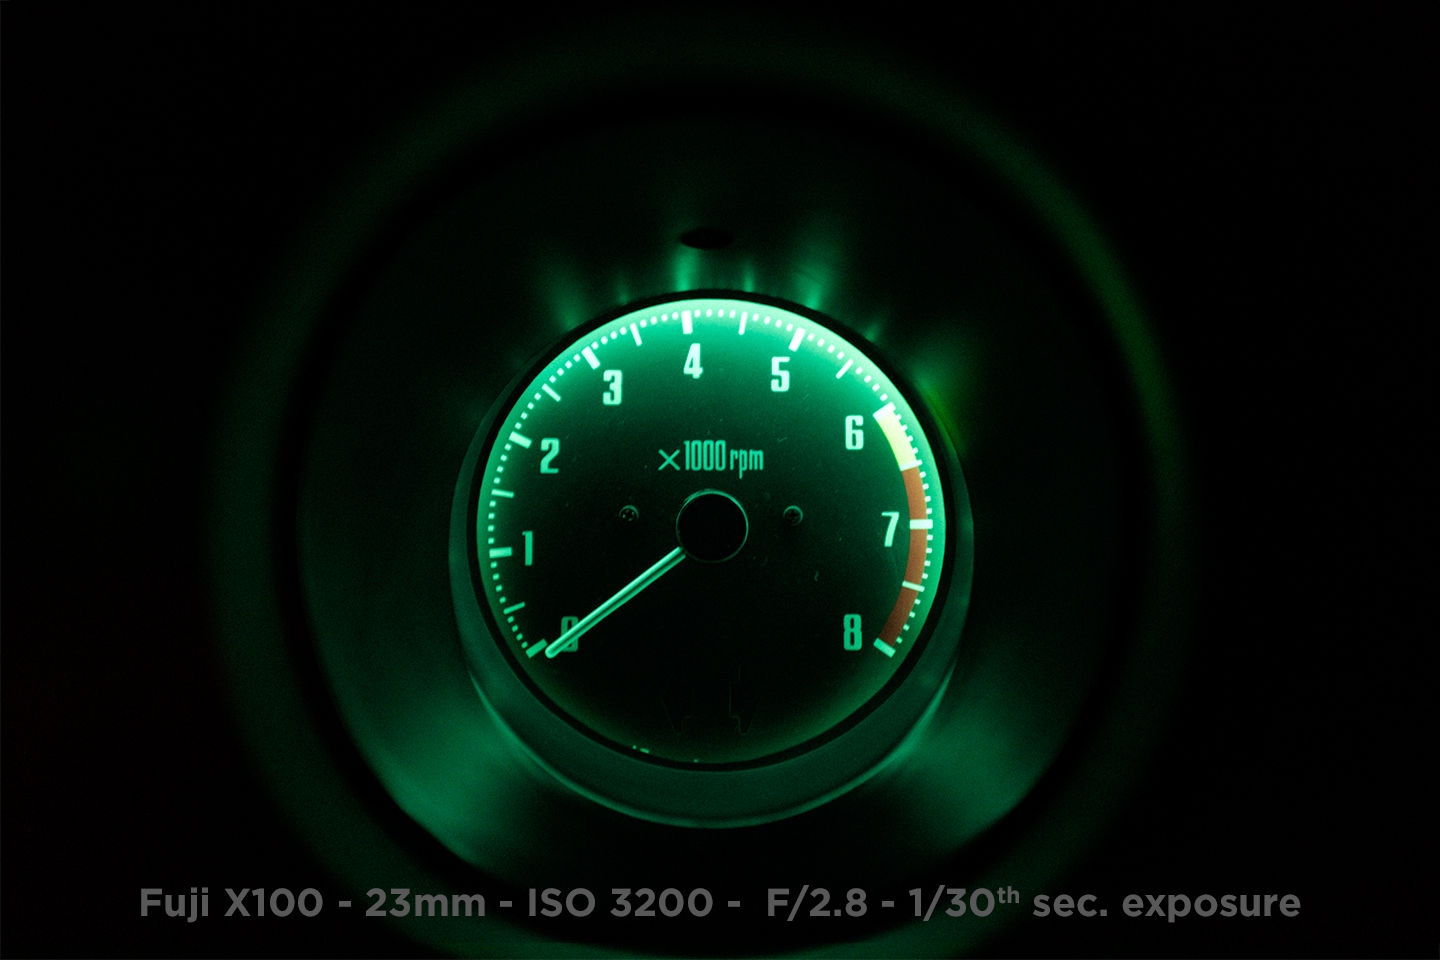
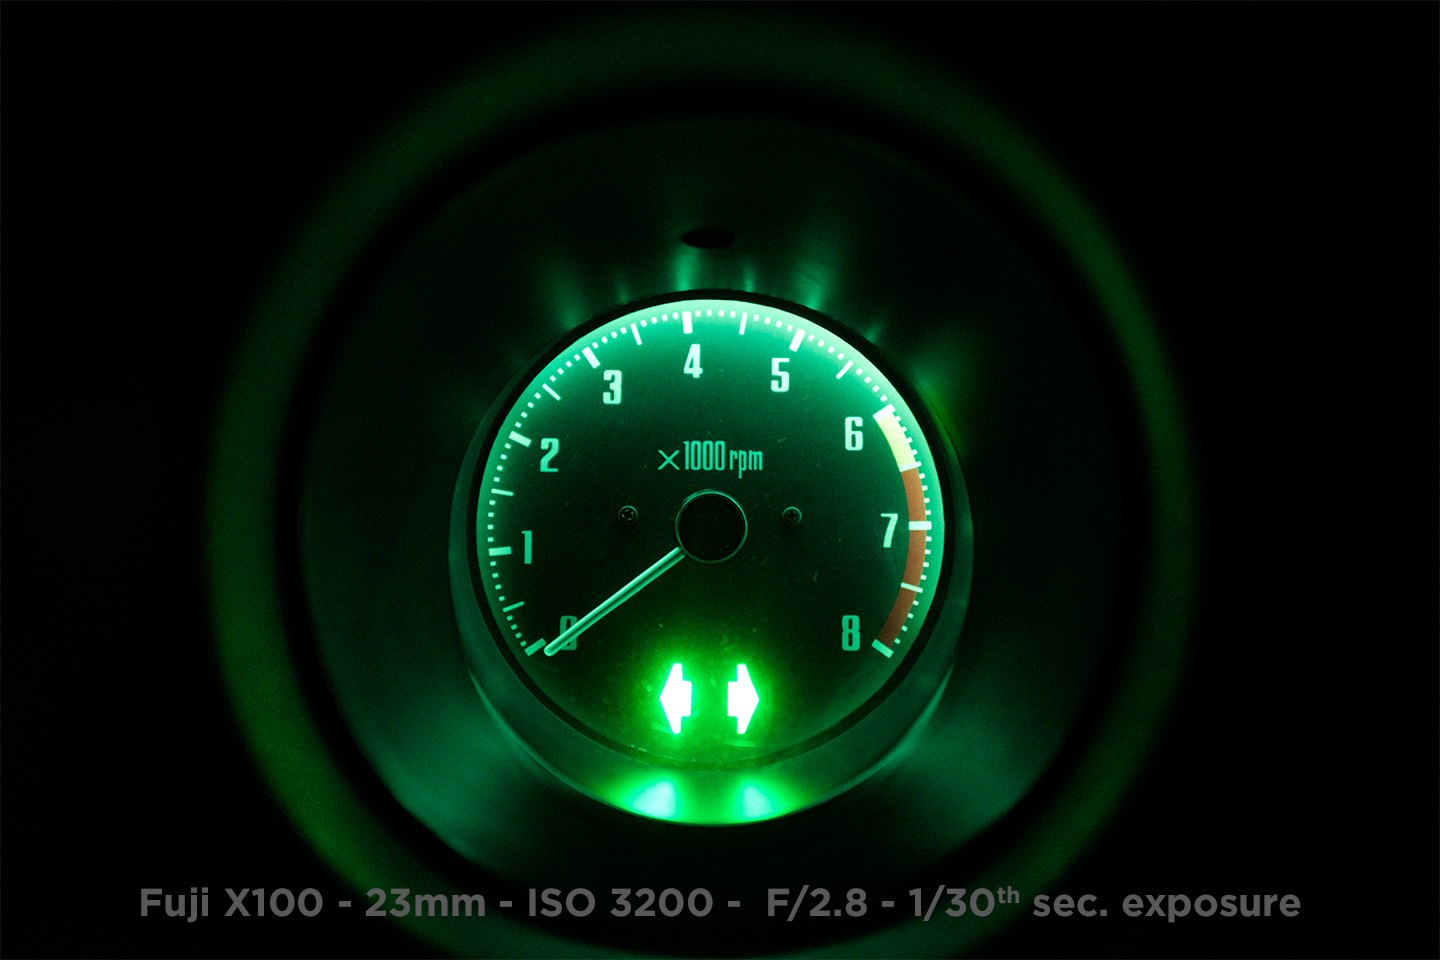
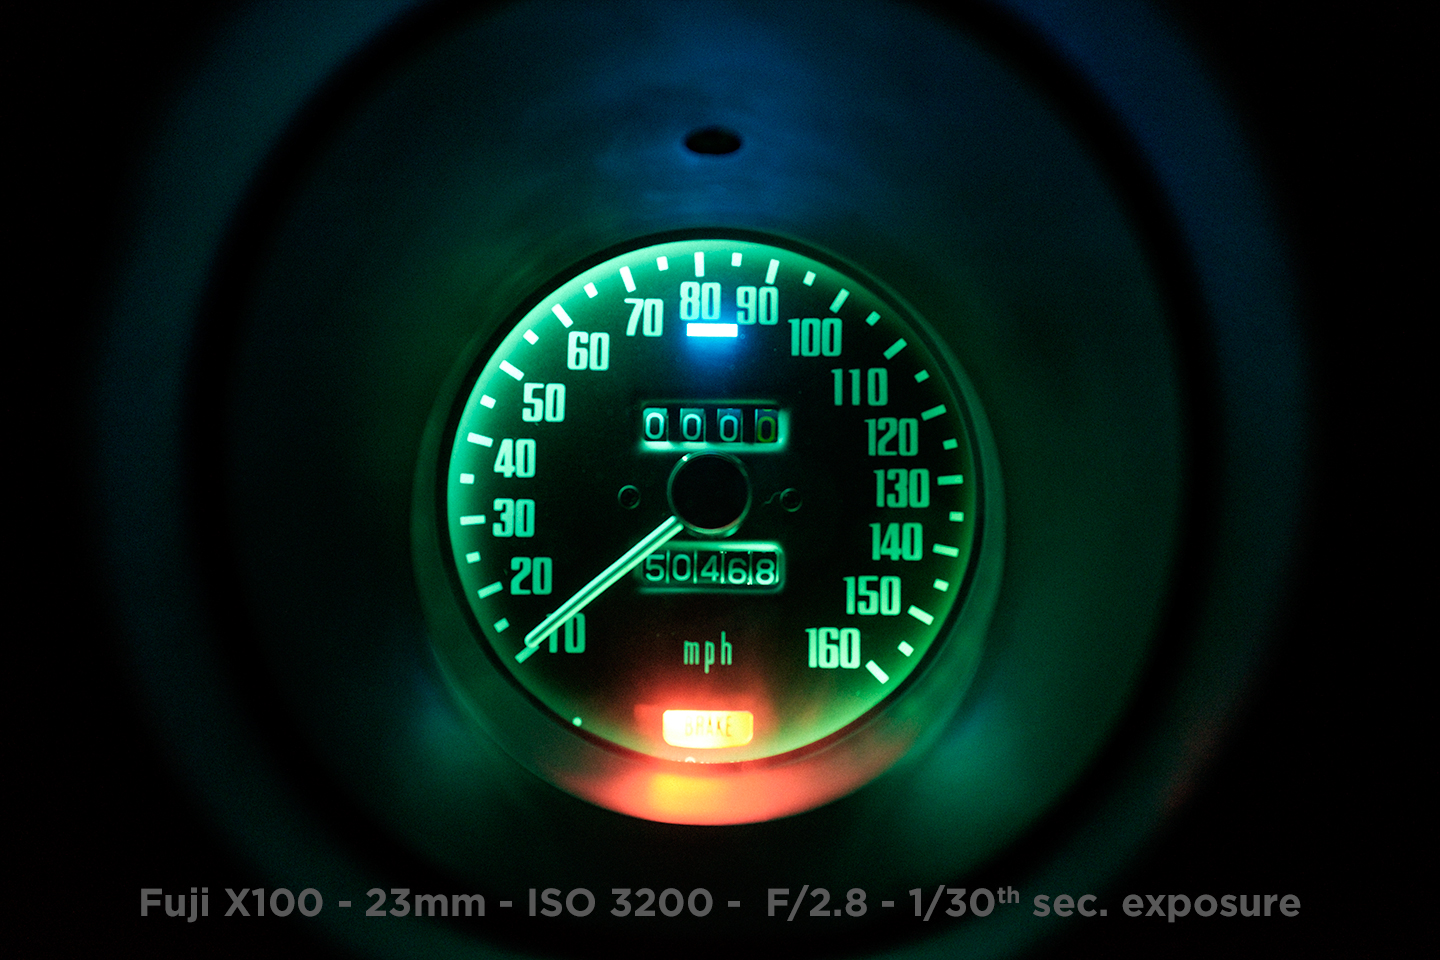
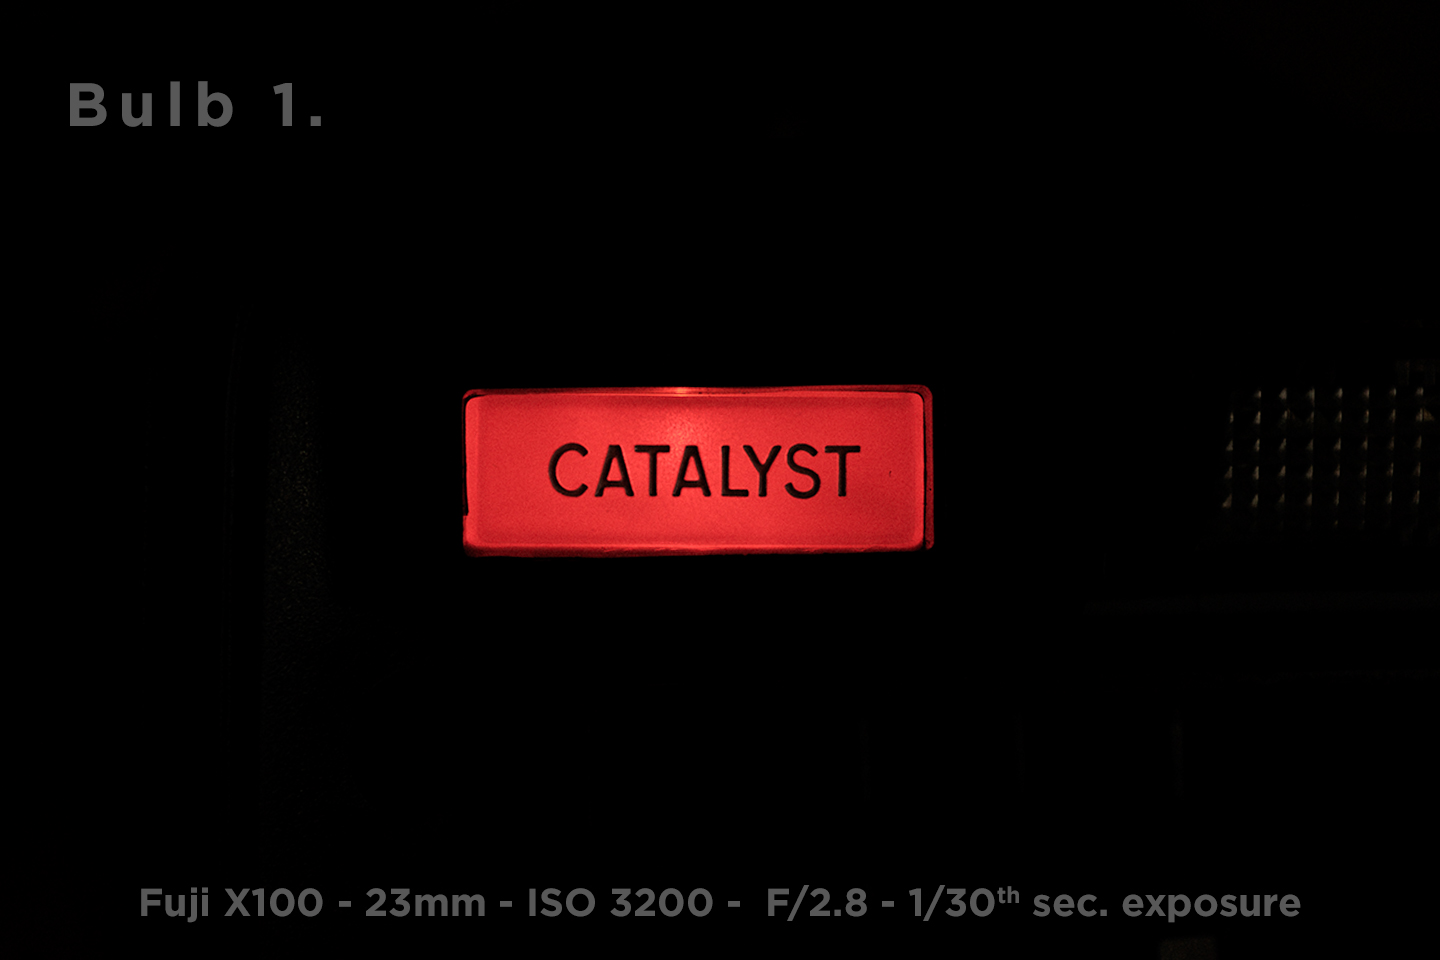
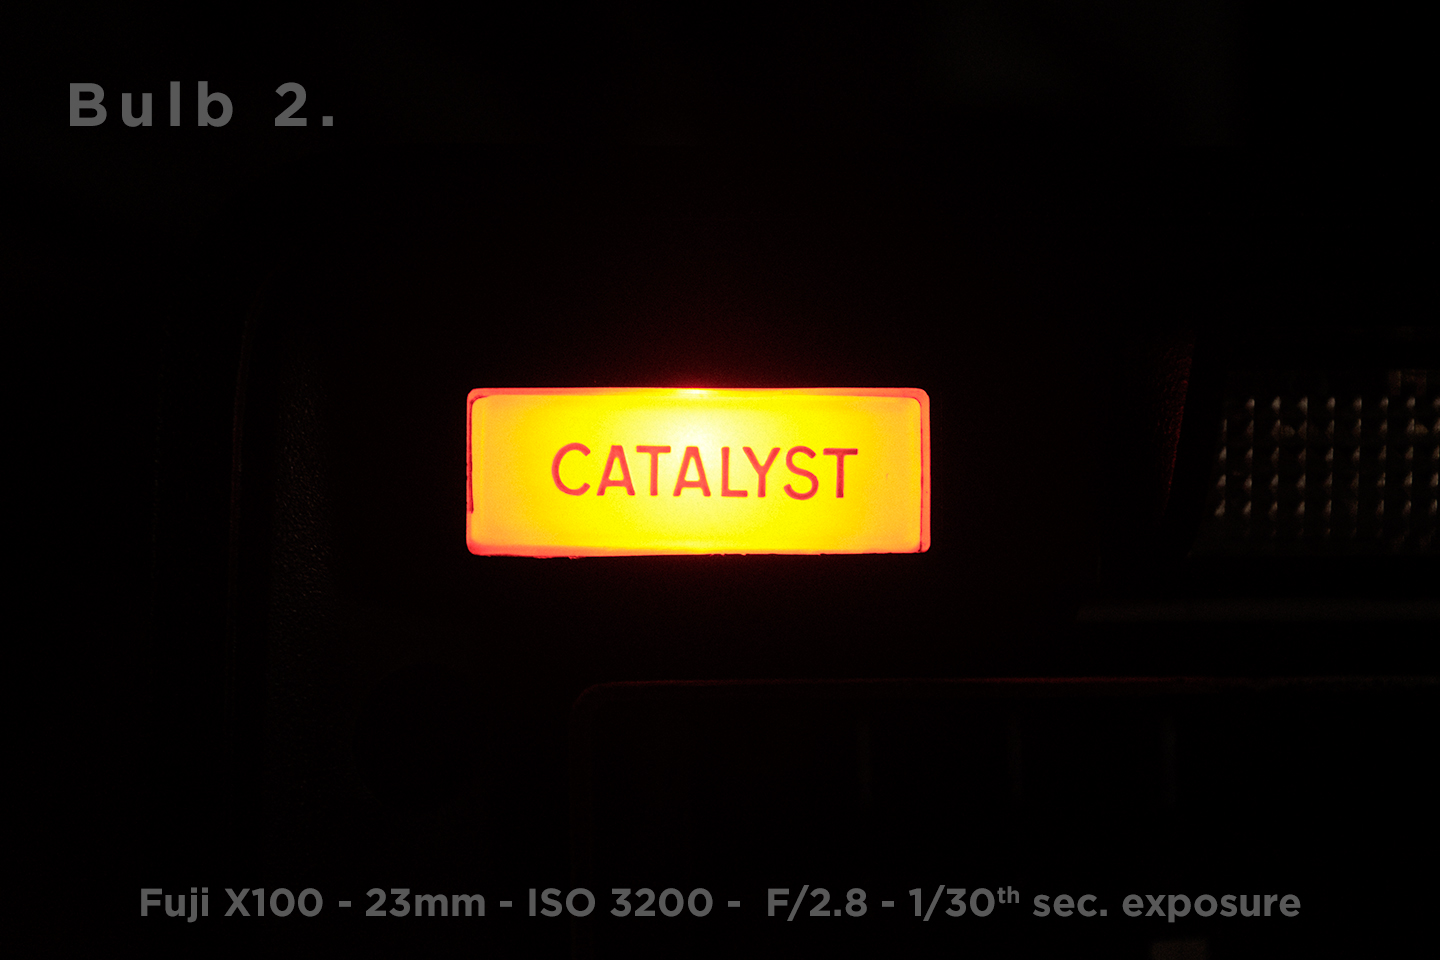
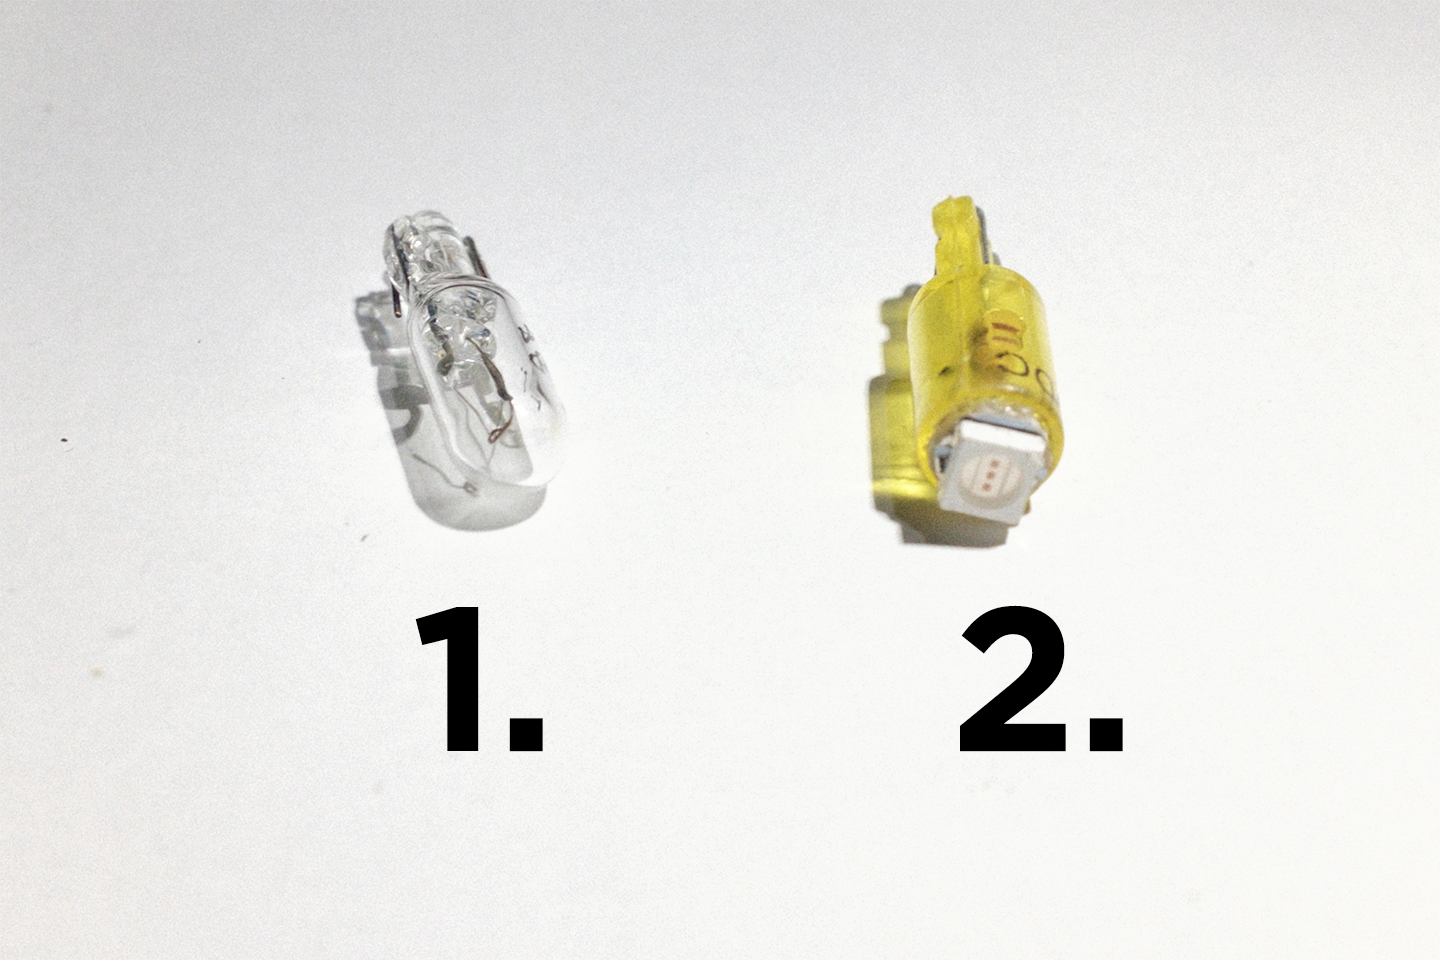
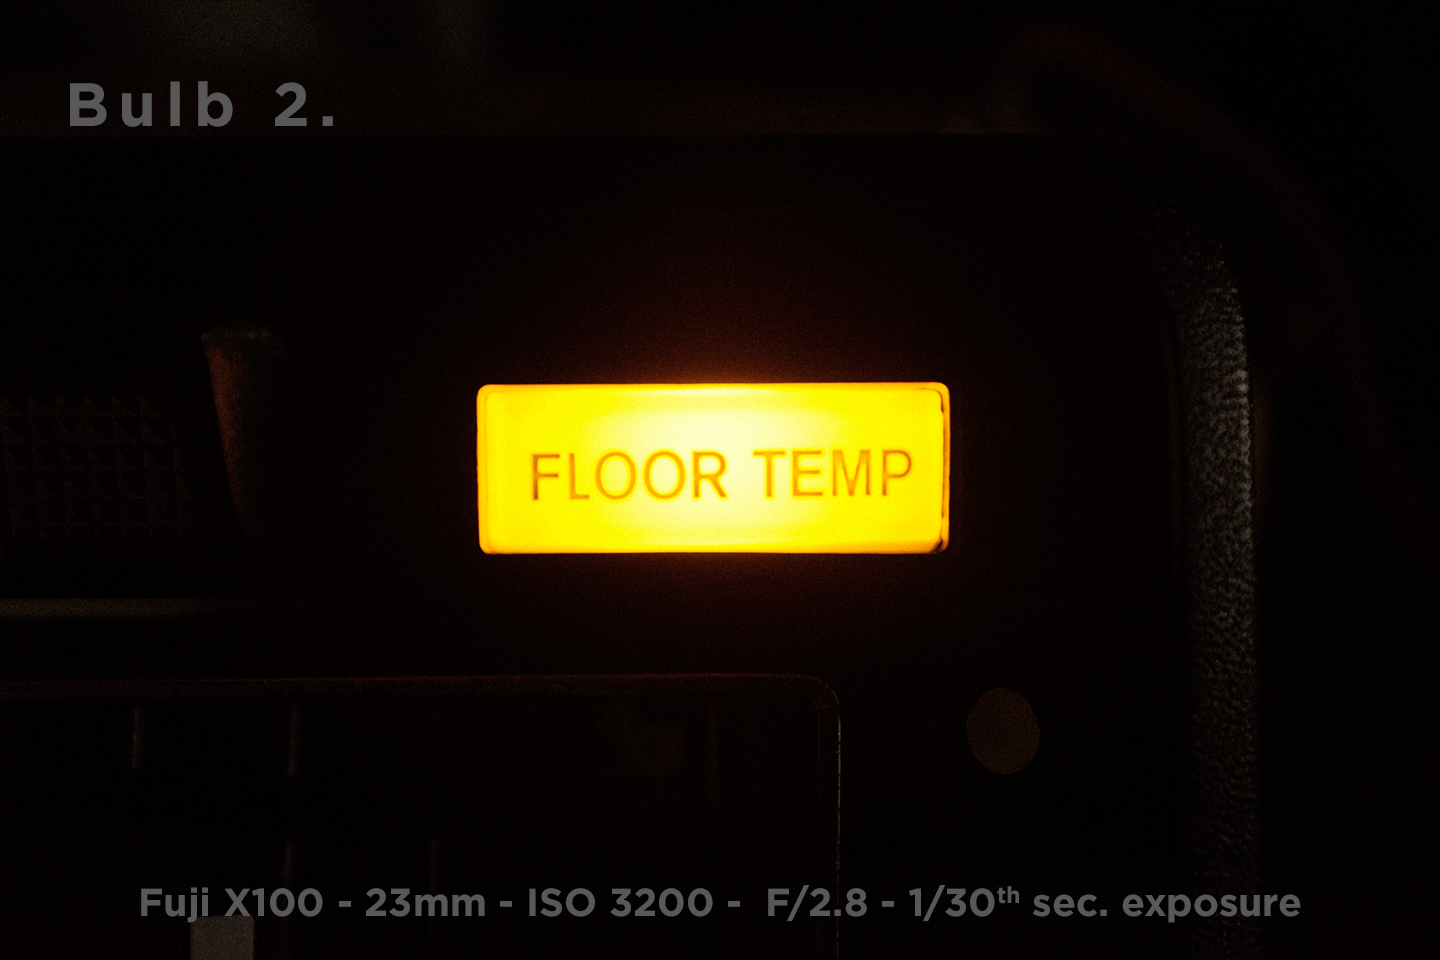
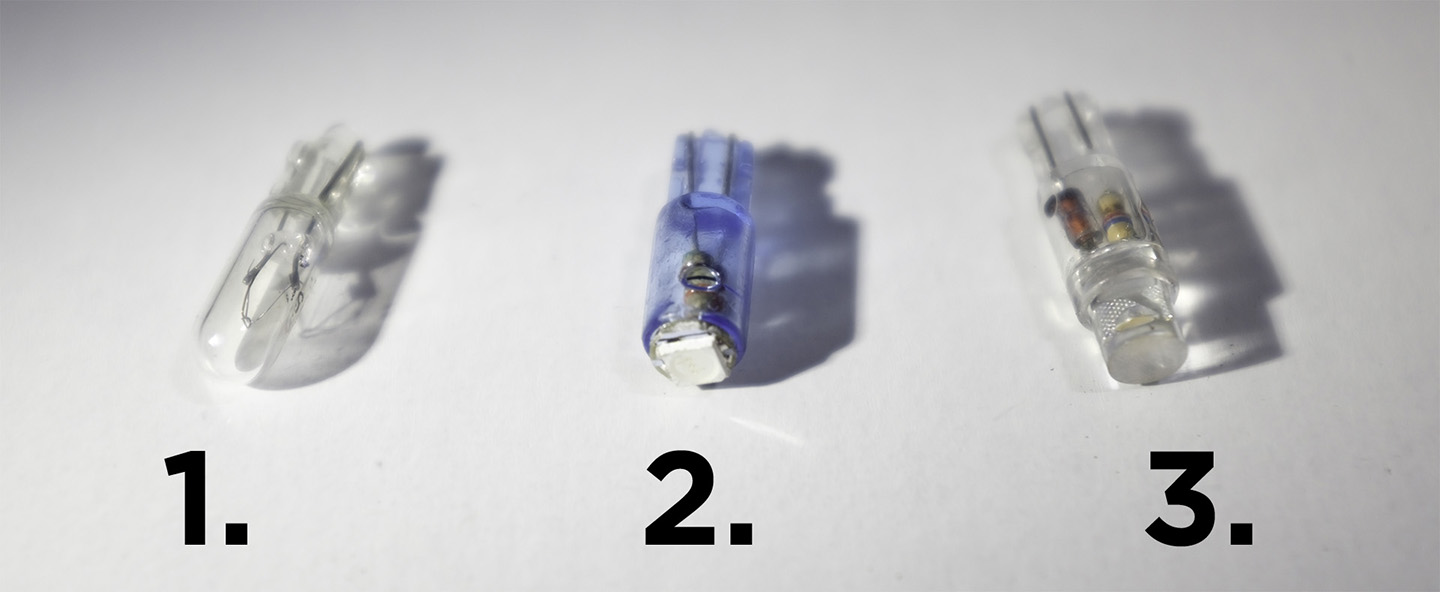
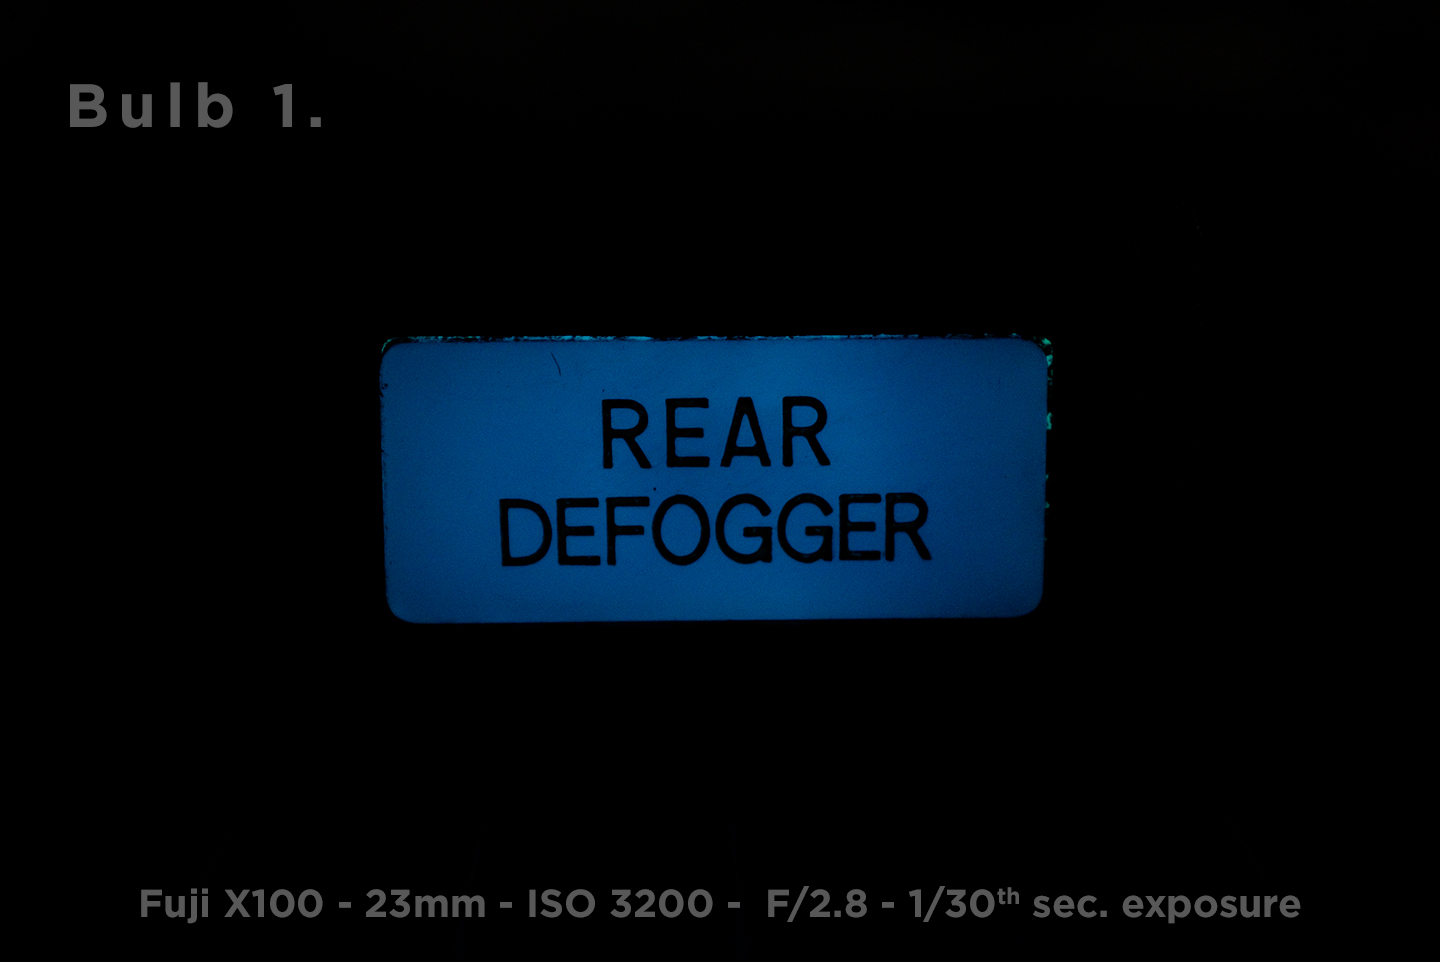
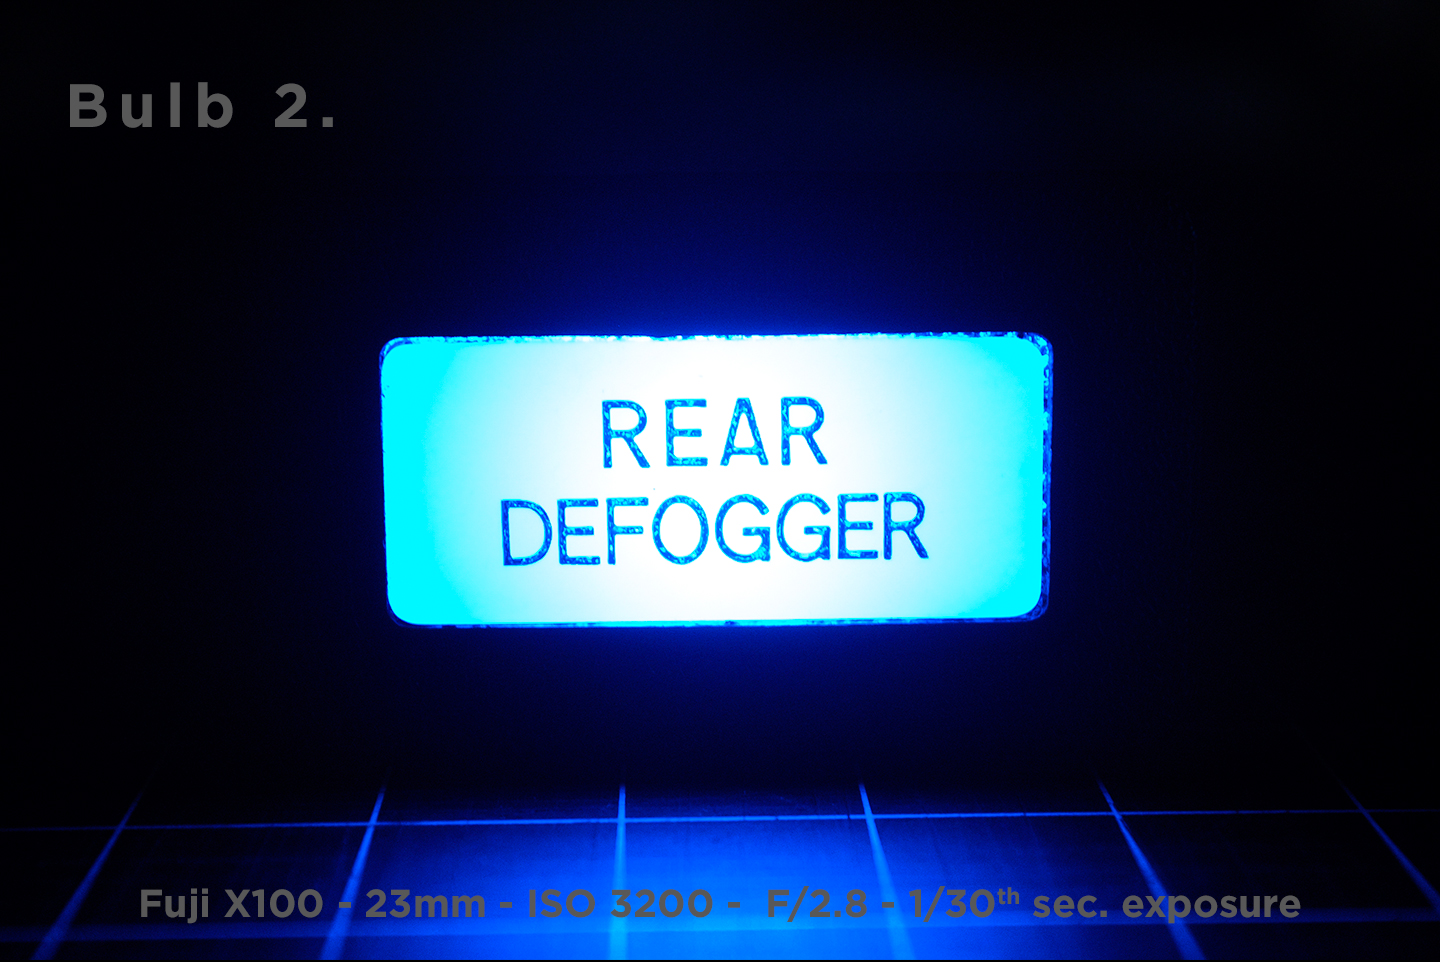
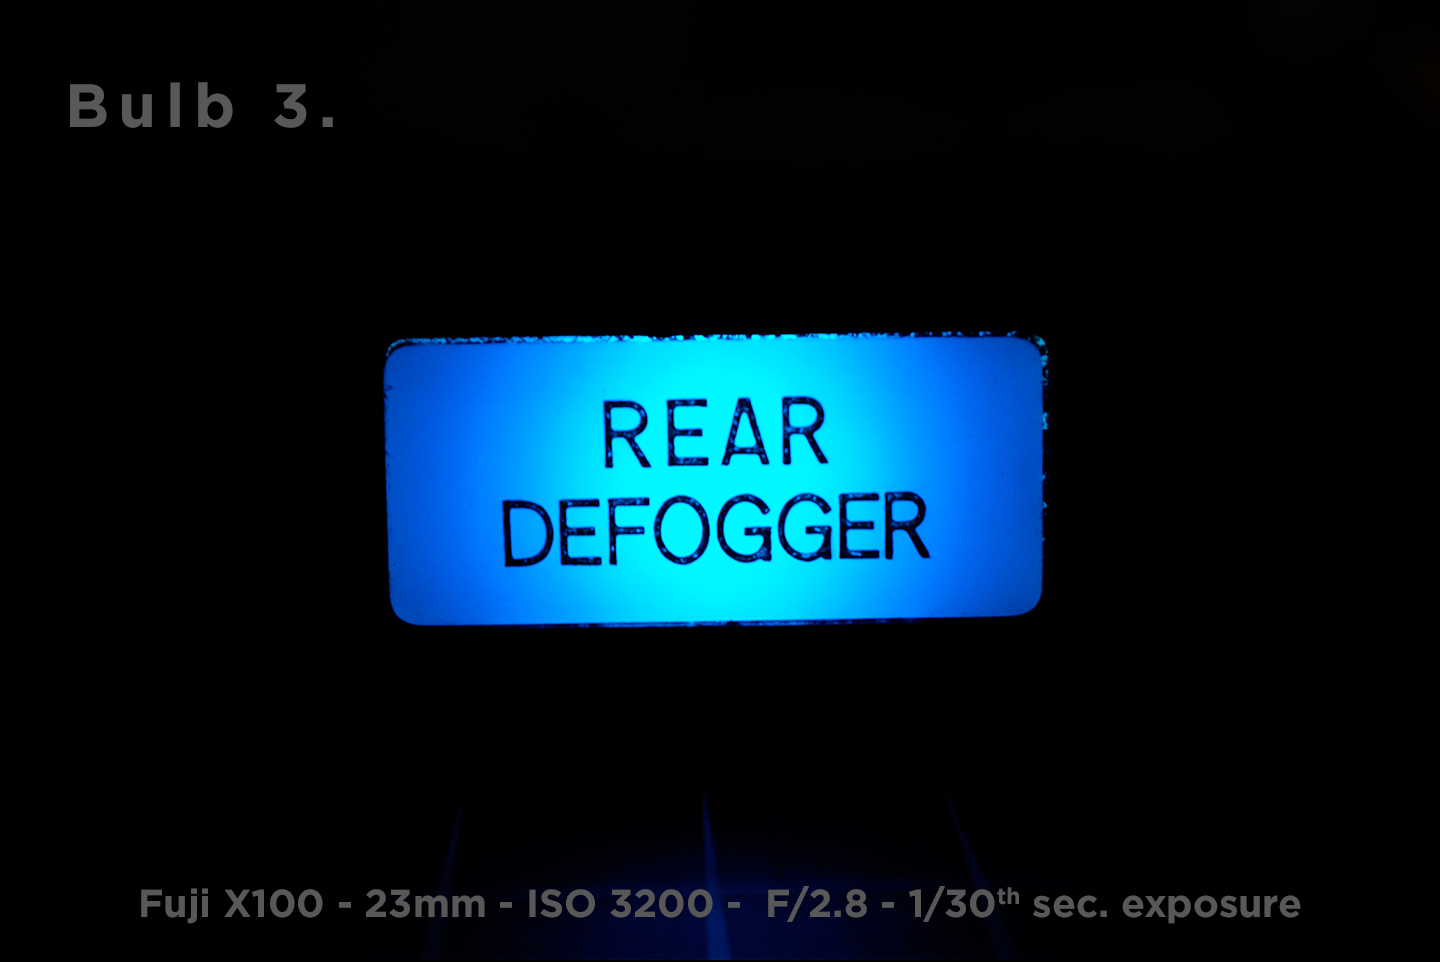
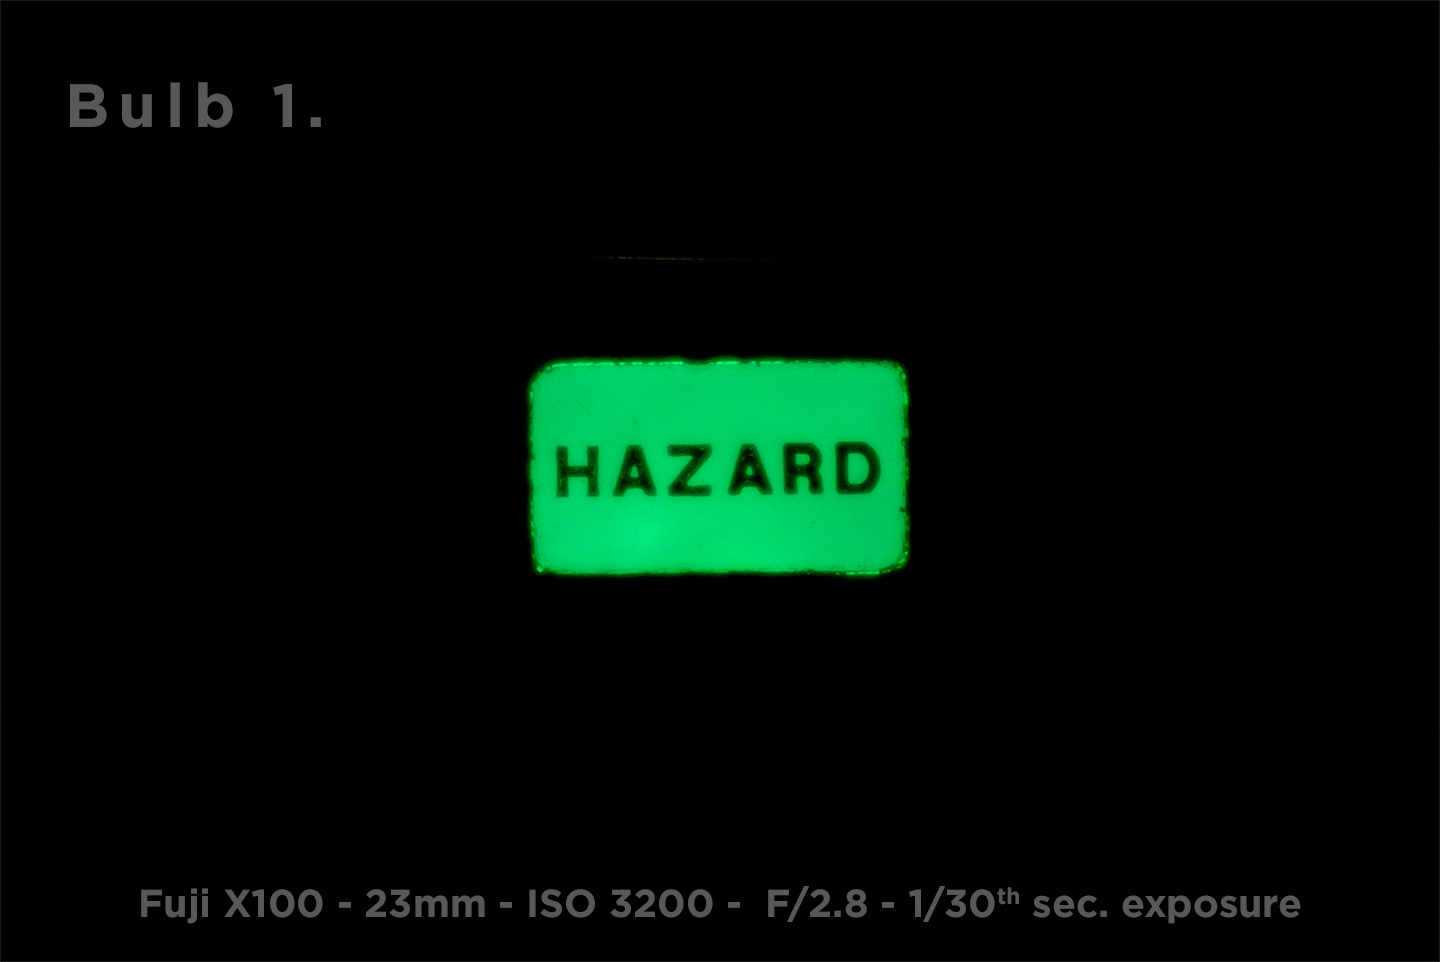
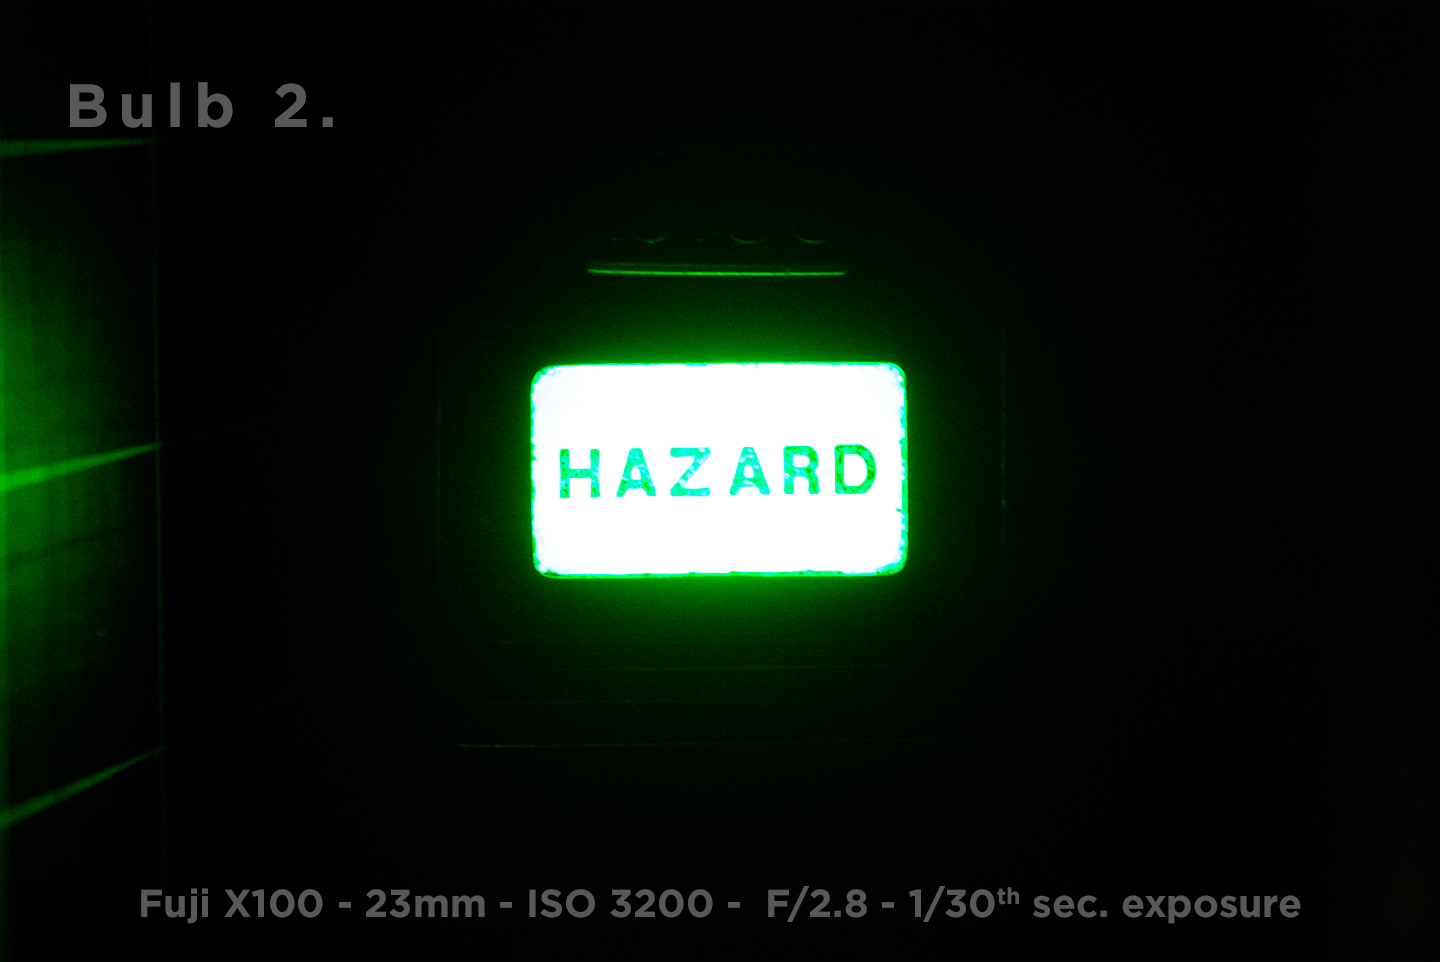
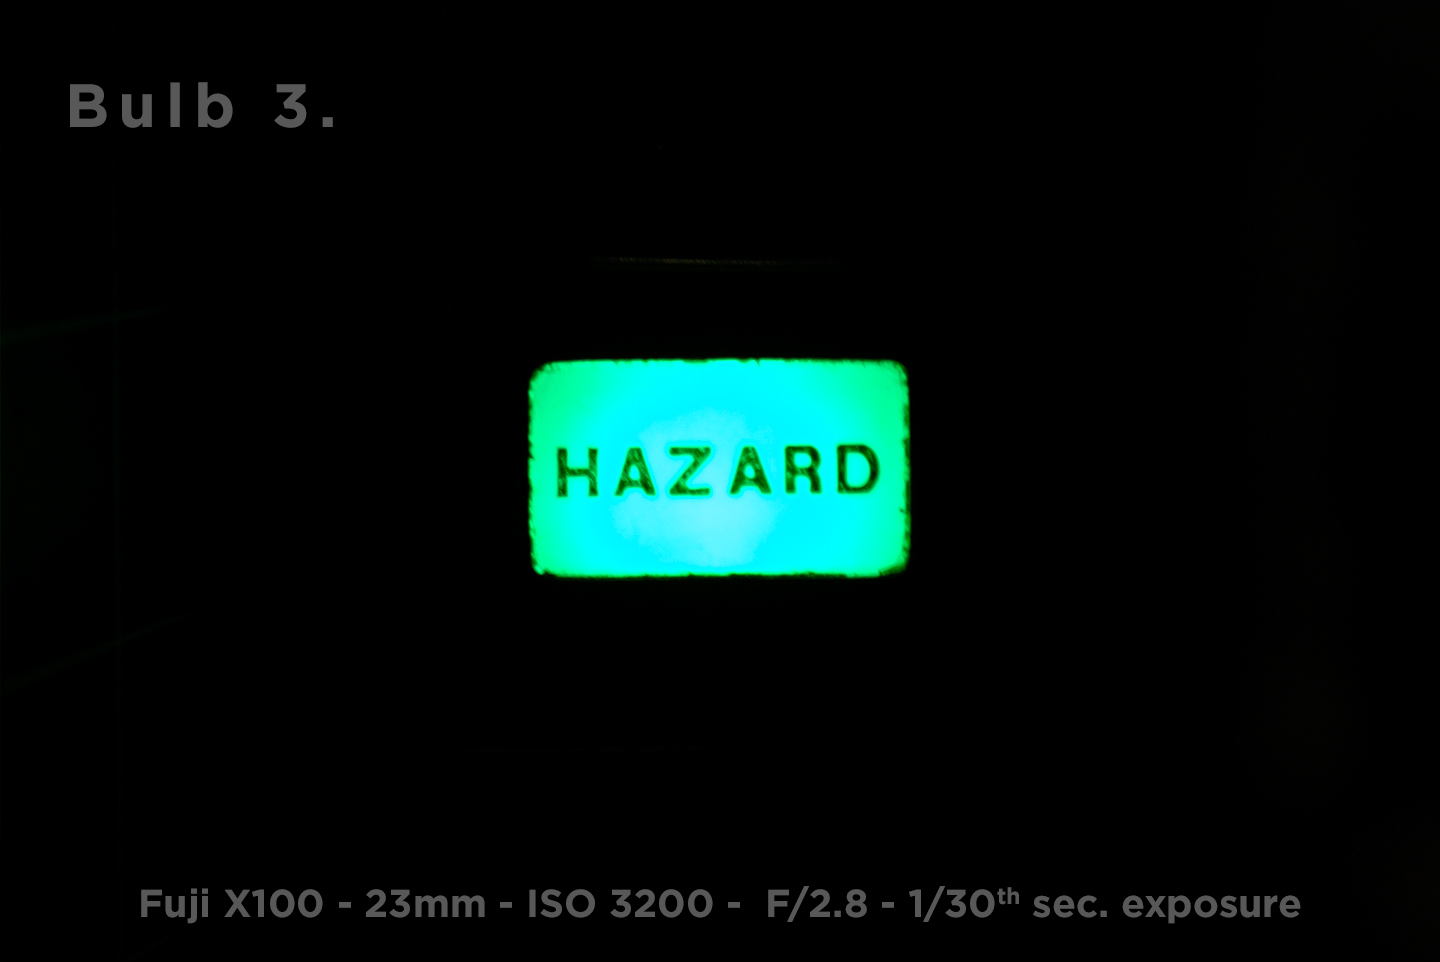
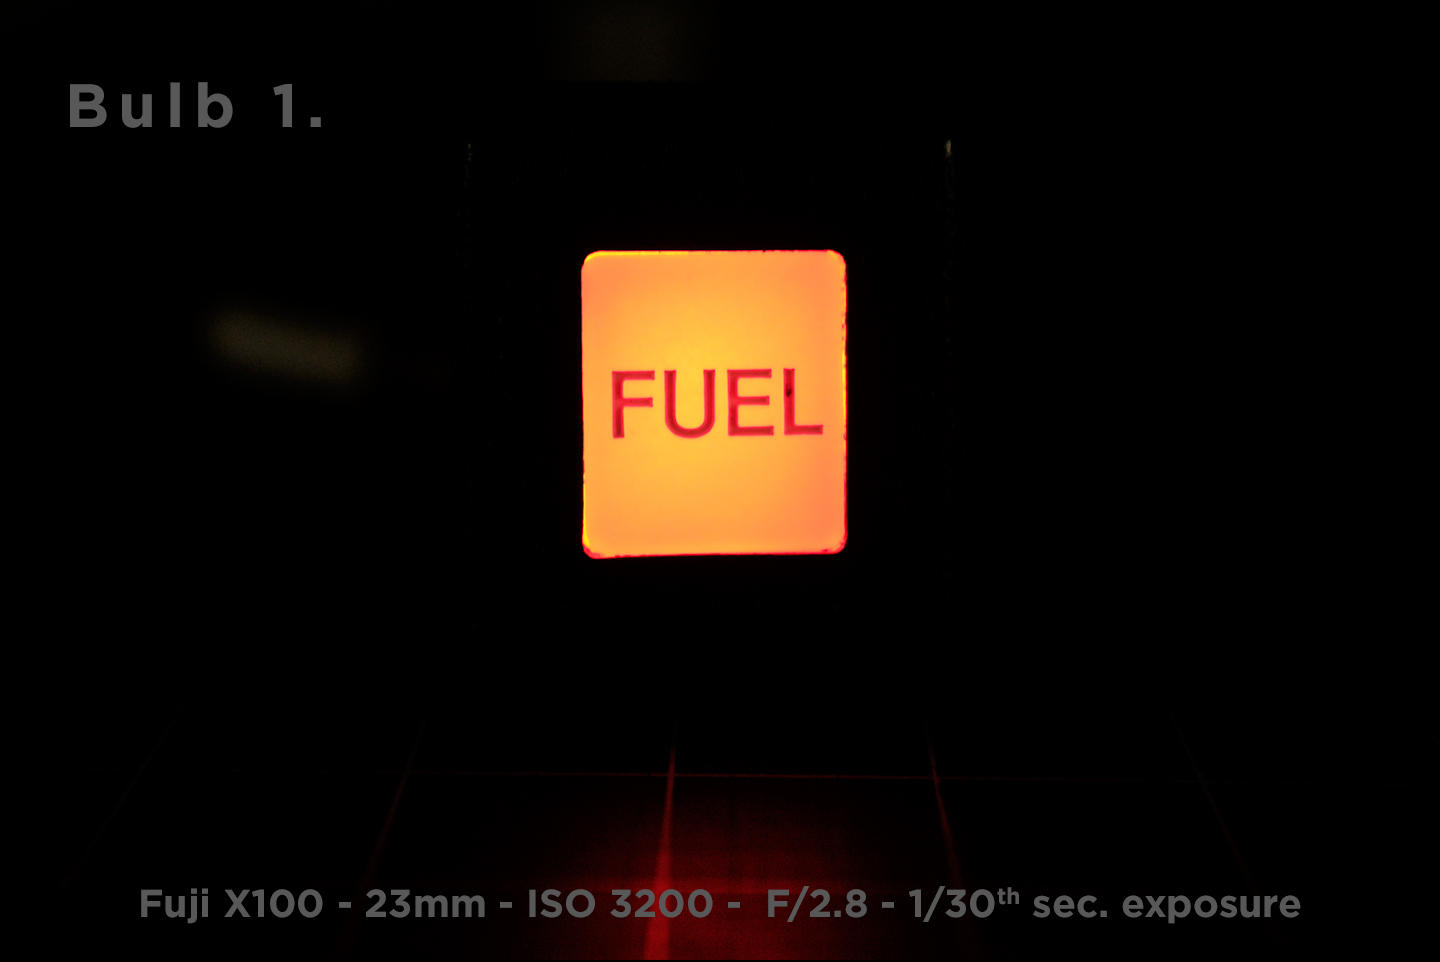
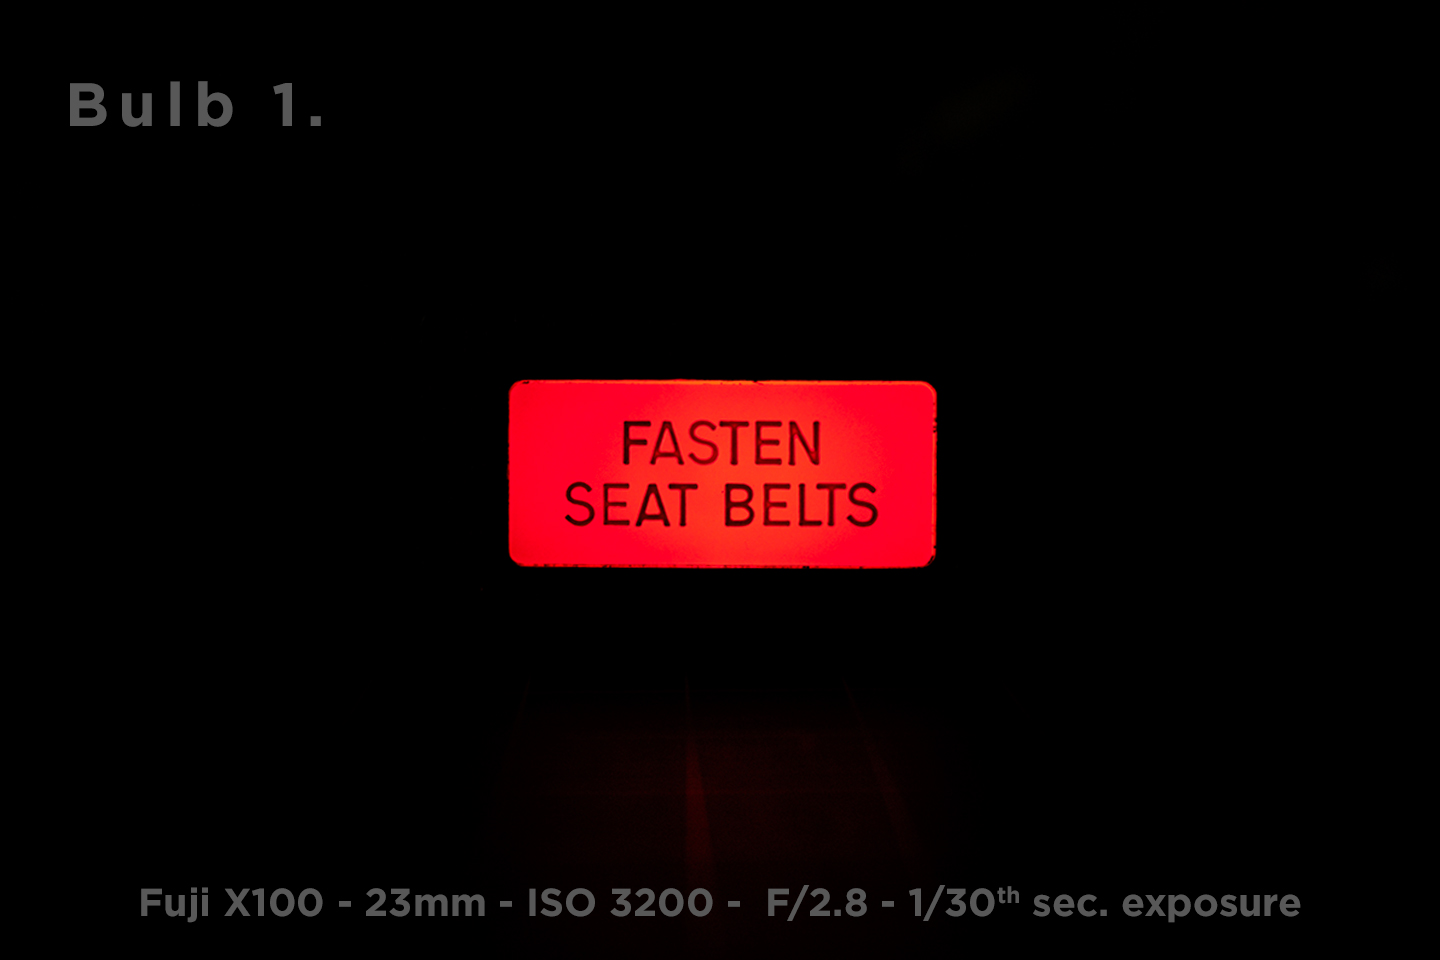
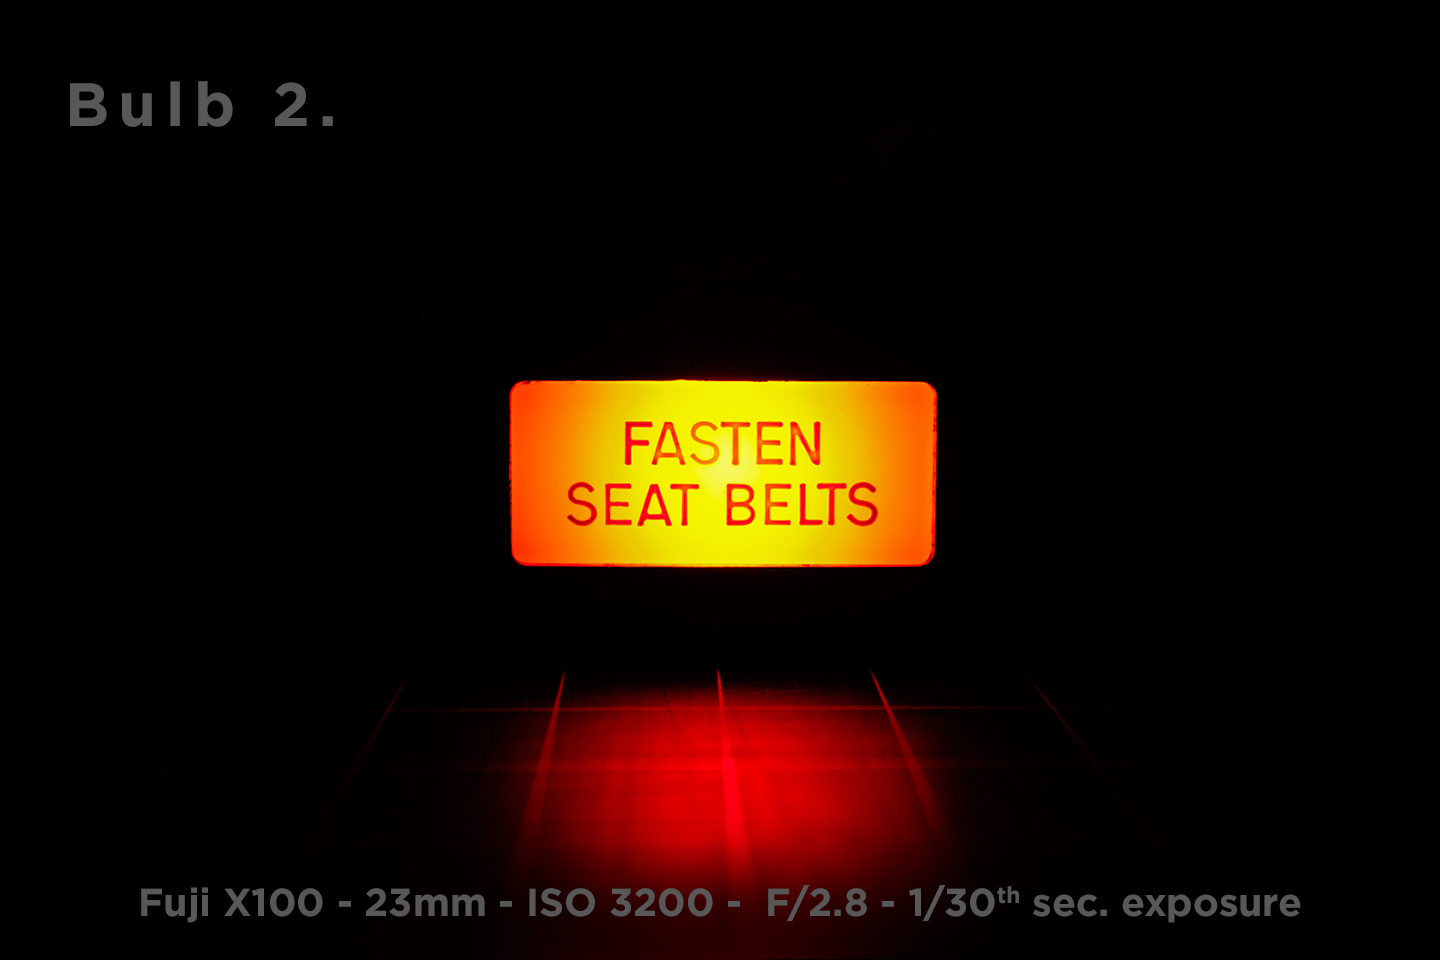
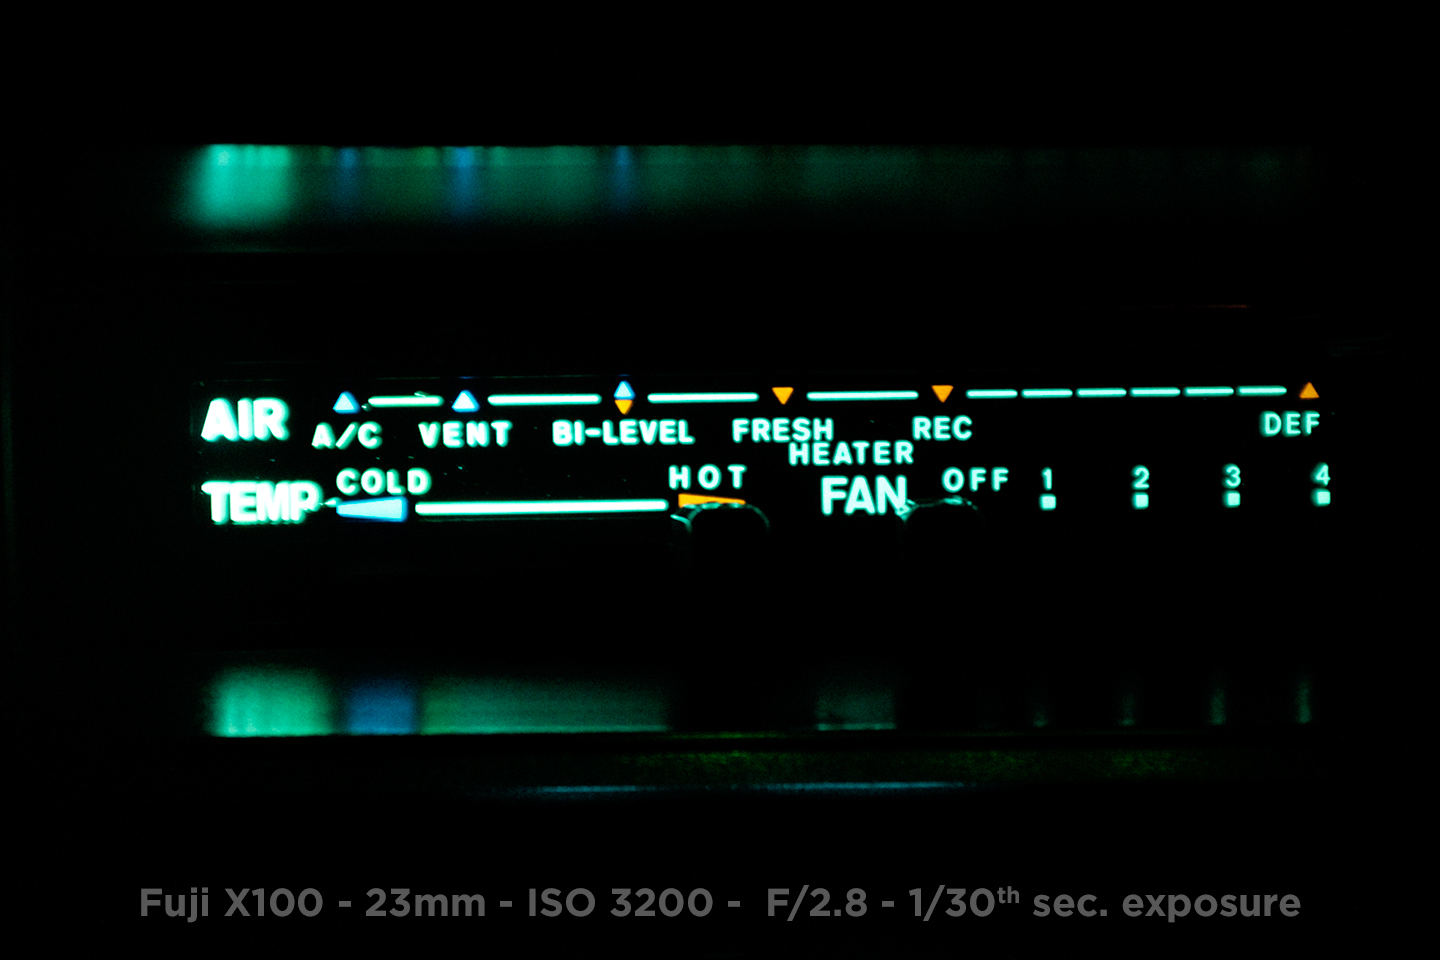
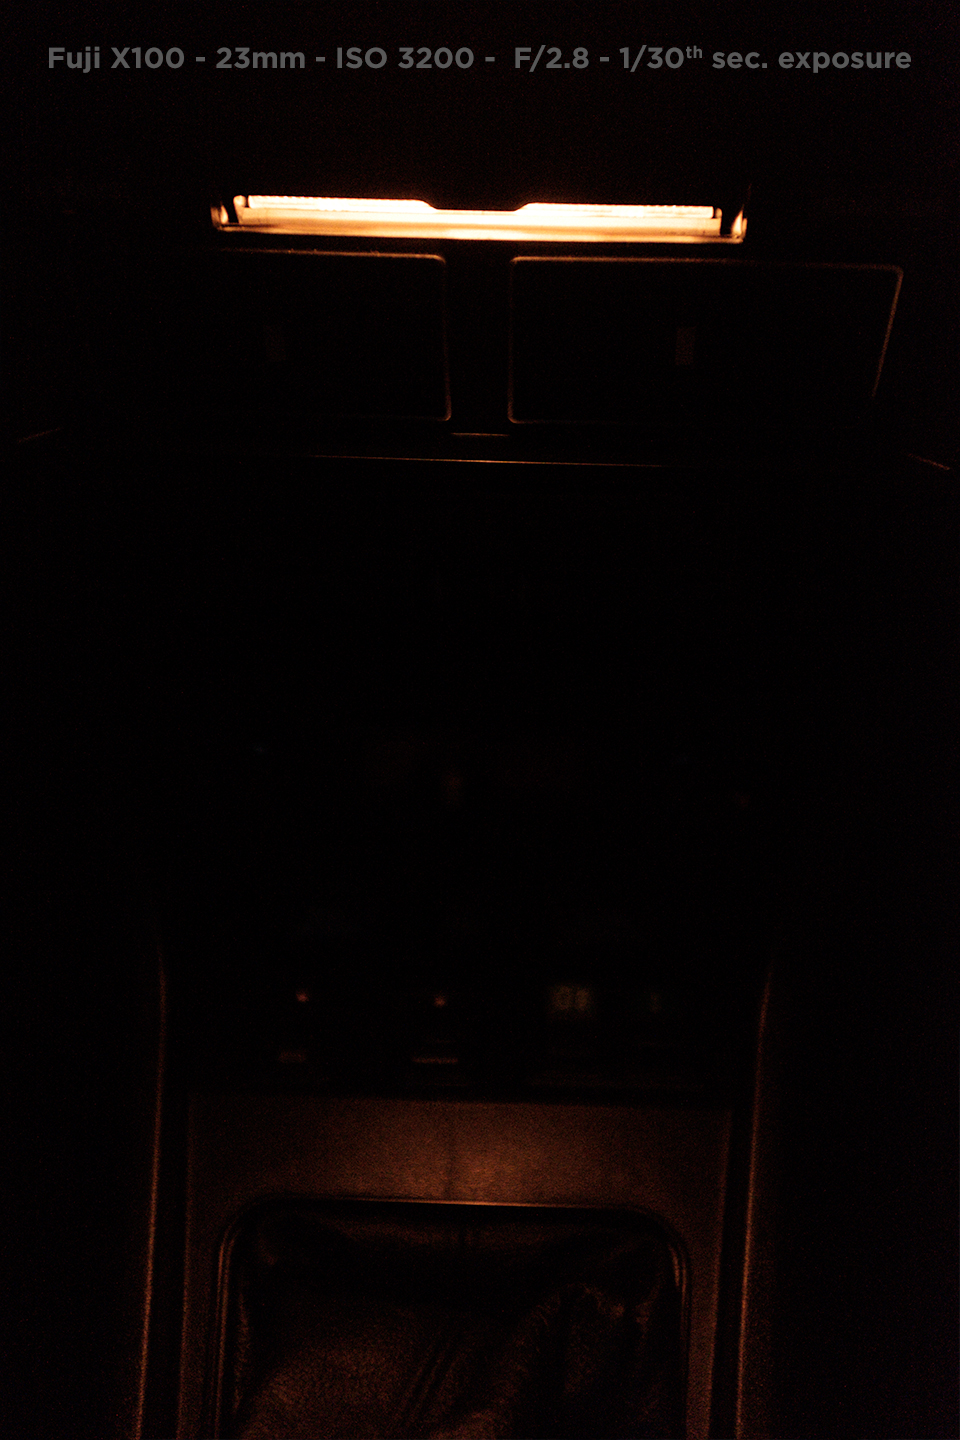
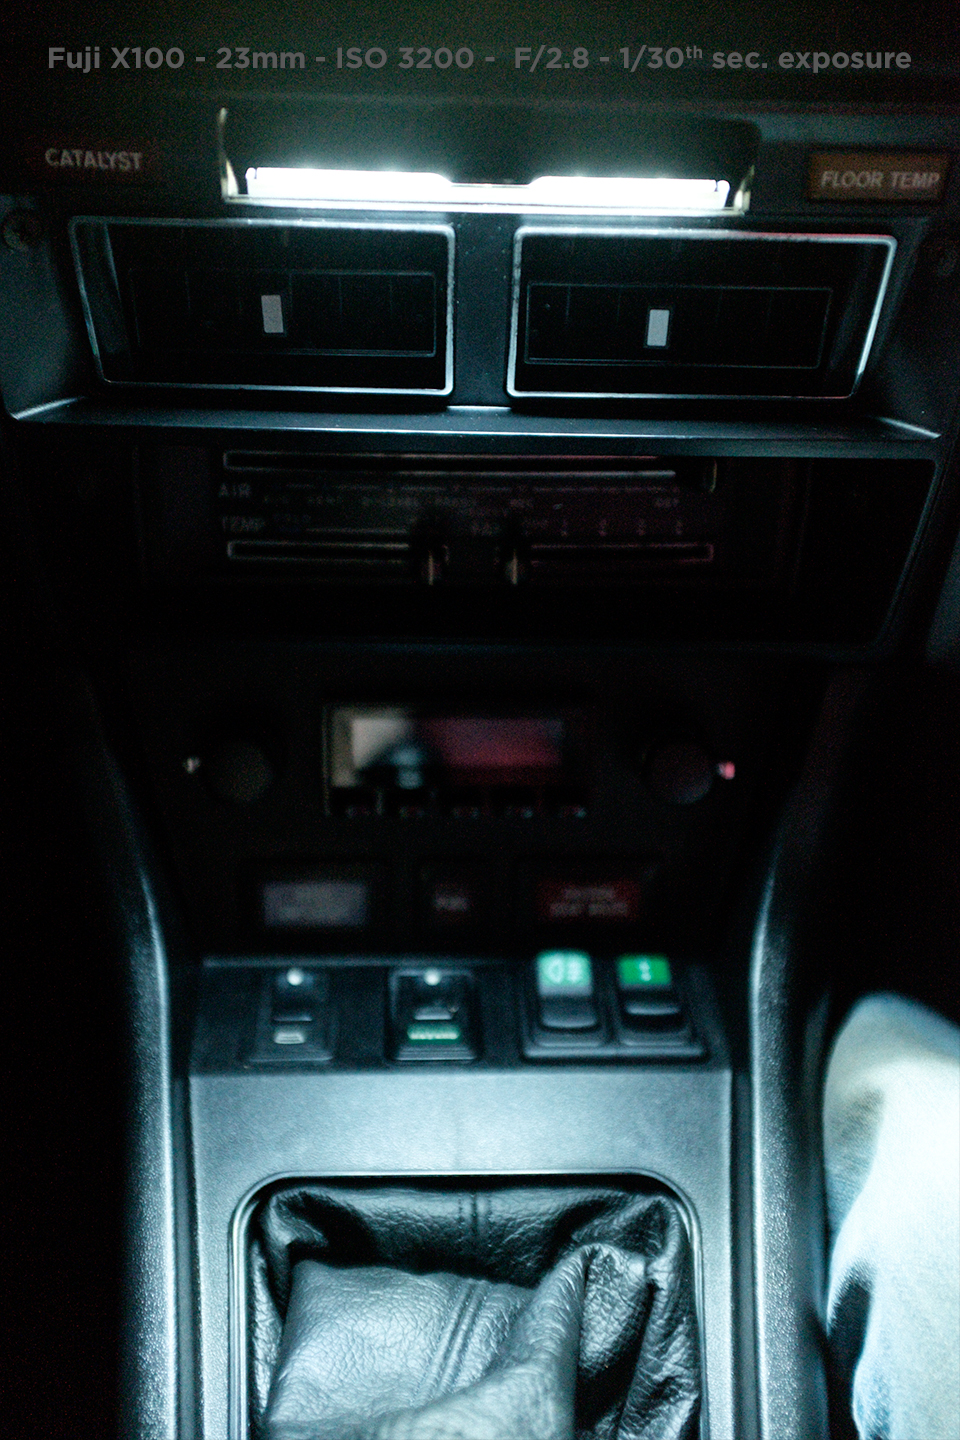
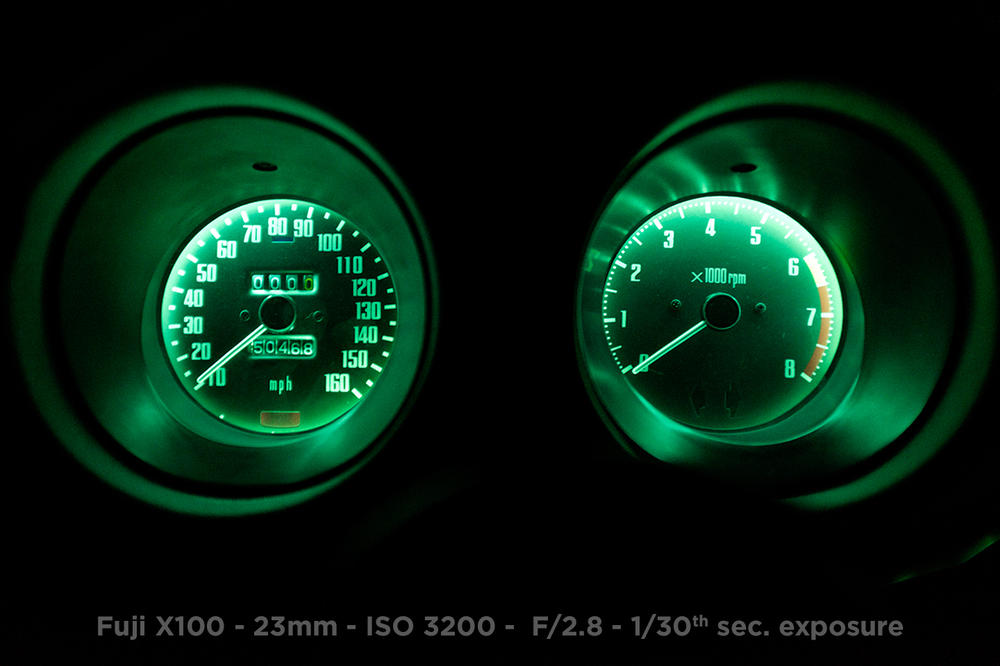
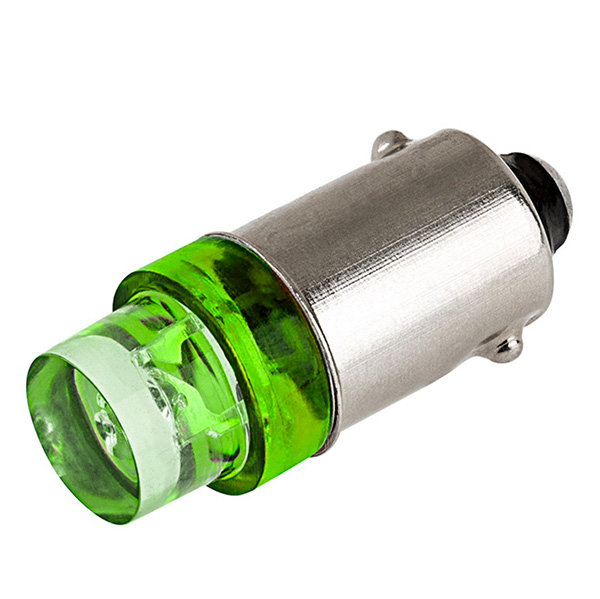
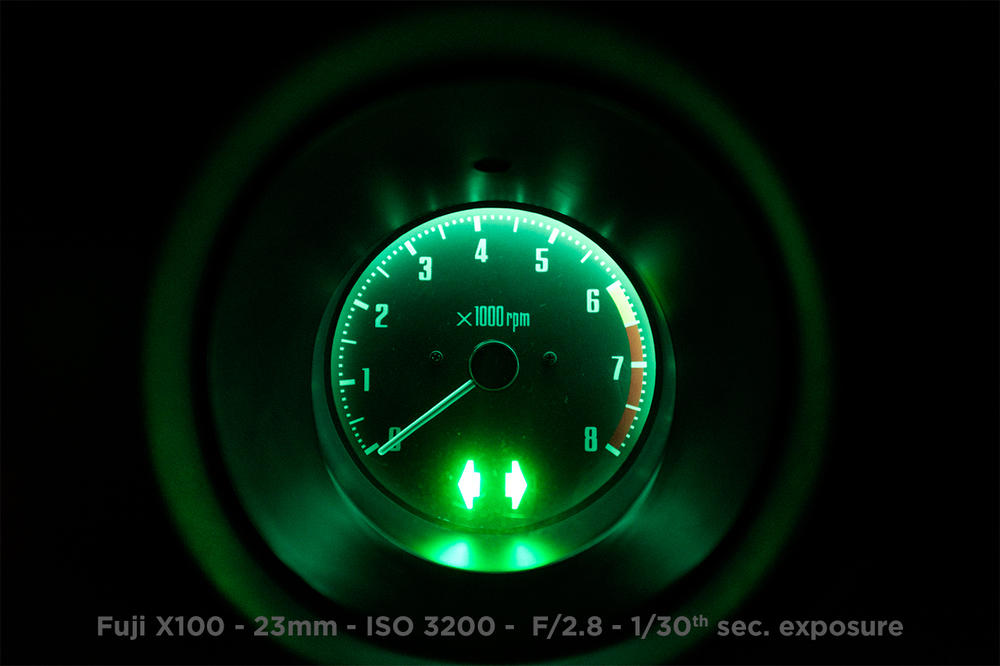
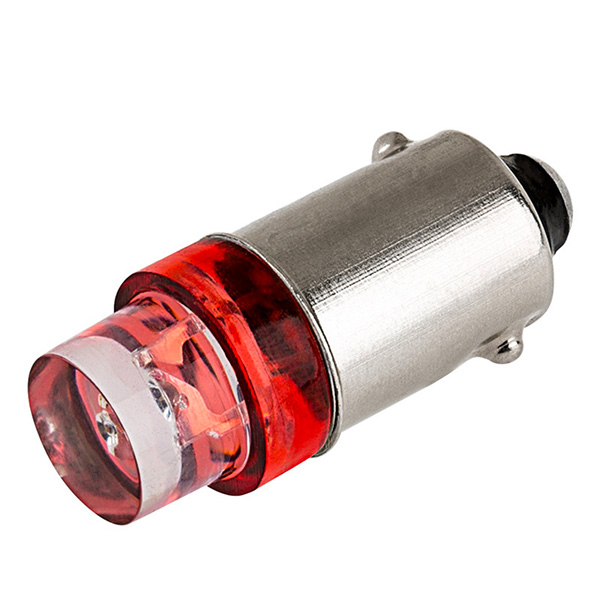
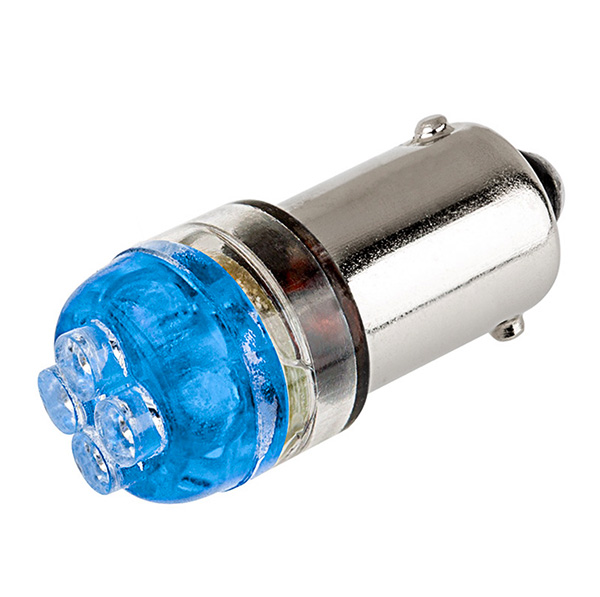
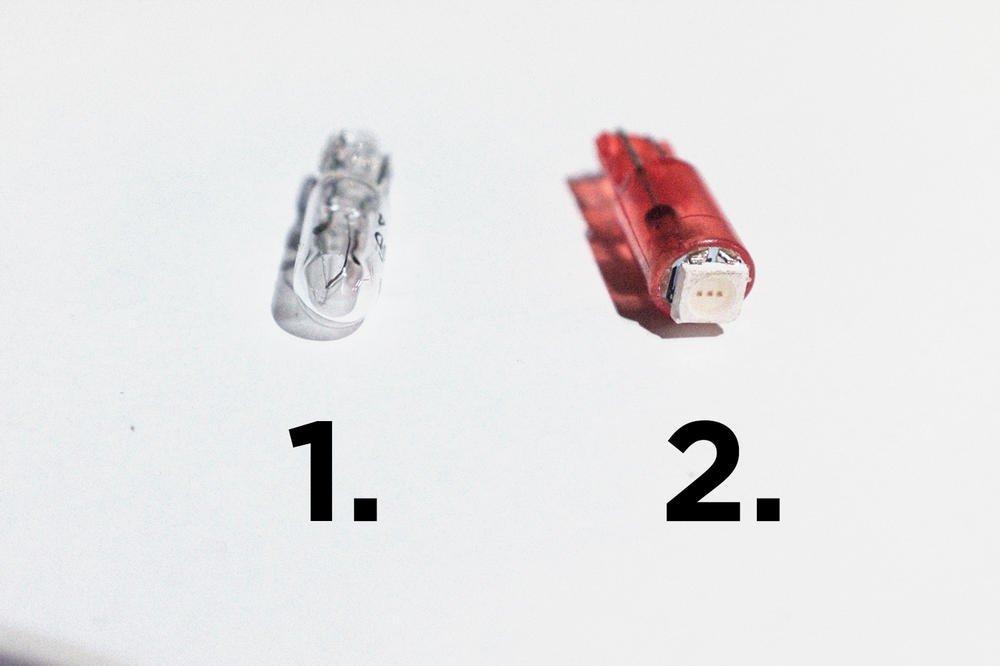
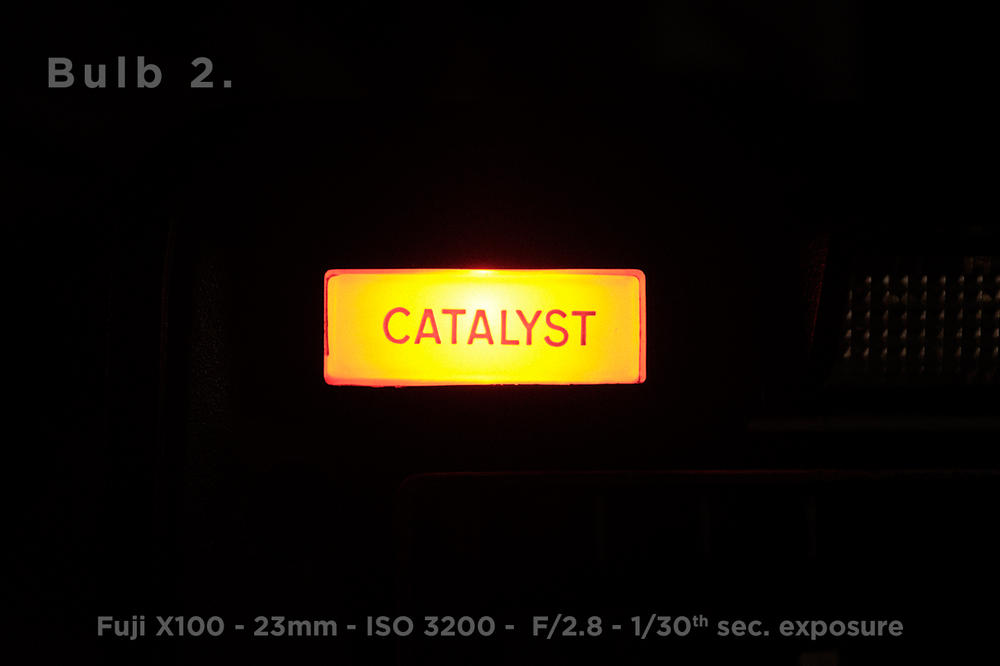
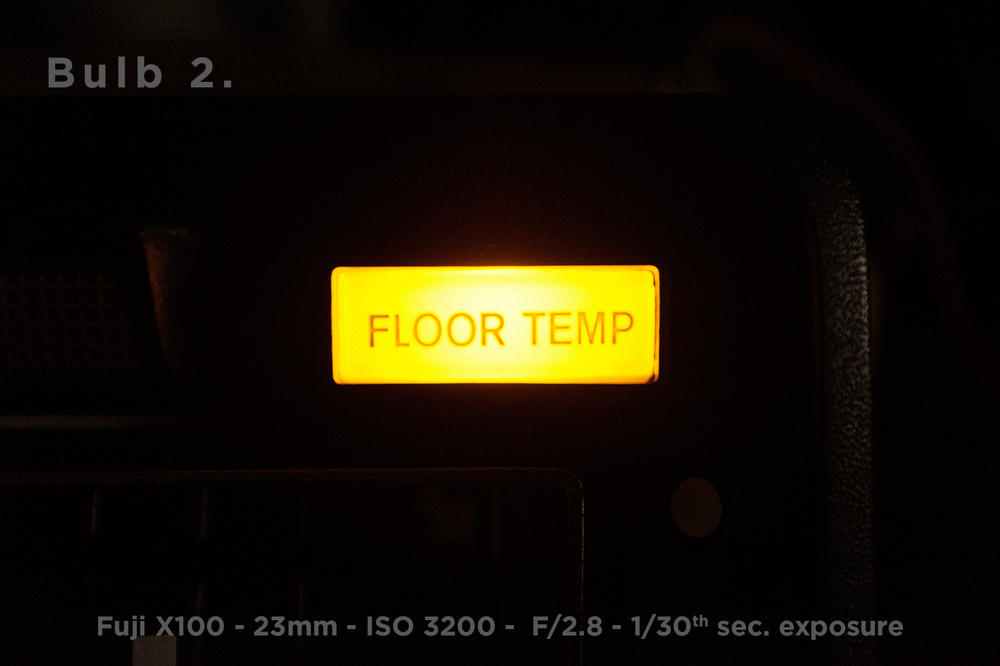
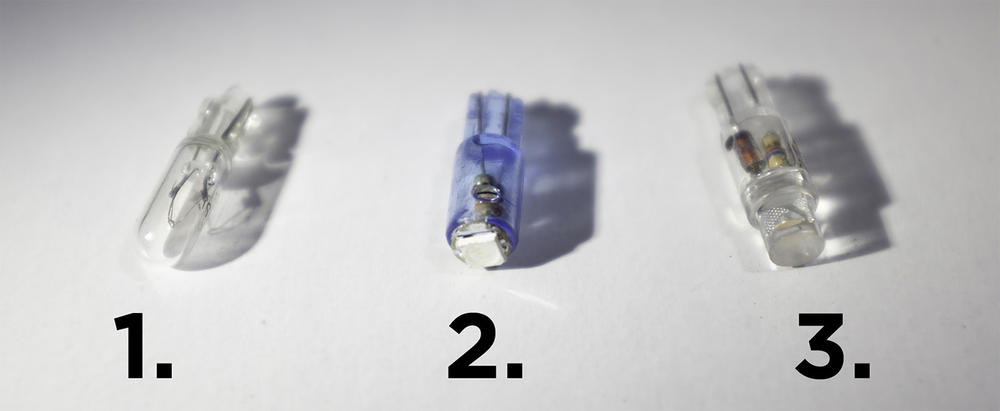
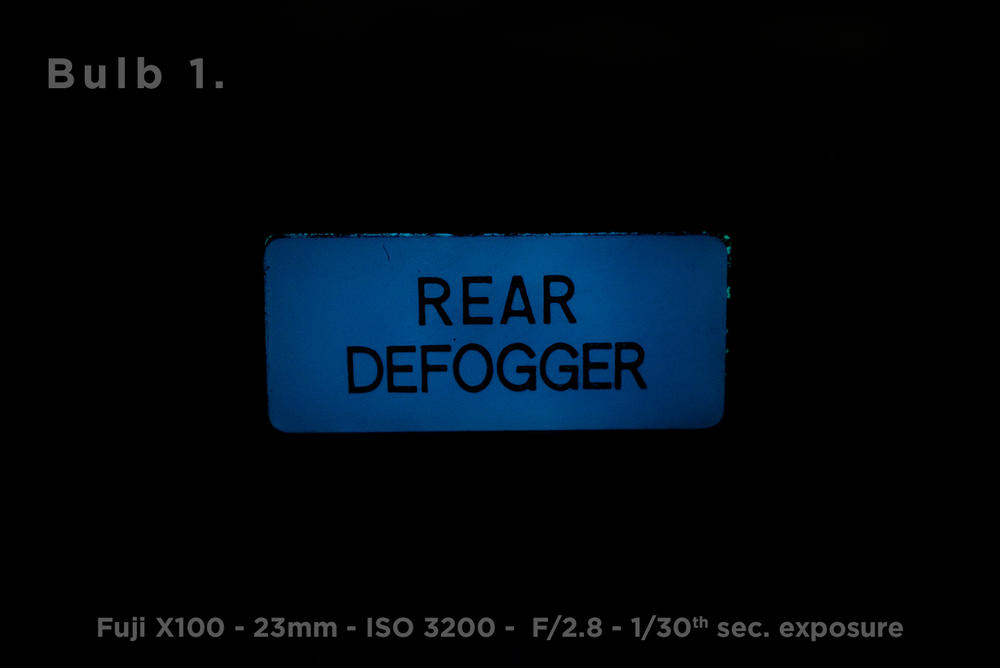
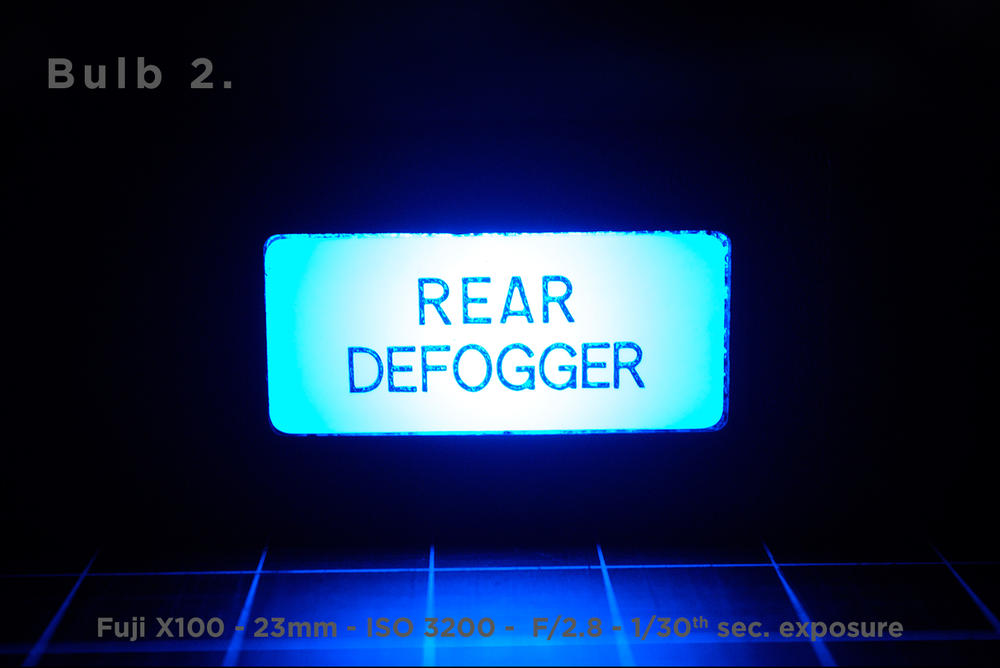
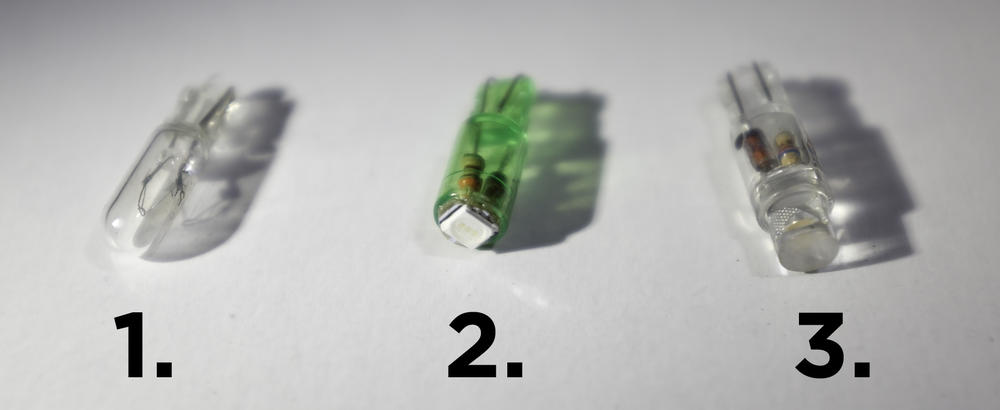
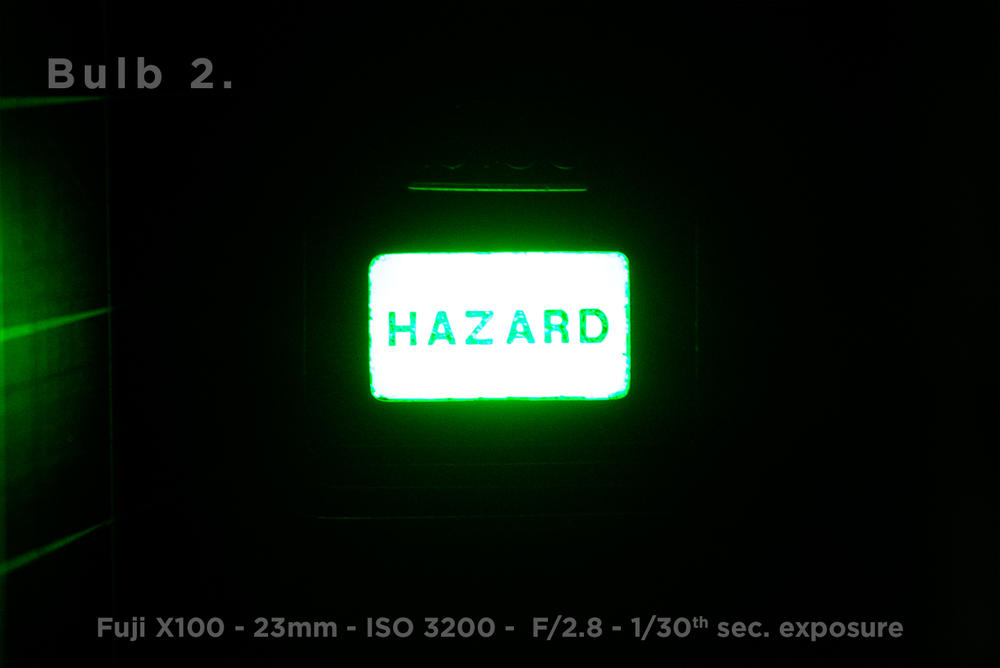
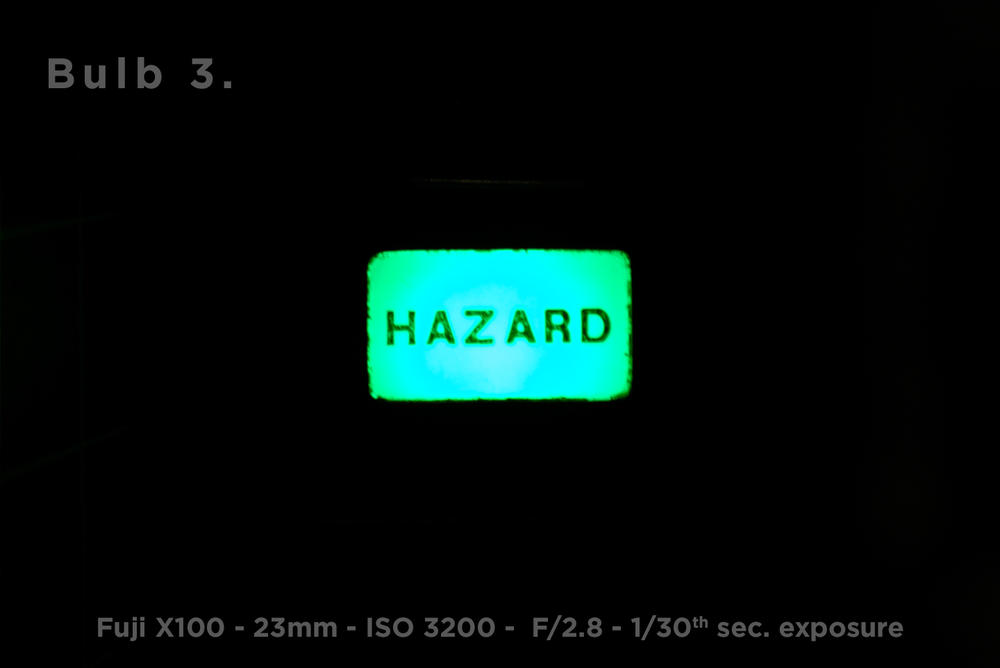
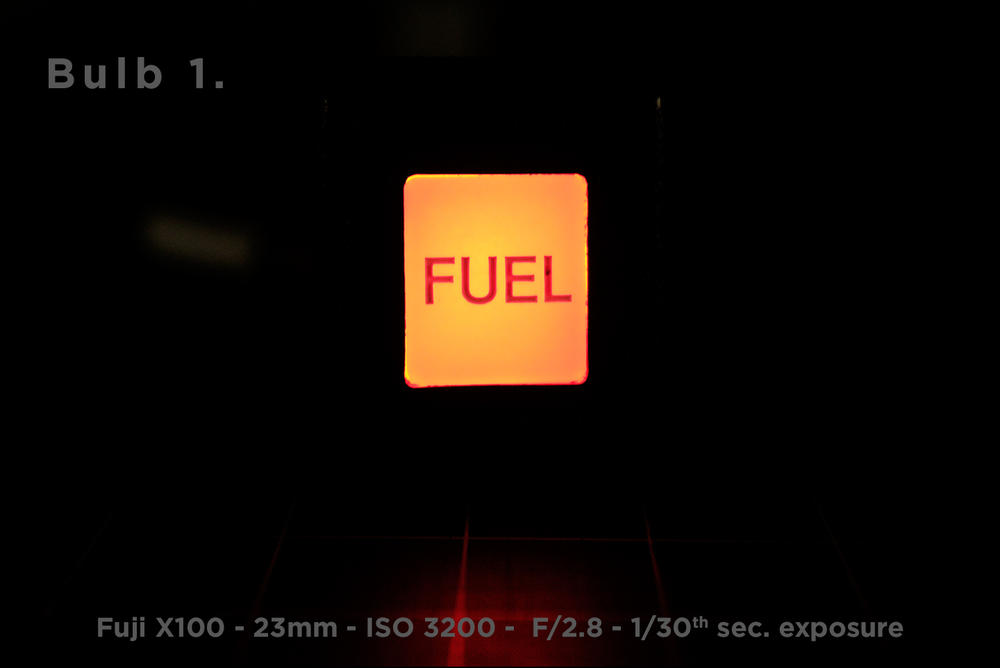
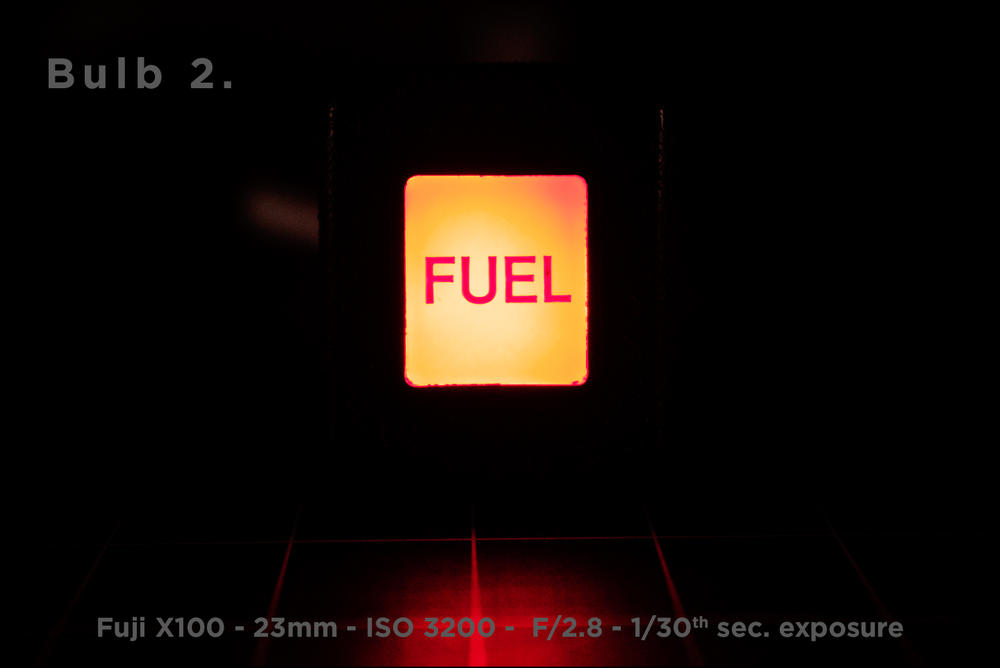
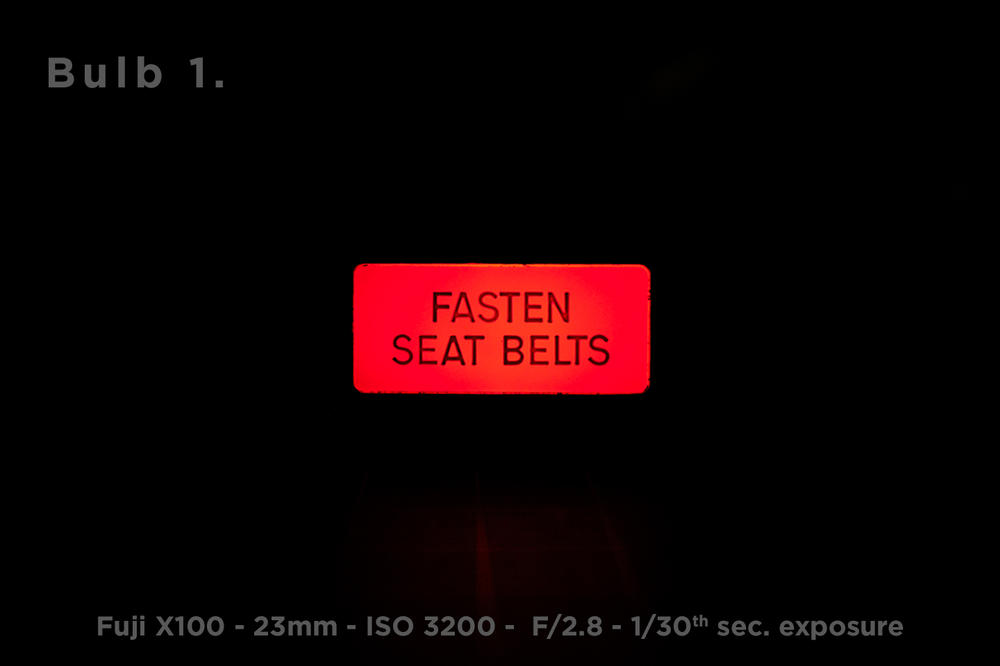
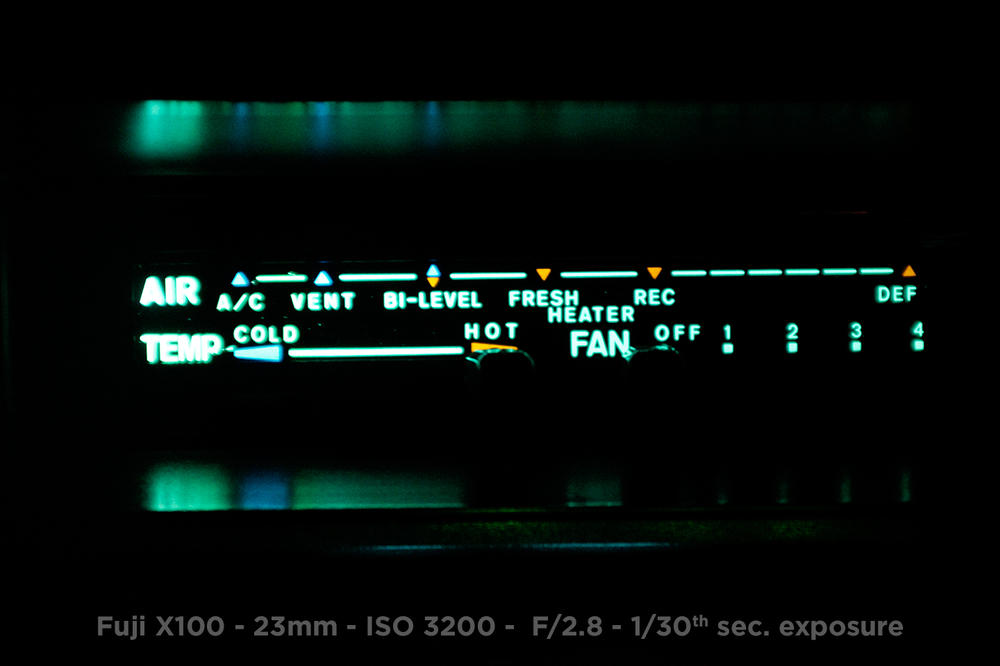
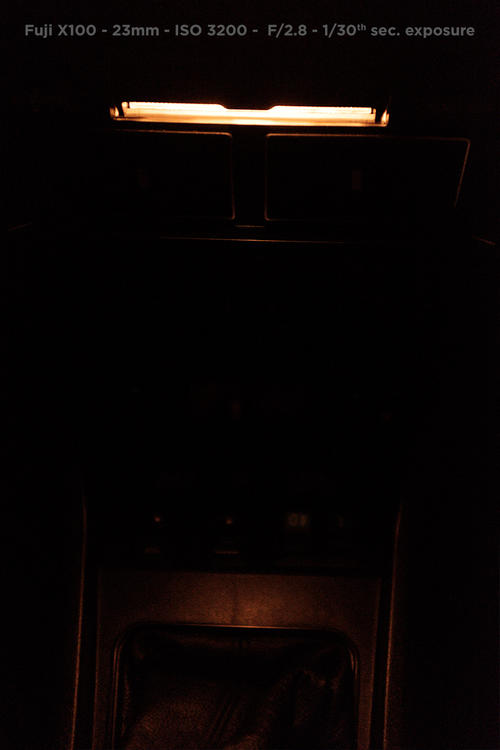
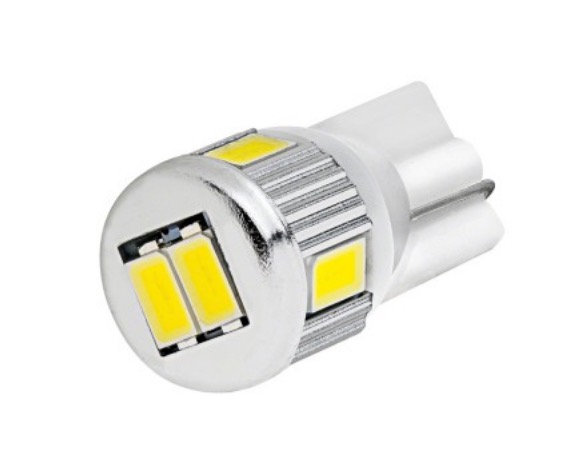
 1 pointGot some more pics of my gauges and other lights inside the cabin. Again, all the following pictures have been shot in manual exposure mode with a white balance set at 5000K. Here’s a pic of the three small gauges with bulb number 6 from my previous post. Here’s a pic of the speedo and tach. I also put LED bulbs in the turn signal indicators, high beam indicator, and brake warning light in the gauges. I tried a couple different bulbs but forgot to take before and after pictures. These are what I used. For the turn signals I got green bulbs from superbrightleds.com. https://www.superbrightleds.com/moreinfo/ba9s-ba7s/ba9s-led-bulb-1-led-ba9s-retrofit-car/3/#/attributes/15 Green. 90°. 4 Lumens. BA9s These bulbs are perfect. Obviously brighter than the stock tungsten bulb, but not overpowering. Got a red bulb of the same variety for the brake warning light and the fuel warning light. Again, brighter then stock but not too much. For the high beam indicator I went with a different style bulb then the turn signal lights and brake light. https://www.superbrightleds.com/moreinfo/ba9s-ba7s/ba9s-led-bulb-4-led-ba9s-retrofit-car-classic-car-bulbs/6/ Here’s a pic of the speedo with brake light and high beam indicator lit up. Since my car is a 1975 California car, it has a floor temp warning light and catalyst warning light. Here’s a pic of the bulbs tested for the catalyst warning light. Bulb 1. - Stock tungsten 74 Mini Wedge Bulb. Bulb 2. - Red LED 74 Mini Wedge Bulb. https://www.superbrightleds.com/moreinfo/miniature-wedge-base/74-led-bulb-1-smd-led-miniature-wedge-retrofit-car/227/ The stock bulb is really dim. The LED is much brighter. Even though it does not show in the pic, it is nice and red when seen in person. Here’s a pic of the bulbs tested for the floor temp warning light. Bulb 1. - Stock tungsten 74 Mini Wedge Bulb. Bulb 2. - Amber LED 74 Mini Wedge Bulb. https://www.superbrightleds.com/moreinfo/miniature-wedge-base/74-led-bulb-1-smd-led-miniature-wedge-retrofit-car/227/ The stock bulb is really dim. The LED is much brighter. Here’s a pic of the bulbs tested for the rear defogger light. Bulb 1. - Stock tungsten 74 Mini Wedge Bulb. Bulb 2. - Blue LED 74 Mini Wedge Bulb. https://www.superbrightleds.com/moreinfo/miniature-wedge-base/74-led-bulb-1-smd-led-miniature-wedge-retrofit-car/227/ Bulb 3. - Warm 3000k LED 74 Mini Wedge Bulb. https://www.superbrightleds.com/moreinfo/instrument-cluster-gauge/74-led-bulb-1-led-miniature-wedge-retrofit-car/226/ The Stock Bulb is really dim. Bulb number 2 is way too bright for a bulb that will stay on and not a warning light. Bulb 3 is perfect. Brighter than stock, but not overpowering. To the naked eye its really similar to the look of the stock bulb, just brighter. 3000k is really close to the 2800K color temp. of tungsten bulbs. Here’s a pic of the bulbs tested for the hazard light switch. Bulb 1. - Stock tungsten 74 Mini Wedge Bulb. Bulb 2. - Green LED 74 Mini Wedge Bulb. https://www.superbrightleds.com/moreinfo/miniature-wedge-base/74-led-bulb-1-smd-led-miniature-wedge-retrofit-car/227/ Bulb 3. - Warm 3000k LED 74 Mini Wedge Bulb. https://www.superbrightleds.com/moreinfo/instrument-cluster-gauge/74-led-bulb-1-led-miniature-wedge-retrofit-car/226/ The stock bulb is really dim. Bulb number 2 is way too bright for a bulb that will stay on and not a warning light. Bulb 3 is perfect. Brighter than stock, but not overpowering. To the naked eye its really similar to the look of the stock bulb, just brighter. 3000k is really close to the 2800K color temp. of tungsten bulbs. The fuel warning light is a standard BA9s tungsten bulb. Here’s a pic. I replaced the stock tungsten bulb with the same one used in the brake warning light inside the speedo. https://www.superbrightleds.com/moreinfo/ba9s-ba7s/ba9s-led-bulb-1-led-ba9s-retrofit-car/3/#/attributes/15 It’s brighter than stock but not excessively so. Here’s a pic of the bulbs tested for the fasten seat belts warning light. Bulb 1. - Stock tungsten 74 Mini Wedge Bulb. Bulb 2. - Red LED 74 Mini Wedge Bulb. https://www.superbrightleds.com/moreinfo/miniature-wedge-base/74-led-bulb-1-smd-led-miniature-wedge-retrofit-car/227/ The stock bulb is pretty dim. The LED is much brighter. Even though it does not show in the pic, it is nice and red when seen in person. The cigarette lighter socket and the HVAC controls both use 194 Wedge bulbs. I don’t have a pic of the cigarette lighter socket but I do have one of the HVAC controls replaced with an LED. This is the bulb used. https://www.superbrightleds.com/moreinfo/boat-miniature-wedge-bulbs/194-led-boat-and-rv-light-bulb-6-smd-led-tower-miniature-wedge-retrofit-106-lumens/2489/4112/ The map light was also replaced with LED’s. When I had my combo switches re-built a couple years ago I sprung for the map light LED from Dave at www.datsun-240z-upgrades.net. Here’s a pic of the stock bulb. Here’s a pic of the LED bulb from datsun-240z-upgrades.net. It’s way brighter and the map light is actually very useful now. The only interior bulbs not replaced with LED's in my car are the dome light and the glove box light. I swapped an LED in the glove box light but it did not work. The polarity needs to be reversed and I didn't get around to it yet. Here's my bulb count so far for a '75 2+2. Speedometer: (2) BA9s bulbs for illumination (1) BA9s for High Beam Indicator (1) BA9s for Brake Light Indicator/Warning Tachometer: (2) BA9s bulbs for illumination (2) BA9s for Turn Signal/Hazard Flashing Indicators Temp/Oil Gauge: (1) BA9s Clock: (1) BA9s Amp/Fuel Gauge: (1) BA9s Catalyst Light: (1) 74 Mini Wedge Floor Temp: (1) 74 Mini Wedge Rear Defogger: (1) 74 Mini Wedge Fuel: (1) BA9s Fasten Seat Belts: (1) 74 Mini Wedge Hazard Switch: (1) 74 Mini Wedge Cigarette Lighter Socket: (1) 194 Wedge HVAC Controls: (1) 194 Wedge Glove Box: (1) BA9s Map Light: (1) Might be 194 Wedge, not sure on size, replaced with LED from datsun-240z-upgrades.net


 1 point
 -
1 pointI never knew you were supposed to do that first. (Activate) I just put them in straight out of the box. Maybe that is why I don't like them with my new springs.1 point