Leaderboard
-

motorman7
 Subscriber
 7Points2,208Posts
 -


wheee!
Free Member2Points4,607Posts -

Mark Maras
Free Member2Points3,705Posts -

psdenno
Free Member2Points2,623Posts
Popular Content
Showing content with the highest reputation on 10/01/2018 in Posts
-
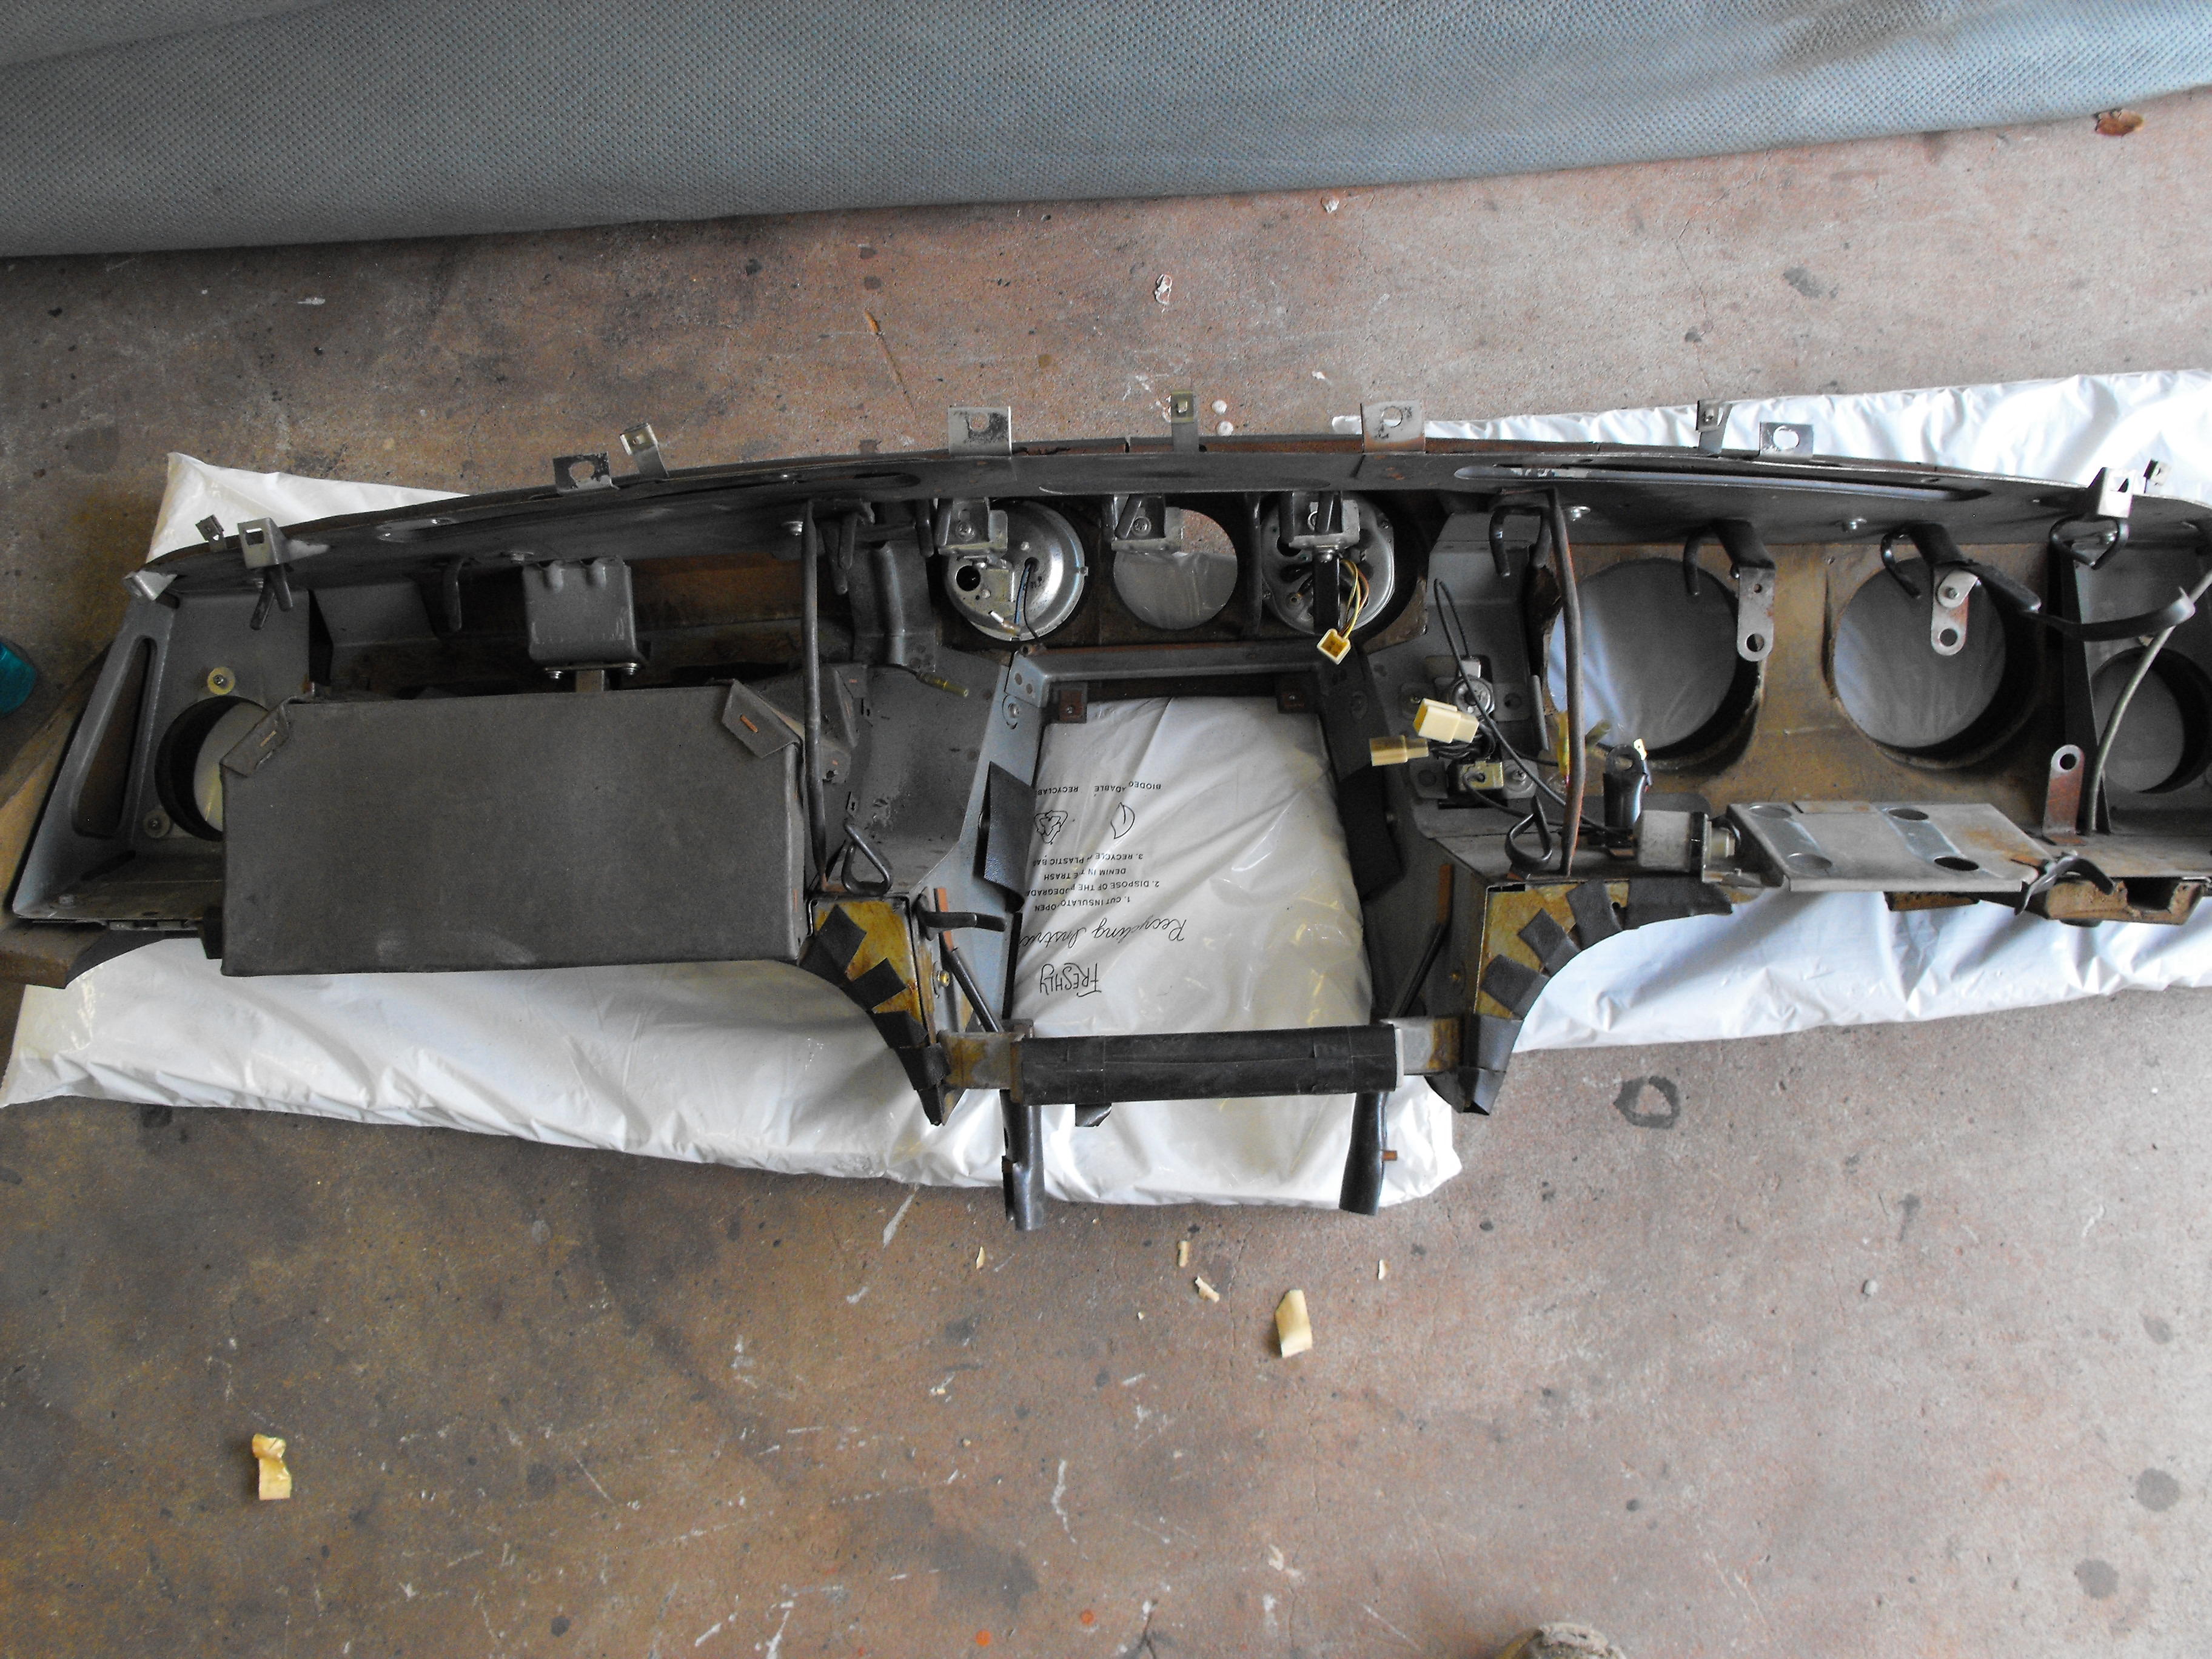
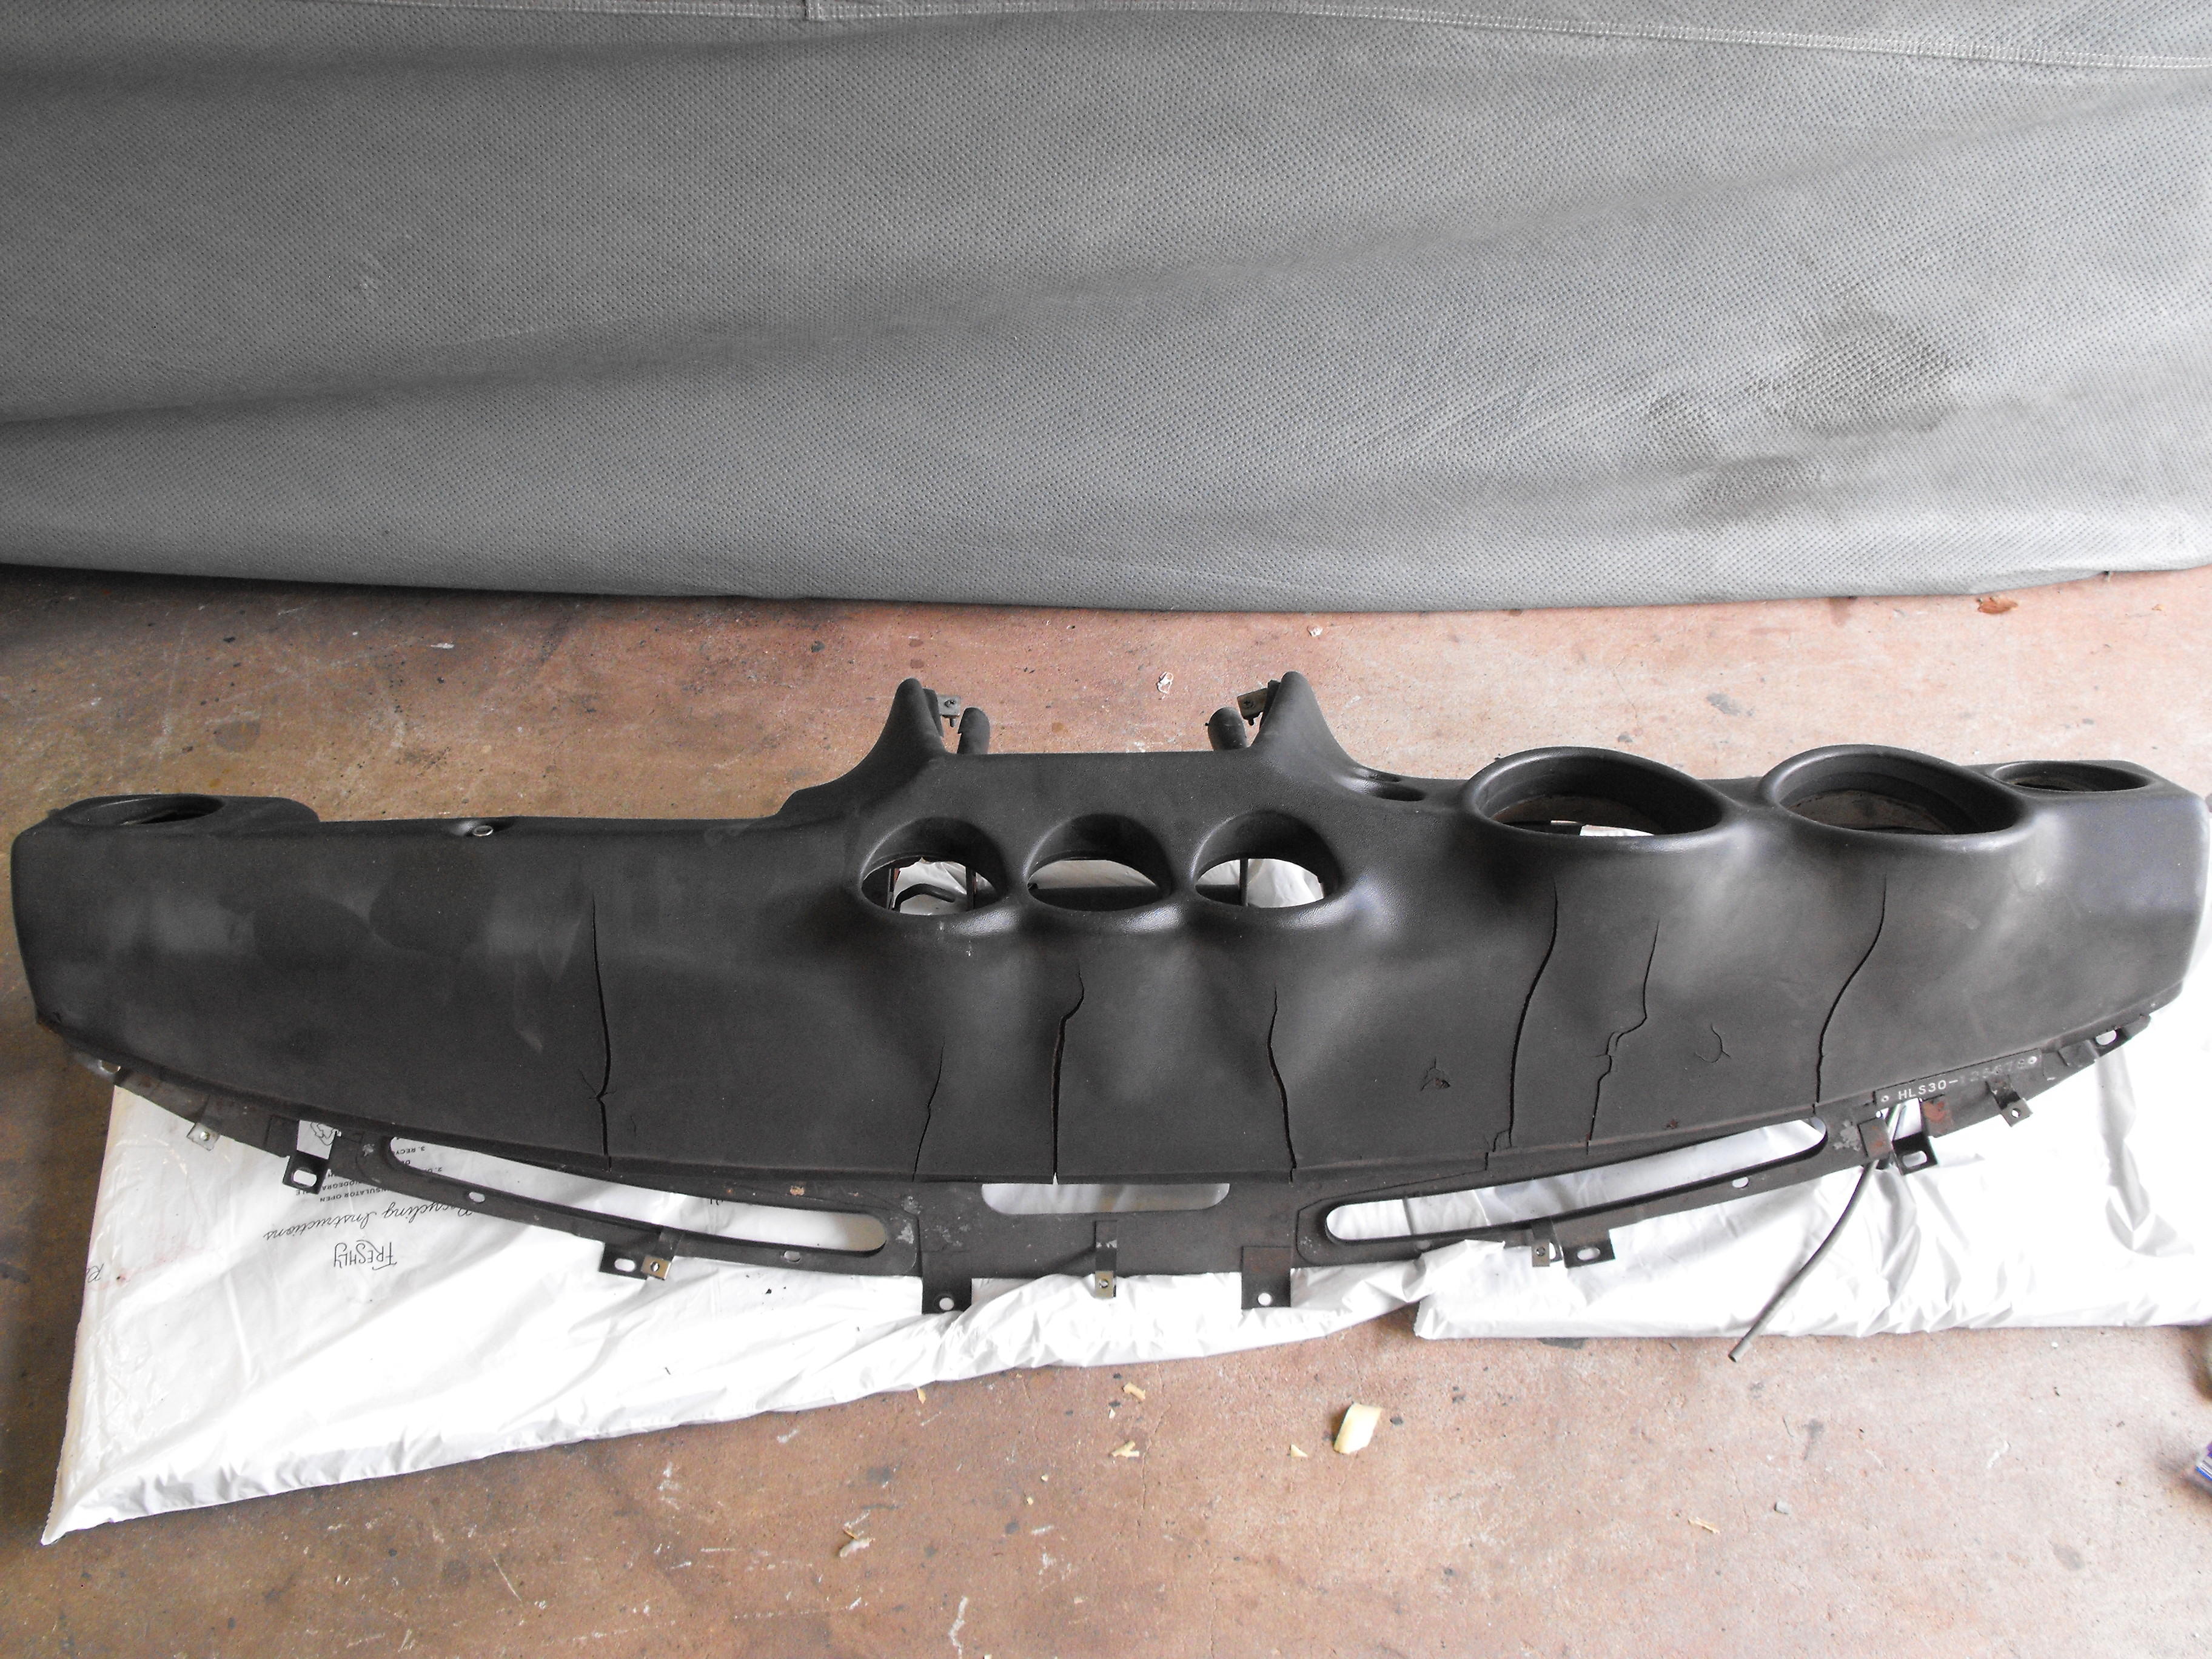
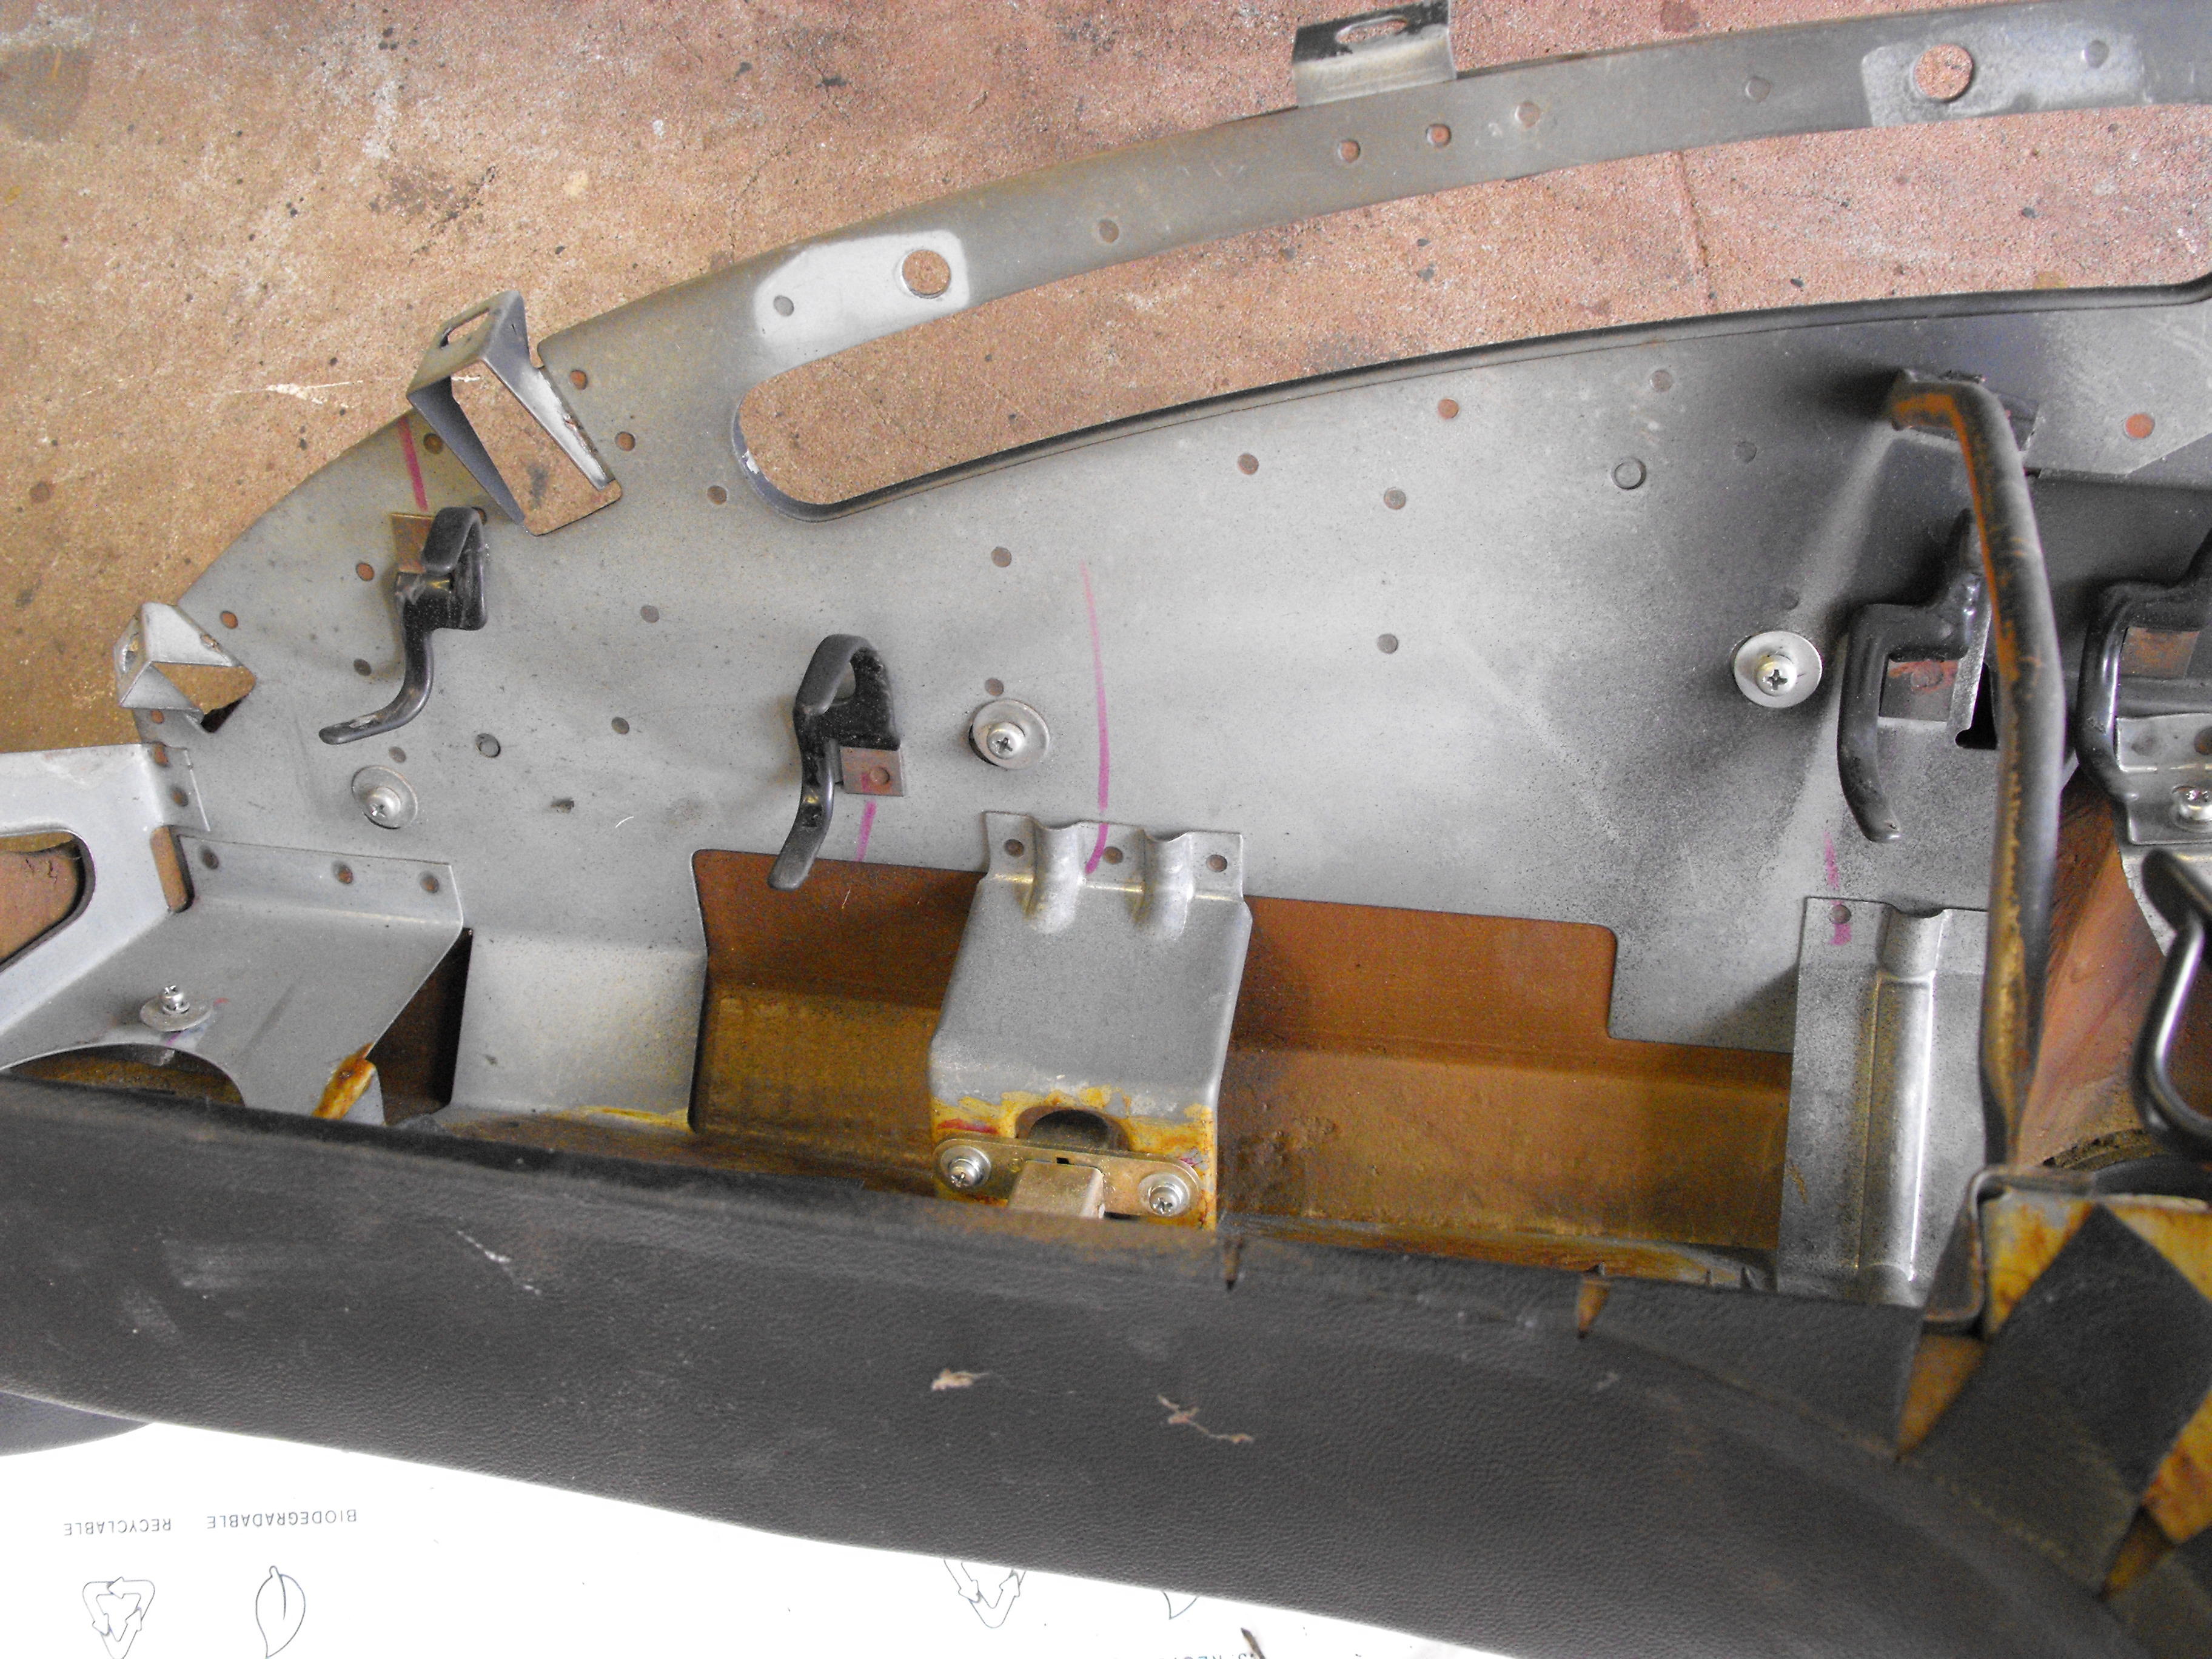
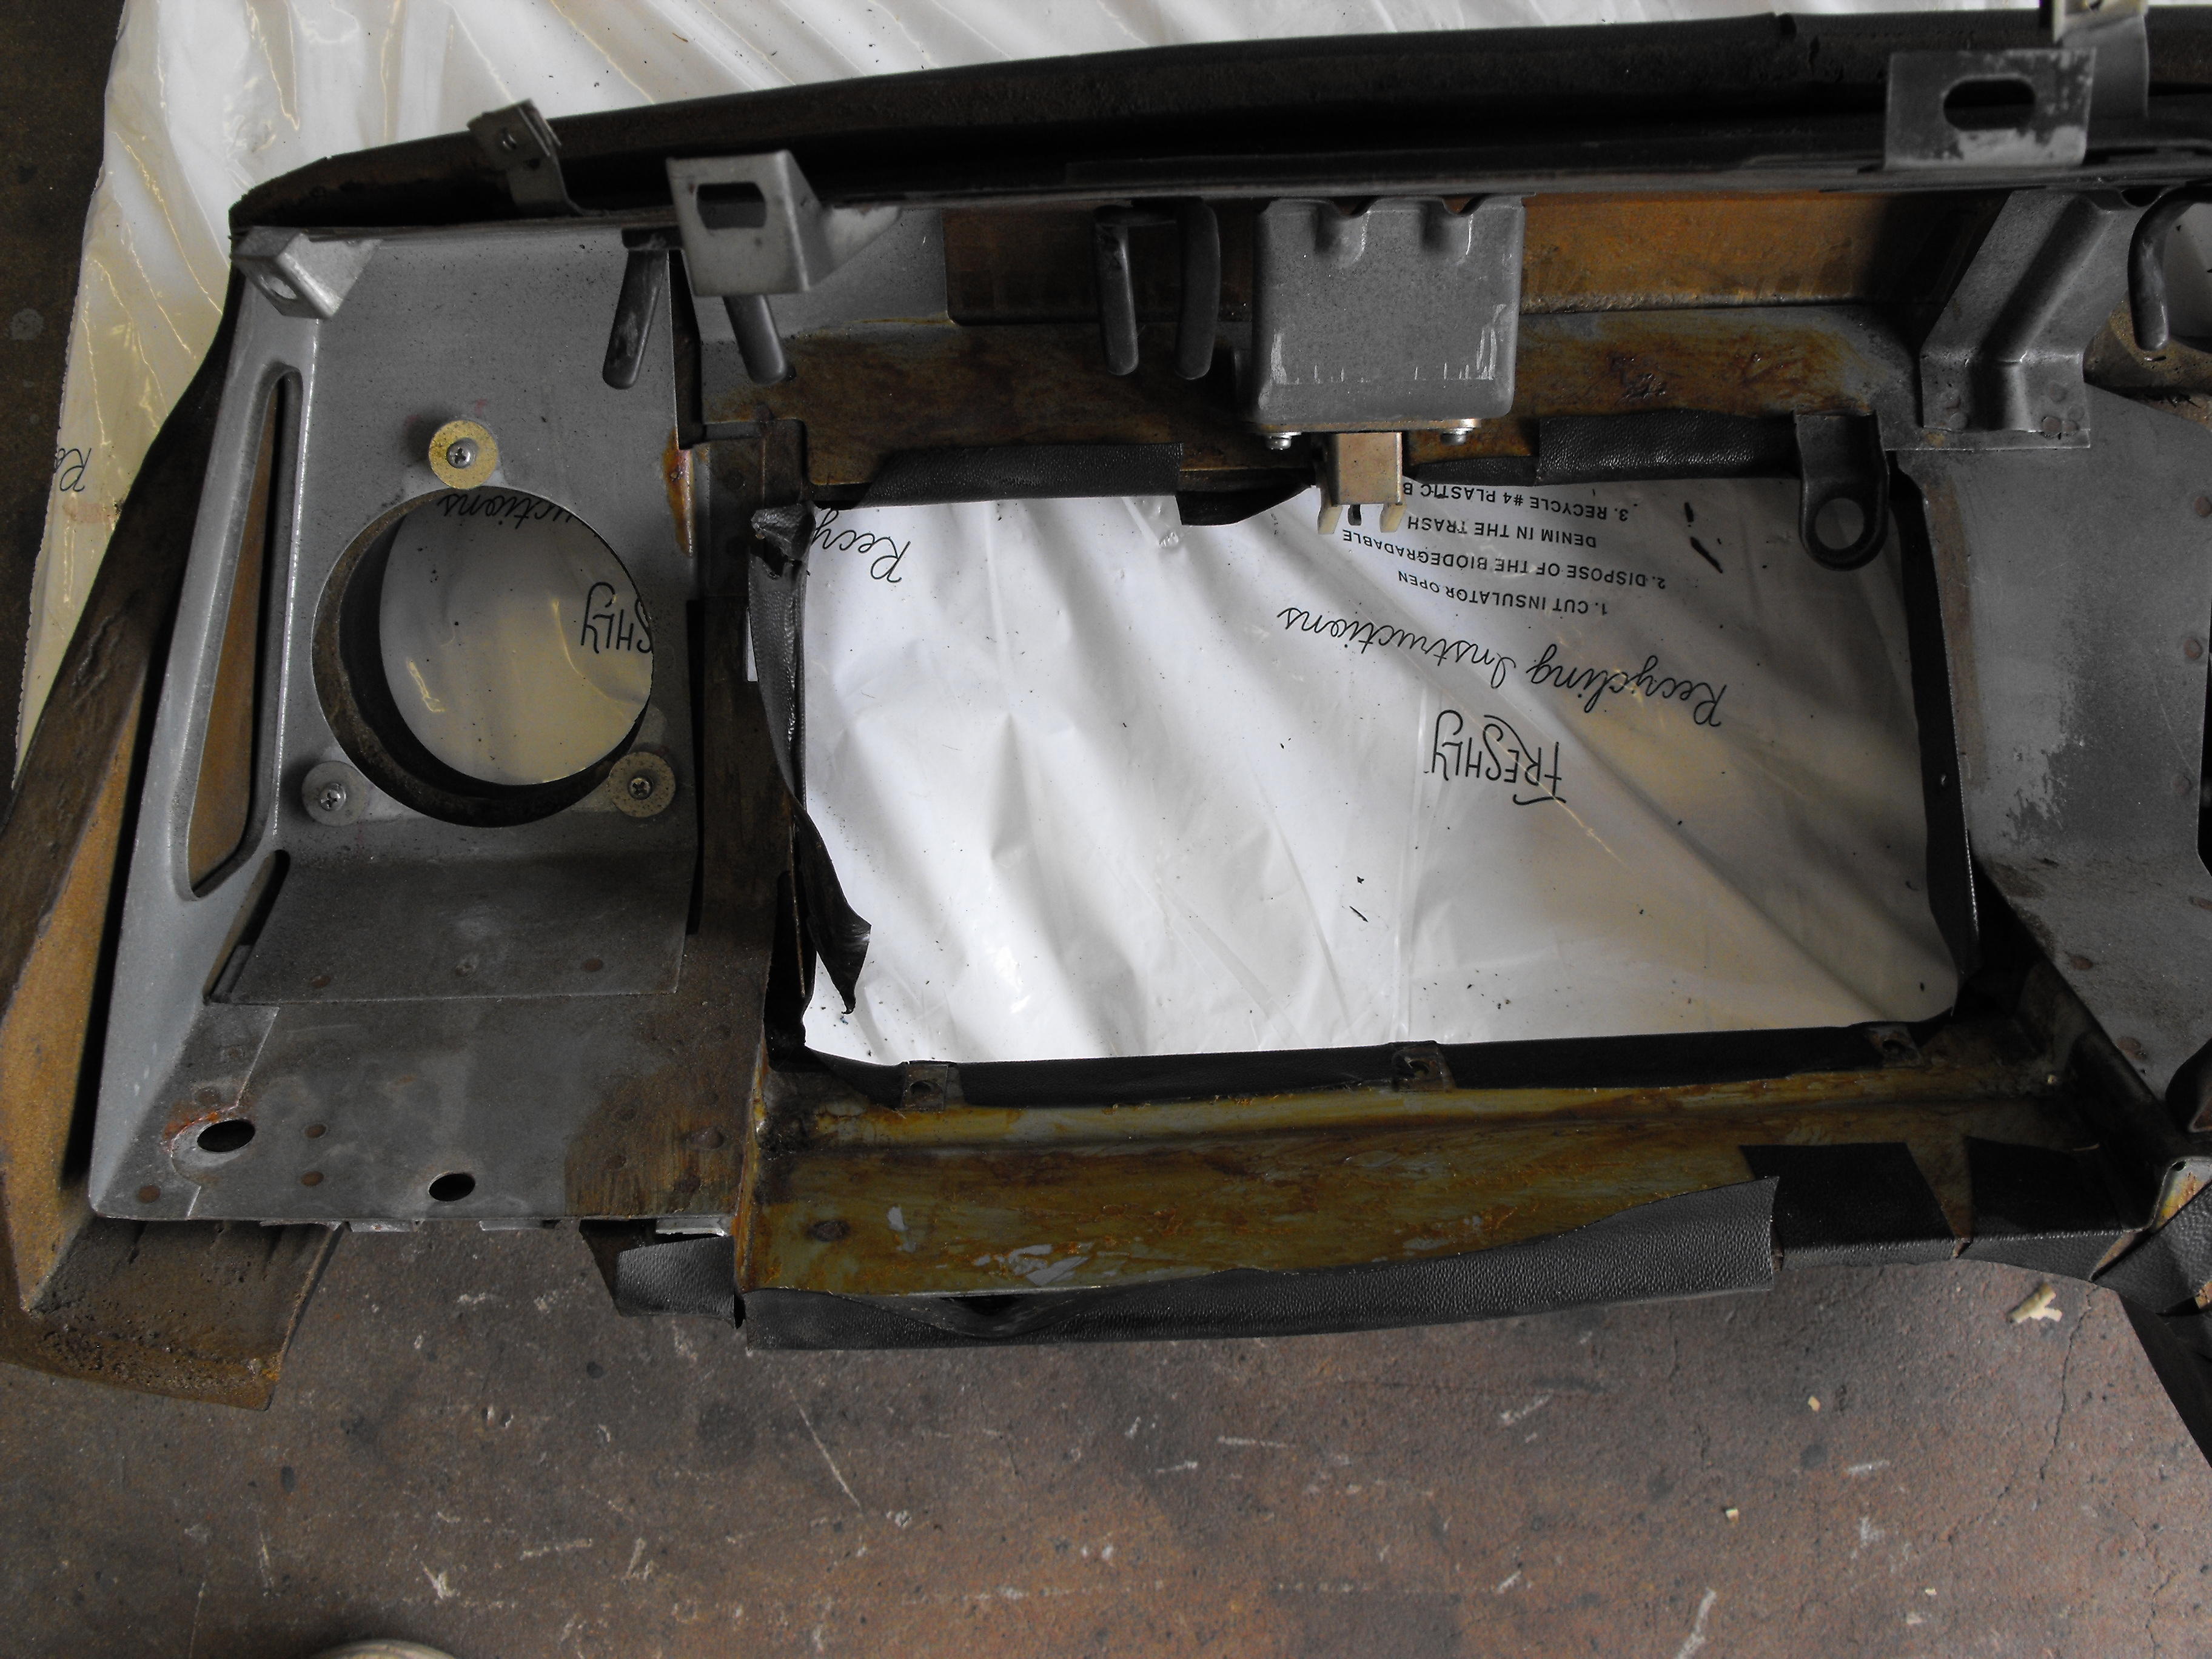
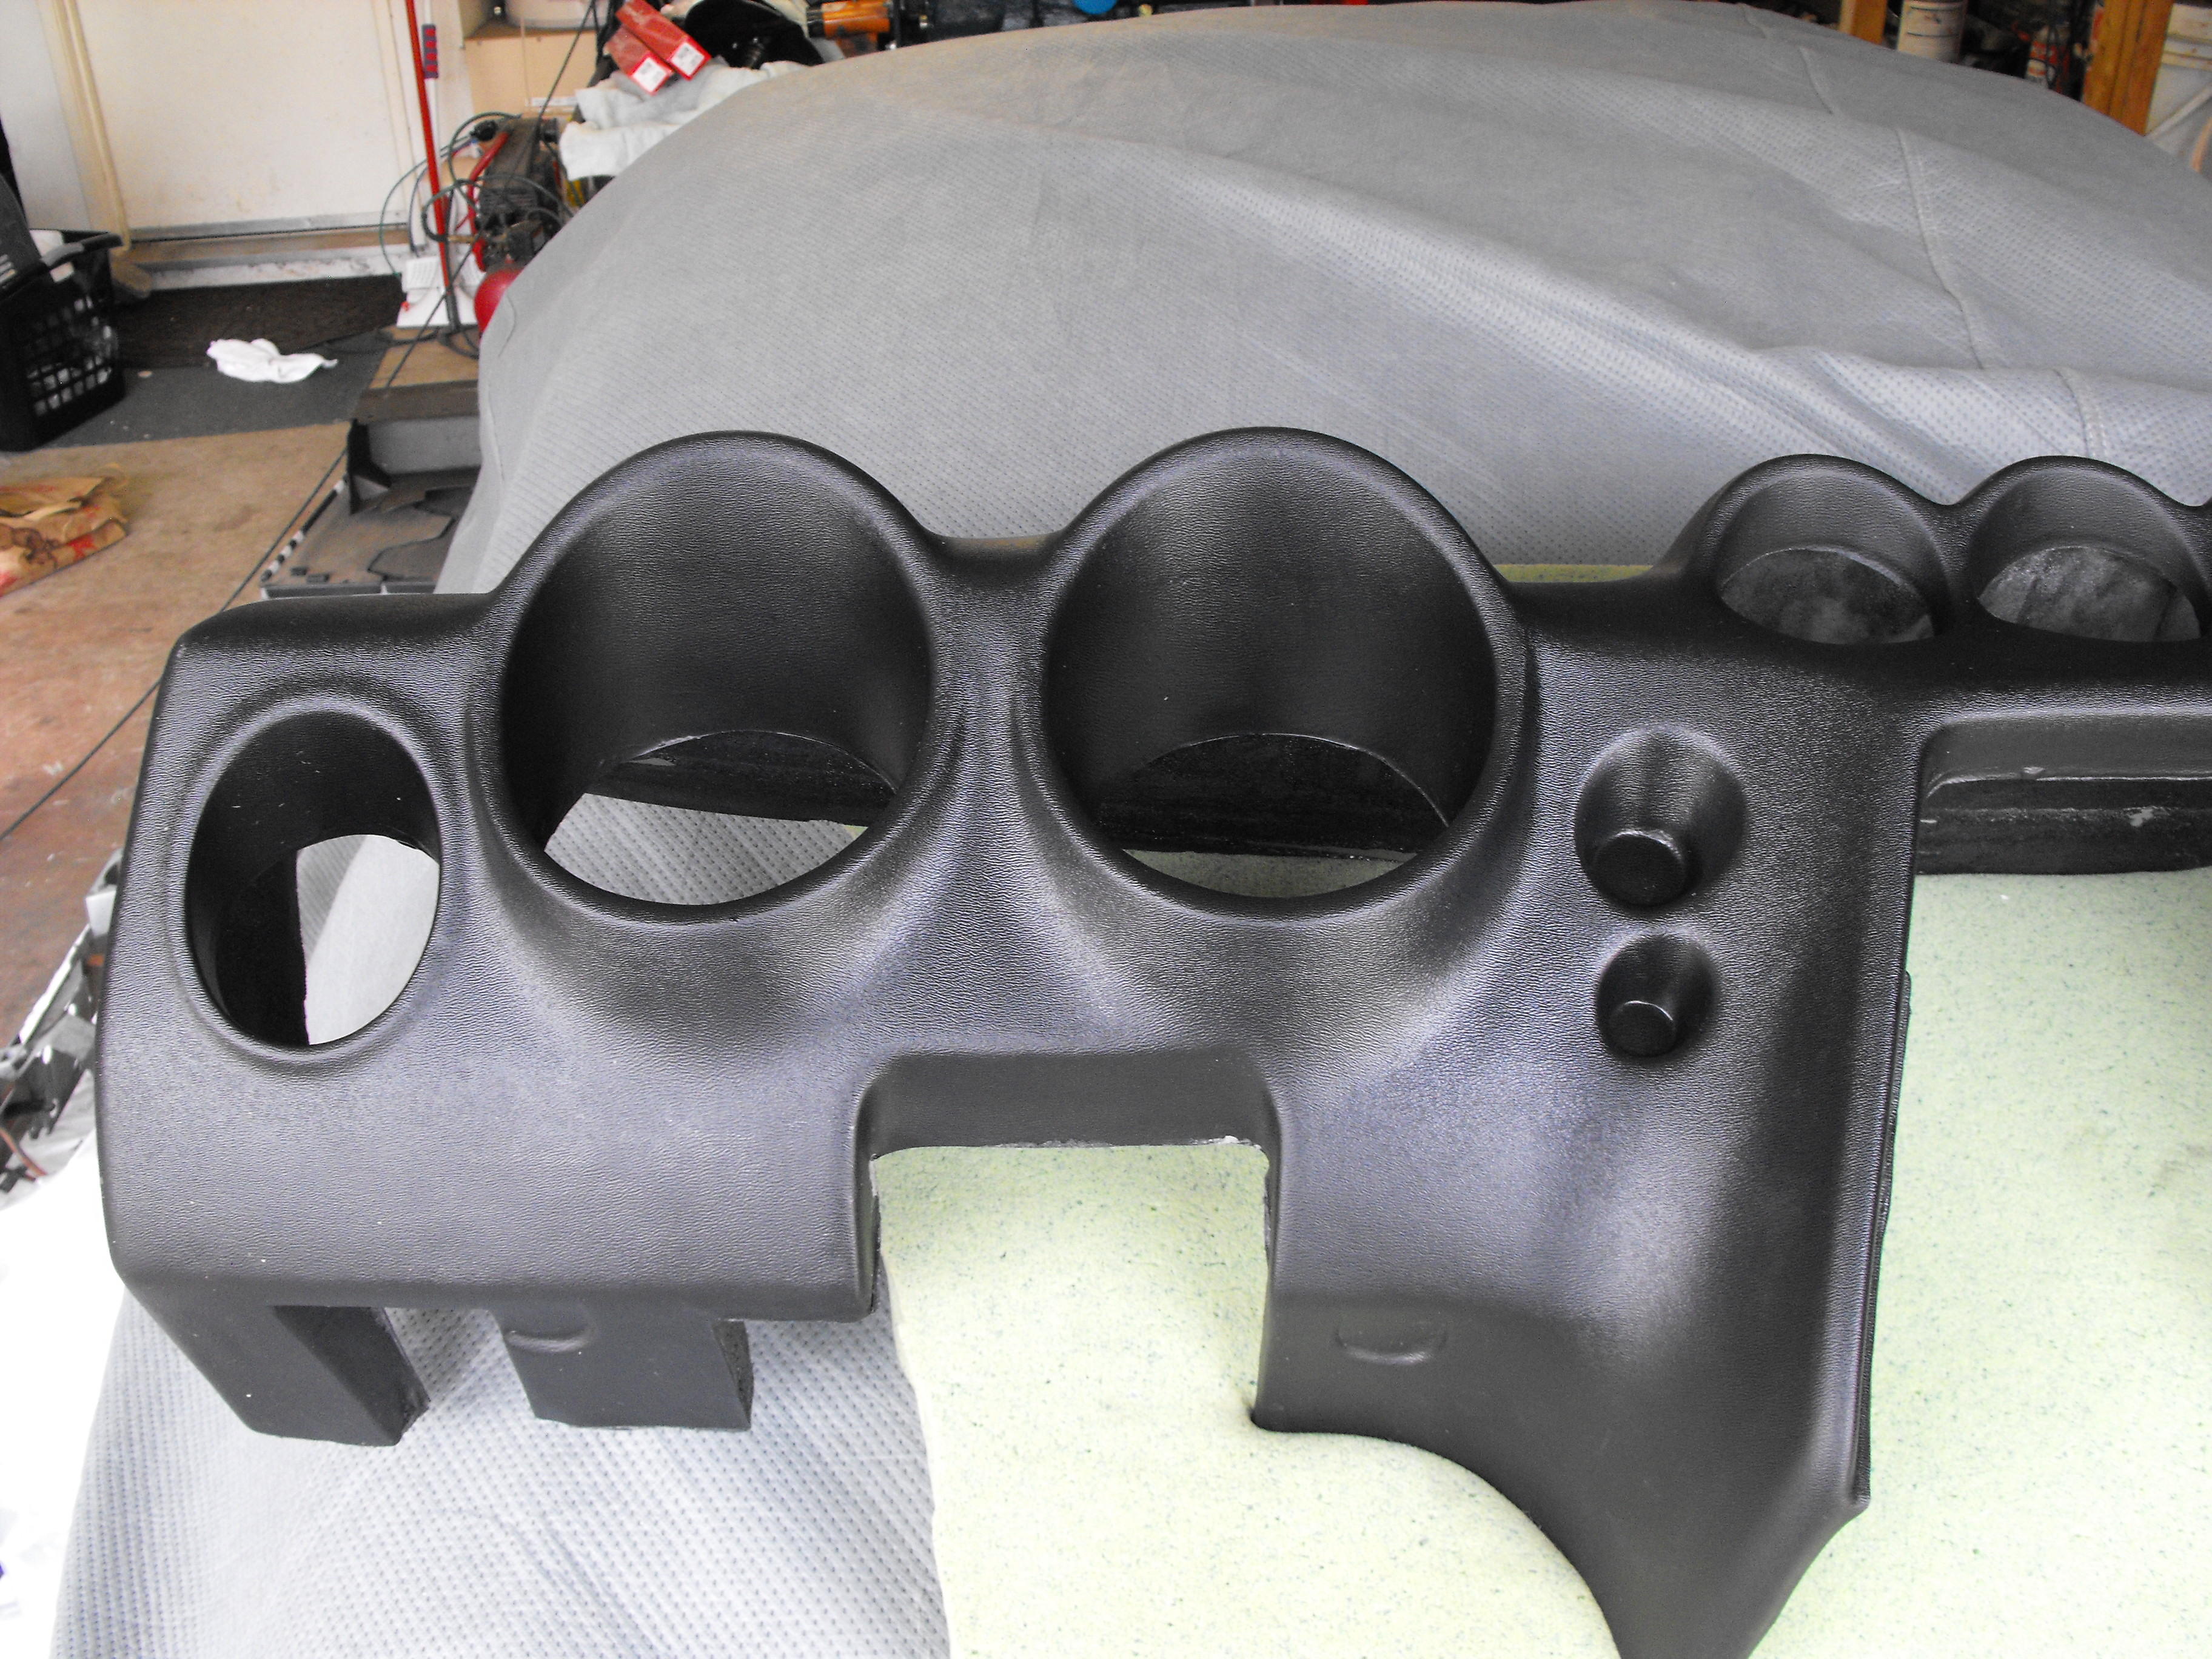
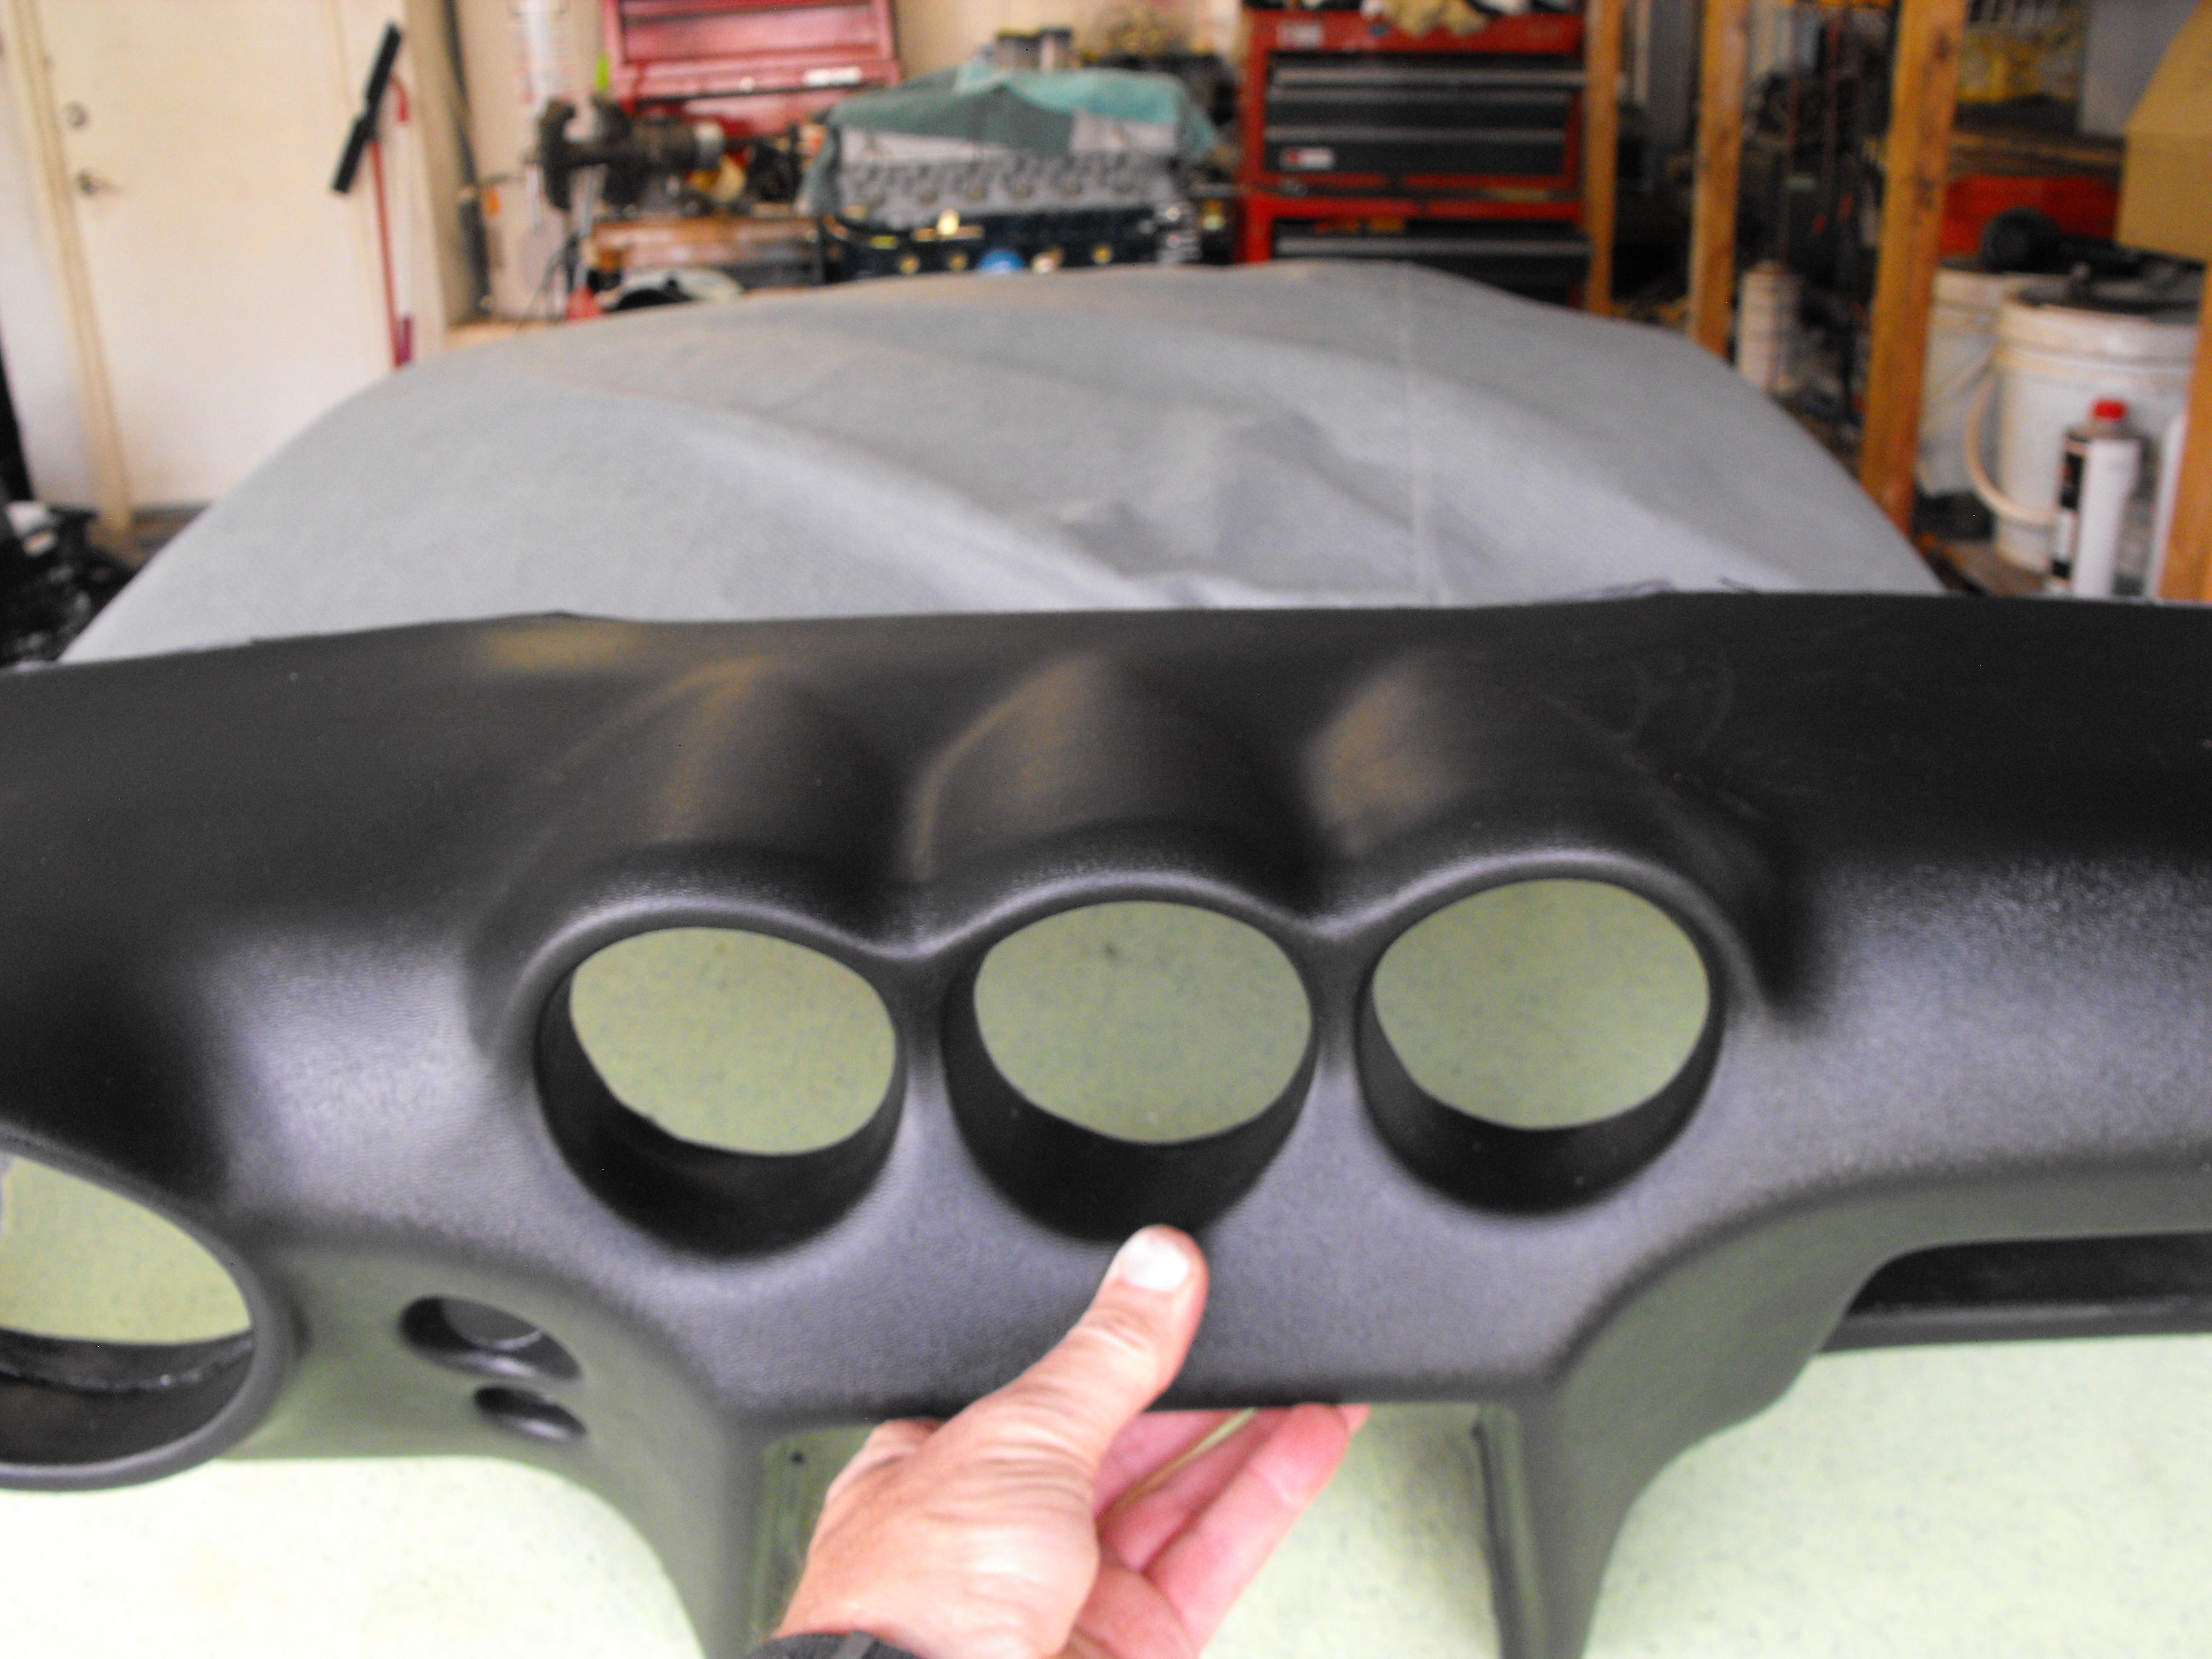
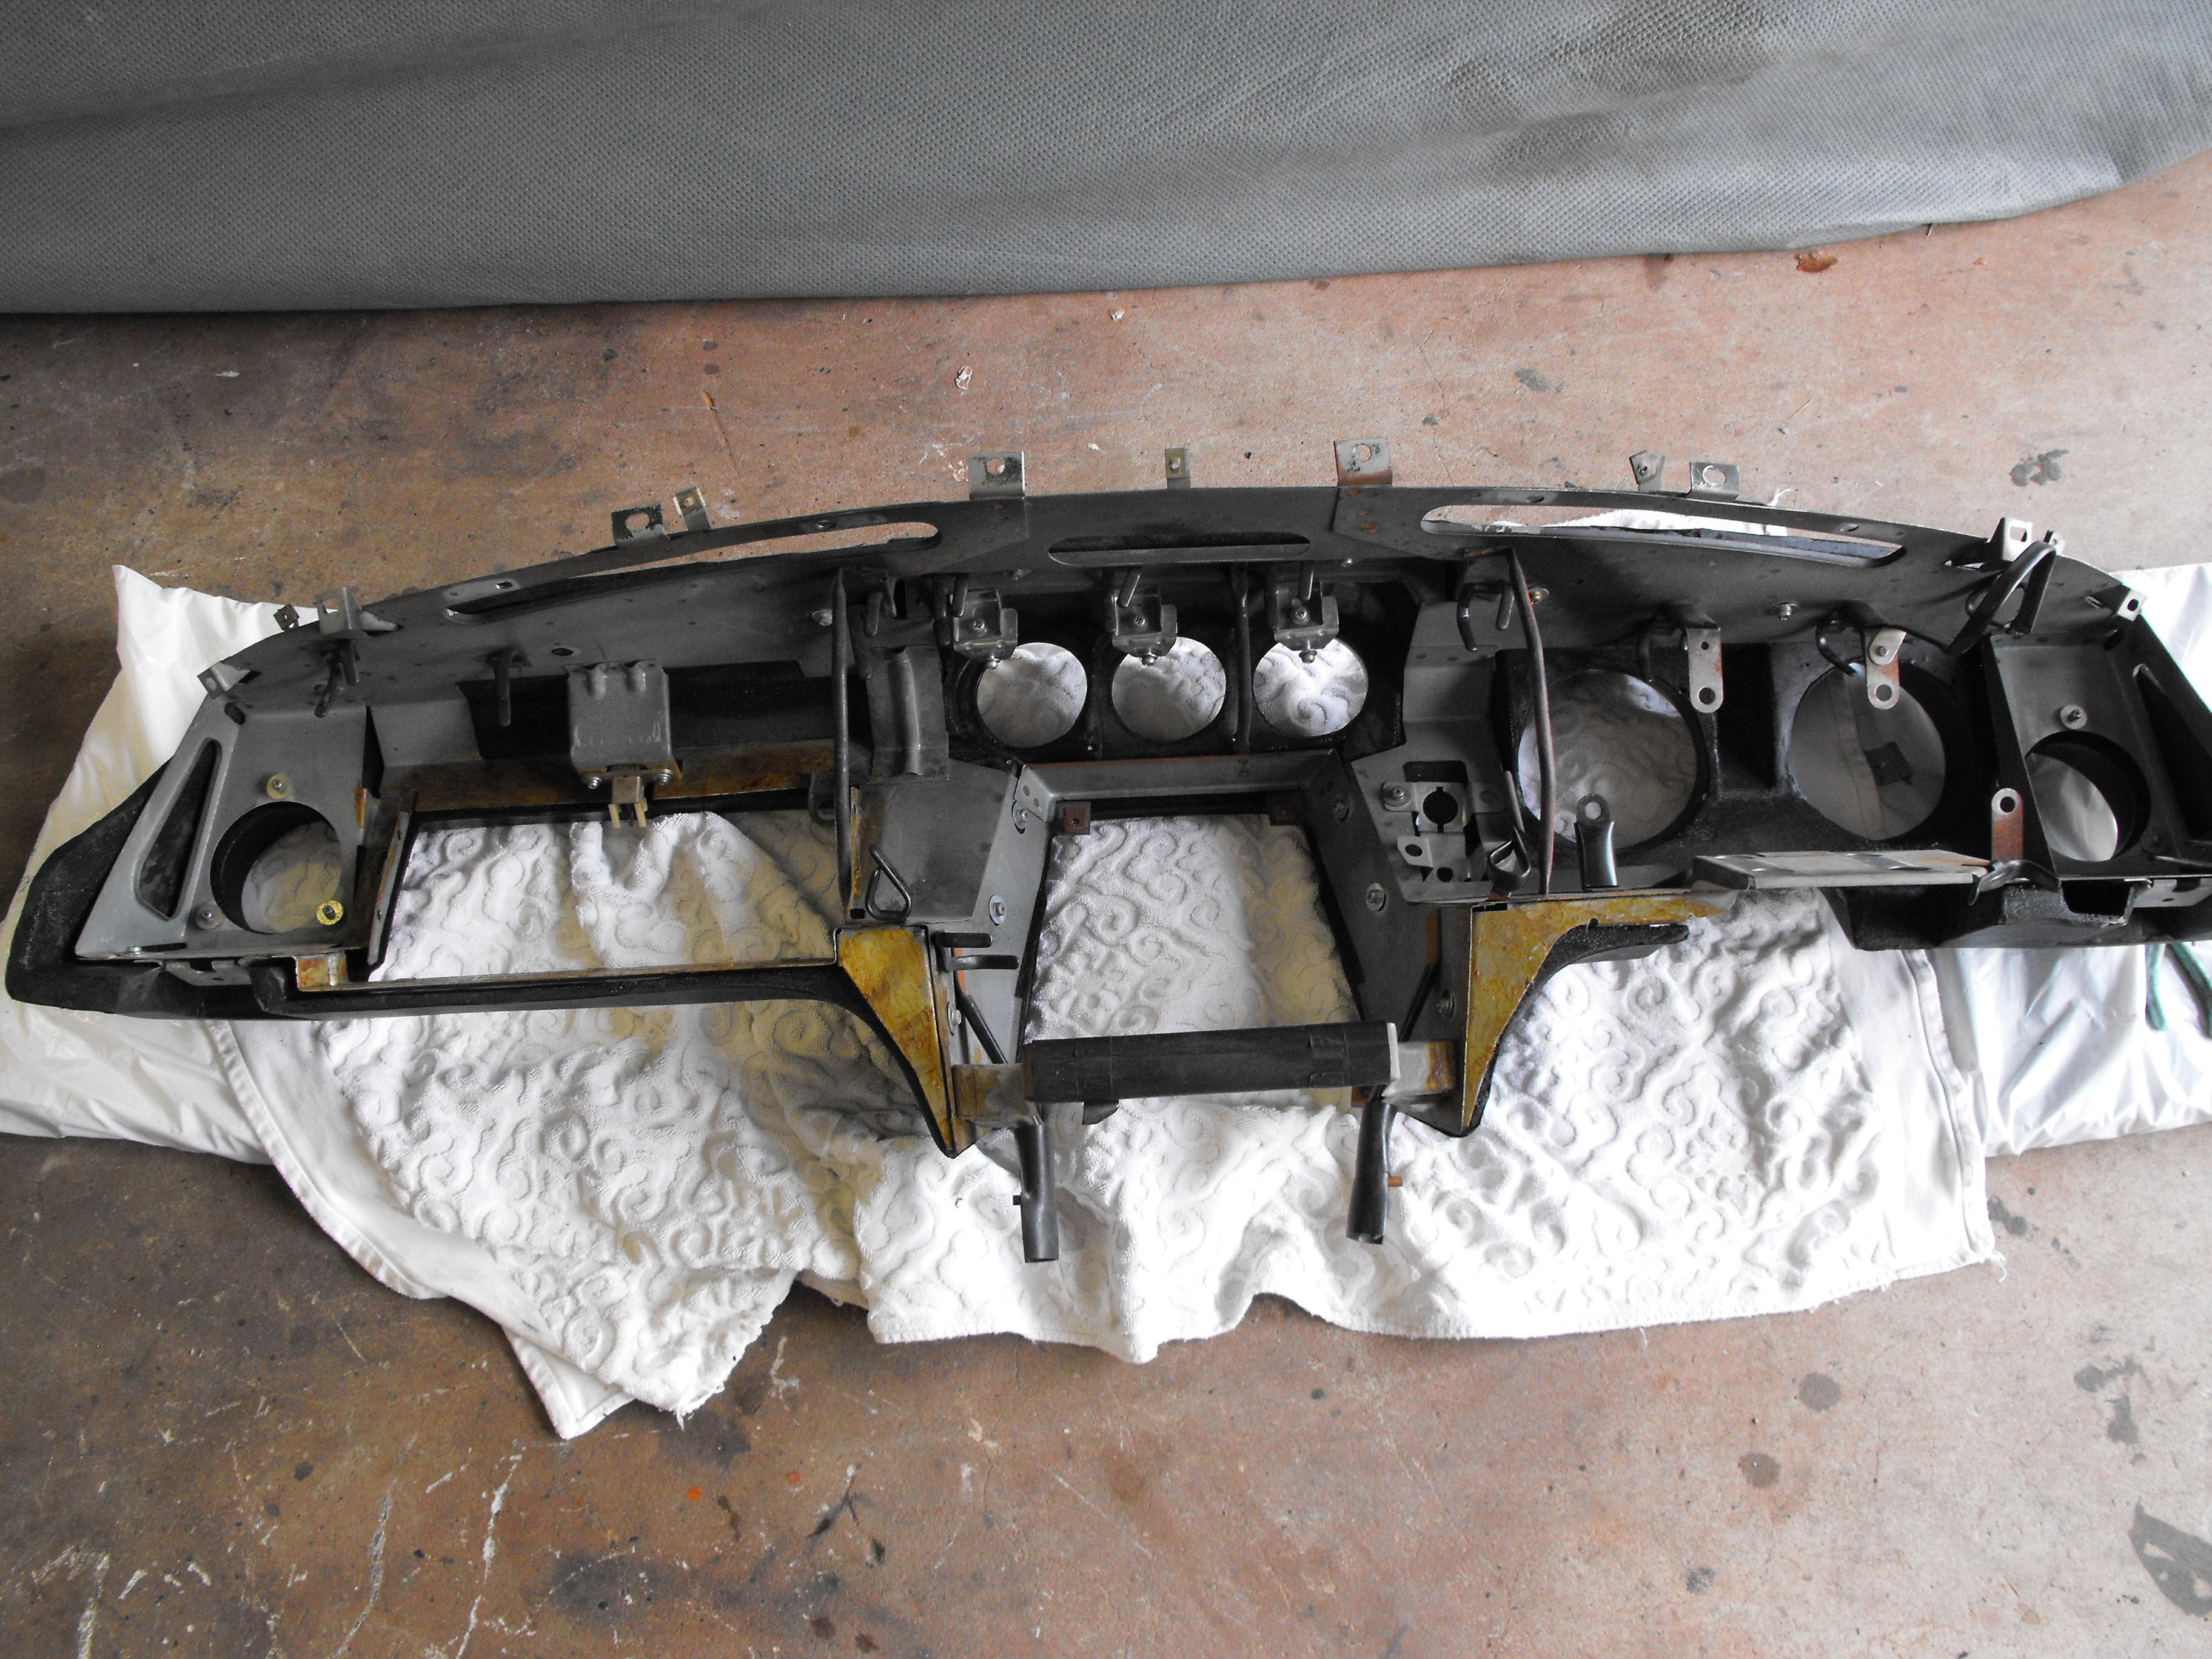
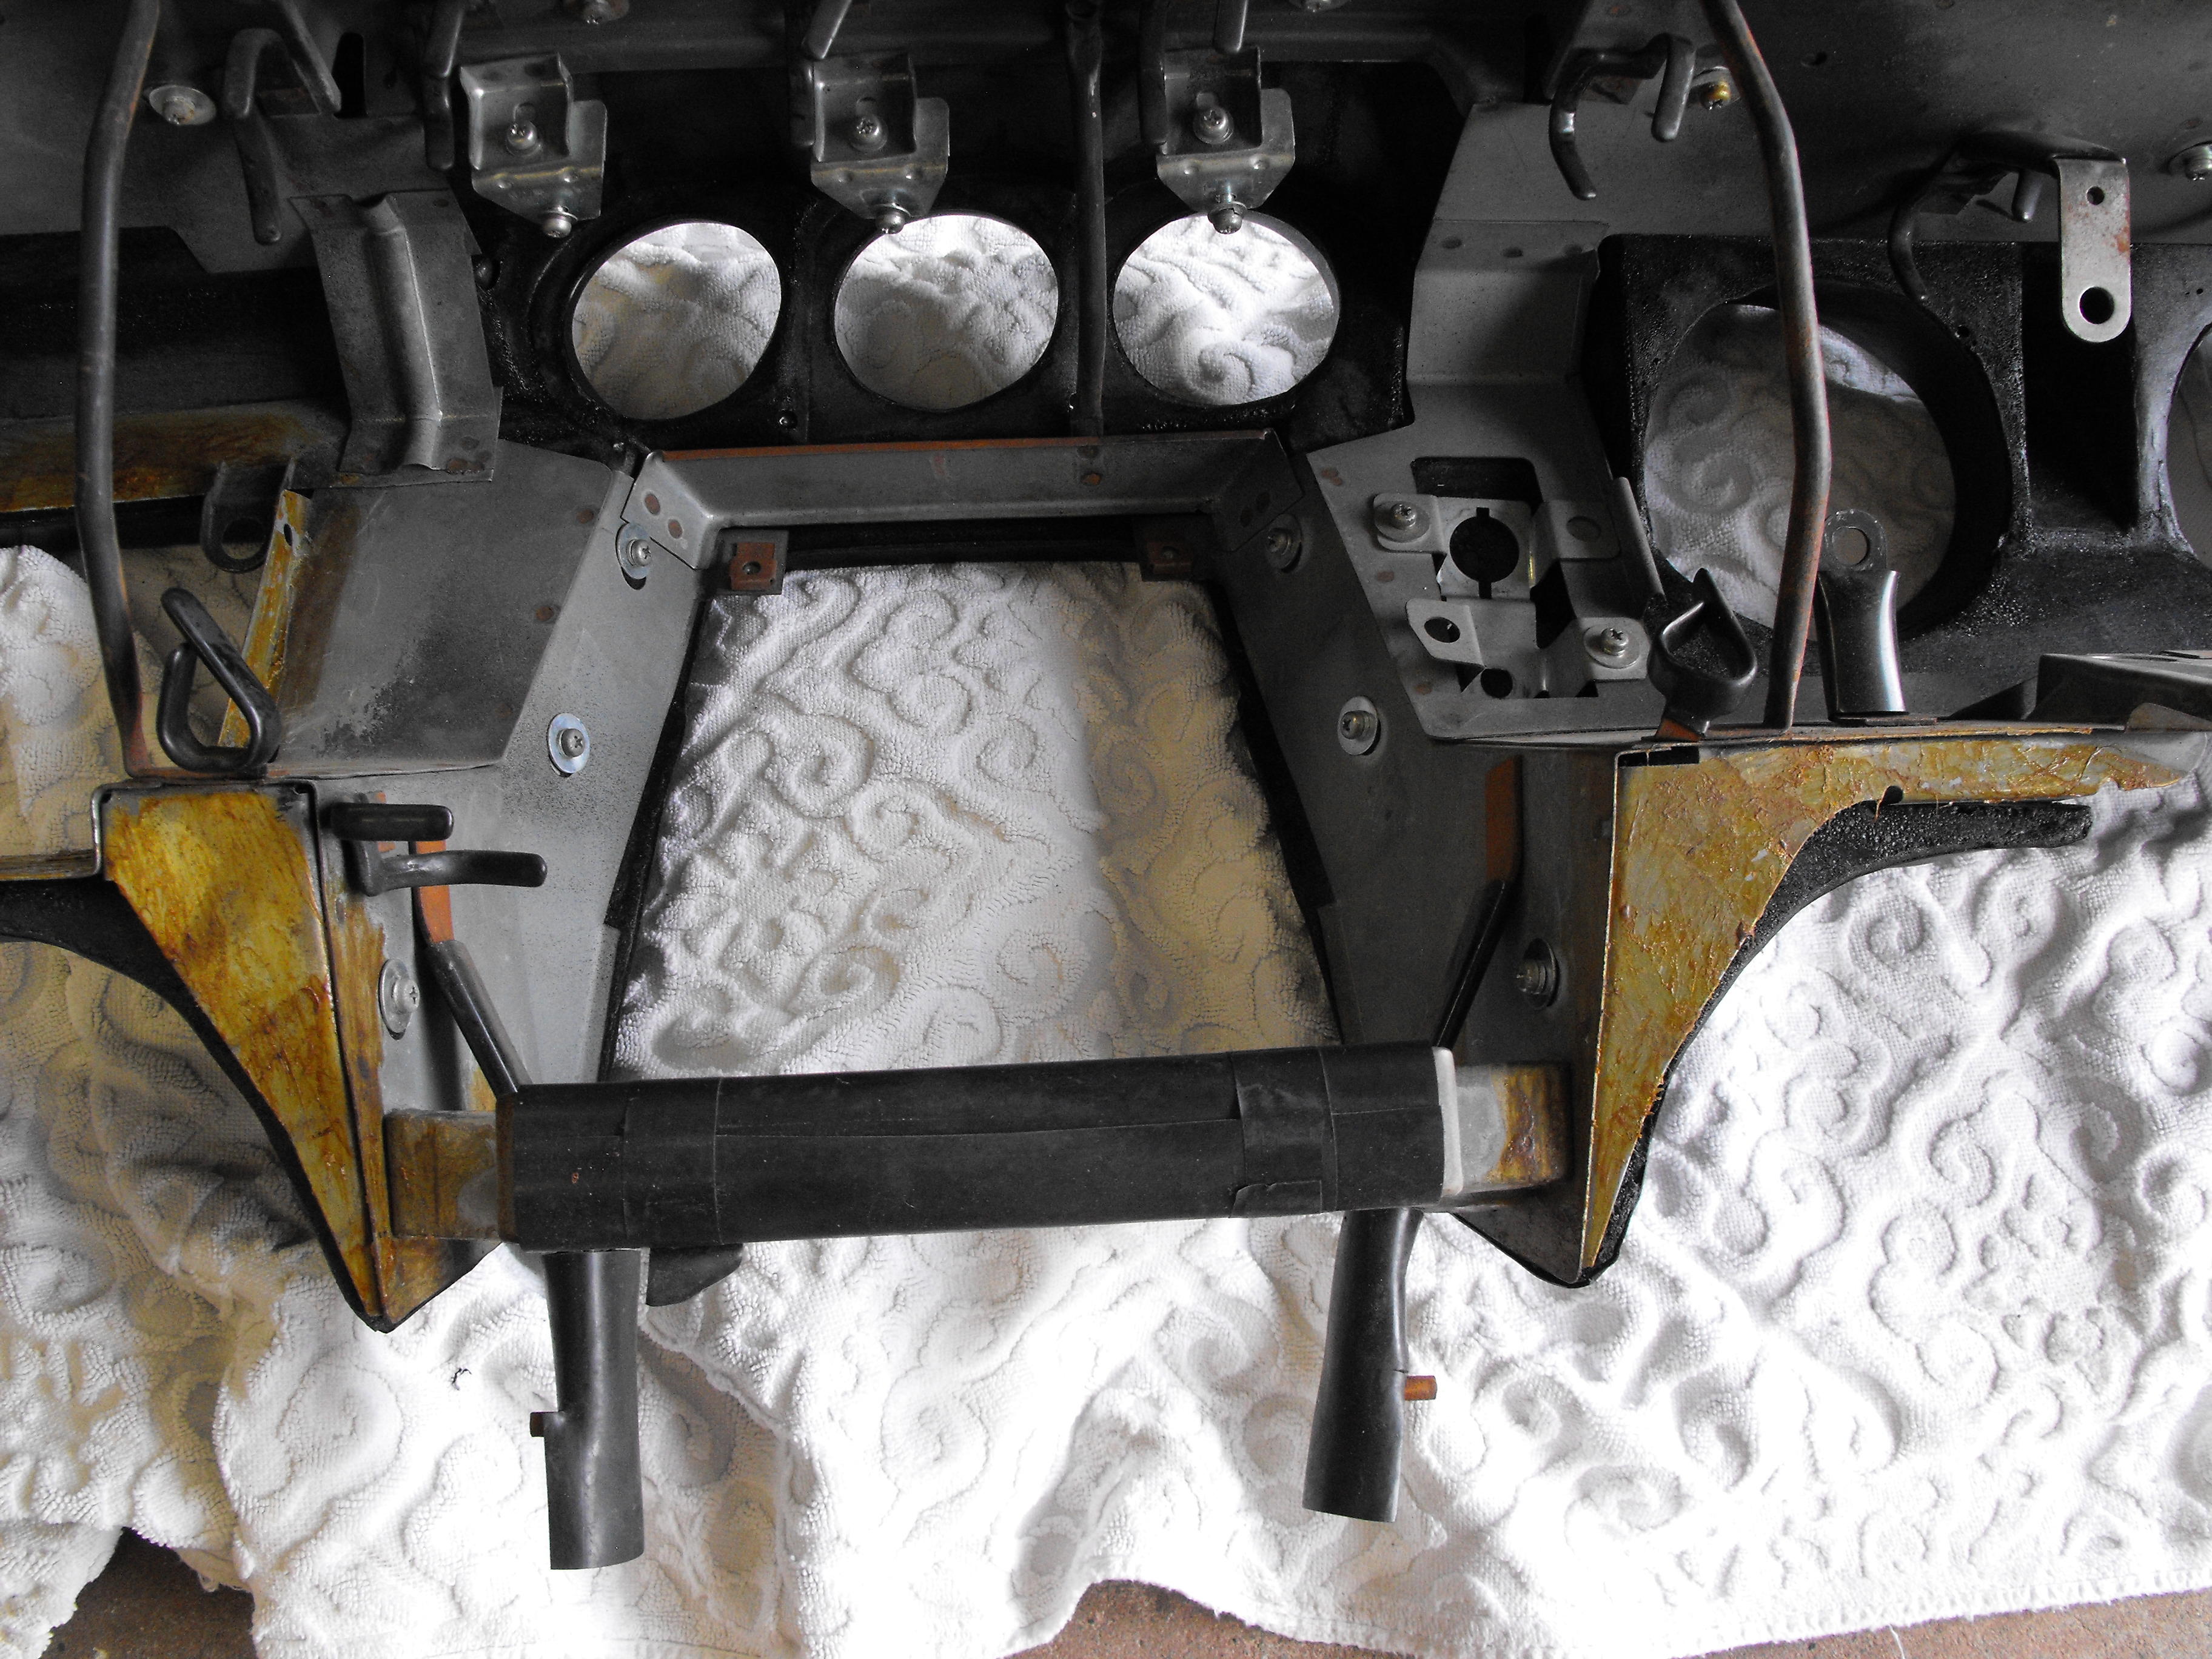
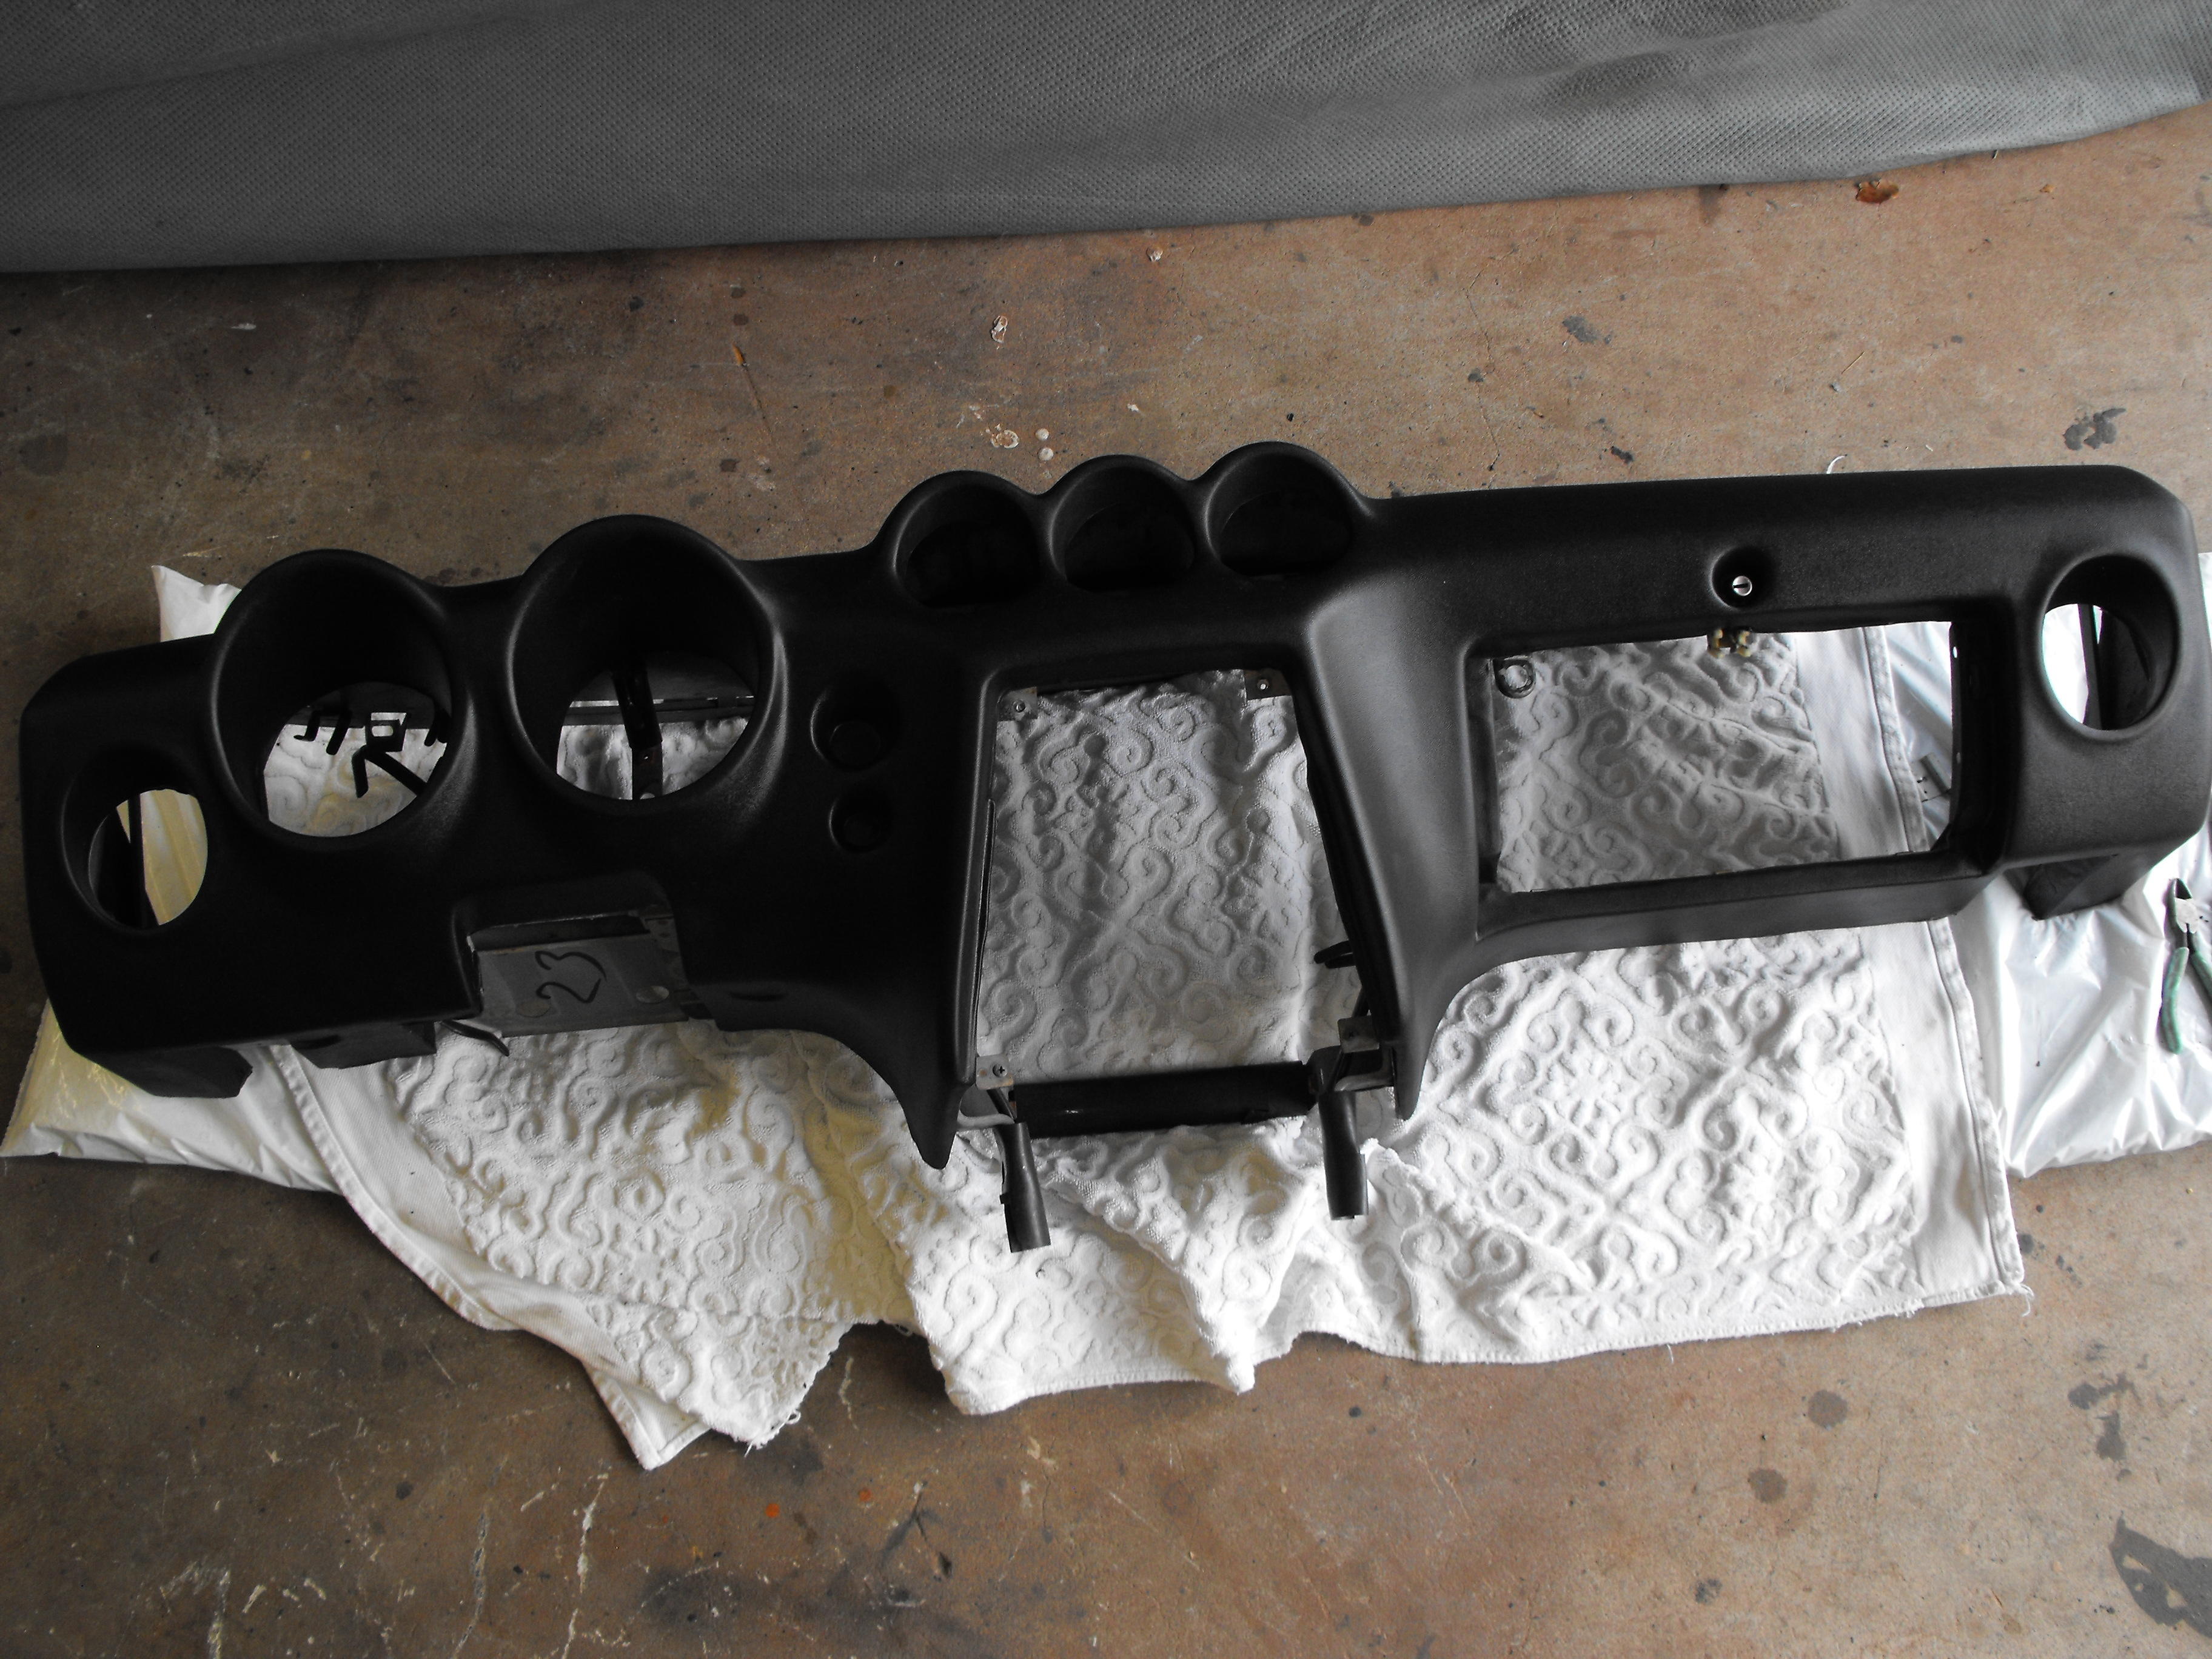
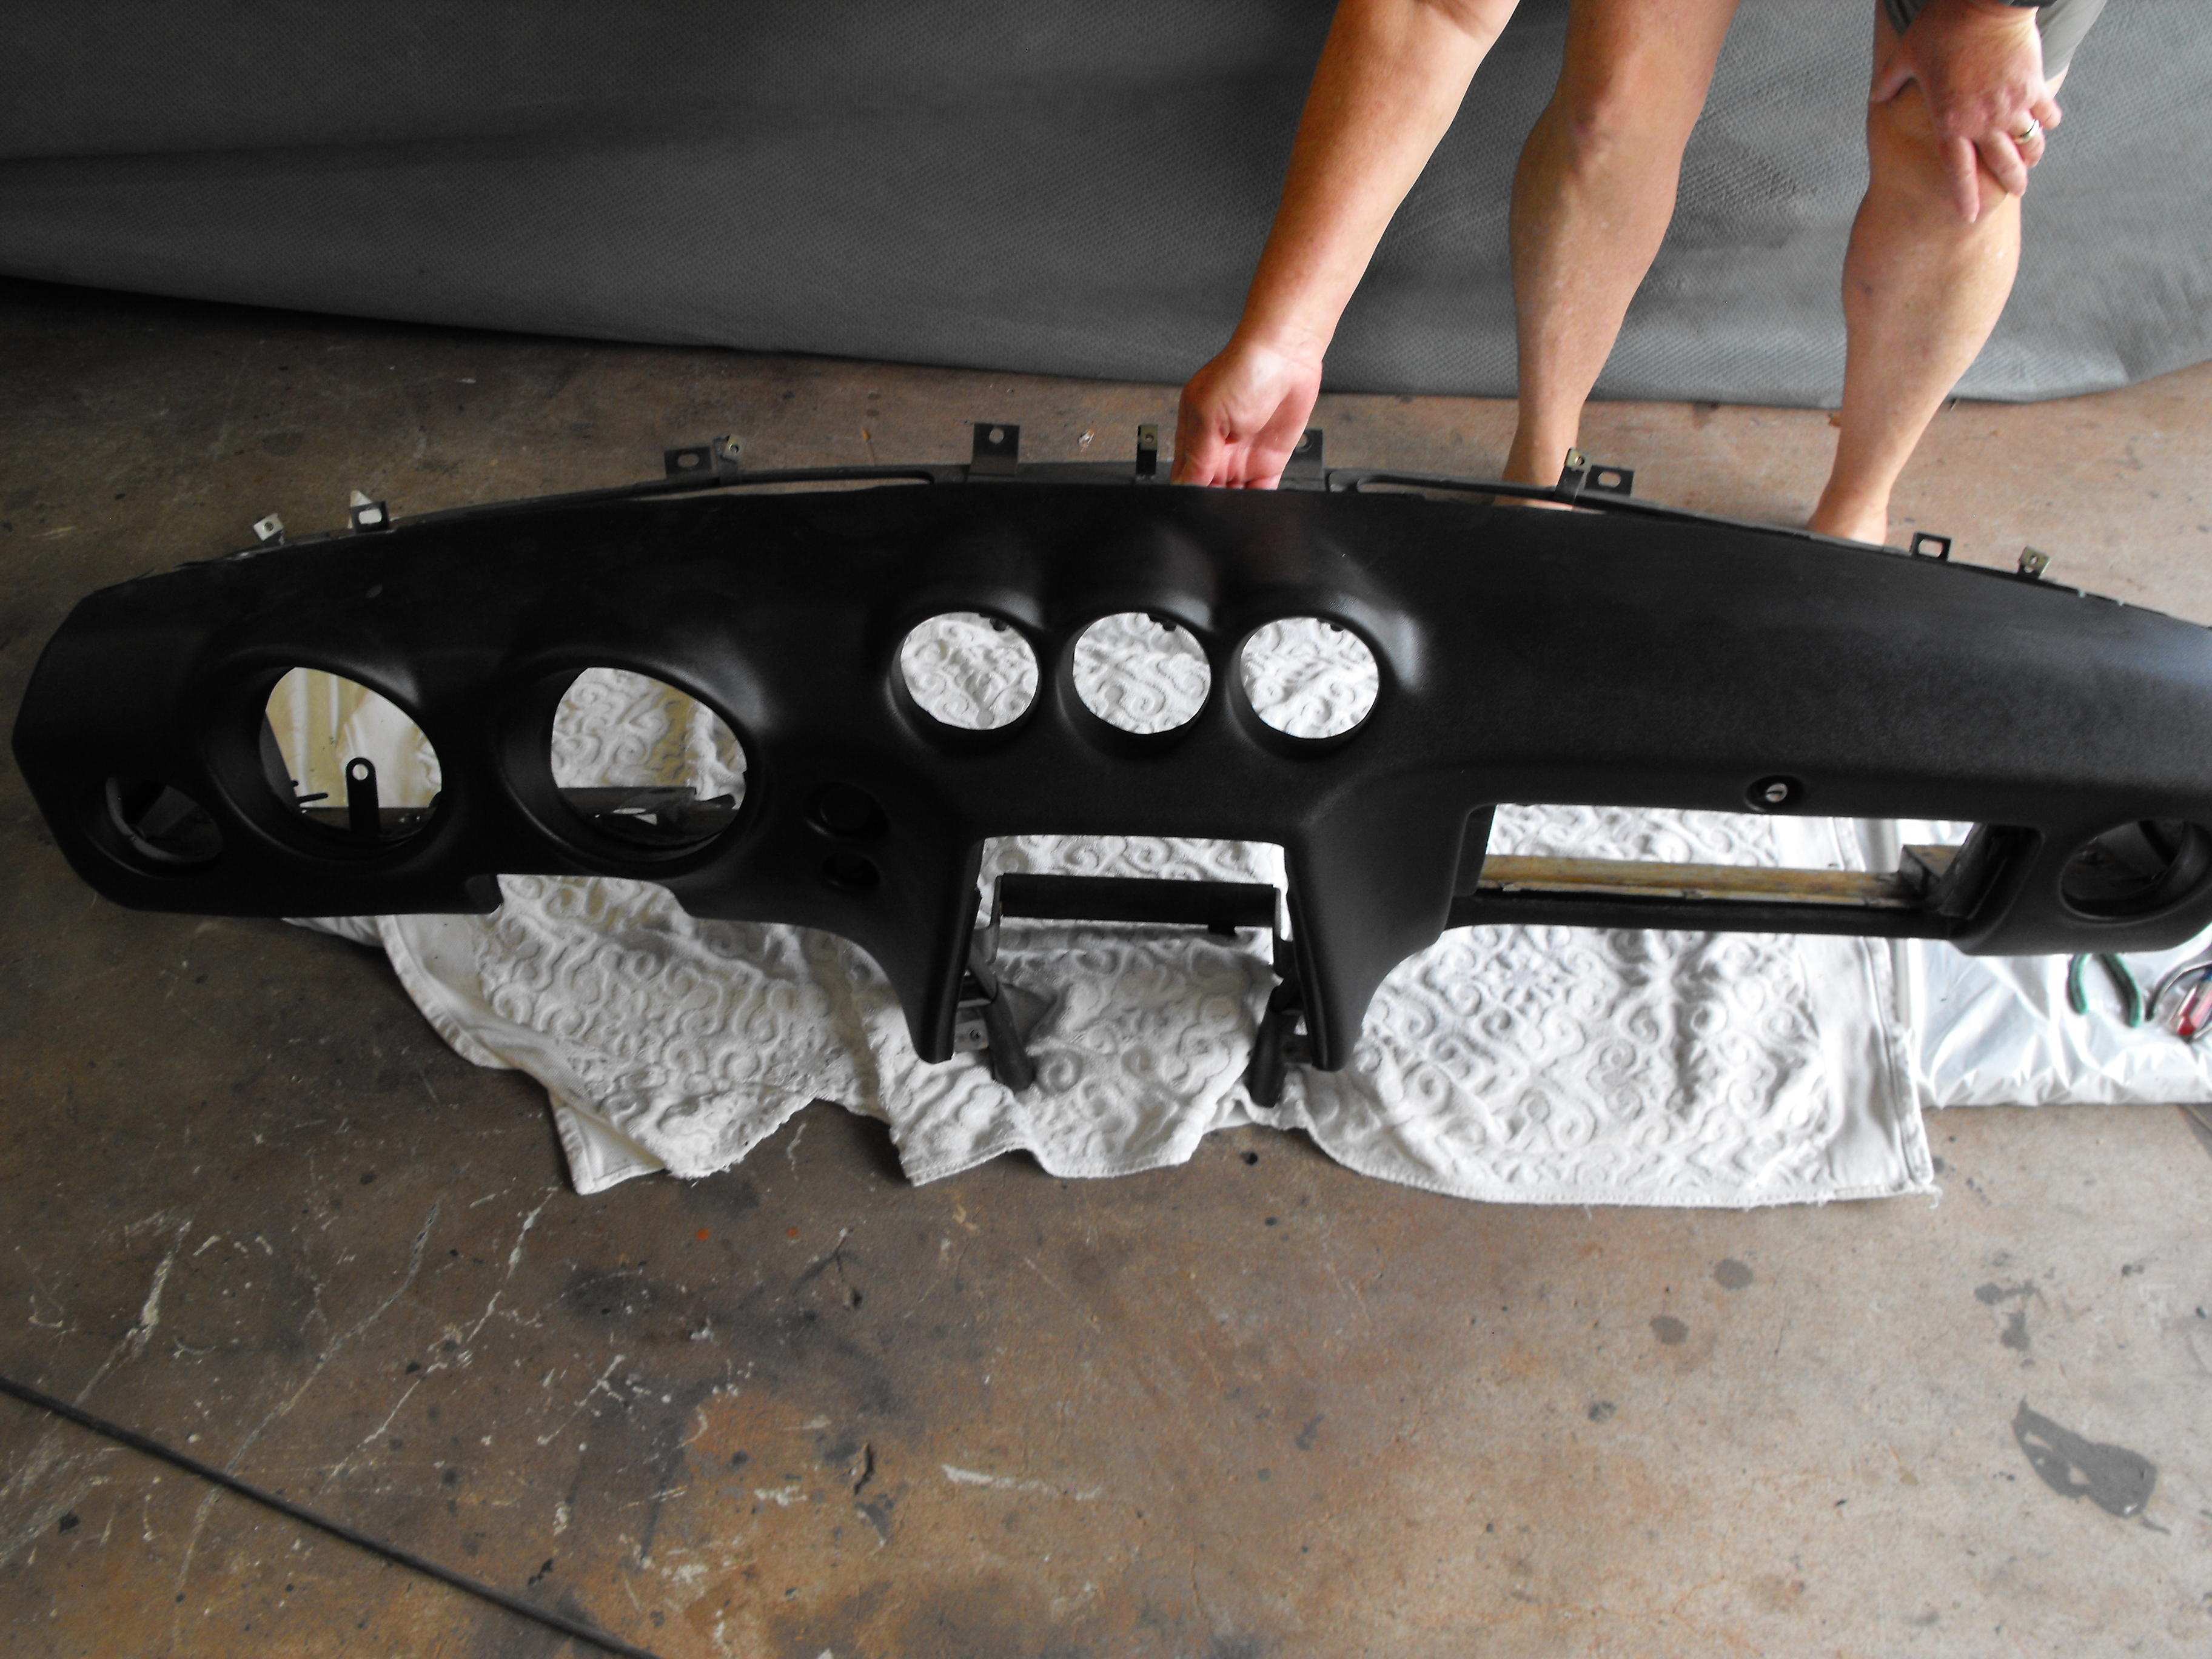
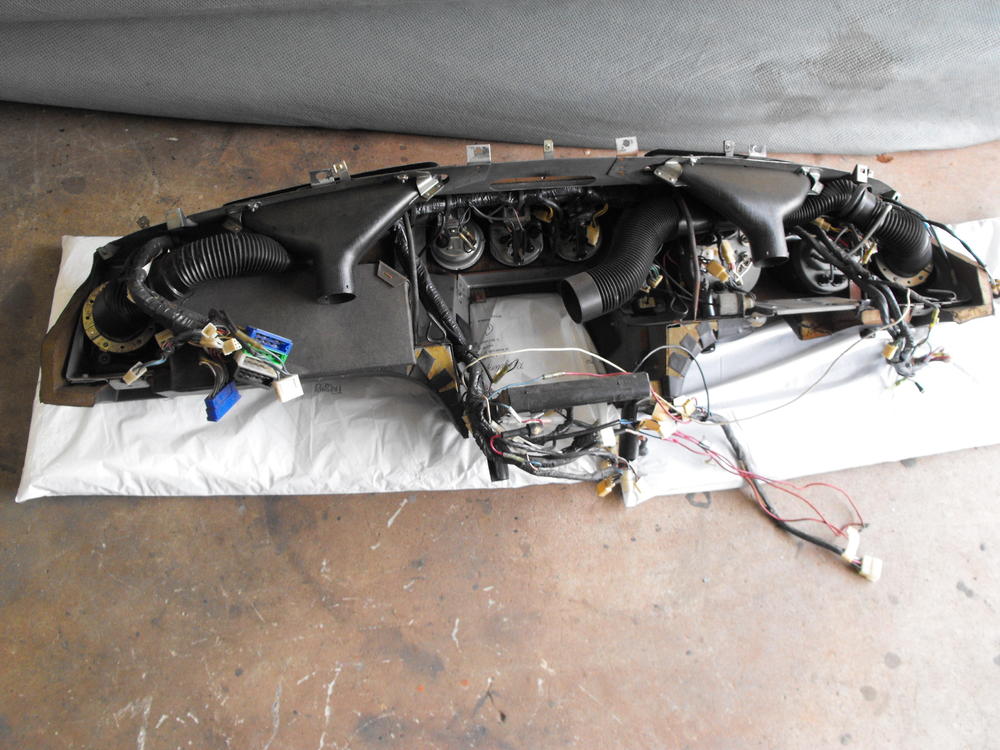
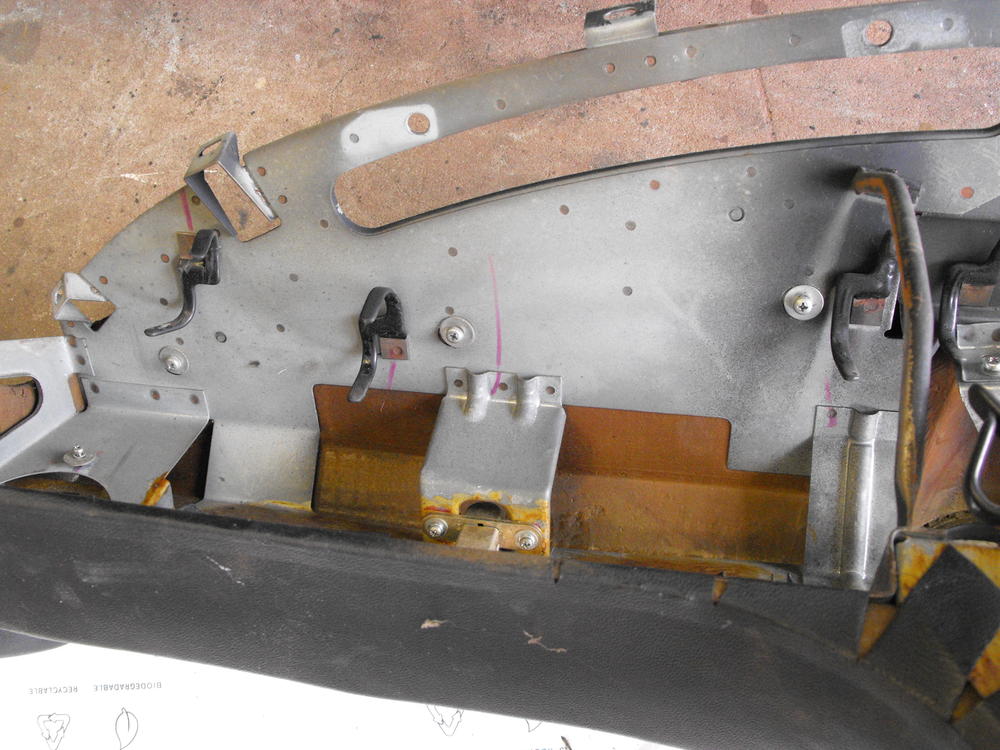
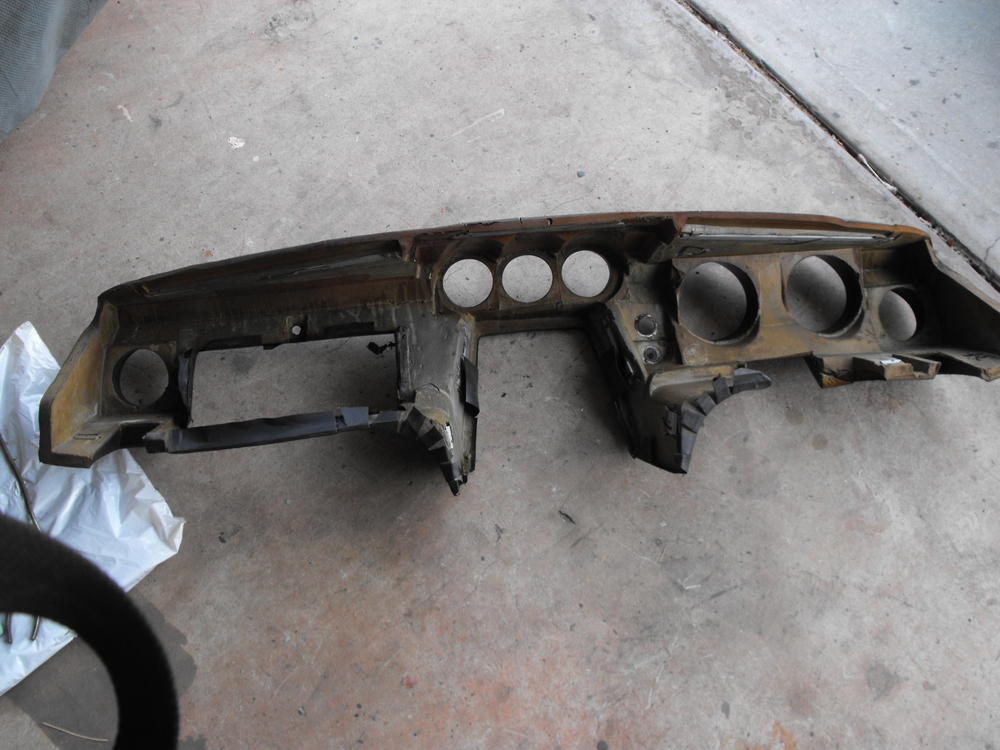
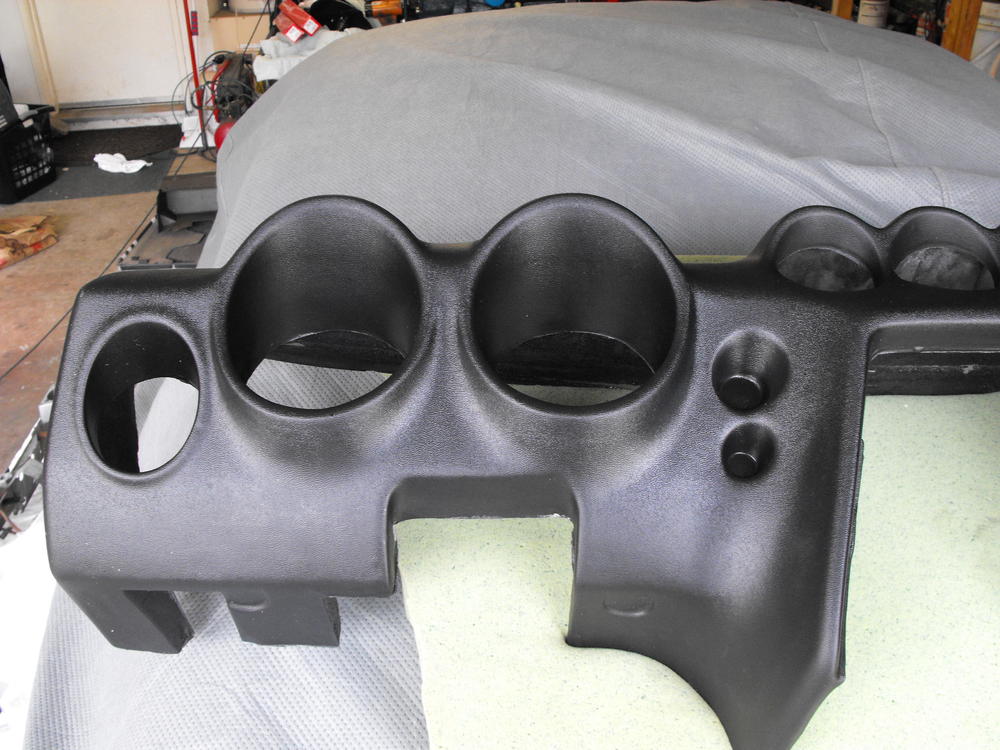
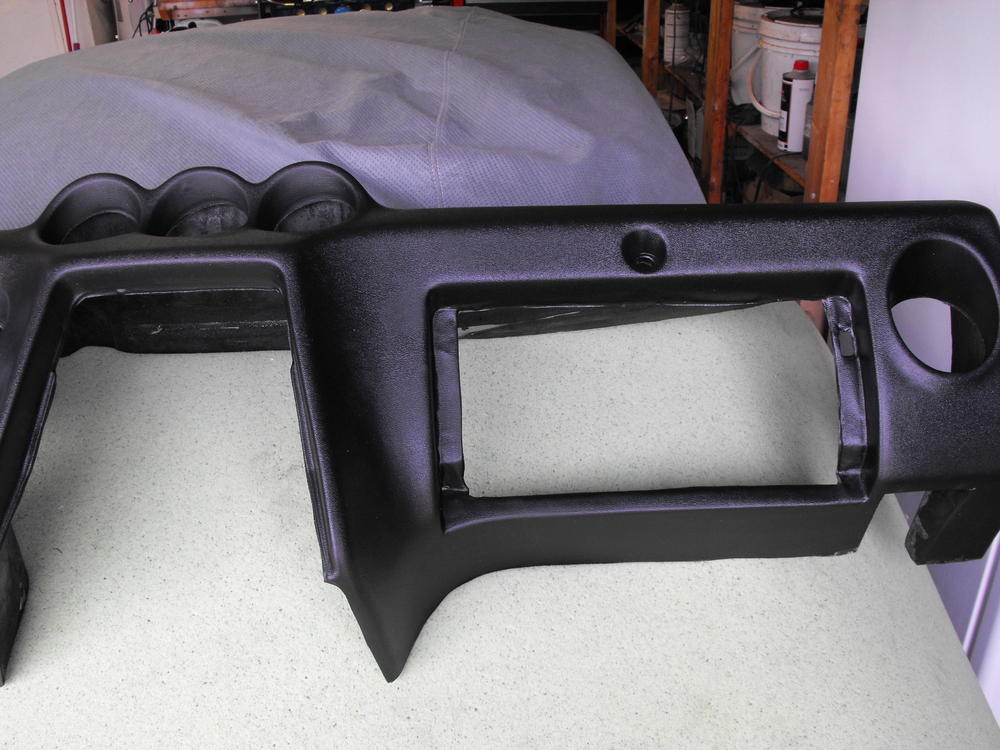
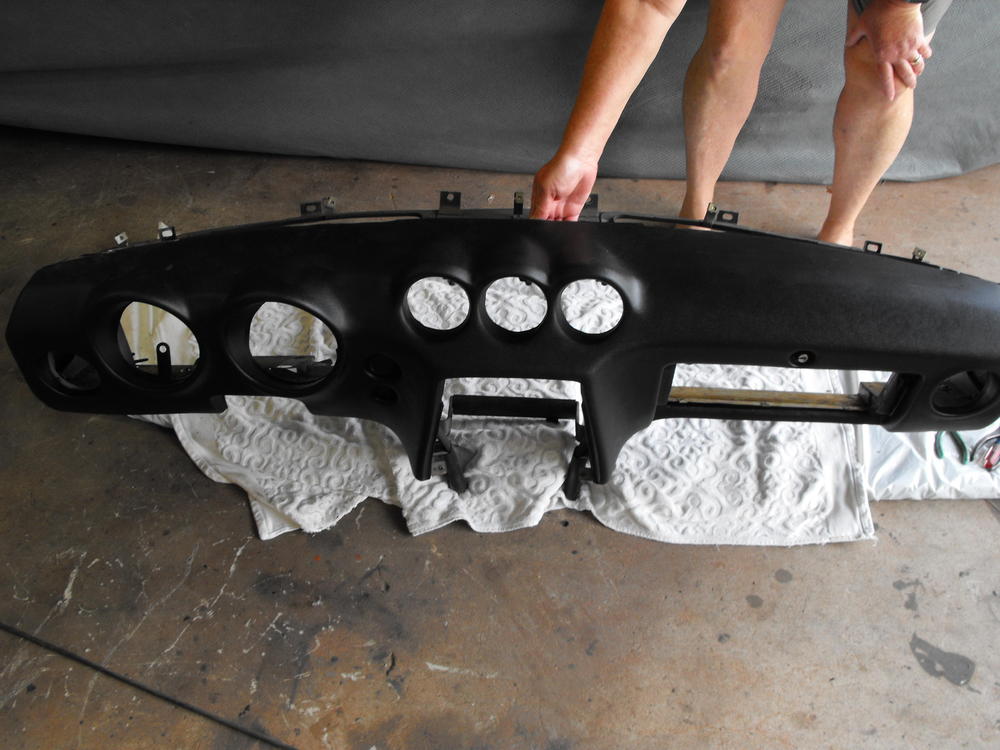
4 pointsToday I installed the 'Vintage Dash' 240Z dash onto the dash frame. This is a first time install for me and it seemed to go fairly well. Removing all the instruments and wiring, removing the old dash and installing the new dash took less than 3 hours. It is was not too difficult. In regards to the fit, the dash fit very well on the frame. It was a bit snug and required exerting some force to hold the dash to the frame while screwing things together, but that is the way it should be. The holes in the dash lined up well with the frame and I had no issues. I would however, recommend clearing the dash screw holes before putting the dash over the frame. The holes can be a bit hard to locate if you try to find them when you have the dash over the frame. I was very tempted to use some spray adhesive, but there was not any on the original (except near the glove box) so I went without glue. The look and fit are very good. I like the shape of the dash over the water, oil and clock instruments and the texture is reasonable. It still does not match the original, but does look very good. The only negative comment I have about the dash is that they should have left flaps around the glove box and the heater cutout similar to the original. Neither of these areas is visible until you open the glove box, then you will see that the dash flaps do not go over the glove box stiffening rails. What I will probably do here is spray the flanges black and put some black silicon in the gap between the dash and the flange. That way the missing flaps will not be so obvious. Otherwise, the dash looks great. I will post about the instrument fit when I get to that step. The cost here is about half the cost of 'Just Dashes' and the appearance is great. I would also say that it is easier to install the 'Vintage Dashes' dash than it is to package up your dash and ship it to 'Just Dashes'. Pics are below. Also, I am guessing that @jayhawkhad some work done on his Tachometer or someone in Japan is Psychic


 4 points
 -
2 pointsJalex, it might be worthwhile to go back through the entries in this thread and count the times people have told you NOT to change the timing until you determine if the cables are causing the problem. That's what troubleshooting is all about - eliminating possible causes one at a time without introducing new variables. Who's telling you to change the timing? Someone in a private message on this forum? Someone in Panama? A little voice in your head? I think you're testing the patience of those trying to help you and may be pushing the limit with many. Relax, follow the advice as given, or move on. It's as easy as that. Dennis2 points
-
 1 pointI wouldn't shake his hand, you don't know where its been. Drink his beer though!1 point
 -
 That sounds like a possible contributing factor. The car gets used for big trips and very little for day to day use. It sits a lot. I had another member discuss the possibility of acid buildup due to non-use of a PCV system but I've always had a working PCV system on the car, either with triples or with SU's and I change the oil very often, like every 2000km. But this damage appears corrosive in nature, not mechanical. I use Shell Rotella Diesel oil. Maybe I should have used synthetic all along.1 point
 -
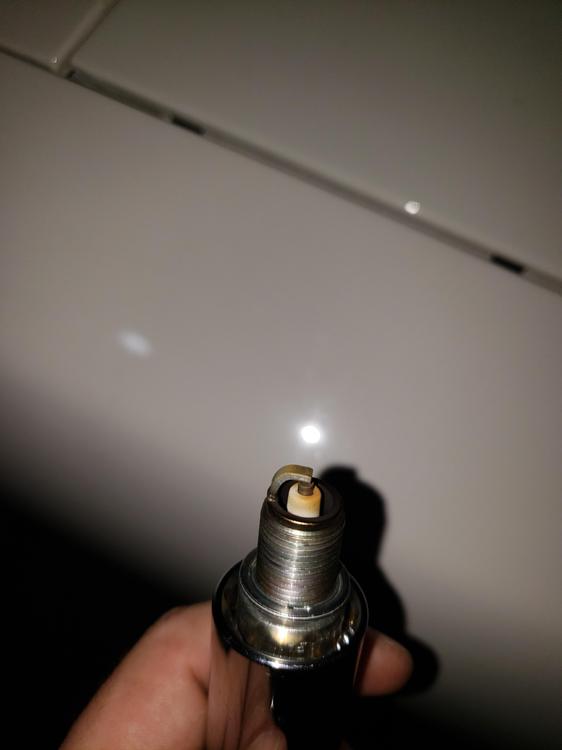
 1 pointSorry Denis. I will leave the timing as it is at 14 btdc. I raced the car last night and it accelerates fine. I hope you guys can help me solve this low rpm spark plug fouling. I should have never bought a car that had an engine remanufactured and modified by californa datsun. I should have bought a stock engine.1 point
 -
So I asked a couple of my mechanics at work to have a look at the rocker pics and they are convinced that the cause of this pitting is due to the engine not being run often enough! The oil gets up to the valve train, sits and slowly drips back down to the engine. The rockers eventually start pitting around the oil spots (not on the part of the pads that are under contact with the valves), and the next time it is started, the corroded metal falls off into the engine and probably into the oil filter. Basically they are saying the engine needs to be run and used more often to avoid this happening. Neither of them saw this is having any real effect on the engine as long as the oil gets changed regularly. This is good to know!1 point
-
 1 pointSo, uhhh, you're not interested in coming back out to SoCal to help out on mine, either? Sent from my SM-G950U1 using Tapatalk1 point
 -
 1 point
 -
1 pointI think it might improve it but I doubt that it would be eliminated. There's still something wrong and we're getting closer to the cause, I think. Reducing the gap would certainly allow it to fire easier. One could combine both ideas (maybe) and buy a hotter plug and reduce the gap. Who knows, it just might work. BUT, my decades of shade tree mechanic work tell me this is a very simple problem (unless it's Pertronix related) and I refuse (at least for now) to give up. I have the same feeling about this problem as the previous SU problem. Simple problem, simple fix. @jalexquijano Have you tried swapping #4 wire with another next to it? After swapping the two wires, warm it up, take it for a fun drive, bring it home and let it idle for a while. Let it cool down and pull all the plugs. That should be the next test. We're getting closer to the problem.?1 point
-
 1 point
 -
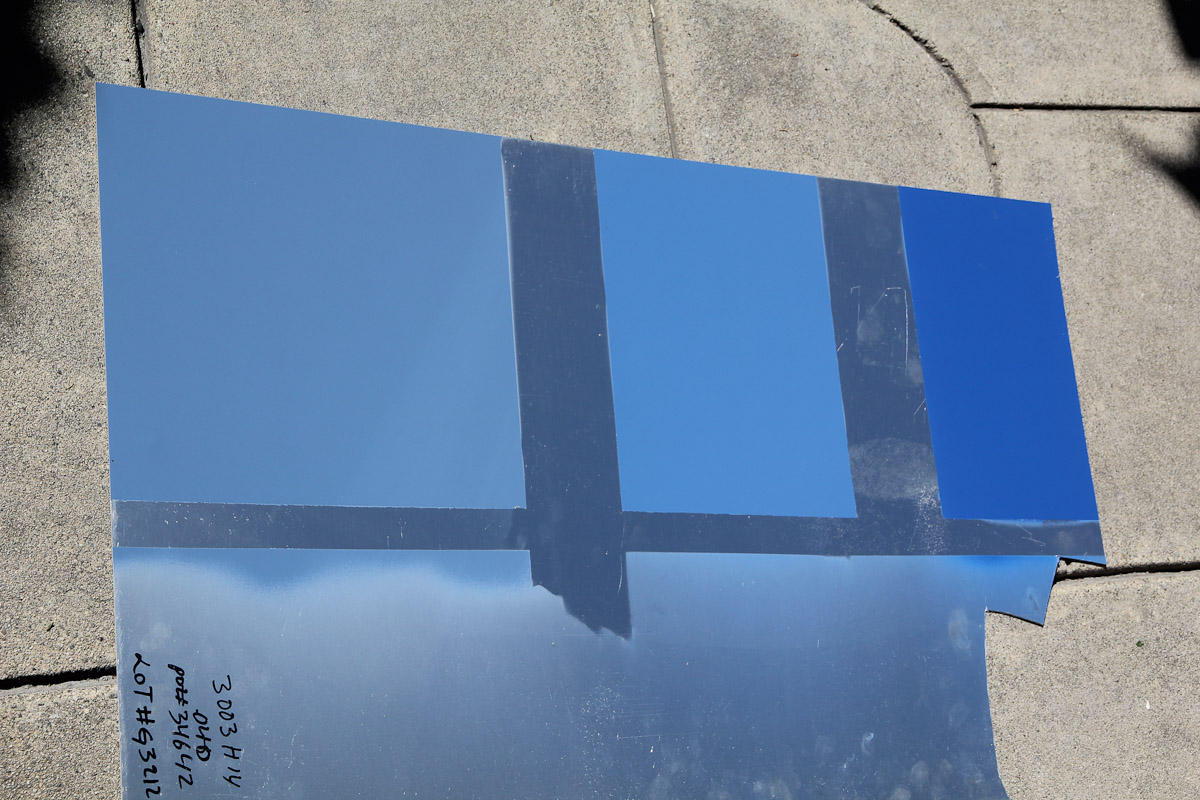
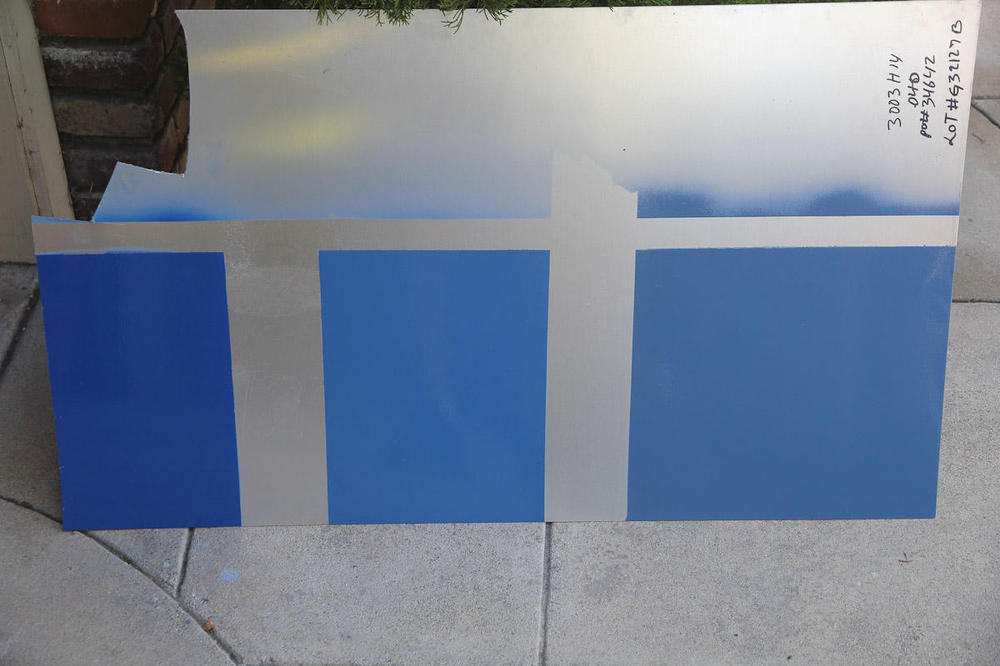
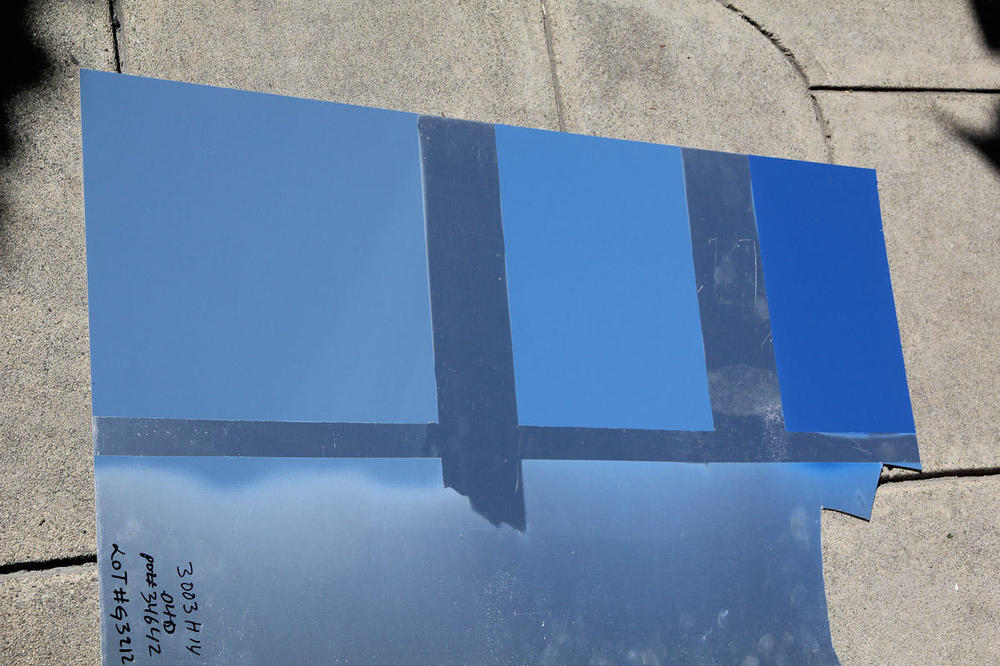
It always helps to colour test a shaped panel if possible. It gives so much more life to the finished colour in both sun and shade exposures.1 point
-
I still don't have a color, but had a pretty productive weekend nonetheless. The three blues I had were BMW Santoriniblau, Rover henley blue, and Alfa polizia blue (in that order on the first picture). In the shade (first picture) they looked...not bad. In the sun, not quite so much. My wife and I both liked the henley blue in the middle the best, but in the sun, it kind of washes out and starts to look a little too close to pastel. Photos are of colors on cars are hard, but this Mini in the same color is pretty true to life, and it's just not quite what I'm looking for. After all this, I came to realize that I want a darker color that has more green and less red in it. It's down to WV's dove blue and slate blue. Meanwhile, I got some more primer on the doors, hood, hatch and fenders after blocking and doing some touchup on the body work. Flat gray paint doesn't photograph real well, but the three biggest problem areas I had on these are almost there. Ran out of time before I could get some more paint on the shell. I'm hoping to get color on before the end of October.


 1 point
 -
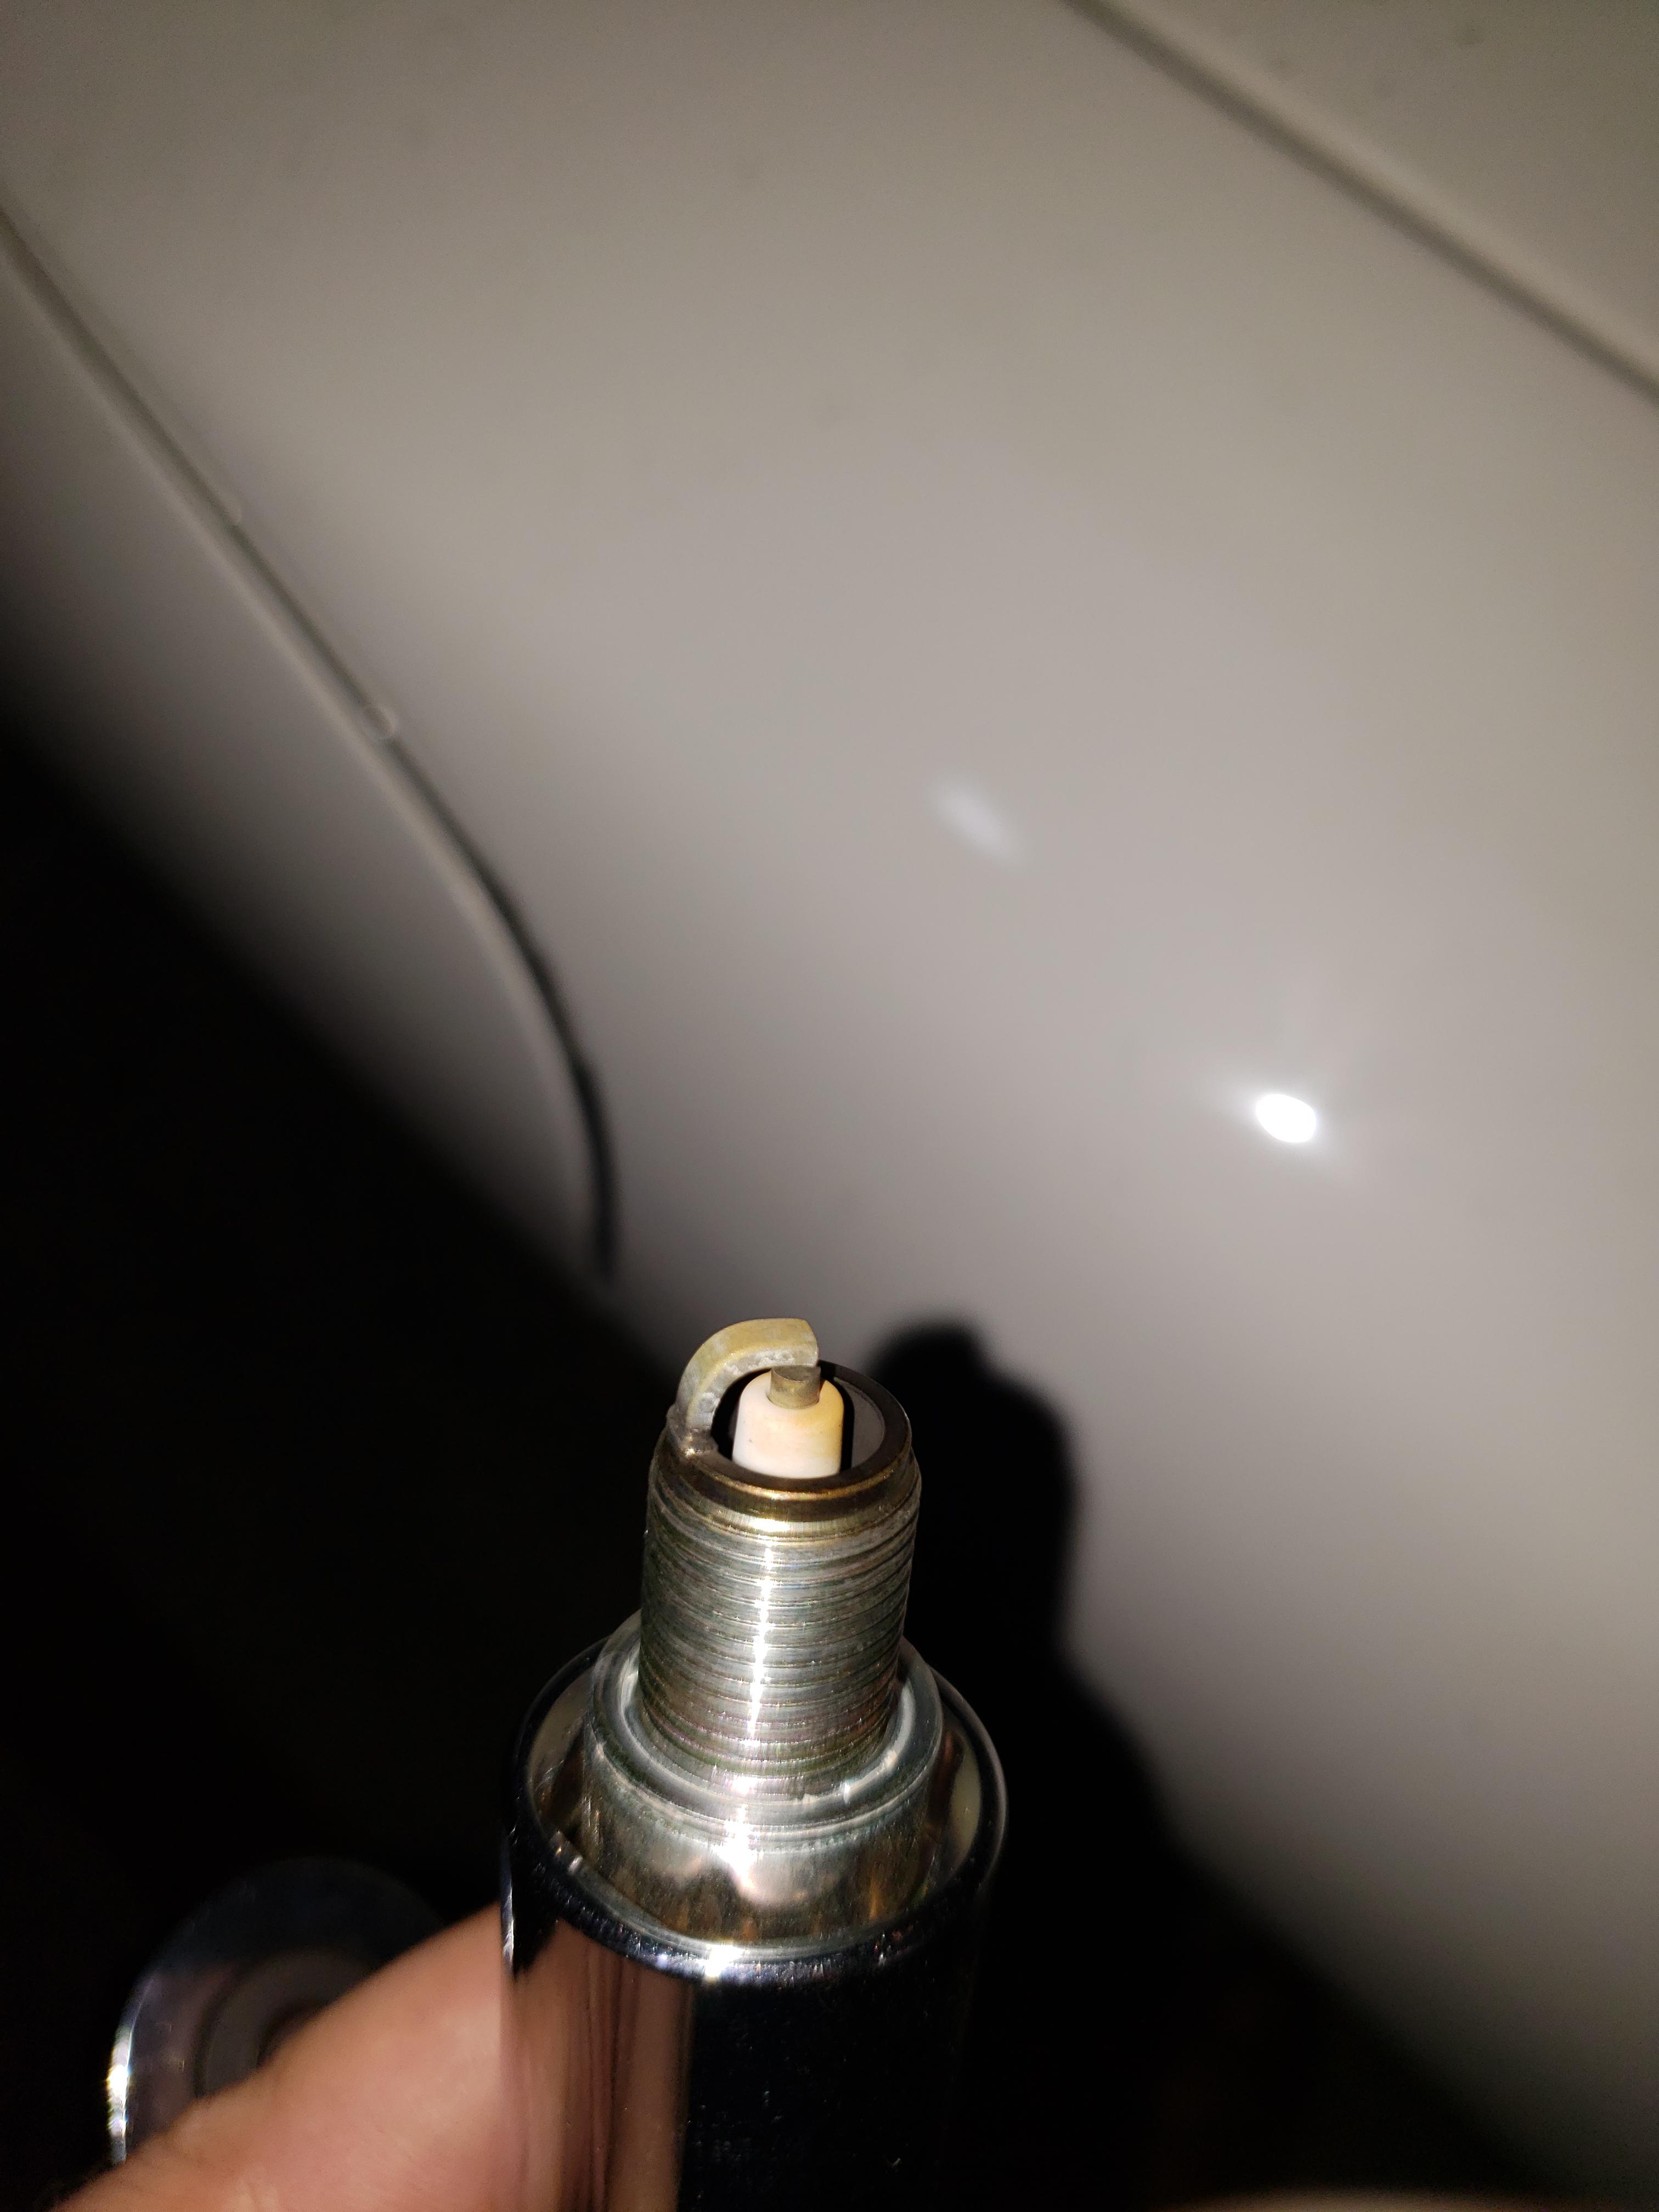
1 pointI burshed the 6 plugs and took the car for a hard run on the highway. Parked the car and took 3 and 4 out.

 1 point
 -
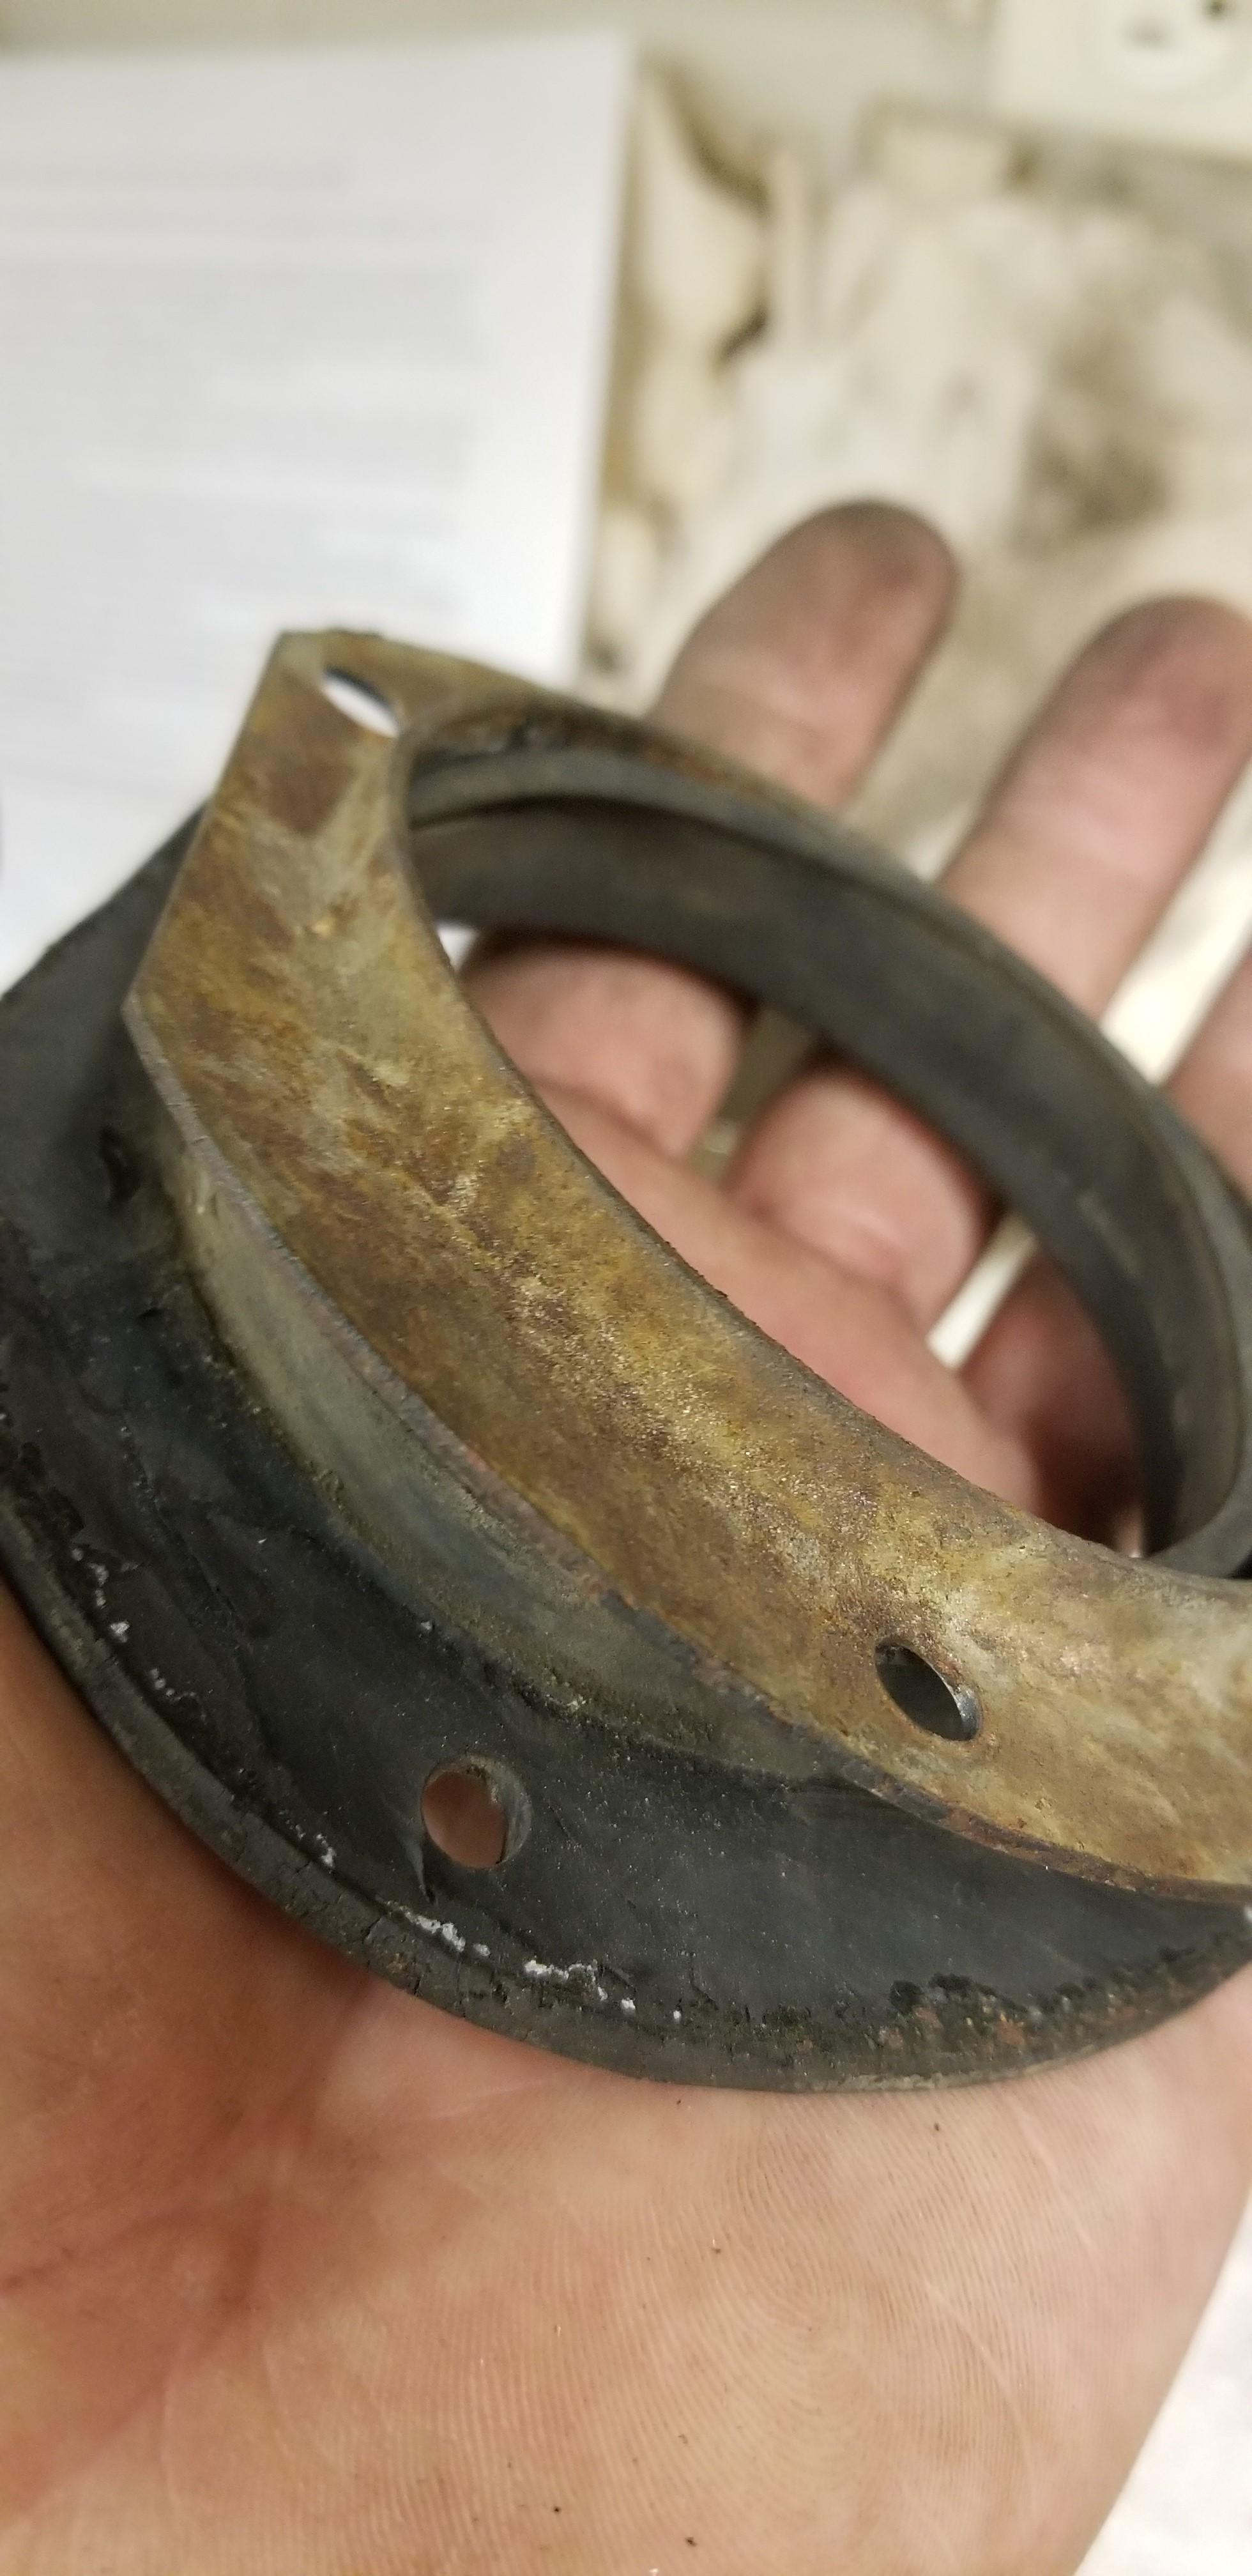
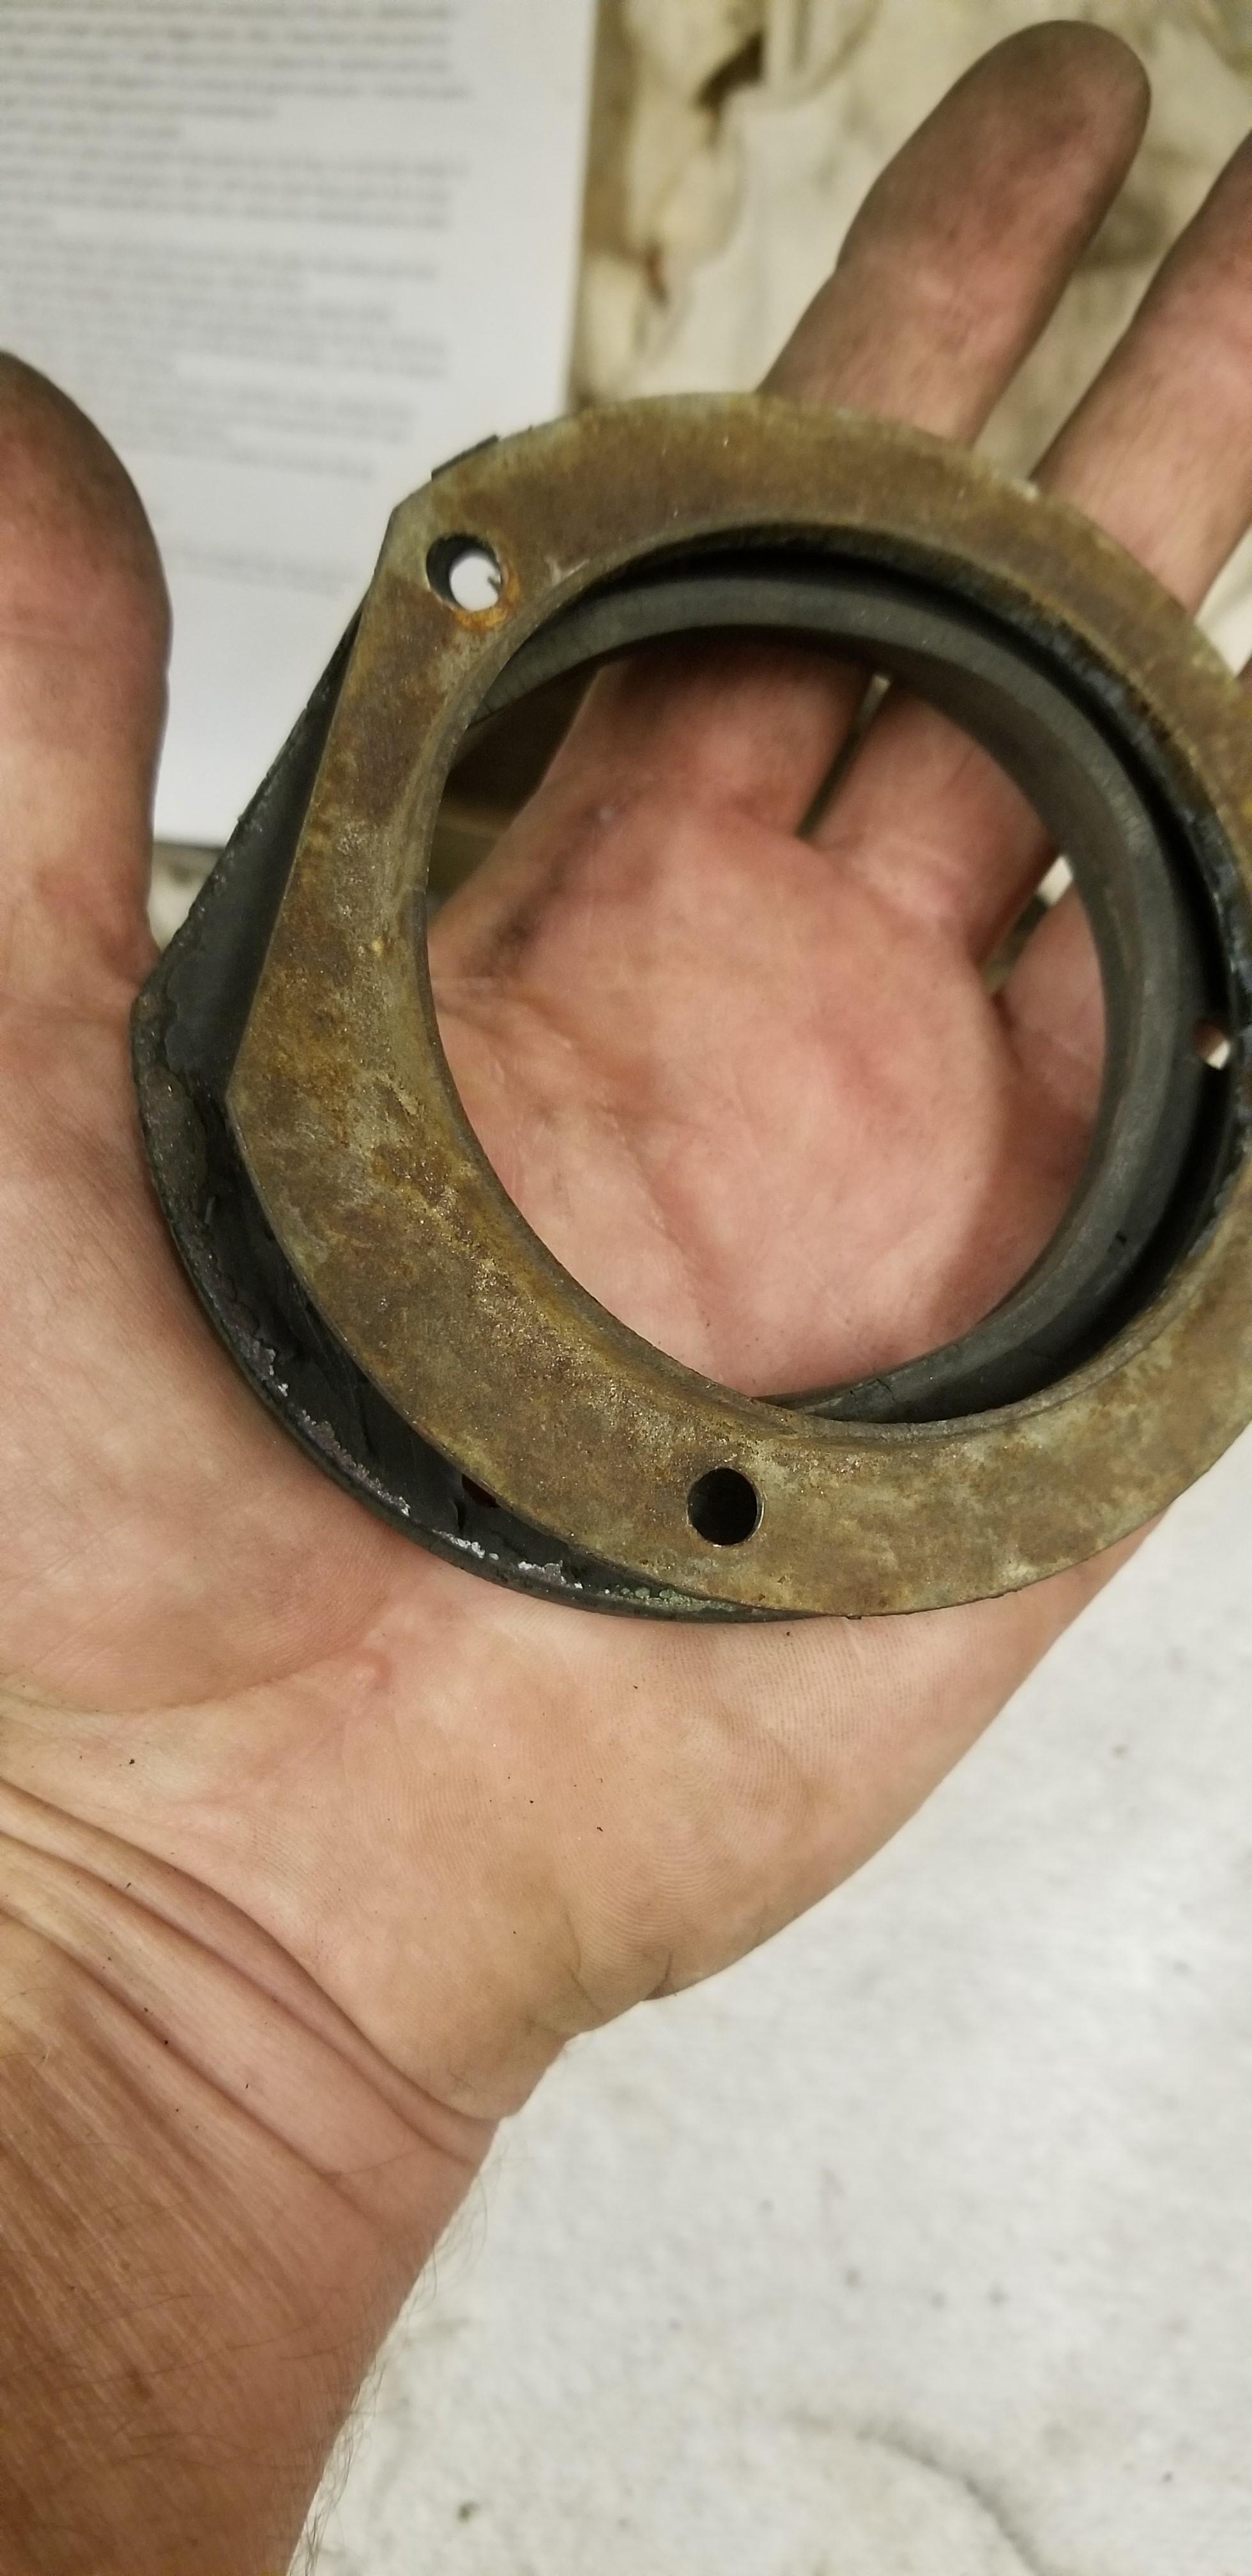
 1 pointI keep finding things that I have misplaced. It's really frustrating! I was looking for the ring that goes on the filler neck. Like this I probably have 3 of them here, but I can't find any of them. So I had a 280z filler neck and I was able to get that off the 280z filler neck. They appear to be the same and the holes in the chassis line up. The rubber is evidently bonded to the metal plate. I took a razor blade and separated them I would like to find one in better condition, but I suspect most of these are dry rotted in a similar fashion to what I have. The rubber portion doesn't look very good but I will reattached it with some black silicone. I plated the metal plate. Now it's ready to reassemble Overall a decent weekend. I also started blocking the car. Hey @Home Built by Jeff you wanna come help???


 1 point
 -
 1 pointI installed the new unit. The old one tested fine the next day but I figured it cut out on me twice, it will do it again. I noticed that there are manufacturing date on stickers on the new and old units. The old unit was manufactured in December 2013. These things don't last very long do they? BTW: I gave up on the tow after they contacted me and was unable to give a revised ETA. I ended up with another towing service the following morning that arrived within 30 minutes with a flatbed. BTW 2: The Dunkin' people sent me home with a dozen donuts ; ) Must be my good looks.1 point
 -
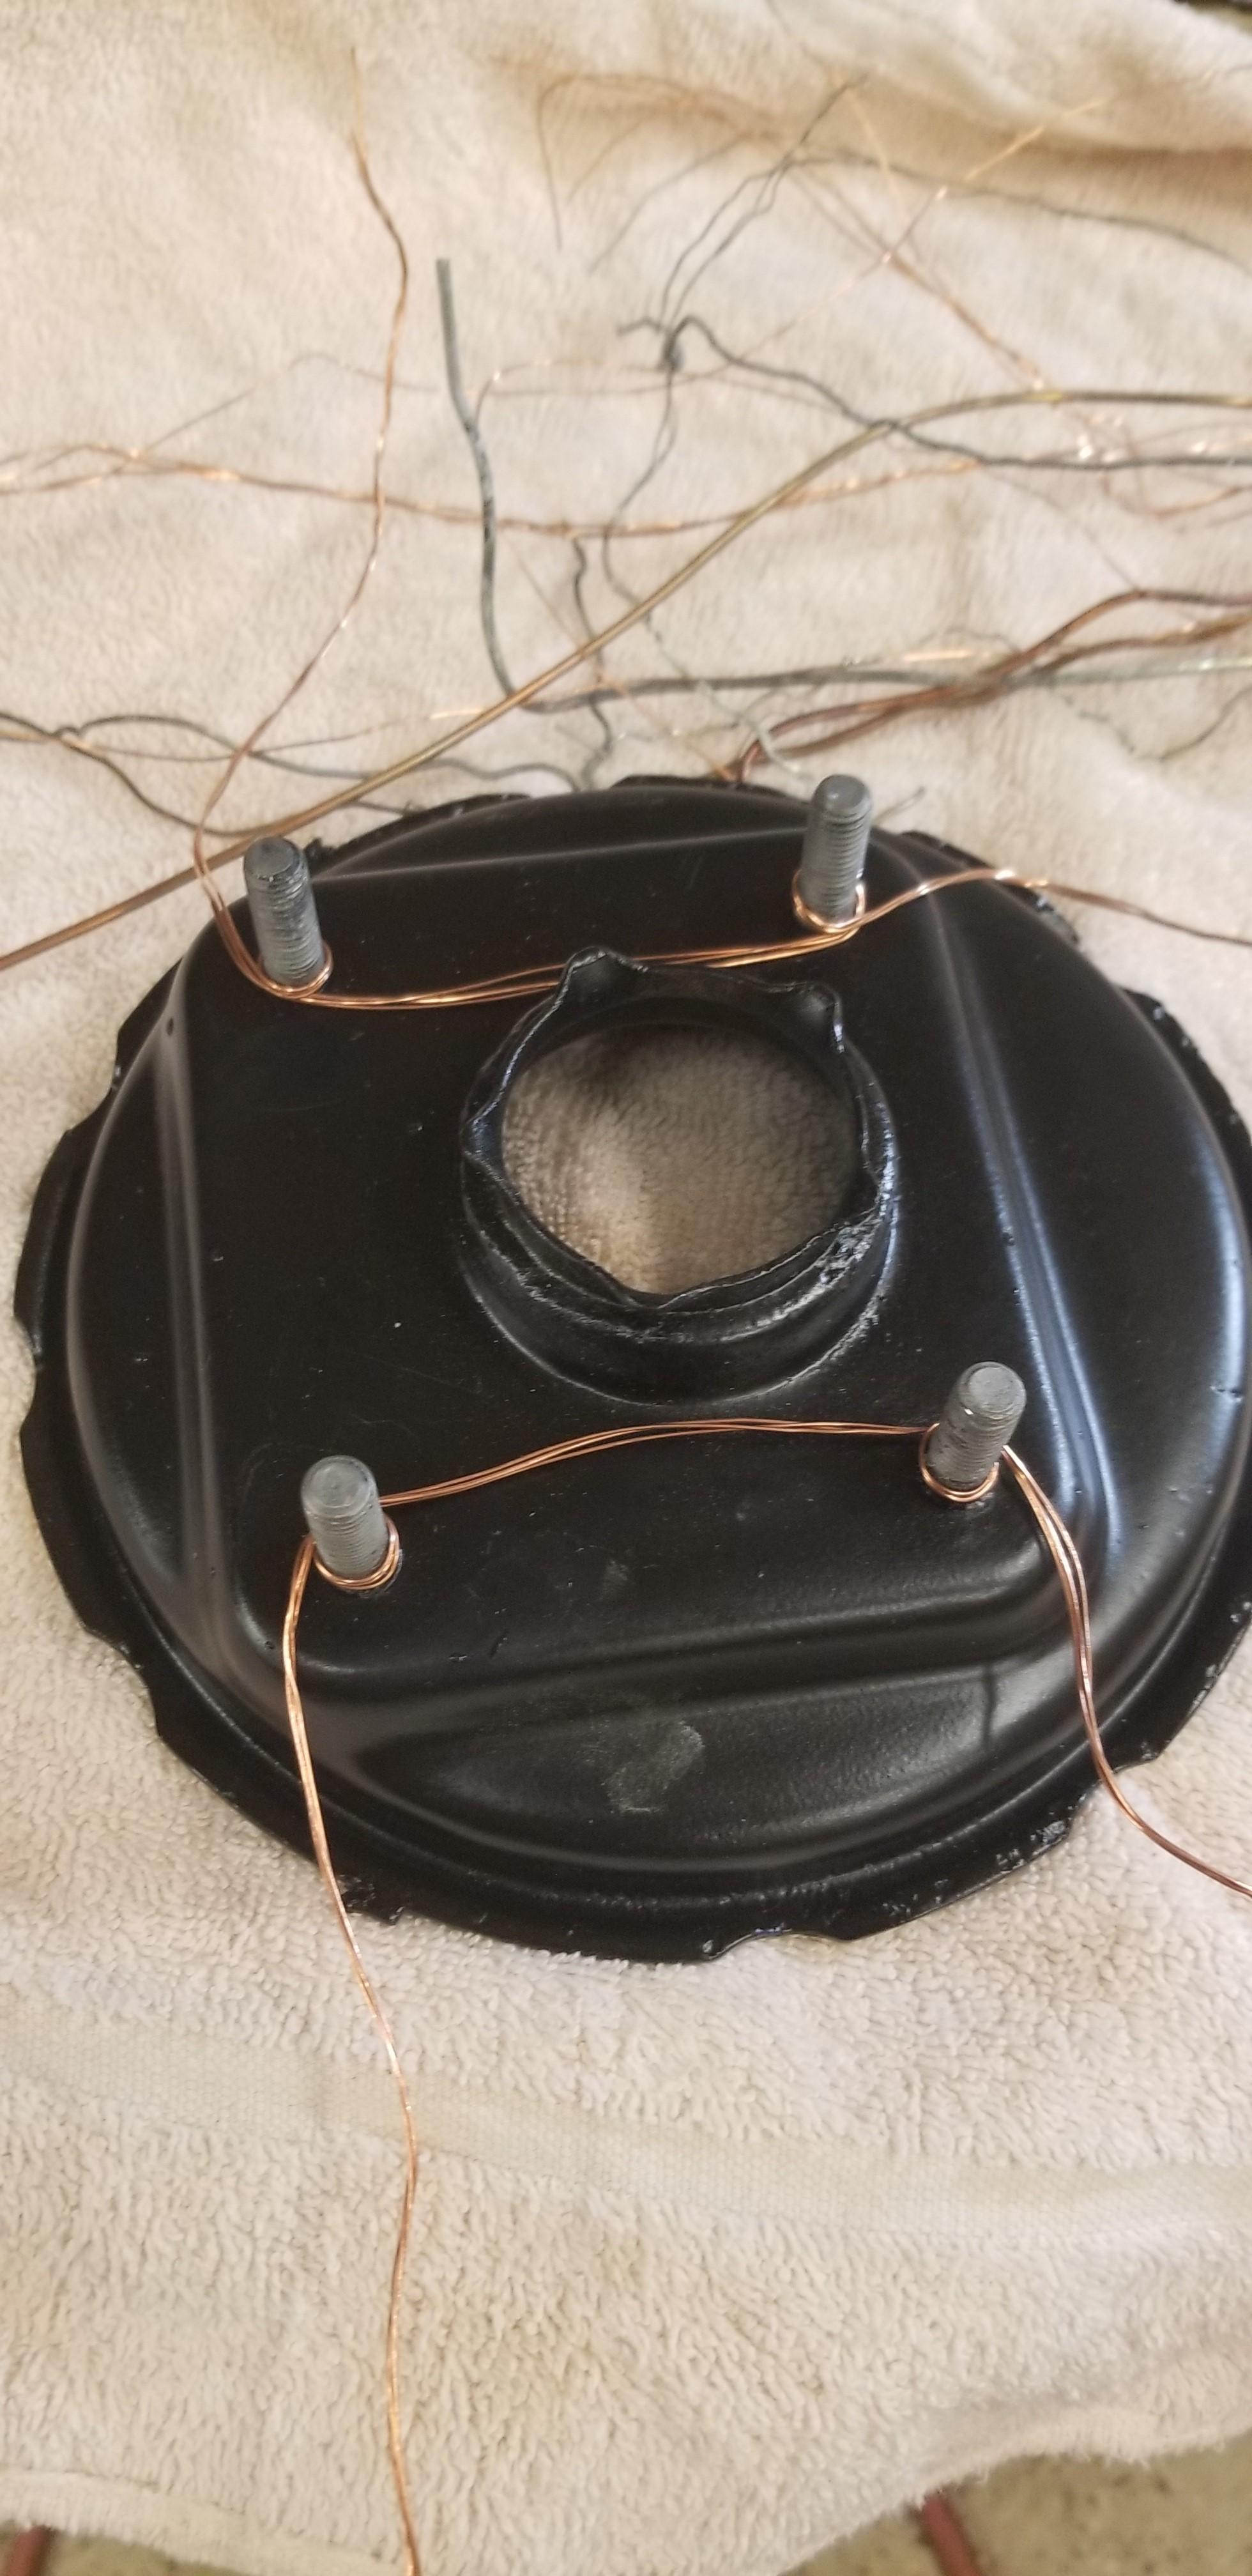
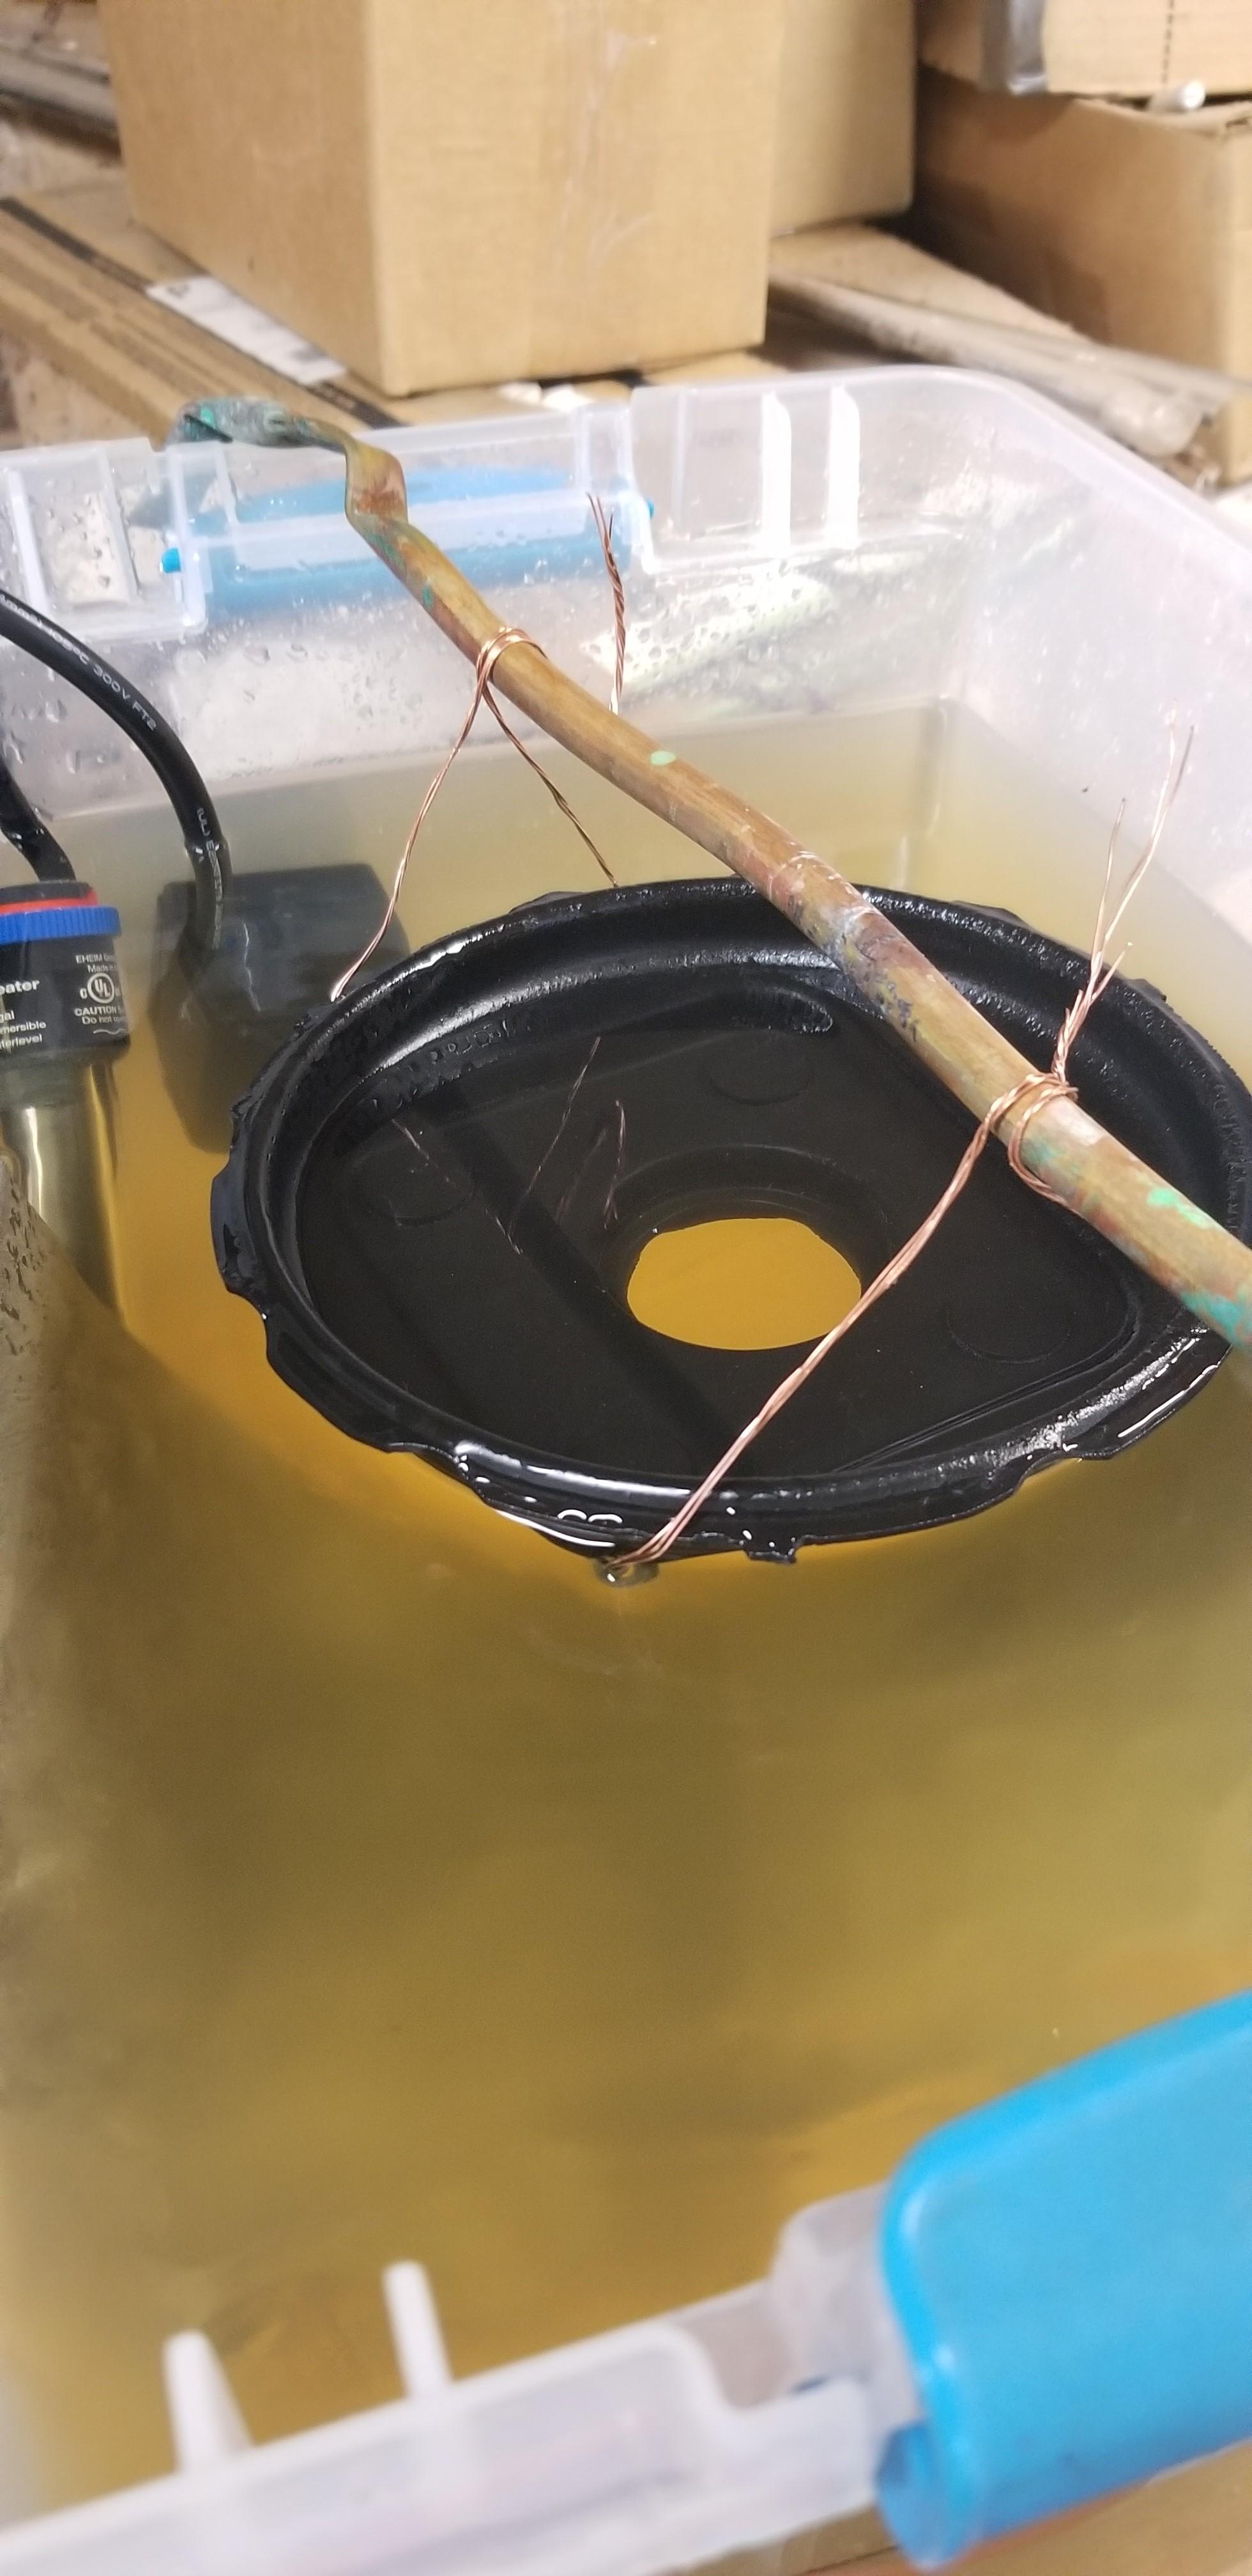
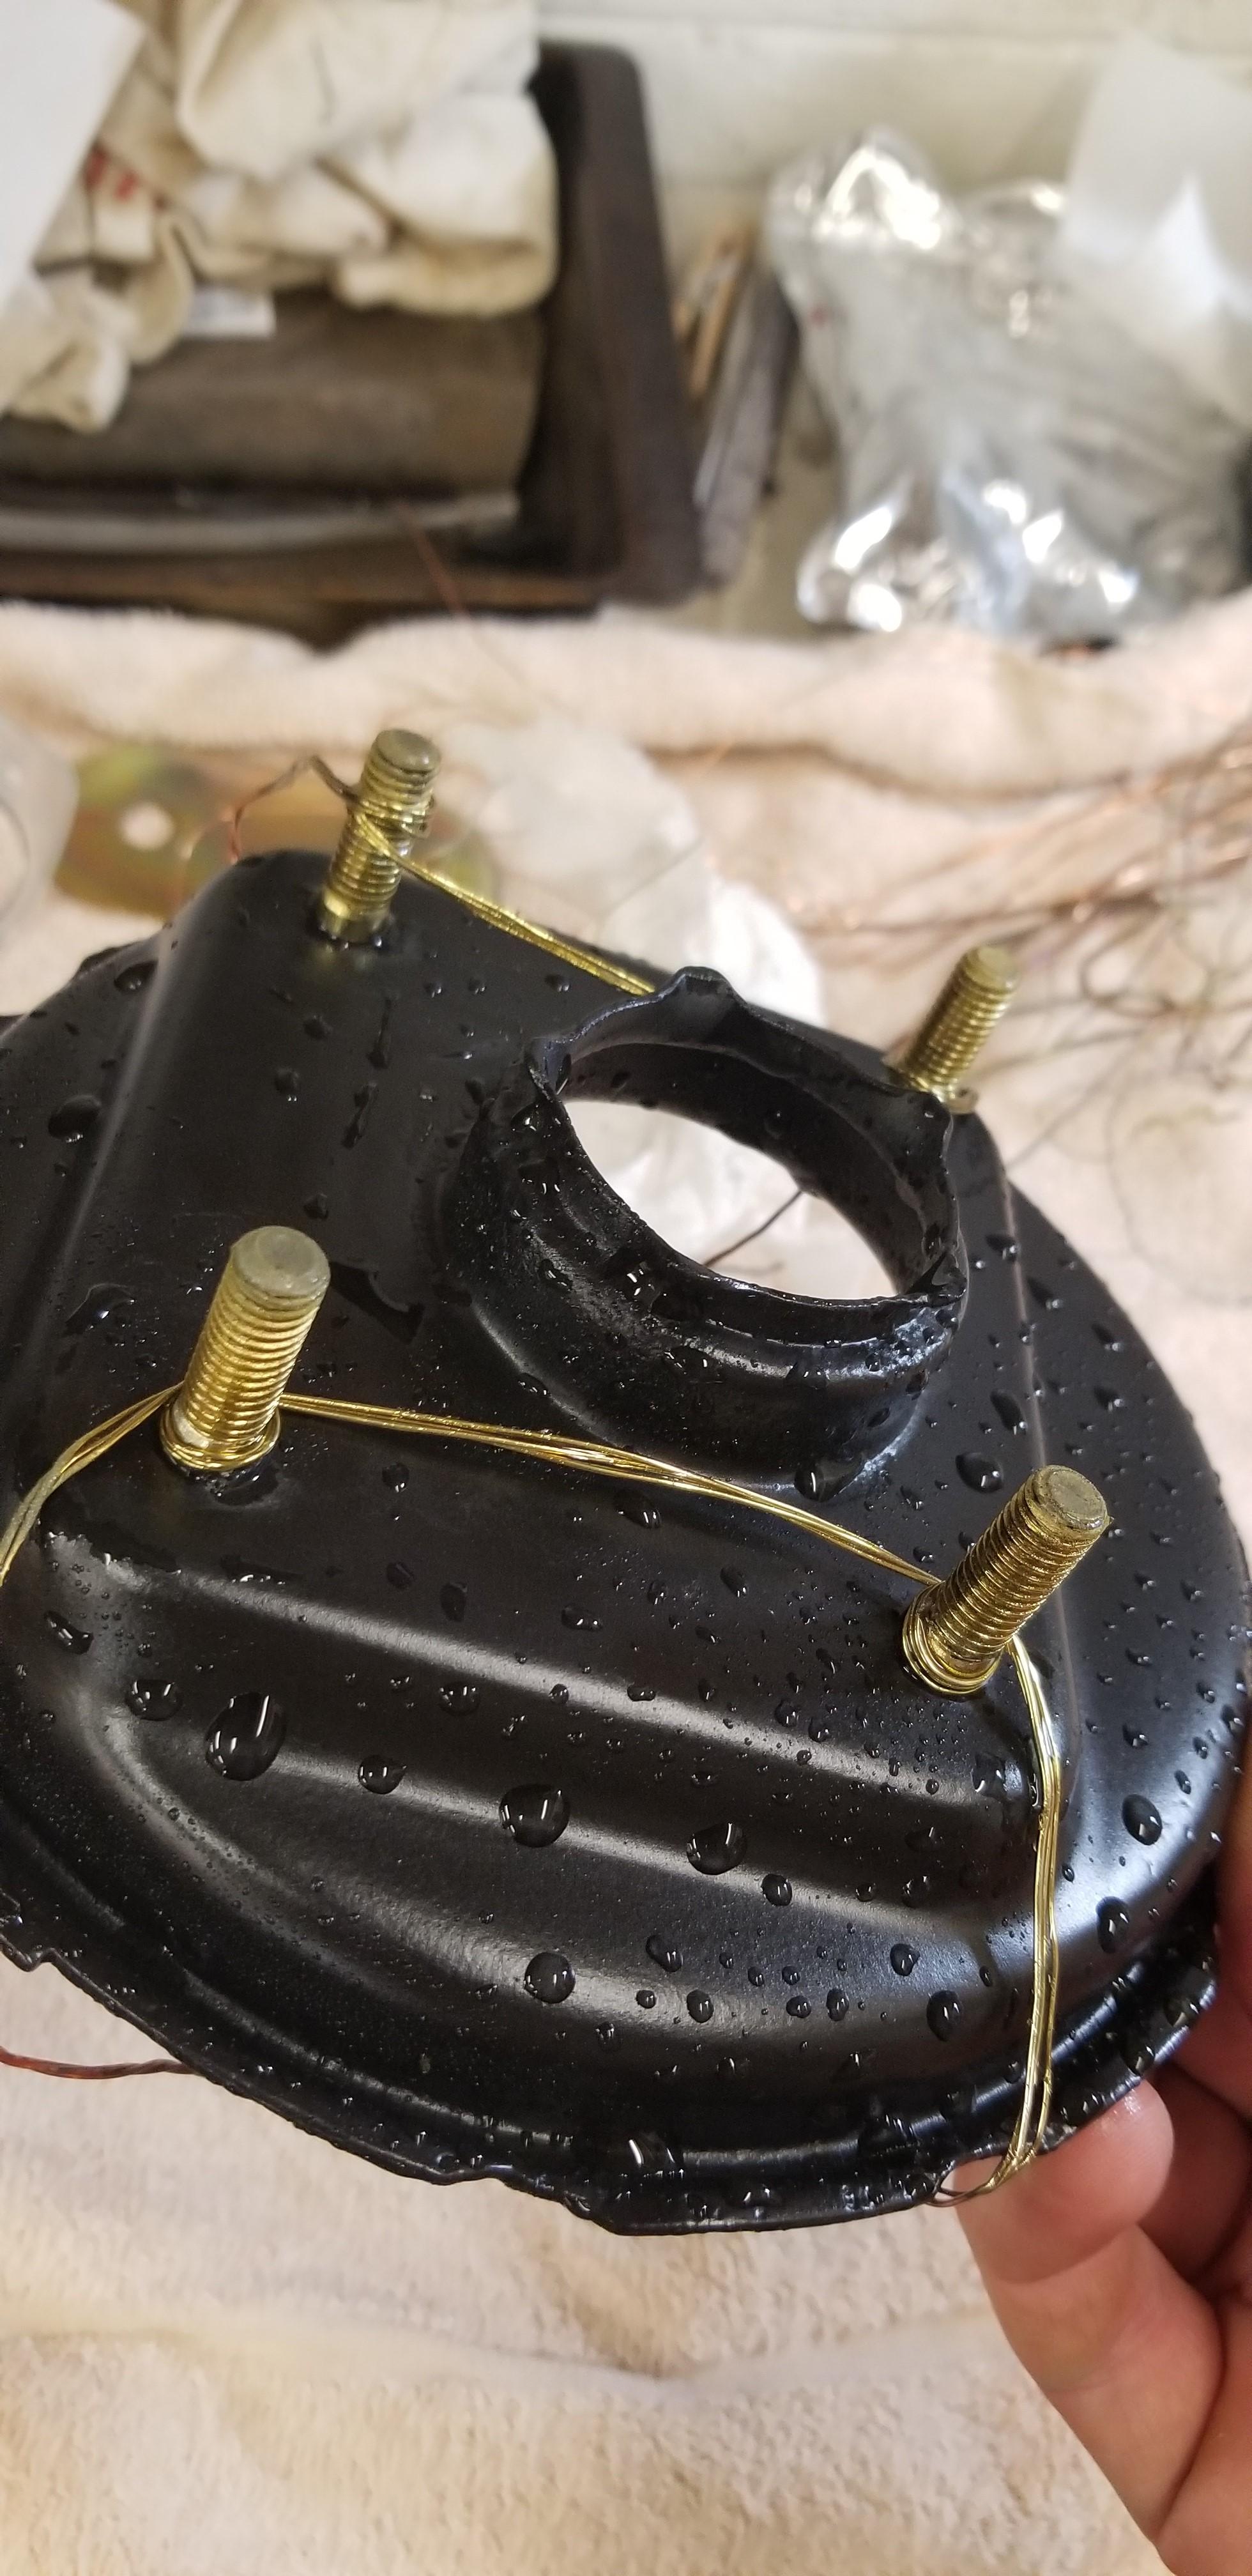
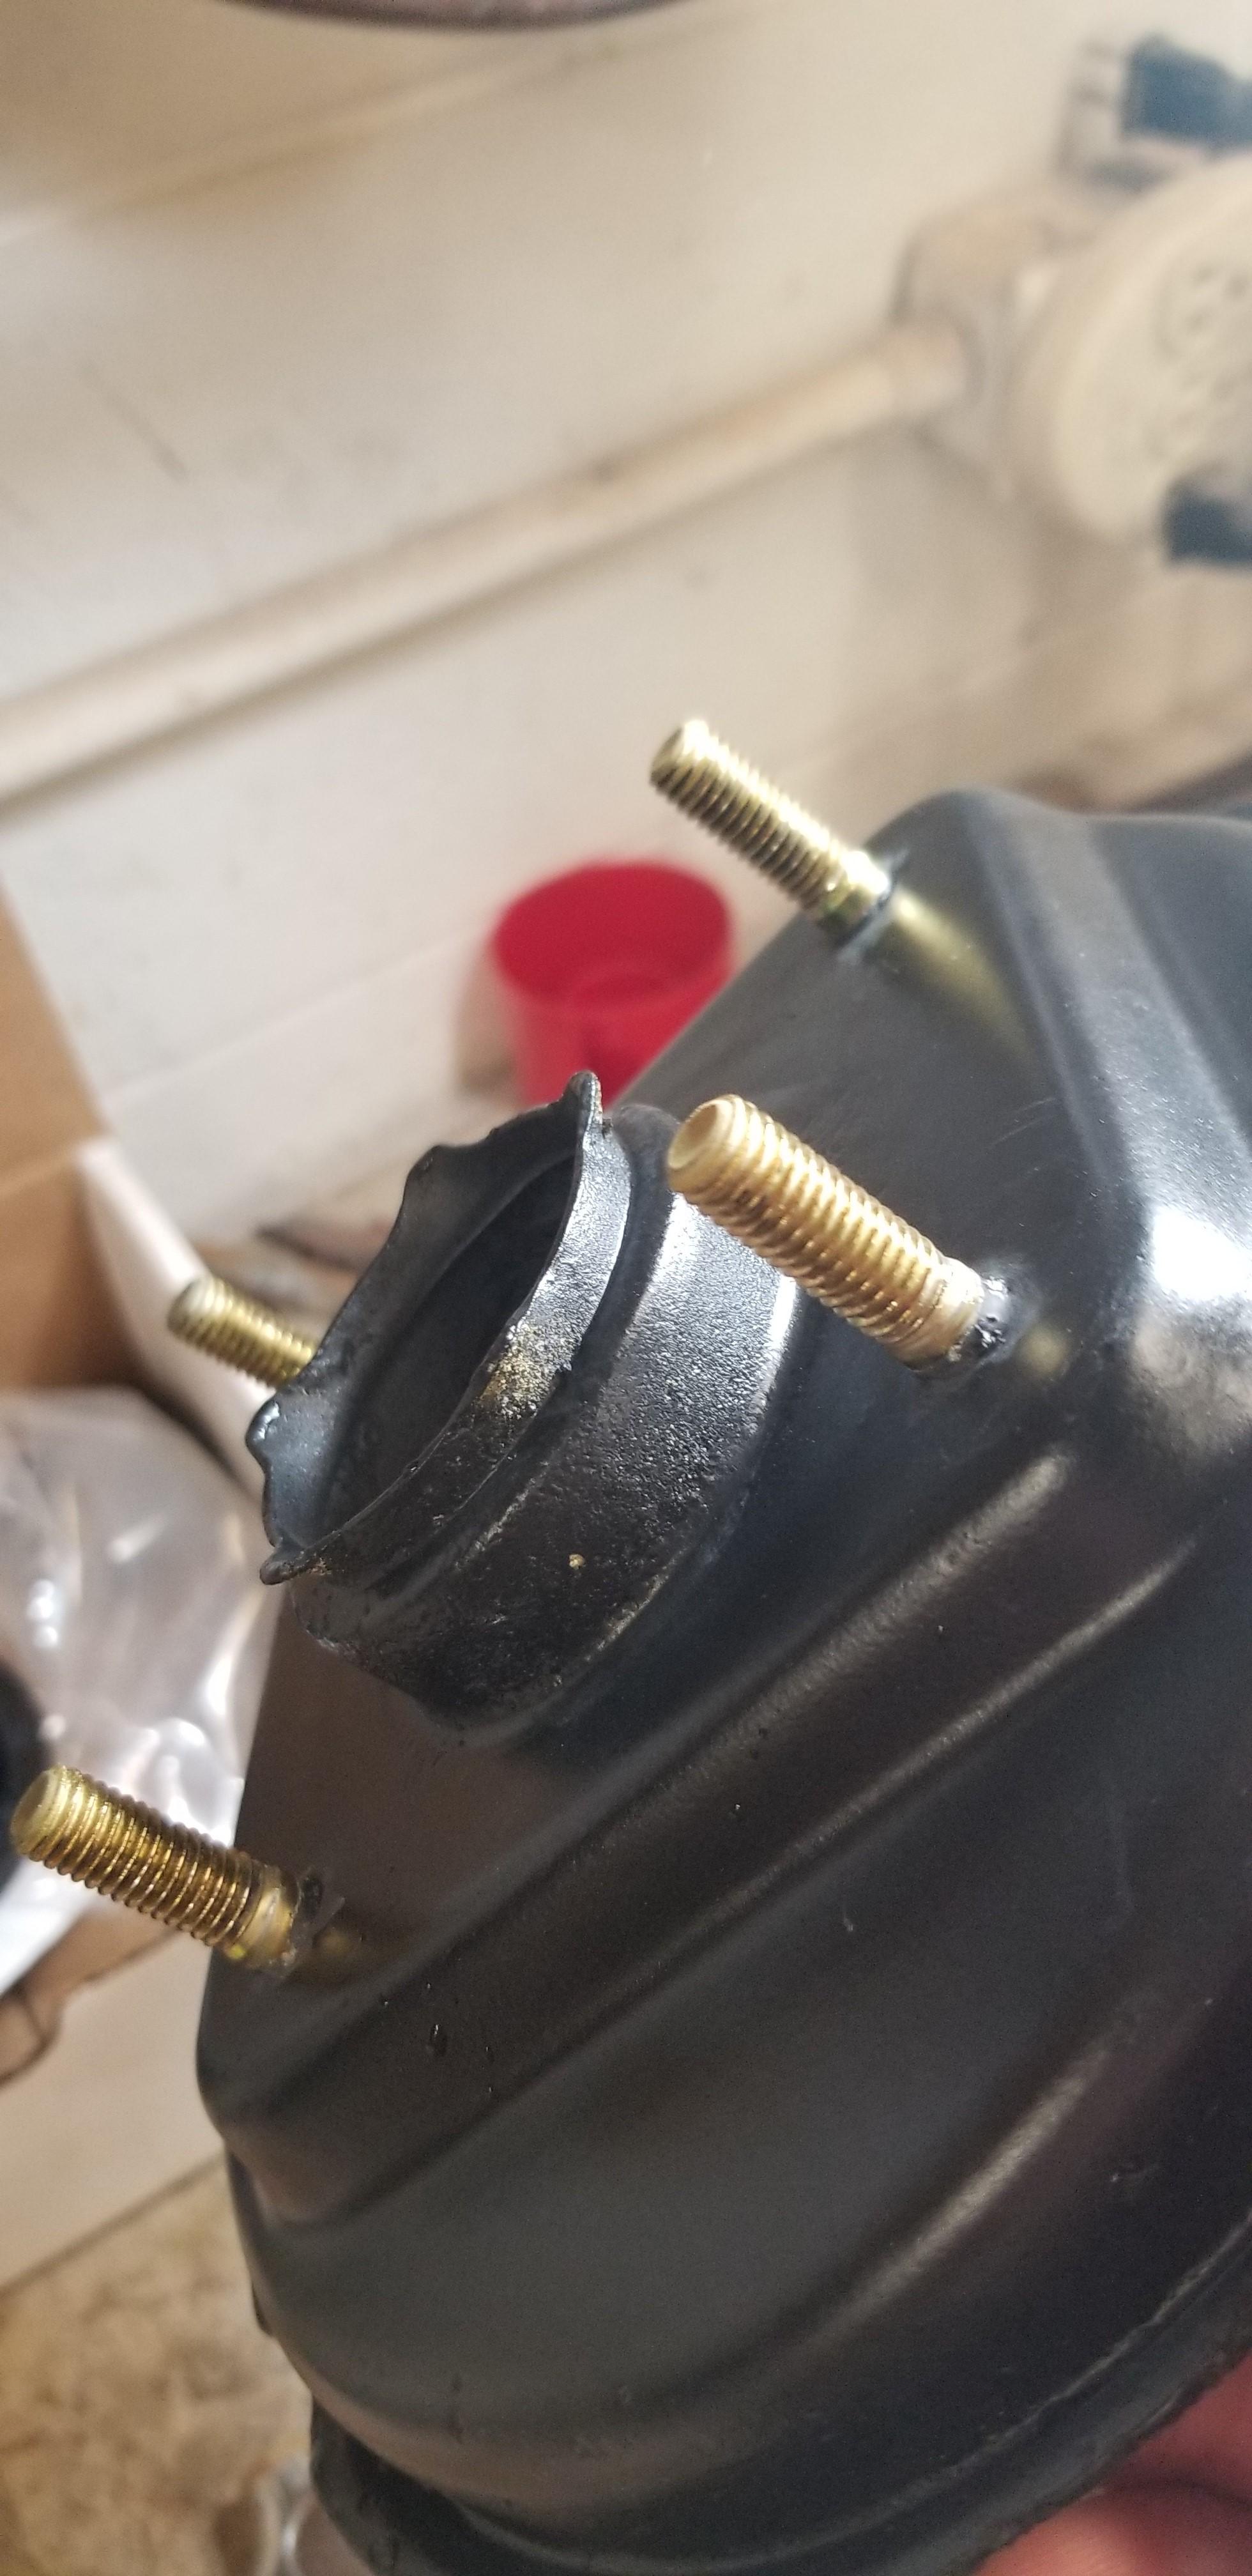
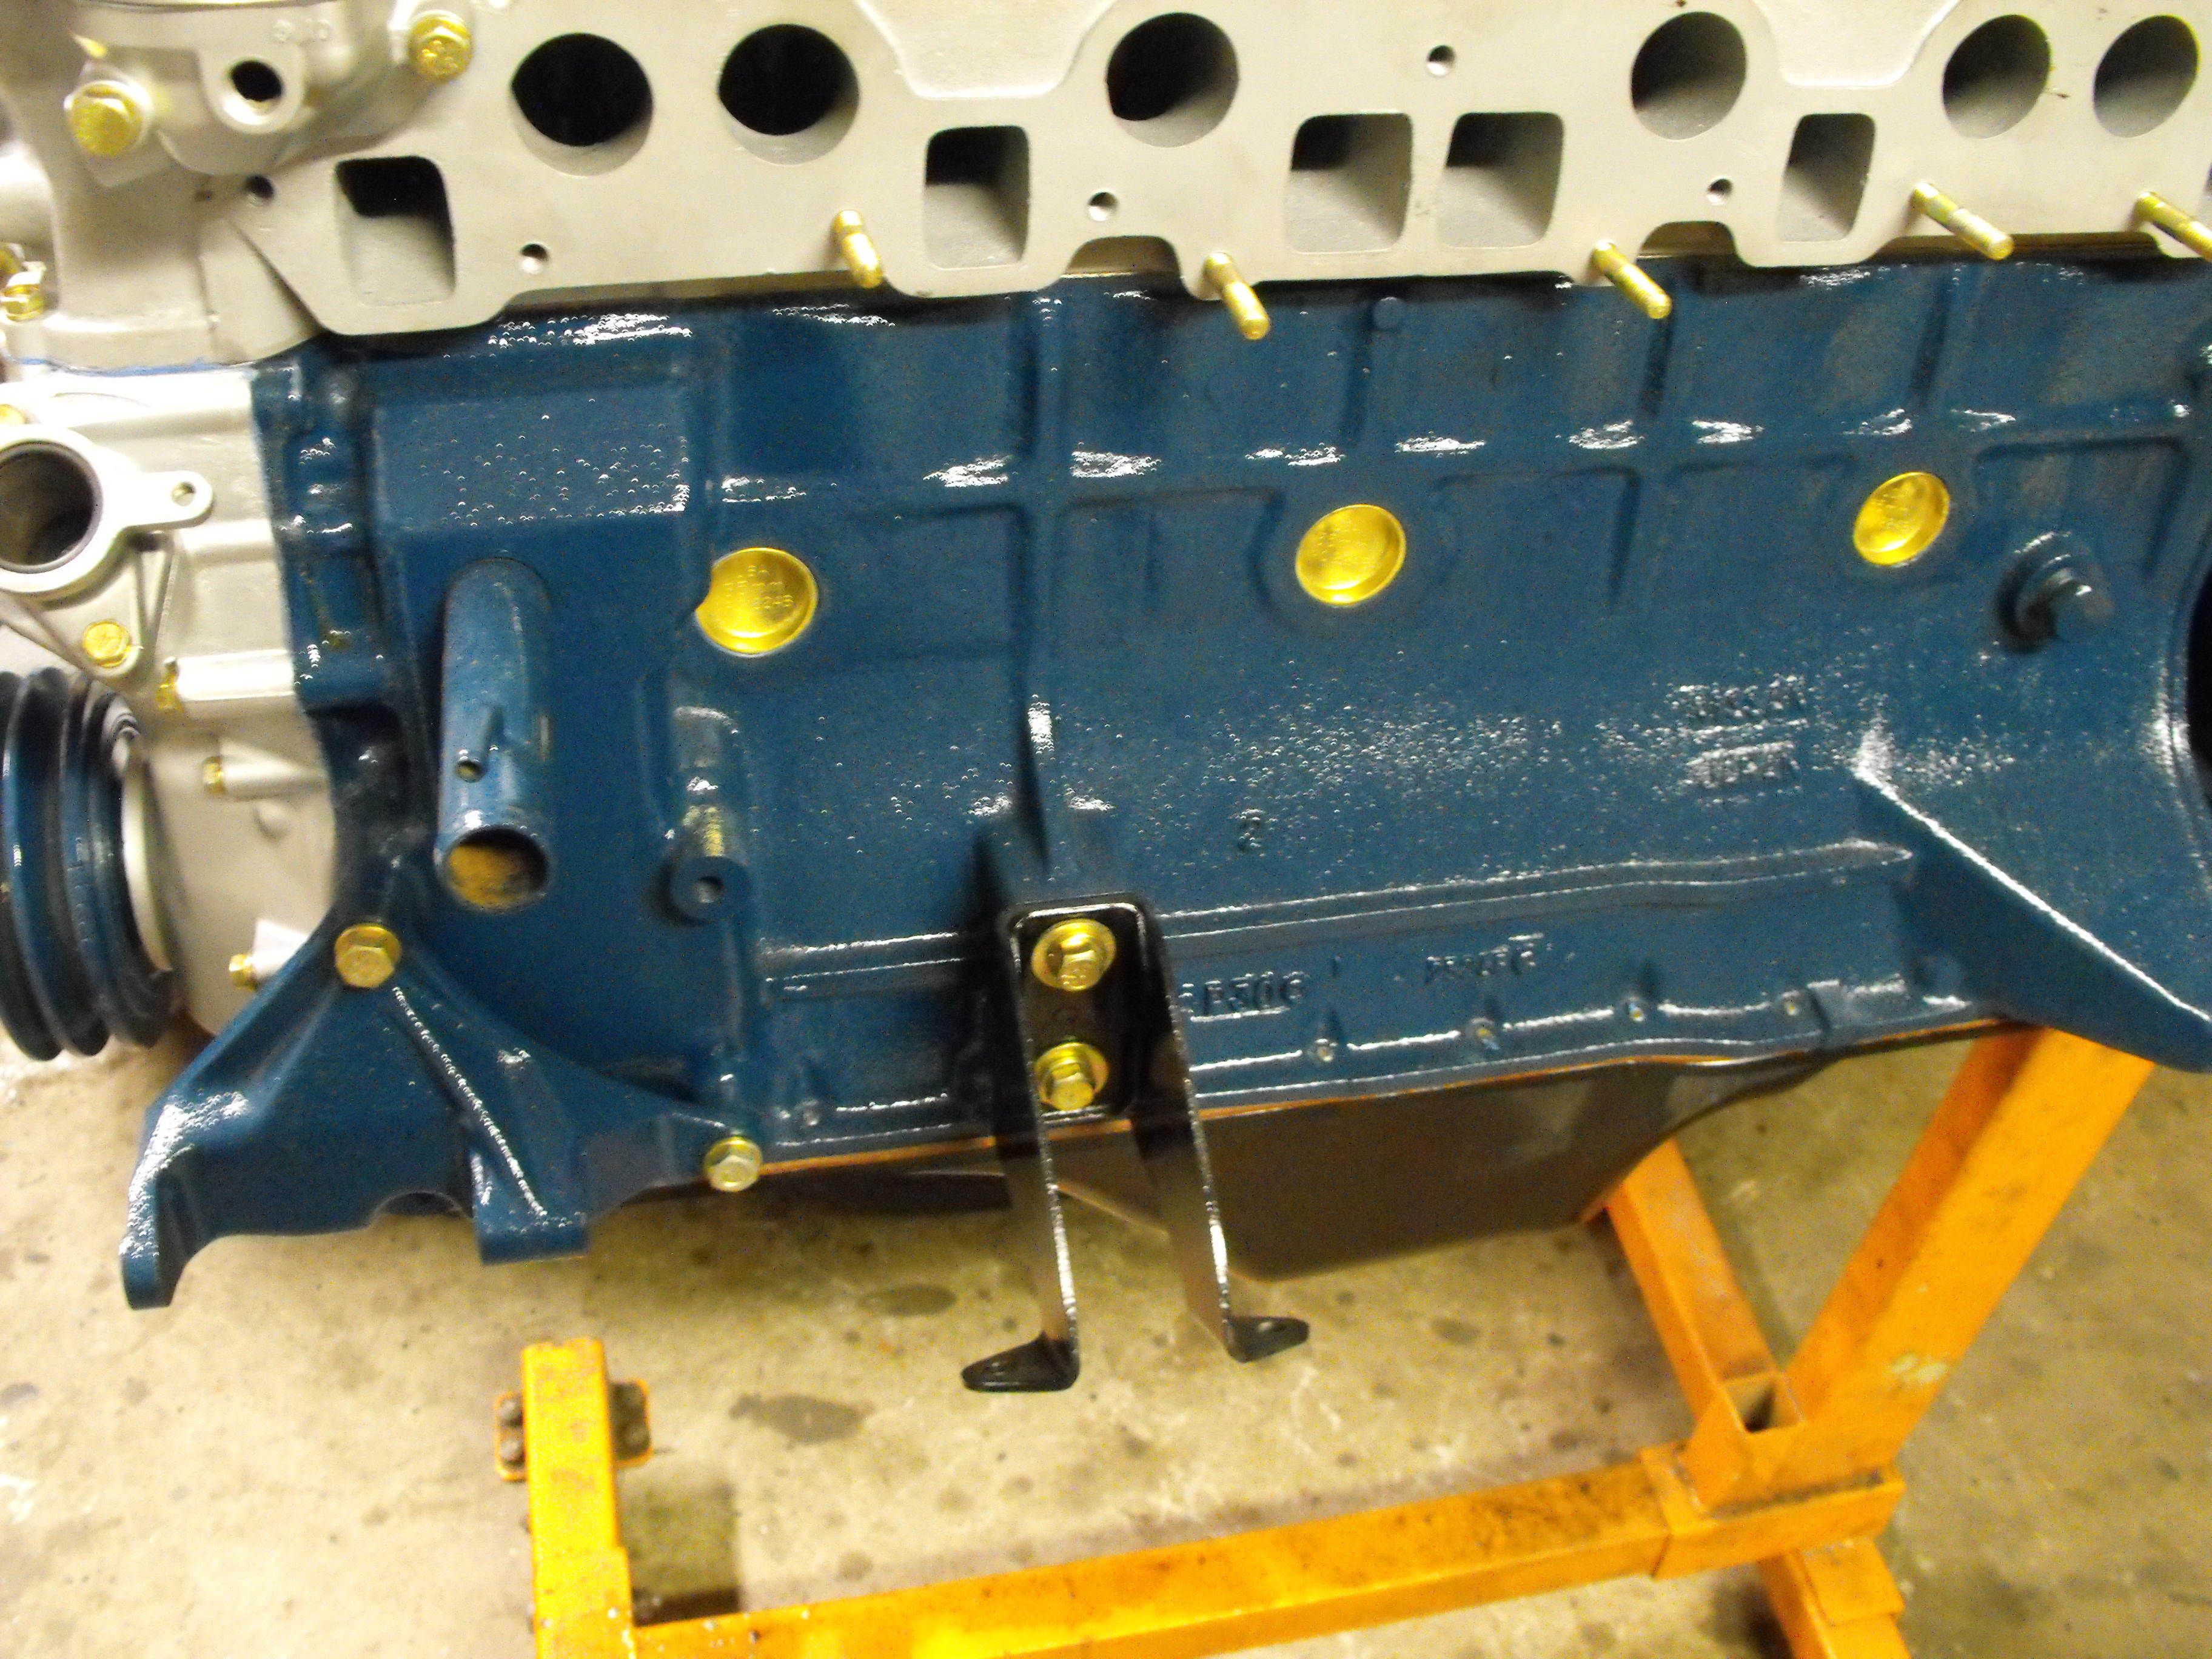
So I really wanted to protect the studs on the booster before I reassembled it. I have both halves of the case finish painted. So I plated them in place. I wired them up and suspended them in the tank This is how the other half turned out Now I'm working on plating the MC push rod. I'm working on removing the pitting from the rod.


 1 point
 -
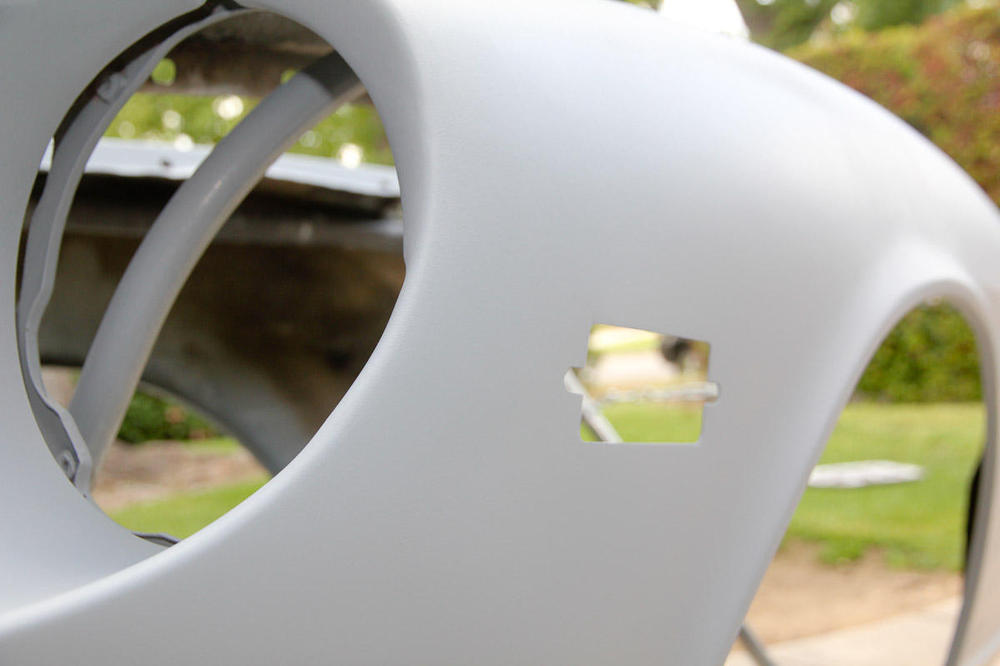
 @Captain Obvious Thank you, I appreciate the kind words and your love for the diagram.1 point
 -
1 pointHi Charles. My decades of welding was mostly done on galvanized pipe and steel. I've experienced the symptoms of "zinc fume fever" (google it) many times. Along with a sweet taste in your mouth, it will give you the same symptoms as coming down with the flu. Headache, fever, chills, thirst, nausea, vomiting, chest soreness, fatigue, gastrointestinal pain, weakness and tiredness. (List is courtesy of Lincoln Welding). As you can see, zinc oxide fumes can make you feel pretty crappy. The good news is that the symptoms don't last all that long. By the end of a days exposure one goes home sick. Next morning the worst of the symptoms are gone. The effects seem to be cumulative. After a week of daily exposure, one needs the weekend to partially recover. I've not had much exposure to cadmium but you're correct in that cad. has much worse long term effect. Prayers coming your way. Let us know what you discover. Many of us are welding and plating on a regular basis.1 point
-
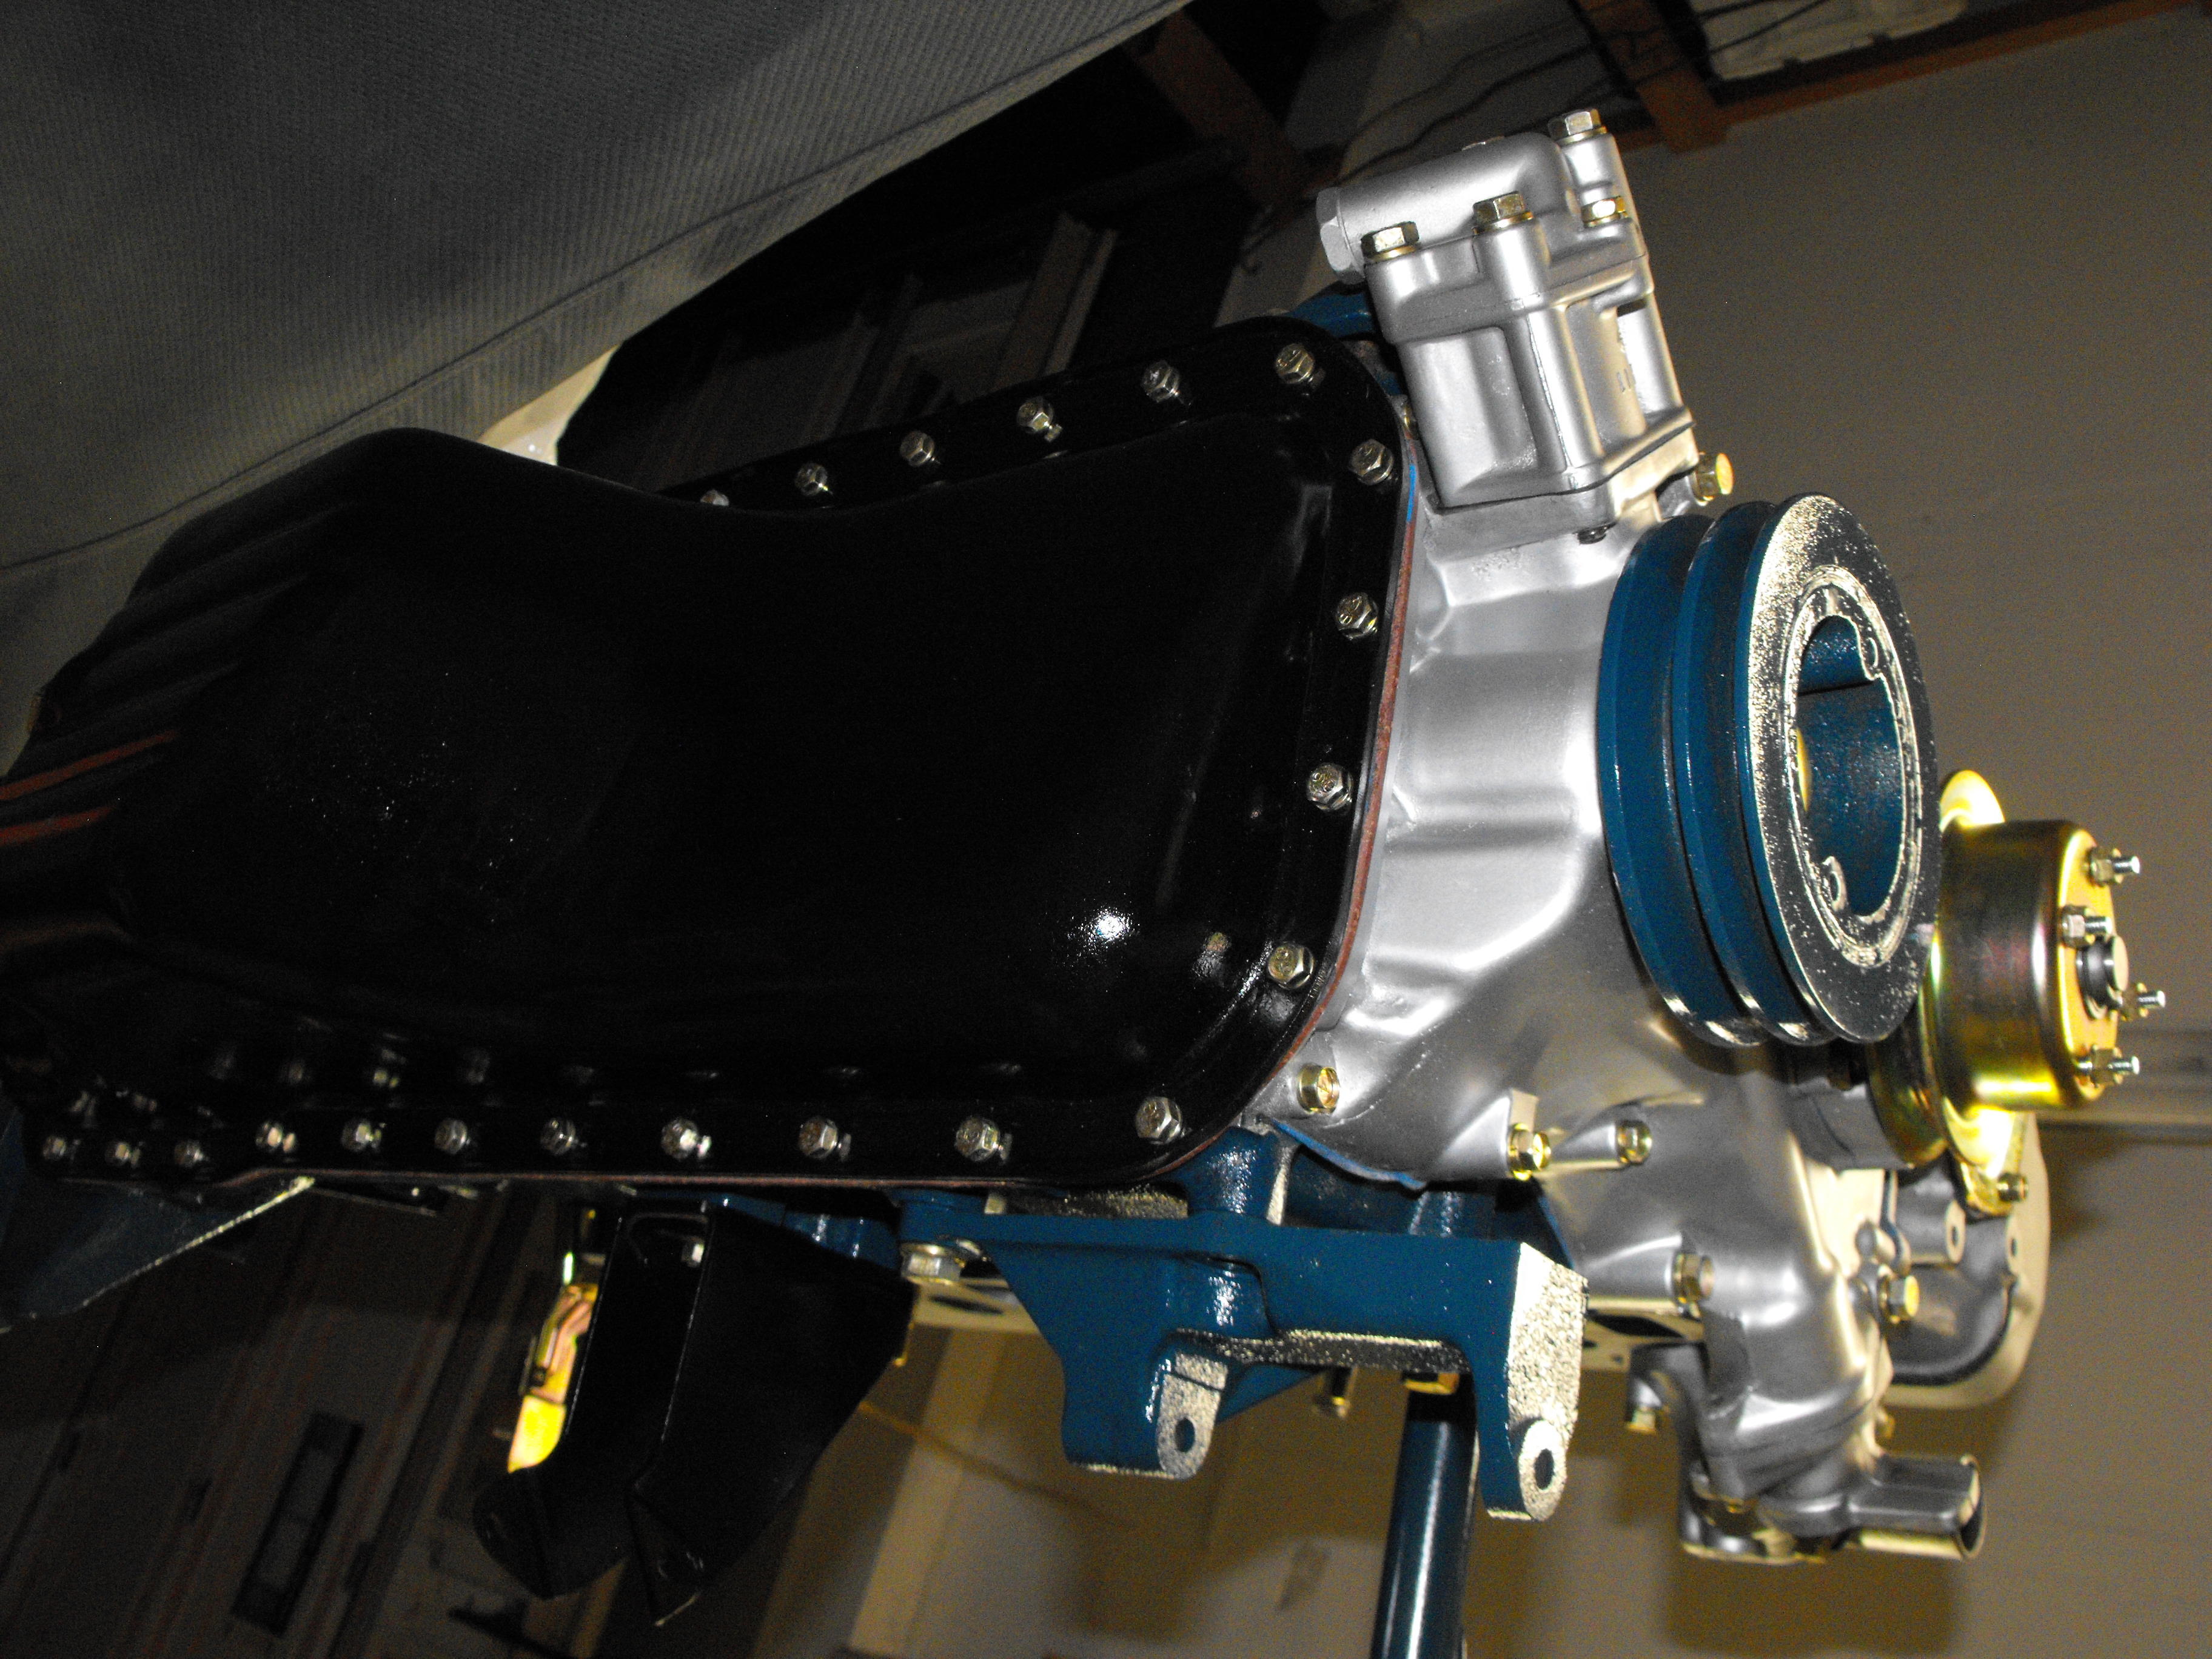
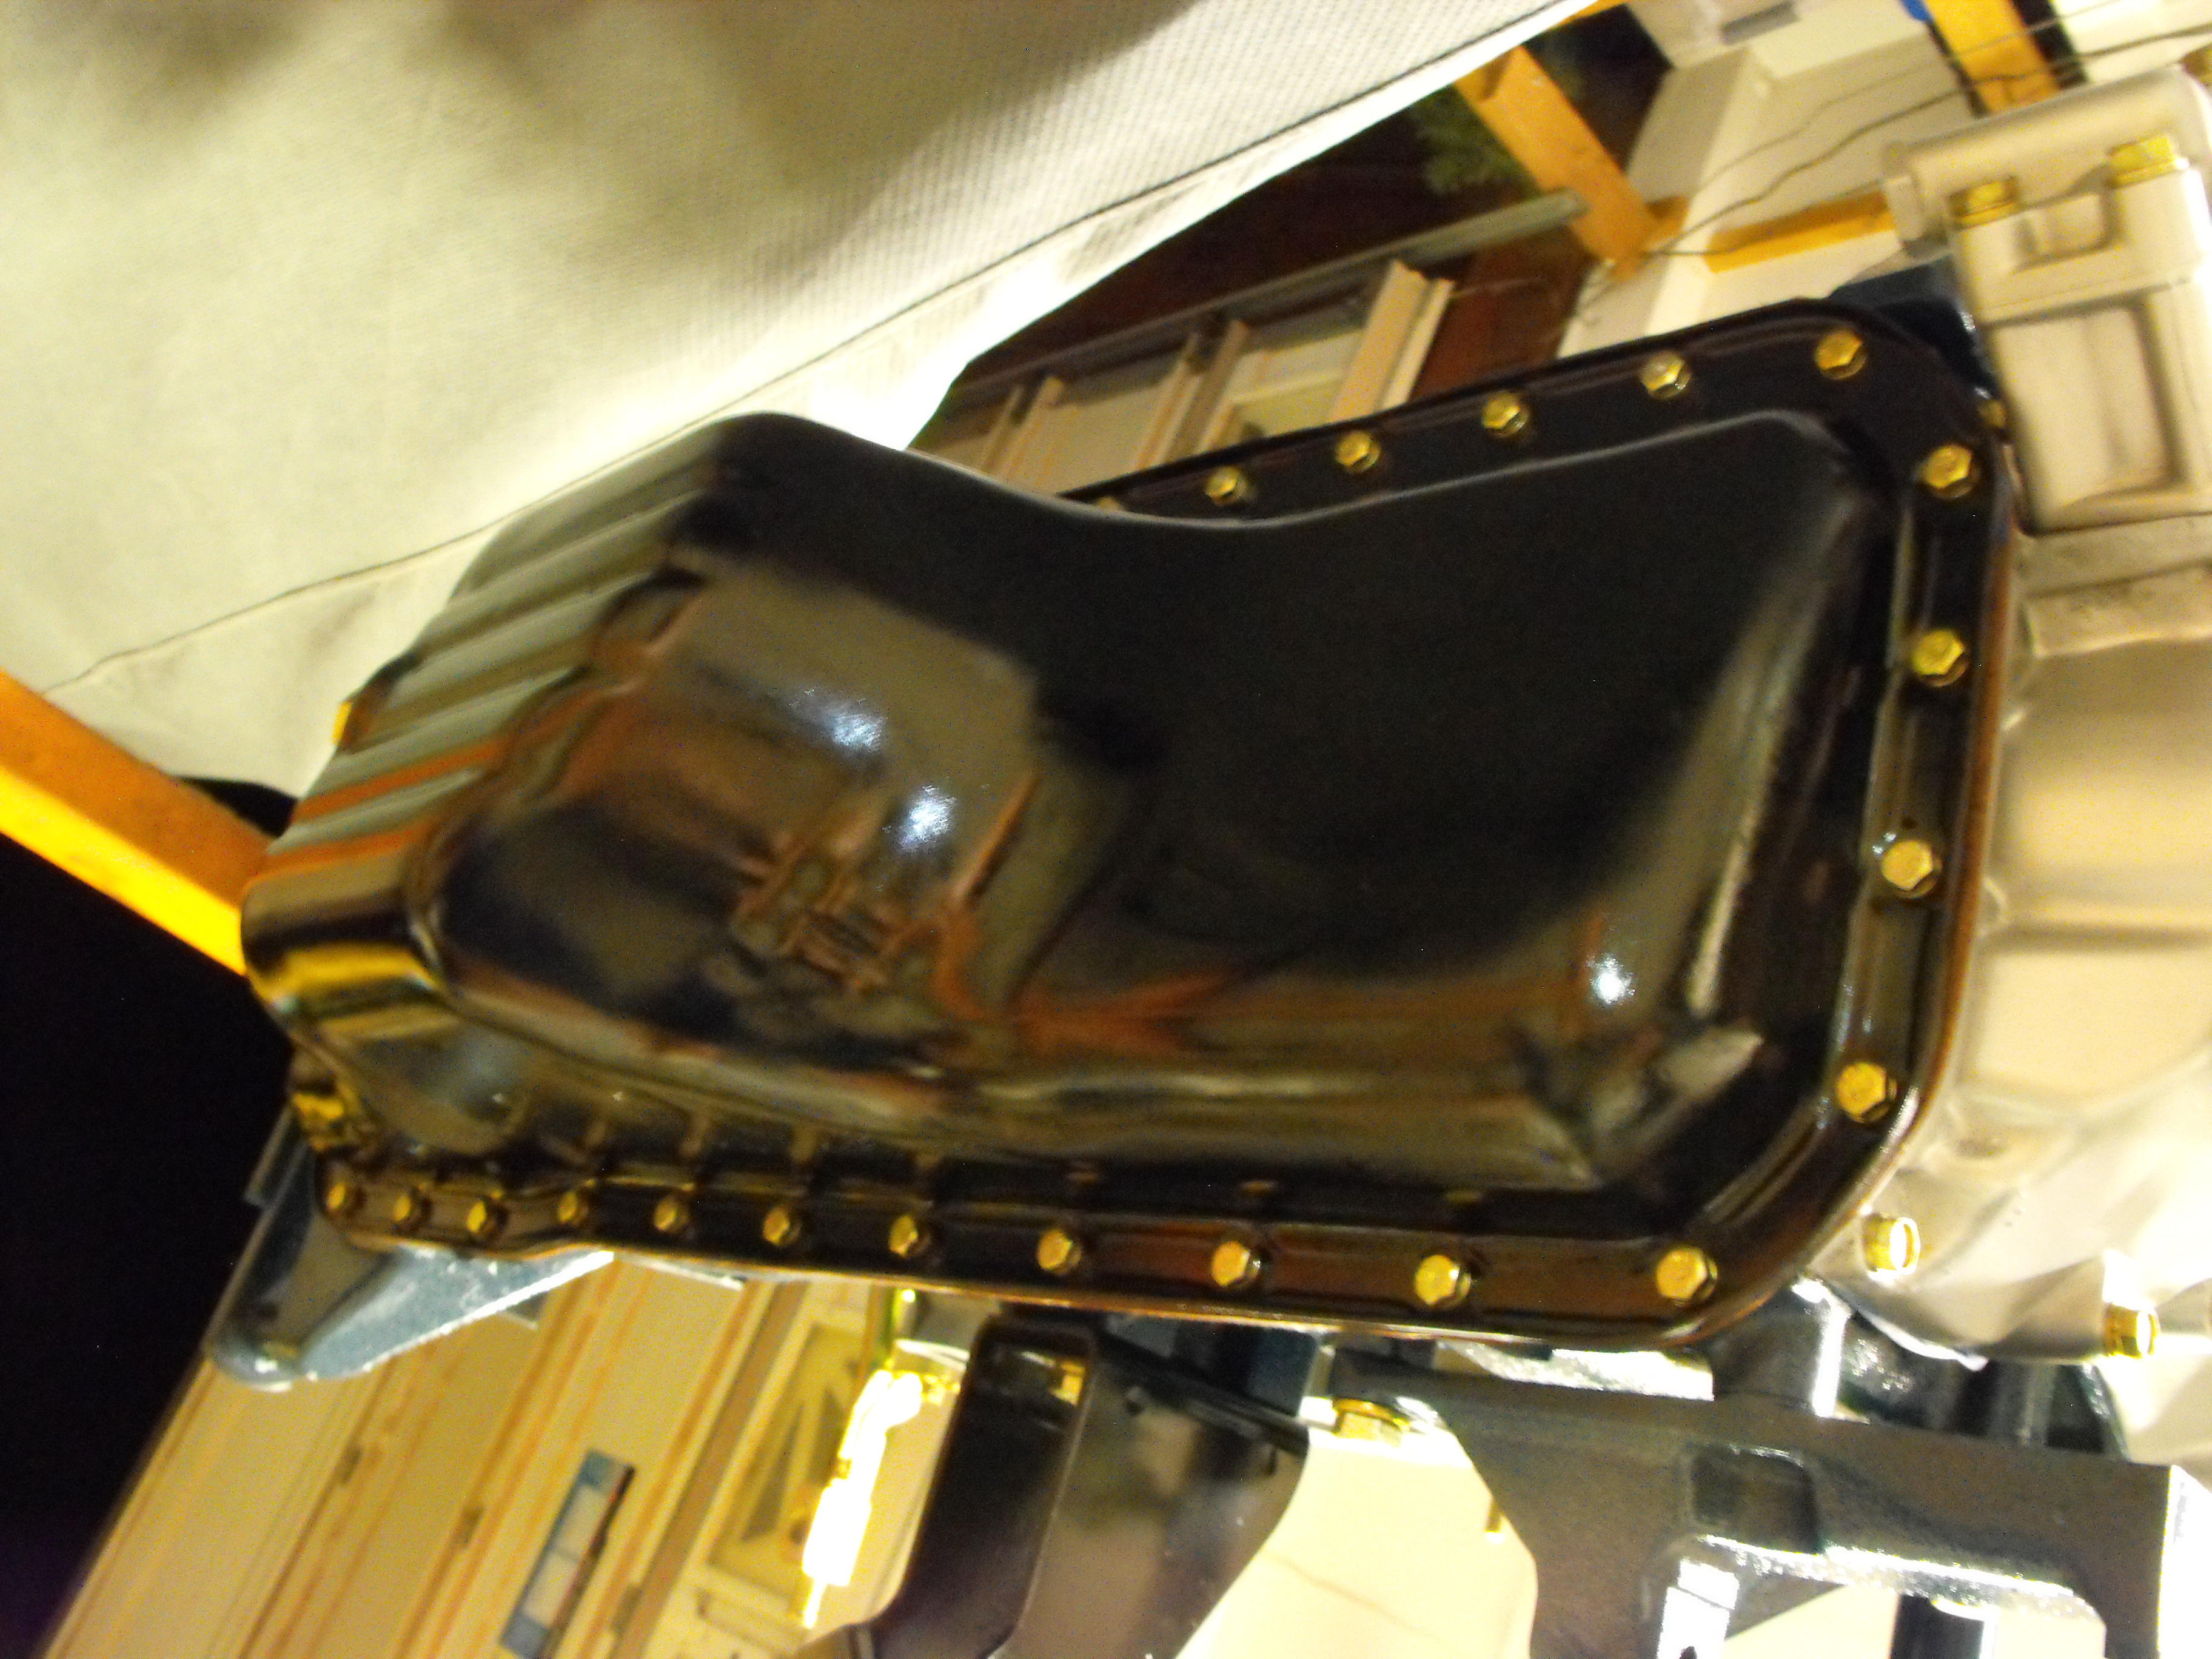
I adjusted the valves on the motor and added a few more of the plated parts. Started working on the suspension assembly. I should have all of the suspension pre-assembled before the body gets back from the paint shop. Ordered some new ball joints today along with the shock/strut bellows, rack and pinion bellows and tie rod ends.


 1 point
 -
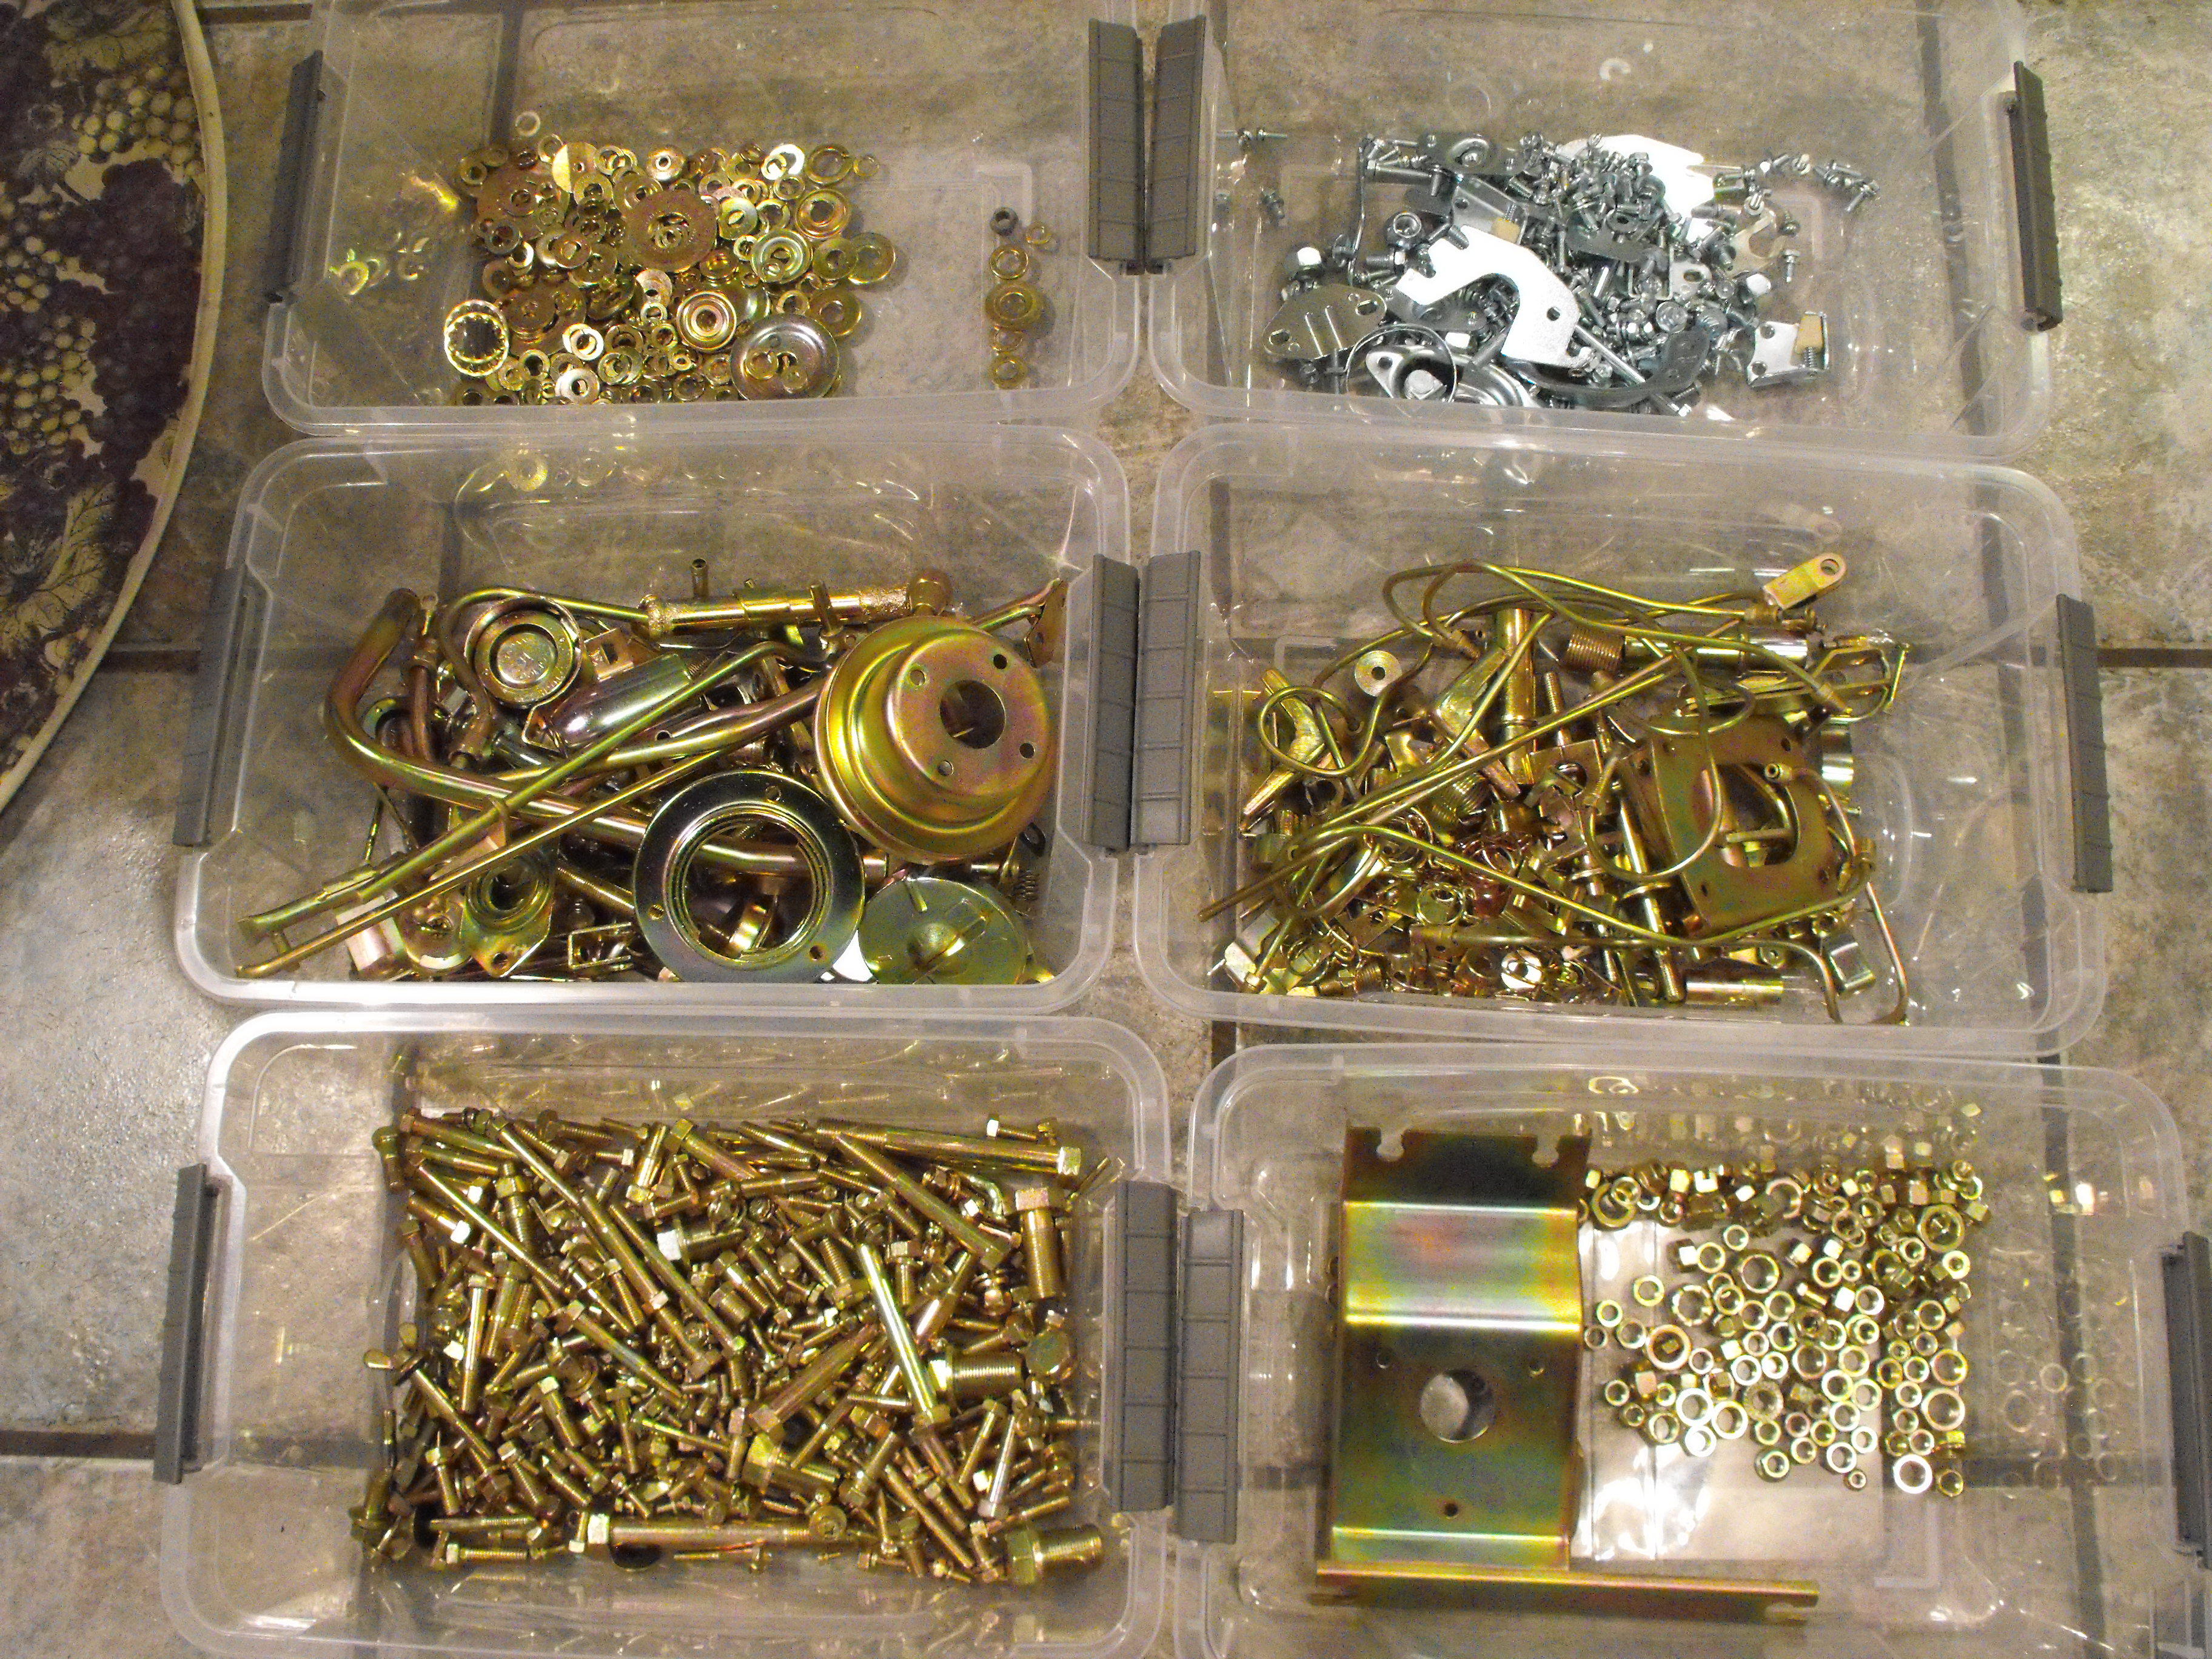
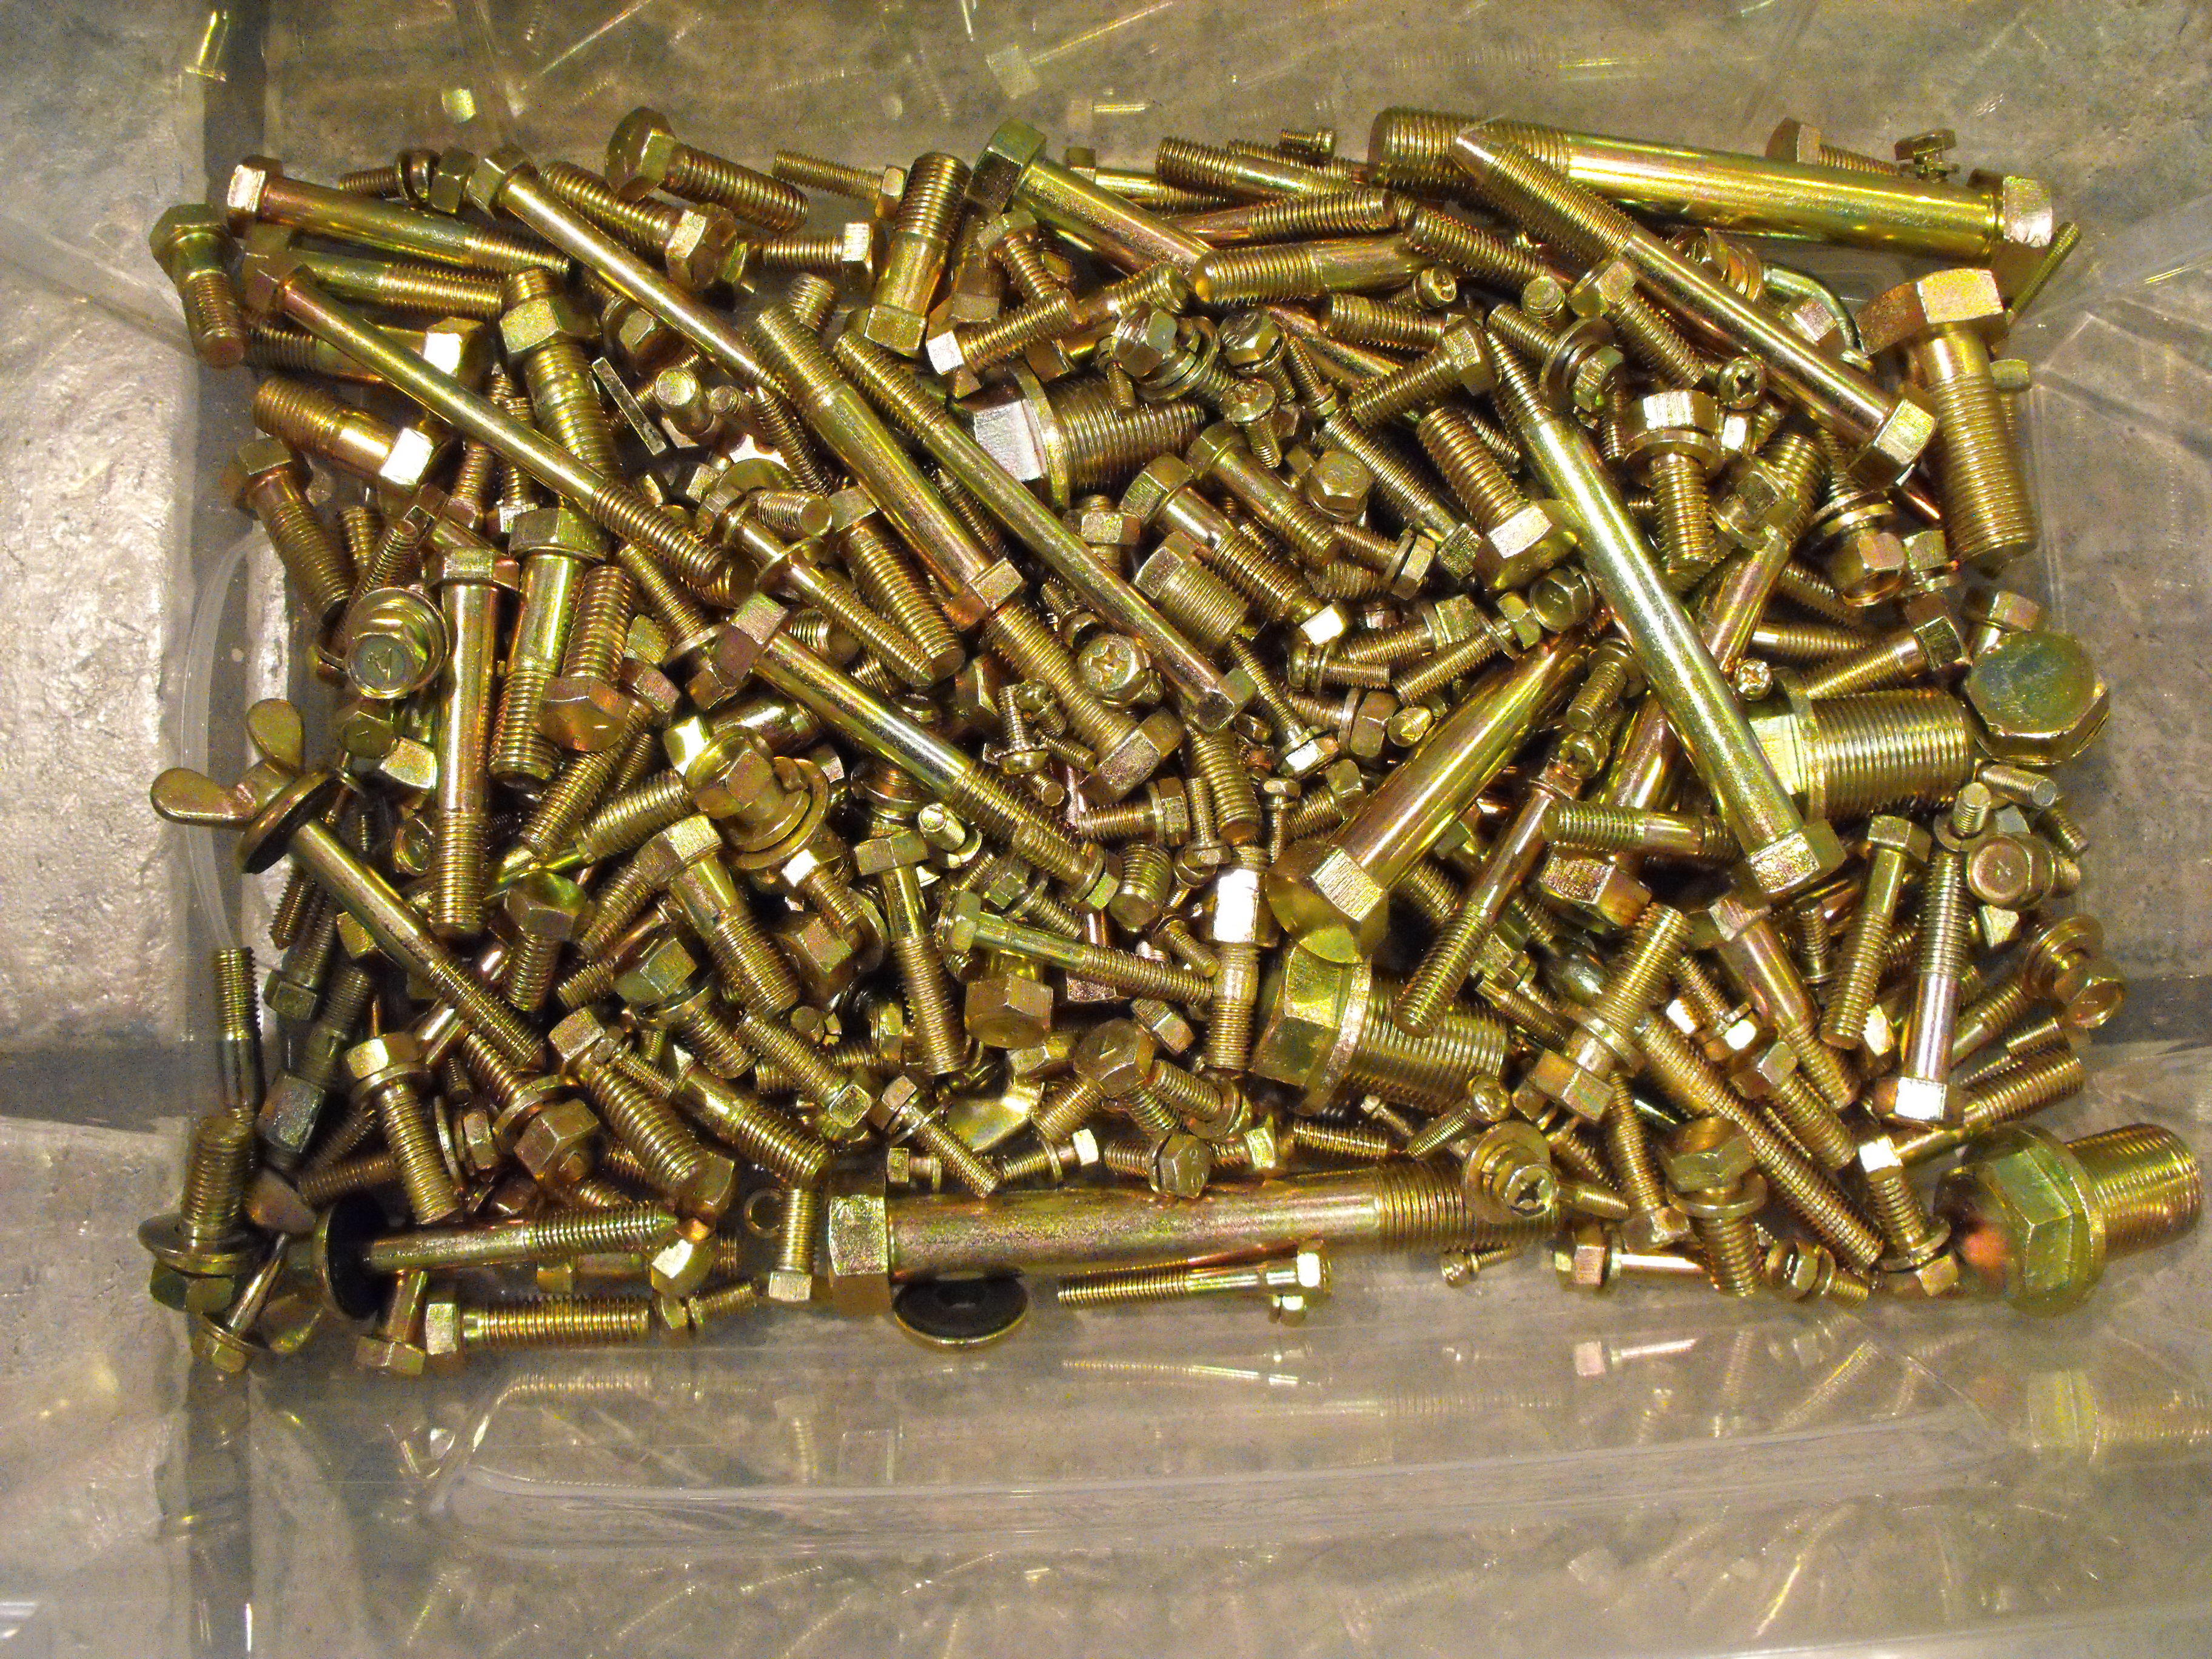
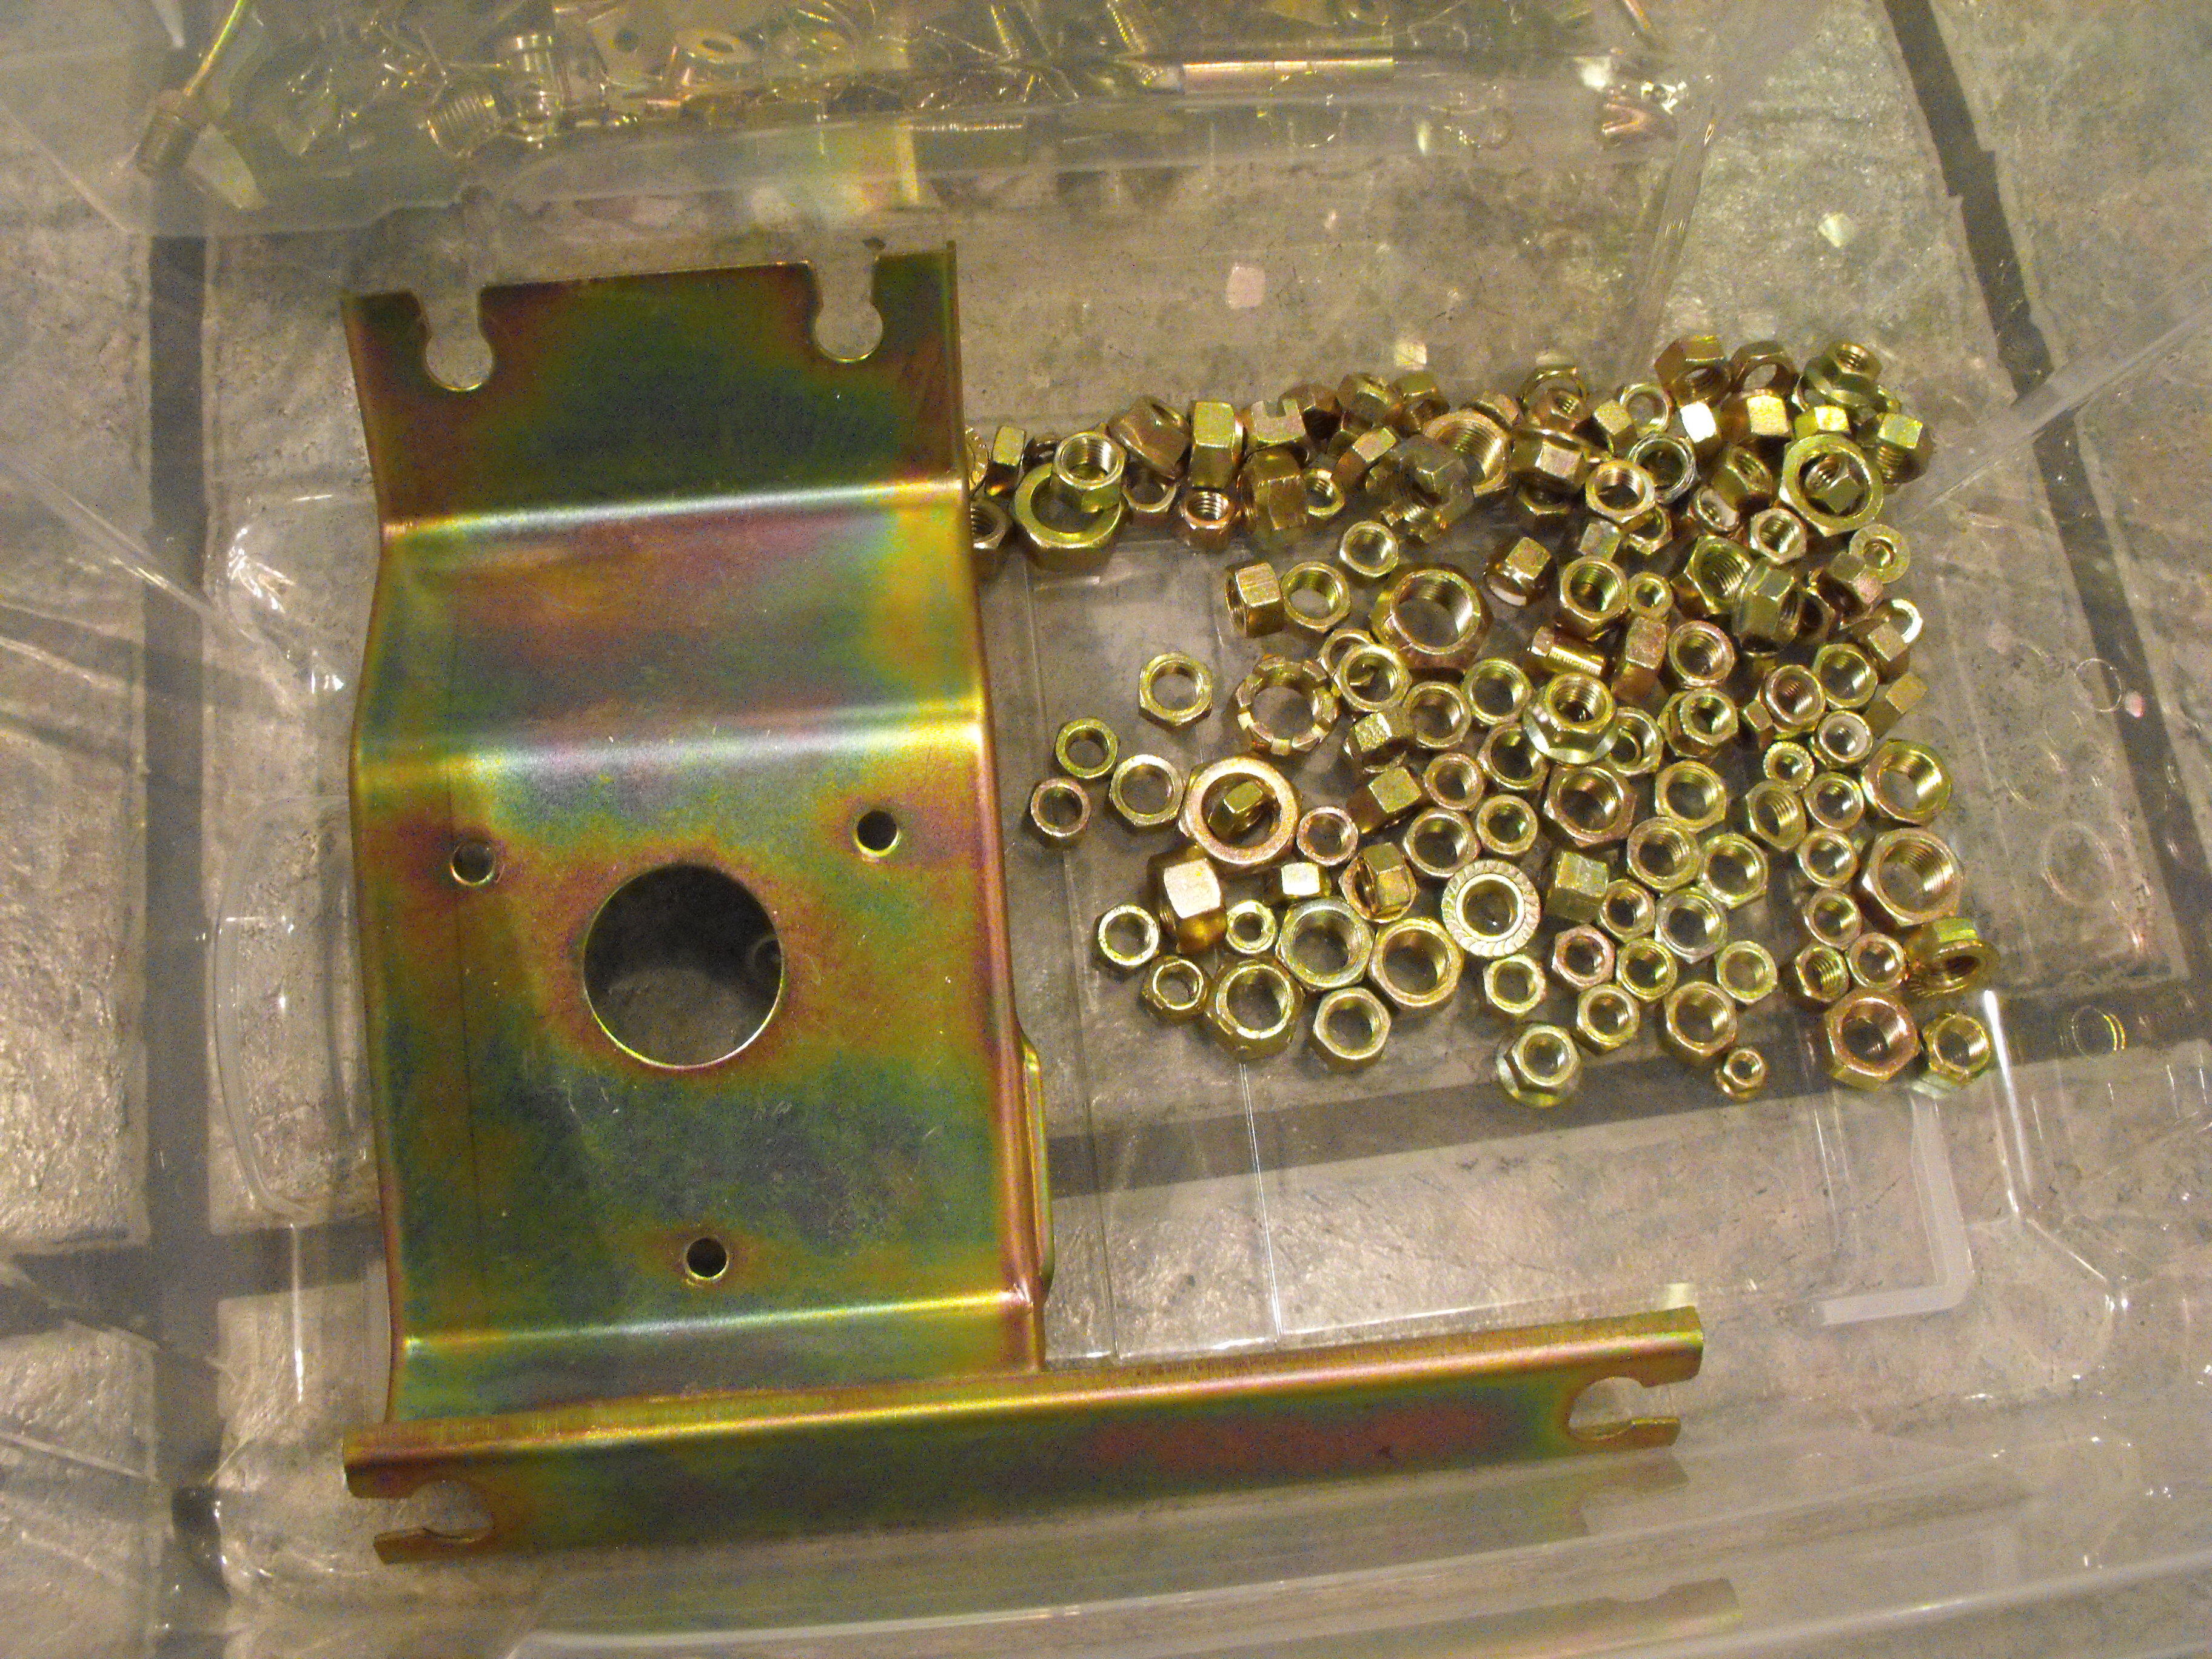
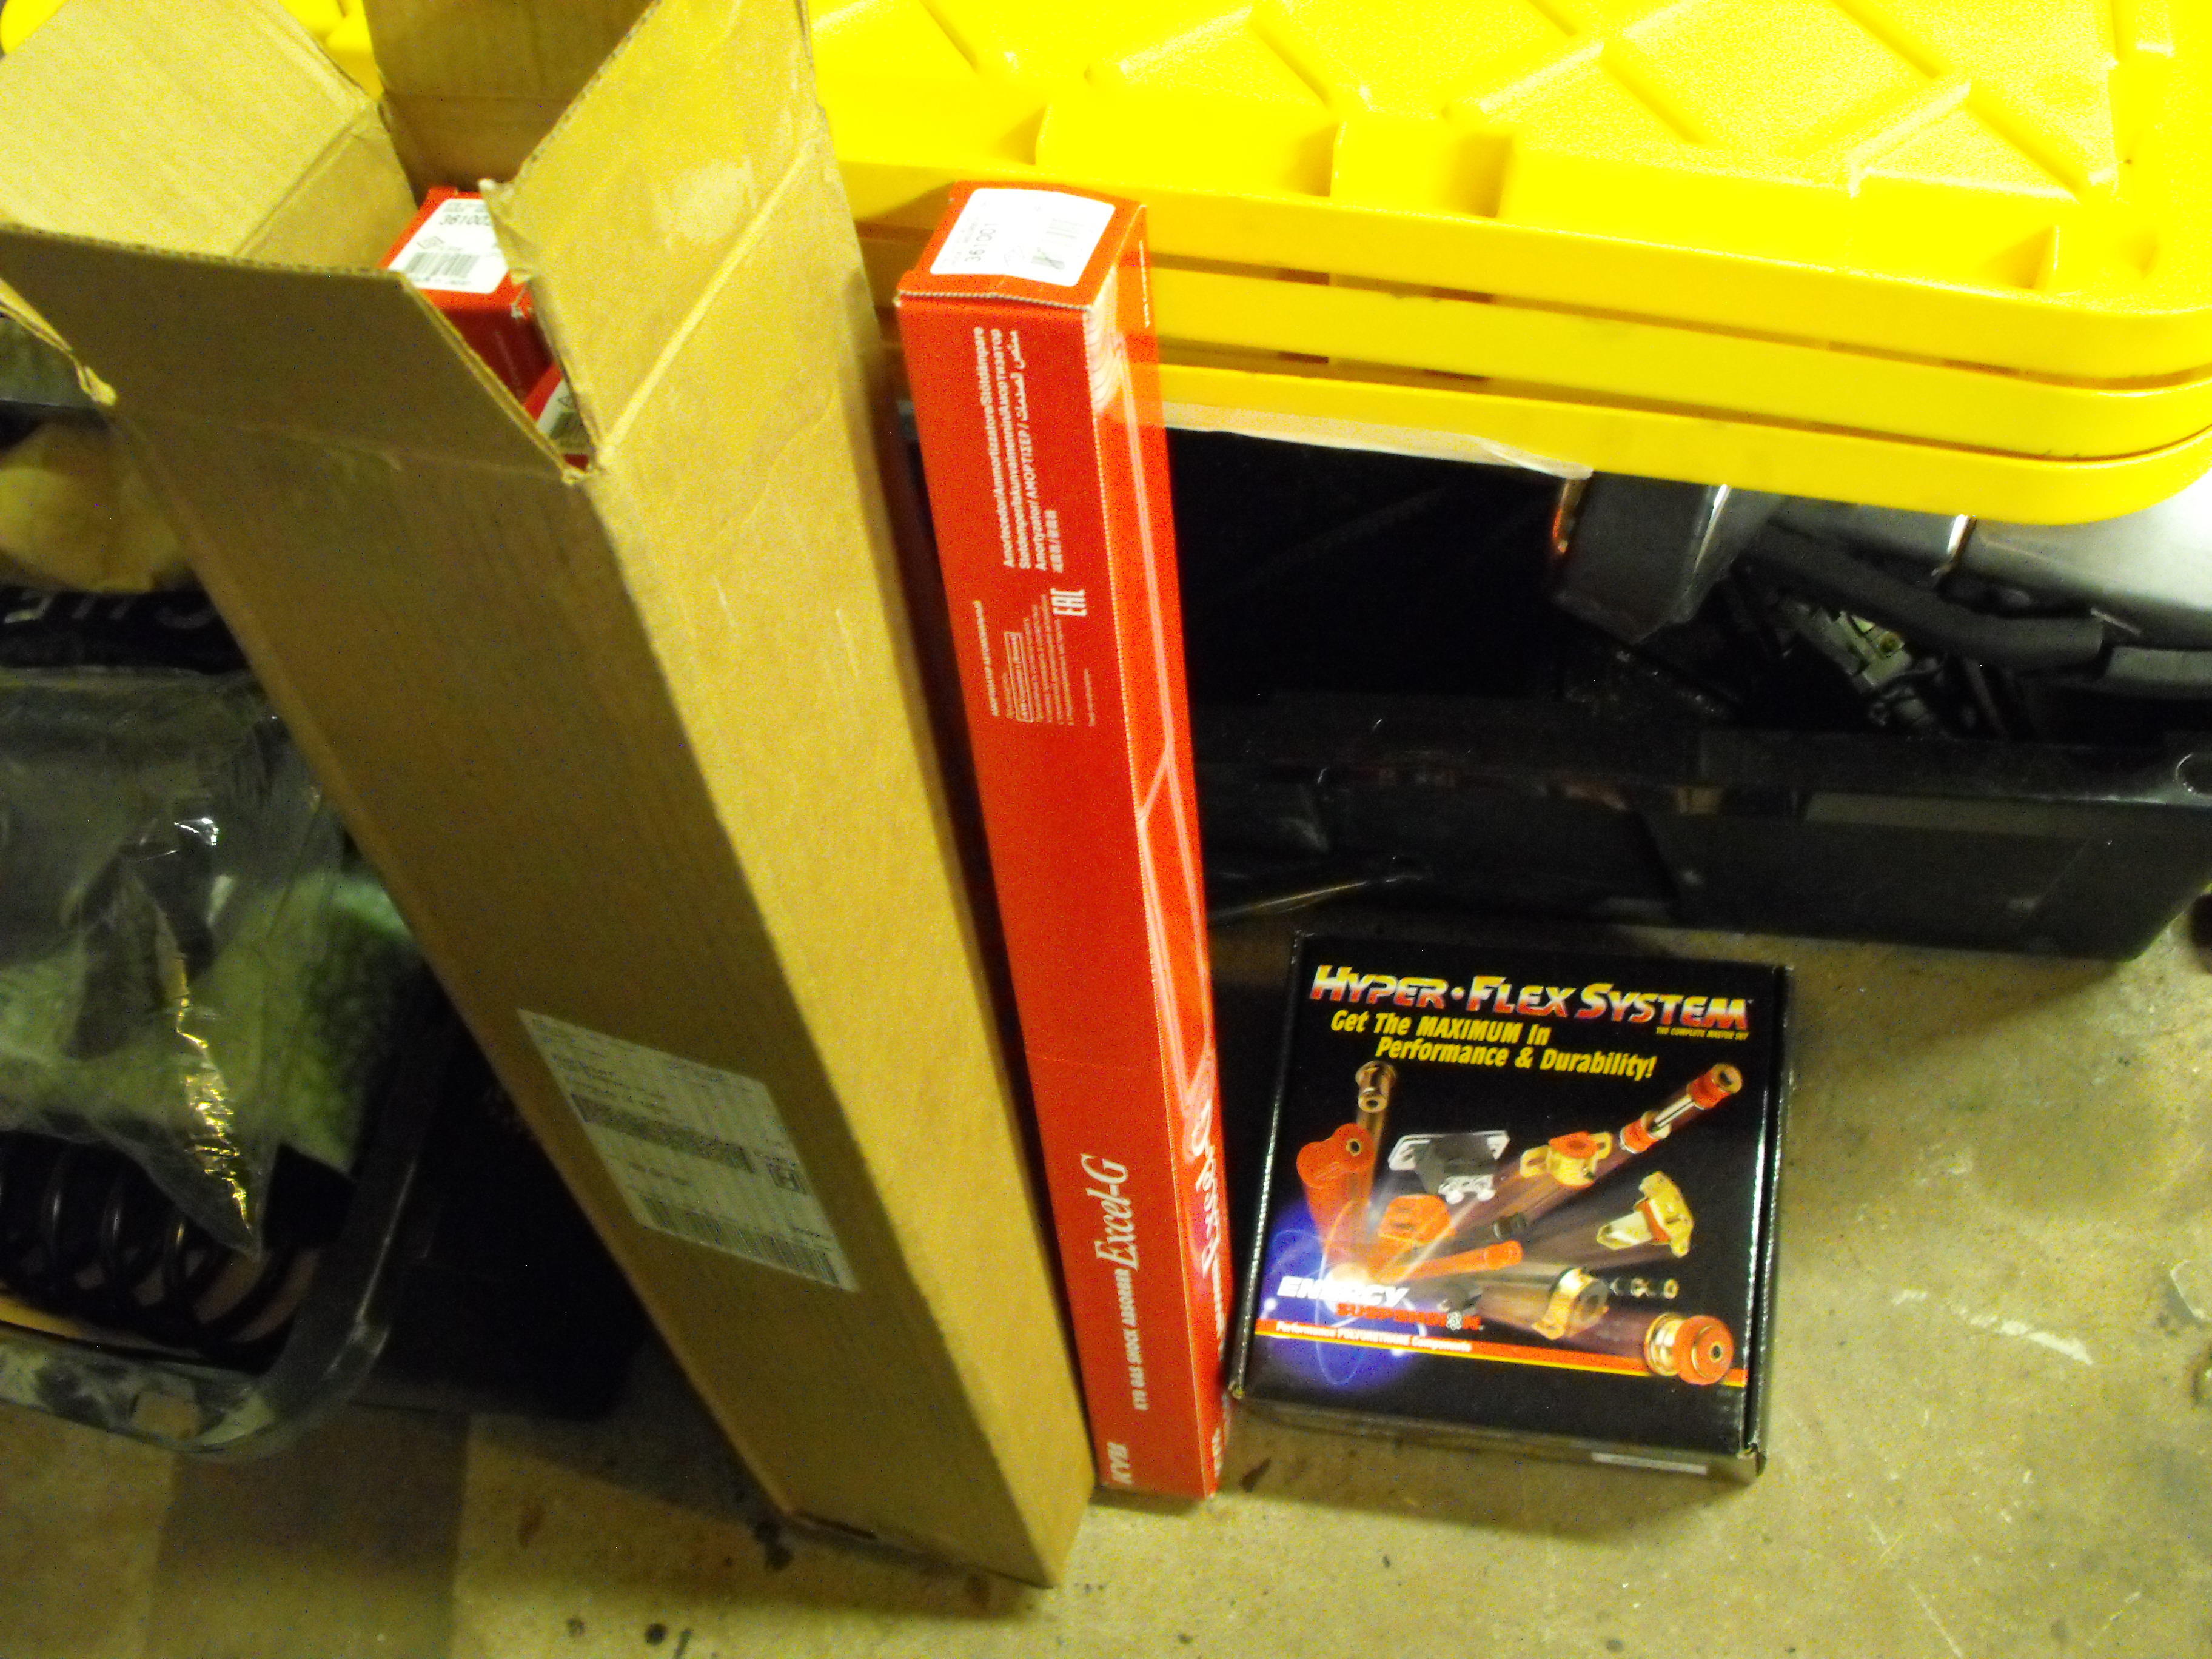
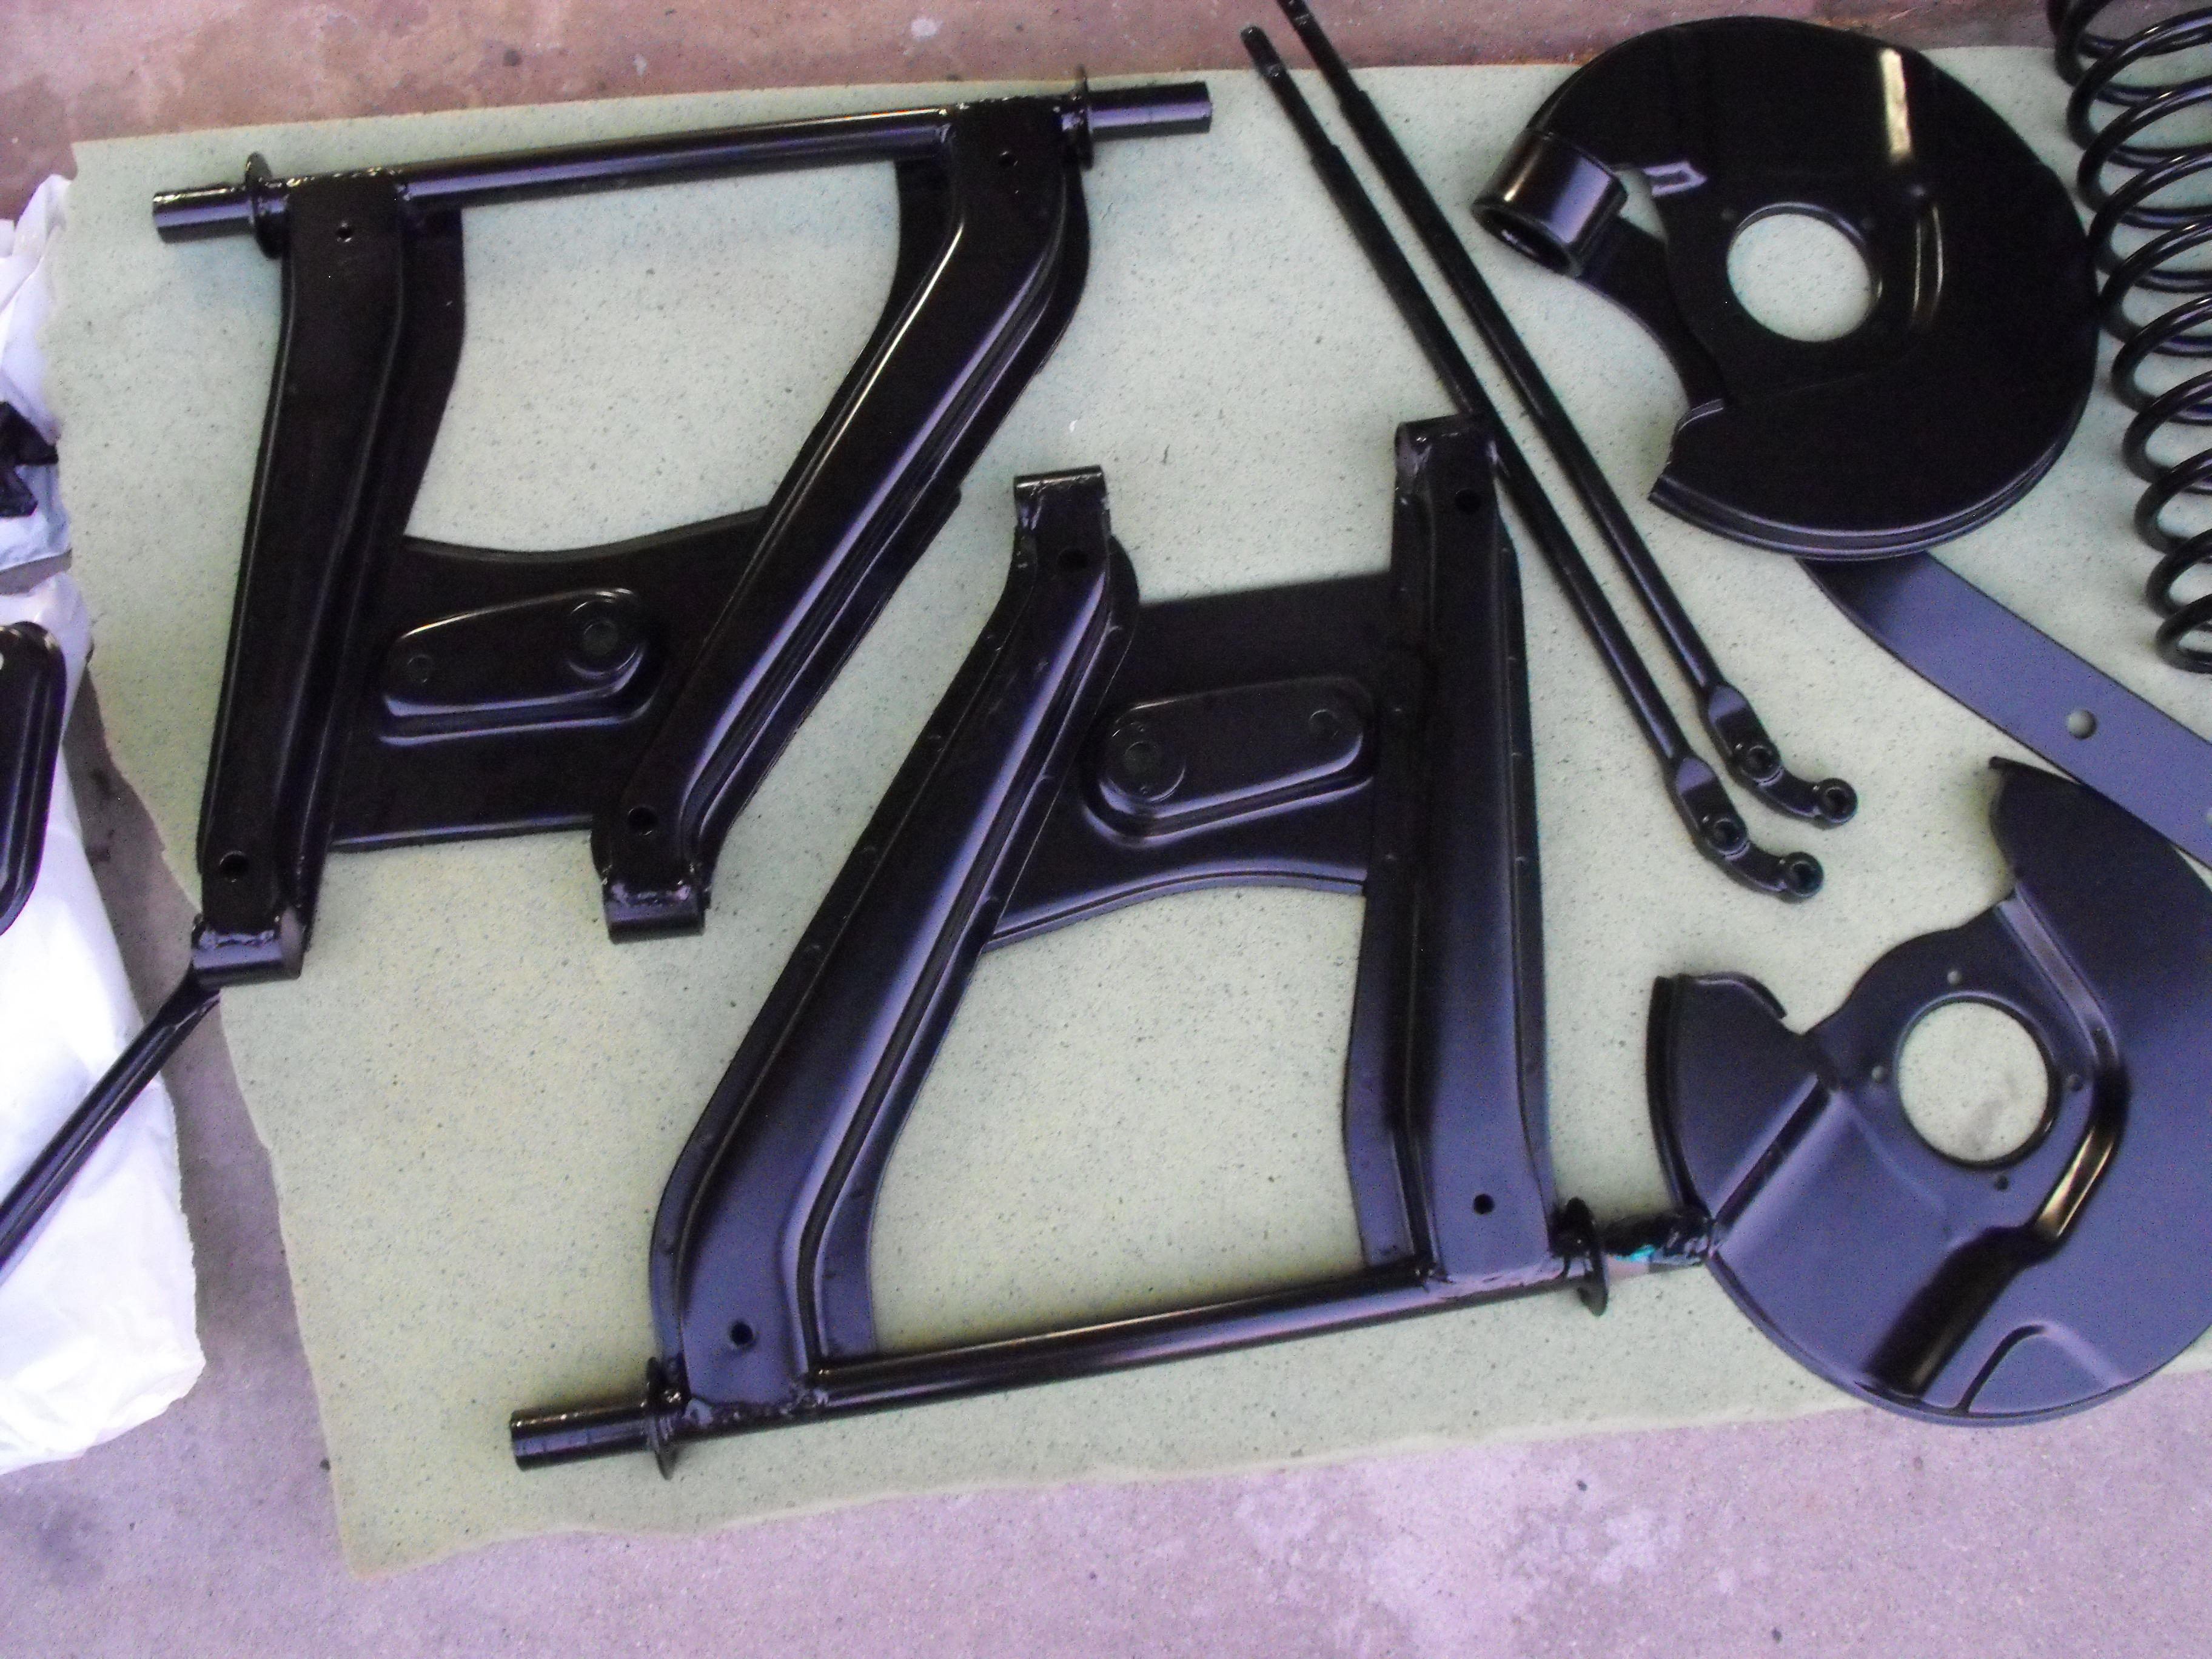
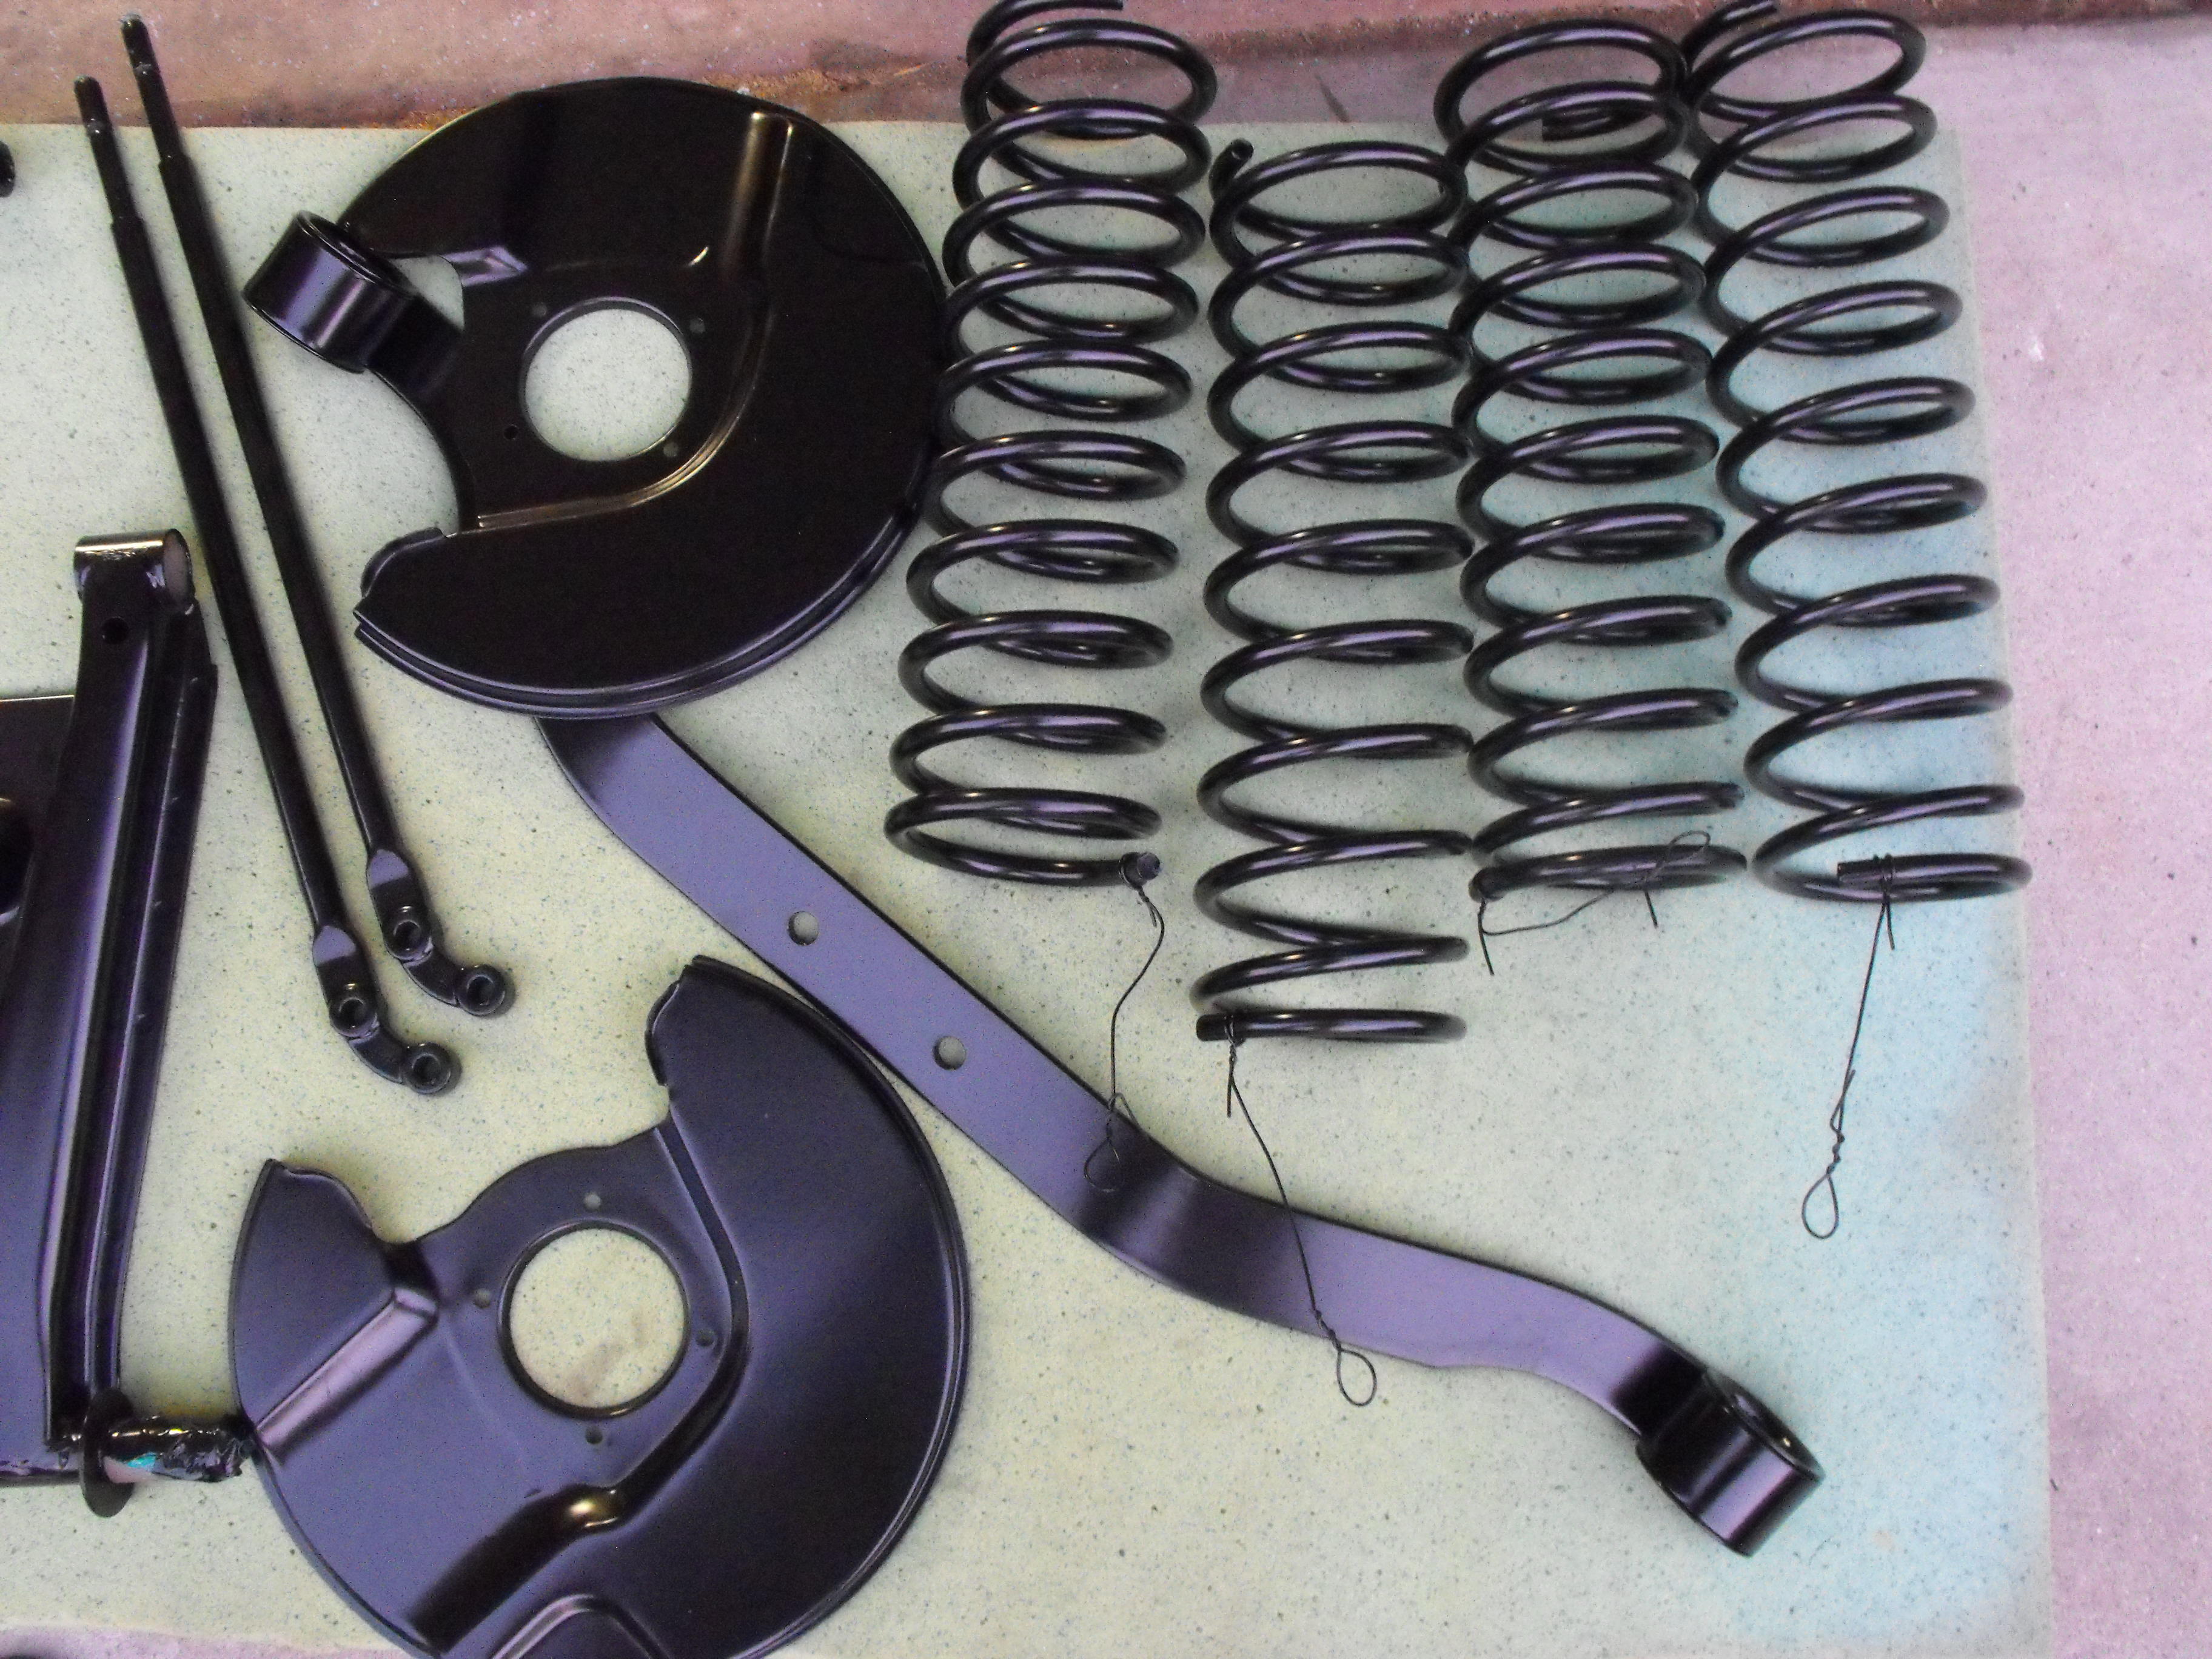
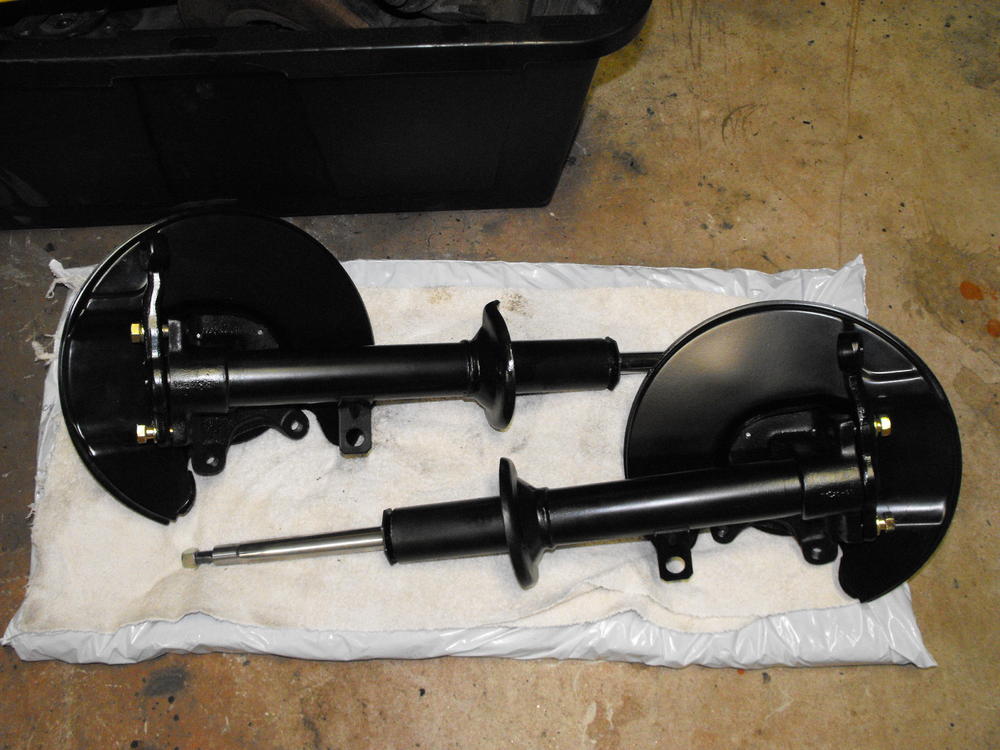
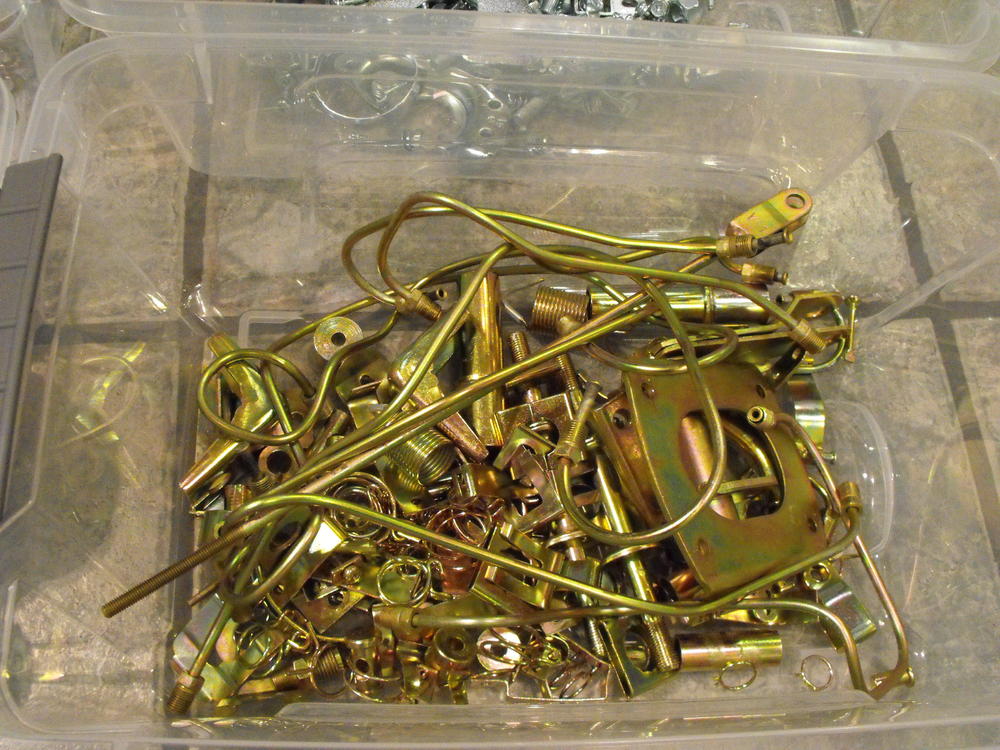
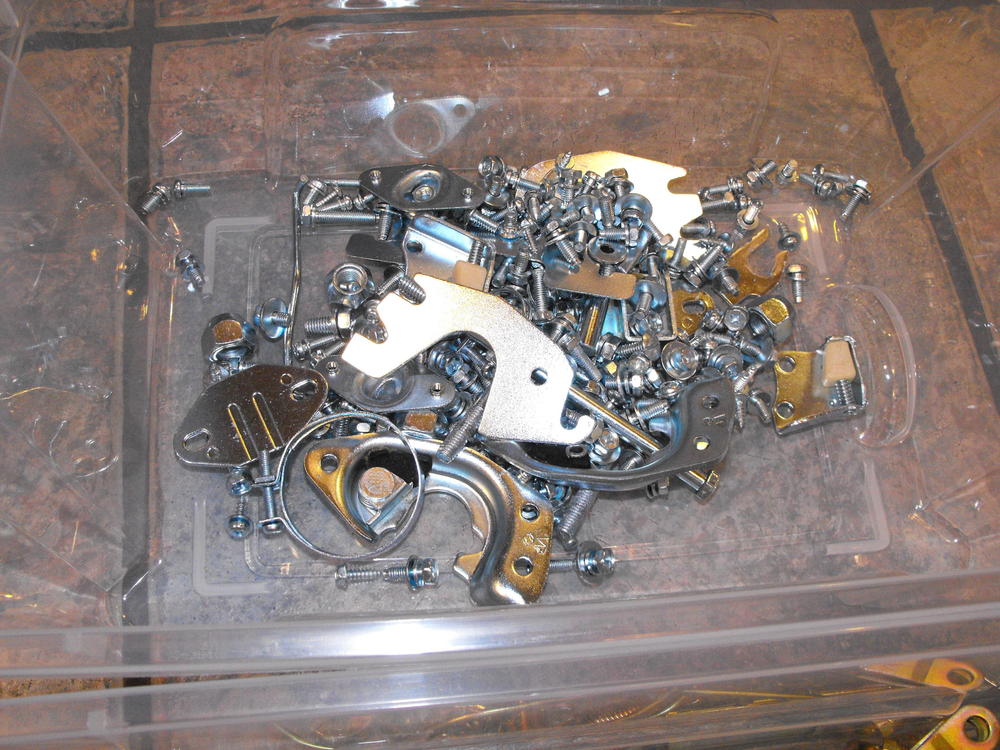
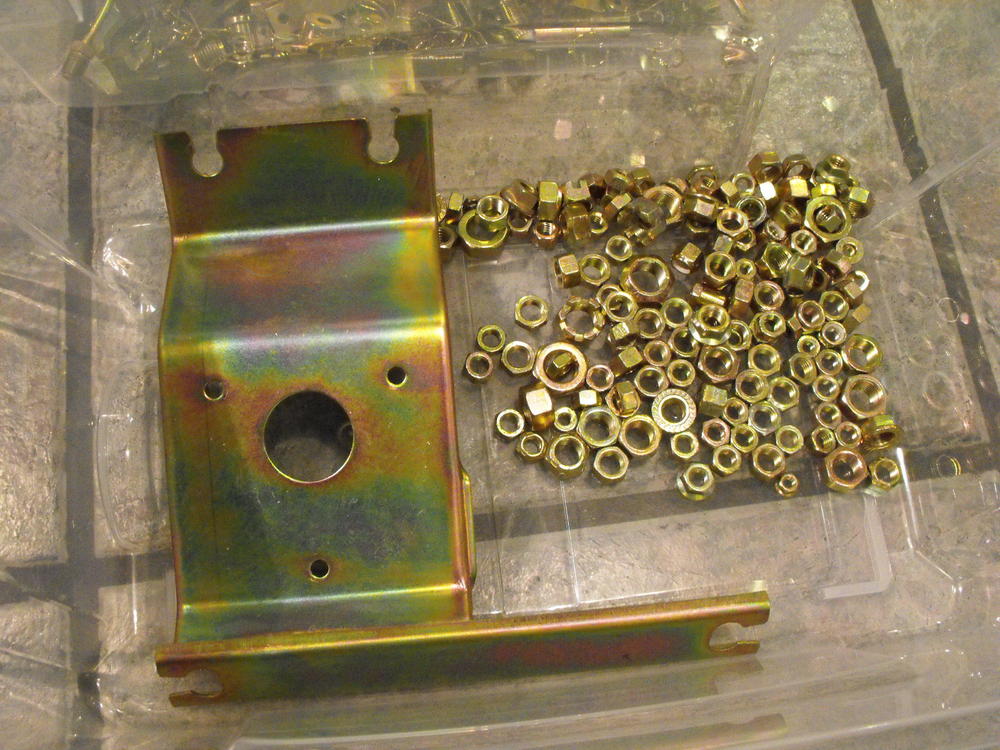
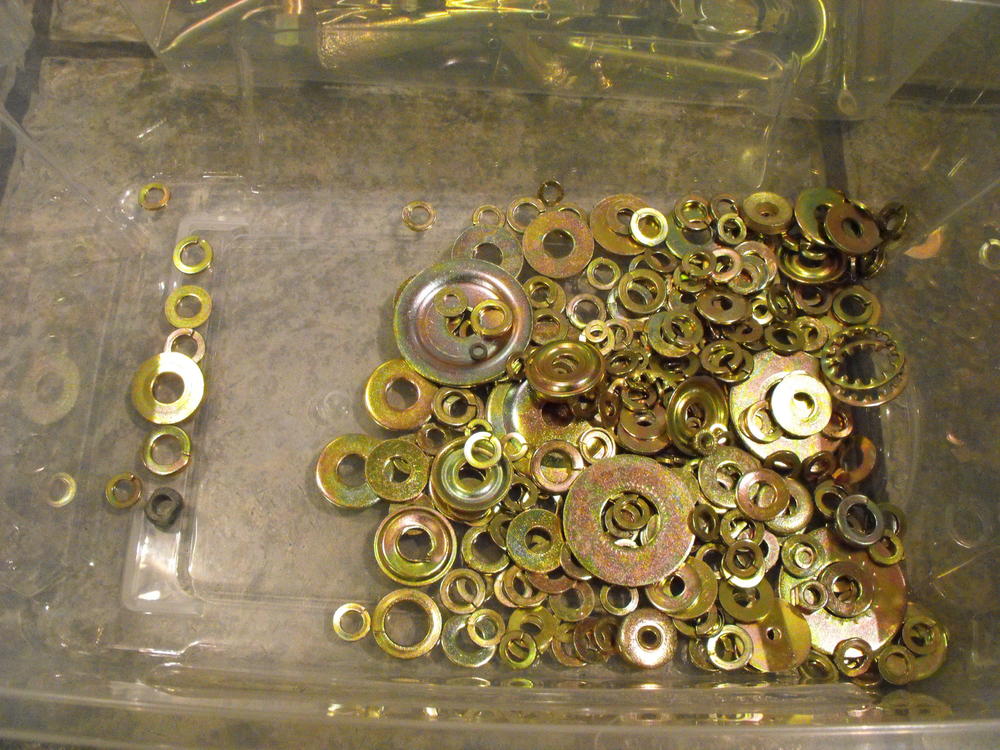
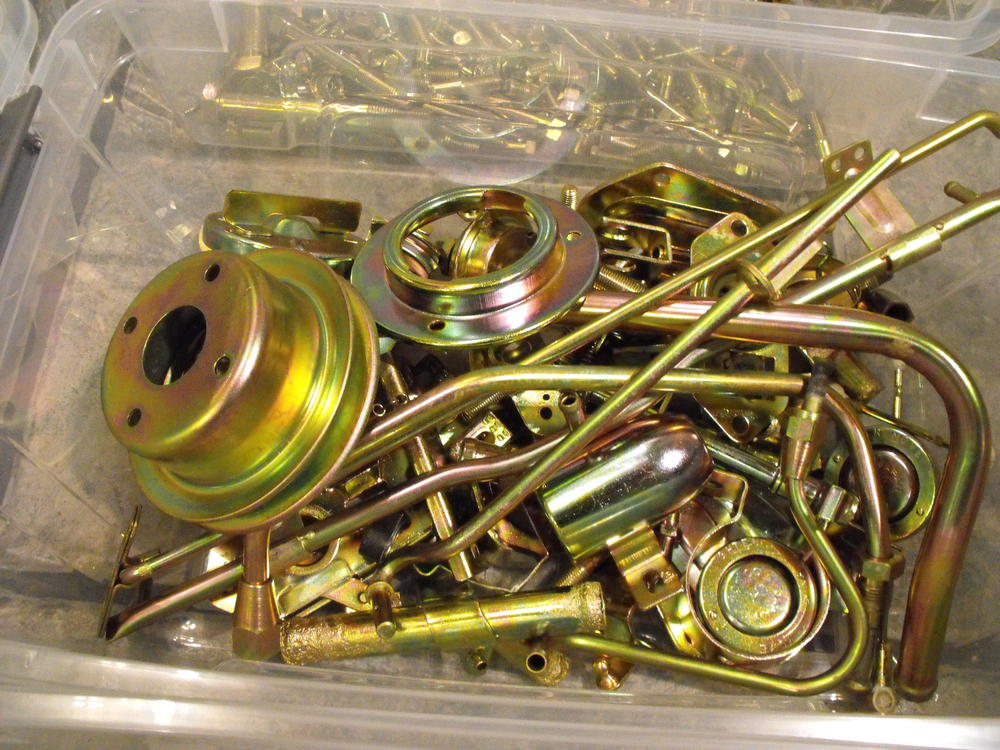
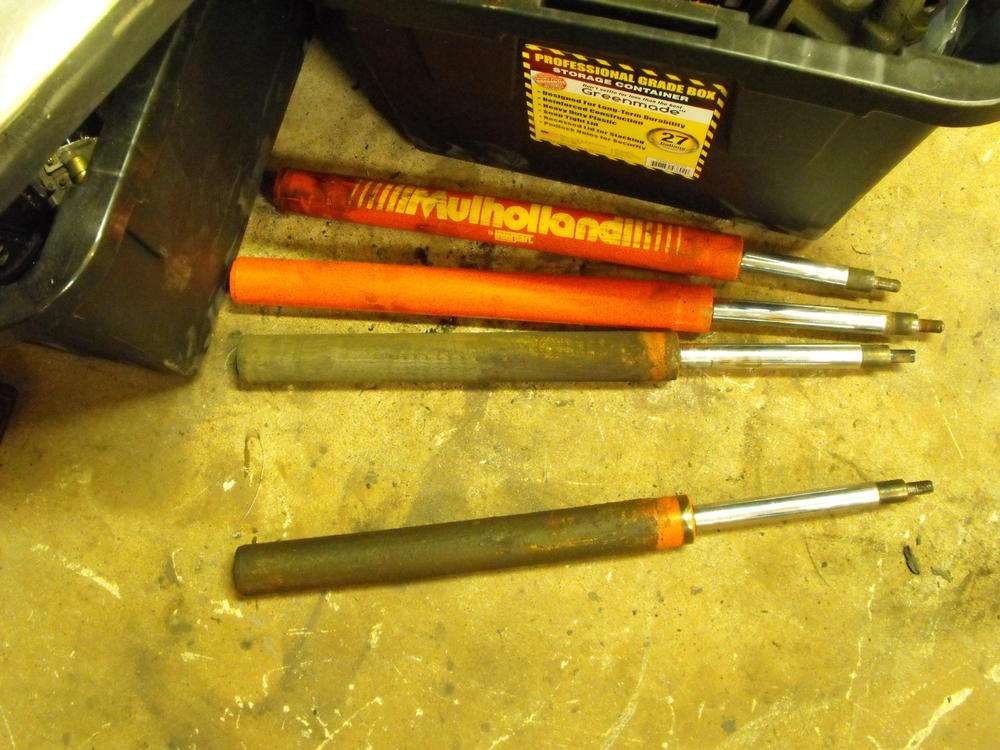
The plated parts arrived today, all 44 pounds worth. The parts look great, not sure if the pictures do them justice. I got the shocks out of the struts...finally. Actually the rears came out pretty easy. The fronts were not so easy. I soaked the left front strut for about a week in Kroil and PB blaster before finally tapping the strut off of the shock. Can you guess which two shocks were in the front from the picture below? ? The nuts that held the shocks in were also a challenge. I ended up heating the strut with my map gas torch and then putting ice on the nut, then loosening. That seemed to work pretty well. Also, note the 'Mulholland' shocks. Those are pretty retro. Not sure if they are around an more. Anyway, I will now clean up the struts, paint them, and then assemble with the nice new parts: KYB's, Energy suspension kit and newly plated fasteners. This is the fun part.


 1 point
 -
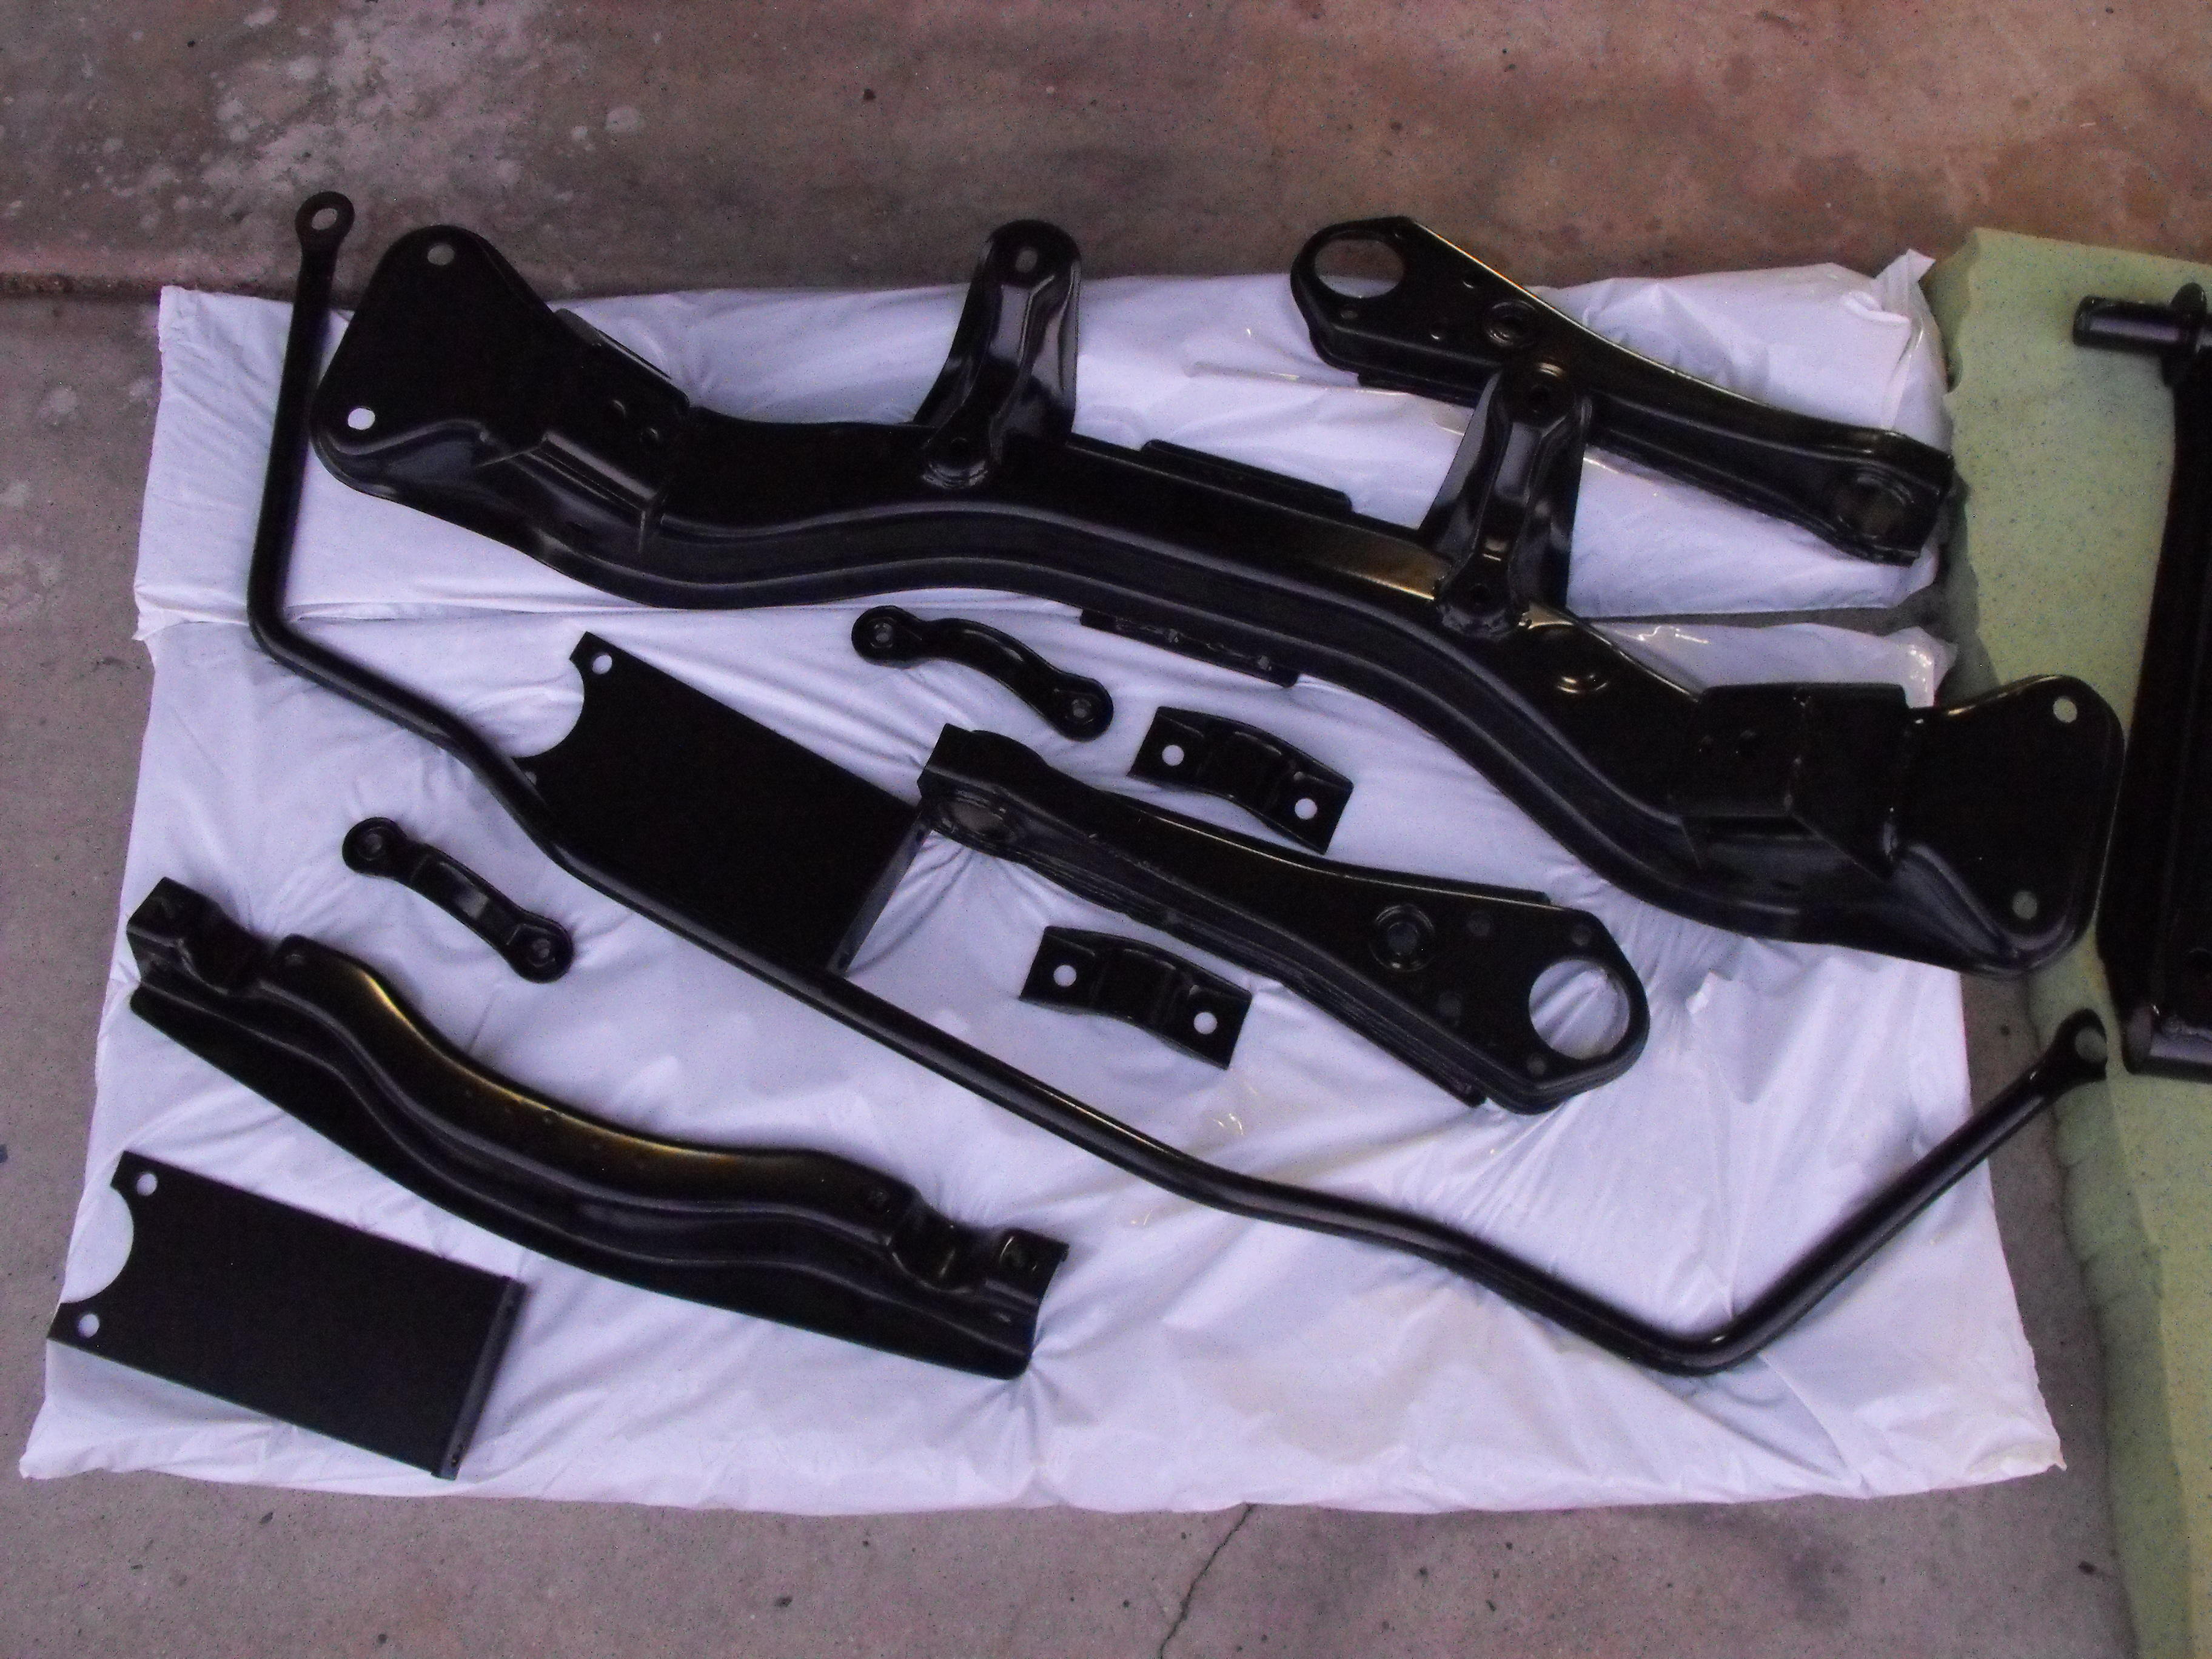
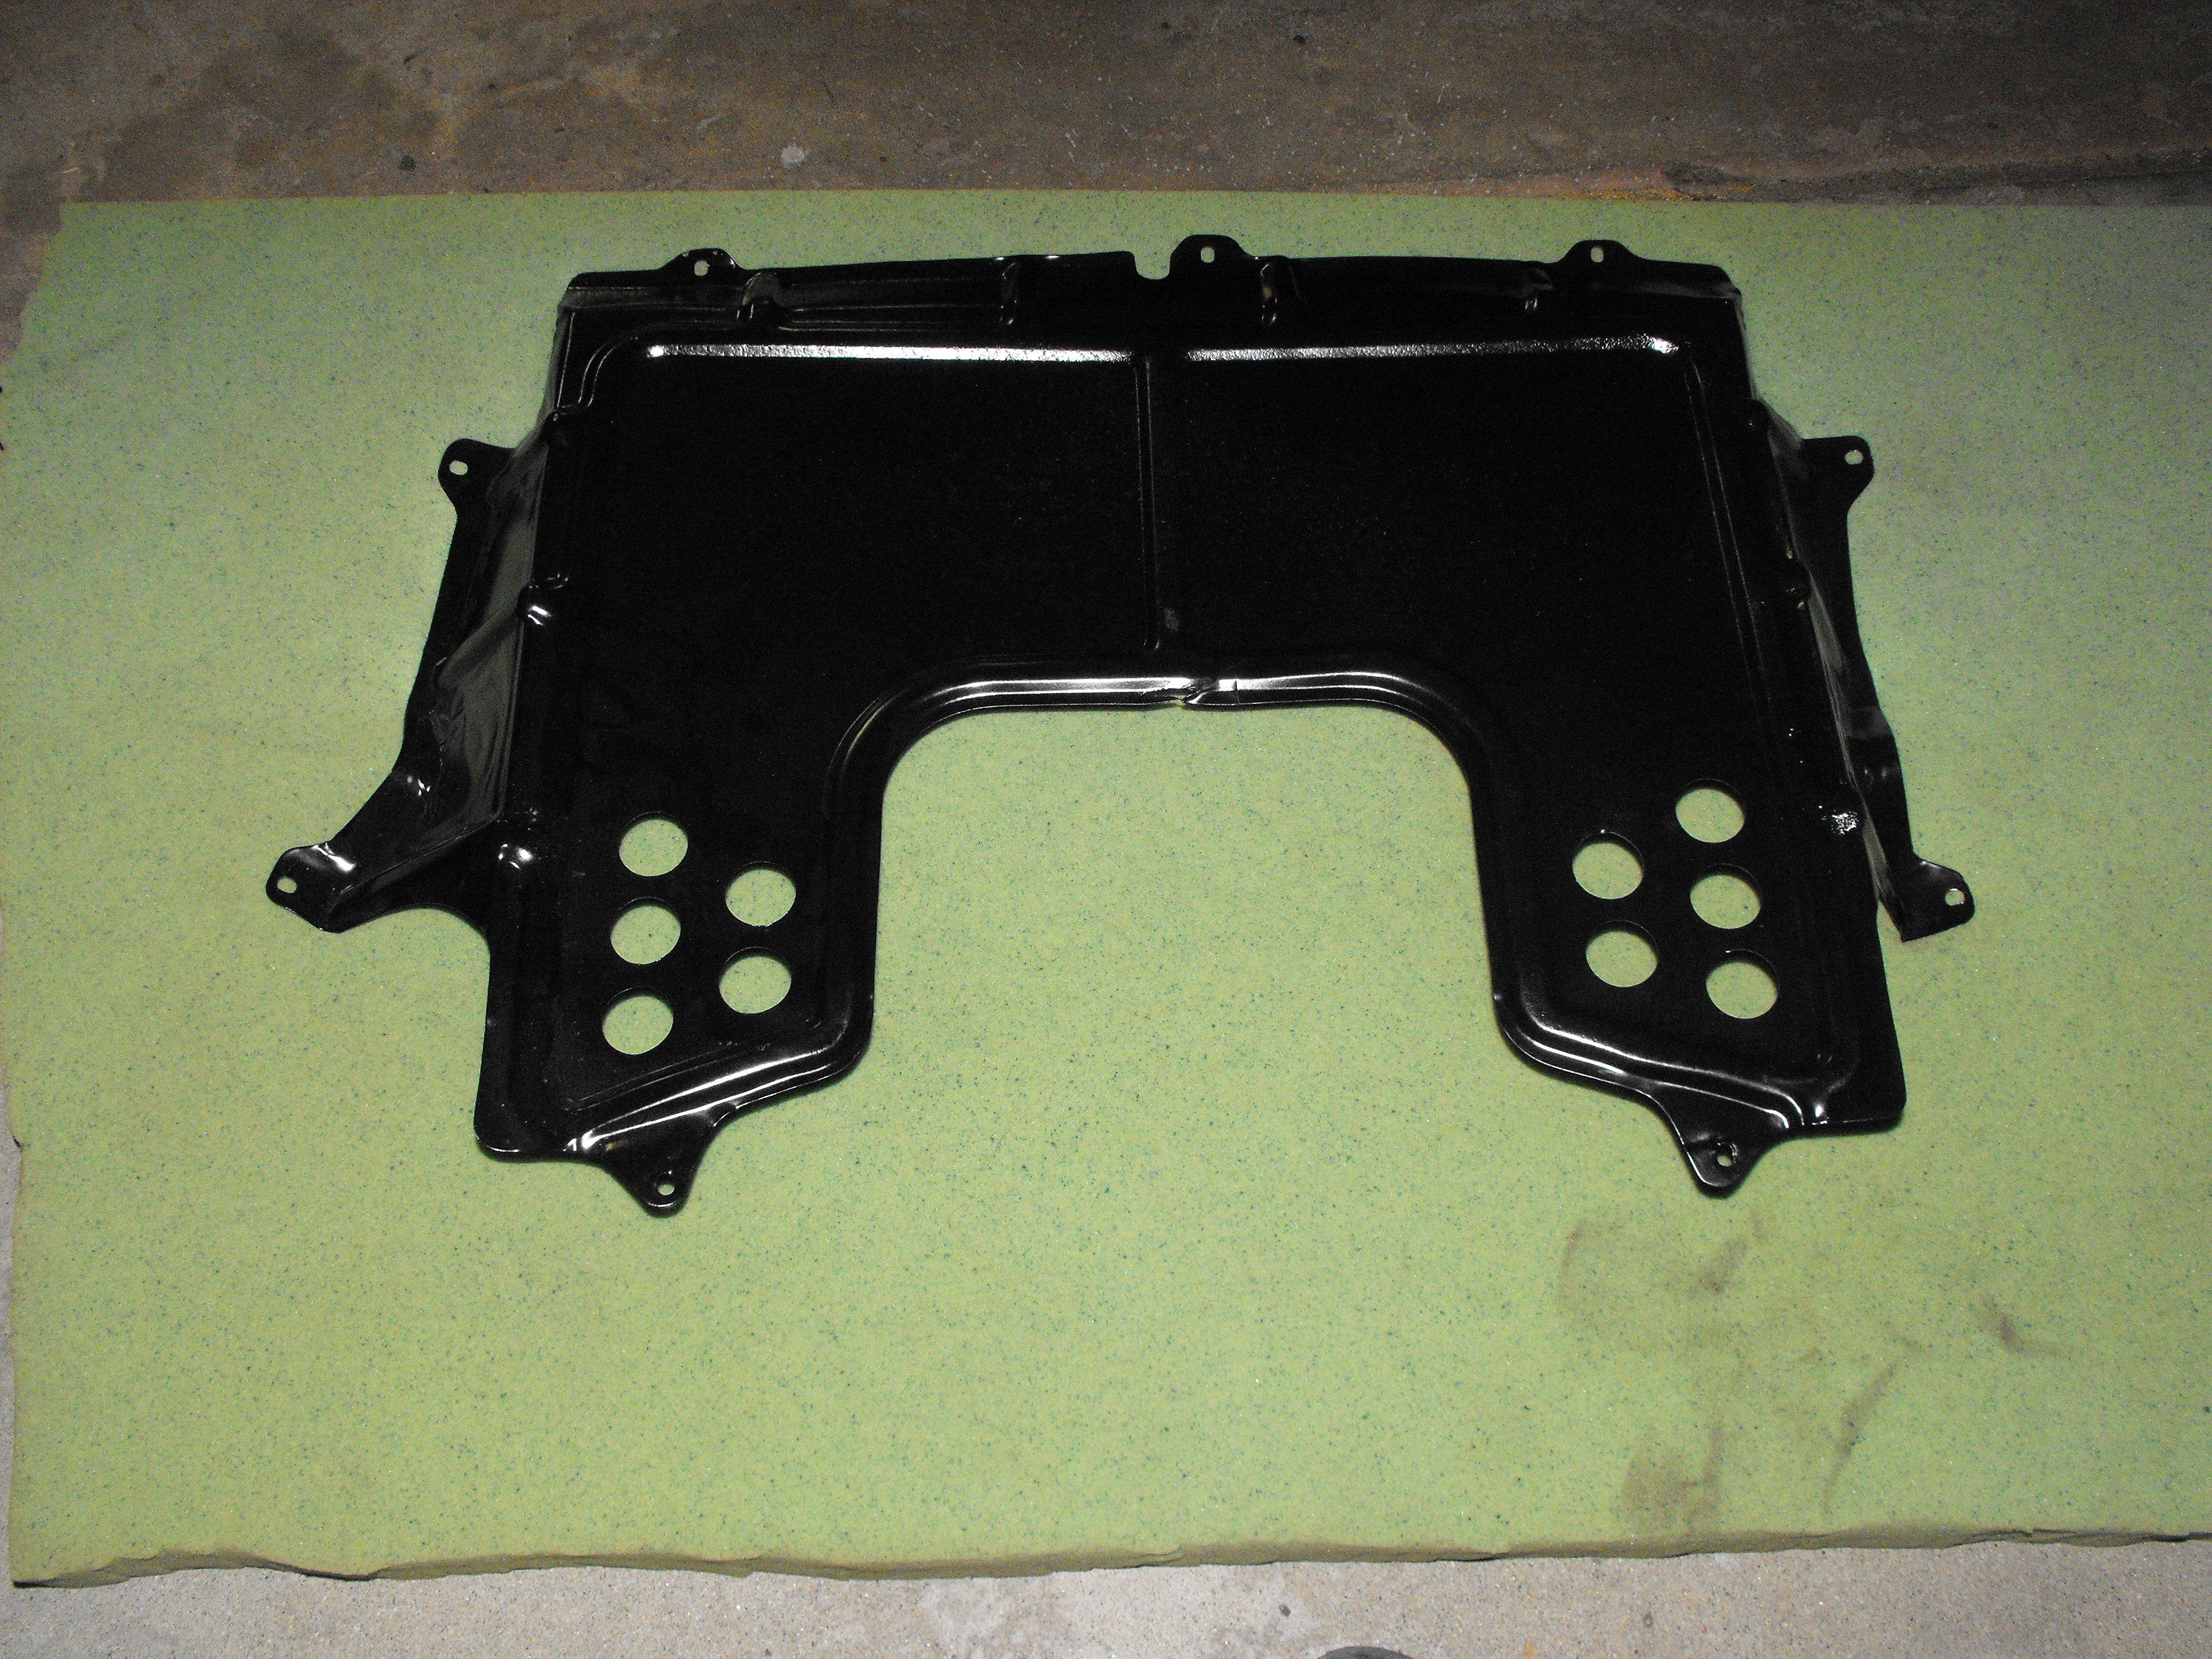
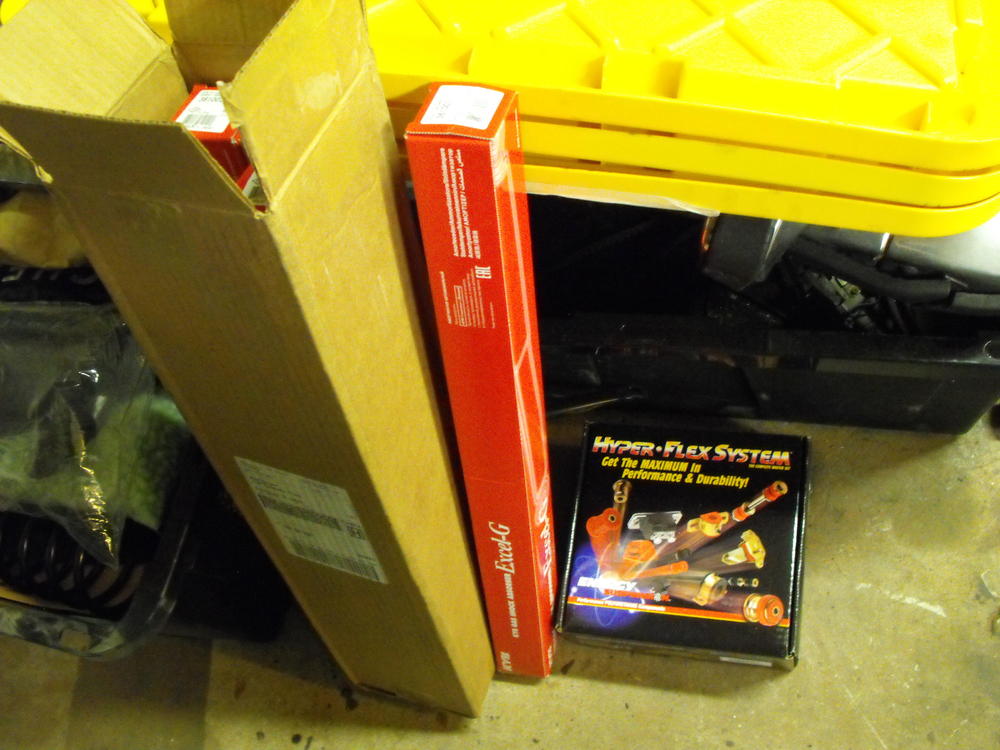
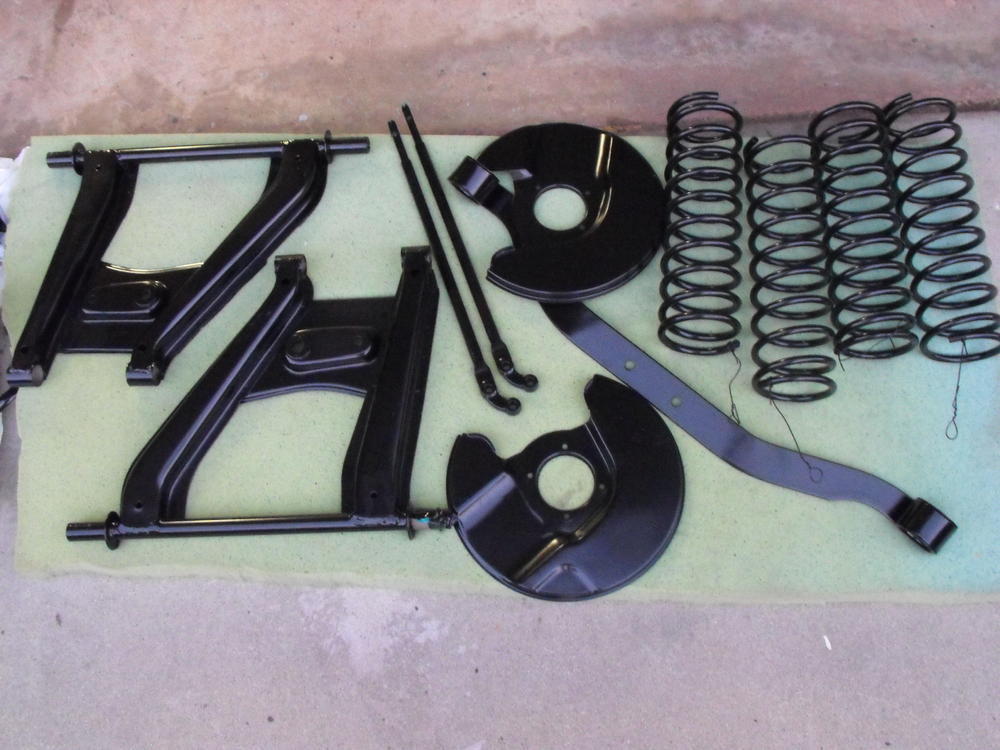
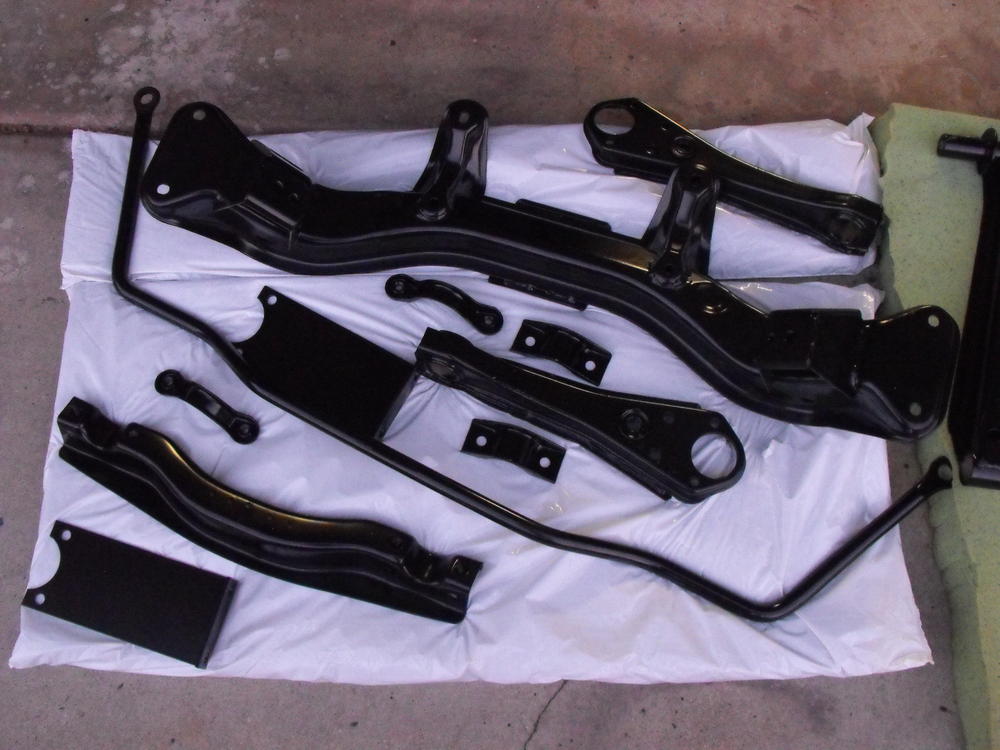
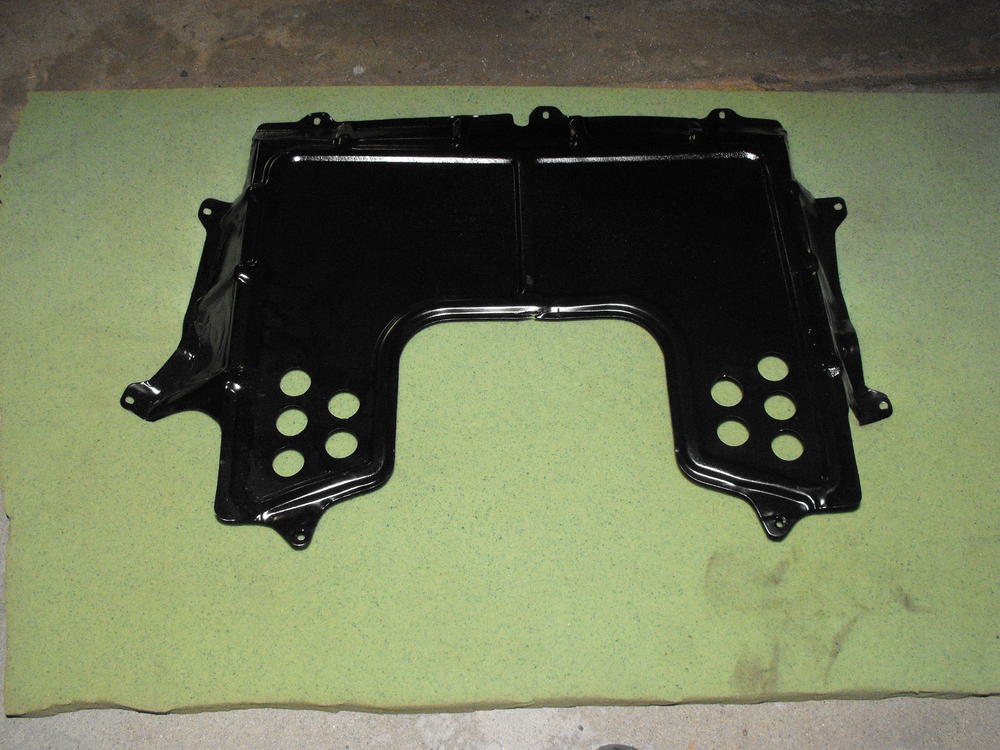
Got parts back from the Powder coat shop. I love working with fresh clean parts. The shocks arrive tomorrow, Energy suspension kit will be here Wednesday, and my zinc plated parts should be here by Friday. Nice to have all this coming together. I will do a little suspension pre-assembly while I wait for the body.....which will be a while. The splash pan is a little pock marked but not bad. Fortunately it is not a highly visible part. I will have to look into that some day. Although, I really like taking the parts to powder coat shop because they degrease and sand blast the parts clean. Plus they are relatively cheap given what they produce.


 1 point
 -
 1 pointI have an extra crossmember. I will even sandblast and seal it for you before shipping. No hurry $50 you pay shipping. Shipping is maybe $10. Reinforcing it will work if you use the proper gage of metal. Once again it has to be welded into place. Did you ever think about moving away from places that salt or sand the roads? My goodness don't think I have ever seen a crossmember rotted through.1 point
 -
The fuel bouncing around would speed evaporation by increasing surface area. In other words, it would reach vapor pressure more quickly as the temperature goes up, or after something like a fuel fill up. When you stop for gas and woosh the cap, you release the vapor pressure. But it will re-attain that pressure when you put the cap back on. About the backpack blower... It's my understanding that the check valve in the cap allows air INTO the tank, but doesn't let anything out. My understanding is that entire system is supposed to operate under a vacuum as fuel is removed from the tank. If one would ask the question "so why doesn't the tank pressure go up on that" I don't have a good answer. I don't know why your blower ends up in a puddle of fuel when you shut it off. And maybe even more important... I don't know why mine doesn't. Maybe because you're taking fuel out so fast? Maybe because the float chamber is atmospherically controlled? Don't know, and now it bugs me. Thanks a lot.0 points