Leaderboard
-


240260280
Free Member3Points4,441Posts -


siteunseen
Free Member3Points14,903Posts -

Mike B
Free Member2Points2,195Posts -

conedodger
Free Member2Points11,316Posts
Popular Content
Showing content with the highest reputation on 11/17/2018 in all areas
-
 2 pointsOk, some updates for those of you who care... Goal: make car usable (ie, keep the drum rears and not upgrade to discs, and no a v8 will not be installed either.) So, New Odyssey battery has been ordered (the one from 1986 has given up the ghost) The gas tank was drained - it was, nearly full tank (which is good and minimizes the risk of internal rust... it smelled pretty funky, but had nearly no shellac/slime/sludge. Thank you dad for putting in fuel stabilizer! The Rear drums were removed, both rear brake cyl shot (the little rubber thingie was crumbling and dry white powder came tumbling out - not THAT kind, the aluminum oxide / dried brake fluid kind. Poking into the Master, slave & clutch cylinders - they gunked / slimed / melted the rubber pretty well, and so were replaced with new. Front Right disk was frozen (and needs help - not sure if can be rebuilt, so an early replacement caliper set found and ordered - I haven't gotten to the left front yet. The Front solex carb was removed and cleaned and is deemed "good". The rear solex, well the carb choke is frozen. Solid. Not sure it can be taken apart to be freed so an early carb set was located and ordered. The clutch was bled & now works again. Still to do: Finish rebuilding / reinstall the carbs. Check driver-side caliper, flush brakes, flush fuel lines. For those of you who want pictures, I have a few (and a few movies too) Google Drive library of photos and videos In the library, you'll see the period-correct narrow-gage headers (thank you BSR), and the Sempereti tires (from Ireland) are still deemed healthy (?!) mounted on American rims (from Japan) And for those of you who have pedantic tendencies, the state of Colorado has declared that this car is a 1970, based on the mfg build date (that's what they could see when they did the vin check). Go discuss among yourselves - I'm not arguing it with bureaucrats. <'flame on/>2 points
 -
2 pointshttps://www.jauce.com/auction/q218844905 Sent from my [device_name] using http://Classic Zcar Club mobile2 points
-
2 points
-
2 pointsI understand. I remembered the smell of Florida from 1973 holidays as a child when returning for work in 1997. My Z's smell the same too. It must be the plastic or some fungi that likes the interior. There is one Z that I did not like the smell. It had 12 dead mice in it when it arrived. Horrible lol Everyone liked the pink colour and Ford V8! We tried washing the interior, smell remover, etc. but no success The paint guy in our car club had to strip the interior and clear coat the inside to seal in the stink.
 2 points
 -
 2 pointsThanks blue , I must add one thing , each car has each smell . I always feel “ USA “ every time I get in the orange 240Z. And I really like the smell . I can not say well enough, what makes me feel like that ? Maybe you are not realized , but I am sure there is a certain smell in the US . Each time I opened the box bought eBay USA, , there was a smell which I like . It brings back good memories to me when I was at a flight training in Bakersfield California . Supermarket , warehous , airport , everywhere. Kats2 points
 -
 1 pointGood to see your making progress, keep the updates coming. No flames here. Cheers Mike1 point
 -
 1 point
 -
 1 pointI always like Volvos had planned to buy an 1800 coupe when I came back to the States in 1971. However, the body style had changed to "sportswagon" and the coupe was no longer available new. Bought the Z instead. Interestingly in the article about the 3 million mile 1800, his daughter said they weren't close. No wonder....... .he was cranking out 100,000 road miles a year to get to the three million mile mark. I wonder how she'll word the Craigslist ad when she sells it. "One owner, retired school teacher, rebuilt engine." Dennis1 point
 -
 1 pointNot only is it a tough place to hammer back but the metal is incredibly thin at these corners because of the stamping process1 point
 -
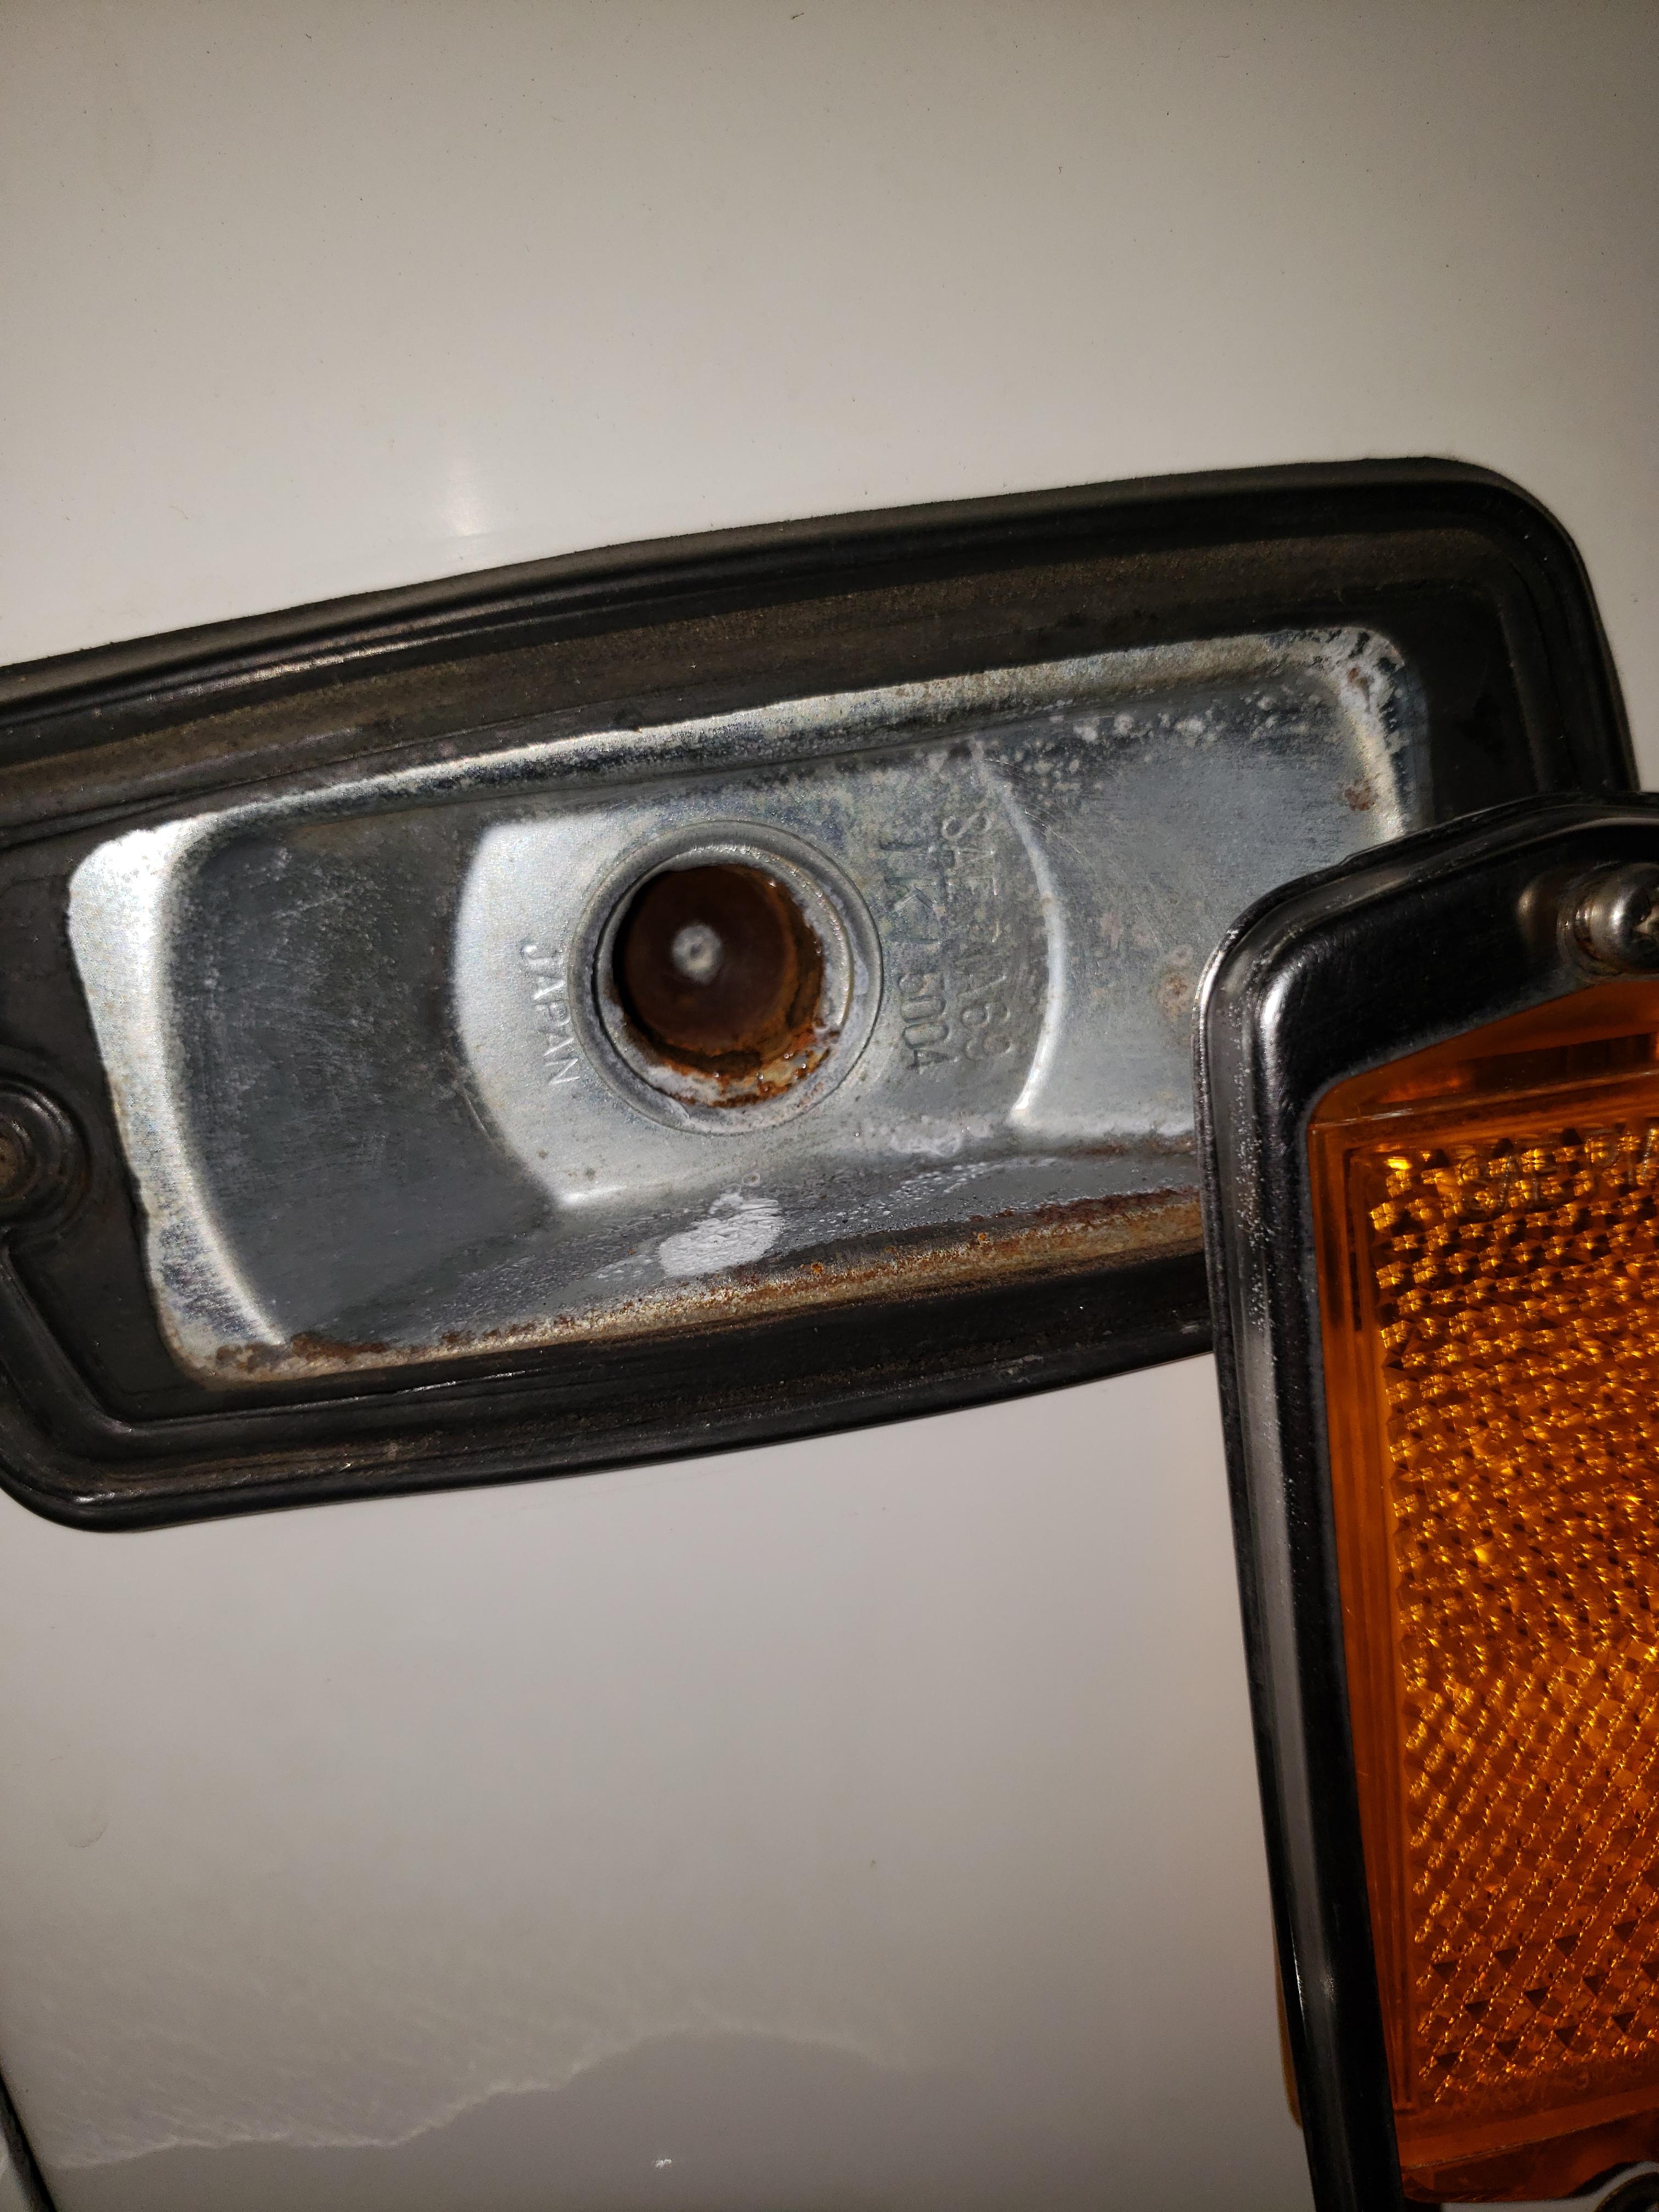
 Rust in the socket was the cause. Now back in commission. Should i purchase a pair of these lamps from amazon and replace them?
 1 point
 -
 1 pointThanks Mike B. Now just need to figure out which proxy bidder to use. It's a little different from the one in Kat's pic. Could the one on auction be from a later era such as the 80's?1 point
 -
 1 pointI would give the engine a full tuneup before getting too far in to the carbs. Valve lash, ignition timing, etc. Many tears have been shed and much time wasted just to find out that a simple tuneup did the trick. Plus, since you have a modified engine, I would check the engine basics, like cam timing and compression ratio. People often go off-spec. when they install their new performance cams. You don't know that the PO did things right. Your engine does sound odd in that short sound clip. Could be cam and/or ignition timing. Also still looks like you have two issues - dying at the lights when the engine gets hot, and getting the carbs synchronized. The tuneup procedure seems lengthy but it's not too bad. When you're done you'll know a lot more about what you're working with.1 point
 -
 1 pointindeed, the self contained approach is less invasive to wiring. Very good point. Now if you can figure out a way to install an idiot light that comes on when people text while driving you should try out for "shark tank", not for them mind you as idiot is a forgone conclusion. Something that mounts on the roof for the rest of us.1 point
 -
1 pointShameful brits.... next they will be faking 432R's and pooping on your front step!1 point
-
1 pointHi Kats! Thanks for your die hard devotion to our cars/forum. I have always loved the smell of the Zs I've owned. I assumed it was the carpet or plastic panels but who knows, I just know if I was blind I could smell a Z. The sound of the hatch opening is very distinctive also if I was blind. Thank you for sharing your knowledge in a polite manner. Cliff EDIT: Kats you have always been more than polite! I apologize if that sounded bad. You are one of favorites. Manners be damned. Cliff1 point
-
 1 pointThose plugs should be near white to a light tan if it was running with the choke off. I'm going to assume a few things like; there's a good hot spark at the plugs, compression is good, the ignition timing is OK. Let's start with the easy stuff. When the choke is operated, the cables pull the nozzles down in both carbs. The nozzles are known to occasionally stick in the down (choke) position when the choke knob is pushed forward (off). You can reach under the carbs and feel the nozzles come down with the help of a friend operating the choke knob. When the choke knob is pushed forward, manually push up the nozzles to see if they're sticking in the down position. Do your round tops have 3 or 4 screws and is there a drain fitting on the float bowls? Ztherapy has a video called just SUs that explains the workings of SUs and how to tune them. SUs are really quite simple carbs IMO.1 point
 -
 The fender is still available. I don't have a spare driver side one though. Garrett1 point
 -
 A few years ago, I was in the middle of restoring the heater/blower system for my 70. All of the foam gaskets were shot, so I made tracings and used them to fabricate replacements from foam sheet. My approach involved making paper cut-outs that I could glue to the foam sheet and then use as a guide for cutting out the shapes and punching the holes. I didn't want to risk malking a mistake with my original tracings, so I scanned them into .pdf files and then used those to print out the pieces that I eventually glued to the foam. I ended up with a library of .pdf files for all of the system's gaskets. I posted these as part of a how-to article, but another member recently contacted me to say that they won't download any more. For that reason, I'm re-posting them here. Hope they can help someone else with their restoration. They should come out of your printer in 1:1 scale. For most of these gaskets, I recommend that you use the 1mm-thick closed-cell neoprene foam sheets that you can buy at crafts stores like Michaels. These sheets already have adhesive on one side, so they're very easy to use. You'll probably need at least a dozen sheets (maybe more). You'll need something thicker and softer to make the pads for the big airflow control flaps. I recommend 1/4"-thick open-cell foam. They need to be covered with thin, soft vinyl sheet. The foam that lines the plenum box for the centre air outlet grill is intended to reduce airflow noise. It needs to be made from open-cell foam (1/8"-thick). 240Z 1970-71 Series 1 - HVAC Foam Gasket Templates.zip1 point
 -
 Glad you are back on the road after curfew.1 point