Leaderboard
-

grannyknot
Free Member6Points5,158Posts -

Captain Obvious
Free Member4Points9,866Posts -

motorman7
 Subscriber
 4Points2,208Posts
 -


Zed Head
Free Member2Points18,801Posts
Popular Content
Showing content with the highest reputation on 12/17/2018 in all areas
-
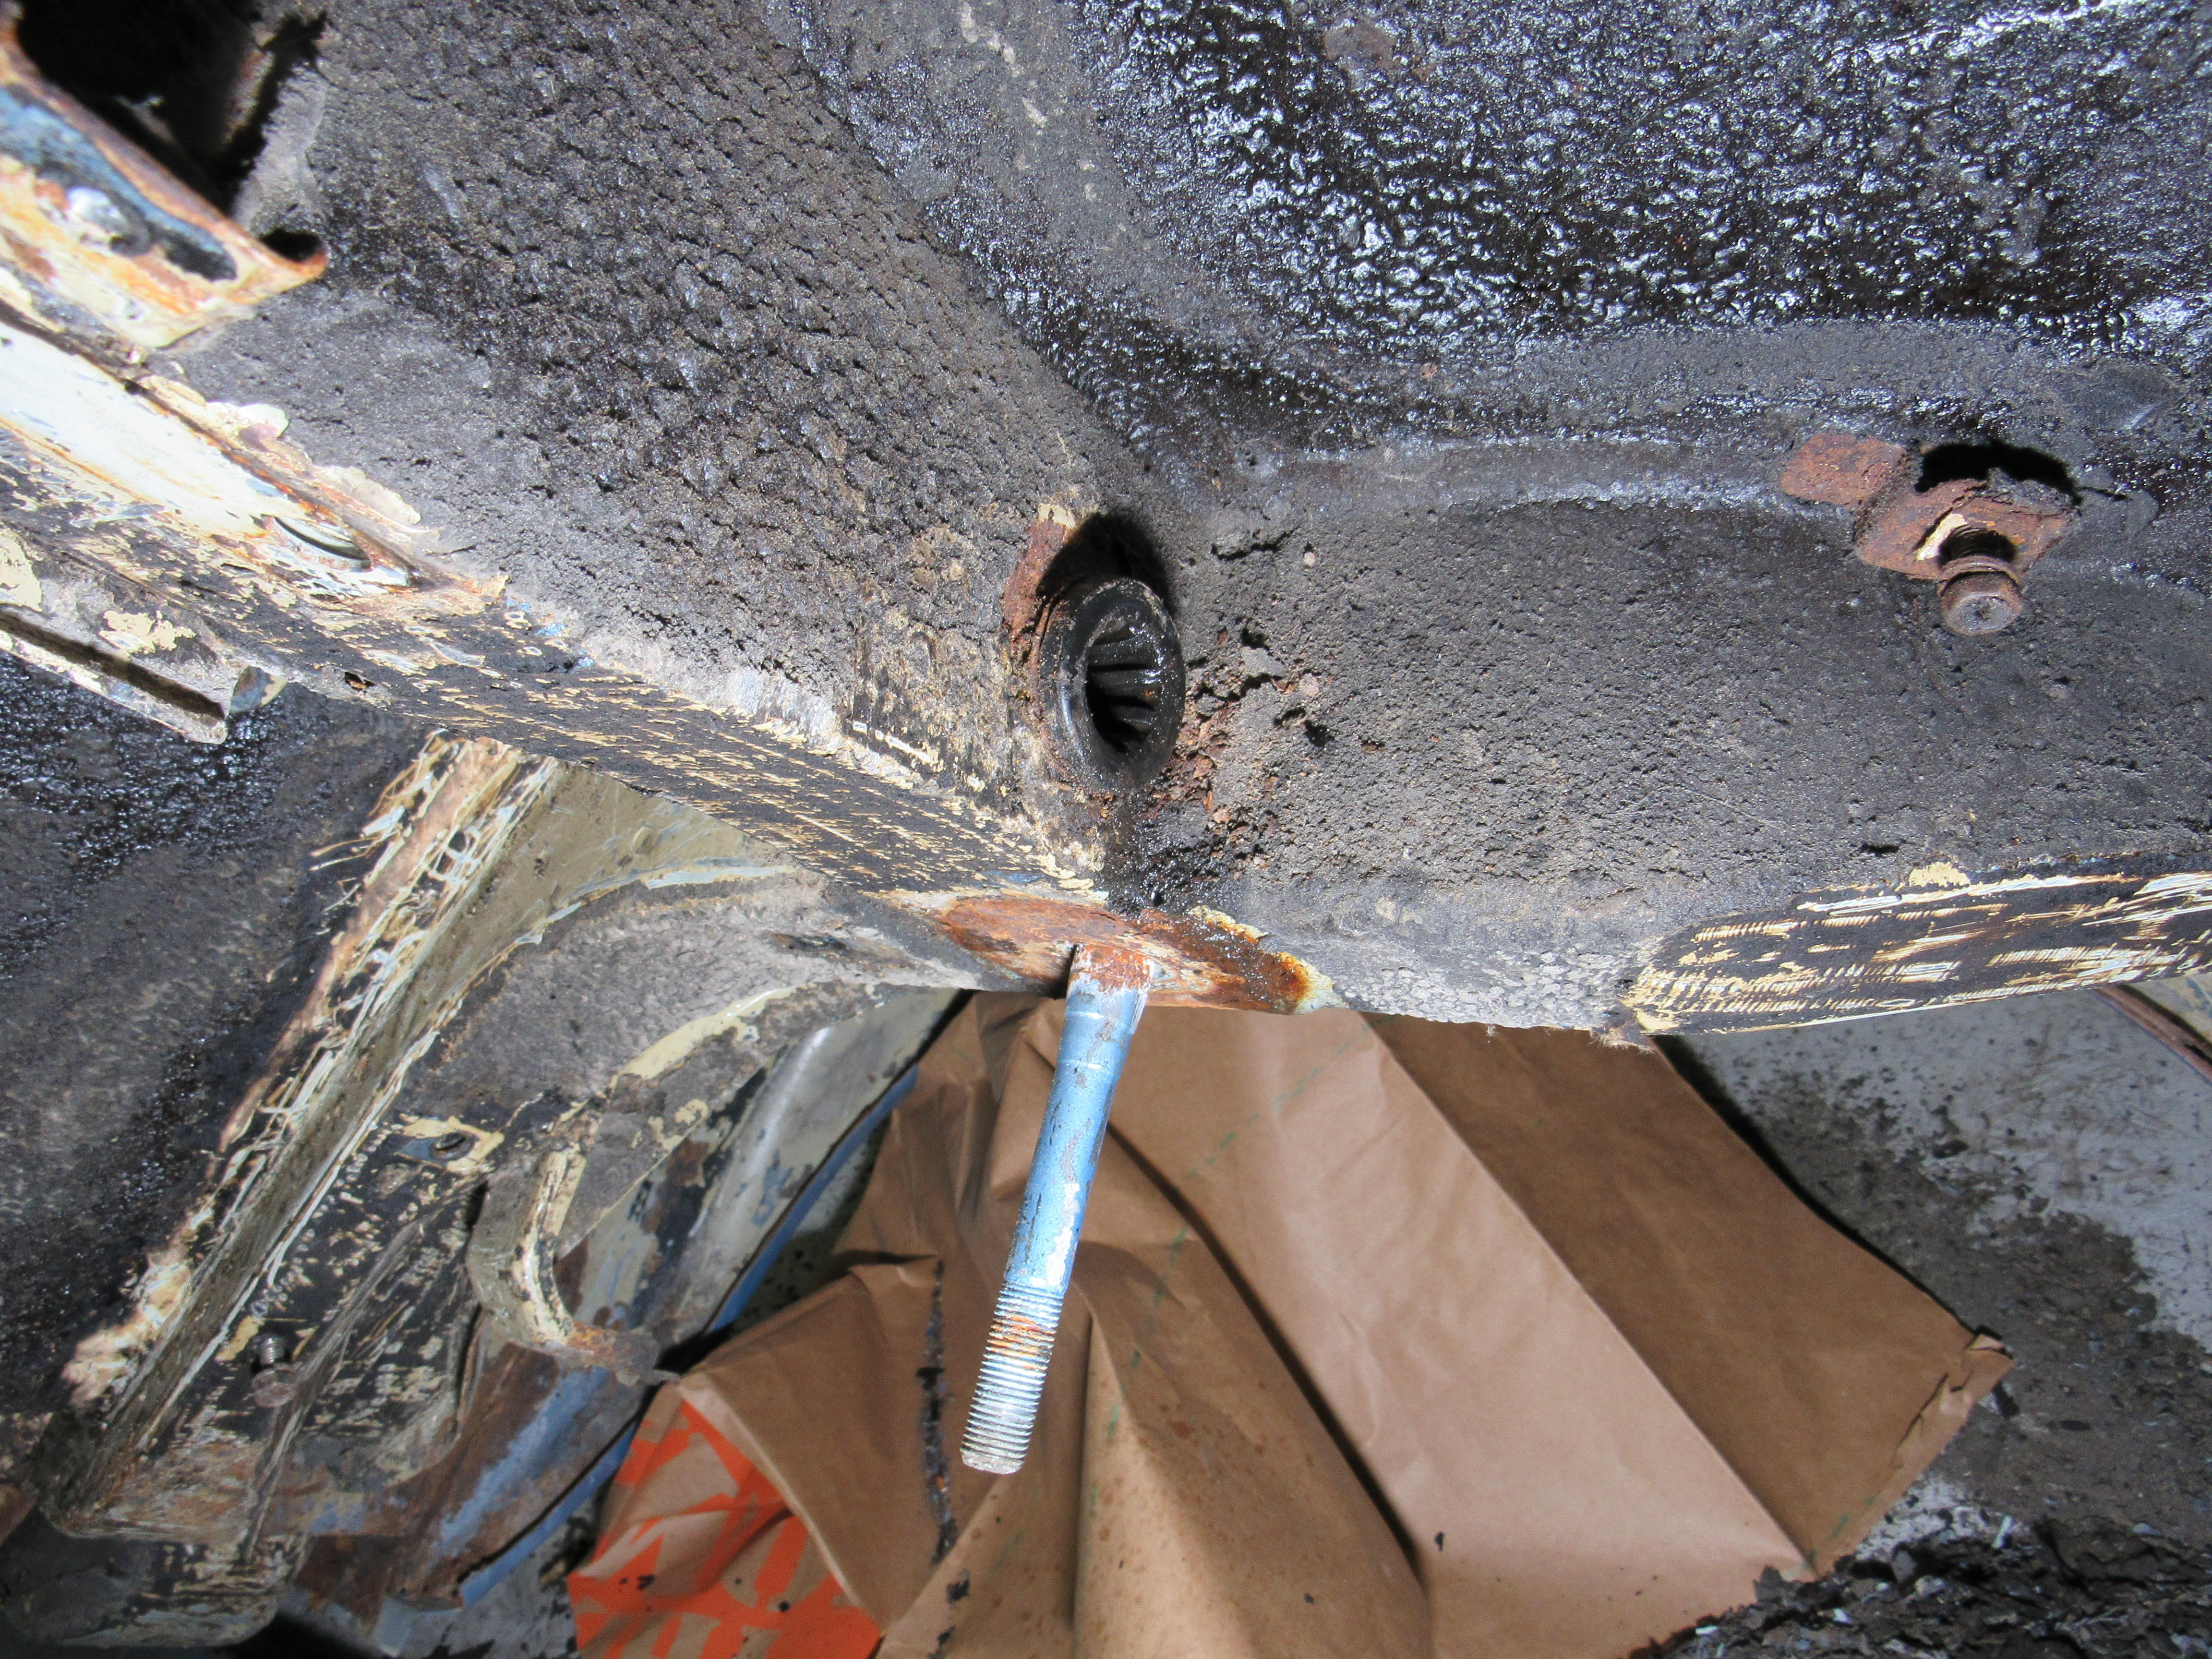
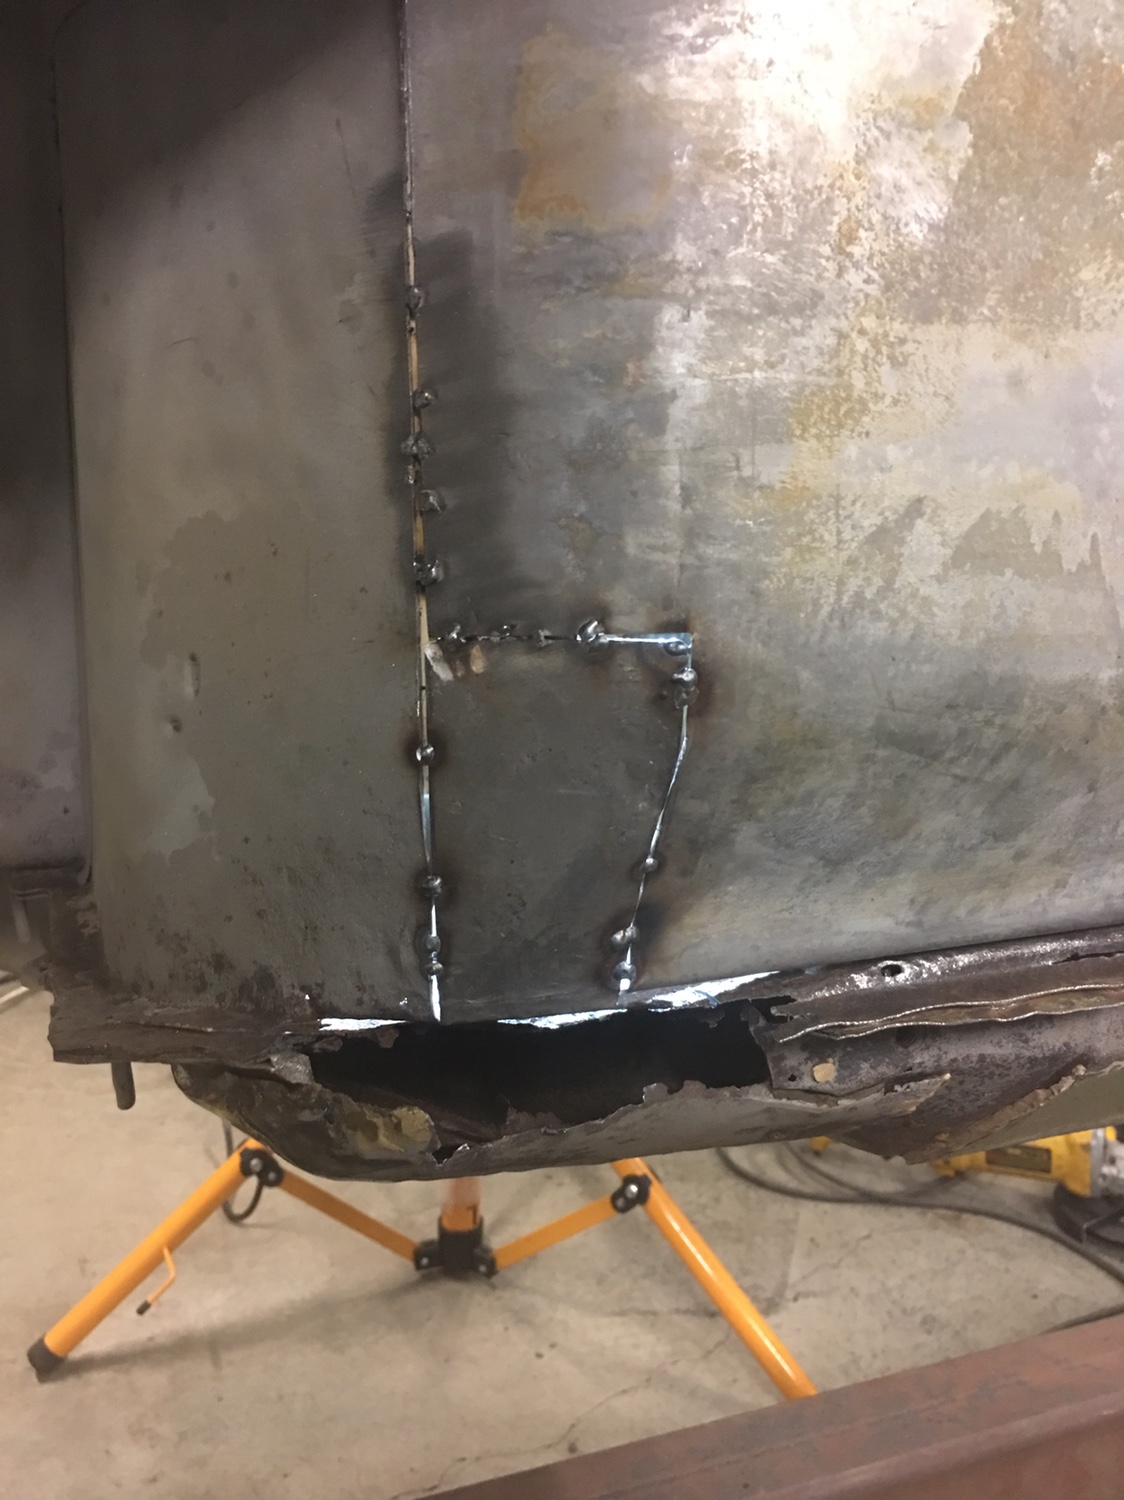
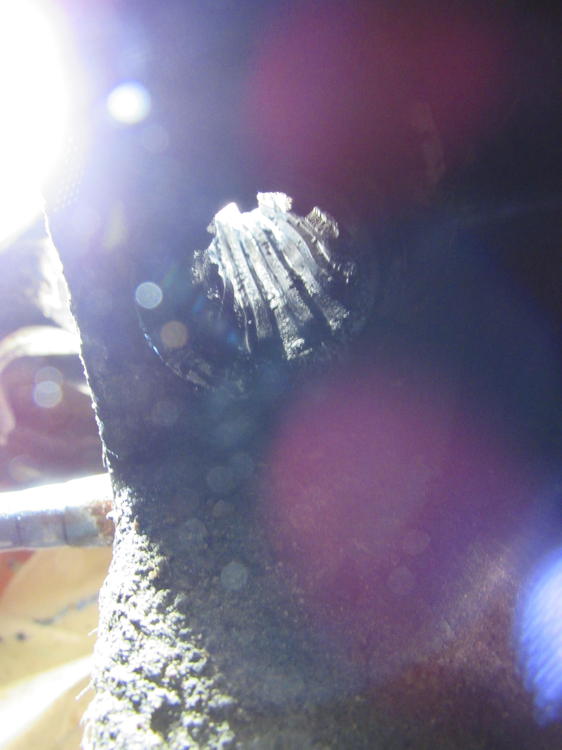
3 pointsEvery so often someone will post a thread about not getting being able to get enough fuel up front to the engine, they have replaced the filters, the pump ... and so on. Here is an obstruction I have never run into before and is completely hidden, there is a rubber sleeve going through the subframe between the tank and the fuel pump on my 77, the fuel feed hose goes through that hard rubber sleeve. I have started scraping in that area so cut one side of the hose and pulled it through, for some reason the hard rubber sleeve has contracted and crushed the fuel hose taking a 9mm ID hose down to 4.5mm. I guess maybe age did it or gasoline vapors coming through the hose, anyway I'm going cut it off and bang it out of the subframe, I'll find something thinner to act as a protector for the fuel line. The drill in the pic was used to find the narrowest section of the hose. Hope this helps someone.


 3 points
 -
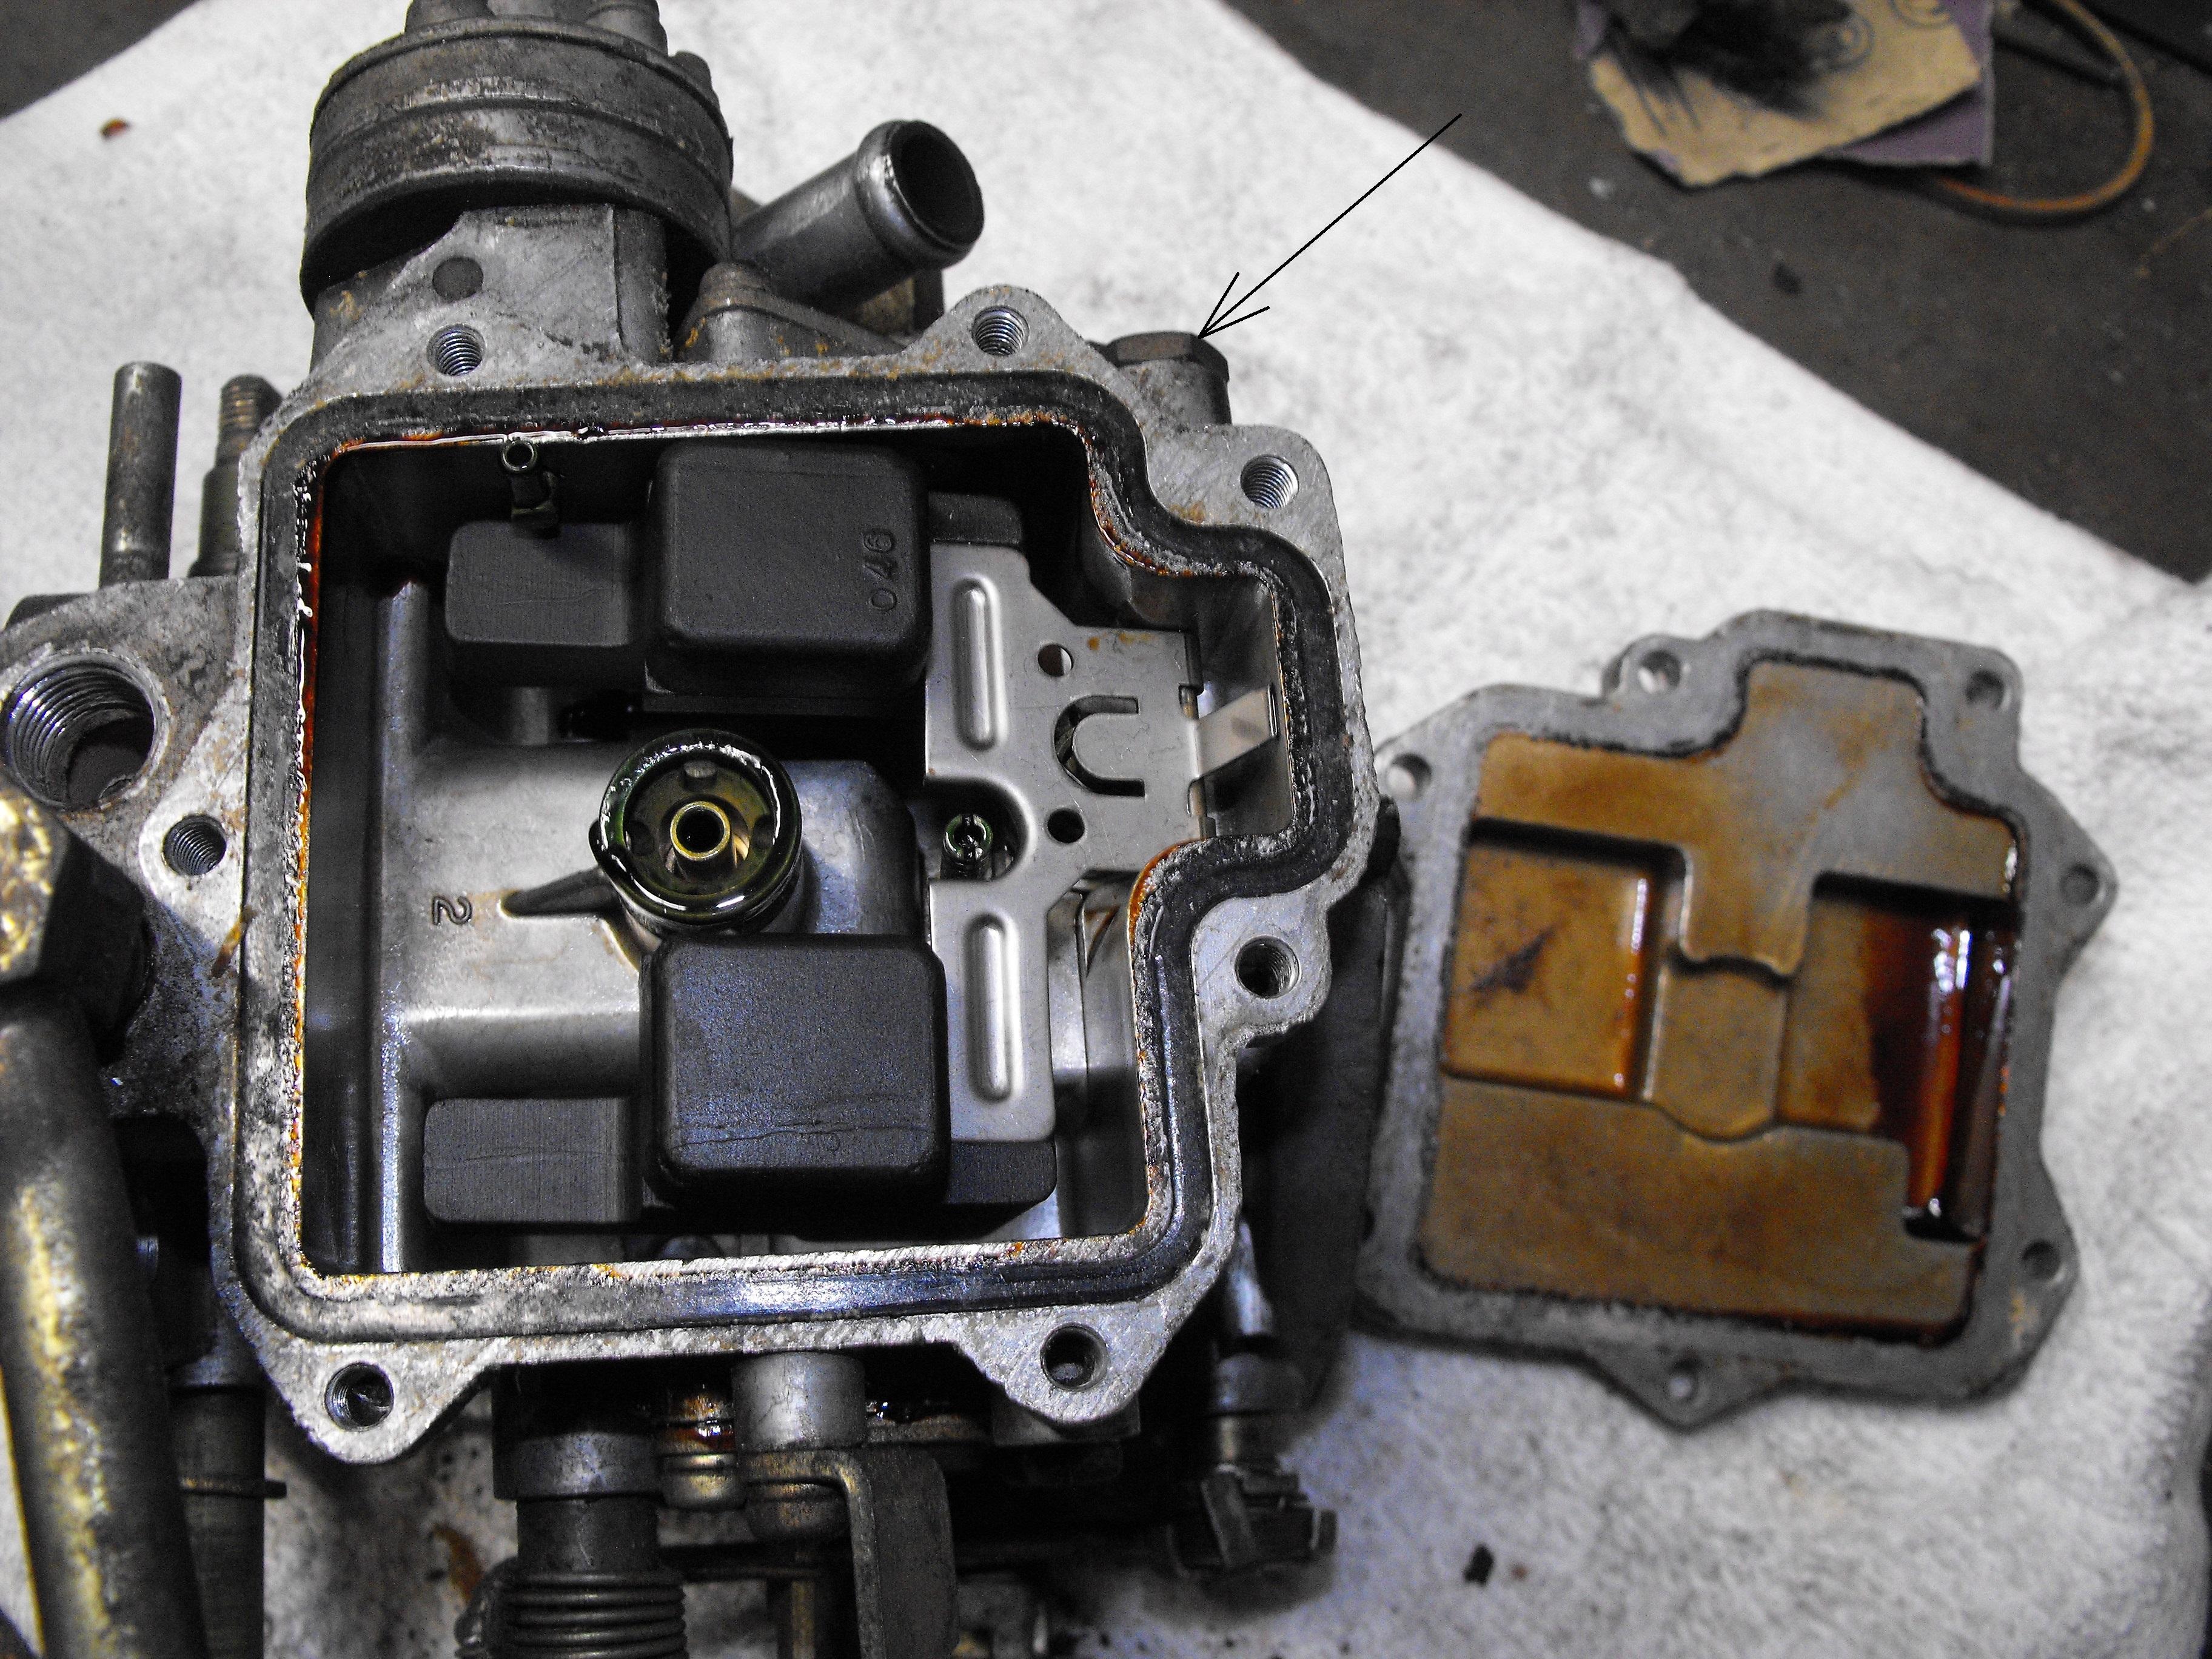
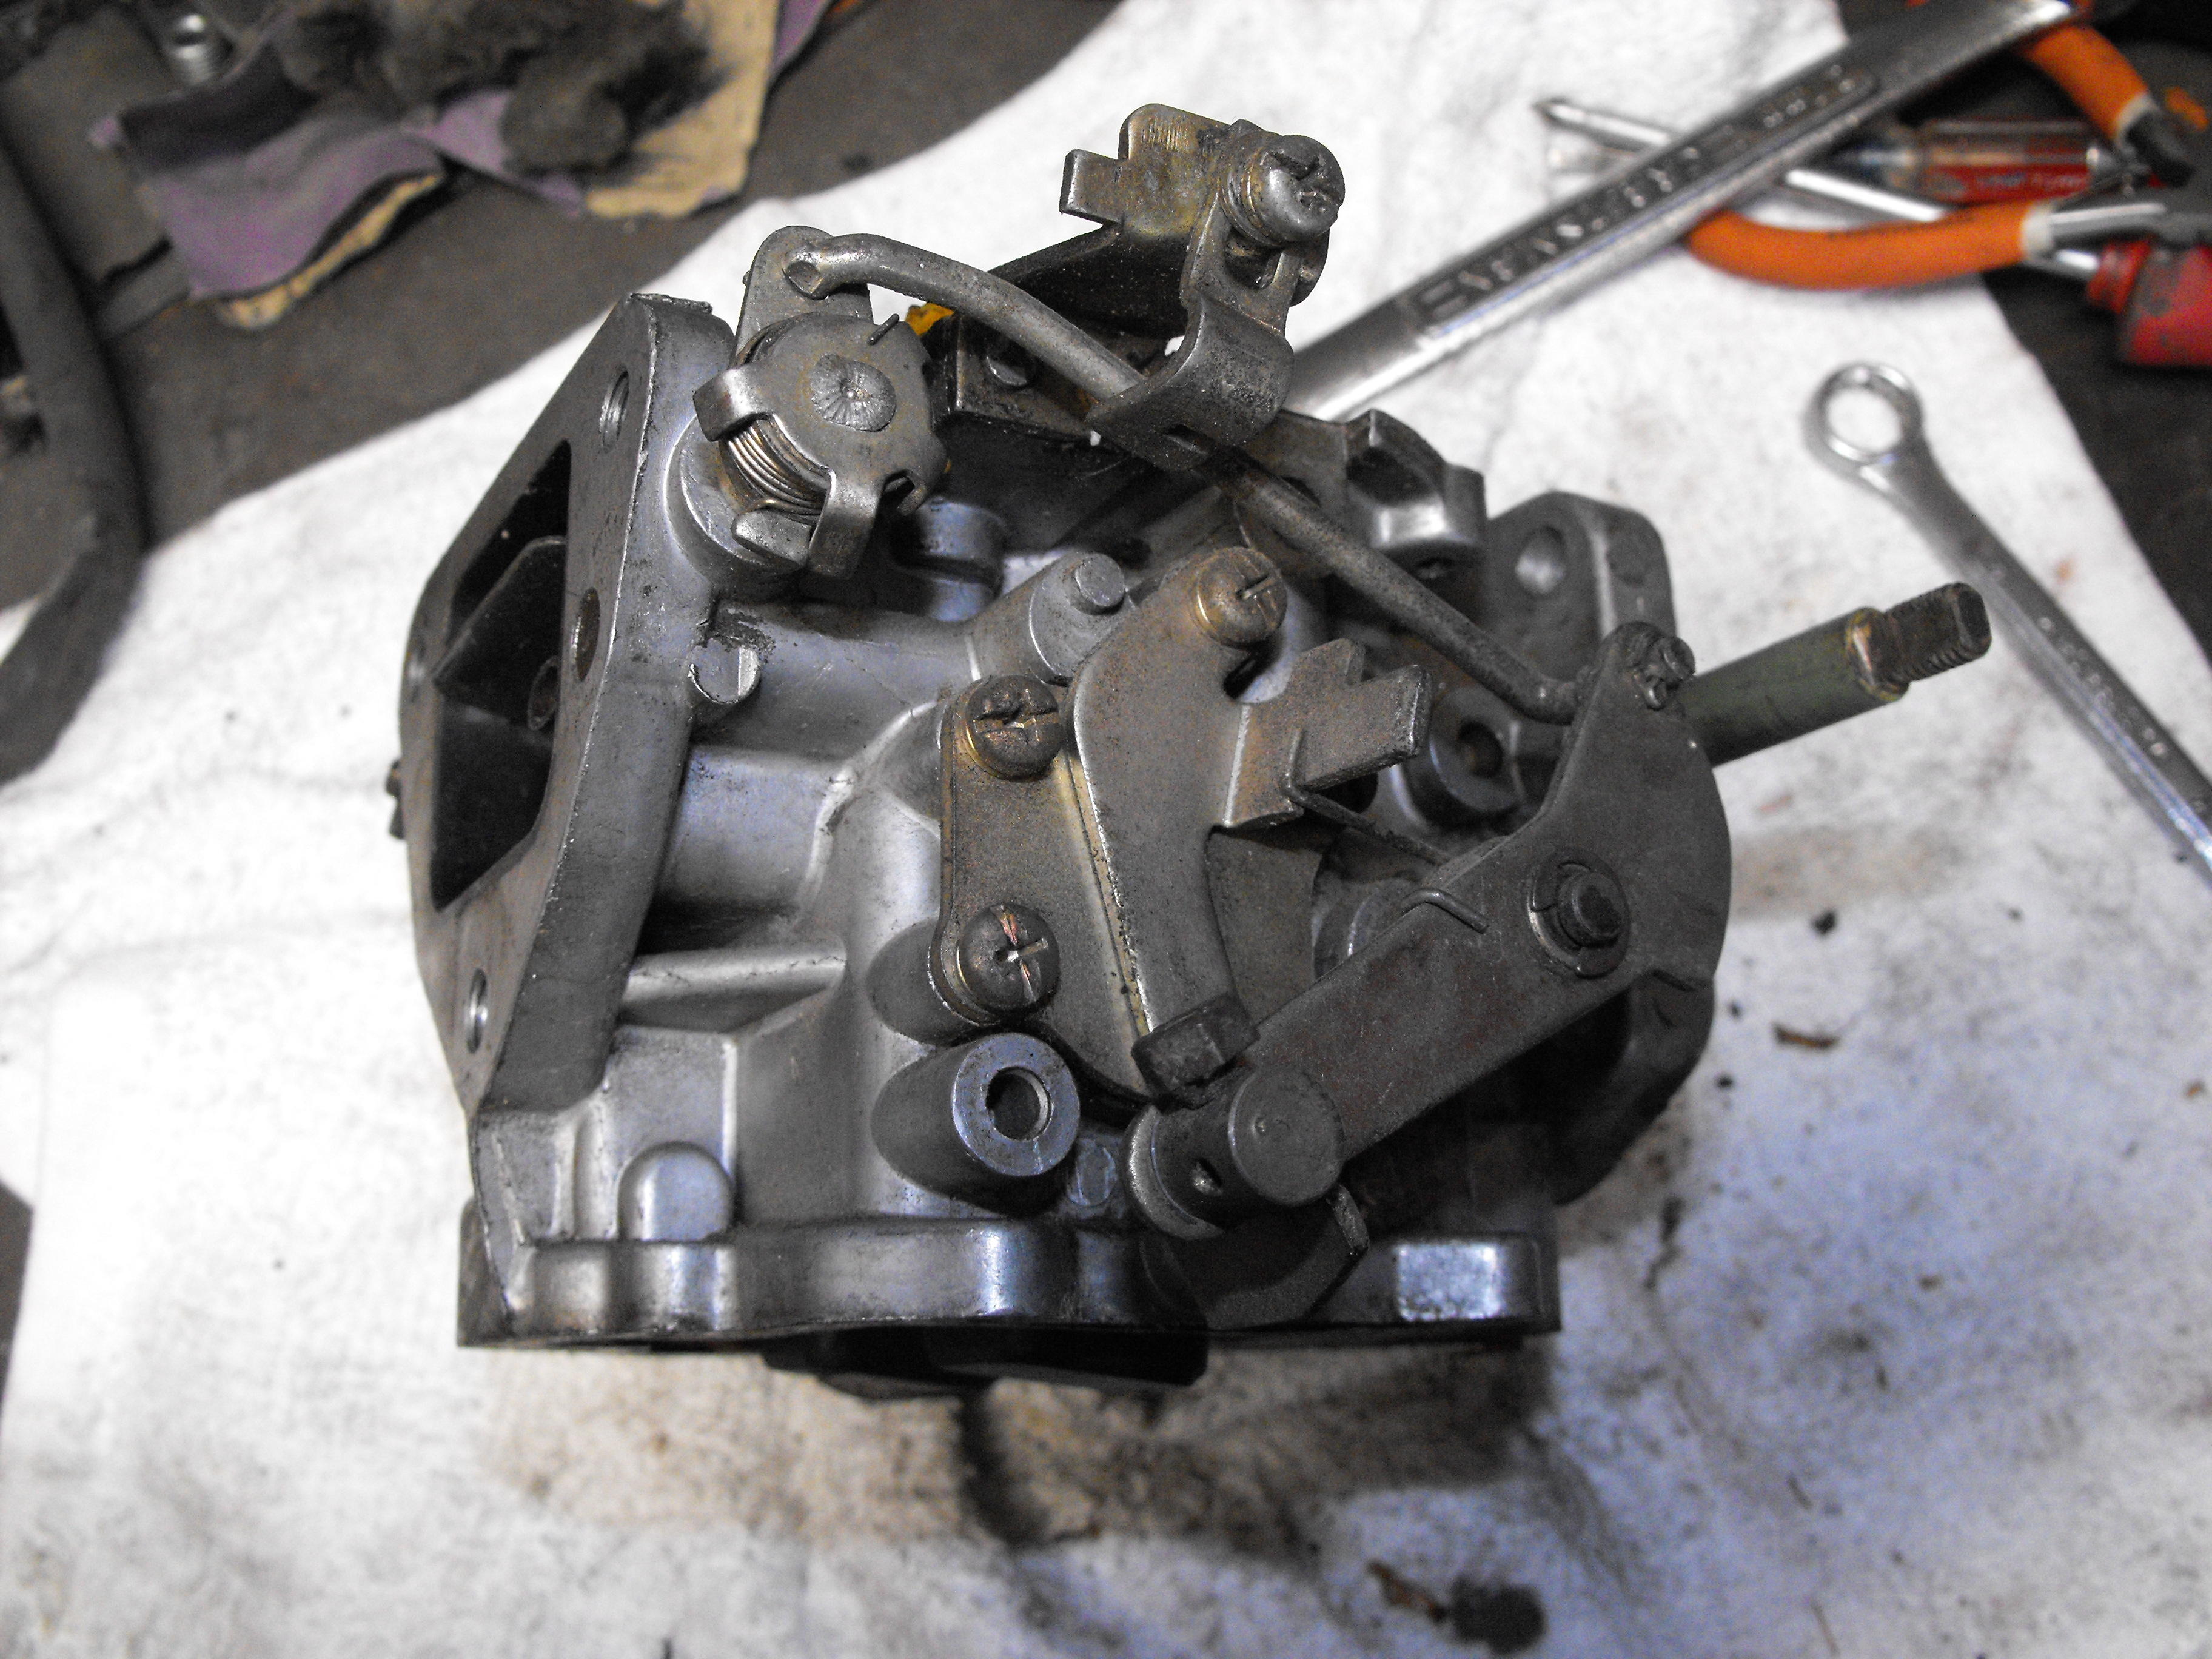
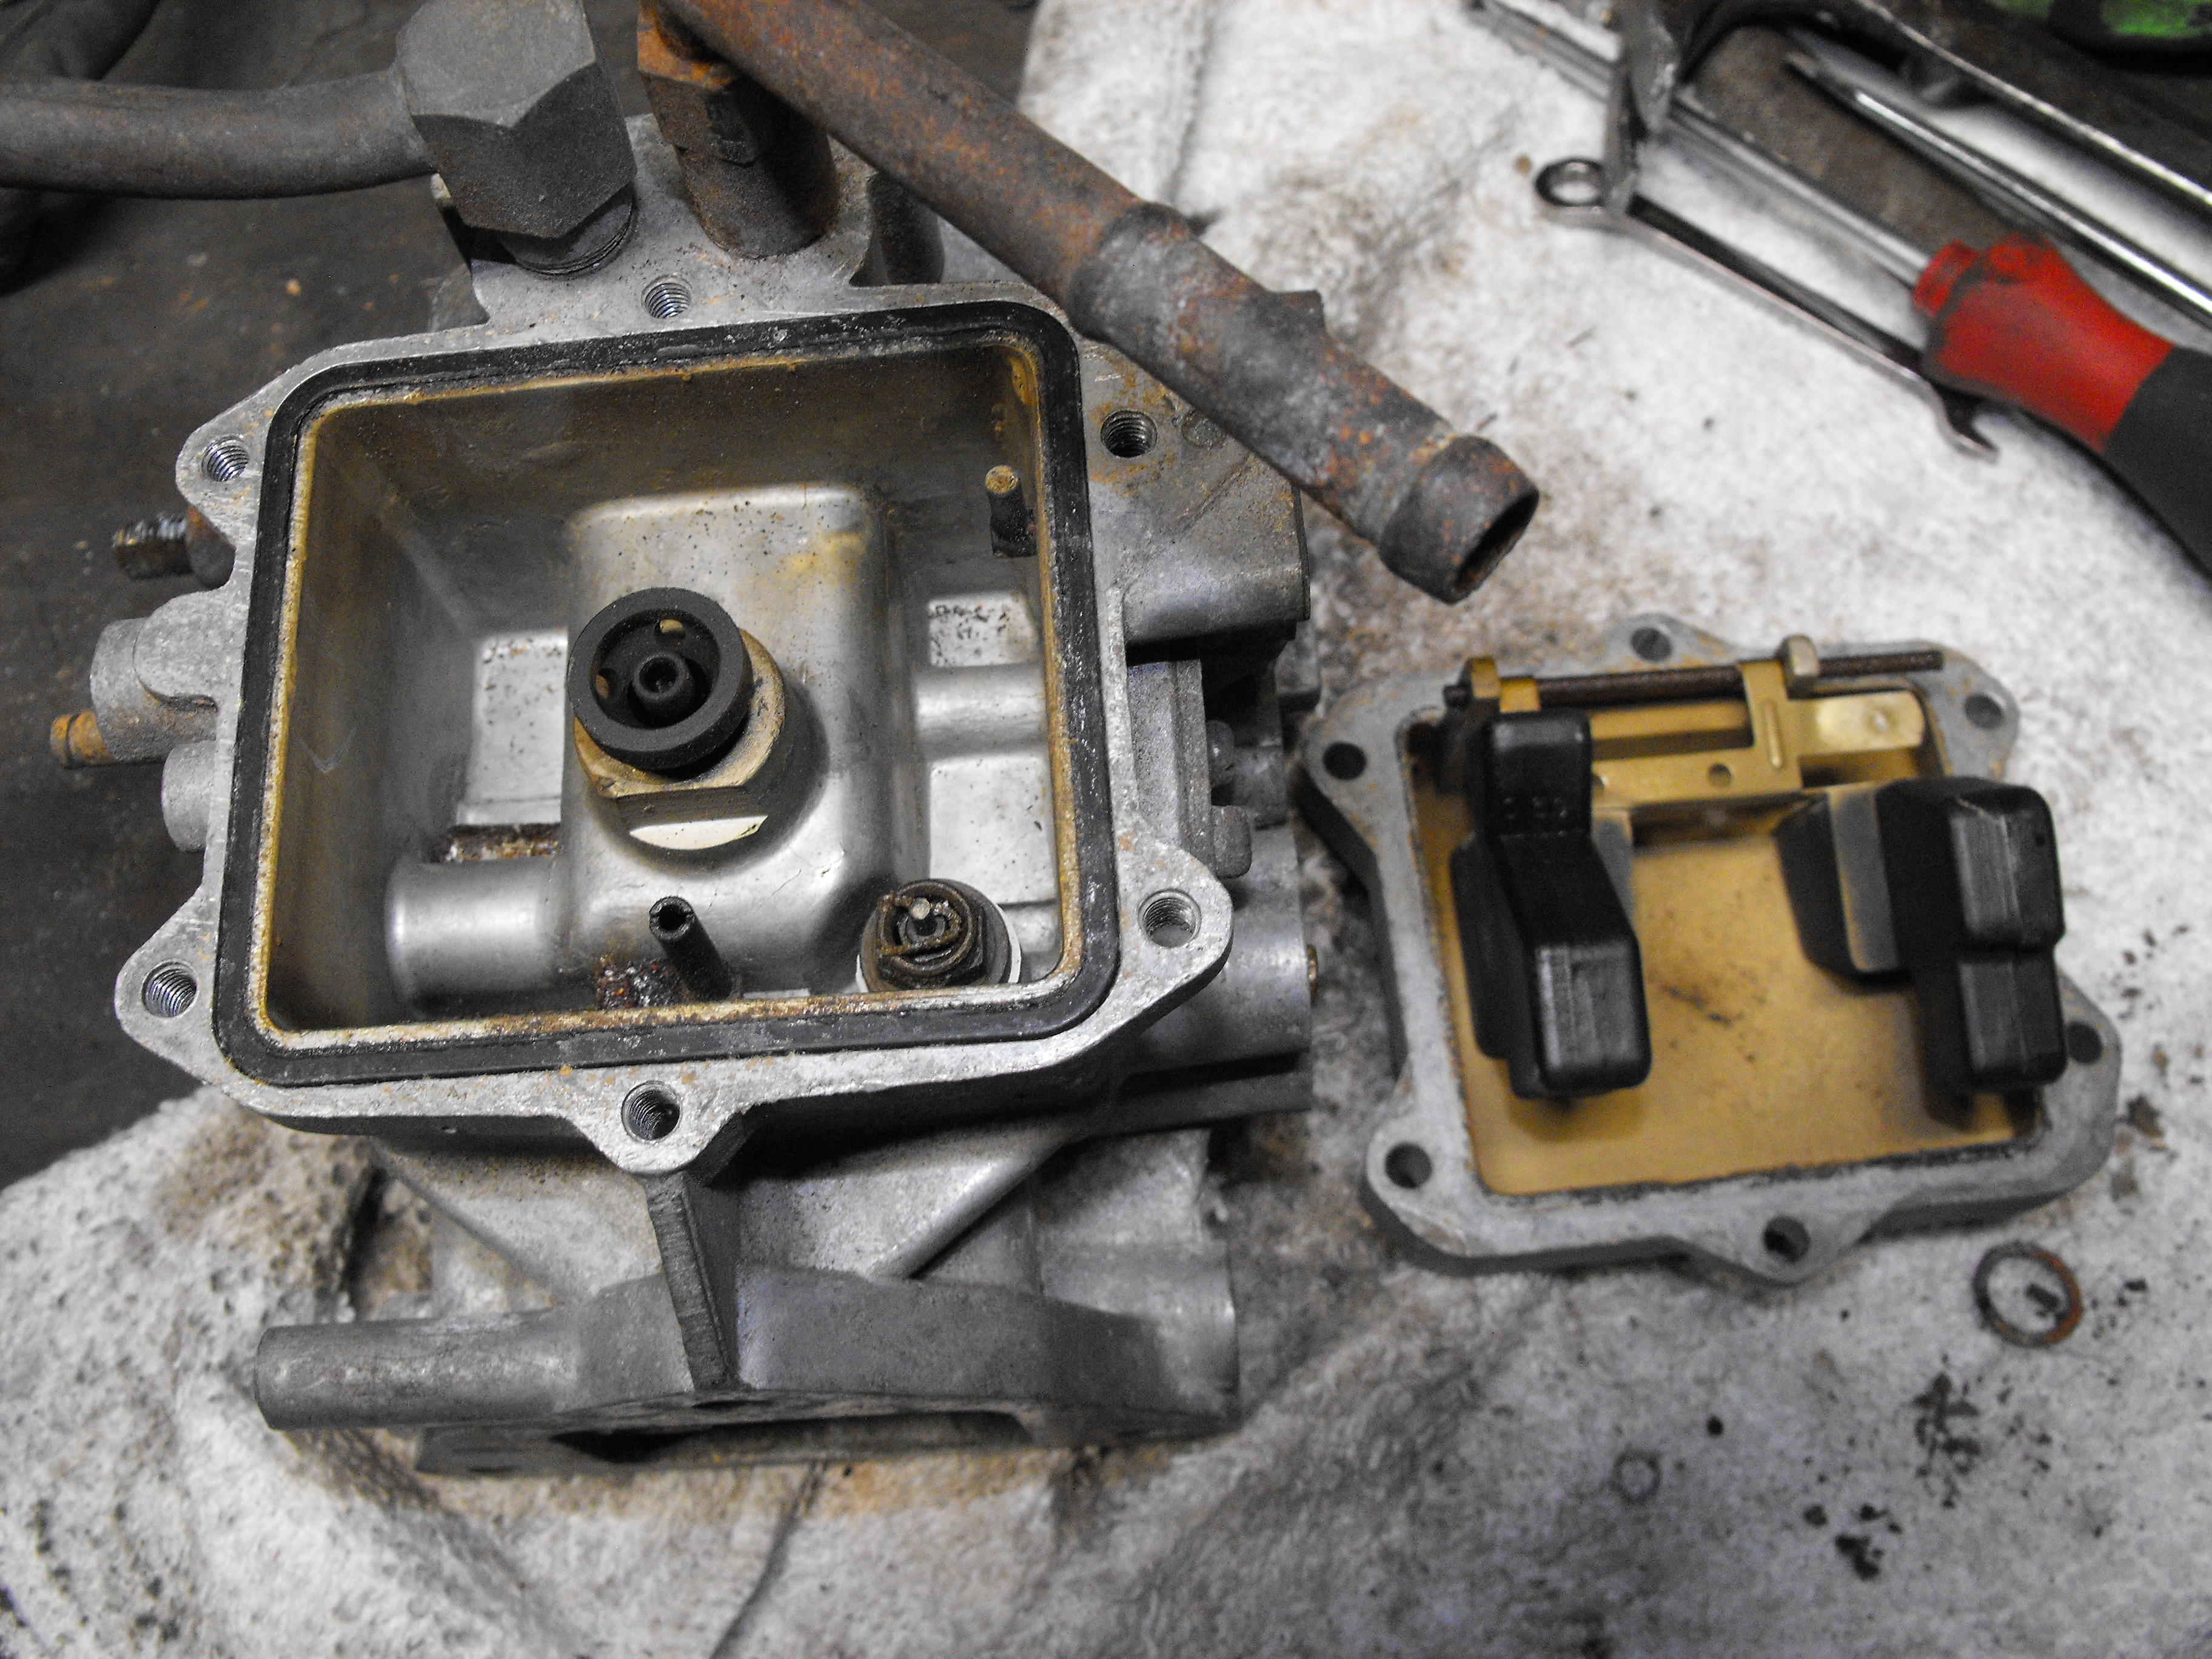
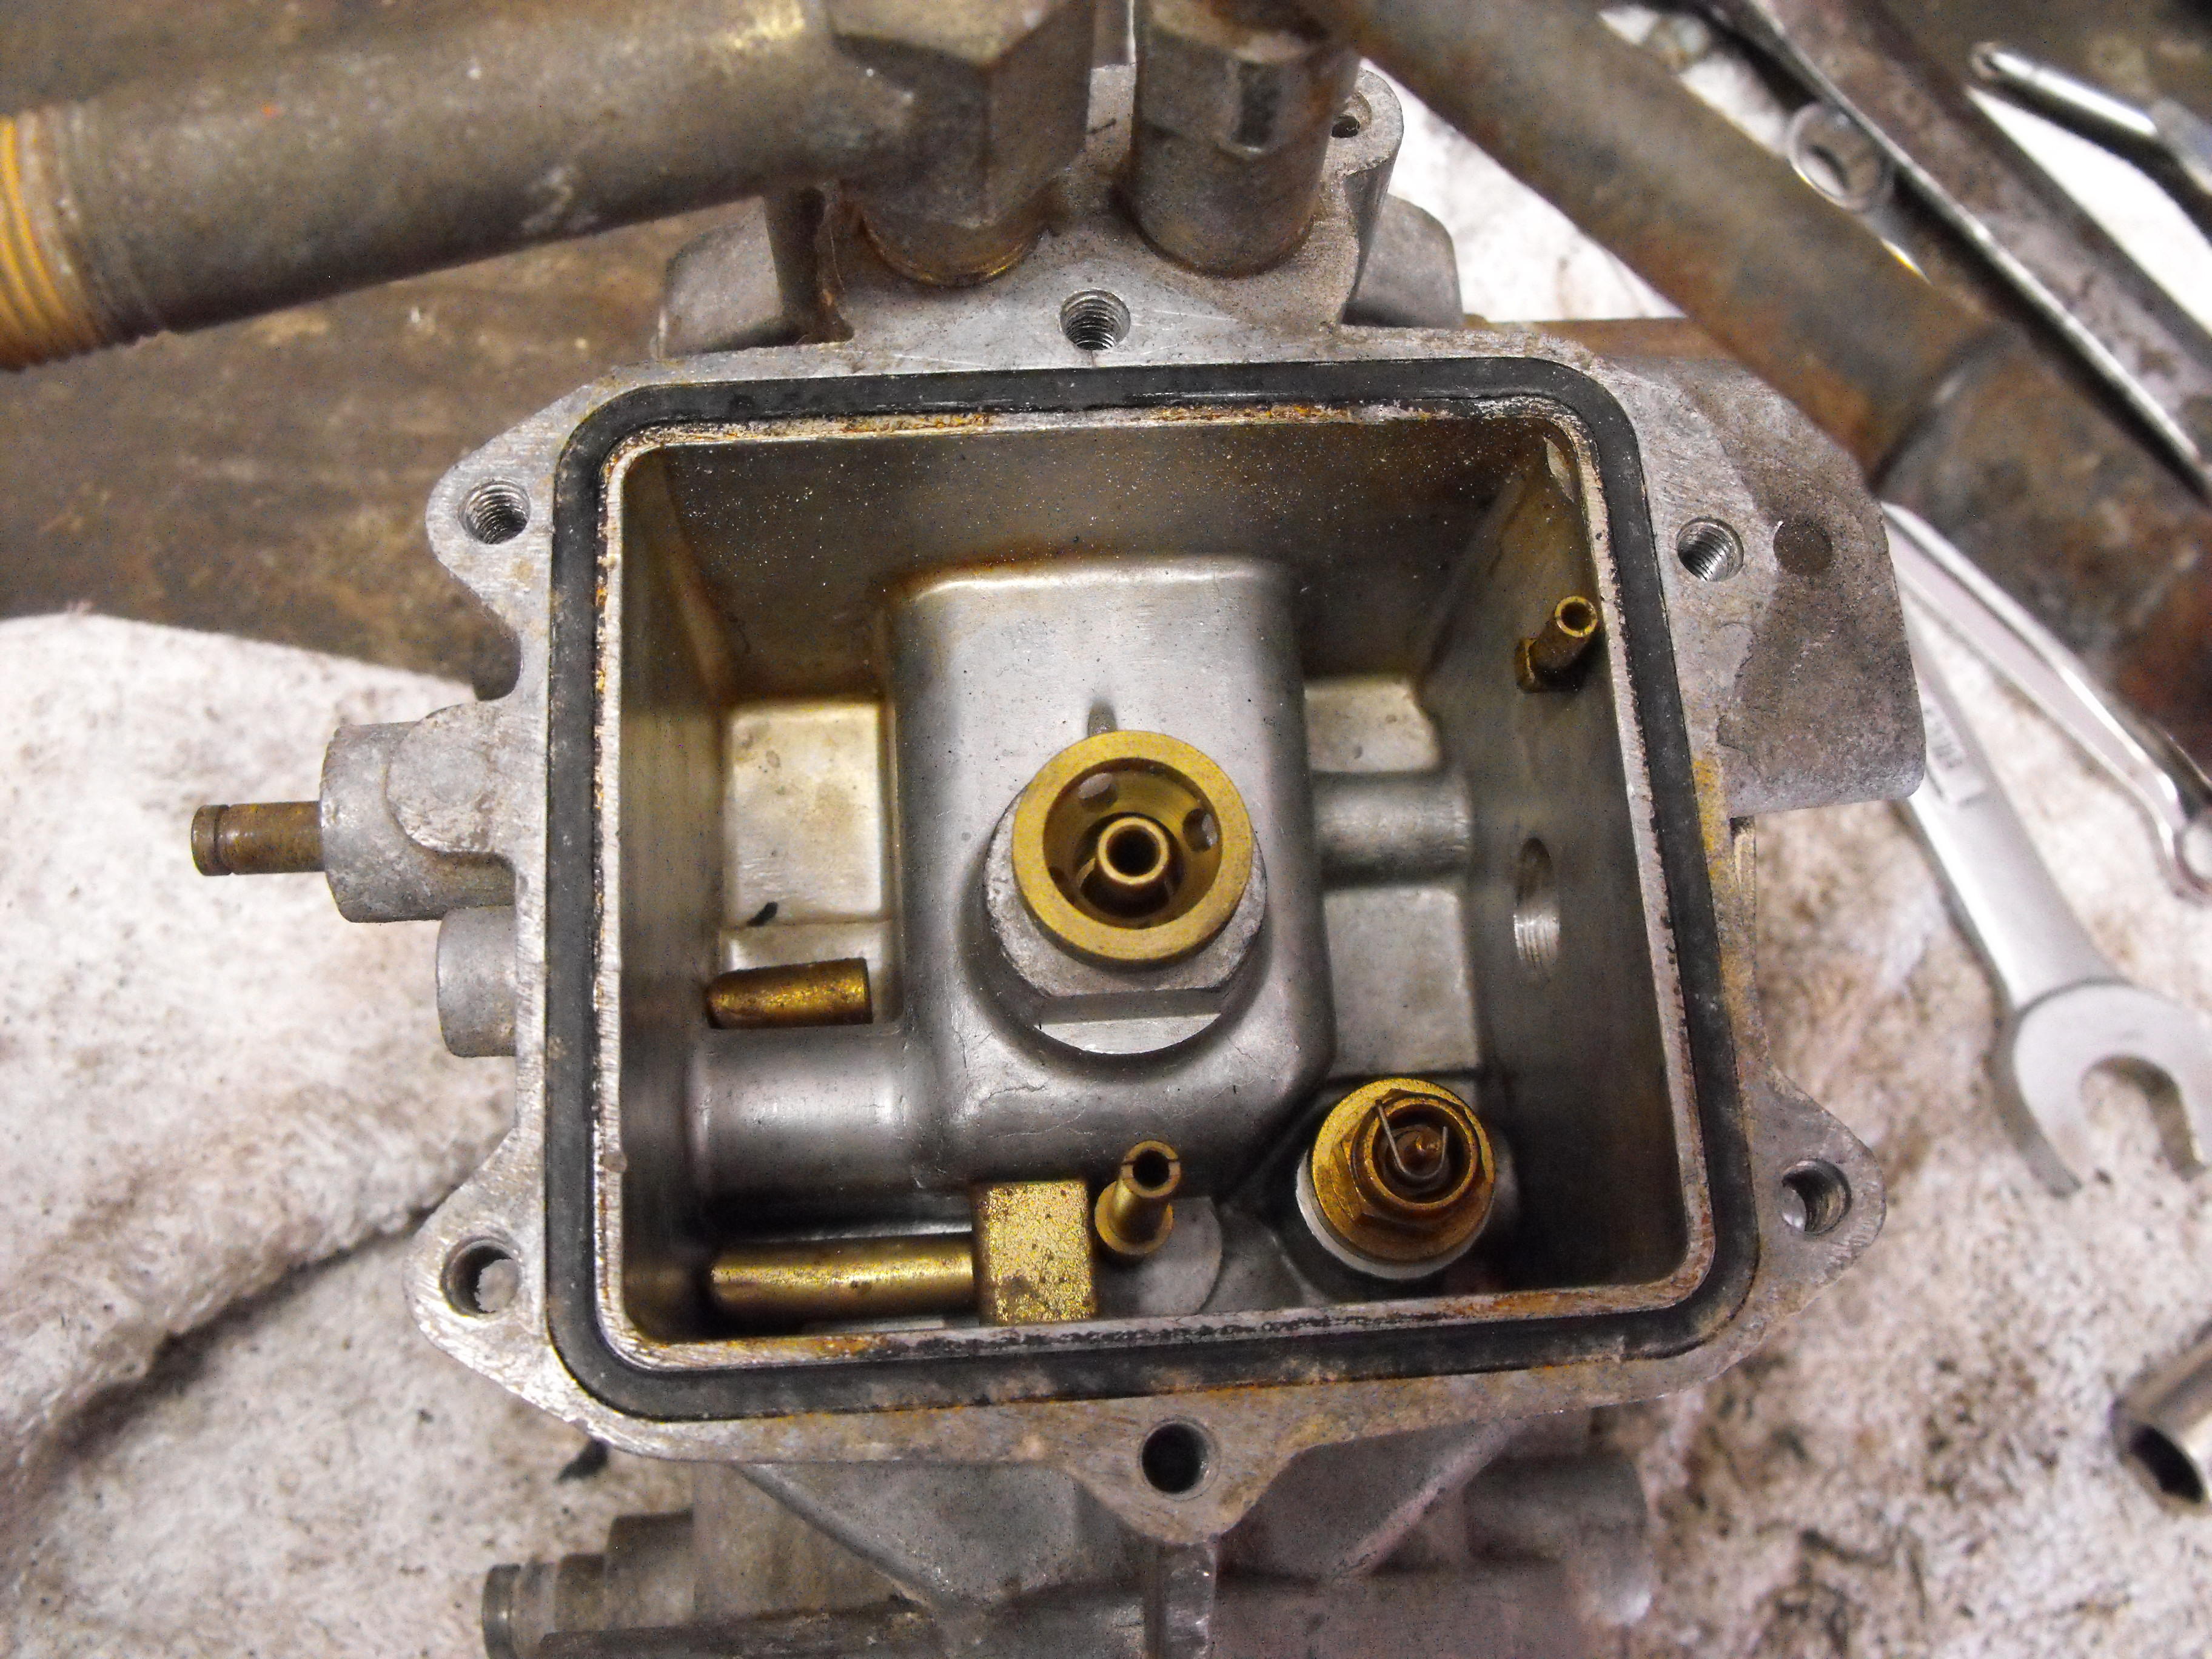
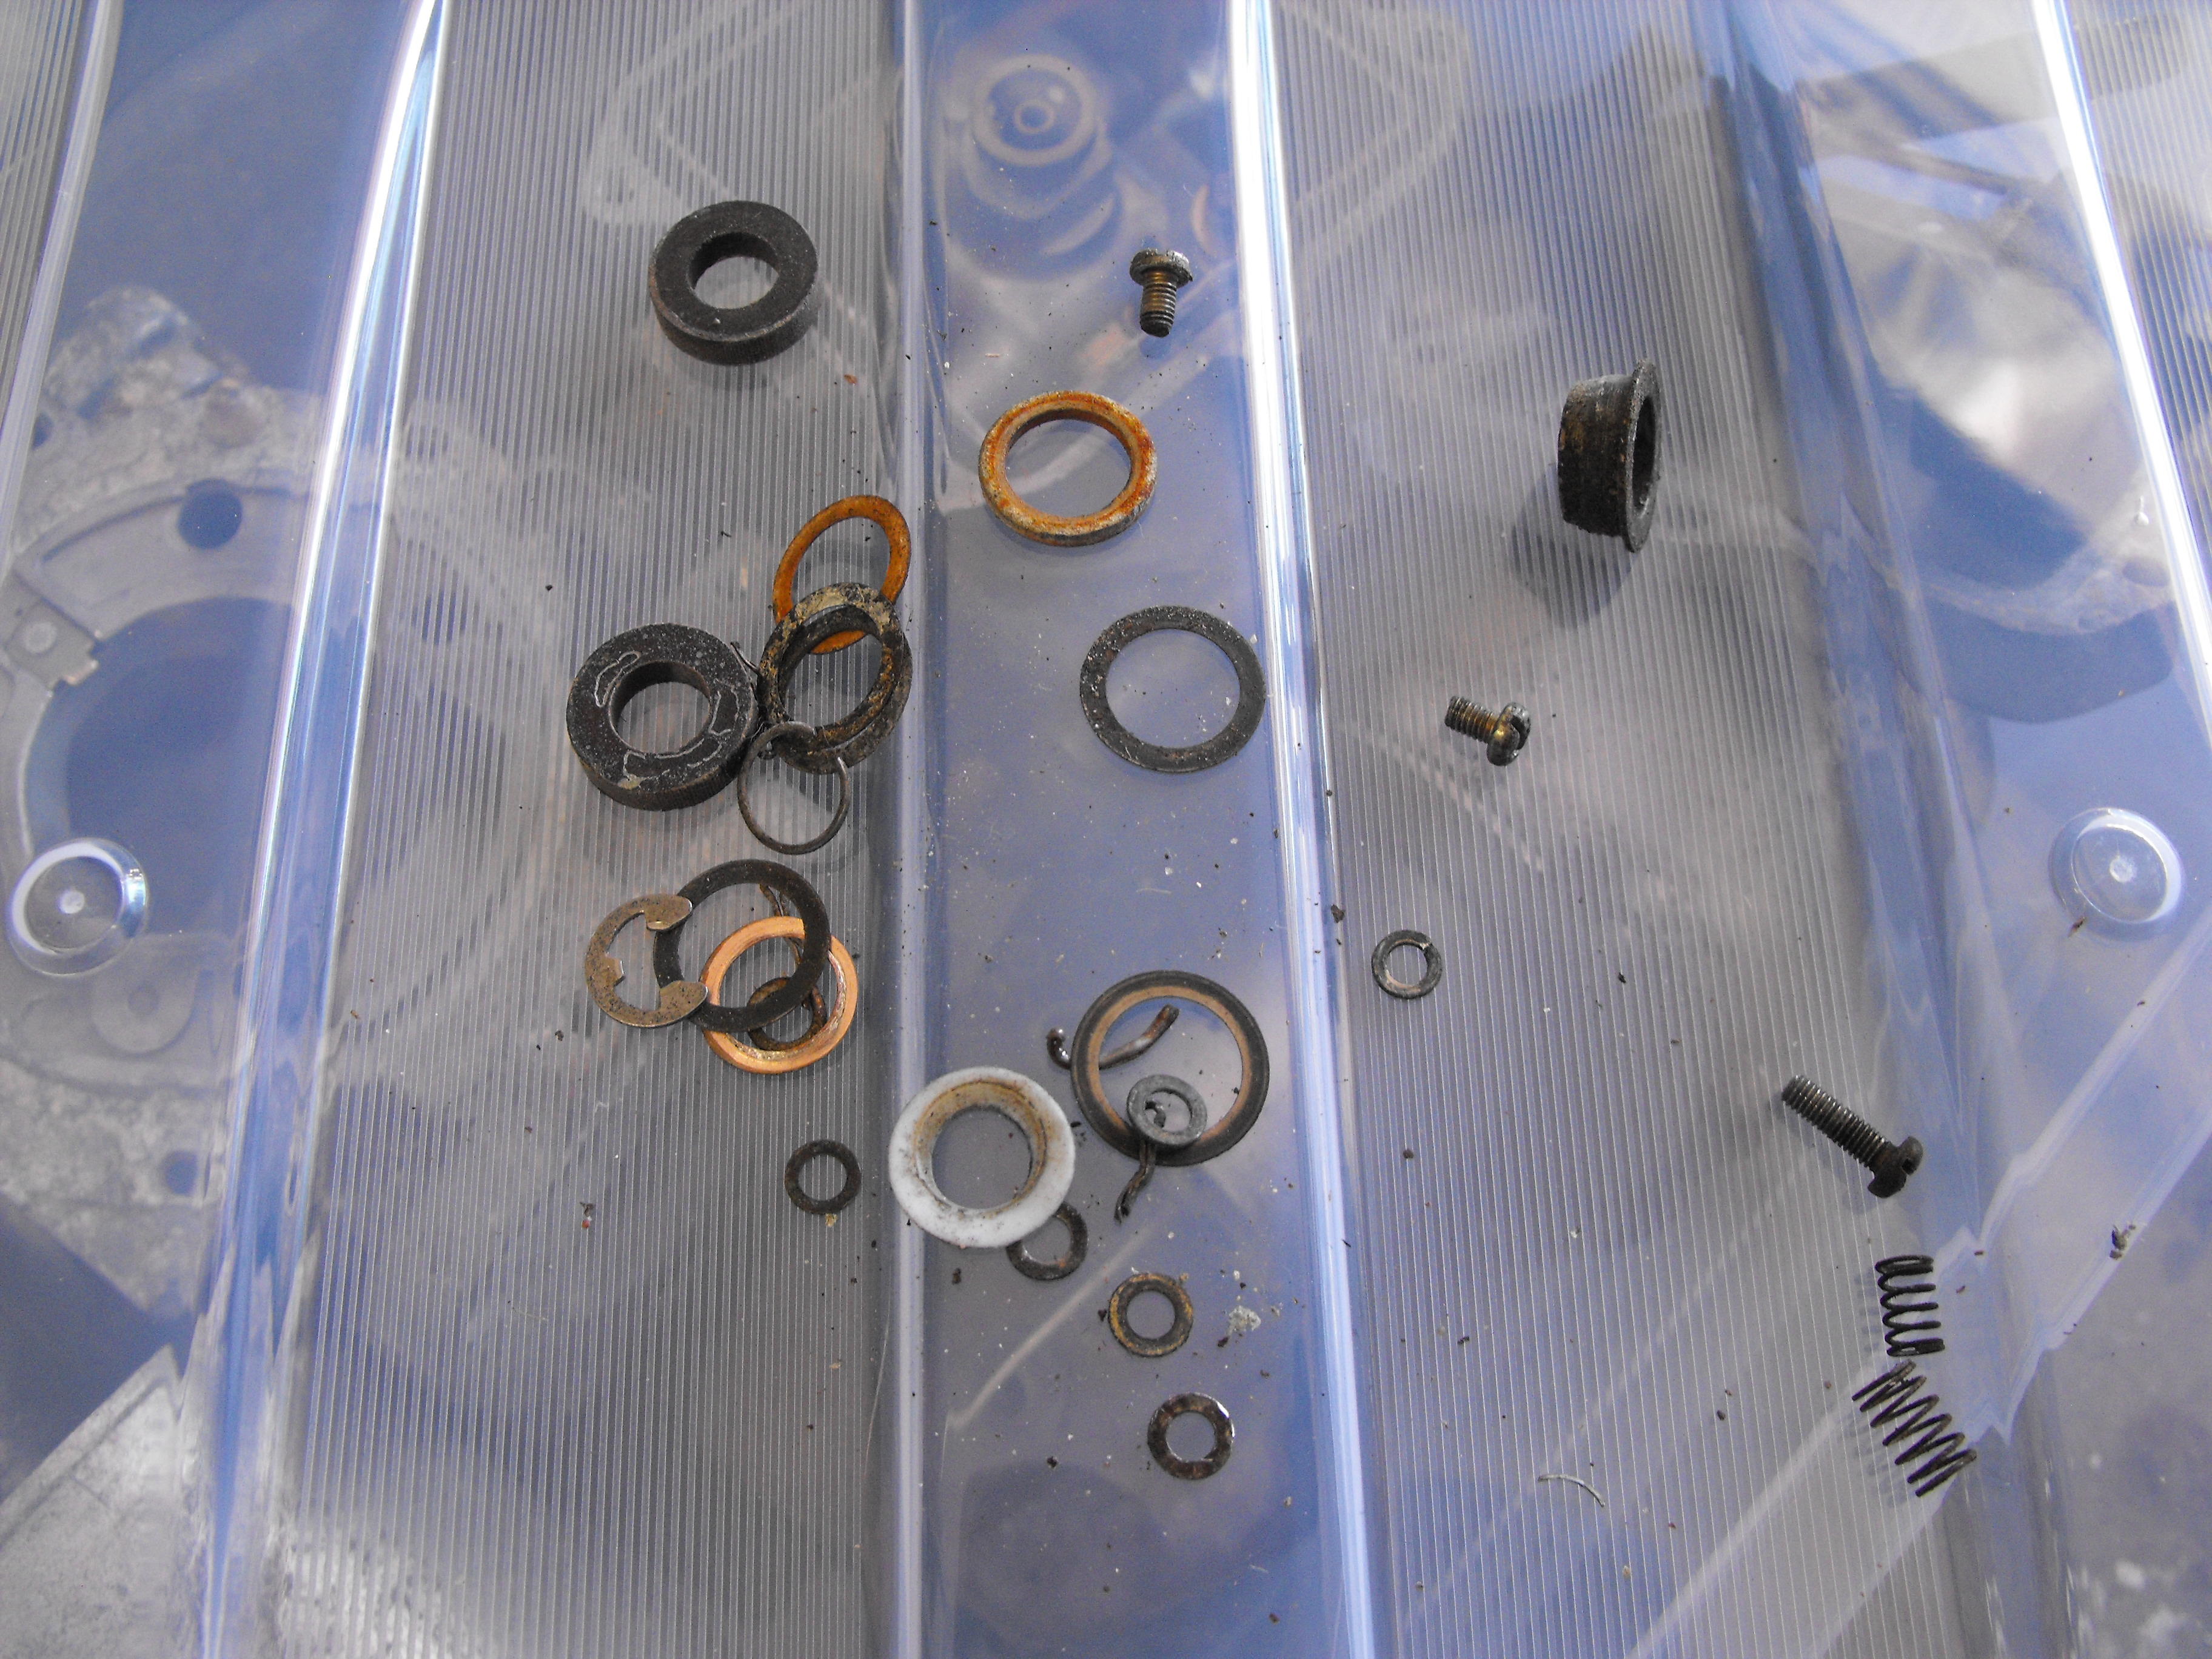
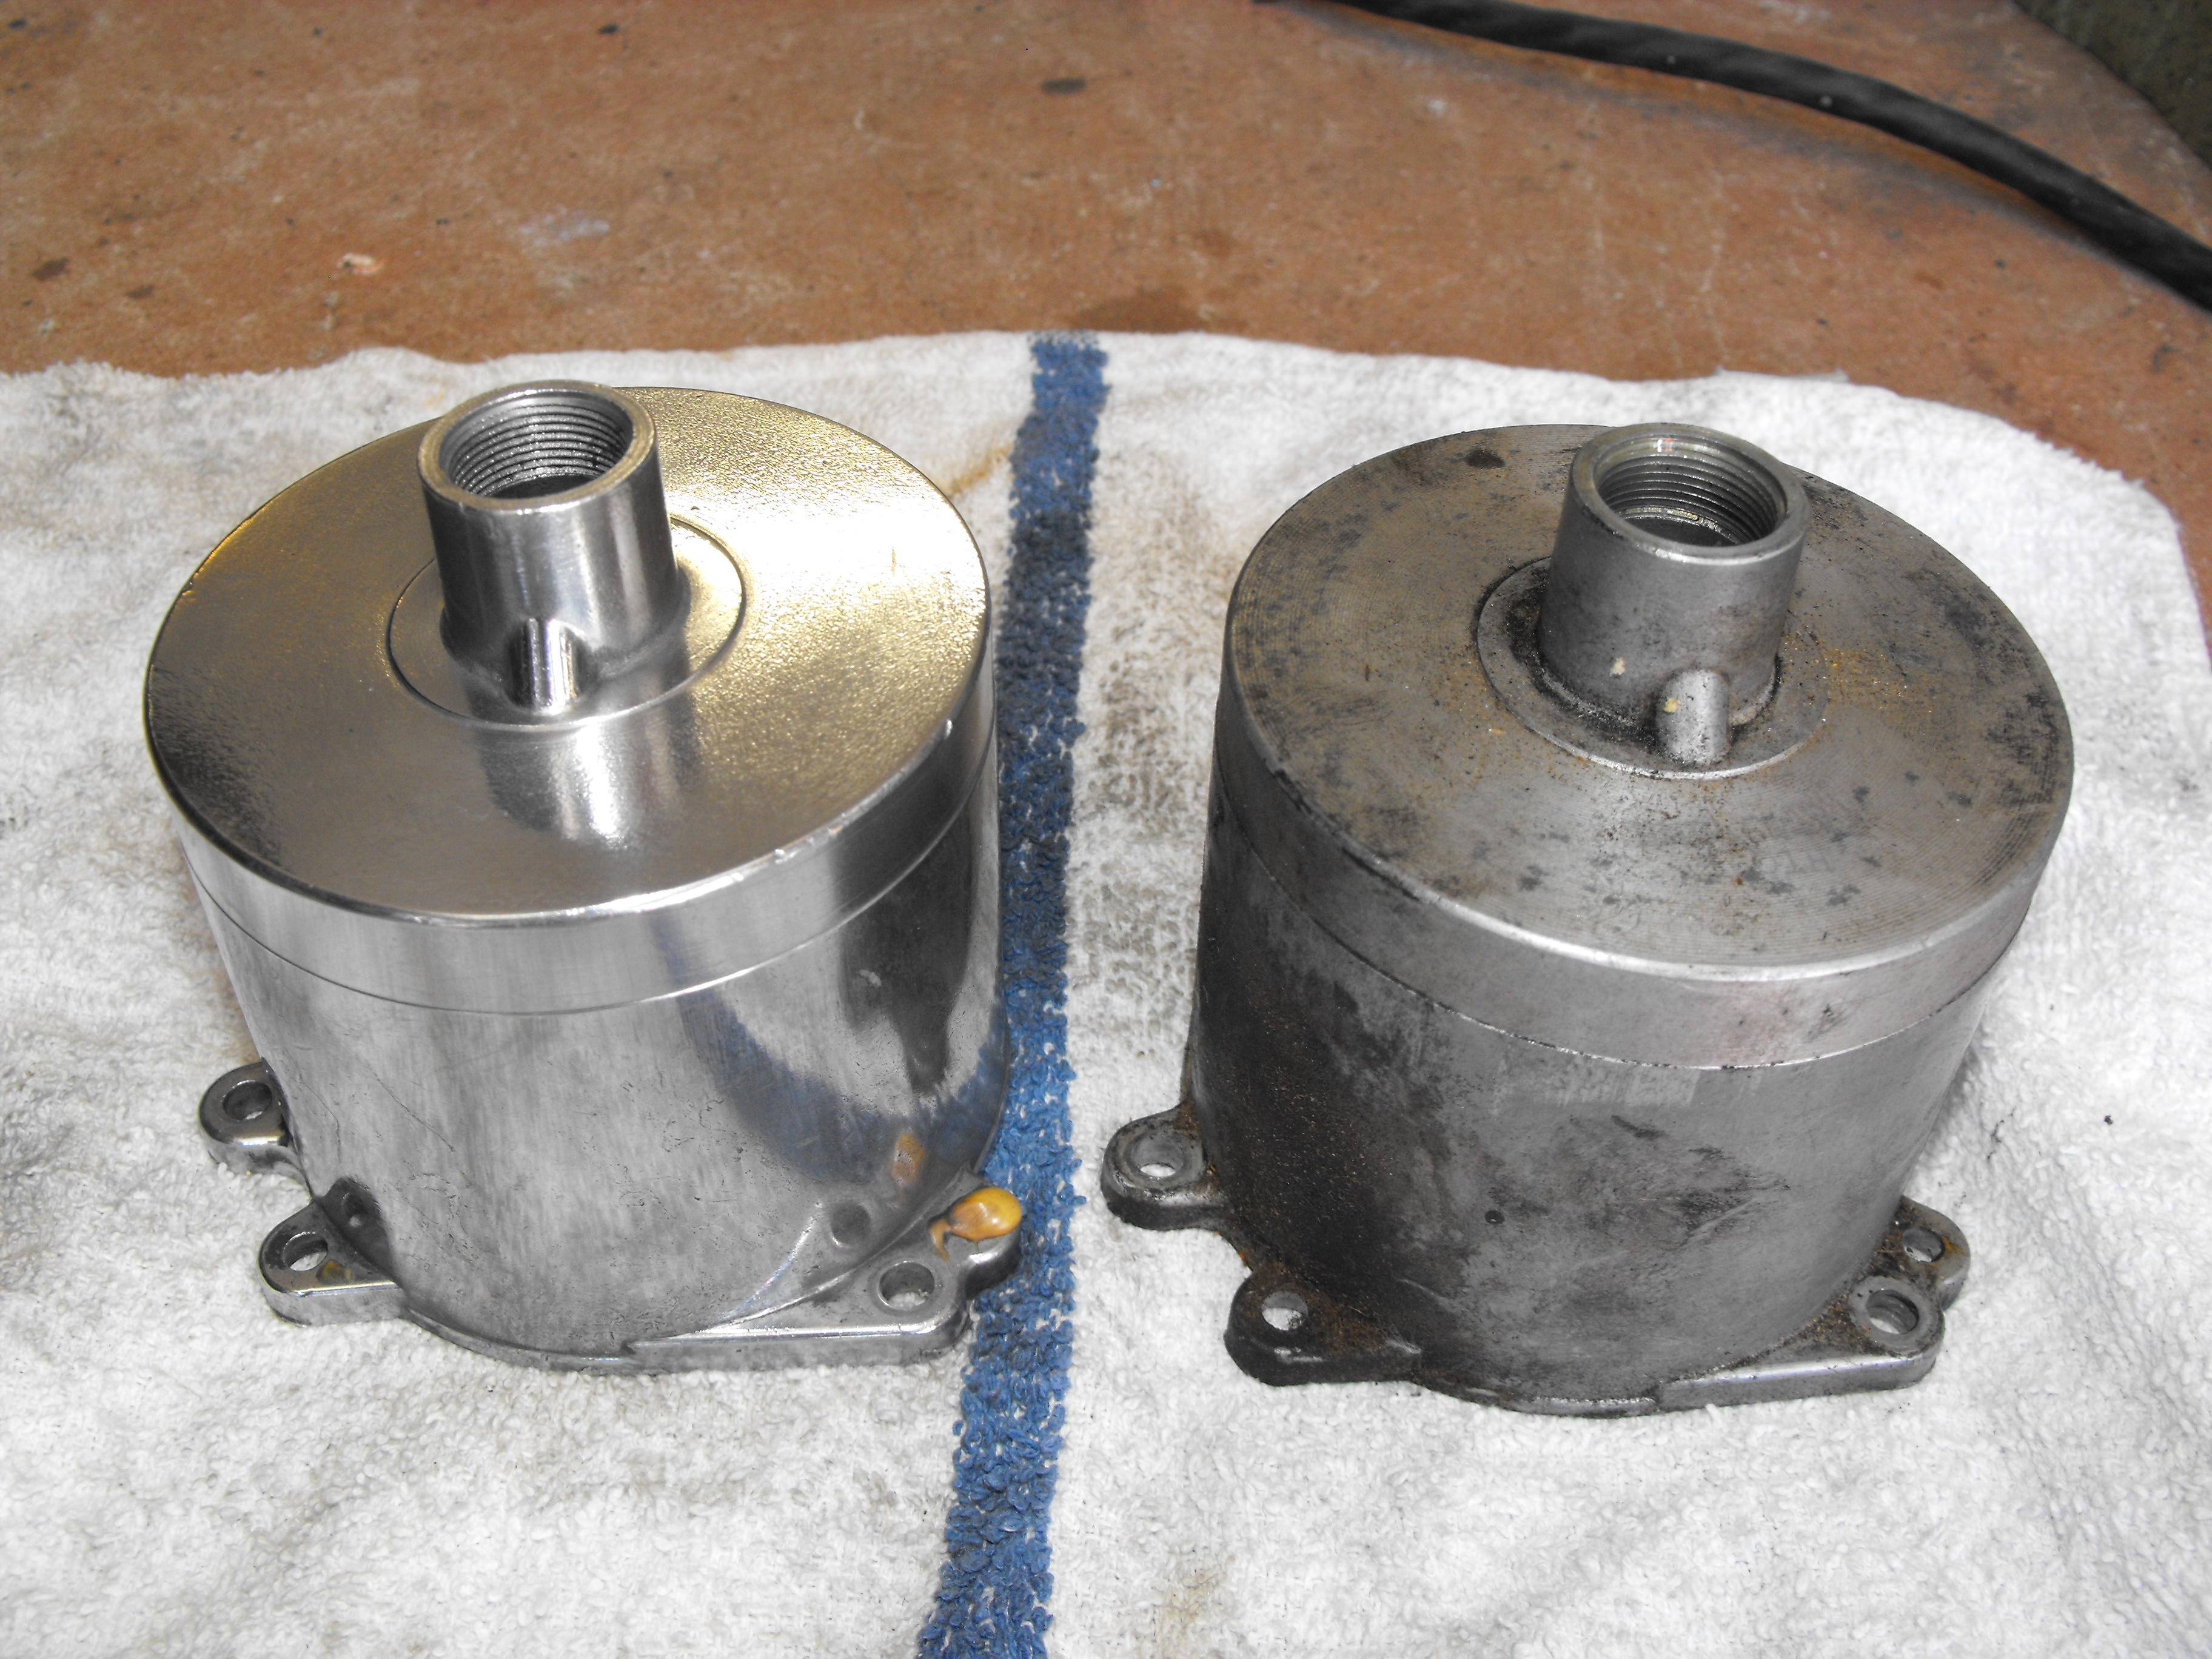
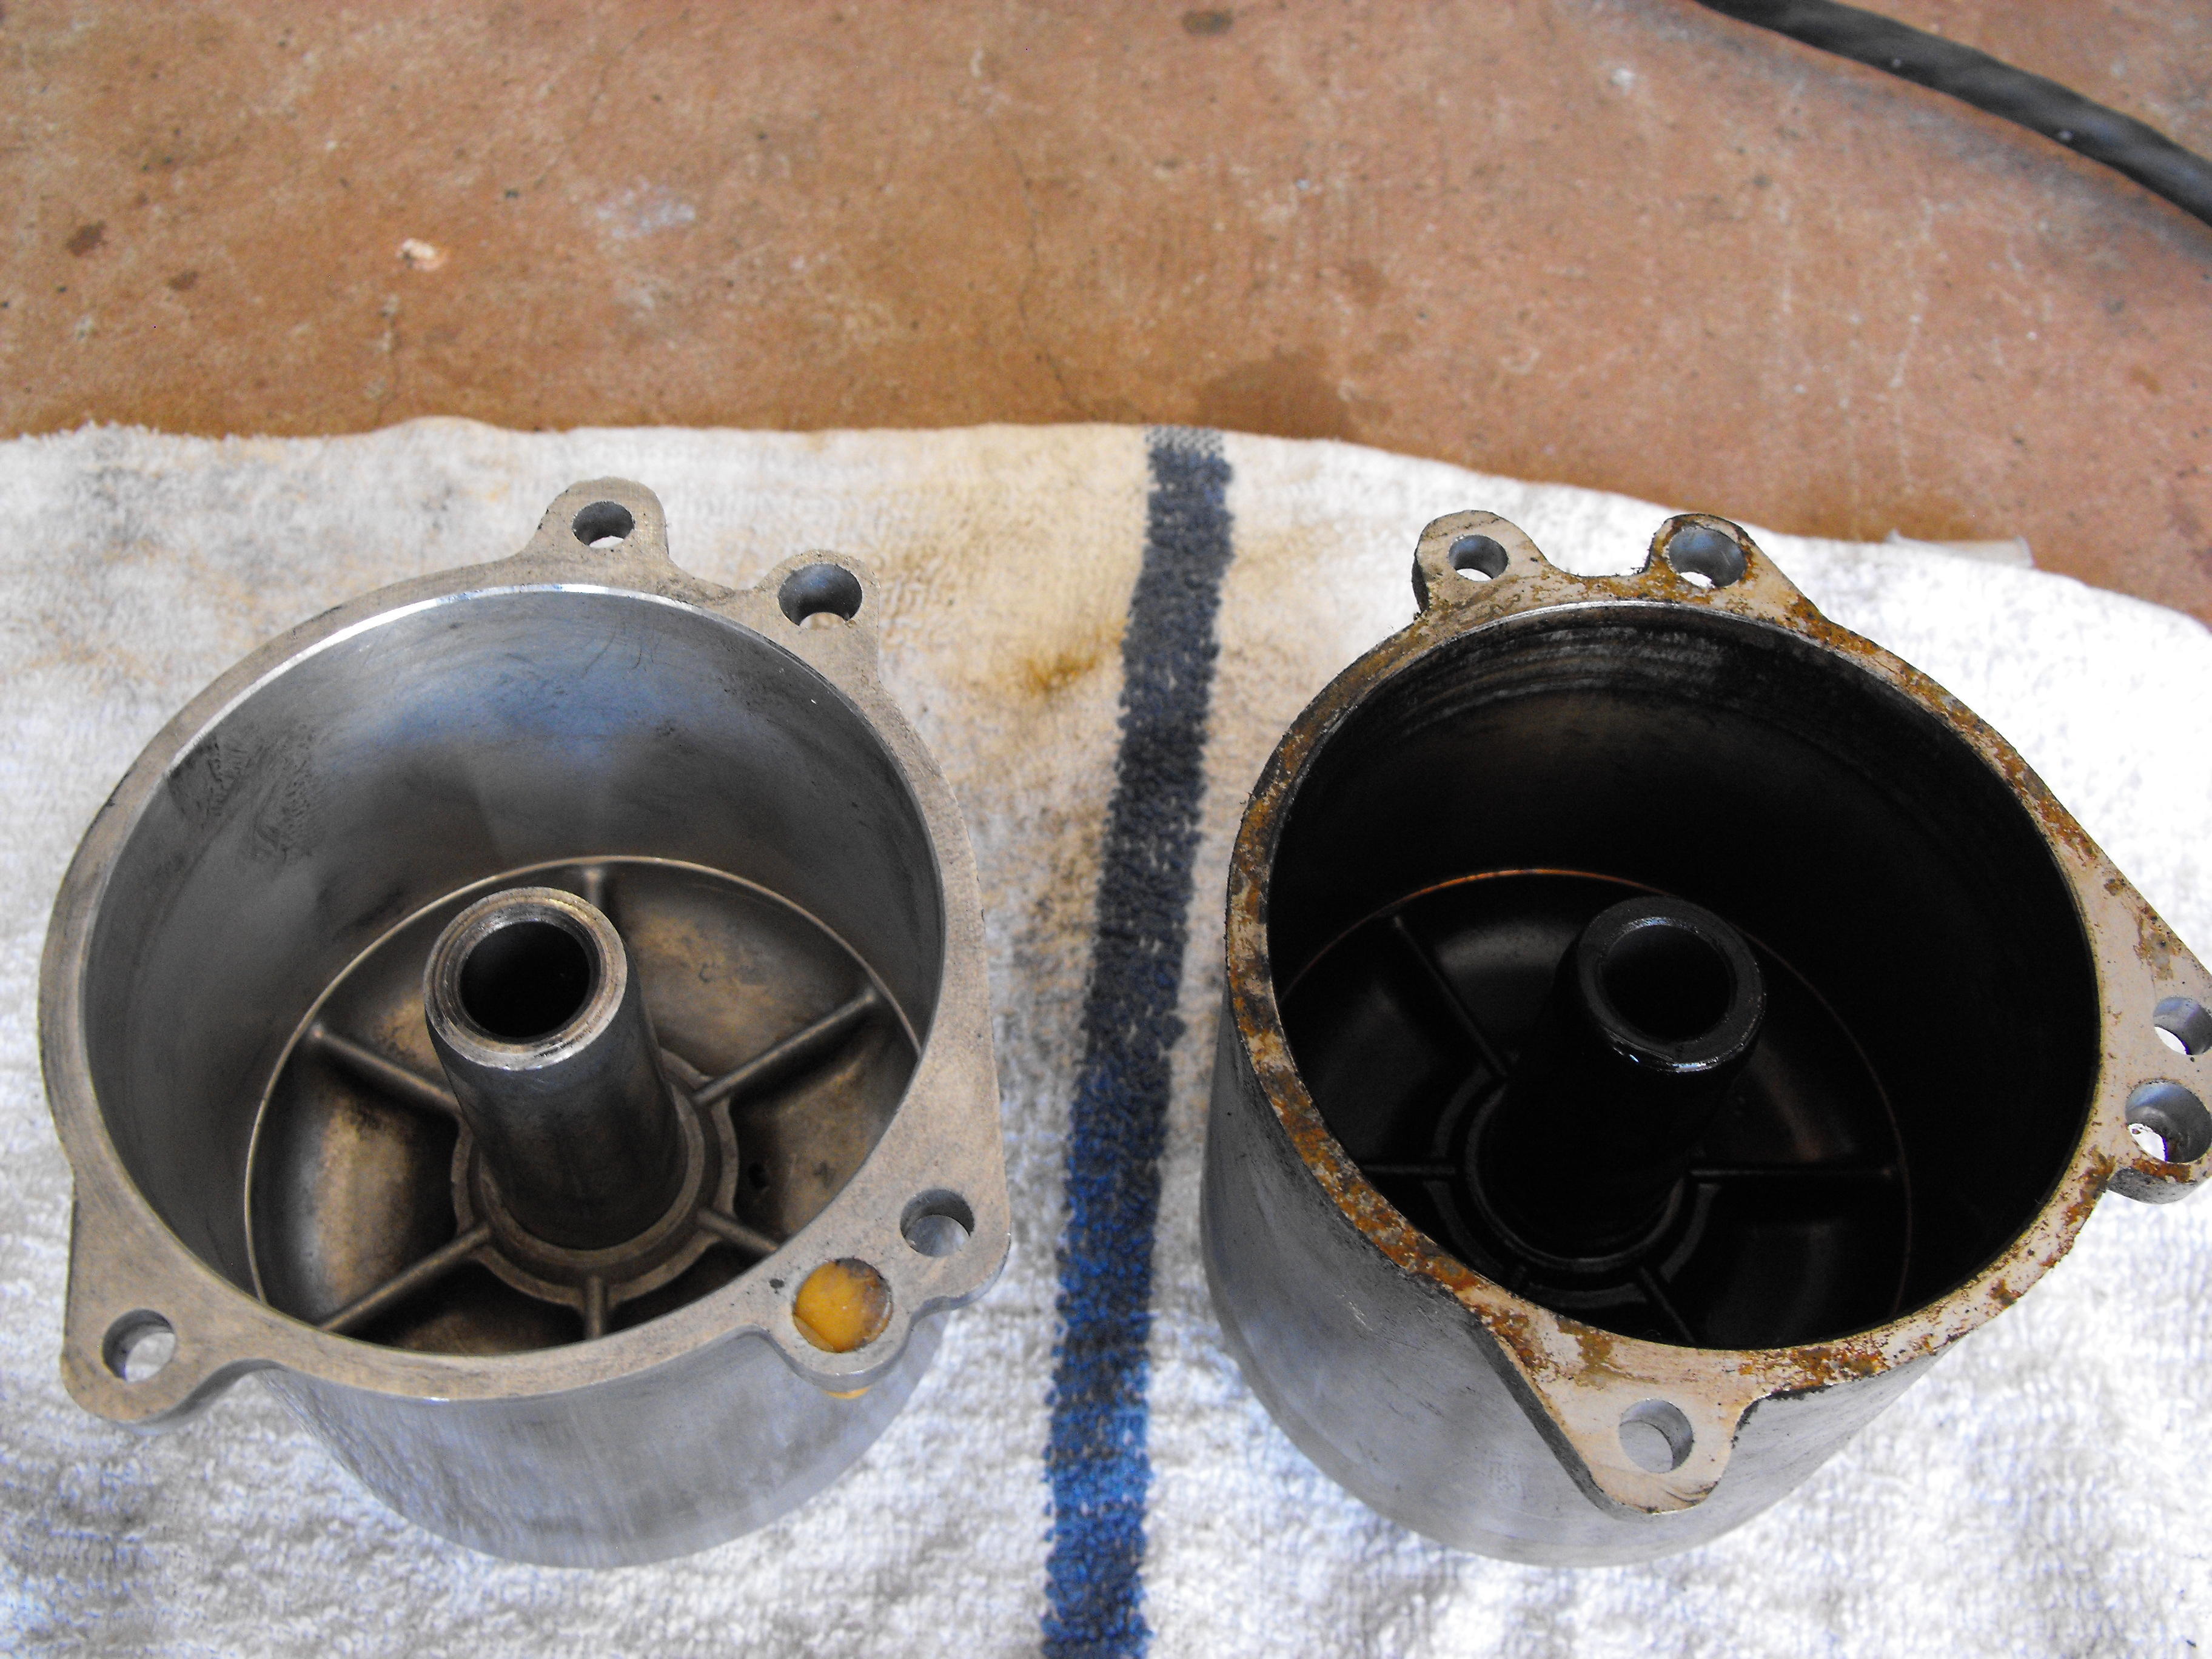
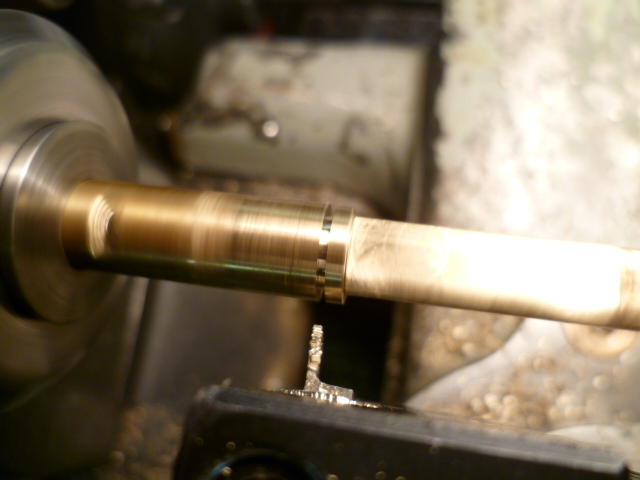
2 pointsHi Snekers, The float pin can be removed by taking off the nut shown in the first picture below. I put an arrow on it. On the rear carb, the pin came out easy. The pin on the front carb was stuck, so I soaked it in Kroil for a day (which didn't help) and then ended up heating the housing lightly with a torch. That did the trick and the pin came out. Was very cautious with this as I did not want to damage the floats. The forward carb also was not as clean as the rear. In fact there was some blue-green colored goo in the area where the nozzle is. The second set of carbs is very different as you can see and has the floats on the base plate. I do not care for this design as much, but did want the zinc platable parts off of it. Also, the sight glass cover is a different shape. Interesting seeing the differences. Nice improvements on the -2 carbs. Both styles of the flat tops have bushings on the throttle spindle. As you can see in the pic, the bushing looks a bit oval (worn) so will need to look into getting a new one of these. Interesting seeing the green zinc chromate paint over the brass spindle rod. Not sure why they did that, corrosion preventative? The key to the re-build here will be all of those little parts. I made sure to collect every item from both sets. Will not send those to the plater as they may not make it back. I did a quick clean and polish of one of the vacuum chambers. They clean up well.


 2 points
 -
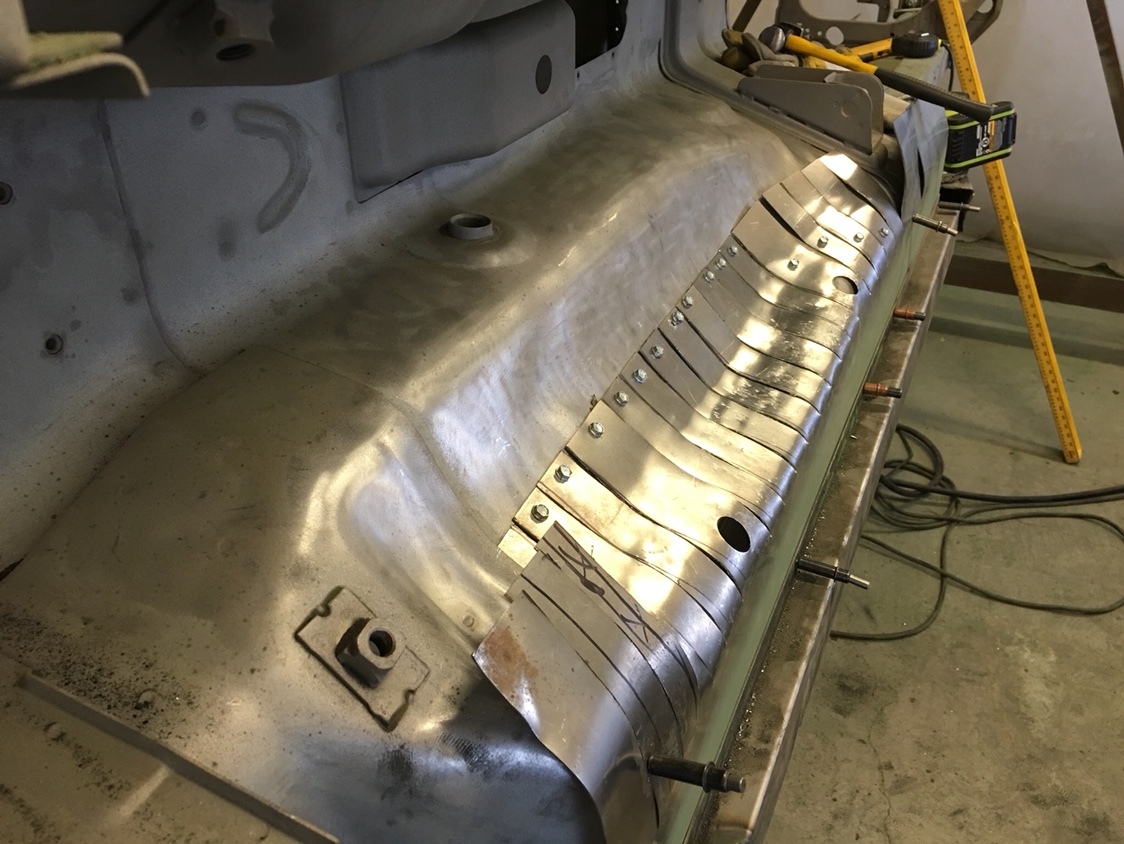
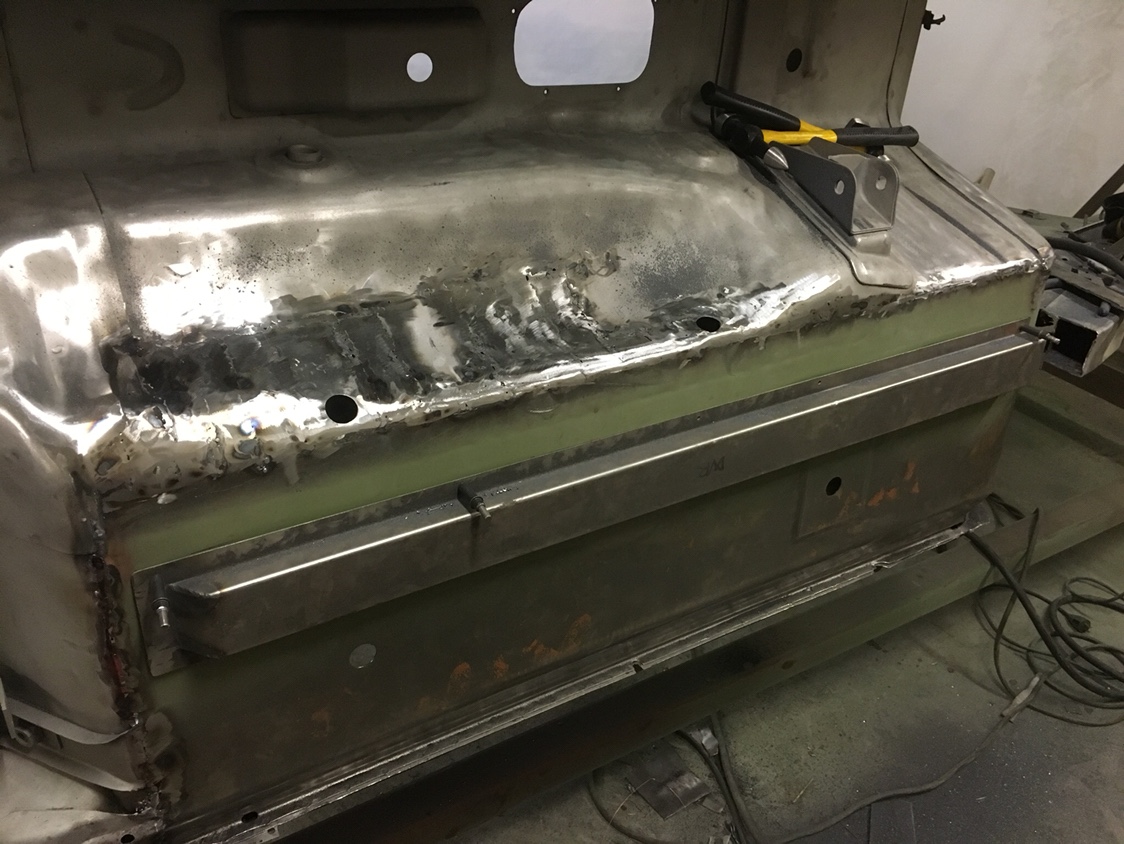
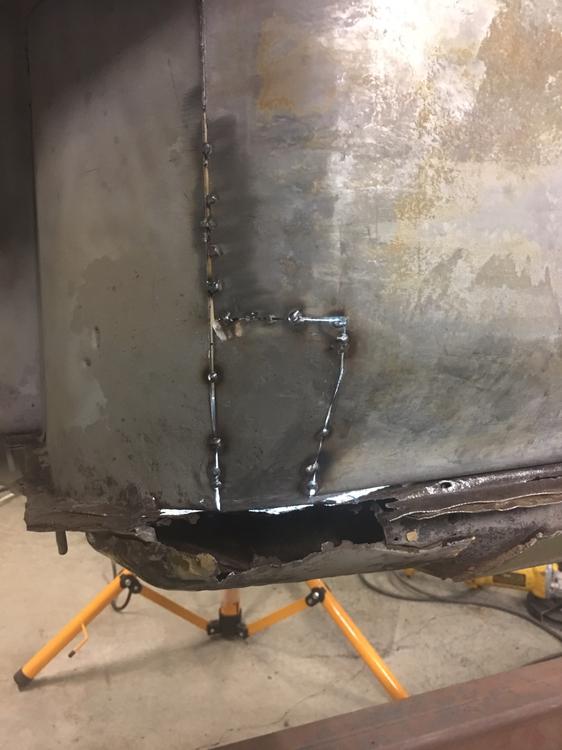
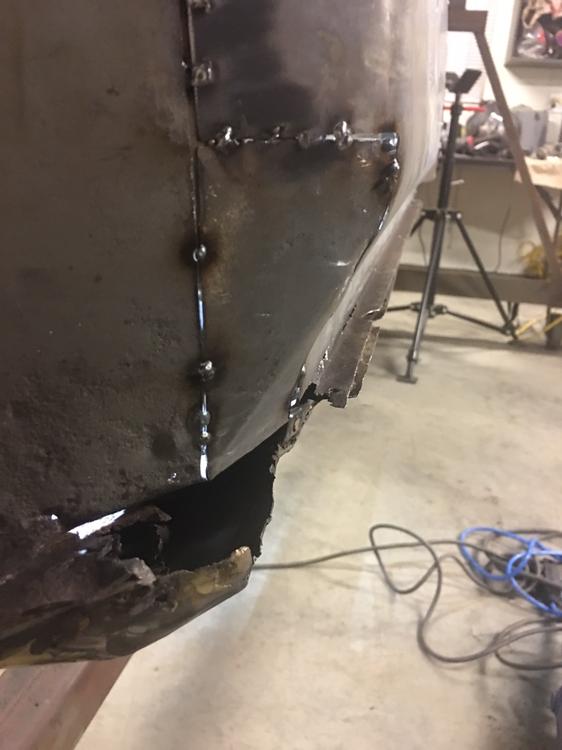
2 pointsLooks like you have everything nicely prepped, after you get the pan roughly shaped and placed you can start with the rocker side of the pan and run a couple of zip screws or clecos to hold it, then 1 on the back lip. At the front where you left 3" of the existing support rail you want to force the new pan down into that curve and secure that with a couple of zip screws until you start welding. The position of the pan may change so don't tack weld anything, any holes from the screws can be welded up at the last step. Now comes the fun part, matching the new pan up to the trans tunnel, there a couple of ways to do it but I like to start in the center close to where the front of the seat would be and secure that with a zip screw then cut relief lines in the pan as you need them to get the pan to lay against the tunnel. Much twisting and bending of the pan and some stretching of the tunnel will get you there. If you are lapping the weld joint try and get the lap down to a 1/4" to 1/2", if butt welding leave your lap nice and wide so you can slice down the center of it, try and find the thinnest cutoff wheel you can for that cut, trying to butt weld over a large gap is so frustrating.2 points
-
2 points
-
 1 pointThanks Captain! You are my mentor. Recently I am so inclined to Dino 246 , is it because I am looking at the car sitting on the grass the other side of the fence ? Kats1 point
 -
 1 pointIf you're expecting a groundswell of Japanese owners to start converting their cars from RHD to LHD, from 5-speed to 4-speed, from 3.9:1 diff ratios to 3.3:1, fast steering rack ratios to slow etc etc - with a special premium on adding Amco 'towel rail' bumper bars - then don't hold your breath. Emblems are one thing, but it tends not to go much further than that.1 point
 -
 1 pointI'd try to drill or ream the splines out of the insert and leave it in place.1 point
 -
 1 pointBefore my Grandaddy would give me a whipping he always gave me a last chance to do what he said with one word, "Y'ain't??? That word got a lot of toys picked up.1 point
 -
Thanks for the lead. This also looks promising and they are right down the road. http://www.olycoatings.com/dryfilm.html http://www.olycoatings.com/thermo.html I sent them an e-mail to get some more info.1 point
-
1 pointThere is a saying here in the US... "The grass is always greener on the other side of the fence." In it's simplest term, it's used to describe the guy who looks out his window into his yard and thinks to himself that his neighbors yard always looks nicer than his does and he wishes he had his neighbors yard instead. Put into the context of automotive enthusiasts... People here in the US modify their cars changing over to fender mirrors, changing to right hand drive, re-badging their 240SX cars to Silvia. Converting to clear JDM tail lights on their 300ZX's. The Honda guys peeling off the US hood ornament and installing the red Japanese H instead because it's neat. Wouldn't surprise me to find that kids in Japan do the exact opposite. The grass is always greener.1 point
-
 1 pointIs this some "high country" S.C. lingo??? "I'm a fixin" to add it to my linguistic skill set.1 point
 -
 I like the 90% thought! I guess I just need to be creative and not expect perfection. Thanks for all the replies.1 point
 -
Very cool, O-ring seals. I love it. For these carbs I am currently thinking that I will try and replicate the green material. For the needle alignment, I would think the one nub and three screws would get me pretty close...but probably not perfect, Depending on the screw and tab hole tolerance. Interesting that the bottom part of the one nub is missing. Sent from my C6902 using Classic Zcar Club mobile1 point
-
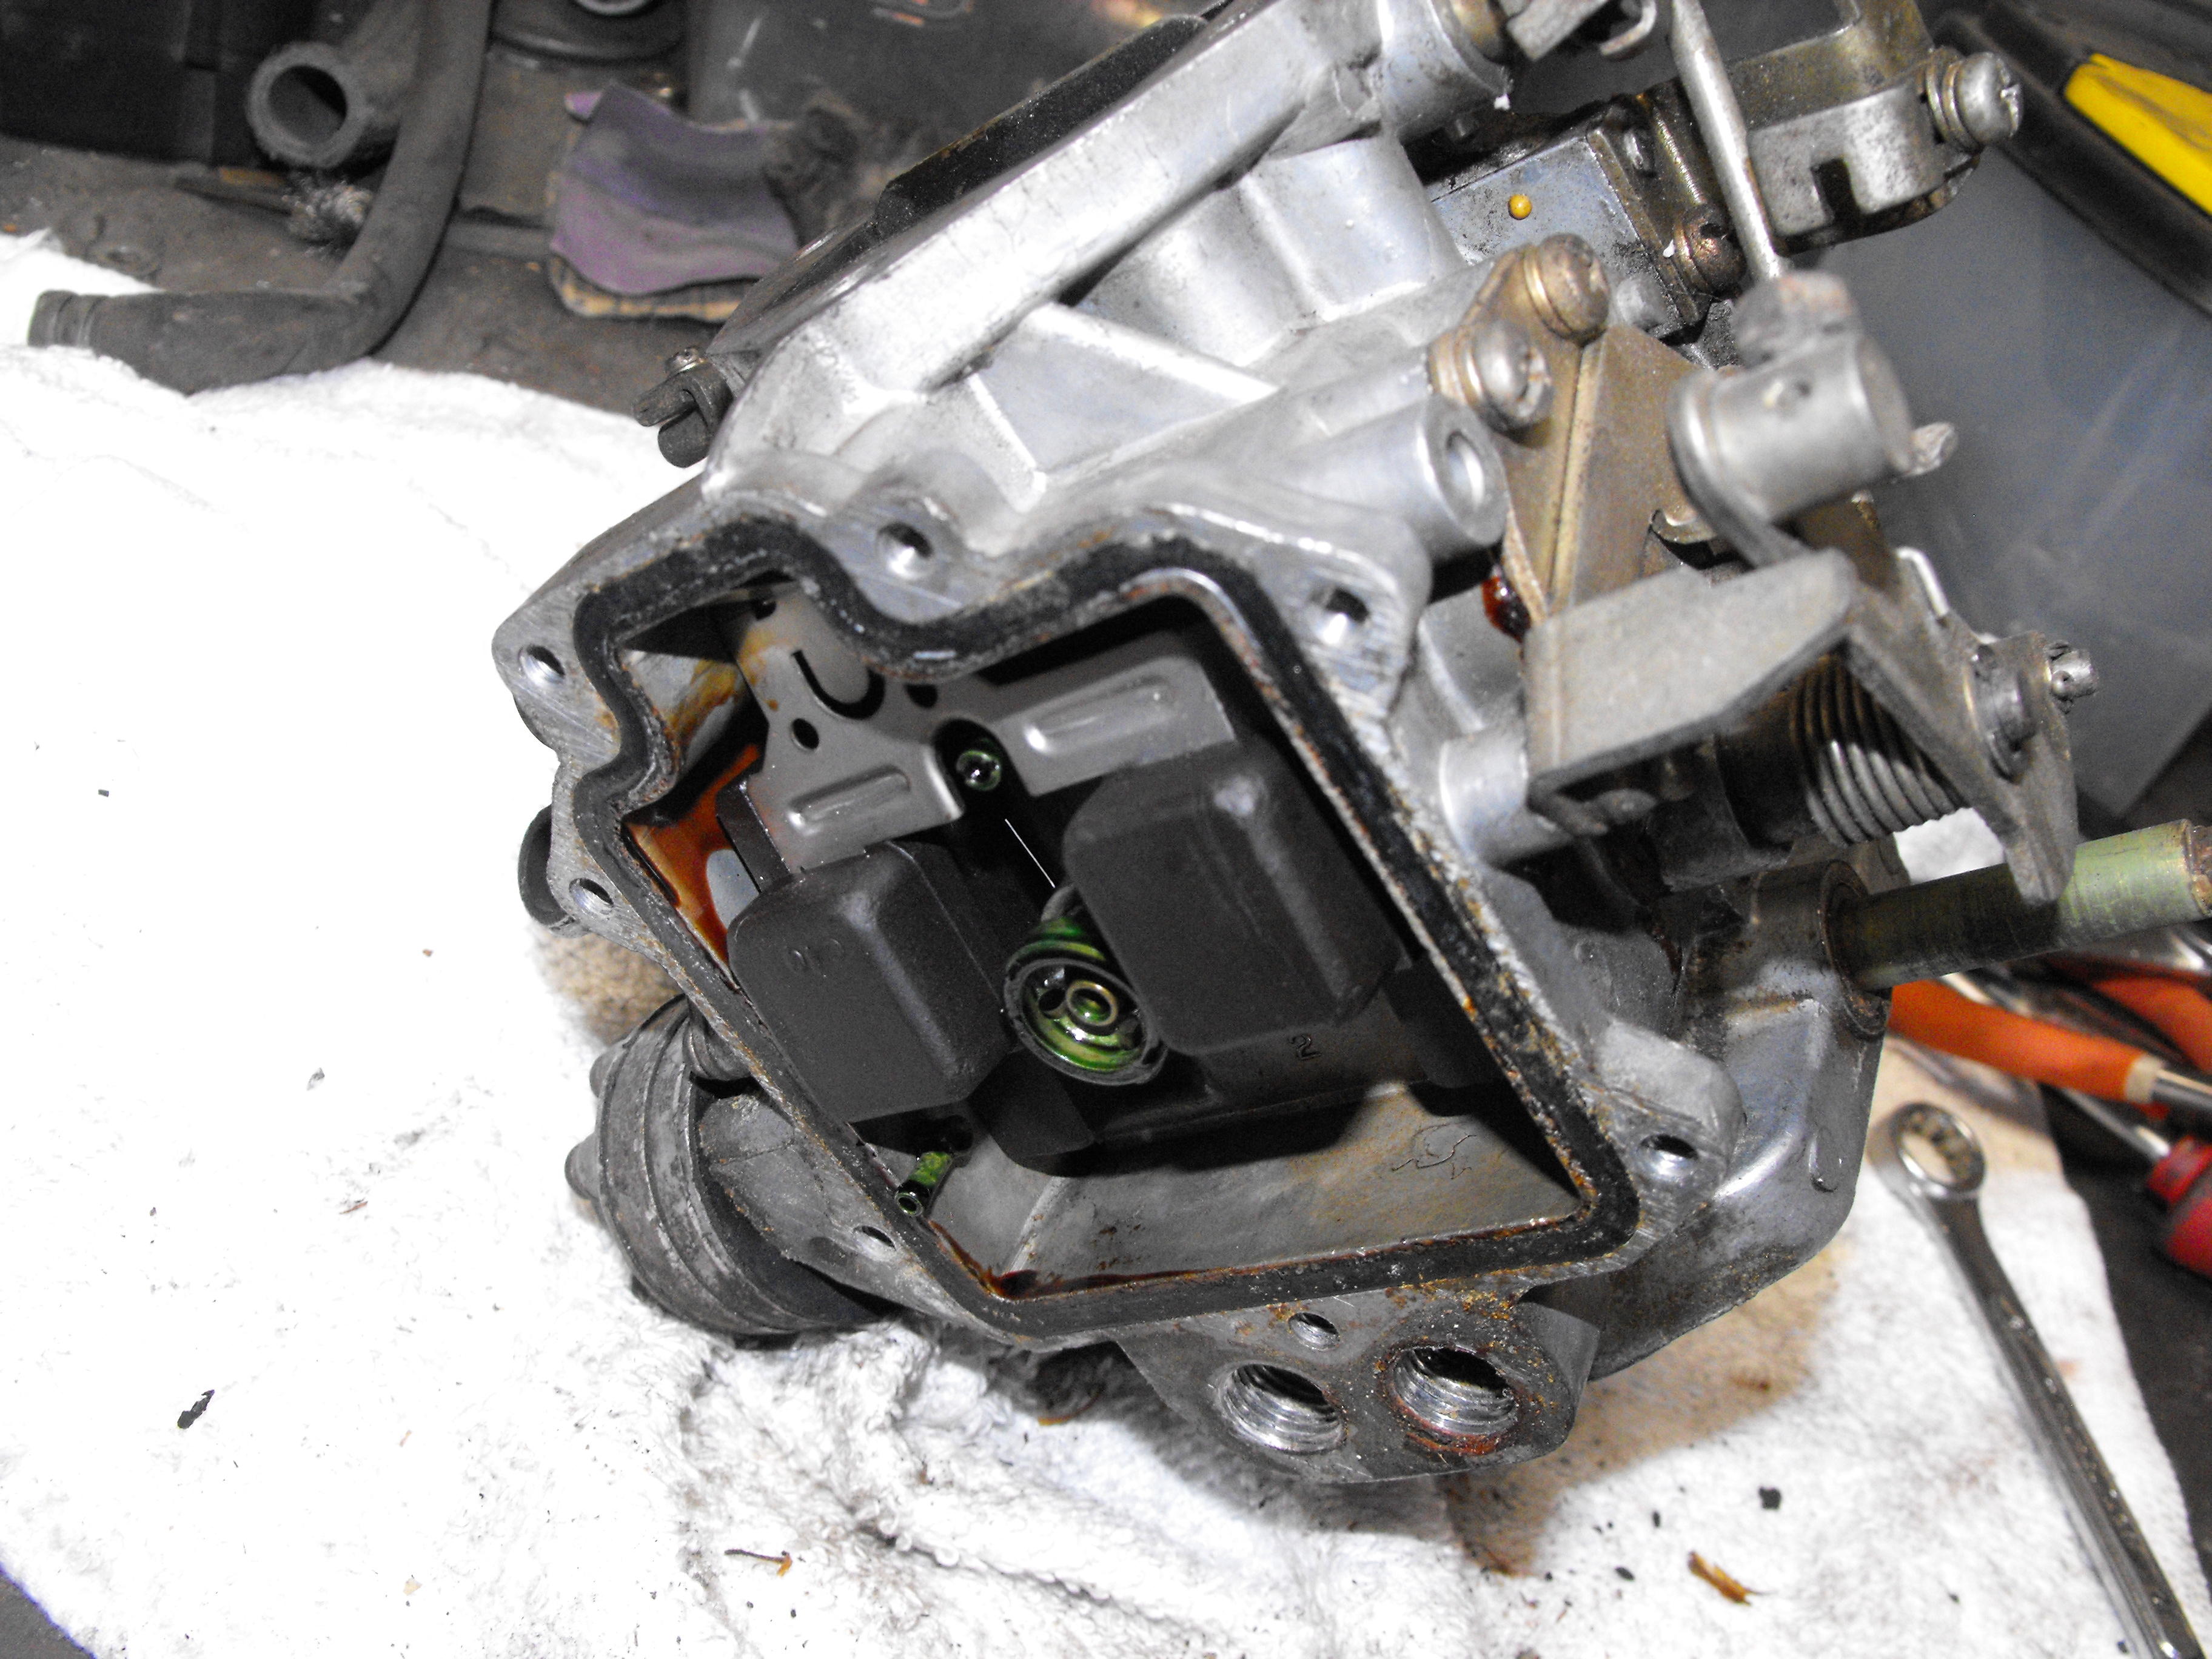
Well to be clear... Your alignment nub has cracked in half and only HALF the nub is stuck in the chamber cover. The other half is usually still stuck in the carb body, but in your case, it has fallen out somewhere along the way and years. Unfortunate, but not insurmountable. Those two cones provide very accurate alignment of the chamber cover with respect to the center bore where the piston slides up and down and where the needle slides into the nozzle. If that cover is out of alignment, the needle will rub the side of the nozzle hole and wear something (needle, nozzle, or both). You can usually get it aligned relatively well just by feel, especially since you still have one good nubbin. But if you were insane and had too much time on your hands, you would make an alignment tool that would be used to fixture everything in proper alignment and use some epoxy to cast a new alignment nub to replace the broken one. A feat I have not yet needed to resort to. And that green coating? I don't know what it is, but it was commonly used. I last saw that on a late nineties Sentra throttle shaft. At least it looked like the same stuff. Last time I was messing around with the throttle shafts, I took a different route and did this:
 1 point
 -
Agreed. The -2 carbs are certainly better. I don't think they ever got the bugs worked out of the -1 and just bailed. It's hard to come up with a post-mortem engineering analysis as to what happened with the progression from -1 to -2, but if I had to guess it was something like "Ooops! We better change that, and quick!" Couple other comments. First, don't throw away your old float bowl seals. The new ones have a tendency to swell significantly when they come in contact with gasoline (stupid, right?), and you may find yourself wanting to resort back to the old ones and a smear of fuel resistant sealer. So try to carefully pick the old ones out of the grooves without tearing them. Also, don't give up on the throttle shaft bushings just yet... Just because the hole is off center doesn't necessarily mean that it is oval worn. In fact, the bushing in your pic clearly has more steel on one side than the other, but I suspect they were pressed into the body and then line bored and reamed as a final step to assure alignment between the two bushings. And because of that, they may have ended being machined in such a way that the center hole is not concentric with the outside of the bushing. That doesn't matter... All that matters is that the two of them are in alignment with eachother and are in the center of the carb throat. I would expect that even if something is worn some, the steel shaft would wear a whole lot faster than the steel bushing. So if you stick a 10mm rod into the bushing, is it all sloppy like, or is it still a good fit? And about that green coating? I suspect it's a lubricant. So they don't have the sticky brass of the shaft riding on the steel bushing. I wasn't there when they designed it, but I suspect it's meant to be slippy. (That's a mechanical engineering term, isn't it?) And last... Too bad about the broken alignment cone on the suction piston cover below. Is that a test piece just for clean-up and polish, or is that one that you were going to use on the final product?1 point
-
Try and think of the pans as only 90% correct, you have to make the pan fit your car, if you think you don't need that extra 3/8" on the rocker side of the pan and you still have enough work with, cut it off. Measure twice cut once? Did you keep the original floor pan, you can solve a lot of problems by having a look at the old stuff if you still have it.1 point
-
 1 pointThe primary answer is weight. You take a 240 and turn it into a 280 which was heavier than a 240. The difference could be as much as 200 pounds and while you will need to meet the new minimum weight you get to locate it where it does the most good. The second reason is simple; you have an already sorted out car with a history at the tracks you will race (again) and all the suspension & drivetrain data needed to dial in the car, all for the cost of two corner valances, a front air dam and a set of taillights.1 point
 -
 The pan incorporates an amount of extra material around the edges for you to blend in the panel. You will need to find the best overall fit for the pan, then fabricate whatever you need to make it work. I made corners and sections as needed.

 1 point
 -
 1 pointI don't think I'll be going as far as a supplied air system but I have robbed a couple masks and cartridges from work. I'm in the oil industry and use I beilieve p100 cartridges. They are good enough to bump the VOC stink out of the air when do open process work. Should be fine. On another note I had a fun conversation with a few guys last night and these two got carried away with the ever oat to bare metal then epoxy vs epoxy the mud. I think im still gunna spray first then fill. Just so I KNOW the car is sealed up and if it sits for a year with no real paint I'm good to go Sent from my SM-N950W using Tapatalk1 point
 -
1 pointMy pleasure. Glad to help. And thanks for the great pictures of how your mirrors work in traffic!1 point
-
 1 pointWing mirrors would be very helpful in some instances https://youtu.be/zAw_Y3Y7eKk?t=11581 point