Leaderboard


Popular Content
Showing content with the highest reputation on 01/10/2019 in all areas
-
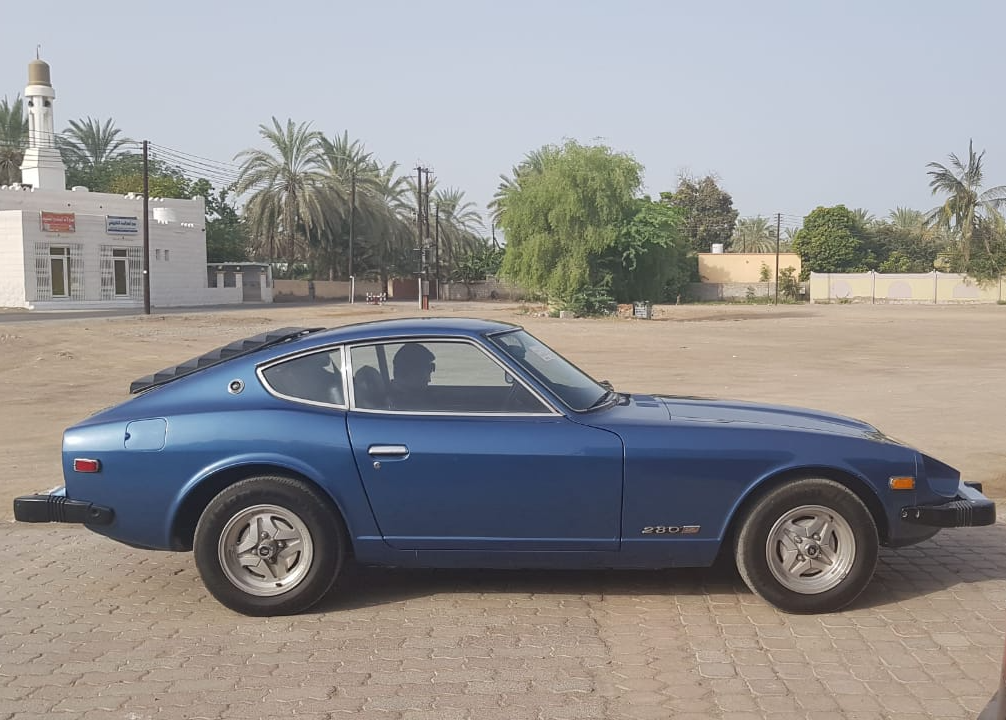
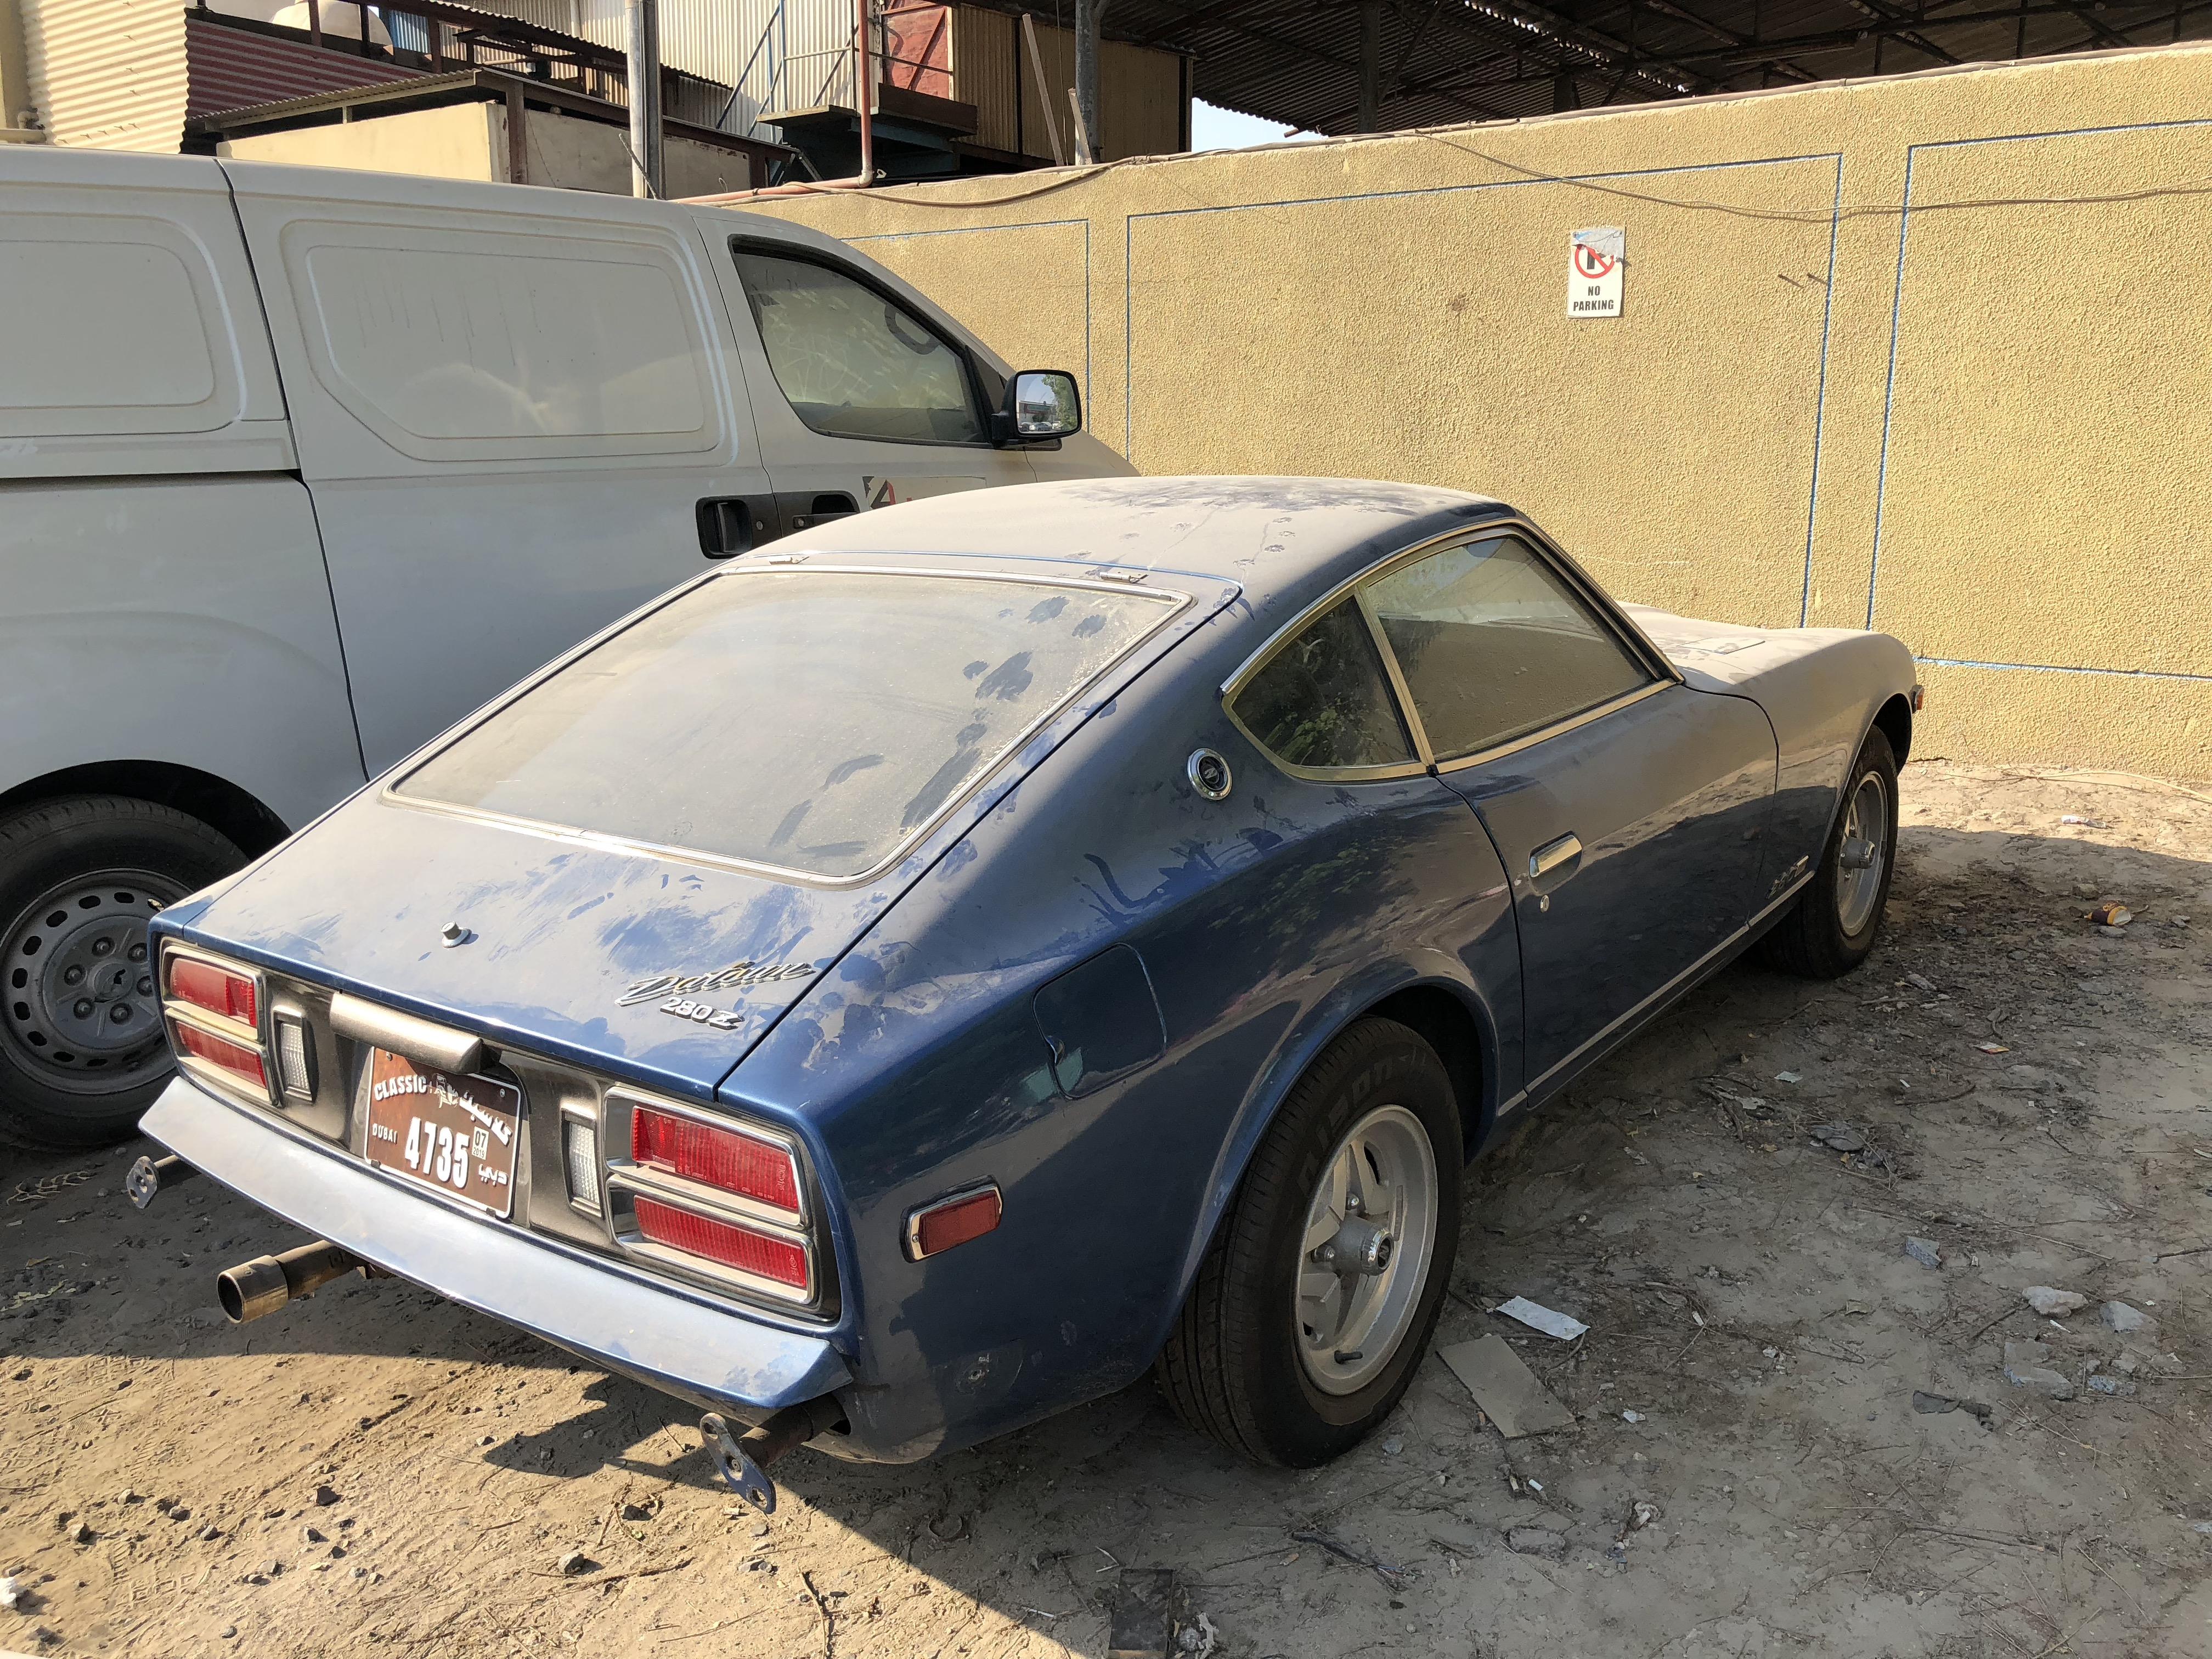
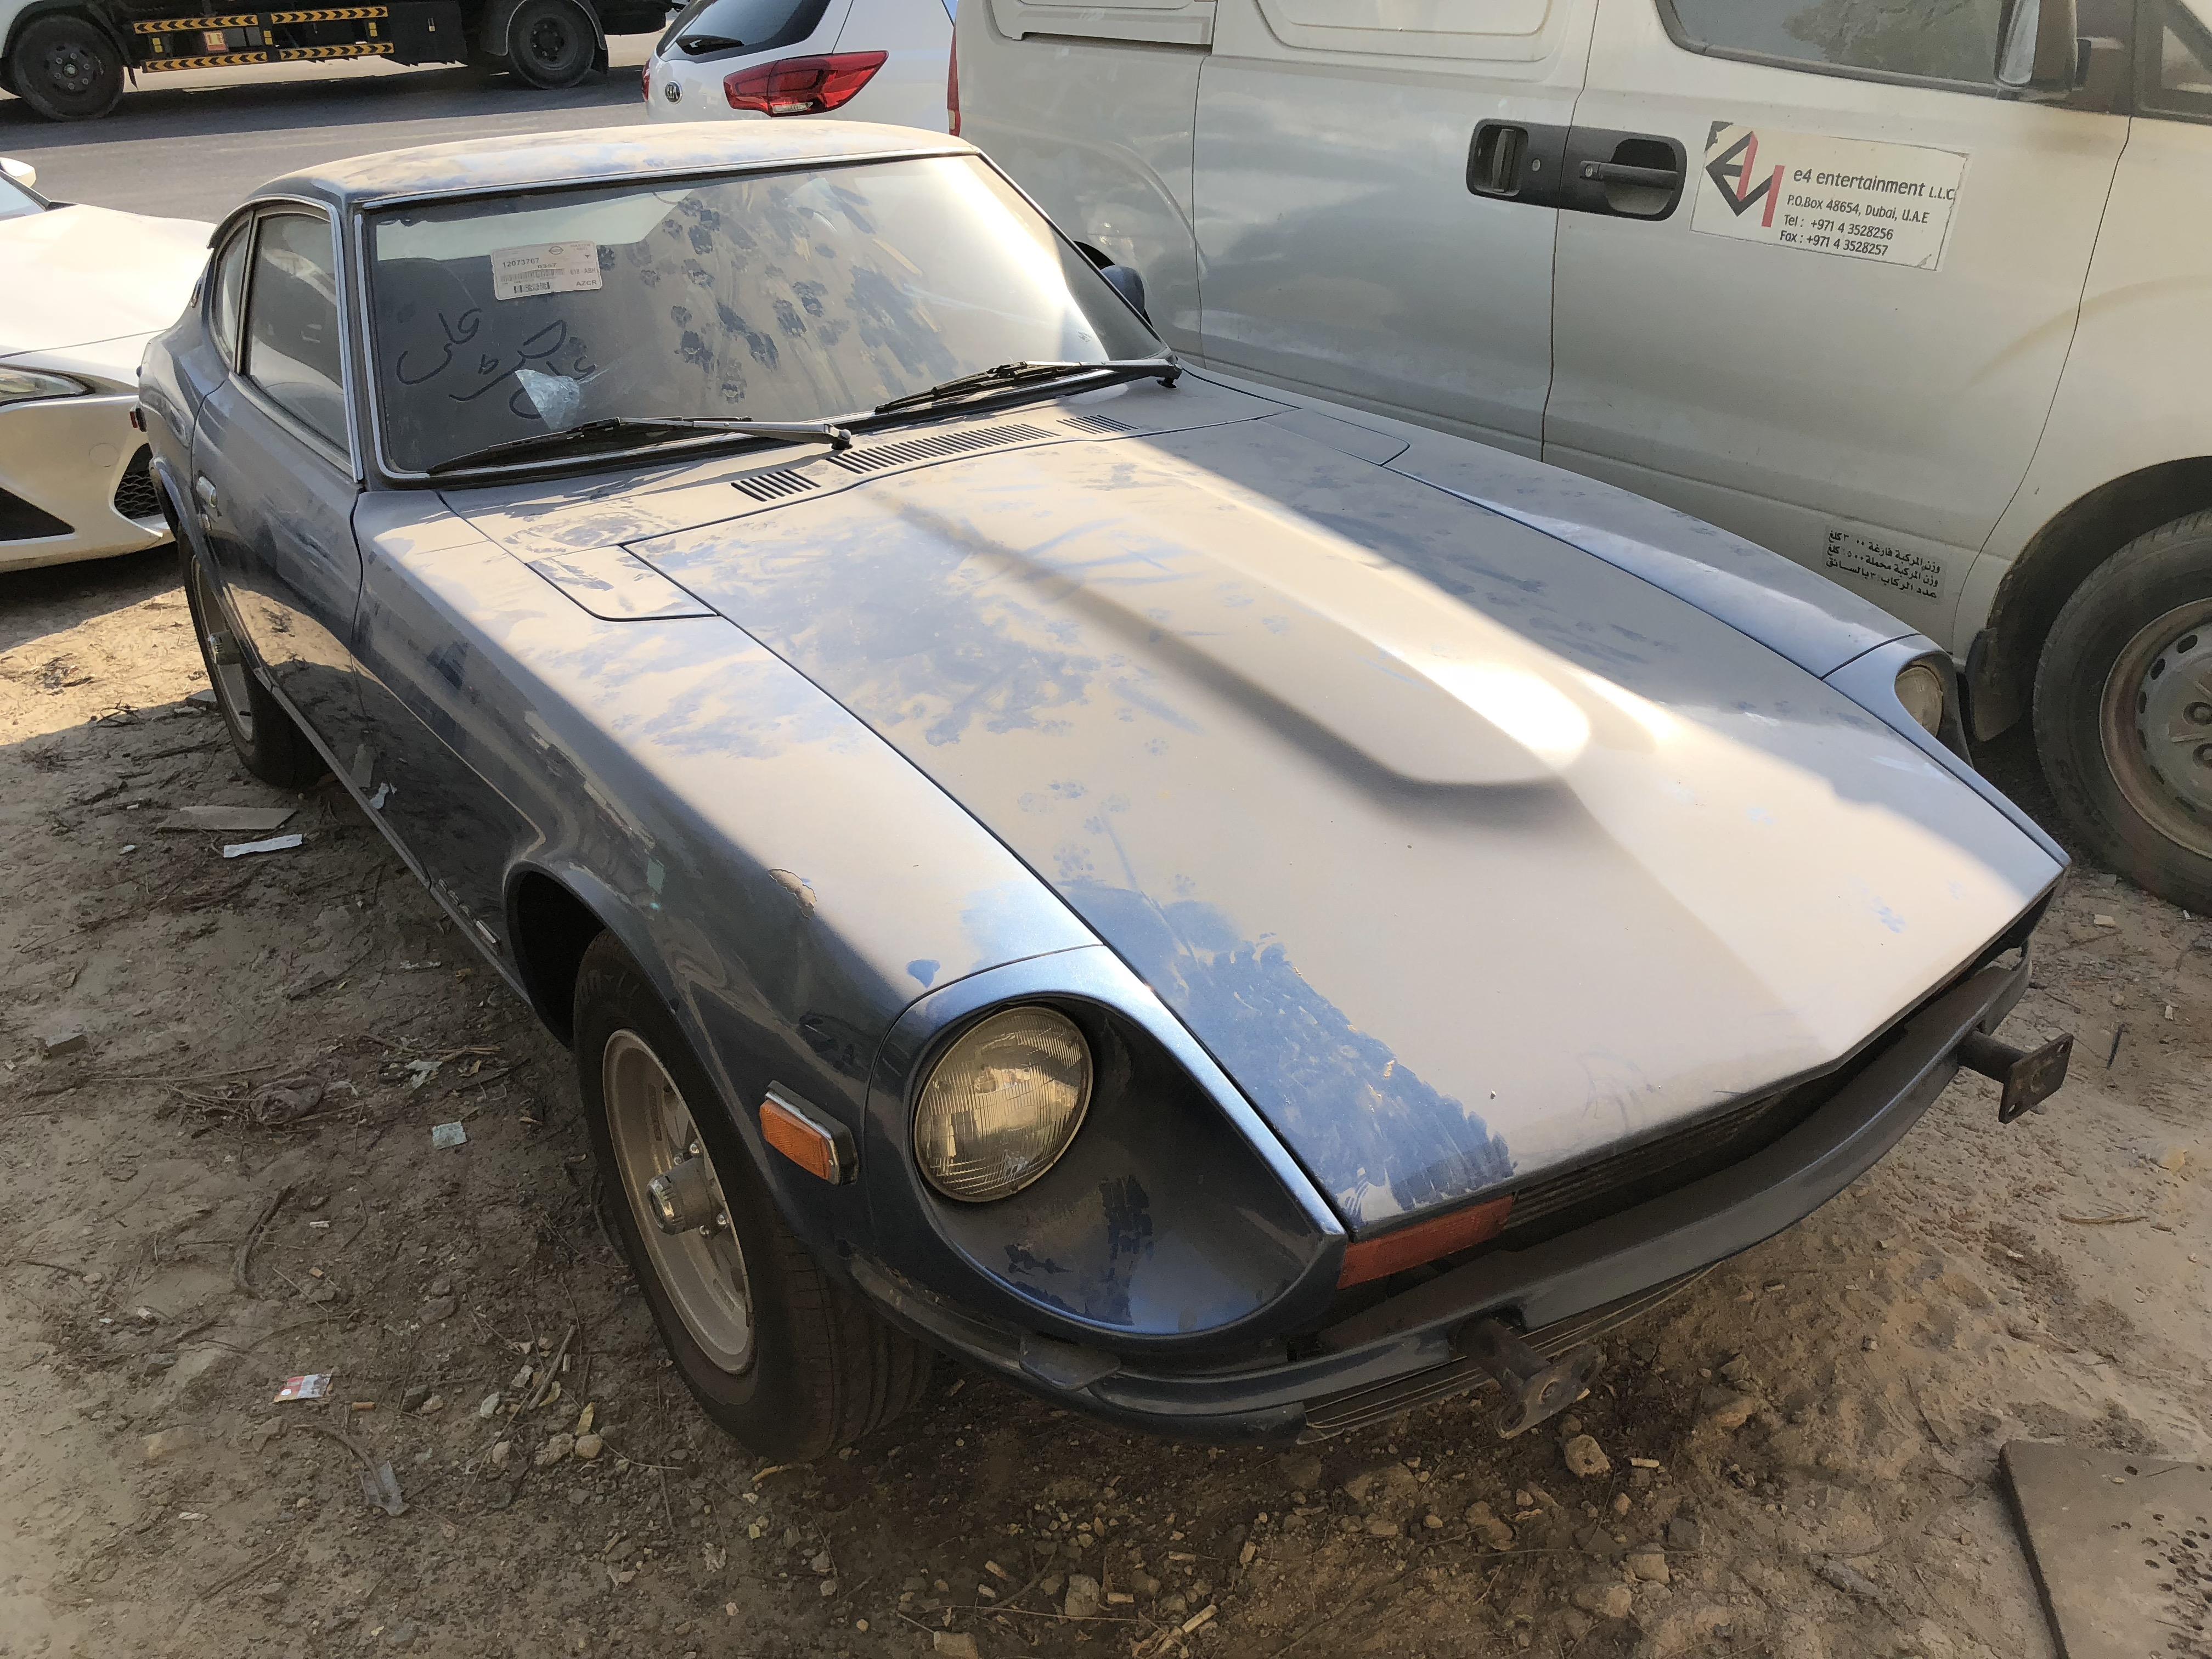
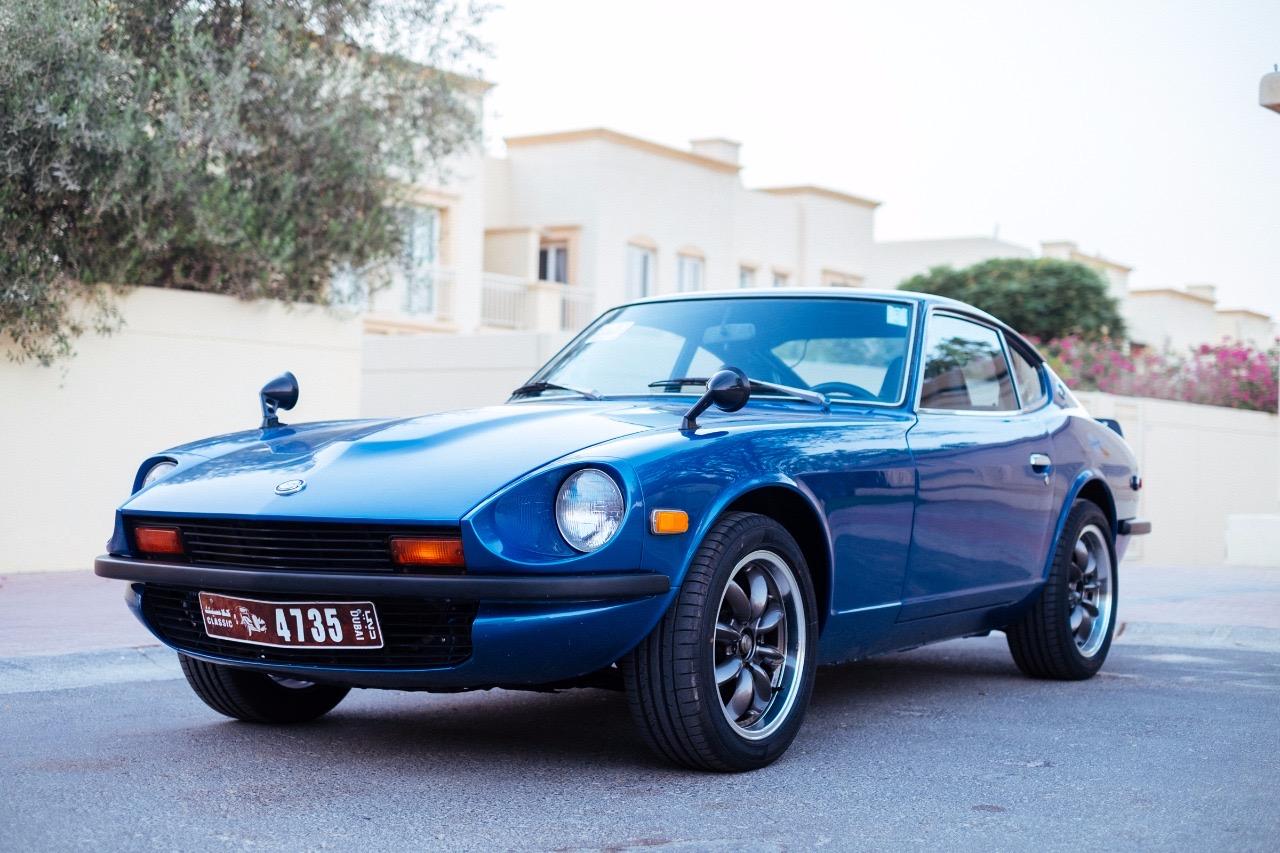
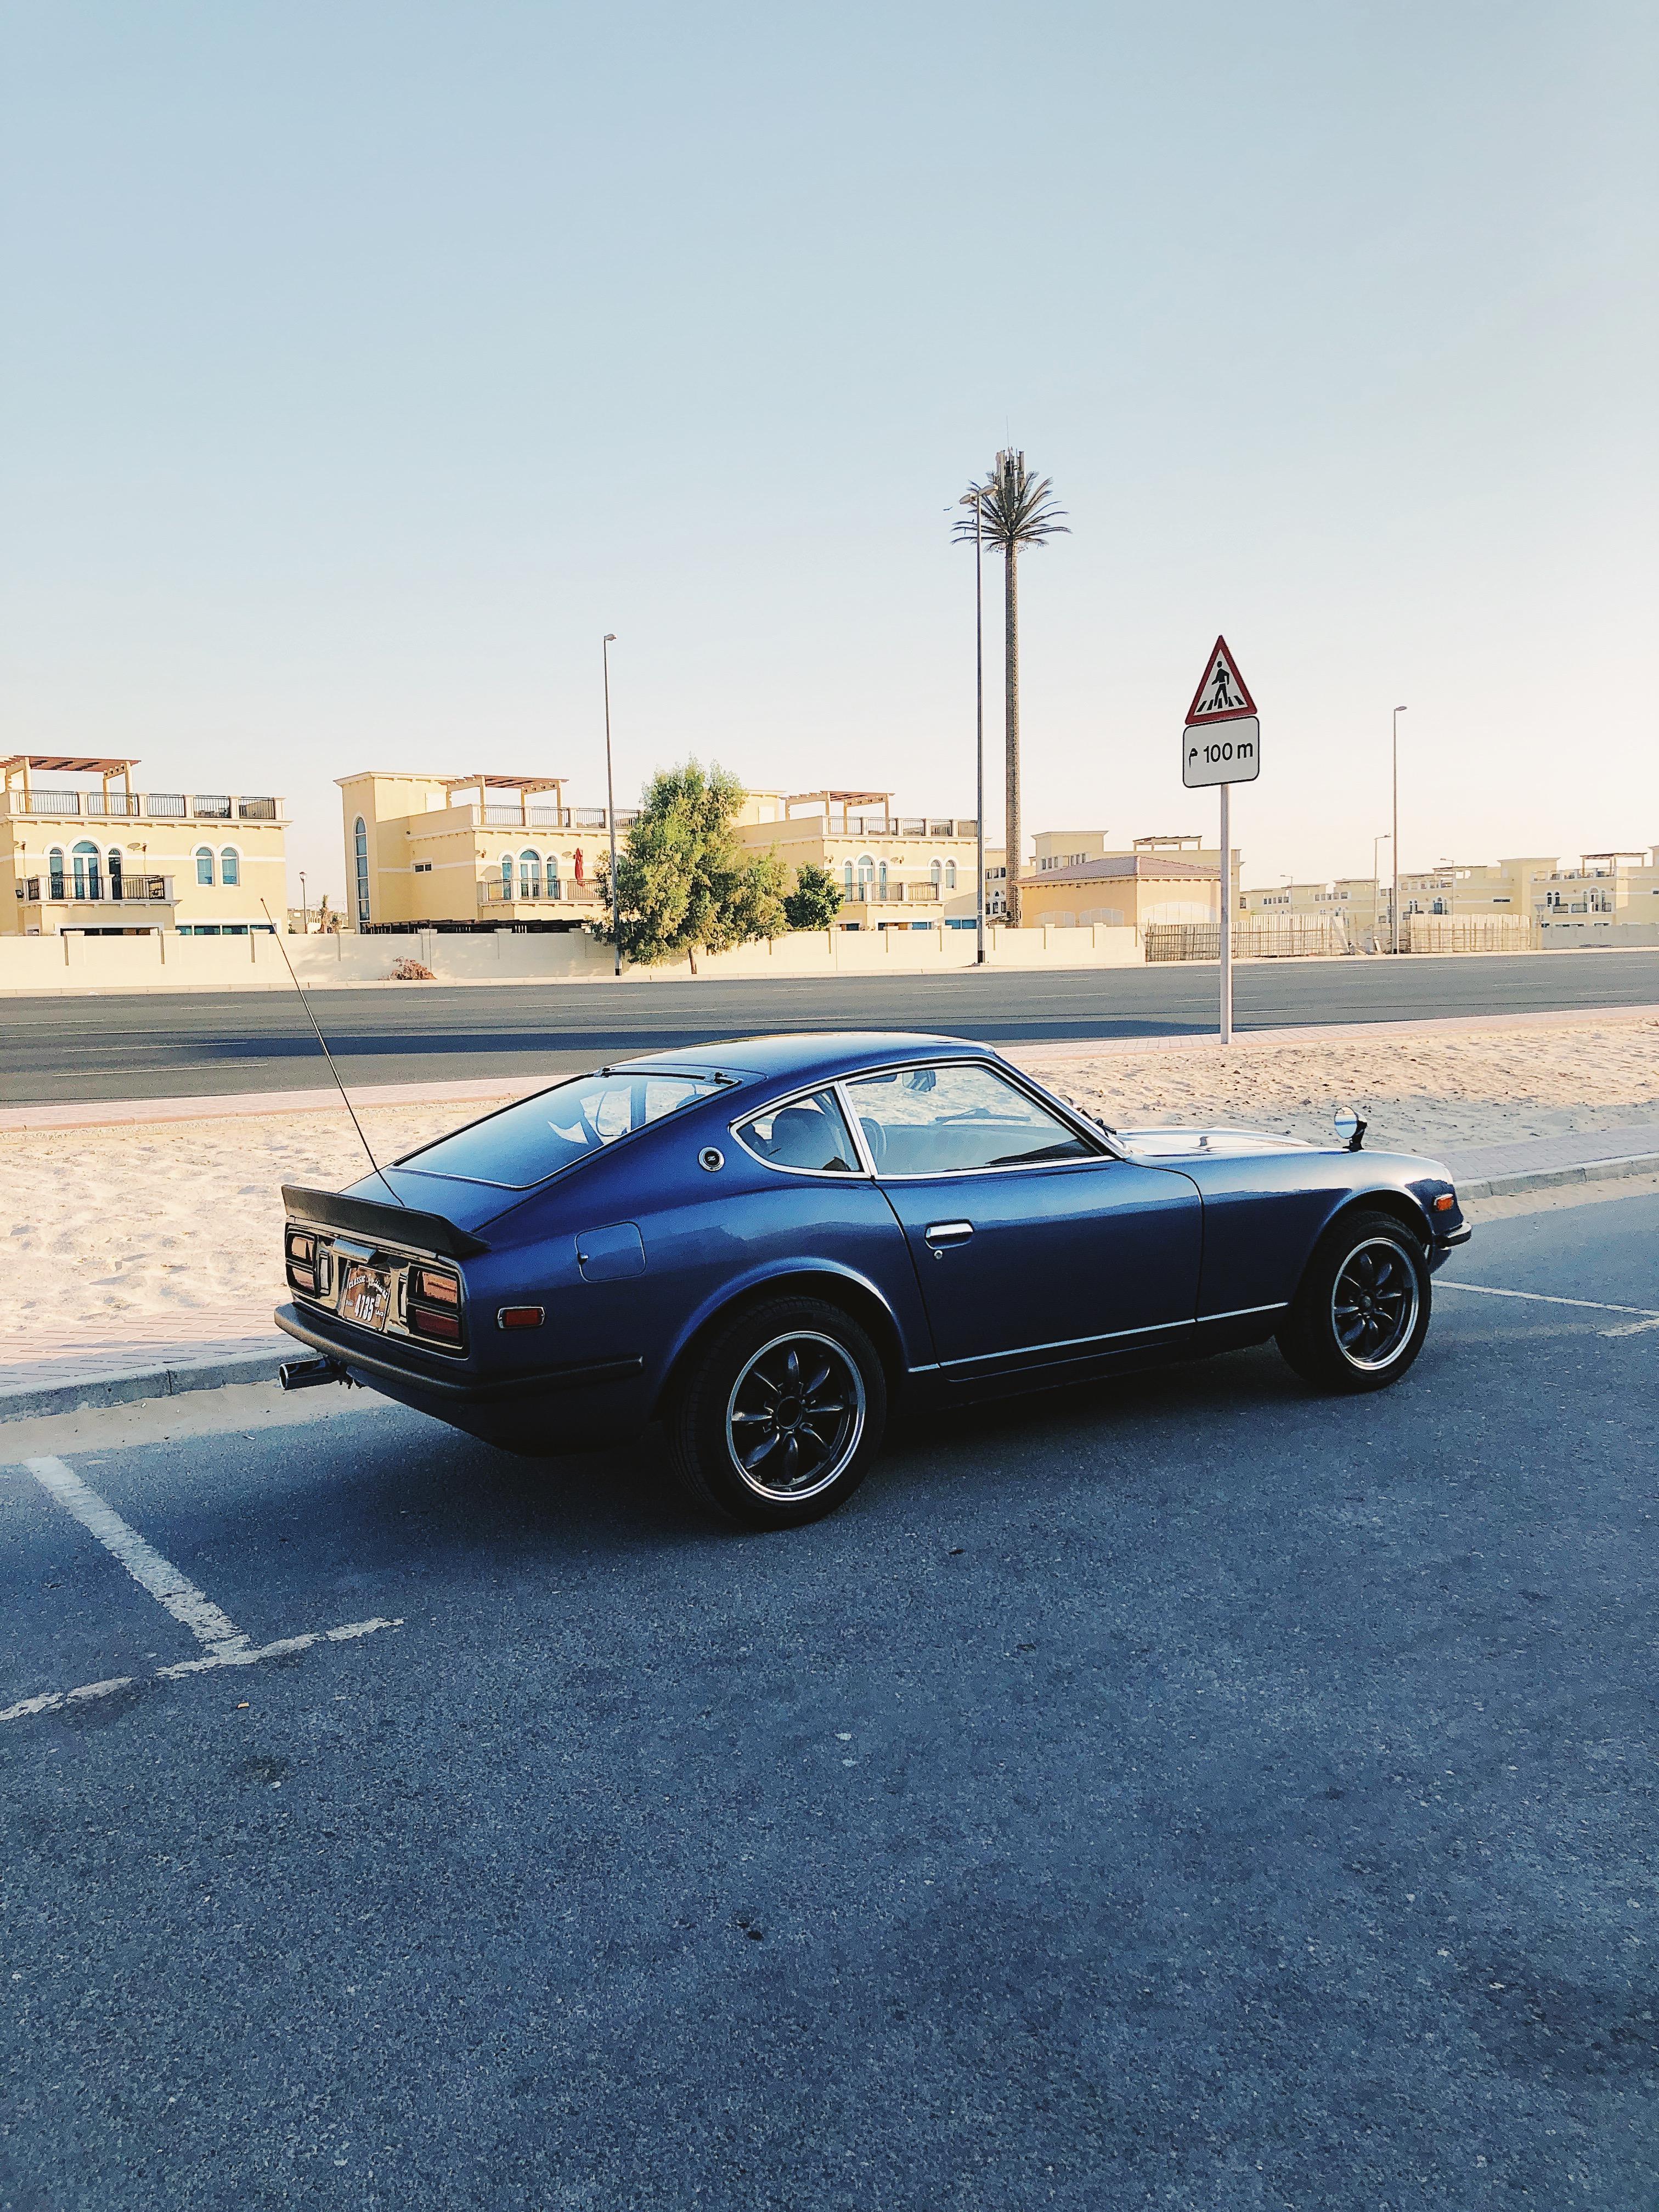
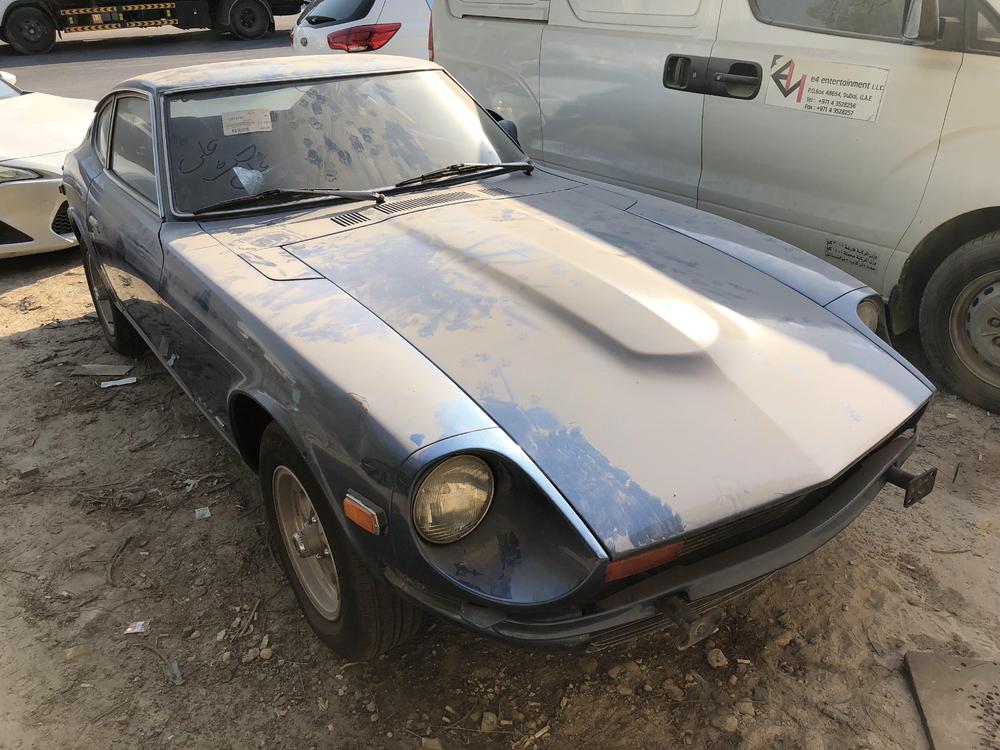
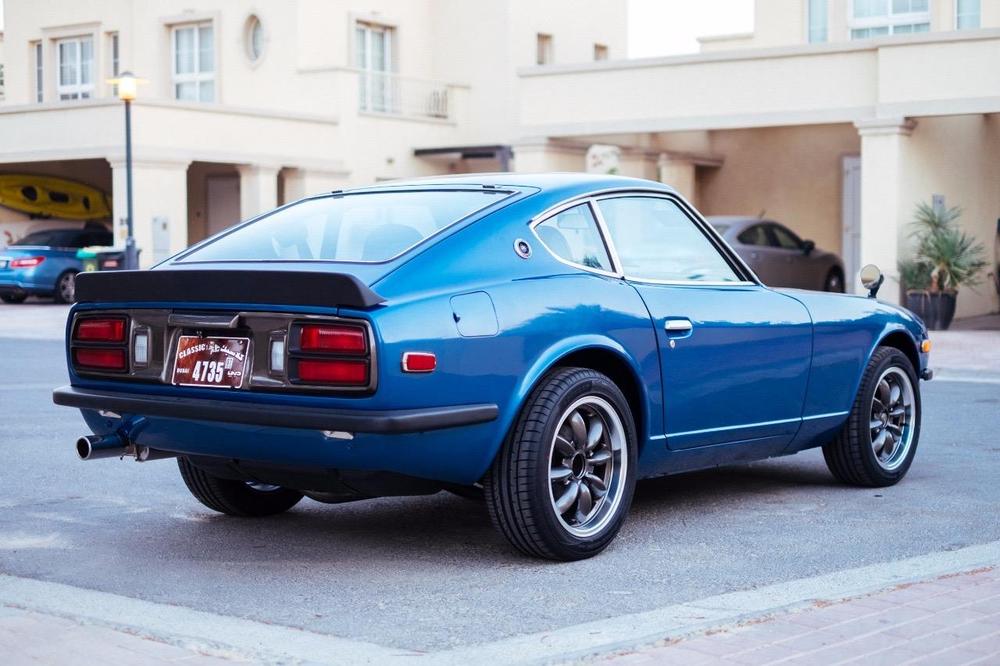
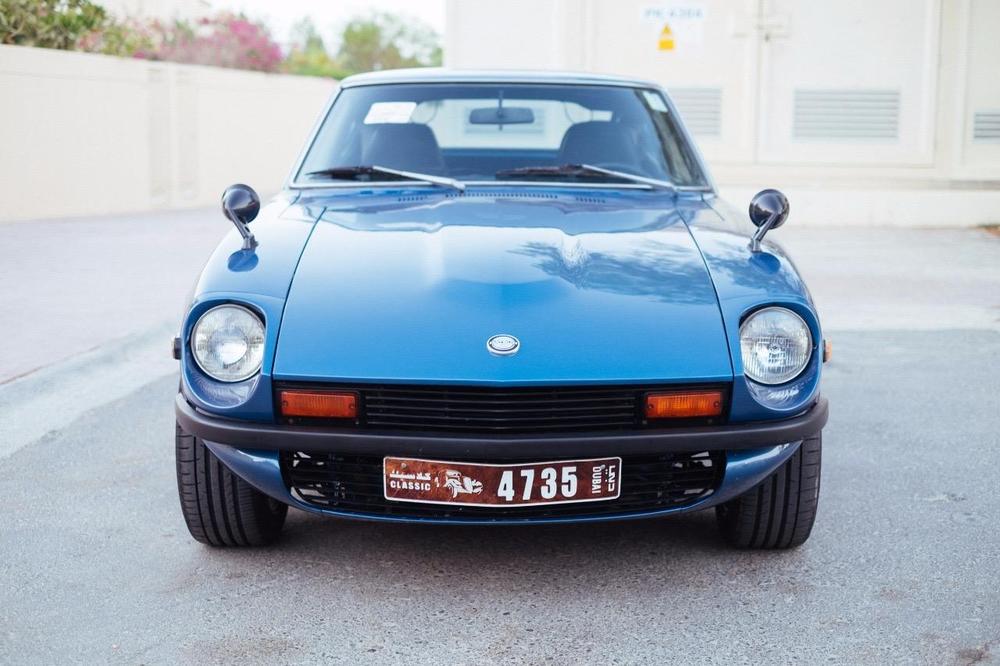
6 pointsHi all, just wanted to introduce you to my 1975 Datsun 280z, who we lovingly call Zella. I acquired Zella about 4 months ago, after looking for a Datsun S30 for more than 1.5 years. She's far from perfect, but she is so much fun to drive. She just got a re-paint (of the original color), had her exhaust replaced with an MSA one, and had her ugly 280z bumpers replaced with some minimal ones. Her wheels have also been replaced to give it that modern touch. Hope you like it. Before This is what she looked like when I first got her. Had to get rid of those ugly bumpers. After And this is what she looks like now. Needs some coil overs soon to give her that proper stance and some work in the interior. But for now, she's so much fun to drive!


 6 points
 -
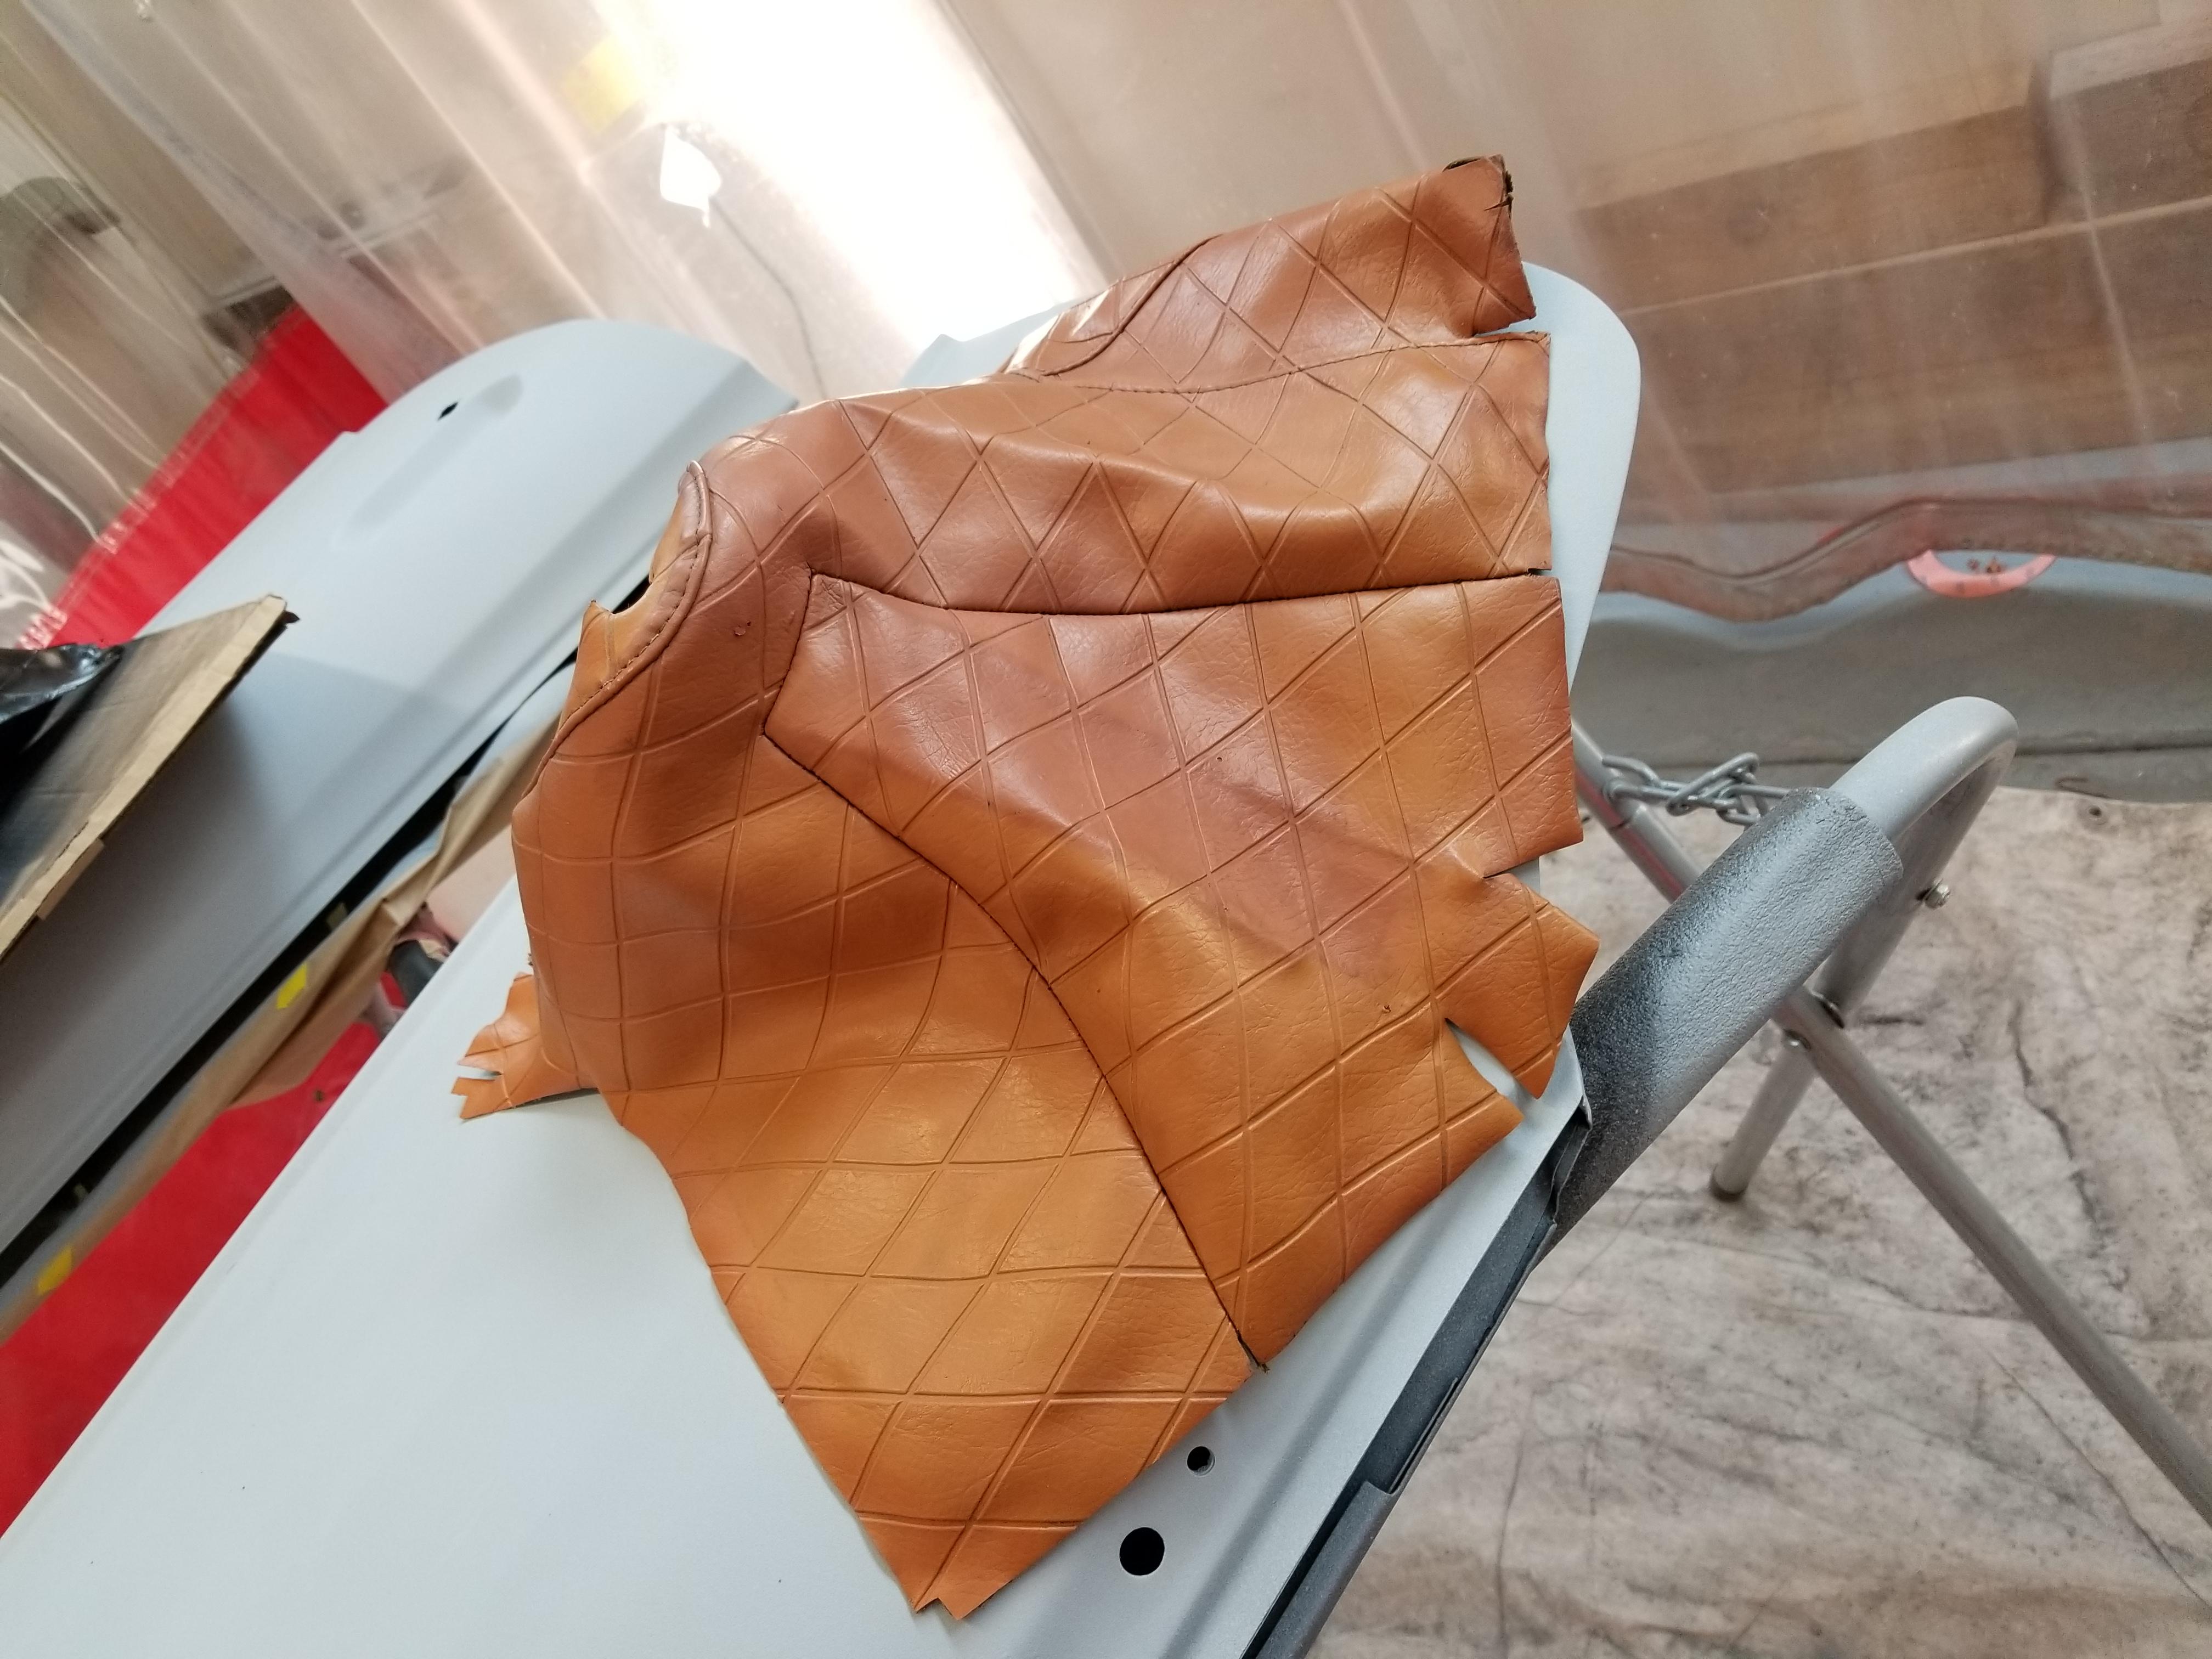
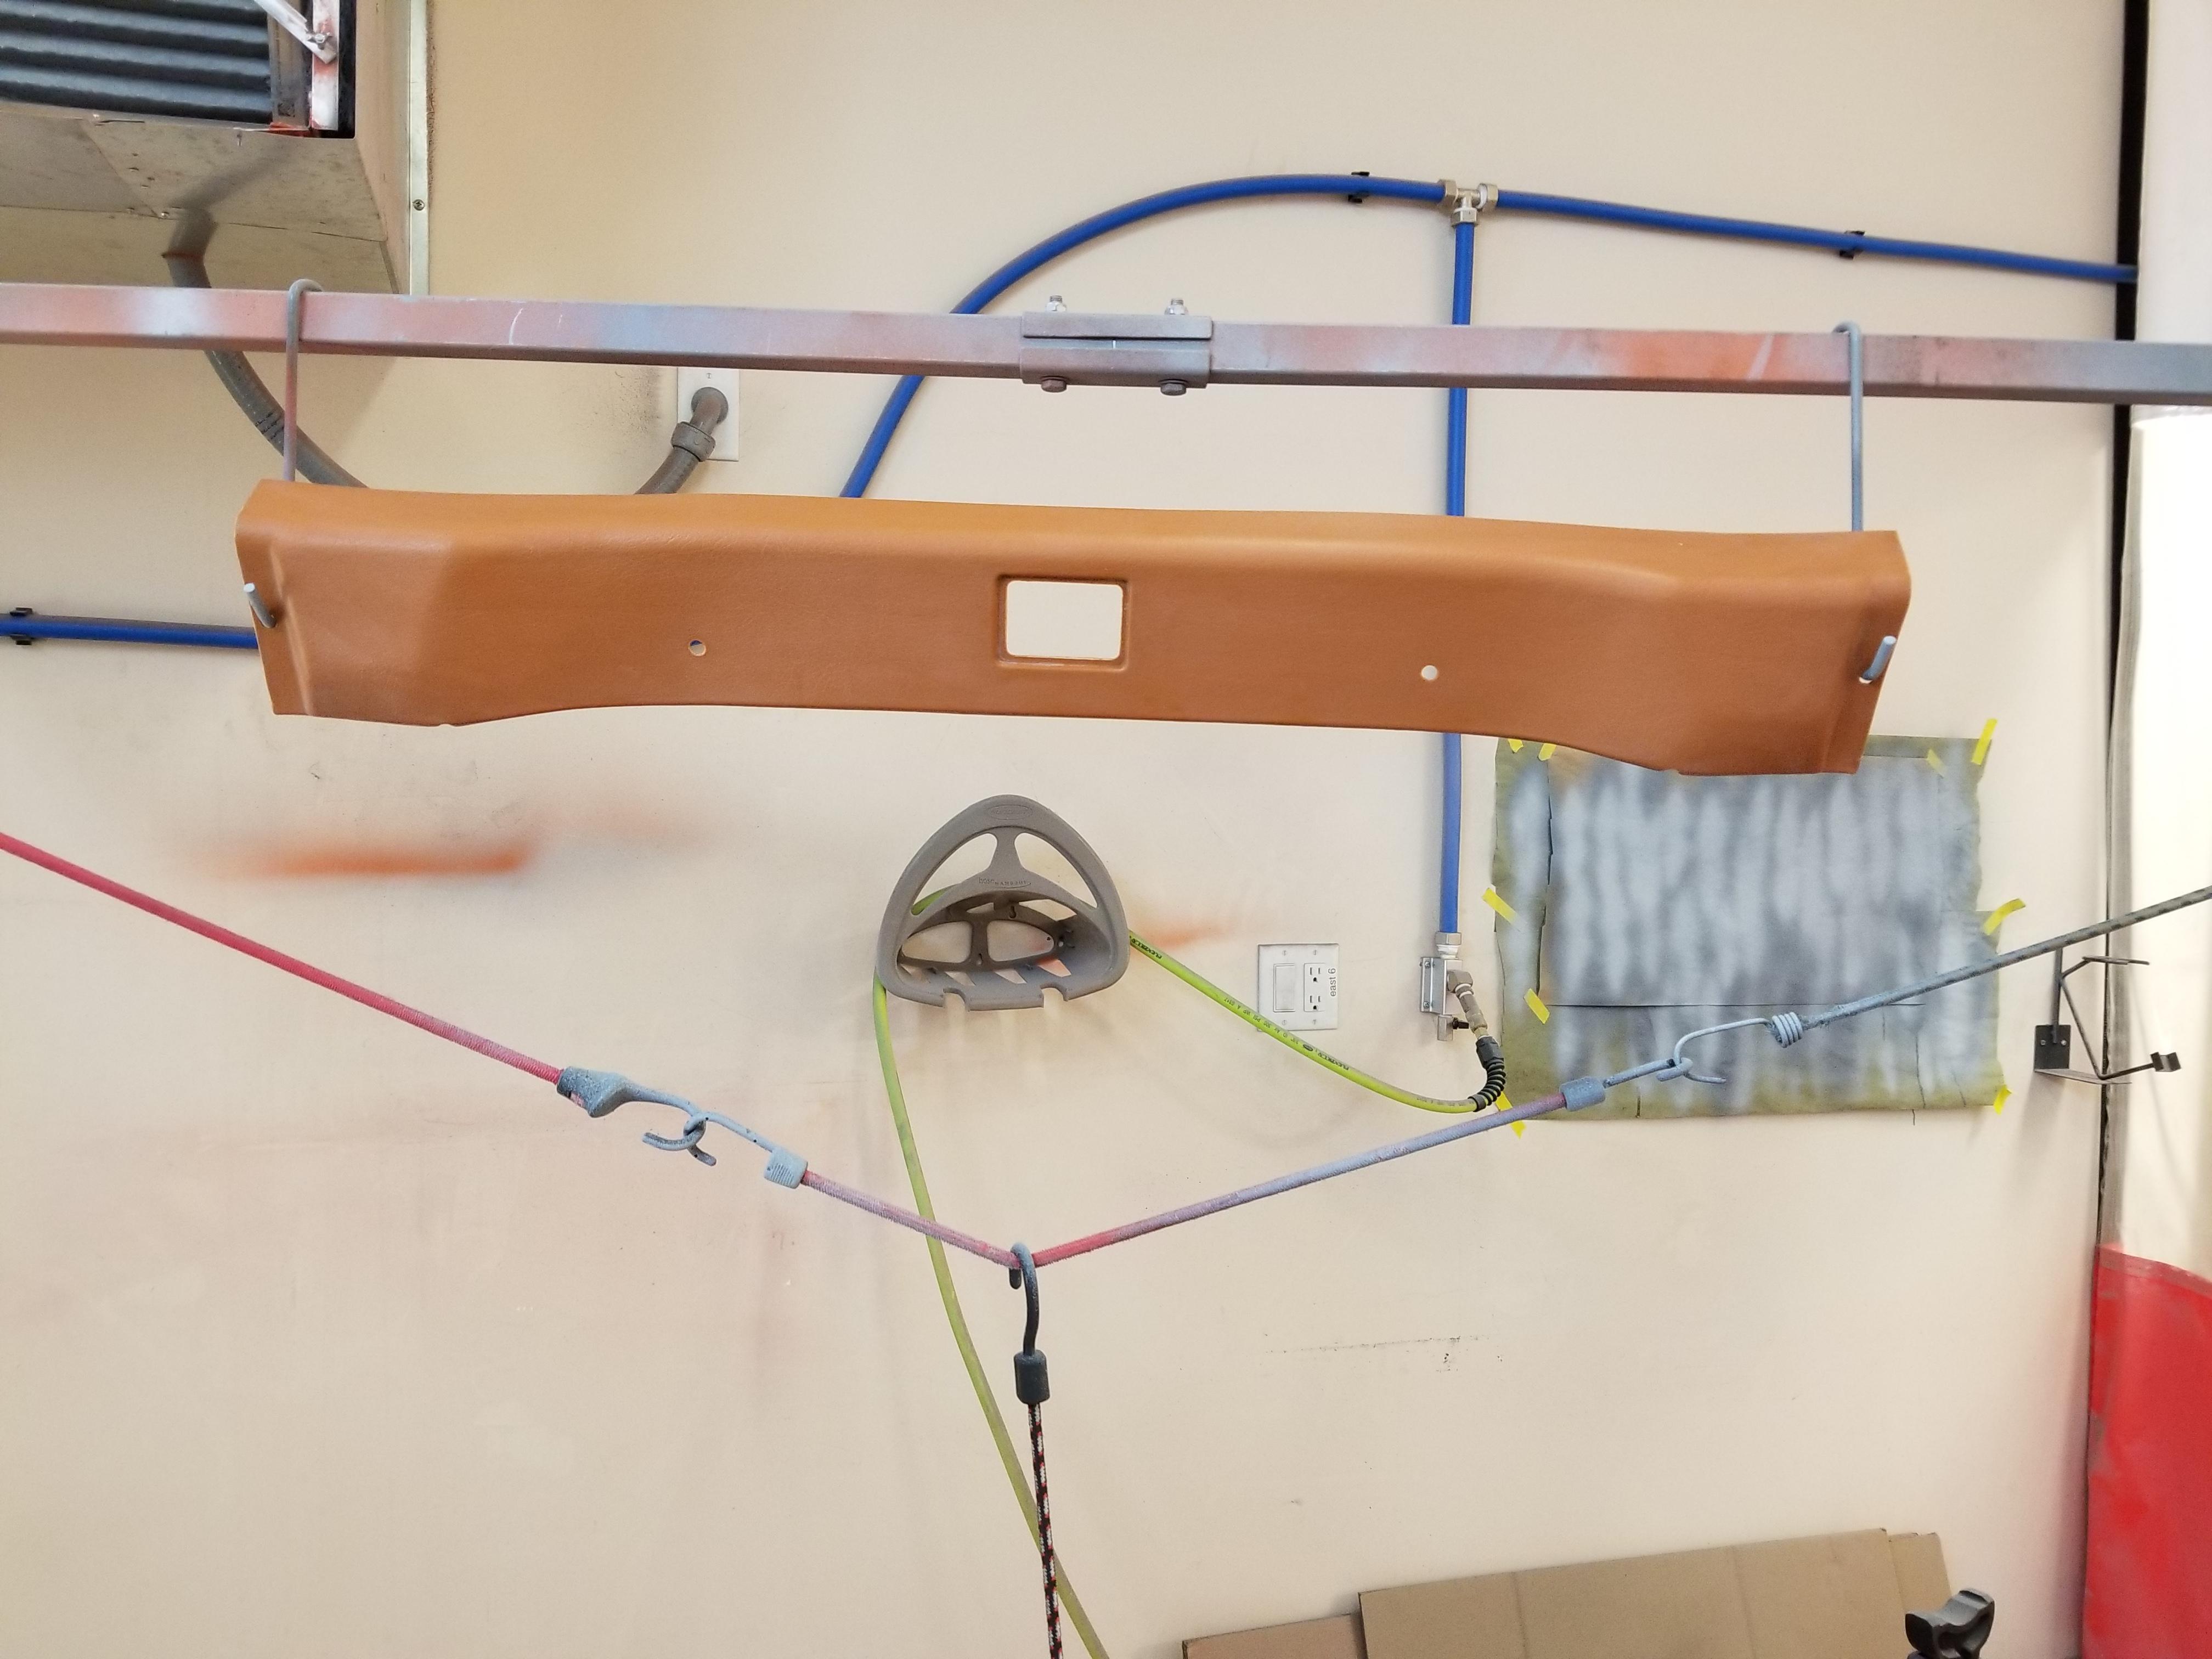
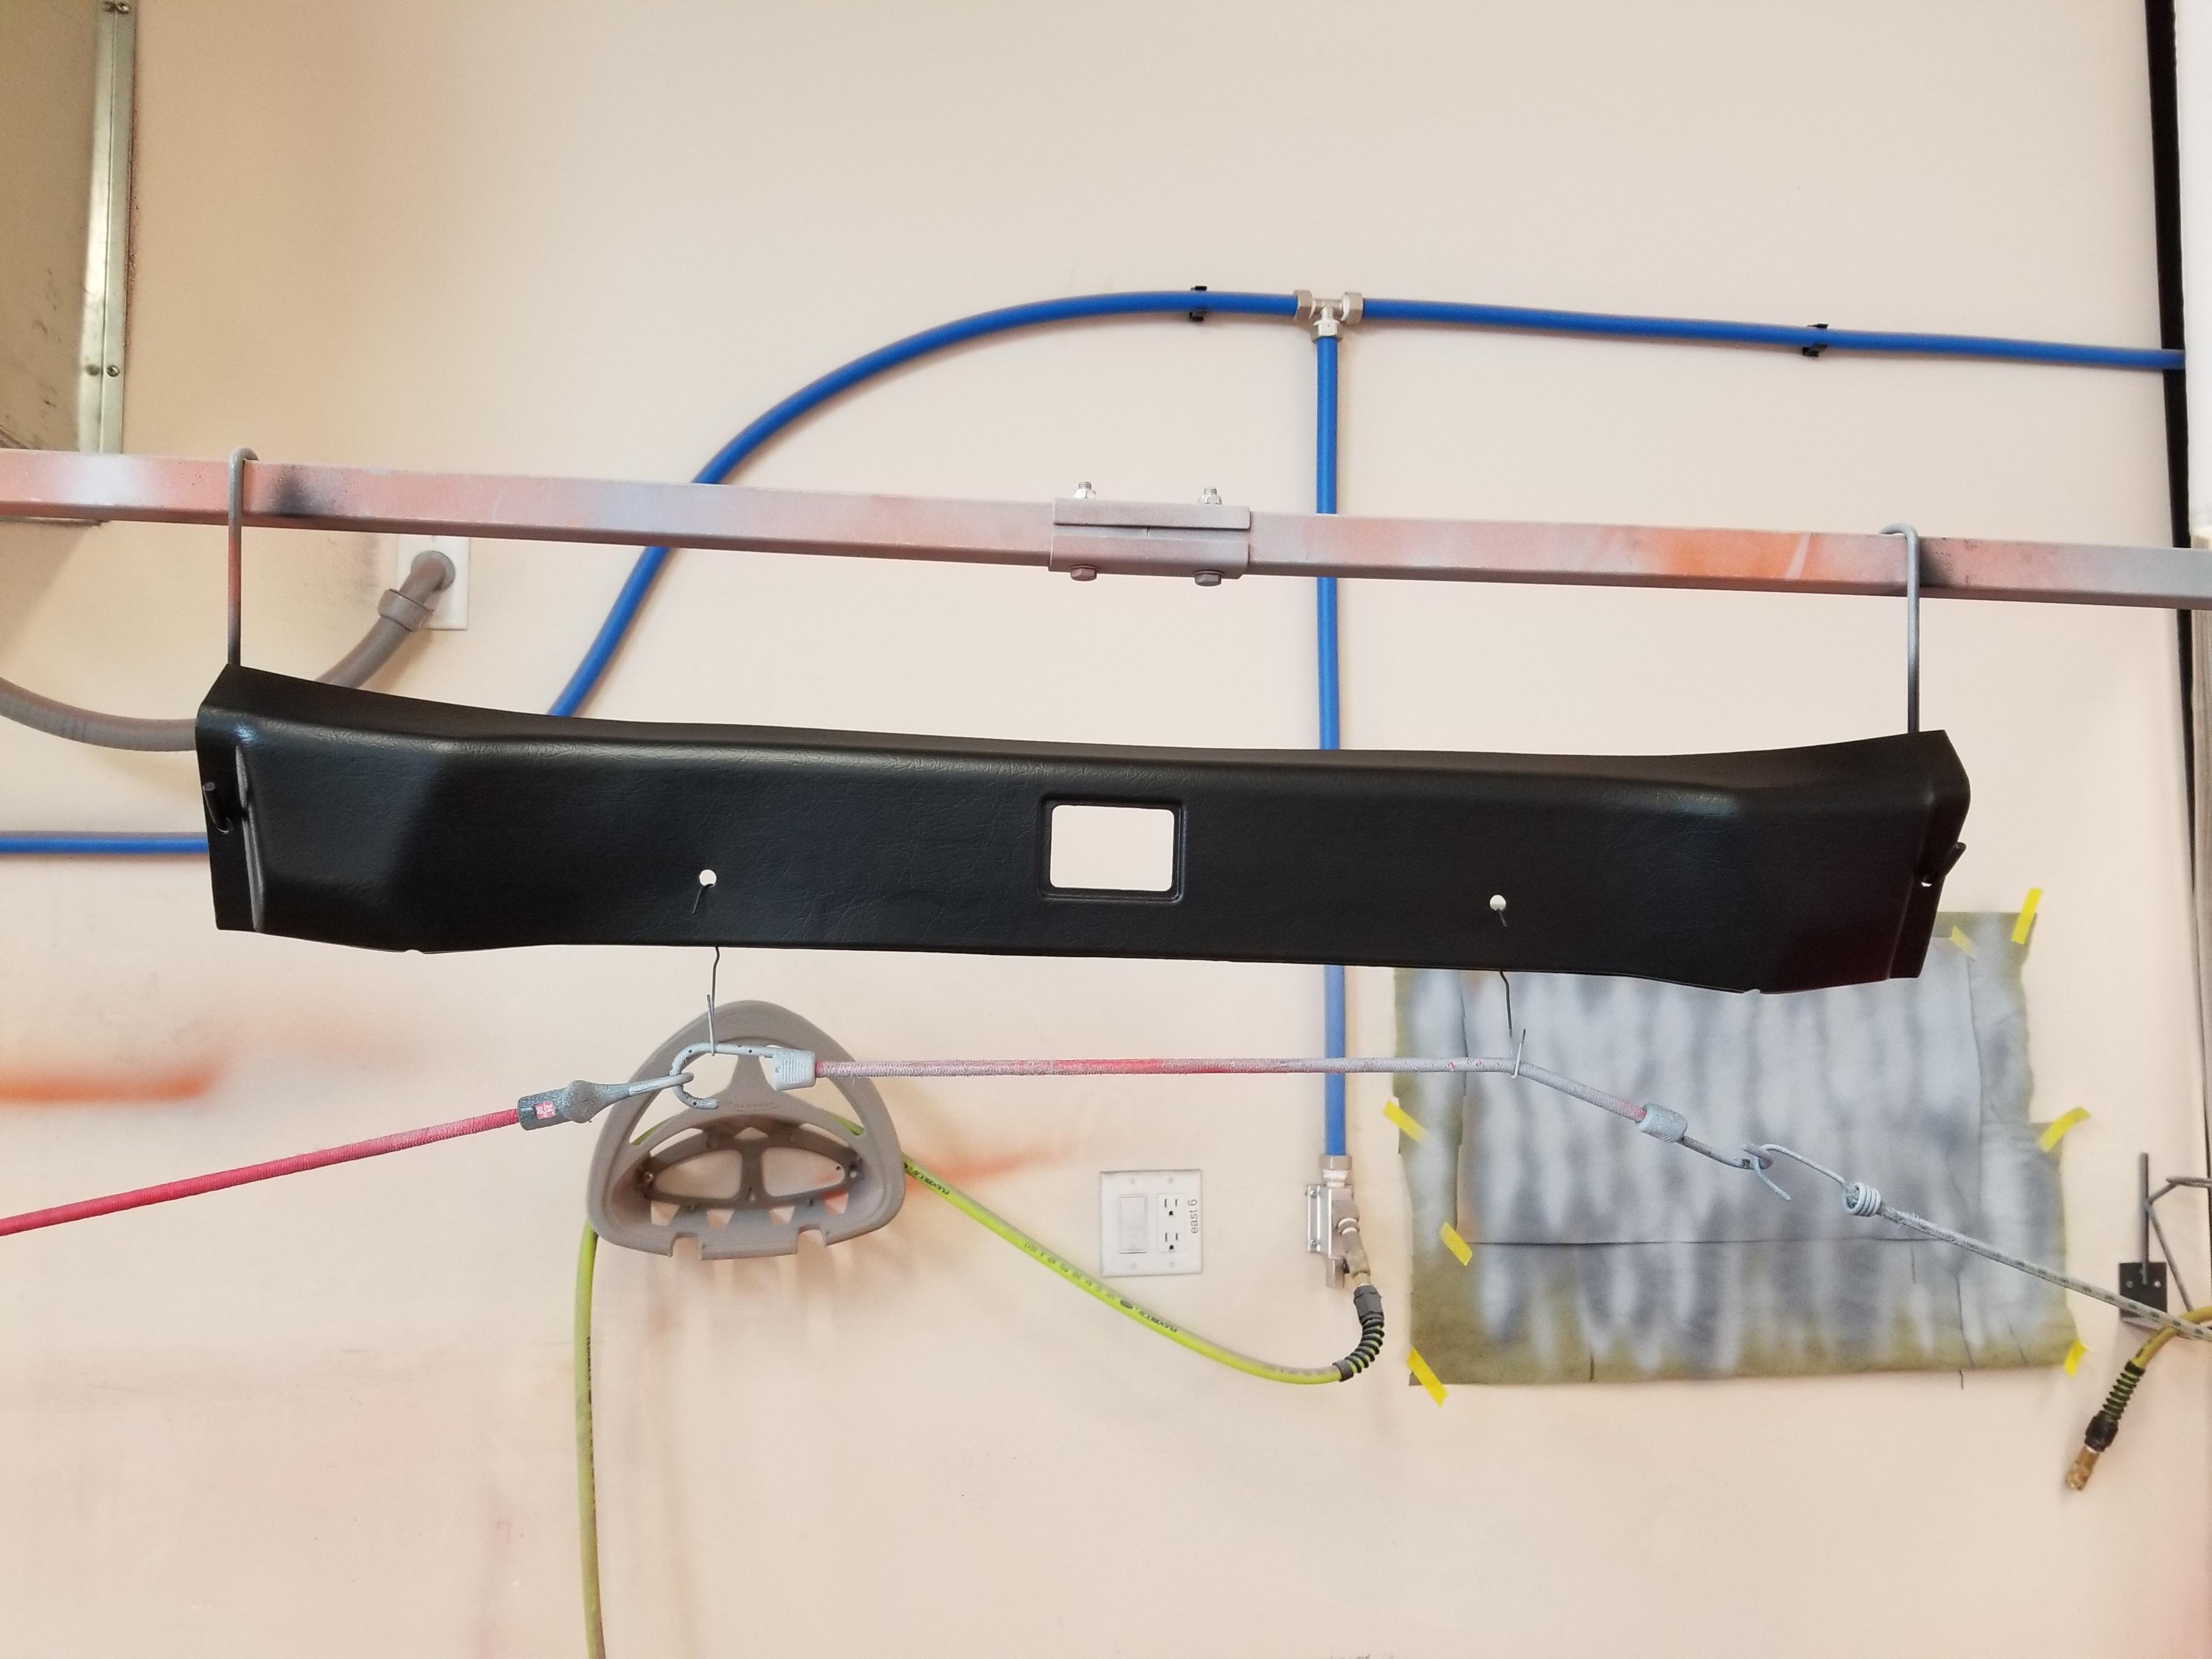
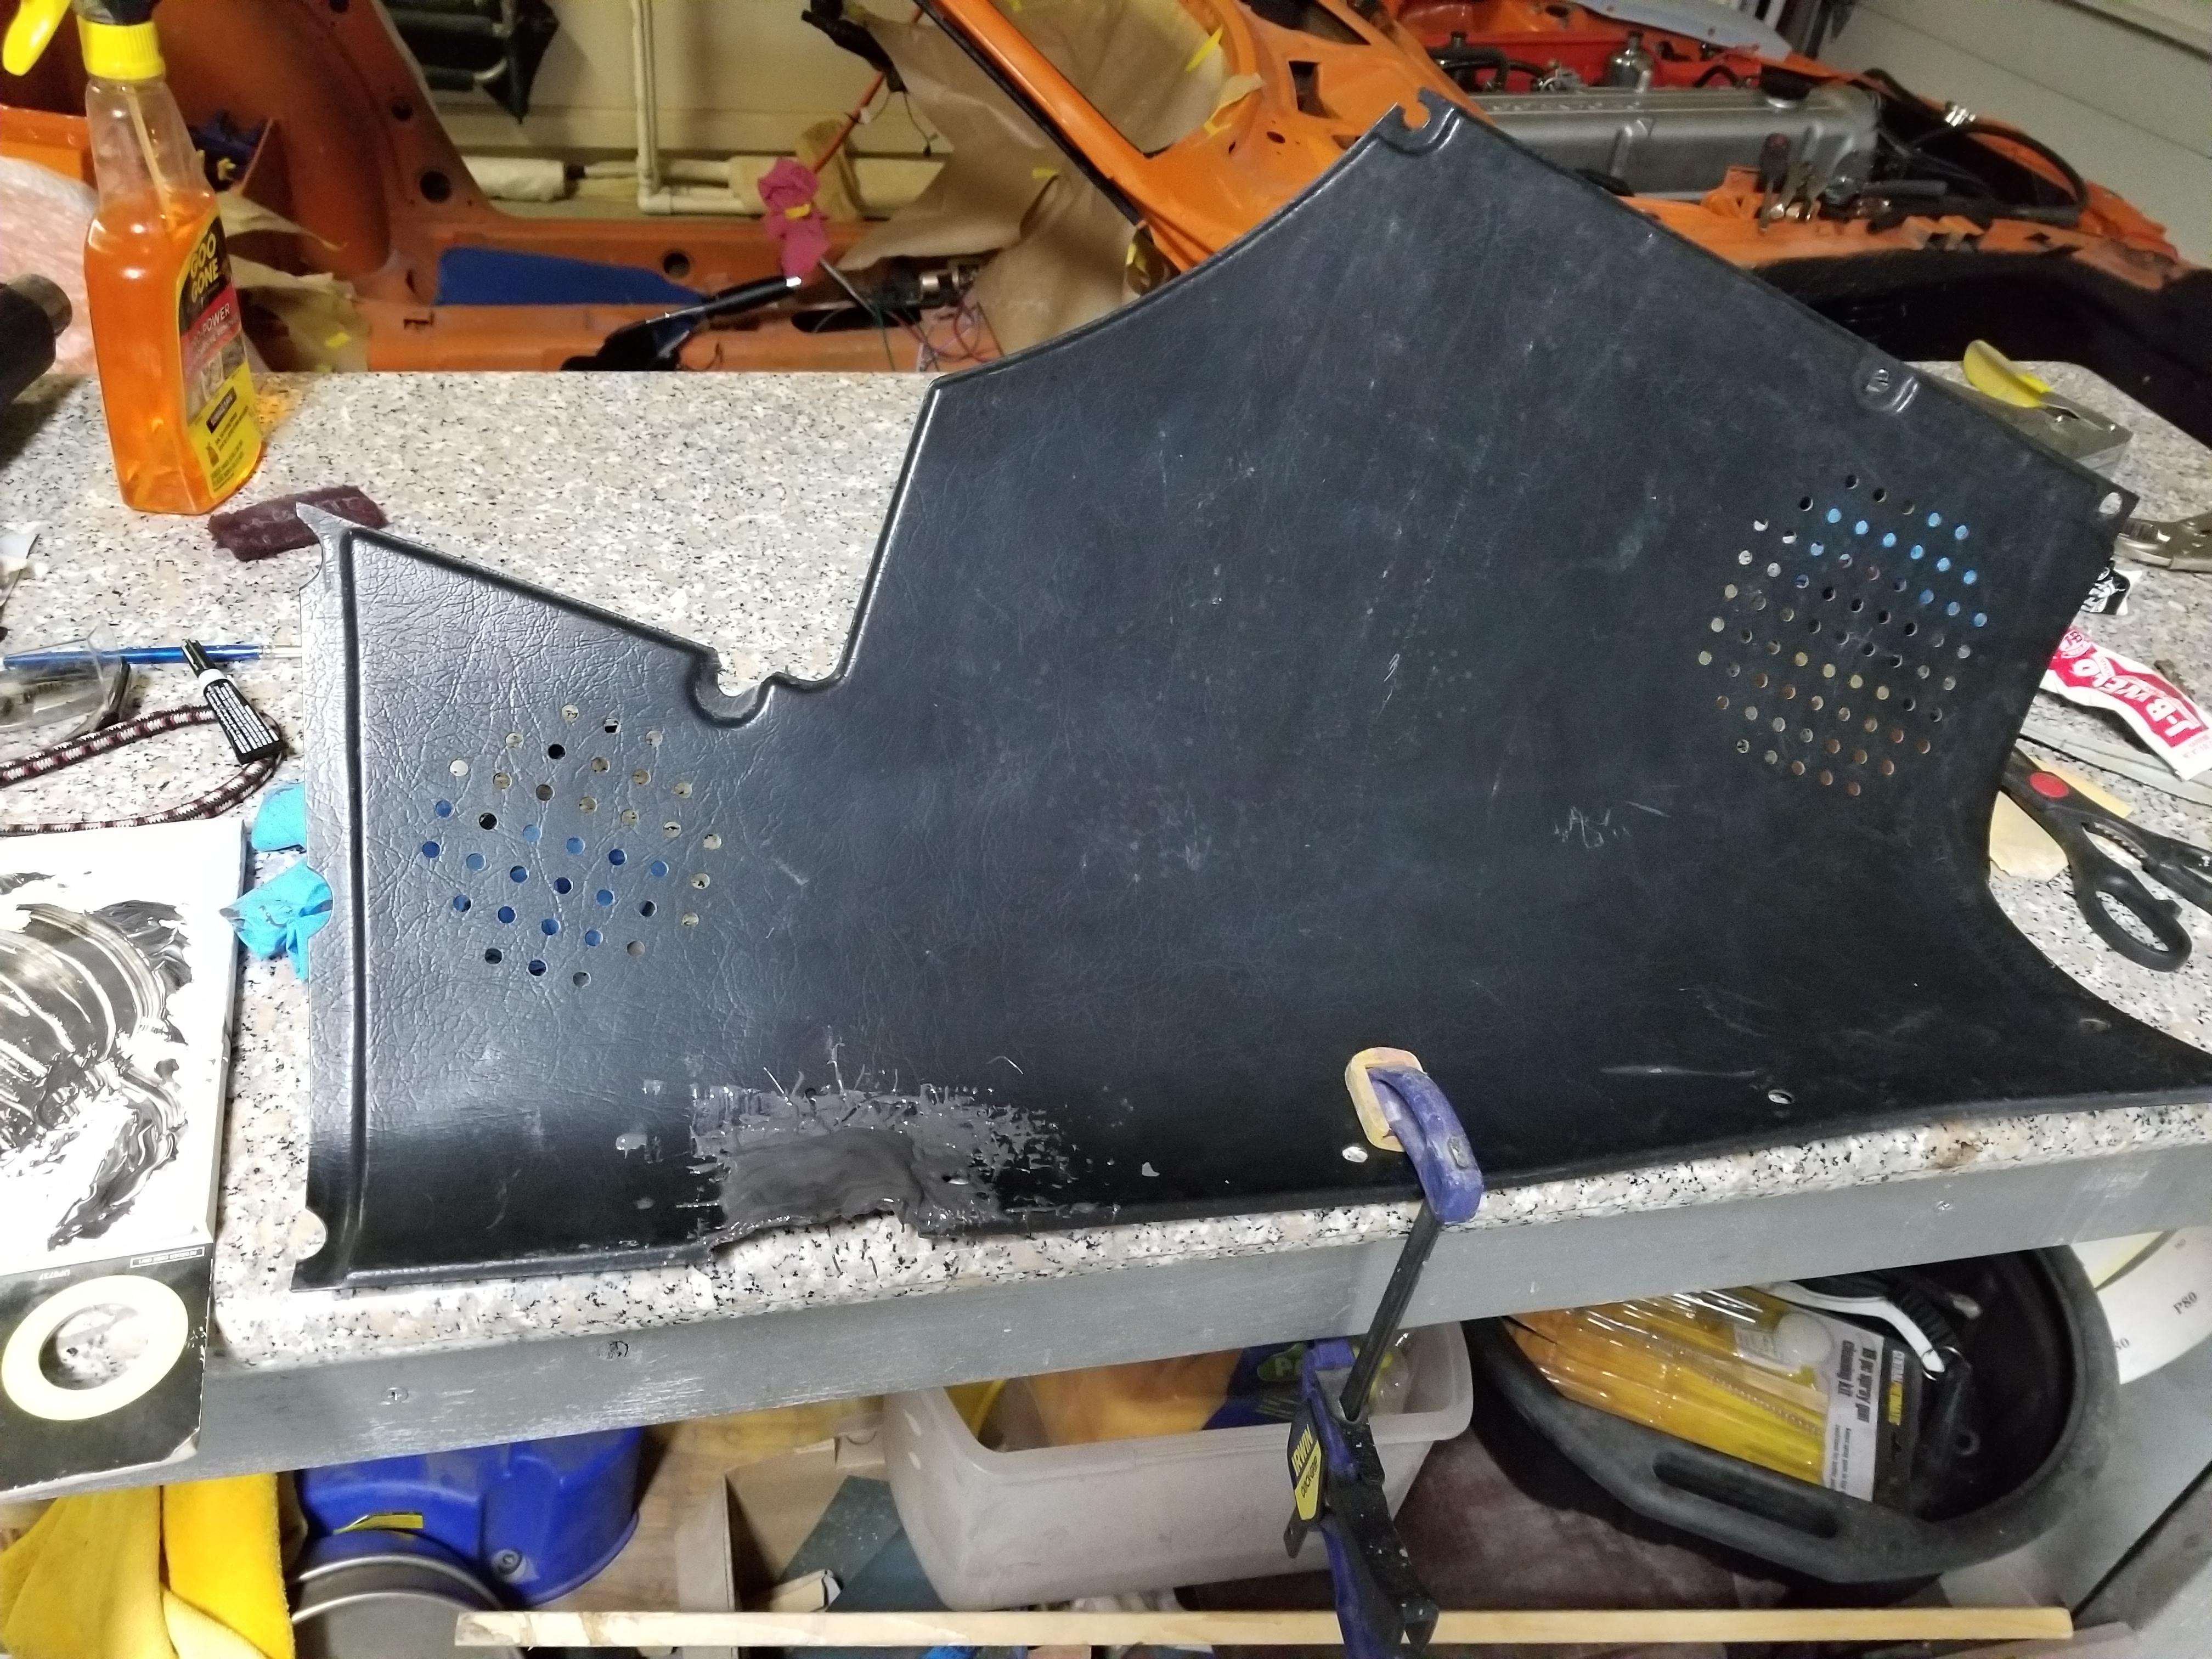
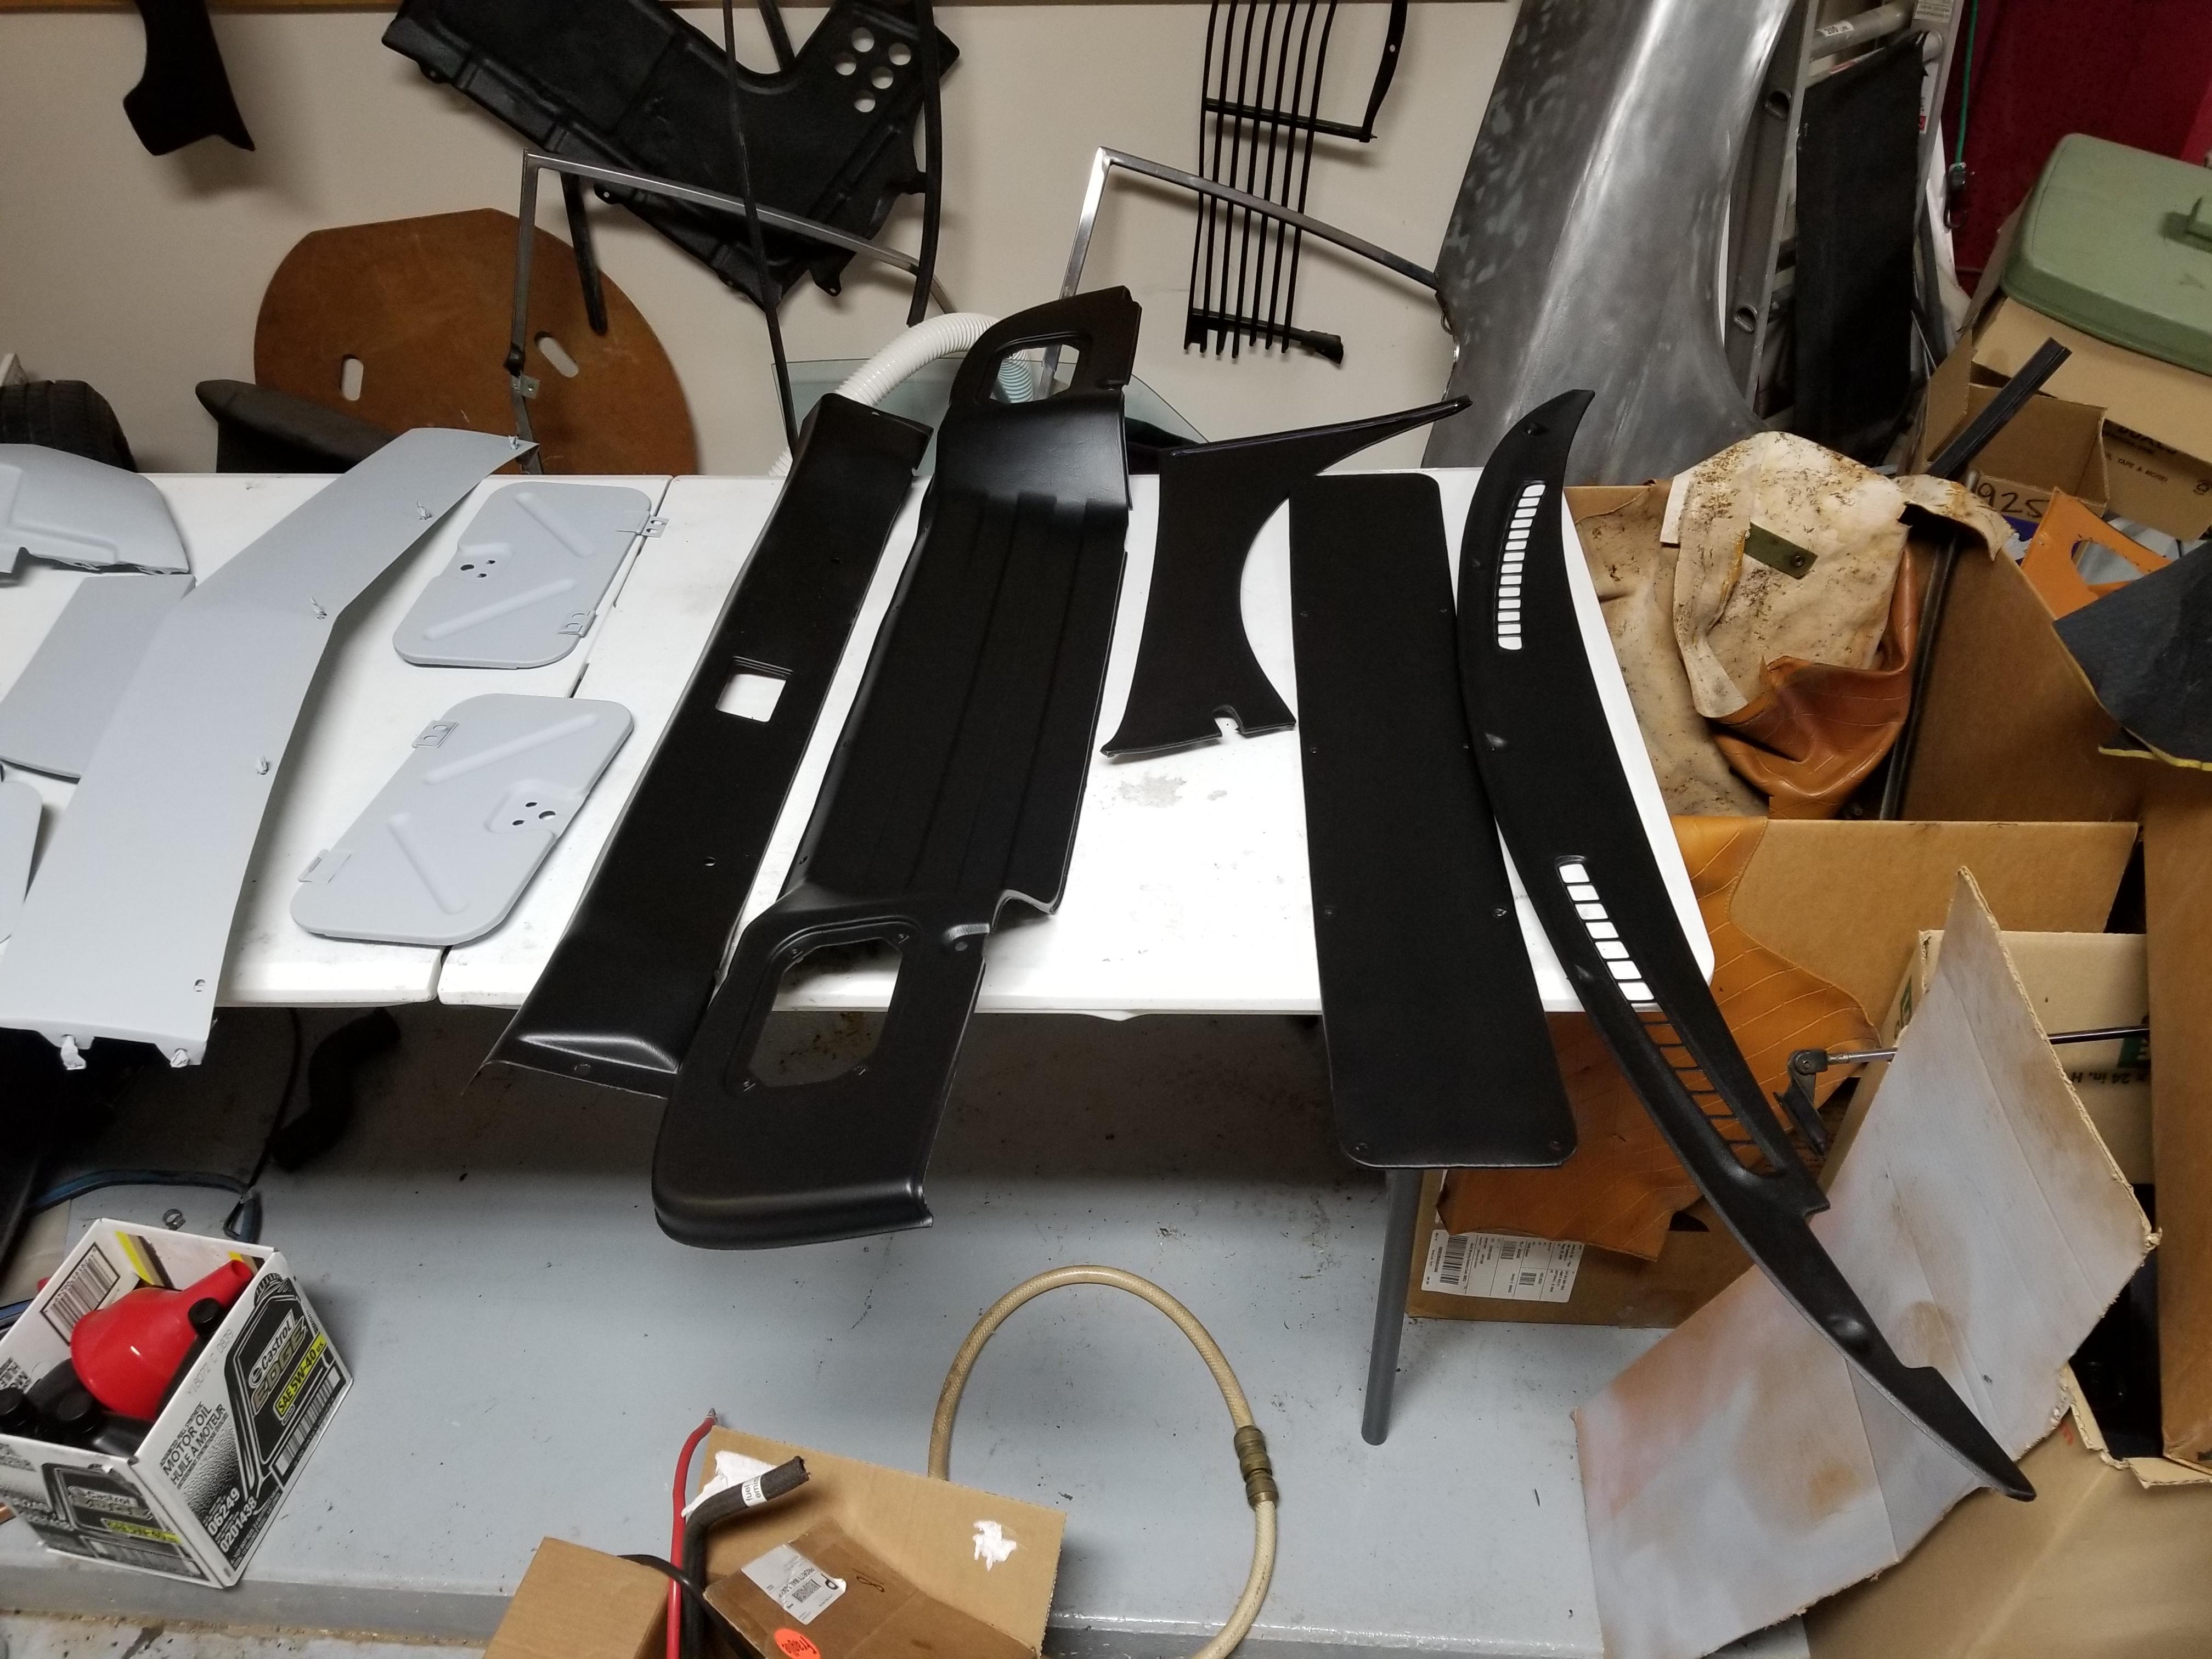
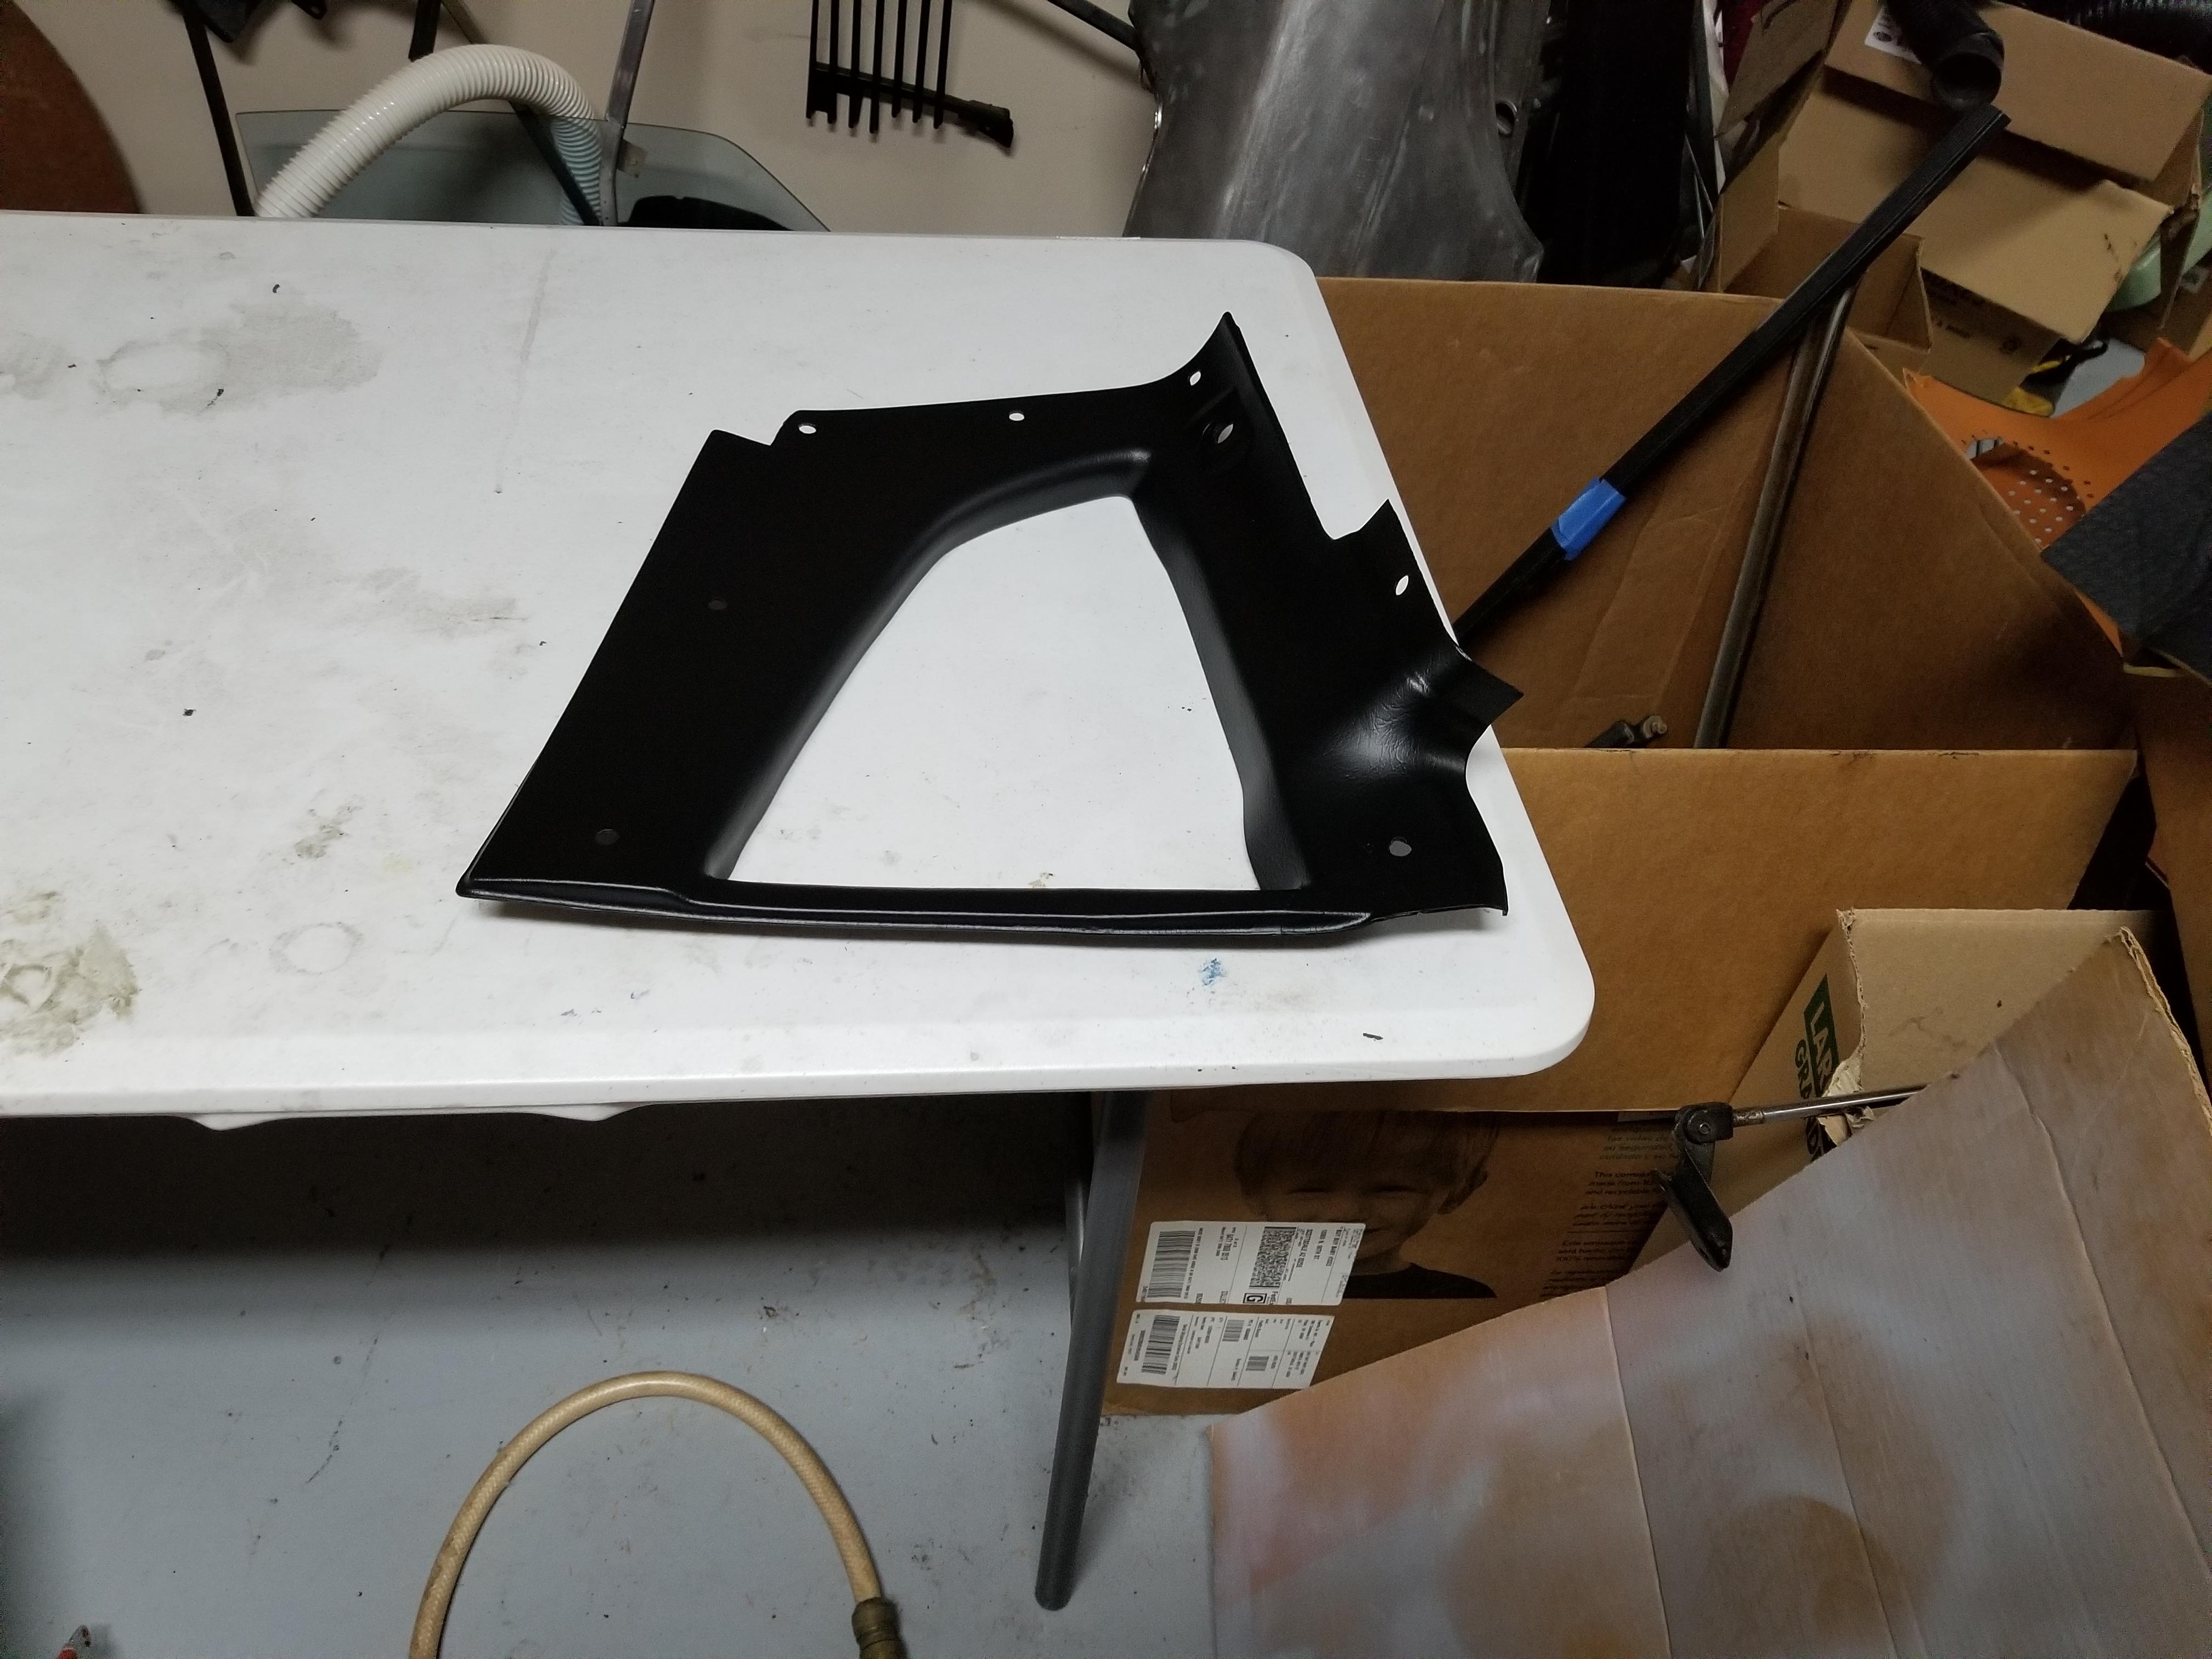
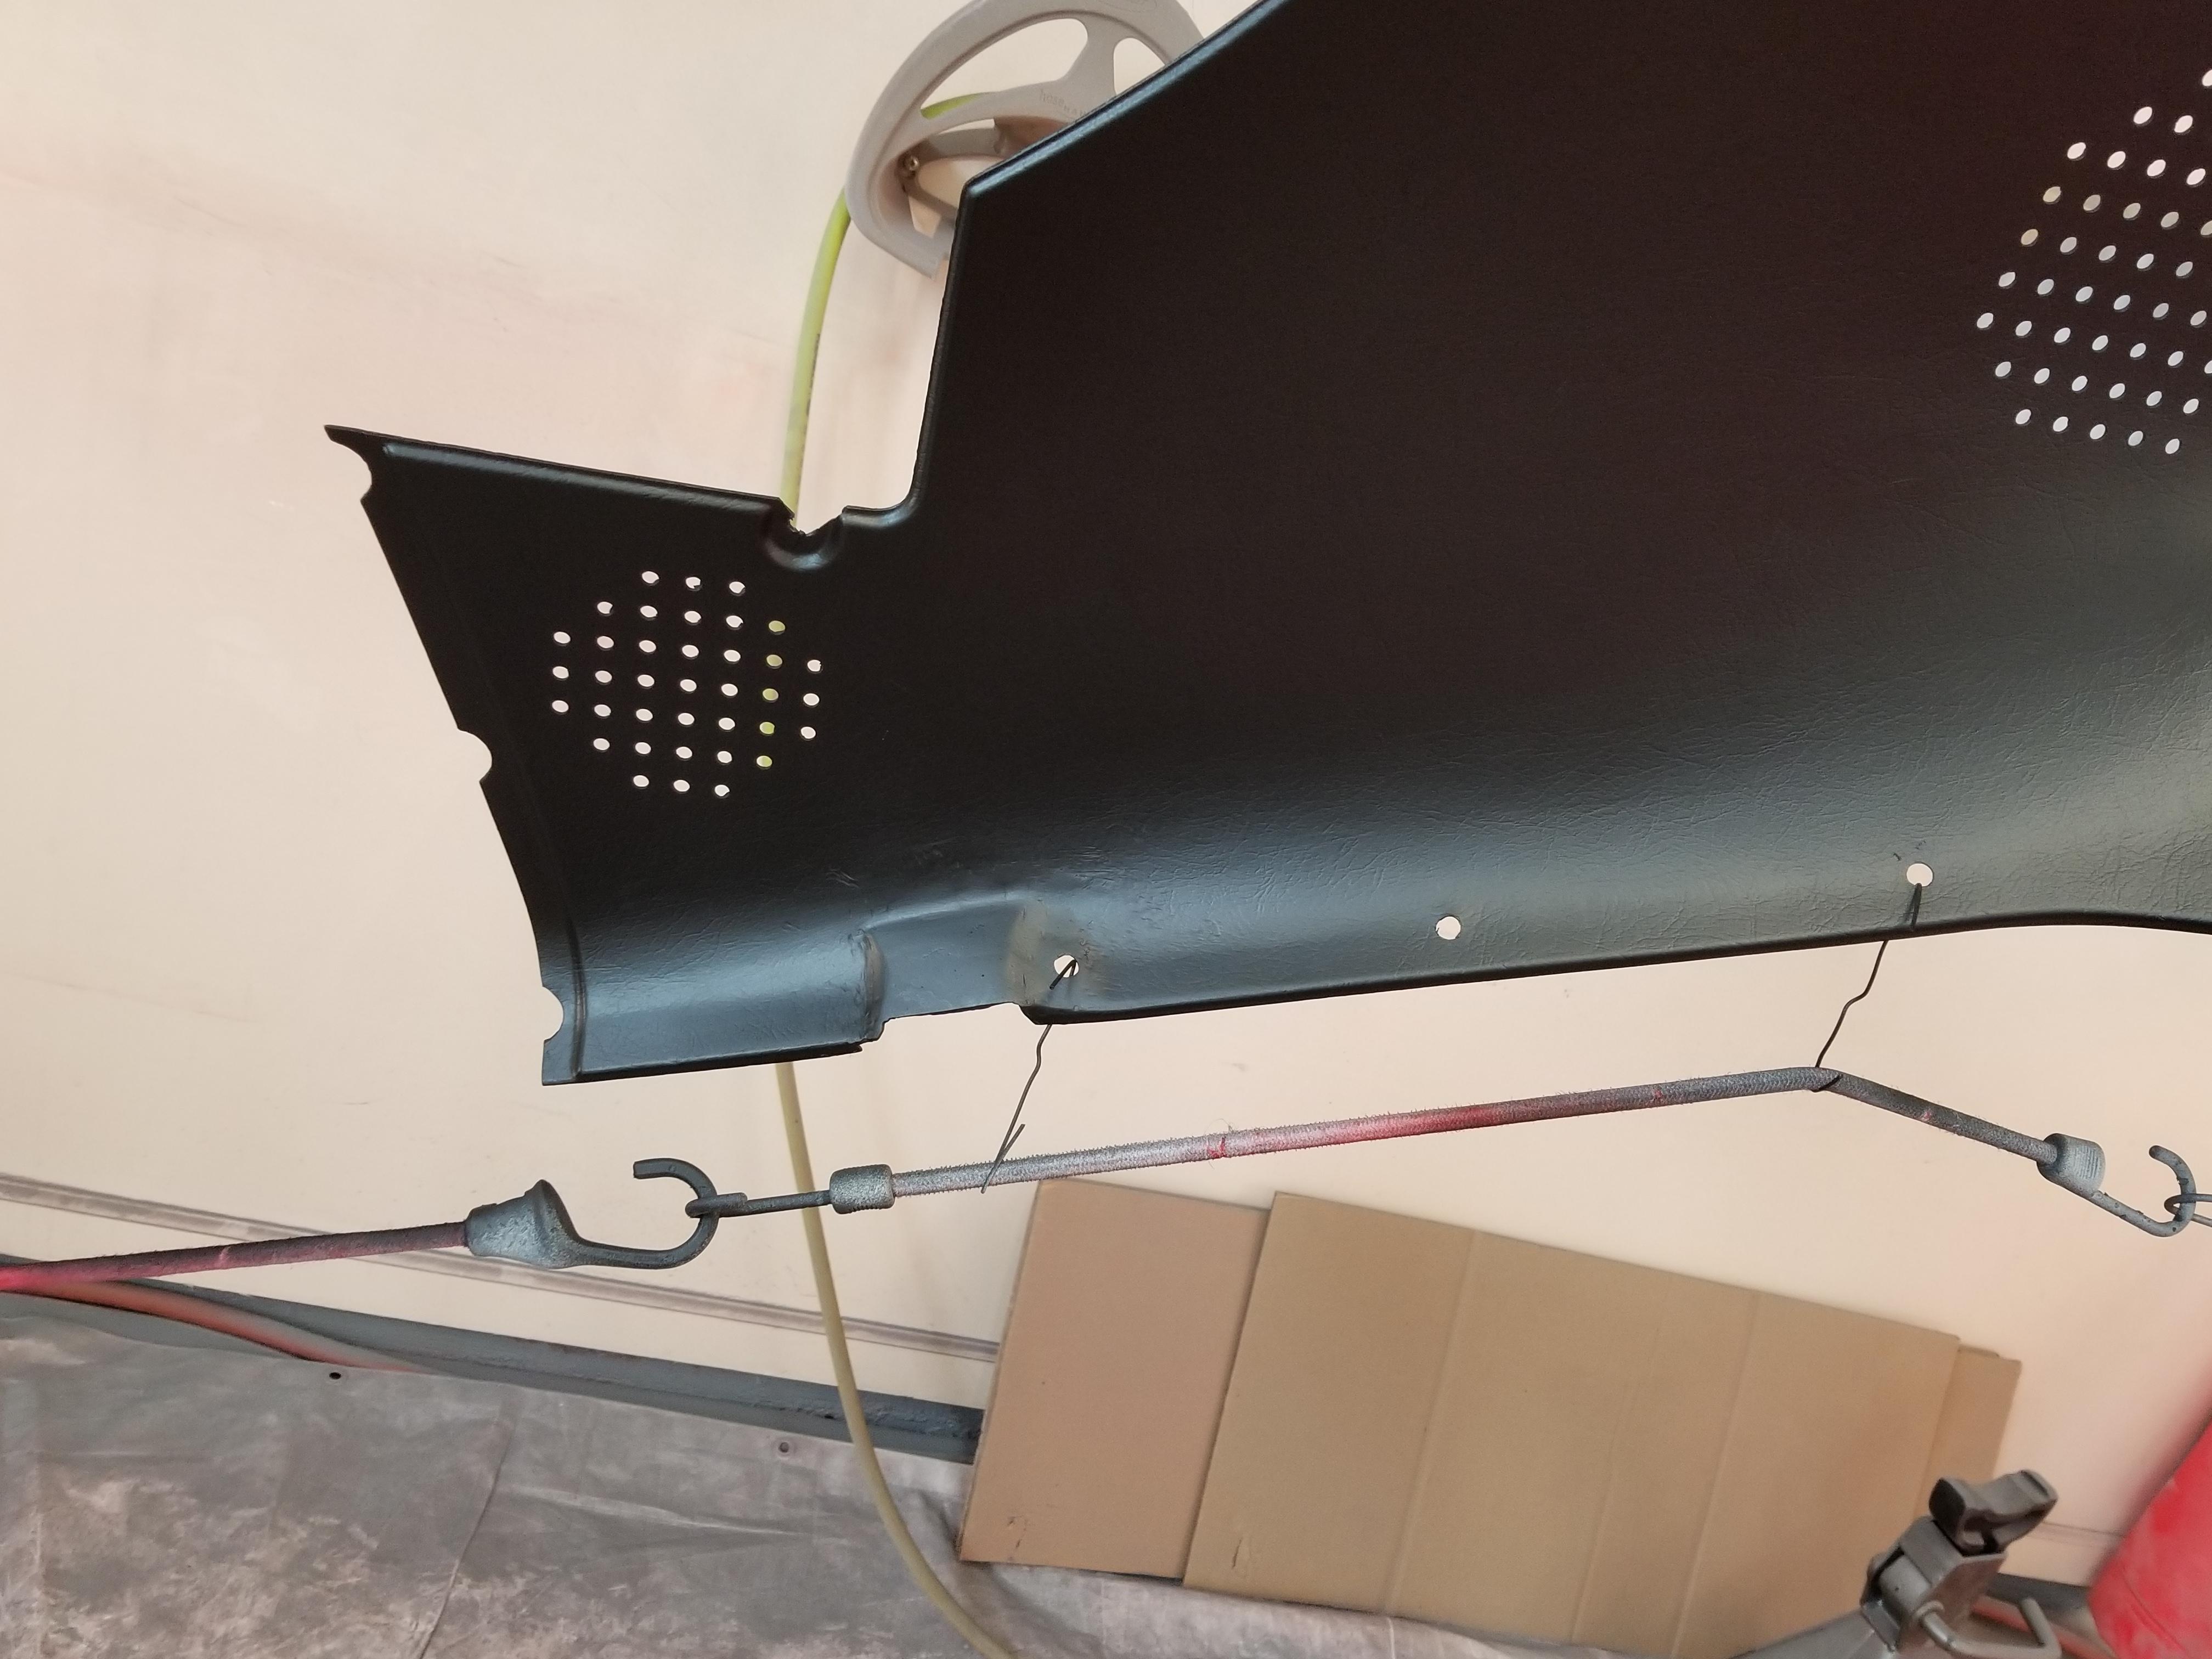
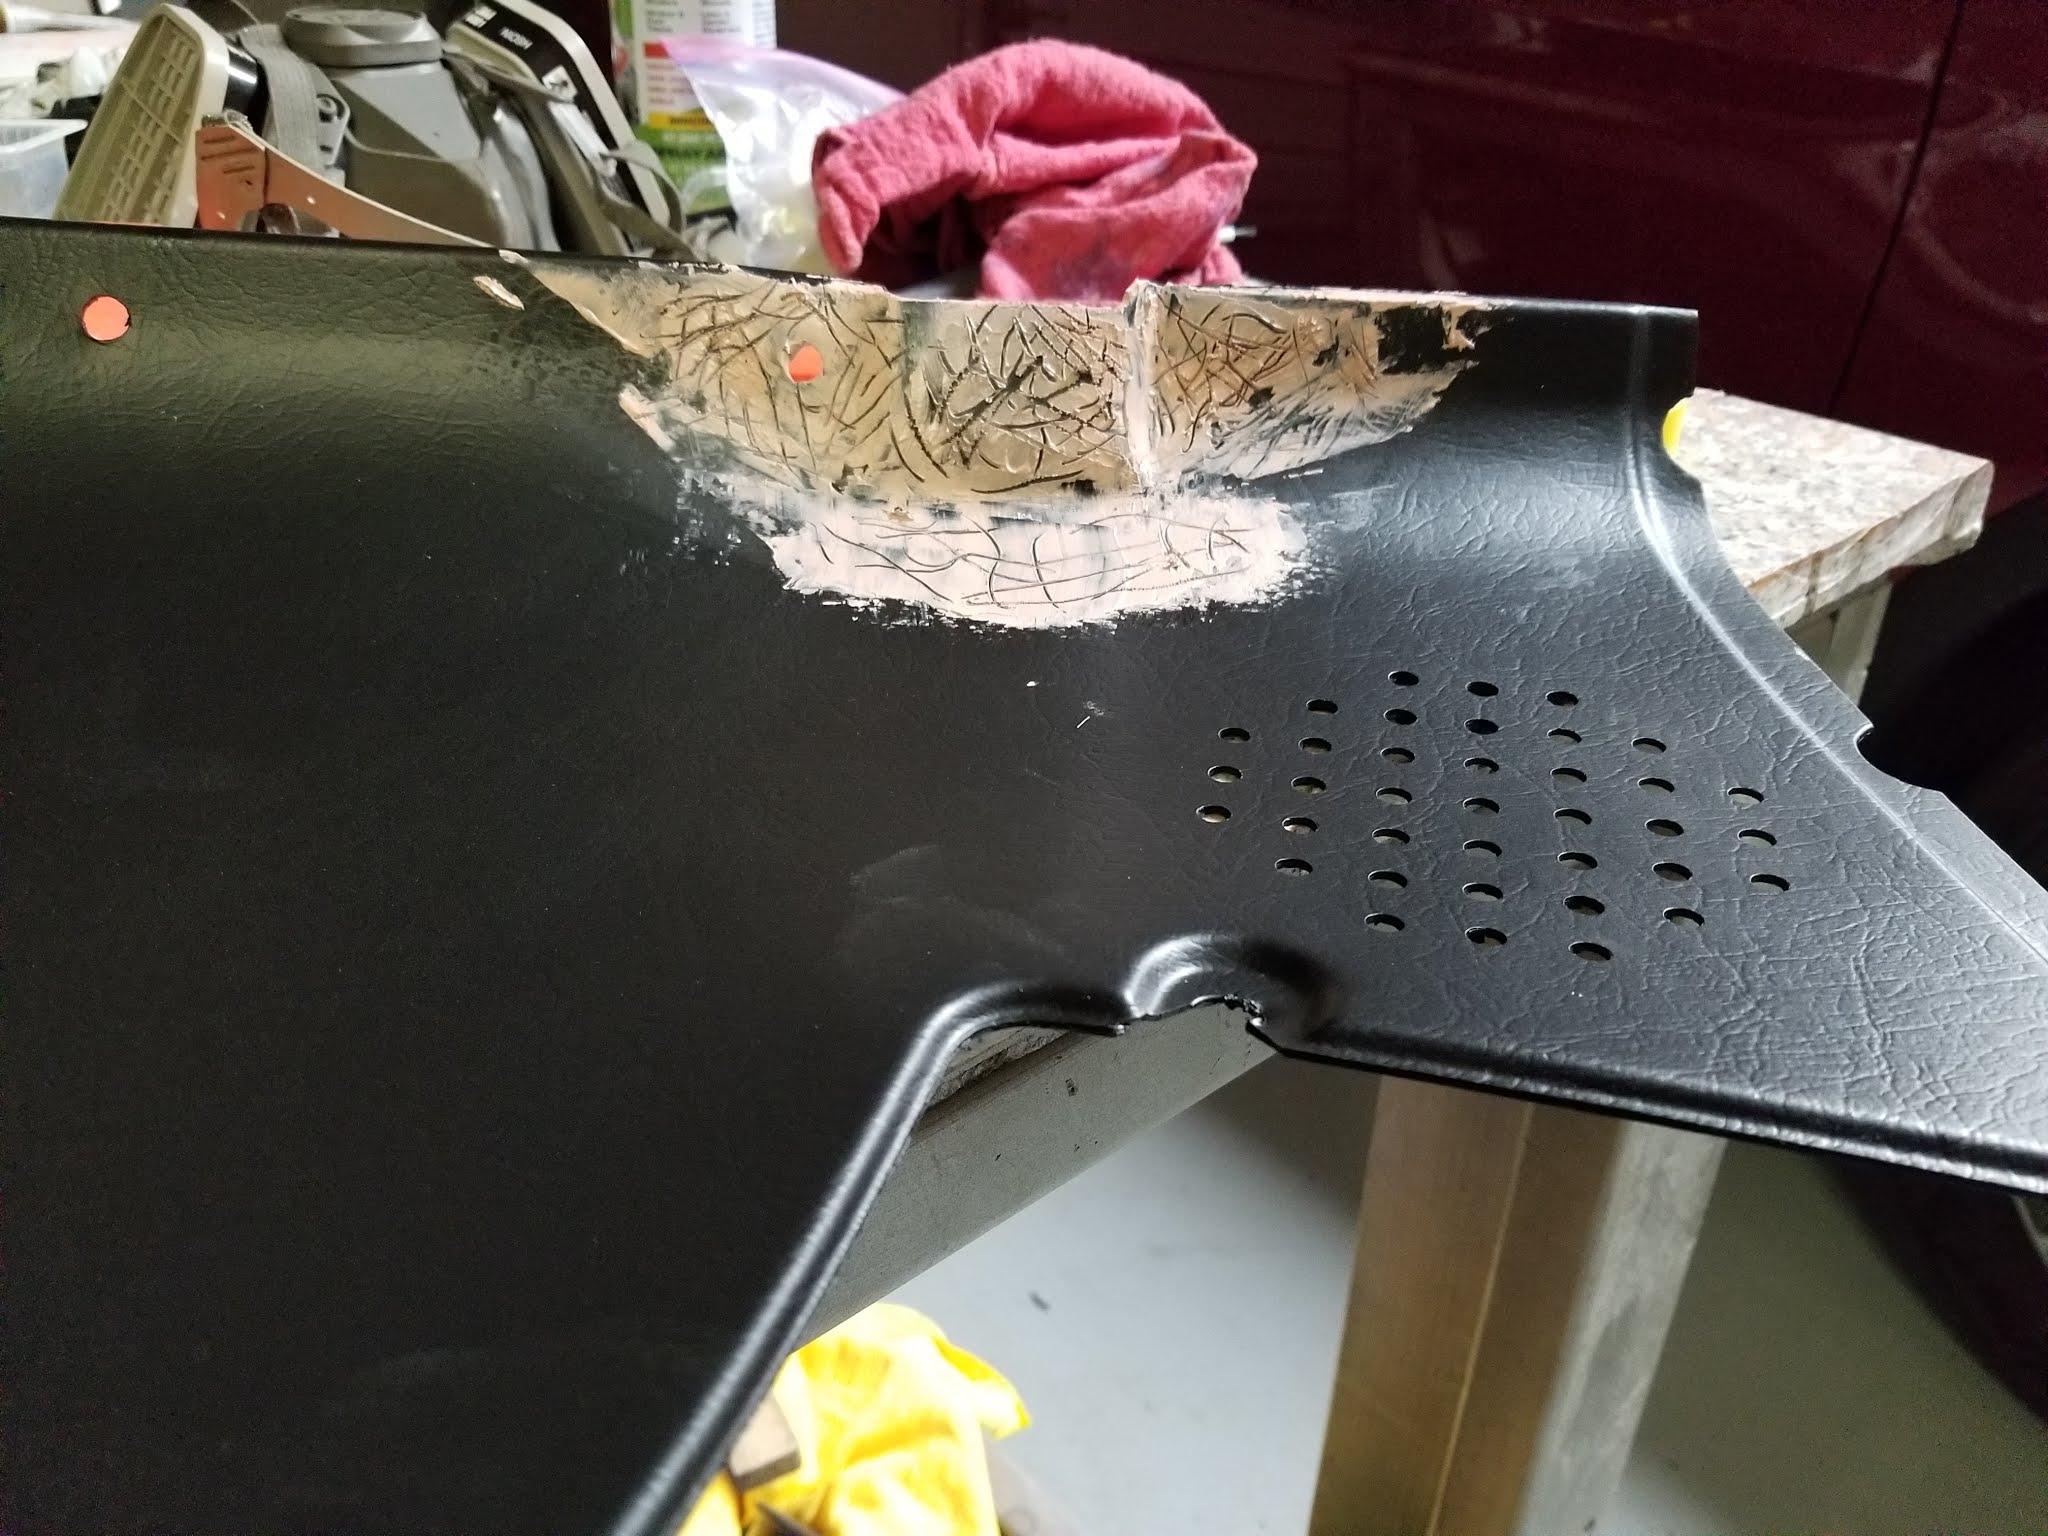
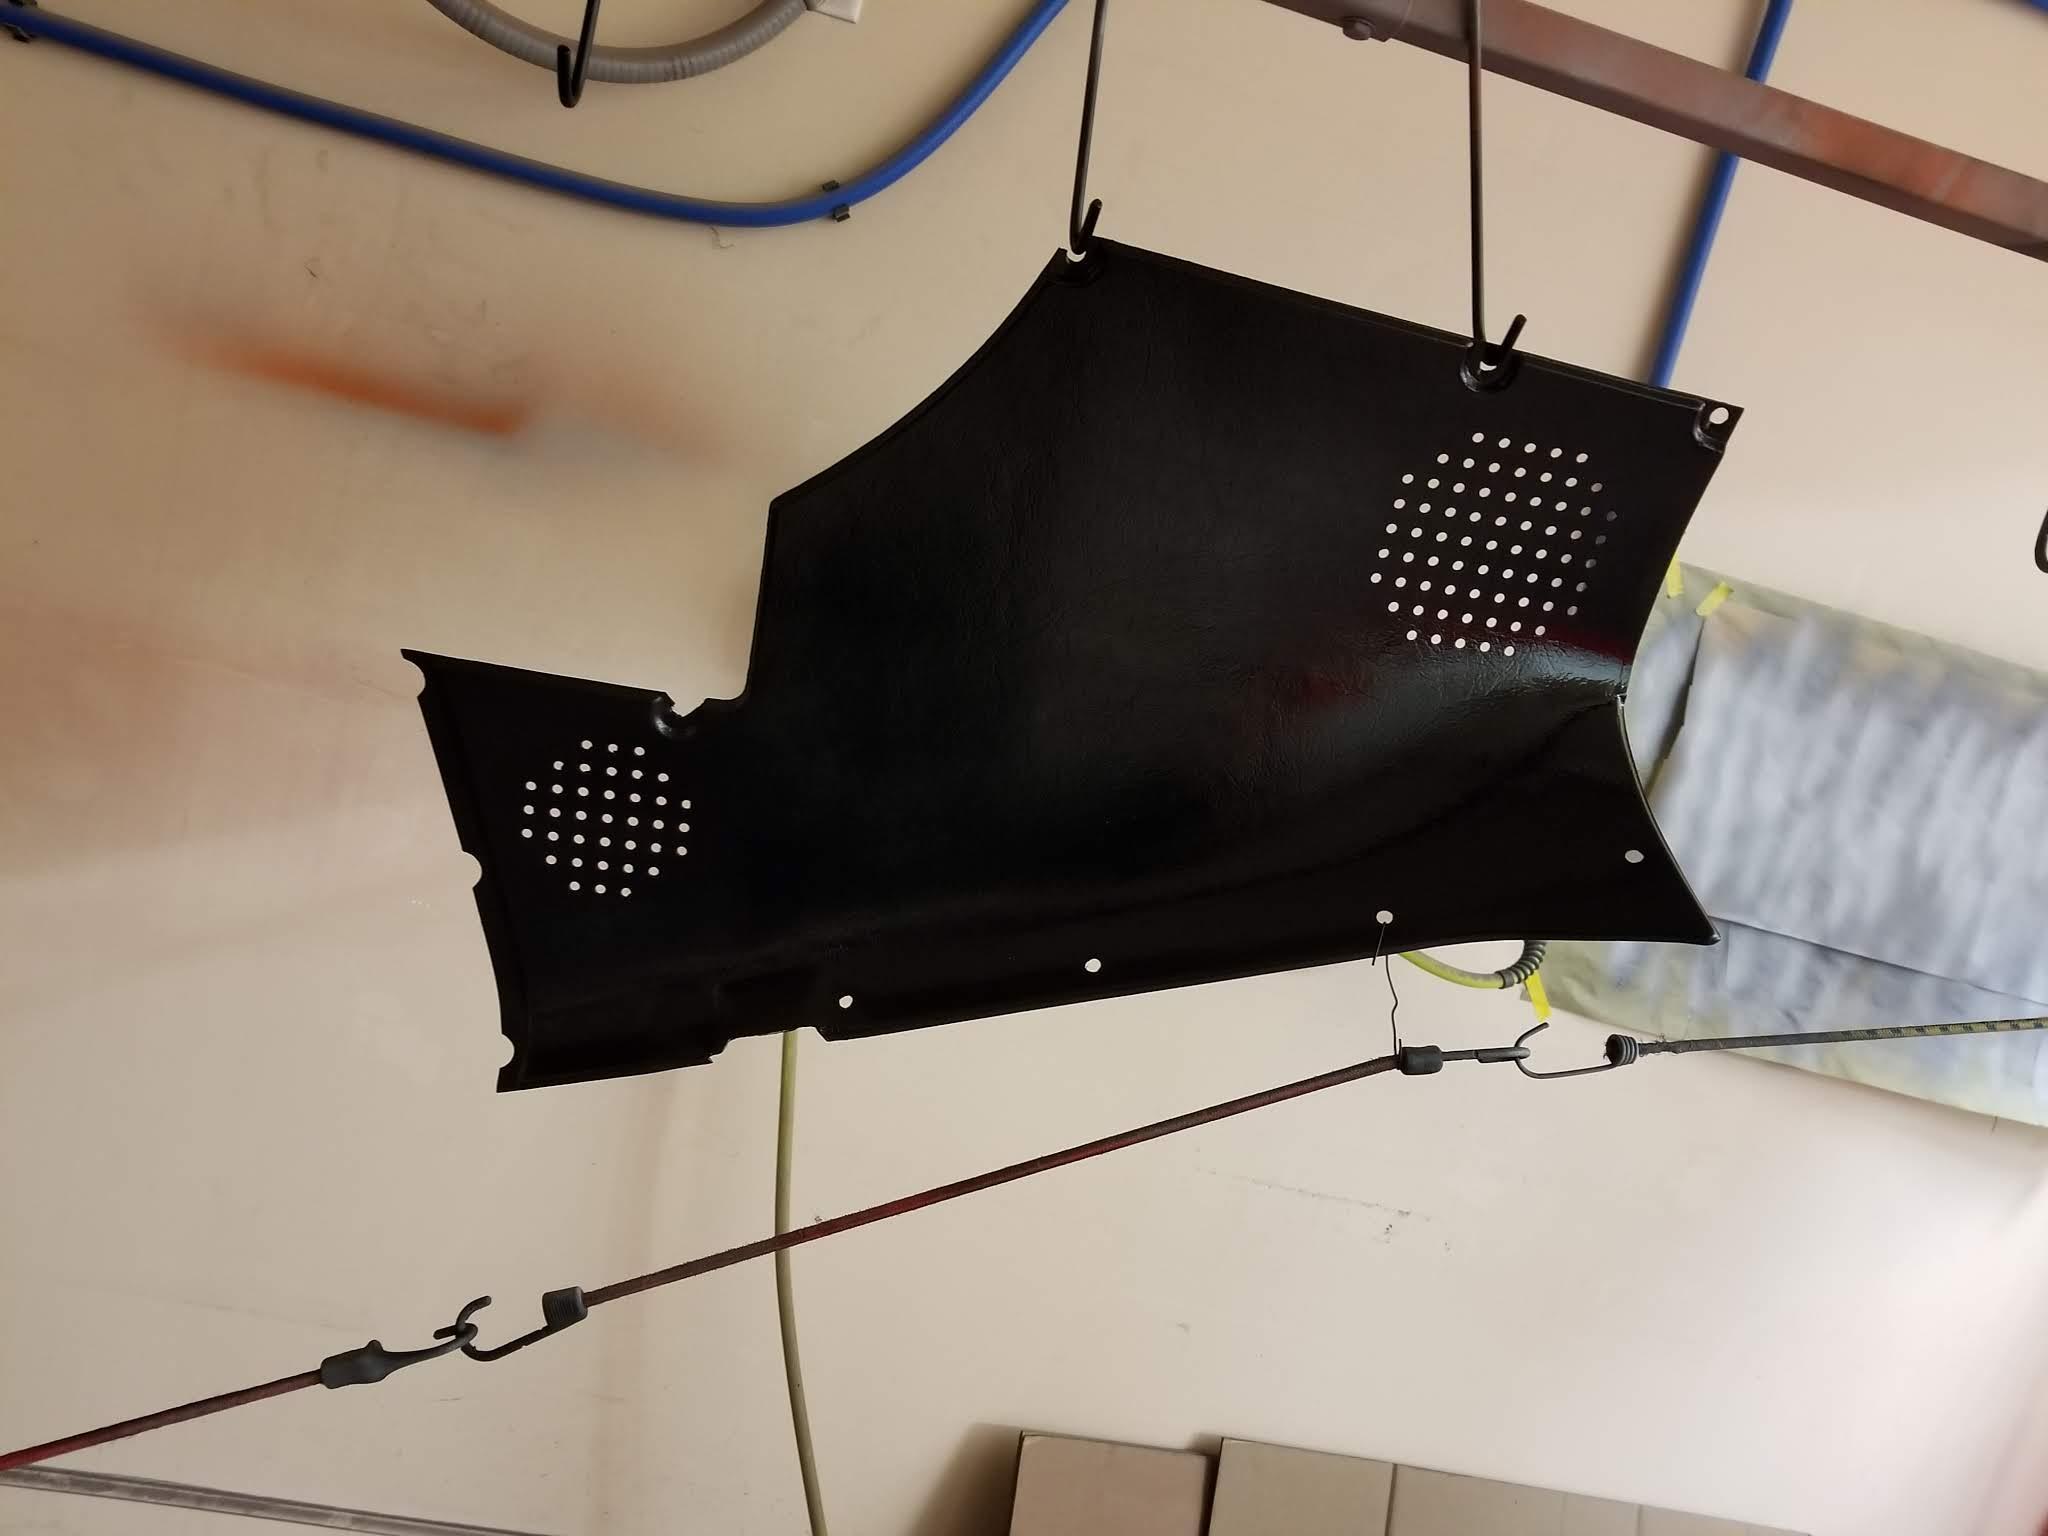
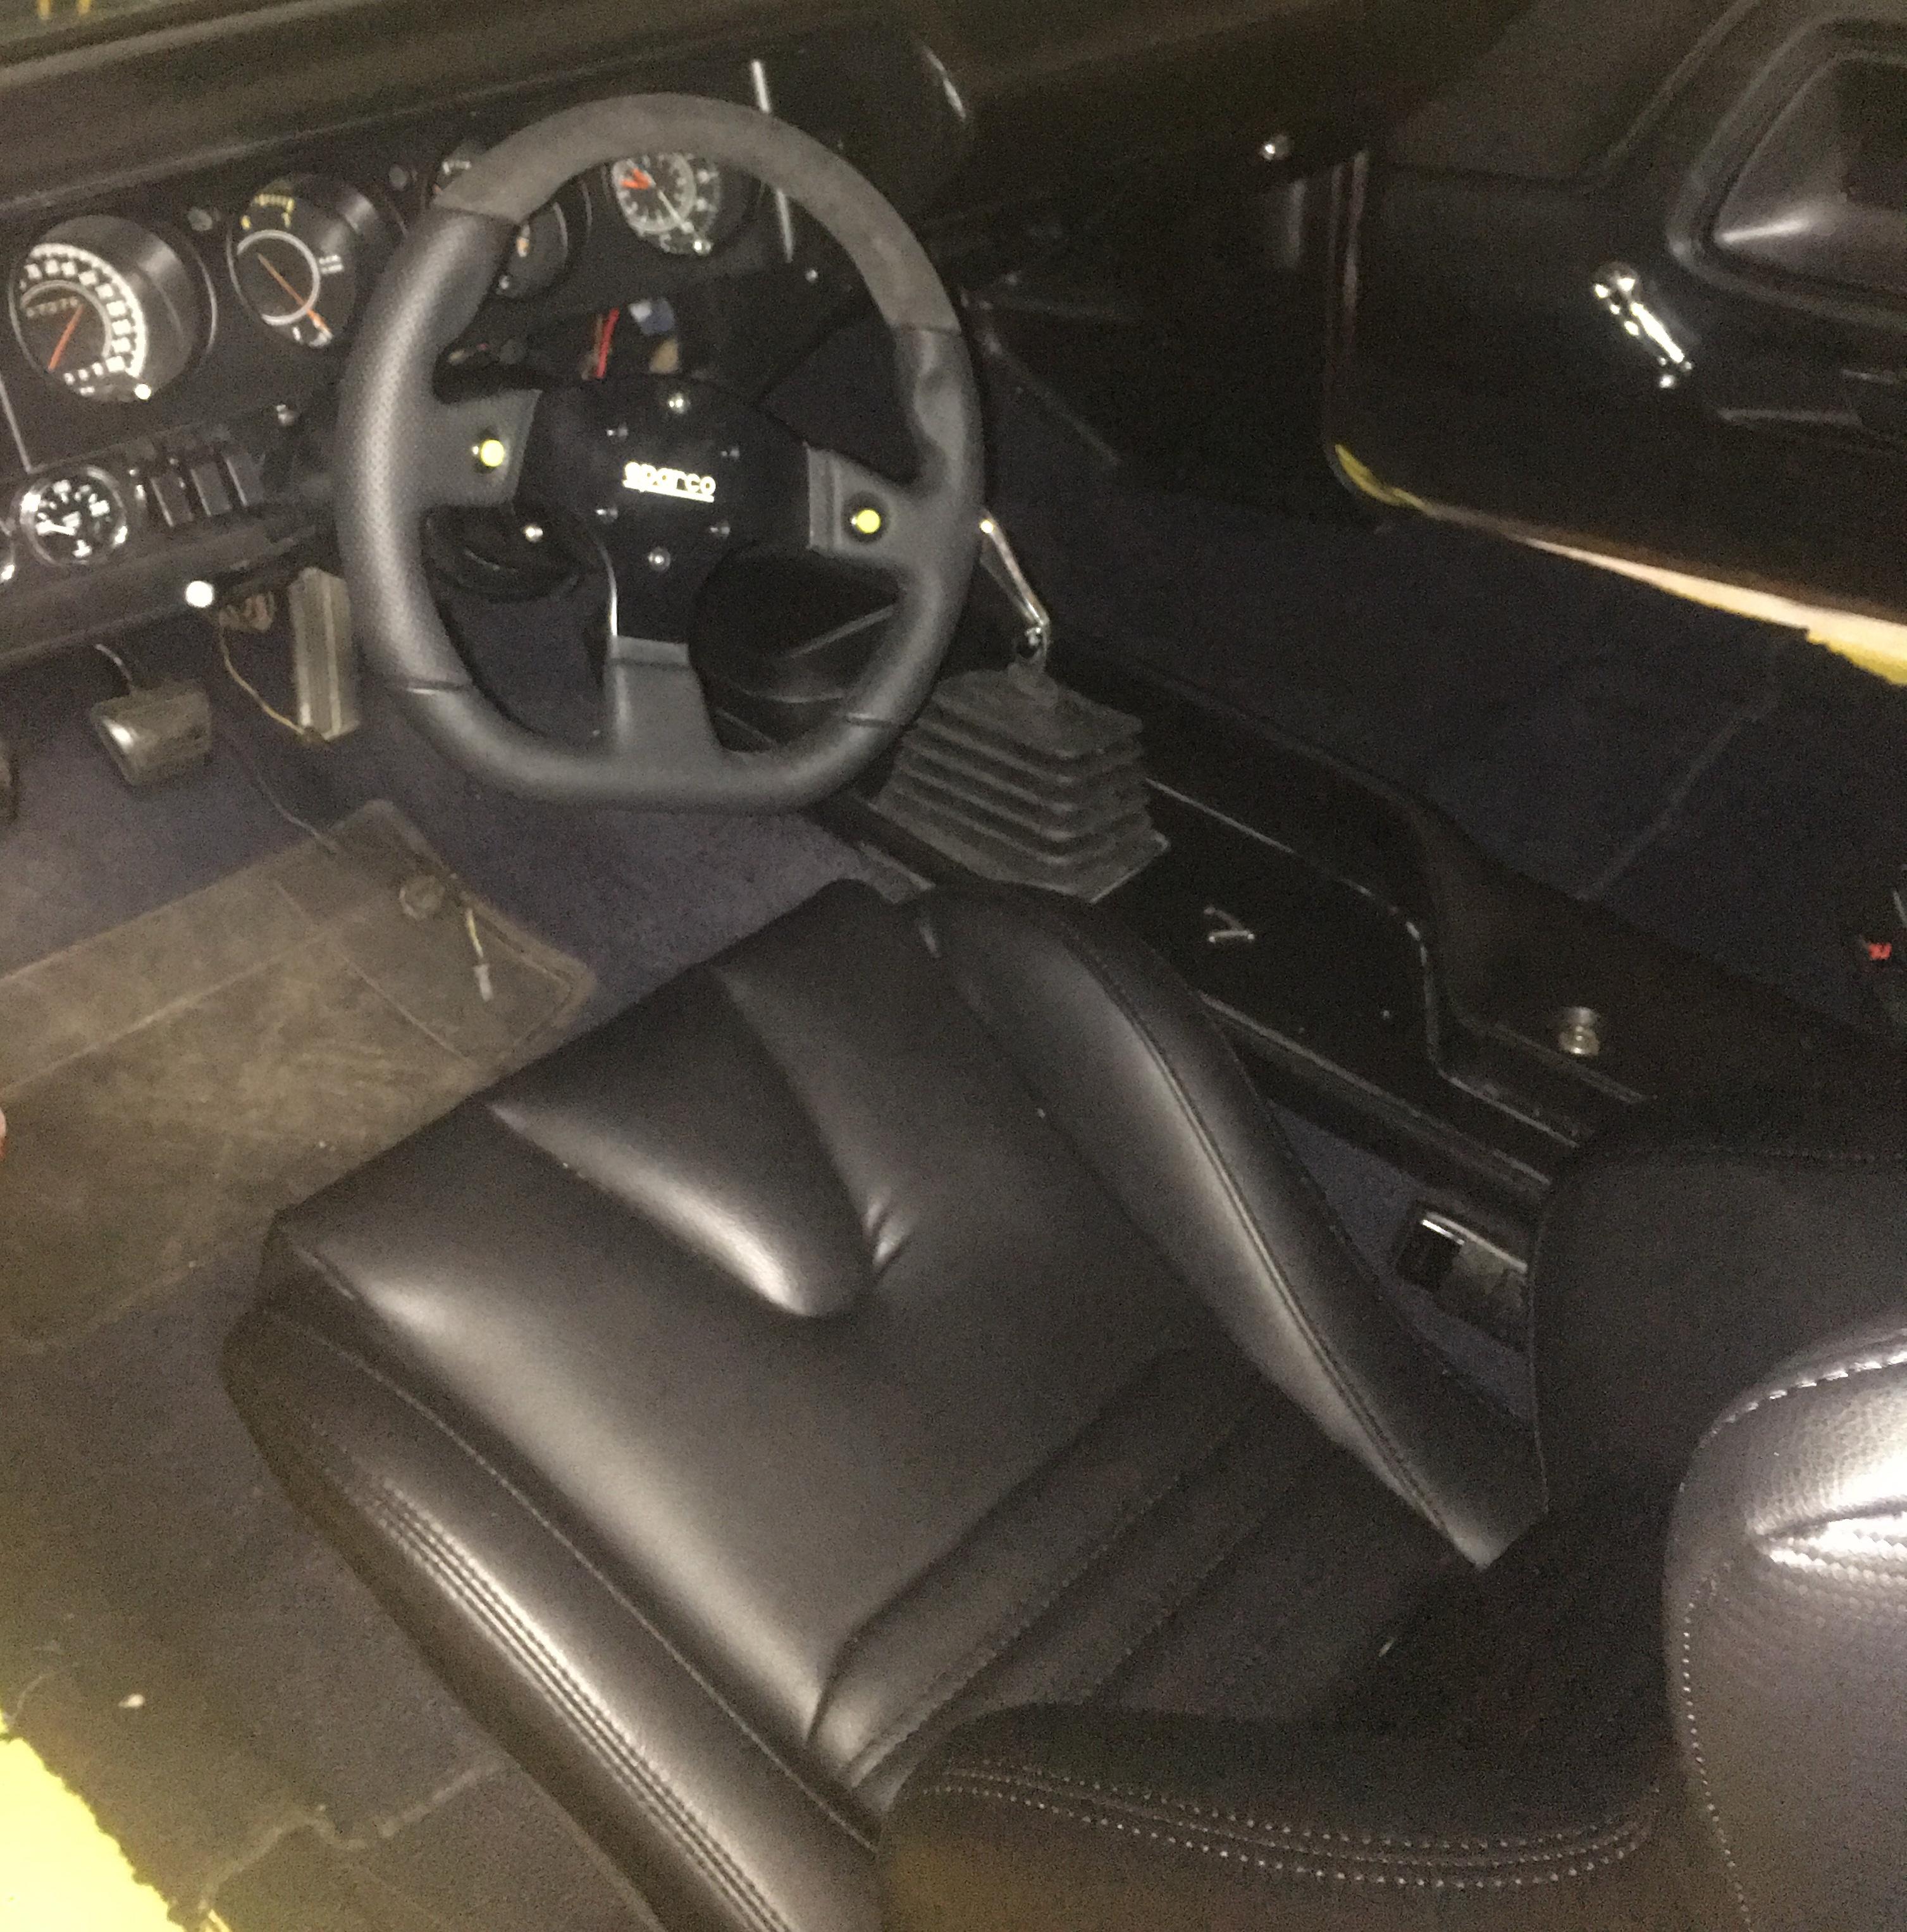
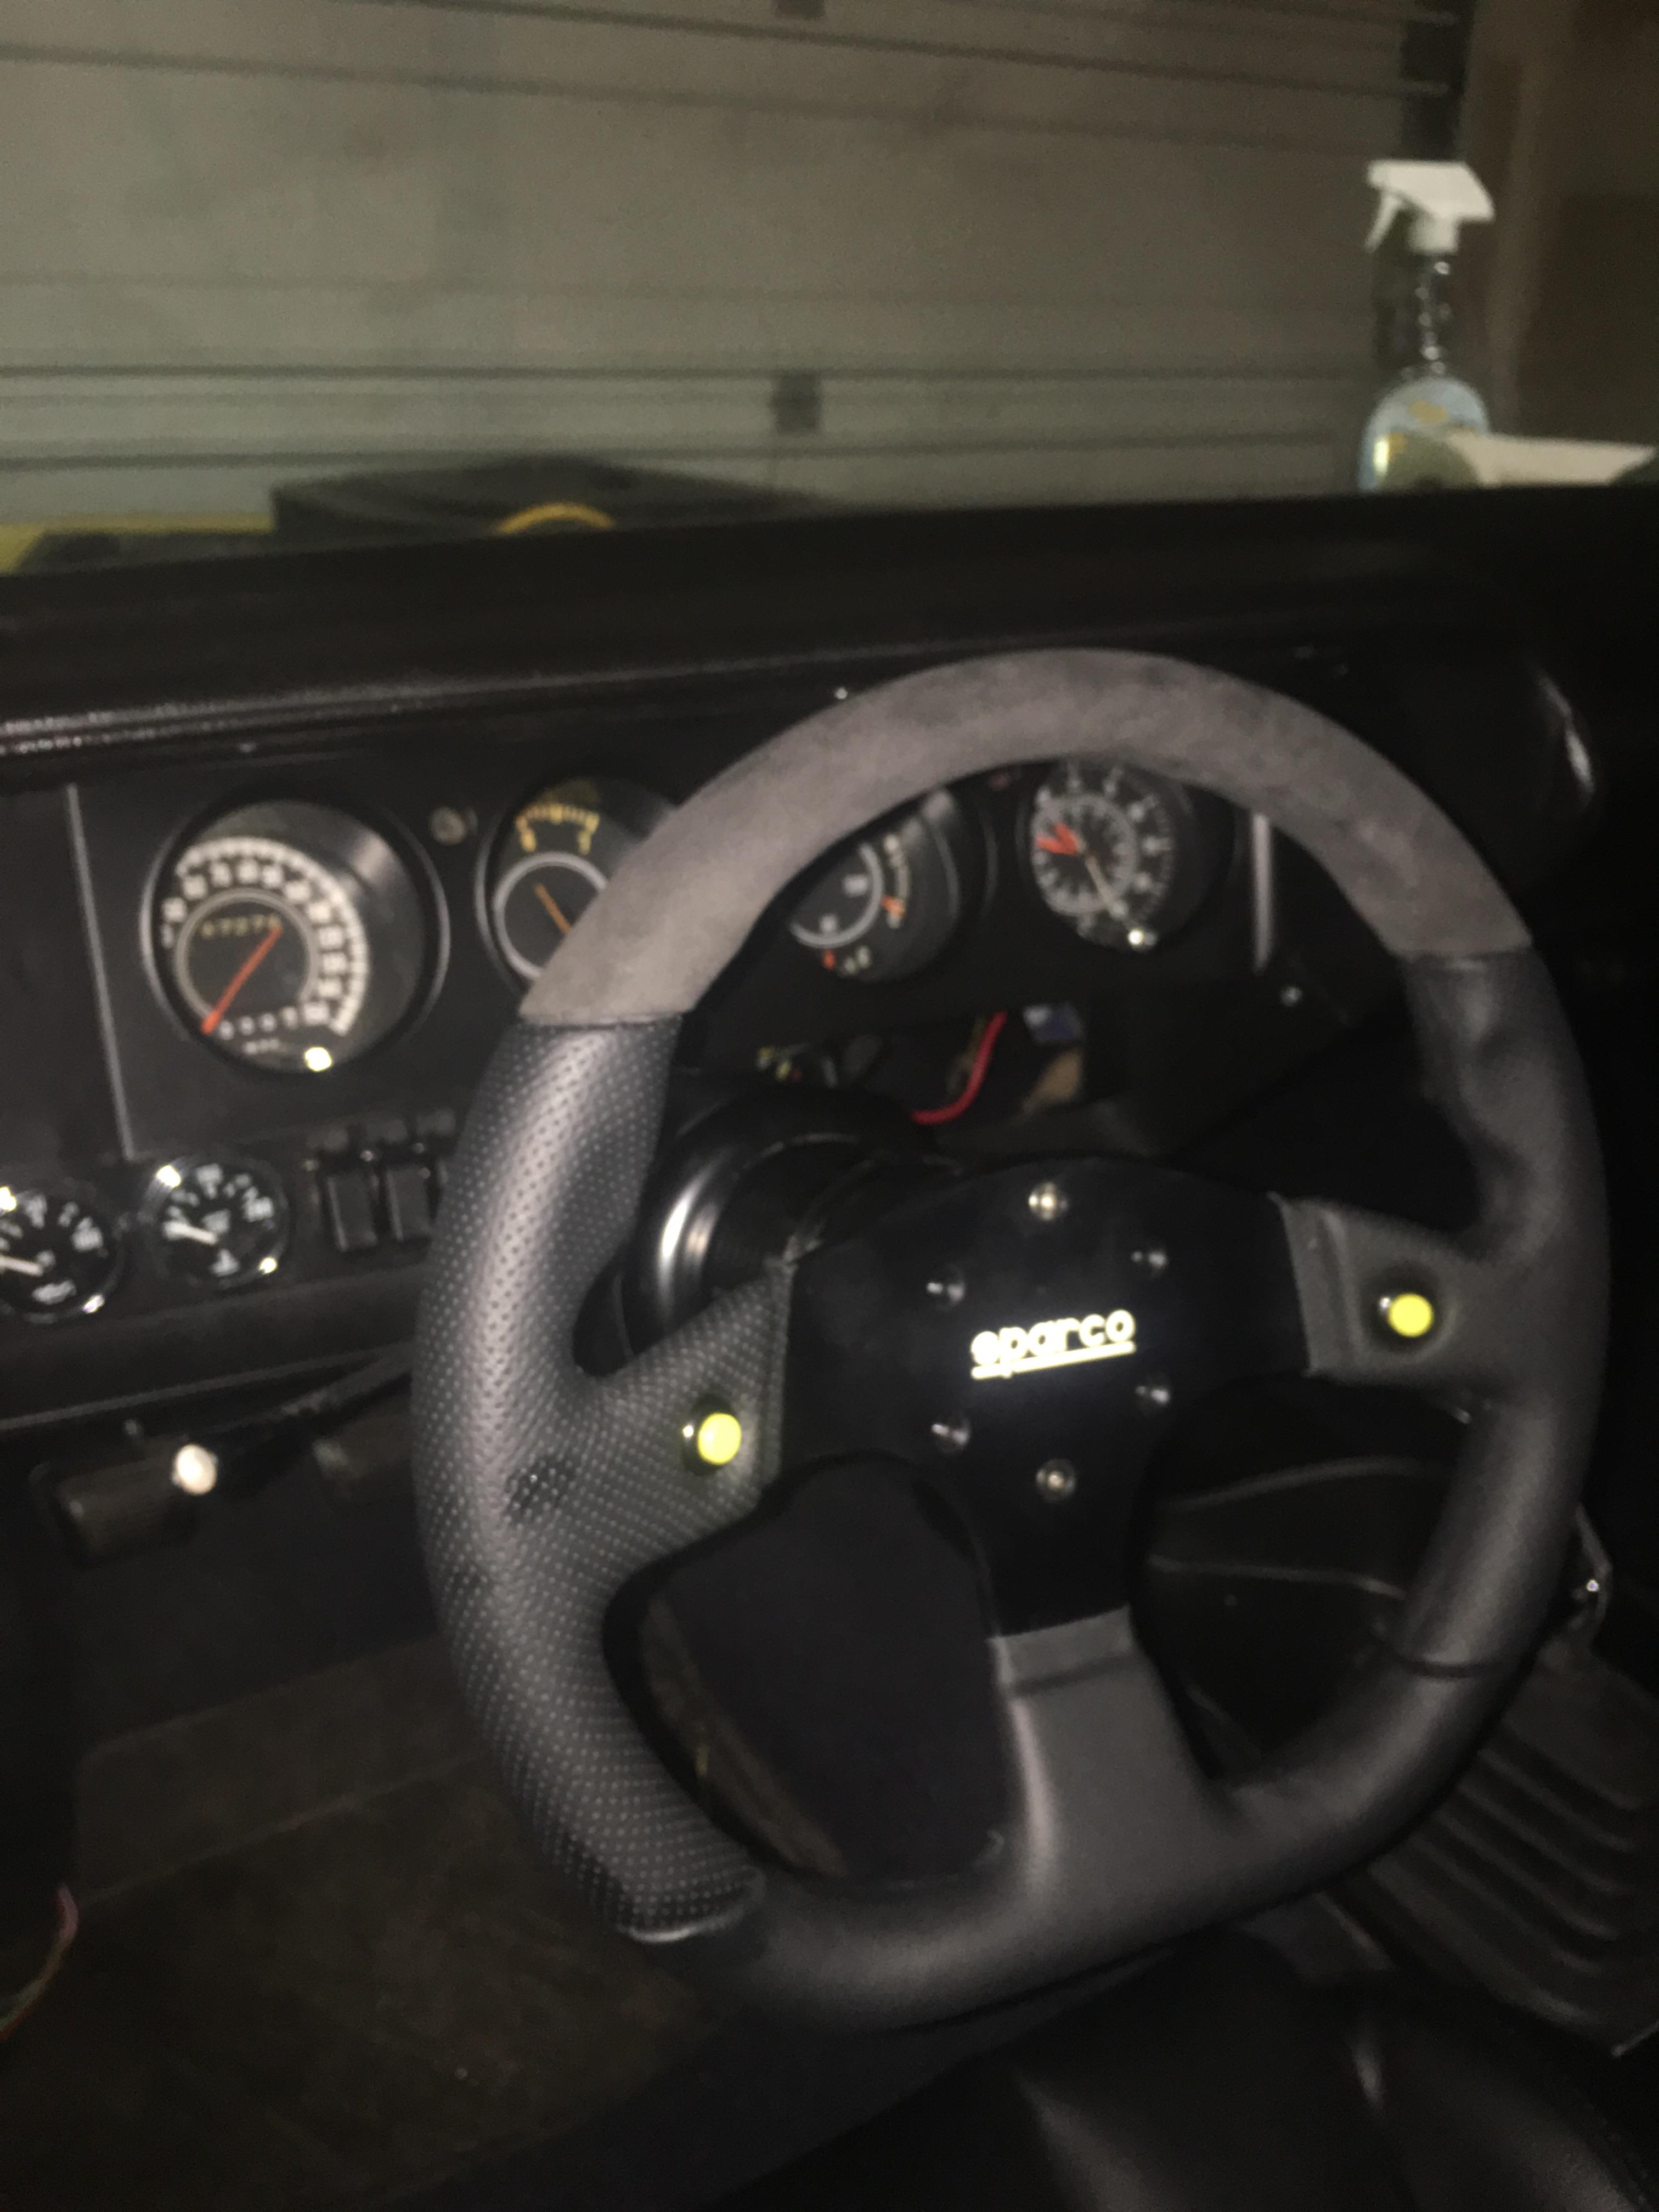
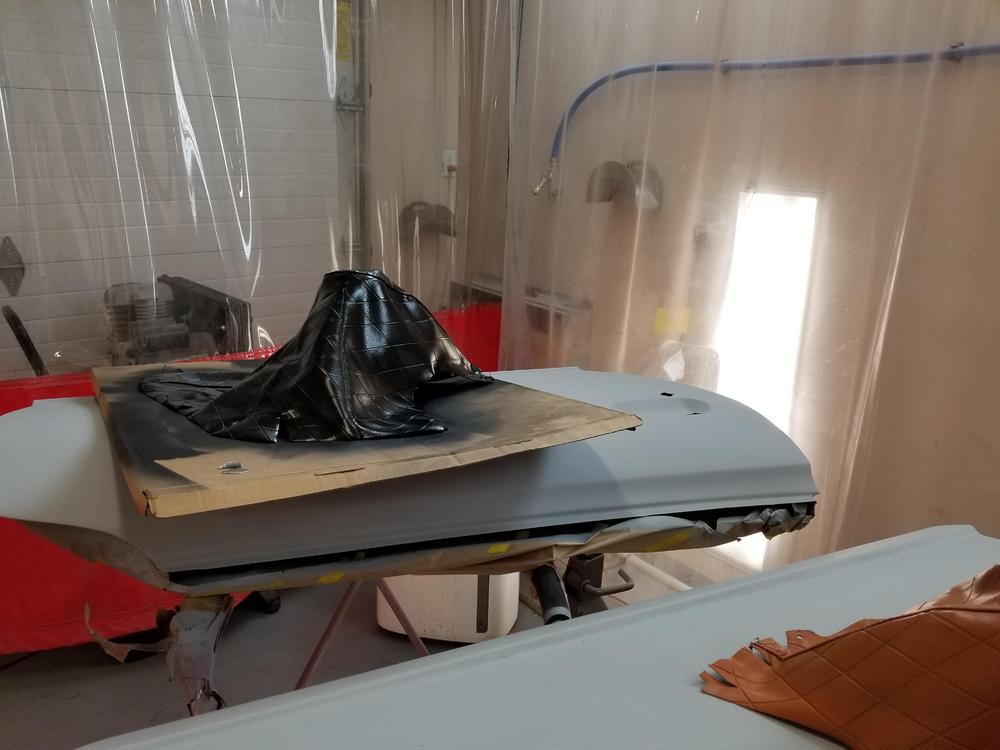
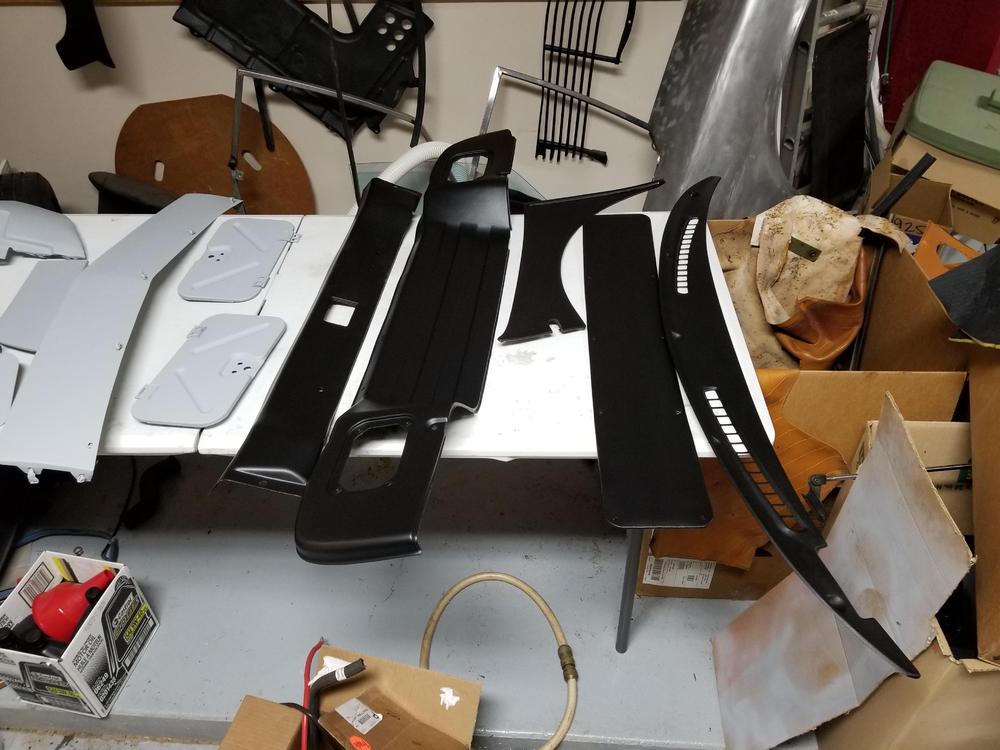
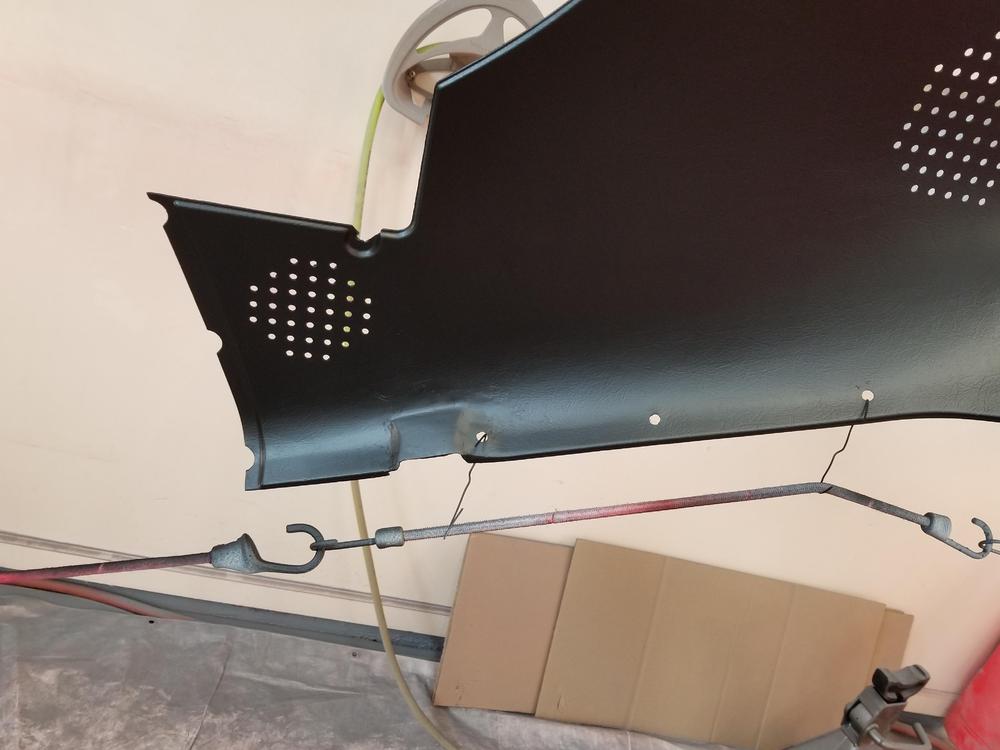
So, I thought it would be a good idea to update the thread regarding the change of interior color. I must admit that I was leery of changing the color of vinyl with a paint/dye. Our vinyl was in fairly good shape and it is quite expensive to replace all of the vinyl and plastic, so I thought it would certainly be worth a try. After a reasonable amount of research, I decided to use the SEM product line. I also decided for once in my life to strictly follow SEM’s process. I had two pieces of vinyl that were damaged through exposure to the sun. But even these pieces turned out well, and I do not think it was purely due to the fact that I was going from tan to black. I think the result would have been just as good if I repainted them in the tan color. Anyway, the result was truly amazing. Every vinyl piece came out looking brand new. It is nearly impossible to tell that they have undergone a restoration and a color change. Yes, there may be a seam that if pulled when installing might show the original color. I plan to touch up these spots after I install the interior. You can avoid this possibility by spraying the back of the material at least on the seams. I did have a spot or two where there are cuts/splits in the vinyl, and one very small hole. I simply took some black vinyl and superglued it on the back of the piece. I did this for two reasons: to reinforce the area so the cut/split did not grow and in case the material was pulled during installation it would merely expose the added black vinyl. Once these areas were painted, I could not spot them easily. The plastic trim was in relatively good shape considering that it is 45+ years old. One of my rear quarter pieces had been hacked up by a previous owner who was attempting some ridiculous change to the speaker areas using a machete. A replacement panel came with the car so I used that. A few other panels had chips where material was missing. These few areas were of the 1- 2 sq. in. category. Some panels had cracks, mostly at the edge of the panel, some minor and some more considerable, but all required attention or the crack would have continued to grow. I found a product called Q-Bond. It is an interesting process. For a crack I cut a “V” groove in the back of the plastic and cleaned the area around the crack. They give you what seems to be a graphite like powder. You sprinkle the powder into the grove. Since it is primarily the back I sprinkled it liberally around the groove as well. If the crack cannot be completely closed in the front of the panel you place a piece of tape on the front covering the cracked area. I used yellow tape that I have experience with from painting a car. It sticks well, but can easily be removed and has never damaged an area that I have used it on. The graphite like material can’t fall through the crack because of the tape. Q-Bond also provides what they call super-glue. Looks just like what you buy in the hardware store. You dribble a few drops on top of the graphite that is mounded on the back of the crack. It seeps in and sets up in less than 30 seconds. I gave it a few hours and then sanded the front of the panel to insure that the filling was level with the front surface. We painted the panel with the SEM product and where it was just a crack you could not tell that anything had been done. The crack line looked like it was part of the original pattern on the plastic. Where major repair was required, I used J_B weld to fill a missing area. The J-B weld patch as well as any other areas on the front of the panel that needed to be sanded were rendered flat with no grain. I tried scribing lines with a pin in some thin putty but this wound up looking like scratches. I have read about graining pads, but I think they perform better on vinyl/leather than a hard plastic panel. I decided to use a textured paint from SEM. This will not imitate grain, but I thought it would be better than leaving it flat. You don’t have a lot of control other than varying the distance of the nozzle from your work to produce less texture. I lightly sanded the texture and tried to blend it into the original grain. I then repainted the panel to get a consistent color. Its not perfect but if you are not looking for it you can’t spot it and the panel is repaired. Where I was missing a lot of material, I added some plastic pieces cut from the panel that I replaced. I super glued these to the back of the panel I was repairing and then used JB-Weld to bring the repair level with the rest of the panel’s surface. This also worked really well. Its strong, but it is ugly. Once again, I used the texture and sanded it and then painted the entire panel. It will not pass concourse inspection but it definitely is cheaper than replacing the panel, and it is a sound repair and it is another piece of authenticity - a 45 year old piece of trim that looks pretty good. As an example this is the vinyl that covers the rear shock tower. It has been cleaned with a mild soap, and Scrubbed with a gray scotch brite pad using SEM soap. You can see signs of fading from the sun. Here is one of the shock tower vinyl sections painted. Plastic panels - this is the interior overhead where the dome light mounts in the middle. I was amazed at how nicely the plastic and the vinyl cleaned up. This is one of the rear hatch area panels. It installs behind the rear wheel. It had some cracking and it also had a missing section around one of the mounting holes. The first picture shows all of the repair work - cracks at edges and the missing section around one of the mounting holes. The picture below show the panel after paint has been applied. You can see the patch area. The only issue with this panel is the total lack of grain in the repair area. It was noticeable and so I pushed on. Here is the my first crude attempt at trying to see if I could imprint some grain. This looks awful here but it was even worse when color was applied. The next picture is of the panel with everything having been sanded. It has the benefit of the texture paint having been applied, and color over that. The rest of the plastic and vinyl came out even better and I was very satisfied that we were able to save so much of the original car. Can't wait to see all of the vinyl and the trim panels go back in the car. Unfortunately, I completely rewired all of my electrical harness, and don't want to assemble the interior until after I test everything. Testing the harness is waiting on a new dash. Early on in the restoration I tried repairing the dash, but it crumbled and my total lack of expertise inspired me to try wrapping the skeleton with vinyl. Twice I thought I was going to get away with it but alas the speedometer and the tachometer wells could not be done by me to my satisfaction. I then searched for someone in need of some extra cash but every shop that I went to said that it was so difficult that they would have to charge enough to fund their son's first year at Harvard. Next step on the road to wasting a fortune was a full cap. I would have stuck with the cap, but this car is for my son, and I worried that the cap would not do well in the cold climate that he lives in. The overall restoration is coming out pretty good and to be honest the cap just didn't match what we were able to achieve with the rest of the car. I am currently on a wait list for a replacement dash pad. products that we used: 1. Gray Scotch Brite pads 2. Dawn dish soap 3. SEM Soap 4. Vinyl/leather prep or plastic Prep 5. SEM Sand Free (adhesion promoter) 6. SEM Color Coat Satin Black 7. Q-Bond 8. J-B Weld The following URL is valuable in terms of a reference for the SEM products that you will need and the overall process. https://www.semproducts.com/product/color-coattm-mixing-system/system#product-videos I suggest you watch the video. I also watched this video. Their humor is a bit tiring but I found it before the SEM youtube and it encouraged me to give it a try. episode 128 Dyeing Door Panels and dash pads Autorestomod. Bottom line: If you are thinking about refreshing your plastic interior trim or your vinyl – DO NOT hesitate The SEM process works, at least if you diligently follow their instructions. They have a complete line of colors and you can even mix a color to match something. If you have plastic that needs repair within reason you can successfully restore your plastic panel cracks with Q-Bond. I am sure that there are other products out there that work just as well but I have not tried them and because these have worked so well for me I probably will not experiment with anything else in the future. The one thing that I do want to try is grain imprinting using those grain pads. Hope this helps.


 6 points
 -
3 pointsFirst of all, congrats on the new place and a dedicated space for the Z. My advice is to get rid of anything you haven't used over the last 2-3 years (or needed to finish the Z). Don't sell it, this will just take time and effort. Give it away. Once you have done this, you can focus on the Z and you'll have space to do it. All that *stuff* isn't necessary, believe me.3 points
-
I've met you in person Cliff. We need to talk about your choices of girlfriends. ?2 points
-
2 pointsWell Zella is pretty hot! Nice bumper conversion. What tire and wheel size did you go with? You won’t get much by the enthusiasts in this forum....they see everything. ? Sent from my iPhone using Tapatalk2 points
-
2 points
-
2 pointsI have a three bedroom house that I rent out and I live in the garage apartment in the back.
 2 points
 -
1 pointHaving done what I hope is enough research, I have started down the road on my next off-beat modification. I decided to pull the trigger to go with the Patton Machine fuel injection kit on my 260Z. I still think I'm going a little lean at times at the top end with my current SU setup, and I hope this will remedy that situation. The cost appears to be less than sourcing a non-egr FI intake, AFM, MS setup, etc., and it seems to be nicely sorted out. I'll try to remember to take a lot of photos for posting. I hope to get the setup in March.1 point
-
1 pointSome of you may remember I had dragged home an early (70) Canadian 240 from the weeds in North Alberta over a year ago and I salvaged pretty much everything but the shell. The VIN was 2744 I think?. The thing was all matching numbers. The chassis is no more, it was beyond repair for all but the most dedicated restorer. I fell out of the driver side of the car as I leaned over to get out and the rocker disentigrated and the seat tipped over and deposited me on the floor. Yes, that bad. I would dearly love to rid myself of the engine that is taking up valuable space in my cramped shop. It is a Canadian specific spec engine, no air pump and correspondingly no air injectors on the exhaust manifold, smooth balance tube. E31, all original as far as I can see. It could go to a deserving home for embarrassing small amounts of nearly worthless Canadian loonies (like a large handful). I will be lazy for the moment and suggest I'm not interested in shipping it anywhere other than within Alberta, where I will happily drive it within 3-4 hours of in the back of my truck and push it off the tail gate for you for the price of my gas and lunch. Not a McDonalds cheeseburger, I'm talking fancy, like Wendy's. Surely someone out there would rather have it sitting in their shop rather than mine. I have also very rare matching gas tank that has fewer vents than usual, as these cars did not have the evap recovery tank and piping either. Make yourself a rare Canadian spec Z. You can do it. Let me know if you're interested at z240@shaw.ca1 point
-
Check your profile settings and make your actual address private. No reason to share that with the world @STeeleMarine1 point
-
The earlier 280Z's and the ZX's have the problem too I think. The ZX people often find a 10 ohm resistor in the wiring harness. FastWoman wrote about that, and she also used the tweak on her 78. I did it to my 76 car. Not sure why exactly the problem is there, maybe the fuel changed over time and/or the cars were tuned to perfection for emissions purposes. But adding the resistance makes a great tuning and troubleshooting aid for not much effort. Another clue that that's the problem is if you get popping back through the intake manifold and bucking at low throttle settings, trying to accelerate. That's a bad case. The milder version is just a hesitation though as you pass through the mid-range RPM at part throttle.1 point
-
1 pointThanks! Shes a 340 pistol grip car........not matching number and no build sheet/fender tag unfortunately....I have the $$ to put a 6.4 hemi in it but decided to get a zcar instead...I have my feelers out everywhere....my truck and trailer are fueled up and ready to go!1 point
-
1 pointGood eye! The louvers are in the shop getting painted the same color as the bumpers. Not sure if I'll put em back on the car, but will try em on after the paint and decide.1 point
-
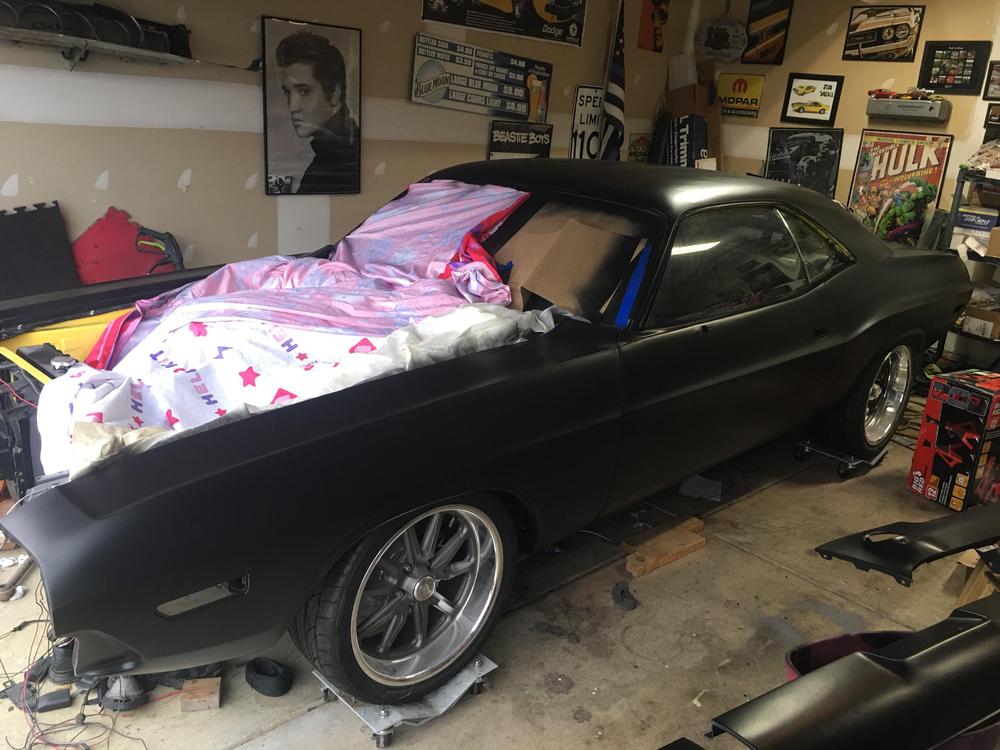
1 pointStill a project but the interior and wiring are 90% done....I did a quick paint job in my garage just to protect it....it’s headed to my friends shop to do the brake lines and fuel line....it hasn’t seen the road since 1985....it will be a 70 yellow ta clone when shes done...

 1 point
 -
1 pointSo it does have an antenna, but it's on the other side. You can see it in the photo below. The fender mirrors are after-market, and came originally with just one mirror on the drivers side. It's a 280z imported from the U.S.
 1 point
 -
Purchased and received these when they were on sale recently. Will have to wait until the car comes out of winter hibernation to report back. https://www.apexengineered.com/store/p22/Crossmember_Upper_Steering_Clamps.html1 point
-
You live in Alabama...you should enjoy them more. Sent from my iPhone using Tapatalk1 point
-
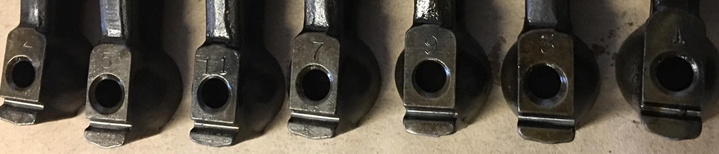
1 pointNot my idea. Must have been the original engine builder. I just use punch marks or an engraving tool to write on the side in the web1 point
-
1 pointhmmm..... I have three L28's already.... time to collect em' all? lol1 point
-
1 pointI'm not that clever... if that was done by anyone, it would have been @zKars.1 point
-
1 point
-
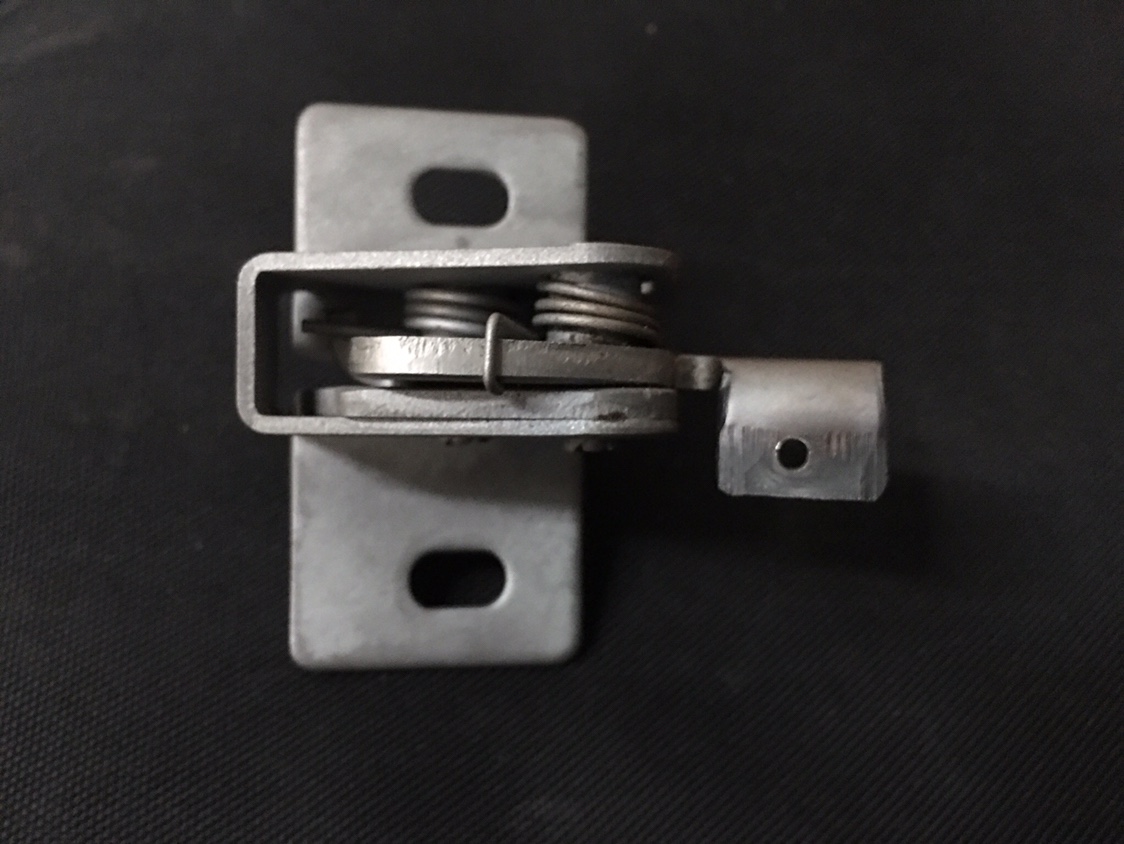
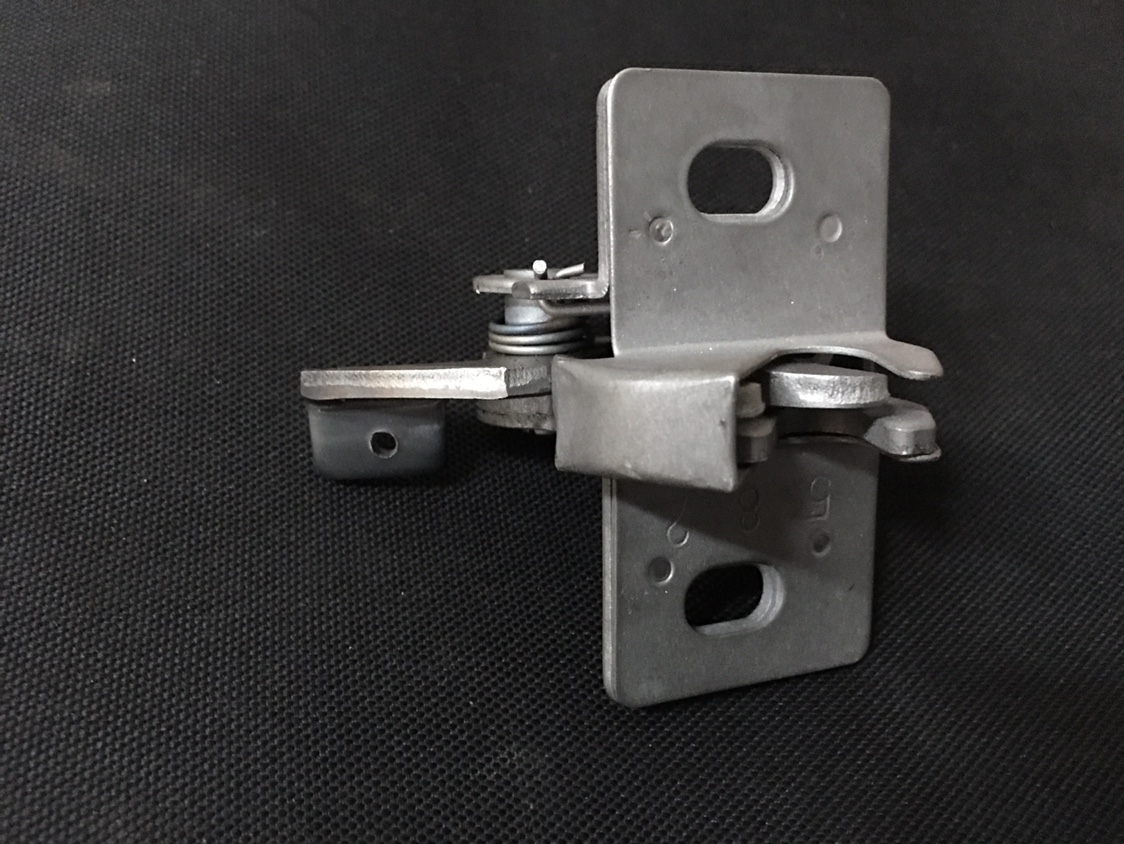
1 pointAnother side project... I managed to get the rear hatch opening mech drilled in preparation for the remote trunk release mod. This is hardened steel and is much harder to drill than you would think. I broke several bits and even my cobalt bits wouldn’t touch it till I heated it up to remove the hardening. Now I will countersink it a bit for the pull wire to sit in. More to come later!

 1 point
 -
I contacted the 3543 eBay seller and he said that he had listed the car with a guy on consignment and that the consignment guy had changed the ownership and the mileage in the ad. But then he still tried to say inhis message to me that mileage was unknown and didn't answer my direct question about the older 249,000 mile claims. So, still a little sketchy even by direct contact through eBay. I also gave him the link to this thread twice, but no response. He even added the old "little old lady" clause. "Elderly Owned always garaged Kept beauty". Just a guy trying to sell an old classic. Even if this isn't the same guy it's probably the same consignment shop. Might be why the guy knows the details of old 240Z's.1 point
-
1 point
-
1 pointYou @'ed me just to say your sorry, and point out specifically, twice, that you didn't think it was funny? Thanks, that was considerate. p.s. that's mild sarcasm, often 'seen' as funny. @wal280z I think that zspert was fine with it. Carry on!1 point
-
1 pointRetractable air hose reel and electrical drops are great. I have @Diseazd to thank for the pull down extension cords. I'd never thought about one before he built a new garage and mentioned it. My Dad gave me a retractable air hose reel for Christmas after he'd been given two the same year. He "re-gifted" me, cheap arse. Oh yeah, Bob's got a good one with the LED. They sale 4ft fluorescent bulbs now too if you have those fixtures already.1 point
-
1 pointWhat's your price range and what are your plans? Restoration, resto-mod, daily driver, hot rod...something to sit in?1 point
-
1 pointTake a new tool out for each job because you can't find the one you just used. Leave it on the closest horizontal surface when you're done. Swear to be more organized and fail immediately.1 point
-
Finally got around to installing the harmonic damper I received for my 280 from Jeff "JSM" about 6 months ago and all is good. There was some question about its stability because of the small crack in the rubber portion of the pulley. I just Trimmed it down flush with the pulley and it looks as if the crack was never there. Plus I had a shop check it out and they said it is good.1 point
-
Installed my X-mas aftermarket power antenna. Power up, Power down and shiny to boot!1 point
-
1 pointI agree. (and, 110 oxidizes toward orange over the years - even so, it's always completely different than 918 which is definitely a "burnt orange" without any apparent red in the tint - and 918 would never oxidize toward red) The engine bay is probably not the place to look for original color. Best to look for the factory overspray on the interior of the car. Check the spare tire well first, but it may have been shot over as well. Definitive proof is usually under the vinyl on the pillars... If it's 110 - oxidized 110 - the color you get from a supplier from their stock formula will never match the oxidized paint. It will be a deeper red. Remove one of your side maker lights and look at the paint underneath. You may see that it's darker, more red. If so, it isn't stained - that's the original unoxidized color.1 point