


Leaderboard


Popular Content
Showing content with the highest reputation on 01/29/2019 in Posts
-
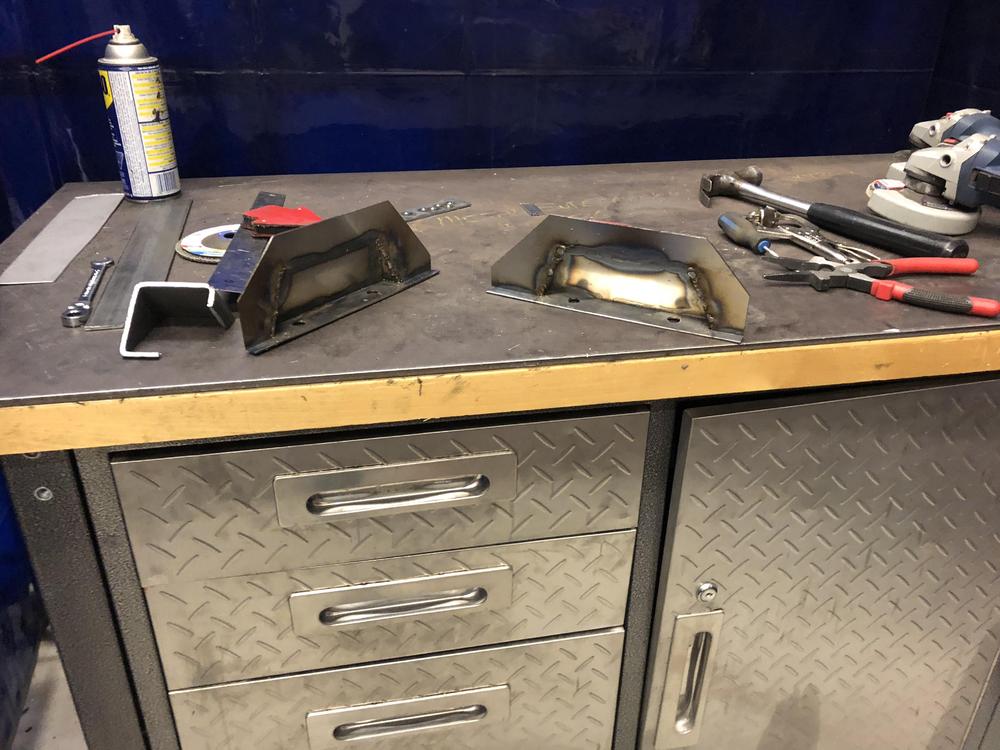
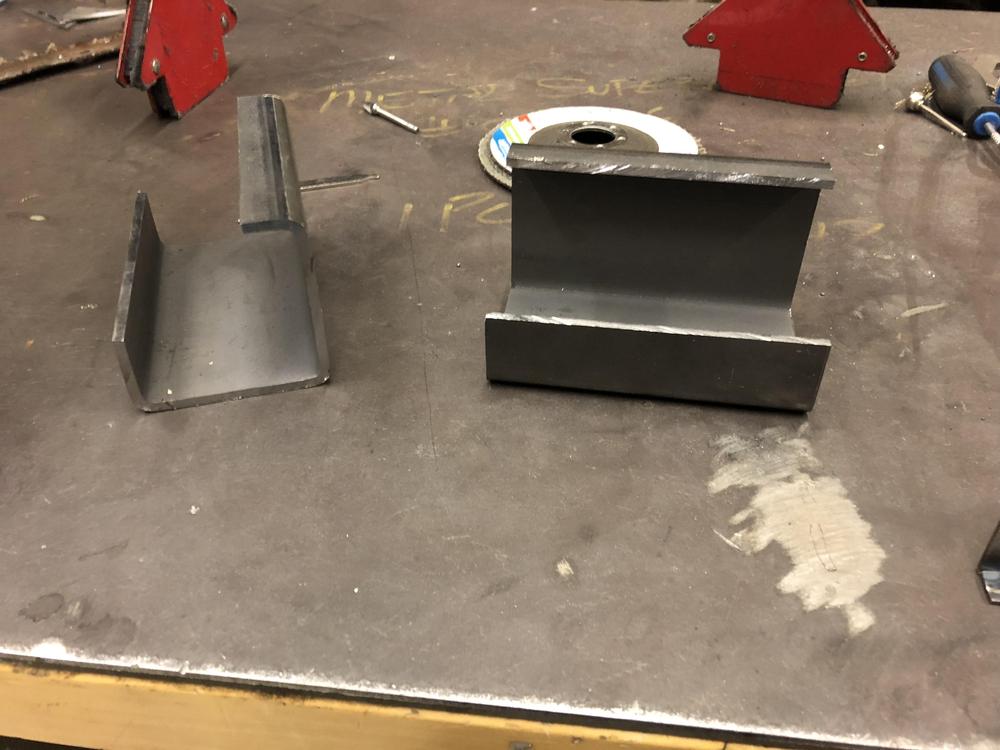
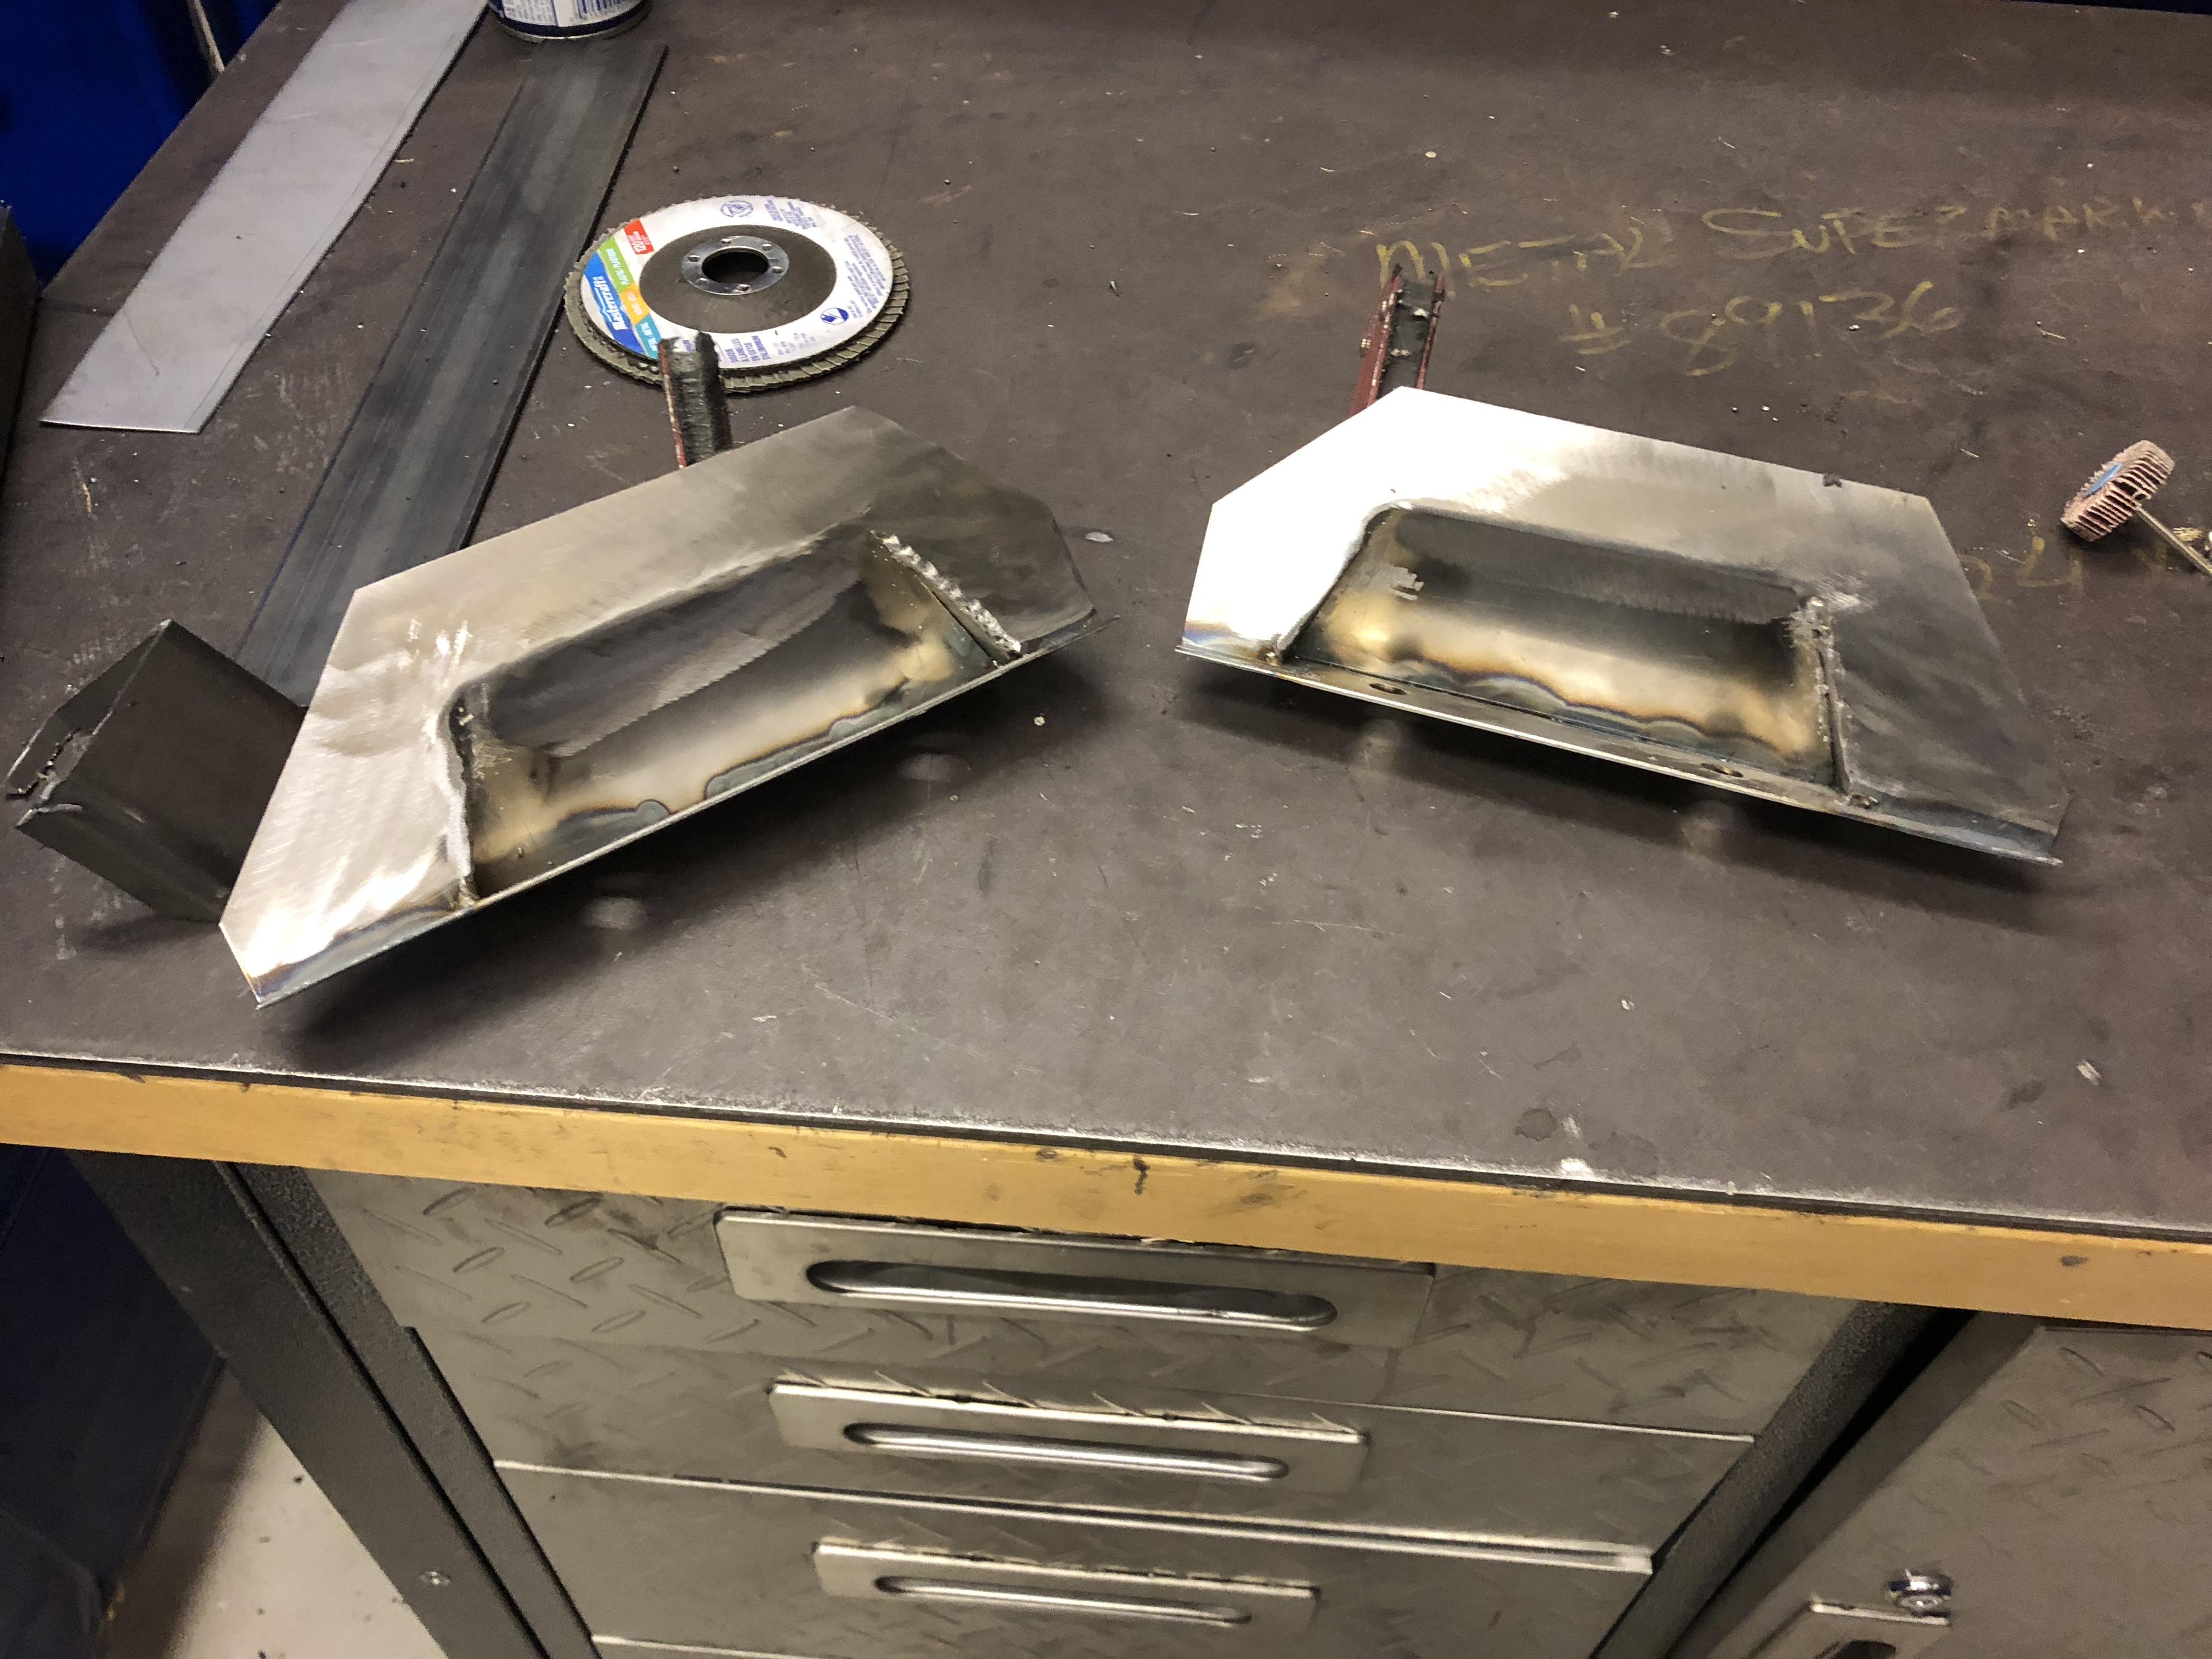
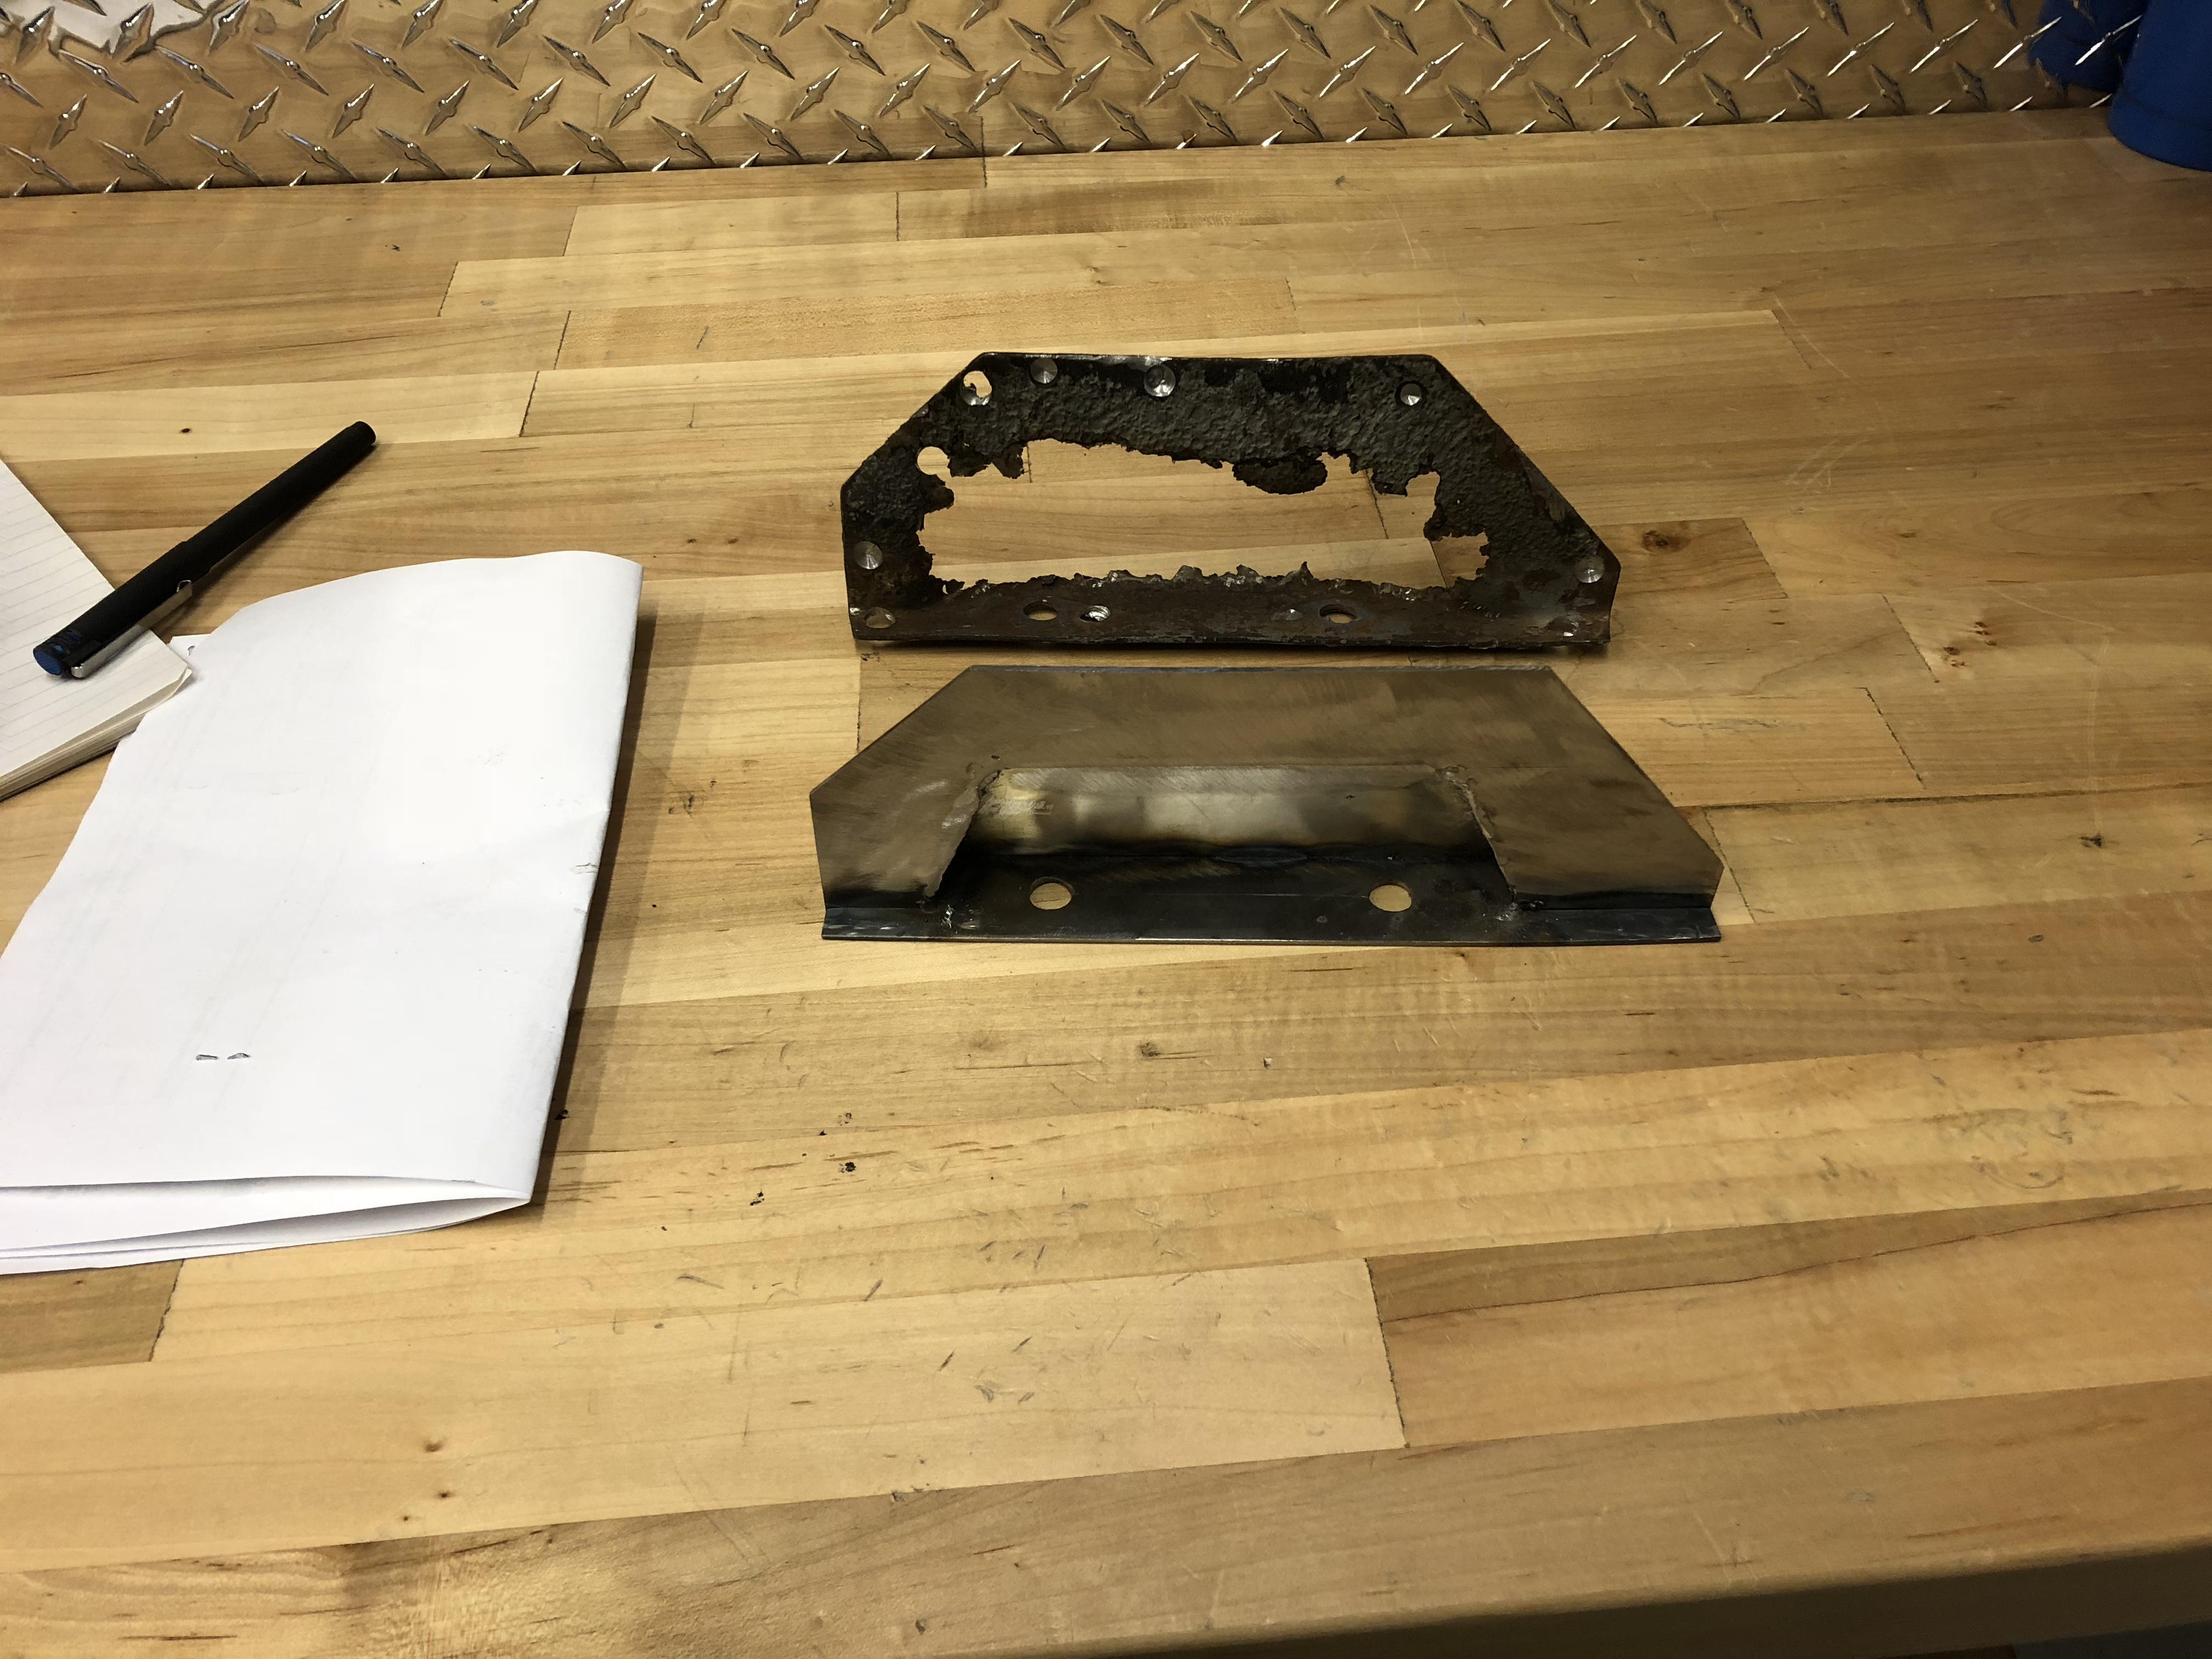
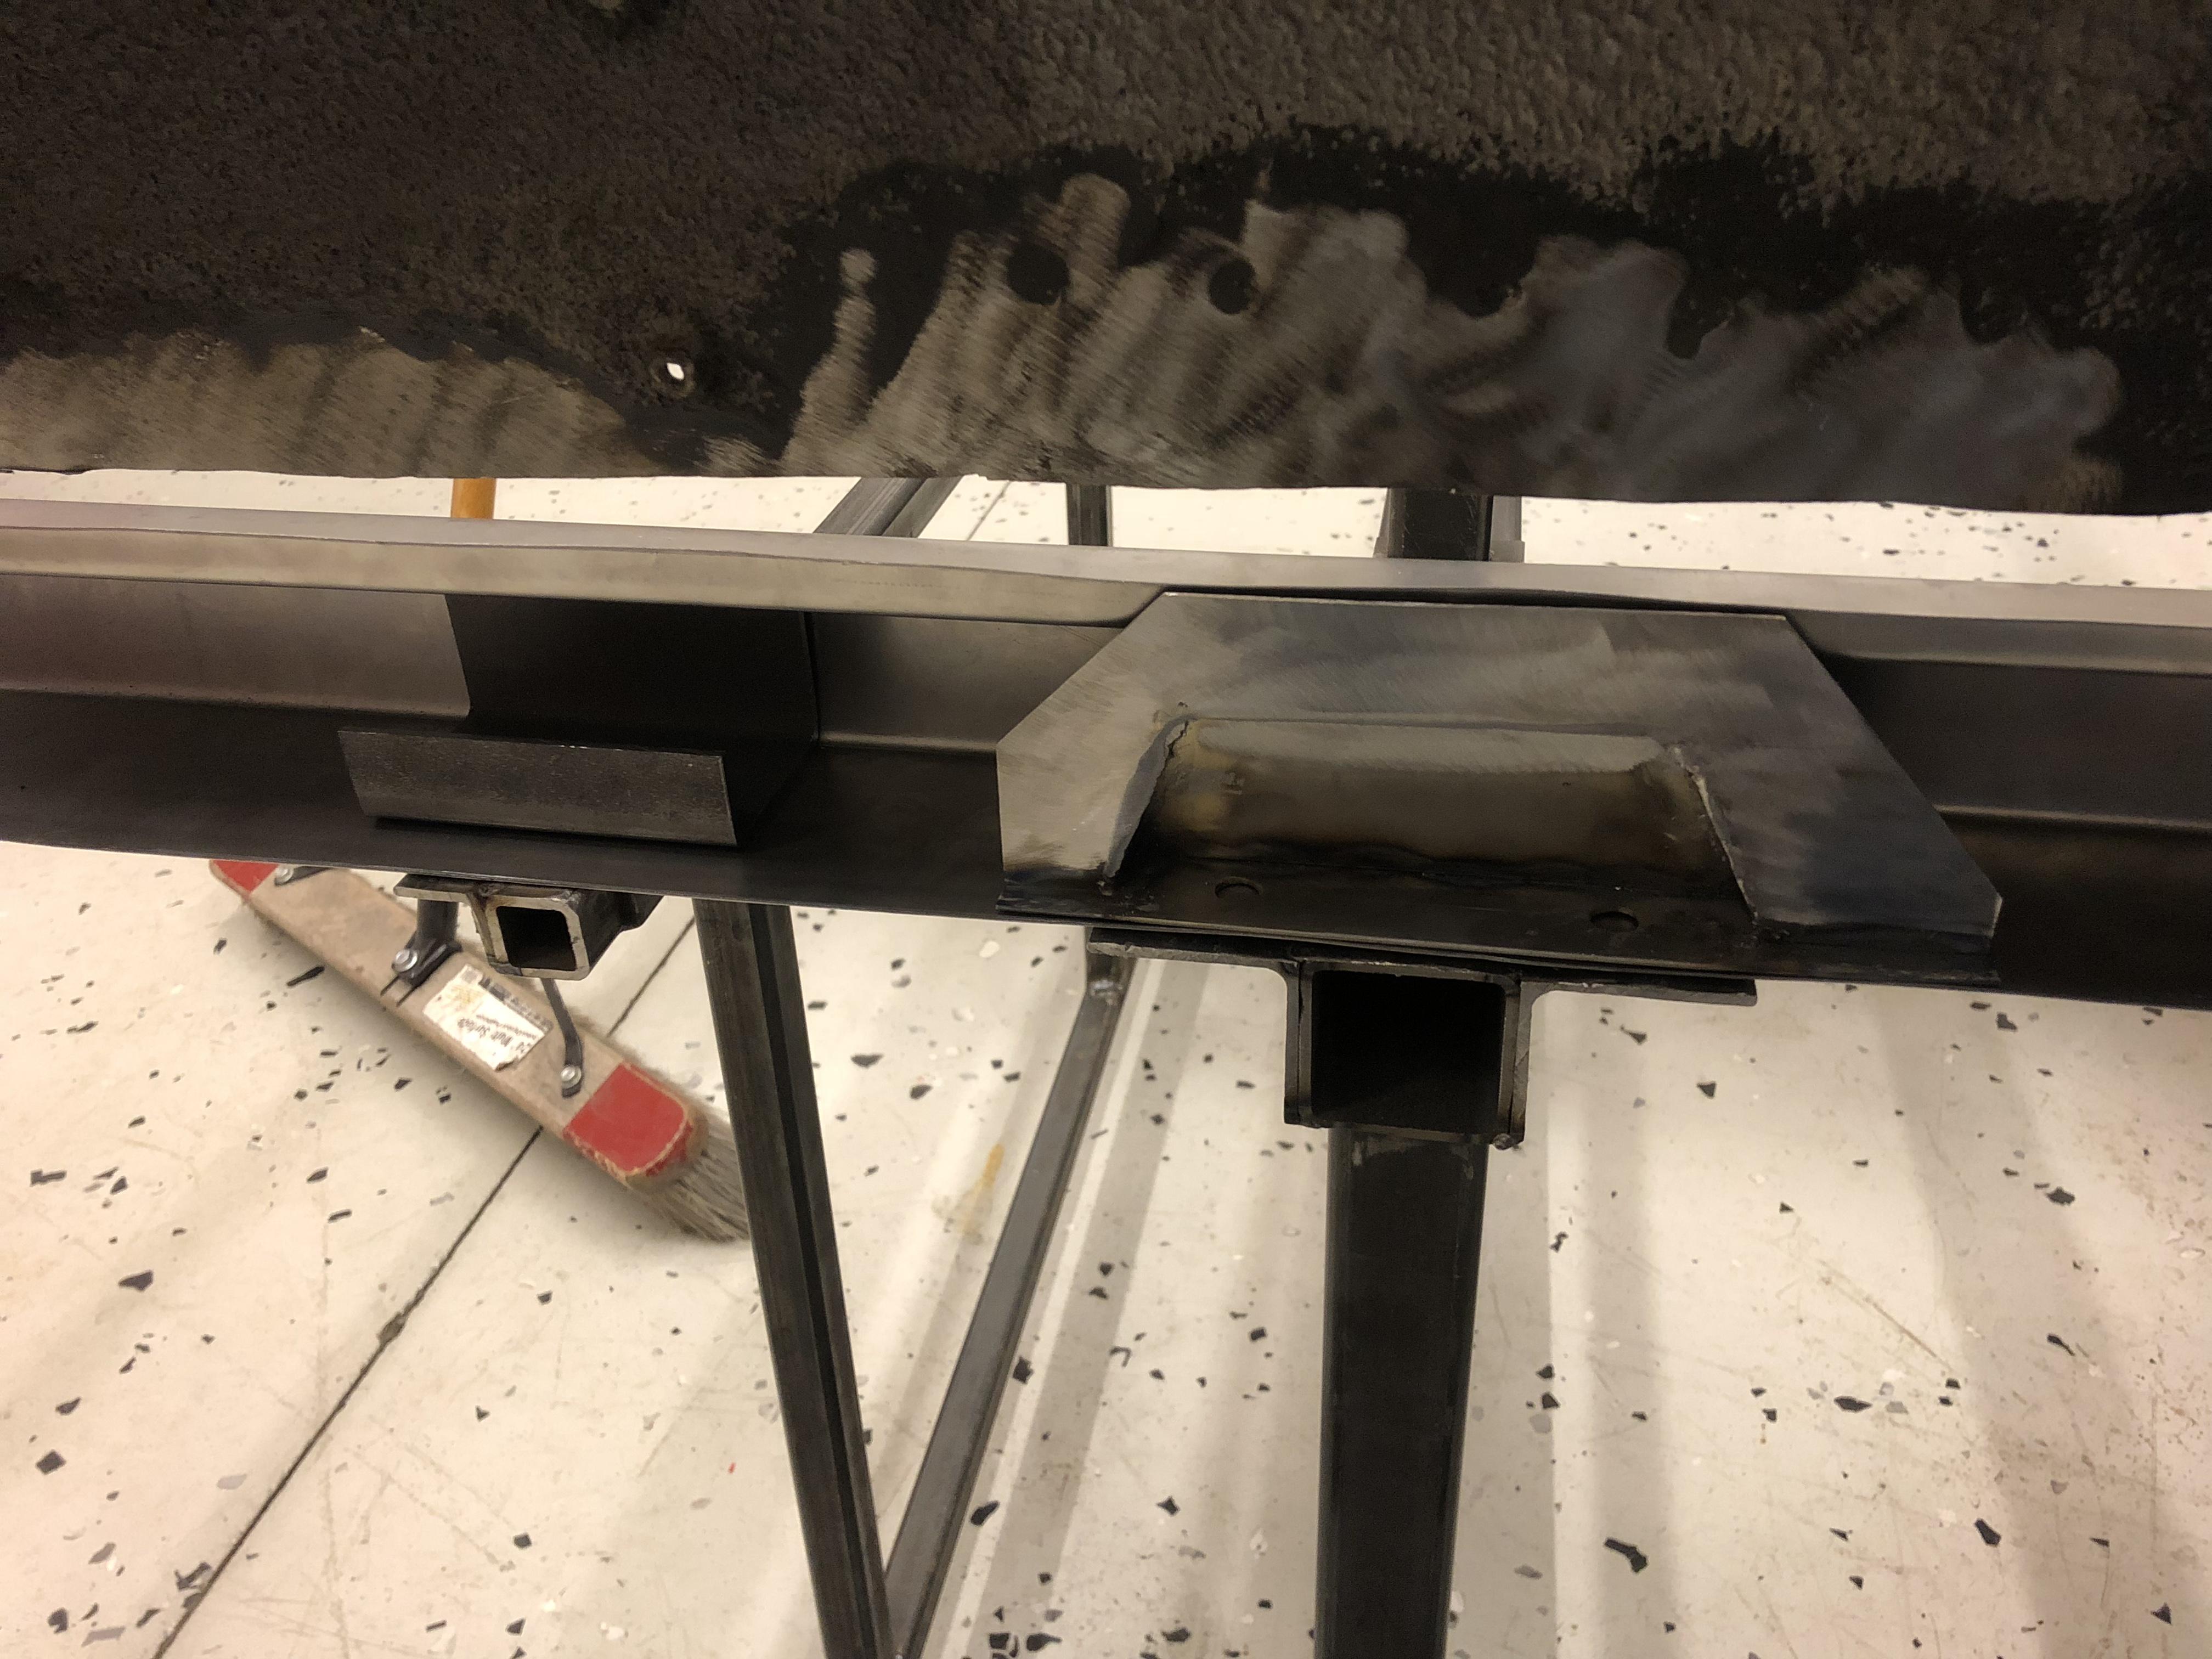
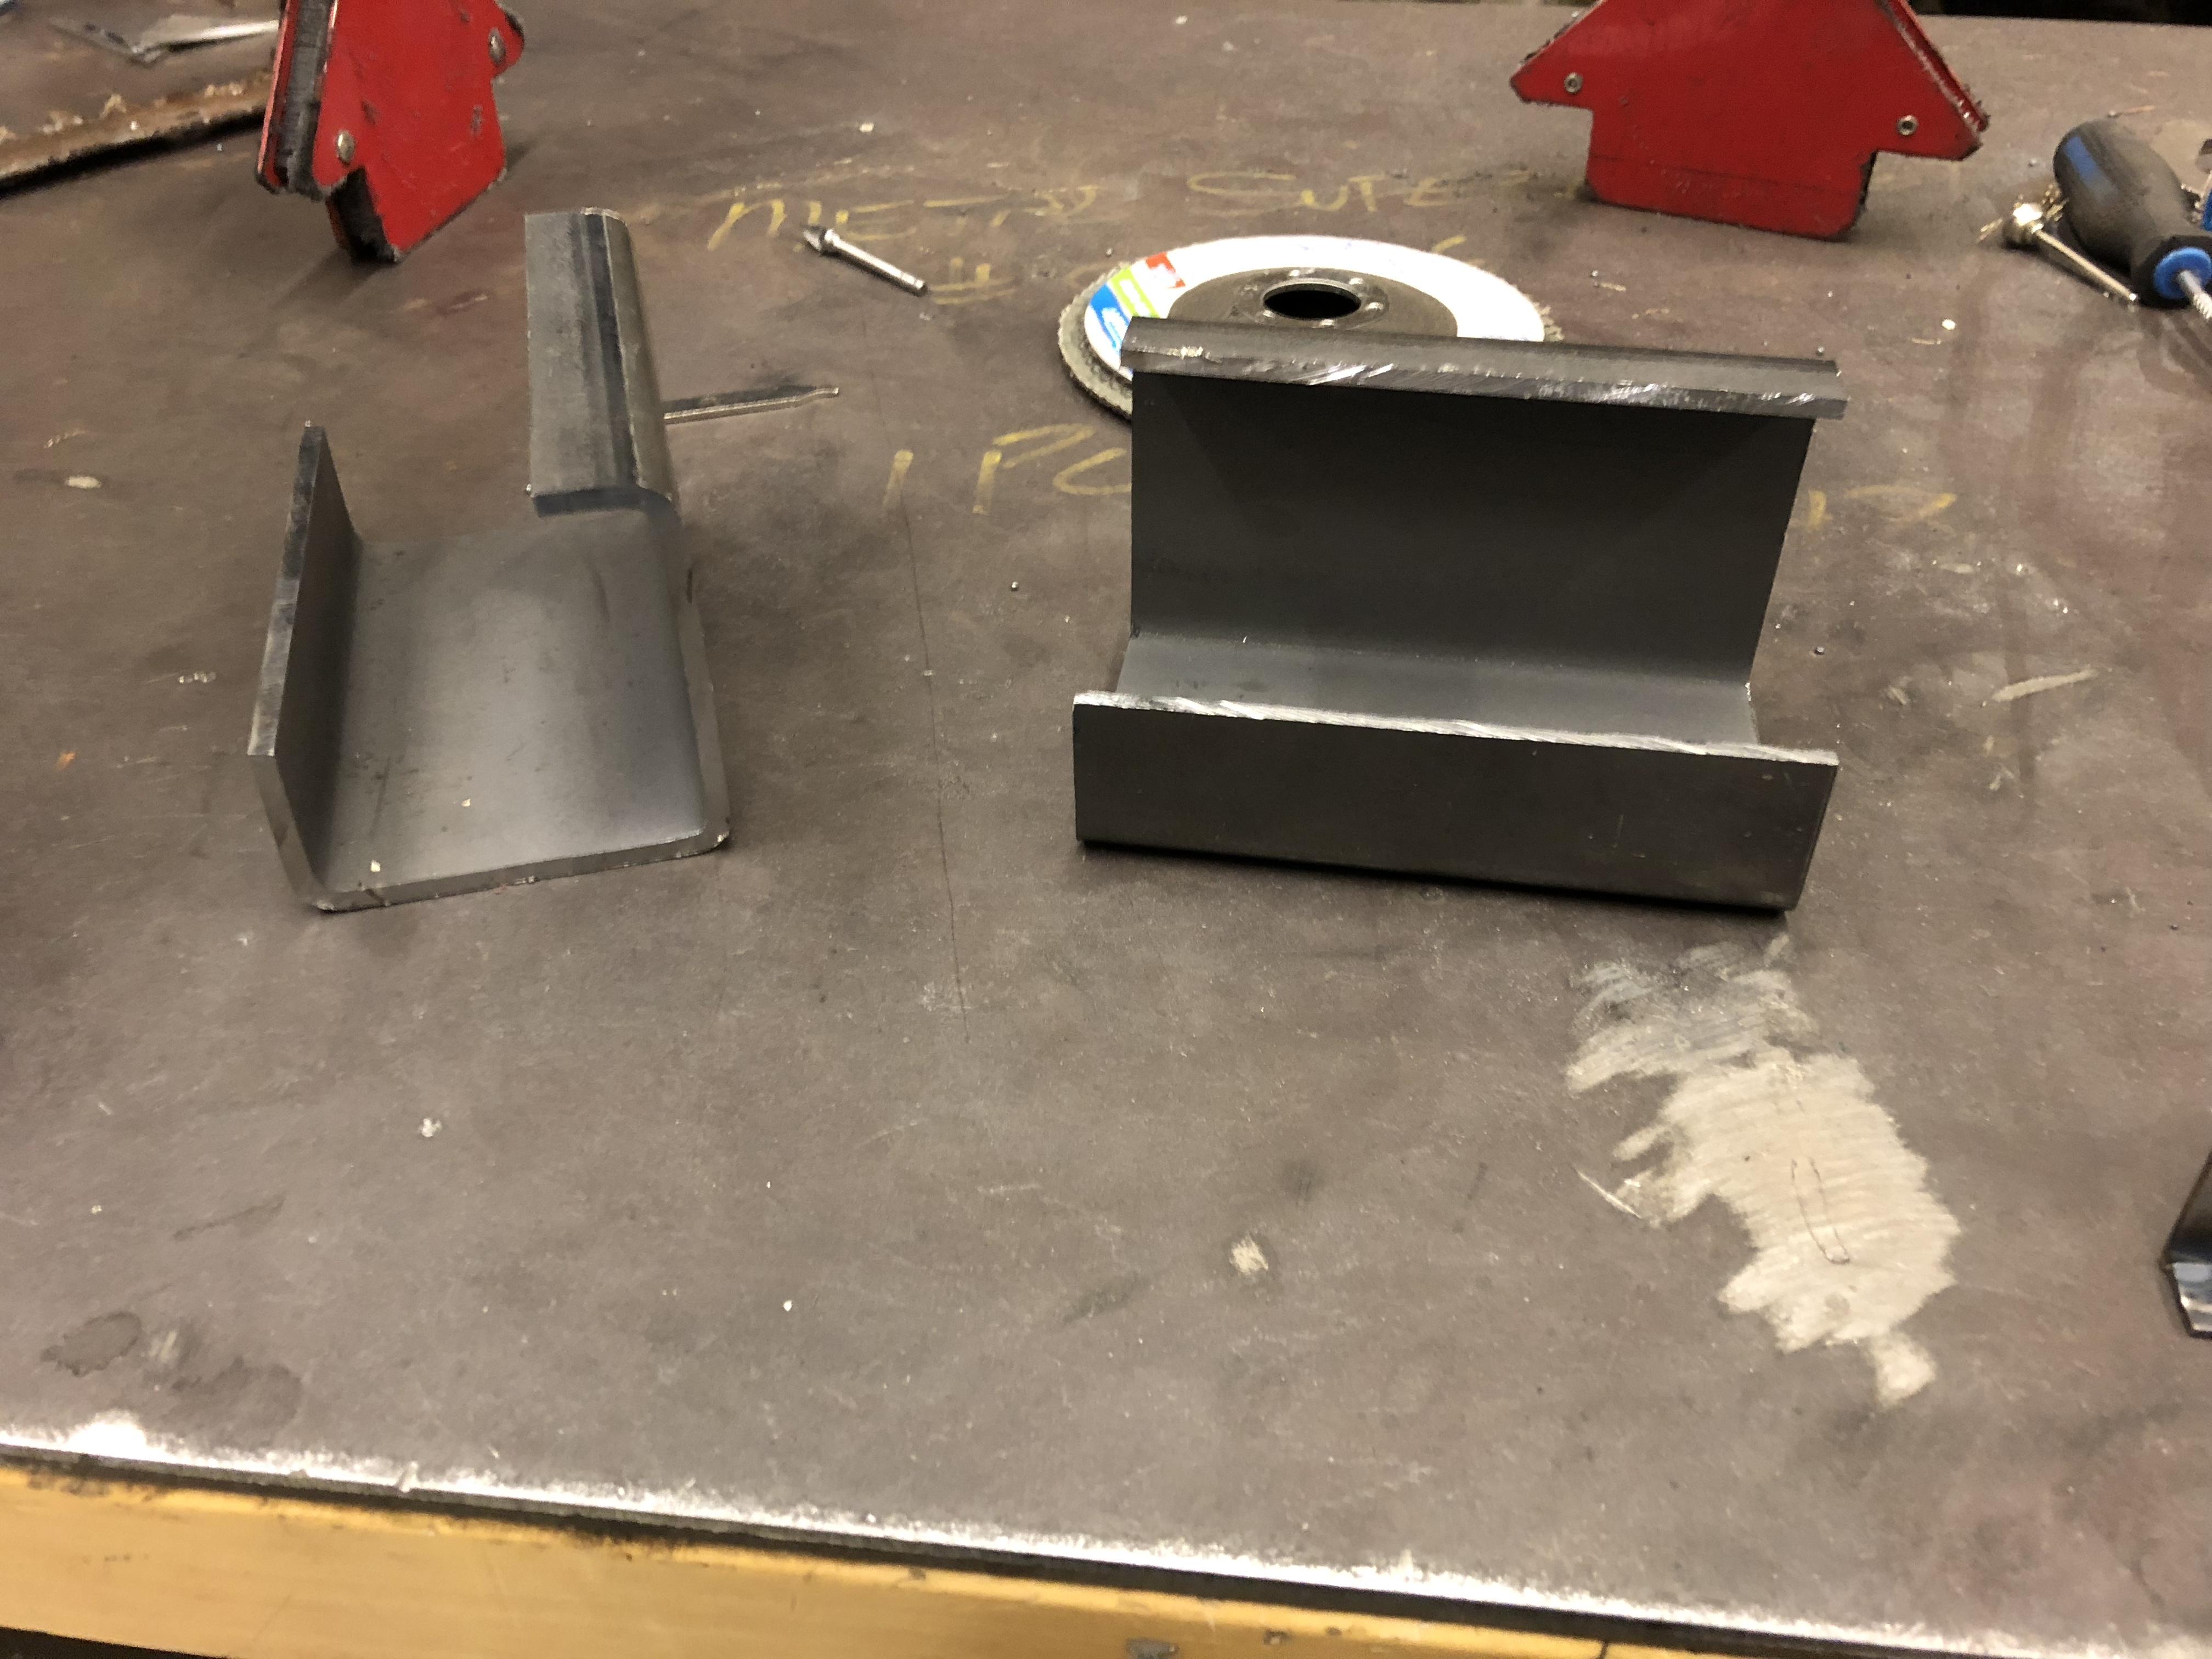
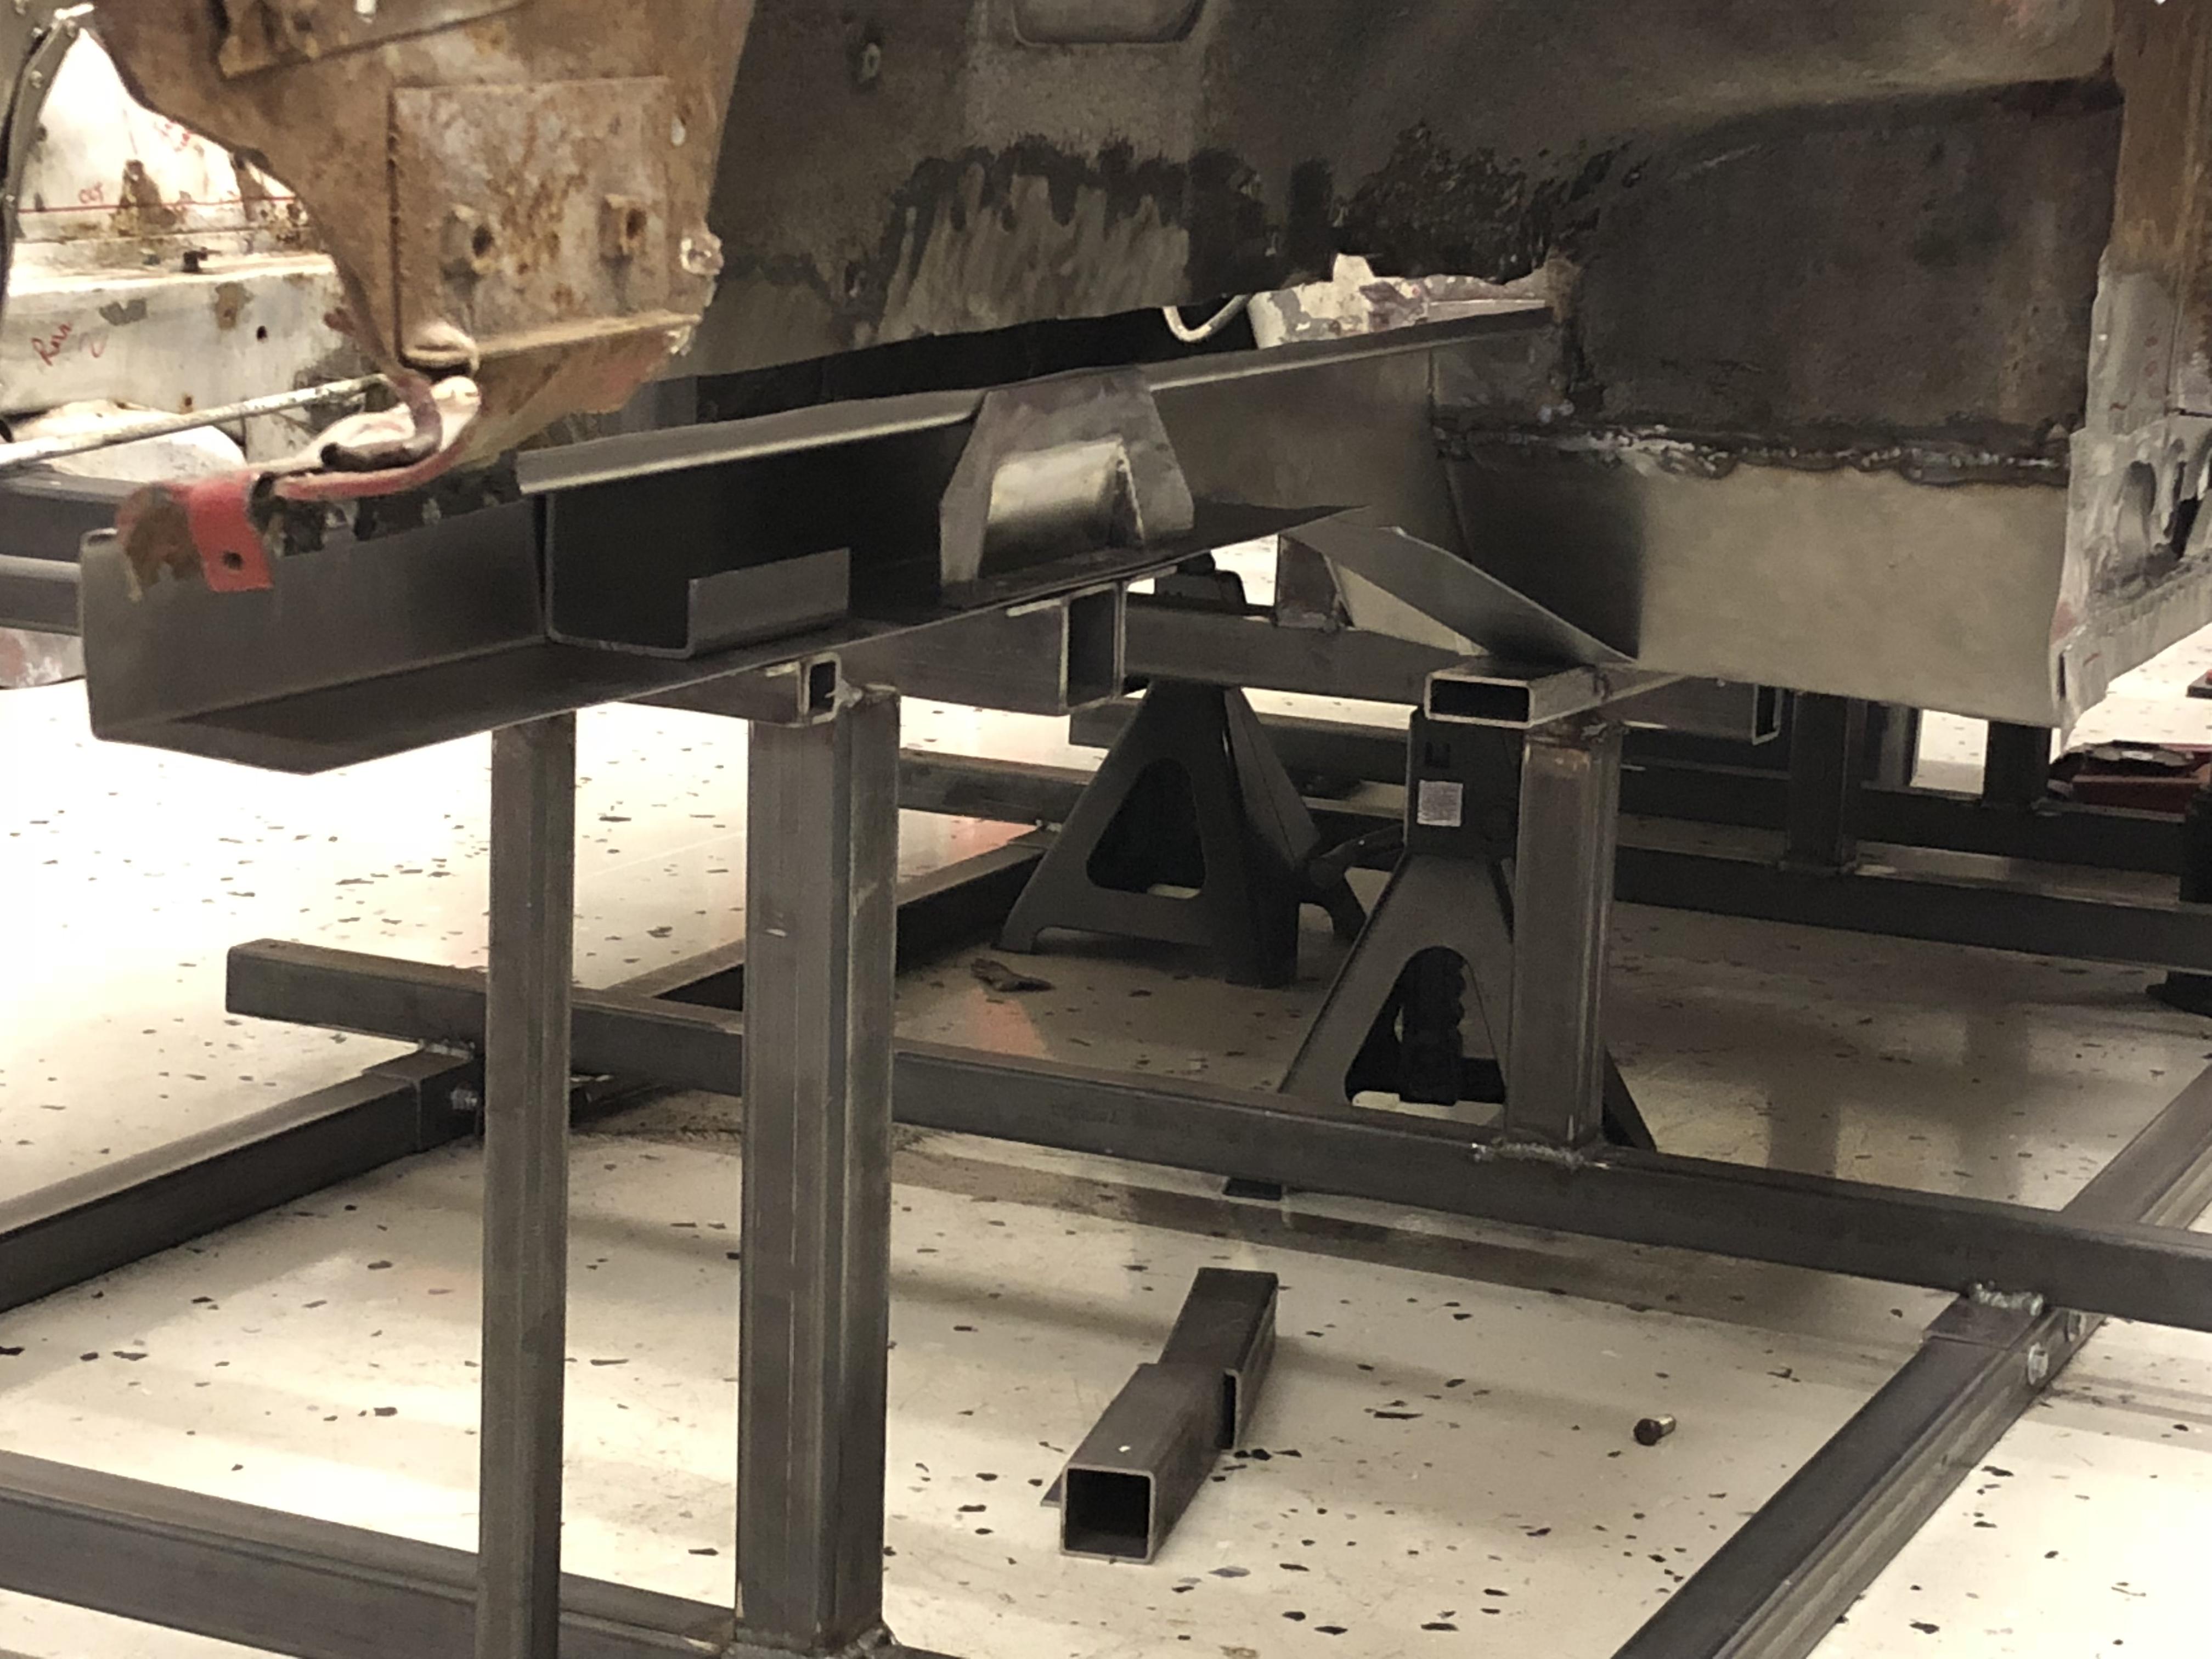
 3 pointsGot a chance to weld up some crossmember brackets. They are 14 ga. y ‘ Also “made” the sway bar braces. Basically 3/4 of a 2.5 x 2.5 x 1/8 square tube....easy peasy ? And test fitting everything .... Should have a completed rail in a few more days!


 3 points
 -
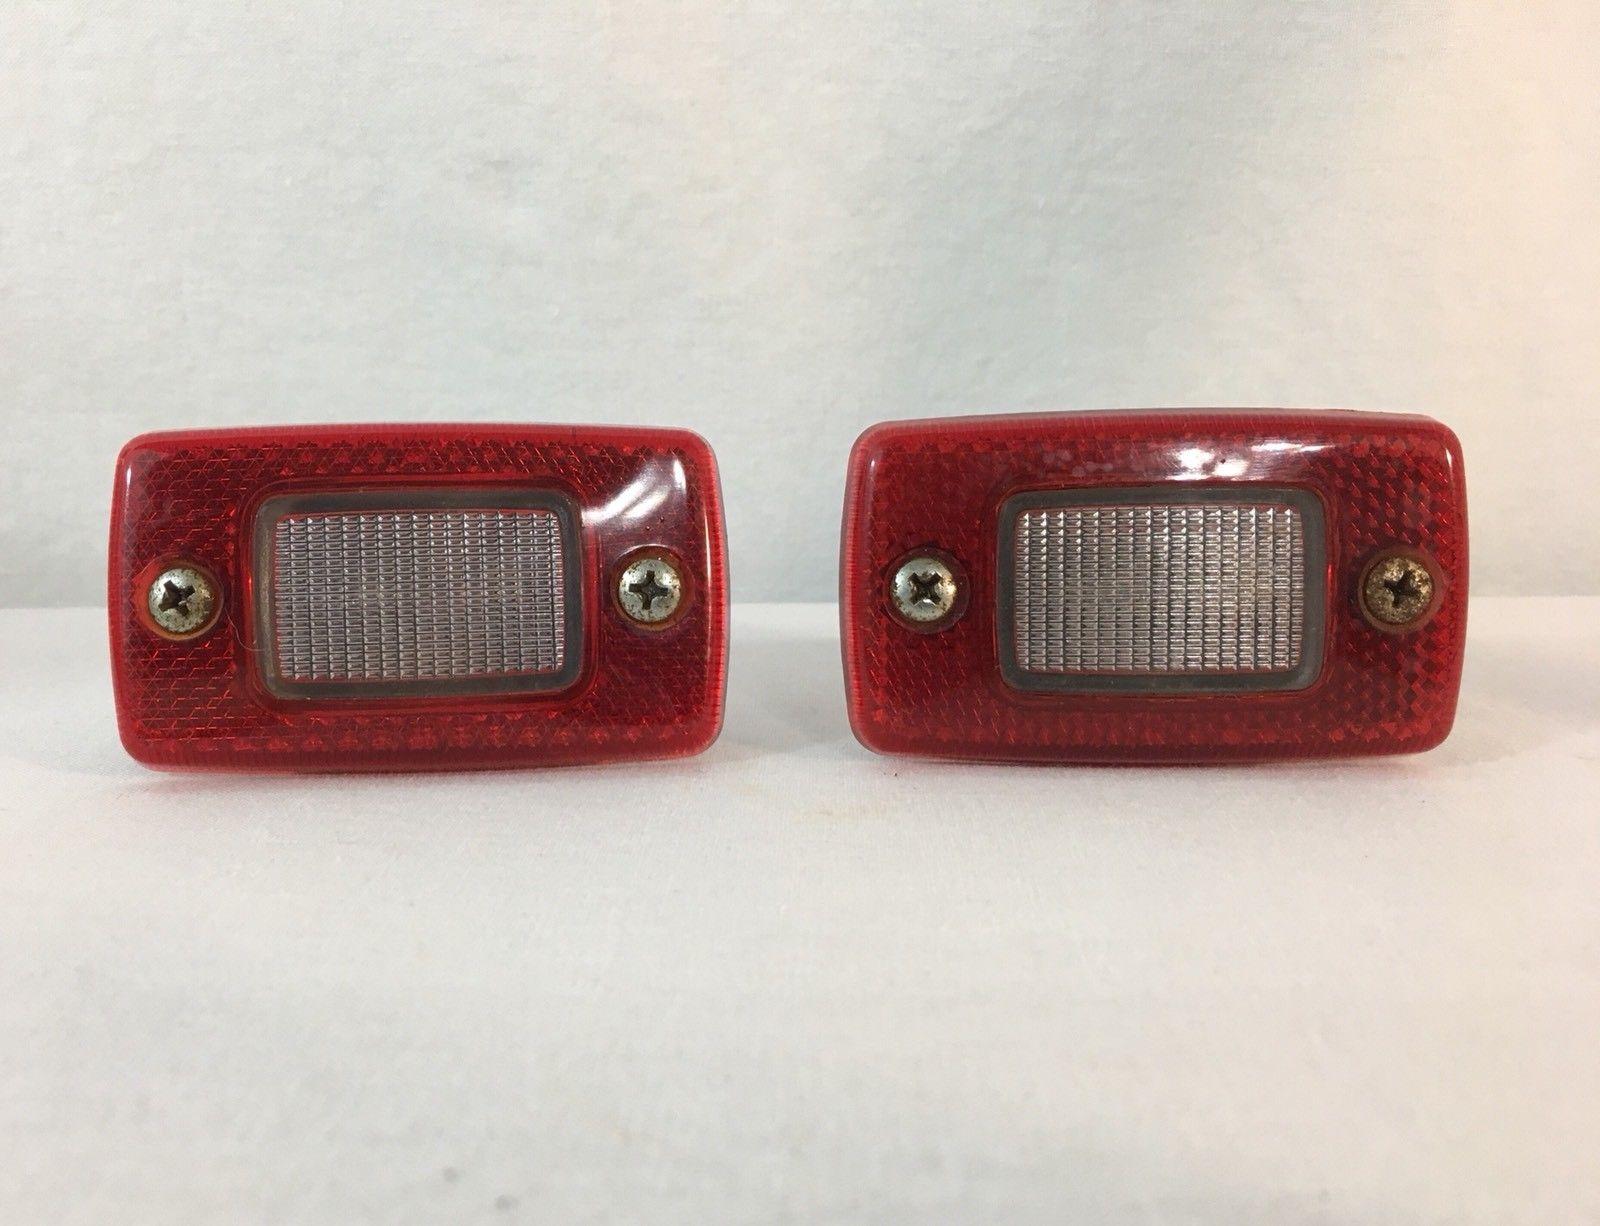
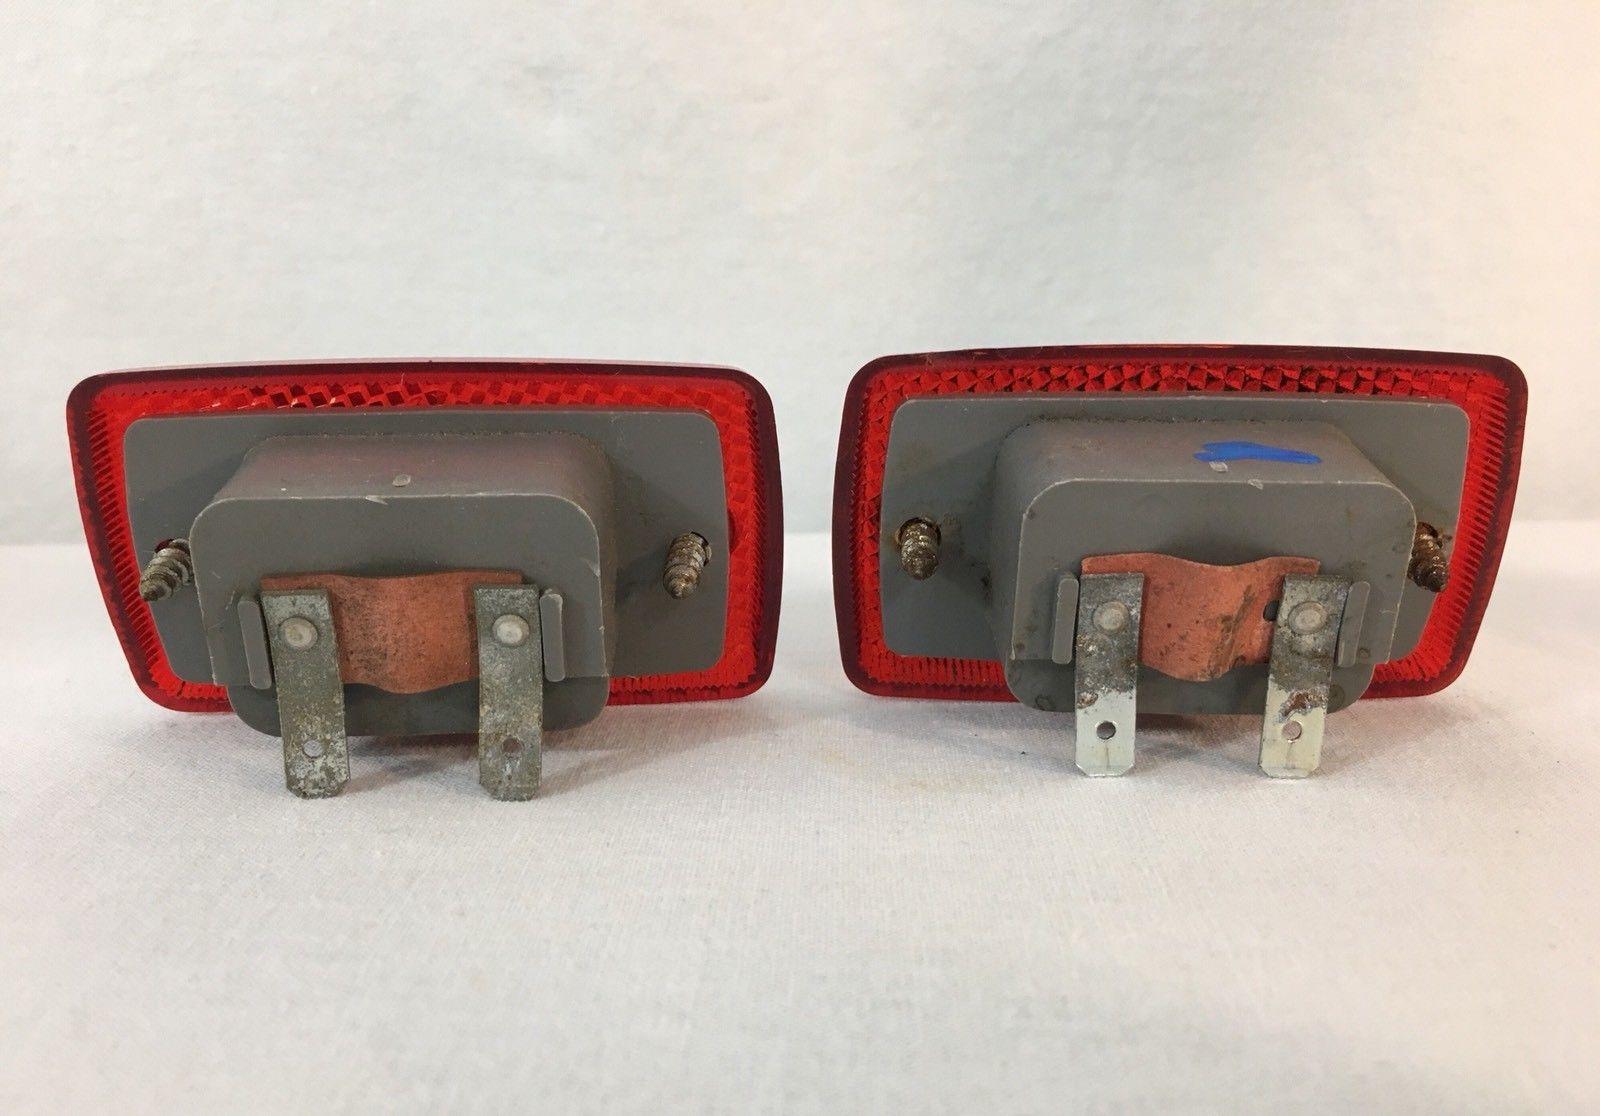
 3 pointsHoover's above post of the originals are the first I've ever seen of them, although I knew of their existence from the parts manuals. I've had my eyes on the step lights from a 280zx for some time. These are red---there was a clear version as well. While not as correct as these originals, they could be had for considerably less and should work just fine. They would mount in the locations shown but somewhat differently, in that they would screw into the door cards from the front, finished surface.
 3 points
 -
 2 pointsMark: that is how most of the youtube's show it being done. Now to see if I have the wherewithal to give it a try.2 points
 -
 2 pointsBeen there, done that. I drilled a hole in the ends of the crack, ground a vee in the crack, preheated with a butane torch, welded the crack with nickel rod (I've also used rod for stainless steel) and buried it in dry sand to let it cool slowly.2 points
 -
 2 pointsCliff, Let’s wait until I get a 240z and then we can work on running the prices up. I’m still looking [emoji6] Sent from my iPhone using Tapatalk2 points
 -
 2 points$35,000 for sure, easily. We need to make sure that people who want a 240Z pay as much as possible and strangers who are selling their 240Z's get as much as possible. It's the right thing to do.2 points
 -
 2 points
 -
 2 pointsIt's a shame parts like this can't be reproduced. I love the idea of a little better lighting in an OEM setup2 points
 -
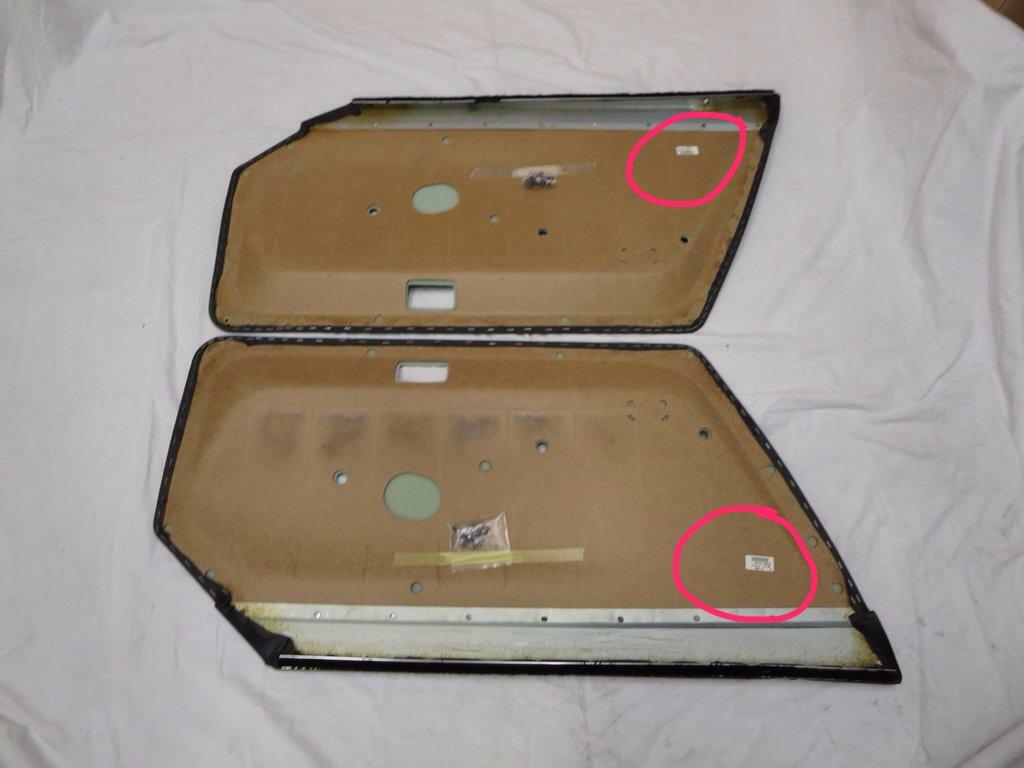
 2 pointsIt looks like they mount in the lower portion of the door card, to illuminate on the ground as you step out right? These spots look appropriate as they are under the arm rest. They line up better with your other pic of the door too. I would think power would be run from the door jam push switch by the hinge, so they come on as you open the door like the interior light.
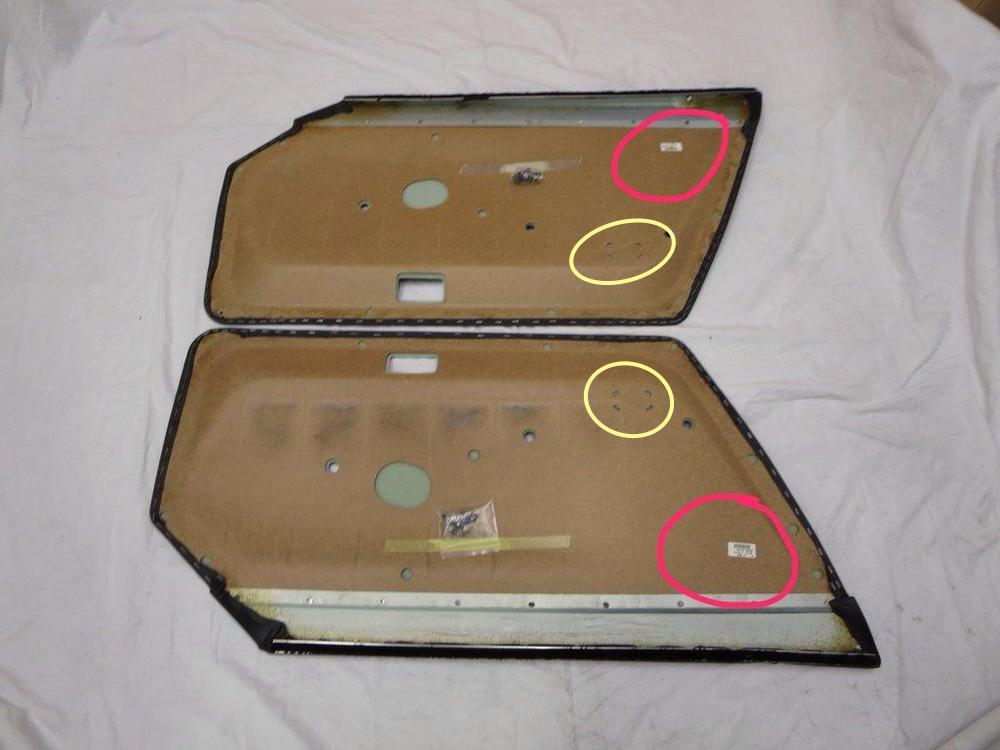 2 points
 -
 2 pointsThey mount in the door. If you take off the interior panel on the door, you will see some holes you never noticed before.
 2 points
 -
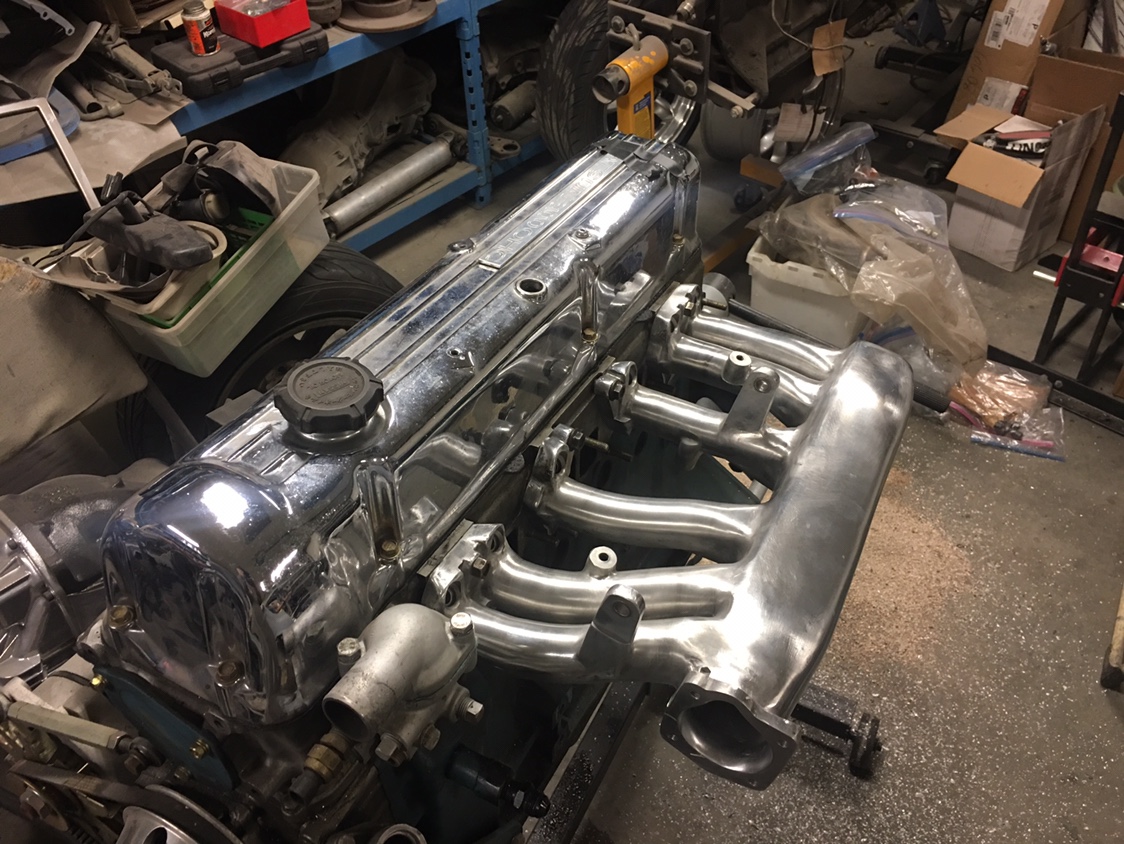
2 pointsAchievement unlocked! E88 head tapped and ported for N42 non-webbed fuel injection intake!
 2 points
 -
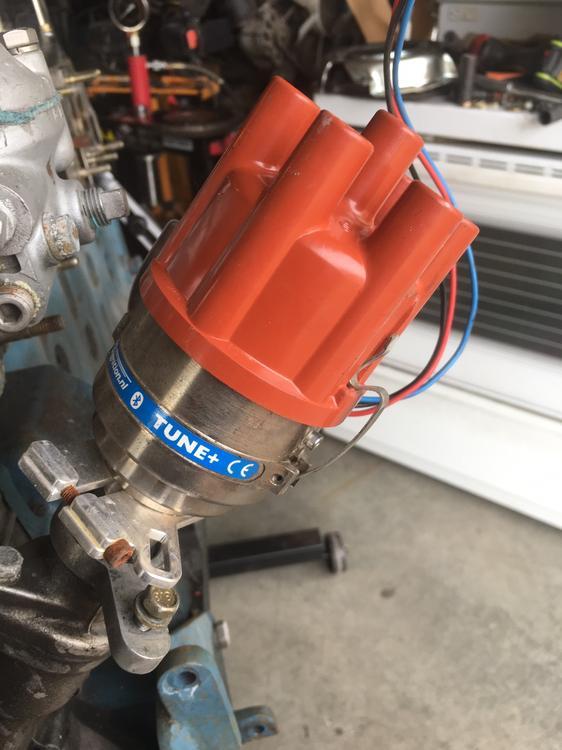
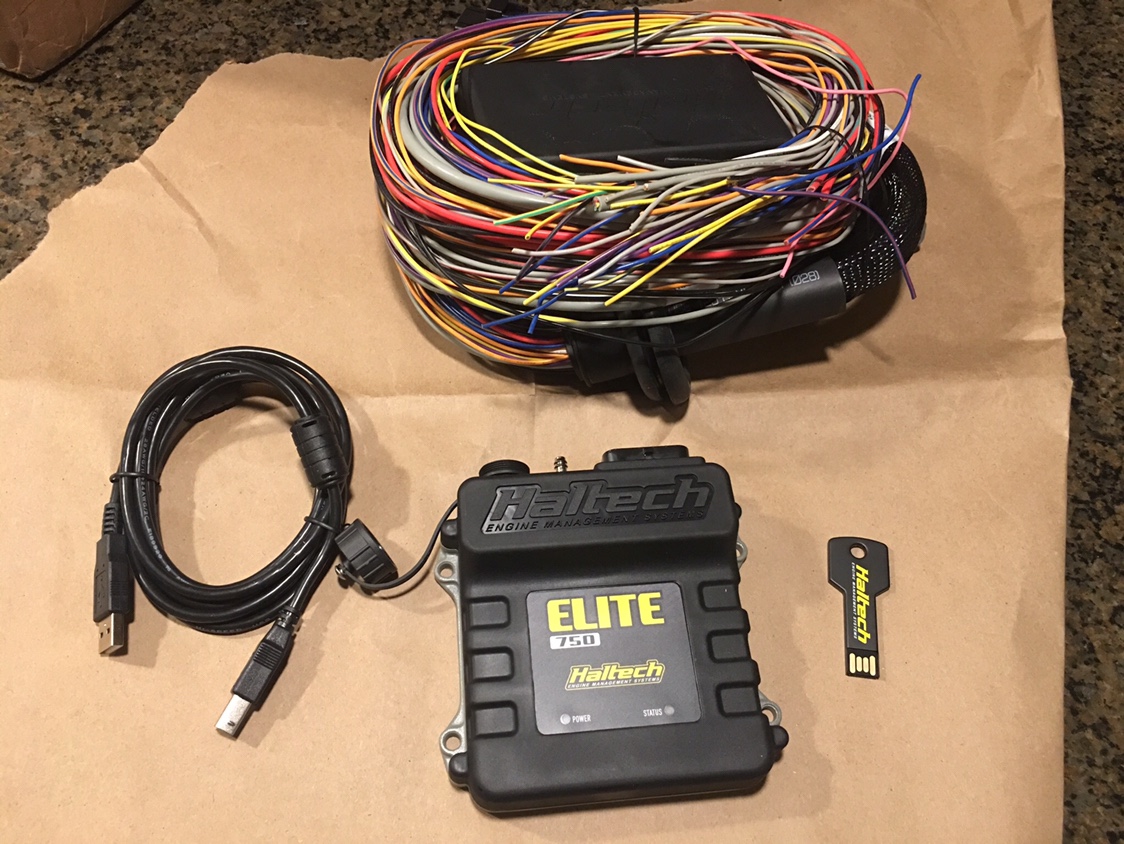
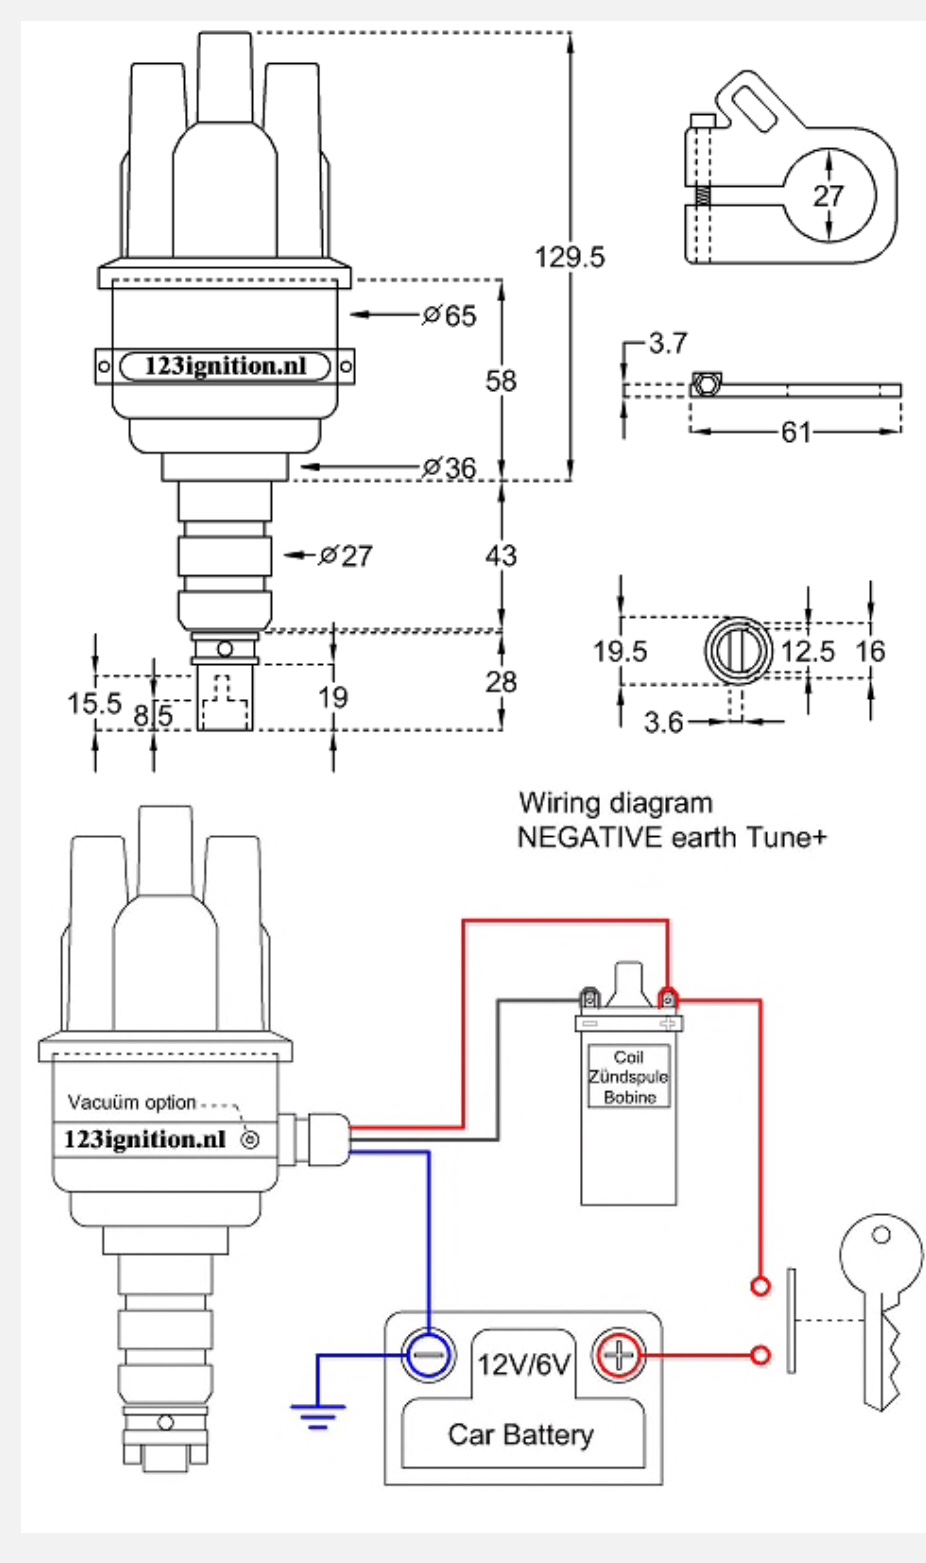
Up for sale is a used 123 Ignition, Programmable Bluetooth Distributor. It came with the stroker engine I purchased and was used with no issues by the previous owner. I am switching to a Haltech Elite 750 ECU with fuel injection, Coil On Plug and Crank Angle Sensor so the electronic programmable distributor will be redundant. Price as new from 123ignition are $585 US plus shipping. I am asking $400 US plus shipping. Unit is clean, damage free and has all the pieces needed to plug directly into your Datsun L24/26/28 motor. Read all about the features and capabilities here: Programmable Bluetooth Distributor for Datsun L6 Sample info: PRODUCT DESCRIPTION Fits Datsun "Z" Cars. Comes with proper drive dog and pinch clamp. The 123\TUNE+-6-R-V-DATSUN is designed for 6-cyl. engines: L24, L26, L28. 123ignition is proud to announce the first fully programmable wireless Bluetooth 4.0 ignition! Control your 123\TUNE+ with your iOS/Android smartphone or tablet. The App makes it possible to adjust the ignition curve and shows an electronic dashboard. Main features: REV-counter, Antitheft system by a PIN code, Bluetooth 4.0, Real time tuning, Vacuum advance, Boost retard, Soft REV-limiter, etc.

 1 point
 -
 1 pointAs long as you are using a redirect up on the C Pillar, you should be ok then. Good to hear.1 point
 -
 1 pointI remember a friend's Mom had them on her ZX. I think they were for street parking so know one would knock your door off.1 point
 -
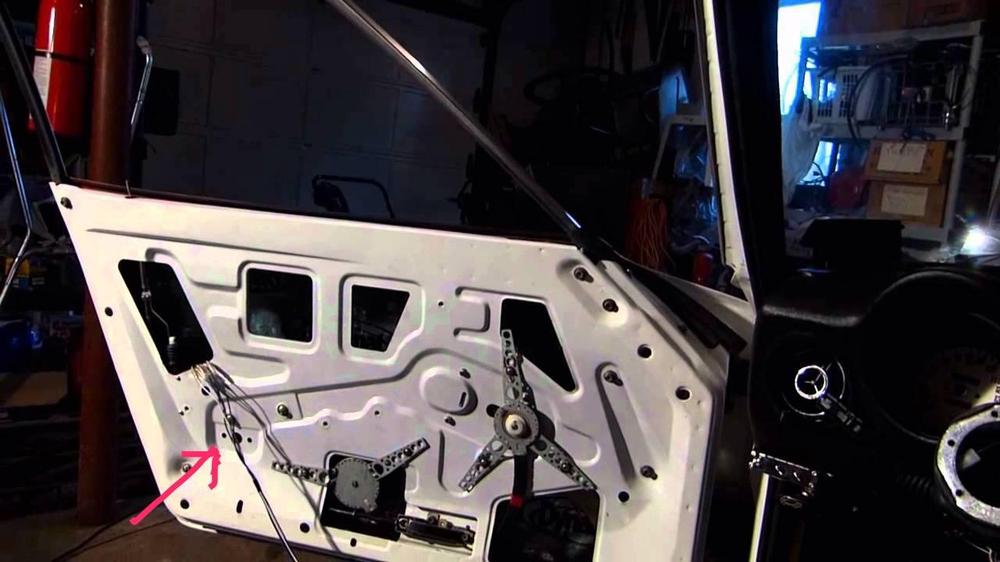
1 pointYes, i agree the door switch would turn them off and on, just not sure how the wire would go from the switch to the lights in the door. The wires would have to be long enough to open the door all the way and not to long to get pinched it the door when closed. As well as holes drilled in both the door and A pillar. Seems like a lot, when the hole is already in the door card and wires run in the harness. Much more than plug and play.1 point
-
1 pointJeff, You mentioned in this video that you plan to mount the seat belt retractor on the wheel well. That is a really bad idea, unless you install an anchor point up high on the pillar. If you anchor it down low, so that it just goes up and over your shoulder, then down again to clip into the buckle, you could compress your spine in a crash. I do some racing with NASA (National Auto Sports Association) here in the U.S.. Here is the section in the regulations that addresses this: "The shoulder harness should be mounted behind the driver and above a line drawn downward from the shoulder point at an angle of no more than twenty (20) degrees from horizontal with respect to flat ground. " I hope this makes sense to you. If you have questions, let me know. Marty1 point
-
 1 pointFYI: https://www.zcar.com/forum/10-70-83-tech-discussion-forum/116018-welding-manifold-safe.html https://forums.hybridz.org/topic/29099-welding-cast-iron-exhaust-manifolds/1 point
 -
 1 pointTrust me you don't want to see those... don't worry the joke may be lost in translation. ? But on a serious note, I have fun doing the work myself and as you say you learn something but also save money. Plus if things don't work properly I only have myself to blame. ha.1 point
 -
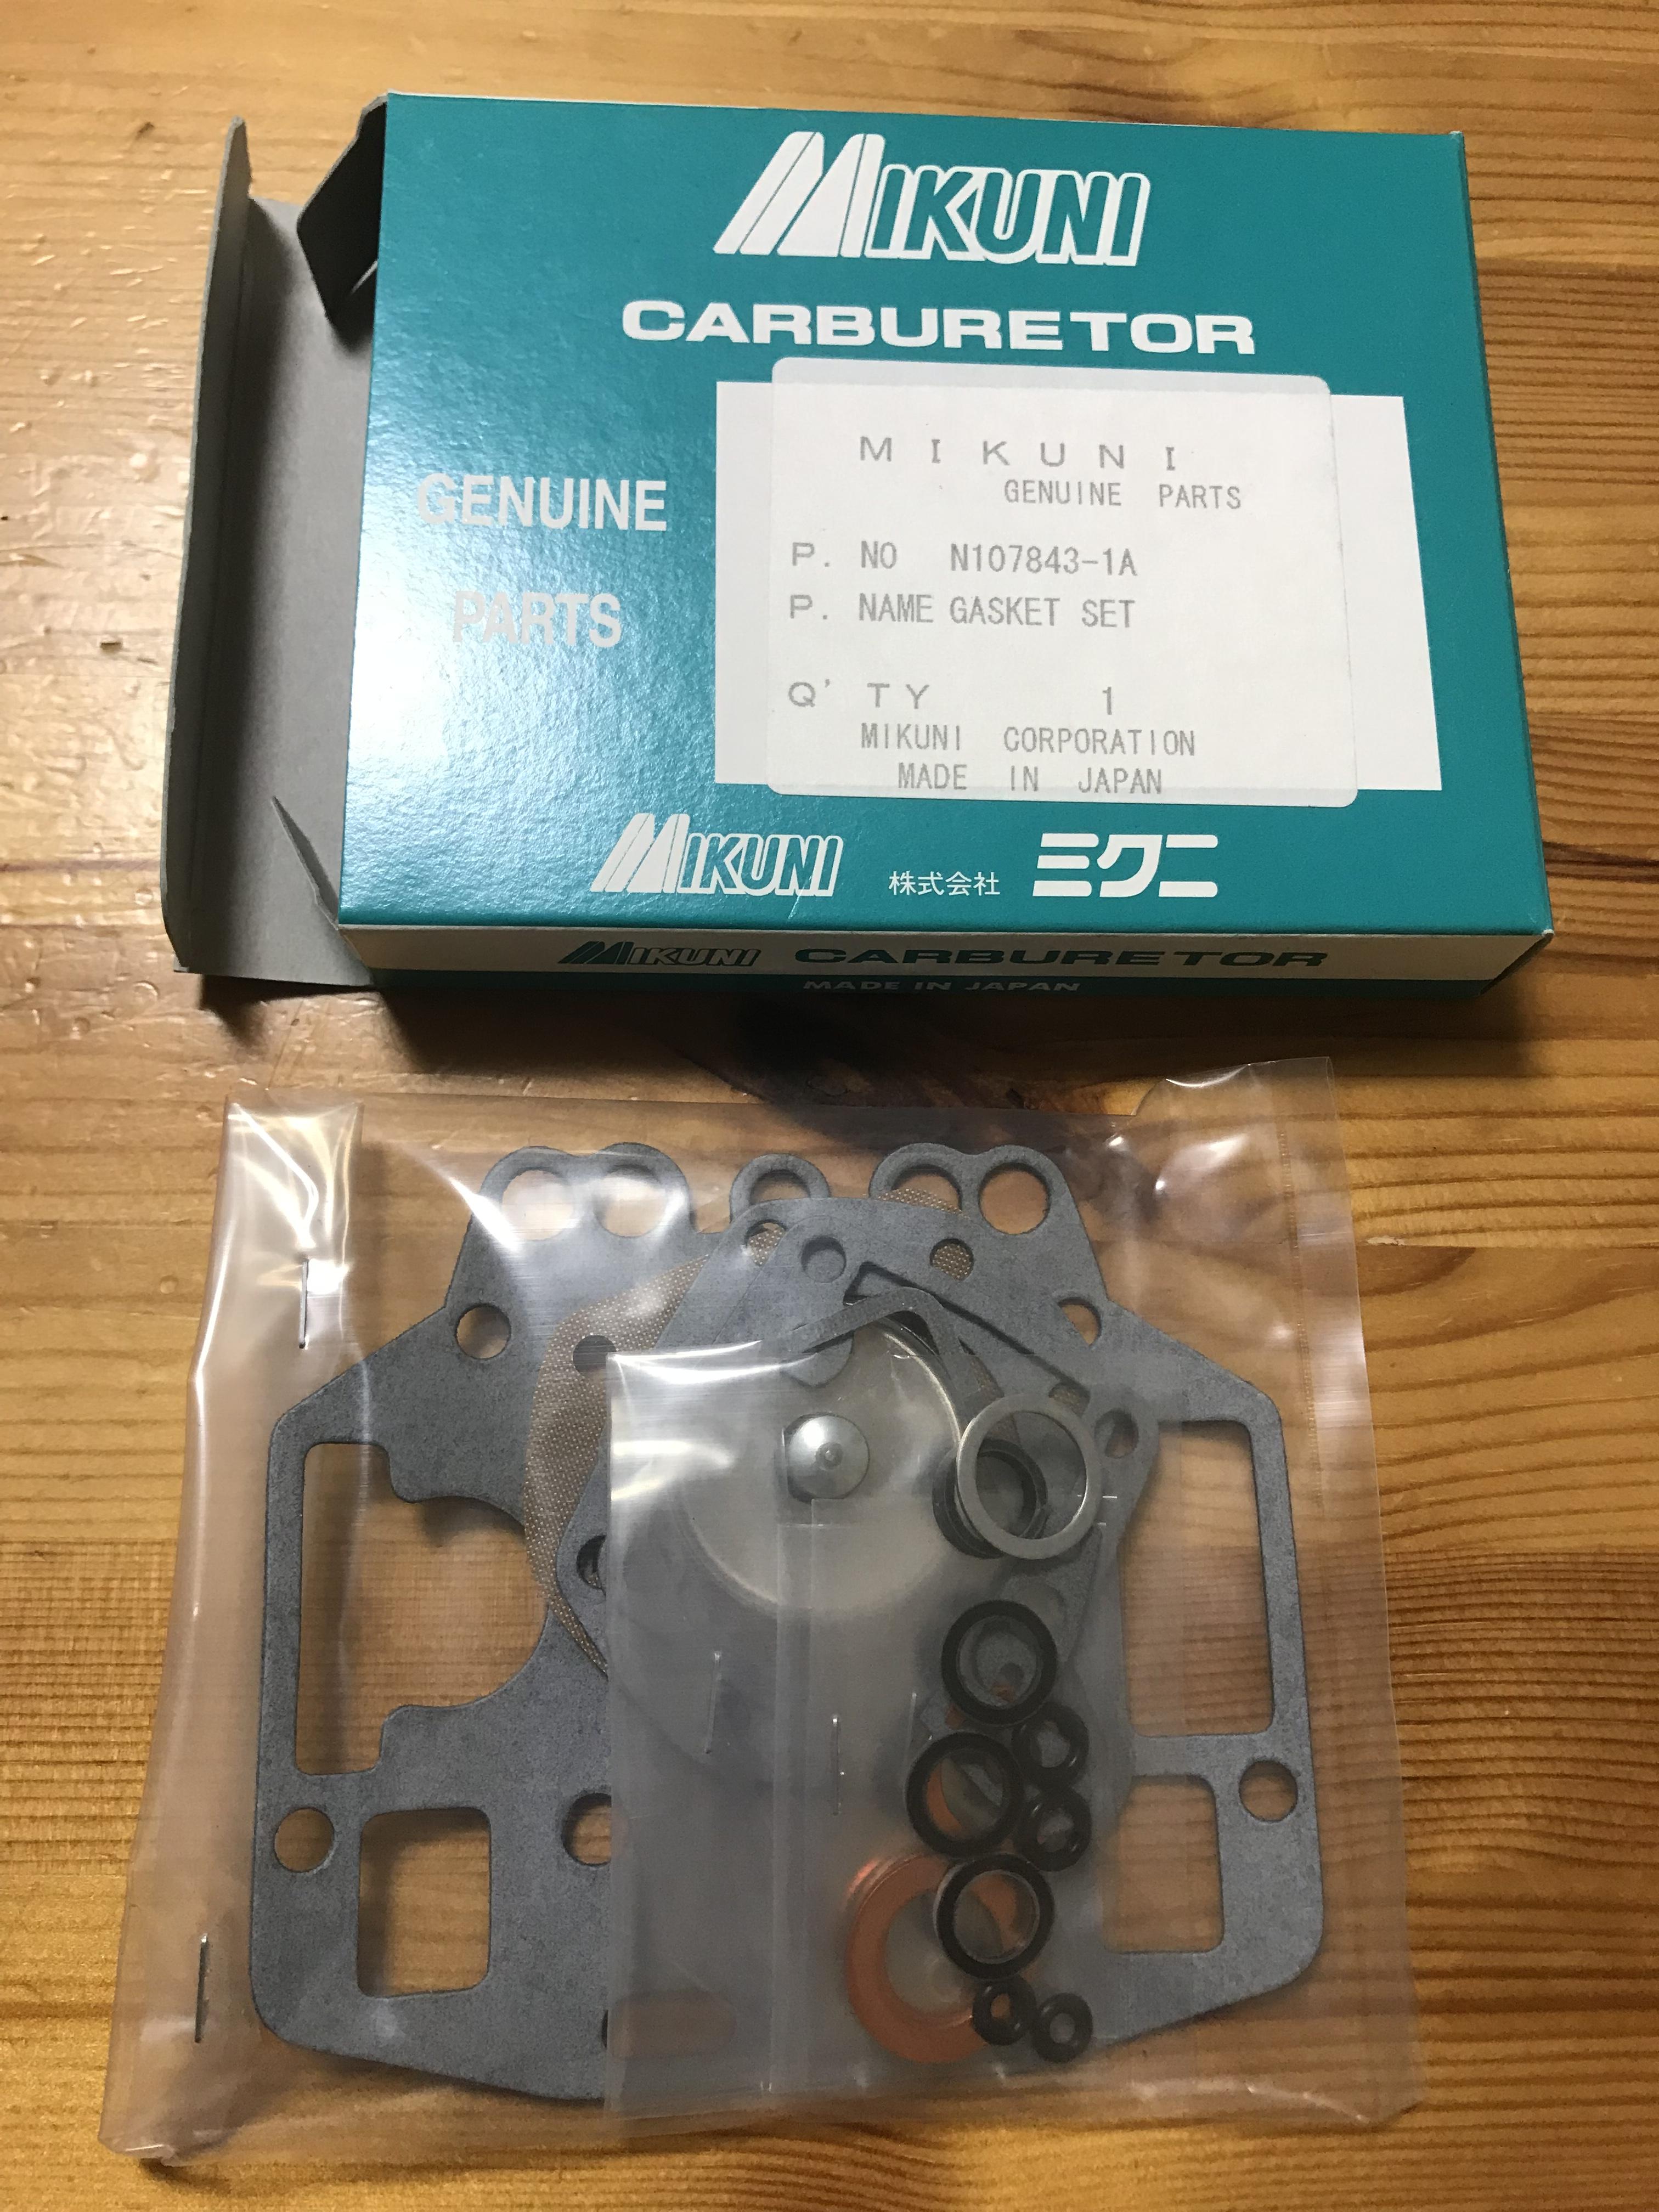
 1 pointThanks Gavin , I did not know there are some venders out side of Japan . Even they includes the eight shape gasket ! No need to ask Steve . And thank you for sharing pictures of your jewels , you did it your own , having fun and saving a lot of money . Here is a genuine Mikuni gasket kit just for your reference. Kats
 1 point
 -
 1 pointYes there's a RB20e and a RB20de. RB30e is the only 3.0 as far as I'm aware. Problem that I can see is mainly chamber volume because rb30e has Hemi style chambers. Would require custom pistons. Sent from my iPhone using Classic Zcar Club mobile1 point
 -
 1 pointIf a Luddite like me can do it, you won't have a problem, does Haltech send you the unit with tune already installed or are they tuning it remotely as you drive?1 point
 -
1 point
-
 1 pointHoly crap batman! I'm scared for you! I wouldn't know where to began with all that wire. Hope it's all laid out in the instructions. Good luck Mark.1 point
 -
 1 pointSince they exist, they must have been made in quantity to justify production. Where did they all go if they're not on our cars? Were they used on ther Nissan. Models? Is there a warehouse full of them somewhereits? Dennis1 point
 -
 I measured the filter with my calipers. It is .5" (12.7mm) long and .25" (6.4mm)diam. Those fuel injector filters are pretty doggone close. Will need to open up the small end as the carb filter is open on both sides. Will do a bit more checking here. If nothing shows up, I will PM you with my info.1 point
 -
1 pointI read that Nissan cast manifolds are easier to weld as the alloy is more favourable than typical North American manifold alloys.1 point
-
1 pointI have both early and late but I never knew the fasteners were OEM. I just thought someone had replaced the phillips head screws with the other type! I've got a few pairs of 40's and about 5 sets of 44's now.. (I have a problem) but I love these carbs. I forgot to mention above that with regard to the missing gaskets, I found the same problem with my SU carb rebuild kit, that the fuel filter screens, the crush washers and some gaskets were missing. The rebuild kit also didn't contain new floats, which I thought was odd if I'm honest. So it's not unusual that rebuild kits don't contain everything. I think in most cases the assumption is that you don't remove the jet block when rebuilding these carbs and just replace all the other gaskets and accelerator pump diaphragm? Who knows? I had all my carbs completely disassembled and I vapour blasted them to look like new! Photos here: https://www.viczcar.com/forum/topic/11264-safari-brown-i-mean-gold-the-nsw-project/?do=findComment&comment=205897 Before: After: My SU's I rebuilt myself after having all fasteners plated and manifold + carb bodies vapour blasted. I should really order in the parts to finish my Mikuni rebuild's. Compared to working on SU's, I love the Mikuni's. They are easier in many ways to work with.1 point
-
1 pointHey Kats, I noticed this also when I pulled mine apart, thought it was odd.. I found a vendor in the US that sells them however, as mine were so brittle when I removed them they broke into several pieces, they were more like plastic than rubber! https://www.ebay.com/itm/TOYOTA-2000-GT-SOLEX-MIKUNI-40-PHH-CARBURETOR-GASKET-KIT/291845981988?epid=1642106380&hash=item43f3604724:g:GuAAAOSw6n5XsK8M:rk:15:pf:0 eBay seller Upgrade Motoring has all the parts from what I can gather. https://www.ebay.com/usr/upgrademotoring eg: https://www.ebay.com/itm/MIKUNI-44PHH-CARB-GASKETS-REBUILD-KIT-W-PUMP-DIAPHRAGM-FIG-8-ORINGS-240Z-510-S30/142838570315?hash=item2141d79d4b:g:ct4AAOSw-RhaWVRn:rk:11:pf:0 This kit is good value. https://www.ebay.com/itm/MIKUNI-44PHH-CARB-GASKETS-REBUILD-KIT-X3-W-PUMP-DIAPHRAGM-FIG-8-ORING-240Z-SOLEX/143029235076?hash=item214d34ed84:g:WdoAAOSwzhZb~HGW:rk:29:pf:0 Or this European seller has them for $3 each. https://www.ebay.com/itm/SOLEX-40-PHH-MIKUNI-CARBURETOR-JET-CARRIERS-O-RING-8-SHAPED/292072596660?hash=item4400e224b4:g:iJwAAOSwJQdXDSoz:rk:22:pf:01 point
-
1 pointI was going to say that looks like an RB30 (SOHC) but then I remembered there is an RB20 SOHC as well as the DOHC version isn't there? I wonder why you wouldn't use the RB30 though, since the ports are likely to be larger?1 point
-
1 point
-
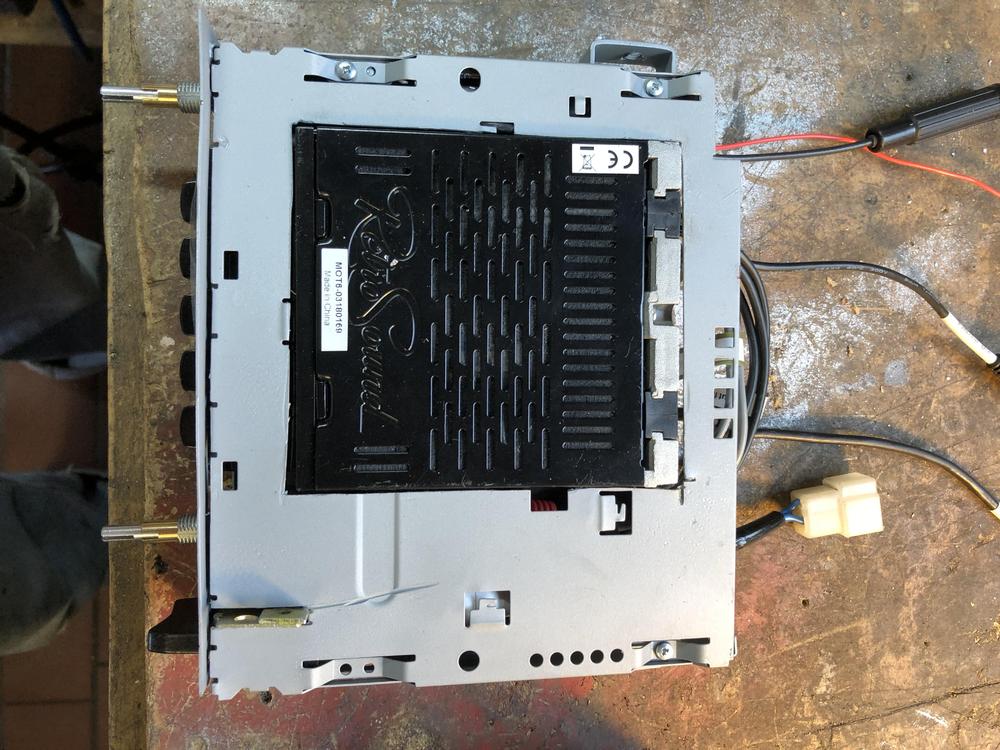
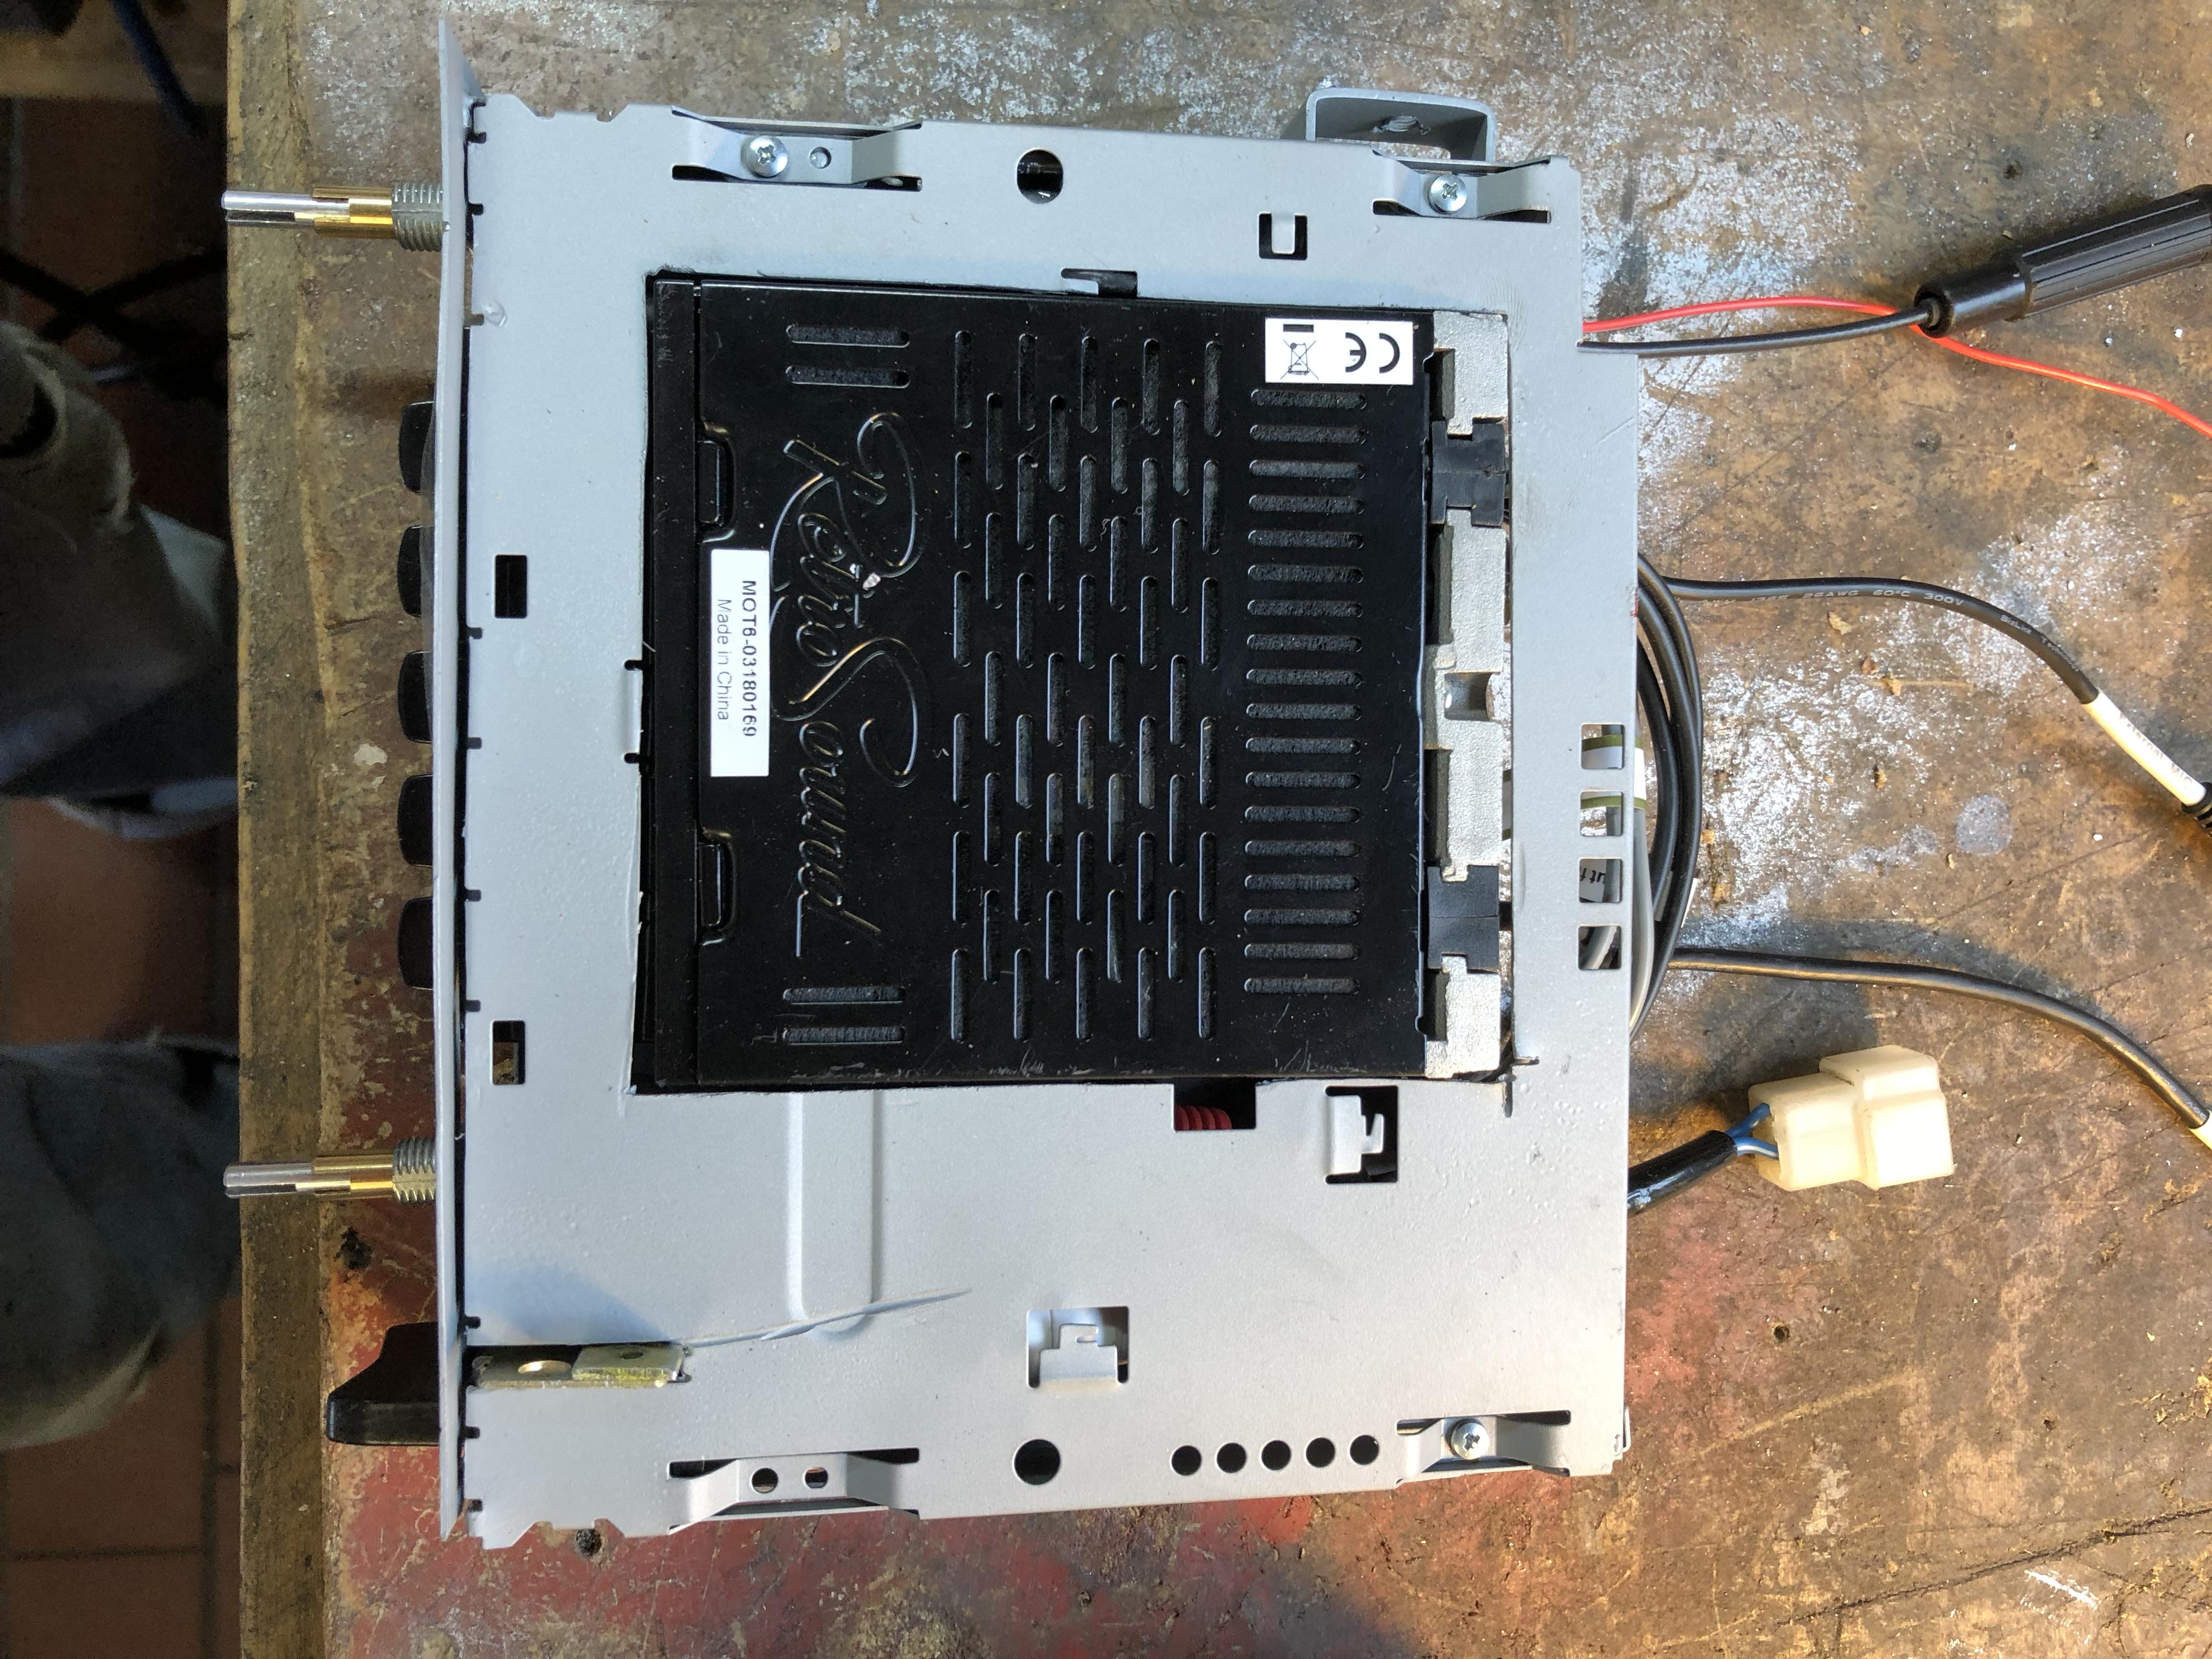
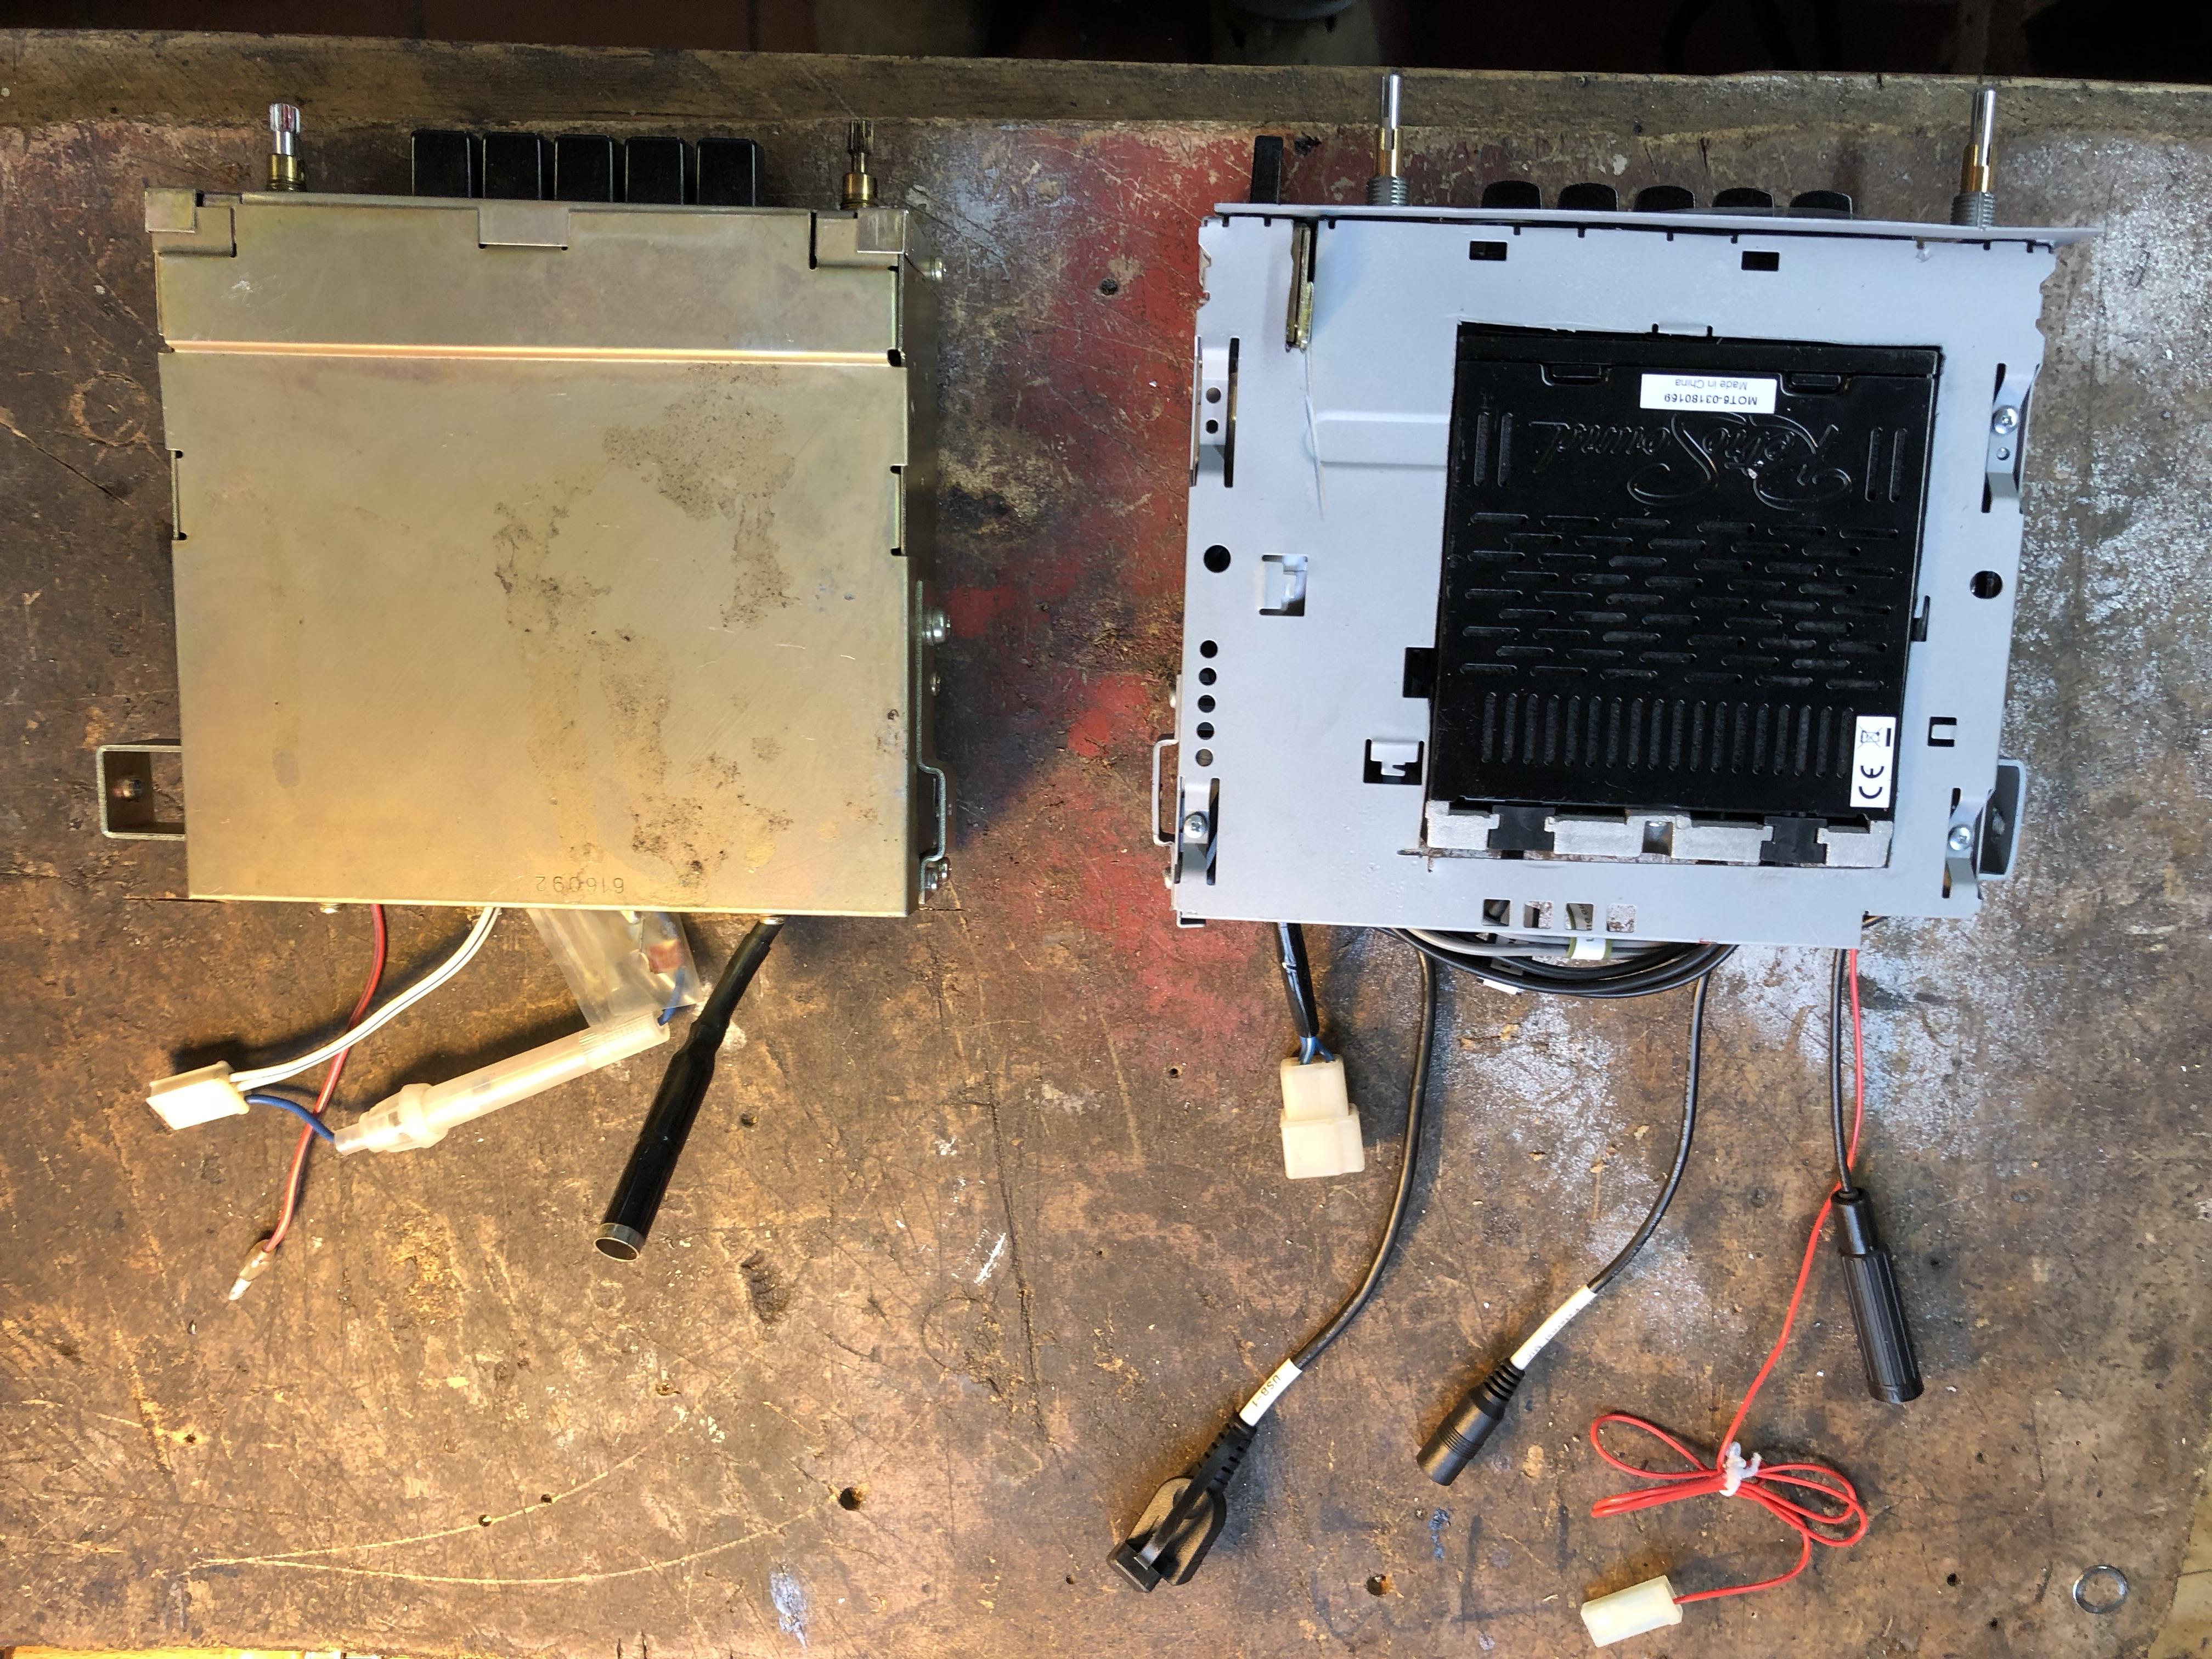
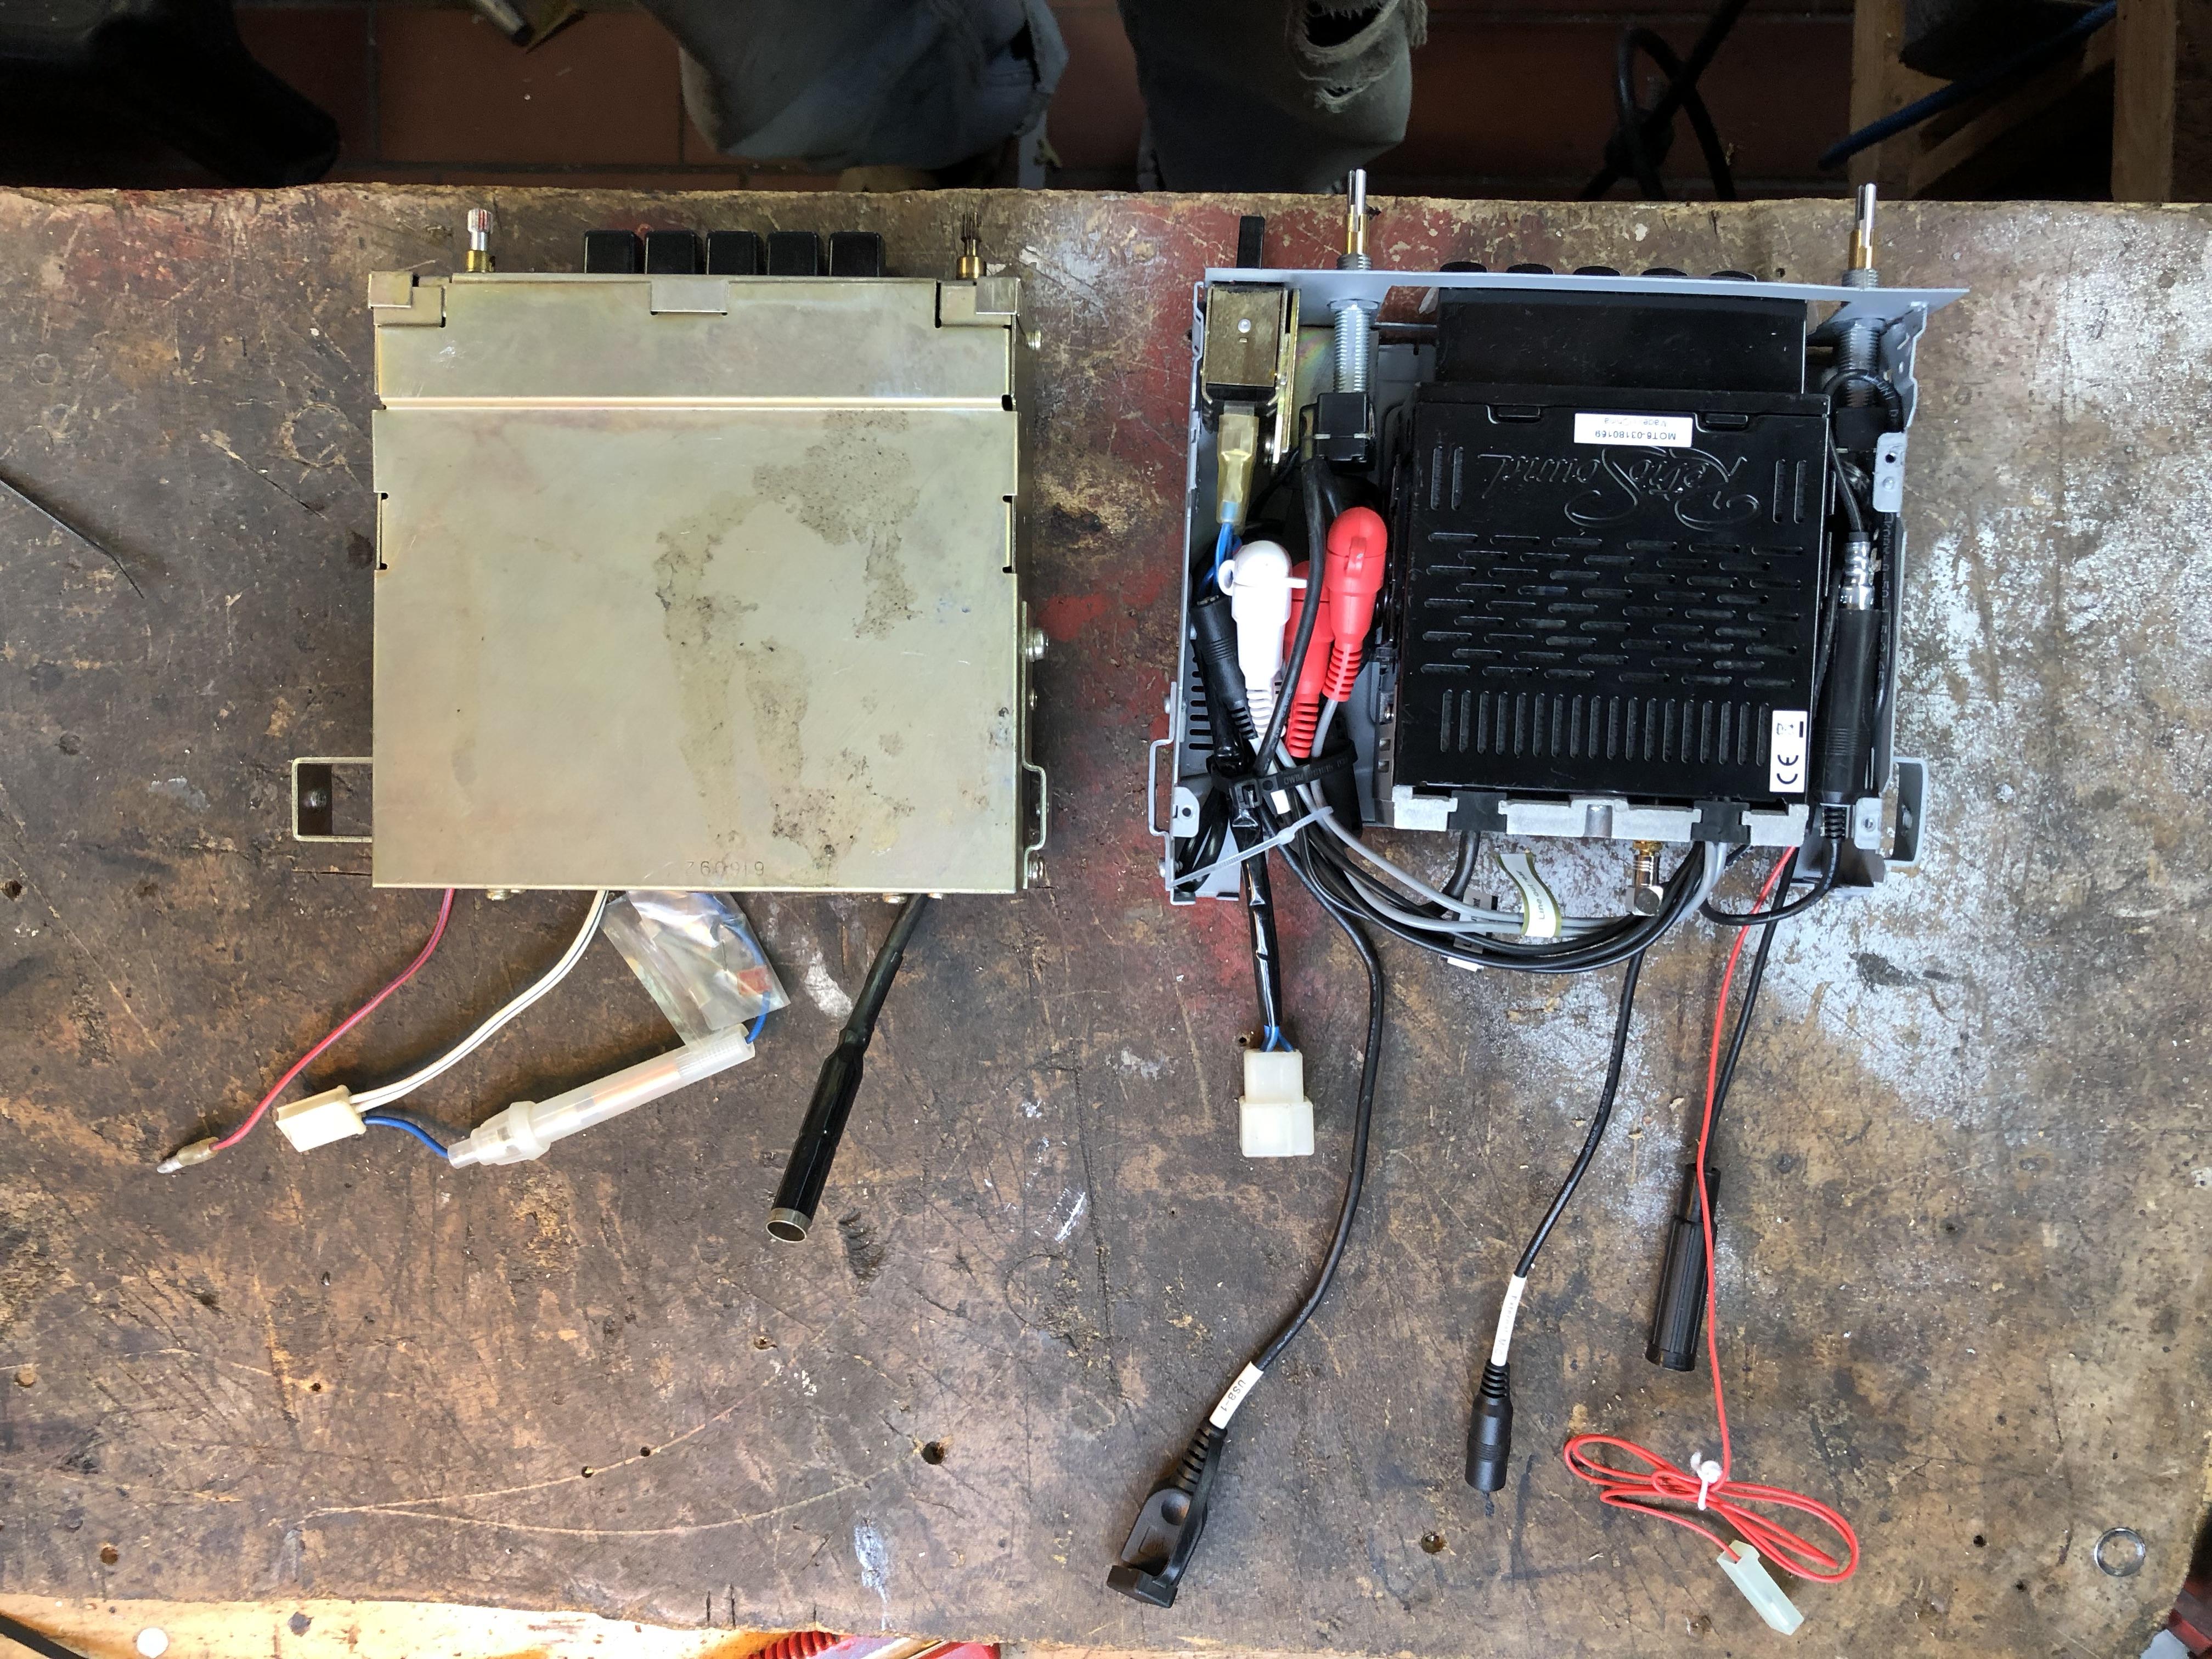
 1 pointRetroclassic in a new case , you only need the faceplate of the original radio. Nothing will be distroyed.

 1 point
 -
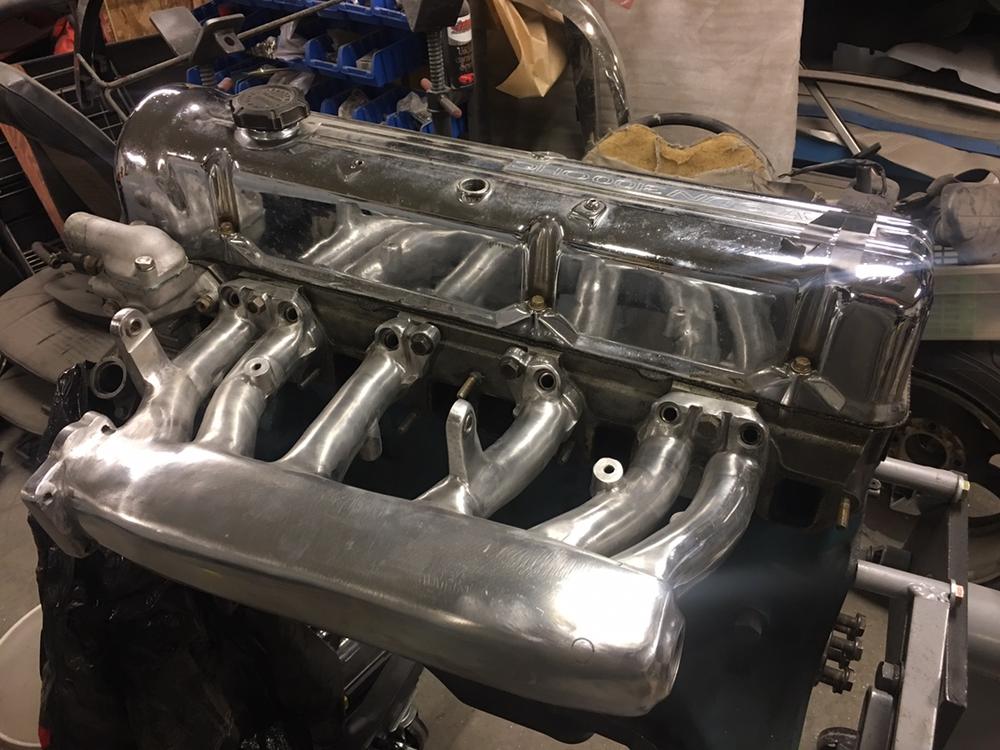
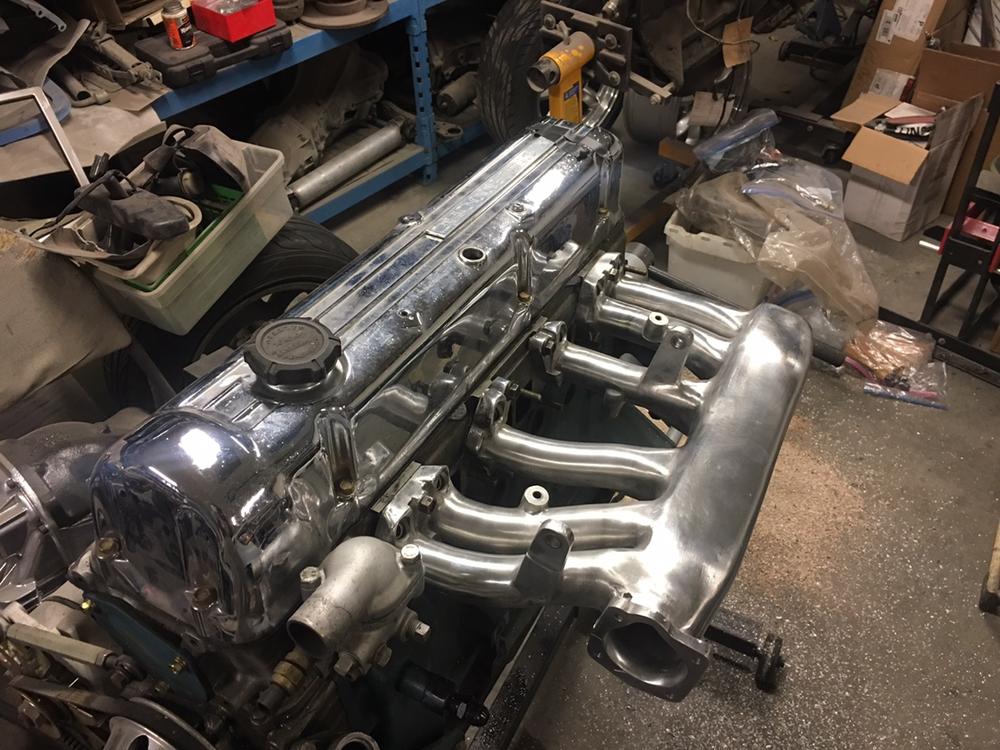
 I haven't got much to show you honestly. The House / Workshop / Garage build is coming along nicely and keeps me distracted from the car projects. And that for at least another 6 months. And the panelbeater is recovering from a broken nose and i'snt able to work at the moment. However This saturday was a milestone in that: I went to check out some potential new garage lifts. The grey one is actually my favourite so far: However i felt like i HAVE to do something for the cars every now and then. so i decided to take apart the FET intake manifold. so i can have the parts cleaned and replated with my next load. Before: During And after. It surely does look good in my opinion ? Will be even better once it's blasted, cleaned and all the parts are plated and back into position...1 point
 -
1 point
Works with iOS iPhones and Android phones. Tune from your driver seat!1 point


Important Information
By using this site, you agree to our Privacy Policy and Guidelines. We have placed cookies on your device to help make this website better. You can adjust your cookie settings, otherwise we'll assume you're okay to continue.