


Leaderboard
-


Av8ferg
Free Member7Points1,538Posts -


siteunseen
Free Member6Points14,903Posts -

Woody928
Free Member4Points123Posts -


wheee!
Free Member4Points4,607Posts
Popular Content
Showing content with the highest reputation on 05/25/2019 in all areas
-
3 pointsCheers to my US brothers in arms... Sgt Mark Lewis Electro-Optronics Tech Lord Strathcona’s Horse Royal Canadians Combat Veteran, Task Force 1-09, Panjwaii Afghanistan 20093 points
-
3 pointsThanks Gents. Cliff, the purest would stick his nose up when considering mashing together a 240 and 280. Both cars have their pluses and minuses. I like the 240z styling,(bumpers, turn markers, interior like the wood and the diamond vinyl etc..). The 280z is a more defined ride, kinks were sorted in the final production years of the 280. I can only have one Z, unlike you, so I need to make it the car the best of both. So my plan is to only change things that with minimal effort can be reversed. I’ll put a front air dam on with 240 marker lights and 240z bumpers. I’m going to do a custom interior vinyl like “Home Built by Jeff” did. While the car will be custom it won’t be over the top. Only the enthusiast and Z lover will know the changes. Average car guy won’t have a clue.3 points
-
2 pointsGents, As we enjoy this Memorial Day weekend grilling burgers and sipping cold beverages with family in friends wherever you are I wanted to share the story of the sacrifice of one of my closest friends (we were friends for 18 years) who died on 14 Sep 2012 in Camp Bastion, Afghanistan. His name was LtCol Chris “Otis” Raible. He was the CO of a Marine Harrier squadron and died defending his Marines and aircraft from insurgents attacking on the fight line in Bastion. Many men and women have made similar sacrifices serving our country and without their willingness to lay down their lives for our Nation, our way of life would be far different that it is today. Take a moment, raise a glass for those sacrifices and enjoy this holiday. Here the story of the actions that happened that night in Afghanistan and a picture of my friend Otis! https://www.google.com/amp/s/www.gq.com/story/battle-of-bastion-taliban-afghanistan-air-base/amp
 2 points
 -
 I found the problem. Zed Head sent me in the right direction when he recommended looking at the coil wiring. Years ago I cut signal wires to the distributor on the main harness. I crimped them back together but not very well. the wires were able to pull out of the crimp by hand. I put the wires back together again and the problem has gone away. lesson: young self did things inadequately, those problem will haunt you years later. Thanks for all the help everyone.2 points
 -
2 pointsRear bumper is my bar. Holds, so far, 6 empty soilders (Bud Lights) when I mow my yard. Yeah I know 6 is a lot but I have a big yard.2 points
-
 2 pointsThank you Blue , MikeB , and Chris . I see ③ on the two places , they are LHD dash board, so the picture is no reversed . I think it is very Japanese people-ish that writing ③ , people always tend to write numbwr in a circle when we want to mean “ numbering “ . ( I can show here ③ easily because my keyboard is for Japanese language ) Also , it is very natural for Japanese people that we use “ No “ for “ number “ , this is numbering too . However , it is a little bit abrupt that we think the ③ on the dash would mean HLS30- 00003 . It doesn’t have to be HLS30-00003 ‘s dash for the service manual ‘s photo example. The dash could be pulled from a shelf where newly assembled dash boards standing-by for the installation. Kats2 points
 -
 2 pointsWhat everyone else said. That's added value right there, isn't it?2 points
 -
Mark I apologize for forgetting your deep well of knowledge. Phillip has helped me so much over the years. I am grateful to the both of you! @Zed Head I am always impressed at your ability to express, relay information without all the bull****. You are great and deep well of info. Ima about to cook 56 pork shoilders and 62 slabs of ribb for the holiday.1 point
-
1 pointThis is what I’m doing right now... Hanging out at the wash racks at the end of Maple Resolve 19 in Wainwright Alberta. American troops participate with us every year. That’s two of my guys chatting with the Hercules crew. Good times.1 point
-
 I'd look into shoulder bolts. They're made to have a bearing ride on them. You may get lucky and find one that will work or make it work by modifying it.1 point
 -
 1 point
 -
1 pointThat back most header stud was too short on mine too. I bought one from nissan for a v8 titan truck that was enough to bolt it down. I have them on the front and the the rear. M10 so I had to open up the hole a little.1 point
-
1 point
-
 1 point1 point
 1 pointdone for now, tried my 75 car engine, it warms up without any water puking, and passes the chem test perfectly. will post again once I get the maxima head on. I retested the spare engine compression test again, 165-170 across all. I also tried pumping up the rad to about 15 psi and then bore scoping the cylinders with a warm engine, could not see any obvious water leaking in. oh well its a mystery for another day.1 point
 The Hybridz guys have lots of stories of breaking things on their modified engines, especially the turbo guys. Knocking/detonation can break things right away, apparently, on these engines. Detonation is one of the main problems they try to avoid. Seems like 123 just needs better instructions and higher quality caps. Stores like this one are what the forum is all about though, aren't they? Save somebody else a headache. Verify timing with a light, don't trust the instructions.1 point
 1 point
1 point
1 point 1 point
 1 pointThere is a hole under the antenna area for a water drain. Often the drain hose separates leaving a hole between the interior and muffler area.1 point
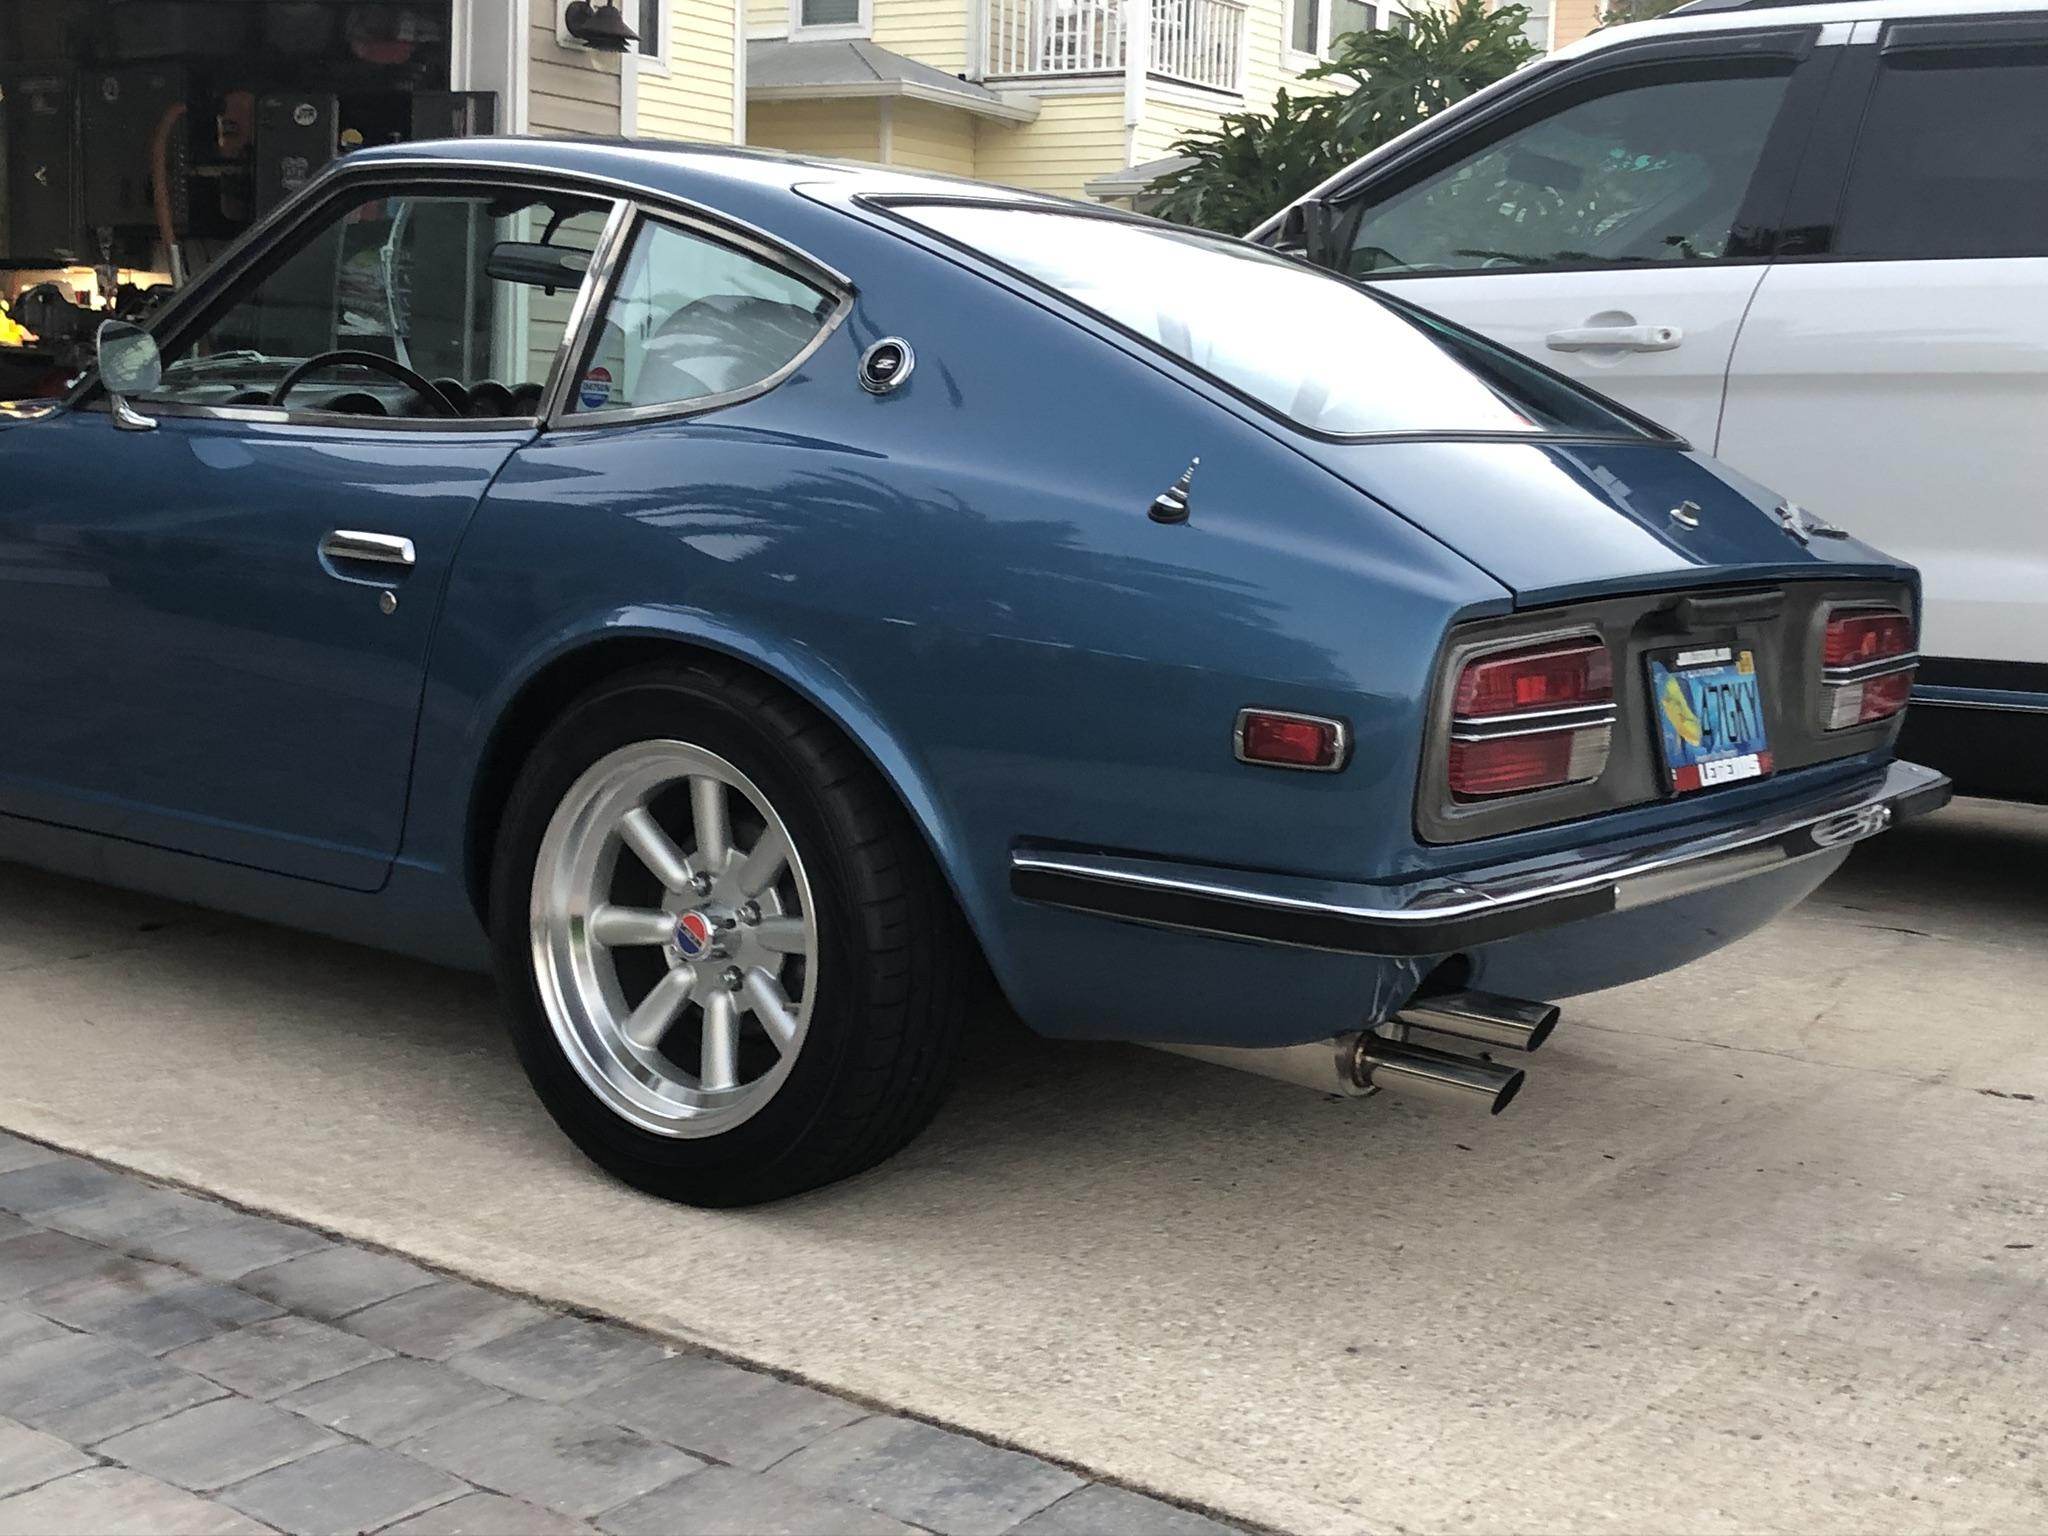
1 pointIt’s not a complete exhaust, just the muffler. I had a new MSA exhaust already so I had it cut down to fit the longer ZStory mufffler and added a small resonator in to hopefully control some of the drone I was expecting. It’s pretty loud under acceleration but mellows out once your cruising.1 point
1 pointThere is a hole under the antenna area for a water drain. Often the drain hose separates leaving a hole between the interior and muffler area.1 point
1 pointIt’s not a complete exhaust, just the muffler. I had a new MSA exhaust already so I had it cut down to fit the longer ZStory mufffler and added a small resonator in to hopefully control some of the drone I was expecting. It’s pretty loud under acceleration but mellows out once your cruising.1 point 1 pointThanks for the reply and detail. I plan to pop off all the panels and go through replacing them all. My 71 also has a nice finish with mostly all new rubber except several grommets and I want to replace them all. Sent from my iPhone using Tapatalk1 point
 1 pointFunny is the parts box with all kind of Datsun stuff under the knob (also a few non Datsun parts..)1 point
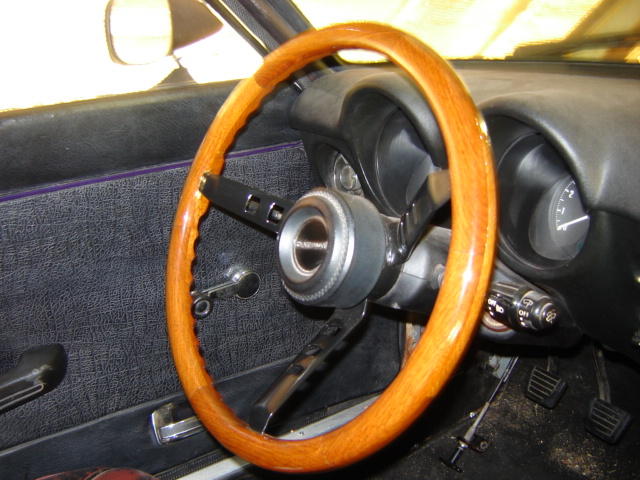
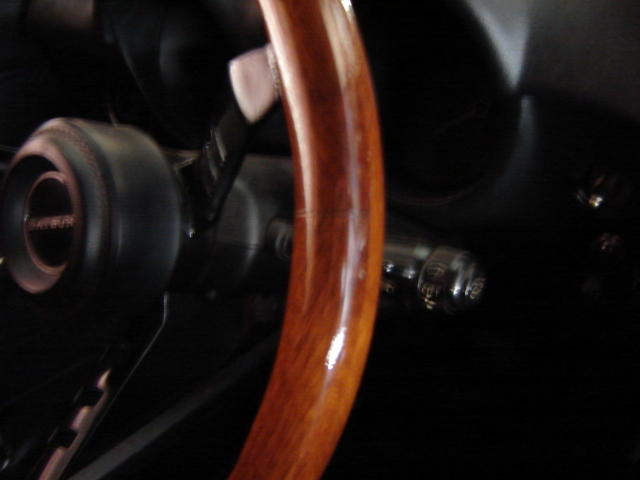
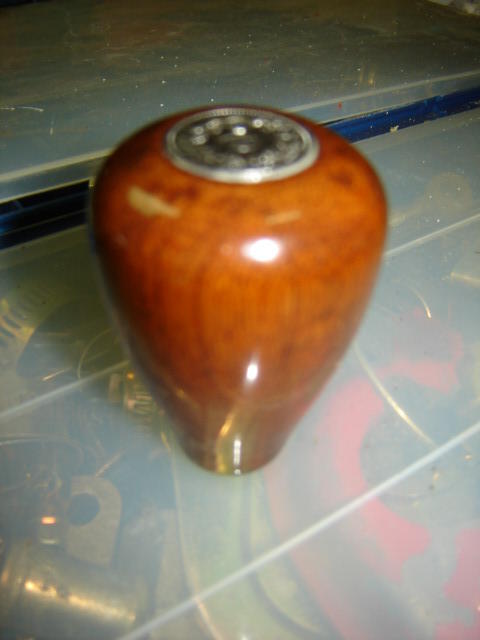
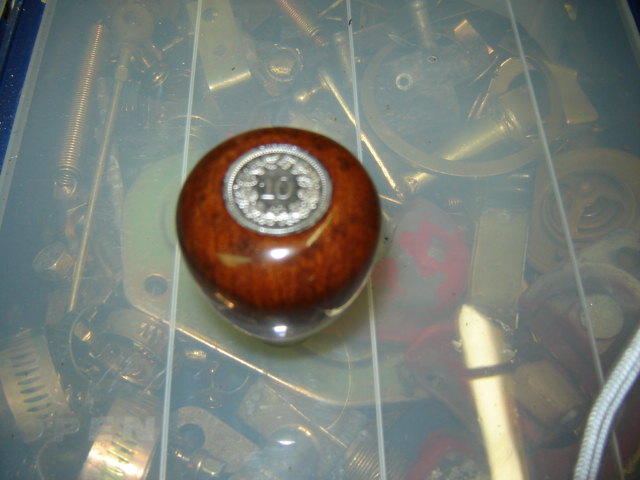
1 pointIn 2007 i took an old wheel and pulled the fake wood (resin and wood powder mix) off and made myself a fat mahogany wooden wheel! It was 38 hours of work.. 8 layers of blank laquer.. and lots of sanding was involved.. came out nice.. (metall in semi gloss black) There is a ring of 6.5 mm in the wheel.. I made 6 parts on the front hollow and 6 massiv parts at the back, glued the front parts with 2-comp. glue to the metall and the wooden parts with prof. wood glue (water resistant) together.. With a matching gearknob, made on a wood lathe. joke from myself.. the 10 means 10 years of work on my Z ?
1 pointFunny is the parts box with all kind of Datsun stuff under the knob (also a few non Datsun parts..)1 point
1 pointIn 2007 i took an old wheel and pulled the fake wood (resin and wood powder mix) off and made myself a fat mahogany wooden wheel! It was 38 hours of work.. 8 layers of blank laquer.. and lots of sanding was involved.. came out nice.. (metall in semi gloss black) There is a ring of 6.5 mm in the wheel.. I made 6 parts on the front hollow and 6 massiv parts at the back, glued the front parts with 2-comp. glue to the metall and the wooden parts with prof. wood glue (water resistant) together.. With a matching gearknob, made on a wood lathe. joke from myself.. the 10 means 10 years of work on my Z ?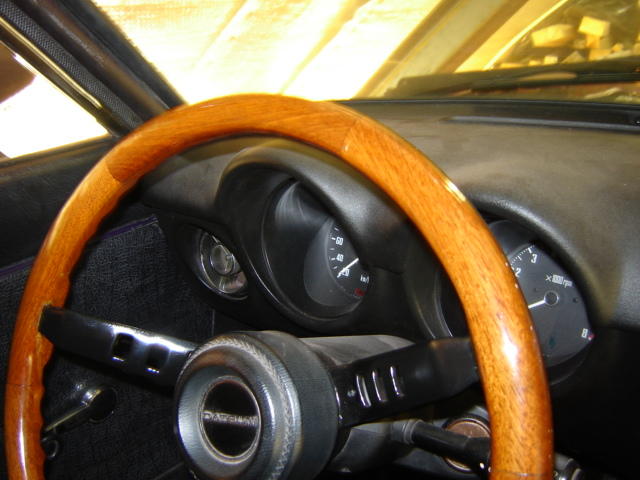
 1 point
 1 pointCongrats on getting a Z and welcome to the group. There is probably more that one thing that needs to be done in order to start the engine and keep it running. You can download the FSM and a beautiful color wiring diagram to really help. As far as the electrical portion goes, there are a few very knowledgeable electrical guys here ( I'm not one of them), but what anybody who is bringing a old car back to life has to do is, go through and clean and check E V E R Y Single electrical connection. That means the dash harness, the EFI harness, the cabin harness and the engine bay harness along with everything that is attached to them. 40+ year old wiring oxidizes, rusts and corrodes with time and moisture. DeOxit electrical cleaner seems to be recommended often. If you do this in the beginning it will help you solve a lot of issues down the road. It's time consuming but well worth it in the long run IMO. Edit to say that previous owners have often hacked the wiring. Those are always fun to discover and correct?1 point
 Regarding the idle issues and settings----if you haven't used it. 260Z Carb Adjustment Manual (1).pdf With the flat tops you need this and I would stress that you follow it exactly from beginning to end. It should resolve any issues. (Don't worry that it is labeled 260z carb adjustment---they are essentially the same as the 73 version)1 point
1 point
1 pointthe 280z steering wheel is no where near as durable, I have a very nice one, its the molded cushion foam, but you can tell its starting to get a bit loose in one area, and will puff up if exposes to sun. I think later ones had leather but the 75 was by far the most fragile. I found myself turning it by using the spokes when slow moving (high steering force required). Going to the 240z with no fear of grabbing the rim was like going to power steering. A very good mod indeed. I like my 75 bumpers, think the 76 were good too. offers a little protection with out the over the top found in the 78 and maybe the 77. Only down side is the rubber parts if bad are extremely hard to find. I got lucky, mine are in great shape.1 point
Regarding the idle issues and settings----if you haven't used it. 260Z Carb Adjustment Manual (1).pdf With the flat tops you need this and I would stress that you follow it exactly from beginning to end. It should resolve any issues. (Don't worry that it is labeled 260z carb adjustment---they are essentially the same as the 73 version)1 point
1 point
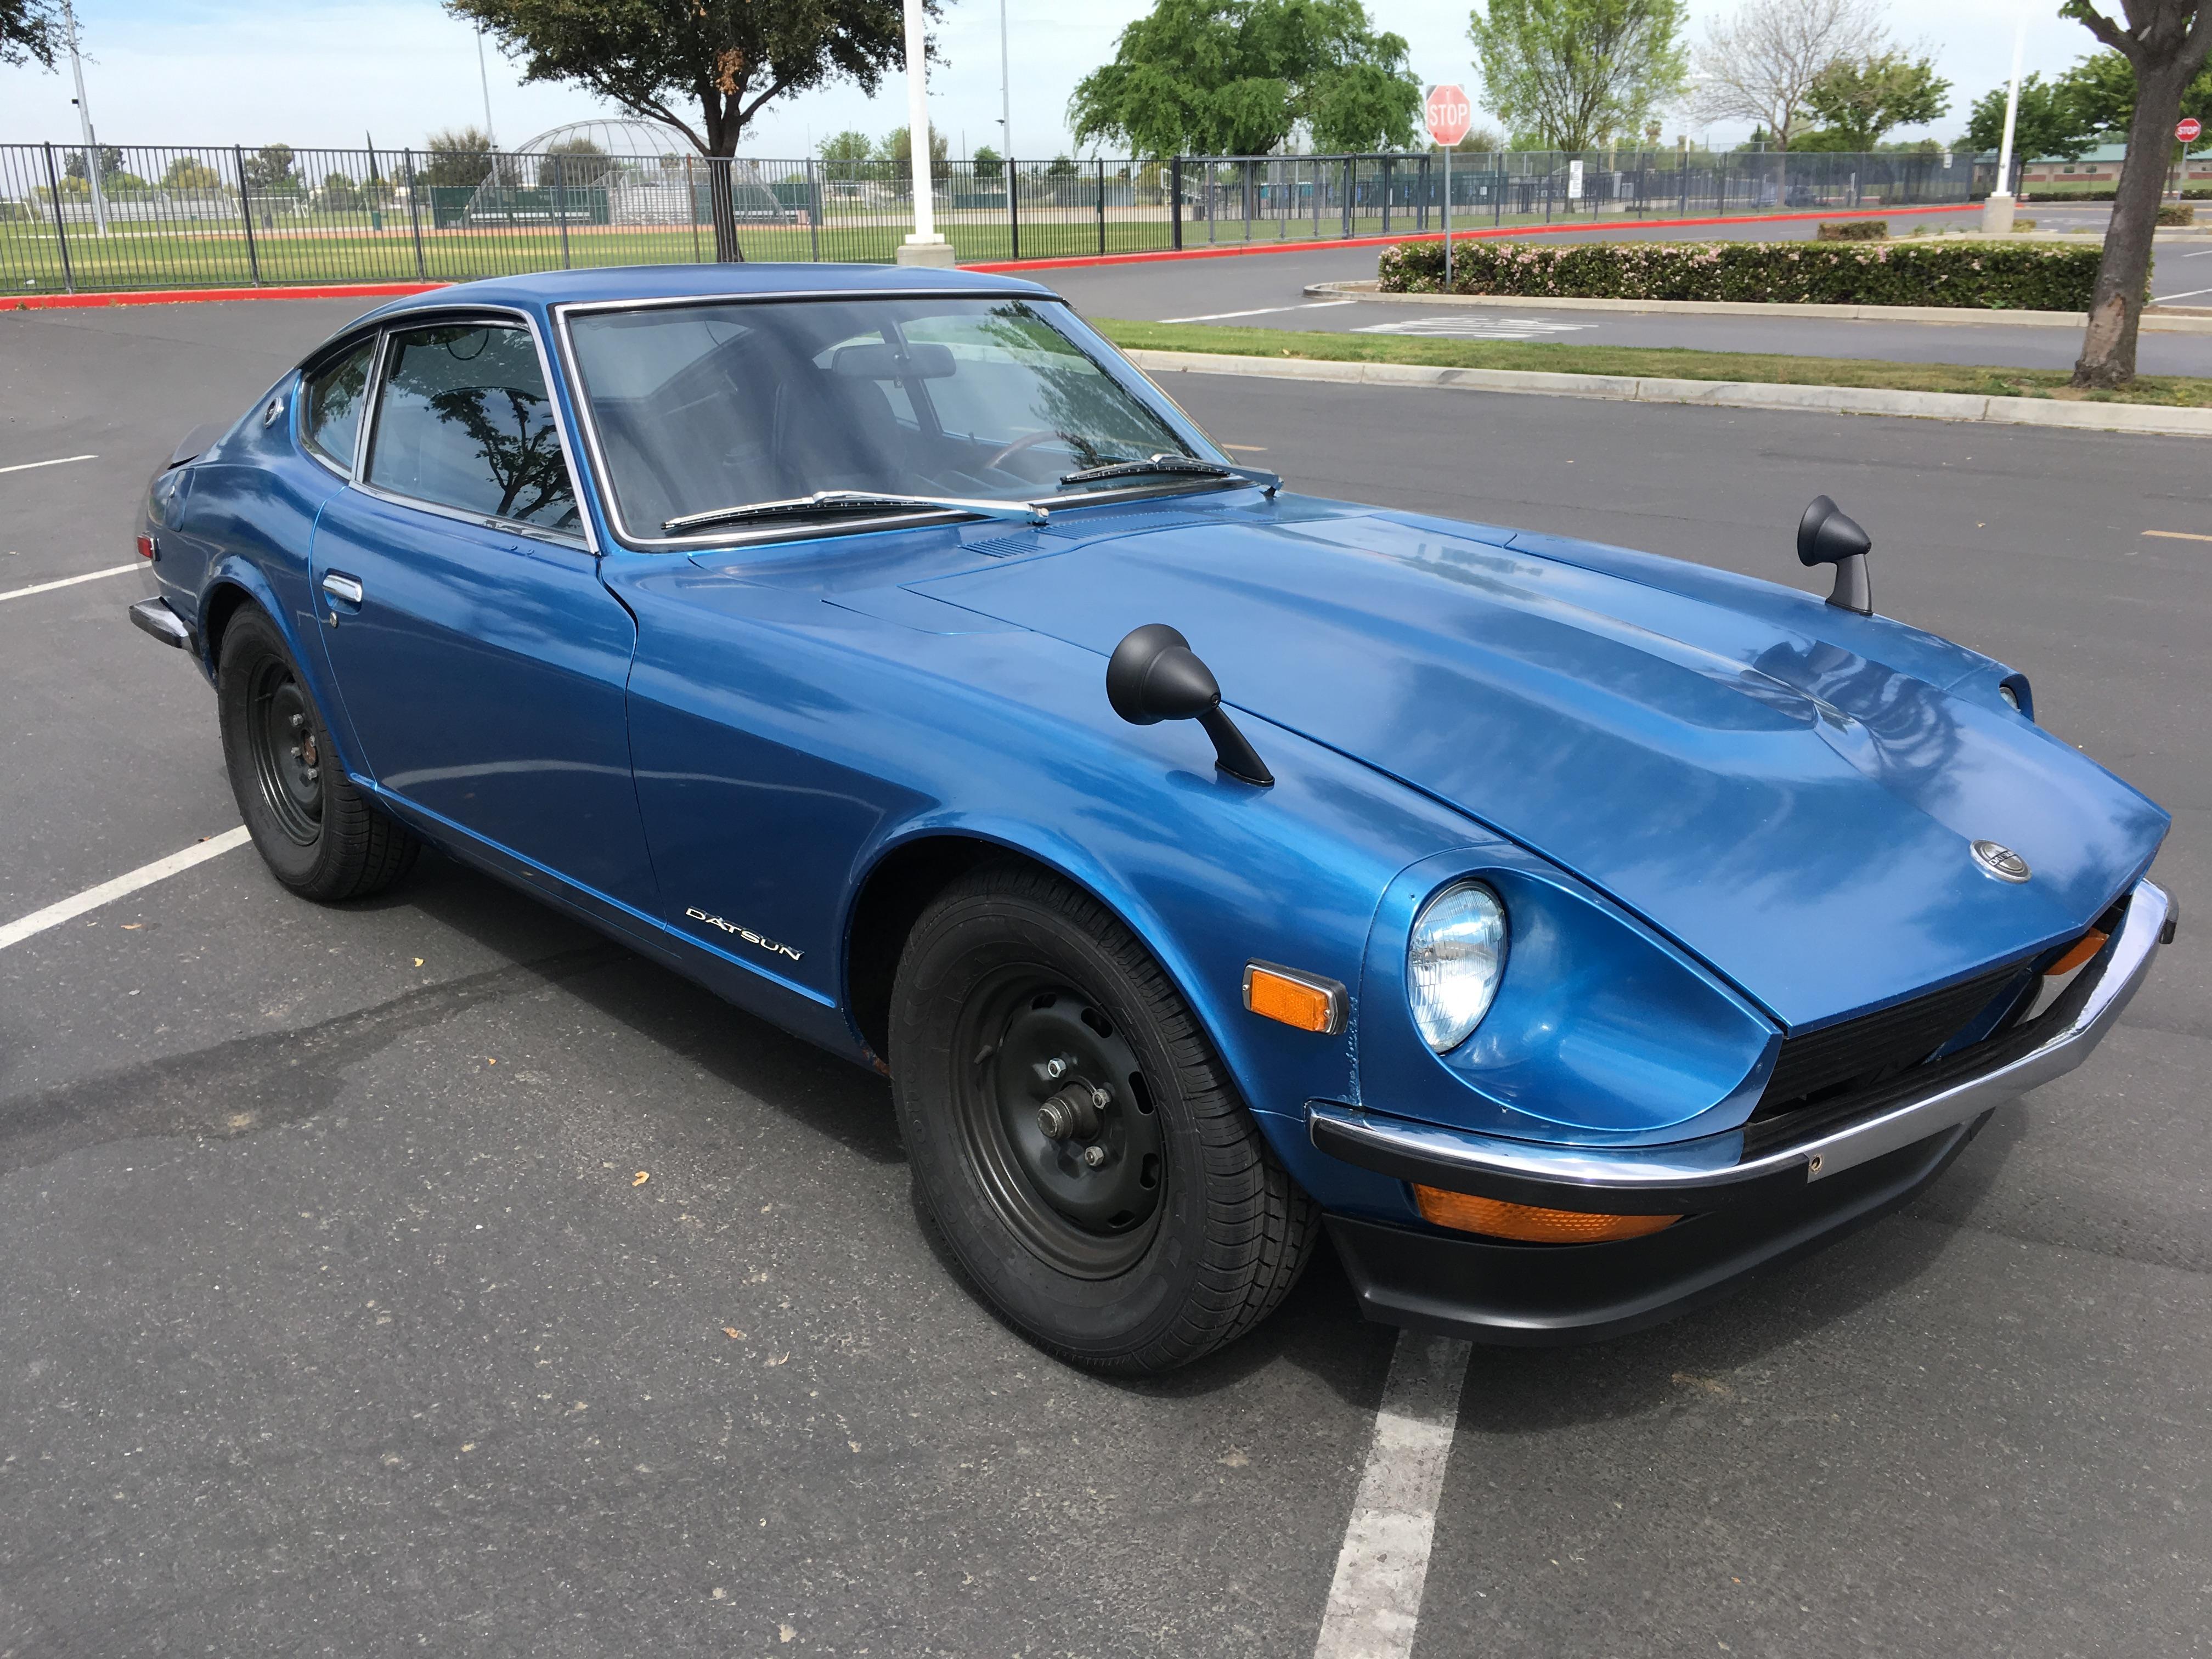
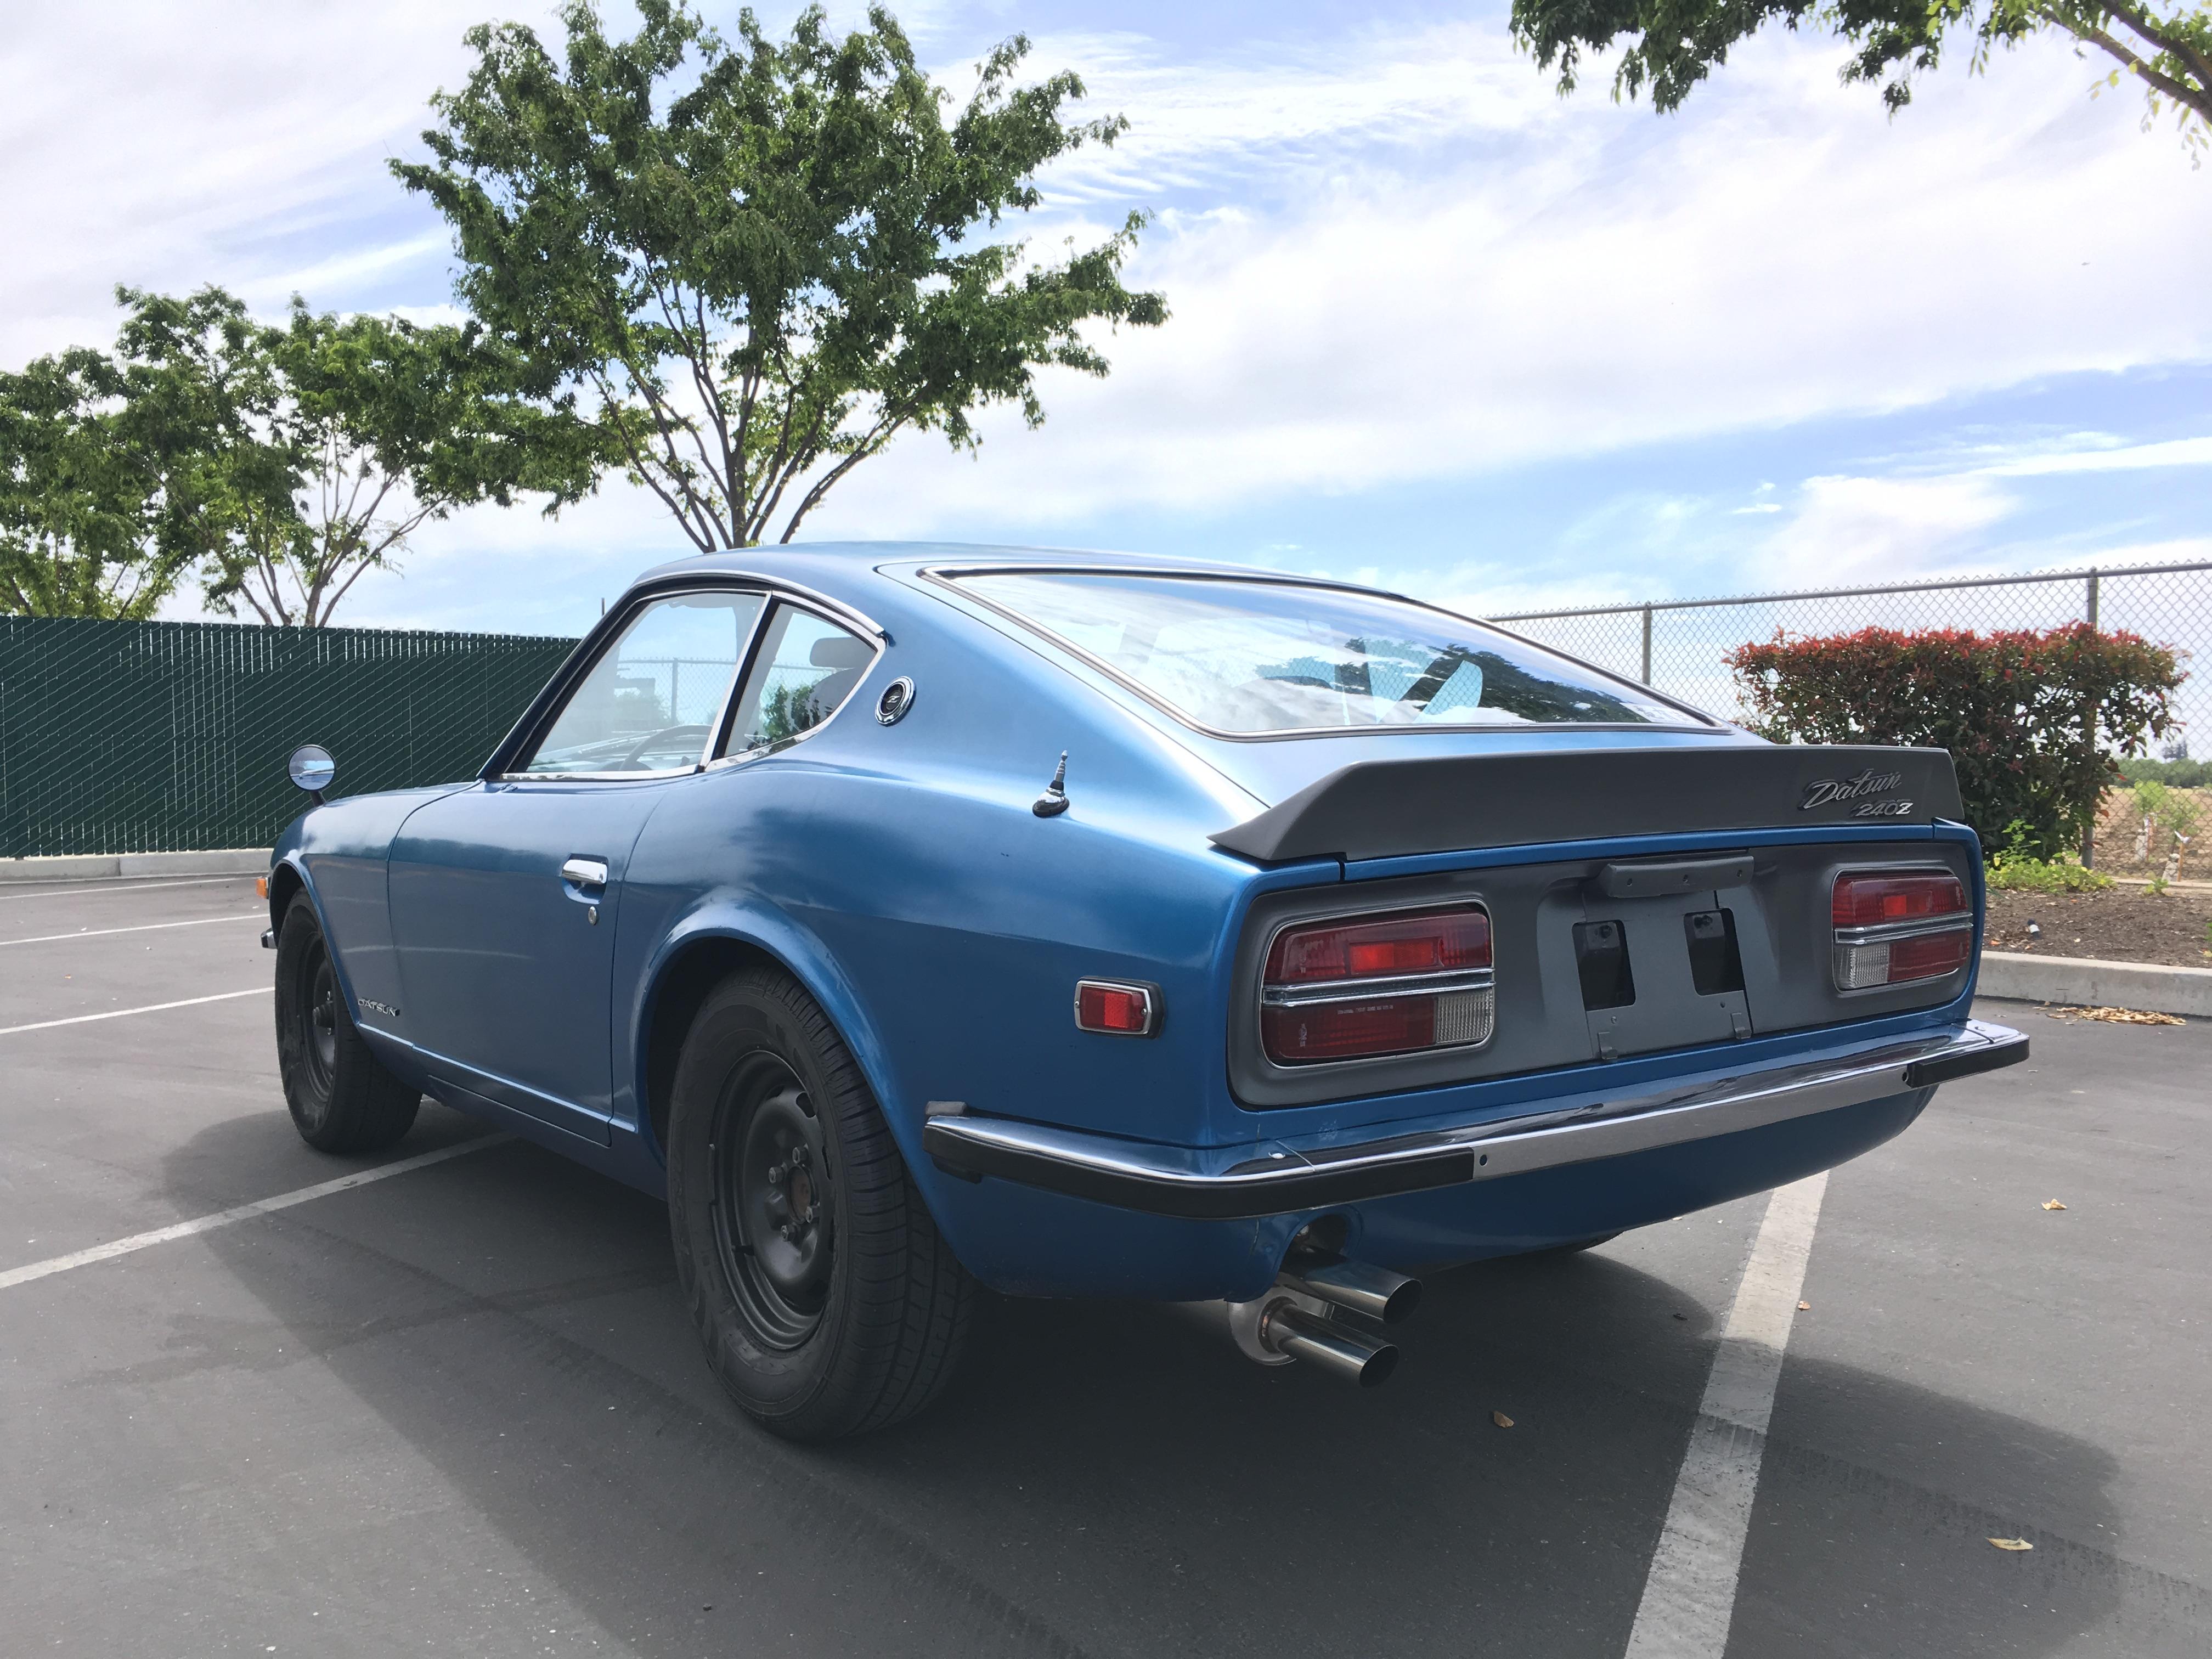
1 pointthe 280z steering wheel is no where near as durable, I have a very nice one, its the molded cushion foam, but you can tell its starting to get a bit loose in one area, and will puff up if exposes to sun. I think later ones had leather but the 75 was by far the most fragile. I found myself turning it by using the spokes when slow moving (high steering force required). Going to the 240z with no fear of grabbing the rim was like going to power steering. A very good mod indeed. I like my 75 bumpers, think the 76 were good too. offers a little protection with out the over the top found in the 78 and maybe the 77. Only down side is the rubber parts if bad are extremely hard to find. I got lucky, mine are in great shape.1 point 1 pointJust welcomed my 4th 240Z home tonight. I love these cars. This one is a bit more polished than I'm use but I'll get over it. The thing that sets this car apart from my previous 240s is the rich history and the meticulous records. Purchased in Japan by a service man with original purchase receipts (to include DOD loan papers), hand written service documentation (outstanding penmanship) and various vintage Datsun swag(local and national Z clubs). That along with a dash void of blemish, a recent total rebuilt drivetrain(matching numbers) and the original owners widow(whom was also active in Z clubs) has me instilled in me - a sense of responsibility... to act as a steward. This, like so many cars here, was loved and cherished; it played a significant role for it's owner for whom took great pride in ownership. Passion.

 1 point
No question - the FRS is a street legal kart. Great gas mileage and a bullet proof boxer engine. My wife has a new VW GTI (e needed one practical car) but loves to drive the FRS. Anyway, I've been staring at my 240Z off and on all day... soooo happy. I'll never go this long again without a 240Z again!1 point
1 pointYour review of the FSR made and still makes me want one. That was 2013, I believe I can afford one now.1 point
1 pointStill needs one more coat of poly and a wet sand but here’s the before and after pics. I’m pretty happy with the outcome. Sent from my iPhone using Tapatalk1 point
1 pointOkay, first coat of Poly on and I’m glad I didn’t stain it. The poly brought out the natural color nicely. I’ll let it dry a couple days, wet sand it smooth and put another coat of poly on. So my advice so far for people looking at this thread in the future. Don’t stain it! Sent from my iPhone using Tapatalk1 point
1 point
1 pointNo question - the FRS is a street legal kart. Great gas mileage and a bullet proof boxer engine. My wife has a new VW GTI (e needed one practical car) but loves to drive the FRS. Anyway, I've been staring at my 240Z off and on all day... soooo happy. I'll never go this long again without a 240Z again!1 point
1 pointYour review of the FSR made and still makes me want one. That was 2013, I believe I can afford one now.1 point
1 pointStill needs one more coat of poly and a wet sand but here’s the before and after pics. I’m pretty happy with the outcome. Sent from my iPhone using Tapatalk1 point
1 pointOkay, first coat of Poly on and I’m glad I didn’t stain it. The poly brought out the natural color nicely. I’ll let it dry a couple days, wet sand it smooth and put another coat of poly on. So my advice so far for people looking at this thread in the future. Don’t stain it! Sent from my iPhone using Tapatalk1 point 1 pointI seriously doubt that the script "No" means 'number' in the language of a Japanese factory worker. Thanks for the pictures.1 point
Well here we go again, lots more to report and I really need to control myself with spending on this car! The car was selected and displayed with Petrolicious for their first ever UK meet at Bicester Heritage, it certainly kept in very good company within the main site. I’ll also admit that I was very excited by this as their channel is the reason why I ended up buying my 240Z so it was a big deal for me. I’ve seen some photos of the car from the day but I’m sure there’s more to be found. Great to catch up with several club members and we had awesome weather for it. Finally our new brake package has come together and now been fitted up, I need to start with a huge shout out to Iamatomman (Gary) for sorting me out in this regard. I’ve been searching for a long time to get the right solution to this element of the build, I’ve not been a fan of the shouty willwood solutions and equally not convinced that the Hilux setup was up to the task with its more limited ‘performance pad’ options for a 4x4 and weight. Bring in the perfect solution in my eyes, R32 GTR Sumitomo Brake Calipers with 296mm vented disks. Gary’s made custom titanium brackets and re-drilled the standard GTR disks so that these bolt straight up to stock 240Z hubs. As you’d expect with a GTR, the brake pad choice is phenomenal so we’ve put on some Porterfield R4S pads designed for fast road and track use. These so far seem to be superb with great bite from cold and just get better the more heat you put into them, the only downside as you’d expect with any performance pad is a little more dust with enthusiastic use. With the car only weighing in at 1000KG this setup is hugely over spec’d and gives massive amounts of confidence, particularly with modern traffic. Having got the kit from Gary, sourced a set of callipers off of ebay and refurbished then with thanks to Big Red, picked up the pads from Porterfield and refurbished the brake fitting kit I got with the brakes to save a bit of money, we were good to go. Doing my usual with any European trip looming I decided to fit these last Monday evening after work on the driveway with our scheduled departure of Thursday morning. What could possibly go wrong! As expected a few headaches, 6 hours, a packet of crisps, numerous cups of tea later everything was fitted up with the assistance of LED floodlights at midnight. Test drive was revealing a very spongey pedal however that was a problem for a new day. Certainly had some fun removing the original brake dust shields (now too small for our big disks anyway), removing the old disks and hubs and wrestling everything into place. At the same time with rain scheduled for Spa and knowing how lethal our tyres are in the wet (even if very fun and childish in the dry) I decided it was time to bite the bullet and replace these with something deserving of the rest of the car. Finally we had a set of Yokohama AD08R tyres on their way to be fitted before the trip, in a last minute dash I managed to get the brakes re-bled and working, tyres fitted, filled with nitrogen, booked a trip to Edinburgh and flew out all on Tuesday leaving last minute packing and preparation for 9.30pm on Wednesday night before we left. I’m very relieved that I decided to leave the stock MC installed for now with the time I had available, while the car needs it and the pedal has a little too much travel, this remains a headache for another day as I still have no idea as to how to properly adjust the rod to it. We had an amazing time out in Spa, with the car covering just over 1000 miles in less than a week. Great company and tour guide from Tony, being shown some nice backroads closer to Spa which could be enjoyed away from the Motorway (even drove the old track). What a circuit Spa is, the elevation changes were fairly breath taking. I can see why it’s a bit of a Mecha for motorsport fans and definitely the most exciting circuit I’ve visited and driven to date. As hoped and with the car running so well we got a track session for Saturday evening however much to our disappointment it was plagued by safety cars while a wall was being rebuilt. Unfinished business and a return visit one day I’m sure… The car felt really keen and we’re super impressed with the new tyres, for a road tyre they really hang on through the corners and still slide nicely at the limits of traction. Less childish behaviour can be had with the trade-off of superb grip on the road. We could really push people through corners and drive around them however in a straight line we were still left lacking and wanting more with almost everyone pulling away. Certainly some drag racing going on against Peugeot 205’s. Thoughts are turning to building an engine with approx. 200 bhp flywheel that revs happily to 7000prm without spending the earth…. The trip didn’t leave the car unscathed though and we picked up a big stone chip on day one of the trip which we watched expand all trip until we got home. I’m relieved to say that despite it having spidered outwards, Kenneth from Autoglass has saved the windscreen with a resin filler yesterday. Quite scary seeing how big it had really got when he applied some pressure to it. I’ve also got rubber trims turning up to try and reduce some wind noise and make the car a little more comfortable for longer journeys. These cars are never really finished but I feel as though the whole package has really moved on, particularly when I compare it to the sloppy driving experience the car started with… IMG_0135 by Mark Woodrow, on Flickr 6D62364D-FE32-4CE8-8041-18E19804611E by Mark Woodrow, on Flickr IMG_0123 by Mark Woodrow, on Flickr IMG_0127 by Mark Woodrow, on Flickr IMG_0141 by Mark Woodrow, on Flickr IMG_0163 by Mark Woodrow, on Flickr IMG_0144 by Mark Woodrow, on Flickr IMG_0167 by Mark Woodrow, on Flickr New tread pattern looking alot meaner: IMG_0186 by Mark Woodrow, on Flickr IMG_0191 by Mark Woodrow, on Flickr IMG_0303 by Mark Woodrow, on Flickr Getting a little dusty IMG_0285 by Mark Woodrow, on Flickr Think we'll need to take a trip to the French Riviera next Version 2 by Mark Woodrow, on Flickr1 point
1 pointI seriously doubt that the script "No" means 'number' in the language of a Japanese factory worker. Thanks for the pictures.1 point
Well here we go again, lots more to report and I really need to control myself with spending on this car! The car was selected and displayed with Petrolicious for their first ever UK meet at Bicester Heritage, it certainly kept in very good company within the main site. I’ll also admit that I was very excited by this as their channel is the reason why I ended up buying my 240Z so it was a big deal for me. I’ve seen some photos of the car from the day but I’m sure there’s more to be found. Great to catch up with several club members and we had awesome weather for it. Finally our new brake package has come together and now been fitted up, I need to start with a huge shout out to Iamatomman (Gary) for sorting me out in this regard. I’ve been searching for a long time to get the right solution to this element of the build, I’ve not been a fan of the shouty willwood solutions and equally not convinced that the Hilux setup was up to the task with its more limited ‘performance pad’ options for a 4x4 and weight. Bring in the perfect solution in my eyes, R32 GTR Sumitomo Brake Calipers with 296mm vented disks. Gary’s made custom titanium brackets and re-drilled the standard GTR disks so that these bolt straight up to stock 240Z hubs. As you’d expect with a GTR, the brake pad choice is phenomenal so we’ve put on some Porterfield R4S pads designed for fast road and track use. These so far seem to be superb with great bite from cold and just get better the more heat you put into them, the only downside as you’d expect with any performance pad is a little more dust with enthusiastic use. With the car only weighing in at 1000KG this setup is hugely over spec’d and gives massive amounts of confidence, particularly with modern traffic. Having got the kit from Gary, sourced a set of callipers off of ebay and refurbished then with thanks to Big Red, picked up the pads from Porterfield and refurbished the brake fitting kit I got with the brakes to save a bit of money, we were good to go. Doing my usual with any European trip looming I decided to fit these last Monday evening after work on the driveway with our scheduled departure of Thursday morning. What could possibly go wrong! As expected a few headaches, 6 hours, a packet of crisps, numerous cups of tea later everything was fitted up with the assistance of LED floodlights at midnight. Test drive was revealing a very spongey pedal however that was a problem for a new day. Certainly had some fun removing the original brake dust shields (now too small for our big disks anyway), removing the old disks and hubs and wrestling everything into place. At the same time with rain scheduled for Spa and knowing how lethal our tyres are in the wet (even if very fun and childish in the dry) I decided it was time to bite the bullet and replace these with something deserving of the rest of the car. Finally we had a set of Yokohama AD08R tyres on their way to be fitted before the trip, in a last minute dash I managed to get the brakes re-bled and working, tyres fitted, filled with nitrogen, booked a trip to Edinburgh and flew out all on Tuesday leaving last minute packing and preparation for 9.30pm on Wednesday night before we left. I’m very relieved that I decided to leave the stock MC installed for now with the time I had available, while the car needs it and the pedal has a little too much travel, this remains a headache for another day as I still have no idea as to how to properly adjust the rod to it. We had an amazing time out in Spa, with the car covering just over 1000 miles in less than a week. Great company and tour guide from Tony, being shown some nice backroads closer to Spa which could be enjoyed away from the Motorway (even drove the old track). What a circuit Spa is, the elevation changes were fairly breath taking. I can see why it’s a bit of a Mecha for motorsport fans and definitely the most exciting circuit I’ve visited and driven to date. As hoped and with the car running so well we got a track session for Saturday evening however much to our disappointment it was plagued by safety cars while a wall was being rebuilt. Unfinished business and a return visit one day I’m sure… The car felt really keen and we’re super impressed with the new tyres, for a road tyre they really hang on through the corners and still slide nicely at the limits of traction. Less childish behaviour can be had with the trade-off of superb grip on the road. We could really push people through corners and drive around them however in a straight line we were still left lacking and wanting more with almost everyone pulling away. Certainly some drag racing going on against Peugeot 205’s. Thoughts are turning to building an engine with approx. 200 bhp flywheel that revs happily to 7000prm without spending the earth…. The trip didn’t leave the car unscathed though and we picked up a big stone chip on day one of the trip which we watched expand all trip until we got home. I’m relieved to say that despite it having spidered outwards, Kenneth from Autoglass has saved the windscreen with a resin filler yesterday. Quite scary seeing how big it had really got when he applied some pressure to it. I’ve also got rubber trims turning up to try and reduce some wind noise and make the car a little more comfortable for longer journeys. These cars are never really finished but I feel as though the whole package has really moved on, particularly when I compare it to the sloppy driving experience the car started with… IMG_0135 by Mark Woodrow, on Flickr 6D62364D-FE32-4CE8-8041-18E19804611E by Mark Woodrow, on Flickr IMG_0123 by Mark Woodrow, on Flickr IMG_0127 by Mark Woodrow, on Flickr IMG_0141 by Mark Woodrow, on Flickr IMG_0163 by Mark Woodrow, on Flickr IMG_0144 by Mark Woodrow, on Flickr IMG_0167 by Mark Woodrow, on Flickr New tread pattern looking alot meaner: IMG_0186 by Mark Woodrow, on Flickr IMG_0191 by Mark Woodrow, on Flickr IMG_0303 by Mark Woodrow, on Flickr Getting a little dusty IMG_0285 by Mark Woodrow, on Flickr Think we'll need to take a trip to the French Riviera next Version 2 by Mark Woodrow, on Flickr1 point 1 pointHere's a photo of the writing on the door of my HLS30-00210 after the paint was stripped off.
.thumb.JPG.1418aaa044ca48de19e26d13cfa95614.JPG) 1 point
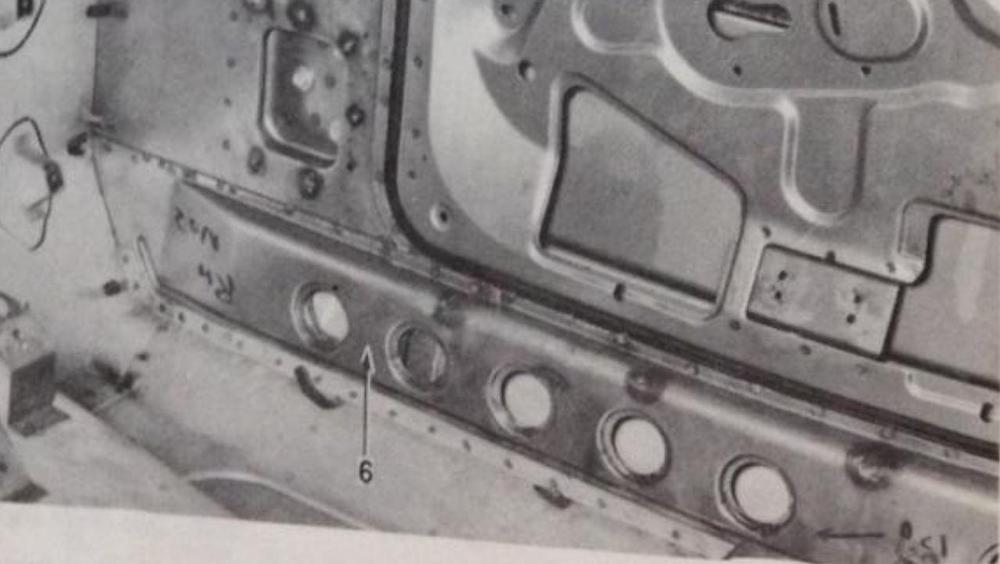
1 pointI think you're reading too much into the numbers shown on the back of the dash. My HLS30-00210 had "No 3" written on the top of the inner fender. That didn't mean my car was HLS30-00003 either. I think these numbers were some kind of code, possibly inspection marks. I'm attaching a photo that Kats posted from an early JDM parts catalog that shows similar markings on either end of the inner rock panel: "No 2" on the left and some other writing and an arrow probably pointing to an area needing some more work on the right. My car also had some kanji writing on the door and quarter panel which I think were also notes about some more finishing work that was needed before being painted.
1 point
1 pointI think you're reading too much into the numbers shown on the back of the dash. My HLS30-00210 had "No 3" written on the top of the inner fender. That didn't mean my car was HLS30-00003 either. I think these numbers were some kind of code, possibly inspection marks. I'm attaching a photo that Kats posted from an early JDM parts catalog that shows similar markings on either end of the inner rock panel: "No 2" on the left and some other writing and an arrow probably pointing to an area needing some more work on the right. My car also had some kanji writing on the door and quarter panel which I think were also notes about some more finishing work that was needed before being painted..thumb.JPG.c0fb90d84f912b2fa3d3e05ddb7496b6.JPG)
 1 point
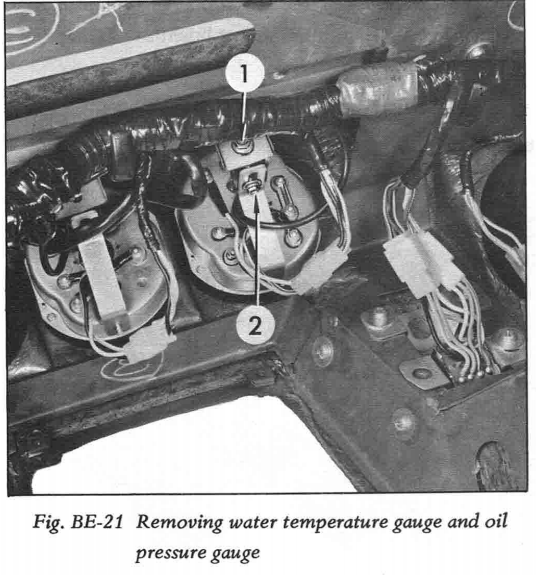
Hi @kats & @Carl Beck, I do think the red car is HLS30-00003. Here are two interesting images from the first FSM with the red car. Do you see a number written in two locations? ?
1 point
1 pointHi @kats & @Carl Beck, I do think the red car is HLS30-00003. Here are two interesting images from the first FSM with the red car. Do you see a number written in two locations? ?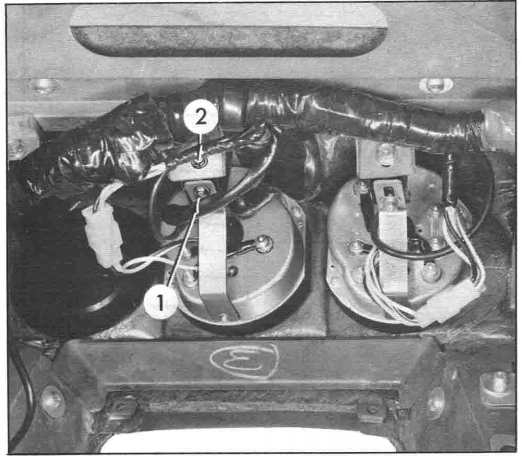
 1 point
Well we're back again, its been another busy but productive weekend. I'm pleasesd to say that the car now has a fully functioning forced cold air intake fitted! I just wanted to start by giving a shout out to Richie, I completely hijacked this setup from his recent work and used his suggestions and parts list to make this possible. It goes without saying that this setup is entirely custom, with all of the parts having been sourced from ebay with the exception of the airbox from MJP (this effectively comes in flatpack form though). This setup previously seems to have only been used on tripples rather than SU's from what I've seen to date though... First up was to protect the airbox itself, arriving in naked firbreglass it looked a bit dull and looked like it would benefit from some protection. Also the lip of it was white in places from the raw finish and gave it a rugged look, having gone round with a black shapie everything was blacked up to match in. Following a quick degrease and a few coats of laquer using a rattle can in the garden the results the next day were much better and give it a more premium finish. Saturday afternoon started by getting the carbs back to basics to allow me to get in with some masking tape to make a transfer outline of the bolt holes and carb intakes before transfering this across to a cardboard template of the airbox. Having carefully cut this up I could test fit the cardboard for fitment until I was satisfied, with that done I transfered the outlay onto the airbox backing plate marking it up with a Chrome Pen. So as to not rip the fibreglass up, a dremel was used to drill around the areas before opening up the gaps annd sanding them back to get the desired fitment. This was a bit of a sod and took some patience as you only get one shot to get it right. With that done the rubber sealing trim was installed and the clips/brackets that secure the airbox offered up for positioning and drilling, being patient with the dremel and drill got all of the holes in place. These has now been locked down using M4 Bolts and Nylocks on the inside to give a flush fitment and cause the least disturbance while remaining removable. Long term if there's no issues, I'm still tempted to move to rivets however we will see. Come Sunday, next up was taking the CRX induction pipe to mark up and chop up using an angle grinder. With my small one out of action the hacksaw came into play as the 9inch grinder I had turned out to be too man for a precision job. This was a case of more patience and conservative cuts to get the desired length (I still think the pipe may be a tad too long with the airbox being very snug pushed up against it). In order to hold it in place a silicone joiner hose was inserted through the bulkhead, this was an absolute just fit and had to be heated in hot water to be made pliable enough to slot in place and is now going no where. With alot of squeezing the ali pipe was dropped in place with some pushing, pulling, cursing and swearing before being tightened up using jubilee clips. With all of that done, all that was left to do was cut the 90 degree bend pipe out of the front to fit up a suitable cone air filter, the pipe was a bit too heavy duty so took some time with the grinder but seems to have done the job. This slotted in place with jubilee clips and has had a generic ebay red 3 inch cone filter added onto the end. Having covered it in K&N filter oil it looks to be more than up to the job of keeping out all necessary debris and flies etc. Only time will tell how durable it will be! Overall it seems to be gone very well, its snug but has good clearance in all of the right places. I may cut down the pipe from the airbox to the bulkhead to allow for easier fitment and removal going forward however its ready for the shows this weekend. Having taken it around the block it seems to be running smoothly however the extended roadtest of a couple of hundred miles should reveal all. Fingers crossed I can get it to a Dyno soon to have a proper tune up and see what all of our hard work has gained us, the performance certainly seems stronger. In other news we're getting close to our big brake upgrade on the front, pads have arrived, fitting kit cleaned up, disks and brackets on their way. I'm just waiting for the brake calipers to be done by BiggRed and then we'll be looking to get them fitted up. More than likely a job for next week to take the pressure off assuming the clipers arrive before then... Fortunately the car is all fueled up, polished and stowed away in the garage for the weekend waiting to go this year, no more water pump fixes at 11pm the day before please! A little detail I've been meaning to do something about for a while now! IMG-9845 by Mark Woodrow, on Flickr IMG-9875 by Mark Woodrow, on Flickr One Template IMG-9818 by Mark Woodrow, on Flickr Test Fit IMG-9820 by Mark Woodrow, on Flickr Transfer Across IMG-9823 by Mark Woodrow, on Flickr Cutting IMG-9825 by Mark Woodrow, on Flickr IMG-9830 by Mark Woodrow, on Flickr IMG-9847 by Mark Woodrow, on Flickr IMG-9848 by Mark Woodrow, on Flickr IMG-9834 by Mark Woodrow, on Flickr The business end! IMG-9858 by Mark Woodrow, on Flickr IMG-9864 by Mark Woodrow, on Flickr IMG-9884 by Mark Woodrow, on Flickr IMG-9891 by Mark Woodrow, on Flickr IMG-9901 by Mark Woodrow, on Flickr IMG-9920 by Mark Woodrow, on Flickr1 point
1 point
Well we're back again, its been another busy but productive weekend. I'm pleasesd to say that the car now has a fully functioning forced cold air intake fitted! I just wanted to start by giving a shout out to Richie, I completely hijacked this setup from his recent work and used his suggestions and parts list to make this possible. It goes without saying that this setup is entirely custom, with all of the parts having been sourced from ebay with the exception of the airbox from MJP (this effectively comes in flatpack form though). This setup previously seems to have only been used on tripples rather than SU's from what I've seen to date though... First up was to protect the airbox itself, arriving in naked firbreglass it looked a bit dull and looked like it would benefit from some protection. Also the lip of it was white in places from the raw finish and gave it a rugged look, having gone round with a black shapie everything was blacked up to match in. Following a quick degrease and a few coats of laquer using a rattle can in the garden the results the next day were much better and give it a more premium finish. Saturday afternoon started by getting the carbs back to basics to allow me to get in with some masking tape to make a transfer outline of the bolt holes and carb intakes before transfering this across to a cardboard template of the airbox. Having carefully cut this up I could test fit the cardboard for fitment until I was satisfied, with that done I transfered the outlay onto the airbox backing plate marking it up with a Chrome Pen. So as to not rip the fibreglass up, a dremel was used to drill around the areas before opening up the gaps annd sanding them back to get the desired fitment. This was a bit of a sod and took some patience as you only get one shot to get it right. With that done the rubber sealing trim was installed and the clips/brackets that secure the airbox offered up for positioning and drilling, being patient with the dremel and drill got all of the holes in place. These has now been locked down using M4 Bolts and Nylocks on the inside to give a flush fitment and cause the least disturbance while remaining removable. Long term if there's no issues, I'm still tempted to move to rivets however we will see. Come Sunday, next up was taking the CRX induction pipe to mark up and chop up using an angle grinder. With my small one out of action the hacksaw came into play as the 9inch grinder I had turned out to be too man for a precision job. This was a case of more patience and conservative cuts to get the desired length (I still think the pipe may be a tad too long with the airbox being very snug pushed up against it). In order to hold it in place a silicone joiner hose was inserted through the bulkhead, this was an absolute just fit and had to be heated in hot water to be made pliable enough to slot in place and is now going no where. With alot of squeezing the ali pipe was dropped in place with some pushing, pulling, cursing and swearing before being tightened up using jubilee clips. With all of that done, all that was left to do was cut the 90 degree bend pipe out of the front to fit up a suitable cone air filter, the pipe was a bit too heavy duty so took some time with the grinder but seems to have done the job. This slotted in place with jubilee clips and has had a generic ebay red 3 inch cone filter added onto the end. Having covered it in K&N filter oil it looks to be more than up to the job of keeping out all necessary debris and flies etc. Only time will tell how durable it will be! Overall it seems to be gone very well, its snug but has good clearance in all of the right places. I may cut down the pipe from the airbox to the bulkhead to allow for easier fitment and removal going forward however its ready for the shows this weekend. Having taken it around the block it seems to be running smoothly however the extended roadtest of a couple of hundred miles should reveal all. Fingers crossed I can get it to a Dyno soon to have a proper tune up and see what all of our hard work has gained us, the performance certainly seems stronger. In other news we're getting close to our big brake upgrade on the front, pads have arrived, fitting kit cleaned up, disks and brackets on their way. I'm just waiting for the brake calipers to be done by BiggRed and then we'll be looking to get them fitted up. More than likely a job for next week to take the pressure off assuming the clipers arrive before then... Fortunately the car is all fueled up, polished and stowed away in the garage for the weekend waiting to go this year, no more water pump fixes at 11pm the day before please! A little detail I've been meaning to do something about for a while now! IMG-9845 by Mark Woodrow, on Flickr IMG-9875 by Mark Woodrow, on Flickr One Template IMG-9818 by Mark Woodrow, on Flickr Test Fit IMG-9820 by Mark Woodrow, on Flickr Transfer Across IMG-9823 by Mark Woodrow, on Flickr Cutting IMG-9825 by Mark Woodrow, on Flickr IMG-9830 by Mark Woodrow, on Flickr IMG-9847 by Mark Woodrow, on Flickr IMG-9848 by Mark Woodrow, on Flickr IMG-9834 by Mark Woodrow, on Flickr The business end! IMG-9858 by Mark Woodrow, on Flickr IMG-9864 by Mark Woodrow, on Flickr IMG-9884 by Mark Woodrow, on Flickr IMG-9891 by Mark Woodrow, on Flickr IMG-9901 by Mark Woodrow, on Flickr IMG-9920 by Mark Woodrow, on Flickr1 point 1 pointIn addition to all of the above techniques to mitigating exhaust fumes in the cabin, you can also extend the tail piece of the muffler another 2-3" to get the gases out into faster moving air and installing a spoiler on the rear hatch disrupts the vortex at the back of the car and can help. Going Bosozoku would certainly help but would remove 10% of your power and probably get you a big ticket.?1 point
1 pointTwo completely independent posts on the exact same fix. Has to be good!1 point
1 pointIn addition to all of the above techniques to mitigating exhaust fumes in the cabin, you can also extend the tail piece of the muffler another 2-3" to get the gases out into faster moving air and installing a spoiler on the rear hatch disrupts the vortex at the back of the car and can help. Going Bosozoku would certainly help but would remove 10% of your power and probably get you a big ticket.?1 point
1 pointTwo completely independent posts on the exact same fix. Has to be good!1 point 1 pointOne other thing to check after you have done all of the things mentioned above...tail light seals in particular. On the inside of the hatch, there is a vinyl wrapped trim piece that extends across the bottom back of the hatch. That trim piece needs to be flat and sealed with sealant to the hatch. Otherwise, fumes get sucked into the lock mechanism and in through breaks in the seal of this trim piece. Most of the time, in my experience, after 45 years of not being removed and re-sealed this trim piece is wavy and has many spots where there are air gaps. Last summer, a 72 that I had just rebuilt was filling the cabin with fumes. I had sealed every possible entry point and then it hit me that I had not re-sealed the hatch trim panel. Did that and no more exhaust fumes.1 point
1 pointThat vinyl covered cardboard finishing panel on the inside of the hatch needs to be sealed all around its perimeter. There's a gap around the latch mechanism that lets fumes get sucked in. The area at the back of the car is a high pressure zone compared to the inside of the car. Ironically, the problem gets worse when you open the windows because the air flowing by the windows pull air out, which gets replaced from the back end.1 point
1 point
Well lots of progress made today, its been a damn long and wet day at that however the old exhaust system is now off and the new one fitted up in place.... I'm back on it tomorrow however I've got some more immediate issues to sort, to fit the Racesport manifold into the engine bay I had to remove the steering column to get enough space to squeeze it in, that in itself was fine however I now cannot reconnect it at the top because the poly coupler has expanded pushing the bolts out at an angle so I can't relocate them back into the top of the column. Anyone know how I can compress the coupler or work something out to get this connected and the steering back? The last thing I did tonight was to start the car for the first time, good news was that it fired straight up with some choke, bad news is that its running like an asthmatic dog... I'm guessing it's a combo of full new exhaust, no more K&N's but open trumpets, and that the carbs been removed, thrown around and are out of whack. I'm planning on watching the Ztherapy DVD for guidance but any hints or tips to get it running ok would be much appreciated! I did pick up a carb syncrometer last week at least... Last one is I need to work out where to connect the central exhaust hangar, currently it doesn't seen to meet up with anything obvious In the meantime my temporary fitting assistant the cable tie is helping out... I feel knackered having been scrambling around on the ground all day, and certainly have massive high lift envy of people right now however it proves its still possible. Given that I'm a complete DIY, home taught mechanic when it comes to things like this I'm quite happy with the results so far. Certainly a case of giving things a go and having lots of spare nuts and bolts around and plus gas to cover everything. Short of the suspension its the biggest job on the car that I've tackled yet! IMG_9321 by Mark Woodrow, on Flickr Definitely got a larger diameter pipe going all the way back now! IMG_9319 by Mark Woodrow, on Flickr Out with the old and in with the new... IMG_9347 by Mark Woodrow, on Flickr IMG_9354 by Mark Woodrow, on Flickr IMG_9360 by Mark Woodrow, on Flickr Already hidden away, seems almost criminal... IMG_9373 by Mark Woodrow, on Flickr1 point
1 point
So 23 of may… 2019! i had to take my car unfinished home... What an A...hole... After 4 years my painter did'nt keep his word.. I'm to sick to tell the whole story but i miss my windshield that cost me a lot.. and payd for paint i never saw.. Year ago i brought him a super clean as new dash, i got it back covered in plaster dust (it layed in his house wich he was rebuilding..) a mesh... Cobwebs and all.. also a pic of cleaned seats.. not bad for forty year old ones hey!!
1 pointOne other thing to check after you have done all of the things mentioned above...tail light seals in particular. On the inside of the hatch, there is a vinyl wrapped trim piece that extends across the bottom back of the hatch. That trim piece needs to be flat and sealed with sealant to the hatch. Otherwise, fumes get sucked into the lock mechanism and in through breaks in the seal of this trim piece. Most of the time, in my experience, after 45 years of not being removed and re-sealed this trim piece is wavy and has many spots where there are air gaps. Last summer, a 72 that I had just rebuilt was filling the cabin with fumes. I had sealed every possible entry point and then it hit me that I had not re-sealed the hatch trim panel. Did that and no more exhaust fumes.1 point
1 pointThat vinyl covered cardboard finishing panel on the inside of the hatch needs to be sealed all around its perimeter. There's a gap around the latch mechanism that lets fumes get sucked in. The area at the back of the car is a high pressure zone compared to the inside of the car. Ironically, the problem gets worse when you open the windows because the air flowing by the windows pull air out, which gets replaced from the back end.1 point
1 point
Well lots of progress made today, its been a damn long and wet day at that however the old exhaust system is now off and the new one fitted up in place.... I'm back on it tomorrow however I've got some more immediate issues to sort, to fit the Racesport manifold into the engine bay I had to remove the steering column to get enough space to squeeze it in, that in itself was fine however I now cannot reconnect it at the top because the poly coupler has expanded pushing the bolts out at an angle so I can't relocate them back into the top of the column. Anyone know how I can compress the coupler or work something out to get this connected and the steering back? The last thing I did tonight was to start the car for the first time, good news was that it fired straight up with some choke, bad news is that its running like an asthmatic dog... I'm guessing it's a combo of full new exhaust, no more K&N's but open trumpets, and that the carbs been removed, thrown around and are out of whack. I'm planning on watching the Ztherapy DVD for guidance but any hints or tips to get it running ok would be much appreciated! I did pick up a carb syncrometer last week at least... Last one is I need to work out where to connect the central exhaust hangar, currently it doesn't seen to meet up with anything obvious In the meantime my temporary fitting assistant the cable tie is helping out... I feel knackered having been scrambling around on the ground all day, and certainly have massive high lift envy of people right now however it proves its still possible. Given that I'm a complete DIY, home taught mechanic when it comes to things like this I'm quite happy with the results so far. Certainly a case of giving things a go and having lots of spare nuts and bolts around and plus gas to cover everything. Short of the suspension its the biggest job on the car that I've tackled yet! IMG_9321 by Mark Woodrow, on Flickr Definitely got a larger diameter pipe going all the way back now! IMG_9319 by Mark Woodrow, on Flickr Out with the old and in with the new... IMG_9347 by Mark Woodrow, on Flickr IMG_9354 by Mark Woodrow, on Flickr IMG_9360 by Mark Woodrow, on Flickr Already hidden away, seems almost criminal... IMG_9373 by Mark Woodrow, on Flickr1 point
1 point
So 23 of may… 2019! i had to take my car unfinished home... What an A...hole... After 4 years my painter did'nt keep his word.. I'm to sick to tell the whole story but i miss my windshield that cost me a lot.. and payd for paint i never saw.. Year ago i brought him a super clean as new dash, i got it back covered in plaster dust (it layed in his house wich he was rebuilding..) a mesh... Cobwebs and all.. also a pic of cleaned seats.. not bad for forty year old ones hey!!.thumb.jpg.e0ccc5ad8c7ef2e6dad7e56d31916cca.jpg)
 0 points

.JPG.962d1c550e4d7b4fc2e90aeeb37160c3.JPG)
.JPG.7e8b88f1f120977dc8a169b8e7ad99b8.JPG)

.jpg.01cb559aa80f3352605a7d9589c64737.jpg)

Important Information
By using this site, you agree to our Privacy Policy and Guidelines. We have placed cookies on your device to help make this website better. You can adjust your cookie settings, otherwise we'll assume you're okay to continue.