


Leaderboard
.JPG.cfcada9cf1c1b502df3f5f2f2ca3ff36.JPG)


Popular Content
Showing content with the highest reputation on 08/07/2019 in all areas
-
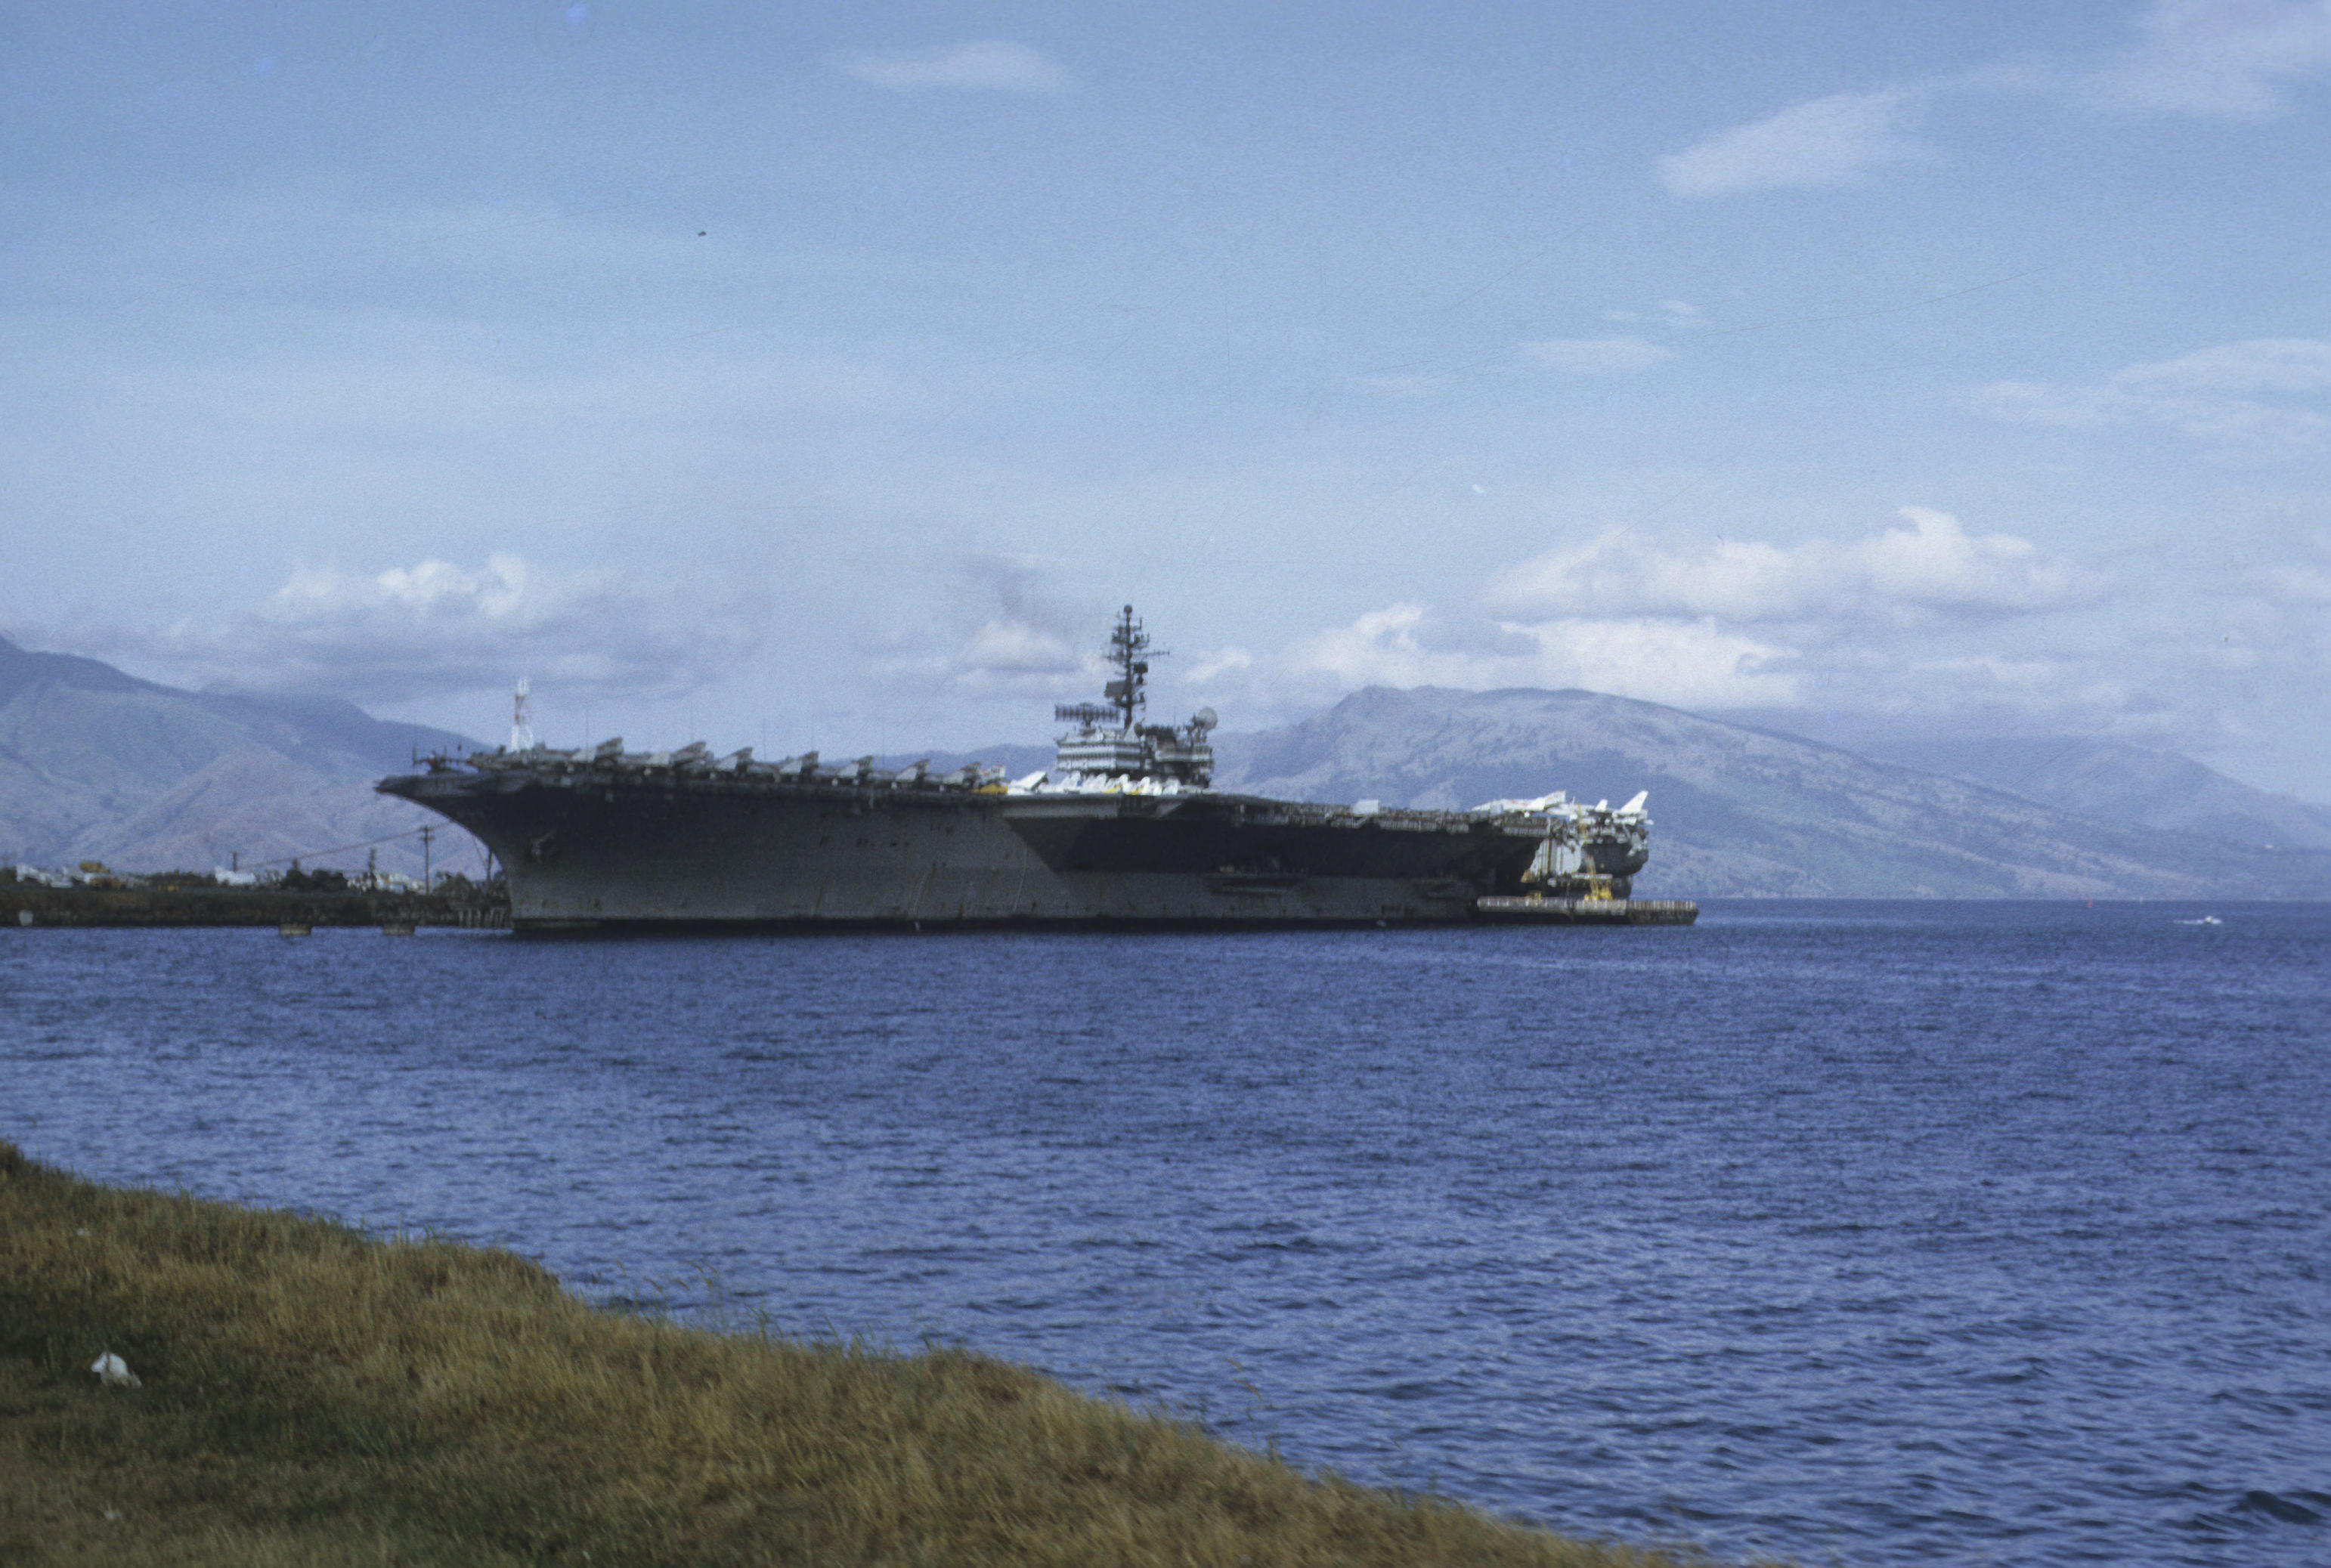
 4 pointsYou reminded me that it was 11 months on THIS vintage flat top IN 1972 that allowed me to save enough to buy the Z in 1973: USS Kitty Hawk, CVA63, Cubi Point Naval Air Station, Philipines, 1972
 4 points
 -
 Between 2 & 3 - Coat the area to be soldered with a good flux. That will help the solder adhere to the wire.3 points
 -
 92. And the truck? Also a 92. What am I doing on this forum if I have a bmw (still running) and Ford (in a coma and surgery now) if you might ask? Cuz y'all were the only ones on the internet I could find that were discussing this idea at all2 points
 -
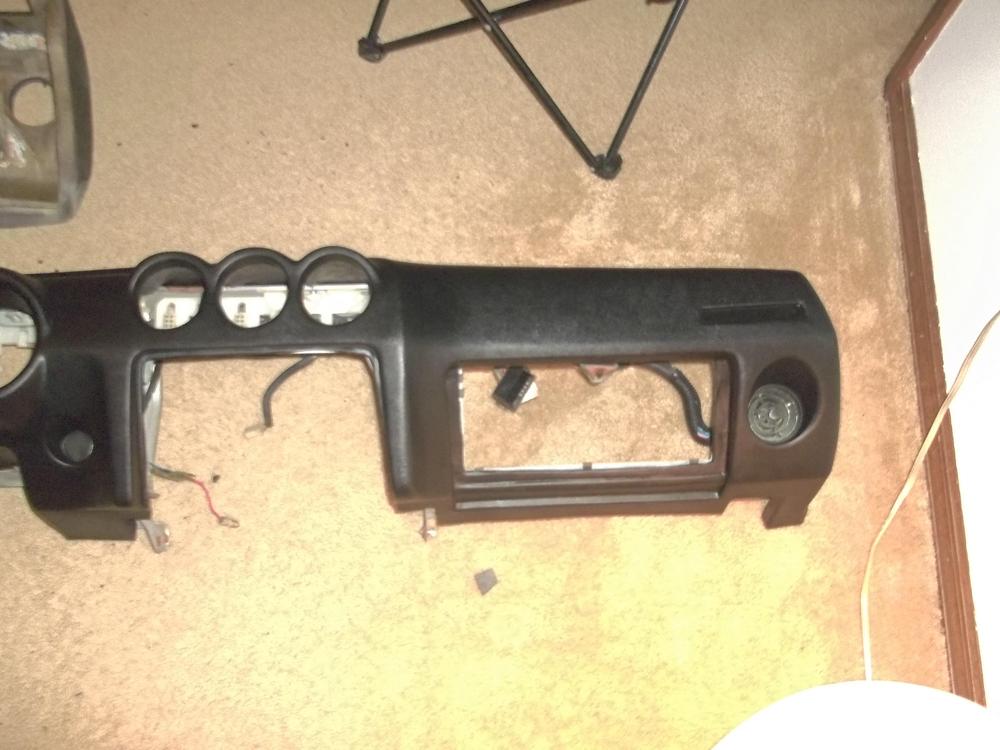
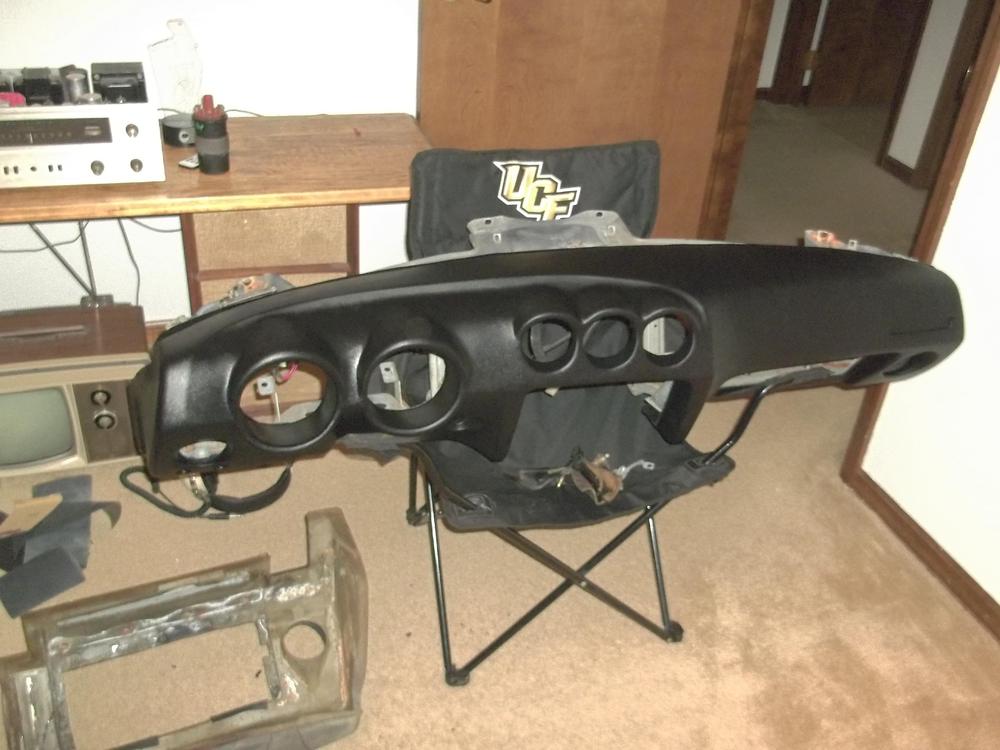
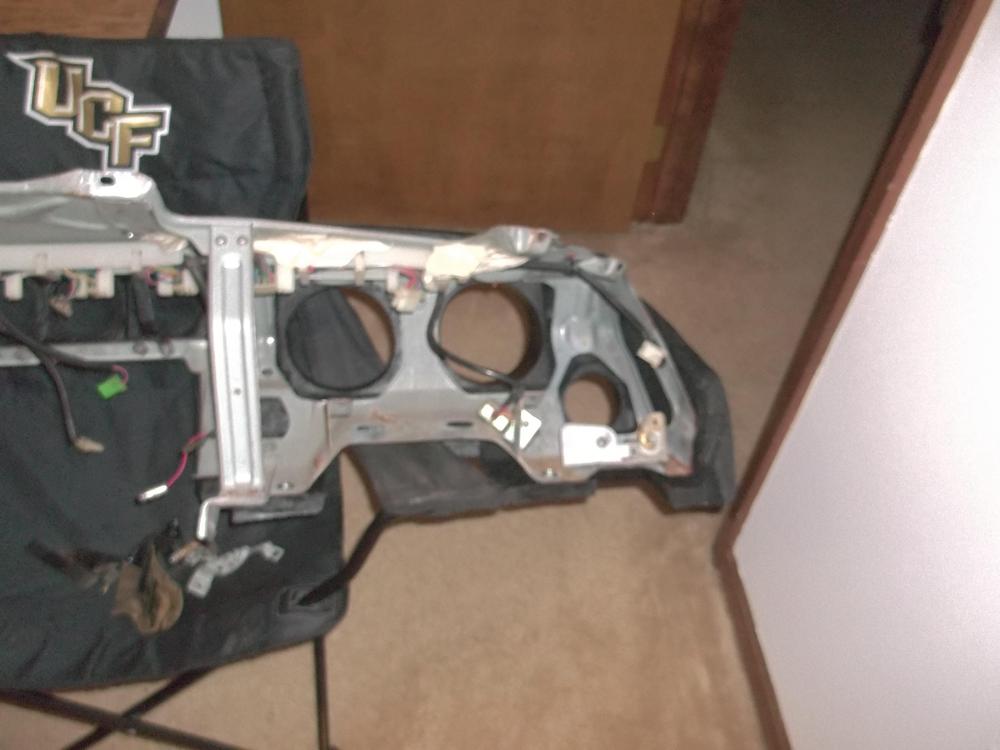
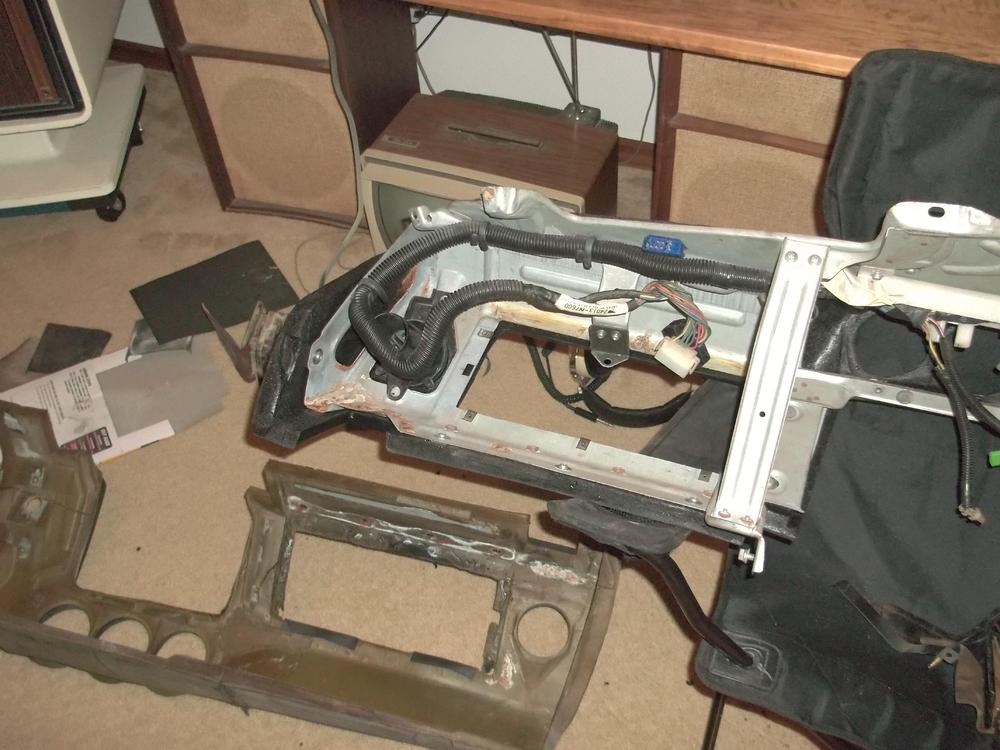
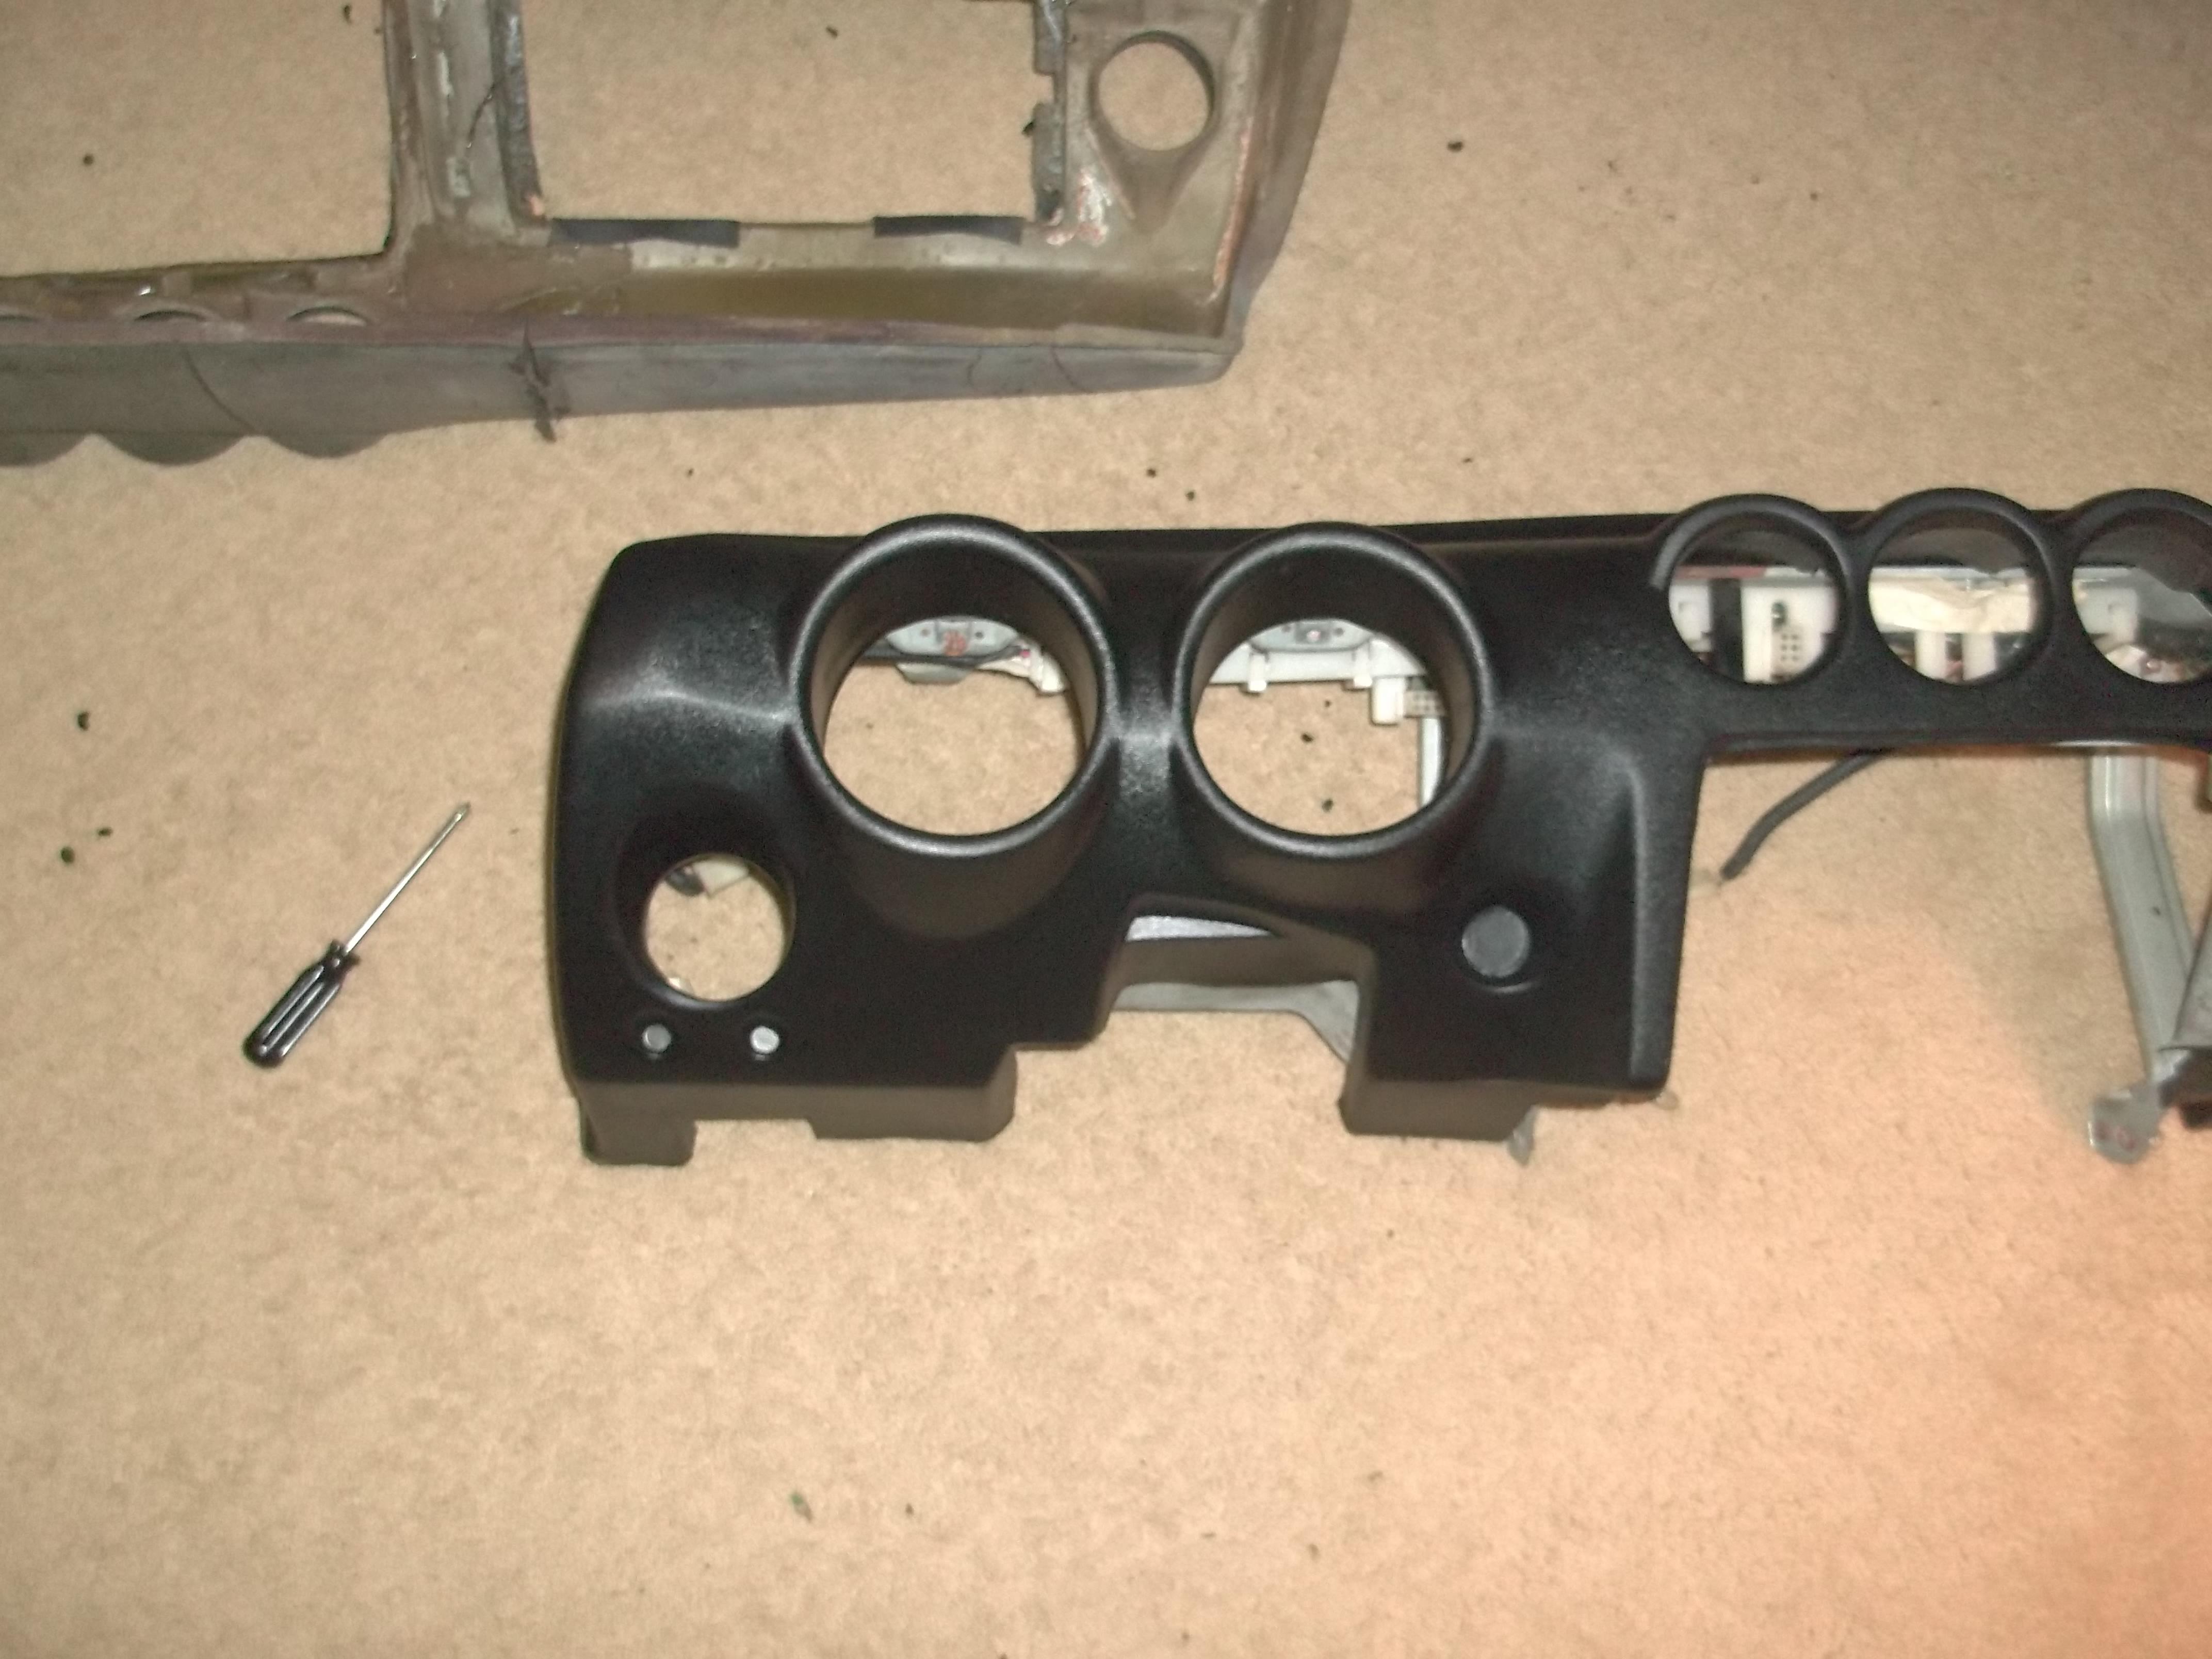
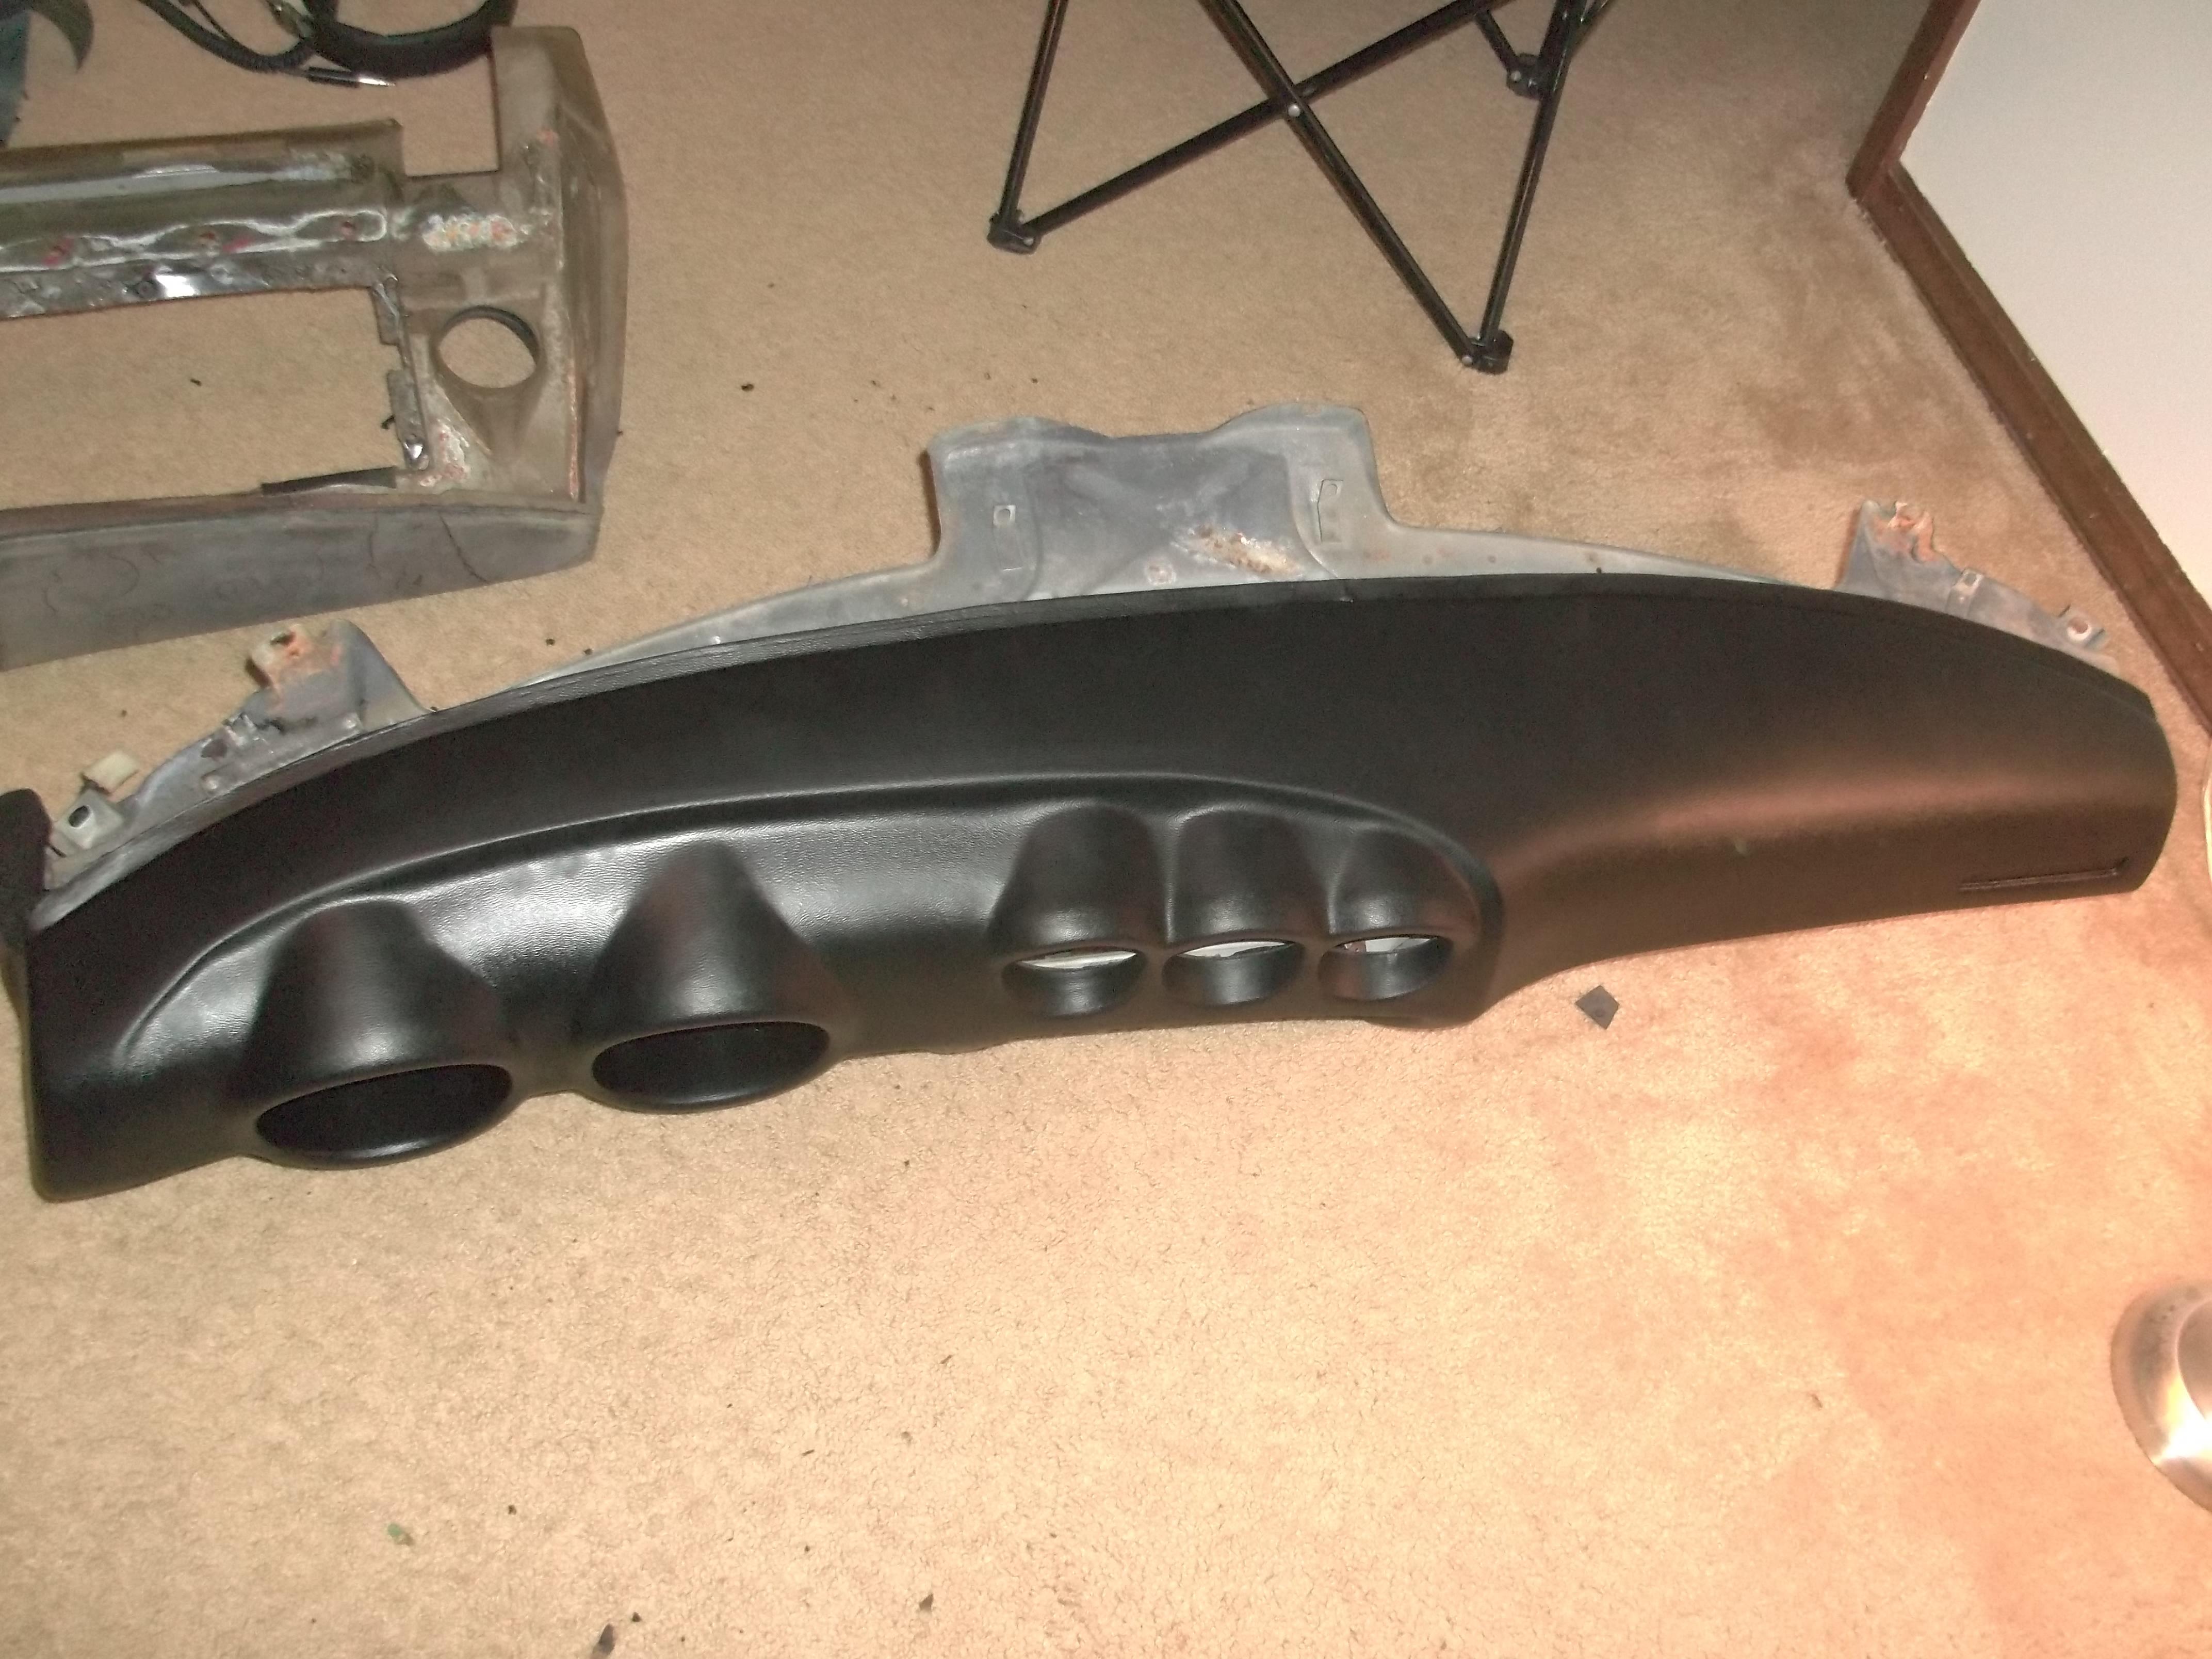
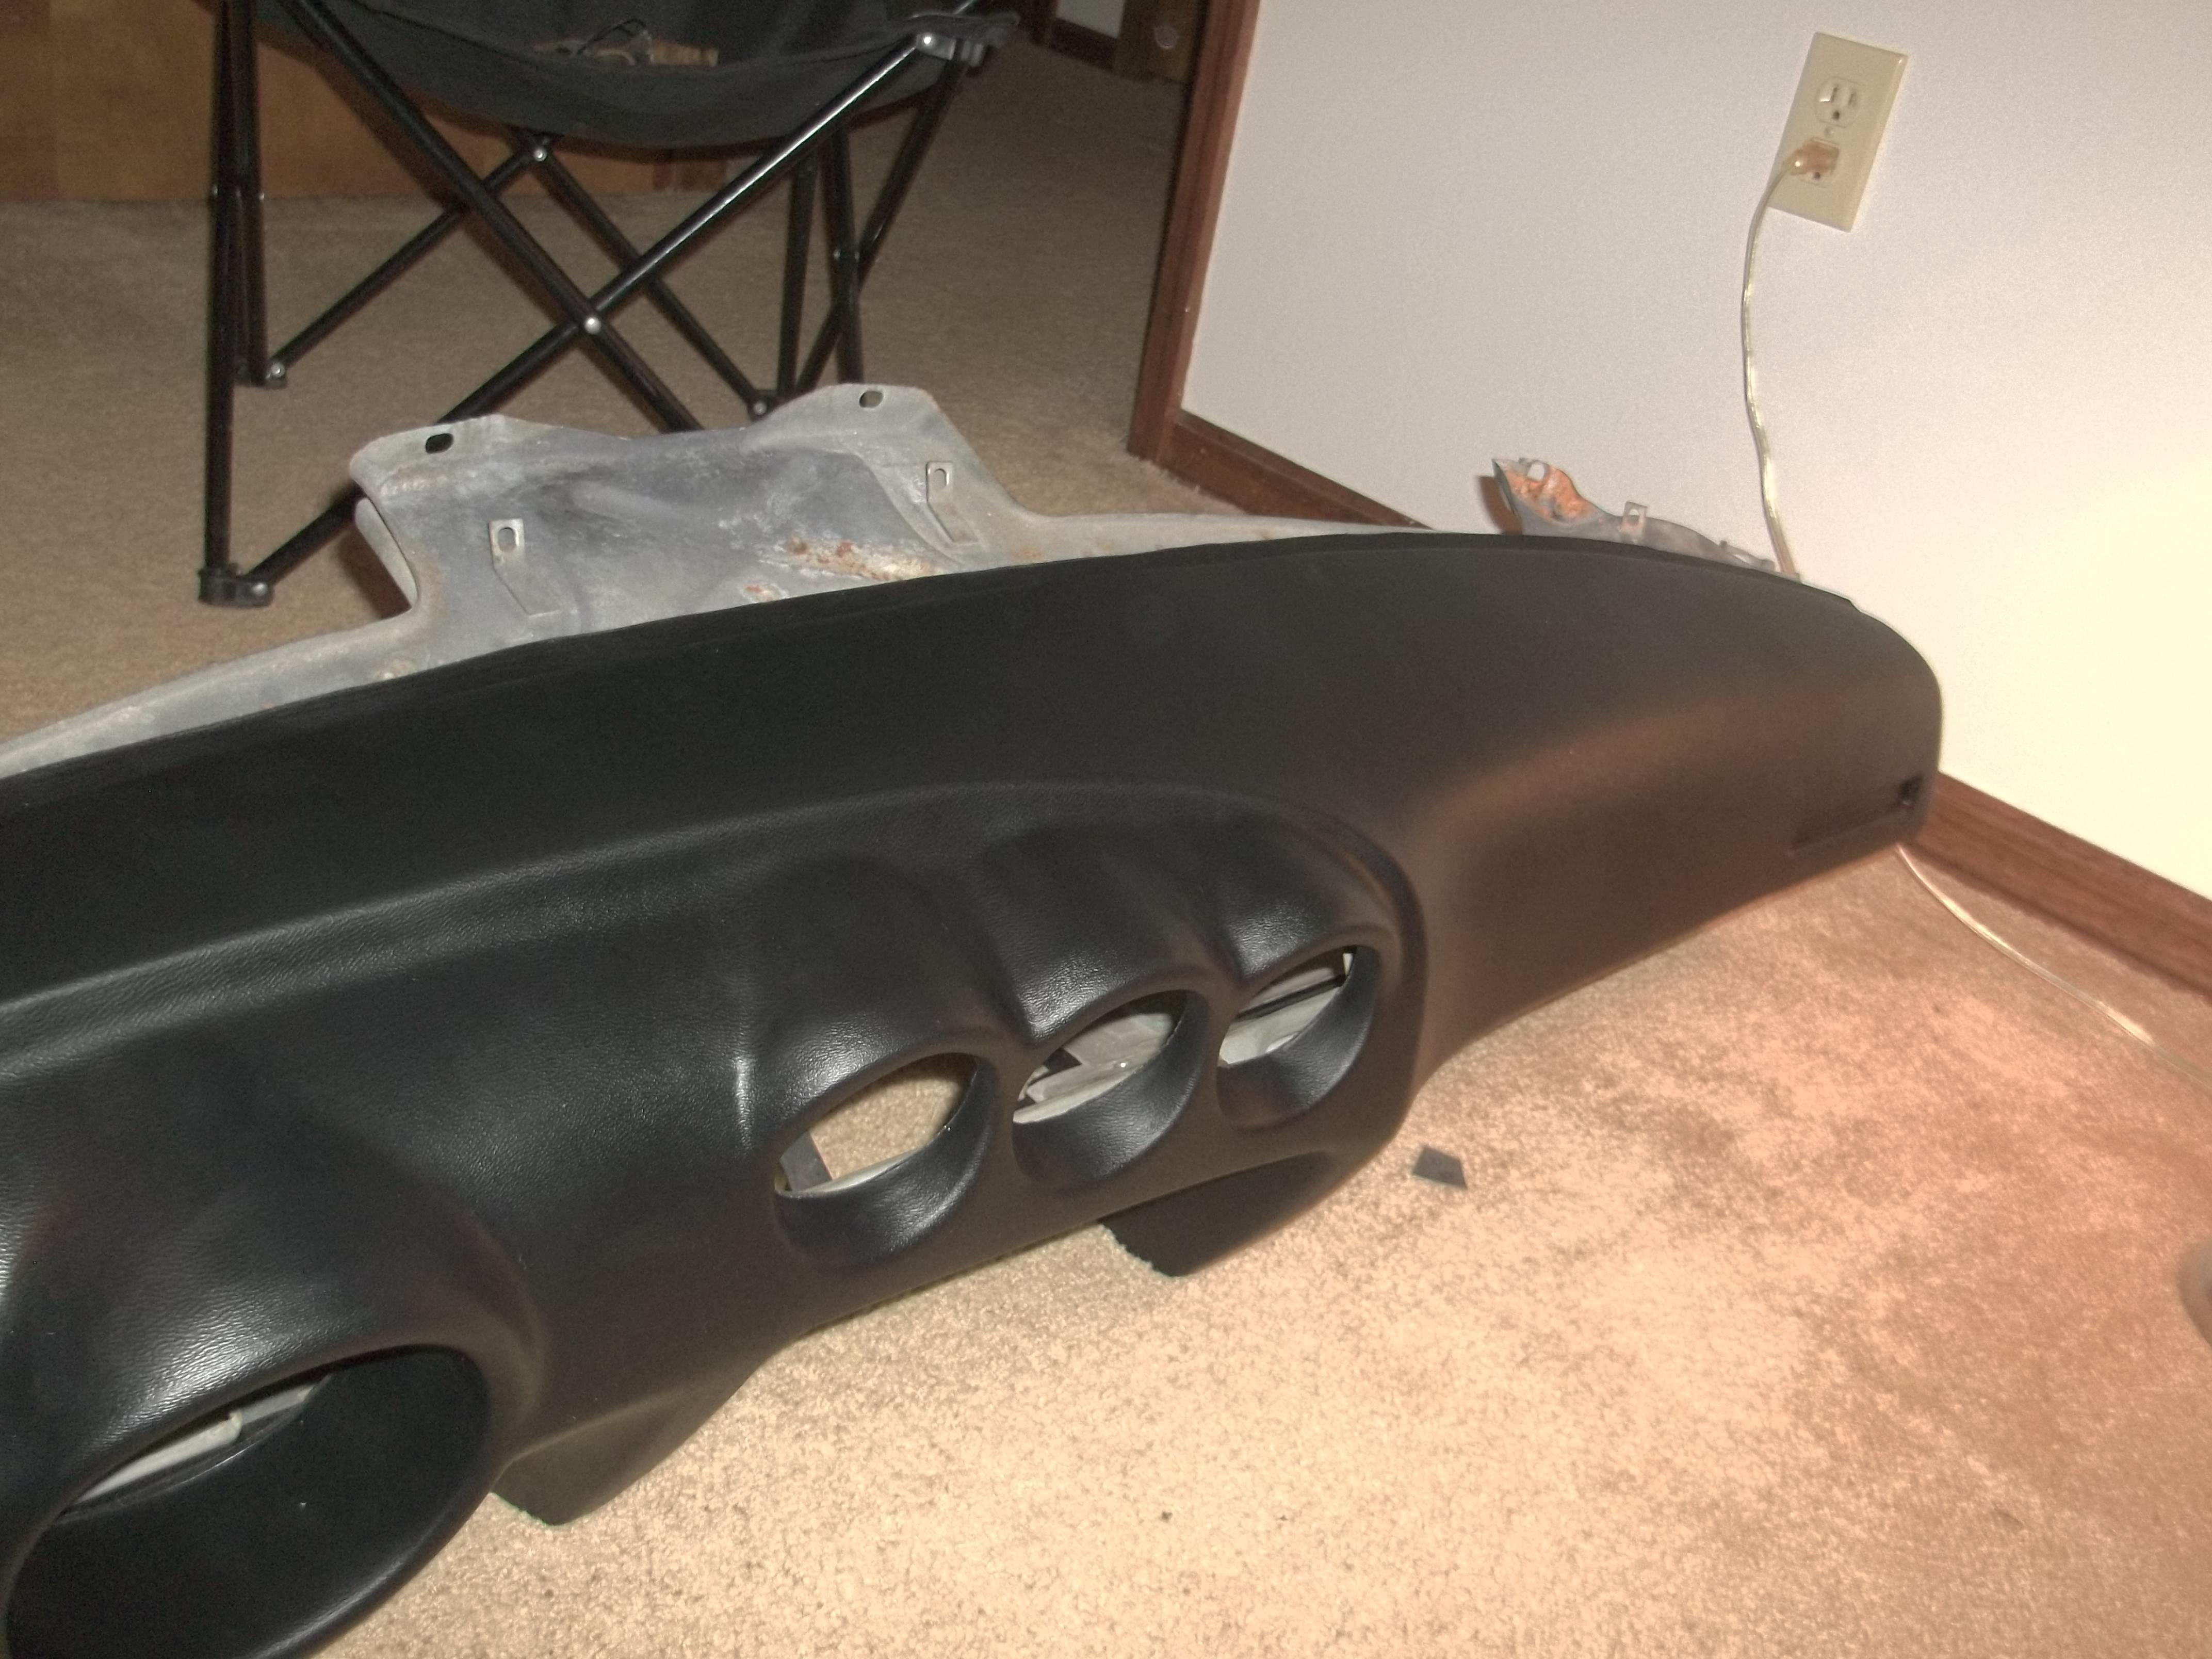
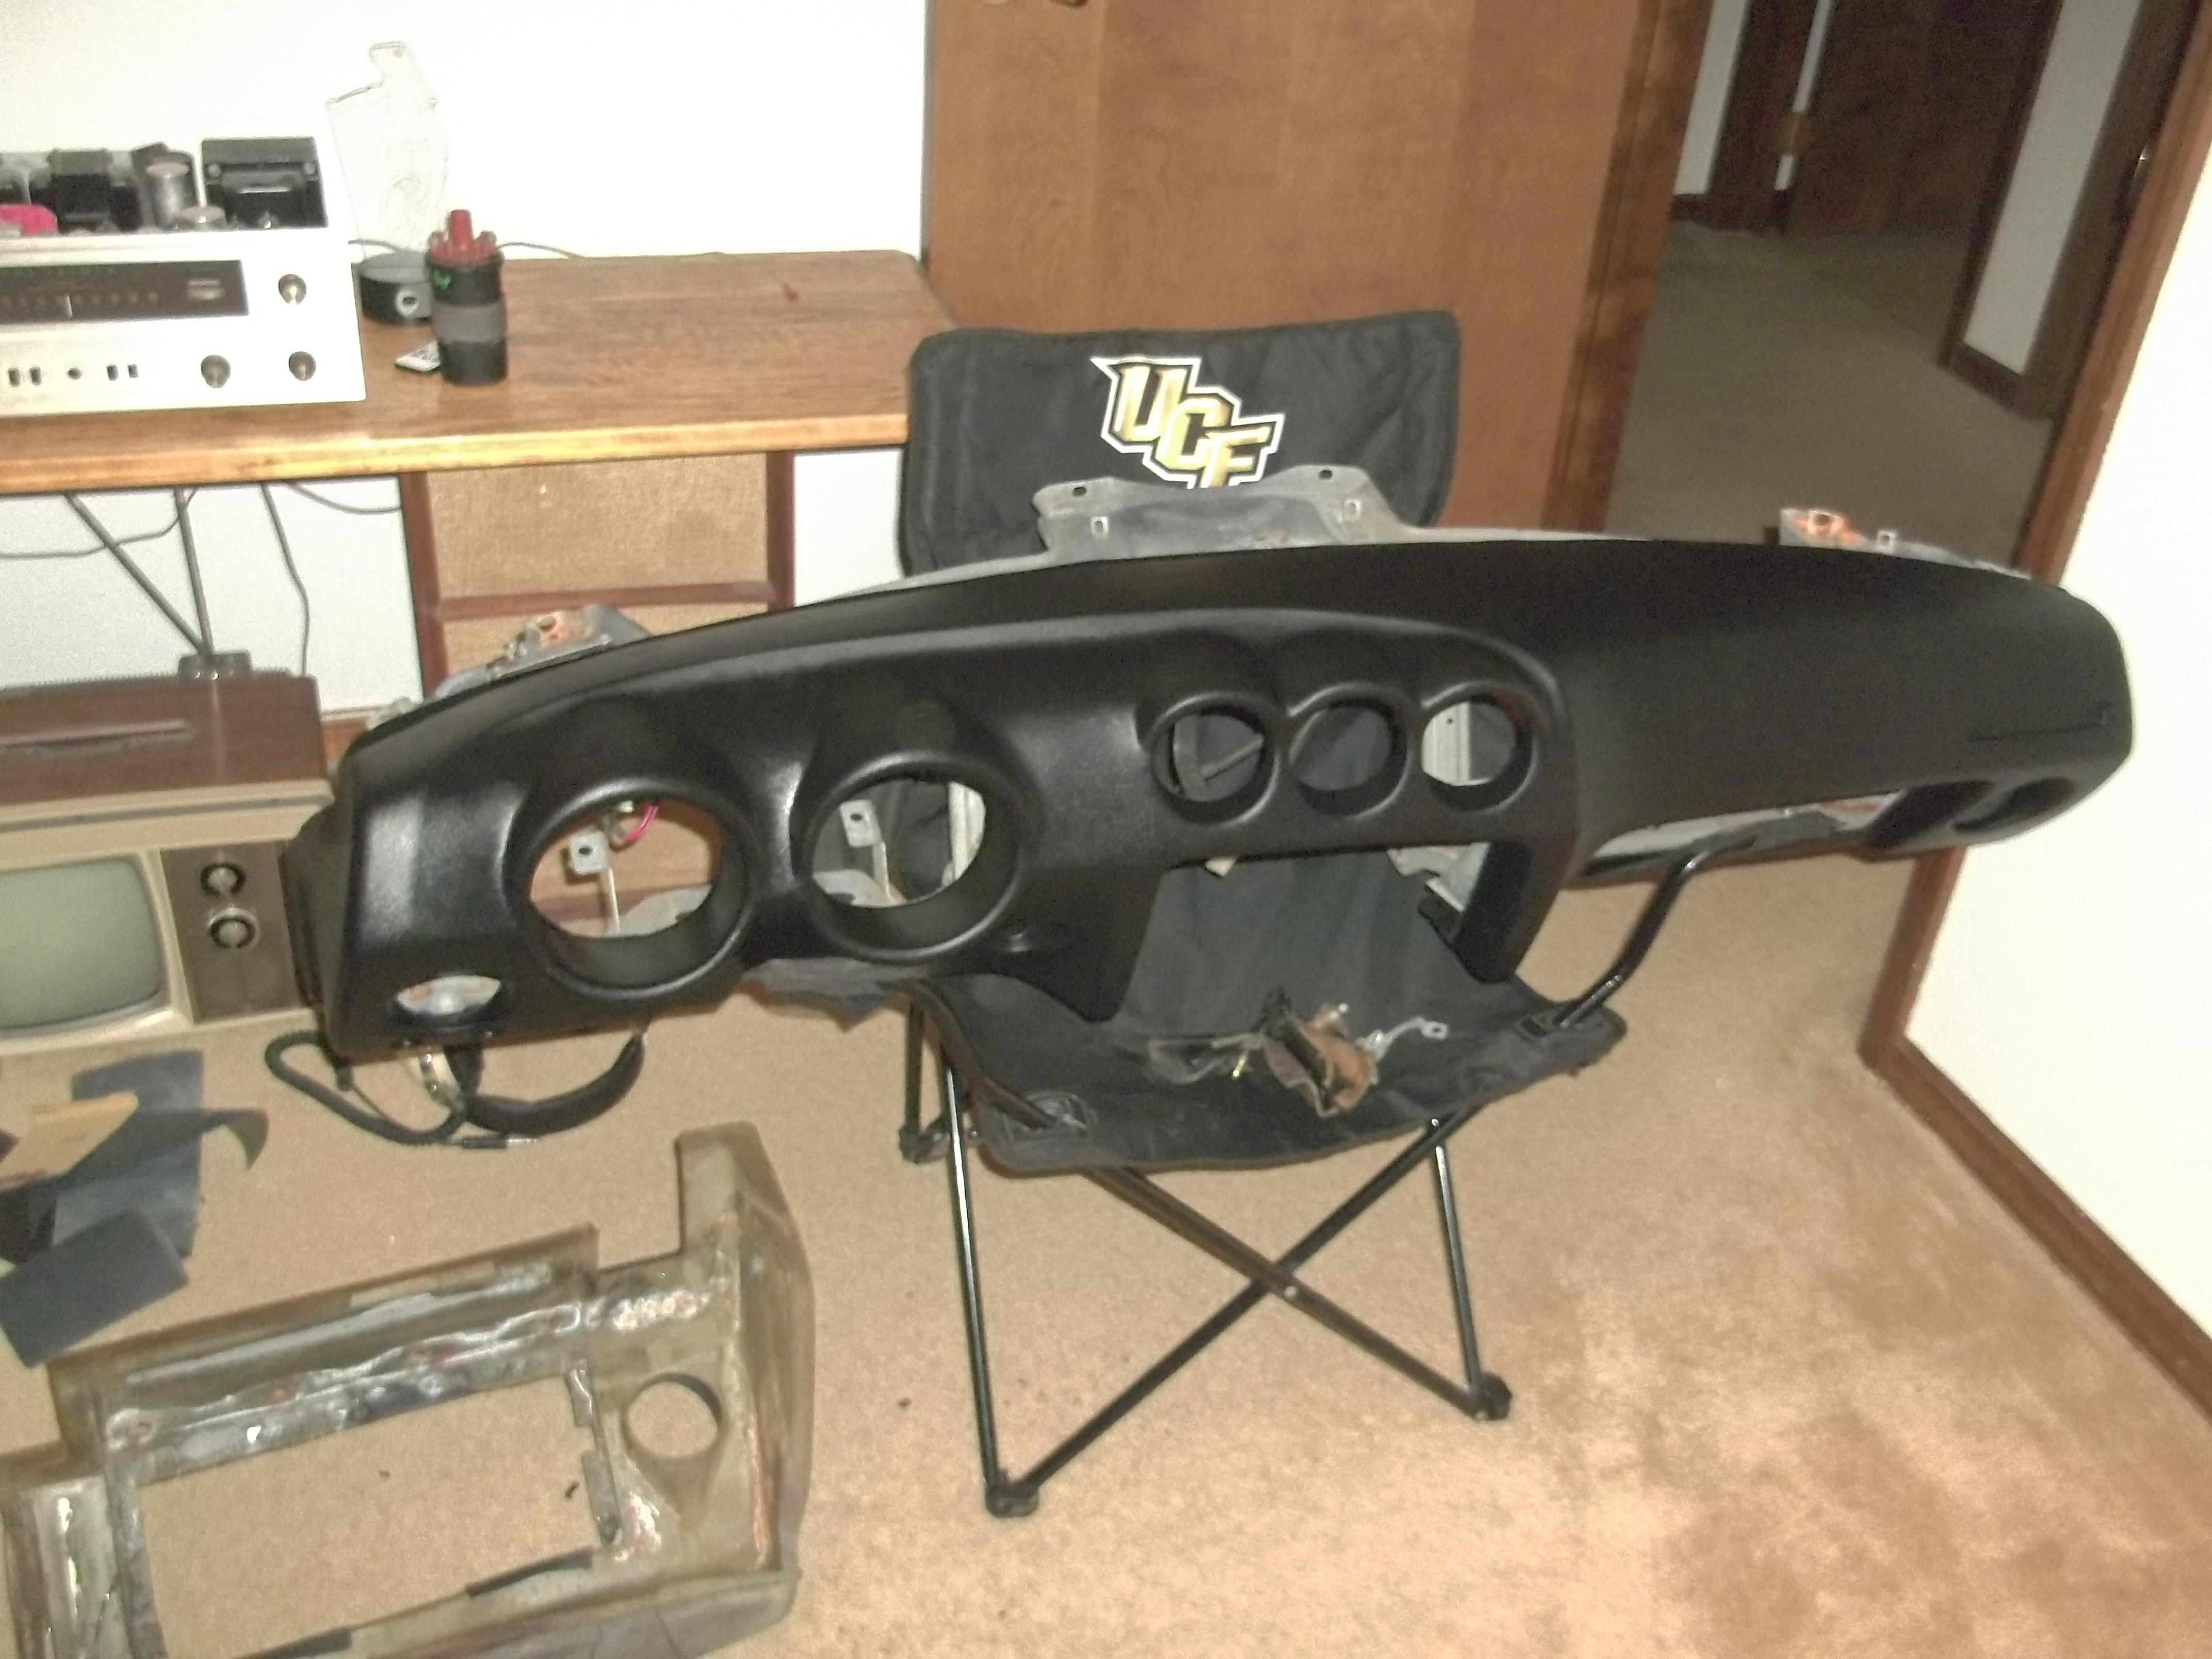
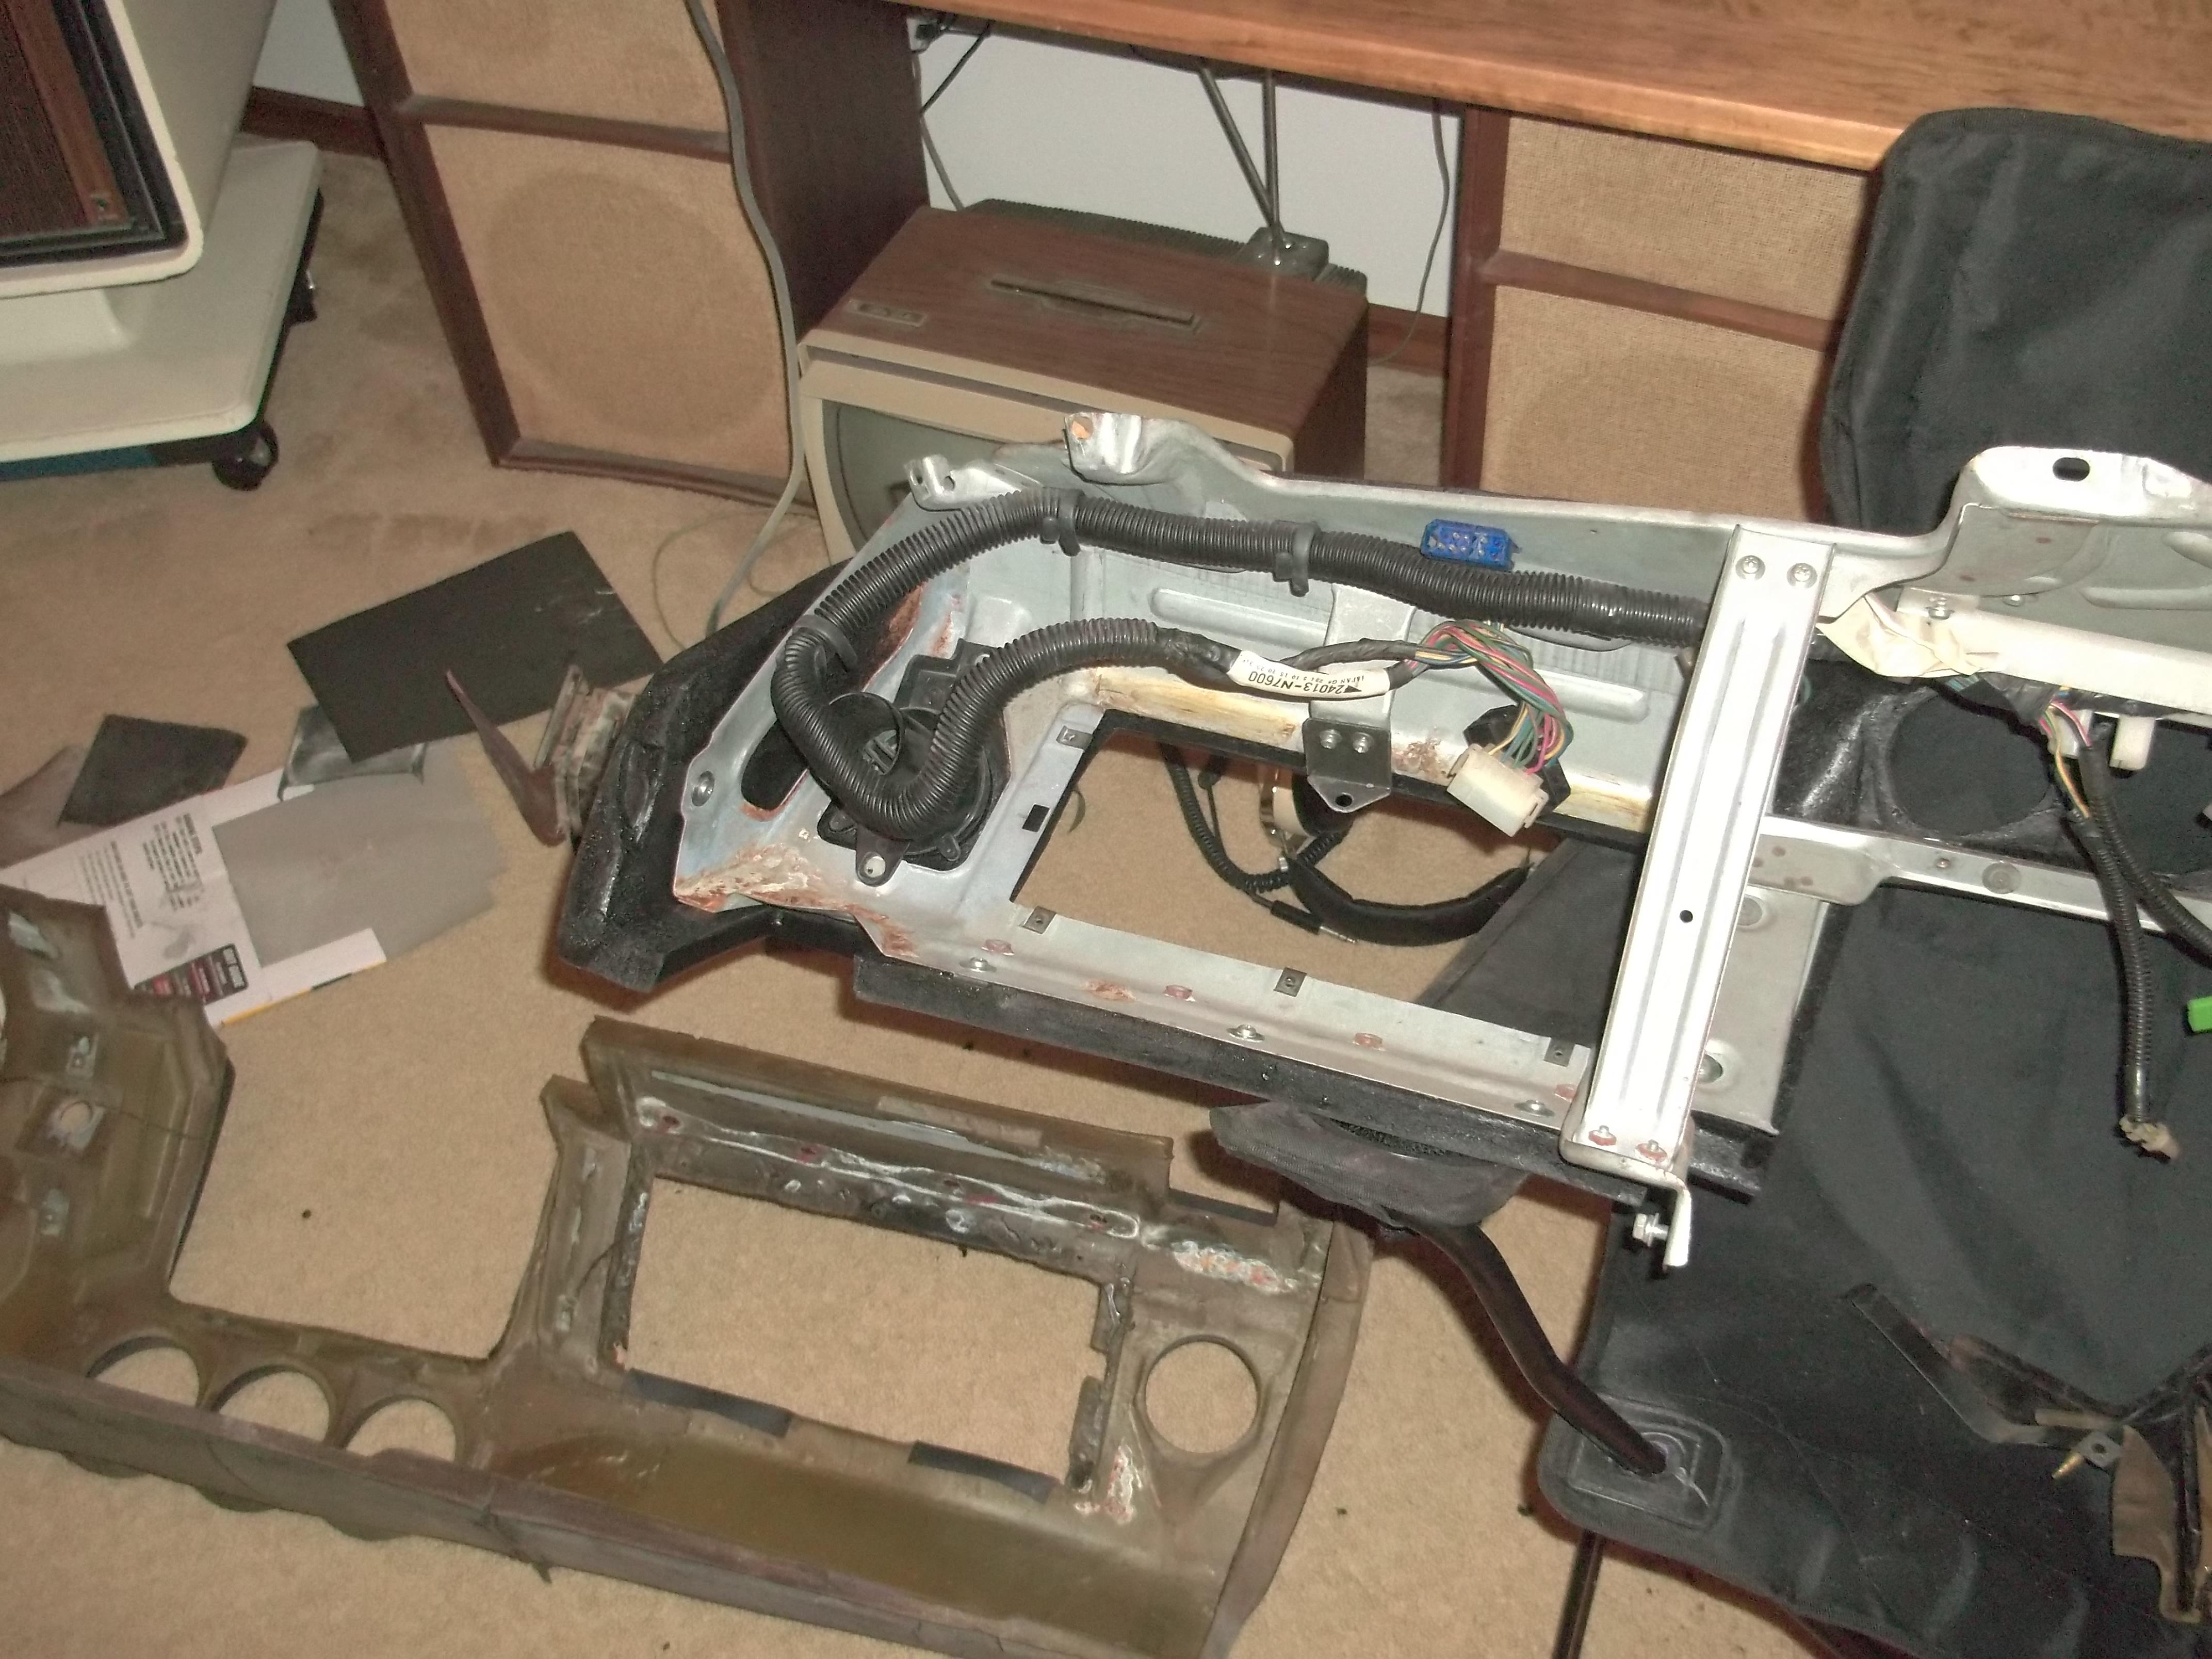
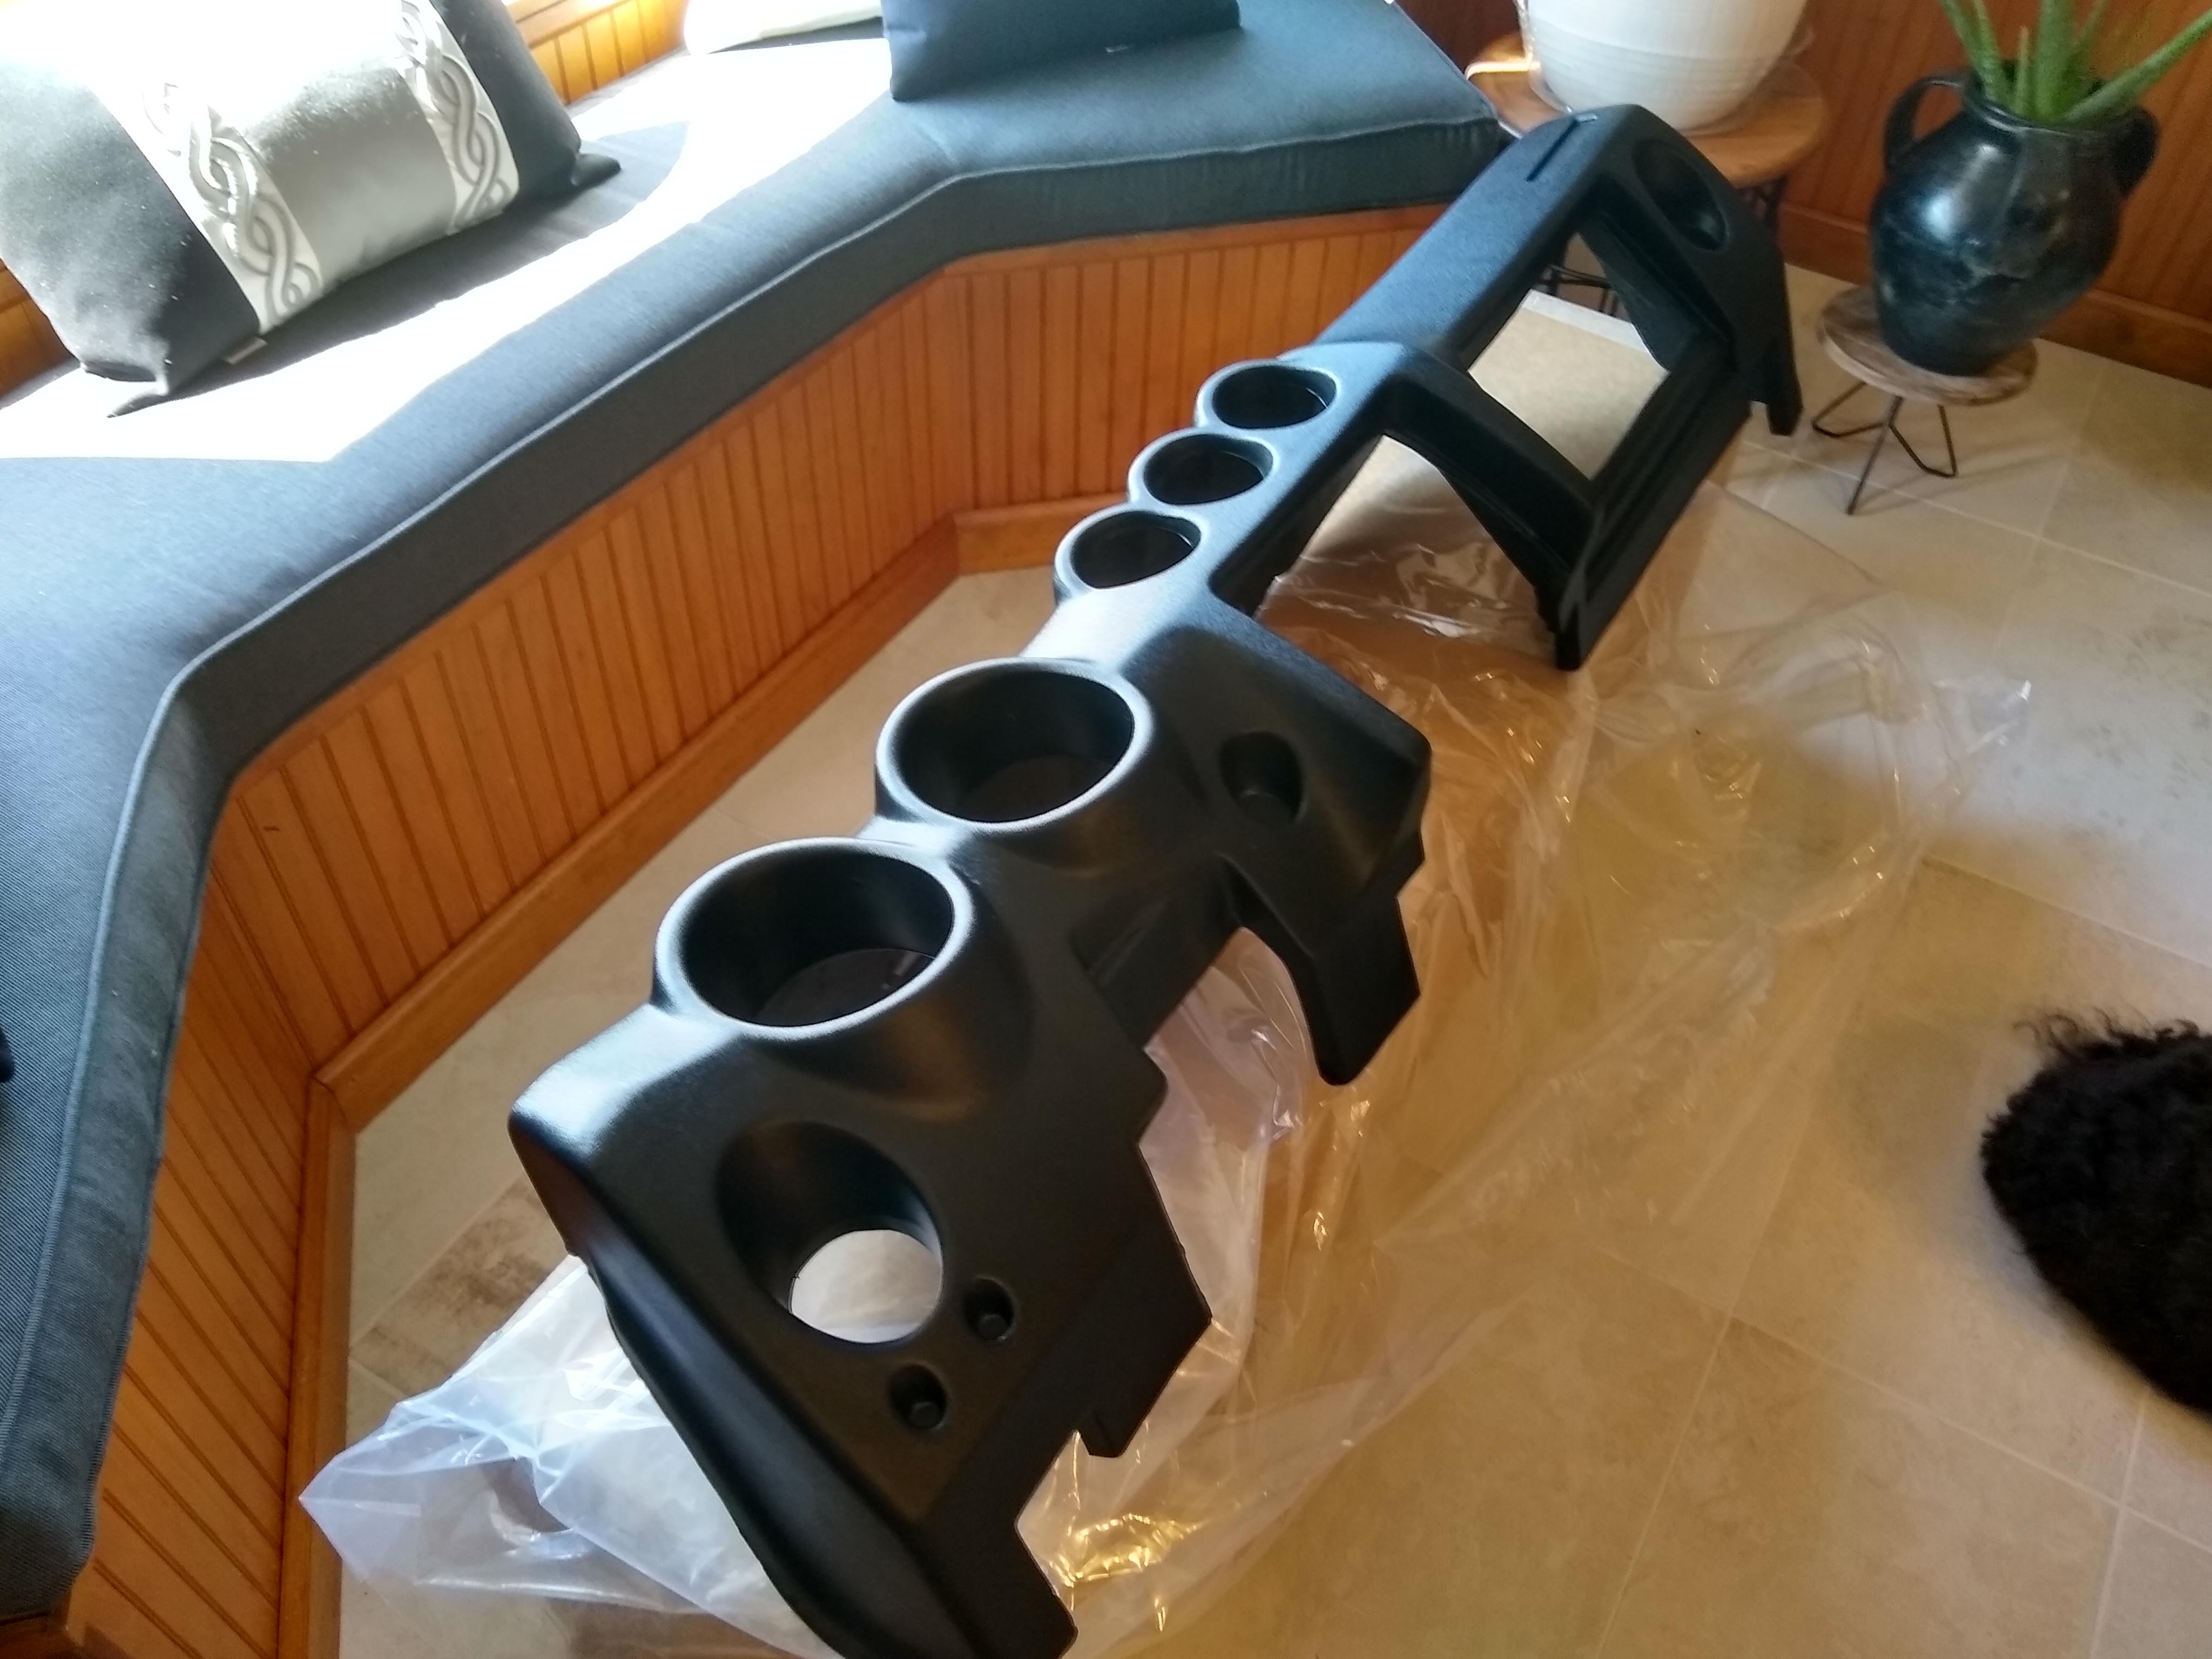
 2 pointsI am using a donor dash for the metal frame so I can understand how best to install without having to tear apart my car. So let start with removing the old dash pad, there are 21 sheet metal screws that attach to hard points and a few other sheet metal screws that while not actually affixed to the pad, the do stick up into the foam. these should be removed so as not to impede the process. I was able to get19 of the 21 back in, the other two holes I was not able to locate, will have to deal with them after I pull the pad off the donor frame.
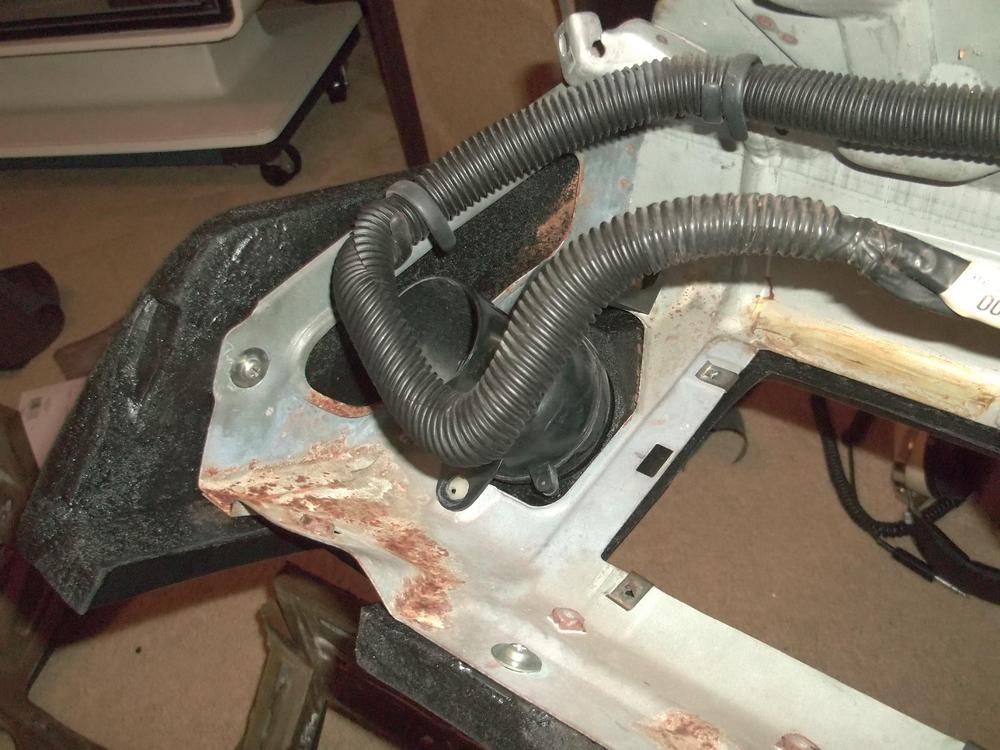


 2 points
 -
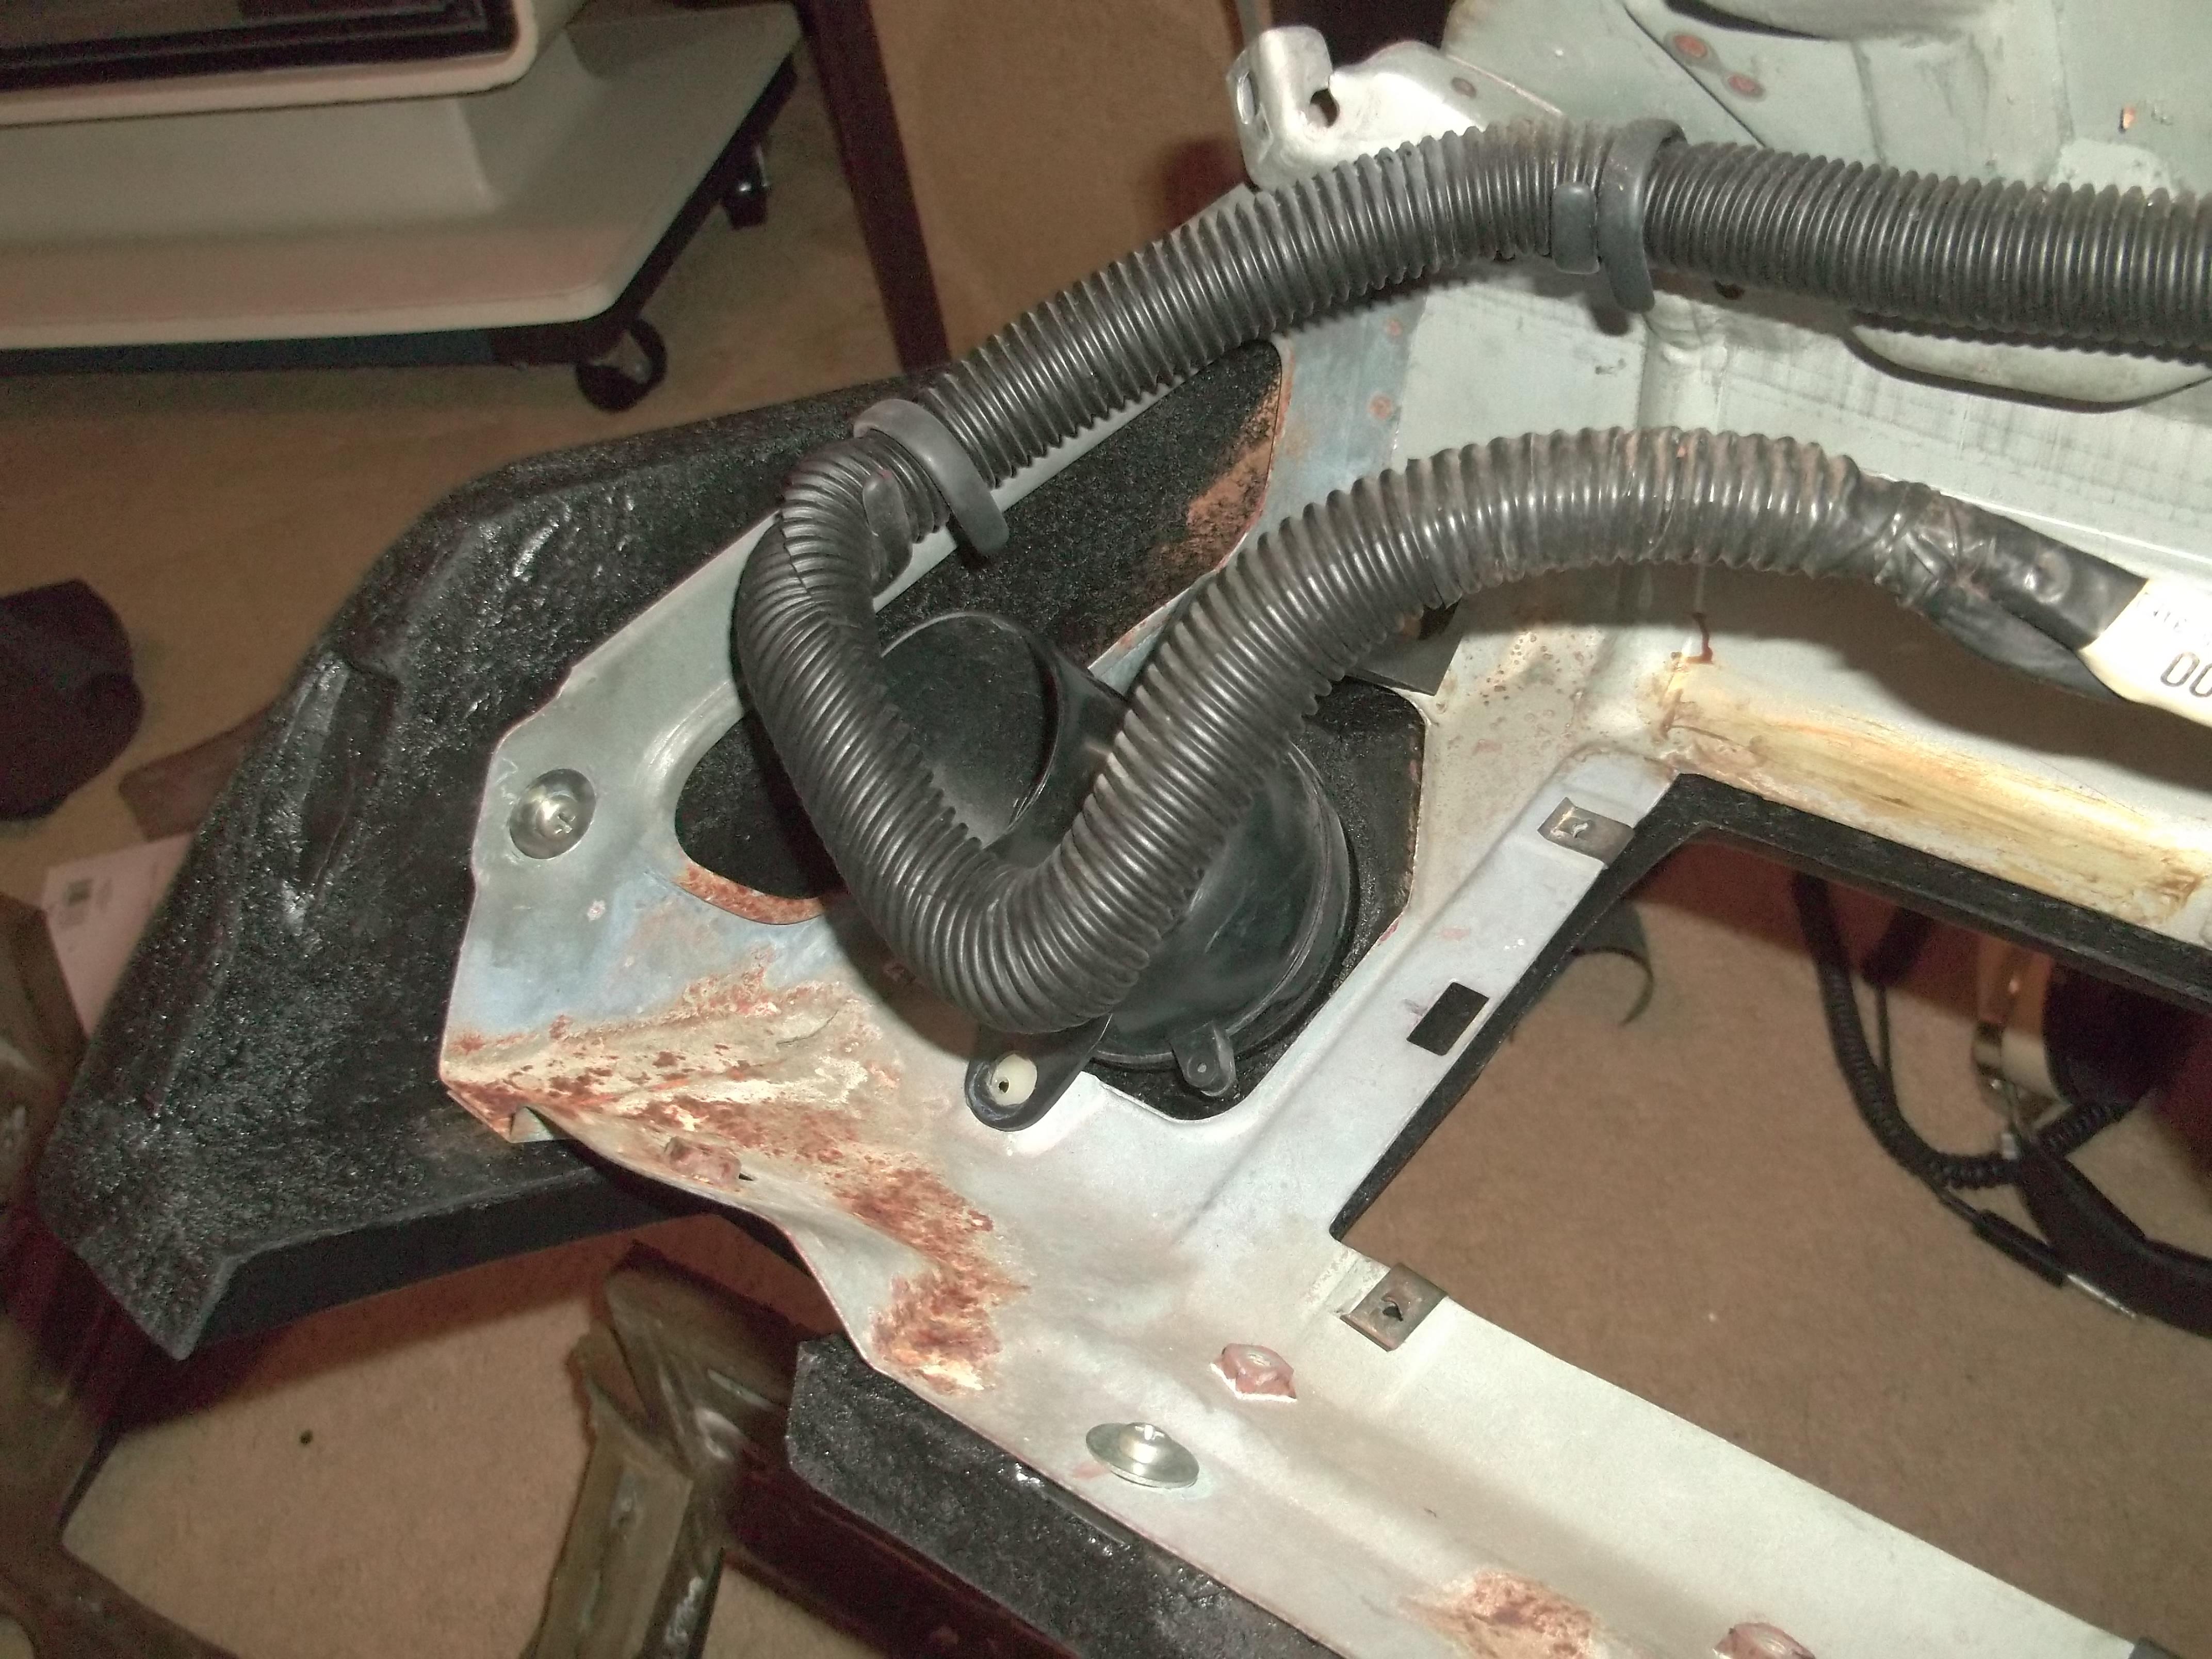
Where exactly is this in the wiring harness? I can't make it out with the close-in shot. By the way, great job on the perseverance. You're representing your generation well. Edit: Wait, I'm taking that it's at the fusible link. So that branch wasn't getting full current due to the corrosion. When it got the extra load, the voltage would drop.2 points
-
 After grinding and sanding, I normally I use a wire brush, lacquer thinner, and Zinc rich primer.2 points
 -
 I think toilet sealing rings are beeswax. Cheap and plentiful. Sorry I had to stoop to a potty reference...2 points
 -
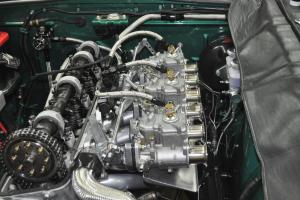
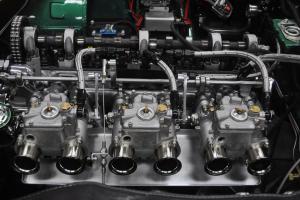
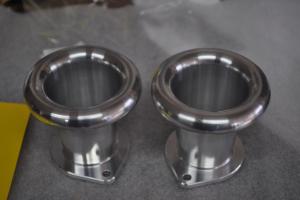
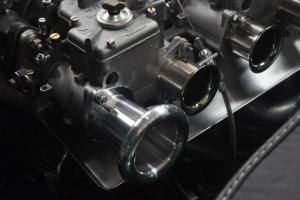
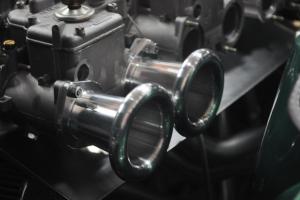
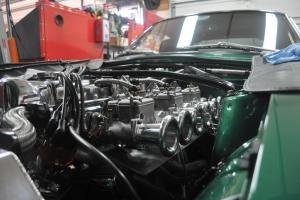
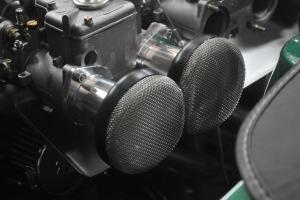
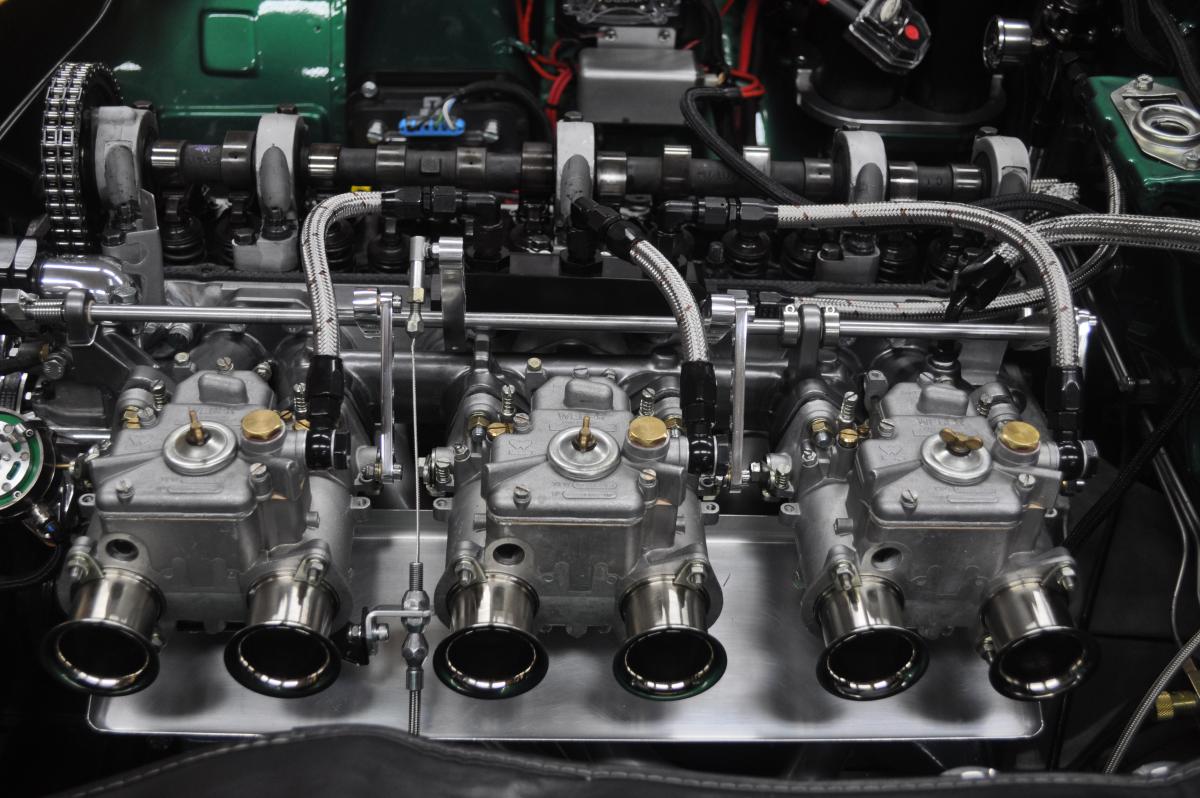
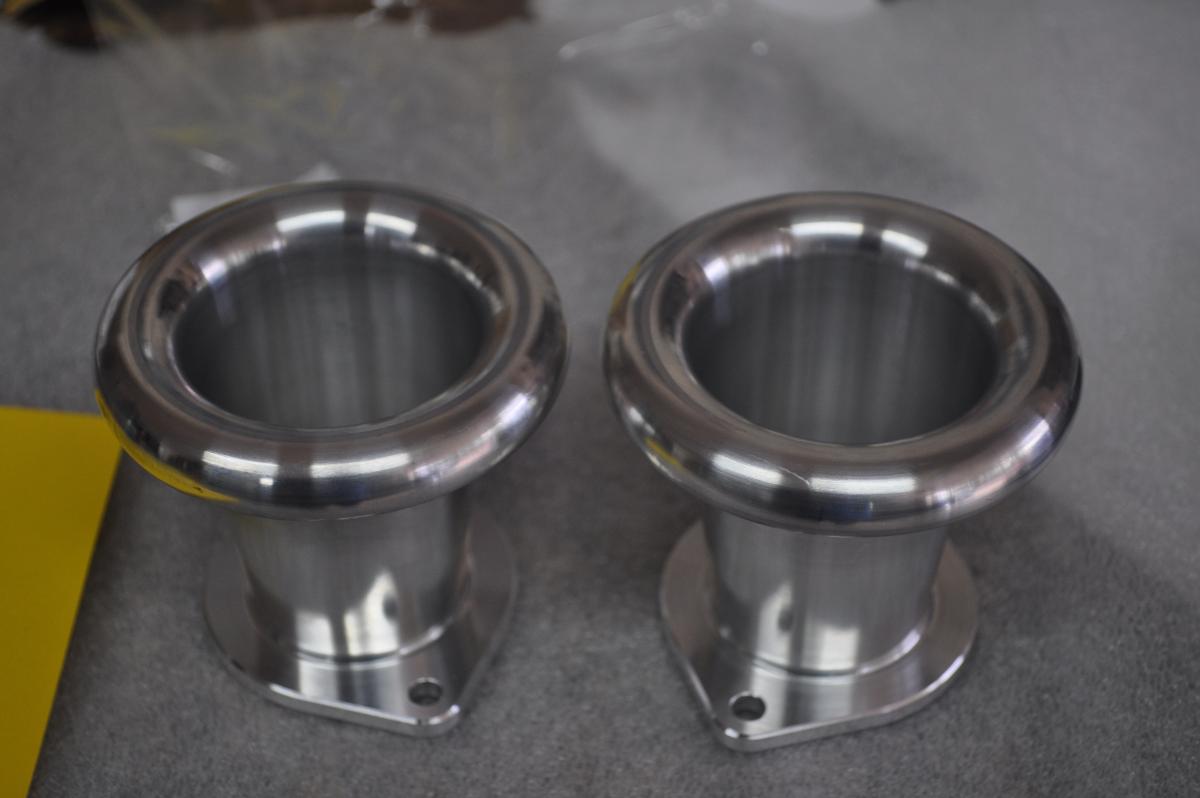
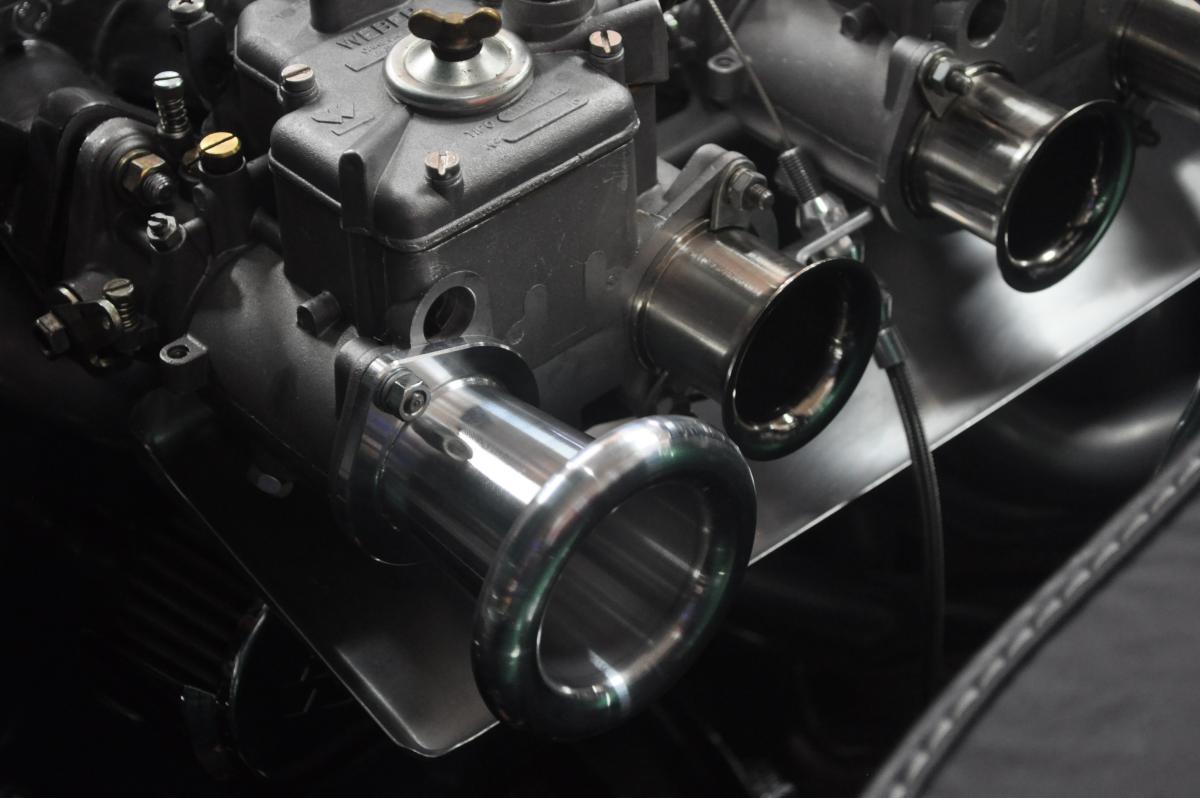
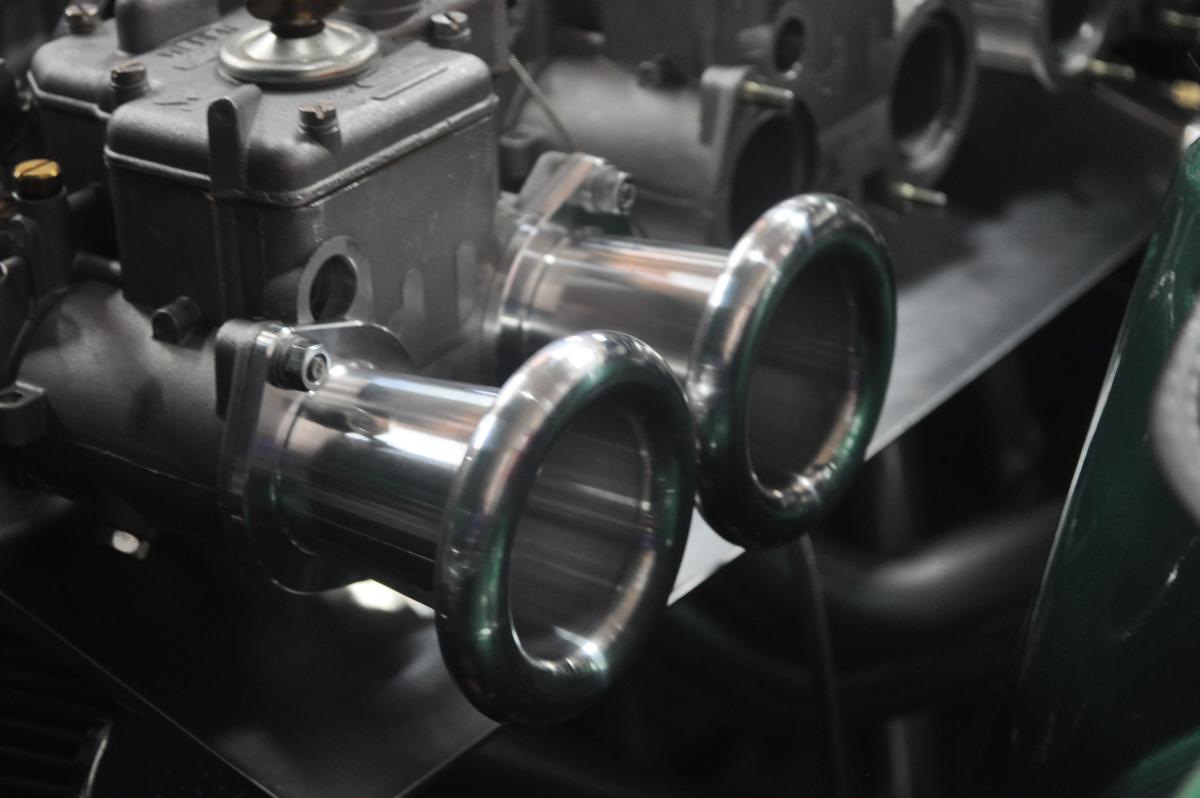
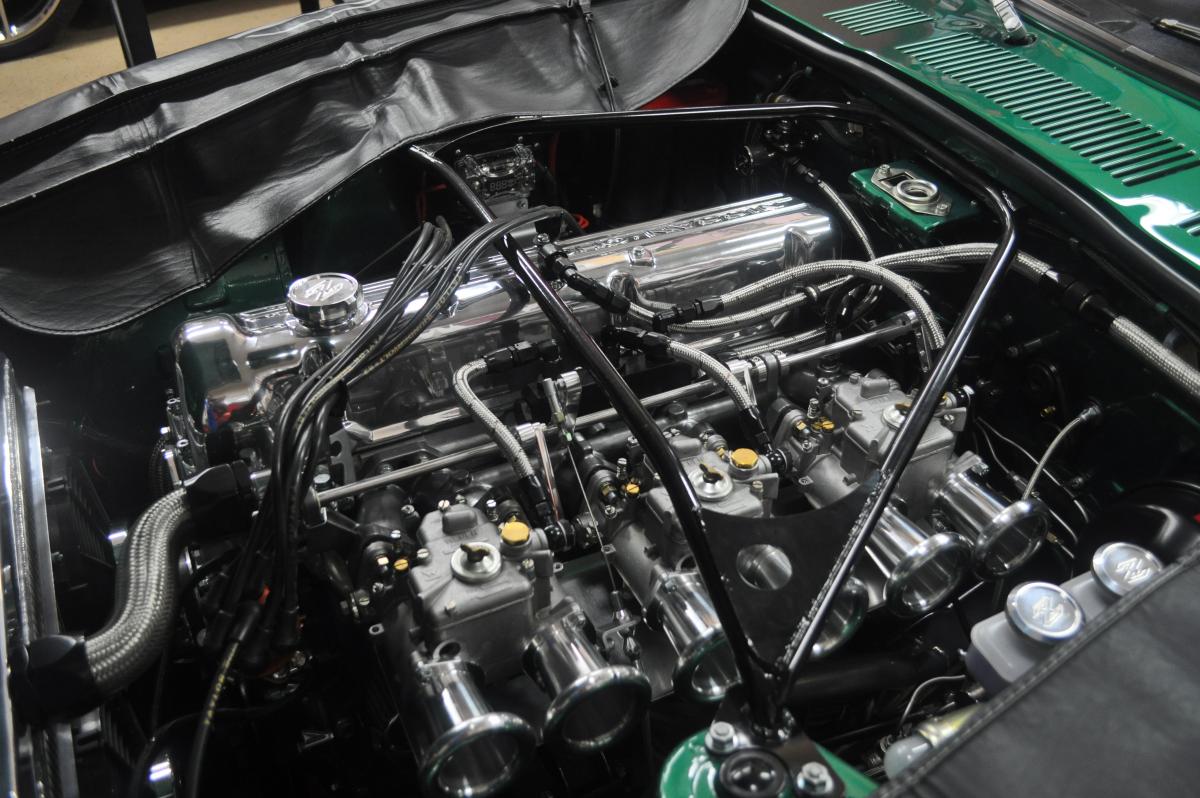
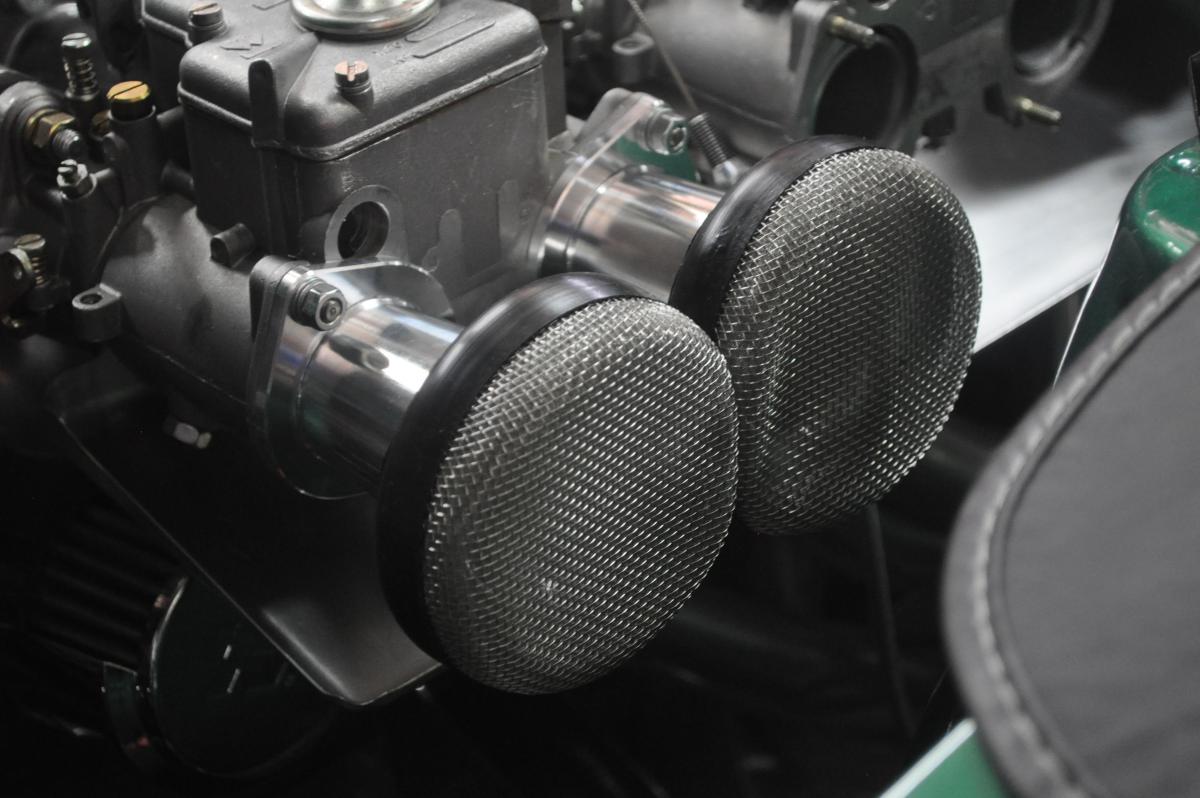
 So I have never been particularly happy with my Cannon manifold for the triple Webers that I run. As many of you know, the alignment of the rod ends that are tapped into the manifold and not particularly accurate and as a result it has been necessary to remove the middle rod end so as to minimize binding of the throttle rod. I have always had issues with this setup in terms of "return to idle" and this misalignment exacerbated the whole setup. I have also had to use external return springs which just add more clutter to the engine bay as well. So the primary motivation I had for this upgrade was to achieve a smooth return to idle regardless of whether I was successful in eliminating the return springs or not. For some time I had been contemplating an upgrade to a beefier throttle rod with the existing Cannon manifold, but this would have also required larger tapped holes in the manifold due to the necessity of having to use larger rod ends as well. Also was never clear if doing this would potentially eliminate the external return springs that I was using. In the end, I opted for a brand new Harada manifold that I purchased on eBay from a seller in Japan. It received very good reviews and I know that a few folks on this forum have used them as well. The transaction was flawless and the shipping from Japan was like lightening. I received this unit faster than some things that I have purchased domestically!! In any case, I thought that I would share my install and the results that I have achieved. First a few notes about the Harada. The throttle rod "arms" are actually built into the manifold as opposed to the threaded approach with rod ends that the Cannon took. There are only 2 arms and so the alignment by definition is perfect. The manifold does provide for a "middle" arm but I chose not to use it as it interfered with one of my throttle arms to the middle carb. Also, given that the Harada uses a 10mm throttle rod (which I actually replaced with a high strength stainless steel version that I purchased from McMaster) the rod is definitely beefy enough that you can do without the middle support arm. In addition, the Harada includes a built in return spring that I was hoping would be beefy enough so as to eliminate the external ones that I had been using with the Cannon. Finally, the Harada is about an inch shorter than the Cannon and although I definitely welcomed the increased room it gave me in the engine bay, I did not anticipate the improvement in engine performance that I ultimately achieved. More on that later. Upon receipt, I noticed that the casting on the manifold was a little rough (although significantly better than the Cannon) and so I proceeded to clean up all of the casting marks and also did my best to polish up the runners as well. Once this was complete I had the manifold powder coated in a gun metal grey which really complimented the rest of my engine bay. Now for the install itself. On my old Cannon setup, I used the front or forward facing throttle mechanisms on the carbs themselves, but given the layout of the Harada and the positioning of the arms and return spring, I was forced to move to the rear most throttle mechanisms on each carb. This was actually an easy swap and worked out well with no interference. I also had to fabricate a new bracket to hold my throttle cable mechanism to as to avoid any interference with the new positioning of the throttle arms. Everything worked out perfectly. While I was at it I also rebuilt each of the Webers with new gaskets, needle valves, etc., and upgraded to the heavier internal return springs so as to increase my chances of being able to remove the external return springs. I kept all of my jetting the same based on the belief at the time that the small change in manifold size would not really make that much of a difference. For reference, my primary jetting specs were as follows: Choke - 32mm Idle jet - Keith Franck / Hypojet equivalent of 60F9 Main jet - 130 Emulsion tube - Keith Franck equivalent of F11 Car started right up but was running a little rough and seemed very rich. Went through a complete balance as well as setup of the idle mixture, but car still ran very rich at this point. However, I had no stumbling issues or the dreaded off idle stumble and the car ran great especially at higher RPM's with the exception of the richness. So I ended up backing off on my idle jets to a 55F9 and also increased my choke size to 34mm. I had tried the 34's with the Cannon setup in the past and could never get it to run properly no matter what I did to the jetting. Well the Harada was a whole new experience. Once I finally got everything in sync and I properly adjusted my idle mixture, the overall performance of the car was like never before. Acceleration is smooth with no signs of an off idle stumble. No coughing, no backfiring, just smooth acceleration and great pulling power. And best of all a perfect return to idle without having to use the external return springs!! For good measure I also did add some longer velocity stacks that had a more rounded lip than the stock ones that came with the Webers. They do look cool and I also believe the design of them helps quite a bit with the air flow into the carb bodies. I have not messed with my ignition timing yet but so far have no pinging even under the most severe loads. I suspect that I may be able to add a little more advance and see if I can eek out a little more power as well. It's very easy to do with the 123 Igniton system I have so I will probably be tweaking that this week. Other than that and the possibility of going to a slightly smaller main jet, I am very happy with the upgrade. This is definitely a cut above the old Cannon manifold both in terms of performance as well as drivability. Wish I had made the change years ago. I've attached a few pictures so you can see the install progress. Mike.
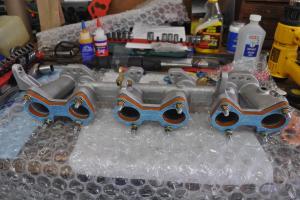

 1 point
 -
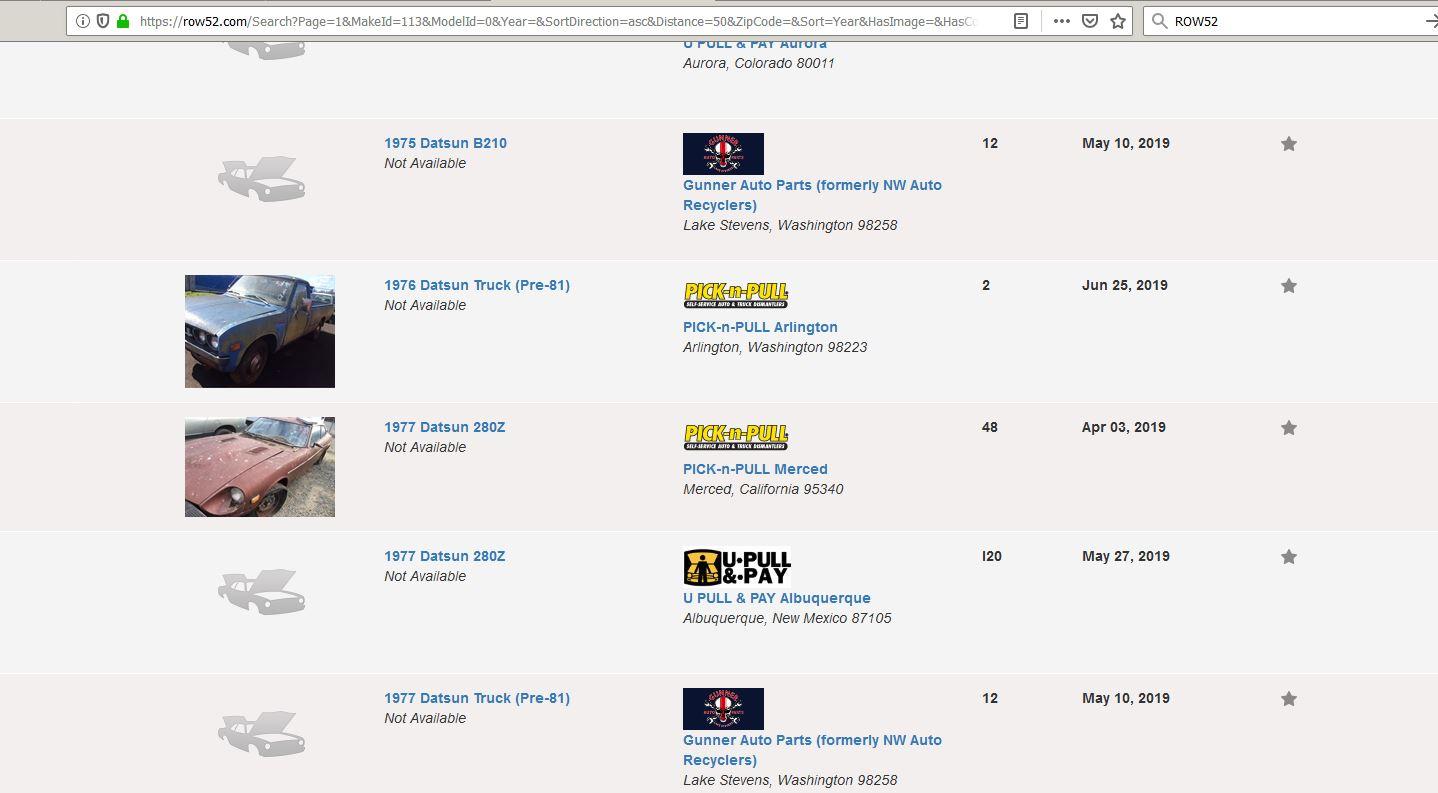
 Slim pickin's are getting fewer and fewer now... only 2 '77 280Z's nationwide. I still recall when we would get a S30 every few weeks at the local PNP. Back when gas was $4 a gal. Those were the days...
 1 point
 -
Been there, done that. And now, confirmation that I was not the only owner with THAT problem. (Sorry about that0 see the thread at >> for some pics of the issue I fought with. Looks better than what I started with. Let me know if you need some additional white / red stripe wire. Got lots from the old harness I pulled out. Mine was green instead of rusty. NOTE: See the electrical tape covering the two wires in the picture? If you have THIS condition here, you may the same condition THERE. Not as bad as the "While I'm there disease" but more of the "Let's prevent another disaster"1 point
-
 1. Clean with vinegar and tooth brush until copper on both wires is bright. 2. Pull back enough insulation on the exposed end so that its copper can be fully wrapped around the exposed copper in the harness wire. 3. Solder the two together. 4. Insulate with electrical tape.1 point
 -
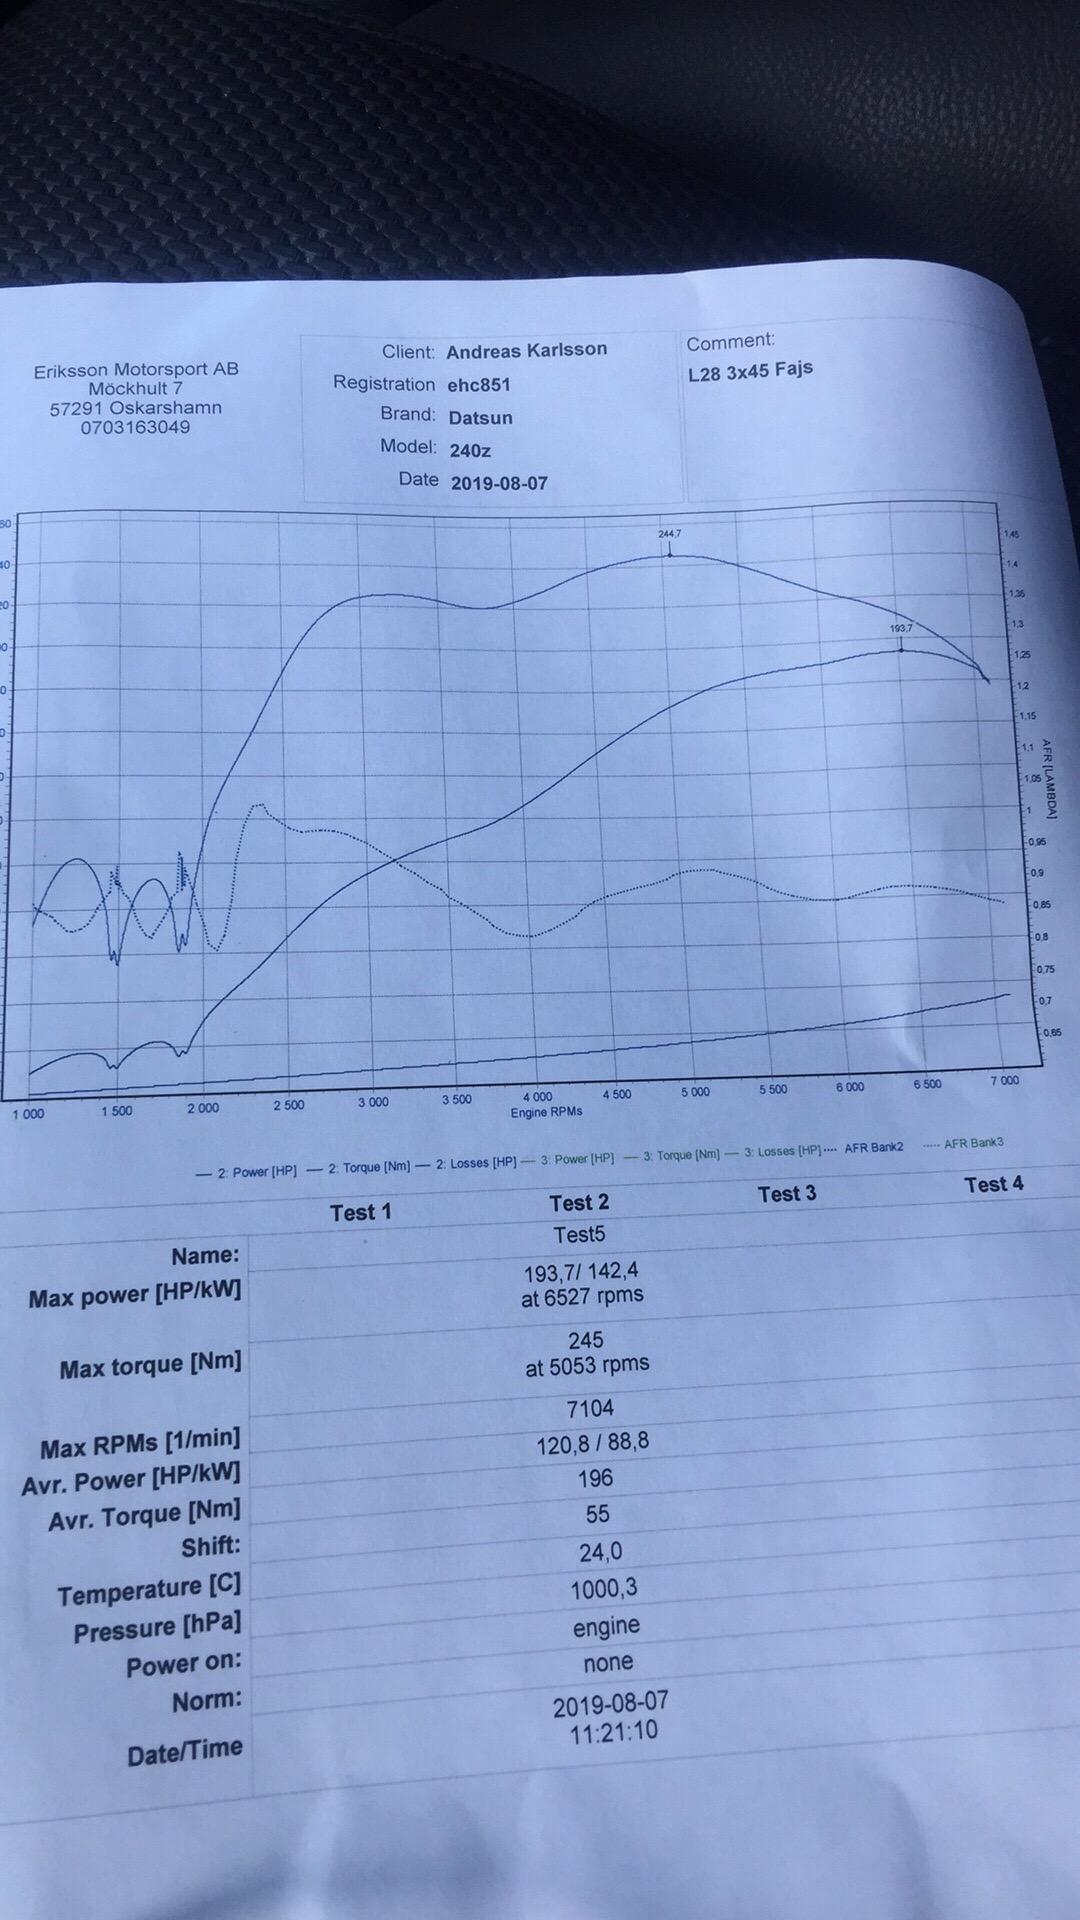
 Less power on this dyno but i think this dyno is very accurate (have been on two other dynos before). But i have a nice curve.
 1 point
 -
 wow. good call, THANK YOU! I had noticed that inside there, but would not have thought to switch it over. Thanks to everyone here, this was really helpful and learned a ton.1 point
 -
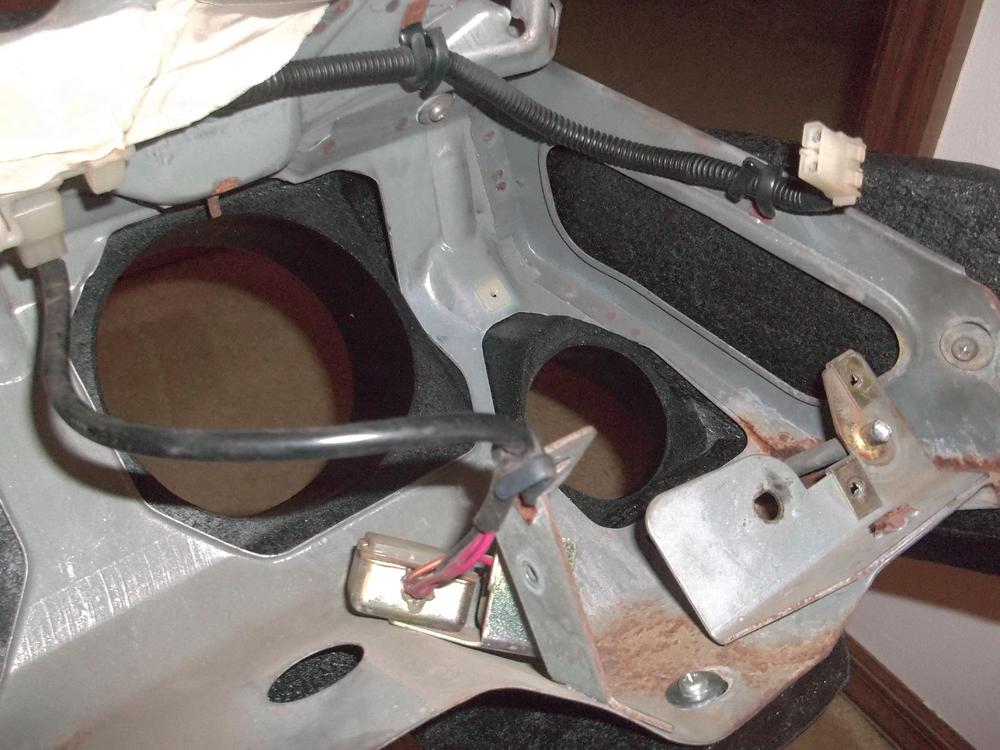
 Found the problem! When I cut back the tape the crimp for the white wires for the problem circuit fell apart. What is the best way to repair and recrimp this area? Also notice how much corrosion there is.
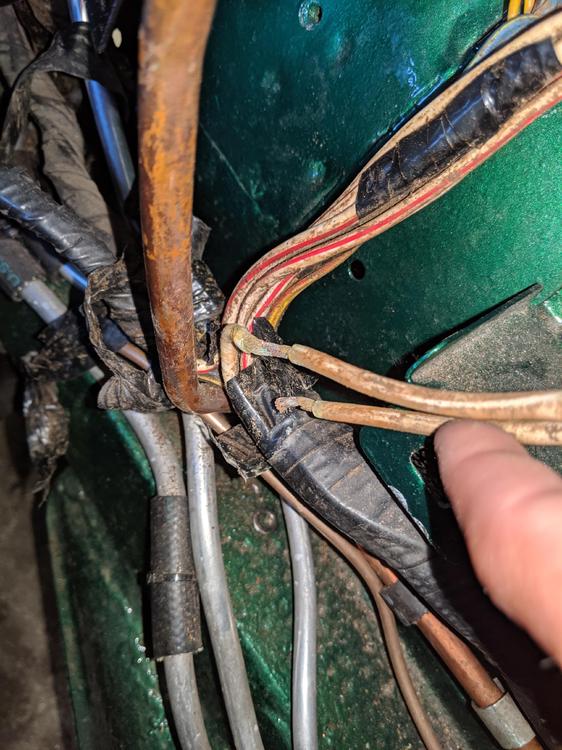 1 point
 -
I haven't exactly found the problem but narrowed it way down. I jumped the supply side of the fusible link for the trouble circuits to the + on the battery and it has stopped dying. My next step is to unwrap that section of wiring harness and look for the issue.1 point
-
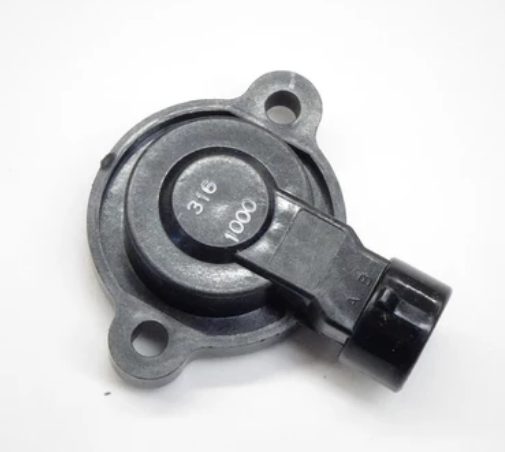
 1 pointGot it already! It’s a GM version and is designed for the zcardepot adapter plate that is on its way to me now.
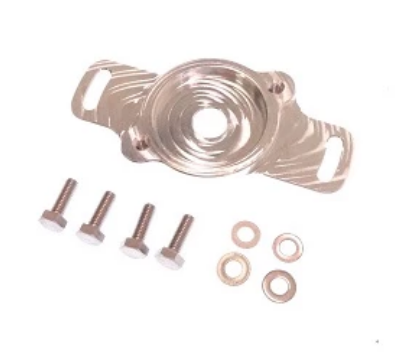
 1 point
 -
1 pointDon't forget Throttle position sensor. You need the kind that gives continuously variable voltage over the throttle position rotation range, not the stock on/off style.1 point
-
 Haha!! Here's hoping it worked. Datsun cracklin. Still want to see pics if you can figure out how to get them posted.1 point
 -
I like to paint phosphoric acid on metal then wipe with acetone when dry.1 point
-
 1 point
 -
 As I mentioned above it really doesn't take much force to flex the head. Experiments with longitudinal clamps might show something. If it's bowed up on the ends then it might be as simple as tightening the center bolts first. If it's bowed up in the middle, clamp it from end to end and drive some wedges under the middle of the clamp. Who knows, it might actually be simple to do. https://www.harborfreight.com/1-2-half-inch-pipe-clamp-3813.html
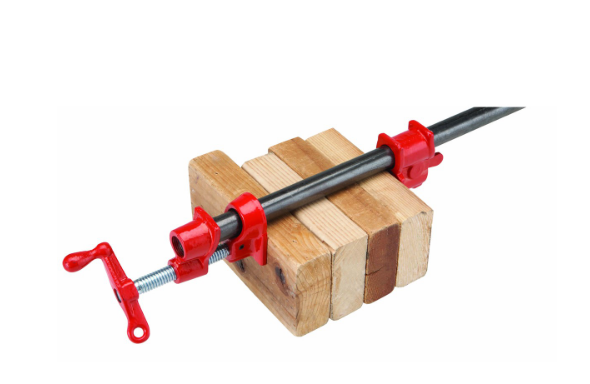 1 point
 -
I’ve had one for a while. Work great but hard to get a good selection of the sanding belts. They don’t last long when you catch an edge.1 point
-
 A must for port and polish, I'm going to stop by on the way home tomorrow. Thanks1 point
 -
1 point
-
1 point
-
 I would stick with the 76 throttle body. The ZX butterfly is smaller and will restrict flow a little. Years ago there was a modification with a 60mm throttle body and the AFM from a toyota cressida. You had to solder the 280Z electronics into the toyota unit. A resistor in the temp sensor wire allowed you to, all be it little, adjust the ECU to compensate for the extra air flow. Tip: If you do these changes to a running engine. Check the performance before making the changes. The way I do it is this. - Pick a quiet road where you can safely drive up to 70 mph. - Drive in 4th or 5th gear at 25mph and accelerate to 60 or 70 mph. Don't change gear. - Have someone video the speedo and tacho while you do it and plot the values against time (seconds) in excel. That will give you a performance curve you can refer to after you do the mods.1 point
 -
 Carl, I ended up with my stash of Holy Grail parts through pure serendipity. For the past 30 or so years I've kept in touch with Nissan/Datsun parts availability through careful tea reading combined with help from the guys at my local dealer with whom I've had a relationship for almost 40 years.1 point
 -
(Edit: it was mark maras, madkaw, and eurodat that got me thinking it was possible and helped inspire the methods i used. I wanted to refer to their previous comments but had to go back to find their names, thanks each of ya. It's the only reason I made an account here, just to thank you.) I just did a bit different approach to the similar problem, not with an opel but I have a Ford truck with a head gasket failure, and found it warped about .033 up in the center. I didn't have a thick plate of steel to bolt onto, but found a girder and hoped to make it work. The approach I took was much different, rather than air heating and cooling, I figured that oil heating would more effective to thoroughly heat everything through to temp, taking notes from the kitchen chefs, and also slowly cool it. Borrowing from old blacksmith forgings. So far it appears that the head is not nearly as crooked, wheras before you could stand back ten feet and eyeball it and see where it warped at. I used washers about .090 thick, heated the head, and bolted it to the cool c-beam, bastardizing a feeler gauge set to do some math and combine multiple shims to brace between the beam and head, stacked between each L-R row of head bolts: Began with .033 warp, with .090 washers at the corners, and from what someone said here I went half the distance past center? It was a long weekend, but I basically stacked the feeler shims in a combination equal to what distance was needed, increasing in the stack sizes towards either end, with the old head bolts, nuts and lock washers on the beam side And with an old metal oil drum cut in half, two old gasoline Coleman camp grills, a propane weedtorch, digital thermometeras well as industrial use temp needle gauge that is fitted in processing equipment, I basically deepfried the cylinder head. It had already been fried once! But this time, heated the head upside-down so the c-beam would be out of the oil, in an attempt to keep it from distorting as well, if I could manage to keep it somewhat cooler than the head and thus remain more rigid while subjecting the head to the heat, and also left the mounting bracket on the head so I could dip it in or pull it without reaching in. I also had several fire extinguishers on hand, and a forklift to lift or lower it. Currently, I'm looking at it, it looks like it may be straighter, but I'll admit I'm nervous to unbolt the thing. Even with the criss-cross outermost and working in, what if somehow I made it worse?1 point
-
 1 point
 -
 Yeah, I feel your pain. Sometimes it's kinda fun, other times not. Had a guy at a gas station walk up when I had the hood up. He looked at the engine like he knew what it was and then asked " Is that one of them rotary motors?" I just closed the hood and said gotta go!1 point
 -
 Way off, $5,000. Told me where they could buy one for a few thousand. "Here's my phone, call them and I'll buy it today". Then didn't know was it a 2.4, 2.8, Z or ZX. Oh yeah also said no way was the paint original. That's when I quit being polite. its too hot to argue with rednecks.1 point
 -
1 point
 1 pointI just got done listing my 72 Z on BAT and it was not a good experience. It took them over two weeks to assign someone to my listing and them another week getting the listing right. Once I gave them the go, on July 18th, it took them until the 25th to list it. I thought it was a great car to go up against the Pierre' Z factory restoration car and told them so, but they didn't listen. I was then up again Z of lesser valve for my entire 7 days until the morning of the last day, when a the bidding takes place, and they listed a nice stock 72 Z that probably took away some of the bidders. They also tried to get me to lower my reserve, which I didn't. Luckily I already had a buyer lined up for my reserve price.1 point


Important Information
By using this site, you agree to our Privacy Policy and Guidelines. We have placed cookies on your device to help make this website better. You can adjust your cookie settings, otherwise we'll assume you're okay to continue.