


Leaderboard
-

Captain Obvious
Free Member7Points9,848Posts -


240260280
Free Member6Points4,441Posts -


wrecked2001
Free Member5Points15Posts -

madkaw
Free Member5Points4,338Posts
Popular Content
Showing content with the highest reputation on 09/15/2019 in all areas
-
4 pointsWell the MN47/54 ran today for the first time . Talk about nervous . 11.25:1 sounds pretty good out the tail pipe. This cam sounds pretty radical too. Only ran it long enough to move my car out of the way, but wow- can’t wait !4 points
-
3 points
-
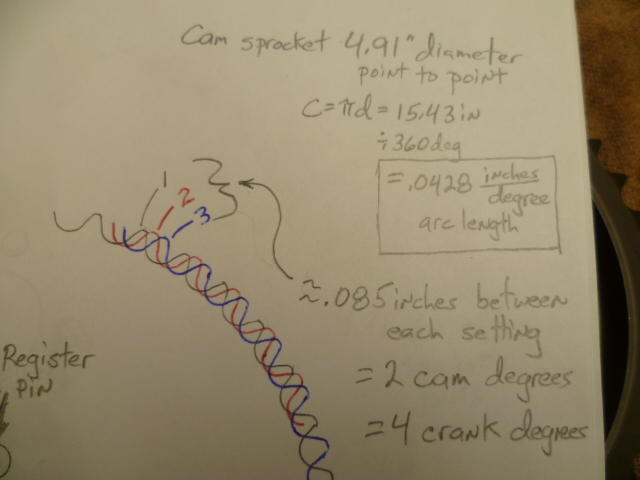
3 pointsActually I am completely confident that I am 100% right and 0% wrong. Changing the cam gear to a different index hole has absolutely nothing to do with chain tension. It changes relative teeth position, but not chain tension. This is what the different index holes do... They change the relative position of the gear teeth to the hole. (Which changes the relative position of the teeth to the cam lobes.) But it does nothing to the overall tension on the chain. Remember this pic? : The reason they say you can use a different hole to account for chain stretch is ONLY to bring the valve timing back into spec. It won't tighten up the chain any... That's the tensioner's job.
 3 points
 -
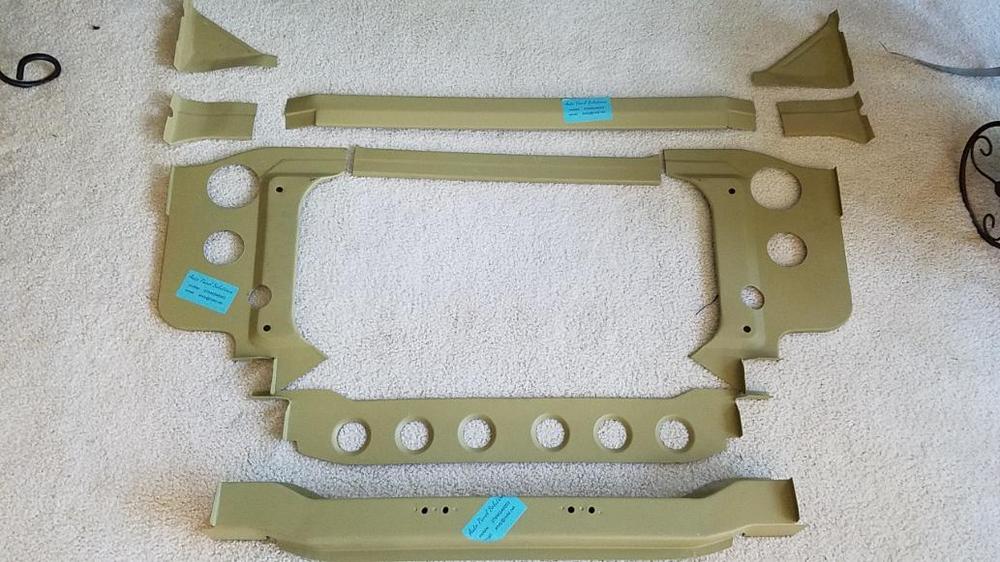
2 pointsHey guys, long time between post. I would like to share some good news. I picked up my S30 for $500 dollars.It had the usual rust issues, battery area, passenger side floor board due to ruptured heater core and spare tire well.But other than that being a Texas car and being stored on gravel it is pretty solid. The biggest issue which would have been make or break was the Rad Support. The car look like it had incident with a curb. The front of the front drivers side frame rail was wrinkled along with the Rad Support on that side. Someone tried to straighten it in the past with little success. To make long story short i couldn't find a replacement in the junk yards or online anywhere. Let me introduce you to Auto Panel Solutions. They are a Mom and Pop business based out of the UK. The contacted me on Facebook to let me know about their new kit. I ordered it immediately. The quality is good, though I haven't fitted it yet. Here is a pic,I can upload more.If you check them out on Facebook they have a multitude of patch-panel solutions for the S30. They are based in the UK so you know they know about rust and how to fix it. Any question I would be happy to answer.
 2 points
 -
 Sorry I forgot to finalize this topic. What it ended up being was a huge vacuum leak in the brake booster which just so happens to plug into the carb that was giving us trouble. After we replaced the booster, we were good to go.2 points
 -
I guess the crap ones should be called stoppers.2 points
-
 2 points2 points
2 pointsNope. Distance and tension are not the same. When you take up the slack by rotation change of the sprocket, there is less chain under tension between the sprocket and the crank on the drivers side, so there is more chain under slack on the passenger side. . It is a bit confusing as there are many teeth grabbing the chain at the same time and it is continuous. An easier way is to think of the chain as a string tied to a fixed crank. When you go from 1 to 3, you are pulling tighter on that string so the excess string falls behind the puller on the slack side. For an observer working from the top of the engine like @siteunseen did, moving the sprocket from 1 to 3 while keeping the crank at TDC, it appears that the chain is getting tighter but this illusion is because they can not observe the resultant extra slack hidden inside the timing cover area. For an observer like @Captain Obvious with the timing cover exposed, they can see they are making more slack and the tensioner is protruding more to correct it. See it is special relativity and is dependent on the viewer ?2 points
2 points2 points
2 pointsNope. Distance and tension are not the same. When you take up the slack by rotation change of the sprocket, there is less chain under tension between the sprocket and the crank on the drivers side, so there is more chain under slack on the passenger side. . It is a bit confusing as there are many teeth grabbing the chain at the same time and it is continuous. An easier way is to think of the chain as a string tied to a fixed crank. When you go from 1 to 3, you are pulling tighter on that string so the excess string falls behind the puller on the slack side. For an observer working from the top of the engine like @siteunseen did, moving the sprocket from 1 to 3 while keeping the crank at TDC, it appears that the chain is getting tighter but this illusion is because they can not observe the resultant extra slack hidden inside the timing cover area. For an observer like @Captain Obvious with the timing cover exposed, they can see they are making more slack and the tensioner is protruding more to correct it. See it is special relativity and is dependent on the viewer ?2 points 2 pointsTrue. Back in the day we used offset keys to retard the cam timing and improve top end performance in drag racing engines. Years ago when replacing a timing belt on a Camry, I was sure I installed it correctly until I fired it up and drove it. Rushed job due to miserable weather and working outside. The cam timing ended up retarded by one tooth. The poor little 4 cylinder would struggle with low end performance BUT when it reached 4000 RPMs the power came on like gangbusters. It acted like the 12A in our RX7. It just wanted and loved more revs. I drove it for a few days until the weather improved and I could redo it. I was a bit disappointed after the repair. It was a lot of fun driving it with the cam retarded.2 points
 2 pointsWhile there are so many good minds talking about this subject I would like to ask a question about a timing fact/myth I've heard many times. Starting with a new chain, by deliberately advancing the cam gear to #2 or #3 you can gain more low down torque. True or false? Bruce, this is one of those great lines that should be permanently fixed to bottom of each post regardless of whether you are right or wrong2 points
 2 pointsSo back to my experience moving the the cam sprocket. I remember when my buddy and I did this we had to release the chain from the sprocket because otherwise we couldn’t get the sprocket back on. CO back to your sprocket drawing (impressive BTW). You’ve labeled the teeth as 1-3. The angular distance from the center of the sprocket in 1 vs 3 to the center of the crankshaft (lower gear that sits over the crank) would be different...no? 1 is farther away than three. This results in more tension on the right of the chain as you move it. The chain tensioner can only take up slack on the left side. So when the chain stretches over time, the engine timing slowly retards. When you move the sprocket to the next position you transfer that slack to the side that has the ability to take up that slack (left side)...The tensioner can only do so much which is why shaving the head exceeds the capability of the sprocket position and tensioner to account for. This is why I think my engine has chain slap. When I moved the sprocket this problem started. My chain is obviously overstretched. Let me end this with the disclaimer....I’m no engine expert and borderline dangerous with my knowledge. I’m looking at this purely on observation. I’m not offended if you tell me I’m totally wrong and to sit back down and listen to the professor. I’m learning! Sent from my iPhone using Tapatalk2 points
 You can also google Robert Jackson Madill OK and get lots of background. Seems he left a few unhappy customers in the Ford and Volvo worlds before coming to 240Zs.2 points
2 pointsI paid $640 shipped, taxes and customs, with the exchange rate. You can buy all the individual pieces of this kit separately, I just chose to buy the the whole thing.2 points
You can also google Robert Jackson Madill OK and get lots of background. Seems he left a few unhappy customers in the Ford and Volvo worlds before coming to 240Zs.2 points
2 pointsI paid $640 shipped, taxes and customs, with the exchange rate. You can buy all the individual pieces of this kit separately, I just chose to buy the the whole thing.2 points Evidently so in the case you show, but I'm surprised that people don't seem to be ready to accept the possibility of a little chaos theory sprinkled through all this. How about the possibility that Mr Suzuki's pot of yellow paint was running a little low, and that a little bit of thinner was added to save him opening another one? Or that Mr Yamaguchi preferred a thinned consistency whilst traditionalist Mr Mori liked a well-stirred thick daub, and young Mr Ito - who had a late night last night - didn't stir his pot as well as she should have? And all that on just one shift... I think we should be cautious of creating set-in-stone definitions for what are human-added elements subject to natural variation.2 points
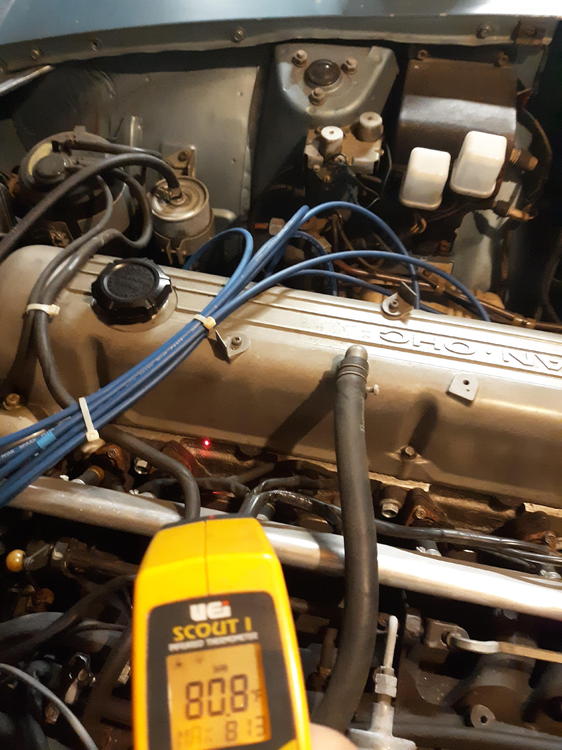
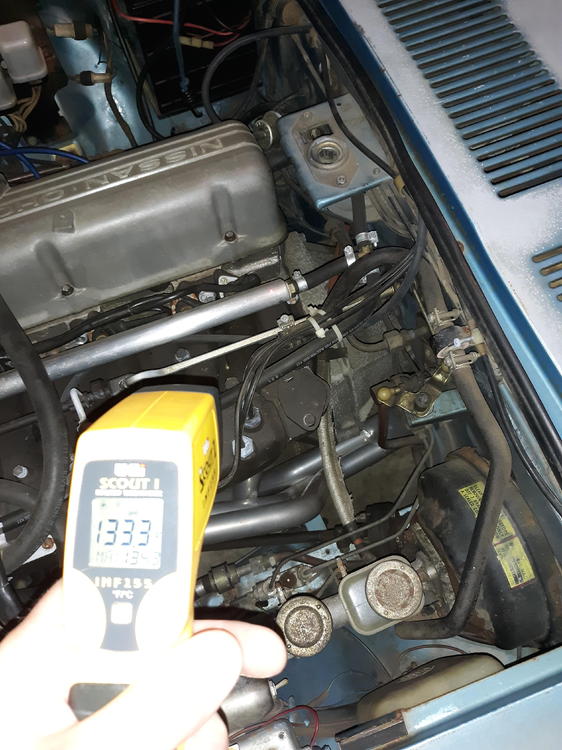
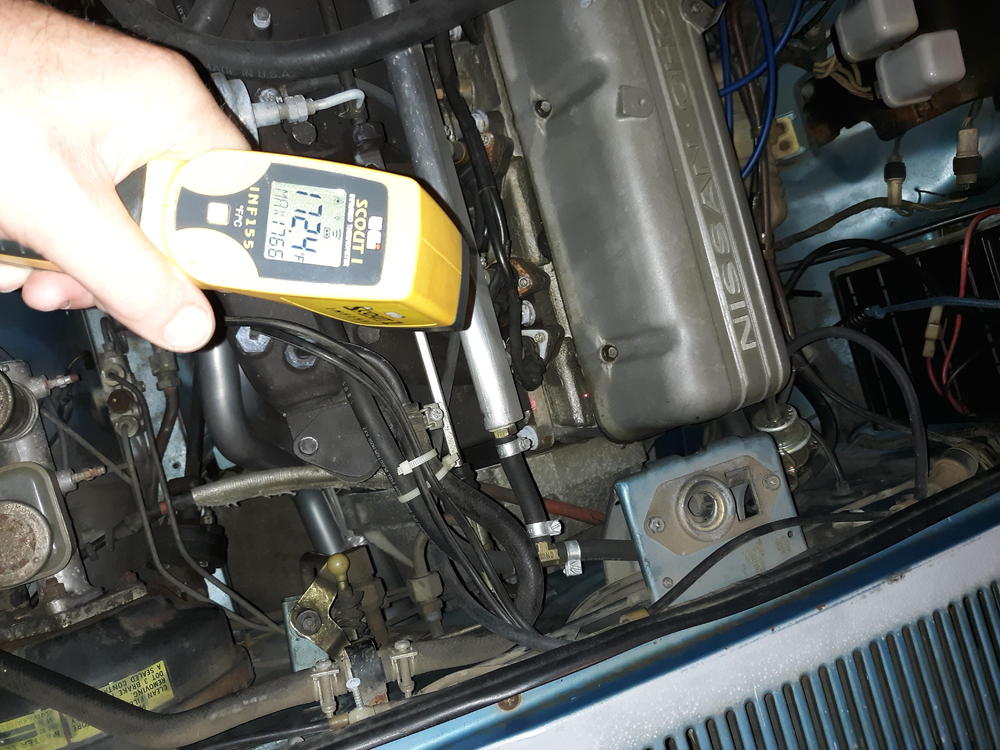
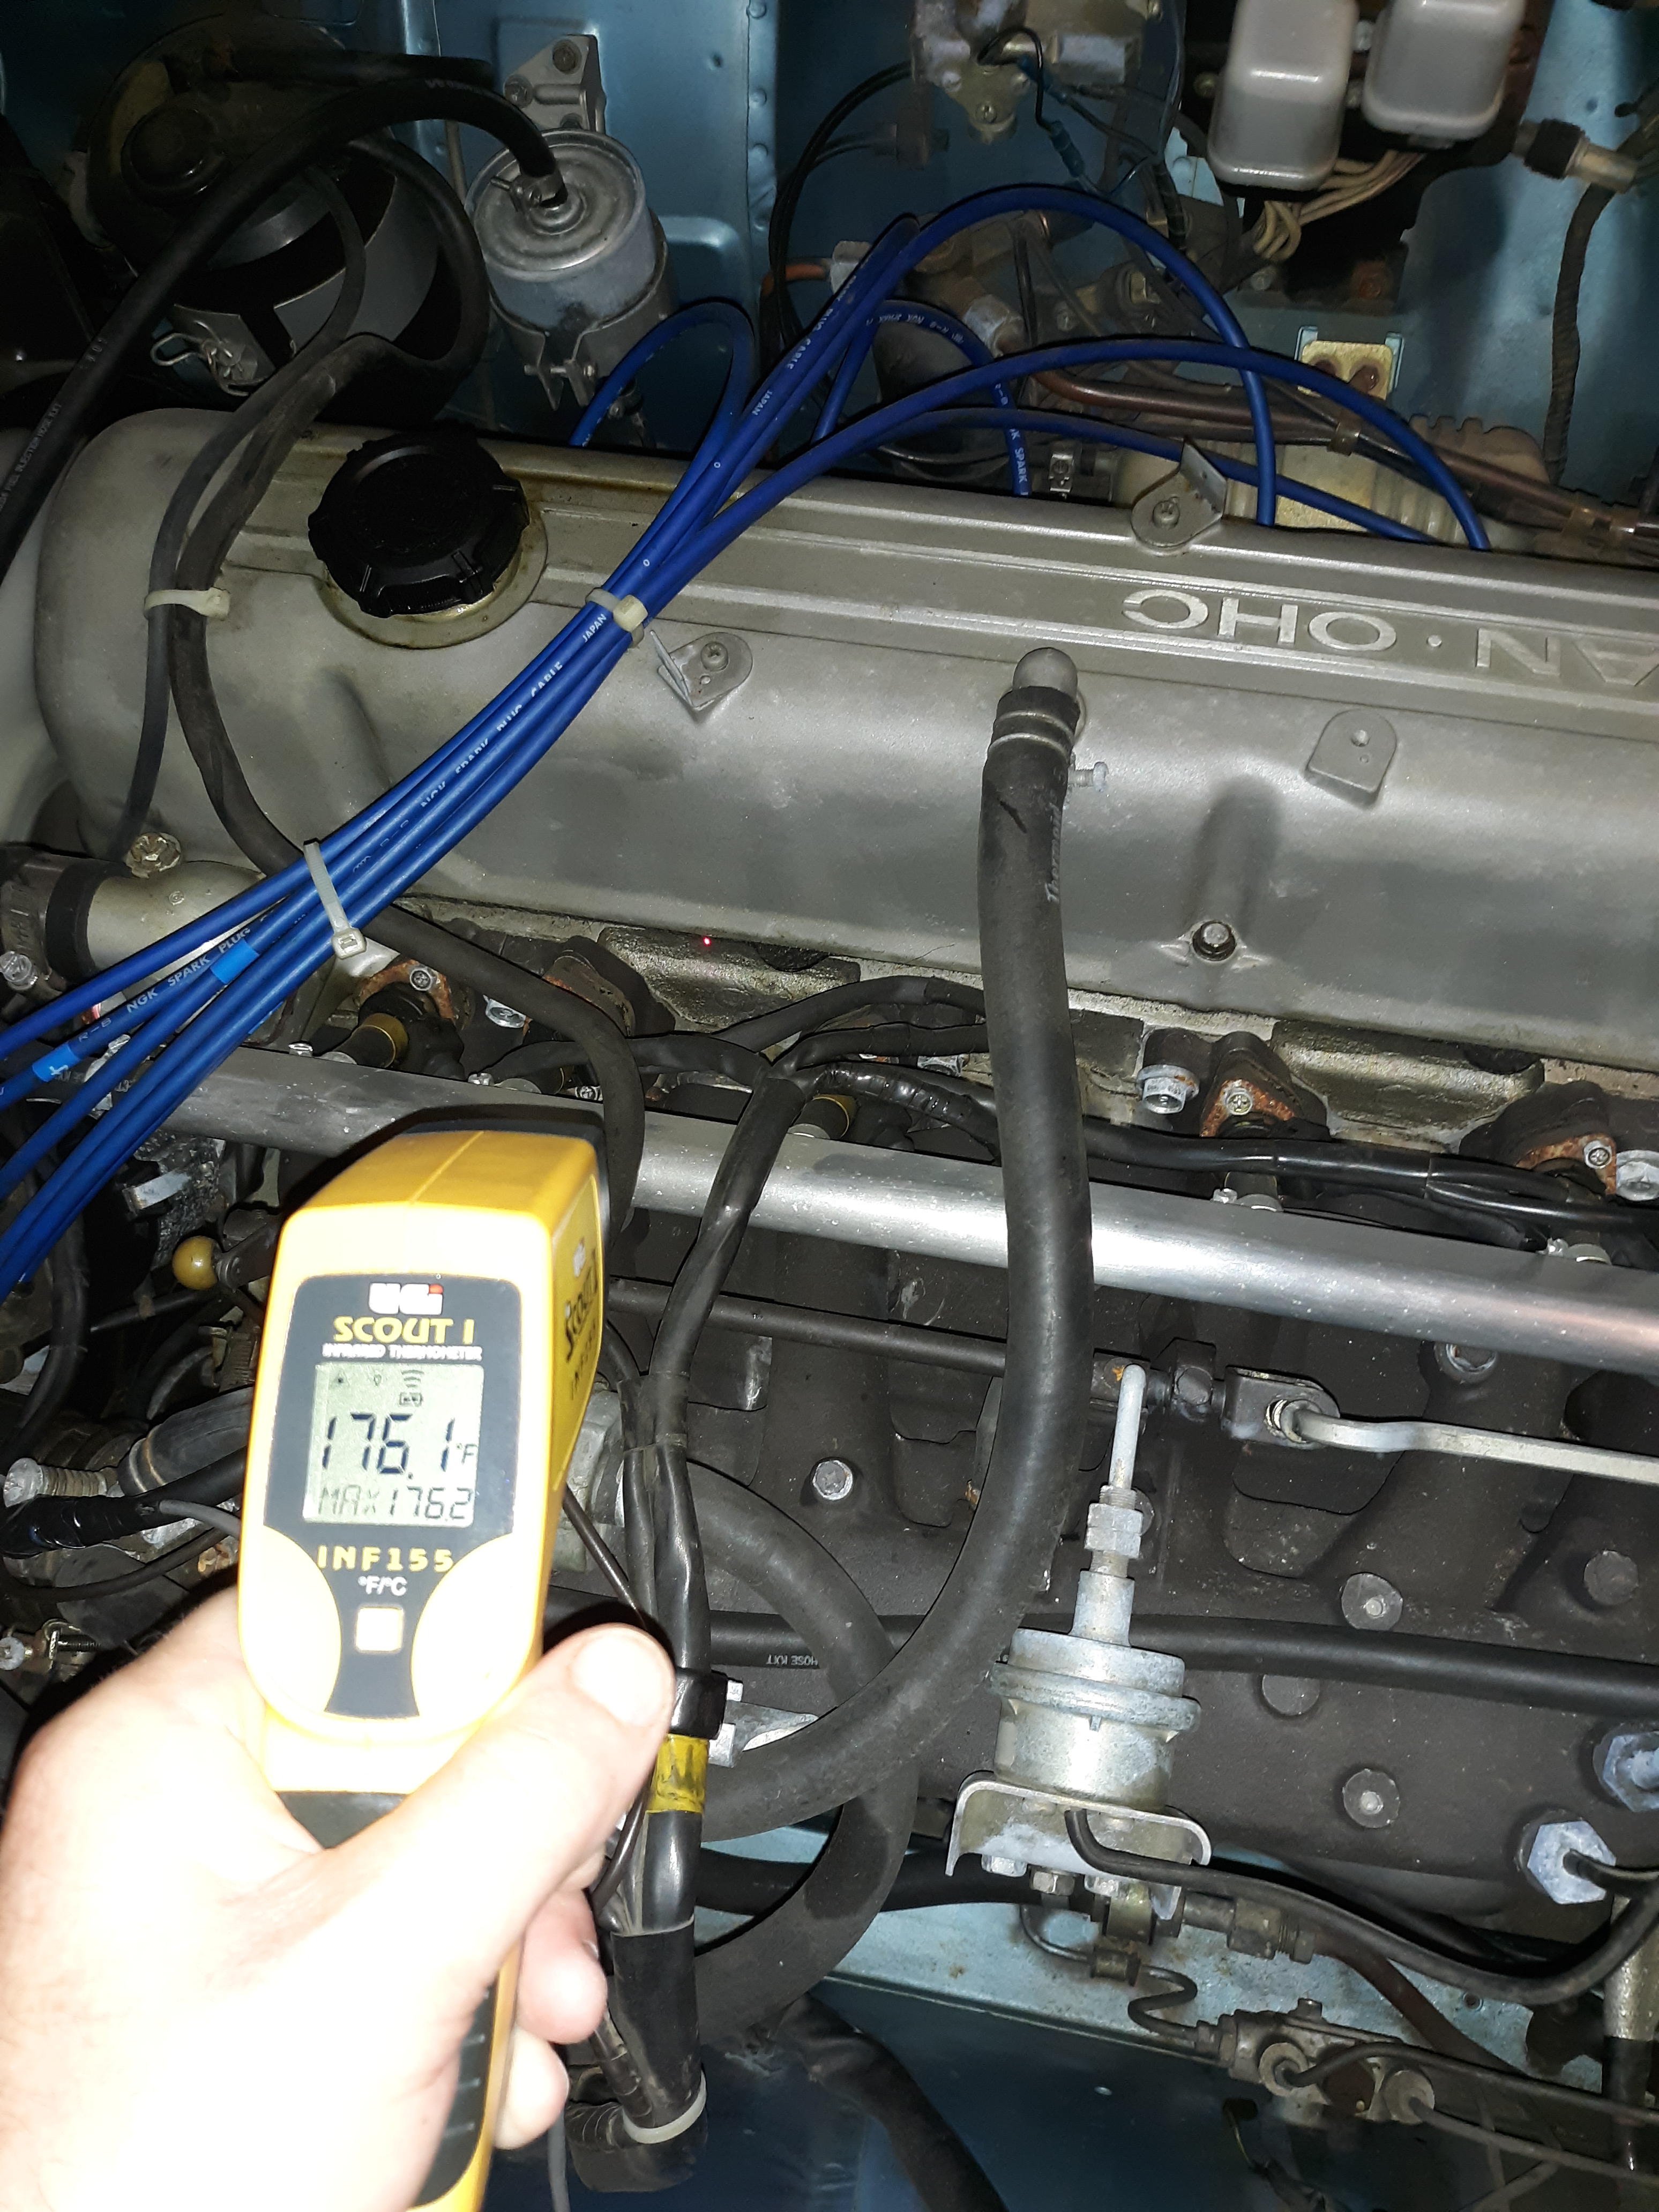
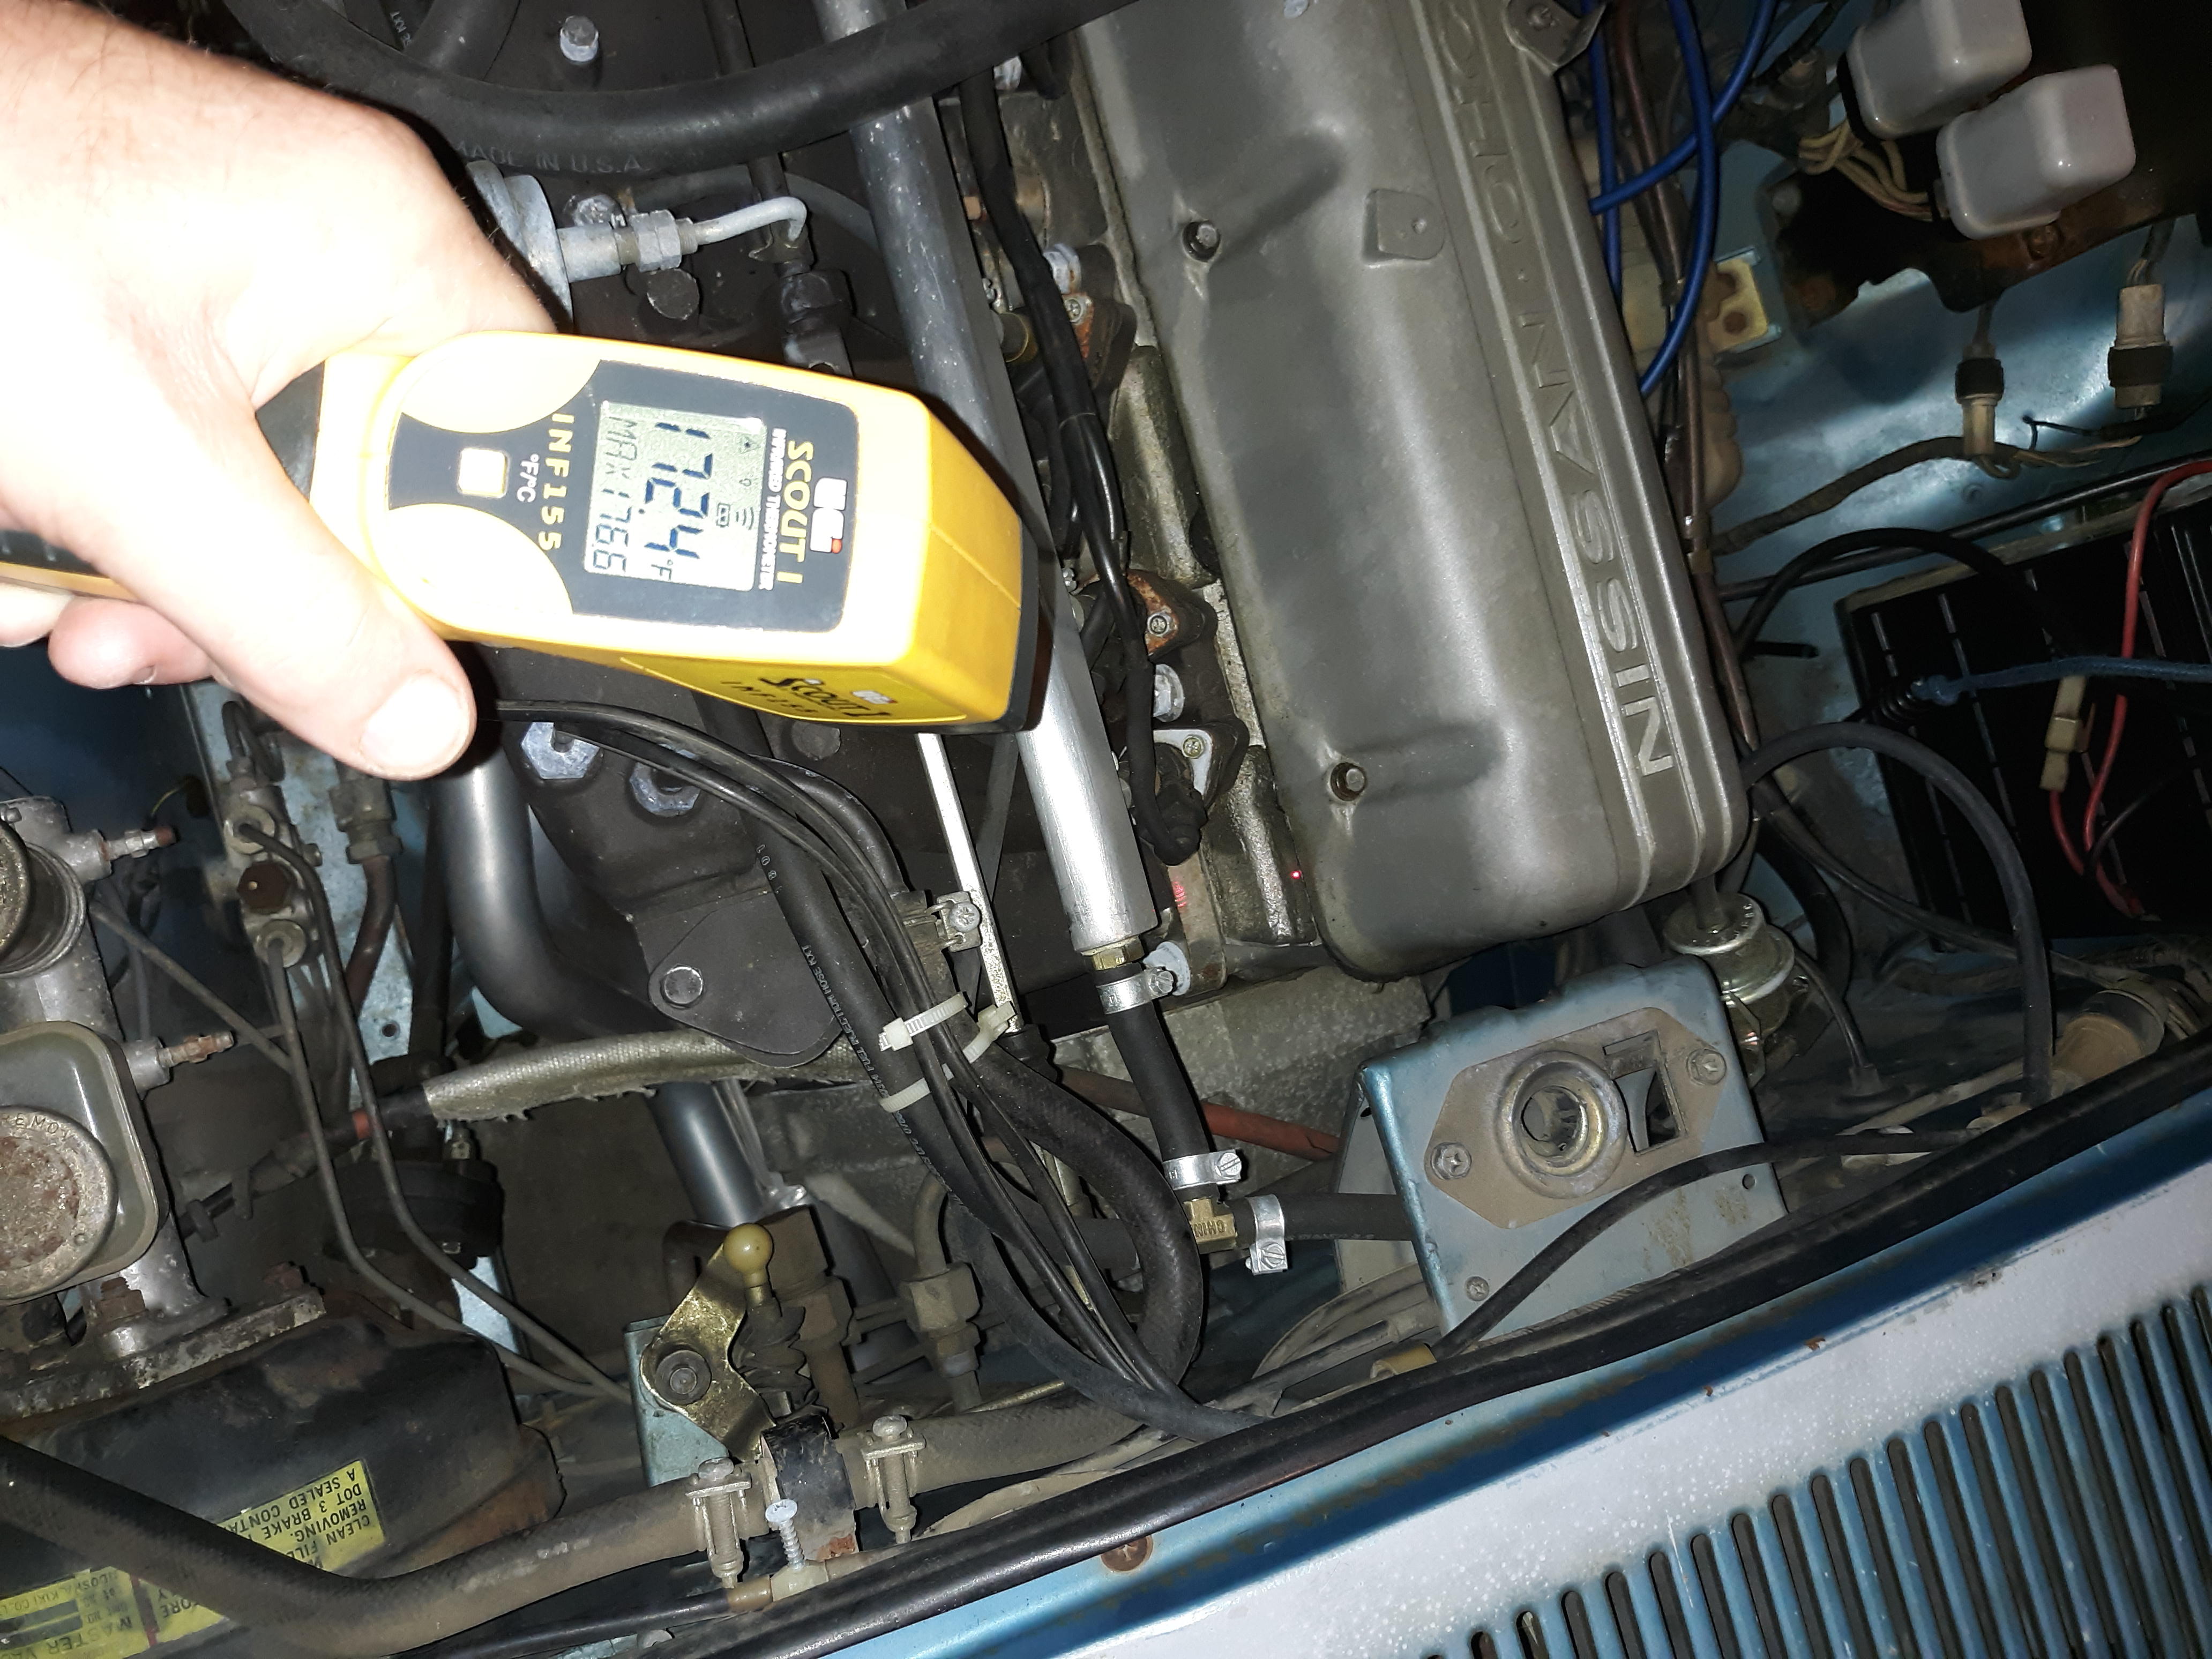
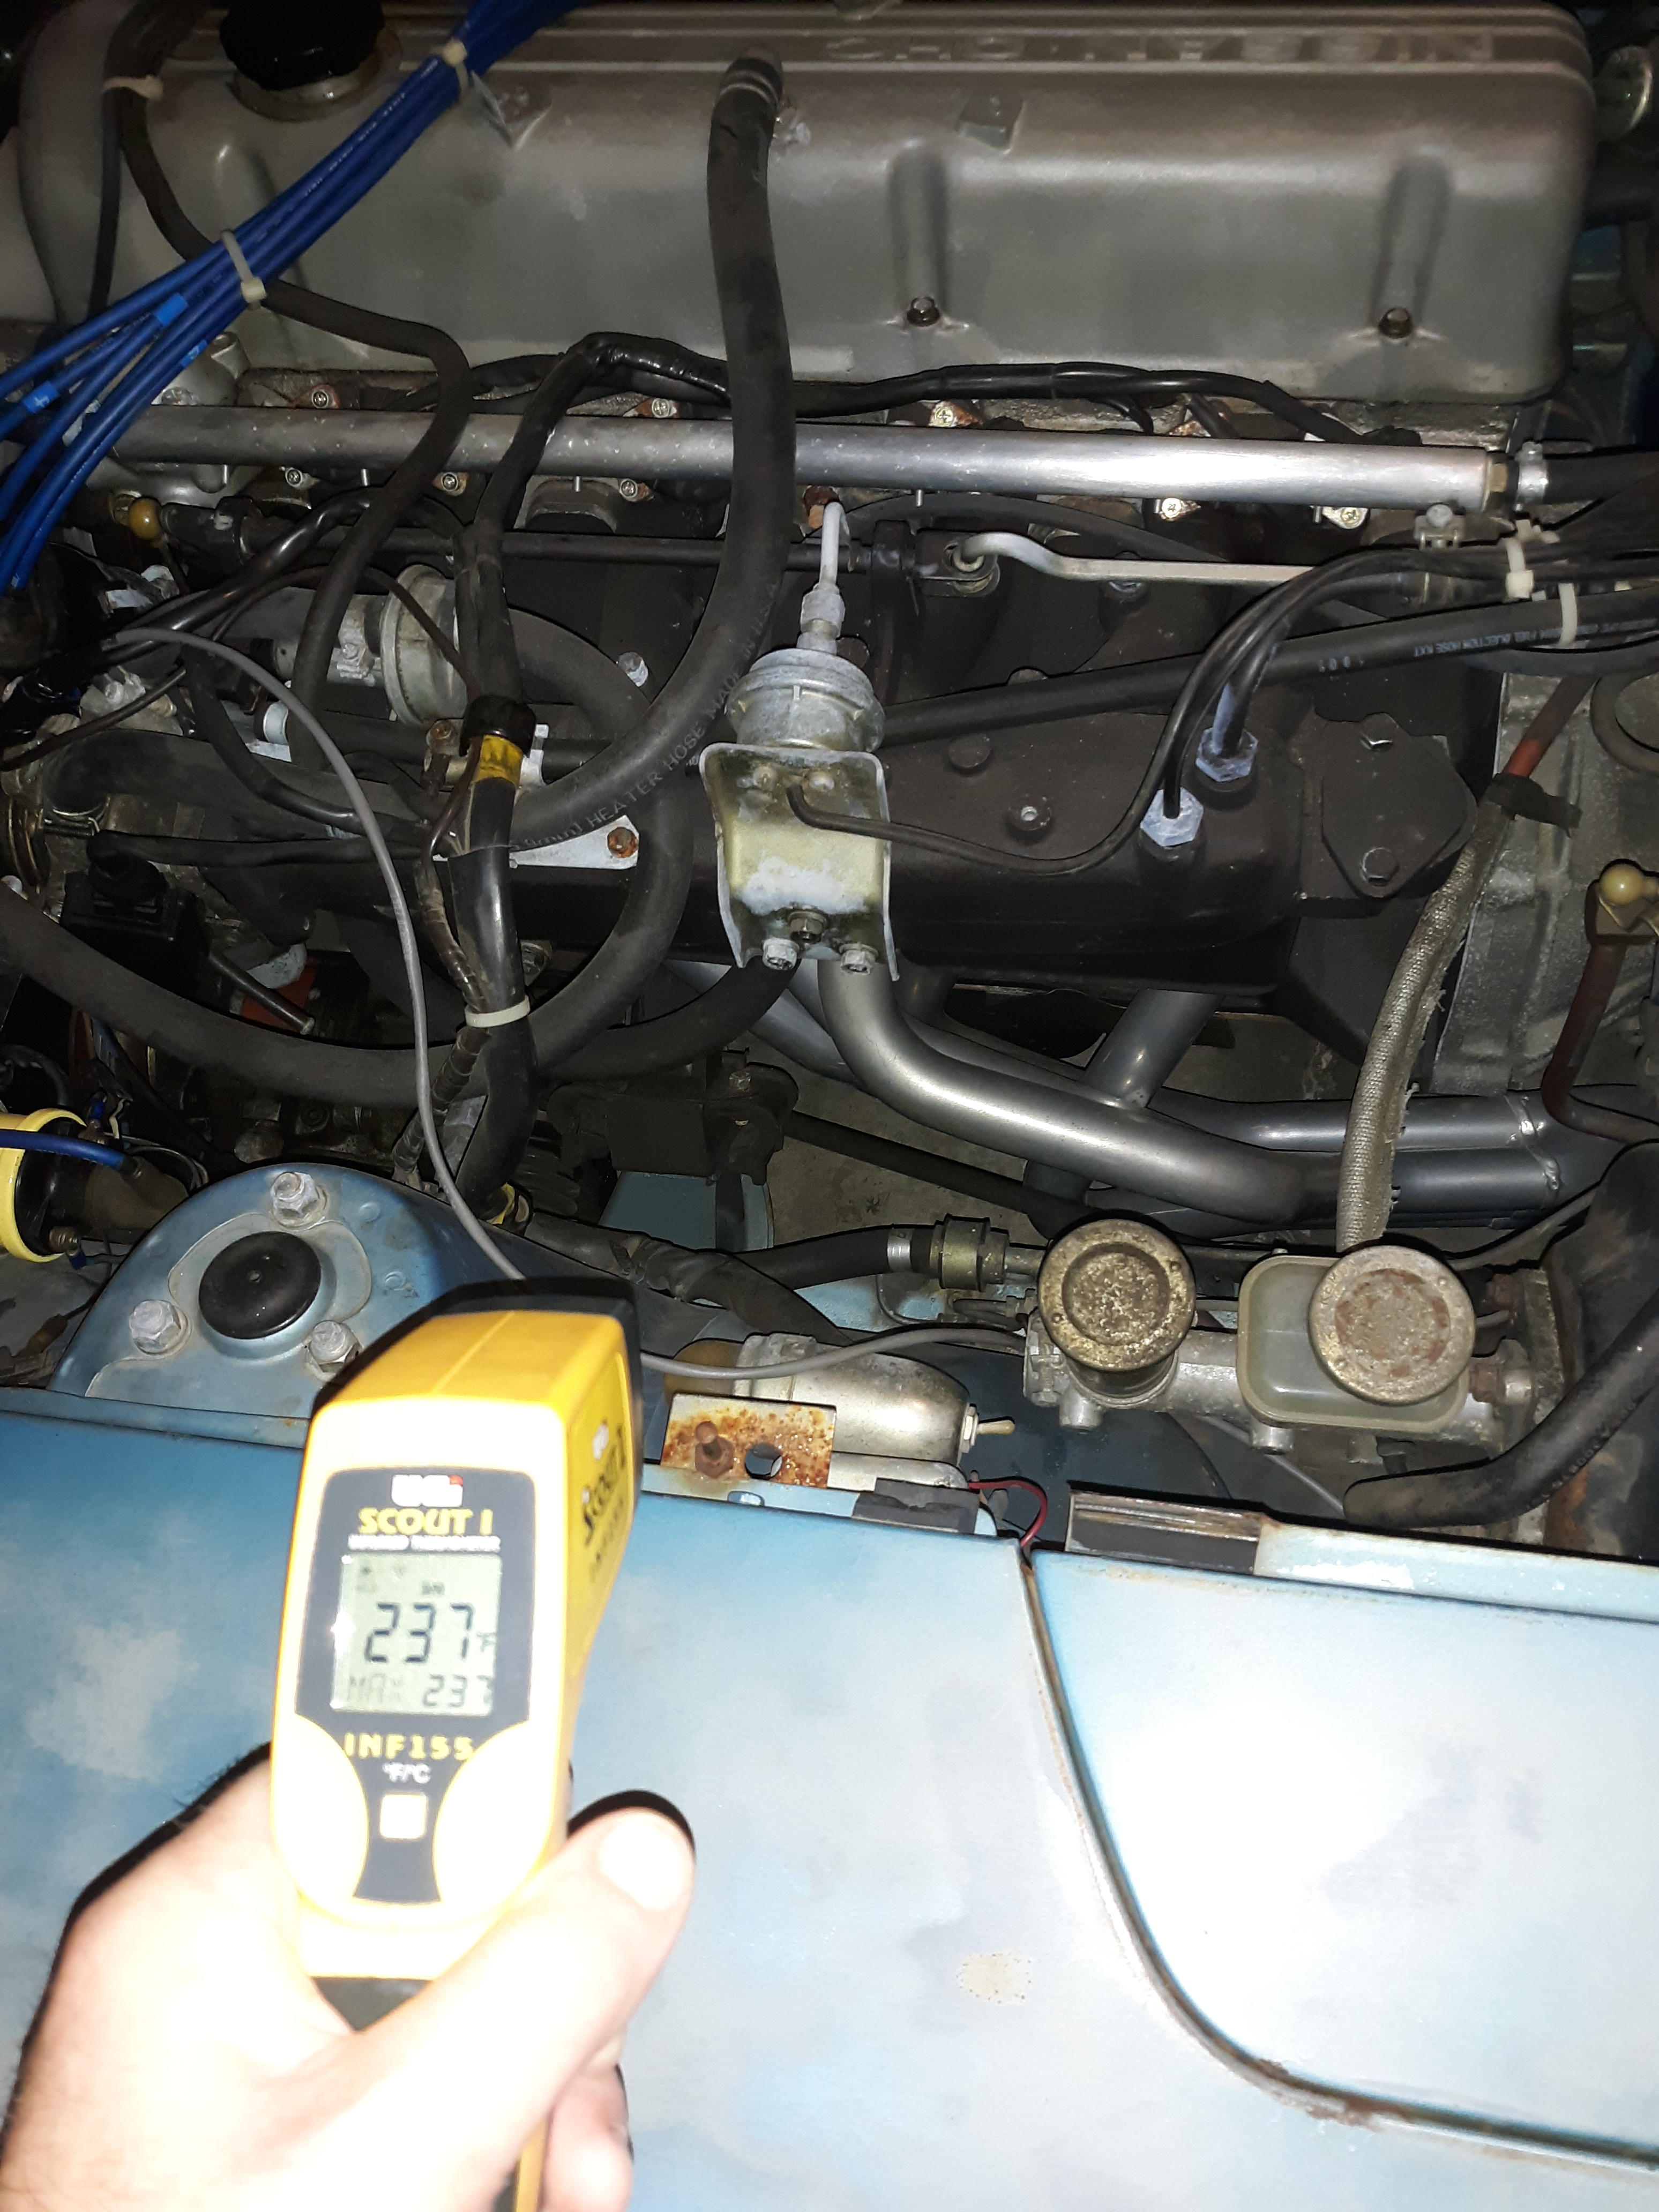
 1 pointGoofing off today I took some measurements on my 280 with the aluminum fuel rail. It goes up and down 20 degrees every few seconds. I guess that's when the excess dumps after the fpr opens up? Anyway the car was 80 degrees cold in my garage before starting. The higher numbers are of course after a quick romp. Fuel rail room temp... Hot closer to the return hose... Front of head... Rear... #3 header runner... Head at room temp... Oh yeah (don't tell my Mom) but here's my next purchase. @JLPurcell didn't you buy something similar to this? Thanks for any advice. Cliff
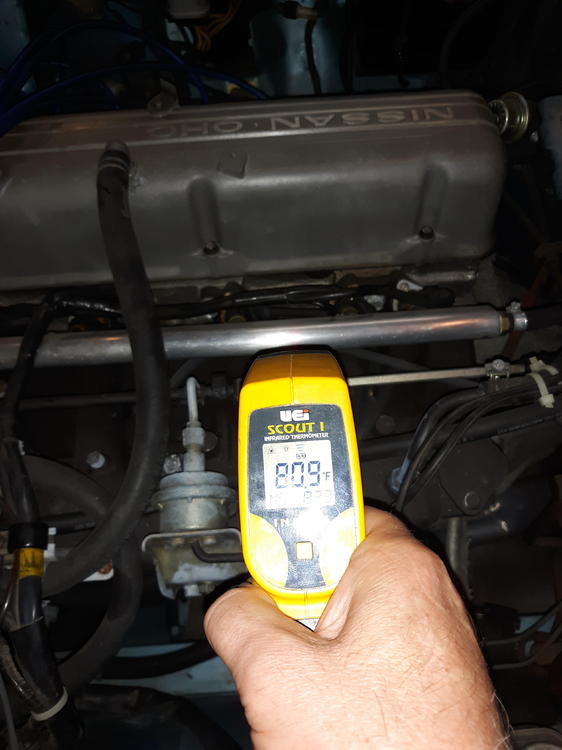


 1 point
1 pointIt can be done by yourself but much easier with a second person, you do one side at a time, loosen all four bolts holding the hinge to the body, have someone push down on the closed hood in the front corner and tighten the three bolts that you can get to and get the fourth later, then the other side the same. Also, you need to remove the grill.1 point
1 point
1 point
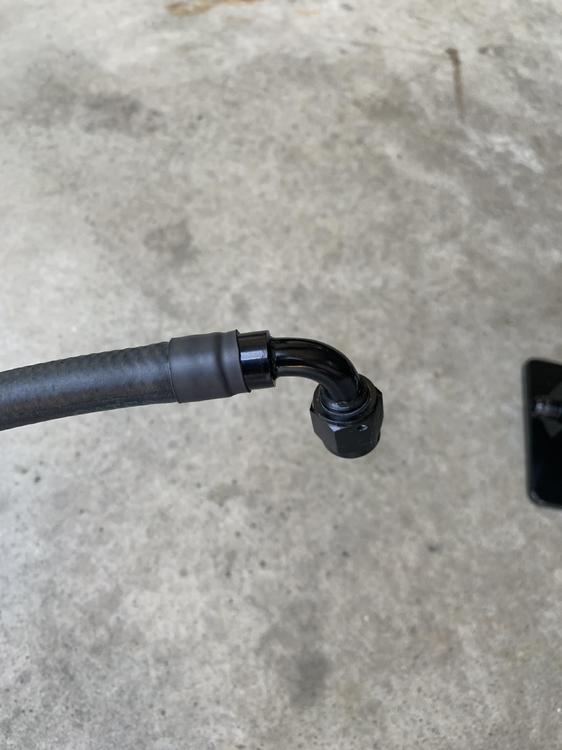
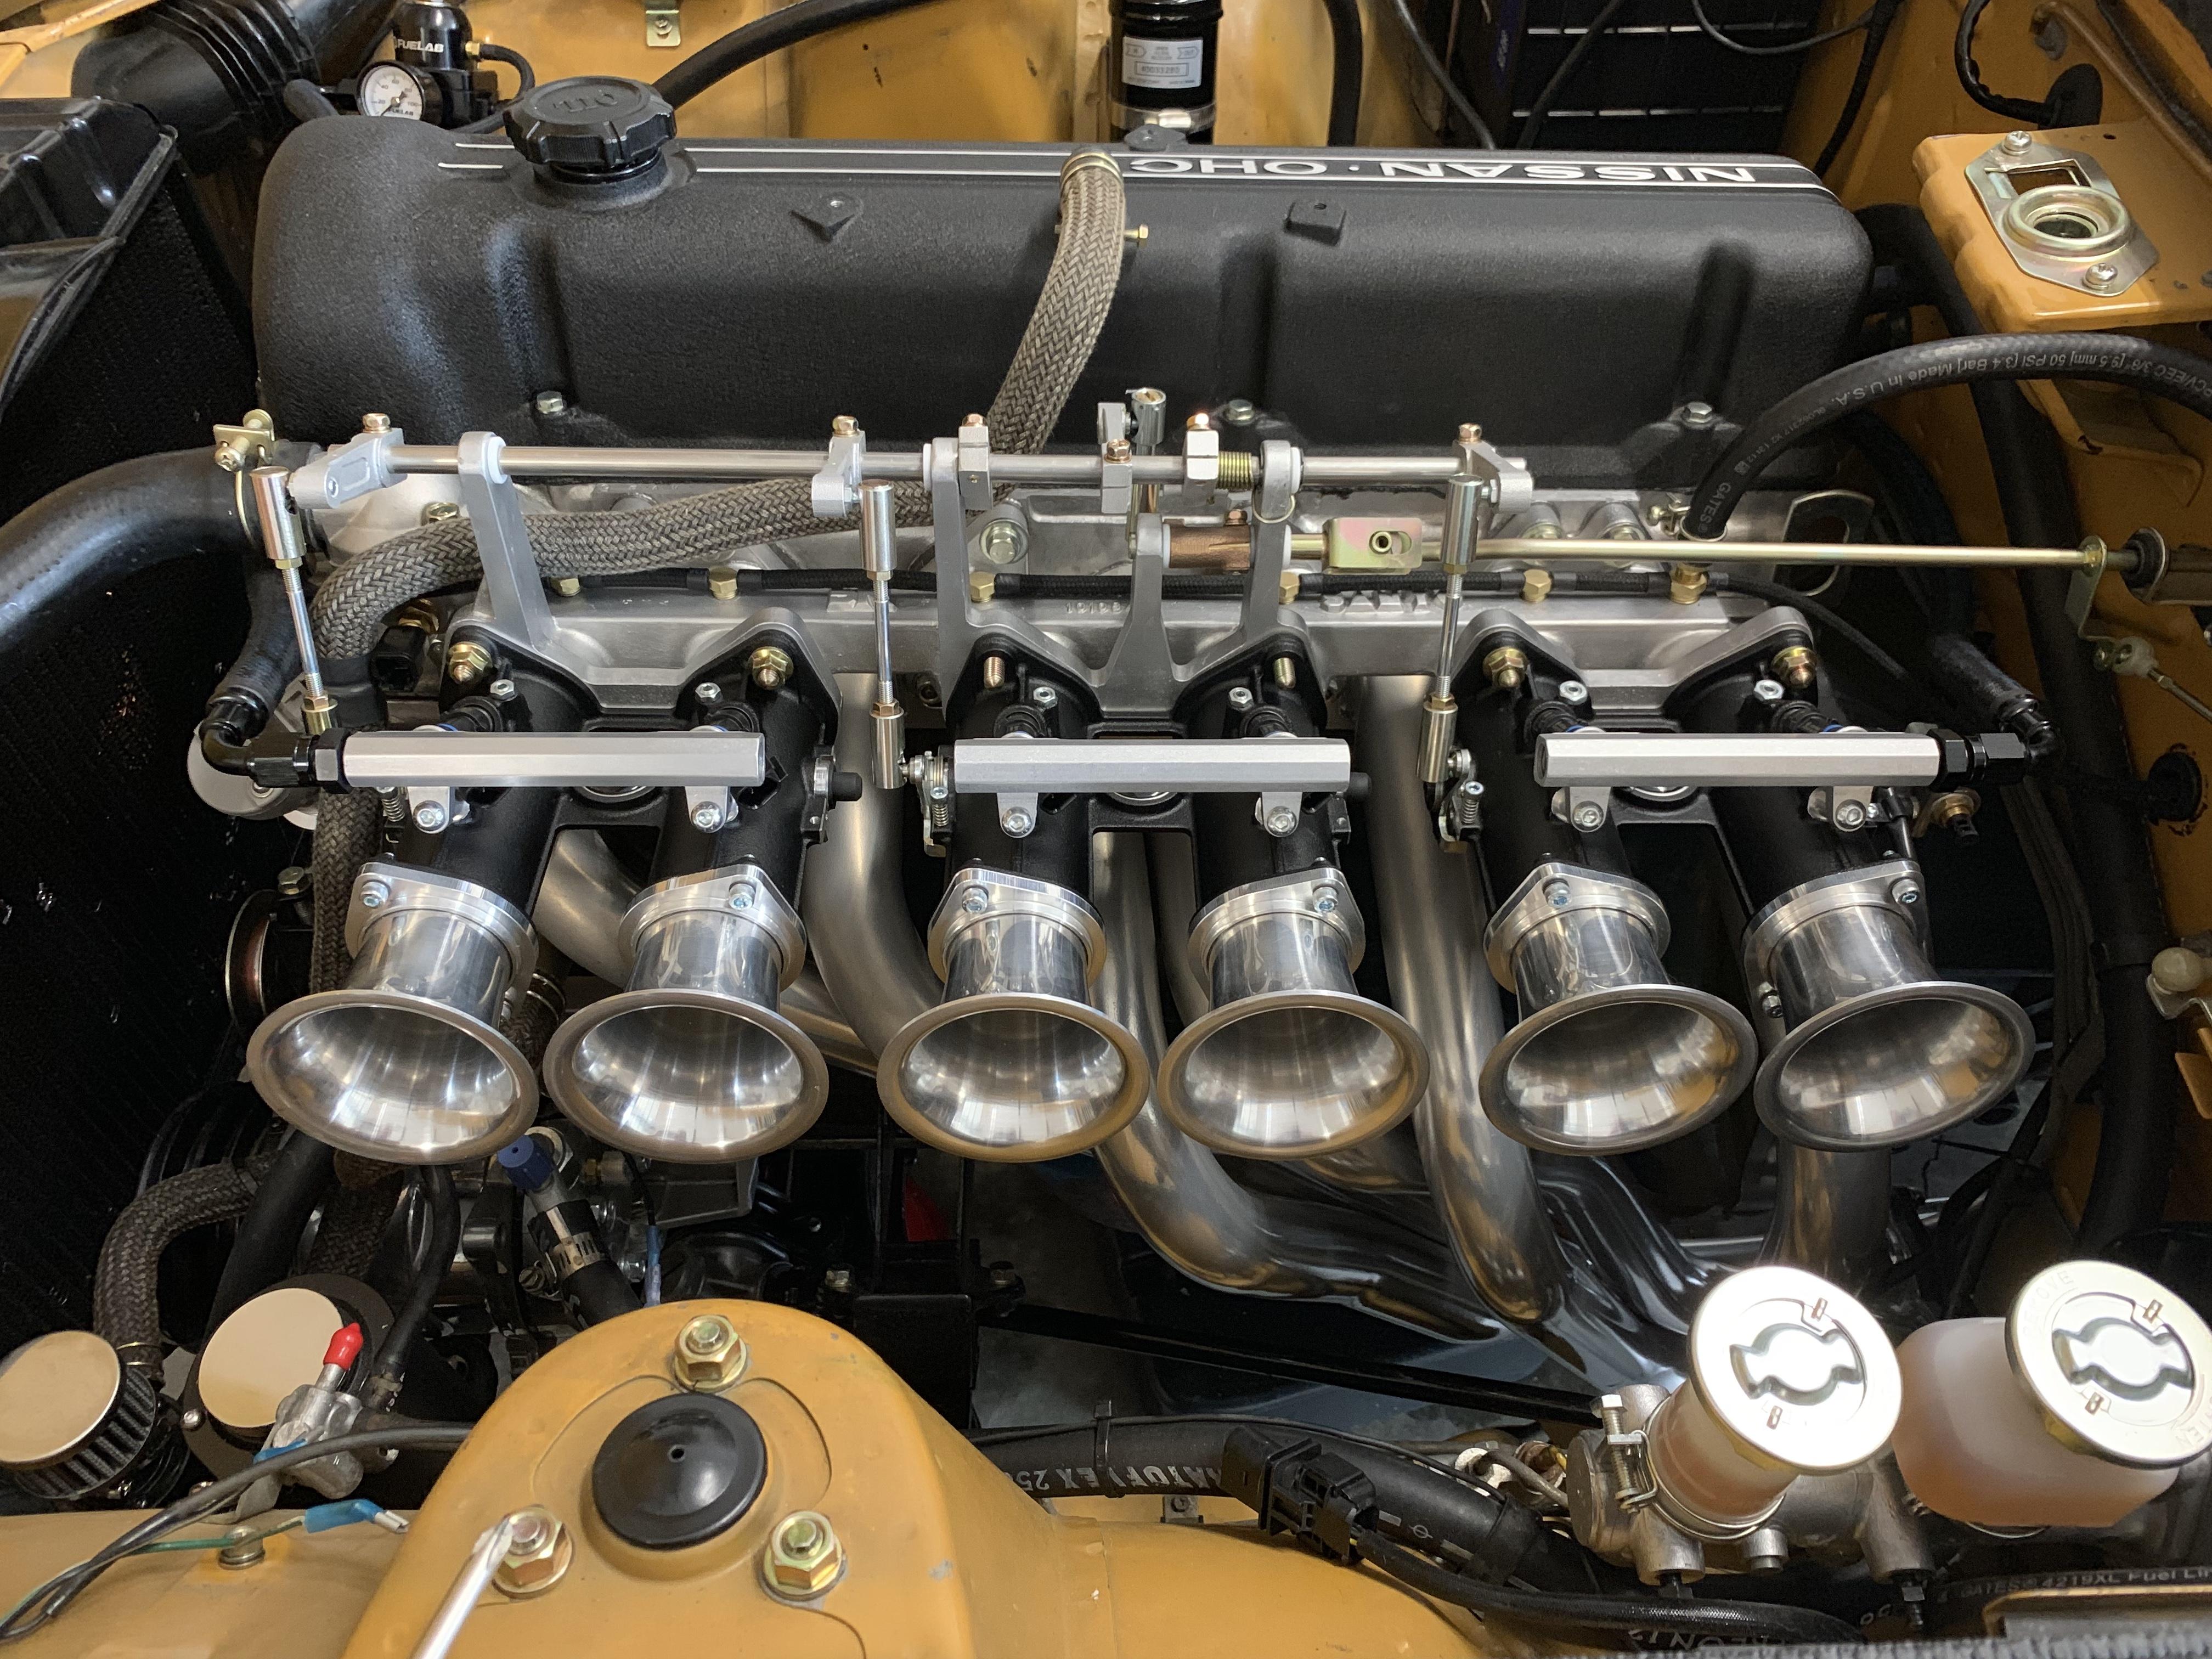
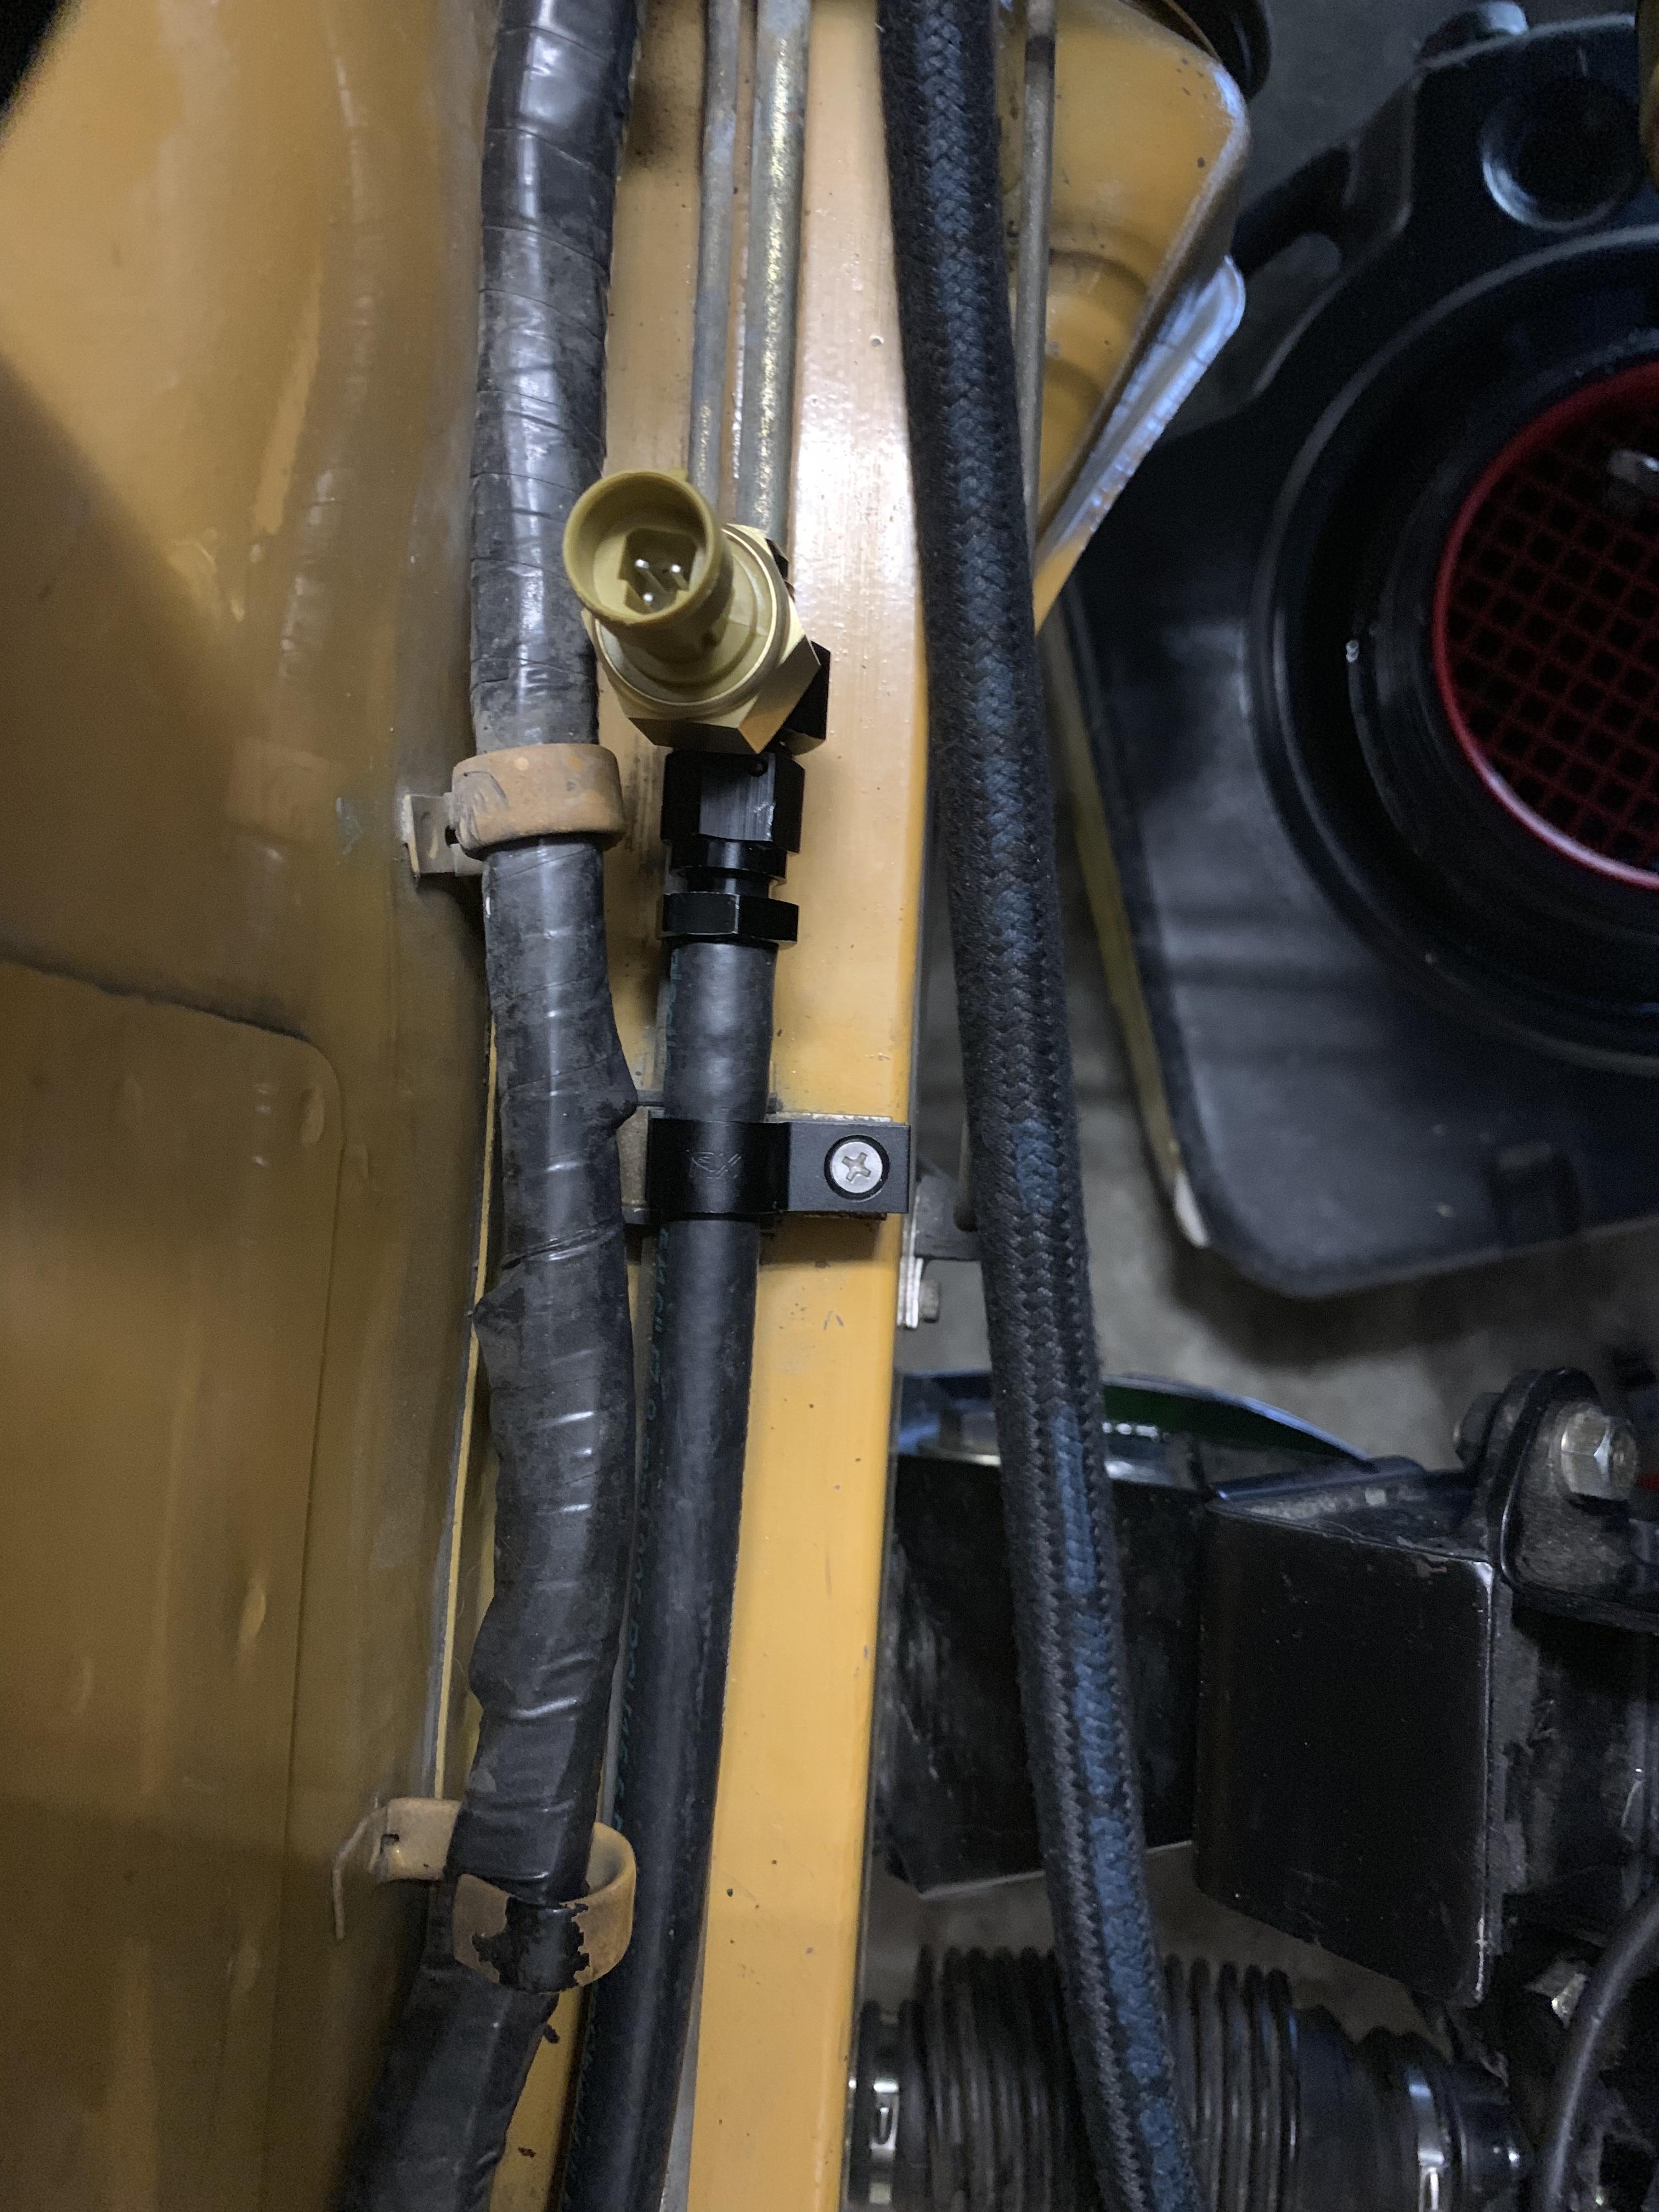
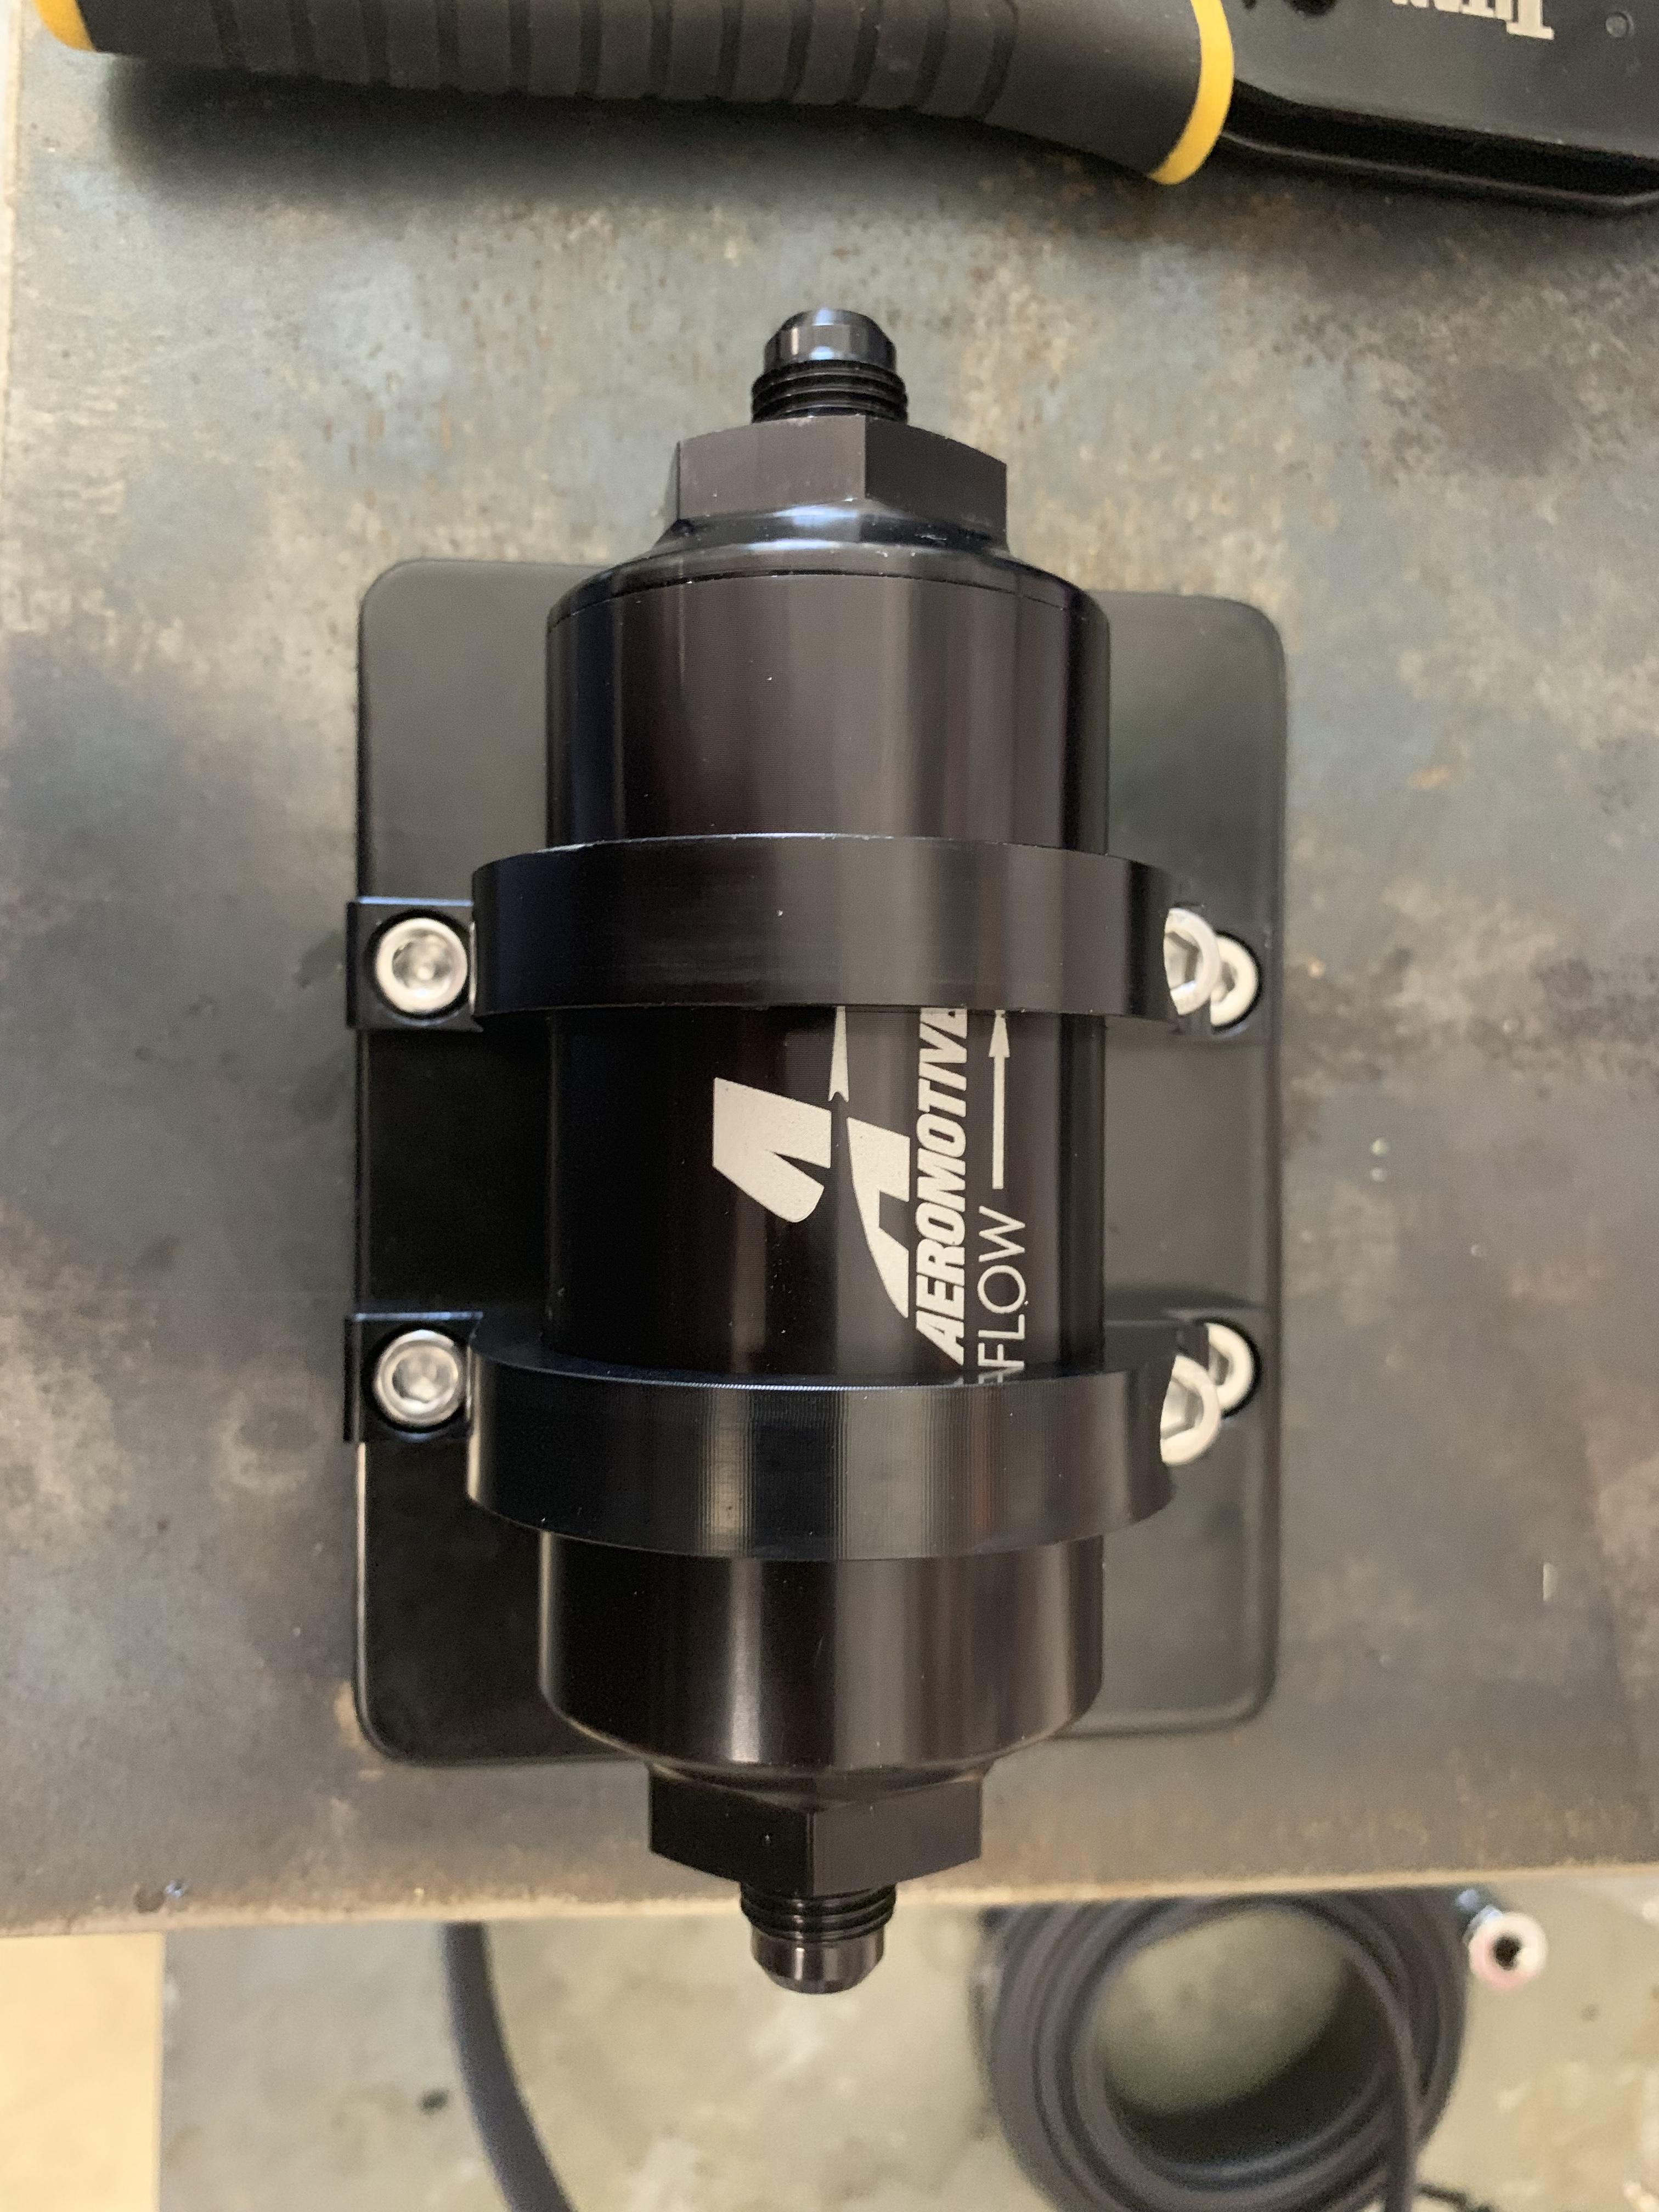
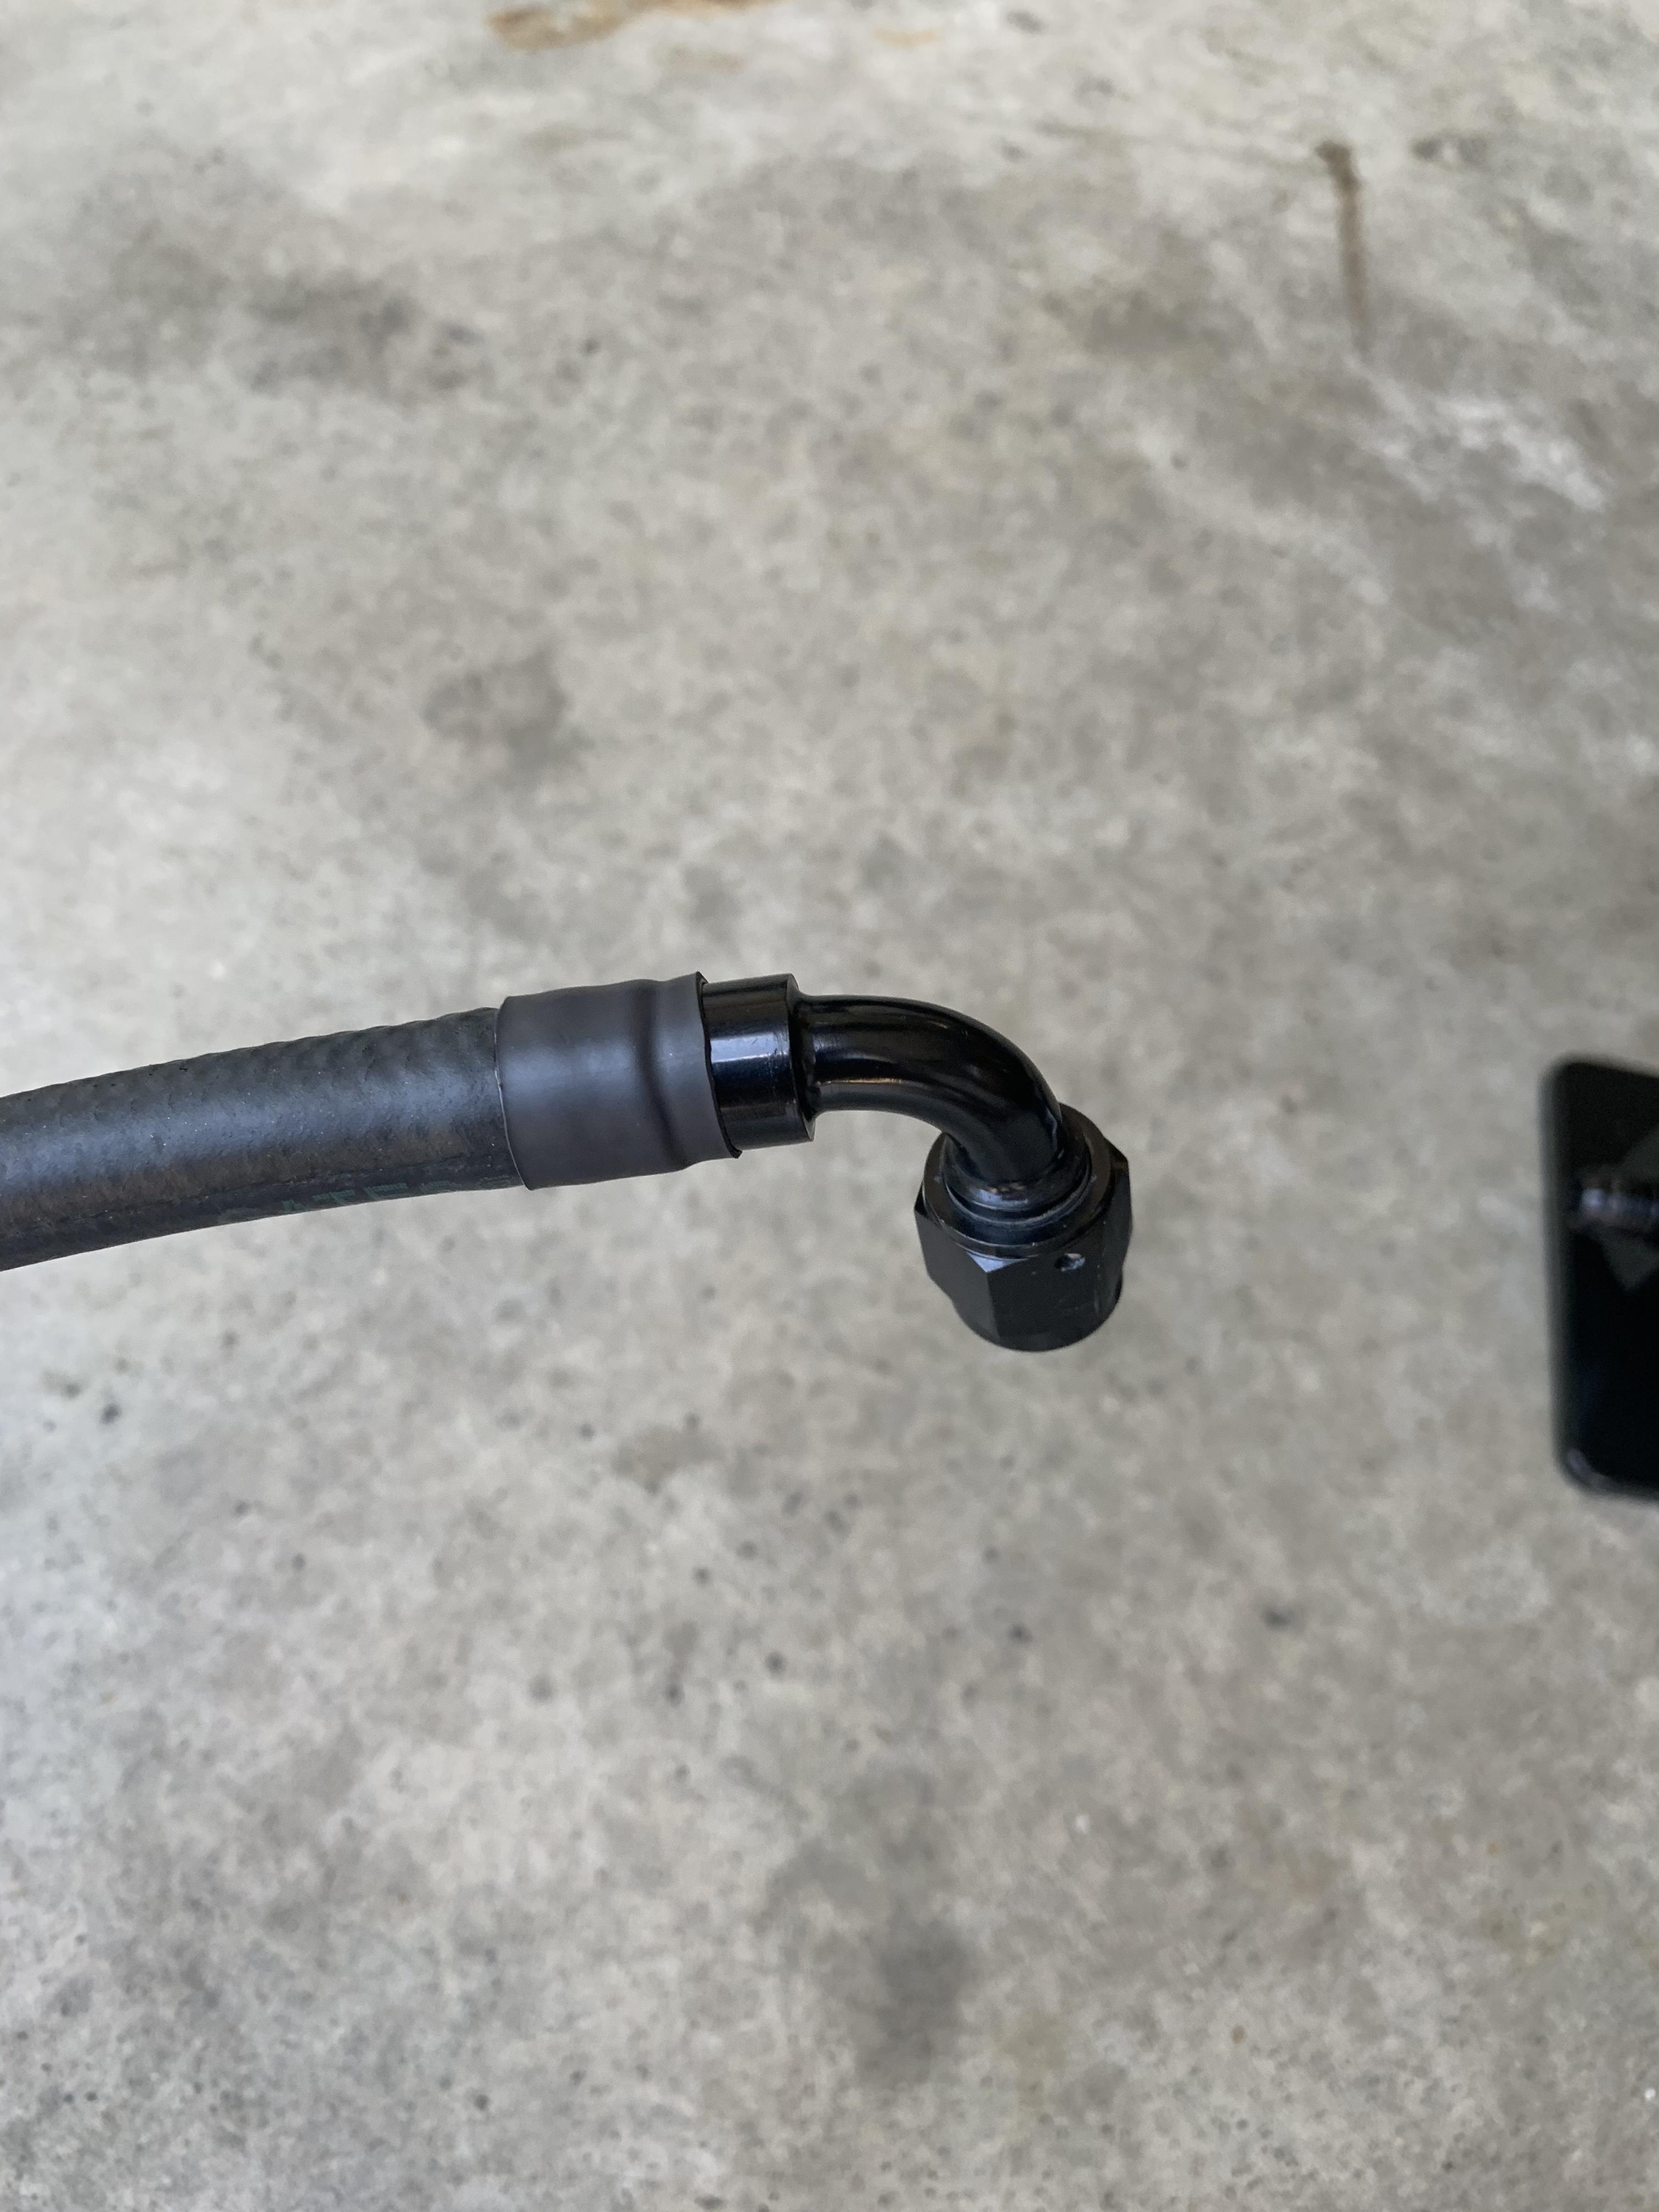
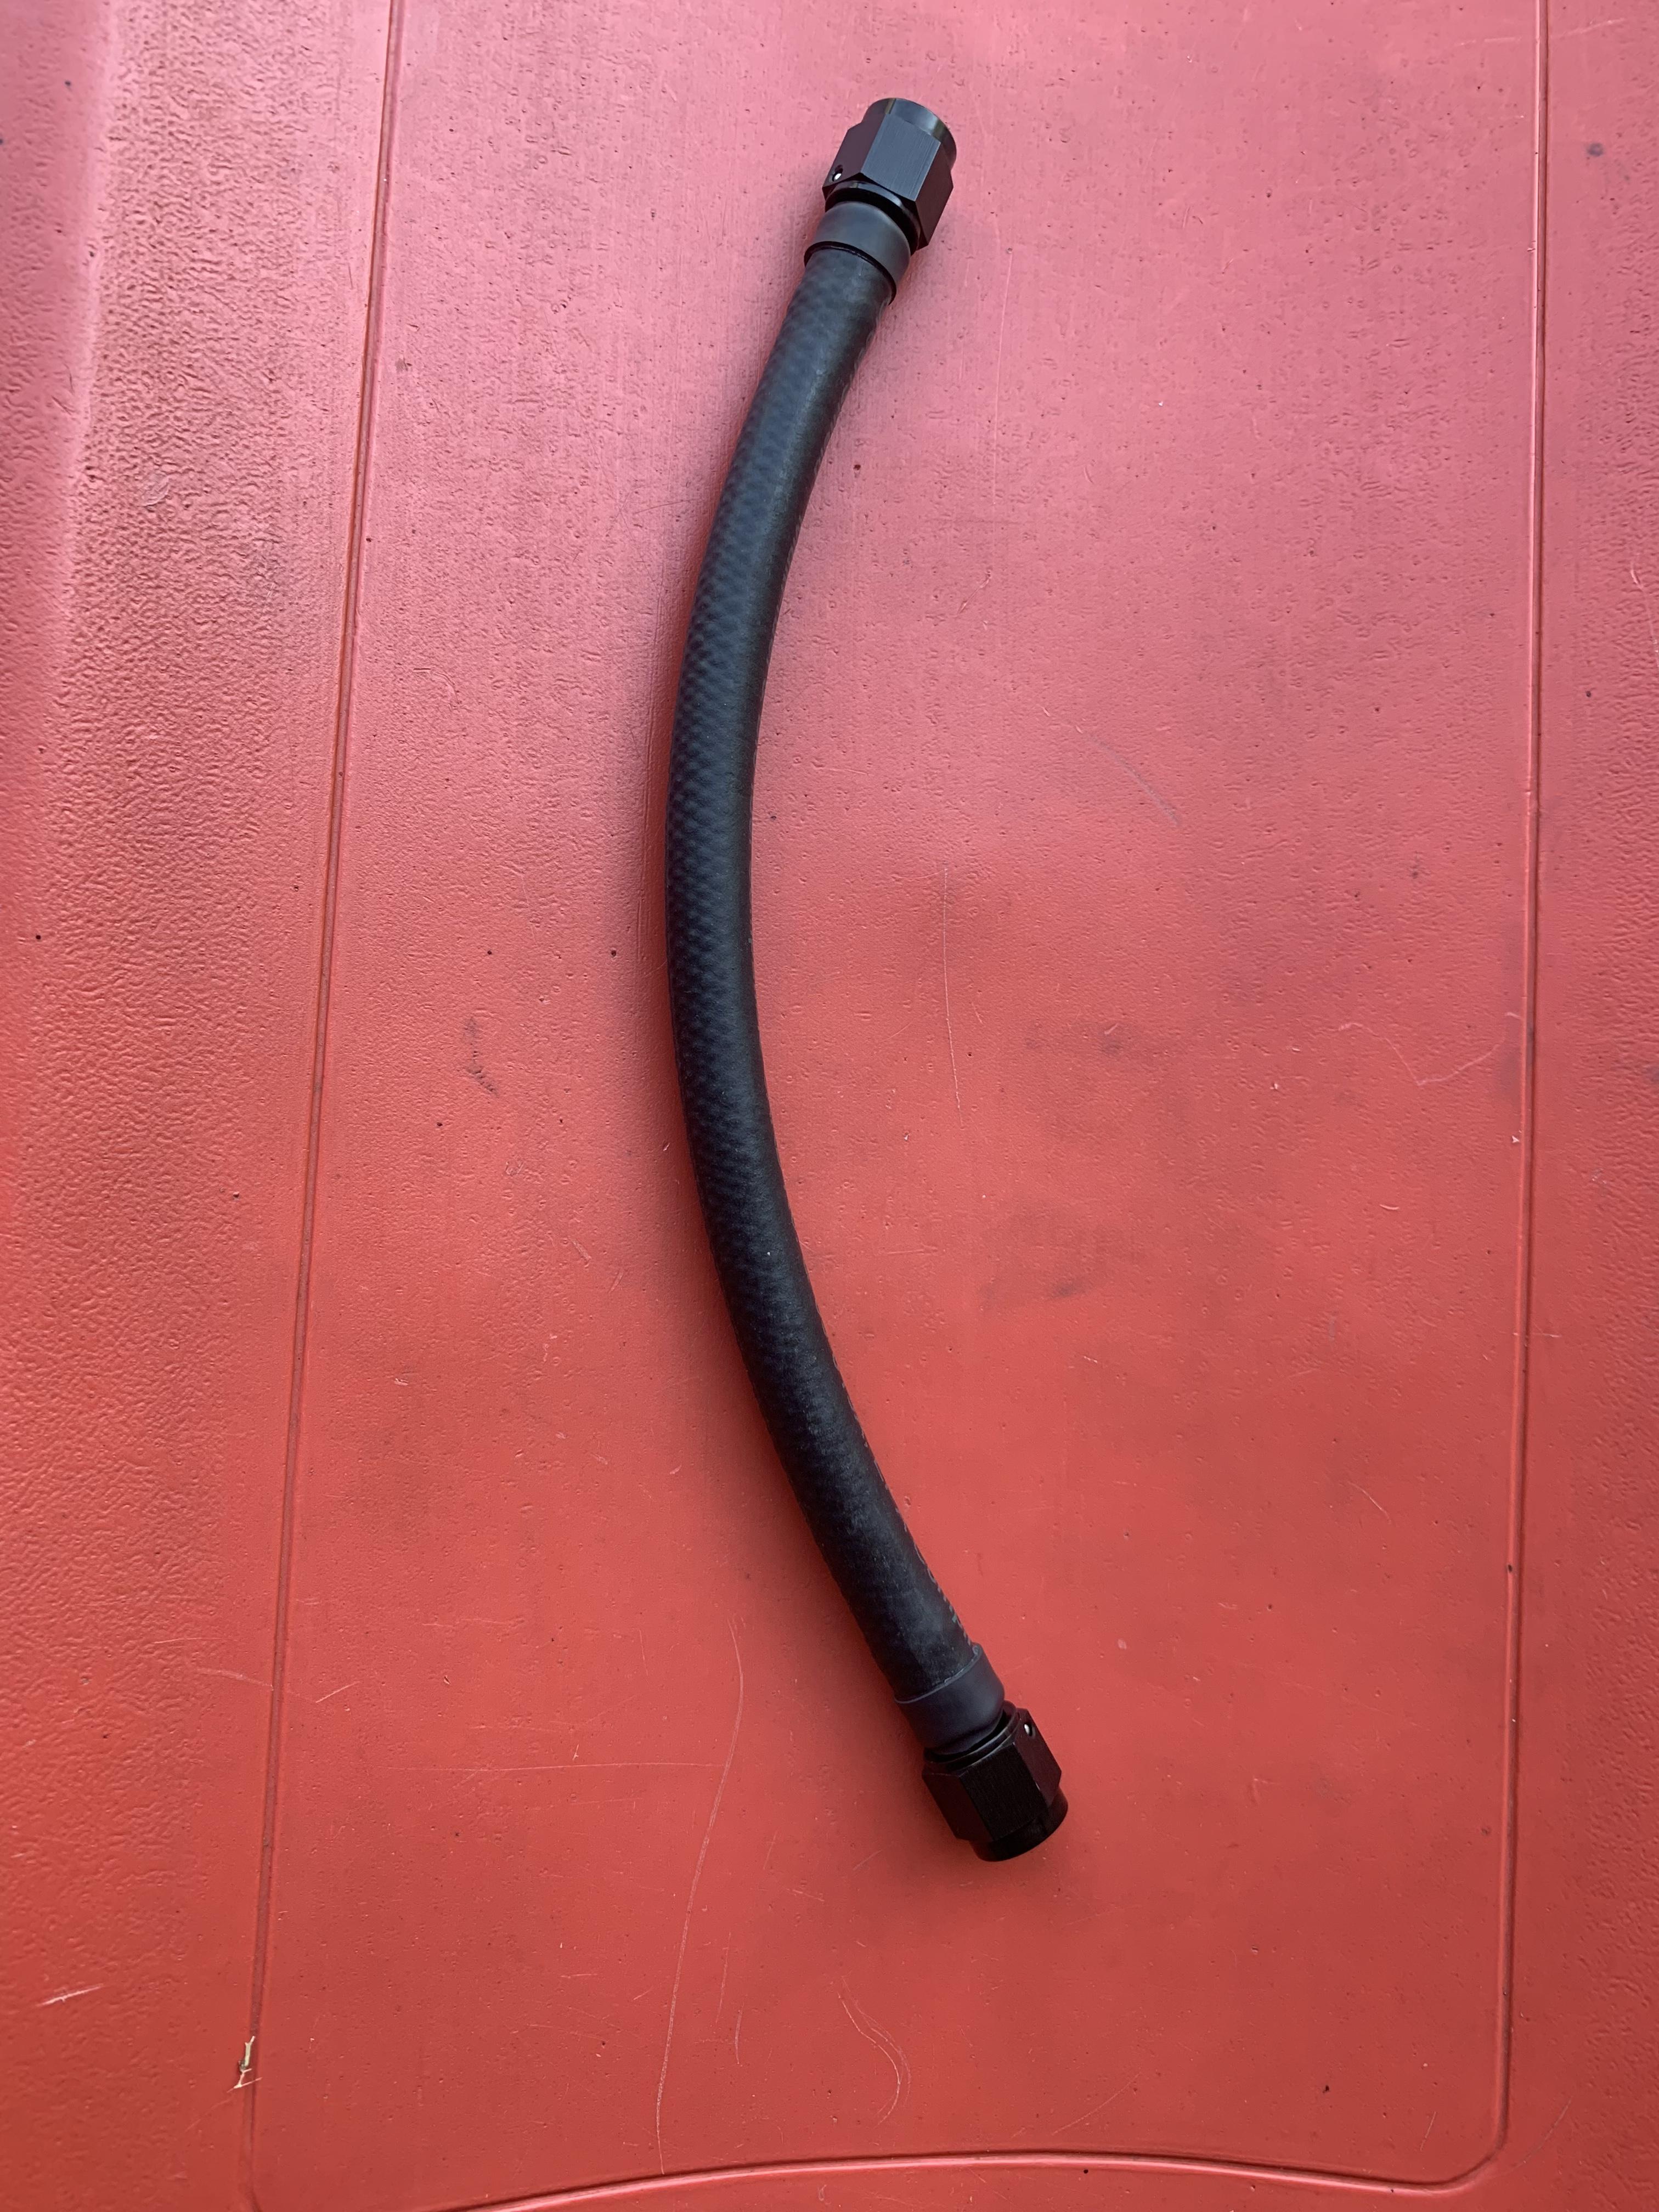
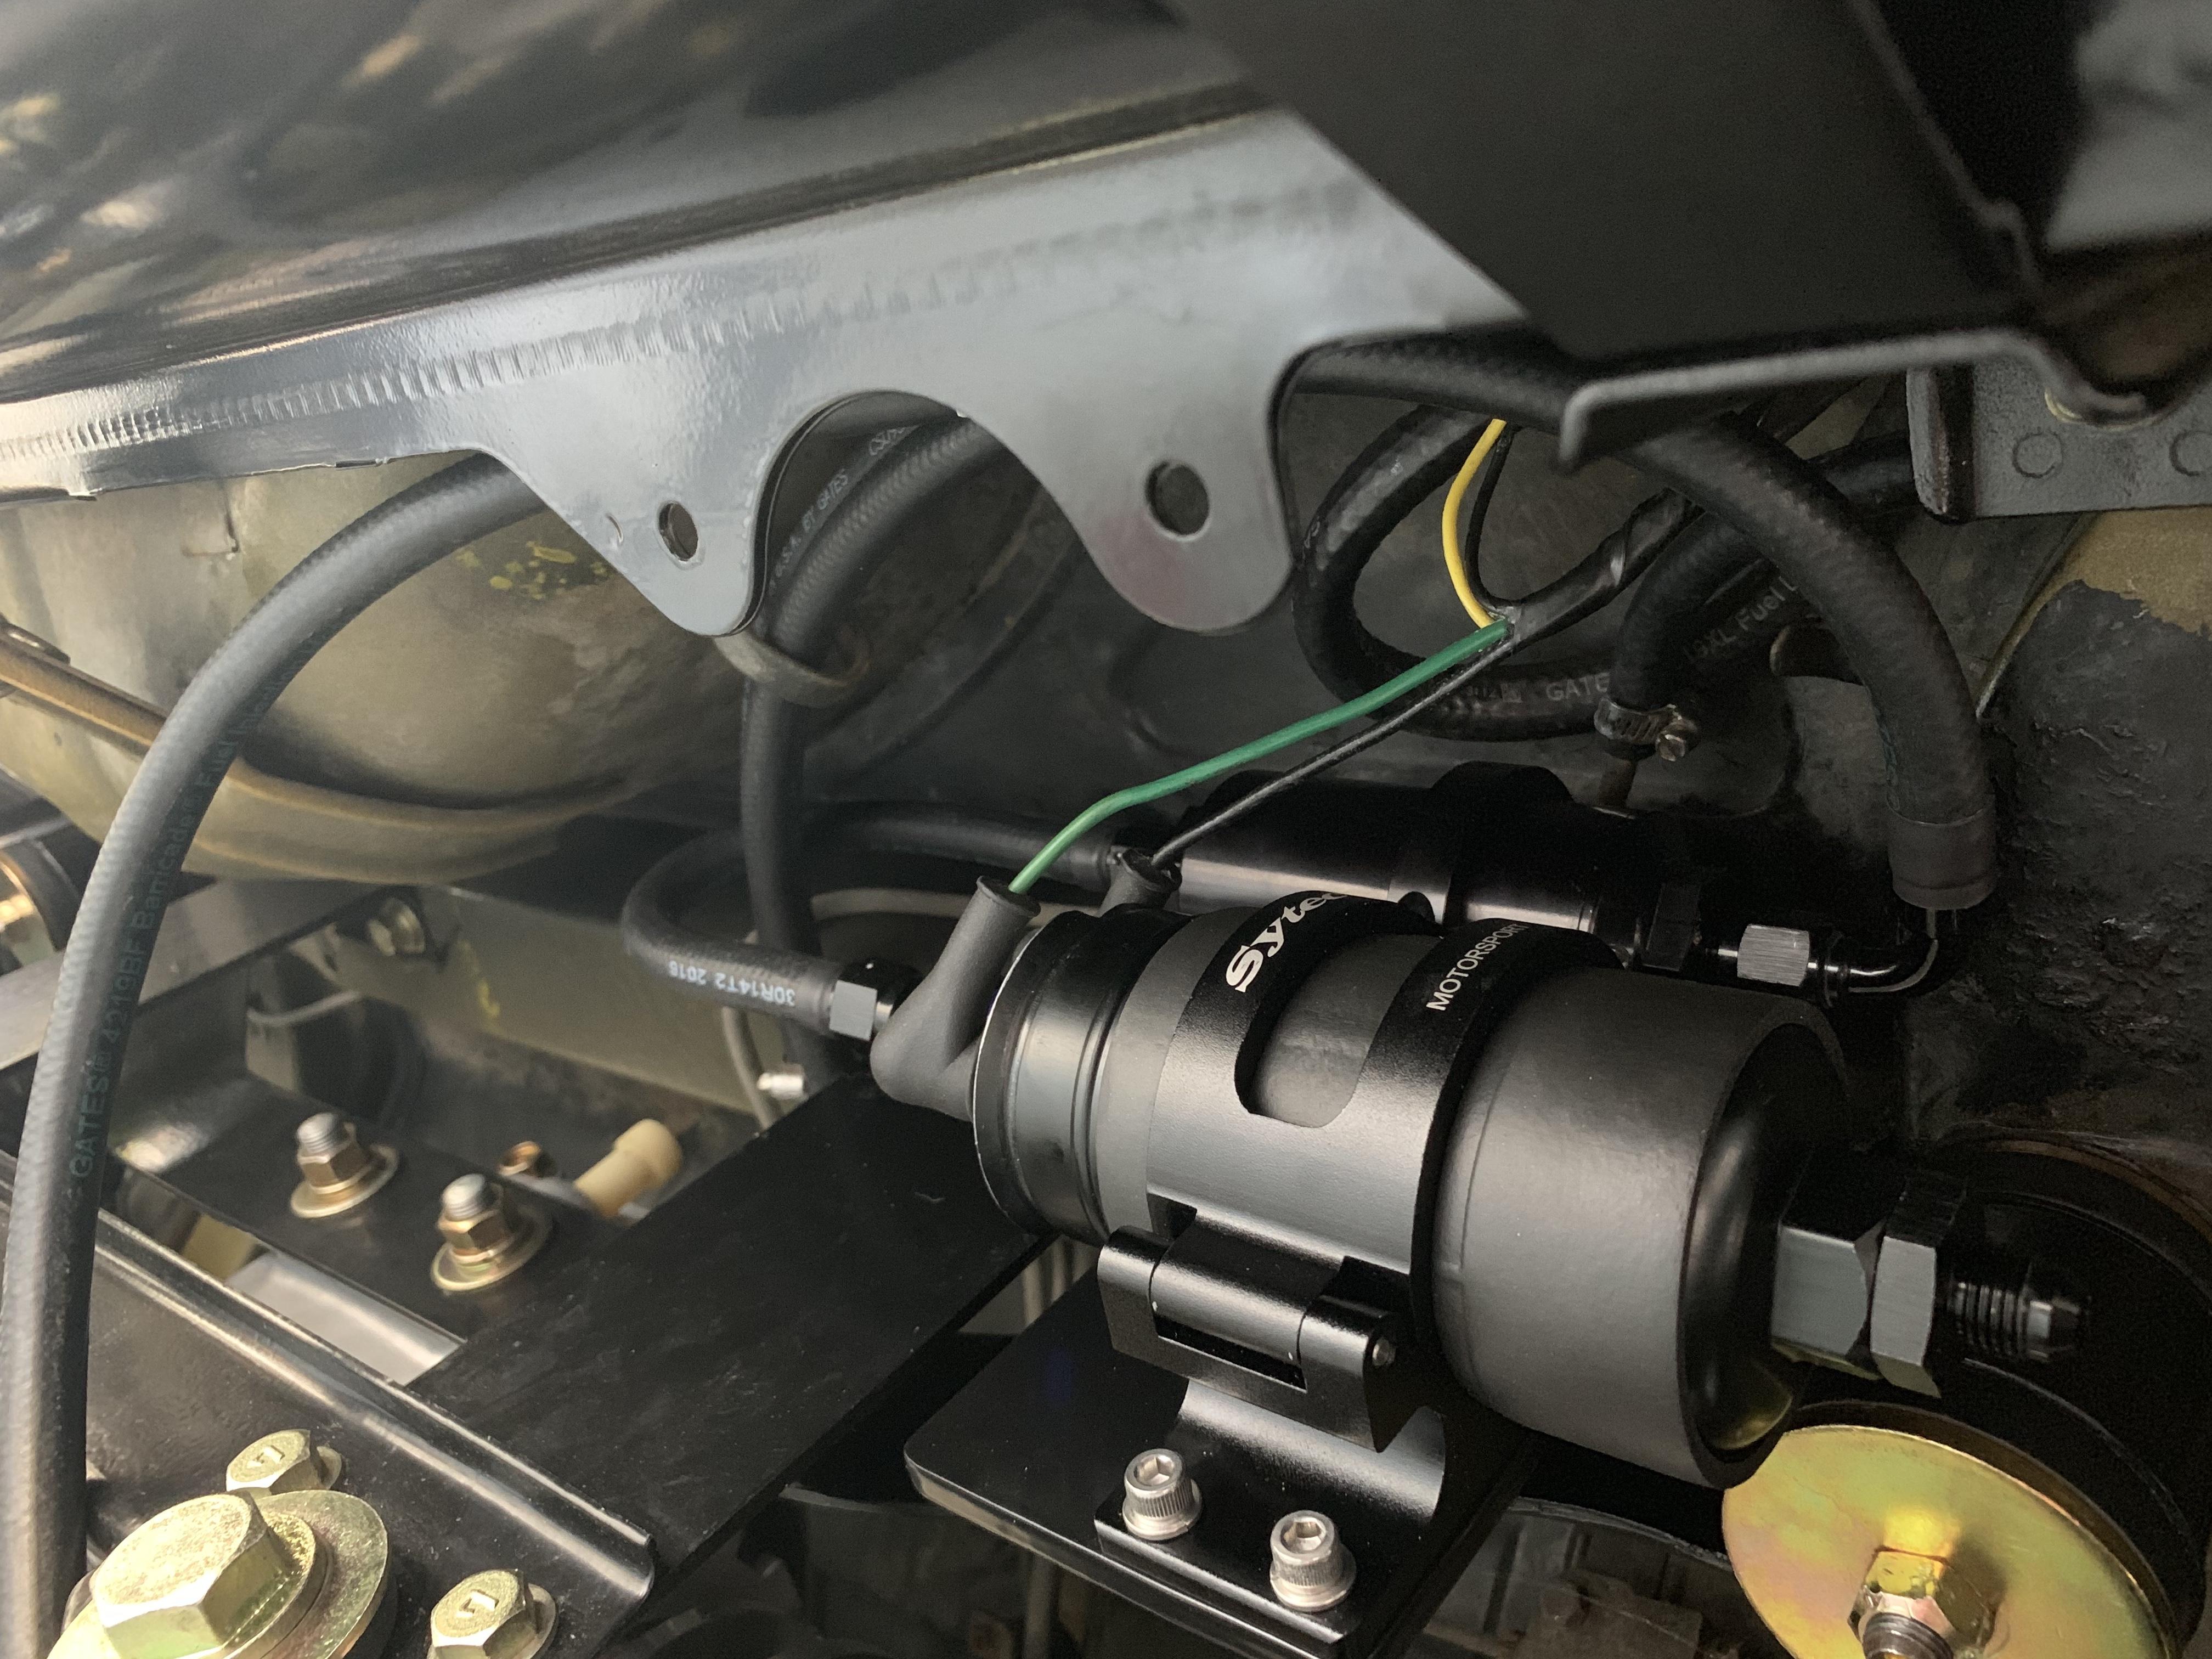
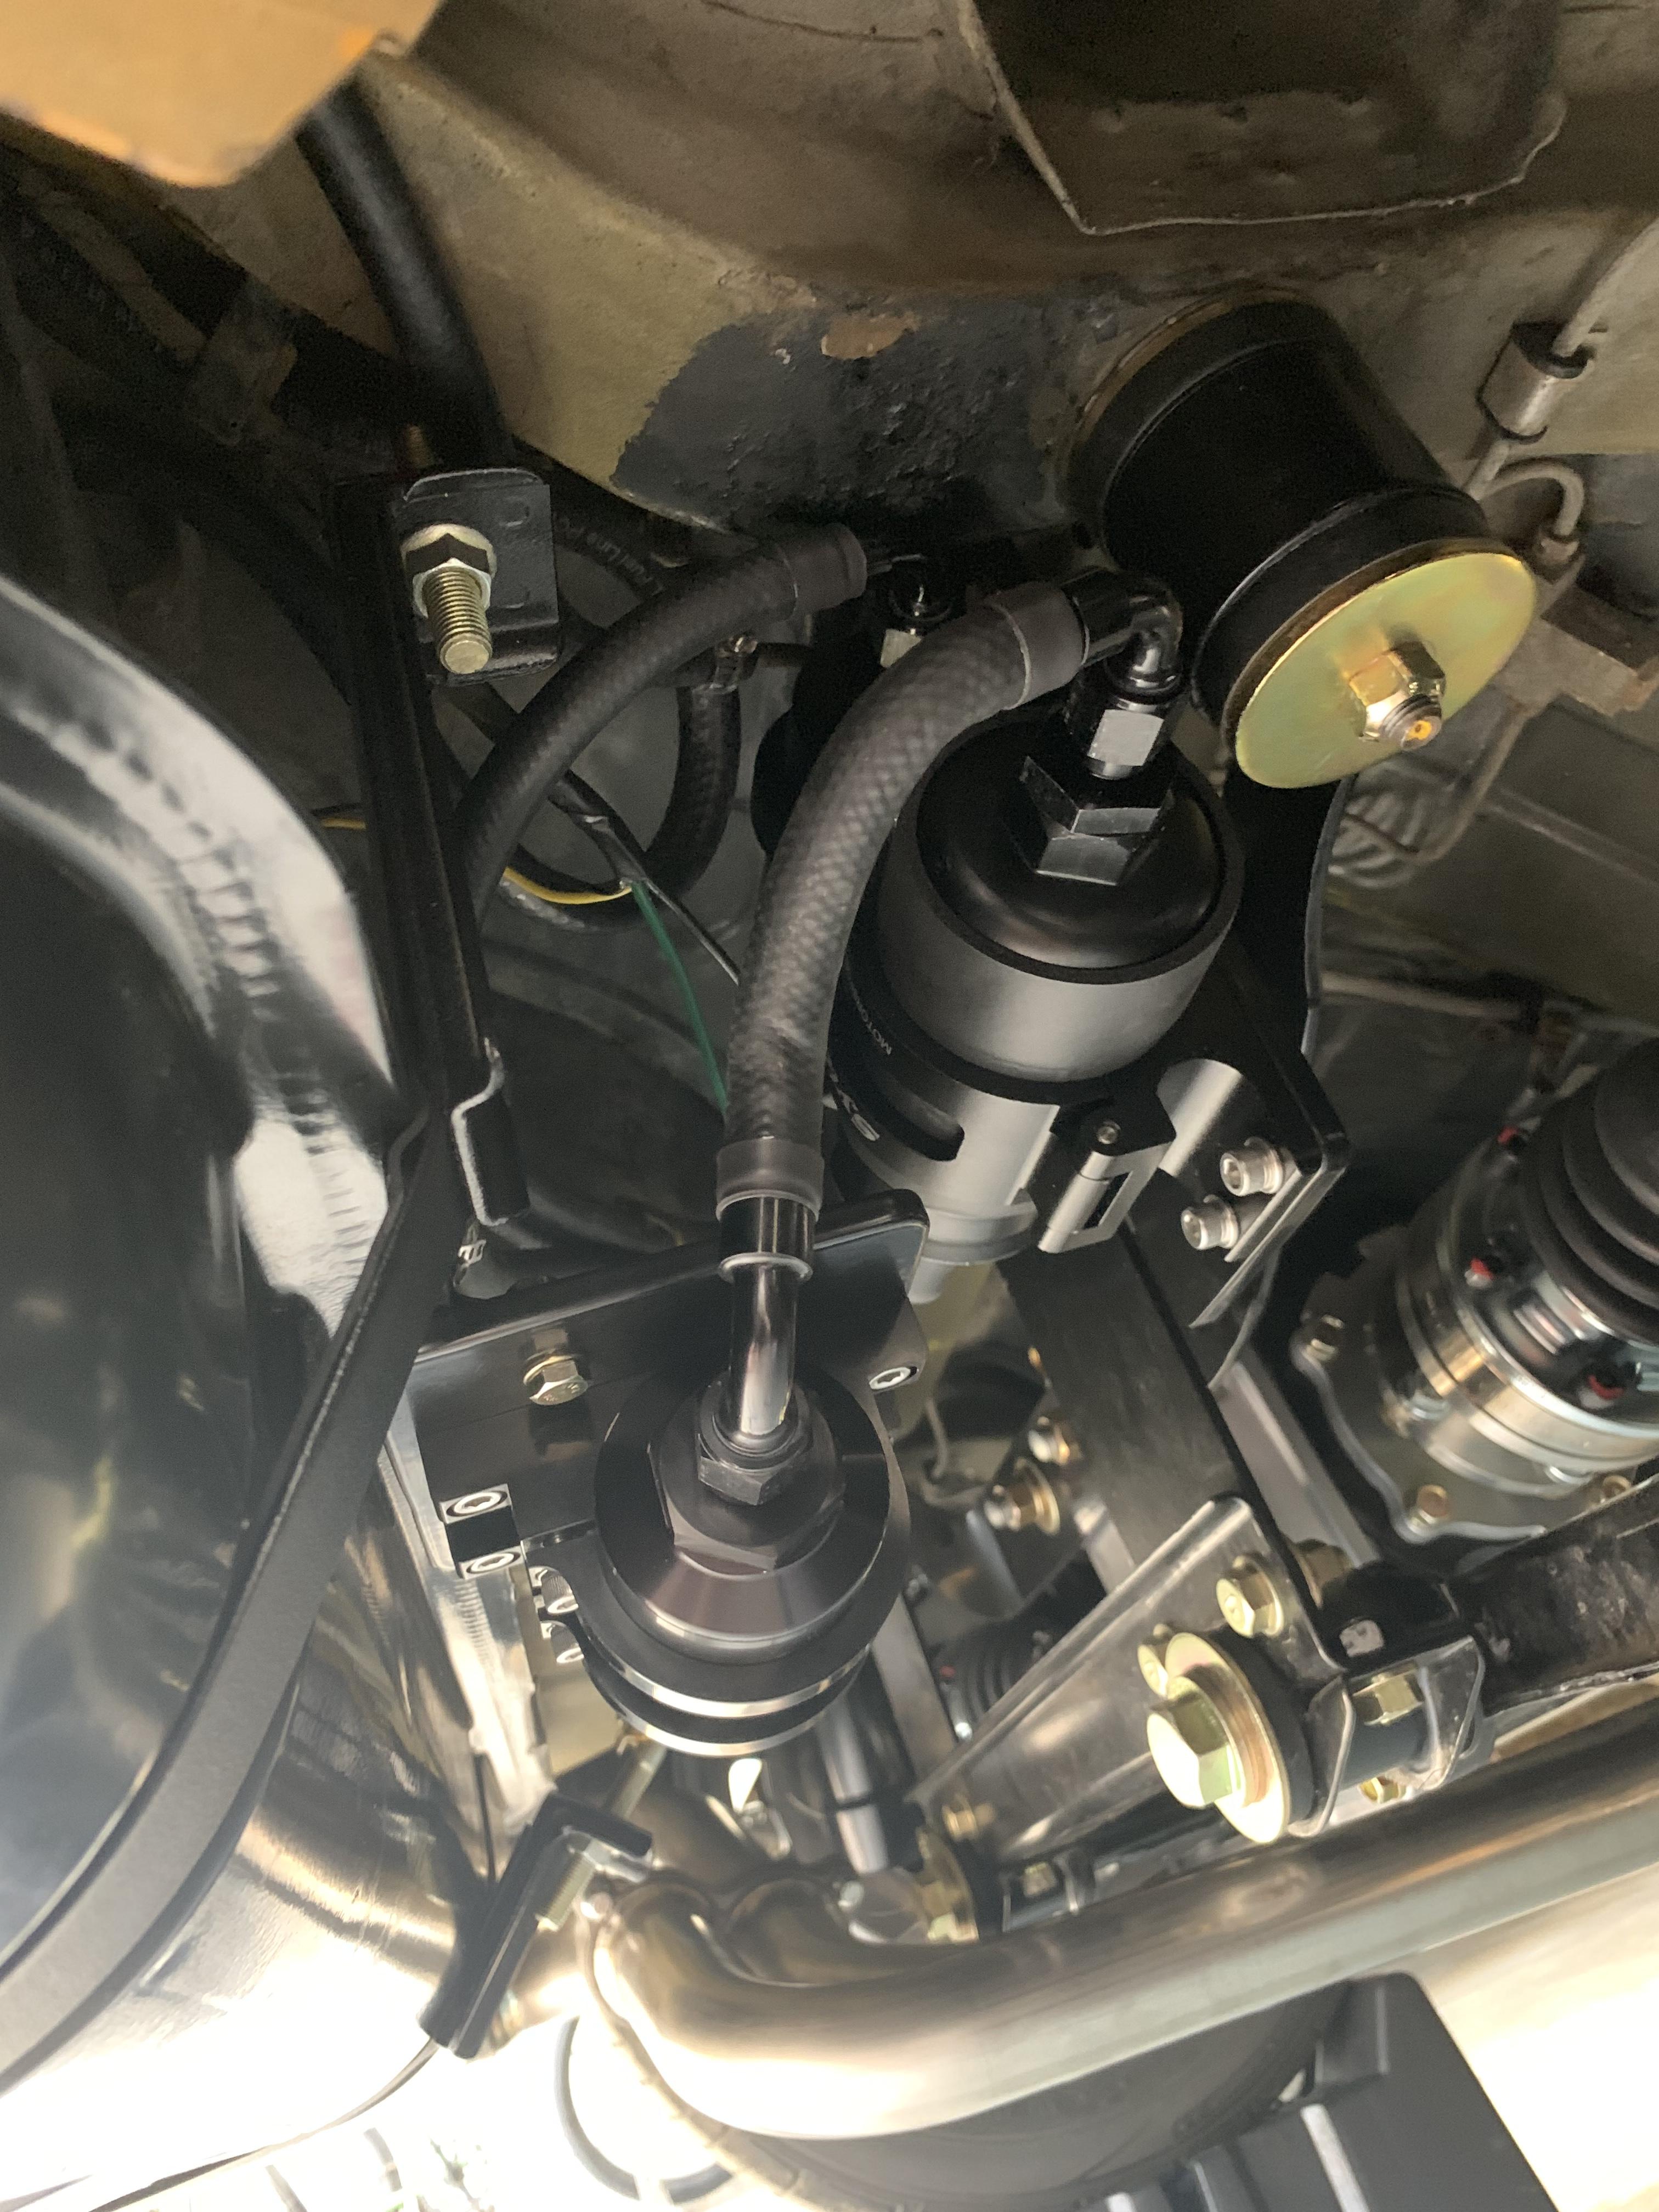
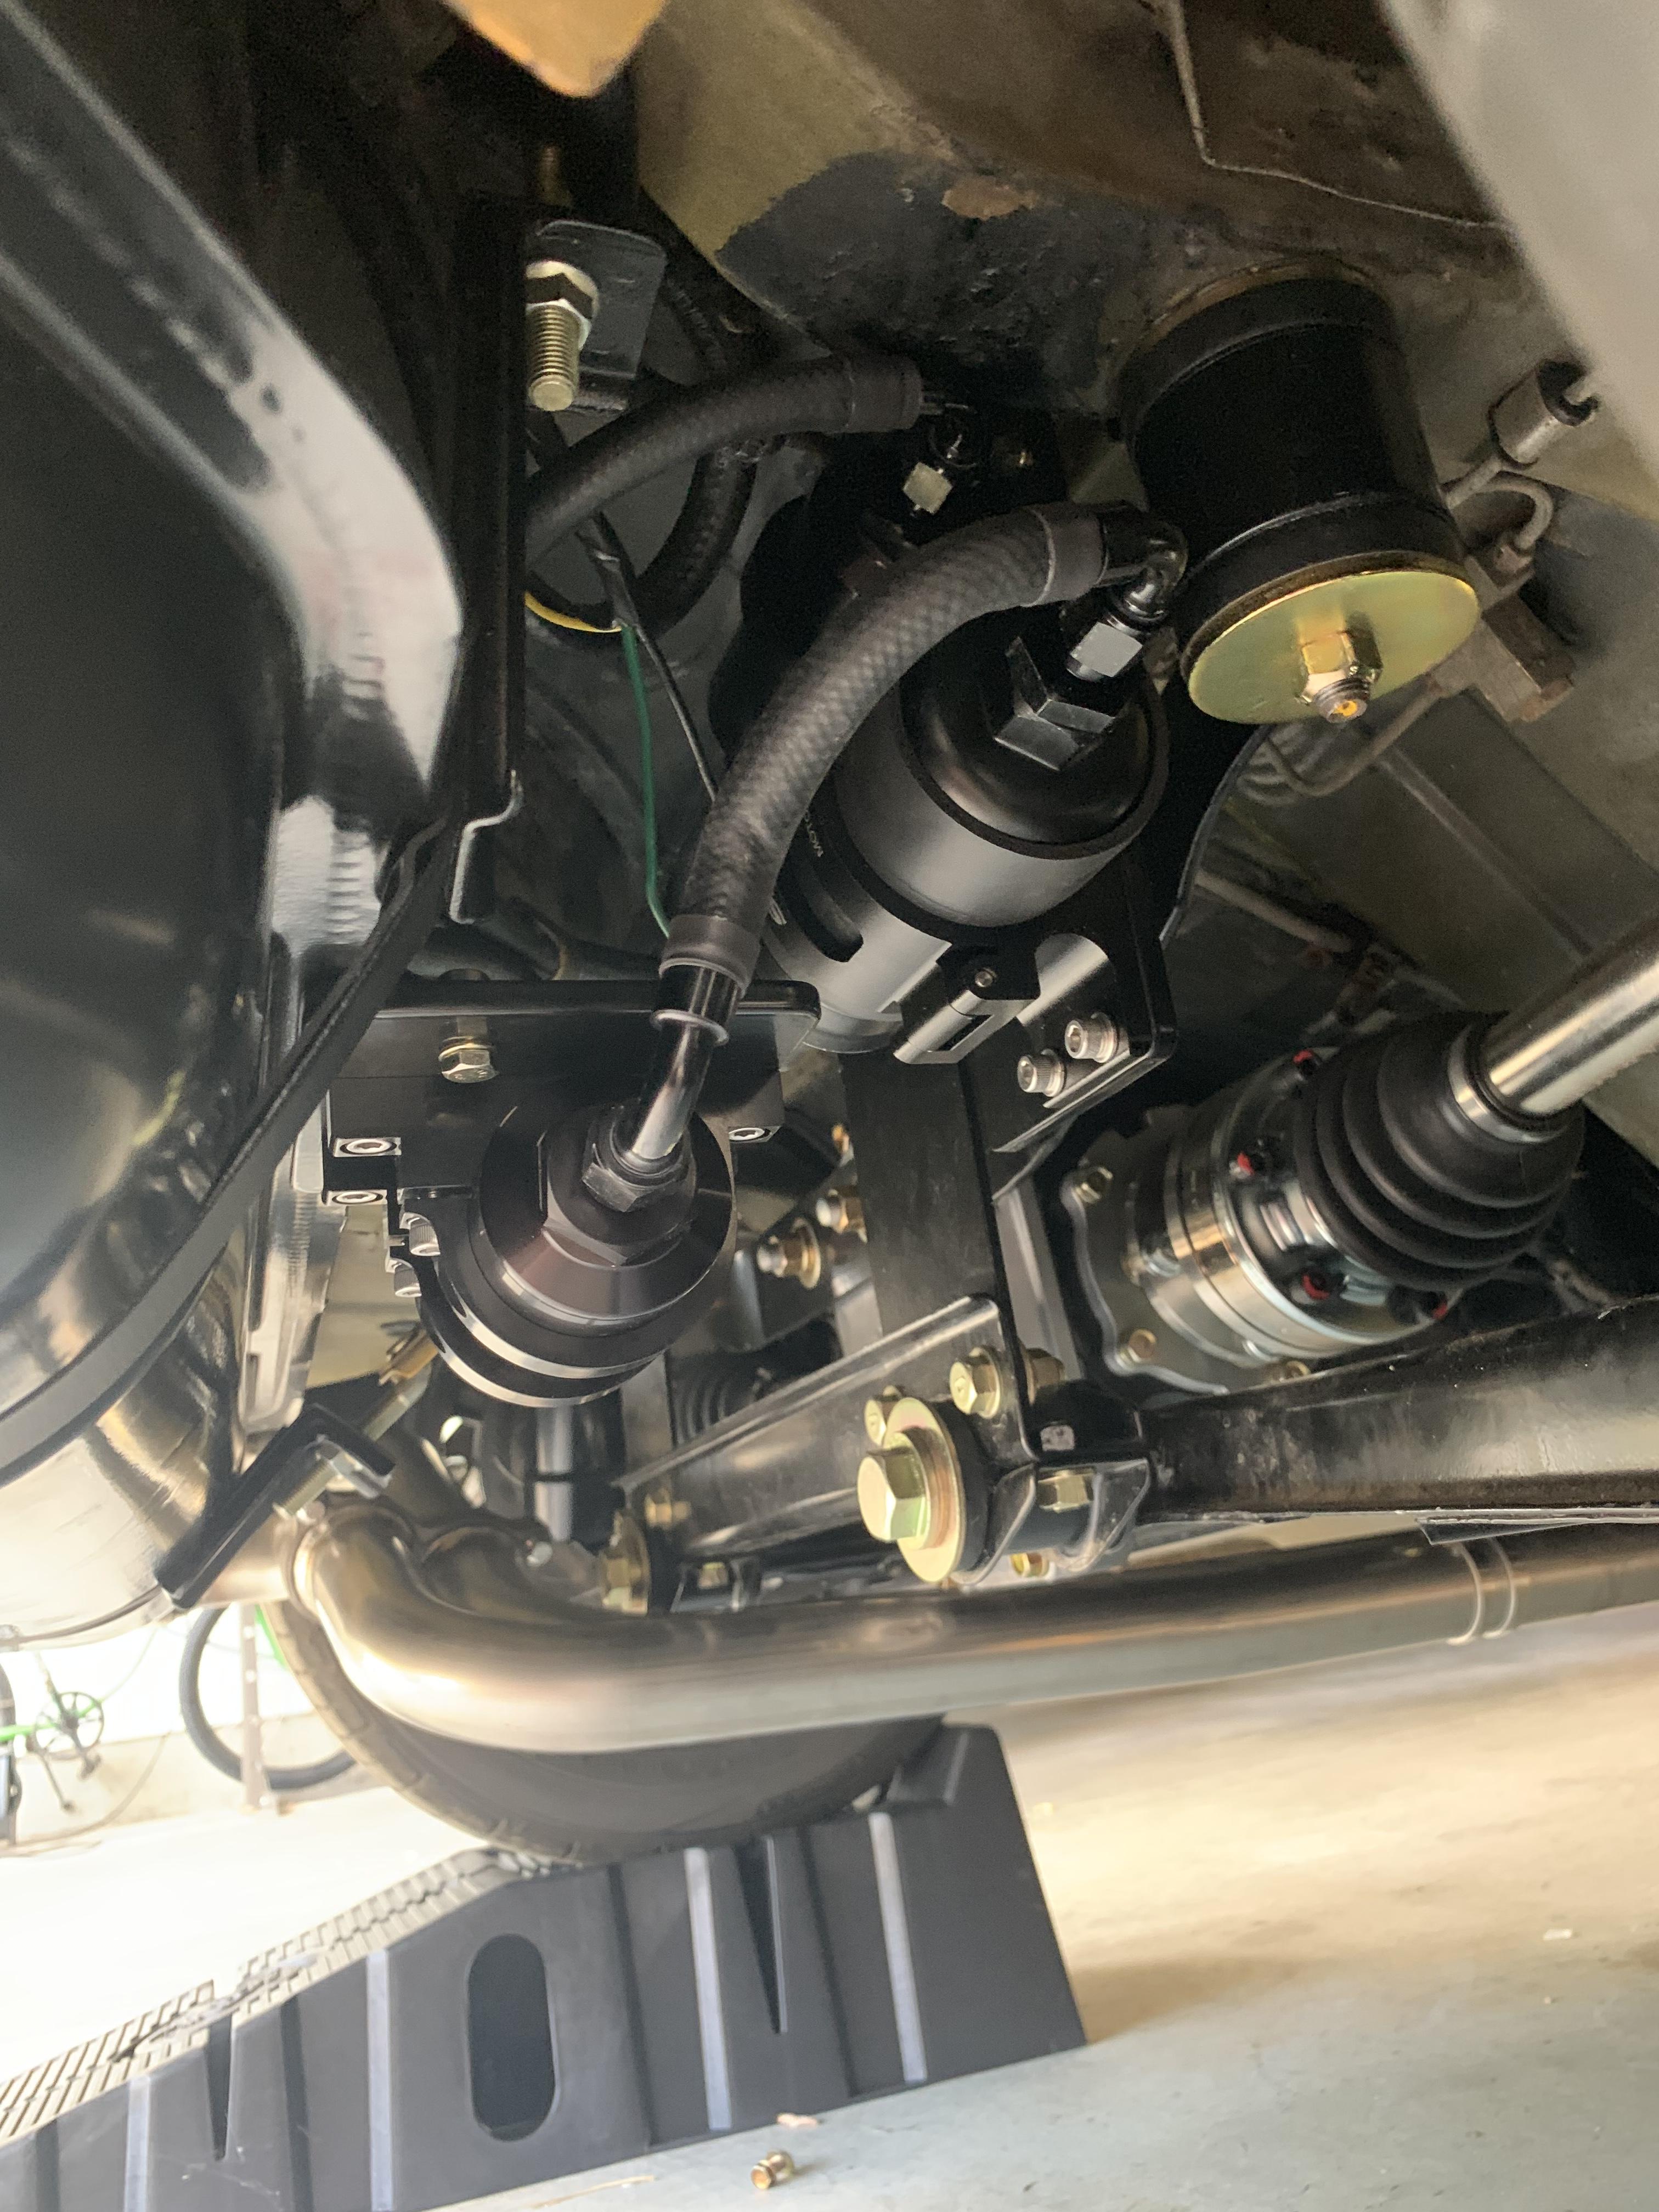
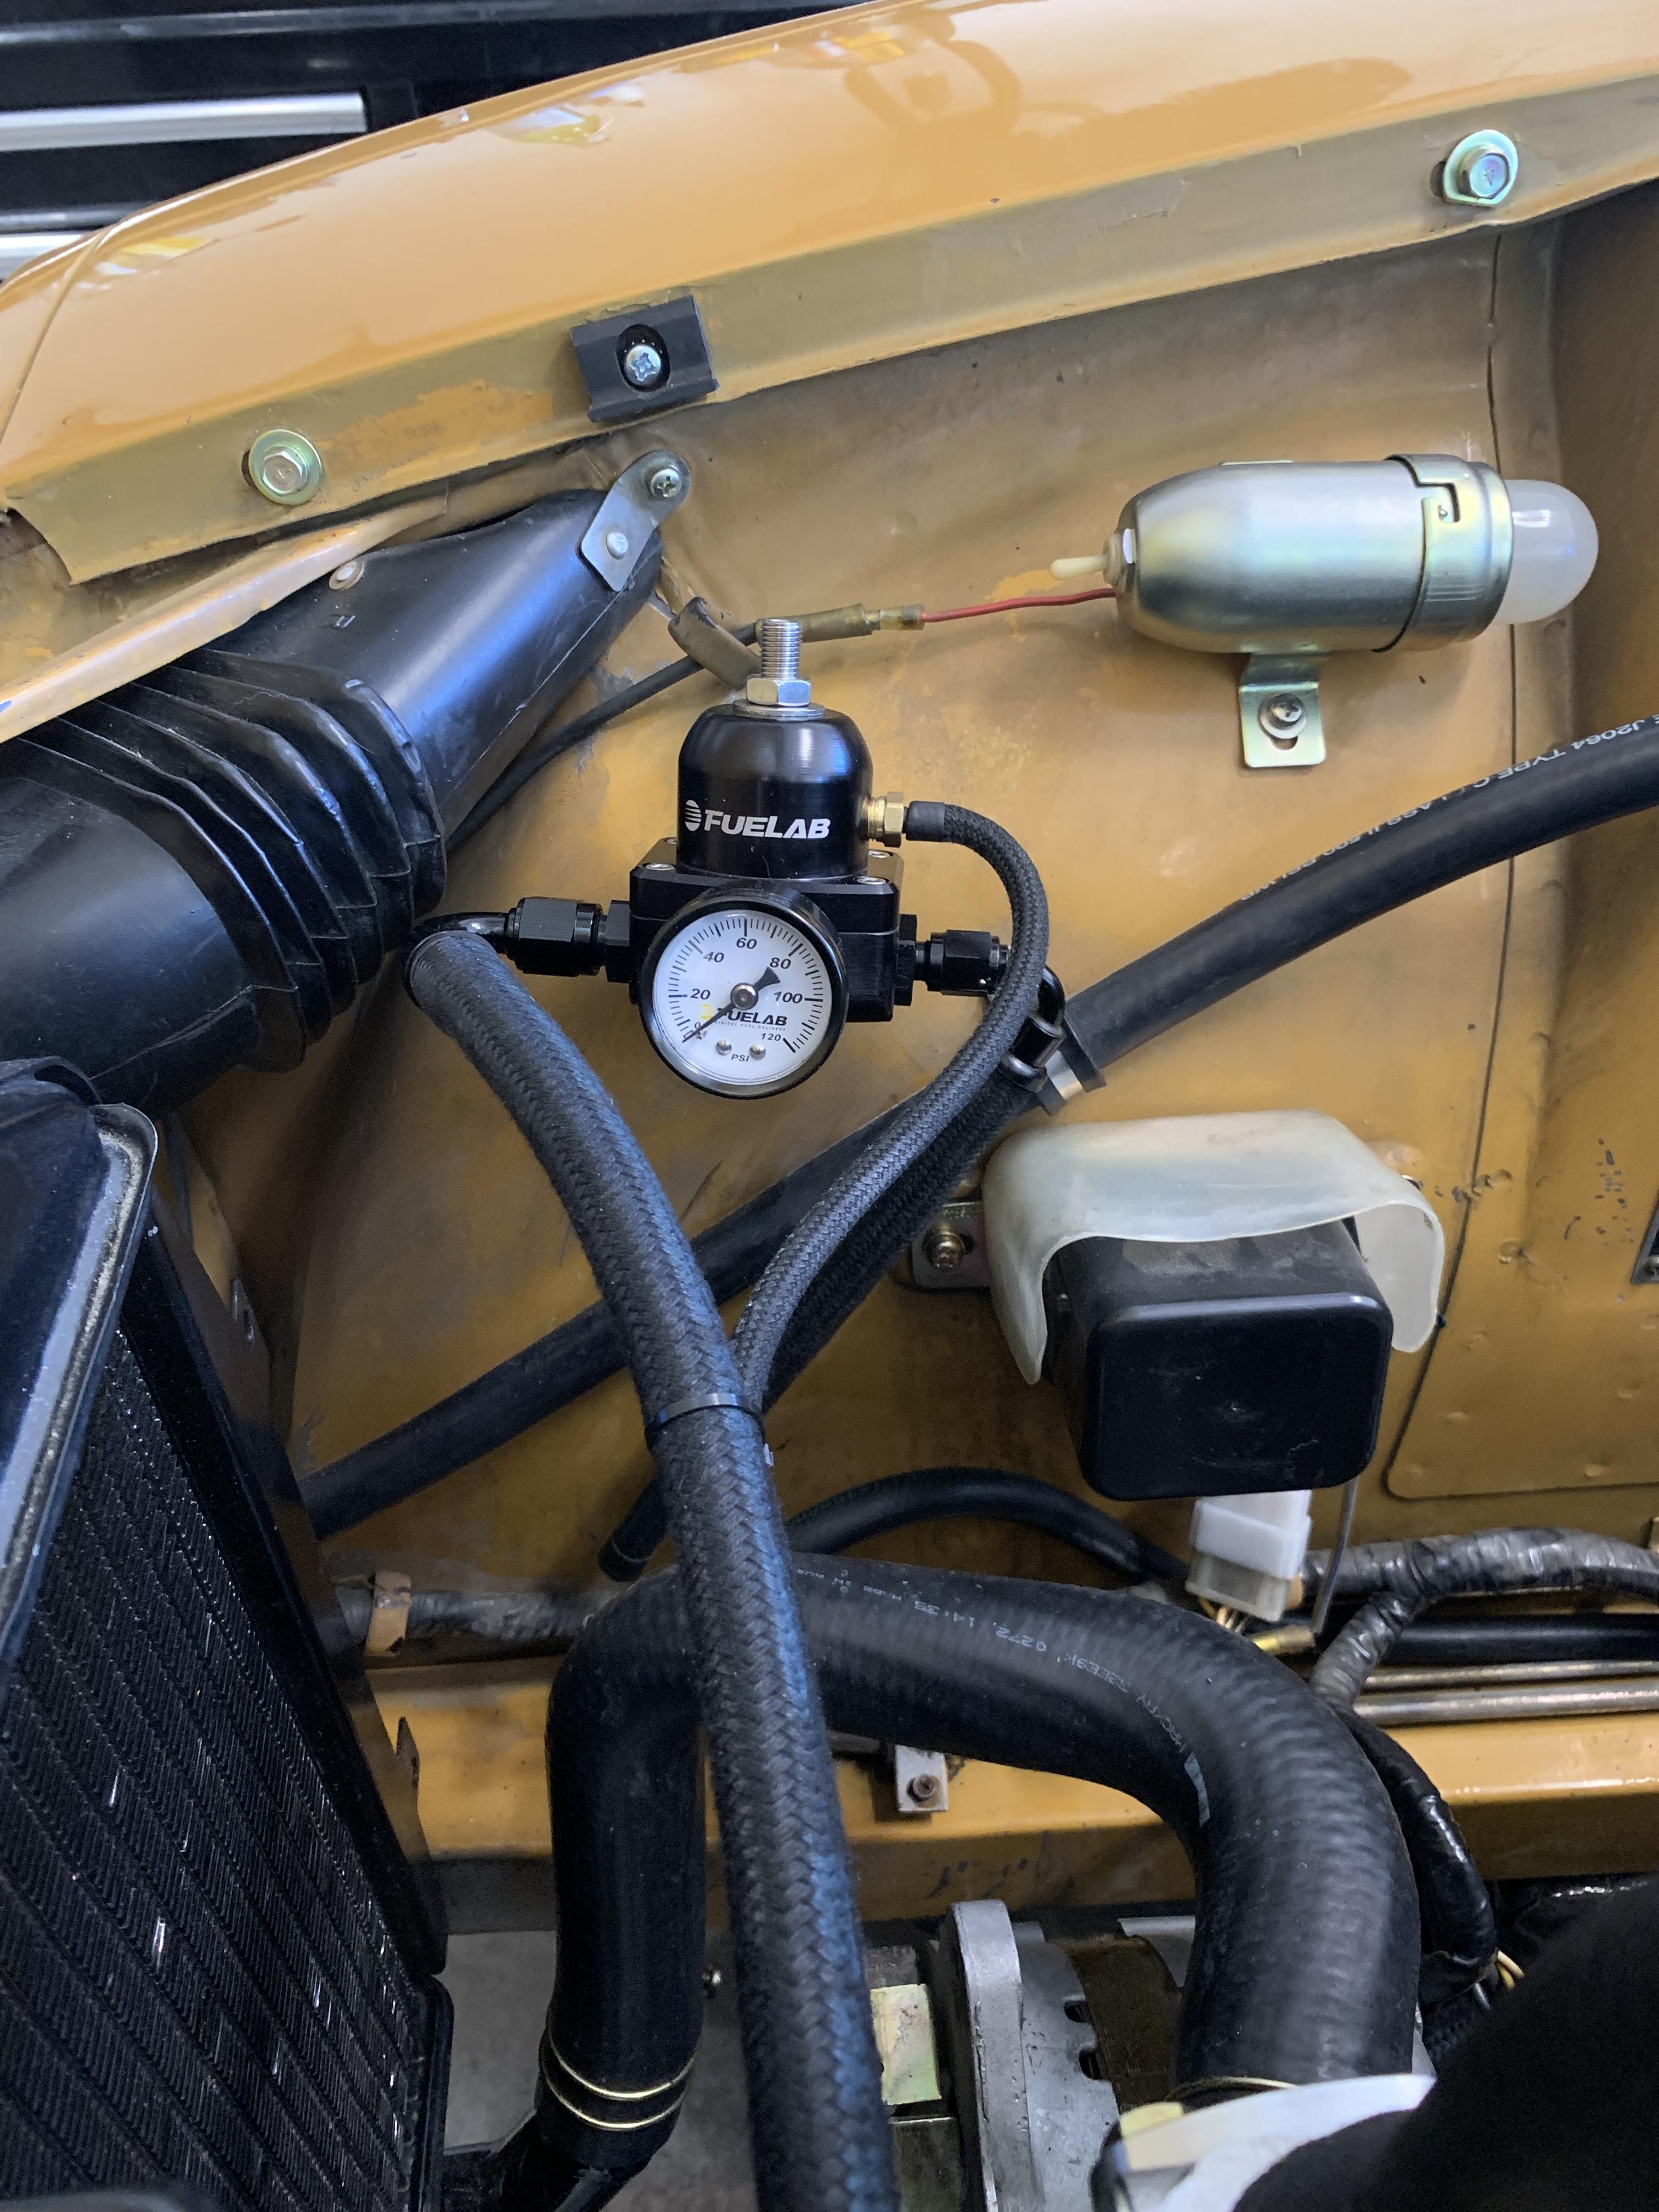
1 pointIt can be done by yourself but much easier with a second person, you do one side at a time, loosen all four bolts holding the hinge to the body, have someone push down on the closed hood in the front corner and tighten the three bolts that you can get to and get the fourth later, then the other side the same. Also, you need to remove the grill.1 point 1 pointEfi Fuel system is in and wired. Happy with how it turned out. ITB here i come. All pushlock. I might switch some of it out to 5/16 from -6 braided. The braided seems a little large and out of place.


 1 point
 Found it! http://www.tsimportedautomotive.com/gearreductionstarters.html1 point
 1 pointHave you tried to adjust it? I have found many hinges will do this. Even a good pair. Many times you can loosen the bolts slightly and push down on the hood, then retighten them1 point
1 pointInitial Tuning of Weber DCOE or other Side Draft Carbs What are the model and series numbers on each of the 3 carbs? e.g. 40DCOE151 Important: Make sure fuel level is same on all carbs. Ignore any web sites that say 25mm down from jet bridge as fuel will spill into carb throat. ~ 29mm down is where to aim according to many sources. Idle Balance: 1. Set all the idle enrichment screws to the same number of turns out. If you have 151's (made in Spain) then turn all the 6 idle enrichment screws all the way in then each turn out 1.75 turns (1-3/4). Also close the air bypass screws. If you have others (made in Italy) then turn all the 6 idle enrichment screws all the way in then turn out 0.75(3/4) turns 2. Warm up the car, disconnect the 3 push rods, and then adjust the idle air flow for each of the 3 carbs. measure the flow to all 6 carbs adjust the idle stop on each carb so that all 6 are equal in air flow. if the flow between two throats is different on the same carb AND you have 151's then us the air-bypass on the lower flowing throat to increase its air flow to match its partner. if the flow between two throats is different on the same carb AND you have non-151's then you may have a bent throttle shaft and drilling a small hole in the lower flowing throttle plate can bring back the balance. (Don't do this until you take carb apart and inspect for other possible problems like throttle plate wear, etc.) Off-Idle Balance: 1. Install throttle arms and make sure they do not push on carbs so as to increase idle rpm or air flow. These arms should have no influence at idle. You can do this by not tightening the three throttle arms at the main throttle linkage bar on the manifold until all push rods are attached to the carb lever arms. 2. Have a way to solidly turn and hold the linkage to off idle ~ 2000 rpm and measure air flow. 3. Note the carb flowing the least and use the turnbuckle adjuster on its push rod to extend the push rod so that the air flow increases. 4. Loosen all push rods at main throttle linkage bar and repeat #1 to #4 until the off-idle is as balanced as you can make it. The next tuning steps are to get jets and air correctors right. You need an a/f wideband O2 setup to do this precisely otherwise note engine note, plugs, and driving and adjust to taste. We can give suggestions for jetting if you share engine displacement and mods.1 point
Hi guys, My pal just got brand new triple webers going (74 260z) and we're having a tough time getting the first carb (one closest to the firewall) to sync with the other two. When we popped the vacuum gauge into the front of each carb, we originally had a reading of "5" for the front two and "7" for the one near the firewall. After turning the screw up on the other two to "7", the carb near the firewall started reading as "10" even though we didn't make any changes to it. Any idea what we're doing wrong here? -chase1 point
1 pointSo Grannyknot I should put “60% of the time I’m right every time”. Kind of like the cologne Sex Panther. Sent from my iPhone using Tapatalk1 point
1 pointHave you tried to adjust it? I have found many hinges will do this. Even a good pair. Many times you can loosen the bolts slightly and push down on the hood, then retighten them1 point
1 pointInitial Tuning of Weber DCOE or other Side Draft Carbs What are the model and series numbers on each of the 3 carbs? e.g. 40DCOE151 Important: Make sure fuel level is same on all carbs. Ignore any web sites that say 25mm down from jet bridge as fuel will spill into carb throat. ~ 29mm down is where to aim according to many sources. Idle Balance: 1. Set all the idle enrichment screws to the same number of turns out. If you have 151's (made in Spain) then turn all the 6 idle enrichment screws all the way in then each turn out 1.75 turns (1-3/4). Also close the air bypass screws. If you have others (made in Italy) then turn all the 6 idle enrichment screws all the way in then turn out 0.75(3/4) turns 2. Warm up the car, disconnect the 3 push rods, and then adjust the idle air flow for each of the 3 carbs. measure the flow to all 6 carbs adjust the idle stop on each carb so that all 6 are equal in air flow. if the flow between two throats is different on the same carb AND you have 151's then us the air-bypass on the lower flowing throat to increase its air flow to match its partner. if the flow between two throats is different on the same carb AND you have non-151's then you may have a bent throttle shaft and drilling a small hole in the lower flowing throttle plate can bring back the balance. (Don't do this until you take carb apart and inspect for other possible problems like throttle plate wear, etc.) Off-Idle Balance: 1. Install throttle arms and make sure they do not push on carbs so as to increase idle rpm or air flow. These arms should have no influence at idle. You can do this by not tightening the three throttle arms at the main throttle linkage bar on the manifold until all push rods are attached to the carb lever arms. 2. Have a way to solidly turn and hold the linkage to off idle ~ 2000 rpm and measure air flow. 3. Note the carb flowing the least and use the turnbuckle adjuster on its push rod to extend the push rod so that the air flow increases. 4. Loosen all push rods at main throttle linkage bar and repeat #1 to #4 until the off-idle is as balanced as you can make it. The next tuning steps are to get jets and air correctors right. You need an a/f wideband O2 setup to do this precisely otherwise note engine note, plugs, and driving and adjust to taste. We can give suggestions for jetting if you share engine displacement and mods.1 point
Hi guys, My pal just got brand new triple webers going (74 260z) and we're having a tough time getting the first carb (one closest to the firewall) to sync with the other two. When we popped the vacuum gauge into the front of each carb, we originally had a reading of "5" for the front two and "7" for the one near the firewall. After turning the screw up on the other two to "7", the carb near the firewall started reading as "10" even though we didn't make any changes to it. Any idea what we're doing wrong here? -chase1 point
1 pointSo Grannyknot I should put “60% of the time I’m right every time”. Kind of like the cologne Sex Panther. Sent from my iPhone using Tapatalk1 point 1 pointI like when I'm on holiday and say' "I'm from Holland" and I get a response, "Oh that's nice, is that near Amsterdam?"1 point
1 point
1 point
1 pointI like when I'm on holiday and say' "I'm from Holland" and I get a response, "Oh that's nice, is that near Amsterdam?"1 point
1 point
1 point 1 point
 1 pointEverybody knows Constantinople is the capitol of Europe. Sent from my Coolpad 3310A using Tapatalk1 point
 hs30h, of course you're right. The more Z cars I work on the more anomalies I see. Also, back in the dark ages cars just weren't manufactured like today. Were out of that decal and won't get anymore until tomorrow - keep the line moving!! If anyone would like to hear the back story of the outfit representing that 240 you'll have to ring me at my shop, 301 420 4200 M-F1 point
 Charles, Good to hear that someone else has used DB Electric and with positive results / reviews. They are only the distributor in this case but they appear to be a very solid company. Phil, Yes I think you can interchange a number of the individual parts. I was considering using the new motor, solenoid, gears, etc from the new one and the casing from the original Nissan one, but I haven't made that decision yet. Having said that I do think that swap would easily work. Mike.1 point
 1 pointI bought some thin offsets (~1/8" thick) for the fronts so I didn't have to flatten much the wheel bearing cap. It also allowed the rim to slide over the hub easier. Once I had the offsets centered properly, I used a small amount of plumber putty between the hub and offset to hold them in place for when I remove the wheels so as to not alter their position. These have been great for 10yrs now with no shimmy or vibration when driving at high speeds. Had front end alignment done and good to go! https://www.summitracing.com/search/brand/gorilla-automotive/product-line/gorilla-wheel-spacers/part-type/wheel-spacers?SortBy=Default&SortOrder=Ascending&N=thickness-in%3A0-125-in My 73 has 16x7 Konig Rewinds with 205/55/16's on the front and 215/55/16's on the rear (The rear tires are about 1/2" wider but give me an accurate speedo reading). Love the Konigs, they were much lighter than my cast iron rims that came with the car. Plus easy to clean.
.thumb.jpg.df17f97c5b4bbd903b8aad28951da1ff.jpg)
.thumb.jpg.a1d16d92b0ed63ac86773f5abab80c3b.jpg)
.thumb.jpg.1c73180c7934890b1b4e5c854253e800.jpg)
.thumb.jpg.de523b26a10a5553905a7ef38f76f953.jpg) 1 point
Balancing air flow and mechanical linkage in triple webers: The problem is usually the linkage. Balancing Idle 1.Warm Up and Idle 2. Disconnect the push rod links to each carb 3. Balance the airflow using the idle stop screws if one throat in a carb flows more than the other, and the carbs have the air bypass passages (such as DCOE 151 or 150), adjust the lower flowing throat's bypass to match the higher flowing throat. 4. Once all 6 are balanced, give each carb a push on the throttle and see if the flow returns to the same point. If not then the throttle valve return springs in the carb are most likely weak. 5. Repeat until all are the same. Balancing Off-Idle 1. Set all push rods are the exact same length. One way is to put the 3 rods on two parallel screw drivers, it should be obvious if the rod lengths are different. 2. Carefully re-install the 3 push rods but do not disturb the idle air flow. 3. Push and lock the throttle to 2000 - 3000 rpm then ensure the air flow is the same for all 6 throats. if not then re-adjust (lengthen) the lower flowing rod and repeat the above steps for Off-Idle1 point
1 point
Balancing air flow and mechanical linkage in triple webers: The problem is usually the linkage. Balancing Idle 1.Warm Up and Idle 2. Disconnect the push rod links to each carb 3. Balance the airflow using the idle stop screws if one throat in a carb flows more than the other, and the carbs have the air bypass passages (such as DCOE 151 or 150), adjust the lower flowing throat's bypass to match the higher flowing throat. 4. Once all 6 are balanced, give each carb a push on the throttle and see if the flow returns to the same point. If not then the throttle valve return springs in the carb are most likely weak. 5. Repeat until all are the same. Balancing Off-Idle 1. Set all push rods are the exact same length. One way is to put the 3 rods on two parallel screw drivers, it should be obvious if the rod lengths are different. 2. Carefully re-install the 3 push rods but do not disturb the idle air flow. 3. Push and lock the throttle to 2000 - 3000 rpm then ensure the air flow is the same for all 6 throats. if not then re-adjust (lengthen) the lower flowing rod and repeat the above steps for Off-Idle1 point


.jpg.7a4c25b9f4e9aa21291cad539152764a.jpg)
.jpg.b575a1c289a26fe71e5d62a400461423.jpg)
.jpg.472cab179f342b4593ad99bf9626cafd.jpg)
.jpg.4c6daca007092af8723f408c493f6f4b.jpg)
Important Information
By using this site, you agree to our Privacy Policy and Guidelines. We have placed cookies on your device to help make this website better. You can adjust your cookie settings, otherwise we'll assume you're okay to continue.