Leaderboard
-


jayhawk
Free Member3Points168Posts -

conedodger
Free Member3Points11,316Posts -


Dave WM
Free Member2Points3,591Posts -


240260280
Free Member2Points4,441Posts
Popular Content
Showing content with the highest reputation on 10/15/2019 in all areas
-
3 pointsZup, we (Motorman7 with my '73) also got dinged a point for the bead blasted valve cover. However, in looking at your judging sheets, my calculator says you achieved 290 points, which is the level ("290 or above") for the Gold Medallion status. From the current ZCCA Judging Manual " All vehicles scoring a total overall score of two hundred and ninety (290) points or above in their respective class (except Daily Driver) are eligible to receive the Gold Medallion or Gold Cup achievement award of excellence for their efforts." I know they did not announce that for you at ZCON, but have you received that since? I hope so, you deserve it!3 points
-
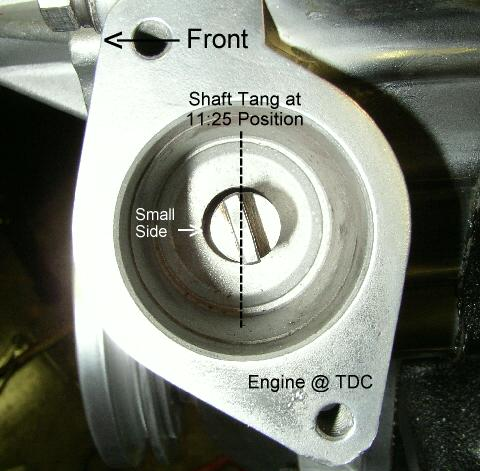
2 pointsPlease post a photo of the tang under the distributor. It should look like this when the crank is at TDC: 11:27 is more accurate ?
 2 points
 -
2 pointsall back together. I made a seal installing driver out of some 1" oak and a 3.25" hold saw, worked great. If you look at the pics of the main seal you can see it not seated perfectly flush on the very bottom. I used a piece of scrap wood and just tapped around the perimeter, this time I wanted it to be more precise and it is. On the front cover, I think used the rebuild kit supplied gasket originally when I did the rebuild. I looked at the Nissan gasket and it looks more engineered. there is a raised ridge all around the sealing surface that looks like it would add to sealing. After seeing it I wanted to undo my home made gasket I used last nite on the spare trans (that I put in) but I realized that the Permatex anaerobic gasket sealer is for real, the front cover is not coming off without a fight, so I decided to just leave it be. I think it would take some heat from a heat gun on the front cover to get it loose. So I will hang on to the Nissan gasket, maybe use on the leaky rebuilt trans (the one I pulled out that was clearly leaking from the aftermarket gasket). I took the spare trans around the block, everything seemed fine, so a will have to take it out on a freeway shakedown. Hope this ends the leaks. I feel the Nissan rear main went in well so fingers crossed on that one. The spare trans will just have to wait and see if the homemade gasket with the good sealer will work out. I am getting pretty good at getting the z up on the jack stands, the 12t or overkill but I like the "wide stance" that they have. I just have to take the car down in stages, drop the front to the jacks at the lowest stage (from about 6" lift from the top of the jackstand at the highest, about 30" clear space under the car), then I can take the back all the way down off the jacks but leaving the diff hyd jack in place holding up the rear about 4" but with wheel touching, then I pull front jack stands out completely and lower the crossmember jack all the way, then back to the rear, let the rear down completely.2 points
-
 1 point
 -
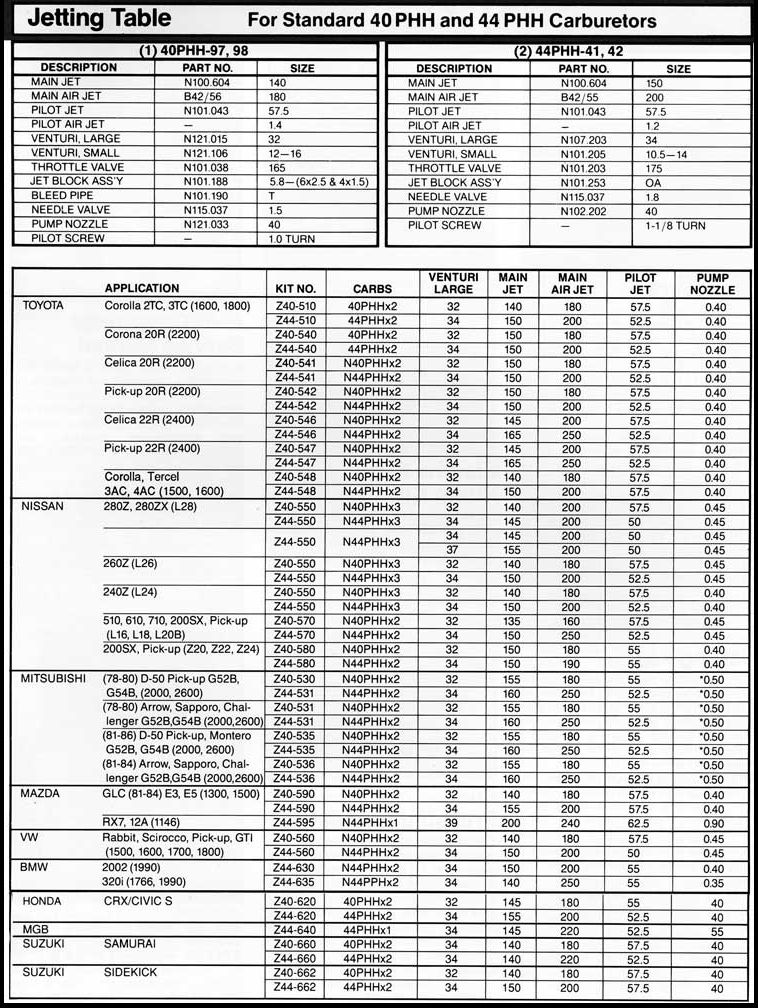
 1 pointI did find this website with more information about recommended jetting. It does have recommendations for 240z-280zx. https://www.upgrademotoring.com/performance/mikuni/mikuni_jettingparts.htm
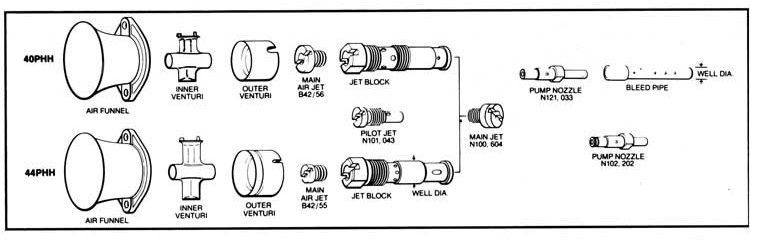
 1 point
 -
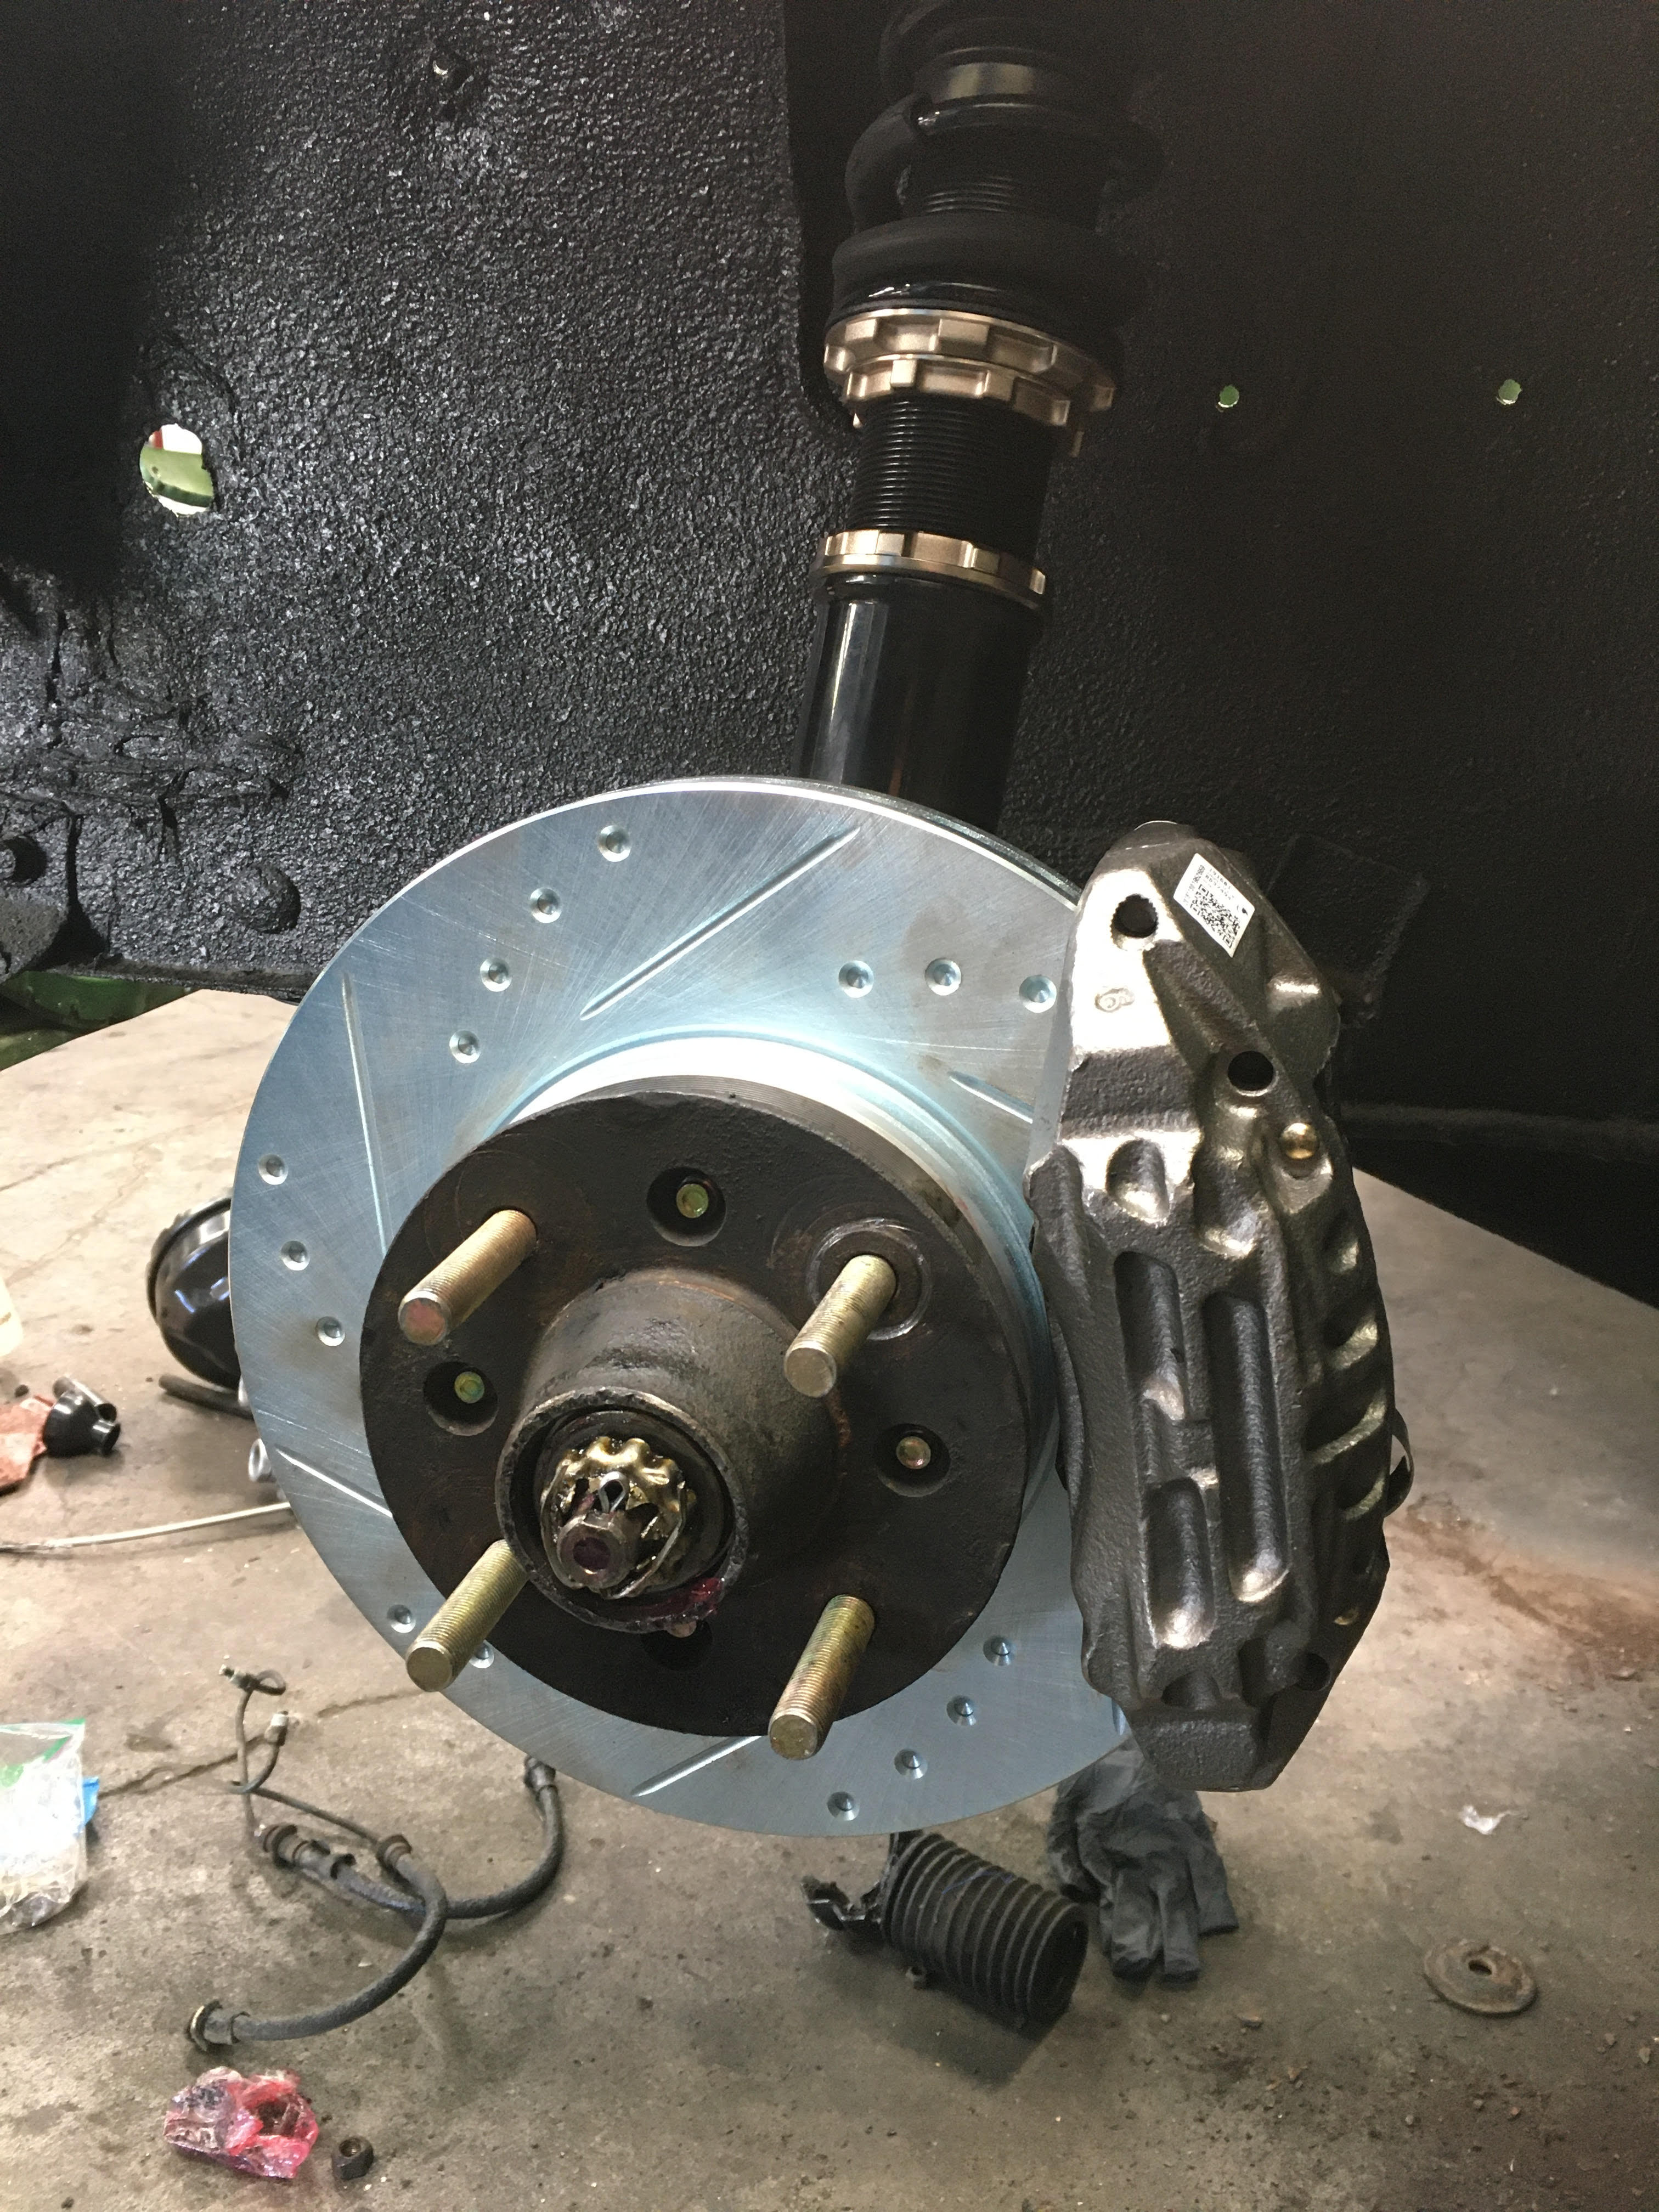
 Yeah, amazingly effective, I could see the grease pushing through the bearings on the inner side, even after i'd loaded the bearings.1 point
 -
 An old cool trick is to slit the hose and hold the hose/barb in boiling water for two minutes. The rubber will swell and pull away from the barb. Just did it on my 78 with factory hoses.1 point
 -
 1 pointBasically I'm doing what I should have done during my first restoration back in the 80's. I recently cleaned off most of the old undercoating and discovered more chassis rust than I expected to see, probably will replace the front frame rail on the left side and replace the let side floor plus other rust repair as required. Before I bought the car in 1978 it had a cheap paint and bondo over rust paint job. As it has had two re-paints I will go to bare metal and then go back to original color, it is currently Ontario Orange Metallic, a '71 Corvette color. This will be a glass out, drivetrain out complete job. I will get into more detail soon as well as describe in more detail what was done during the first resto.1 point
 -
 It screws into the side of the transmission should have two wires coming off it Sent from my iPhone using Tapatalk1 point
 -
 This comes up often enough that it should be posted as a tech article. This is taken from a different posting where Heater Control Panel Illumination was the topic. In case that is what you were looking for: (Original Thread: http://www.classiczcars.com/forums/showthread.php?p=141090#post141090) The Clock not working in the Z's is such an endemic characteristic that it almost seems a basic requirement of the car. If your clock works....it's not a Z. Fortunately, with a little careful effort it can be avoided. Here's how: ......snipped from original thread.... As far as your clock, you can fix it, and if you're careful it will last a long while. I fixed a pair of these a couple of years ago and they're still working great. I even went the extra step to calibrate it and now it only gains 1-2 minutes a day. Not a chronometer but definitely much better than not working. Open the clock housing by removing the two screws holding the face bezel in place. Next gently lift off the clock hands, and carefully remove the face. Below it you should find a black washer and a spring tripod washer. Make sure you don't lose these. Once these are off you can address the main problem with the clock. Added on edit: The sequence of these parts from outside in: Bezel, Minute Hand, Hour Hand, Clock Face, Black Washer, Tripod Washer.) From the back of the case, ( * see add )remove the 3 nuts that hold the clock mechanism inside the case. Once this is done, carefully force the wire and the rubber boot that powers it, INTO the case, and then do the same thing for the connector. If your connector boot (not the one at the case, but the one where the clock connects to the harness) is pliable enough, gently straighten it out and fold in the heat crimped plastic wings so that it will fit through the hole in the case. Added on edit: The bracket that holds the clock to the dash and fits the outside of the case needs to be removed first. There is also a "newer" clock version where the 3 nuts holding the clock mechanism aren't on the back of the case and the bracket that attaches to the case and dash doesn't have the extended "handle". Be careful opening these as EVERYTHING inside pops out the minute you remove the bezel. At this point you should be able to remove the clock mechanism from the metal case. Take a minute to clean out any dust or gunk inside the case, and if you want it to be brighter when illuminated, paint the inside with a WHITE paint, the green lens on the bulb housing will still illuminate the inside as green, but it will be MUCH brighter when you have the lights on. Be careful not to smear the bulb housing. Set this aside to dry. Now, looking at the clock mechanism. You'll note a little motor on the back side of the mechanism. ( * see add ) Get a bottle of sewing machine oil and a long enough needle and apply a small drop (by small, I mean minuscule) to the motor housing and the associated pivot points. You can power it up right away, although personally I let this soak for a bit. Usually the length of time to let the paint dry in the case is sufficient, or overnight. Added on edit: The newer clocks mentioned before have the motor OPEN and with the shaft of the motor being the PENDULUM of the clock. The earlier clocks had a standard clock pendulum but used the motor to WIND the clock spring. The oiling procedures for both are nominally the same. Next, to ensure that it's working, you can either re-assemble and plug in, or you can provide power to the clock via a 12v power supply. It doesn't require a large current as the motor just winds the spring enough to keep the clock going. If everything is working correctly, you should hear and see the motor wind and you'll notice the pendulum gear begin to oscillate back and forth. I then re-assemble the clock and to ensure it doesn't conk out, I leave it plugged into the power supply for a while. If you want at this point you could calibrate the clock, except for one thing. Most power supplies supply 12.0v DC, while in the car you will be working with 12.8v to 13.5v depending on the condition of your battery and connections. To get it "perfect" you would need to match the voltage in your car. This takes a l o n g time, so leaving it in the car would be a problem, unless you don't mind having it dangling off on the side for days-weeks. So, if you don't mind it running a bit fast (as mine does), just hook it up to your power supply continuously for a few days. The procedure is simple. Once the clock is functioning properly, set the time to match a KNOWN good clock. Whether it's your wrist watch, a house clock, digital or analog it doesn't matter. You're just going to be using it to compare what the car clock is doing in relation to that one. After 24 hours or thereabouts as it doesn't matter whether you check every 2 hours or 200 hours, compare the time on both pieces. If the car clock shows 12:30 and your reference is 12:00, the car clock is fast, the opposite would be a slow mechanism. On the back of the clock housing, you'll notice a hole, usually with a milky white plug inserted into it, with markings around it ( + | | | - ). Added on edit: The newer clock has ( S <----> F ) with the arrow ABOVE the hole while some older models had ( F <----> S ) with the arrow BELOW the hole. The directions are the same, but it's easy to think they're reversed. Remove the plug, and inserting a small straight screwdriver into this hole, you'll find a screw in there. Give it a gentle twist in the direction you need to adjust the clock. If fast, tweak the screw by a DEGREE or two (360° in a complete revolution) in the - direction. If slow, in the +. Be careful not to over-adjust, a small adjustment of a degree can be as much / little as 10 minutes per 12 hours or less, so by doing small adjustments you won't swing erratically all over the place. Reset the car clock to coincide with the reference clock. Recheck the two clocks again in another day or so, and repeat the adjustment until they coincide with each other, or you are satisfied with the amount of disparity. Hope this helps. Enrique This post has been promoted to an article1 point