Leaderboard


Popular Content
Showing content with the highest reputation on 10/17/2019 in all areas
-
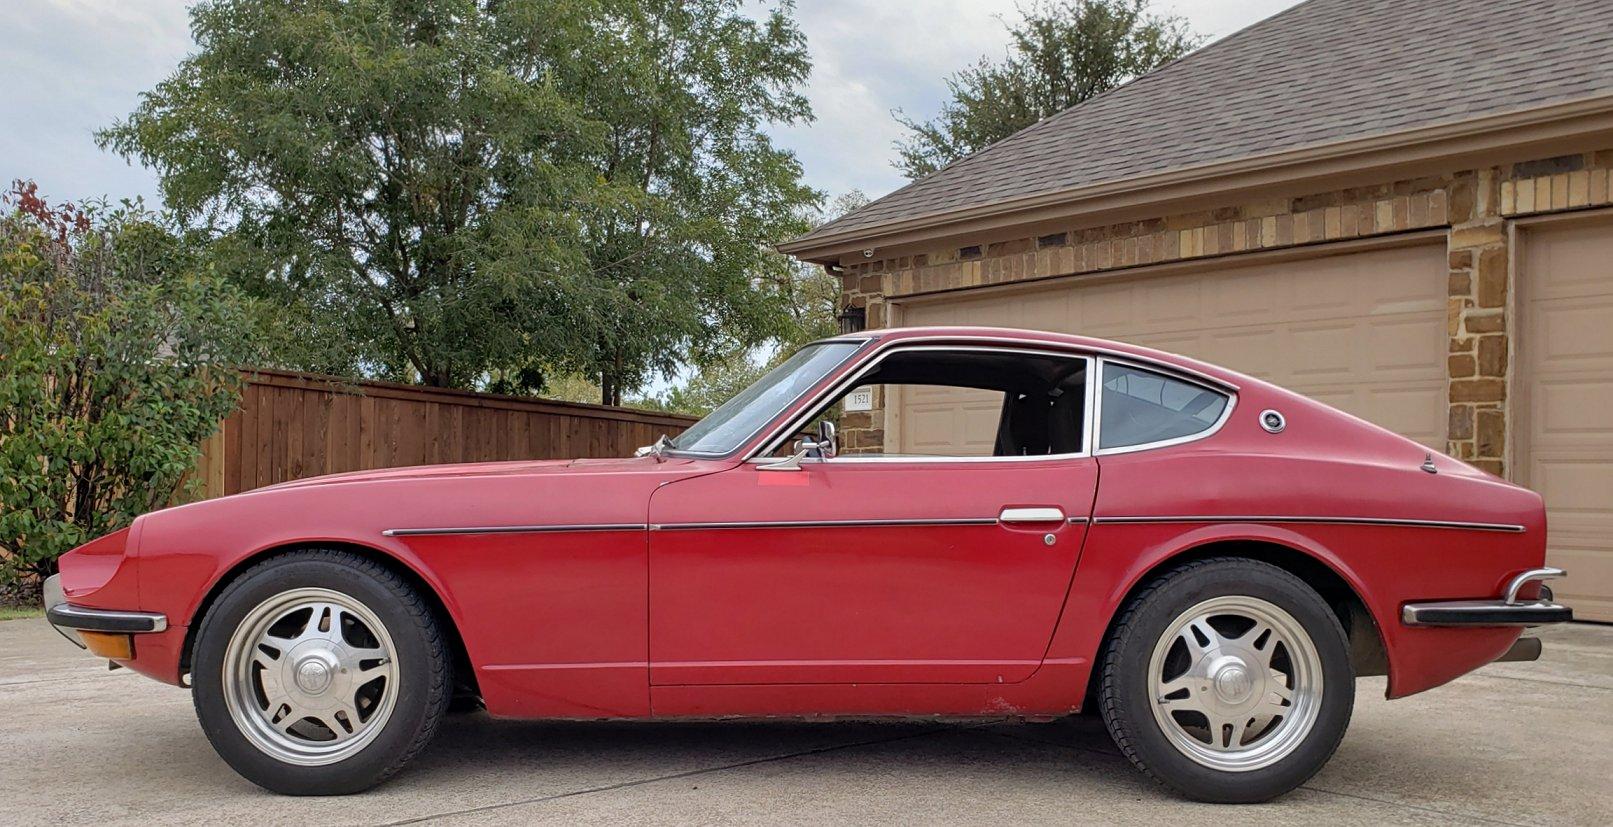
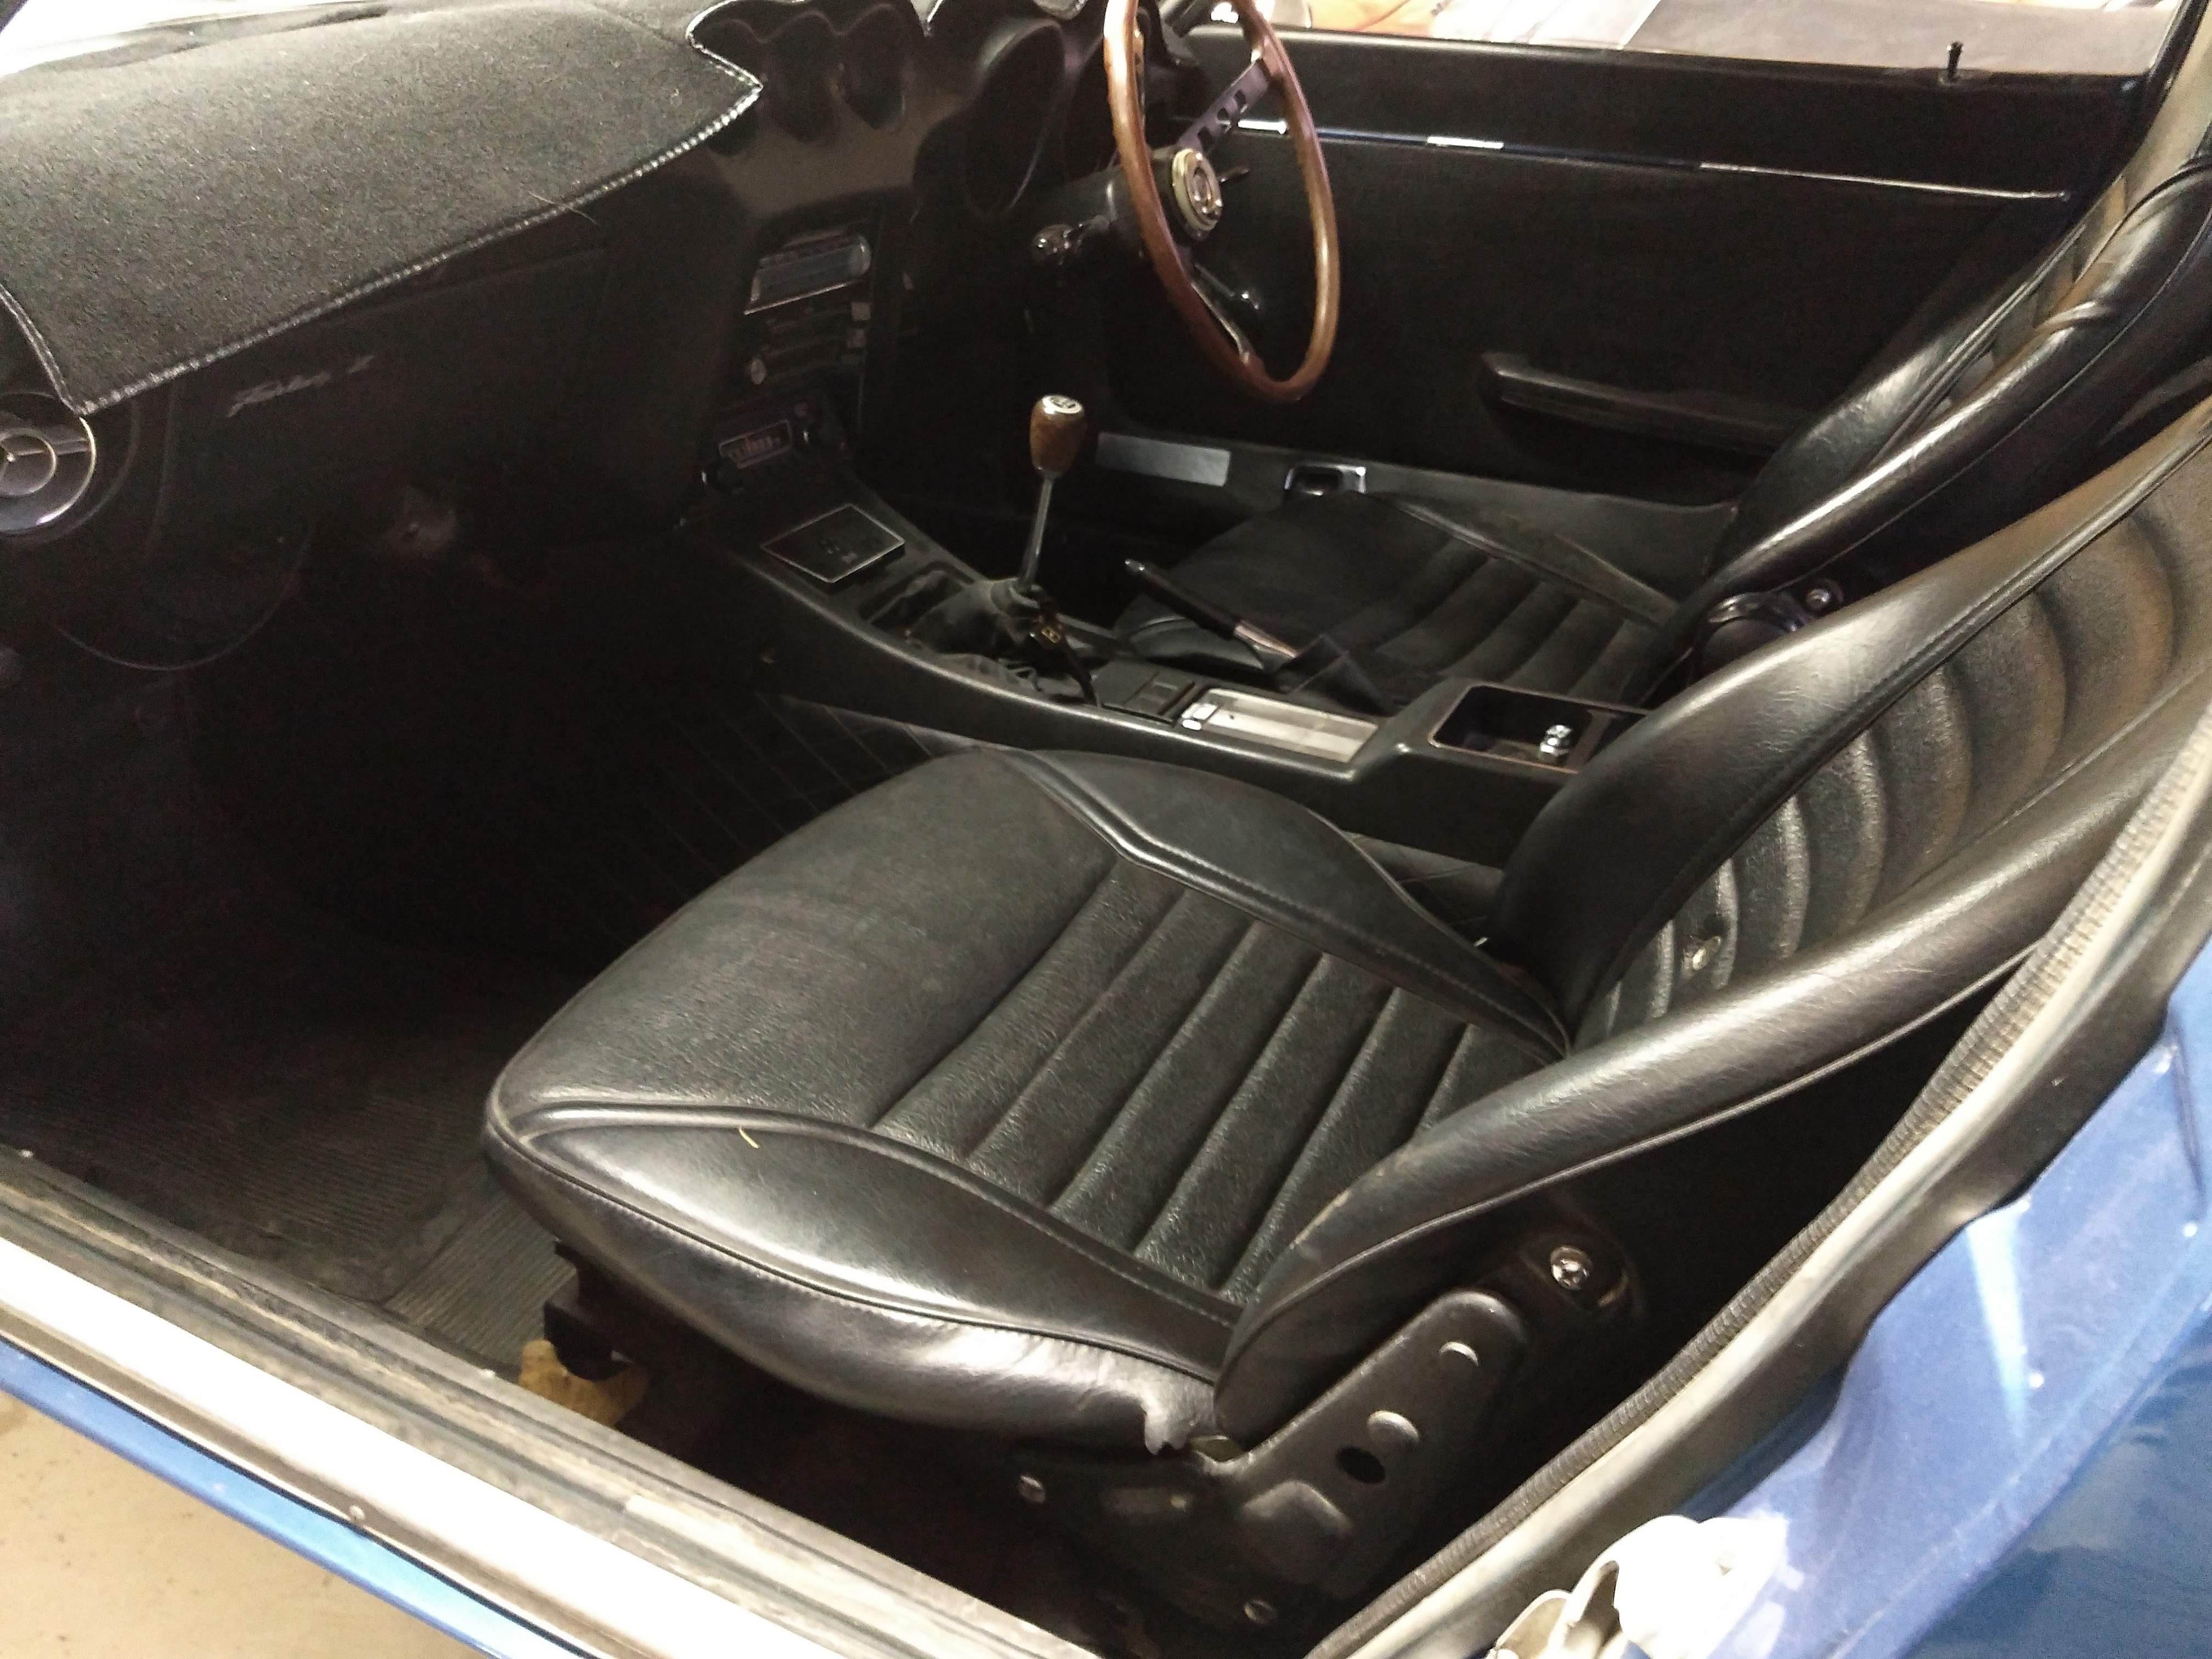
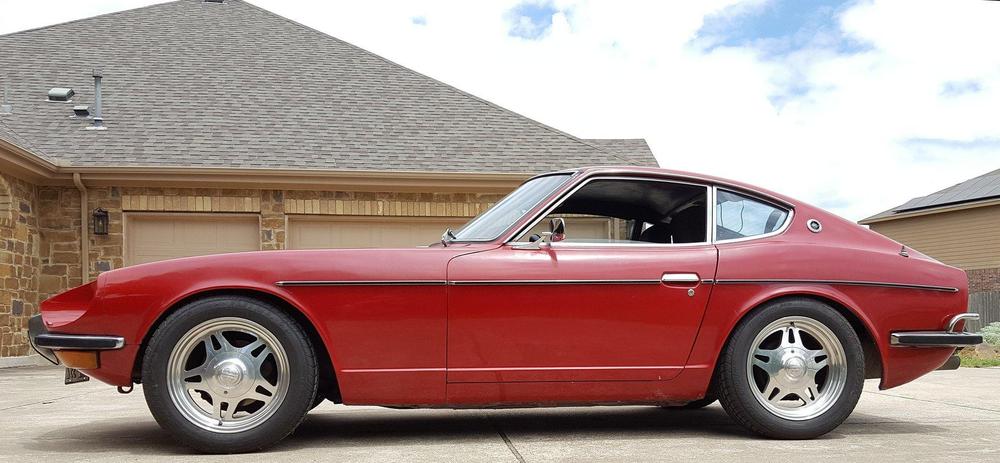
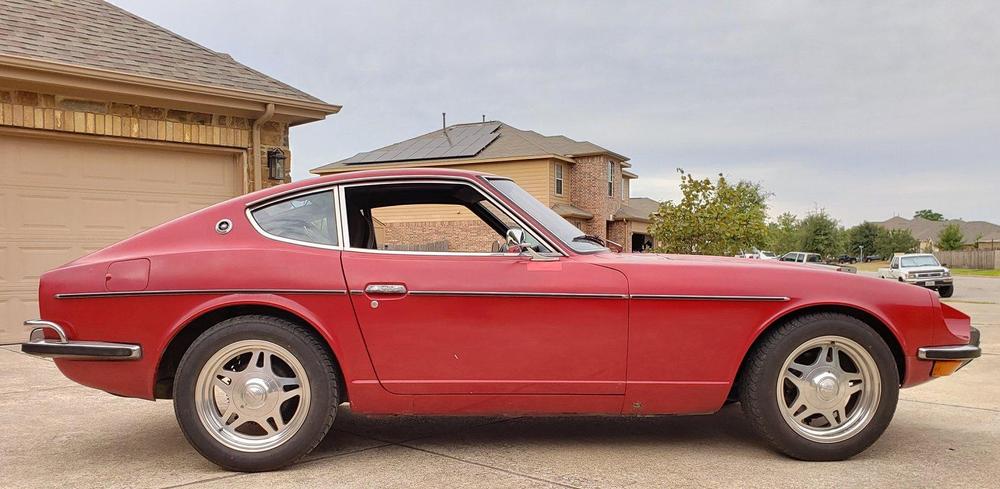
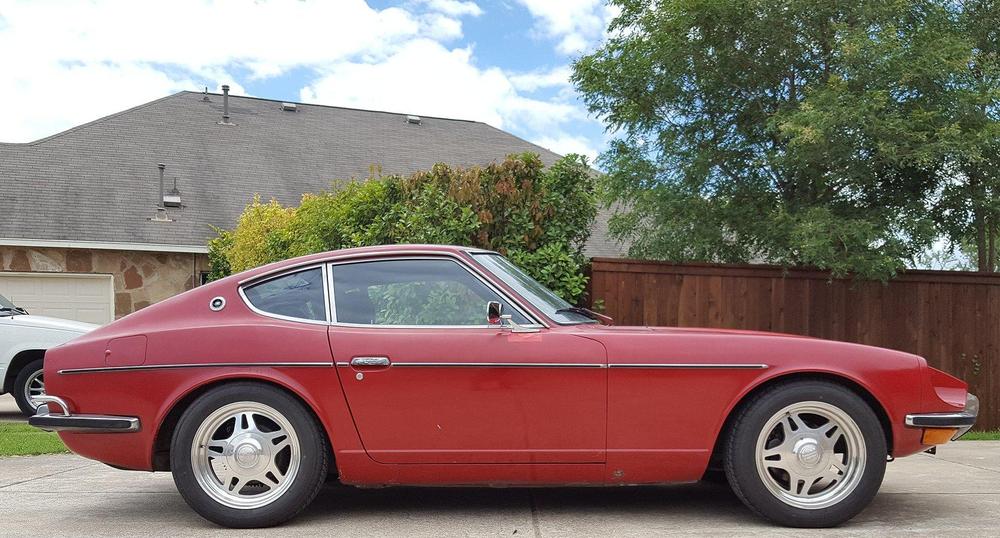
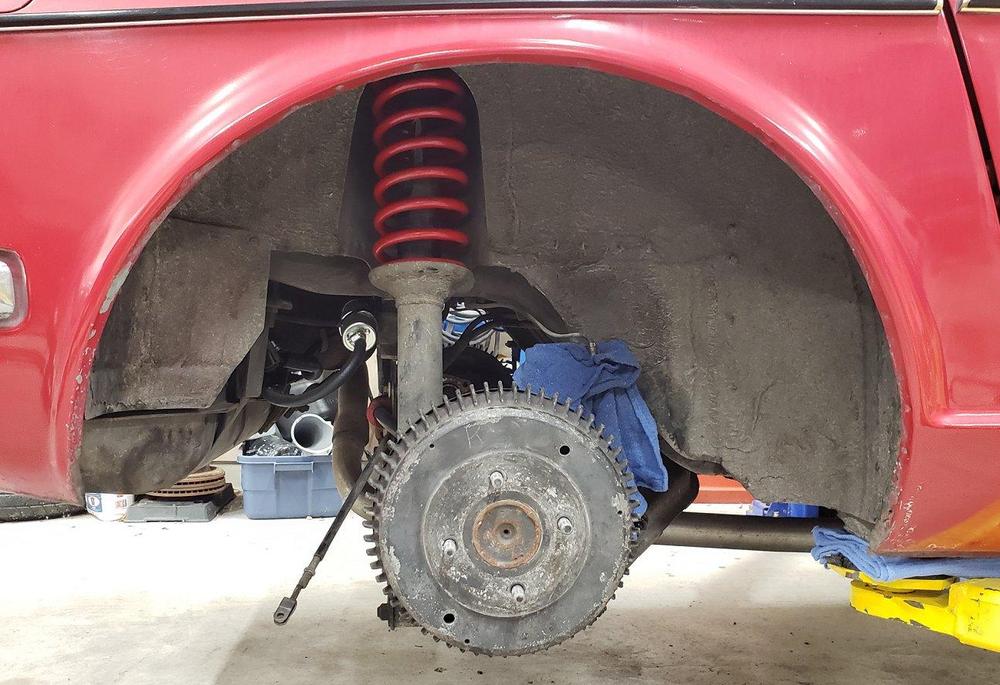
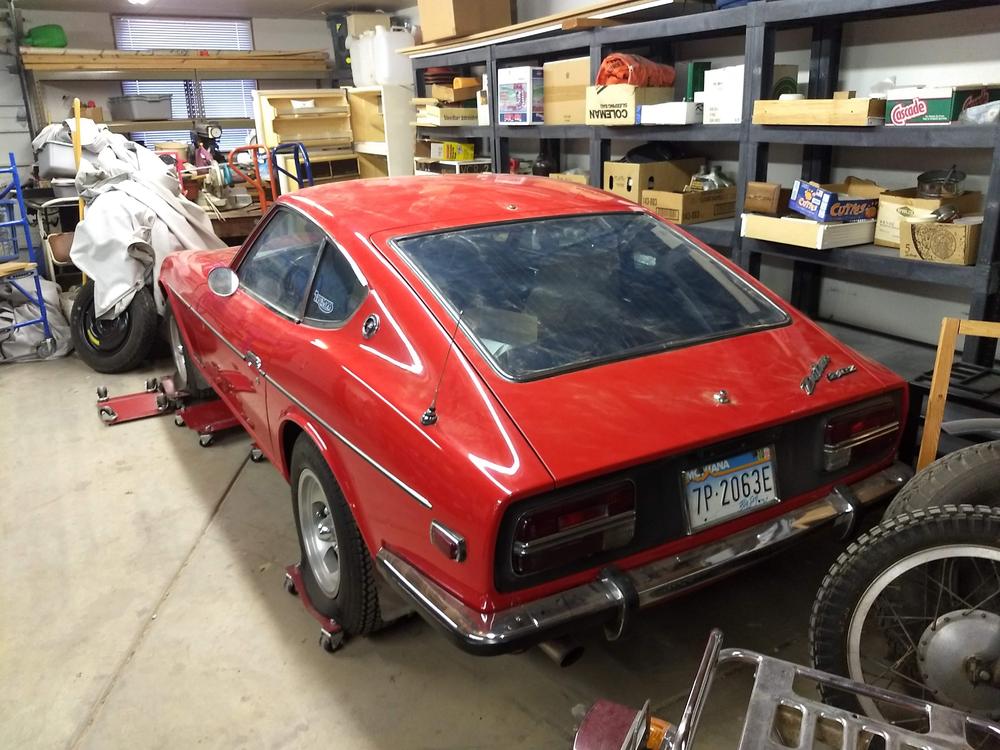
 I took the Z for a test drive and I am really happy with the results. The car still handles well but now it actually has rear suspension travel so it rides nicer but is still on the firm side. Visually, I think it looks 100x better. The sunken rear suspension just let the car down and now it looks like the wheels fit the car and have some room to breathe. Below are some before and after pictures. What do you guys think?
 3 points
 -
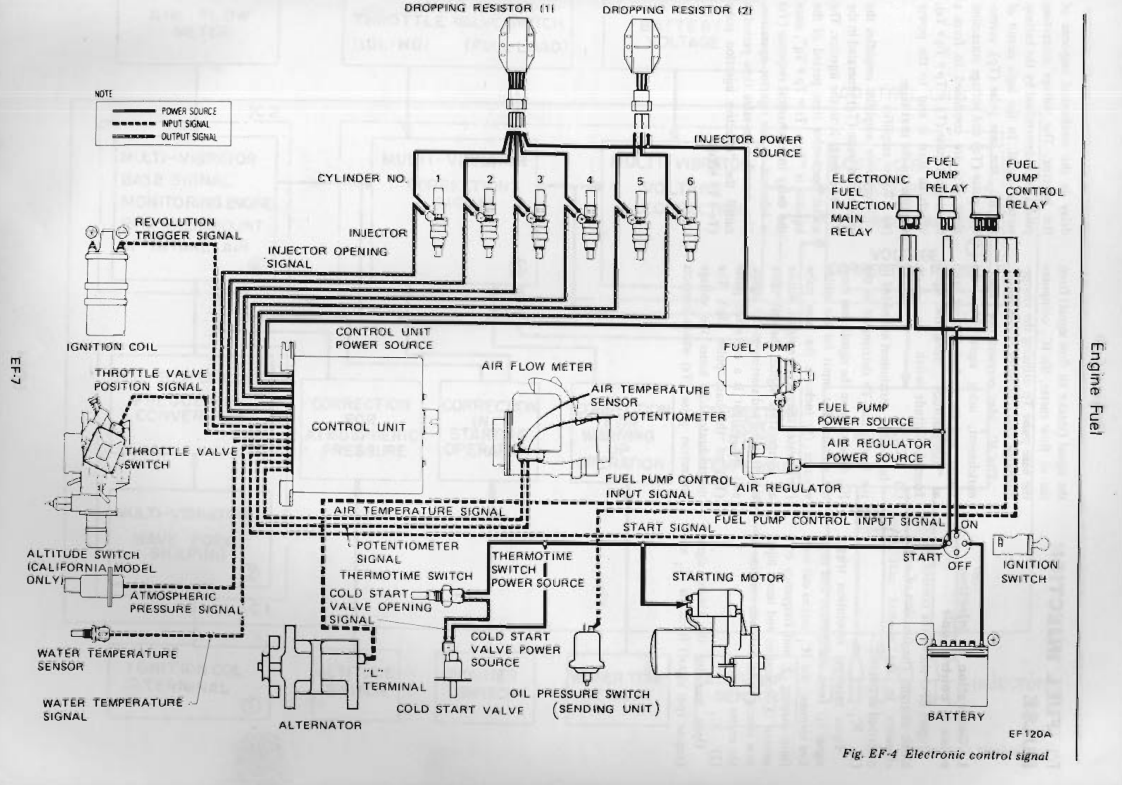
 The ECU has nothing to do with the CSV. The CSV system is its own little separate control system, with power supplied to it and controlled via the thermotime switch. No ECU involvement, no coolant temperature sensor involvement. There is a "signal" that supposedly goes to the ECU, in the diagram, but many of us have realized that the ECU's don't have a wire to that pin. It seems to be a diagram mistake that Nissan never fixed. The thermotime switch is a thermally actuated relay that grounds through the switch body. Check the ground circuit. The wiring diagram can be confusing if you don't know that. There is power through a heater wire around a bimetallic strip, that opens and closes the relay contact points, and also power to the CSV injector. It's pretty ingenious but still looks crude. I removed my CSV and had delayed starting when it got colder or the car sat for a while. So I changed my starting procedure to giving the engine a good 5 or 6 revolutions on a first crank then letting it sit for about 20-30 seconds so the gasoline from the injectors could vaporize. Then it typically would start normally. You might try that as a test for or as a way to get by without starting fluid.
 2 points
 -

-
 2 pointsPlease refer to my response from when you asked the same question a few weeks ago. Deja Vu all over, again. Dennis2 points
 -
 2 points
 -
 2 pointsA little more time in the shop tonight. Finished the hood primer and half of the hatch! One fender and the outer side of the hatch left!2 points
 -
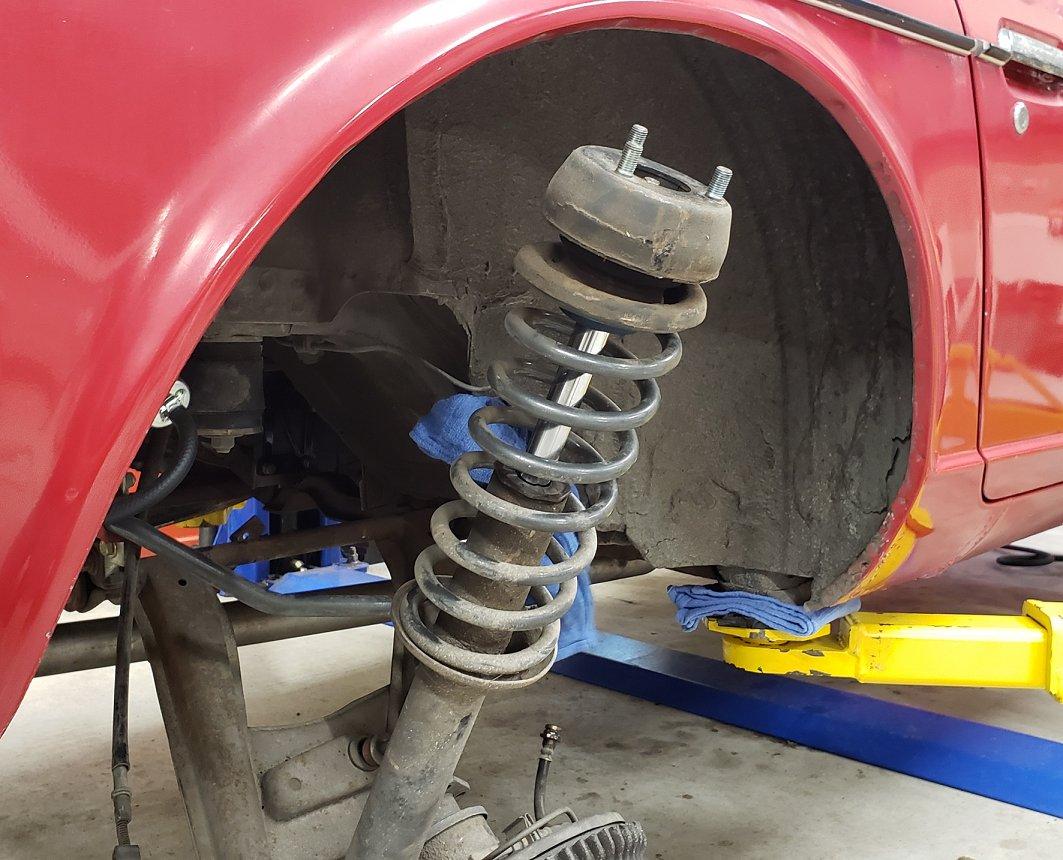
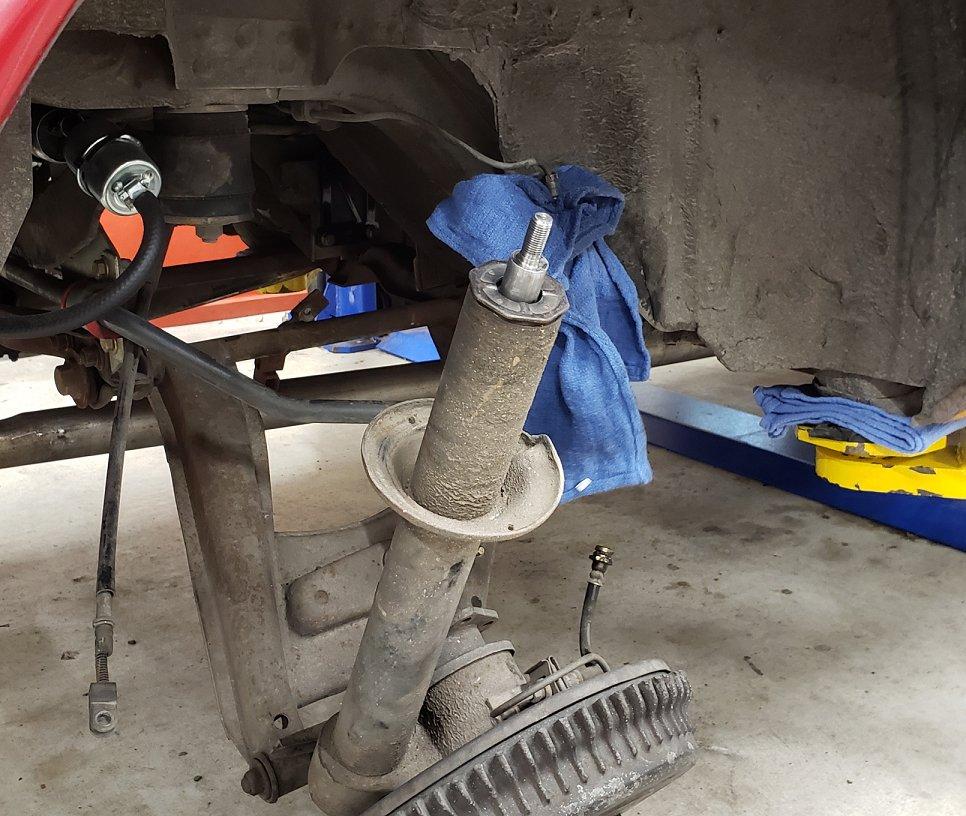
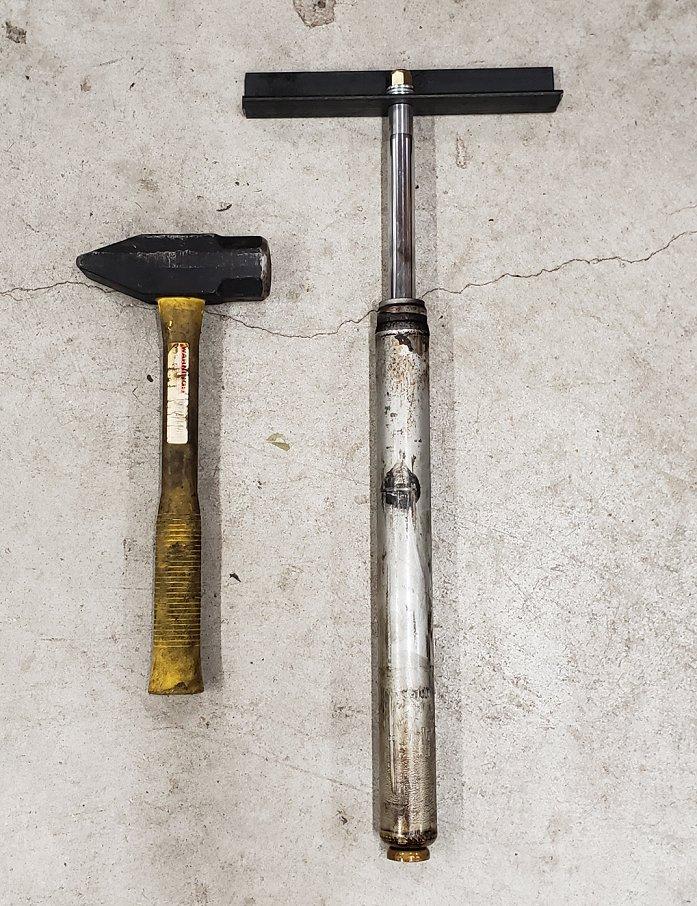
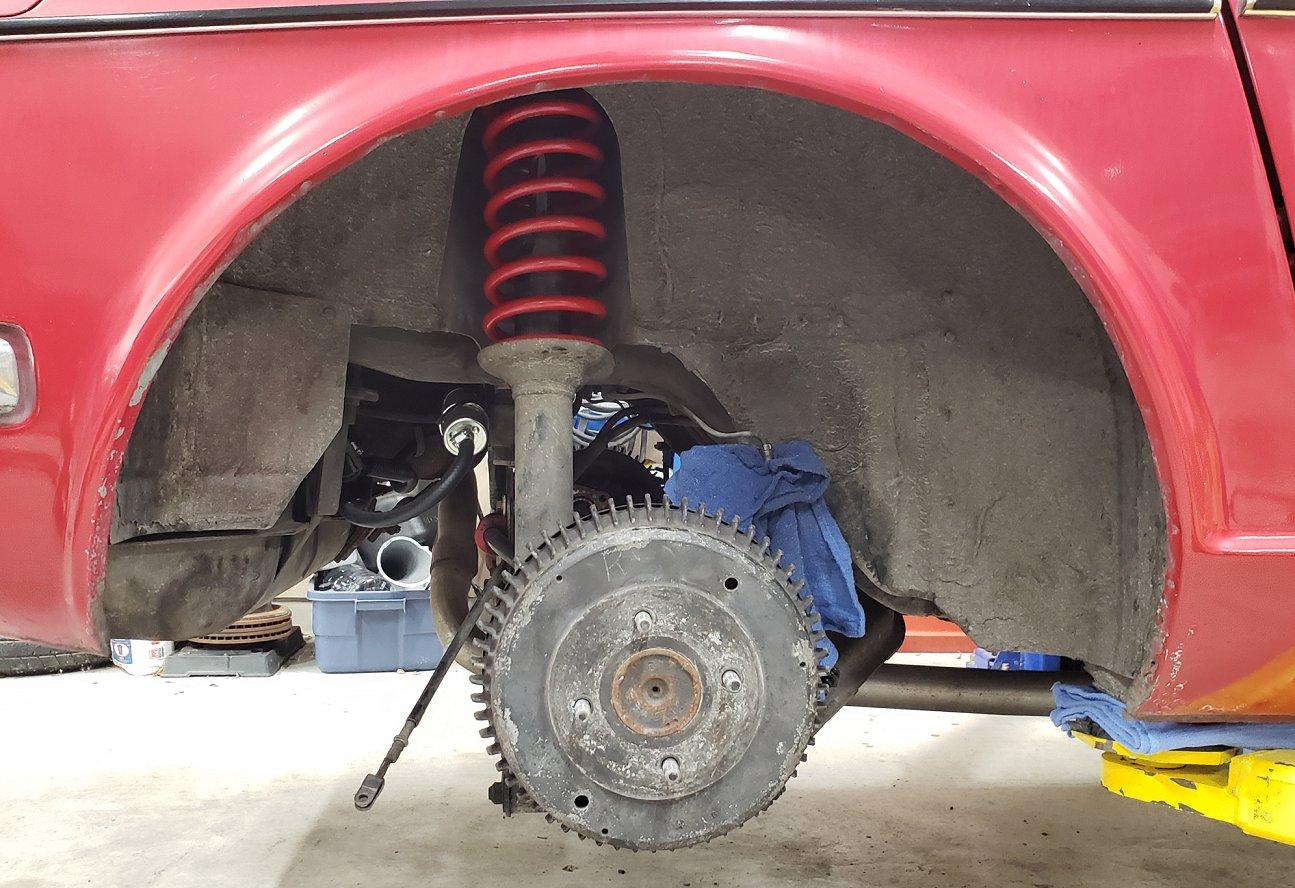
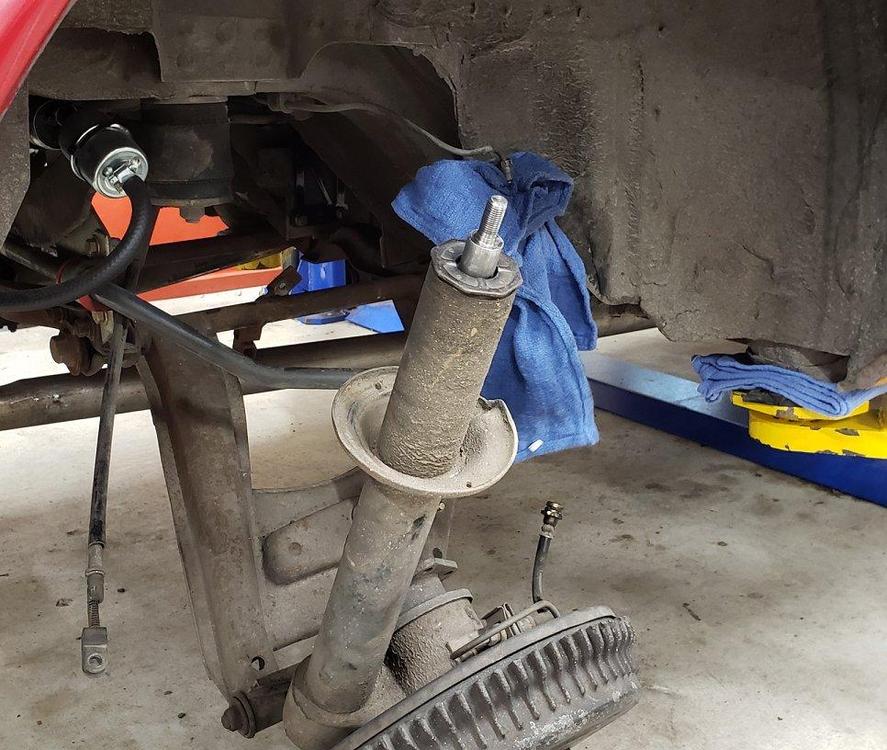
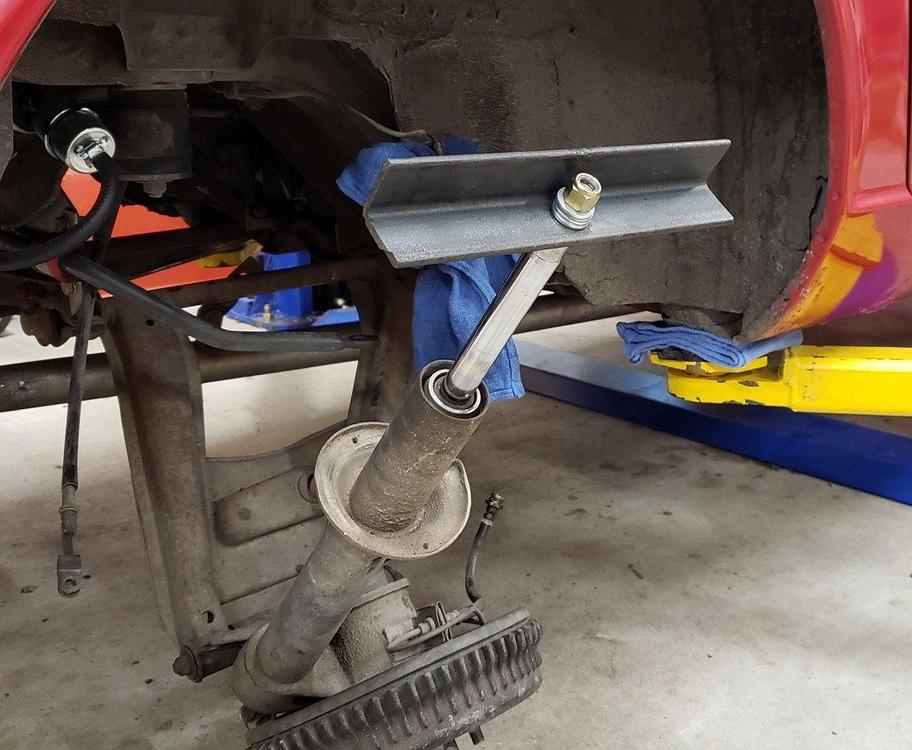
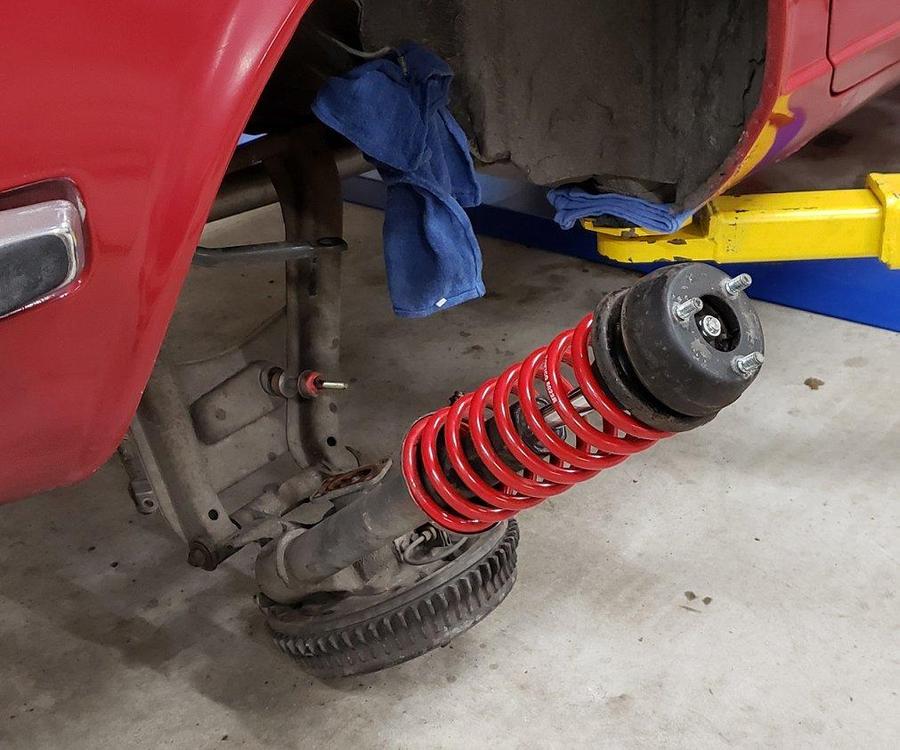
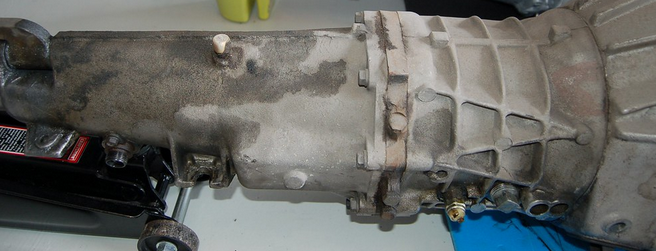
Next up was the struts. With the half-shafts removed and brake hose disconnected it was just a matter of dropping it down and swinging it out. No surprise, the strut cartridge was shot. When it came time to remove it, no surprise that it was stuck in place. No surprise = No problem. I needed to make a handle of some sort to pull it out. Using a piece of scrap angled steel I drilled a hole in the middle, bolted it to the the strut and with a few hits of the mini sledge on the bottom it happily saw things my way. I had some Tokico struts and springs for a 280z that a fellow Z owner traded me for lunch at Torchy's Tacos. I already had some correct KYB rear strut cartridges but compared the rear springs and figured I would give them a shot. They are about 3/4 of a coil longer than the ST springs that were on the car. If this did not work I also had some 280z rear strut mounts that I could try as well. The ST springs did not have to be compressed to remove them but I did have to compress the Tokico springs a little which to me was a good sign. Reassembly was straight forward with no drama. The driver side received the same treatment as its strut cartridge was dead as well.


 2 points
 -
 1 pointIf there are holes in the fender from a rub rail, weld them shut. Do not use filler! It won't stay and can absorb moisture and rust. If they are only under the emblem follow Whee!s advise. Just prime, paint and cover over them1 point
 -
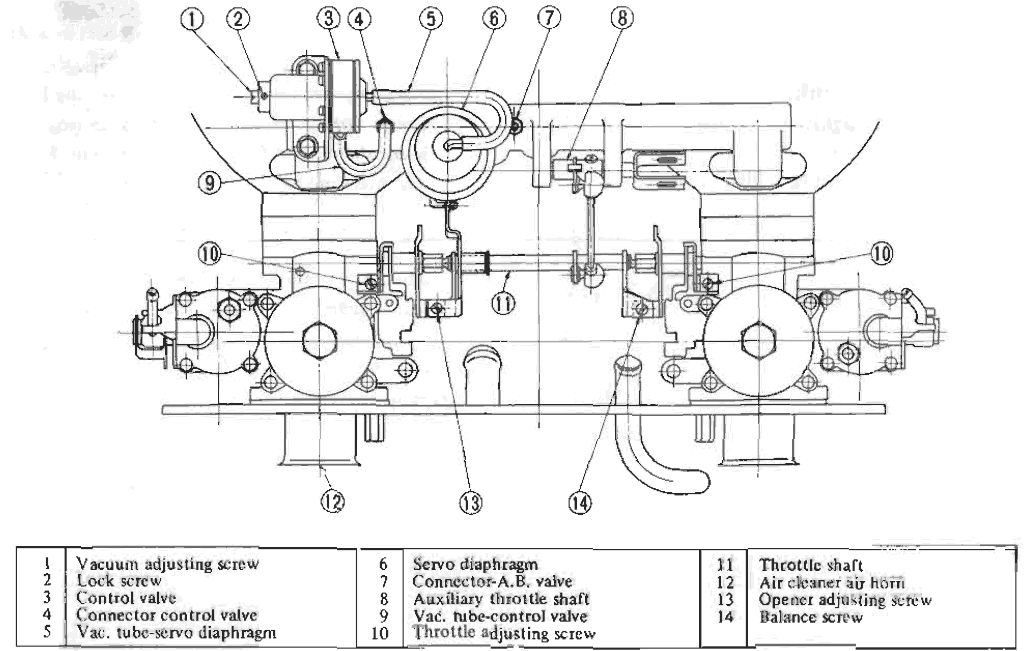
 @Mike Posted this great table: Here is what you need for starting: So your main is too large,and pilot is too large. Reducing these will raise your A/F
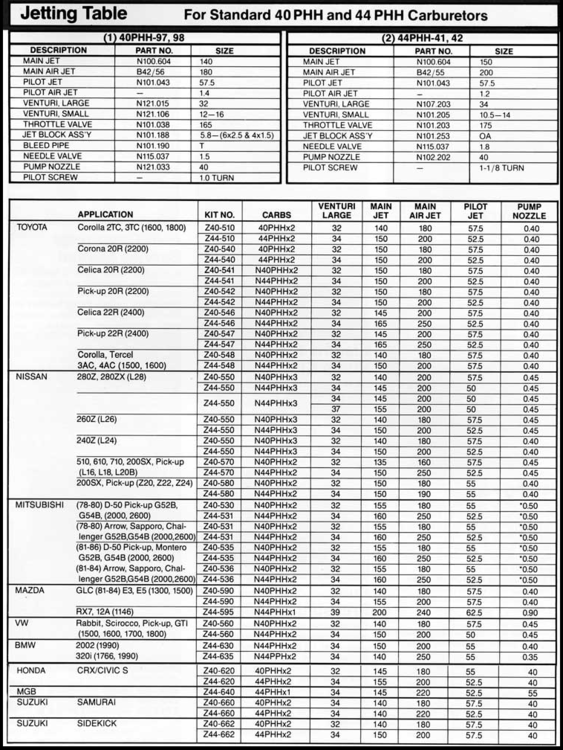
 1 point
 -
 1 pointThanks man, When I say I need to make up 10mm. I am saying I need a collar that has 10mm more throw than my old A style. I don't blame you for tuning out of this. It has gotten convoluted and crazy to keep up with. I had a talk with a guy at MSA this morning. He was very certain that a B collar would work. I didn't want to argue so I ordered a type B collar from them and a 280z 2+2 collar. If the B collar is close to what I am running now I will put in the 2+2 collar. With two day shipping I should have an update by this weekend. Besides hard shifting, with the new suspension parts the car was very pleasant to drive. Took the turns real well and didn't smell like gas leaking from the tank. LOL.1 point
 -
If you're absolutely positive that the injectors aren't opening then that should be your focus. Check the Pin 1 circuit at the ECU. Maybe it has too much resistance or something weird happens during starting. Pin 1 is connected to the negative terminal of the coil so the ECU can "see" when the coil fires. On the module don't assume that new is good. 1978 does have "HEI" but the module I was talking about is the GM HEI module swap.1 point
-
 1 pointOk, thanks. I have found an old used 240z one. Need to fill the molding holes. Hopefully this massaging will have a happy ending!1 point
 -
1 pointNo, but just call Livermore Performance Inc. They don't show a P/N for that application, but can supply anything you need. They are super easy to work with and a top notch company. I've bought Porterfield pads many times from them for my endurance racer Z and they are very helpful. http://www.livermoreperformance.com/1 point
-
1 pointAs Patcon said, minimal. I ended up buying a new driver side fender from Nissan (which fits good) a few years ago and then tried to reuse the passenger side. It was too far off to mount properly without a lot of cutting and welding around the headlight bucket, so luckily another used fender appeared courtesy of @ConVerTT and I was able to get it to fit very well. It is a Taiwanese re-stamp. New ones vary in the width of the bowing out from the centre line it seems and can be massaged back into line. I find that all panels need some sort of massaging....1 point
-
 Sure thing, here's two images. I'll take a closer look at your image and compare, but first glance looks ok? And yes, mine is a '78, hopefully plumbed up like one.
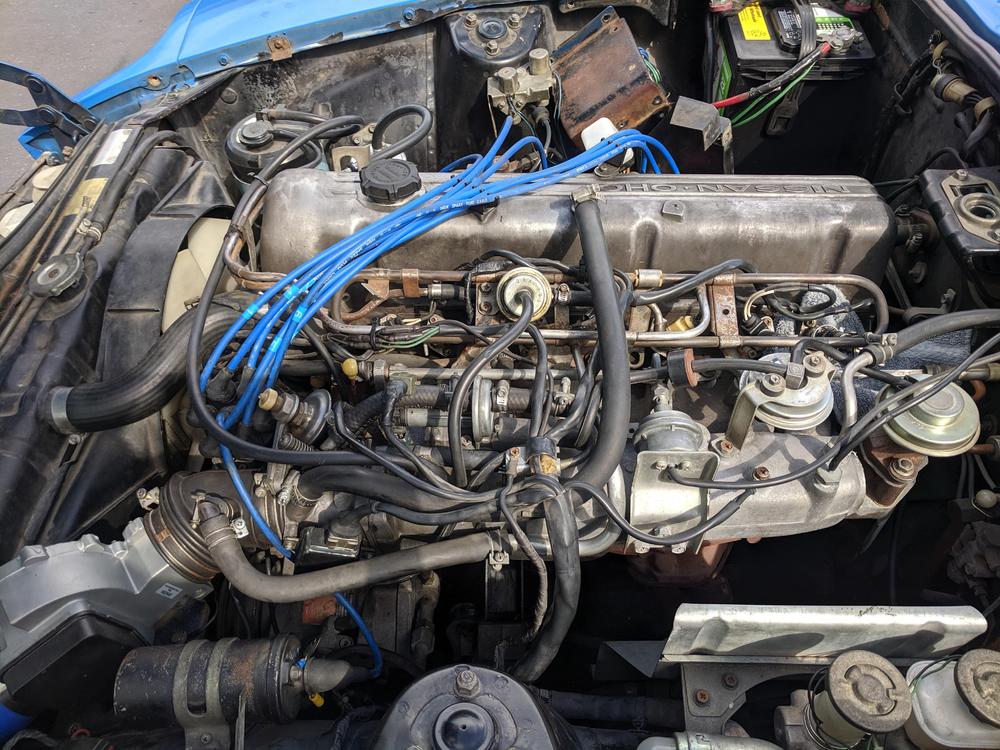
 1 point
 -
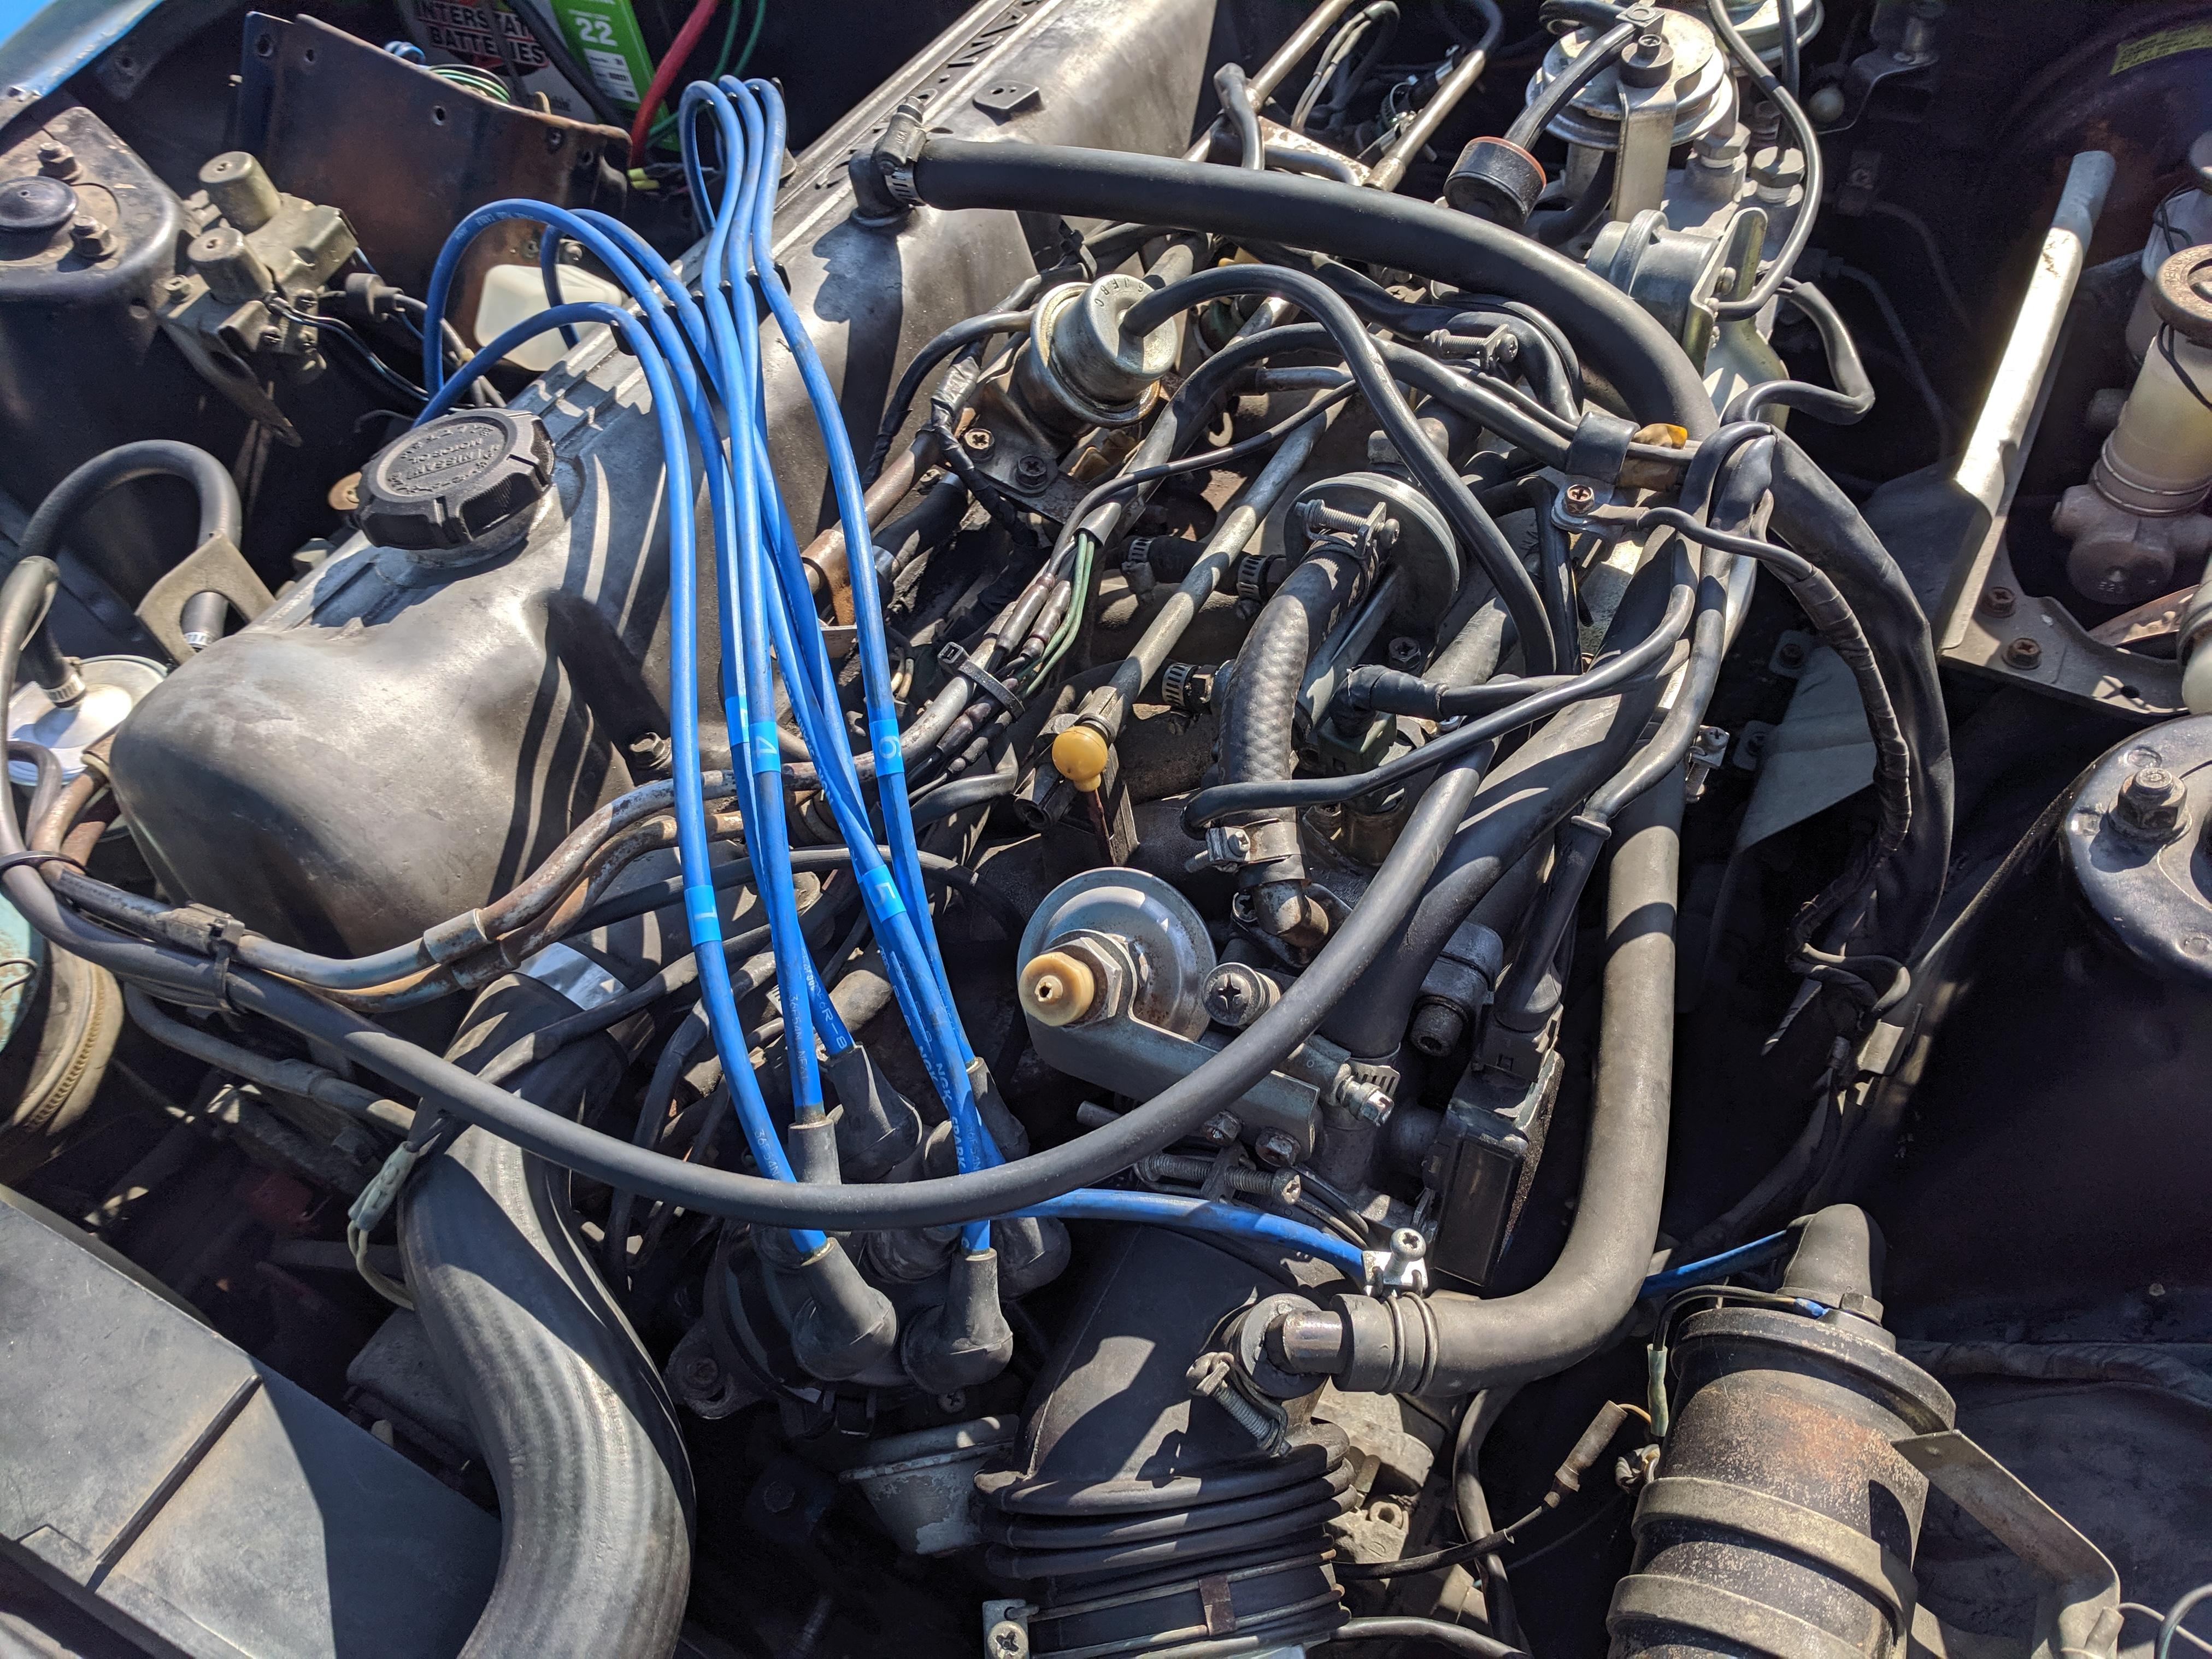
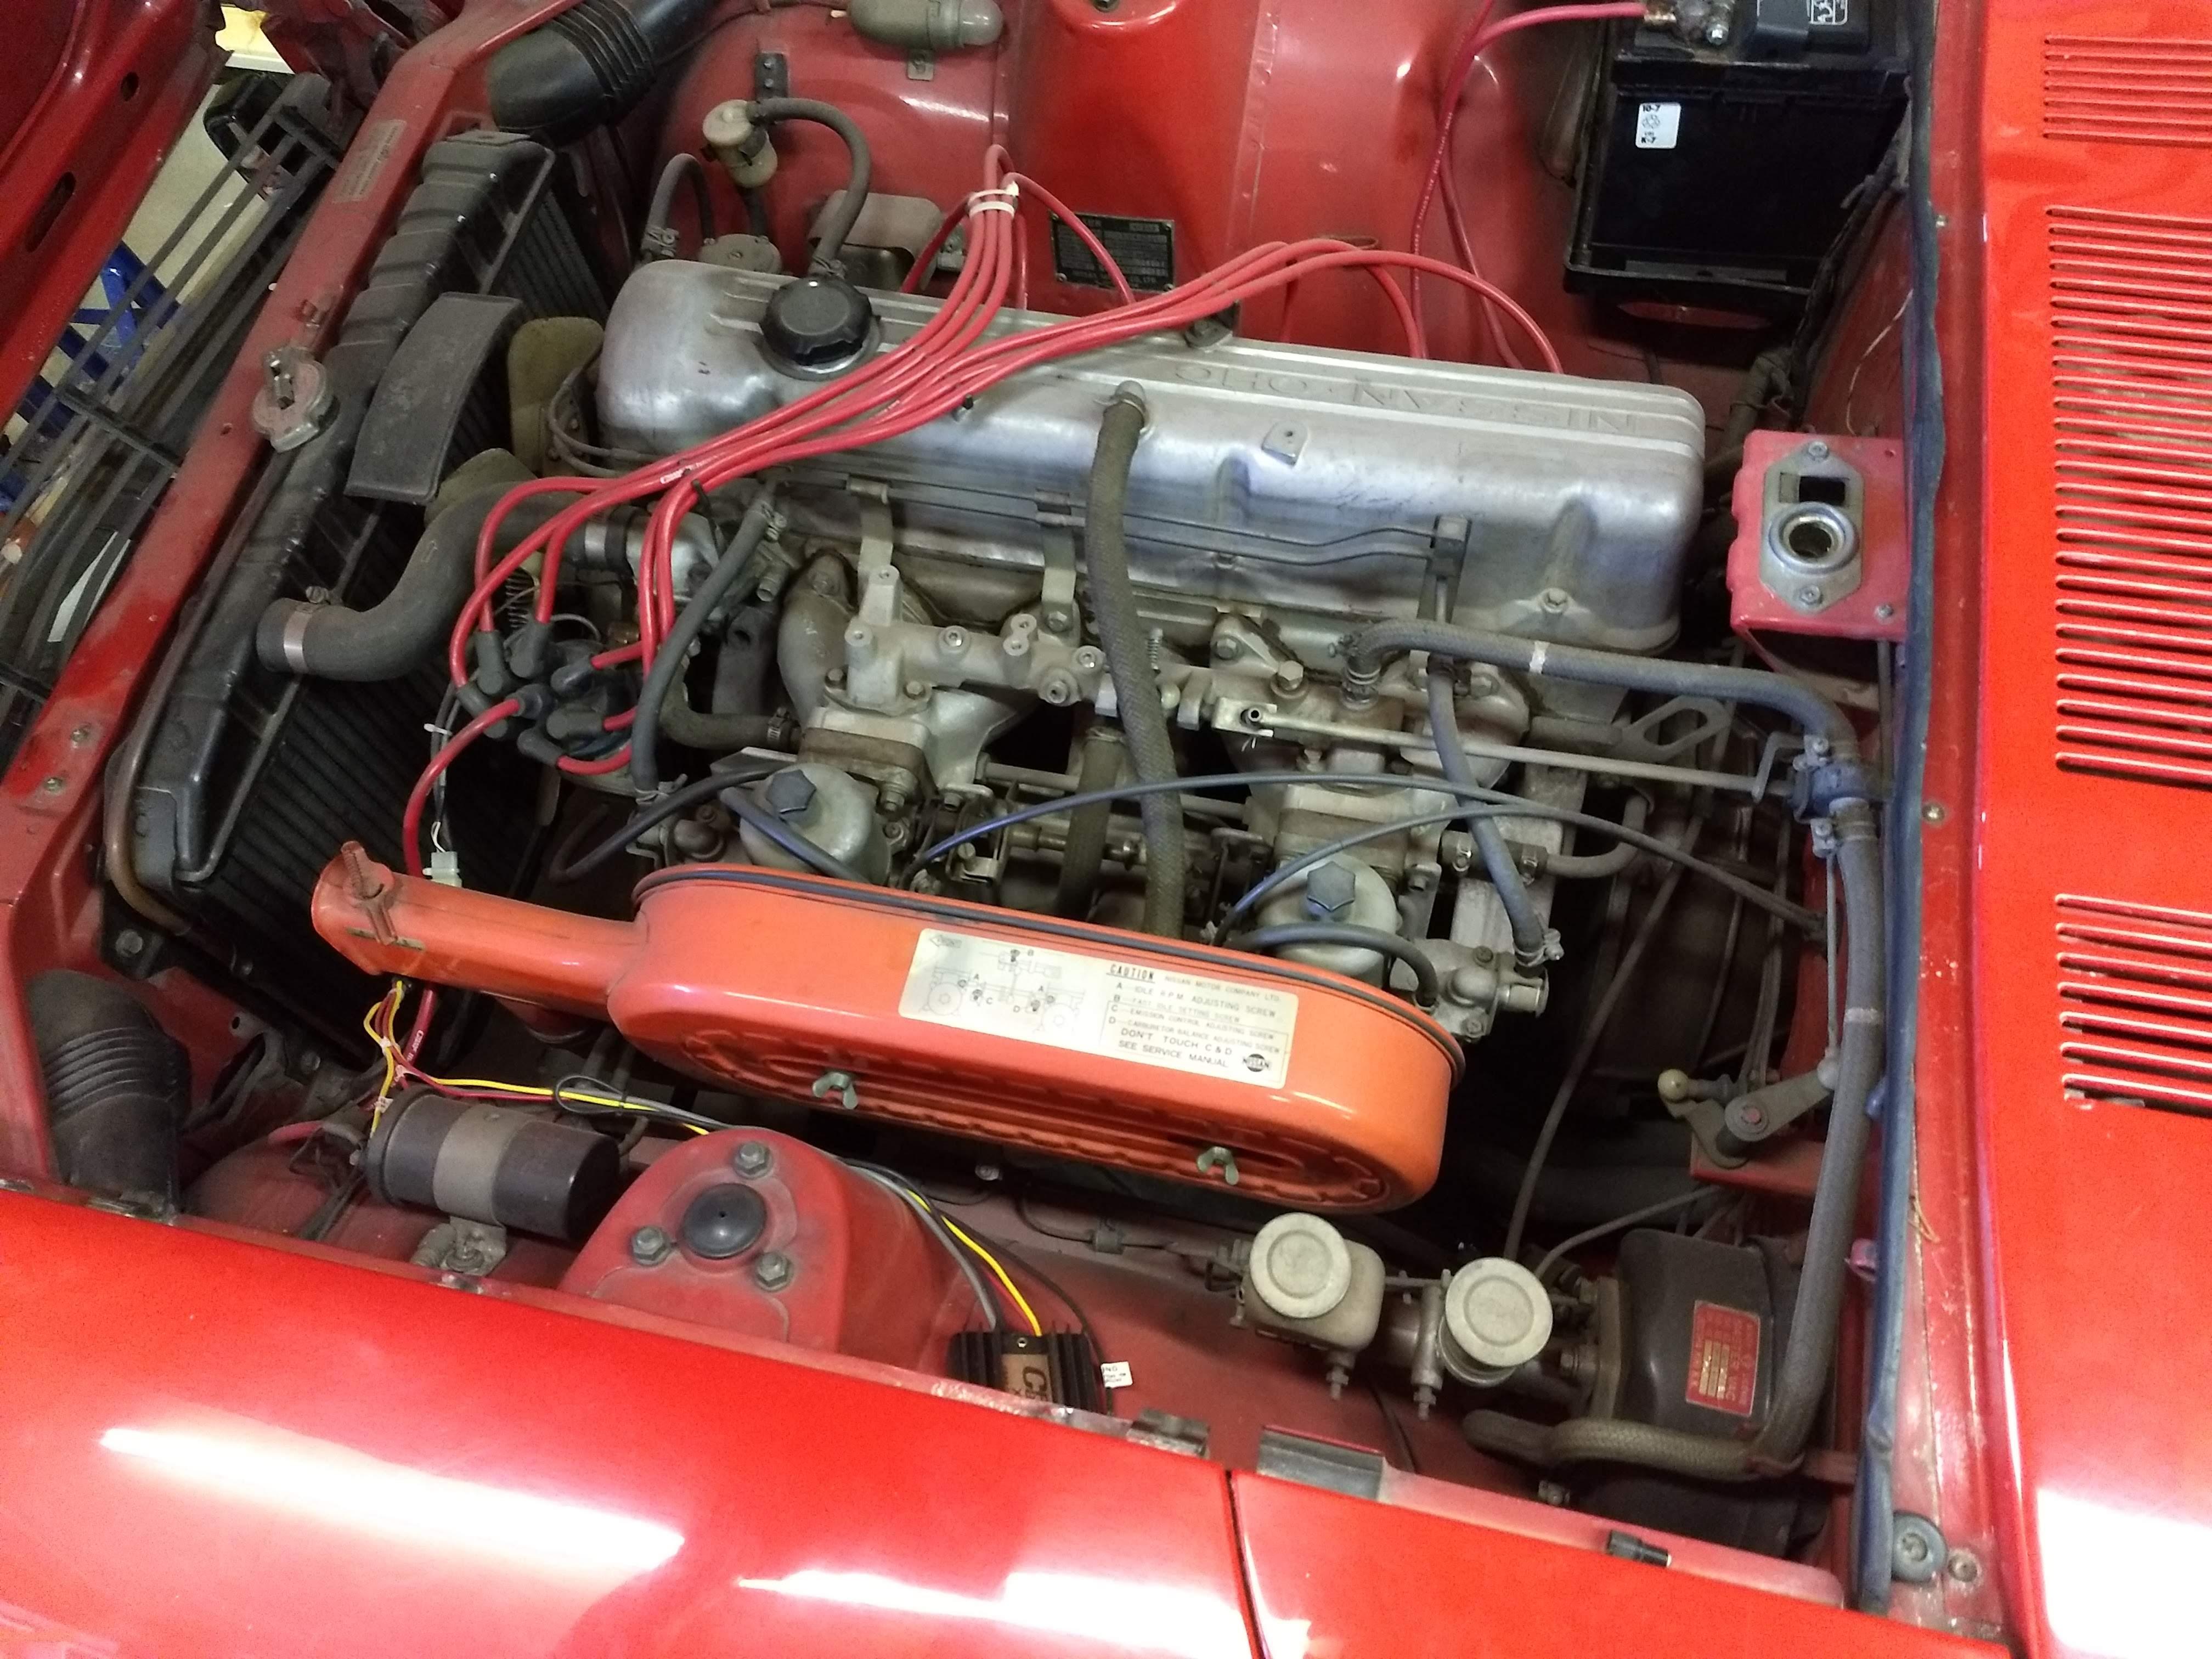
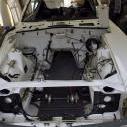
 I think it would be a good idea to take a pic of the driver's side of your motor and post it. It's amazing what will "jump out" at these guys if it's wrong. I'm mainly wanting to see how your AAR hoses are routed. In '78 Nissan changed it around to keep some gunk out of the Auxiliary Air Regulator like this picture. That thing keeps the idle high until it warms up then closes off the extra air and then the idle drops. Here's a shot of the bullet connectors that get plugged up wrong a lot of times too. Welcome to the forum! You won't find a nicer or more helpful group.
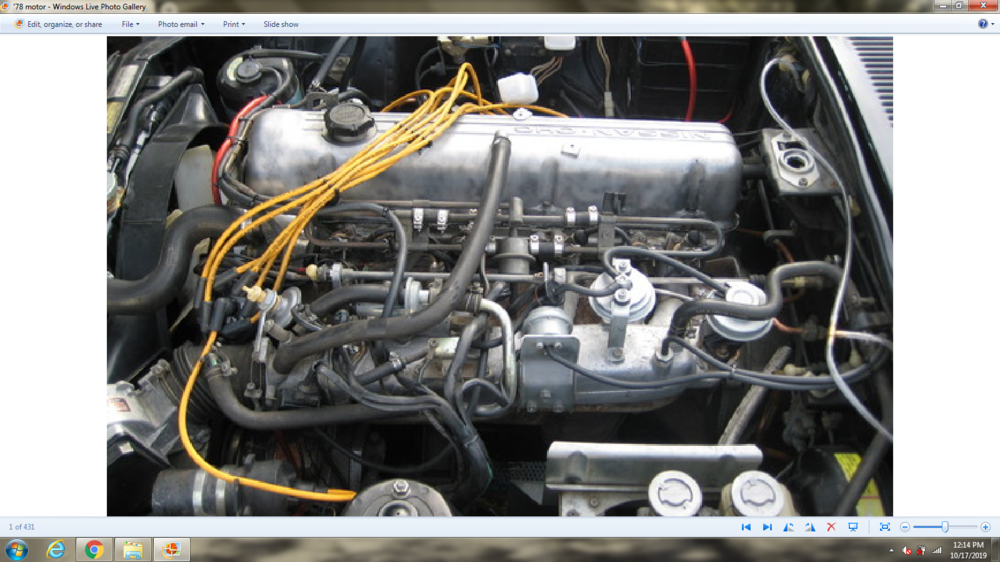 1 point
 -
 I sent you a couple PMs too. I'm also interested in the Fairlady Z. Thanks. Sent from my SM-G935P using Tapatalk1 point
 -
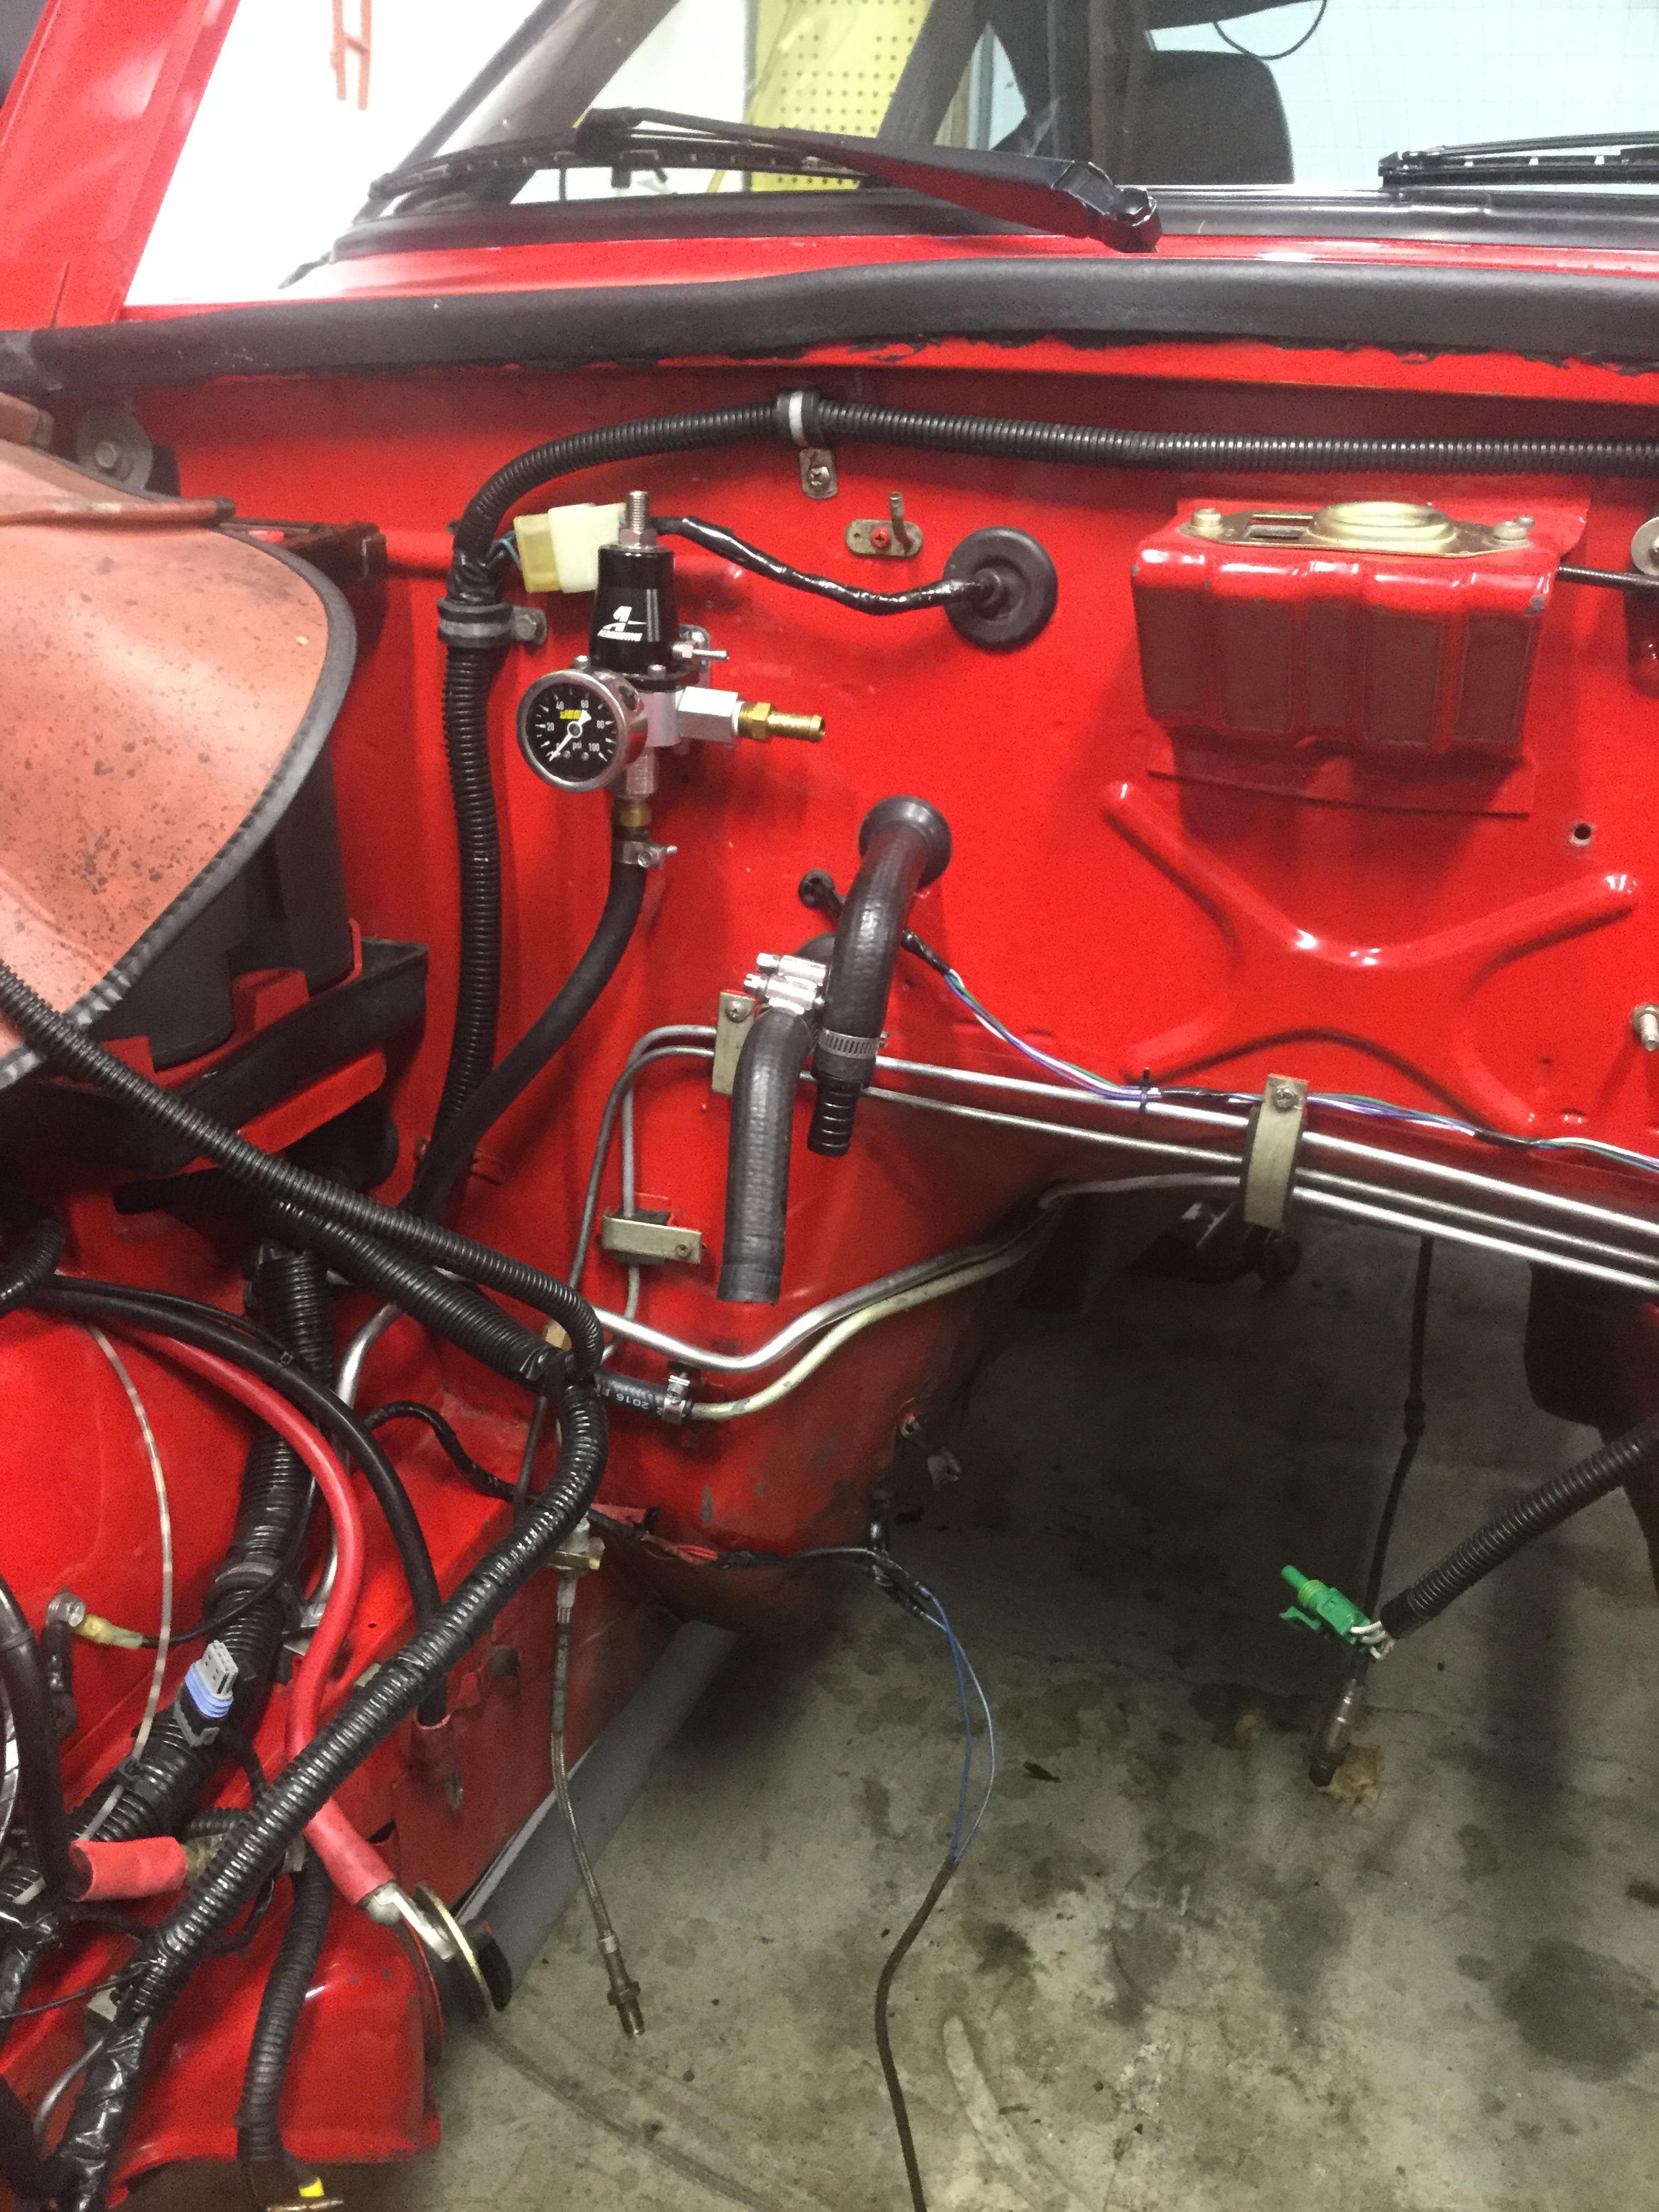
 1 pointI am going to attempt to move my FPR to the drivers side and use it. That way I am hard lines under the car. I will T the return from 7mm to 5mm and return via the stock 5mm line and the 7mm vapor vent line. Then use the 5/16 to feed the ITBs. Hopefully it works! I bought some 7mm efi fuel hose from belmetric. So that should give me a good amount more flow. Hopefully my push lock fittings work with it. My FPR mount was waiting to fail, i cut a lot of the strength out. So I will need to fabricate another and put it in my stock coil spot. Should end up looking pretty clean and simple.1 point
 -
1 pointTrust me, the wheel does not move out. The rotor bolts to the back side of the hub rather than the front of the hub, so the spacer has zero effect on the hub face. It simply positions the rotor. There are about a thousand google images online showing the upgrade. EDIT: Here is a link to one of the many conversion kits. Scroll through the pics where you can clearly see where the spacer goes. https://www.silverminemotors.com/datsun/datsun-280z/brake-upgrades/front-big-brake-kit-stage-41 point
-
Wheel fitment is tricky. I have a set of 14" wheels that fit fine with the vented Toyota setup and yet other 14" or even 15" wheels do not fit. It all depends on the shape of the face/spokes of the wheel. I found that 15x7 ET zero Konig Rewinds will clear front vented Toyota calipers as well as Mustang GT500 rear calipers. Discount Tire Direct sells them at a very reasonable price and has sales a few times per year with a $100 rebate. I bought mine a few years ago for $360/set delivered after rebate.1 point
-
 1 pointNo only if you use it on mondays and fridays you need the upgrade Sent from my iPhone using Tapatalk1 point
 -
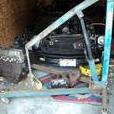
 1 pointSo here’s what I did . I guess I slept since then and couldn’t remember , but easy to see with an empty bay. Looks like I used the original supply line as my return since I ran a new 3/8” supply. A 1/4” line would be quite a bit bigger and would probably work.
 1 point
 -
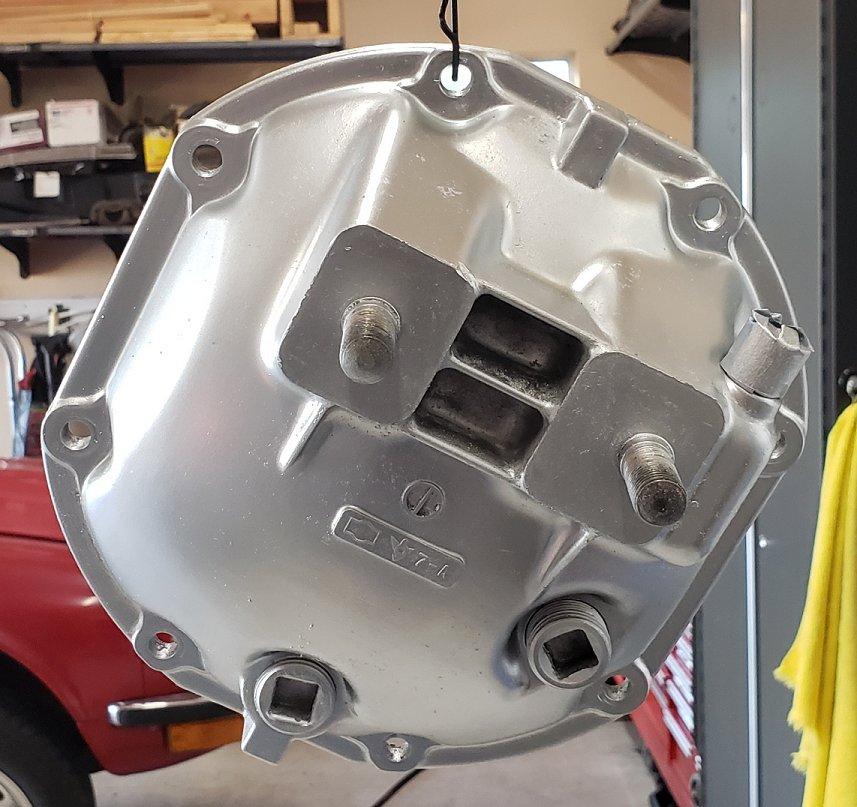
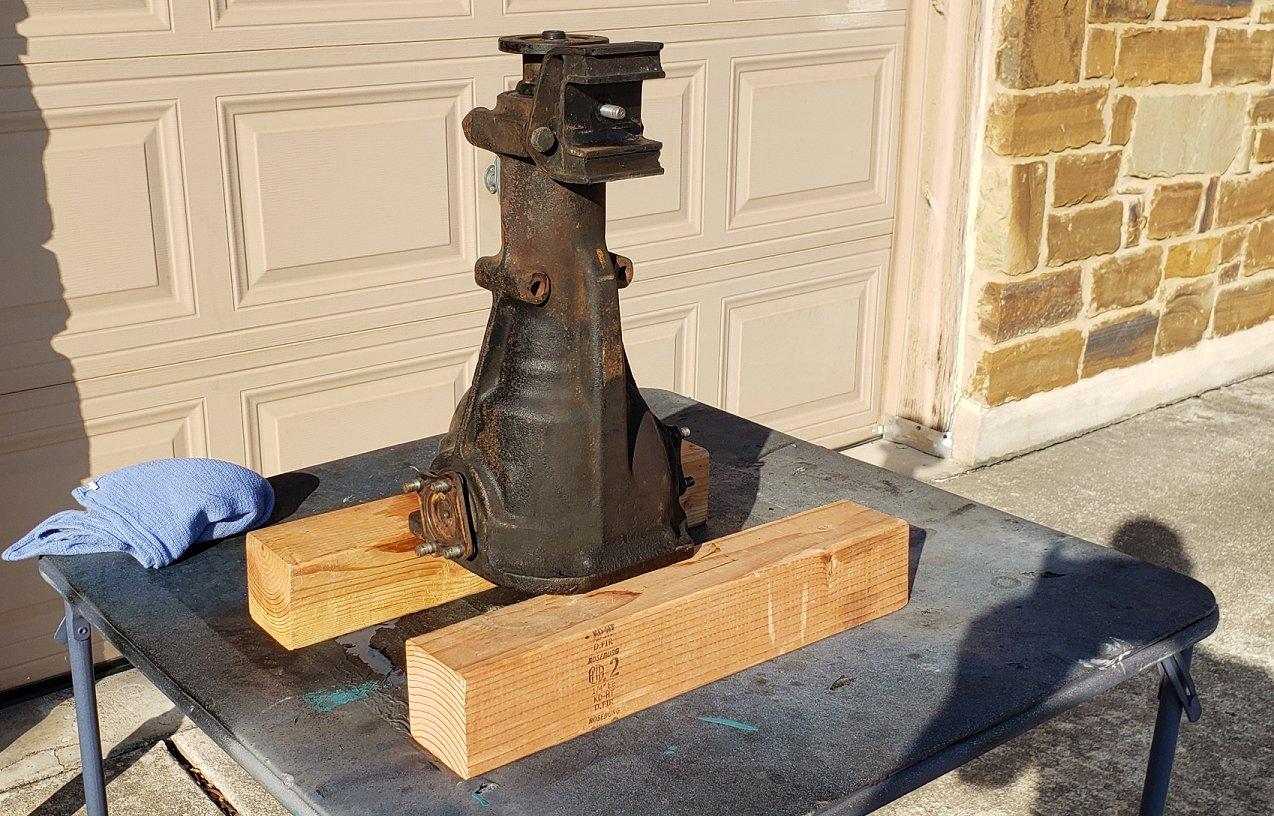
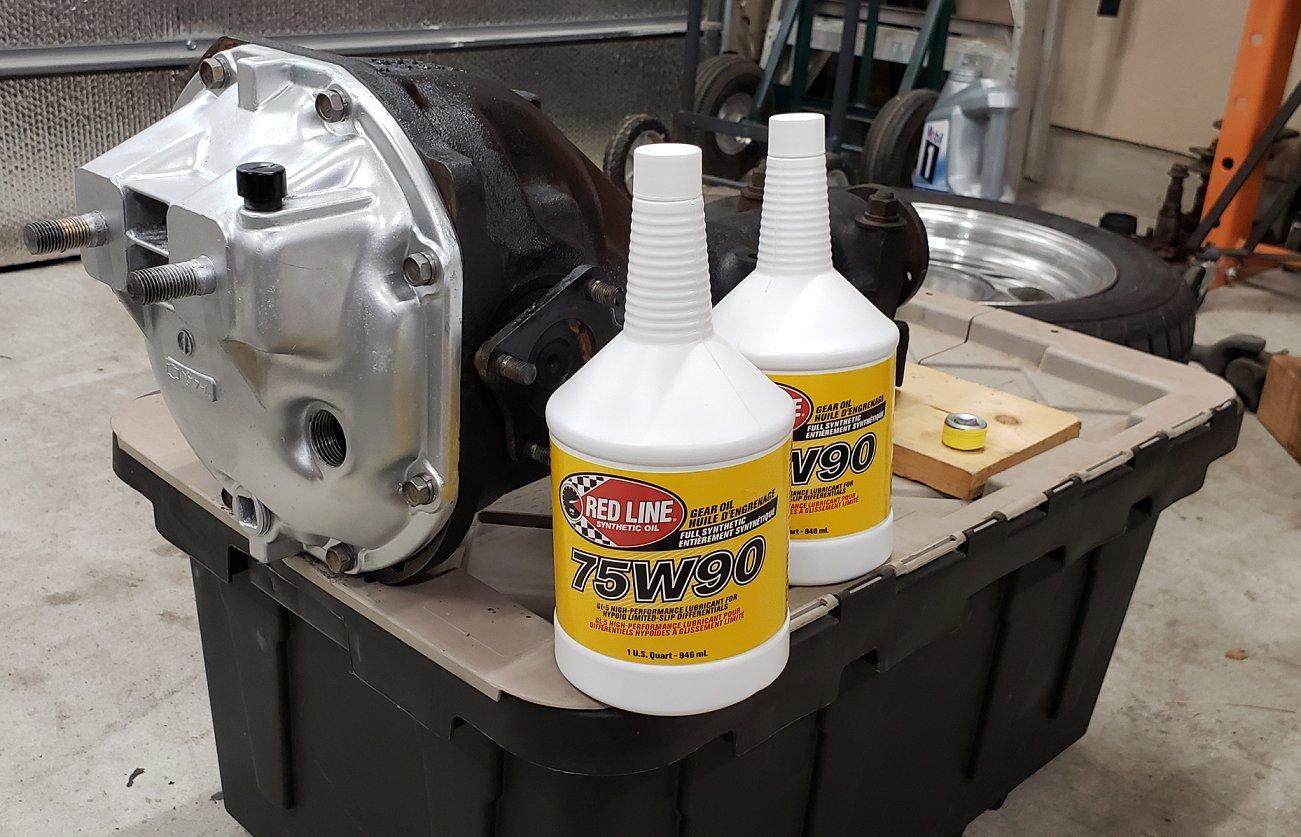
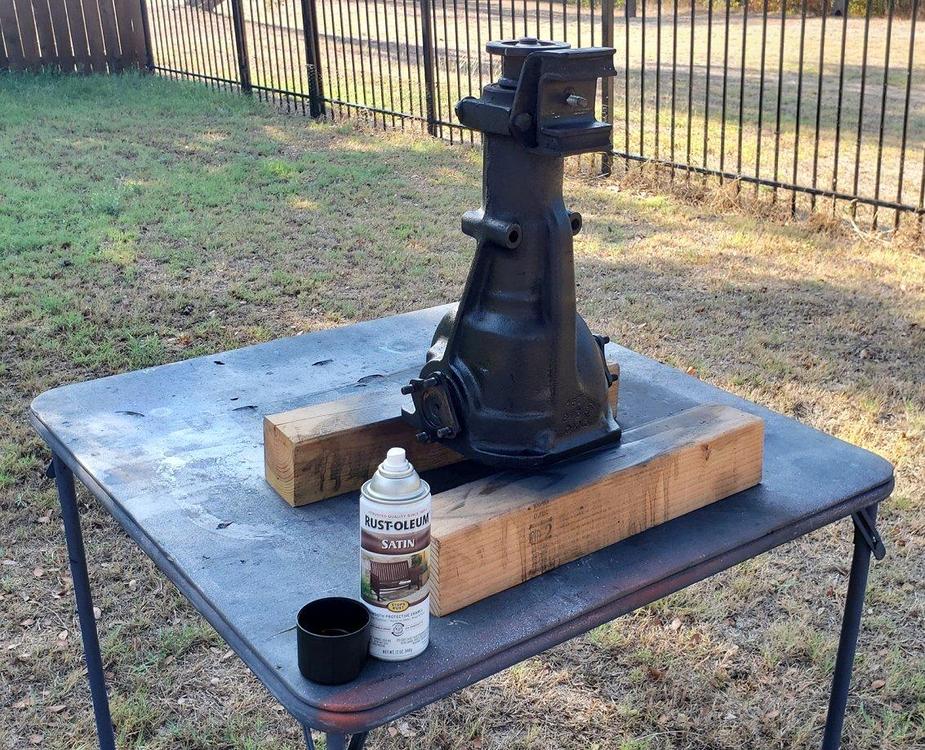
With everything checked out I spent some time cleaning everything up and painting it. A fresh cover gasket was installed with a light smear of black RTV. I used Red Line fluid that is designed for use in LSD differentials. Been using Red Line for years with nothing but great results.


 1 point
 -
1 pointSell the 4 barrel setup and use that money to finish the SU's. They are a better setup over all, unless you are very good at tuning 4 barrel carbs1 point
-
 1 pointHi All, Thanks for the post. I will save this in case I ever need to replace, but I might have gotten lucky. I'm a 240 newbie who just bought a very nice '73 original that had been sitting for 22 years in a garage. Of the many things that needed replacing, the choke cable was stuck. It would move with pliers and generally not in bad shape with the original expanding rubber gaskets still in good shape/ My mechanic didn't offer much except to replace it. Zcarsource has a rebuild program for 150, but after some poking around the net, I decided to try PJ1 cable lube. The cable was out of the car so I could let gravity help. Squirted PJ1 in the loop-end and within a couple minutes it was sliding by hand.1 point
 -
 1 pointLinkage: https://zcarsource.com/catalogsearch/result/?q=linkage If you run higher fuel pressure, the fuel will push the floats down, and you will get too much fuel in the fuel bowls. That's a bad thing.1 point
 -
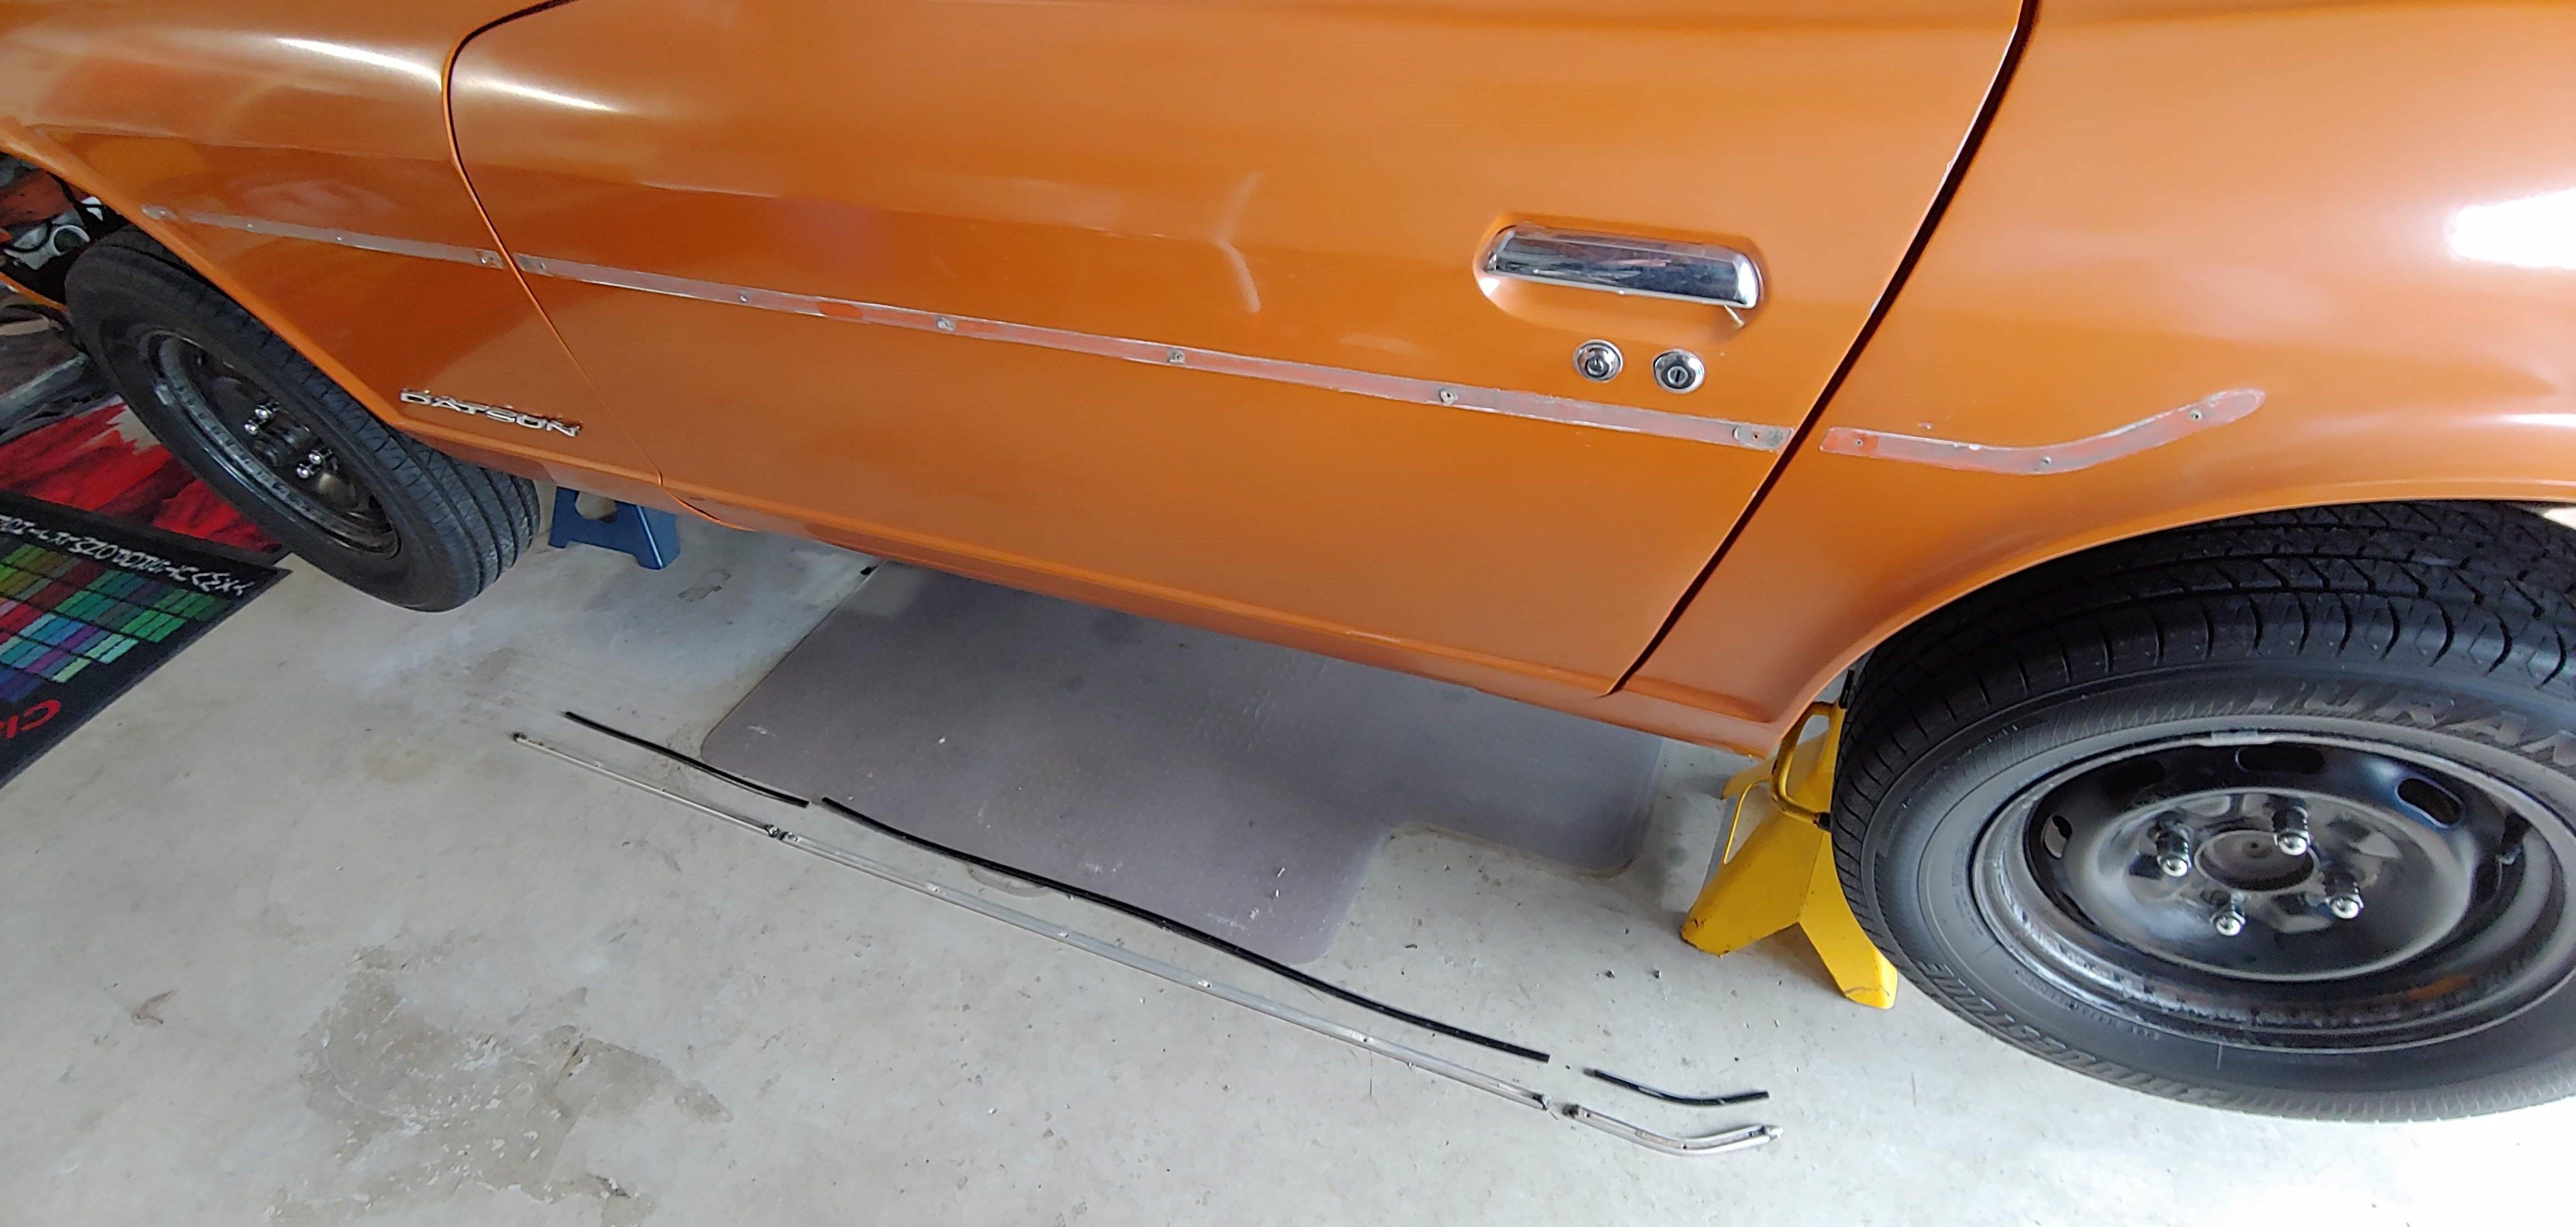
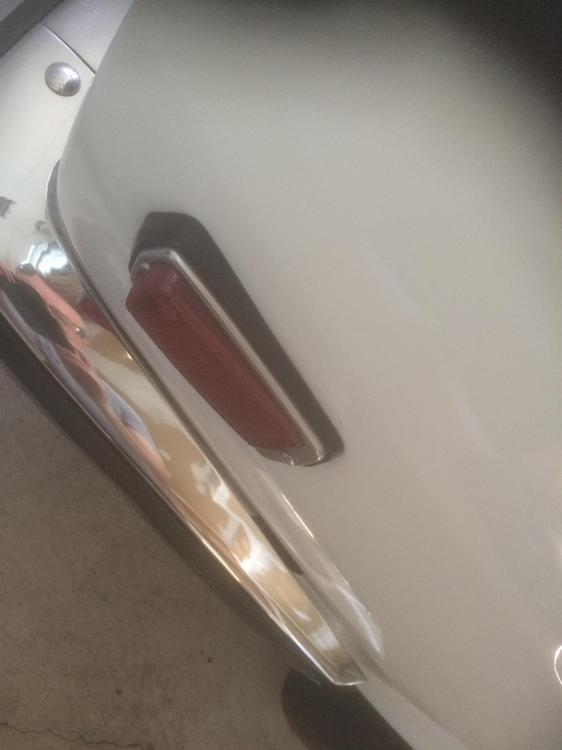
 1 pointHere's one the first items to be removed, the dealer installed rub strips. They were attached with a combination of sheet metal screws for some and pop rivets for others. They definitely wont be going back on. Thinking green, I was able to re-purpose them...
 1 point
 -
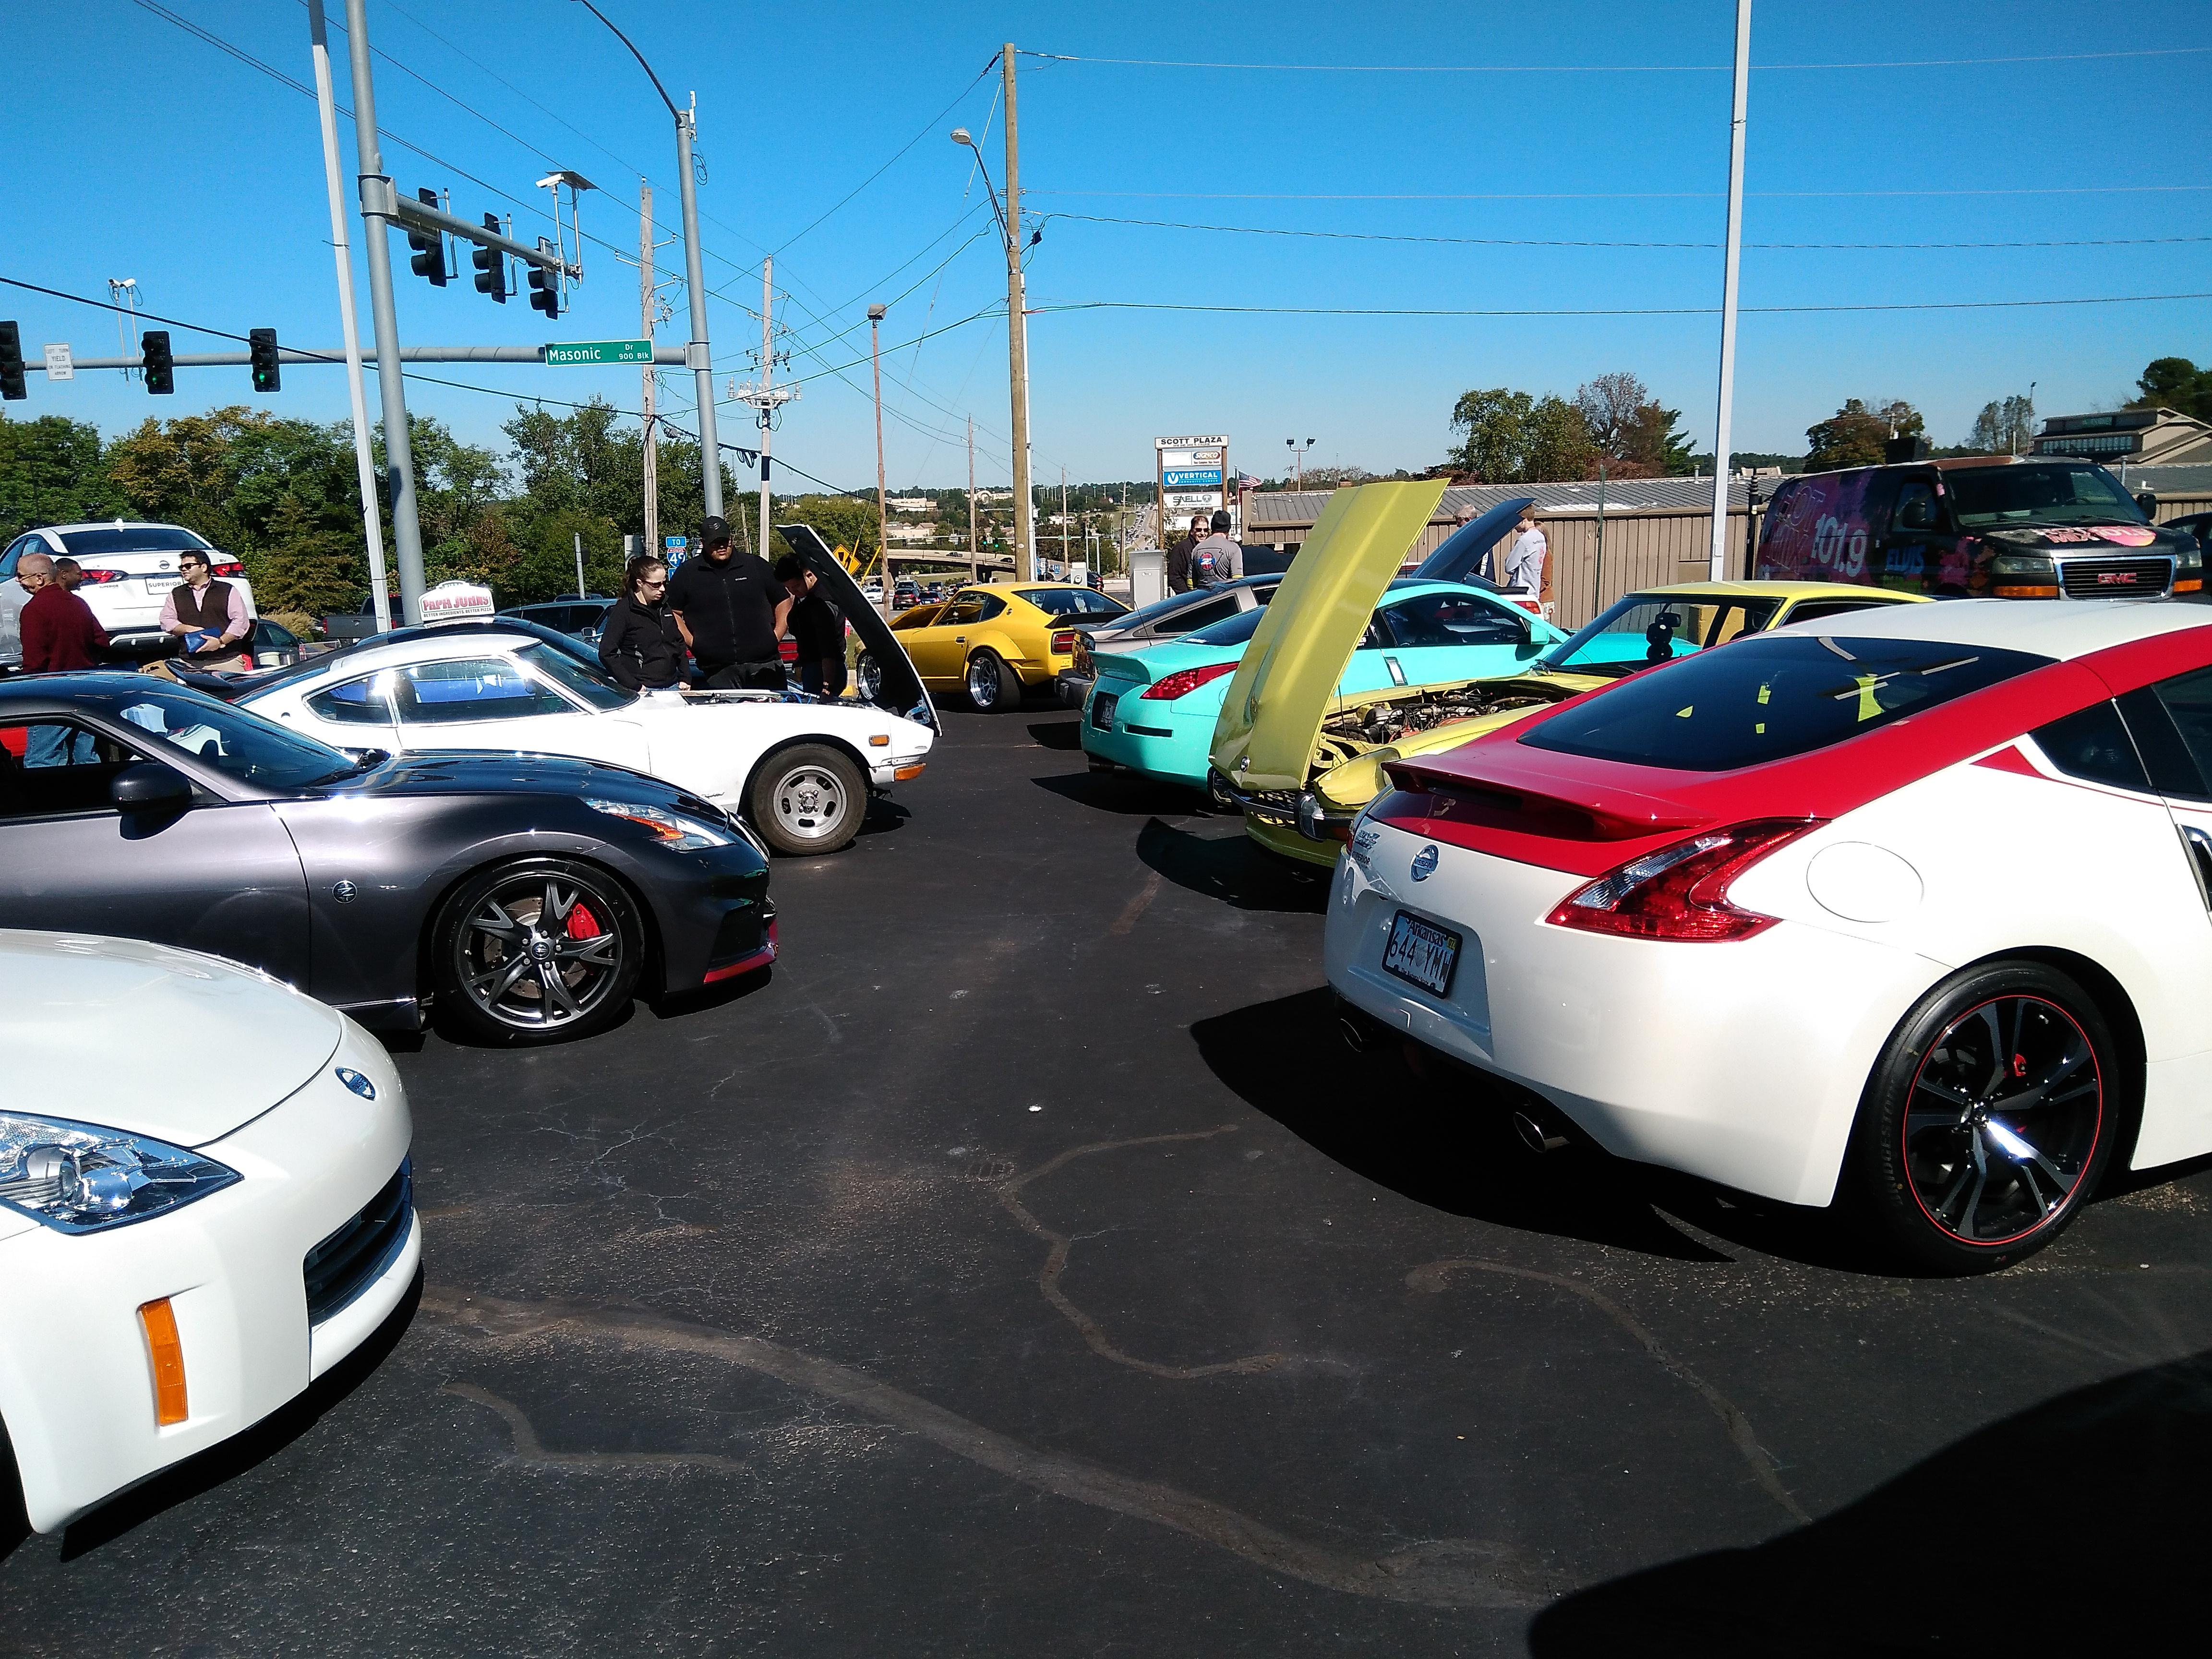
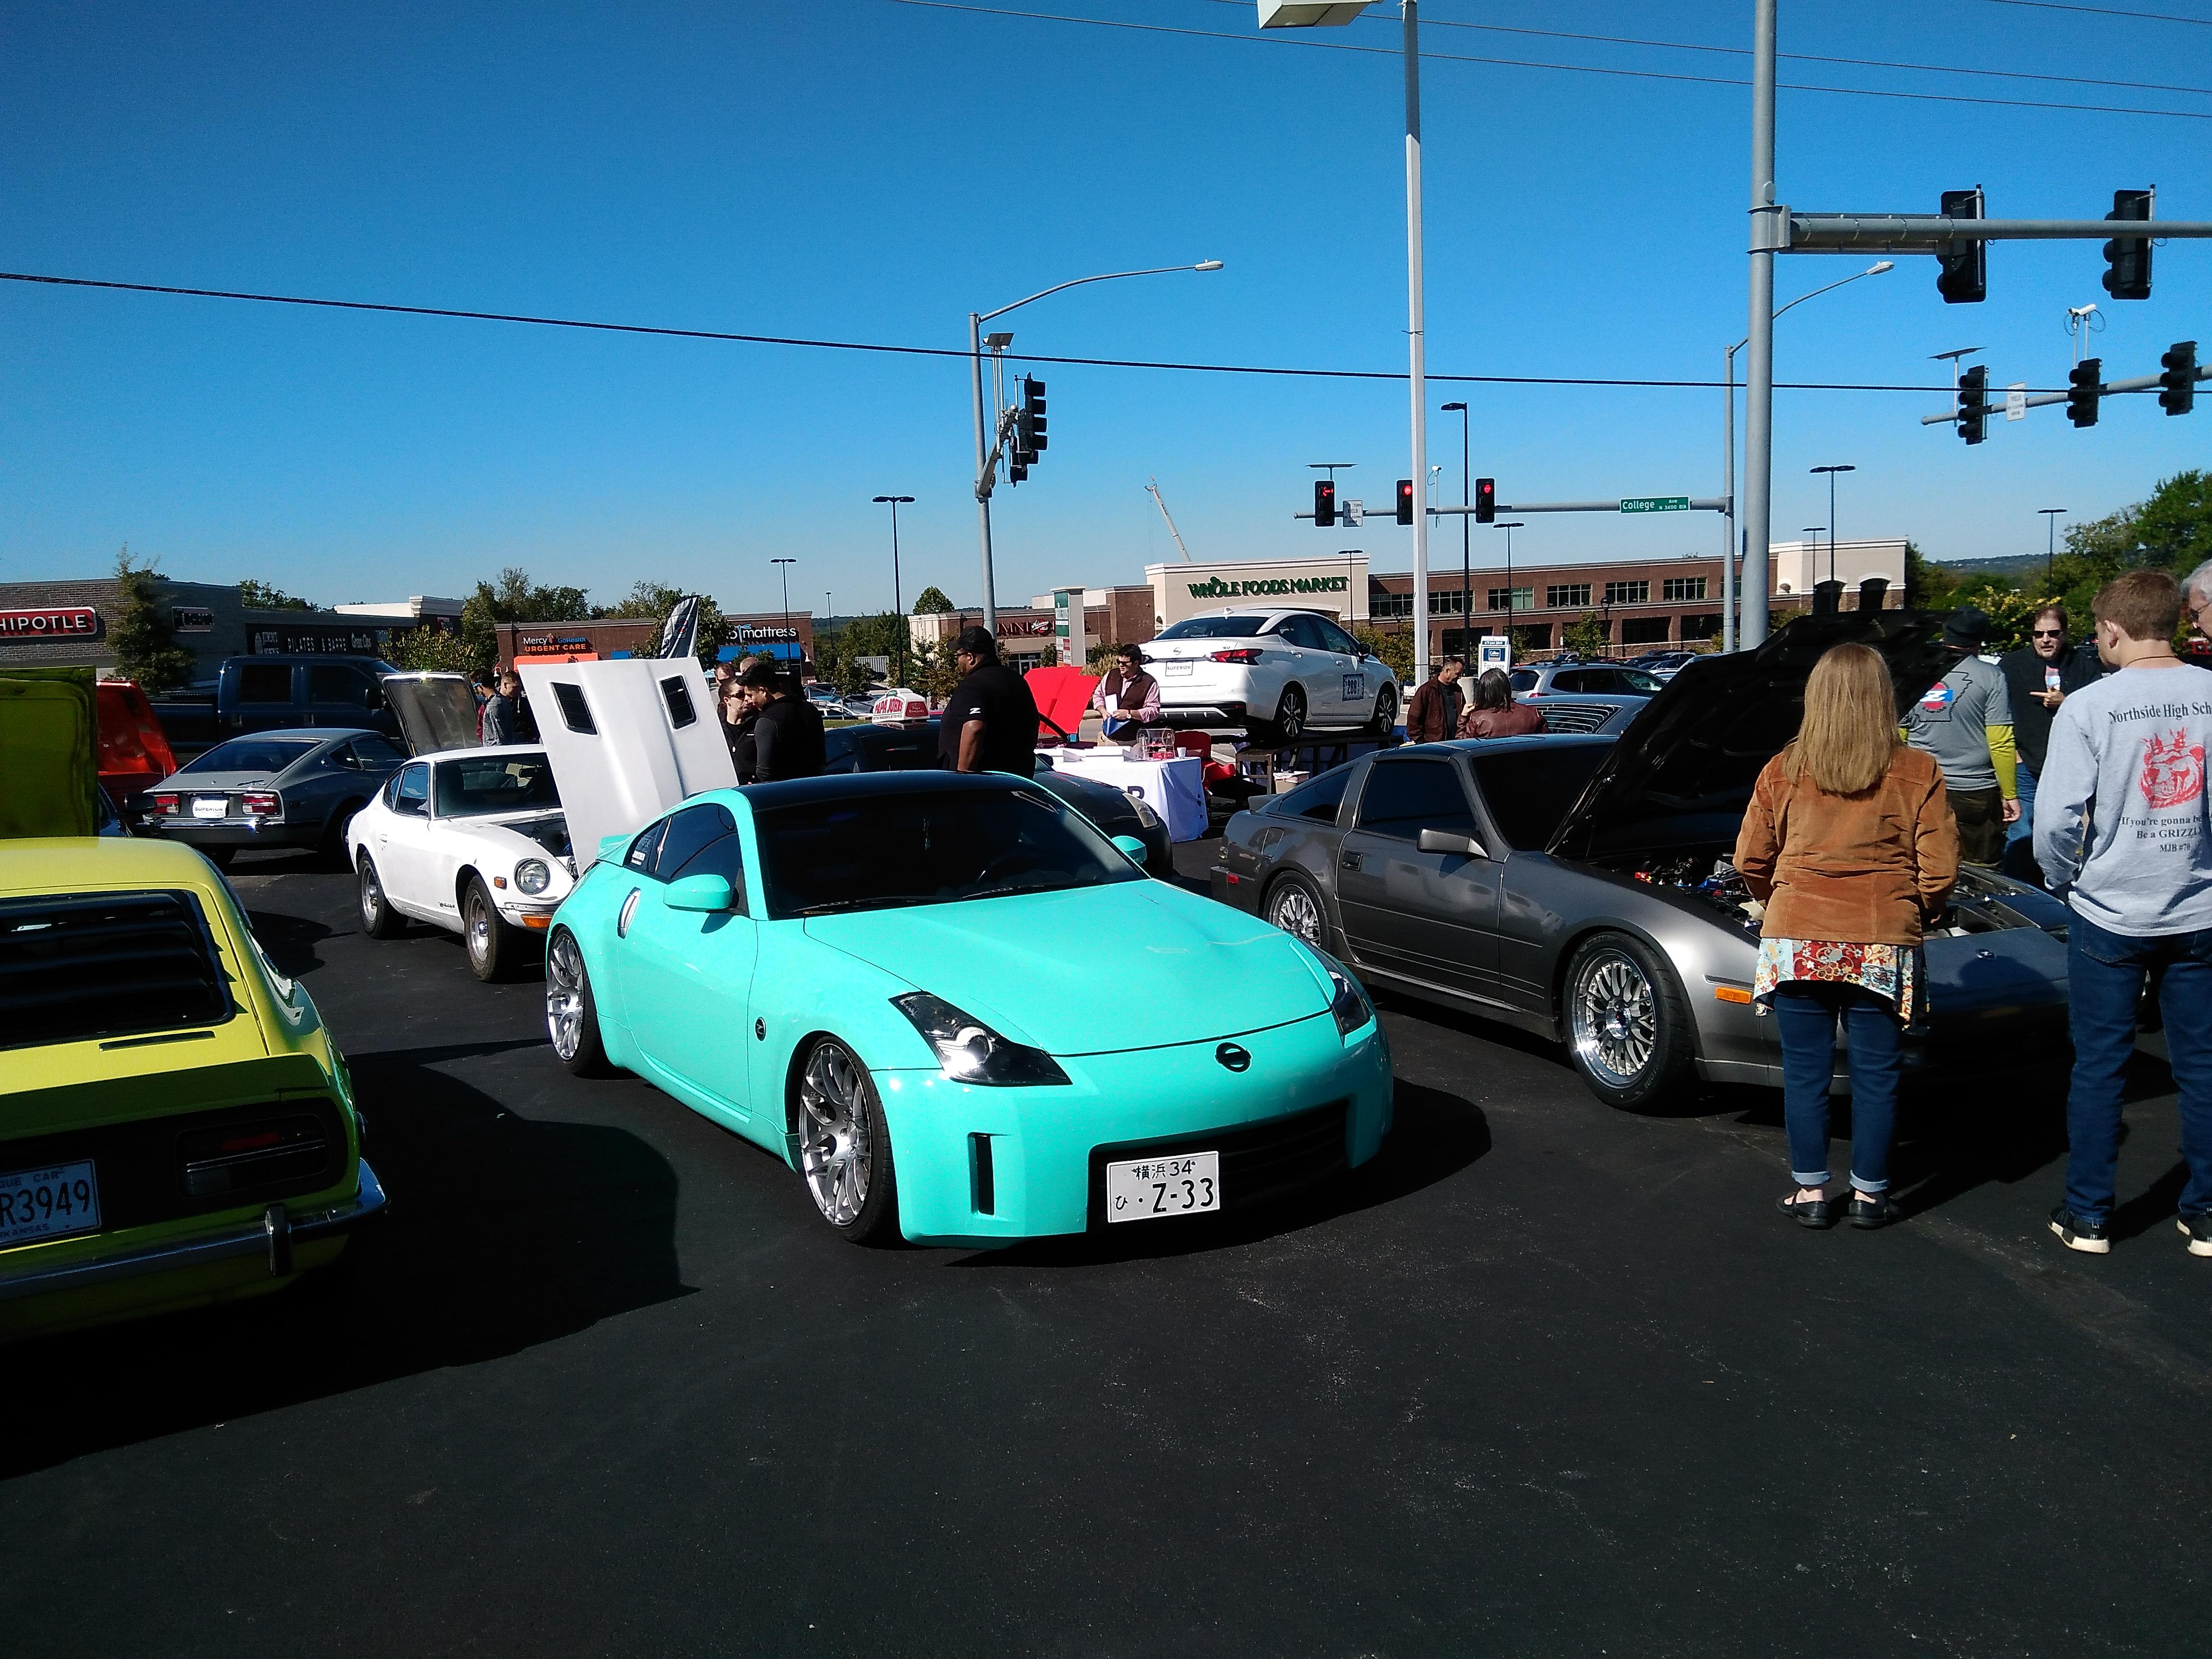
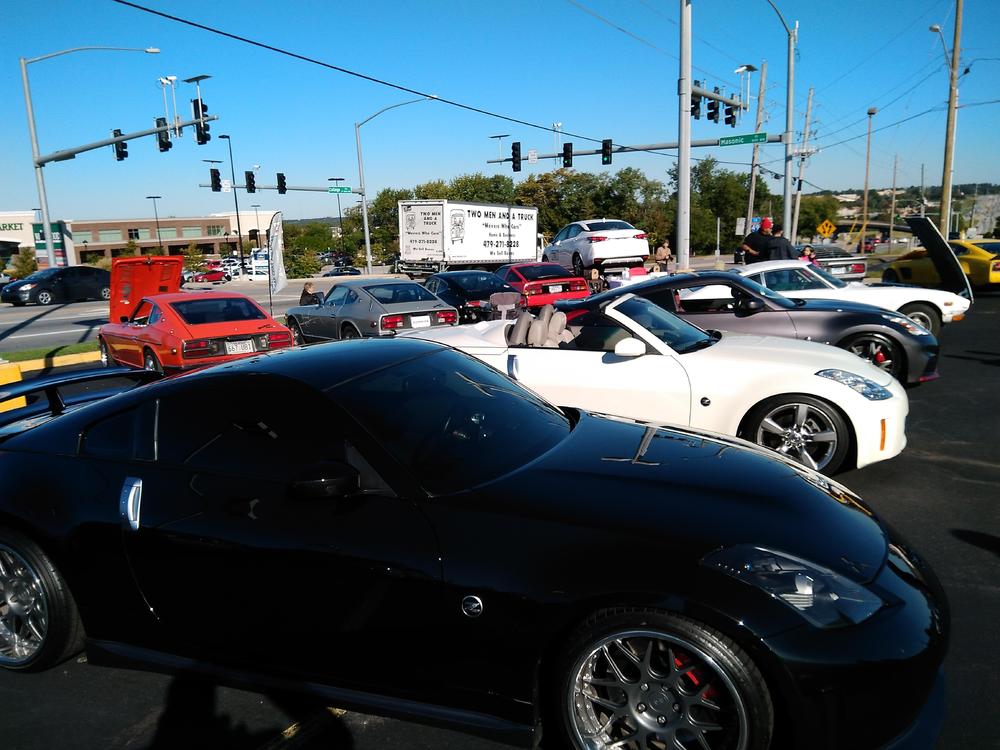
 Our local club had a car show / get together last Saturday at Superior Nissan which is one of our sponsors. We managed to field 21 cars, a radio station did a remote from there, lots of people stopped by. All models were represented except for a zx, even a Scarab. Zup went home with a medallion, but it wasn't gold... Started off cold but warmed up by noon & turned into a fun day. Plans are to do it again in the spring.

 1 point
 -
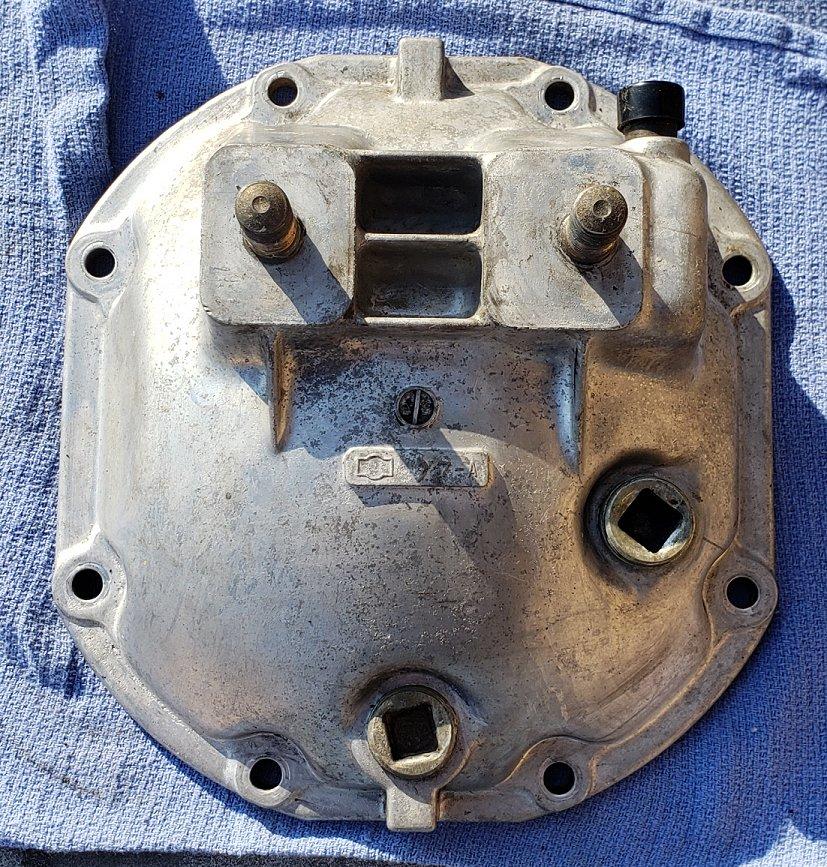
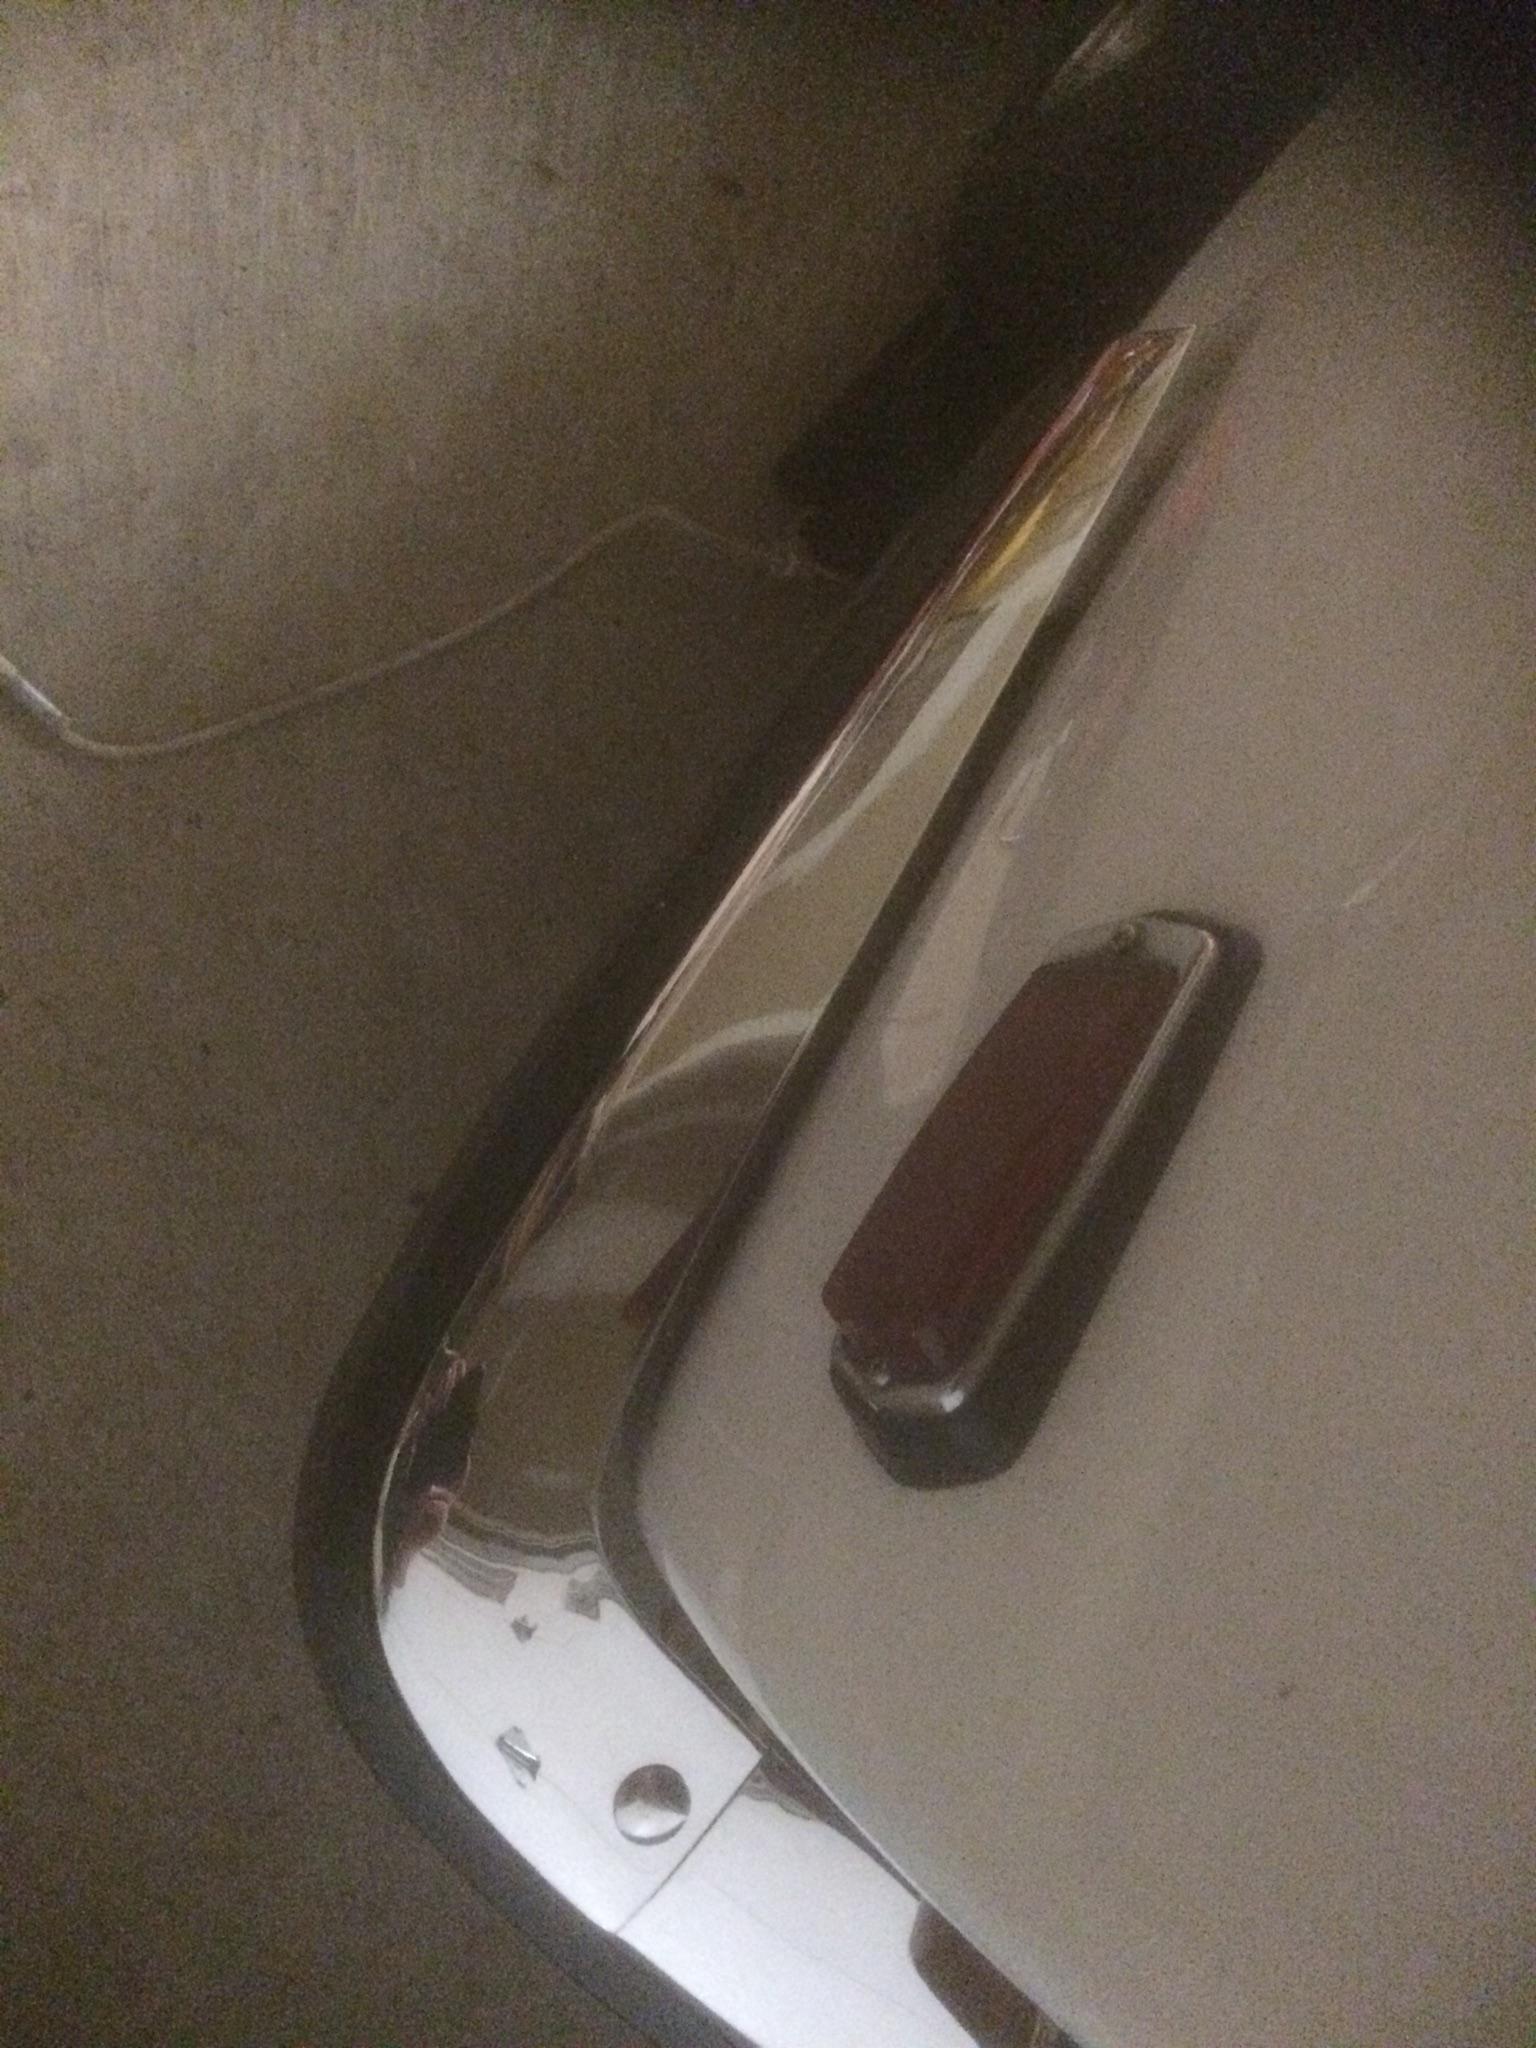
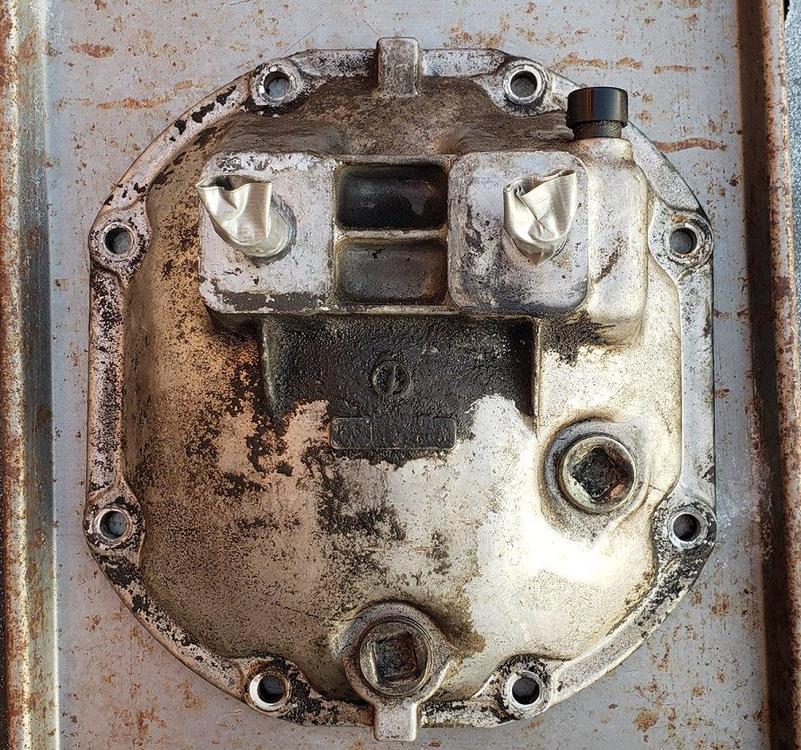
The reverse switch is the brass object near the middle bottom.
 1 point
 -
1 pointhttps://www.google.com/search?client=ms-android-americamovil-us-revc&source=android-home&source=hp&ei=MOalXeK-IIec_Qacxq-gBA&q=240z+su+carb+diagram+&oq=240z+su+carb+diagram+&gs_l=mobile-gws-wiz-hp.3..33i22i29i30.5004.17168..18230...0.0..0.159.2435.3j17......0....1.......8..41j41i299j41i10j41i13i275j41i10i299j0j46j0i131j0i22i30j33i299j33i160.P2aVneooU_0
 1 point
 -
1 point
-
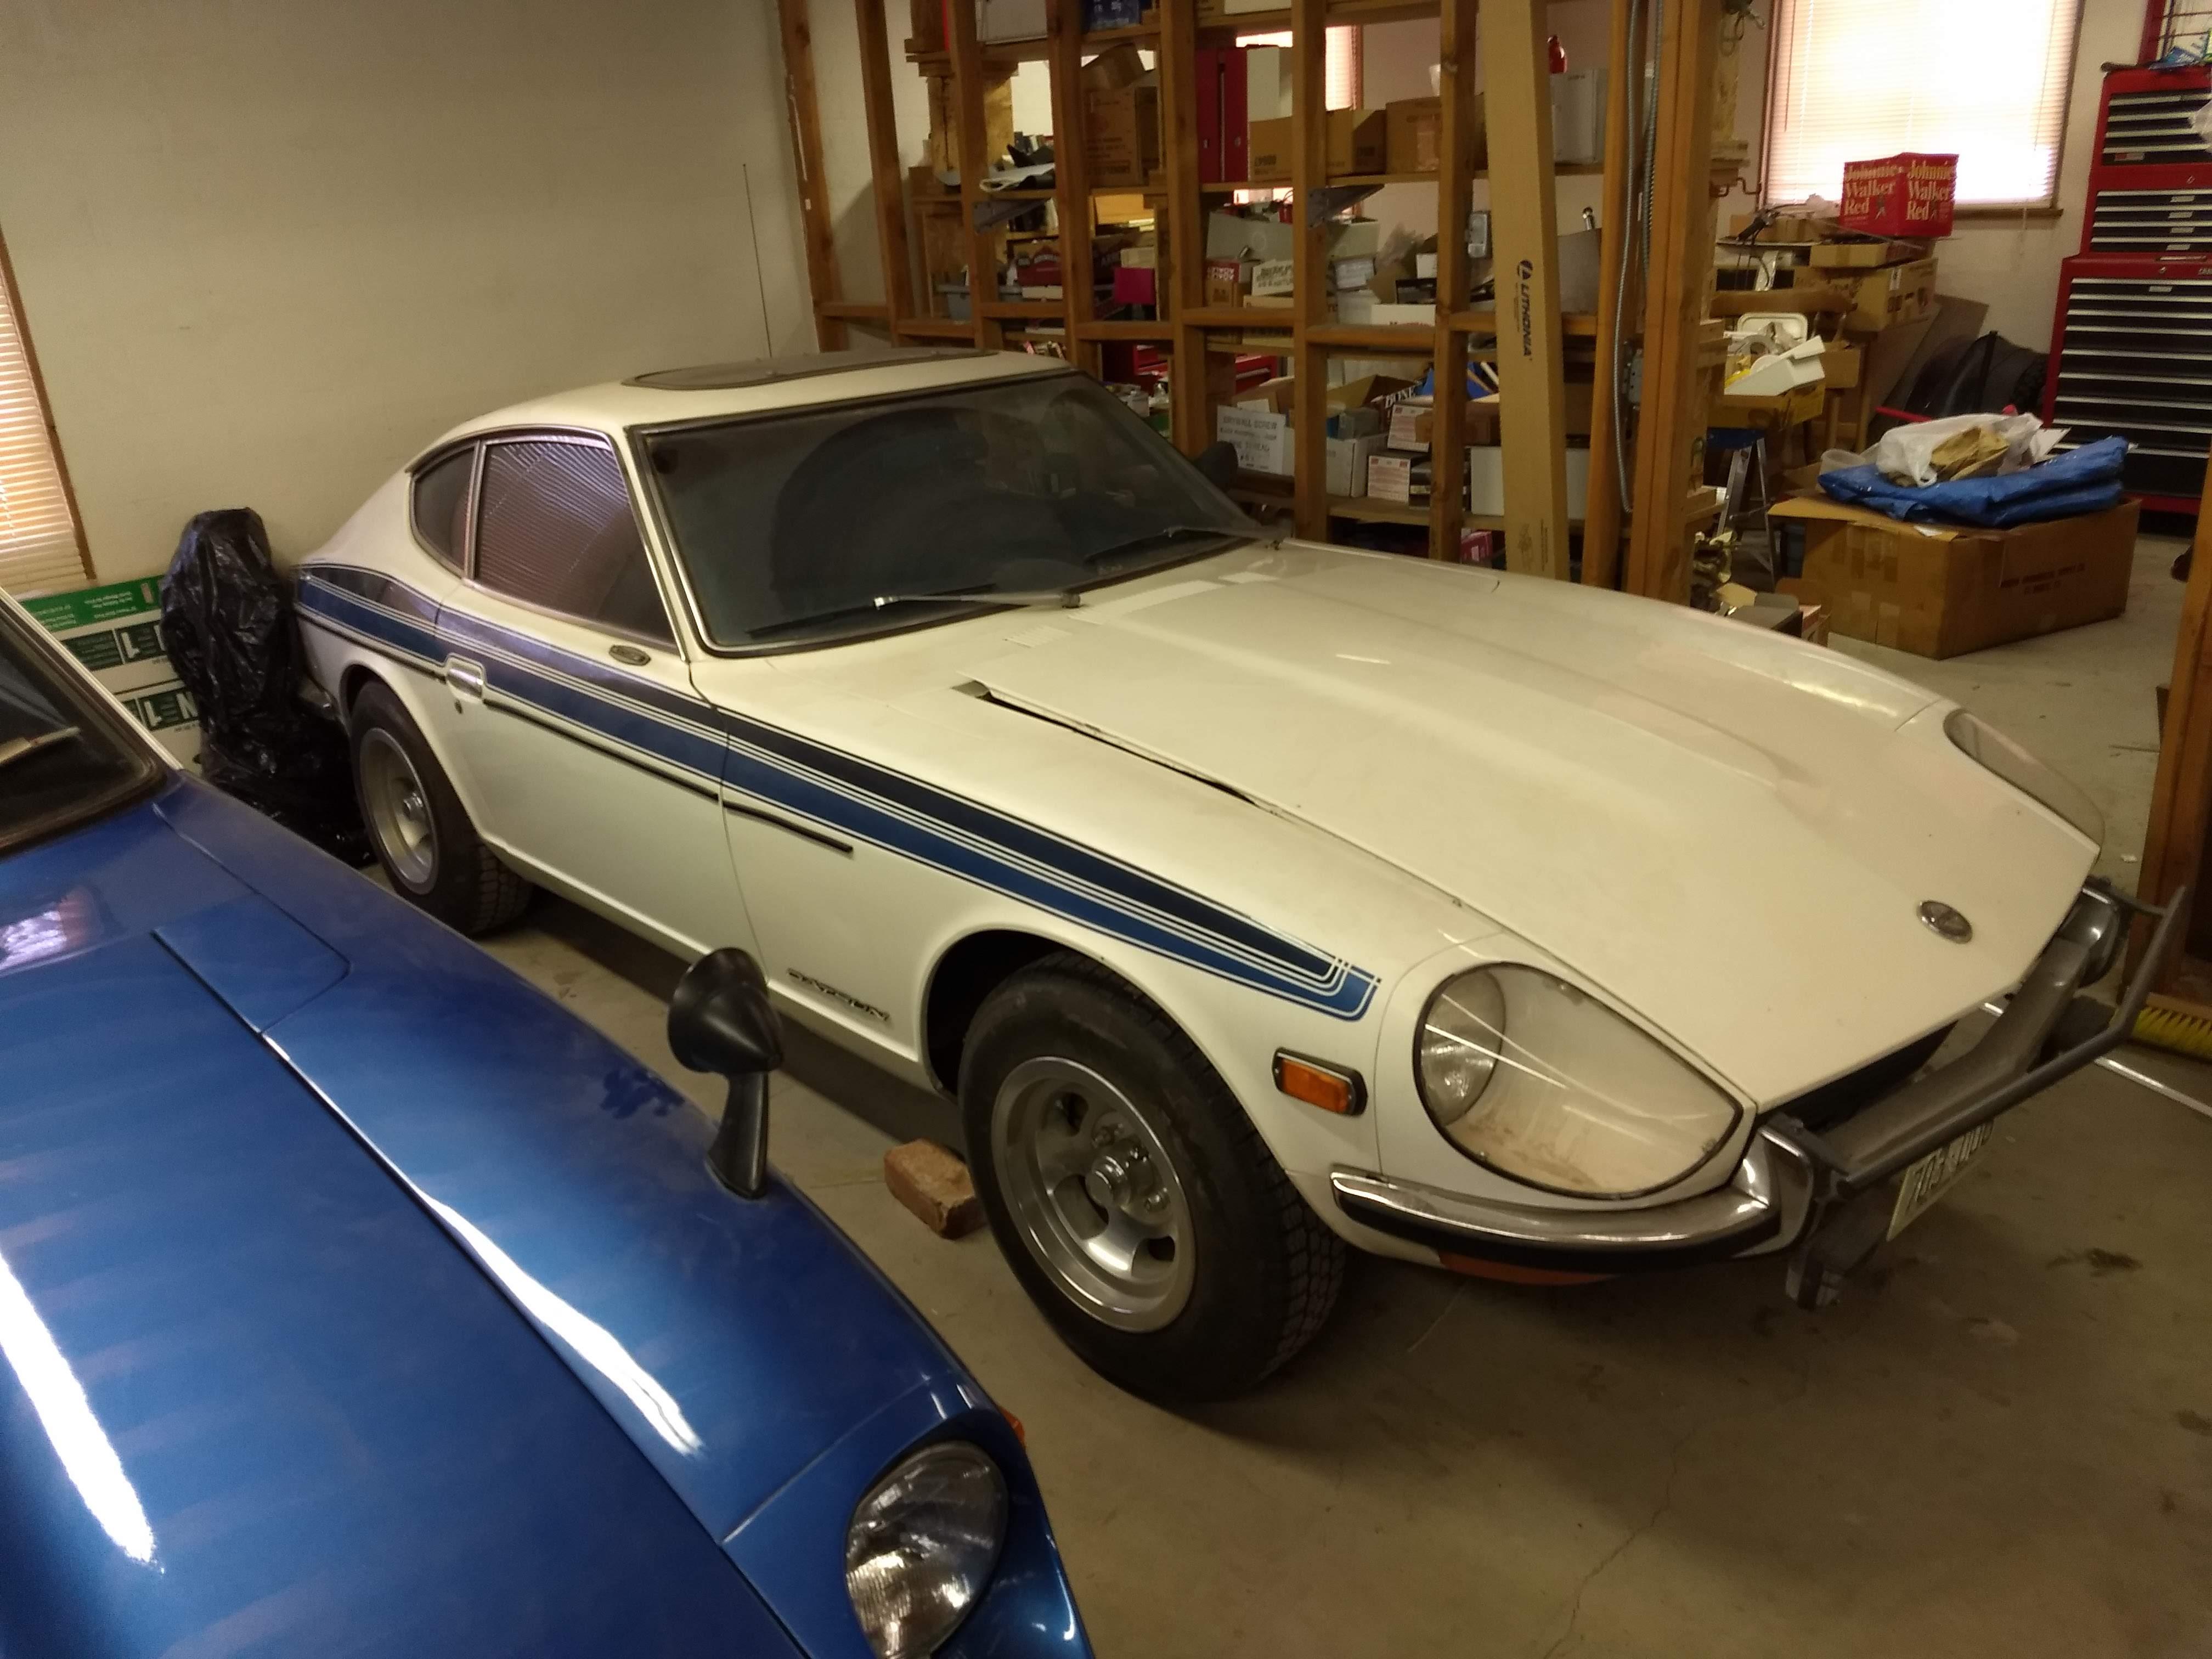
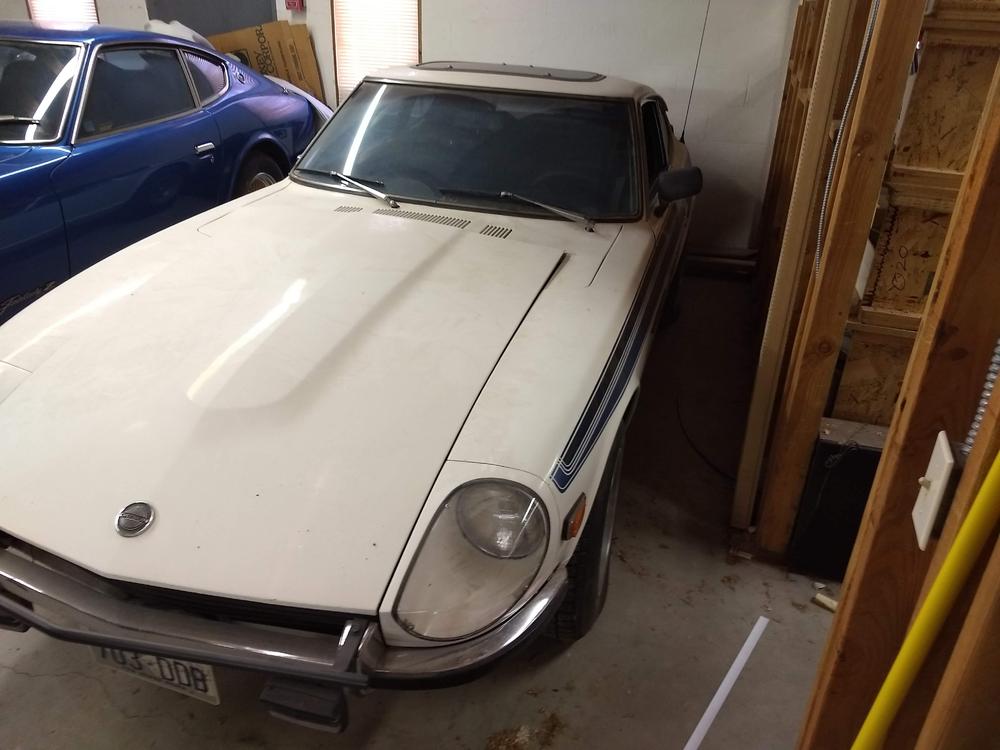
 Thanks for all of the input, we actually have 3 other 240Z's 1 1970 and 2 71's. I ahve pics of two of them with one being the white one. I will be looking to sell them as well but doing all of my research to determine proper value for each of them.


 1 point
 -
-
Thank you, I have some photos but will need to get it out for the rest of pics.


 1 point
 -
There are actually many that were brought back. Prices are still high. https://www.classiczcars.com/forums/topic/58665-1972-fairlady-z-value/ https://www.classiczcars.com/forums/topic/62503-77-fairlady-z-on-craigslist/?tab=comments#comment-579787 https://bringatrailer.com/listing/1972-datsun-s30-fairlady-z-right-hand-drive-japan-only/ Please post pics and the rest of the gang here can help you out. There are also experts from UK an Japan here who have great knowledge. @HS30-H @kats@Mike B1 point
-
 1 pointI removed the chrome strips when painting and they went back on without any problems1 point
 -
 1 pointI took the plunge on both front and rear bumpers from these guys. Here is my experience. 1) order placed June 27 2) order shipped July 3 and tracking info received 3) order received in Ontario Canada July 6. I did have to pay $27 duties. The bumpers were packaged well with bubble wrap and some sort of cloth material. I was very happy with the product. Overall the buying experience was good. Responses to all emails were prompt and I was amazed at the turnaround and quick delivery. Installation: It took about 1 hour to remove and replace the front bumper and the fitment was excellent. However, the rear was another story. I had to chase the threads as mentioned by jfa.series1 which is not a big deal. The first attempt at installing did not go well. The bumper was flush to the body at the rear and the ends were flared out over an inch. After 5 or 6 hours of massaging the brackets and installing/removing etc. I finally got a decent gap all the way around. I determined that the initial install was putting too much pressure on the side brackets causing the flare out. Spacing the bumper at least 3/8” off the back using washers was required to get an acceptable fitment at the ends. Here are some pics


 1 point
 -
 1 pointI'm declaring success! Here are my before and after pics. I've had the painted bumpers on for 7 years so it's going to be an adjustment to now seeing a bright finish. Overall, the fitment went very well. The arc on the center section is a perfect match with the rear valance. The body mount on the left end was welded a bit rearward but the bracket was easily adjusted. Here are significant things to note: The threaded fittings are all M10-1.5, a more coarse thread than OE. New bolts and nuts are required. The threaded fittings all have paint on them, need to cleaned and chased with tap and die. The carriage bolt kit does not contain lock washers. I'll give the vendor some feedback on that. Next up is installing my JDM front bumper to complete the transition to "Oh, Shiney"!
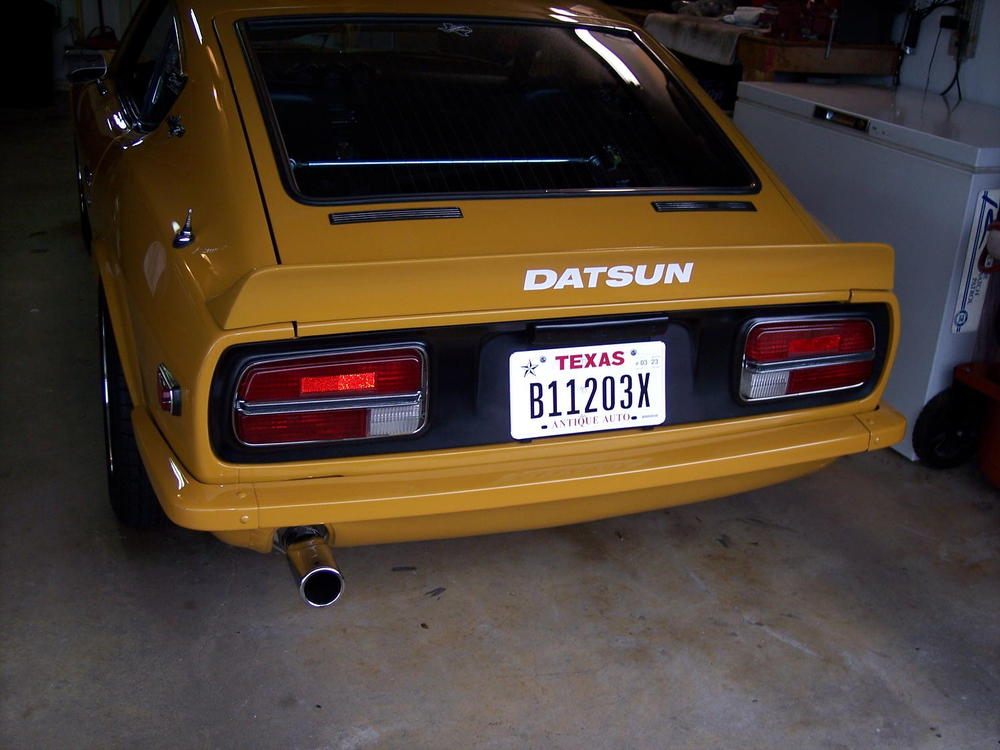
 1 point
 -
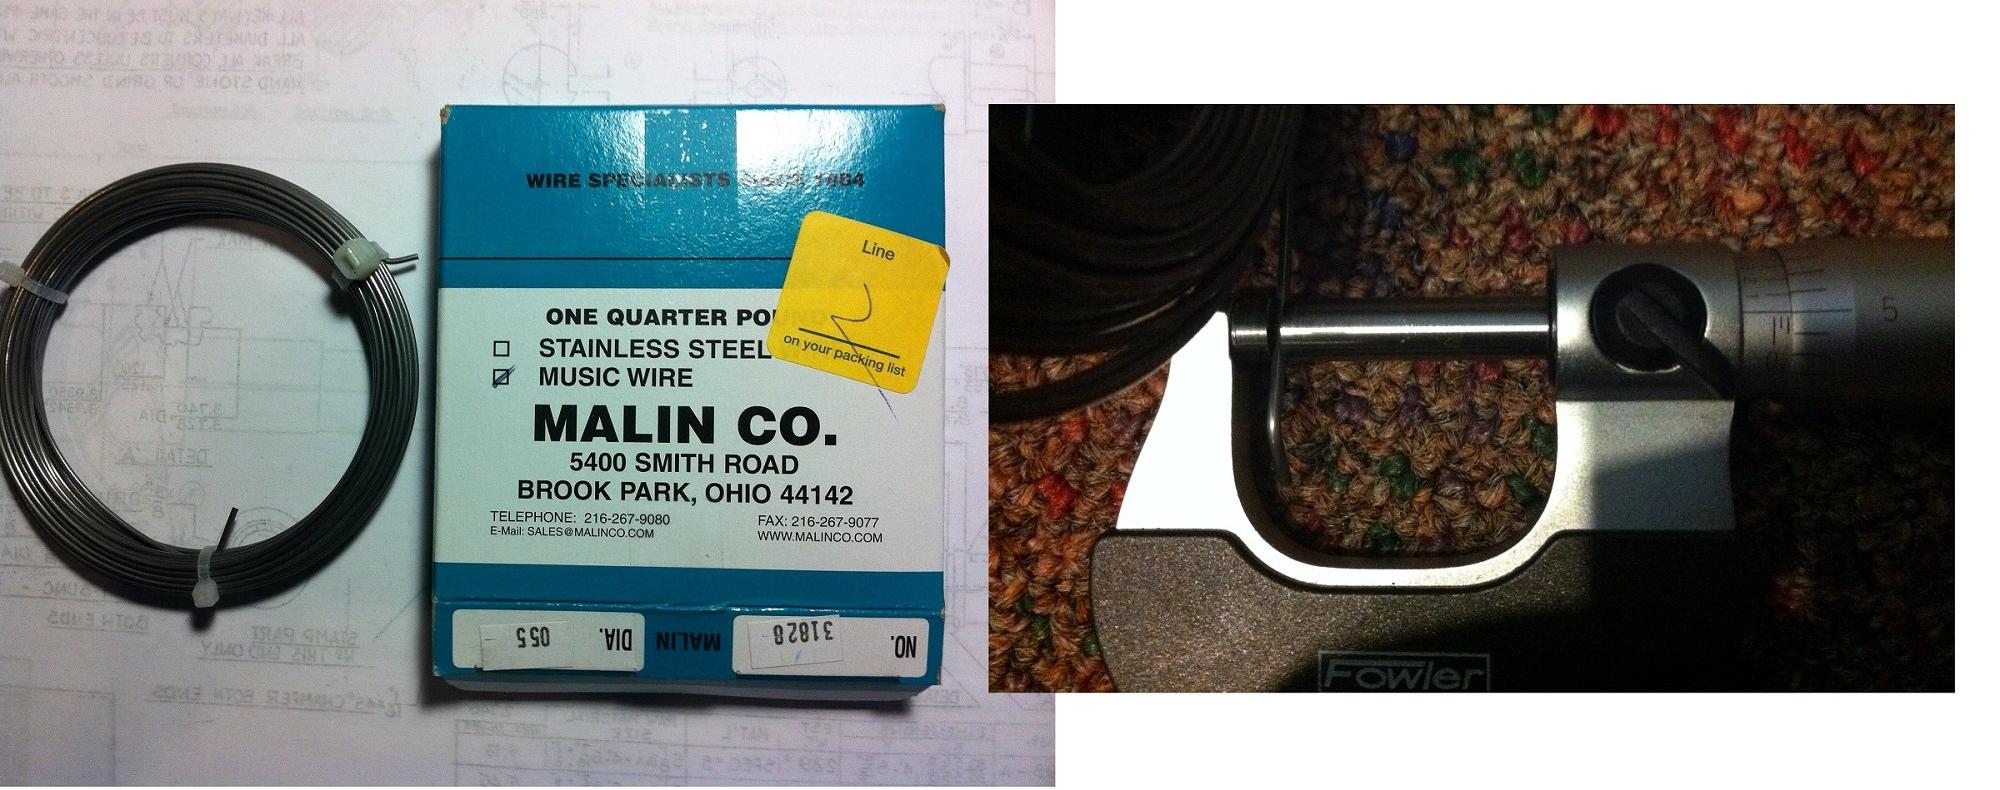
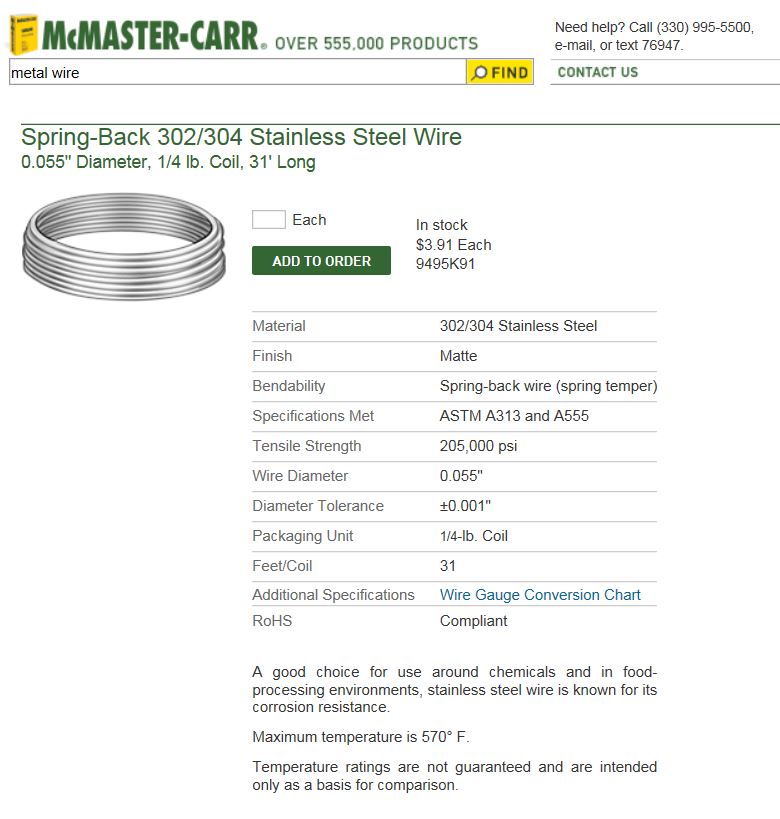
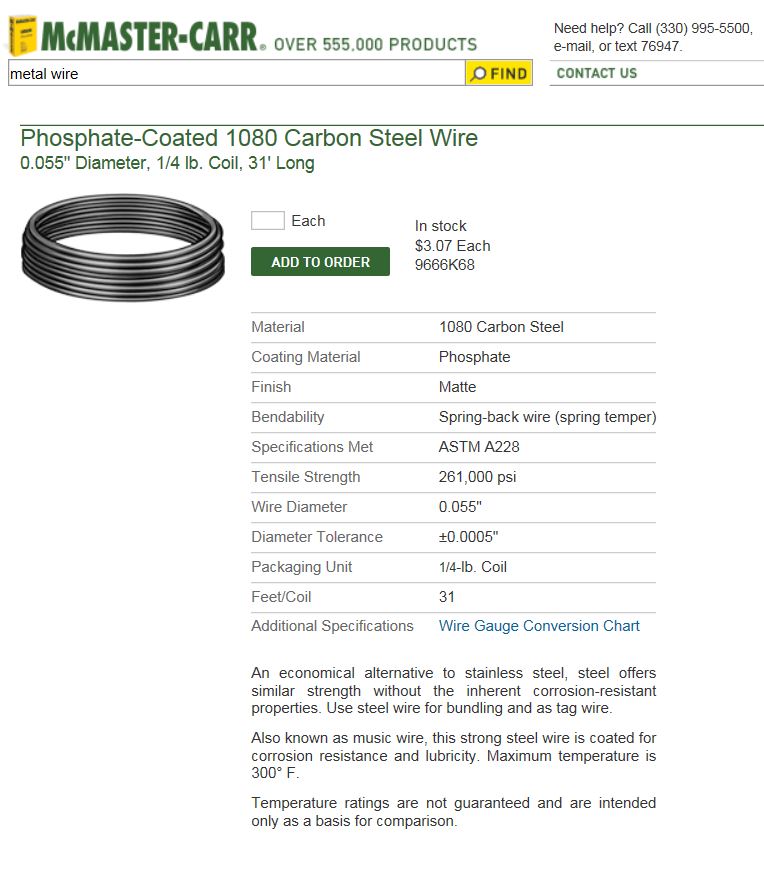
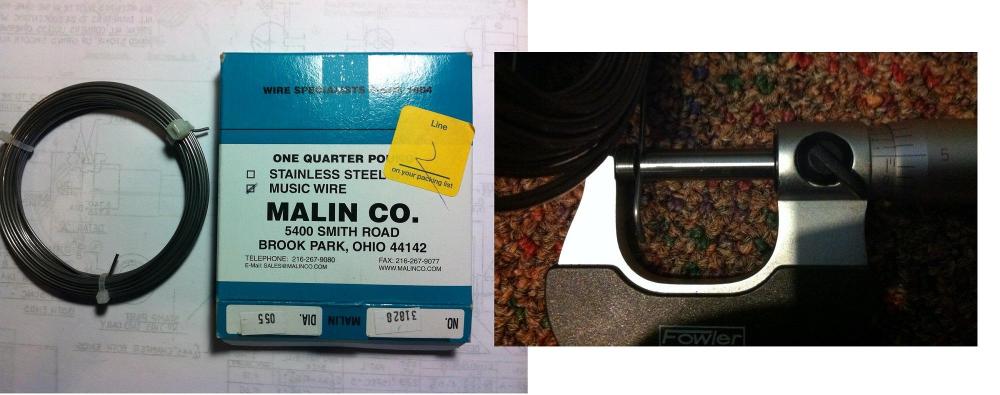
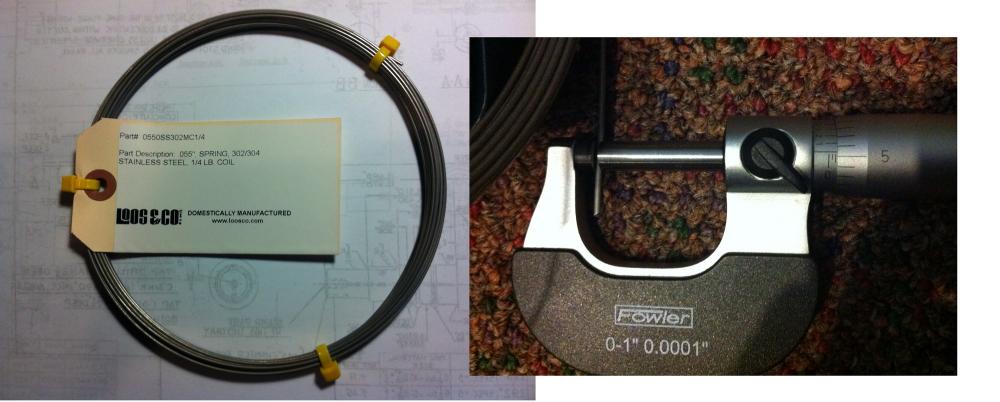
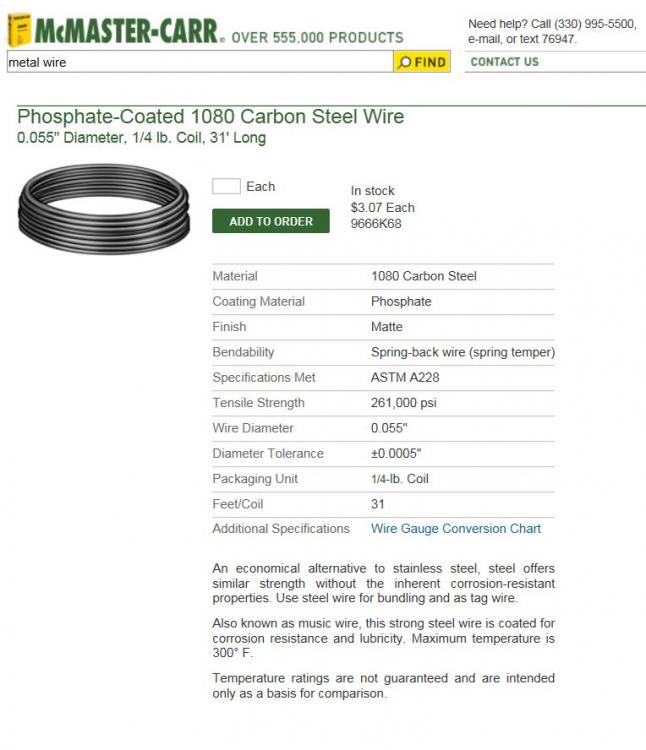
1 pointThis afternoon I received the .055 wire (both SS, p/n 9495K91 and carbon steel, p/n 9666K68) that I ordered from McMaster-Carr. Both wire types look to me like they will do the job and measured very close to 0.055" by micrometer. Both wires seem to have about the same spring back capability. That comment is a bit subjective as I just tried to feel the amount of effort it took to bend the wire until it would not flex back to its original state. When I compared the bending effort to do the same test on the original choke wire from my car, it took less effort to bend the wire to the point it would not flex back. I would say that the original choke cable wire has a lower ultimate tensile strength that either of the new wires. Hopefully on the weekend I will be able to test both of the new wire types in my car. FYI, For other Canadians trying to order from McMaster-Carr, don't bother unless you can order through a company or they will cancel your order. I first set up a web account with them and they sent me the message the next morning: "Due to the complexity of U.S. export regulations, McMaster-Carr accepts international orders only from businesses. This decision also applies to orders shipping within the United States, because it is based on the final destination of the items. We cannot accept this order or future orders." Luckily with one phone call I was able to add my company name to my web account and then I could place my order. All in all the service was good and I will use them in the future. Mike
 1 point
 -
1 pointI have just placed an order with McMaster Carr for both the SS wire and phosphate coated carbon steel wire above. I will report back with my observations of both products after I receive them.1 point
-
1 pointHere's another idea for choke cable wire if you are worried about corrosion: http://www.mcmaster.com/#9495k91/=11m0s0p It has a little lower tensile strength than A228 music wire but it still looks to have good properties and a good price. McMaster-Carr also has Hi-tensile steel music, Here are the specs for comparison to the SS wire above: http://www.mcmaster.com/#9666k68/=11m0vpx This wire does have a phosphate coating which would give a small amount of corrosion resistance and help decrease friction inside the outer cable sheath.

 1 point