Leaderboard
-


Zed Head
Free Member5Points18,788Posts -

Patcon
 Subscriber
 4Points10,921Posts
 -

Captain Obvious
Free Member4Points9,848Posts -

grannyknot
Free Member3Points5,158Posts
Popular Content
Showing content with the highest reputation on 10/26/2019 in all areas
-
3 pointsDon't over-complicate things. ~14 psi coolant mixture is all it needs to seal. The bigger you make the hole the more difficult it will be to seal. You could probably put a piece of tape over it and the manifold force on top of the tape would keep it sealed. Or even just a blob of silicone as you place the gasket. It's not a head gasket leak, it's just a coolant leak.3 points
-
I've never seen a Z where the only rust it had was on the rails, if the rails are rotten you can be pretty sure there is more rust than that to deal with. If you can do the repairs yourself you can save a lot, if paying someone to do the work for you then it gets expensive quickly.2 points
-
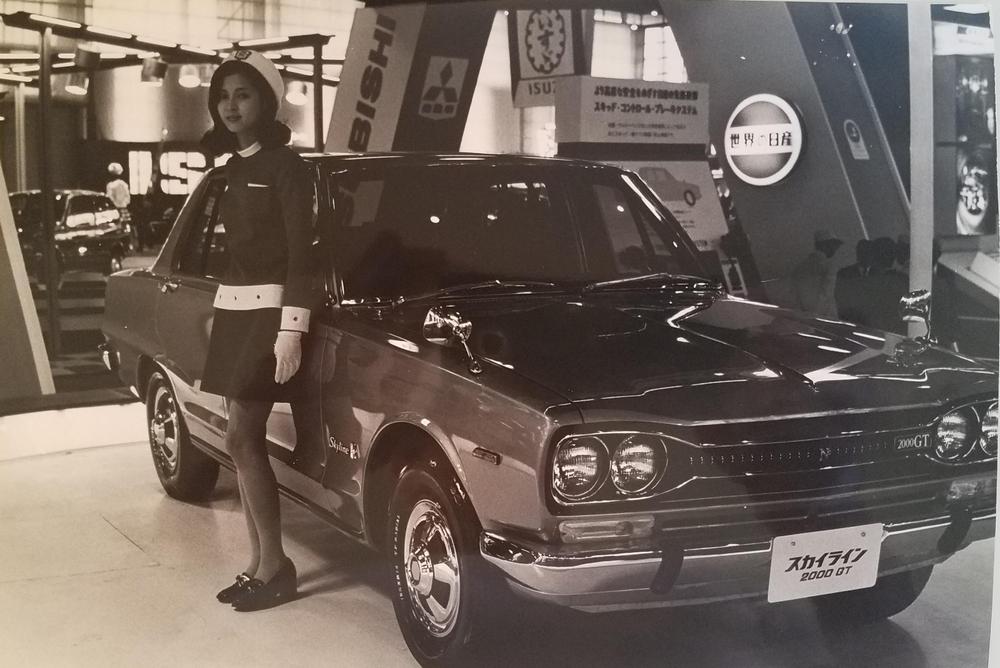
 A couple of photos from my collection. Alan, the 2000 GT is labeled as a 1971 (handwritten on the back), but I think that's an error and it was actually from the 1969 show. It seems to be the same model standing next to it as the 432. Do you agree?? -Mike
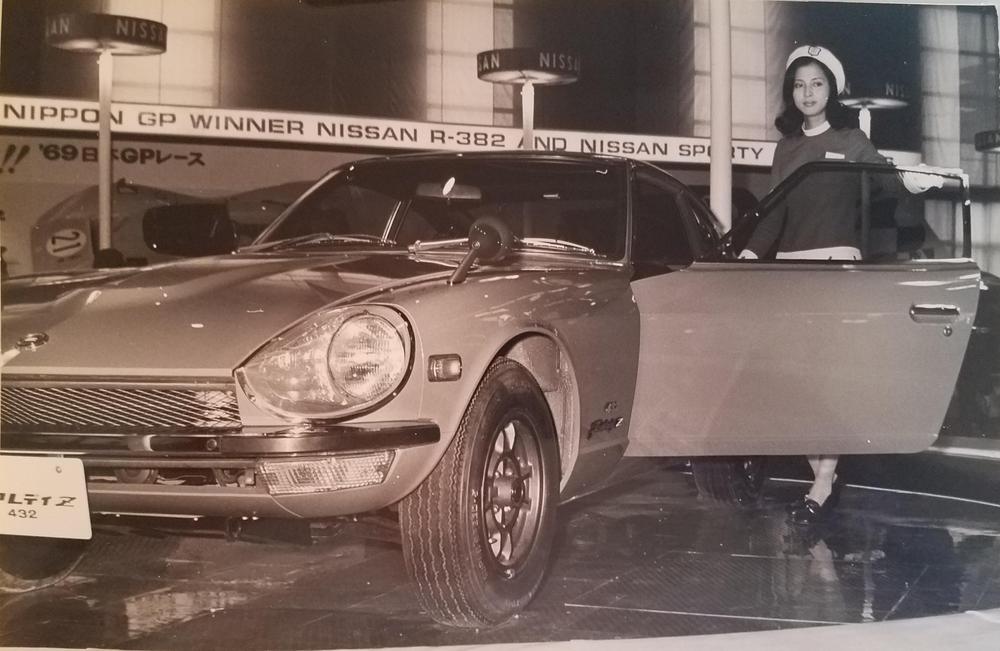
 2 points
 -
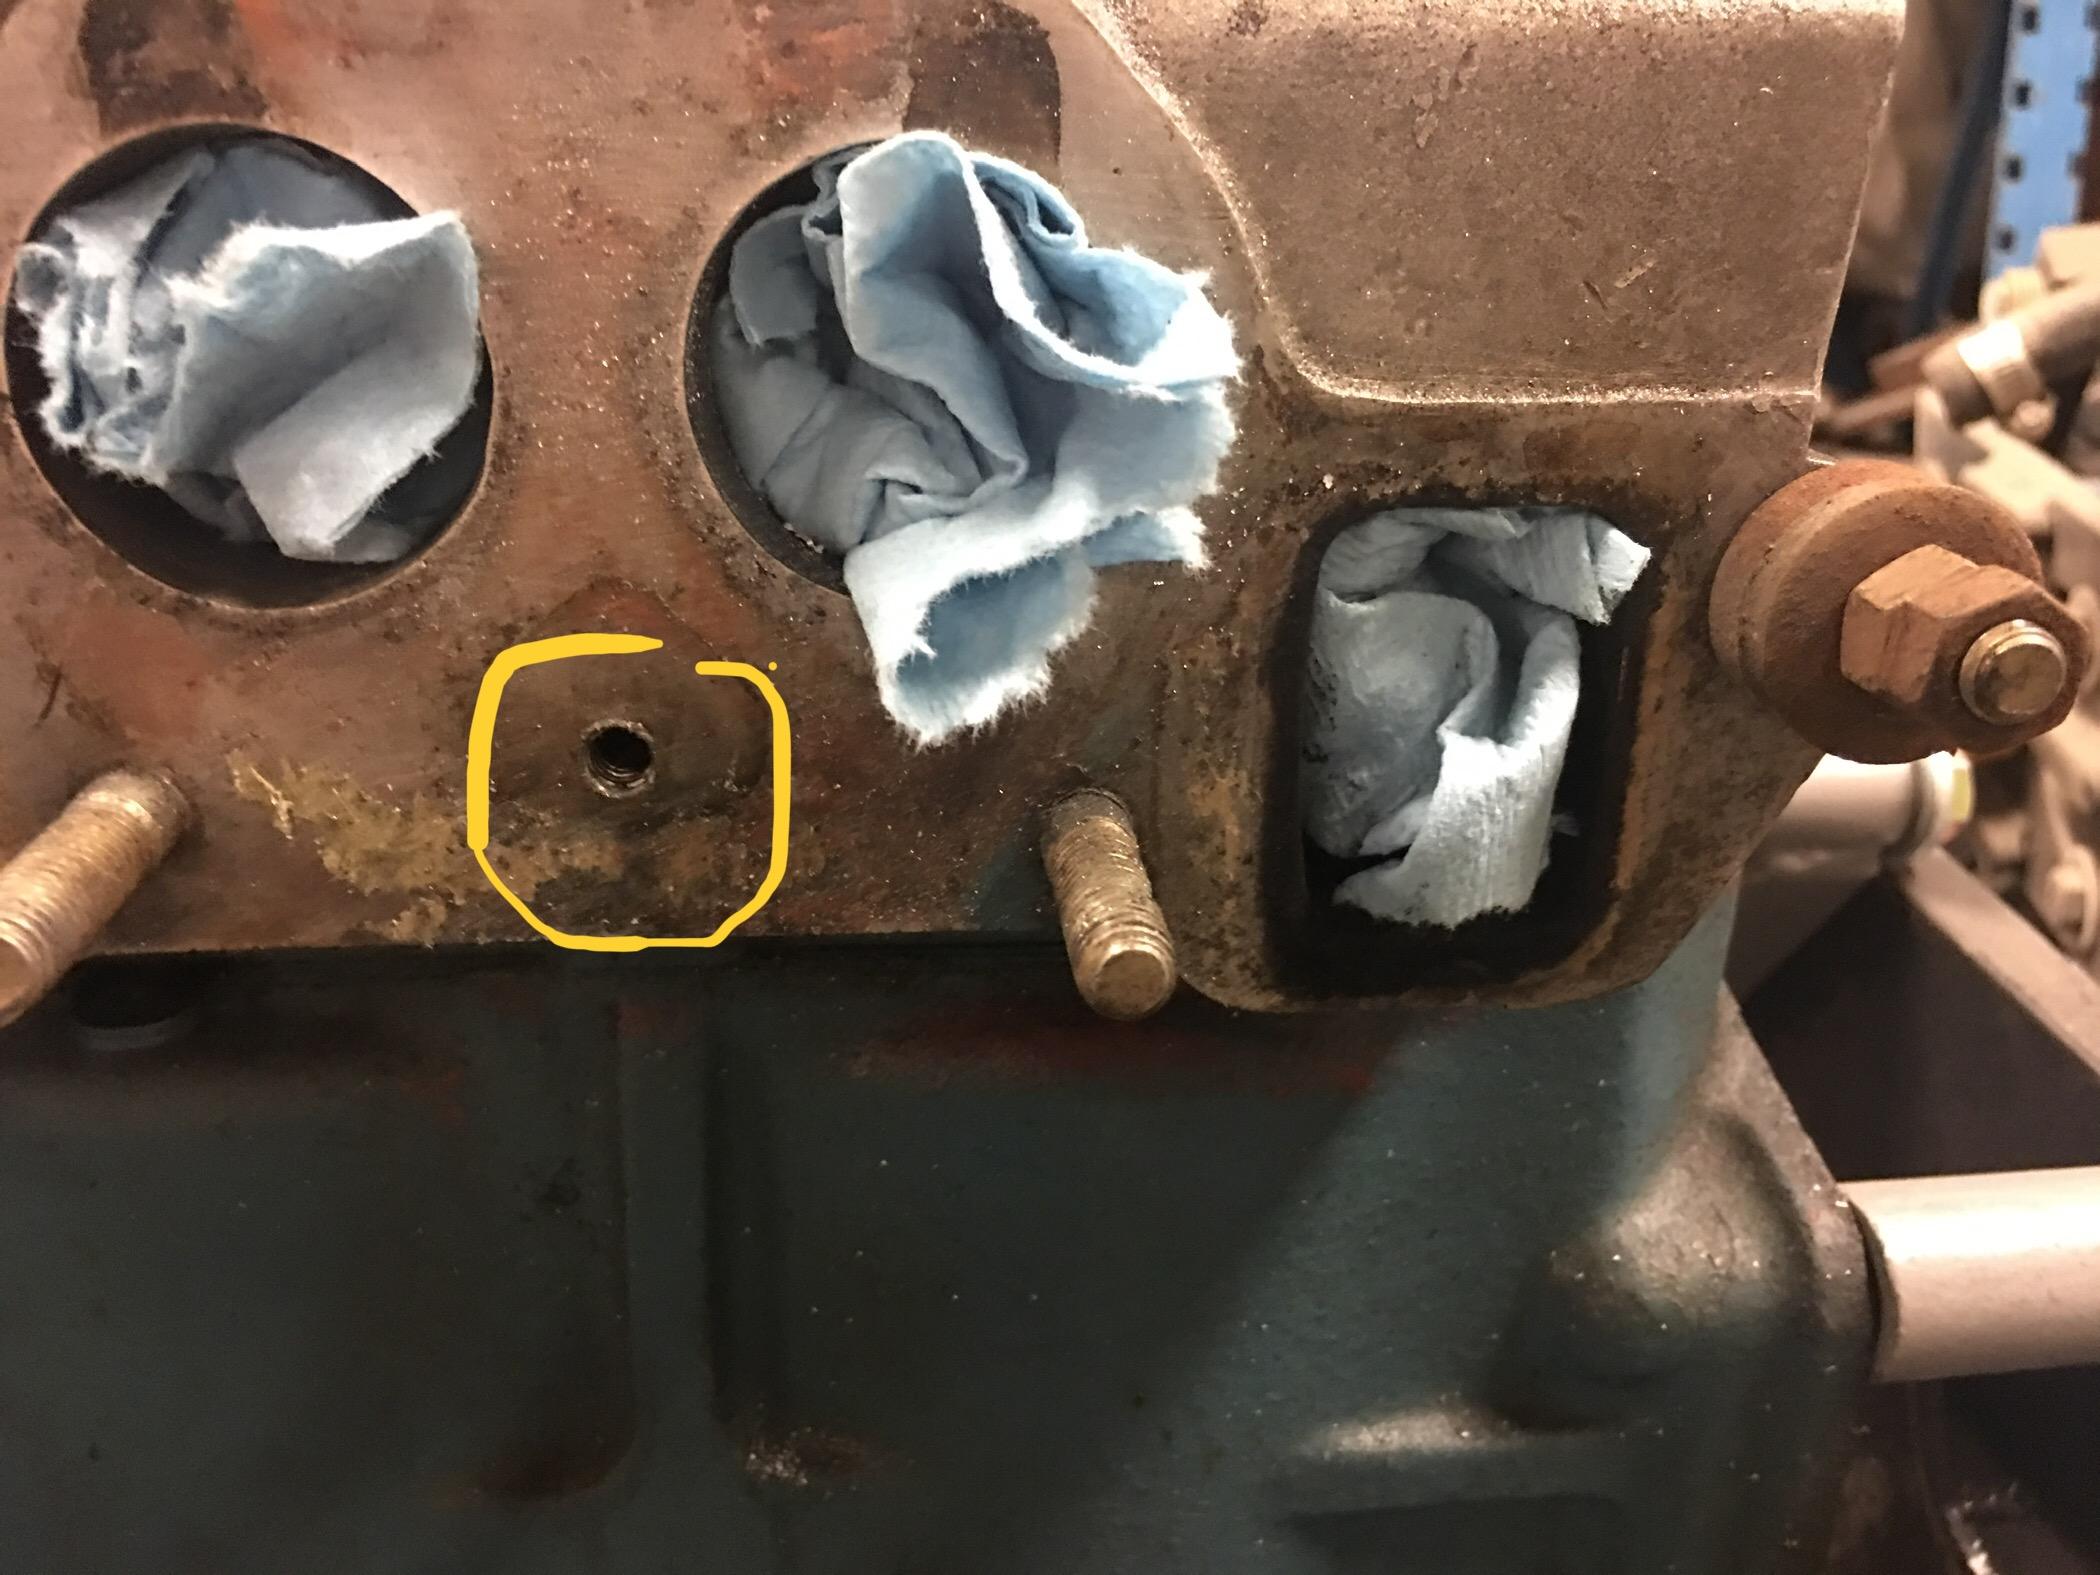
 2 pointsI had a similar hole in my E88 head from @zKars stroker motor. The original builder may have used a coolant system on the head like others have mentioned. Jim had a leak from under the manifold he could never locate until I took everything apart and found this leak. I used a threaded rod to plug it.
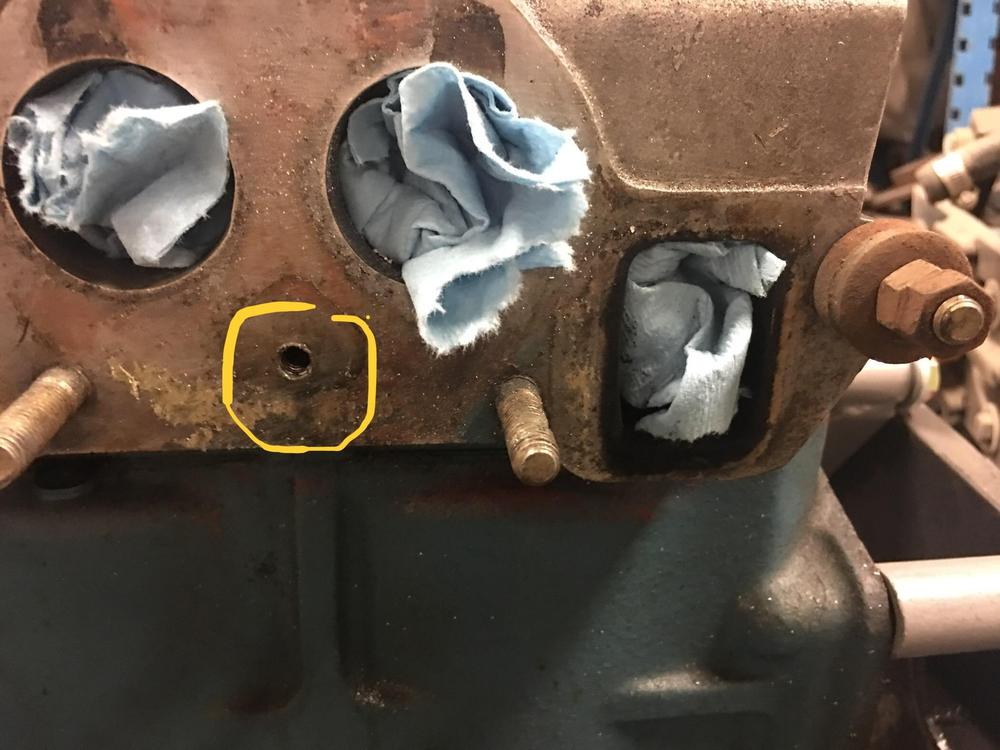 2 points
 -
 2 pointsI read an article a few years back about some of the worst business decisions ever made by a corporation. I seem to recall for example the "New Coke" vs "Old Coke" debacle was one of them. Killing the Datsun brand was one of the worst of the list. As I think back during the late '70s, there were 2-3 brands of Japanese cars, Toyota, Datsun, to a lesser extent Honda. Then everyone else. The Datsun brand was probably their most valuable asset. I remember their advertising during that period. They weren't even advertising their cars. They were advertising their brand. "The name is Nissan". Can you imagine dissolving a well known name and then introducing a new brand to an established market?2 points
 -
2 pointsAnother case of PO's incredible workmanship. Welcome to the club!! You are not alone.2 points
-
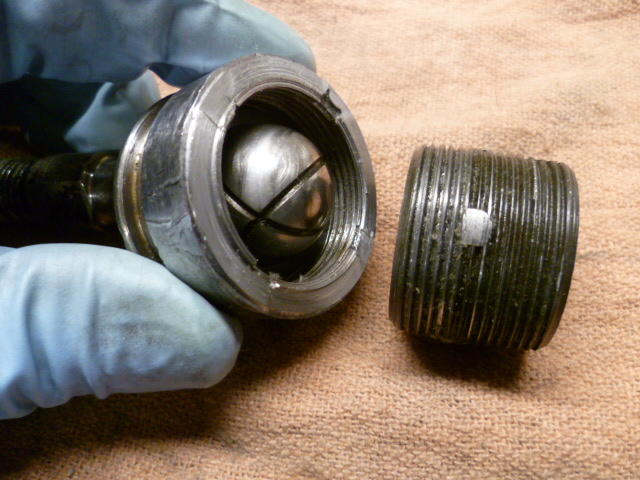
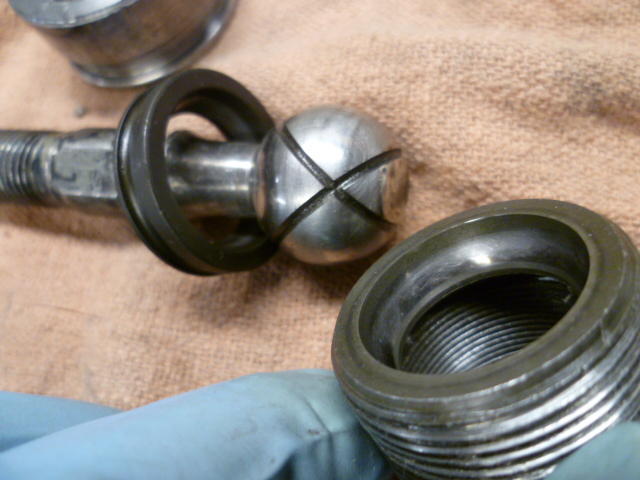
2 pointsI don't know about the earlier ones, but the later tie rod ends aren't really "adjustable". That cup and spring ls a little bit of preload to try to keep things from rattling around in there, but the ball and socket joint itself is not adjustable and wears out. See the four weld 'dots" around the perimeter of the TRE? Back when the thing was first produced, they ran a threaded collar down against the ball inside until there was no slop. Then they threaded on the slotted "spanner" collar to lock it in place, and then they welded the whole thing together. The weld has good penetration and it joins the slotted collar, the main body, and the threaded collar all together: Problem is, the ball and socket joint inside wears as it moves around and eventually there will be slop in the tie rod end. As an academic exercise, I dissected a very loose ball joint donated by @Mike W a while ago. For your viewing pleasure... After you cut through the welds and crack the slotted collar loose: Then I cut through the welds locking the threaded collar into the main body. PITA because the heat from the welding operation and the rapid cooling spot hardened the HAZ: But after enough perseverance, I've got this, exposing the ball and socket joint inside the TRE body. You can see the dot of welded threaded material still remaining on the collar: And here's how the ball and socket joint works: It was educational, but the patient did not survive.


 2 points
 -
 That's how I took it. In fact, I have two new gaskets on the way. I'll install them next year. I took the car out for a 20-mile ride this afternoon. While it still needs tuning, I am very pleased that with all the help from the community I was able to rebuild them and get the car running again! I've never been good with carbs. I hope to have a detail show clean the undercarriage next week and then it is ready to be put in the CarCapsule for the winter. I'd like to keep it out longer, but I'm having some surgery on Nov. 6 and I won't be driving the Z for a few months. Thanks for your help.2 points
 -
1 pointI would definitely buy a 280z now while they are still relatively cheap, hold on to it, work on it and dream. Get yourself a few years of driving experience under your belt using the Toyota. Good luck1 point
-
 That's perfect. Traced it out and the temp and thermotime branch is what's in the picture above. Wasn't hooked up to anything. I'll get a bullet connector tool and a plug and make a new harness for the temperature sensor. Going to ignore the thermotime at this point since I don't have a cold start. Also, you're right. There is no Air Regulator at all. That's all missing.1 point
 -
1 pointSo after confirming dementia is beginning, I realized I was putting the new fender seal on the wrong lip of the inner fender. Here it is installed on the right ridge with the old style rubber strip laying beside it. The new bulb style seal is great!

 1 point
 -
There are two bullet connectors in the harness between the sensor itself and the ECU. Trace the wires back from the sensor. Measure resistance at the sensor itself. Can't tell if you did that. If your wires aren't right a new sensor won't make a difference. If the engine starts and runs with no coolant sensor reading then you probably have a bunch of "resetting" ahead of you. Other stuff has probably been messed with, most likely the AFM, or maybe there's a big vacuum leak somewhere.. The coolant temperature sensor is one of the most important sensors in the system.1 point
-
1 pointAnd, if the metal is thin there you won't have enough to form threads if you decide to drill and tap. Just be sure you have a solid plan before you start.1 point
-
 1 point
 -
1 point
-
 Film taken at Tokyo Motor Show https://www.classiczcars.com/uploads/monthly_2019_10/1969_Oct_Tokyo_Motor_show.mp4.fc0743b00efb54e38c45c2a30575477d.mp41 point
 -
1 point
-
1 pointIf you build the engine for boost now, it will be a dog normally aspirated. You will need to keep your compression low to accept boost later. A 10:1 compression NA motor with a lighter flywheel can bring just as many grins1 point
-
1 pointBelts and Braces: Aviation form-a-gasket on the block, cover and both sides of the gasket for 5min then assemble. Tight as a drum and excess wipes off with Jack Daniels.1 point
-
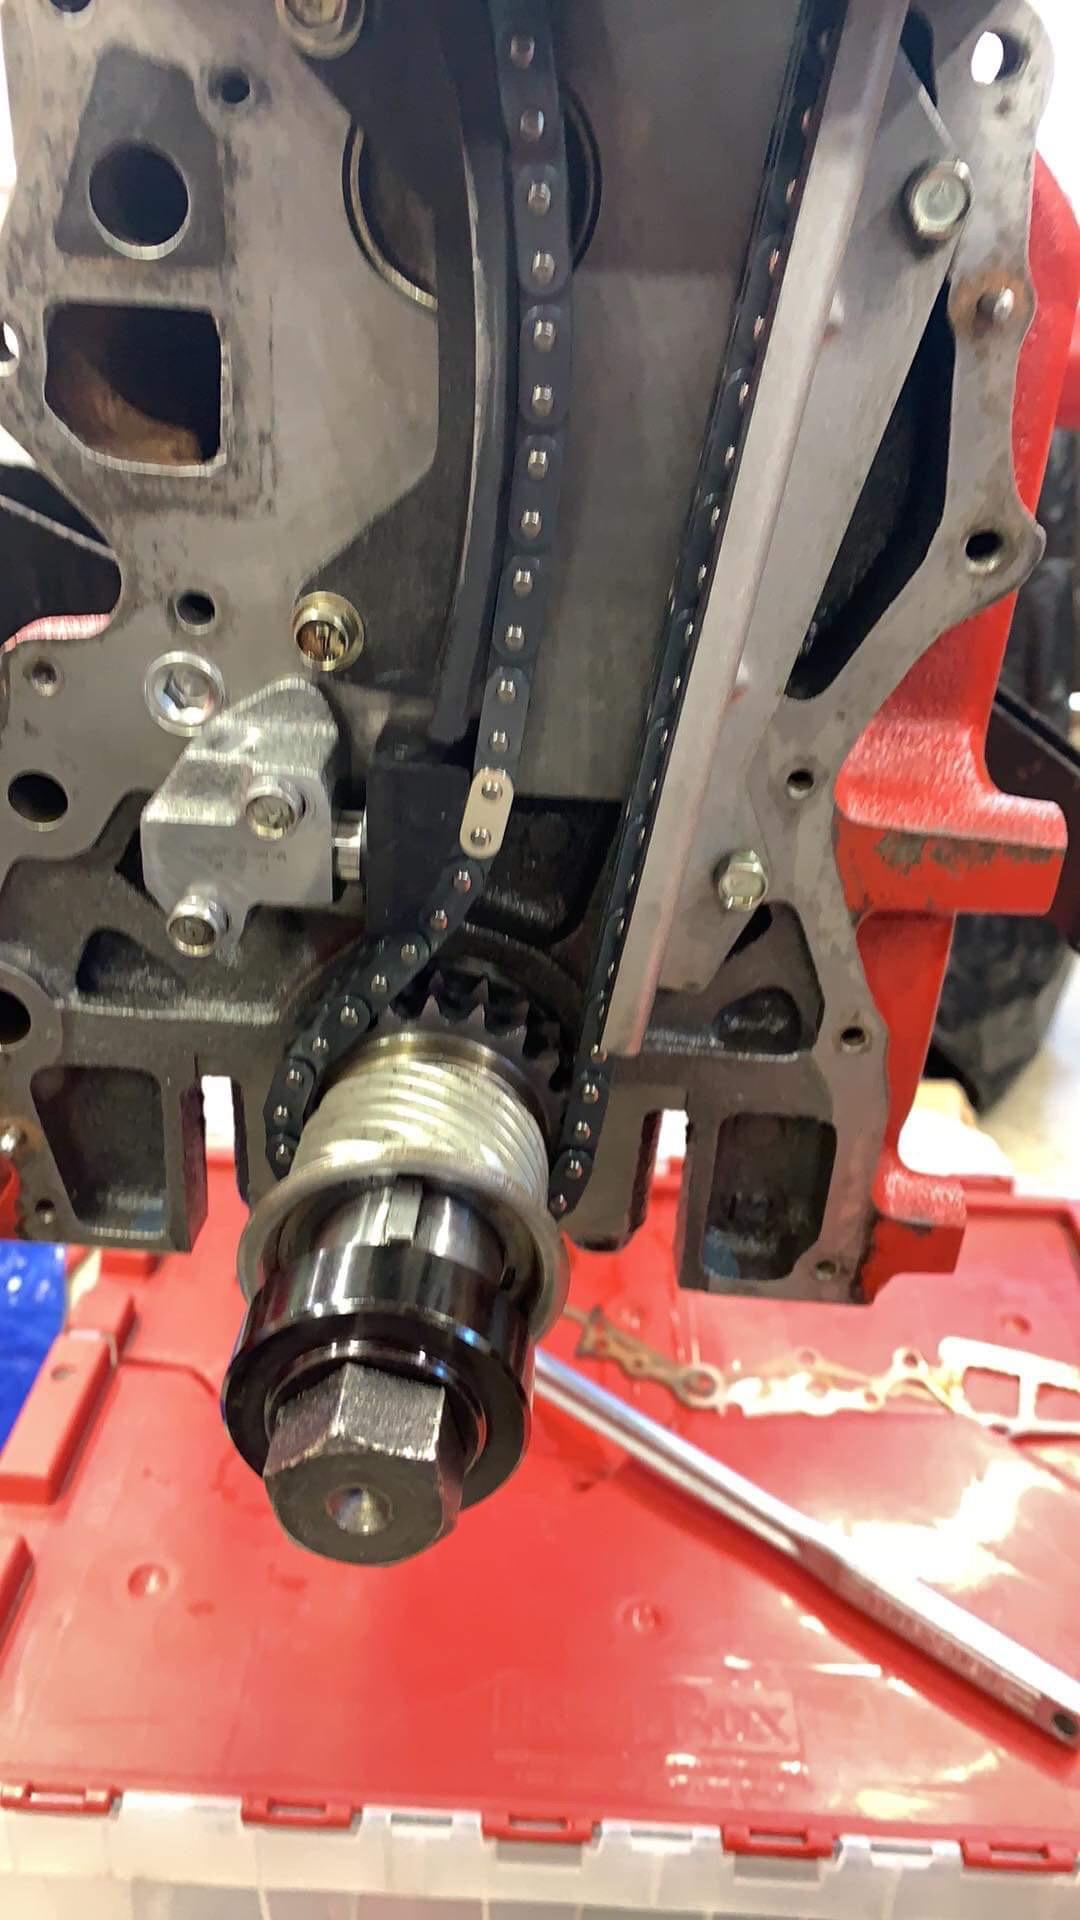
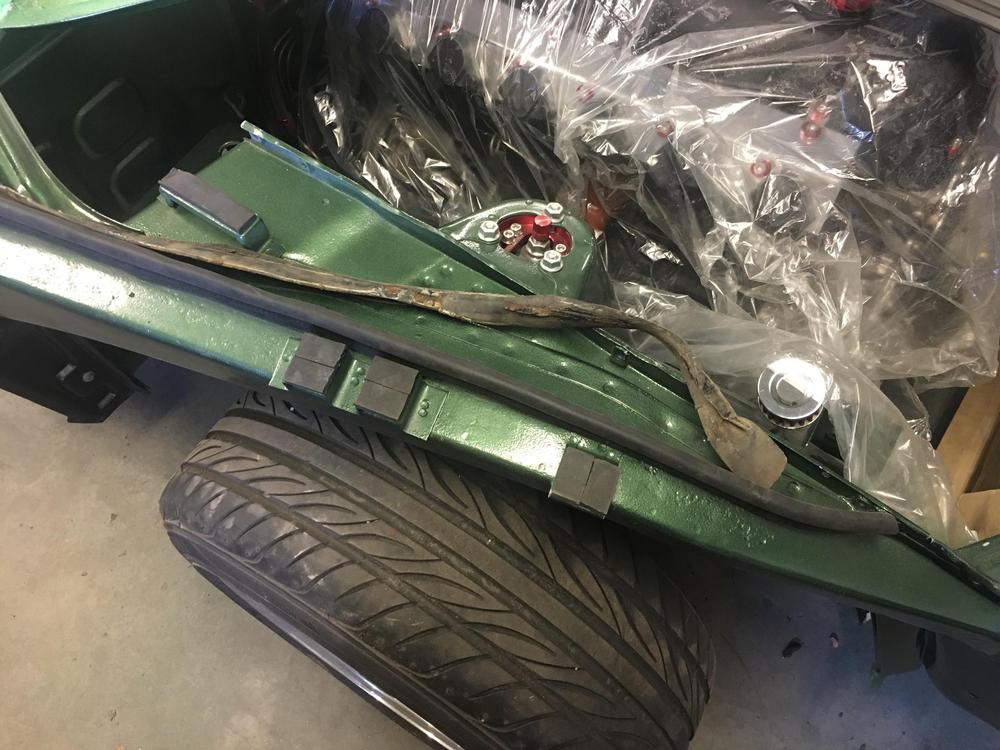
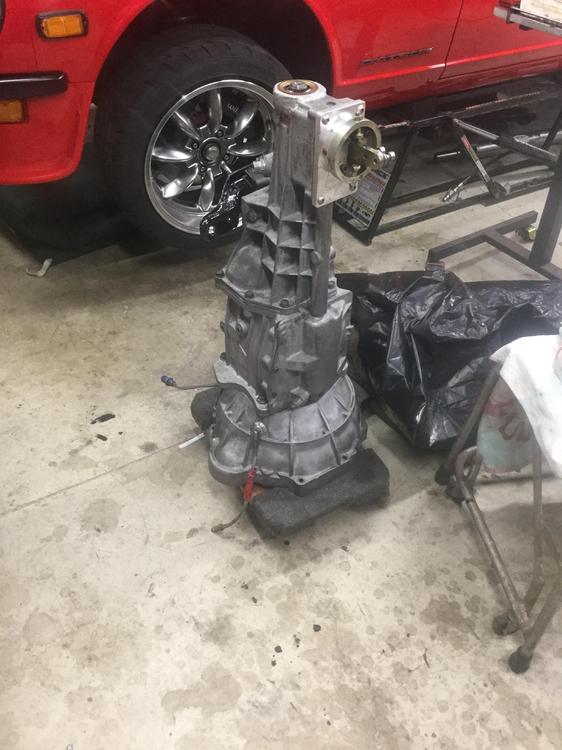
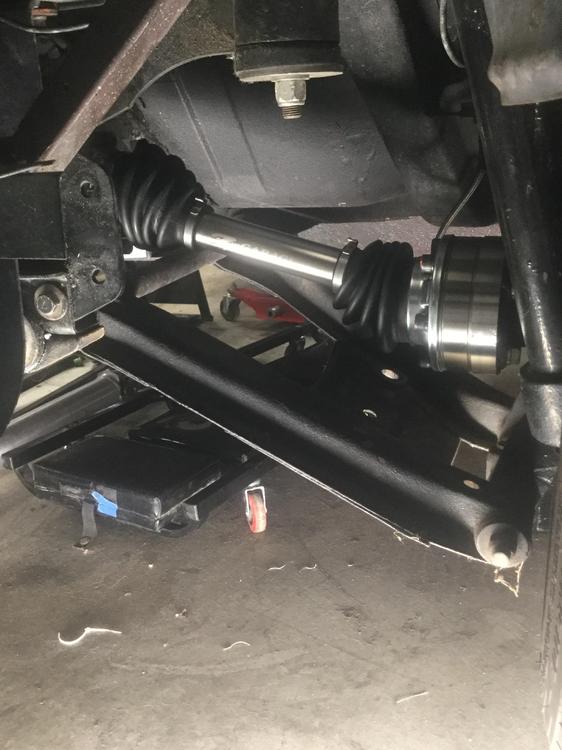
1 pointAbout a day away from MN/47 part 2. Just finished adjusted chain guides and tensioner to take up some slack! I gained about an 1/8” or so on the chain tensioner which meant the plunger wouldn’t be hanging out as far. I probably have about .030 removed from the total distance , so the slack was real. It actually seemed more prevalent then my L24 set up where I had as much as .050 removed. This time around I’m installing my newly acquired G- Force T-5 . It has a McLeod hydraulic TOB , we will see how that works . Also bought these sweet CV axles from Datsun Garage. Very nice pieces . This might be a whole new driving experience ?


 1 point
 -
 We have bombarder this fellow. I apologize for the group. It's a game we play, who's first with the answer. My smartphone is like the Coleco football game I played when I was a kid.
 1 point
 -
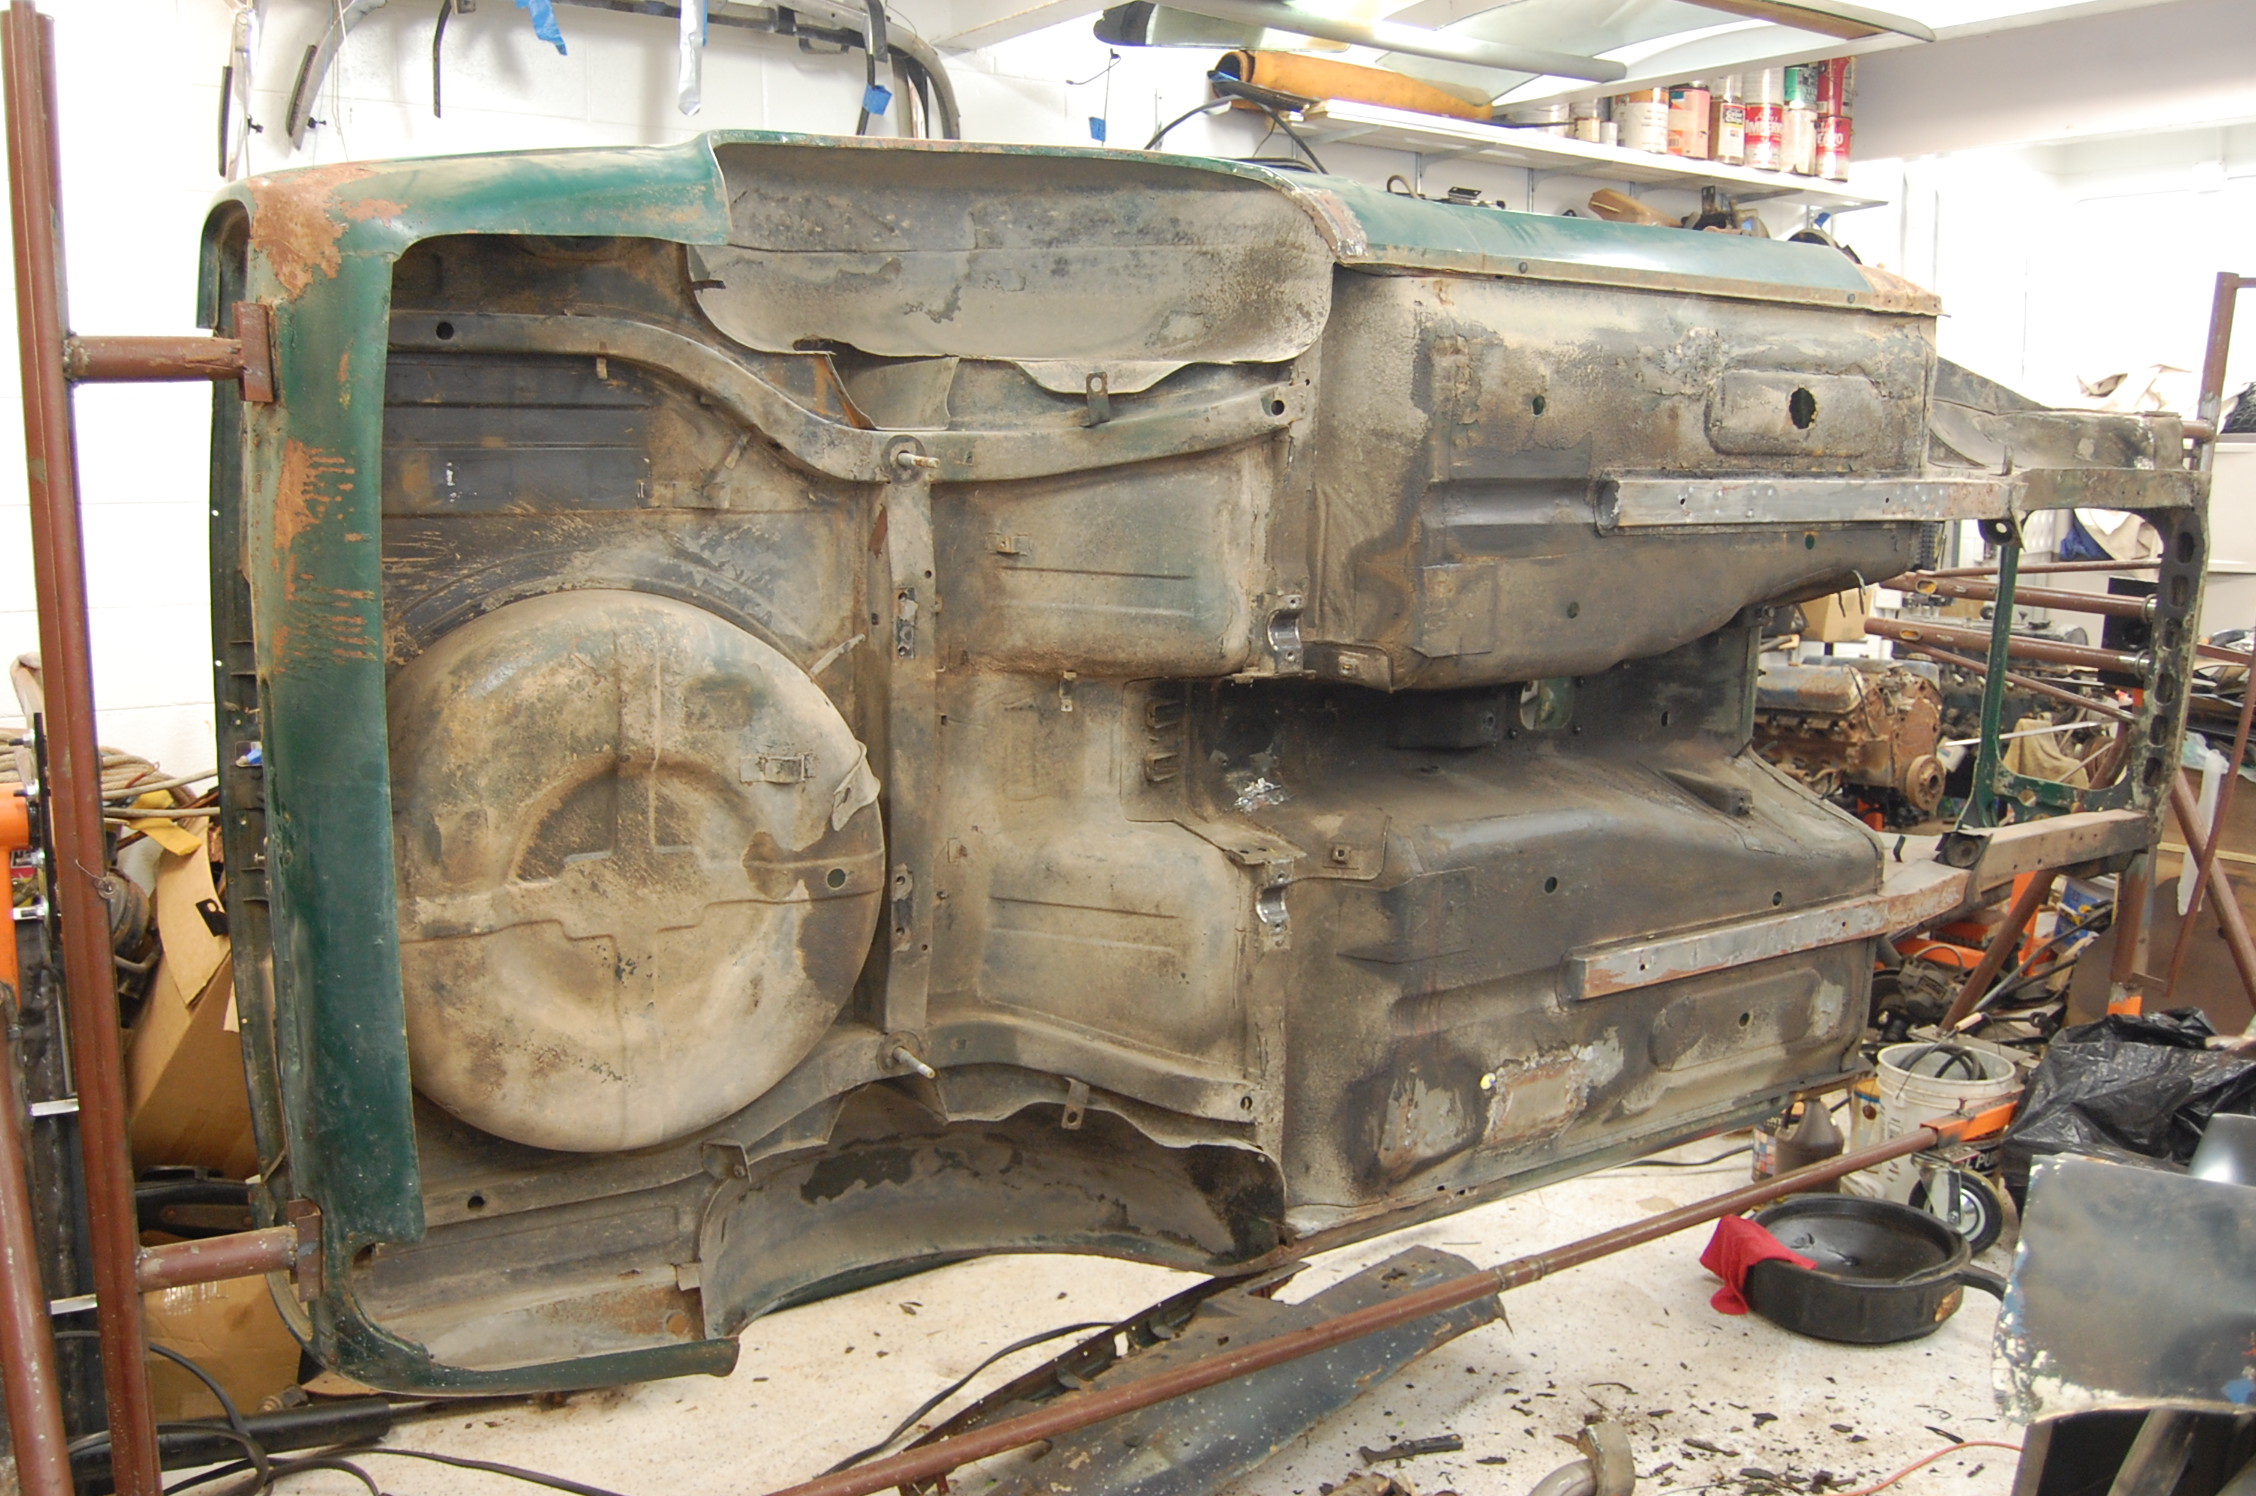
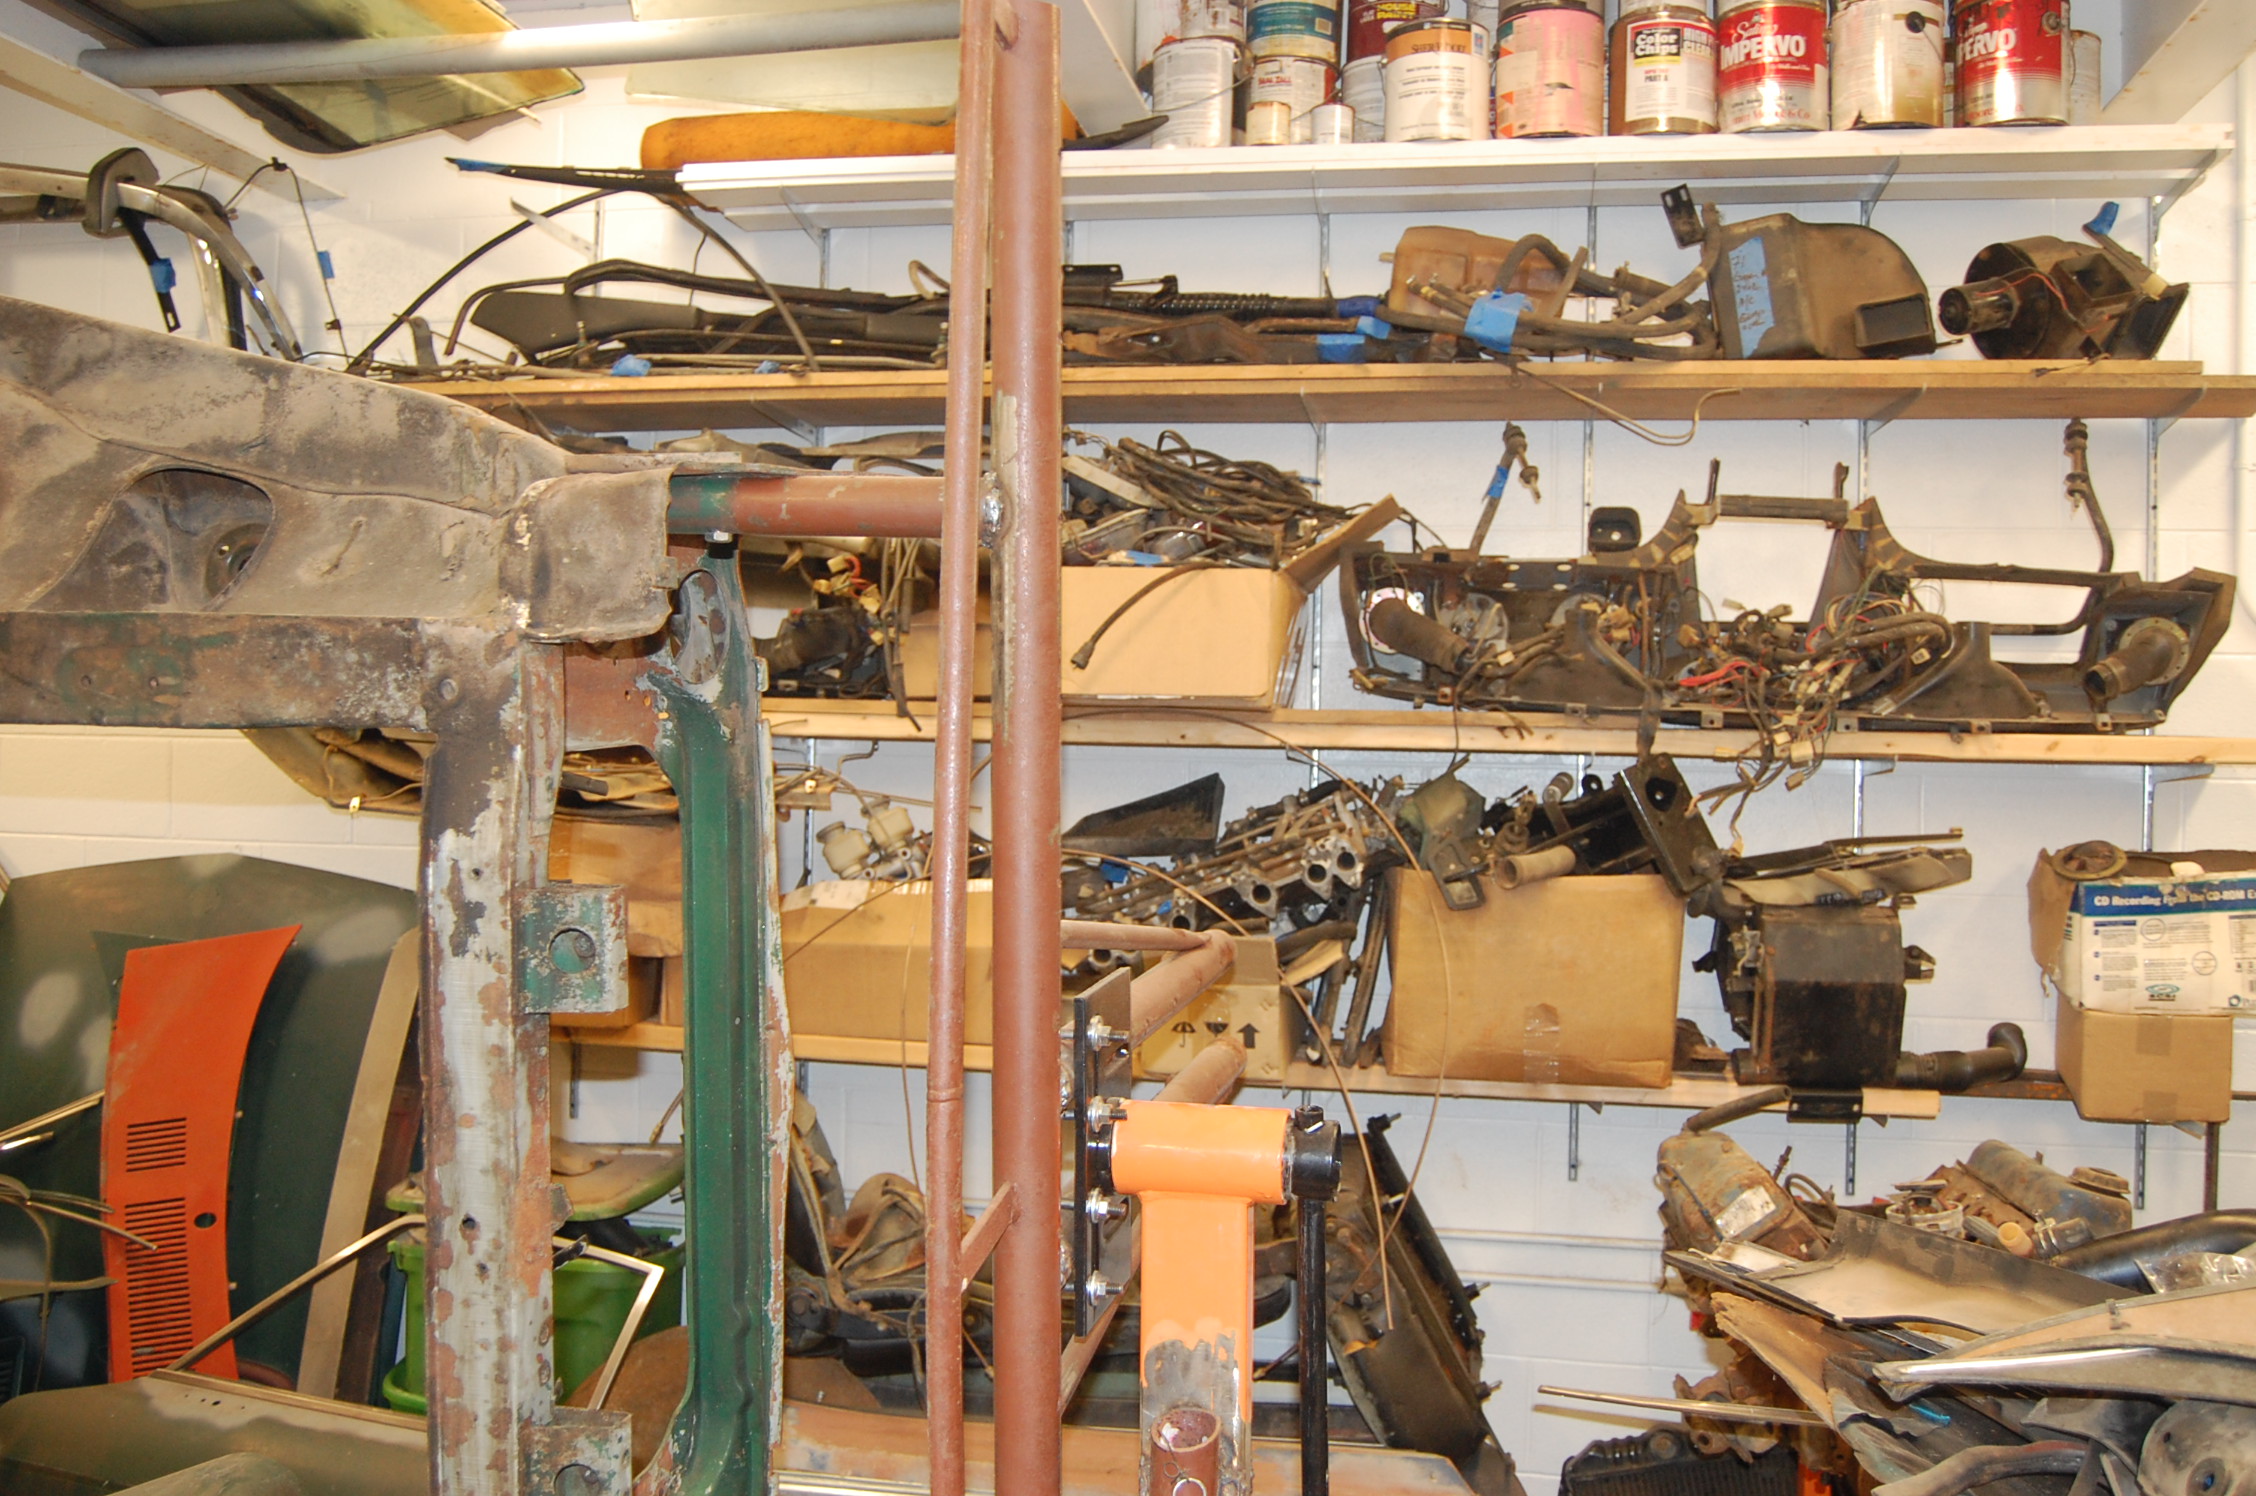
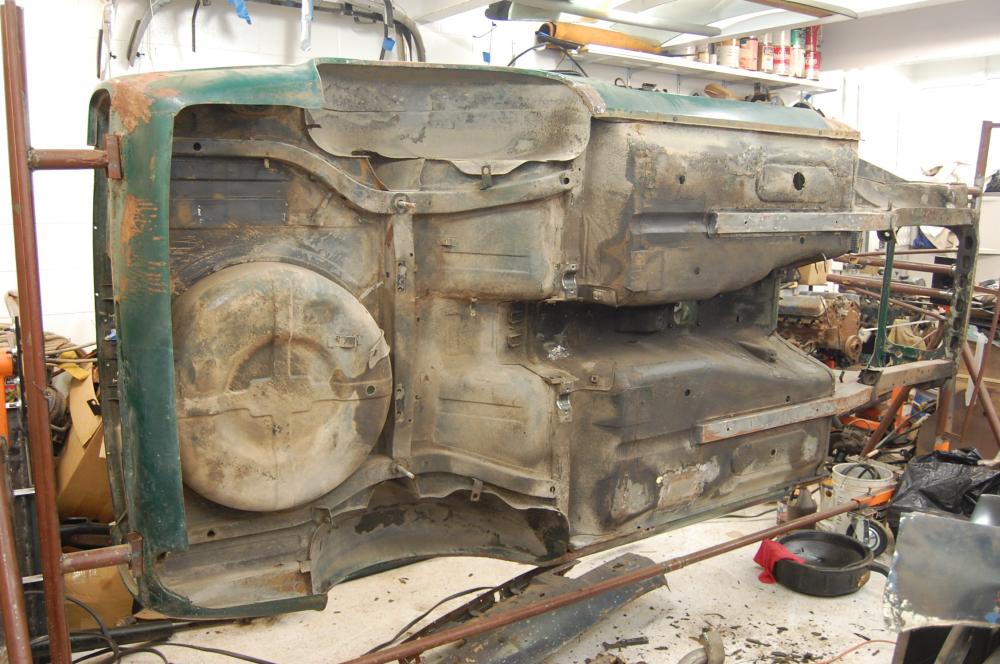
1 pointJanuary 2011 up on the rotisserie and all stripped down The shop was really crowded at this point. We eventually gave up on the Mustang...

 1 point