Leaderboard

 Subscriber


Popular Content
Showing content with the highest reputation on 11/03/2019 in all areas
-
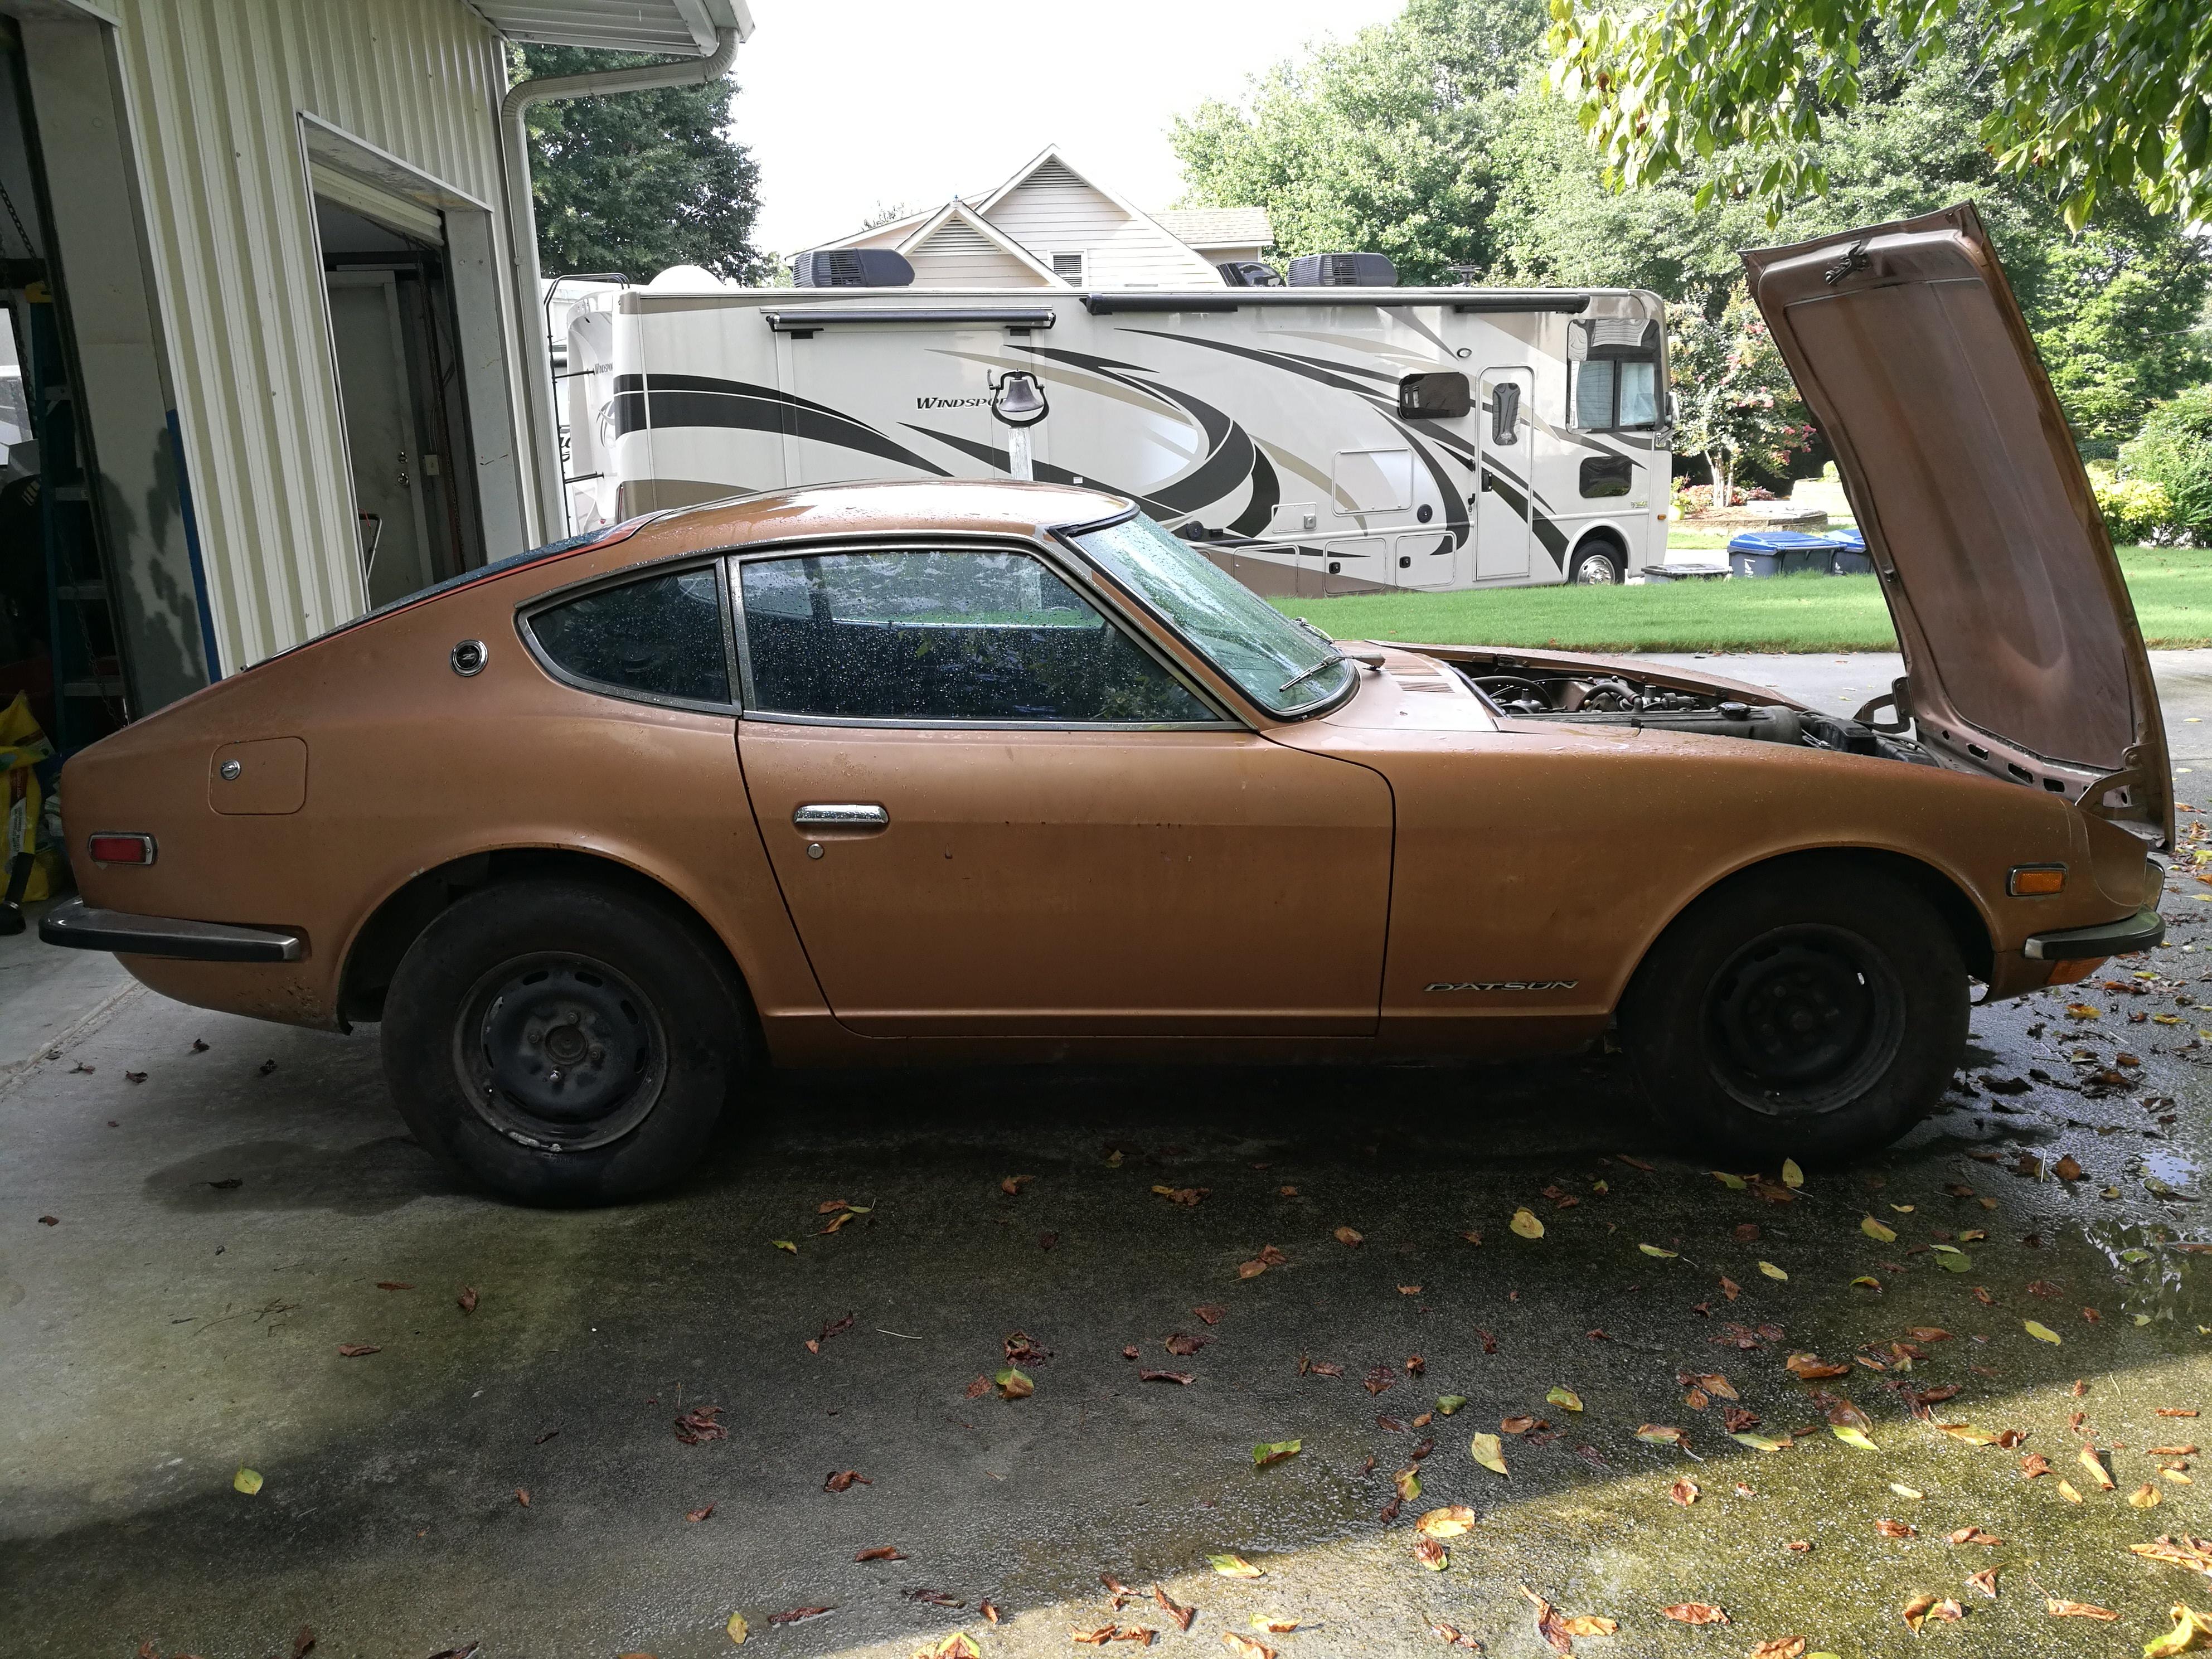
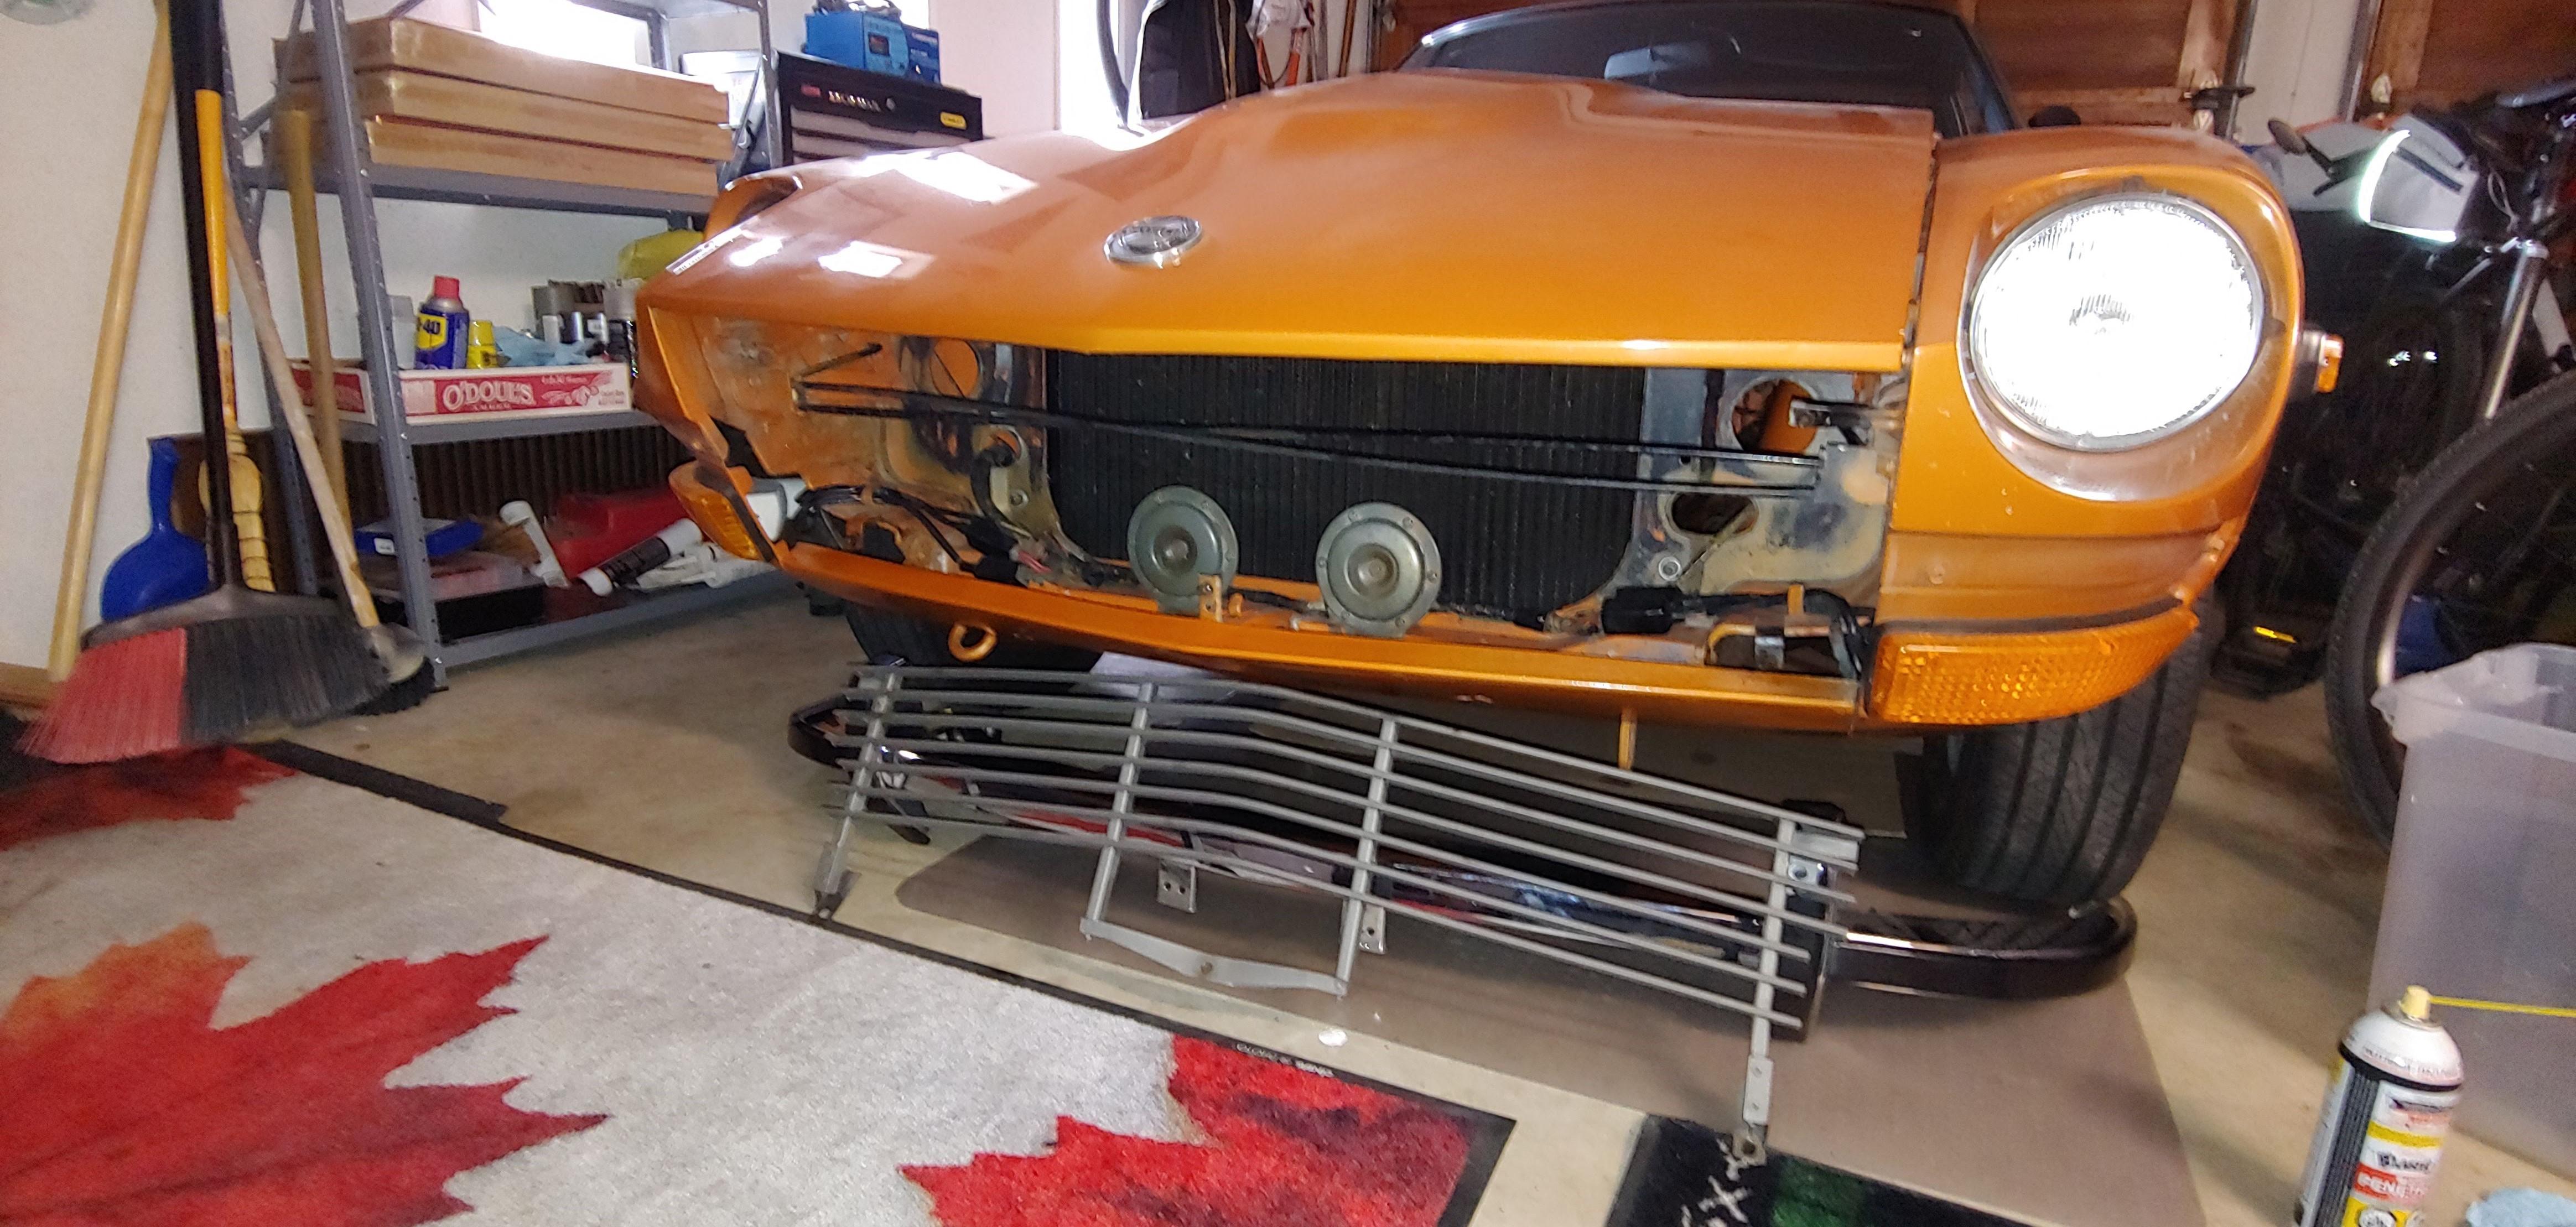
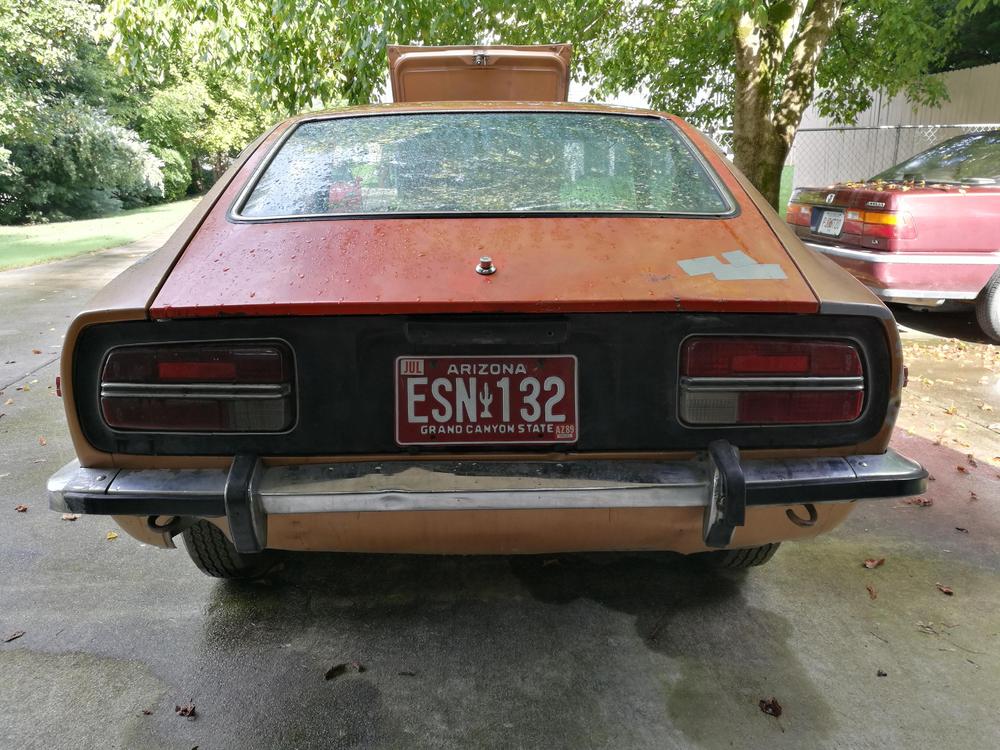
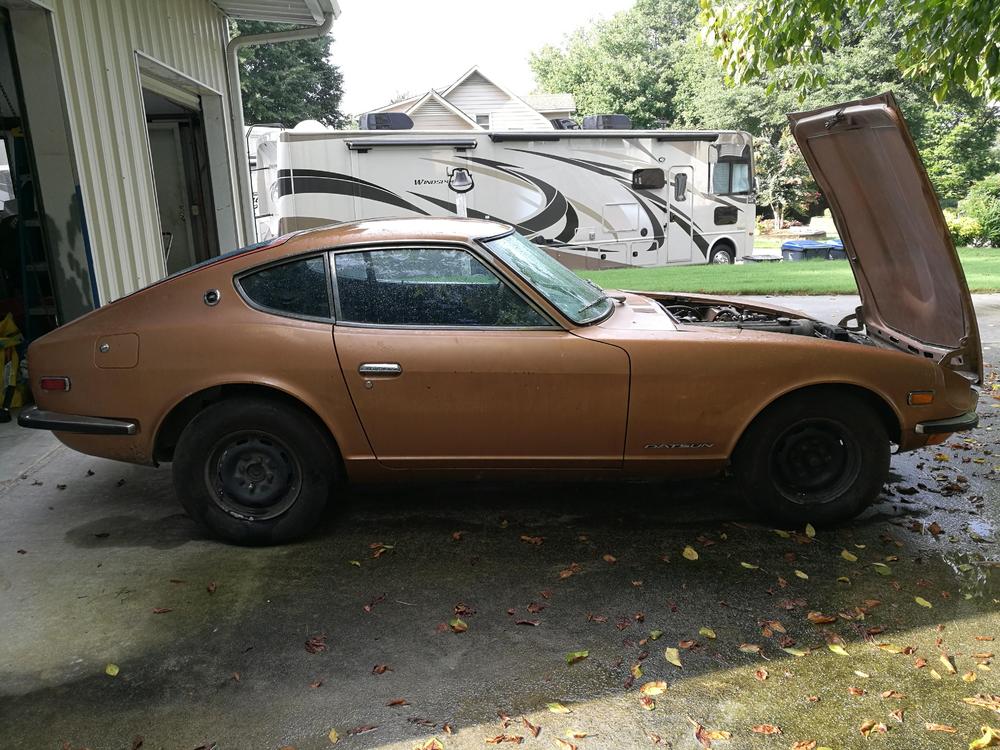
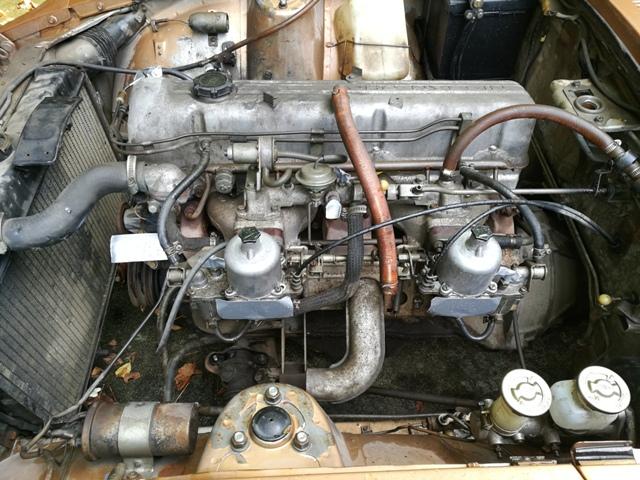
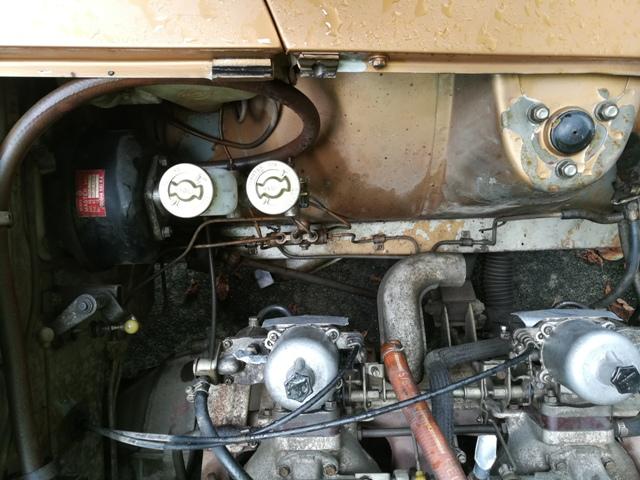
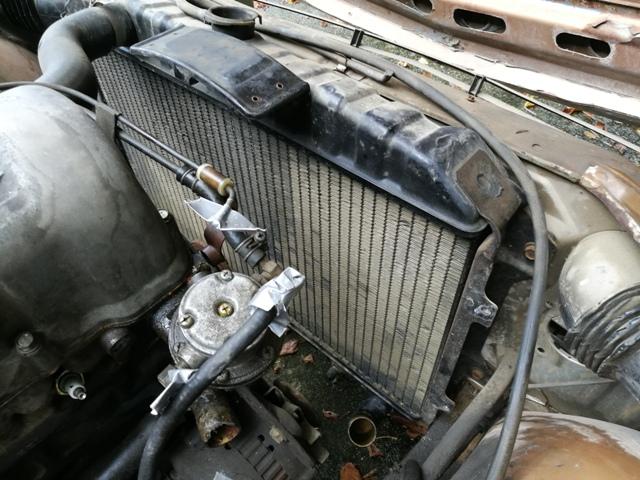
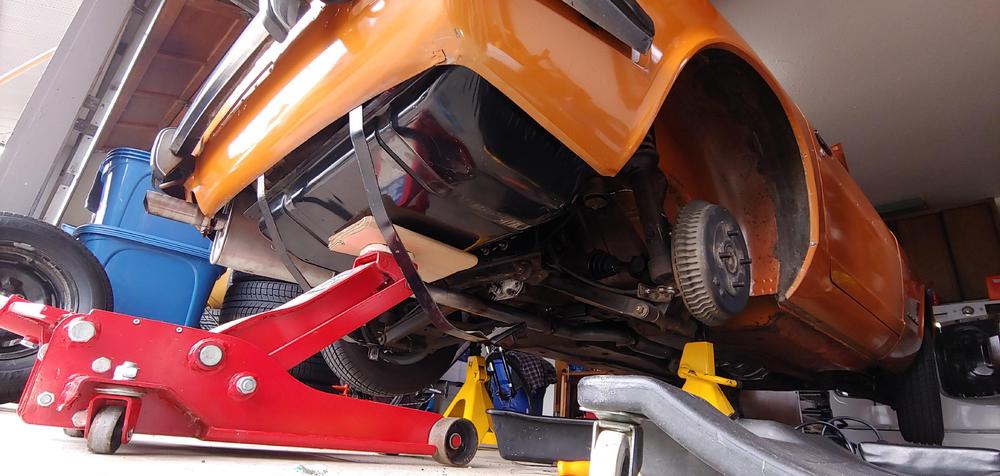
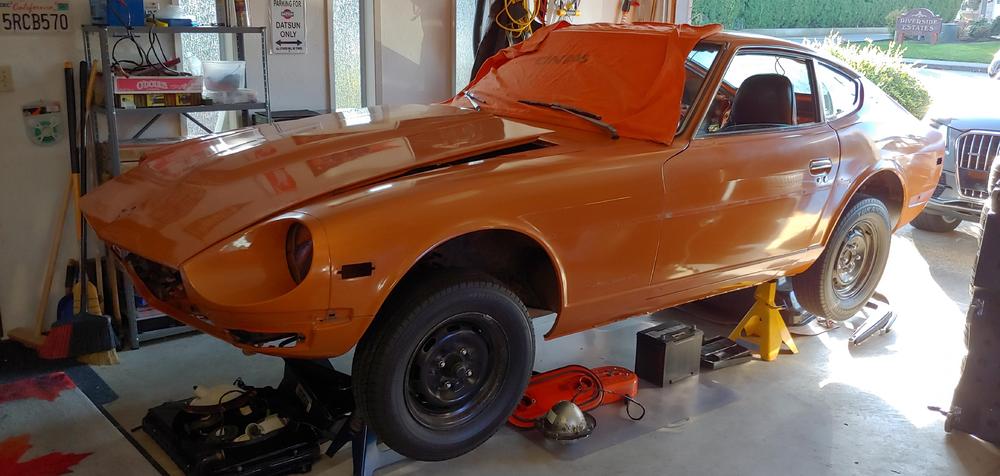
 I got an itch to acquire another Z last year... This car on Bring-a-Trailer got my attention and I couldn't let it go. A project car, the previous owner acquired most of the important rubber parts, a NOS dash, a bunch of spares, etc. and did very little to it other than keep it stored in his garage in the Denver CO area for over 25 years. Prior to that, it was in Arizona. So, having restored one Z which had a fair amount of rust, I was super excited to think about restoring one with next to none. I've been at it for a little over a year now, and so I have a pretty good amount of the work done. My hope is that within the next 12 months, I can complete the restoration. I've got lots of pics of progress so far, so, I'm also hoping I can post updates pretty regularly. Here are a few pics after it arrived in GA: The previous owner said he never started it. If true it hadn't run in over 25 years, but the engine turned over by hand. Before taking it apart, I wanted to see if I could get it running and then do compression and/or leak down tests to learn of its condition. I power washed the engine to get all of the dust and gunk off. Then I took the carburetor domes off and cleaned the domes, pistons, needles, inside the carbs, float chambers, etc. The "choke" was stuck in the on position (jet nozzles down) and carbon was caked on the inside of the carbs keeping the pistons from moving freely. Here's the engine after cleaning: Here is the clean engine after it dried. The distributor shaft had a lot of play, so I snagged the one from my other Z. Fuel lines were completely clogged, so I disconnected at the hard line coming into the engine bay. Fuel pump was gummed up, so I grabbed a spare mechanical one (once was on my other Z), and ran the rubber line down into a gas can. Oil in the engine seemed like oil, so I left it as is. After a few tries of the starter, I got it fired up. Still no coolant in the system, no radiator hoses, etc. I just did a quick sync on the carbs and got it running well enough to know that nothing catastrophic had happened to it. Here is a video after only a few minutes of tinkering with it. Next, I put radiator hoses on, put water in and other misc. things so I could run it for a while. I wanted to run it for a minimum of 30 minutes so I could do the compression check or leak down test. Here's another video. The exhaust is original Nissan parts (verified part numbers of center section and muffler), by the way... and very quiet. Garrett
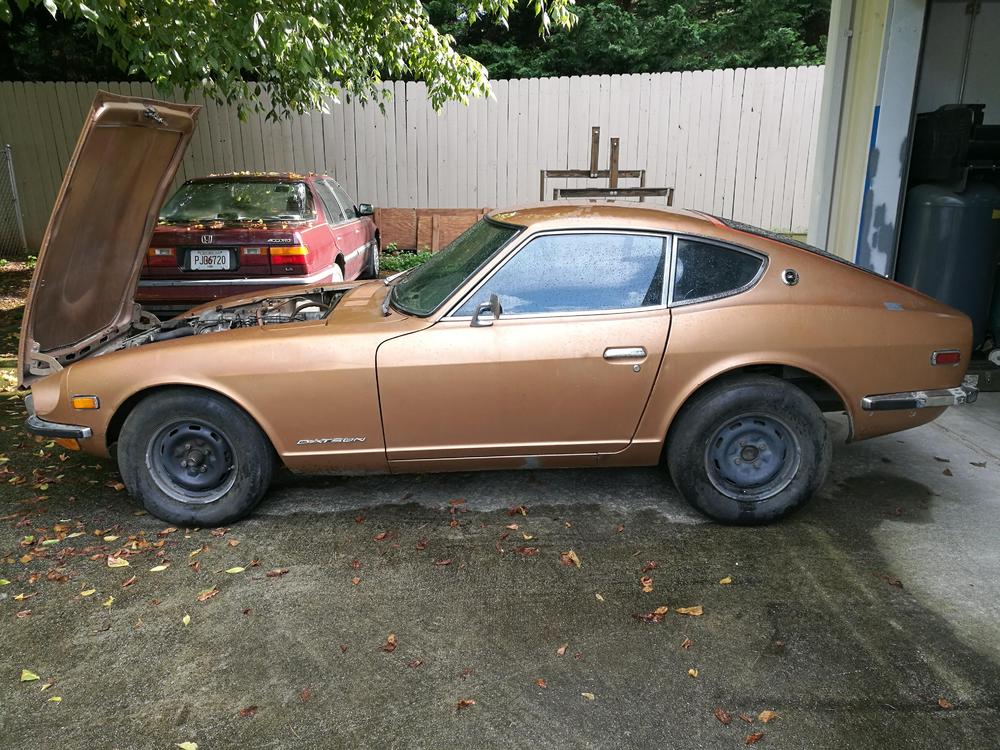

 5 points
 -
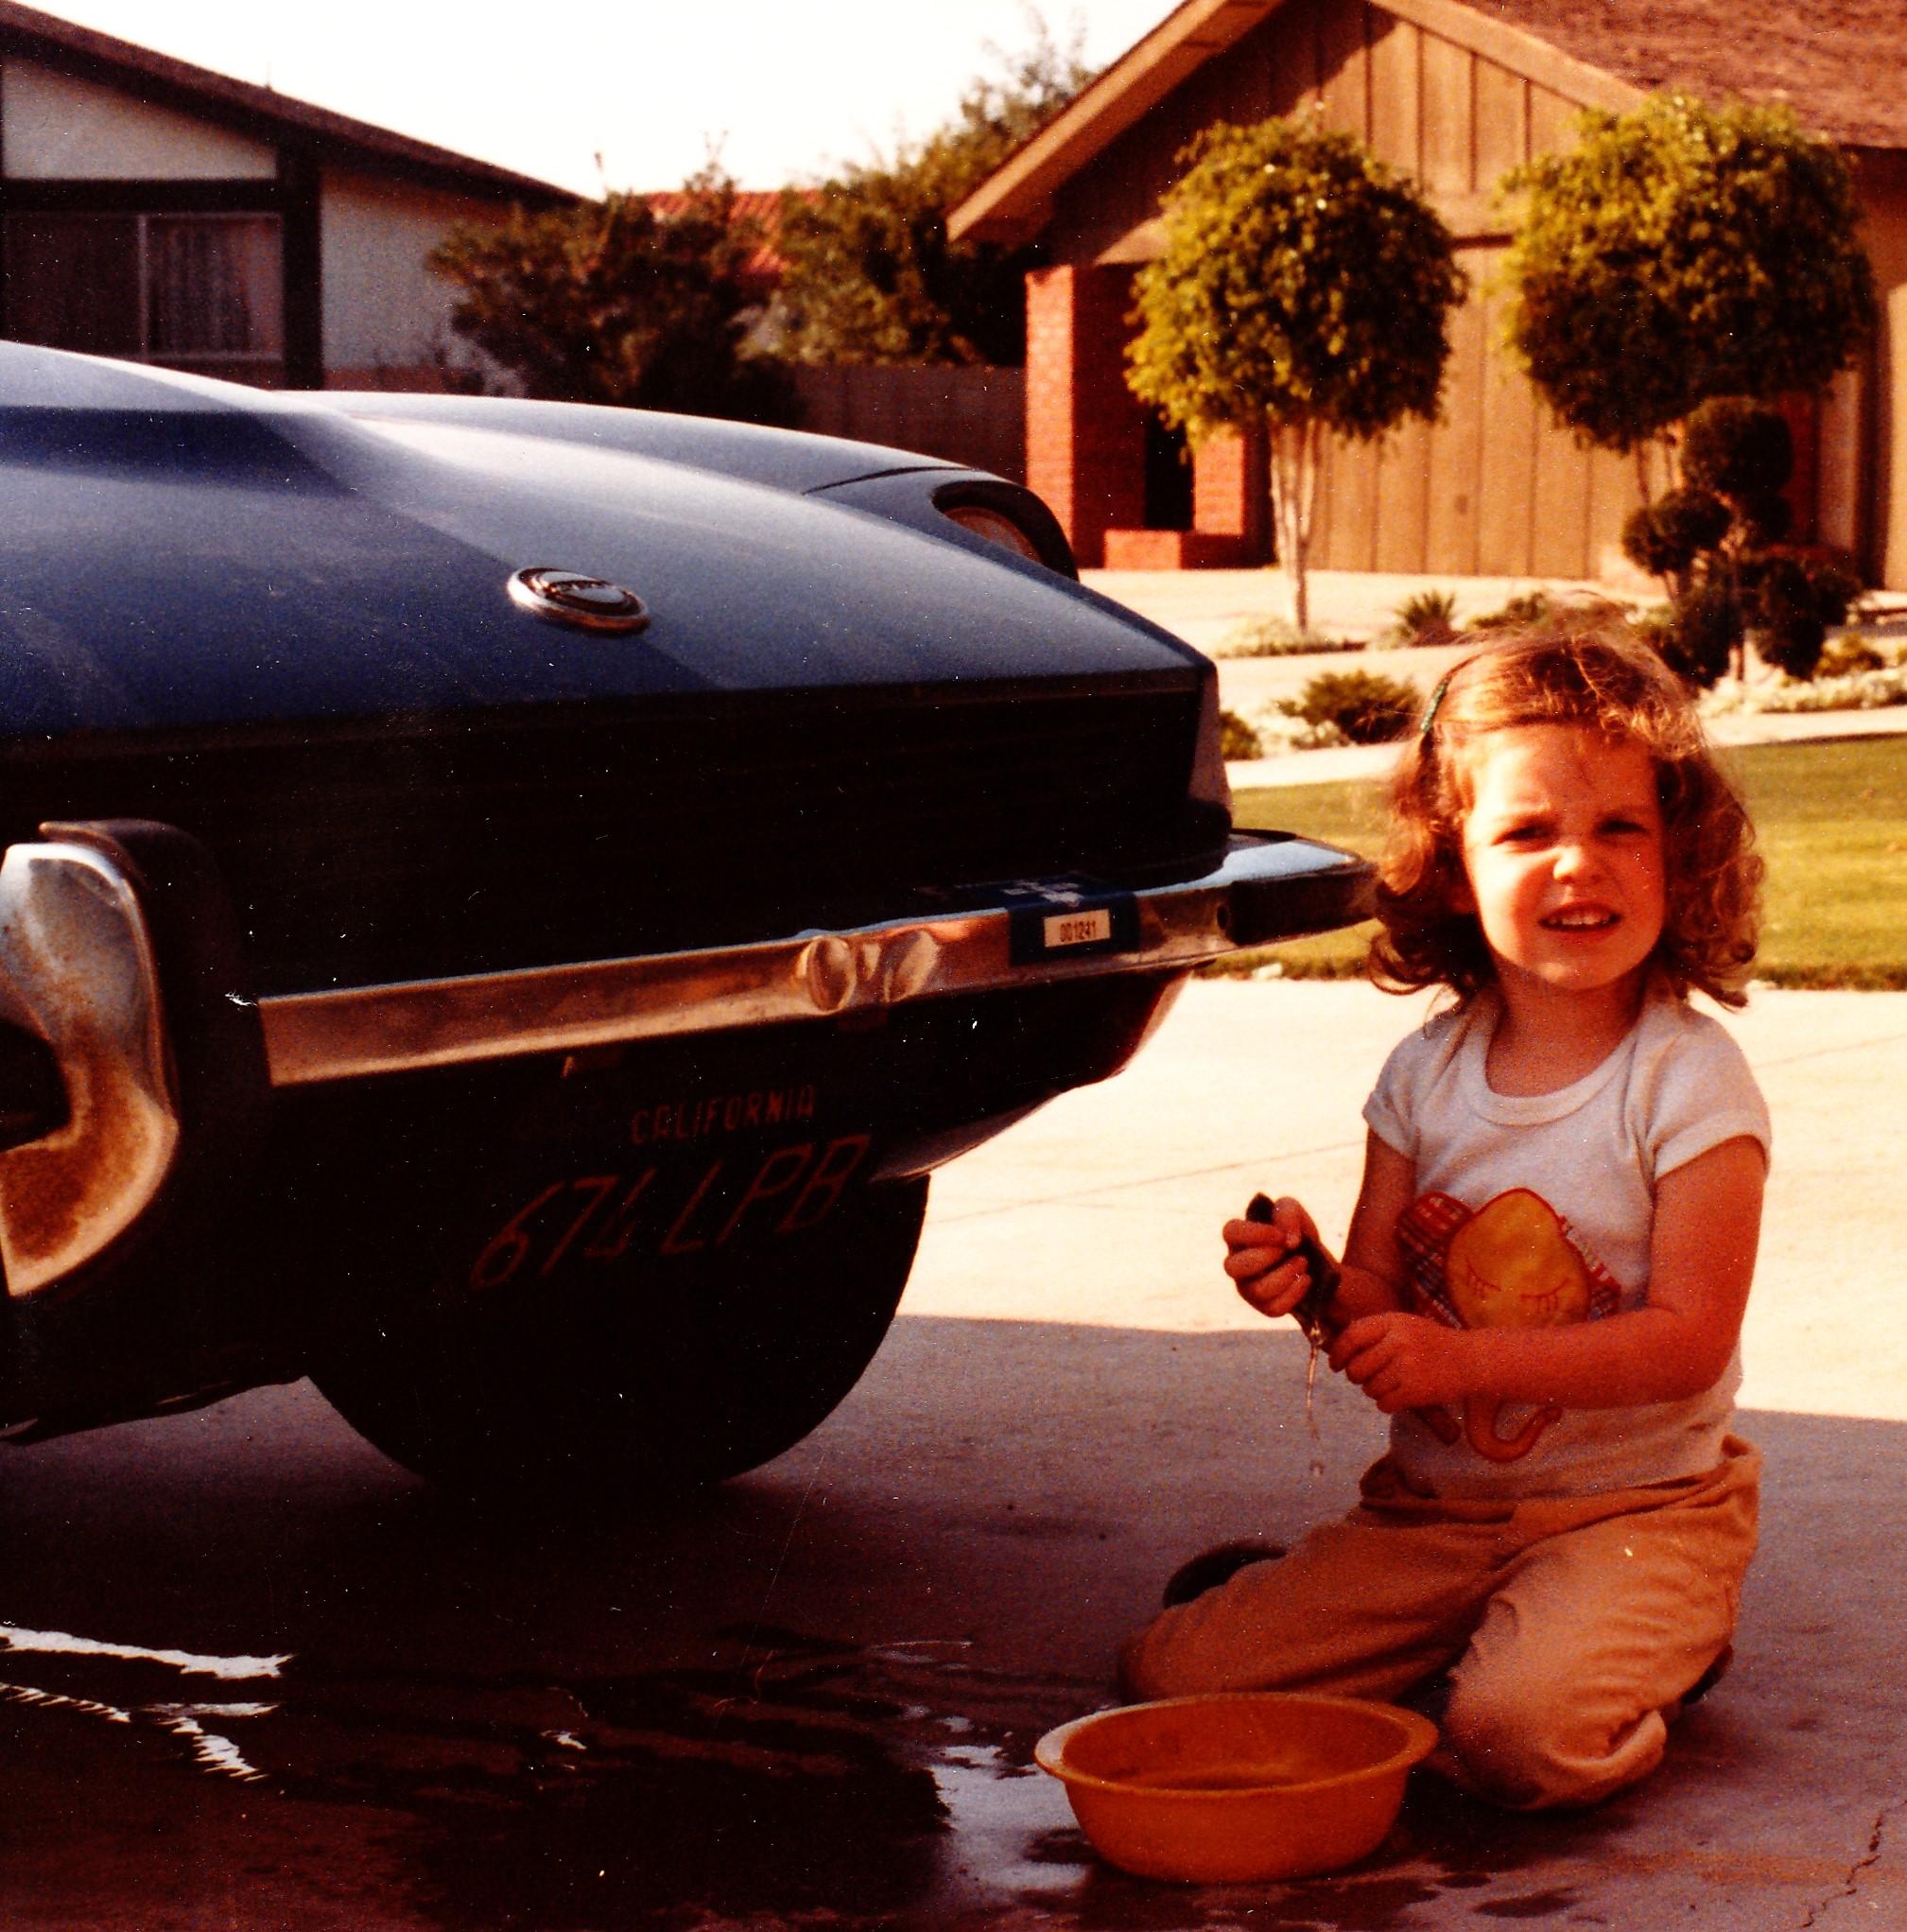
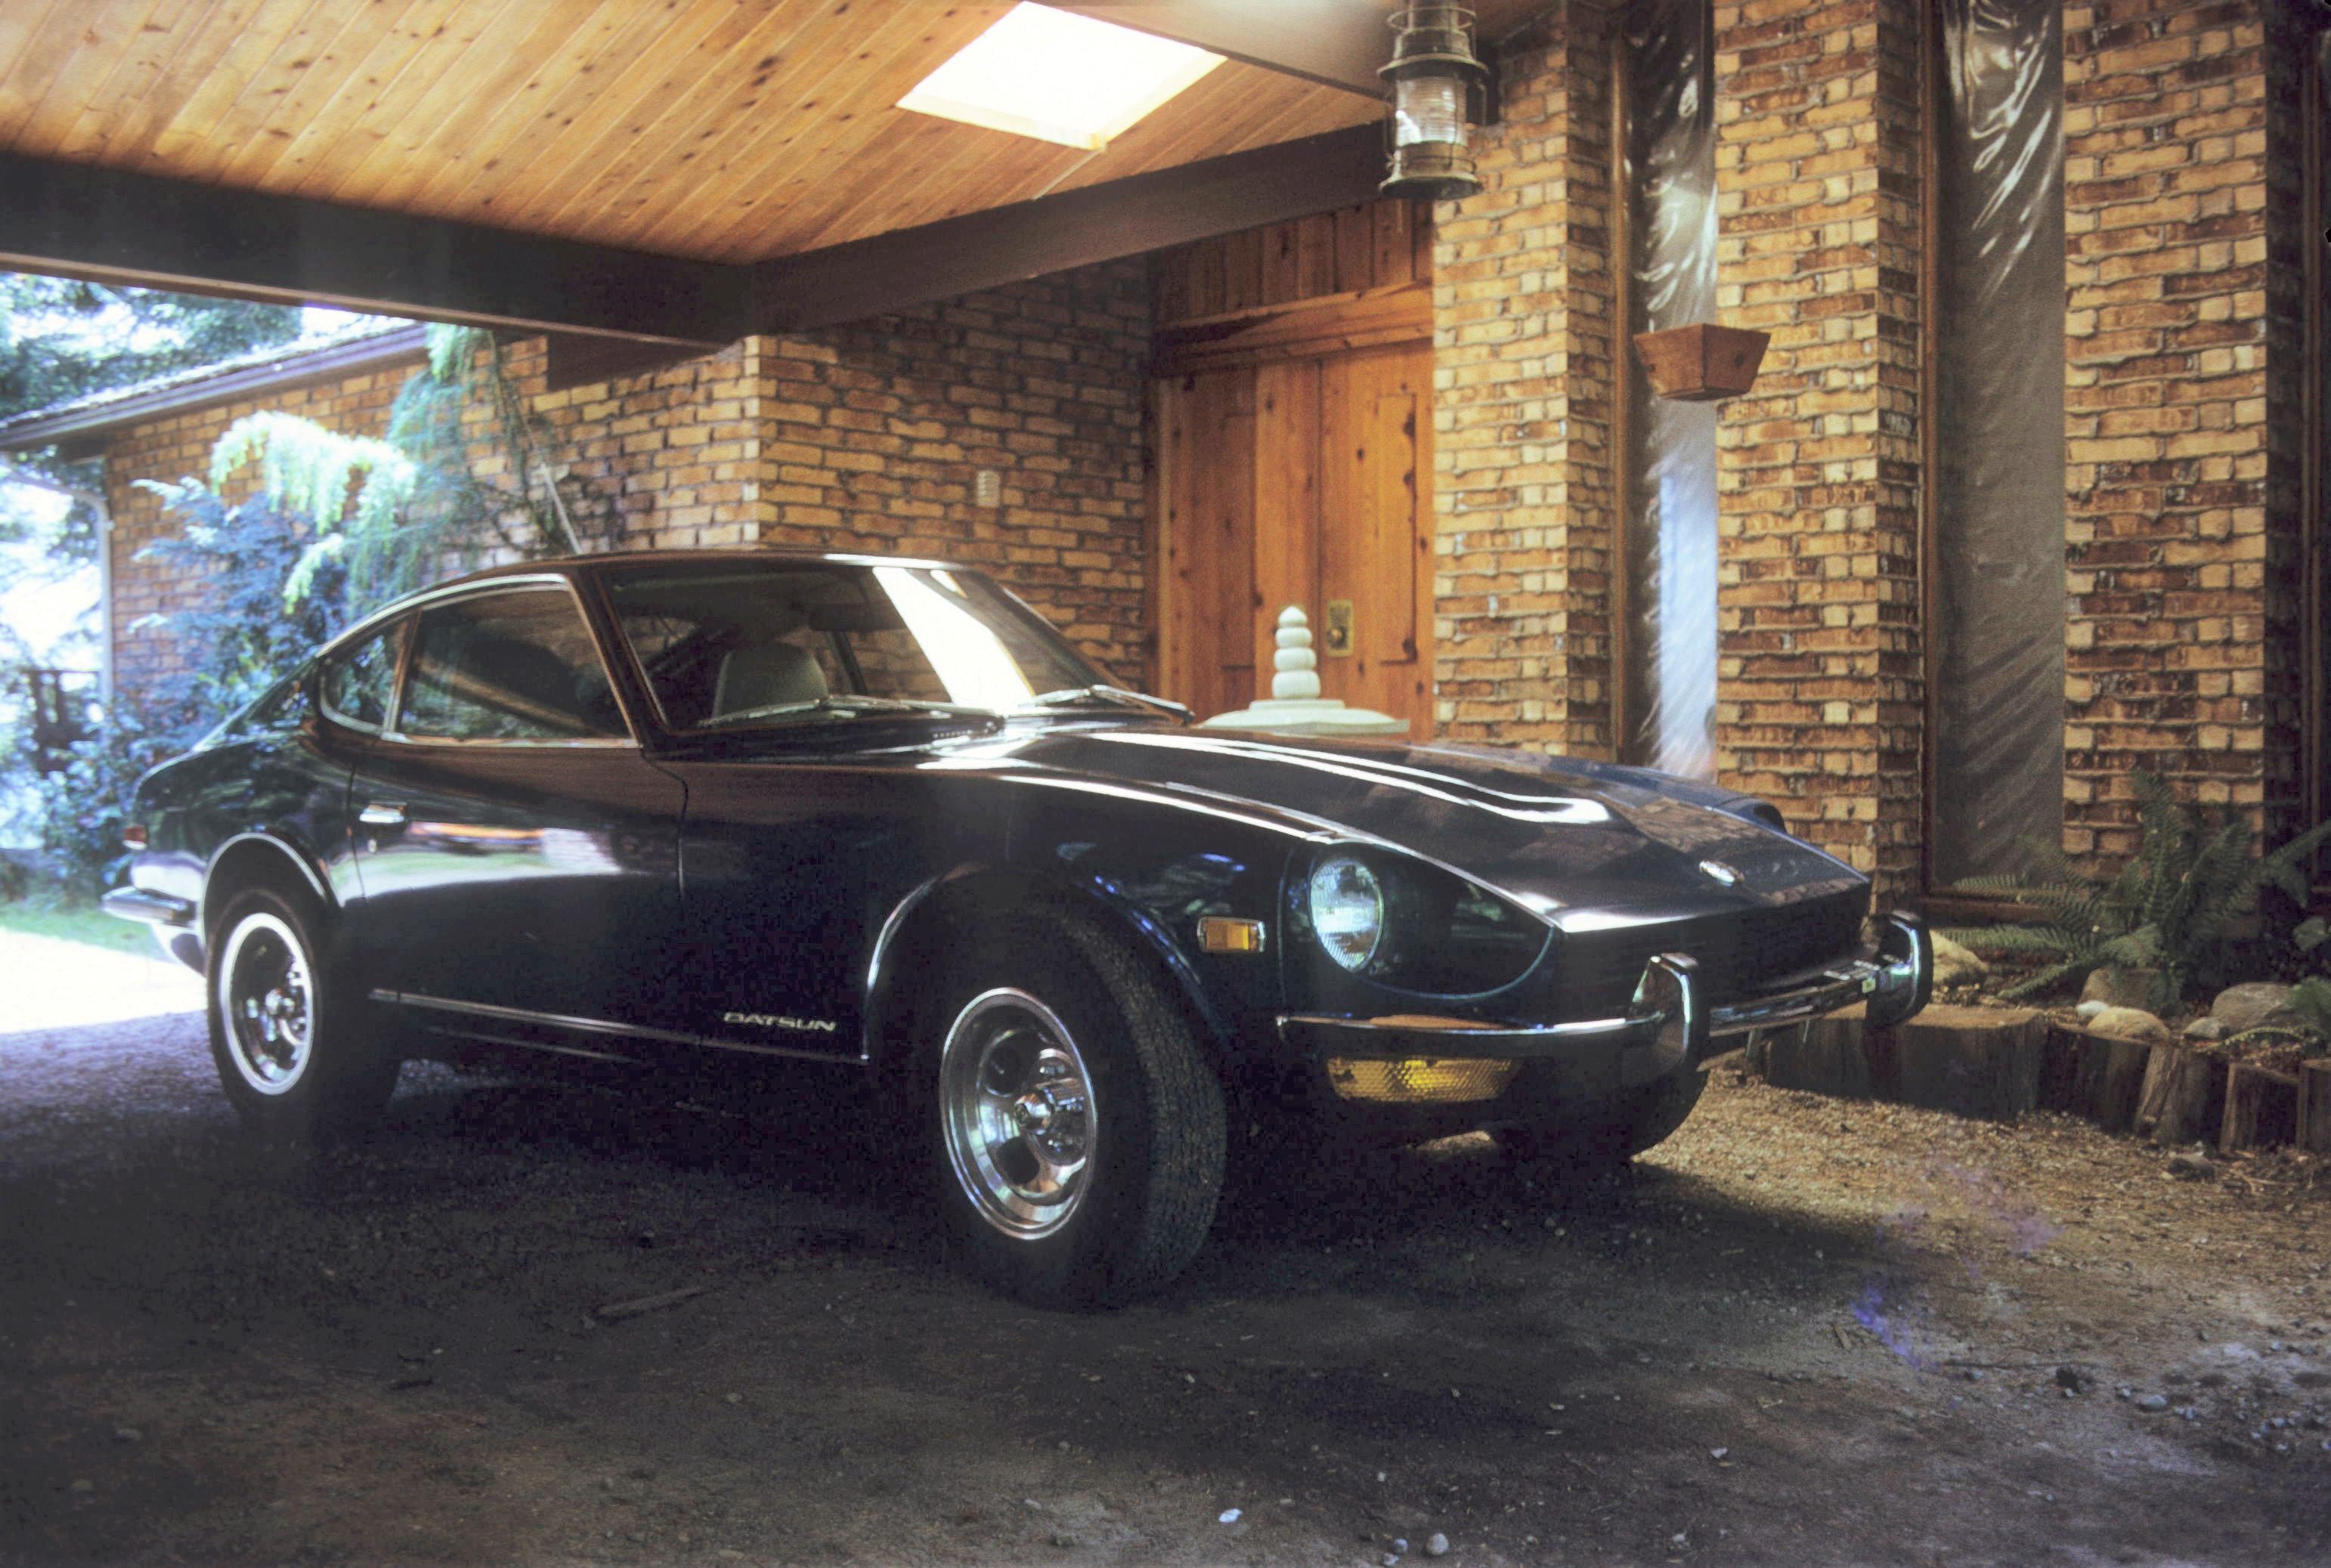
 5 pointsSome old and new photos of my '73 240Z. (I am the original owner) My 240Z in 1973 1982, Daily Driver loved by our daughter . 2019: after restoration - loved by the next generation

 5 points
 -
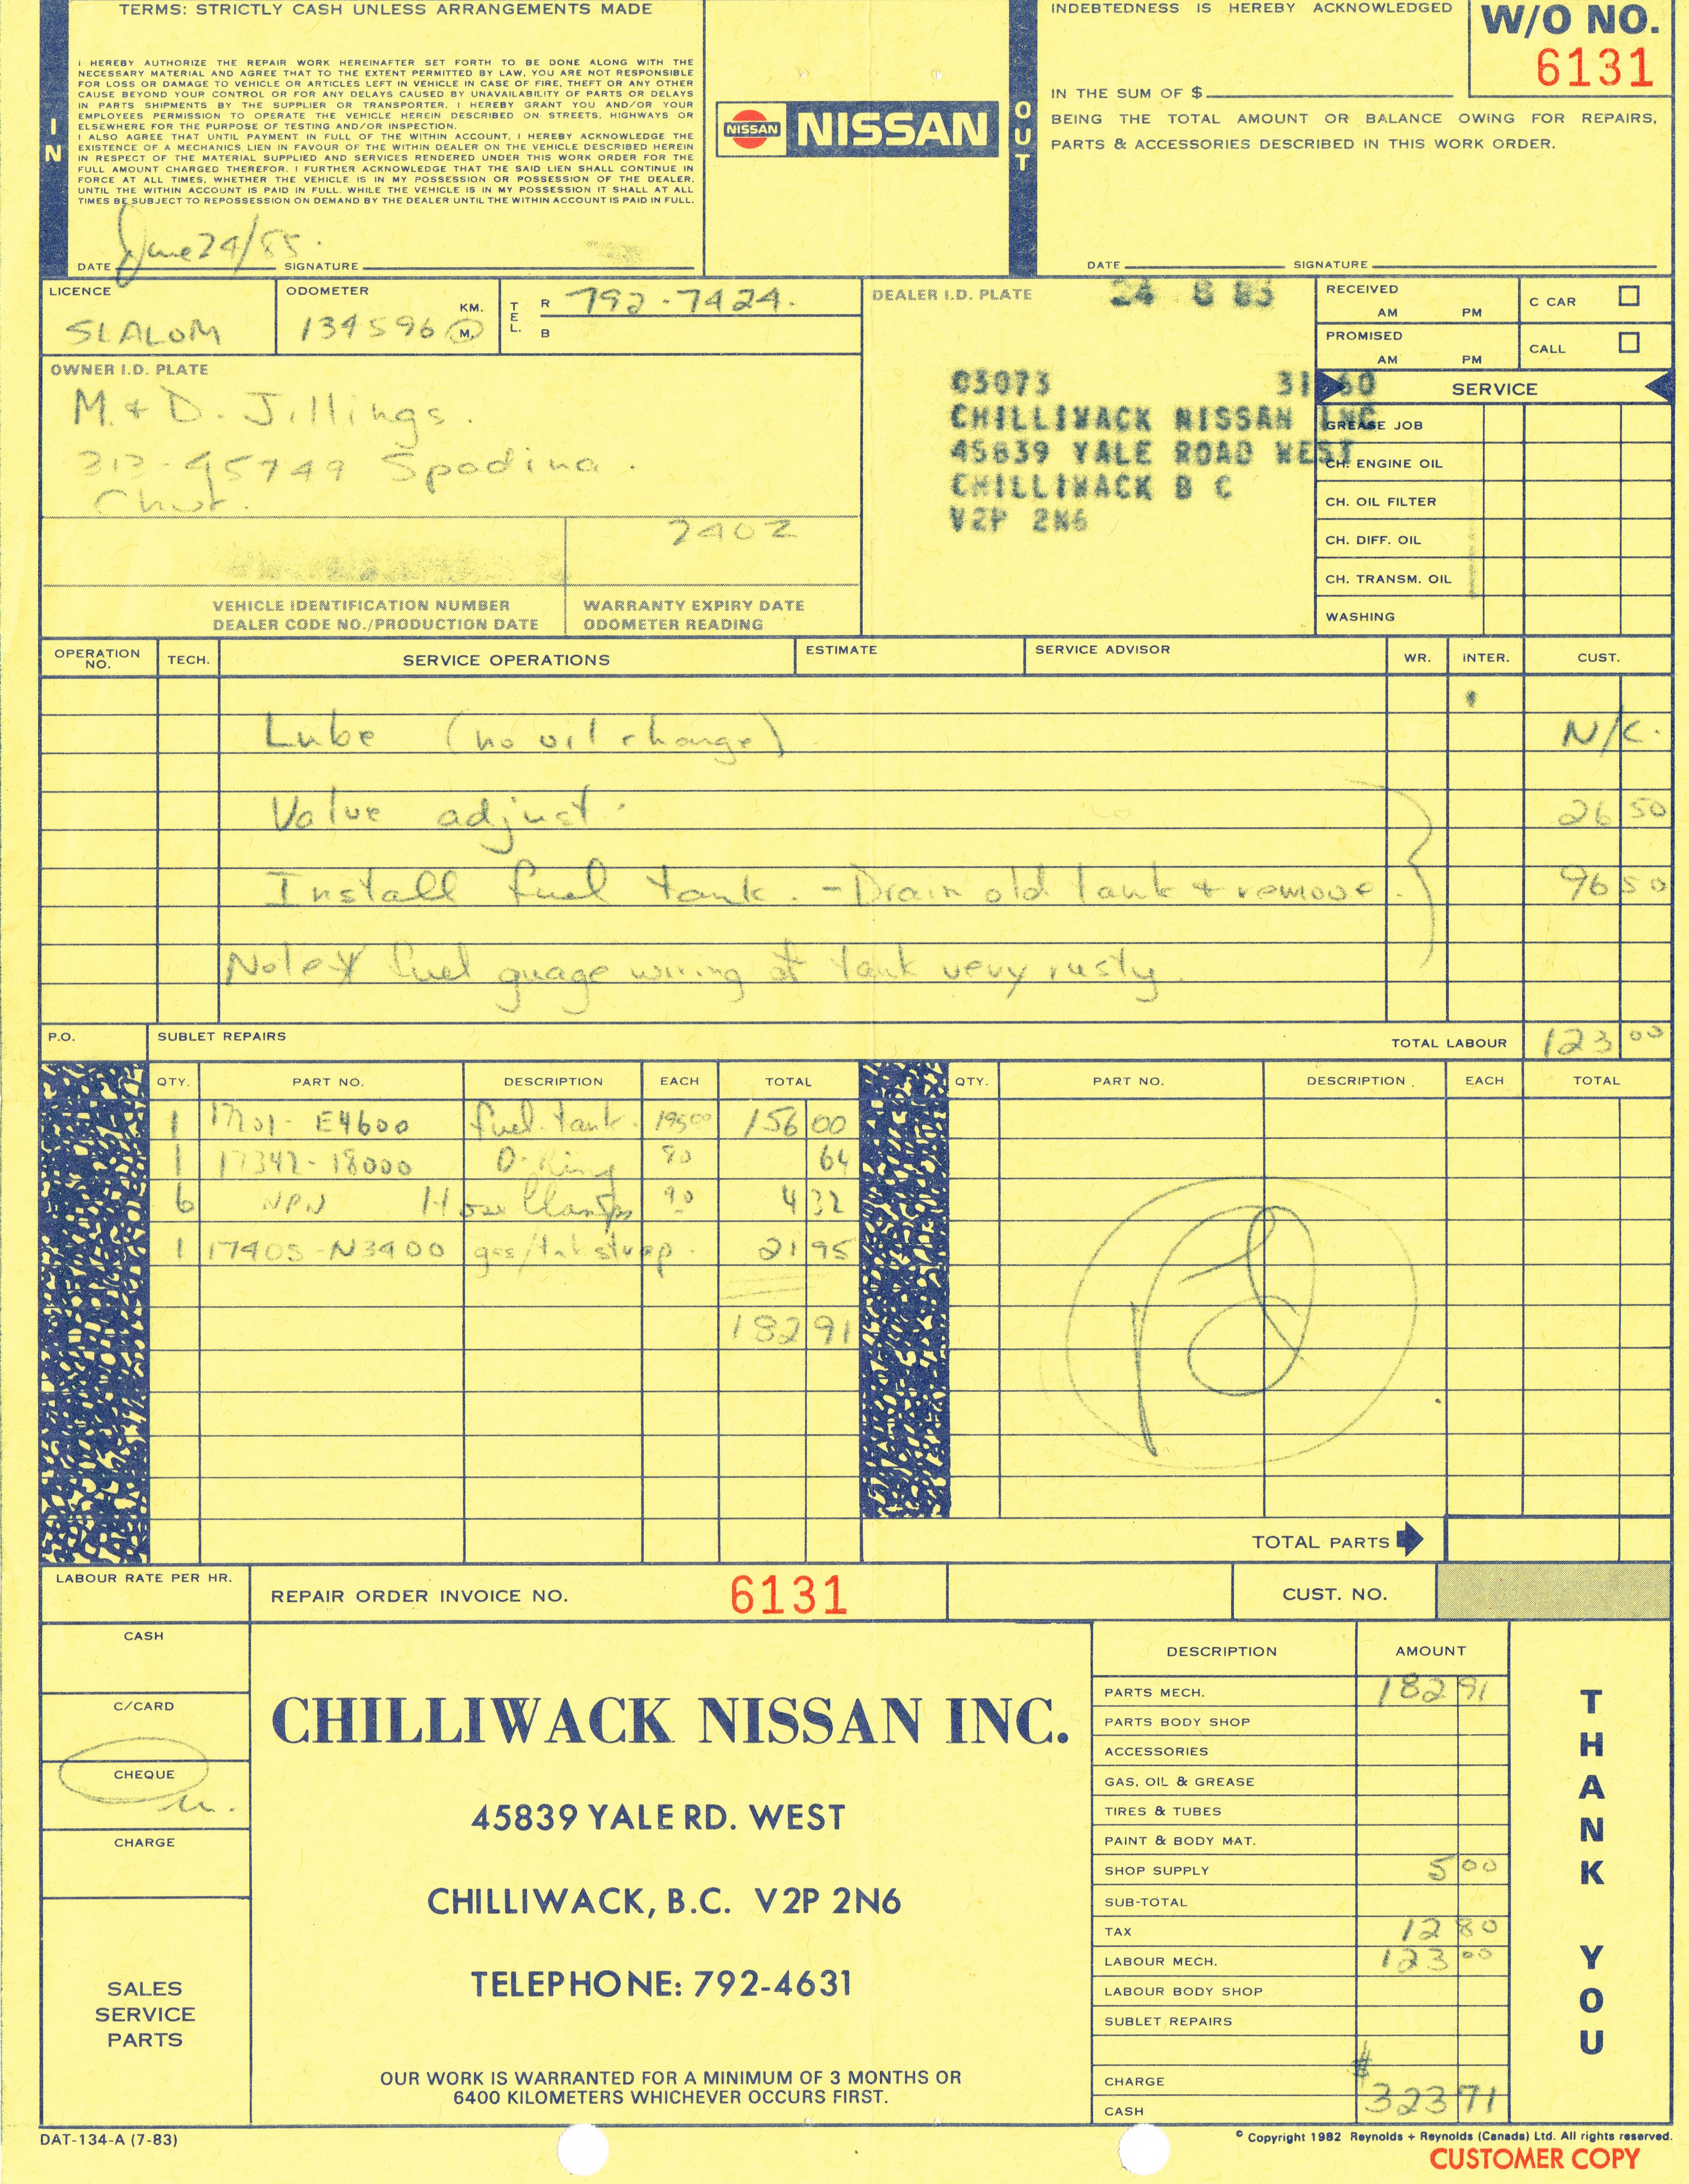
 2 pointsThanks, it's a replacement installed in 1988, was a birthday gift from my wife LOL. Check out the price,
 2 points
 -
 2 points18lbs isn't really that light, maybe for our flywheels but 11-12lbs is usually considered a lightened flywheel. Just shift faster☺️2 points
 -
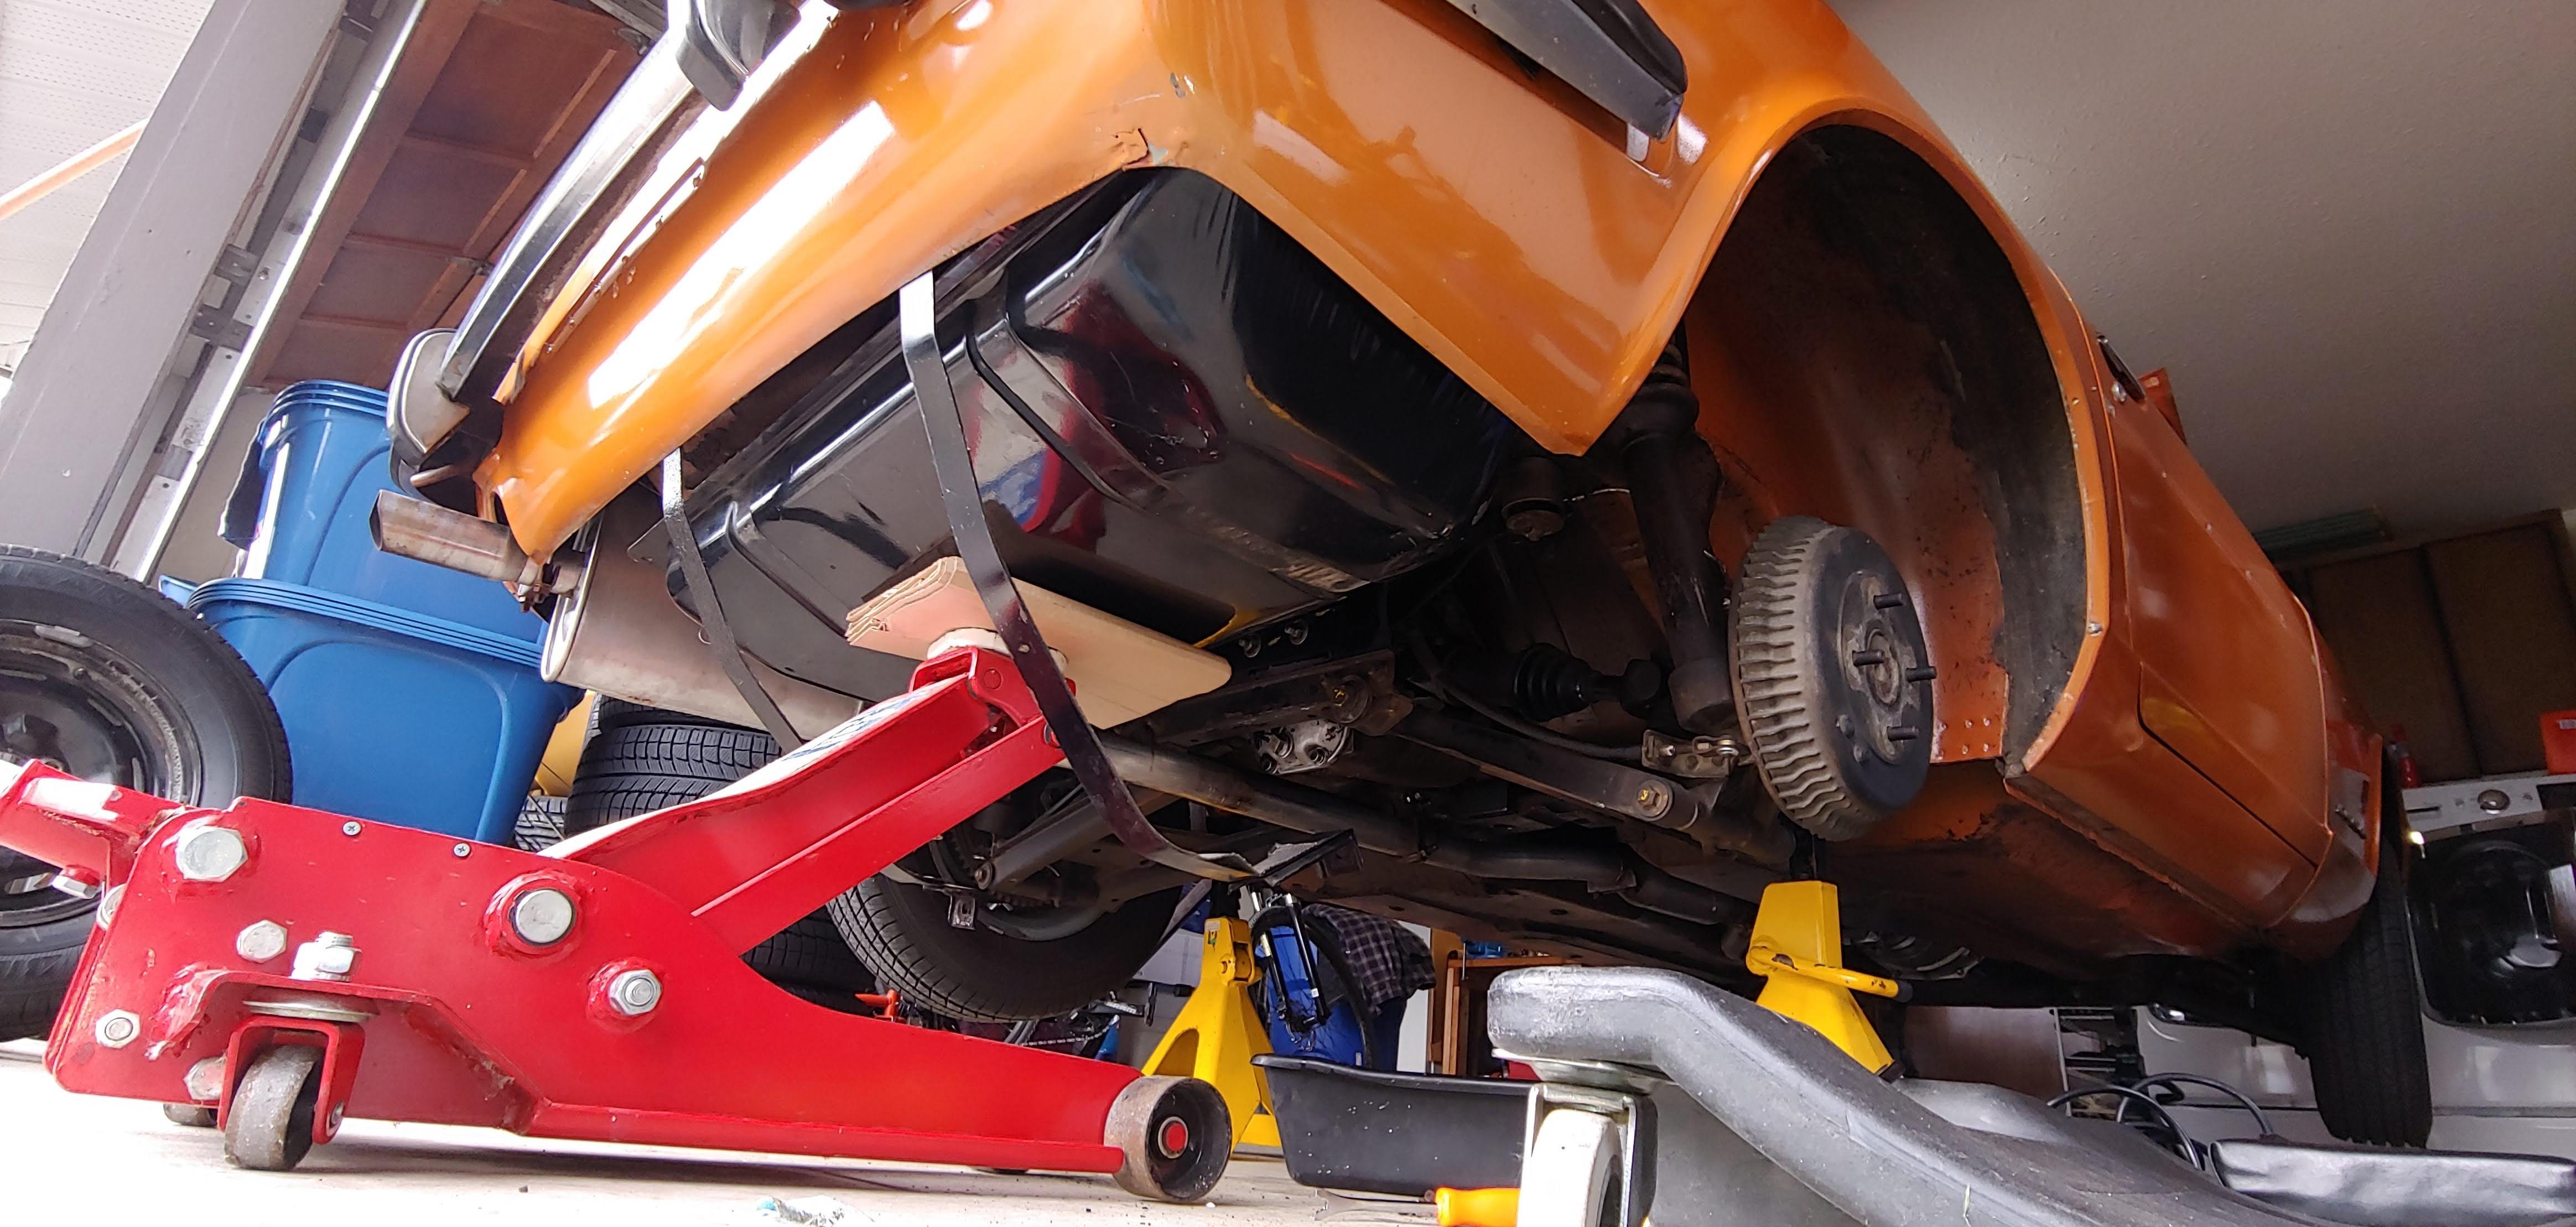
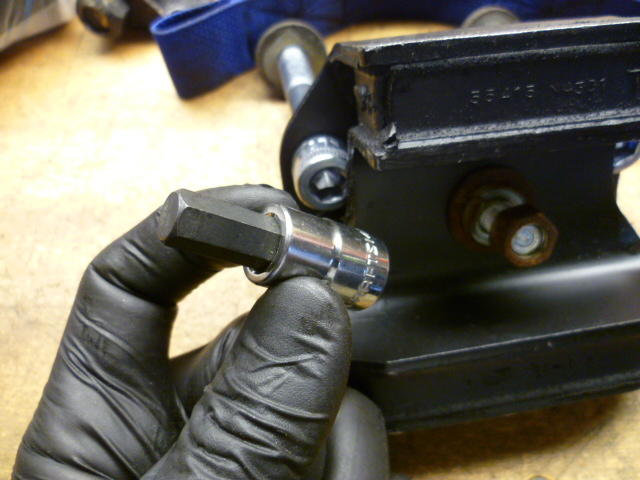
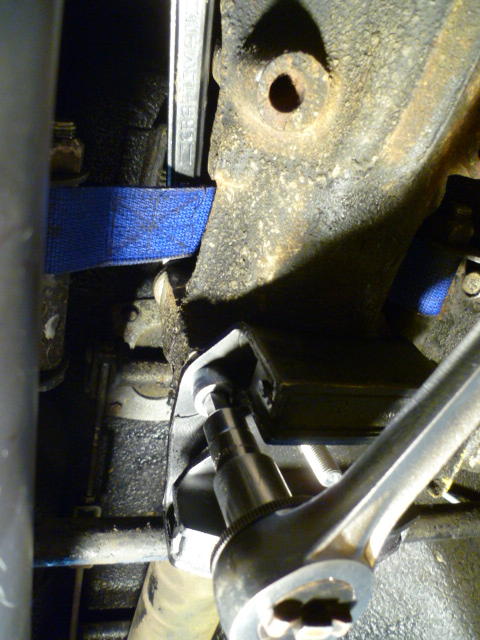
 2 pointsOriginal pic links were dead (because photobucket sucks!!), so I refreshed the pics below. I recently did some work on my front diff mount and strap and here are my findings from the project. It was my first time messing around with these parts. Here is a pic of the old mount and original hardware. I'm replacing the mount because the rubber is soft and squishy. The original hardware holding the mount to the diff is hard to remove because the mount itself is partially in the way. It's much easier with the whole diff out of the car, but if you're trying to replace the mount without dropping the diff it's a pain in in the butt. I think you're supposed to remove the hardware using an open end wrench on the bottom and a box end up in the trans tunnel hump on the nut up top: I decided that since my original mount was already 75% split and squishy, that I would just split it the rest of the way and pull the bottom part of the mount off which allowed me to use a standard socket on the bolt head. In other words, I finished the destruction of my old mount to get to make getting to the hardware easier. Here's my old split squishy mount: When it came time to put my new mount in, I changed the mounting hardware scheme to socket head cap screws instead of the original hex head bolts. I don't know if this is old hat or not, but my custom hardware looks like this. Socket head cap screws on the left in this pic: So what's the big deal about using SHCS there instead of hex head bolts? The SHCS allowed me to use a hex driver on my ratchet like this: And tighten the bolts from the bottom like this. The hex driver clears the bottom plate on the mount so you don't have to deal with the original hardware anymore. If I ever have to mess with this thing in the future, it will be much easier to R&R. Box end wrench braced against the diff body to hold the nut on top and hex drive to tighten from the bottom, I found this much easier to work with than the original hardware scheme. (Edit for new info) Only update I would make to the original procedure is that I would use a grinder to notch the diff mount plate a little bit to clear the heads of the socket head cap screws. The reason for that is the heads of the SHCS are taller than the original hex head hardware and even though I don't think I'm having a problem on my car, I can see the possibility that the lower plate of the diff mount may hit the heads of the screws if the mount is twisted enough. So just to be sure, I would take a little metal off the diff mount to clear the new screw heads. But in any event, here's how easy it is to access the SHCS heads with the modified design: I used 1/2-13 x 4 inch long socket headed cap screws. You could also use M12 SHCS if you can't deal with the English hardware on the Metric car, but since the English stuff is so much more prevalent and cheaper for me, I used Engilsh. I used the black oxide hardware below to test fit, but for my final install, I bought some new zinc plated hardware for corrosion protection. This pic was before I had the zinc plated parts bolts on hand:


 2 points
 -
 PM me your phone number and I can walk you through getting it going. You seem to know what you are doing!1 point
 -
1 point
-
 Yes, the switch and sensor are combined in one unit. Just pop off the plug at the round sensor/switch on the side of the engine block.. Turn the key on and the pump should start running. It's a good test of the fuel pump control system.1 point
 -
1 pointIt did a little, maybe more with additional applications. It works much better on softer rubbers like the bumper strips and rubbers seals for the front turn signals and marker lights.1 point
-
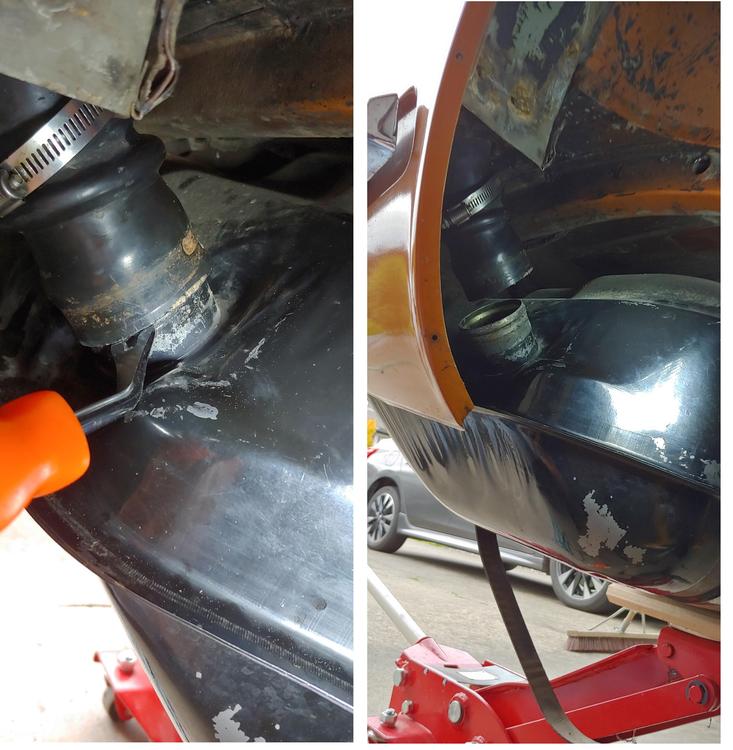
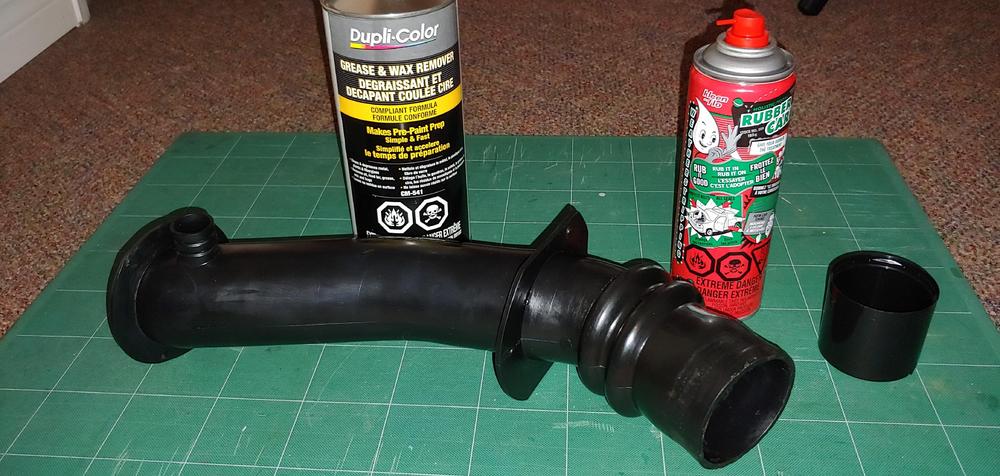
1 pointHere are a few pictures of the fuel tank removal. I was lucky that my car is a non emissions model so I had only two fuel in connections and fewer vent hoses to deal with as well as no evaporation tank. The most challenging part was removing the rock hard filler neck without damaging it. First issue was freeing it from the tank inlet, careful use of a heat gun on low with some twisting action by hand to free it before prying with a small prying tool did the trick. I did work in a well ventilated area making sure no fumes were present. After the tank was out, to finish removing the filler neck, I again used the heat gun, on low, to soften it to the point that the upper square flange and vent connection could be collapsed inward enough to drop through the two round holes in the body. The neck was then free to drop out from the bottom. I was happy to find there were no cracks in the fuel filler neck and it cleaned up very well, with a bit of effort using grease and wax remover and kleen-flo rubber care. Here is the result: This is what it looked like before:

 1 point
 -
 1 pointThanks guys. I’m probably overthinking this. We have San Francisco-type hills around here and I guess I can adjust my use of the pedals to avoid stalling with a bit lighter flywheel.1 point
 -
 1 pointFYI, just a little bit of the gasket maker, and install quickly along the bottom edge per the book. You don't want it creating a gap by starting to setup. If I was doing over again I would use the Permatex anaerobic stuff, stays liquid (more like gel actually) until after assy, then setups up in absence of air. I doubt its a big deal but just saying that is how I would roll today after using some of the stuff. think its call 513 or something like that. I ended up using the after market with the slide in parts, no leaks (I checked it recently when I found my main seal leaking do to my poor install the 1st time.1 point
 -
 1 pointMy aluminum one is 11lbs. No problems driving my end of the Appalachian Mountains. I stall it a couple of times backing up my driveway but that because I'm trying not to disturb my neighbors. It's kind of loud and raspy when you get the RPMs up.1 point
 -
Shipping the car by itself from CO to GA ended up costing $850. All of the extra parts, I knew, was going to be a pain. I looked prior to auction close for rental availability and flights, but long story short, flying out, renting a pick up truck and loading it up, and getting all of the parts back to GA cost $1,654.18 and took 2 days (and into early morning of the third). Total with 5% for BAT was $9240, so delivered total of car and parts was $11,744.88. I am keeping track of costs very precisely and will be sharing with everyone as well as time spent (not nearly as precisely). Regarding the direction of the resto, I plan to do a high quality restoration back to stock, except for the following: The engine had pitting on cylinder 6 that was bad enough to require a re-bore. Pistons are ITM - .030 over. Stage I Isky cam which has a higher lift than stock but the same factory duration (won't be able to tell it has a cam from listening to it) Some bigger valves to allow better breathing Zstory stainless header and exhaust Mild porting to make the valves, cam and exhaust work well together 16" x 7" wheels and performance tires The goal I have in mind is to have the car be like "new" back in 1971, but with "upgrades" for exhaust and wheels. Both of those mods will be fully reversible, if at some point I want to sell the car, and a future owner wants to go 100% stock. The car was originally silver, and I am nearly certain I will put it back to that color. I like the factory orange a lot, but I want to keep it the original color. Silver looks nice on 240z's too. ?1 point
-
Yes, the Allen key is what goes into the head. I've heard them called all sorts of things here including Allen screw, but I believe the official name (here) is Socket Head Cap Screw (SHCS). I'd rather call it an inbusbout. I like it.1 point
-
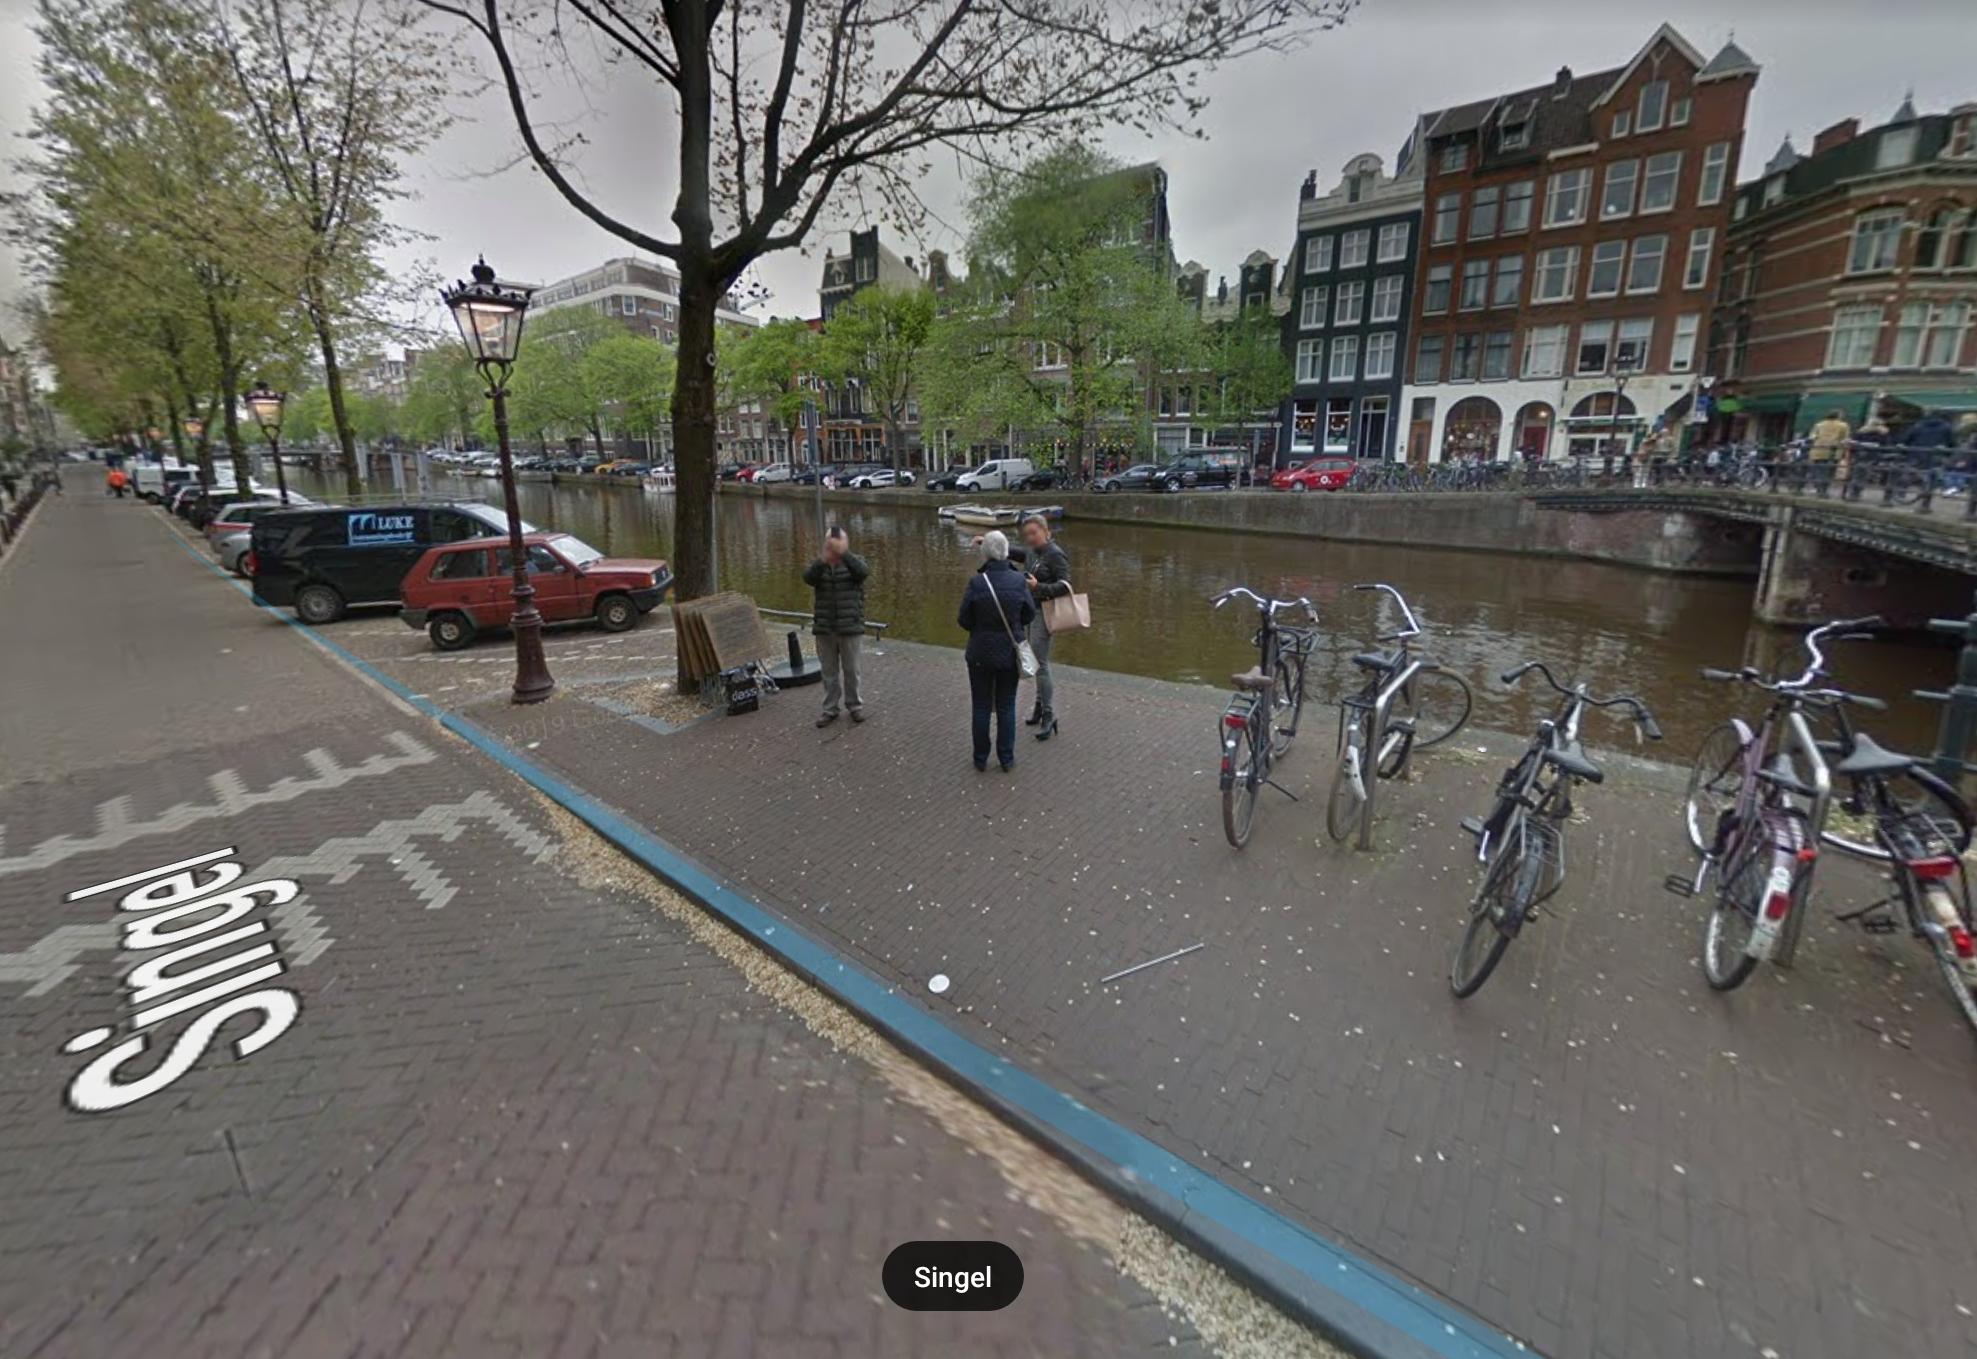
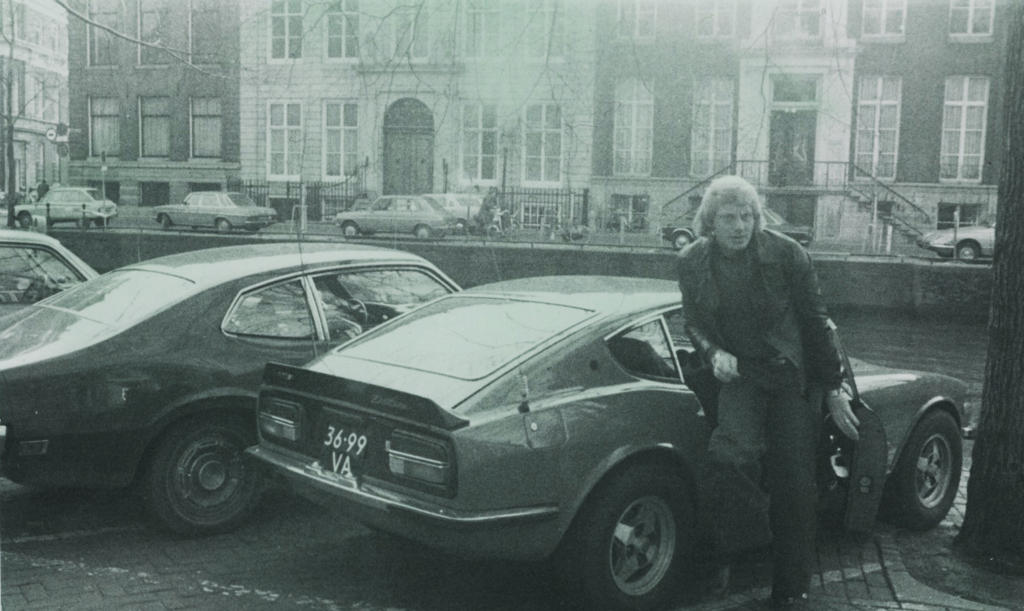
 I'm looking at the photo and it reminds me of when friends from Sydney came to visit. It worried him when we parked the car. Especially when the wheel touch the "railing". You can see what I mean on the other side of the canal. I like the way they still don't use any kind of railing. Well, just enough to trip you so you fall in head first?
 1 point
 -
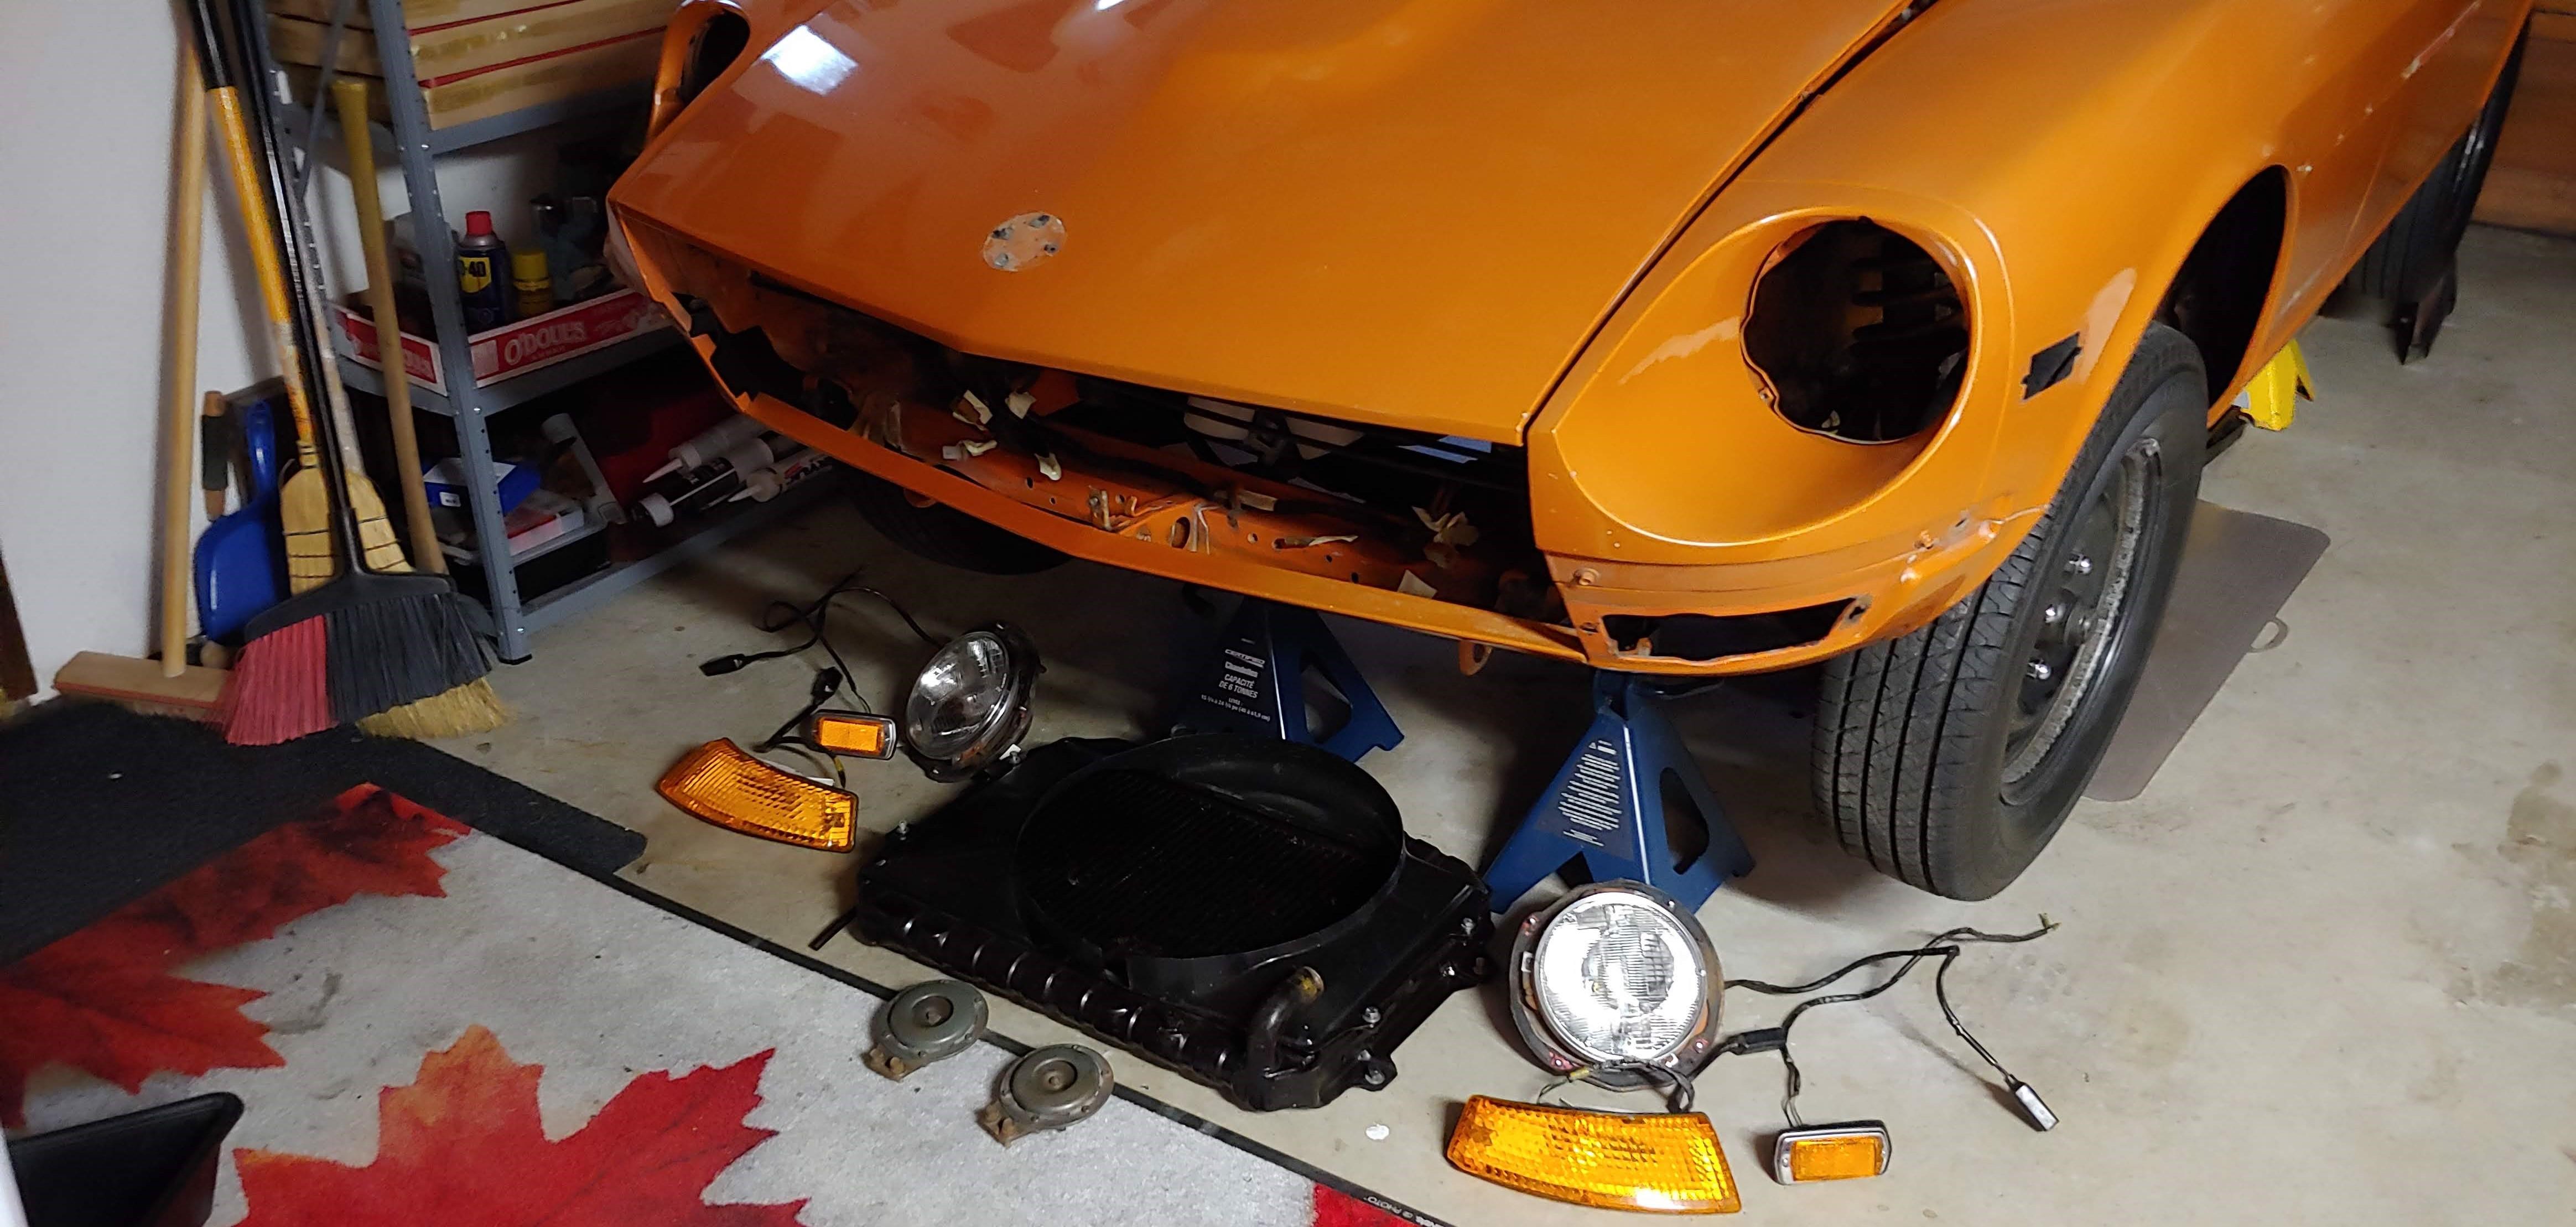
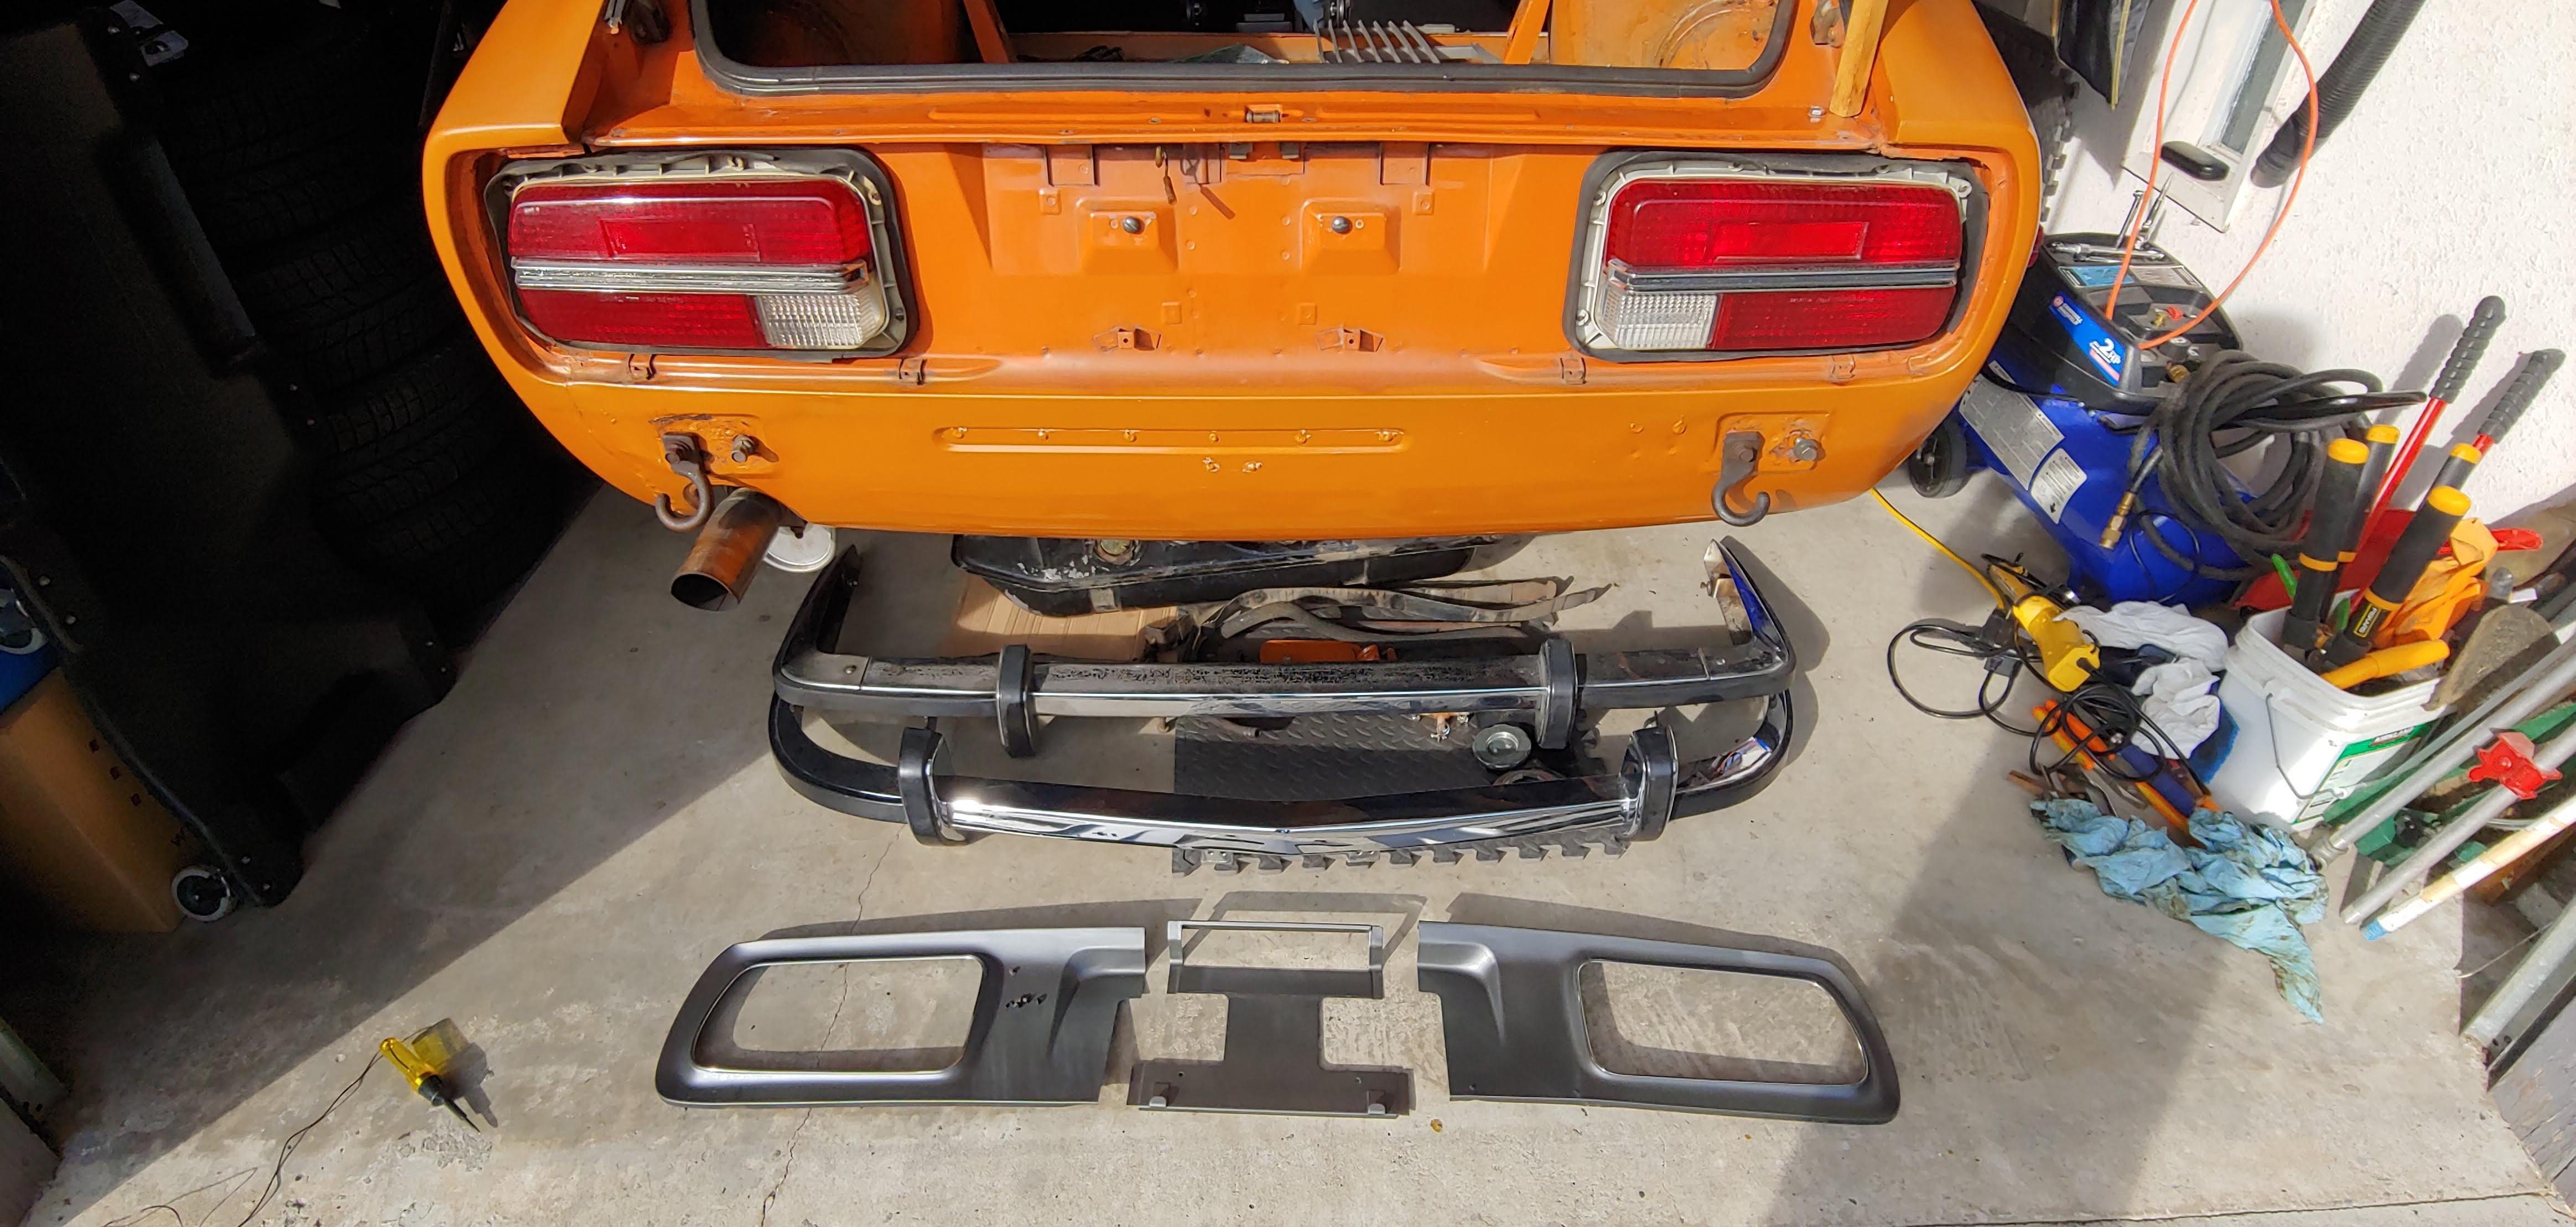
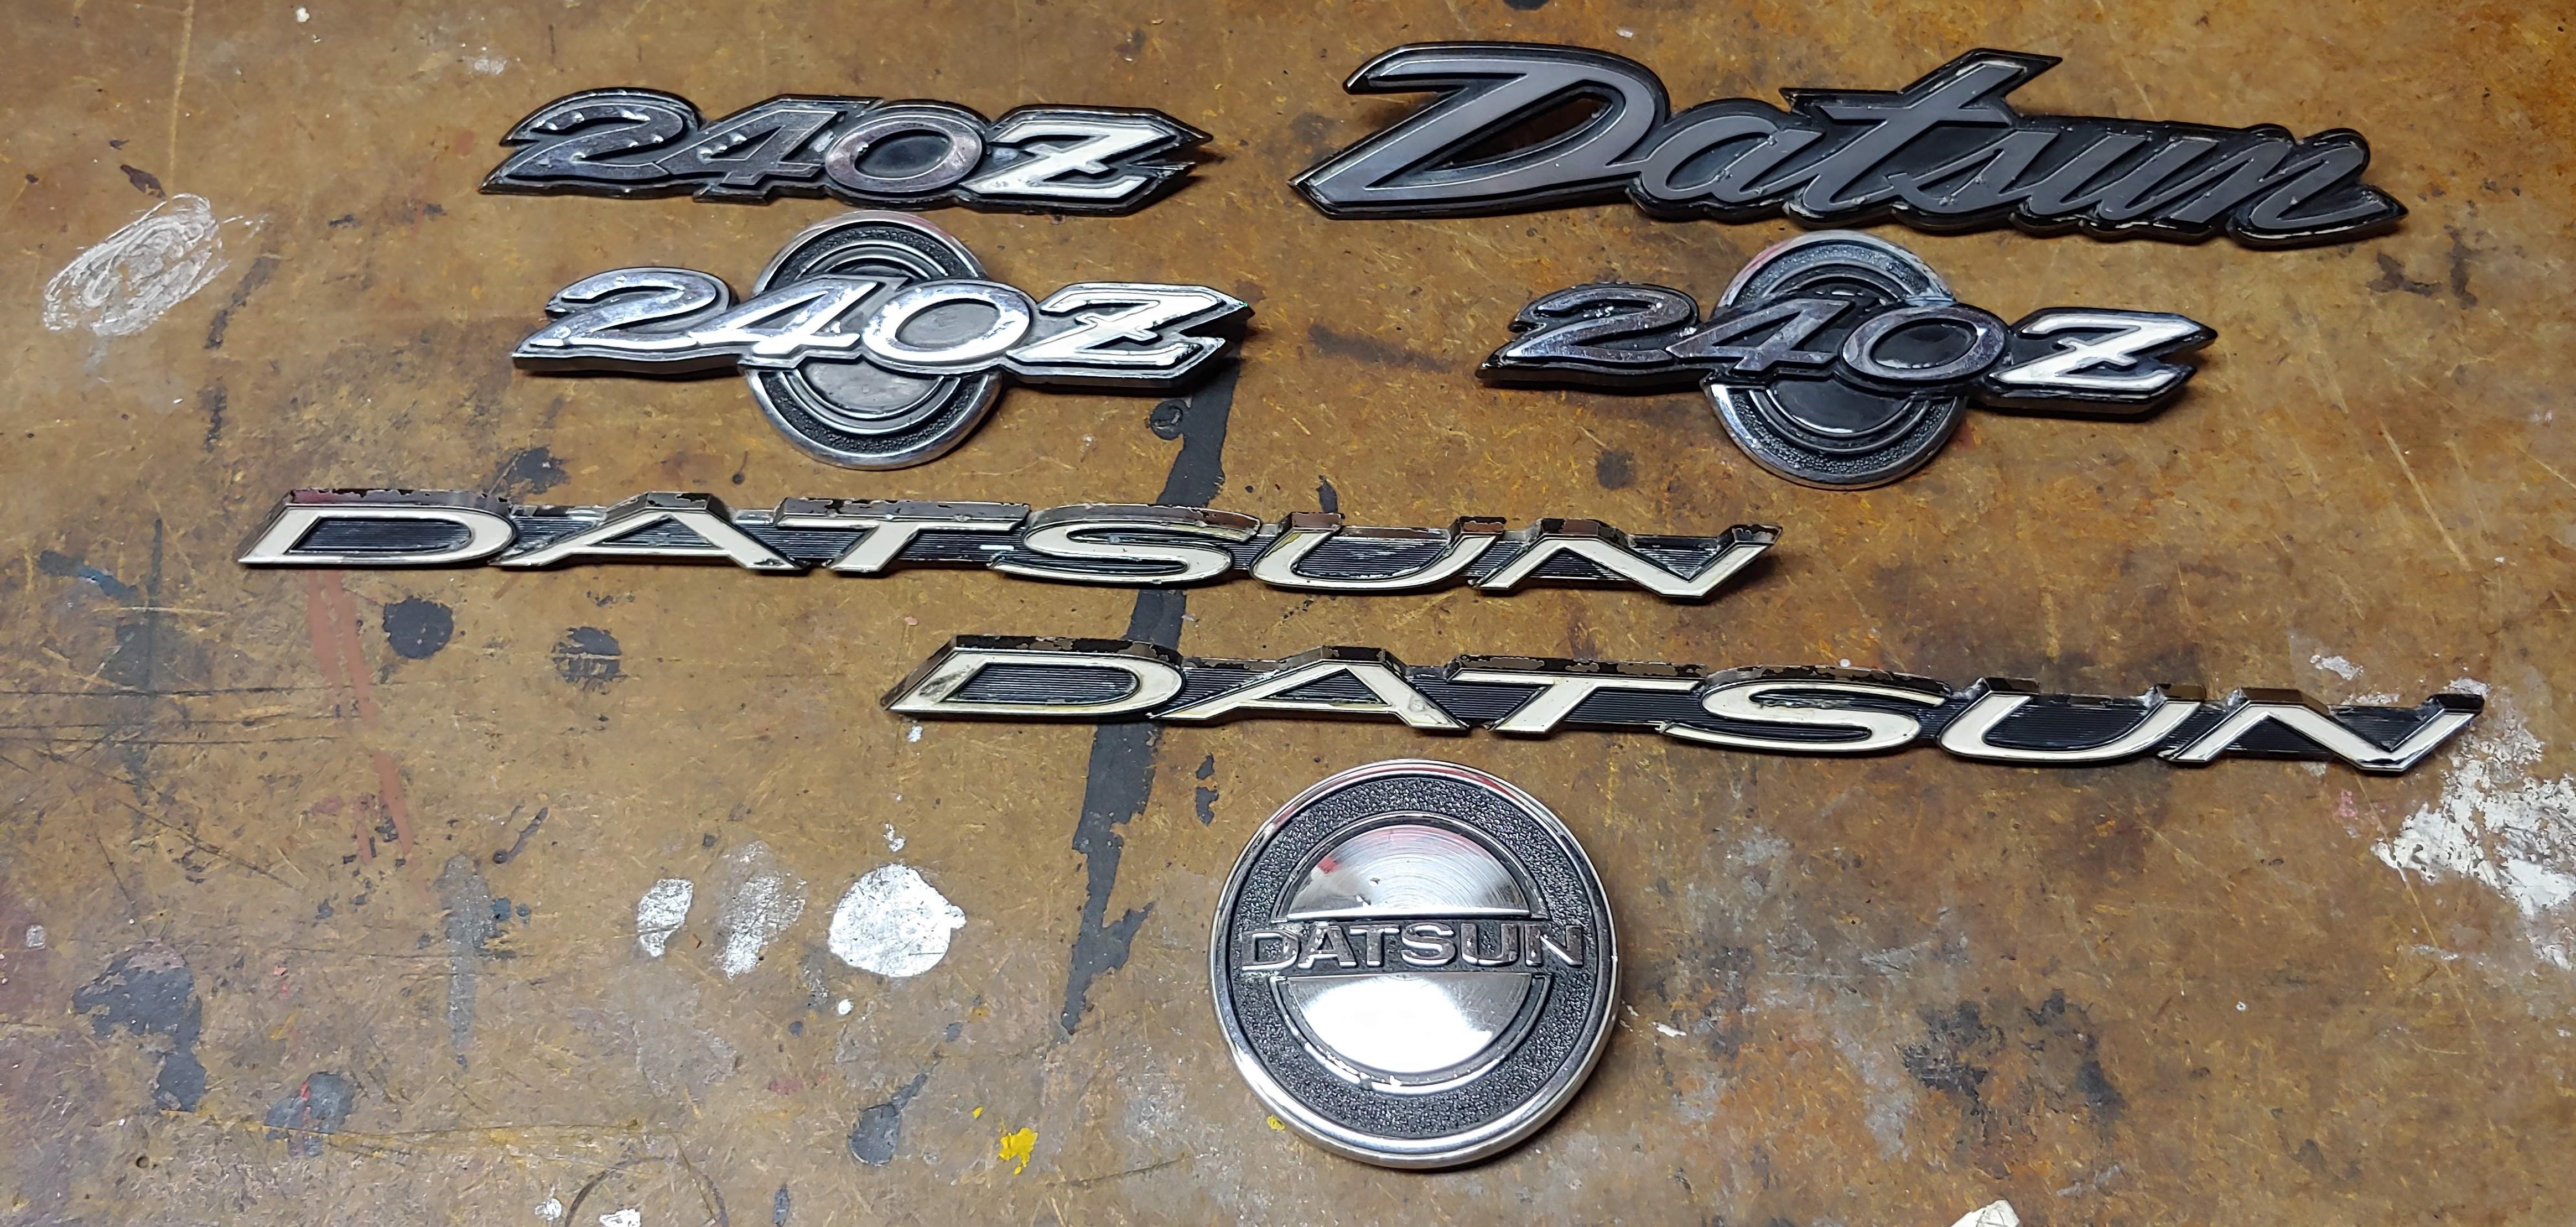
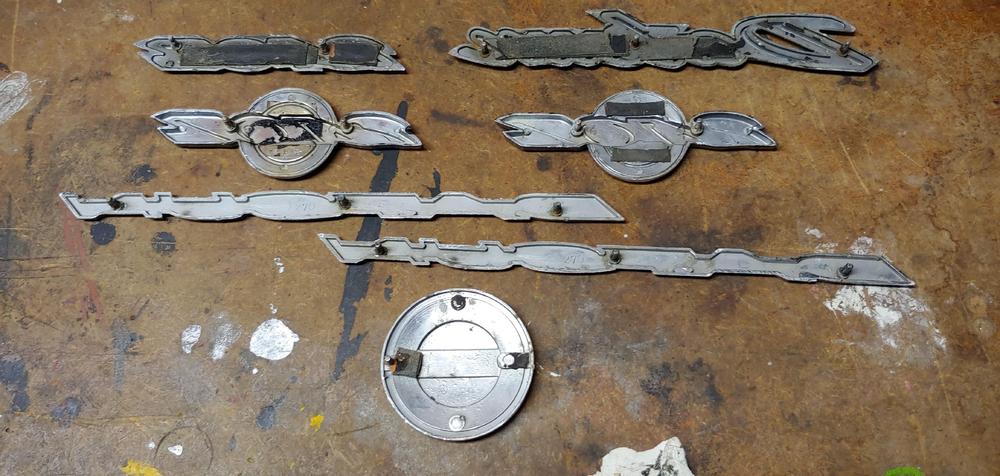
1 pointSlowly making progress over the last couple of weeks, removed front and rear bumpers, grill and all lights, horns and tail light finisher. Also drained and removed the fuel tank and removed all emblems. Drained coolant, removed fan shroud, radiator and battery. So far no parts have been harmed and no stripped fasteners. Wick Humbles book has proved useful. This would probably have been less that half a day for @motorman7. Lol Happy to report that all of the emblems are metal originals, not the later plastic replacements. No posts were broken during removal, I did find that the front hood emblem was missing one post and had a lot of double sided adhesive tape keeping it in place. I used a flat putty knife to remove them.


 1 point
 -
1 point
-
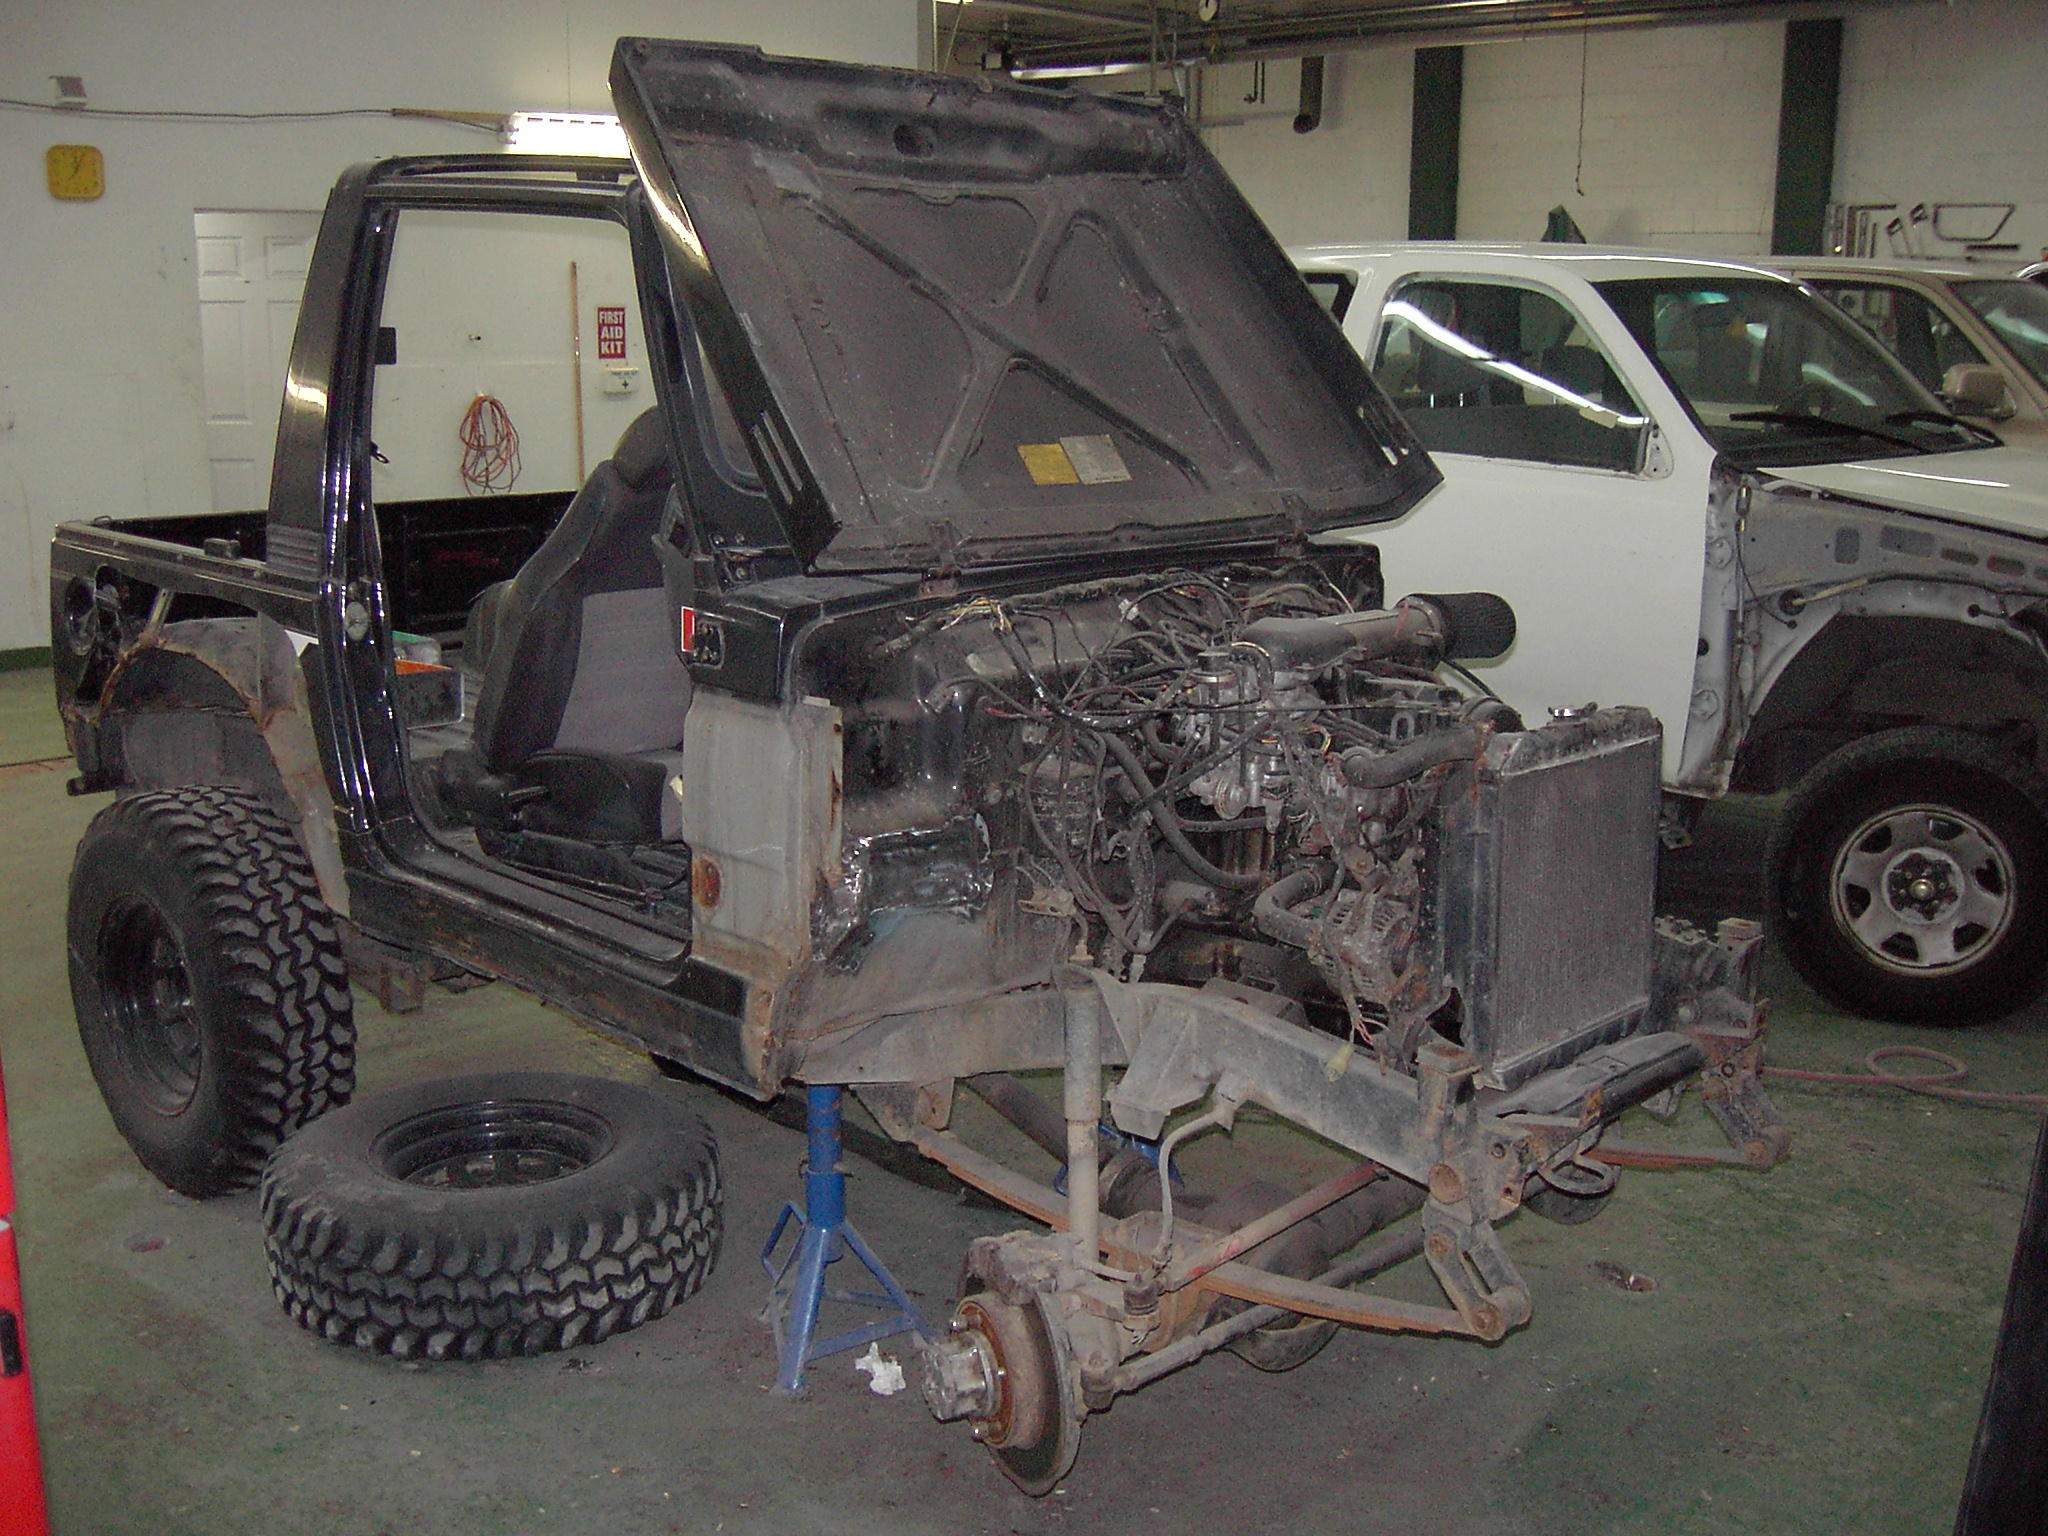
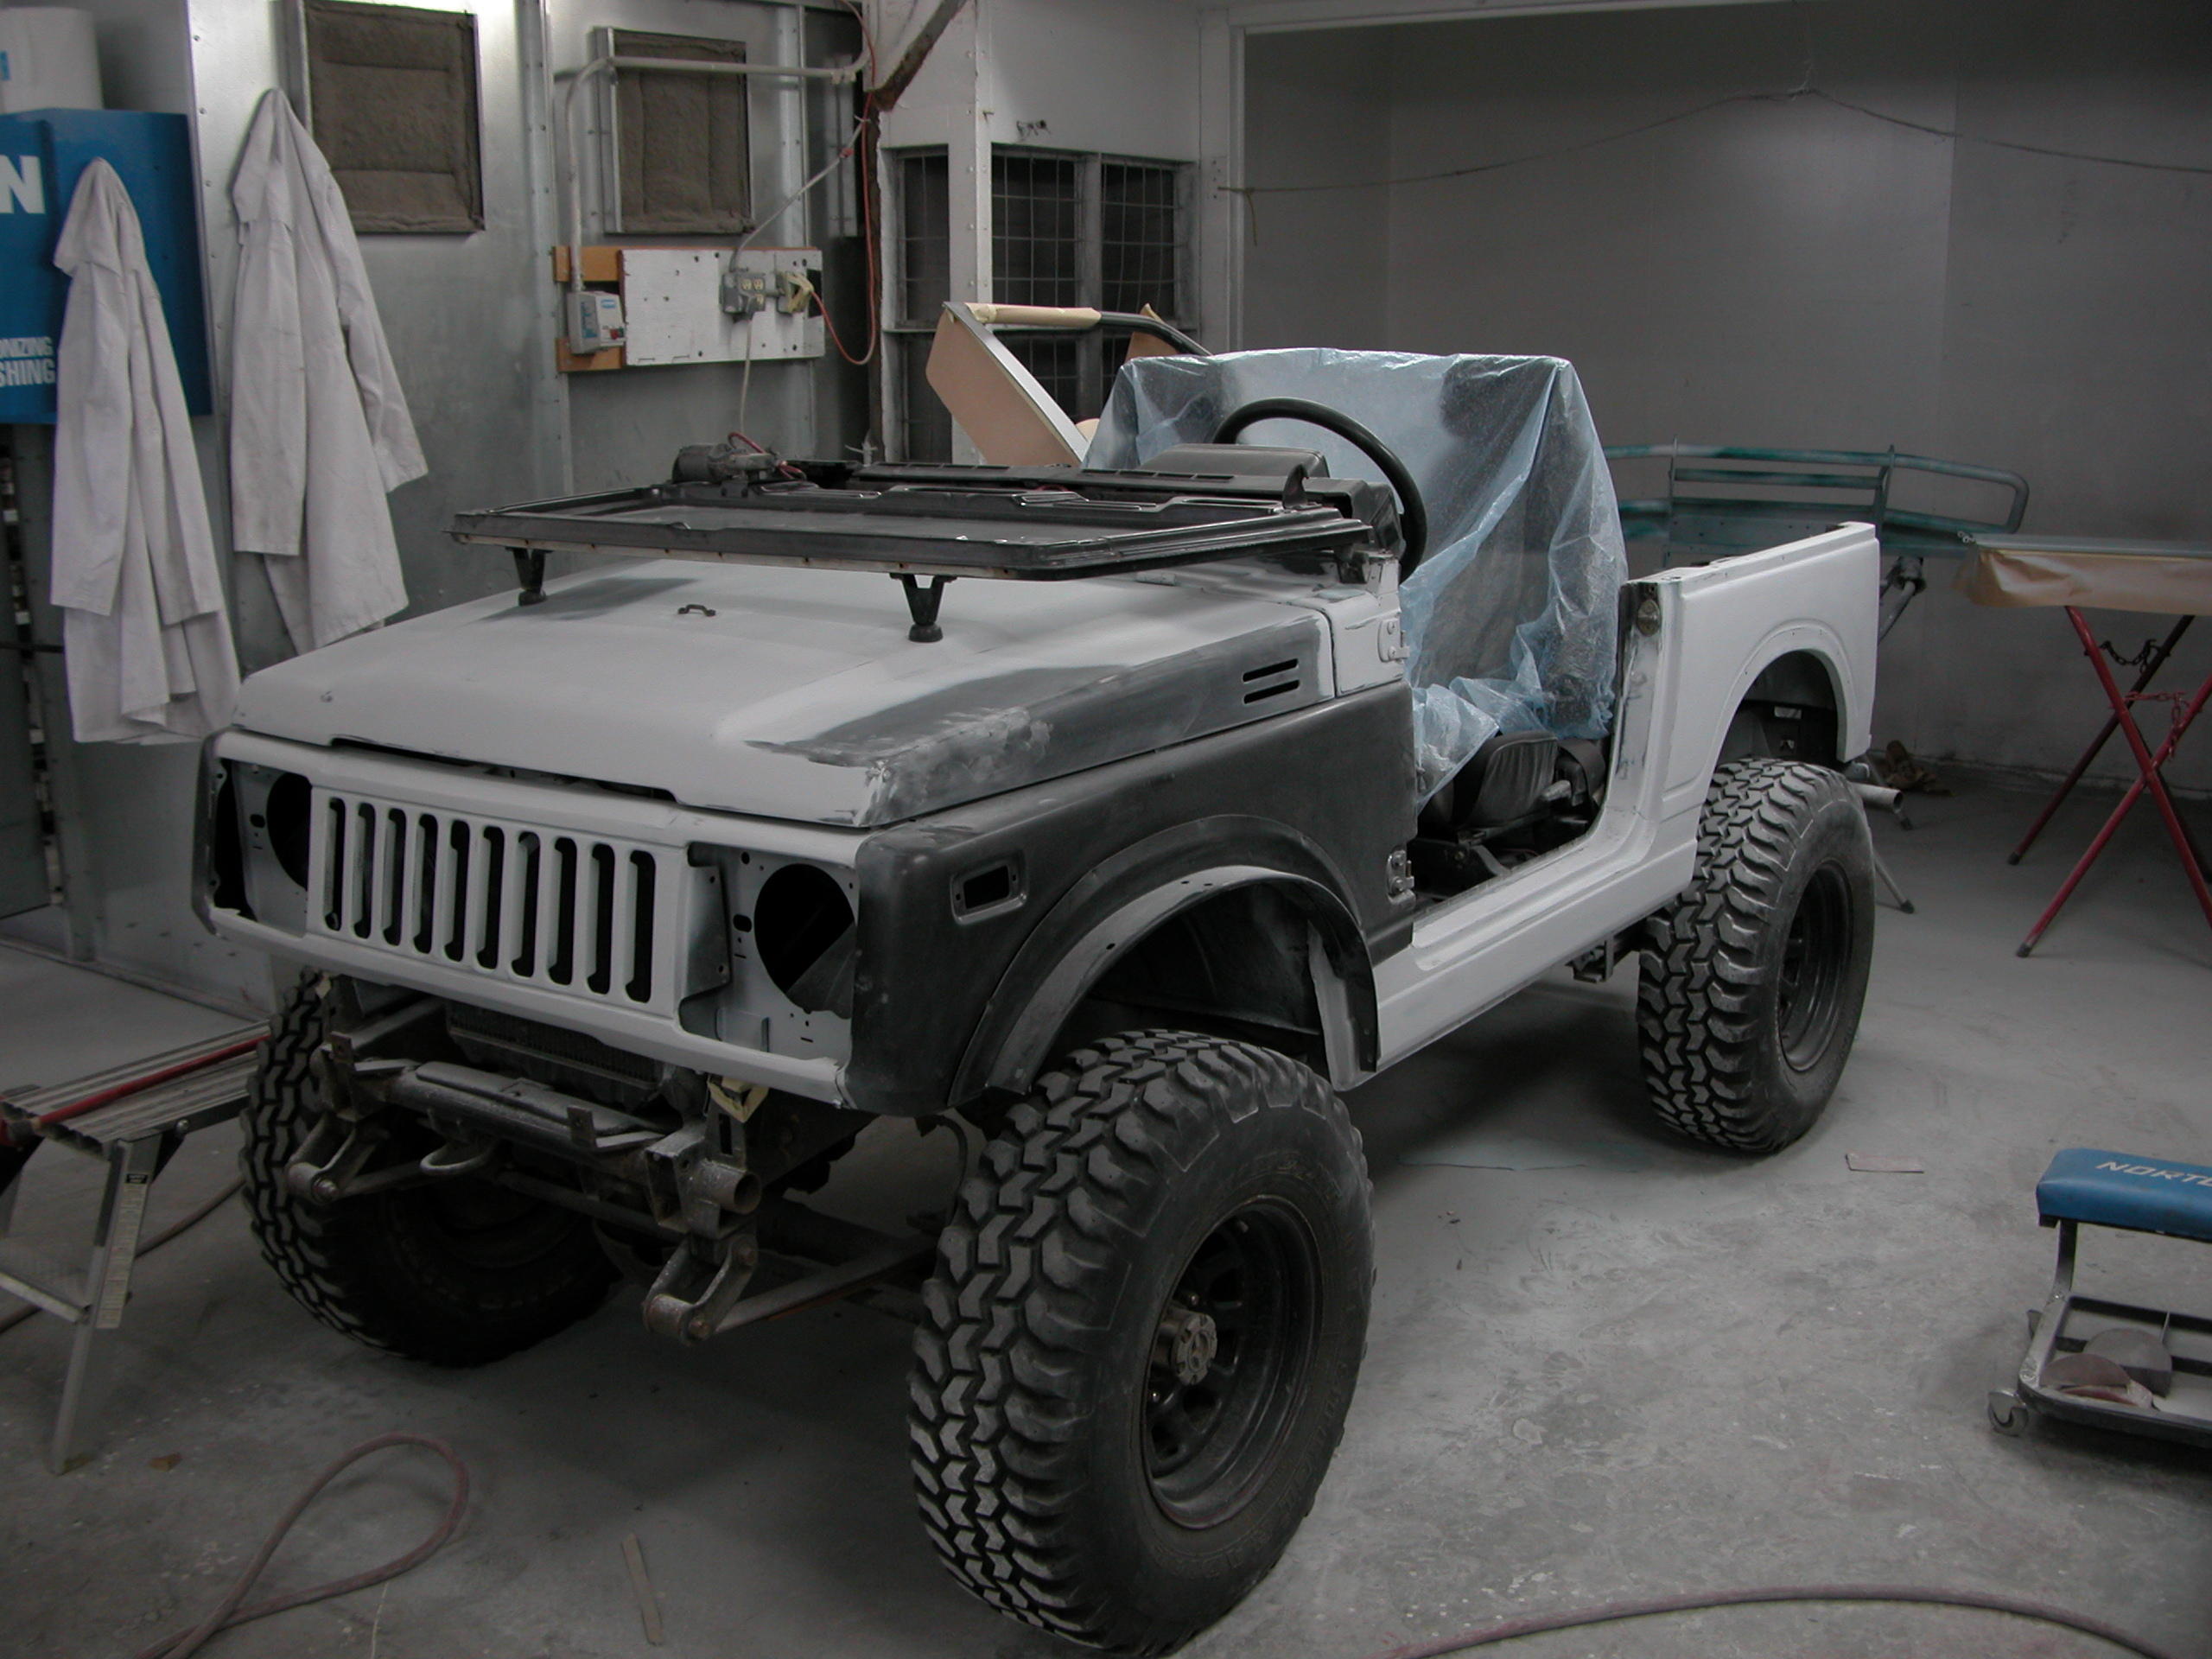
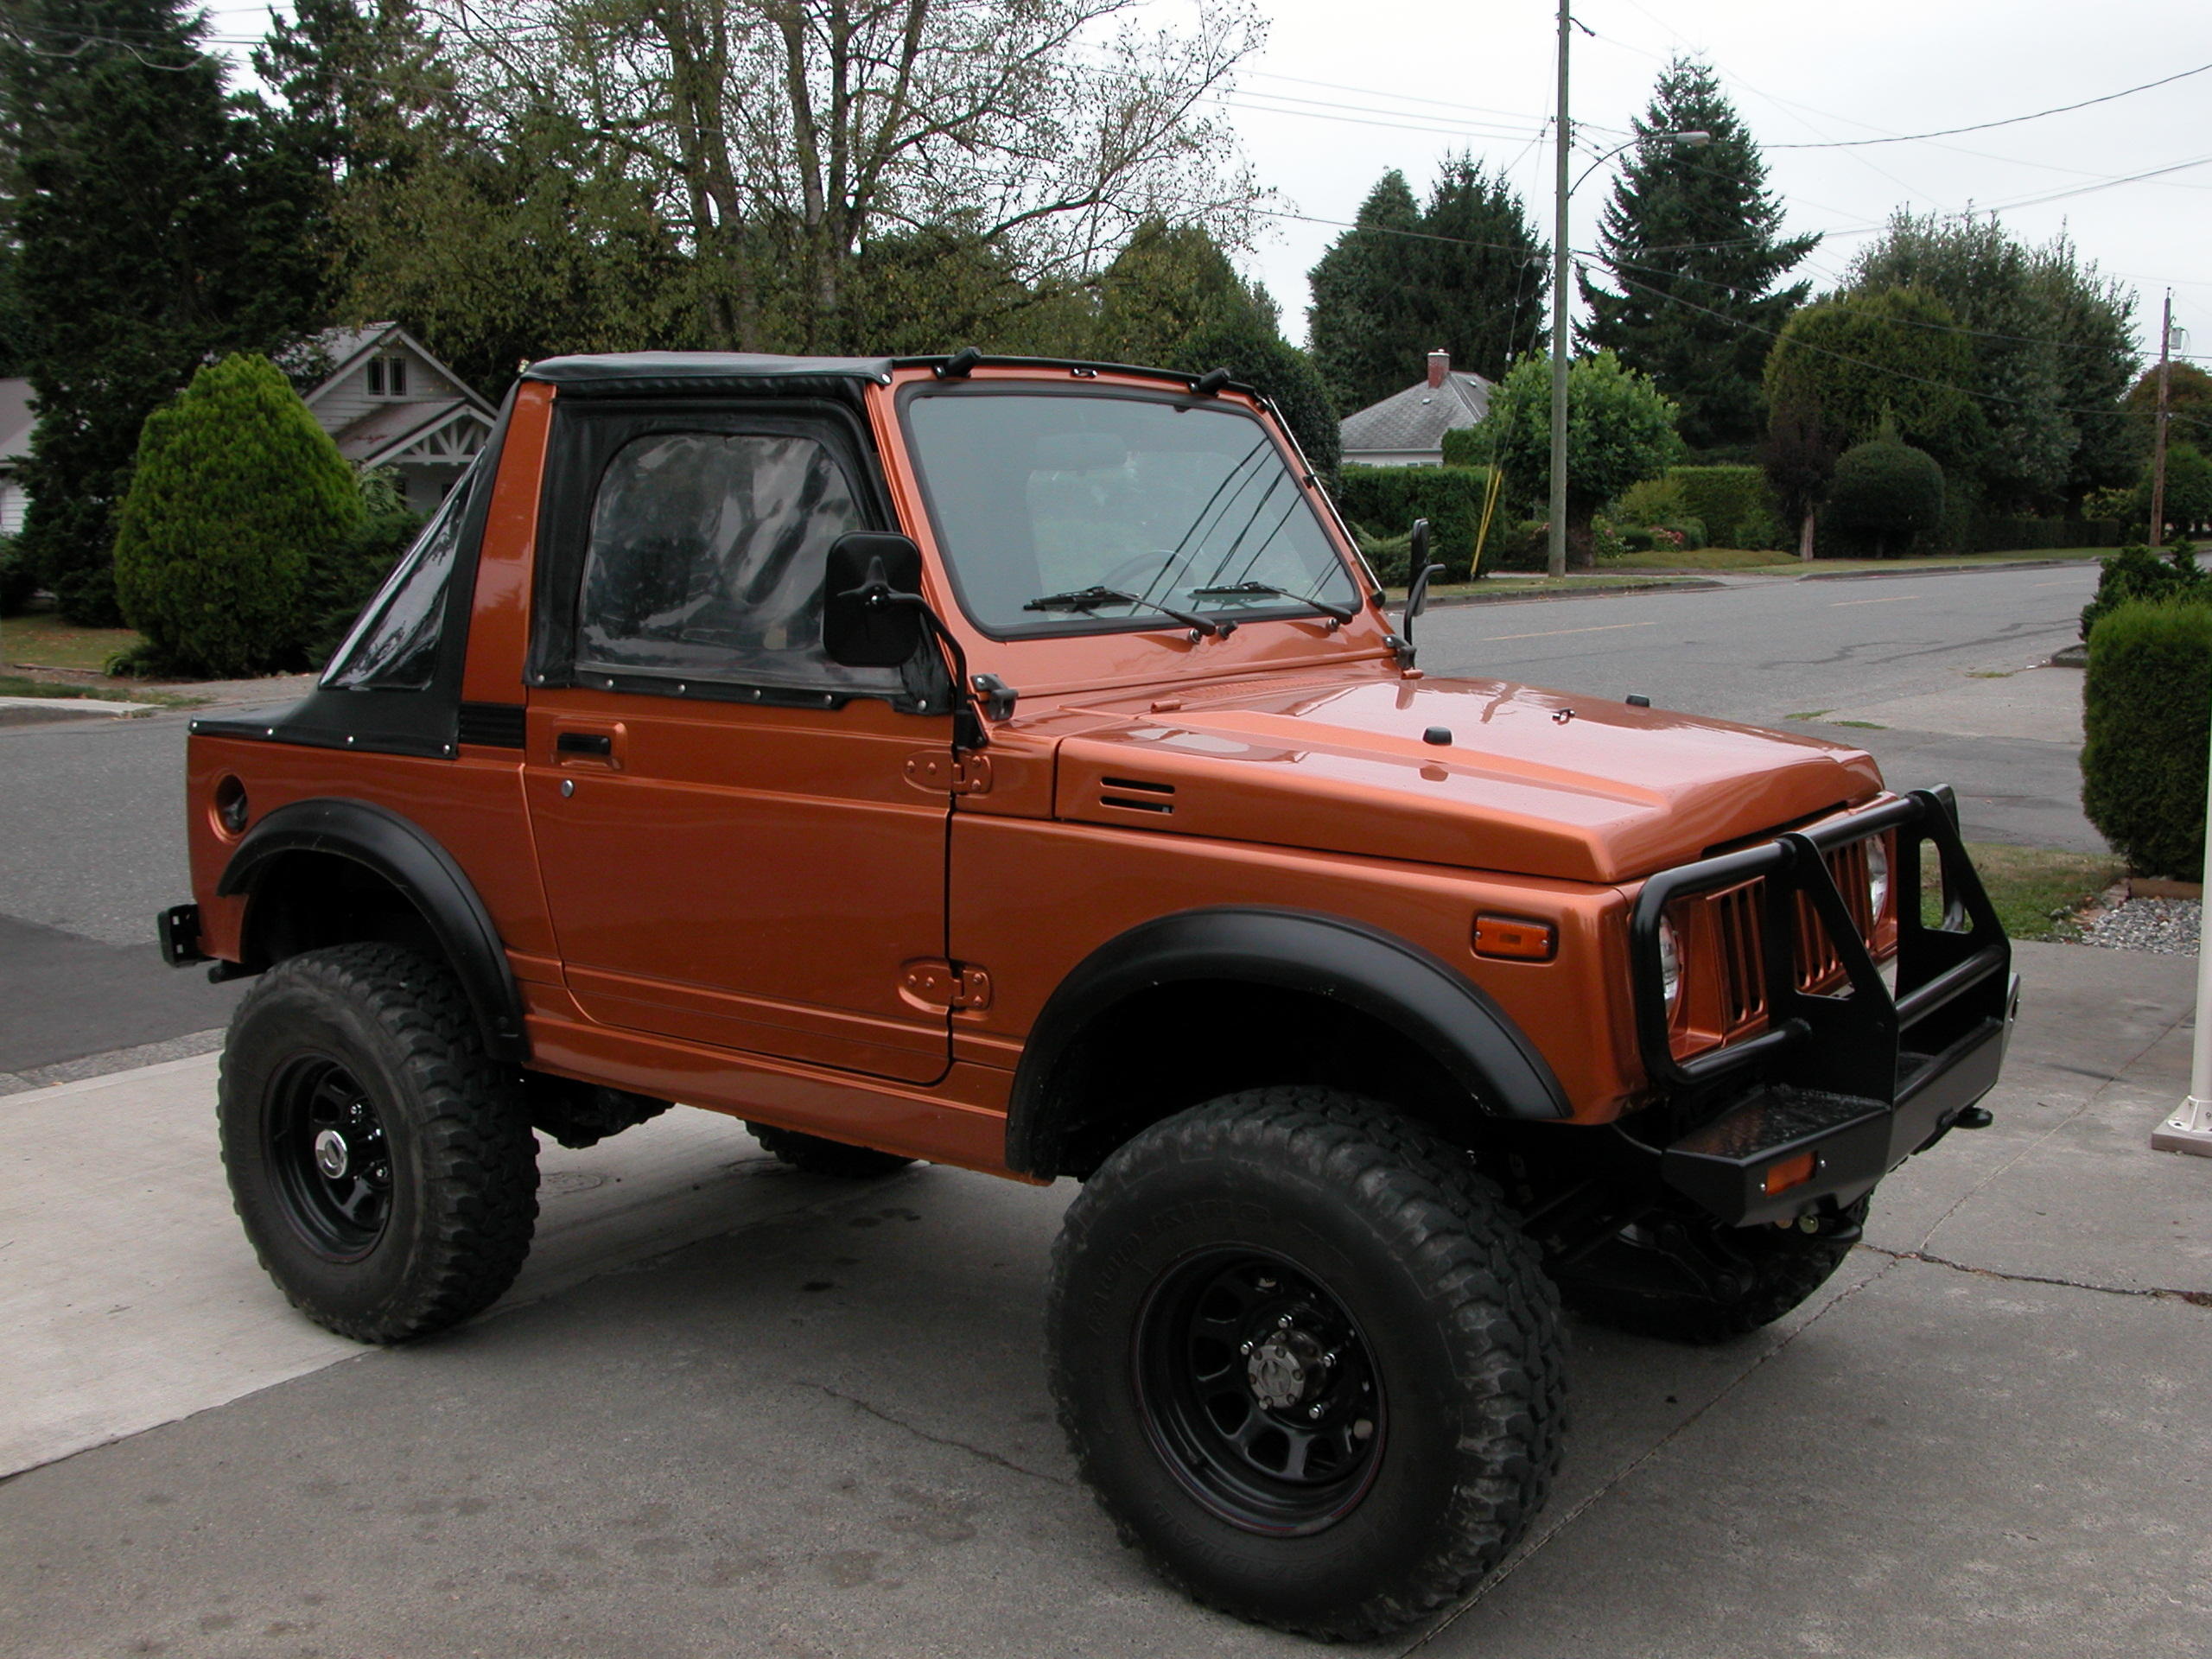
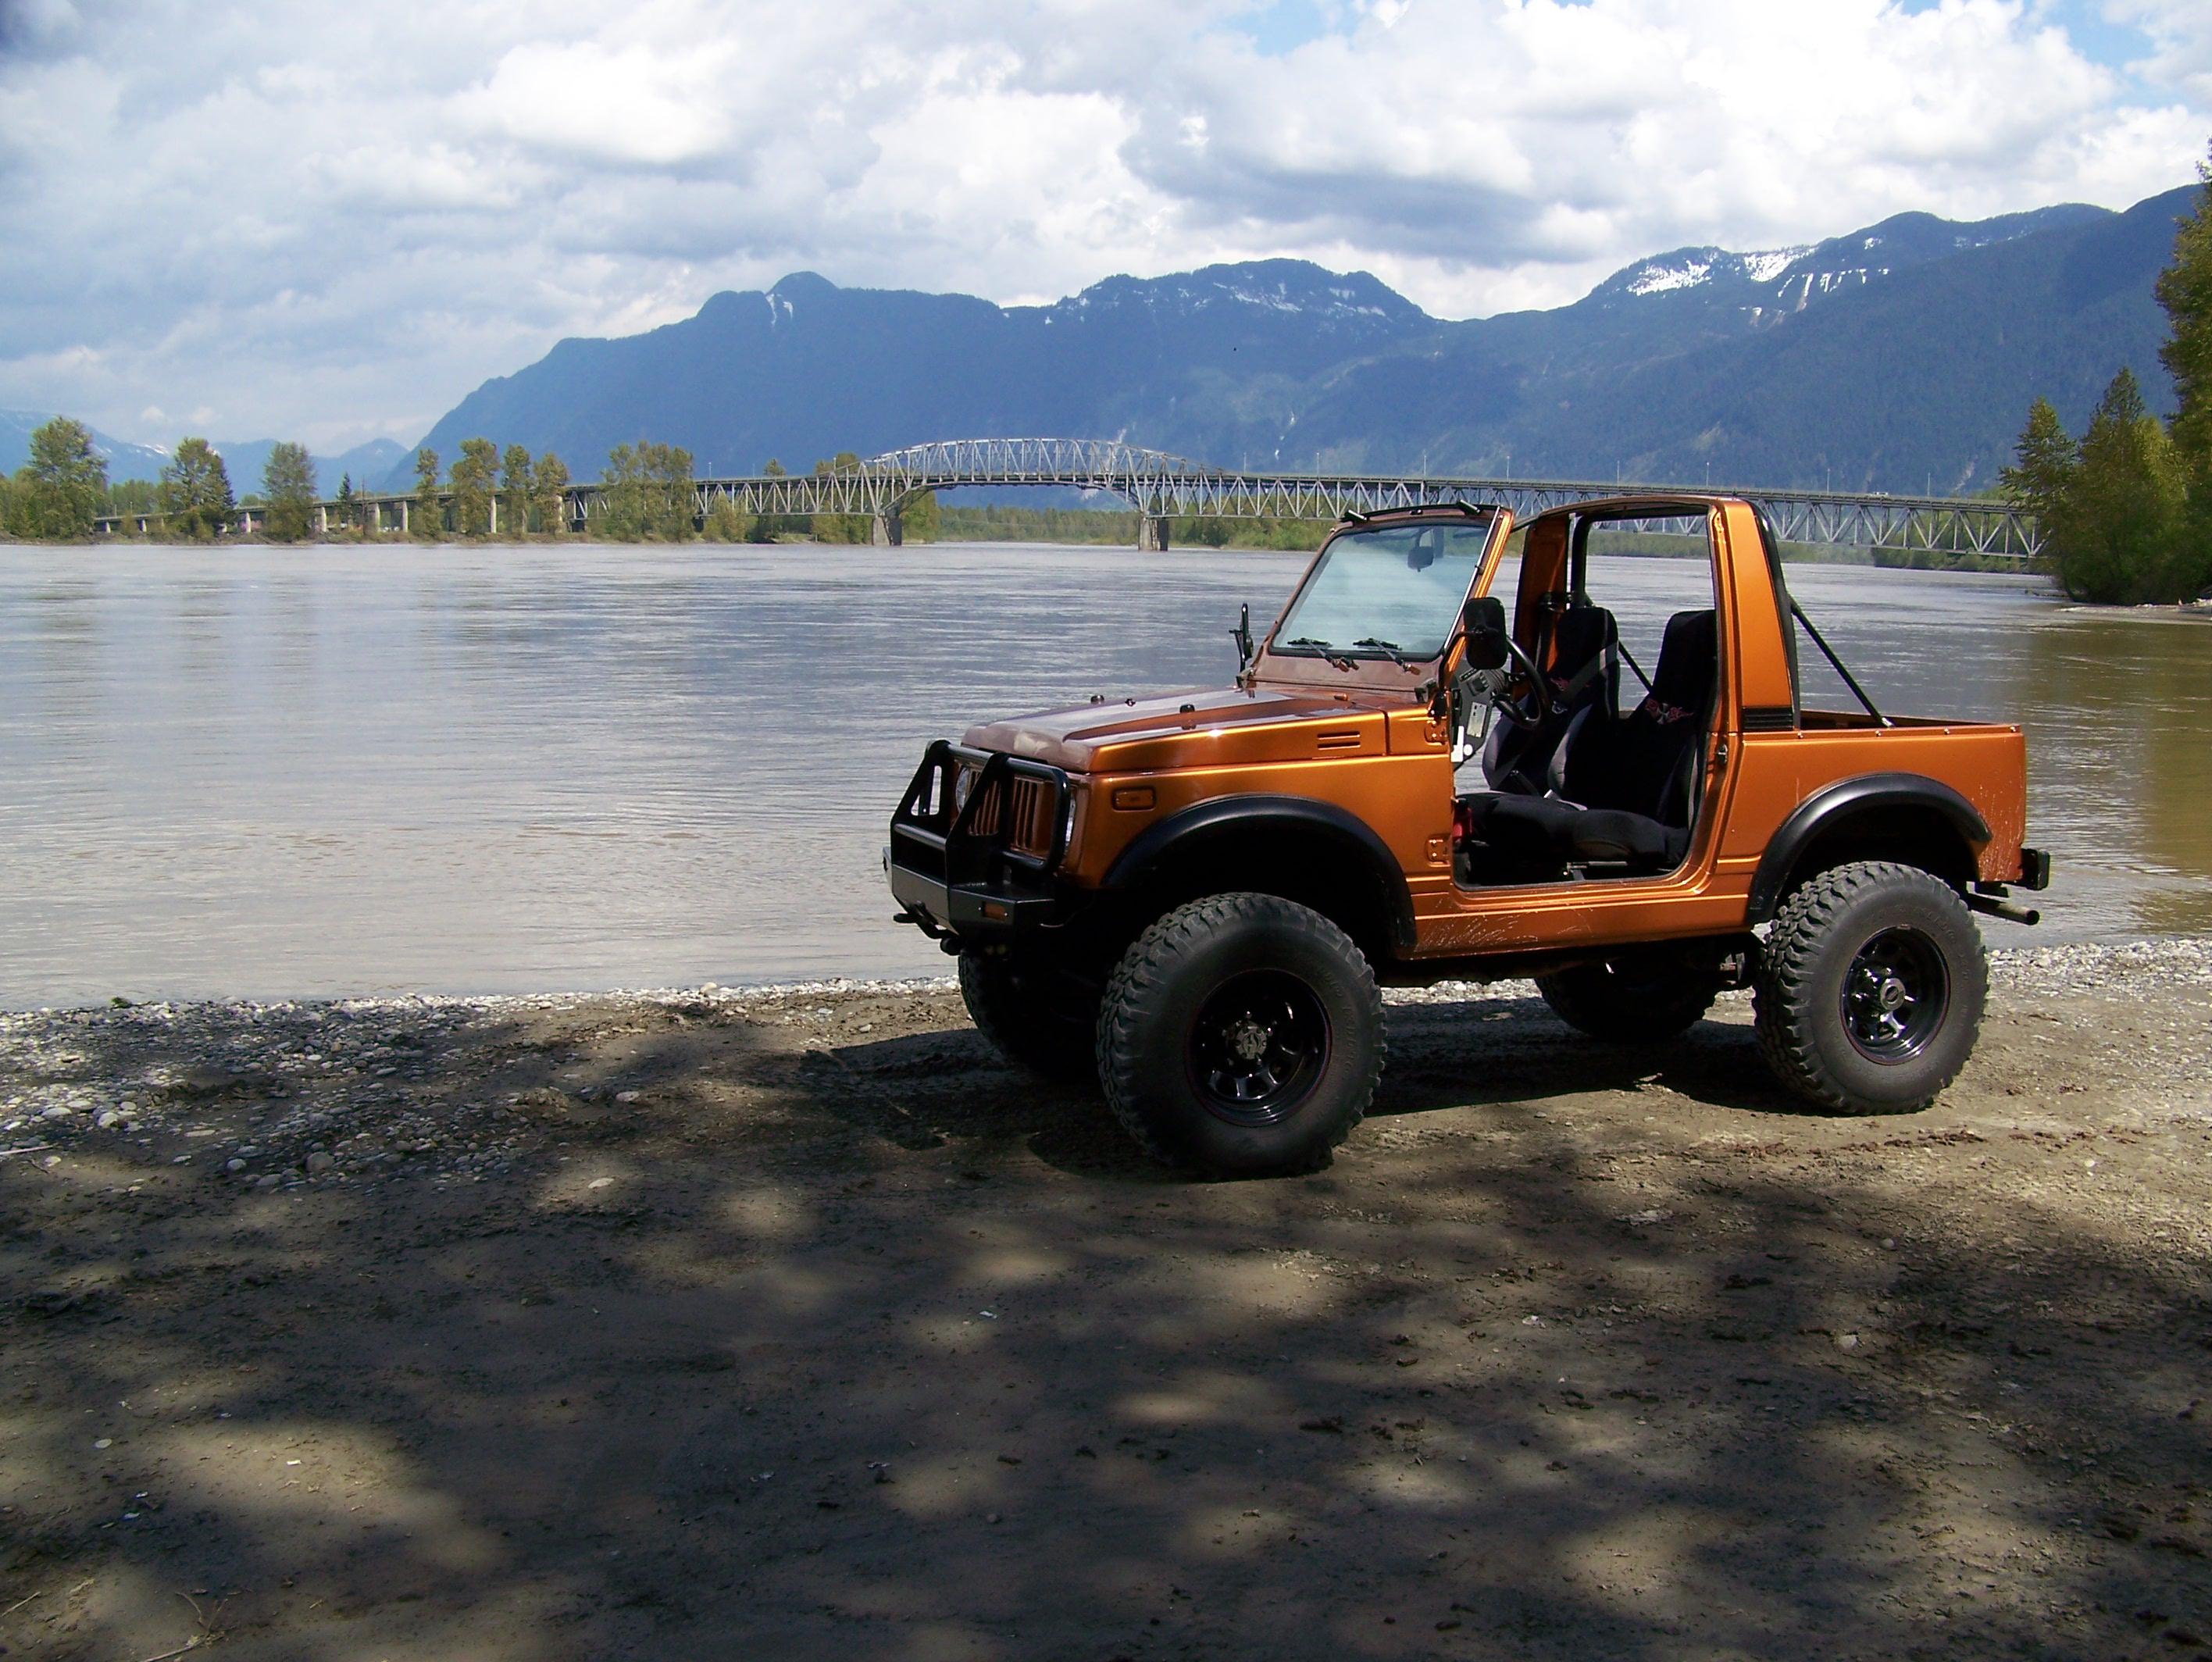
1 pointThanks @CHL240Z, I definitely have some rust repair to deal with. Over the winter I will post pics of the good, the bad and the ugly as I progress. My first order of business is to sell my last project, a 1988 Suzuki Samurai. This will give me more space in the garage and help a little with the budget. I might put it up on BAT. Before, During, And after,


 1 point