


Leaderboard
-


240260280
Free Member6Points4,441Posts -

grannyknot
Free Member4Points5,158Posts -

inline6
 Subscriber
 3Points1,236Posts
 -

Patcon
Subscriber3Points10,921Posts
Popular Content
Showing content with the highest reputation on 11/07/2019 in all areas
-
Please get a real web site. The great wall/iron curtain of facebook is a pain in the arse.3 points
-
 My other passion is Halloween and all things spooky and artistic. So I spend most of this year making these RC controlled tricycles. I did all the legally required stuff (patent, TM, etc.) Hopefully I can begin to get them to market this year. I was thinking you could even put a cooler of beer in one of the wagons and drive it around like a tailgate haha. I am grateful for any feedback, advice, critique, etc. I have 13 prototypes at the moment. And yes, I basically invented them and figured out how to do it. Which is a skill I learned by working on cars! RC Tricycles (Horror Trikes)2 points
 -
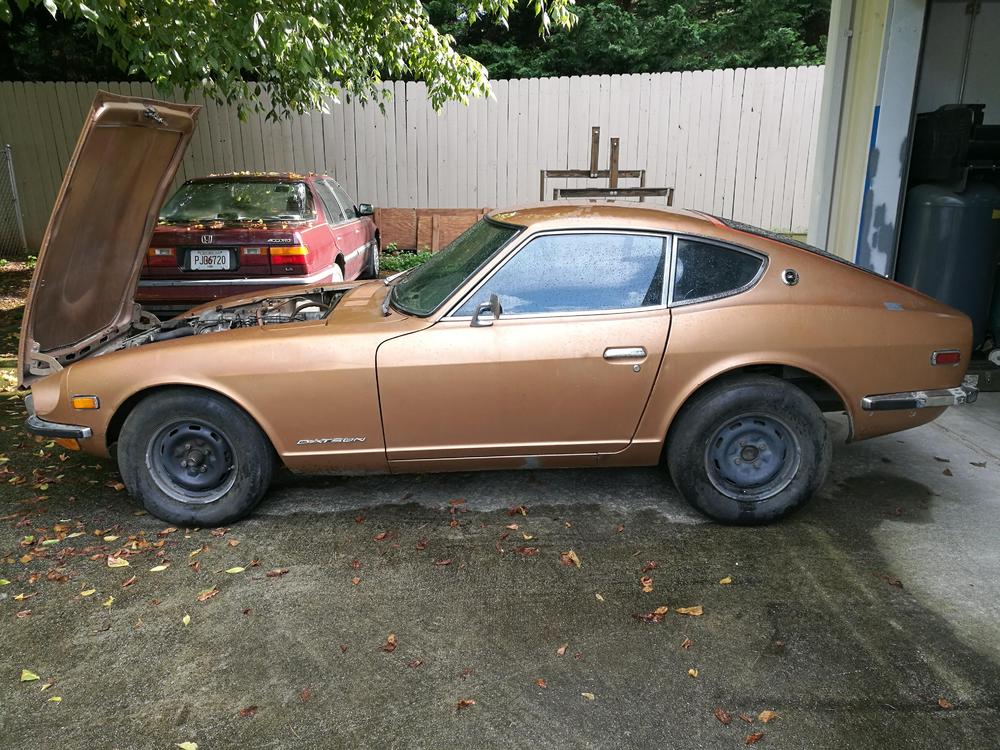
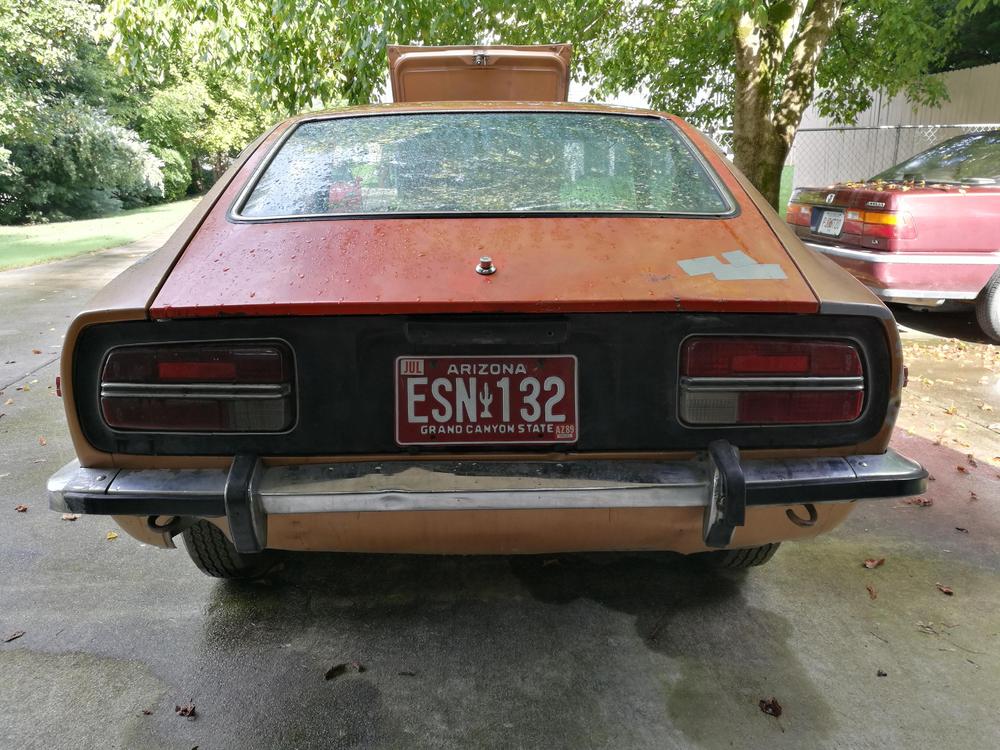
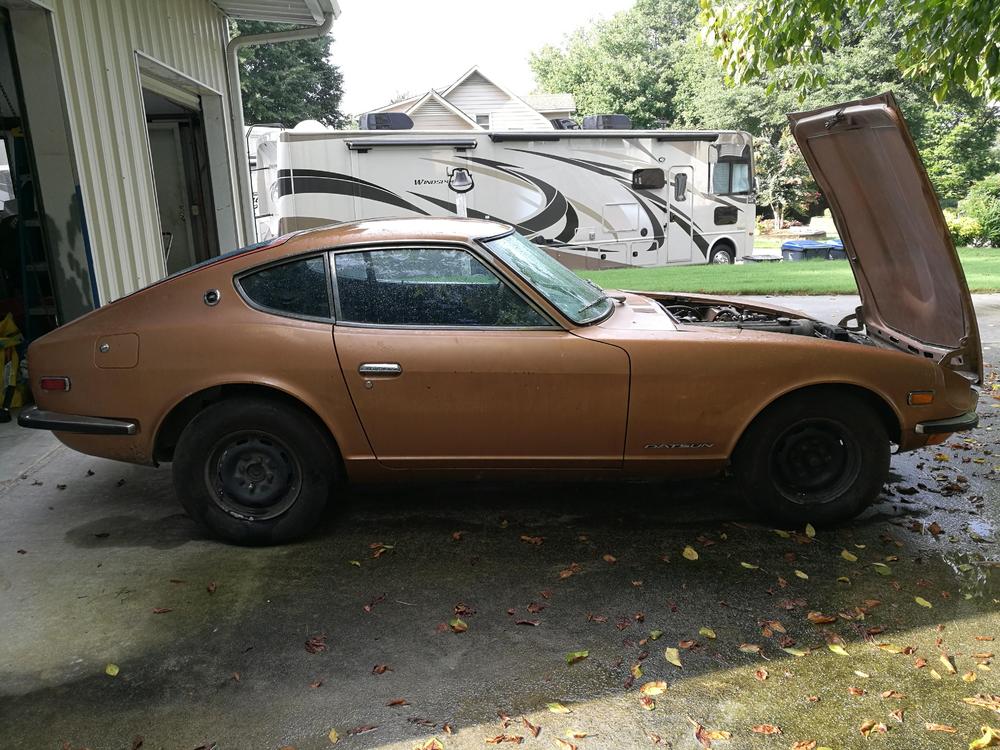
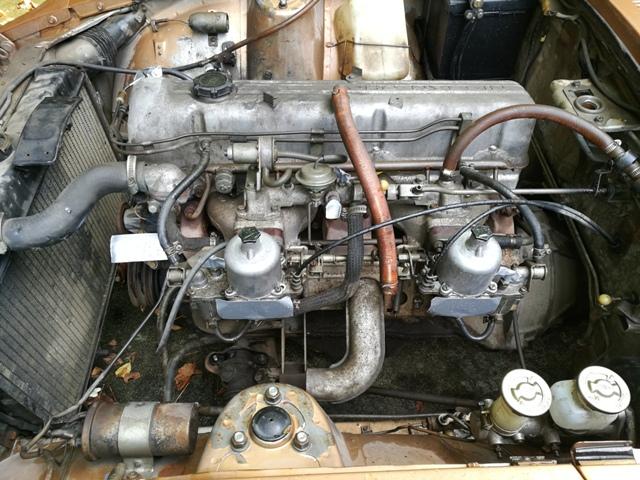
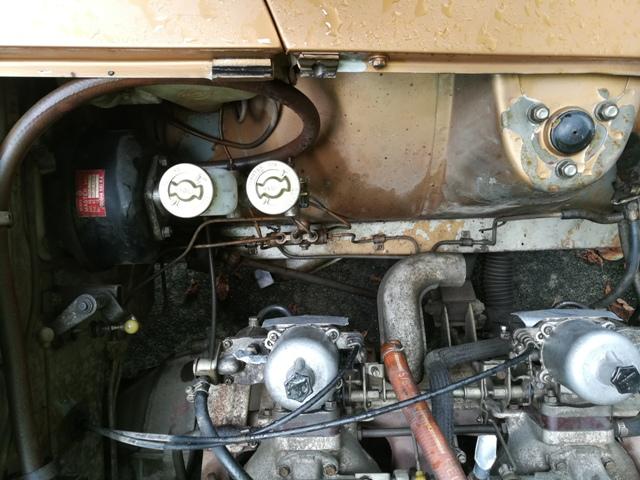
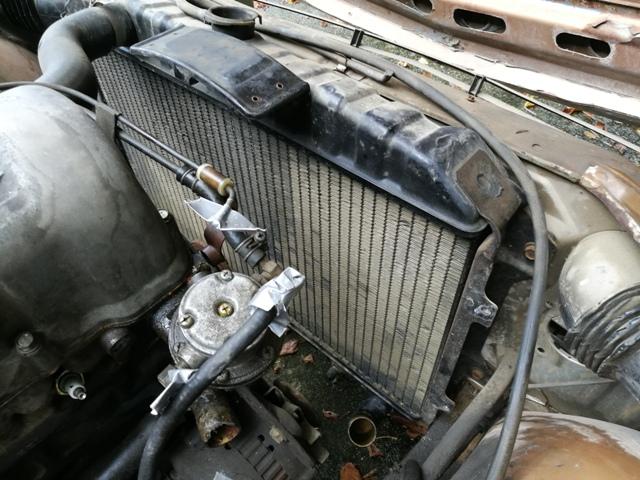
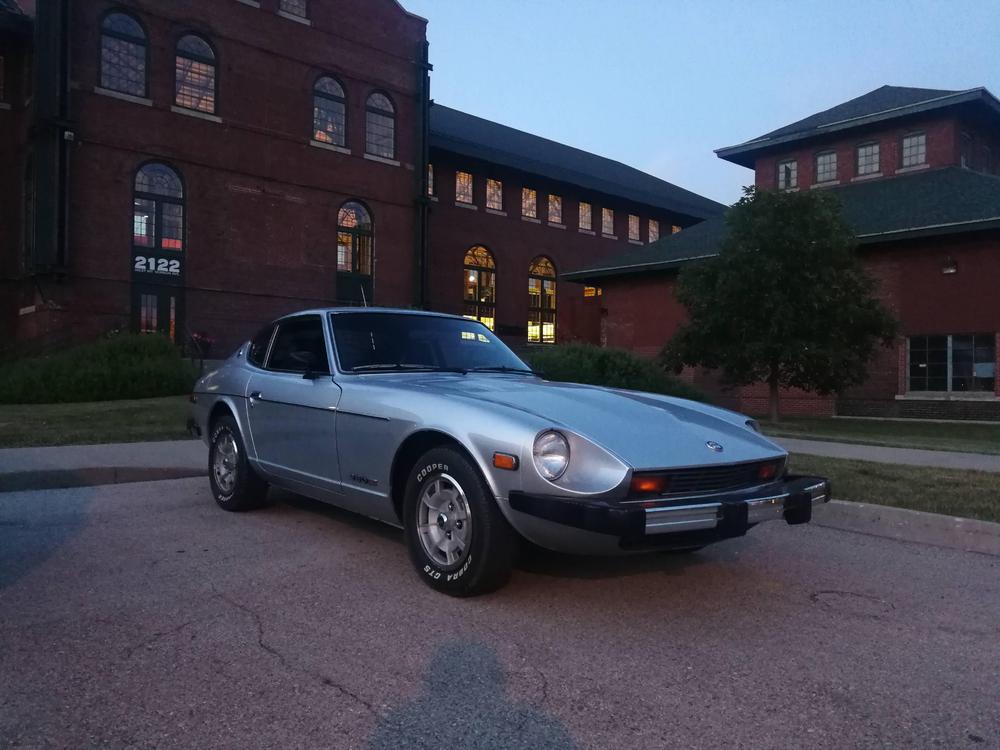
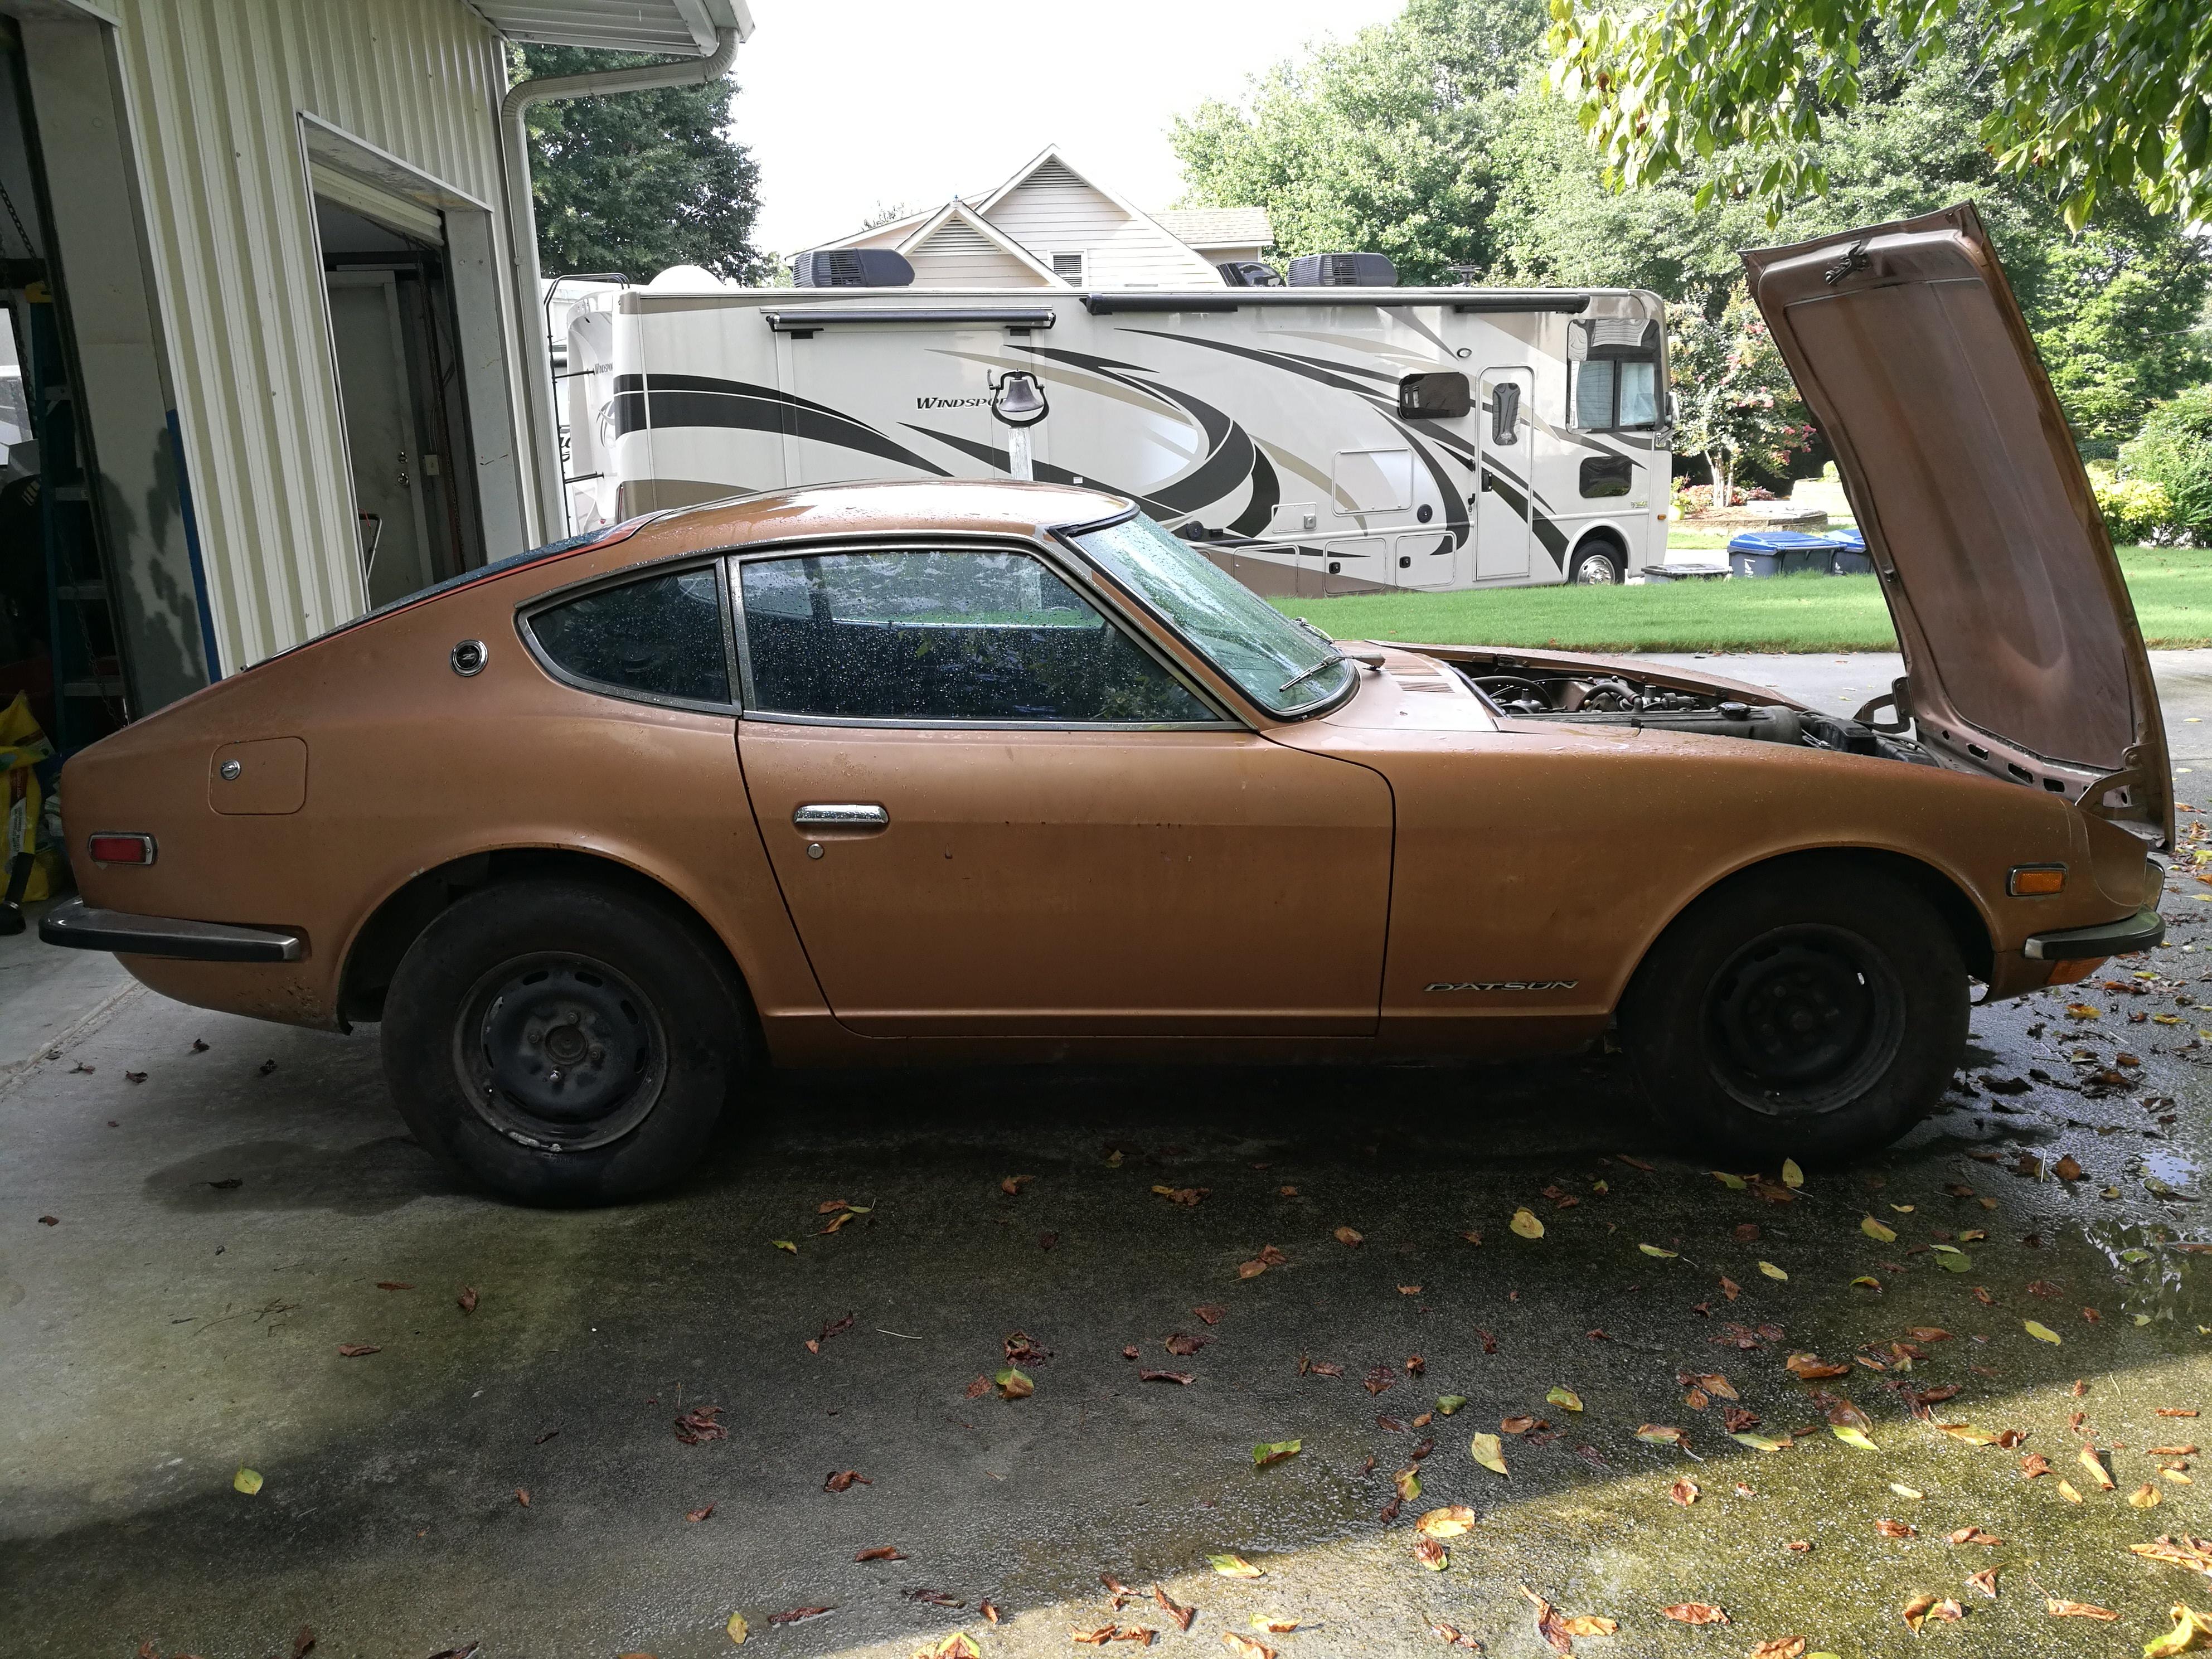
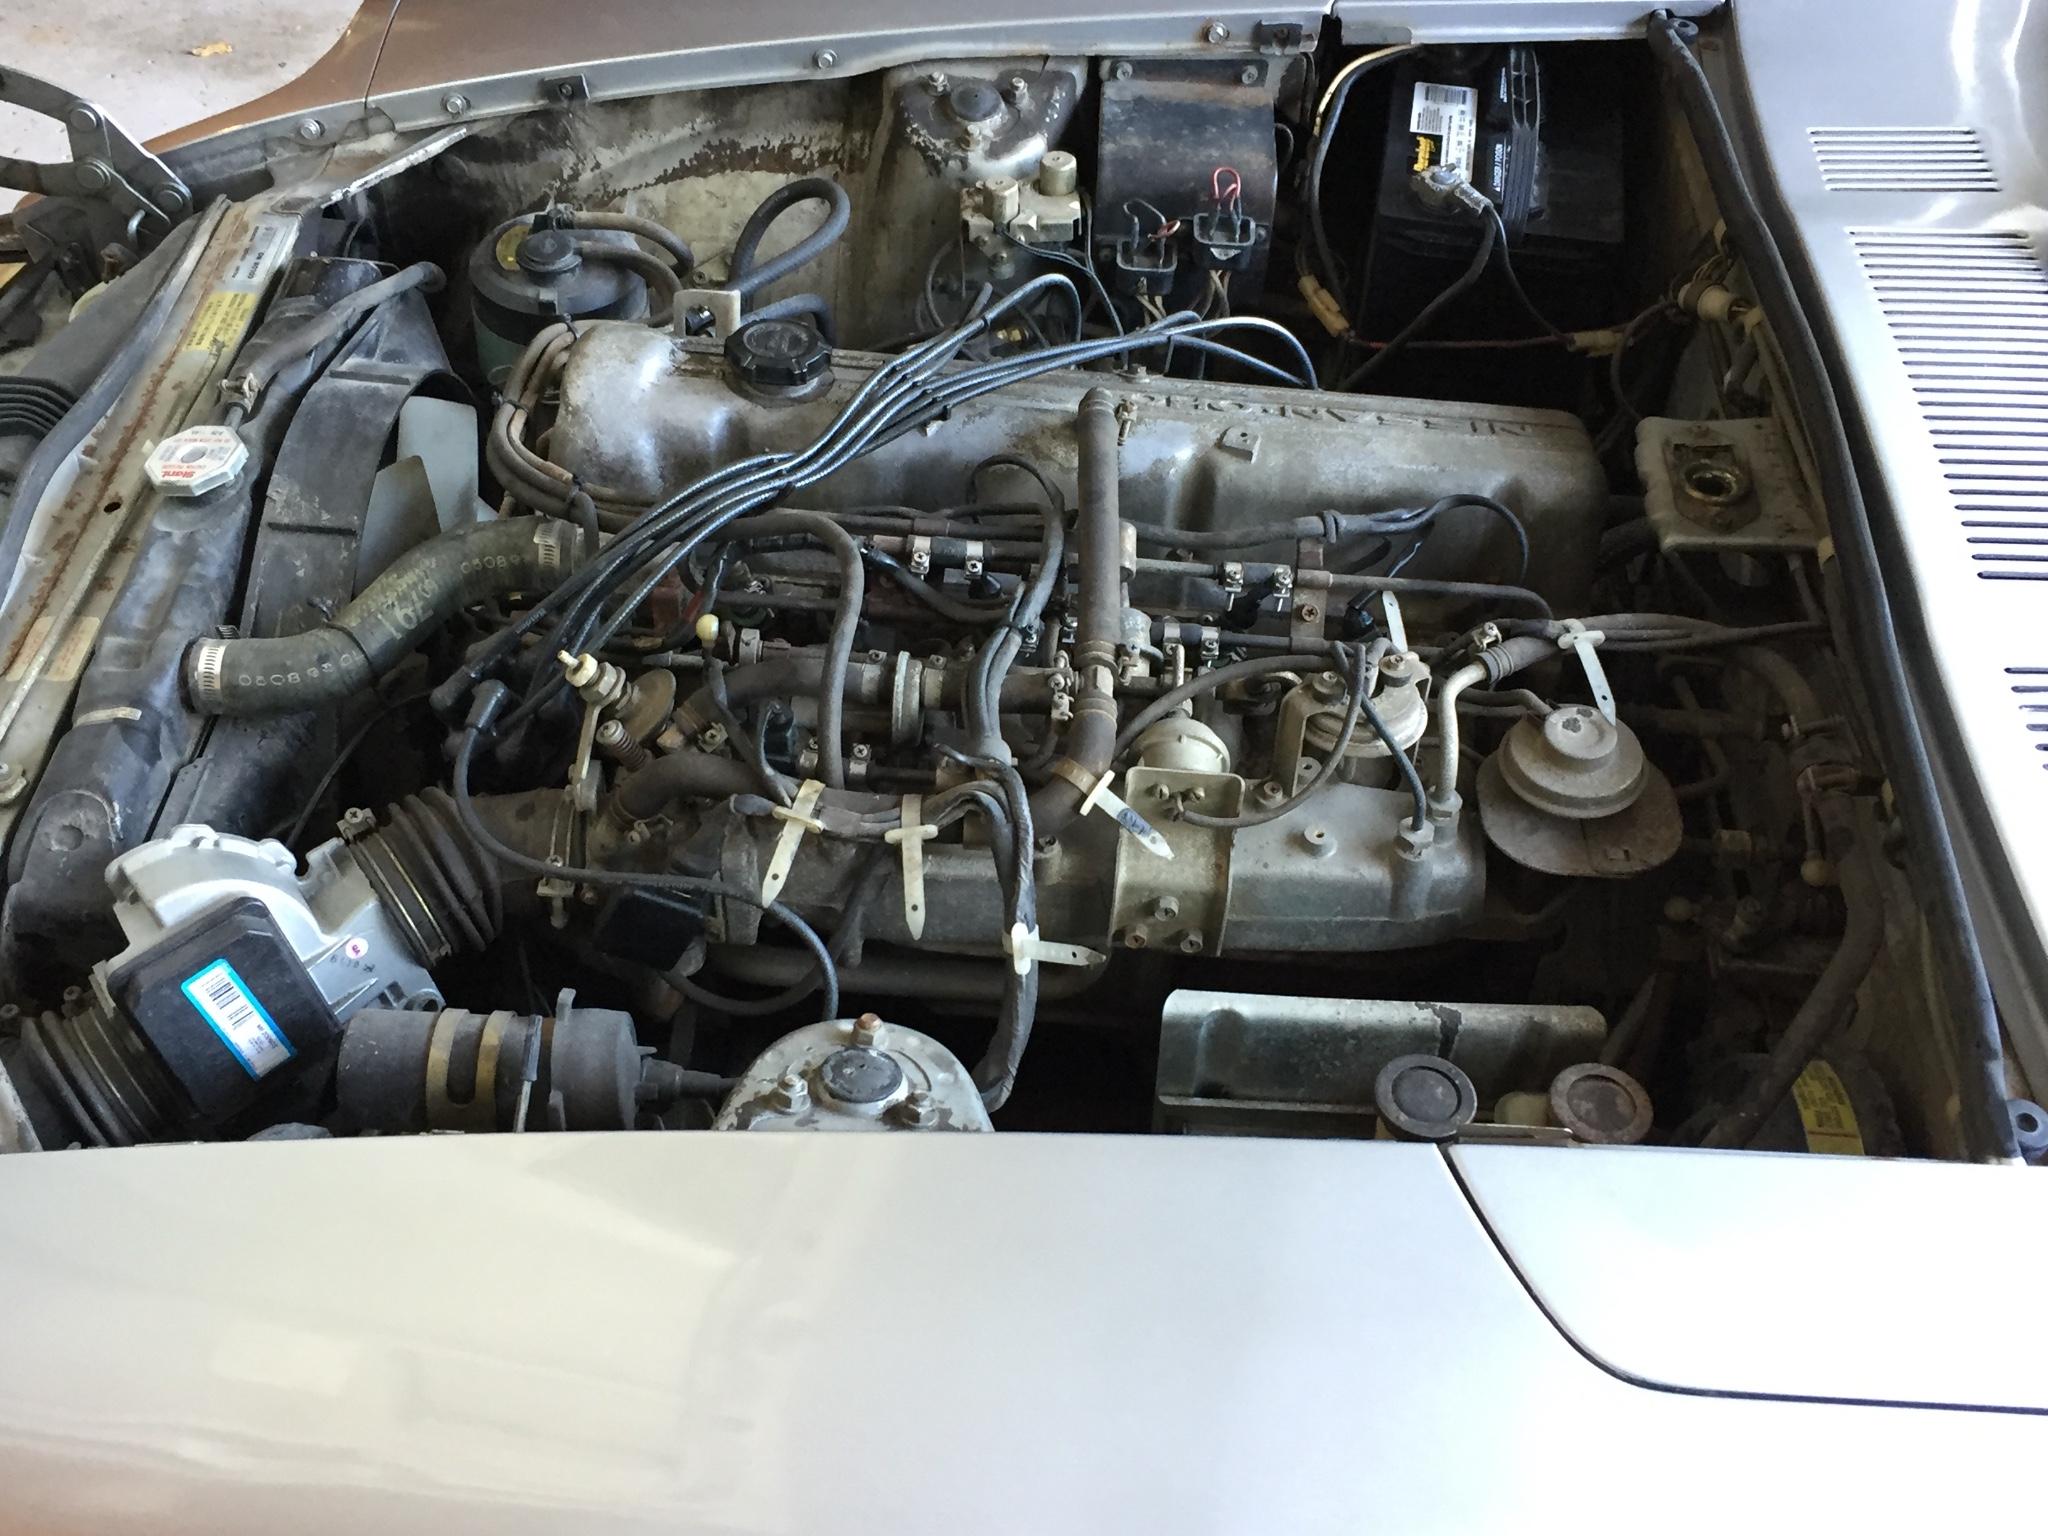
I got an itch to acquire another Z last year... This car on Bring-a-Trailer got my attention and I couldn't let it go. A project car, the previous owner acquired most of the important rubber parts, a NOS dash, a bunch of spares, etc. and did very little to it other than keep it stored in his garage in the Denver CO area for over 25 years. Prior to that, it was in Arizona. So, having restored one Z which had a fair amount of rust, I was super excited to think about restoring one with next to none. I've been at it for a little over a year now, and so I have a pretty good amount of the work done. My hope is that within the next 12 months, I can complete the restoration. I've got lots of pics of progress so far, so, I'm also hoping I can post updates pretty regularly. Here are a few pics after it arrived in GA: The previous owner said he never started it. If true it hadn't run in over 25 years, but the engine turned over by hand. Before taking it apart, I wanted to see if I could get it running and then do compression and/or leak down tests to learn of its condition. I power washed the engine to get all of the dust and gunk off. Then I took the carburetor domes off and cleaned the domes, pistons, needles, inside the carbs, float chambers, etc. The "choke" was stuck in the on position (jet nozzles down) and carbon was caked on the inside of the carbs keeping the pistons from moving freely. Here's the engine after cleaning: Here is the clean engine after it dried. The distributor shaft had a lot of play, so I snagged the one from my other Z. Fuel lines were completely clogged, so I disconnected at the hard line coming into the engine bay. Fuel pump was gummed up, so I grabbed a spare mechanical one (once was on my other Z), and ran the rubber line down into a gas can. Oil in the engine seemed like oil, so I left it as is. After a few tries of the starter, I got it fired up. Still no coolant in the system, no radiator hoses, etc. I just did a quick sync on the carbs and got it running well enough to know that nothing catastrophic had happened to it. Here is a video after only a few minutes of tinkering with it. Next, I put radiator hoses on, put water in and other misc. things so I could run it for a while. I wanted to run it for a minimum of 30 minutes so I could do the compression check or leak down test. Here's another video. The exhaust is original Nissan parts (verified part numbers of center section and muffler), by the way... and very quiet. Garrett

 1 point
 -
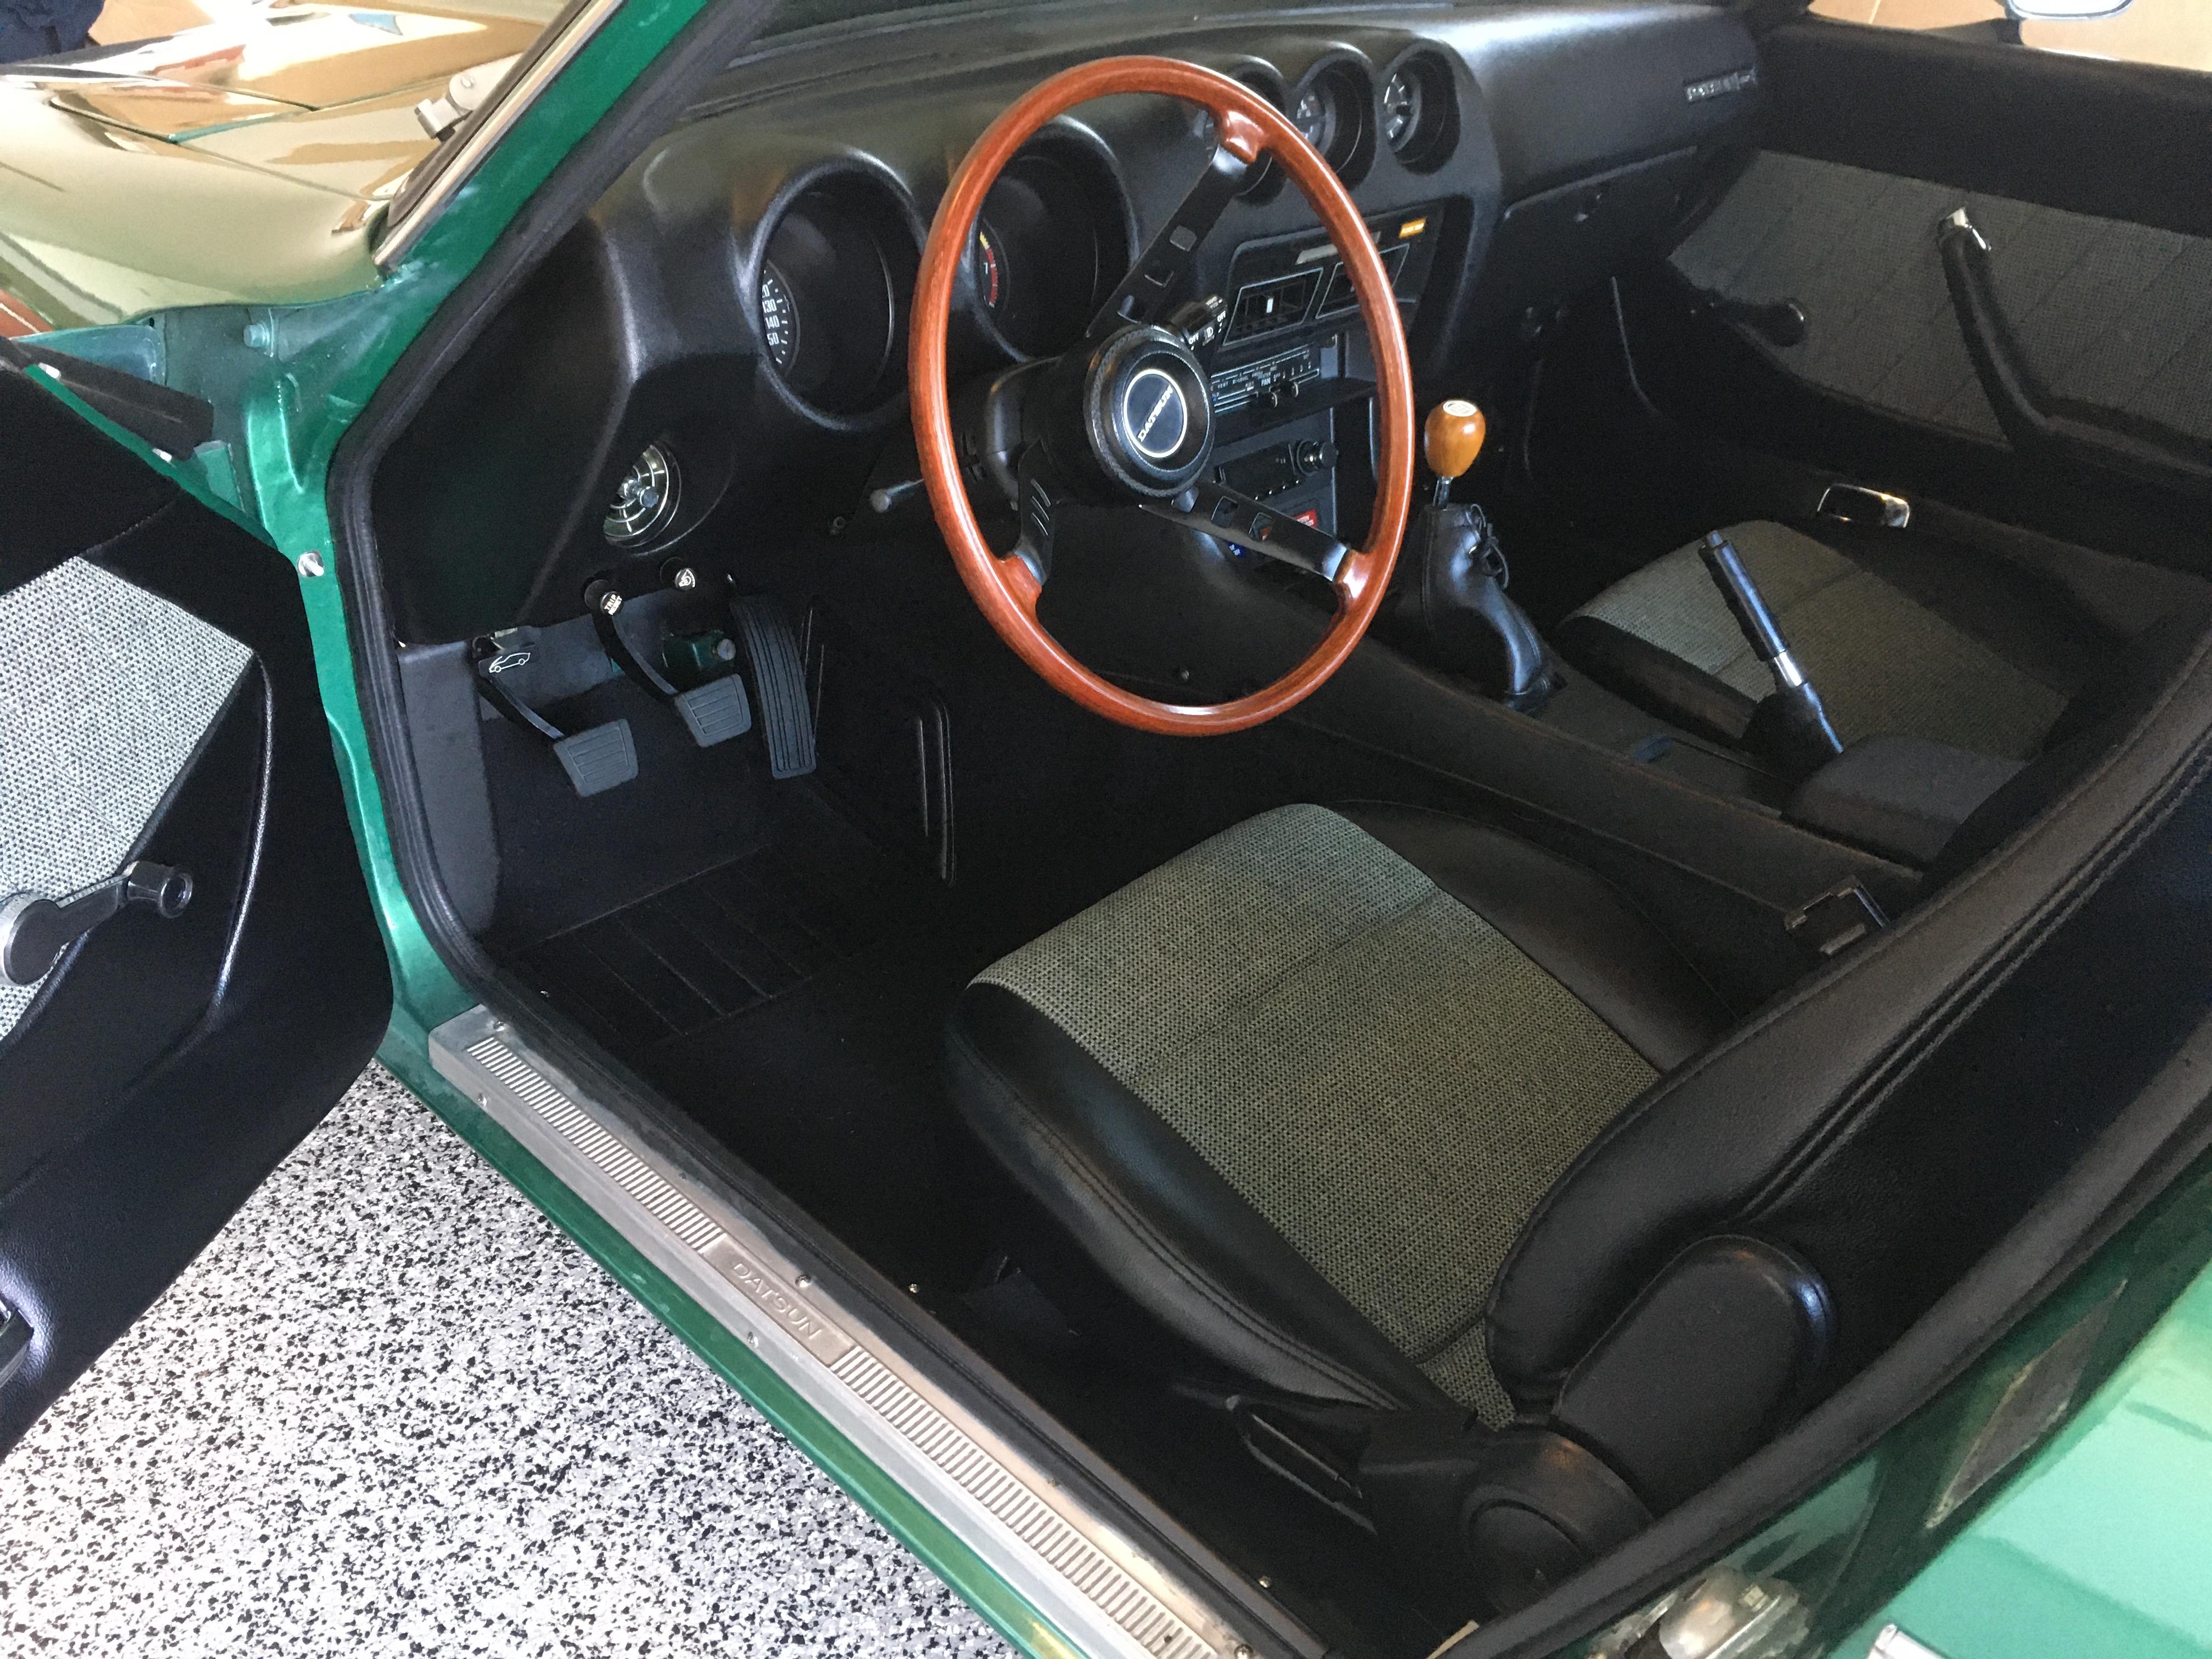
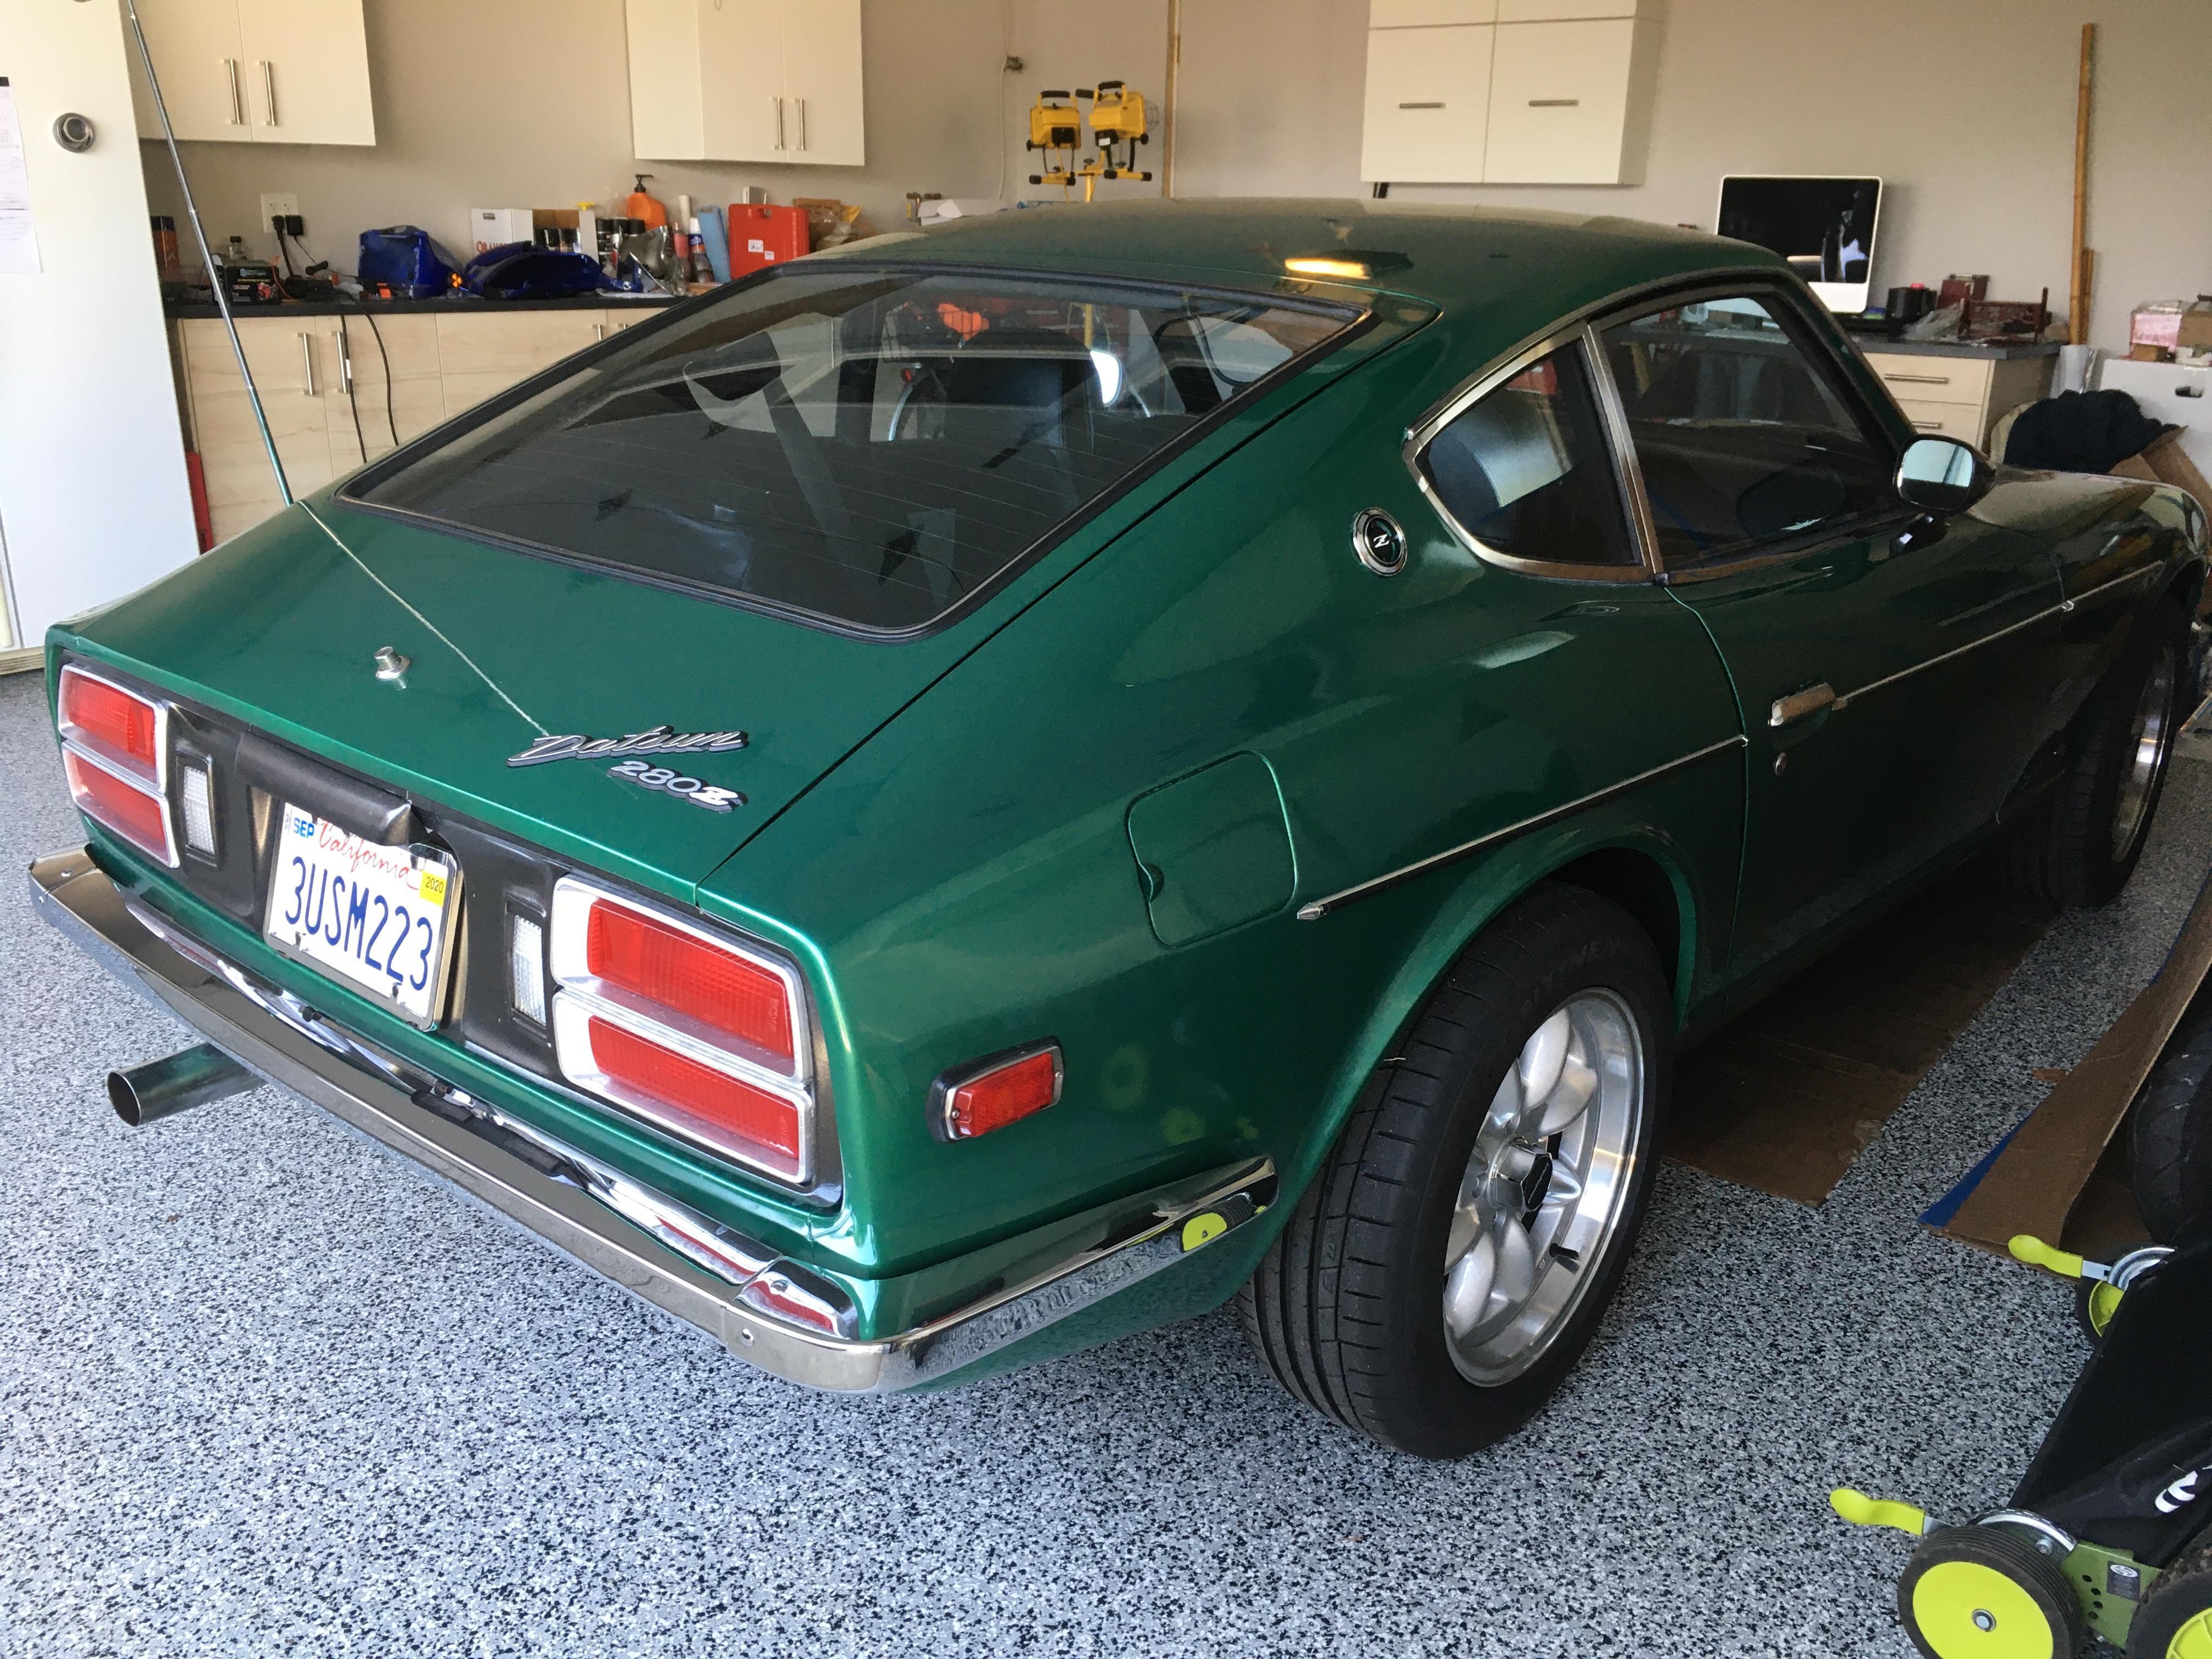
 Hi Guys! New to the site. Just bought a 1977 280z. Its my second Z, but first S30 and I am ecstatic to get started. It seems pretty common place to introduce new projects here so I figured I would drop a note. Current Prognosis: Chassis is in good shape and car both starts and runs pretty well for its age, but definitely needs some dialing in. Going to keep it mostly original and focus on restoring its performance to 1977 spec. Many of the bushings are original and need to be replaced. Engine ticks pretty loudly until it is fully to temp and likes to hang at 2000rpm on downshifts. There is light surface rust on the rear suspension components, engine sub frame, and a few small body panel issues (picture below) which need some TLC. Car was repainted a decade or so ago and while it looks good from a distance, its very rough up close. A few photos are below, or you can get all the detail from the seller's BaT Post from a few years ago. https://bringatrailer.com/listing/1977-datsun-280z-8/ 2019/2020 Projects Fluids Change [Complete] Shifter Bushings [Complete] Brake Master Cylinder Replacement & Bleed [Complete] Vacuum Hose Replacement [In-Process] Powder-coat Suspension Components Bushing Update (Poly Primarily) Oil Pan Seal Replacement Rear Main Seal Replacement Rust Remediation Future Projects (WIP) Front/Rear bumper & DIA trim delete and replacement with 240z/260z components Paint respray (Either original silver or the blue/green Datsun paint of same era 5 Speed Transmission? Small body rust spot above drivers side door drain Chassis/Suspension components to be painted or powder coated Test 3D print of the car (Still waiting on Silver filament ?


 1 point
 -
 Some of you will remember me (LBO730 - Bryan) from a few years back for developing the reproduction early style shift boots, emergency brake boots etc. for the early Z cars. You guys gave me overwhelmingly great support on that project. I'm still doing lots of stuff in upholstery and leathercraft. You can see a photo of the leather interior I did in my 75 280 in my photos. I wanted to see if you guys think there would be any interest in good quality leather wallets, key fobs, belts, wrist cuffs, mouse pads, phone cases, guitar straps, coasters etc. and maybe even purses & totes for the Z crazy females, all of which would be customized with something Z related. IE "Z", 240Z, 300ZX or just about anything you could come up with. (Making sure not to violate any copyright laws) Ideas & suggestions from the Z community would be great. You can see some of the stuff I've done on Facebook at Brookland Leather Co. Let me hear from as many of you as possible as to whether you think this could be a successful idea. Thank in advance for your input!
 1 point
 -
 I concur with Mike. You’ll have at least $20k-$25k sunk into that Z to renovate it. Maybe $10k-$15k sunk into it (including purchase price) just to make it a halfway reliable driver. I bought a ‘75 Z about 1 1/2 years ago in NorCal for $6700. No rust, except a little surface rust on the interior at the firewall and a bit on the underneath side of the car. It had been sitting for 16 or so years. Just to make it a reliable driver, it would’ve needed fuel lines replaced, gas tank cleaned, and new tires installed. Of course, I jumped right away into a major renovation of the car instead of just making it reliably roadworthy. ? Let’s just say it hasn’t been cheap. ?

 1 point
 -
 This does look like a good deal. HOWEVER, be warned the condition of this car will likely chew through the rest of your budget and then some. You will likely spend more like another $10k-15k if you include bodywork and paint. Go into this project with a plan and you'll have a great time!
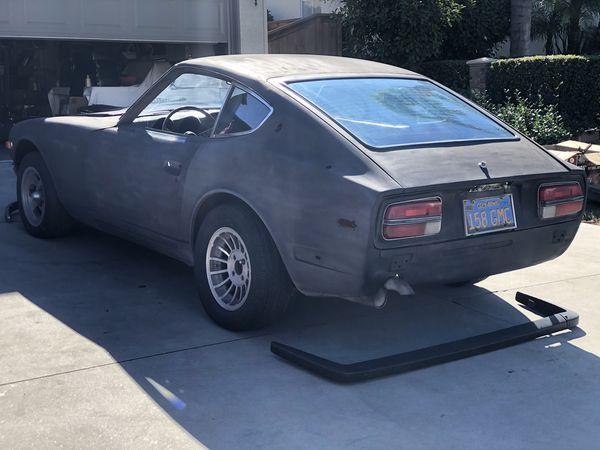 1 point
 -
1 point
-
$7,300 isn't going to get you a running car that you can drive but $4,300 is about as cheap as you will ever see for a Z these days. I say buy it and think of it as a long term project, as money comes available do some work on it. It doesn't look too bad from the pics but he has not shown any of the problem possible problem areas. The carbs are round top SU's so are pretty easy to work on. At a minimum if you find that it is beyond your skills you can sell it and get your money back or even make some money on it.1 point
-
 A final update on this topic: After chasing down random wiring issues and corrosion, I found the core of the starting issue. It was ironically simple: the aftermarket ignition relay was not wired correctly. If anyone else finds this thread in the future, the problem/solution is described below: The previous owner purchased this part (again a Zcardepot part), https://zcardepot.com/products/starter-relay-upgrade-replacement-280z# It looks like it comes pre-wired from zcardepot but I can't confirm that since I didn't order/install it. If it was pre-wired then it's not plug and play, at least for the way my car is wired (78 280z) and requires swapping the two blue wires. Anyways, as many probably know, the "ignition relay" is basically two relays in one: one relay to power ACC (accessories) circuit and one relay for IG (EFI/fuel pump/etc). In my case, the output of the relays was swapped. Meaning that my EFI/Fuel Pump/etc were getting power when the ignition switch was outputting +12v for ACC, which is when the key is in ACC or ON position. But as many know, with most cars, when you turn the key to "START", the ignition switch does NOT output to the ACC circuit ?♂️, explaining most of my issues... Therefore, the solution was to simply to swap the two output wires on ignition relay harness (the two blue wires in the harness). For reference, tests on page EF-27 from the FSM will help identify the problem (you'll find Fuel Pump relays aren't getting power when ignition is in START position). Essentially the two ignition relays should be wired as followed: • IG relay: WB is the relay "output". WR is constant +12v. BW is relay on/off, connected to IG of ignition switch • ACC relay: LW is the relay "output". WR is constant +12v. LR is relay on/off, connected to ACC or ignition switch Thanks again for everyone's help. A lot of terminals a definitely a lot cleaner than before, ultimately the FSM wiring diagrams helped me backtrack through the wiring issues with the starter unplugged..1 point
 -
 1 pointThe tail pipe extension must have been "the fix" to get rid of the exhaust fumes.1 point
 -
 Progress. Parts arrived and my son helped me with a bit of work. I went ahead and ordered a new temperature sensor and temperature gauge sensor. We installed both, then created a new harness and hooked up the wiring harness to the temperature sensor. I cut off the connectors that were on the temp gauge wires, put a new bullet connector on the yellow wire and hooked that up to the temp gauge sensor. We testing continuity of the temp sensor at the ECU (looks good) and tested the temperature gauge by grounding the yellow wire (looks good). After hooking everything up, the car started up and seems to be running better than it did before. That makes me happy. Seems to be using the temp sensor now and the temp gauge is working correctly. My next question: what's next? How do I judge how it's running (other than going back to emissions)? What do I work through next to make sure it's getting better? And a big thank you to everyone here. This sure can get frustrating, but your support has made a huge difference.1 point
 -
 if it continues to leak after replacing the pan gasket, look for oil from the valve cover working its way down, if dry upstairs, look at the weep hole between the trans and the metal shield. If you see oil coming out of there, its prob a rear main and/or side seals. Only way to know for sure is to pull the trans/clutch/flywheel. then you can see exactly which if not both. Rear main you can do then then, the side seals will require pulling the pan and rear bearing cap.1 point
 -
 yes I saw it on the lowes web site. It looks like only made and sold in the 3oz cans but cheaper from where I bought it from. I know 1 can is plenty but I like to have a spare .it seems as I get older I like to have a little stock . it is good for my compressor motor also thanks siteunseen1 point
 -
1 point
-
1 pointSure, if done improperly or too much is taken off, it's the kind of job you want the oldest guy in the shop to do and know that he does it often.1 point
-
 1 pointwizz bombs! That's what the truckers call them. I have empty Gatorade bottles in my work truck that I pull my mower with. The opening is a little snug though. I used to pee in beer bottles, what a sight going to jail for dui with wet pants.1 point
 -
1 pointNo I didn't modify it in any way, the only real flaw is the broken top for one of the screws.

 1 point
 -
 Well you’ll need a way to control the spark - ECU . Then you need a way to tell the ECU crank position . Then you can do what you want . The options are many .1 point
 -
here it is https://www.classiczcars.com/forums/topic/59887-horn-button-refurbish/?do=findComment&comment=5475811 point
-
Super glue is not going to work. I made a metal band that fit tightly around the outside between the plastic and the foam1 point
-
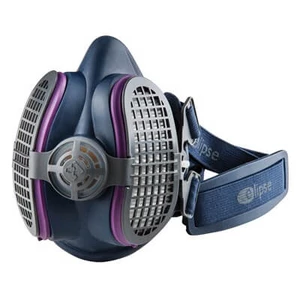
Be sure and use a good respirator. I like these for dust You don't want silicosis!! I use "black diamond" typically, which is coal slag Also be very careful if you do any of the thin sheet metal. You can ruin it easily! Use as low of a pressure as possible and try not to blast straight on. Shoot it at an angle and remember you are work hardening the panel as you blast it
 1 point
 -
1 pointHmmmmm, I wonder where you found the inspiration for that idea?
 1 point
 -
1 point1 point
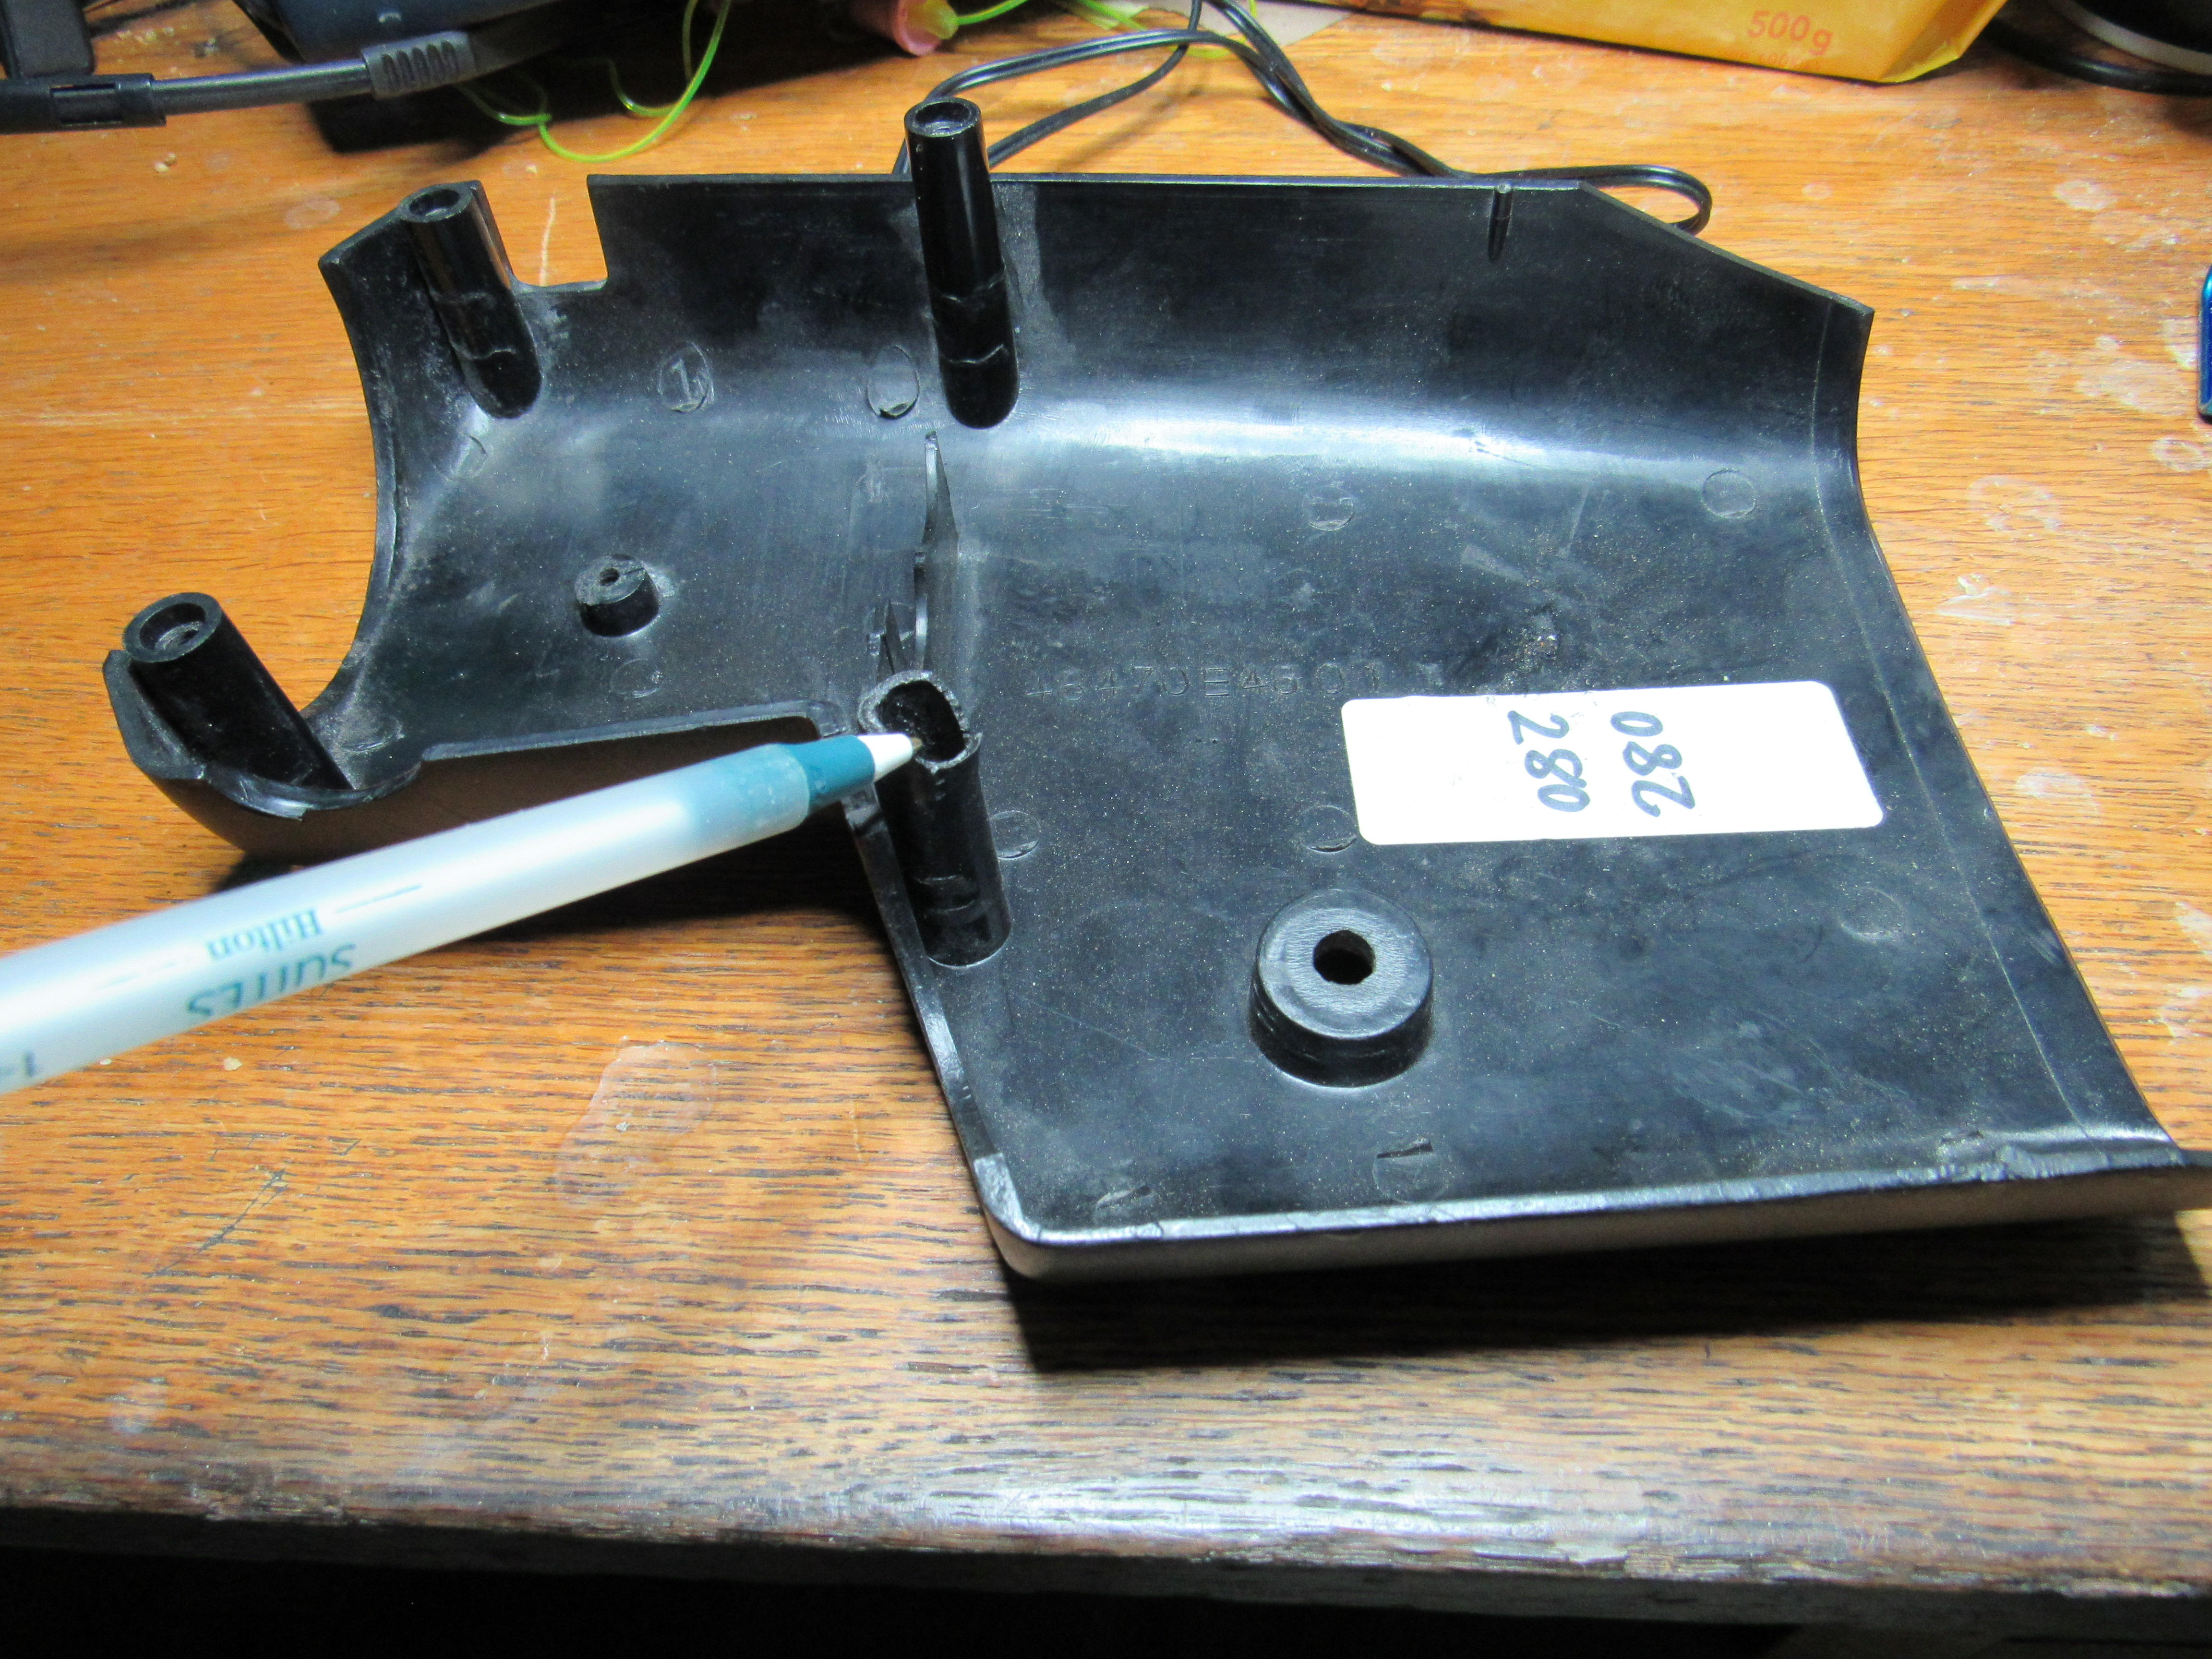
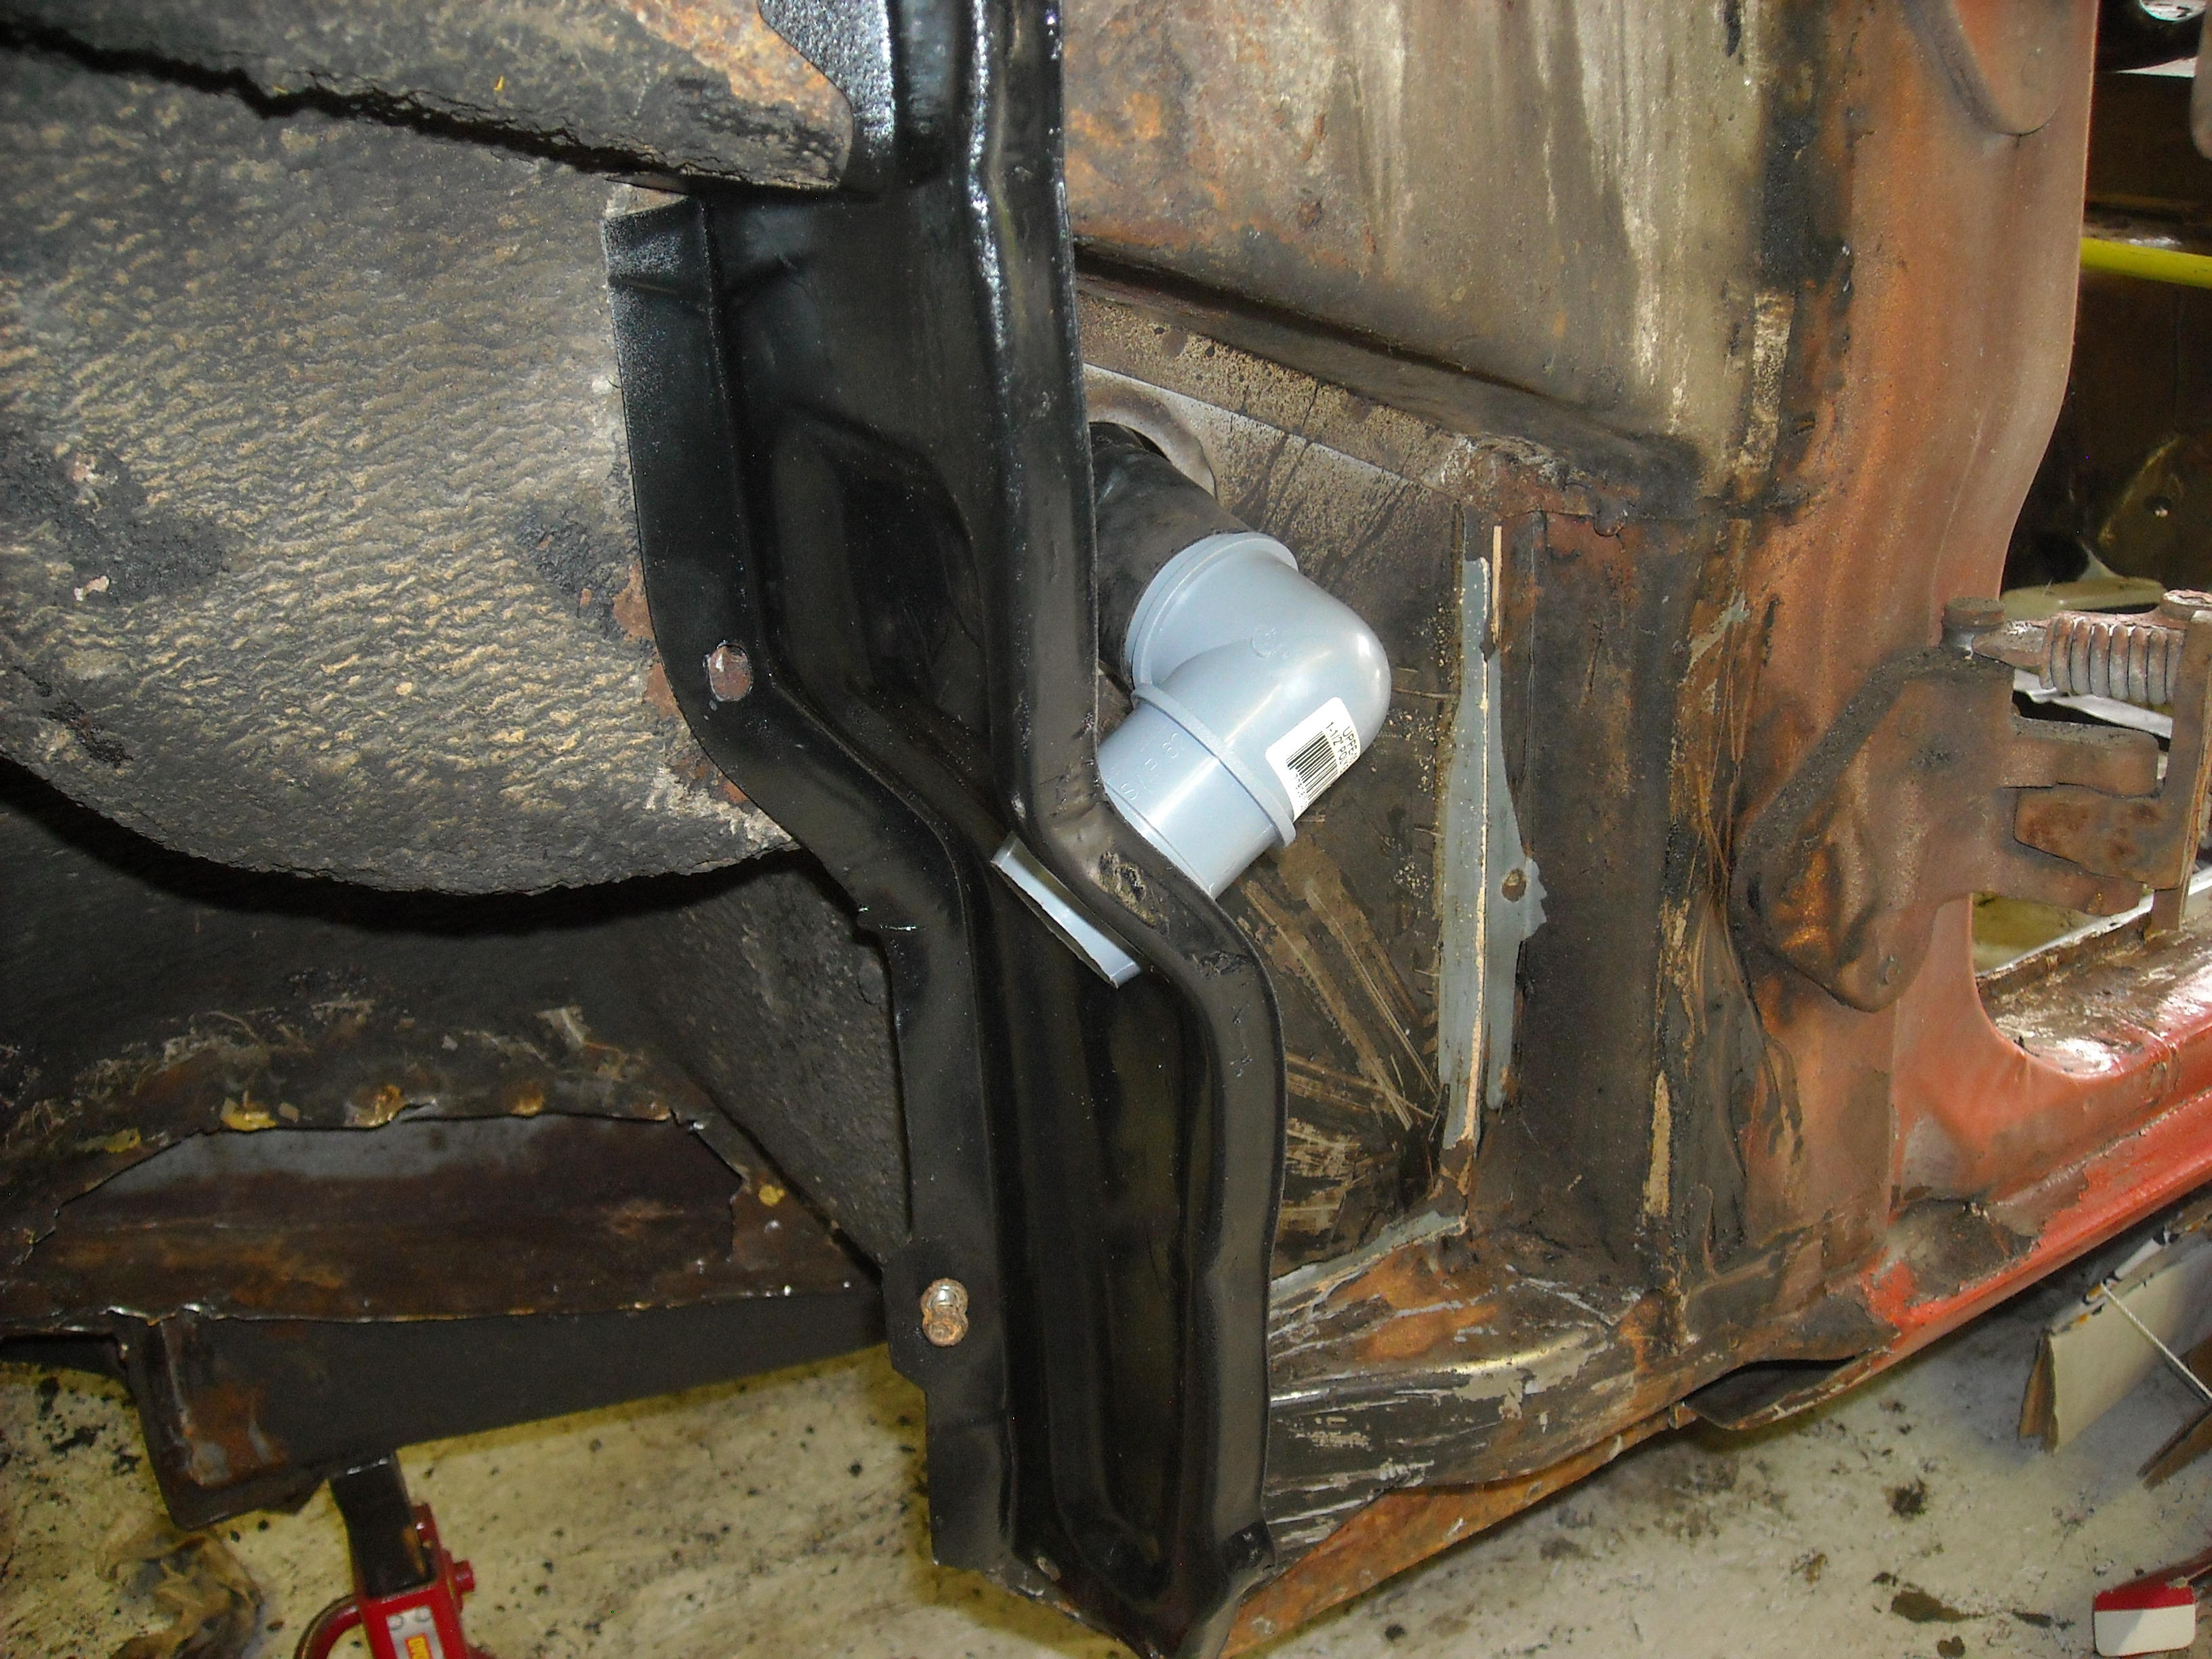
 1 pointDeath by a thousand mods... Here’s a quick little mod to aid in cowl drainage and save the bulldog nose on the sill....1 point
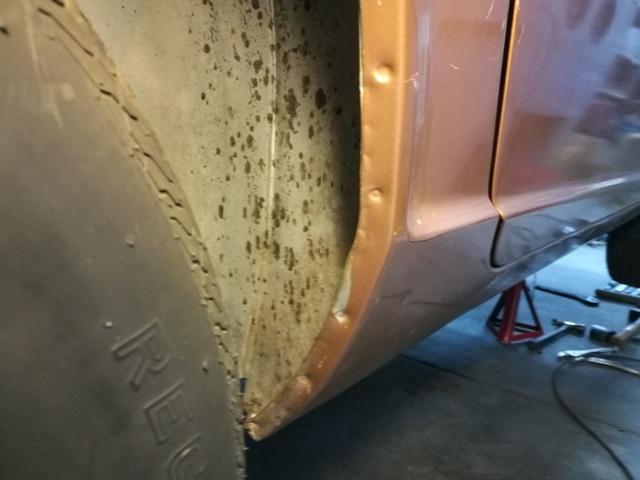
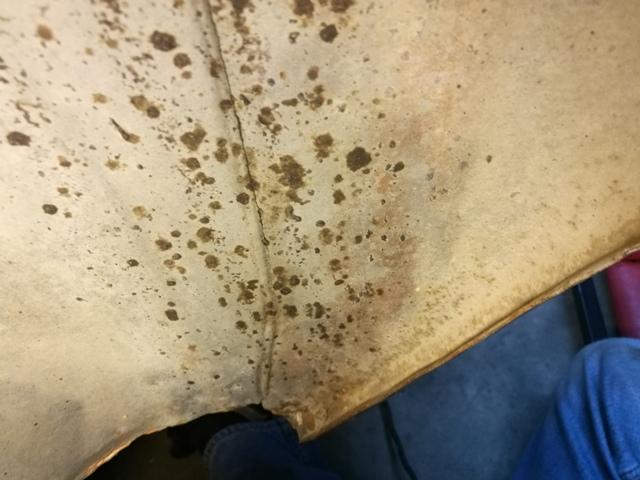
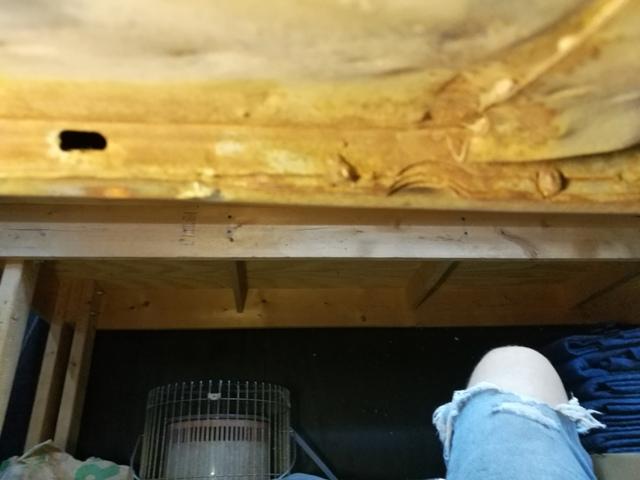
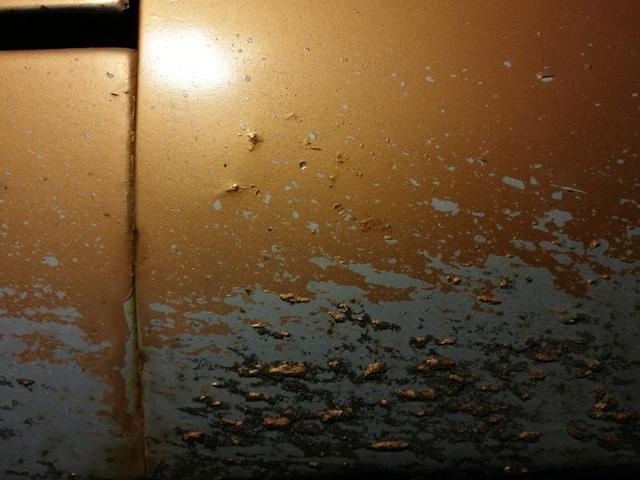
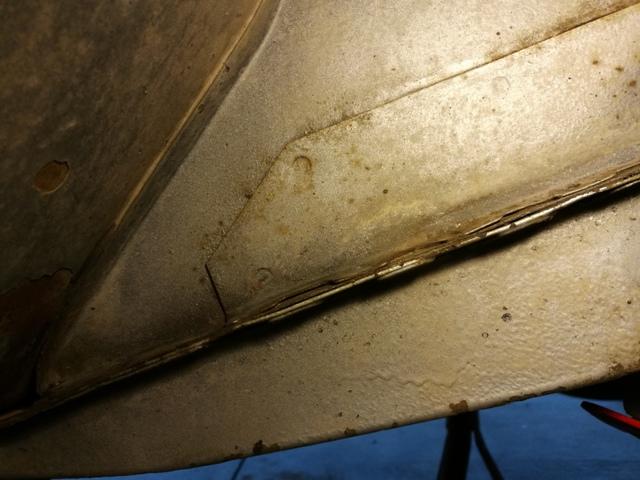
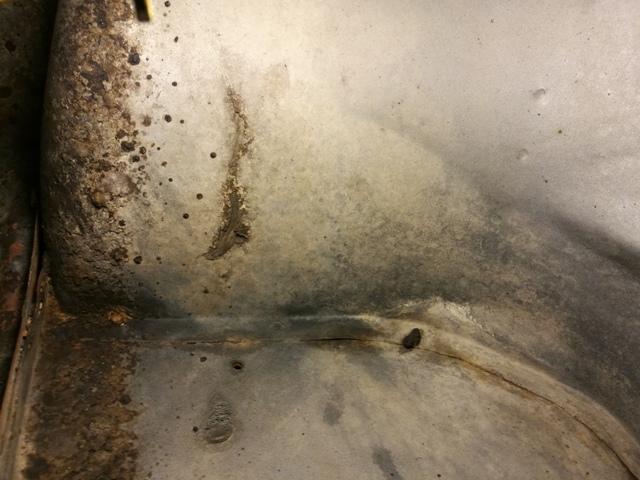
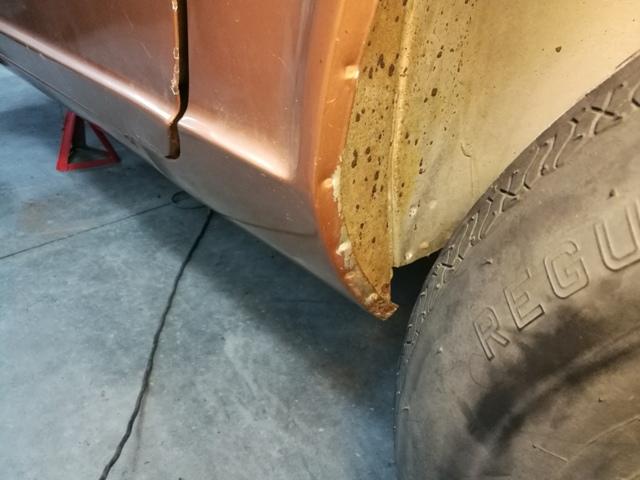
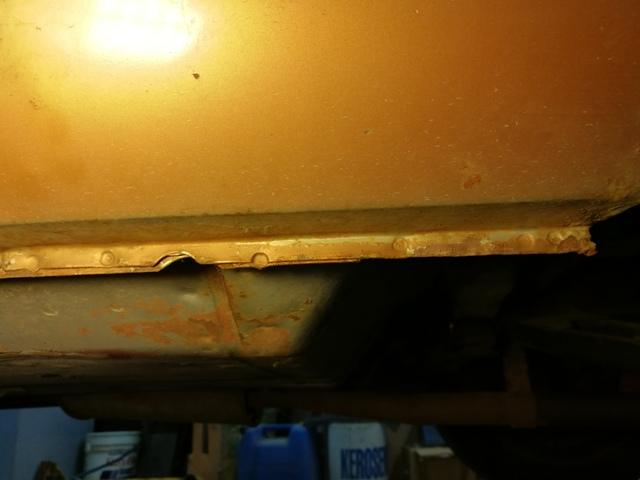
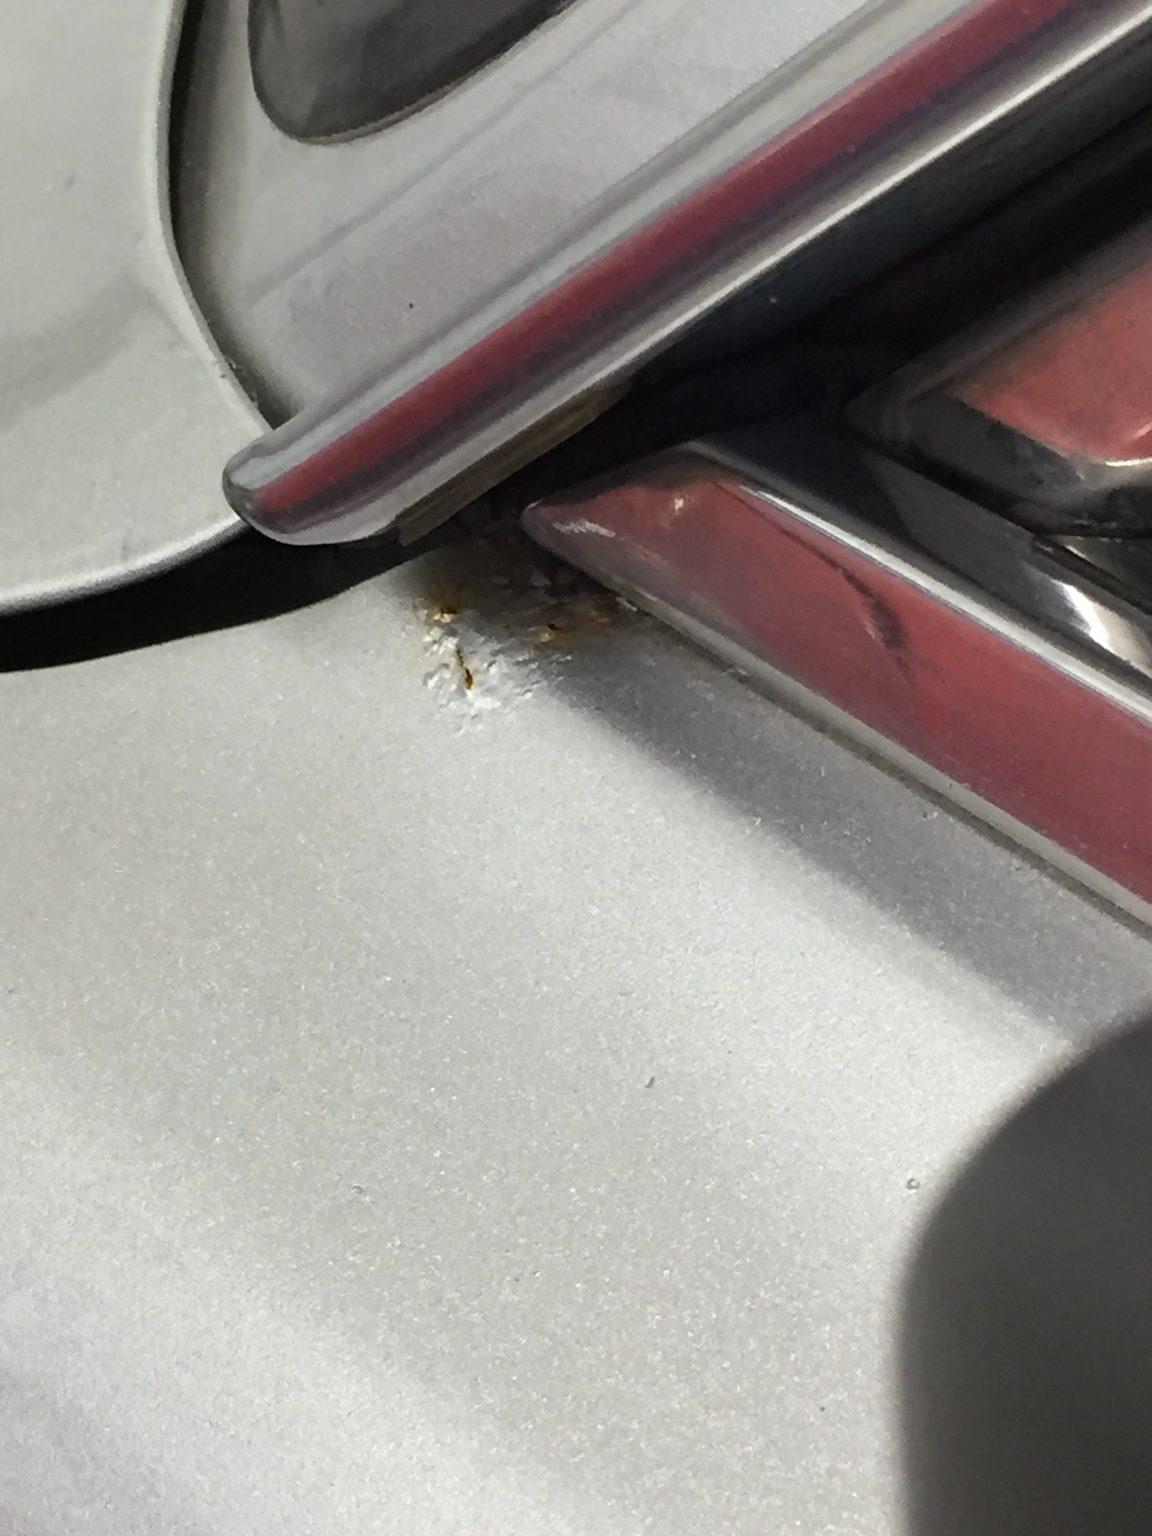
Love it every time I look at parts that usually rust out. Here are some pics as I went around the car when I first could examine it well: Right rear wheel well at bottom corner of rocker: Inside bottom edge of passenger side rocker: Outside bottom corner of passenger fender (fenders are original to the car) - note rust pitting, and inside frame double panel at tension rod mount location: Passenger front inner wheel house area: Driver side wheelhouse and rocker lower corner: Inside driver side rear wheel house looking at bottom, front corner, and from center of car looking at inside of same rocker corner: I didn't take pictures of the floor as delivered, but here are some of them in their sand blasted state: What little rust there was is gone now
1 pointDeath by a thousand mods... Here’s a quick little mod to aid in cowl drainage and save the bulldog nose on the sill....1 point
Love it every time I look at parts that usually rust out. Here are some pics as I went around the car when I first could examine it well: Right rear wheel well at bottom corner of rocker: Inside bottom edge of passenger side rocker: Outside bottom corner of passenger fender (fenders are original to the car) - note rust pitting, and inside frame double panel at tension rod mount location: Passenger front inner wheel house area: Driver side wheelhouse and rocker lower corner: Inside driver side rear wheel house looking at bottom, front corner, and from center of car looking at inside of same rocker corner: I didn't take pictures of the floor as delivered, but here are some of them in their sand blasted state: What little rust there was is gone now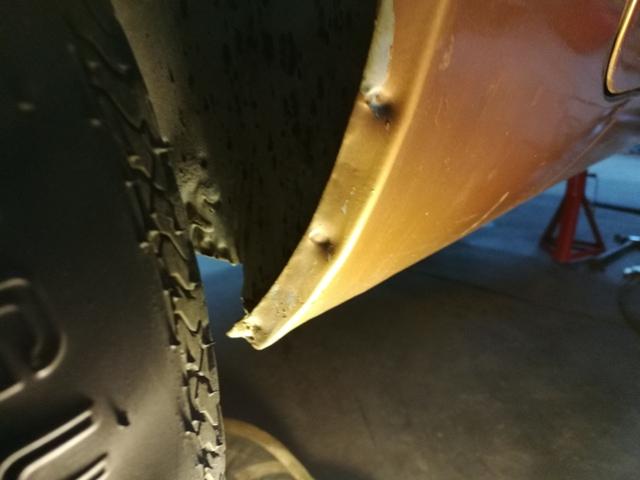


 1 point
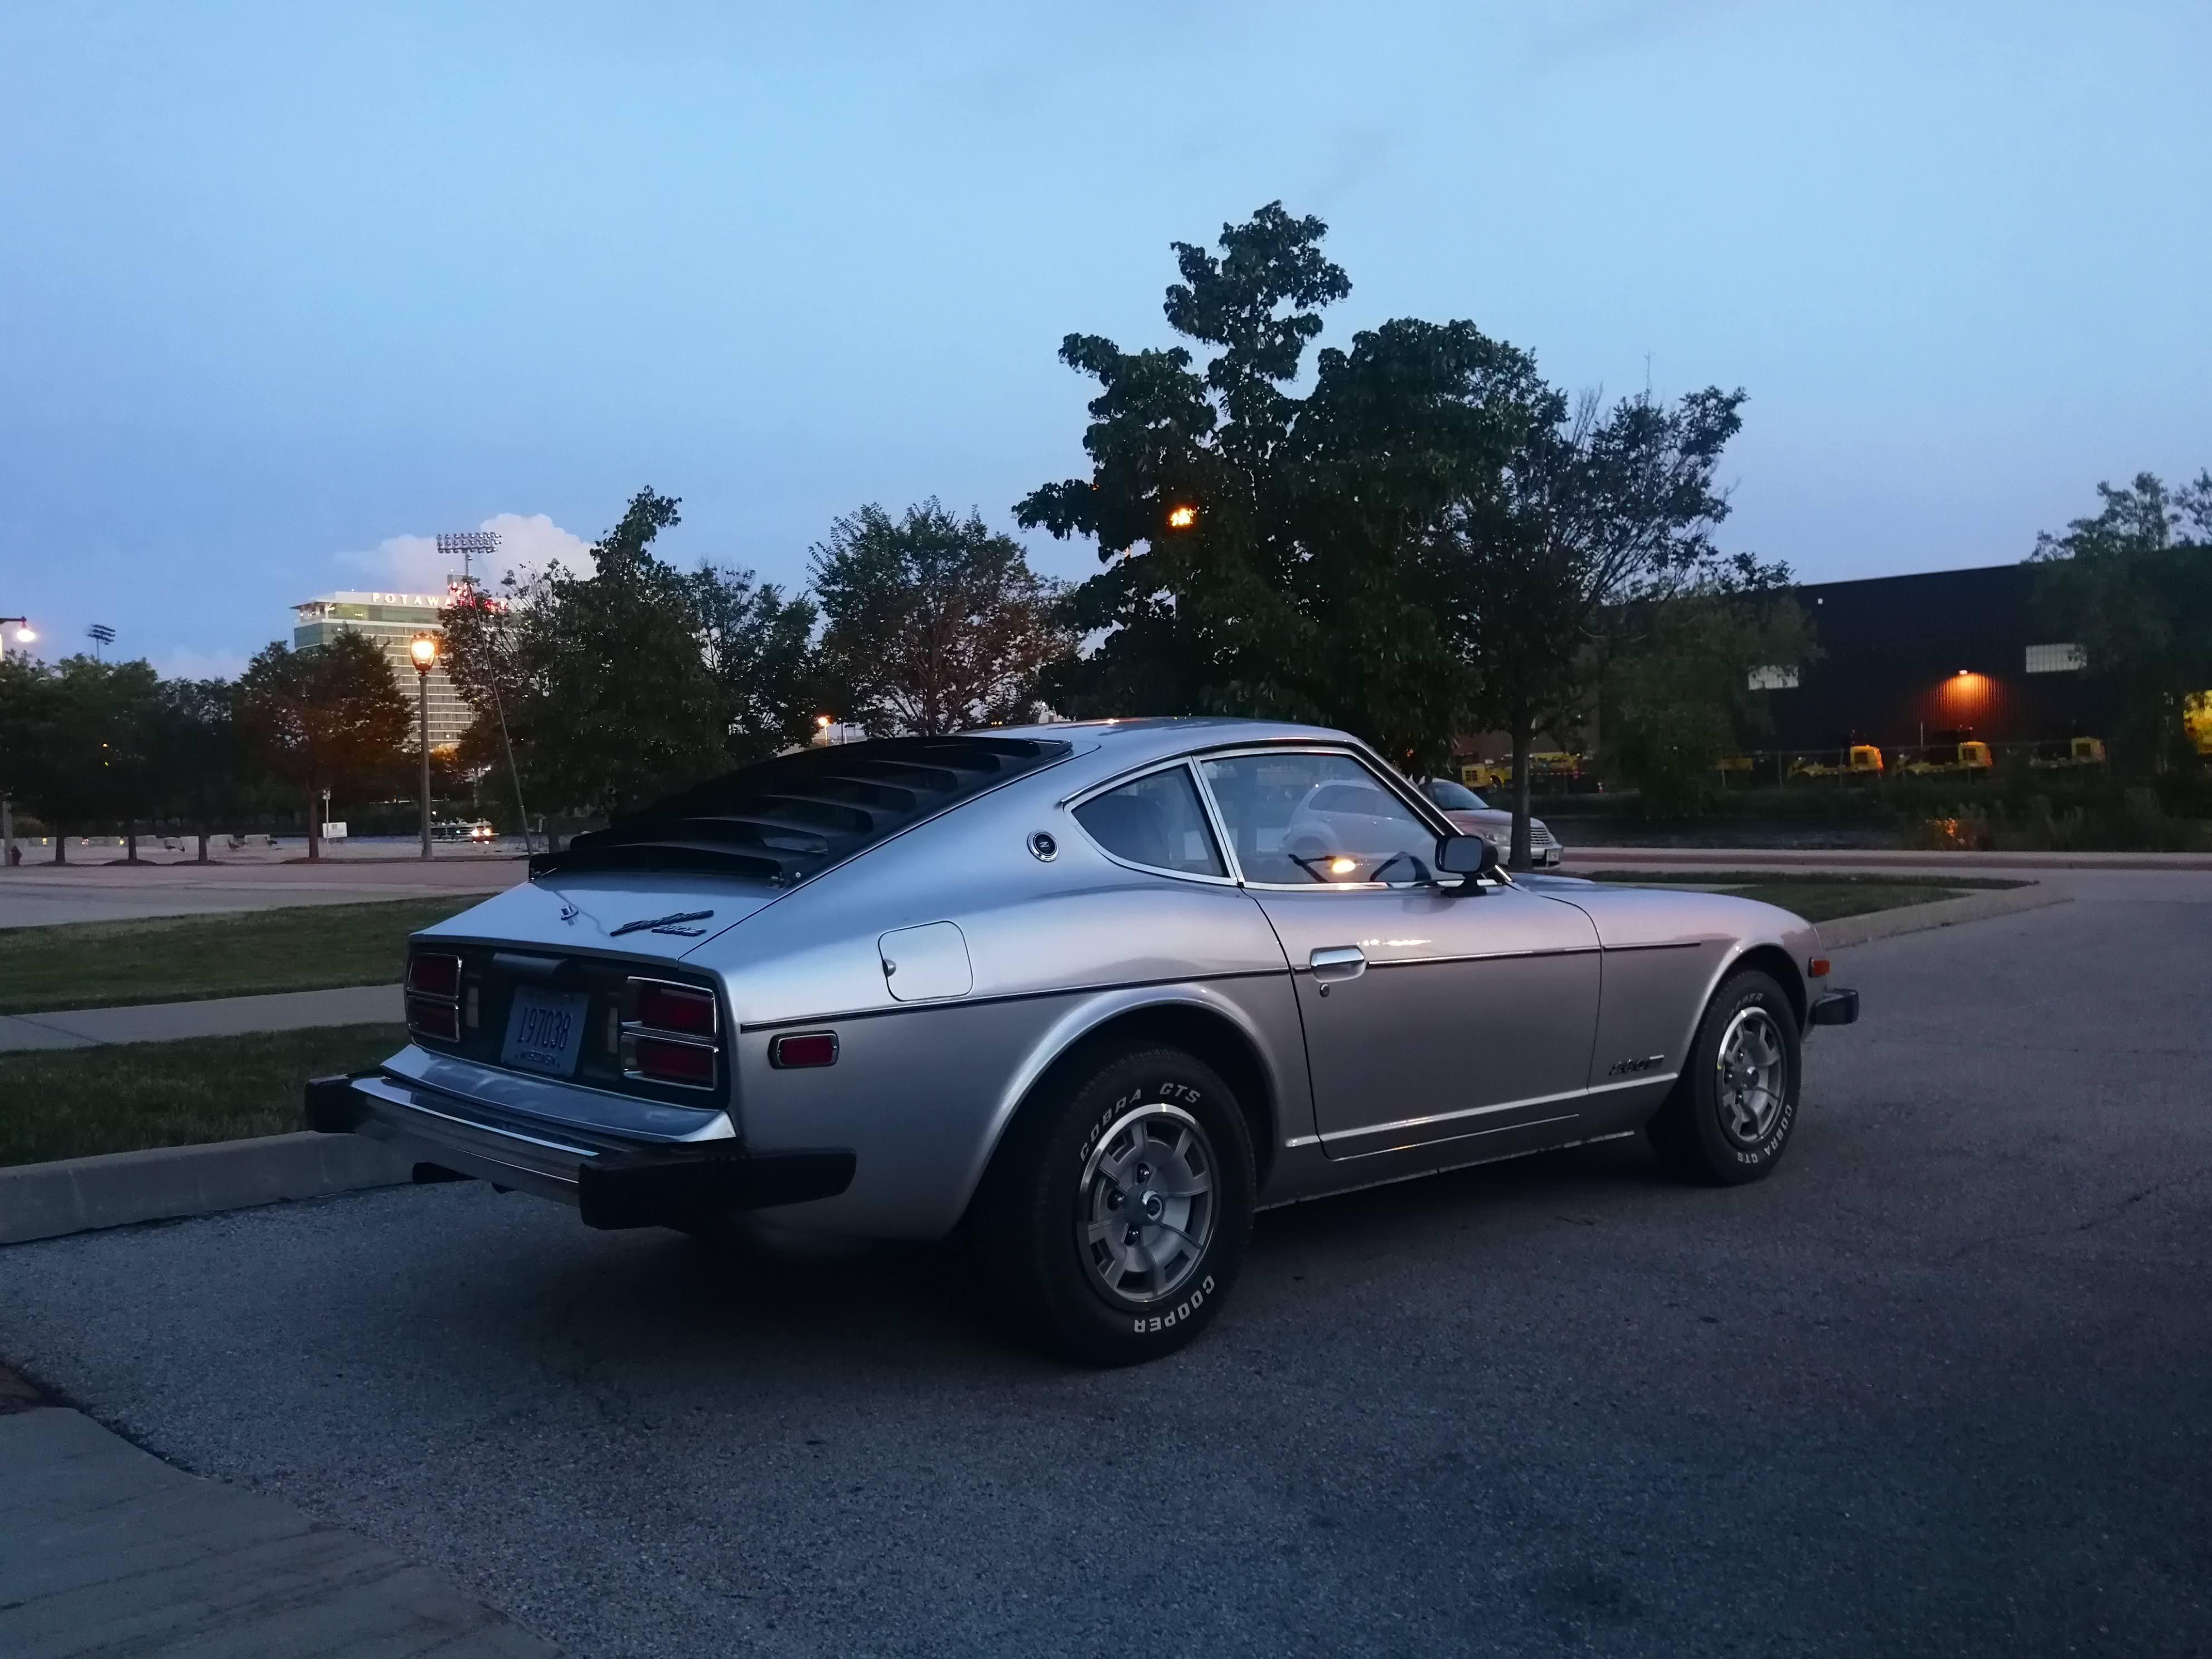
Shipping the car by itself from CO to GA ended up costing $850. All of the extra parts, I knew, was going to be a pain. I looked prior to auction close for rental availability and flights, but long story short, flying out, renting a pick up truck and loading it up, and getting all of the parts back to GA cost $1,654.18 and took 2 days (and into early morning of the third). Total with 5% for BAT was $9240, so delivered total of car and parts was $11,744.88. I am keeping track of costs very precisely and will be sharing with everyone as well as time spent (not nearly as precisely). Regarding the direction of the resto, I plan to do a high quality restoration back to stock, except for the following: The engine had pitting on cylinder 6 that was bad enough to require a re-bore. Pistons are ITM - .030 over. Stage I Isky cam which has a higher lift than stock but the same factory duration (won't be able to tell it has a cam from listening to it) Some bigger valves to allow better breathing Zstory stainless header and exhaust Mild porting to make the valves, cam and exhaust work well together 16" x 7" wheels and performance tires The goal I have in mind is to have the car be like "new" back in 1971, but with "upgrades" for exhaust and wheels. Both of those mods will be fully reversible, if at some point I want to sell the car, and a future owner wants to go 100% stock. The car was originally silver, and I am nearly certain I will put it back to that color. I like the factory orange a lot, but I want to keep it the original color. Silver looks nice on 240z's too. ?1 point
1 point1 point
1 pointI have concerns about reinforcement around the fuel tank. I just see a piece of steel failing to yield and breaking instead, to end up punching the fuel tank it's meant to protect. I would think reinforcement would have to be very well thought out. I think a more interesting idea would be coming up with a puncture resistant liner like fuel cells have.1 point
1 point
Shipping the car by itself from CO to GA ended up costing $850. All of the extra parts, I knew, was going to be a pain. I looked prior to auction close for rental availability and flights, but long story short, flying out, renting a pick up truck and loading it up, and getting all of the parts back to GA cost $1,654.18 and took 2 days (and into early morning of the third). Total with 5% for BAT was $9240, so delivered total of car and parts was $11,744.88. I am keeping track of costs very precisely and will be sharing with everyone as well as time spent (not nearly as precisely). Regarding the direction of the resto, I plan to do a high quality restoration back to stock, except for the following: The engine had pitting on cylinder 6 that was bad enough to require a re-bore. Pistons are ITM - .030 over. Stage I Isky cam which has a higher lift than stock but the same factory duration (won't be able to tell it has a cam from listening to it) Some bigger valves to allow better breathing Zstory stainless header and exhaust Mild porting to make the valves, cam and exhaust work well together 16" x 7" wheels and performance tires The goal I have in mind is to have the car be like "new" back in 1971, but with "upgrades" for exhaust and wheels. Both of those mods will be fully reversible, if at some point I want to sell the car, and a future owner wants to go 100% stock. The car was originally silver, and I am nearly certain I will put it back to that color. I like the factory orange a lot, but I want to keep it the original color. Silver looks nice on 240z's too. ?1 point
1 point1 point
1 pointI have concerns about reinforcement around the fuel tank. I just see a piece of steel failing to yield and breaking instead, to end up punching the fuel tank it's meant to protect. I would think reinforcement would have to be very well thought out. I think a more interesting idea would be coming up with a puncture resistant liner like fuel cells have.1 point 0 pointsHere's some new progress...So I decided that this thread will be a WIP(work in progress) And again I need your help.....anyone has a photo of this part??(desirable without wheel)
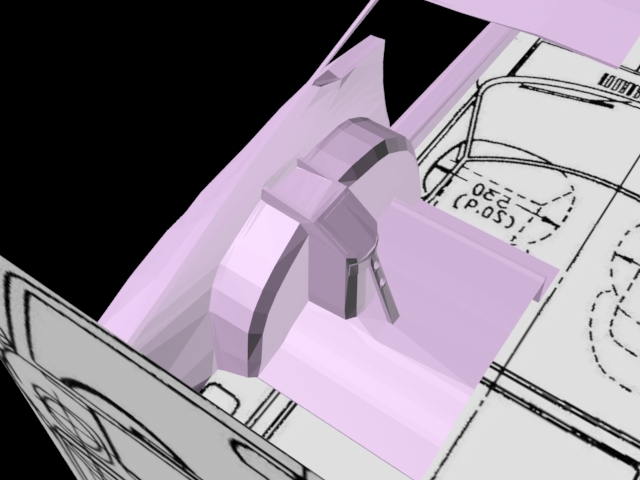
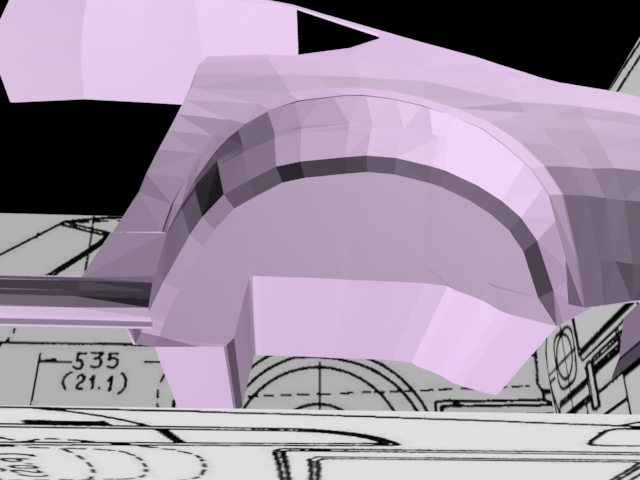

 0 points


Important Information
By using this site, you agree to our Privacy Policy and Guidelines. We have placed cookies on your device to help make this website better. You can adjust your cookie settings, otherwise we'll assume you're okay to continue.