Leaderboard
-

inline6
 Subscriber
 8Points1,237Posts
 -

grannyknot
Free Member5Points5,158Posts -


dutchzcarguy
Free Member5Points2,611Posts -

Mark Maras
Free Member5Points3,706Posts
Popular Content
Showing content with the highest reputation on 11/09/2019 in Posts
-
Yes, I have some previous experience, mainly, what I learned came from restoring my other 240z back in the 90's. With that car, I got lots of experience with cutting out rust and welding in new metal! However, using a stud welder and pins is new to me. No, I put the end of the 2 X 4 section (section was about 12" inches long) on the inside floor, with the 3 and 1/2" side right up against the edge of the hump which runs over top of the rail. And then I hit the other end of the 2 X 4 with the 5 lb hammer. Doing that transfers the force directly onto floor where the weld flange from the frame rail attaches - where it is spot welded to the floor. It is double thick there - floor panel and frame flange. Hitting it repeatedly along the sides of the hump where needed is quite effective at removing the arch (that developed during the cars active driving life) from the front floor section.3 points
-
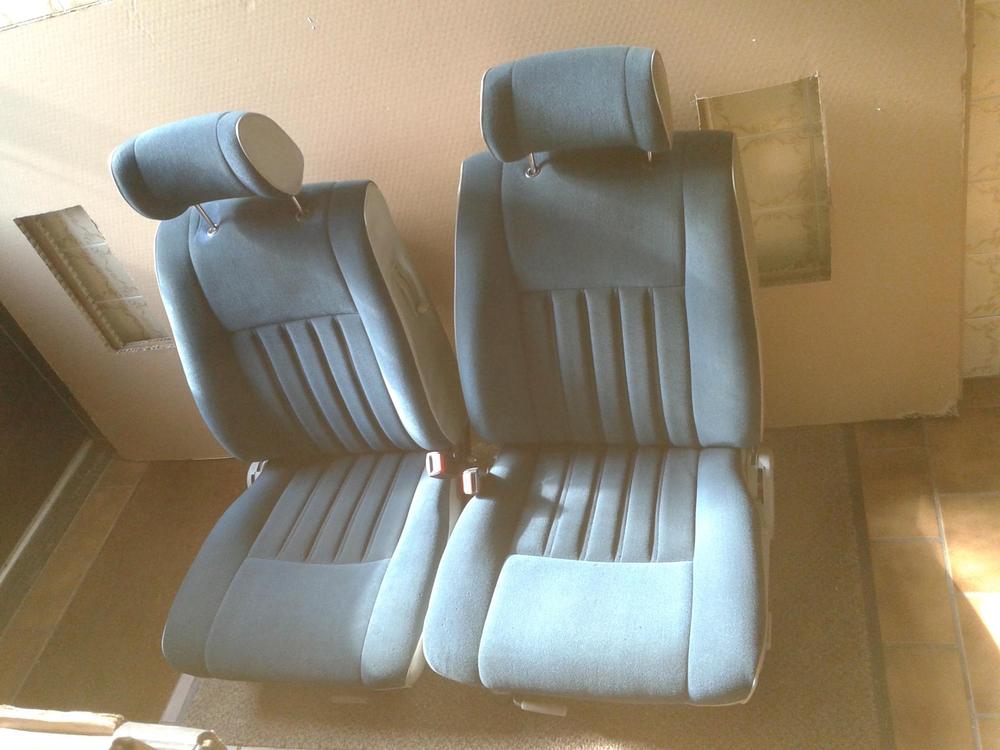
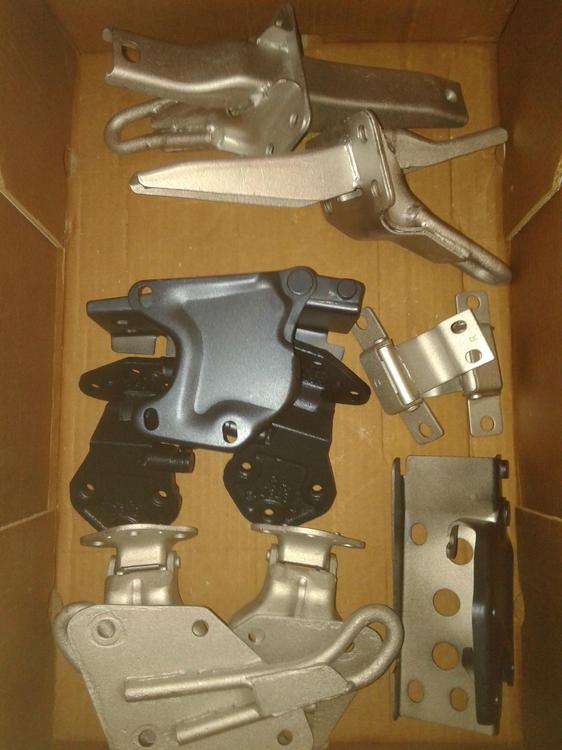
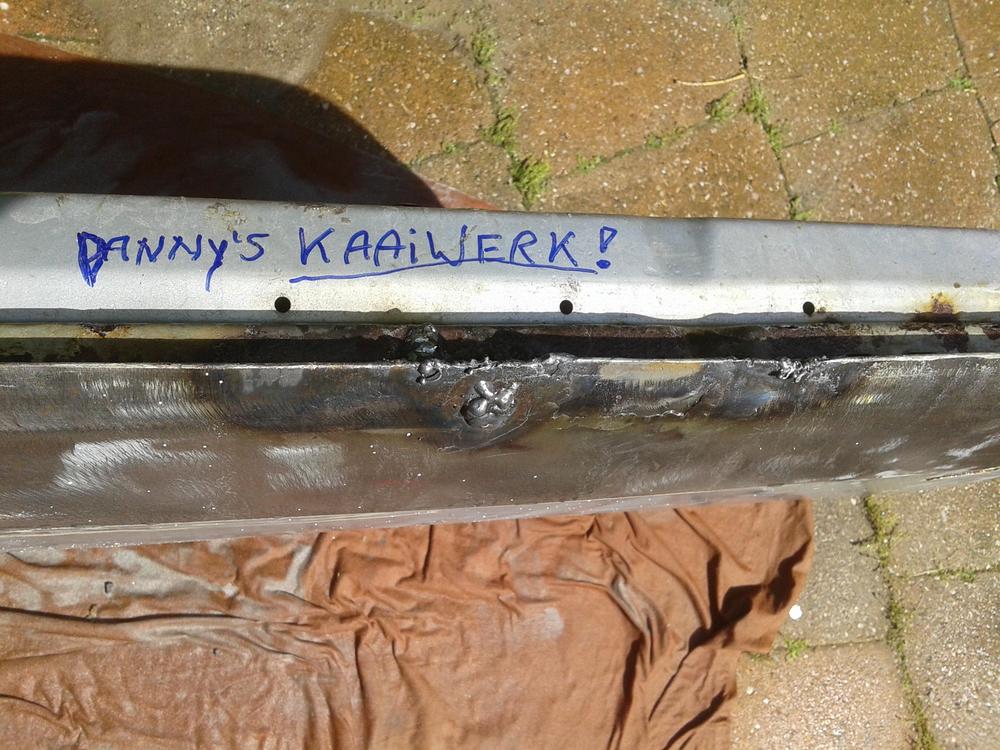
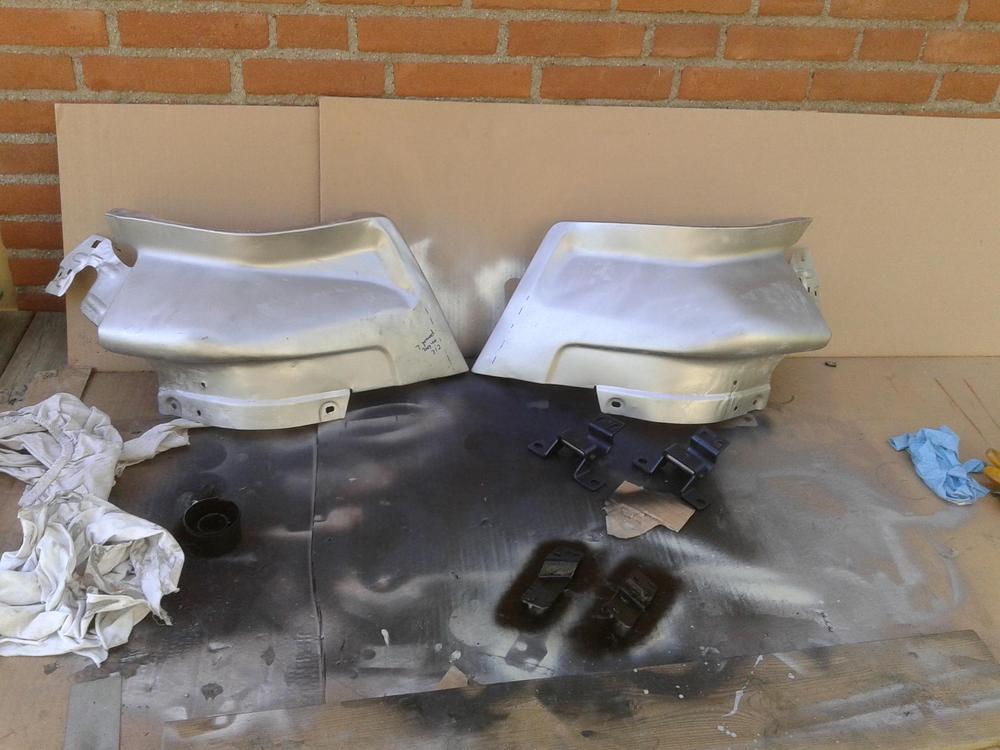
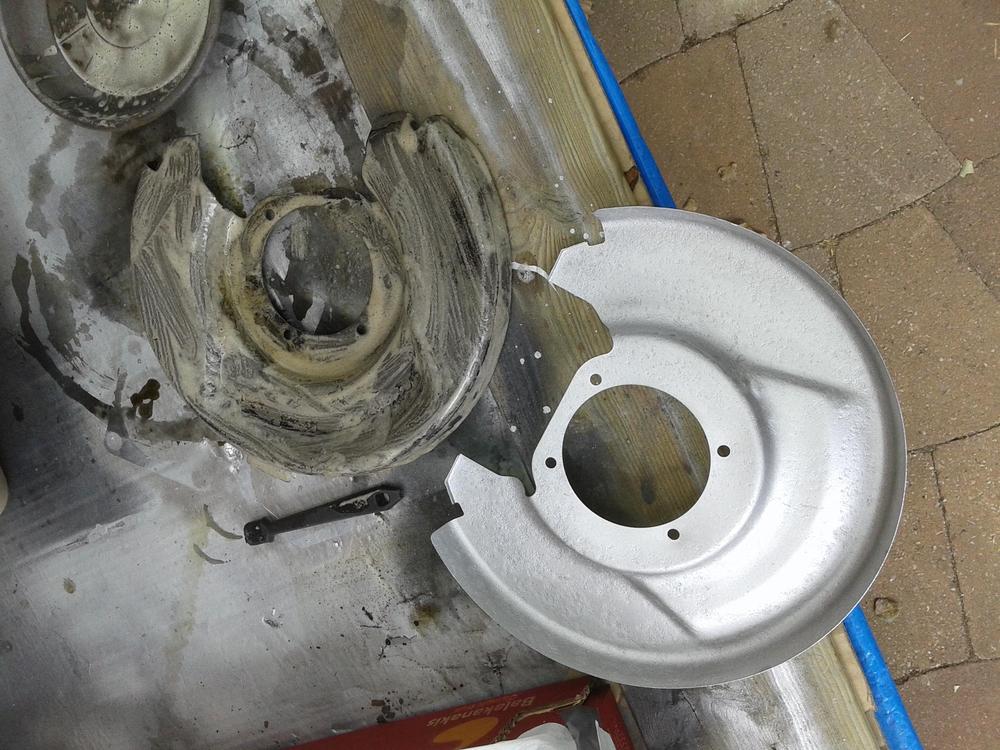
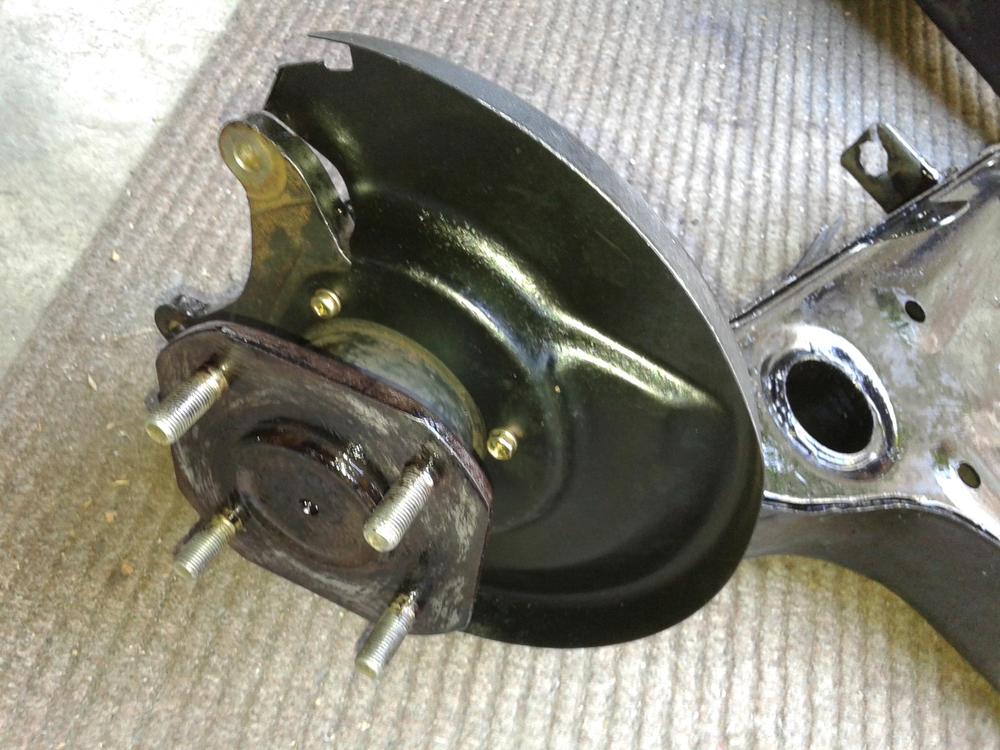
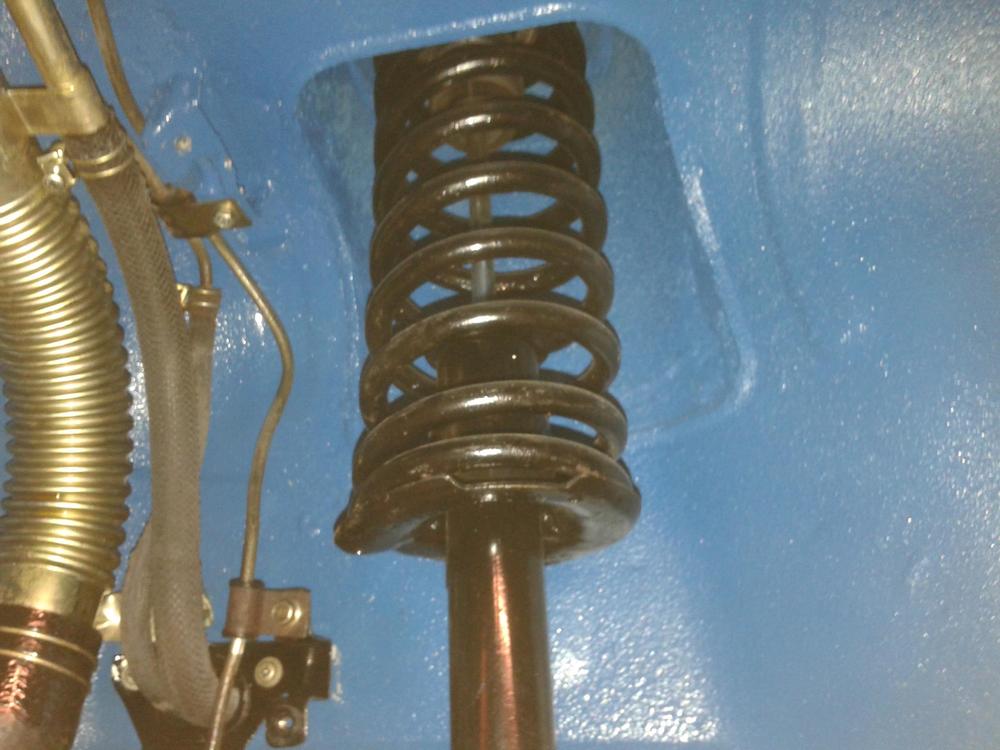
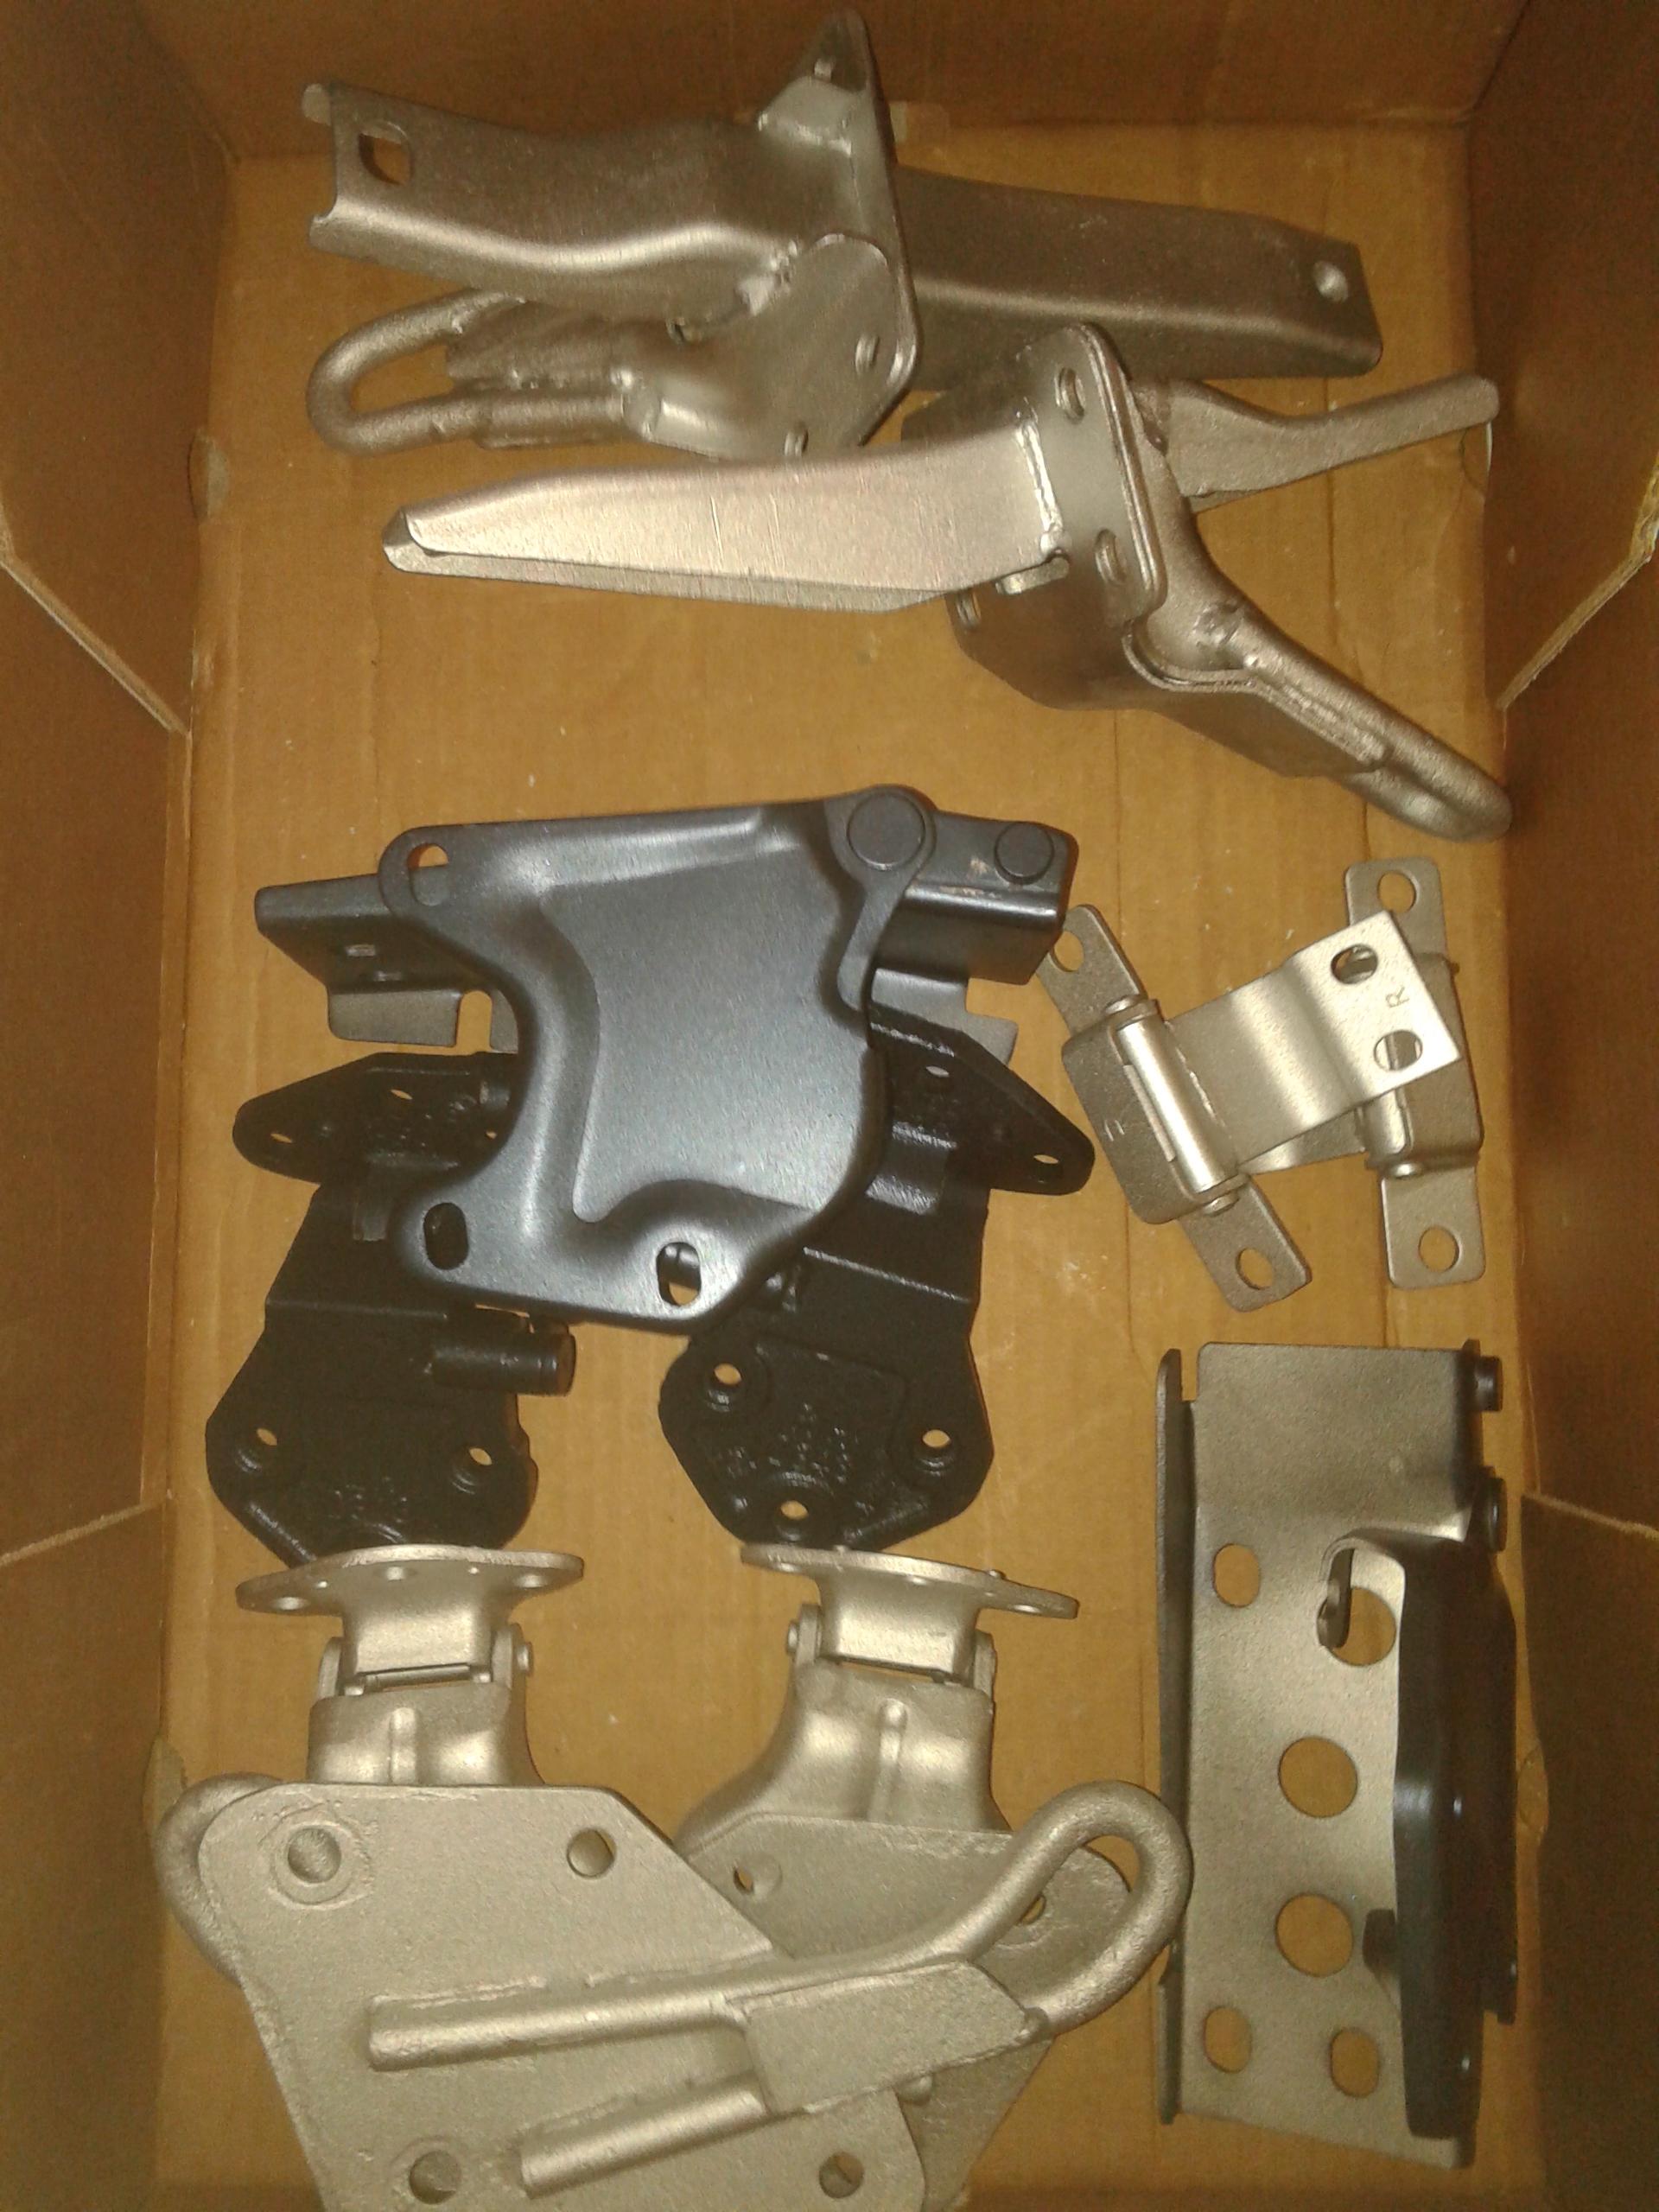
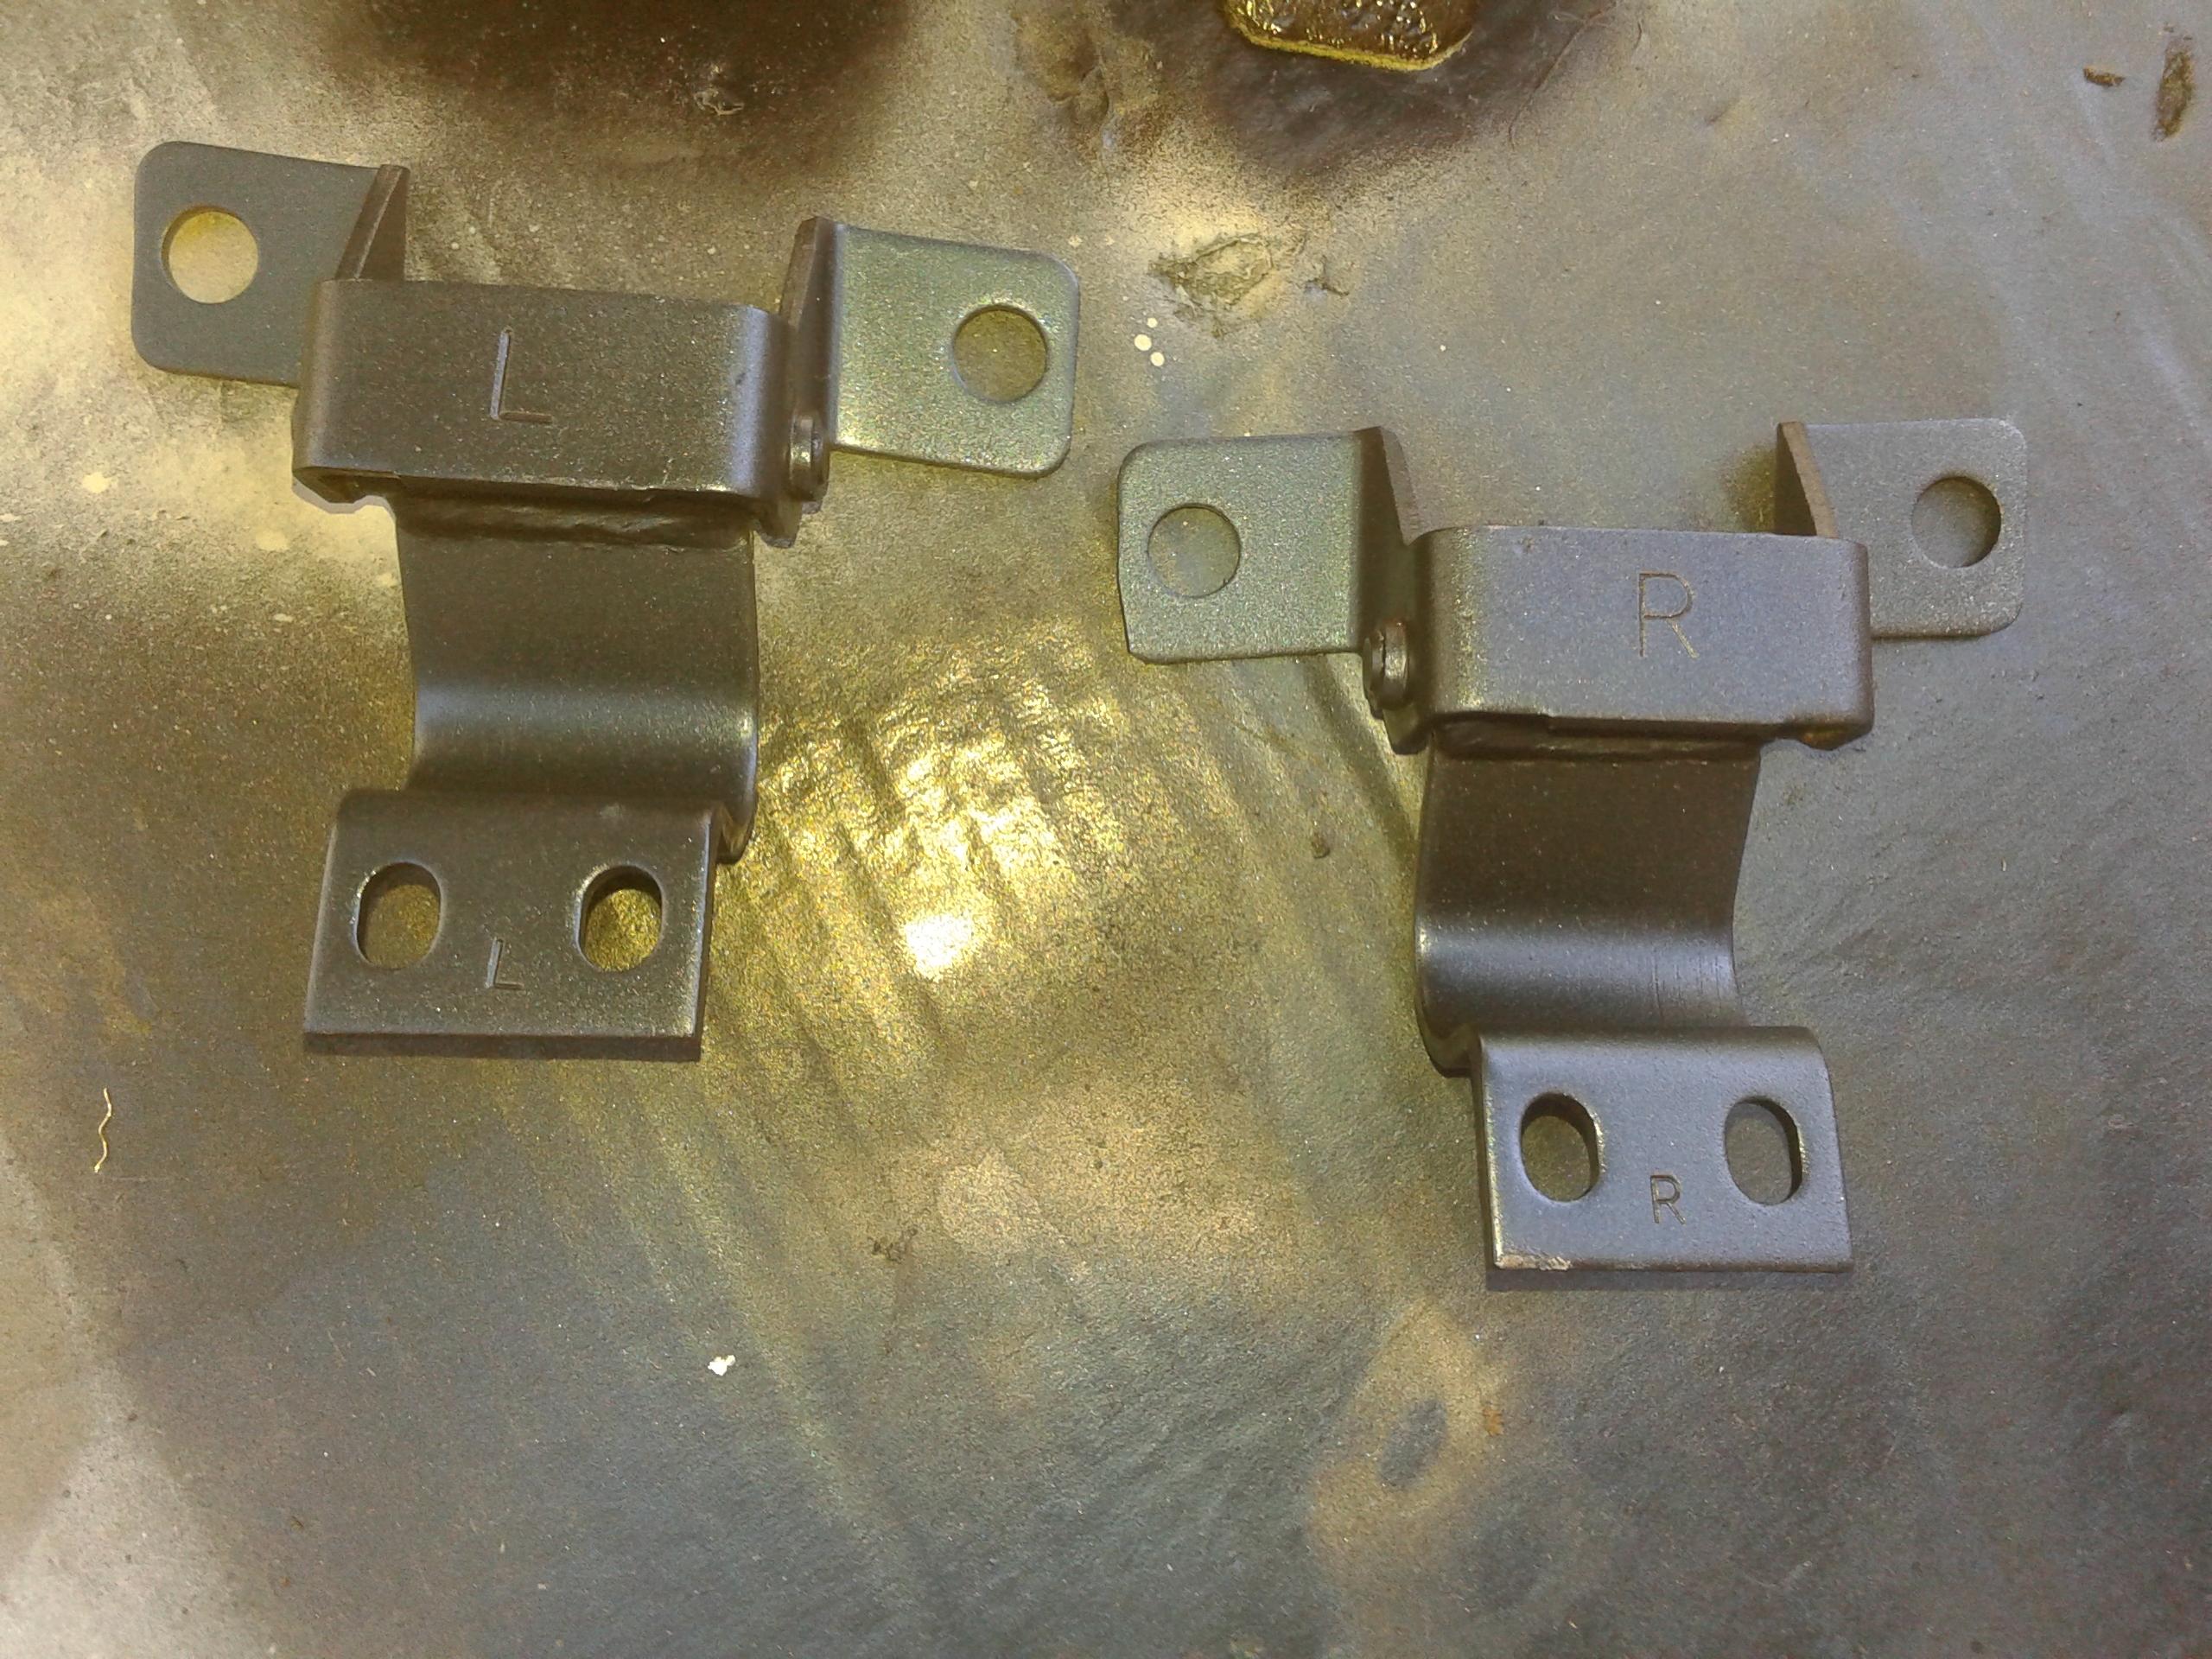
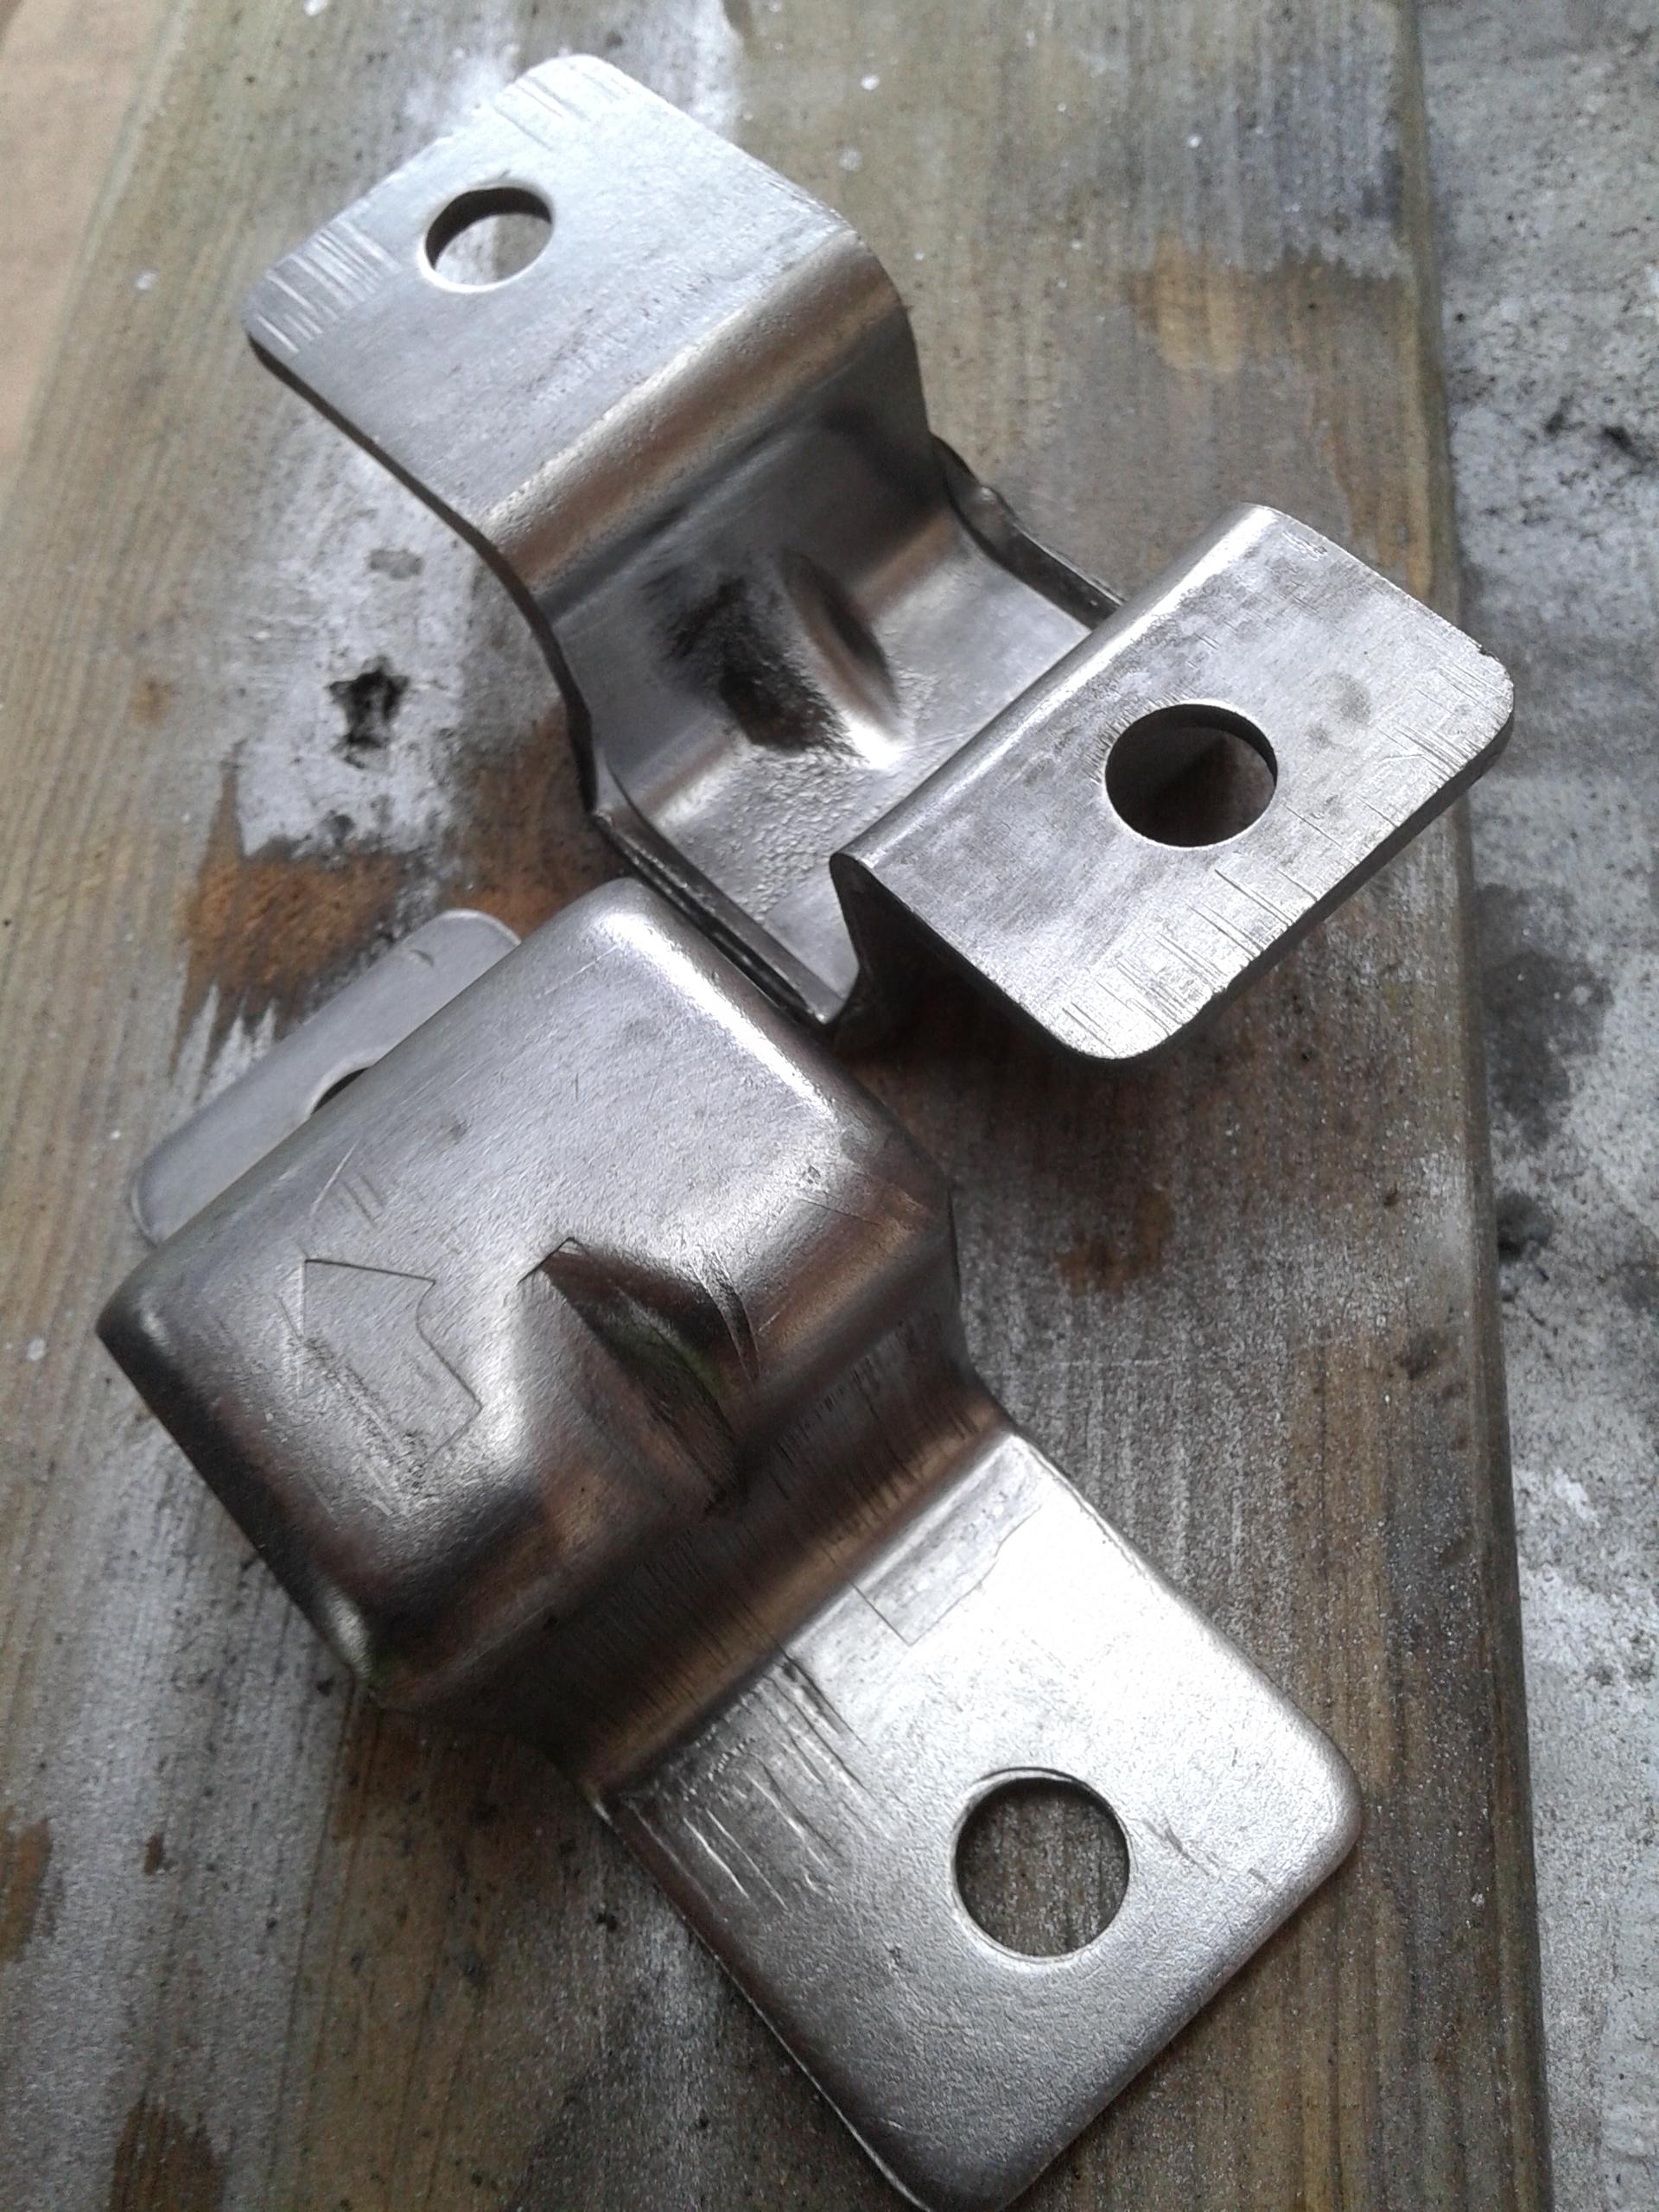
It's November 2019. The zx was for years in a heated garage. Bought me a new battery and a new windshield.. This month my car go's to the pro - paintershop… i hope haha (oh are all those painters people were no good arranggements can be made ??? If i say tomorrow at 10 i'm there at 10! (sons of ….grrrr) The fuel was prepped with some stuff the keep it from clogging.. i putted in the battery after a check for lose cables (the dash is not in..) Then i started the car, the fuelpump started but no starting engine.. then the alarm made itself known.. AH.. that's it.. somewhere here has to be a switch.. i switched the alarm of and.. turned the key.. Yup!! it started right away! 20191107_145039.mp4 Some pic's from the work this year... rear spring. Cleaned but not perfect.. If someone knows a way to paint this fabric.. it's called "tricot" would be nice to paint it a bit darker... rear bumper, lots of dents taken out.. a week of work every afternoon…. cleanup for paint.. hinges.. TAKE A GOOD LOOK.. at these.. Original hinges and no whear on them !!! had good maintanance!! Creative people don't have junk laying around, they just surrounded by a lot of new ideas! My painter tried to weld… he shure can't.. (Danny's kaaiwerk = Danny's sloppy work.. i all deleted it.) New tools.. Front skirt. Hinges rear boot lid. Get the horror out. Rust off before new paint. Original parts… like new.. An electronics engineer doing metal work. Not bad... Checking over and over the edge in the plating. Making it smooooddeehhh…. The as new rear wishbones some colored ground paint in rear wheelwell Lots of new parts.. Rear wheelhousing , part of fuellines.
.thumb.jpg.0c40da64a9649caceb9b04067798b7a0.jpg)
.thumb.jpg.74ed923eddb76b00e0cd1a26a6d600da.jpg)
.thumb.jpg.c0eb4af4f83c24b576913cf30066dc3c.jpg)
.thumb.jpg.cca590cc24b9a21cf9c909c4eb97f435.jpg)
.thumb.jpg.9ad2917b47888d062649af21d28f5ded.jpg)
.thumb.jpg.5561e924544f25f27a21a352f37e6d20.jpg)
.thumb.jpg.33d2a5b8a7181032d0ed68cbc10b53ab.jpg)
.thumb.jpg.a6535d7f29acd382dfd128c8b310d7e6.jpg)
.thumb.jpg.213bd1fded0f9fcc294dfc1abe9a7e28.jpg)
.thumb.jpg.97dd72914e6ff5a1ecf68b68933eb722.jpg)

.thumb.jpg.43119b9af4305105b362e1488af20dd0.jpg)
.thumb.jpg.3a6cc85d30229e558b1b5269bcae4c0e.jpg)
.thumb.jpg.b44d0c60d5d80c5142ef44017981fdde.jpg)
.thumb.jpg.adf5baebab1392417e47bd43059c3bfa.jpg)

.thumb.jpg.3ed6cc26acdeeb3ed9c48d5255d491dc.jpg)

.thumb.jpg.bcd2f71023970d2660c43236e0e62e2d.jpg)
.thumb.jpg.f7afe6345b4329bf7c3f98e764775035.jpg)

 3 points
 -
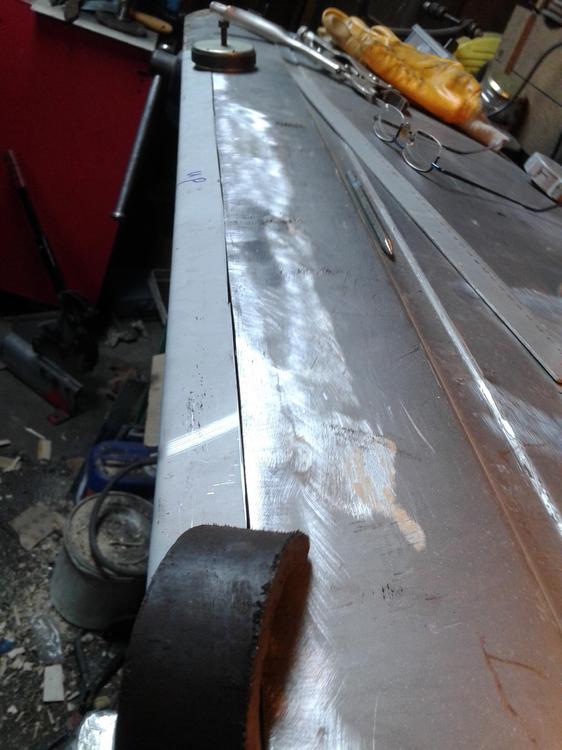
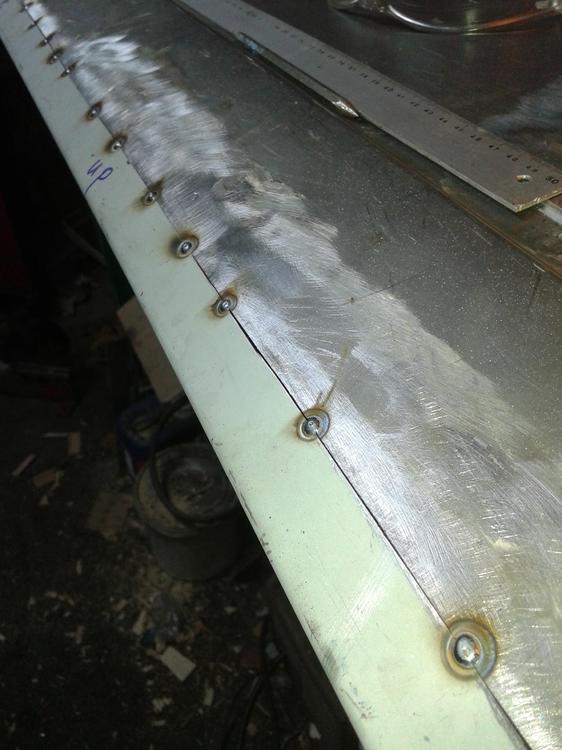
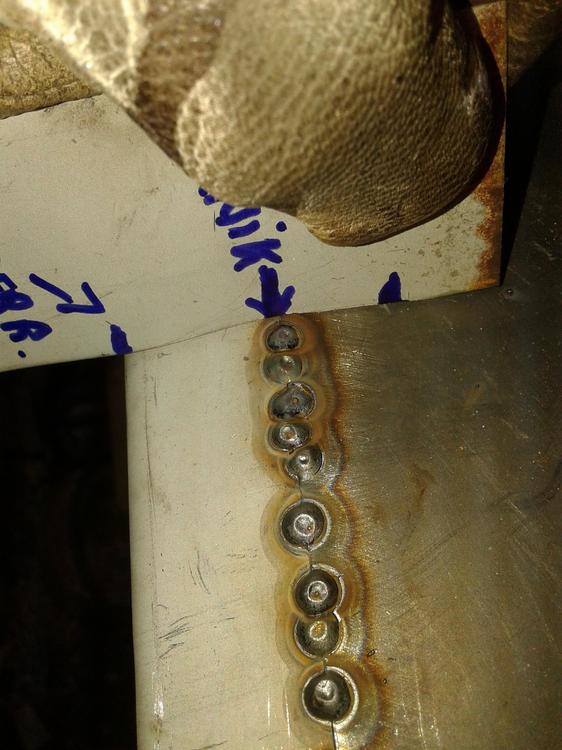
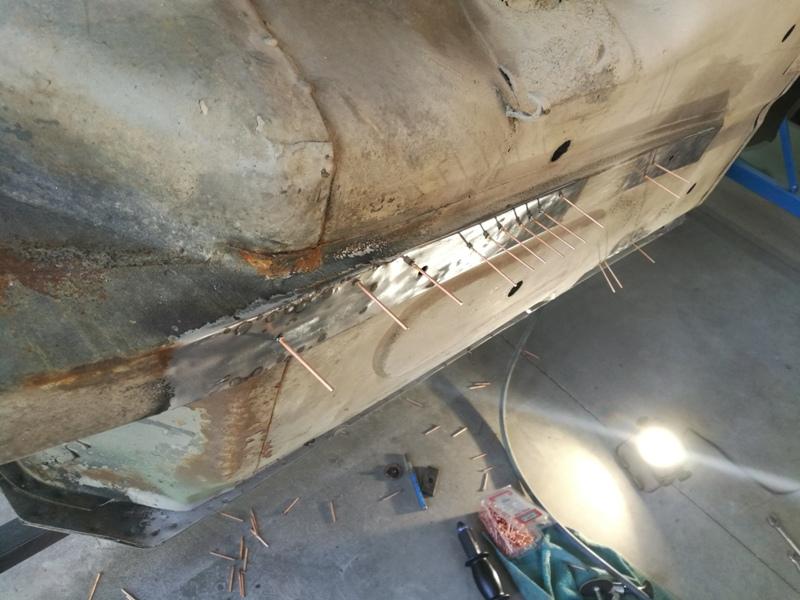
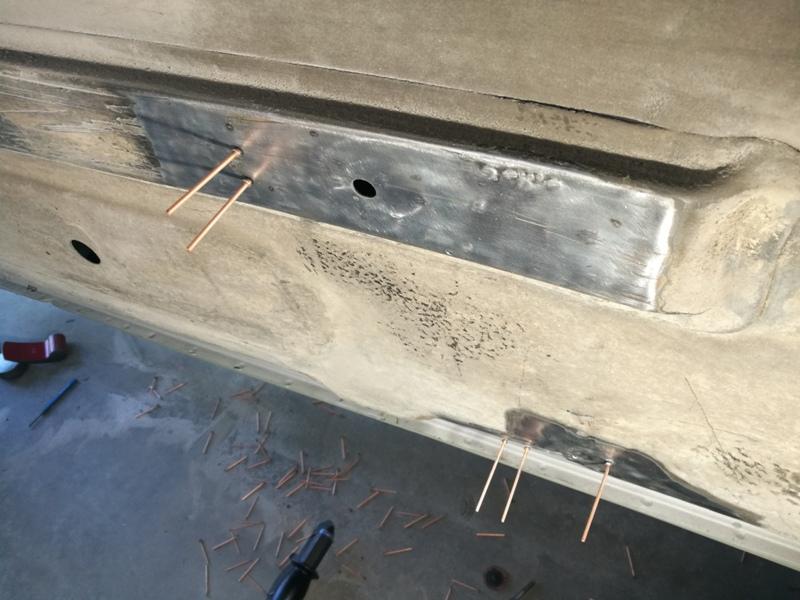
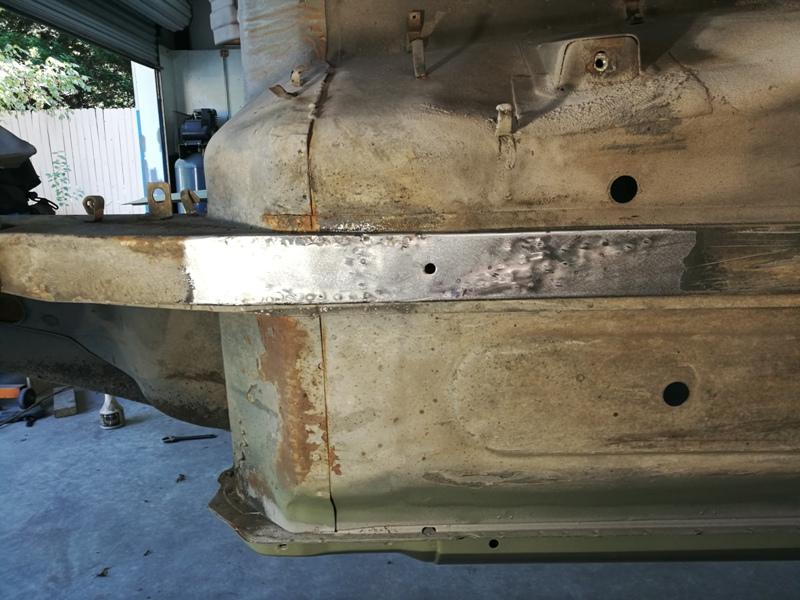
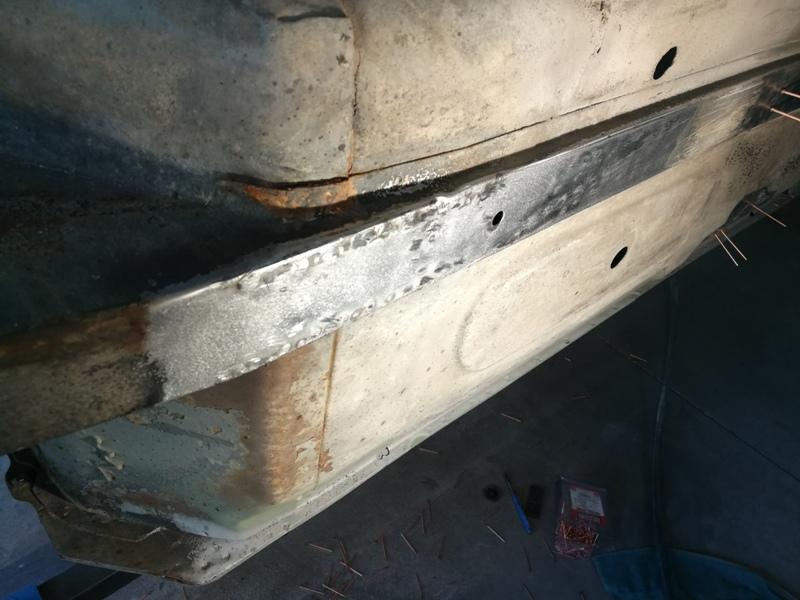
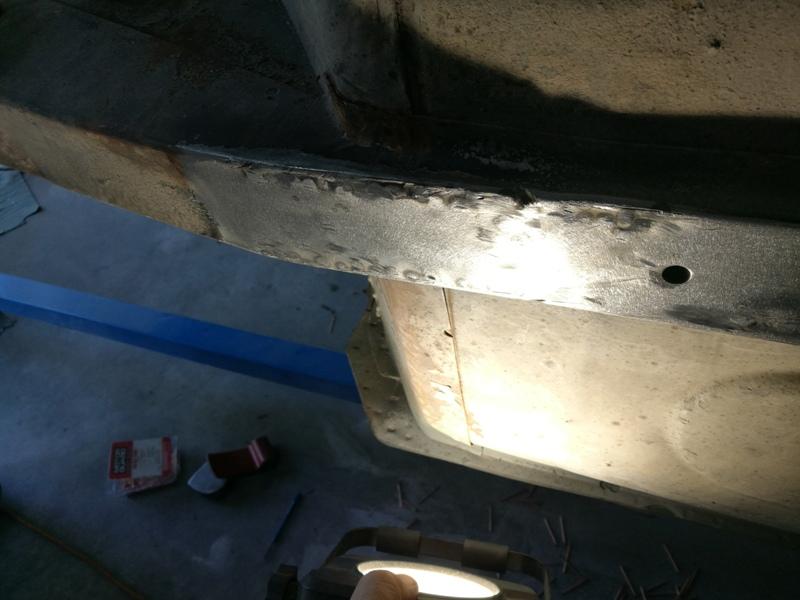
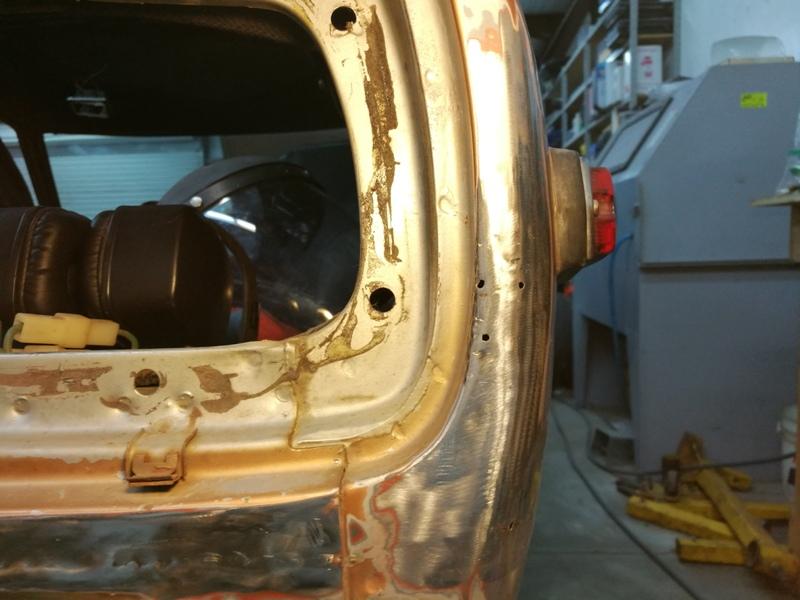
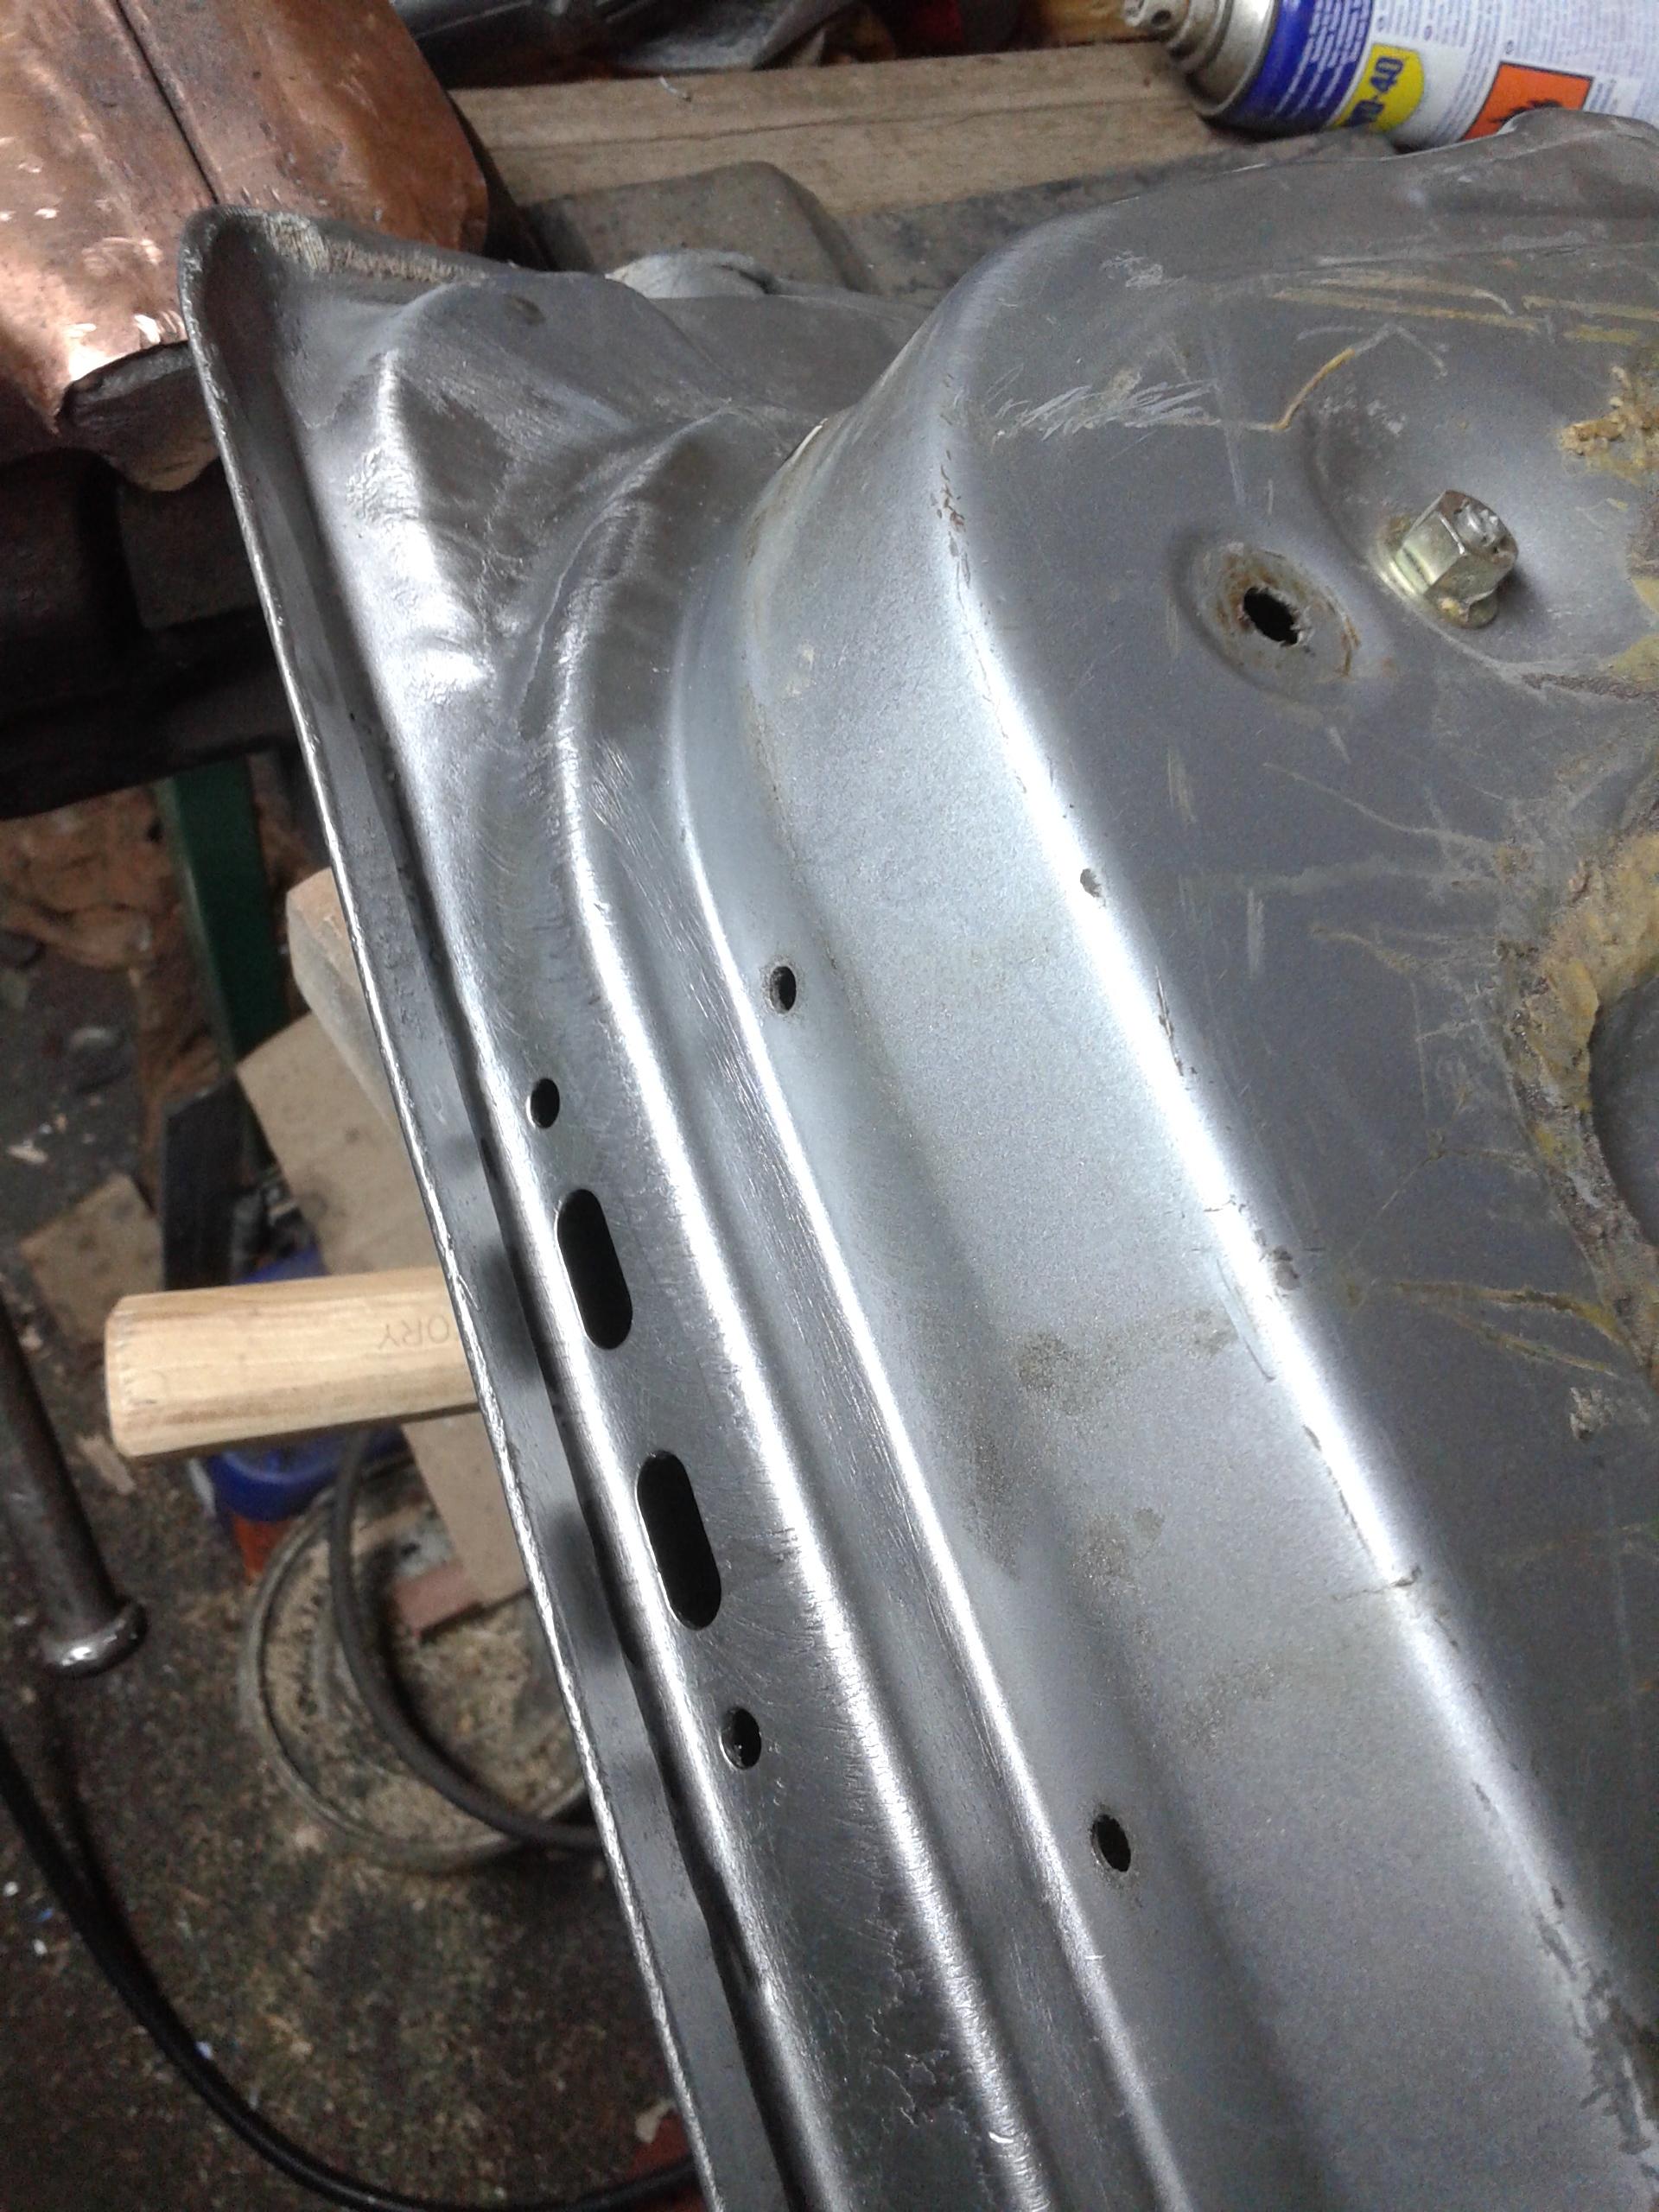
Here are some more pics showing work done with the stud welder. The frame rails and floors typically take a fair amount of abuse on these cars. To straighten the dents in the rails, I used the 2.5 mm pins a fair amount. The 2.0 mm pins also got used in this application, but only for areas toward the center of the rails, away from the side walls. Dented areas on or near the edges require more pulling force. Also, the floors often get bowed from the impacts to these rails over the years the car is on the road. They should be flat. So, when looking front to back and side to side at the lowest surface of the frame rail, they should be flat. A section of 2 X 4 and a 5 lb hammer used judiciously will set things "straight". ? Placing the 2 X 4 strategically on the inside surface, I hammered hard against the wood to move the floor surface downward. There were also a few areas like this which received impacts. I spent two week ends shining a bright light at sharp angles onto both the inside and outside surfaces of the floor to find dents and imperfections. Welding studs and pulling, hammer and dolly work, and using flat punches and hammers, I straightened every imperfection I could find. Then did final clean-up with the sand blaster on the inside surface and sprayed epoxy primer.

 3 points
 -
2 pointsLiving in the rainy NW, if I had backed off every time the wipers lifted, I'd still be trying to get to where I was going. Oh yeah, I forgot yet another lift factor in Zs. Traveling at speed, hit a puddle and the steering wheel goes limp. Yahoo, it's a hydroplane too.2 points
-
 2 points
 -
2 pointsI remember how the front end and the wipers worked in unison. Everything raised at speed.2 points
-
2 pointsYup! Jim, As you know i'm busy with a 280zx.. so i can use some more money for the painter.. (I just added here on my 280zx story a LOT of pictures with some comments CHECK IT OUT!) I could clean them up for you and send some pics if you want.. (i know you want... ? )2 points
-
 2 pointsYeah, but I don't think my wife would let me lose in there, since I have collect a lot of just in case parts over the years, but I can still dream about it....2 points
 -
 Hey Guys I appreciate all of the thoughts and ideas. I did take the distributor back down to look at the mech advance again. The Springs were a bit mushy so I bent the tabs out a bit to tighten them up. I think this should allow me to set the base timing at idle and hopefully have the entire slot used for rpm dependent advance. Don't know if it worked yet because I went to start it back up and it didn't fire. Did some checking and didn't have voltage at the coil or IM. Checked Fusible Links and one is burnt. That's as far as I got before dark tonight. Will be at it some more this weekend and will update on progress. I'm happy to be finding these issues and getting them resolved before making this my daily driver again.2 points
 -
2 points
-
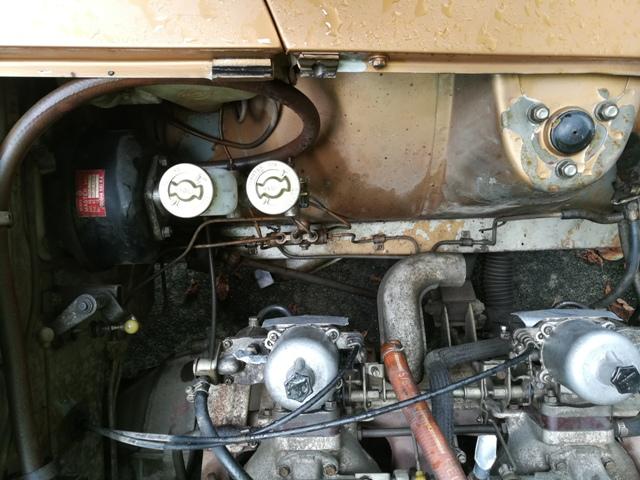
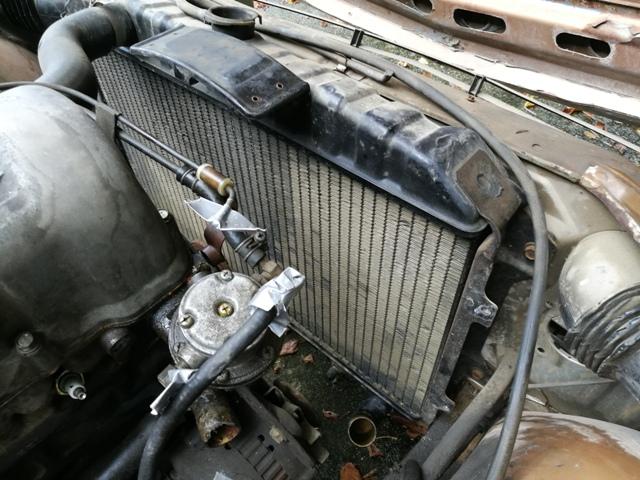
I got an itch to acquire another Z last year... This car on Bring-a-Trailer got my attention and I couldn't let it go. A project car, the previous owner acquired most of the important rubber parts, a NOS dash, a bunch of spares, etc. and did very little to it other than keep it stored in his garage in the Denver CO area for over 25 years. Prior to that, it was in Arizona. So, having restored one Z which had a fair amount of rust, I was super excited to think about restoring one with next to none. I've been at it for a little over a year now, and so I have a pretty good amount of the work done. My hope is that within the next 12 months, I can complete the restoration. I've got lots of pics of progress so far, so, I'm also hoping I can post updates pretty regularly. Here are a few pics after it arrived in GA: The previous owner said he never started it. If true it hadn't run in over 25 years, but the engine turned over by hand. Before taking it apart, I wanted to see if I could get it running and then do compression and/or leak down tests to learn of its condition. I power washed the engine to get all of the dust and gunk off. Then I took the carburetor domes off and cleaned the domes, pistons, needles, inside the carbs, float chambers, etc. The "choke" was stuck in the on position (jet nozzles down) and carbon was caked on the inside of the carbs keeping the pistons from moving freely. Here's the engine after cleaning: Here is the clean engine after it dried. The distributor shaft had a lot of play, so I snagged the one from my other Z. Fuel lines were completely clogged, so I disconnected at the hard line coming into the engine bay. Fuel pump was gummed up, so I grabbed a spare mechanical one (once was on my other Z), and ran the rubber line down into a gas can. Oil in the engine seemed like oil, so I left it as is. After a few tries of the starter, I got it fired up. Still no coolant in the system, no radiator hoses, etc. I just did a quick sync on the carbs and got it running well enough to know that nothing catastrophic had happened to it. Here is a video after only a few minutes of tinkering with it. Next, I put radiator hoses on, put water in and other misc. things so I could run it for a while. I wanted to run it for a minimum of 30 minutes so I could do the compression check or leak down test. Here's another video. The exhaust is original Nissan parts (verified part numbers of center section and muffler), by the way... and very quiet. Garrett

 1 point
 -
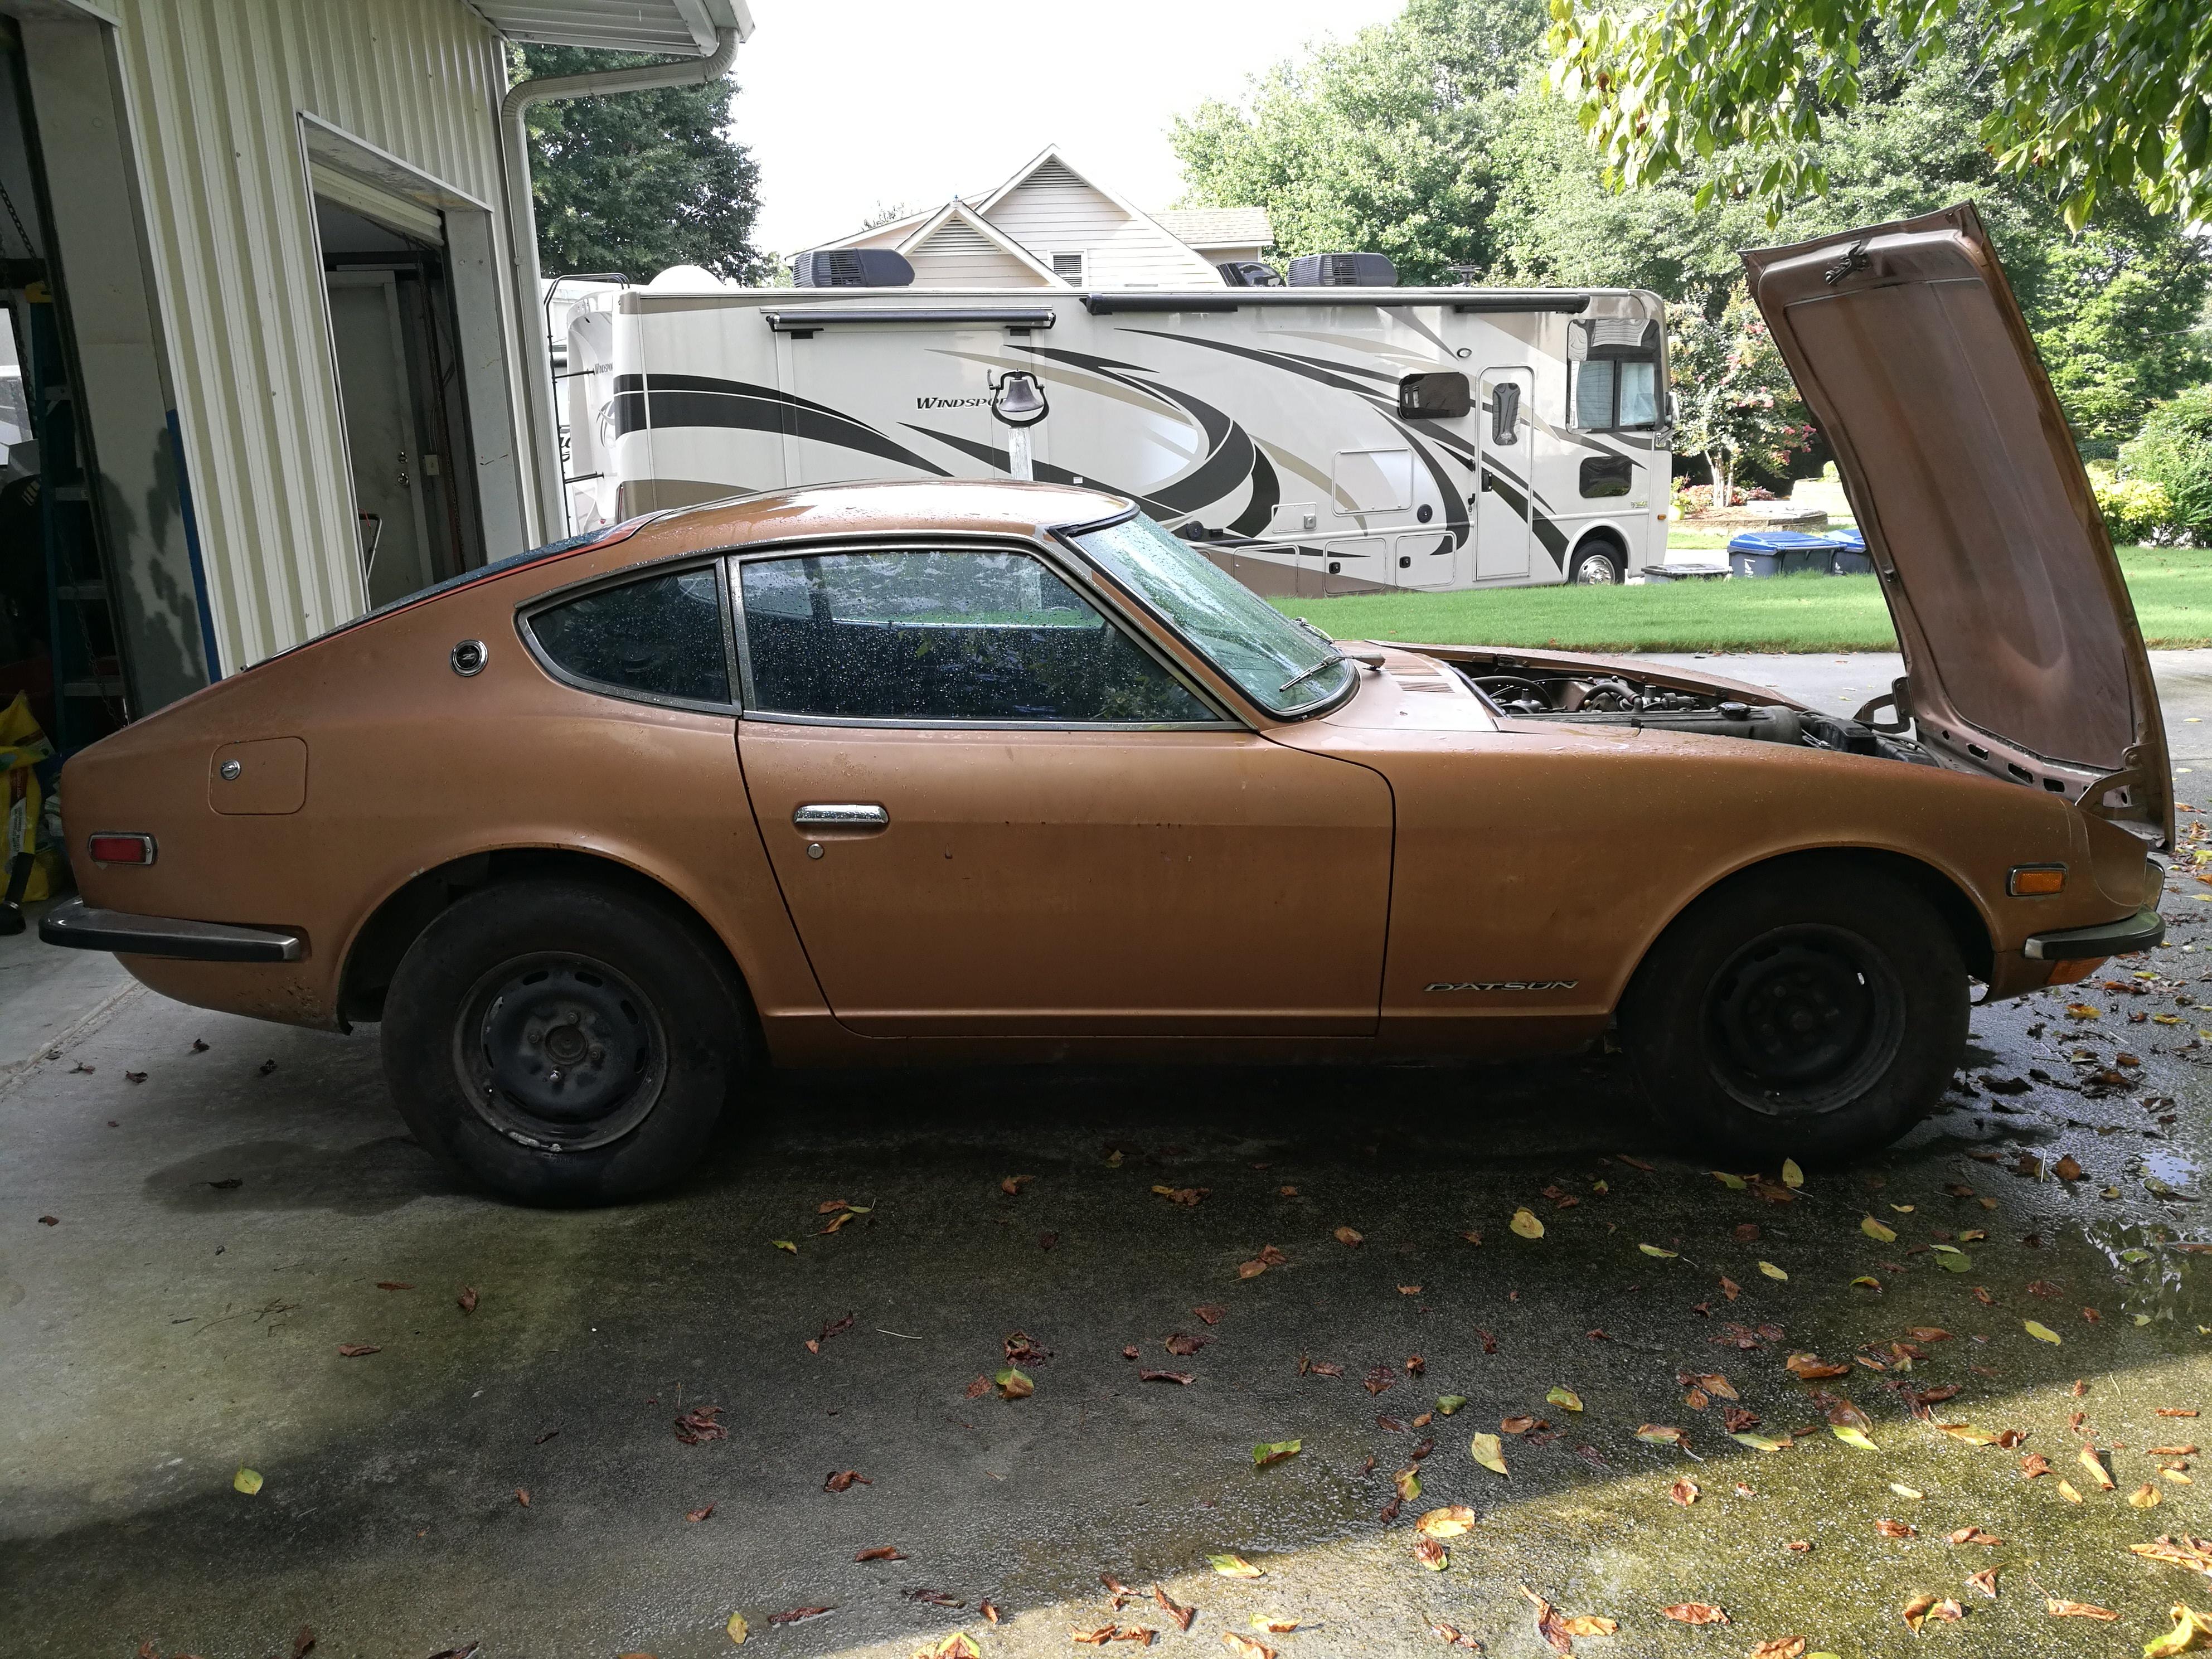
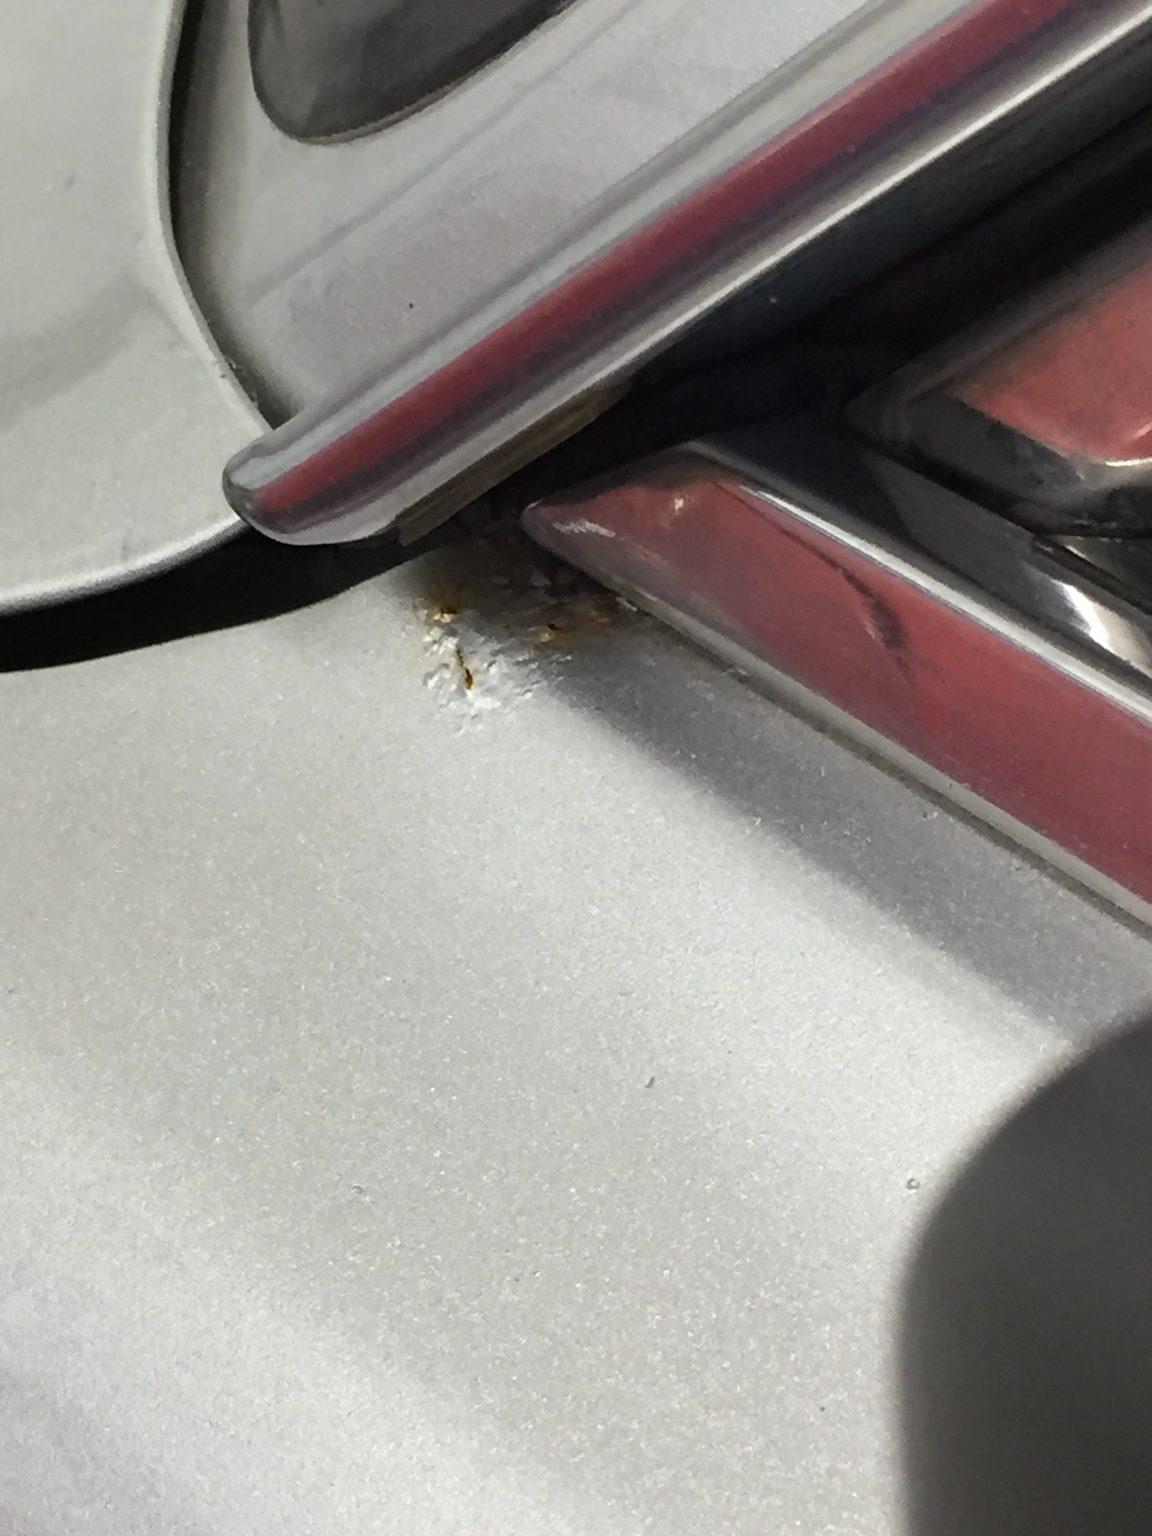
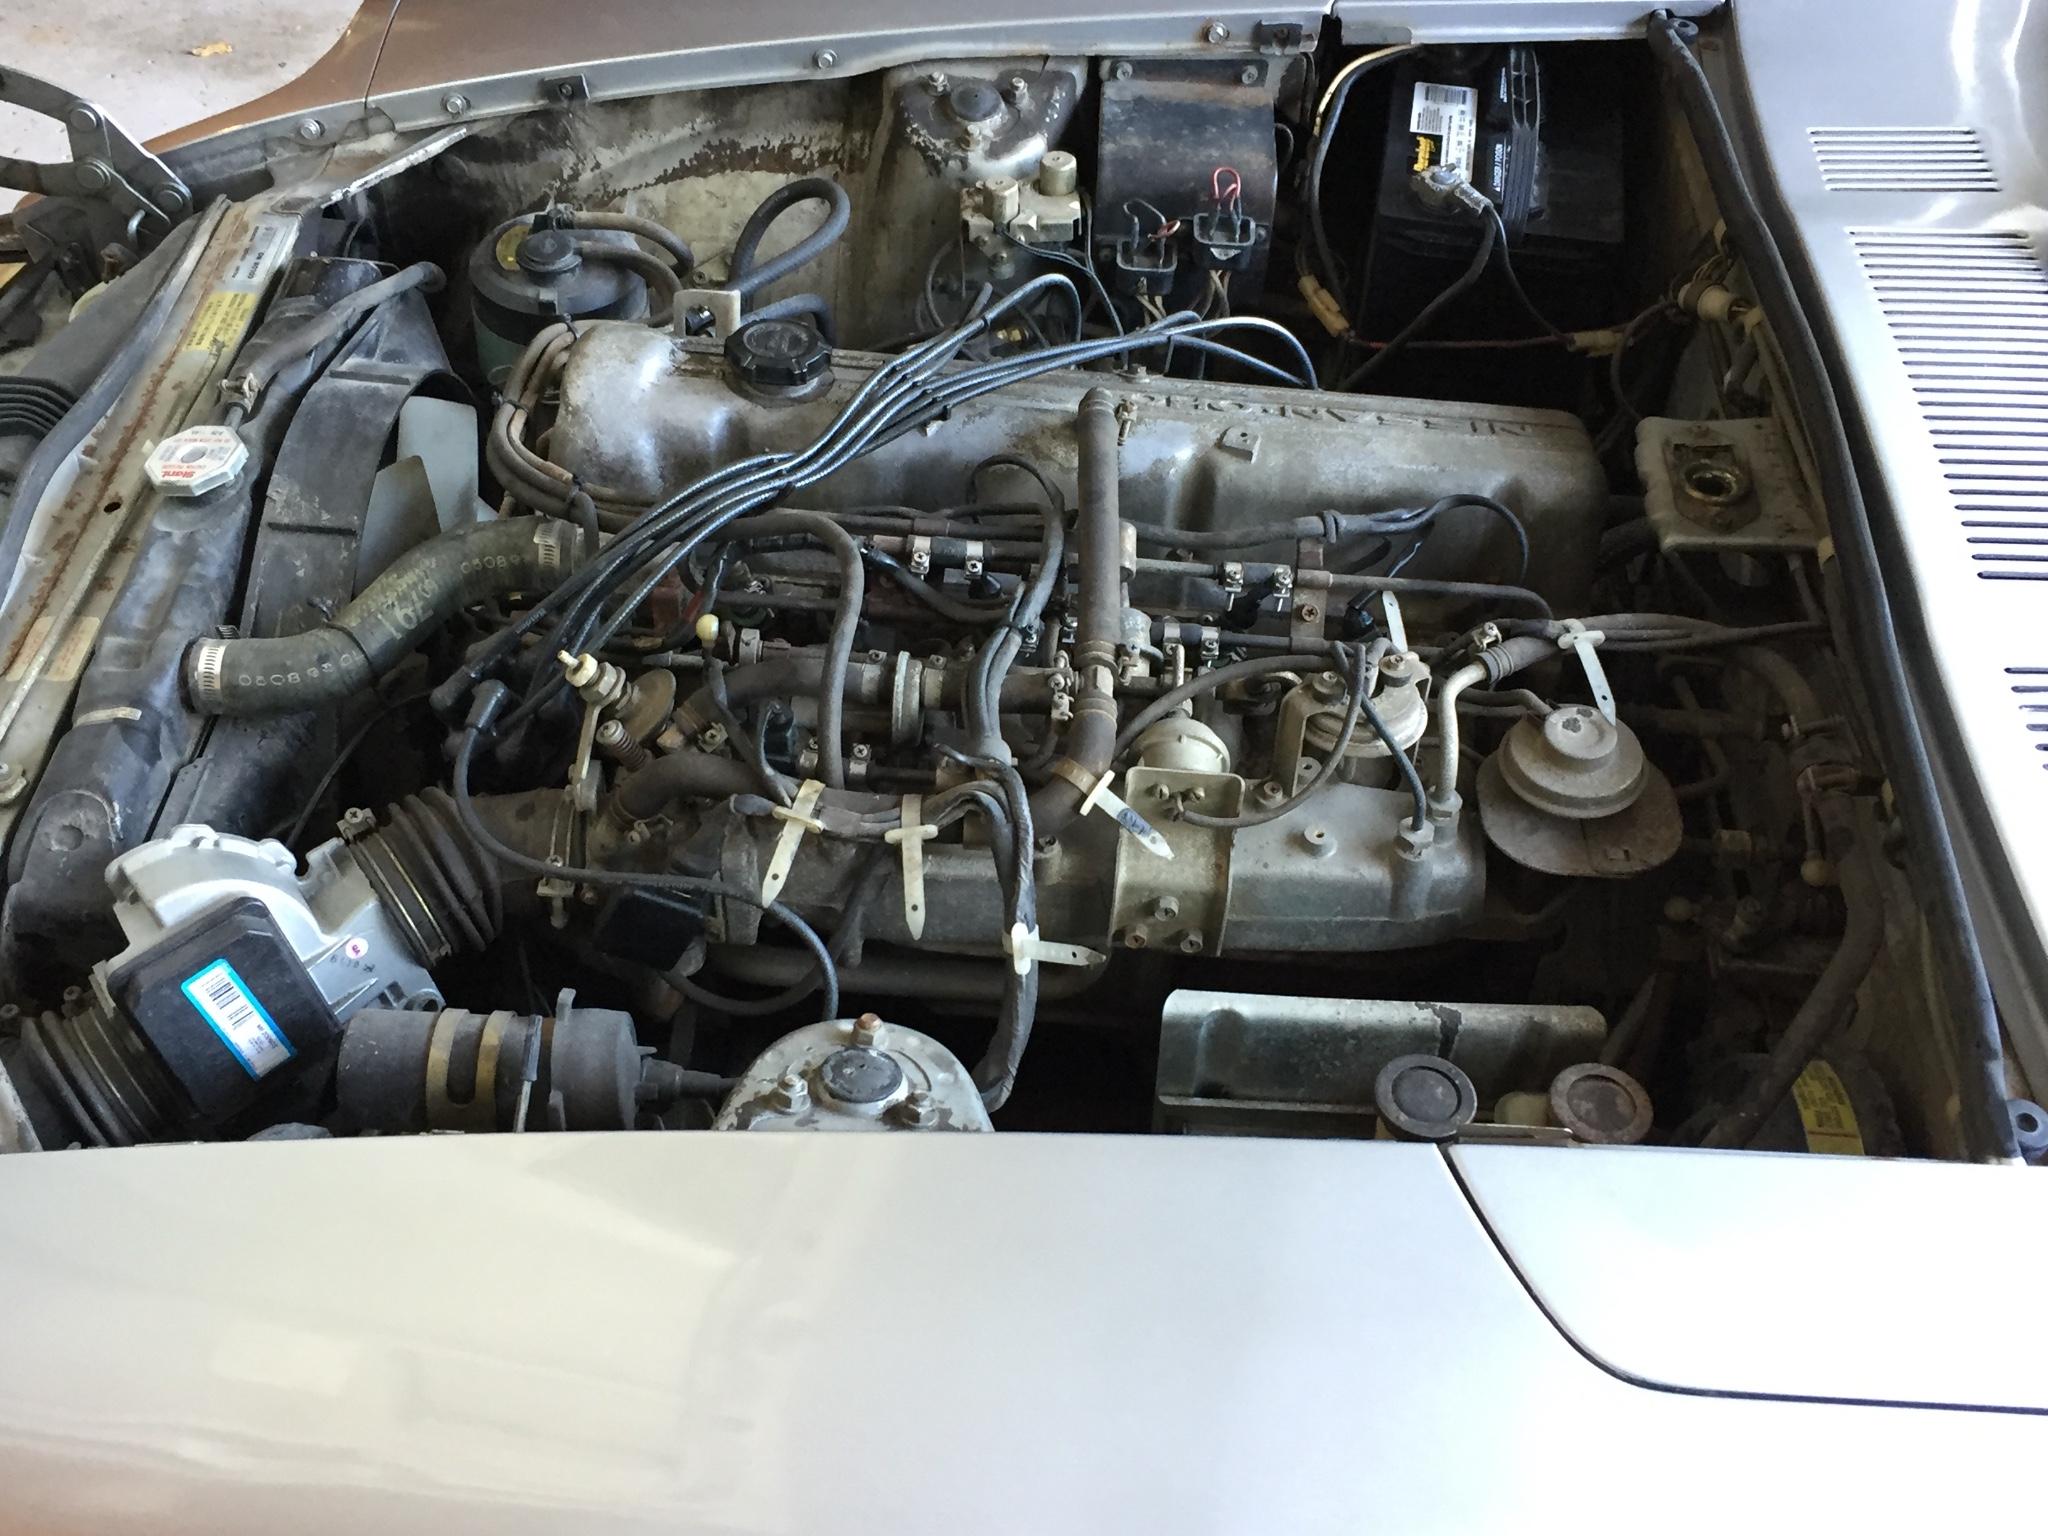
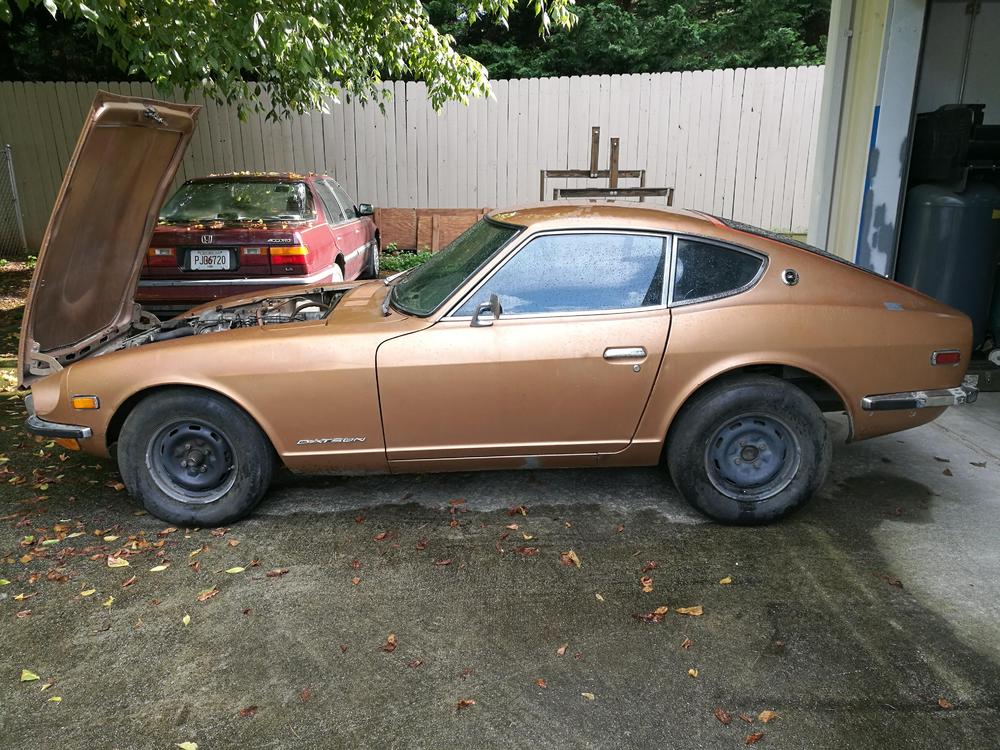
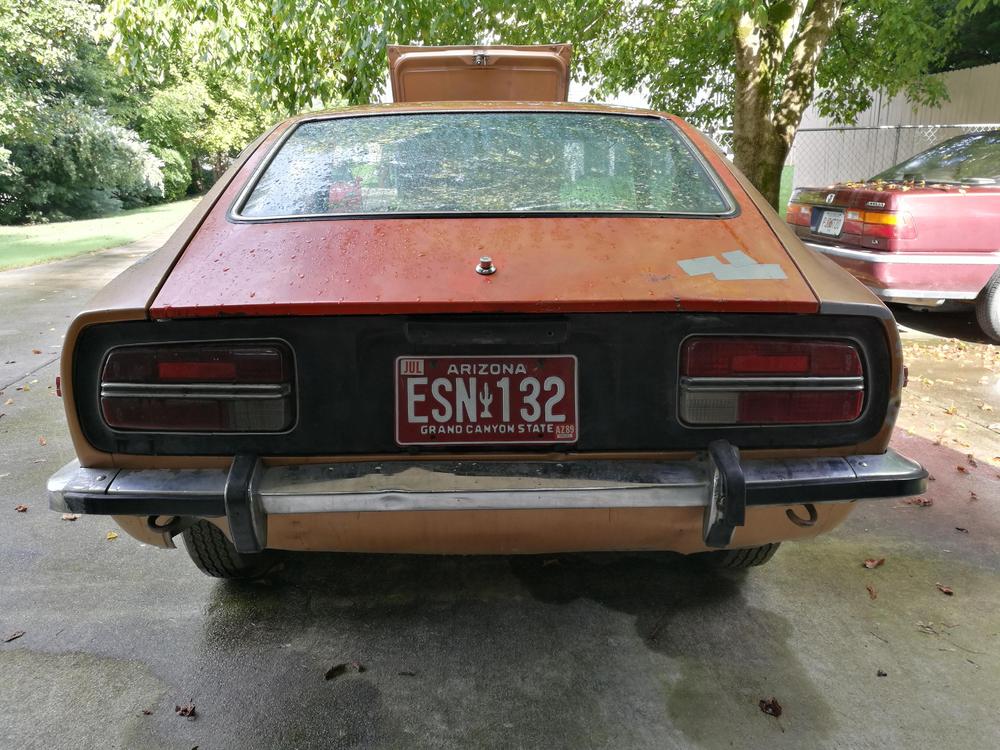
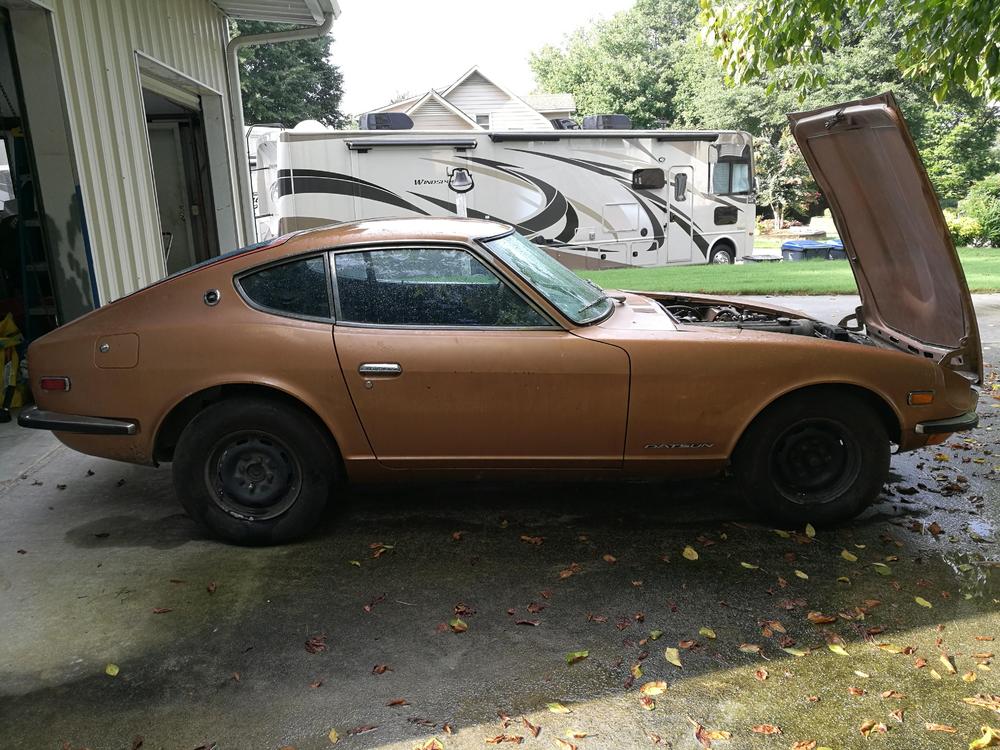
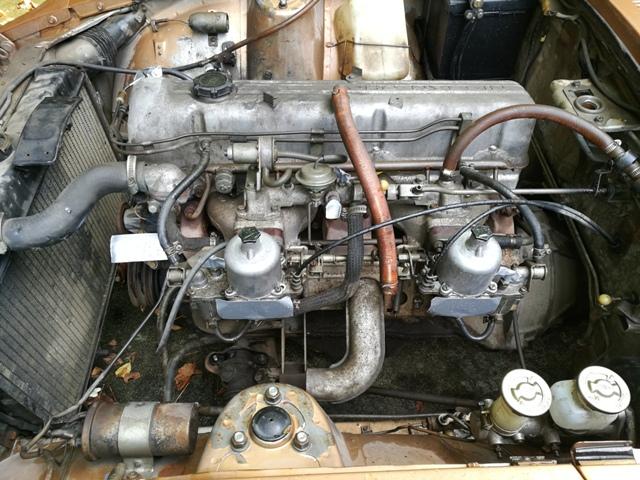
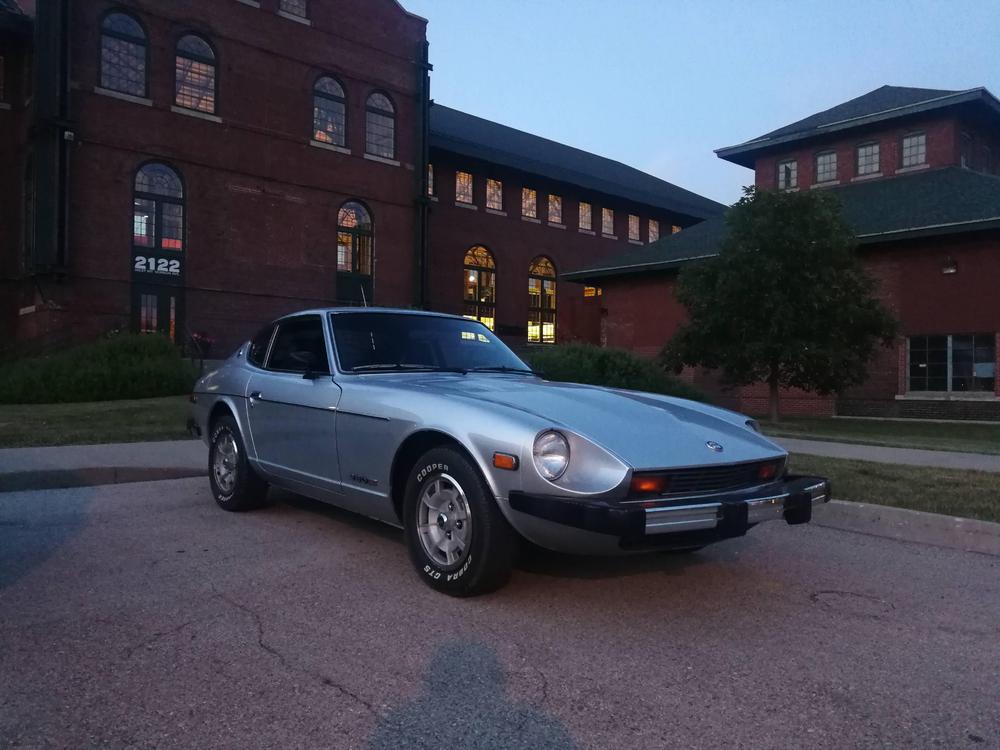
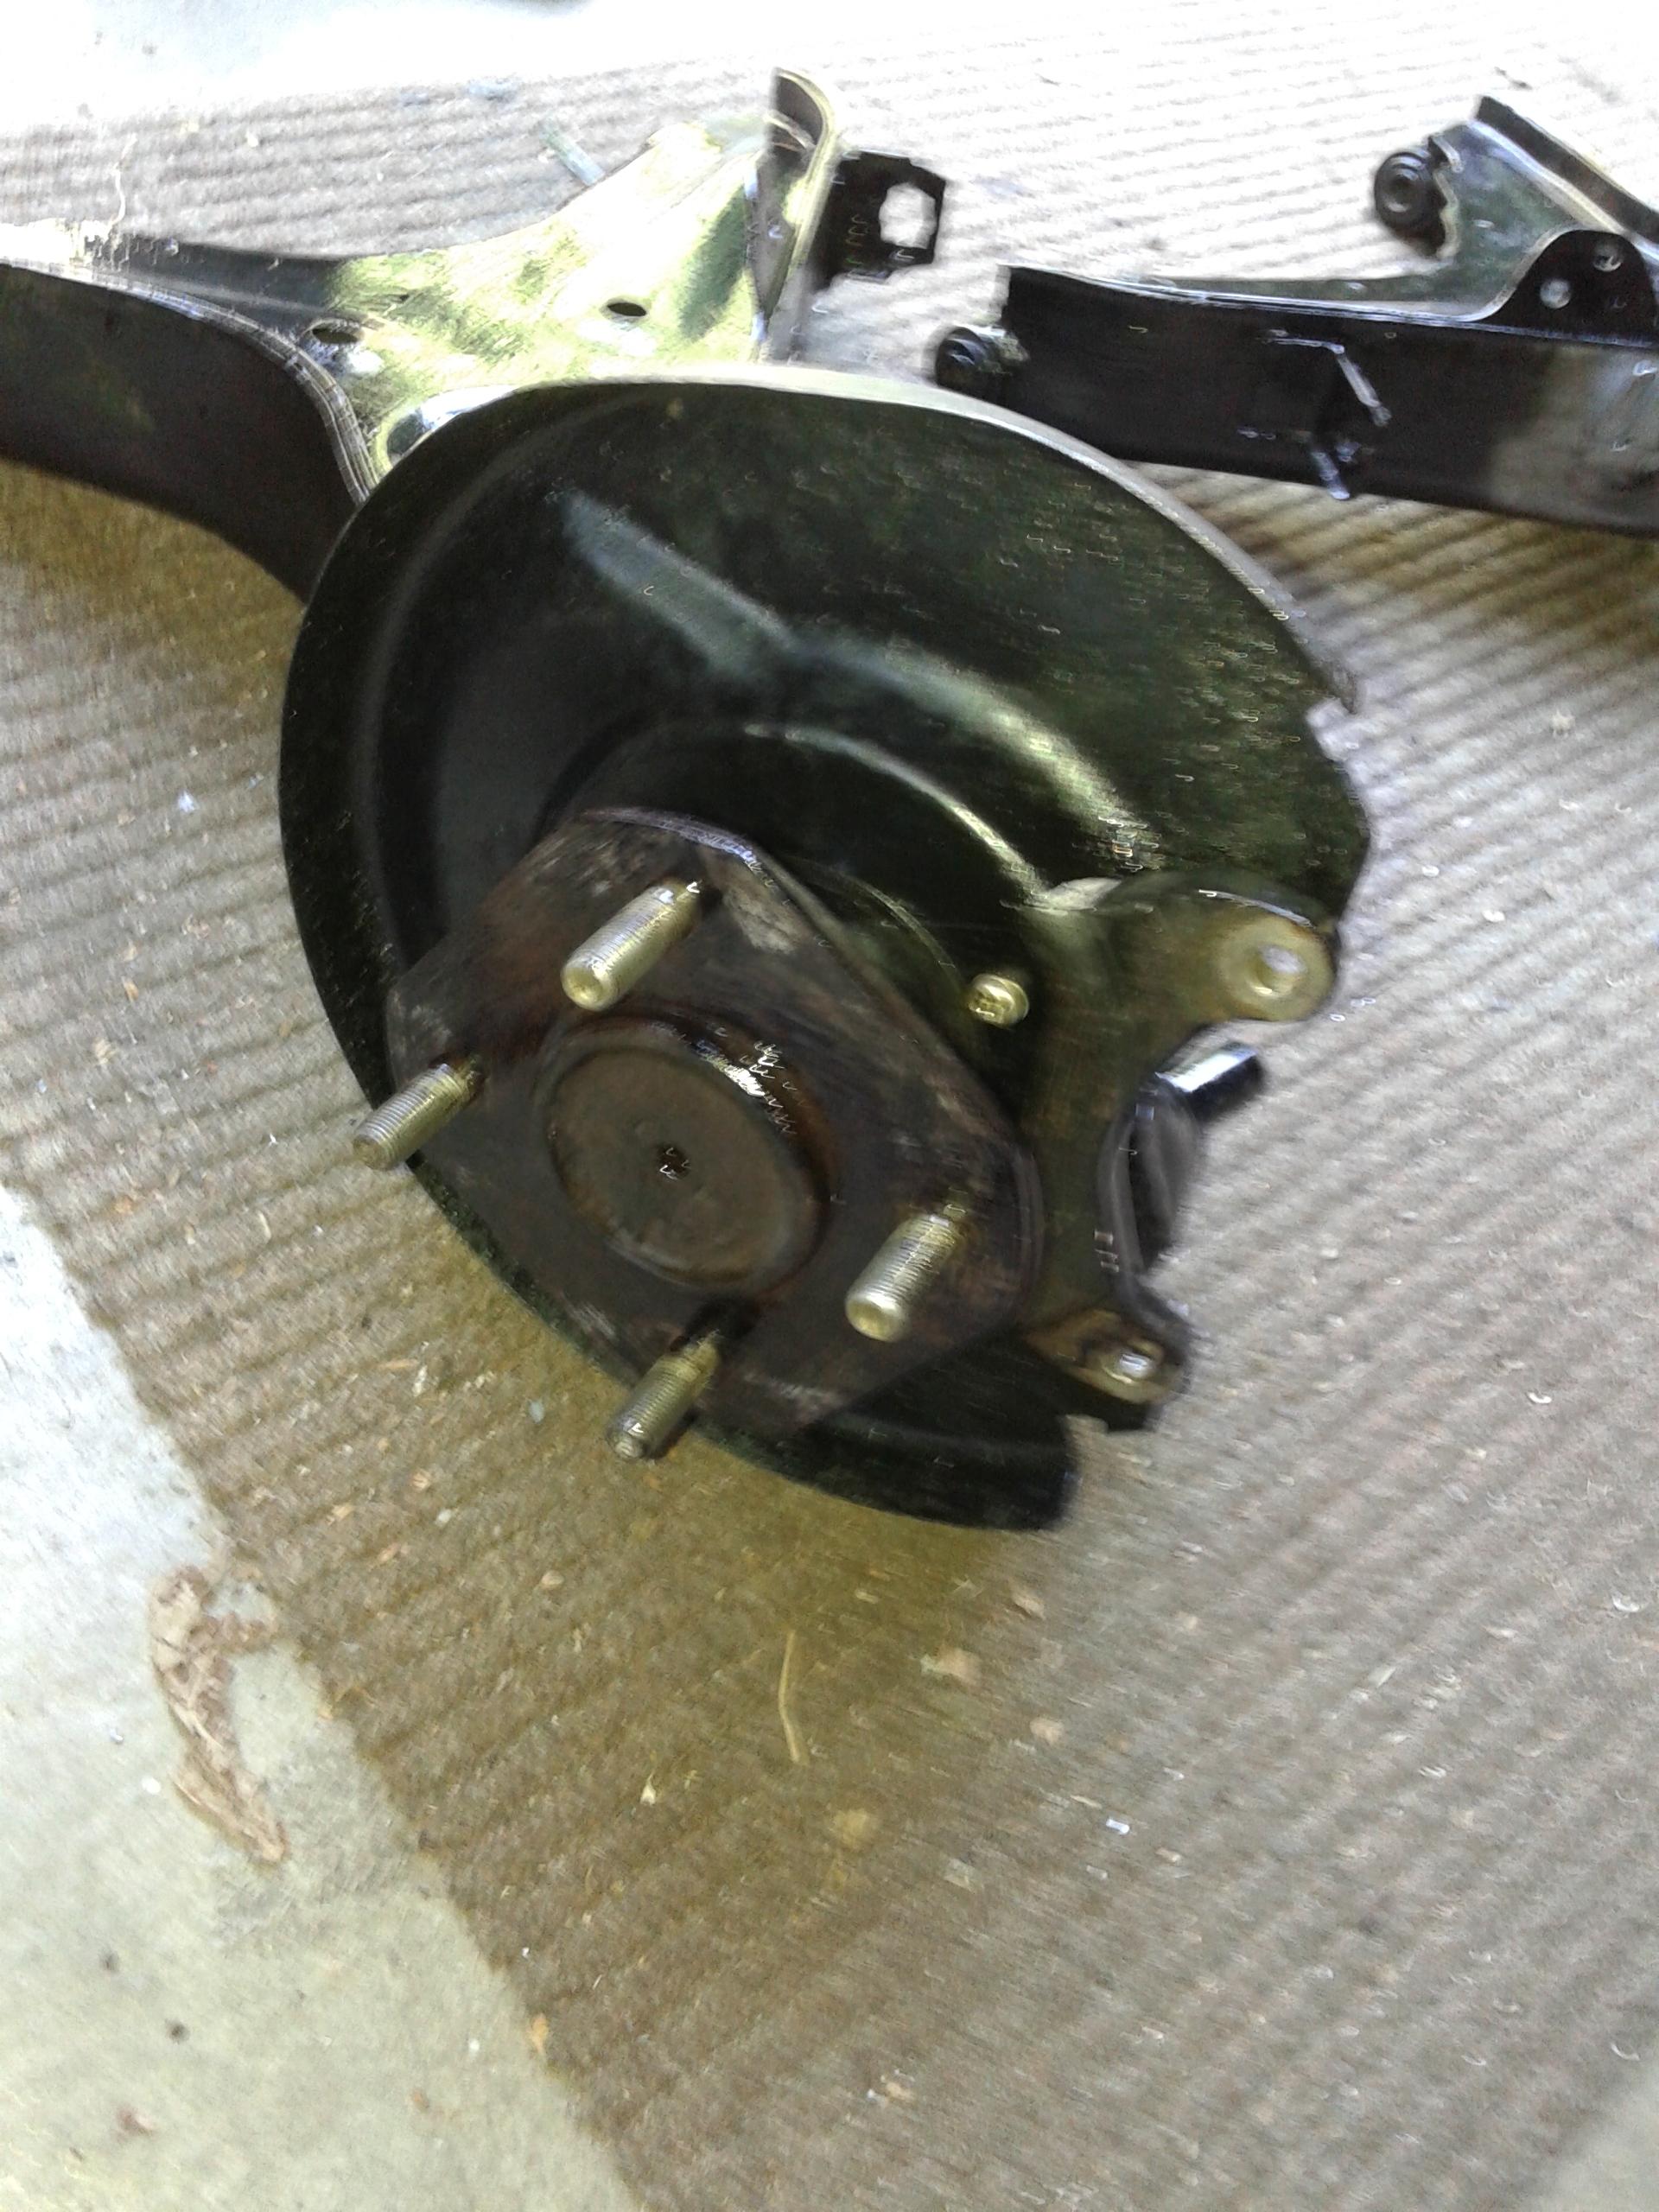
 Hi Guys! New to the site. Just bought a 1977 280z. Its my second Z, but first S30 and I am ecstatic to get started. It seems pretty common place to introduce new projects here so I figured I would drop a note. Current Prognosis: Chassis is in good shape and car both starts and runs pretty well for its age, but definitely needs some dialing in. Going to keep it mostly original and focus on restoring its performance to 1977 spec. Many of the bushings are original and need to be replaced. Engine ticks pretty loudly until it is fully to temp and likes to hang at 2000rpm on downshifts. There is light surface rust on the rear suspension components, engine sub frame, and a few small body panel issues (picture below) which need some TLC. Car was repainted a decade or so ago and while it looks good from a distance, its very rough up close. A few photos are below, or you can get all the detail from the seller's BaT Post from a few years ago. https://bringatrailer.com/listing/1977-datsun-280z-8/ 2019/2020 Projects Fluids Change [Complete] Shifter Bushings [Complete] Brake Master Cylinder Replacement & Bleed [Complete] Vacuum Hose Replacement [In-Process] Powder-coat Suspension Components Bushing Update (Poly Primarily) Oil Pan Seal Replacement Rear Main Seal Replacement Rust Remediation Future Projects (WIP) Front/Rear bumper & DIA trim delete and replacement with 240z/260z components Paint respray (Either original silver or the blue/green Datsun paint of same era 5 Speed Transmission? Small body rust spot above drivers side door drain Chassis/Suspension components to be painted or powder coated Test 3D print of the car (Still waiting on Silver filament ?


 1 point
 -
 1 pointHere’s what the books says, but I need someone who’s done this before to tell if I need to pull this apart and do it again. Says to sand the thrust bearing edges with 320 sandpaper to get the clearance. Should be .002 but not more than .007. The crank won’t move laterally (float) at all when pry it as instructed using a long flat screwdriver. Sent from my iPhone using Tapatalk1 point
 -
 Is there a state licensing board to complain to? I’d be interested in seeing the service procedural checklist and summary sheet. If they have one it probably looks something like this: Replace plugs, wires, points, rotor, condenser, & cap Set timing Check brakes for wear Check brake fluid Check tire pressure Adjust clutch Change oil & filter Top off radiator fluid Check to see if owner is in the waiting area Drive it like you stole it1 point
 -
 Would you like me to help you spend your money? What are you looking for and how far away can it be?1 point
 -
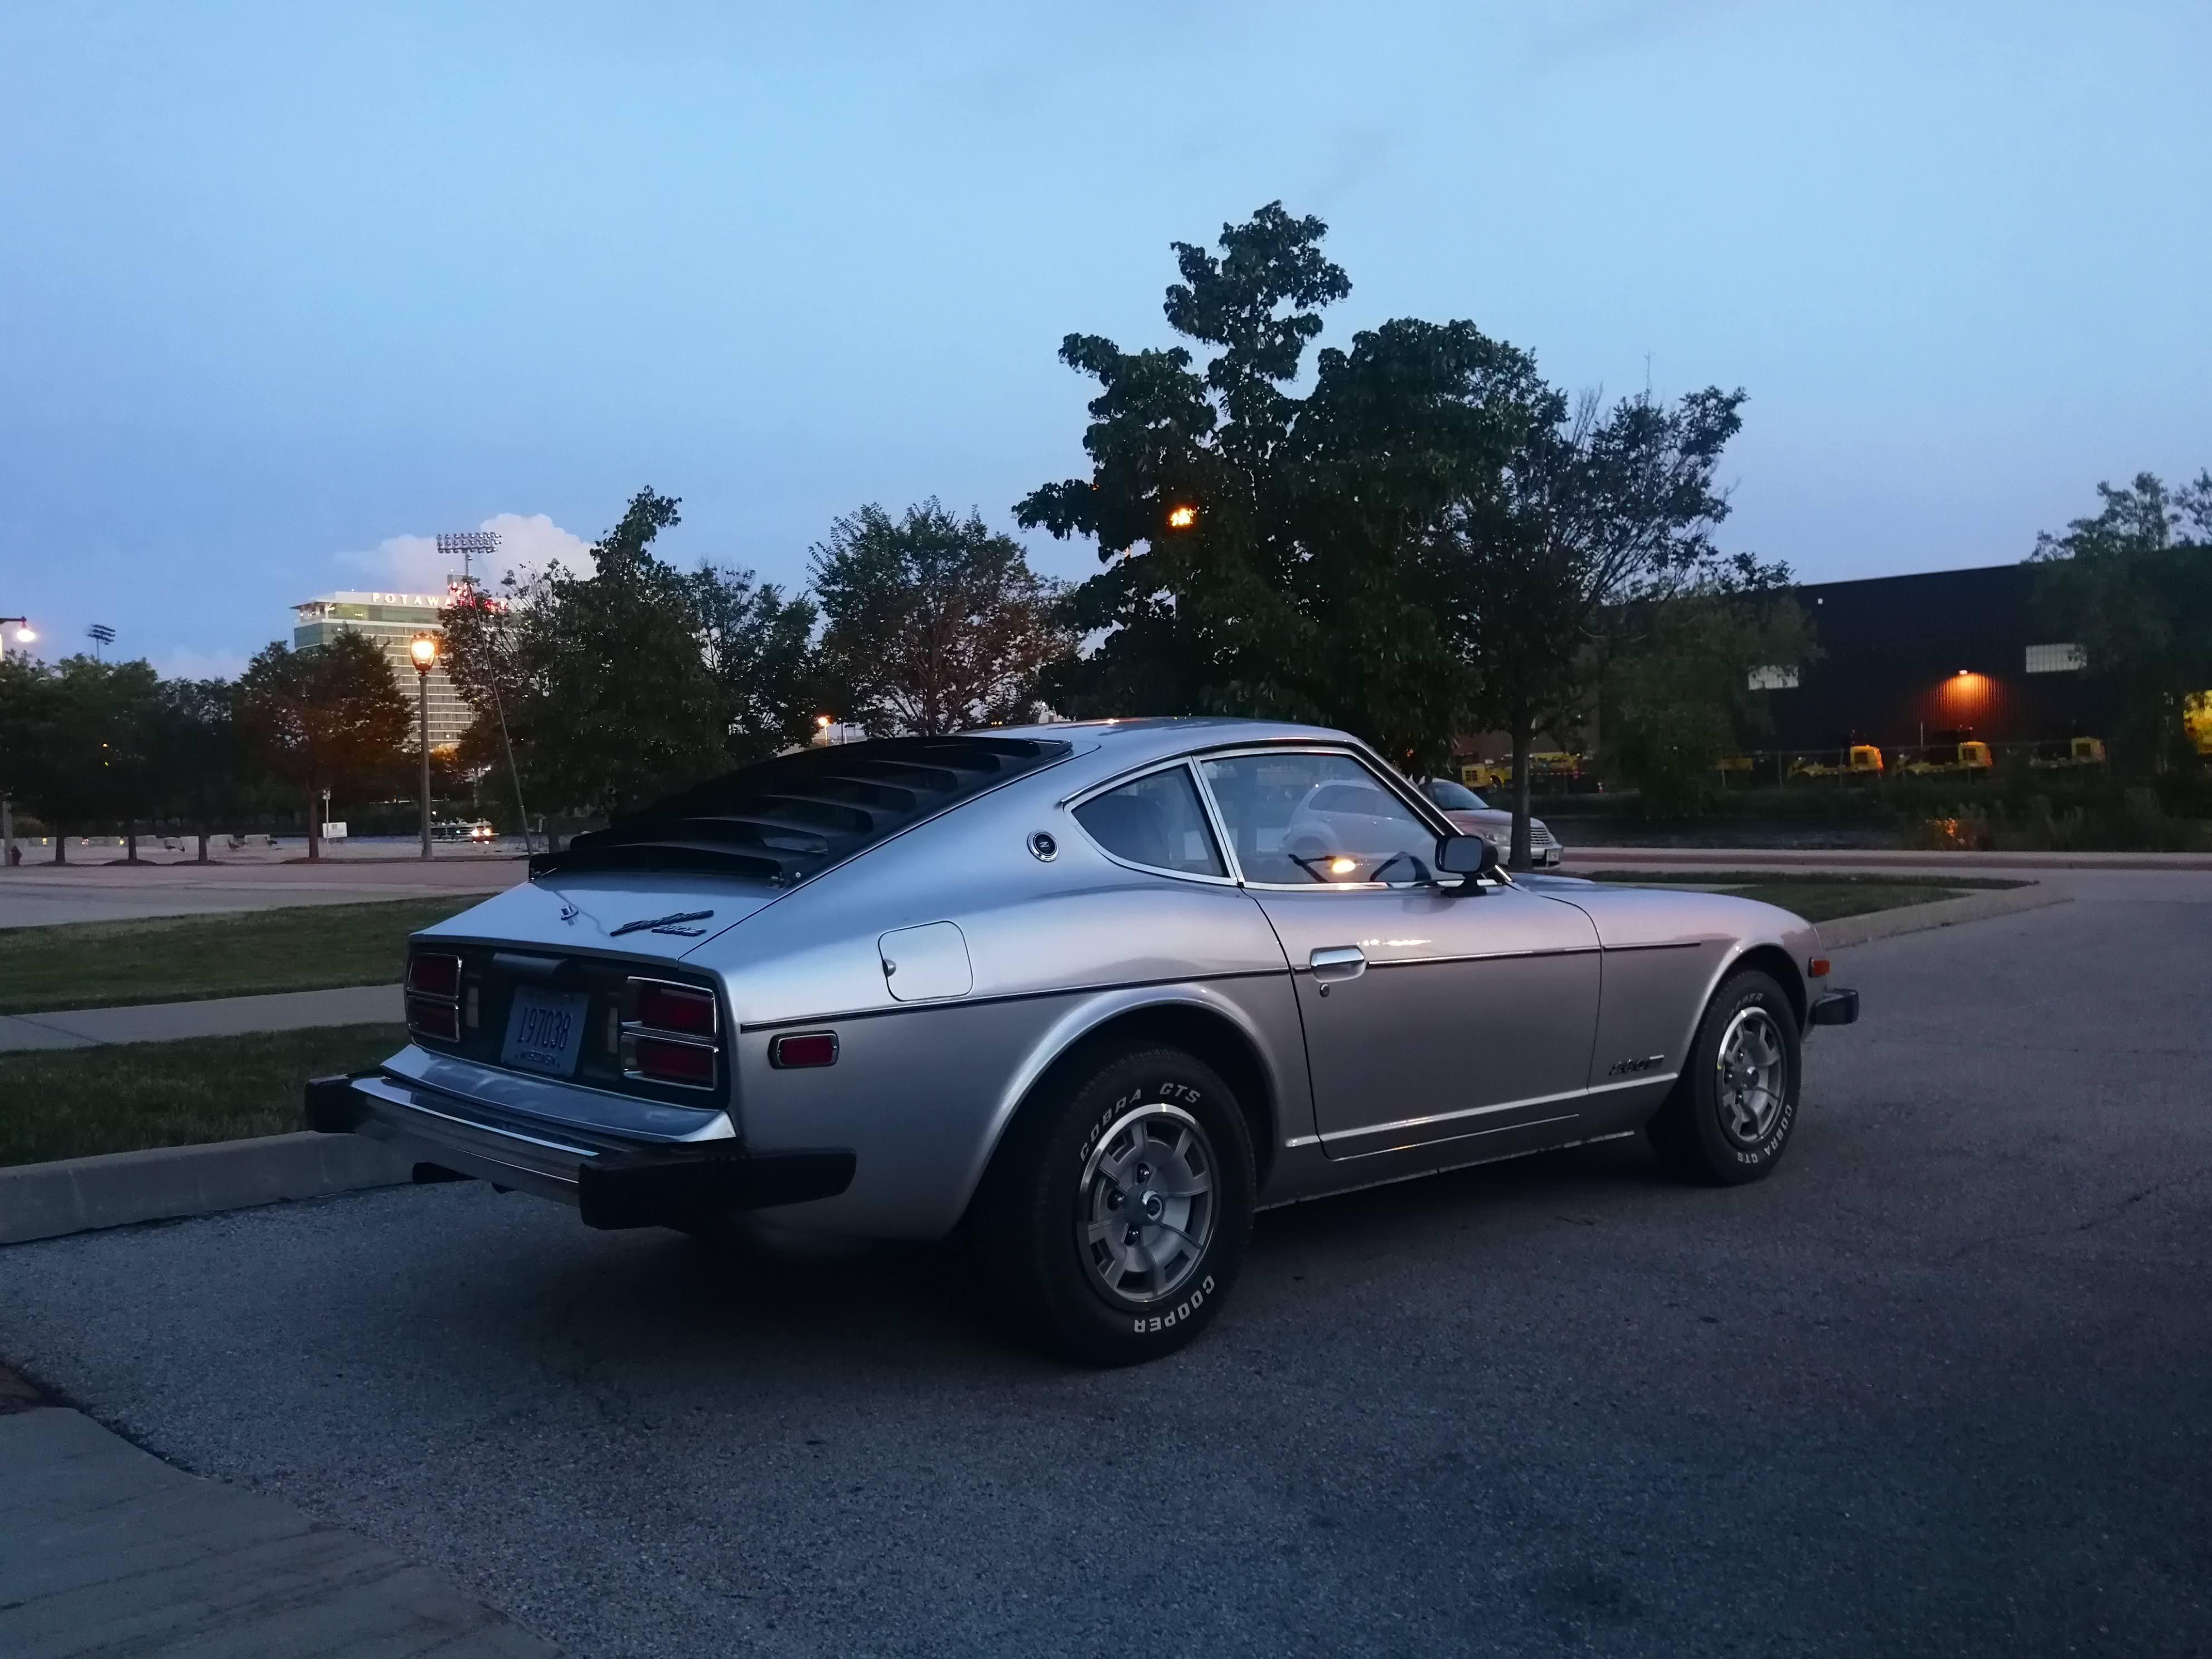
@dmuzial, are you Auto70 on BaT? If so it sounded like you and the seller were pretty close on price, nice to see it end up with someone on this site. I'm in the fresh rubber bushing camp as well, the difference between the old rubber and new is quite surprising and firmer than you might think. You can never post too many pics on this forum, following other members build threads is always pleasure. I just completed a 77/280z project myself and I'm looking for another one, great cars. You might might find a few 77 specific things of interest here,1 point
-
 1 point
 -
 When I bought my 240 in 1984 I was driving often over 220km/h and there was no problem (with heckspoiler and no airdam) maybe the air was better then ?1 point
 -
 1 pointWay back in the day when pop music sounded like Alvin and the Chipmunks, my first car was a '73 240z. Even though the car was only 6 years old, it constantly required a lot of of love and money. Otherwise, they wont age gracefully. Maybe 280z is different than 240z. But mine did not age gracefully. Whatever could be broken was. If you are obsessed like I was and already made up your mind and if you can swing it, buy a z and keep it. Also buy a car to drive.1 point
 -
 Haha, I was not scared of the speed, more of the old Z breaking apart LOL. The 5 speed does make a big difference in top end driving though... I just don't want to go much faster then 90 mph with the 4 speed in mine, way to much rpm. But it's a 50 year old car it's okay..1 point
 -
1 pointTo clarify-- The 73 240z did not have shock absorbers incorporated into the bumper support mounts---that actually came late in 74.5 260z and into 75 in the 280z when the bumpers became the really large projecting "parkbench" type. The bumper support mounts were a very heavy stamped steel plate assembly with a round steel tube transversely mounted at the end. These are much more massive than the thin flat metal strapping that mounted the earlier bumpers and was indeed a design change to make the front bumper assembly more crash worthy. (If you agree that deformation of the bumper would still occur, but no "crush" of the bumper into the radiator support or engine compartment at a 5 mph frontal impact was an improvement.) As crash standards evolved to higher speed impacts (15 mph??) the transition to the shock absorber (controlled crush tube) method was implemented. Your car has the correct mounts and bumper. The plate you mentioned is not for reinforcement, but is merely a filler to close the otherwise large gap, and is correct. You are missing the front bumper over riders (or as some describe them "bumperettes") and the rubber covered filler pieces that fill the gap between the steel bumper and the headlight buckets (sugar scoops) above the turn signal indicator lights at the far ends of the bumper. The steel bumper covers most of this piece at each end. This is a photo of the passenger side filler. The drivers side is reversed. If the bumpers "fit terribly" as you state, it was the poor assembly work of the last person that mounted them. If done properly they fit quite well. Finding the rubber filler end pieces in restorable condition can be difficult in my experience. Many have deteriorated to the point of being very hard and cracked even if you do find them. Better candidates can be restored by applying many layers of a paintable rubber compound such as "Plastidip", drying between coats and sanding with progressively finer grits, then finishing with a final spray of Duplicolor "Vinyl Fabric". If you decide that this is too much to go through--- you can remove the 73 bumper, all of the filler pieces entirely, remove the heavy stamped steel bumper supports and replace them with the earlier type strapping supports, and source a used or new early bumper which will fit up much closer to the body. The earlier 70, 71, 72 240z bumpers are different from the later 73 240z bumpers in shape. Fortunately the mounting holes with concealed weld nuts for the earlier bumper supports are still present on the 73 body and can be used to mount the earlier bumper supports and earlier bumper.1 point
-
 1 pointOrder them from Nissan. They still have restamps of good quality. Mine was almost perfect.1 point
 -
1 pointI'd rather repair iffy factory fenders than deal with "massaging" ill fitting ones.1 point
-
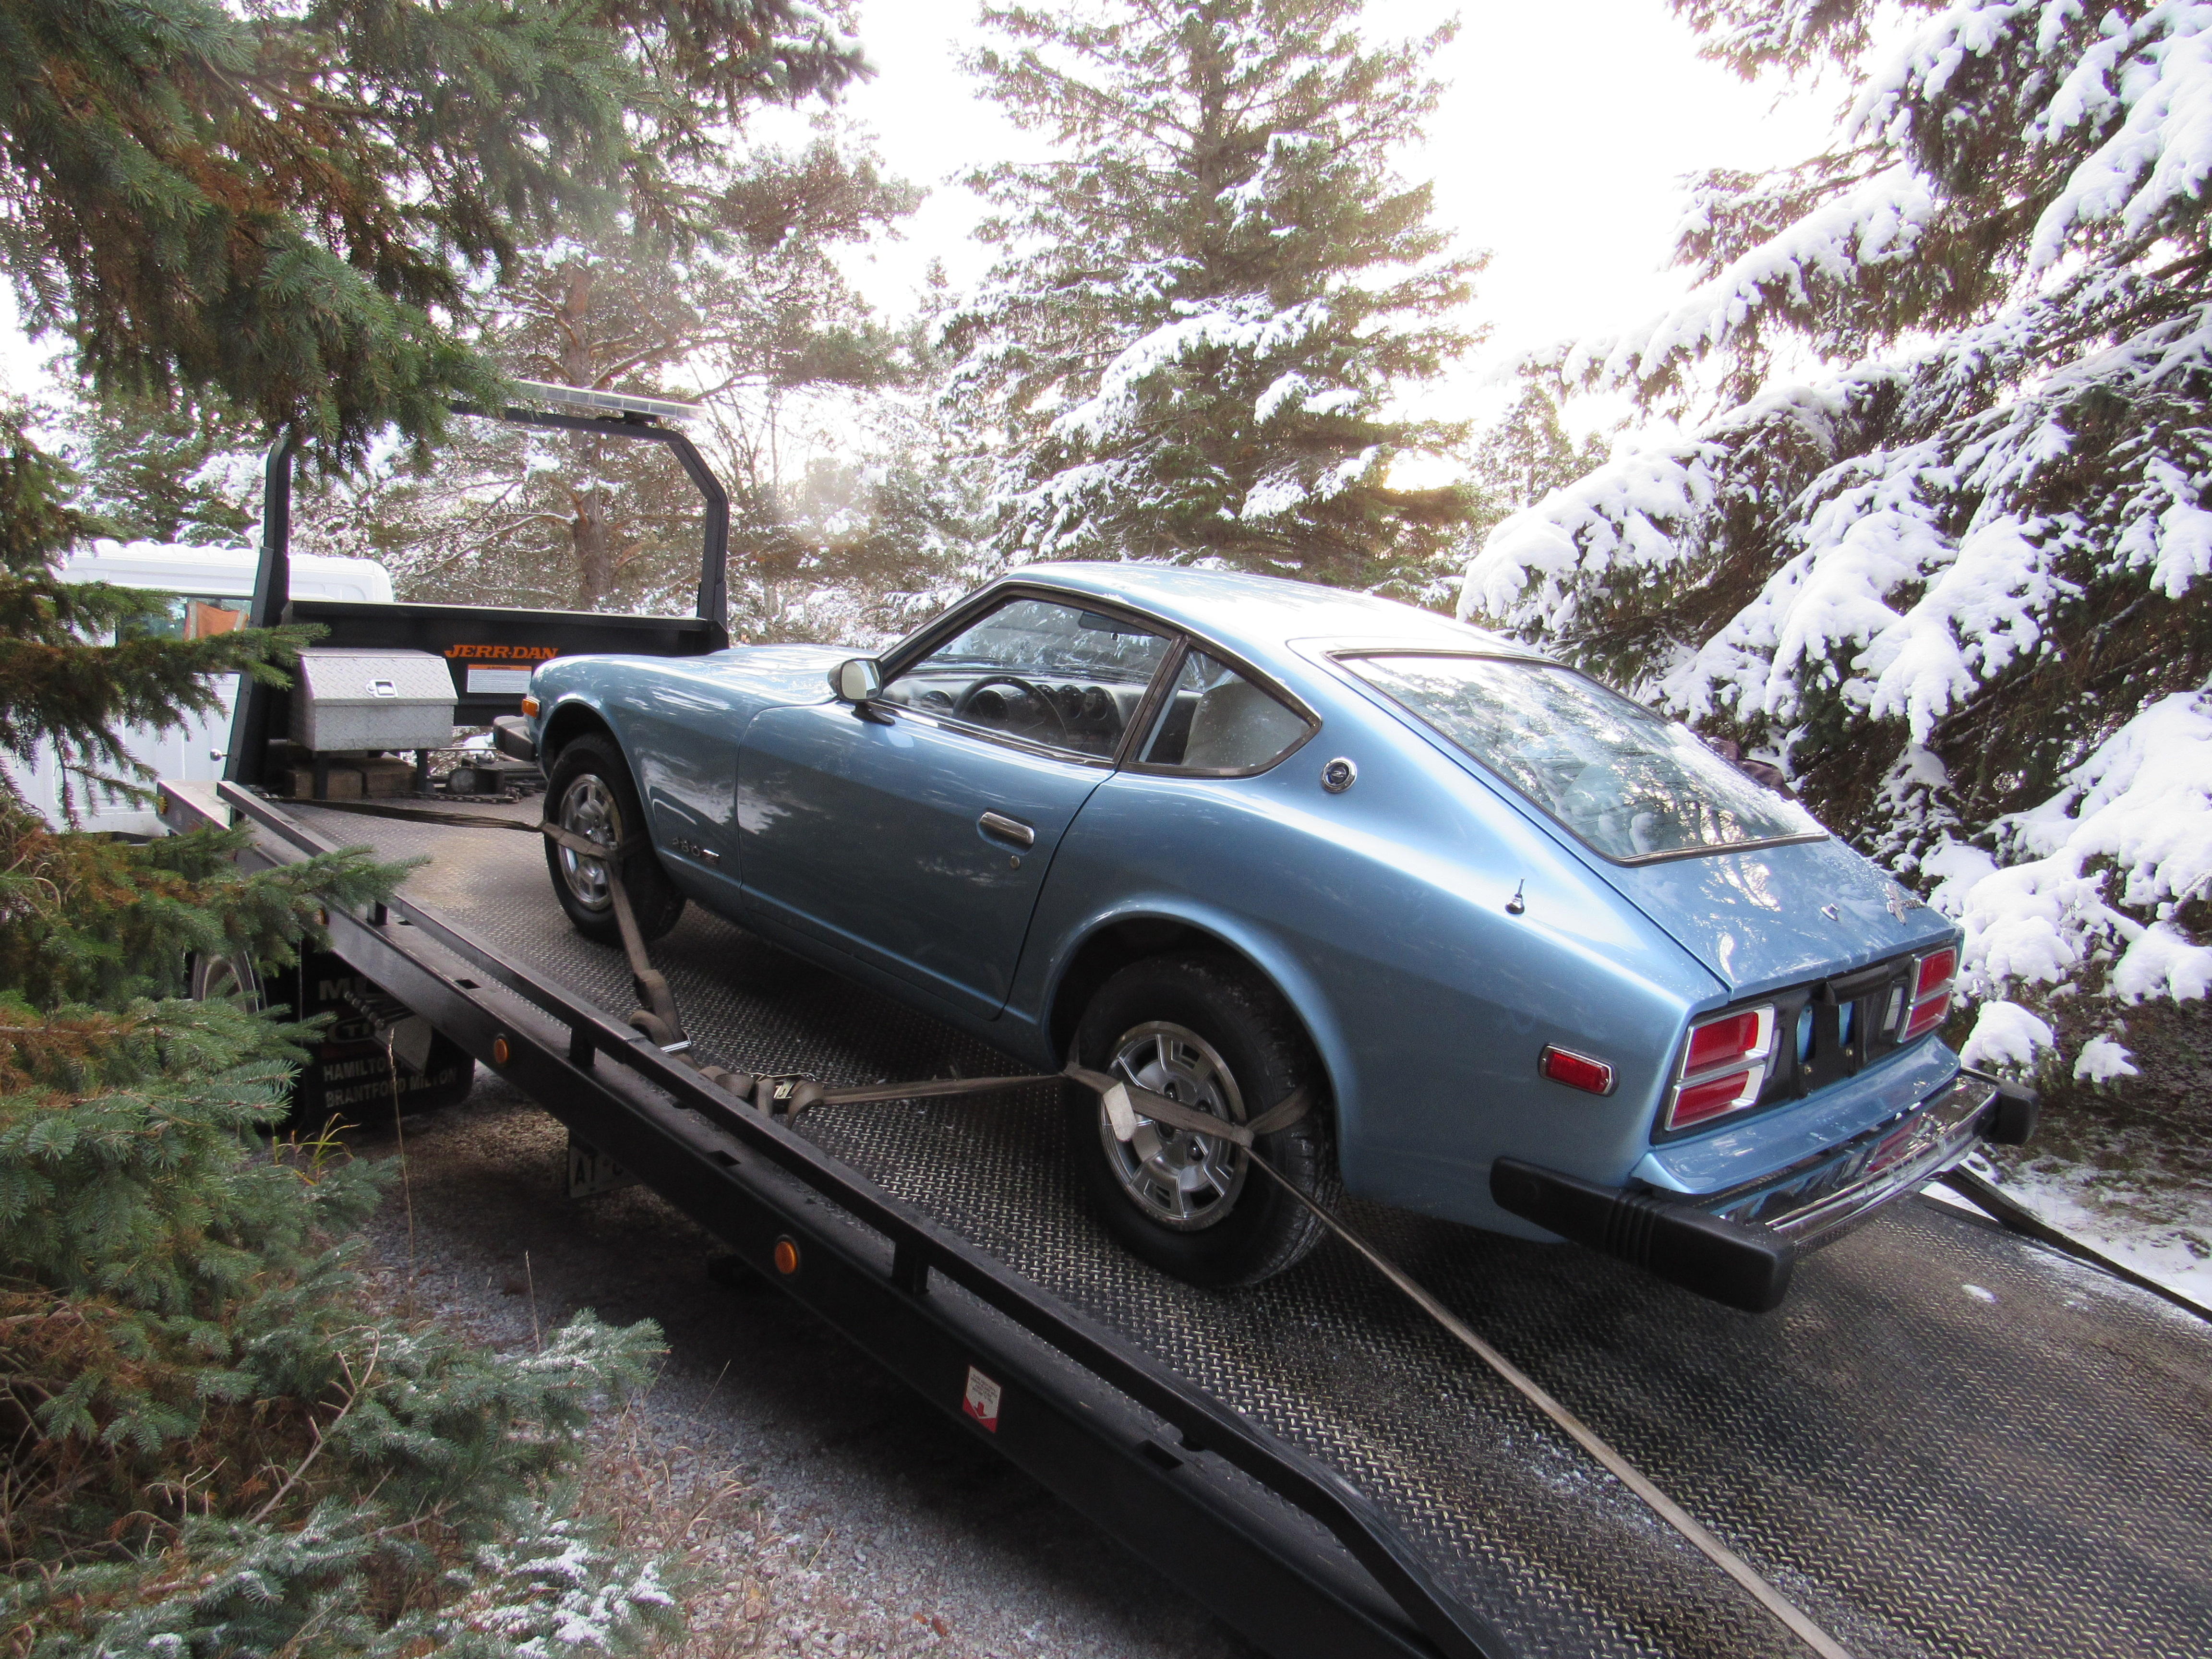
 Likely the very last time that beauty will see snow on its tires ...1 point
 -
 @dmuzial, congrats on your purchase. Looks like a very stable starting point. Check out the 1977 wiring diagram now supported by @EuroDat in the download section. It's been through several revisions since posted back in 2004 Wayne1 point
 -
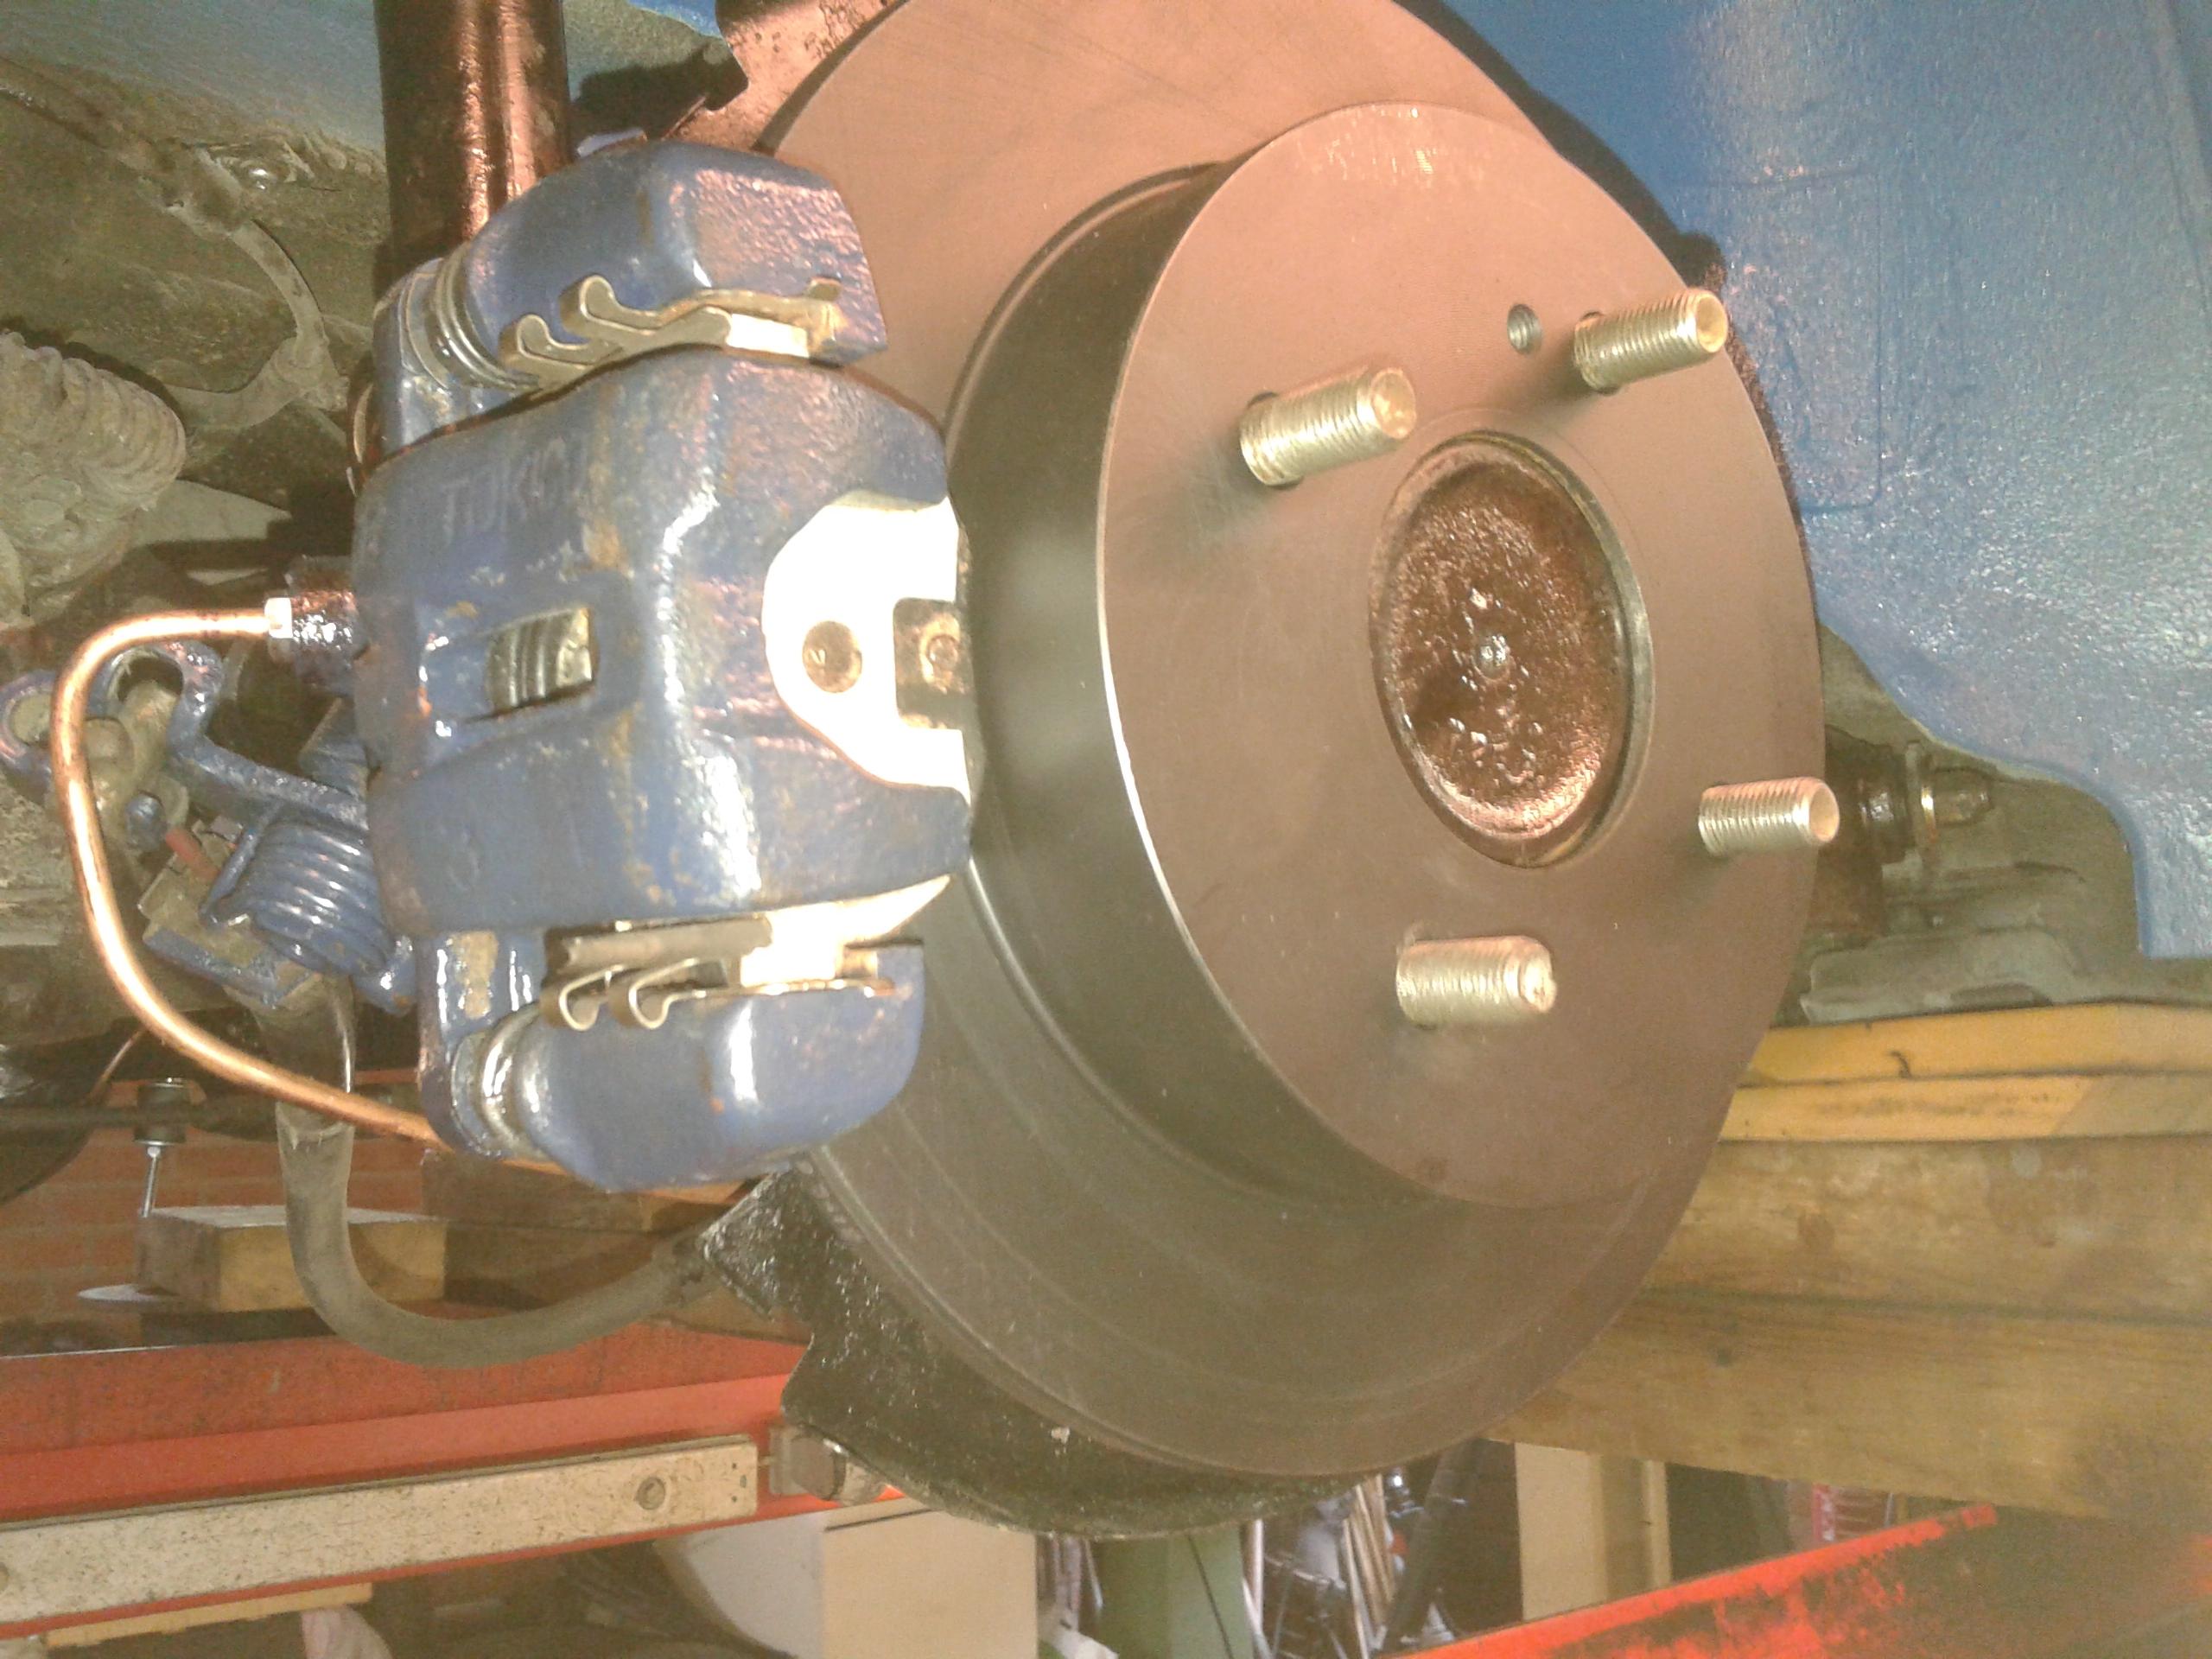
Was looking through the guide on S30 and it looks like it is possible to do it without lifting the engine. Link below in case it is helpful for S130 as well. https://www.zcar.com/forum/10-70-83-tech-discussion-forum/76816-oil-pan-removal-280z.html I will be lifting the engine over the next couple of months to do some rust clean up on the engine sub frame so I can do the engine mounts them. Thanks for the suggestion!1 point
-
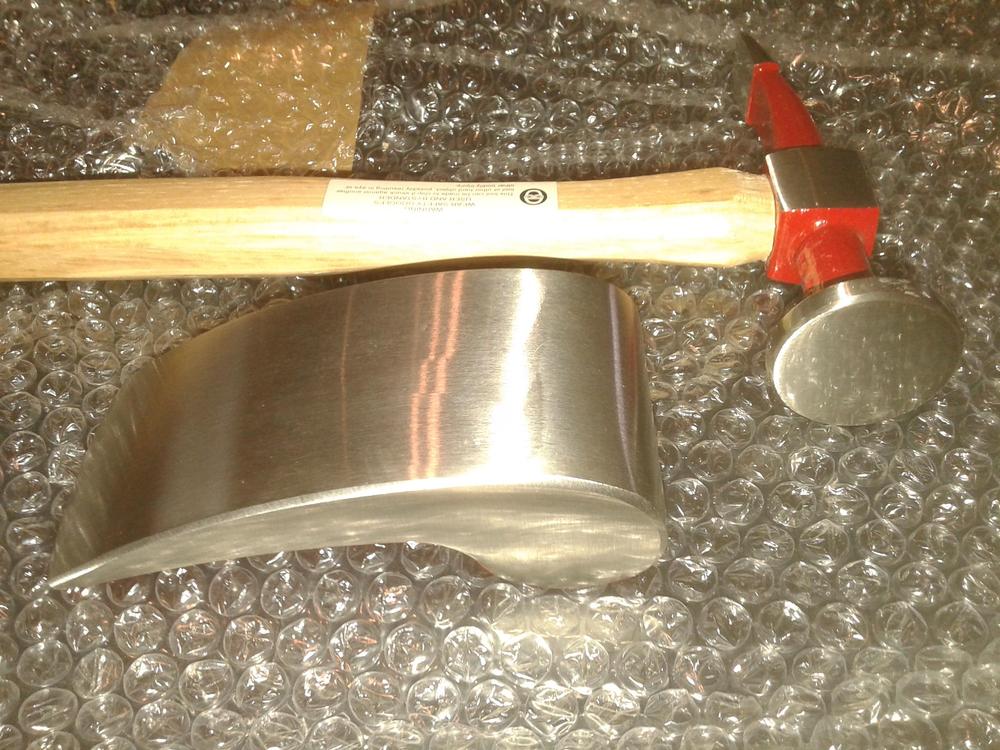
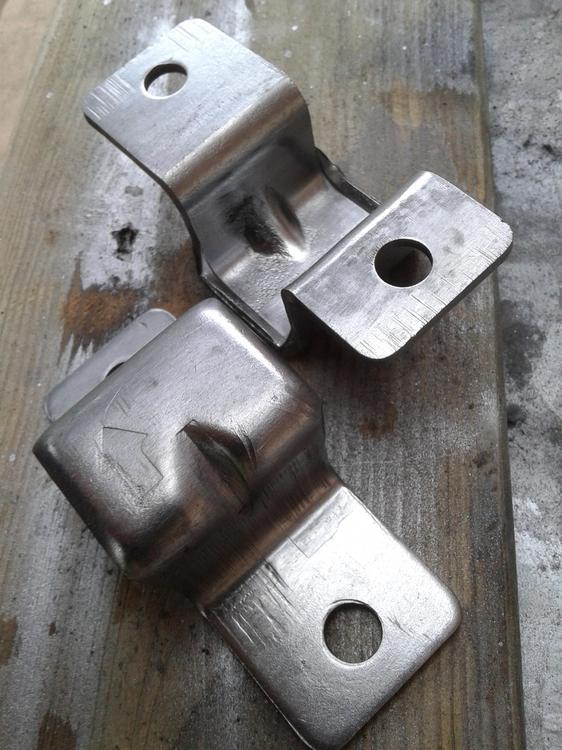
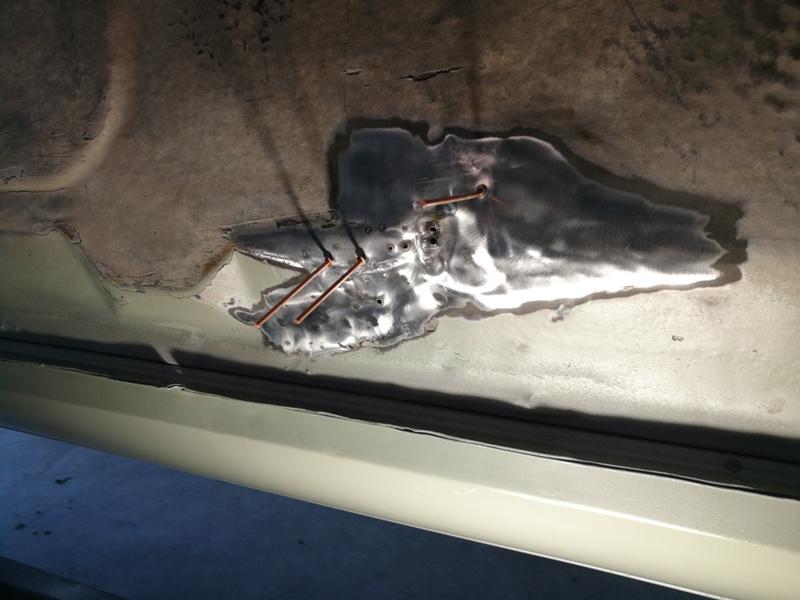
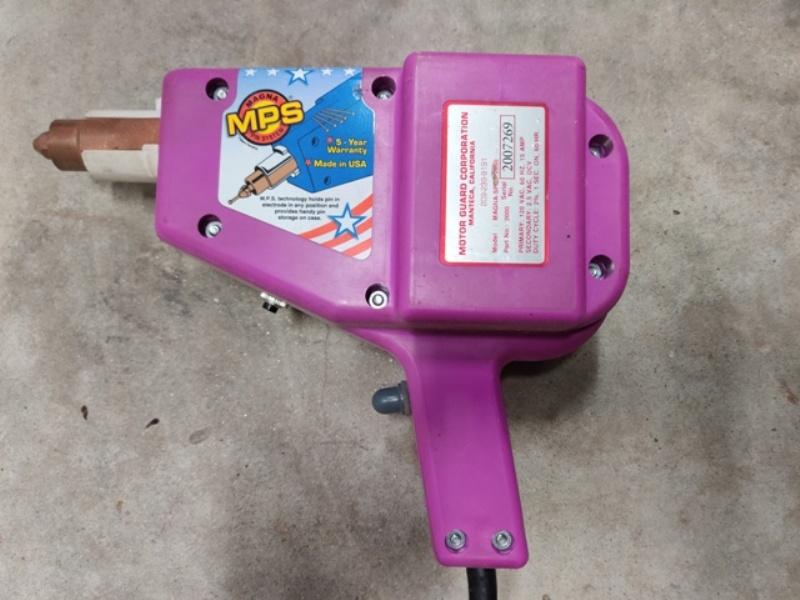
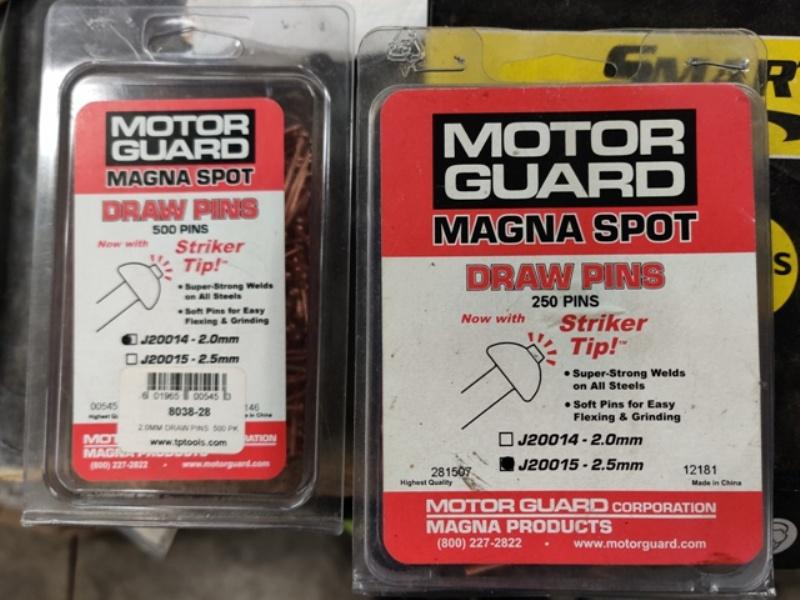
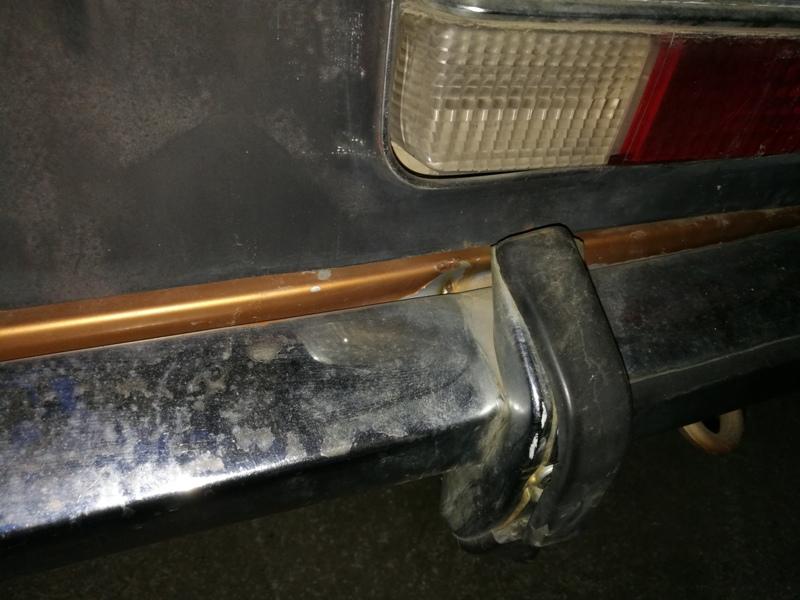
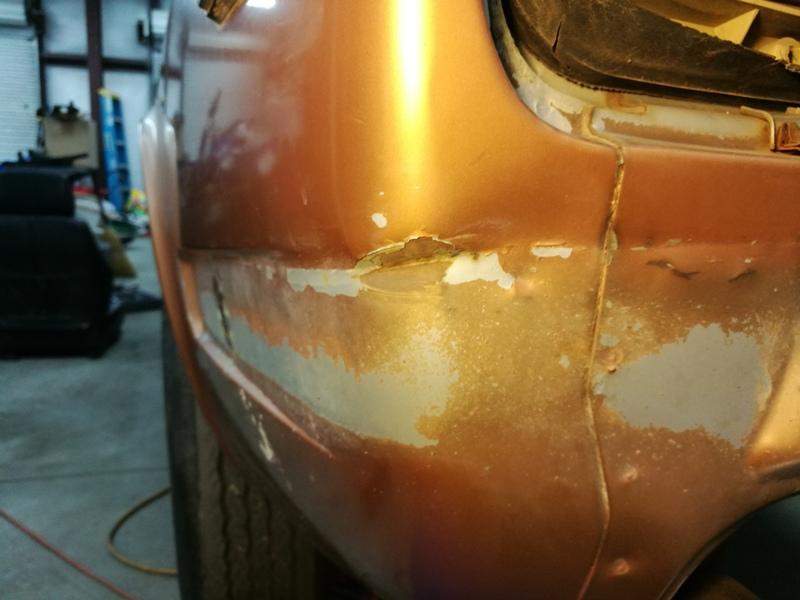
One of the new tools I bought to utilize with this restoration is a stud welding gun: I also got two sizes of pins, 2.0mm and 2.5mm: I had never used one before and was looking forward to learning how to use it well. It's important to me to improve skills and to become good at doing a thing because it becomes much more enjoyable when you can spend a 1/4 of the time (than you used to) to get results that are twice as good as your original efforts. Here was the one of the first dents that I worked on at the rear edge of the right quarter panel. Note that the metal is pushed in enough to bulge outwards on the left side into the tail trim panel opening area. As I welded pins on and used a slide hammer to pull on them, I had to work that area back flat as well. Here is after my efforts. Three of the pins broke loose causing the small holes. I think I could do it better, without making holes, now that I have more hours of experience behind me. A touch up with the welder will fix these holes up. If you look closely, you can see other areas that have been worked with the stud welder and pins: This car was hit lightly in the rear, and the bumper caused some indentations in the tail panel and quarter panels: A couple of in progress pics:


 1 point
 -
 Progress. Parts arrived and my son helped me with a bit of work. I went ahead and ordered a new temperature sensor and temperature gauge sensor. We installed both, then created a new harness and hooked up the wiring harness to the temperature sensor. I cut off the connectors that were on the temp gauge wires, put a new bullet connector on the yellow wire and hooked that up to the temp gauge sensor. We testing continuity of the temp sensor at the ECU (looks good) and tested the temperature gauge by grounding the yellow wire (looks good). After hooking everything up, the car started up and seems to be running better than it did before. That makes me happy. Seems to be using the temp sensor now and the temp gauge is working correctly. My next question: what's next? How do I judge how it's running (other than going back to emissions)? What do I work through next to make sure it's getting better? And a big thank you to everyone here. This sure can get frustrating, but your support has made a huge difference.1 point
.jpg.72679c7dabbb0715aa0c45c33063f202.jpg)

.jpg.6002e6cc9edc80bc8c6b4ef0fb55f7f2.jpg)
.jpg.cec1193e8d5d3c01057e4cc94e34bc92.jpg)
.jpg.e512da34c3045455223ab9e7dfcb97e5.jpg)
.jpg.b20125c67f4e94841c116fb03b780b0d.jpg)
.jpg.c5d61b0a5ee7223f2ace763bf0167d7c.jpg)
.jpg.7b38a10a9526d0256bf2b8180d271f66.jpg)
.jpg.6d3b2de40e48ef7256a36726fc106a23.jpg)
.jpg.4b317a19724ad69eb8c47fd5da160d7f.jpg)
.jpg.de8629e370eaf324be0db2a043138f0f.jpg)


.jpg.16d231ffecc2f2ad76de4e286aec6cdf.jpg)


.jpg.a3414bf4e7a92b88055e9cf80f7fdb48.jpg)


.jpg.4d9512b178ed0f33ddbdf52ed83cc7c6.jpg)
.jpg.da1d78d6c7f9b51df98dd35c8140f029.jpg)
.jpg.81cc33de9711d59db075c82500dba3f2.jpg)

.jpg.a708140234bd1e9fe7f5bfda49592b74.jpg)
.jpg.7f3752e8fc24e3a633528154ea613ab3.jpg)