Leaderboard
-


wheee!
Free Member3Points4,607Posts -

Captain Obvious
Free Member3Points9,849Posts -

inline6
 Subscriber
 3Points1,237Posts
 -

motorman7
Subscriber2Points2,208Posts
Popular Content
Showing content with the highest reputation on 11/22/2019 in Posts
-
 2 pointsUpdate. For reference in case someone runs into a similar struggle. Got the car shifting correctly. I was running a cheap aftermarket 240z "B" collar and it wasn't shifting right unless you really mashed the throw out bearing against the clutch fingers. That ruled out the pilot bearing, clutch hydraulics, and transmission. I also clamped the slave cylinder then pressed the clutch petal to test that it stayed firm. I ordered a genuine nissan 240z clutch collar, a new clutch disc, and pressure plate. I put them in last night and the clutch completely disengaged. It is shifting great. I think it was the pressure plate. I used an air rachet and may have damaged it or it was defective out of the box. A few tips that I learned: The trans goes in easier if you cut the heads off a couple bolts that are the same size as the lower bolts. Thread them into the motor to make guide pins and remove them once the trans is in. The trans goes in super easy and there is less chance of hanging the trans from the clutch. Don't use bolts to pull the trans into the motor. It will slide in right if everything is aligned right. Put the trans in gear and move the output shaft a bit if the splines don't line up right away. When using the clutch alignment tool, push up on it slightly when tightening the first two bolts on the pressure plate. The clutch disc will drop slightly if you don't put a little upwards pressure on the alignment tool. Leave alignment tool in when tightening pressure plate. Check a few times as you tighten to be sure the alignment tool still slides in smooth. Don't use air tools on the clutch plate. Tighten the bolts in a star pattern a little at a time. Before installing, slide the new clutch plate over the transmission input shaft splines to make sure it is smooth and doesn't get hung up. Don''t try to reuse a early style "A" collar with an exedy clutch kit for a 1970-74 240z. The collar that goes with a "B" style trans is 2mm taller from the throw out bearing to where the fork attaches. The shift fork hit the housing using my original "A" style collar. You can also add a washer behind the fork pivot ball to shim it out. The slave cylinder adjustment rod needs to be shortened as the clutch wears. The fingers on the pressure plate will move towards the transmission as the clutch disc gets thinner.2 points
 -
2 points
-
Haha!! I'm not quite to that level. How about a fanny pack with a handful of Canadian Tire gift cards and some ibuprofen topping out at 88 km/h?2 points
-
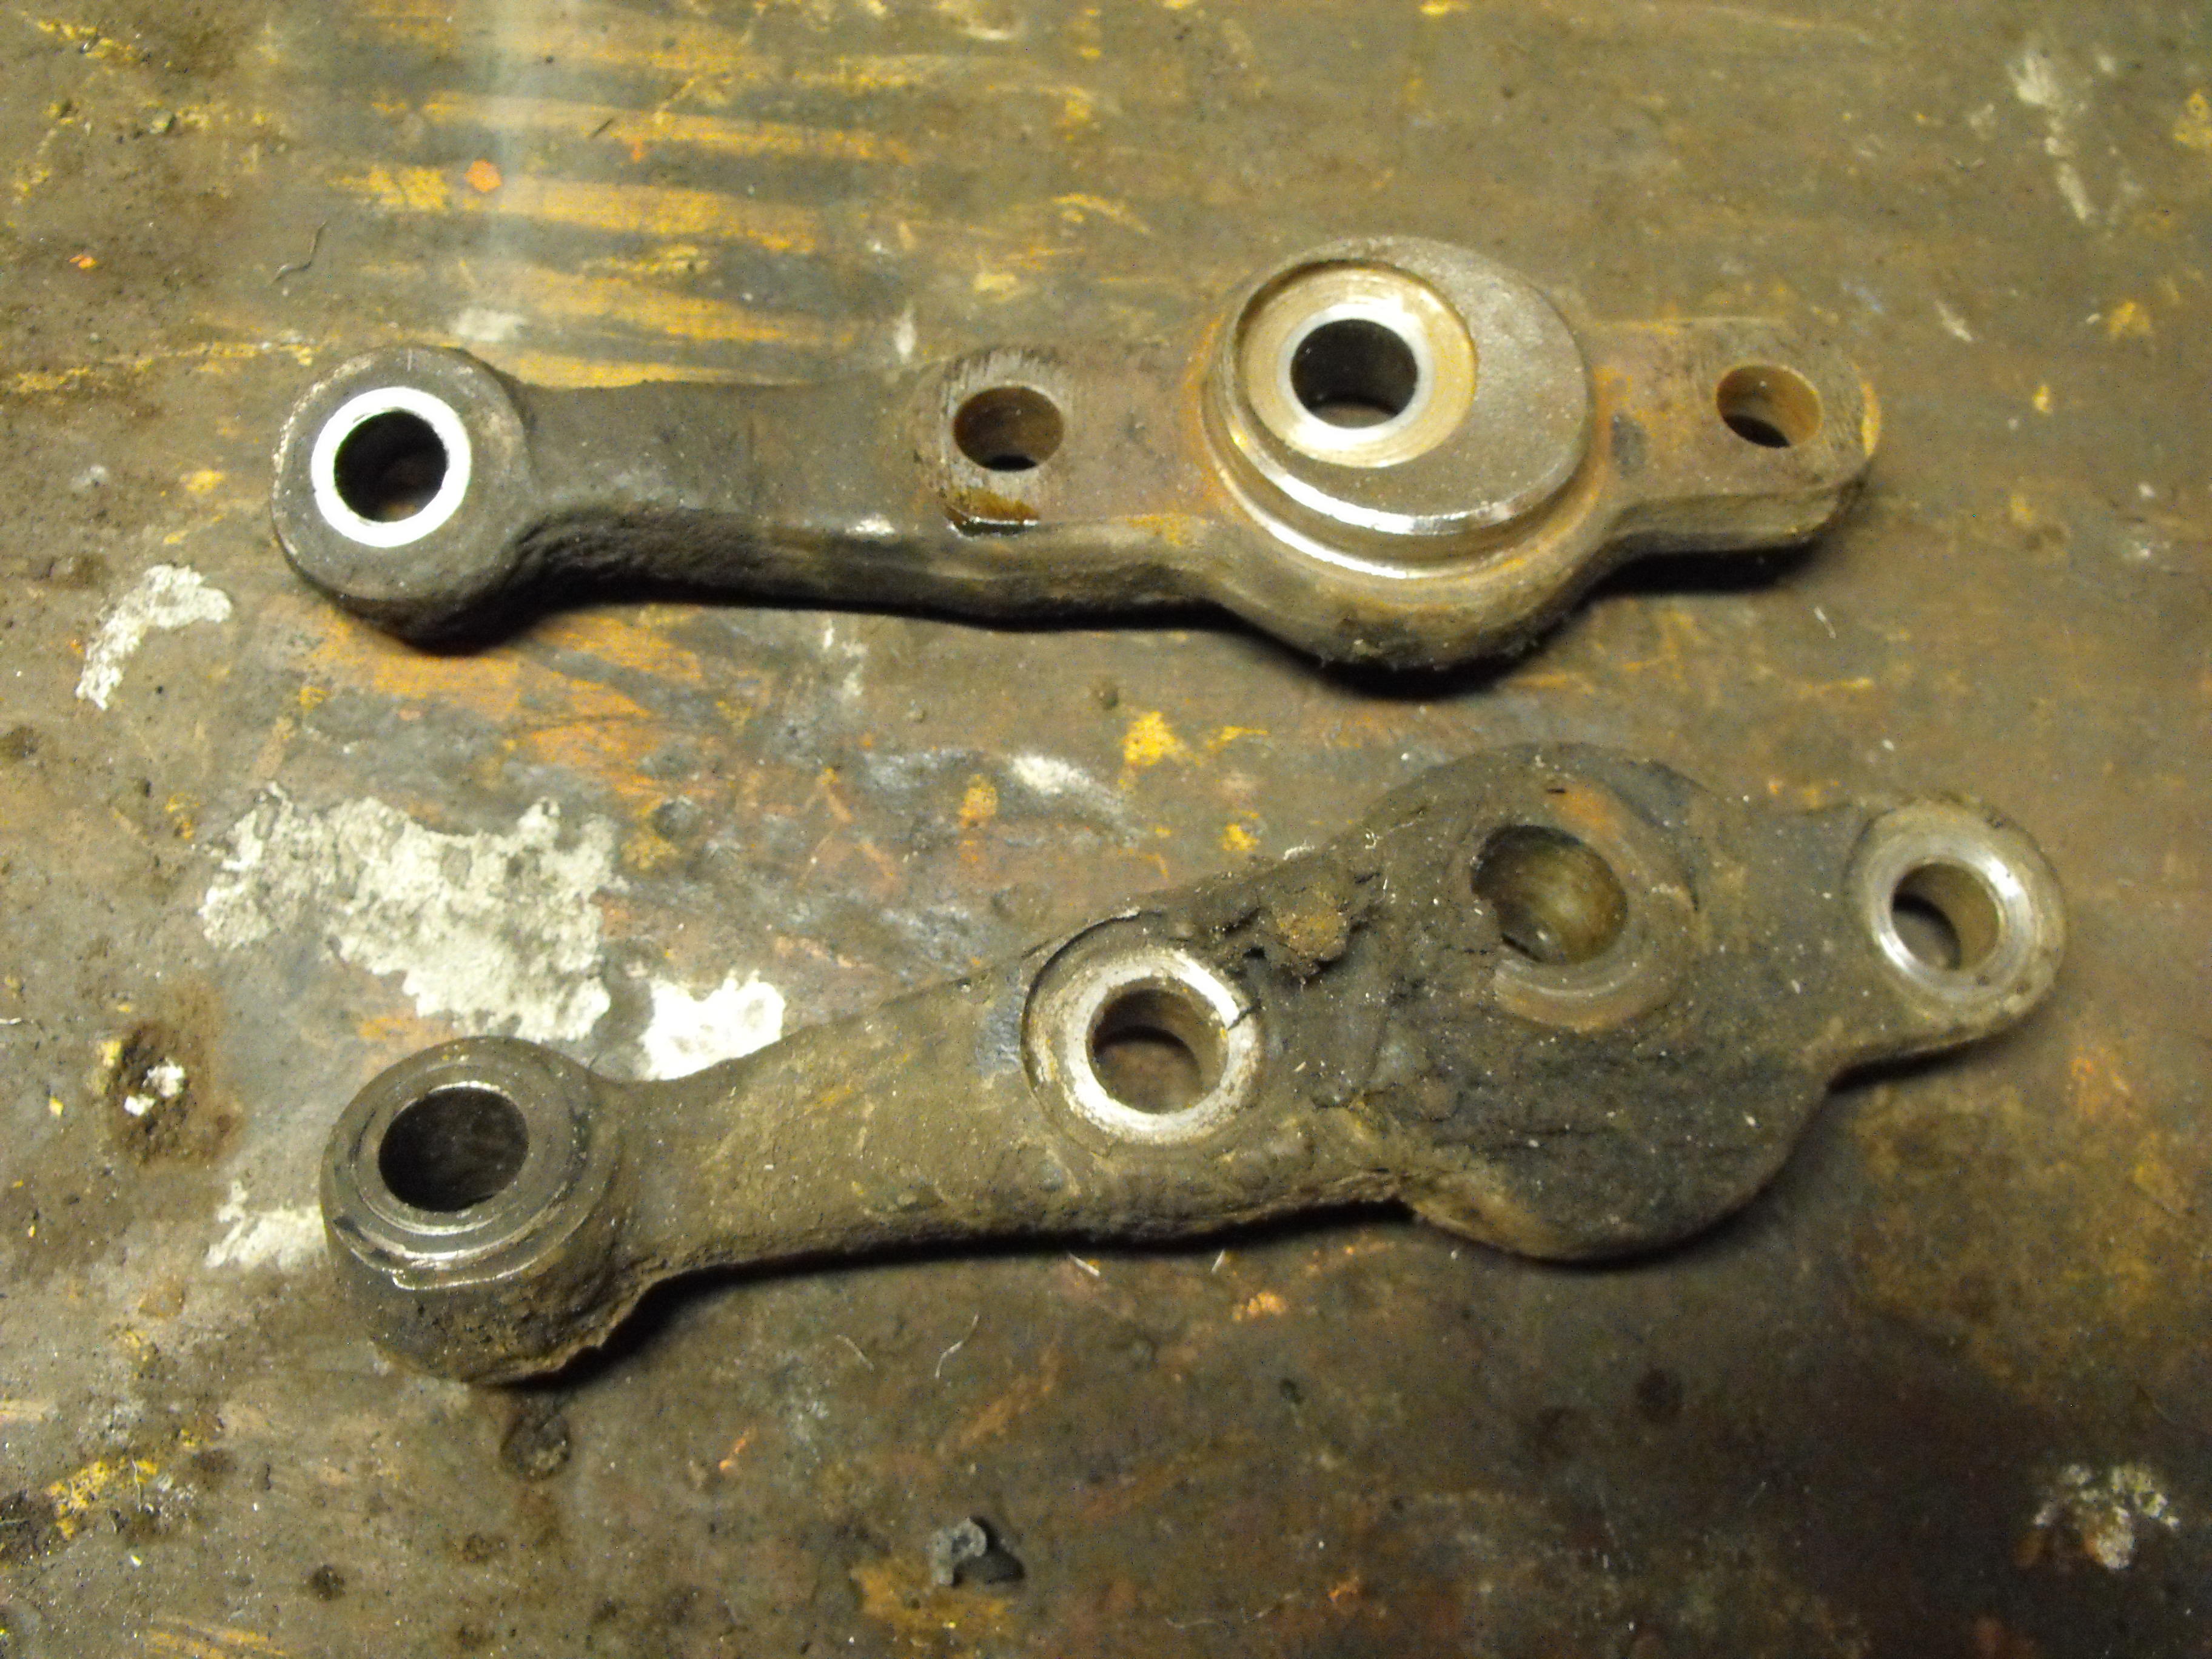
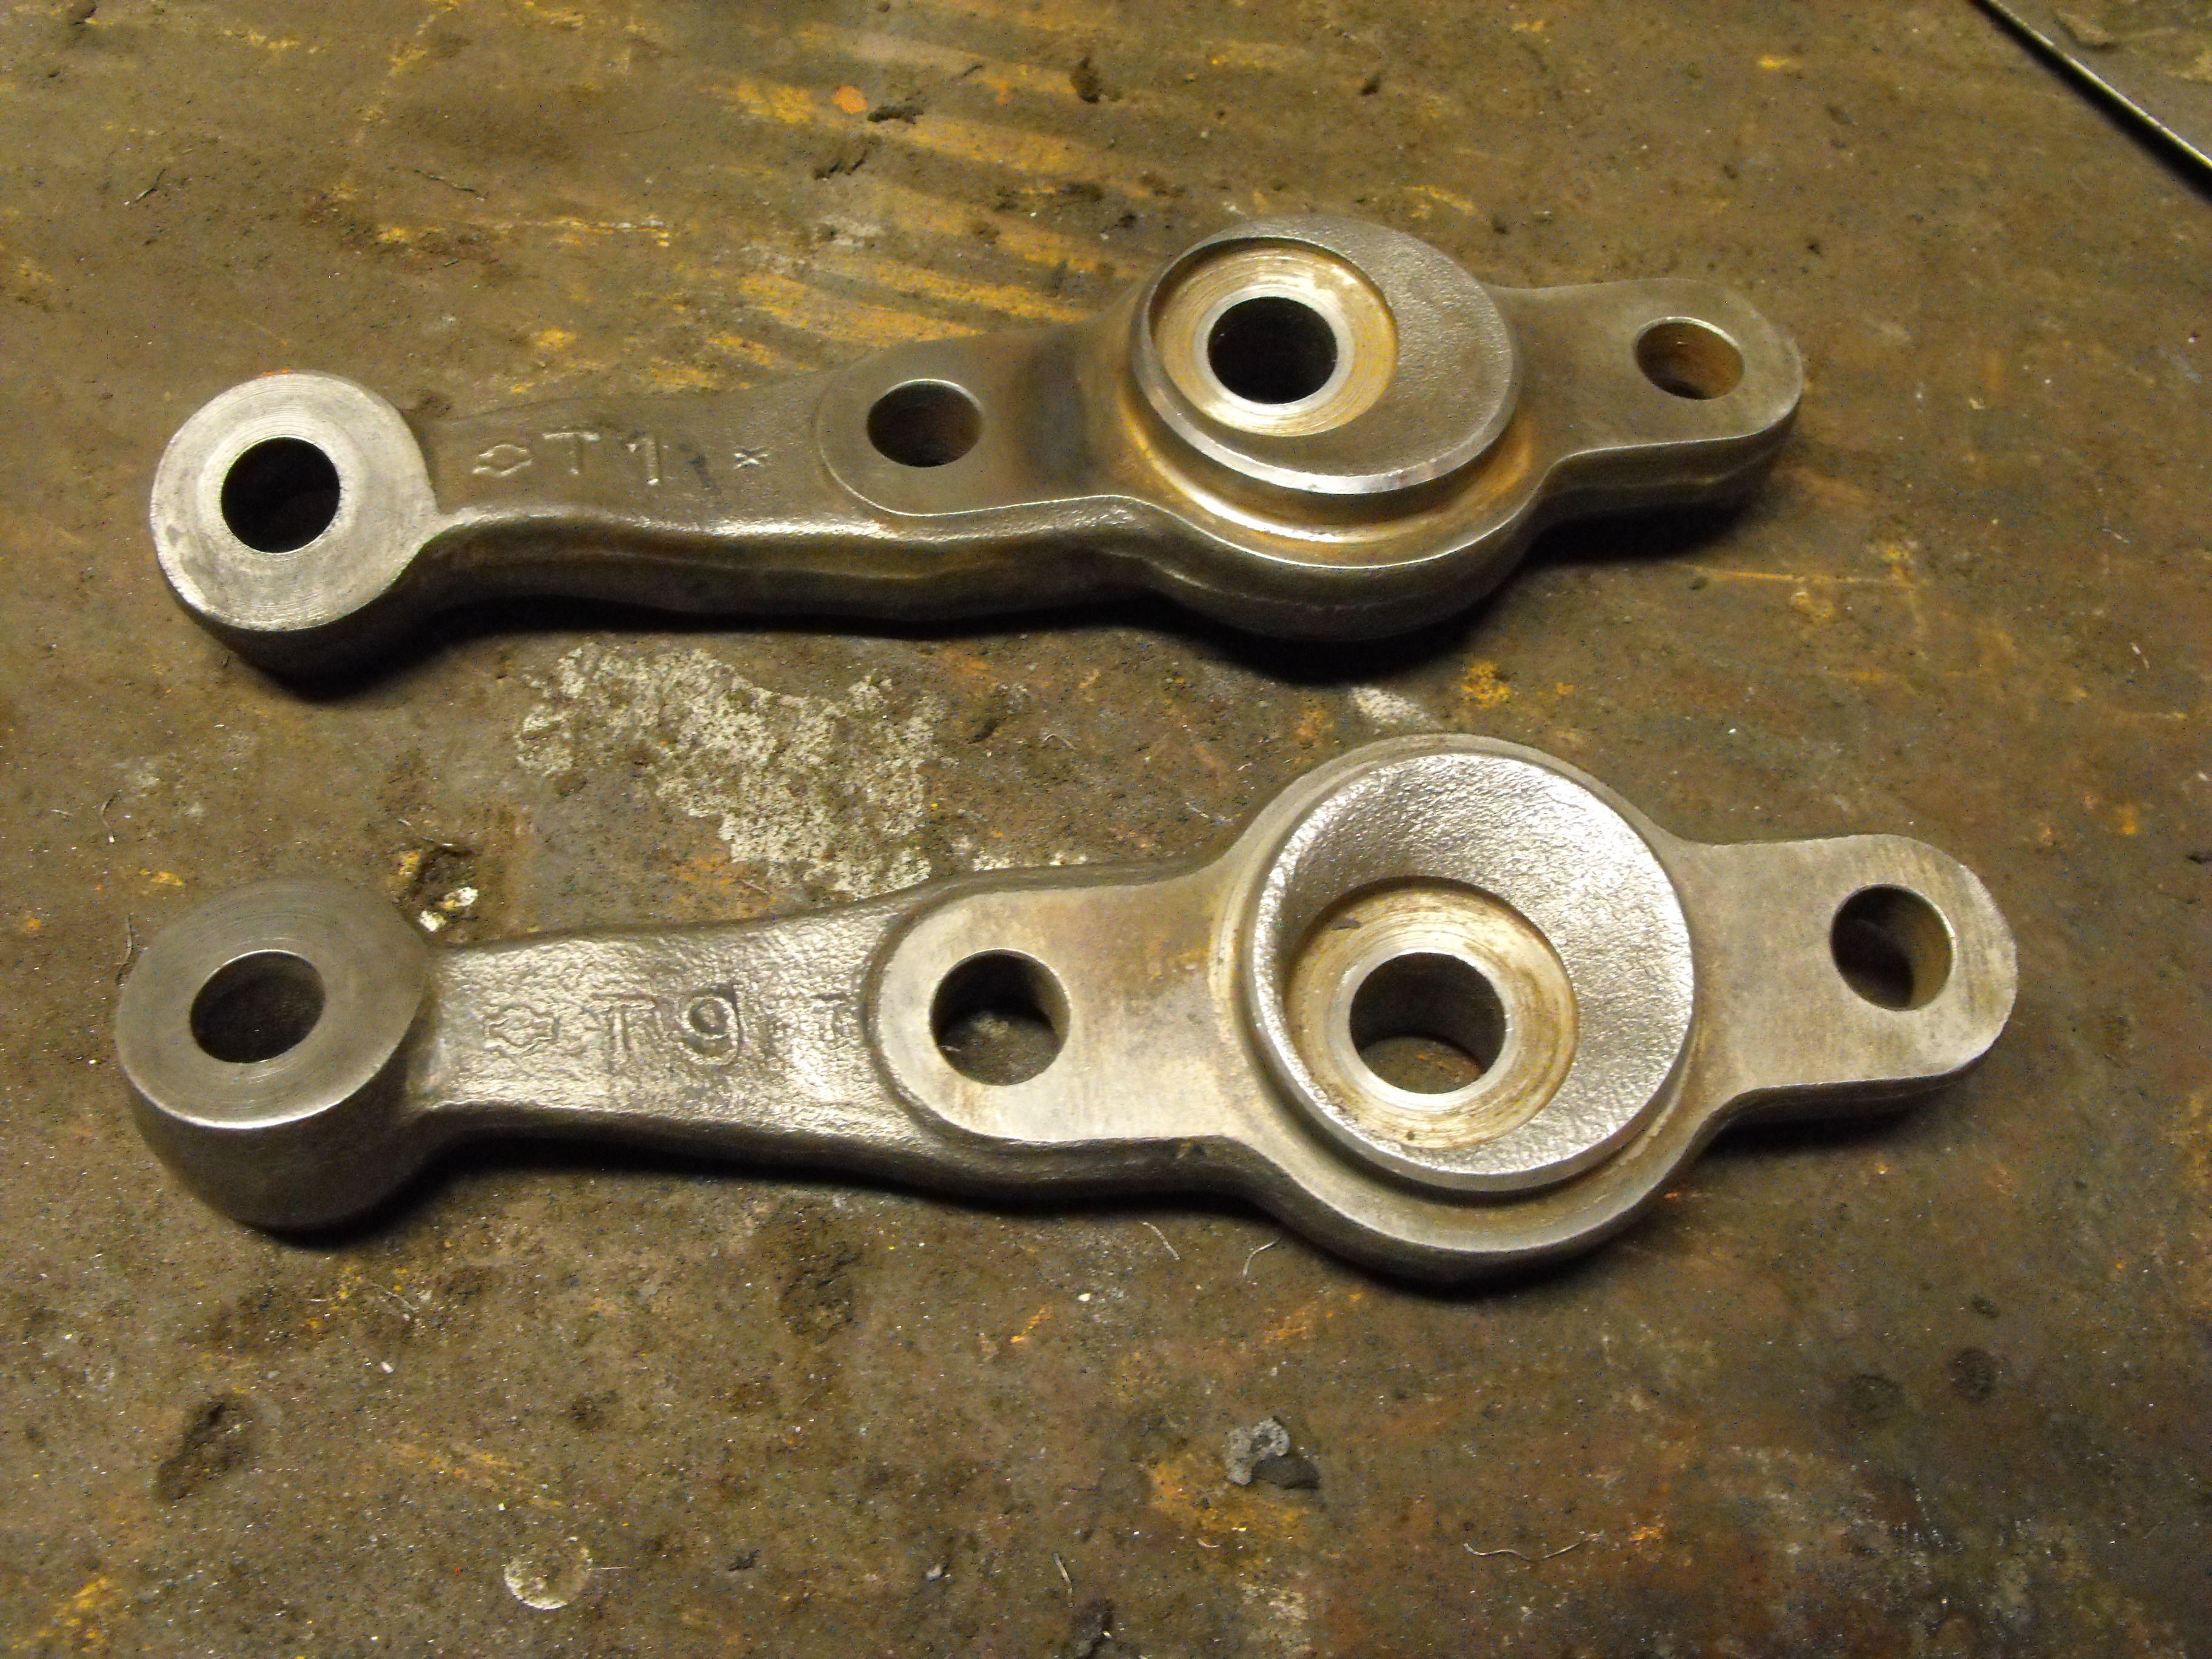
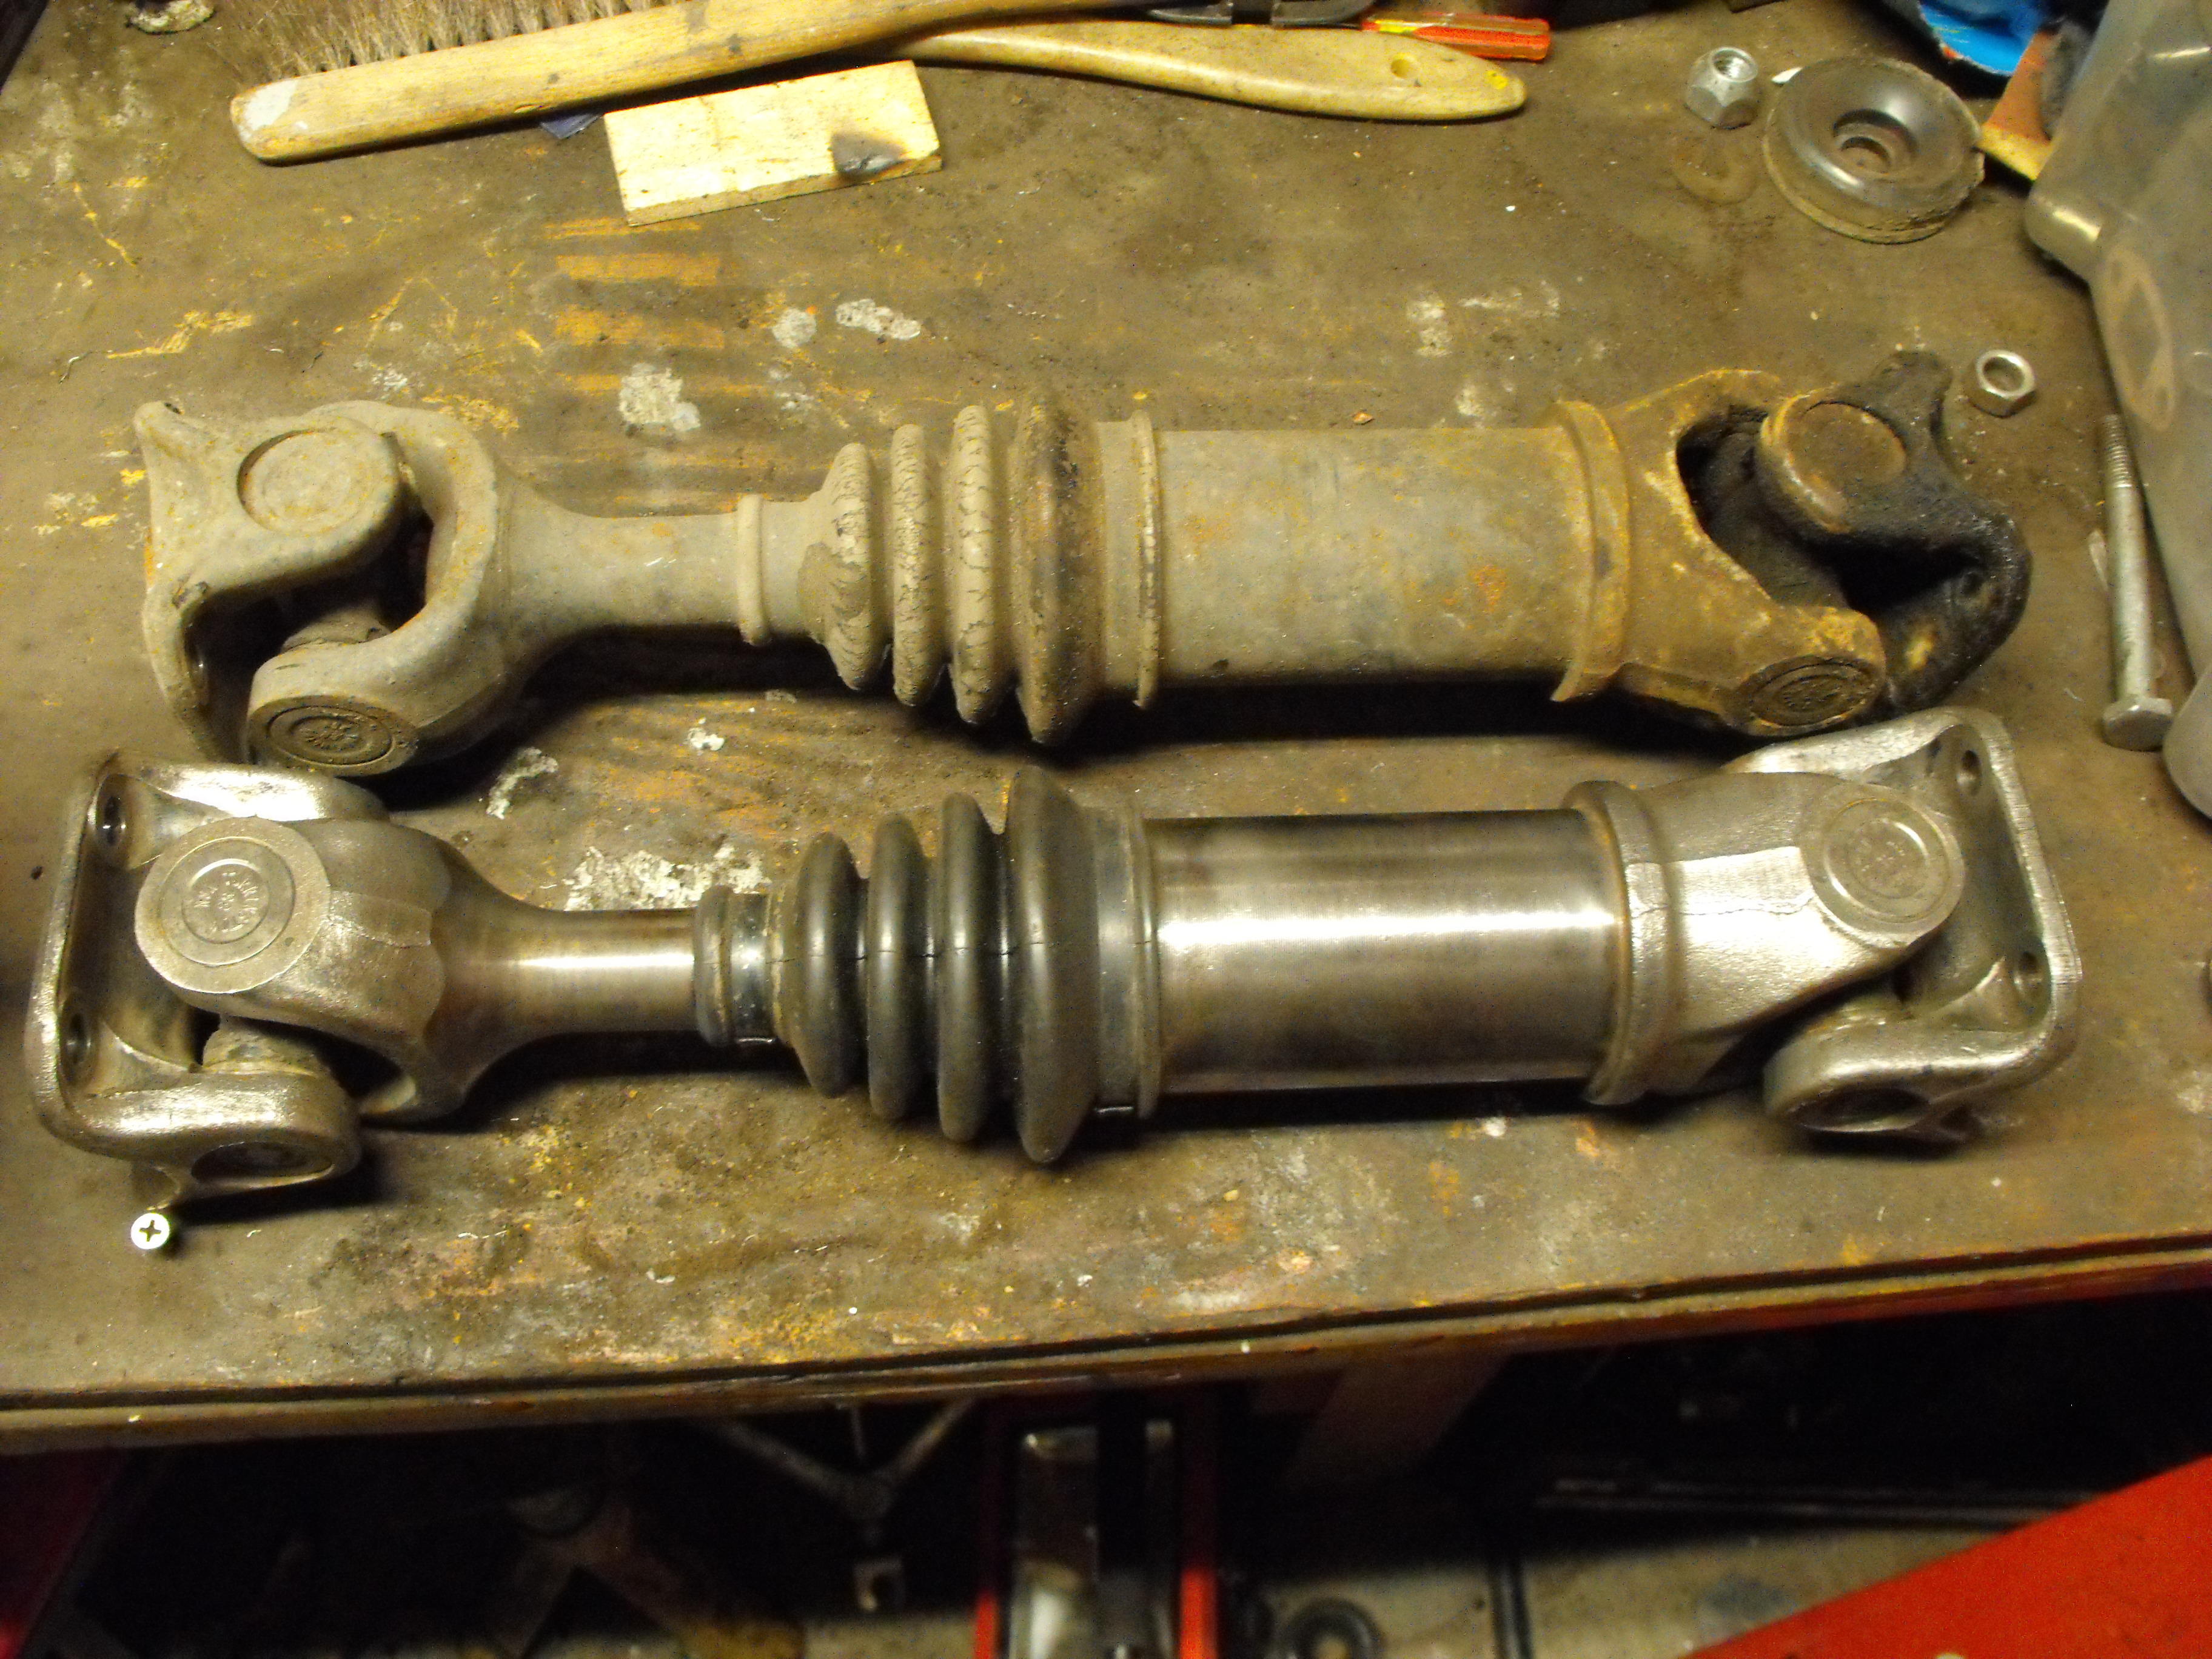
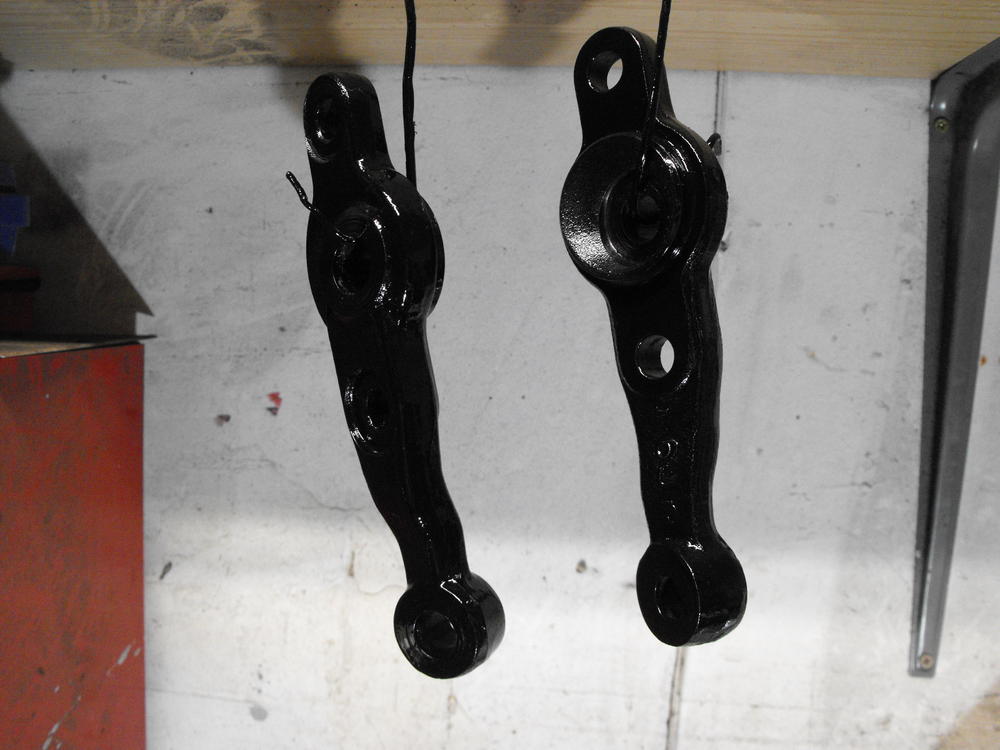
2 pointsStill cleaning up parts here while I am waiting for the zinc plated parts to return from the plating shop. Got the engine re-build kit on order along with new brakes pads, shoes and their respective rebuild kits. So, should have a lot of stuff coming in over the next week.


 2 points
 -
Good to know. It seems copper slag and coal slag are pretty aggressive compared to play sand. But much safer, I am sure. Once the outside of the car was stripped to that point, I mounted it on a rotisserie:2 points
-
 1 point
 -
 here you go, I got some last week and they fit perfectly. https://zcardepot.com/products/headlight-adjuster-screw-240z-260z-280z?_pos=1&_sid=e6342a0d3&_ss=r1 point
 -
 Finally, a lifsign from the bodyshop. Nothing big. but the little update came along a promise that he will contune work on the car again soon. which makes me quite a bit happy. Today he got the brackets for the rear bumper sandblasted, so i assume the plan is to get the rear valance welded back on the car soon:1 point
 -
Excellent! Glad you got that one issue knocked off the list. Now on to the next one!1 point
-
 1 point
 -
You remind me now of thinking to modify some 240z bumpers and put those on a 280zx.. chrome bumpers, i like them but.. no.. the car is completely Original, i should not mess with that.. There is a guy working on my car at the painter… He must be in his 60's and he told me yesterday he is doing this kind of work for over 51 years!!! So, if he can't make it perfectly straight, no-one can!1 point
-
 1 pointMaybe when you get that spreadsheet done you can post it in the downloads section, that's a great layout.1 point
 -
1 pointI've been documenting fasteners in a spreadsheet because I will be sending them off to get them plated and figured they will all get mixed together. I want the right fastener in the right location. The ways discussed so far would require looking up all the fastener part numbers, yes? That may be totally sufficient but I could share what I have if desired. Here is a sample: front sway bar bracket 4 yellow zinc hex head bolts (7 on head) M8 X 1.25 - 20 mm under head - fully threaded 4 yellow zinc M8 split lock washers left rear bumper bracket 2 yellow zinc nuts M10 X 1.25 2 yellow zinc split lock washers - M10 2 yellow zinc flat washers - 22mm od - 10.5mm id right rear bumper bracket 2 yellow zinc nuts M10 X 1.25 2 yellow zinc split lock washers 2 yellow zinc flat washers - 22mm od - 10.5mm id Rear bumper 2 yellow zinc hex head bolts (4 on recess in head) M10 X 1.25 - 25mm under head - fully threaded 2 yellow zinc nuts M10 X 1.25 2 yellow zinc split lock washers - M10 2 yellow zinc flat washers - 22mm od - 10.5mm id 4 special chrome bolts - M6 X 1.0 4 yellow zinc split lock washers - M6 4 yellow zinc flat washers M6 - 14mm od - 6mm id 4 yellow zinc hex nuts M6 X 1.0 8 yellow zinc nuts with locking serrations - M6 X 1.0 Rear hatch latch assy 2 clear zinc phillips pan head machine screws with captive split lock washer - M6 X 1.0 - 15 mm under head fully threaded 2 yellow zinc flat washers M6 - 14mm od - 6mm id1 point
-
 They used to be available from Courtesy. Only one thickness though. You can stack the "ones" and get whatever thickness you need. http://www.carpartsmanual.com/datsun/Z-1969-1978/power-train/transmission-gears/5-speed/12 https://www.nissanpartsdeal.com/parts/nissan-shim-brg-0-1~32218-e9000.html1 point
 -
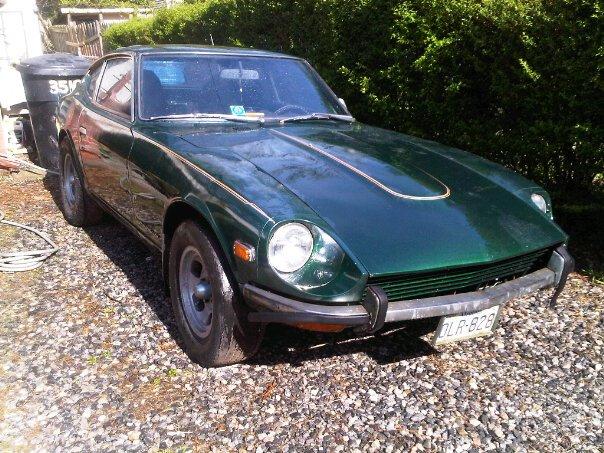
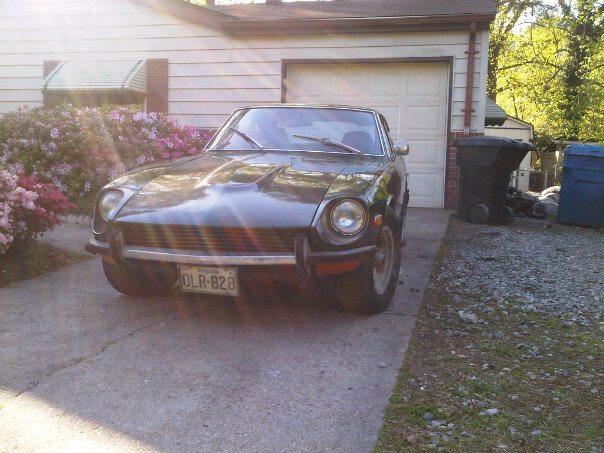
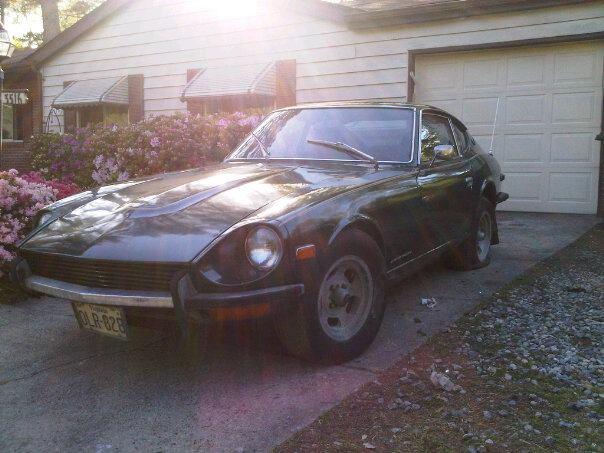
 1 pointThis is how the car was when the previous owner purchased it in 2013 I believe. I was told it sat under a carport from 1991 to 2013, in fact the proof of insurance slip I found in the glove compartment confirmed it was last insured in 1991.
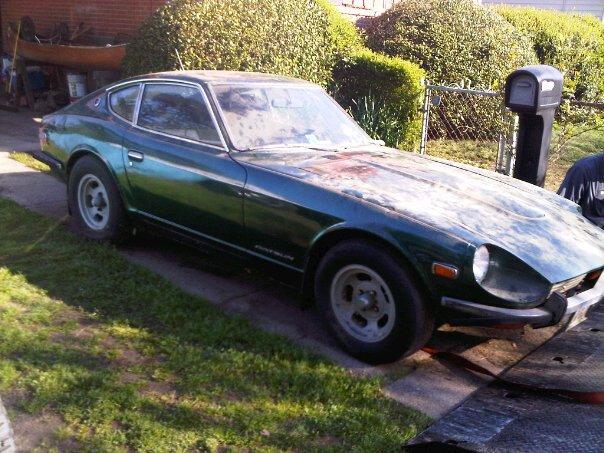
 1 point
 -
1 point
-
 before making in conclusions it sound like you are almost done with the normal stuff. Just get that timing set, and confirm the temp sender resistance readings (don't think I saw that in your response). Make sure thermostat is working and you are getting up to correct operating temps. Once all that is covered buy some new plugs (ngk) install and take for a short test ride, like 10 miles of normal driving. pull the plugs and post up the pics. They are the best indicator short of a gas analyzer of the fuel mix.1 point