Leaderboard


Popular Content
Showing content with the highest reputation on 11/29/2019 in all areas
-
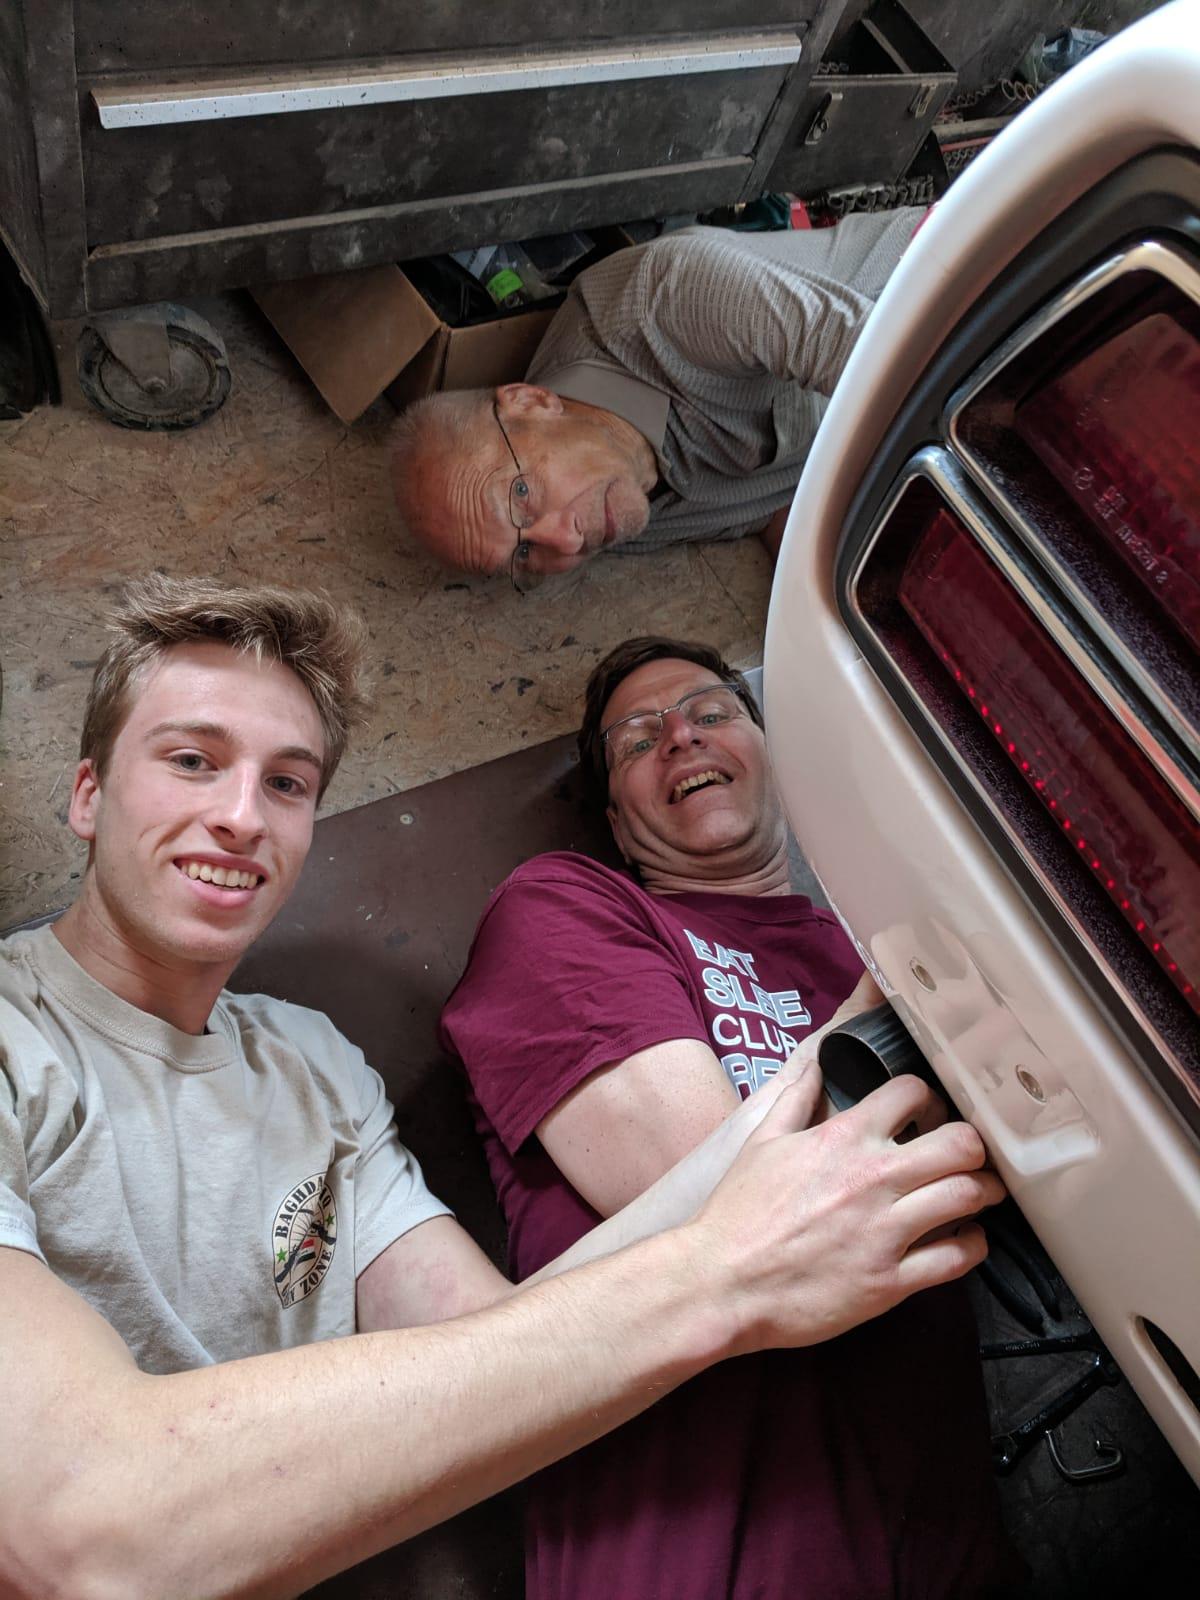
5 pointsActually had three generations involved with it as my dad came to visit for a few weeks.

 5 points
 -
3 pointsNobody cares each length. You buy 10 foot for less then 10$ take one hose out cut the length put it in and done.3 points
-
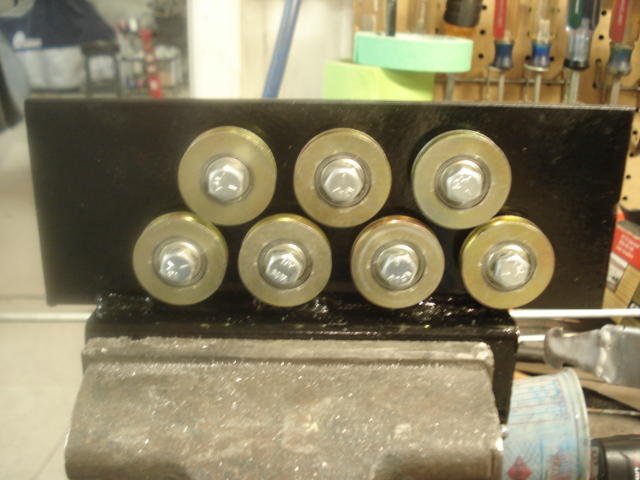
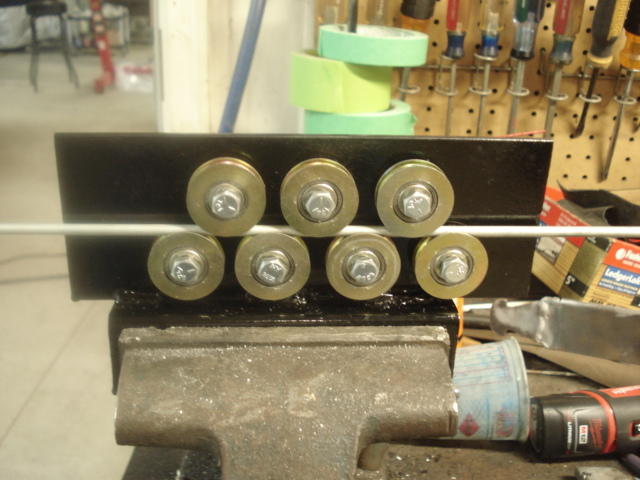
2 pointsI'm in the process of tearing down my 73Z project car, and decided to make all new brake and fuel lines now. To save some money and not have to piece several pieces together, I decided to buy 25" rolls of tubing. I wanted to start with straight tube so I looked in to buying a line straightening tool. Well they wanted $100 for one and that was more than I was willing to pay, so I made one. This will work on 3/16, 1/4 or 5/16. It cost me $15 to make. Attached is a picture of it. If there are others interested in making one of these, let me know. If there's enough interest, I'll write up detailed instructions on how to build one. Paul (zbeemer)
 2 points
 -
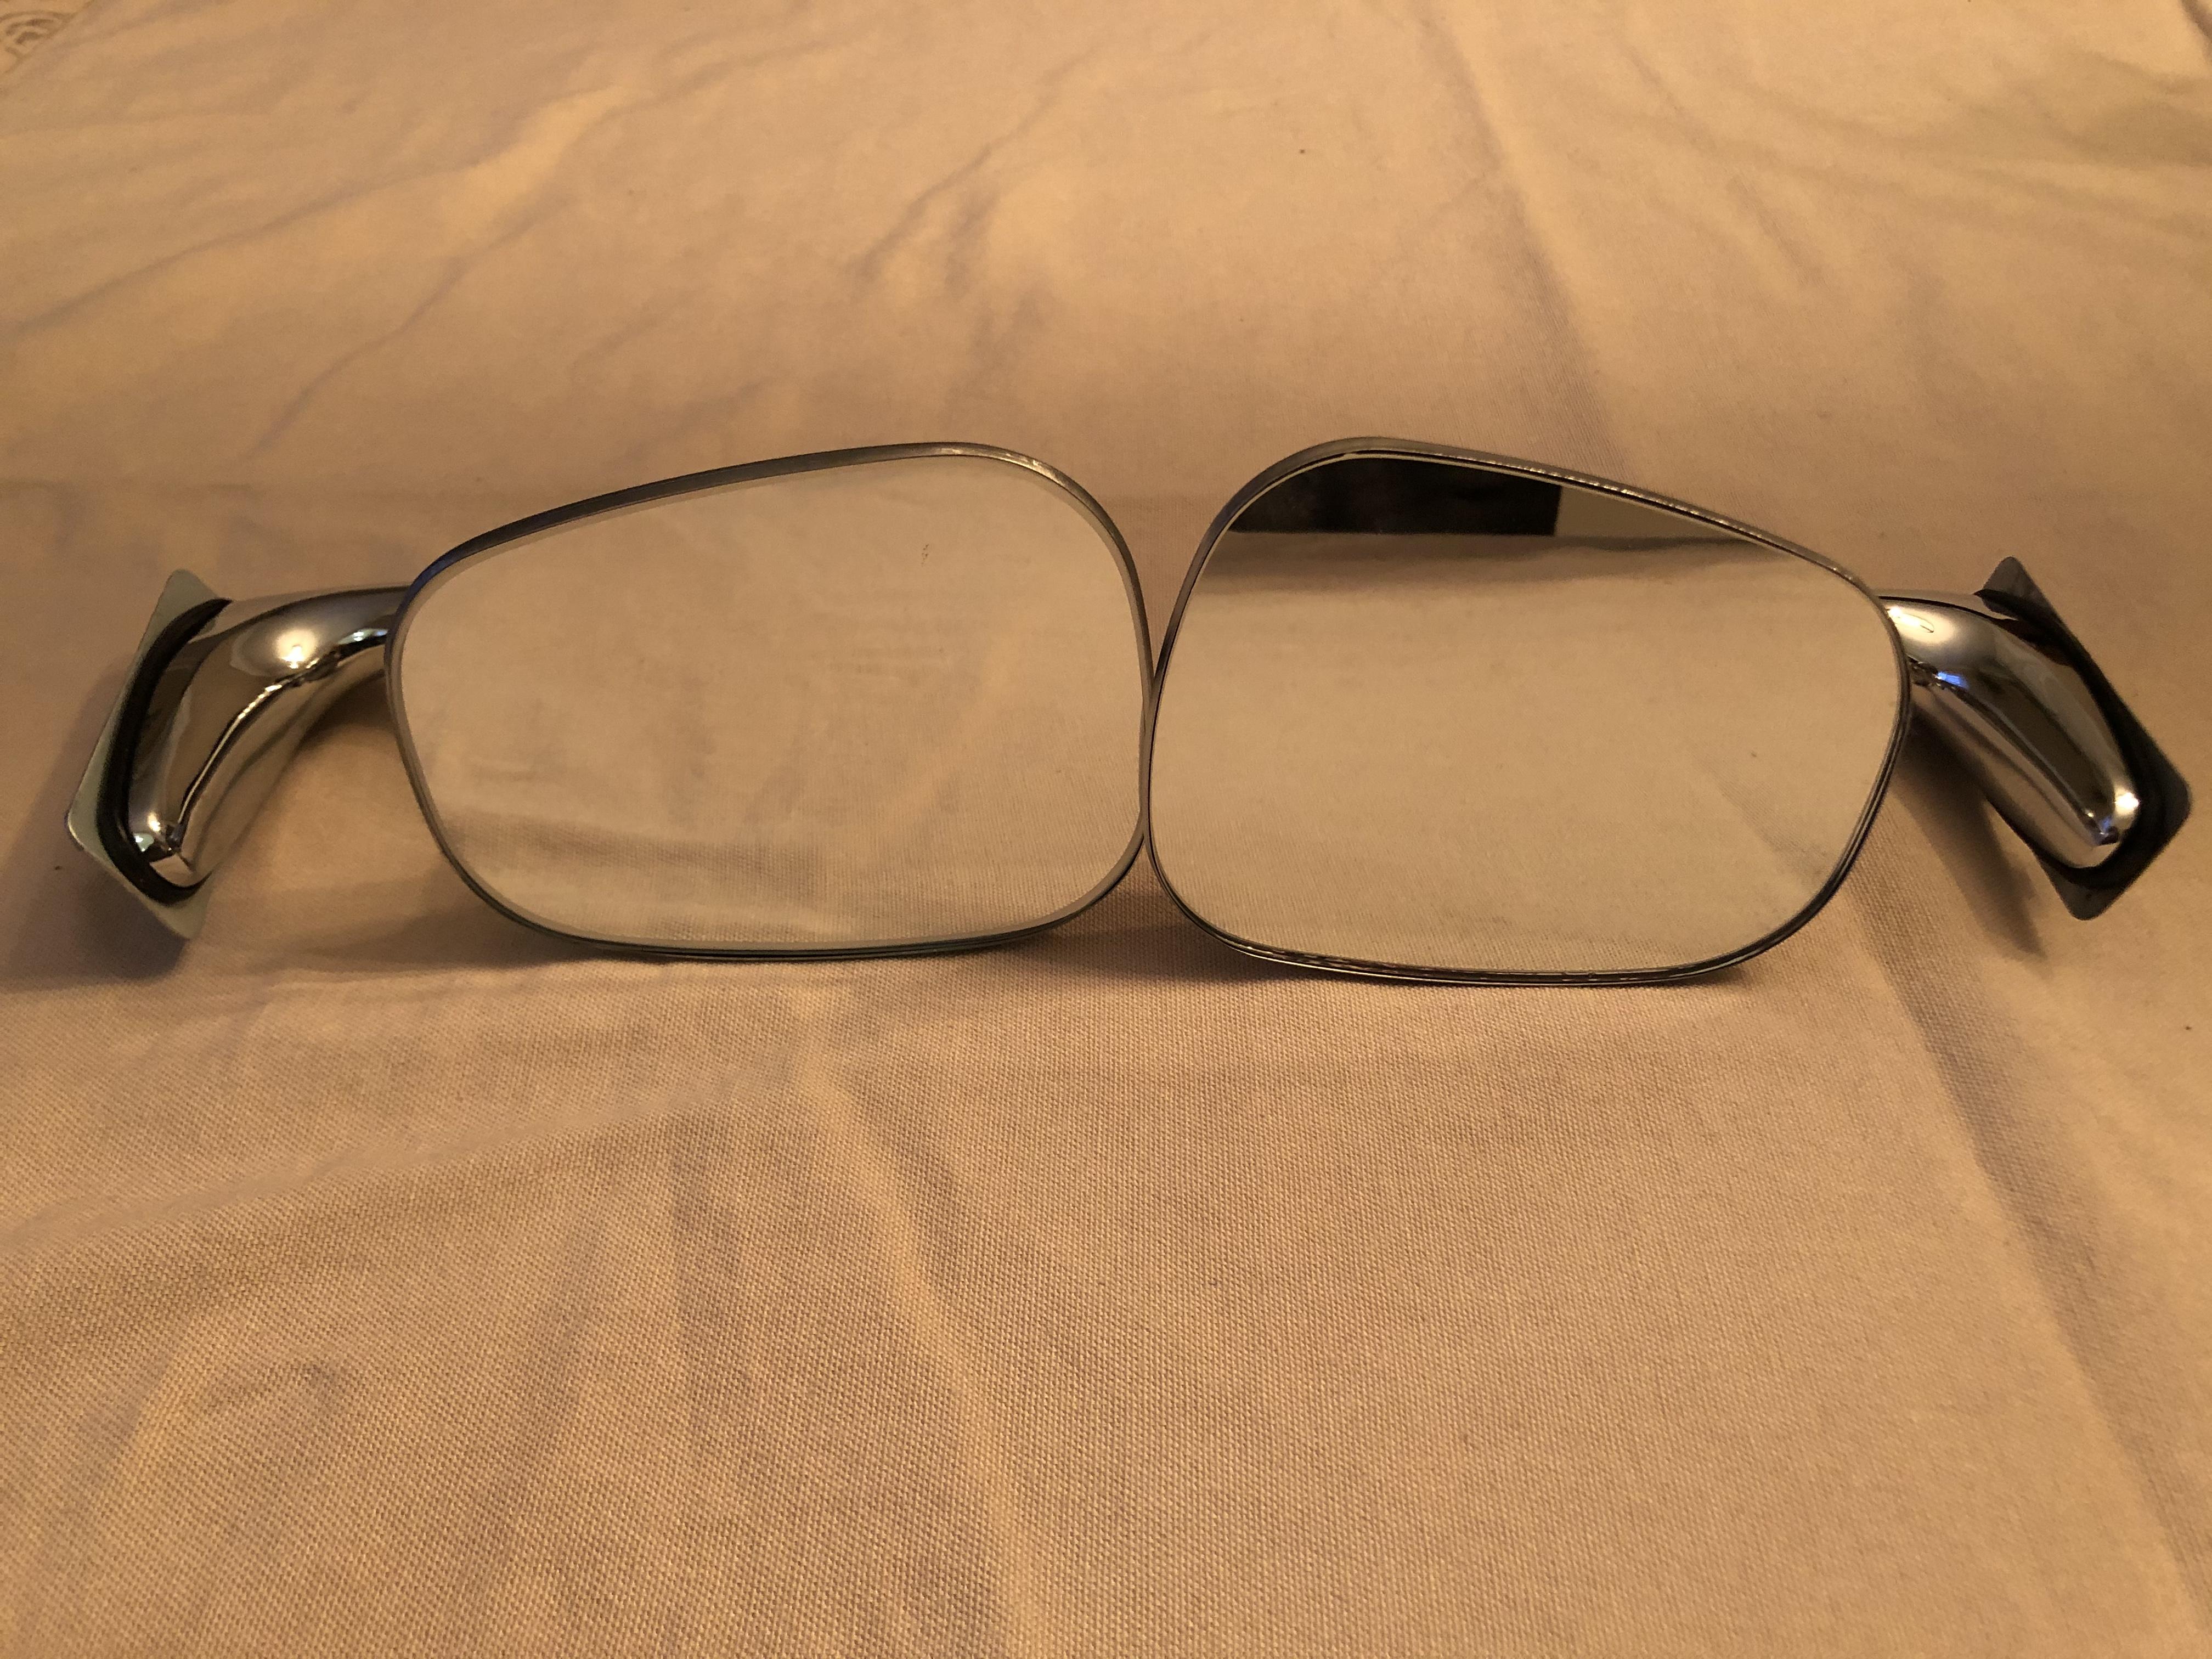
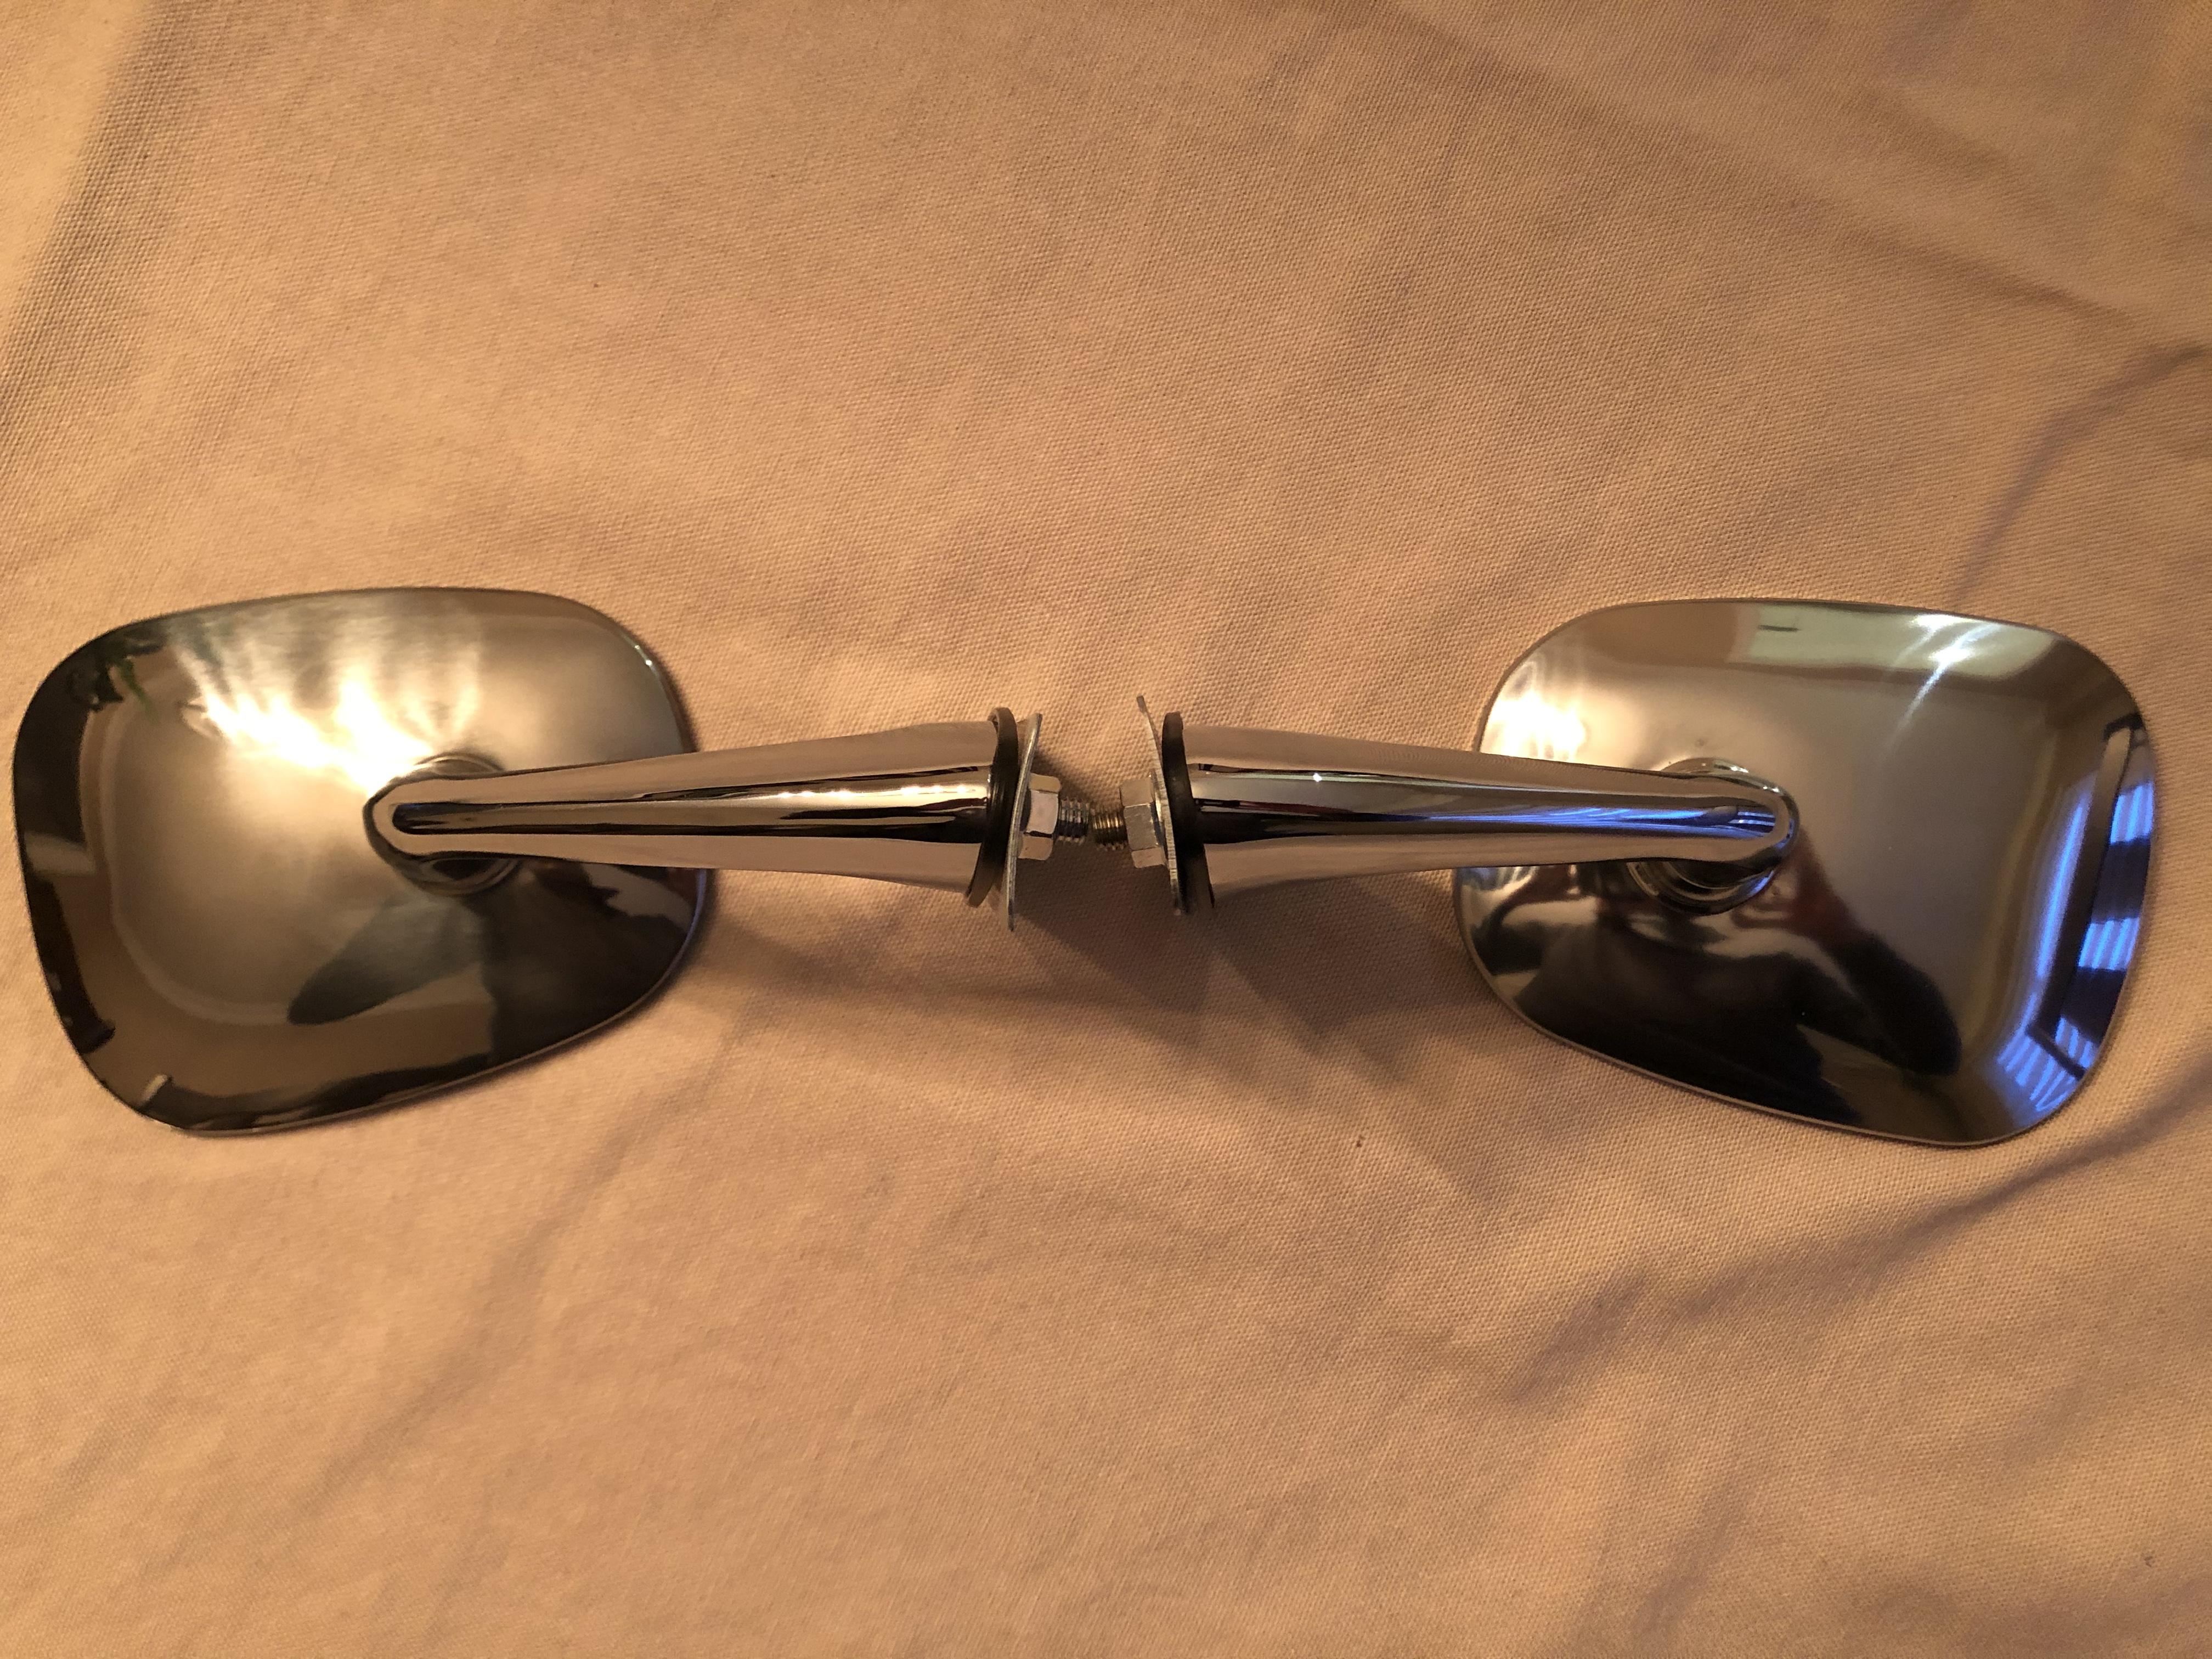
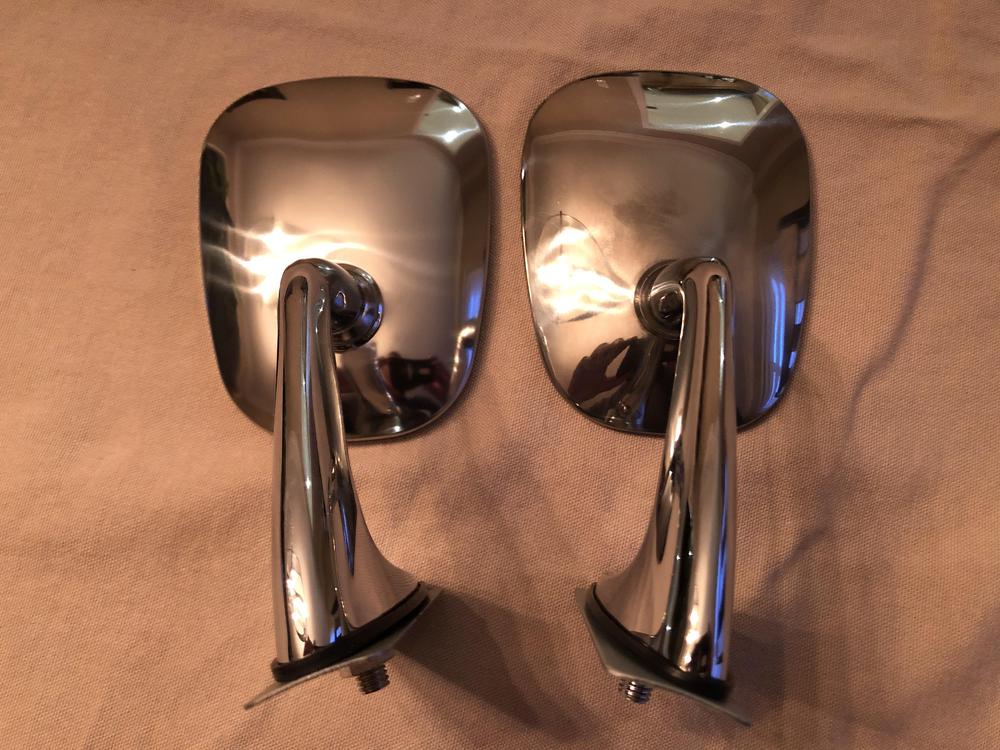
2 pointsPicked up a set of 240z door mirrors for my s30. The driver side mirror is OEM from a local dealer, and the passenger RH is a replica from Rising Sun. I’m impressed with the replica, it looks and feels like the OEM. Thought I share some pics.


 2 points
 -
2 points
-
2 points
-
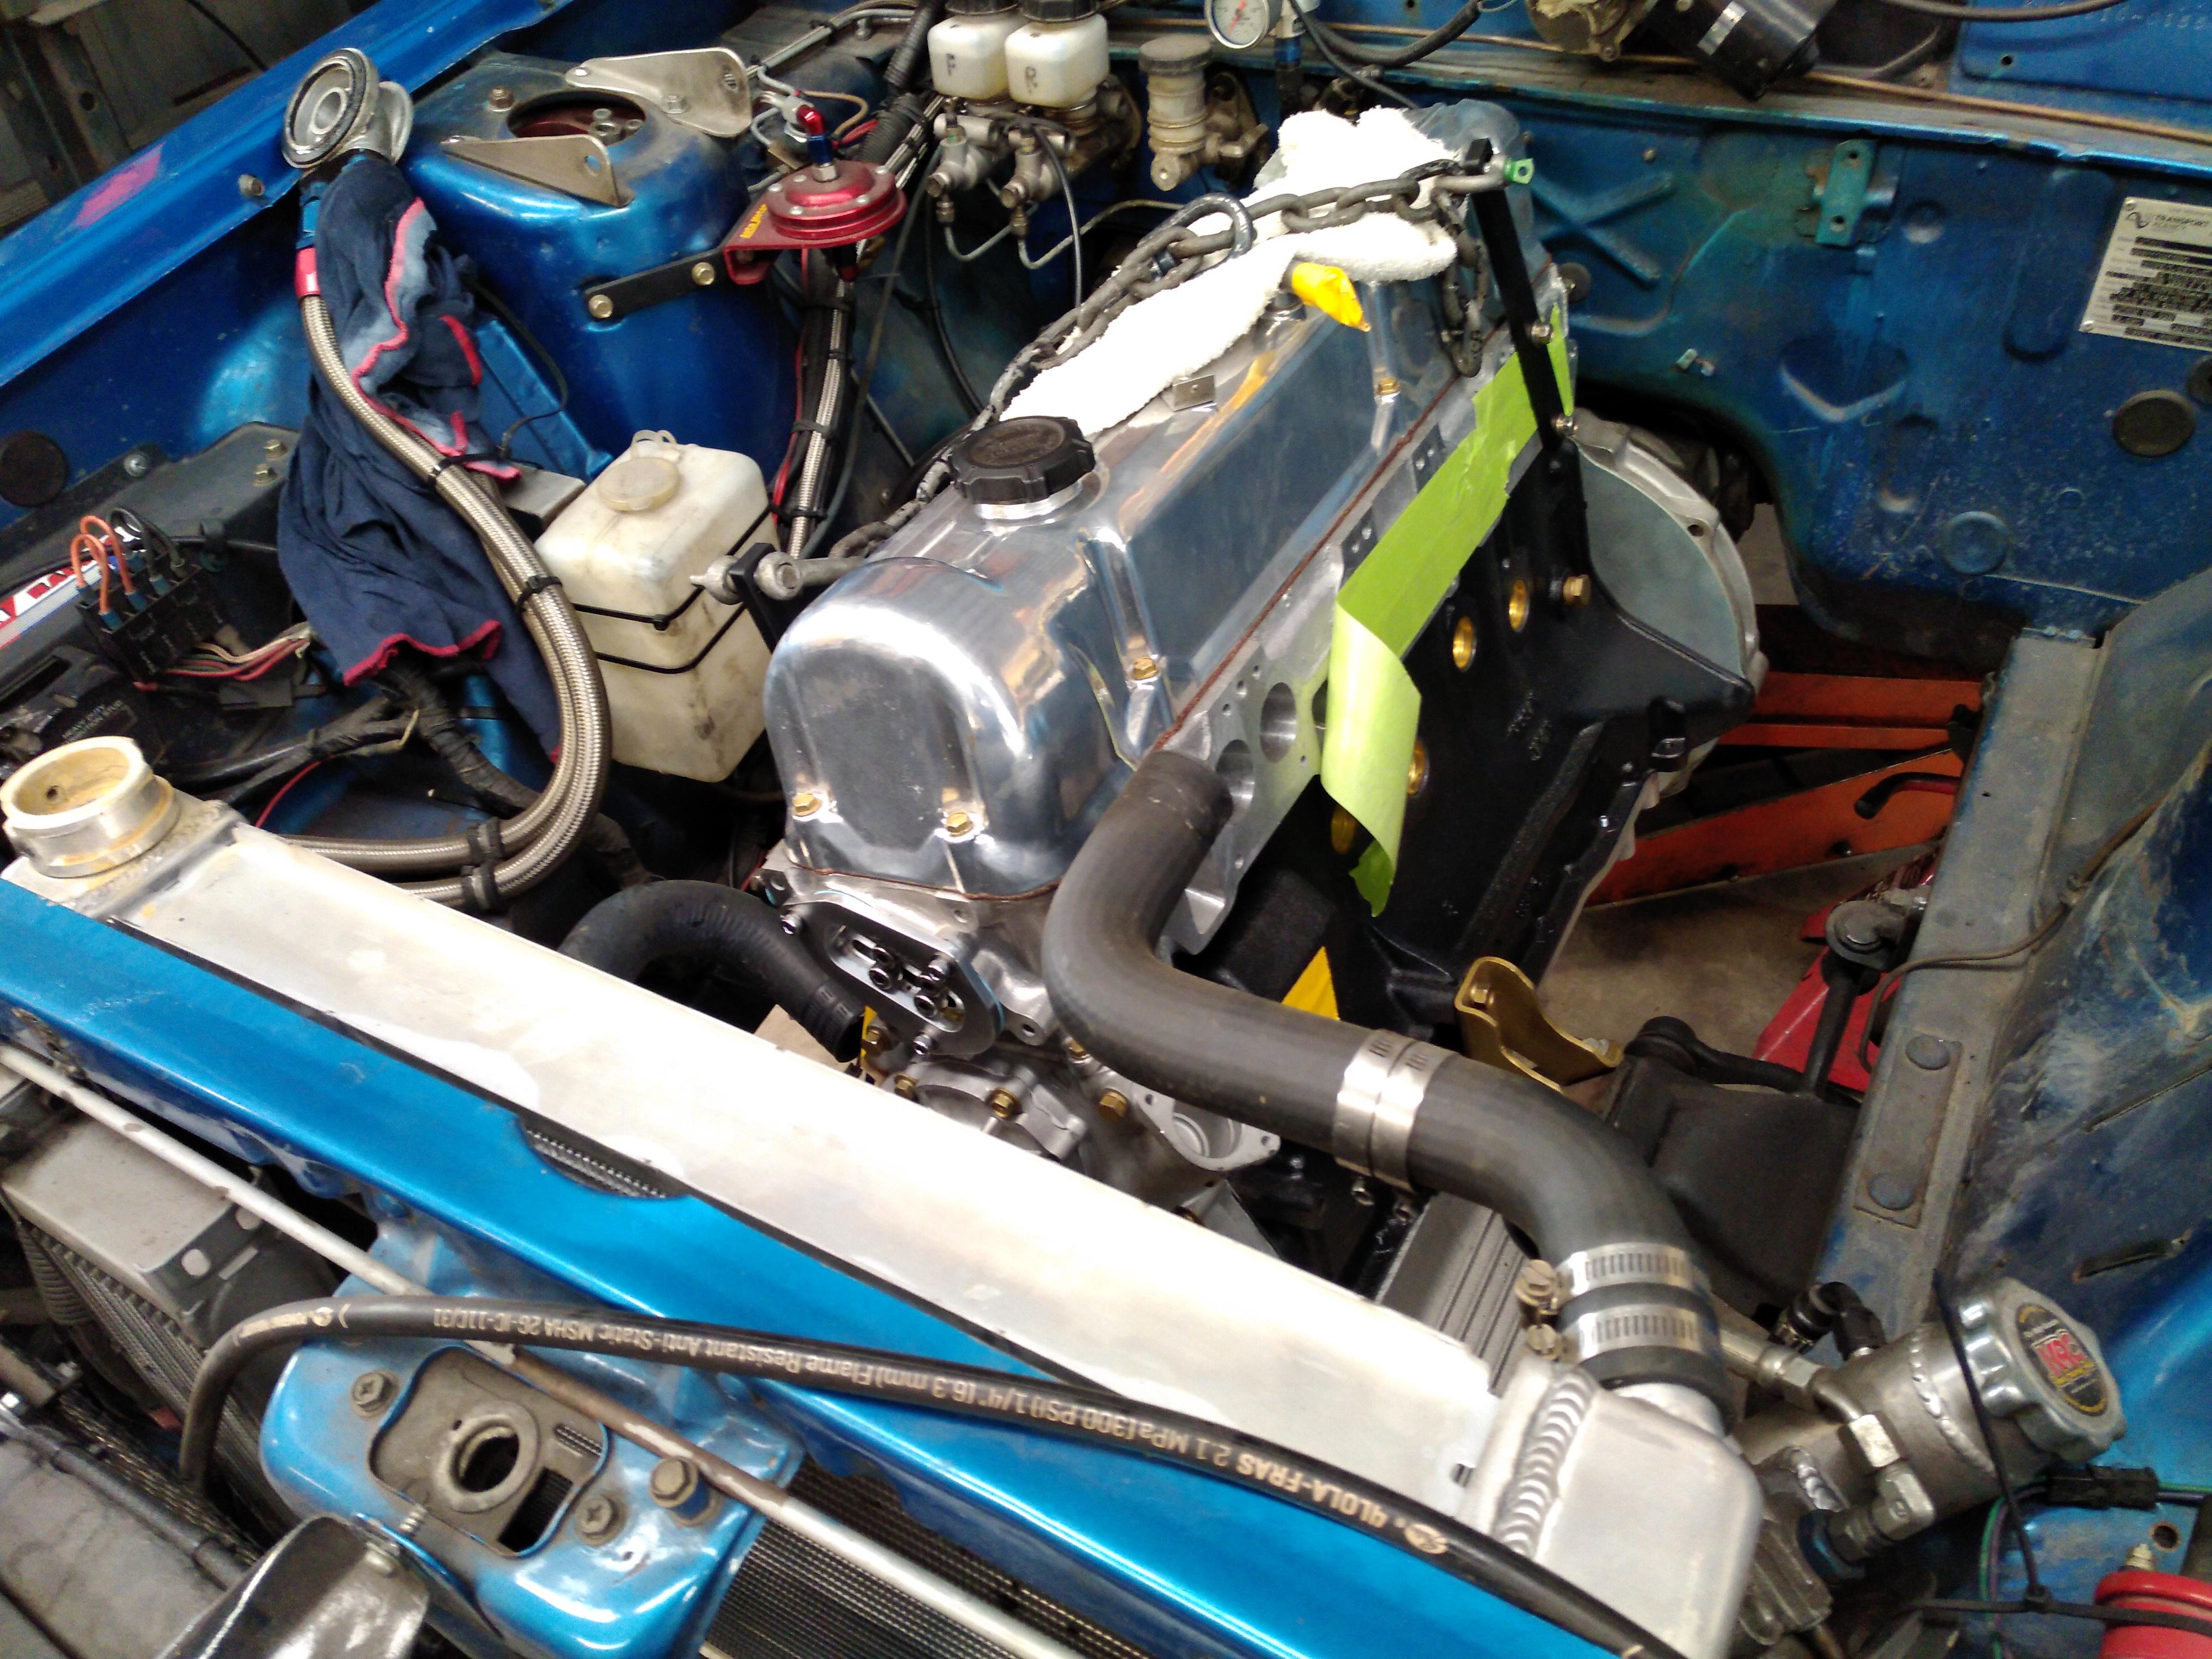
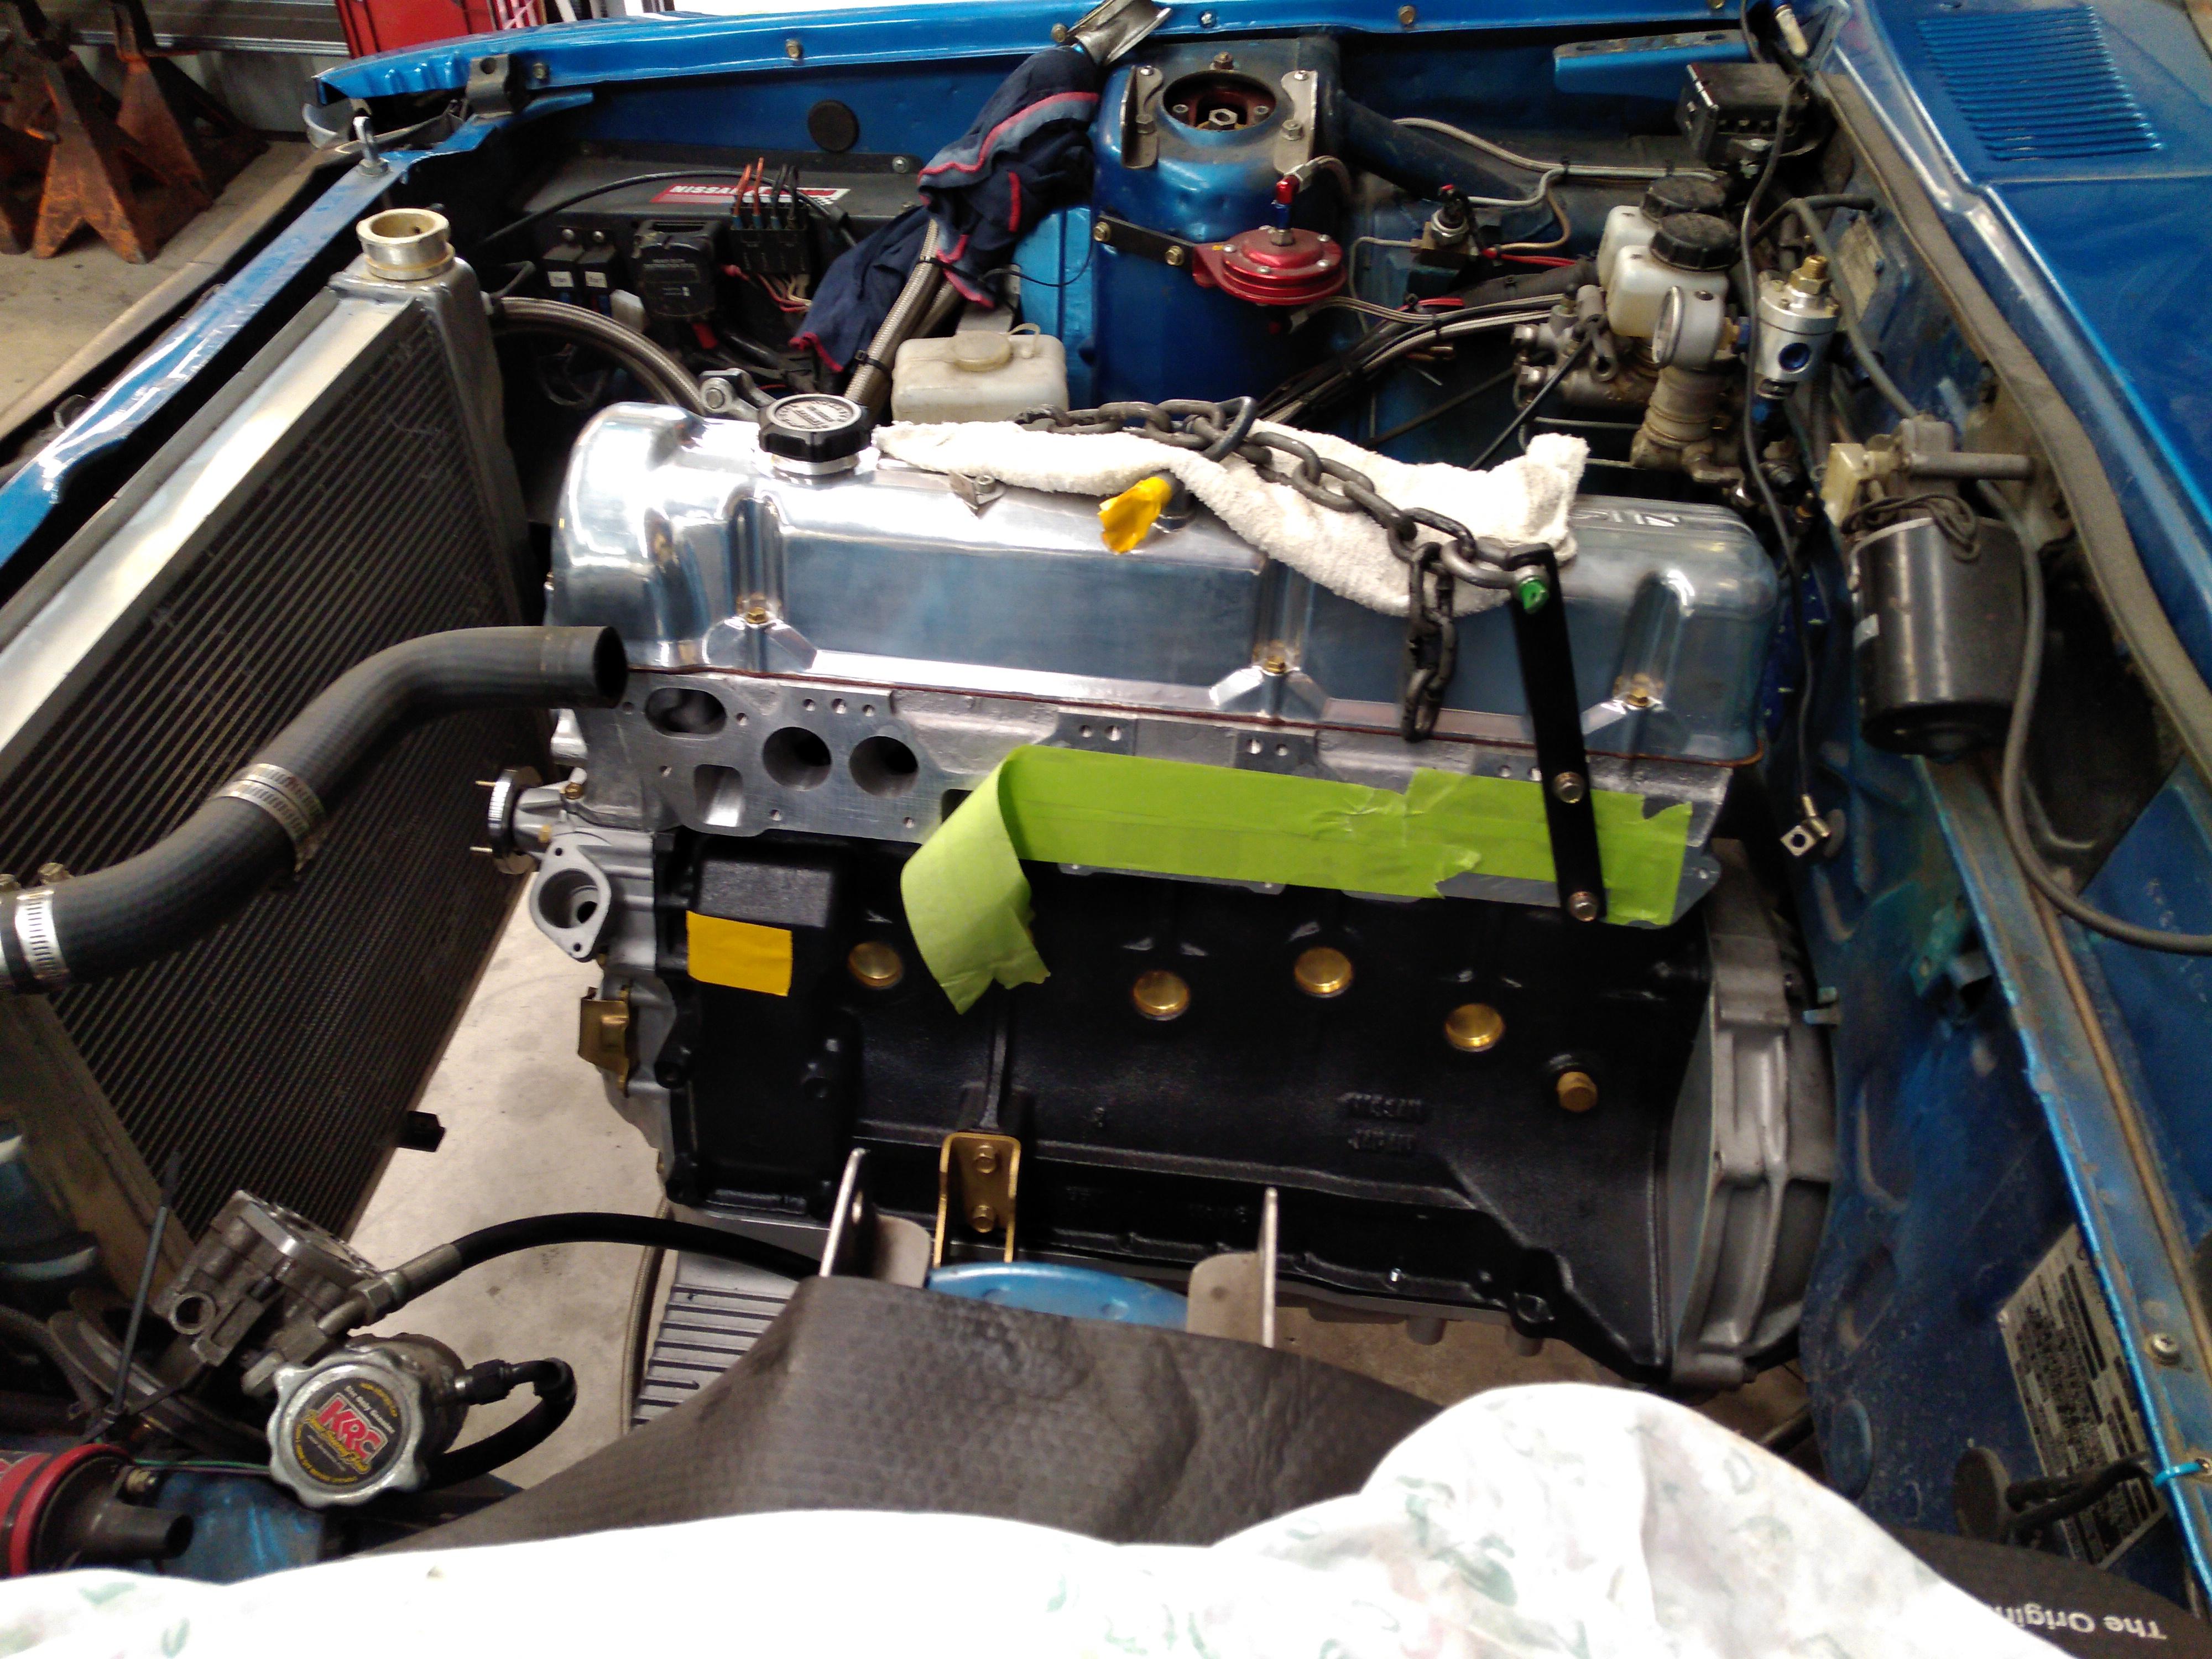
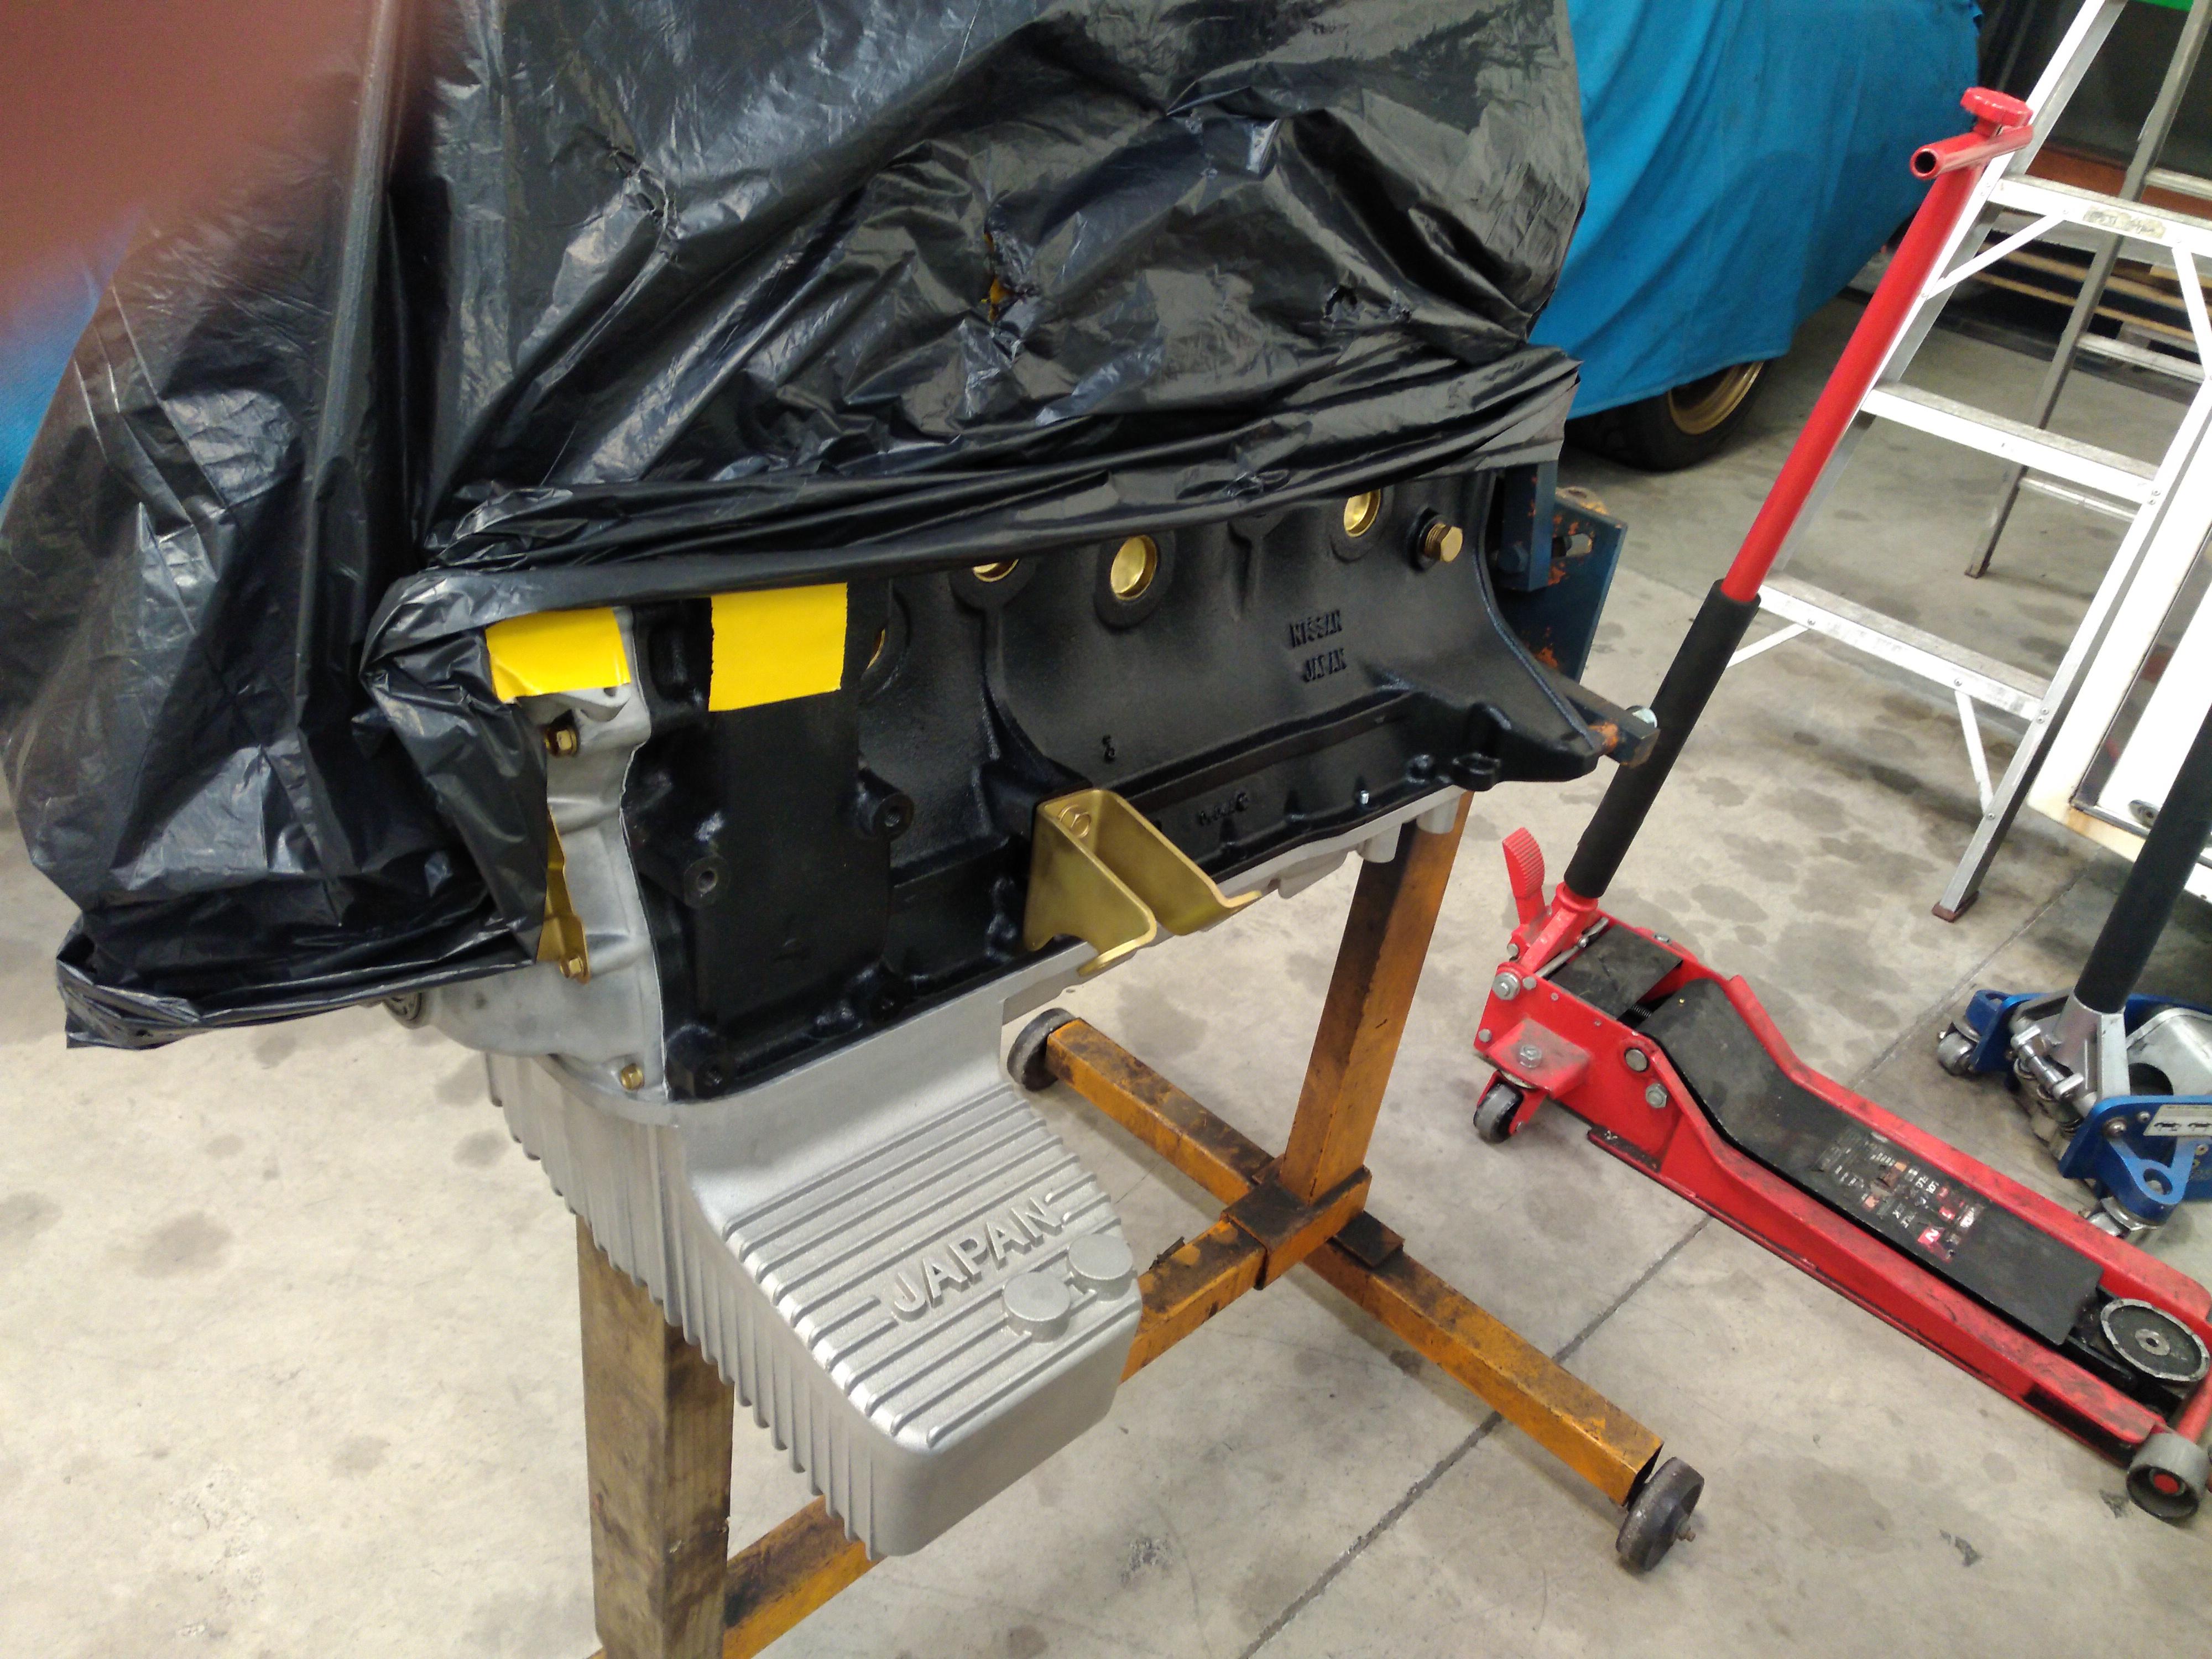
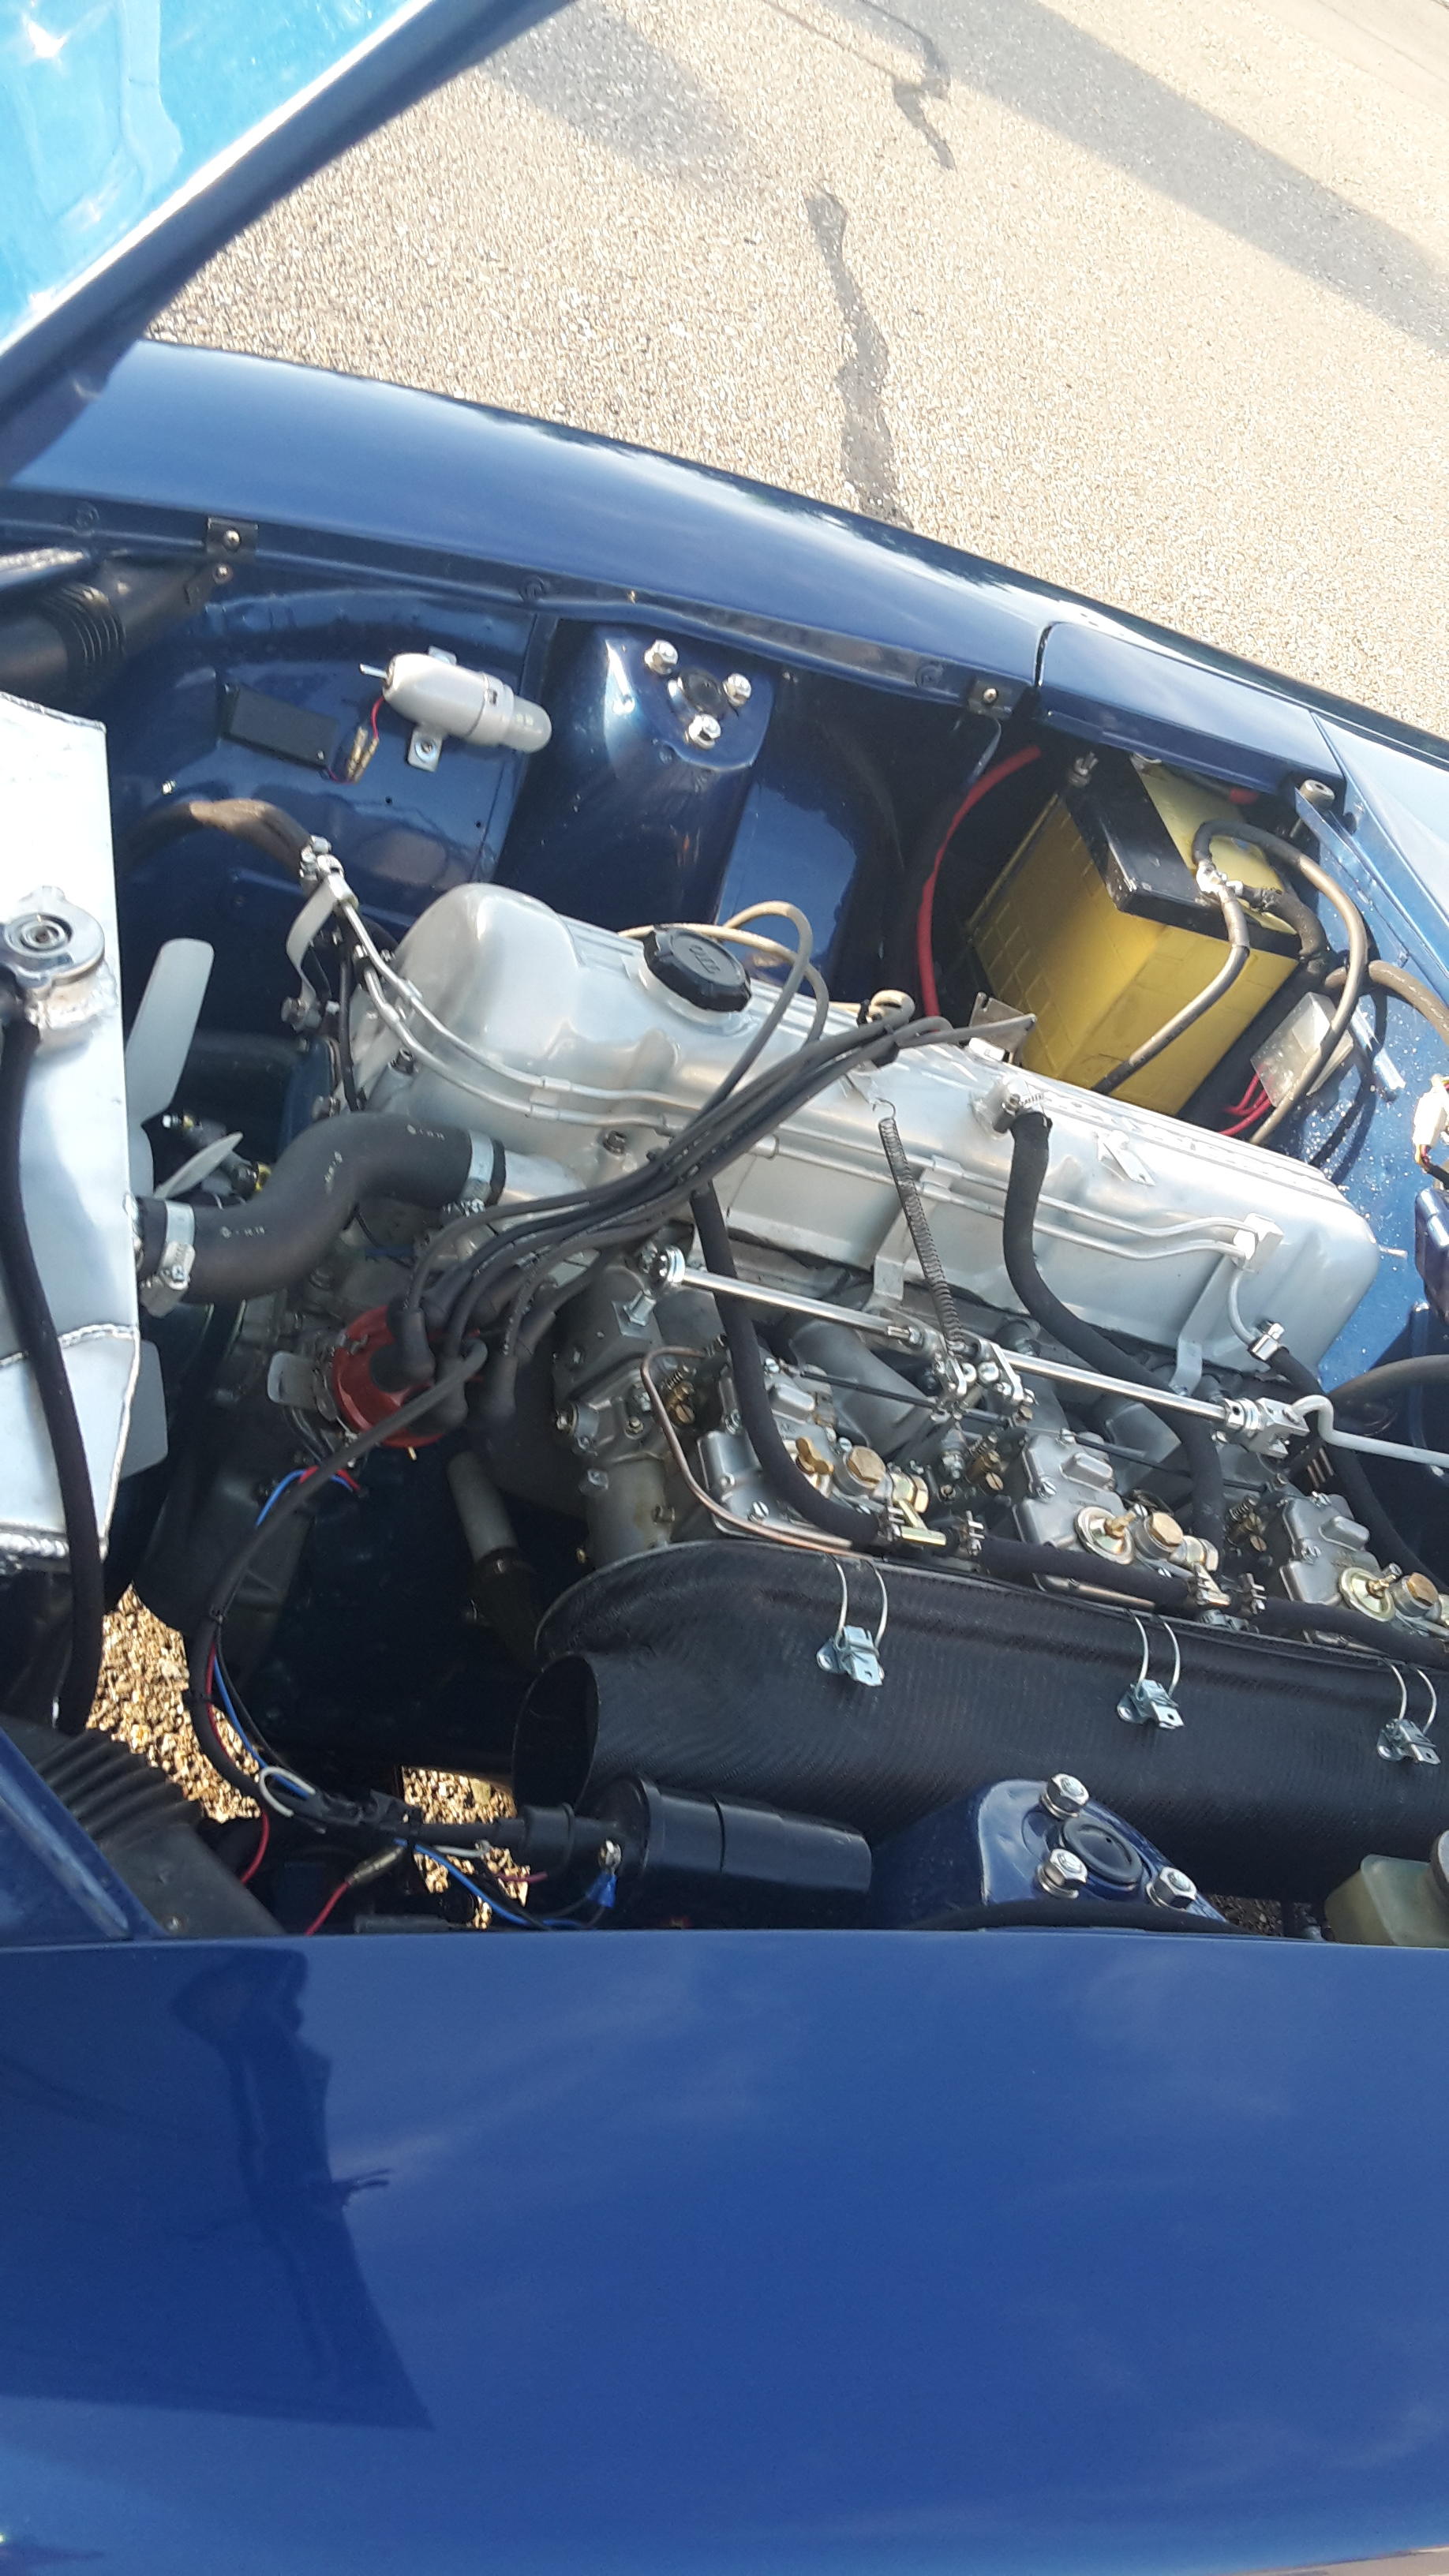
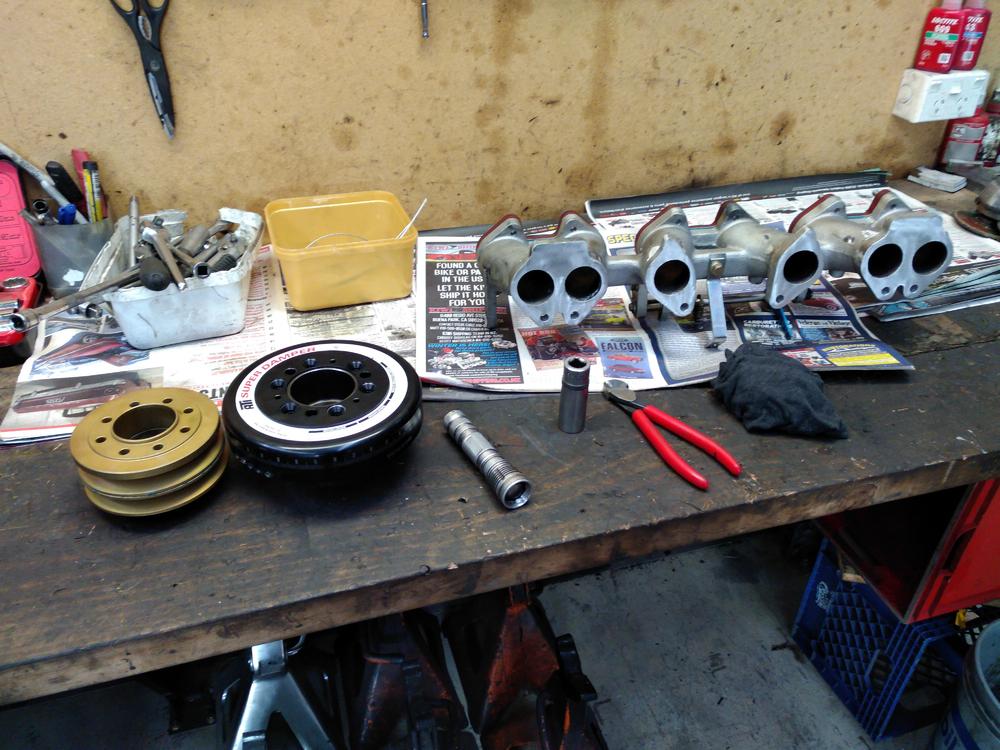
2 pointsMore progress pics. Had to modify cross member to fit sump, will need swaybar redesign. New front pulley set up underway. Sump will be off next week to add trapdoors and windage tray and connectors. Will be putting in new bigger oil cooler. Shes well underway. Lots of swearing and moaning by my mechanic so that must be a good sign of progress.

 2 points
 -
1 point
-
1 point
-
1 point
-
1 pointDon't worry my Dyson has sucked up loads of info and pictures on them!1 point
-
1 pointYes, but I’m not being charged a listing fee or a sales percentage. Mecum charges both, and a 10% buyer’s premium as well. So that allows me to set the opening bid lower and with no reserve.1 point
-
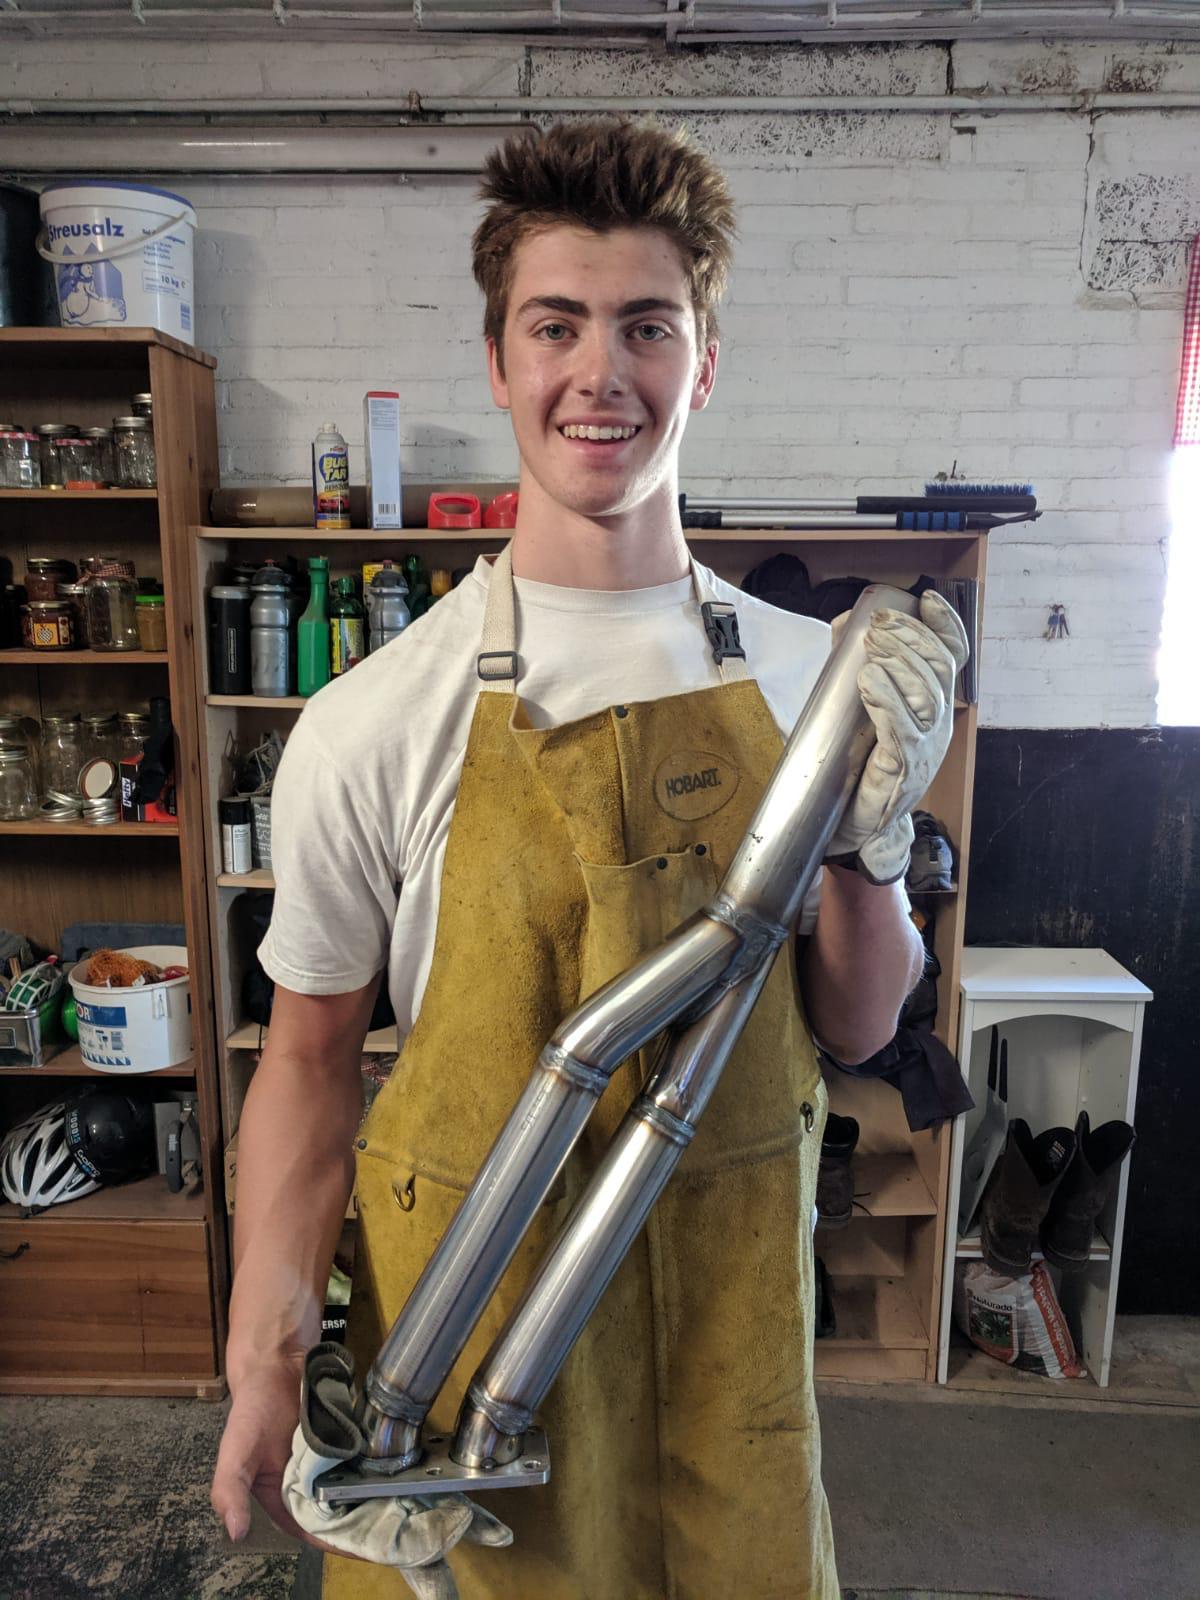
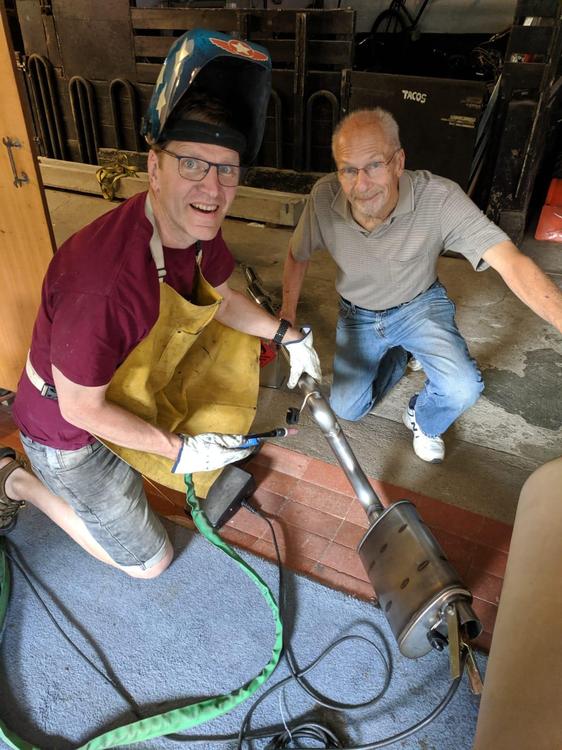
1 pointI'll add some of my favorite pics showing some of what we tackled. We welded up our own exhaust from stainless tubing. Great way to learn how to TIG! Both boys have learned so much through all the trials of putting this back together.
 1 point
 -
1 point
-
1 point
-
1 pointNot hurt at all, I just saw the thread diverting into a bit of a sH!t show. With a dash of tit for tat thrown in. Much like the thread Alan referred to previously where the L24 and S20 are being compared. And whilst it wasn't directly purely at you, I just get frustrated seeing the same silly comments made anytime a home market car like the Z432 and Z432-R is discussed. It seems odd to me, when it comes to other marques usually there is respect for the "best of breed" version and they are highly coveted. Here it seems that we want to find flaws in it and talk them down. No idea what drives it, perhaps it's envy?1 point
-
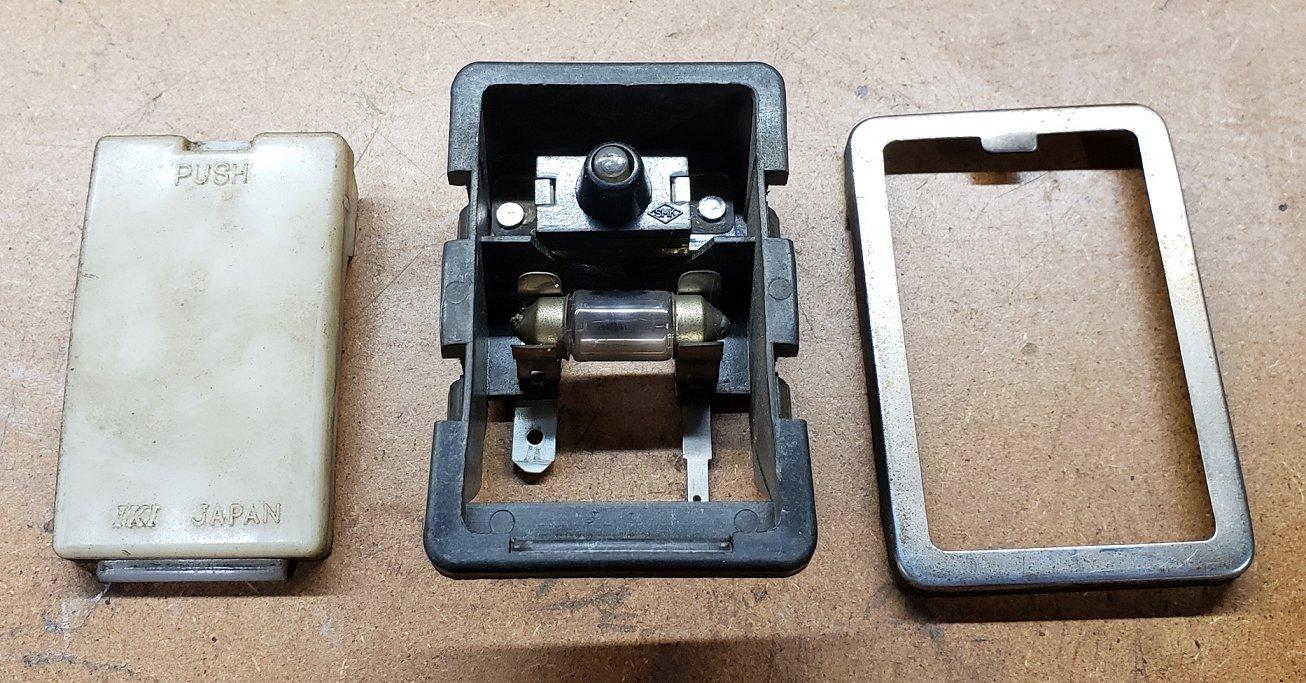
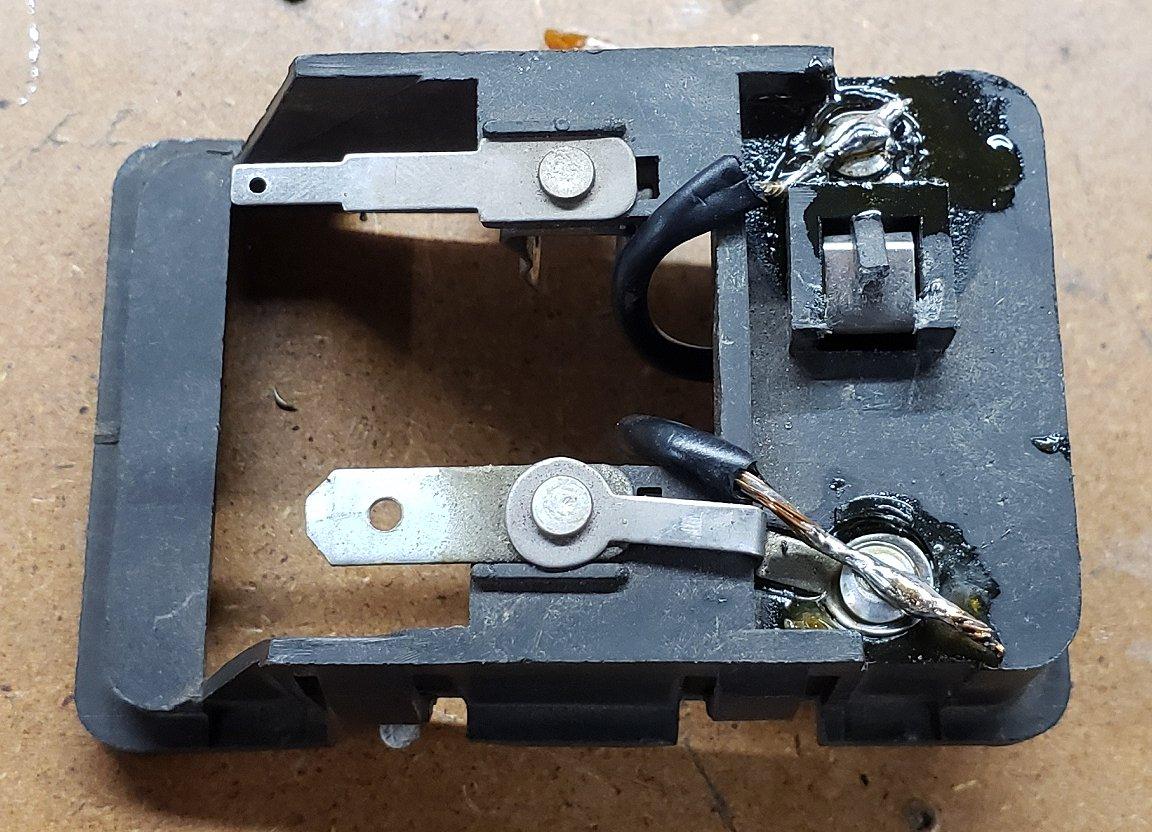
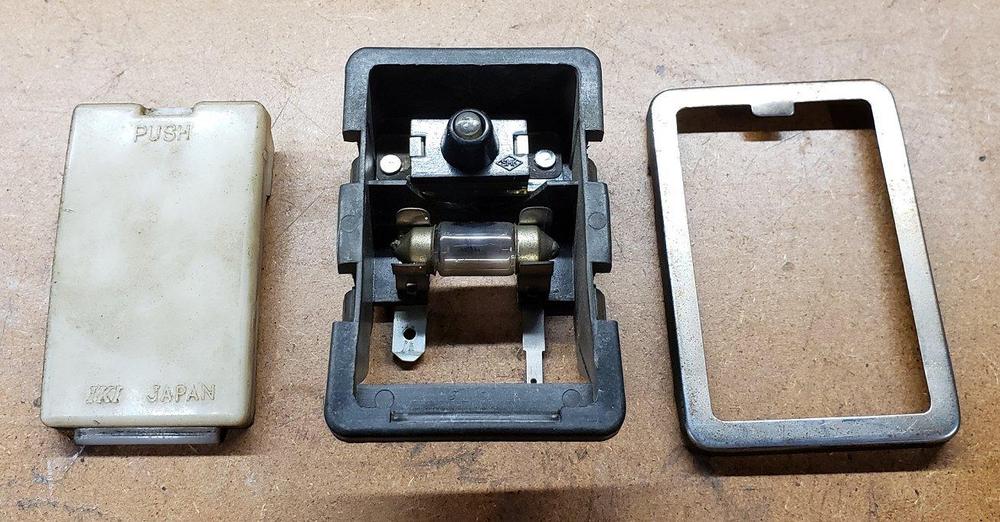
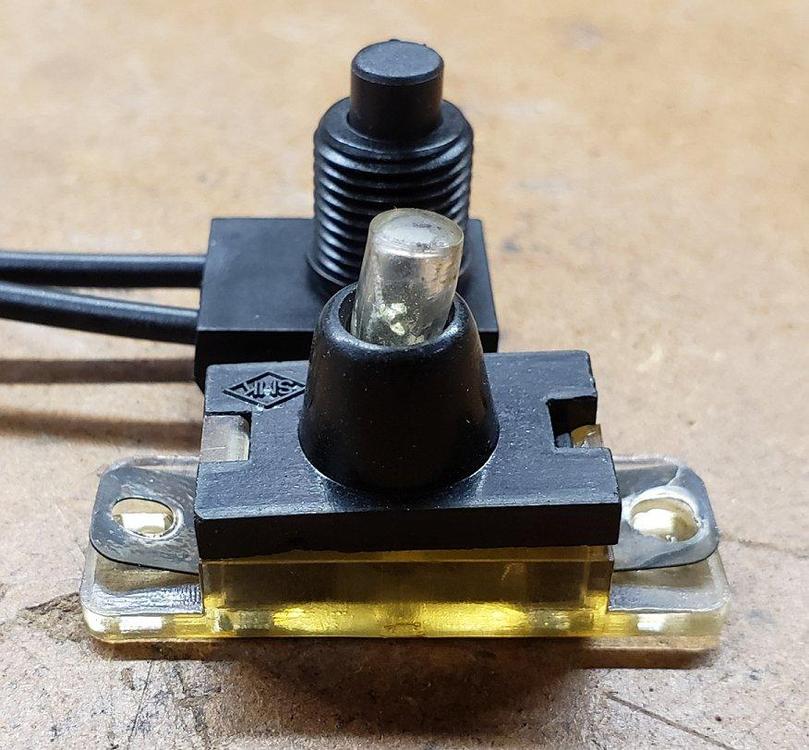
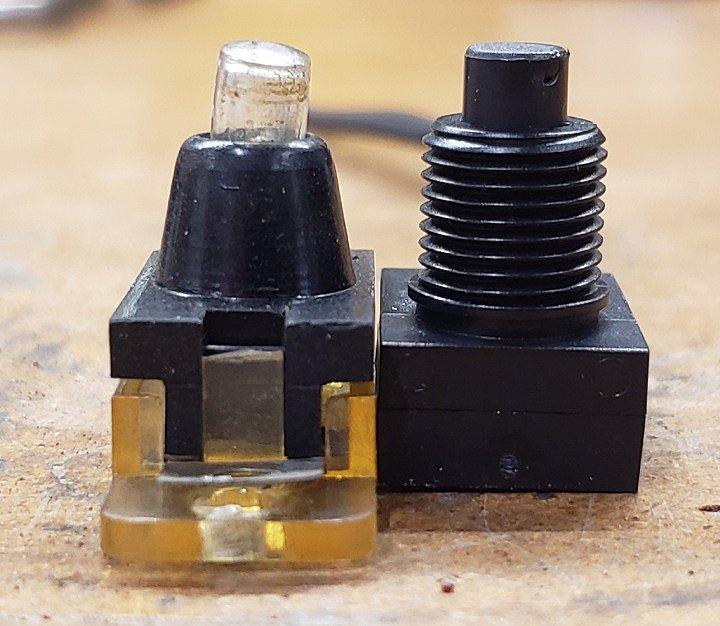
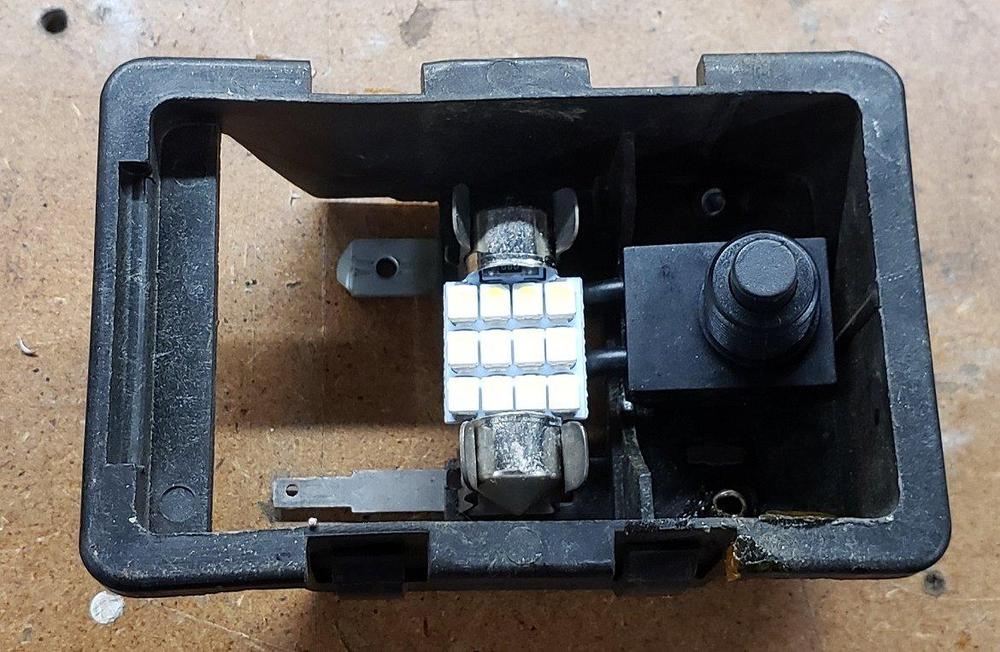
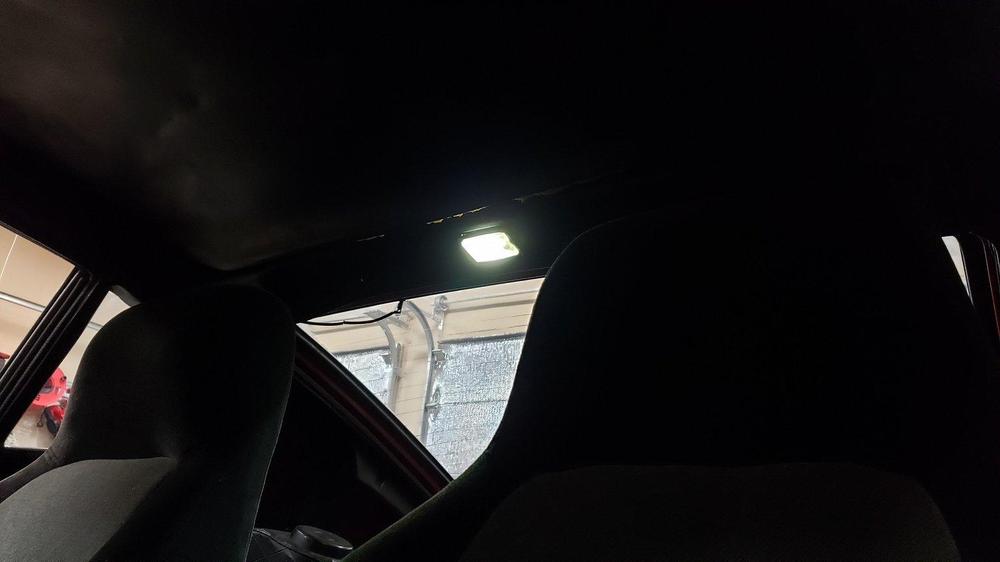
When I removed the rear interior panels for the hatch seal replacement I also had to remove the dome light and trim piece. The dome light has never worked in the car so I wanted to figure out why. A few depressions on the lens told me the switch was not popping back up as it should. After carefully removing the trim piece and lens this was easily confirmed. SMK is still in business and they make of all things, keyboard letter switches. Makes sense but in all my research I could not find this switch or anything close to it by SMK. I would love to know who makes the switch for the NOS units Nissan is selling for $100. There was no way I was giving a c-note for a new dome light so I found these switches on Amazon, 5 of them for $8.68. As always, they arrived in a few days and after some side by side comparisons I decided to move forward. https://www.amazon.com/gp/product/B07LCH1N3B/ref=ppx_yo_dt_b_asin_title_o05_s00?ie=UTF8&psc=1 First I riveted the contacts back to the housing as I had to drill out the spot/swag welds from the old switch. This would give me something to solder to. Looking back on it I wish I had just used some small machine screws and and nuts as I could wrapped the wire around the screw and filled it with solder. Oh well, next time! Then it was just a matter of soldering the wires from the switch to the riveted posts. I had thought about using some double sided tape on the bottom of the switch but I could tell it was not going anywhere, especially once the lens was on. I replaced the old bulb with an LED, again from Amazon and with a quick test I confirmed I had the polarity correct on the bulb and the switch worked. I cleaned up the lens and polished the trim. Upon testing with the lens on I determined I needed to bend the rivets out of the way a little. With the action feeling good I installed with and basked in the glory of my handy work. The light works when either door is opened and works via the switch. Job done!


 1 point
 -
1 pointProgress is slow, but should be starting next week, at least progressed to engine stand ?
 1 point