Leaderboard
-


Zed Head
Free Member4Points18,789Posts -

inline6
 Subscriber
 3Points1,237Posts
 -

Captain Obvious
Free Member3Points9,849Posts -

zKars
Subscriber2Points3,747Posts
Popular Content
Showing content with the highest reputation on 12/21/2019 in all areas
-
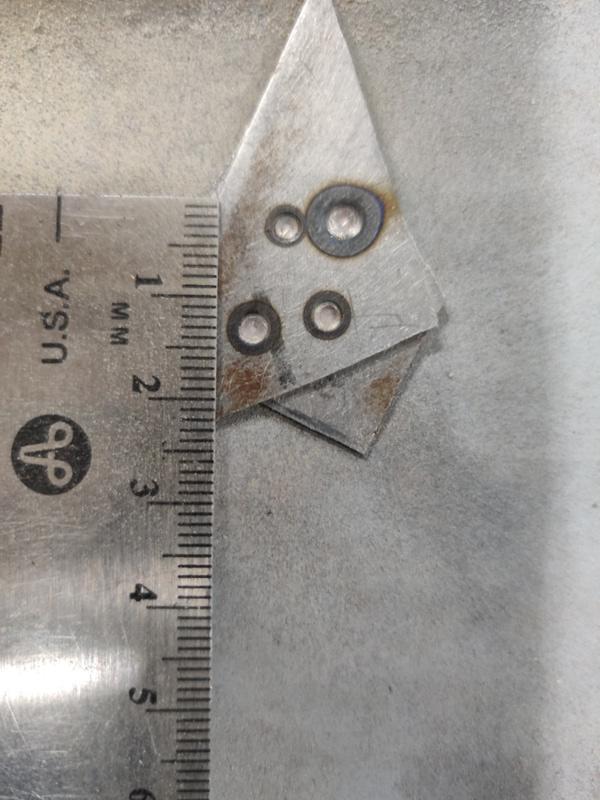
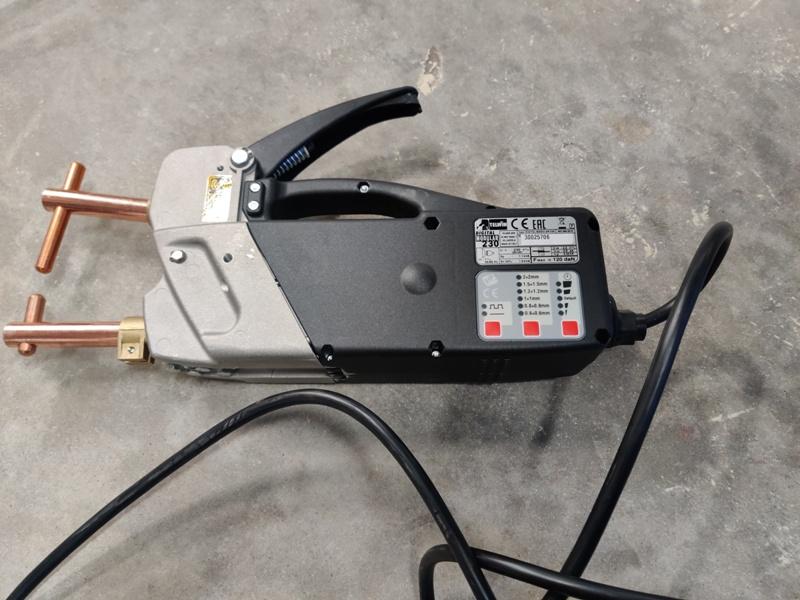
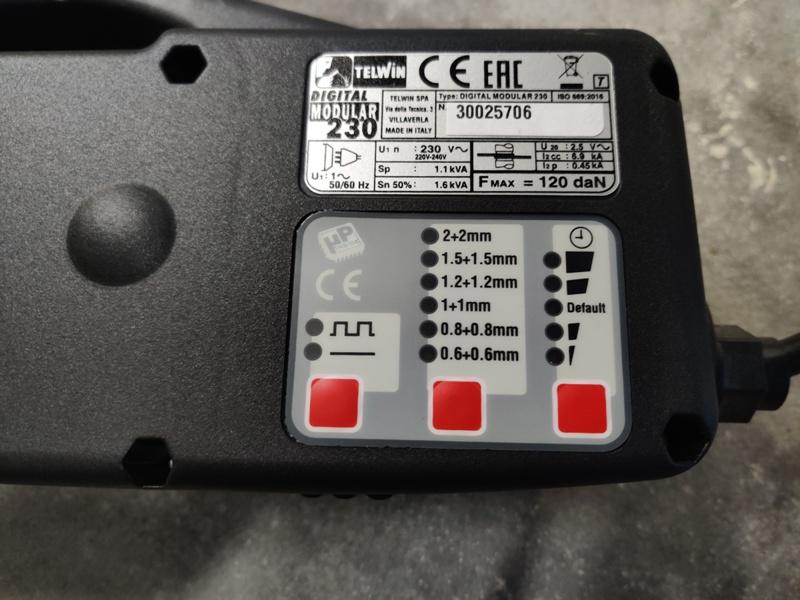
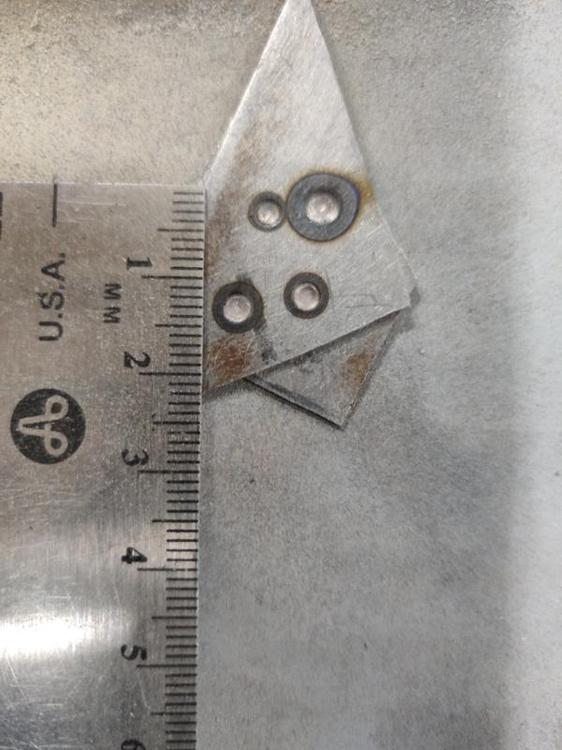
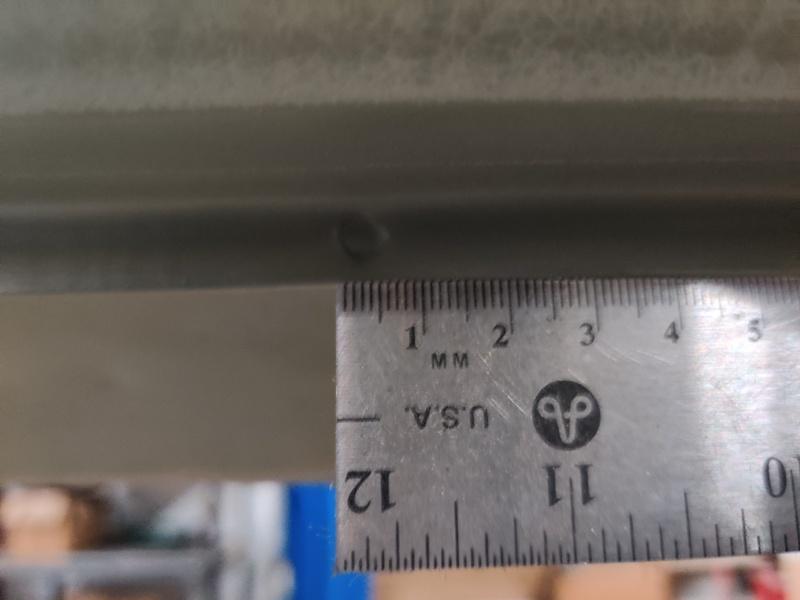
Hi, I bought a spot welder: a HTP Quick Spot II spot welder (along with a Tig welder) over the Black Friday time period (sale still going on now fyi) and was asked by someone reading my "bringatrailer" 240z build thread to share some information about it after I got it up and running. Well, here goes: Here is the spot welder. The special offer is currently $300 off on qualifying products when you buy the Tig welder. This spot welder counted as a qualifying product, so that is nice... It comes with the copper arms and tips you see in the pic. These are good to get you started with making spot welds in basic configurations. USAWeld sells other tip configurations if you need to spot weld different areas that these tips won't reach. There is a control panel which allows you to choose parameters for different welding situations. The settings from left to right in the picture below are basically "on/off pulse power" vs. "continuous" power, selection of thickness of metal being welded, and fine tuning of the duration of weld operation. There is also a pressure setting, which adjusts the amount of pressure the two contacts close upon the sheet metal with. The pulse operation can be used for high strength low alloy, galvanized, or weld thru primer coated metals according to the manual. It uses time between heat pulses to burn away contaminants for a better weld. Continuous can be used for clean metal. You follow the guidance in the manual and set the second setting based on the total thickness of the panels being welded. In the next pic (I only did one sample piece) the welds correspond to the following settings: Weld order from top left to right to bottom left to bottom right is: 1, 4, 3, 2: Weld 1: (top left): 175 lbs, continuous, 1 mm + 1 mm, and default duration Weld 2: (bottom right): 265 lbs, continuous, 1 mm + 1 mm, and default duration Weld 3: (bottom left): 265 lbs, continuous, 1 mm + 1 mm, and 1 step up from default duration Weld 4: (top right): 265 lbs, pulse welding, 1 mm + 1 mm, and maximum duration If it isn't apparent, you should notice that the size of the spot welds is quite small. That is, the diameter of the "divot" is much smaller than that of the factory spot welds on our Datsuns. Here is a reference image: The factory spot weld on the lower edge of this rocker of my 240z (apologies if it is hard to see) is about 5 mm in diameter. The largest of the example welds done above on the test piece is about 4 mm. Here is another reference photo: So, a ready made observation is that the HTP Quick Spot II isn't going to replicate the 240z's factory spot welds. However, it's kind of close... and if the performance is as good as shown in the video below, then maybe getting factory "performing" spot welds is a box that can be checked with this welder. And perhaps making them look factory is pretty easily done with a bit of creativity? I'll be exploring that coming up in the new year in my 240z build thread, if your interested in checking that out. Hope this helps someone. Garrett
 3 points
 -
3 pointsAnd the guy who made preparations A through G. They were complete failures.3 points
-
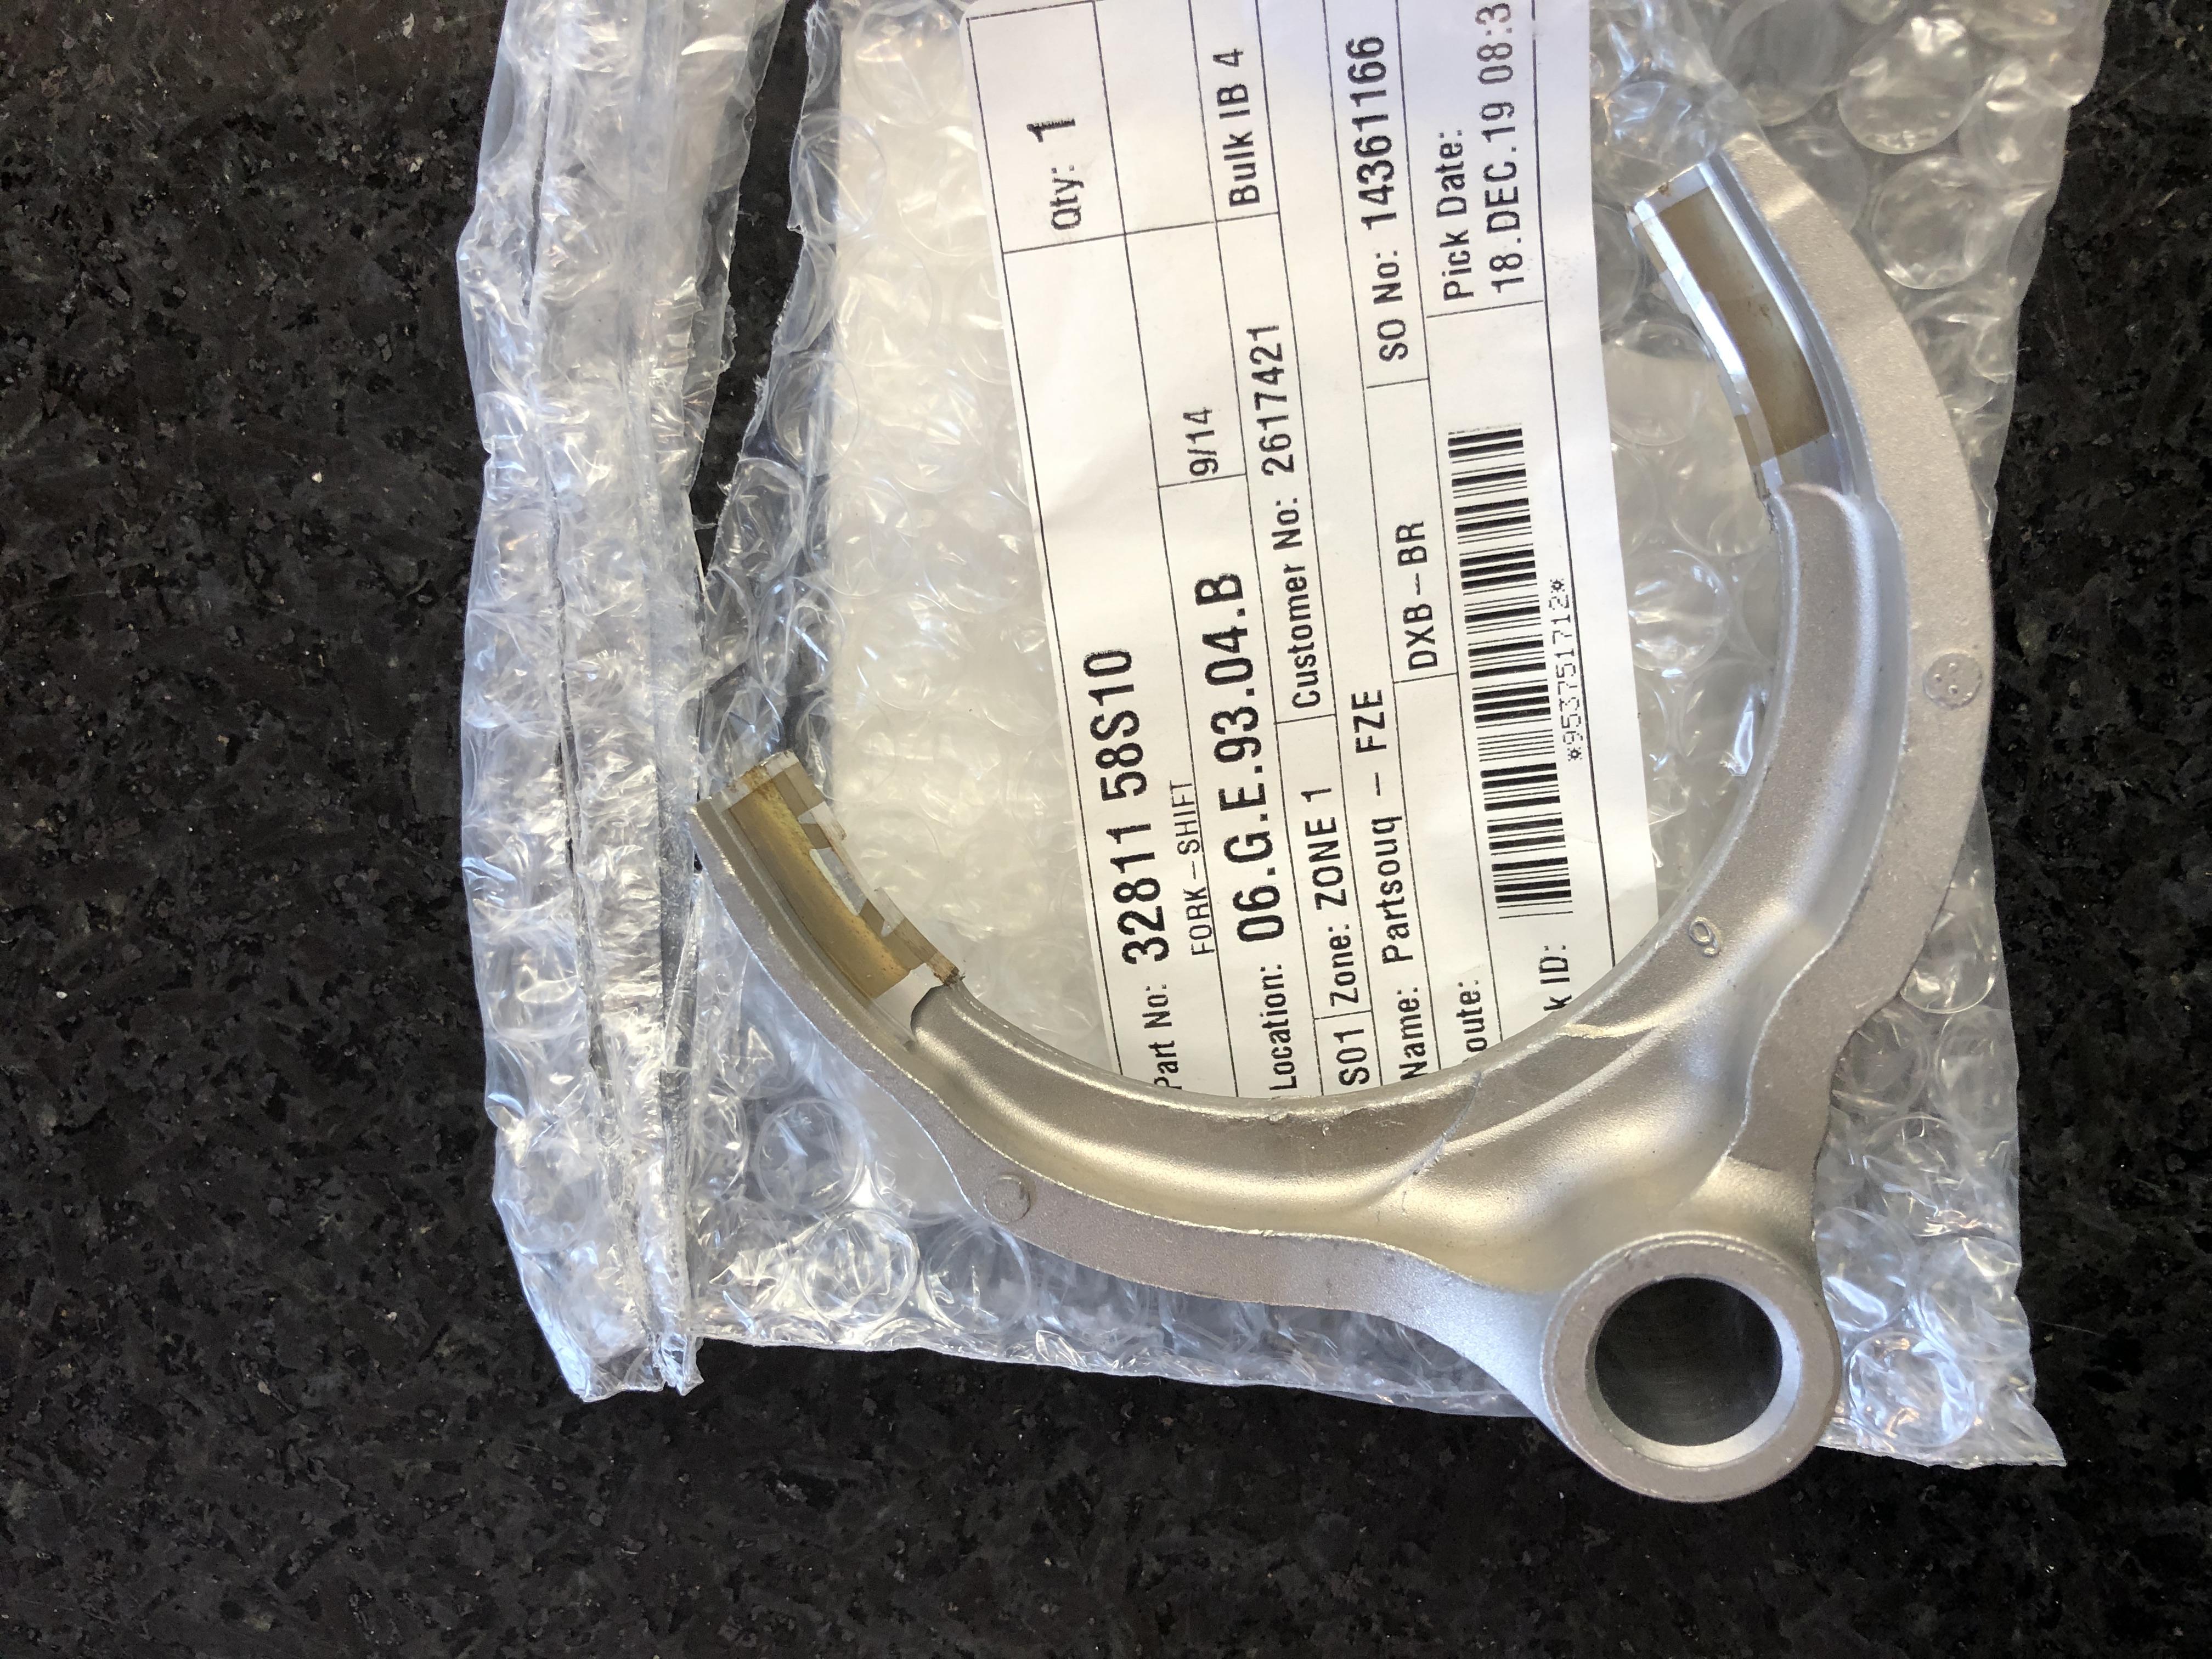
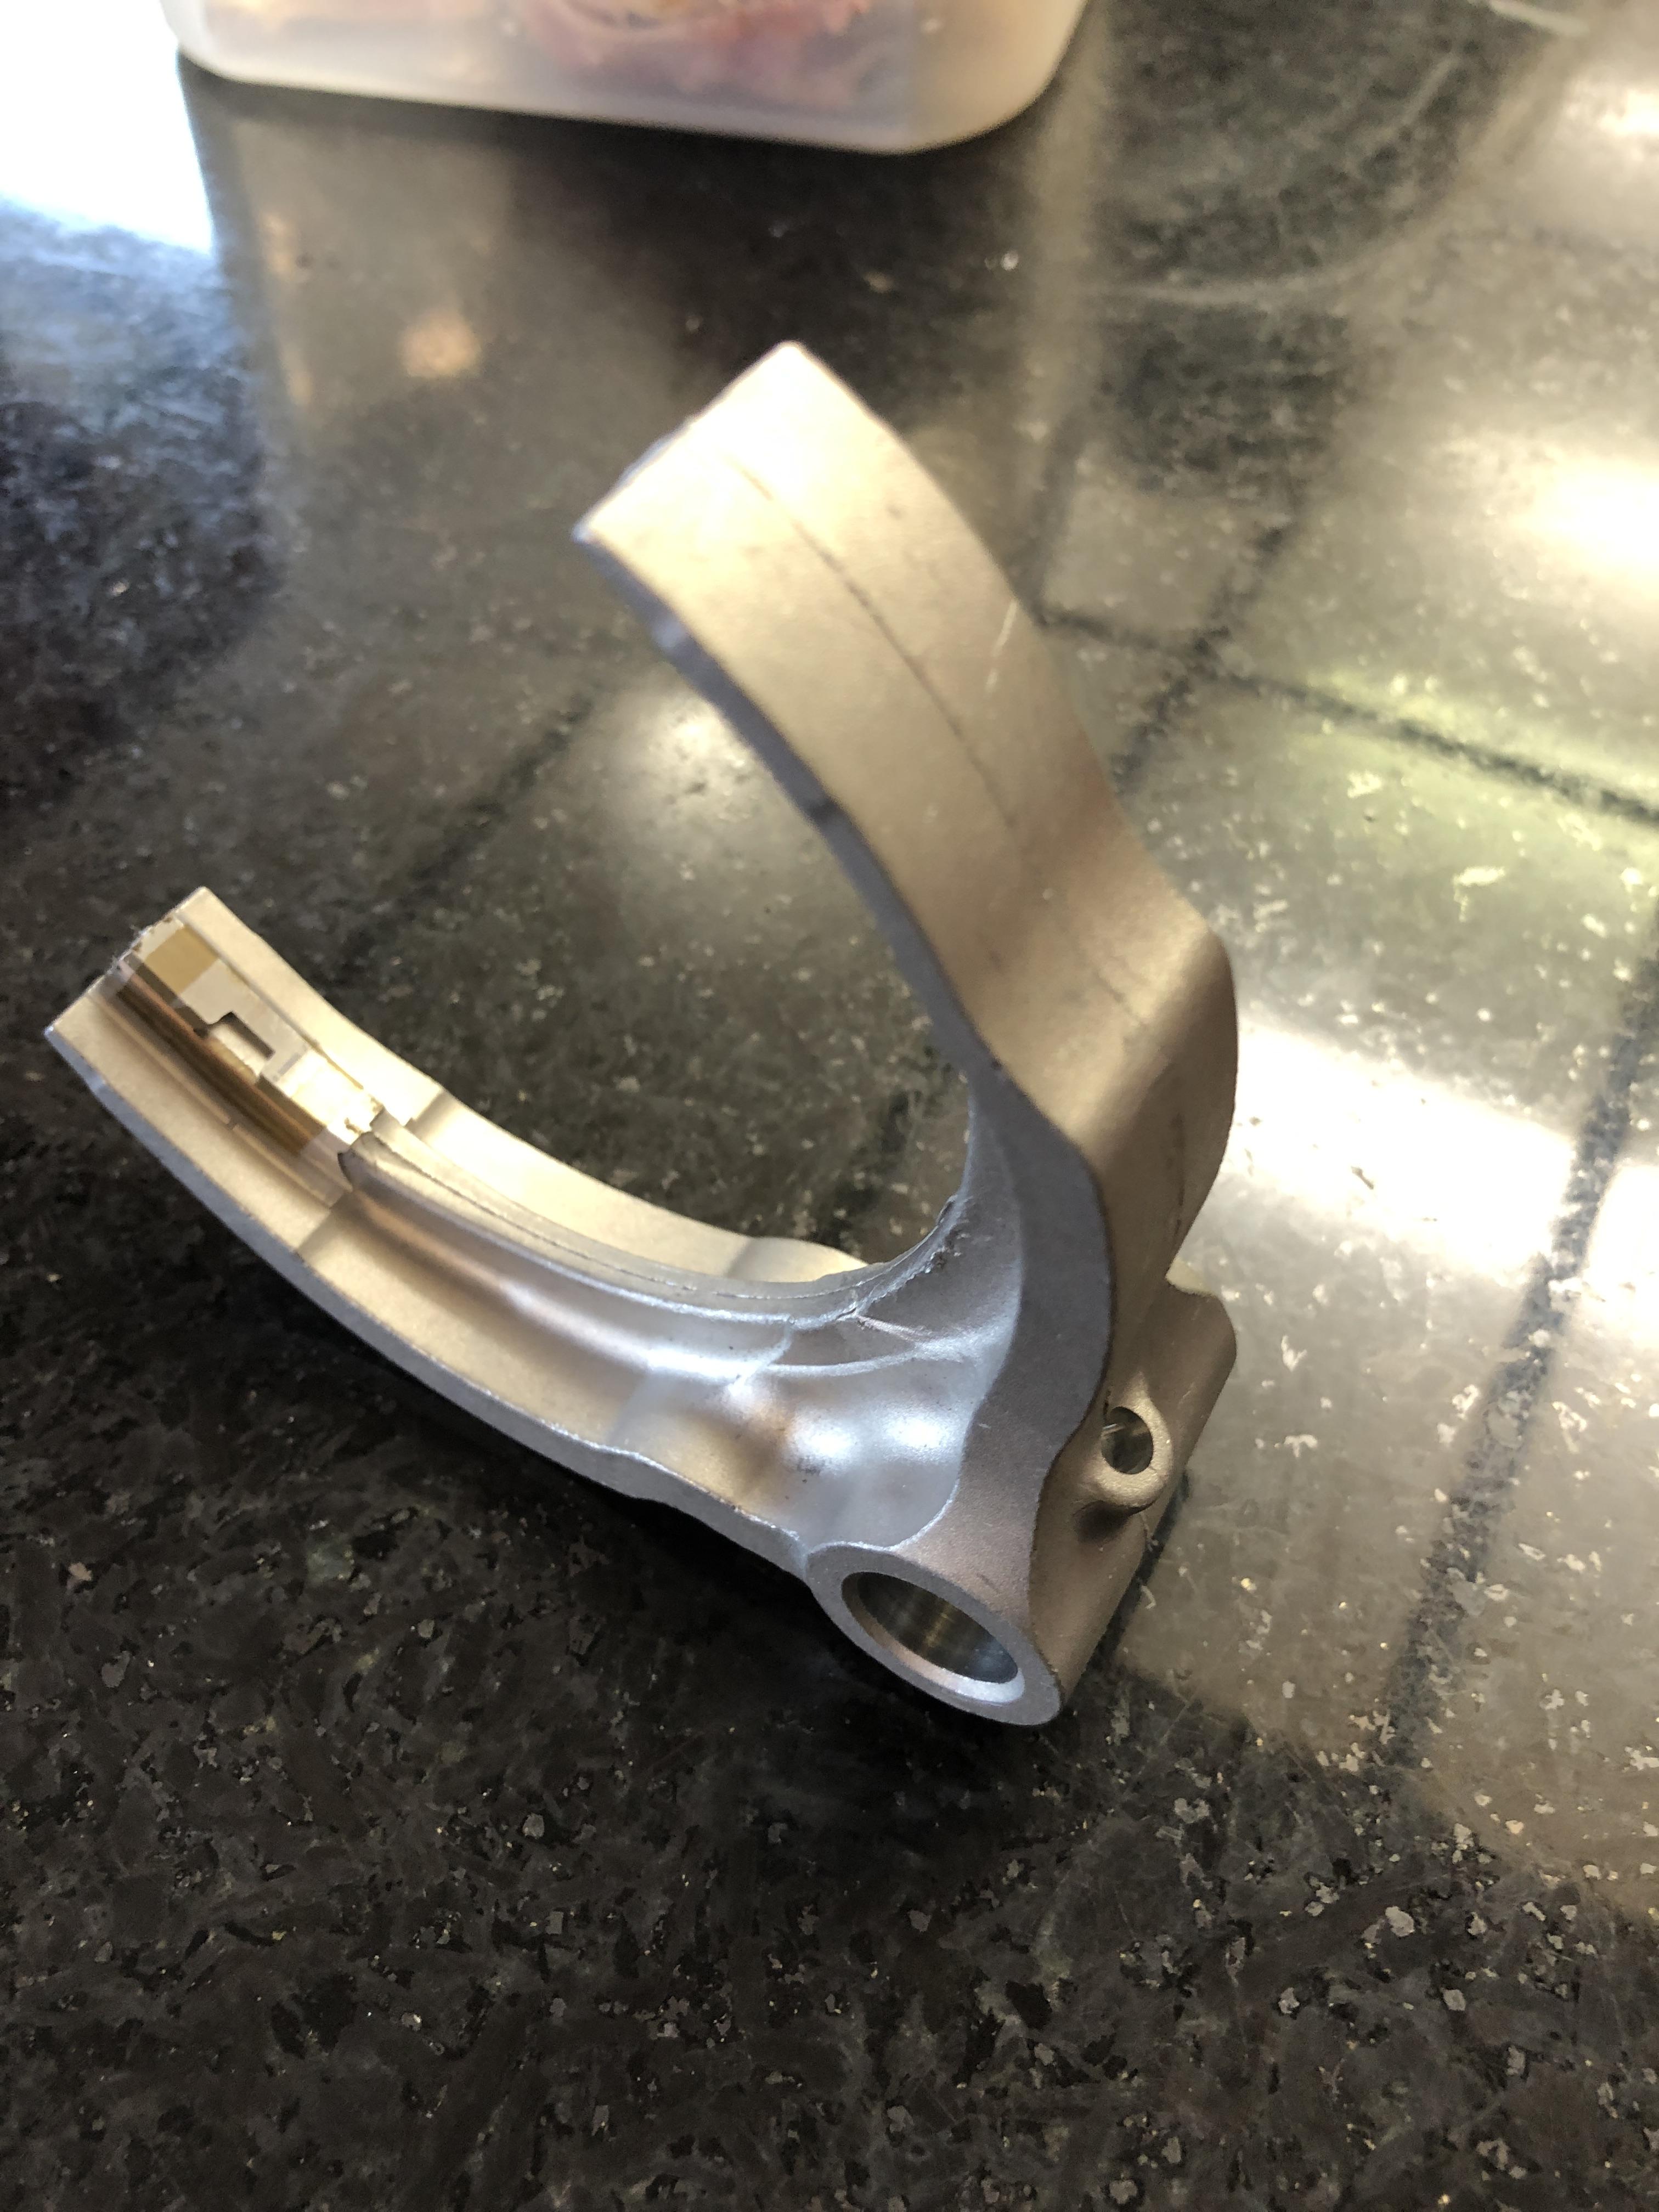
Ok, got a part today that is good news and confirms shift fork compatibility AND availability. One more Fs5W71B saved from the scrap heap. 32811-58S10 is the 3/4 shift fork from a Fs5W71C transmission. It is a usable replacement for both the 1-2 and 3-4 shift fork in FS5W71B with aluminum forks, and would also replace the 4 sp version metal forks. One tiny snag. The roll pin hole in the C and B type 5sp forks are larger than the 4 sp forks. If you break a 4 sp fork, you will need to drill the rod roll pine hole out to 0.195 or 15/64. A number 8 drill bit is good enough. Let me also repeat that the C type 1-2 shift fork will NOT WORK in the B types, it fits a larger diameter selector ring.

 2 points
 -
2 points
-
 2 pointsHello, you can reach me at 4086035922 Hello, number provided above. We are not there all the time. We would appreciate if you let us know which day you plan on stopping by so we can be there.2 points
 -
 2 pointsHi all, just finished my latest project and I am looking for a new one. Prefer a series one project, but would look into any solid mostly Rust free 240 Z. Serious cash buyer. Garypatel@aol.com
 2 points
 -
 1 pointif anybody is interested I removed the 90 degree baldwin filter that was 15 micron and installed a purolator 10 micron straight through filter and my pressure went to 3.5psi. I did not check if I could raise the pressure higher with my regulator I was happy with the 3.5psi. my l28 seem to run better with the higher pressure going from 2.7 psi with the airtex and now with the carter the psi is 3.5psi .is seems like less throttle to move the car now . hope this review help anybody interested in a quiet pump with good pressure .1 point
 -
1 pointThe BaT listing says that a dealer is selling it. Might look for classic car dealers. "The selling dealer acquired the project a year ago and completed it with new suspension components, brakes, tires, interior trim, seals, spark plugs, and more as outlined below."1 point
-
 So, My panelbeater started work on the passenger side floors. Those hungarian-made floor pans came in.. before: After: Still have to be welded etc. but overall fitment looks nice. Here is the bottom side fitment together with the NOS frame rails. Seems pretty spot-on!1 point
 -
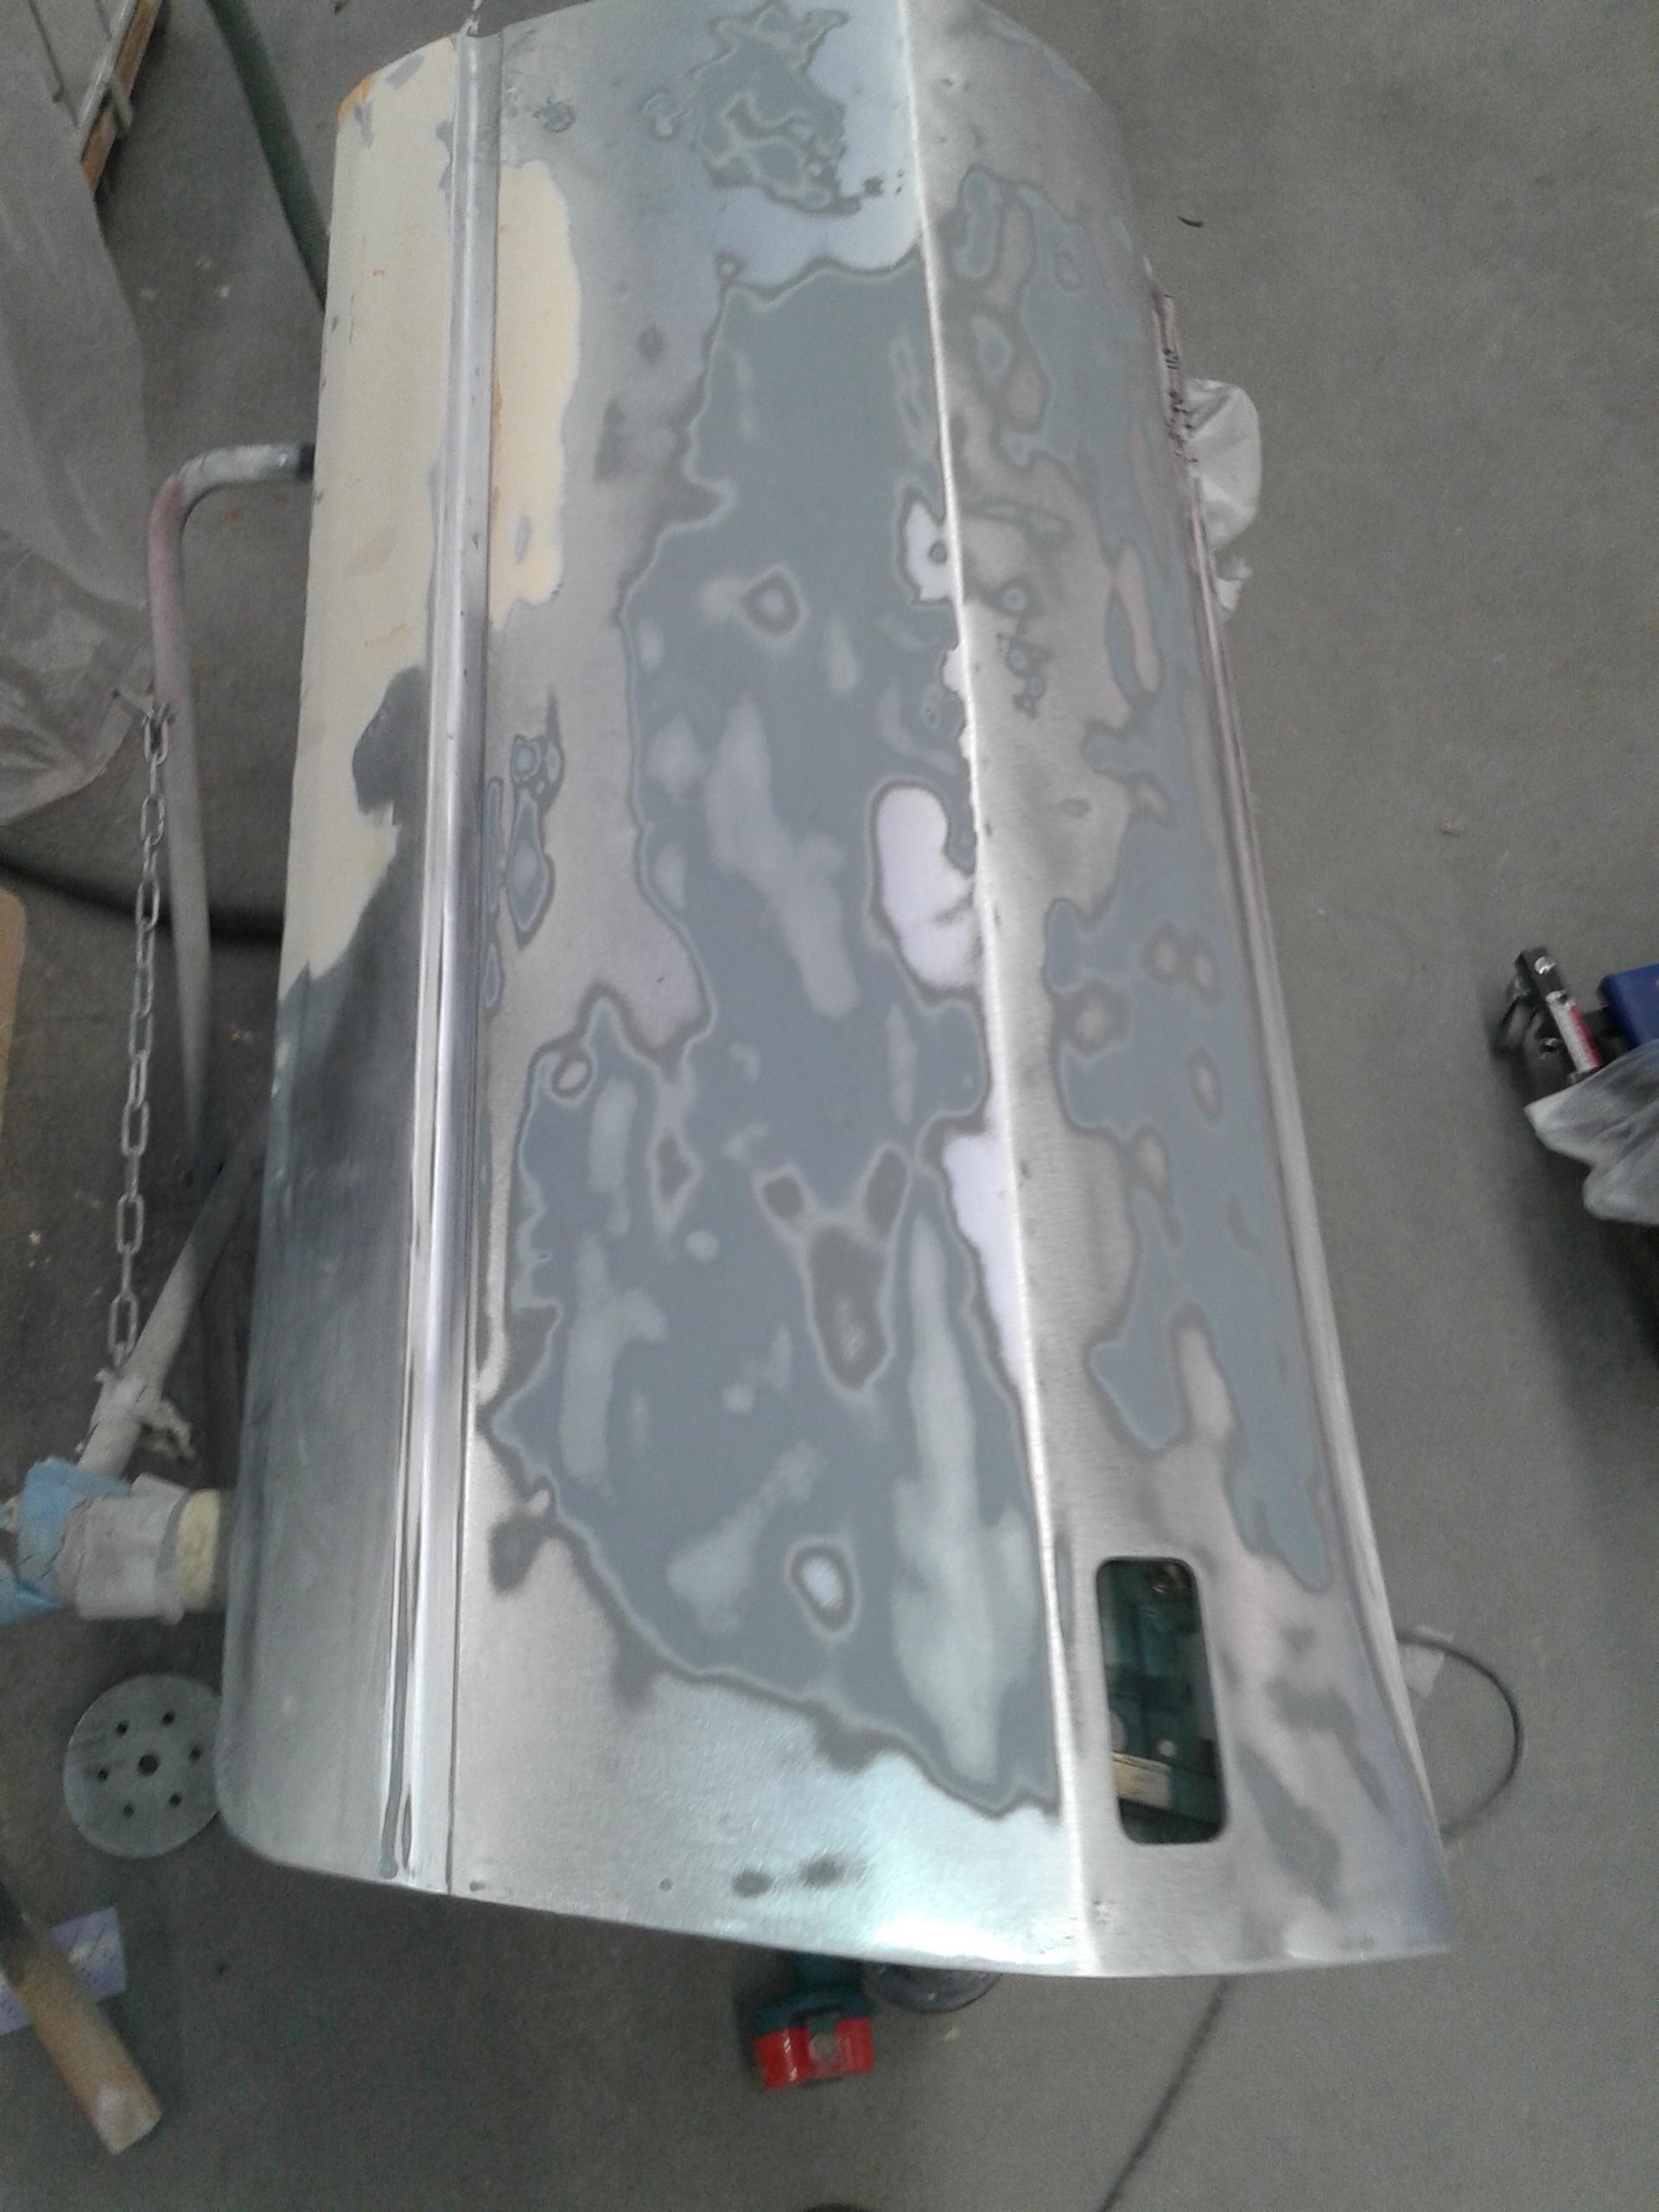
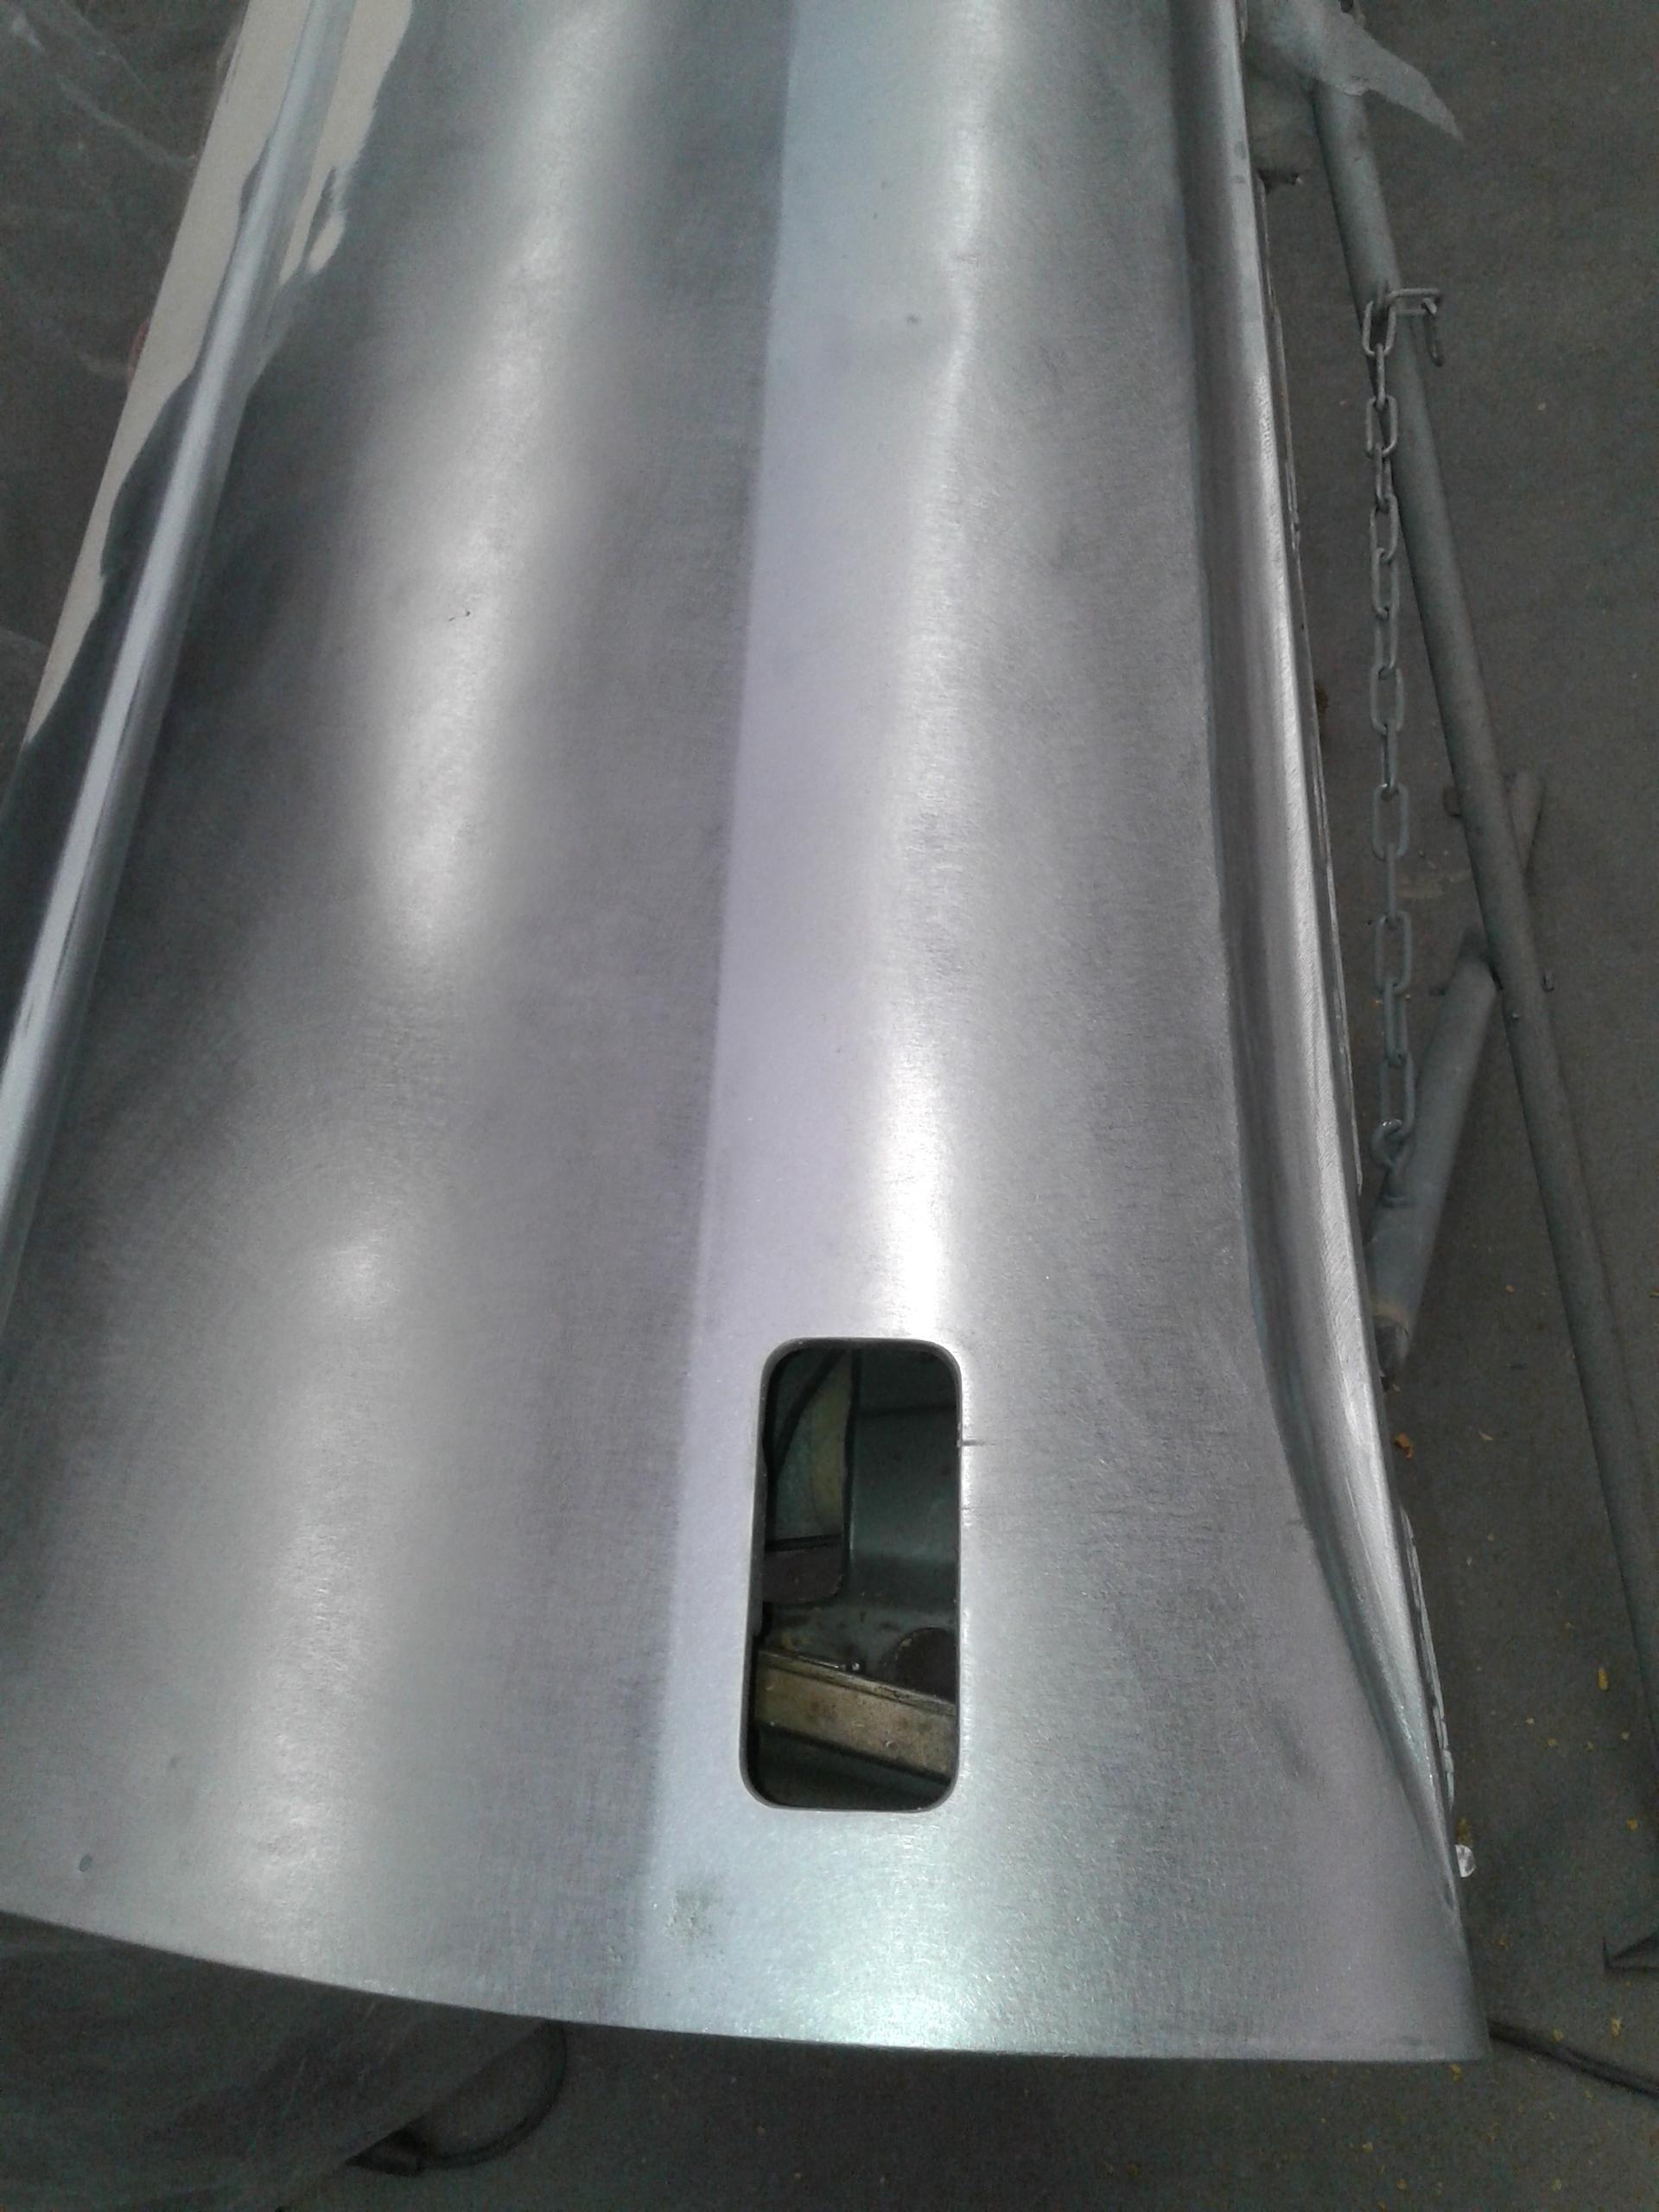
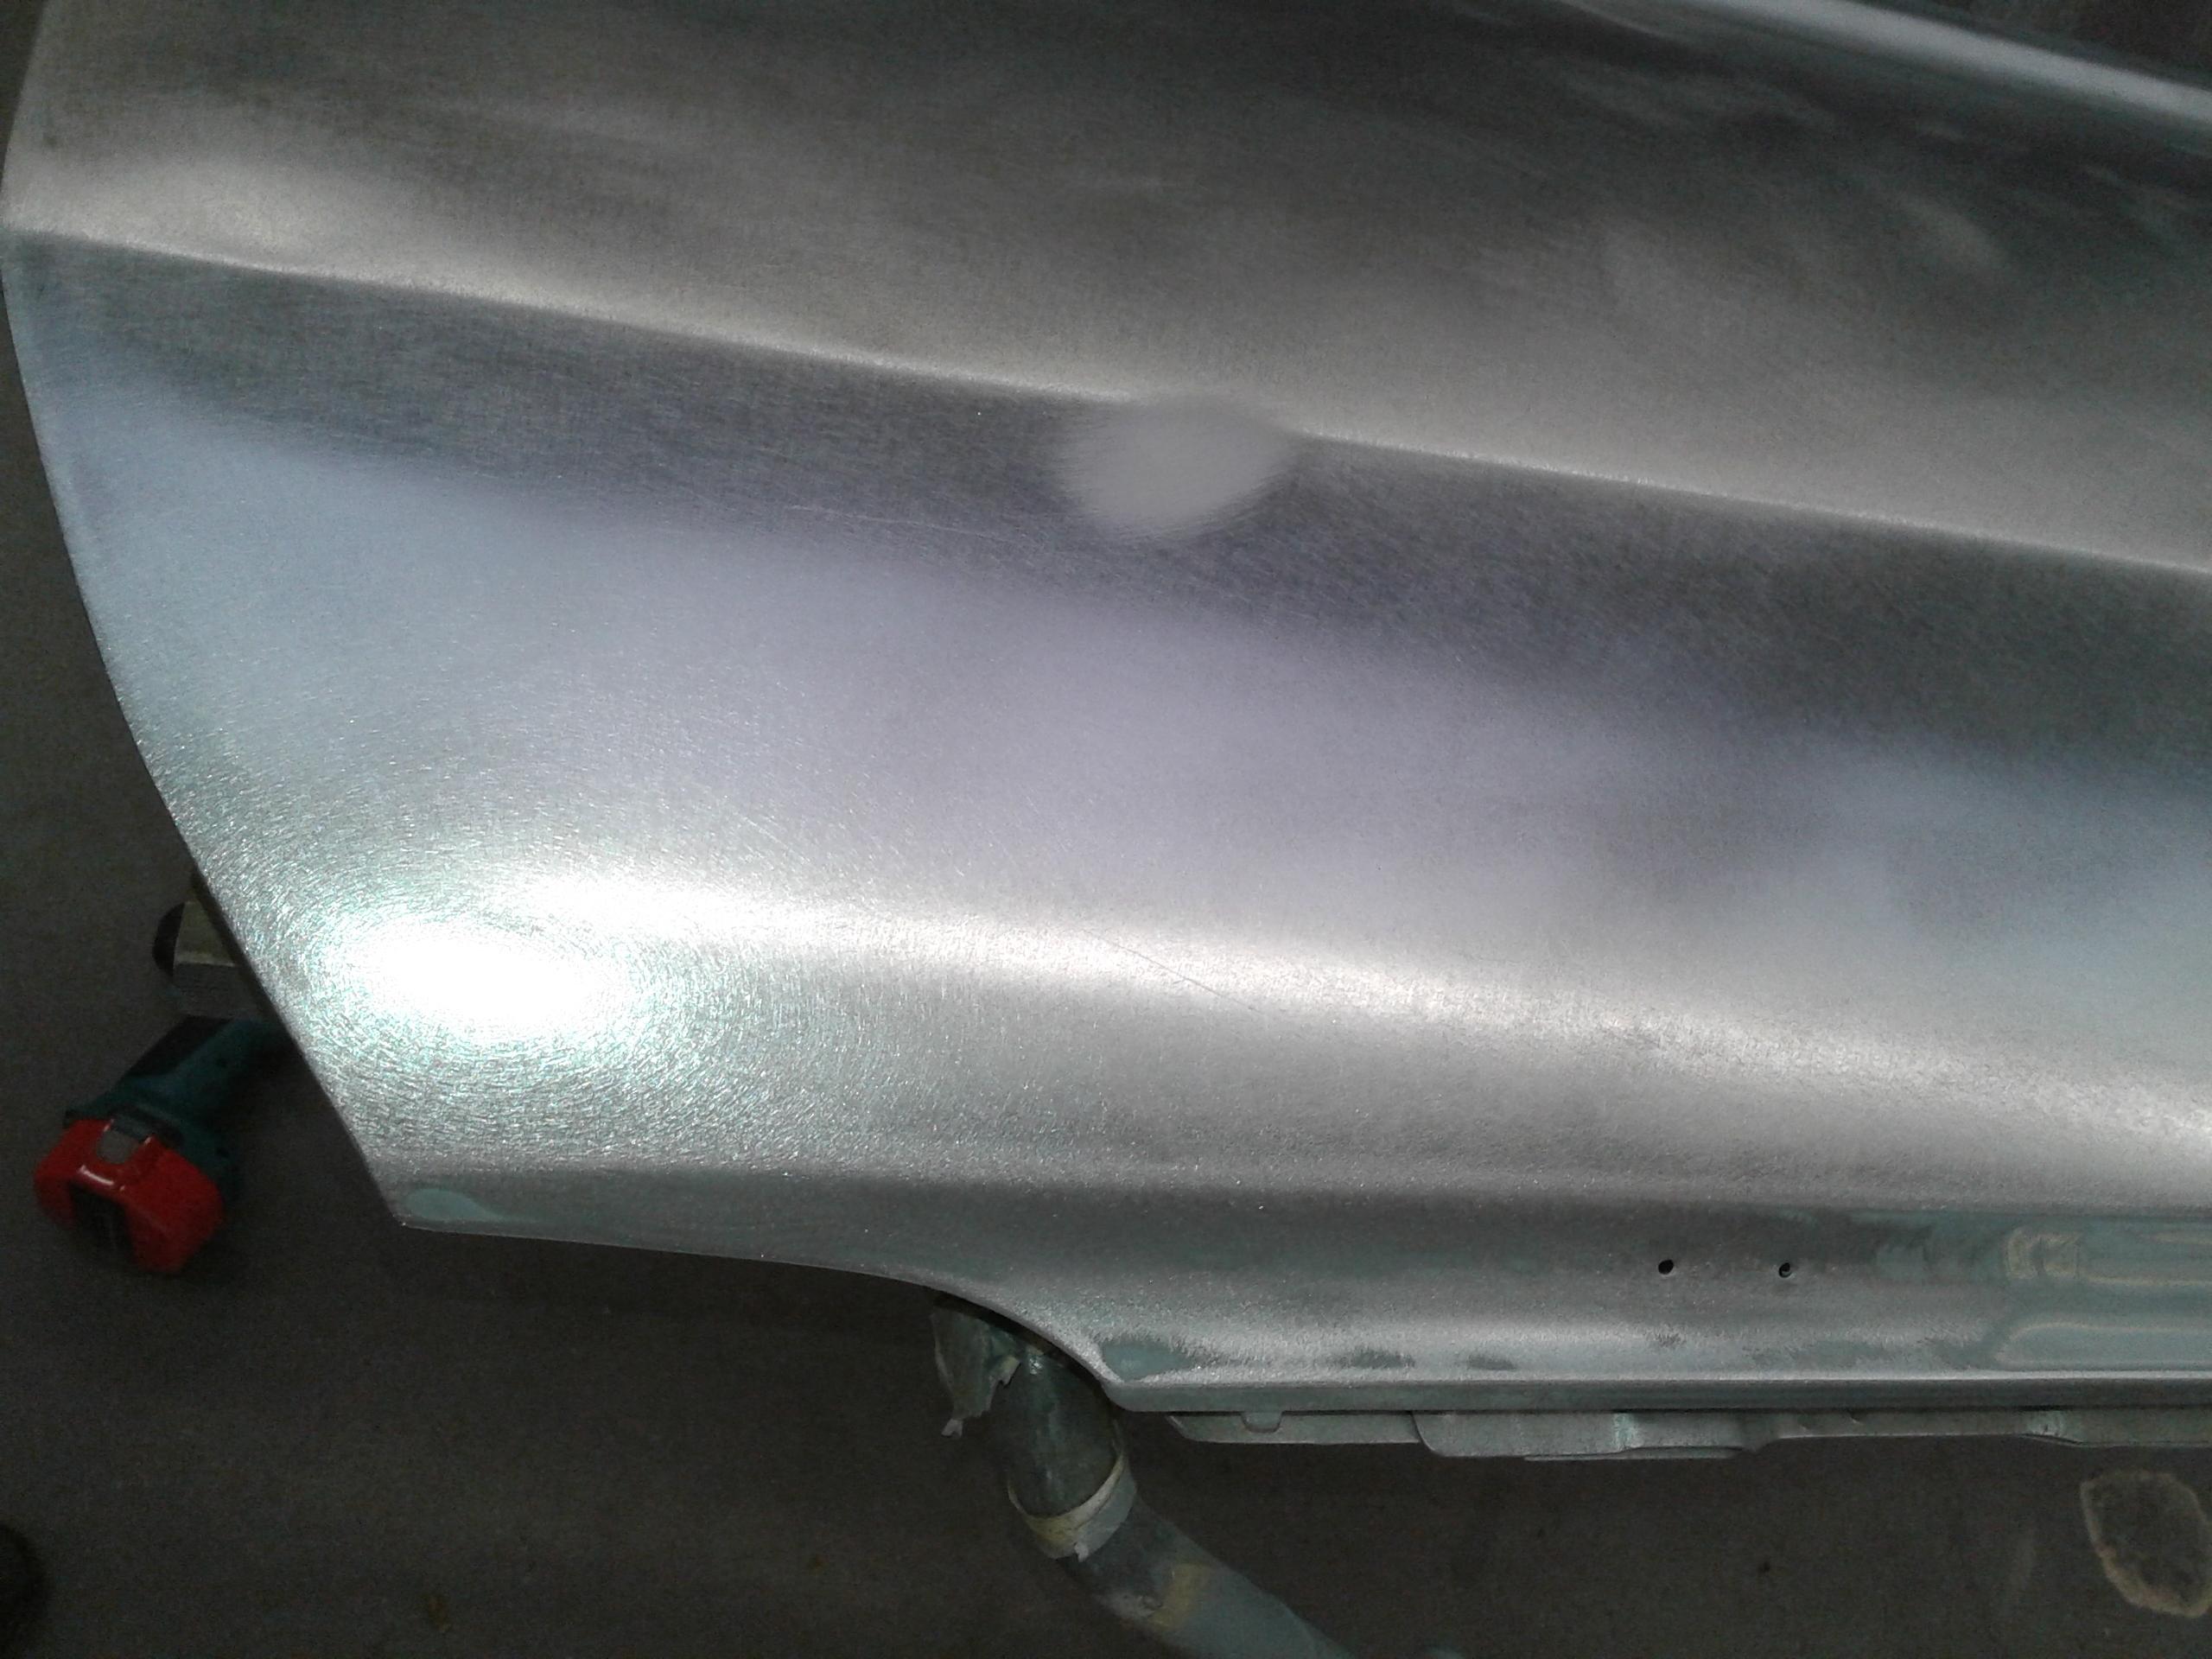
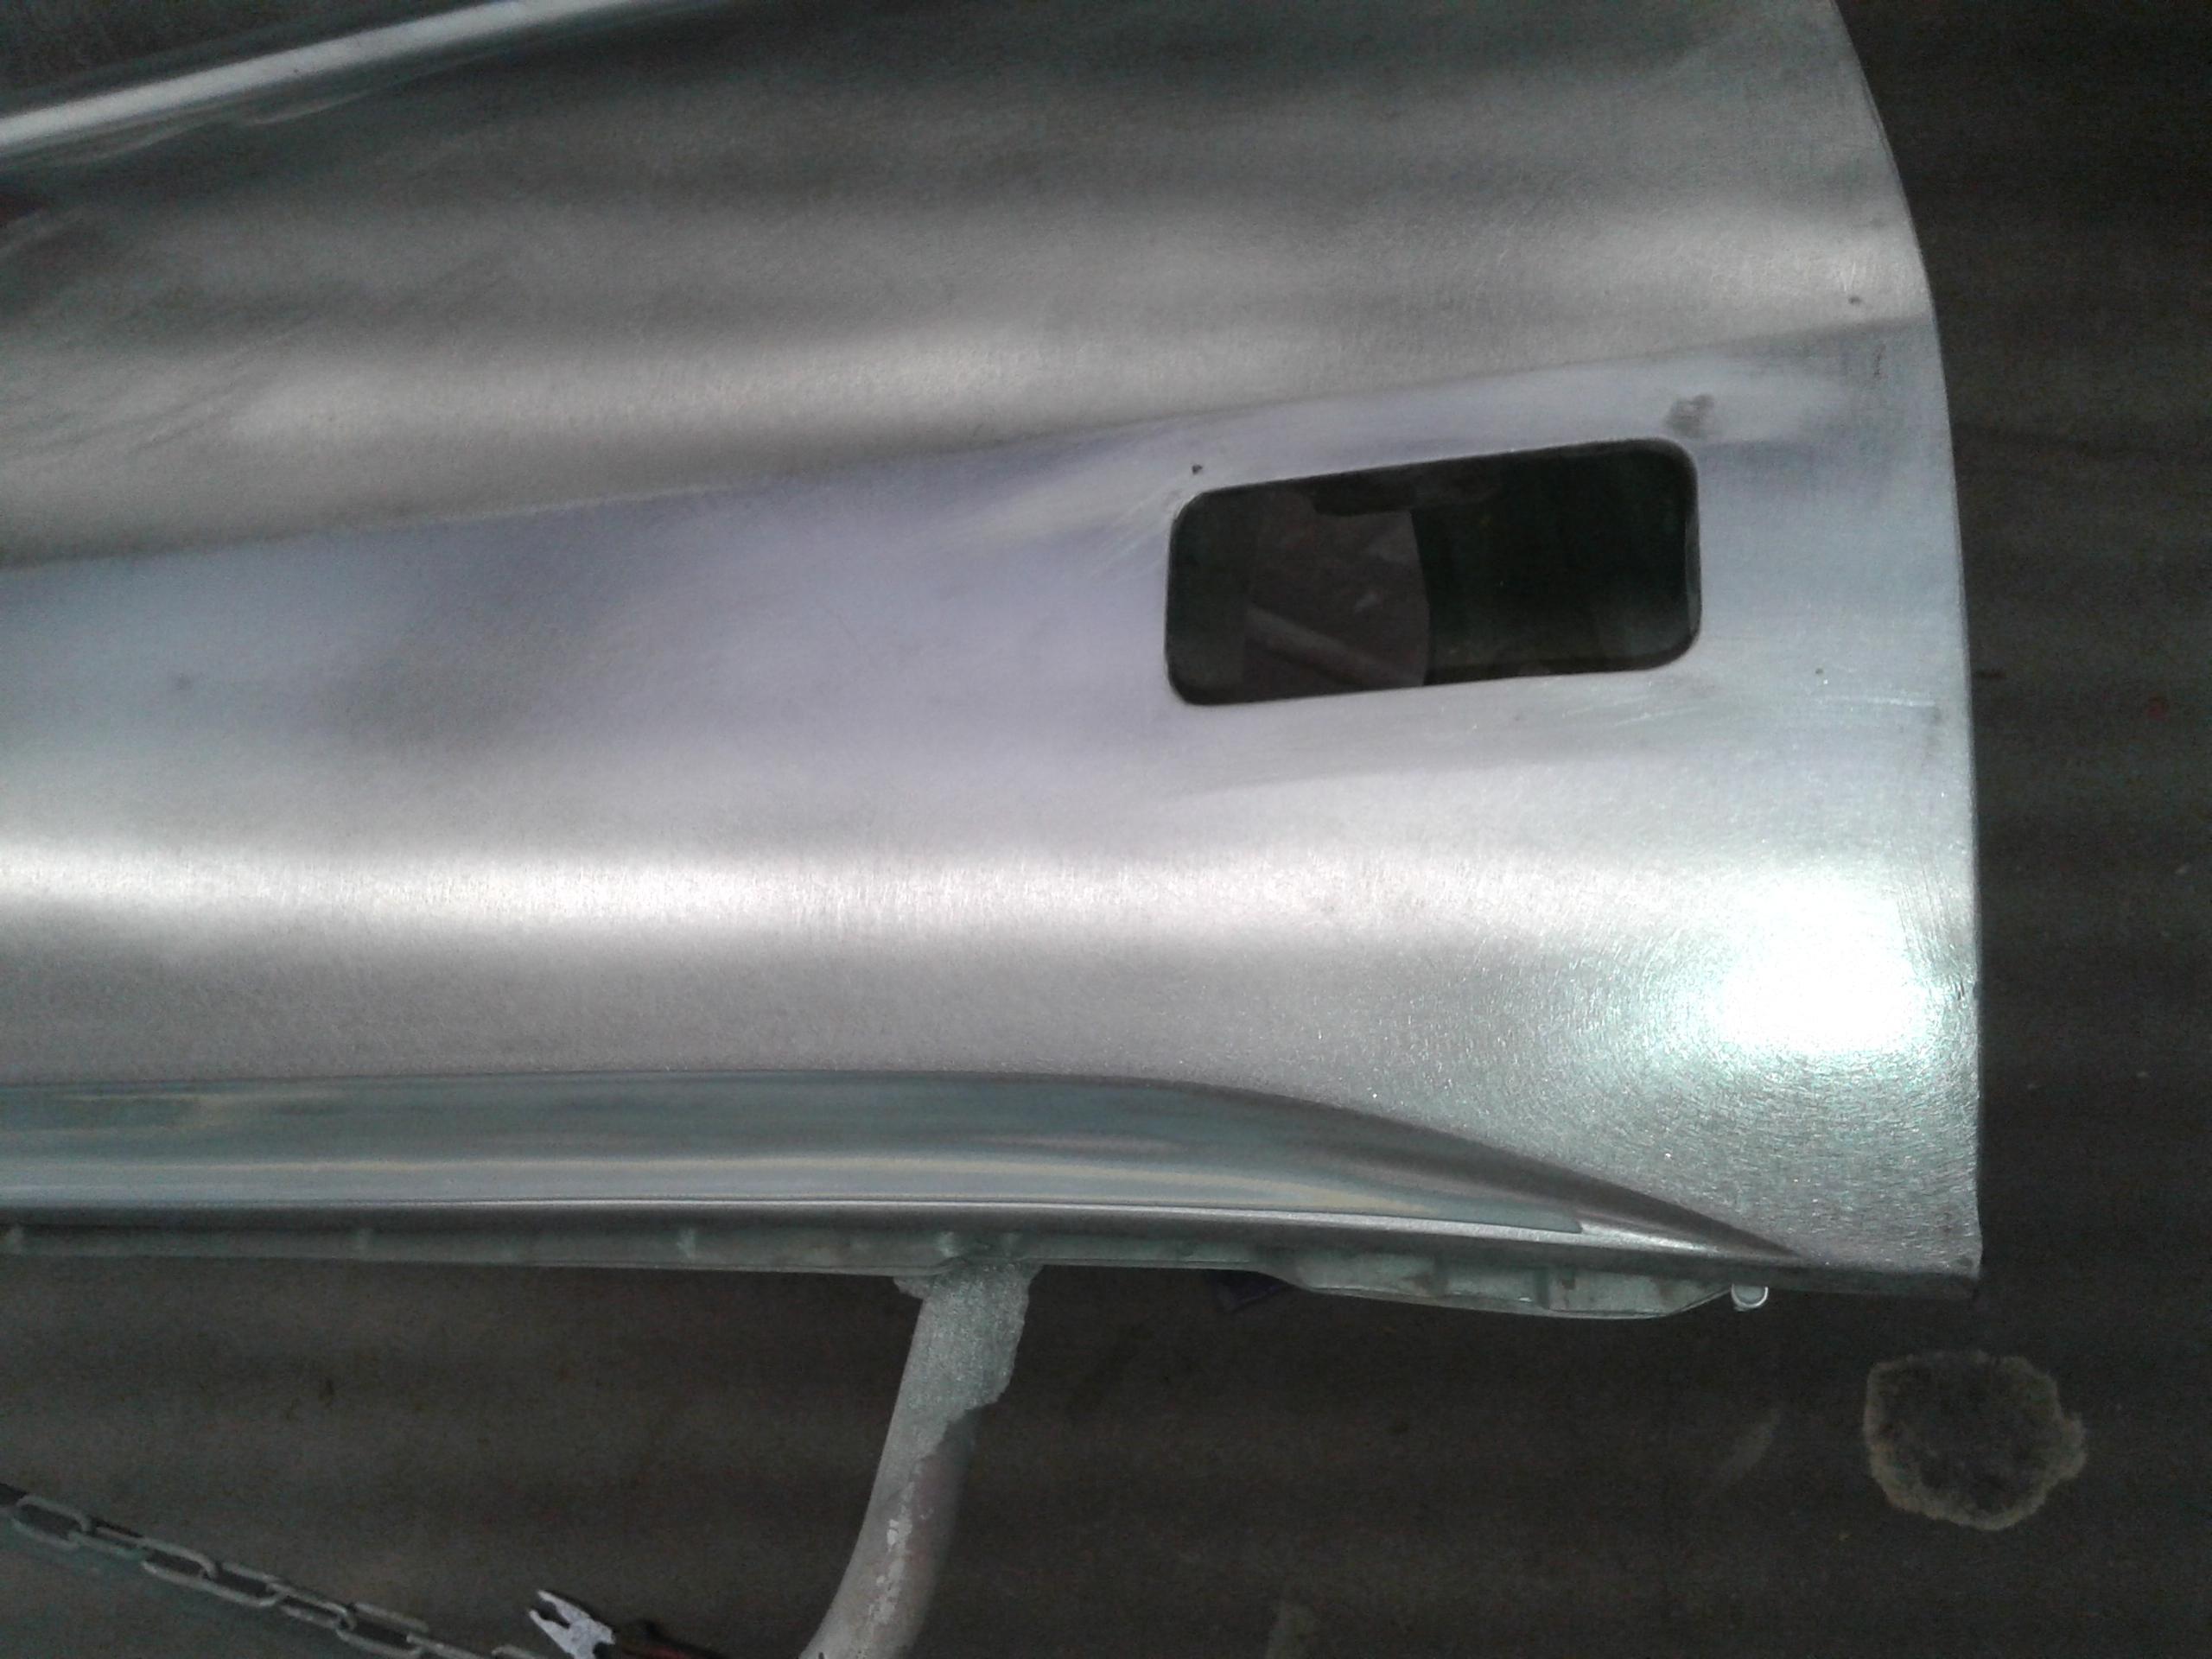
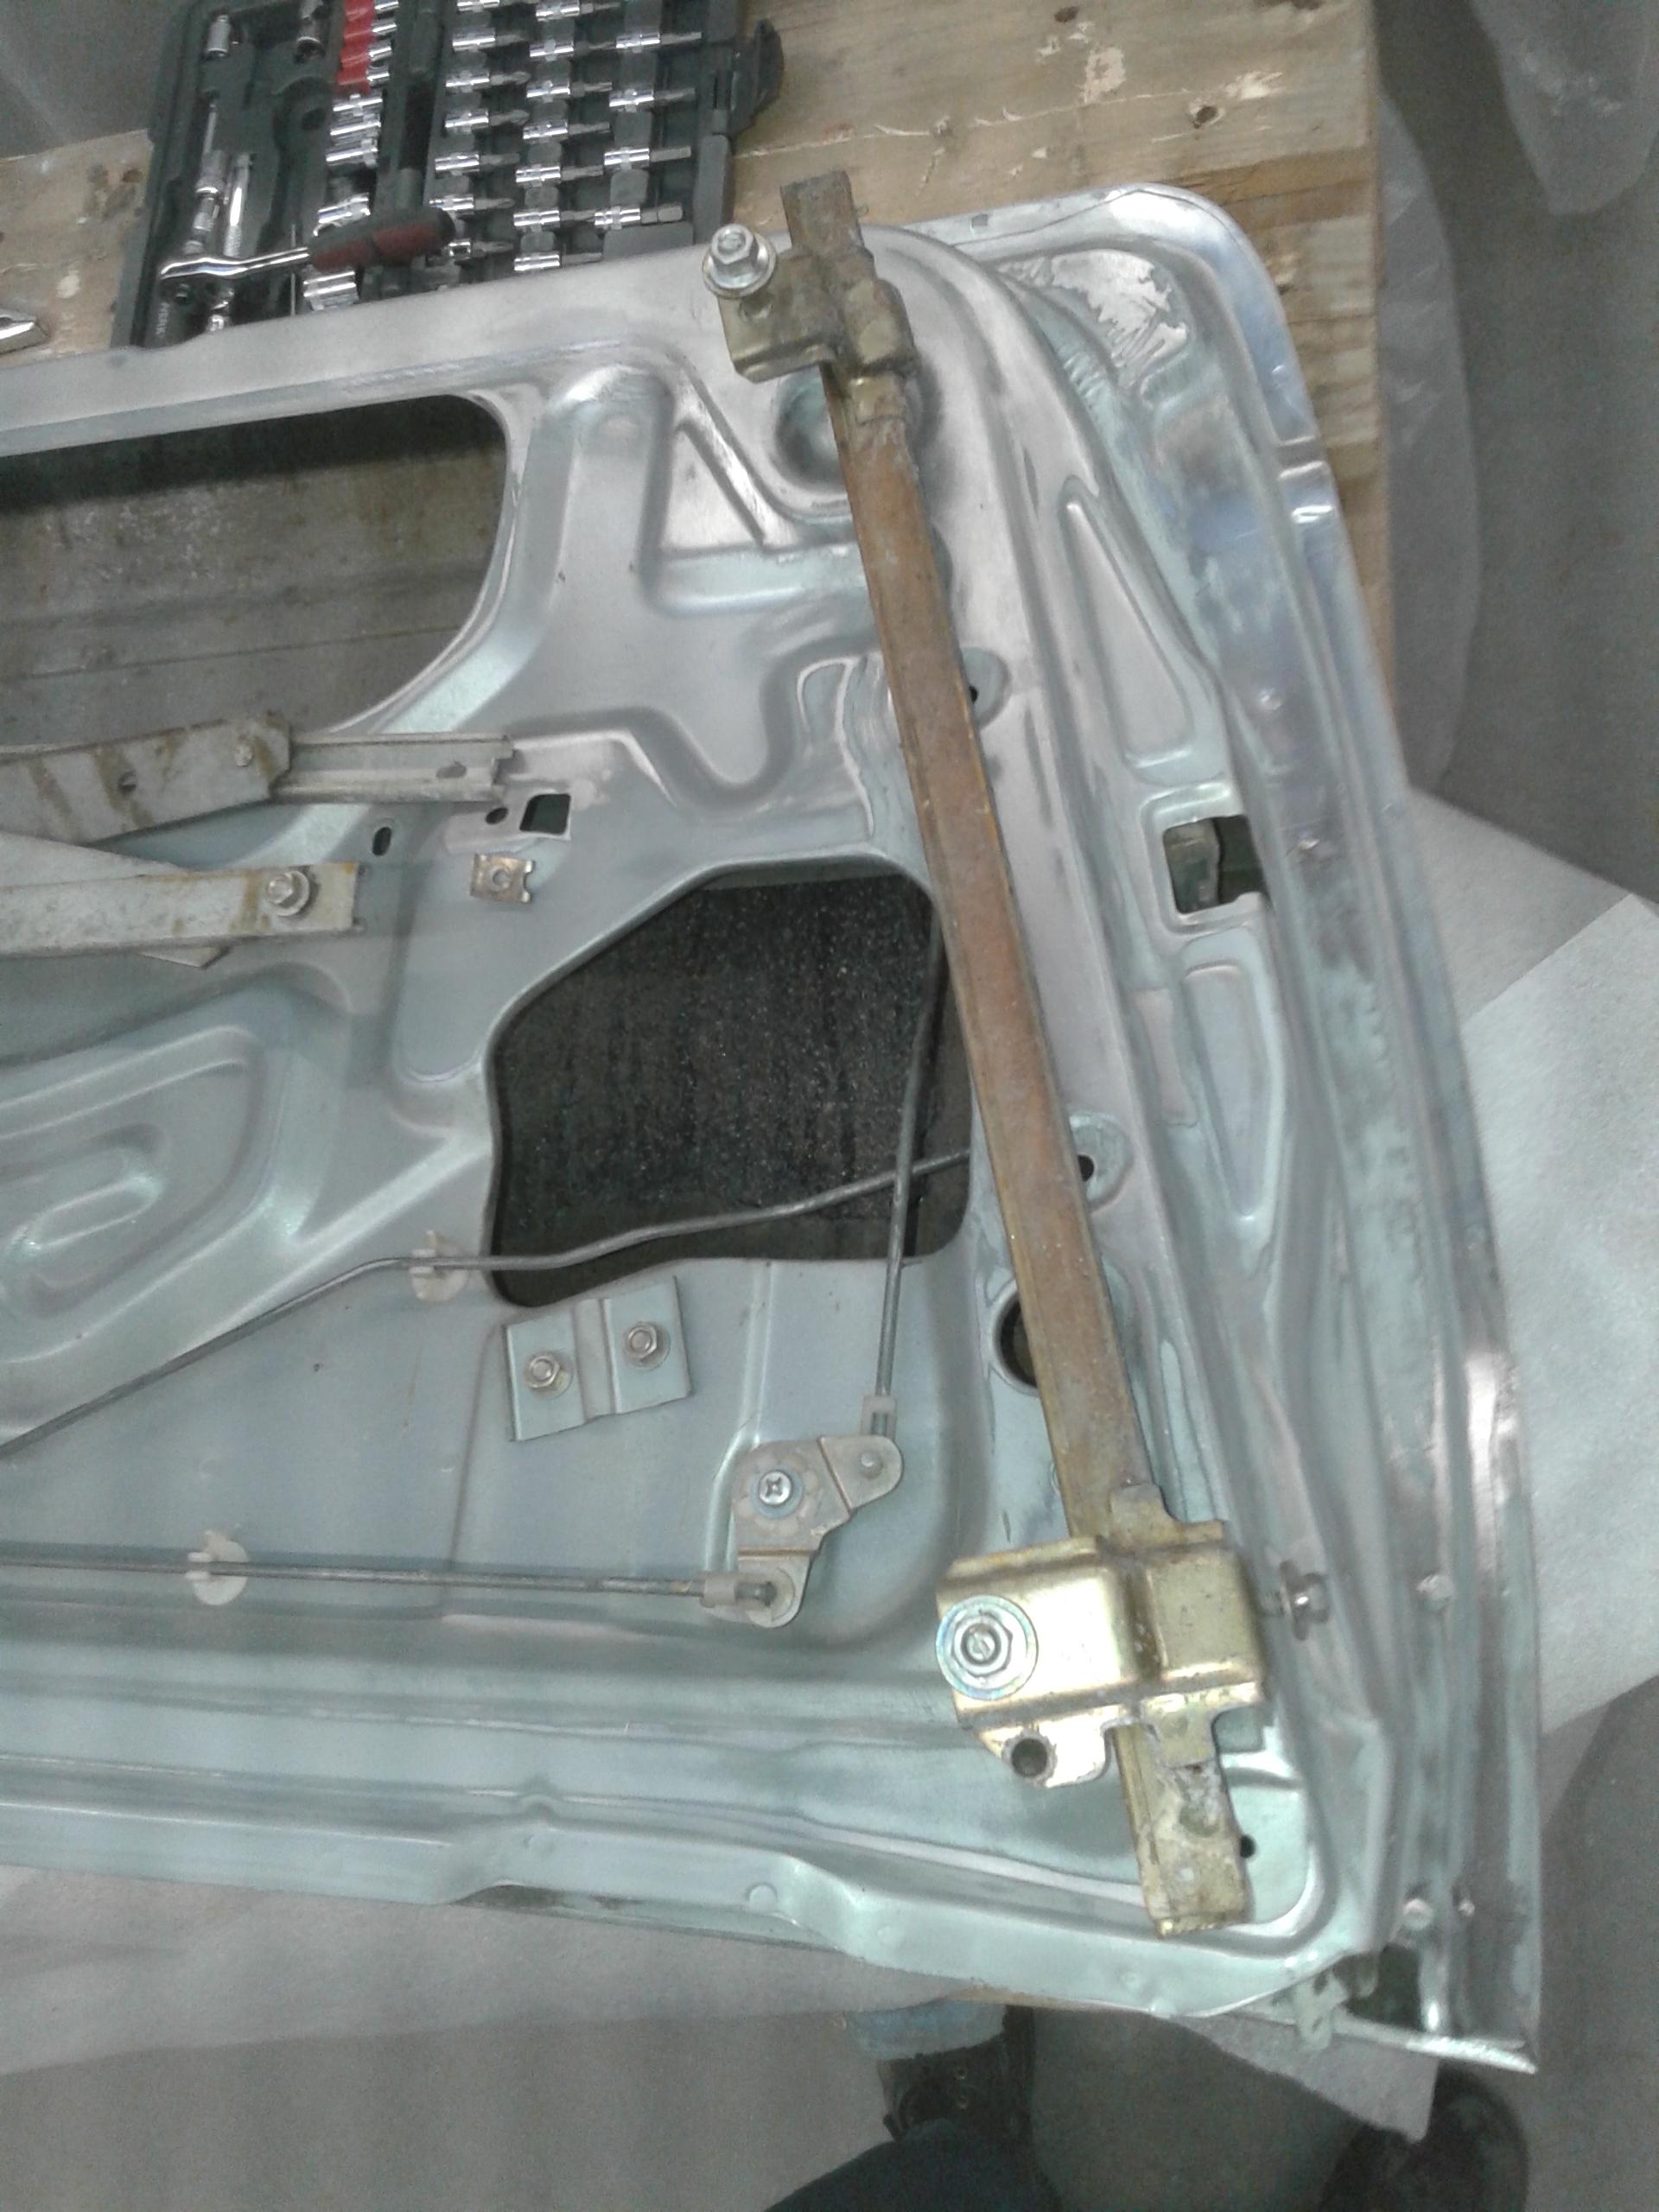
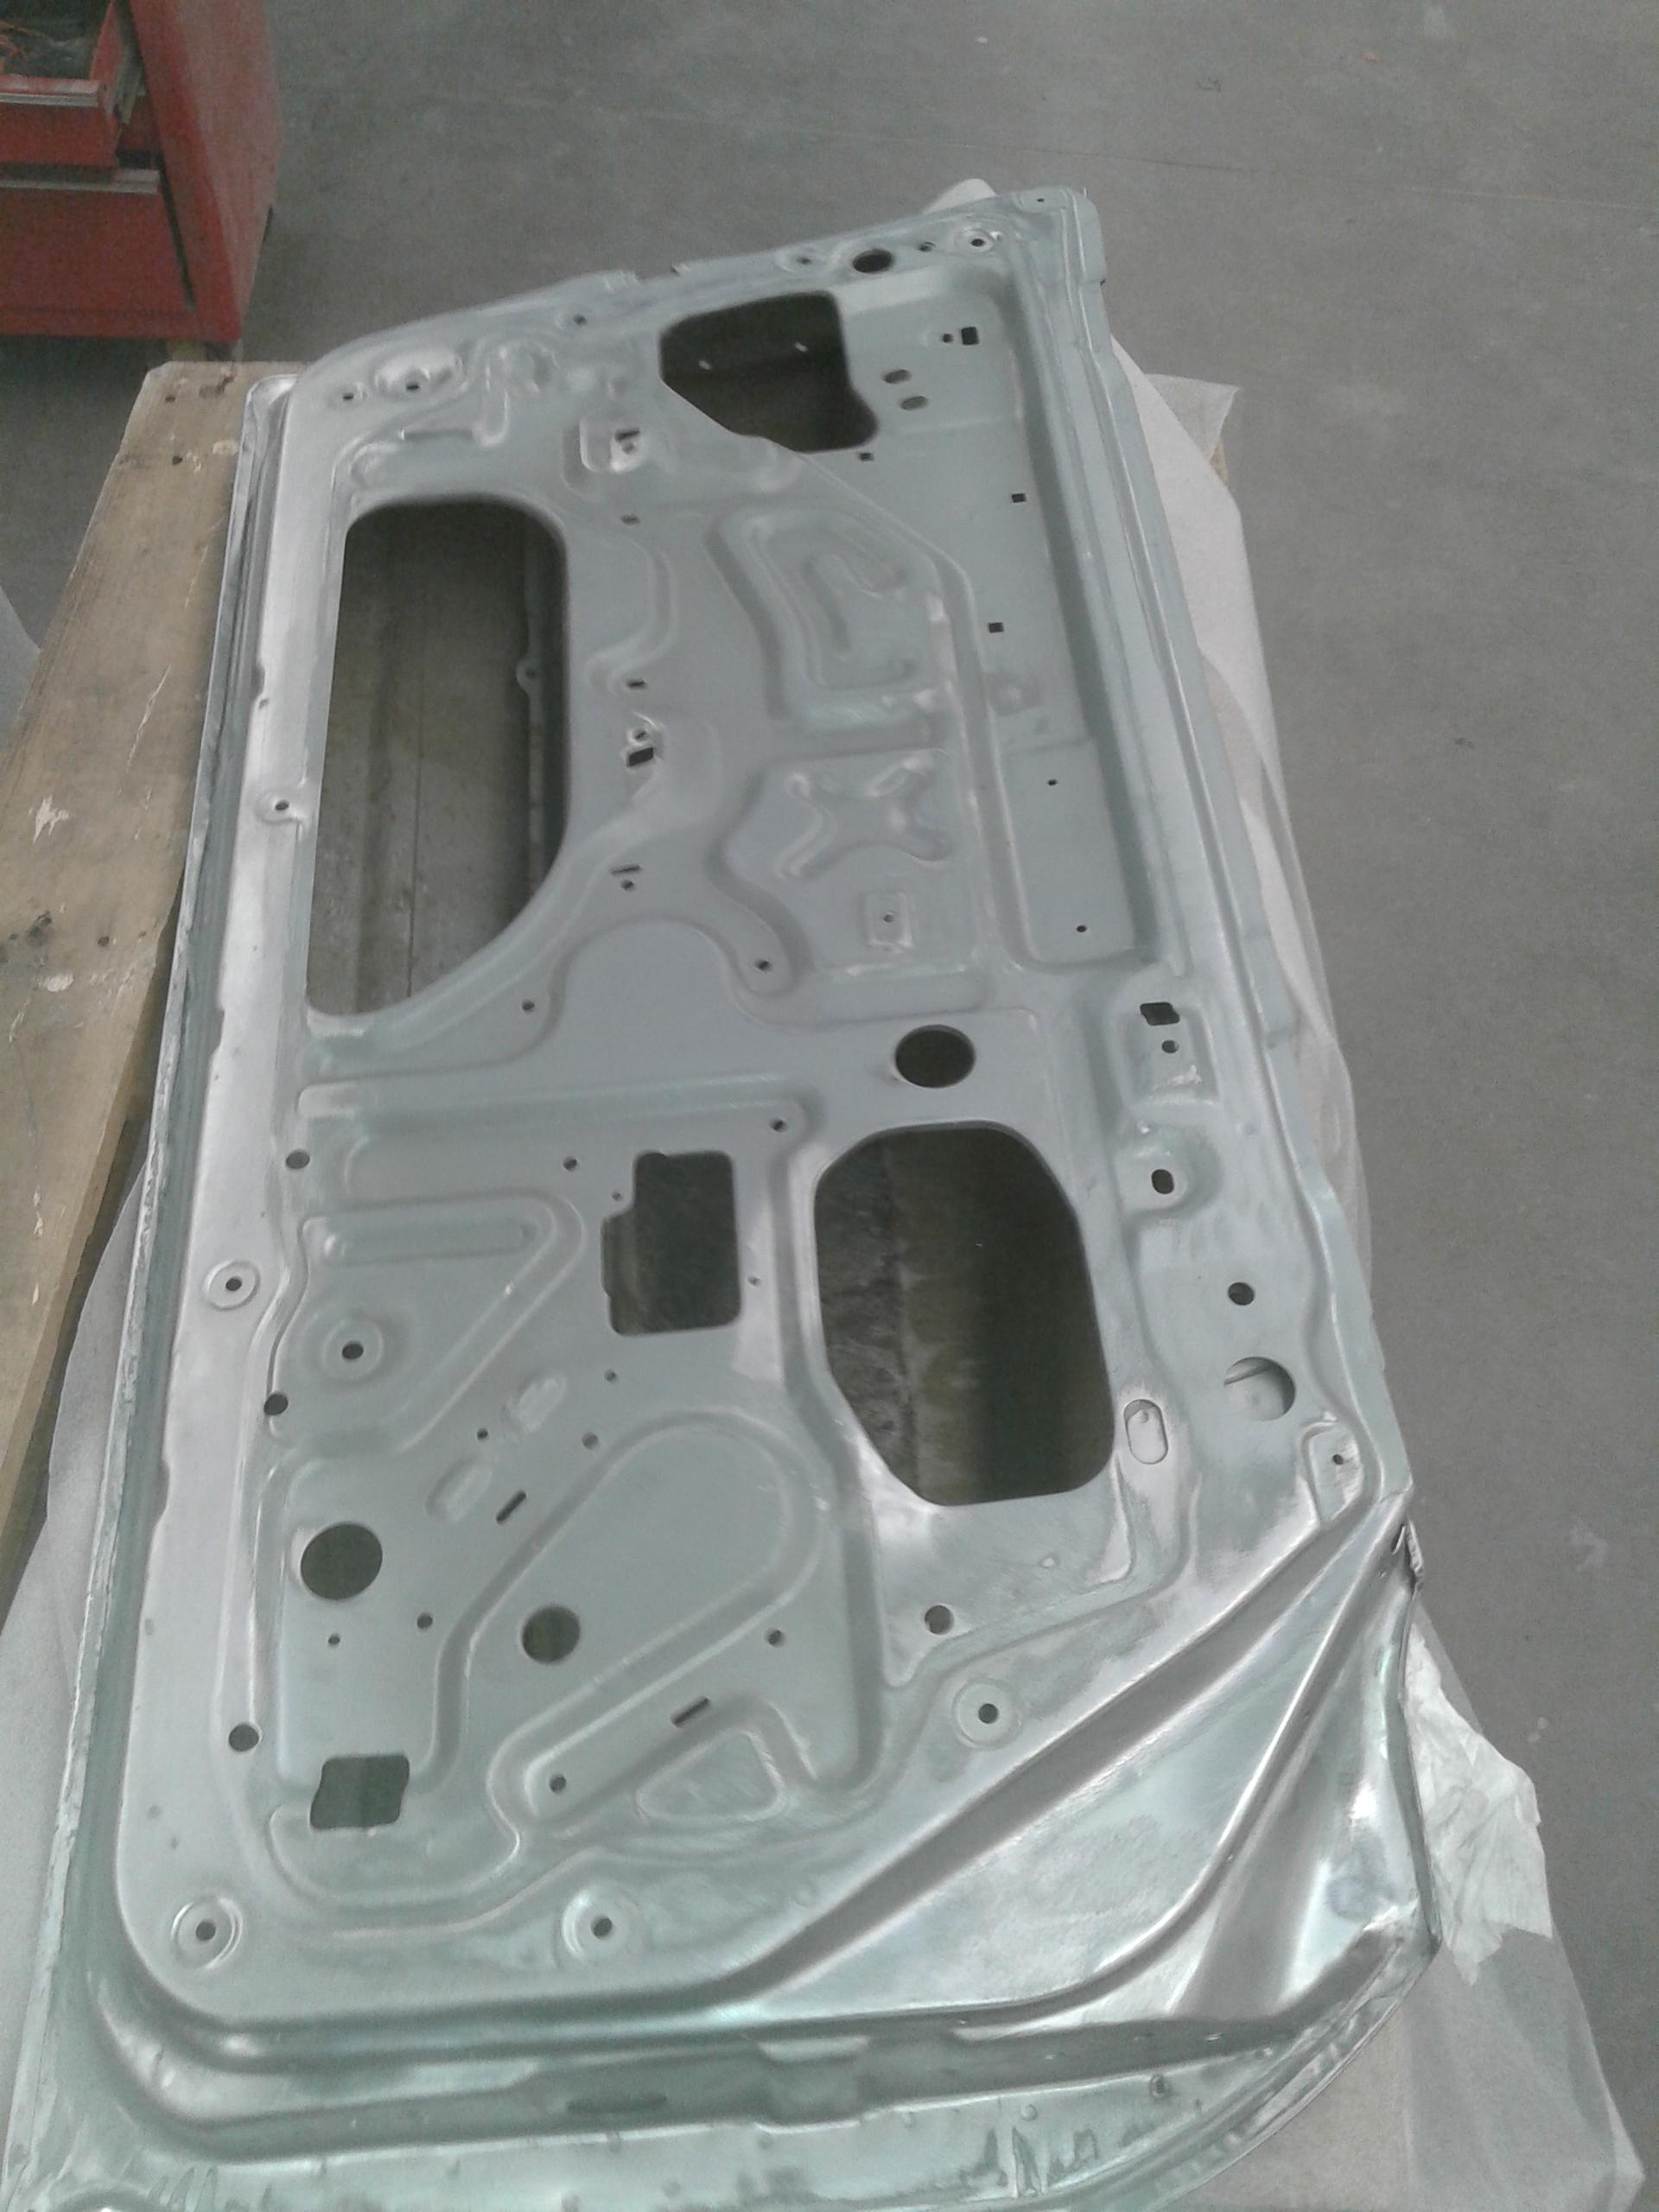
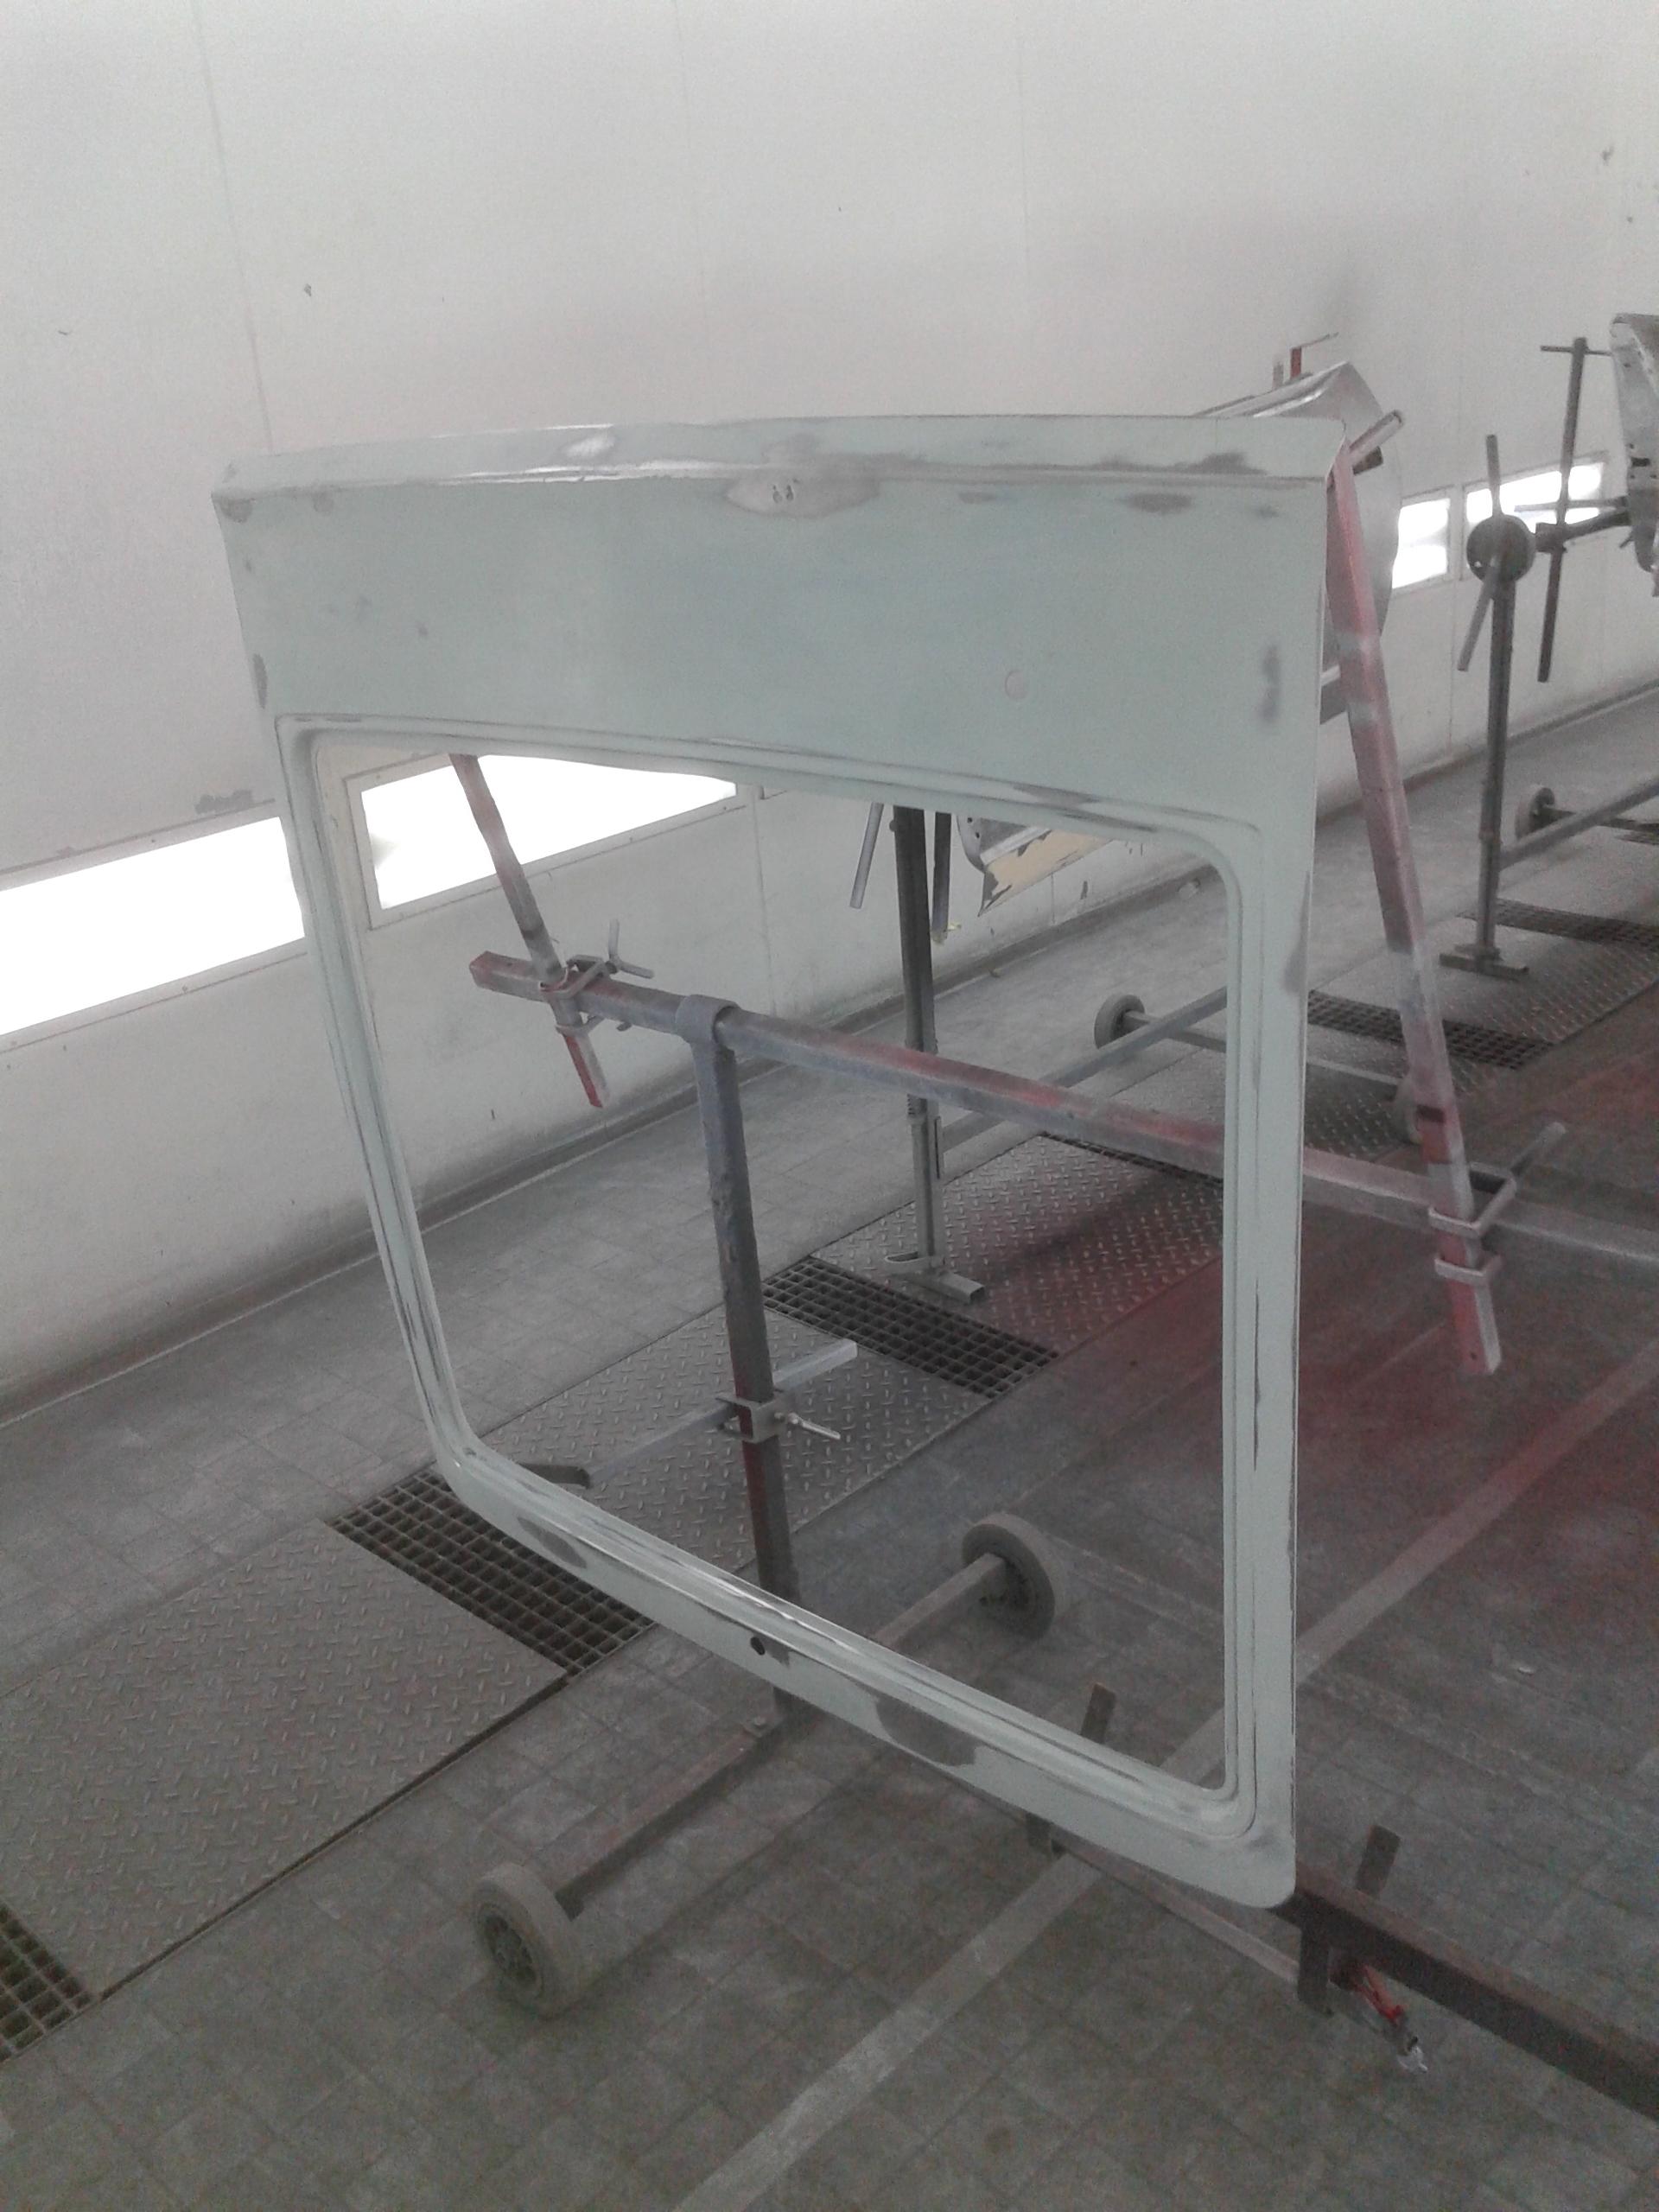
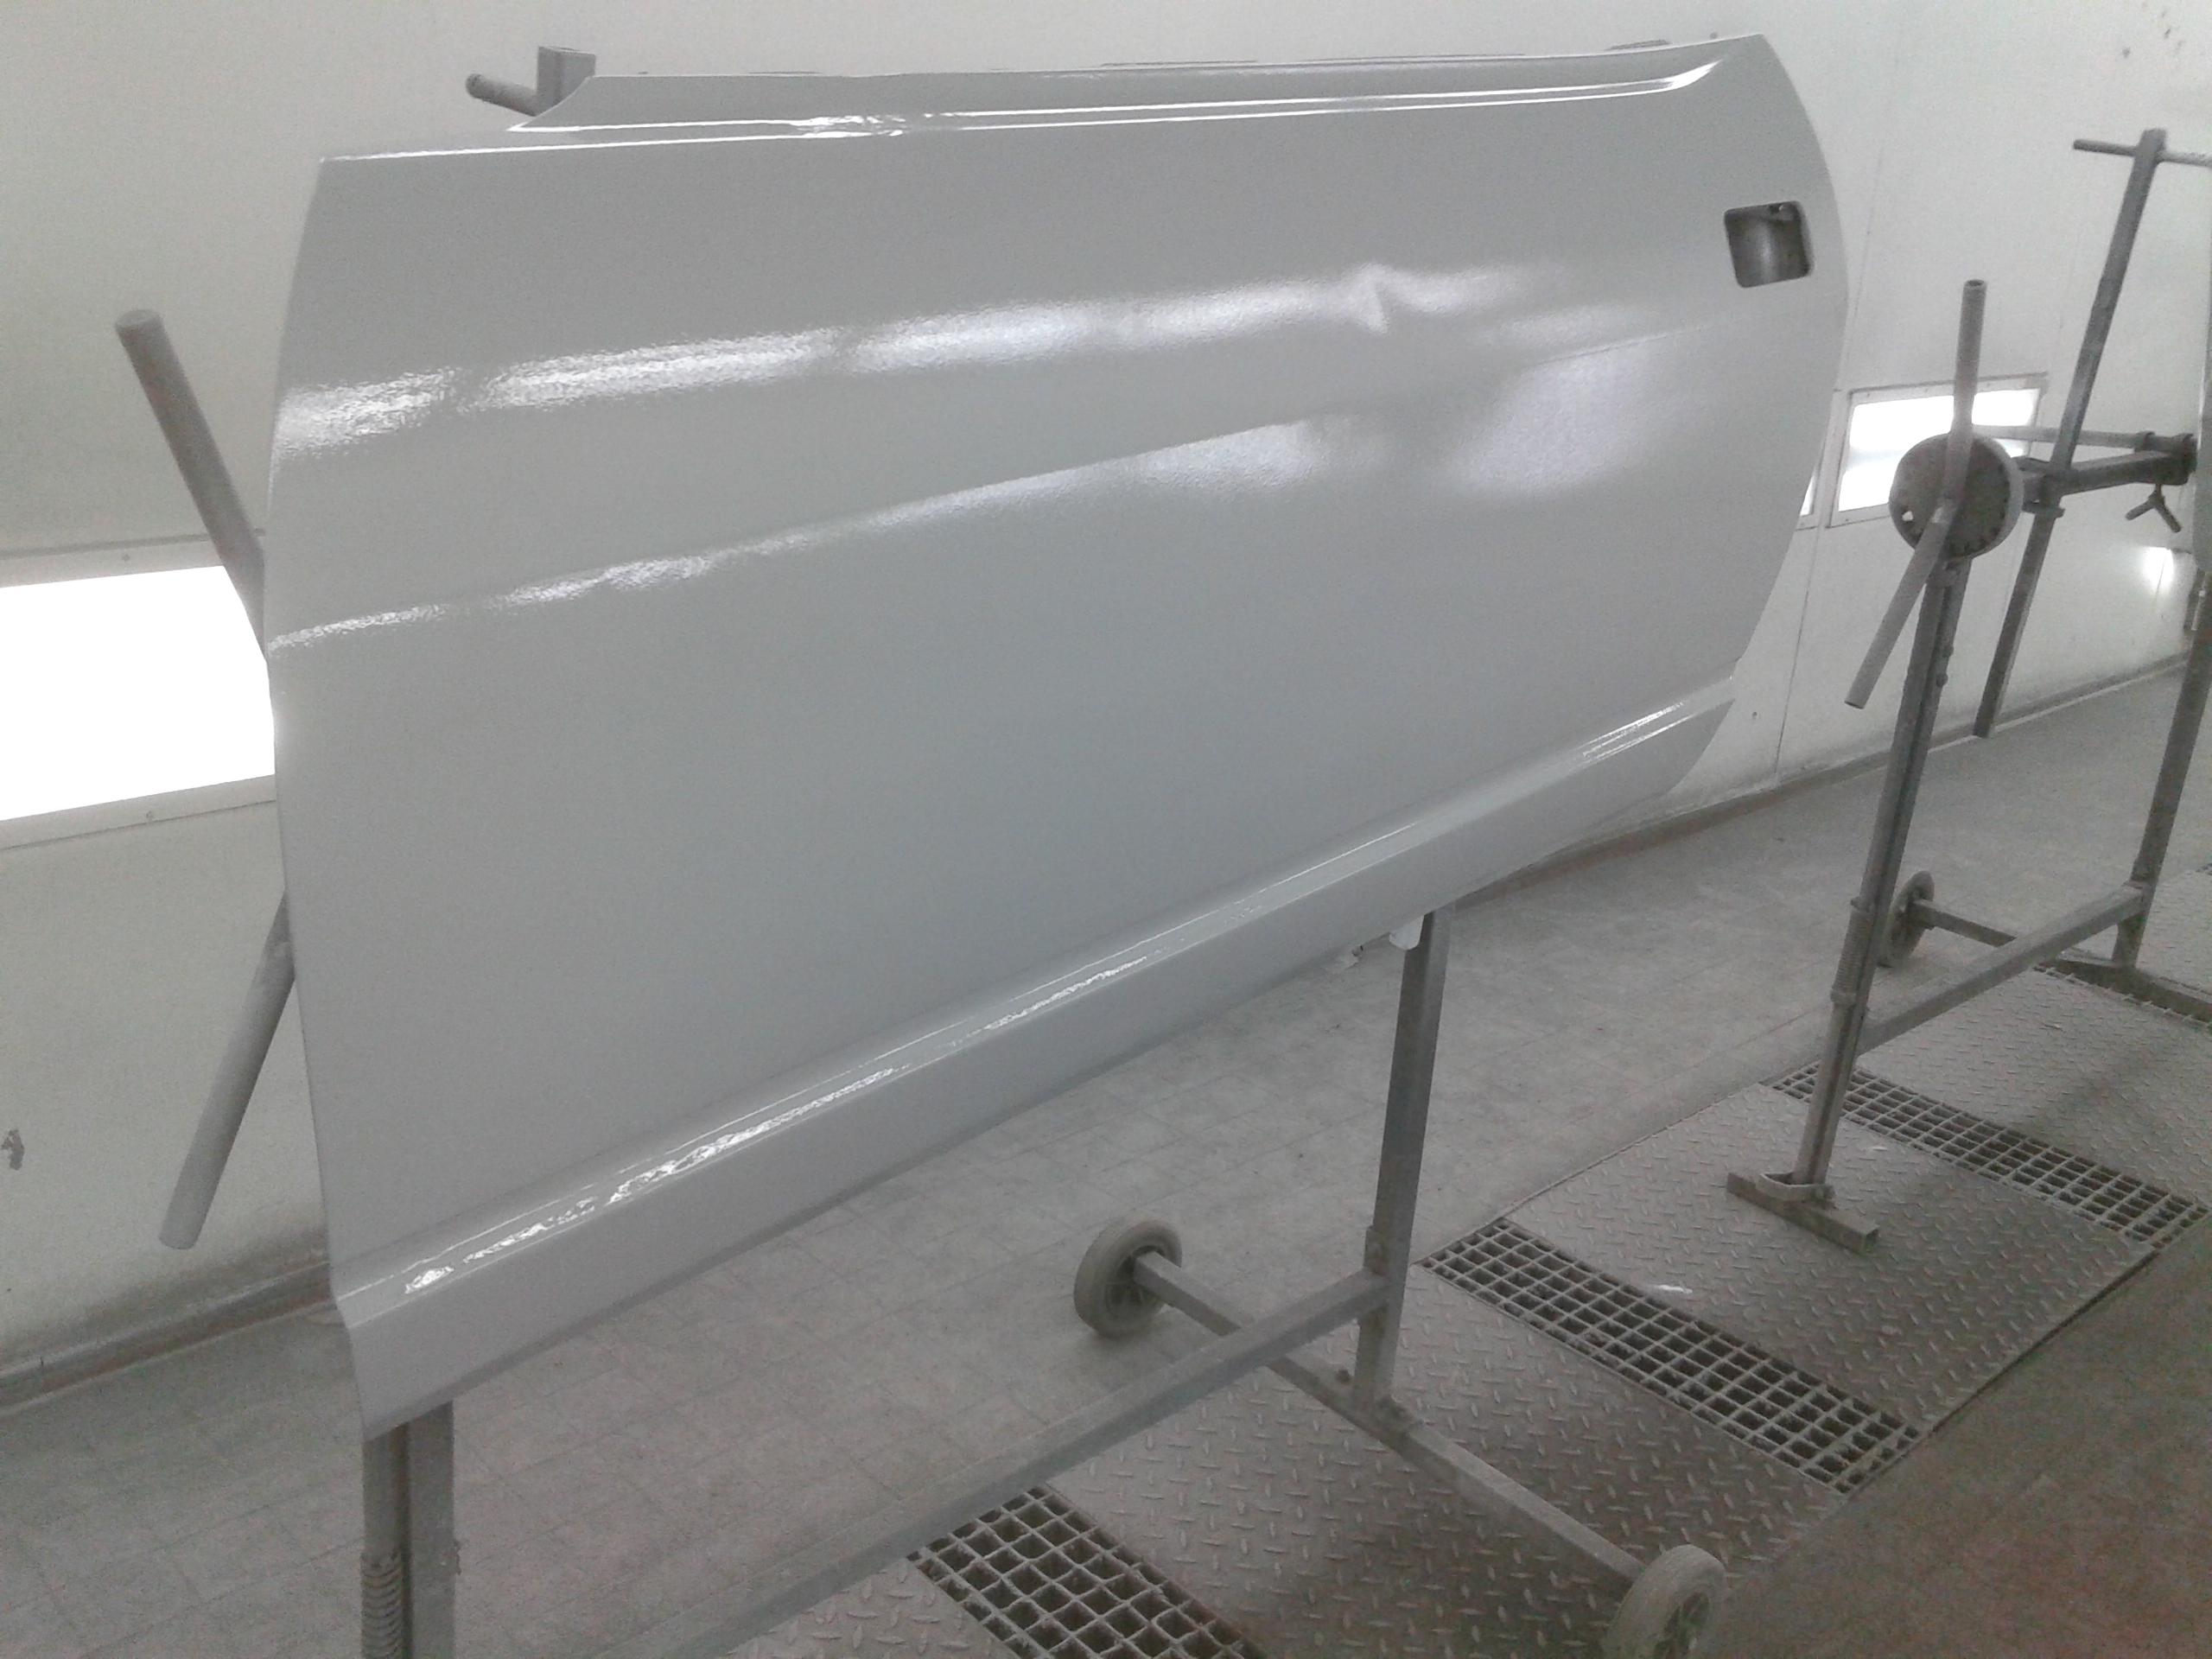
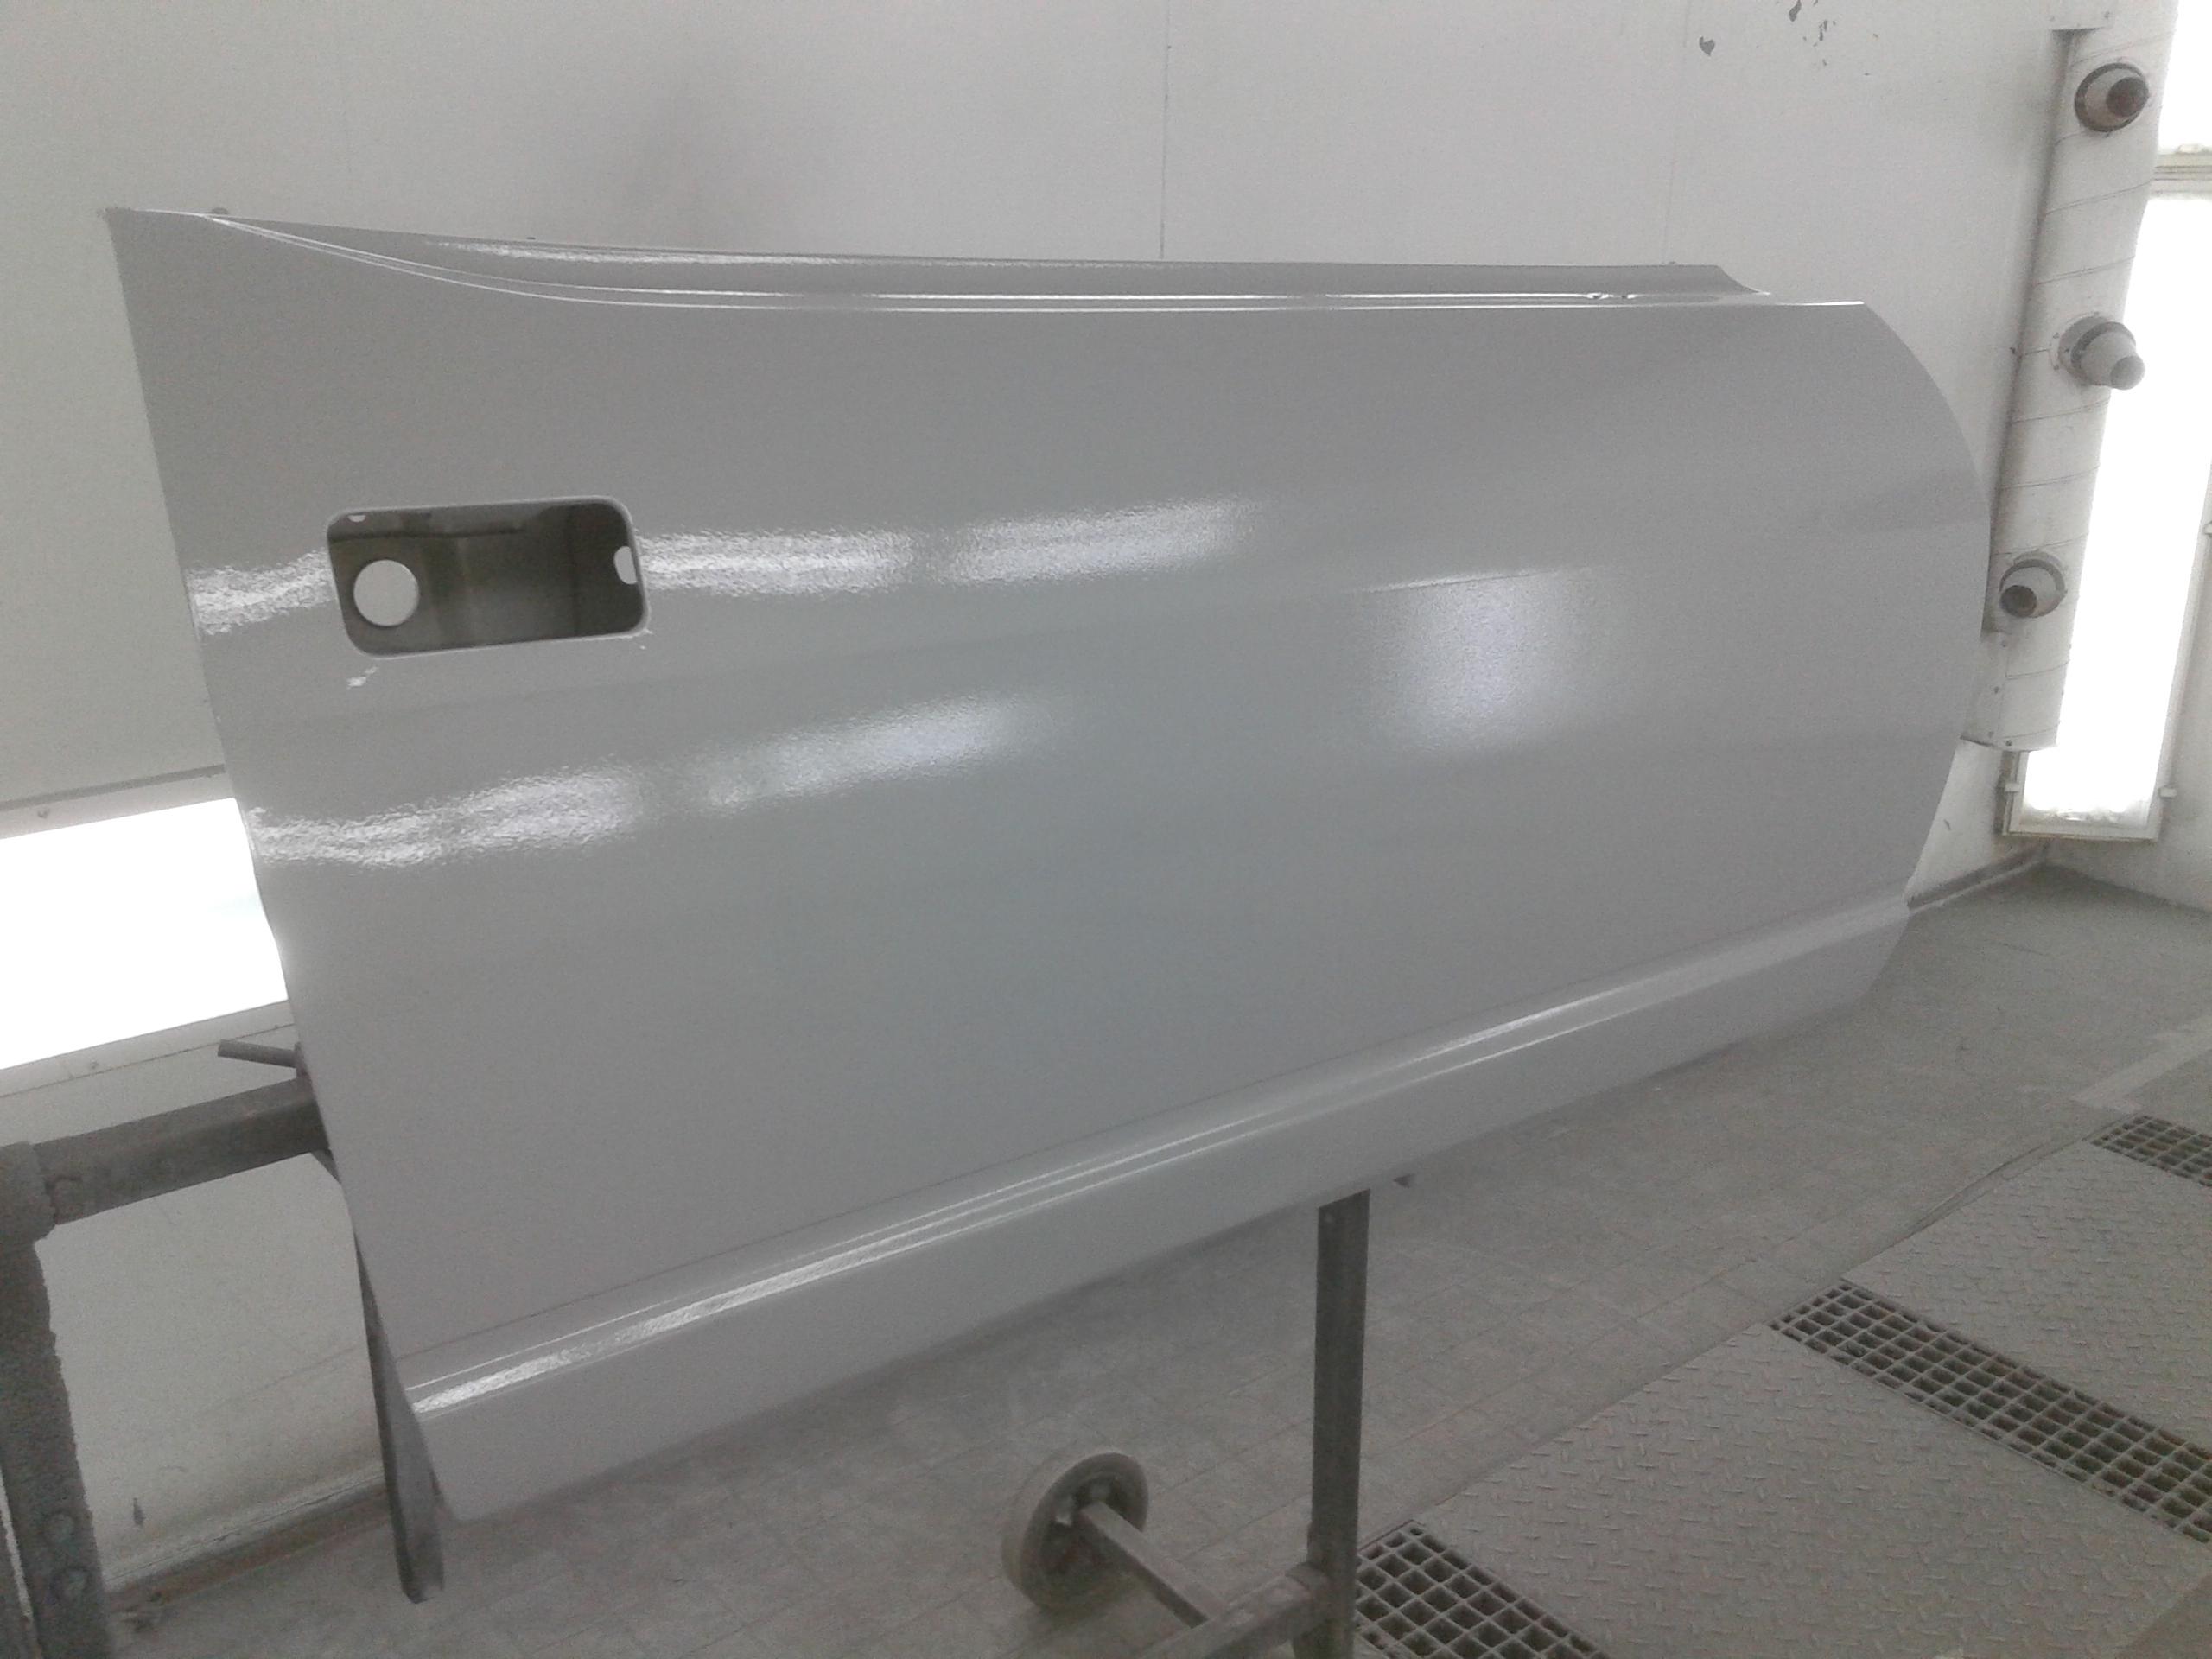
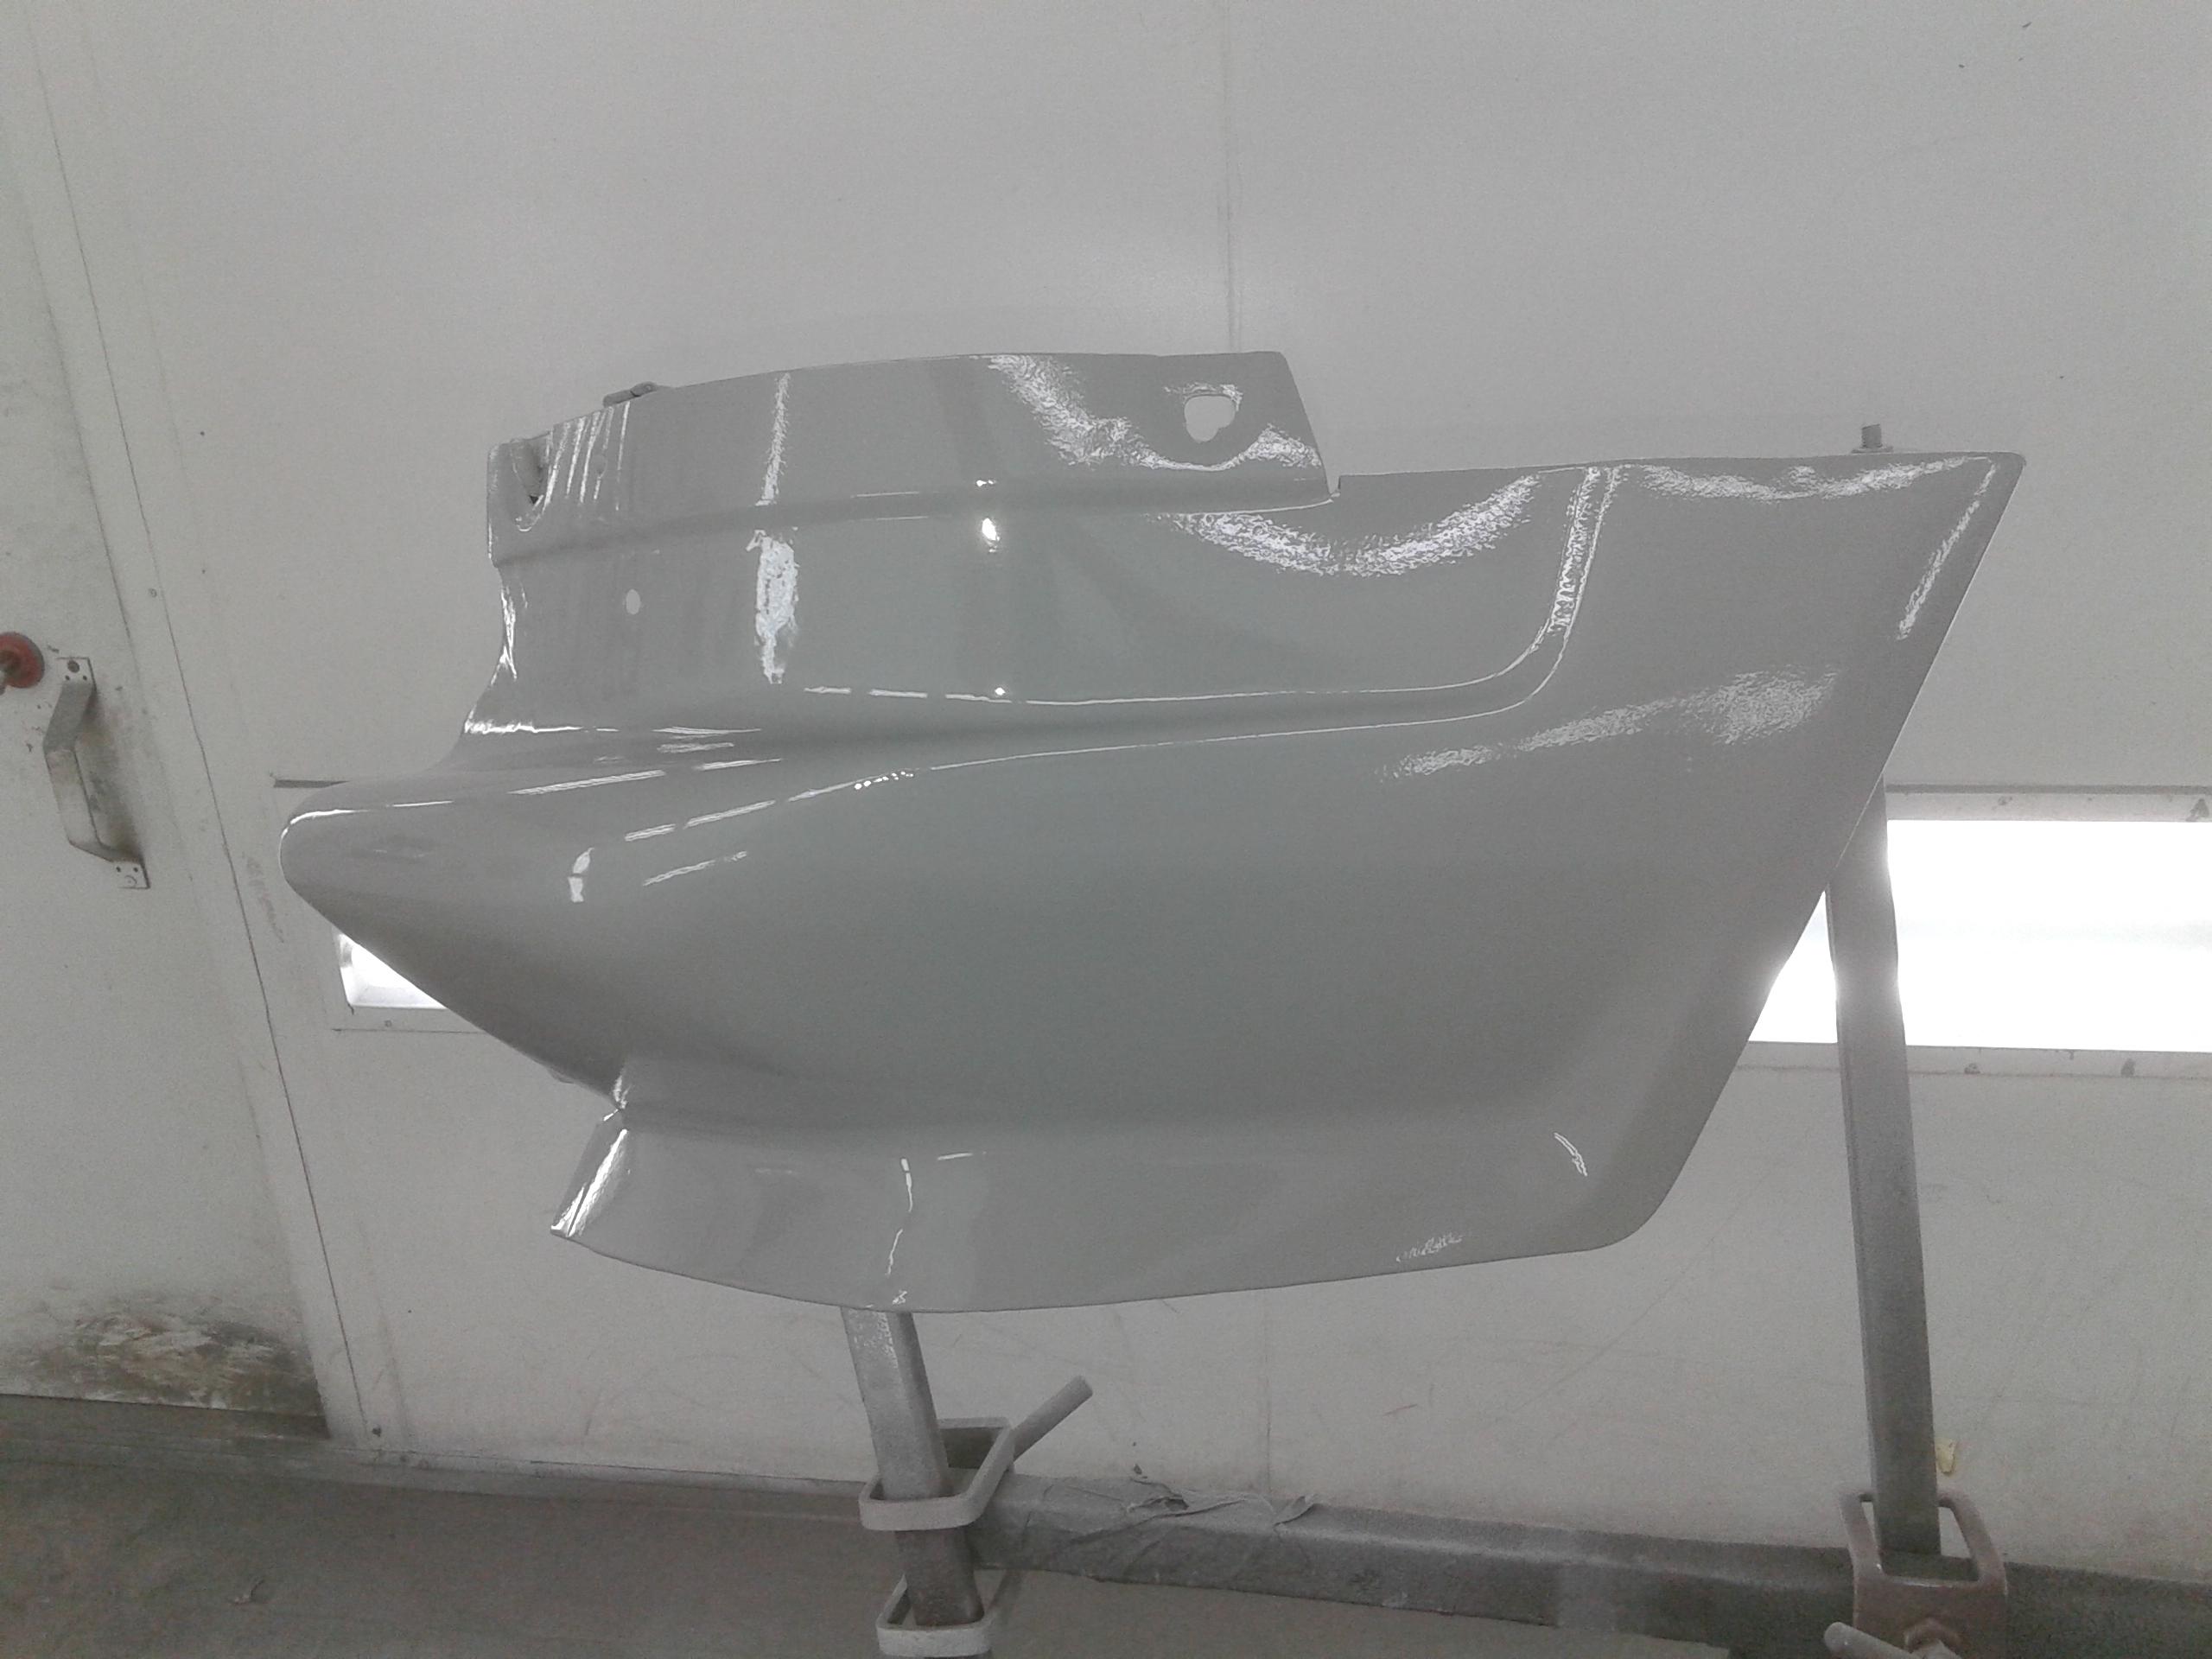
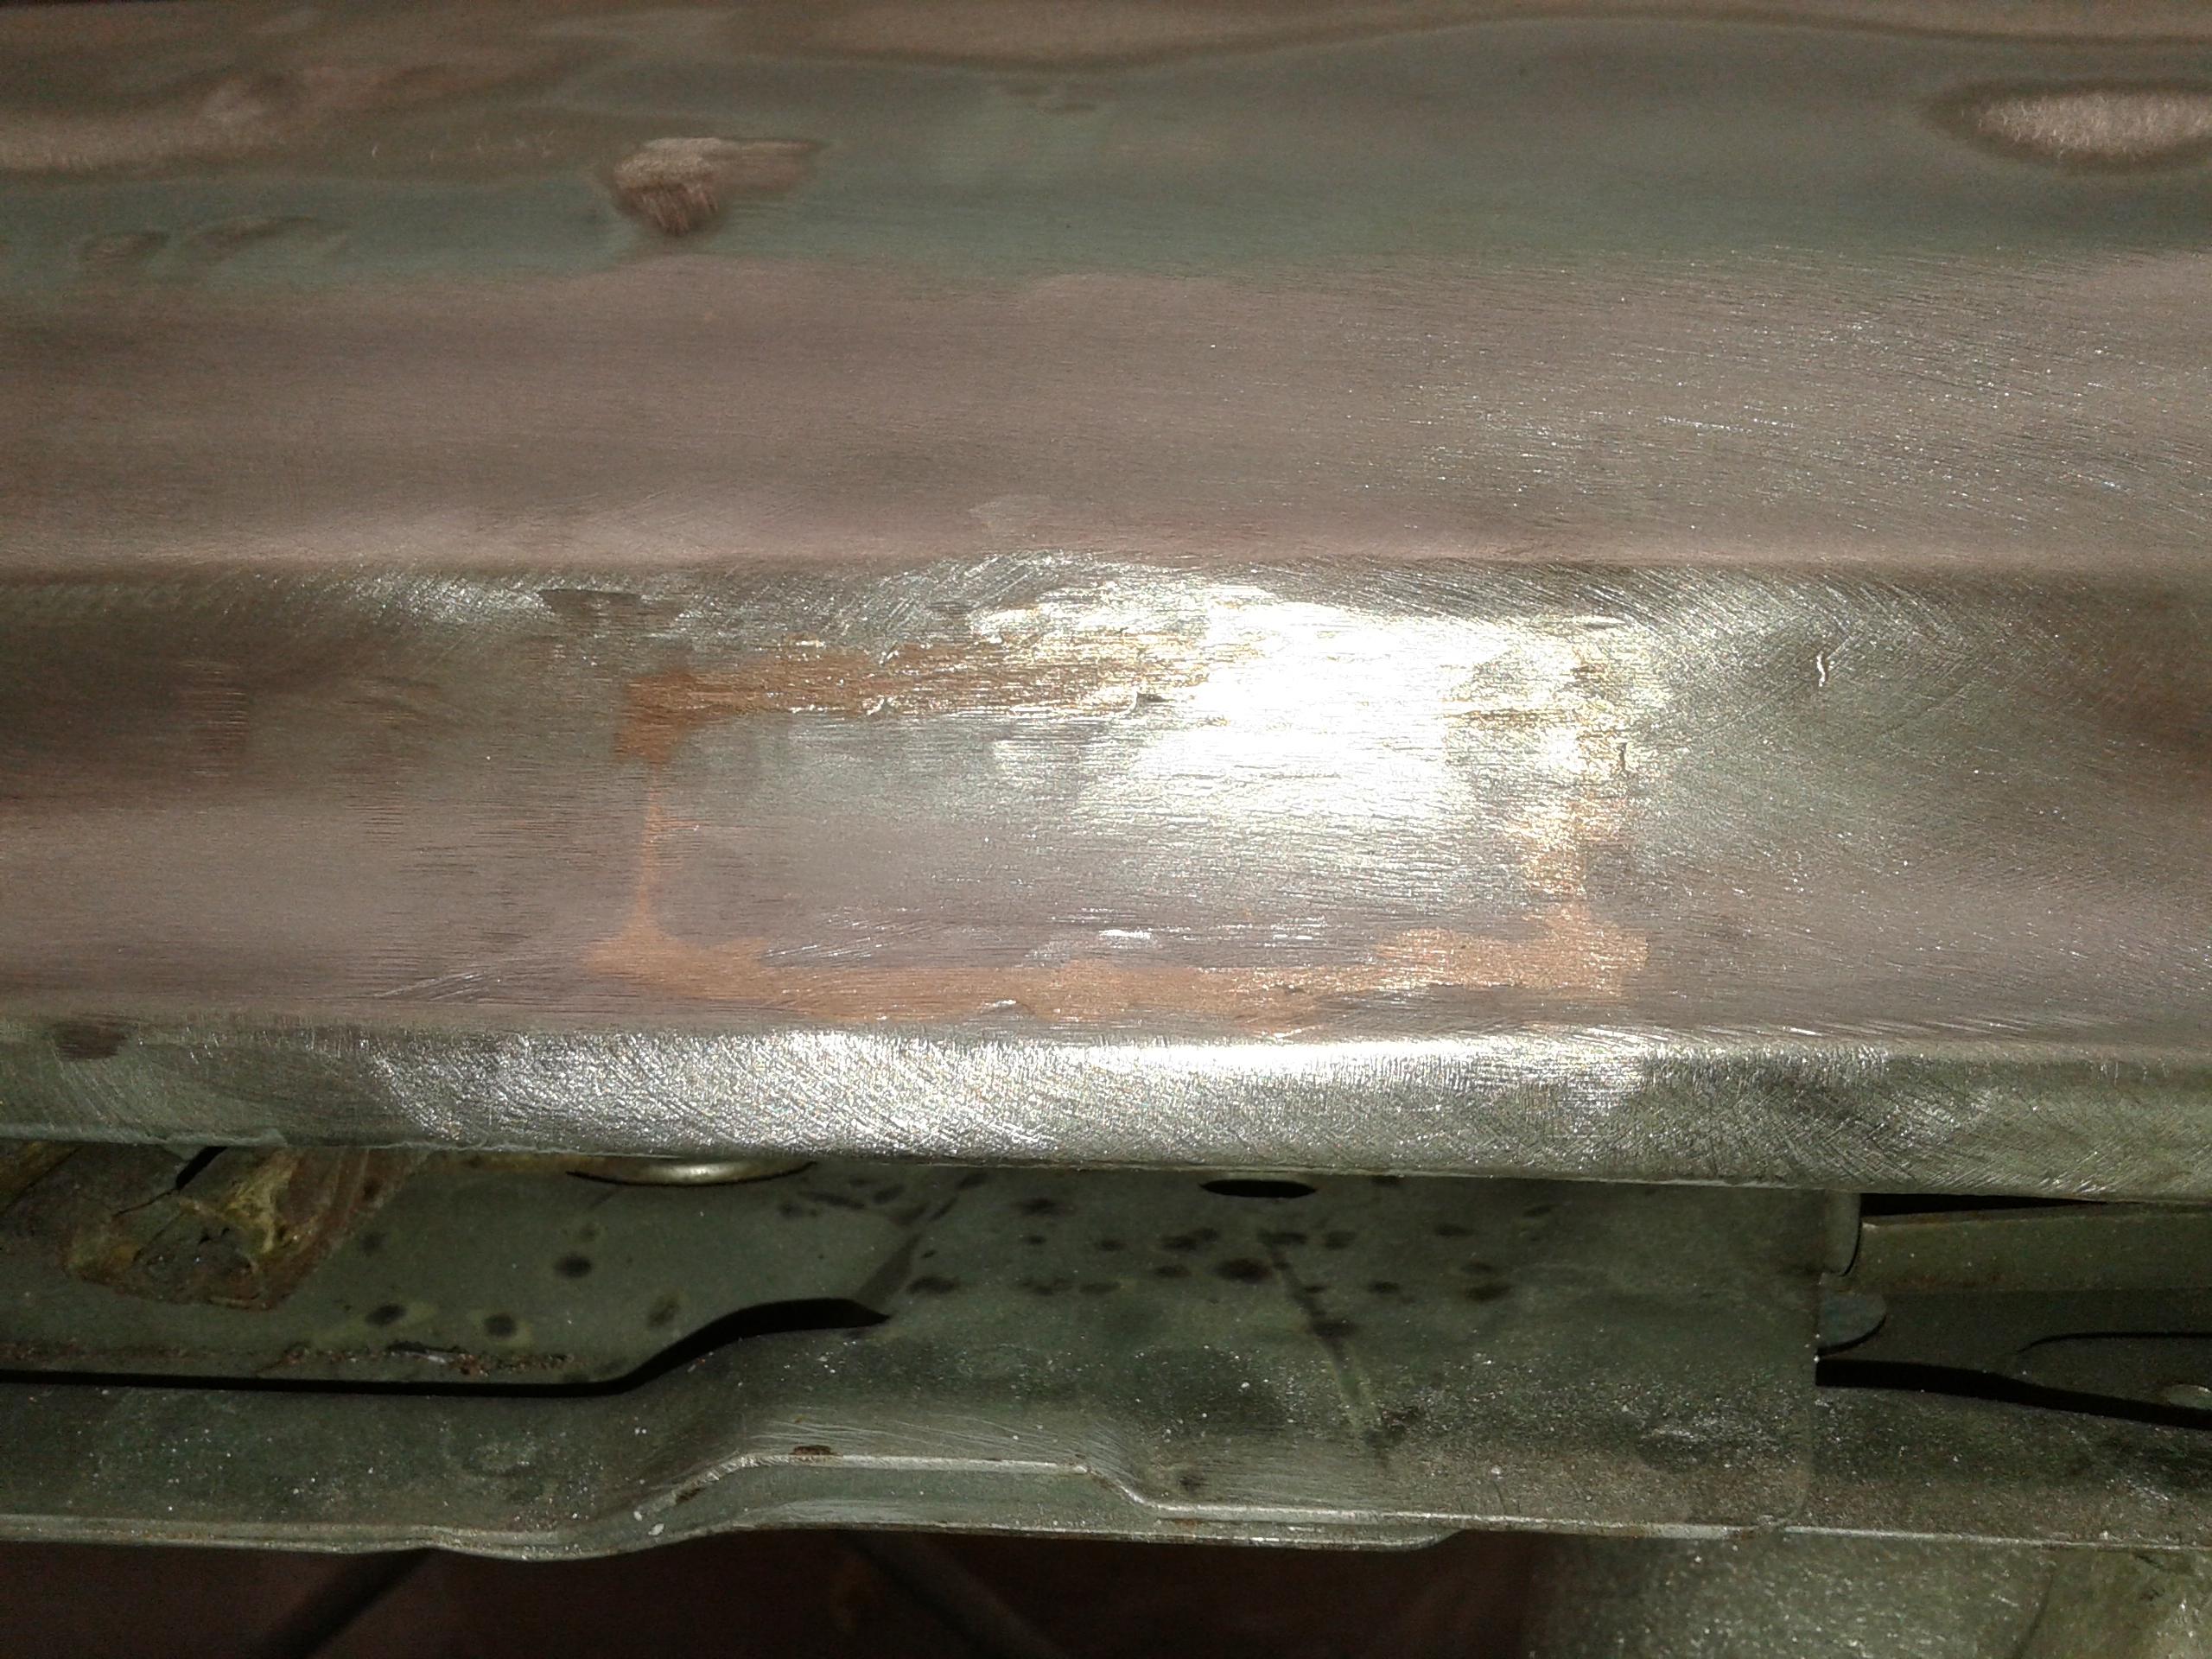
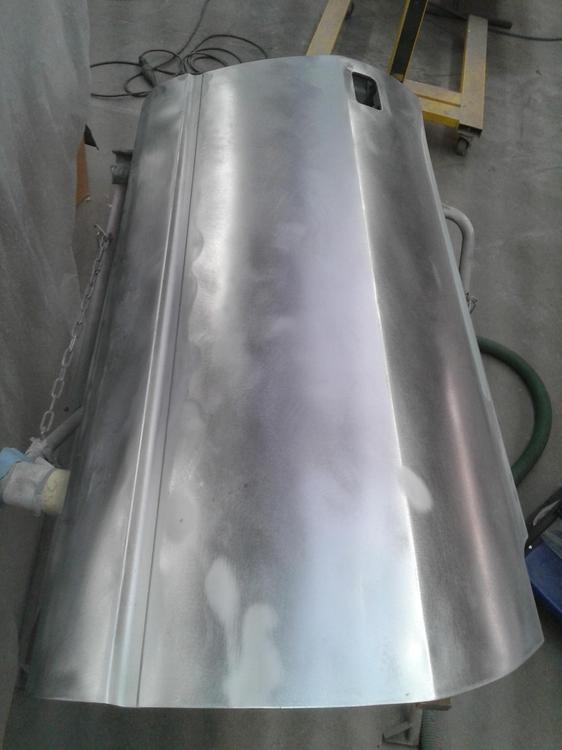
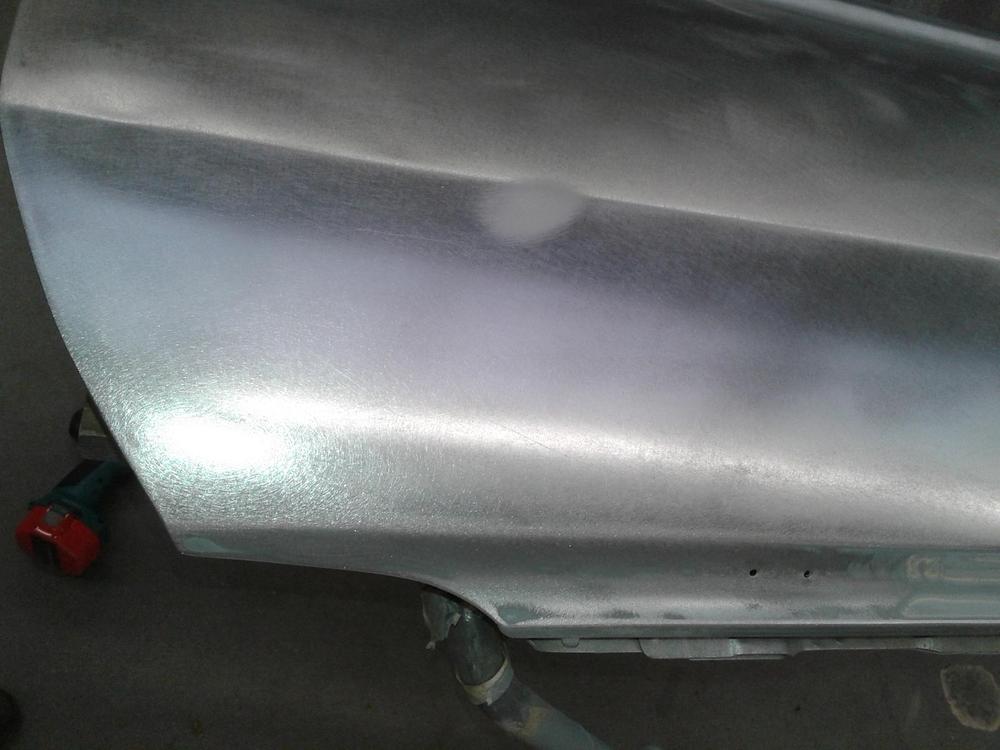
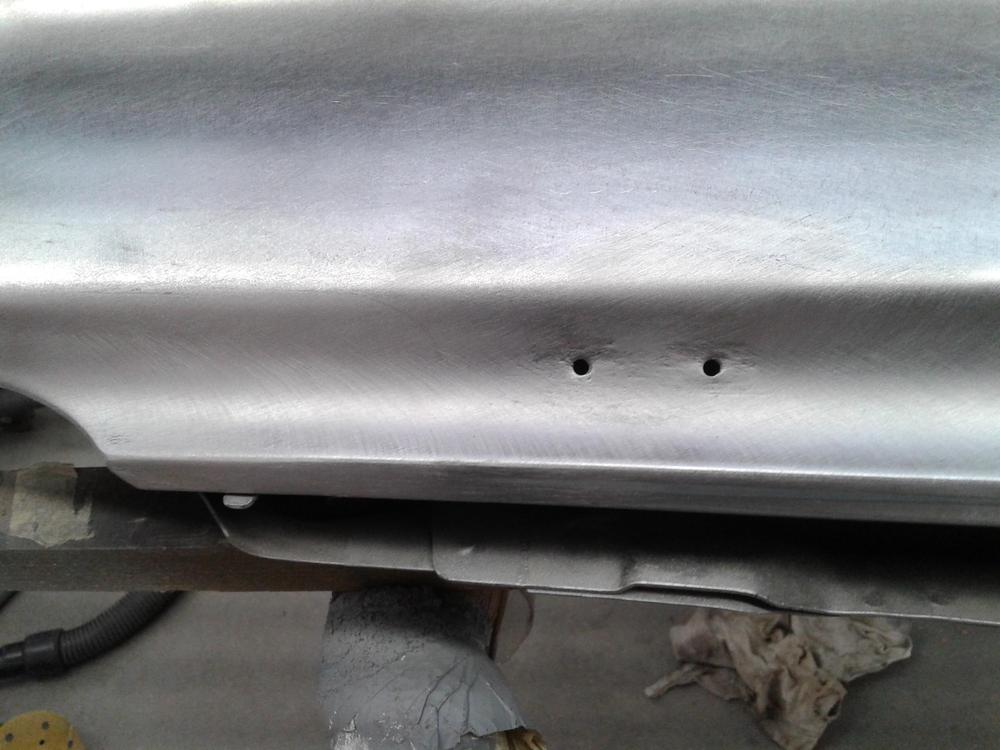
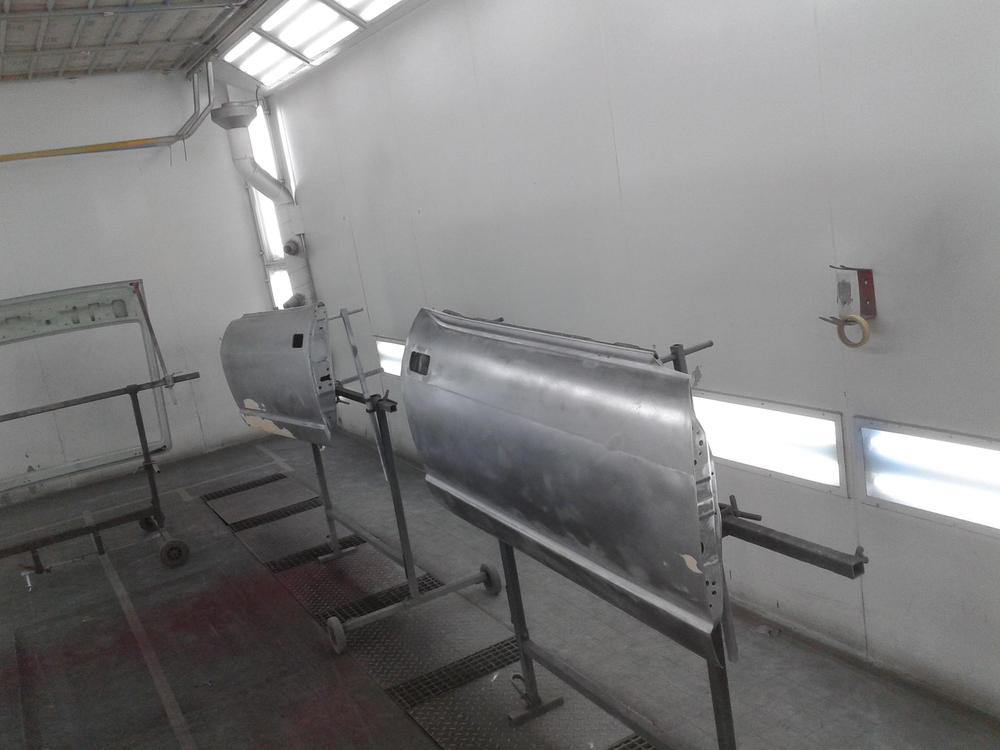
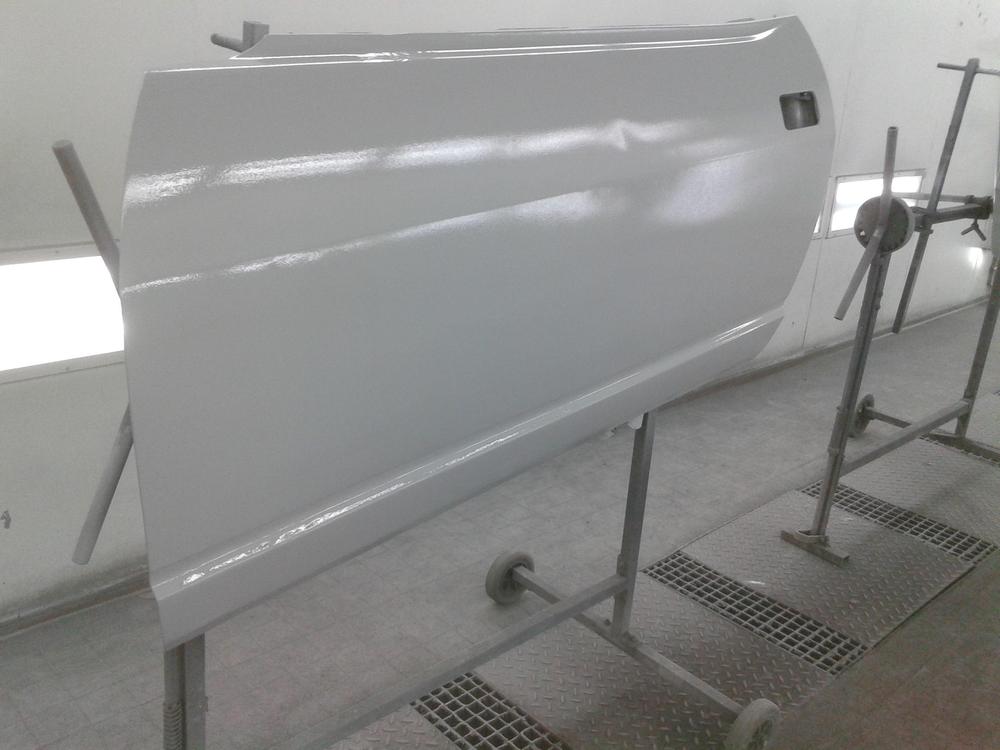
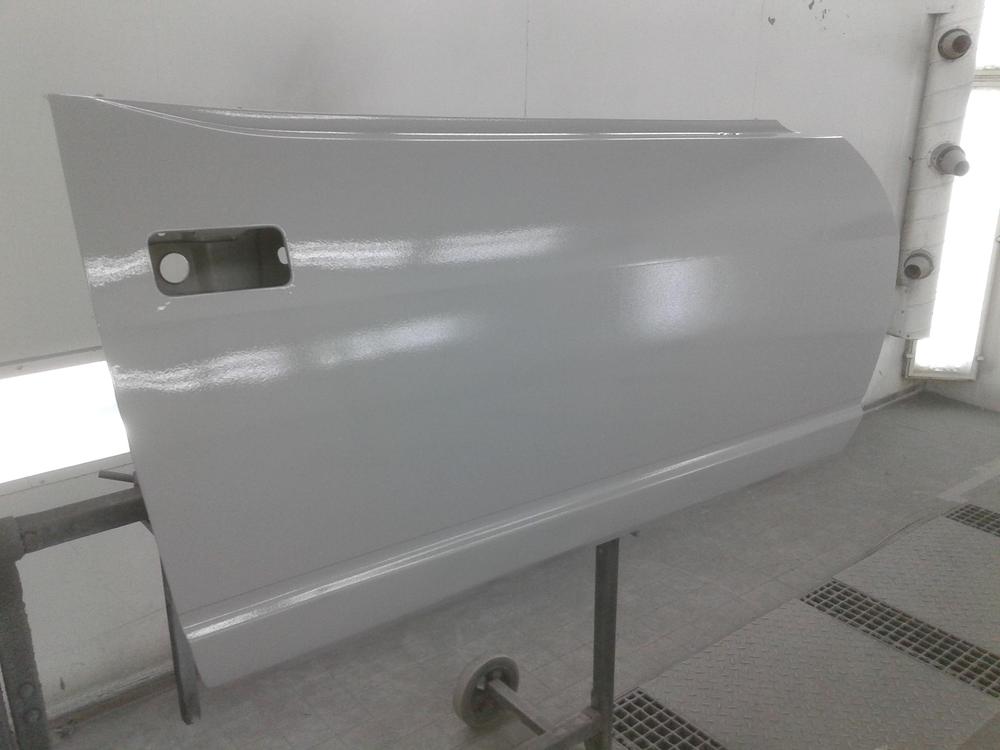
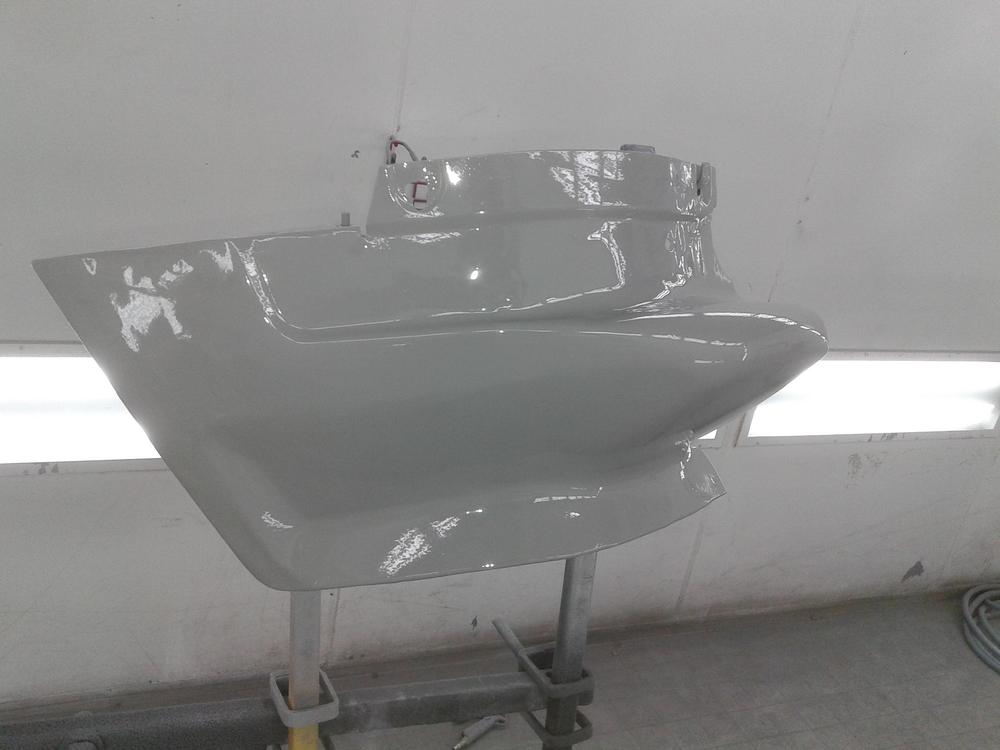
 Another week at the painter/bodyshop.. Most time sanding and eh.. sanding and then…. some sanding! ? Also used some new to me tools.. to get out some dents that were to severe to lieve alone.. Did i say earlyer that sanding is my favorite hobby? NOT !!! First here the pic of the welded in new part were the left mirror sits. I know now the pro's and cons of copper/selicium welding… one con is the weld tore easely when you want to lower it by hitting it with a hammer! So a second weld was neccessary. Today (saterday) was a important day.. The first parts became a layer of epoxy in the spraybooth…. BY ME! I've used a spraygun many years ago but not much experience with them.. i think this went well.. Some small dents are still in there but... not bad for 40+ year old doors! After this they get smoothed out with some bondo and become a new set off paint. (Car will be painted in Nissan TK3, an Original nissan zx color.) Some other pic's of prep.. and sanding.. bare metall pic's.. Rightdoor mirror, bare metall. A "college"had some left over bondo.. i let him leave it on a little dent.. Next i'll probably do the hood and frontfenders prep and epoxy...


 1 point
 -
 1 pointI do have it backwards, sorry about that, could be my dyslexia coming back or senility creeping in.
.jpg.e1e3038e1d21d4954c3b053f3e4adafc.jpg) 1 point
1 point -
 The rust below the window trim actually starts up under the window trim. It then travels down lifting the paint as it goes. You really need to remove the window trim and sand down the rusty area as far as you can. Neutralize the rust then use a little primer, then touch up paint1 point
 -
 1 point
 -
So it's not out yet? One way to make sure you use minimum heat is to put force on it while you do the heating. It will let go when you just hit the right amount of heat.1 point
-
 When you heat it, try to heat the aluminium and don't point the flame at the plug. You want the aluminium to warm up and expand and reduce the contact stress.1 point
 -
The plug, if it has the inverted square drive is a solid piece. So you can't snap it like a bolt. Now if the square drive doesn't fit close enough then you might could strip it but I doubt it. The cover I was working on was loose and I couldn't hold it still enough for a breaker bar. I resorted to the impact and it came right out. No problem1 point
-
 1 point