Leaderboard


 Subscriber
Popular Content
Showing content with the highest reputation on 01/01/2020 in all areas
-
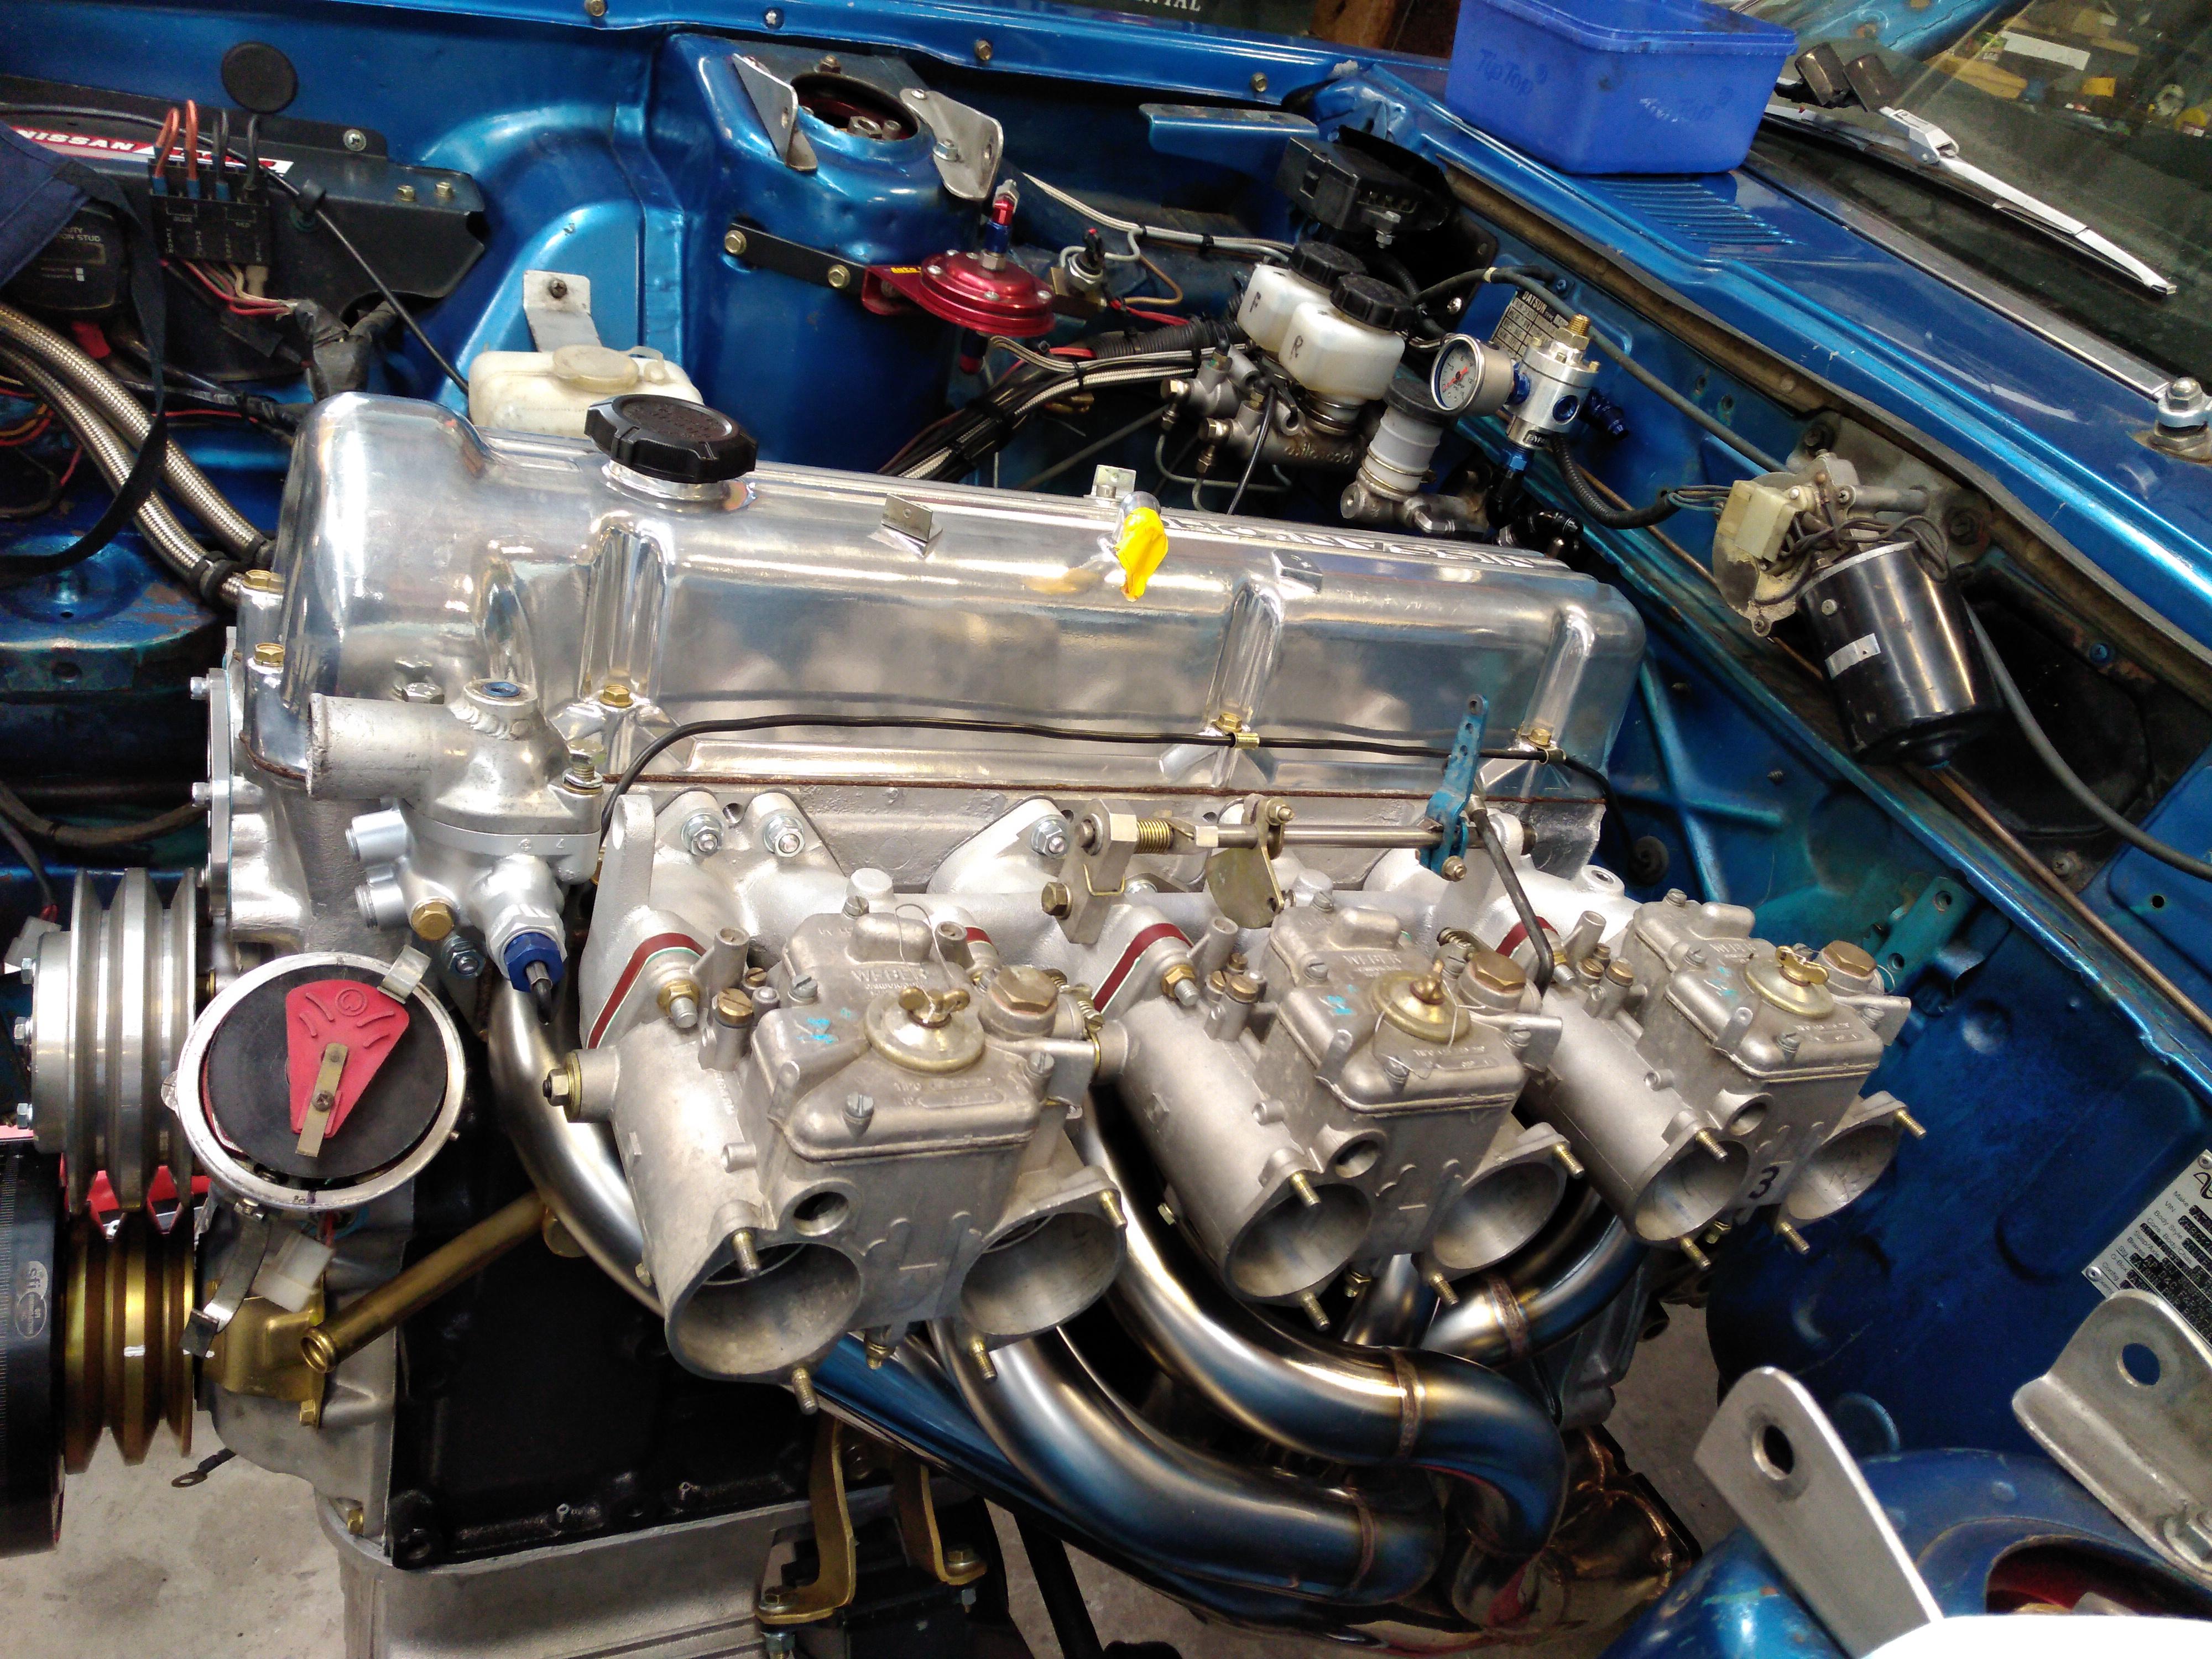
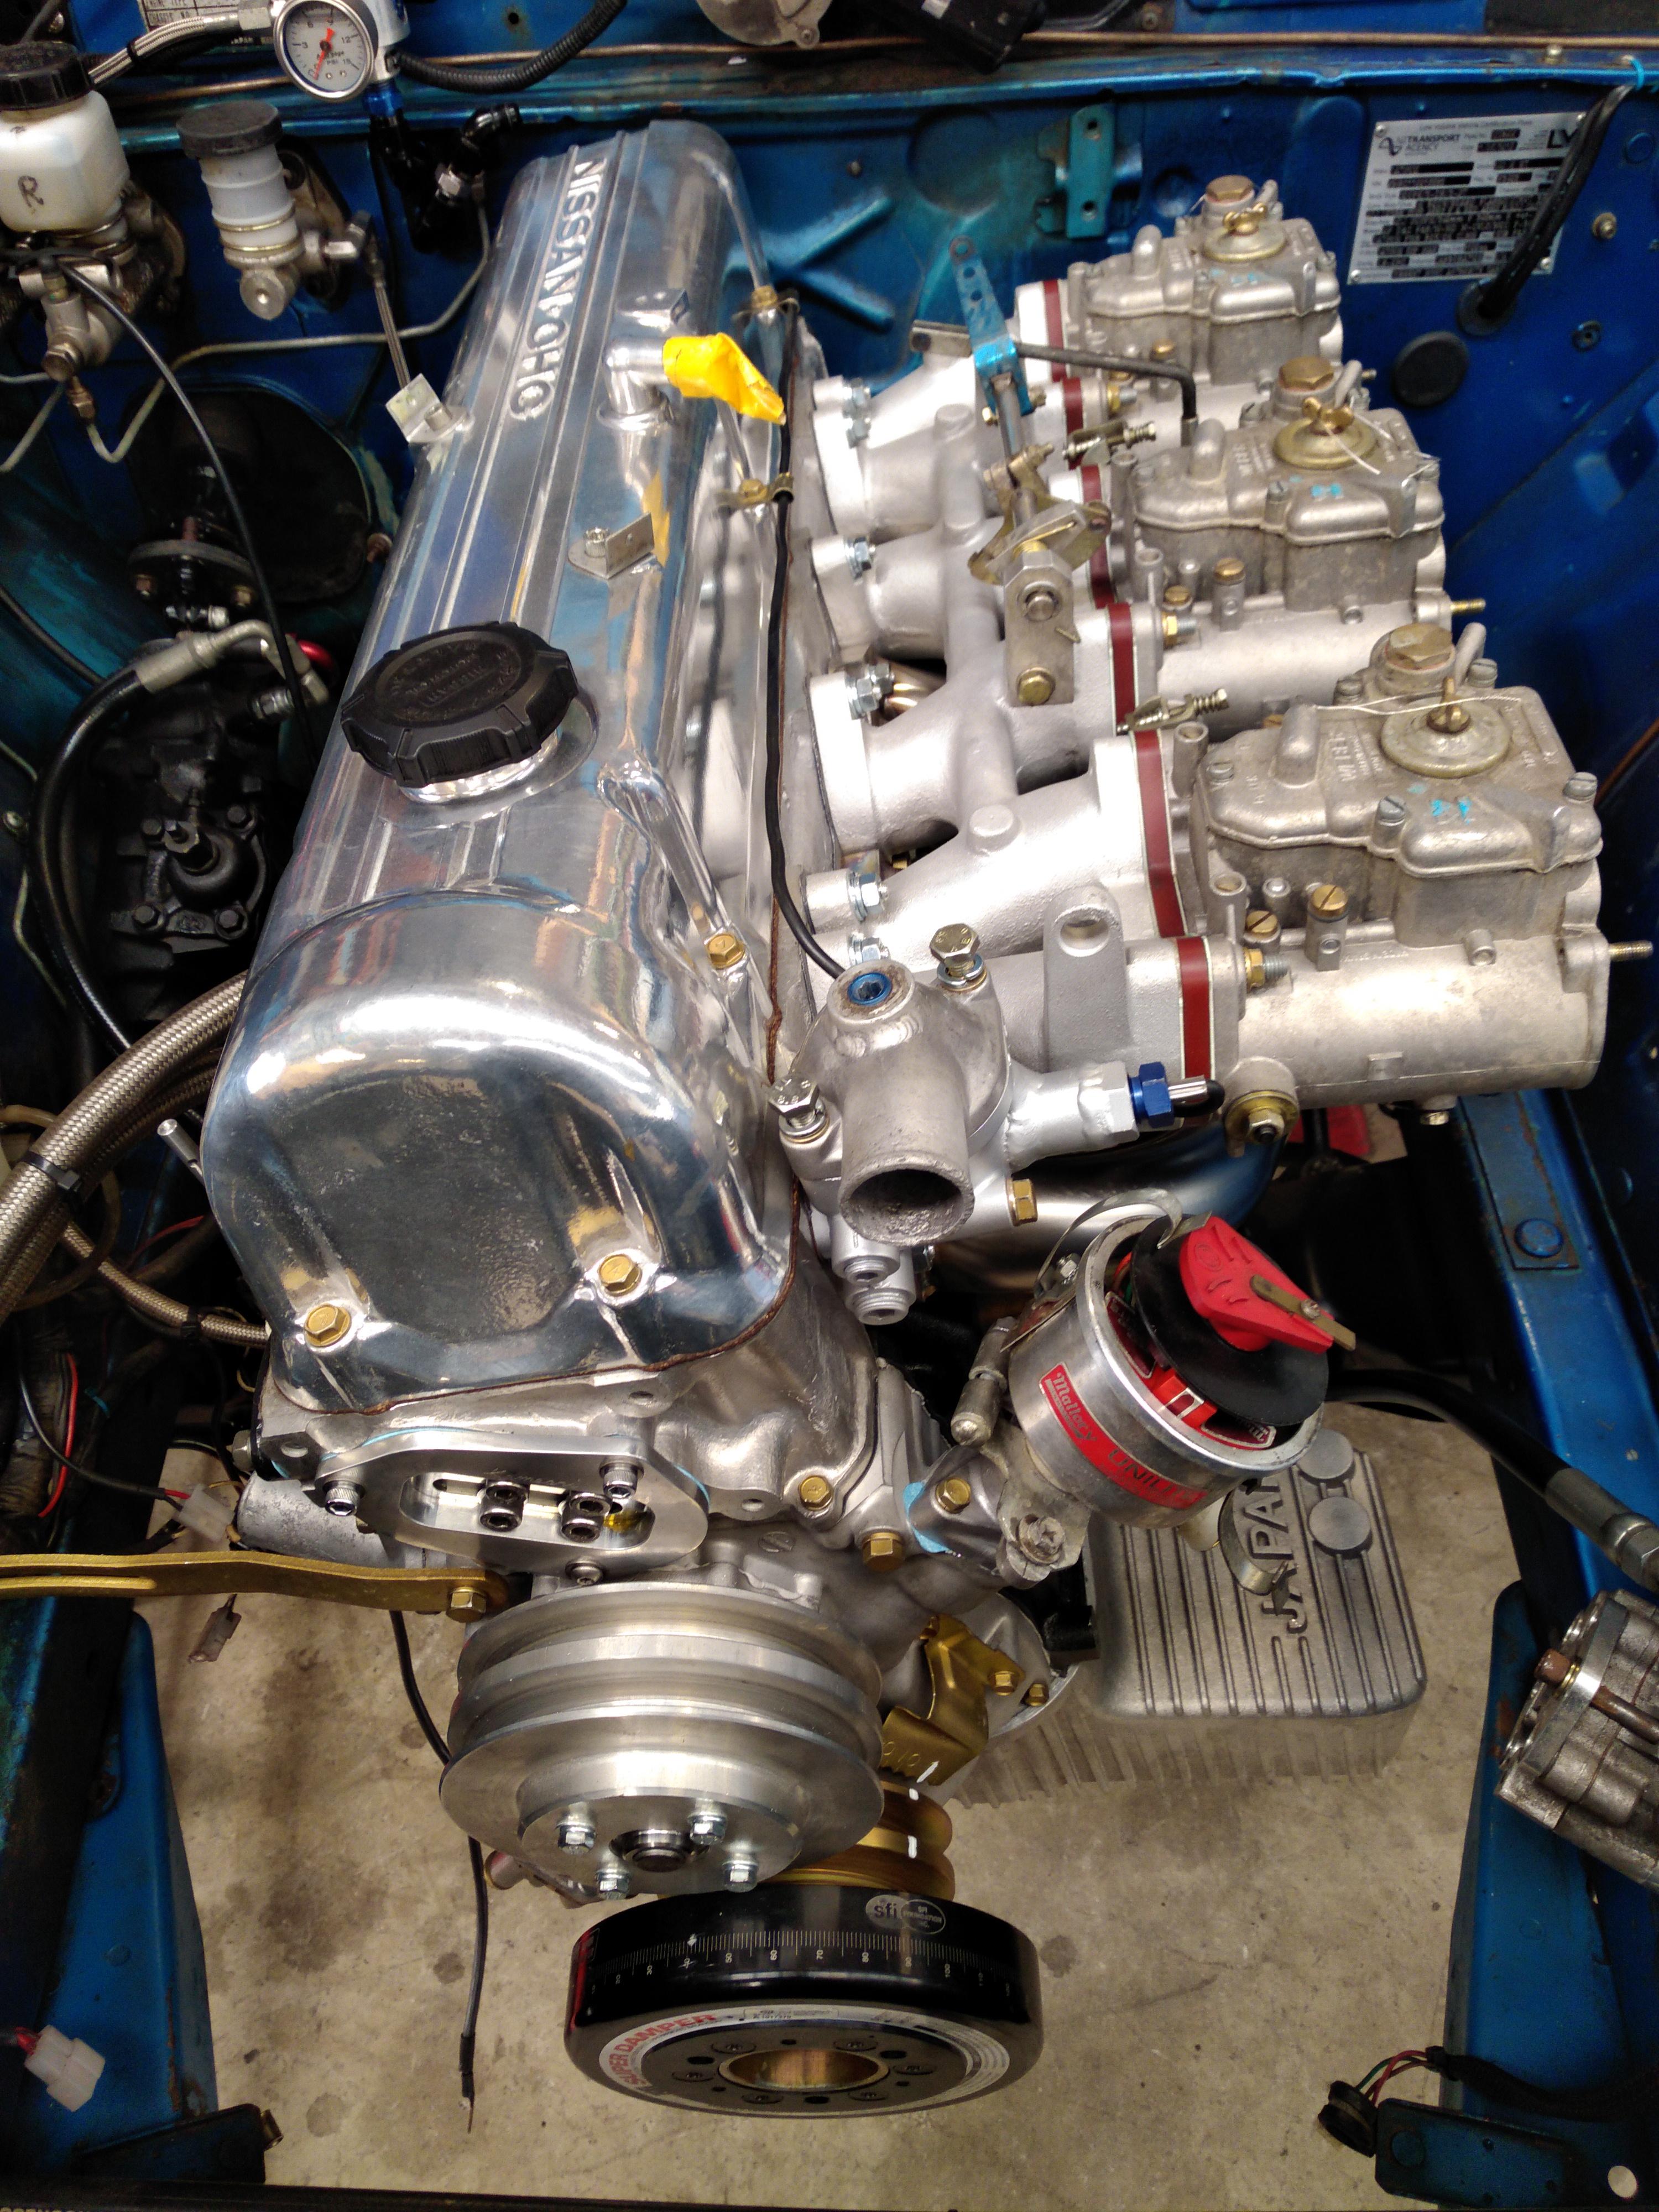
 Having trouble adding a video- but here's an update on my 240: HUGE shoutout and THANK YOU to everyone in this thread- especially 240260280 for all the help and advice! Please excuse the mess in the garage, it's usually immaculate hahah4 points
 -
 3 pointsHi all, From all of us here at The Classic Zcar Club, I want to wish you a very happy New Year! A big anniversary for the Z is on the books and we can't wait to see how this year unfolds. When making your new year resolutions, don't forget to put something on the list for your baby! Let's make 2020 another year to remember! Mike
 3 points
 -
 3 pointsI know I speak for all the users here, @Mike. We really appreciate all of what you and the moderators do to keep this site going. I have learned a lot here and have made several friends because of this forum. Keep up the good work.3 points
 -
 2 pointsWhat he said! Blue, fastwoman and ztrain got me hooked when I first came in. Now every person on here are friends in my mind. This will be a good year. 50 years over here and a bigger demand now. @Mike I think this years ZCON will be one that really shows off. You should bring your son? Happy 2020! I like saying that! 2020, 2020, 2020 ...Judy, Judy, Judy, Judy...2 points
 -
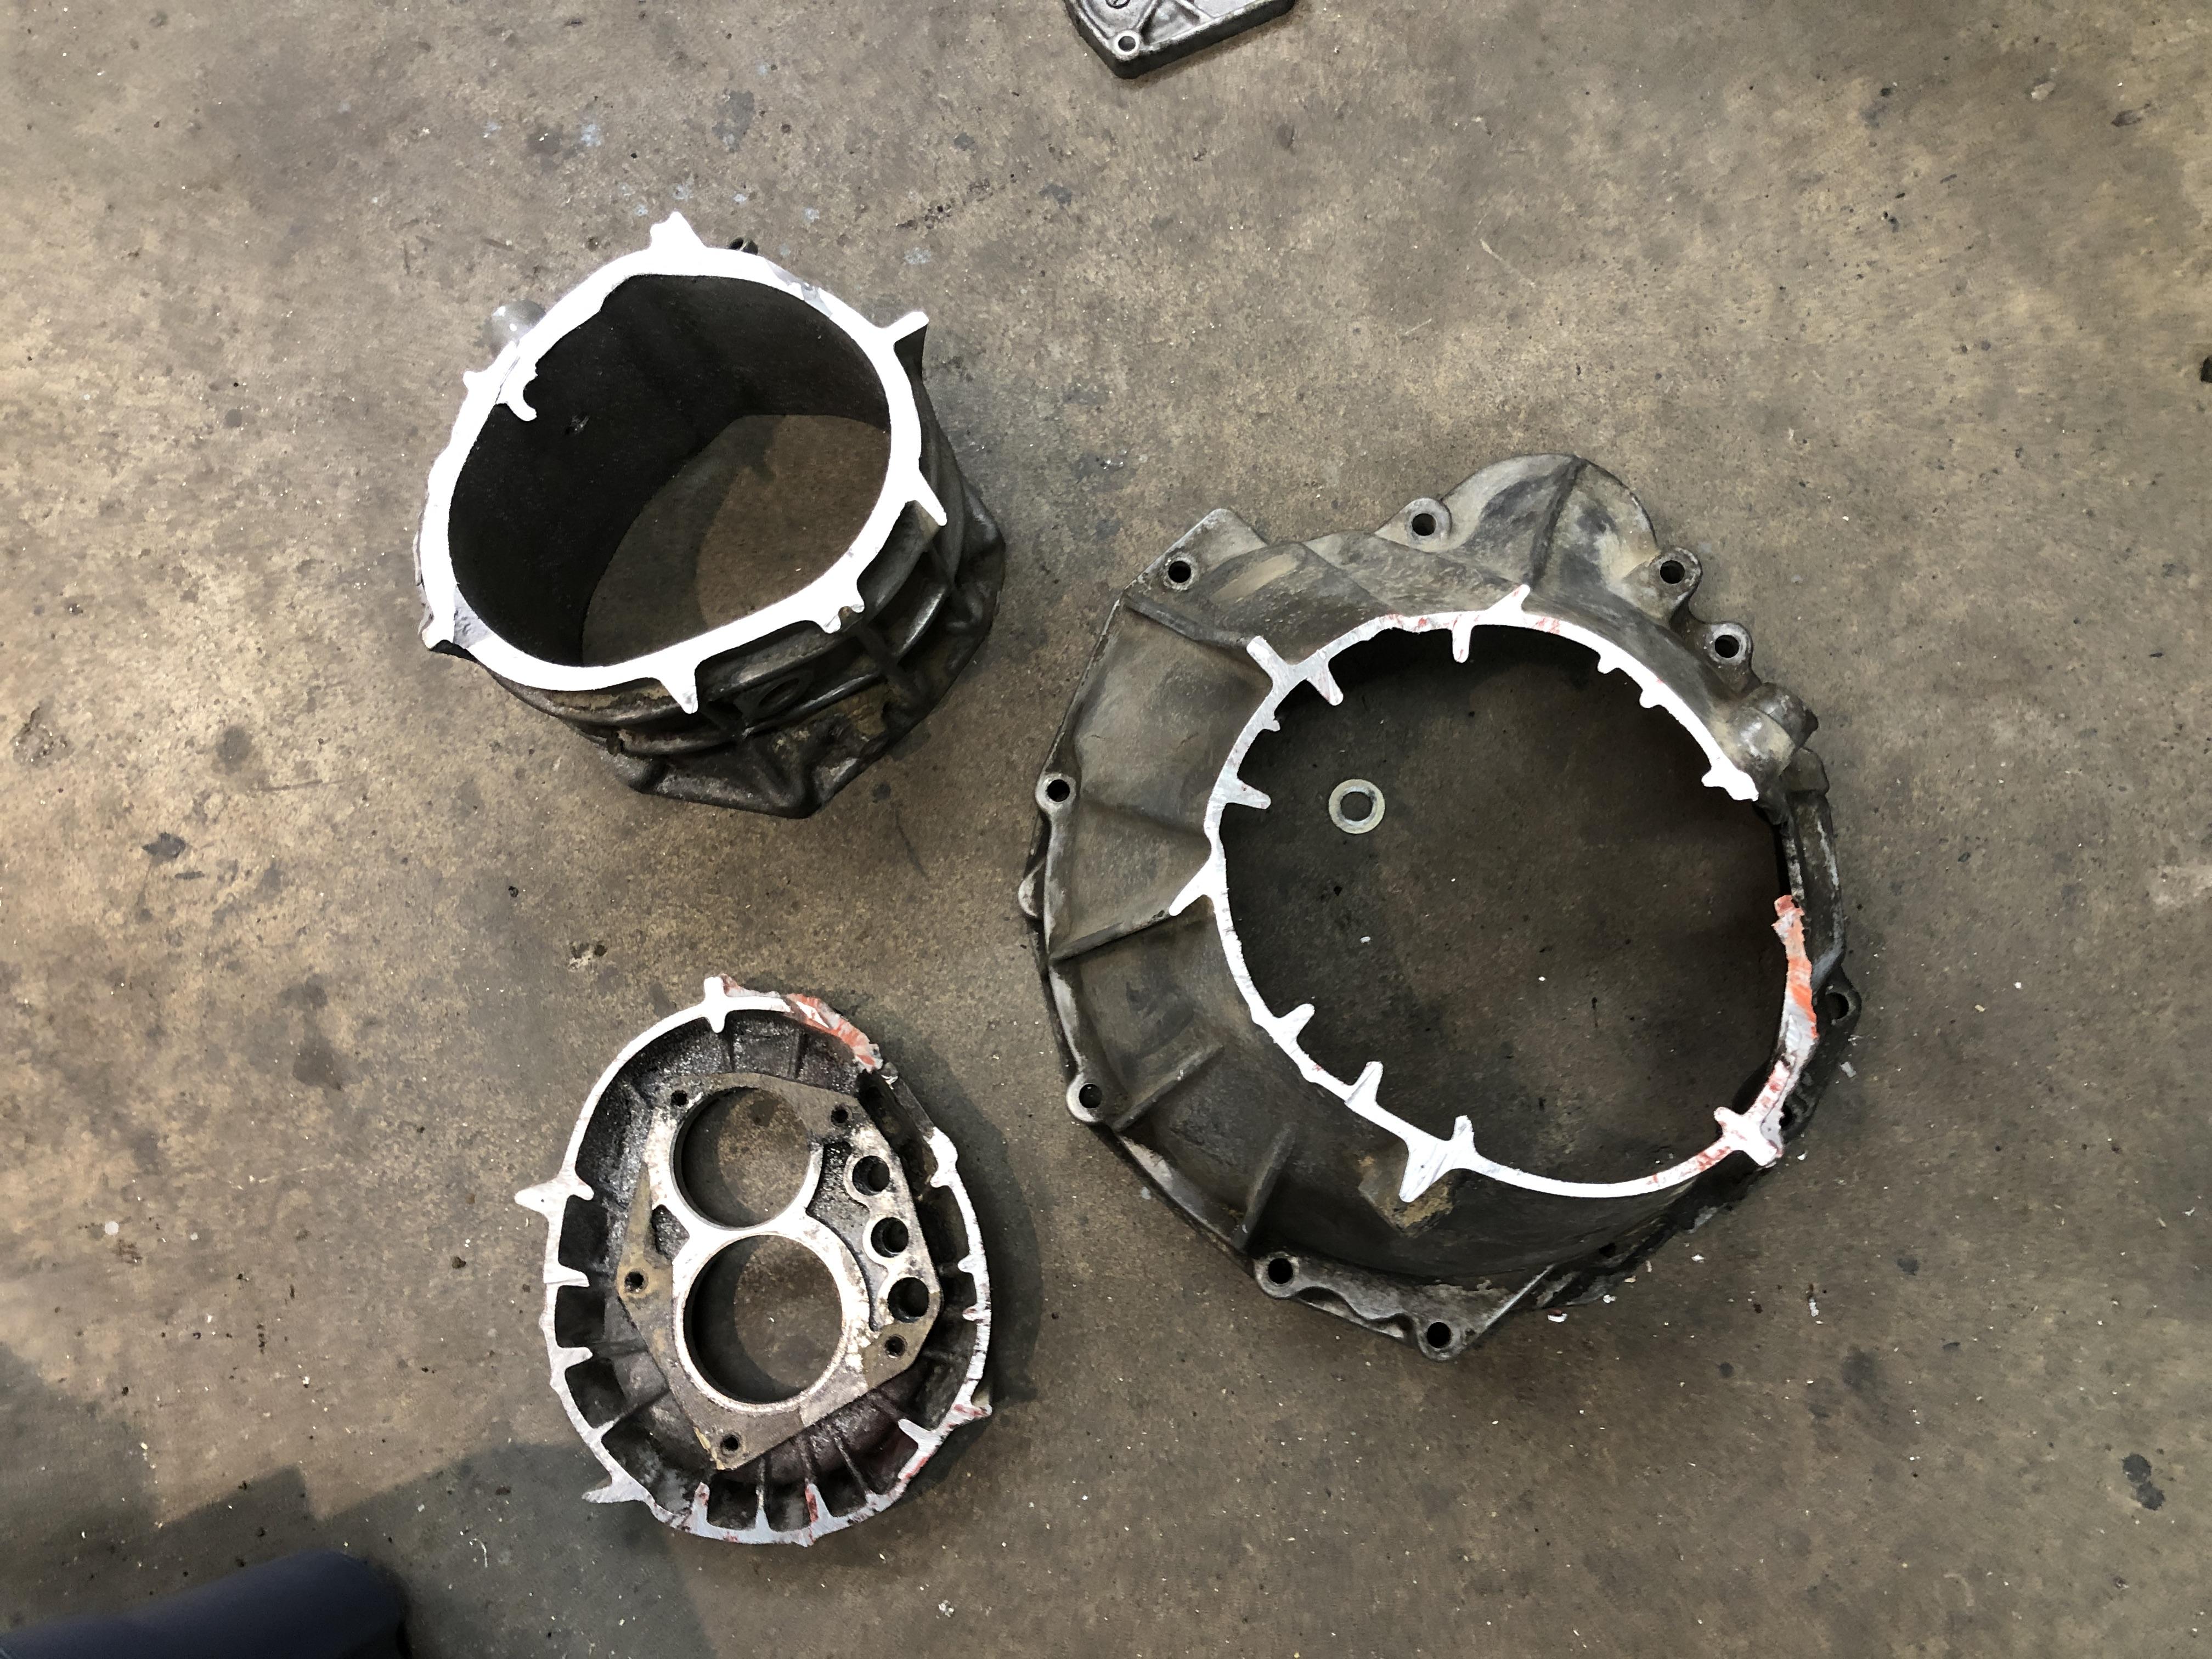
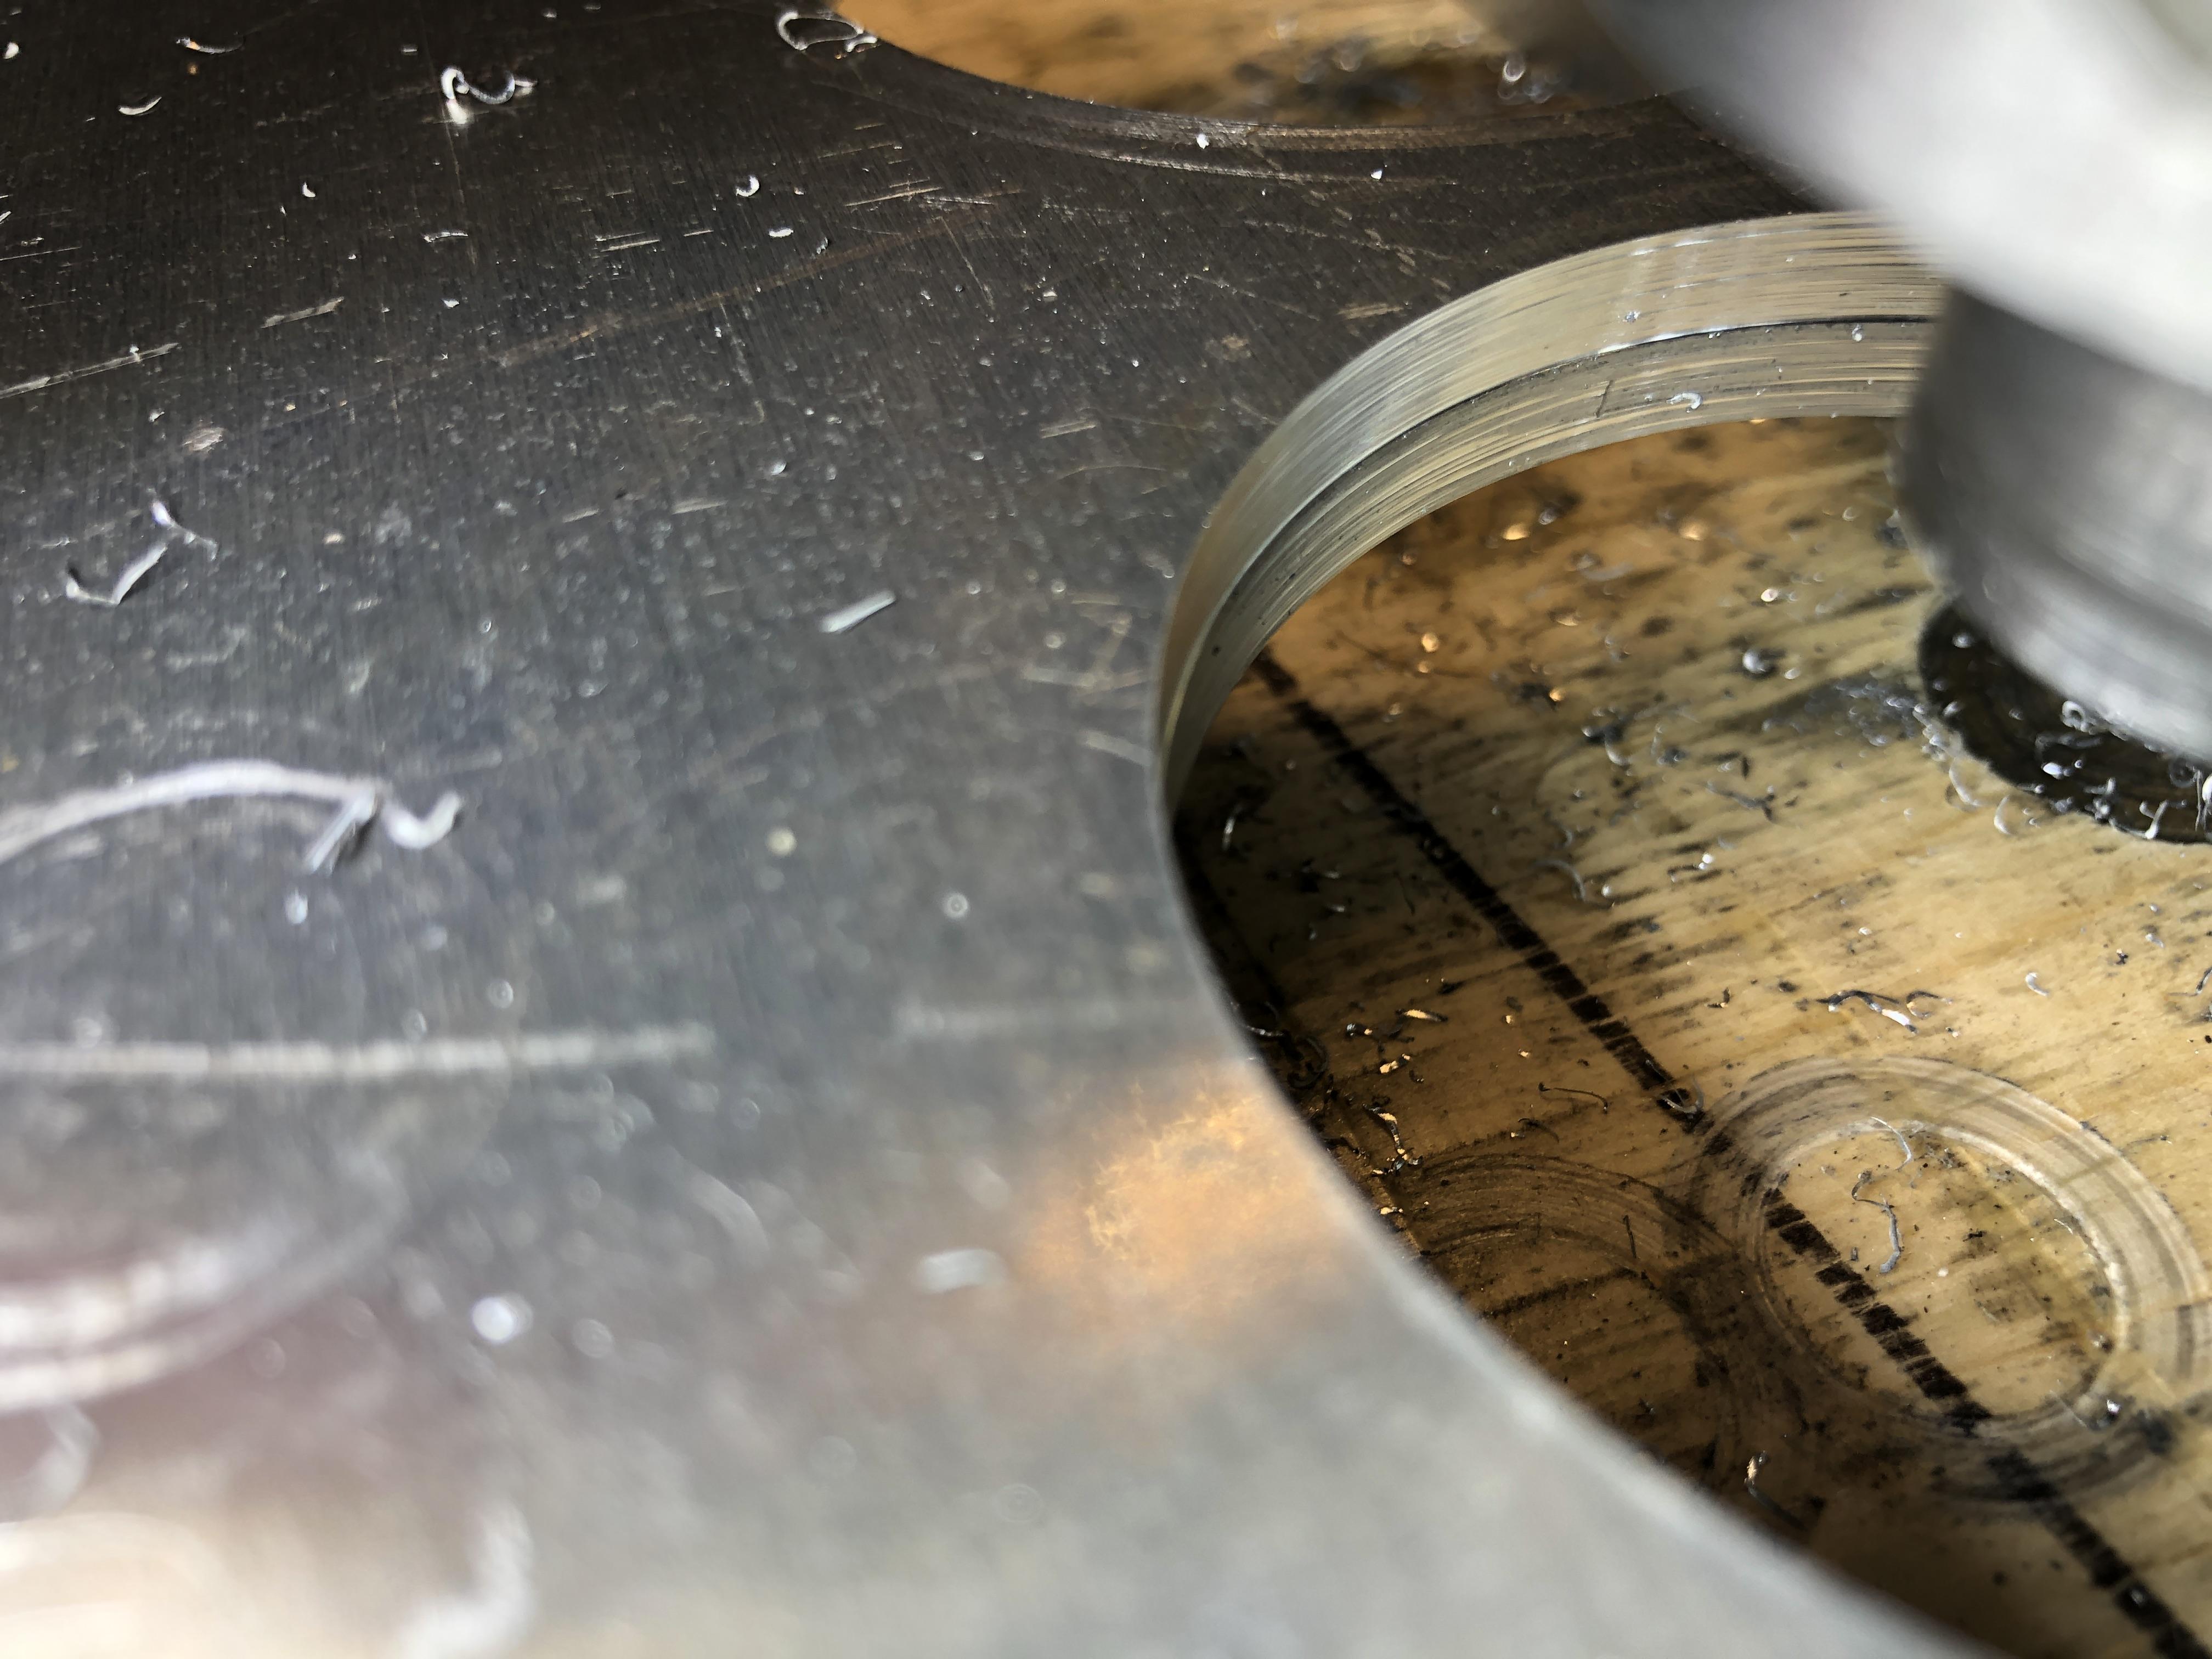
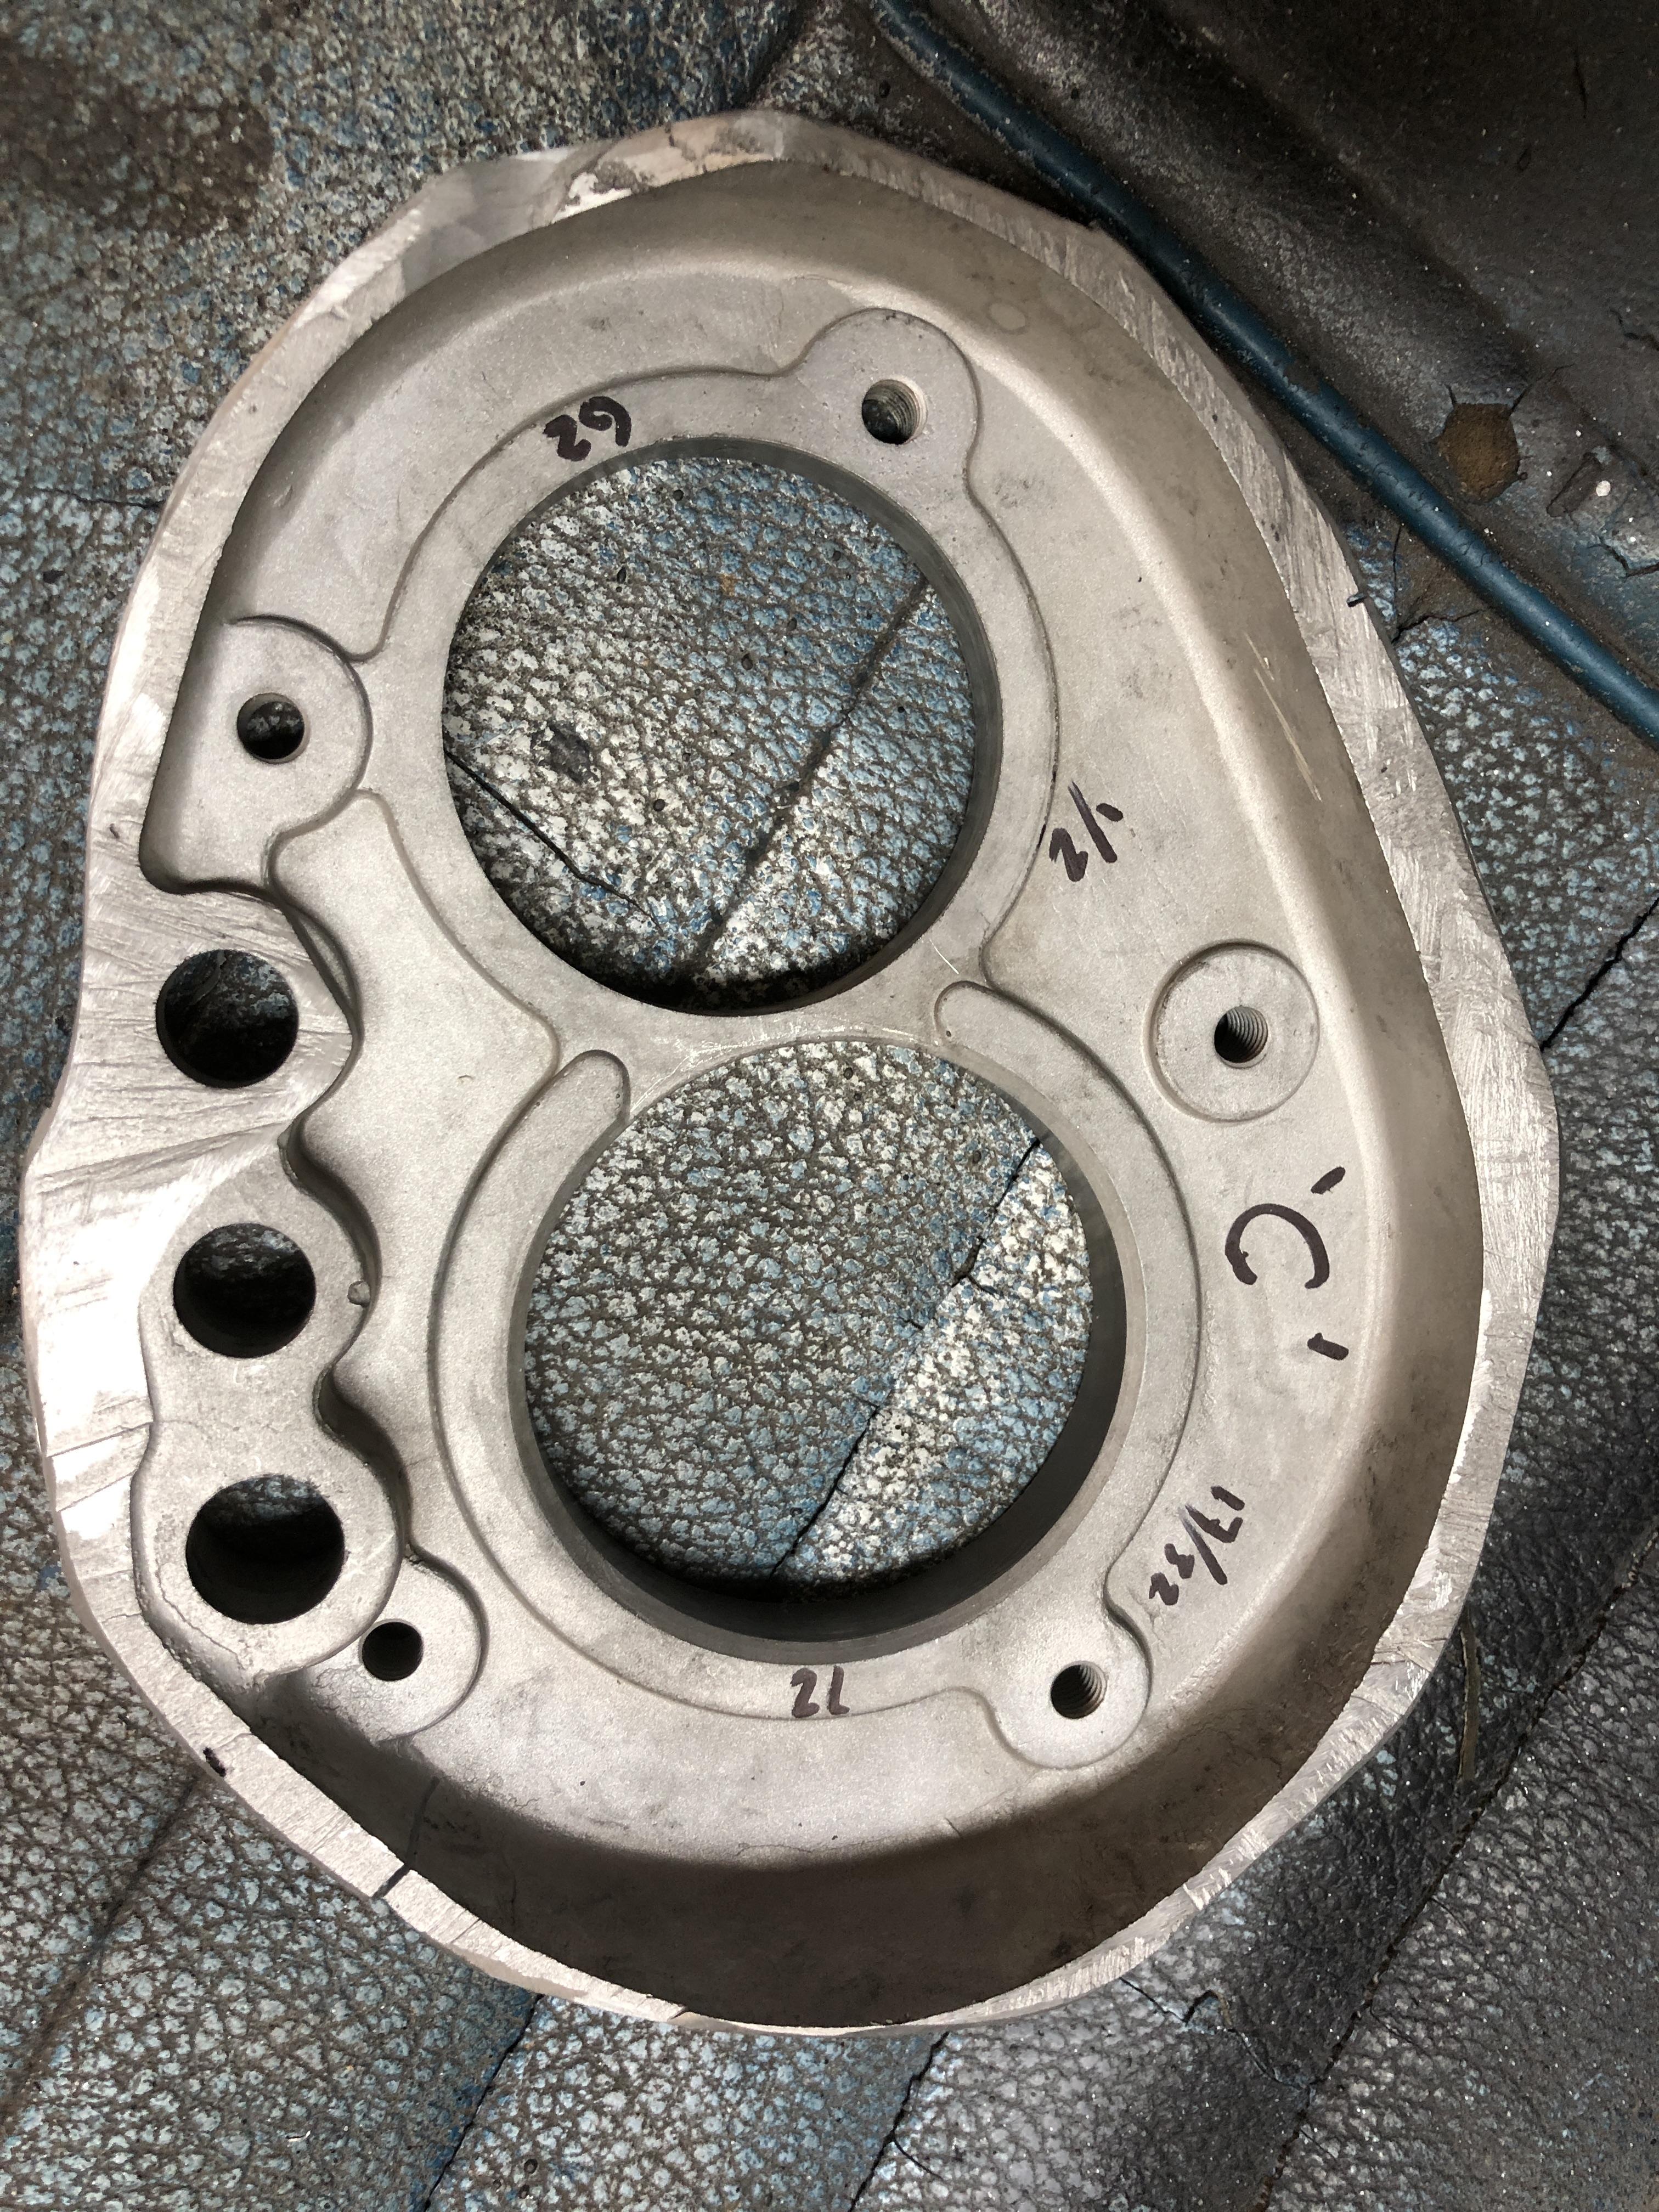
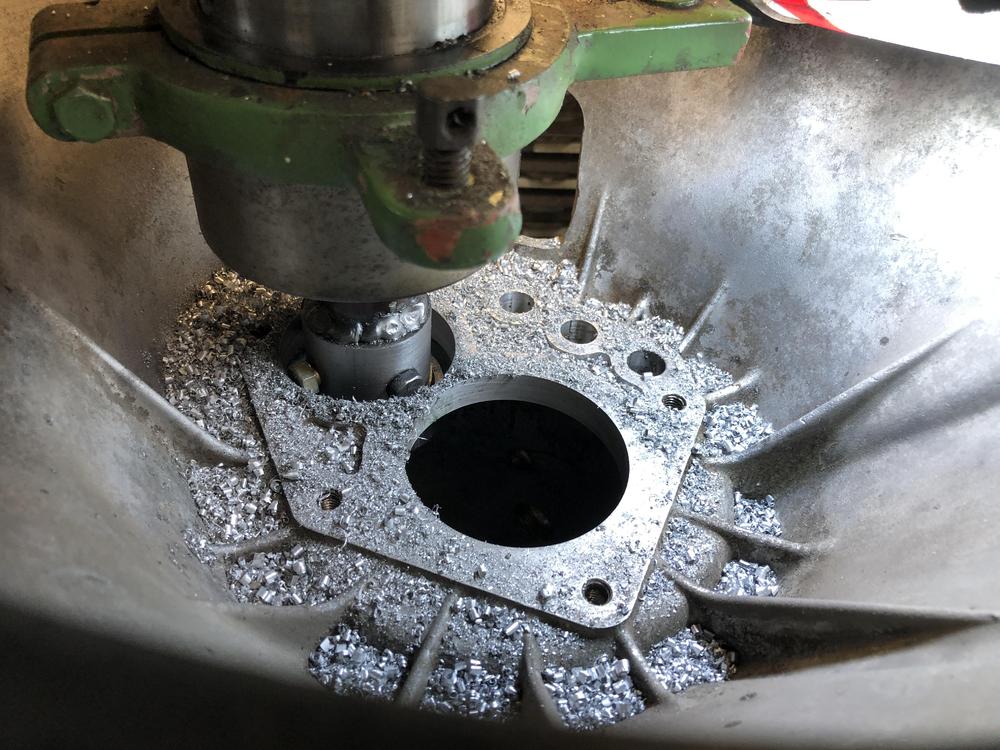
 Success! Only took 5 tweaks of the cutter position to achieve hole size Nirvana. It has that nice rough scrapie sound as the bearing easily pushes through the hole with the drill quill. Such as easy test. Drill through, slap the 62mm bearing on the bottom, and push it through the hole to see how it fits. You know immediately if its the right size or not. Since I was starting with a 57ish mm hole drilled with my 2.25" Forstner bit, I couldn't use my 56mm bearing as the pilot. I got a chance to use my fancy new rotating center finder thingy, or Coax if you want to picky.... Dang that worked slick. Got the needle to quiver inside of 1 division on the dial indicator, then swapped to the mandrel, drilled the new 62mm hole. To test how close to center I was, I initially set the boring bar to just a bit larger than the initial hole I had indicated from, and drilled half way down, leaving a step. I then inspected it visually all the way around to see if the step width stayed consistent to test concentrical-y-ness. I can not tell the difference from one side or the other. Seems just fine to me. Next thing up is to actually put a 56mm bearing on the mandrel and drill out a test 4 speed housing and see it the hole ends up in the right place. I also did a thing. To help me check if my holes are the right size, and if the new 62mm hole is in the right place, I figured there was nothing better than using a real C type front bearing housing for comparison. Turns out the C type I took apart has a busted bell housing that was previously patched with epoxy and fiberglass cloth, so there was no way I would ever use it again, so..... There you go. Now I have a nice easy to handle and measure, C bearing / shift rod plate. Easy to measure the thickness variations, size of the 16mm shift hole (a 5/8 bit is going to be SO close. 0.630 vs 0.625. The rod is very close to 16mm, so a 5/8 hole will need just a tad of honing to make it work. Steve talks about this same problem here http://zhome.com/ZCMnL/tech/240SX5spd/Transmission2.htm "but later had to ream the hole slightly larger myself with an adjustable reamer because it was too tight" Dollars to donuts the machinist used a 5/8 bit.... I could pony up and learn about reaming now.... 62mm_TestFit.mp4 coax.mp4
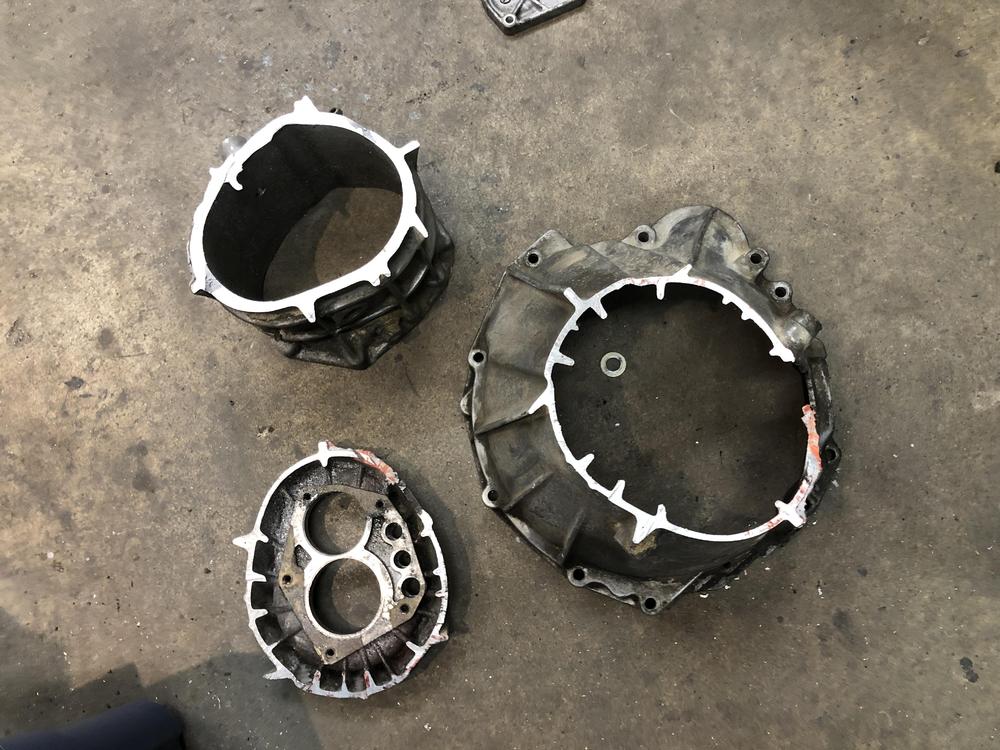

 2 points
 -
2 points
-
 2 points
 -
 2 pointsYes, and I read where there is no extradition agreement between Lebanon and Japan2 points
 -
 2 points
 -
 2 pointsBanzai Motorworks has just yesterday picked up from the manufacturer an excellent reproduction of the rear-most inner fender liner for 260s and early 280s.
 2 points
 -
2 pointsHey, just give the guy a chance. He needed time to go bury all that money in his Mom's backyard.2 points
-
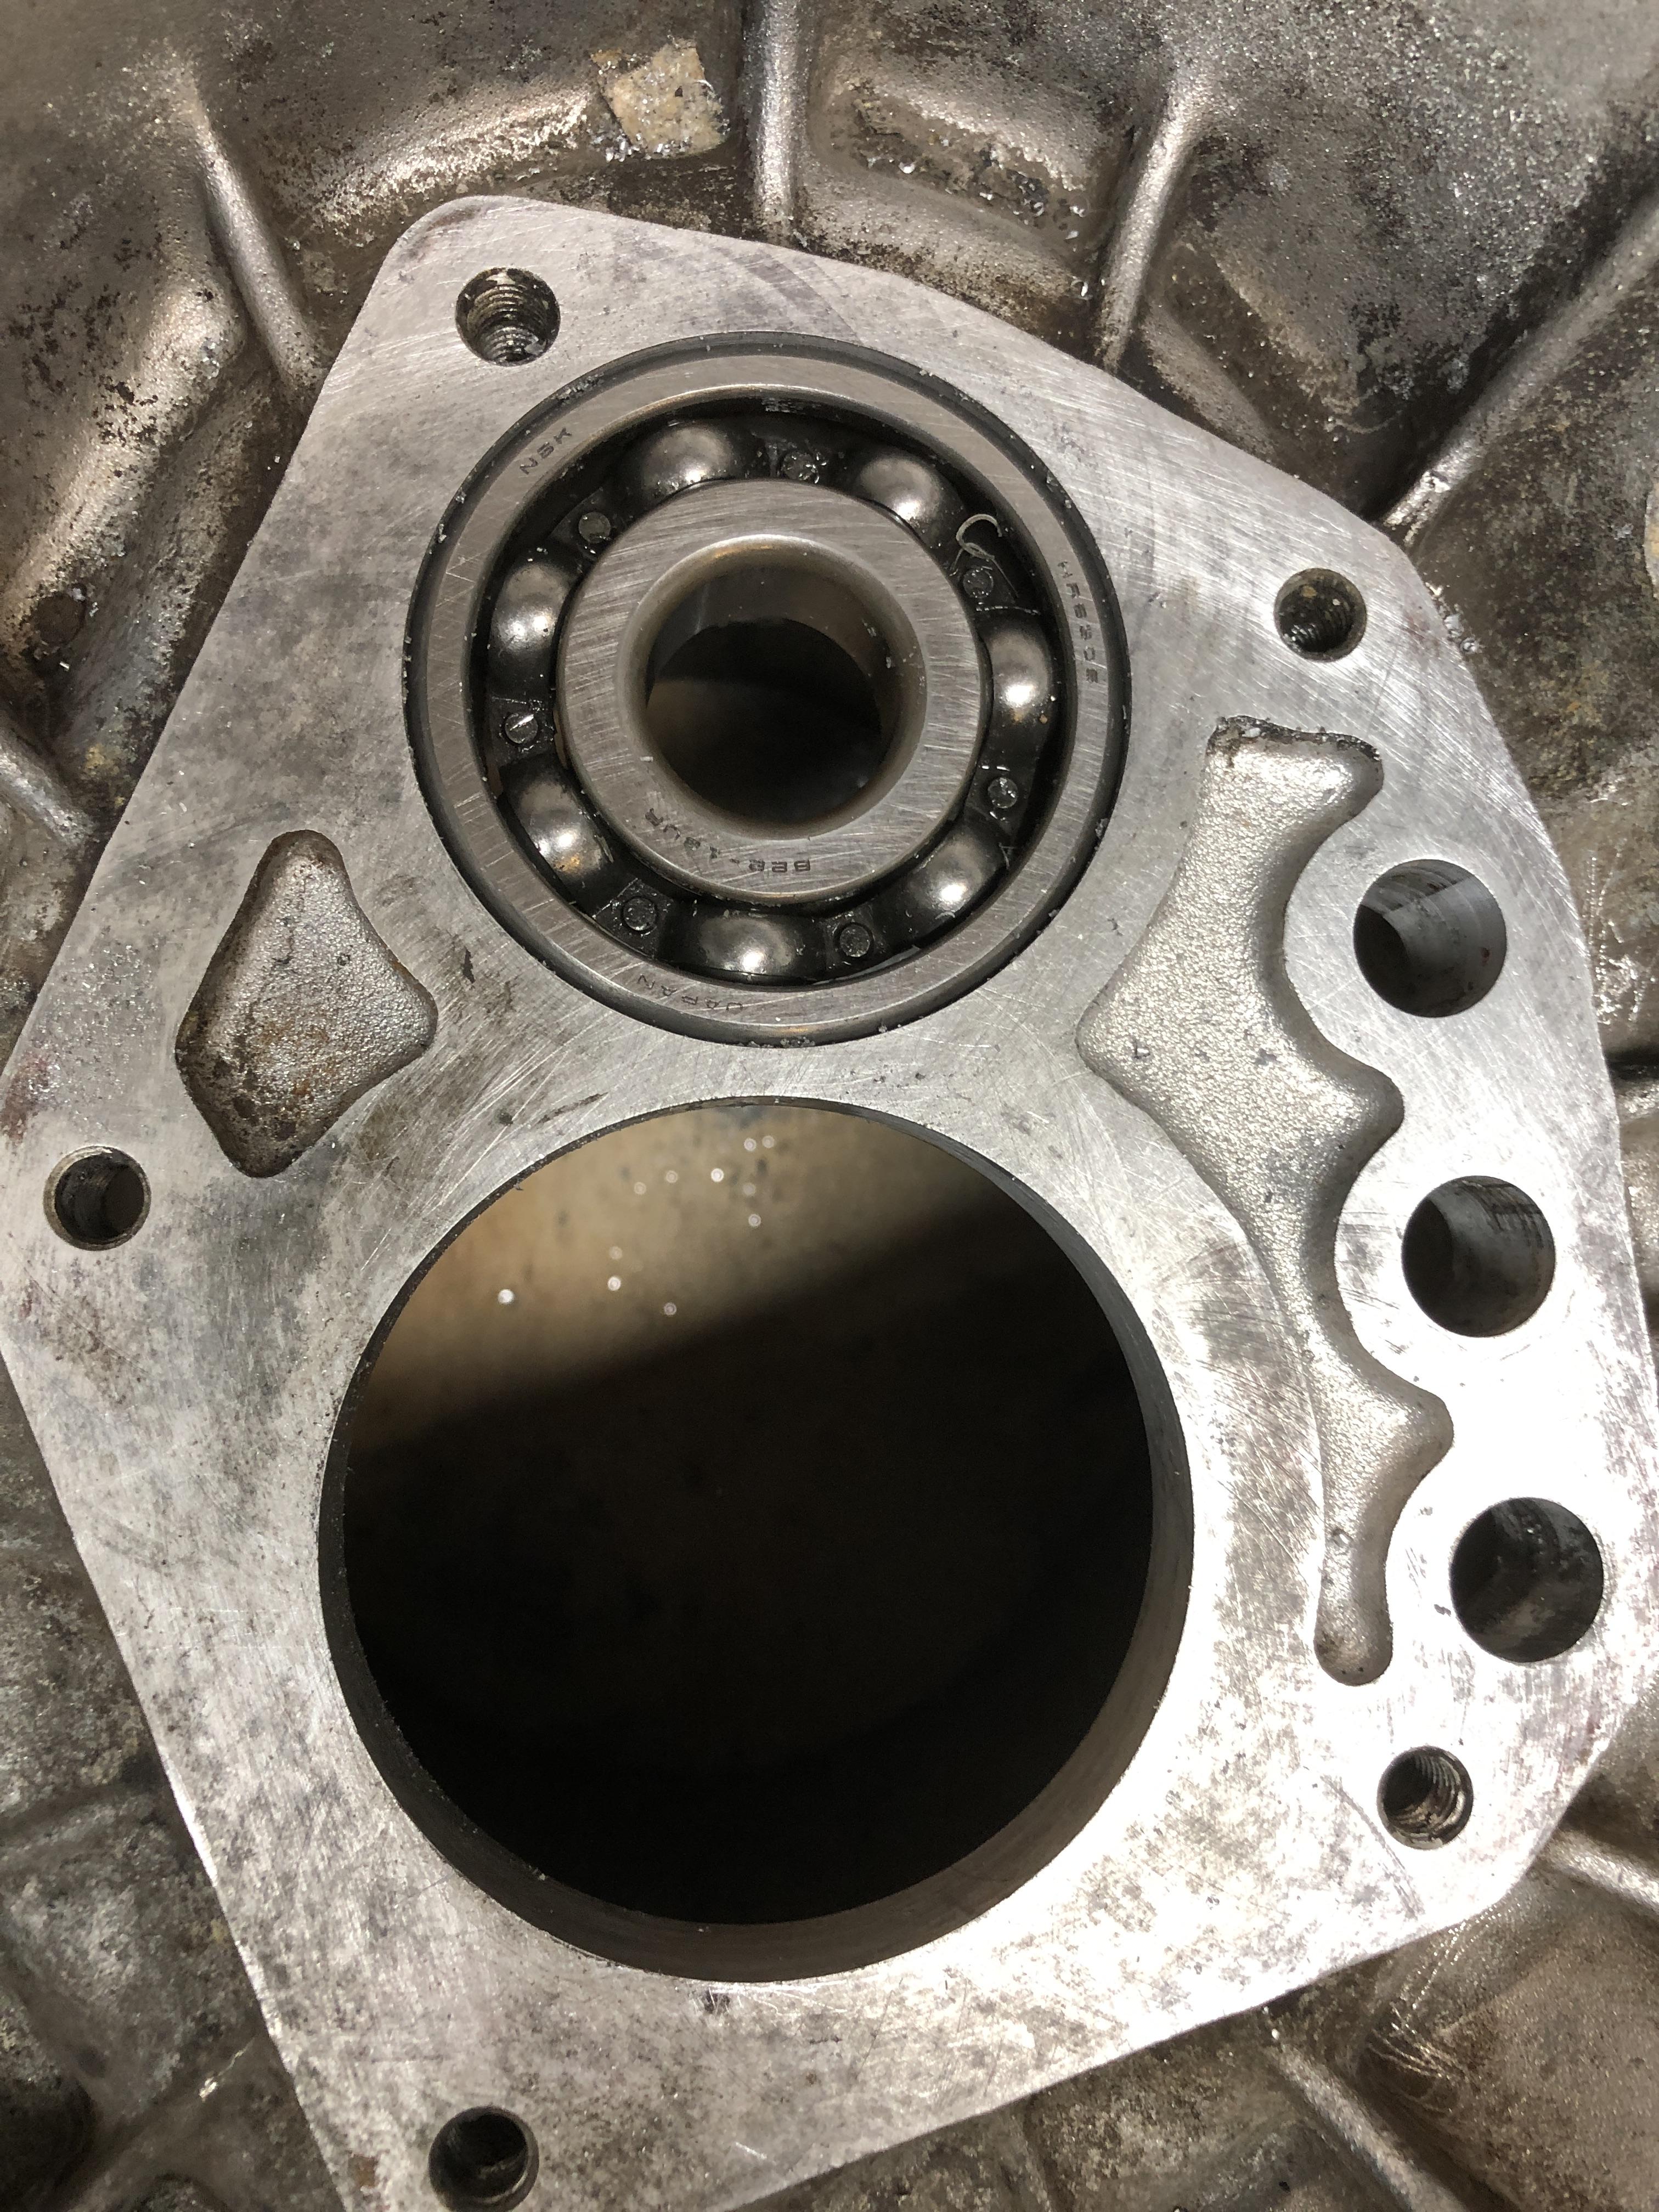
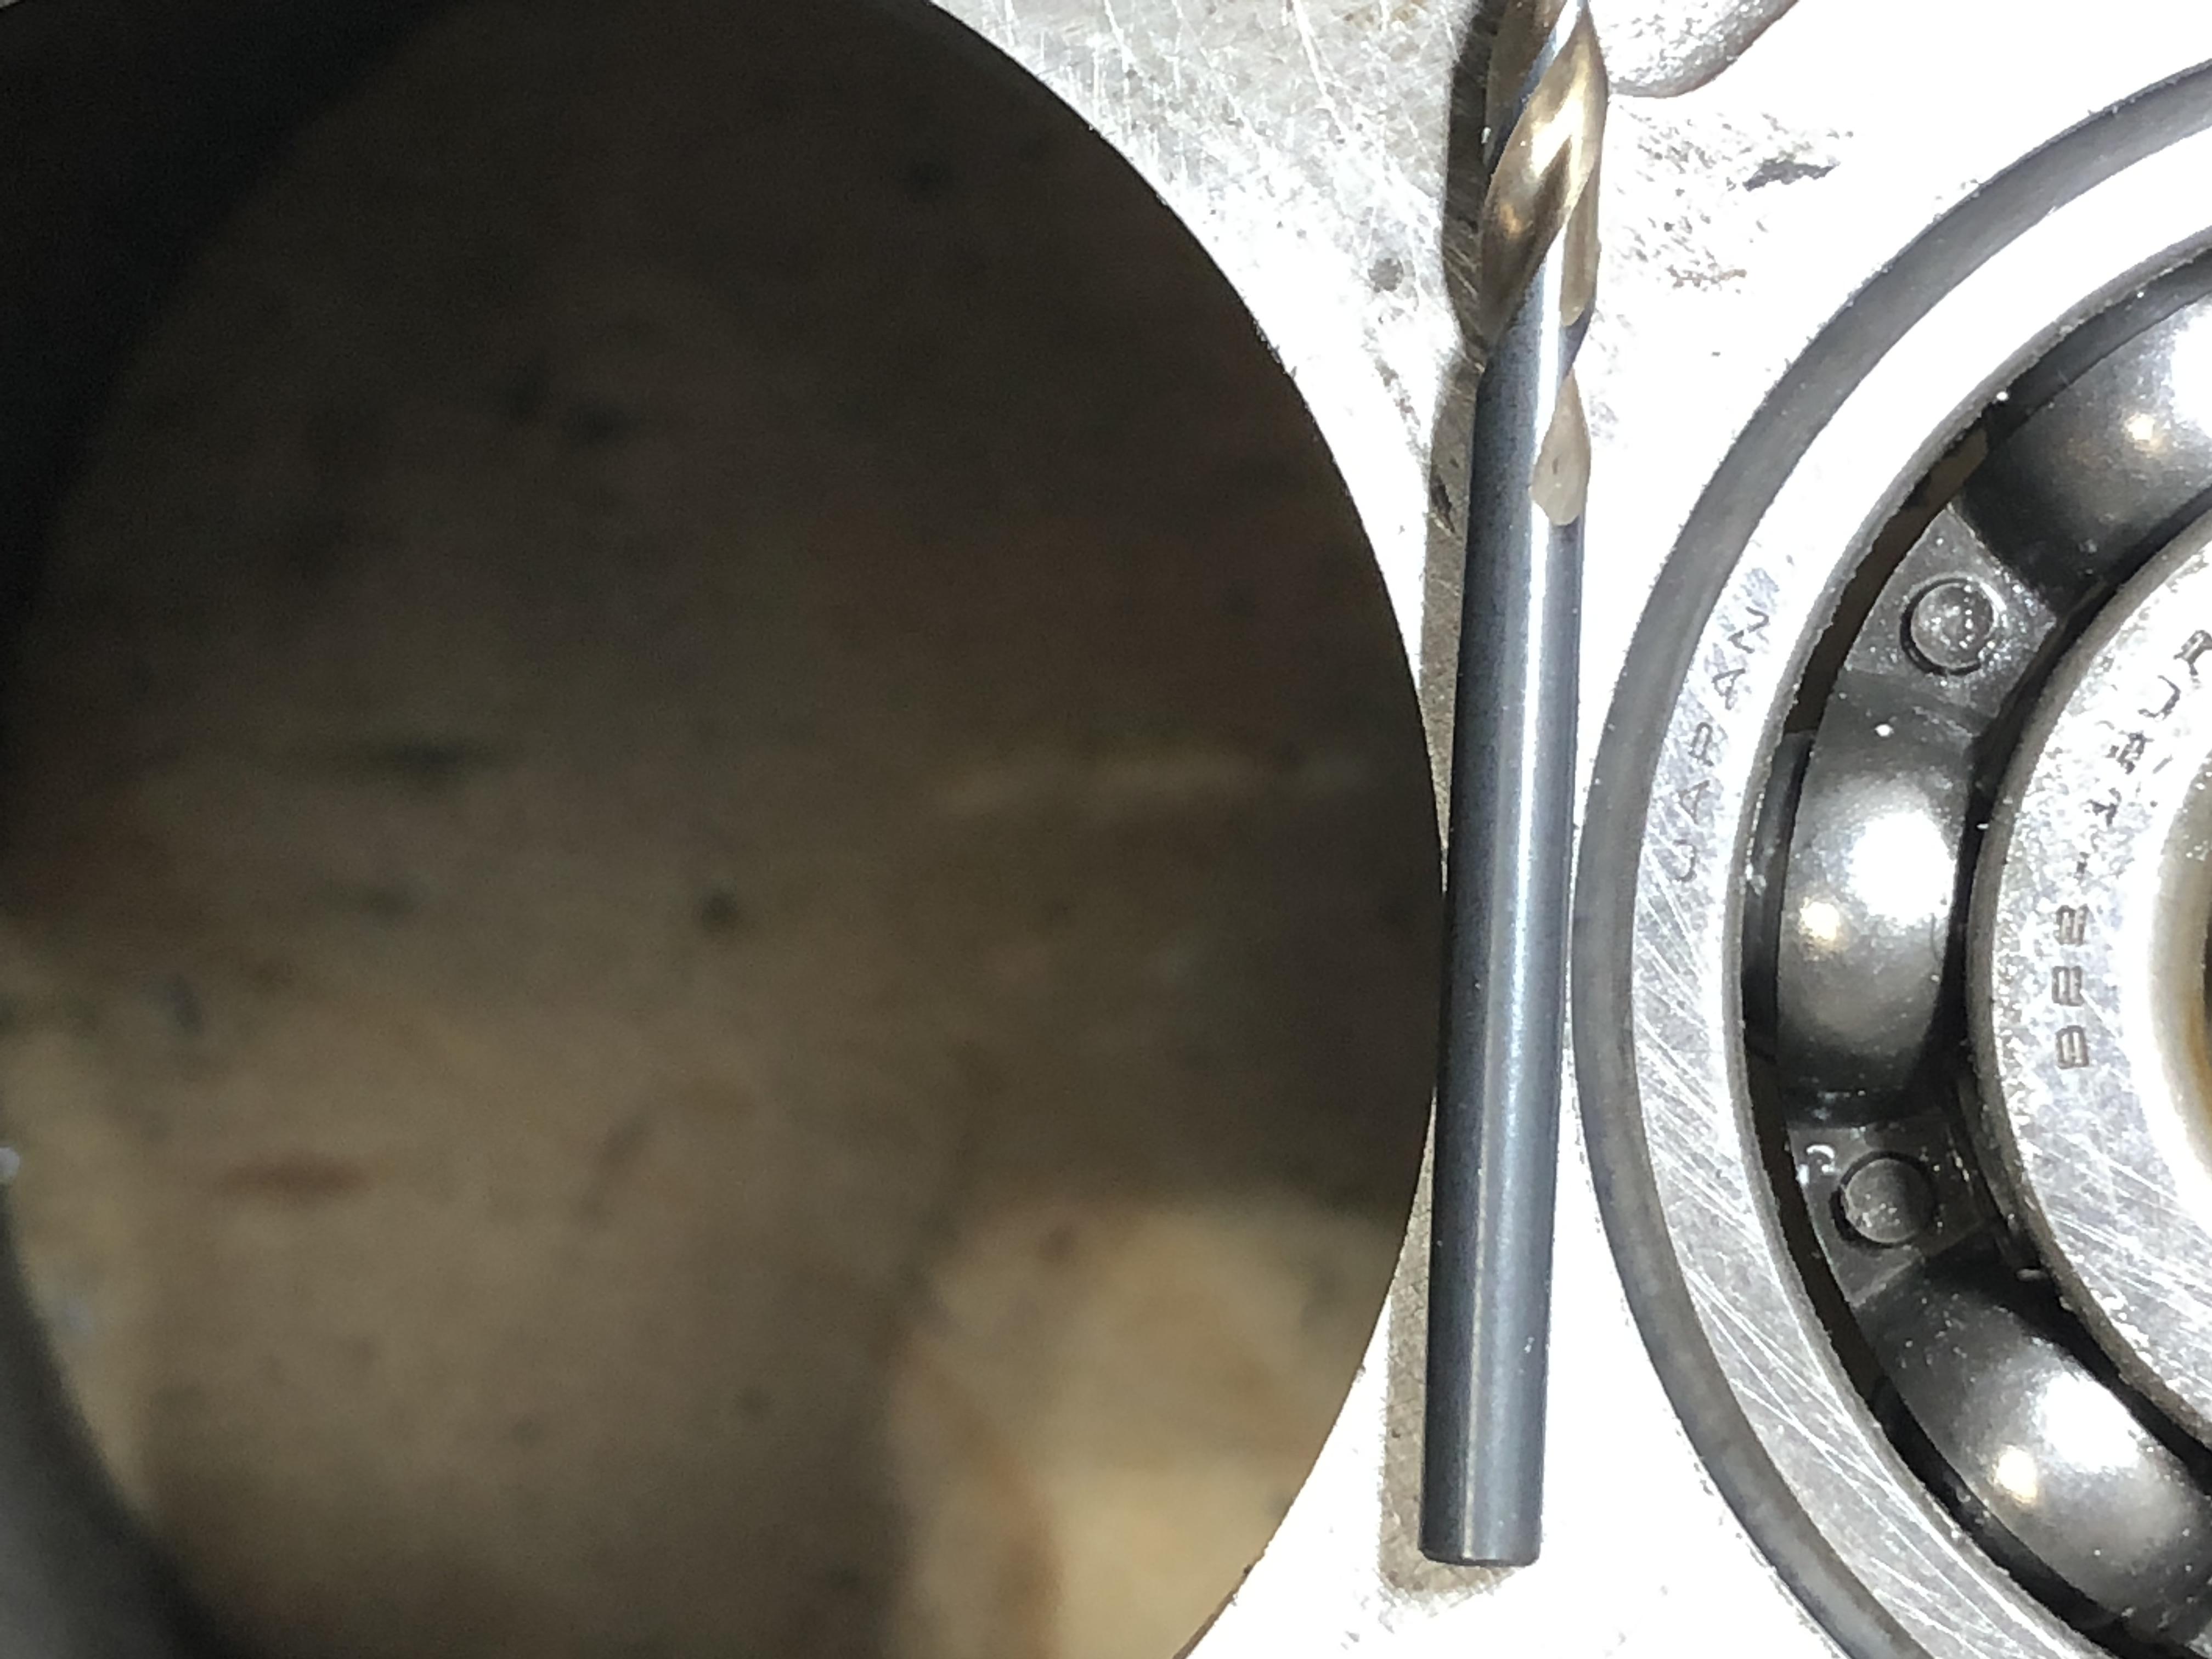
Well, the first real 62mm hole in a real 4 speed housing has been bored. The bearing fit is a nice tap-in, just like the Stock C type hole, and the location is as perfect as close as I can measure. There is exactly 4mm between the two bores. One slight issue that may lead me to use the coax indicator instead of the pilot bearing for centering. Maybe. This time, when you first move the bearing up/down into the 56mm hole with the quill and start moving the table X/Y to get the bearing to slide nice and evenly in the hole, there is quite a bit of X/Y motion possible with the bearing still passing through. You have to listen very carefully to get the least drag noise, and to get the minimum quill effort. This is not slop between the bearing and hole, or bearing on the mandrel, this is the table motion deflecting the casting on its plywood base I suppose. It’s pretty easy to get close. I drilled the hole, it worked out fine, BUT there is a clue that I was not perfectly centered. The bearing stays engaged with the old 56 mm hole until you are about 75% of the way through, then the bearing pops out the bottom, and is no longer supporting the quill location. At that moment, you can see a mark around the circumference of the bore. It’s tiny, I can’t feel it with my fingernail, but I can see it. So the bearing was not dead center to start with. Maybe its just a remnant of the motion induced when the bearing left the bore. Oh so close. Measuring the 4mm space between the two bores is tricky. My caliper is too long. So I set my micrometer to 4mm. You can’t measure that thickness with two curving walls, so it’s resting on top. I need to make a 4mm gap gauge of some type. This is a 4mm drill bit. Parallax is a bitch.... picture is not perfect. This is the 62mm bearing in place.


 1 point
 -
1 pointThere is a small amount of adjustment in most of the front end pieces because of the size of the holes in the panels. May not be enough. Is your grill removed? I would loosen the hood bolts and the hinge bolts and try pushing the hood down and retightening it again. If it fit before, it should fit now. You can also look at the way the hinges shift when pushed down. Then you could adjust them more in that direction with the hood up. The hood may be stopping against the fender before you get the hinge where it needs to be.1 point
-
 1 pointOkay. Flat washers go on the two large long bolts. Locking washers on the rest. Sent from my iPhone using Tapatalk1 point
 -
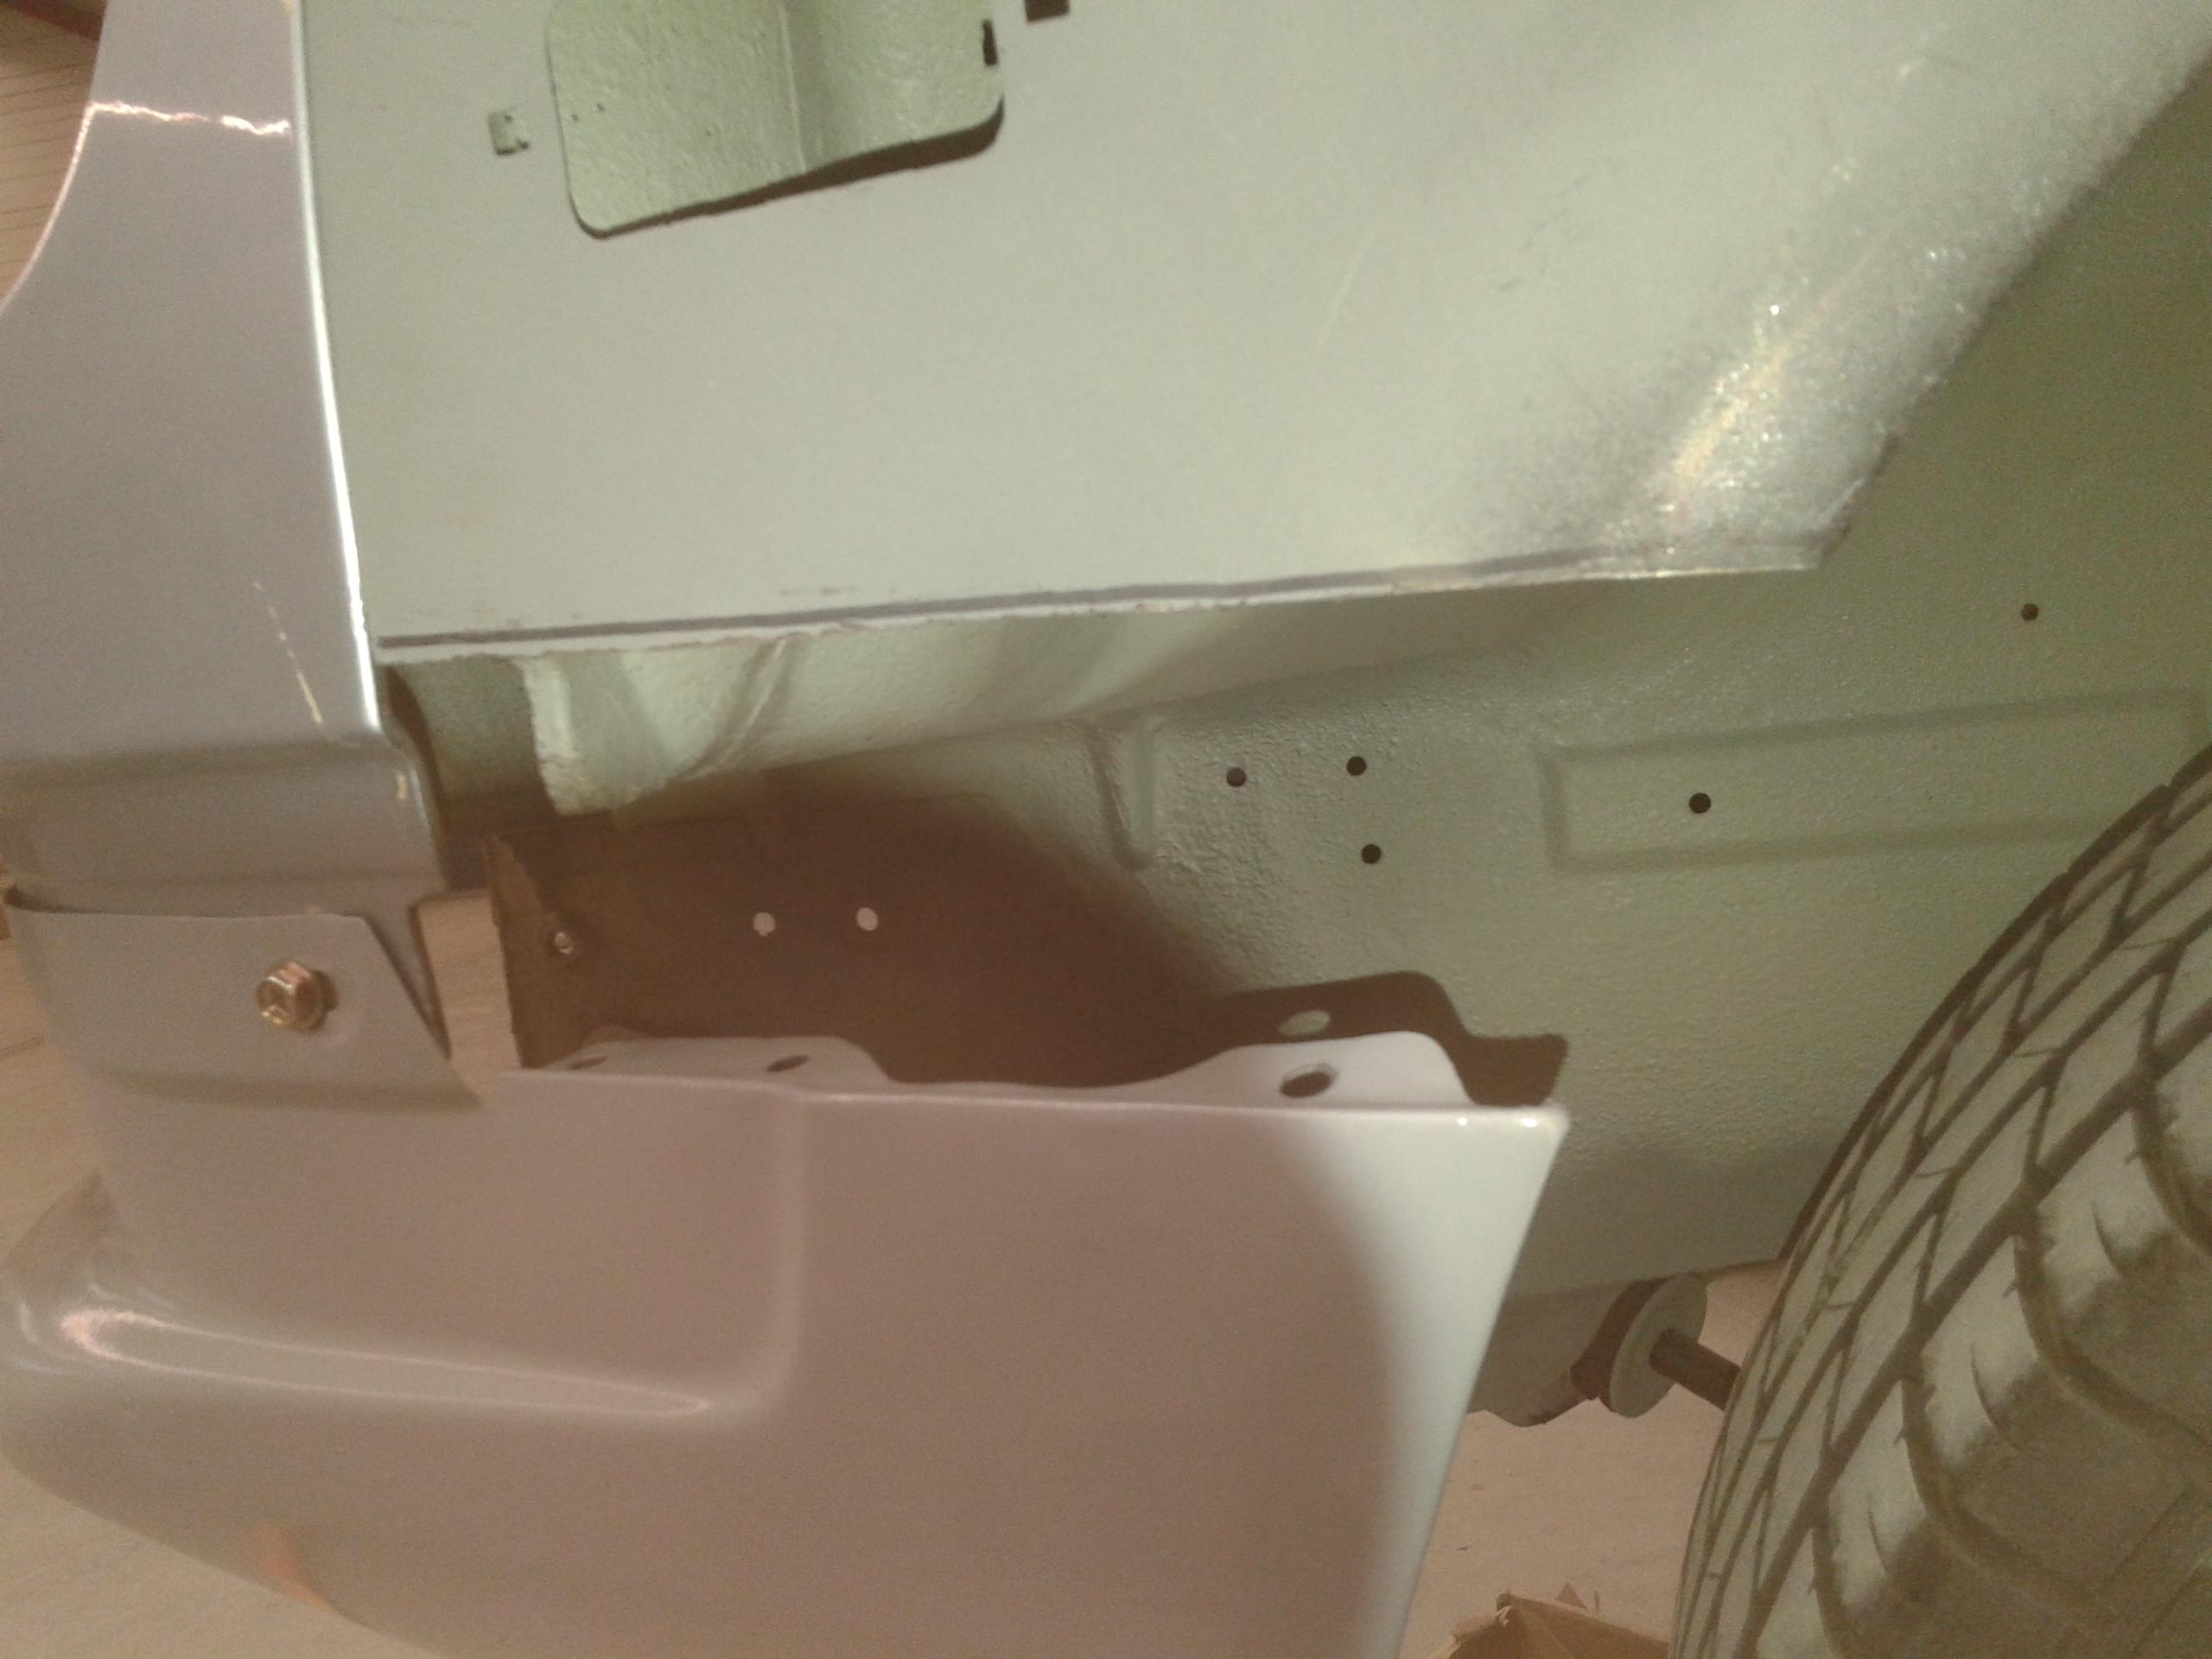
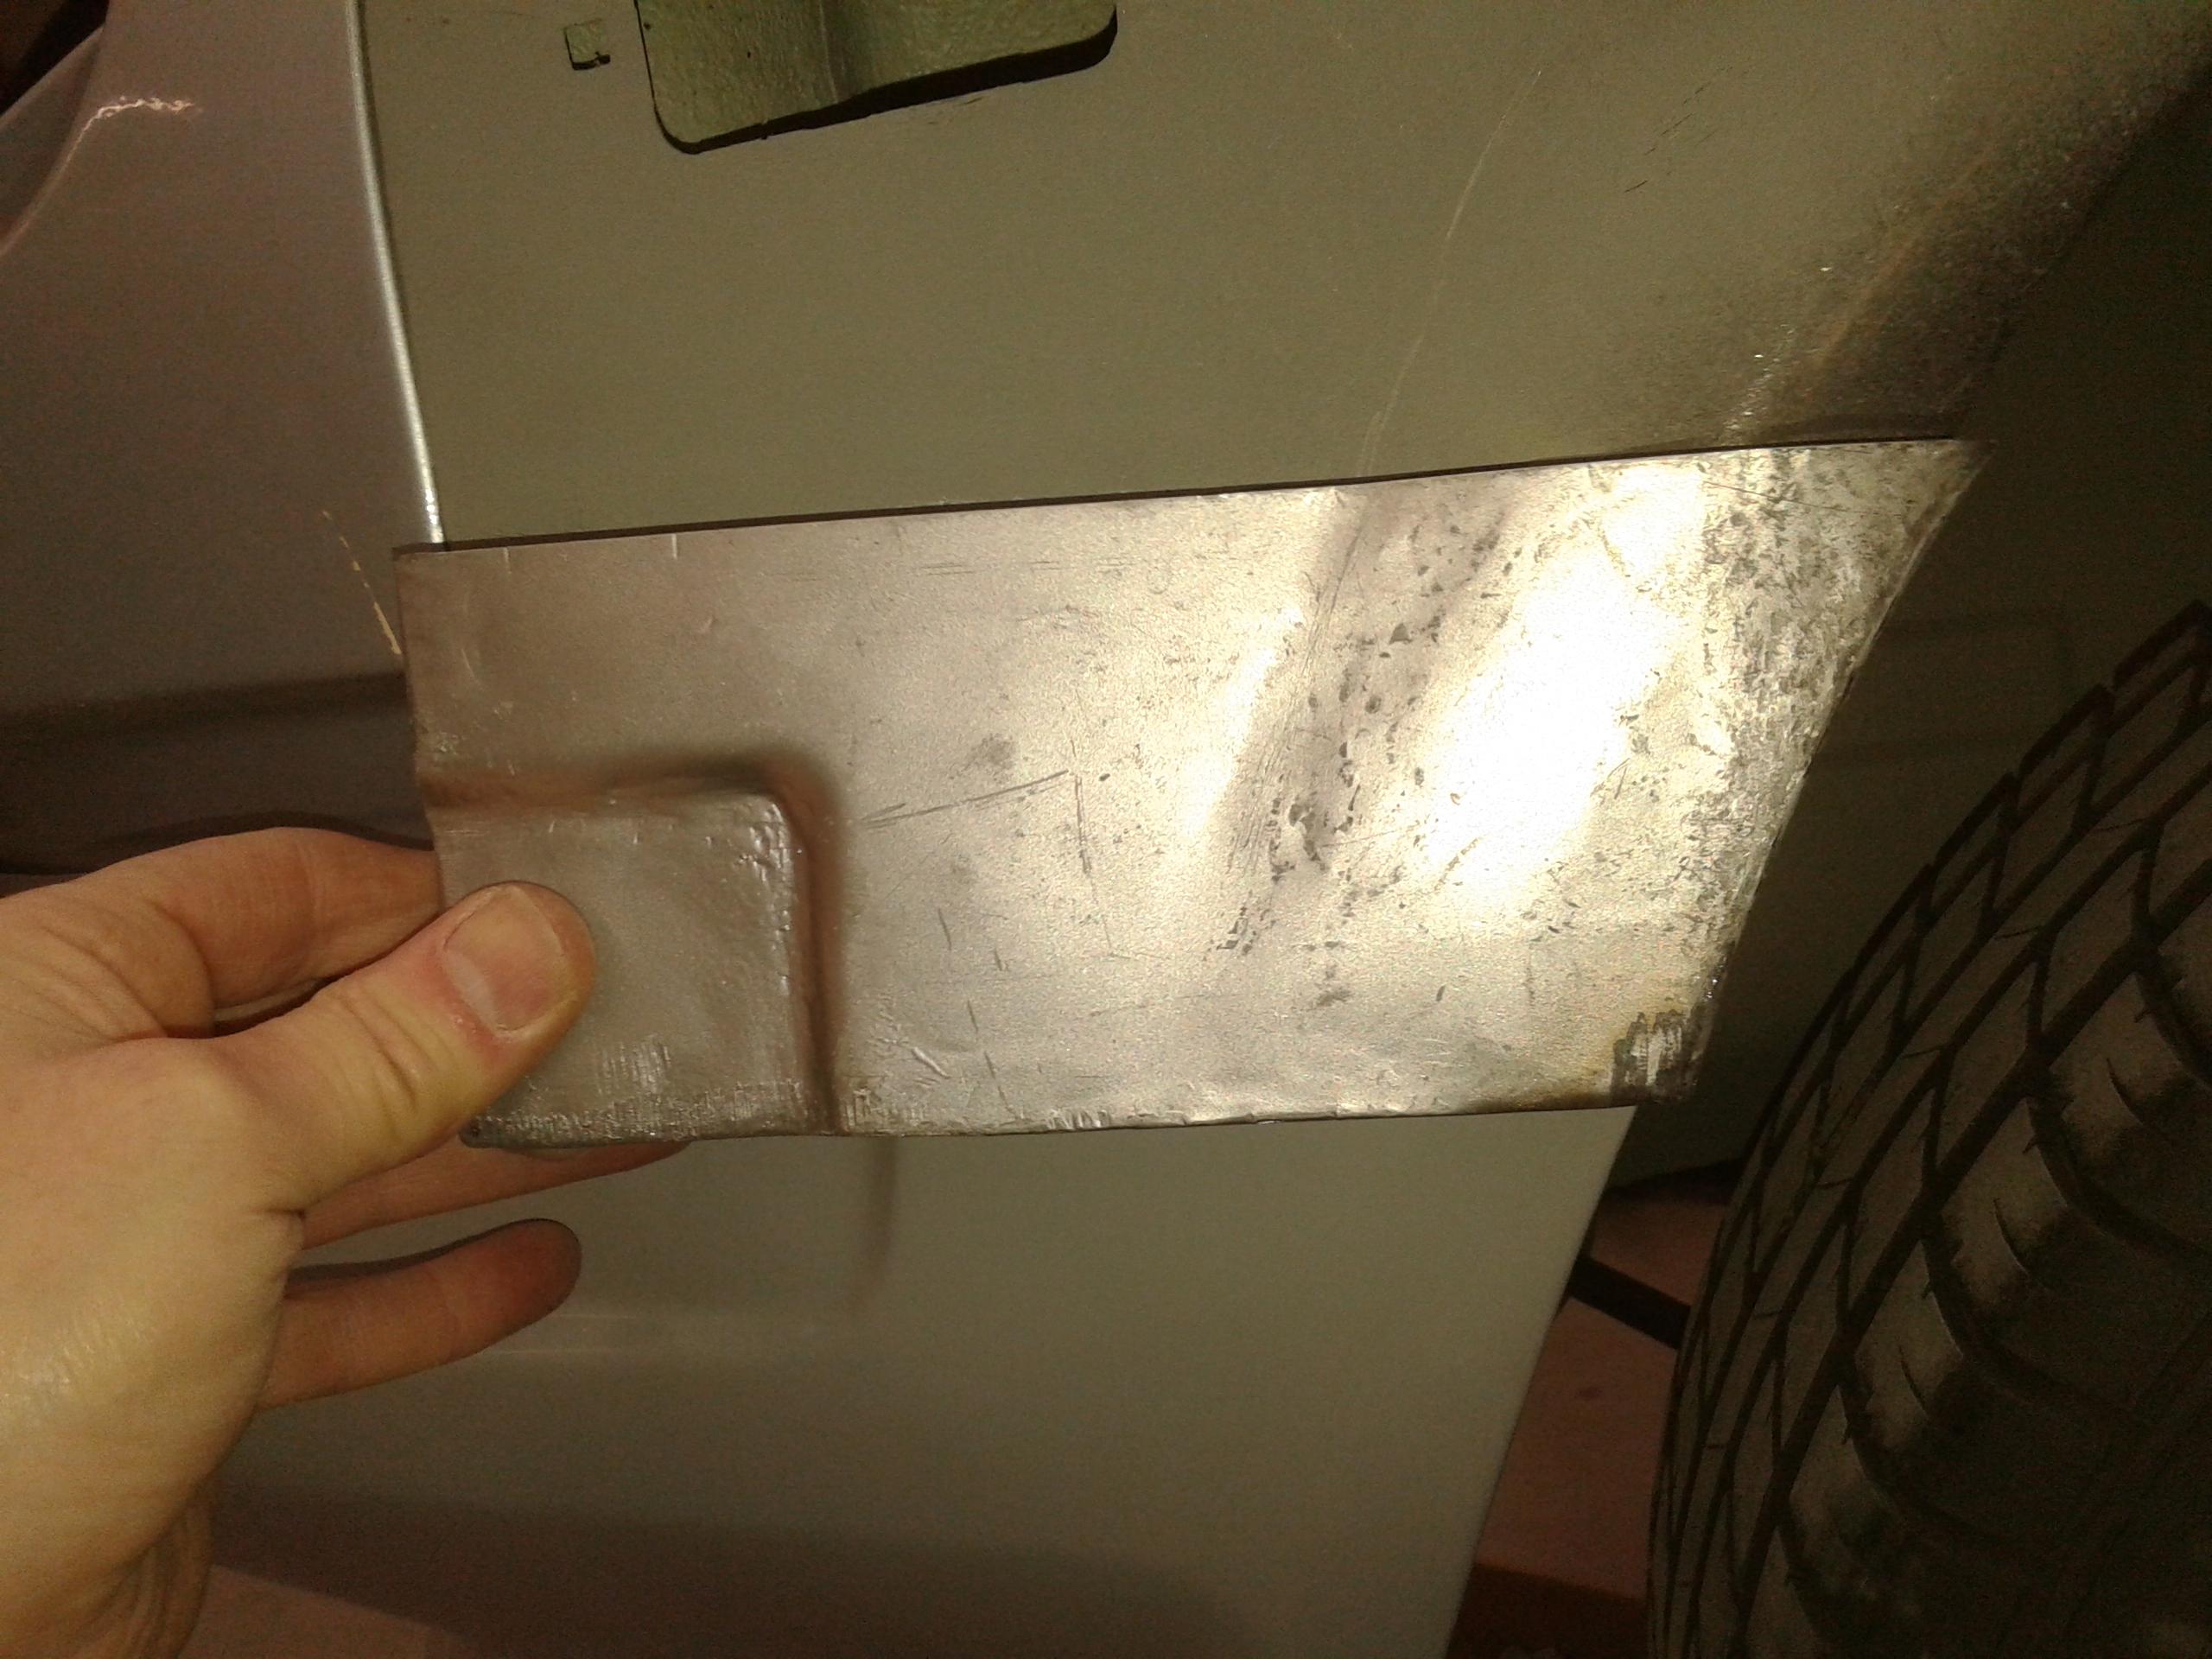
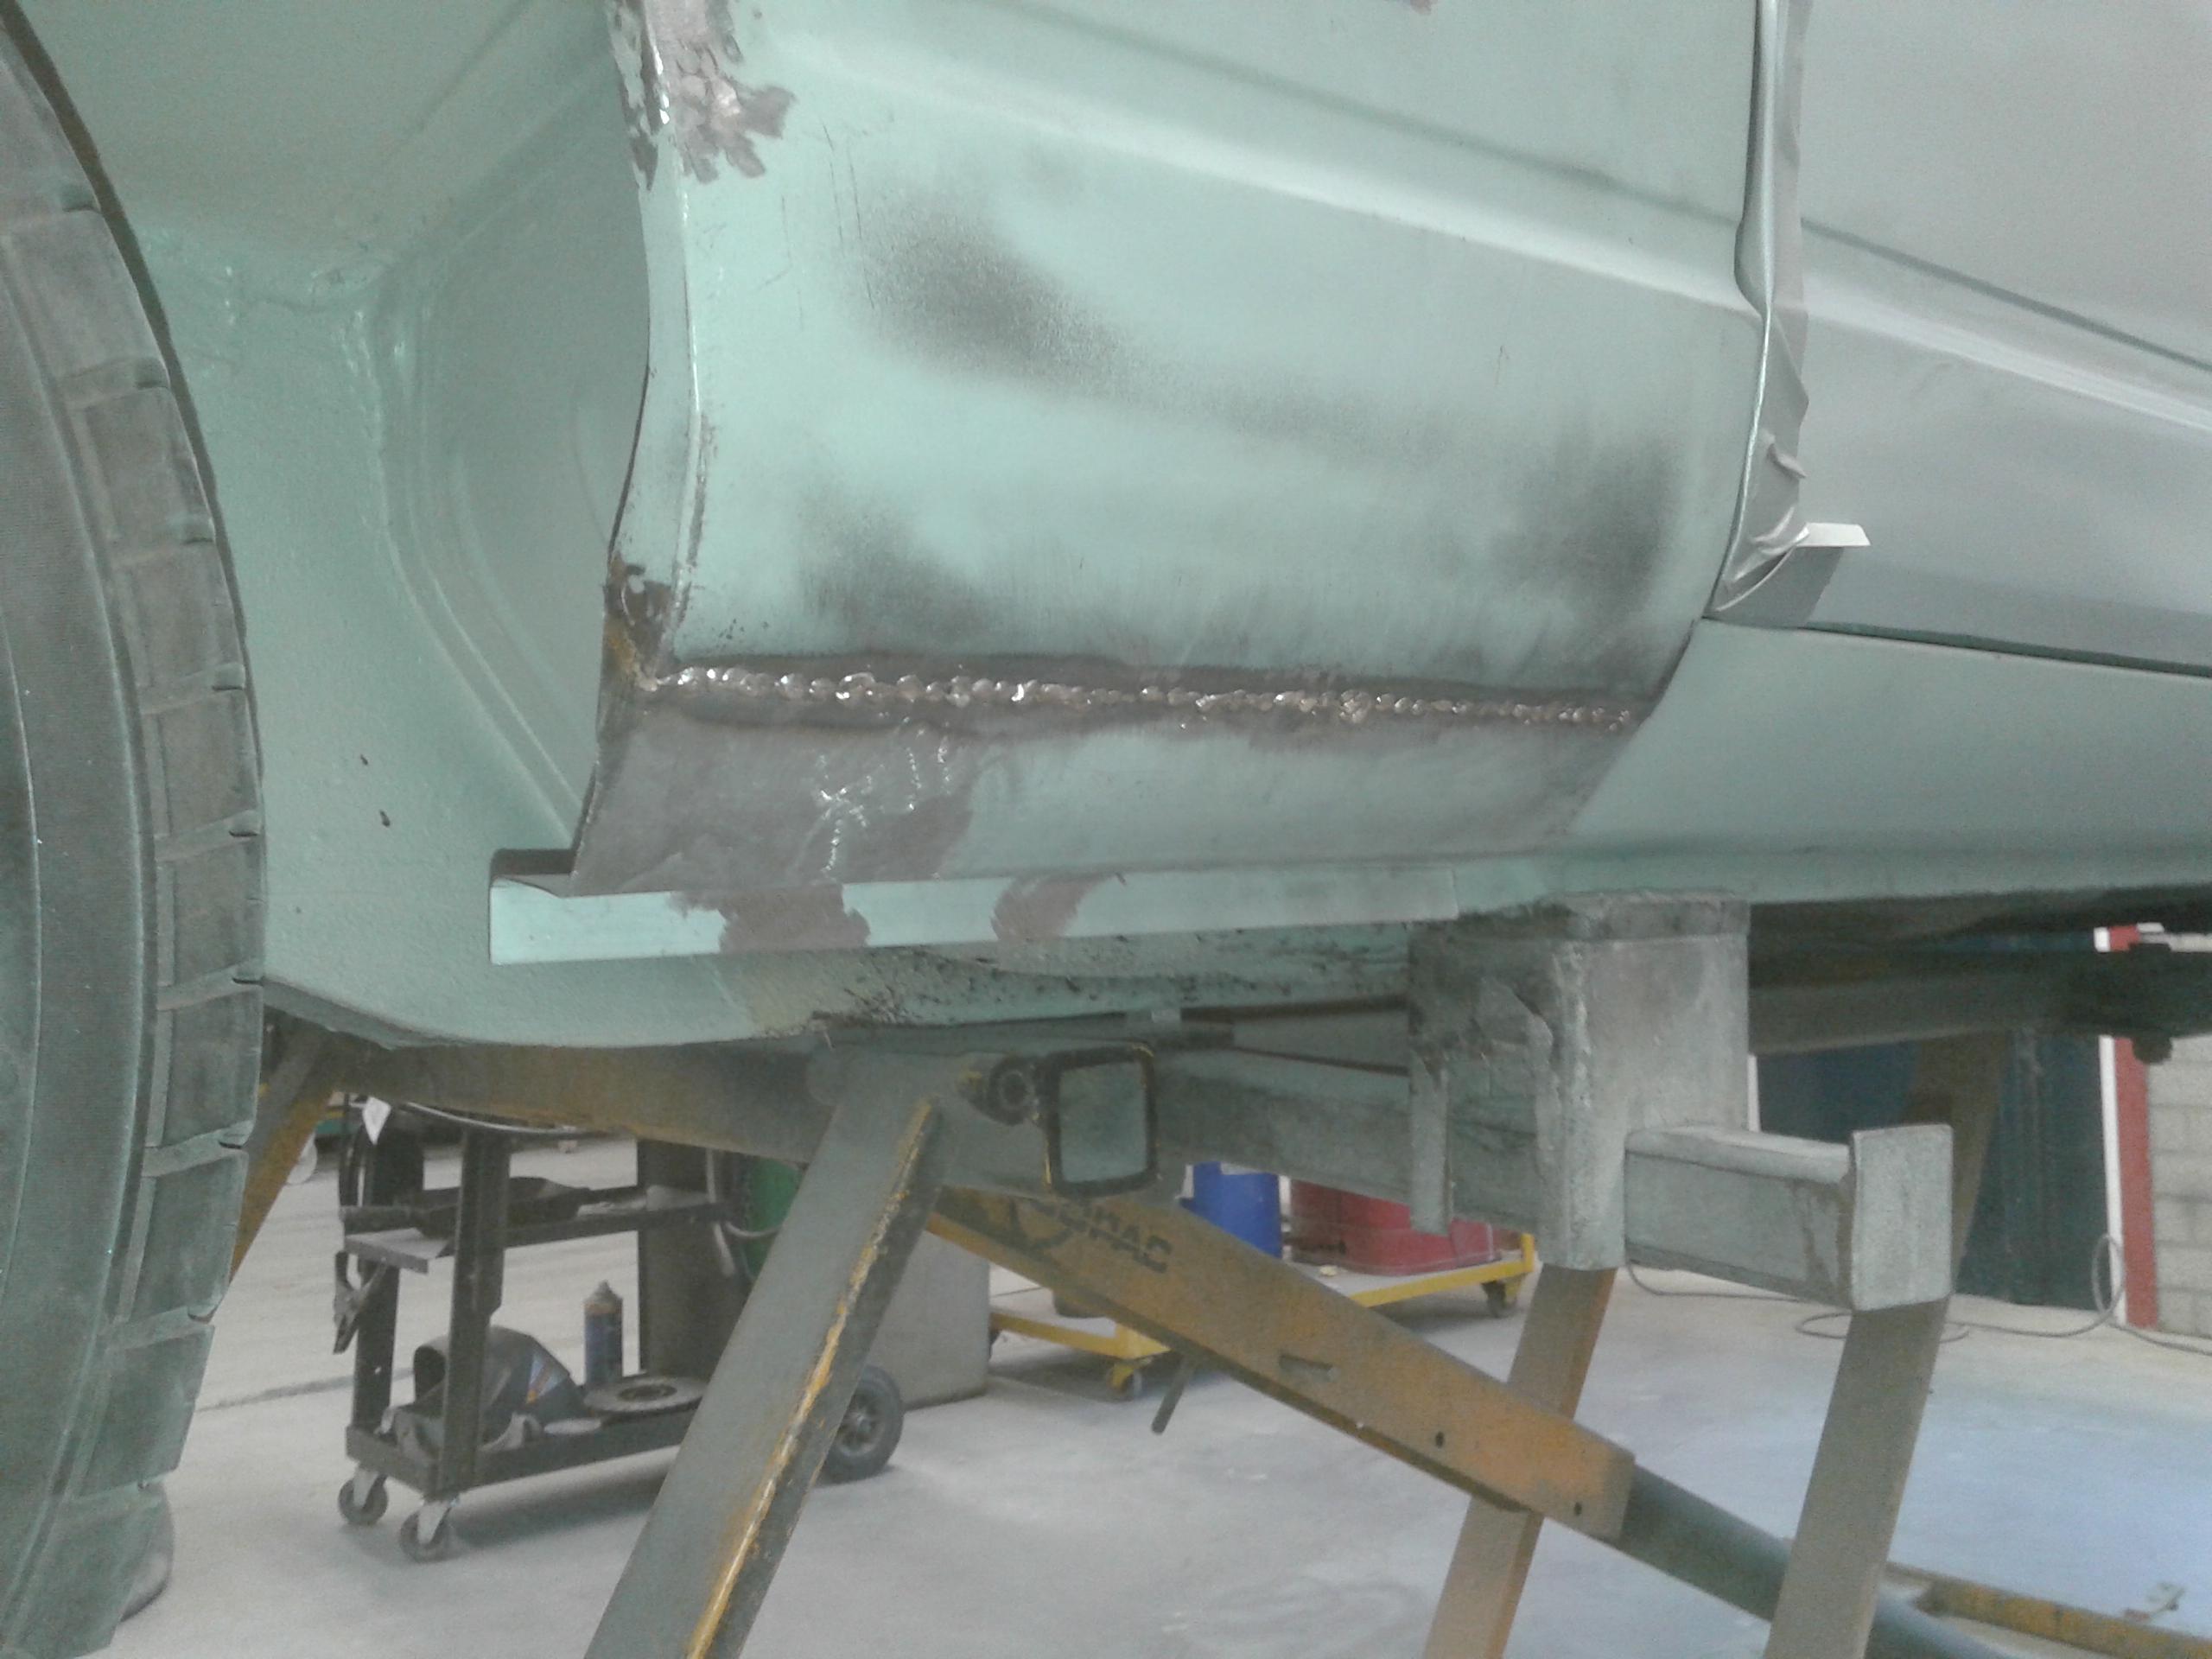
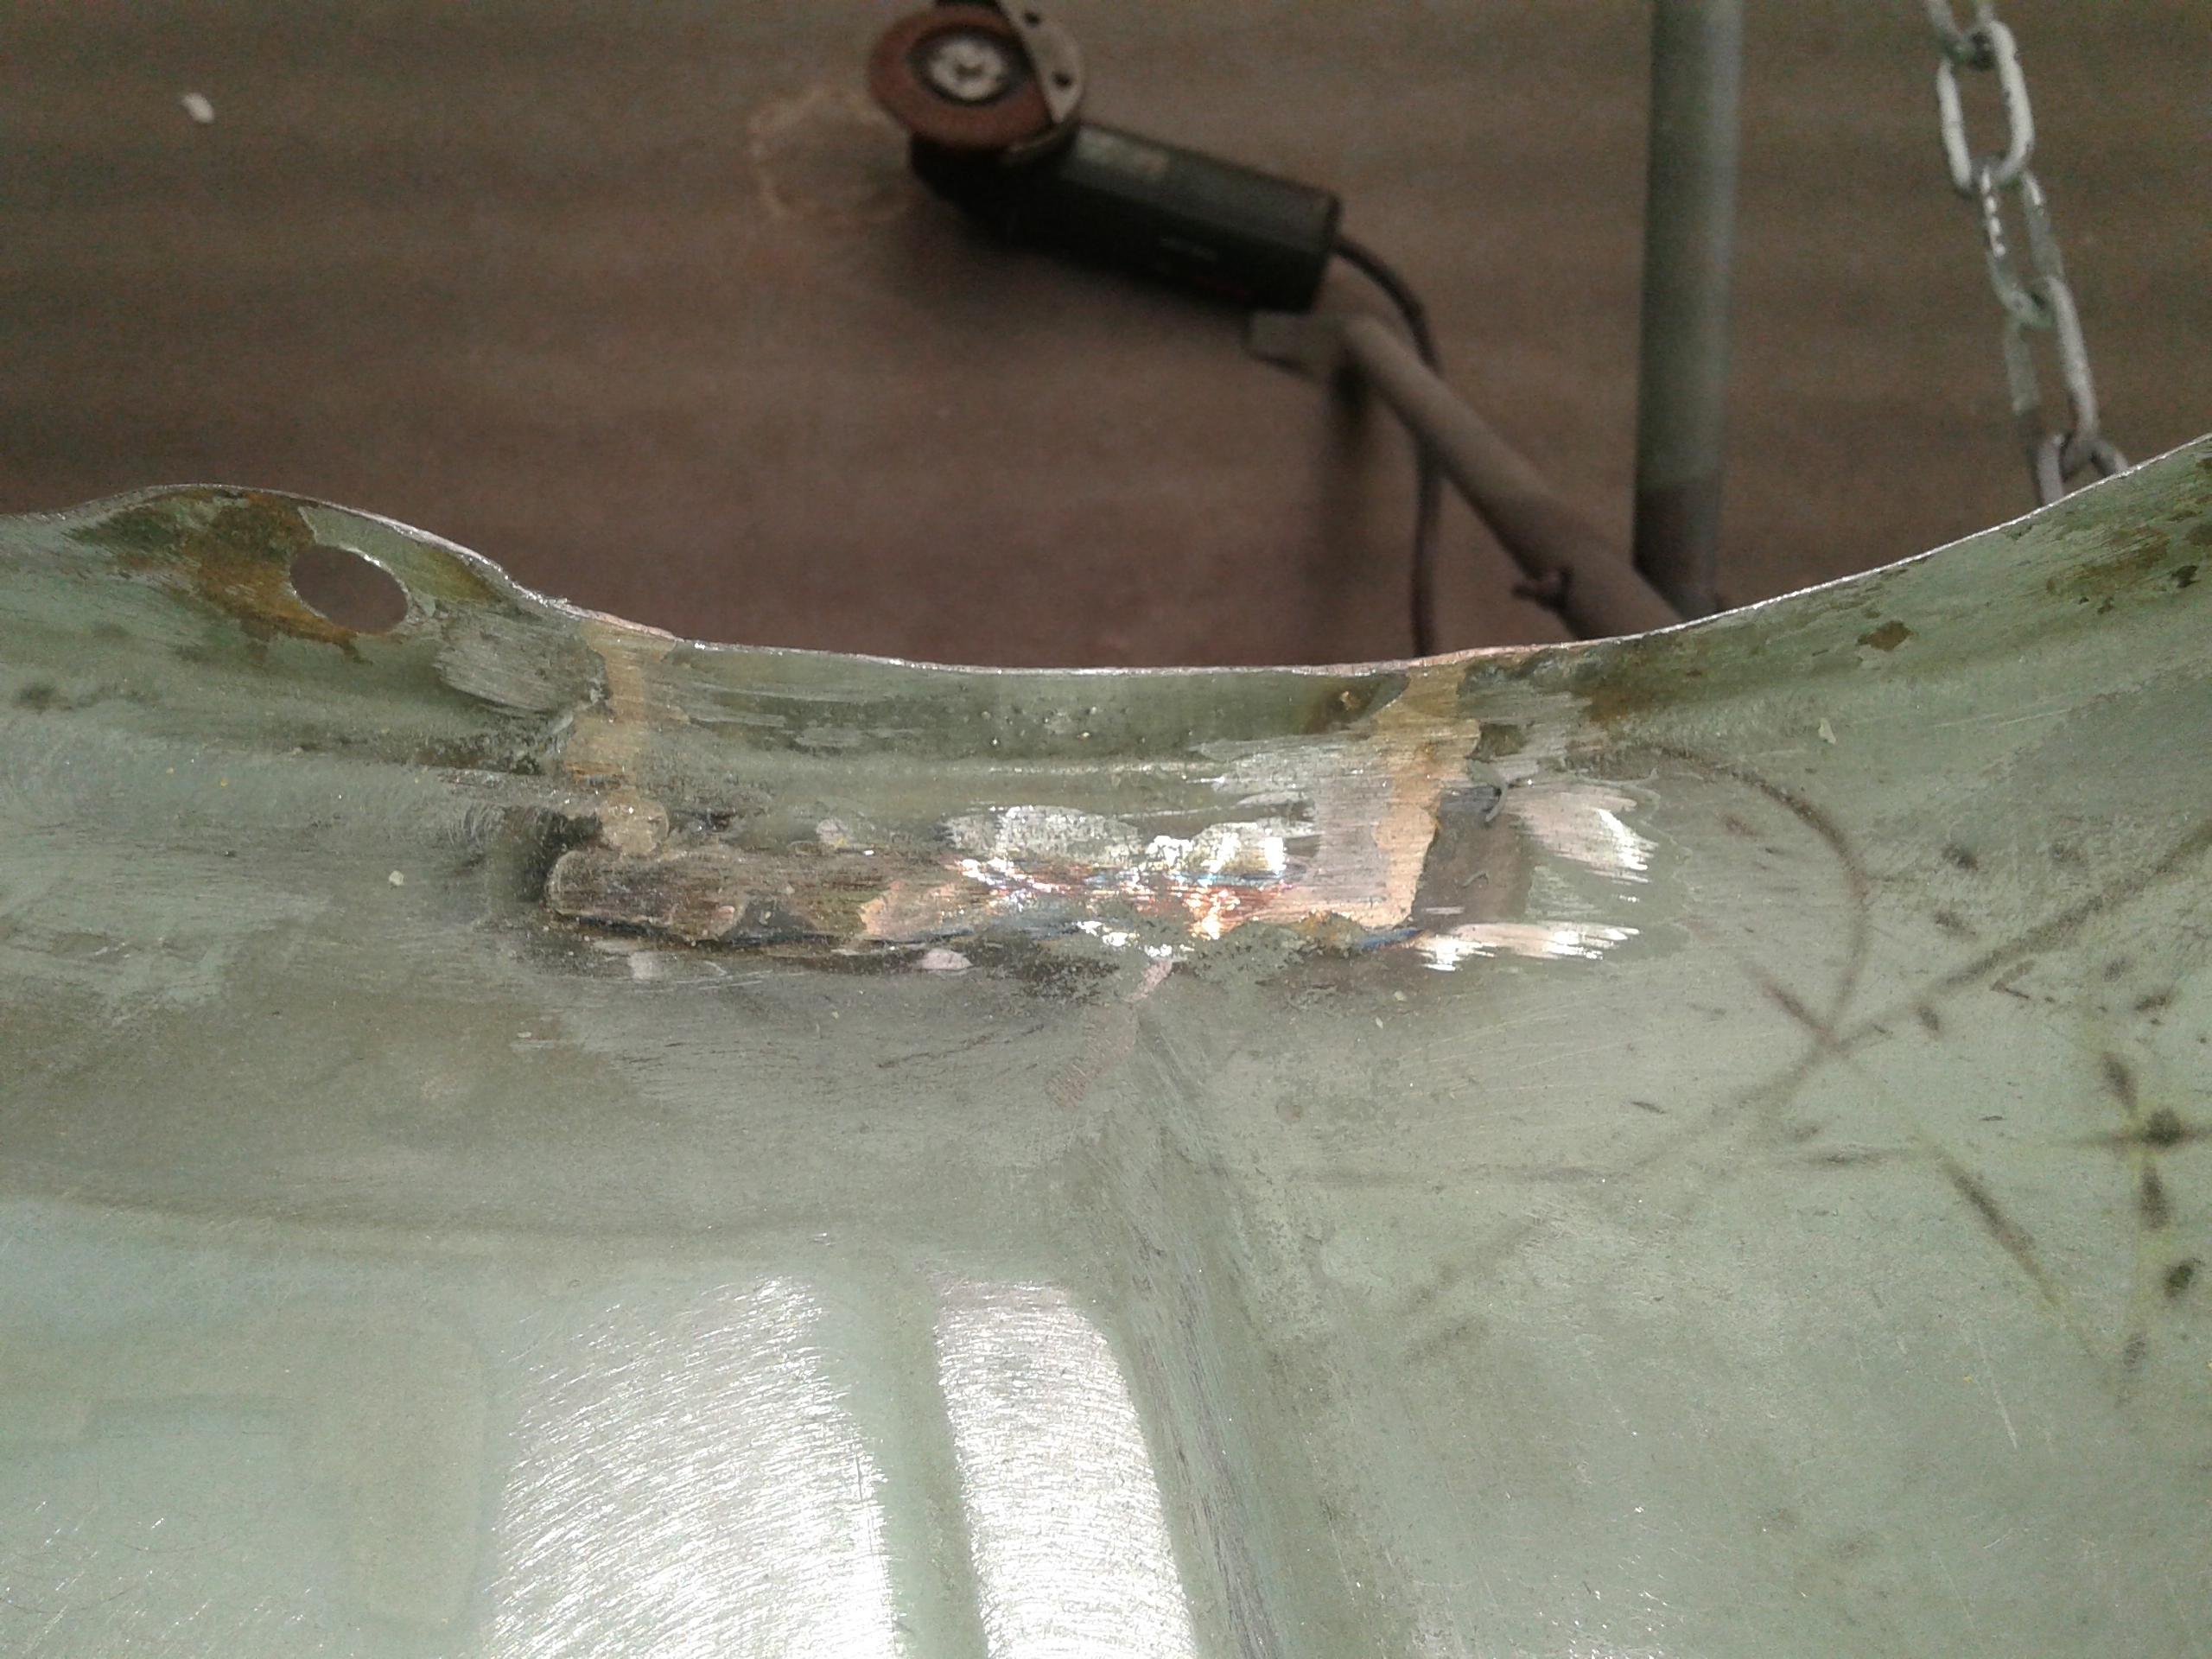
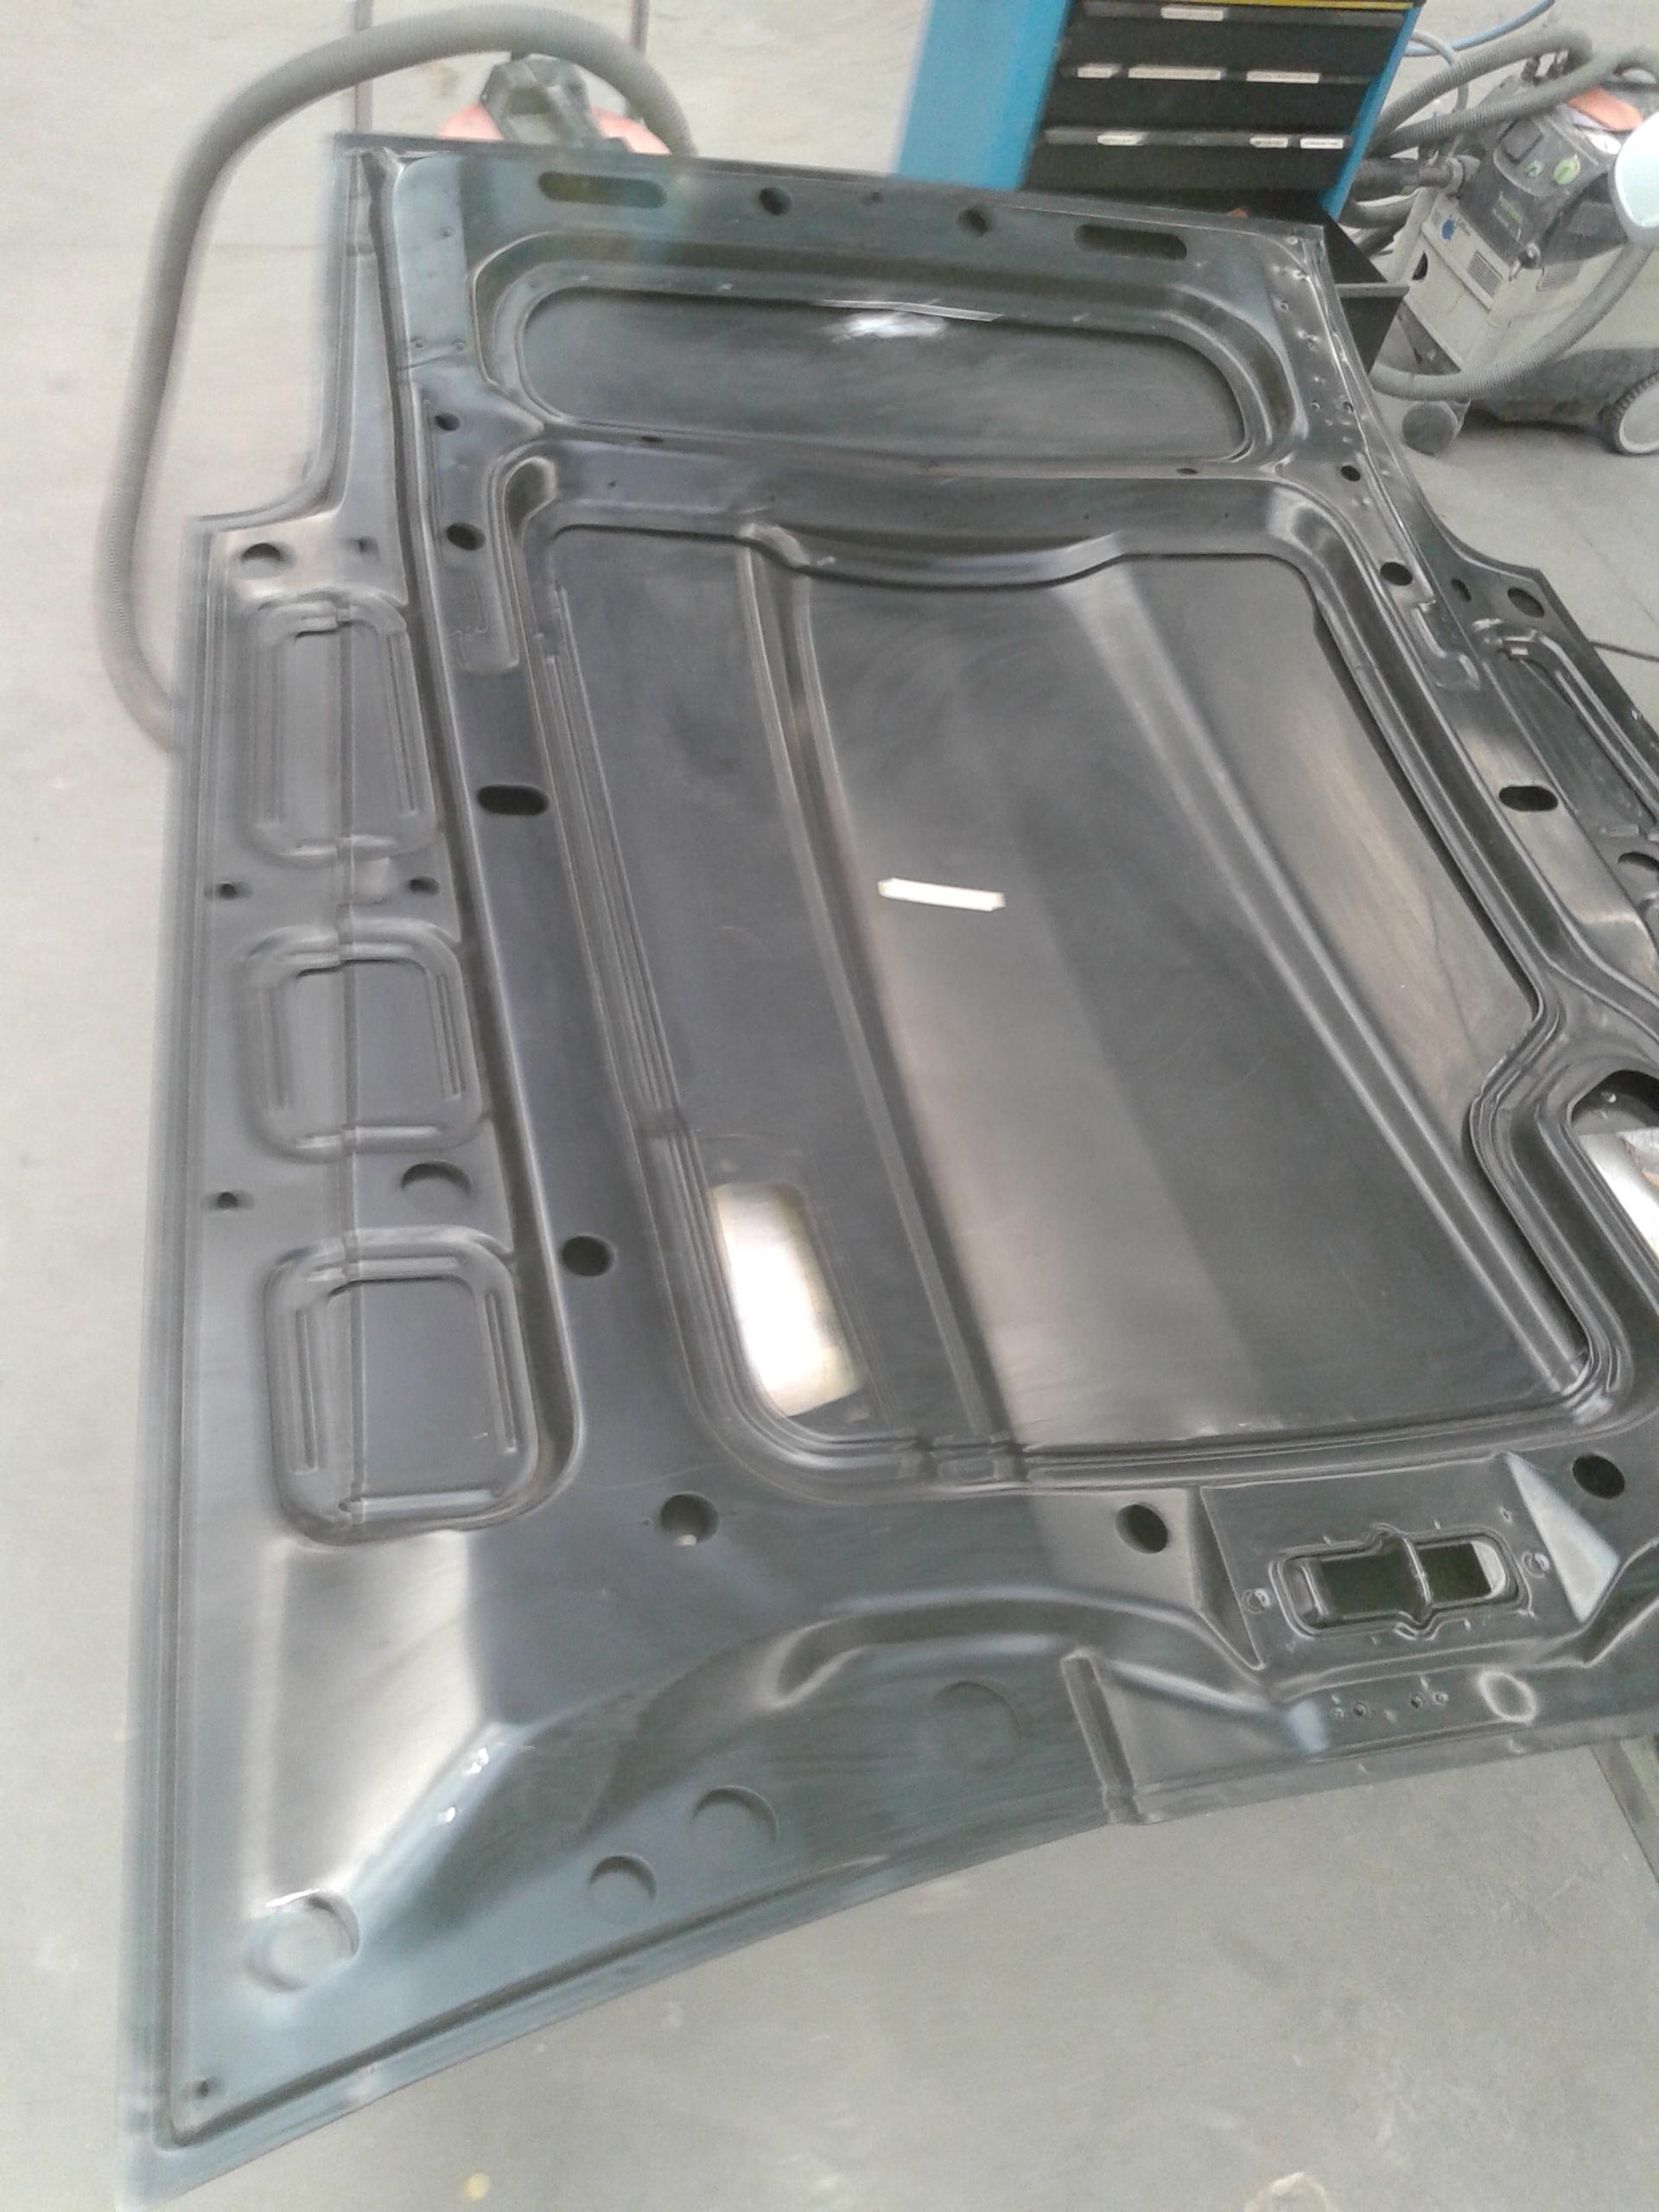
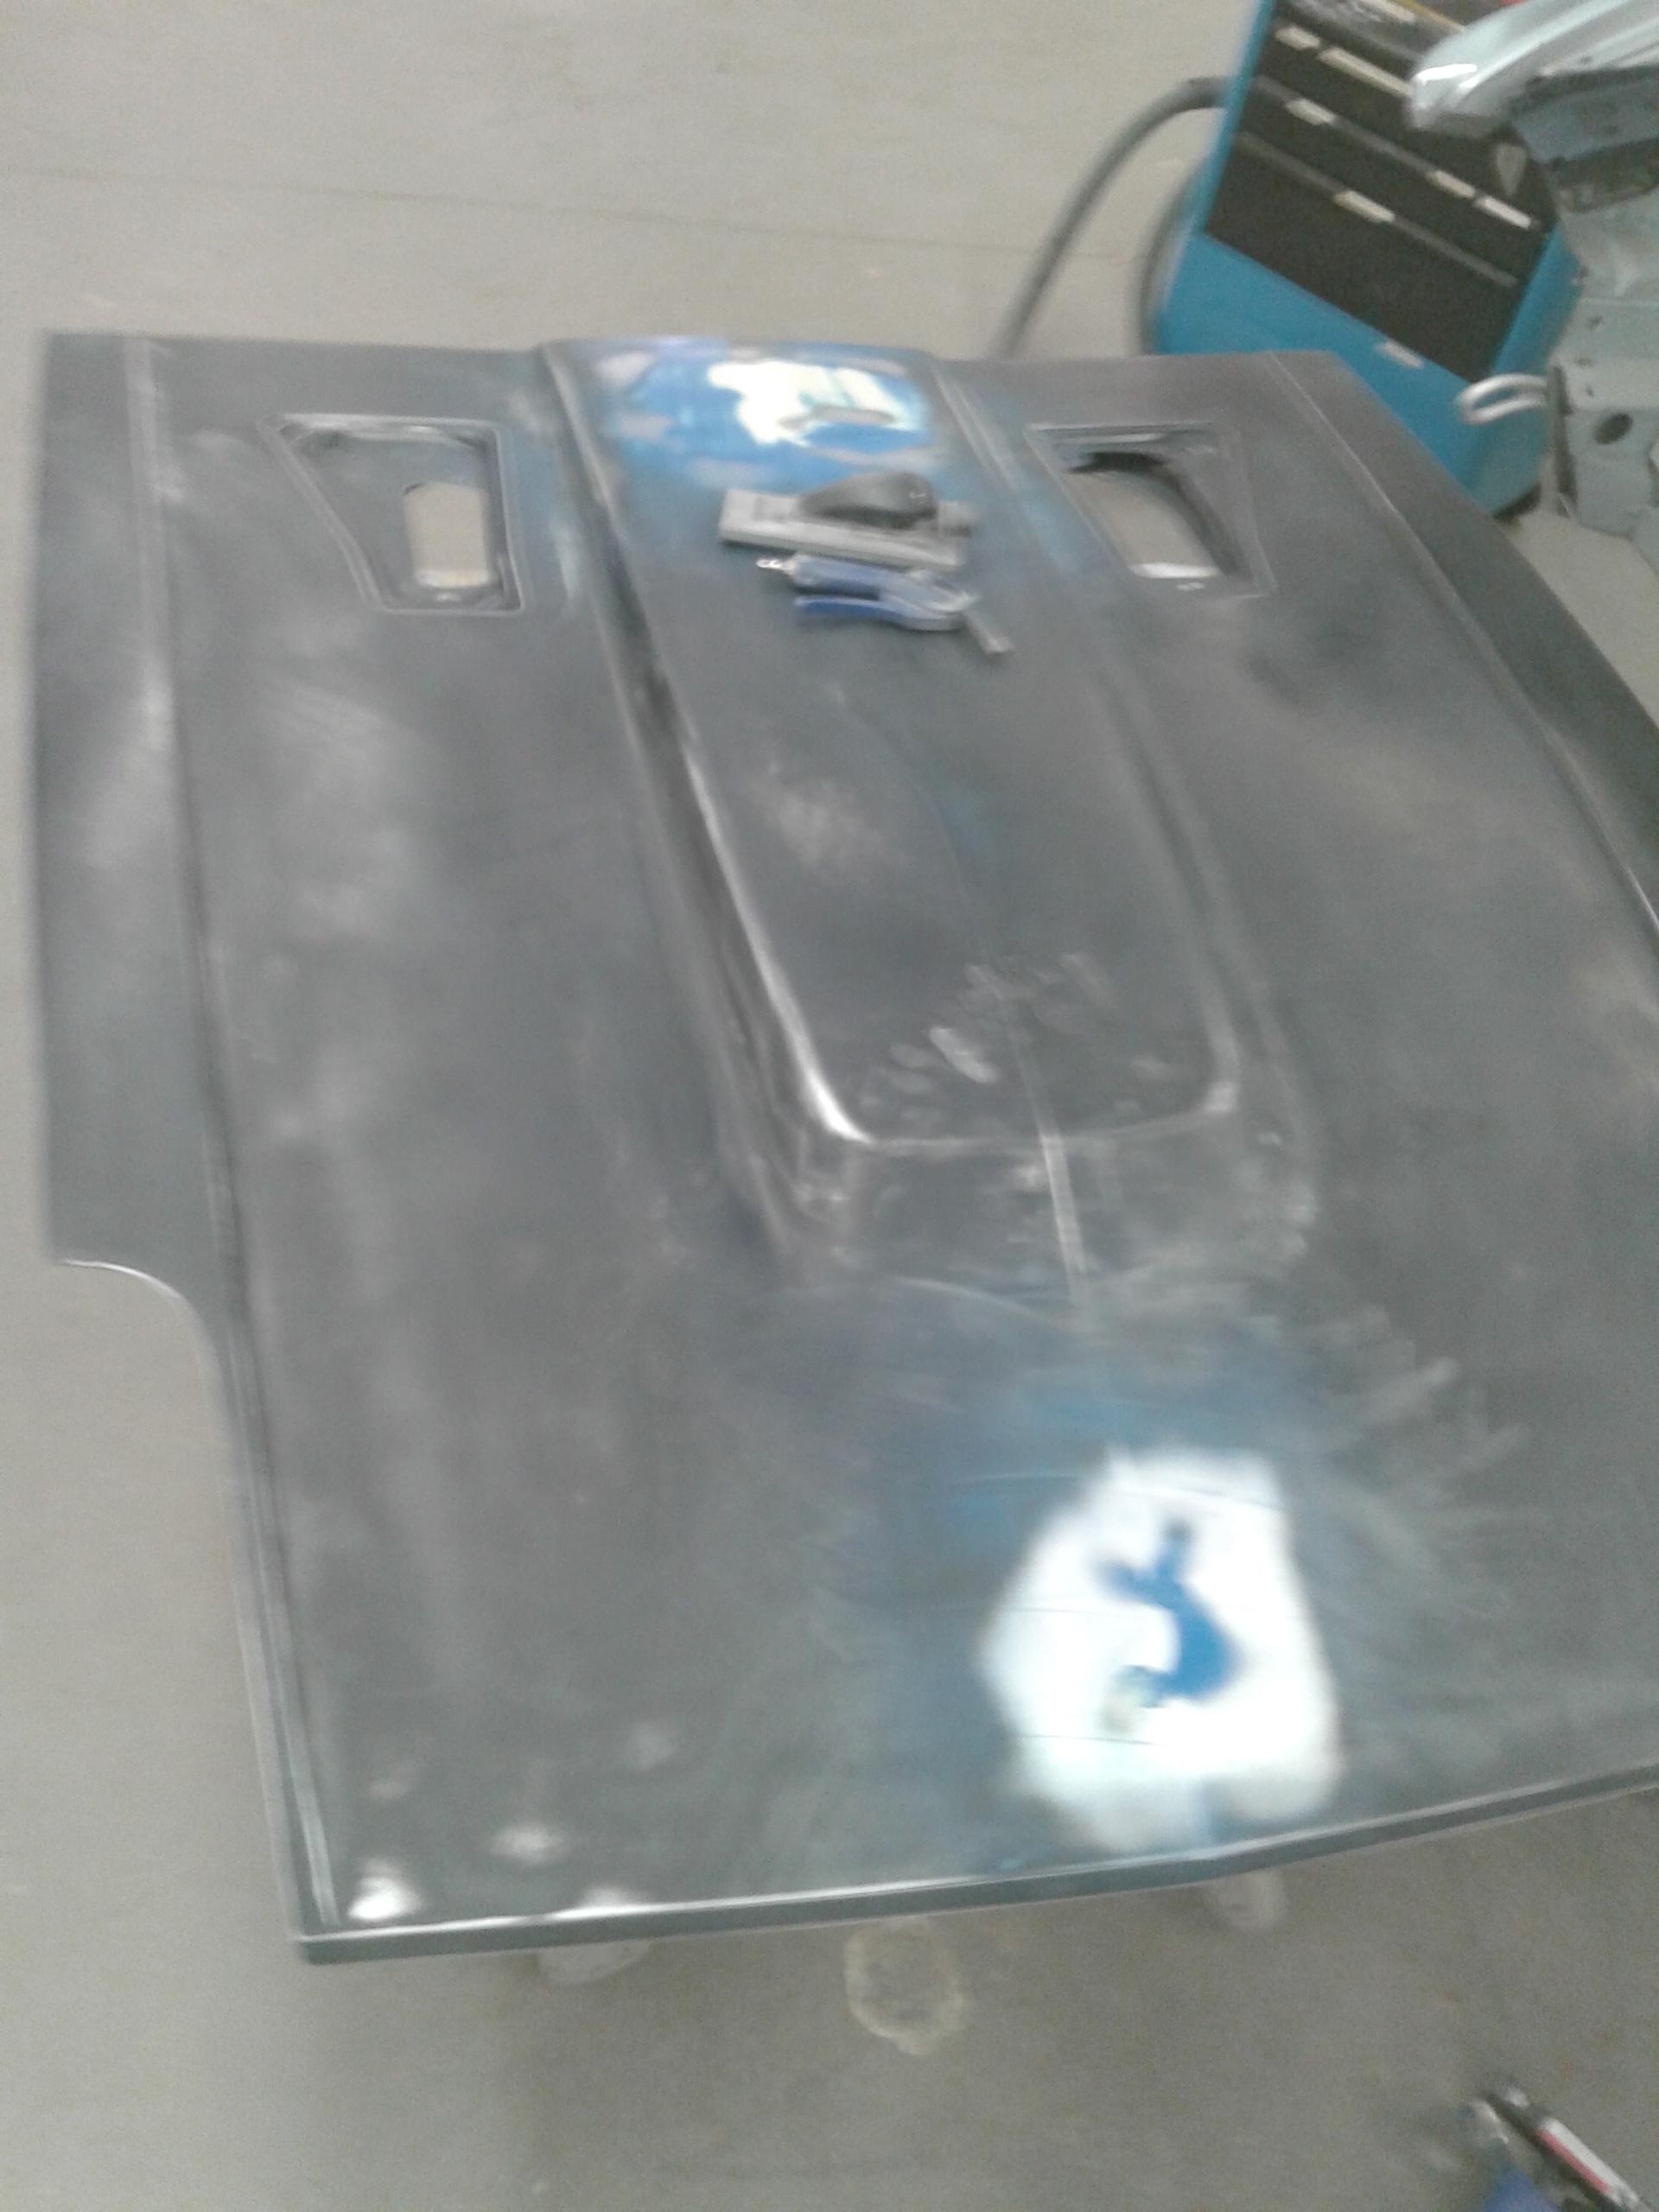
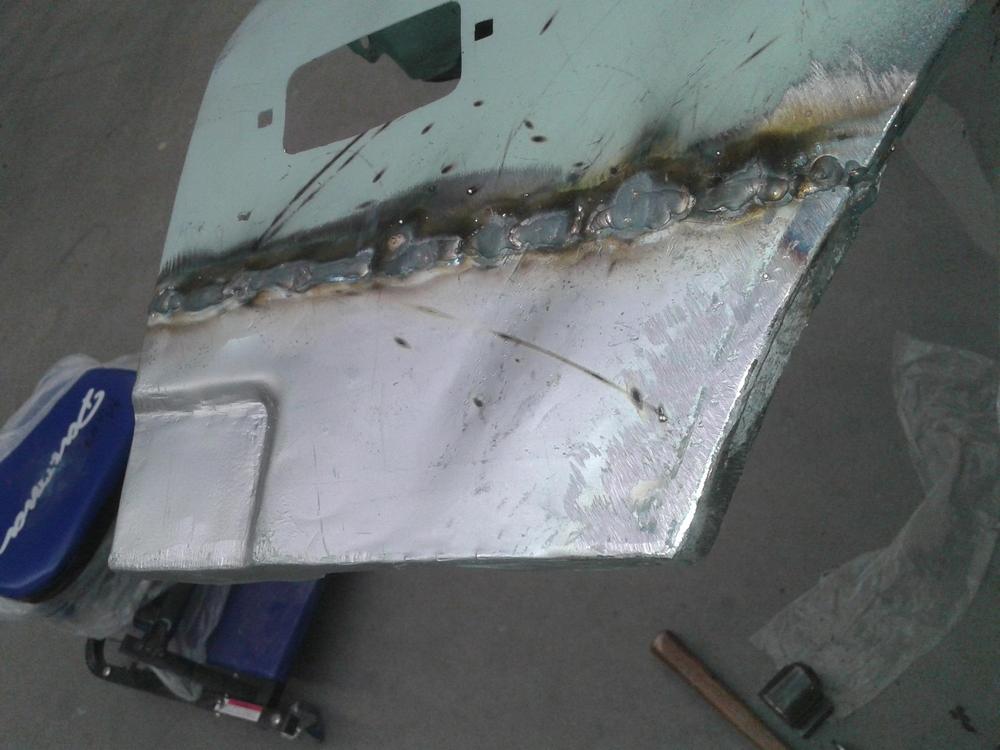
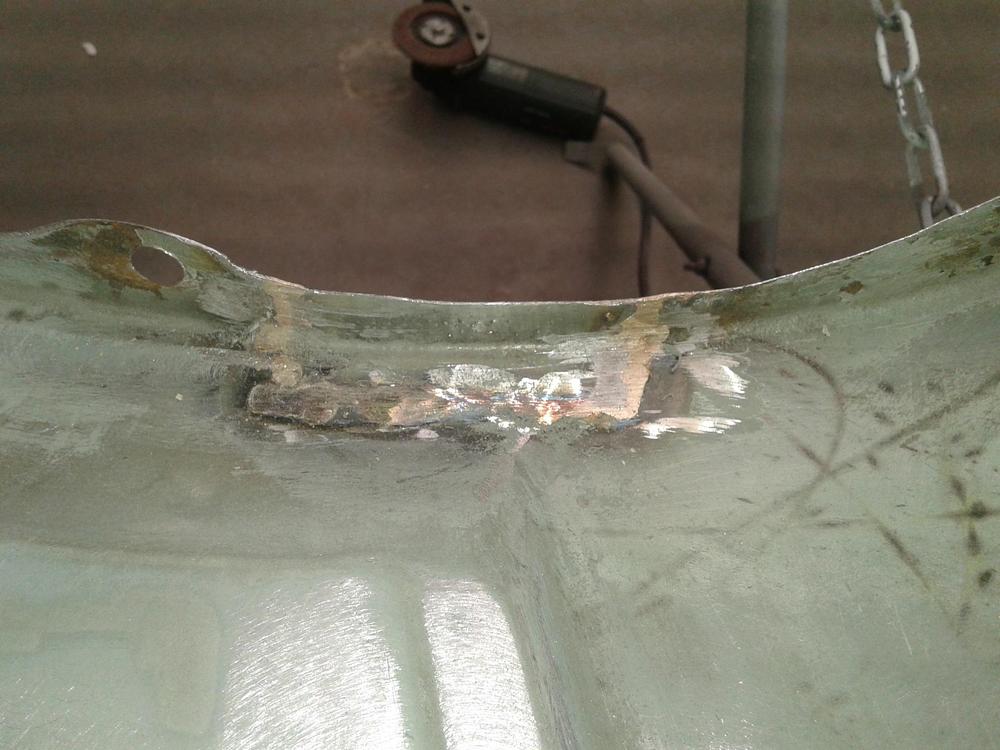
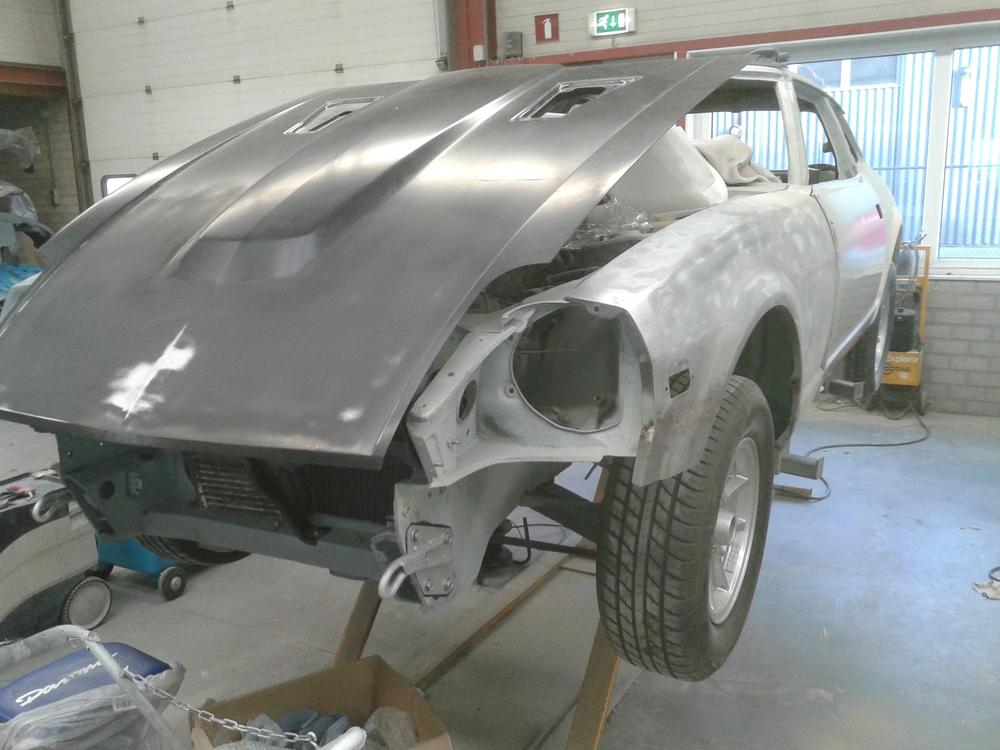
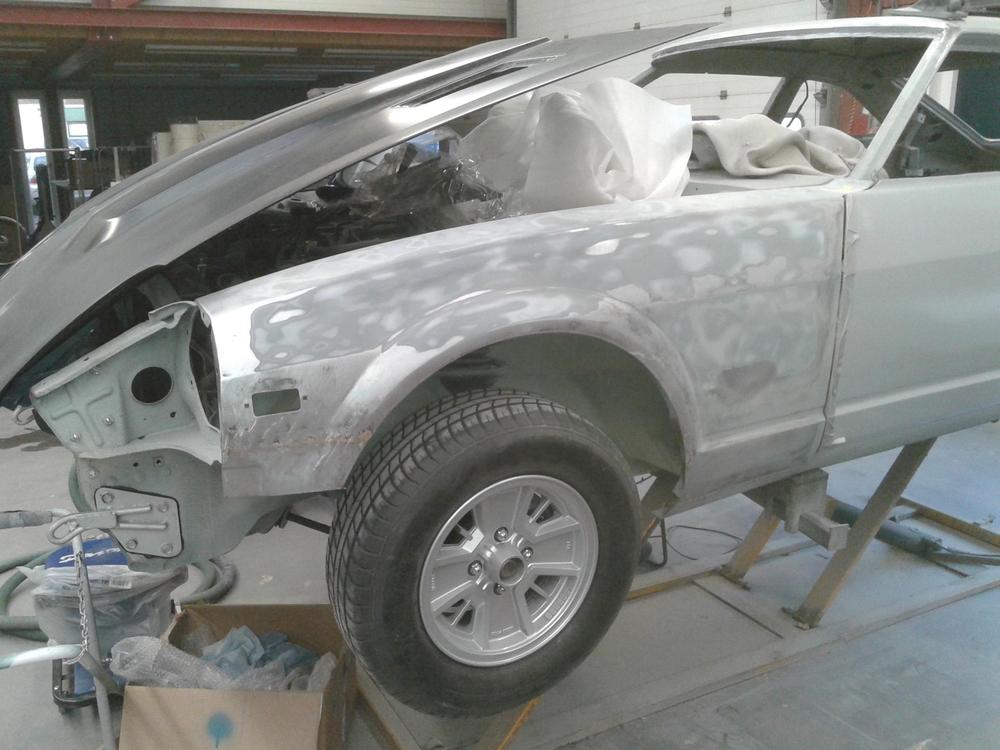
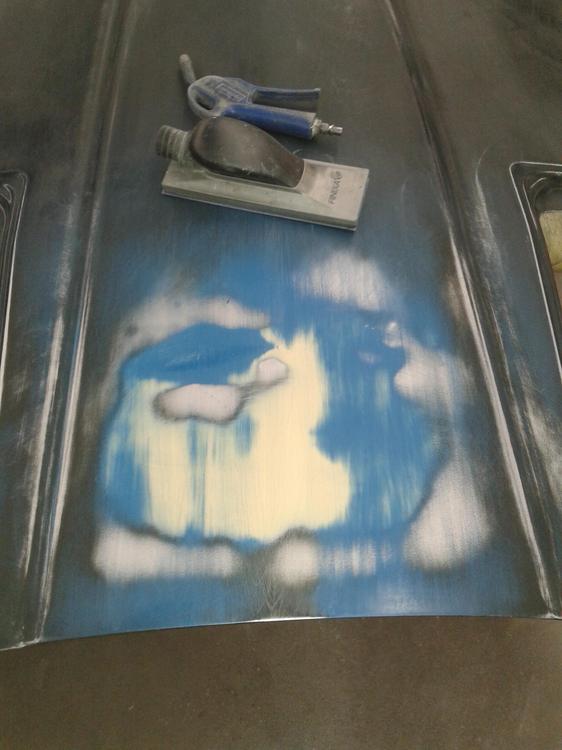
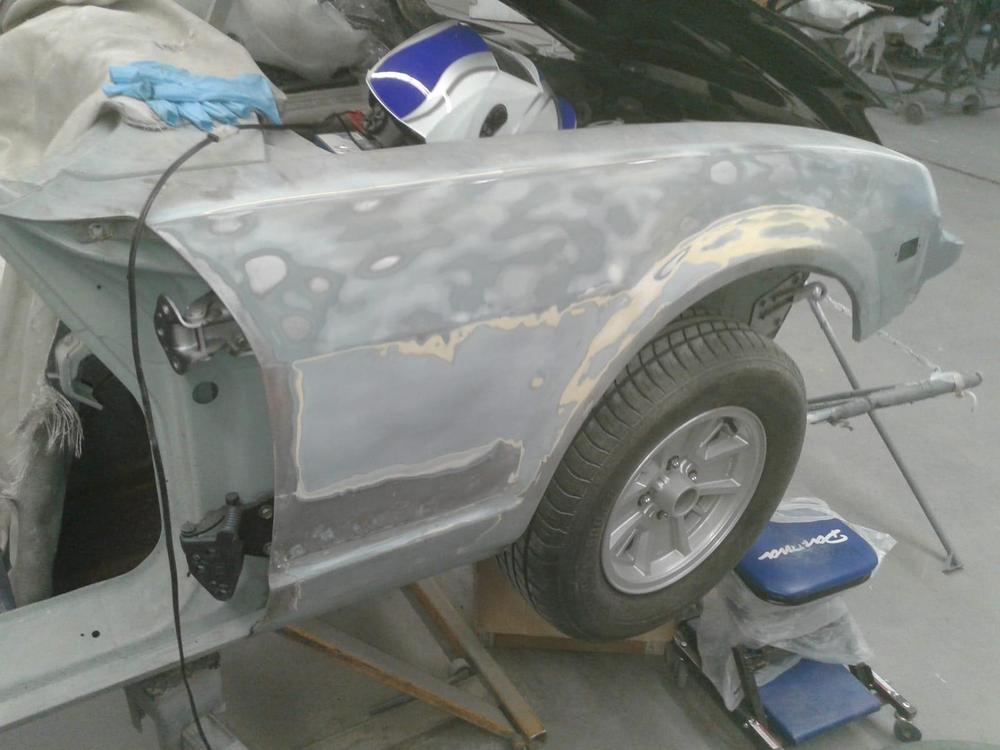
 Yes Bart, it is going well, i try to work on it every working day and i get a lot of support of the guys who work at the bodyshop. Also from the owner of the shop. Because i count all the hours i work at it (or someone else, like the pro painter or bodywork guy) last week we went past the 500 hours ! working on the car and i think it's going to be another 250 to complete the restauration.. ? At least... These days i'm working on the fenders, left in particular and the hood (or bonnet!) whole lot of.. you guest it... sanding! ? Even a brand new bonnet needs work, a Original NISSAN hood… where do i find them haha...! Restoring the left fender.. left lower part of left front fender.. I had a problem with heat, despite the copper/silicium welding i now did.. but about 20 little blows with a special hammer made it strait.. learned again something! Then i discovered that i welded it to straight down, had to correct that.. now the lower front part deviates inward as it should! (see last pic in this part.) lower front left fender. Putting in a little piece in the wheelarch. If you want to do this… i told the owner of the shop you have to have a diploma to weld newspaper paper.. ? Sanding left and right fender.. (still busy..) Sanding (with some rattlecan paint to sort out the imperfections). Making the fenders and hood ready for epoxy coating. (later on the blue paint is sanded off completely before epoxy.) Front left corner, welded in part fender, deviates inward.
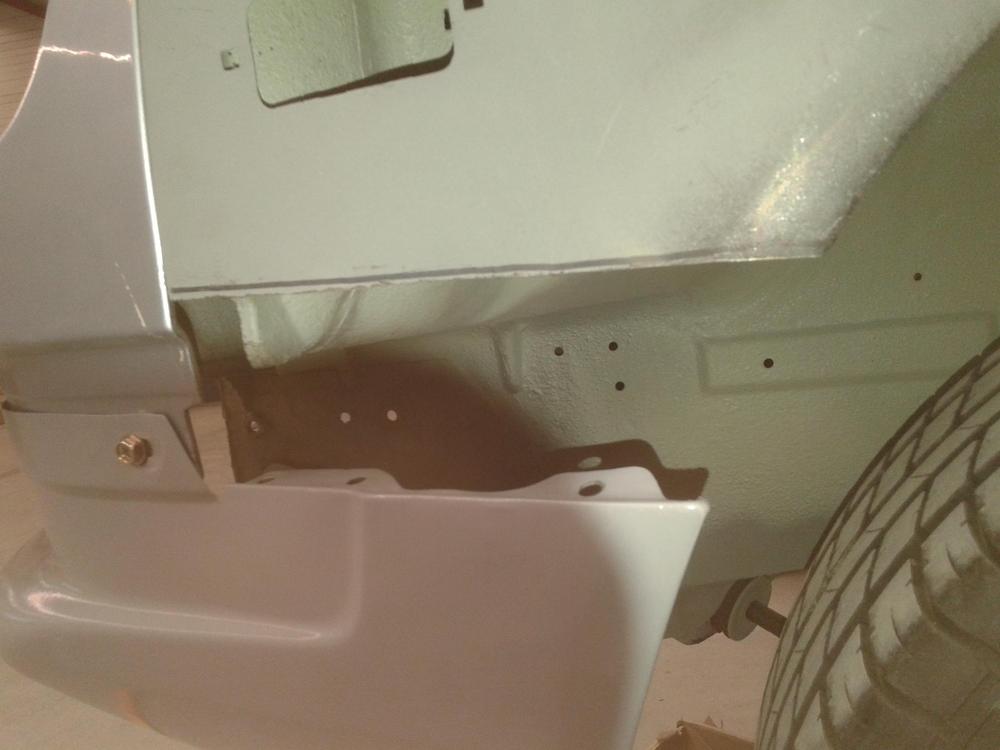


 1 point
 -
 1 pointI can appreciate everyone's point that the hinges may be worn. The reason I am skeptical in my case and possibly BoldU's case is that the hood closed properly before it was removed. I would think if the hinges are worn, it would not have closed previously. Anyone disagree?1 point
 -
 1 point
 -
 1 point
 -
 1 pointHe is convicted accused of serious crimes and the evidence is quite strong. This bail jump adds one more charge to the heap. Perhaps now he can request a trial in a neutral country if he was honorable.1 point
 -
1 pointI don't think he would fair well if he stayed in Japan for the trial. Nissan is looking to hang someone in the center of town.1 point
-
1 point
-
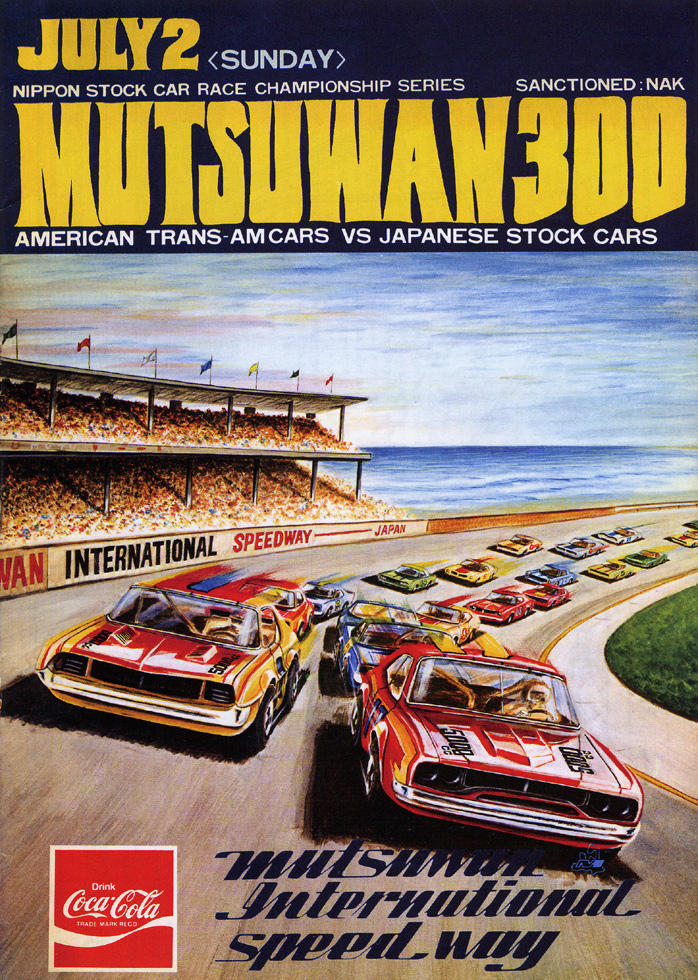
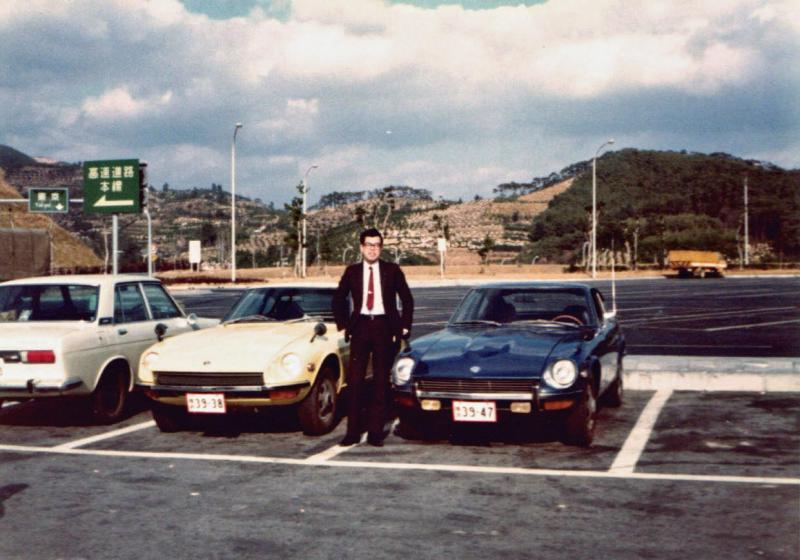
 This was the 'MUTSUWAN 300' race meeting of 2nd July 1972, a stock car race event held at the self-styled 'Mutsuwan International Speedway' near the town of Noheji in the northern Honshu prefecture of Aomori. Mutsuwan was a valiant attempt to set up a speedway style circuit in a region which was far from the established tracks, but it was in the middle of nowhere and the Oil Shock didn't help. Still, an amazing 92,000 spectators turned up to this particular meeting.
 1 point
 -
 1 pointEngine in and clutch done, link from sump to gearbox fitted and manifolds and carbs fitted. New engine mounts. Note you need specific 240k ones, hard to find and very expensive compared to 240Z. That sump which is actually for a Hakosuka, requires cross member modification, slight block grinding and exhaust manifold modification. Will also need a new sway bar, so its not a direct bolt up for a 240k. Getting closer, might be ready for start up in a few days.


 1 point
 -
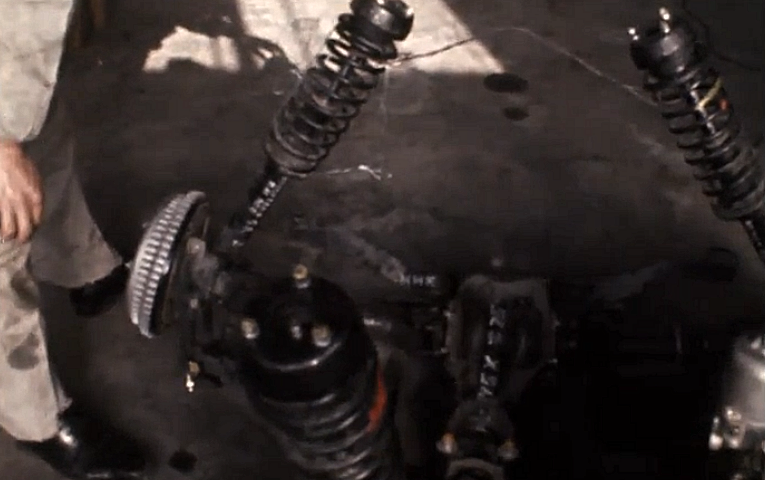
1 point@kats A few videos are available for testing a later silver RHD but the LHD test car below seems to be much earlier. The vinyl top option is known but interesting to see on an early test car. The more striking observation is the early rear panel. They either dug up an early prototype for the test or the testing was started well before the Z styling was finalized. But.... is that a roll cage inside? Spoiler testing too + locking fuel door. LHD too but with a single RH wing mirror (round type) and a LH door mirror (A racing 432R also has a similar wing set up but w/o the mirrors fitted). It was an automatic car with black plastic wheel Can't see the hazard switch type lol Note roll bar like silver tube visible in quarter window. @Carl BeckPerhaps to help with USA roll-over test compliance? Same tail section for dirt road test area Orange turn lights and 6 vertical grill supports! (this may be the original grill that went below bumper that Mr Matsuo mentioned. Same car as in wind tunnel with RH wing mirror and LH door mirror. Perhaps an overflow bottle on left? Very narrow rubber strips on over-riders. No diamond vinyl yet and strange metal tube bolted below quarter window... roll bar? If so, you can see where it fastens. I wonder if it ties into the roof where the mystery nut-serts are. No hatch sill or latch, just a thing vertical metal sheet. Another LHD doing water tests but with wooden steering wheel and square wing mirrors Pre 1969 engine and suspension. Note plastic fan, paint dabs, orange oil filter Very early fuel rail with return at rear carb and smog pump No text on valve cover Rear differential and suspension


 1 point
 -
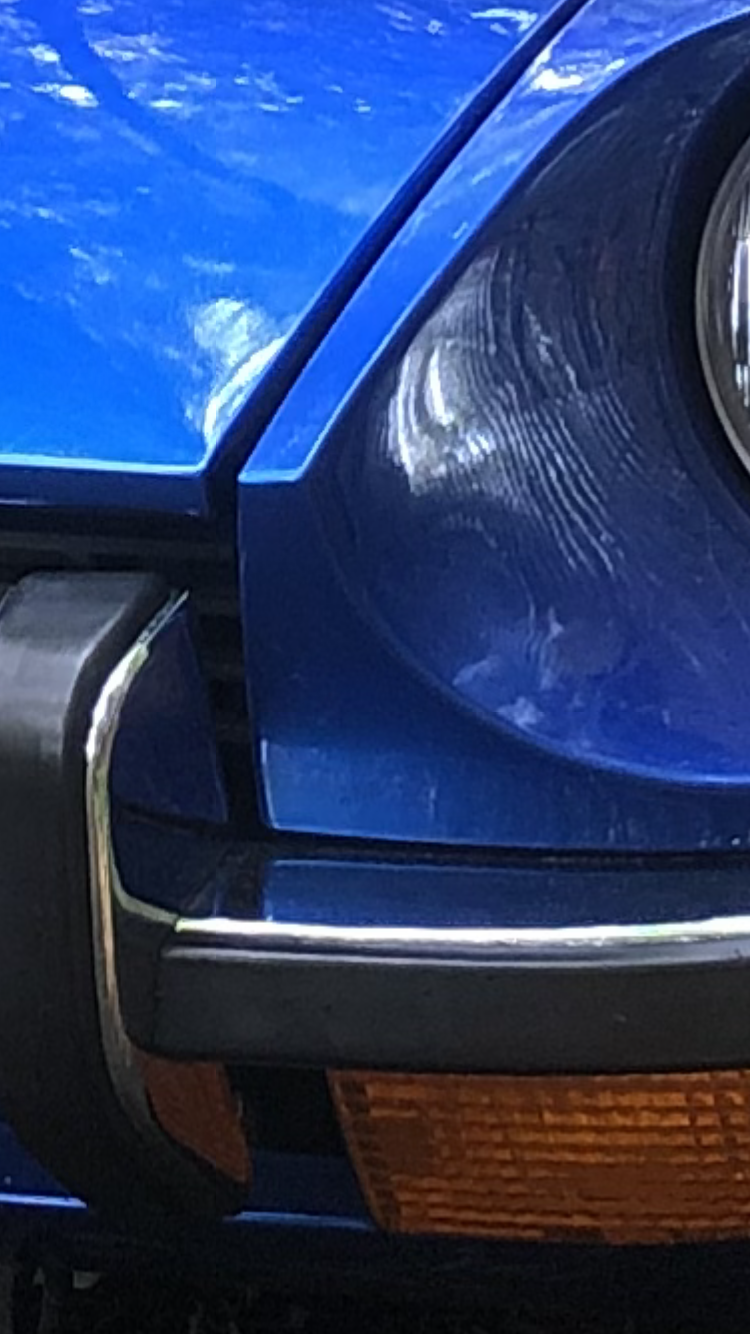
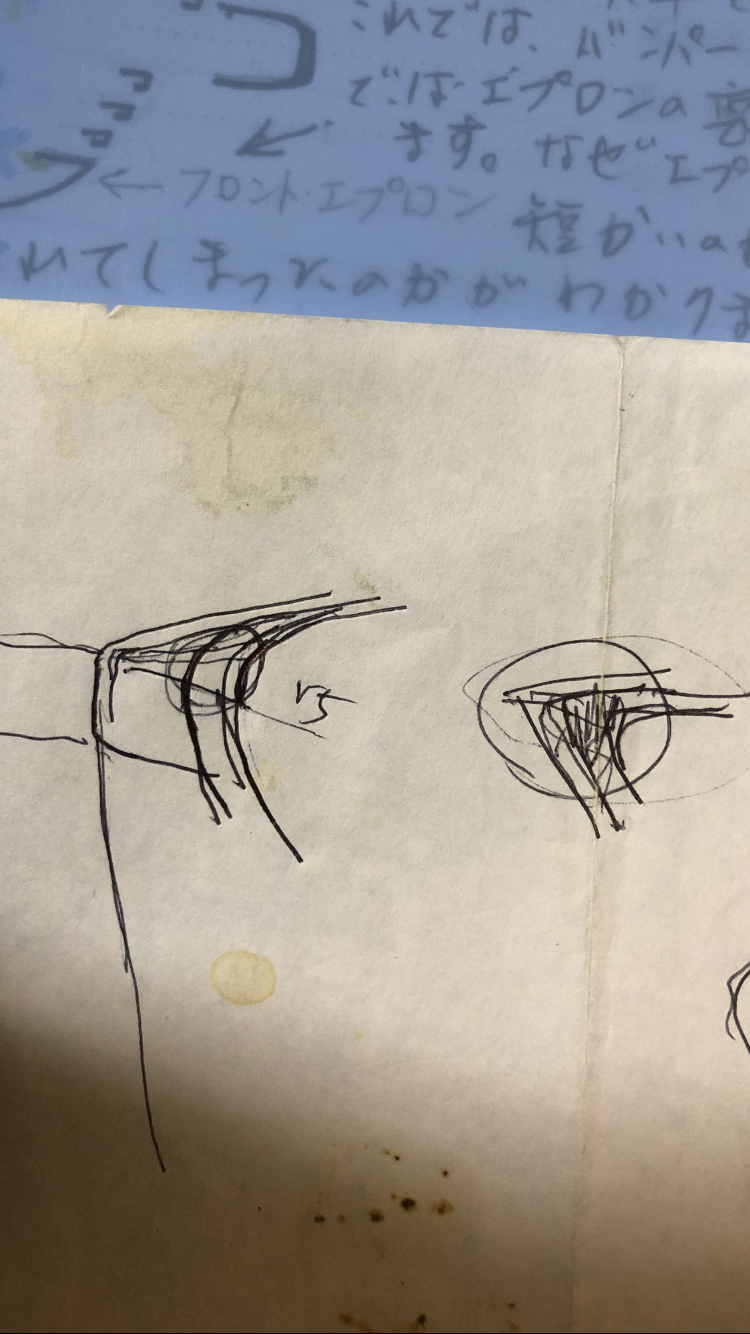
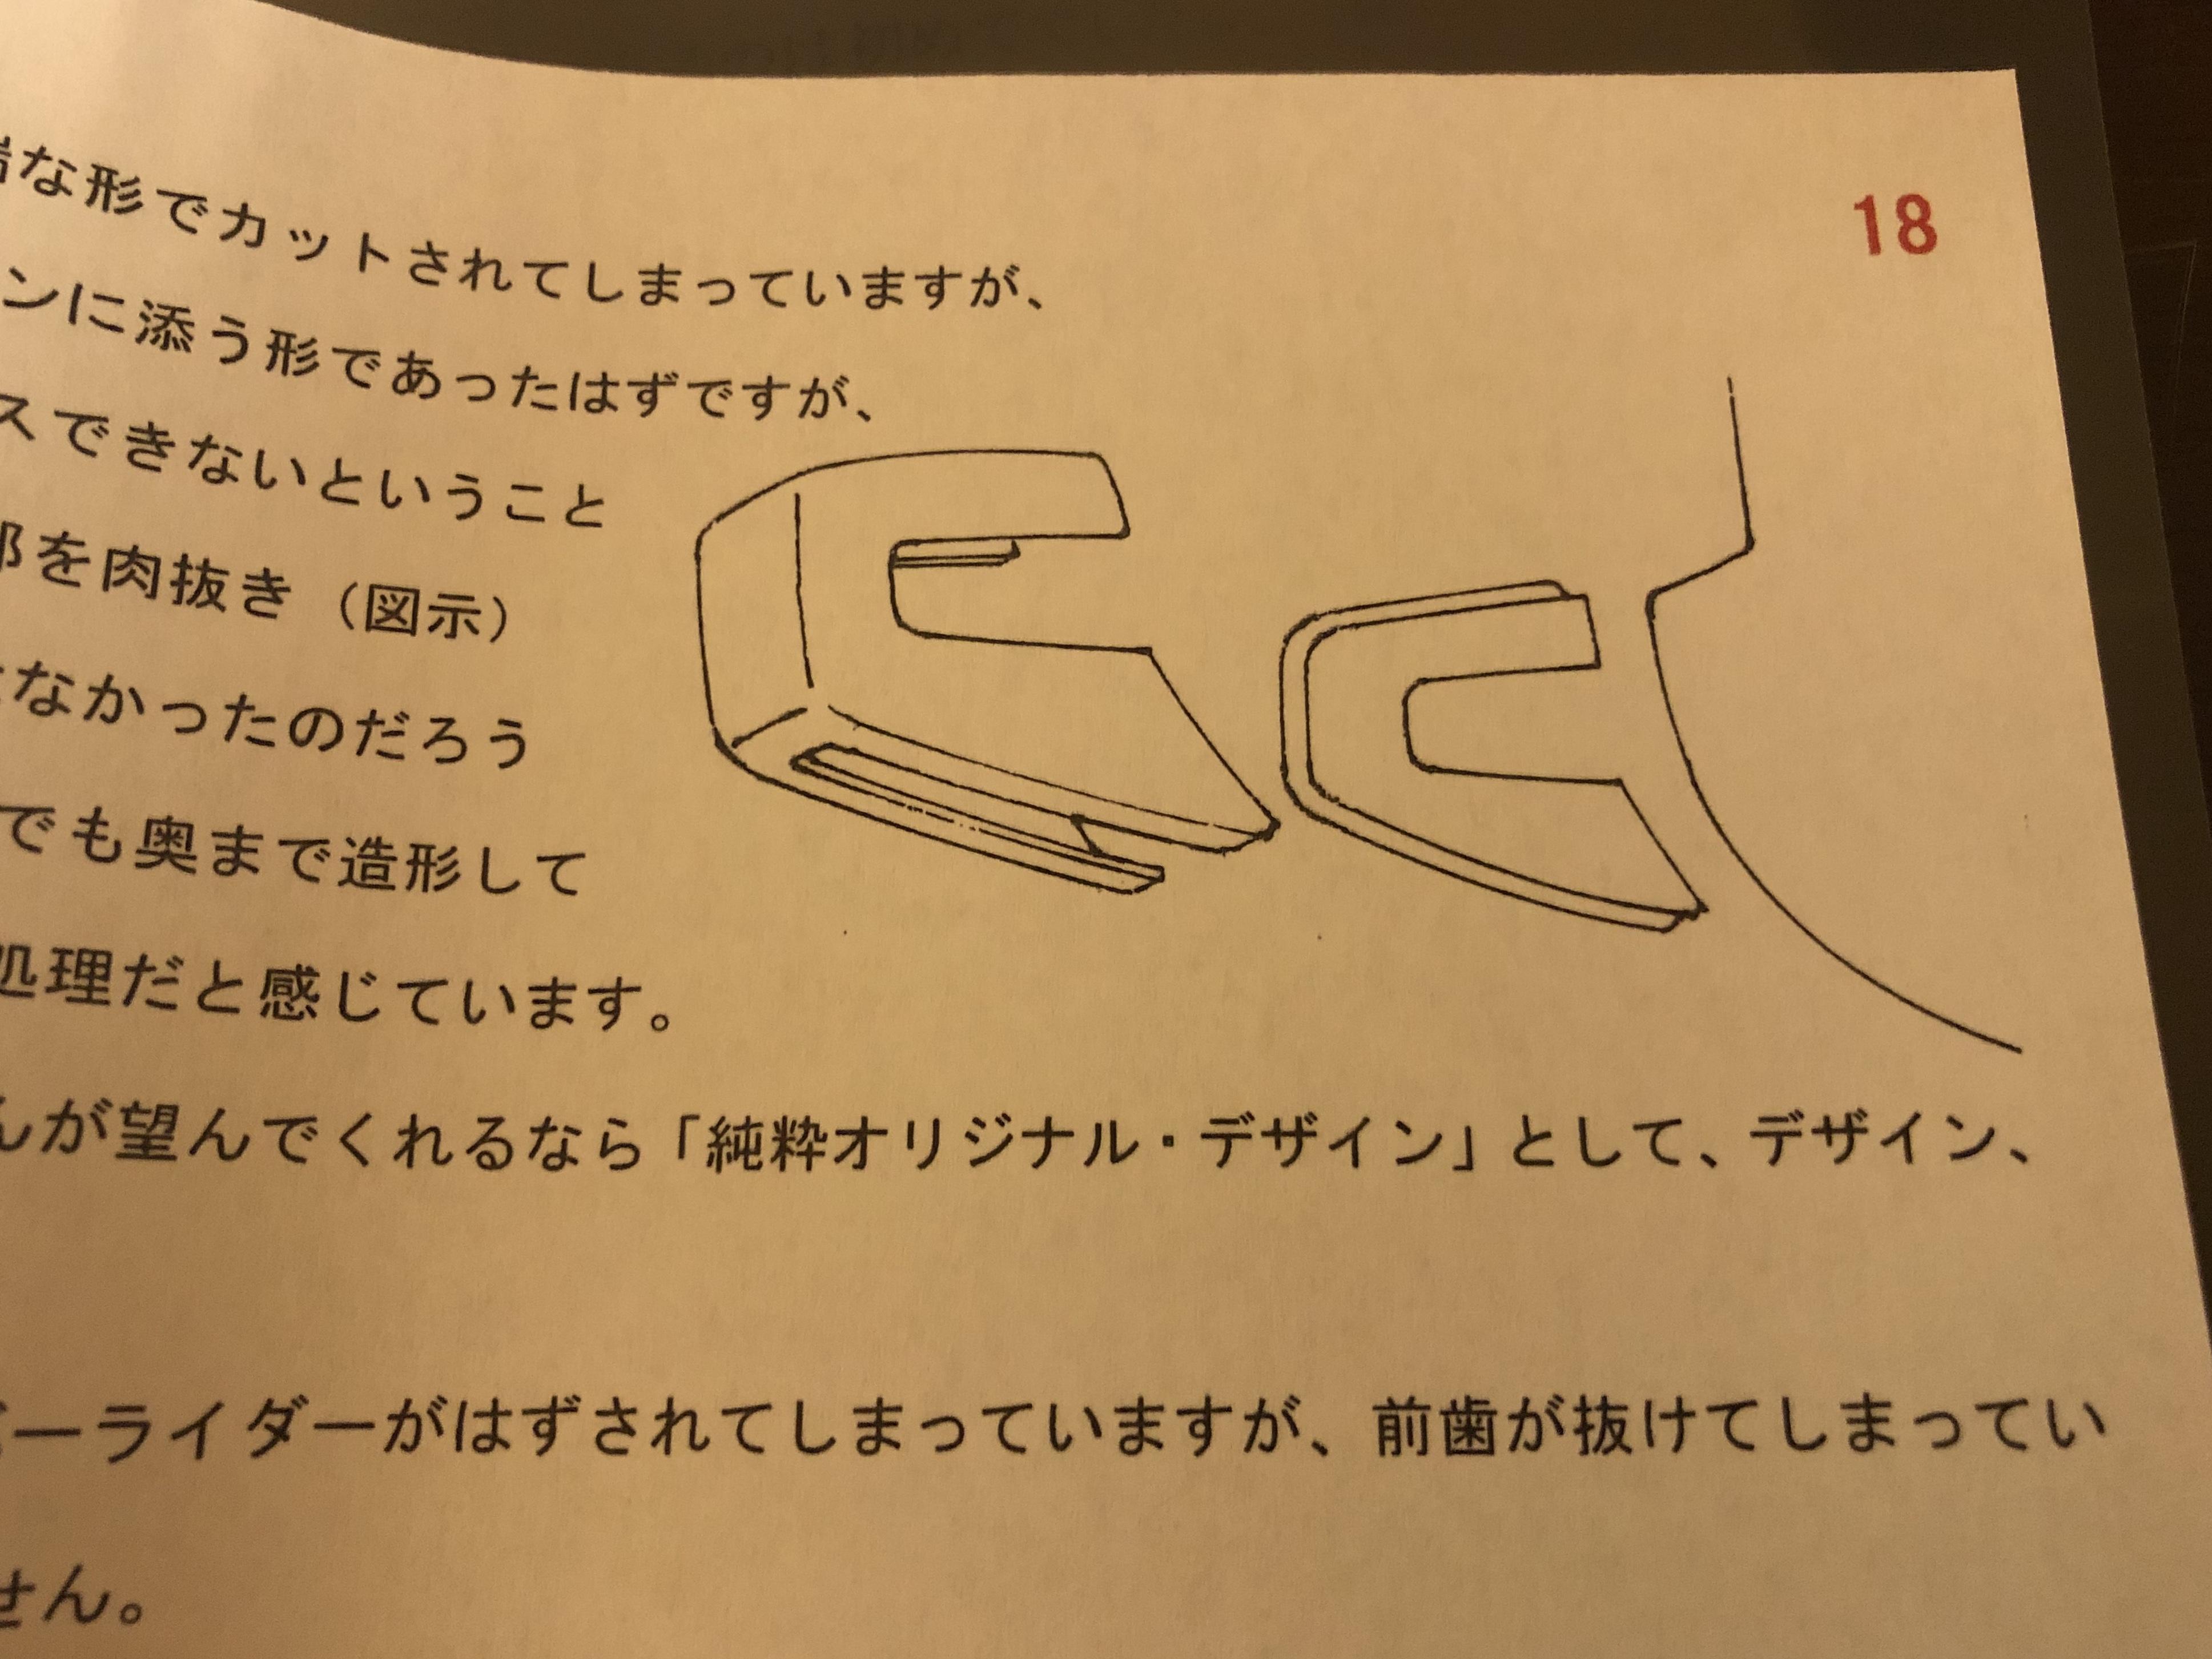
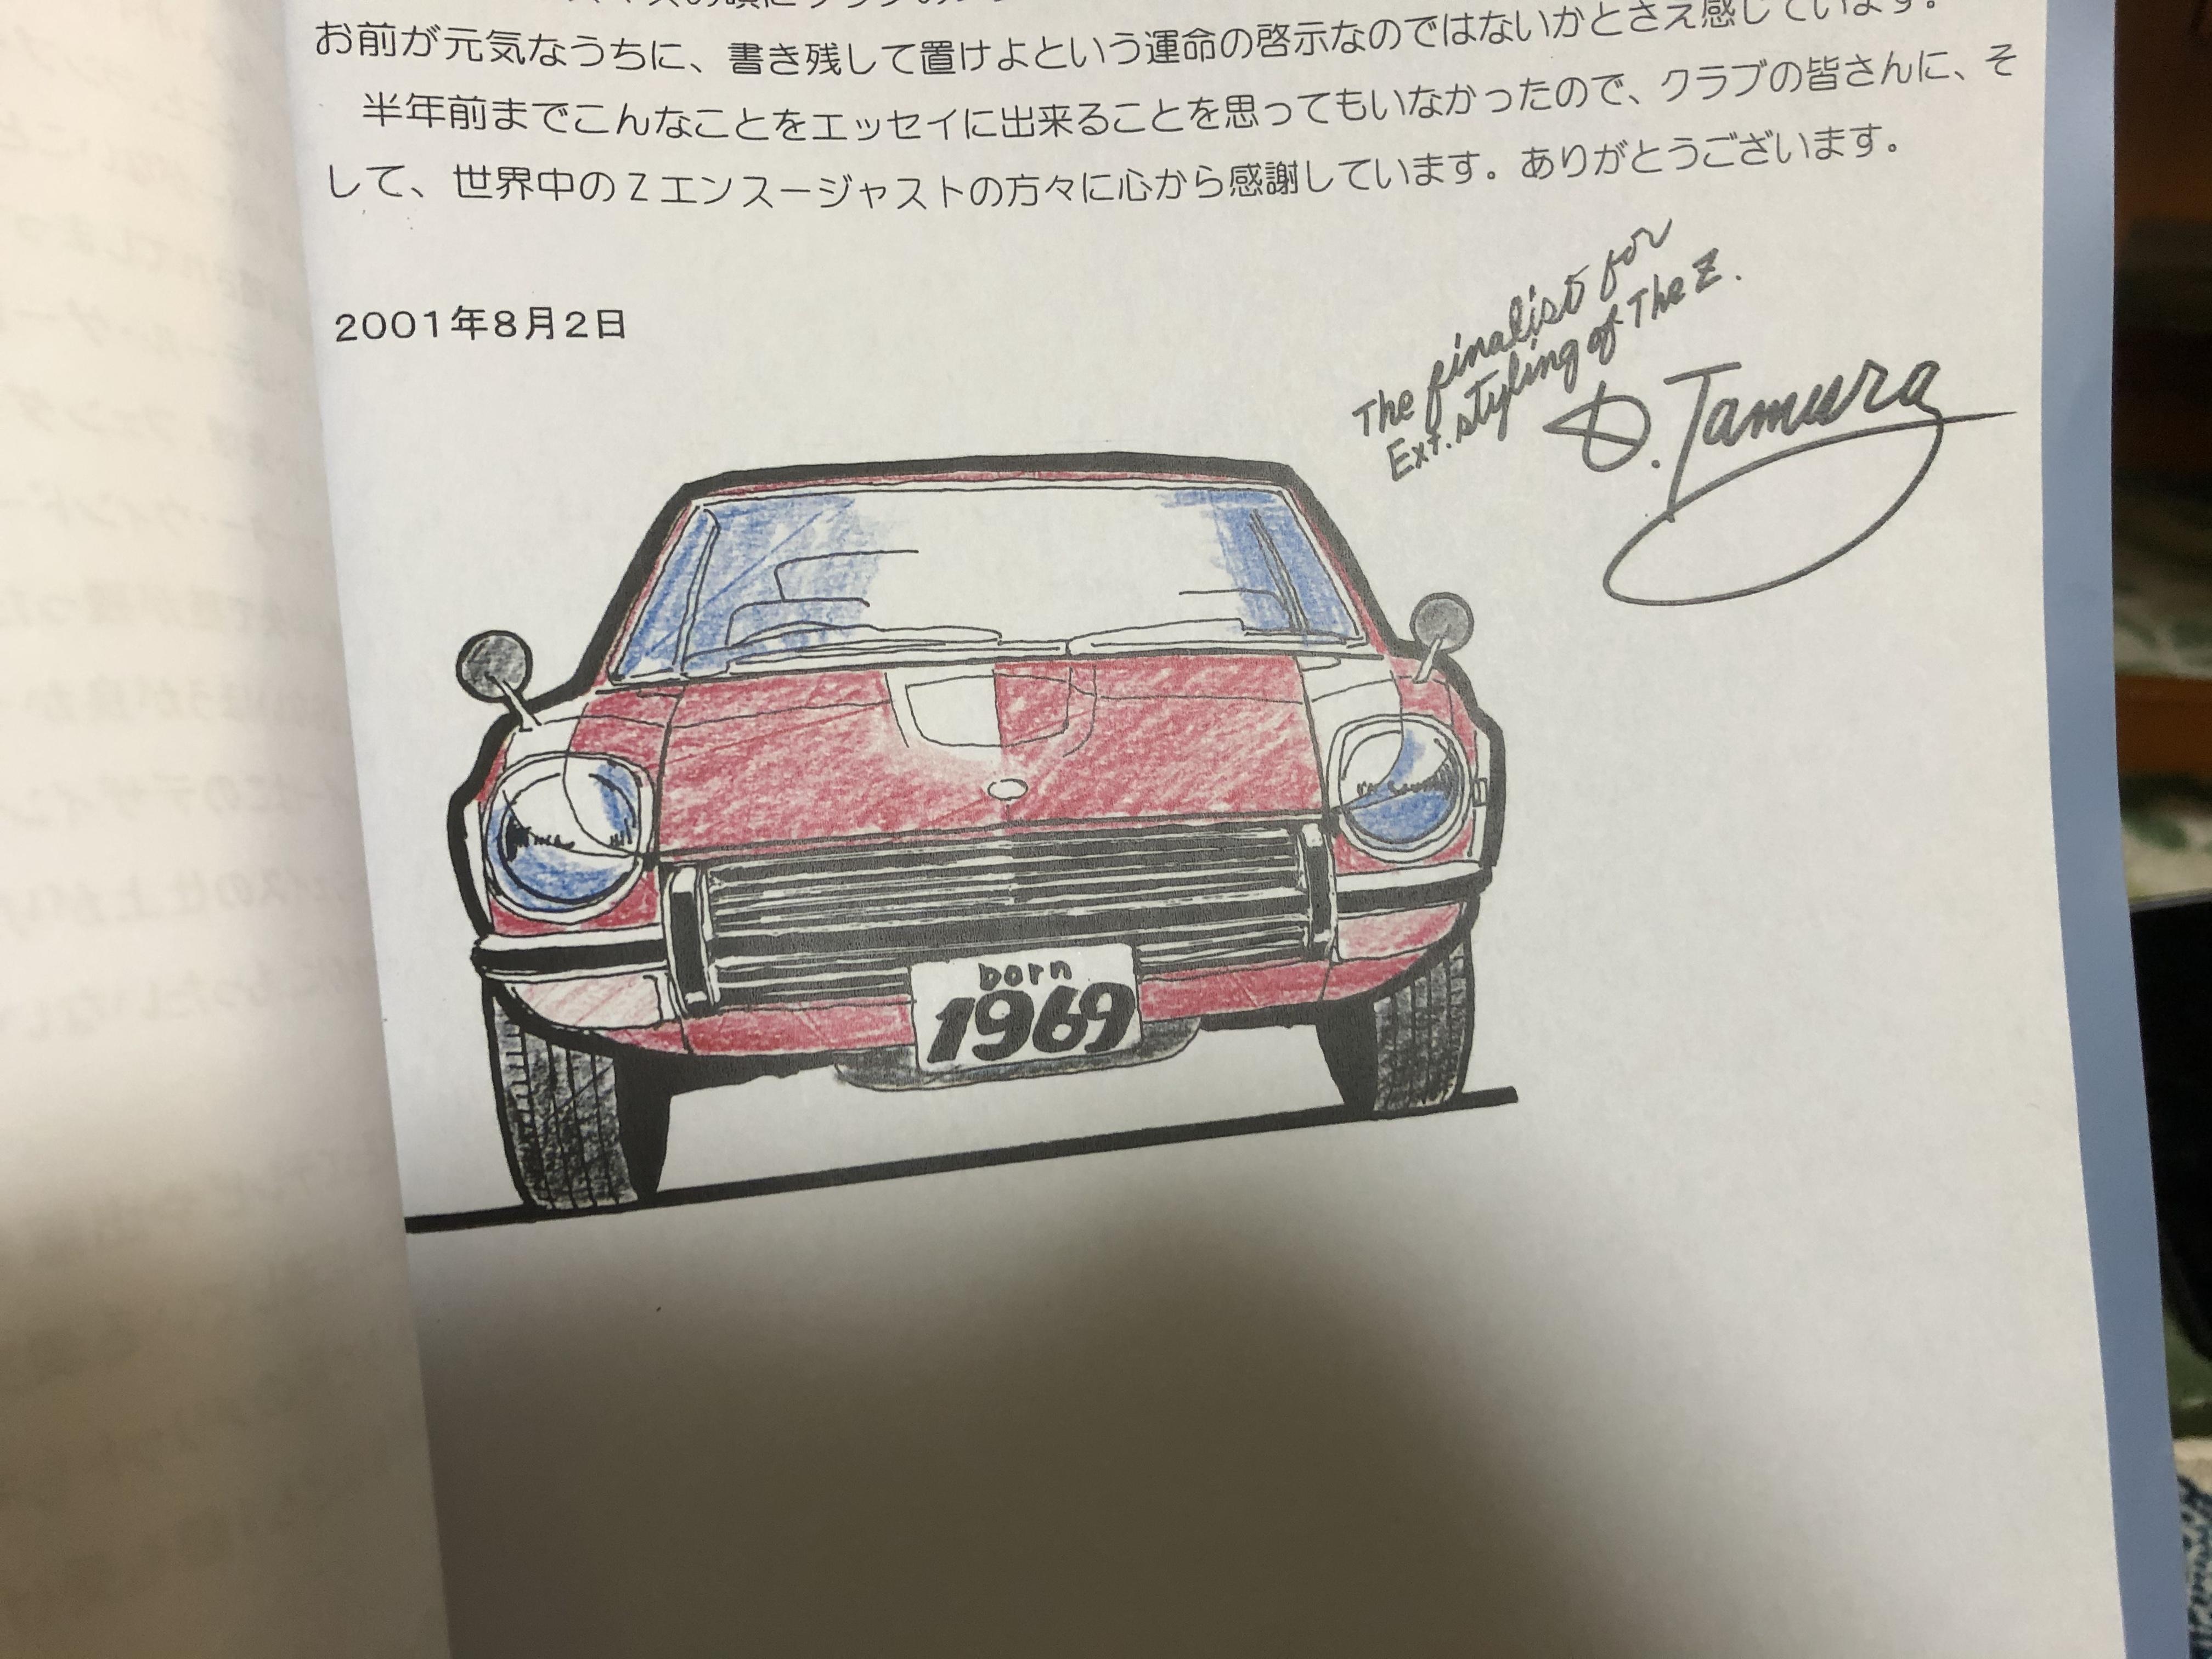
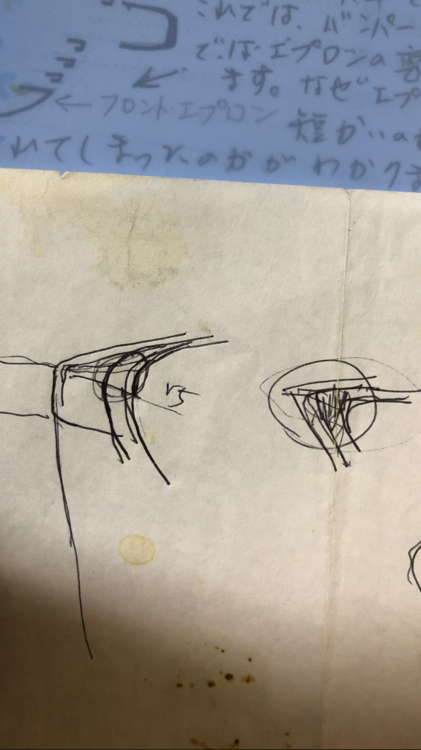
 1 pointBlue , we are learning every day! About the not pointy hood , I remember Mr. Tamura and Mr. Yoshida told me that they were trying to shape the hood front edge not pointy . Mr. Tamura did free hand drawings for me at the dinner table , he explained how they wanted to be the headlight case . You see “ r 5 “ next to the head light case . To match the case , Mr. Tamura and Mr. Yoshida were making the head light cover trim ring as “ not pointy “ . Personally , I am a big fan of its sharp edge of the case . Early original is the sharpest due to aging I think , later metal case is never be that sharp on top of the edge . Here is the reference thread which contains the report of a dinner with Mr . Tamura and Mr . Yoshida . Kats
 1 point
 -
1 pointYes , we need to ask him to talk about all the things when he was in a team . I also want to have an opportunity to see Mr. Takei the chief of the Euro S30 team . I found this car has the rear bumper overrider which Mr. Tamura originally intended for , but as you see in his drawings , this car’s overrider is not as cool as Mr.Tamura ‘s design. Also Mr. Tamura intended to put a rubber strip for center part of the bumper front and rear , can we see it in this silver car ? Kats

 1 point
 -
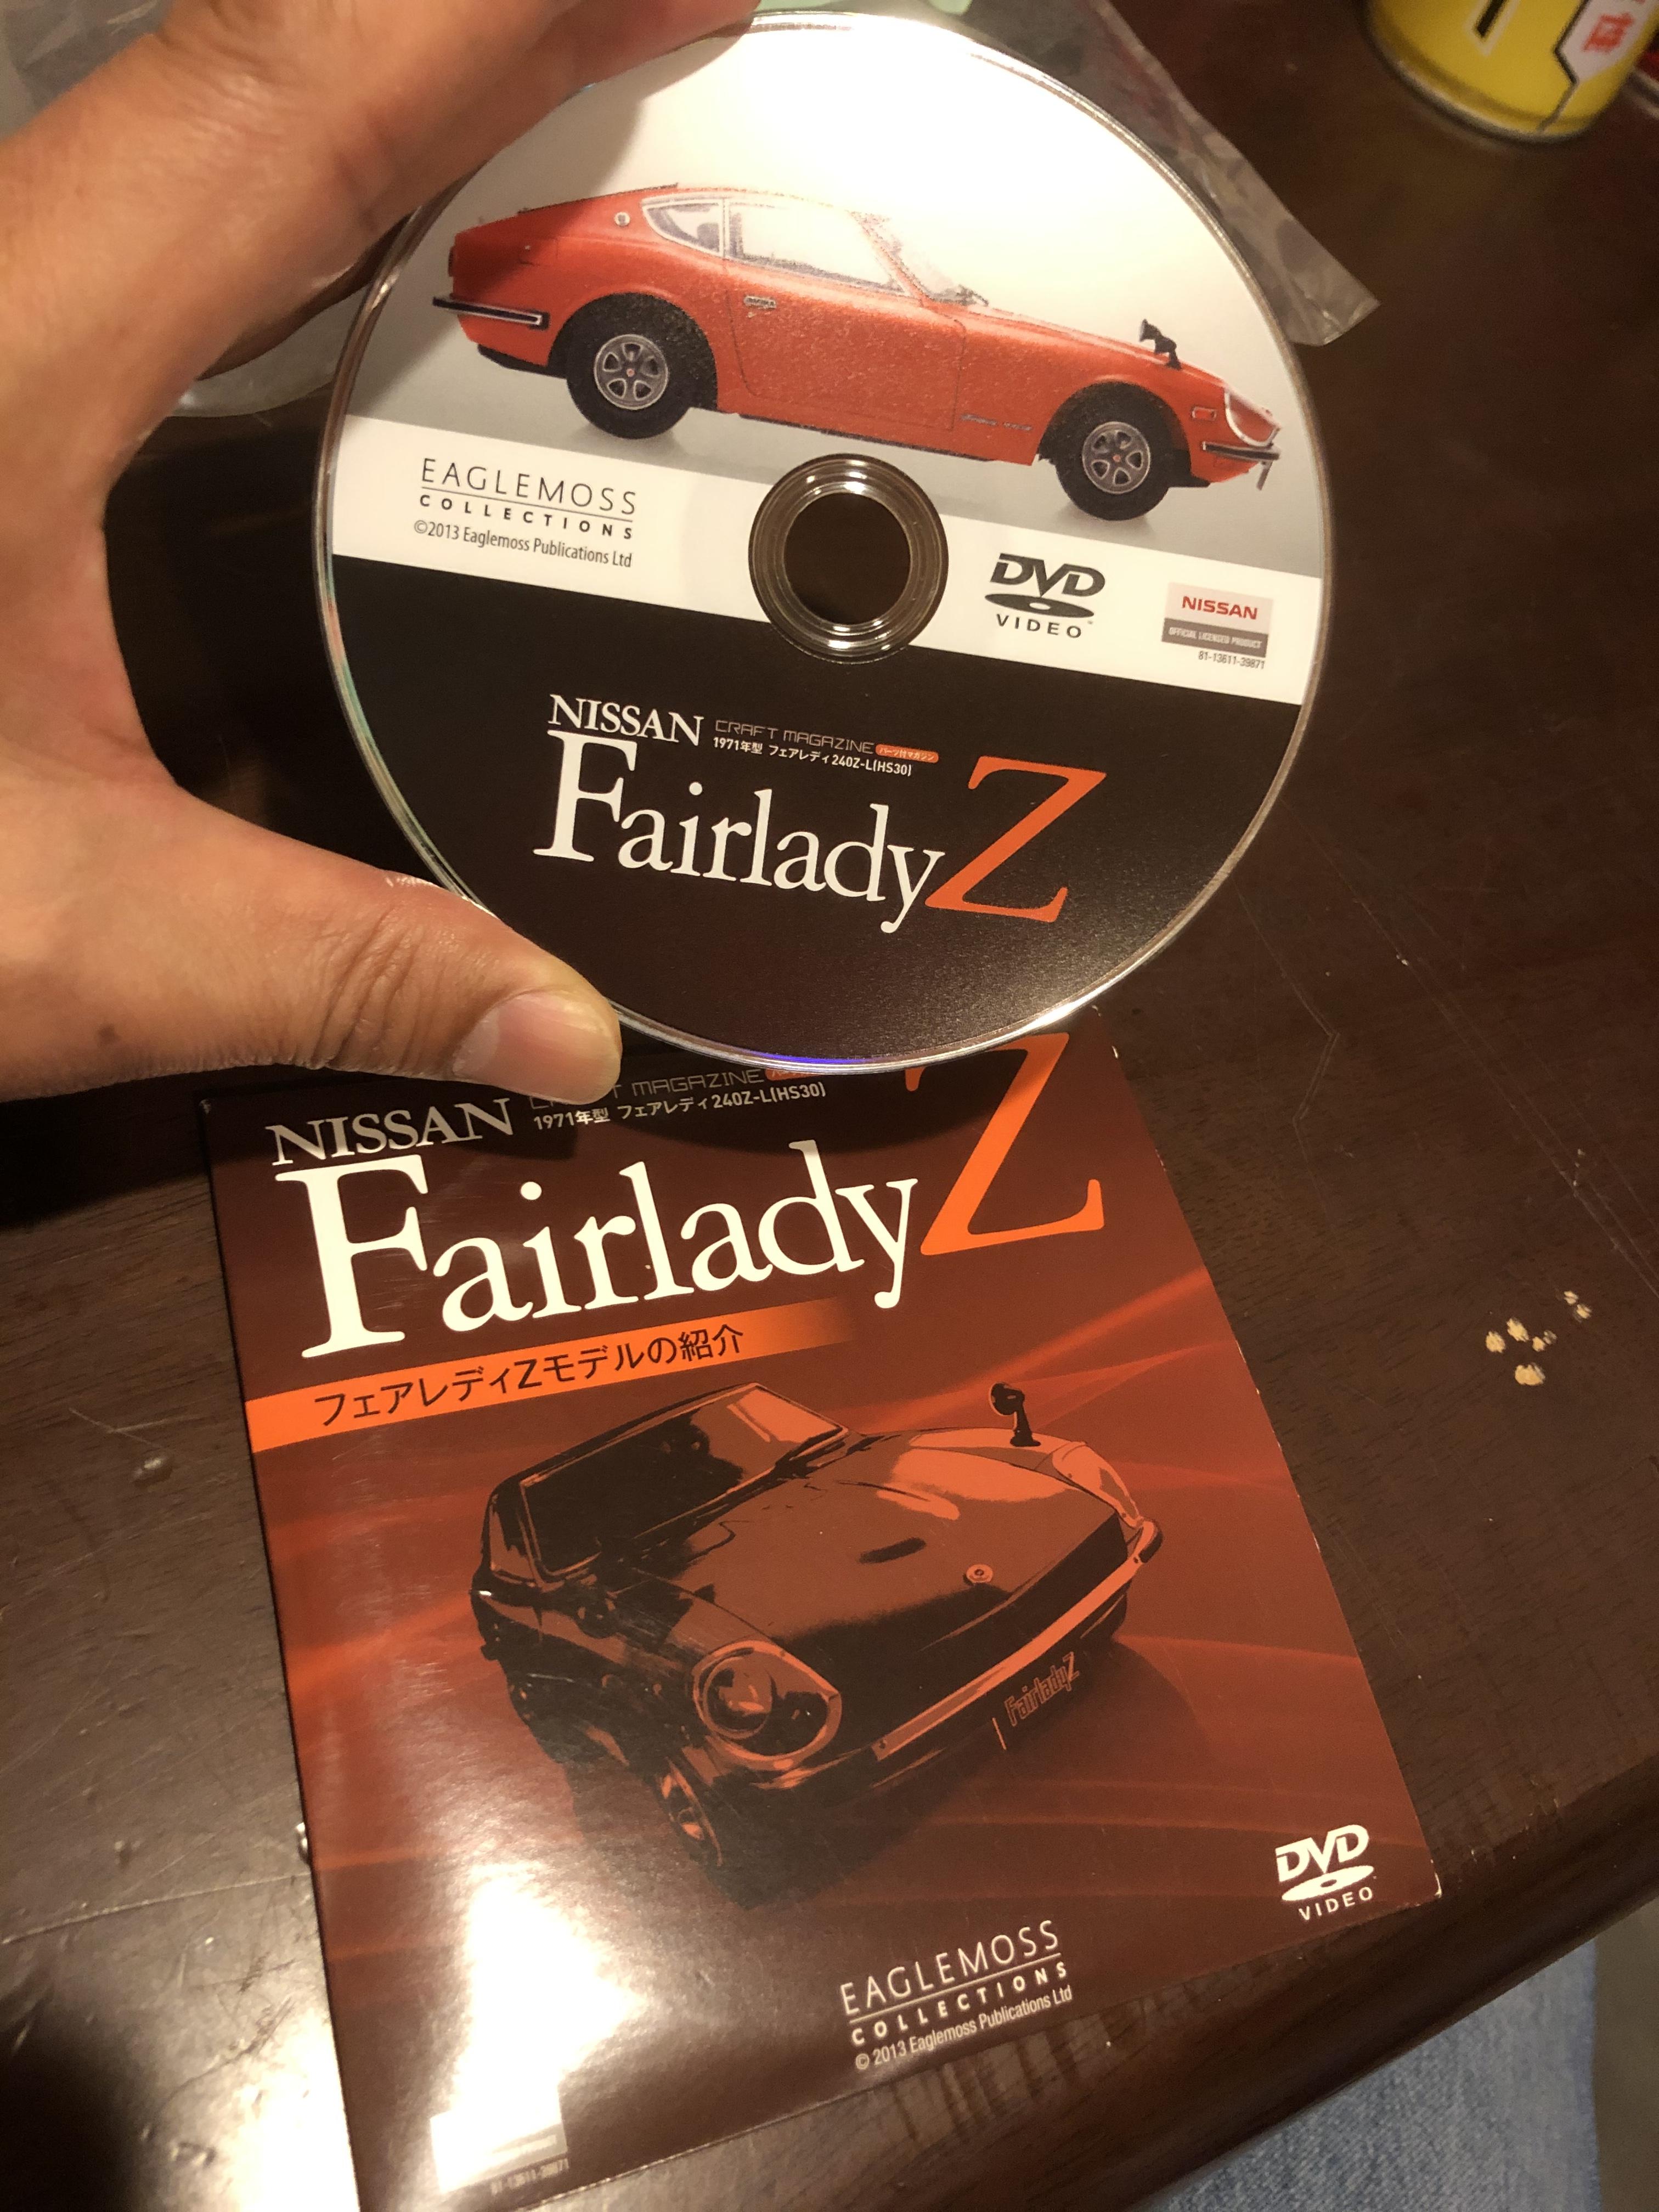
1 pointHi Blue , the silver test car is a unique ! Do you remember I introduced Mr. Miyazaki who was a member of Euro S30 test team ? He said the man who was behind the wheel was him . I don’t know about the roll bar , it appeared different from the production model . I have this video’s DVD , it came as a bonus who bought the 1/8 Fairlady 240Z model . And the 100 books are also the most valuable part of this model . I actually don’t need the model , I wanted the DVD and the books . Kats


 1 point
 -
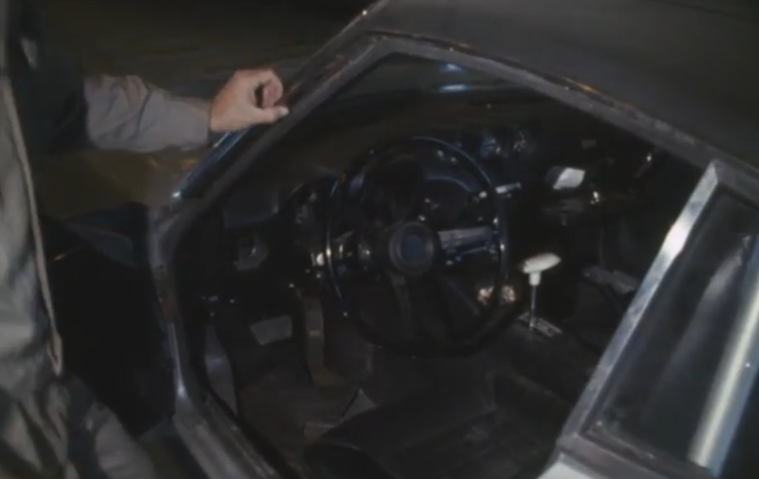
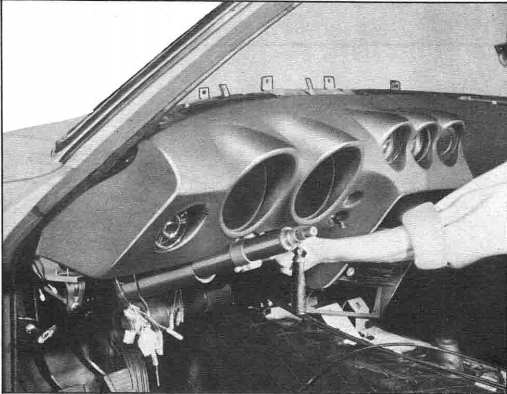
1 pointThe dash certainly is not the final design. The top of the radio/heater cluster extends out much farther into the cabin and the margins are not as filleted nor the edges as smoothed. Here is another interesting pre-production dash:
 1 point
 -
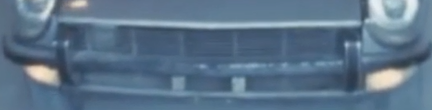
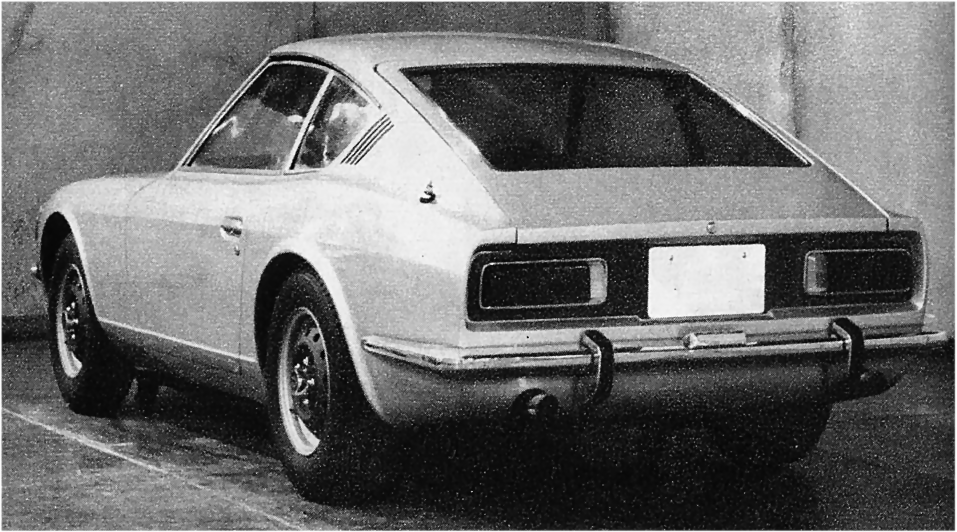
1 pointHere is one example of tail lights (and dual exhaust) in Aug-Oct 1967 designing period. Note the license light in the bumper and keyhole in the hatch lip. Shark gills are a bit obvious.
 1 point
 -
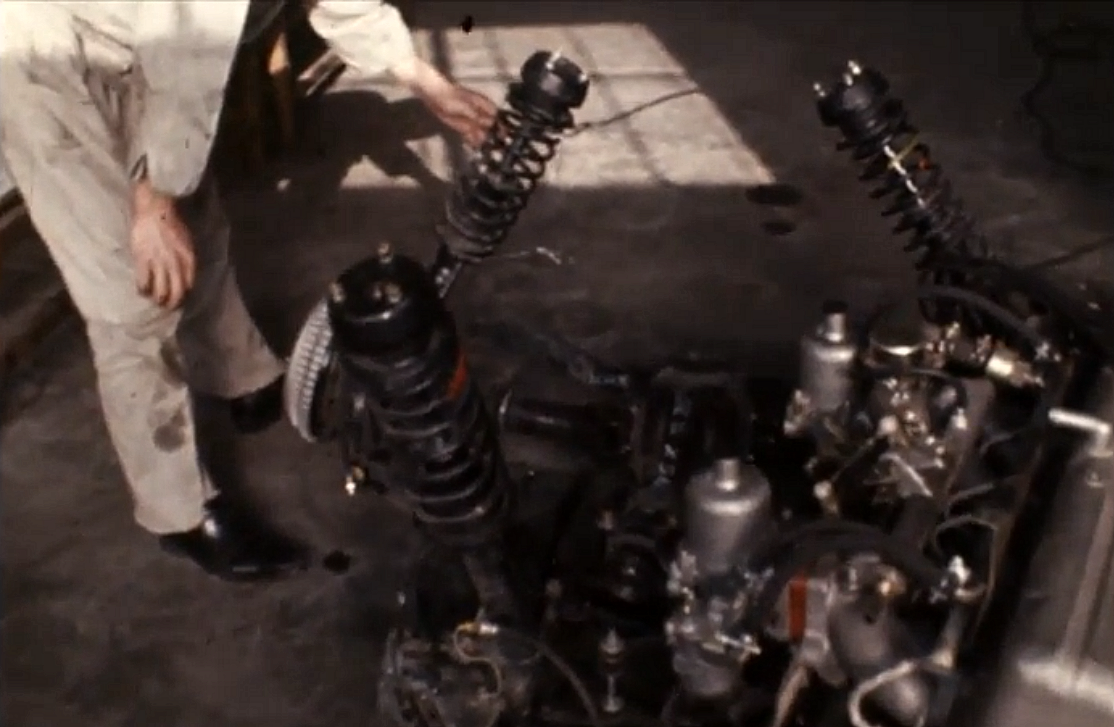
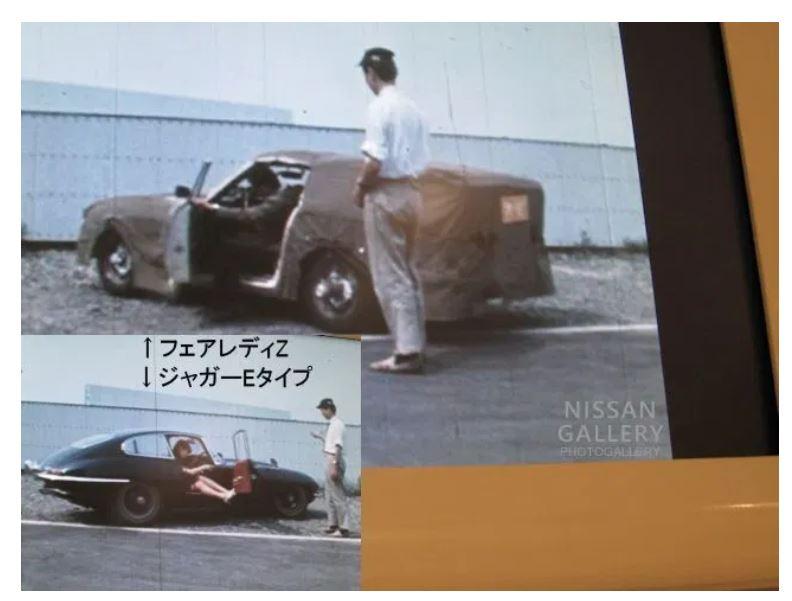
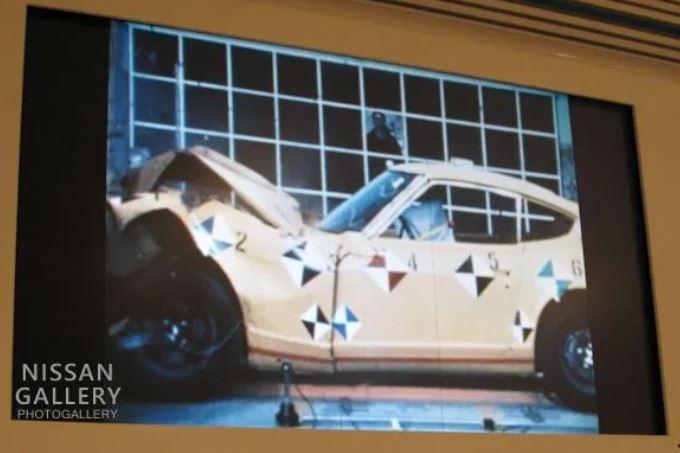
1 pointMore photos from testing the 240z in the 60's to get a better picture: Comparison Cars: Slalom check Egress Checks Aero Models Crash Z


 1 point