Leaderboard
-


ConVerTT
Free Member6Points422Posts -

thumper300zx
Free Member3Points14Posts -


240260280
Free Member3Points4,441Posts -

zspert
Free Member2Points313Posts
Popular Content
Showing content with the highest reputation on 01/03/2020 in all areas
-
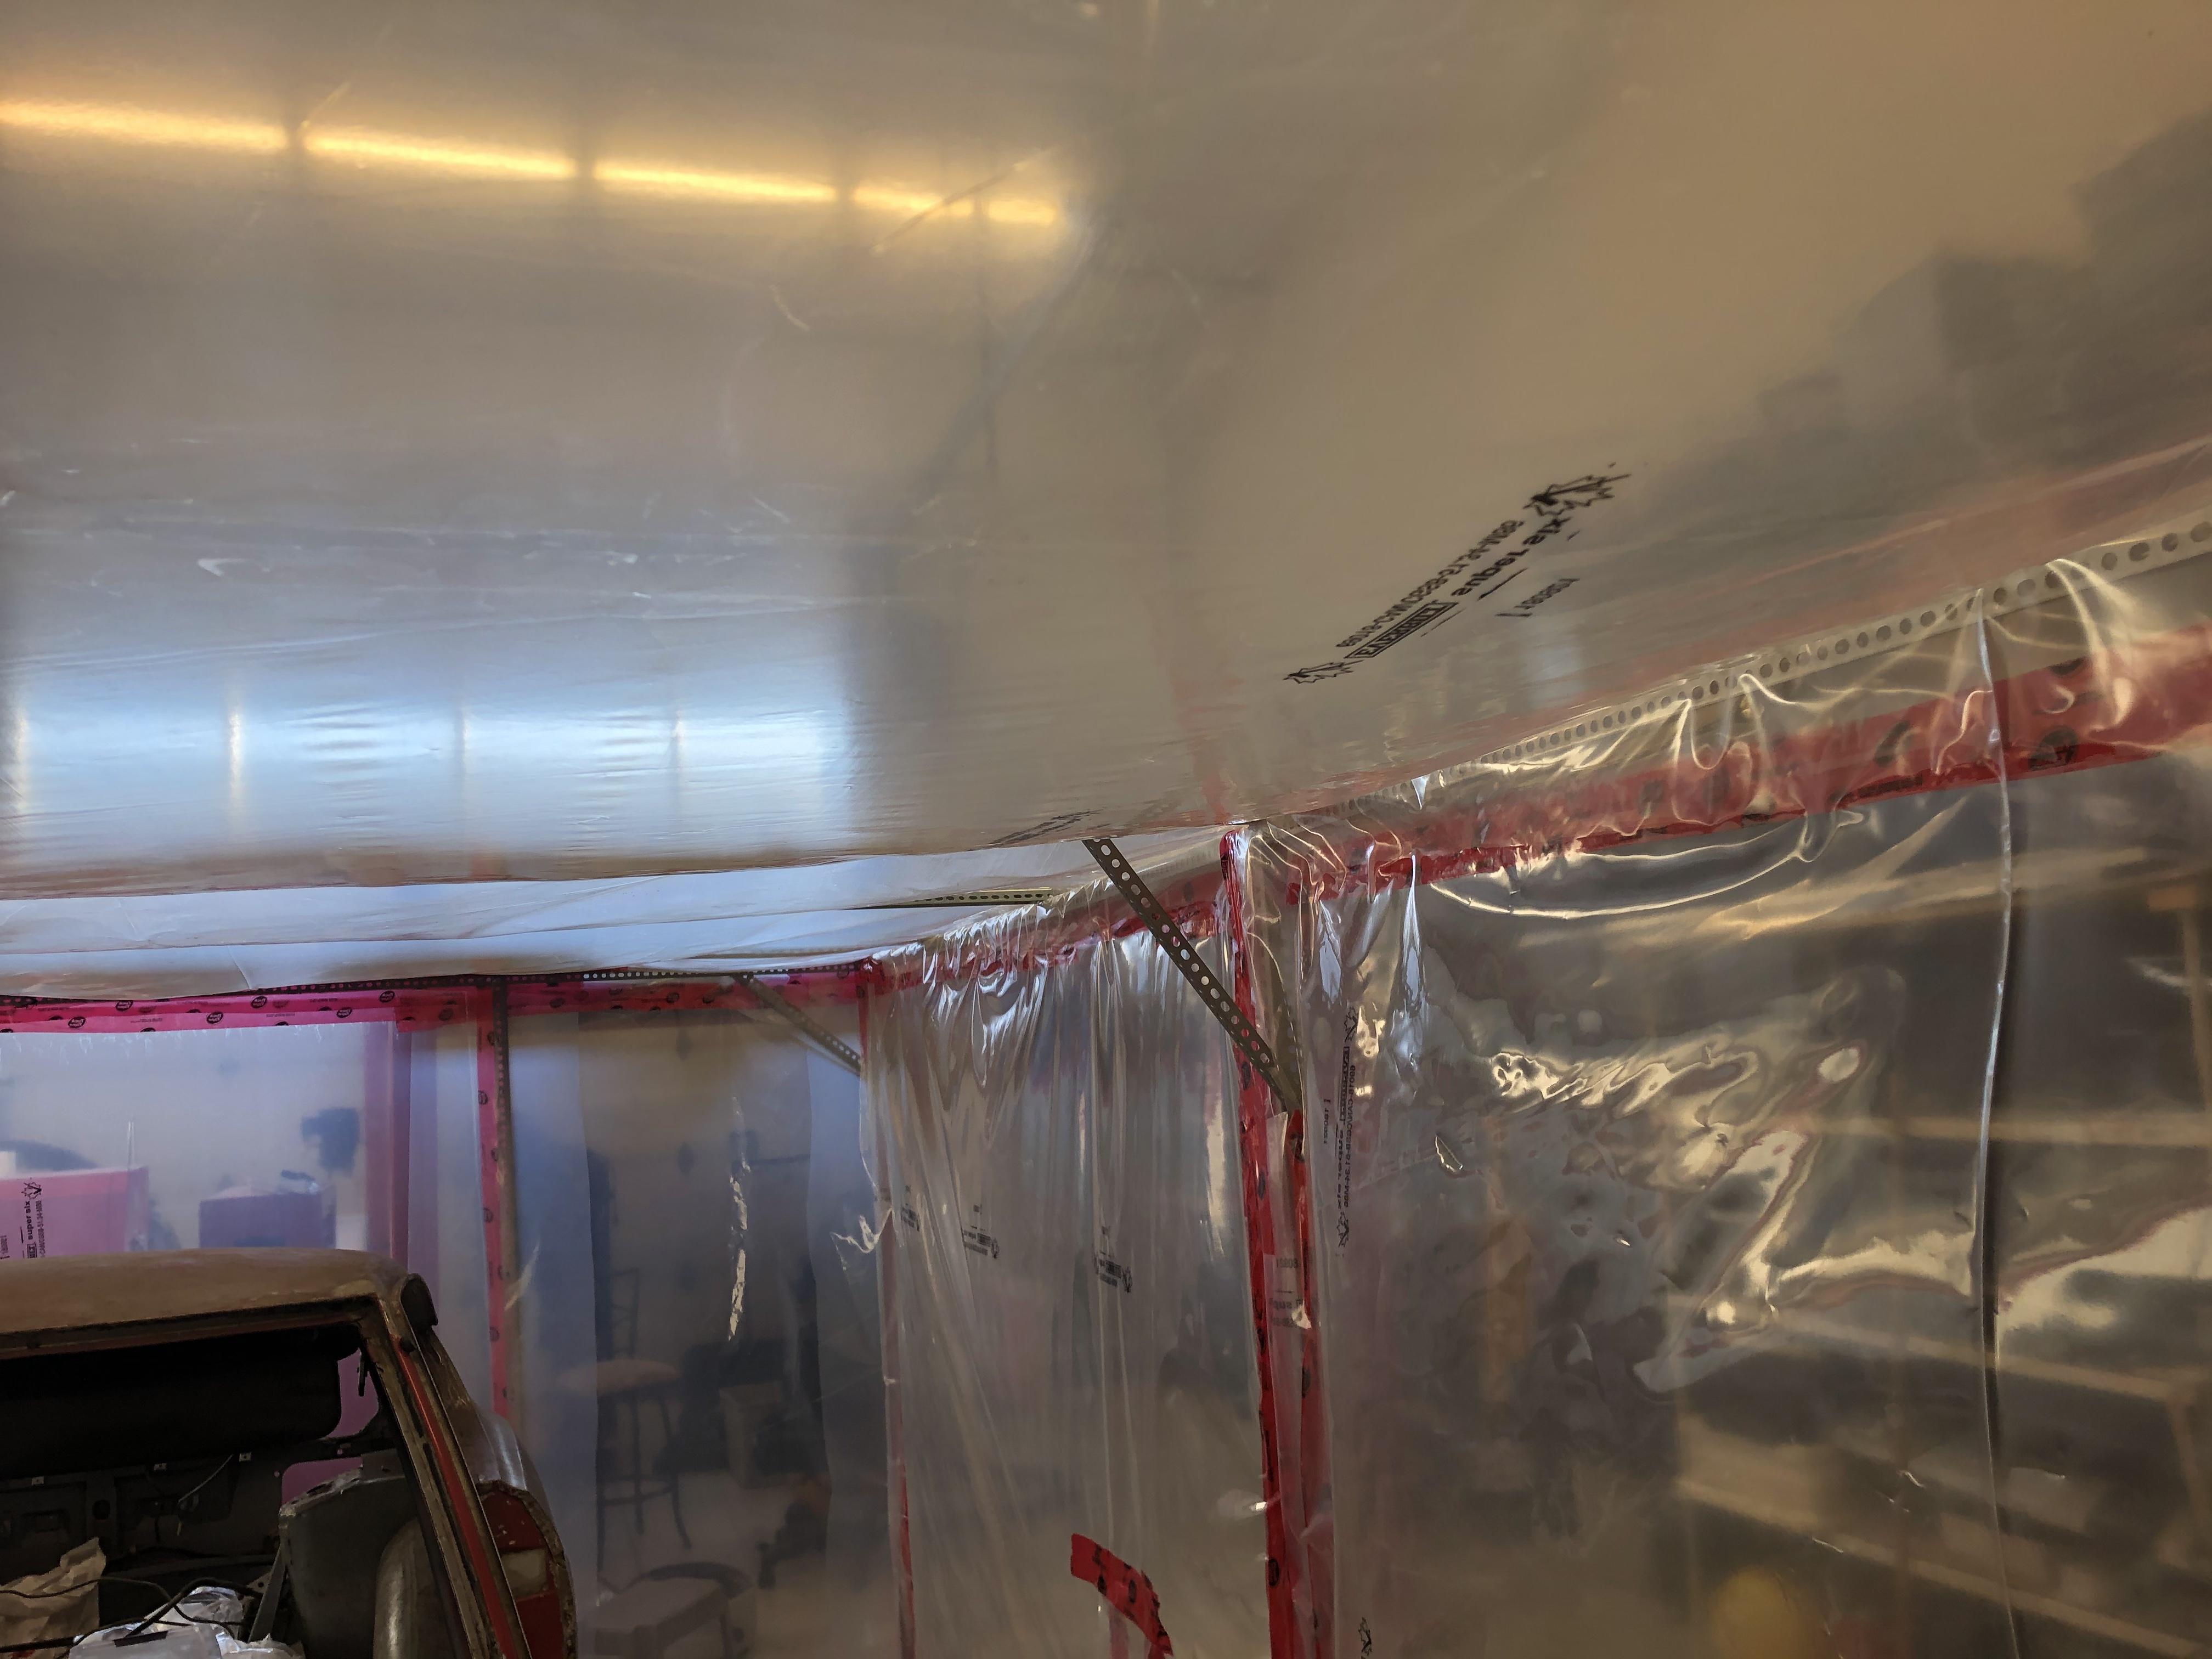
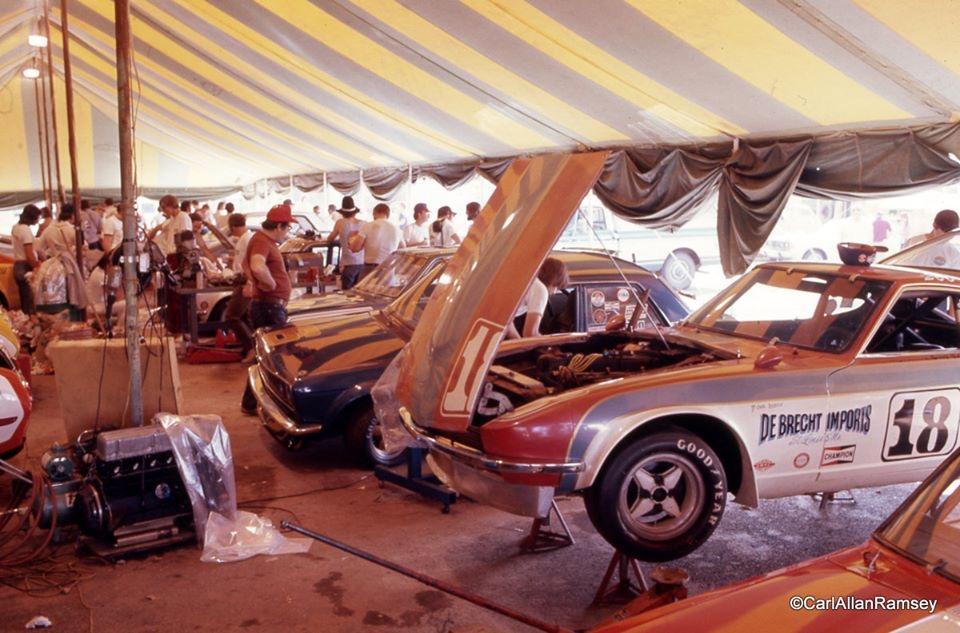
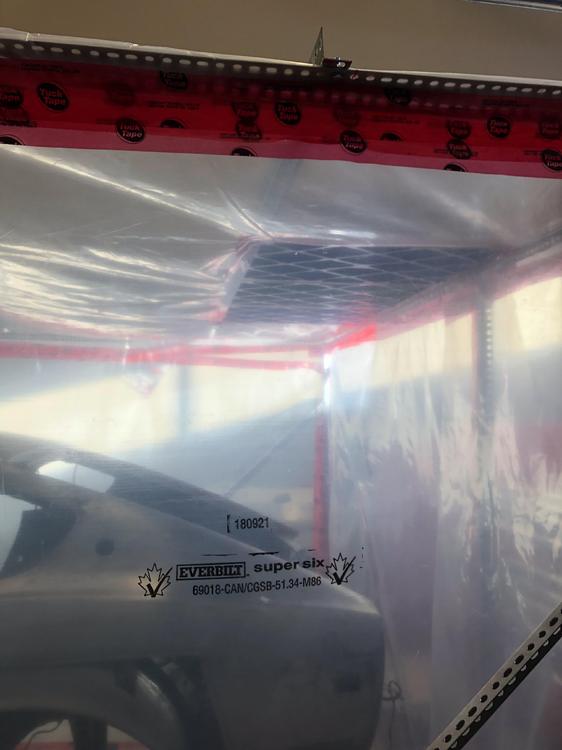
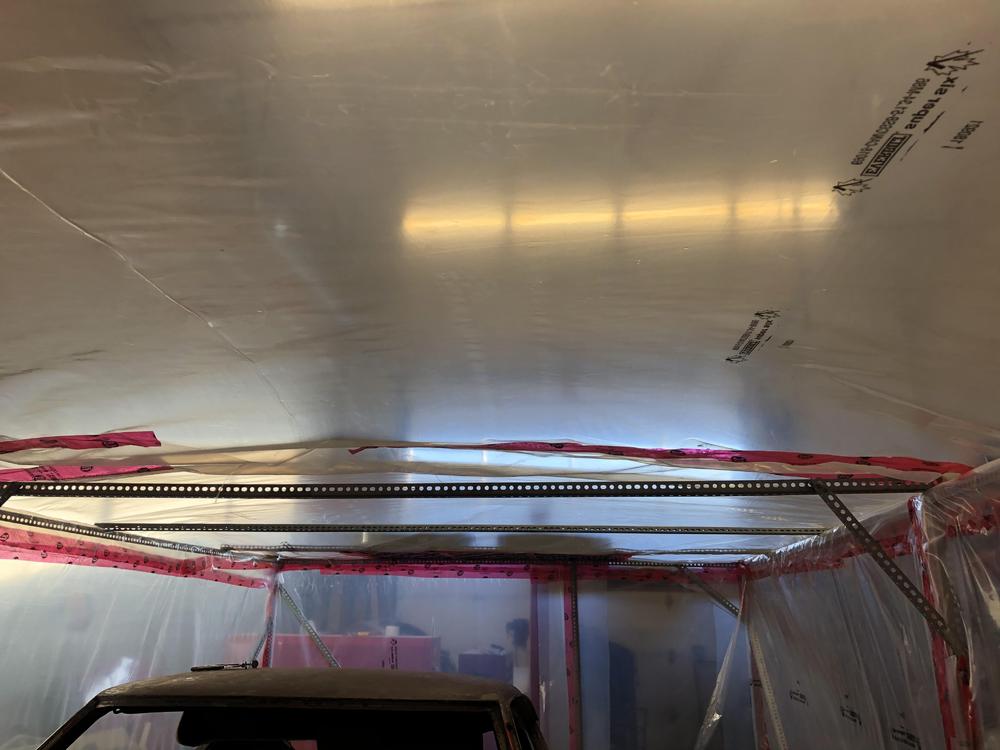
4 pointsNew Years resolution ... better dust control. Enter Dust Booth 2.0 - quad box hybrid down draft /side draft .... Twin 3 speed exhaust .... Twin 3 speed intake ... Fully adjustable to run at negative pressure for sanding and grinding .... or positive pressure for paint work ... ?


 4 points
 -
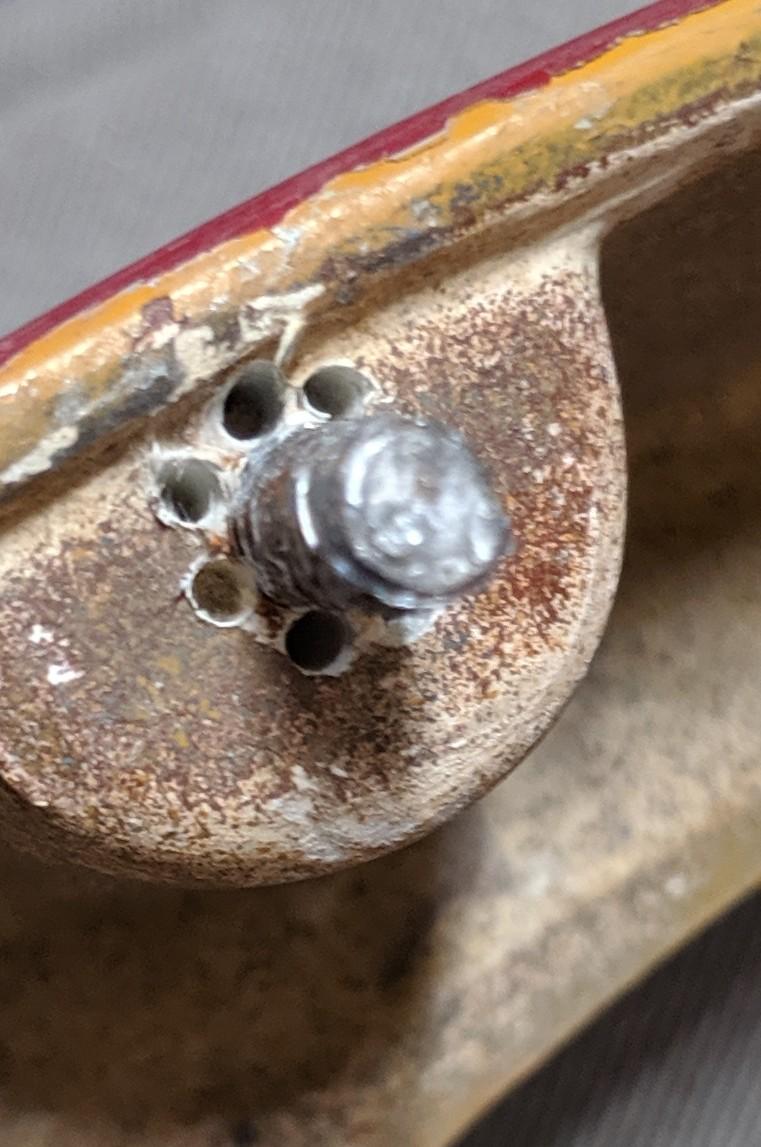
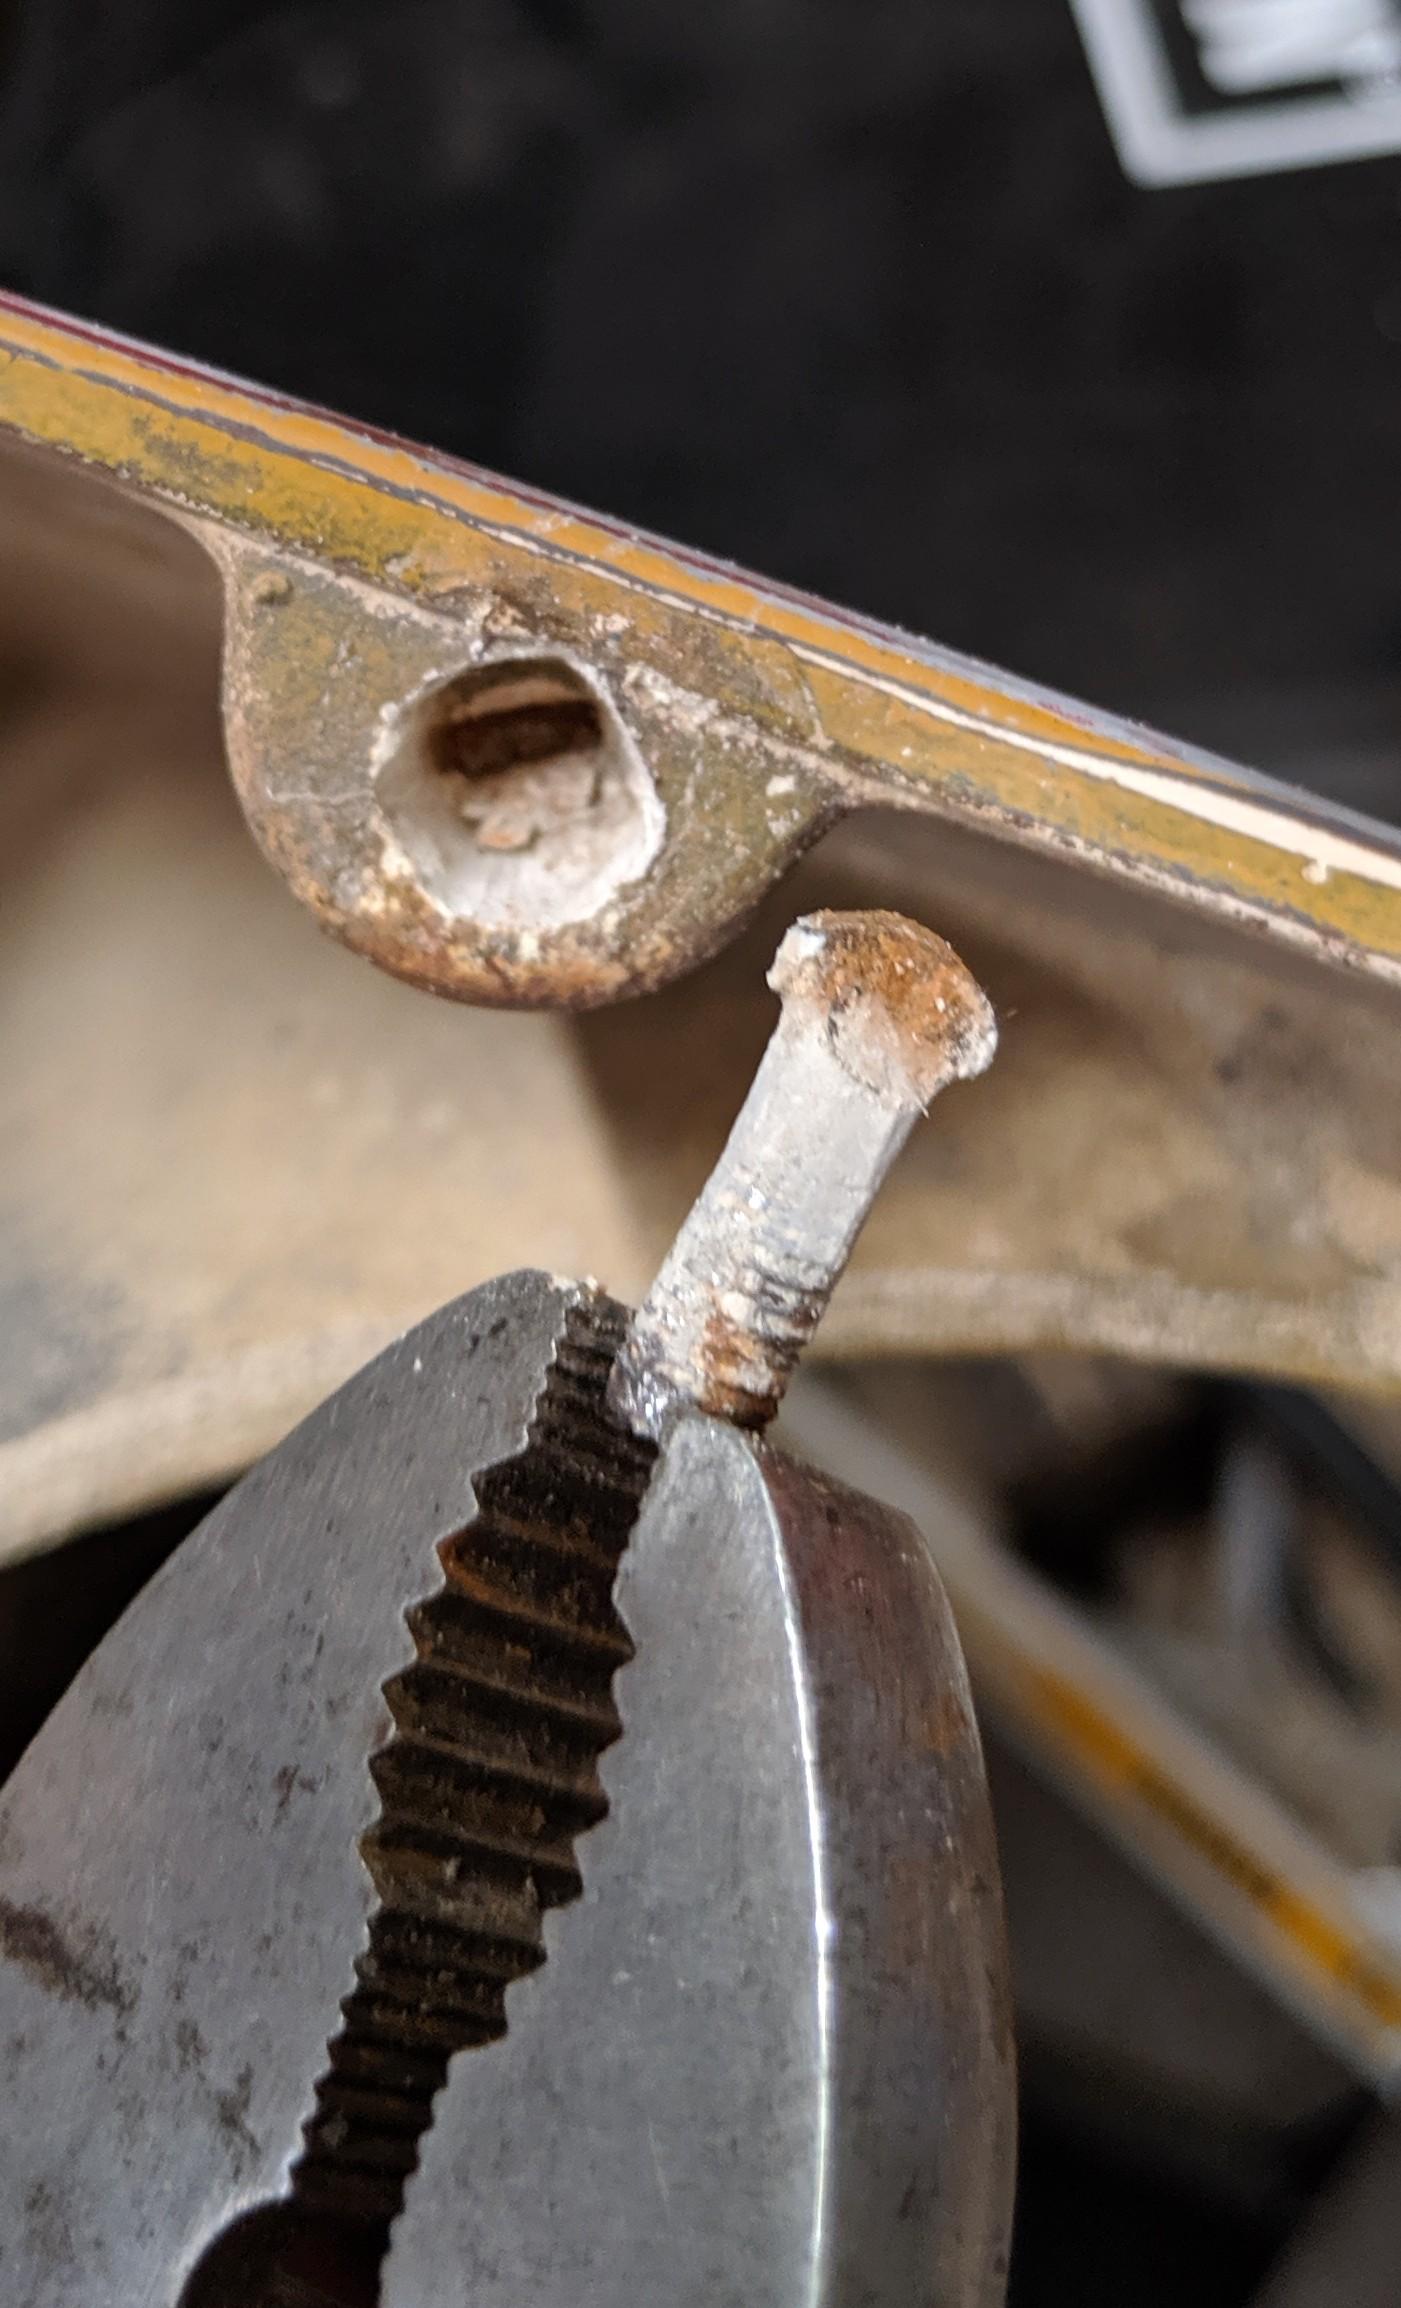
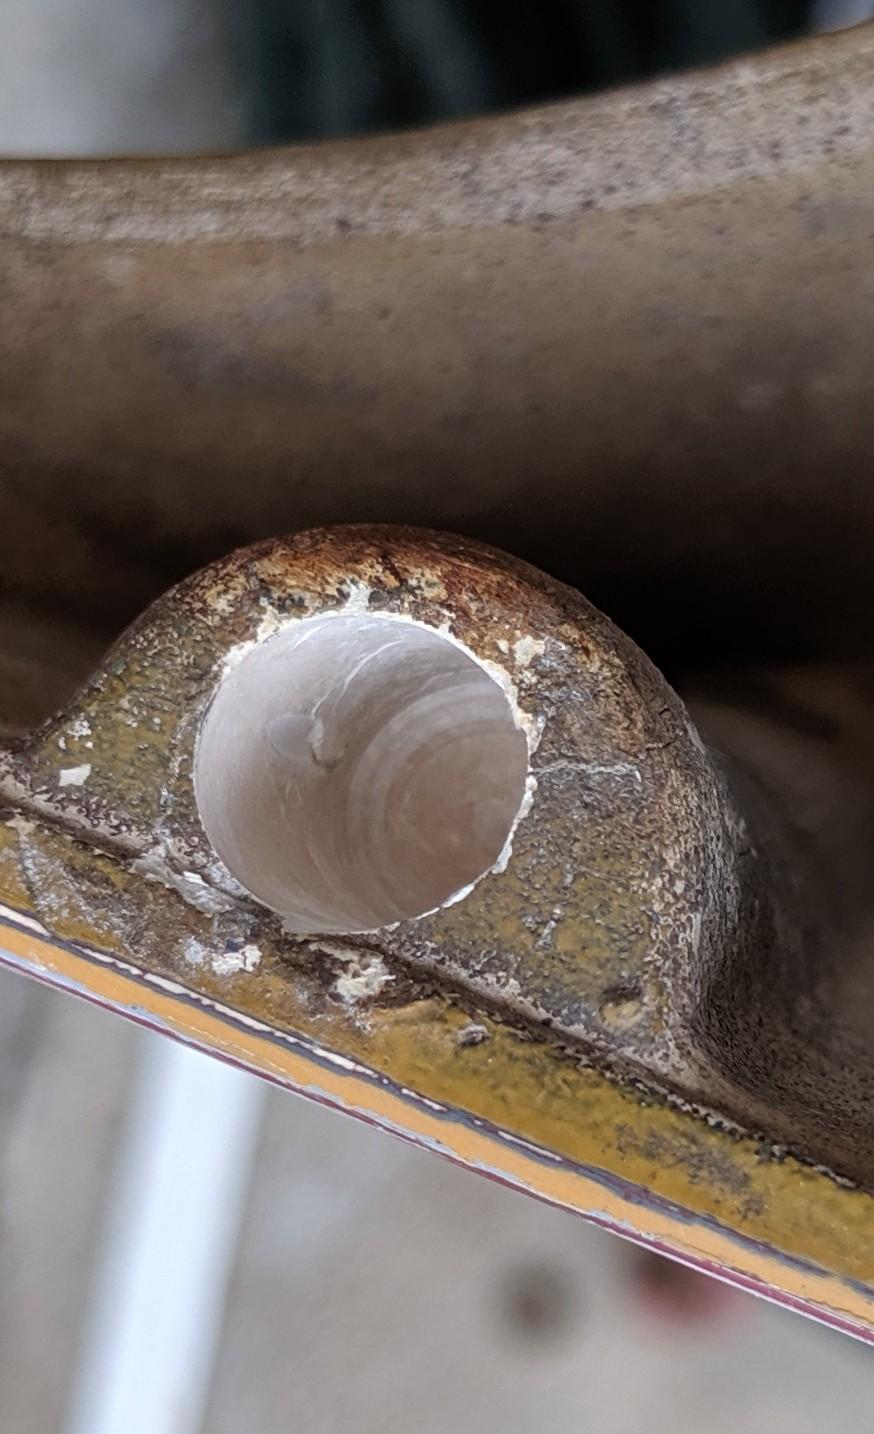
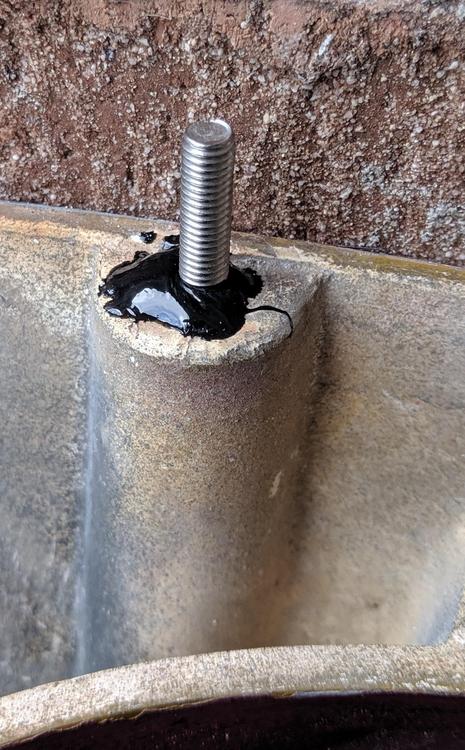
OLD thread warning, but still relevant to those trying to fix. Using methods described above. Had all three break on one bucket, one on other. Worked great. The ABS glue I received was probably a little old because it was very thick. It worked to my advantage on this project because it steadied the bolts. Still had to do some occasional adjustments while it set up.


 3 points
 -
 2 points
 -
 2 points
 -
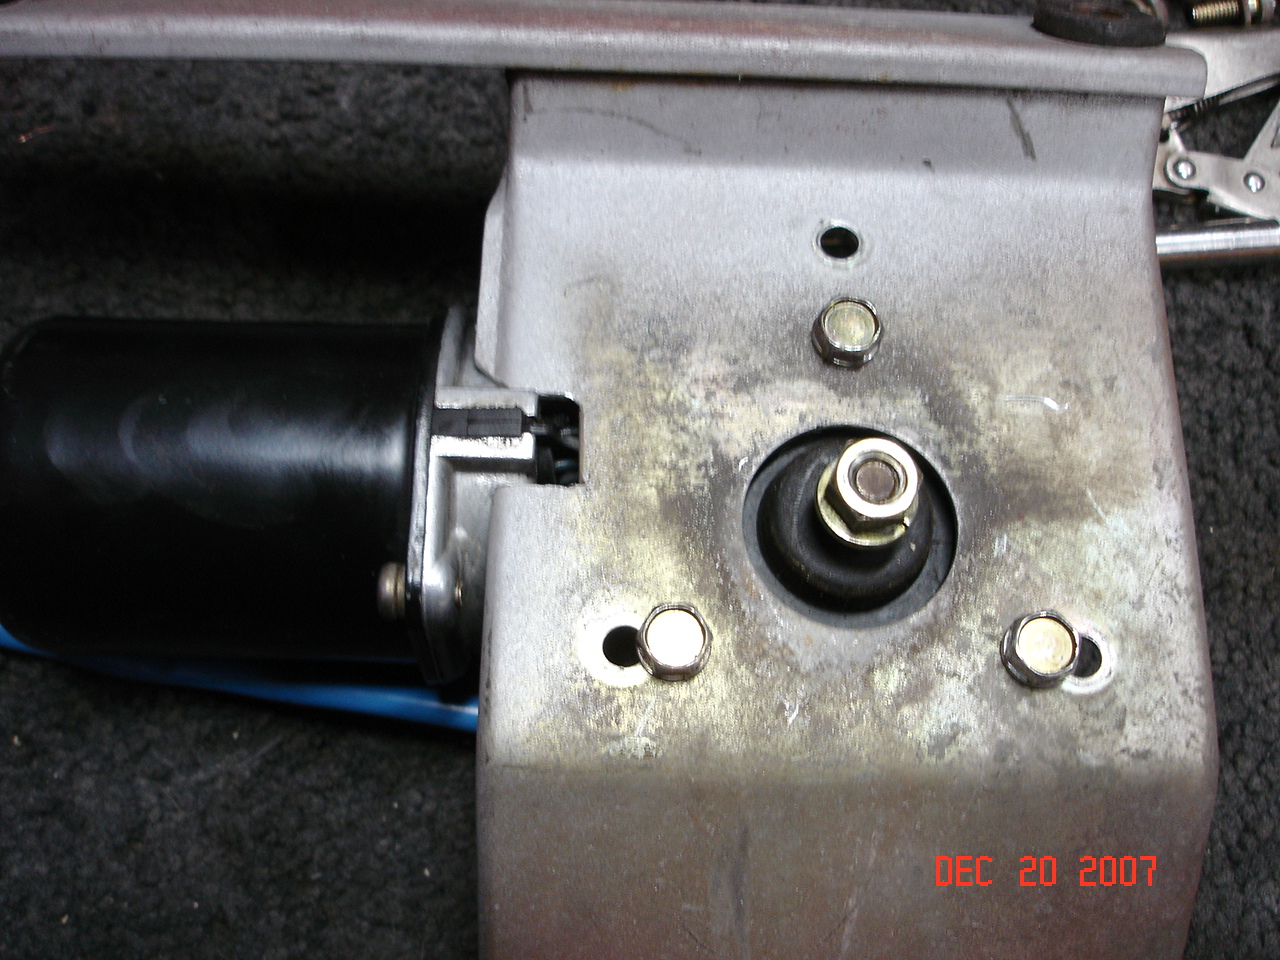
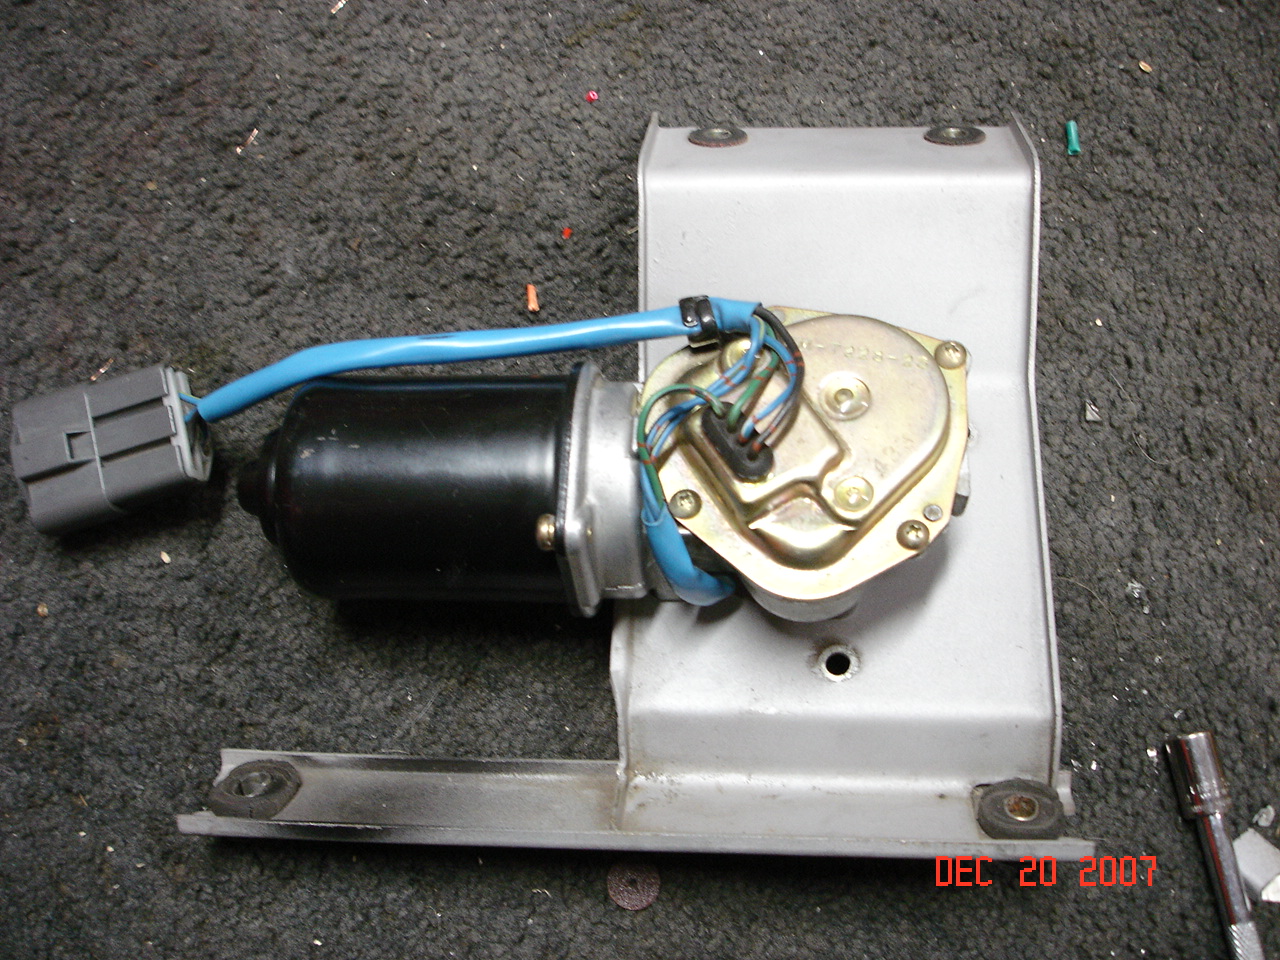
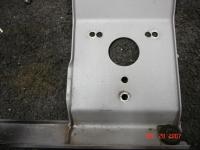
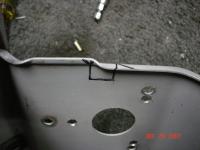
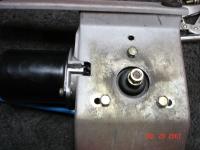
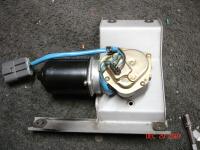
 Tired of the old SLOW and Tired wipers on your 240Z? Ya, Me too. SO I did some research on the subject over at HybridZ and found that for a few years now, people have been trying to use the 94' Accord and 91' Civic wiper motors as a replacement to the Datsun wiper motor that ONLY like to move if the window is WET... So I read every thread and post on the subject to find out as much as possible. All I found was pictures and posts by people saying that "it works great BUT..... The wiper does'nt PARK when you turn the switch to OFF. You have to shut the wiper switch off at the EXACT moment to get the blades to sit in the usual DOWN position. So I went to the junk yard and pulled a 91' Honda Civic wiper motor, brought it home and tore the gear/contact cover off to find what made it click and Also to find why nobody, after 4 years, could get the wiper to "PARK" I wrote everything down that I saw, put it back together and studied the their wiring diagrams and my diagrams. So I wire up the wiper the way everyone else had been doing it for a few years and started tesing each and every wire. I discovered what they had missed and decided to wire up a relay, the way I thought it should be, to get the wipers to "PARK" and then gave it some power. Slow speed worked great, high speed worked even better. So I kicked it back down to slow then crossed my fingers and turn the switch off. It spun a little before the relay kicked in, then it finished it's rotation and stopped exactly where it should have. So I did it a bunch of times and it stopped in the exact same spot every time. So in other words, I seem to have fixed the problem that plagued people who have done the conversion before. Below is everything you'll need to know about putting in a 91' Honda Civic wiper motor into your 240Z. I've done the conversion and it's FRICKEN AWESOME!!! The first time I tried the wipers was in my garage on a DRY window with NEW wiper blades. I made a video of it for any unbelievers and also to show how the OFF position Parks the blades at the end of the rotation. So here's some more good news, the Datsun wiper motor mounting screws work on the Honda motor AND the Datsun wiper arm bracket will slide right onto the Honda motor shaft without modification. When you go to the Pull-A-Part, SAVE THE BOLTS and the NUT & WASHER. If you buy the motor at the Auto Parts Store, it will NOT normally come with bolts or the bracket mounting nut. Here is the Short list of needed items....... 1) 91' Honda wiper motor (make sure to unplug the motor and also remove the female end from the honda with at least 6 to 8 inches of wire past the female plug, you'll need the female end if you wanna make a custom adaptor type harness) I paid $6.50 at the local Pull-A-Part, Schucks Auto Supply wanted about $100. Go Used. 1) 20/30 amp 12 volt relay from the auto parts store (usually about $5.00) 1) 6-terminal Datsun Plug (exactly like the one on your Datsun wiper motor, or Voltage regulator or pre 3/73' Combo switch on the harness side. I sell these and the terminals if you would like to make a brand new adaptor for your conversion The other possibility is to Cut off your plug and wires from your Datsun Wiper motor, it's up to you. You can even Hard wire the Honda motor in if you'd like. 70' Datsun 240Z __________________ 91' Honda civic wiper motor blue/white-------pin 86 ________ Pin 87A-------blue/white blue-------------pin 87 ________ pin 30--------blue Blue/red-----------pin 85-------pin 85----------green/black Black----------------------to------------------black Blue/yellow----------------to-------------------blue/yellow ________________________________________________________ Here are the pics for drilling the Datsun wiper Plate, notching the plate to seat the Honda motor correctly, and that's it. 5 small cuts, 3 small holes. If you have any questions and don't mind reading alot more, check out this link for every single detail. http://forums.hybridz.org/showthread.php?t=82292 After the New Honda Motor is installed in your Z, turn the wipers on once or twice to 1) Make sure the motor is working correctly and running and 2) to Park the wiper studs in the right position before installing the wiper blades. Feel free to ask questions here, post results, share added info (other years and models of Honda wiper motors that are identical etc.) Dave. Datsun to Honda wiper diagram.bmp This post has been promoted to an article
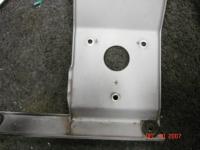

 1 point
 -
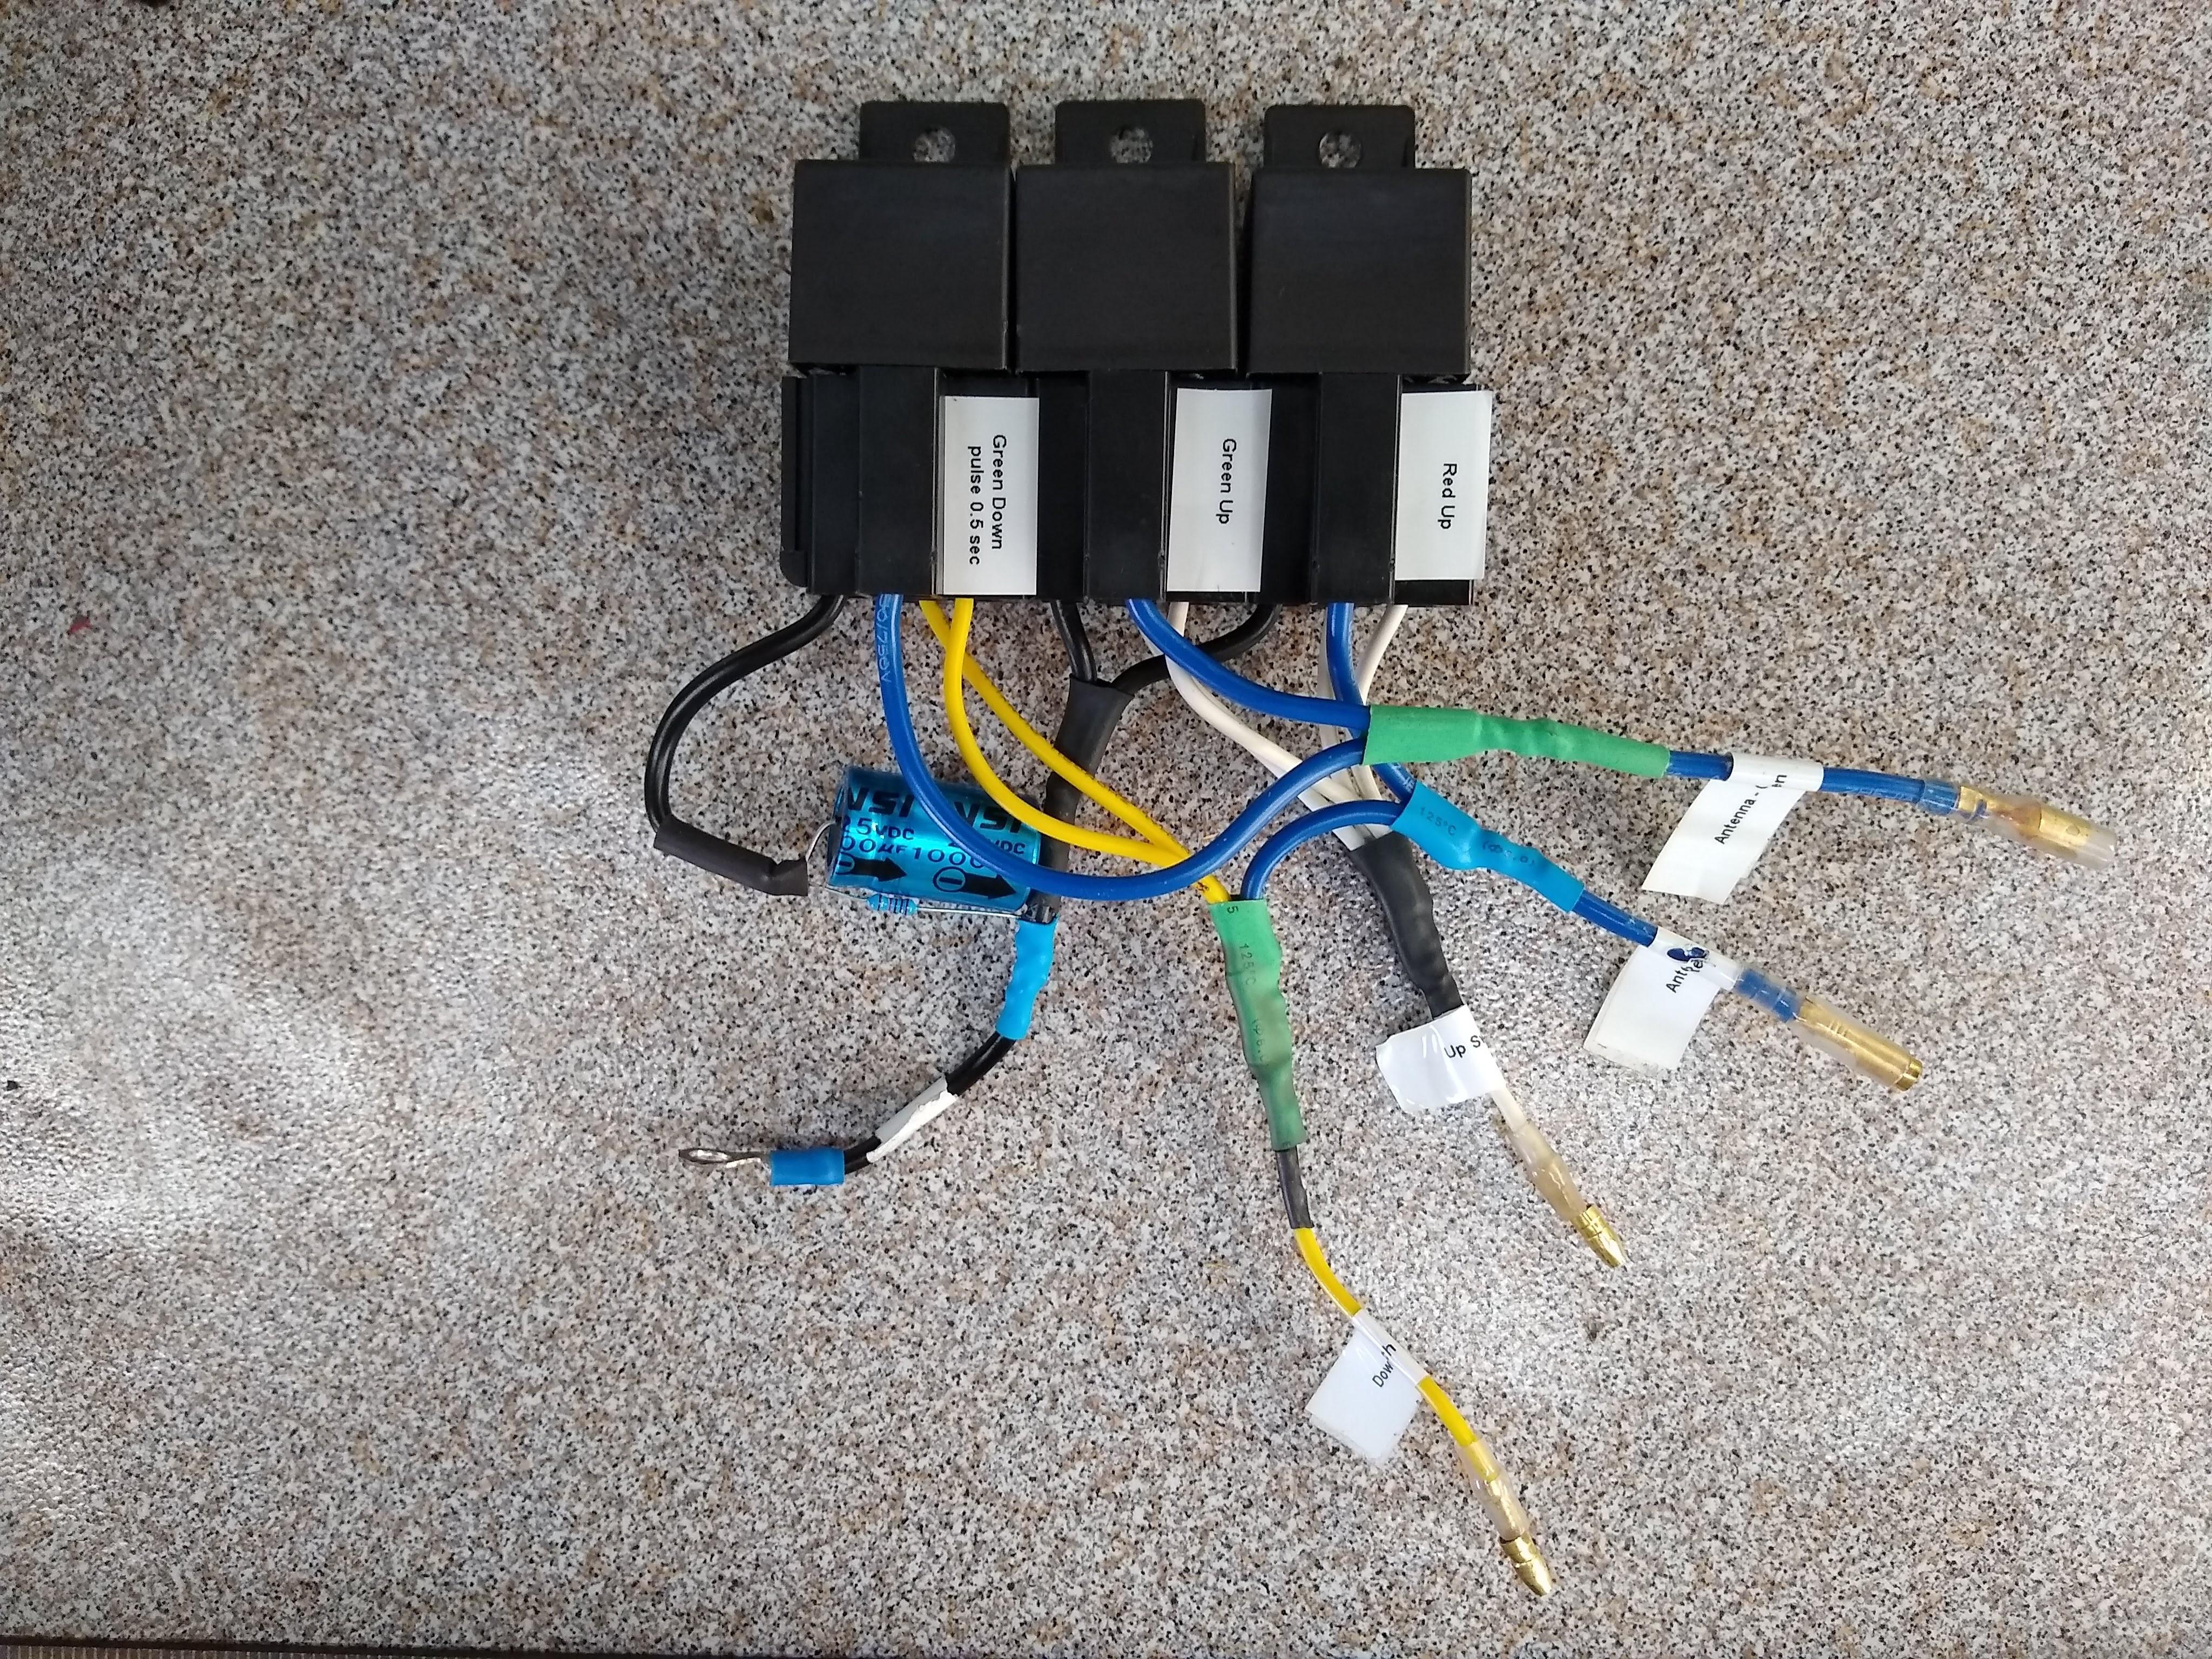
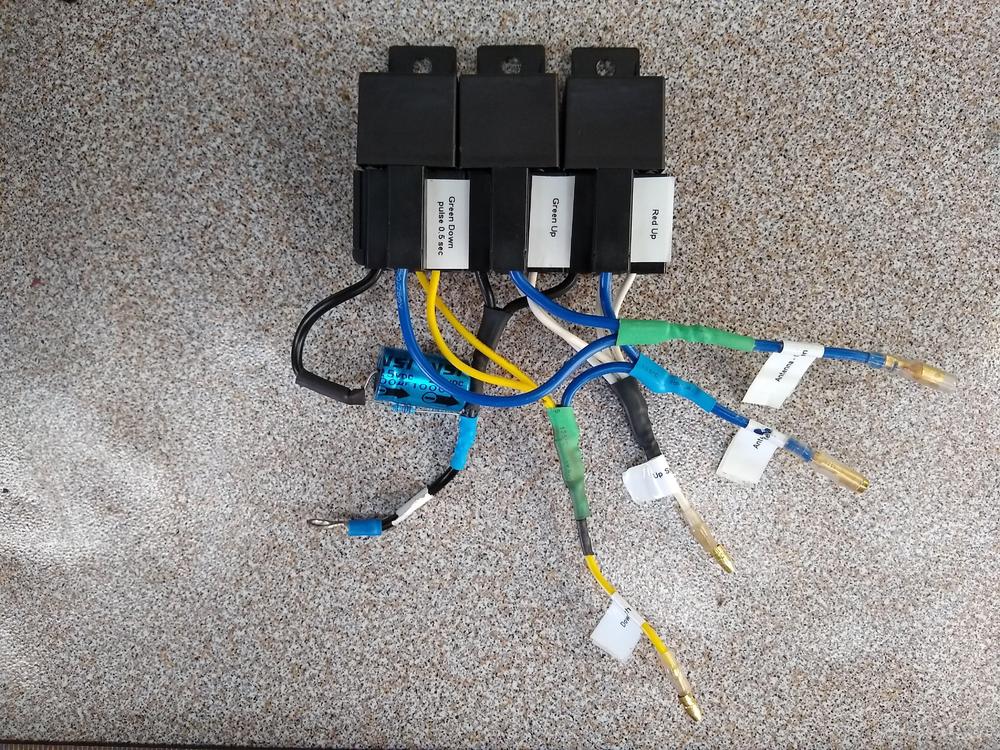
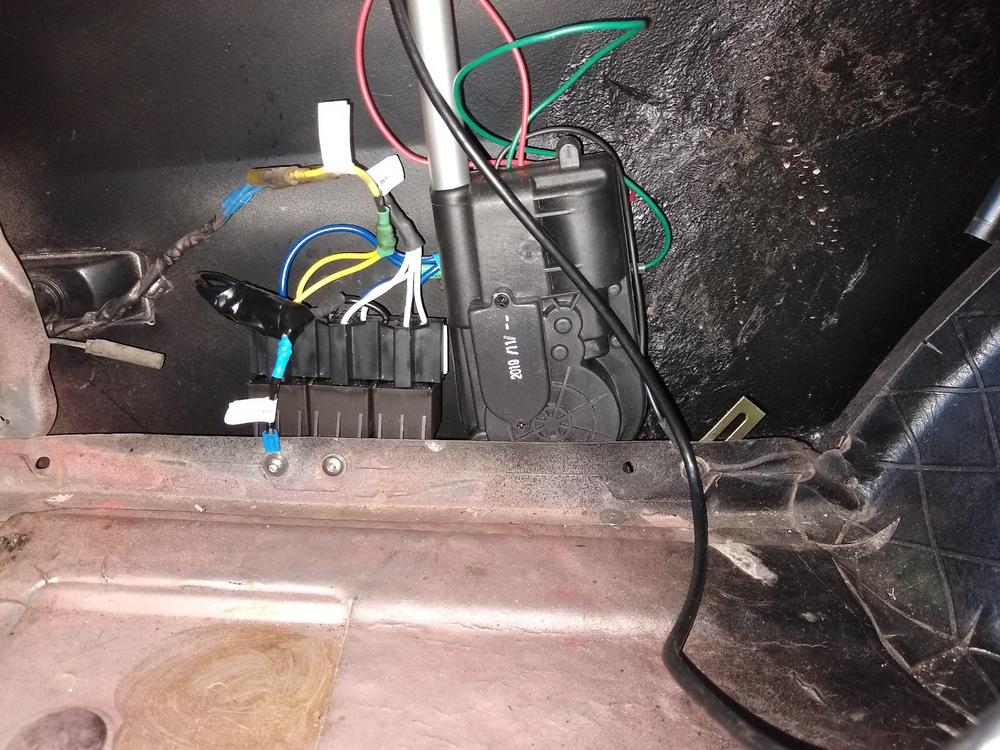
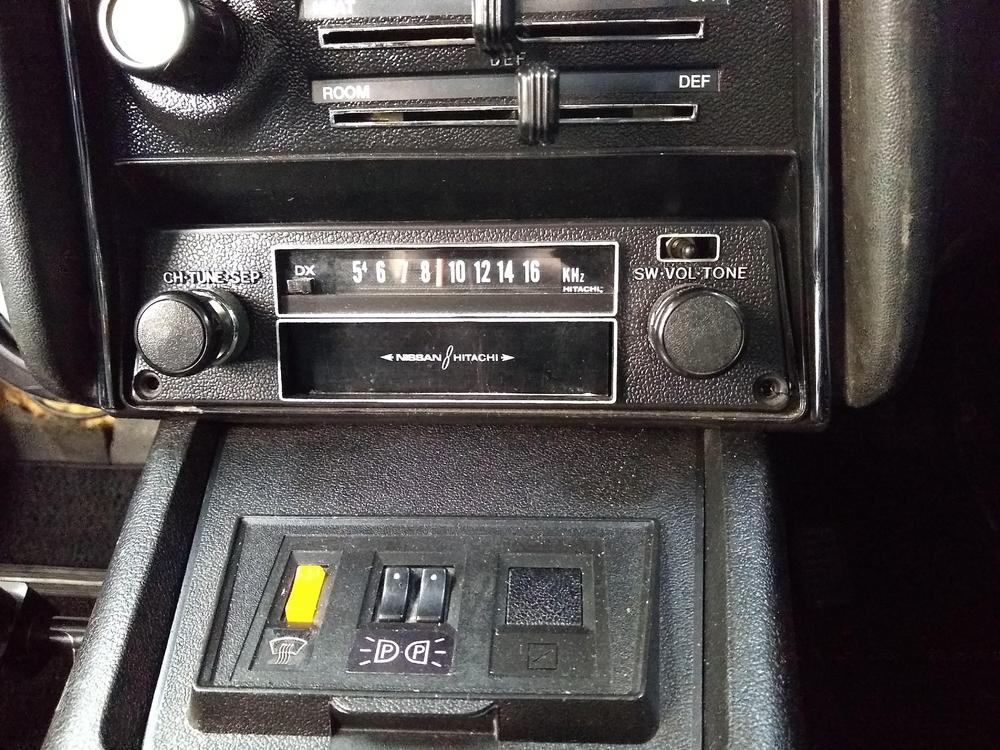
 Instructions on how to install a new inexpensive power antenna to work with the OEM antenna up/down switch.When I purchased my 1972 Fairlady Z-L it only had the 8-track face plate and a loose antenna switch. The 8-track unit itself was missing. I purchased an old 8 track off ebay, 3d printed some parts to build a mock up unit. It does not play but cartridges can be inserted, the buttons work and it looks original. The up/down switch is secured and functional. I am in the process of putting in a secret audio head unit so that I have a radio and use Bluetooth. I wanted to replace the manual antenna with a power antenna. However new antennas operate differently. Original antenna uses two wires, power one and the unit goes up, power the other and the unit goes down.New antennas operate like this;up - power to both red and green wiresdown - power to red wire only. (however I discovered that the antenna needs a pulse to both wires first to turn it on.)I achieved this with the use of three bosch type relays, a capacitor (1000 microfarad) and resistor (10k Ohm) to provide a pulse to the green wire. The capacitor/resistor powers the third relay for about 0.5 Seconds Relay 1 and 2 for up ensure that the circuits are isolated from the down wiring. Relay 3 provides the pulse to green for down.
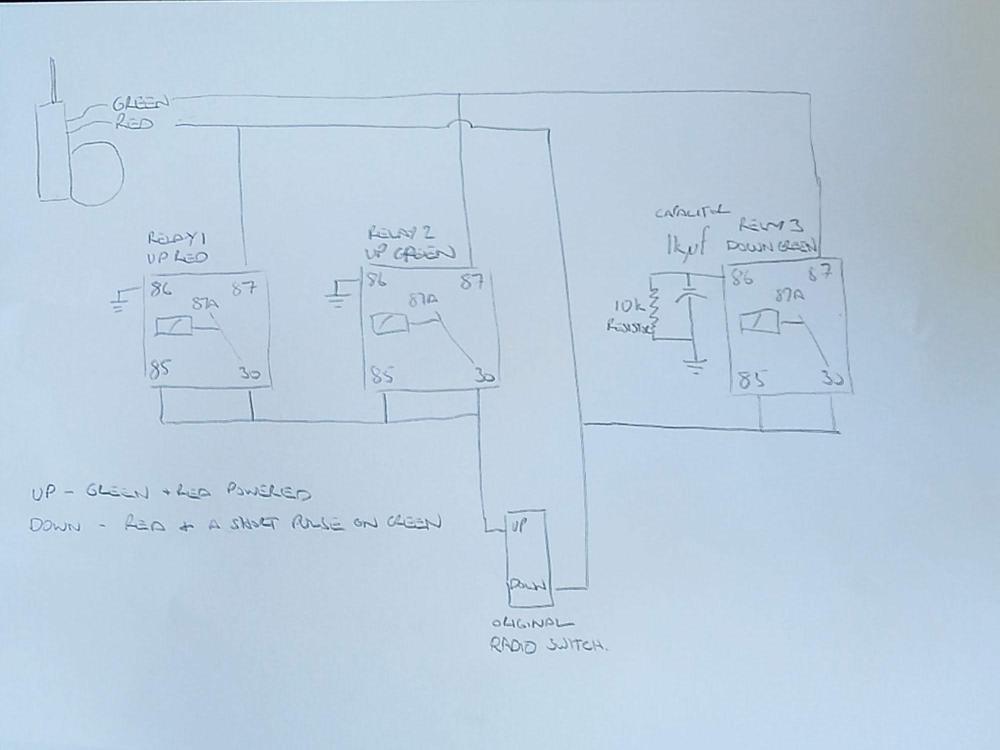
 1 point
 -
1 pointNo. The shop has a draw though exhaust that flows in the same direction - intake louver by the door, exhaust fan on the back wall. I considered hooking it directly to the booth but it flows too much air.1 point
-
 1 pointThey are on the way back now, cost me 500 euro incl shipping, then again i will most likely be taxed again by our greedy goverment , so i think a total of 570 or so. Hope it was worth it..1 point
 -
 All great feedback, thanks. Yes the 4mm measurement isn’t the be all and end all tell tail of your success, correct initial centering in the existing hole is your best defence. Another idea to getting the bearing to center itself when getting started, is to un-clamp the housing from the base so when you push the bearing through, the whole thing can easily move around, rather than using the X/Y adjusters with all the above mentioned rubber play in everything. Go in and out a few times until it settles, then carefully and evenly tighten down the toe clamps to lock the housing to the mill table. Maybe I need to get some good precision DRO X/Y readout on the table so I can accurately locate the center of both holes then compute if the distance is close enough to 71mm before AND after the hole is enlarged.1 point
 -
1 pointClose. Negative pressure with lower fans on 3 and roof fans on 1. Positive with lower fans on 1 and roof on 3.1 point
-
 1 pointBeautiful! So negative pressure is the lower fans on pulling air from the booth with the roof fans turned off and positive pressure is the reverse, lower fans turned off and roof fans turned on pushing air into the booth?1 point
 -
1 pointAccording to my 12/79 Nissan Z Car parts film the plastic inner liner is called Protector-Front Fender Rear. The rubber flap is Rubber-Mud Guard. My repros come with the rubber flap (Rubber-Mud Guard) and all of the required correct Nissan fasteners.
 1 point
 -
 1 point
 -
 I haven’t been on the forum in a while but just noticed your post. That’s exactly what I did. Looks perfect.1 point
 -
1 point
-
1 pointThis just arrived in the mail.... no guilty party in the shipping documents. It came from Amazon. BIG THANKS to SANTA!
 1 point
 -
 1 point
 -
1 point
-
 1 pointFrom Facebook: Nashville Z Car Convention registration is now... LIVE! To register at our super early bird rate, go to www.ZCON.org! Use code: EARLYBIRD15 to save $15 dollars now off each registration.1 point
 -
1 pointBanzai Motorworks has just yesterday picked up from the manufacturer an excellent reproduction of the rear-most inner fender liner for 260s and early 280s.
 1 point
 -
-
 It isn't ABS. It's Fiber Reinforced Plastic (FRP) although there actually isn't any plastic in it. It's actually some type of polymer base with fiber (appears to be fiberglass) embedded. When you replace the studs consider using brass or stainless instead of ferrous steel. Also use a standard nut, flat and lock washer along (preferably of the same material as the stud). with a bit of anti-seize. Nylocks used here could just cause another broken stud.1 point
 -
 0 pointsDoesn't bode well for a new Z. https://www.cnn.com/2019/11/12/cars/nissan-earnings-report/index.html0 points