Leaderboard
 Subscriber

Popular Content
Showing content with the highest reputation on 05/04/2020 in all areas
-
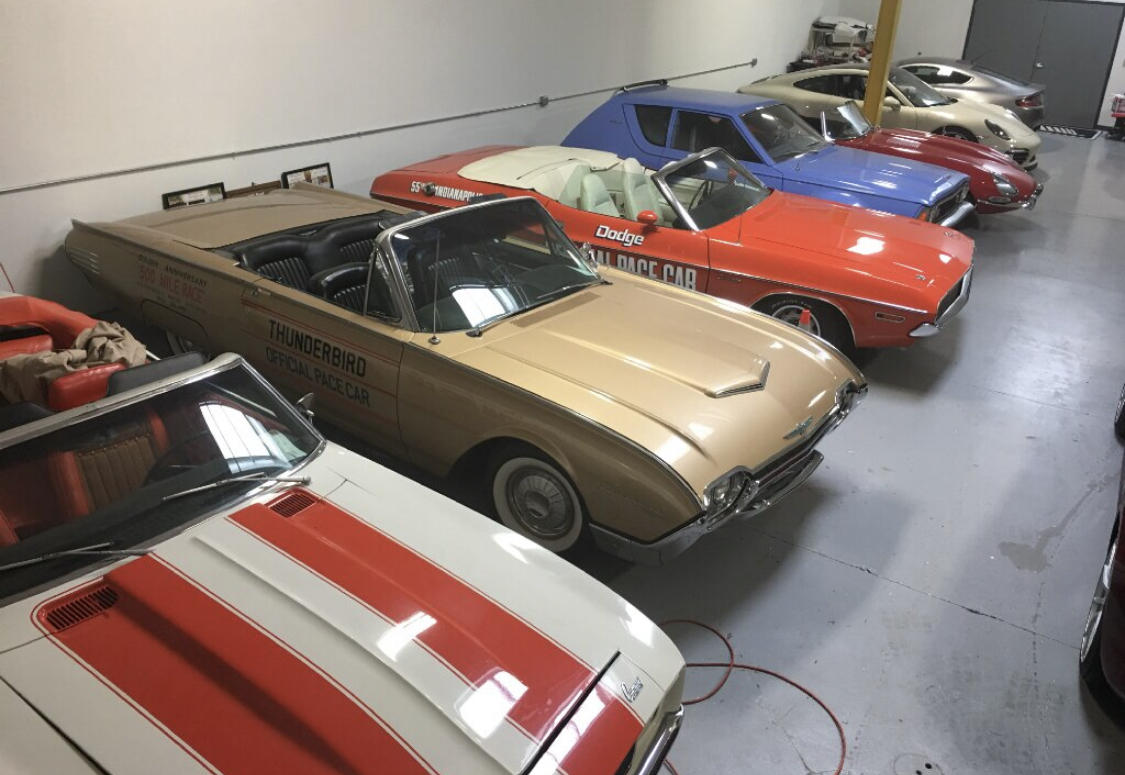
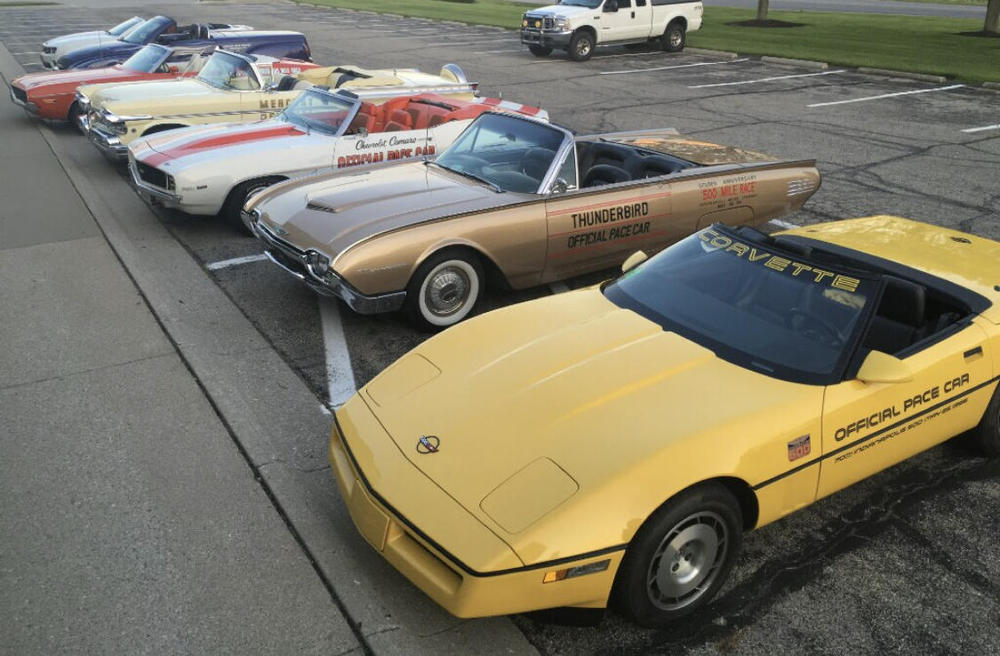
 4 pointsIntroducing myself... Tom in Indianapolis. I’ve lived Z cars since high school, when one of my classmates, whose dad was a Datsun dealer, drove one. I’ve been a car collector for over 20 years, with varying tastes: Jaguar, Aston, Corvette, Porsche, McLaren, and a wide variety of Indy 500 pace cars.
 4 points
 -
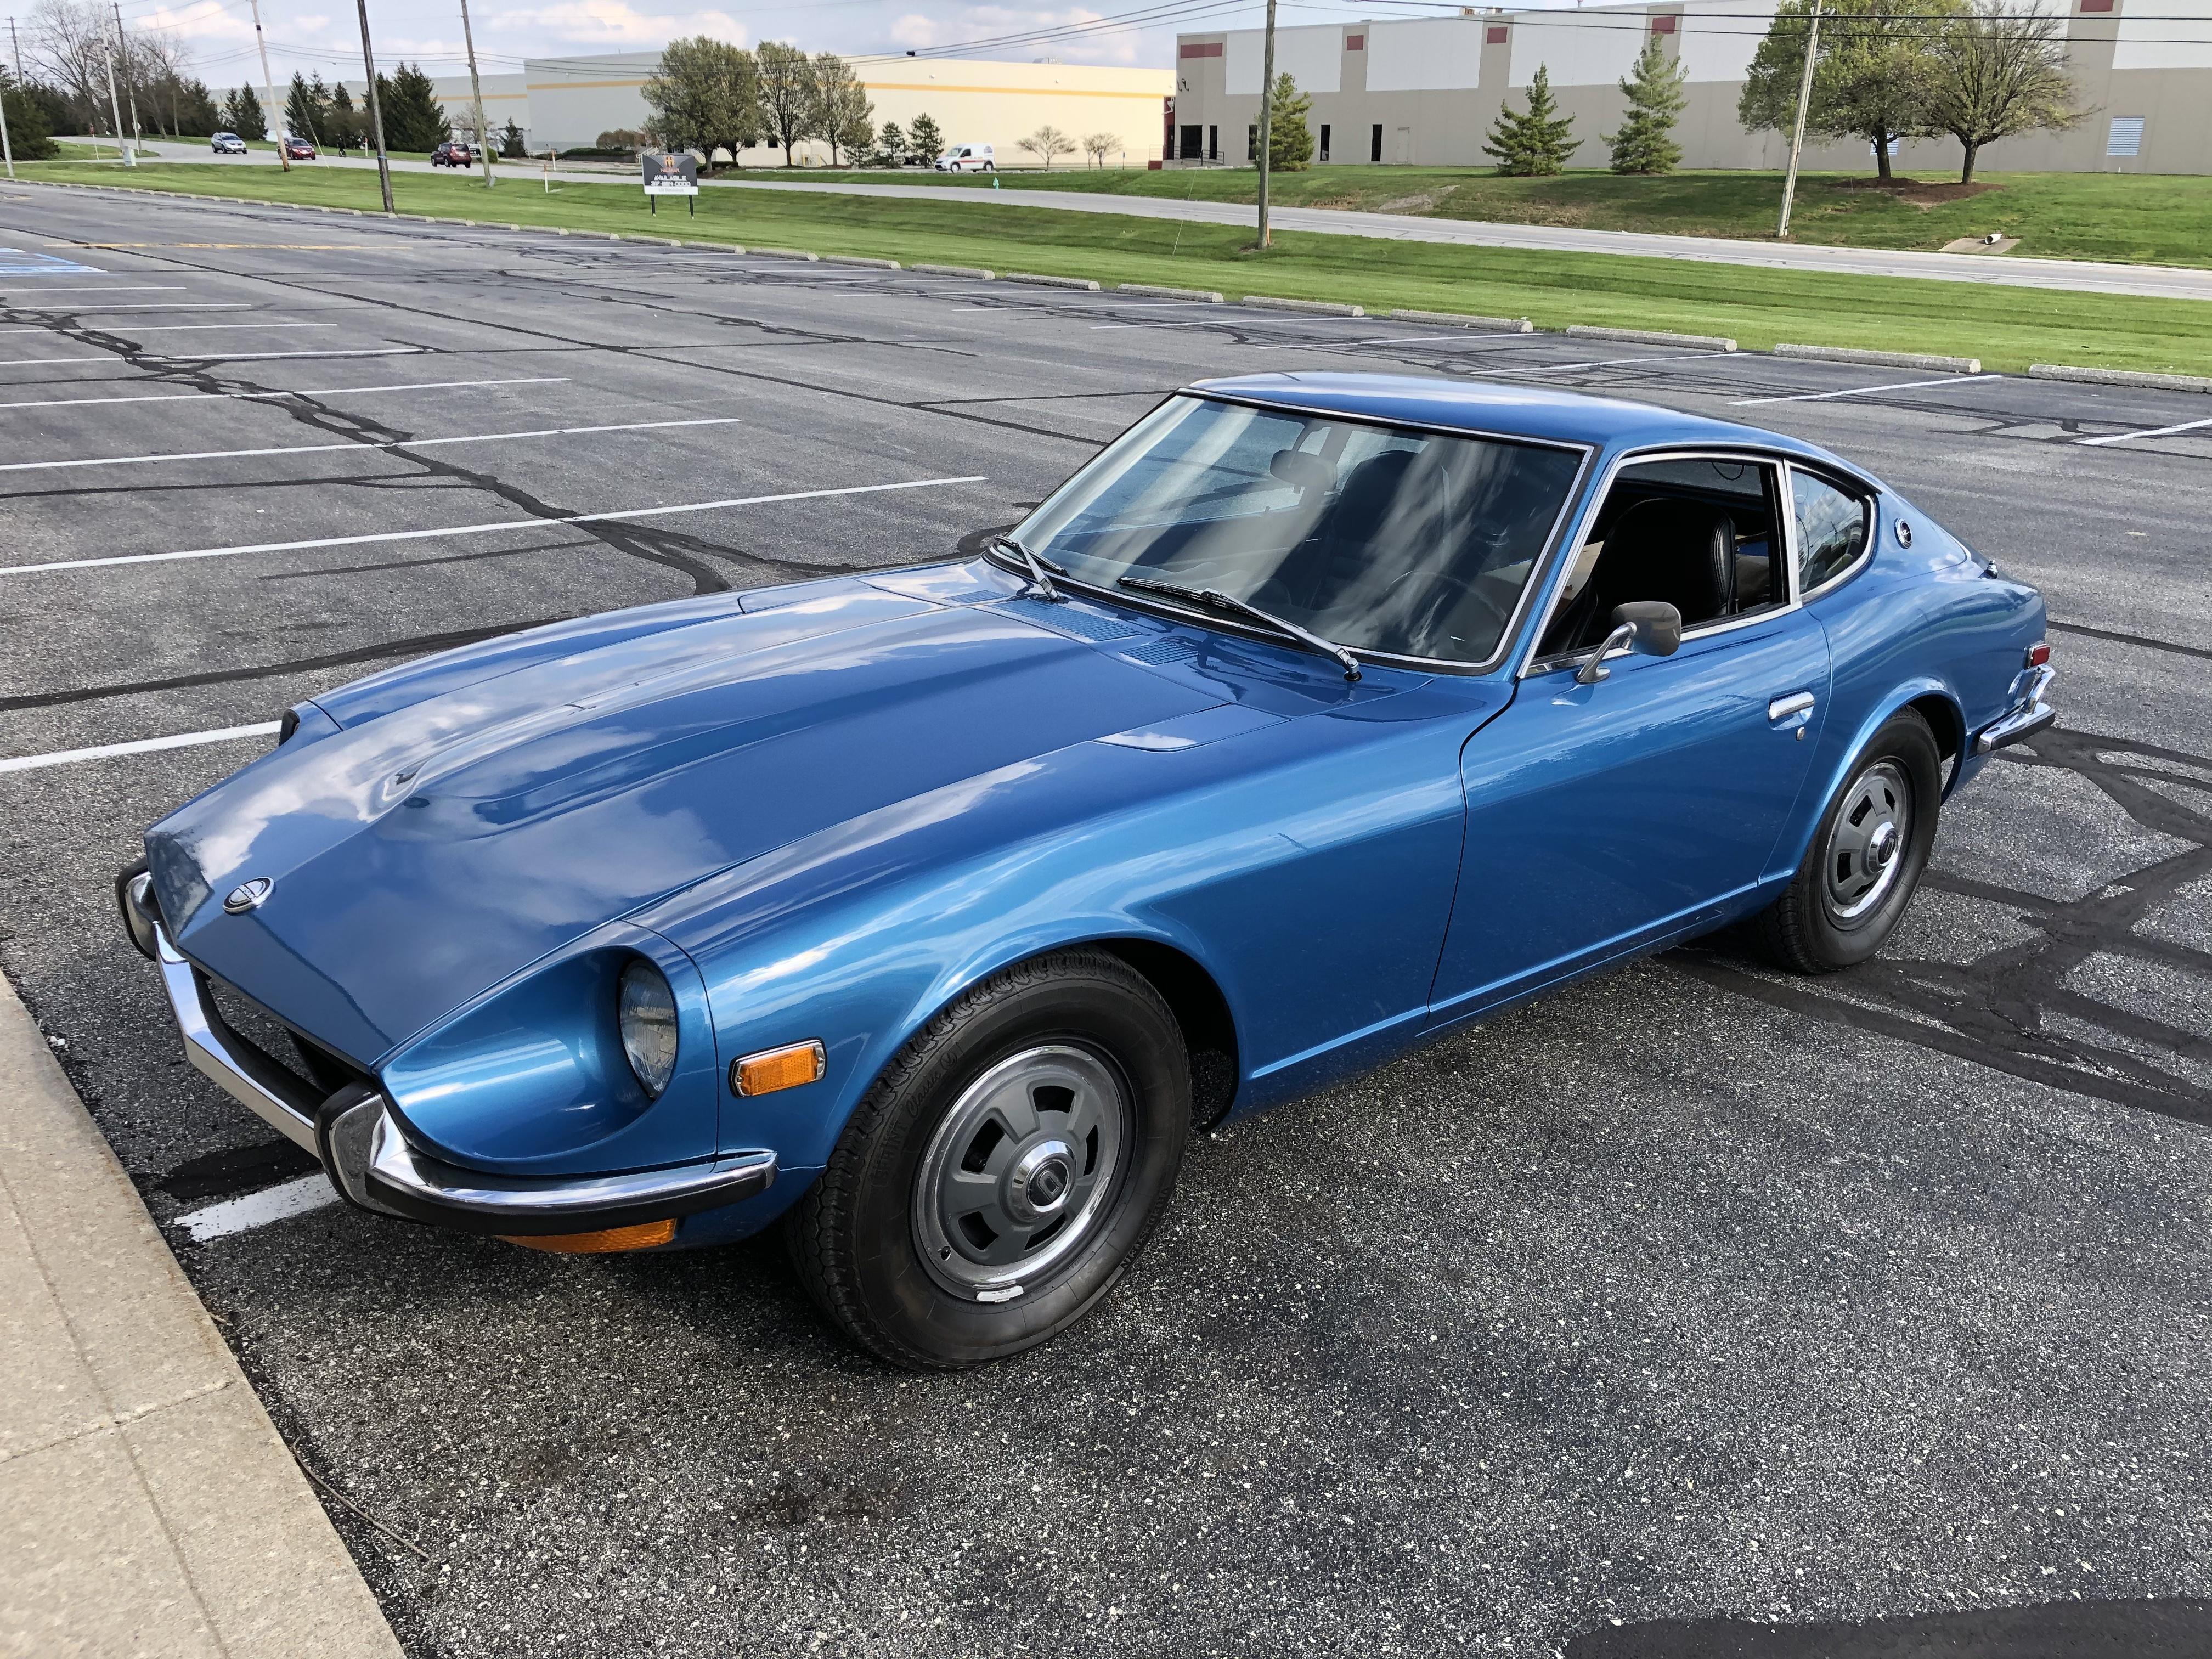
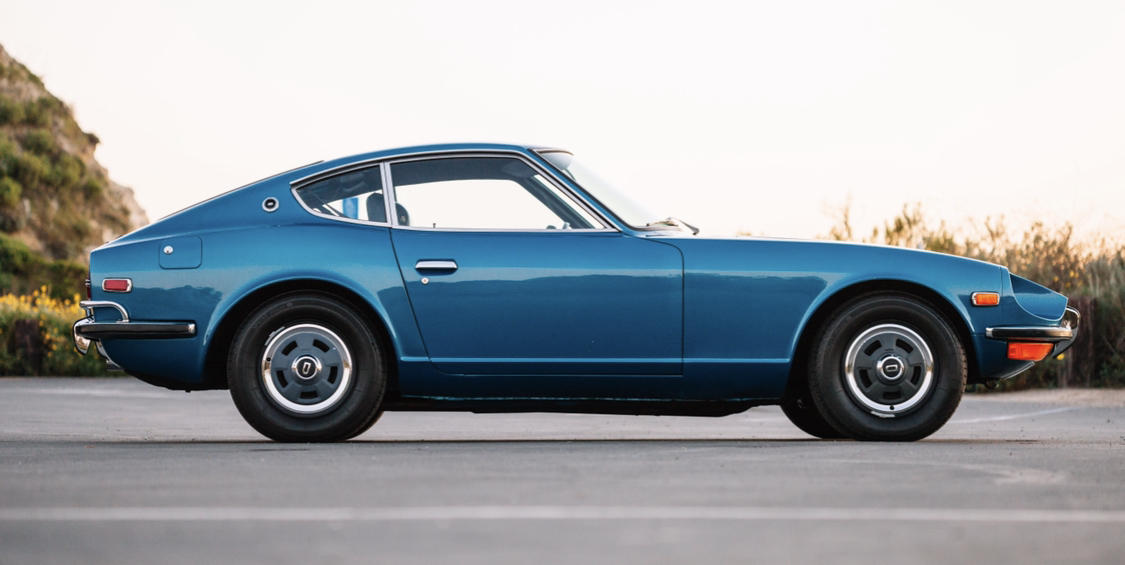
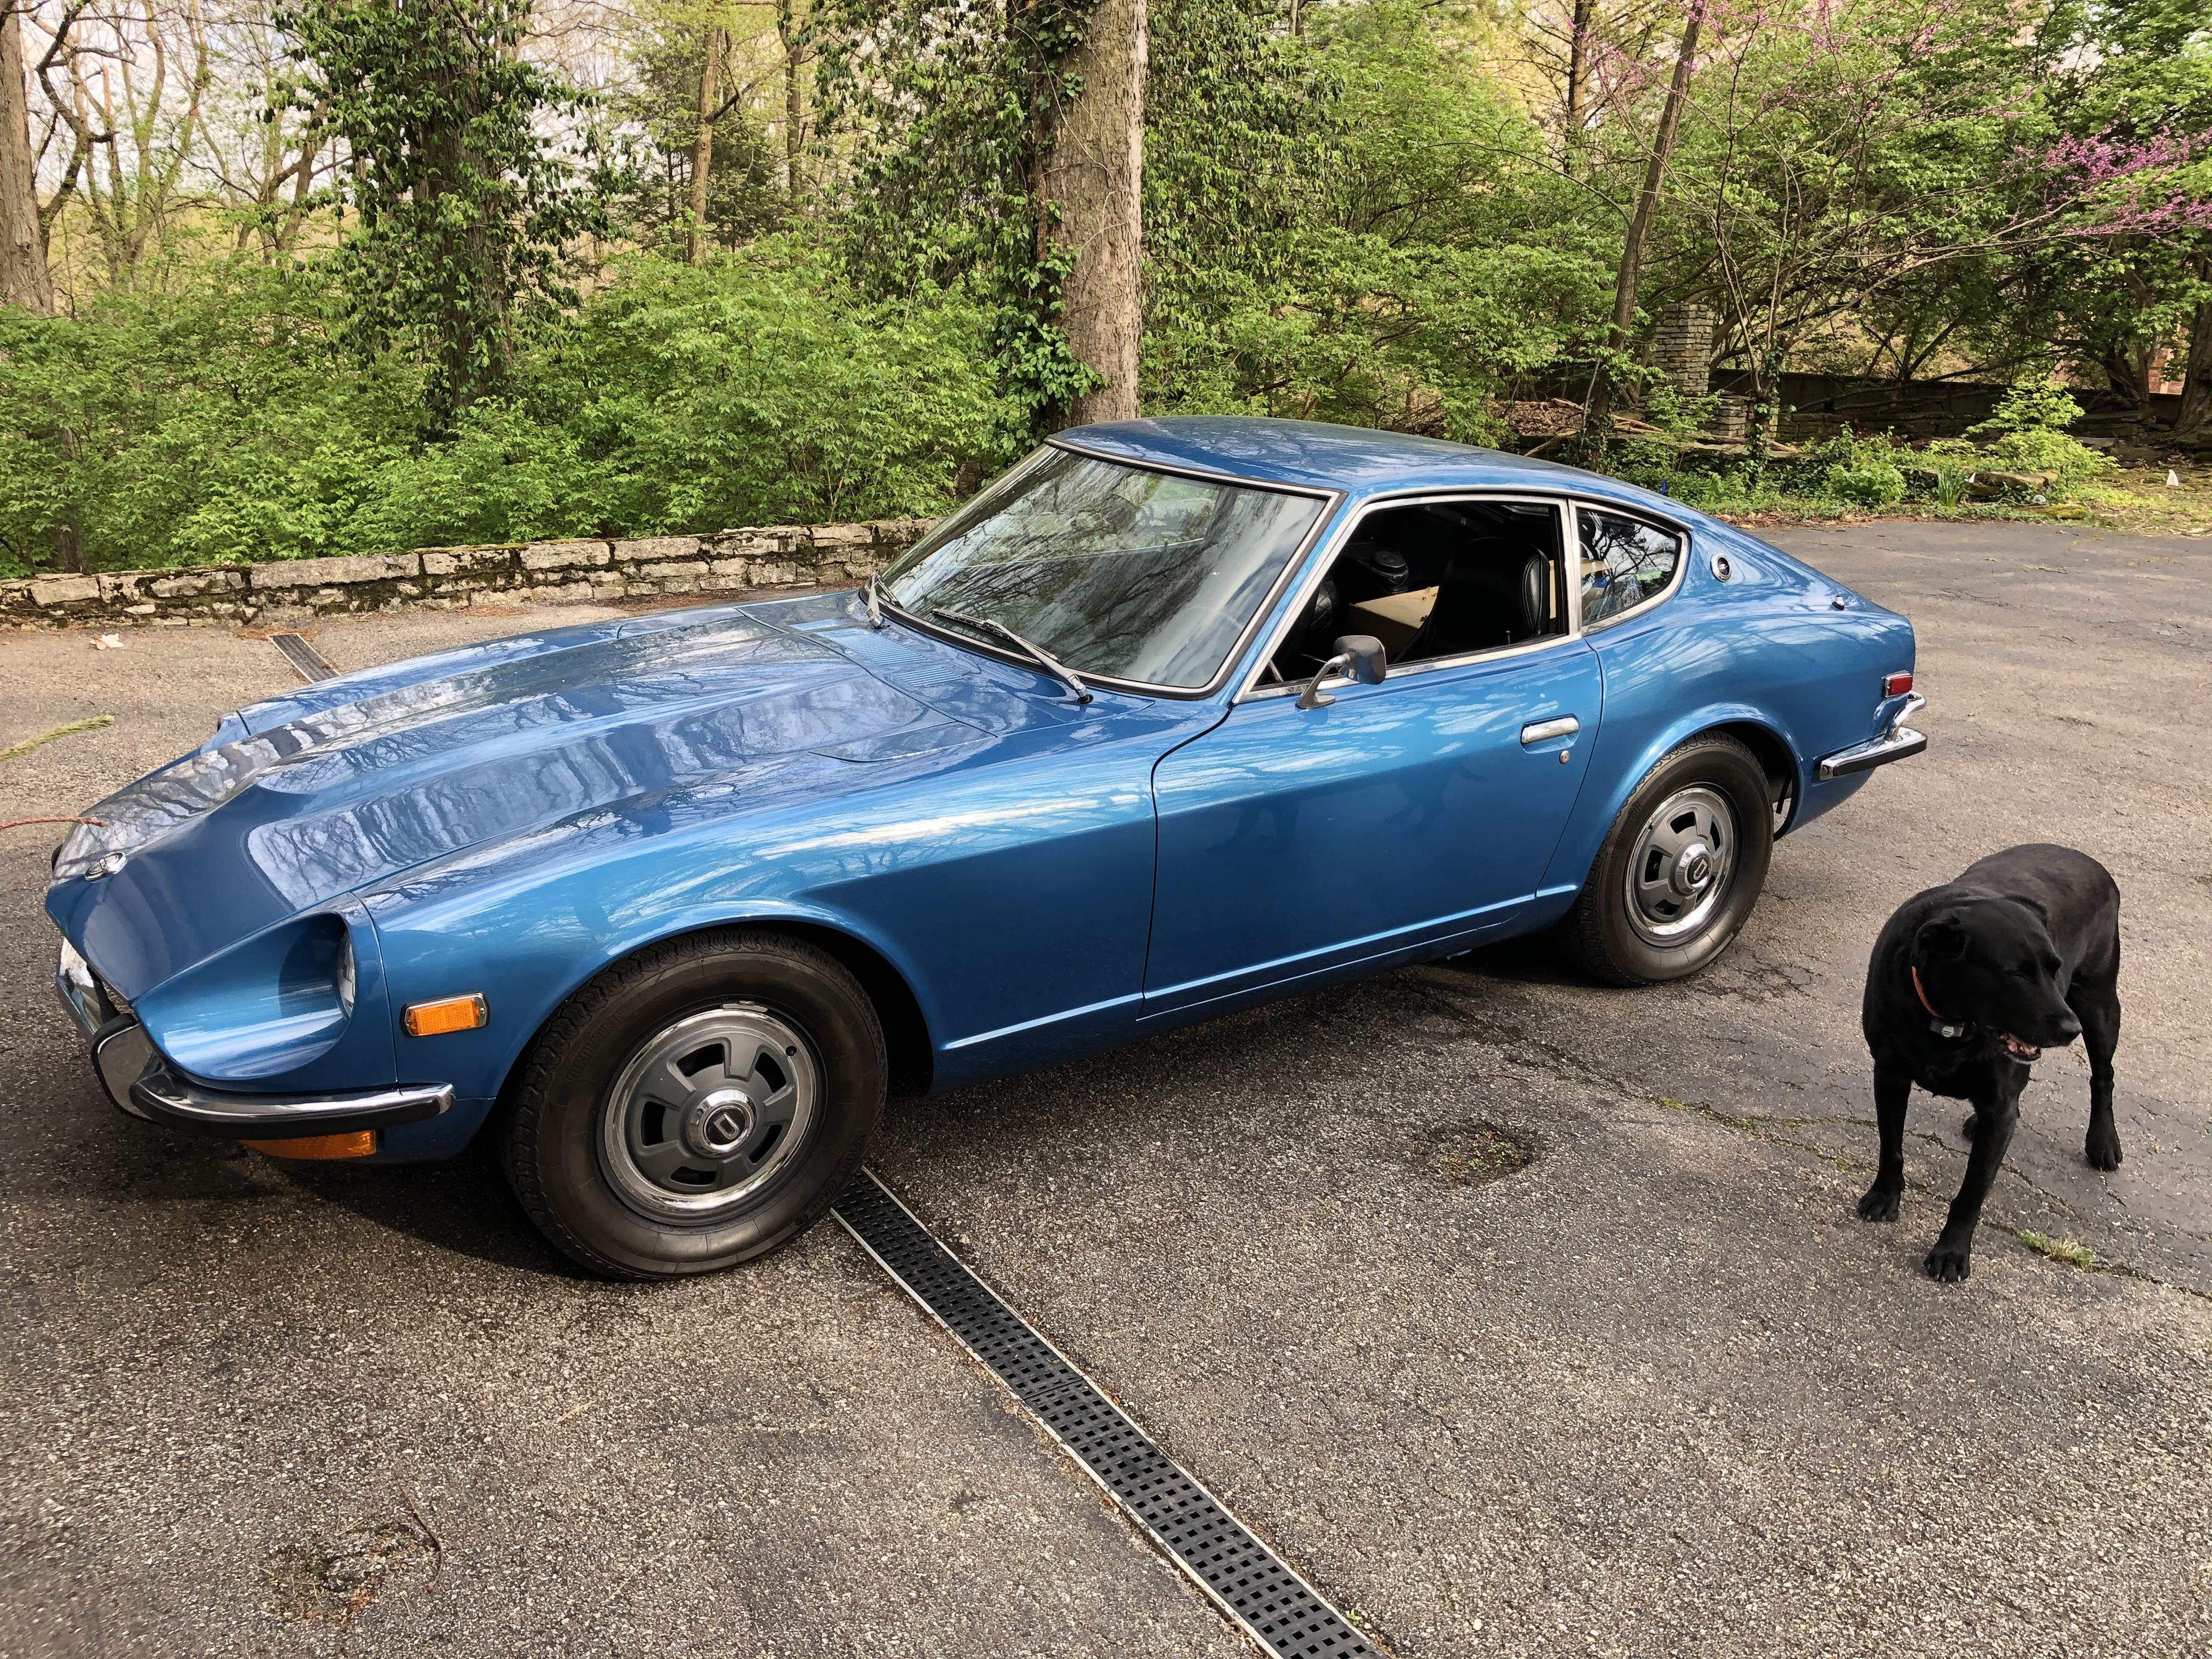
4 pointsThanks, Zup. Me: Midwesterner, writer and journalist (IndyCar Series), car collector over 20 years. Started collecting (and still collect) Indianapolis 500 pace cars - actual pace cars (2), track/Festival cars (3), and factory replicas (4). Also a Jag E-Type, an Aston Martin, a McLaren 12C Spider, a 911 Porsche, a DeLorean, a Gremlin, and sundry others. My Z was a lifelong California car, originally purchased in Orange County. A 1971, it’s had a repaint (not bad), and the requisite rebuilds and massages. I’d wanted one since ‘72, so the 48-year wait wasn’t too bad. ? Still looking for a few benchmark cars before my “plays with cars” days have passed me by. ~ Tom

 4 points
 -
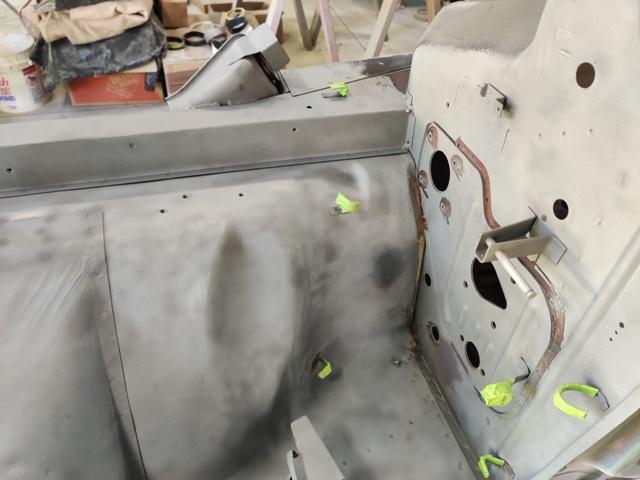
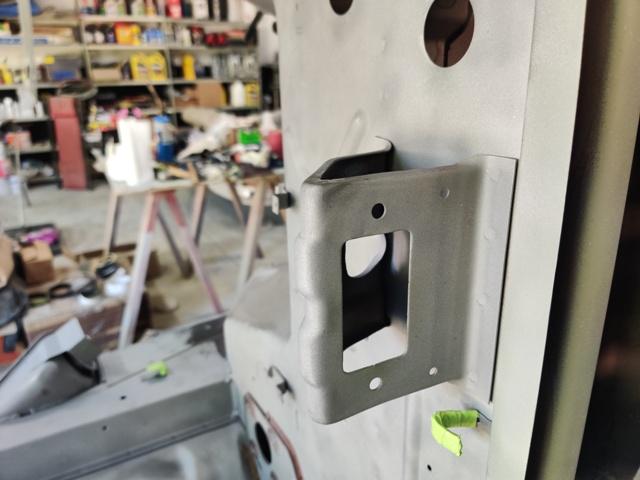
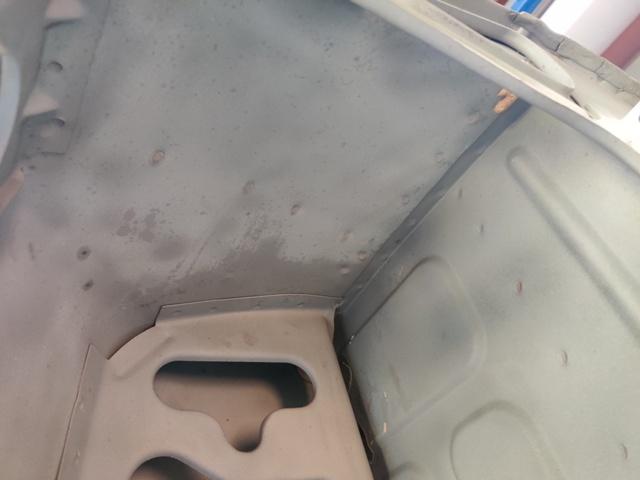
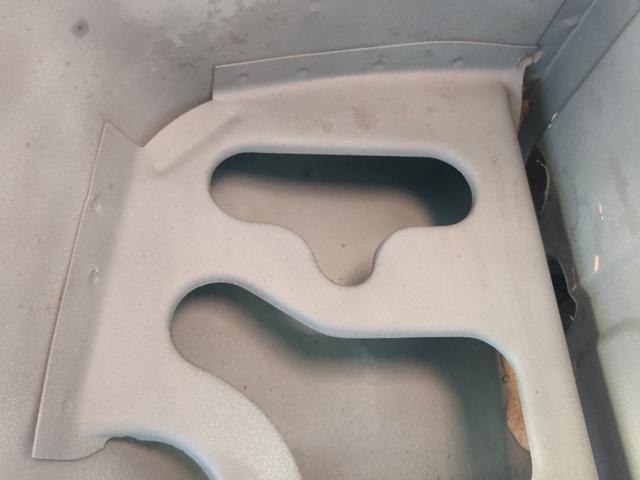
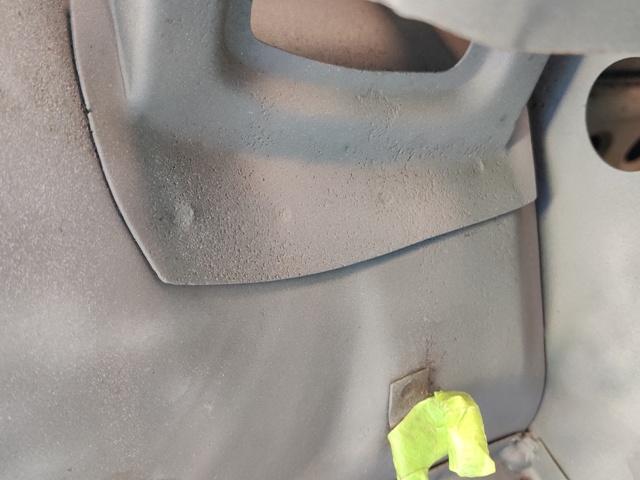
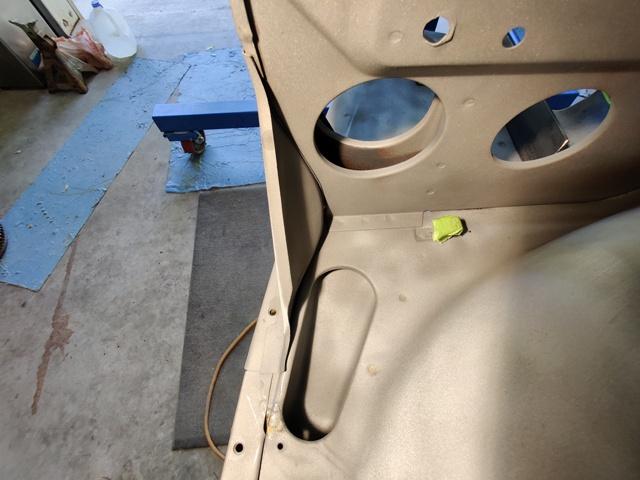
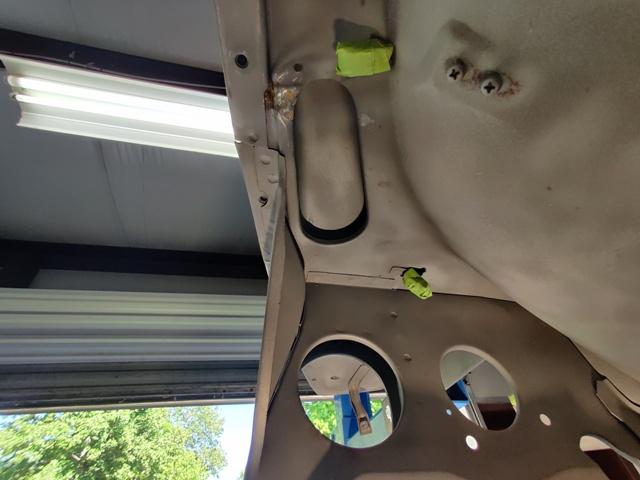
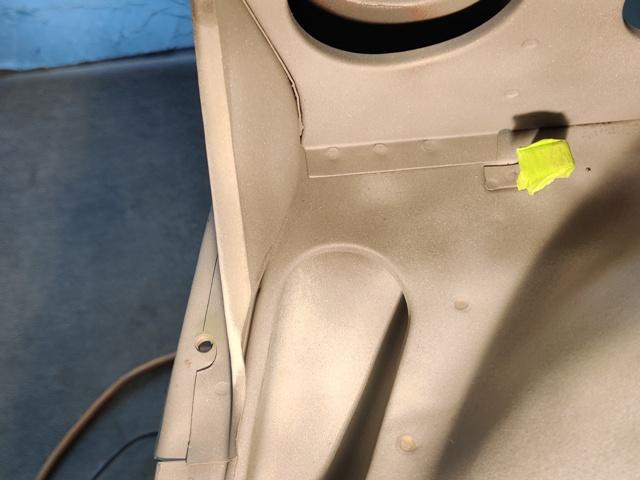
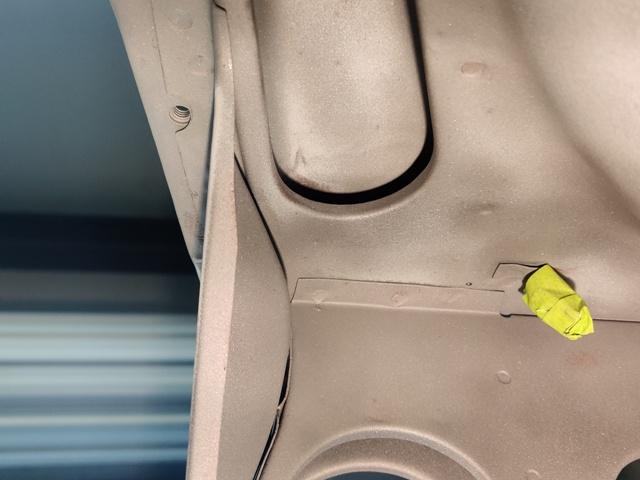
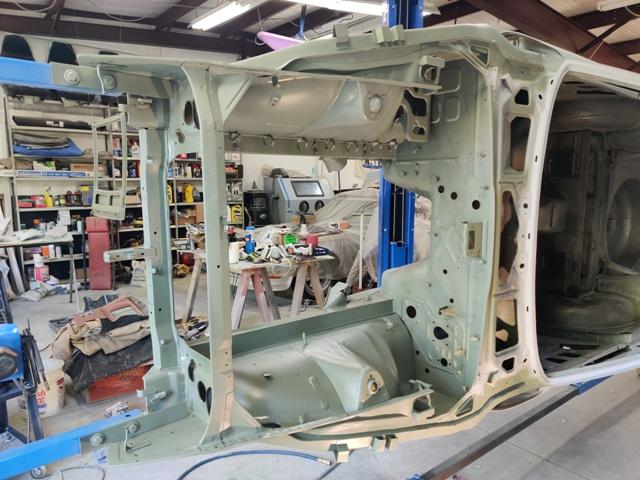
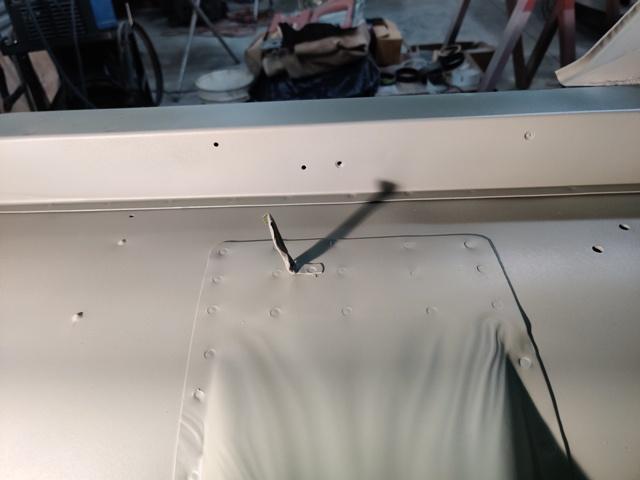
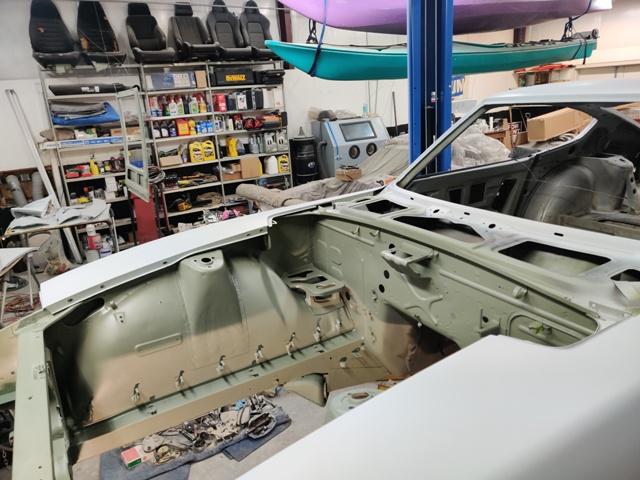
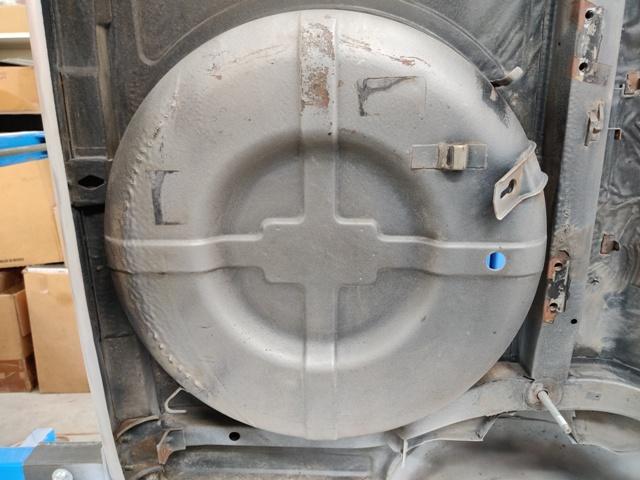
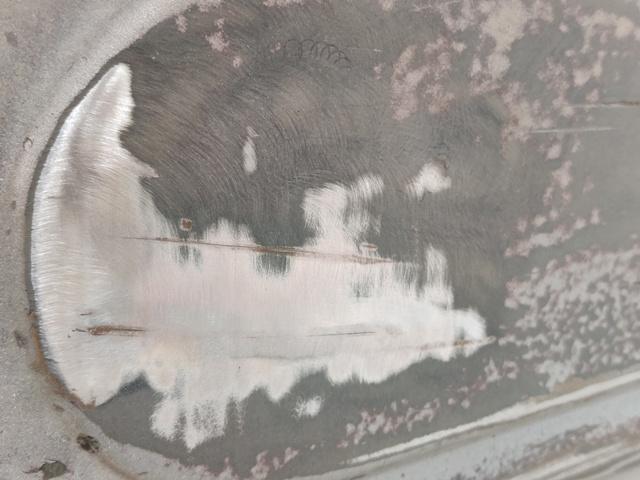
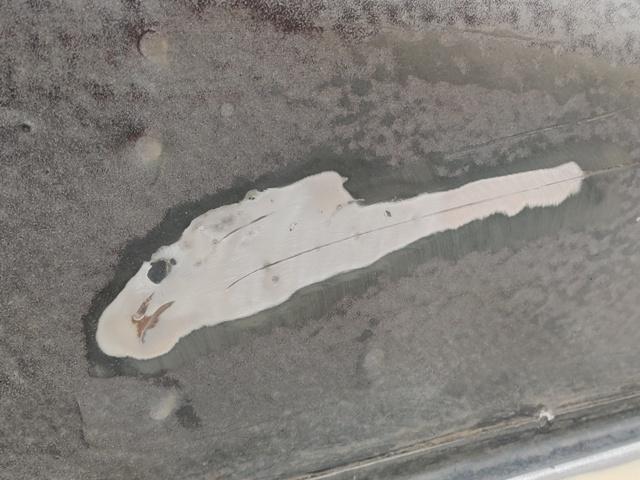
 Finally time to epoxy prime the engine bay. I had a handful of holes that had to be filled. They were extra holes that were drilled in the bay for the A/C that was added to the car in 1971. After filling and grinding, I spot sanded some areas that had a touch of surface rust forming since I sandblasted the bay a long time ago. I taped up all of the plastic coatings on the wire clips. I will be painting them body color as was done by the factory, but no sense building up a layer of epoxy primer on them now. Very minor pitting in the battery tray. I elected not to remove and sand blast between the tray and the inner fender as it think it will last another 50 years after my work here is complete. ? Sand blasting effort was put into reaching all areas, even inside the front lower box section: Glasurit epoxy primer applied: I will be touching up just a couple of areas with bondo and then spraying with high build primer as is on the rest of the car. Before and After Videos:
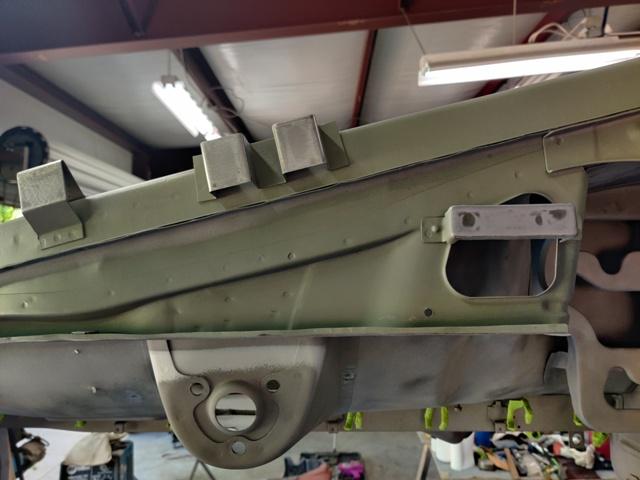


 4 points
 -
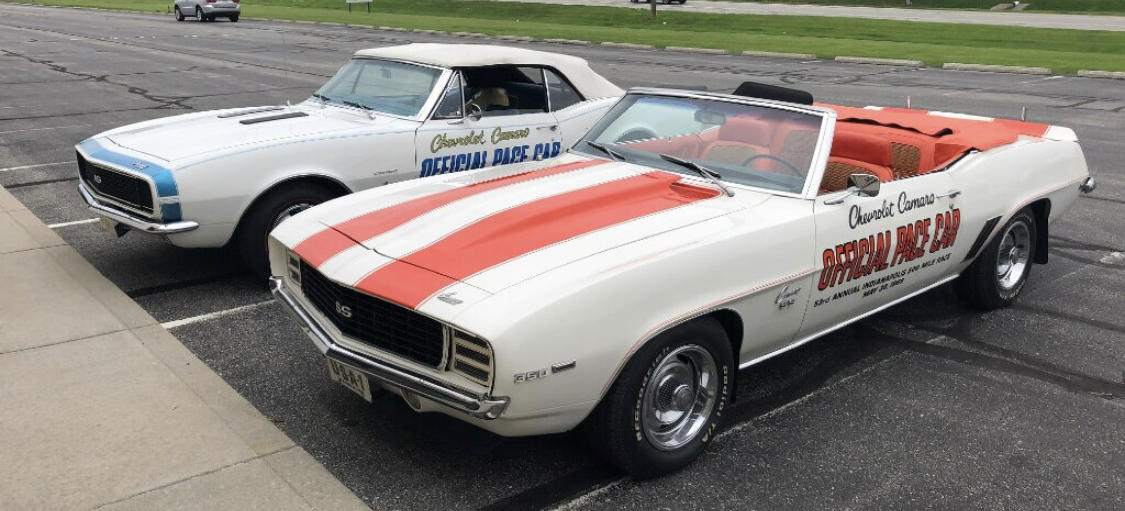
2 pointsI’ve had my ‘69 Z11 pace car over 20 years, one of the first cars I bought as a collector. It has carried celebrities several times in the Indianapolis 500 Festival Parade. Chevy built about 3600 of these replicas. I bought a ‘67 pace car replica (about 200 made) a couple of years ago. Reportedly only one of two made w/factory air.
 2 points
 -
2 pointsThanks, Steve. I have the curse of broad tastes, but the luxury to pursue some of them. The Universal Blue (903) color has always caught my eye. And beyond my high school classmate experience with a ‘72 240Z, one of my high school best friends came home from West Point with a ‘78 280Z. So my inevitable affections for, and eventual acquisition of a Z car was inevitable. I’m here to learn...
 2 points
 -
 2 points@siteunseen i have to 99% agree with you on that one, except I've been moving away from Google and have been using duckduckgo, I find that i can get better results and less advertising than Google, i also notice that the search results tend to be more relevant on duckduckgo. A lot of sites go under "search engine optimization" which in a way rigs content to the top of Googles Search, even if the content is not what you're looking for. What I like about DDG is that ability to get clear search results, and not have a shadow advertising profile built up about me. Sometime i have to use google to get to what i need, in that case i use DDG and add a `!google` to the end of the search, https://duckduckgo.com/bang I attempted to submit a new `bang` called `!czcc` which links to classizcars search index, if it gets approved then we can all use it on duck.com ? I tried to find this thread on duck and google, and was not able to find it.... Hilariously it popped up on the 1st search result on the internal czcc search.2 points
 -
 Not exactly sure what you mean about the notch, but that's what makes it have a front and a back. The notch is not in the middle of the spindle pin. If you put it in wrong, you'll have too much threads sticking out one end and not enough on the other. And yes... You should be able to push the pin (slightly greased) in one side using two fingers until the threads pop out the other side. And then you should be able to use two fingers to pull it all the way through. There should be no wedging at all. The only wedging occurs as a result of the wedge shaped locking pin.2 points
 -
 2 pointsSame here. I had to remove a screwdriver from my keychain although all my keys were sharper. I don't know how the above idiots get away with it. I do worry about their mindset and how many there are.2 points
 -
 2 pointsI wish that they realized how stupid they look. Just a bunch of dumb idiots with guns and masks. Like 12 year olds playing army.2 points
 -
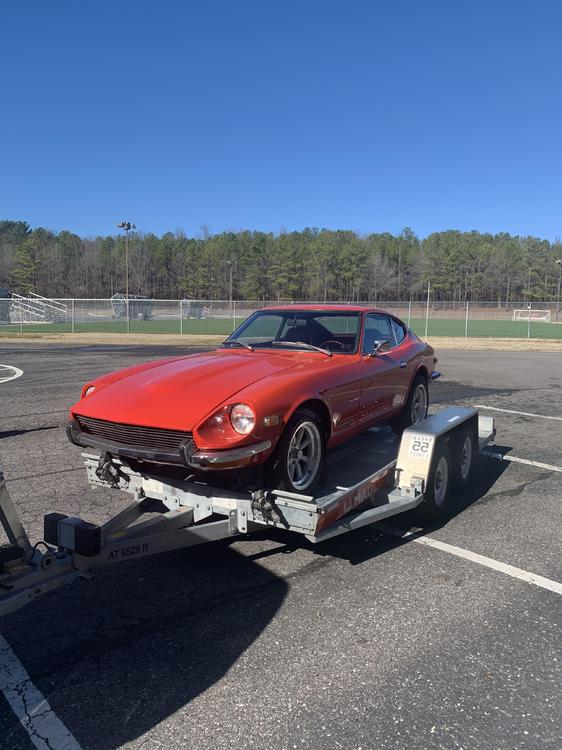
 1 pointFinally getting around to starting a "Build Thread". Background on me...I'm 40 years old and honestly didn't give cars or motoring a minutes thought until about 3 years ago. I never wanted a sports car or cared anything about the performance of whatever I was driving. I do a lot of work at Road Atlanta Race Track in Braselton GA and have for the past 20 years. Around 3 years ago I started getting a campsite and weekend tickets for the Walter Mitty HSR Historic races down at the track because it seemed like something fun that my then 8 year old son would enjoy. The first year he could care less about the cars but enjoyed the camping and food. The 2nd year we camped right beside a gentleman that had a very nice White 240z that was un-restored but in great shape. I stared at that car all weekend and so did my boy. I still didn't know anything about cars, especially old Datsuns but I really did love the look of that car. By the end of that weekend my 9 year old son was reading the race schedule to make sure we didn't miss any action out on the track. Fast forward a couple of years and I have been bitten by the same bug that infected the rest of you guys! I spend most of my free time looking at Datsun parts or tracking auctions on BringATrailer.com for cars that I may or may not even like. What's worse is my now 11 year old son may be crazier than I am. That kid can tell you the make and model of anything on the road today. His favorite show is Top Gear UK and he has his own subscription to Motortrend TV. While eating Thanksgiving dinner this past year with my family in Alabama I mentioned to my cousin who is an engineer at BMW in Birmingham that I would love to find a 240 somewhere to play with. He immediately informed me his boss had one right then for sale. I of course took this as a sign from GOD and told him to stop eating and call his boss and tell him consider it sold. Below is what I bought. It ran great with the exception of a head gasket that was causing a combustion leak. The interior was in very good shape and the car looked pretty nice from a distance. I usually go overboard with any of my hobbies so I quickly decided it needed to look good up close and be as perfect as I can make it. I am learning a lot and this website and forum have been indispensable to me throughout this process. Everyone I have asked questions of here have been extremely helpful and considerate to point me in the right direction. I now have 3 Datsun's in total, 1 was in bad shape and I am using it to cut and weld metal parts for the car below. The other is a 76 280 that is sitting in a shipping container at my shop waiting on its older brother to be complete.


 1 point
 -
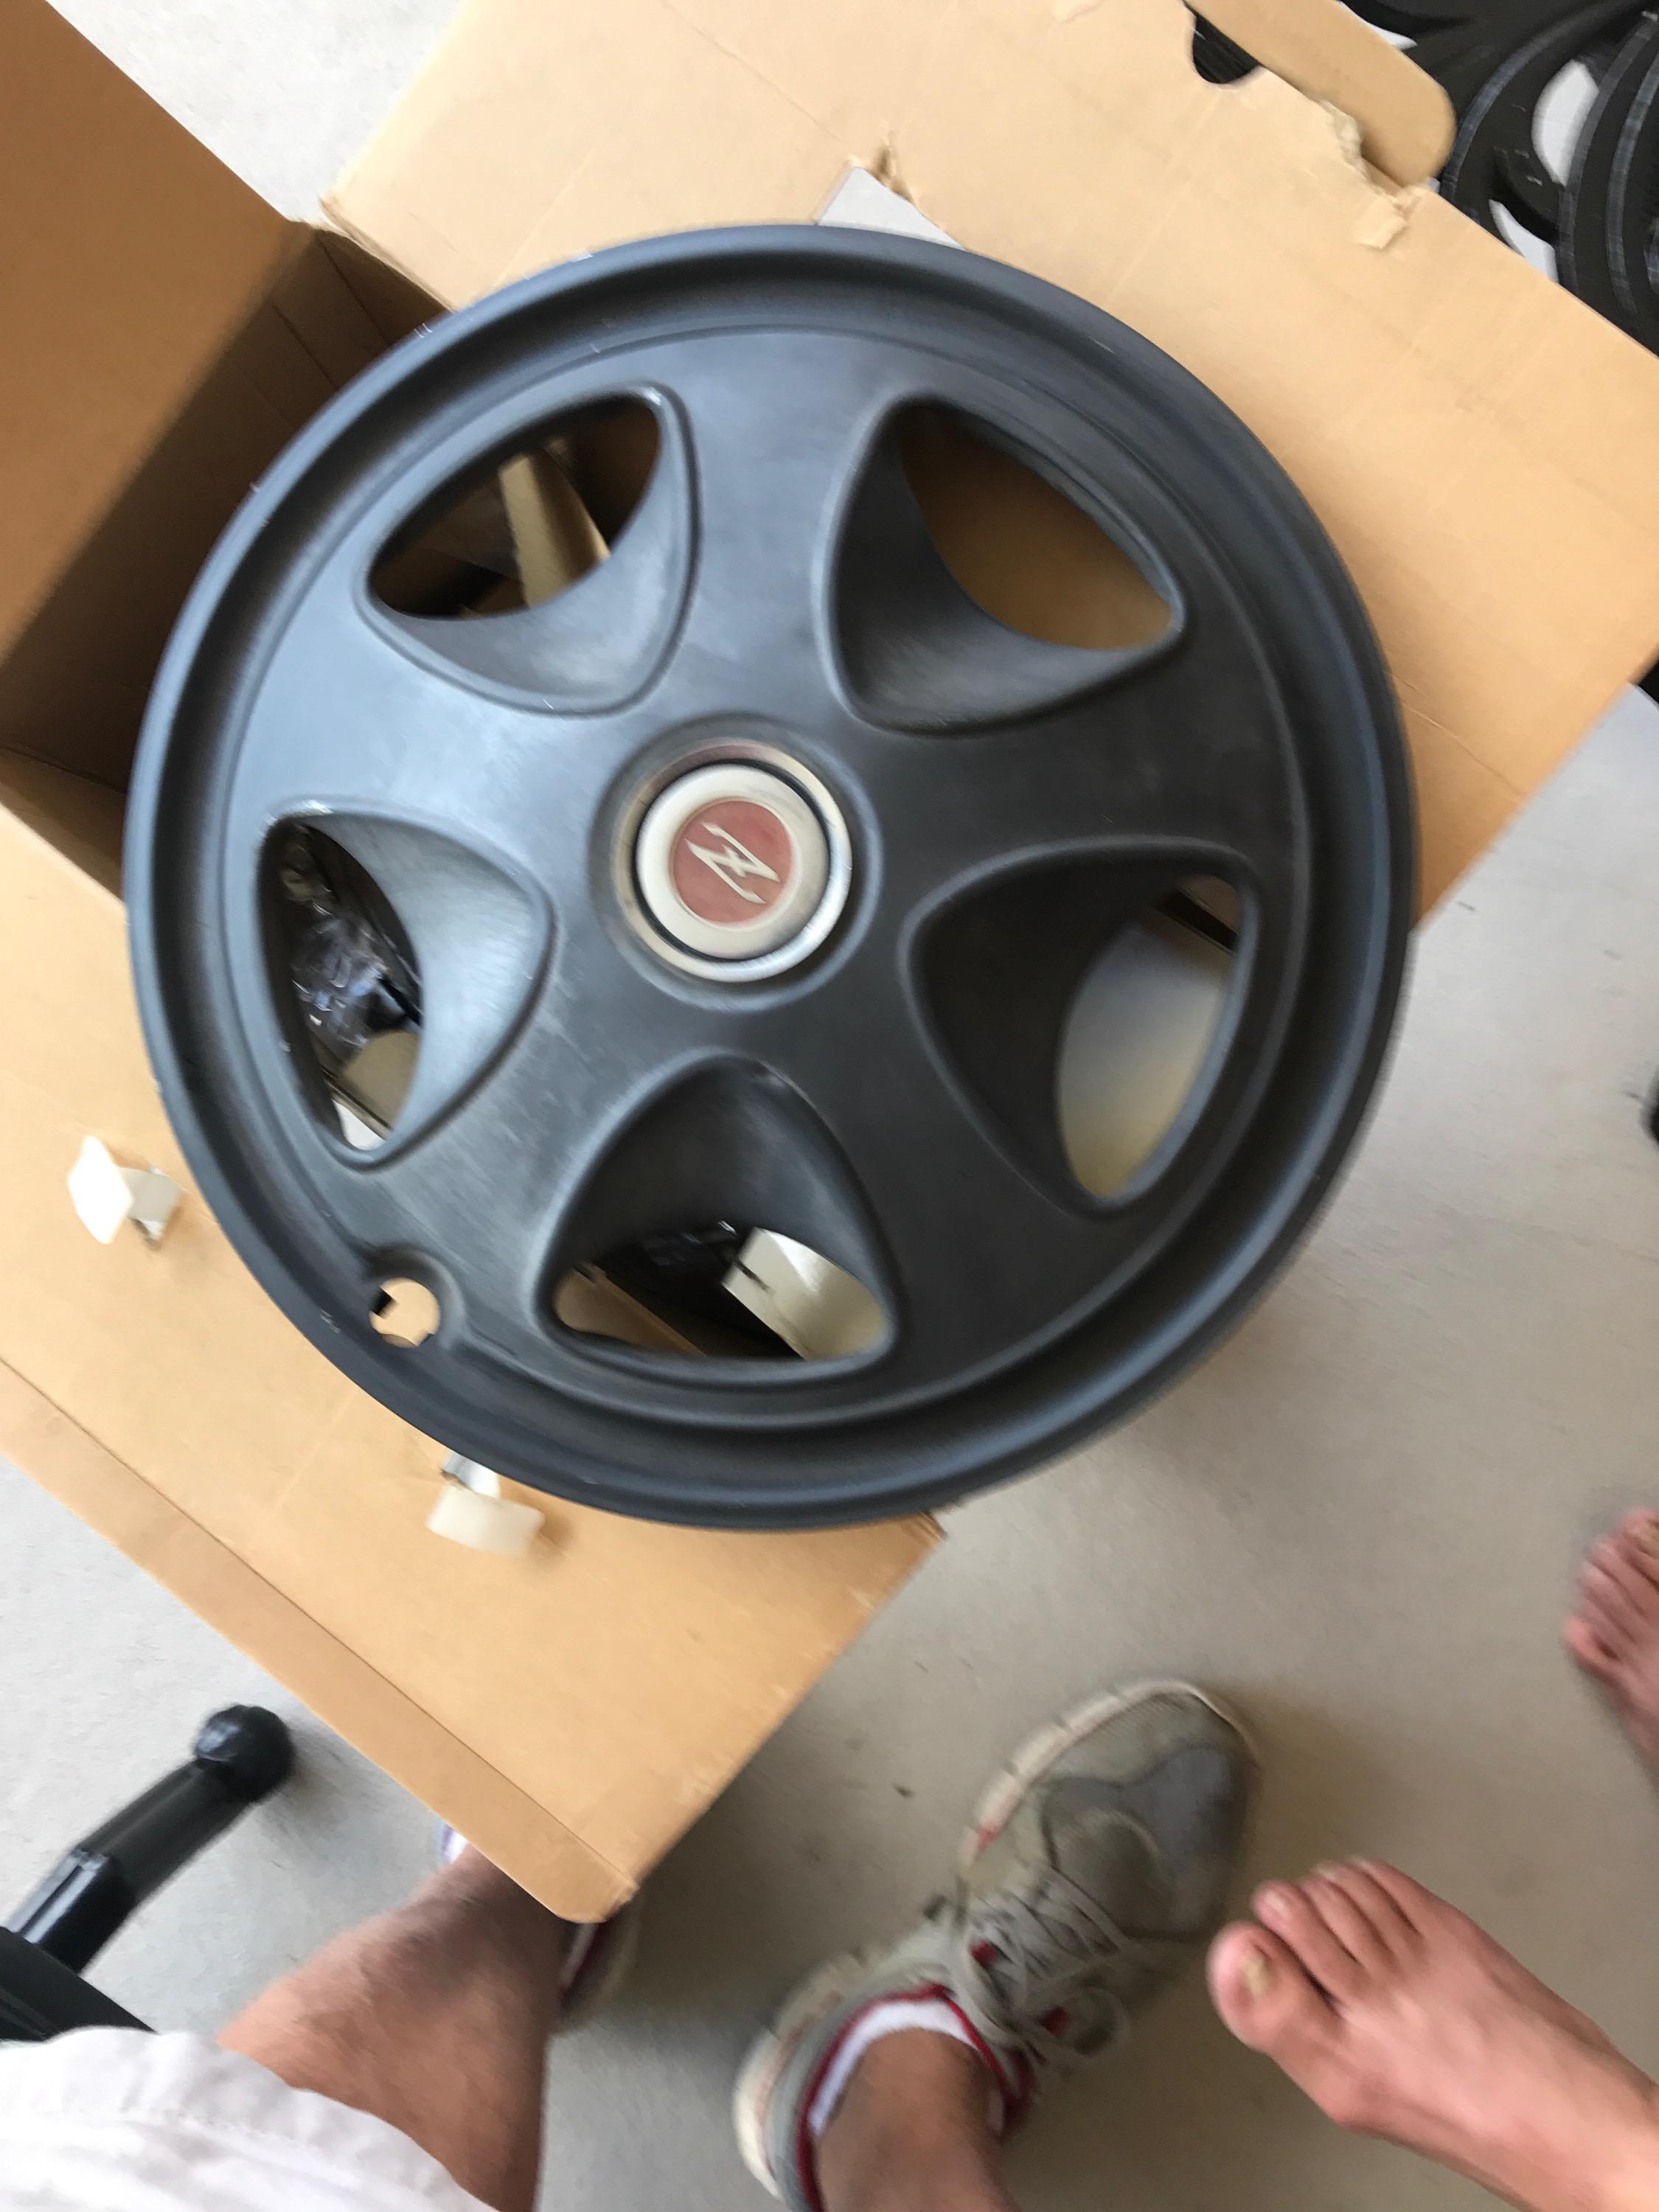
 @lonetreesteve - those look sweet. The 1973 240z I just bought came with some 280z rims. I asked the original owner if he still had the original rims and hubcaps. He found the rims but only 3 hubcaps. See pic. I don't have them in hand yet, but they look all black? Hoping I can pick up a 4th hubcap off eBay.
 1 point
 -
 1 pointInspection lights back from plating, new grommets installed. Next up... final wiring checks and install.
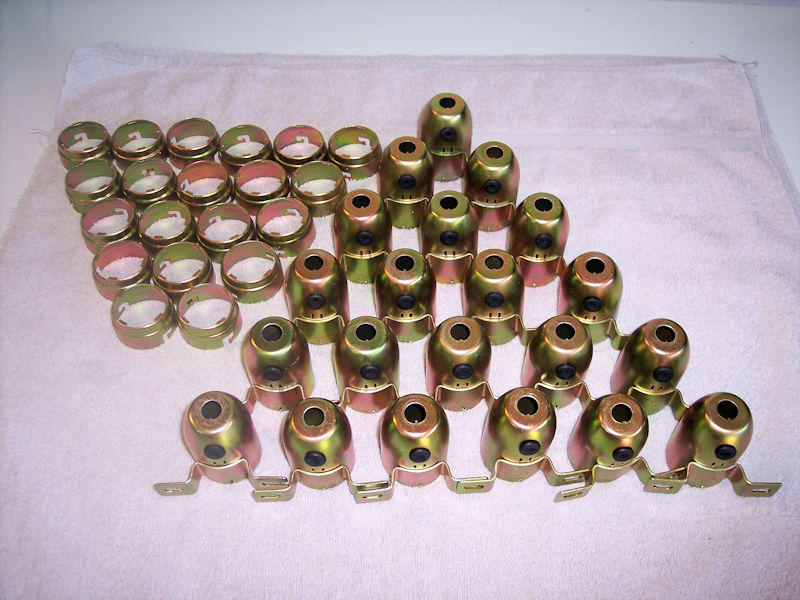 1 point
 -
The same, Steve. The BaT ended w/o hitting reserve. I was just shy. We agreed on a number, and I bought the car. The seller is raising two little kids right now, and has pitched me hard to buy the car back when they’re older. He’s been great to deal with, so when my time with the Z has ended, he gets first shot.1 point
-
1 pointMore Red Paint! Working on cleaning up the wiring harness stuff now. Waiting on the Firewall grommet to get here so I can finish that up. For anyone who doesn't already know a company called Vintage Connections sells kits with all the old school connectors. I bought a crimper and 2 assortments of connectors from them and I haven't ran across anything yet that didn't come in these kits.

 1 point
 -
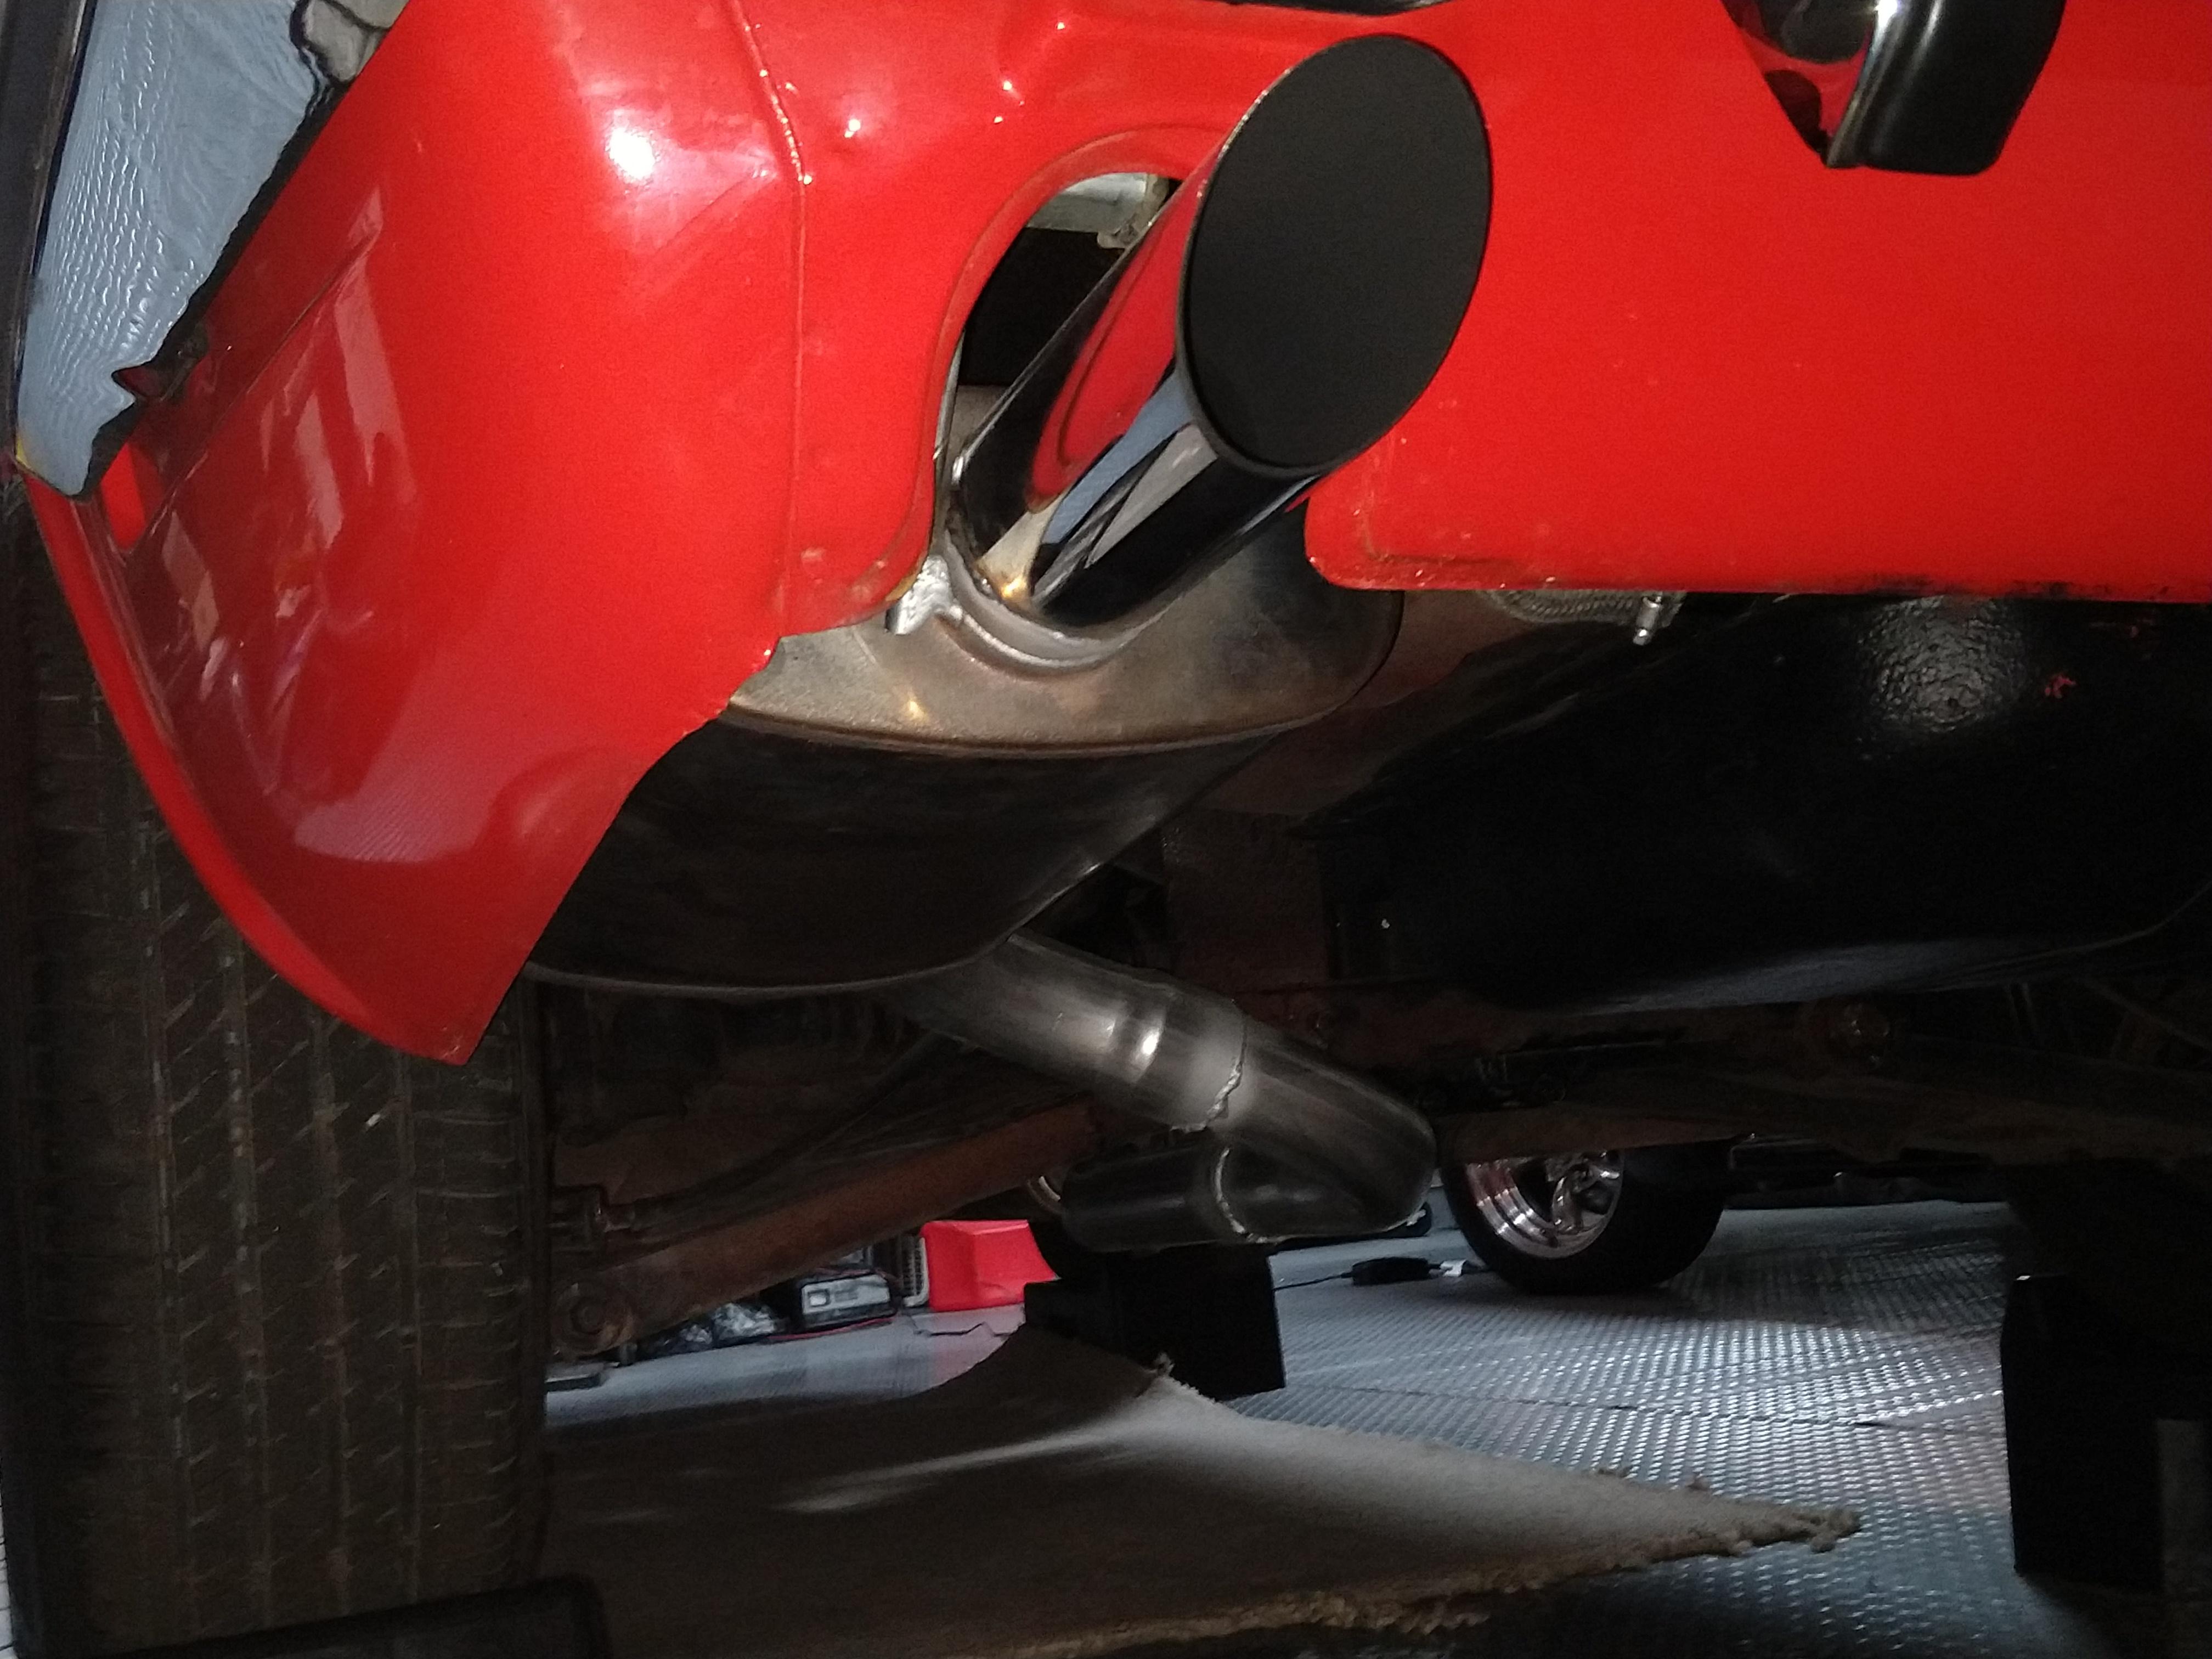
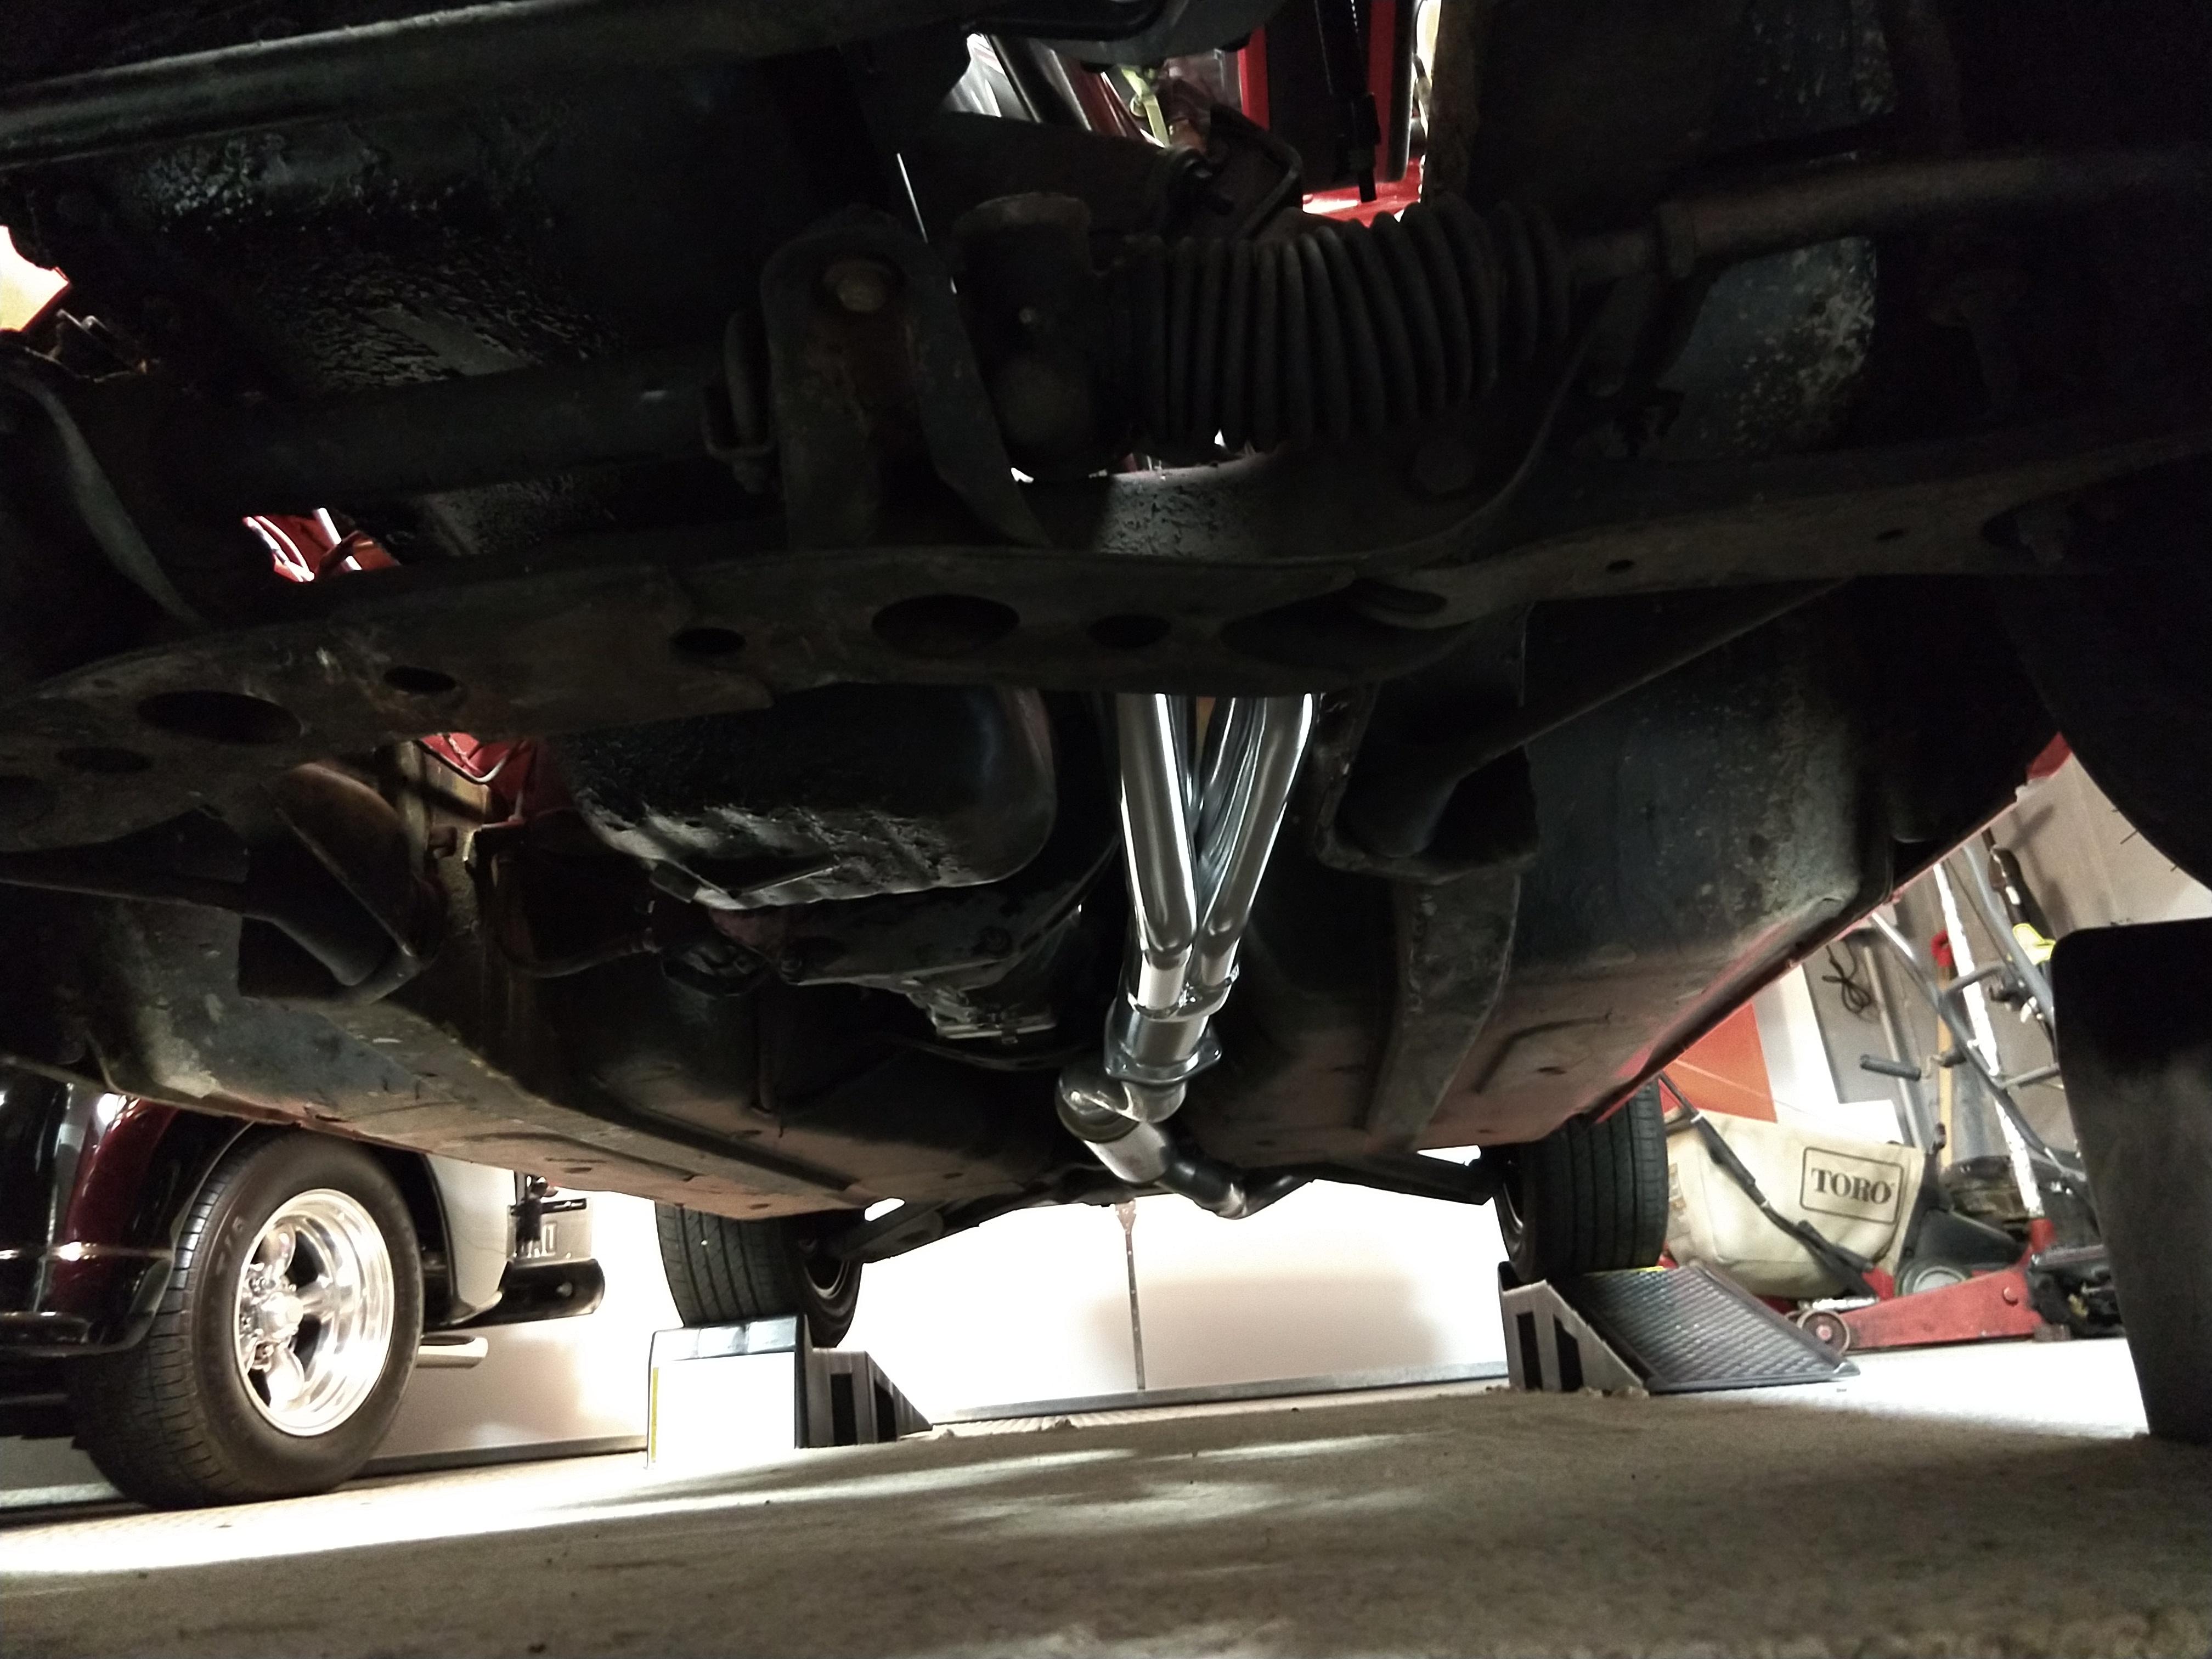
 1 pointI went with the 6 to 1 ceramic coated headers from MSA and then just went to an exhaust shop and had Magnaflow with 2 1/2" pipe all the way back. Used this resonator and muffler. Very pleased with the way it turned out, both fit and sound! Not too loud and no drone while cruising. A question that I have is on the MSA catalog for their premium exhaust they talk about installing the muffler at an angle? Mine is in flat and I really like the way that it's tucked up out of site. I have zero exhaust smell in the cabin either with closed or open windows. Does anyone know why MSA says to angle the muffler?
 1 point
 -
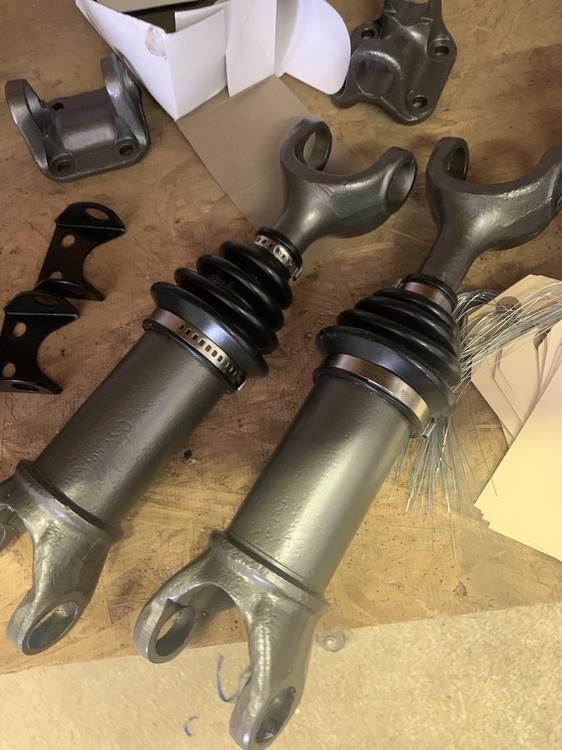
1 pointWas going to go black for all the shafts but I really liked Motorman's cast iron color from his thread so I copied that the best I could. Left the driveshaft chassis black
 1 point
 -
1 pointI drove a '73 with flat tops for about 20 years until it rusted to death. I found the flat tops to be very reliable and required little to no attention. Once tuned they will just keep going.1 point
-
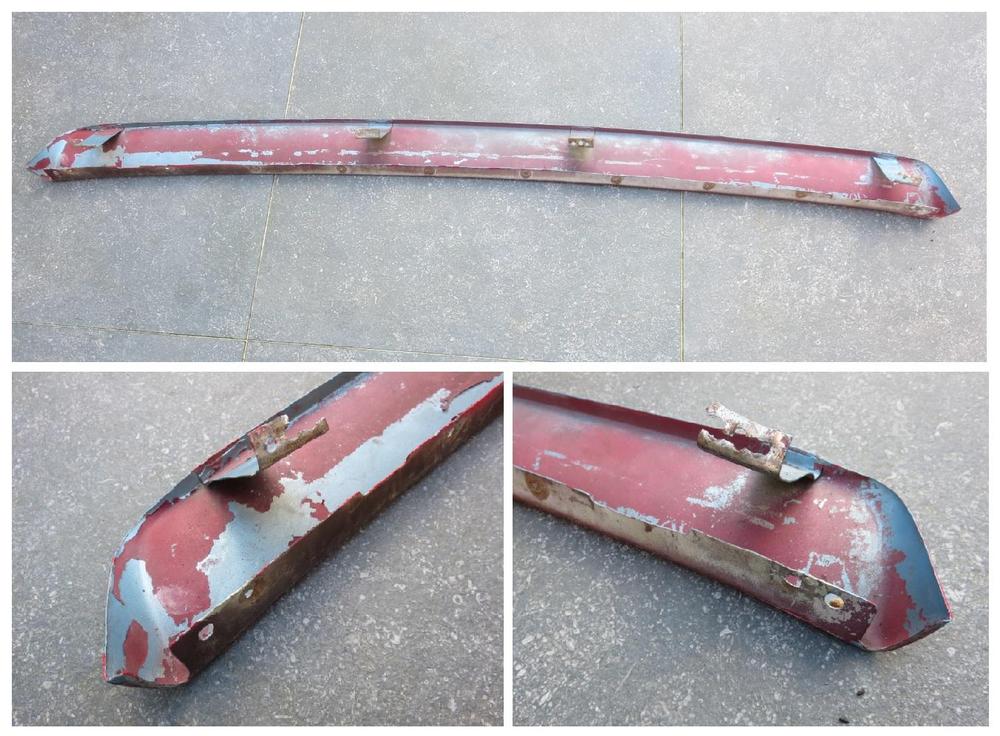
 1 pointThe way I removed mine. First remove bumper. I then drilled out the spotwelds on the four supports with a spotweld cutter. That made it possible to lift up the shield enough, it will deform a little and the drill out all the spotwelds along the top lip. You can see the holes I drilled in mine in the photos above. The valance panal has dimples (round sections that sticks out about 1 mm) where each spotweld is located. You will need to do some panel work to remove them or leave them, but they will be visable even with a 240Z bumper. I see if I have a photo of what I mean.
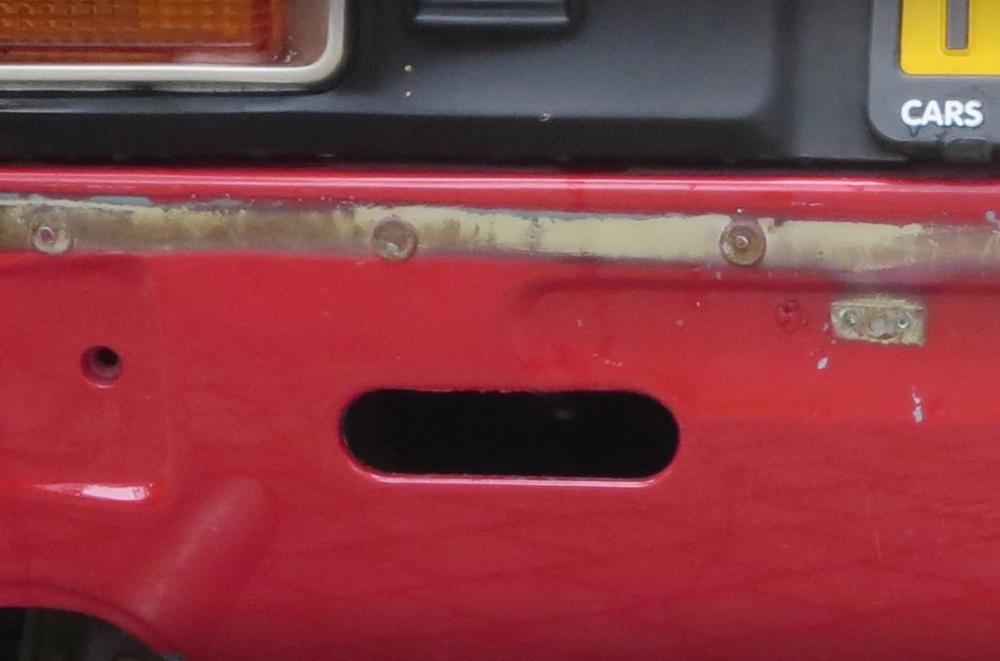 1 point
 -
 1 pointGotcha, I didn't see the sun roof and other mods, as long as the paint job is done well and isn't too outrageous it shouldn't affect the valve much at all.1 point
 -
 1 pointIf your goal is to be true to originality, option 1 is the way to go. A long time member who lives close to me spent the time about 3 years ago restoring and sorting a set of flat tops for his 73. He has had no issues since as far as I know and has no regrets on the move. Maybe he will chime in @Zup Option 2 is of course the easy solution and can be done for much less is you source a roundtop set for Ztherepy to rebuild. Option 3 will not get much support from members here. The side draft webers are a totally different story.1 point
 -
 1 pointYou won't easily find complete sets of them. That is part of why they are expensive when you do. Eric Neyerlin's site is the only place I have seen them listed and offered for sale and they are a bit pricey at a grand plus shipping. http://zparts.com/index.php/shop/wheel-showcase-1/ Enough about the wheels------------ Regarding your bumper conversion, Eurodat provided sage advice in his reply. Keep all the parts and use care as they are removed. You might also reach out to s30driver here on the forums. Jim recently completed the conversion on a very nice 280z and can give you much information on the finer points of the procedure and provide cautions about what difficulties to expect. Best of luck in your endeavors!1 point
 -
One more thing... I’m the third owner of this Z since new. The original owner had it from 1971-2008. Lovingly maintained.1 point
-
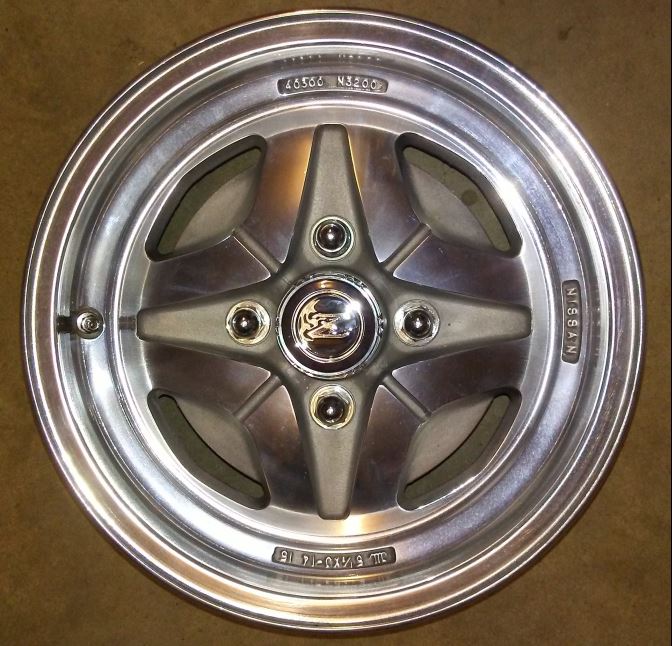
1 pointGood to excellent condition examples of those wheels are quite rare and will involve serious coin to knowledgeable sellers and buyers. Good to excellent condition centercaps are even rarer. Keep them! Consider finding a set of caps that will fit for daily use and preserve your originals for special occasions. Back in March of 2018 I posted this regarding these wheels (although I have a set of the original caps, the caps shown below are not correct for the wheel but I like the fit of them more): "Being a "4 spoke 'old school' fool" for wheels---- I had been intrigued for some time by this statement from Eric Neyerlin on his website: (www.zparts.com) "This wheel (pn 40303-N3200) is the only OEM wheel that Nissan specifically produced for the 70-78 240Z-260Z-280Z (S30) models world wide. Nissan parts catalog shows a 4/73 production date for this design. Though common to most S30 models sold in Australia, Canada? and Europe this wheel was not offered stock on any US imported Z cars except for one year on the 1977 Black Pearl special edition model. Now, 46 years after the 240Z models were first introduction, this rare factory wheel is increasingly regarded as the the only true, period correct, vintage factory aluminum wheel to put on a meticulously restored S30 model, apart from original, model year correct, steel wheels and hub caps common to US models." Well---OK--- I'm in------- This is one of the set of 6 that I recently purchased. All of the wheels are in truly incredible condition, extremely clean inside and out and 4 of them are polished very well. I had a NOS set of center caps on hand from years ago that were destined for use on a set of "iron cross" wheels I owned at the time. The caps fit perfectly on these wheels and I've always liked the factory Nissan "acorn" style lug nuts with the captured washer. A substantial nut with positive fitment between the wheel and the lug. If the stated original production date of 4/73 is correct, then it is entirely conceivable that my 6/73 240Z could correctly have worn these in that same year. As period correct as I can get for this car and I don't have to risk losing my hubcaps-----been there and done that." And also----here is an excerpt from www.zhome.com : Pictured below: A Japanese dealer sales flyer that describes the optional aluminum road wheel, that was available on the 1978 Z. Followed by a Japanese to English translation. Contributed by: Andrew Streckfuss, IZCC #6438. . Translation: Although Z did not attain its respectable status only by the equipment, no other automobile is furnished as complete as Z. * Michelin tire and aluminum wheel Z is not the type of automobile to speed like a maniac; while it normally travels gently and straightforward, it has the ability to quickly dodge any unexpected change in a situation - for example, when a child suddenly jumps on to a street. This swift footwork, which guarantees Z's safety, is, of course, due to the excellent balance and superiority of its total facility including ideal and sharp sterling features. Yet, in order to perfectly exhibit such distinguished performance security, Z's basis is entirely guarded with radial tires. Especially, Z-T employs the Michelin steel radial tires and 5 1/2 J-14 aluminum wheel. (Z-L adopts 195/70HR-14 steel, and Z wears 175SR14 steel.) - - - End Translation - -
 1 point
 -
 site: I think we're all with you!1 point
 -
 1 pointWe can't enter any municipal building with a pocket knife in my city. We go through metal detectors. How in the hell did these idiots get away with this? They'd be shot dead here entering with guns and mask covering their faces.
 1 point
 -
 Ok, Got one of those Diablo blades for the sawzal, and it was off in 10 minutes. I spent way to much time hammering and soaking..... Thanks for the advice. Now I can proceed.......1 point
 -
 Have you given thought to installing the mechanical pump without the spacer - just to see if that makes a difference?1 point
 -
1 pointDito with the welcome. Looks like a really nice find. My advice on the bumper swap. Be carefull and take your time removing the rear bumper gap shield. It is spot welded to the body and easy to destroy while removing it. If you decide later to restore it to original, you will need it. Mine is stored away for one of those "you never know" moments. 280Z's aren't the collectors items the 240Z's are, but as time goes on you never know. The collectability factor will depend on its originality.
 1 point
 -
1 pointWelcome to the forum. All the paper work and you are the second owner? That's quite the find you have there, painting it the original silver will not only preserve it's originality but also it's resale value for some time in the distant future. The change over to 240 bumpers is pretty easy now and reversible. I'm sure you will enjoy it for decades to come but it's always worth considering the next owner. That is a real gem. What are you're plans, any pics of the engine bay or suspension you can post?1 point
-
 1 pointthe check points gap thing is an aside. I.e. check the points gap before you try to set the timing. it's a pre-requisite of setting the timing. to set the points gap, you rotate the distributor until the points are right on top of one of the 6 lobes, the most open point.1 point
 -
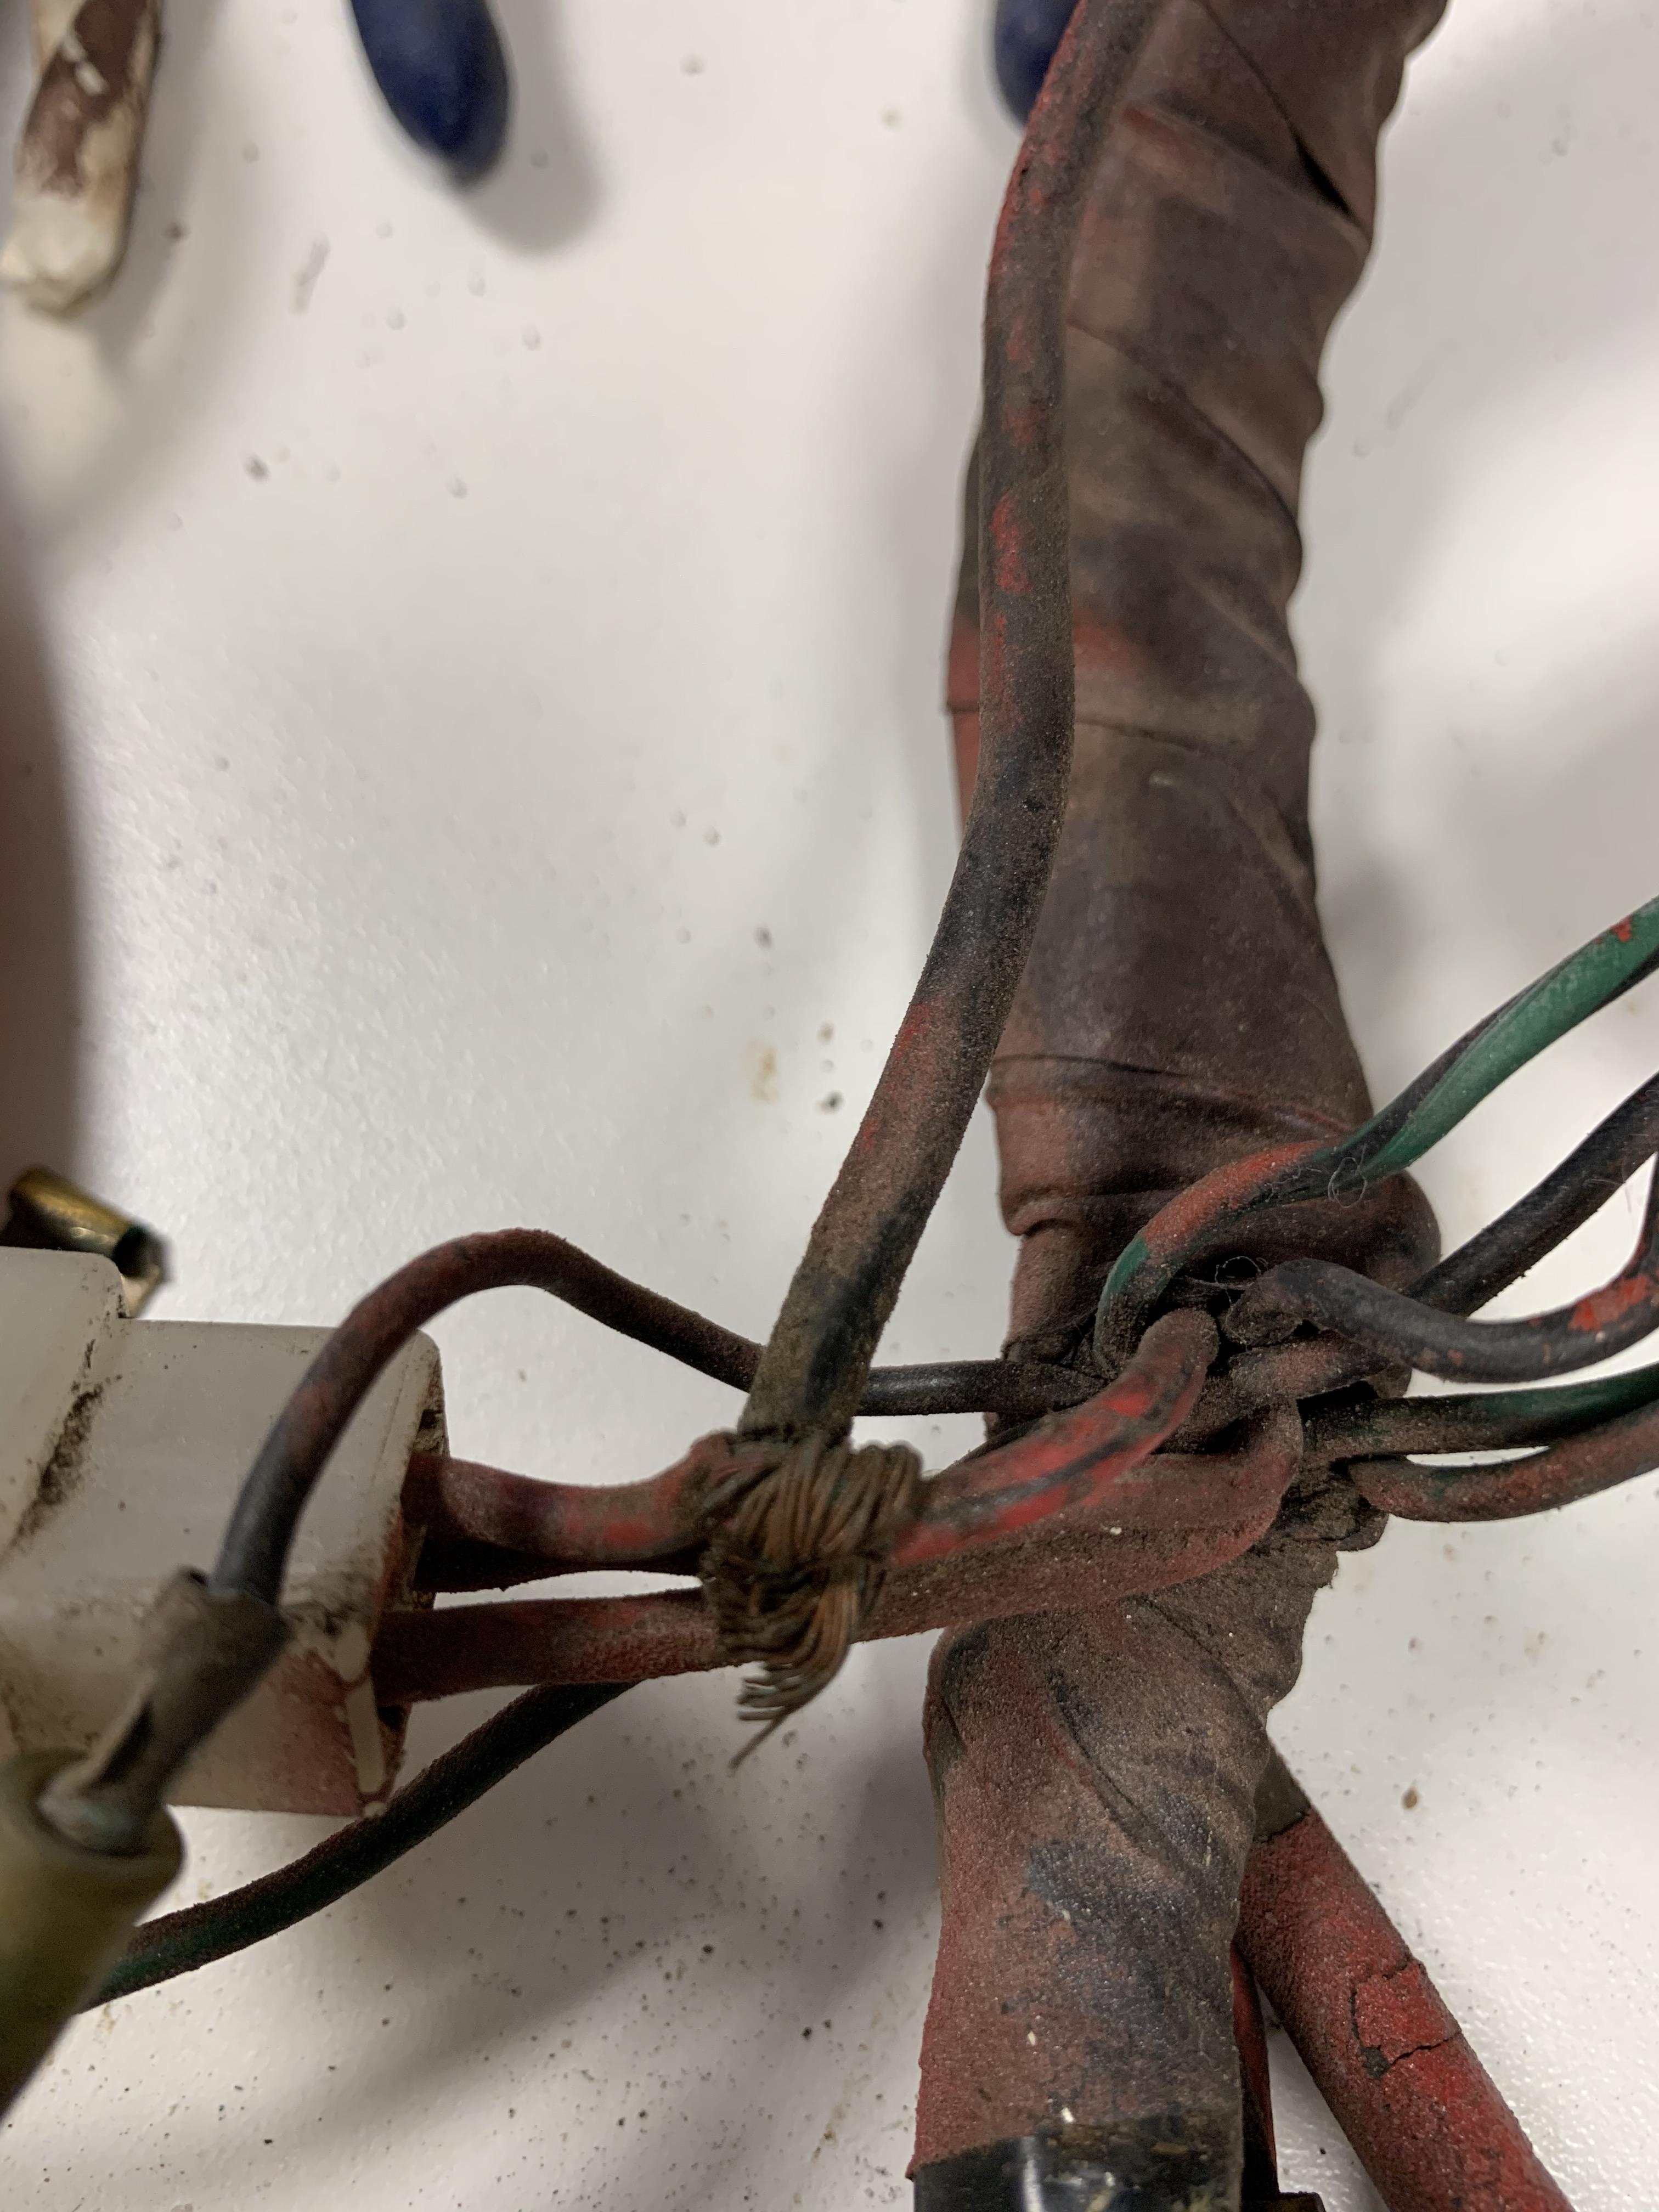
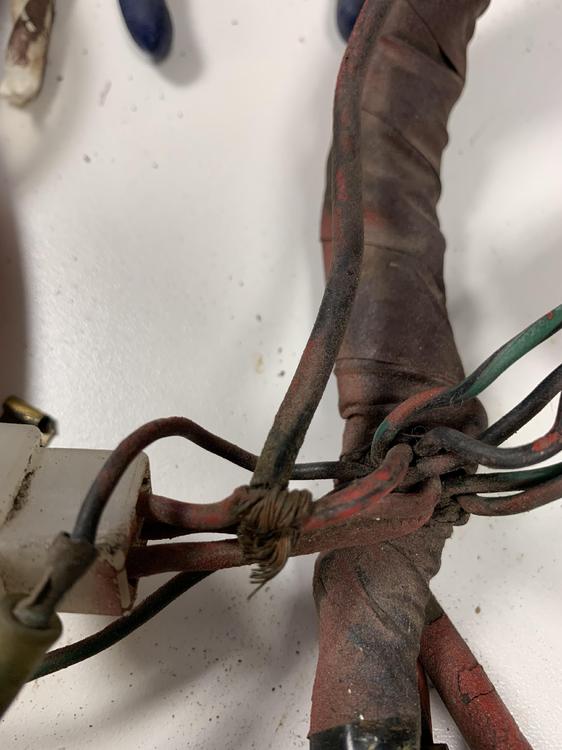
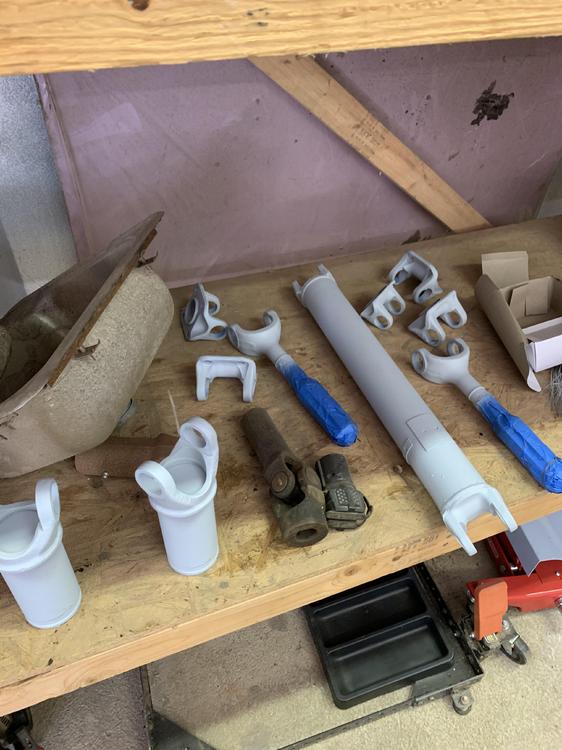
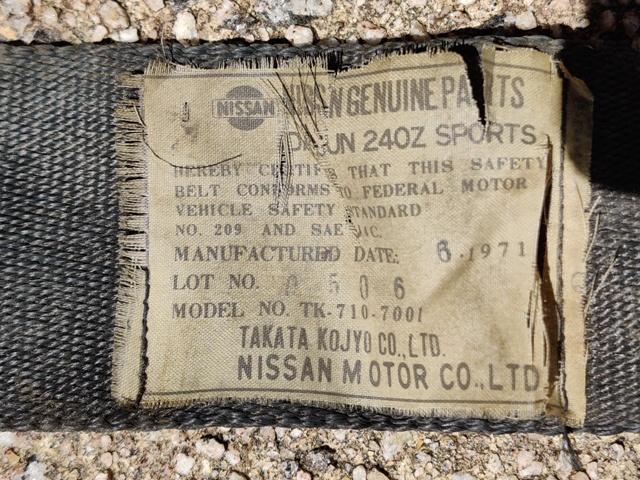
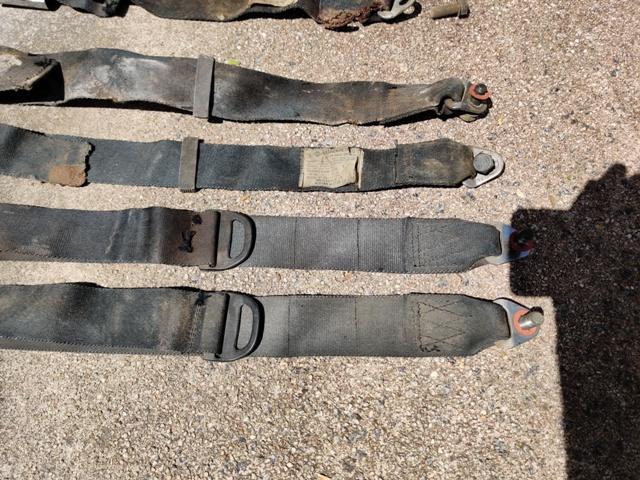
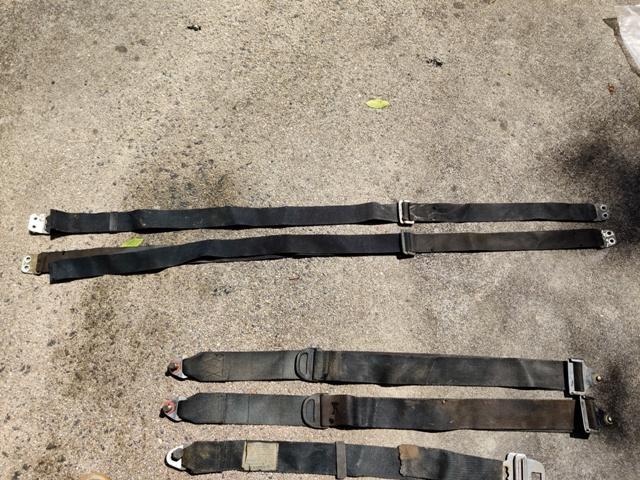
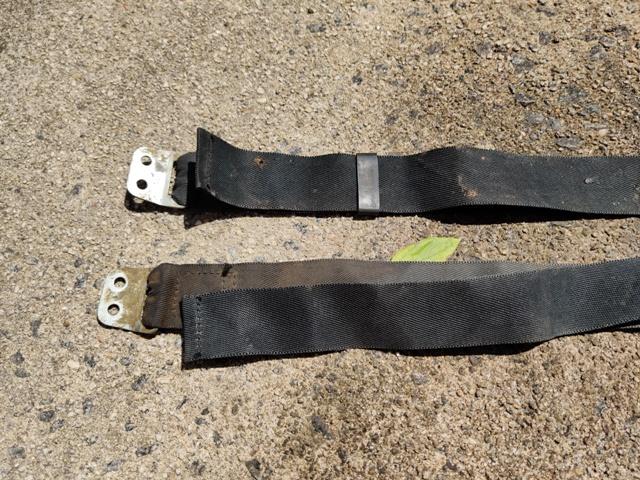
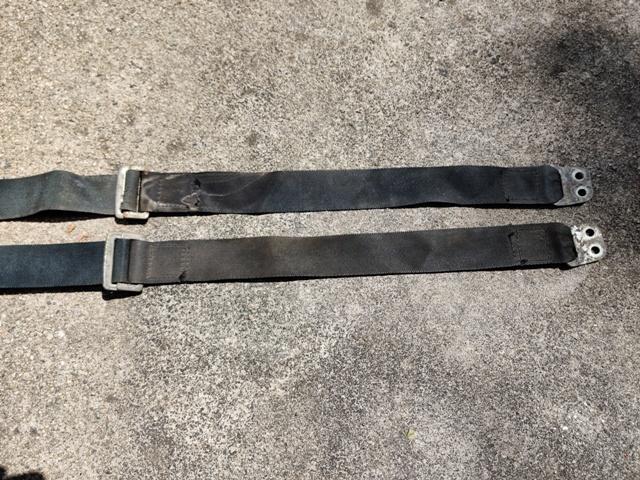
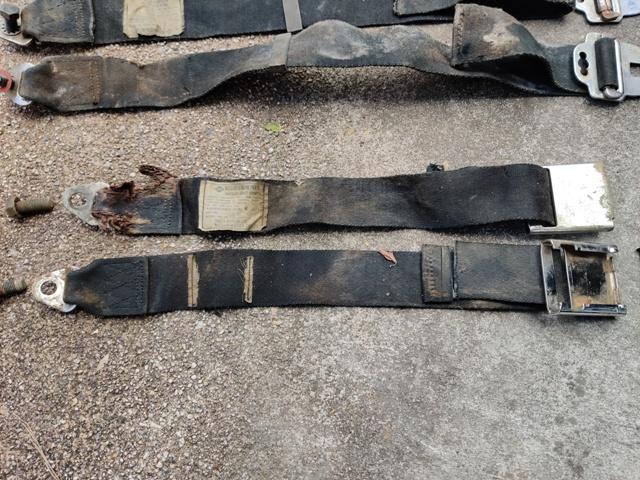
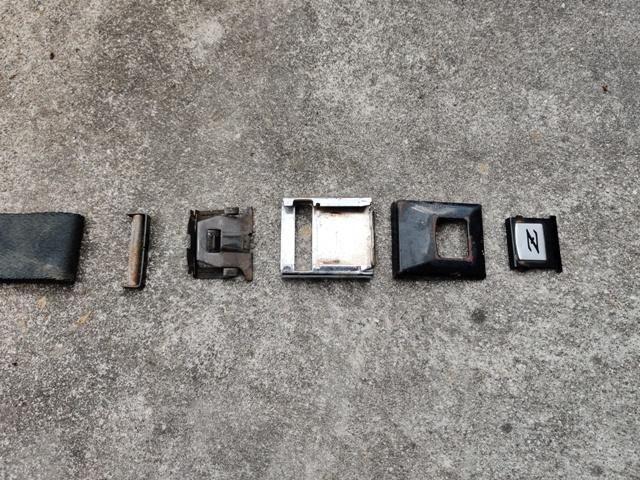
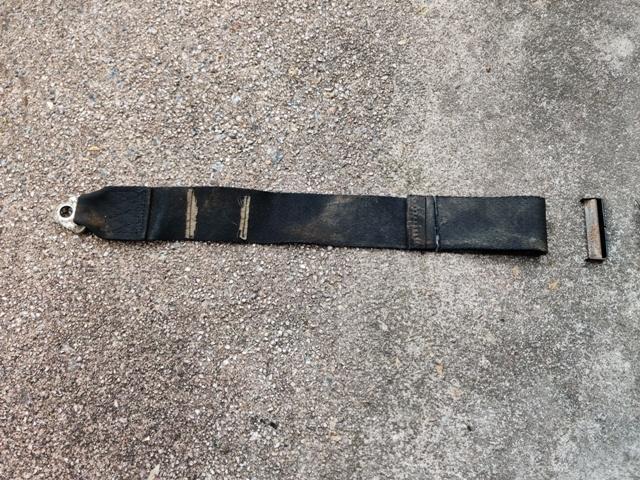
I got the seat belts out and took some pics. These things are in rough shape. I'd like to get them restored. I came across another ClassicZcar forum thread in which a member had his 1972 belts (with retractors) rebuilt by a company called Snake Oyl, but it was like $750. ? I'm wondering about alternatives. For example, I might be able to send off the chrome parts to be replated... buy some seat belt webbing , or buy some late model seat belts from a salvage yard and reuse the webbing, refinish the black painted parts myself, etc. Pretty sure that an industrial type sewing machine would be needed. It took me a while, but I figured out how to get the buckle apart. Shoulder straps are missing plastic end caps (first pic). Lot 0506 - 6/1971: Luggage straps are in need of refreshing also (second and third pics):

 1 point
 -
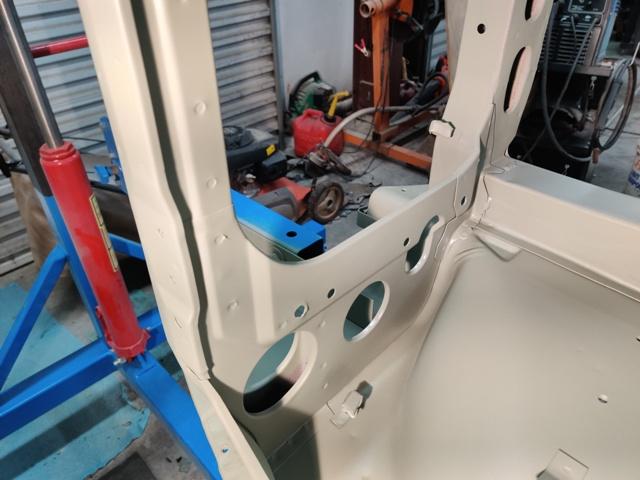
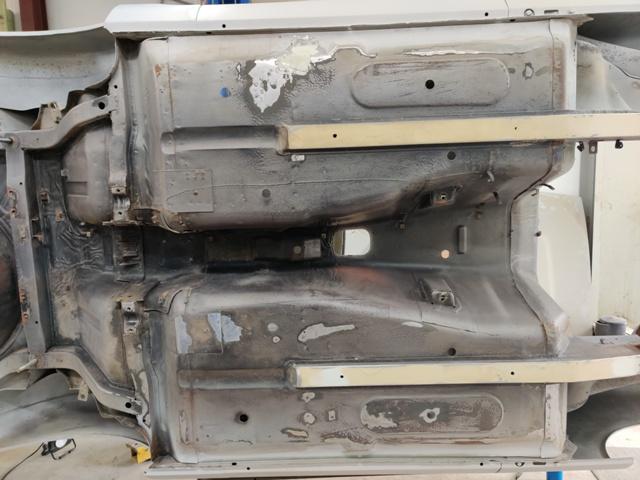
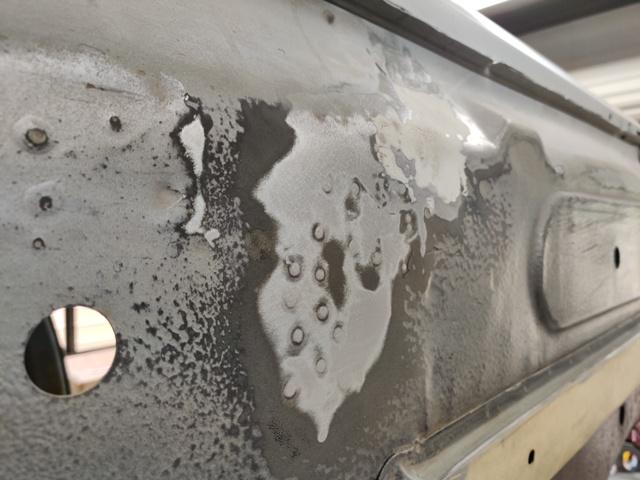
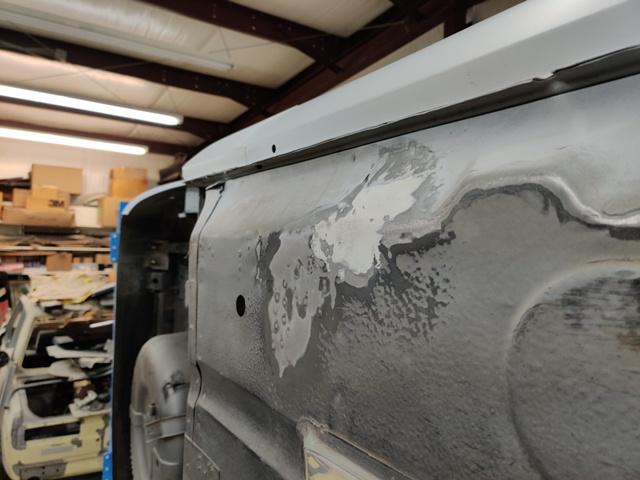
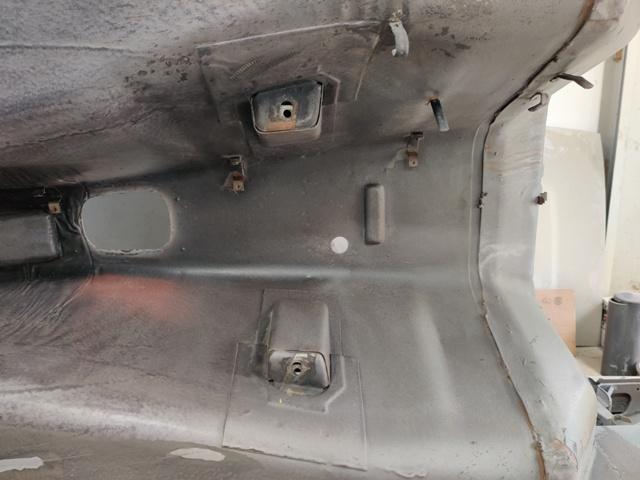
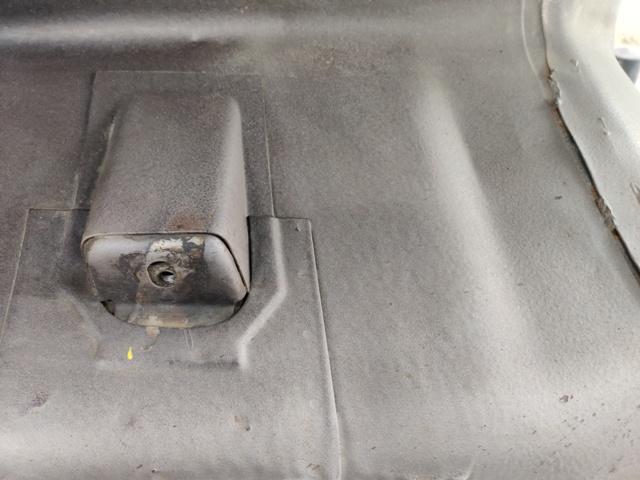
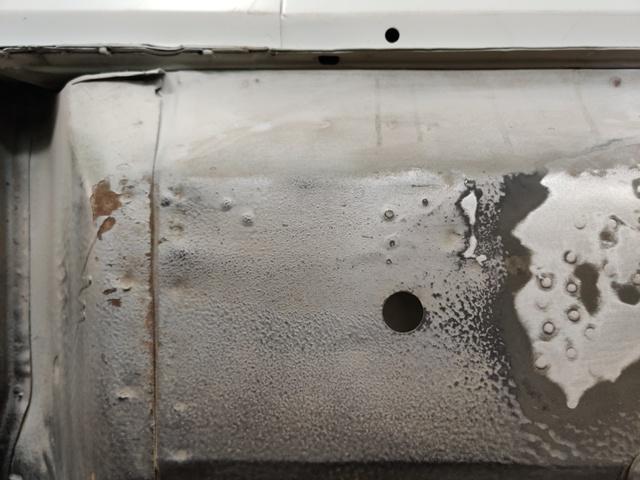
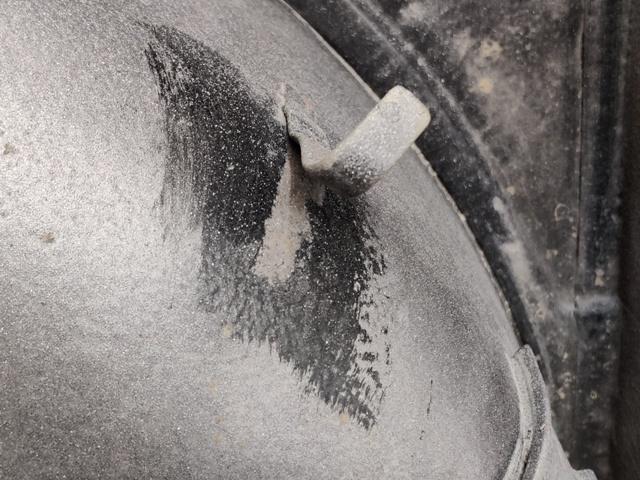
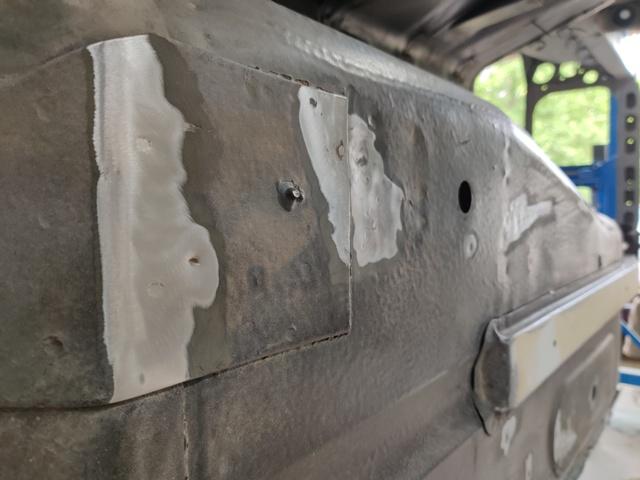
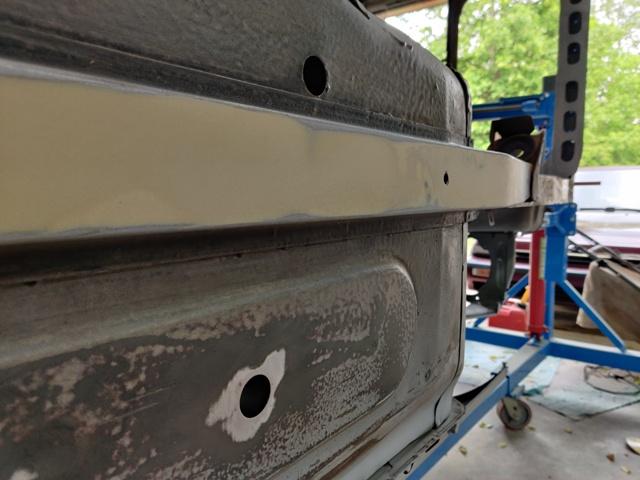
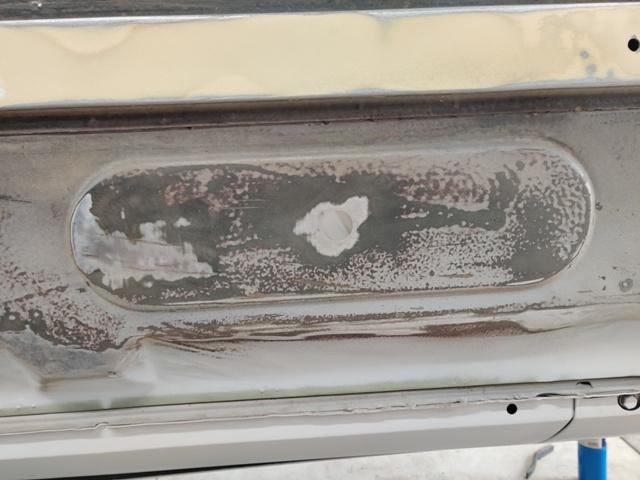
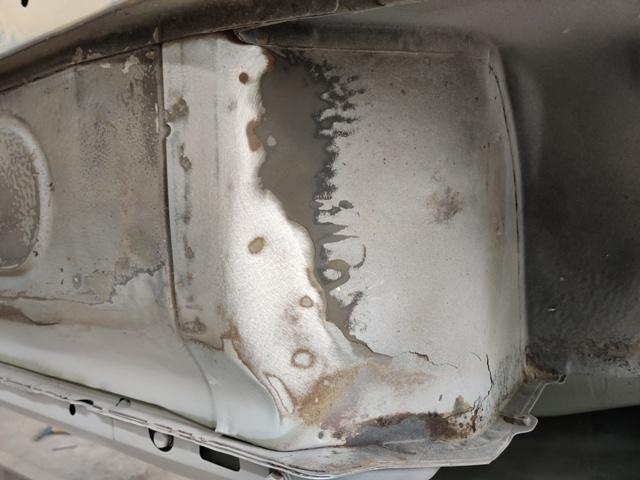
For the work today, I transitioned to the bottom of the car again. I spent a good bit of time cleaning the floor and tunnel with Purple Power. The inside of the tunnel where the back of the transmission sits was coated with grease and dirt which had petrified. Fine steel wool, brass brushes, a scraper and rags were employed. Interestingly, you can see how the car had a very large amount of over spray from the factory on the bottom. Impact areas have required attention. I have been using hammer and dolly, and other tools to straighten the metal. In some places, I have had to use the stud welder (in heat shrinking mode) to shrink the metal. This removes "oil canning" areas that have stretched and been worked. Another observation of note: the factory undercoating, which is hard as a brick by the way, was applied on the bare uni-body. You can see where I sanded through it in the impact areas, and there is no primer underneath. So, the floor was sprayed first, then the car was primed with red primer, then grey primer. Apparently, they somehow protected the coating on the floor from the primer over spray, as there is none of that visible on the floor. But when the car was painted silver, the bottom of the car was fully exposed. The over spray when practically everywhere. Additionally, the inside of the front and rear fender wells were intentionally painted with silver. Cleaning up nicely. Any areas where impacts distorted the sheet metal are being straightened: Third pic above and first below are of a spot that took a pretty sharp impact. Lots of work has been done here to straighten and shrink the metal. Third pic shows well the over spray and texture: Still have a bit of work to do to fix that floor that was welded a bit out of alignment at the factory (first pic - top left corner). Second pic shows an impact that needs to be straighted (right side of pic). Third pic, I wonder why they used a brush and put black paint there? Any chipped areas a being sanded down - feather edged in prep for a touch of primer and the new coat of "bed liner": Note the amount of silver paint (second pic). Starting to feather driver side floor front. A couple of dings need tapping out (third pic). And looking here, it is obvious that the bottom of the rocker has holes from the factory which let water in as you drive. I will be sealing most of these up. with sealer. First pic is the front, driver side, second pic is the rear, driver side. The small round holes in the rear are from me drilling out the spot welds when I did the sheet metal repairs. I have been researching undercoats and truck bed coatings from time to time for months. I would like to find something that looks like the factory coating on the bottom of the car. I have watched a lot of Youtube videos and have a game plan. I plan to use Raptor liner. I will buy a $20 HVLP gun from Harbor Freight, and drill the hole in the cap to 2.0 mm (increase from 1.4 mm) and then experiment with thinner and pressure to try to get a finish which looks like the factory stuff in the pics.


 1 point