


Leaderboard
-

JLPurcell
Free Member4Points1,670Posts -

siteunseen
Free Member3Points15,111Posts -
Mark Maras
Free Member3Points3,718Posts -
nix240z
Free Member3Points468Posts


Popular Content
Showing content with the highest reputation on 05/08/2020 in all areas
-
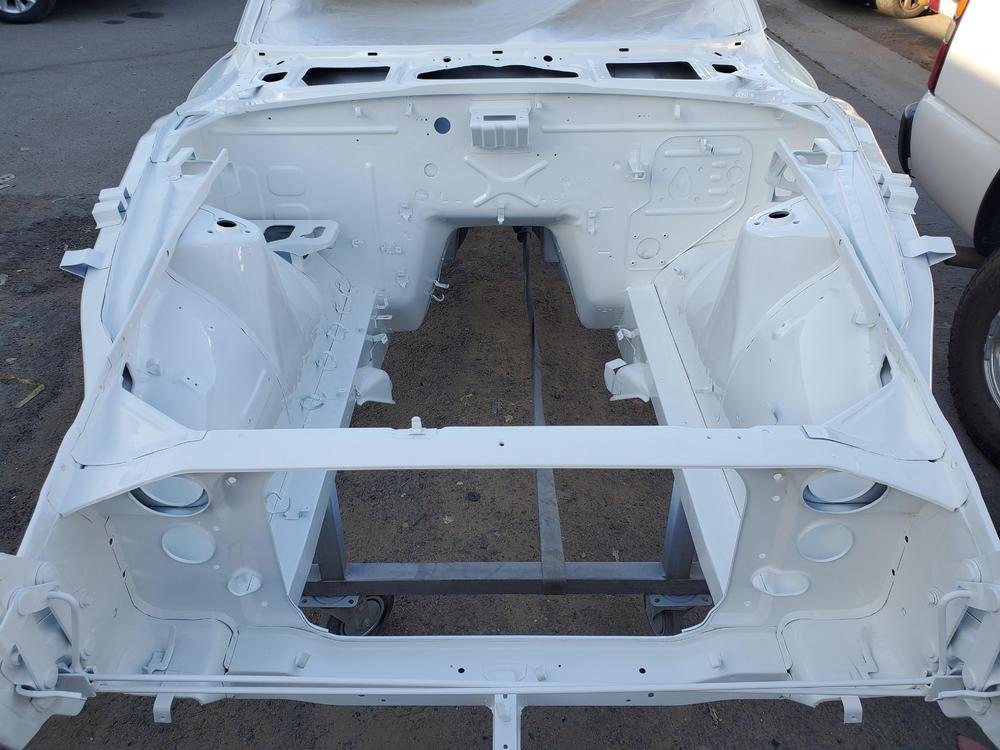
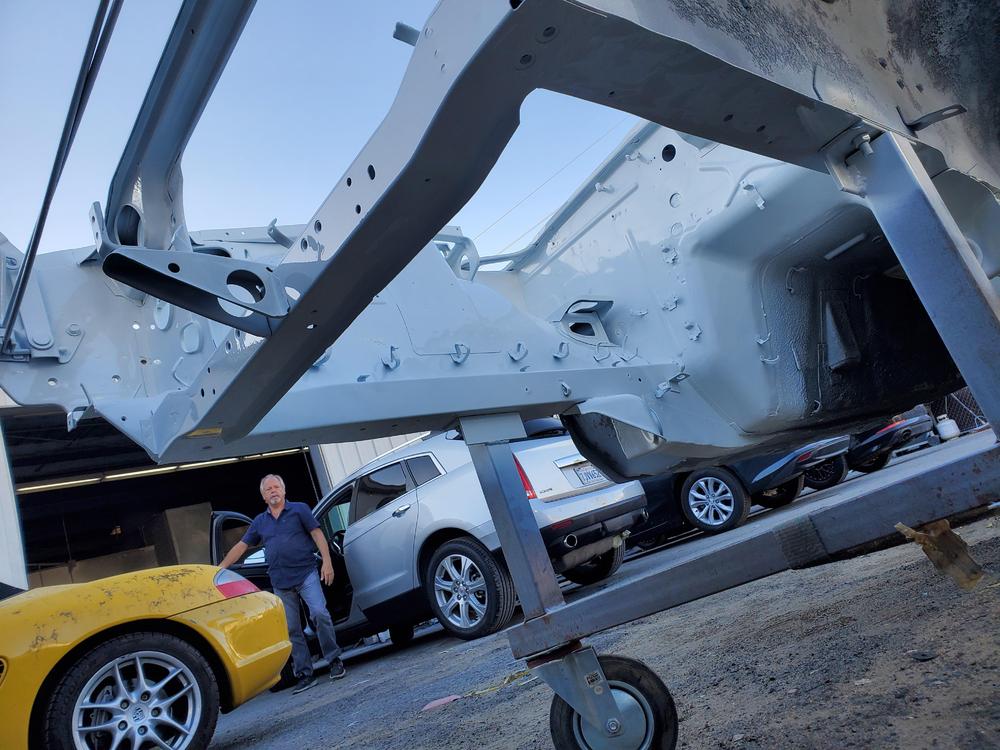
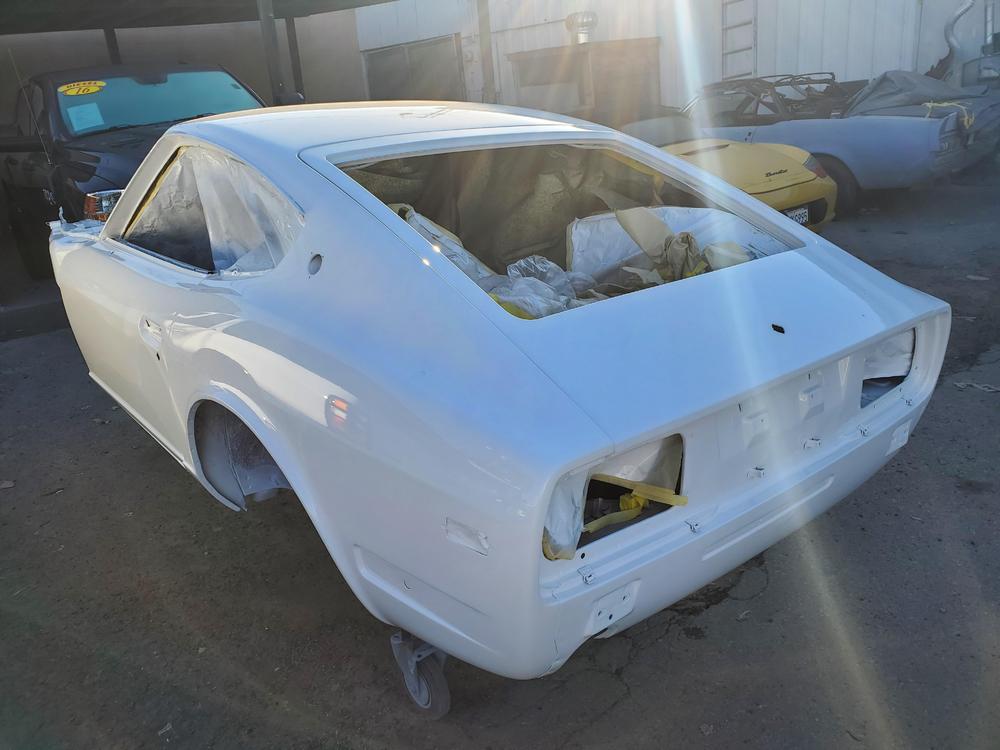
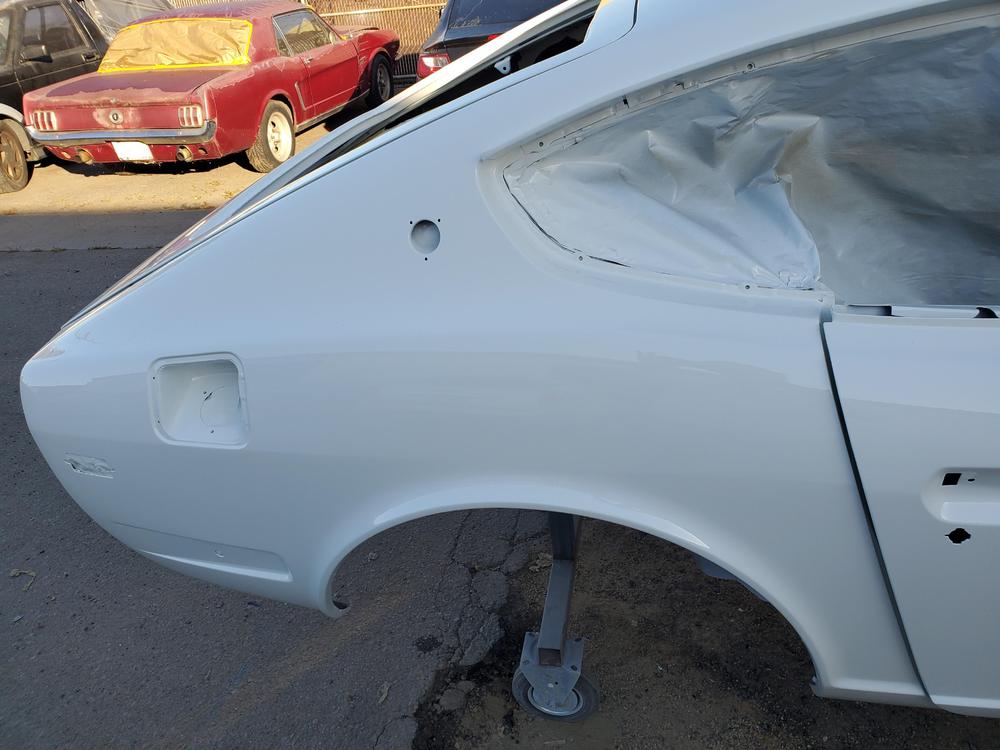
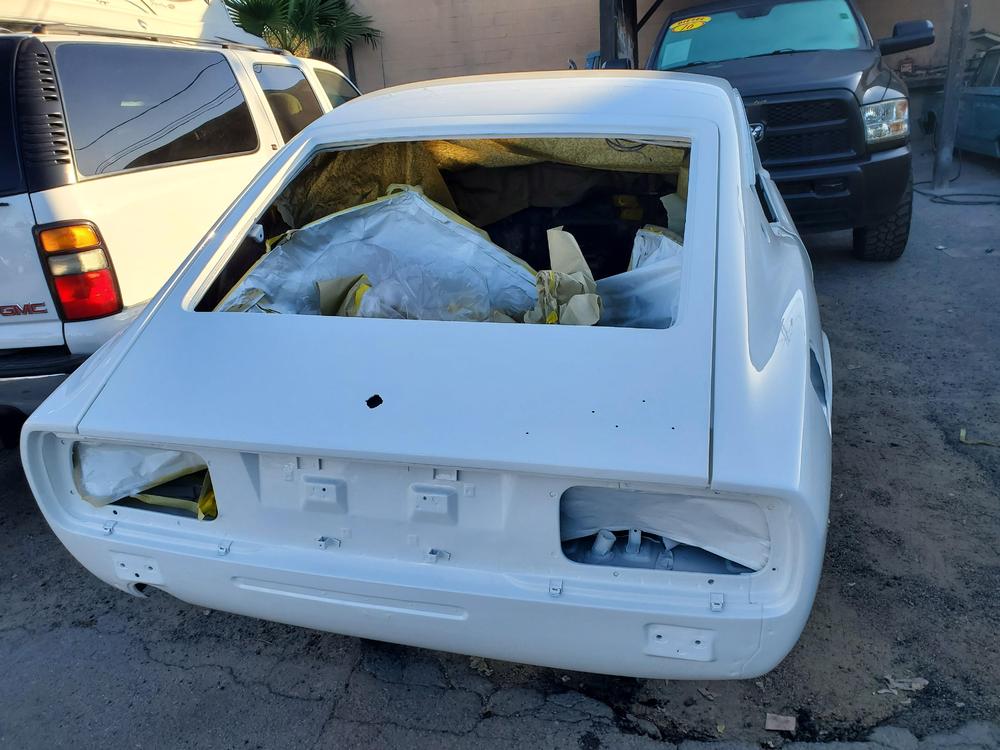
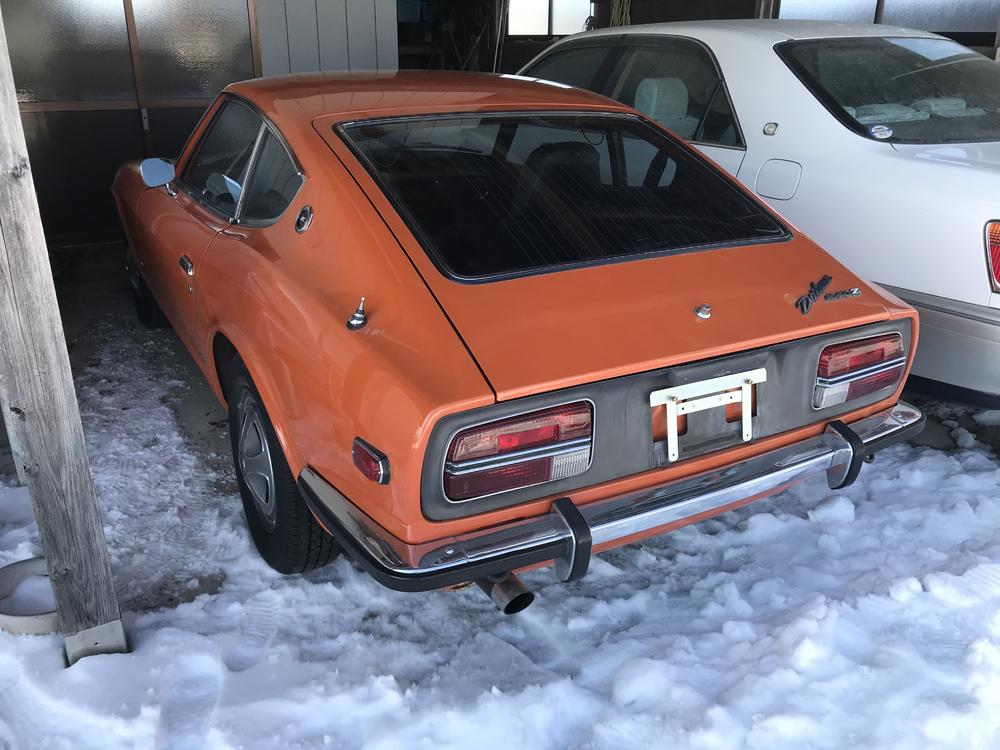
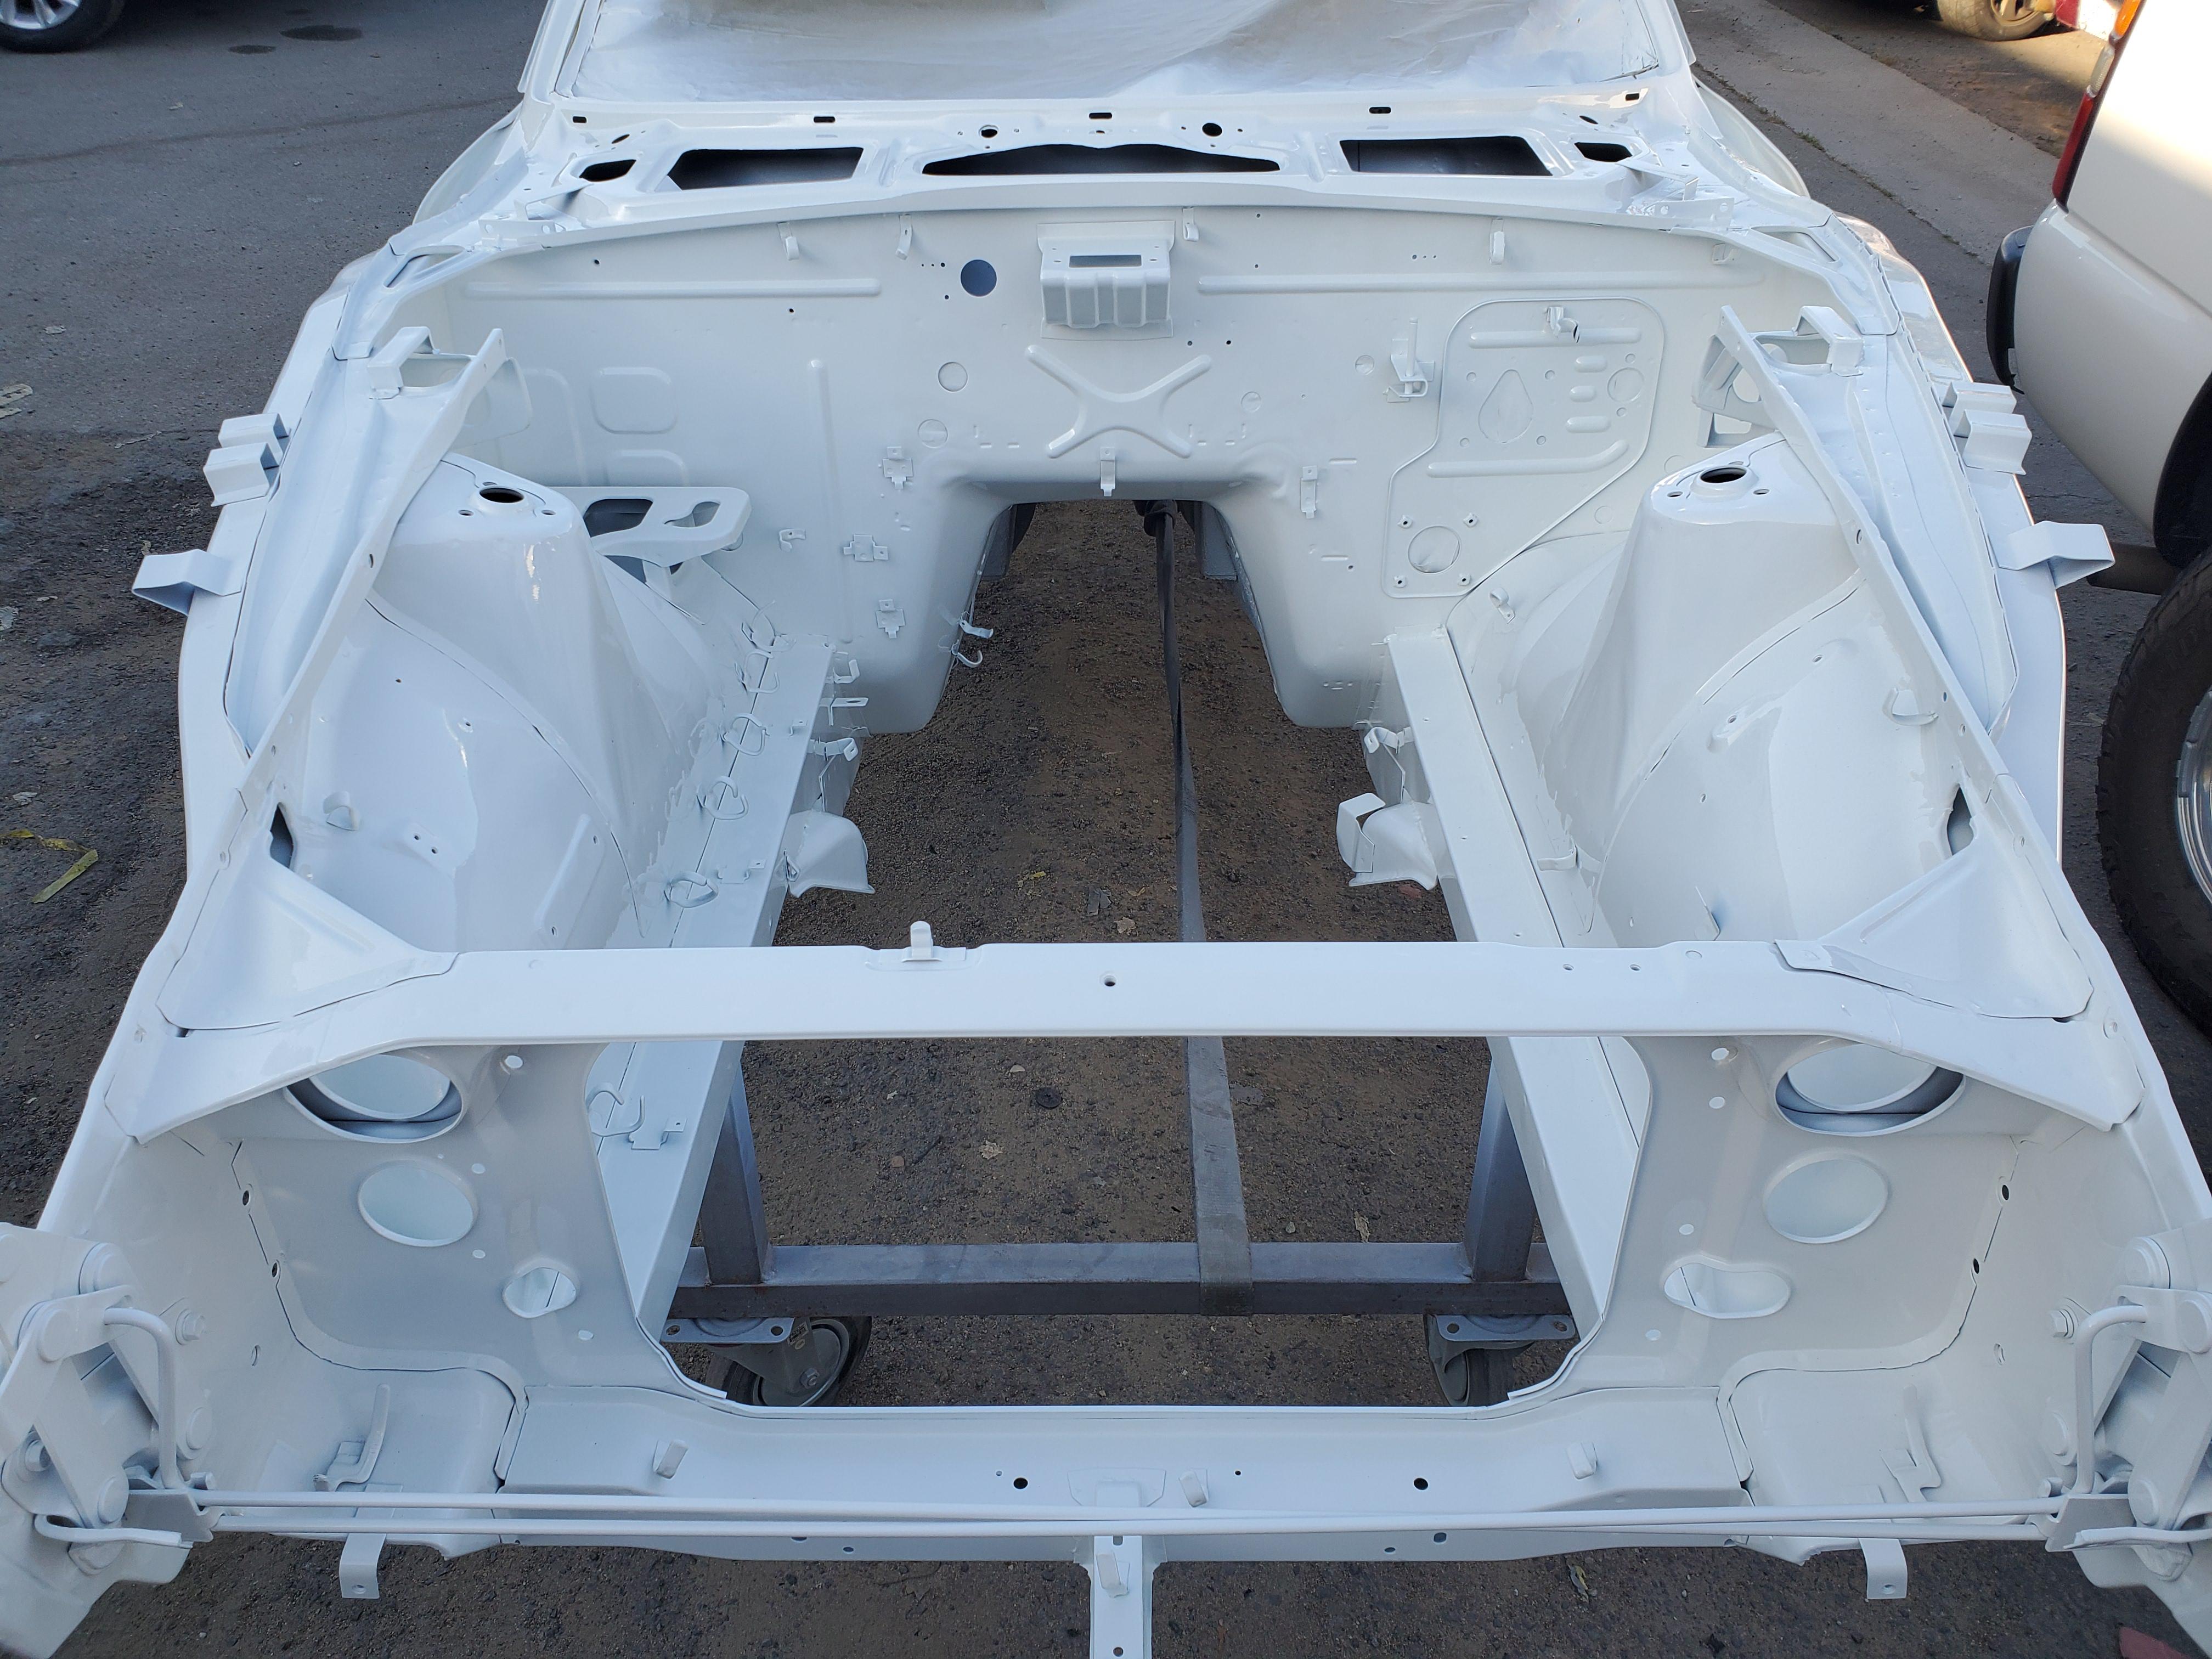
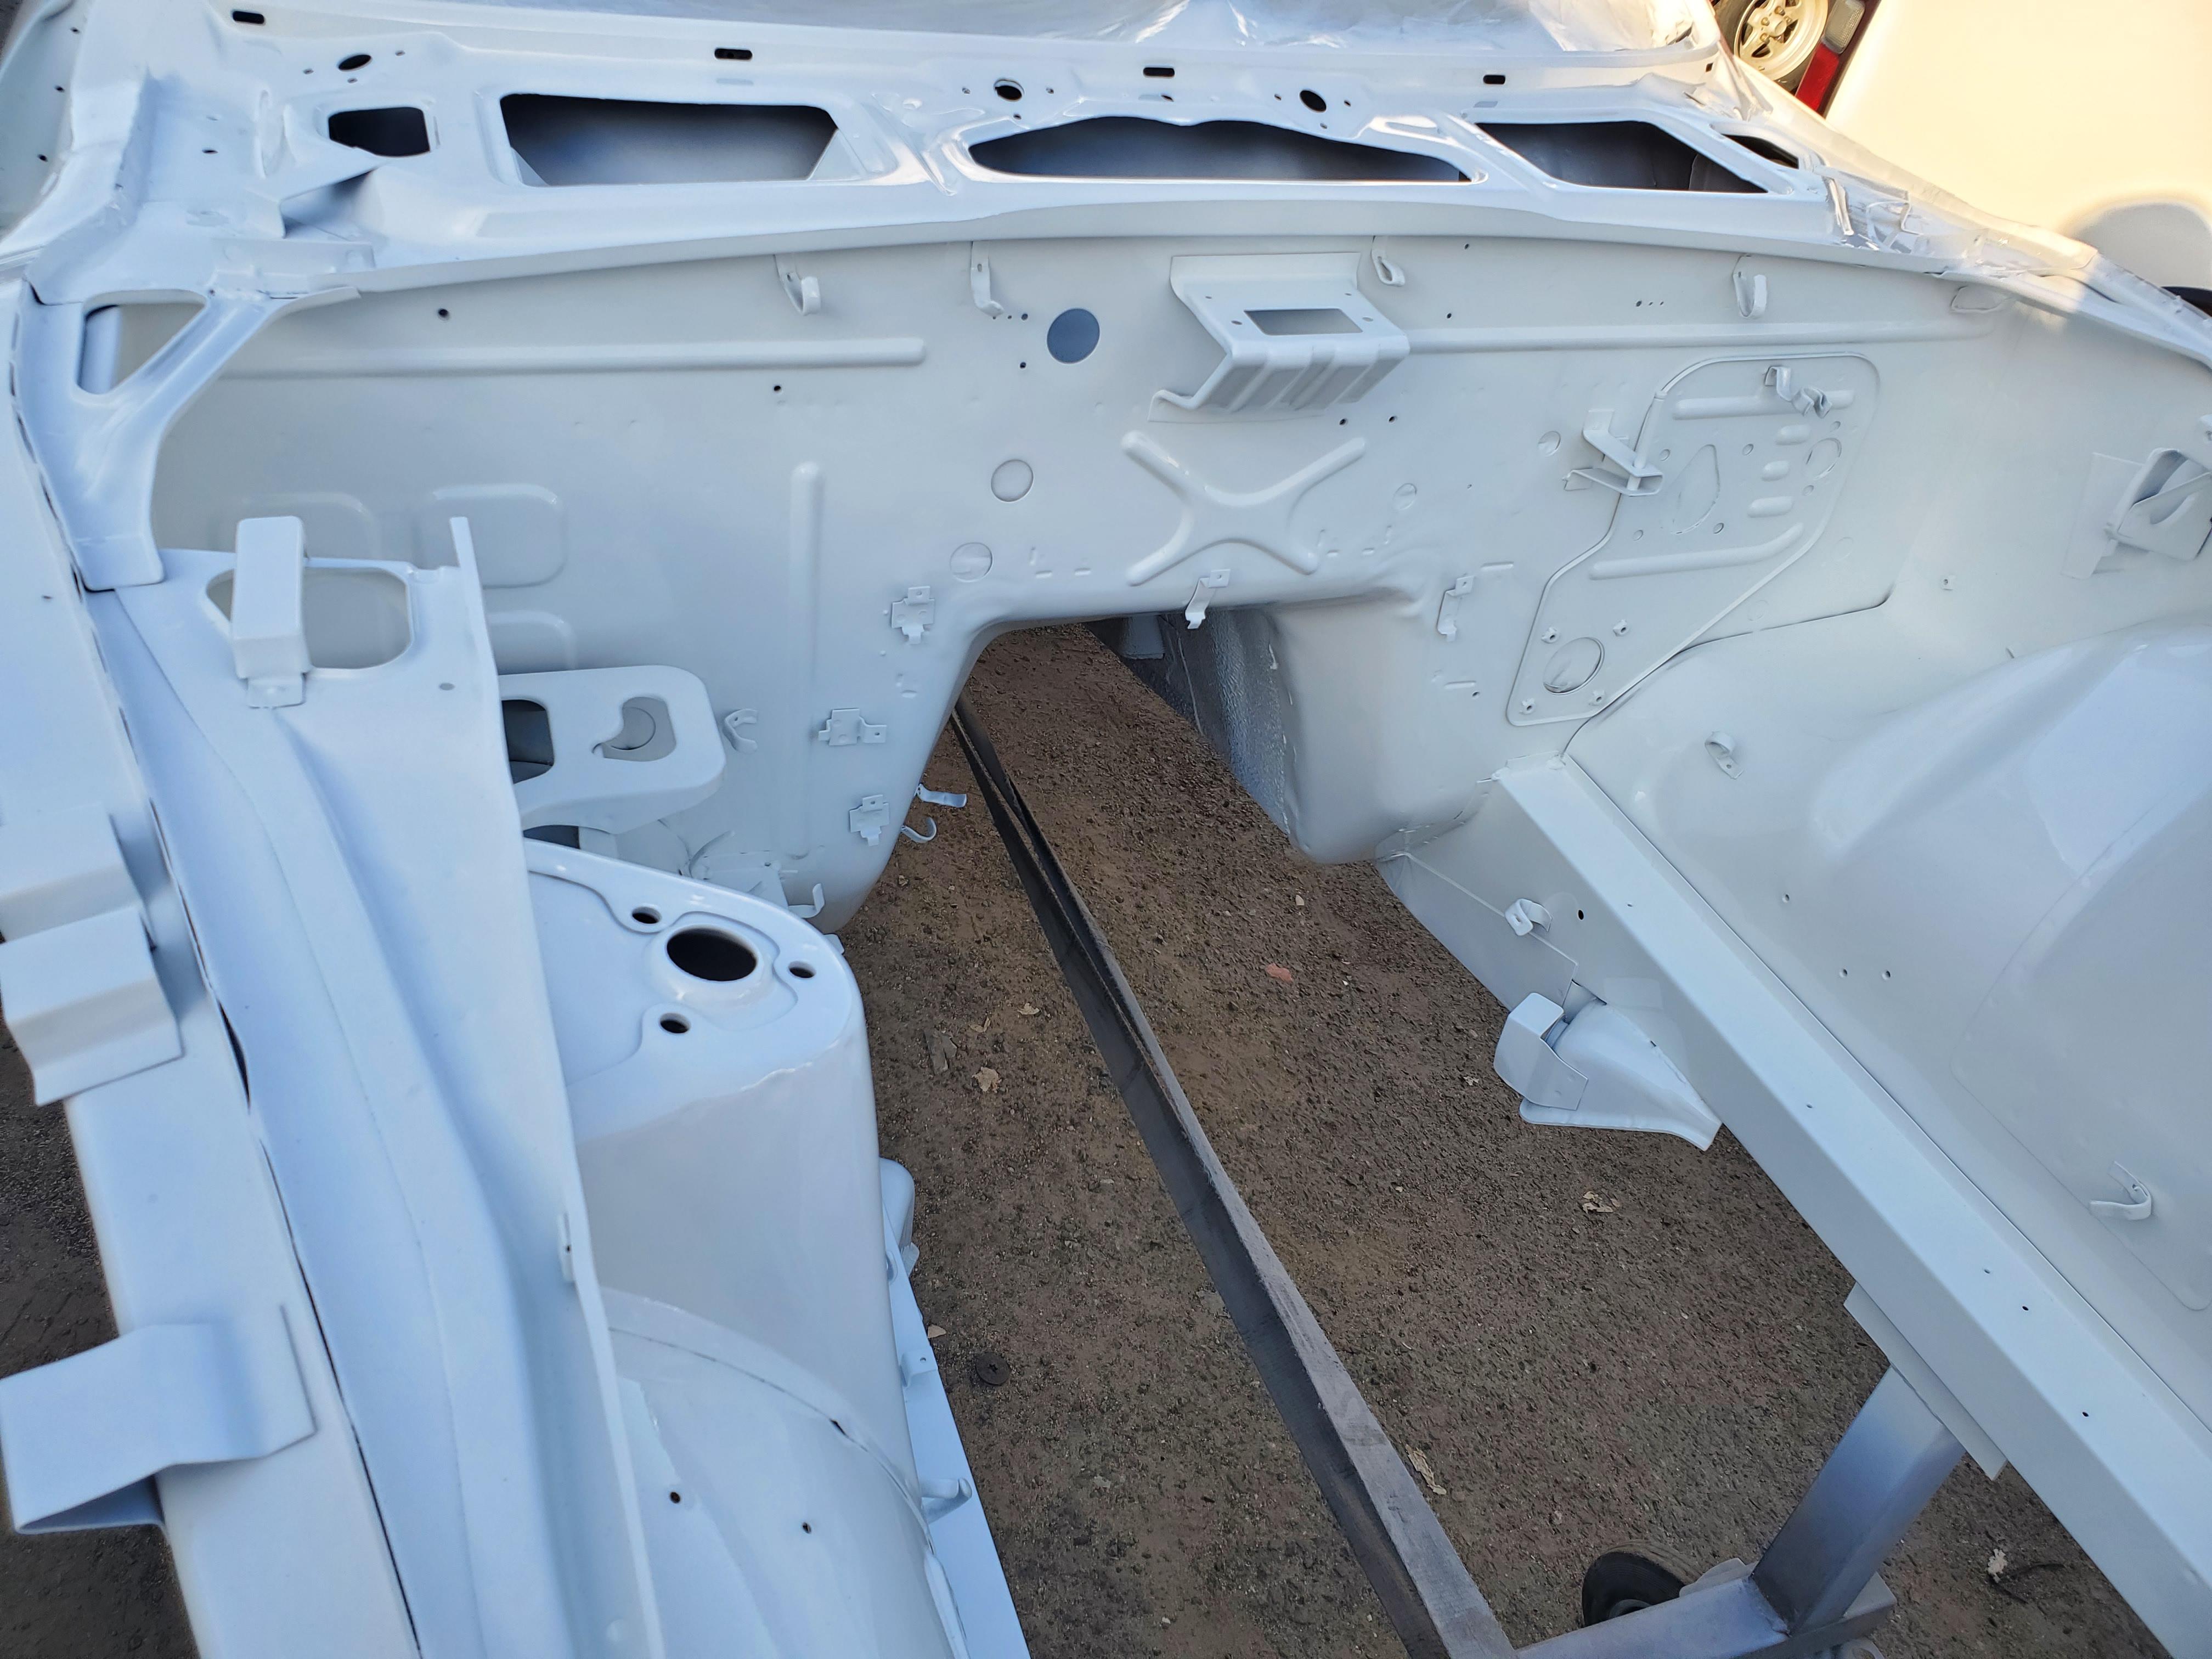
Yes, I was tempted to photoshop a grill on the front. Well she's finally painted. Woo-Hoo! Guess that was done on Wednesday. Pics are lousy because of the shade in the morning, but nice to see it finally done. Shop will do a color sand and looks like I may be able to pick it up on Monday. That would be awesome. Parts are sitting in my garage, ready to install.

 2 points
 -
2 pointsI hate it when that happens - it means I didn’t learn something new. Although I also fear that years of marriage have taught me that it’s better to be wrong even if I am right! [emoji12]2 points
-
2 pointsThanks. I took the engine to the machine shop, same with the head. Letting them check over it and clean it, and making sure all the cylinders are fine. I'm waiting to hear back on the pressure tests and stuffs. Anyways, I got the painters tape and lacquer thinner. Trying hard, and cleaning hard lol. Labeled everything too, just like you said. Waiting to clean the pistons though, want to hear back from the engine shop. Trying to find bolt kits online for the engine. I don't want to re-use some of the bolts. Too crusty. I appreciate all your experience you've shared with me, I hope you guys have a blessed day. God speed.2 points
-
@jalexquijanoSitting here sipping my PineSol and Quinine I seem to remember previous trouble with one of those center plugs that I thought you cleared up with a new quality (Bosch?) cap and rotor. You already had new wires and plugs. Is this the same problem cylinder and problem that has come back or is it ongoing?2 points
-
2 pointsI have the antenna drain tube and 240z grommet for the lower fender well... Somethings I don't advertise for sale.
 2 points
 -
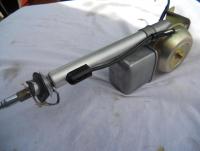
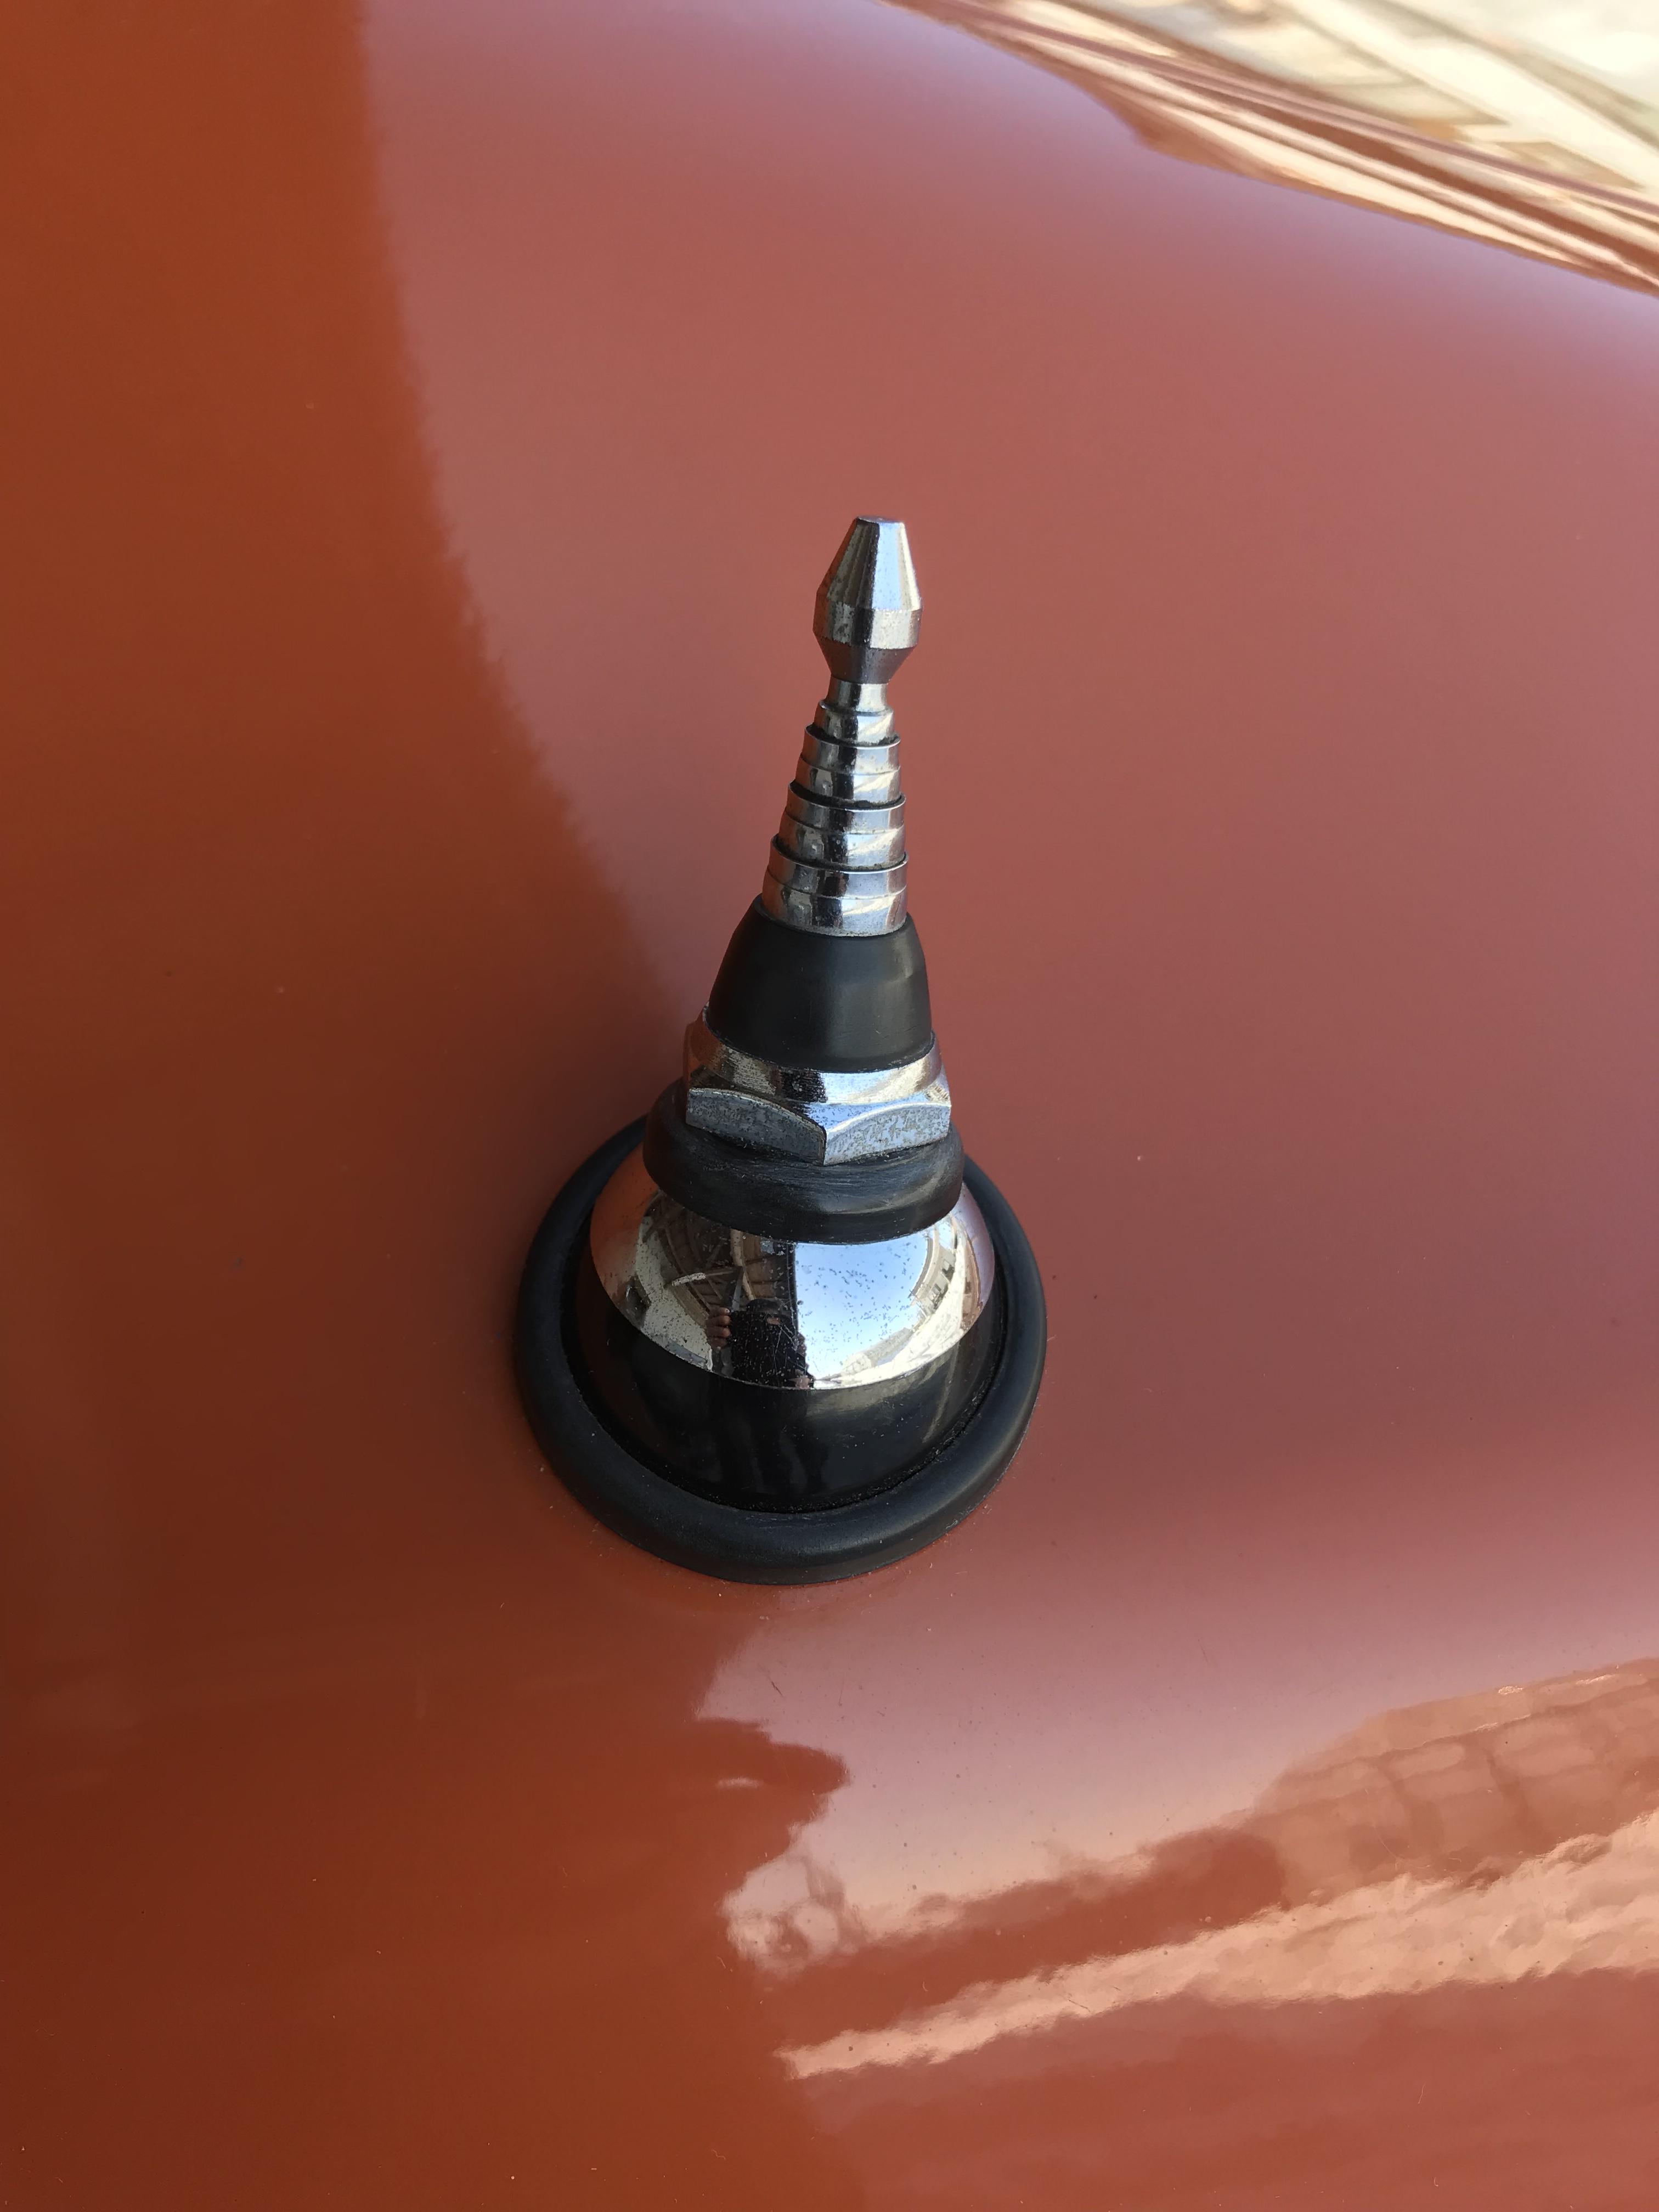
1 pointI am sure members are aware that in my list of projects to bring my restored 72 to the next level I wanted to find a NOS bullet tip antenna. That has proven to be difficult but in my quest members donated or sold me donor antennas:D for parts and I was able to find enough good parts to complete a restoration of an antenna which is the next best thing. The finishing touch came when a member offered me a NOS mast. I hope the following will help other members in the position of wanting a good working original antenna.
 1 point
 -
1 pointMy race car is right around 200 HP at the crank and I built it as cheap as possible. I started with an '82 F54 block/P79 head. I got a great deal from a friend and only paid $500 for the engine (with matchbox distributor), 5 speed trans and 3.90 diff. I had the machine shop measure and clean everything, hone the block, polish the crank, install new freeze plugs, do a valve job and mill the head 0.050". My machine shop bill was about $500 and the bearings, rings, gaskets, oil pump, water pump, timing set, head studs, etc. were another $750 ish. I already had an old header and the cam, rockers, springs, and lash pads, though if I had to buy new, they would have been about $700 more for all that. The crank damper is between $150 for a rebuilt stock and $600 for a BHJ. Finally, I had good SU carbs, intake and air cleaner housing, but that's another $500 if you need to buy a good set of rebuilt ones. I didn't need pistons, but that's another $250 minimum if needed. I added another $225 to get the flywheel lightened and $125 for a clutch. Throw in another $200 for misc stuff like belts, hoses, plugs, thermostat, air filter, etc. etc. and you will be at roughly $3,000 minimum if you already have a good engine to start with and don't buy a fancy damper or lighten the flywheel. Obviously, if you already have good carbs, it's a bit cheaper. I have built dozens of Z motors, so I only had to pay for the machining and I didn't go overboard on any component. I'm not saying you can't make 200 HP cheaper, but you would need to already have a vast stash of parts which I'm guessing you don't have and you'd have to cut back on some pretty important items like oil pump, water pump and crank damper. If you start with a N42 block/N42 or N47 head, you can make the same power, but you will need flat top pistons and then the head isn't as knock resistant as the P79 or P90. If you shave a P79 or P90 head, most people choose to change the valves and shim the cam towers. I did not go that direction which saved money. I modified the cam gear and chain guides. Good luck with whatever you decide to build!1 point
-
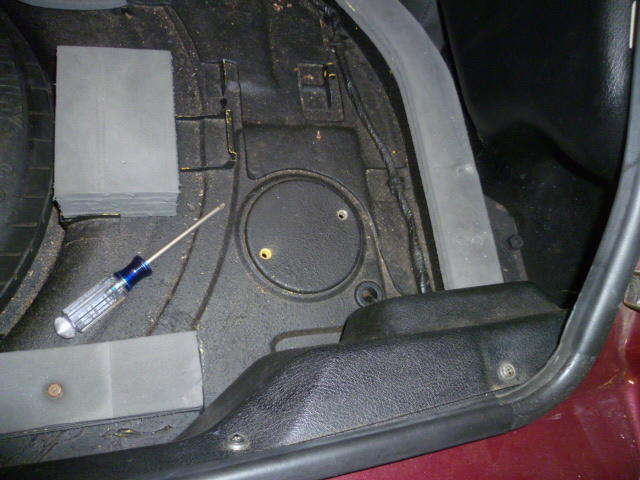
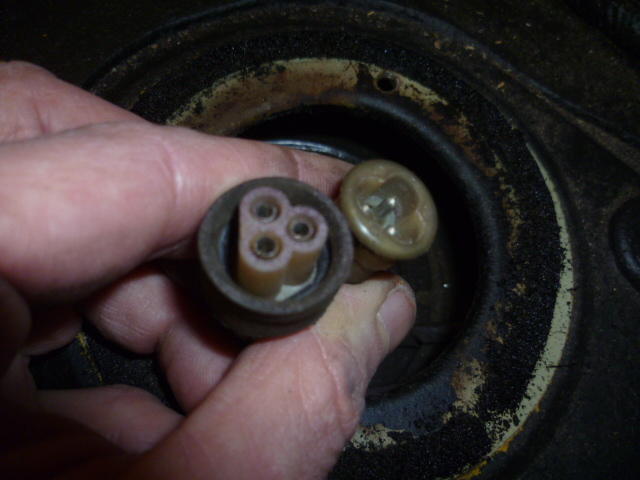
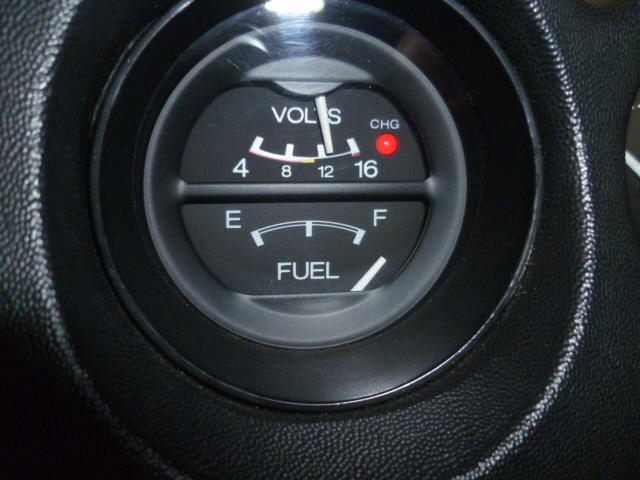
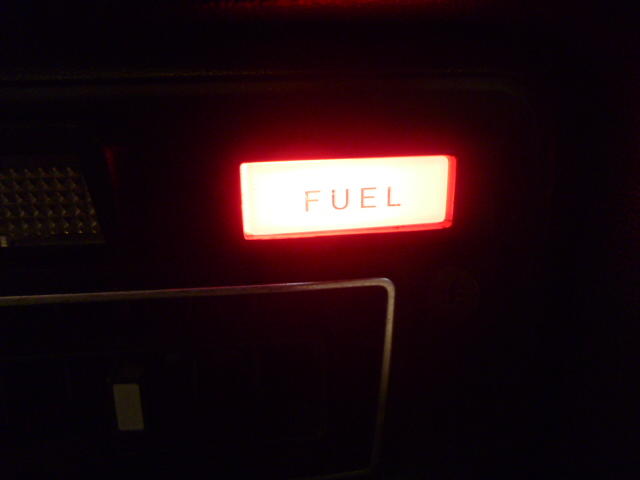
1 point@AK260, I had a few spare minutes yesterday, so I took a quick preliminary look at my fuel gauge system. Not sure if all the years have this, but my 77 has a convenient access port in the rear deck to get to the tank sender unit: Take the screws out and pop the cover: I pulled the wiring up a little and found the connector between the body harness and the sender unit. Looks a little crusty, but it's not green. Disconnected it and then took turns grounding the gauge connection and the "FUEL" warning lamp connection: Here's what my fuel gauge does when the sender wire is grounded. Clearly my gauge itself and all the connections leading back to the sender are fine: And just since I was working back there, I verified that my fuel lamp works when I ground the other wire: So I cleaned up that connector and put it back together. I don't know if doing just that will have much effect on the needle position on my gauge. I'm assuming that most of my issue is within the sender unit inside the tank and I'm not going to pull that to mess with it until I'm really ready. I won't know if simply cleaning that one connector up did anything until I fill up next time. I'll keep you posted.

 1 point
 -
Thanks for the idea Mark. I'm having trouble sleeping these past few weeks so I decided to mix up a warm nightcap of Pine sol topped off with some whipped oven cleaner. Having a hard time finishing this post, getting very slee
 1 point
 -
1 pointYou are right. They are SM needles. I looked at the receipt from ztherapy. Sorry about that. ?1 point
-
1 pointAre you sure they weren’t SM needles? I may be wrong but I understood they shipped SM by default on all their rebuilt carbs. [emoji848] Interesting how different engines can respond. I found the SB going very rich on my engine. Way too lean at idle if I was to dial them back. Doing this you get very hot idle which in my case is bad as queuing on the motorway or at tracks etc on a hot summer day is a regular occurrence. I also suffer with horrible reversion around 3.1-3.5k rpm so the SBs just didn’t work with my car. There is a chap who posts on youtube with a stroker - he says they work very well for him. But I’m guessing a 3.0 high comp engine needs more fuel than my high revving 2.8 that is still building power at 6.5k rpm. The thing with making a rich needle leaner to make it work better at WOT is that not only can you get lean idle but I found it ruins the quality of pickup and throttle response. So here’s the thing about dyno runs: my tuner spent 4 hours re-profiling my SM needles that came with the SU carbs. He told me it was going very lean at the top so he backed off and apparently I need triples to get the fuel flow. Actually, on the road at WOT I have never been above 12.8 AFR - why? Because to get to the same conditions he did I would have to be flat out in 4th at 125MPH. I may see that on a race track straight but never on the public road. Flat out in 3rd, uphill on the local motorway at 22:00 when it’s virtually empty is my free dyno time ;) I used KV needles to prove that the fuel flow wasn’t an issue and could happily hit AFR 10s at the top end with jets only 1/2 mm down. So fuel delivery wasn’t the restriction, lack of a properly profiled needle was! Oh and an air leak on the carb insulators that went undetected at the time (but at WOT the effect of that would not be dramatic). So began the obsession with needlework and simulating before buying. At £25 a set it very quickly gets very expensive to do it by trial and error. The AFR meter / sensor was the best investment I ever made for tuning. Because I see real world AFR and carb response with different ways of using the throttle in normal driving not just simulated WOT. I would love to as I see this as open research for the Z community at large - but I am hesitant to share quite yet. It is currently not at all user friendly - you have to understand how it works to make it work. Once I have it all tied down then I fully plan to share. However, in the meanwhile, I would highly recommend this site: Http://www.mintylamb.co.uk/suneedle/ Drop in your reference needle, select a second needle and use the up/down scroll bar to quickly scan through profiles. It also allows you to download ooodles of profiles (which is where my unhealthy excel based obsession started)! Again, I would urge any needle changing to be monitored with an AFR meter in real world driving. Are all the engines mentioned above running well with SBs totally stock and on stock headers or something else?1 point
-
1 pointI did the drop, clean and coat thing a couple of years ago. The product I used was: https://www.summitracing.com/parts/KCO-53000 It seems to of worked out OK. I had dump some bolts in the tank and rolled it around to break up any loose rust. I used a shop vac to dry it out.1 point
-
Smarter, not at all. Adding to Cliff's suggestions, I would throw in a quick compression test to rule out poor compression in #4. I'd also pull the cap with the wires intact and measure the amount of resistance in each circuit by touching one contact of an ohm meter to the spark plug end of a wire and the other contact to the corresponding contact inside the dist. cap. If the odd #4 plug isn't caused by poor compression it has to be electrical. I can't think of anything else. Oh, by the way, next time you're out for a spin and you encounter the misfire above 4500, pull the chokes on just a bit and see if the misfire changes. Same goes for lack of power when accelerating from a stop. If giving it more choke improves either situation the fuel mixture was too lean at that point in time and you richened the mixture with the chokes. If performance gets worse the mixture was too rich. Every time I experienced a high RPM miss it was the plugs. Try swapping them out with one of the better looking sets you have stashed and see if the miss goes away. How long ago did the miss above 4500 rpms start? Old plugs?1 point
-
1 pointI've done the POR15 gas tank kit a couple times now, just follow the instructions to a T. Clean as you can it then a hair dryer running through the tank for an hour until you are sure the inside of the tank is dry. I had so much left over that I took a brush and gave the outside of the tank a good coat too.1 point
-
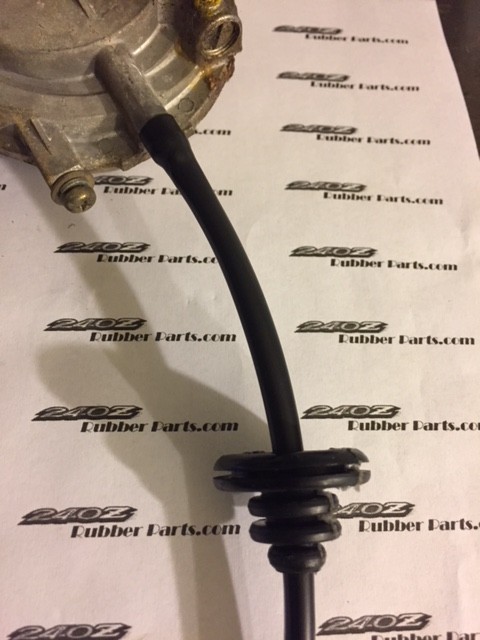
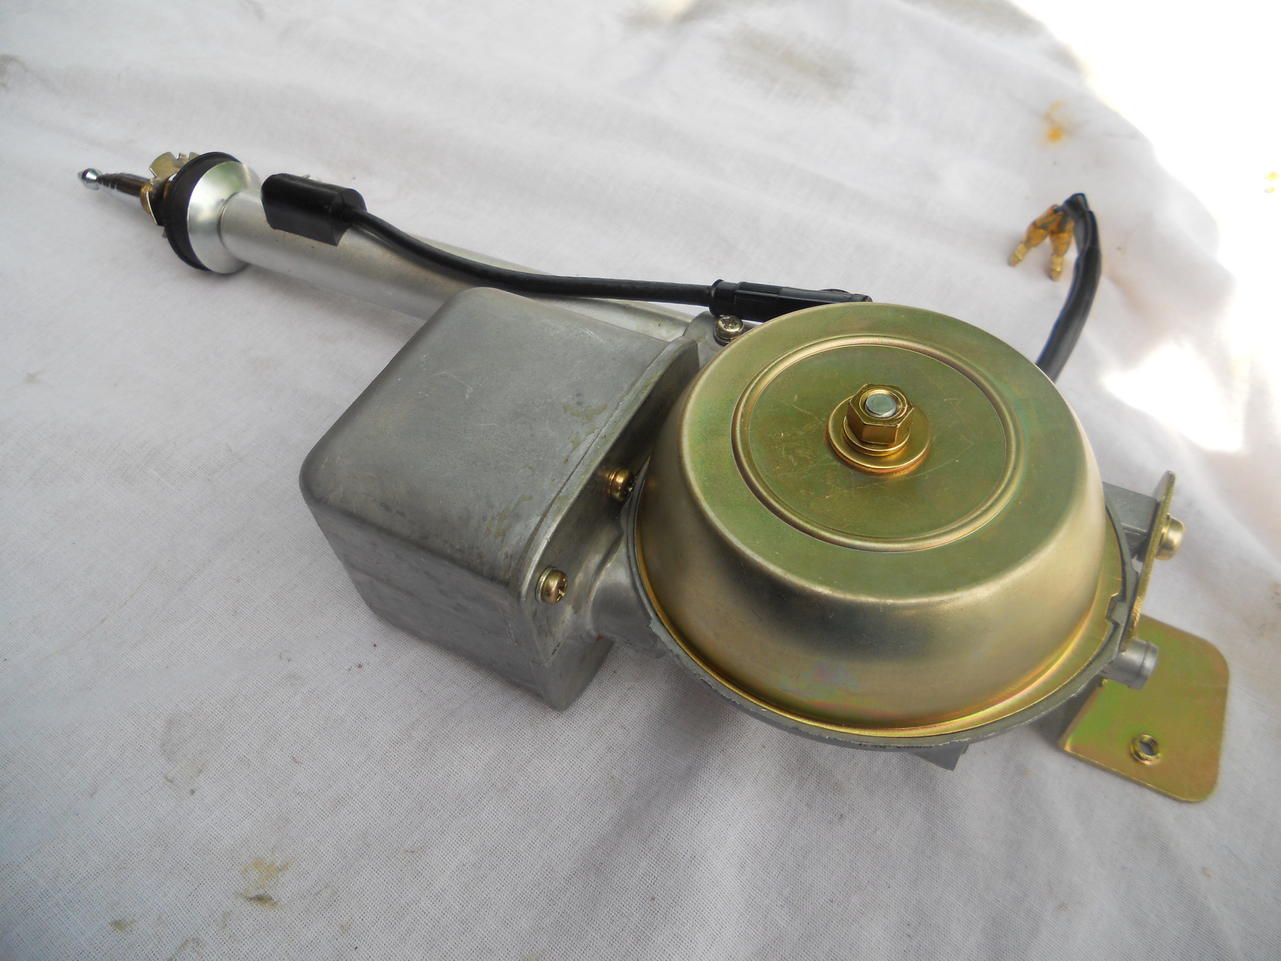
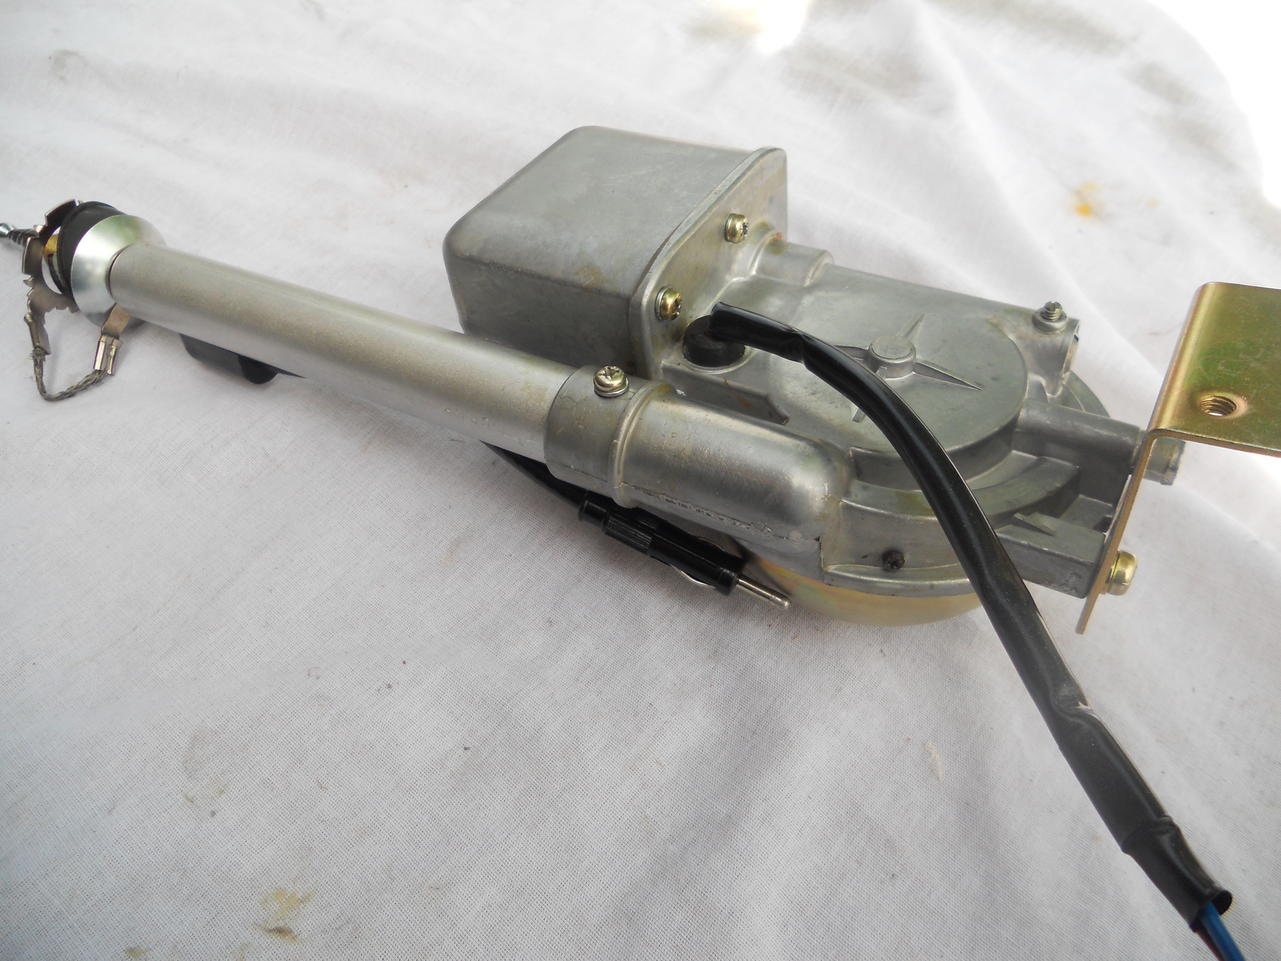
1 point1 pointAgree with what was said above. That book will walk you completely through tear down then rebuild yourself. There's a few things you have to take to a machine shop and get done but I got out cheap there, about $200 if I remember right. Take tons of pictures and write everything down you may not be sure about. A roll of cheap painters tape was a big help for me on the connections, wiring and plug-ins. You can do both sides with a piece of tape then add 1 & 1 or A & A. Get a box of quart size zip-locs for all the nuts and bolts then write what it is on a piece of paper then drop it inside the bag. I wrote on the outside with a Sharpie, bad idea as it smeared off. A gallon of lacquer thinner and some small brass wire brushes for cleaning from your local hardware store is about as cheap as you'll find. Cheap spray on oven cleaning foam also works good. It's like $.99 at walmart. A few 5 gallon buckets will be useful too. All 6 pistons fit perfect in the bottom for me, poured about 2 inches of lacquer thinner in there and they came out like new. Read, read and read. You'll see something helpful every time, have fun young man! Here's a days worth... https://www.google.com/search?rlz=1C1BOFA_enUS494US494&ei=ueSNXvXSLrCwytMPxNeXiA0&q=l28+rebuild+parts+list+classiczcars.com&oq=l28+rebuild+parts+list+classiczcars.com&gs_lcp=CgZwc3ktYWIQA0oJCBcSBTEyLTc1SgkIGBIFMTItMTNQqKsBWP7KAWDq1gFoAHAAeACAAWSIAbsHkgEEMTIuMZgBAKABAaoBB2d3cy13aXo&sclient=psy-ab&ved=0ahUKEwi1k876idnoAhUwmHIEHcTrBdEQ4dUDCAw&uact=51 point1 pointgrab a copy of this https://www.ebay.com/itm/How-To-Modify-Your-Nissan-Datsun-OHC-Engine-Book-ISBN-0895863537/143572353532?hash=item216d9441fc:g:H3kAAOSwdIVeZXSZ that ebay listing for the book is pretty cheap... If you are new around motors, check out some of the 10X videos from Whats the status of the motor? do you have it in a stand? Is it cleaned up? did you do a compression test // leakdown test on it? I grabbed a concrete mixing tub a couple years ago when i was building my motor, and just lets the droppings / liquids fall into the tub. Helps when you want to clean your trans, or diff too. https://www.homedepot.com/p/Plasgad-Black-Large-Concrete-Mixing-Tub-887102C/205451585 And a big bag of coffee filters (fiber free, easier to see the dirt, and cheap) and start cleaning, keep cleaning as you go. you probably want a turbo, i want a turbo.1 point1 pointI just completed the refresh of one of our members antenna. It was great to have the rubber parts available for this project. Thanks 240Z Rubber Parts.com for these great reproduction parts. The latest being the drain tube and grommet.
.JPG.4bc6c6f89c901afdf000c131d3134fd5.JPG)
.JPG.faa33c71abf64ba7b43b8d336c50df24.JPG) 1 point1 pointAlmost finished. Still looking for proper material for drain tube. I hope member is happy with the results. It was great to have the products from rubberparts.com available for this project.
1 point1 pointAlmost finished. Still looking for proper material for drain tube. I hope member is happy with the results. It was great to have the products from rubberparts.com available for this project.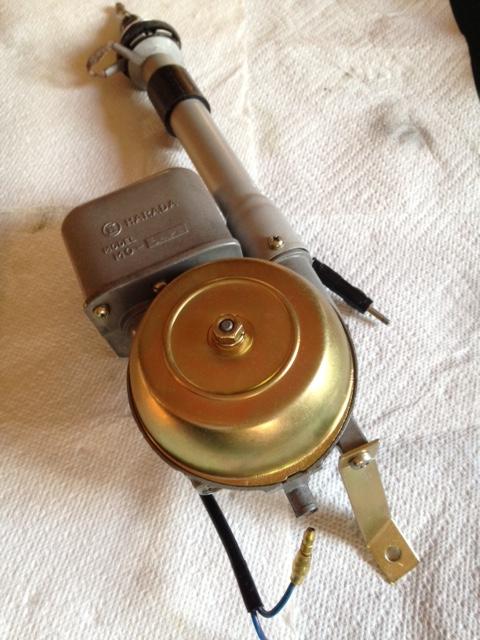

 1 point1 pointthis week ending on 2-9-18 will be offering a bundle kit for $75.00 plus $8 shipping. Black top for finisher nut Antenna ball 3-piece kit fender-top rubber seal Send me an email at orders@240zrubberparts.com with your email address and I will send you a paypal invoice once your kit is ready.1 point1 pointKats do you think fostering would work. Their product was great look how long it lasted most of them I came across the motors still work with cleaning. Only parts that took heavy weather conditions didn't last. Sent from my [device_name] using http://Classic Zcar Club mobile1 point1 pointI have got a reply from HARADA , but it seems to me almost impossible to get a replacement mast. They said first of all , they can not supply parts to individual customers, they can do only for car manufacturers like Nissan. They said ‘maybe we can react / move on if Nissan place an order to us ,but Nissan has to specify the parts number of the mast and tell it to us when placing an order’ So, I now think to make it happen, #1 many people want the mast ( hundreds or thousands?) #2 Nissan thinks replacement mast will make a profit #3 We and/or Nissan know the part number of the mast #4 HARADA still have tools and materials to make it It’s just a long way to the mast if you wanna Rock and roll . I visited my mother’s house , the outside was minus 10 degrees Celsius, I decided not operate the antenna. Kats By the way, were there quite a number of people who tried to bend the antenna ? A gas lid too, why Fairlady Zs have key- locked lid ? Was Japan unsafe at that time or Fairlady Zs were too good for those people and they were jealous so badly ?
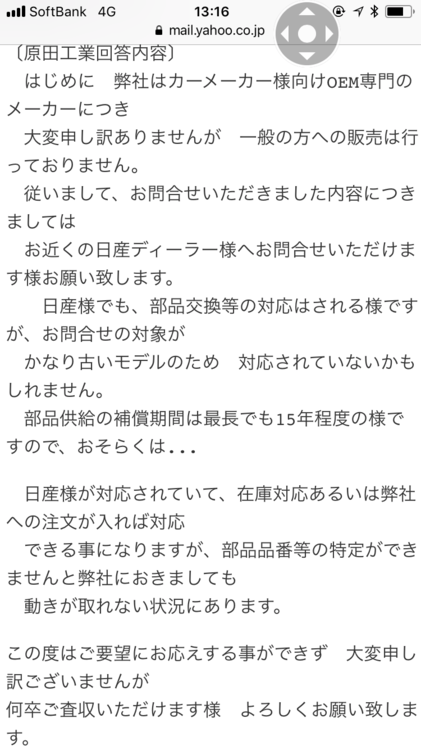


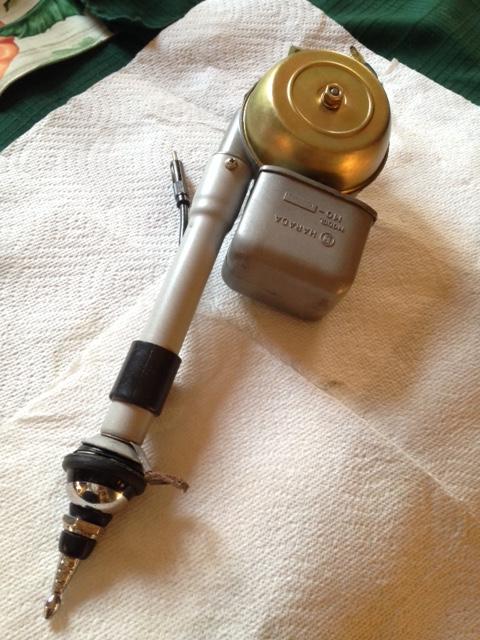
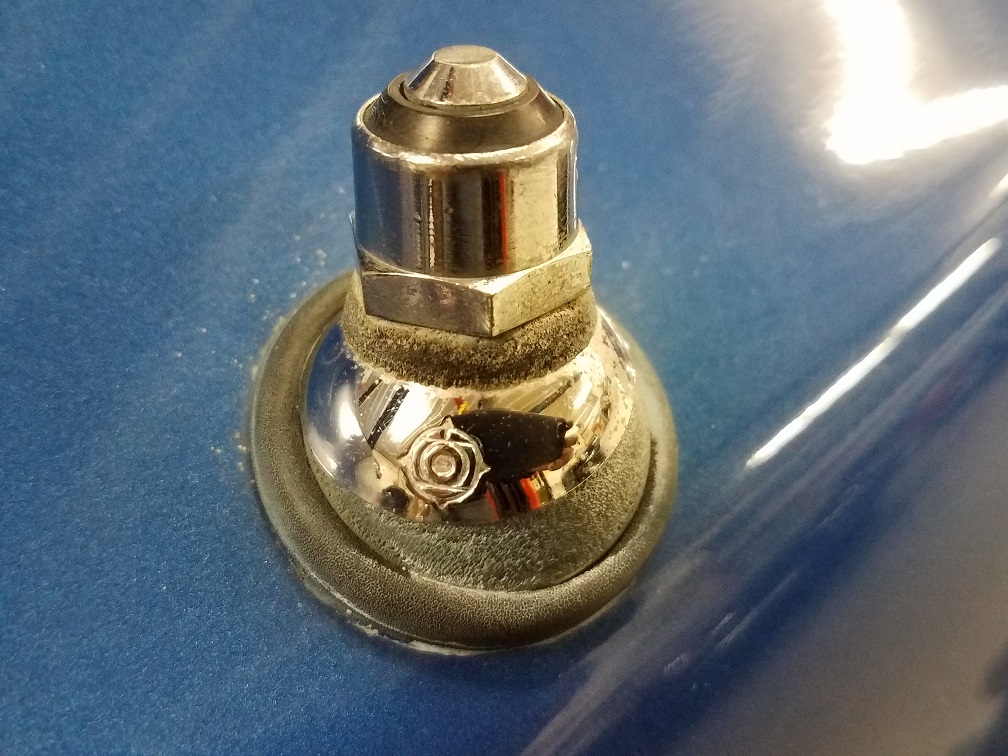
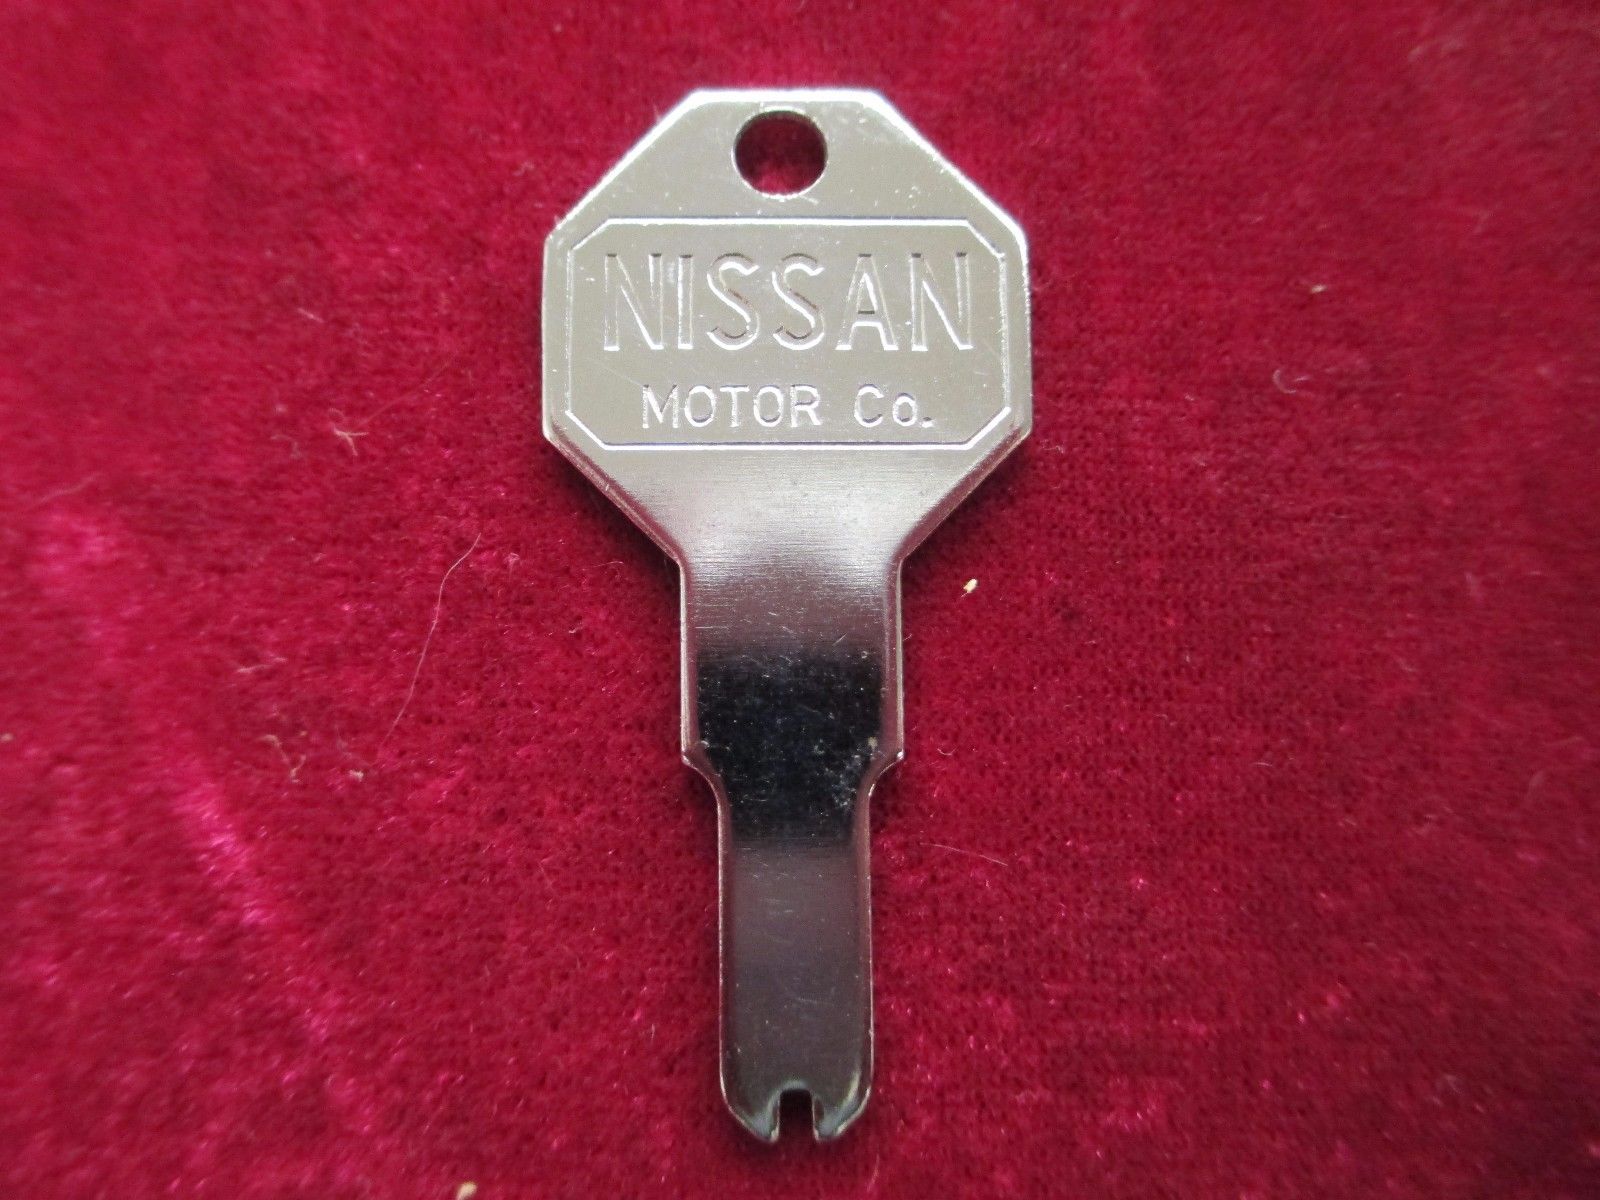
 1 point1 pointHi Kats, This is a picture of the manual antenna showing the emblem on the round metal piece and another photo of the original Nissan key. -Mike
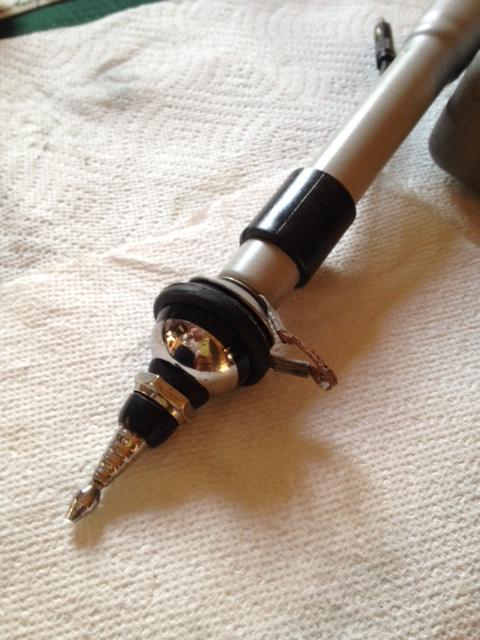
 1 pointI also have the covers by Seatz - no left/right sides. These are awesome quality!1 point1 pointAll that it left to do is install the assembly cover, retaining bracket and the interior mast shaft parts (grounding assembly, metal half ball and interior half of the rubber mounting ball). Note: I will be using the current exterior shaft retaining parts currently on my car. They are as new and I have not been able to find extra of those parts in usable condition. Once final assembly was complete I lubricated the mast (silicone spray) ran power to the antenna and did some fine adjustments to insure smooth operation. I hope this post will help other members in the future.
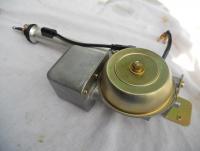

 1 point


Important Information
By using this site, you agree to our Privacy Policy and Guidelines. We have placed cookies on your device to help make this website better. You can adjust your cookie settings, otherwise we'll assume you're okay to continue.