Leaderboard
 Subscriber
Popular Content
Showing content with the highest reputation on 05/17/2020 in all areas
-
 3 pointsI have a very unhealthy AFR fetish! I put this together based on quite a lot of hours of reading / internetting / speaking with engine builders / tuners and trackside mechanics at classic races. Heads up: 14.7 as correctly stated above is the ideal mix to get a full burn and is good as your idle baseline afr. There are of course many situations that you want to be either side of it. With modern fuels, the consensus in research papers / controlled experiments is that optimum power is produced between 12.5 - 12.8. Aim for this across the range at WOT. On a side note, some modern engines prefer just north of 13 due to head designs etc. If you are planning on hooning it at max revs in 4th on the long straight of a race track, racers typically aim for closer to 11.5 as the richer mix has a cooling effect on the engine (but without going into details, it does put a stress on it too). My L28 AFR sits doggedly between 12.2-12.9 from 3.6K to the 6.5K rpm limit and pulls like a train. I have ran it at 11.5-12 and the engine is marginally but noticeably keener on the transition from part throttle to WOT; however the power difference is difficult to discern without a rolling road. I find anything 11 or below loses power / makes the engine bog down. On the cruise you ideally want to be north of 14.7 if you have a working vacuum advance. Ideally 15.5-16ish. This makes for a slightly hotter cruise but will give you way better fuel economy. Modern cars can tolerate HUGE timing (c. 60 degrees) and with super high pressure common rail injection / better atomisation run even leaner. Anything north of 17 on the overrun will give you fun pops and crackles on the tail pipe at around 3k-4K rpm. My L26 running a little lean once shot out a 2 foot flame out the back when coming off the power at 6k rpm. Scared the b’jeesus out of me but my friend following thought it was mighty impressive! ;) The other thing you will be surprised by is just how much a mere 0.5 difference on the AFR can affect your fuel economy and richness of the sweet aroma of your exhaust. Whatever you do, don’t run your engine lean on WOT as it does horrible things to your exhaust valves and piston crowns. Welcome to the rabbit hole of the AFR gauge - you just took the red pill ;)3 points
 -
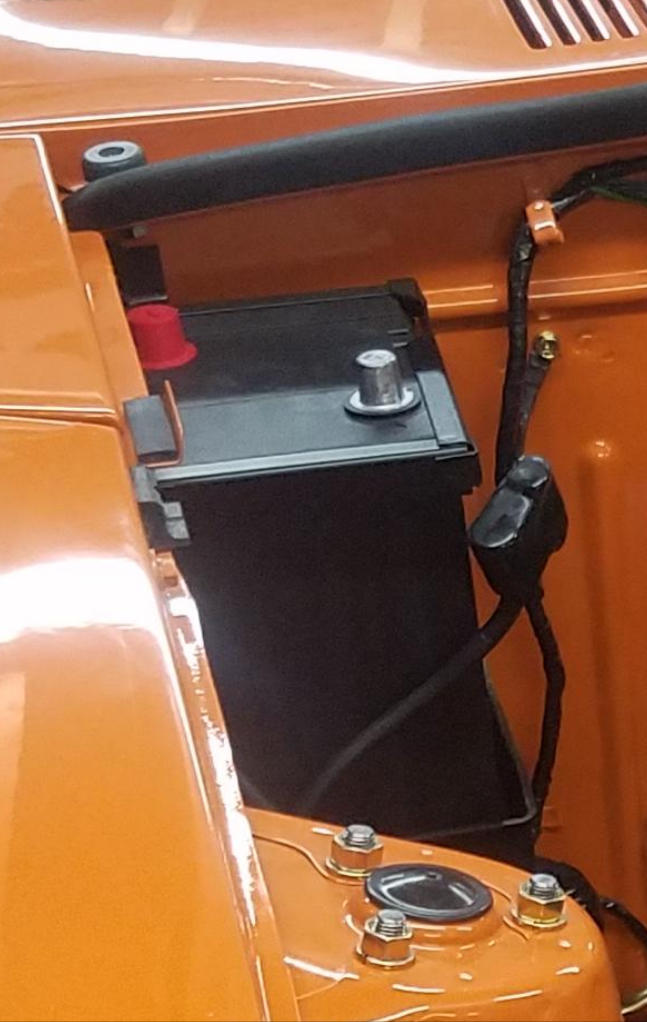
 2 pointsGroup 24F is what I’ve always bought. https://www.batteryequivalents.com/bci-battery-group-size-chart.html The stock battery frame internal dimensions are 10-3/8 x 6-15/16. In my link above that suggests that a 24F is too wide at 10-3/4, and that 24H and T are better at 10-1/4. I’ve never had a problem with a 24F fitting a stock frame, probably a manufacturer specific shape thing, or the max width is at the base, not around the perimeter of the top. Can’t comment on the correct height, no Z’s in reach at the moment, sorry. Just spotted a good battery picture in one of the threads here. Kinda shows the stock frame and mounting tab at the firewall.
 2 points
 -
 2 points
 -
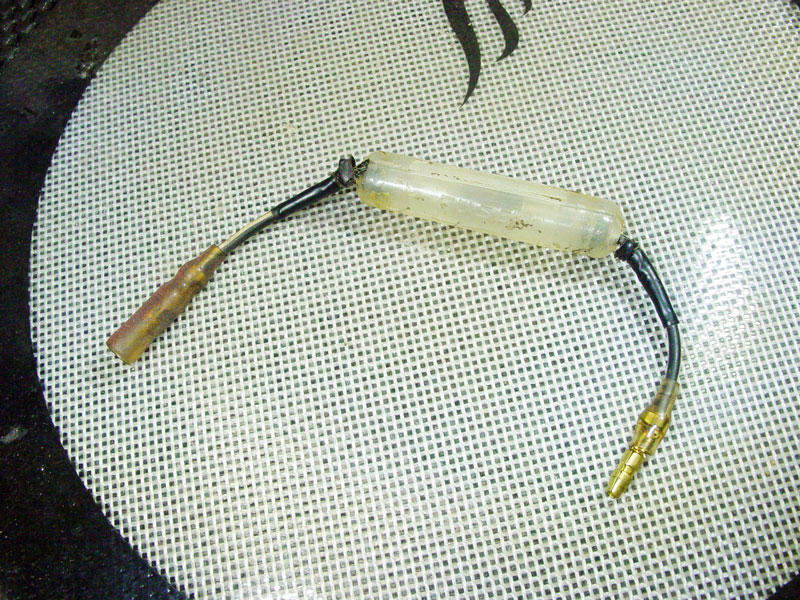
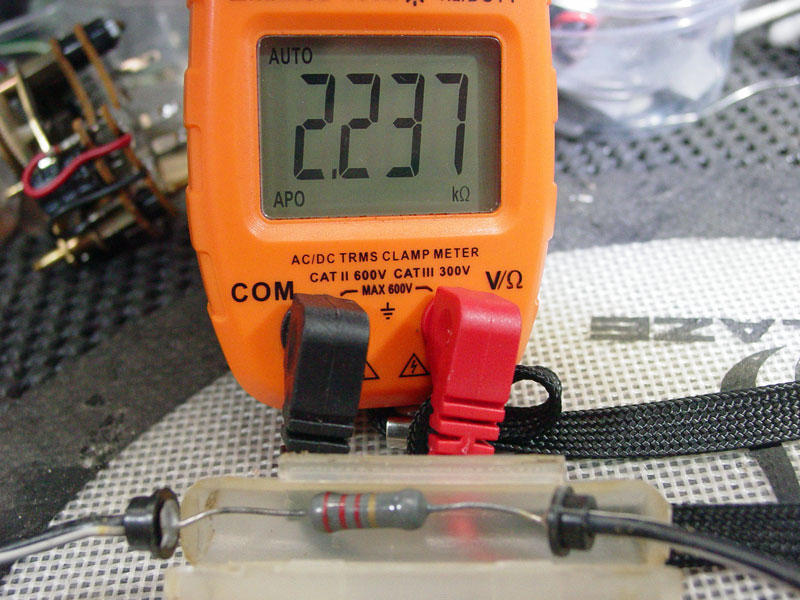
 Hey zKars, I found my tach resistor on my 75 280z . It was very close to where yours is, but my resistor holder is completely different. It would appear to be the old style FUSE holder. I guess in Jan of 75 that's all they had! My resistance (2.237K ohm) is close to yours and it looks like a 2 or maybe 5 watt resistor. Hard to tell anymore. The connectors are good , but I like all connections crimped and soldered. Just another something to do.
 1 point
 -
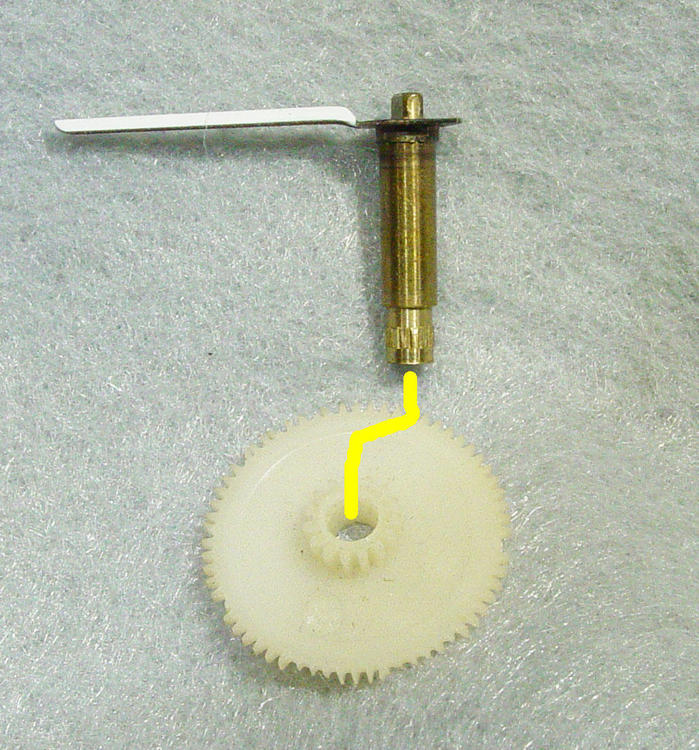
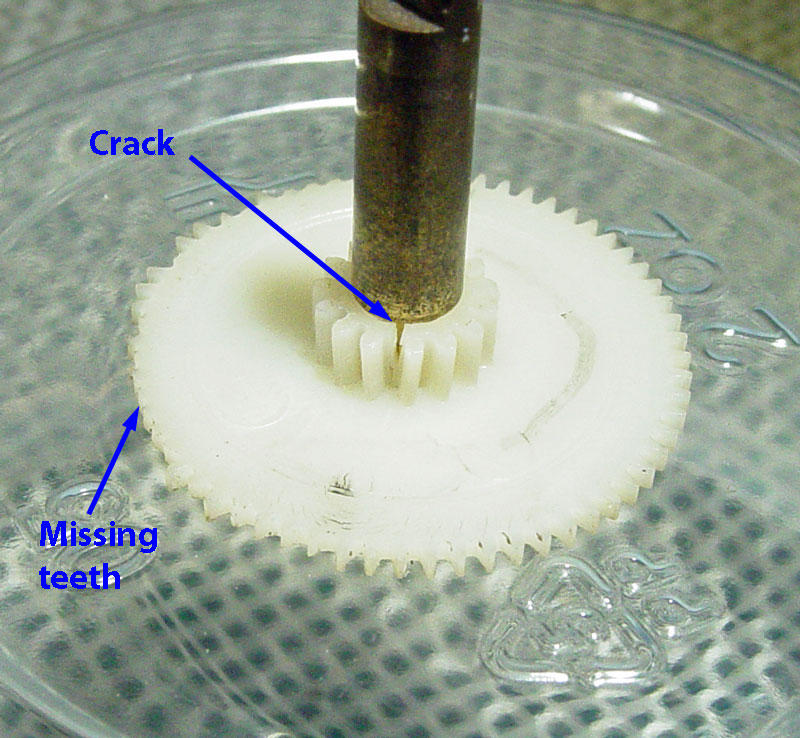
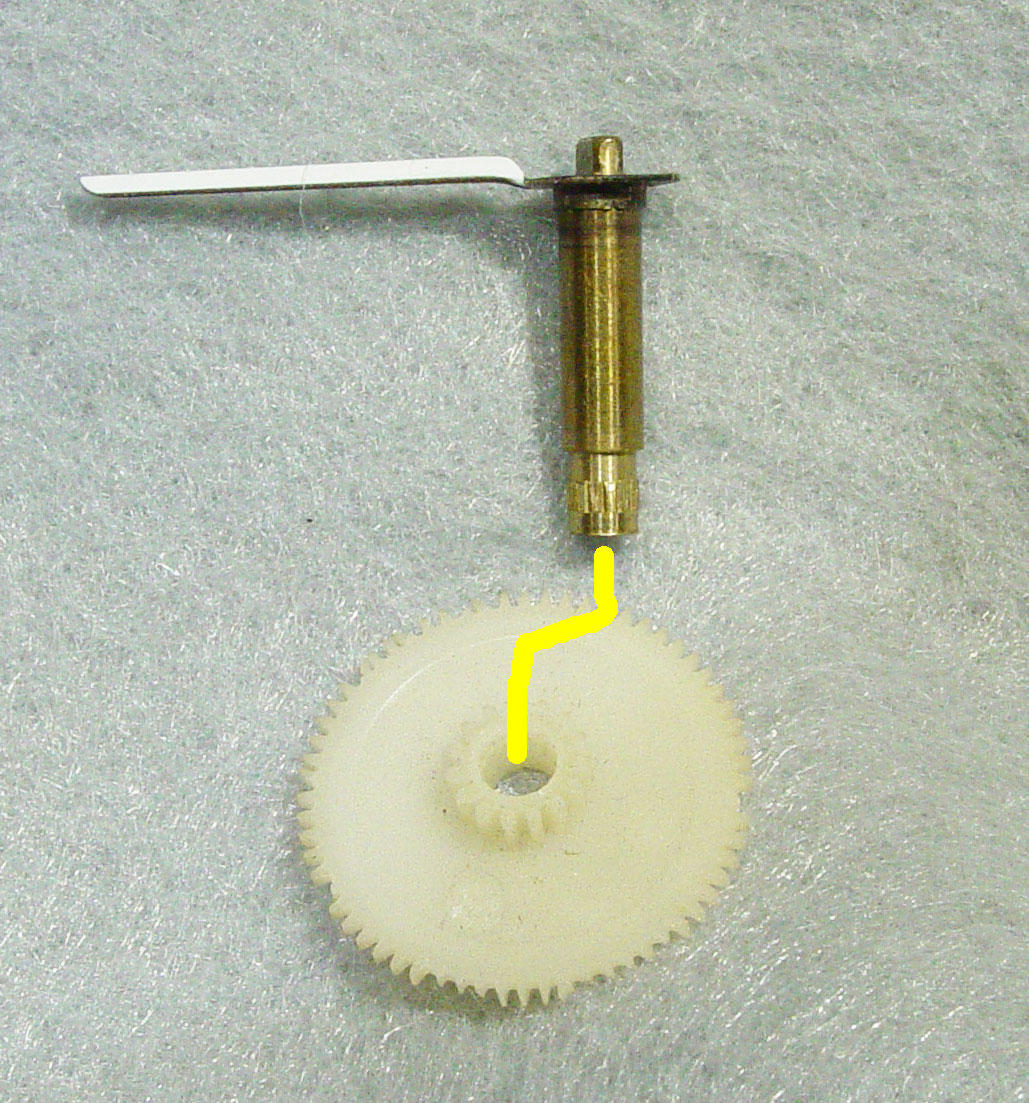
1 pointOk I have to respond again to this comment on clock hand removal. Forks, spoons, and knives are not the correct tools for the job! You may be able to get the hands off, but at what cost. I know this may work for some, but using a fork/spoon can cause a big problem . This method can cause the clock stem to come out of the nylon main drive gear as pictured. In addition, this rocking motion of the clock stem back and forth can crack the brittle nylon gear which the stem is inserted. A gear puller pulls the clock hand up while pushing down on the clock stem and doesn't disturb the lower gear. Nylon gets brittle after 40 years and if you crack the smaller gear it distorts and will not mate correctly with the adjacent gear. This is what caused the pictured gear to fail. The cracked gear locked up the mating gear and the pressure applied by the owner to set the clock time stripped several teeth from the main drive gear .There are many types of gear pullers and I have a several , but the size of my hands make it difficult for me to use so I made my own. It only tool me 10 minutes on a small grinder to make this tool. Also, cardboard is not the material you should be using against the very delicate paint on the clock face. This is uber fine very porous flat paint. What I have found best and doesn't scratch is VIVA cloth towels. This also prevents hand oils from staining the paint which is extremely hard to remove. Never use any solvents , water or IPA( isopropyl alcohol) on the clock face. Kanto Seiki changed the white paint formula over the years and it may smear with water or IPA. I hope this helps. Ron
 1 point
 -
 1 pointI contacted Vintage Dashes and asked about the floor mats. They directed me to Wiomotorsport on Instagram who answered immediately. He's considering making mats for the 280Z but he's not sure there's a market for them. Perhaps those of us interested in them can drop him a line on Instagram and maybe he can be convinced to produce them. Just saying... Sent from my SM-N950U using Tapatalk1 point
 -
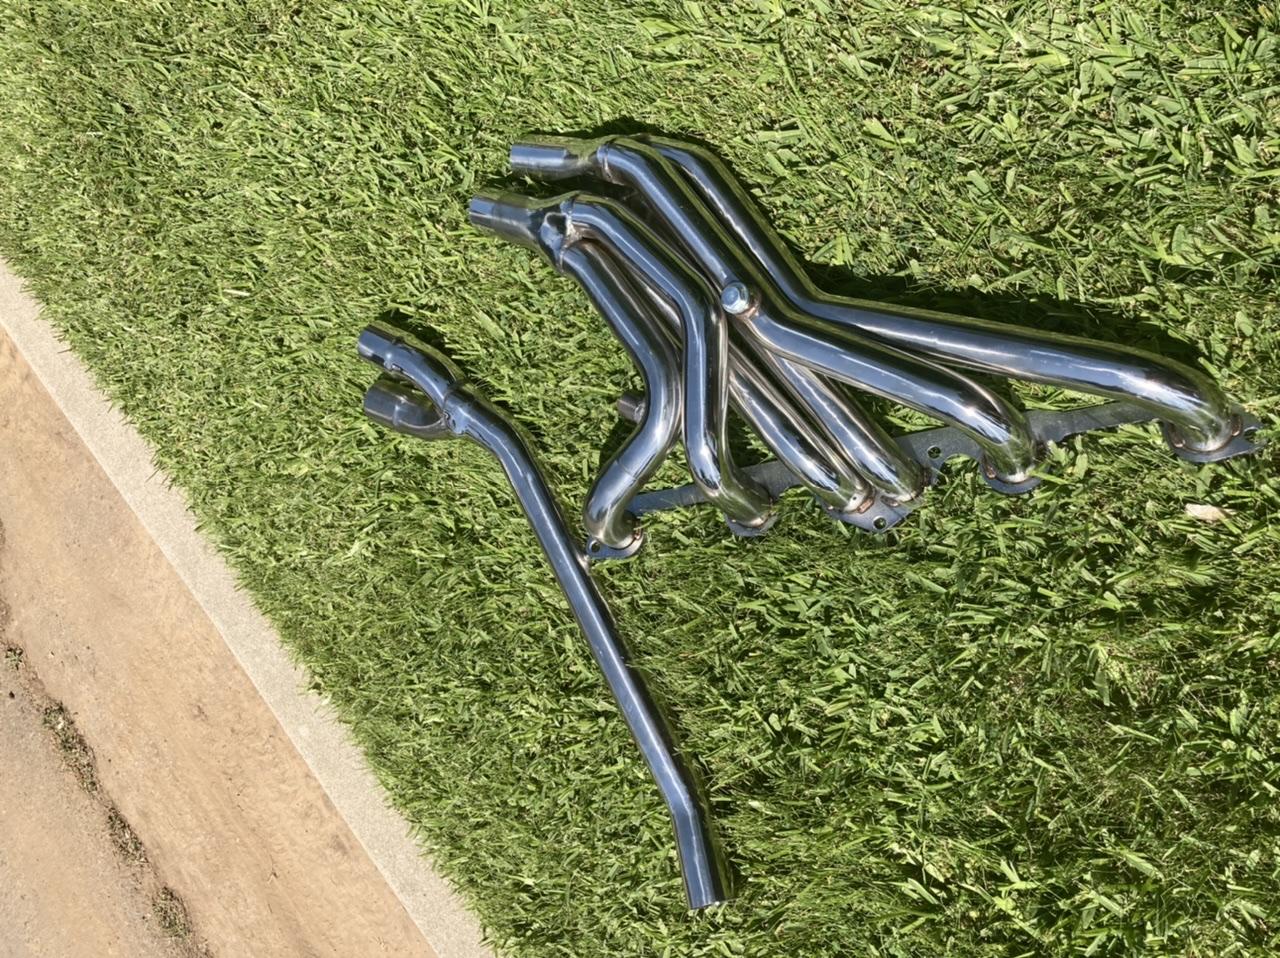
 1 pointPicked up those headers today. They were never used, so this was a good deal. Time to finished this engine build next week.
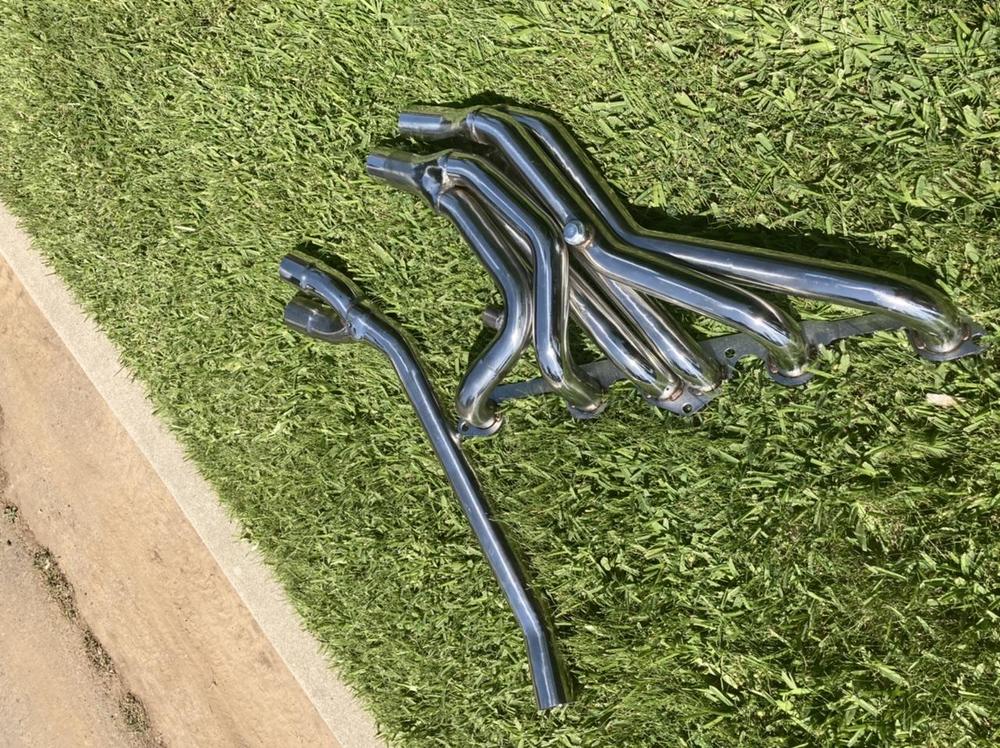 1 point
 -

-
1 pointBefore you send it in, you might want to remove the rubber pads. They might disappear when the tank gets cooked.1 point
-
1 pointI forgot to mention that if you pull on the clock hands hard enough you can pull the clock stem out of the main gear. The brass stem is knurled at end and is hard to put back in the original position. If not exactly positioned the interference fit is more than the nylon can take, due to age, and can crack the smaller gear. Just a heads up! NOTE: This only applies to the 280- analog quartz clocks.
 1 point
 -
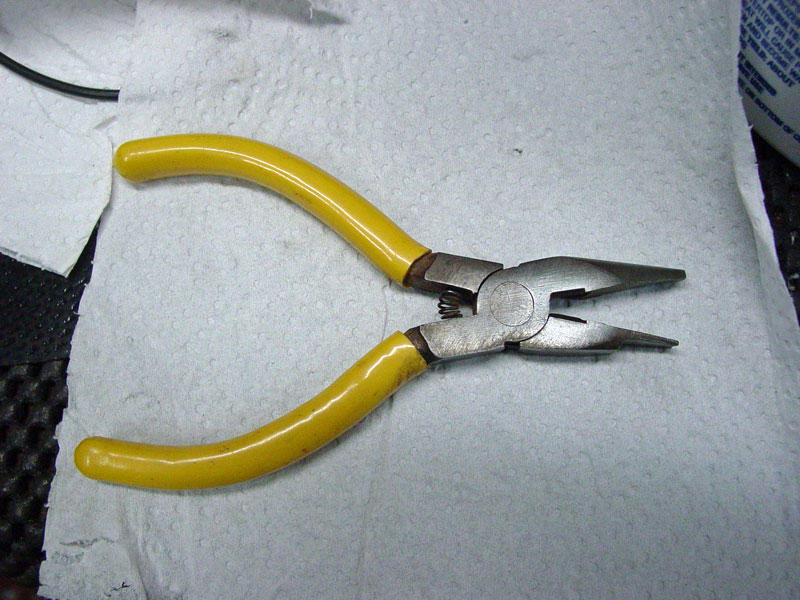
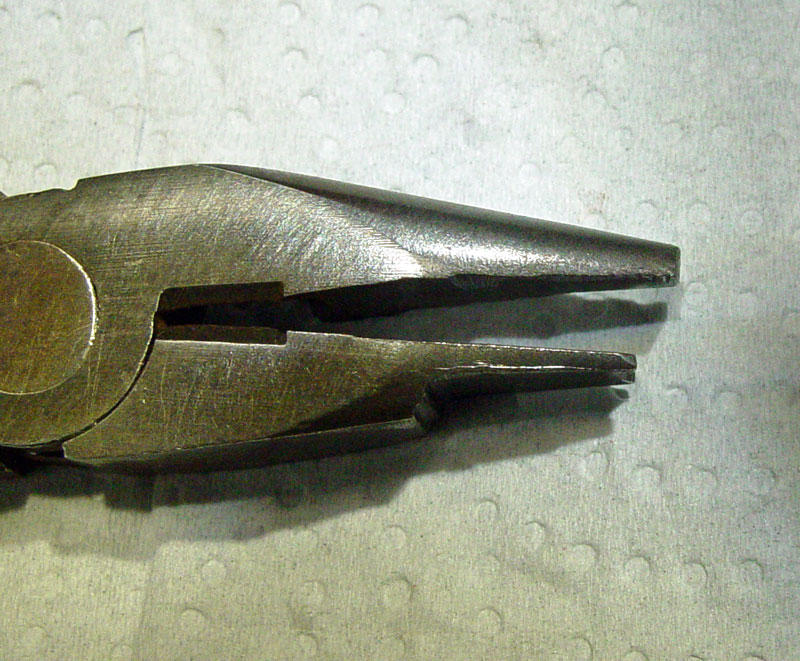
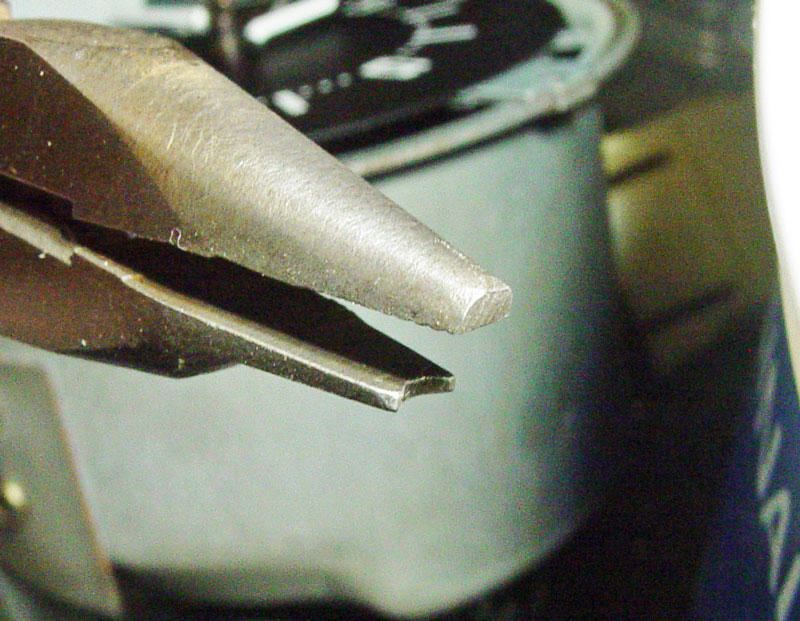
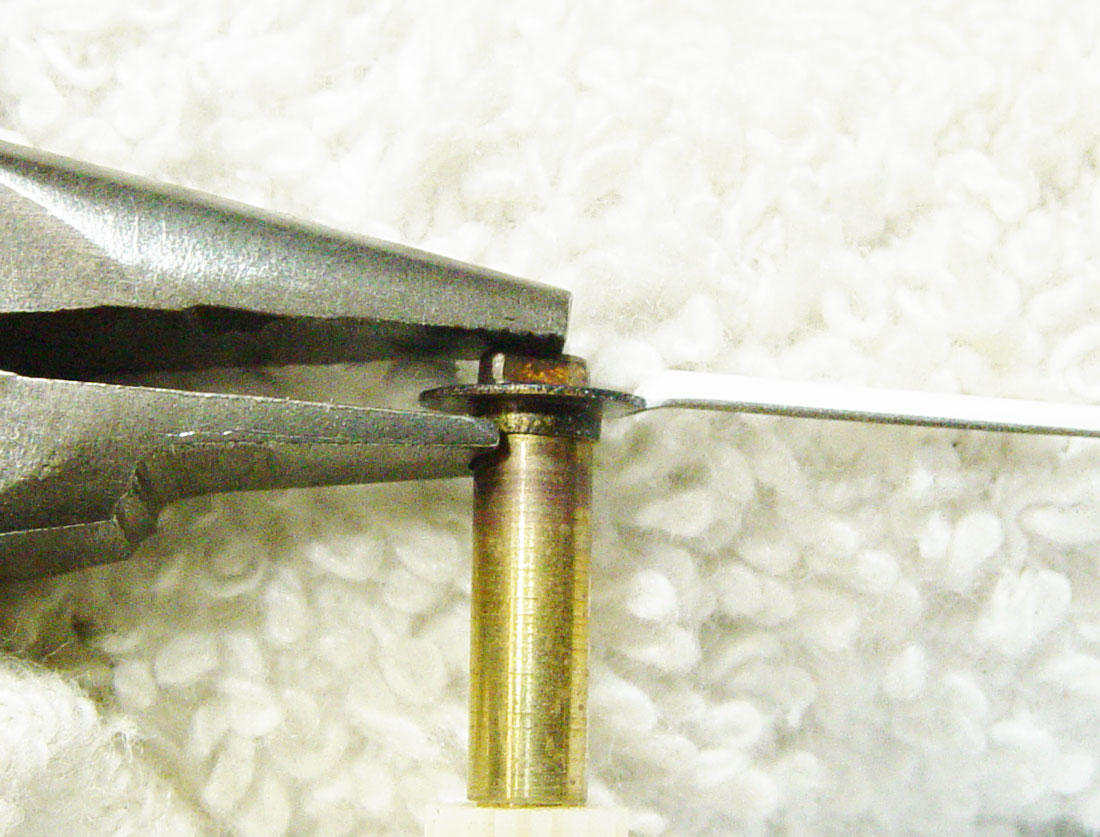
1 pointWhat I use is a home built puller. Well, it doesn't pull , but breaks loose the corrosion between the brass shaft and the tin clock hand. You have to be very careful and not touch the clock face as that will cause damage. If you look at CH-4 photo you will see that the pliers contacts the shaft just below the flange of the hand. Apply a small amount of pressure by squeezing the pliers. Do this again 180 deg from your first contact. What you want to do again is break the corrosion contact between the clock stem and the hand. Once the hand starts to move stop and use your finger nails to remove the clock hand. If you try and do this all in one step you will bend the large flange of the clock hand. Also, I use a soft paper towel that goes around the clock stem so the clock face is protected from finger oil and also protects the face from pliers contact. Let me know if you have any questions.
 1 point
 -
 1 pointThis question has come up before and I recall jokingly recommending a clock hand puller. Much to my surprised delight, they are a Google search away.1 point
 -
 1 pointTry using electrical heat-shrink tubing, I did. Works fine. Cheers, Mike1 point
 -
 1 point
 -

-
 0 pointsBetter watch what he touches and don't shake his hand. He's a super-spreader. Good luck. It sounds like a nasty disease to get even if you survive it. Worse than the flu.0 points

.jpg.1a265f290ed5dd69f515186066bf4114.jpg)