


Leaderboard
-
cmillermorris
 Subscriber
 8Points22Posts
 -

240260280
Free Member4Points4,442Posts -
Clay C
Free Member3Points108Posts -
Trnelson
Free Member3Points101Posts


Popular Content
Showing content with the highest reputation on 08/30/2020 in all areas
-
3 pointsGentlemen, thank you for the advice. I changed to the AC Delco this morning and within A 15 mile test drive I can tell an enormous difference! I would agree that the synchros are probably somewhat worn add that to a poor gear oil choice and it equaled a bad grind. I feel like I’m good for now but I’ll probably dive into the transmission over the winter. I read somewhere that the earlier transmissions had “Porsche” type synchros? Is that not the case?3 points
-
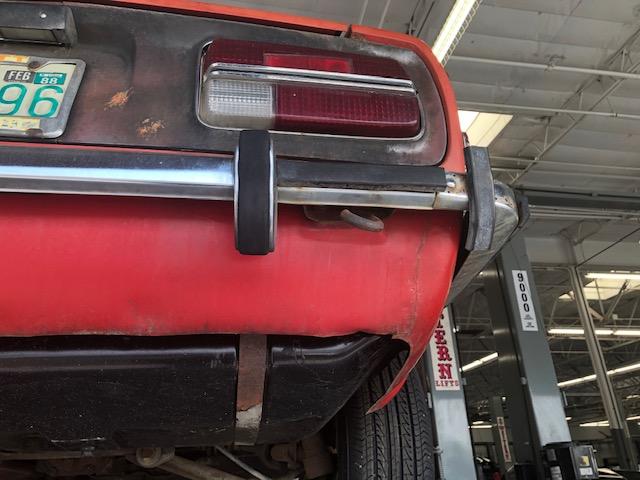
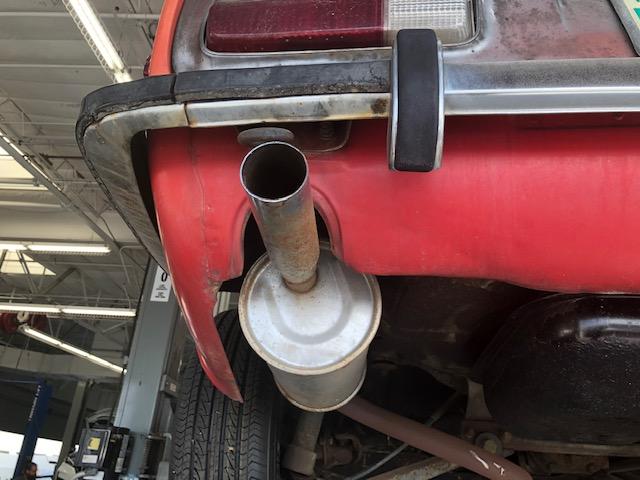
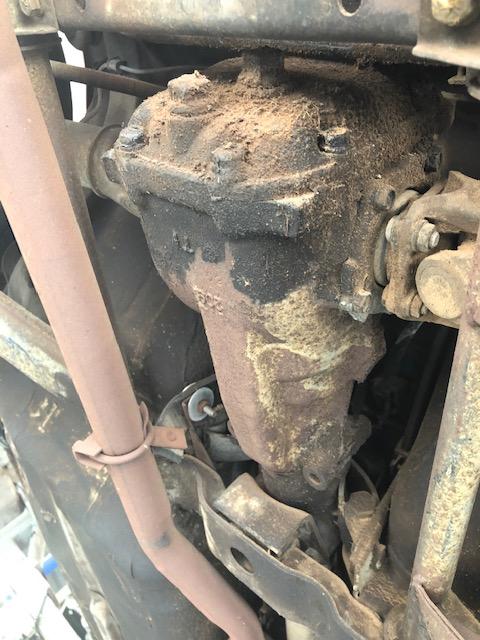
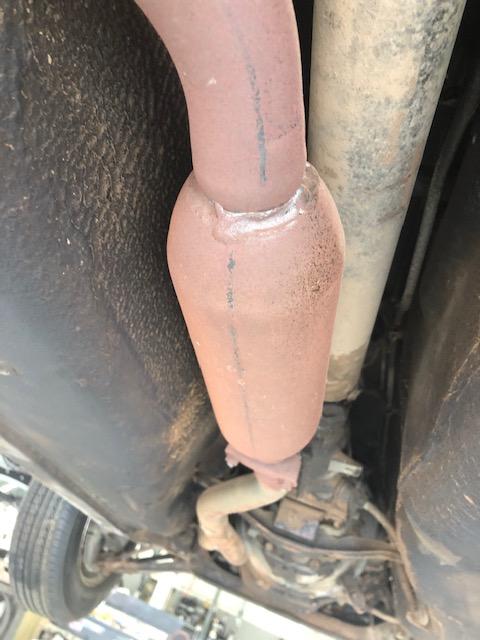
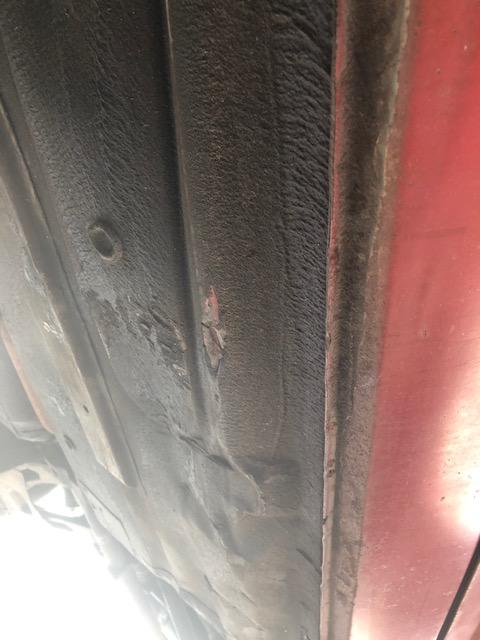
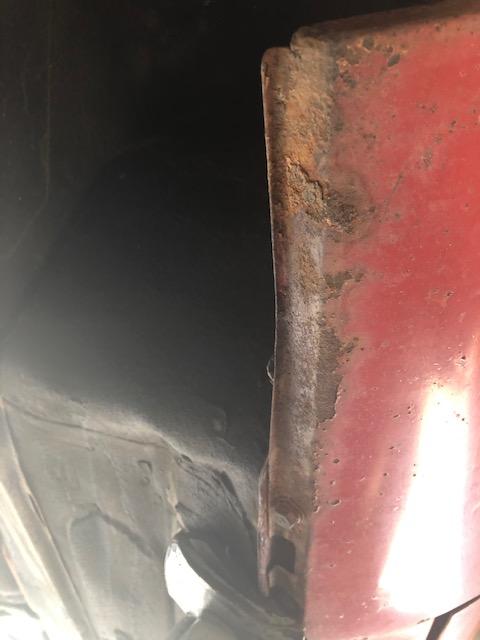
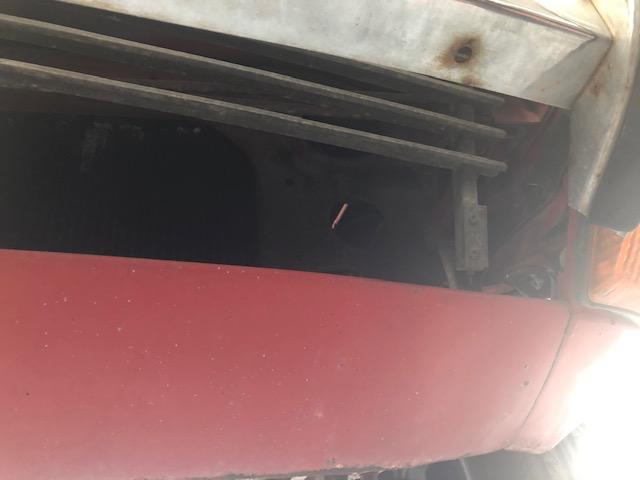
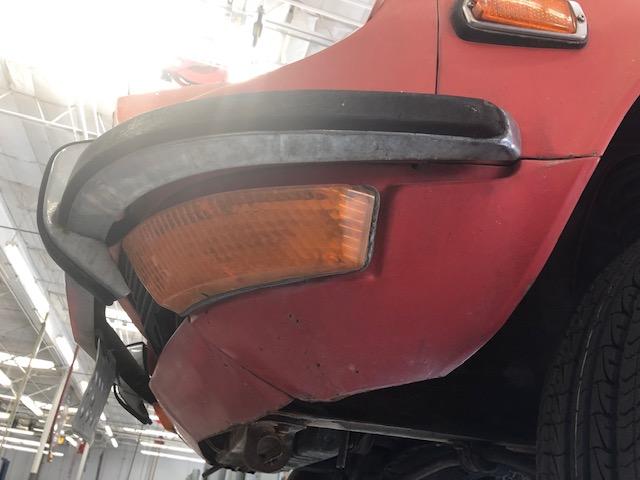
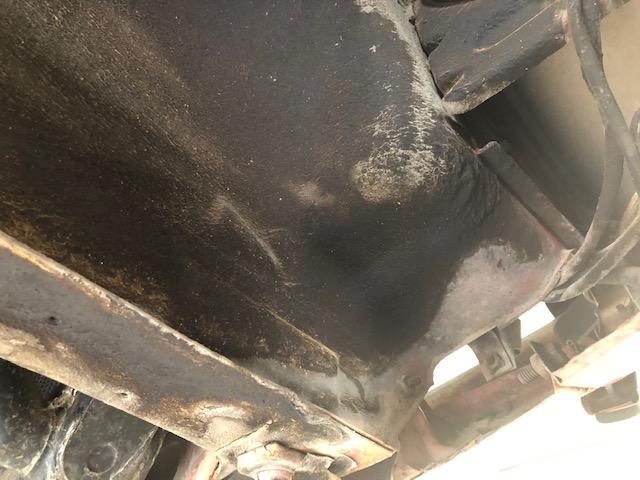
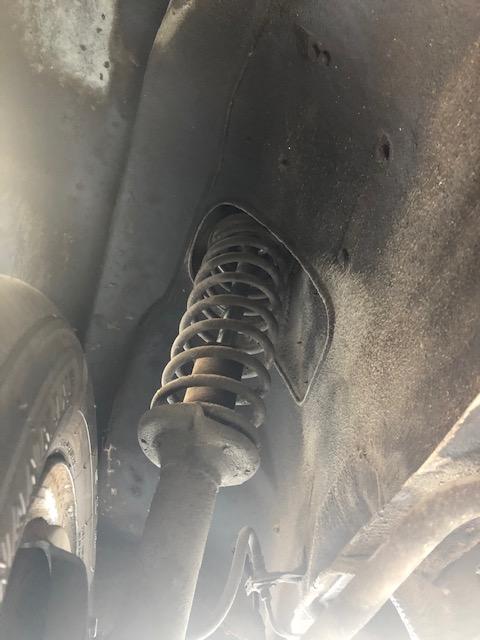
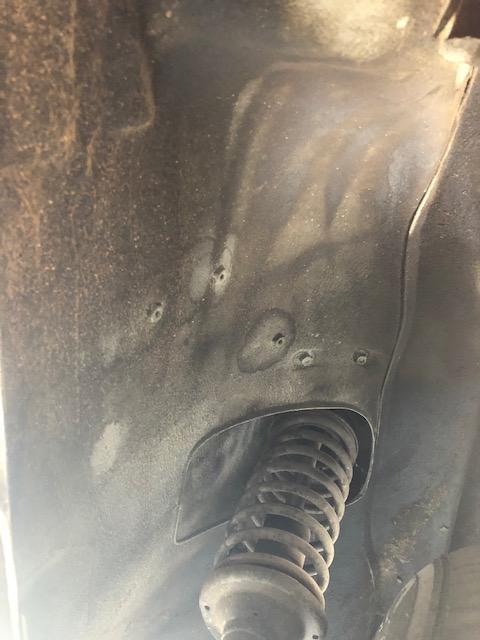
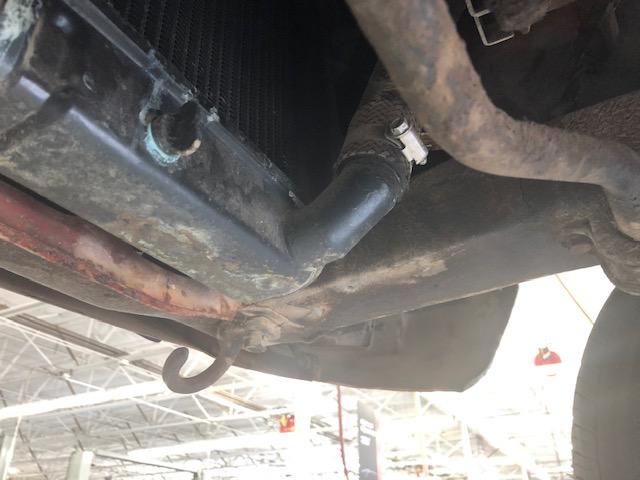
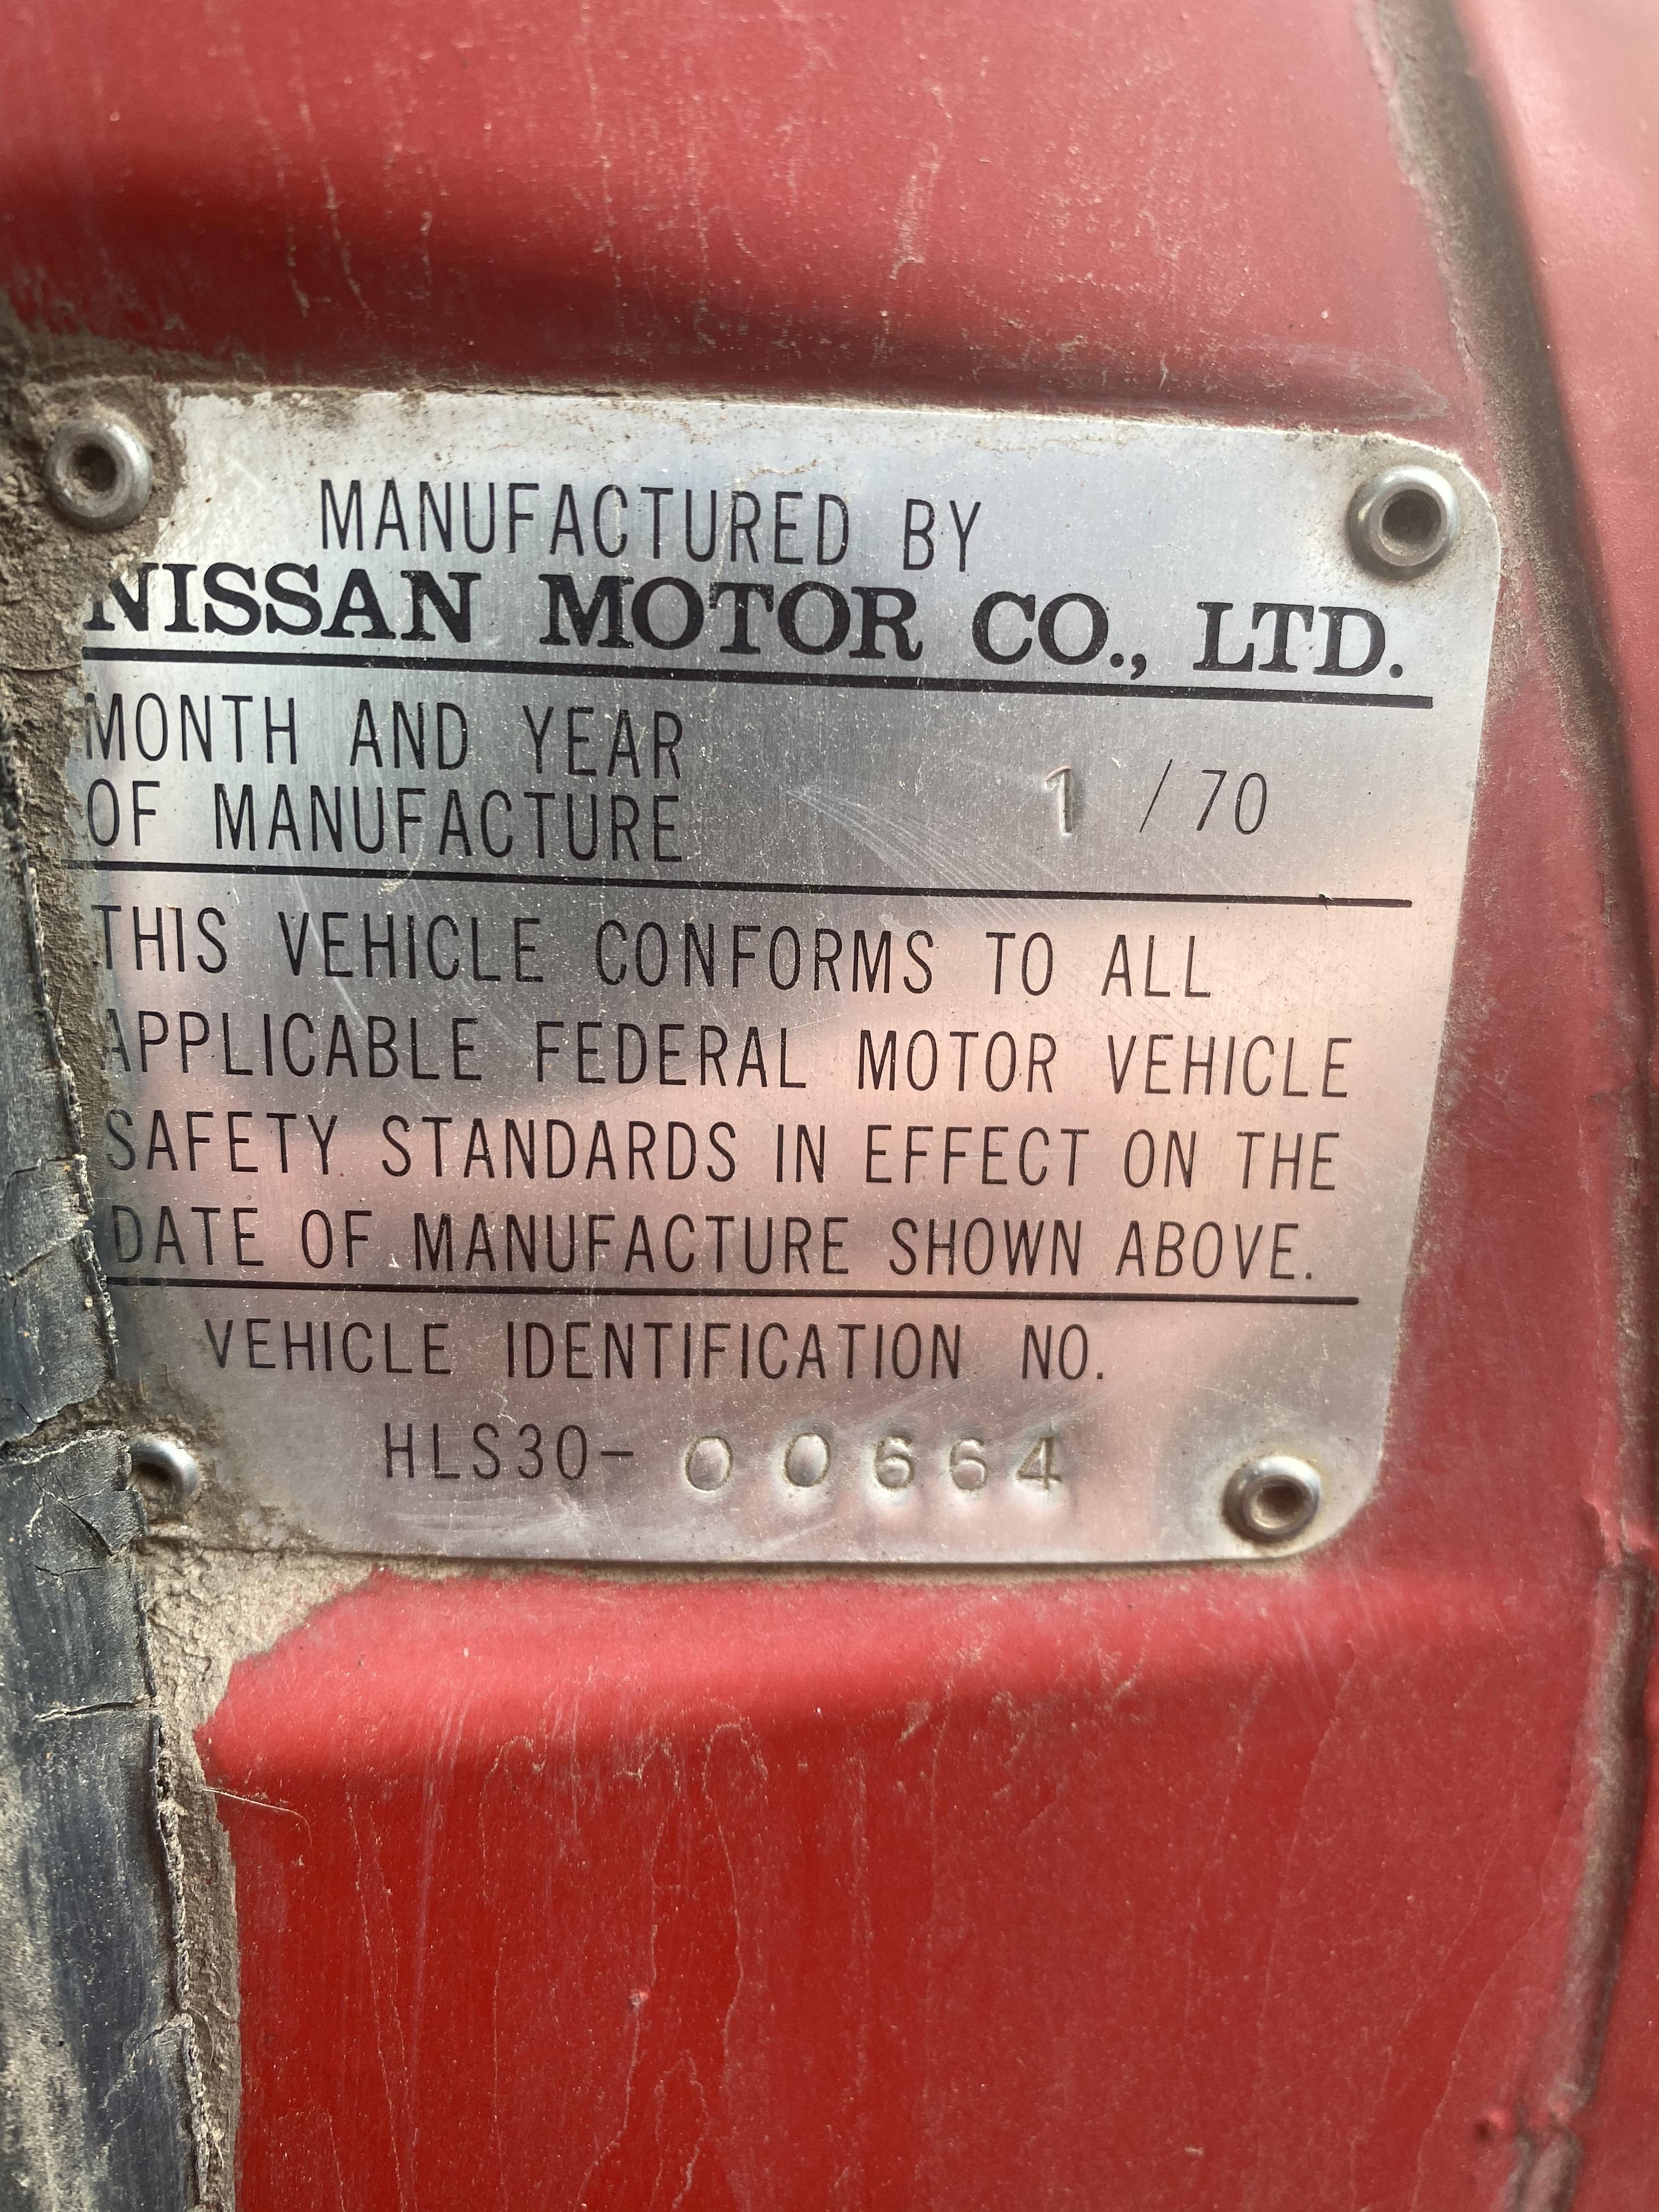
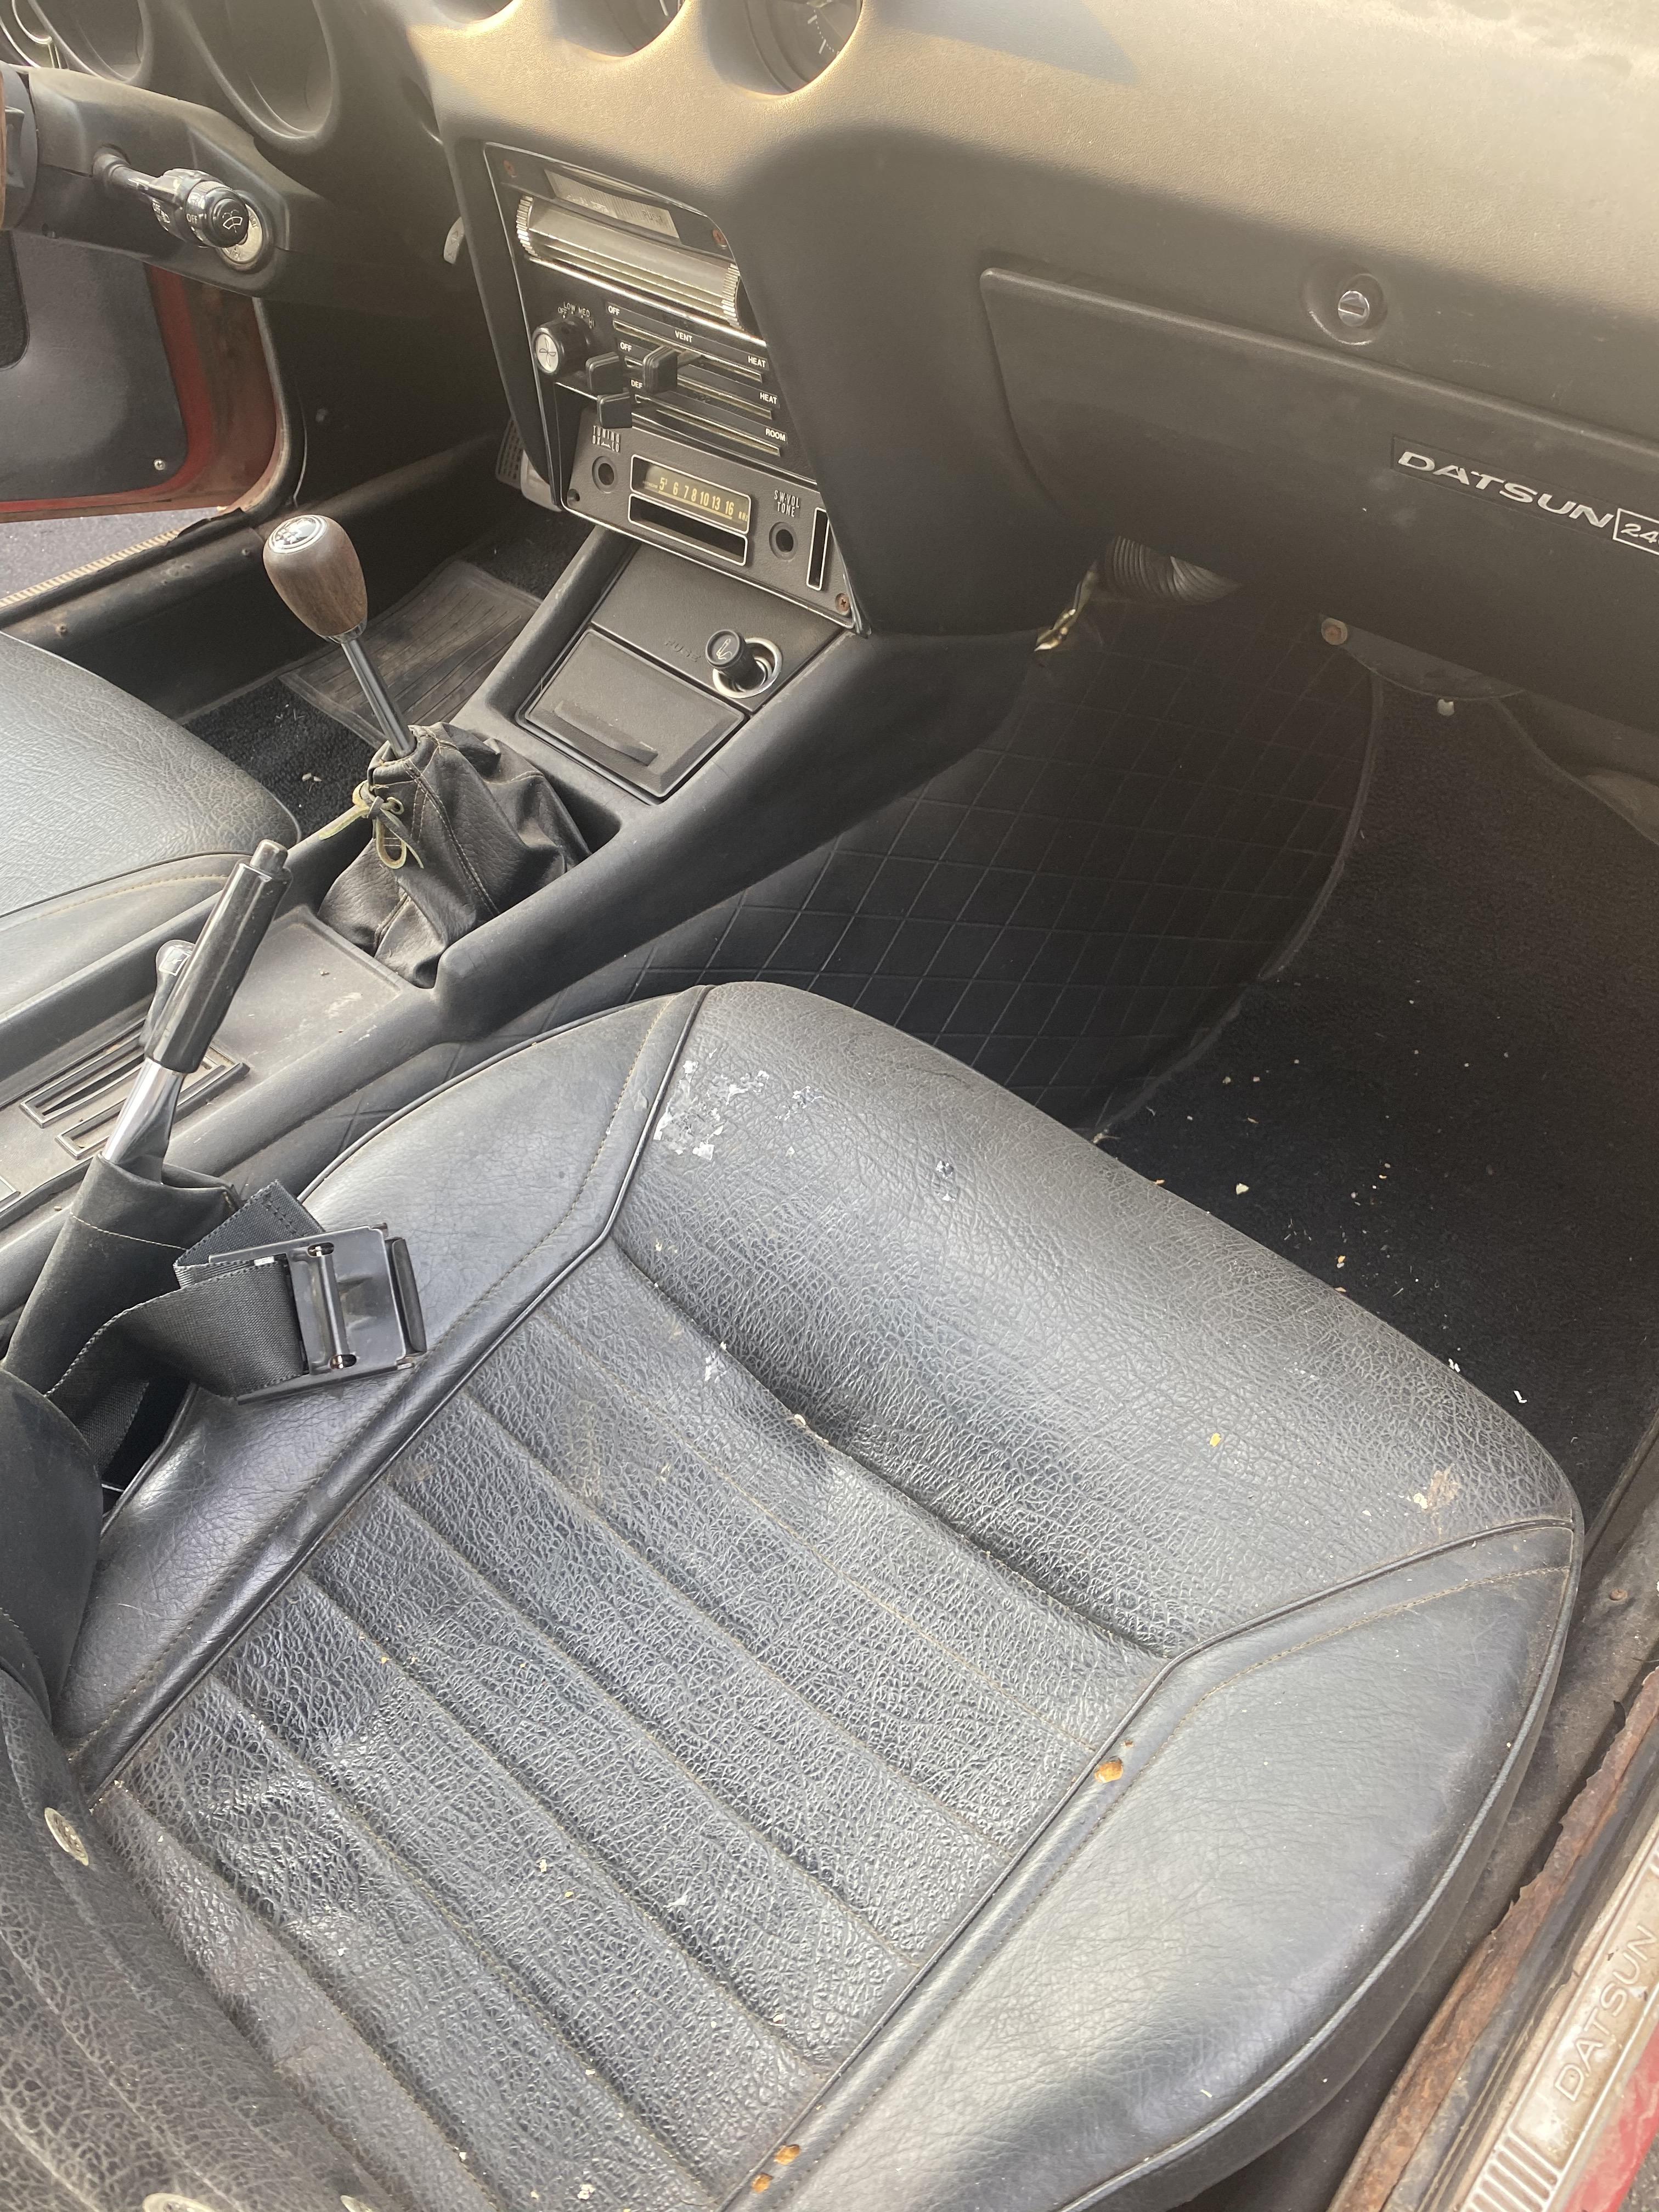
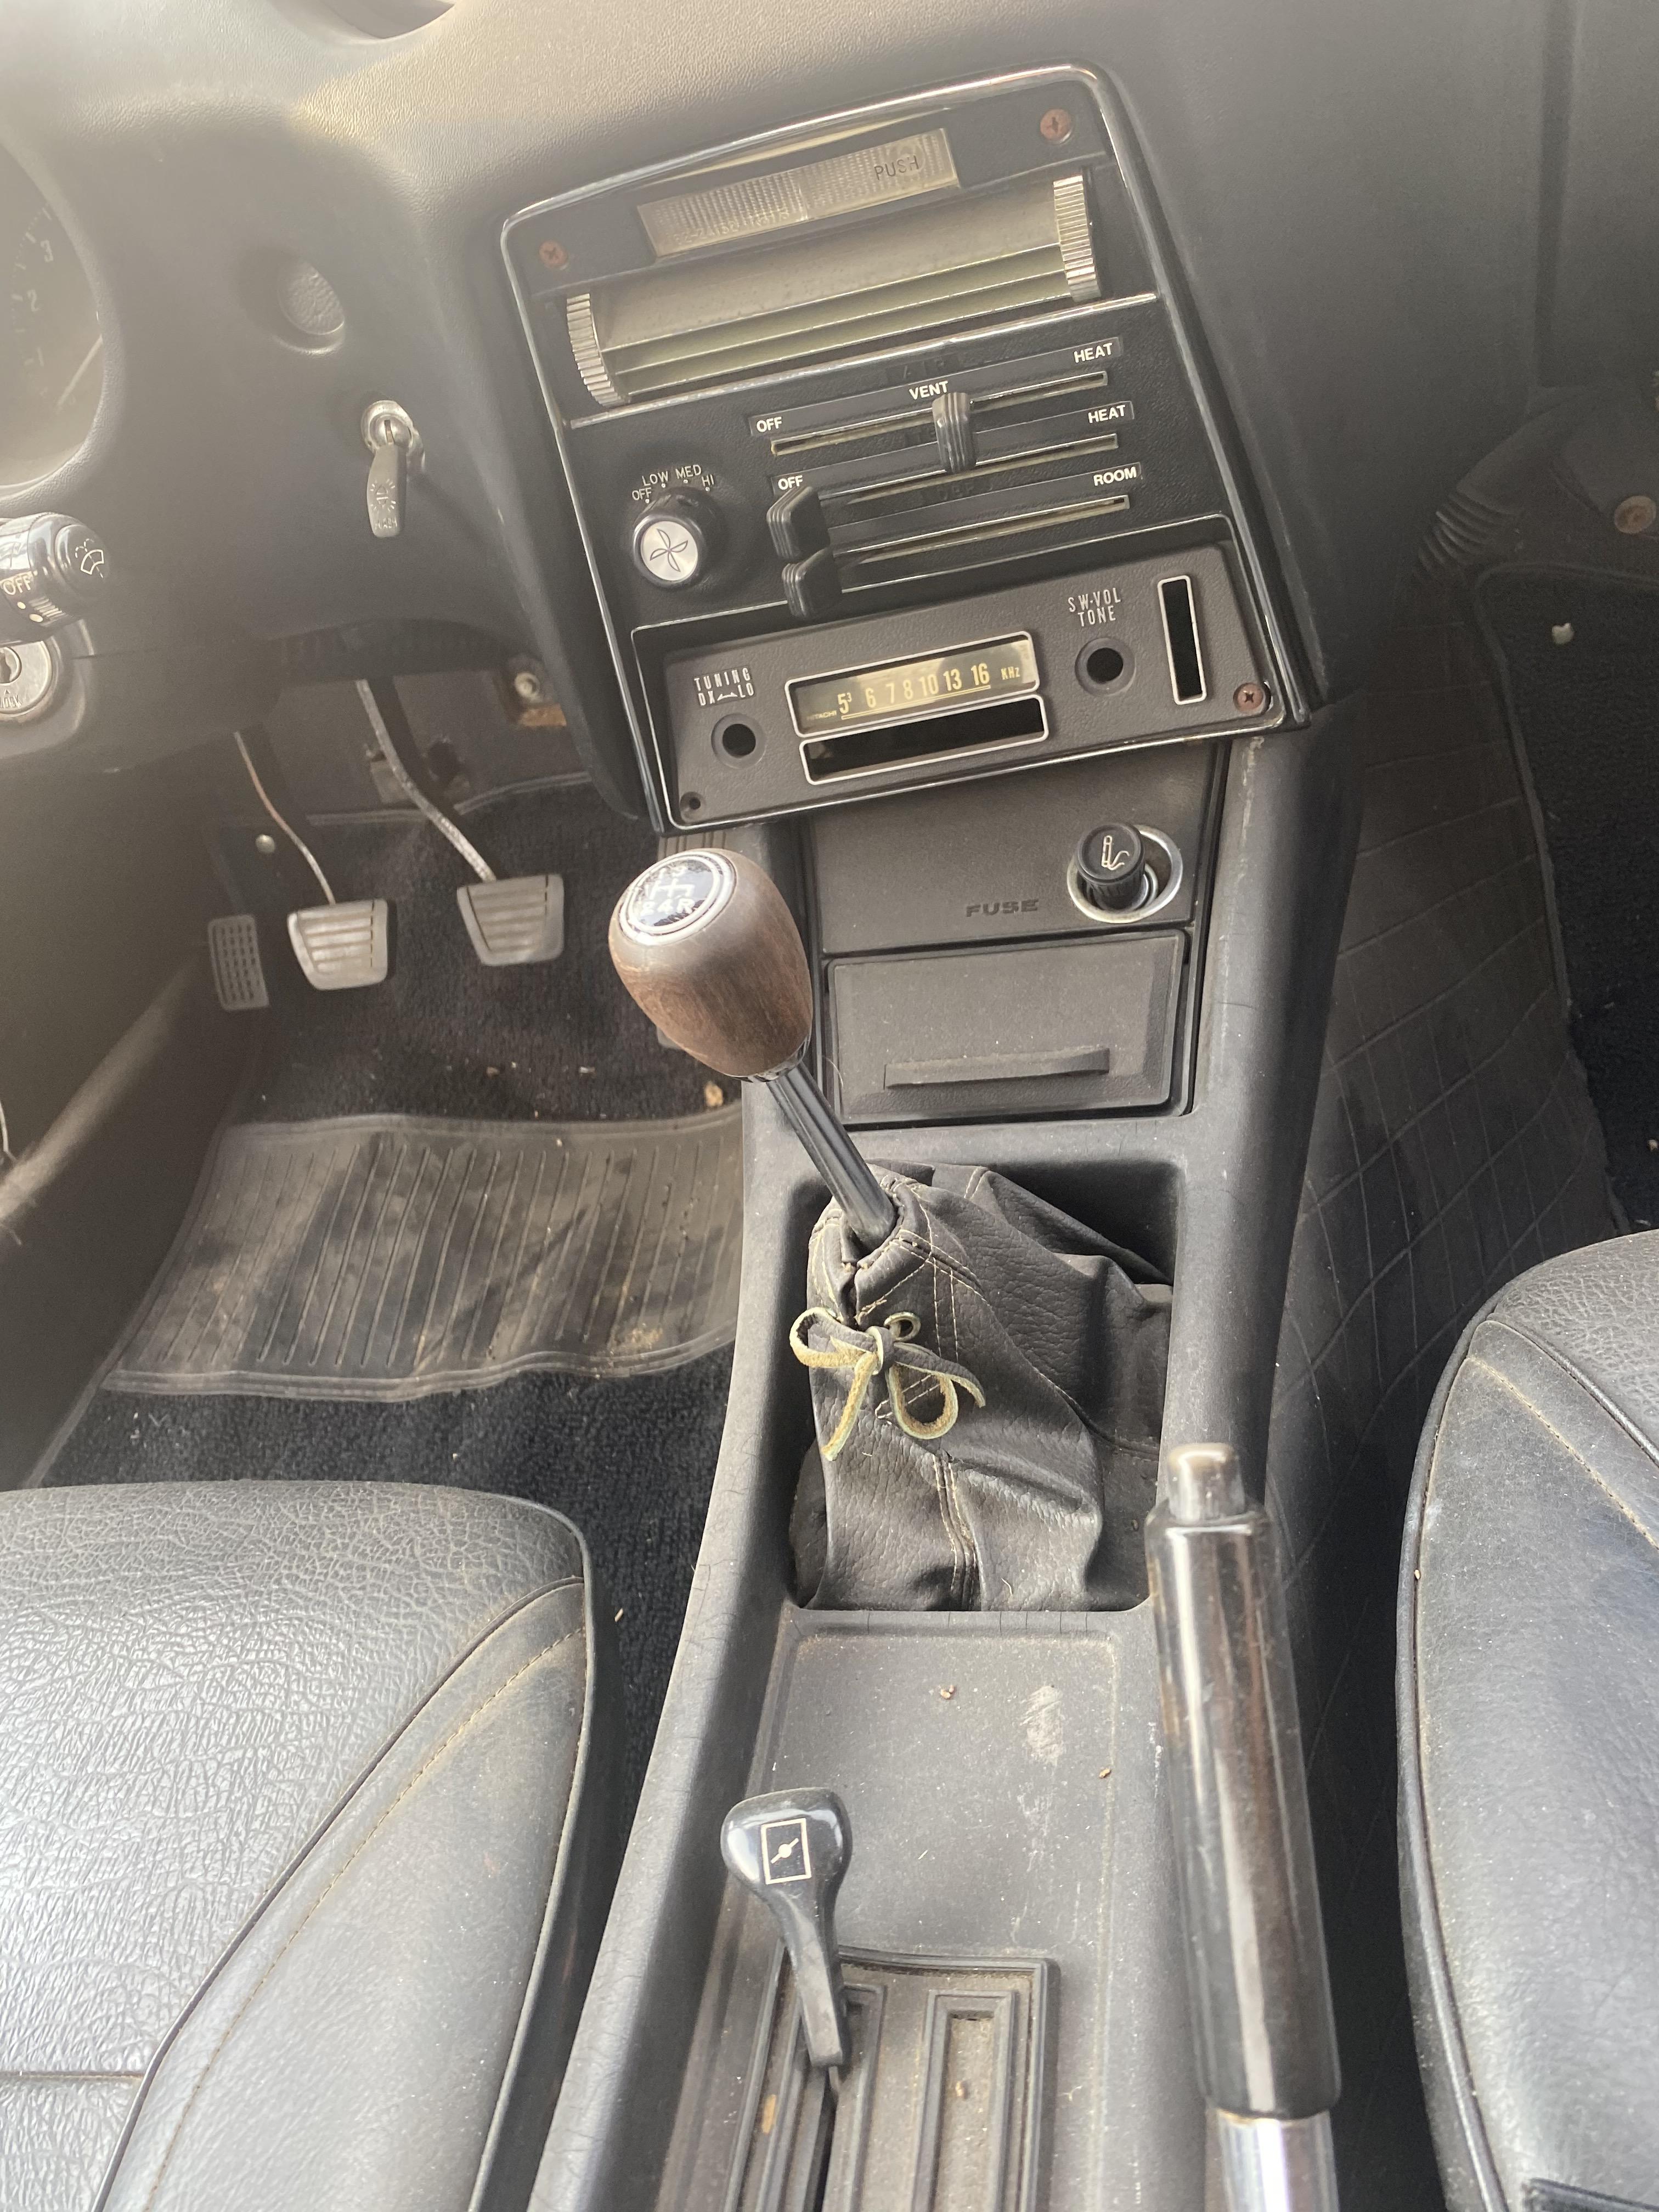
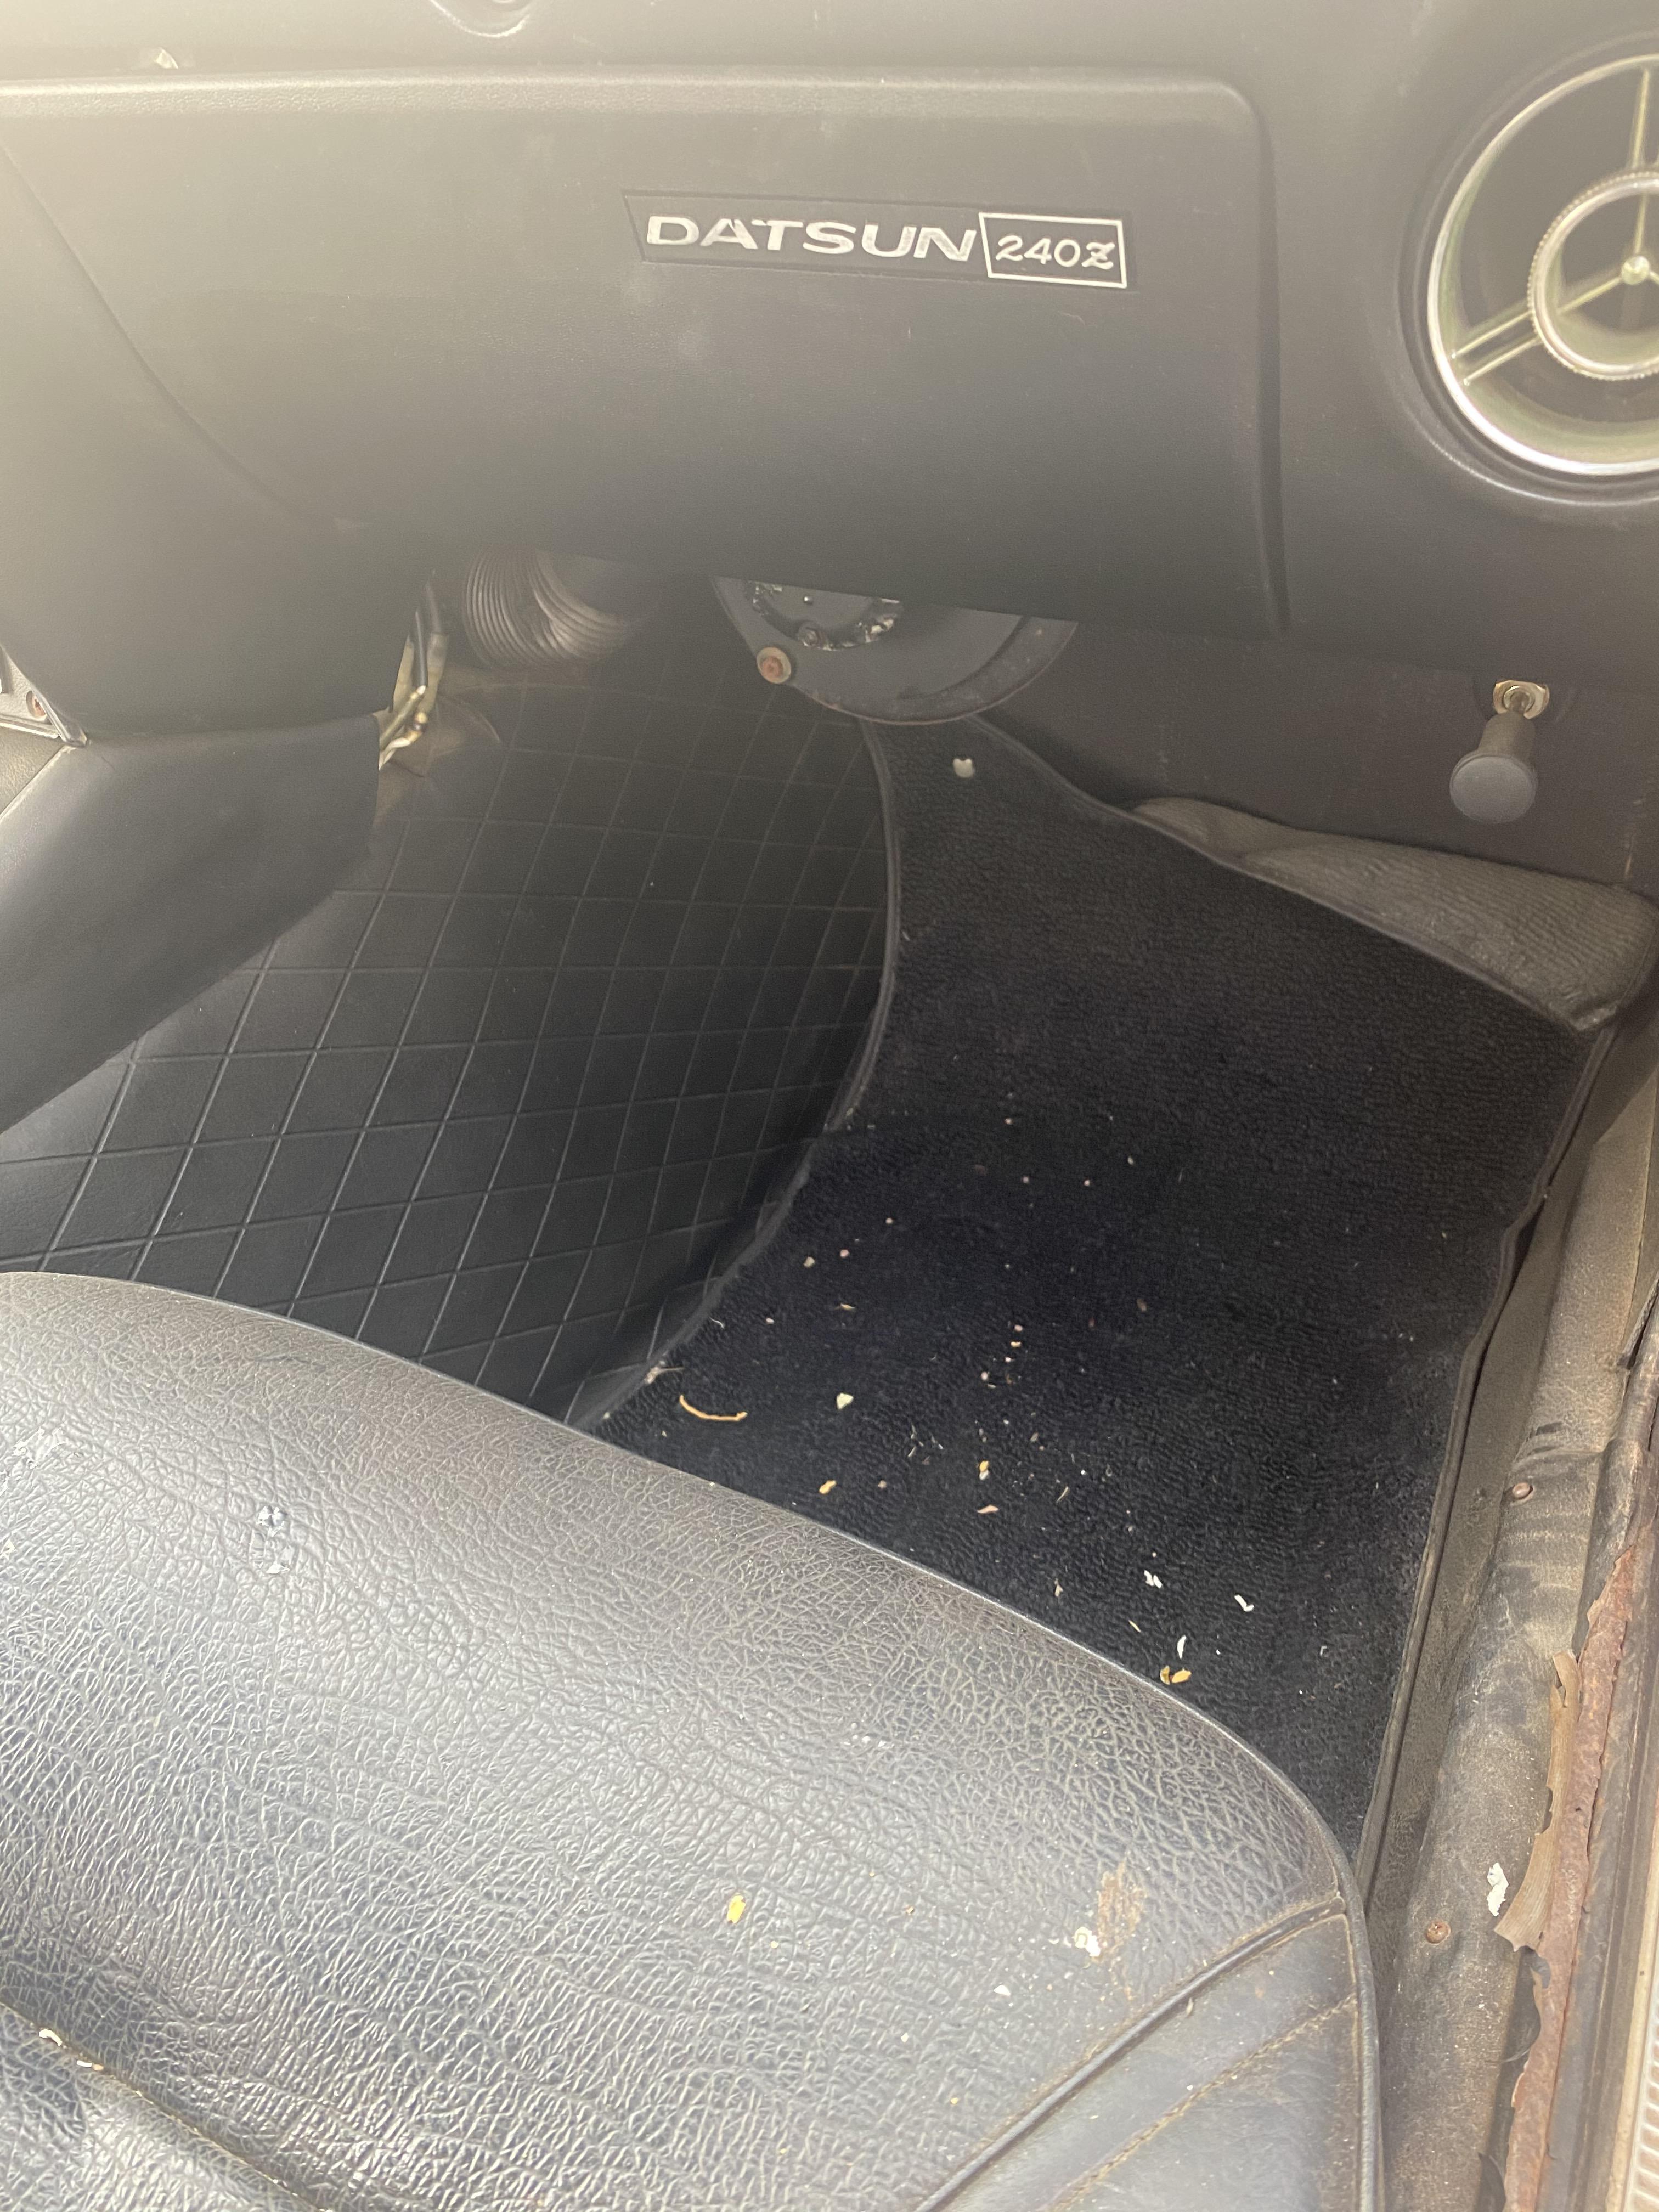
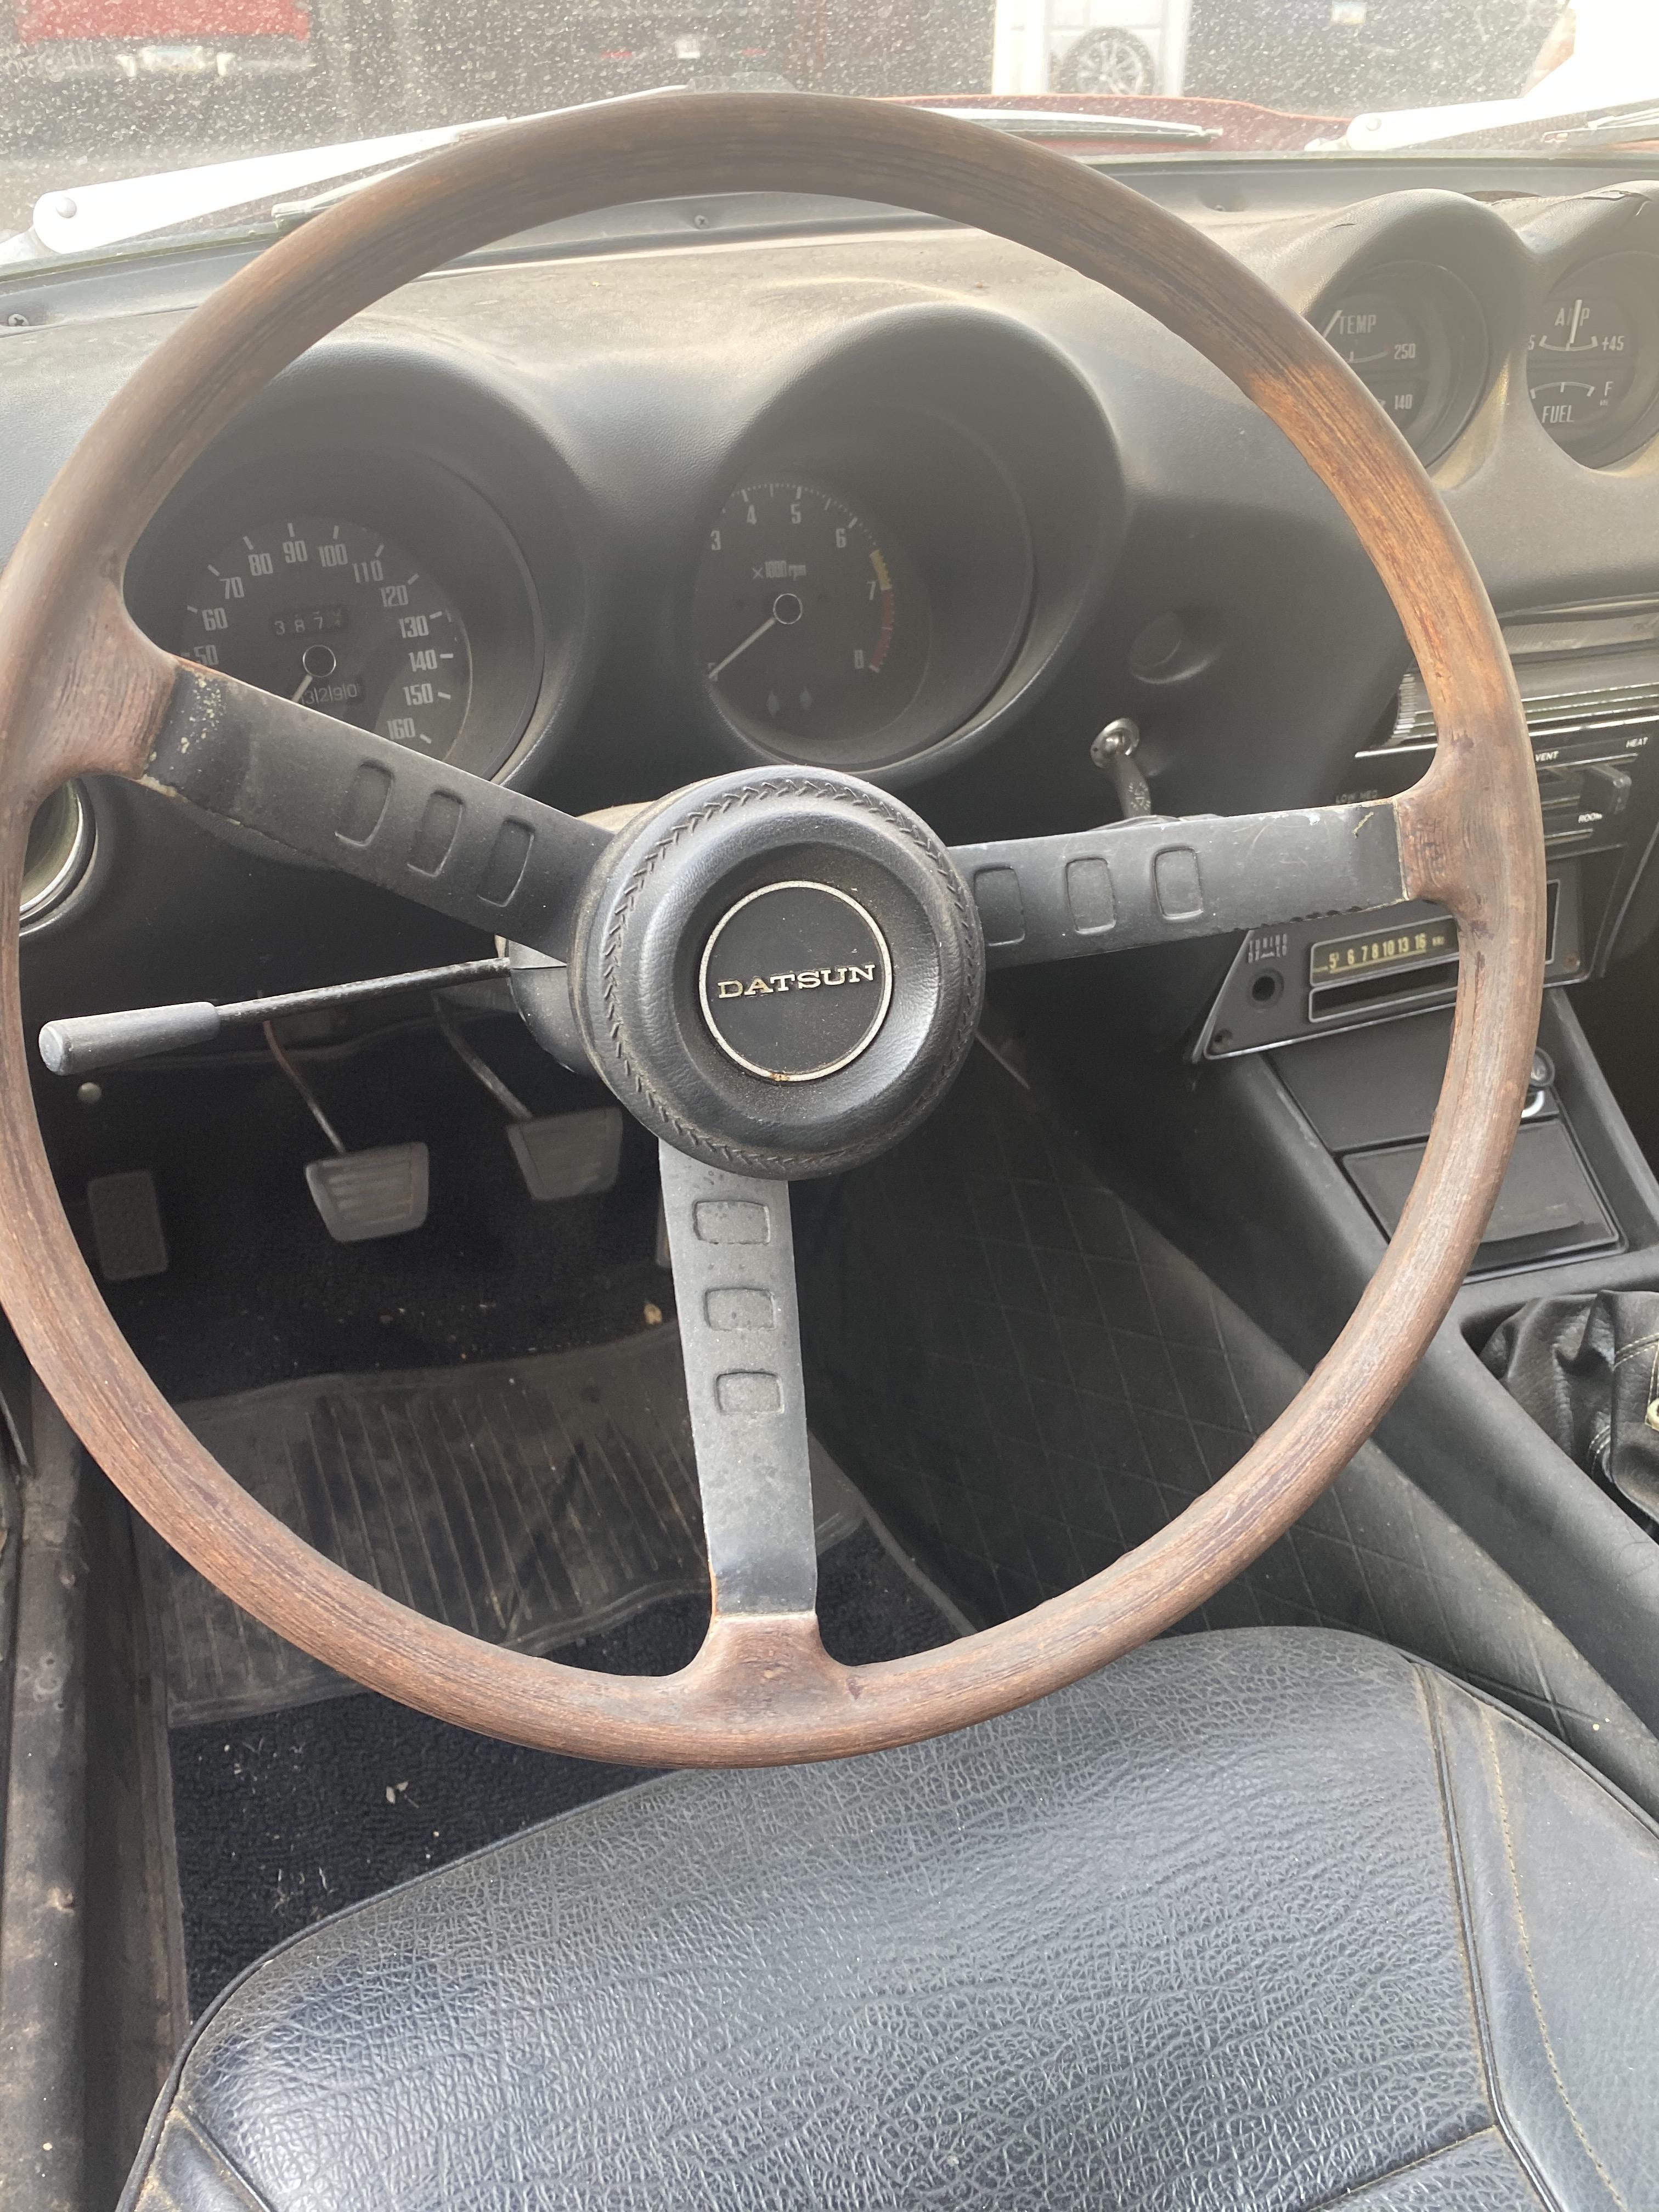
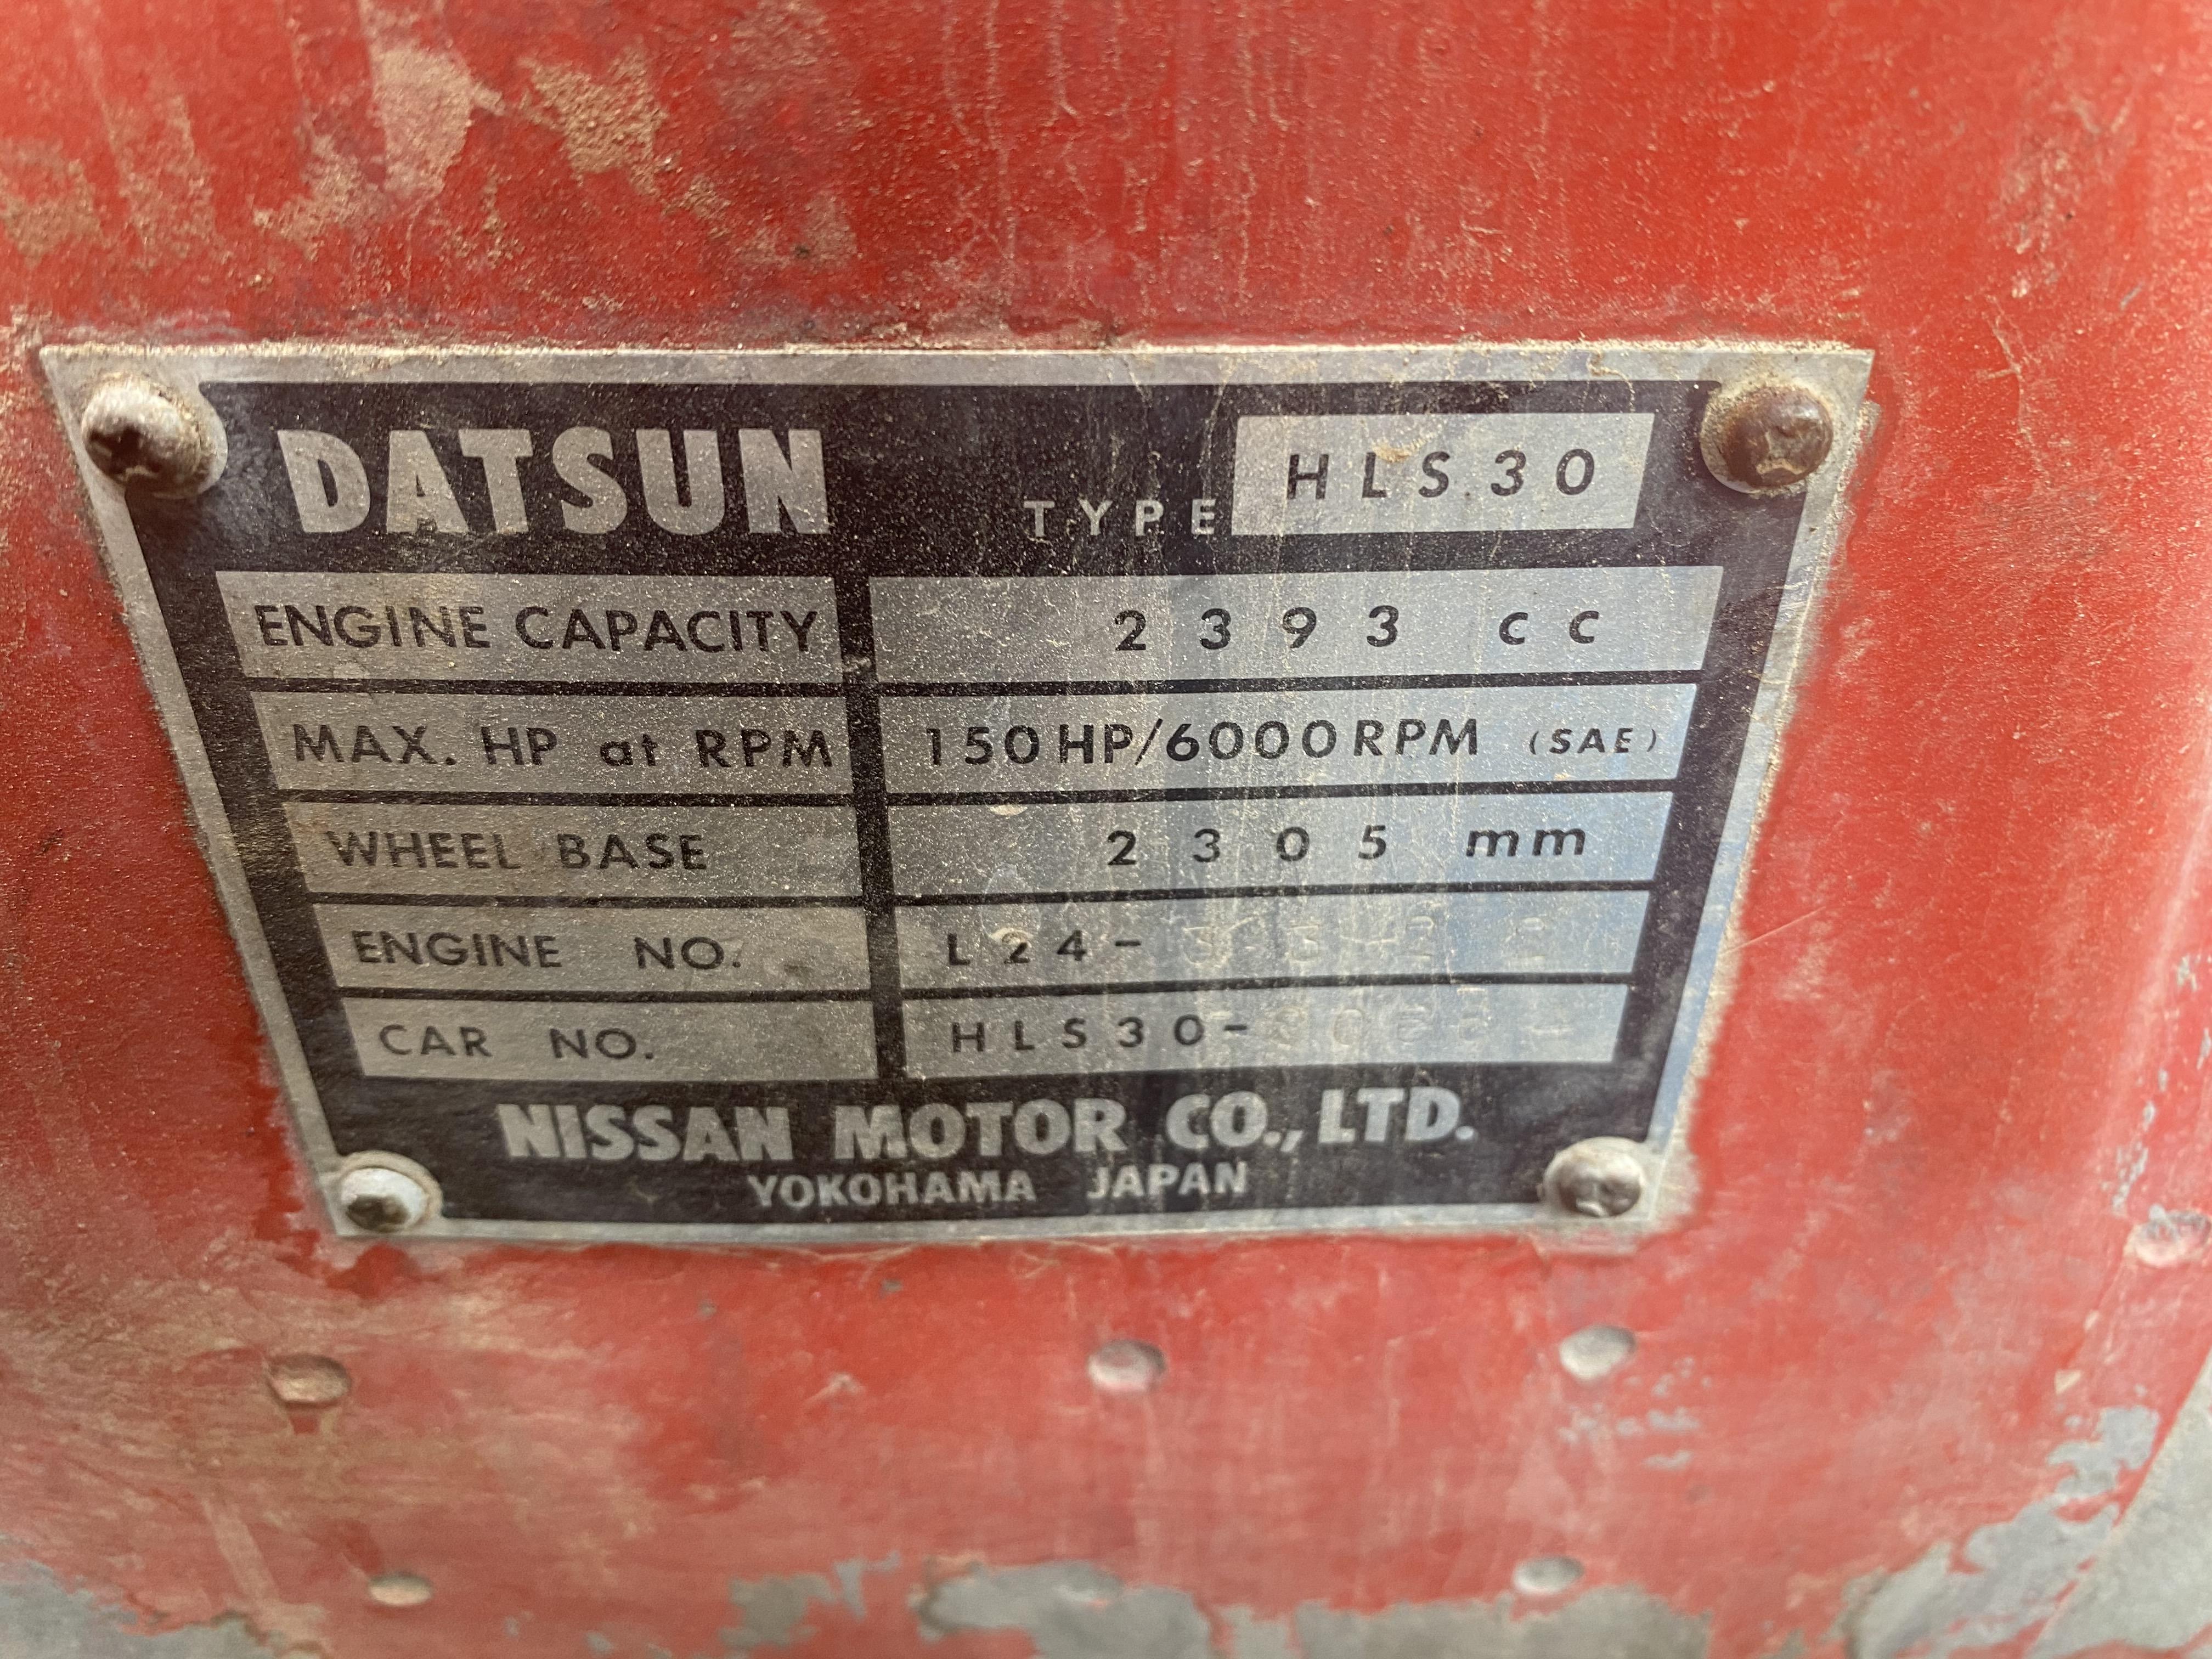
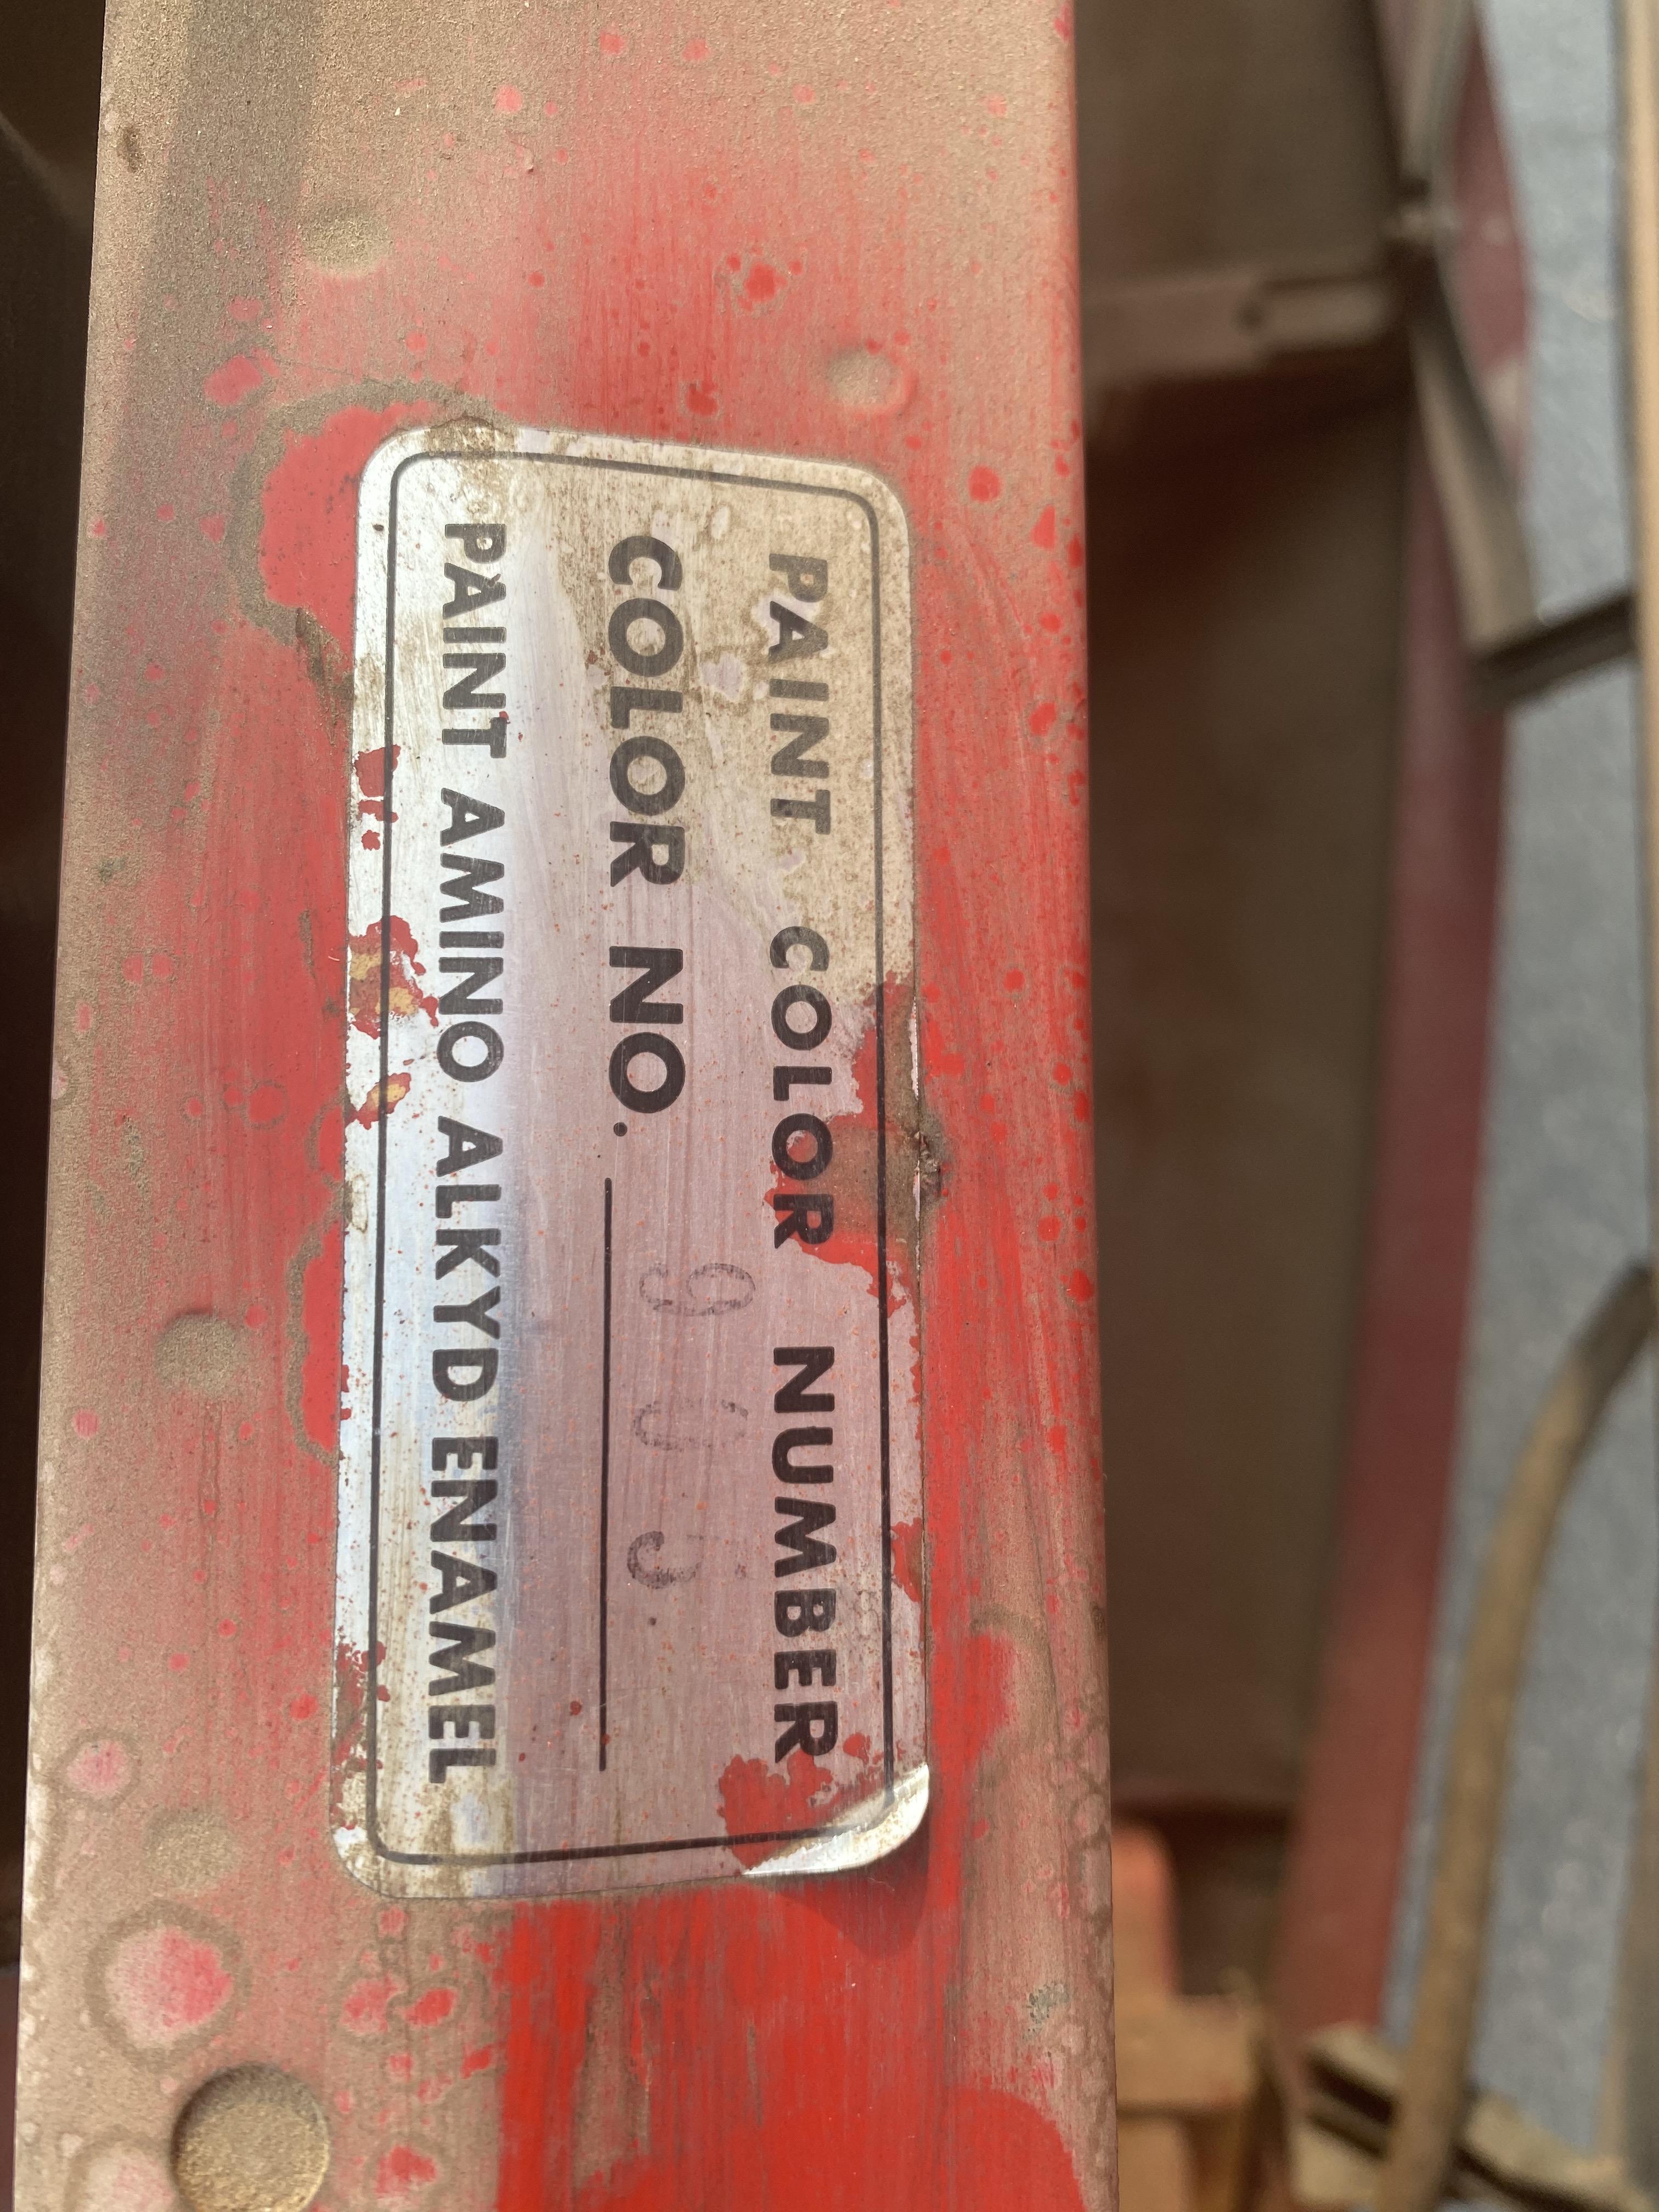
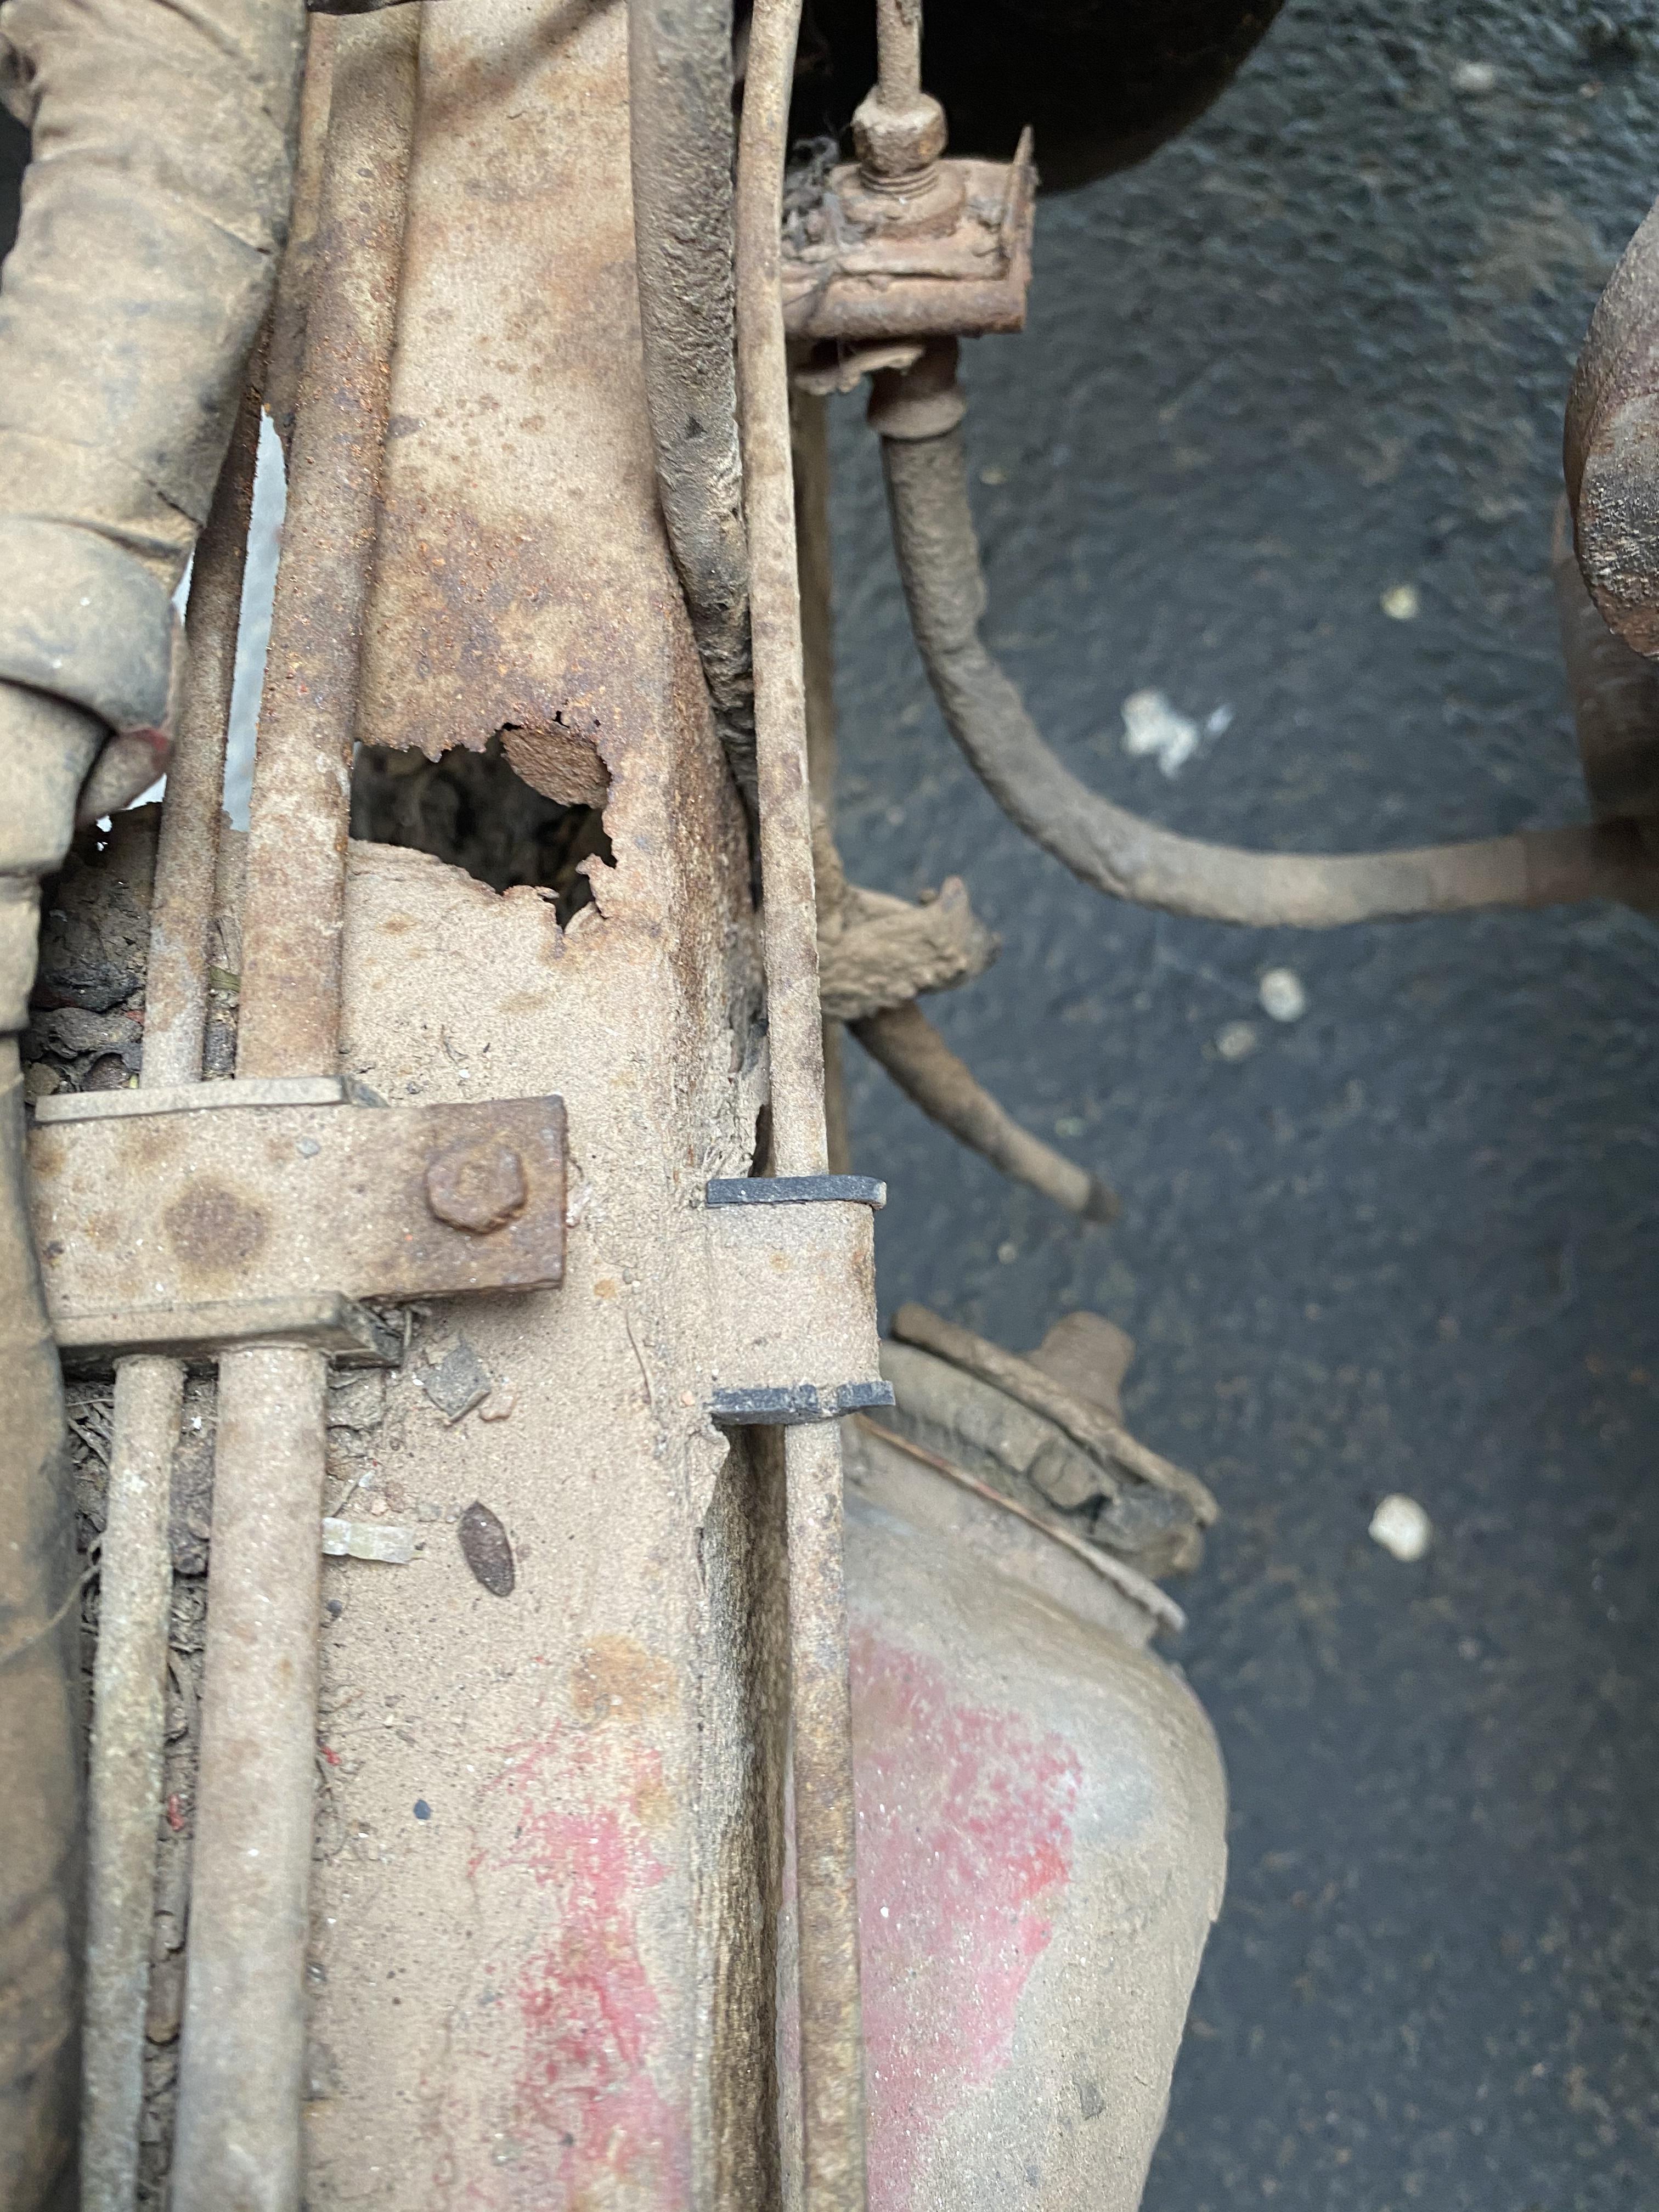
3 pointsI will try to get some more pictures for everyone this week. I think I might have located a 70 240Z donor car, and I have never driven this car, and don't plan on it until the rust/frame rail have been addressed.3 points
-
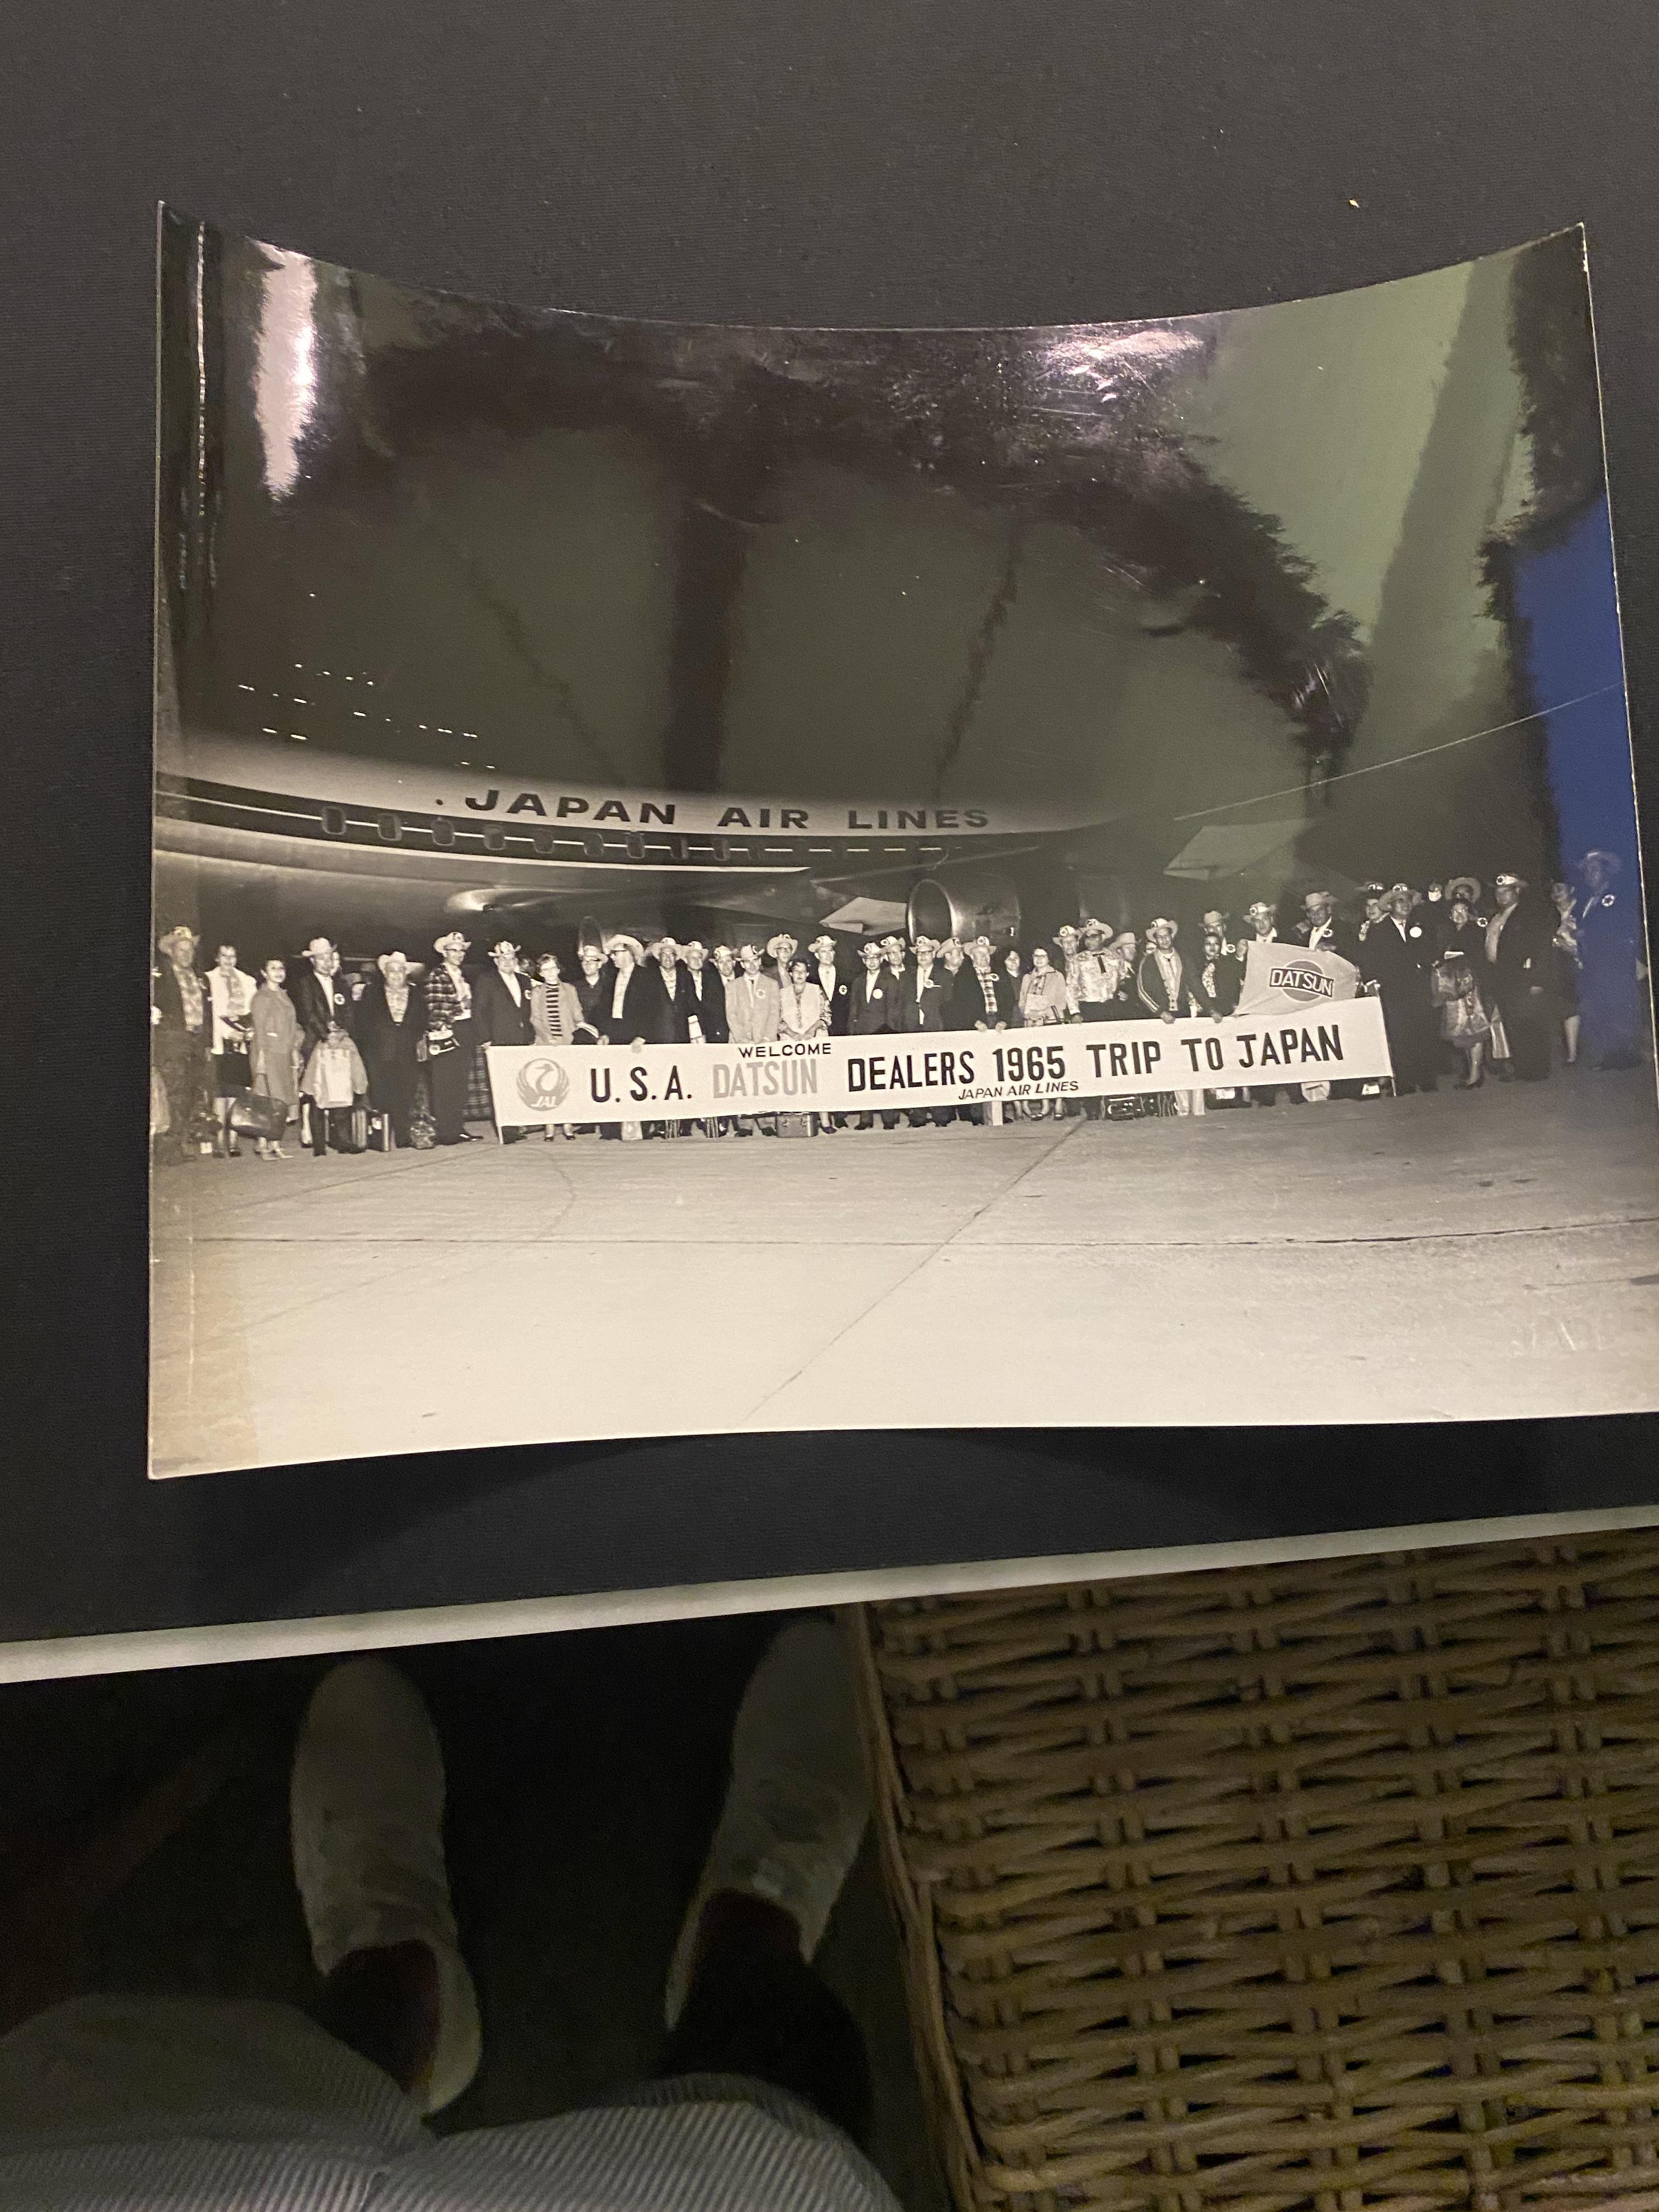
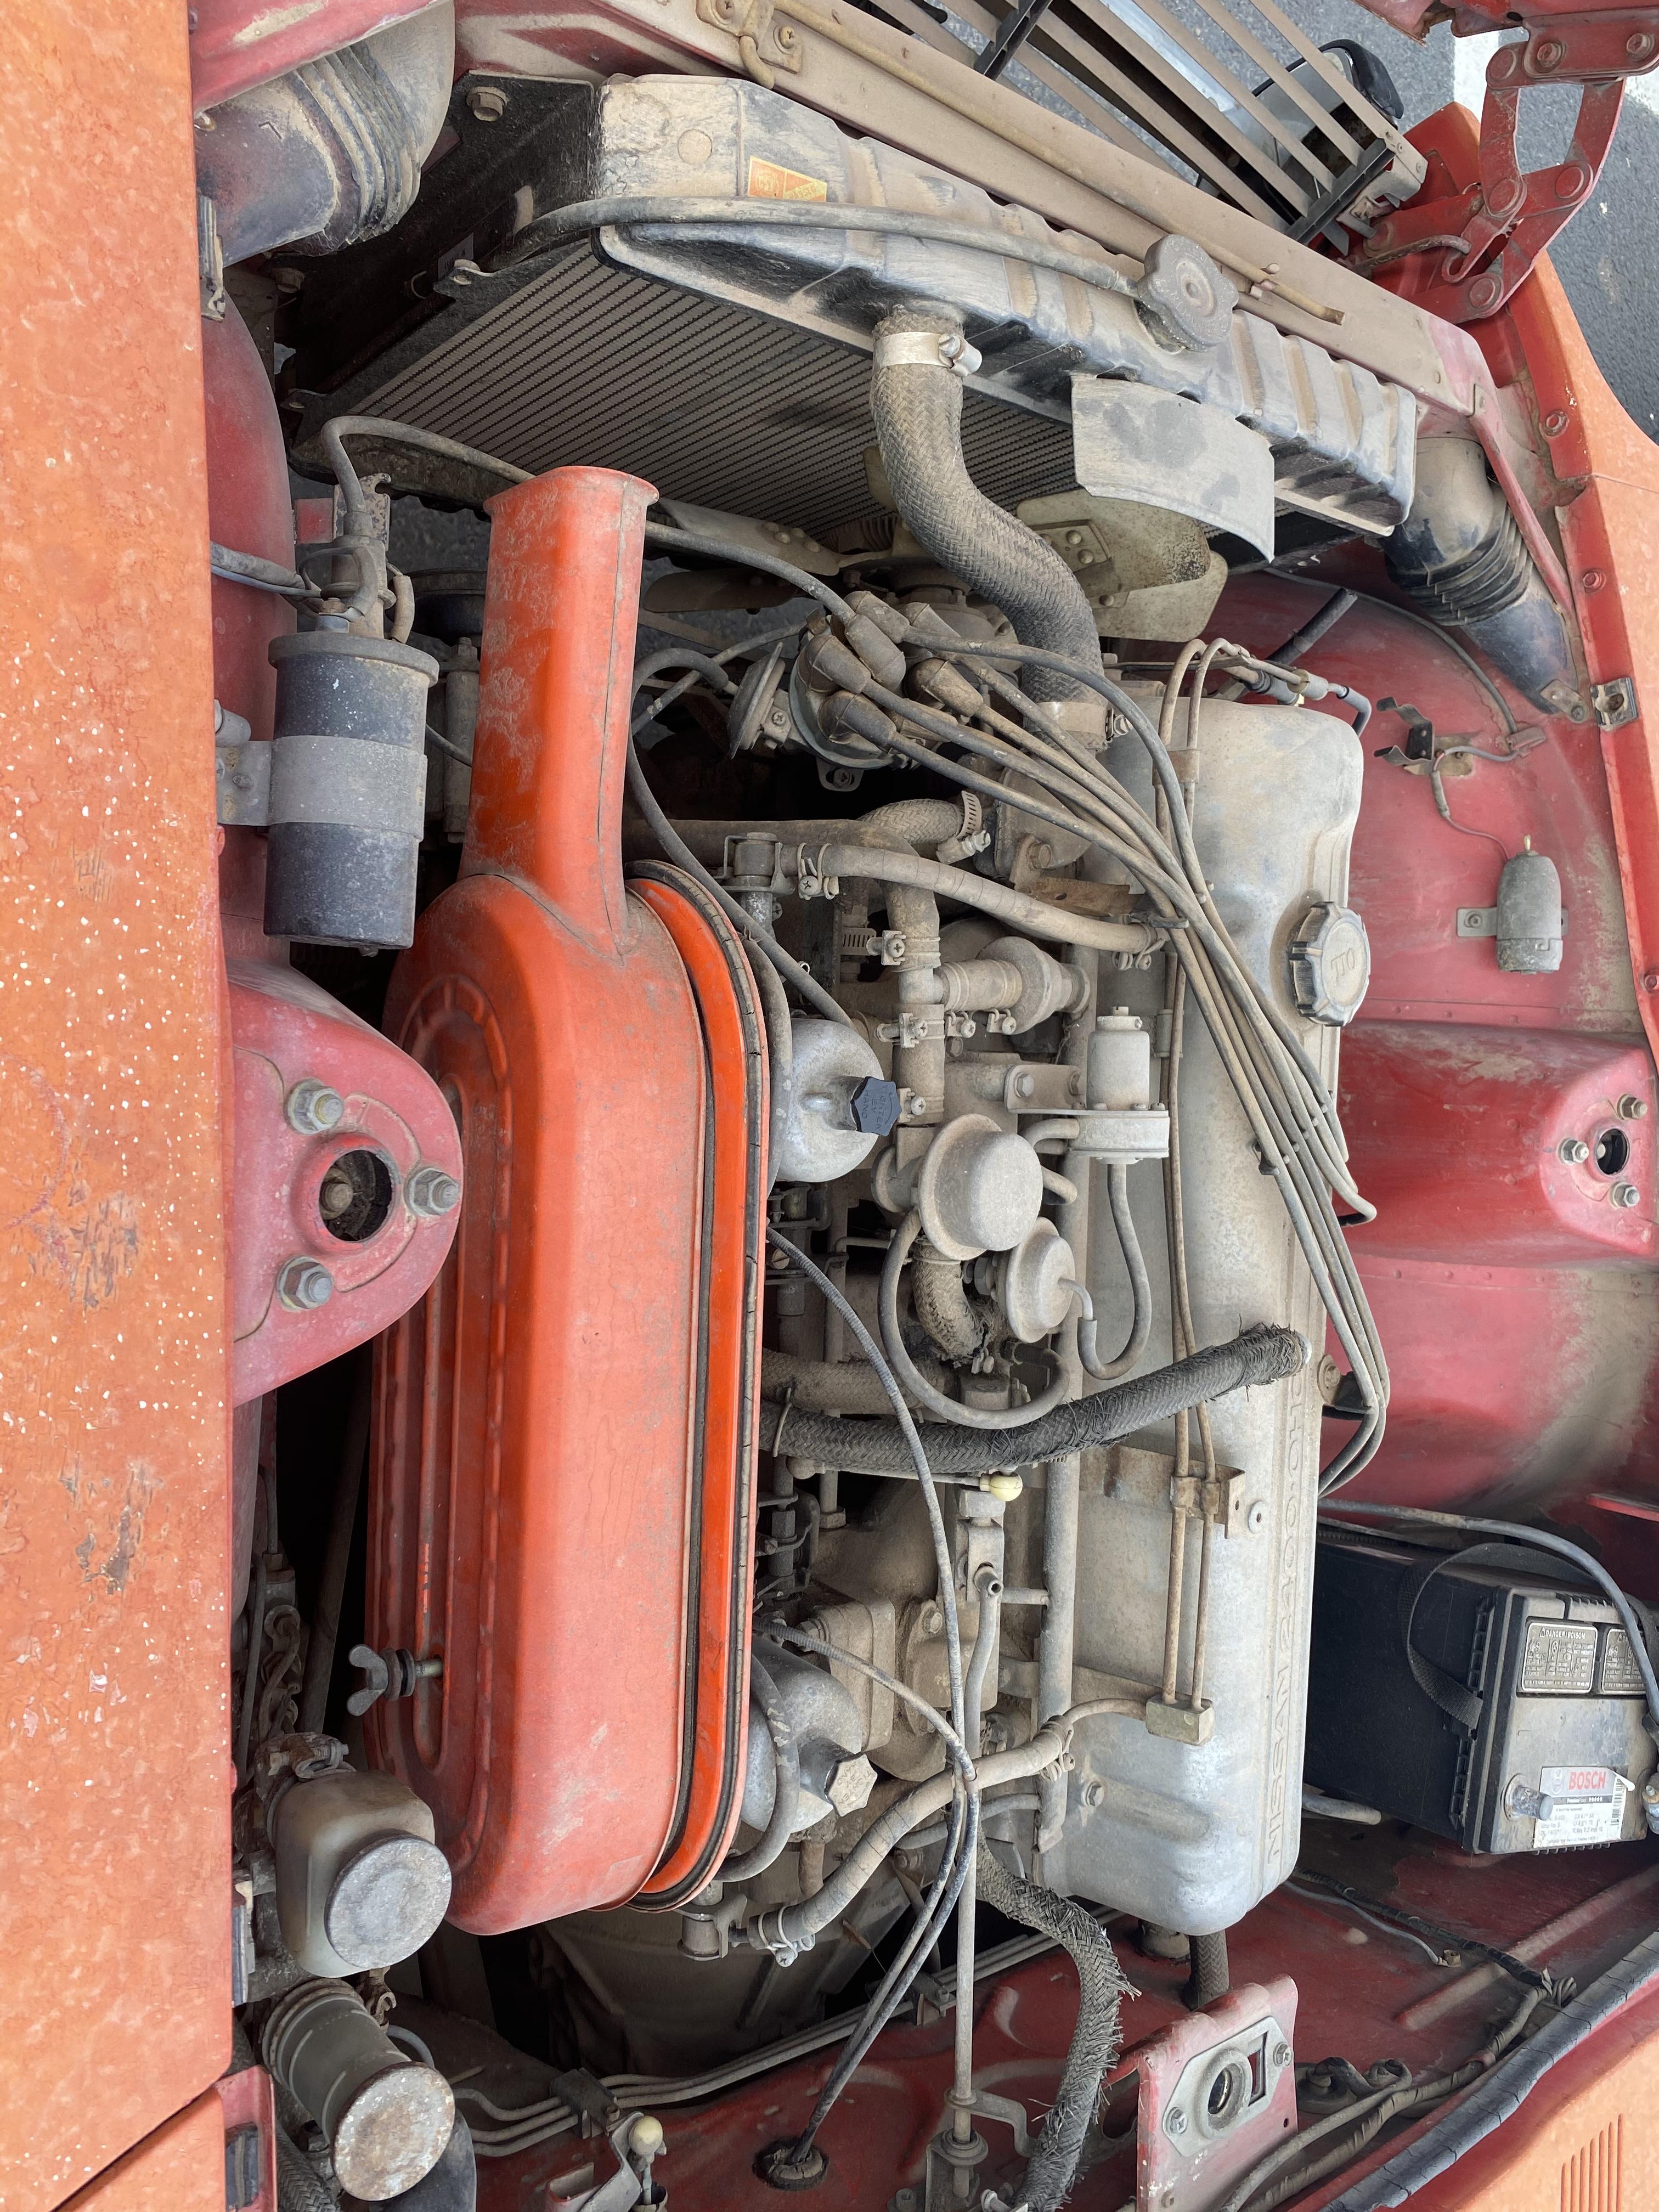
3 pointsPlease take more photos for us. It is rare to see an early Z that has been unmolested. These photos help us greatly in the accuracy of our restorations so they are very much appreciated ? More close-ups in the engine compartment, the fire wall area, the area between the bumper and the radiator, up under the dash, etc... THANKS!3 points
-
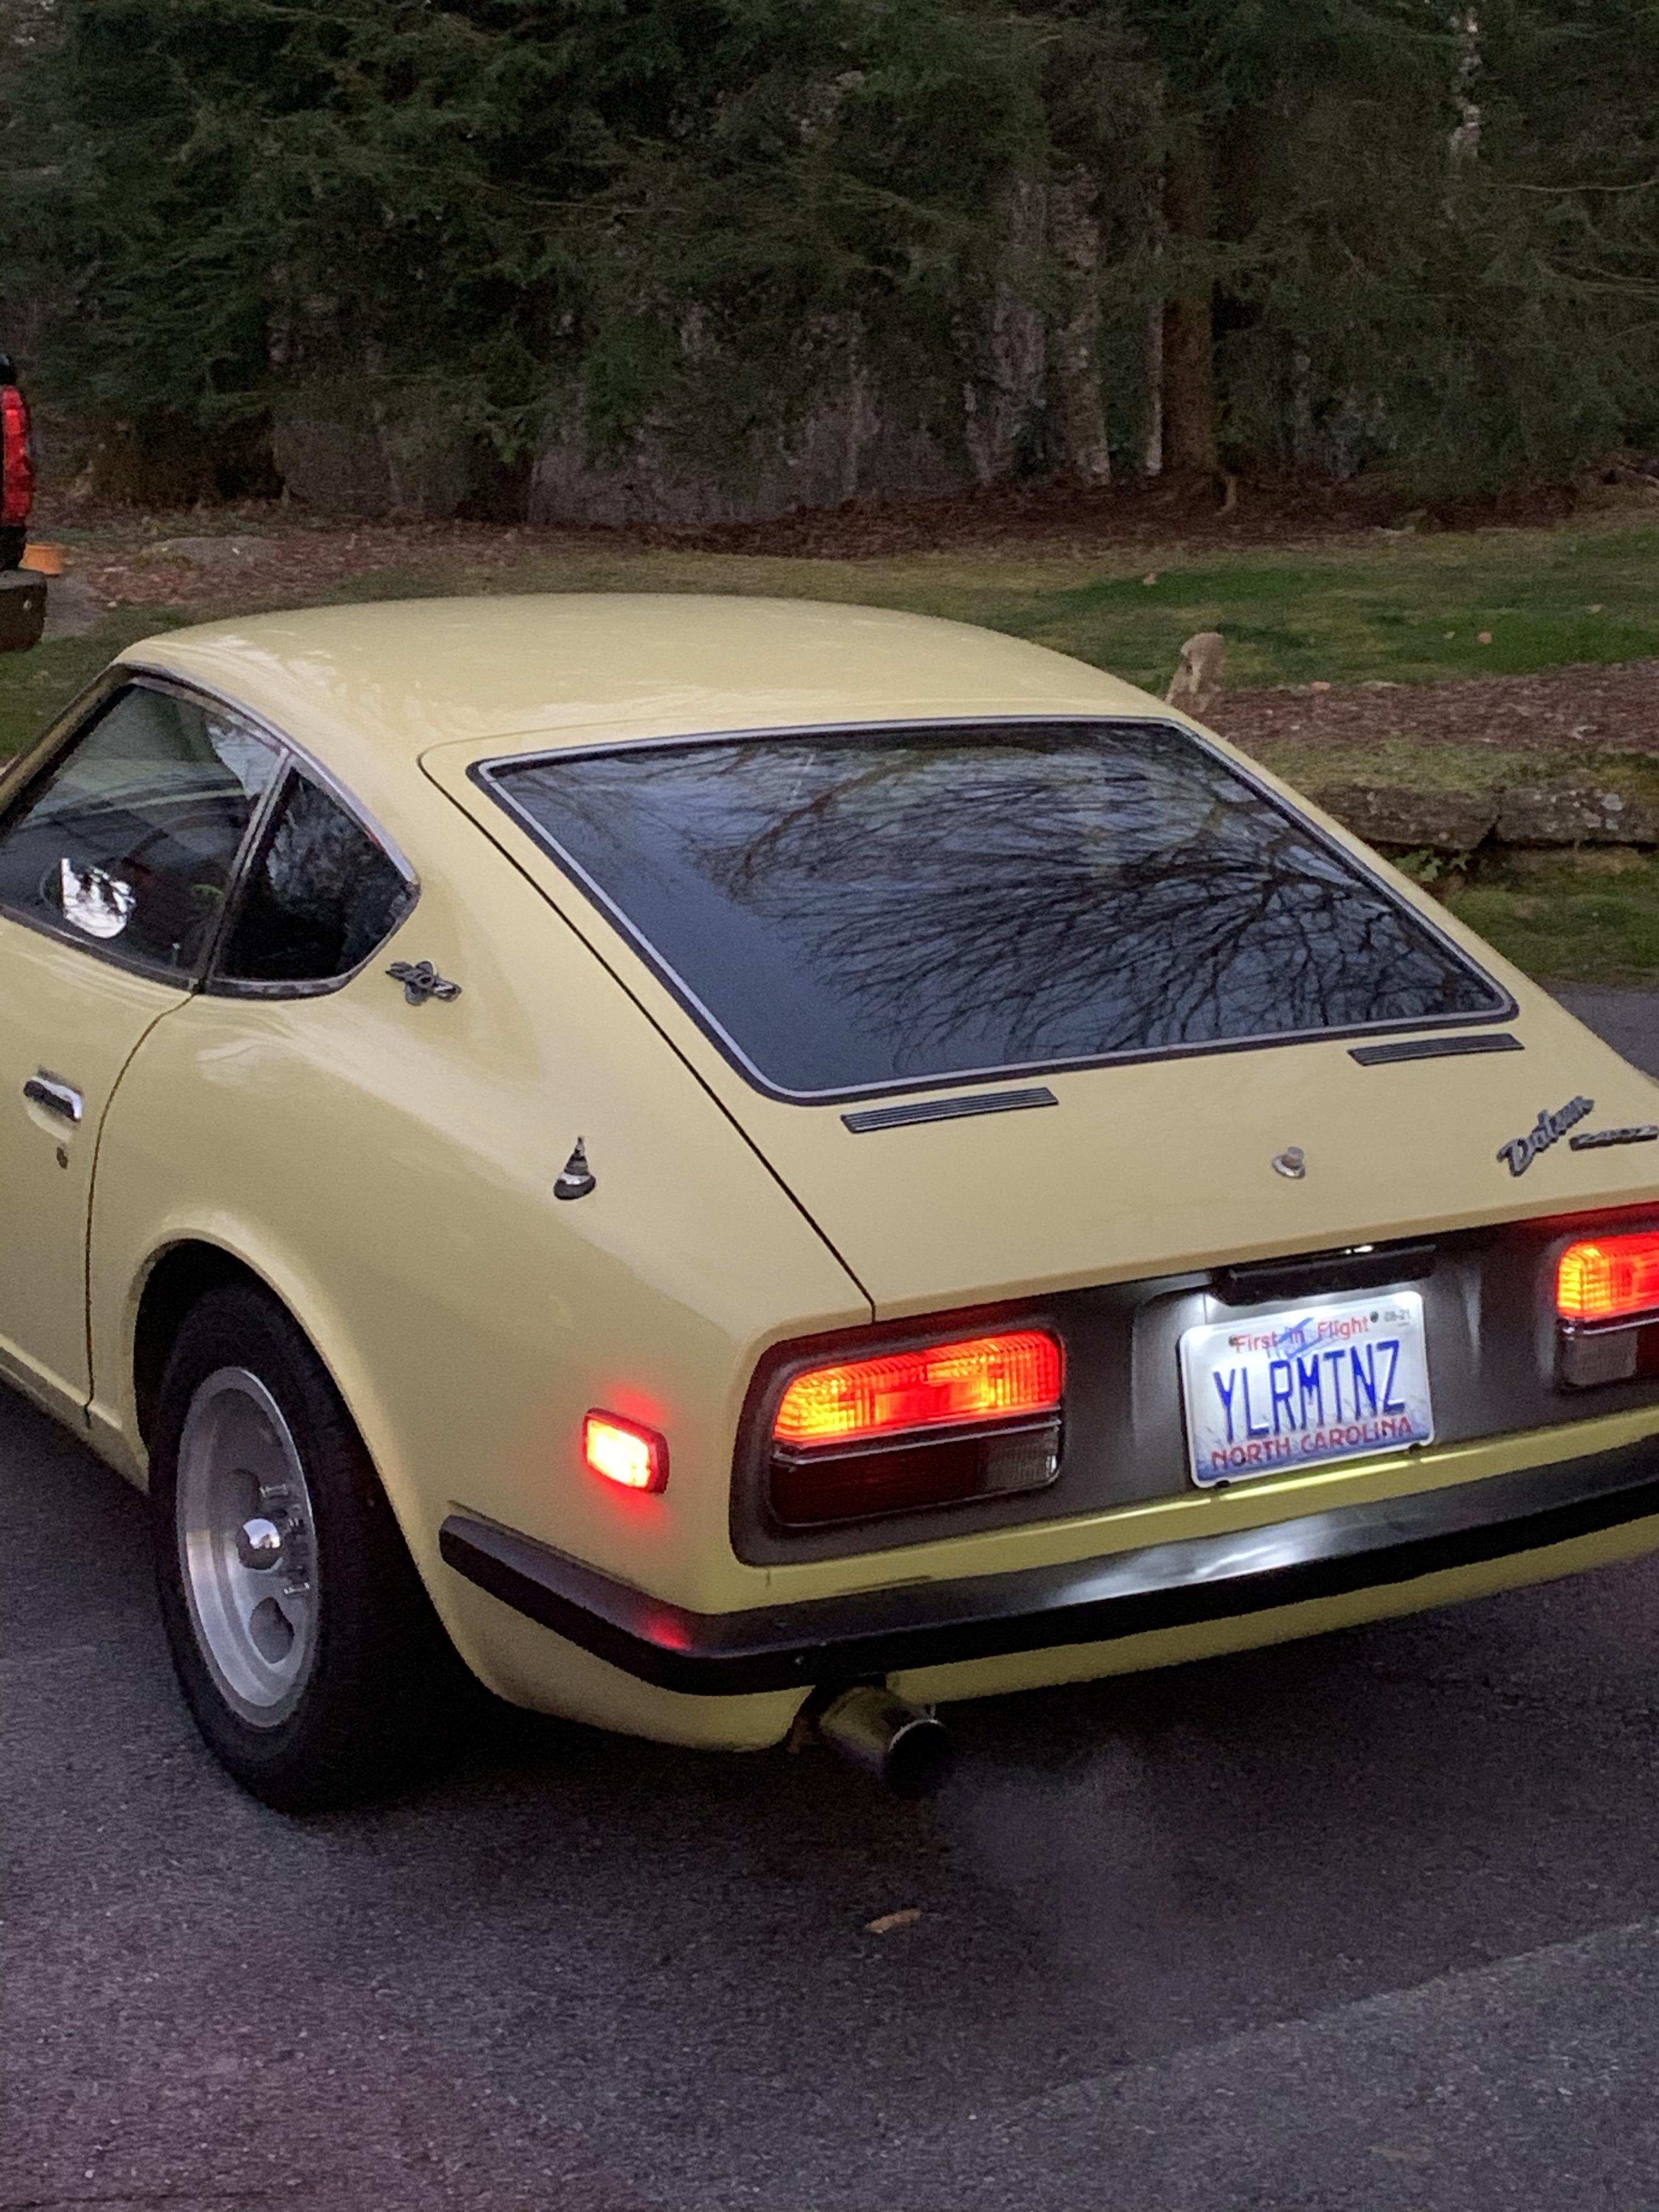
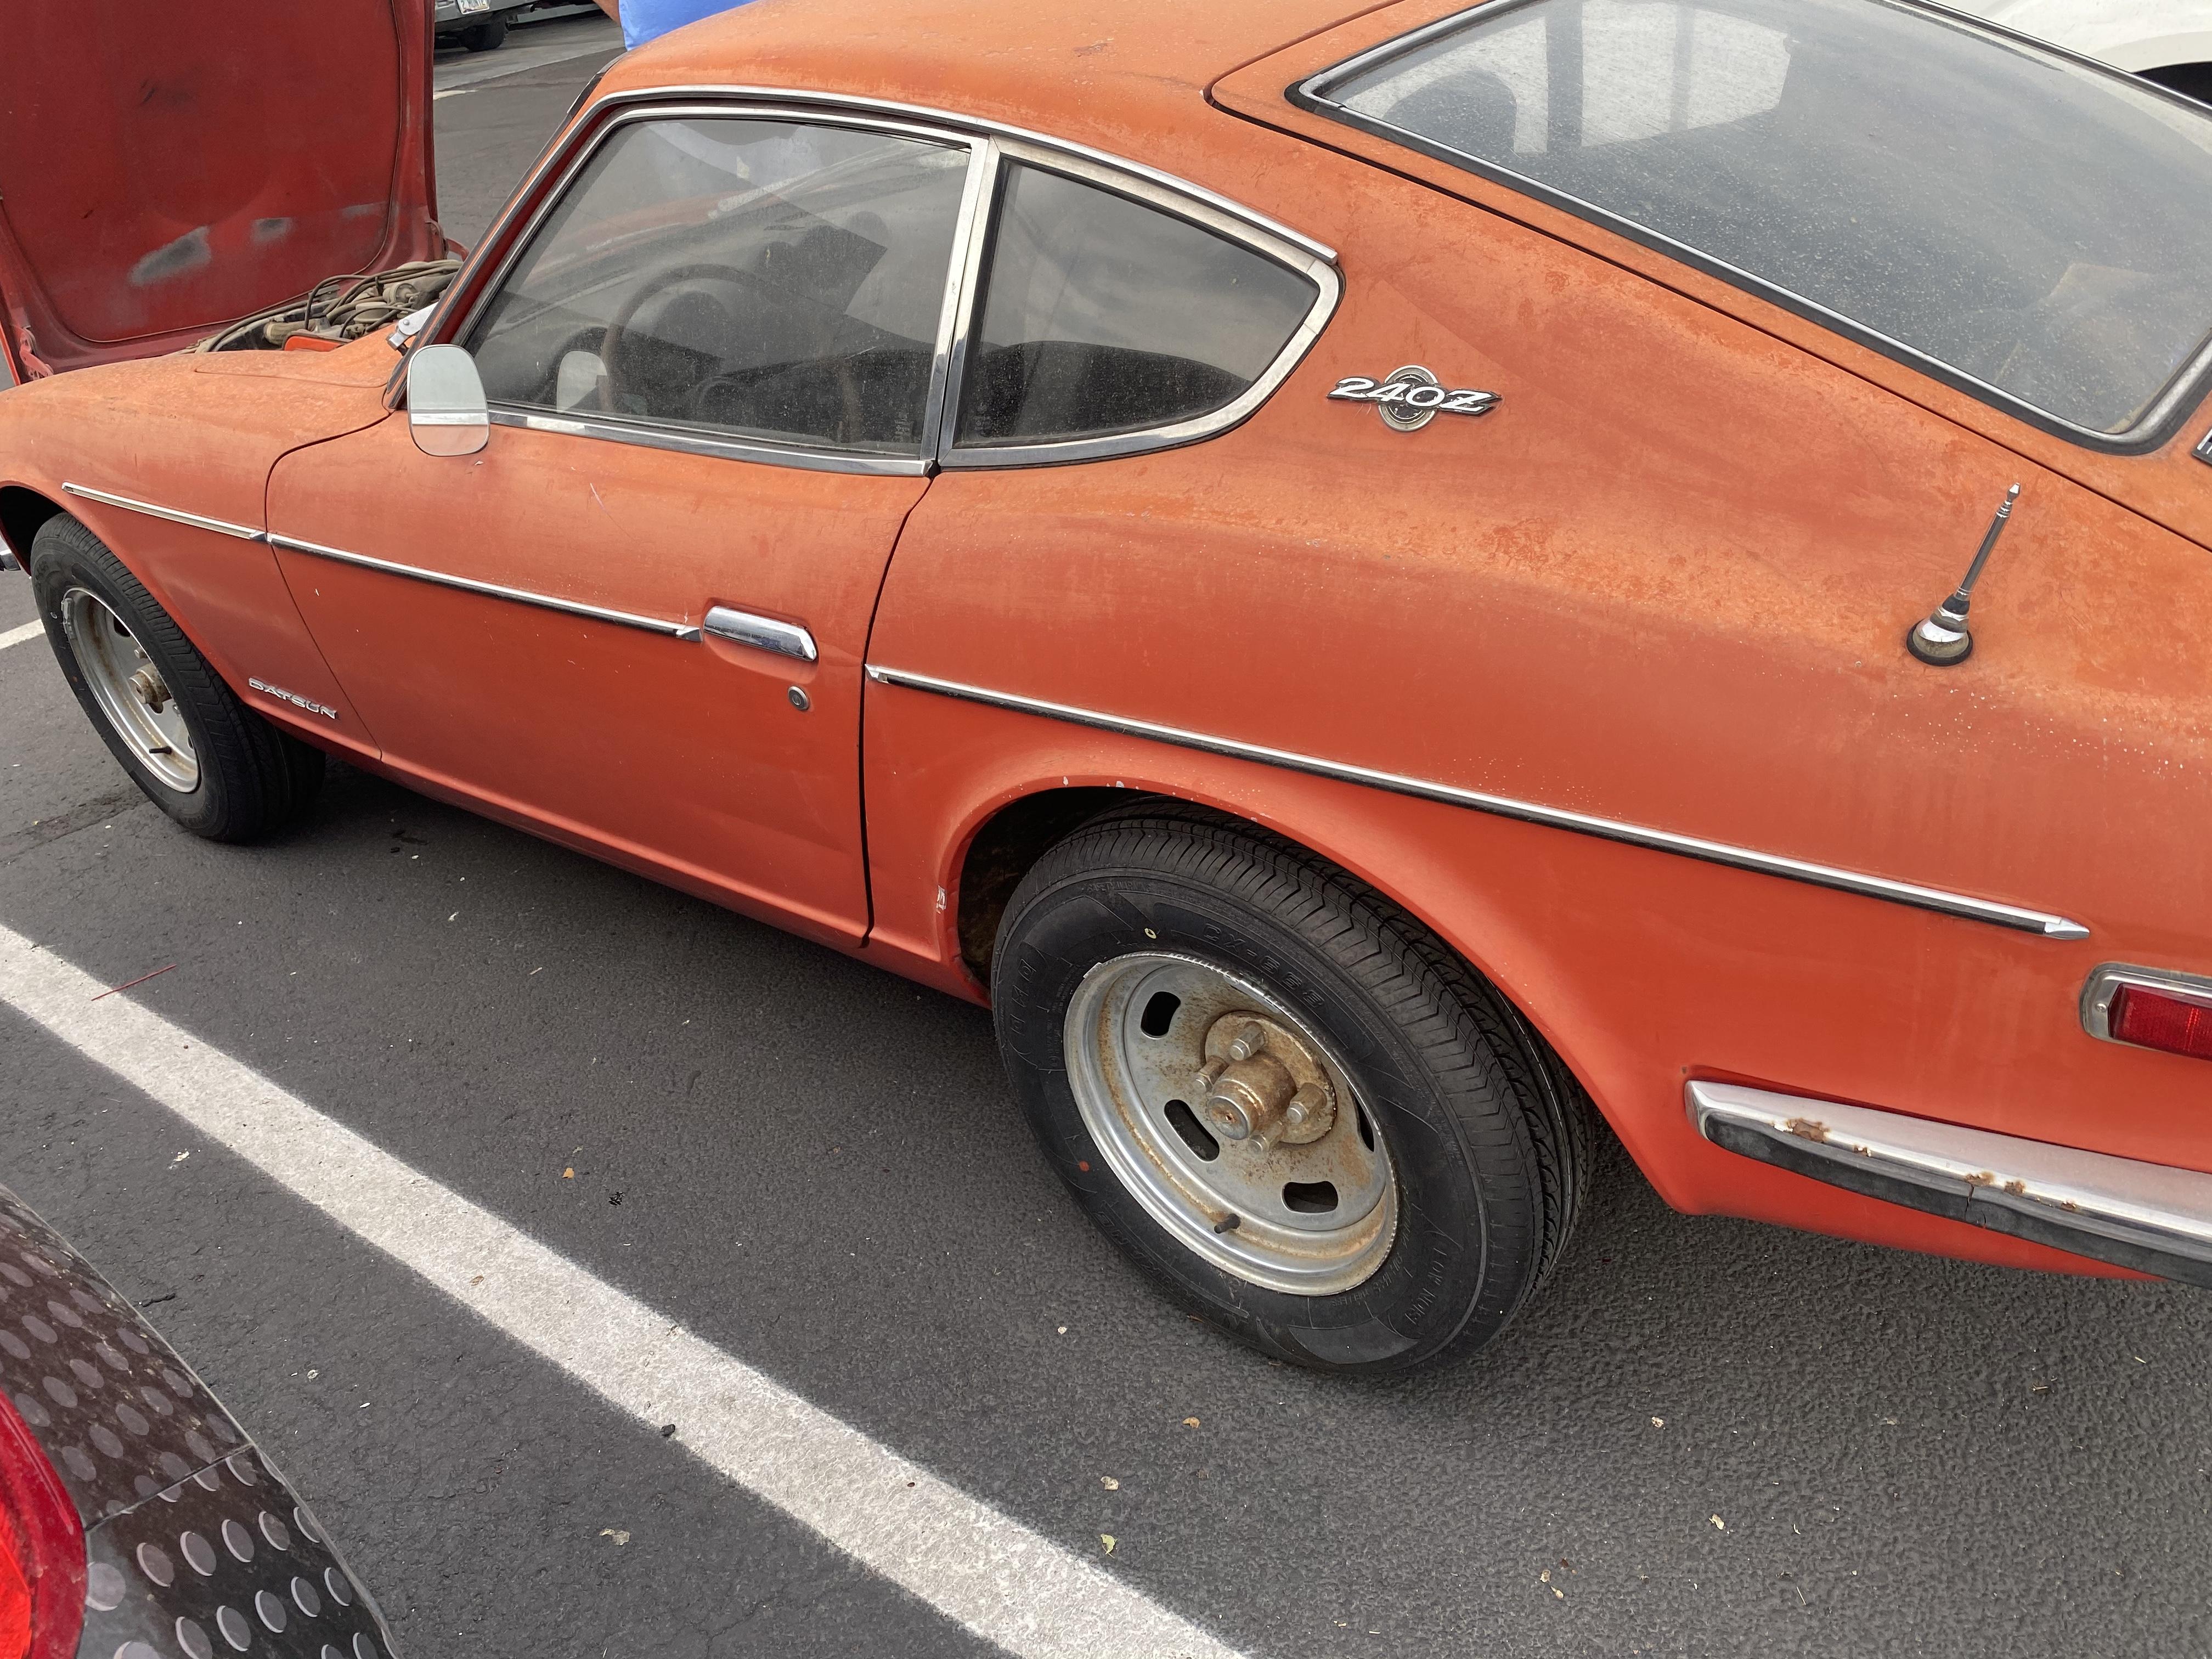
3 pointsI already went down the road with a 260 donor for a 240....it will ruin the value of your car to anyone that’s a collector down the road. Too much is different on the front end. Wait for the right car.3 points
-
2 pointsTo add to the body of knowledge here, just ran my Z for the first time in 4 months after putting it back together again with these Konis. Having gone from the Tokico blues of the PO to these, I am truly stunned at how well the car is damped and how well it corners now. I’m currently on 2 full turns of the adjusters and find the damping to be wonderful without shaking out my fillings (I am on lowered eurospec springs). I think I will tick back to 1.75 turns though to get a little more comfort for longer journeys than my usual local blasts of the twisties. The first set arrived damaged but with a couple of photos and emails, MSA priority mailed me a new set without delay. Love those guys even more now. As an occasional track dayer and furious fast roader on bumpy twisty British B roads , I can’t recommend these shocks highly enough. They have truly transformed my Z! I also get way better traction at T junctions now with no wheel spin unless I really goad it.2 points
-
Glad you're out of the woods for now but I'm not sure that was really the root cause. I think the corroded connector you found is the fusible link for the EFI system (and only the EFI system). If that's the case, it could account for the car cranking fine but not starting. Corrosion there wouldn't account for the rest of the symptoms you had. I'm thinking that while messing around up by the battery and cleaning that connector, you bumped whatever really WAS causing the issue. Hope not, but it might come back.2 points
-
Should say "Problem disappeared.". They do that sometimes. Your solution didn't match the symptoms. That's where the extra commentary is coming from. You might be back. Good luck.1 point
-
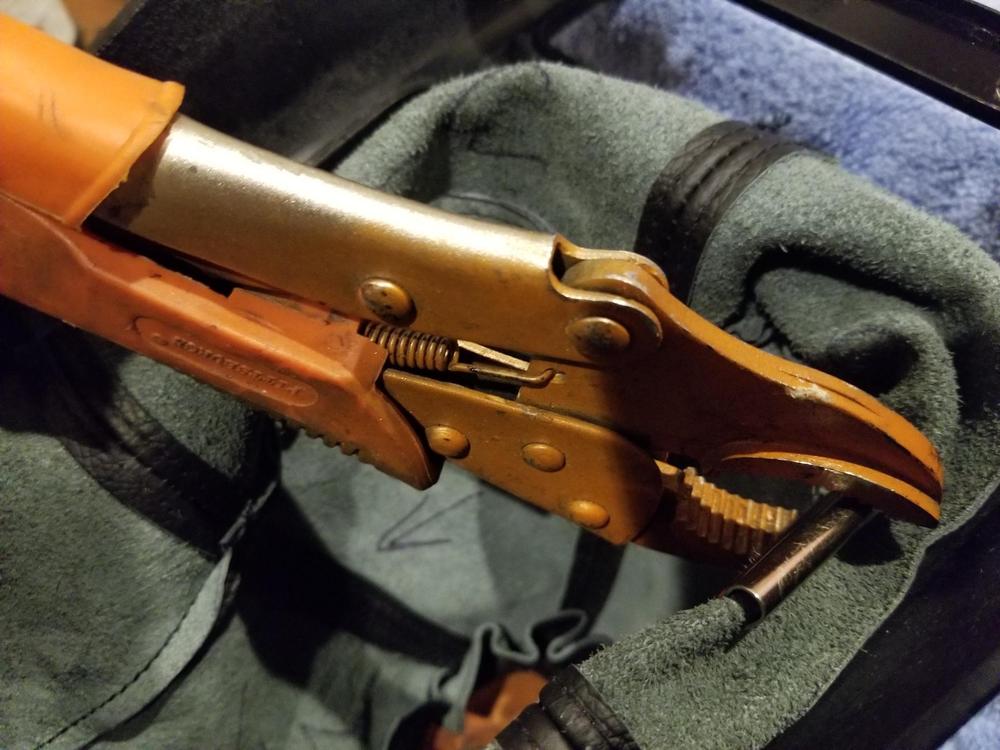
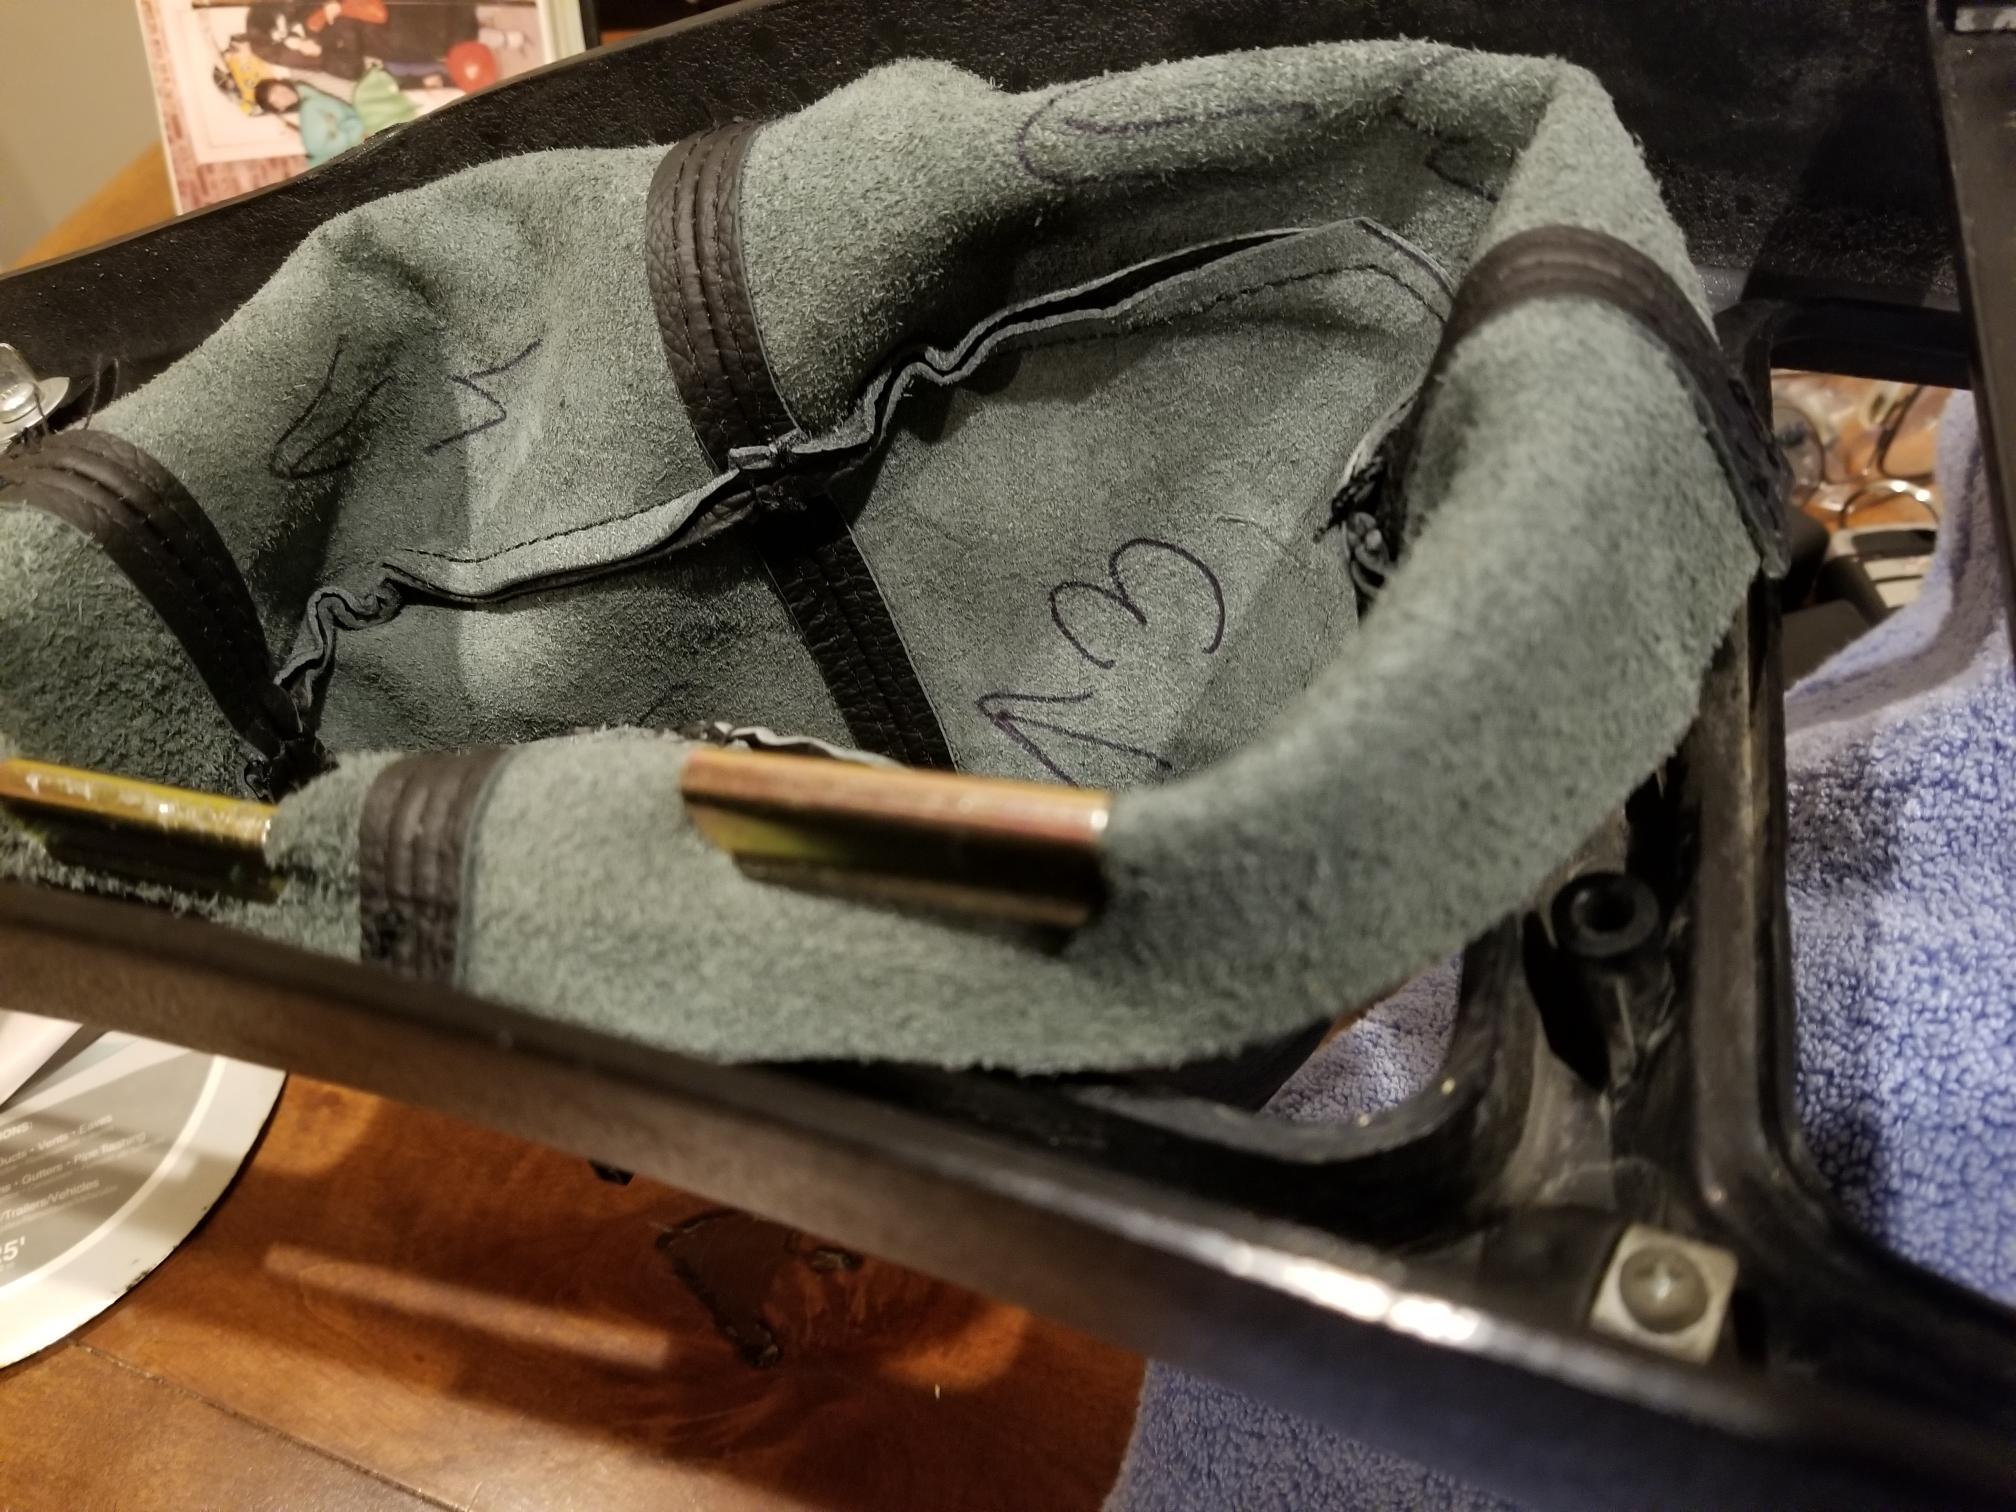
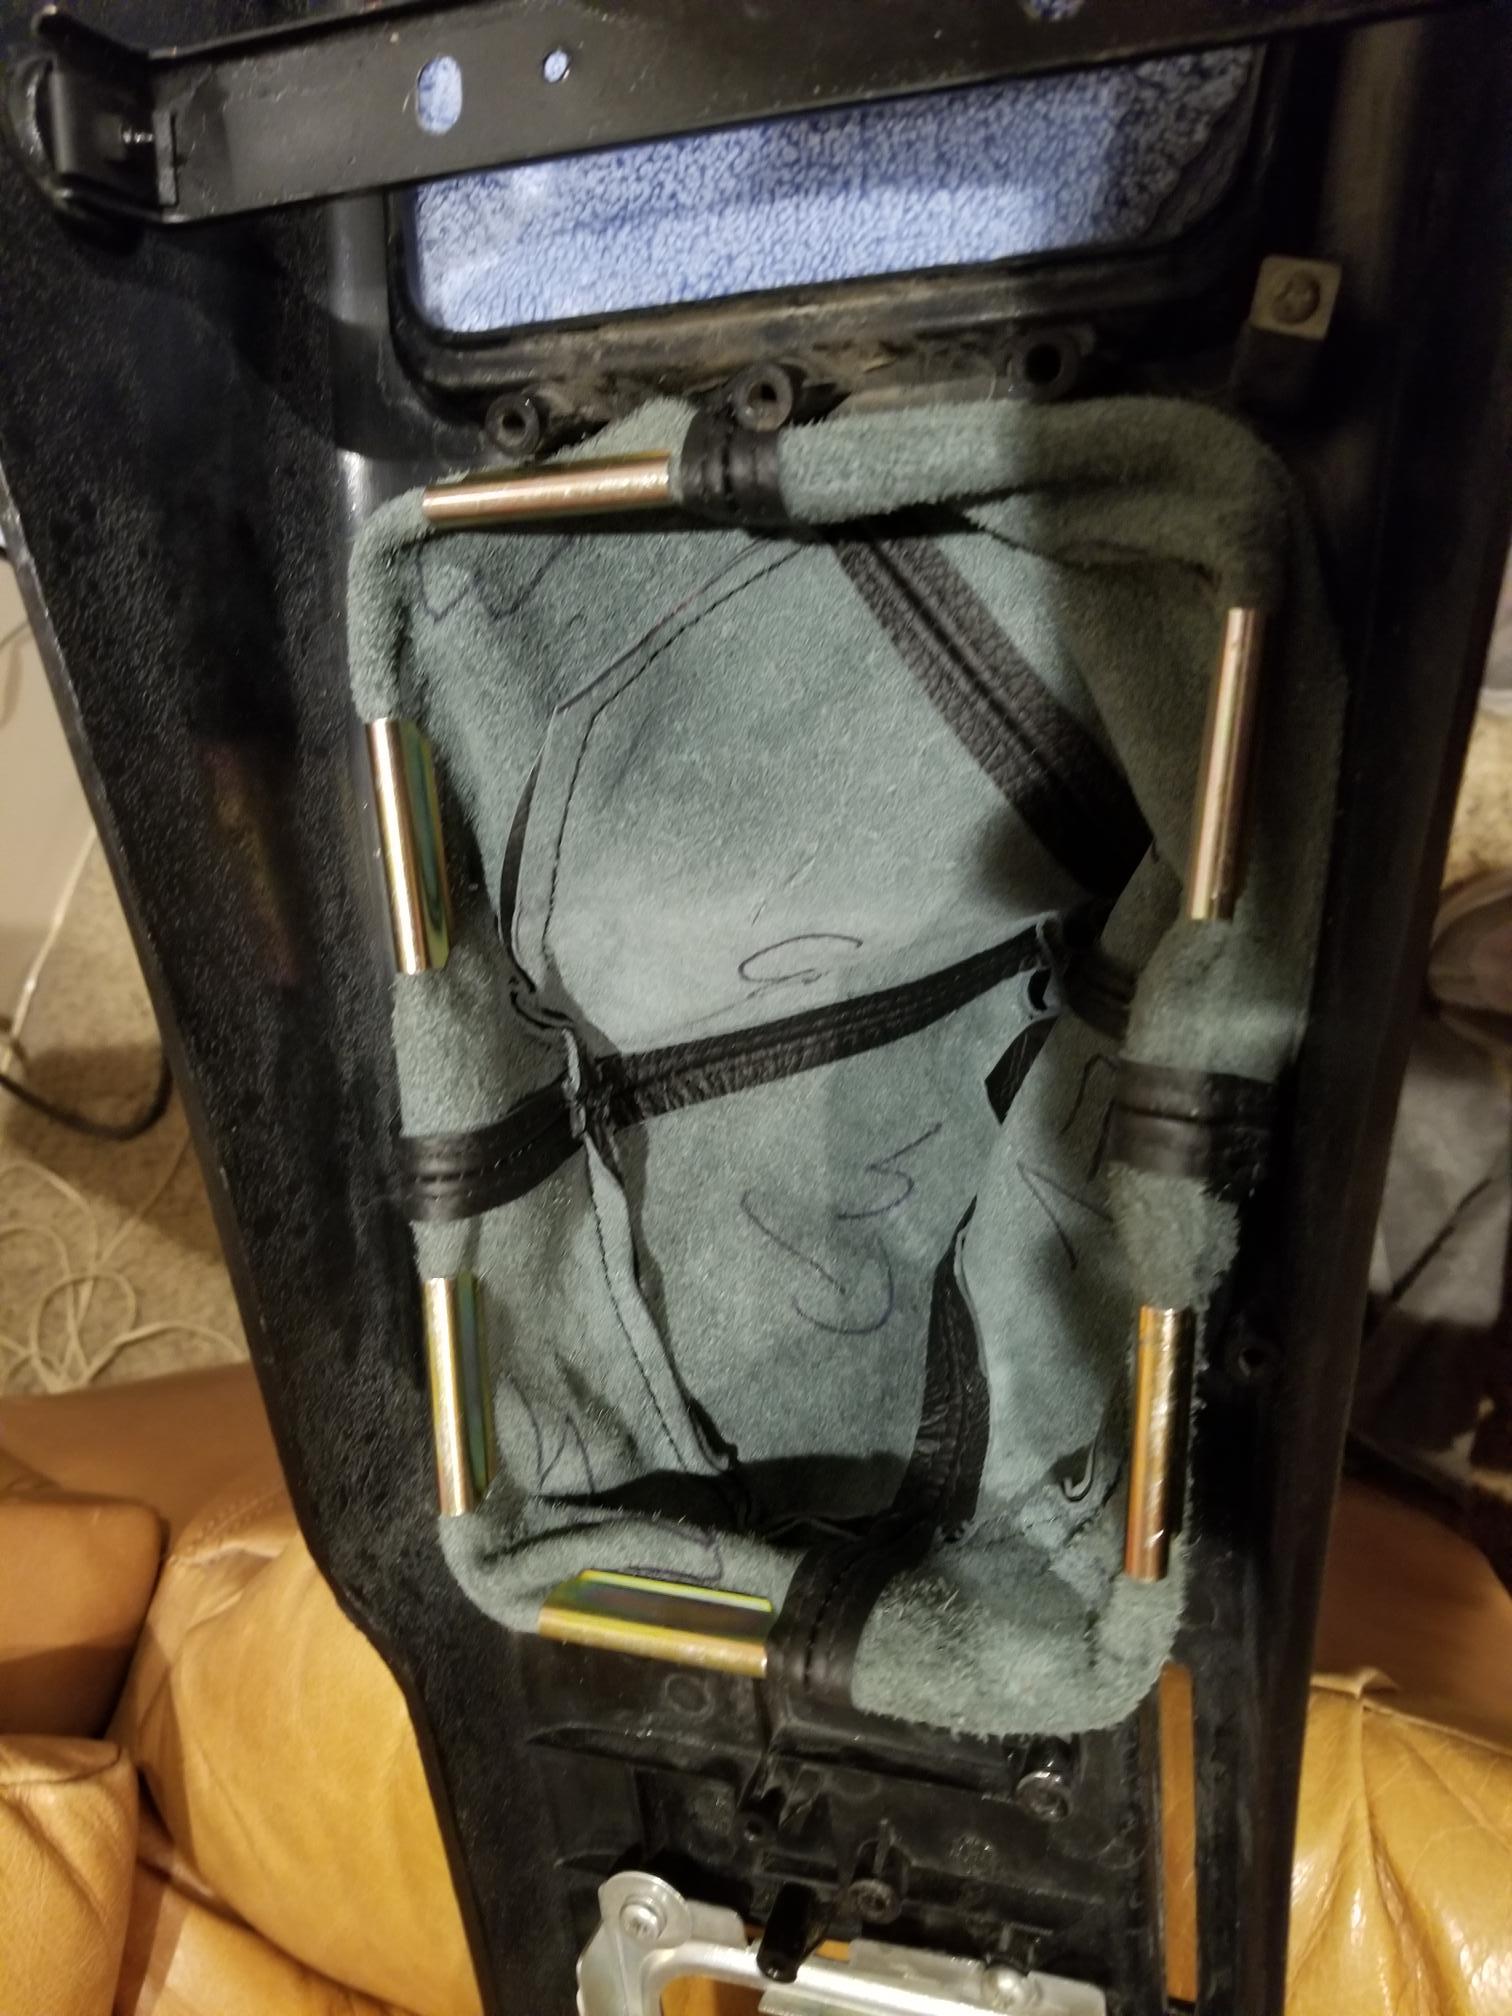
1 pointReplacement of the Inner and outer Shift boot When I bought the bucket it did not have an inner or an outer shift boot. Replacing the inner shift boot is fairly obvious. There is a rectangular ring that surrounds the boot and holds it in place. The outer boot is soft vinyl, or leather and it slips over the gear stick. Mistake 1: I installed the center console after completing work on the center console area and everything that is involved with that like the vinyl over the trans. tunnel, choke control, fuse box lid, indicators, radio etc. It turns out to install the outer shift boot you must remove the center console so that you can press the spring clips onto the underside of the center console, seems obvious now, and it would be exceptionally obvious if I had removed the previous outer shift boot. I did not think this was going to be a particularly difficult task. I recall seeing someone hammer the clips into place to hold the boot to the backside lip of the boot hole in the center console. This proved to be way too scary for me. My center console is in pretty good shape but I suspect it is 40+ year old plastic. The new leather boot is thick and the new clips are very tight. One blow with the mallet and I put the bludgeon down and started typing. There must be a secret that I was unaware of and if I find the decoder ring or learn the secret hand shake the leather boot will be installed on the clips, it will be tight, the center console WILL NOT crack and this minor nightmare will be over. Unfortunately, a search of the forum and the internet did not provide much in the way of guidance or tips. So this post is NOT for those of you that have been successful in the past and did not think it would be valuable to document the process because it was such an easy project. I was not having much luck draping the material over the console and hammering or squeezing the clip over the boot onto the console. It seems insignificant and it may be so, but putting the leather inside the clip and then putting the clip on top of the edge of the console made a big difference, for me. It took me a while but it finally came to me. Hammering was too scary, pushing the clip into place seemed impossible. So I went to my second most popular GOTO tool. The first being the mallet and the second being a pair of vise grips. I slowly and carefully squeezed the clip over the console lip. It was easy. I cant explain why it took me so long to figure it out. Now that it is completed my memory of the task was that it was easy. I feel a bit silly posting this, but hopefully the next person to replace their outer shift boot will not have to think twice about how to go about it. One more thing. I read that you only need 6 clips. In my opinion you would be better off with eight. There is no way to get a clip over the seam and if you did the clip would be expanded to the point that I doubt it would hold very well. Below are some photos that may be useful . By the way the console did not crack -----yet!


 1 point
 -
1 pointIt certainly sounds like your synchros are wearing down. Probably below minimum spec. A good oil could make all the difference. The GM AC delco oil suitable for brass synchros has yielded good results for some members here on this forum. That or Redline MT-90 75W90 GL-4 gearoil. Btw: The A type transmission (F4W71A) uses the same synchro rings in second gear as the F4W71B the FS5W71B and the early FS5W71C transmissions (the 71C without the reverse synchro). All four gear have the same synchros. Only fifth is little smaller in diameter.1 point
-
1 point
-
1 pointIt would be best to get a 70 or 71 donor and be as accurate as possible. This may eventually be a $20k difference.1 point
-
I stand corrected. I found a picture on this site for the turn signals on a 280Z tachometer.1 point
-
1 pointLooks like it only needs the new rails on the right side ( engine Bay and floor) and some battery tray area new sheet metal. But don't be fooled. There Will be a lot of work on the car. Everything is 50 years old..1 point
-
1 pointI don't necessarily agree that you need a body shell, but if you find something appropriate, why not! Again, be careful with your alignment. So what you basically have is an early version of the early HLS30 builds everyone refers to as "series one" and you are going to find some very unique parts throughout the car. This site is going to be a treasure of information. I have much of my stuff documented. You'll find information about the European imports as well as what was made in Japan and how the cars differed from the export models. Great car, more pictures!1 point
-
1 point1 point1 point1 point1 point1 point1 point1 point1 pointMy experience .... 1 The Precision seals (sold by many of the above mentioned vendors) the windshield seal works & fits well with no gaps including the fit of bright trim, also the quarter window seals. I paid a lot of attention to fitment and positioning the seal and the trim perfectly on the glass before installation. 2 For the hatch window seal I went with OEM Nissan, about $190, for the difference in price, I considered it worth it. The outer hatch Precision seal is fine. 3 The door seals are the biggest issue, I have used the Kia 0K018-59760B seal on my hatch, fits and works well. Others report they work perfect on the doors. I suspect the 2002 Kia Sportage seals may no longer being made now that it is 2020.... I have some Vintage rubber seals coming for my neighbors project 240 now ready for paint. Will comment on fitment when that stage is reached.1 point1 pointMy thoughts would be if I spent the money for forged pistons I would take full advantage of their durability with respect to rpms and CR. I would go with as big of a cam as possible and run 11:1+ , but 91 octane you are probably in a safe region. With MS3- which is what I run- with full control of spark you can push the envelope with timing and dial it in more safely than a dizzy, but you probably already know that . As far as porting, my MN47 Is also very similar to to the 79&90 heads, but unsure of the port structure. I could only go 35mm before getting the walls to thin. This is 35mm way down in the hole . So just matching ports of intake and head you might not see any issues1 point


Important Information
By using this site, you agree to our Privacy Policy and Guidelines. We have placed cookies on your device to help make this website better. You can adjust your cookie settings, otherwise we'll assume you're okay to continue.
Account
Search
Configure browser push notifications
Chrome (Android)
- Tap the lock icon next to the address bar.
- Tap Permissions → Notifications.
- Adjust your preference.
Chrome (Desktop)
- Click the padlock icon in the address bar.
- Select Site settings.
- Find Notifications and adjust your preference.
Safari (iOS 16.4+)
- Ensure the site is installed via Add to Home Screen.
- Open Settings App → Notifications.
- Find your app name and adjust your preference.
Safari (macOS)
- Go to Safari → Preferences.
- Click the Websites tab.
- Select Notifications in the sidebar.
- Find this website and adjust your preference.
Edge (Android)
- Tap the lock icon next to the address bar.
- Tap Permissions.
- Find Notifications and adjust your preference.
Edge (Desktop)
- Click the padlock icon in the address bar.
- Click Permissions for this site.
- Find Notifications and adjust your preference.
Firefox (Android)
- Go to Settings → Site permissions.
- Tap Notifications.
- Find this site in the list and adjust your preference.
Firefox (Desktop)
- Open Firefox Settings.
- Search for Notifications.
- Find this site in the list and adjust your preference.