Leaderboard
-

Captain Obvious
Free Member6Points9,850Posts -

motorman7
 Subscriber
 6Points2,208Posts
 -


Zed Head
Free Member4Points18,789Posts -
rcv
Free Member2Points140Posts
Popular Content
Showing content with the highest reputation on 09/07/2020 in all areas
-
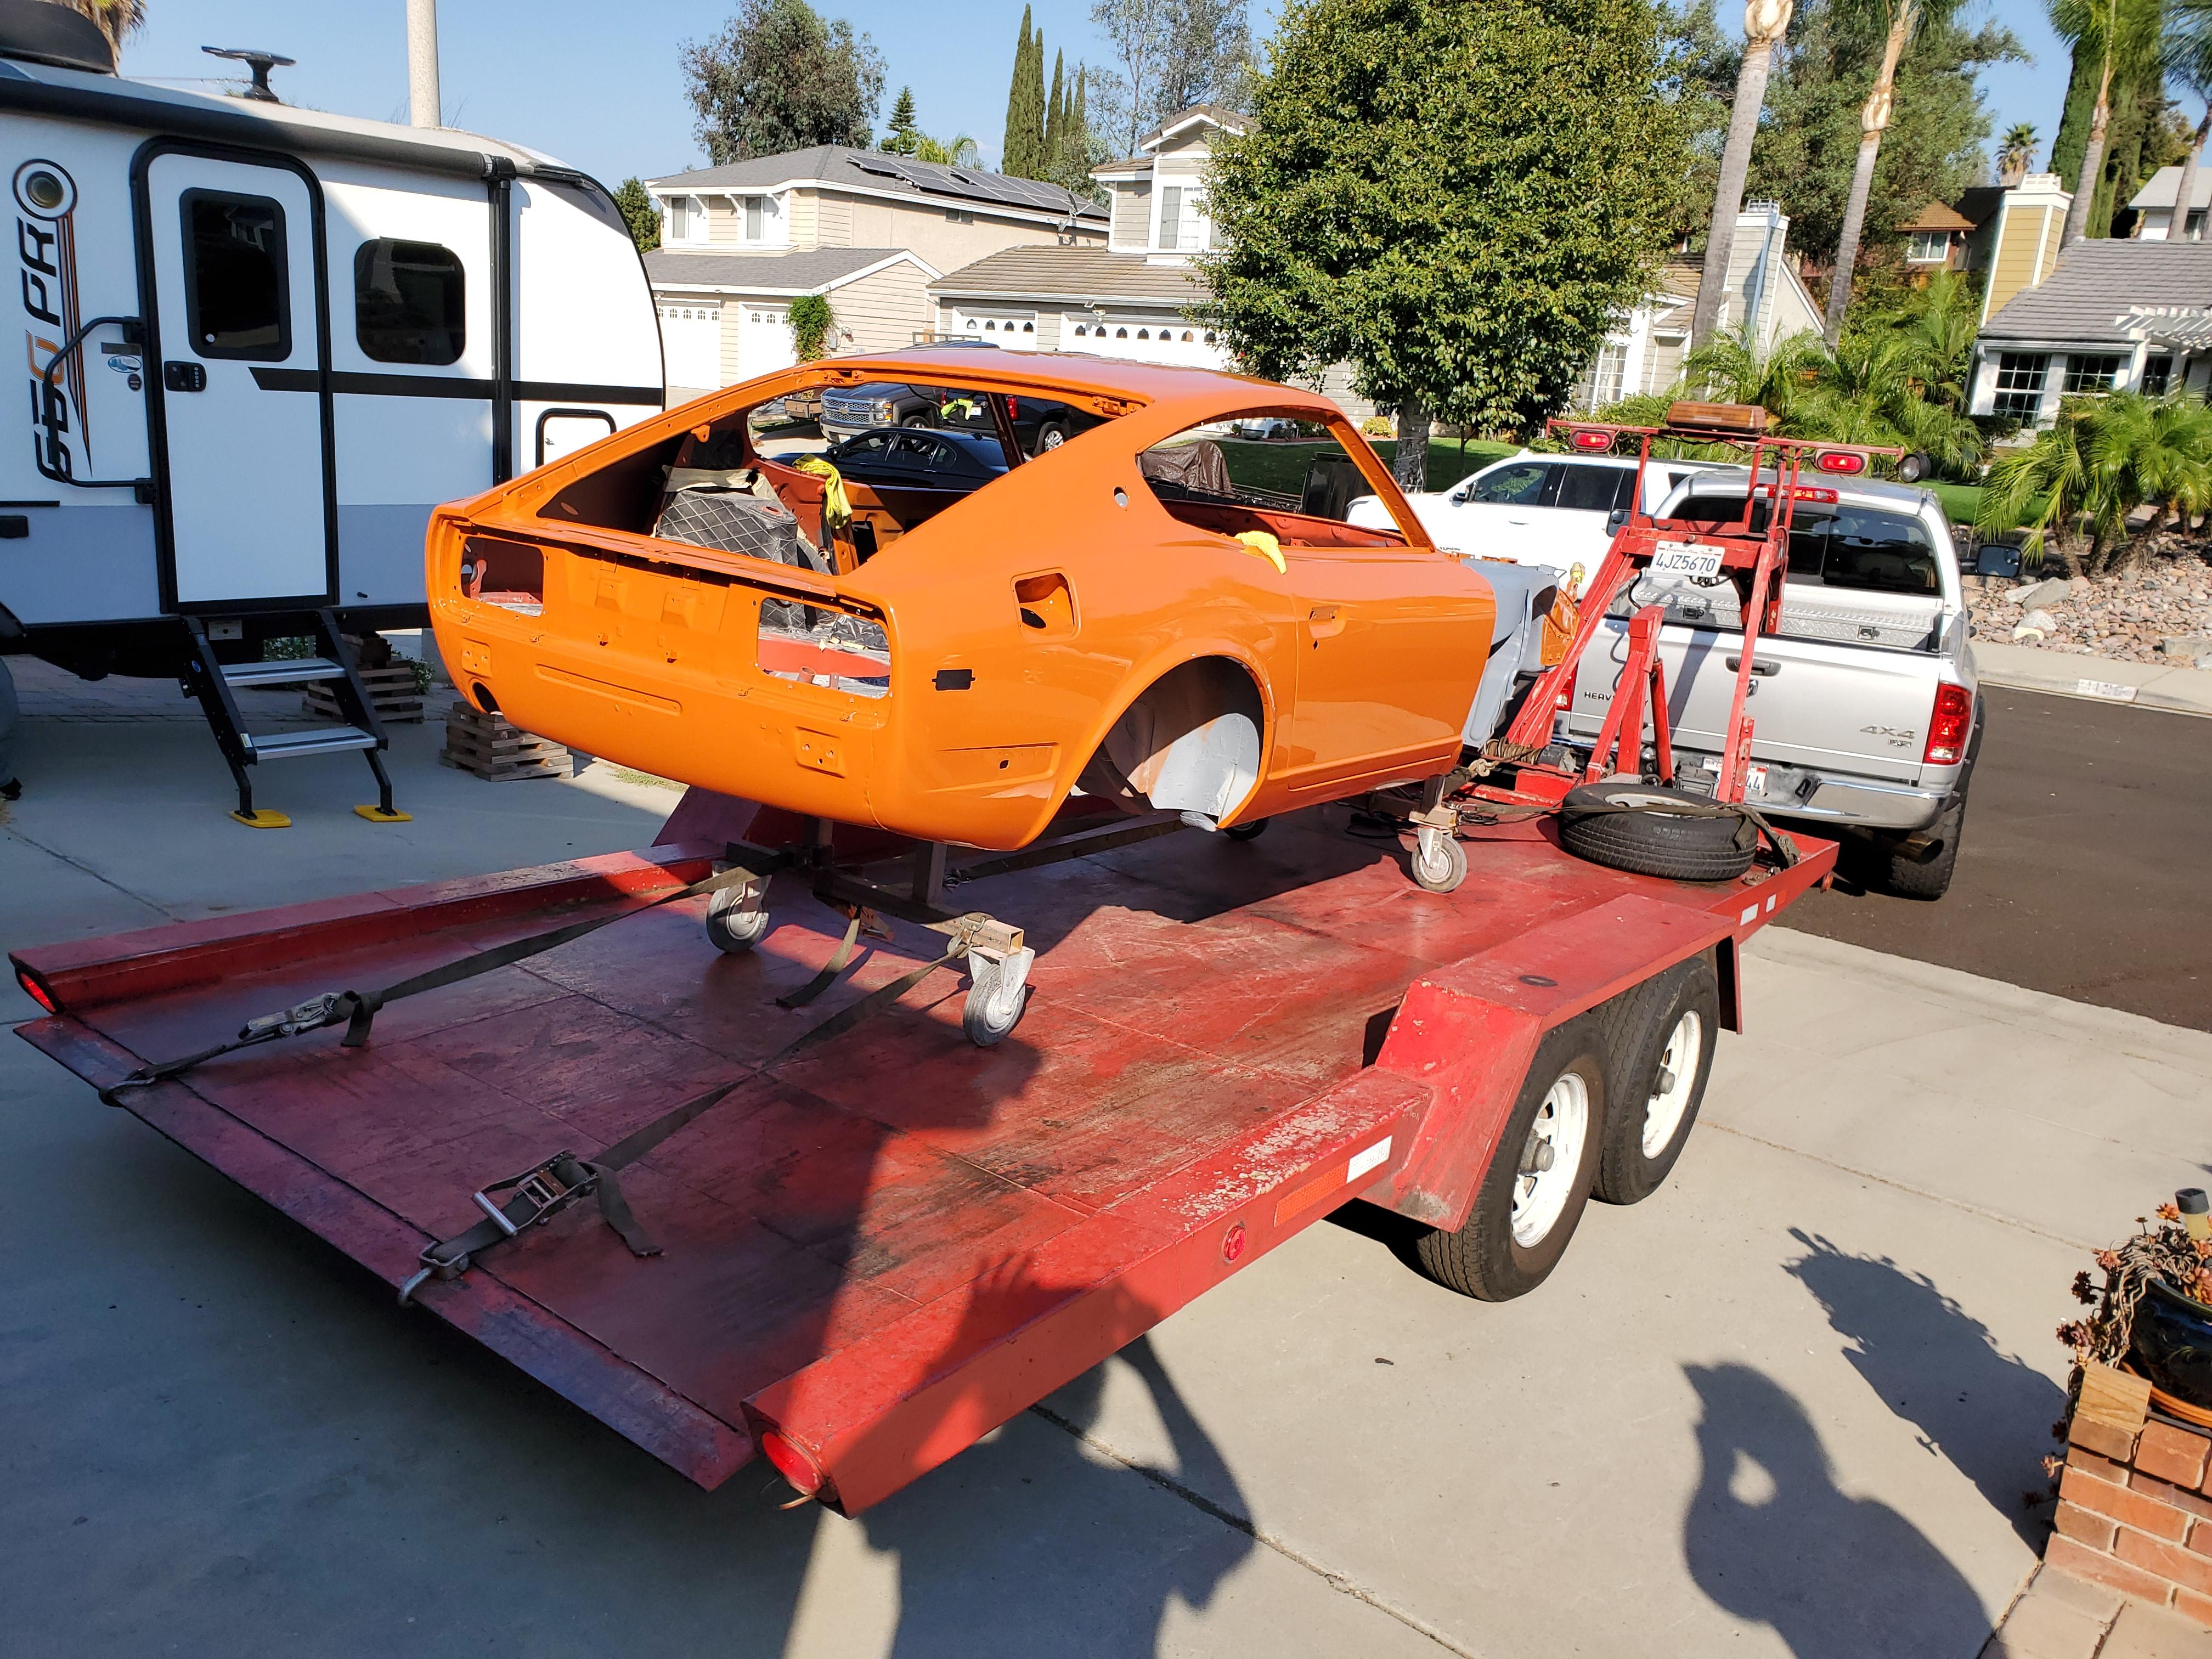
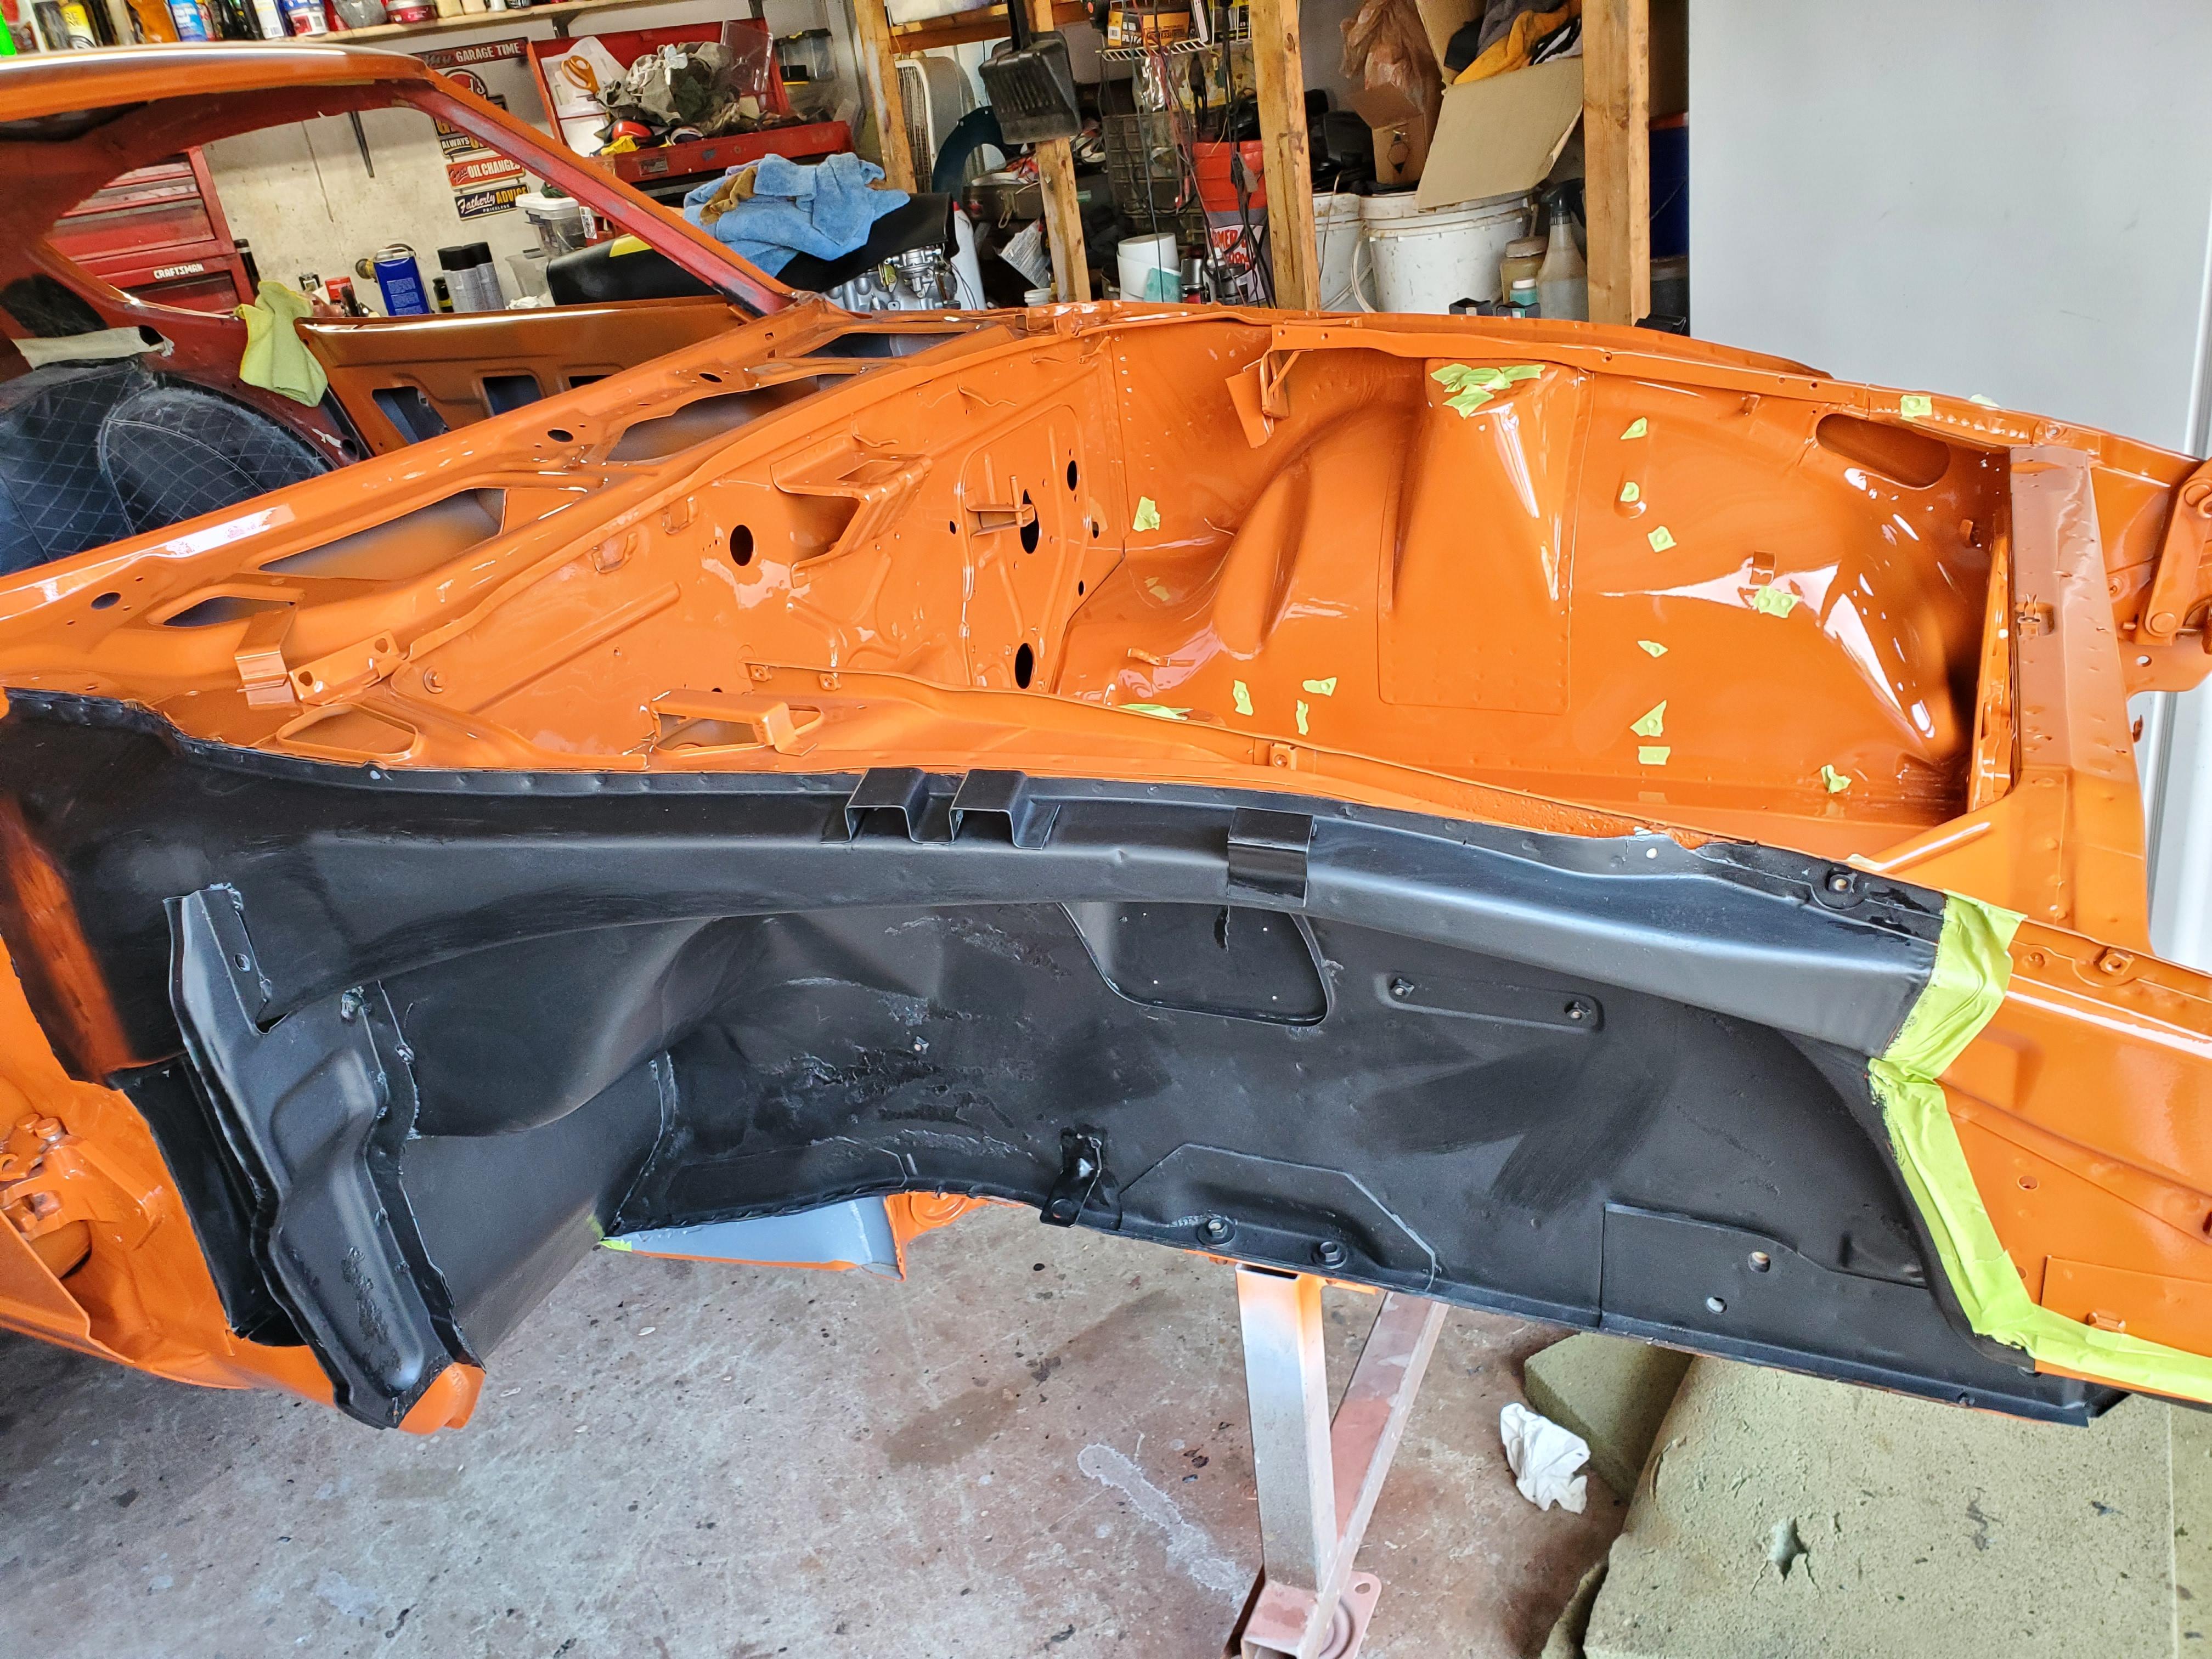
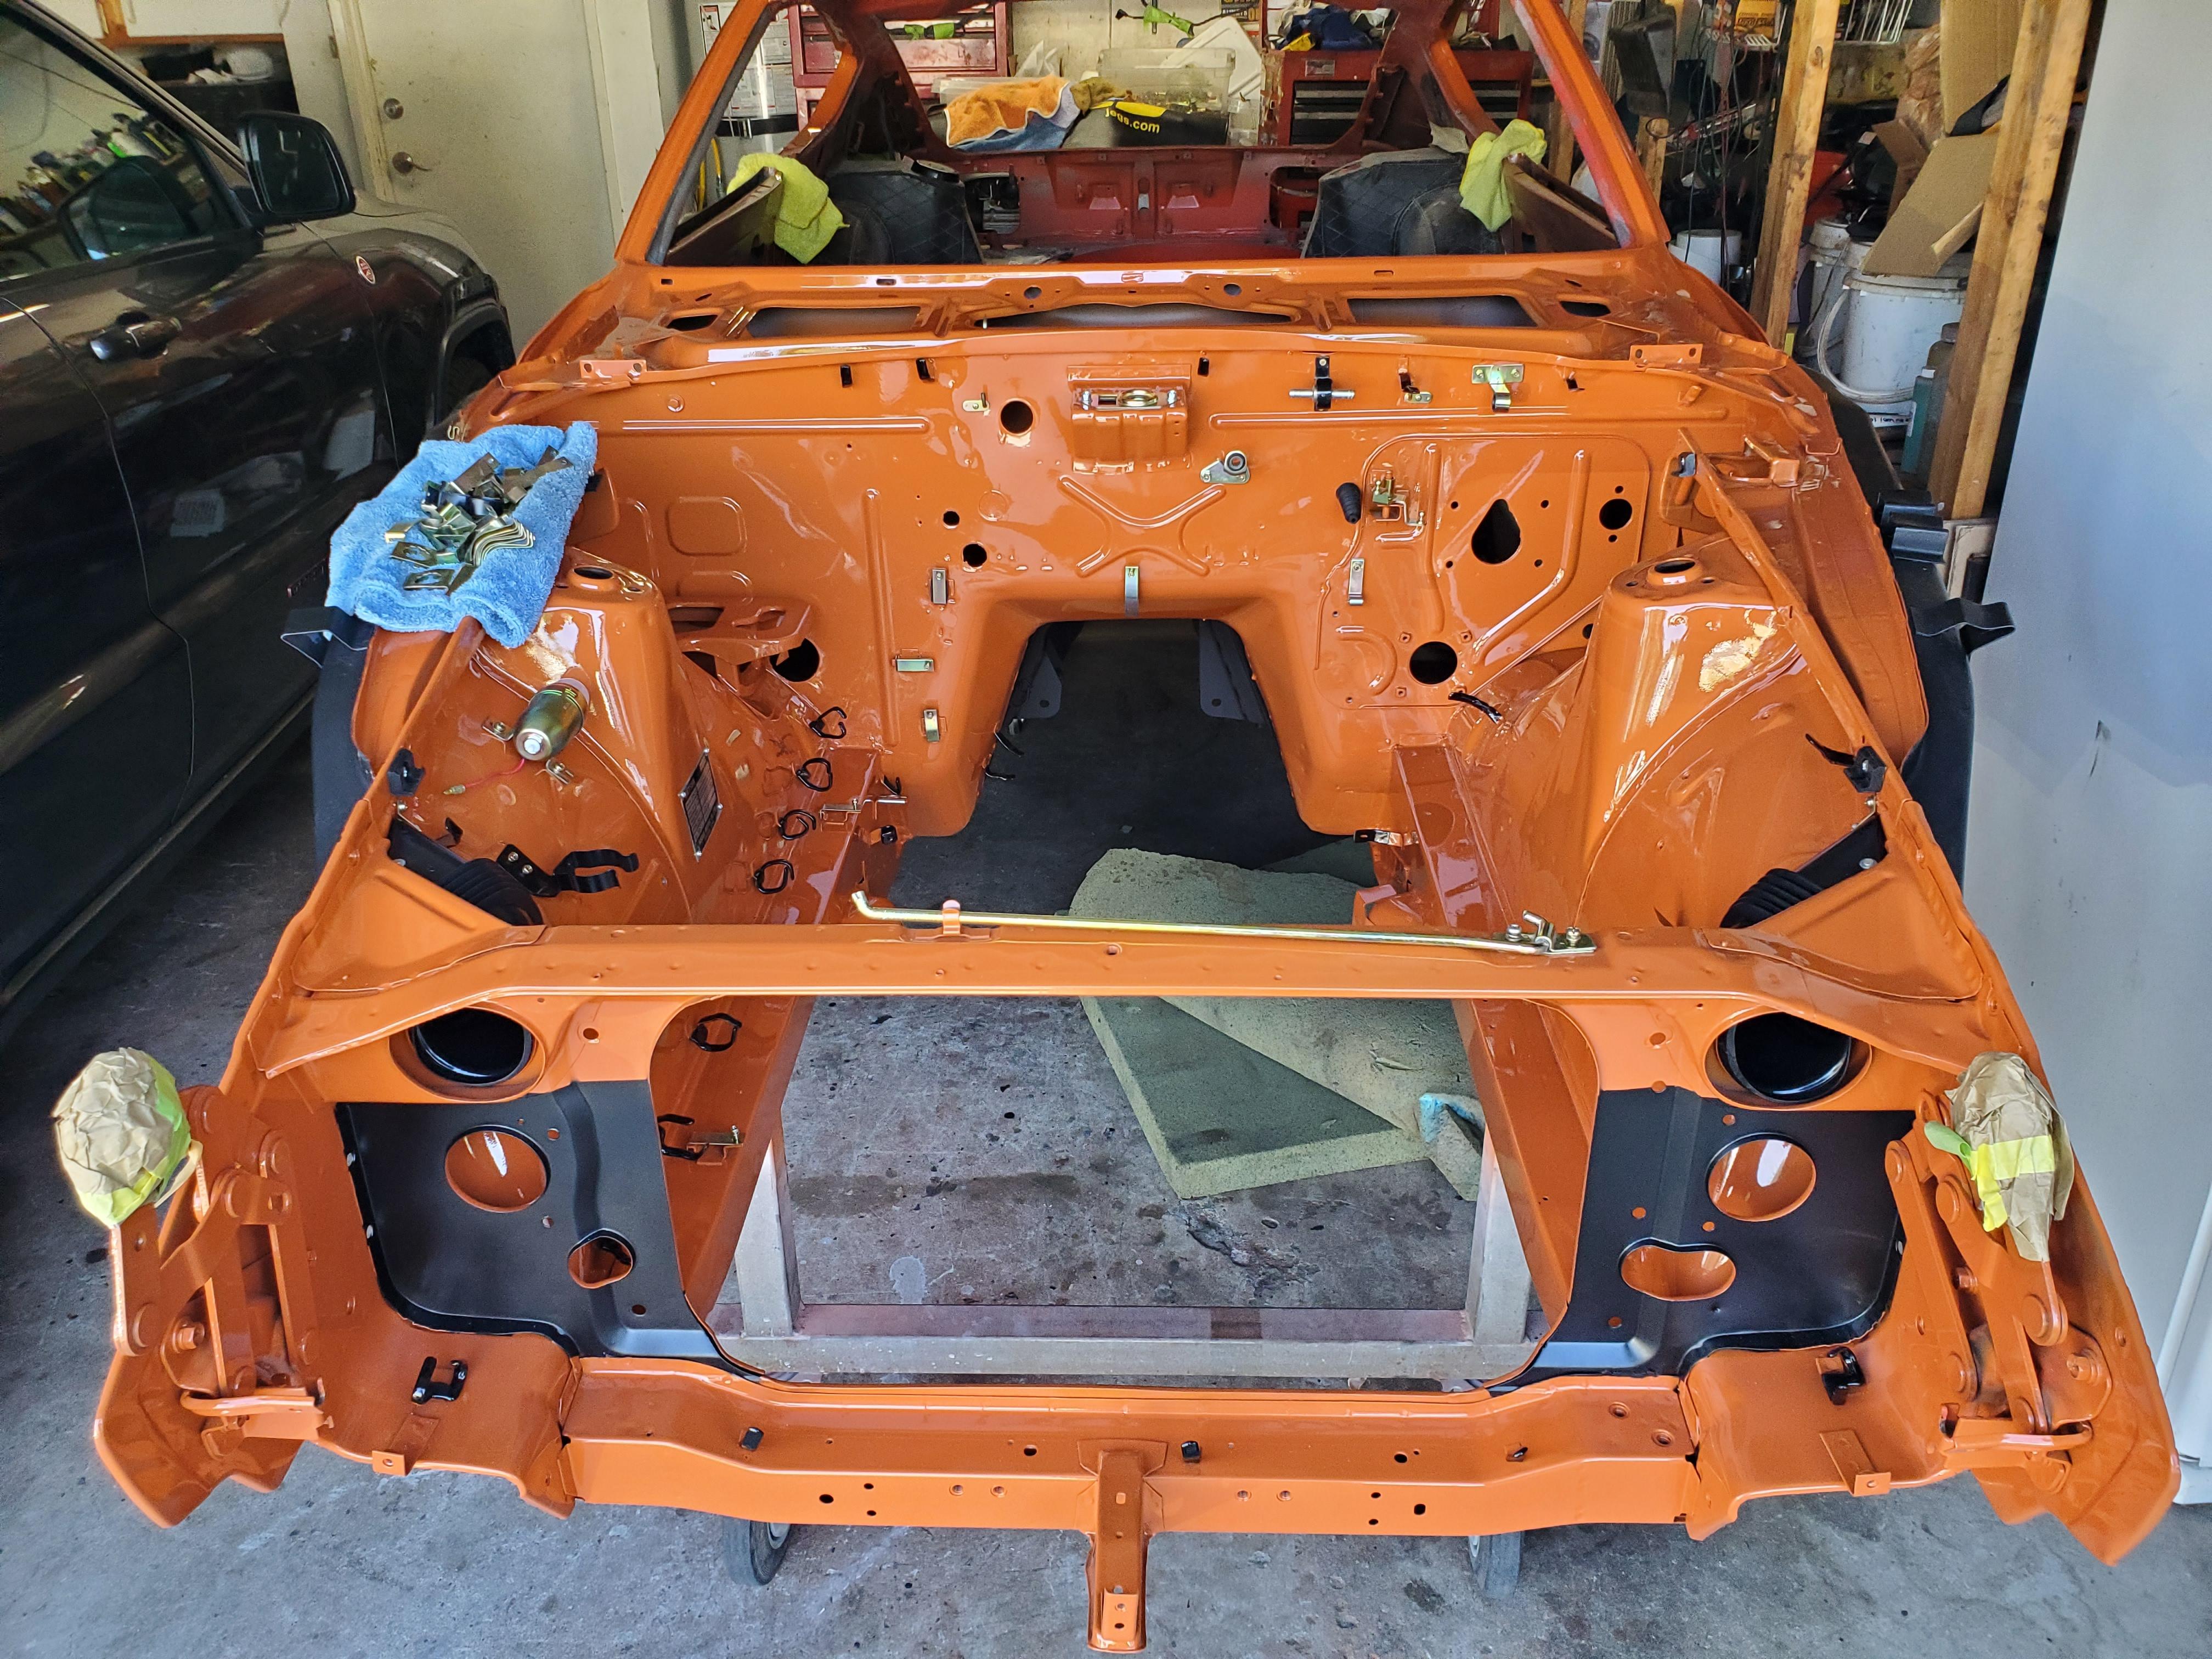
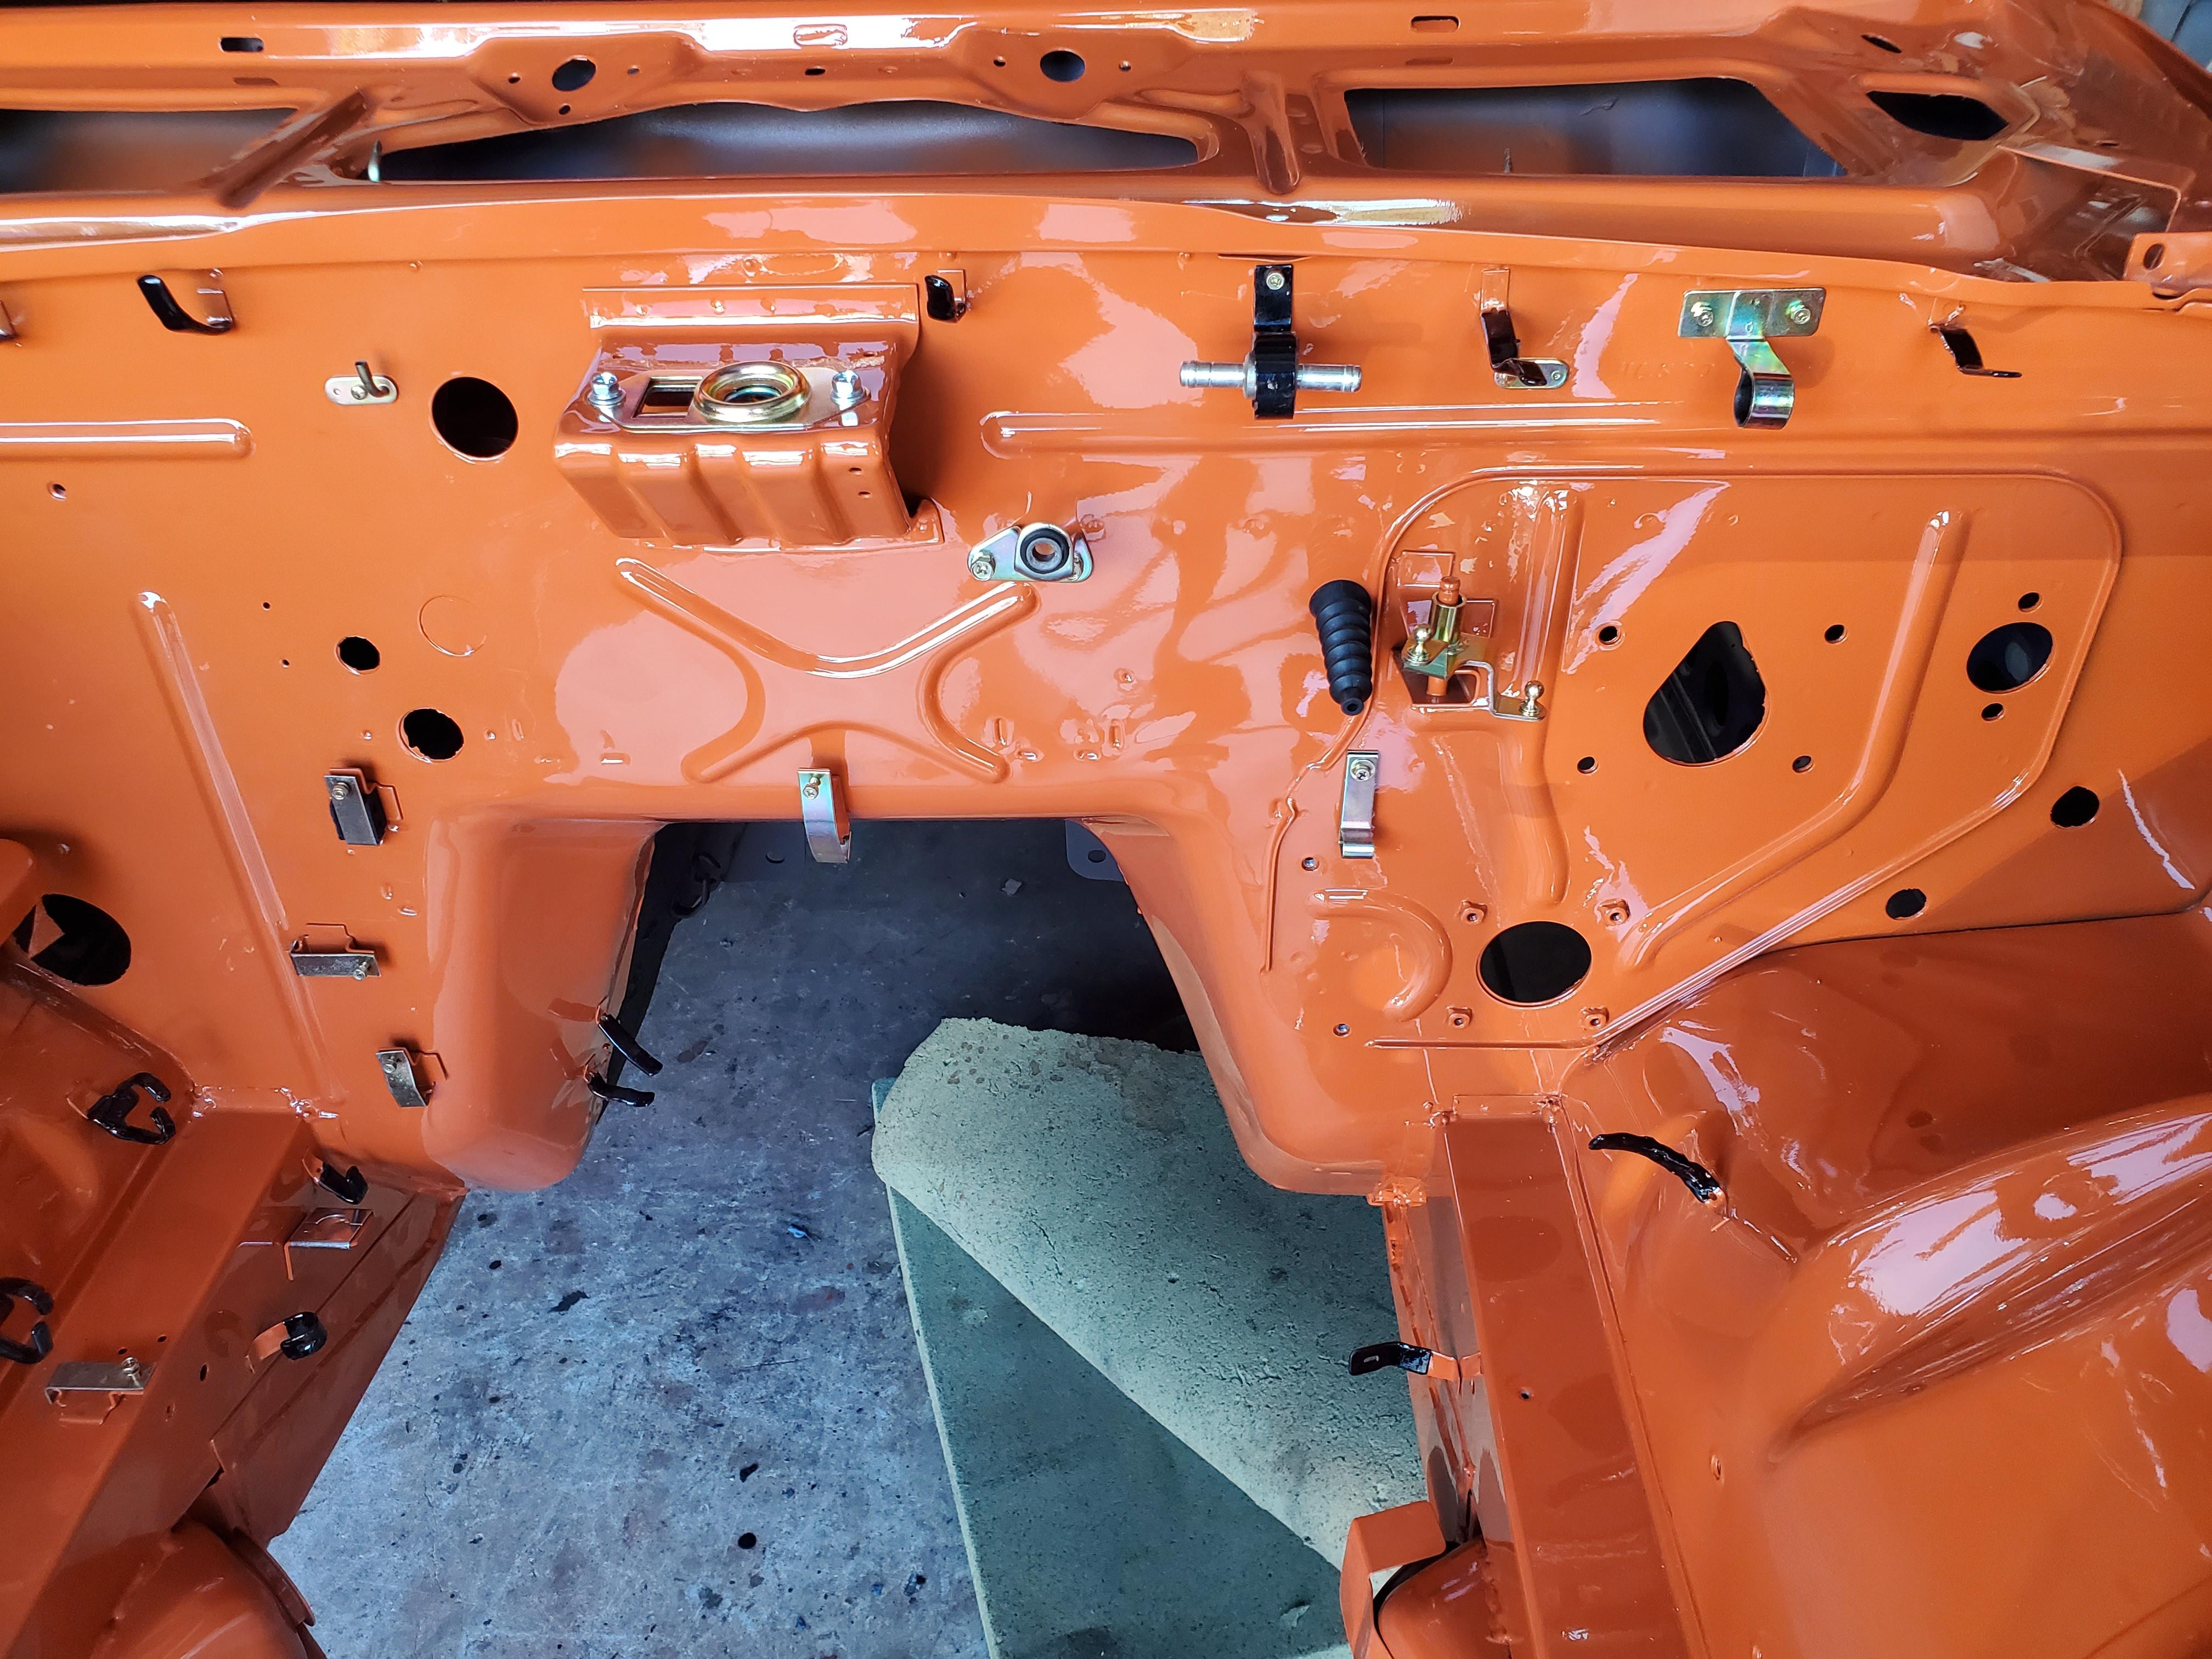
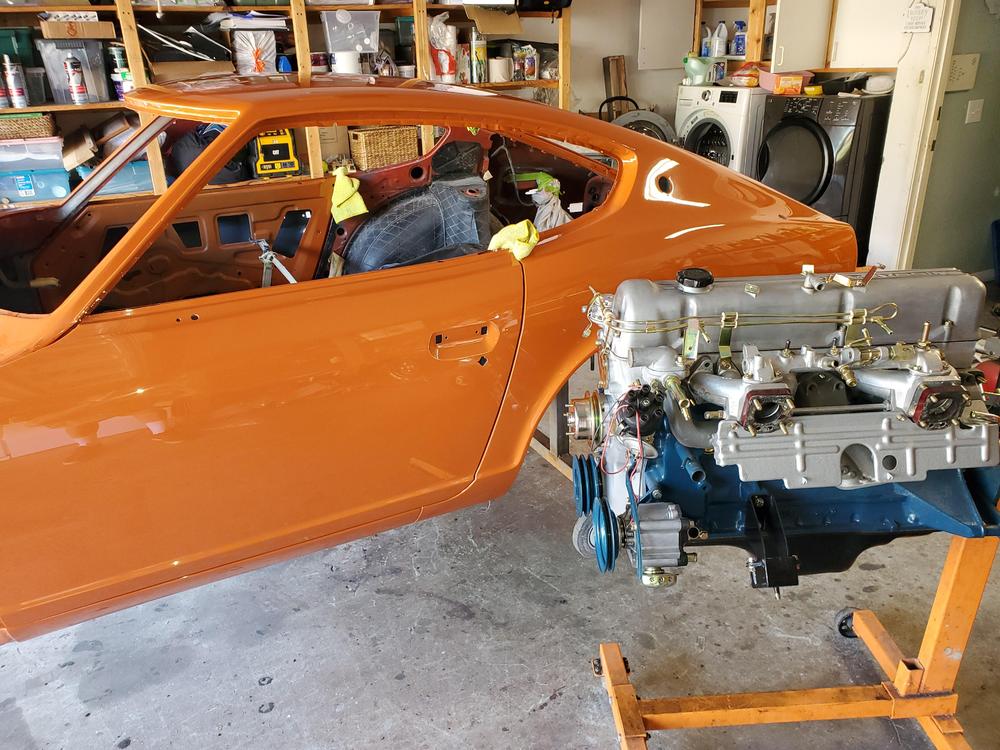
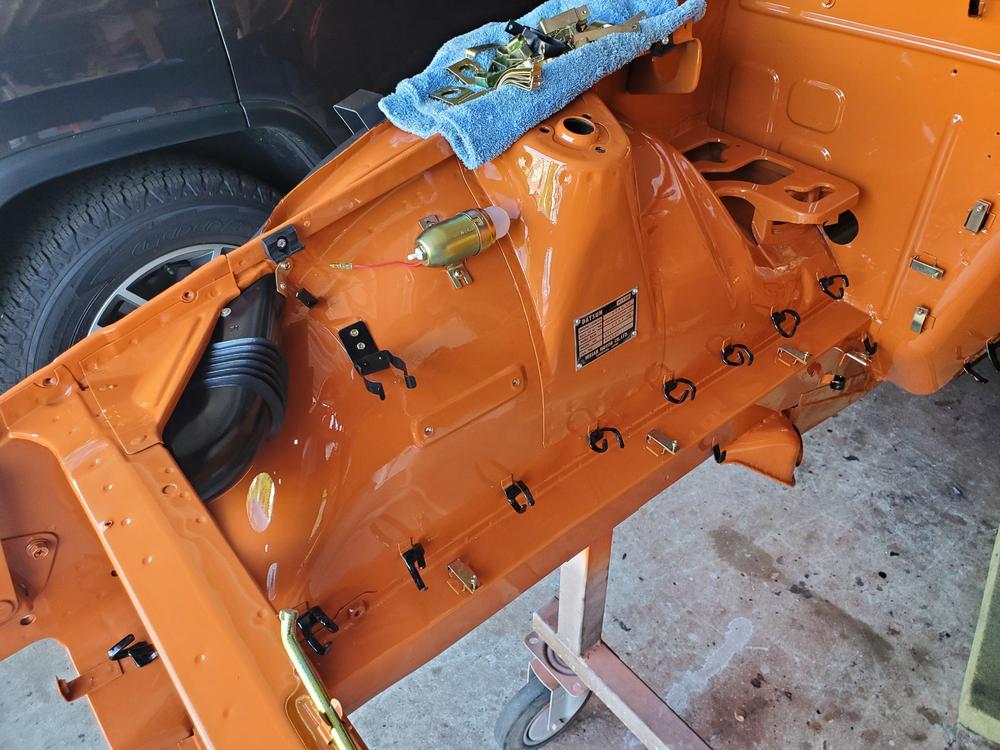
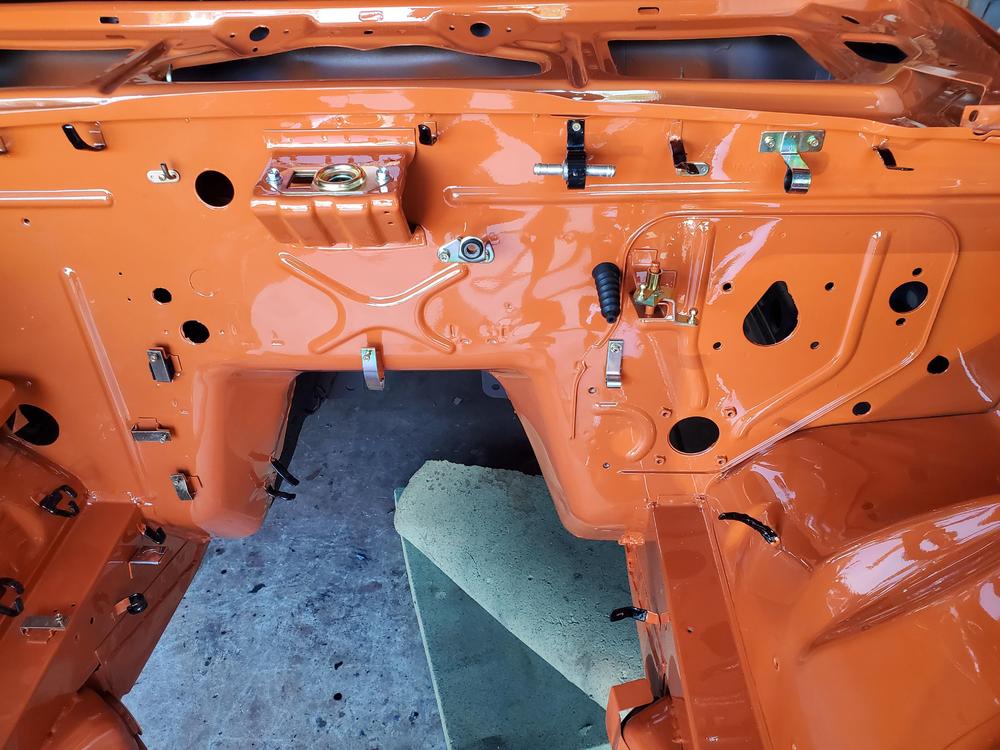
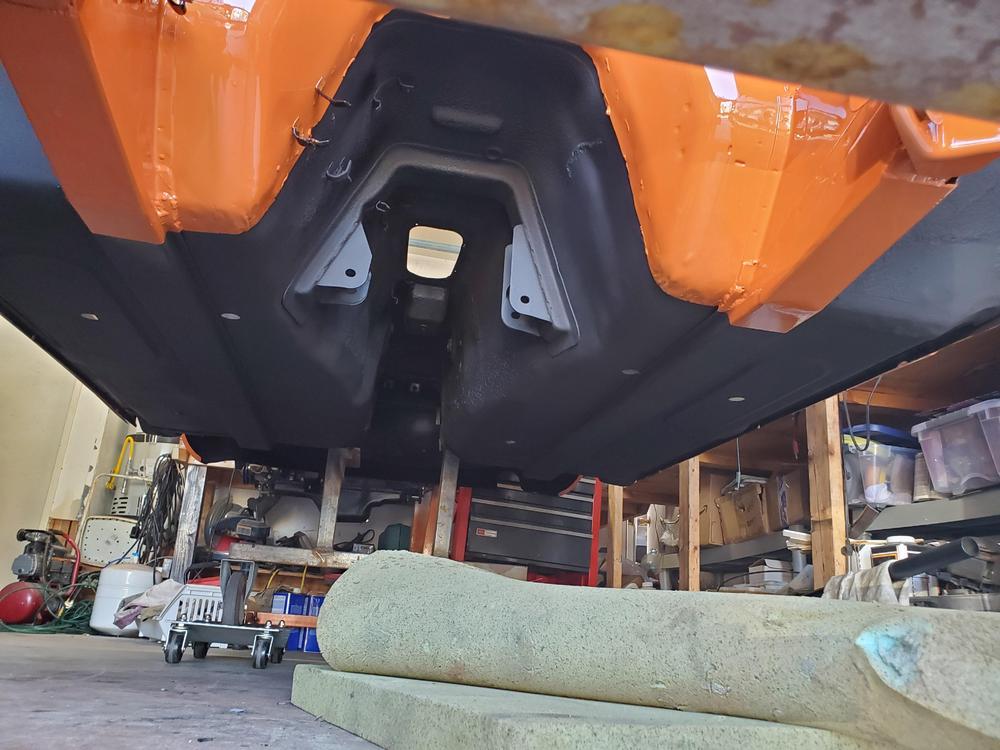
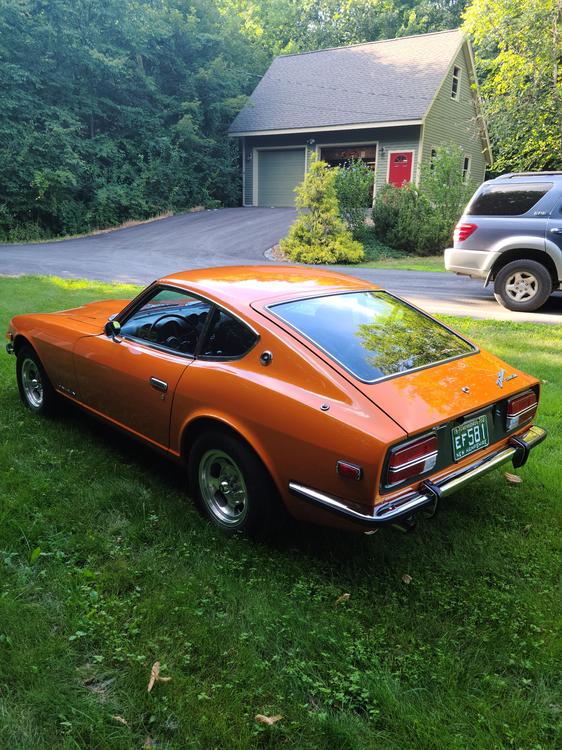
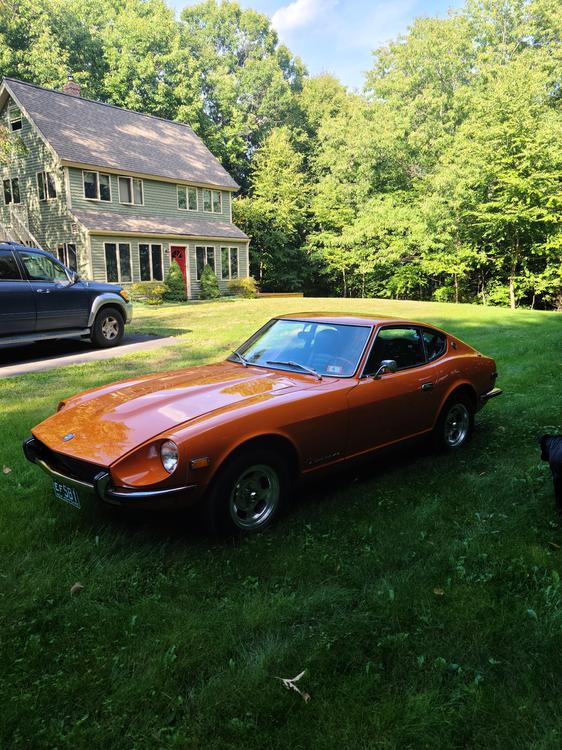
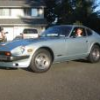
6 pointsCar arrived Friday from Miguel. The paint work is amazing as always. Since it has only been around 110 degrees F here in San Diego, I decided to do a little work on the car. Got the underside painted with POR-15 and then added a little undercoating. Painted the forward radiator supports, rear vent holes and the wire tabs. Started installing a few components that were ready to go. My son is going to lend a hand tomorrow so should be able to finish up the brake and fuel lines and install the suspension. She's looking pretty nice!


 6 points
 -
 2 pointsAnswer is found at 0:40 in this slightly grainy PPG promo video... https://youtu.be/SdHYcXGx4bw2 points
 -
2 points
-
 2 pointsI'm with Mark, I would have already started it. I have always been under the impression that you should start it and hold it at fast idle for a period of time to break the cam in????2 points
 -
1 pointThe white disc has been discussed before. It's a hot Koni topic all over the internet. Plug "koni insert white disc" in to your favorite search engine. Apparently it keeps the bump stop off the top of the strut. It's a bump stop landing pad.1 point
-
 1 pointAs the owner of a sailboat for over 20 years, one quickly learns how to correctly deal with stainless steel fasteners. From the book "Lessons Learned at Mother's Knee", not just any old lube will work with SS - it needs to be an anti-seize lube that resists the thread-to-thread pressure that will displace ordinary lubes. I have one container that has copper as a component. The SS fittings on our hydraulic lines will always benefit from some anti-seize. While installing my KONI's I noted a light colored lube on the threads, possibly a lithium type lube. And yes... slow and easy is the technique.1 point
 -
1 pointYup. That's typical galling. Here's some links that talk about such things. Some of these even specifically call out stainless nyloc nuts: https://www.boltdepot.com/fastener-information/Materials-and-Grades/Thread-galling.aspx https://www.anzor.com.au/blog/what-is-stainless-galling https://www.westfieldfasteners.co.uk/Ref_Thread_Galling.html The bottom line is usually... Use lots of lube and go slow. And even then, don't do stainless Nyloc on stainless threads unless you're an expert. Now I don't know if Koni's damper shaft is stainless, but it might be. Did they supply the stainless Nyloc nuts with the dampers? All those parts were in the same box? Seems they would know about the risks. Especially by now. So is the yellow tip the thing that you spin to change the damping? Seems like you could just take a small piece of metal tubing and judiciously "crush" one end to ovalize it and allow it to grip that yellow tab. If that's the case, it would be an easy way to make a longer tool to reach the adjuster.1 point
-
 1 point
 -
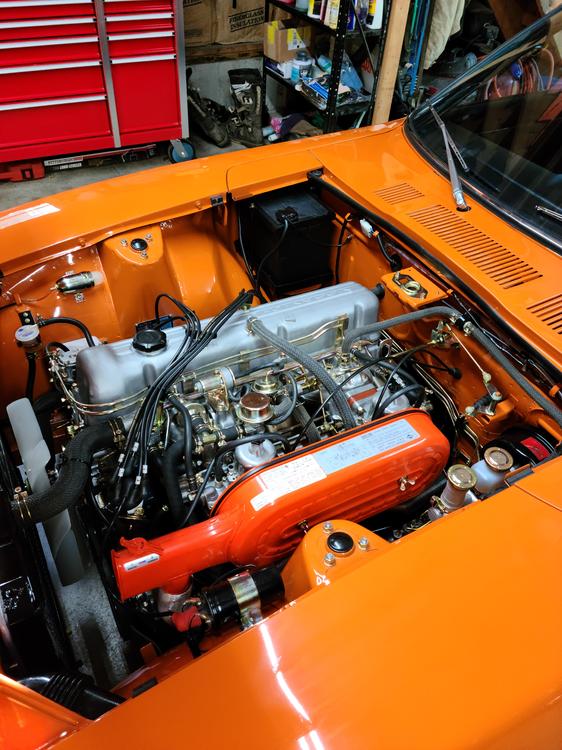
 1 pointHere are some final pics of my pumpkin build..I finished it in June and spent a few weeks chasing leaks and dealing with a head issue caused by my engine guy. Everything is now as it should be and I'm enjoying driving it!
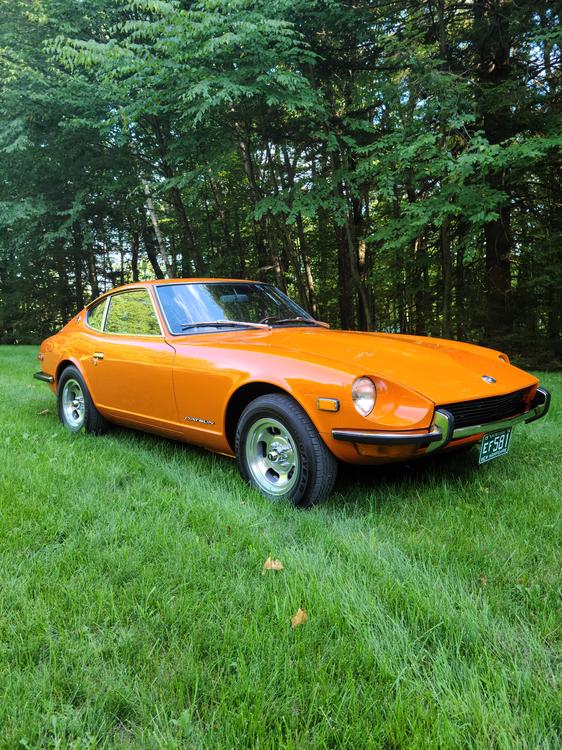

 1 point
 -
 1 pointI would have been besides myself -pissed if I had to do that with a brand new set up (lock nut) . I will take your advise seriously . I wonder if my old KYB nylon lock nuts will work? I hope you do give them some feedback . That shouldn’t have been overlooked . Makes me wonder if they actually have a test vehicle to mock this stuff up on . I’d be happy with a T handle that fit the slot . Since there is two full turns of adjustment , having marks on a dial is kind of worthless. Kind of like a carb mixture screw - can’t remember how many turns out , so you dial it in while counting and dial it back out .1 point
 -
 Can't find a search option for this thread, and I can't remember if I posted these before, so here: Portland, Oregon, 1986, Electramotive IMSA GTP 300ZX Turbo IMSA Nissan Prototype by Racer, on Flickr IMSA Nissan Prototype by Racer, on Flickr IMSA Nissan Prototype by Racer, on Flickr1 point
 -
 And as an American who risk his life to fight for my former country, my family and I thank you from the bottom of our hearts. It's a debt that we can never repay in full. All we can do to show our appreciation is to better ourselves as Americans by giving back and never forget the sacrifices that so many made in pursuit of our freedom. My respect to you and all those who wear the uniform. Thank you Mike for the kind words. Have a great Labor Day! Sent from my SM-G975U using Tapatalk1 point
 -
1 pointAfter 18 years you'd think there'd be at least one guy who did his very best to follow the instructions. Either ending up with success or mangled parts. He made that first post but never came back with what he did.1 point
-
1 pointYes, it is to be expected. That's normal for the signal going out to the sender units (Oil, fuel, and temp). They are pulse width modulated. I don't think it directly pertains to your issue (which sounds as if it may be a non-issue after all), but if you or someone else wants a description on how the gauges work, let me know and I'll put something together.1 point
-
1 pointStainless Ny-locs are a dangerous thing, especially if you aren't aware of the issues. Stainless is prone to galling and that's exactly what happened to you.\ If they ran a stainless nyloc onto a stainless shaft, they were asking... No, wait... BEGGING for trouble.1 point
-
1 pointI blew it out with compressed air right before I put it on, but I just ordered a cheap torch tip file that I’ll use before I button up the valve cover.1 point
-
1 pointNo, he's saying it "bottomed out" on the metal at the top of the strut tower and wouldn't reach down deep enough into the hole to get onto the adjustment spinny. He had to "lengthen" the tool to reach deeper into the hole by removing some of the finger grip knob portion from the underside. I don't think he was ever intending to leave it under the plastic cap, it was completely unusable as originally designed. Couldn't adjust the strut at all. Of course, I'm trying to translate for someone else....... @AK2601 point
-
1 pointMaybe one of the MSA guys would be interested in knowing that, apparently, they are giving bad advice. Or they could show a control arm with the bushing pressed in to the old sleeve. This problem has been discussed for 18 years. Time to get it resolved, maybe? Has everyone been doing it wrong for 18 years? @Joseph@TheZStore Here's the parallel thread on Hybridz. https://forums.hybridz.org/topic/26687-front-and-rear-control-arm-bushing/?tab=comments#comment-2059341 point
-
1 pointYou say it wouldn’t get deep enough ? To fit under the strut tower cap ?1 point
-
 1 pointThe pressure reading from the auxiliary gauge is the best test but I'd have started it up by now. Oil flow up to the head indicates the oil pump is pumping. On initial start-ups I normally leave the valve cover off to check the oil flow to each cam lobe and watch the pressure gauge.1 point
 -
 1 pointHi Dmuzial, I have a 78Z manual, and had this same problem about a year and a half ago....actually started a thread in the Engine and Drivetrain section since I originally ran across the problem when installing the diff...you can see it here: Lots of good responses to my questions by the forum members. Bottom line was that some of the drawings in the FSM were copied from previous year models and are incorrect. Like you, I initially installed the bar with the bushing cylinders aft of the mustache bar (per the FSM diagram) only to discover that I couldn't get the forward diff mount to line up correctly. It all worked out good once I reversed the bar so that the bushing cylinders were forward. Love this forum...never fails to get you back on track with whatever Z problem you're tackling at the moment!1 point
 -
 1 point
 -
 1 pointCoincidentally I cleaned the bullet connectors & afm connector a week before the car died and it ran better than it ever had. I also smoked the engine last week and no leaks could be found. Just checked the fpr and no leak. tach needle is perfect too. This is so strange... EDIT: the coolant temperature sensor connector bullet connector popped out. Thanks for the tip.1 point
 -
1 pointJust a quick update for anyone else who runs across this: The engine/transmission is now in the car, and even though it's not running yet I did some test runs by pushing my car down my driveway, putting it into gear and then slowly releasing the clutch. Things feel pretty good, so I'm going to call this a success so far. I'll post a final update once the car is driving.1 point
-
 As a Marine Vietnam veteran(1966-1967) I honor your father. Peace to you my friend. Can't wait to see your restoration. Cheers, Mike1 point
 -
 Interesting thread! Especially as my Aussie (spectra looking) pump started to play up at the weekend and intermittently pumped well then dry filter time. It’s been on the car for under 4k miles!!! Fortunately I had the 43 year old original pump and a small socket set in the spare wheel well so I swapped it out on the side of the road. Then I proceeded to carry on with my 3 hour round trip journey and even terrorised a Mustang having a go and not thinking my car was a fair bit quicker ;). Just love that modified L28! And in all of this the old pump didn’t miss a beat!! I only replaced it previously so that the engine bay looked new/ tidy When I put the L28 in. Waste of money by the looks of it. I will take it apart at some point and upload photos.1 point
 -
 I just read your story to my wife. I'm 70 and she's 65, and we lived through that era and watched the war on TV. My high school classmates (class of '69) went over, and some did not return. I'm glad your dad and your family made it out. He was clearly a remarkable and admirable gentleman.1 point
 -
 Hello everyone, my apologies for not concluding on this issue, My issue ended up being the EFI control module itself, as well as a short near the ballast resistor. I hope this helps anyone in the future.1 point
 -
 Whoa, I just went through your pics on viczcar, that is quite a project. You're right to be scared of the A pillar and roof rust, those are the most difficult areas to repair. The rest of the cars rust, although time consuming is repairable but the A pillars consist of 3-4 layers of tightly folded metal and there is just no room to work in there. You might seriously consider finding a complete rust free roof/A pillar State side and grafting on to your body. Any chance that there is an acid dipper in Perth, media blasting is great but will never get into the inner cavities of the subframe. Now I'm all for DIY rust repair, for me it is the process of the project that I enjoy but let me play devils advocate for a second. If you know you're going to spend 35-40k to get this car on the road then that same kind of money will buy you an awfully nice finished Z. Looking forward to your progress, this forum is great resource for any problems you run into during the rebuild. Will be interested to see what you think of the KlassicFab panels, they look great. Pricey but if they are as good as they look it will be worth it.1 point
 -
1 pointHey Chas, I don't think the rust is too bad, I'll know more once I get it up on the rotisserie, the worst of it is the panel repairs done by previous owners. The shape of the rear quarter wheel lip looks like it was guessed at so will have to dig through the putty to find out what's under there first. Fortunately there is a very good body panel manufacturer the next province over that seems to be the only one making 510 rear quarters for 2 door coupes and the price is reasonable. http://www.alfaparts.net/dat510.html They make panels for a lot of older cars, http://www.alfaparts.net/
 1 point
 -
 1 point
 -
 1 pointOMG. Another canadian with a hobby tractor. Now the snow chains and the picture will be complete. Chris, The 500 is starting to come back to life in your caring hands. The parts are looking great.How is the body for rust? It looks good in the foto's, but we all know what happens when you start digging around.
 1 point
 -
 1 pointthe plan is to try the purpose made stencil tape, it has provision for a constant 1/16 line once applied then the center is removed. I was not happy with any of the various tape methods as getting the constant width was an issue, esp when considering I have to do the entire grid. The stencil was designed around the idea of quick pin stripe methods not requiring great skill to apply in the automotive industry.1 point
 -
1 pointA very big thanks for outstanding customer service from MSA and KONI! Like a few others, I could not get the gland nut to adequately thread into place because the shock was not seating properly. My struts are squeaky clean inside with no foreign debris. As recommended above, I contacted MSA about the issue. @Joseph@TheZStore quickly responded and identified a Nissan mfg. anomaly where the bottom cap on the strut has an internal shoulder. Chipped paint on the bottom of the new KONI shock confirmed the interference. MSA had modified gland nuts on hand for this problem and sent a pair to me at no cost. Note the machined internal relief shoulder on the gland nut on the right vs. stock on the left. The relief allowed the gland nut threads to fully engage and get the gap well under 4mm. One front strut down this morning, one to go for tomorrow and then on to the rears. Jim
 1 point
 -
1 point
-
 1 pointDid the bushing set you bought come from this site: http://www.suspension.com/nissancars.htm If it did I can tell you that the outer a-arm sleeves must be removed. The bushings do not need to be pressed in, they slip in quite nice. Generic instructions (should be outlawed) should be read and then thrown away, substitute common sense if they don't jive with whats in front of you.1 point