Leaderboard
-

AK260
Free Member13Points999Posts -


siteunseen
Free Member8Points14,904Posts -


CW240Z72
Free Member7Points229Posts -

grannyknot
Free Member6Points5,158Posts
Popular Content
Showing content with the highest reputation on 04/13/2021 in all areas
-
4 pointsPlease consider sticking a folded piece of cardboard in the spinng fan. You need those fingers to type helpful replies on here.4 points
-
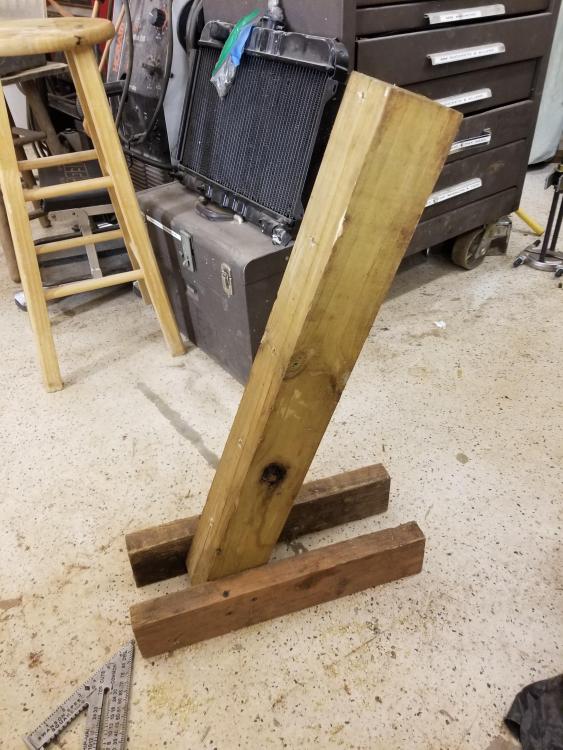
 Looking for some hose to bleed the clutch slave. Found this in a moldy old box in the back of the shed. Pure gold
 3 points
 -
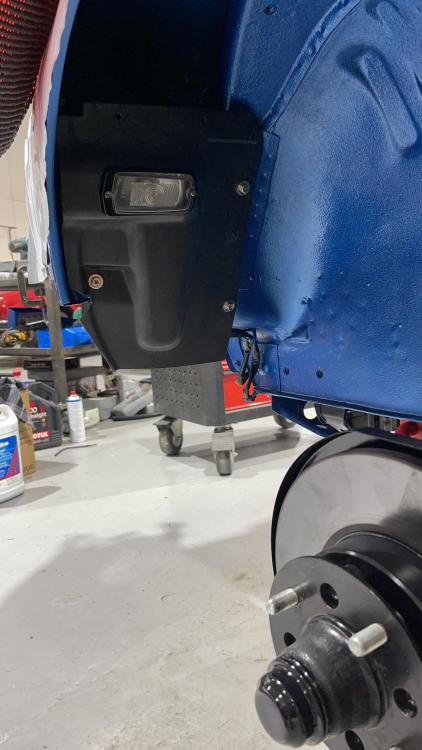
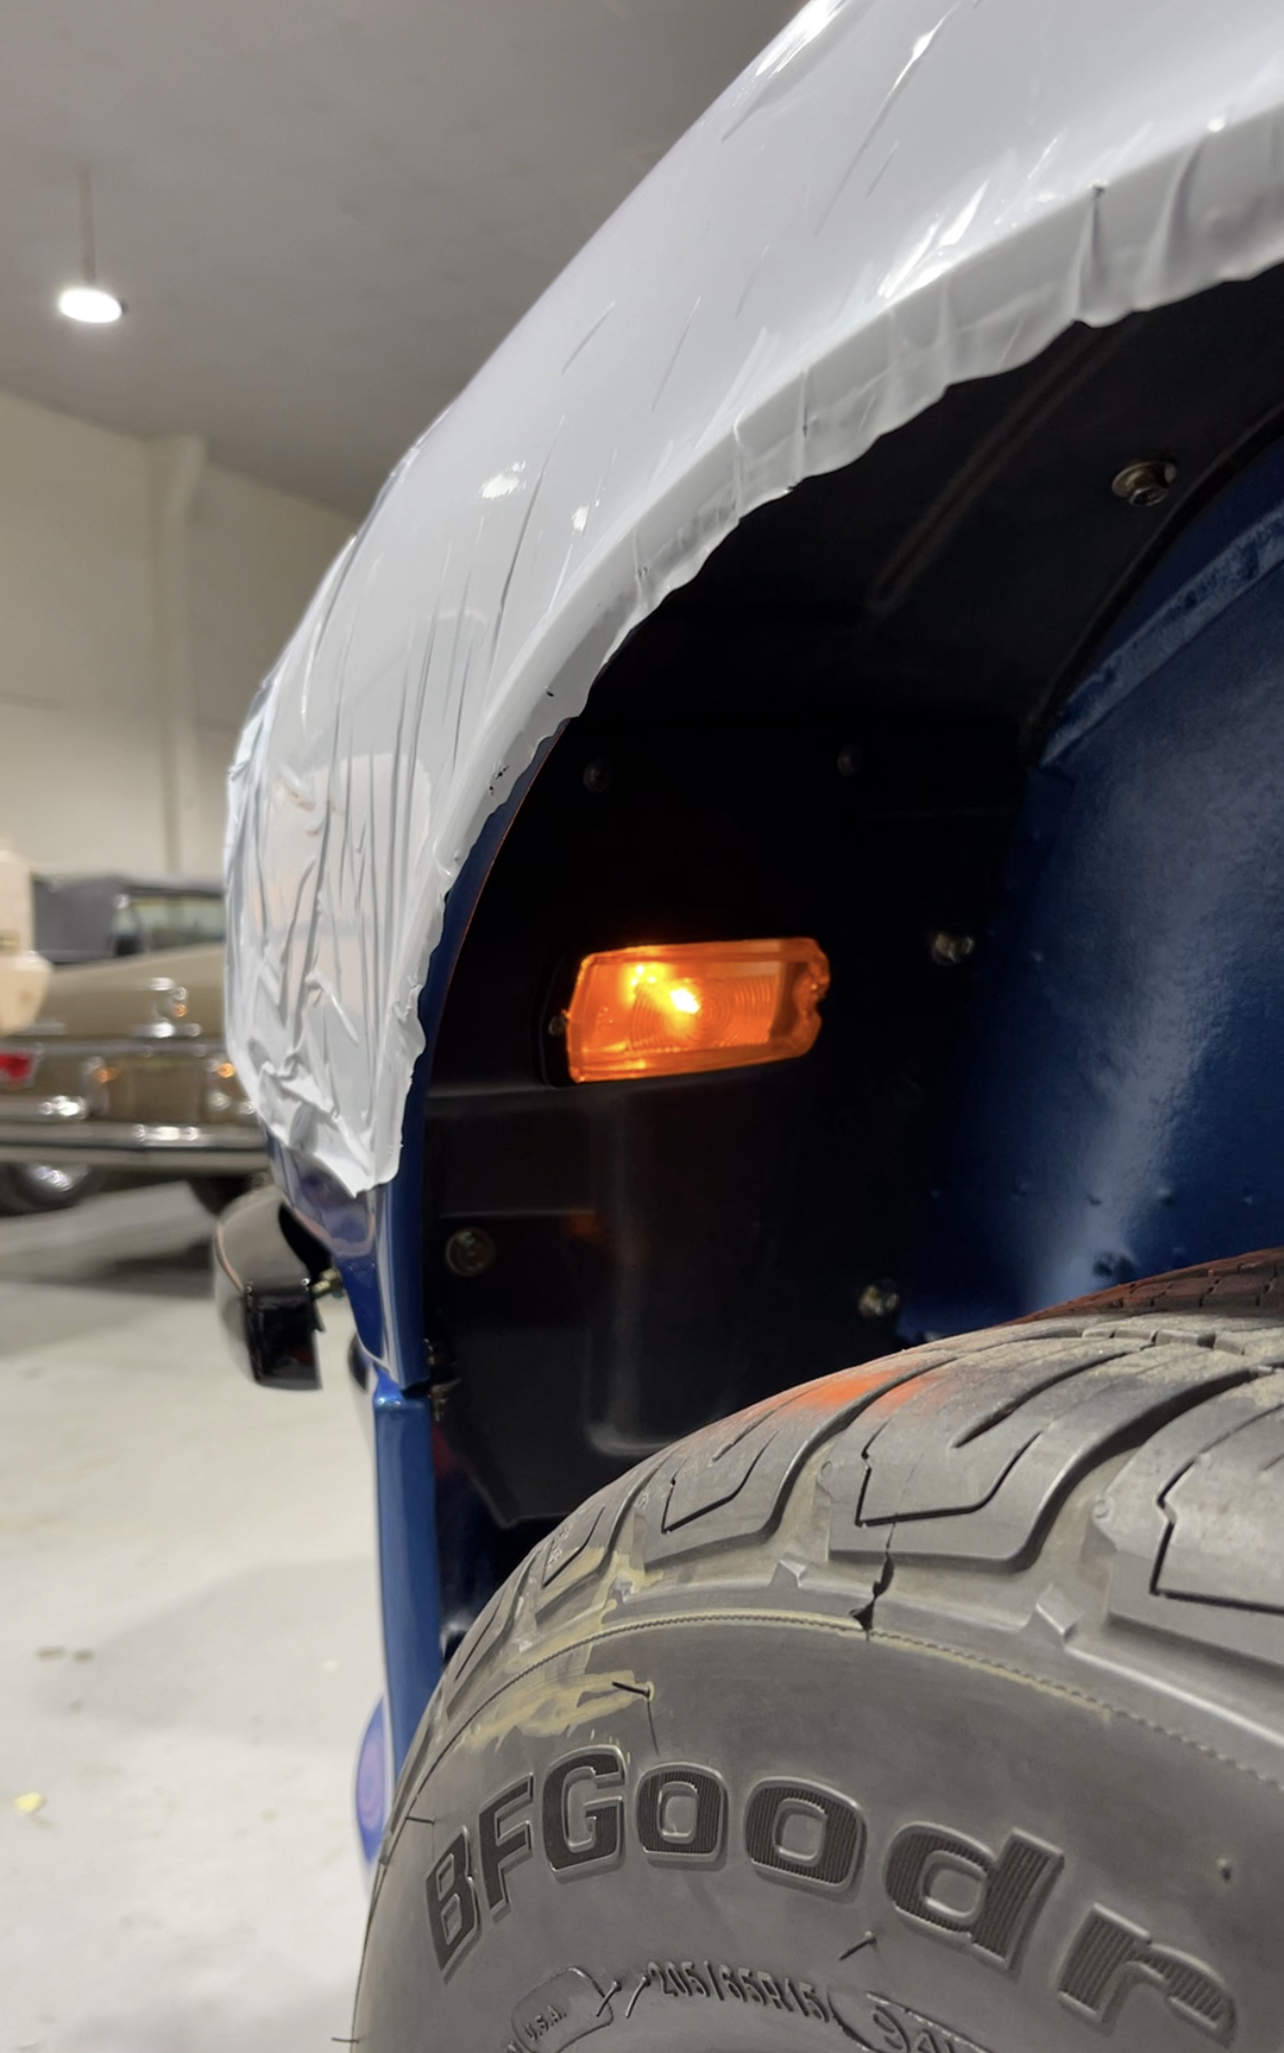
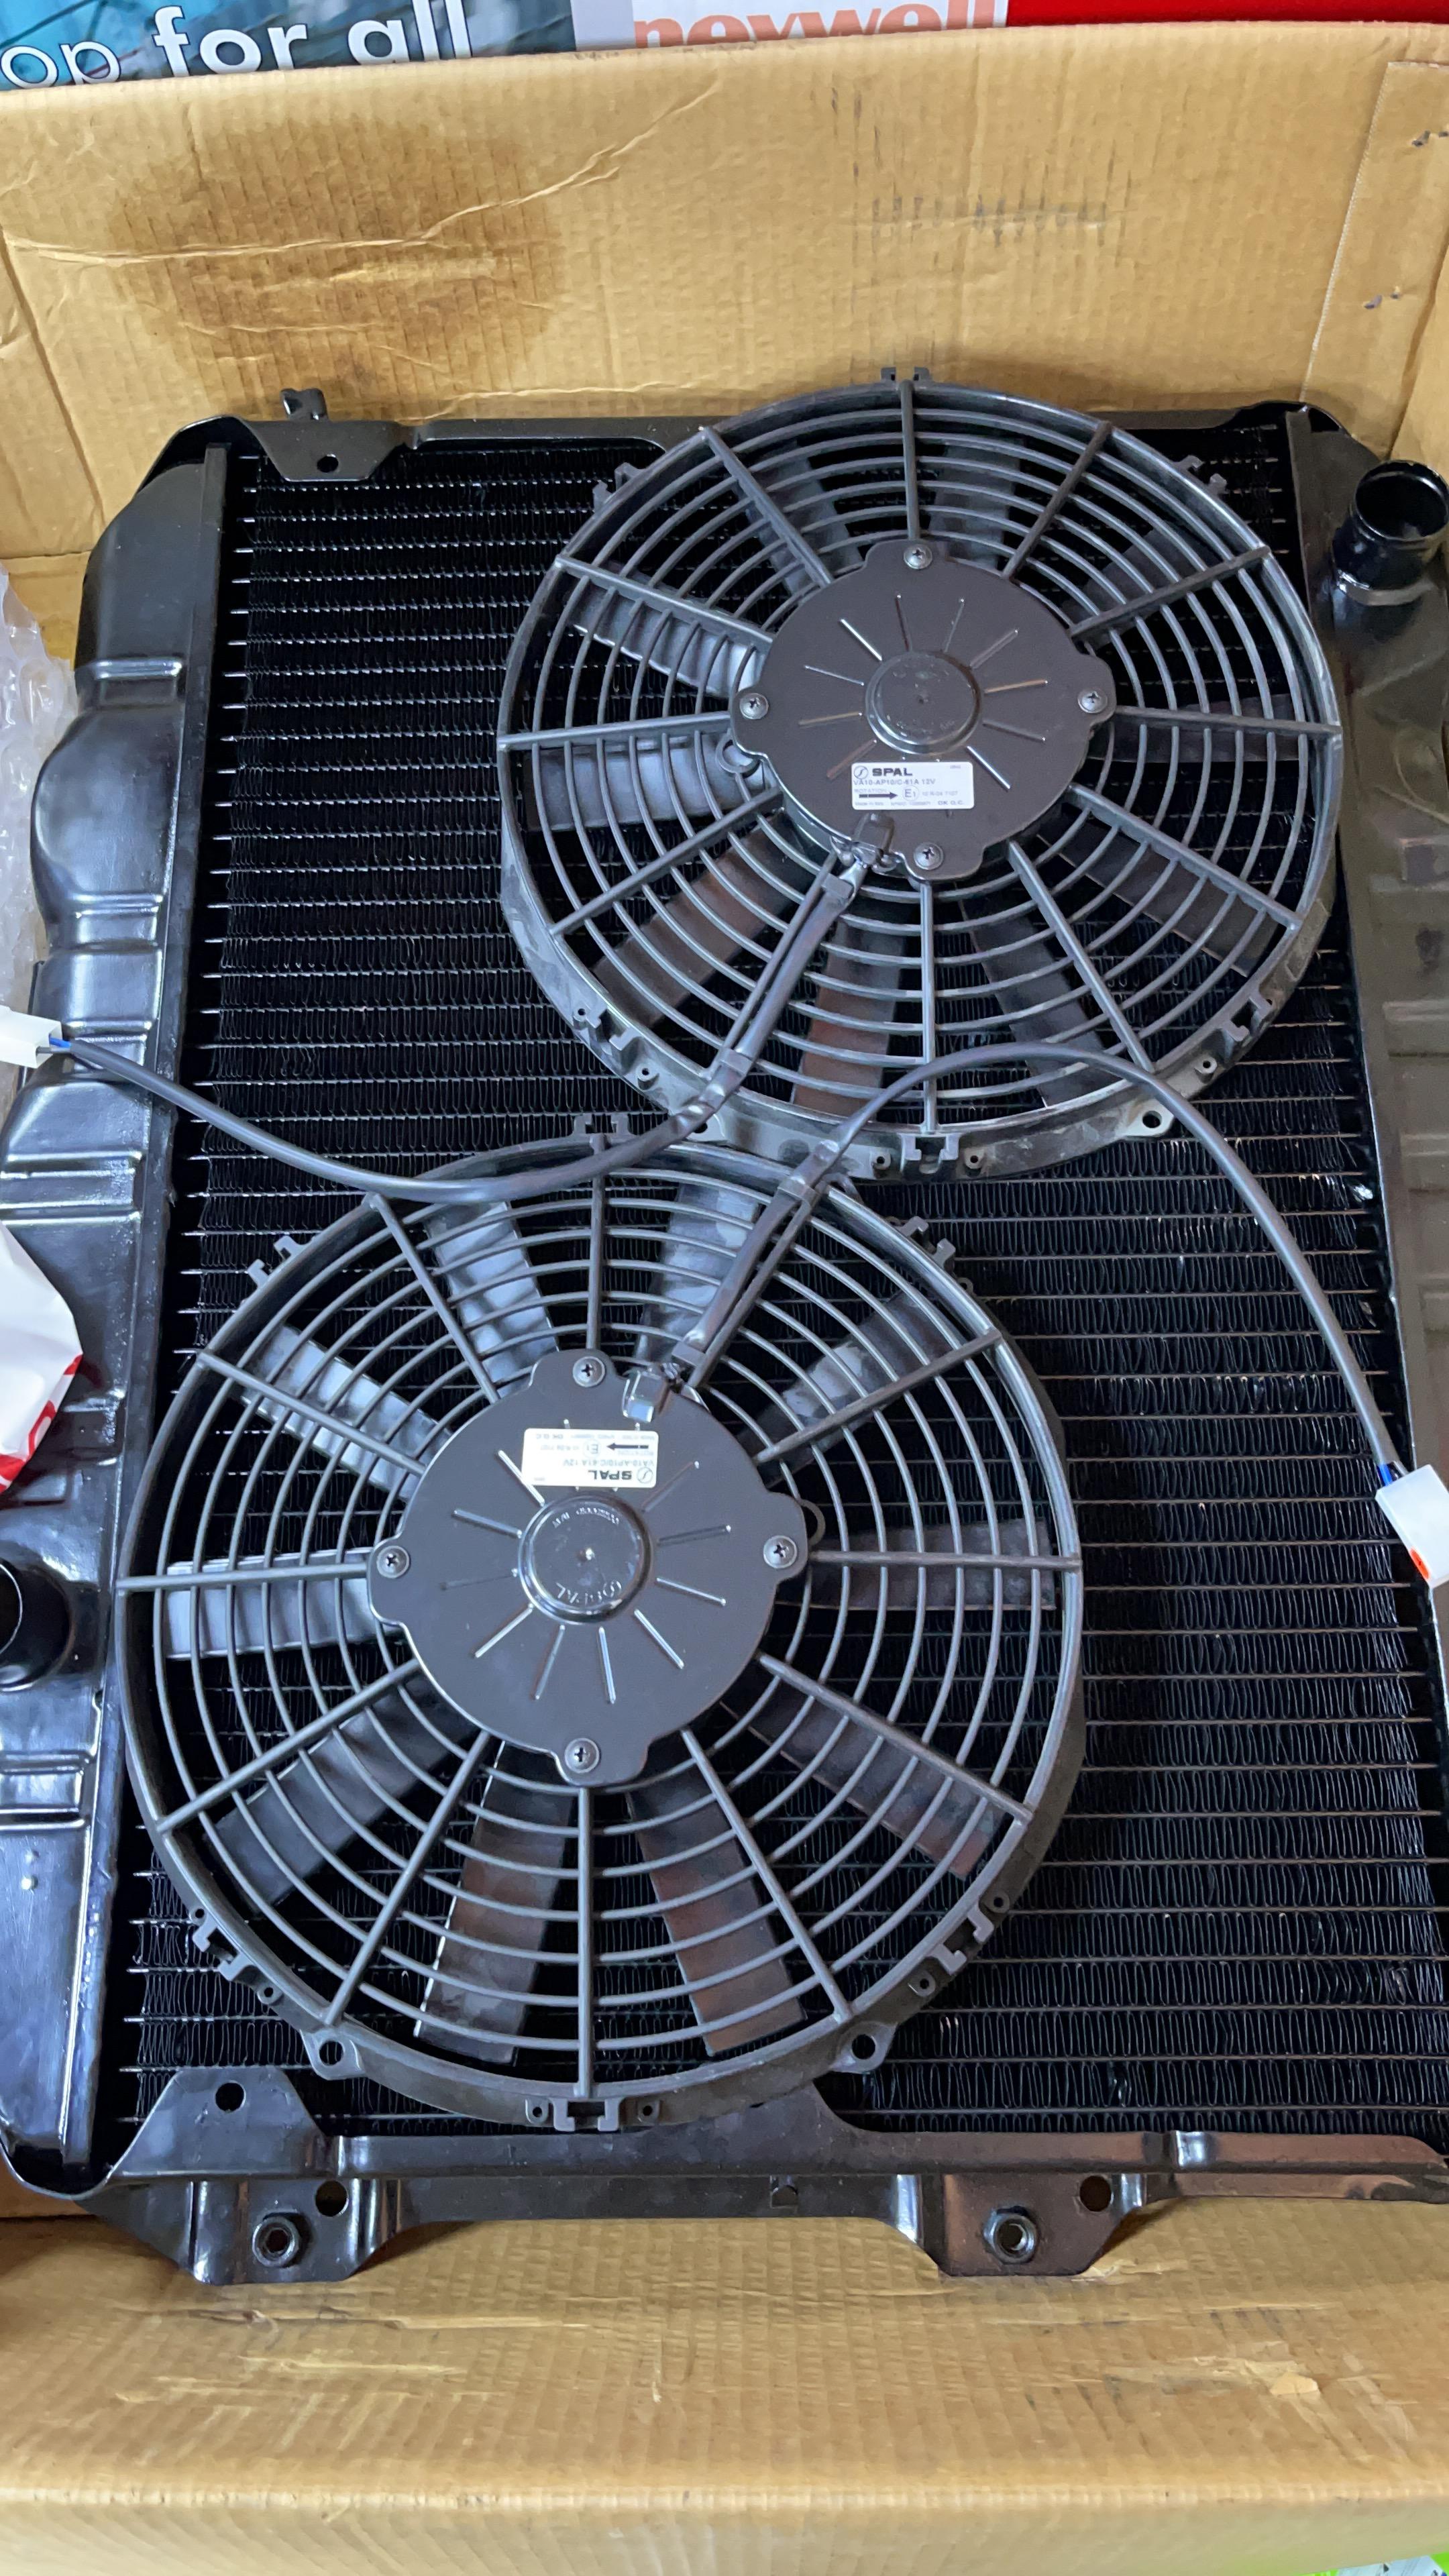
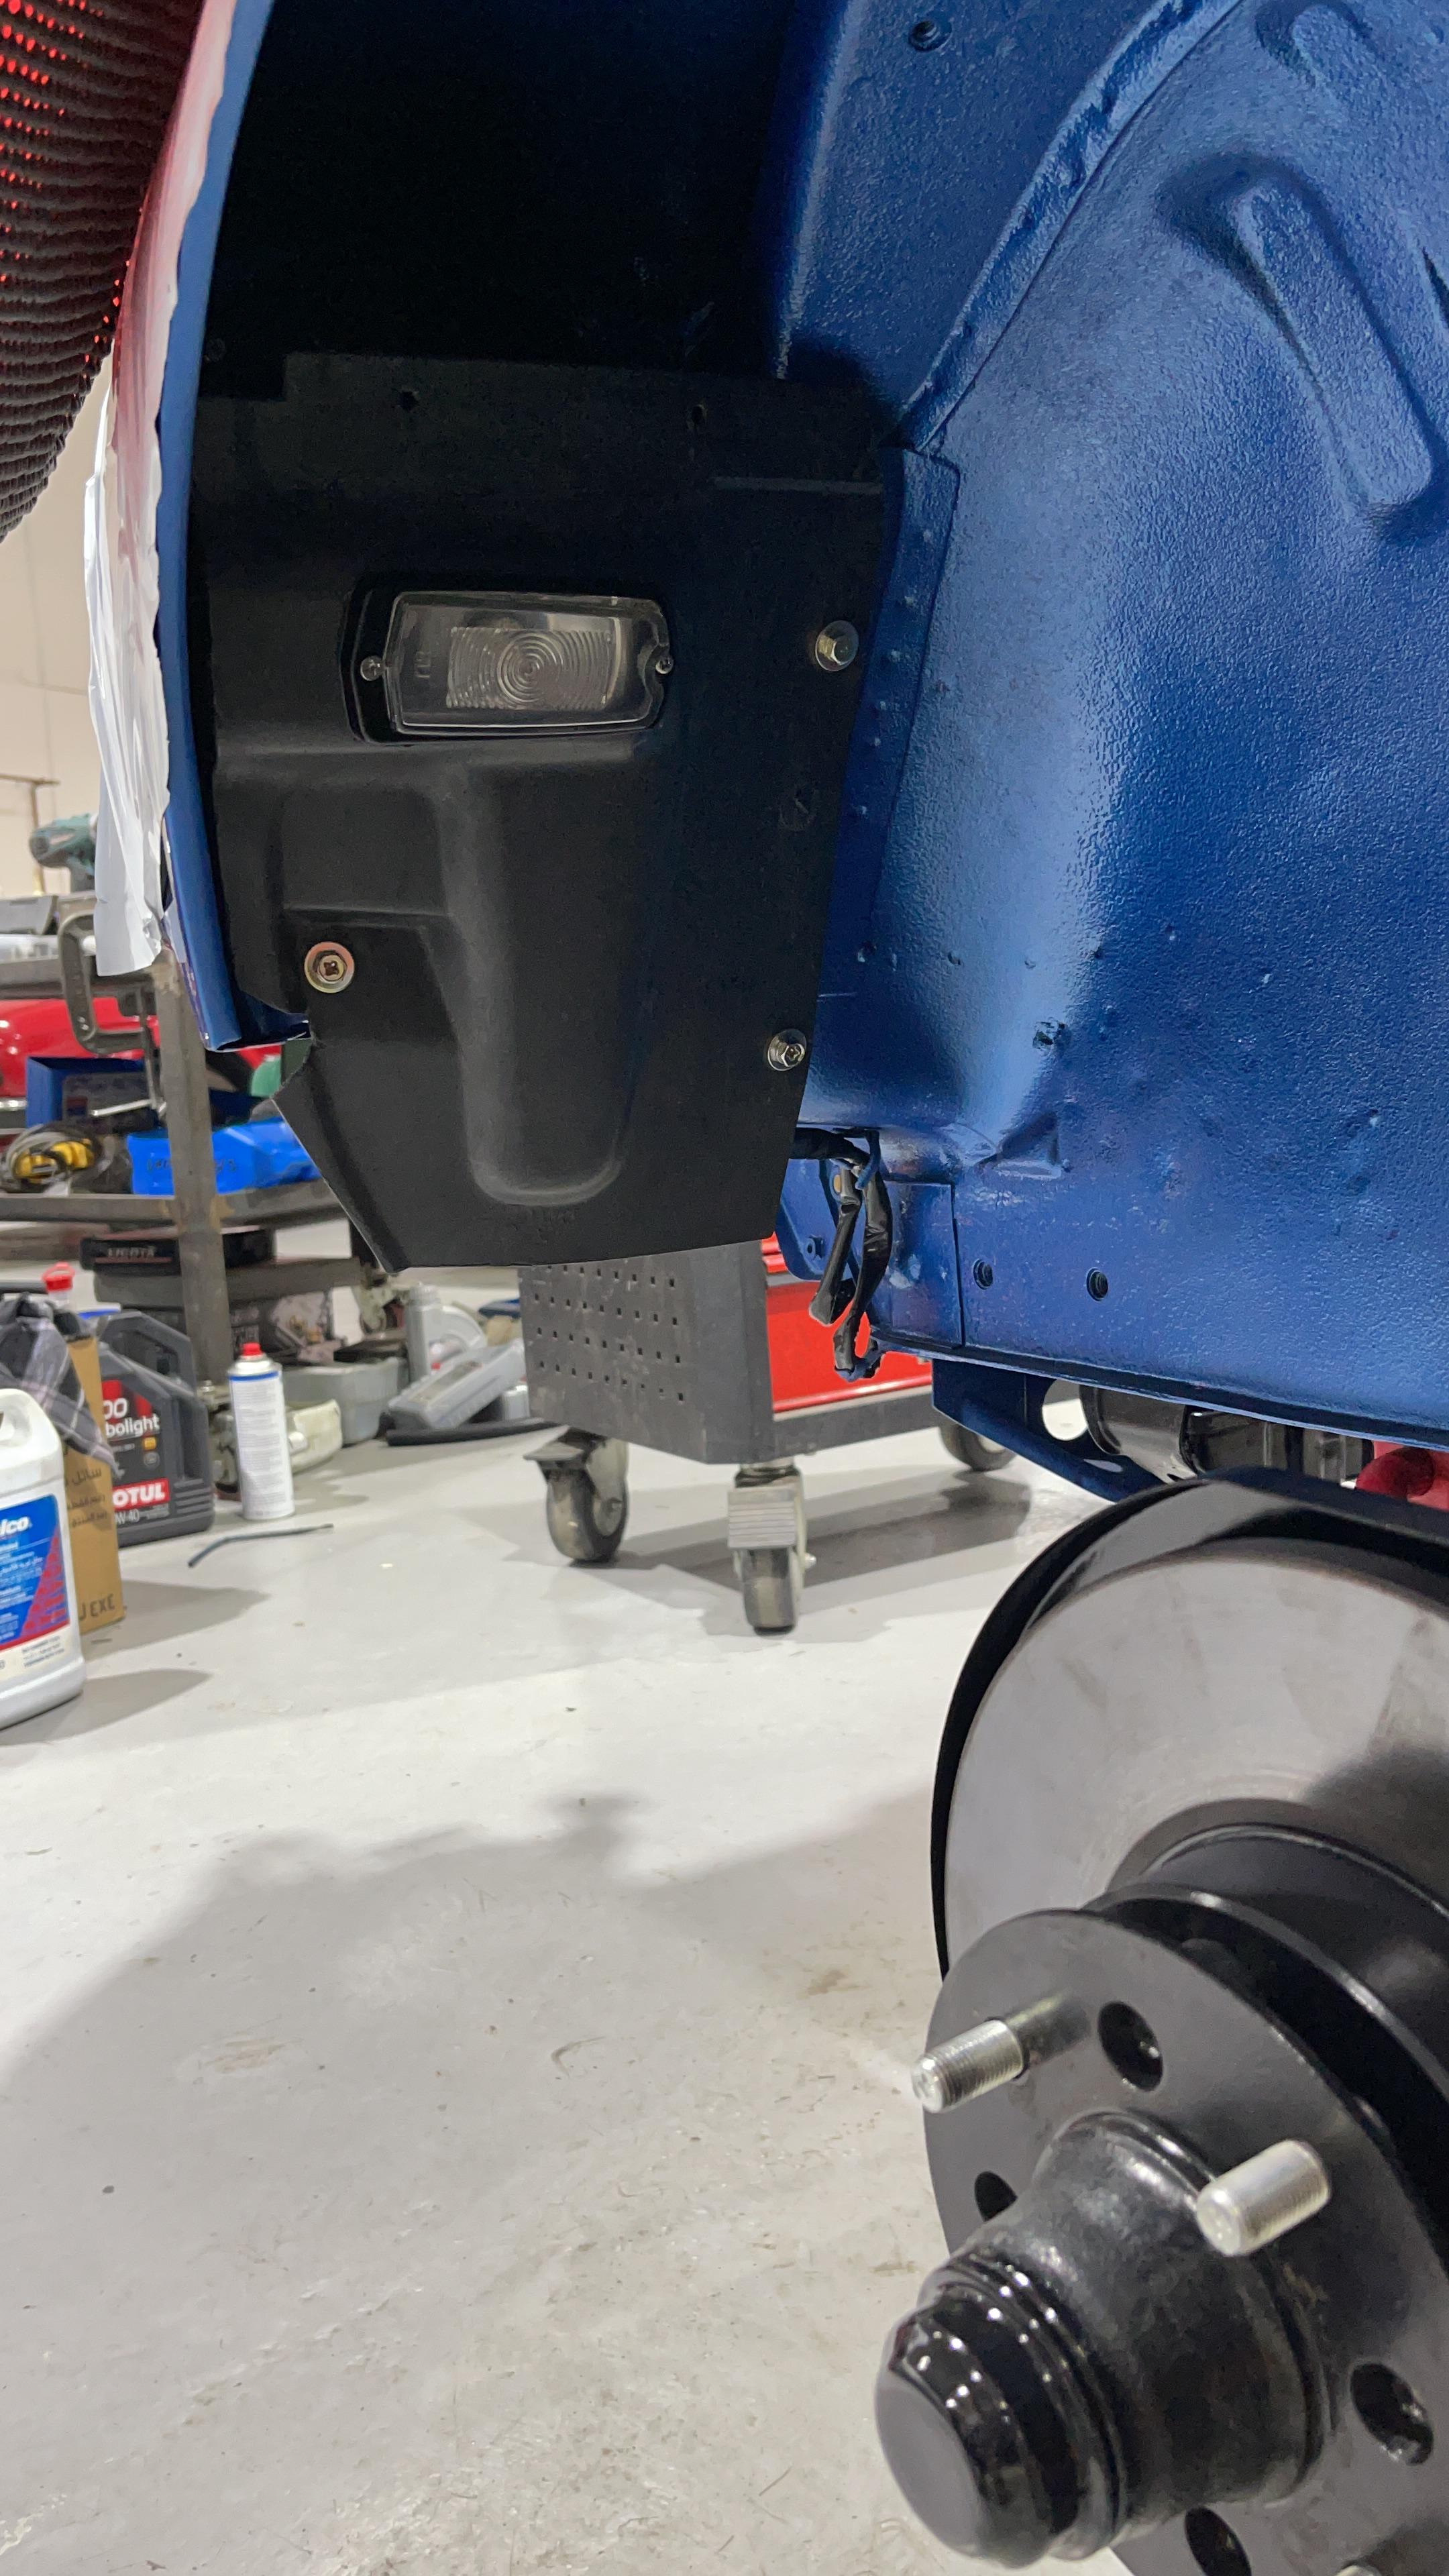
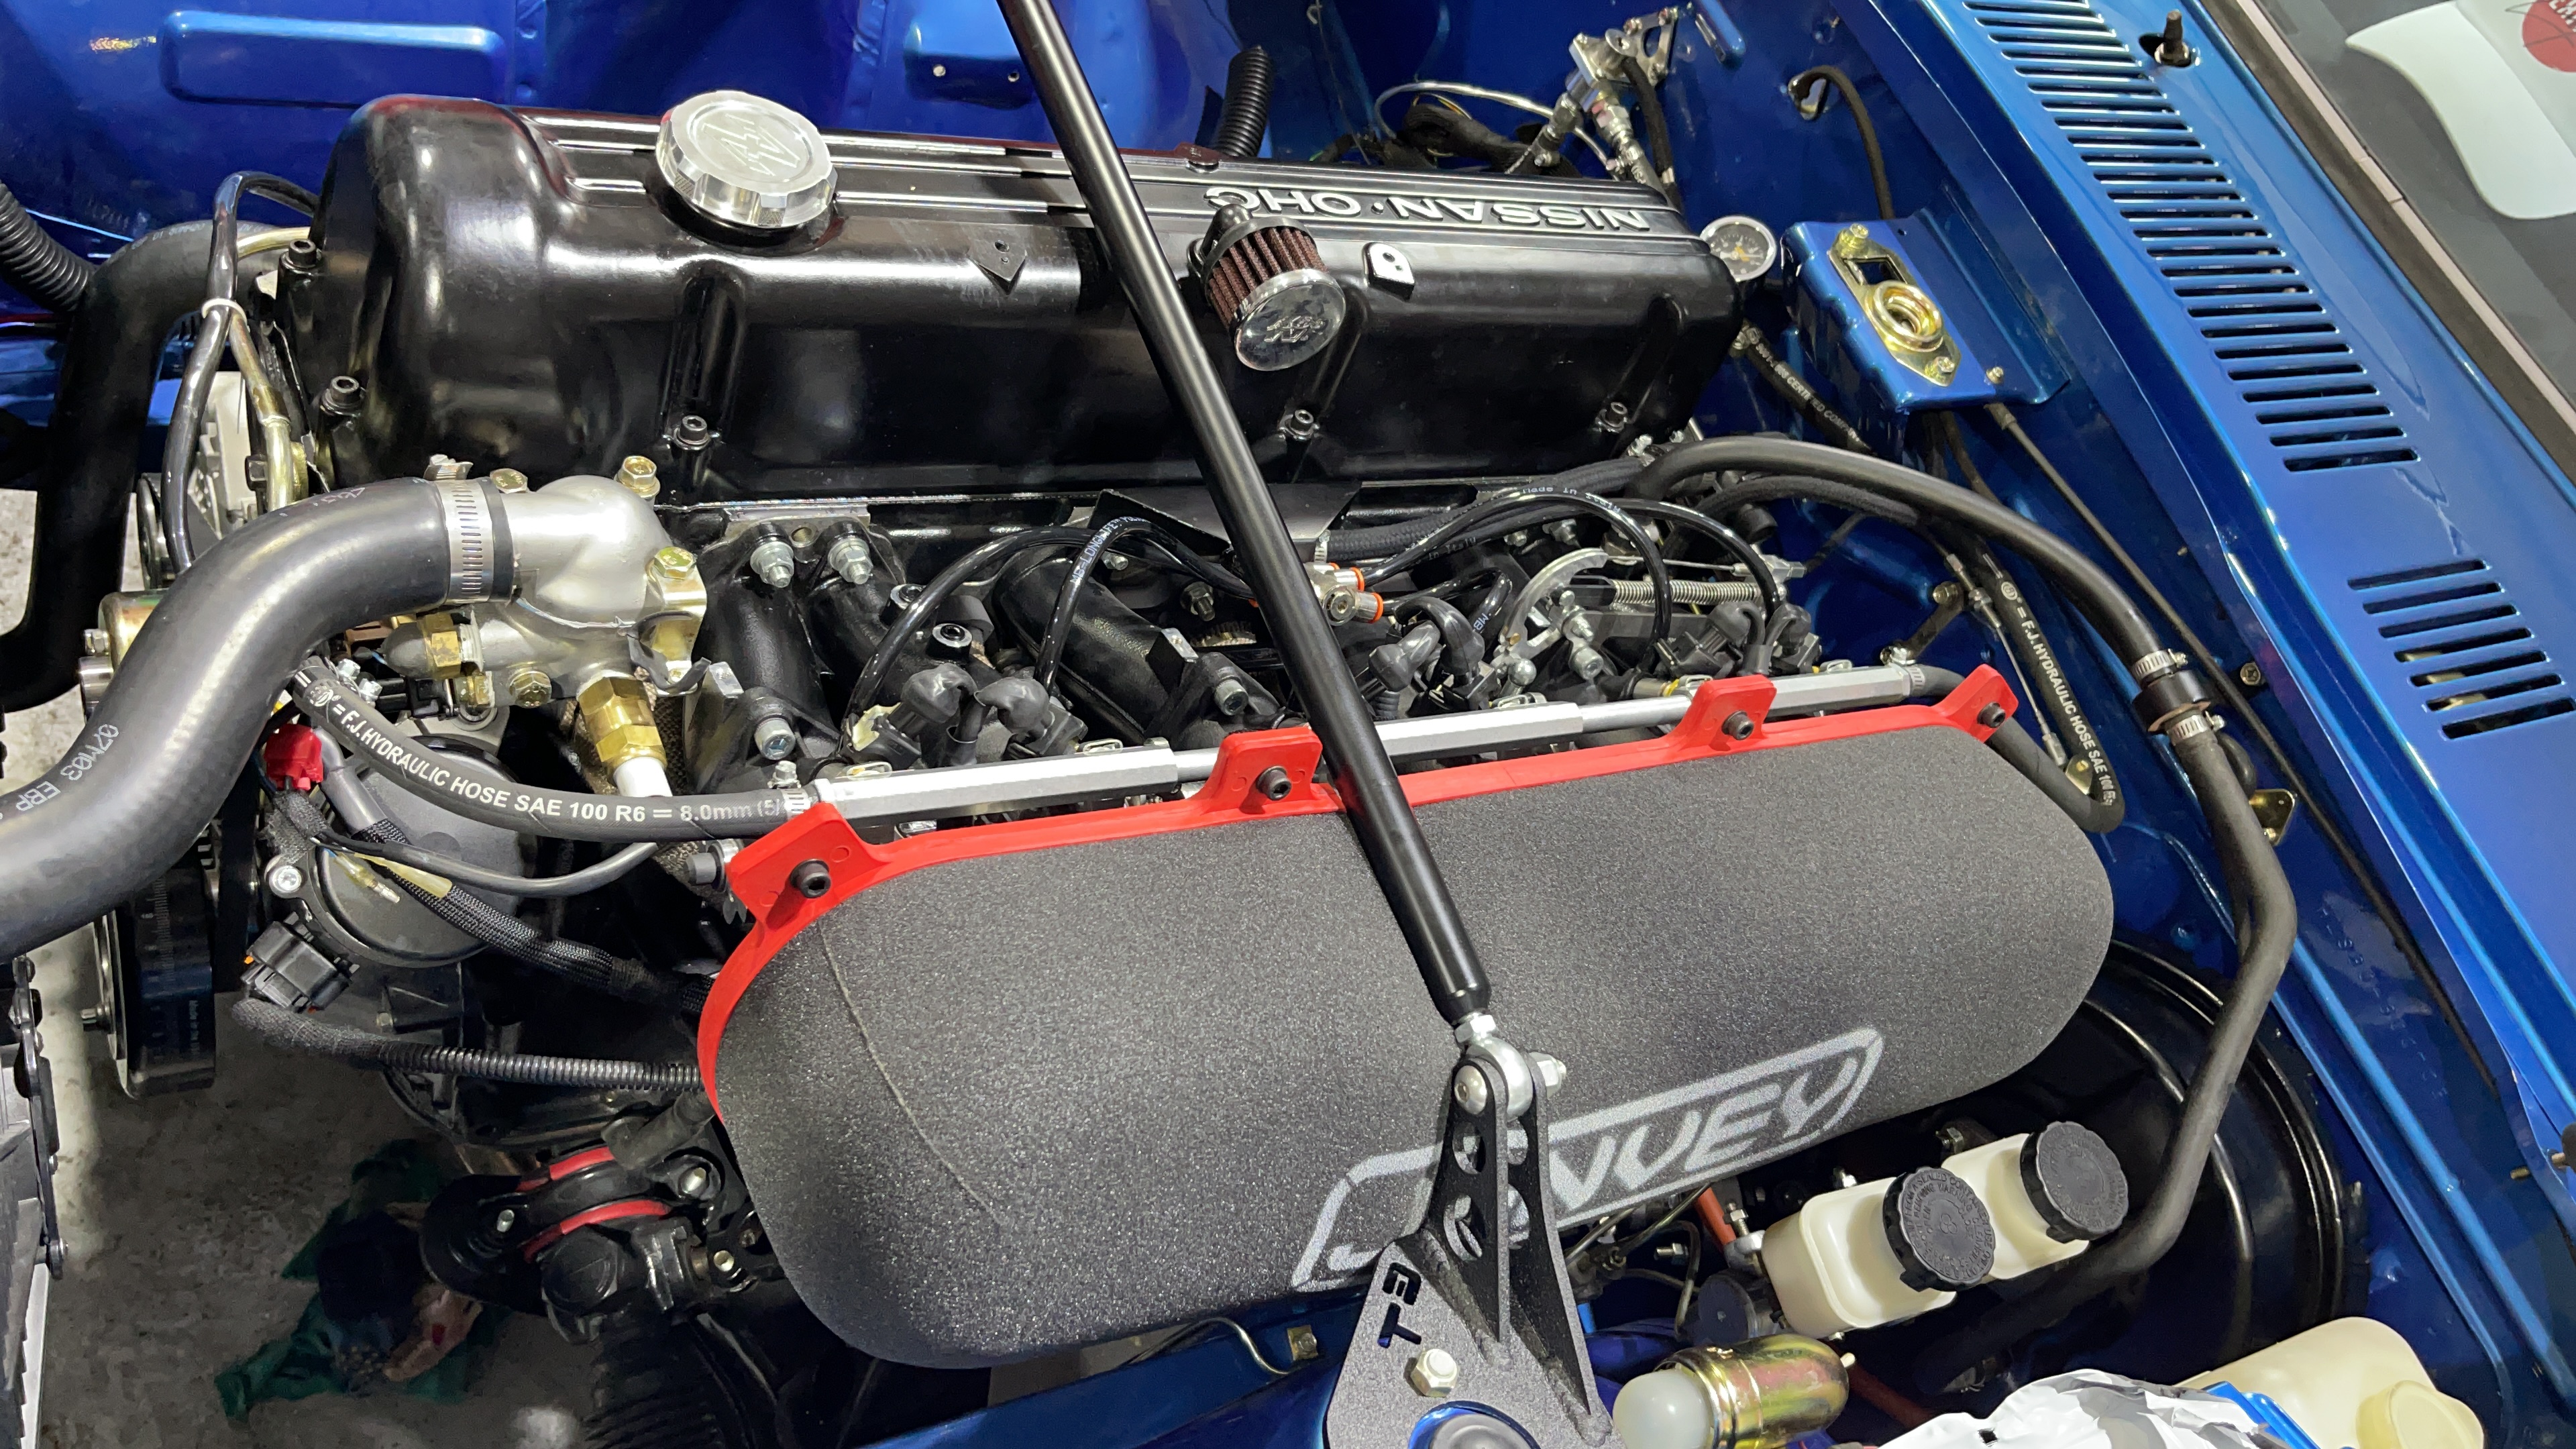
 3 pointsMy FPR is at 3 bar, straight from Jenvey to match the injectors and the ITBs, Also noticed that my fuel pressure gauge needle is shaking a lot between 42-50psi, seems like am good for a new fuel pump soon 😂 I got a pretty decent idle today (850-900rpm), and reving sounds healthy. The idle AFR is around 15-15.2 and lowering (so richer) with higher rev, as I did not work on my AFR table yet. Had the wiring double checked for lights/signals/gauges and turned out my "Brand New" alternator from ZcarDepot is fu**, the internal regulator is defective so it doesn't charge my battery... Nice 150$ spent, sending it back to them for replacement would cost me too much time and money... Quite pissed as I will have to get a new one tomorrow morning so I can go register the car, as I now need to drive it to refine the tuning... And for those of you who remember the idea of putting the side markers in the wheel wells, I confirm it's clean and almost made for it (its tight on the back side, between the headlight and side signal bottoms, so make sure you place them as much as possible on the outer side of the car). Also, as I changed the harmonic damper to an ATI one, surprise surprise the original mechanical fan could not fit anymore... Only Spal was fitting in depth and available locally, and made a great deal on these 2, now wired to the MS3. The wiring and fuel line are not cleaned up and definitive as I am still expecting some looms, braided hose and AN fittings. I will also remove the useless temperature sensors and thermo-contact used prior the ECU control of the fans. As much as I love the air horns on the ITBs, too much sand in the area, cannot risk the engine, so big monster filter for runner, and naked for showing...
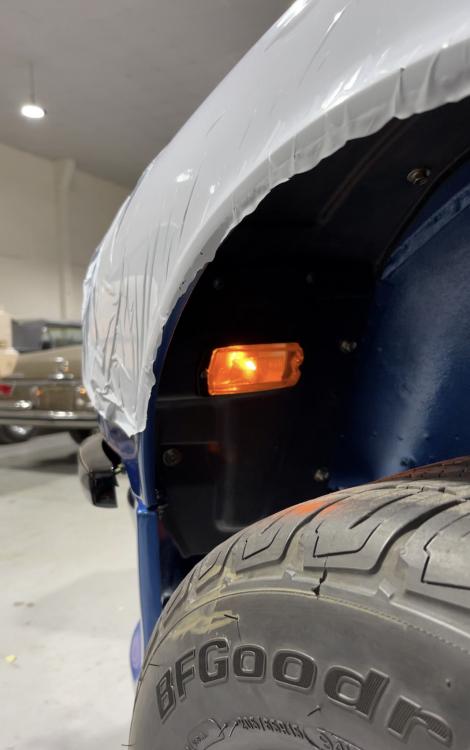


 3 points
 -
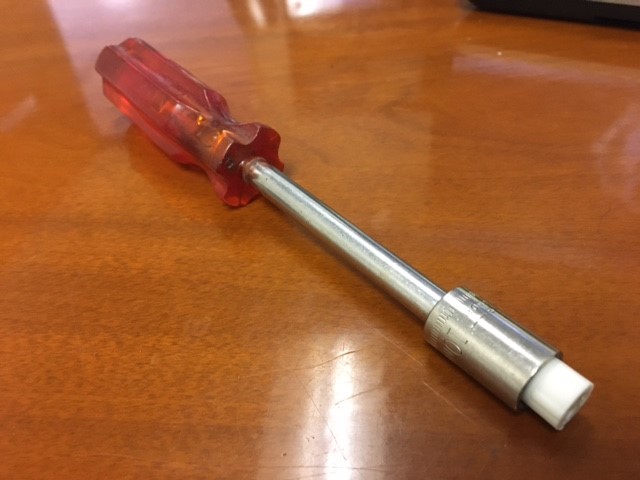
 3 pointsVery nice home made adjuster, lapriser. This actually reminds me that last year I told Joseph that I would post the easy & cheap long neck adjuster tool that folks have made over the years. If you look at the bottom of the KONI supplied adjuster knob, you will see that the tip with the elongated adjuster slot is actually an insert into the end of the adjuster knob. There are actually two different KONI adjuster tab sizes so we have two different inserts depending upon what tab size is used for your application. Although a somewhat tight slip fit, you can remove your insert easily by taking something like a largish wood screw that will bite into the plastic enough to pull the insert out. Be carefully not to deform the intentionally soft plastic of the slot too much. Now you can glue or epoxy (anything hardening really that will fill the voids) that insert into the end of either a screwdriver-like nut driver tool or into a small 1/4" drive socket that you can turn with a 1/4" drive screwdriver-like handle. I bet you probably have an old one at the back of your toolbox that you never use. I don't recall the exact size nut driver or socket needed to fit it into but it is somewhere less than 1/2" or 12 mm size (maybe 10-11 mm or 3/8"-7/16'" range?). If you don't have these tools at home, they can be had for cheap at Harbor Freight, some brand X tool kit, etc. No need to spend Snap-On or Mac Tool levels of money on something that could be had cheaply or you likely already have and don't use. There is a good chance you can make this tool with a screw, a hand tool and glue that is already in your garage and not have to spend any money or more than 10 minutes time. Although you could make your adjustments turn the socket with 1/4" drive ratchet and small short extension, I really suggest using the screwdriver type handle and not a ratchet to reduce the leverage and remove the tendency to over torque/over tighten the KONI adjuster tab and snap it off. The small diameter of the screwdriver handle makes is easy to toss in the glovebox or toolbox for quick adjustments with the twist of a wrist without overtightening. Easy-peasy.
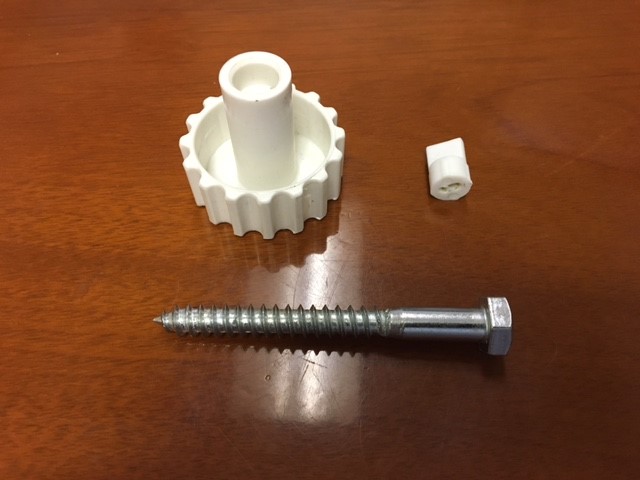
 3 points
 -
Right then chap, let’s take it one at a time Operating temp: basically you need it to be at a temp where combustion happens efficiently. I speak Celsius and don’t fully comprende F. 200F I think is 93c and that is fine. As long at you are over 170F (70ish c) and below 95c you are in the range. And I’m talking water temp. Also remember that water temp is not the same as oil temp. Typically the oil takes another 5 or so mins to come up to temp. There is in fact a raging debate on some sites about which end of the rad the sensor should be. Personally I like it at the hot end as I want to know what is coming out of the engine without taking any cooling effect into account. But if I could have both, then that would be fab! Then again, I’m a data junkie ;). A lot of modern cars measure both. As mentioned and probably lost in my very verbose replies before - disconnect the choke cables when doing any of this stuff. Also wind back the “fast idle screw” so that you can see a gap and that it has no effect at idle. See markup below (not my car). Or better still just disconnect the accelerator ball link while you are doing this job (the bent one in the photo above). We need to remove from the equation the things that could be interfering and focus on the carbs themselves. The lift pin test is a subtle thing so it takes a little practice to get used to it. You only need to lift a tiny amount. Too rich will also stall your engine. So for now, assuming your carb needles are stock N27 or SM, just take the mix screws down 2 turns. That should be rich enough but not too rich. The AFR gauge will help a lot. Then start closing down the idle screws equally on each carb - very gently - until the revs come down to an acceptable idle. The butterfly adjustment screws only need to move a tiny amount for a large effect on idle speed. Crank pulley marks can be off - how are you planning to determine TDC?3 points
-
And one last thought: that kameari distributor is supposed to be set at 35-38 degrees at 4k rpm!!!! Which is a lot of timing! I know people using it typically gun for 32 - 34 @4k to keep it safe. So if you want to check your timing, check it / set it at 4k and then see what it drops to at idle. http://www.kameariengineworks.co.jp/L6-racingdyisubihaisen-2.pdf2 points
-
 2 pointsUpdate: The issue was old/tired/maybe dirty injectors. Bought new injectors/fuel filter and it starts on the first crank when stone cold.2 points
 -
2 points“I have neighbours” ... Brilliant! :D I bought 2x very good quality 10” fans from a UK club member for £20 and connected one up to an old 12v battery at the back of the garage today - wow!!! At full throttle, it does sound like a 747 but shifts more air than the rubbish Aeroline 16” one I just returned to eBay! So both of those at half speed are going to cure my ills with fan clutches and be relatively quiet in operation. In fact, I have a dual MOSFET circuit I built to drive as a purely analogue and constantly variable speed fan set up which will reverse direction for 5 mins when ignition is off and the car is hot to reduce heat soak. Having said that the FETs get awfully hot and I’m going to experiment with either having the heat sink in the air flow or the PWM driver also sitting on the bench. PWM is a way more elegant control mechanism, but if you get the frequency wrong you can fry motors easily with back EMF issues. I also have a solution in mind for that ;) so watch this space if I ever get enough time to do it all this summer!! This is what it looked like here yesterday @ 08:00 And the same place 8 hours later!!2 points
-
2 pointsNot sure if you've ridden dirt bikes in the past but that's my way to compare. A 2 cycle would be the aluminum flywheel and a 4 stroke would be OEM flyweel. I love the quick rev of the lightened flywheel. Had one on my boat too and it was great.2 points
-
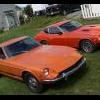
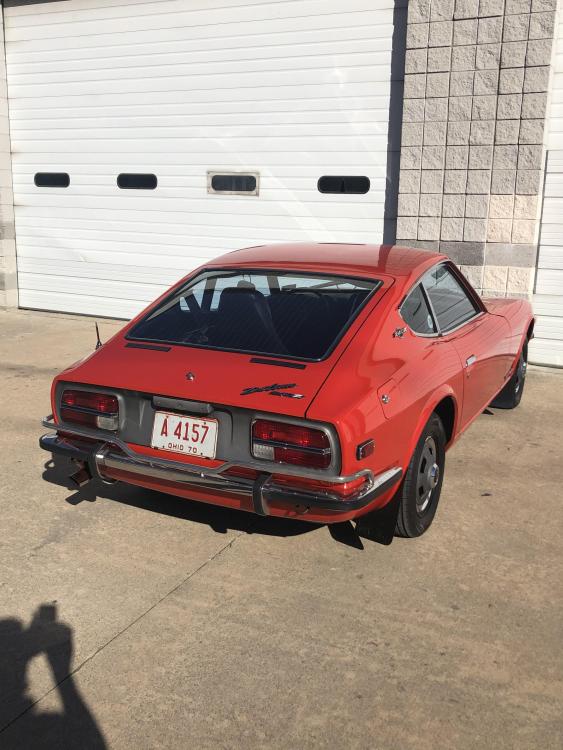
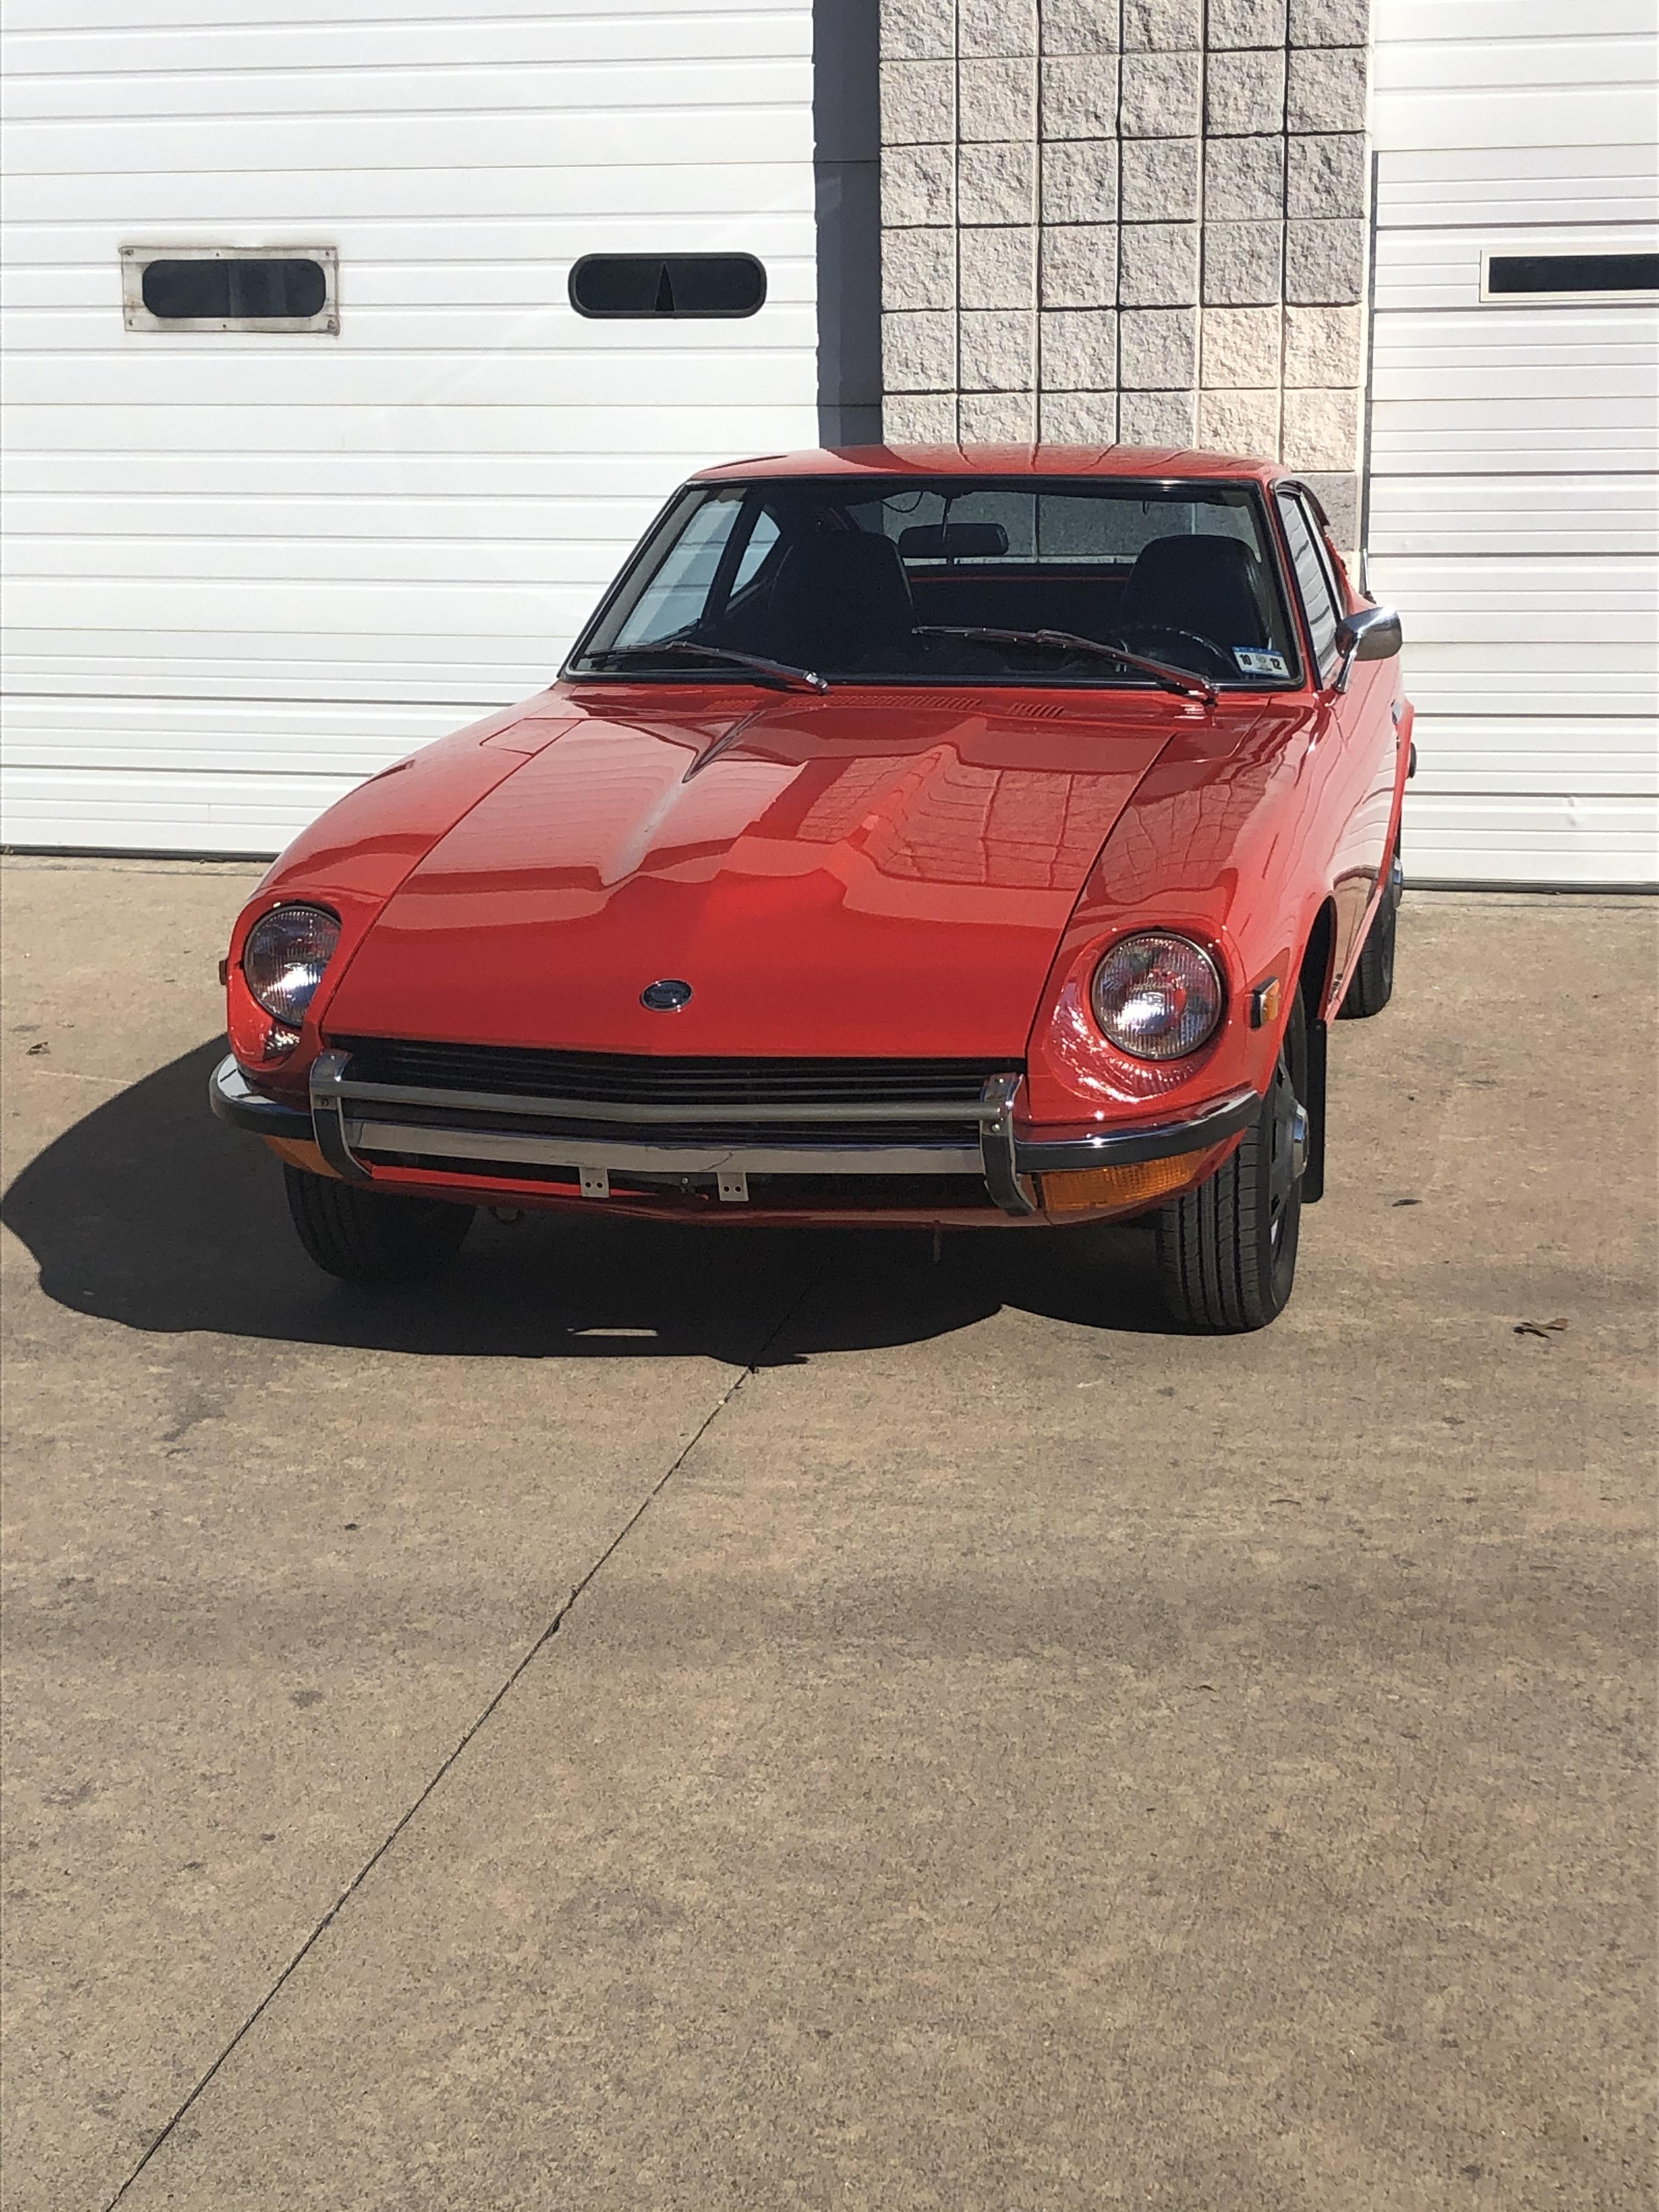
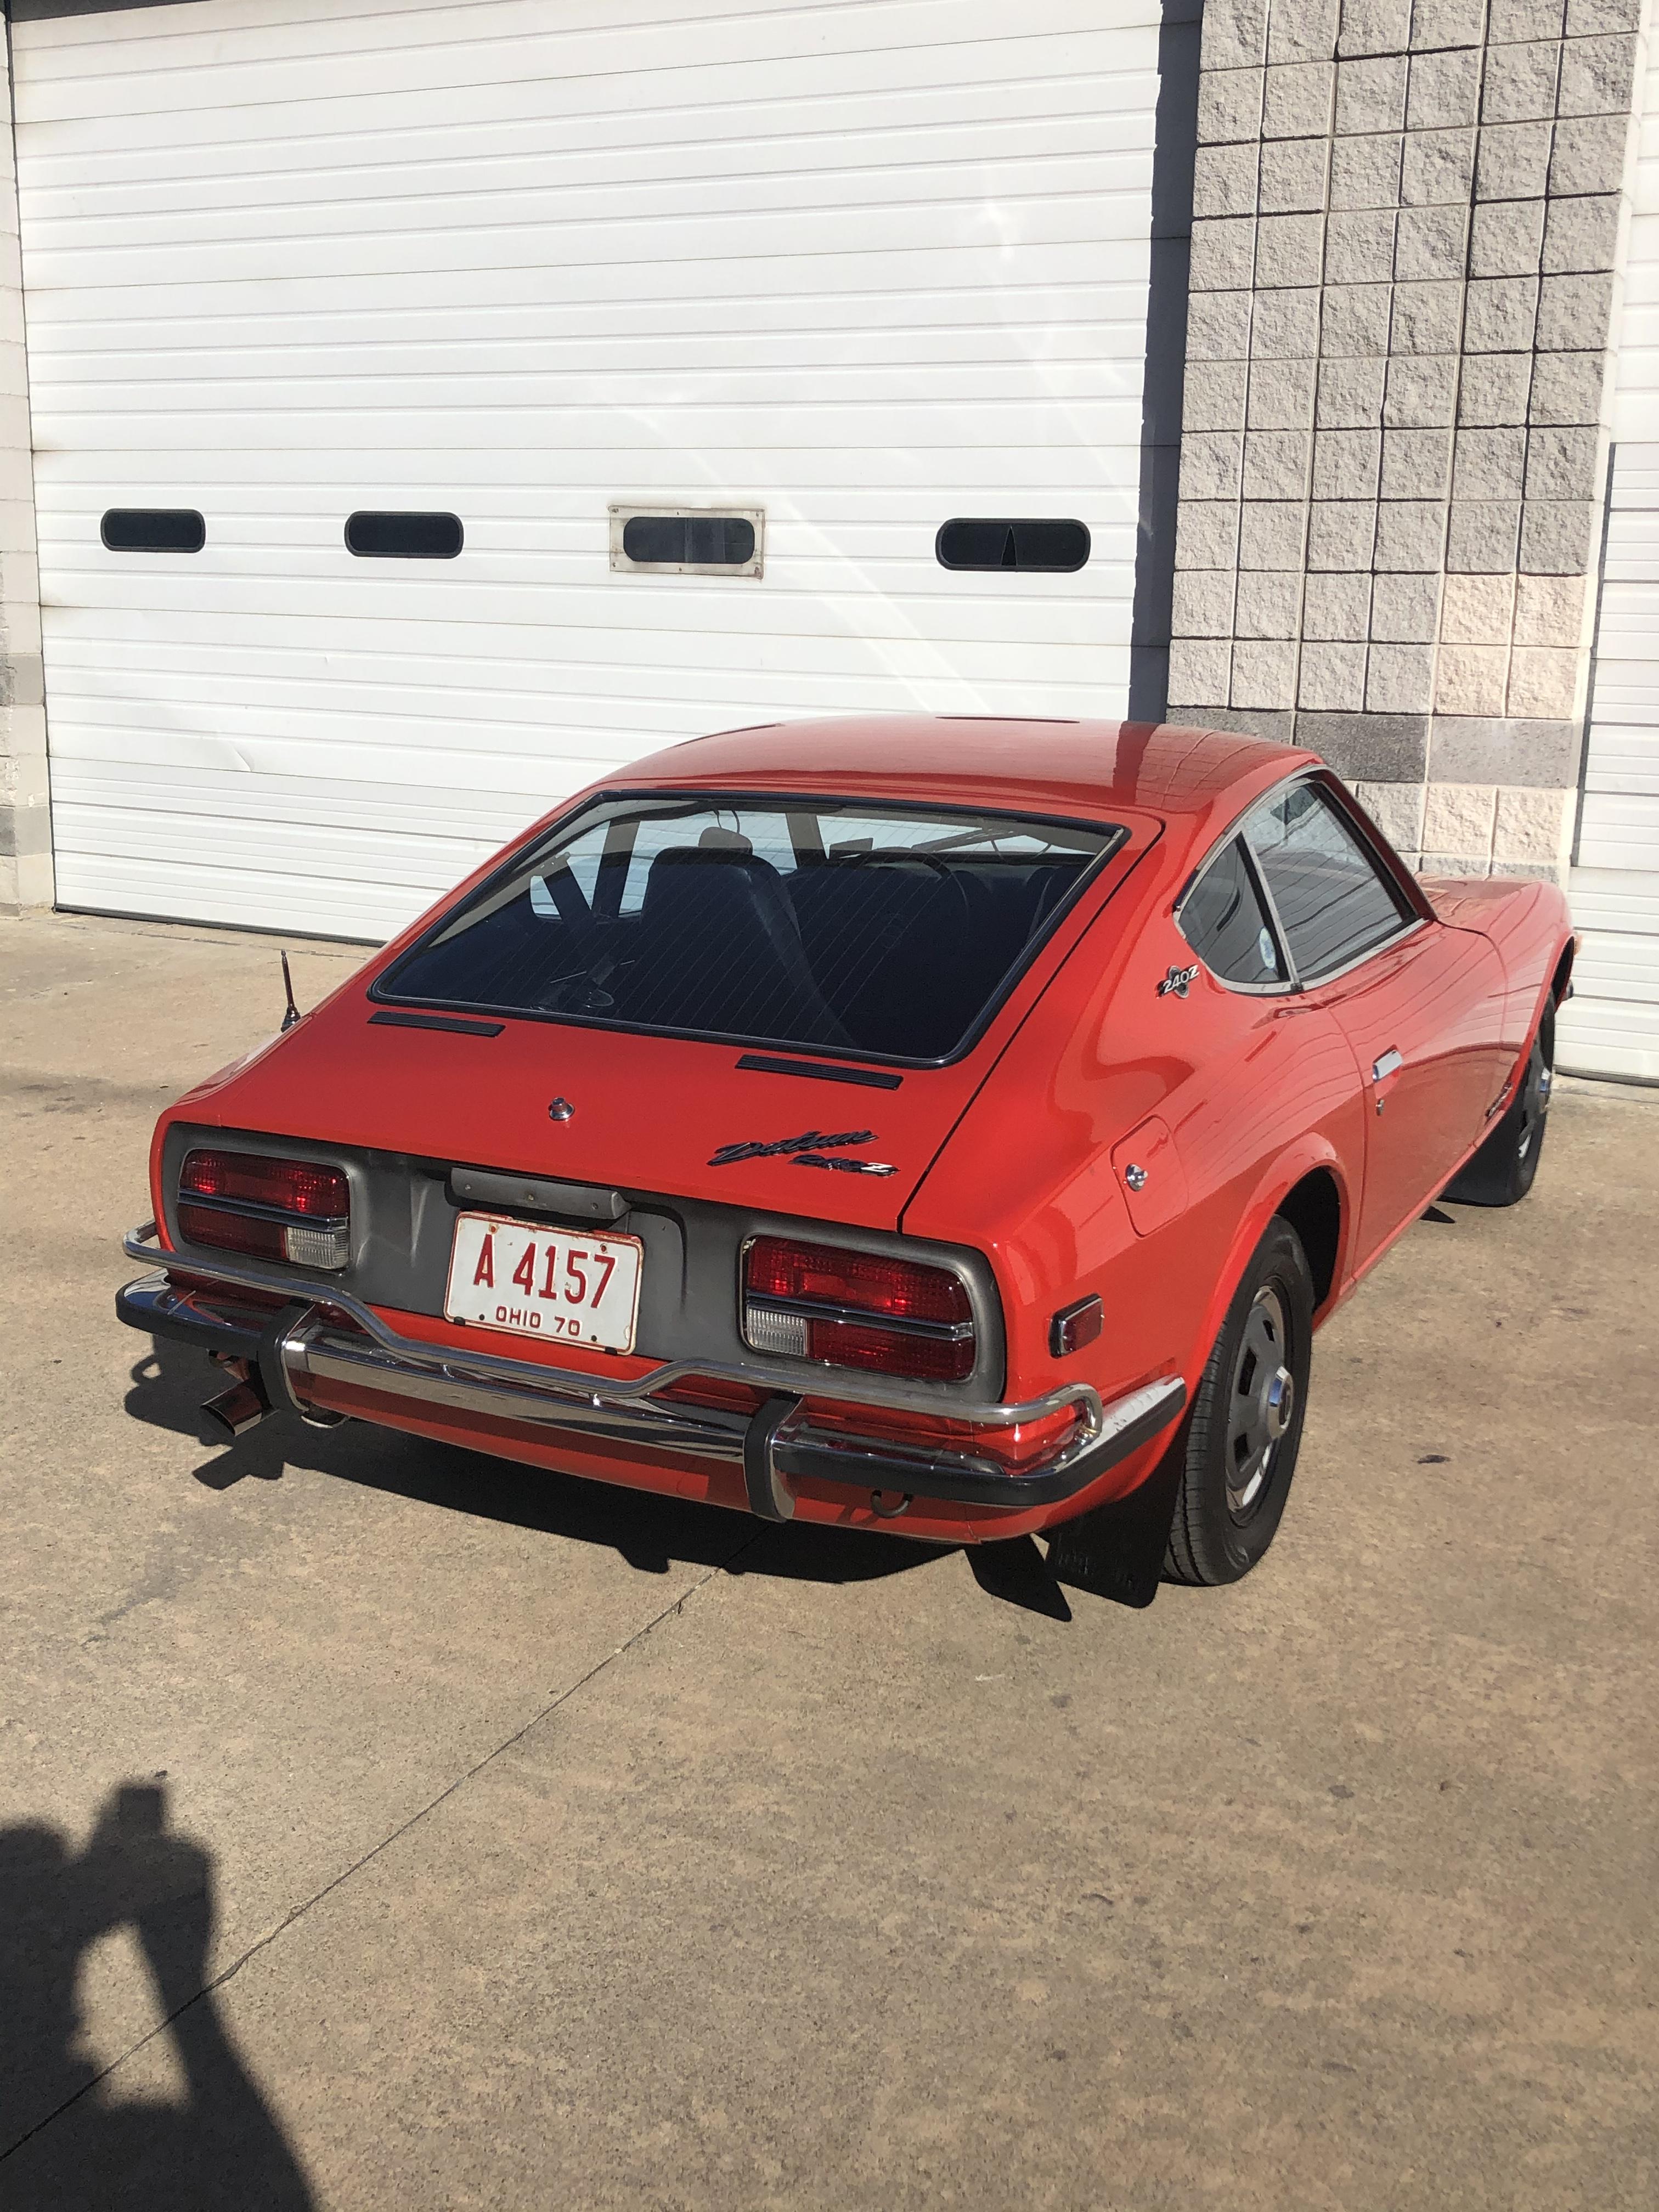
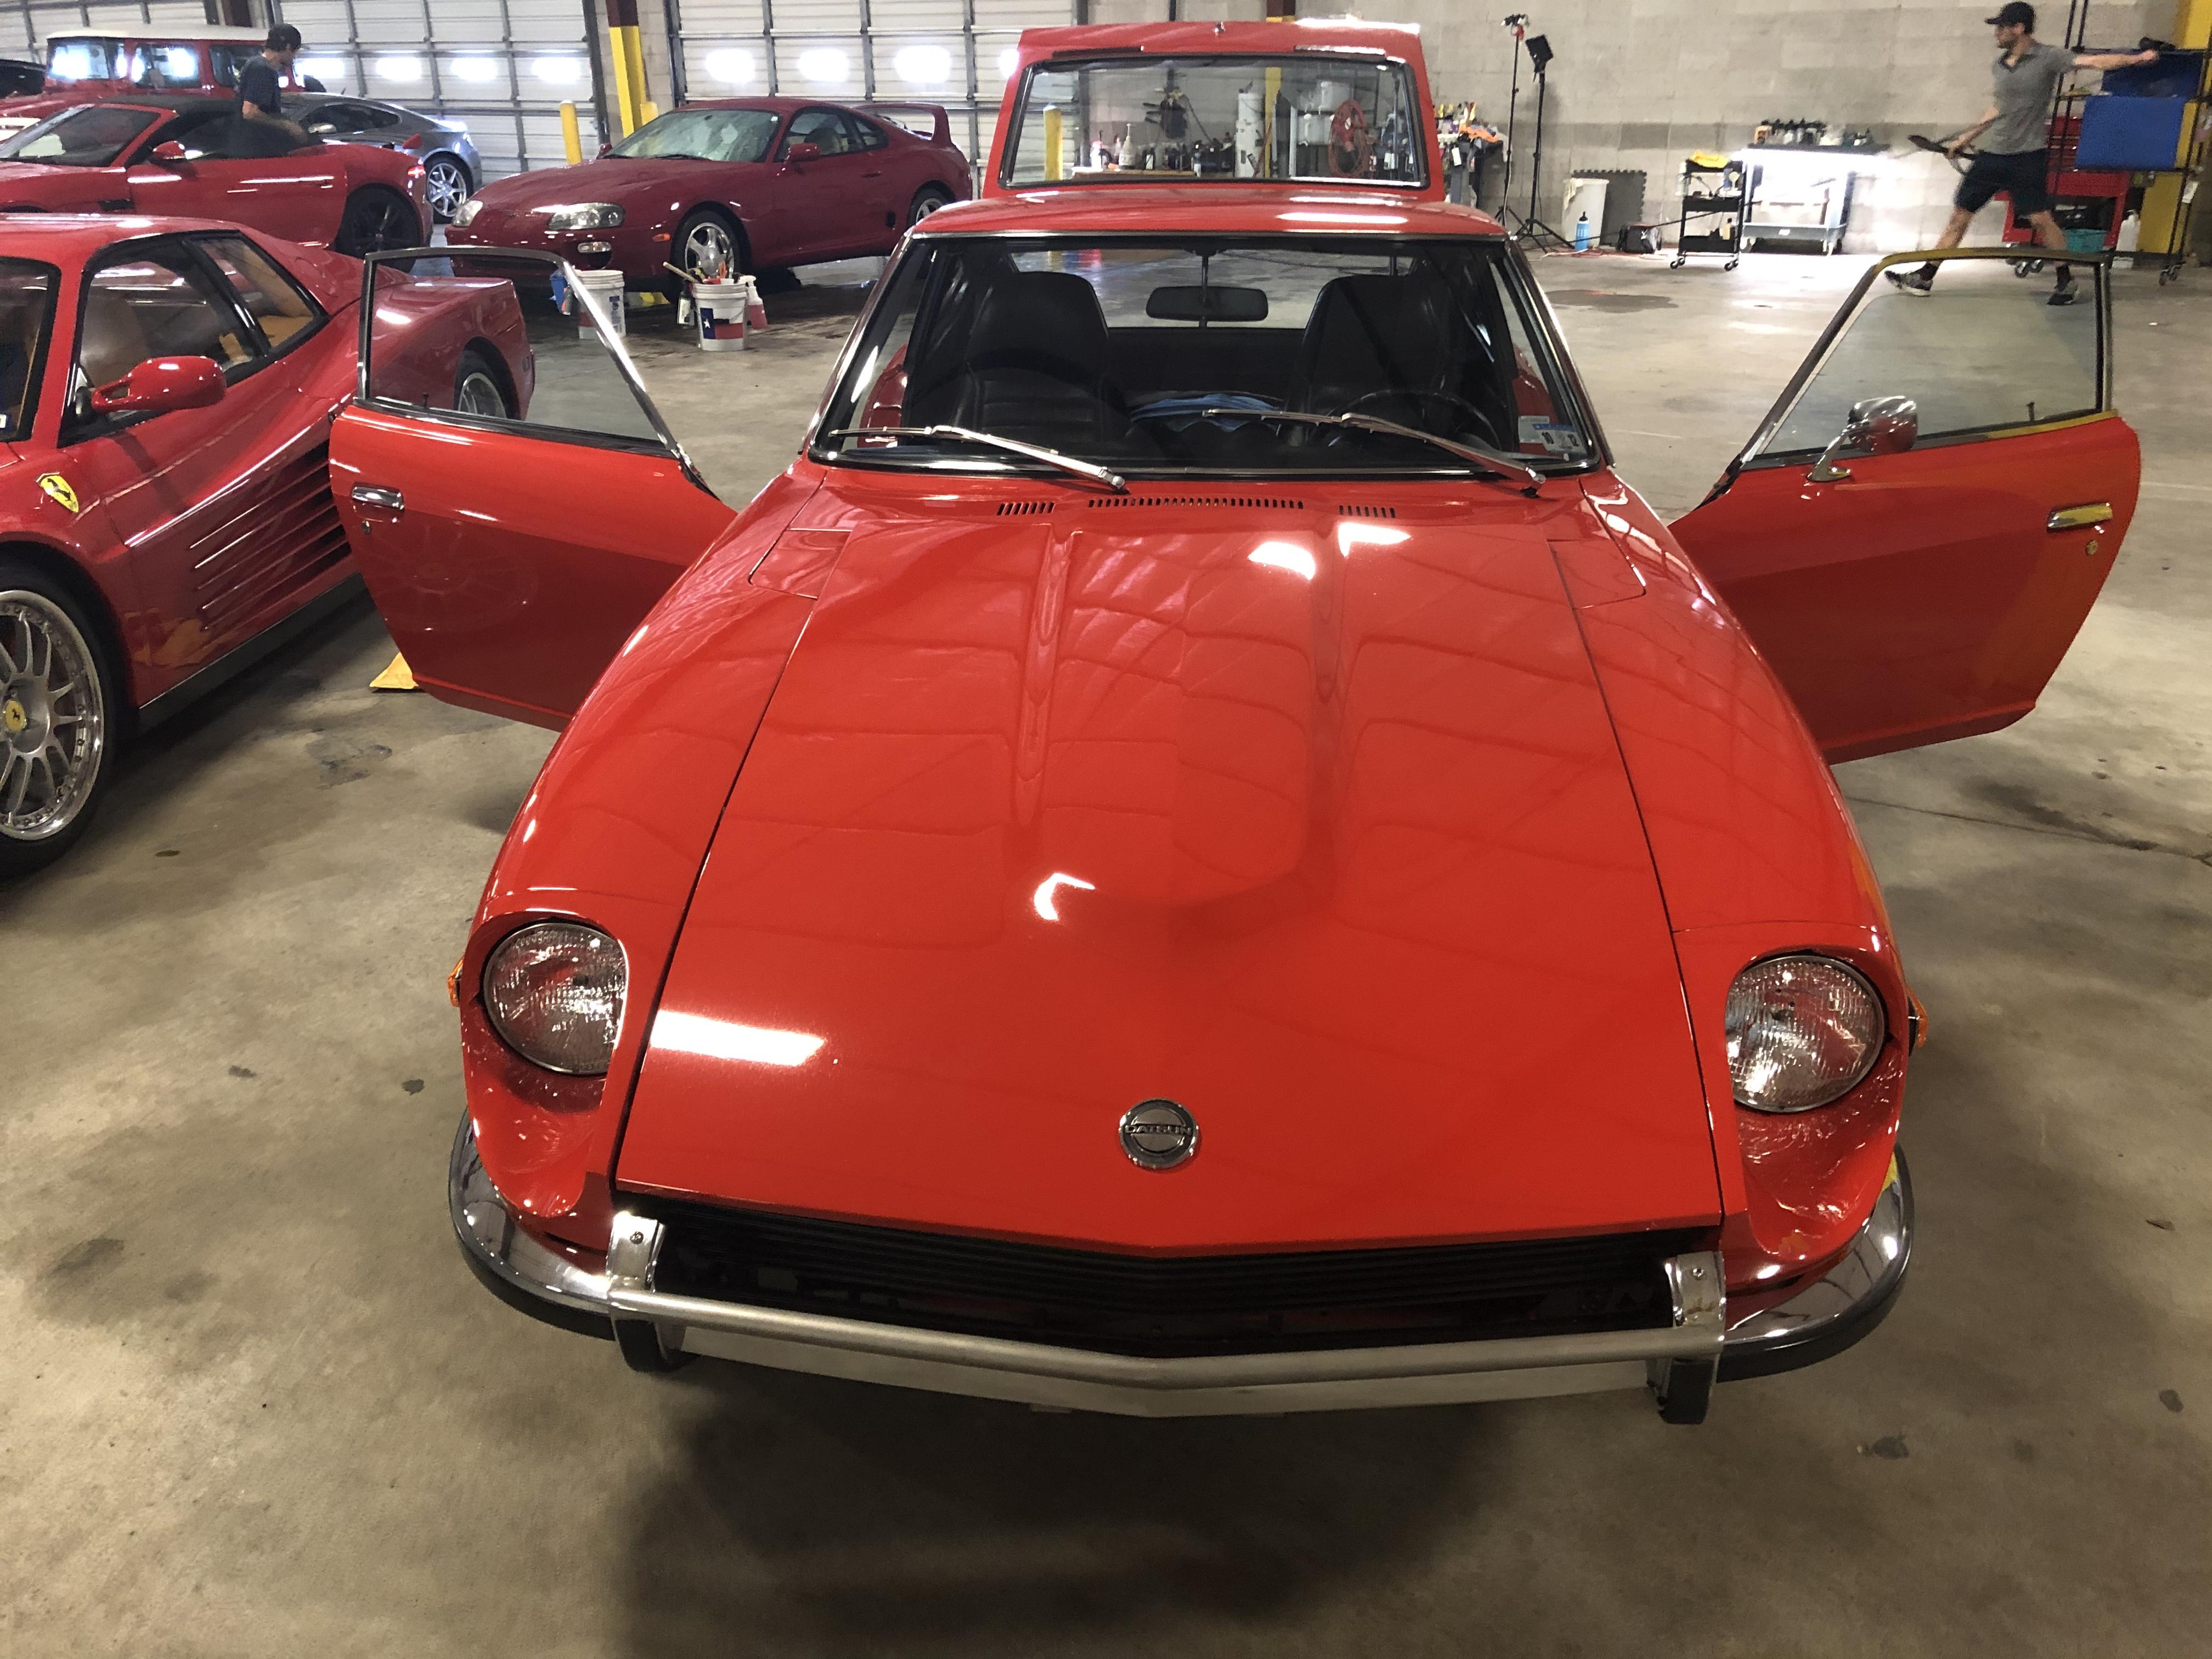
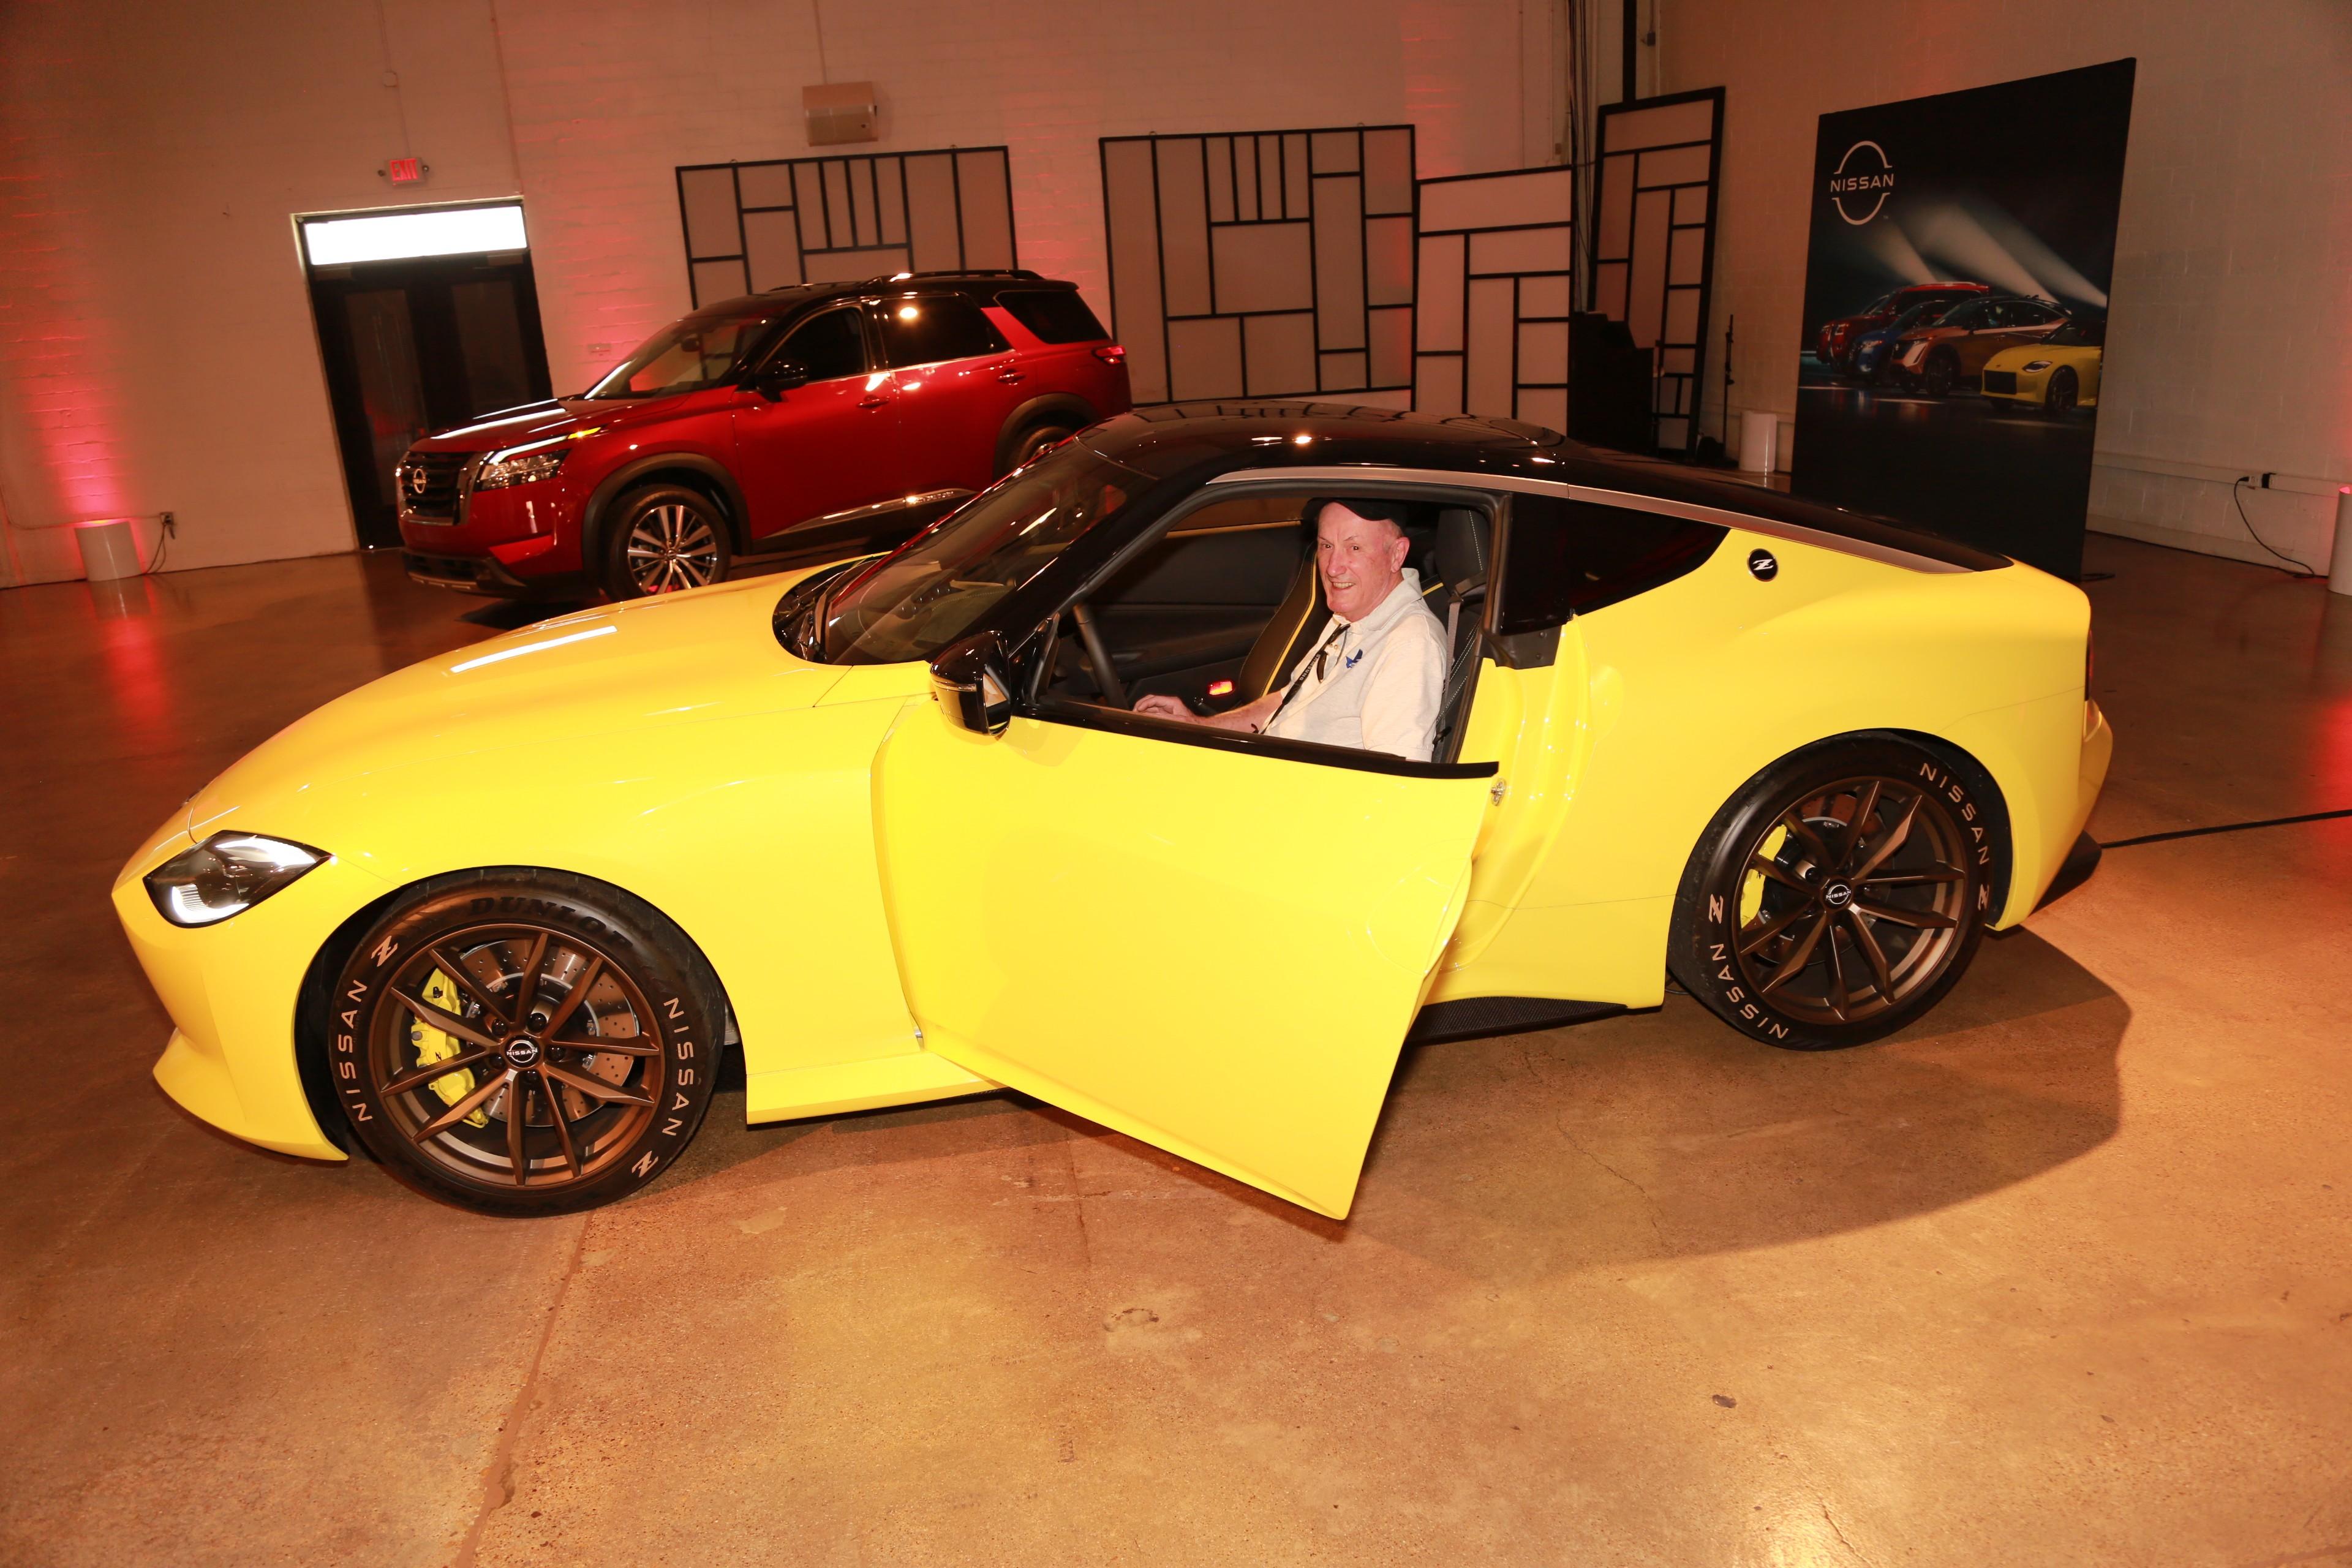
 There is a 1970 Datsun 240Z survivor for sale on Hemmings Auctions that went from $0 to $60k in under 24-hours. Can it give the Green Monster a run for the crown??
 1 point
 -
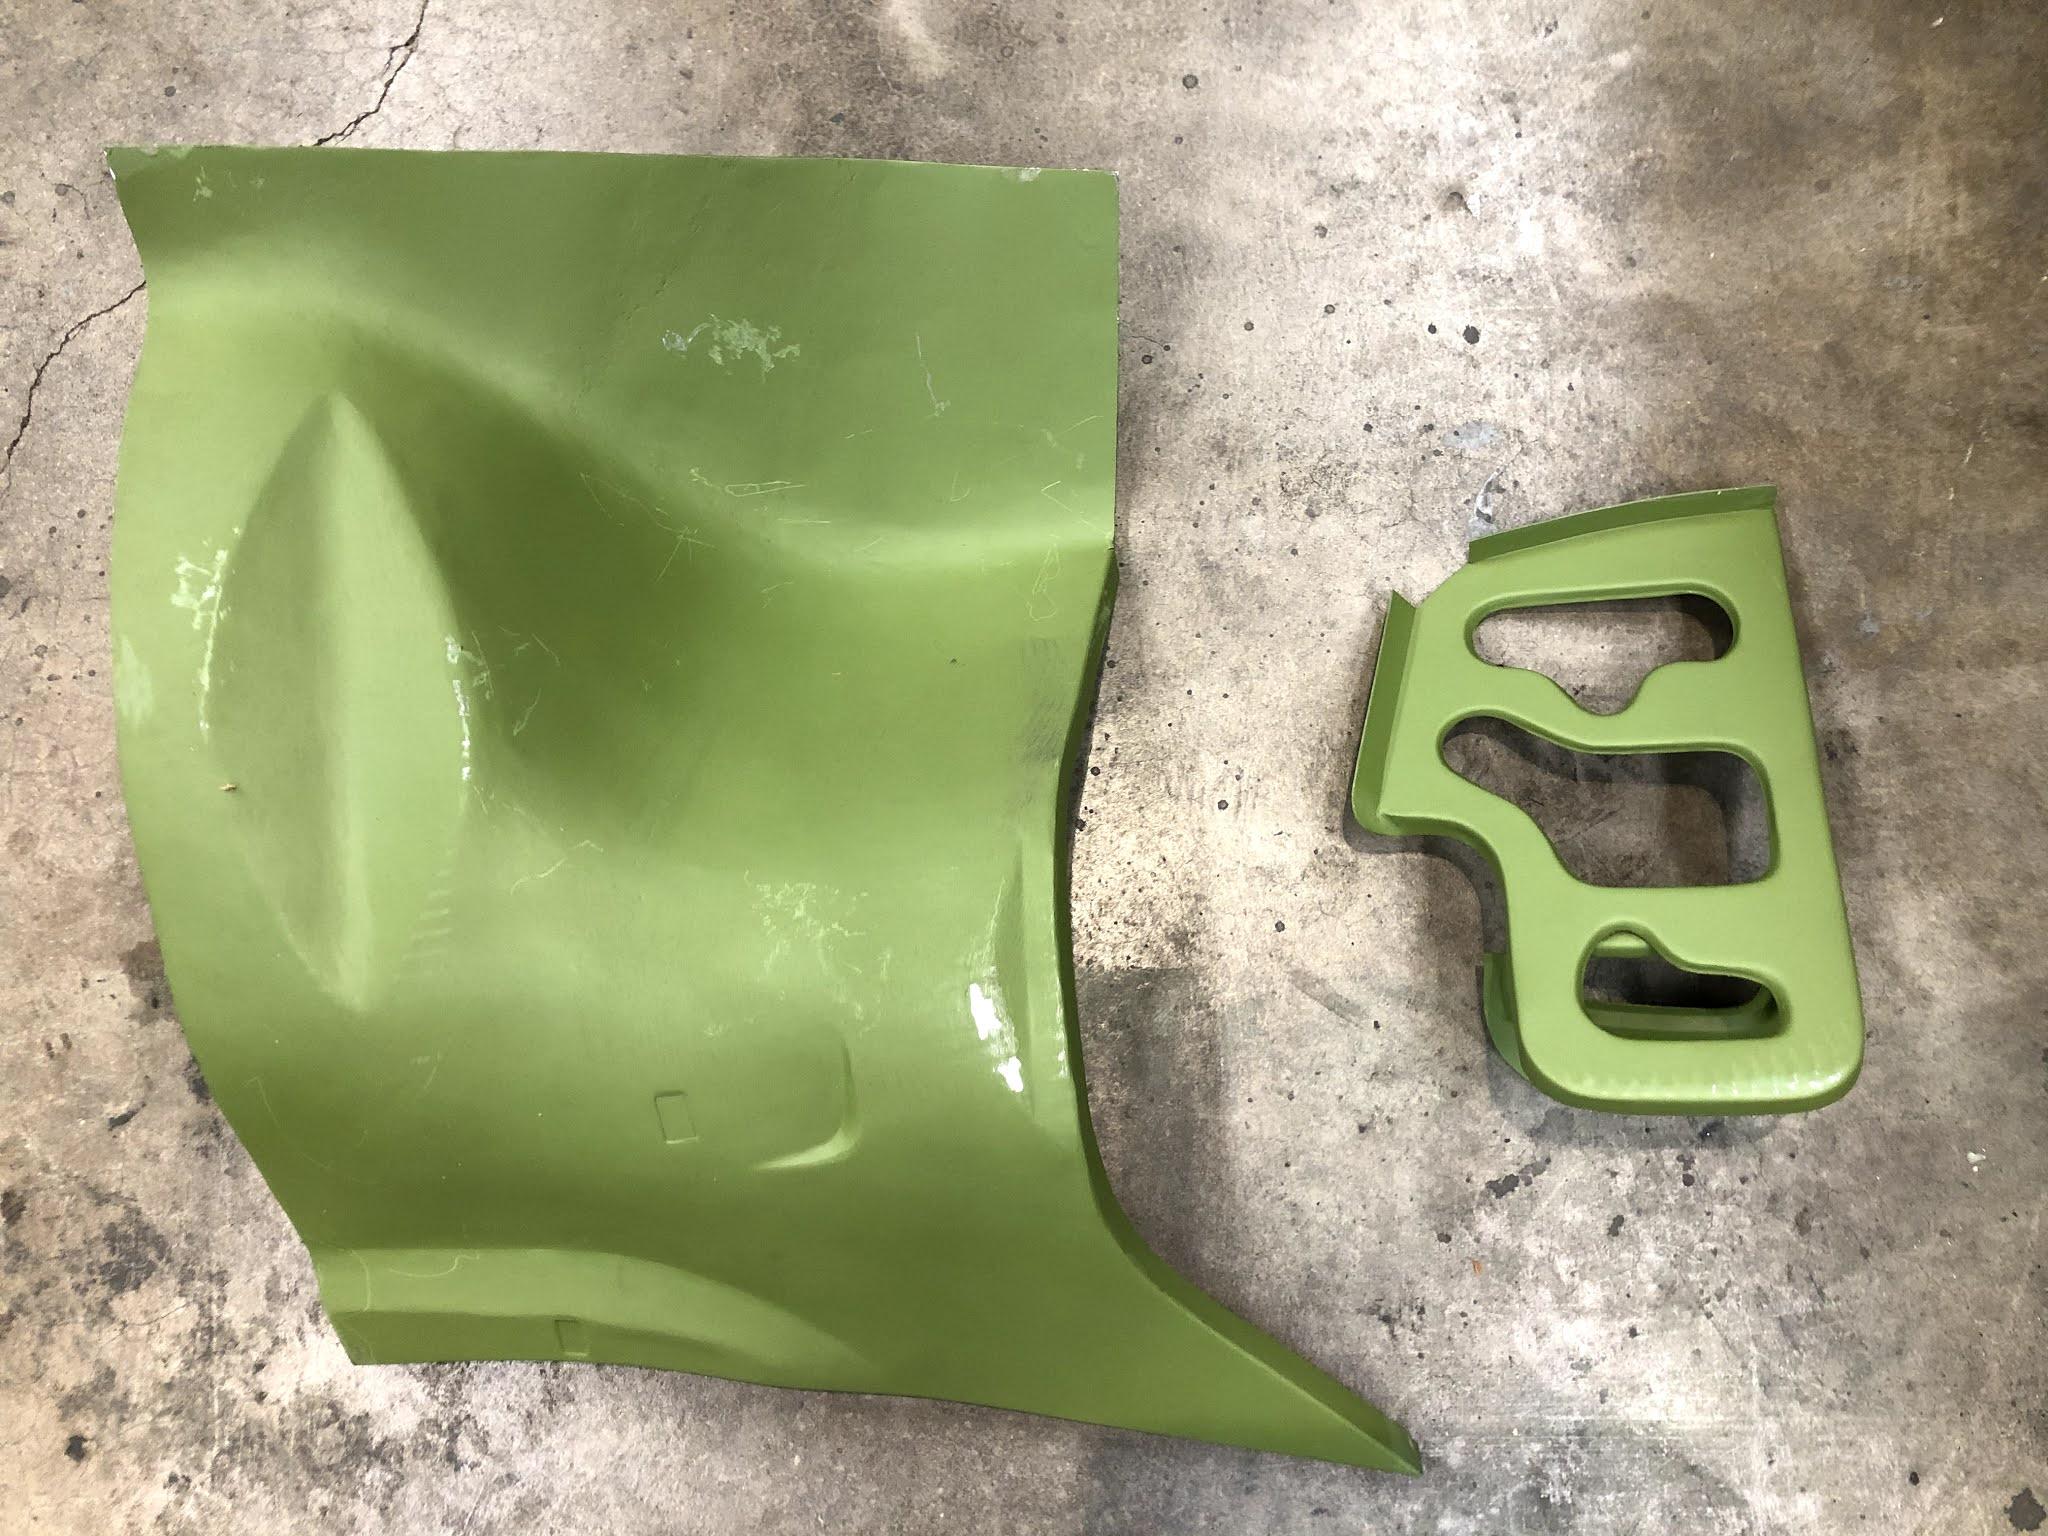
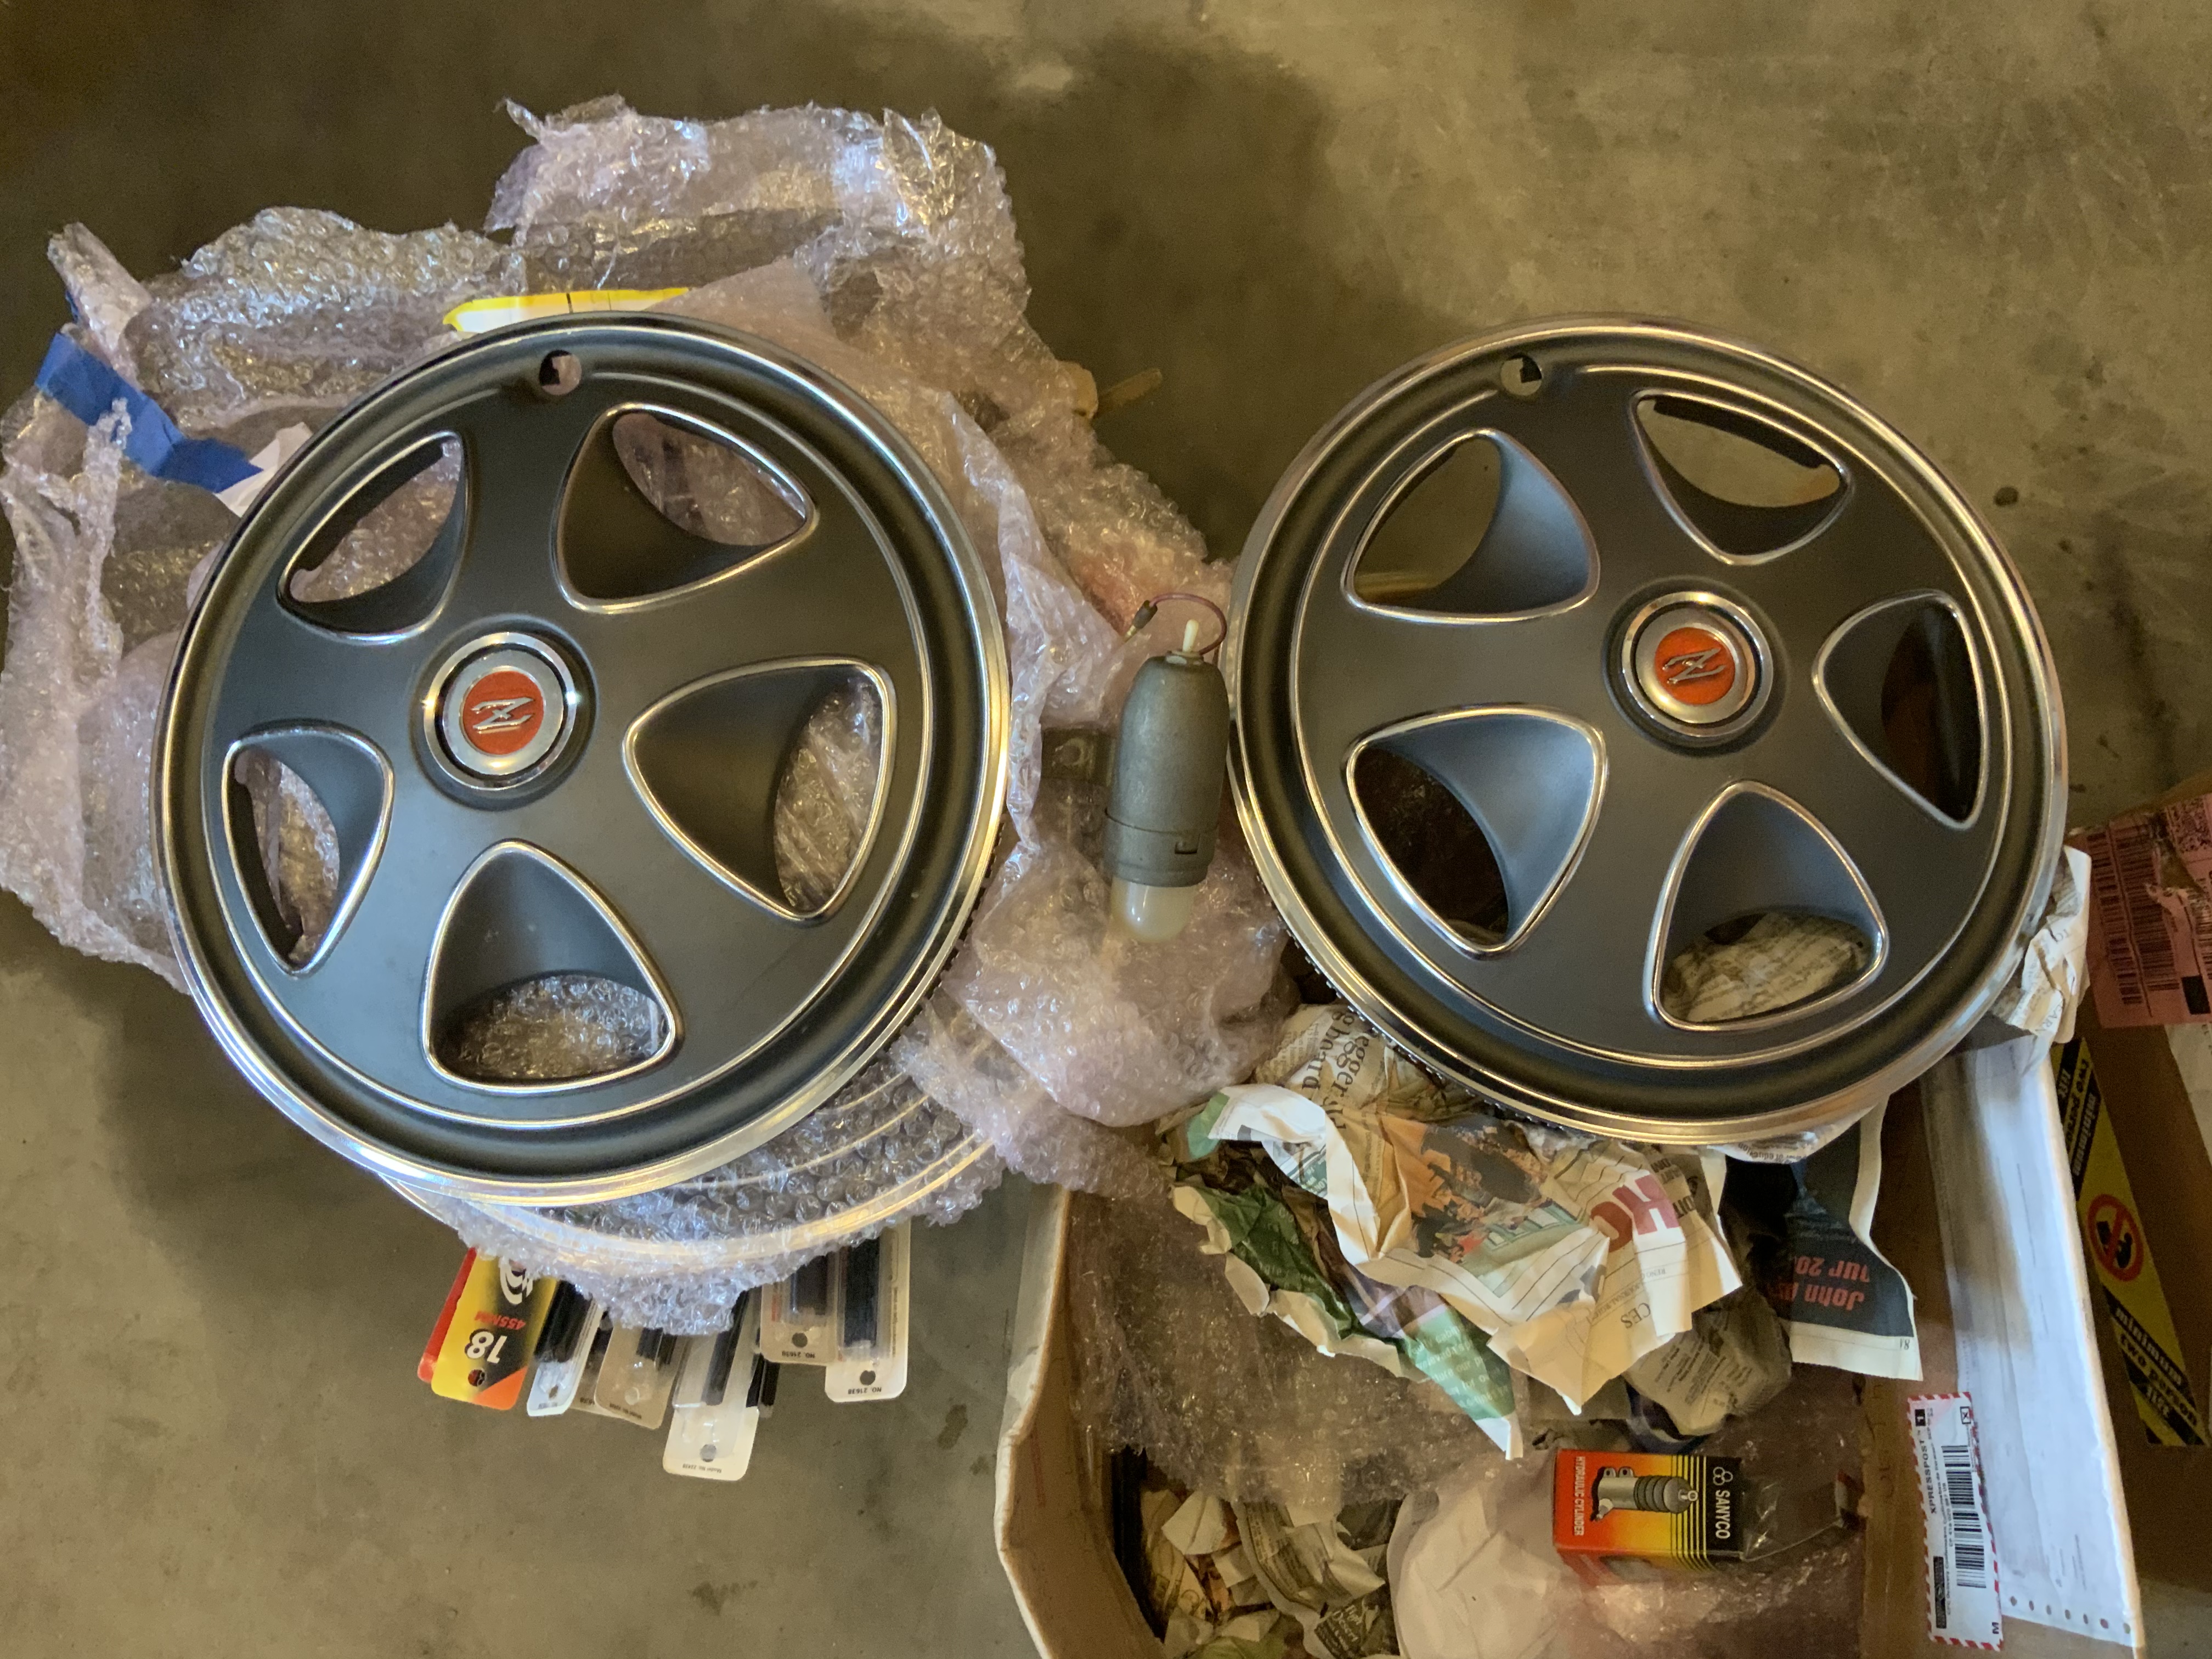
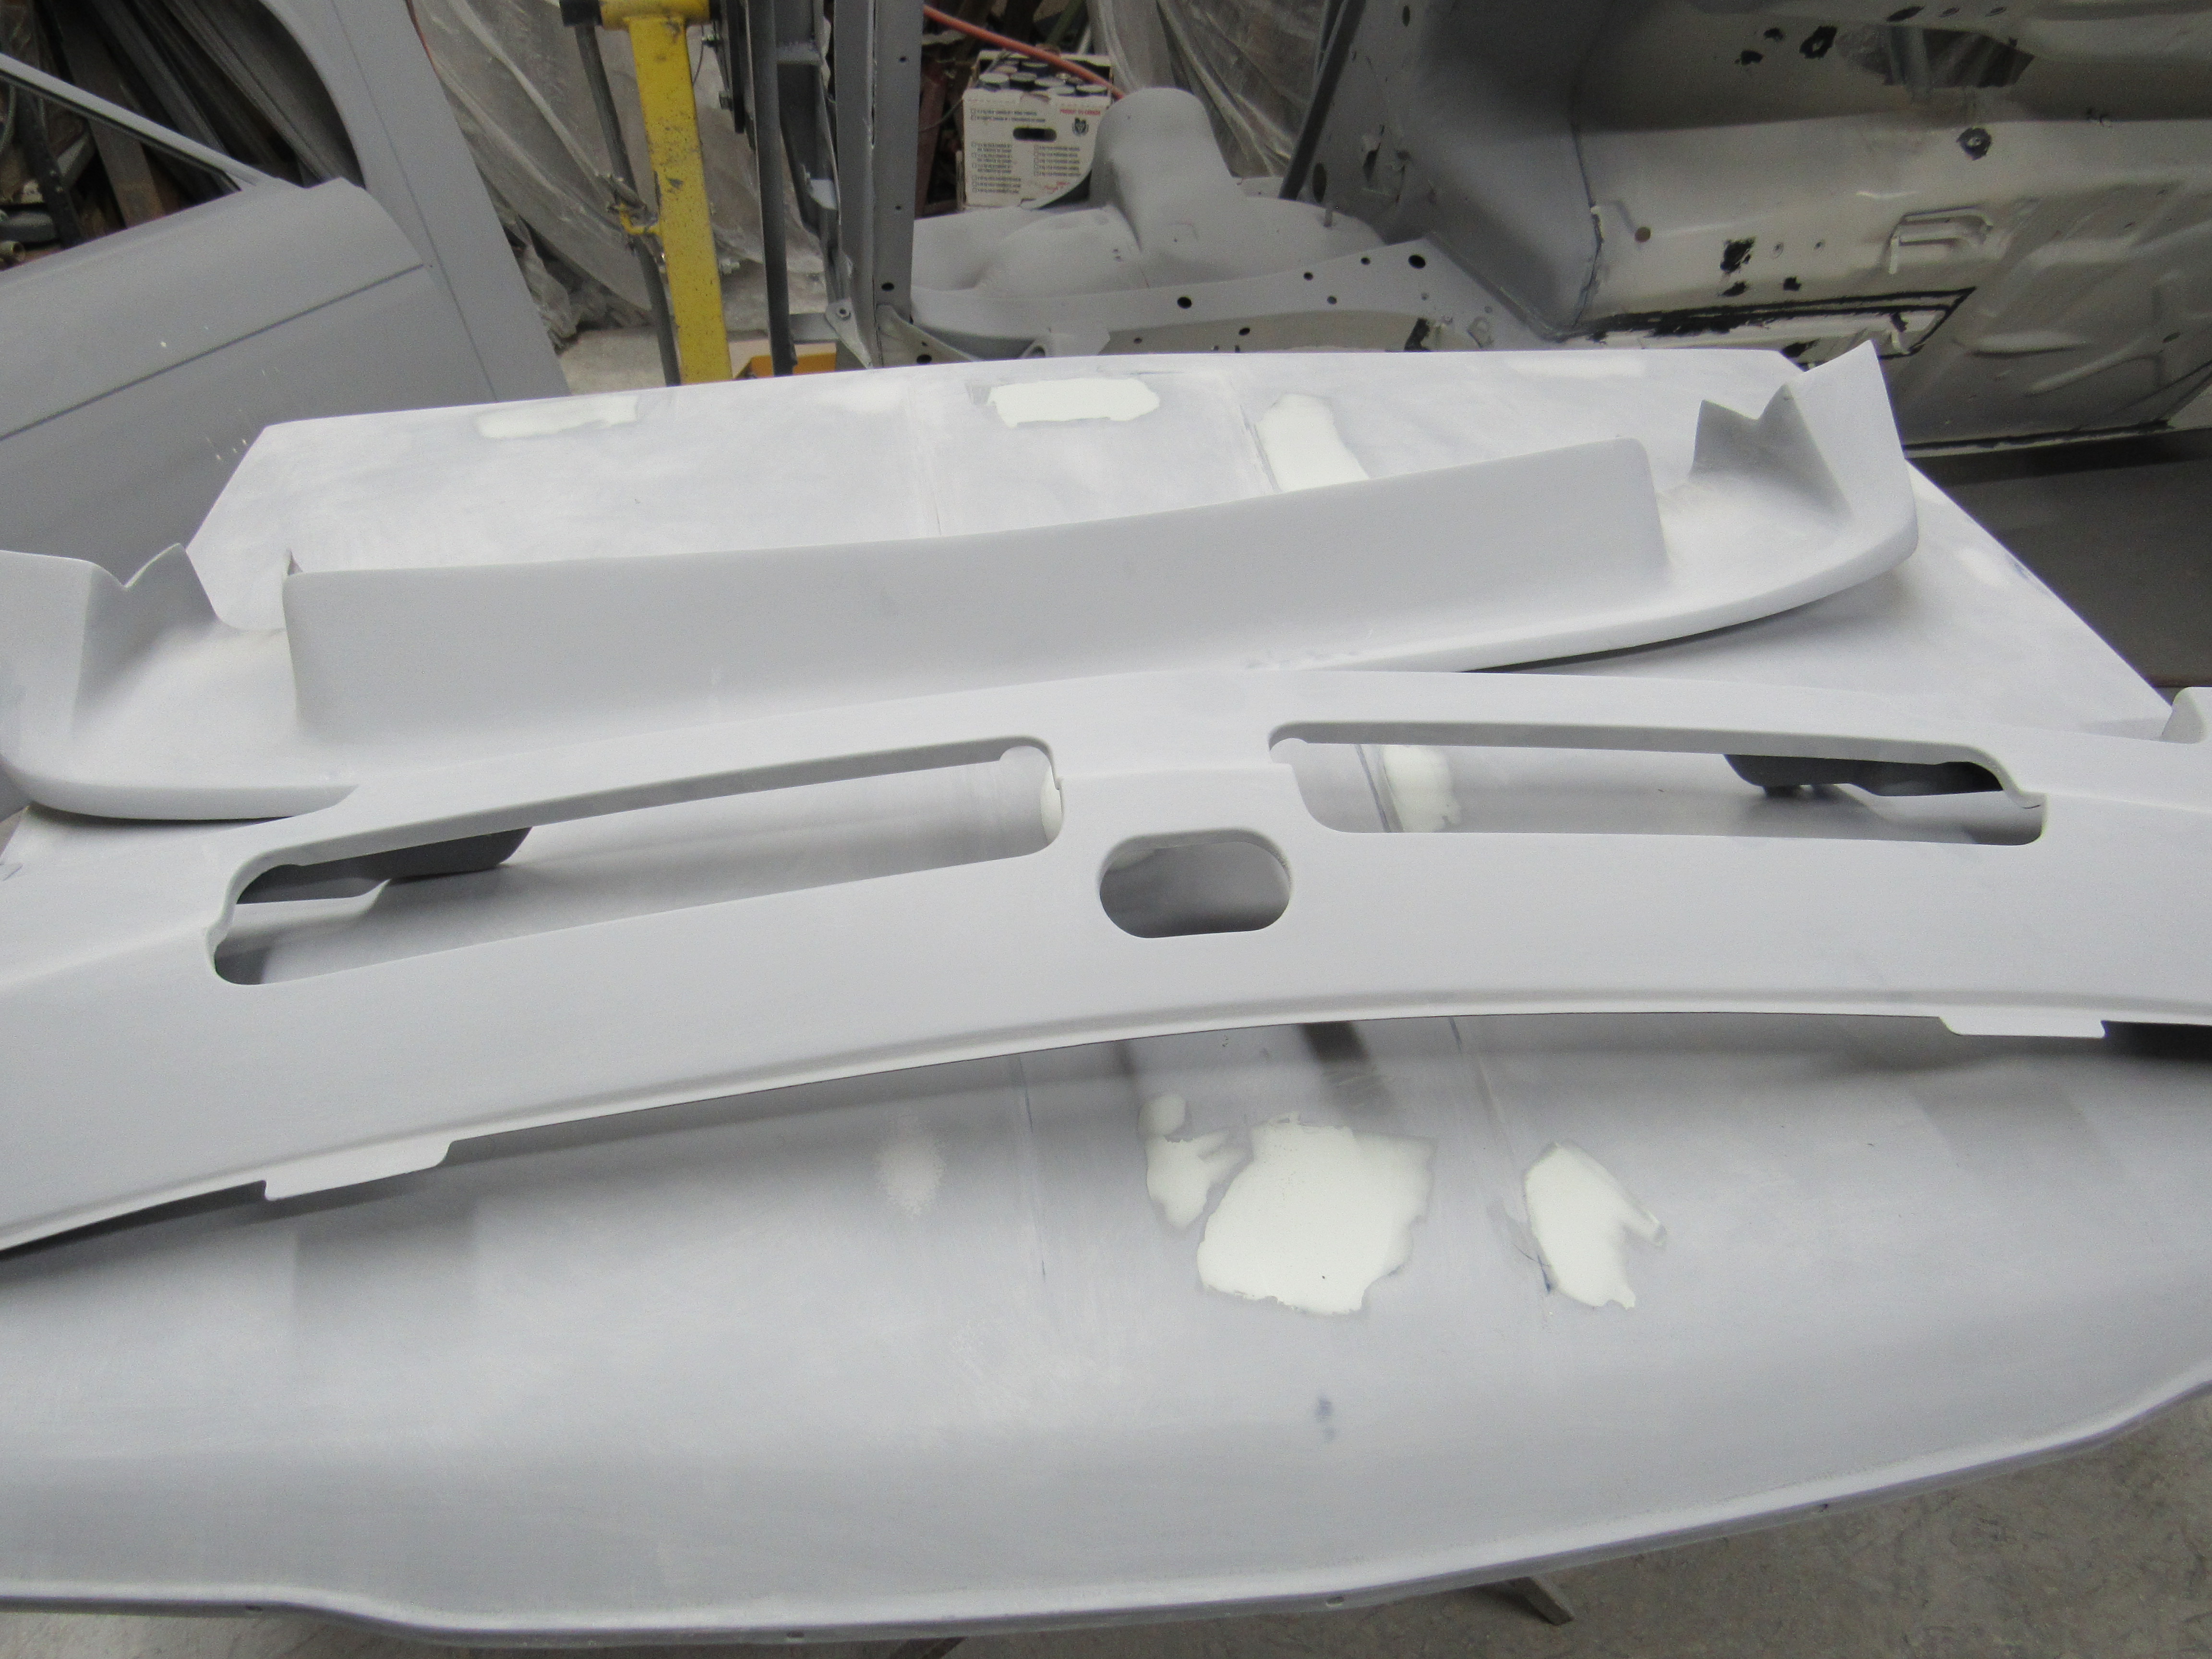
 They have the original grey/cream coloured primer on them. Should I strip them to bare metal or just paint over the top?
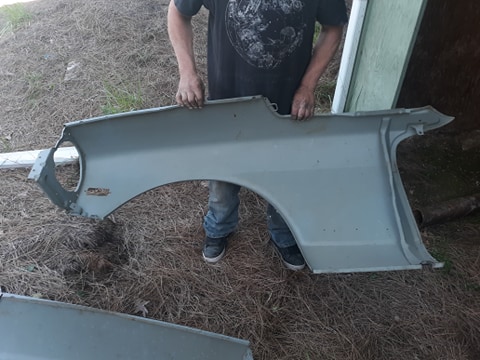 1 point
 -
1 pointYou can't go wrong with Spal fans especially in your part of the world, I can only imagine the heat when stuck in traffic in Dubai.1 point
-
Why can’t you be in the UK!?!! So inconsiderate!!!!!1 point
-
1 pointLet me get it working safely first and I’d gladly share it. (I’ve melted one FET already with too small a heat sink - good job I have 12 of them :p ). Edit: I discovered today that my Q5 uses one of these right behind the fan! I may just get one as it’s beautifully packaged! I strongly suspect they have solid state electronics in there given the heat sink arrangement! https://www.ebay.co.uk/itm/FRONT-RADIATOR-COOLING-FAN-CONTROL-UNIT-MODULE-8K0959501G-For-Audi-A4-A5-A6-A7-/284091597931?_trksid=p2349624.m46890.l492861 point
-
 1 pointIt's a very common problem. There is a multitude of pressure plate and throwout sleeve combinations. Tall, short, and in-between. The cheap clutch is probably fine, it's the combination of parts that is the problem.1 point
 -
 1 pointClutch is new some cheap power torque from O’reilys. Had a feeling that it was the issue. Looks like I’m going to have to remove the transmission yet again 😞1 point
 -
 1 point
 -
 1 point@siteunseen is that implying that the fan is “dead” for the first 30-60 seconds? No spinning? my fan is always on, even when I first start the motor, can’t make it stop. I thought it was a little weird that it does that, the car takes like 5-6 min to warm up to where I can drive it.1 point
 -
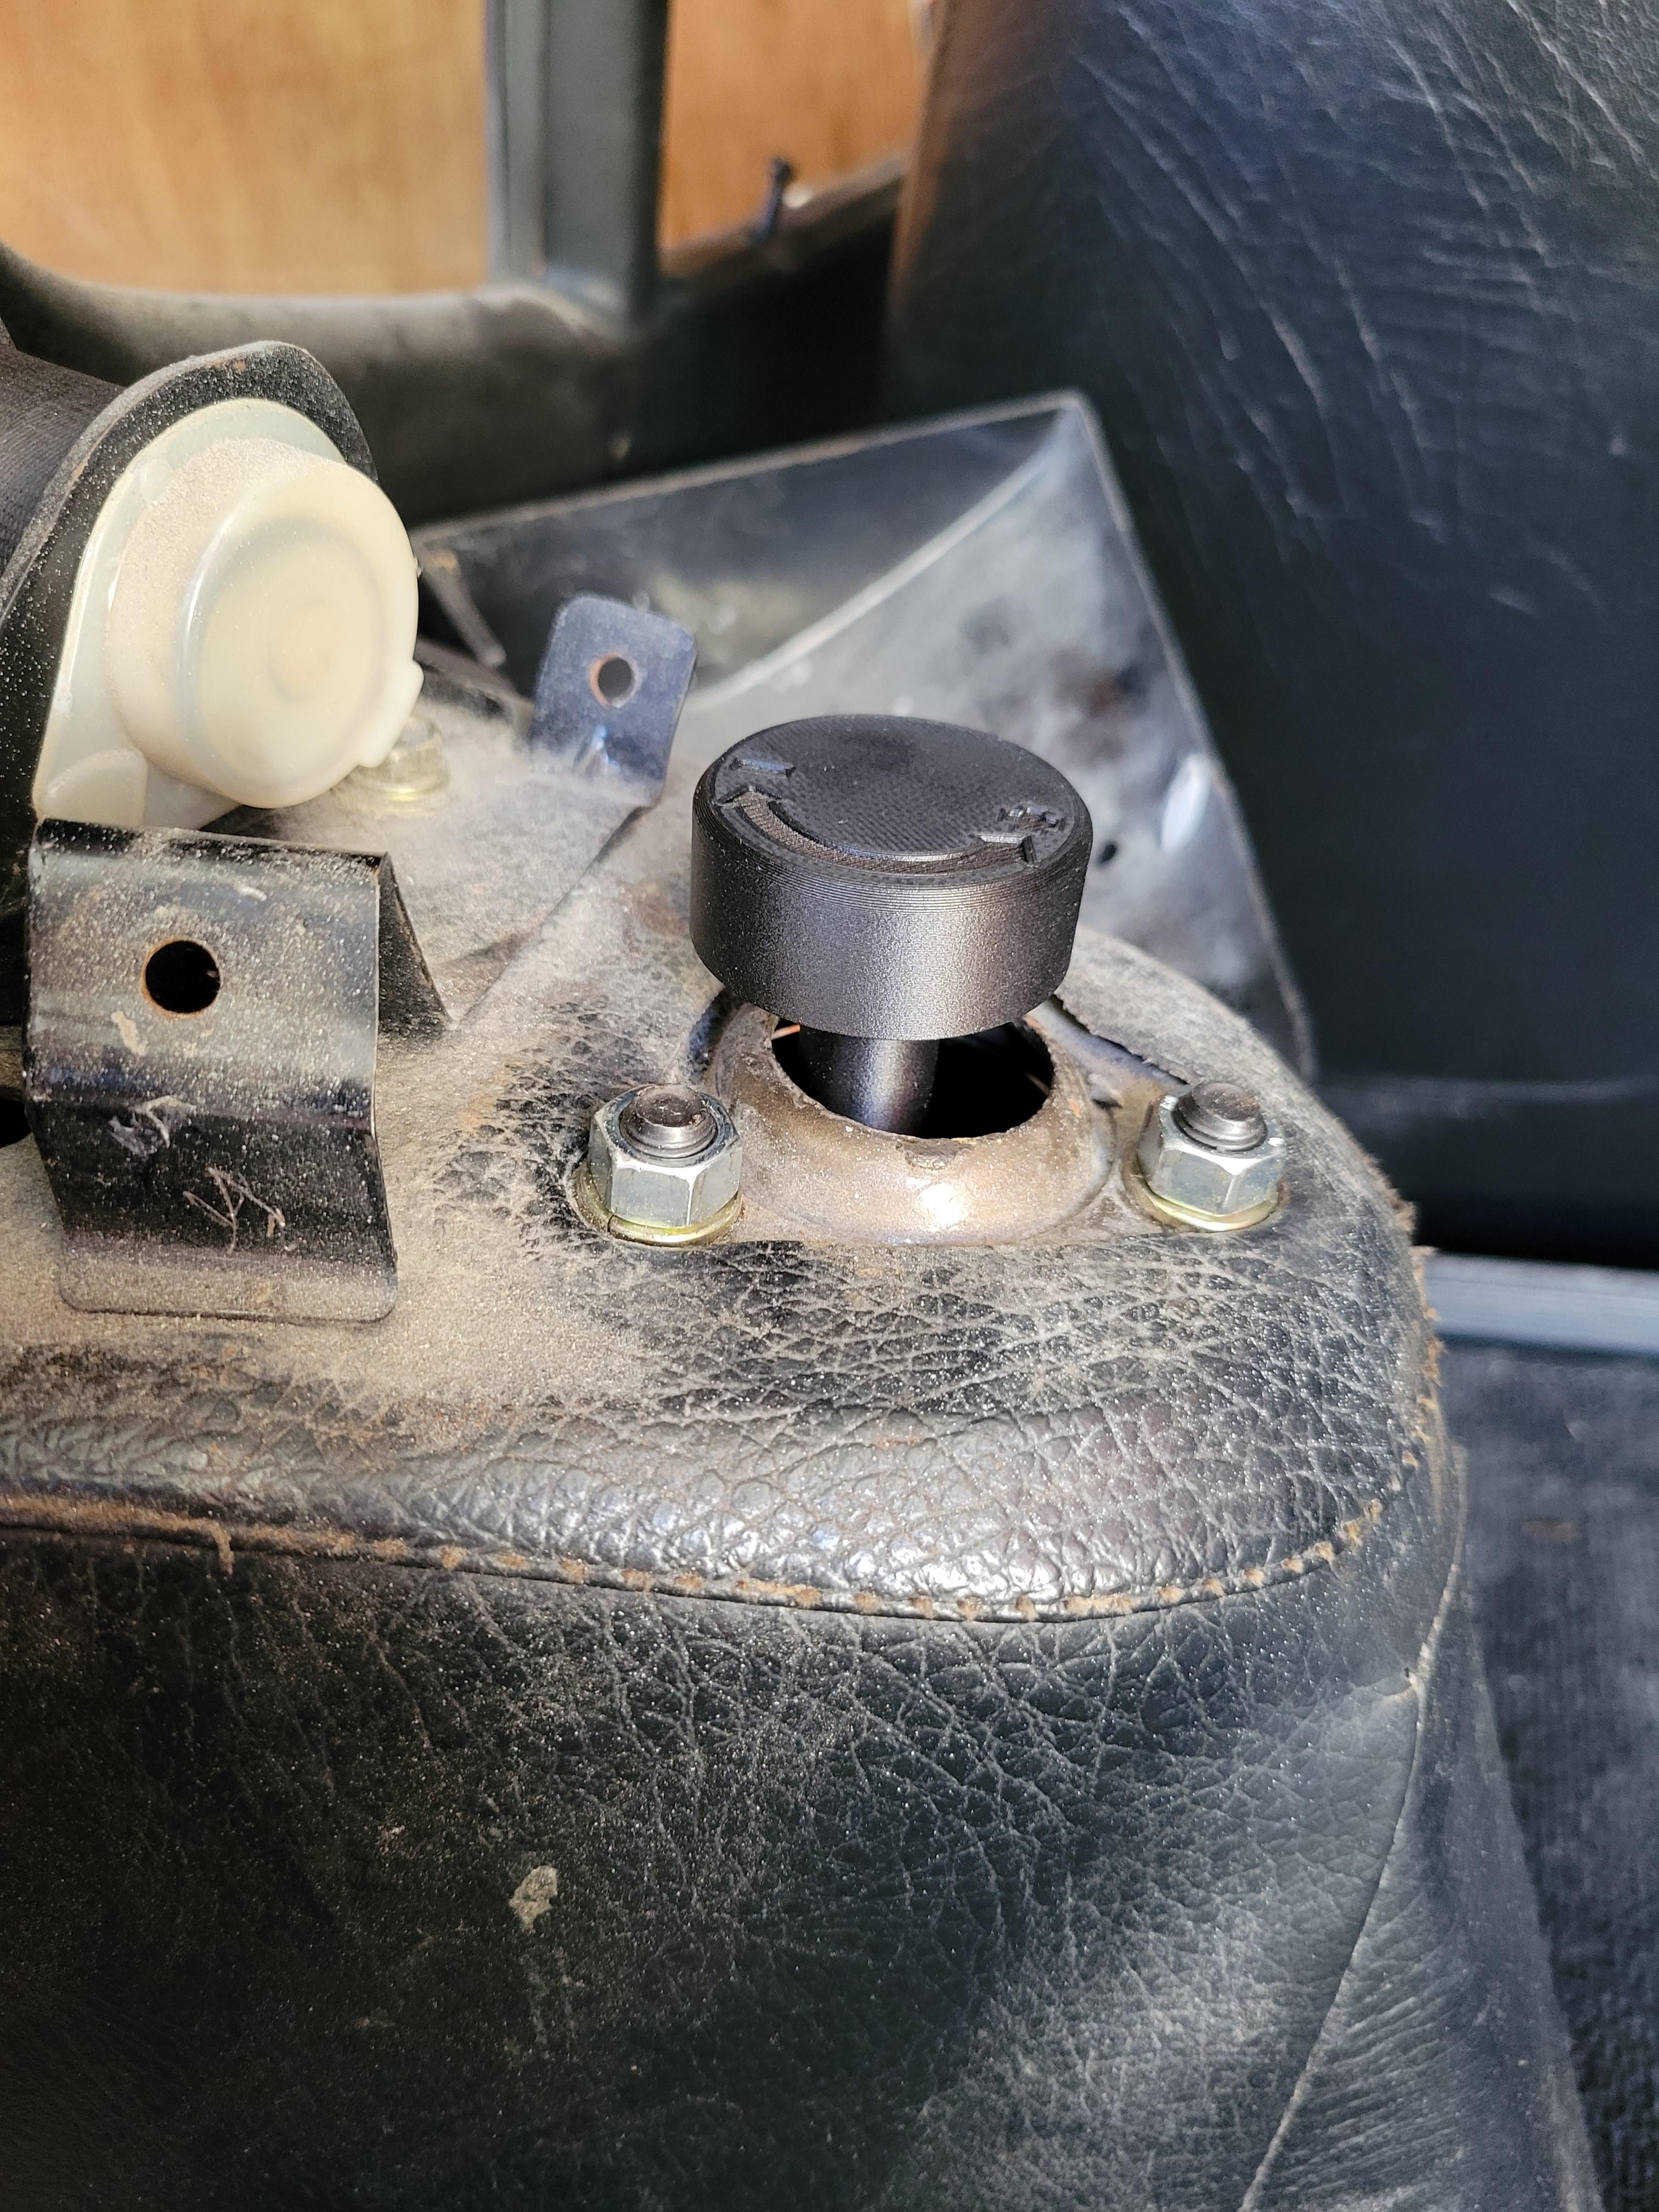
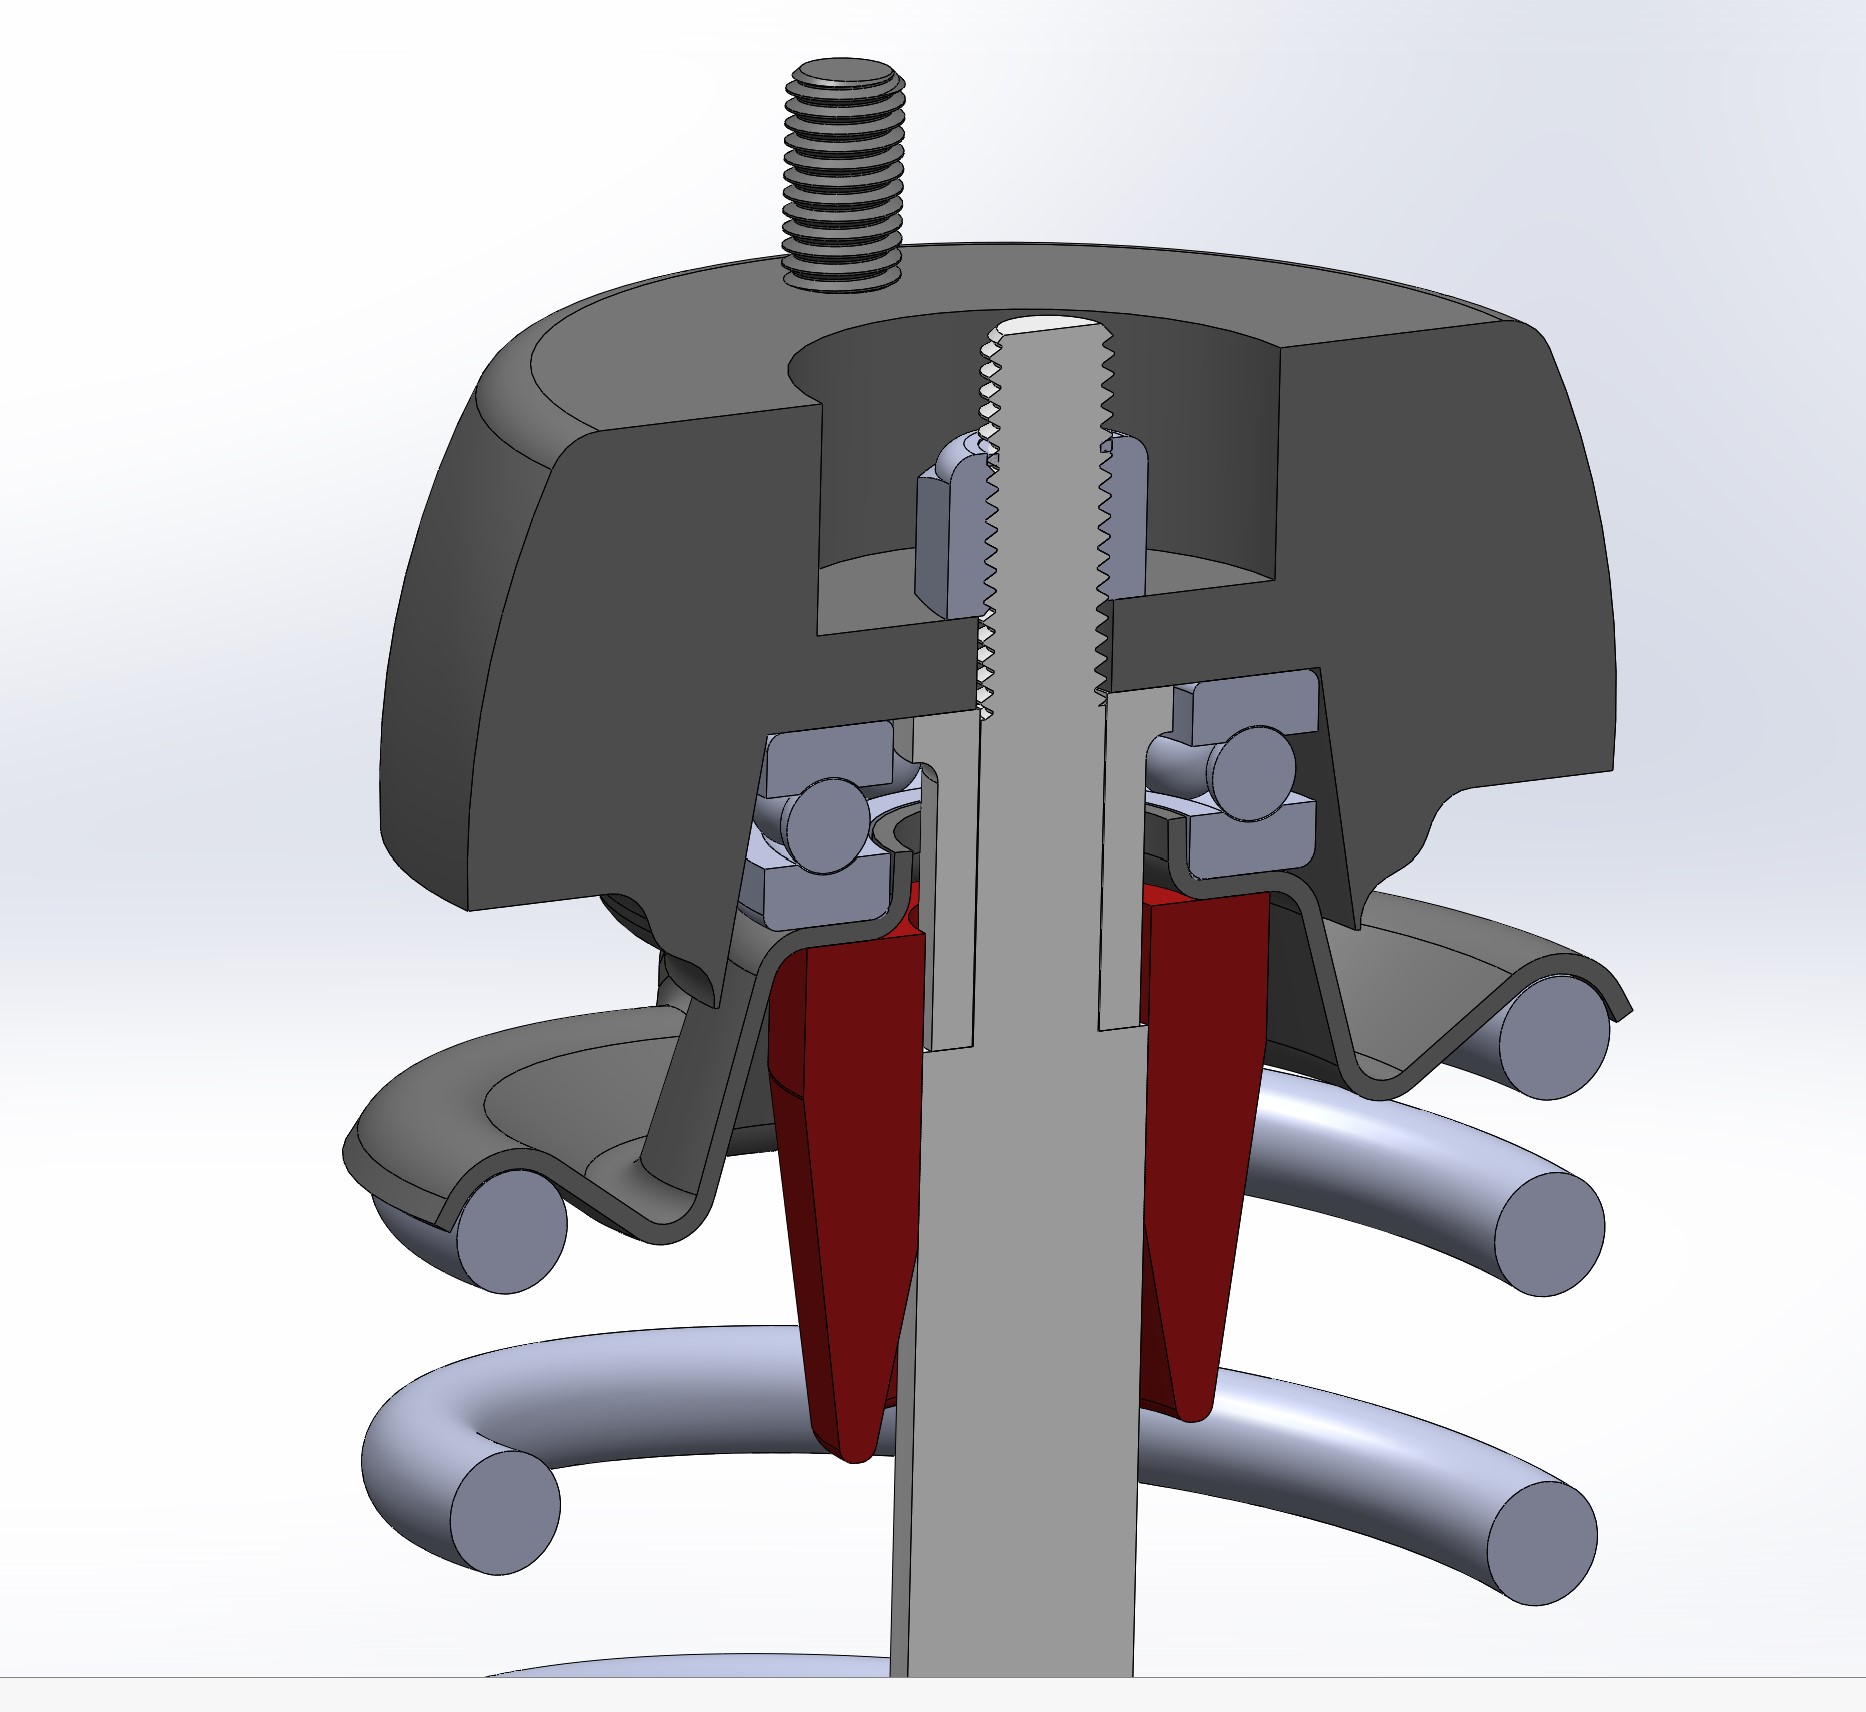
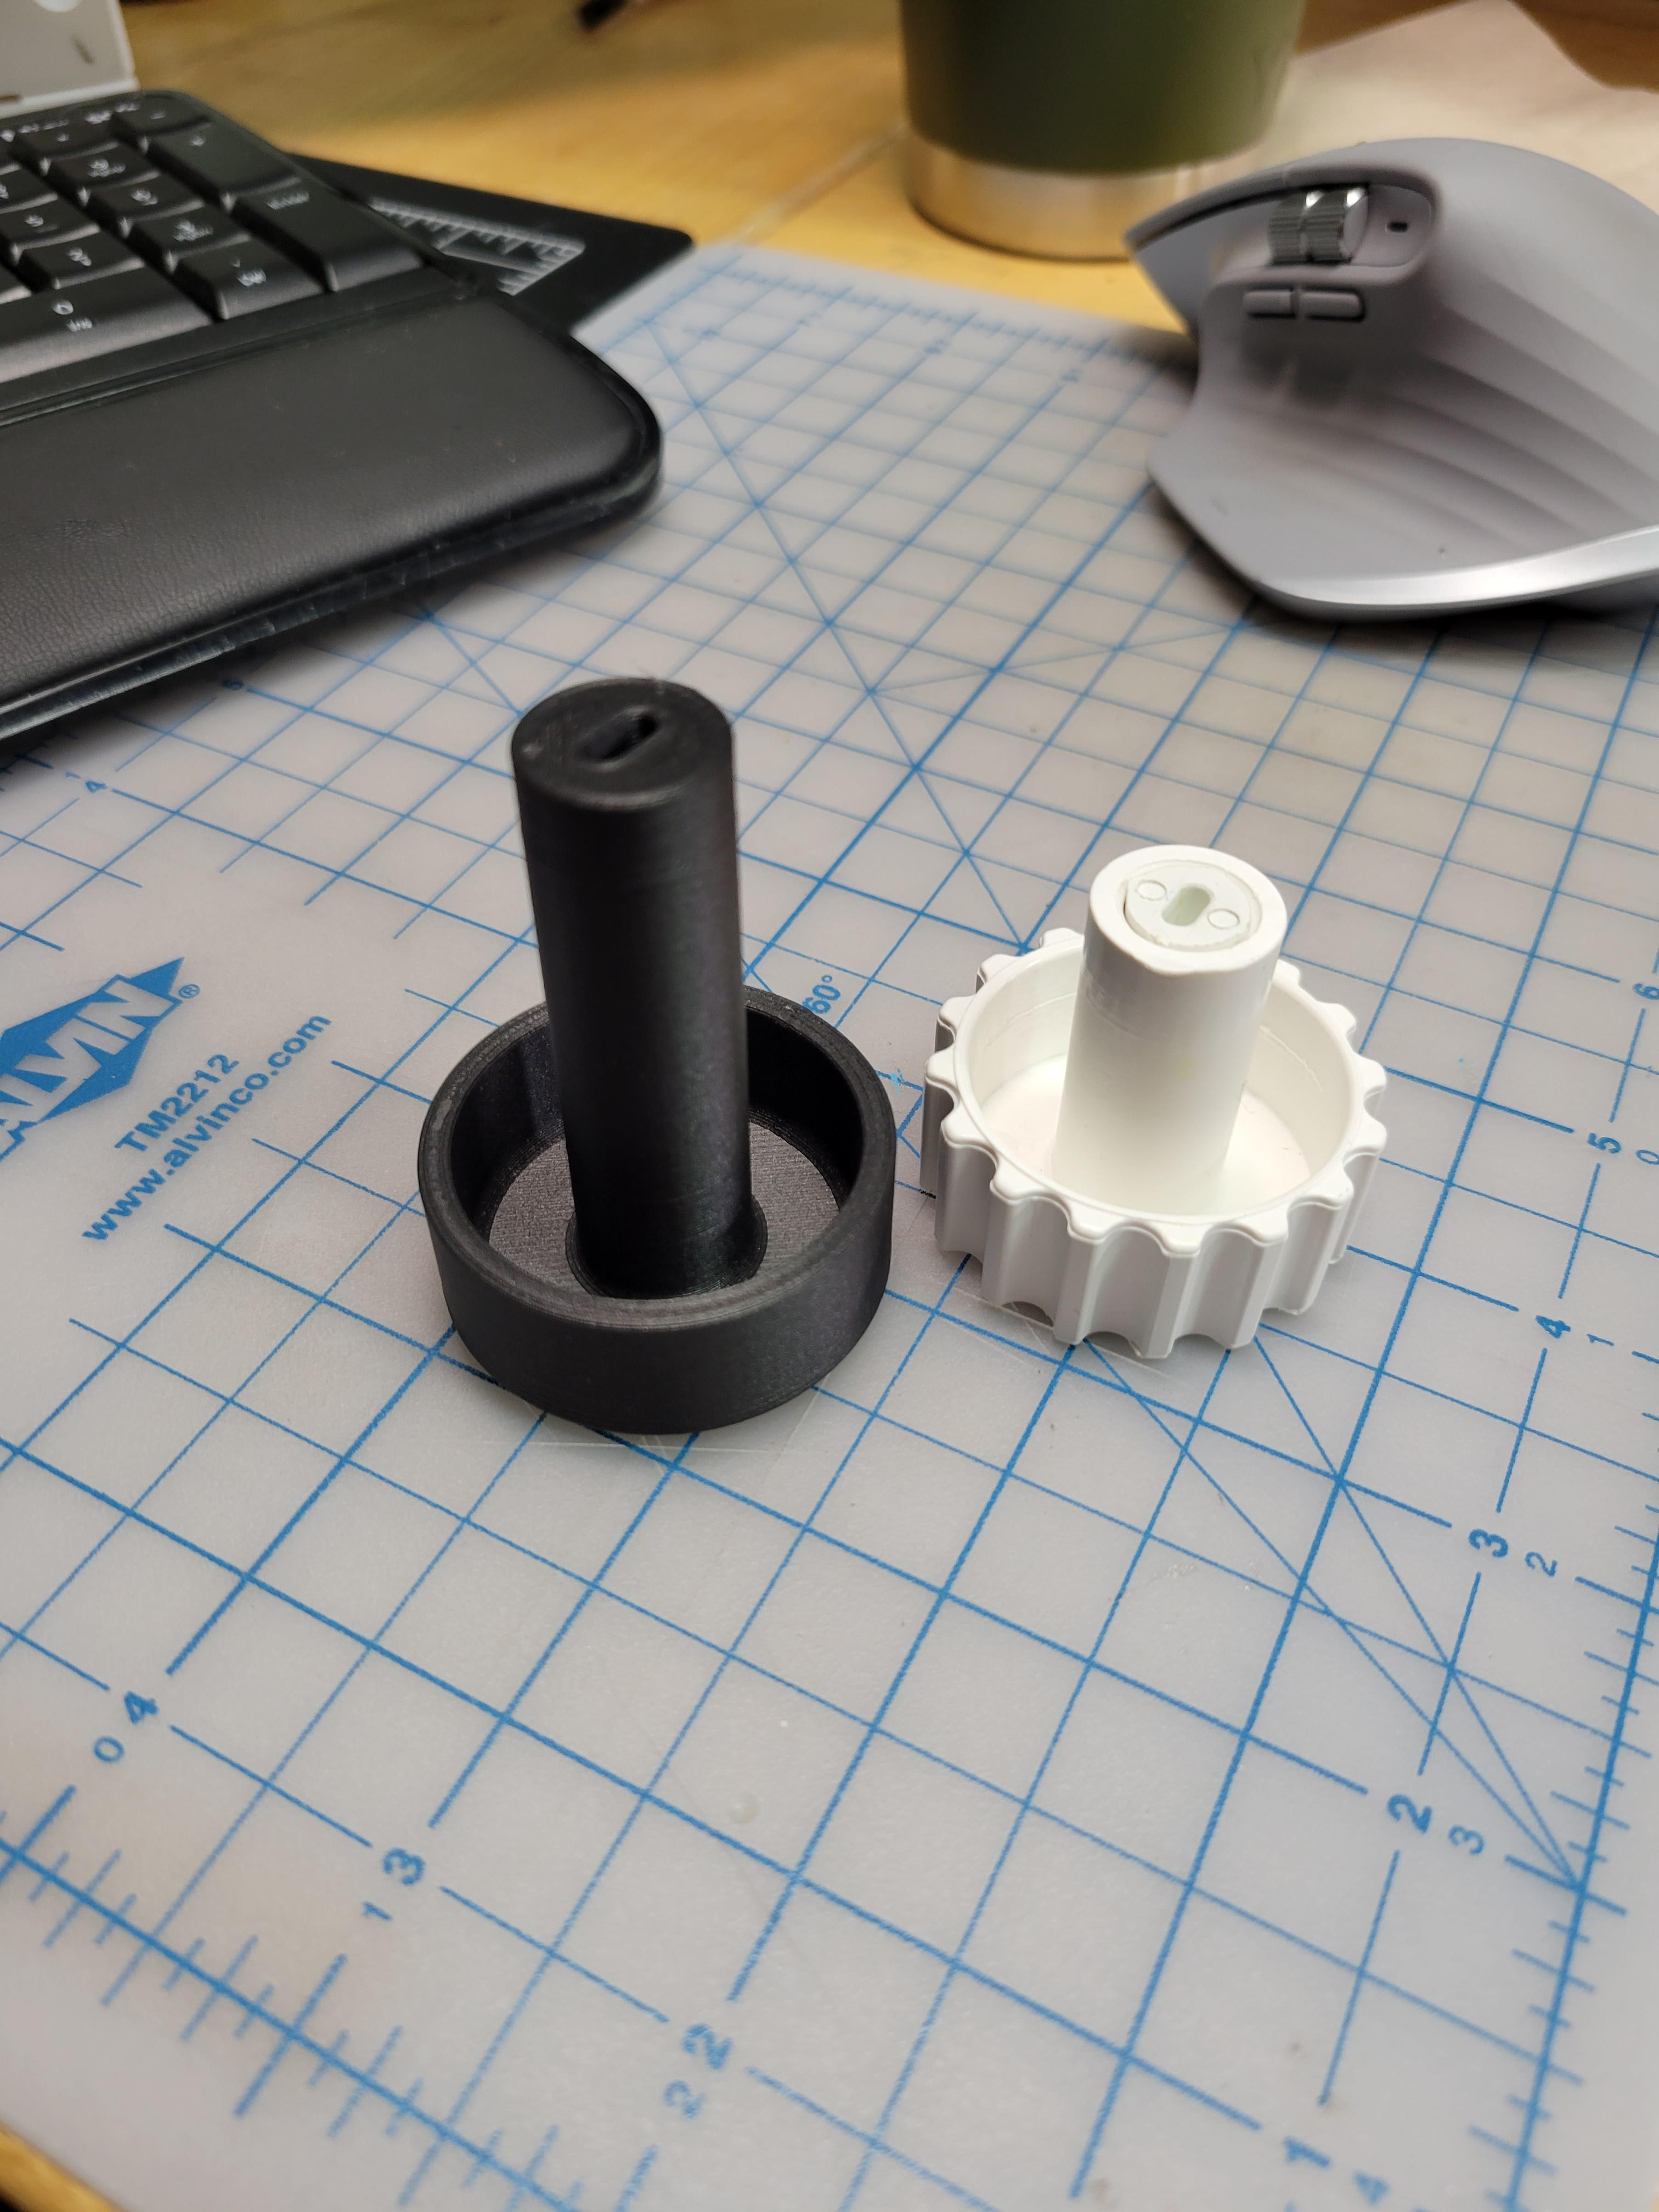
 1 pointI was able to redo install of the front strut with the one I have remaining. I also completed the rear strut on the driver side so half the car is now done. Install went perfectly and no issues at all with the supplied top nut. I am installing a few other adjustable suspension components so I won't have it back on the ground for another week or so but I am very excited. Here is an updated Cross Section with the edited bearing for clarity. I've also created a file for a longer strut adjustment knob that I am looking for a place where it can be readily downloaded and 3D printed if you wish. I will post when it is live.

 1 point
 -
1 pointYou are too kind Mr Site! That is good advice sir I should be less fool hardy!!!! I was playing hot potato with the fan clutch at 90c while holding it in a dishcloth. But I still couldn’t get it to go hard, so I’m wondering if it needs to be rotating at speed for it to engage!?1 point
-
I thought about that, but the sensor was so easy to remove. One quick haul on a vise grip, unplug and hand loosen. Next time it goes on a ramp ill get the filler plug out and put it back in hand tight.1 point
-
1 pointToo much fuel can make idle idle funky. Big injectors can make tuning difficult because the resolution is so poor on the low end. On a 350 I once tuned, I had to go to variable fuel pressure regulator to get it tuned properly1 point
-
 A big pipe wrench and a floor jack on the end of the pipe wrench is what I used after trying to be gentle with the fill plug. It chewed up the plug a bit but it came out.1 point
 -
1 point
-
 1 pointActually, I have seen those Nissan OE snubbers. I bought them from MSA back in the mid-1980's. They were installed on struts that got stored and I didn't get around to using them until 30 years later. When I checked them out, they looked perfect but crumbled to the touch. So much for open-cell, natural rubber suspension bushings. The sad part is that today's no-cell neoprene bushings are not the answer for a lot of owners (unless you are dedicated to track days, autocrosses, or live in a part of the world were roads aren't exposed to frost-heave).1 point
 -
 1 pointMy friend has the trim, he wants $200.00 for the full set. About par with most 240 trim I see on eBay. He is not very far from me. Shipping will be interesting, kind of a wide flat box. I'm sure they would call oversize. Let me know if you are interested. You might want to find something more local.1 point
 -
I should have been posting on this thread for a month. Been something each day. today i finally got a load of mt 90 into the tranny the hard way. Through the reverse sensor opening. installed a new clutch slave and had a go at removing the front bumper (not as simple as one might think) rad tomorrow.
 1 point
 -
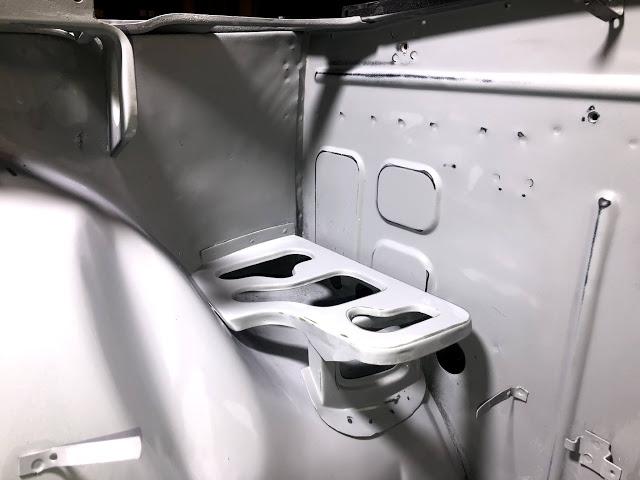
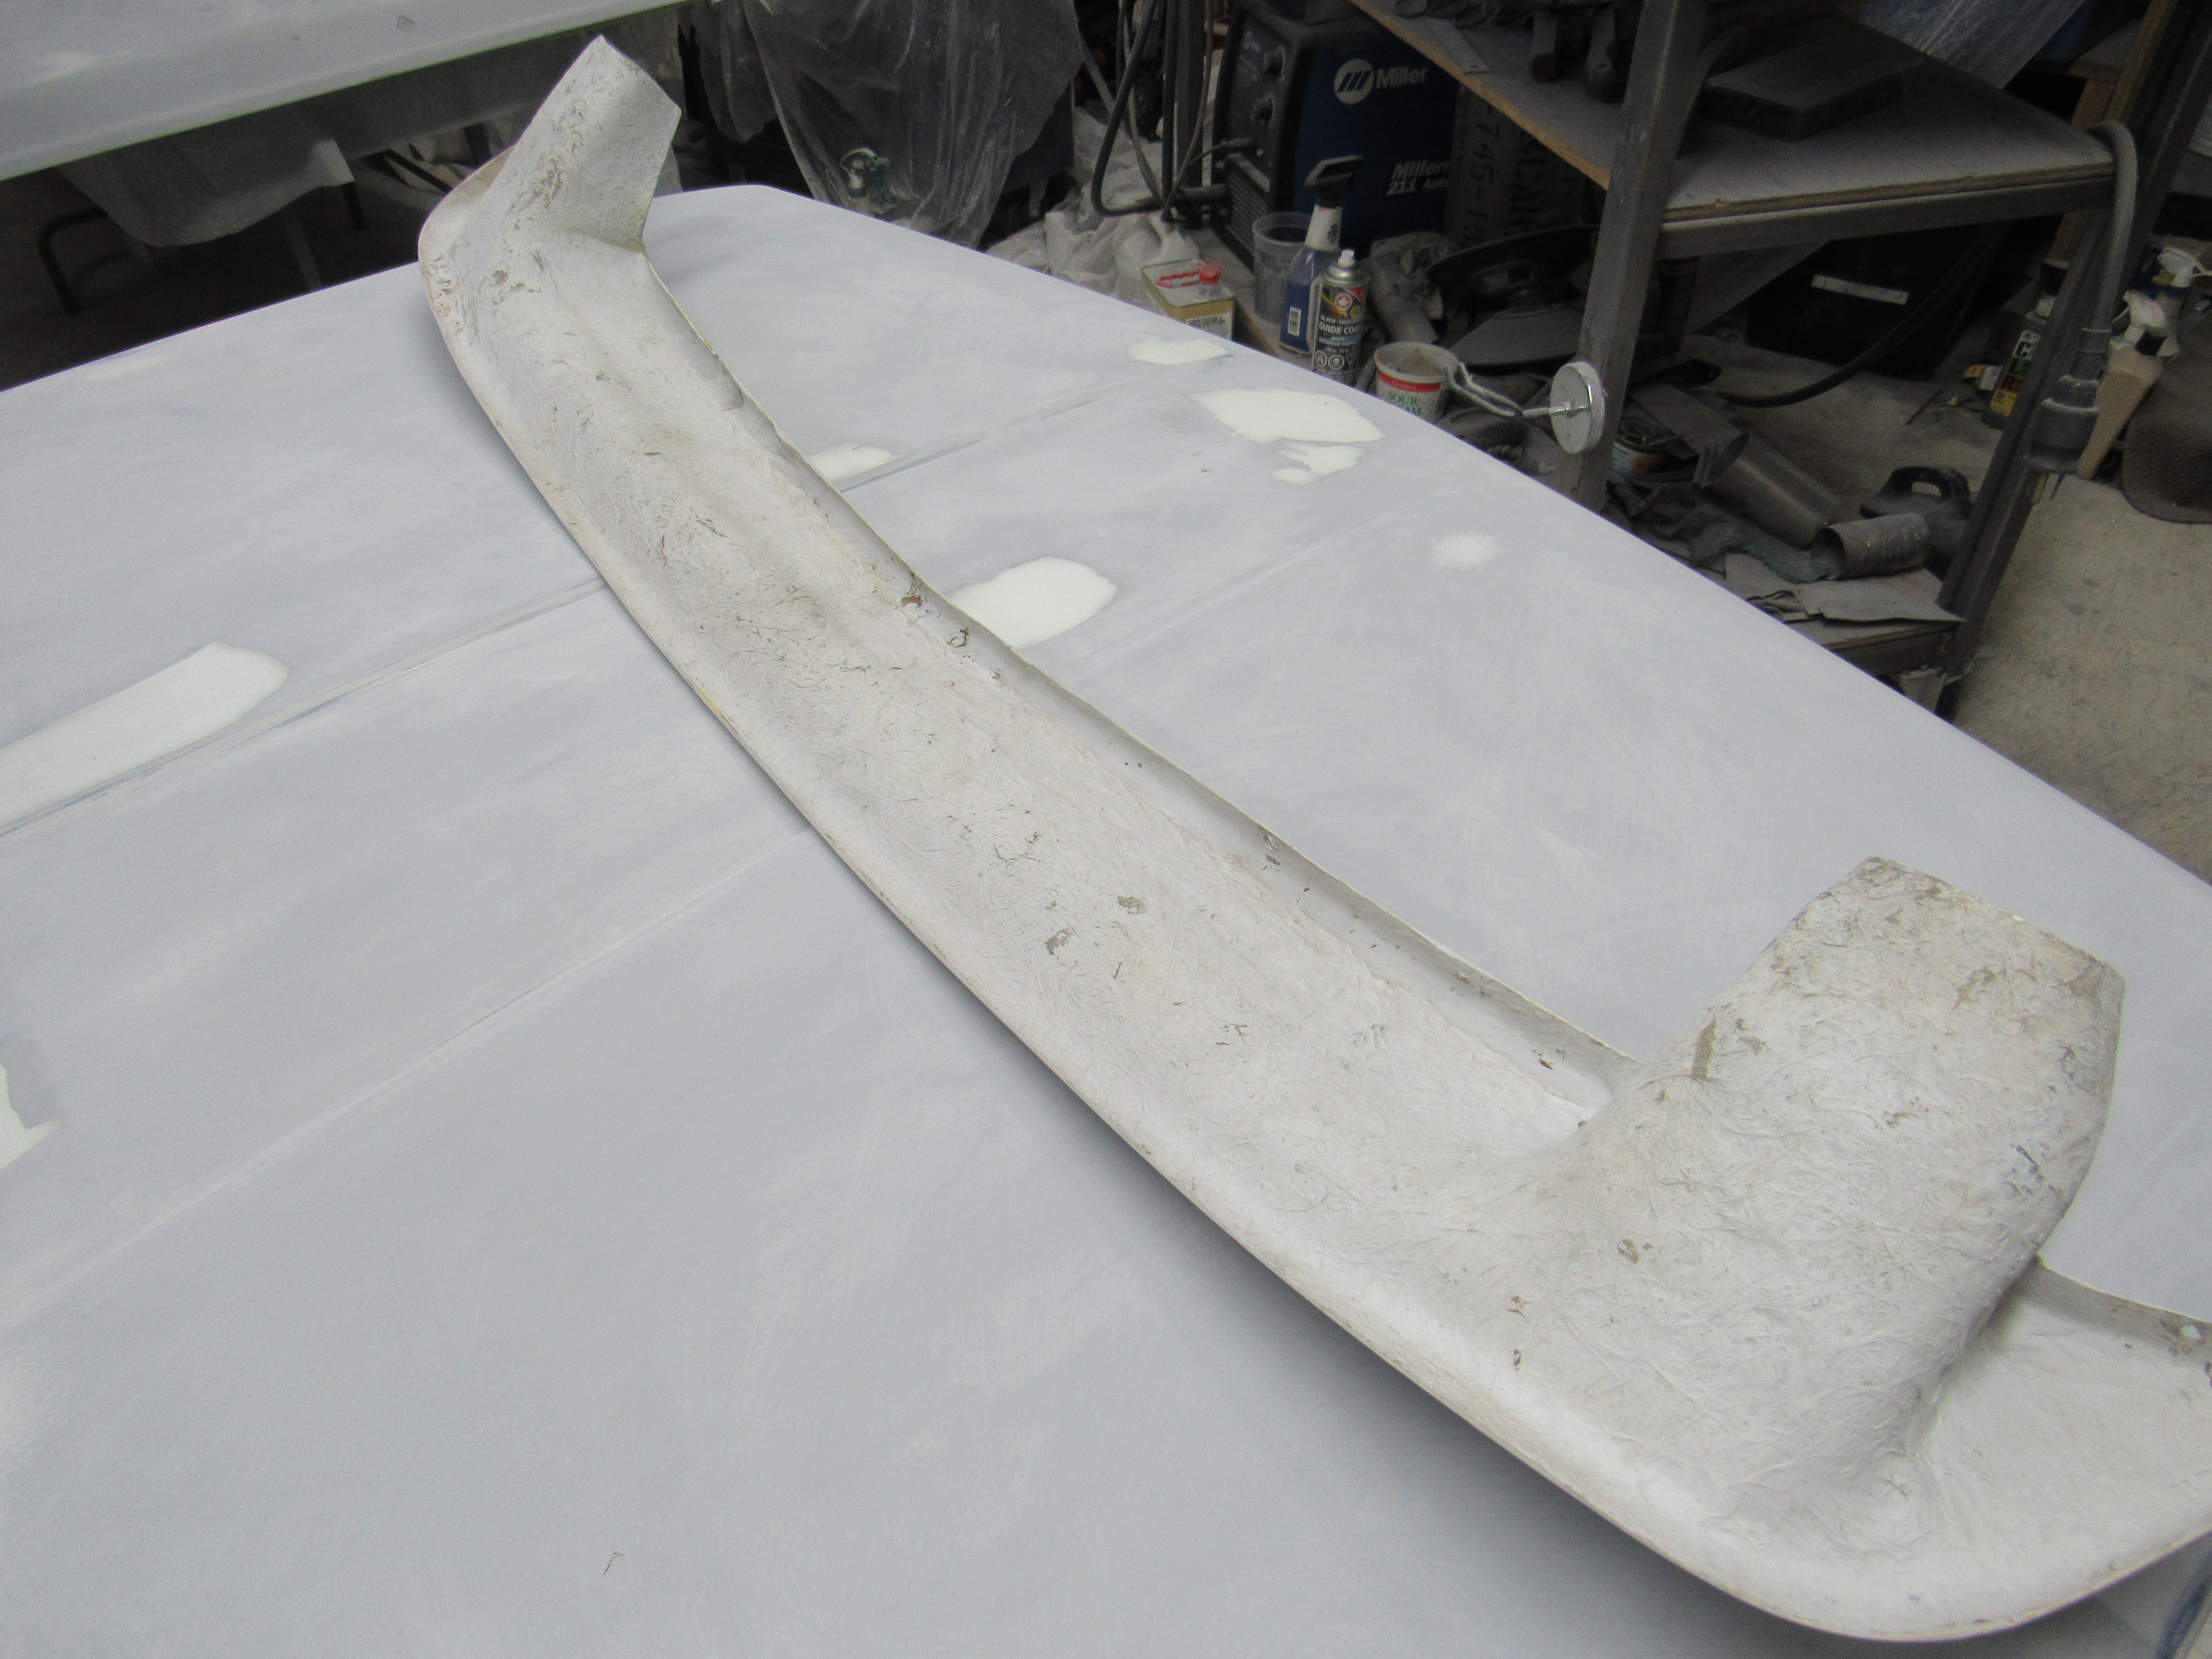
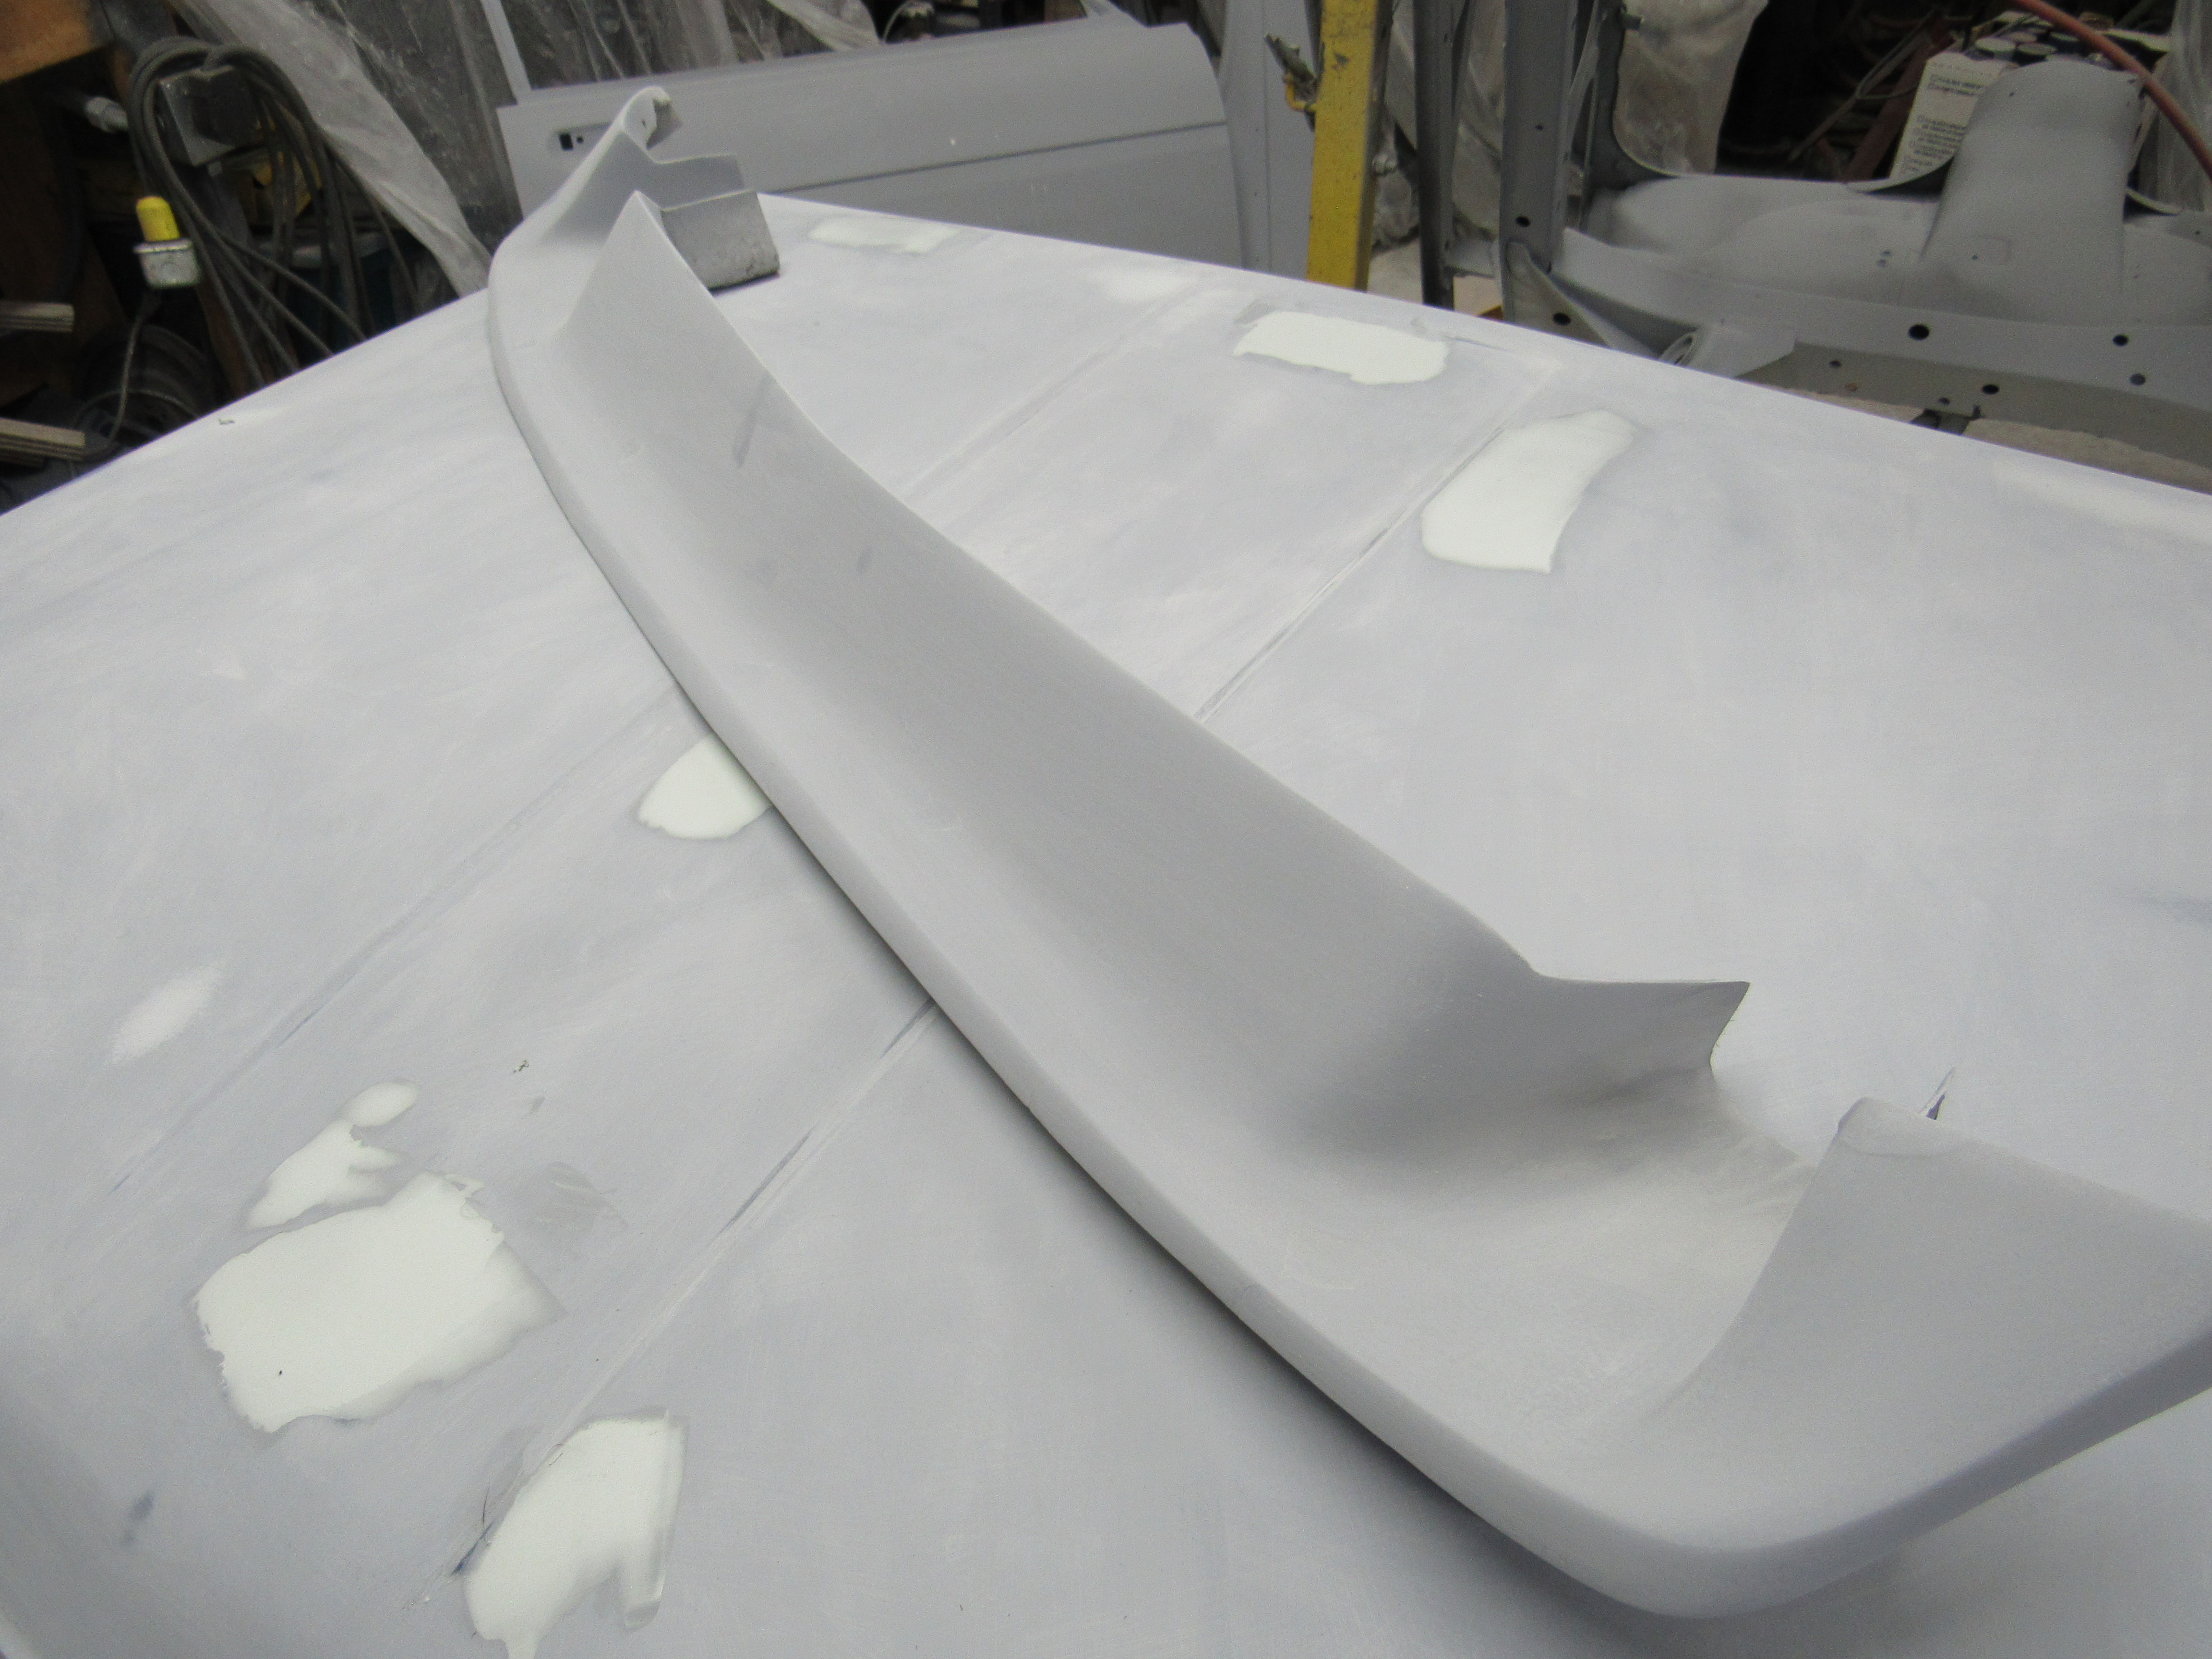
1 pointYou say she's not going to be entering any beauty pageants so white is a good colour for that, it is very forgiving.1 point
-
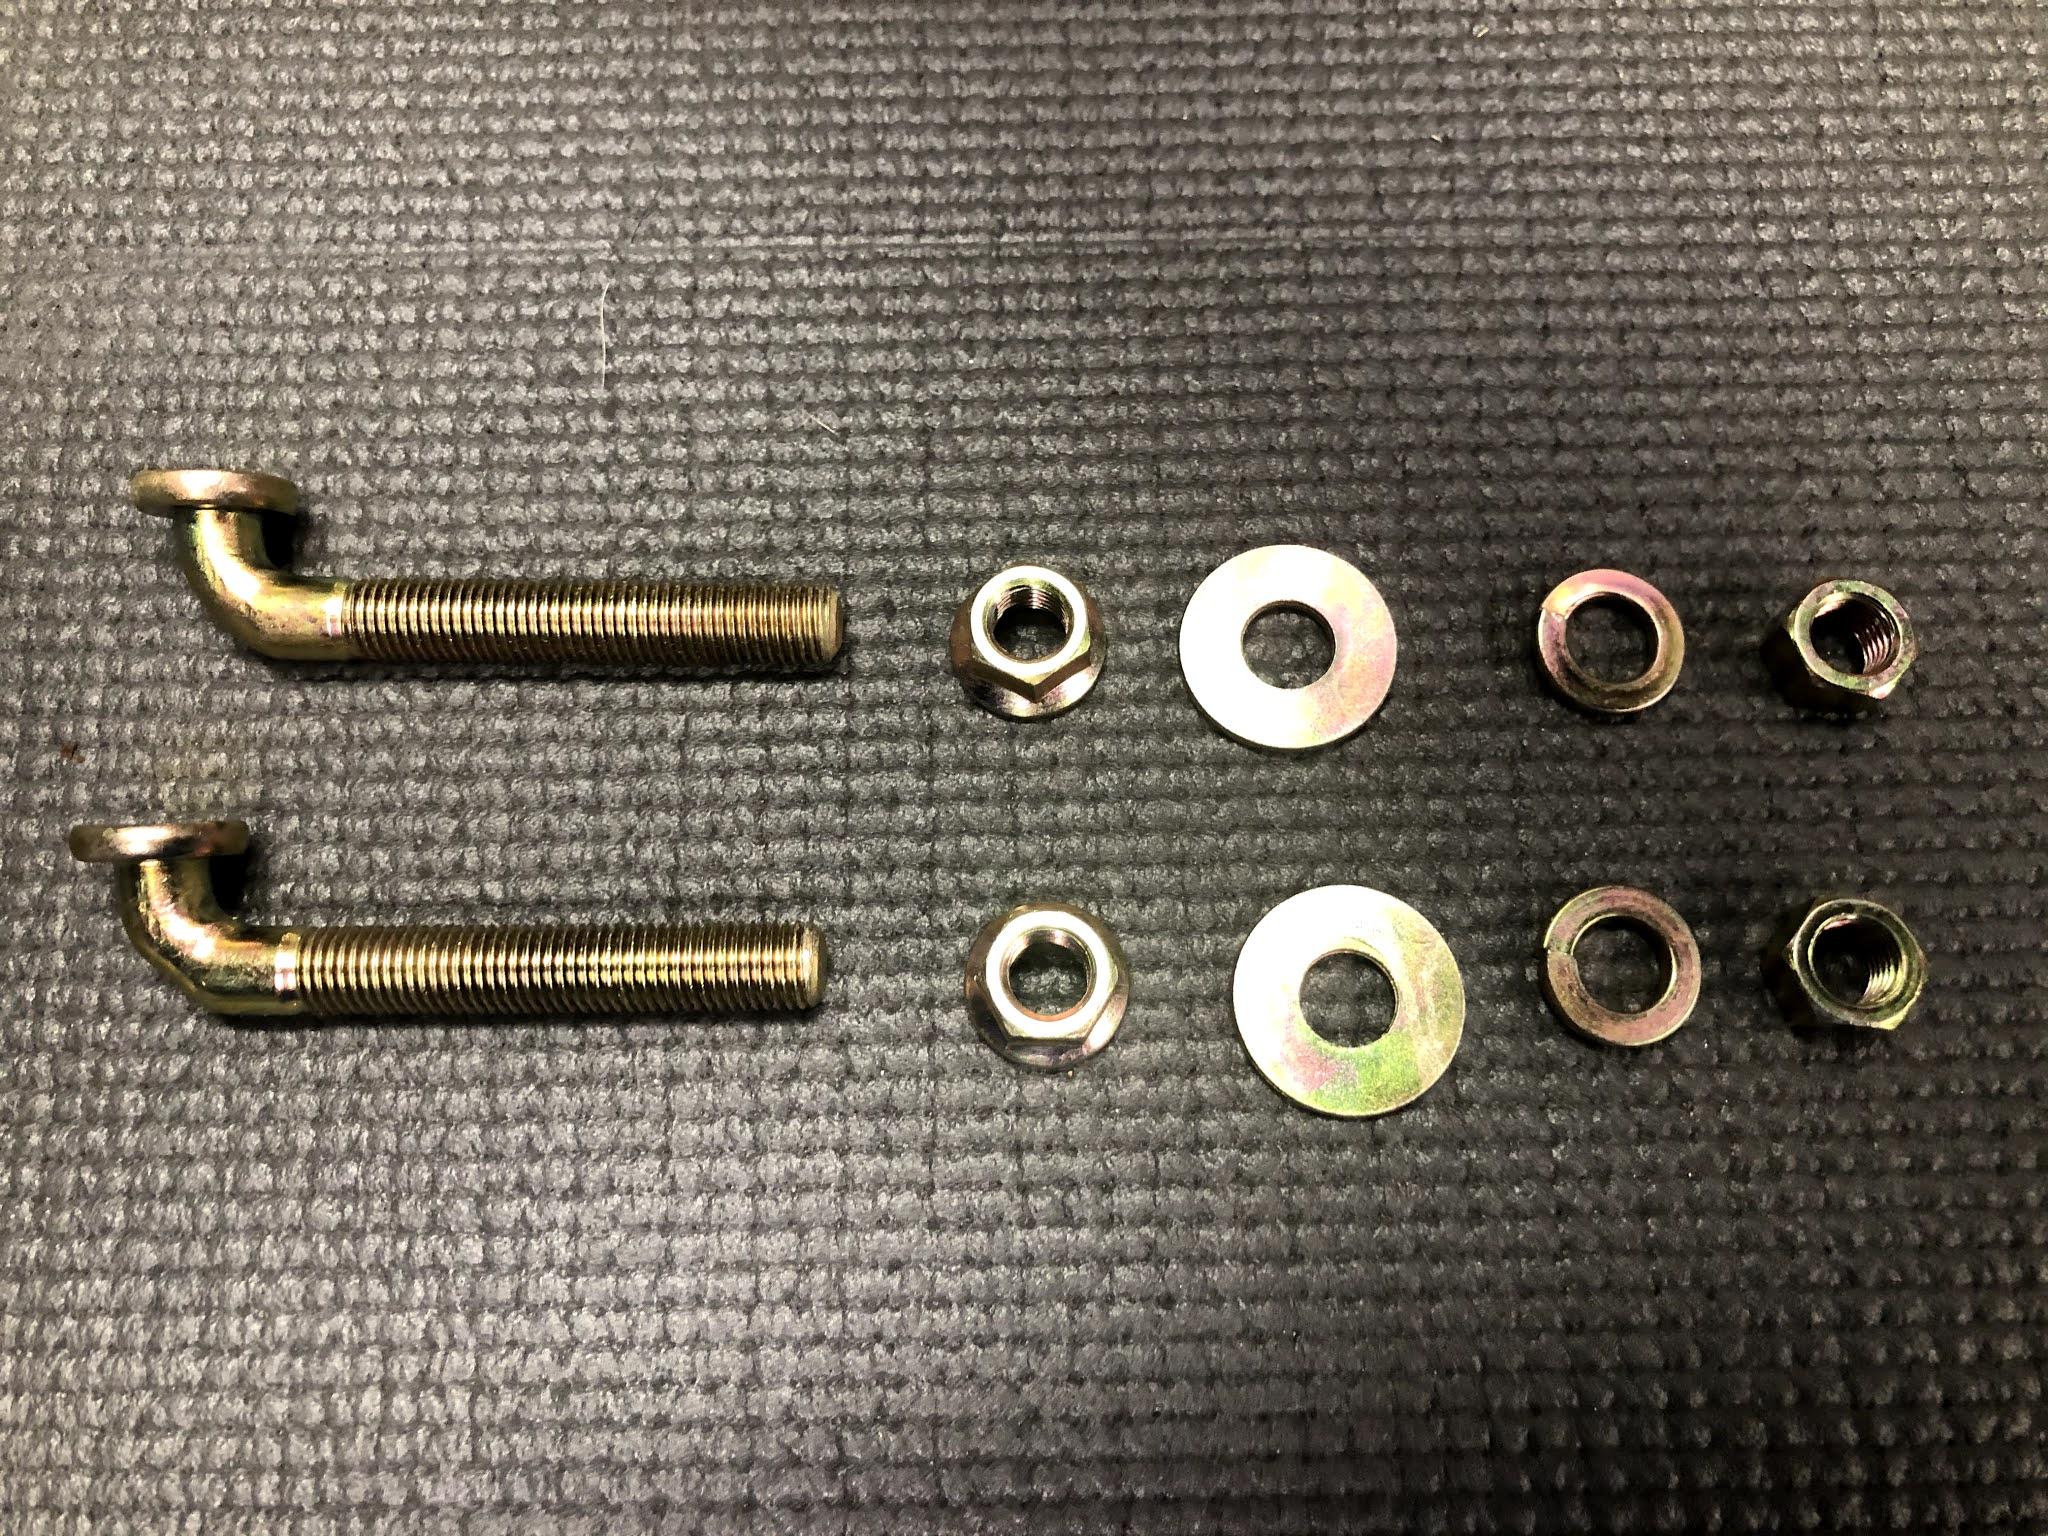
1 pointThat flat side anchors the bolt against flange so you only need one wrench to tighten it, it's very tight in that spot to begin with. You could modify a standard bolt to do the job but you really want one with the same length of shaft so you have maximum strength were it's needed.1 point
-
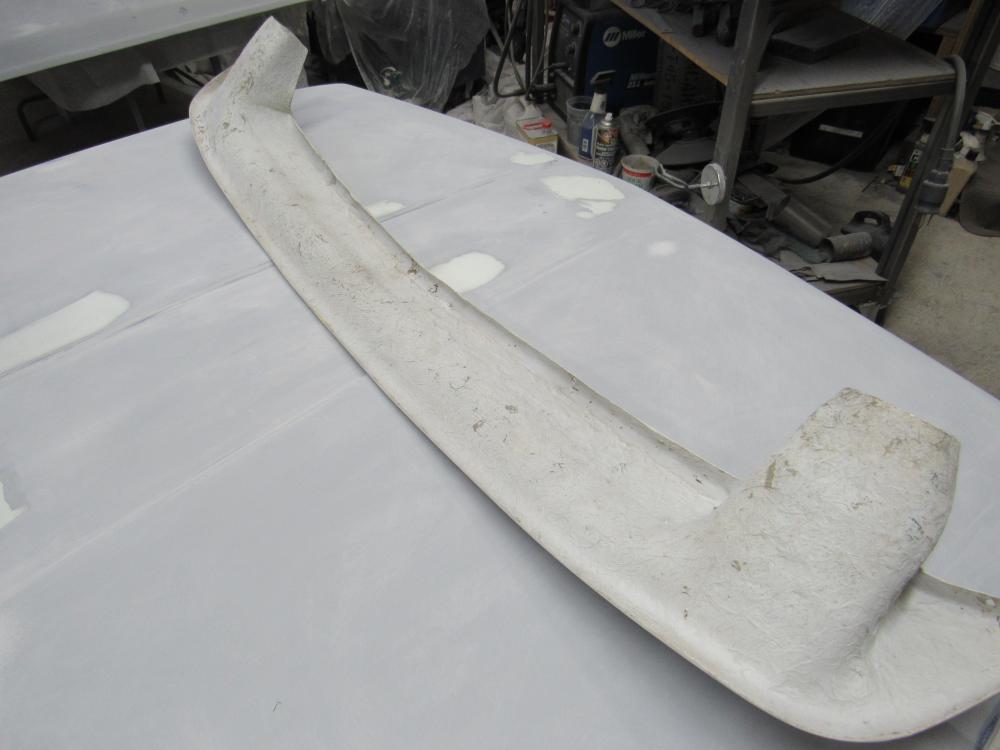
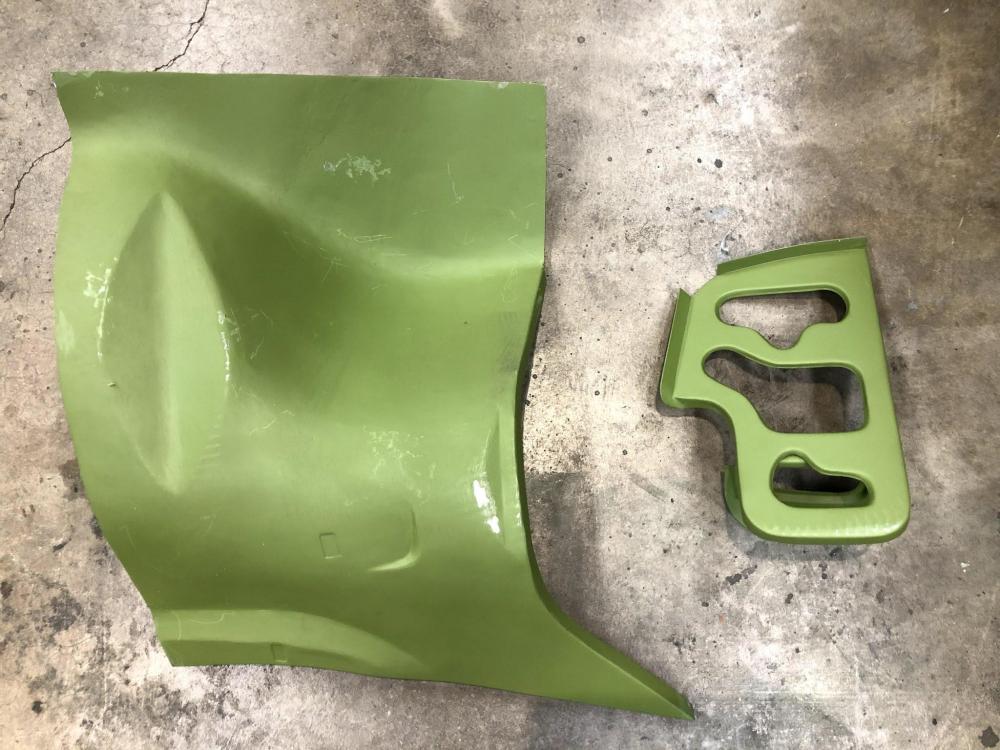
1 pointIt's a spoiler I bought used from http://www.new-datsun-parts.com/datsun-510-parts.html With the valance off the car the spoiler doesn't seem to fit very well but the valance does get bent into a more curved shape when mounted so I'm hoping it fits together properly when mounted. I thought perhaps it was for another car but it does look the same as pics I have found on Google and the vendor says it is correct for a 510, besides, I don't think I have ever fit a spoiler that actually just bolted up easily.


 1 point
 -
One of the chaps in the UK dropped one into his Z - it’s an ABSOLUTE monster!!!!!! Such a sweet sweet engine!1 point
-
1 pointYou cracked me up! I had the exact same conversation in my head too!!! I figured “secondary” would just cause confusion ;) Maybe top dog and underdog!?1 point
-
 1 pointTo me it will always be master and slave. But for the overly sensitive types, perhaps primary and secondary, or actuator and actuatee, or . . . . . . . . . . . nah, screw it. The thing that forces the fluid is the master, the thing that responds to the fluid pressure the slave.1 point
 -
1 pointGet the afr closer first. Which scenario is actually running less spark advance, 1 or 2?1 point
-
 1 pointVac hoses have to be equal length. That’s about it. It’s an odd shape, but I want to use it since it’s cool and vintage.1 point
 -
1 pointTo add my two cents: I ABSOLUTELY LOVE my Fidanza flywheel and exedy clutch! I think they do a great package on eBay but just check you are getting the right one for your car ... https://www.ebay.co.uk/itm/EXEDY-CLUTCH-KIT-06029-w-FIDANZA-FLYWHEEL-for-70-75-DATSUN-240Z-260Z-2-4L-2-6L-/324528069103?_trksid=p2349624.m46890.l49286 And I have to echo the sentiments - replace all the bits that wear out and you’ve done it once!! Having said that, I didn’t replace my slave cylinder as I preferred the original part to the new one I had bought! Somehow it felt better built. We’re no longer allowed to say “salve” cyl are we? What is the new correct phrase?1 point
-
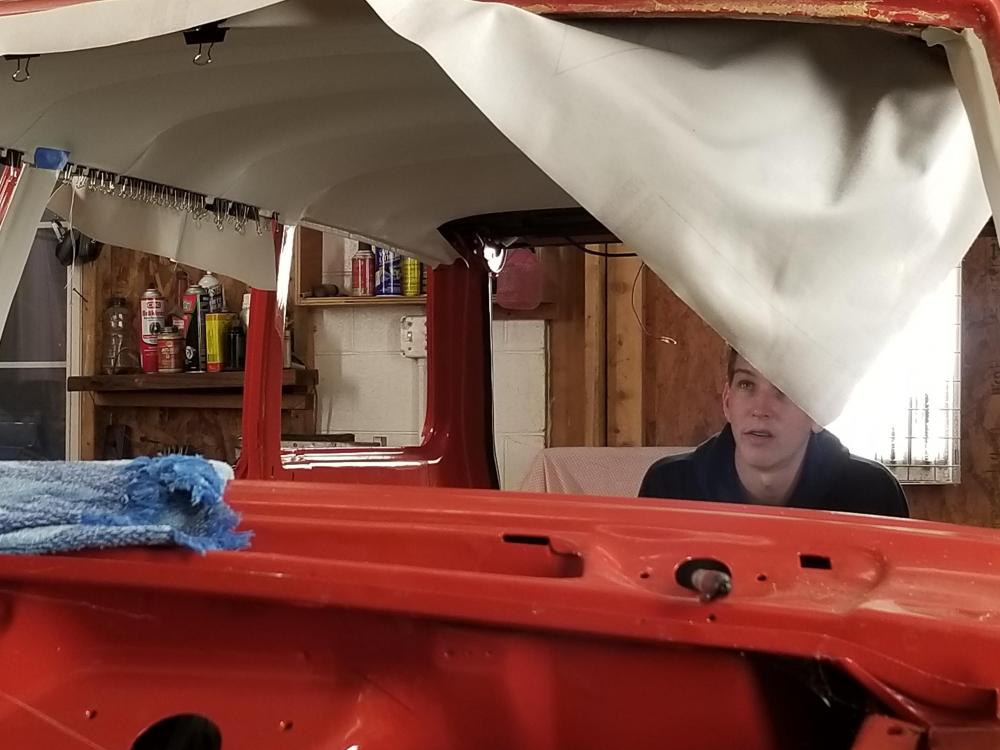
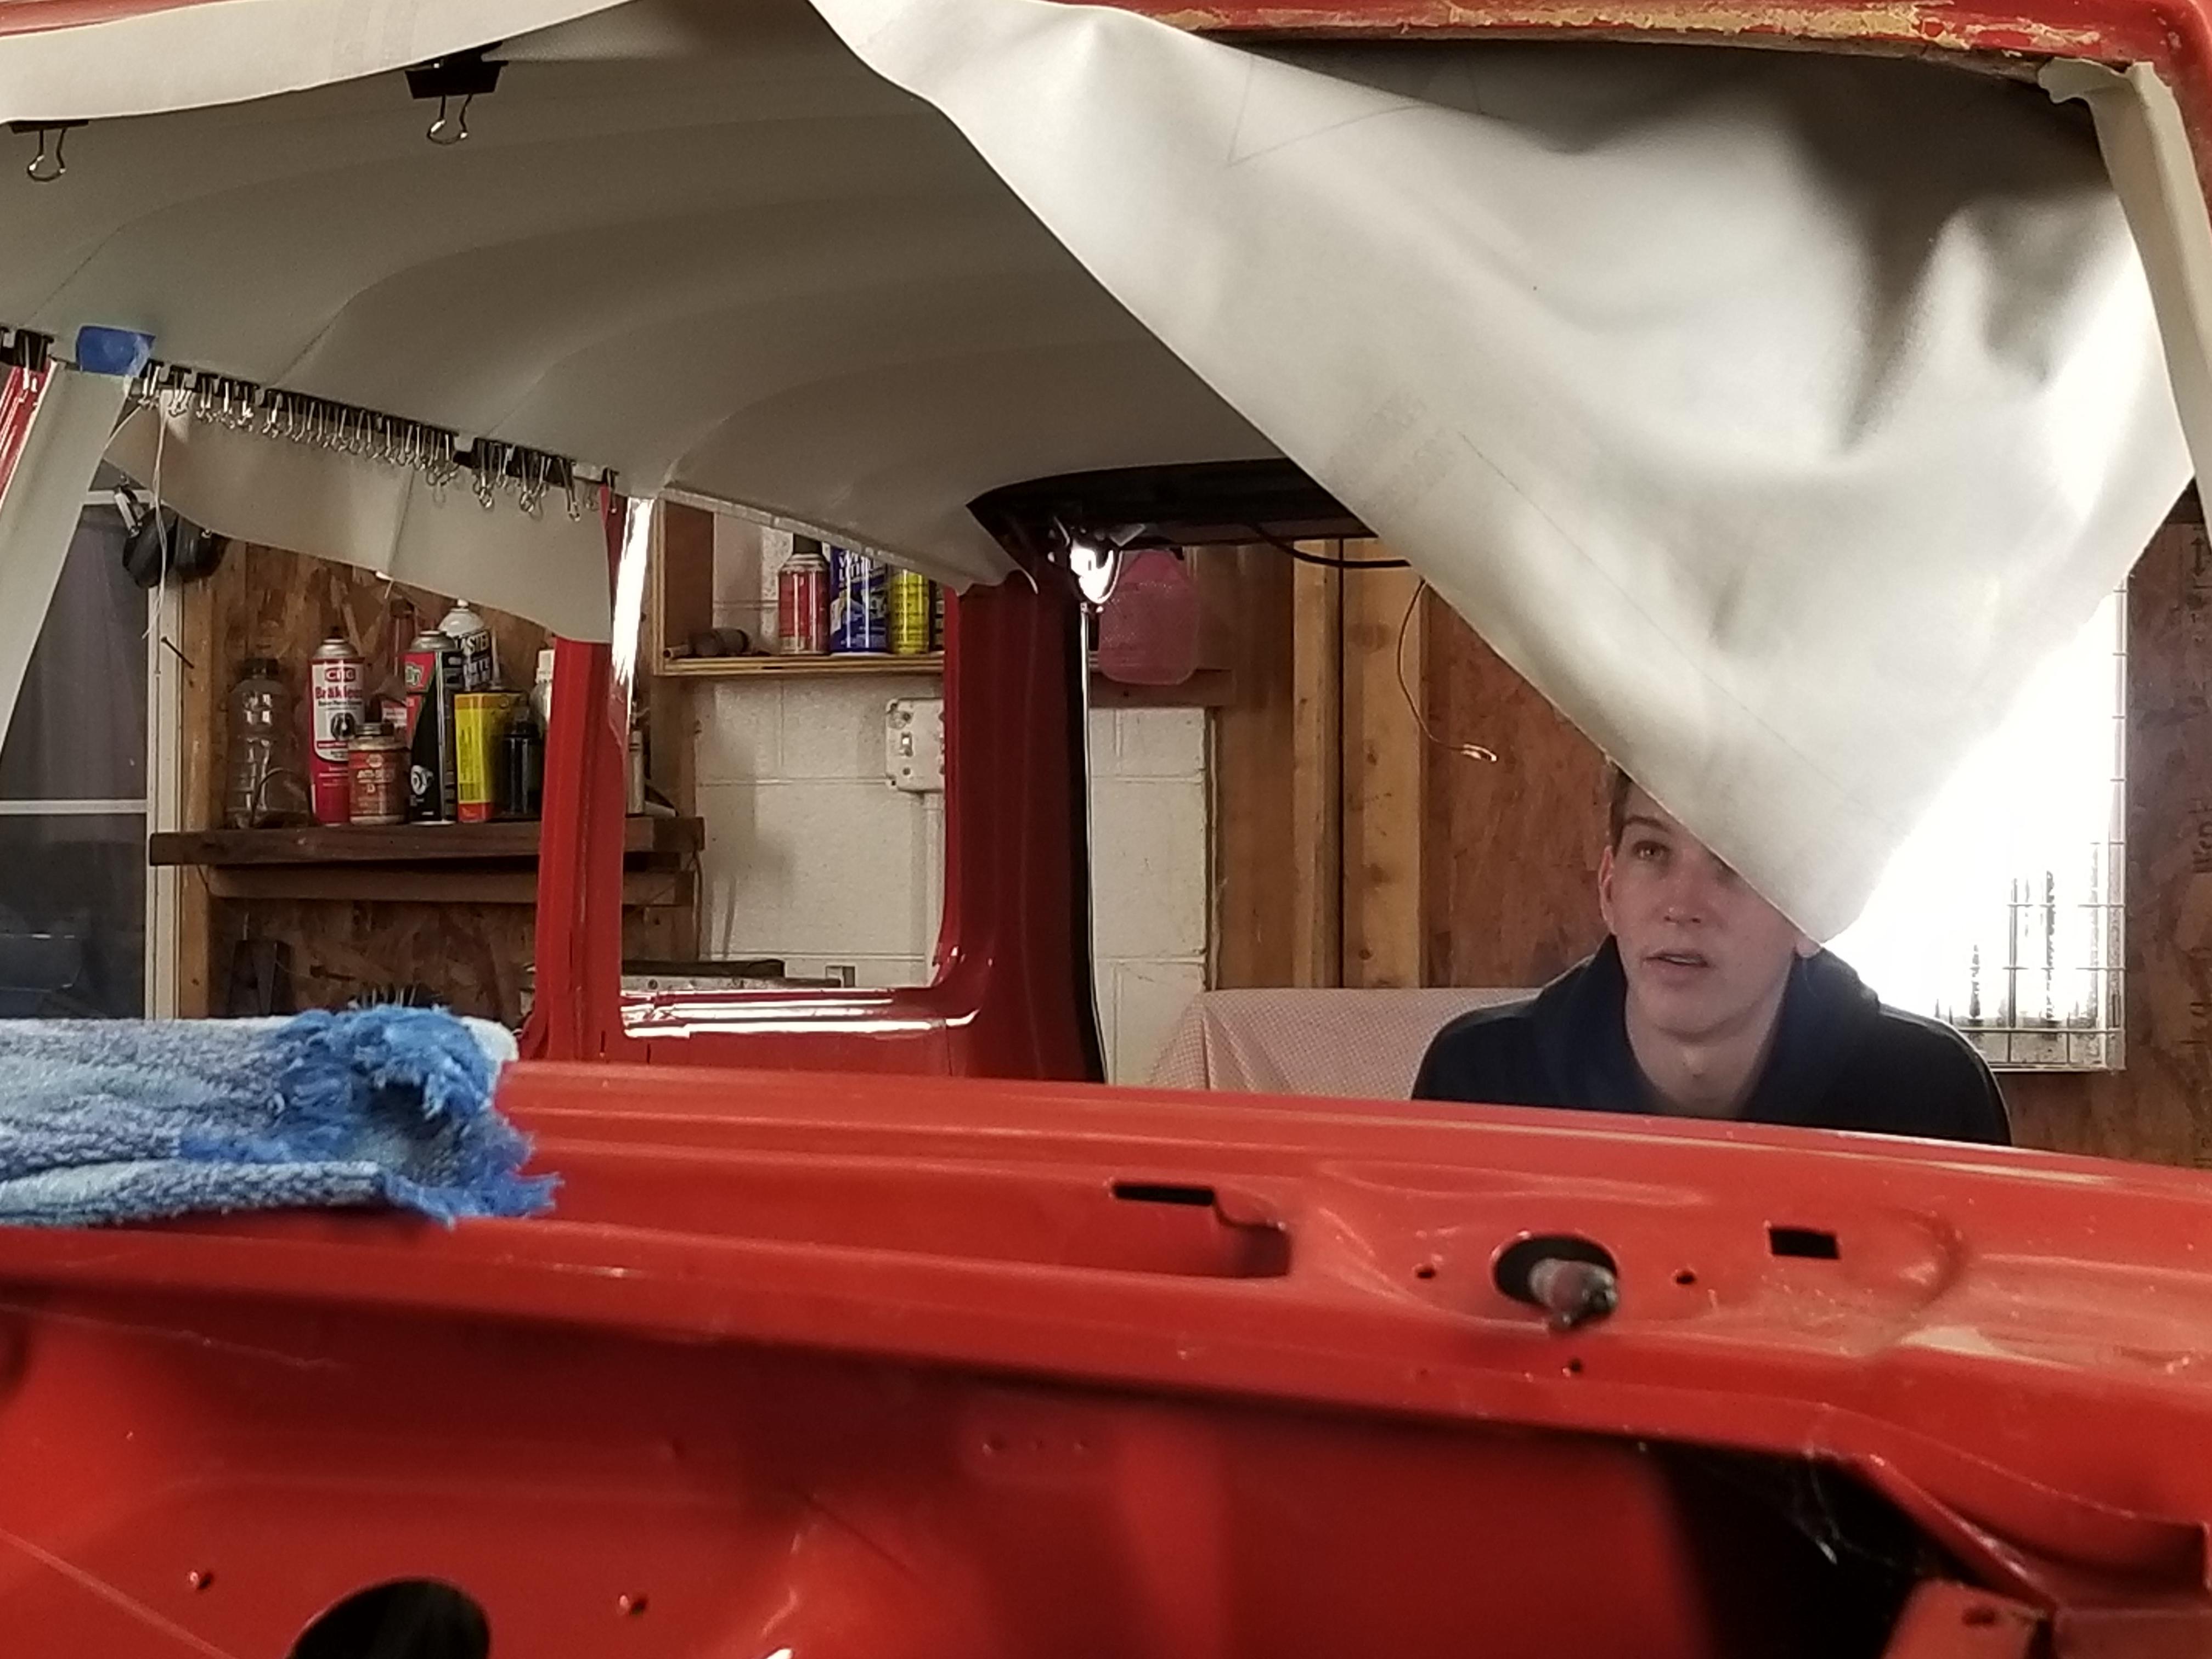
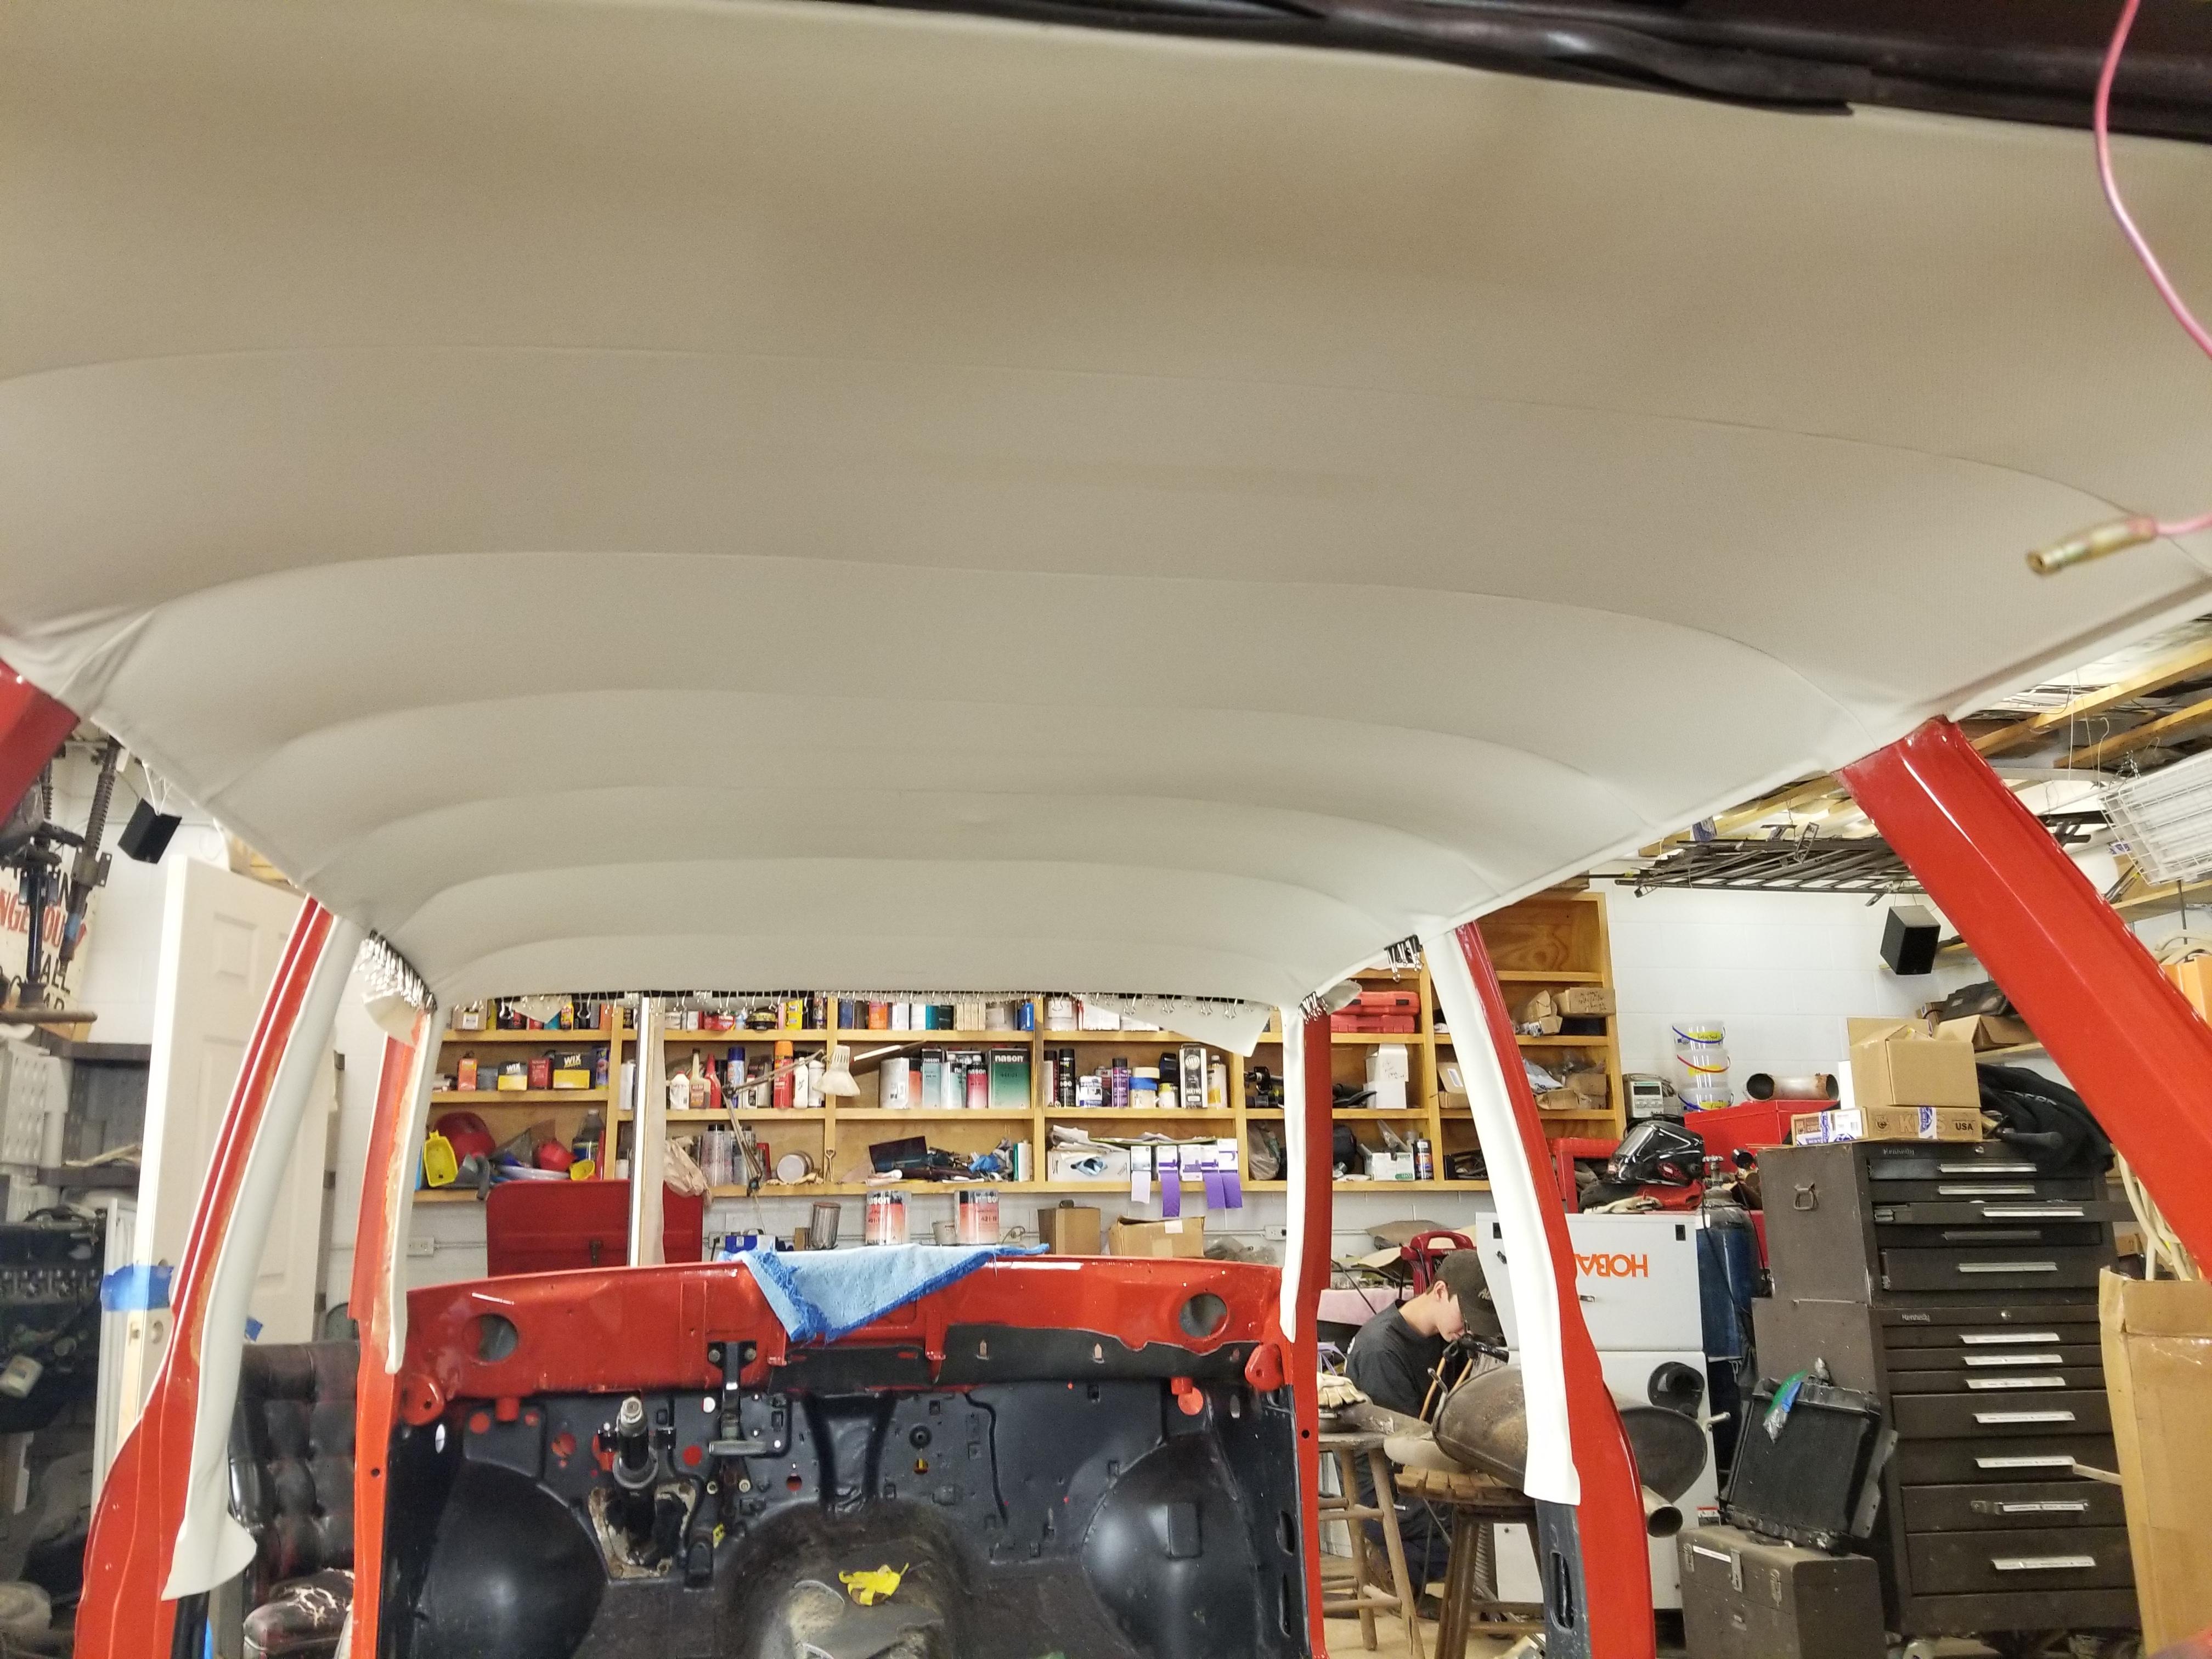
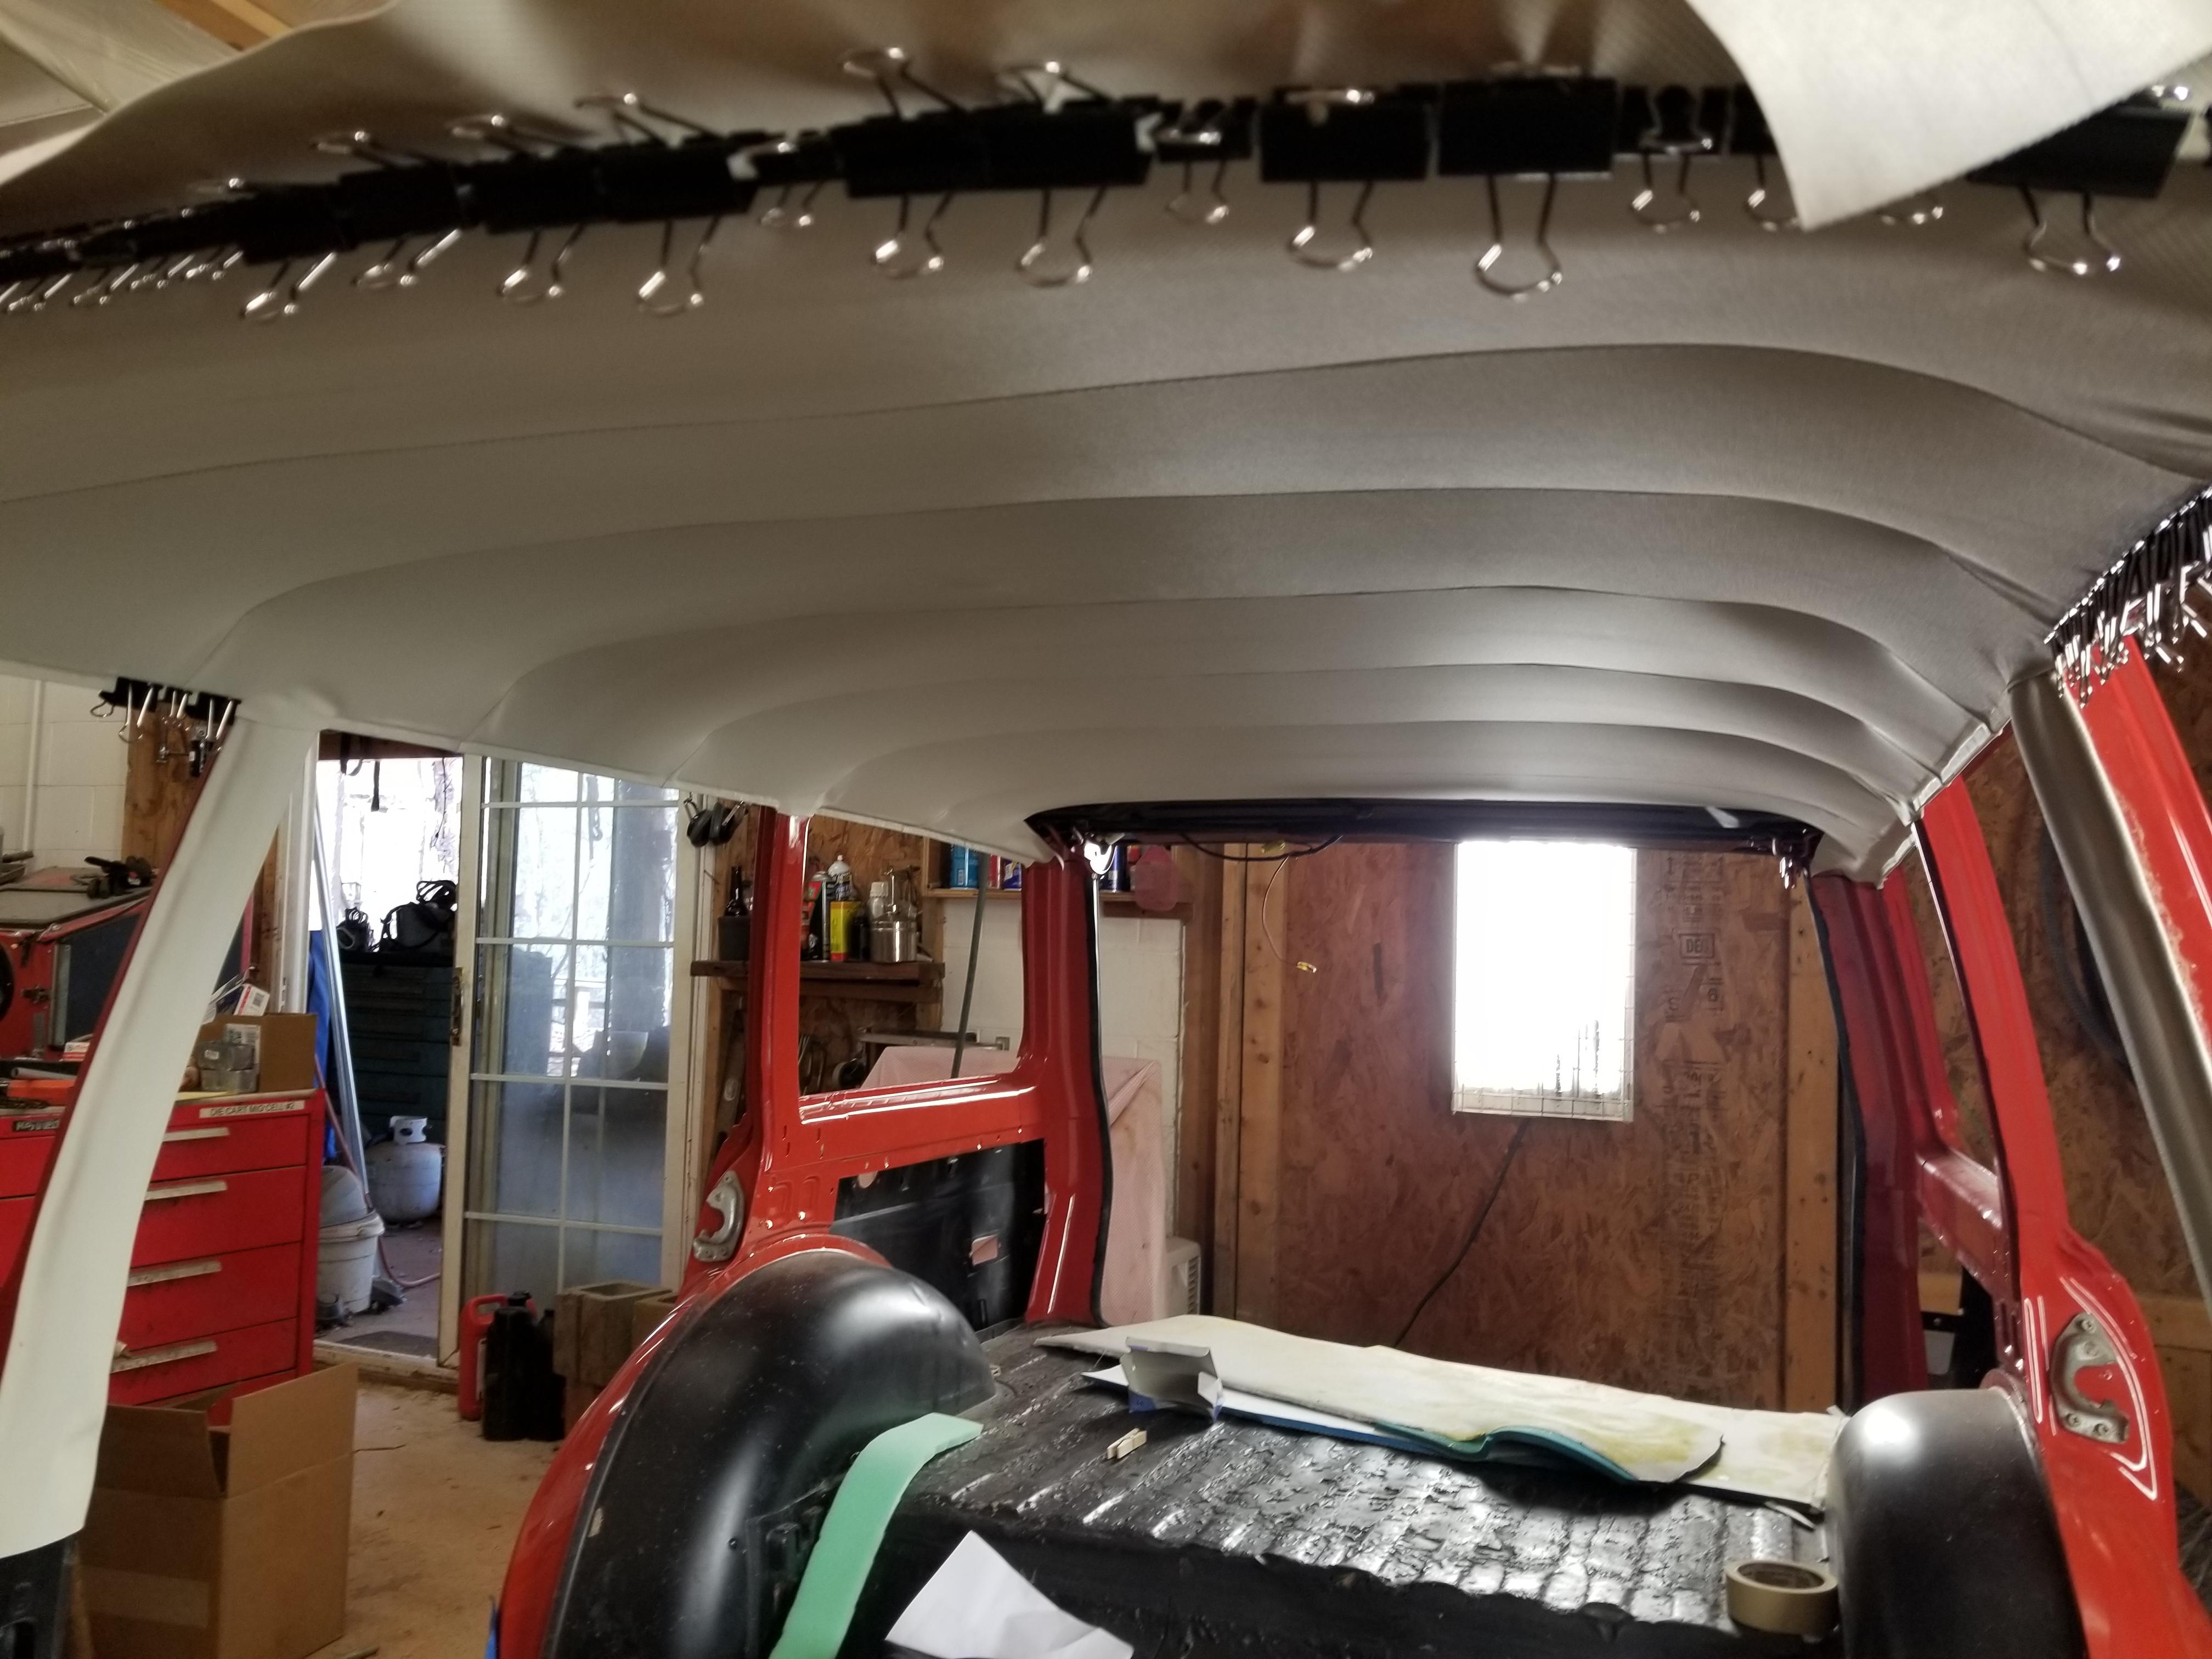
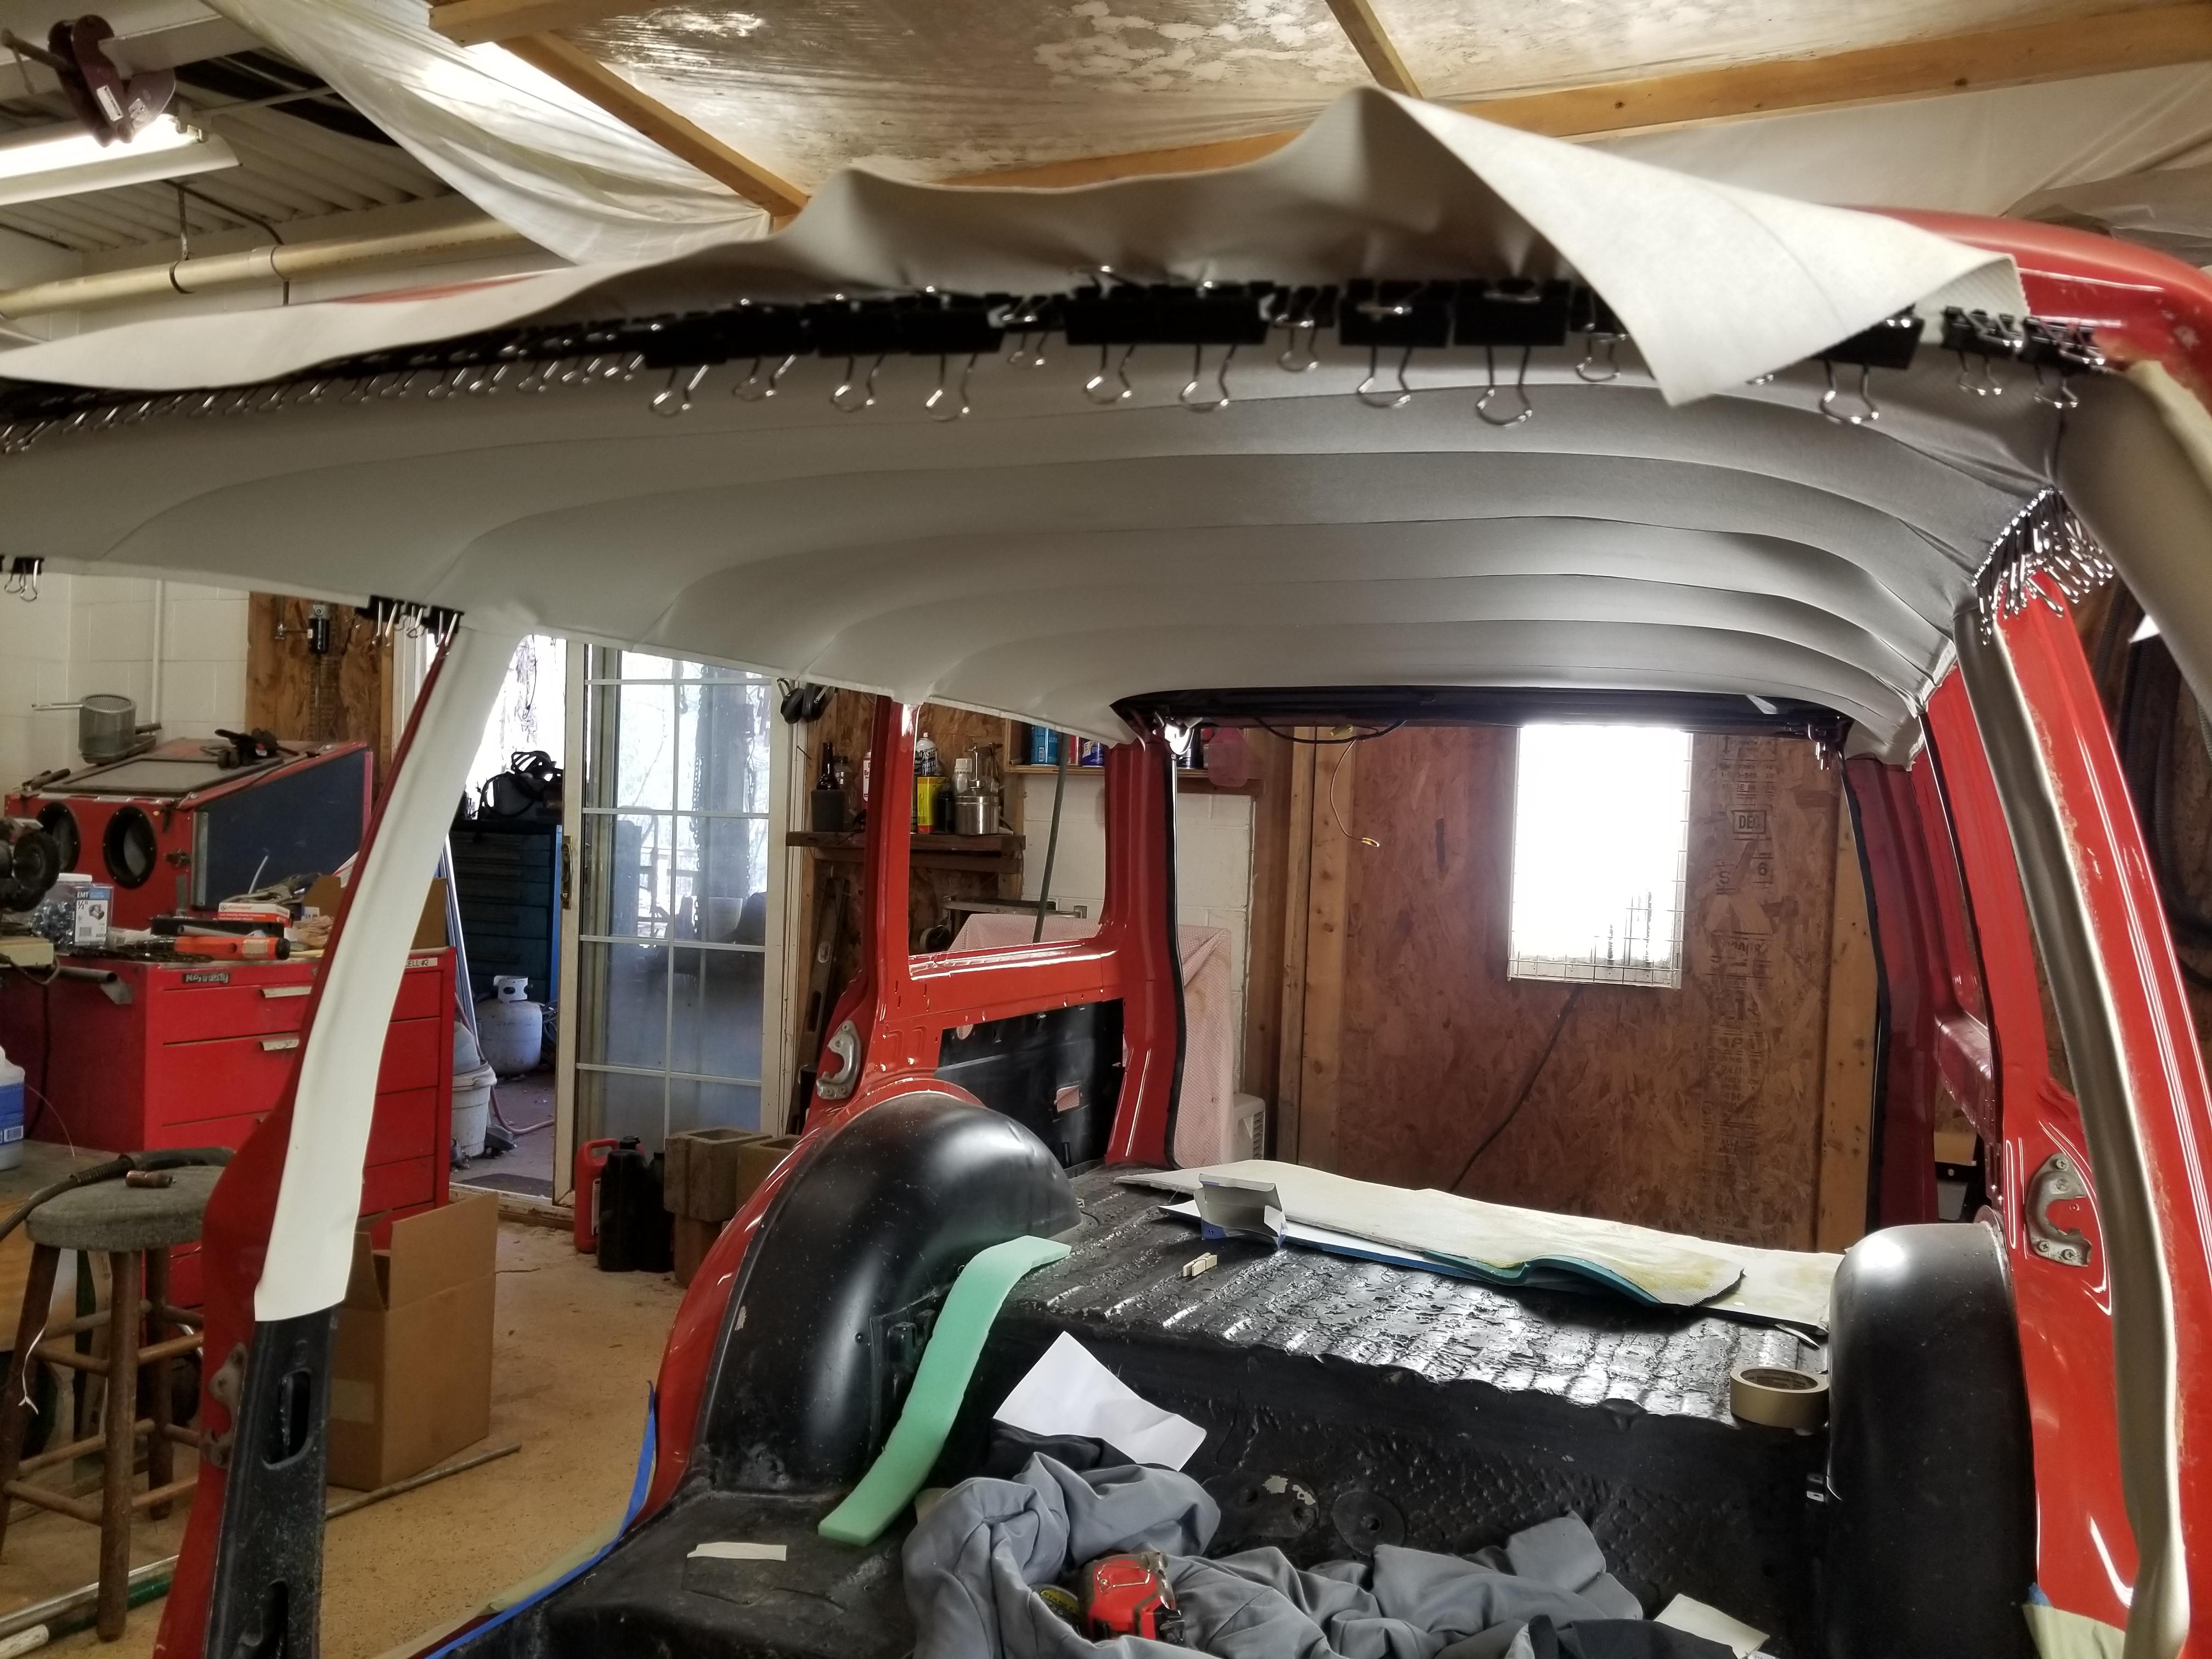
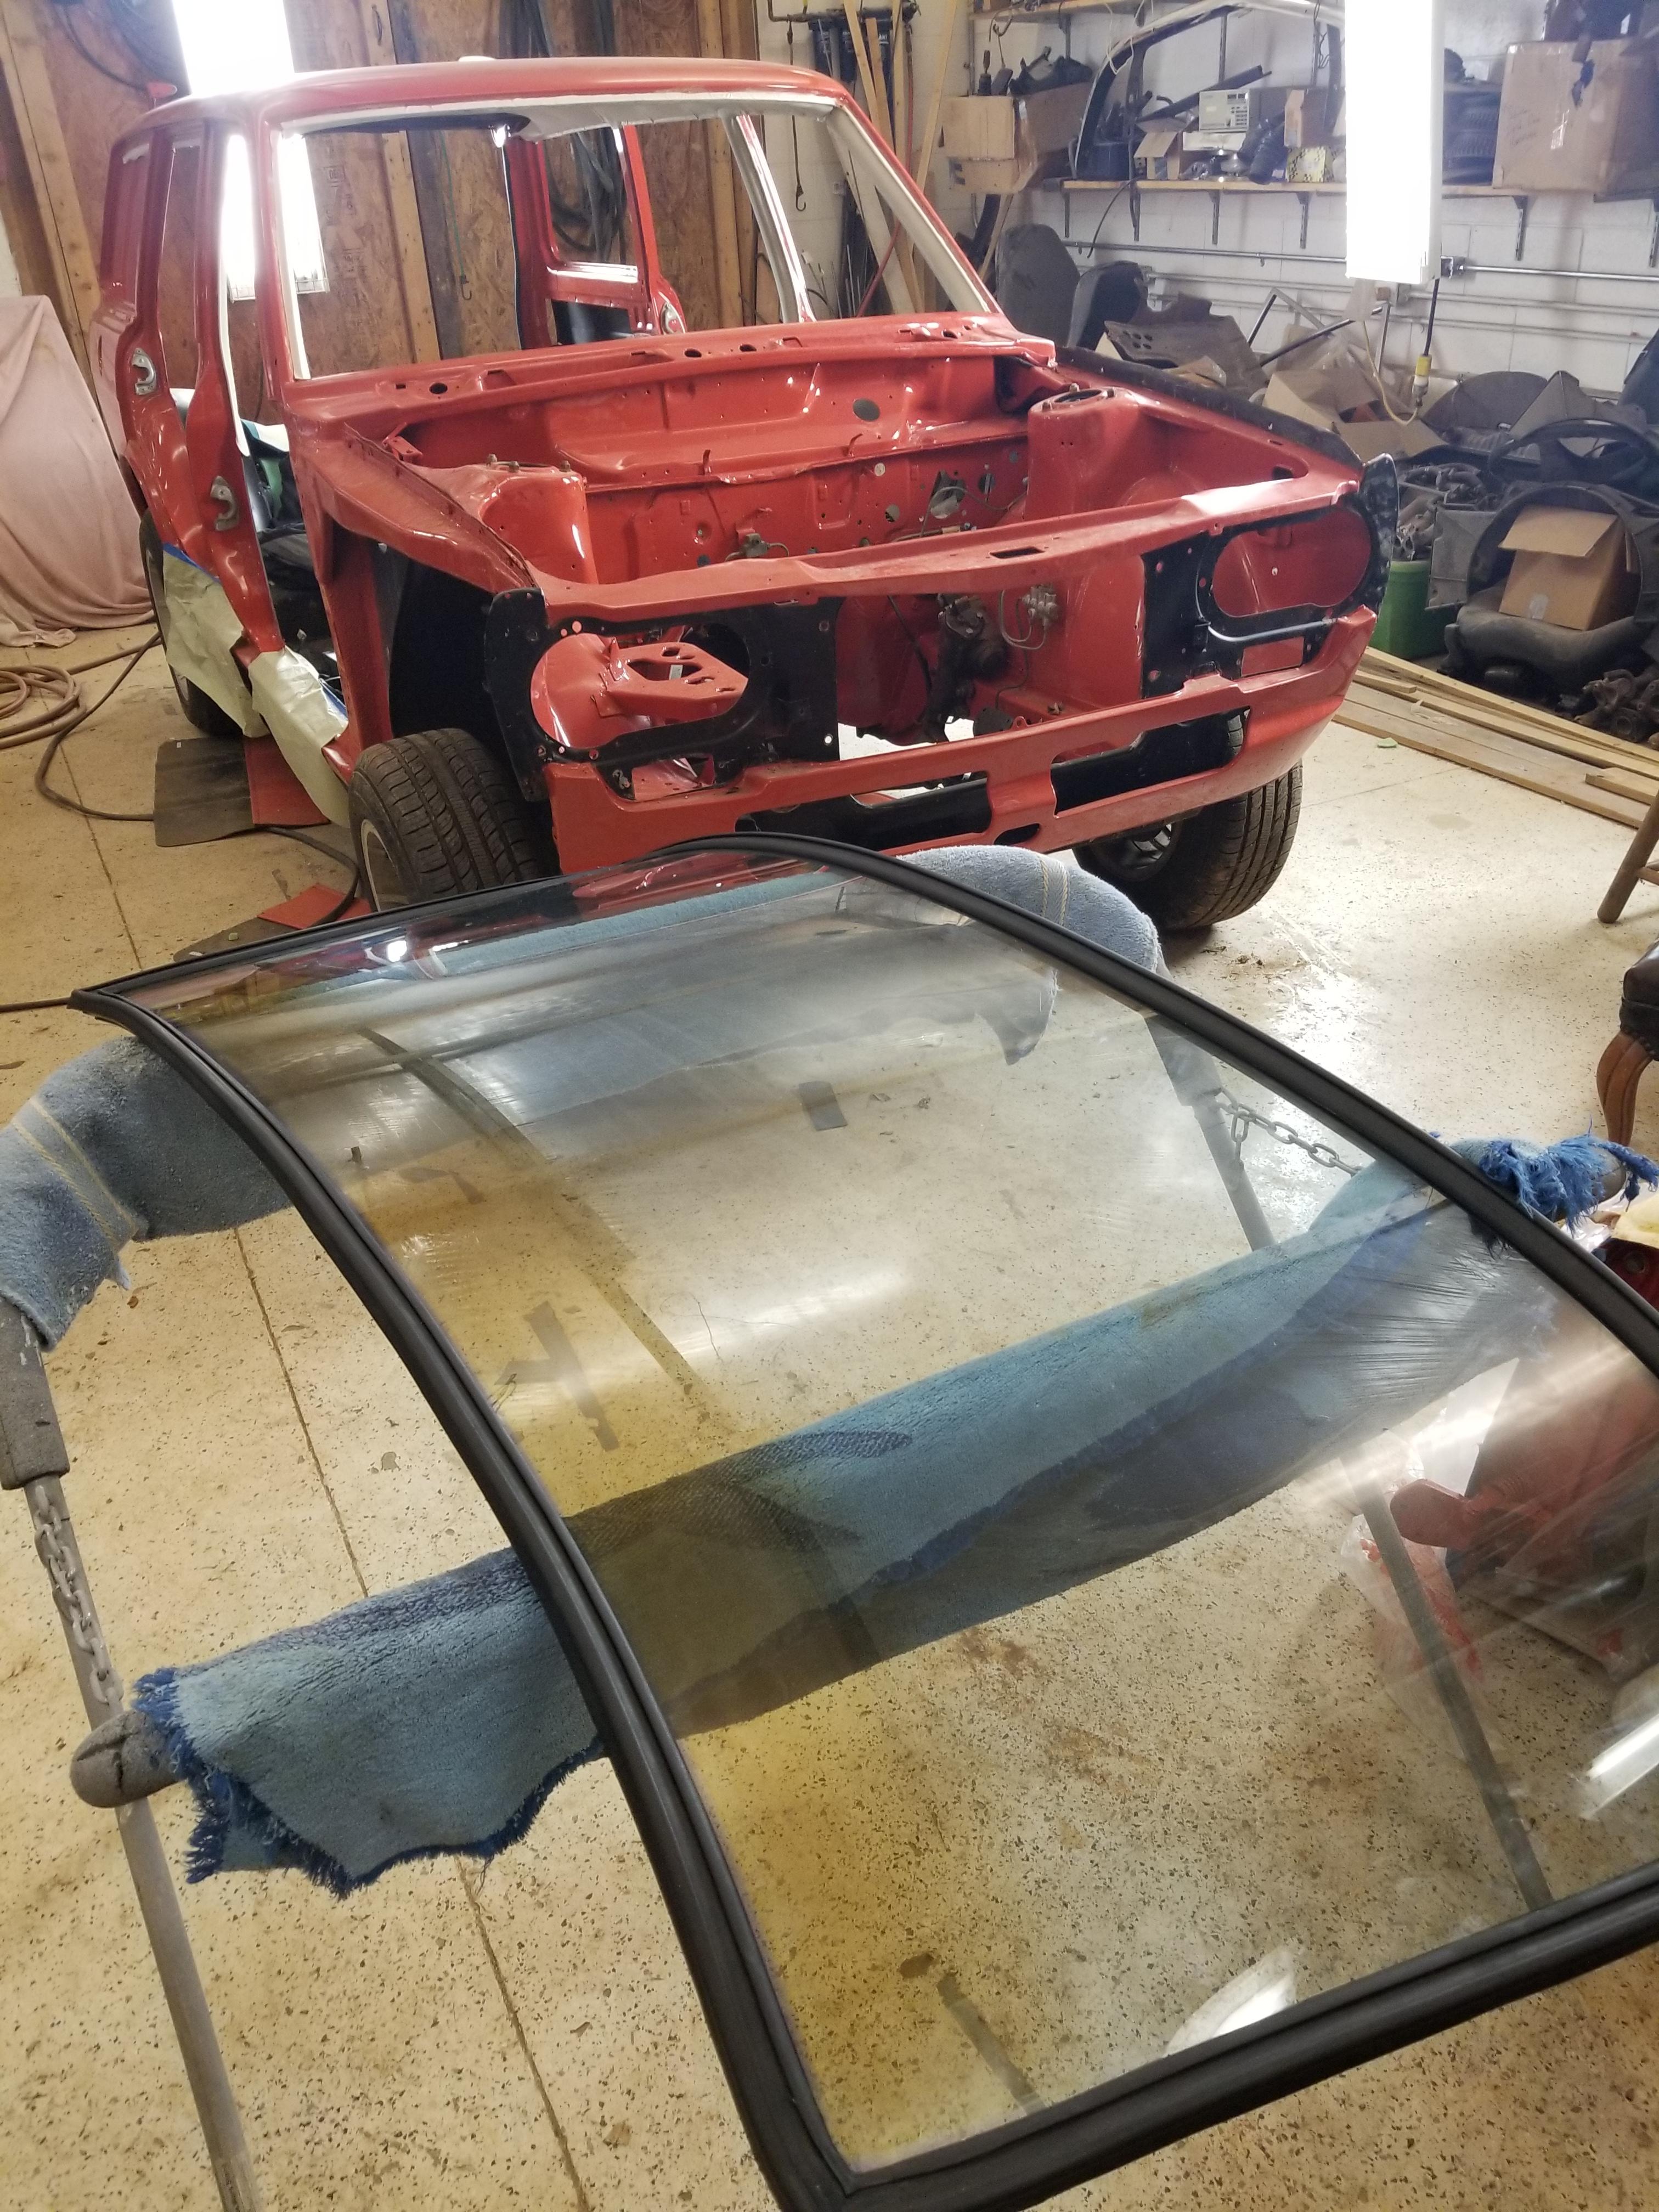
1 pointSo let me tell you a little story... Some time last summer, maybe June, we had a professional uphostery shop do Cody's headliner. They did a wizz poor job! Headliner made from scratch. Fabric was too thick, seams weren't great, sloppy install. It took forever for them to do it. Then we took it back to have them work on some problem areas. A few weeks later the glue was all letting loose. Panels all starting come loose around the window frames. We just cut our loses... So I ordered a headliner off Ebay. It came in. We strung it up but it was too small. So I sent it back. I bought one from Goliners on ebay. Jim is good to deal with but again it was too small. He told me these were made off of the factory template. Instead of sending it back again, I found a source for the same fabric and Shelley reworked it for me. Now the problem with this is, we don't have a commercial sewing machine. That makes it hard to feed through the machine and prevent slippage and such. Overall though it came out good. The problem we ran into was two fold. The wagon has a piece of metal at the rear of the roof and I'm pretty sure the headliner is supposed to wrap up and over this piece of metal. When I did that with the Ebay headliners, I would lose about 5/8". Then each panel of the headliner should be 11"s but the ones I purchased had random panel sizes 10 7/8, 10 5/8, 10 1/2. All these errors compound and when you get to the front of the car, you're an 1 1/2 too short. So we remade the panels we had too and Cody and I started the install maybe 3 weeks ago. We would have to do it in short sections and it takes a while for the glue to tack up, especially when it's cold outside. I used the Weldwood contact cement. The yellow 272 stuff I believe. I will run you out if your work space isn't ventilated, but it holds really good. We started with the A & B pillars. I wrapped them over a little foam. Then when the headliner crosses them we folded a hem. We started at the back with the headliner at the metal flange glued it and stretch it to the side to tension it. Then we put all the meatl bows in and got them vertical. Lots of metal clips along the edges. We worked out way up the sides of the car. The front was also clipped and stretched. I had problems when I got to the front. I had wrinkles I couldn't get out. So I had to pull the drivers side above the front door loose and rework it to pull the excess out. To be my first headliner with bows, I think we did ok... Now that the headliners in we have started working on glass, to make it water tight. Then I can kick his car back out of my shop and move "Lily" back in We had a Datsun guy tell us one time, if we bought a headliner off Ebay we would mess with it for days, mess it up and then buy another one and take it to a professional... Pfffftt!! Nope, you can do it if you take your time and don't get in a rush and it might even be better than the professionals!!!


 1 point
 -
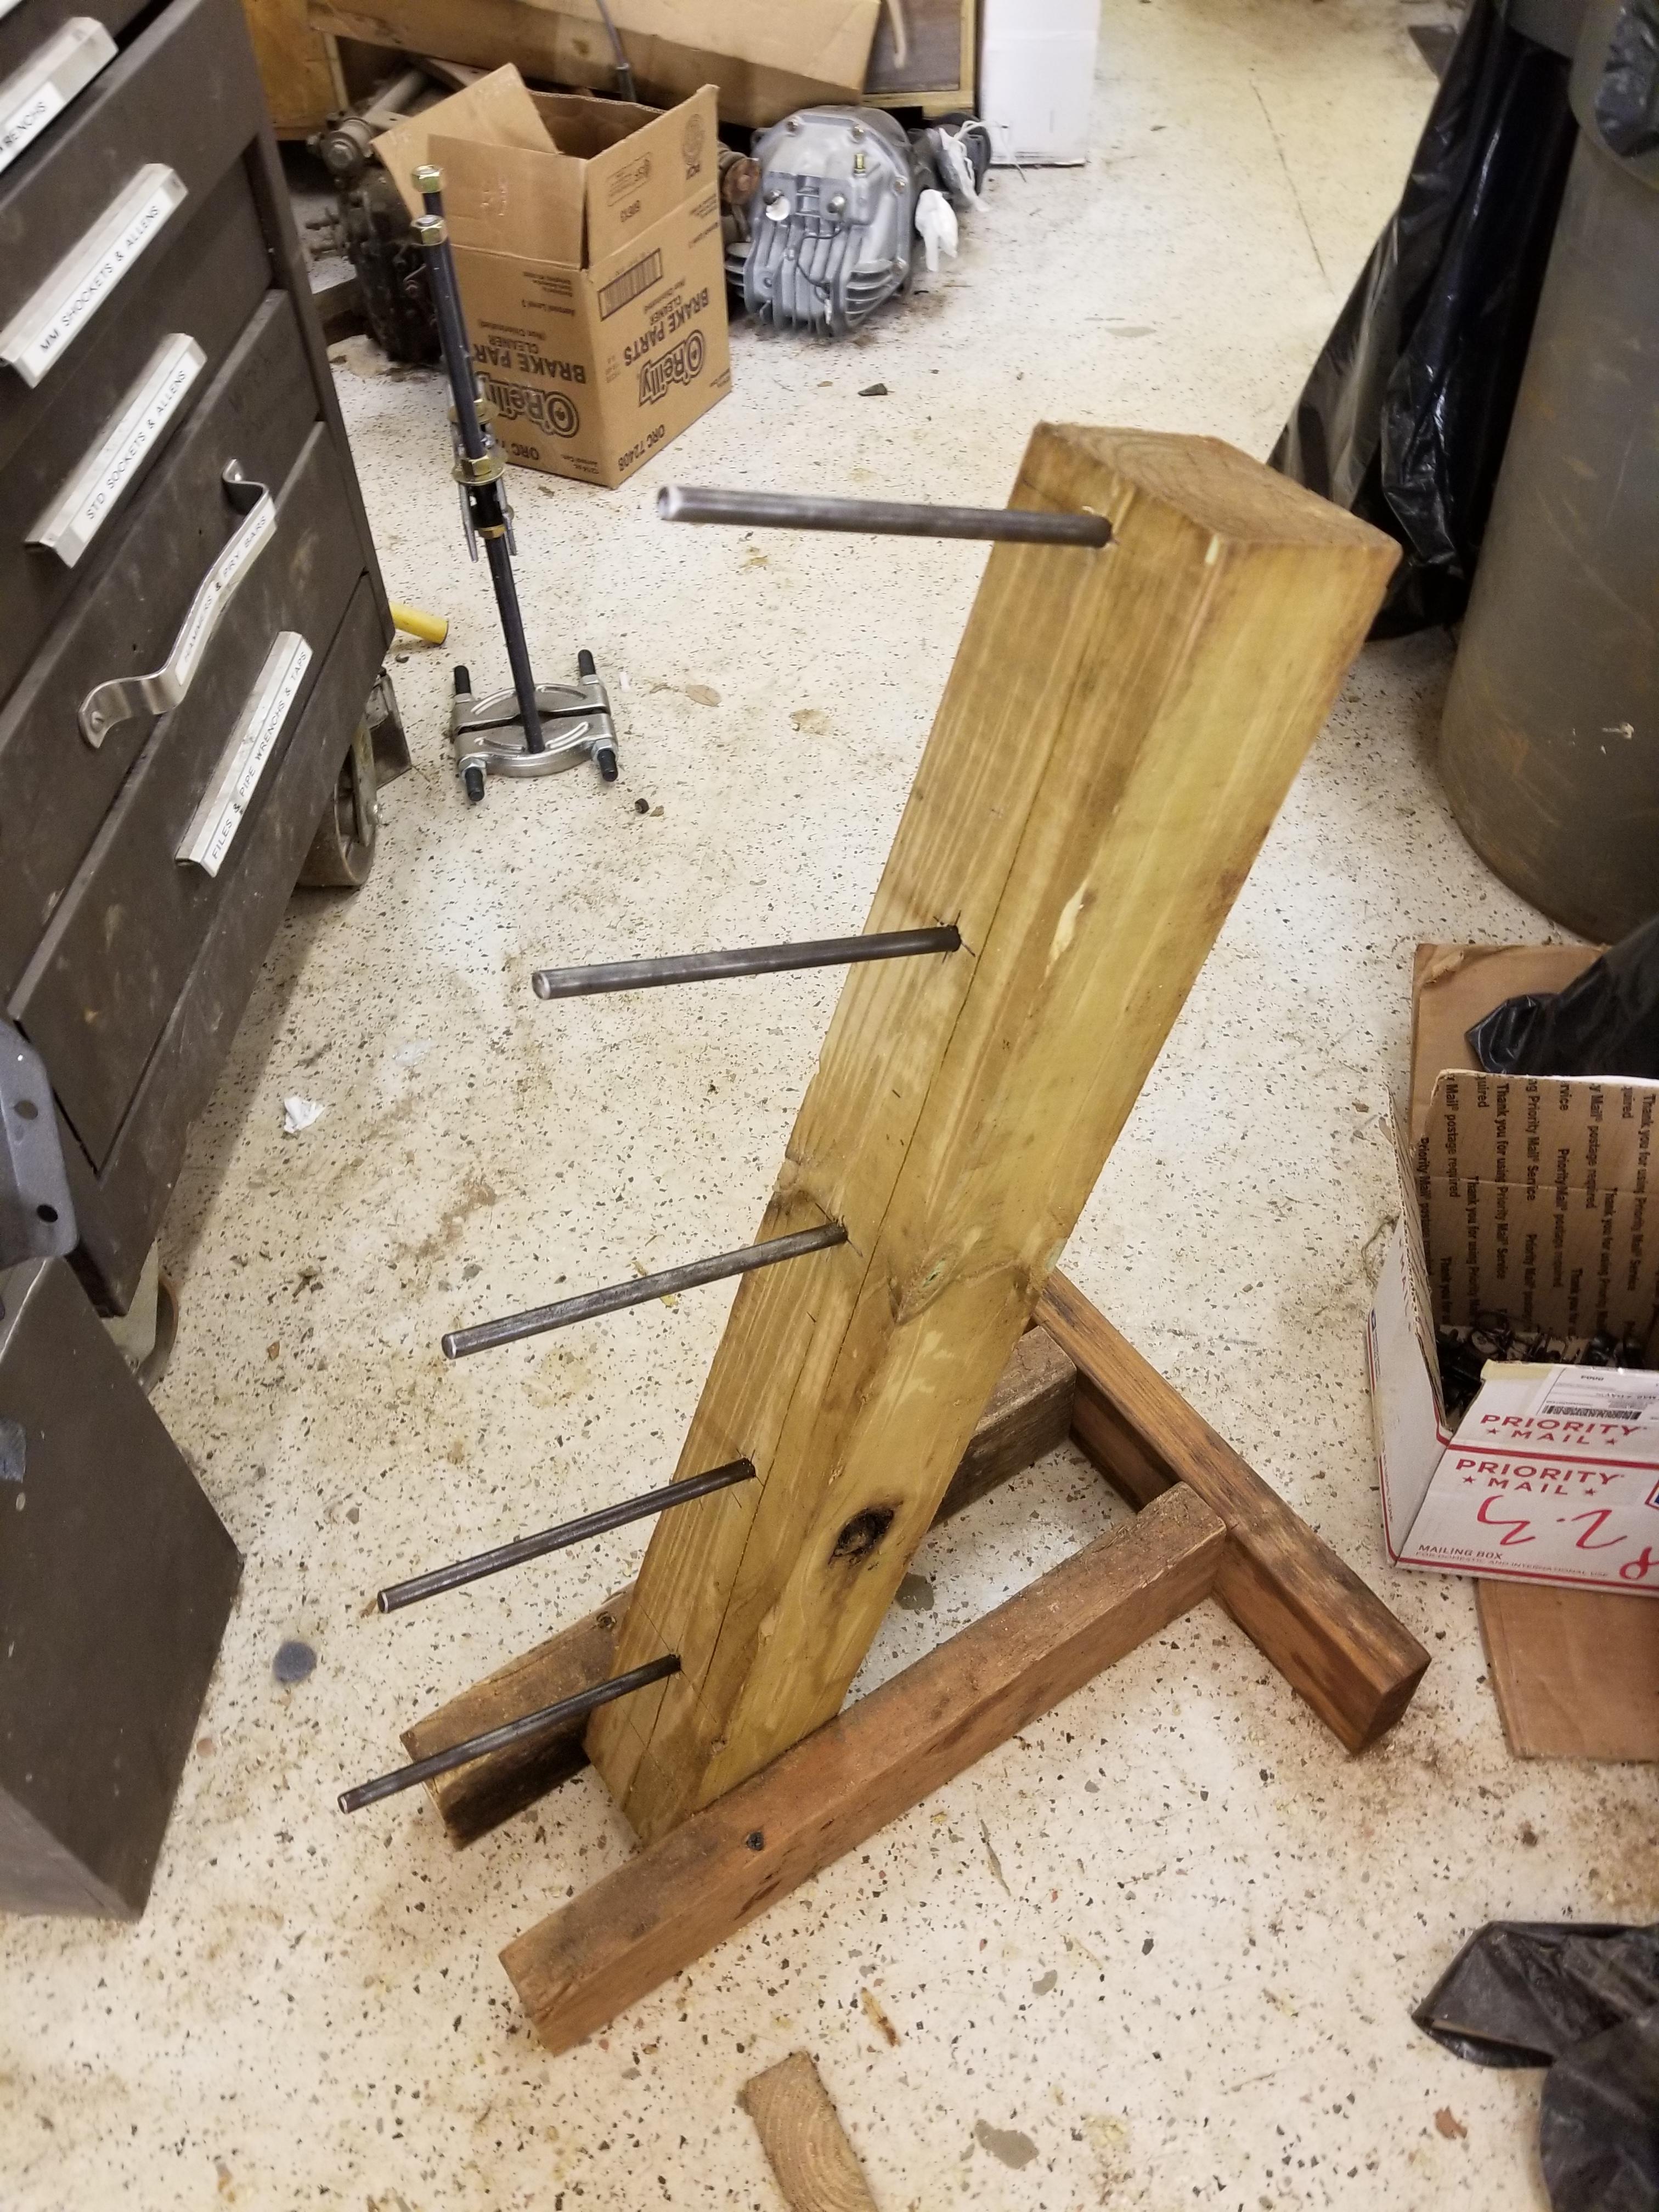
1 point@EuroDat Chas, I have been unable to locate a replacement reverse idler. What steps do I need to take to make this more serviceable? We also started tear down yesterday. I built a gear tree out of some material we had laying around
 1 point
 -
 1 point
 -
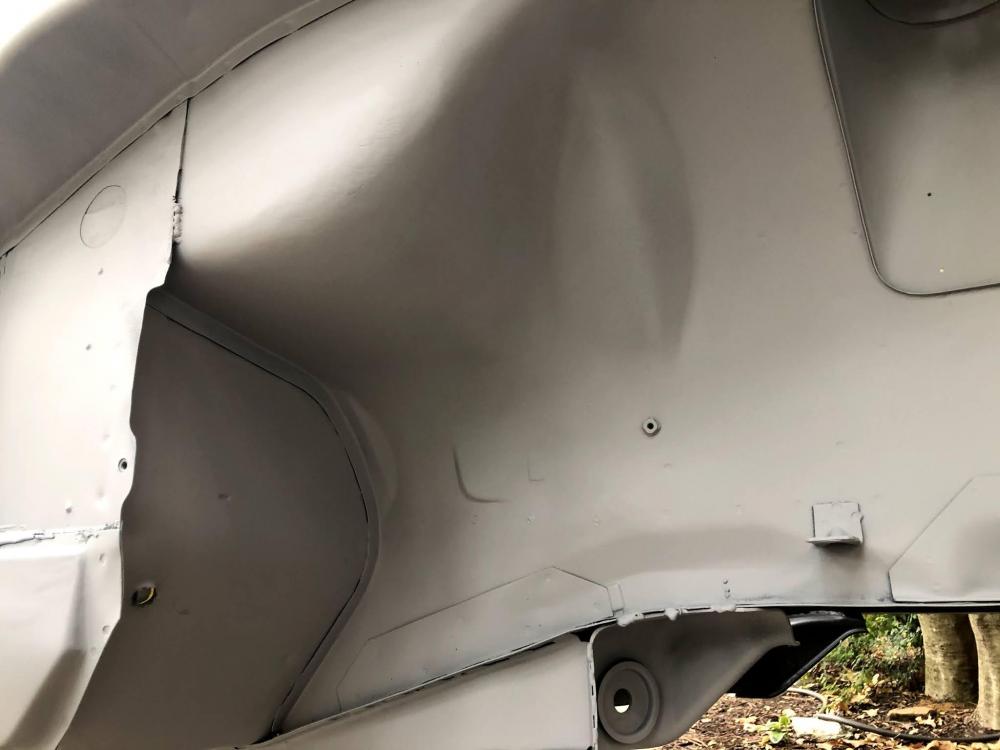
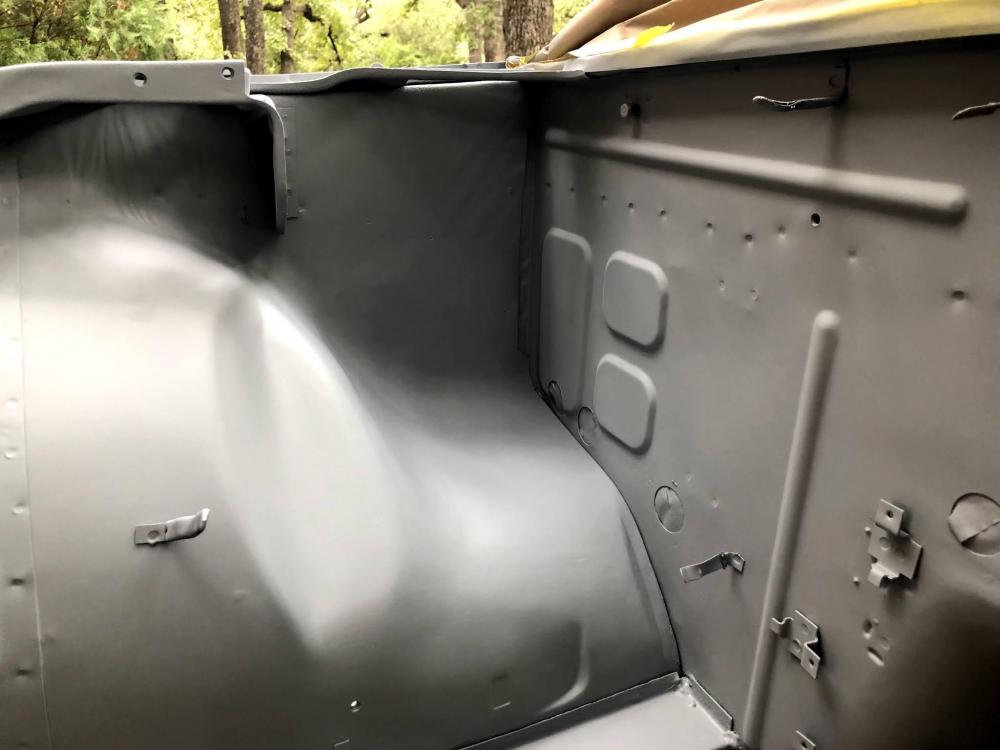
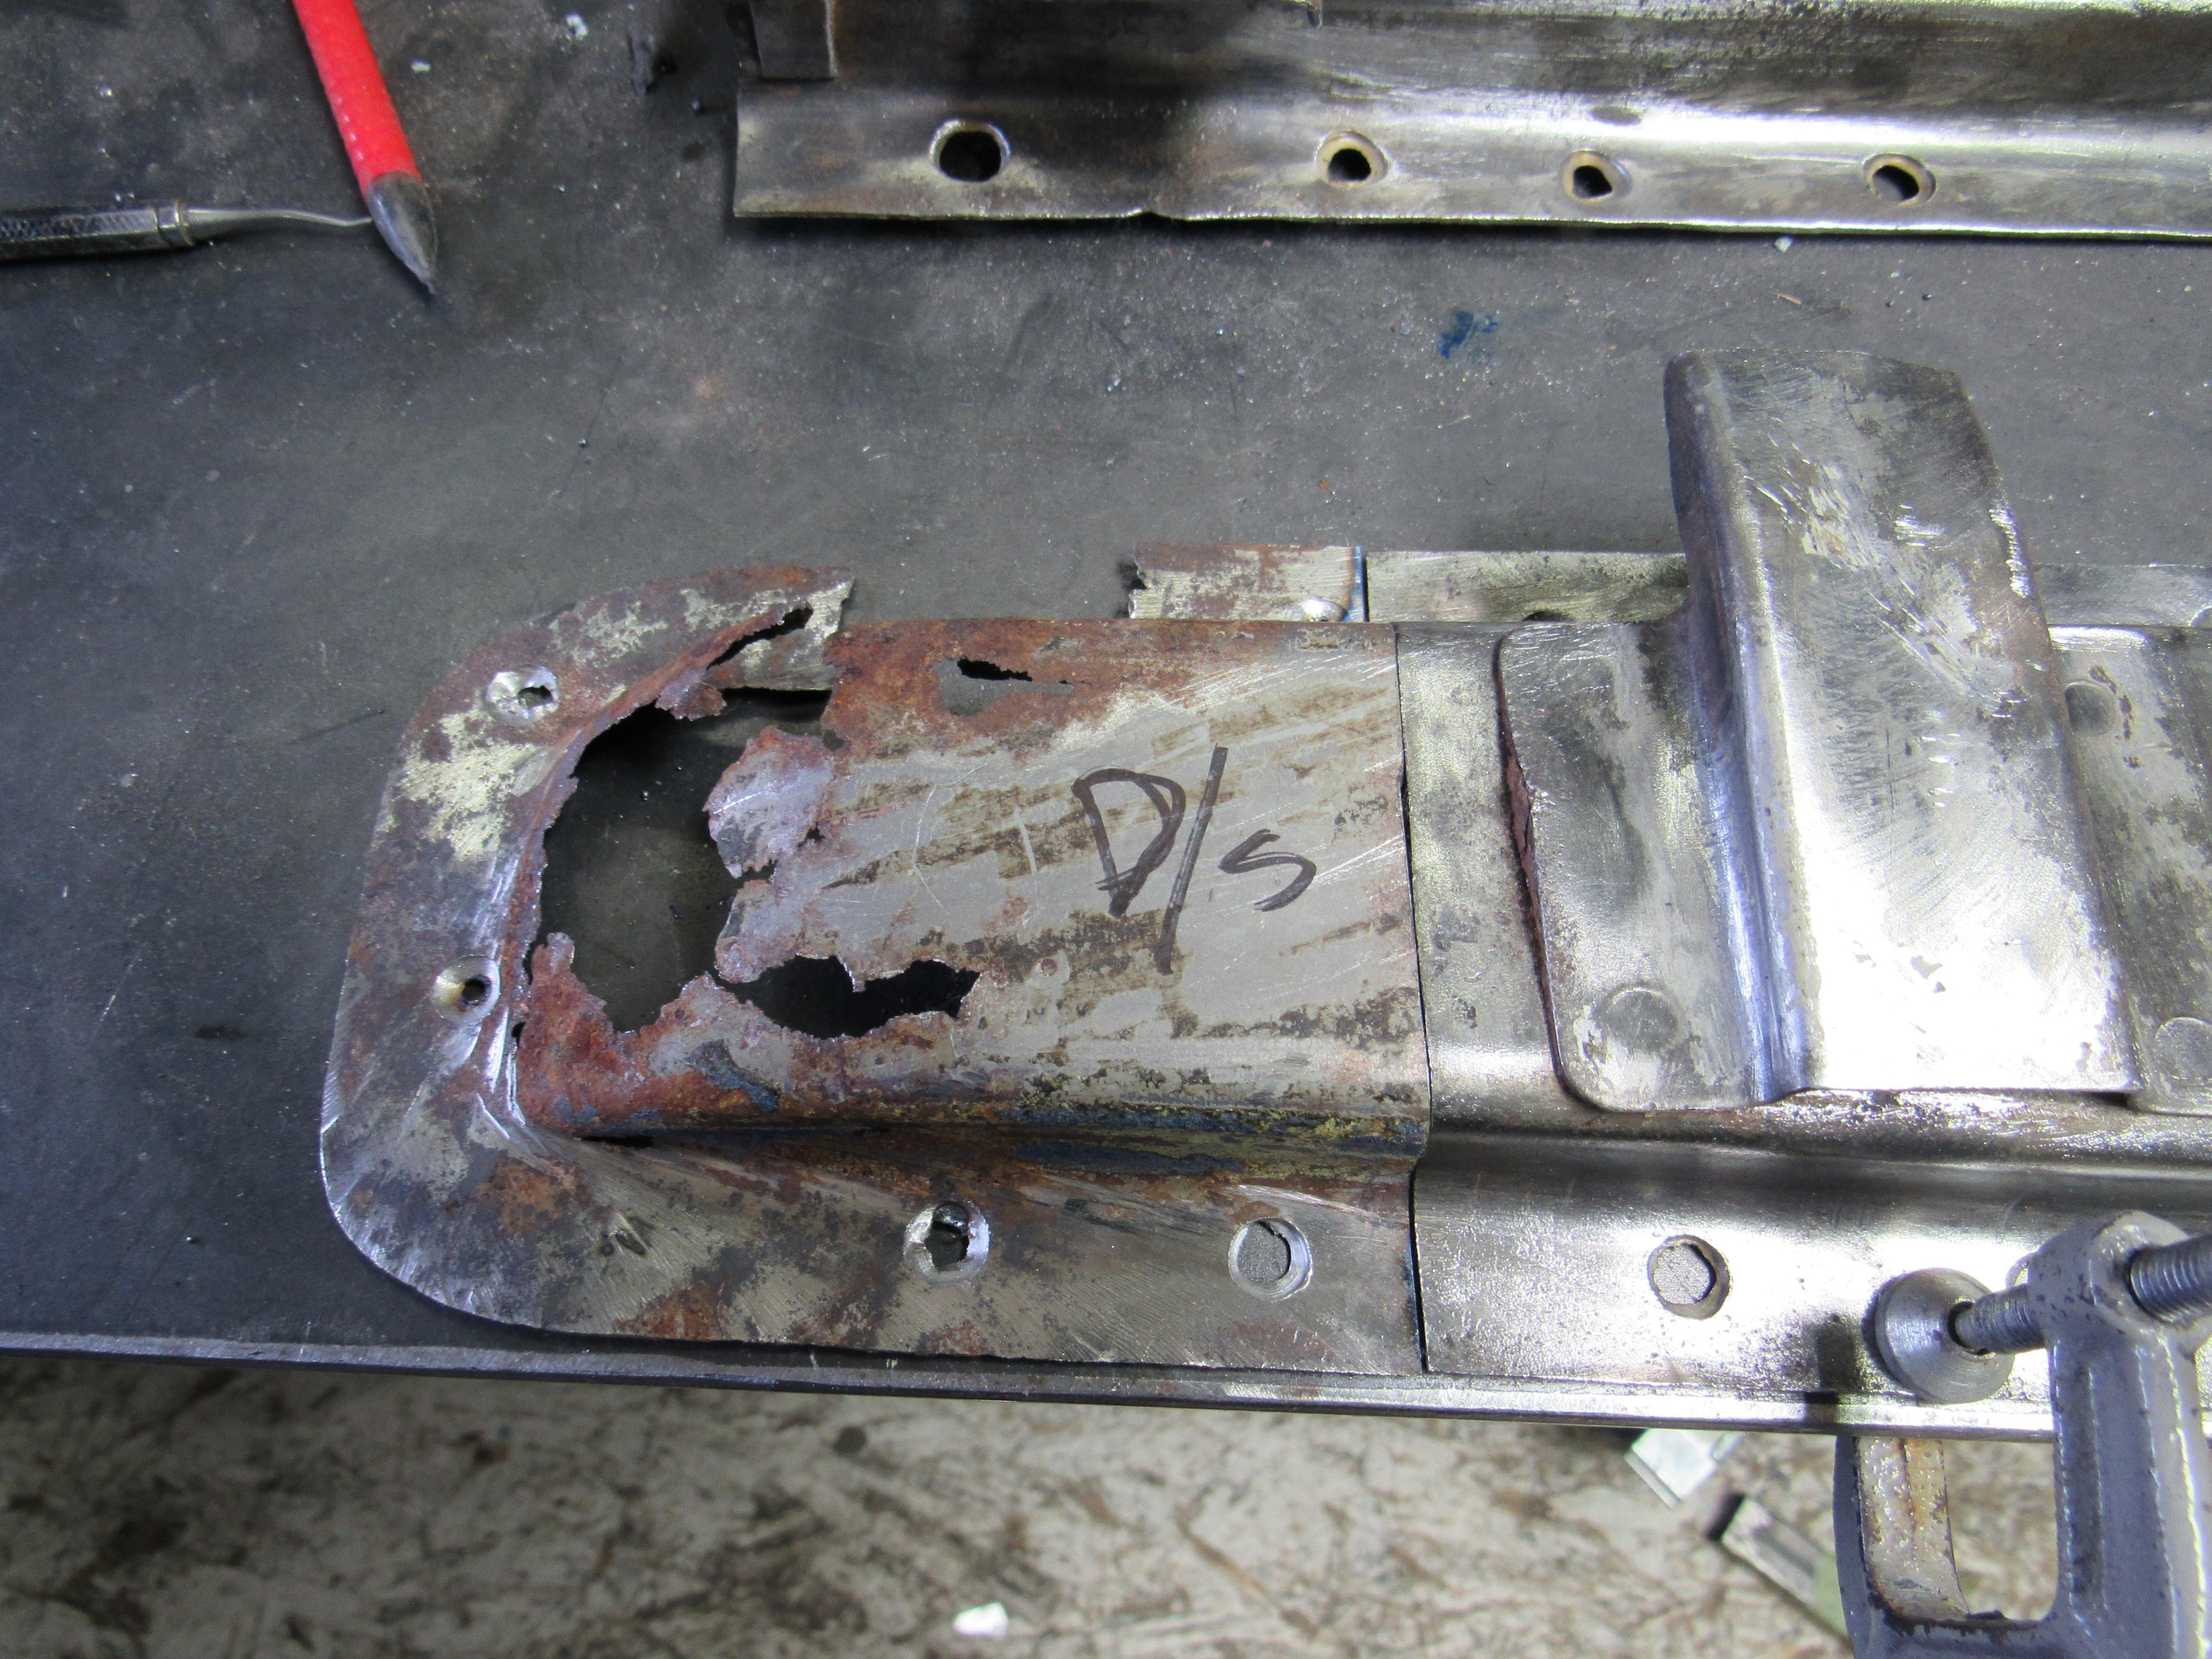
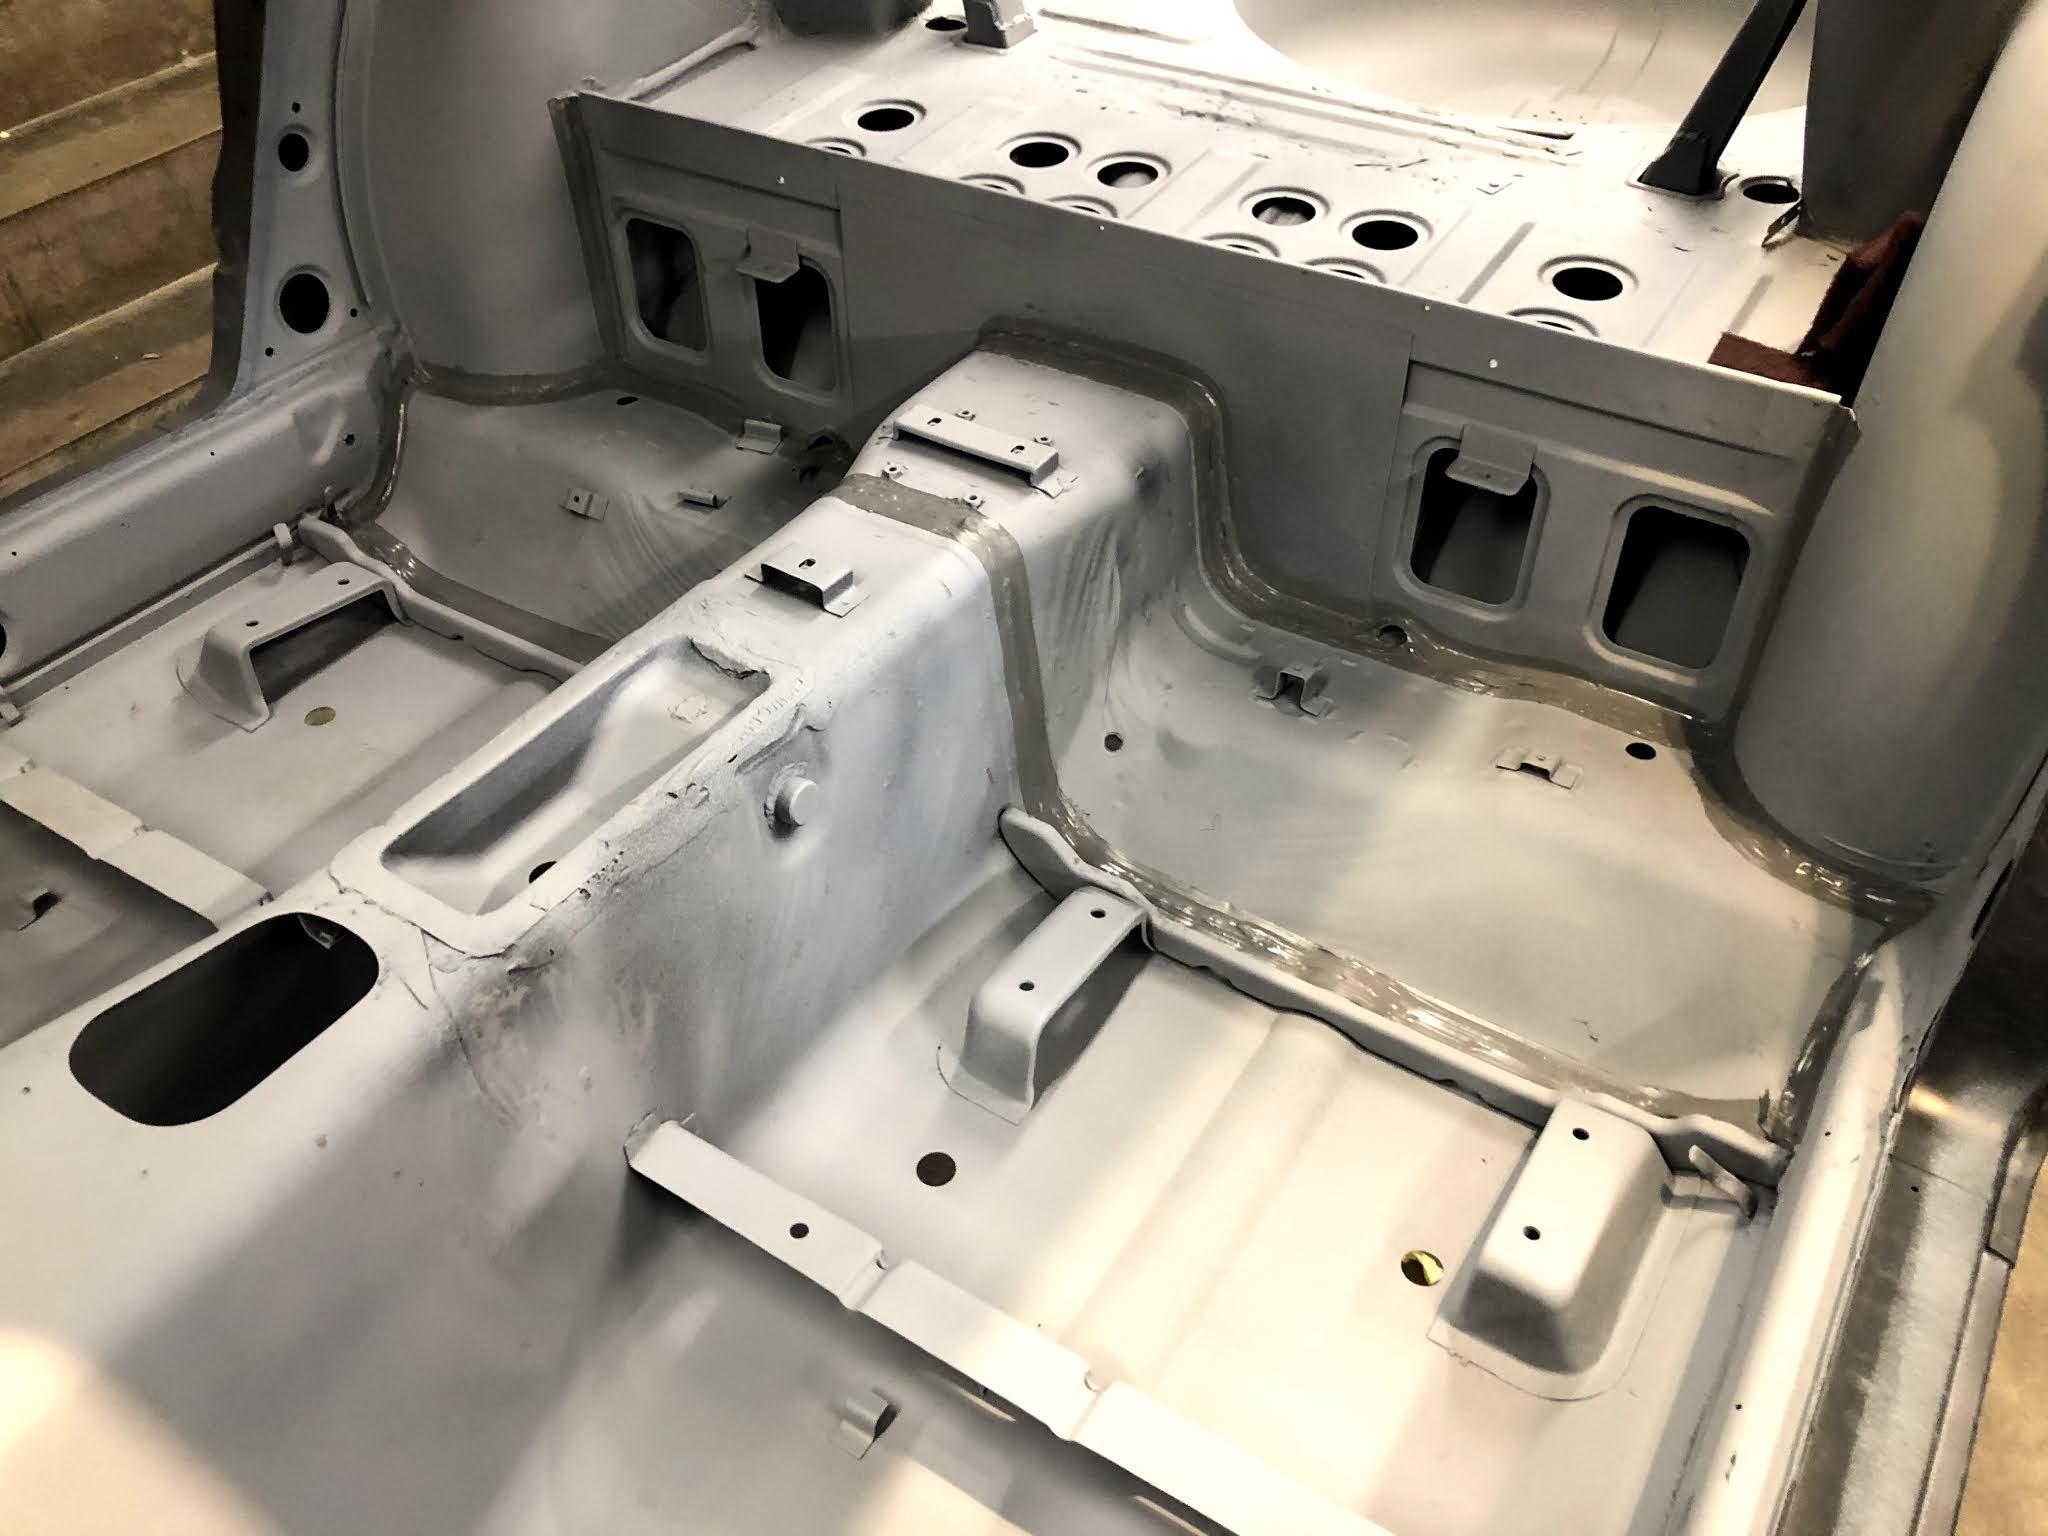
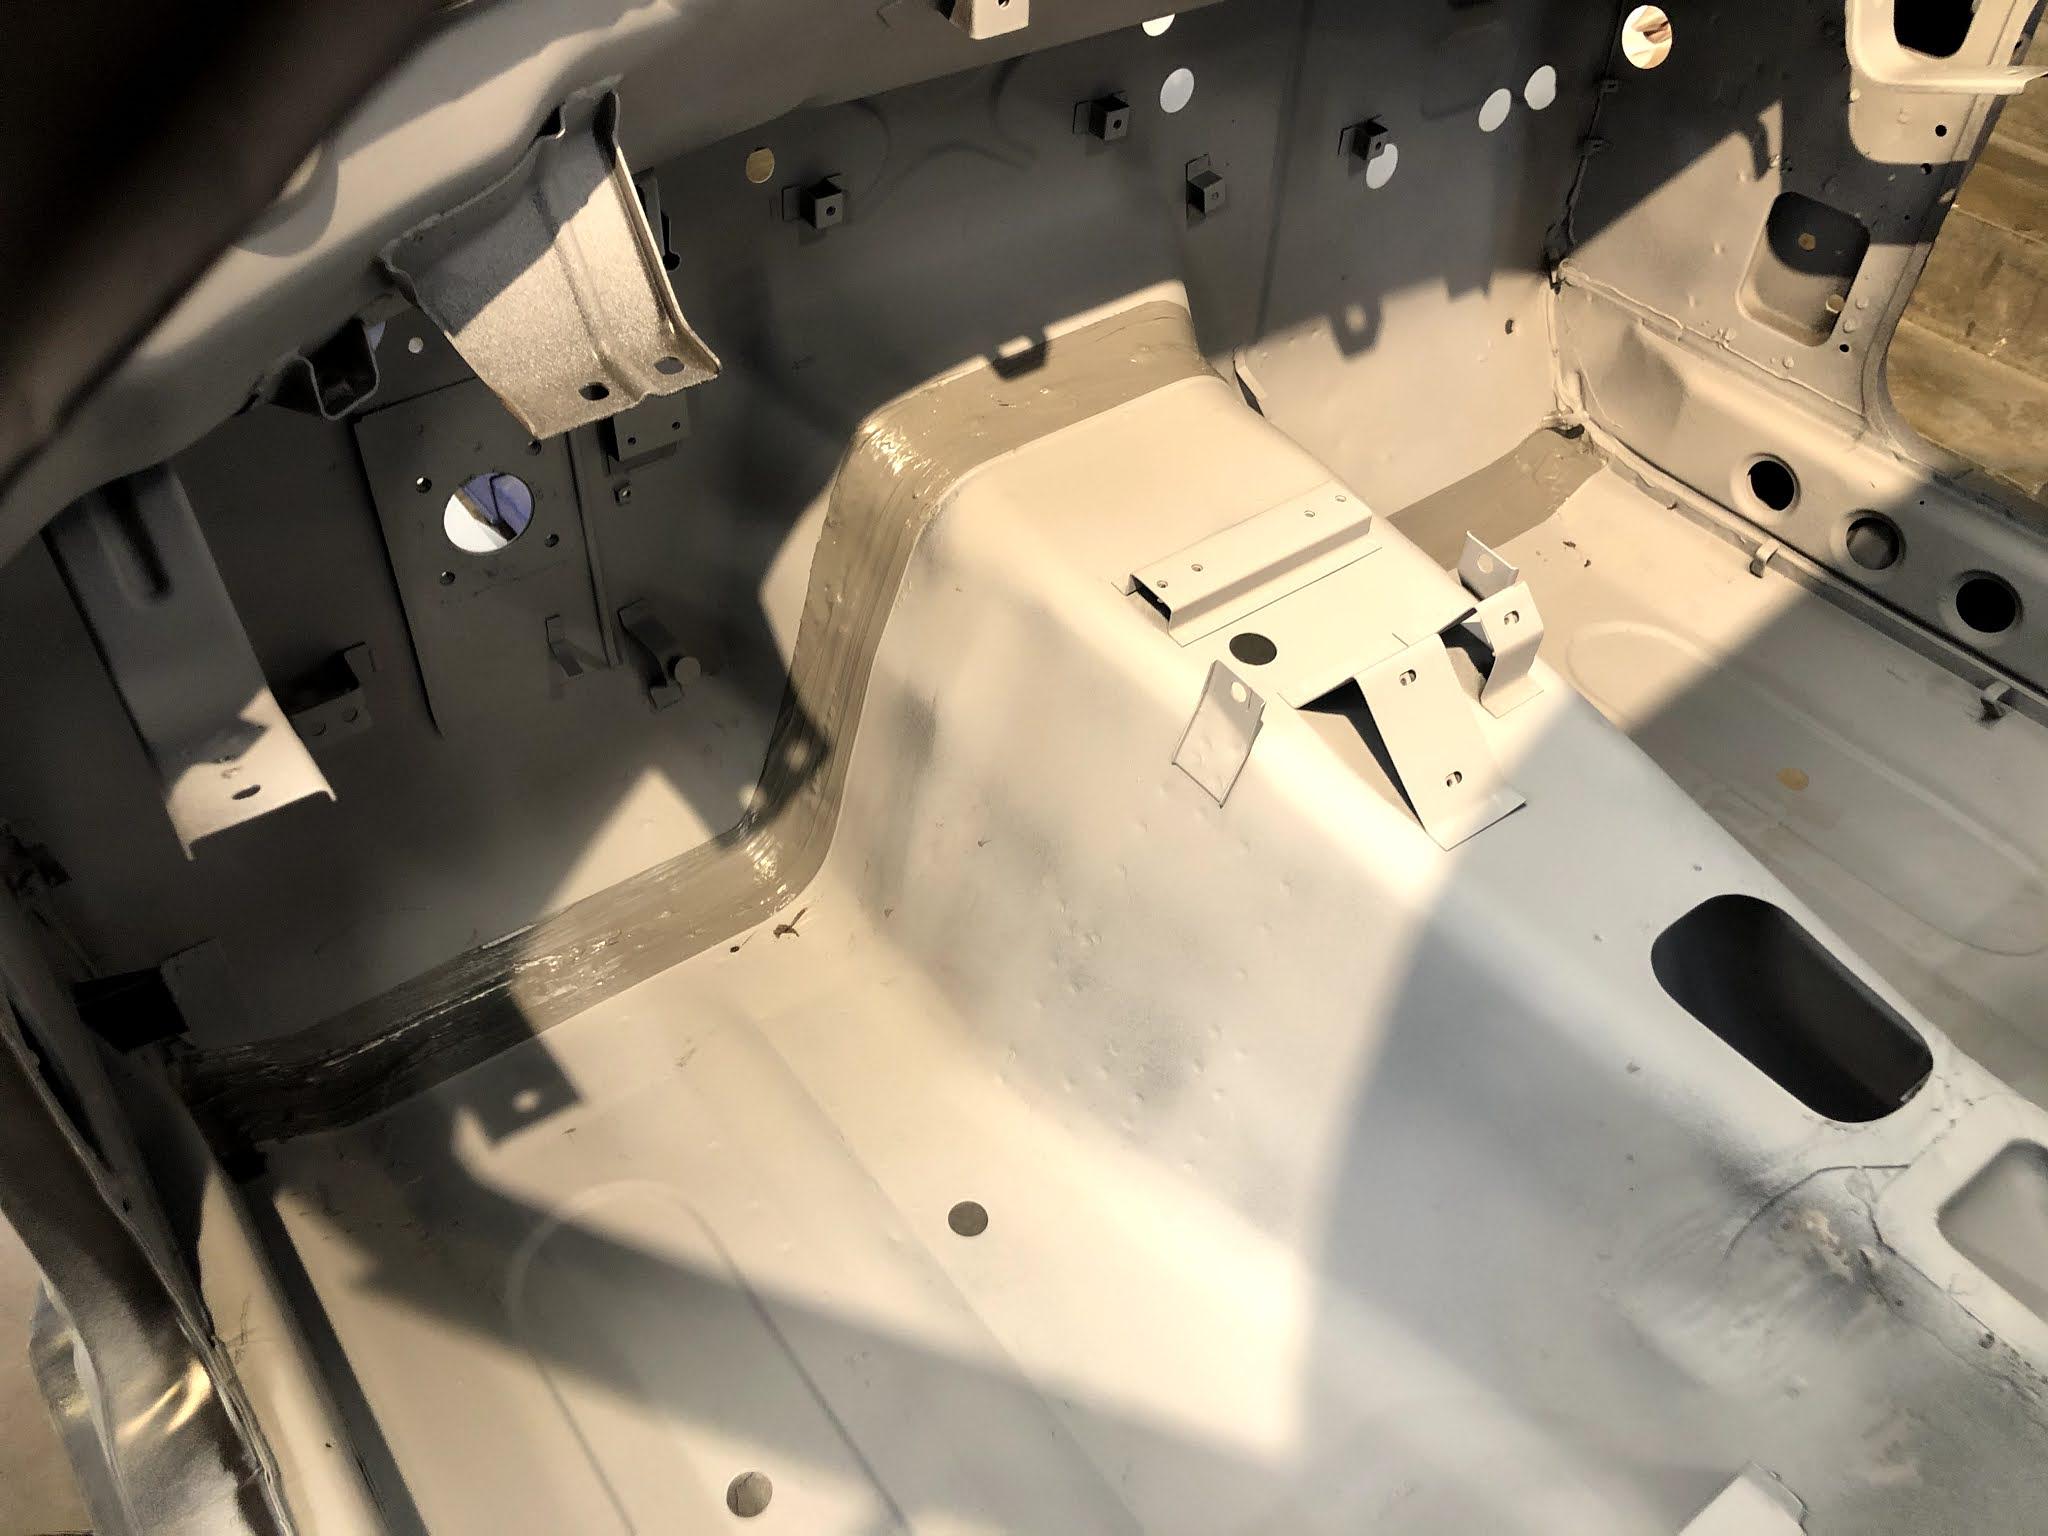
1 pointNot sure why the floor pan rails aren't being reproduced by anyone yet, they certainly take a lot of abuse. Fortunately mine were in pretty shape except for some rust at the tail end, I got those finished up today and welded on. There is also a big hole in the rails just in front of those end pieces, comes like that from the factory. Maybe there was a rubber plug in there at one point but uncovered it just acts like a scoop picking up rain water from the road, I think I might weld those shut.

.thumb.jpg.6a5185b7f05e99dd913cf039f541b880.jpg)
.thumb.jpg.2568d5c013a8acc88059a6ebb35aca0e.jpg) 1 point
1 point -
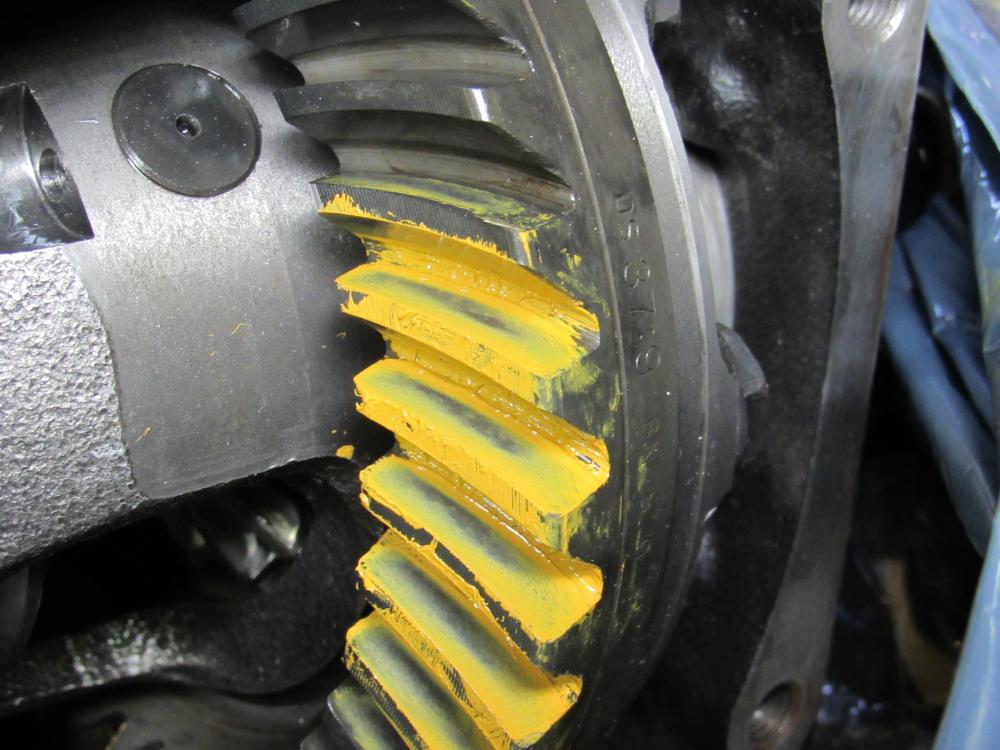
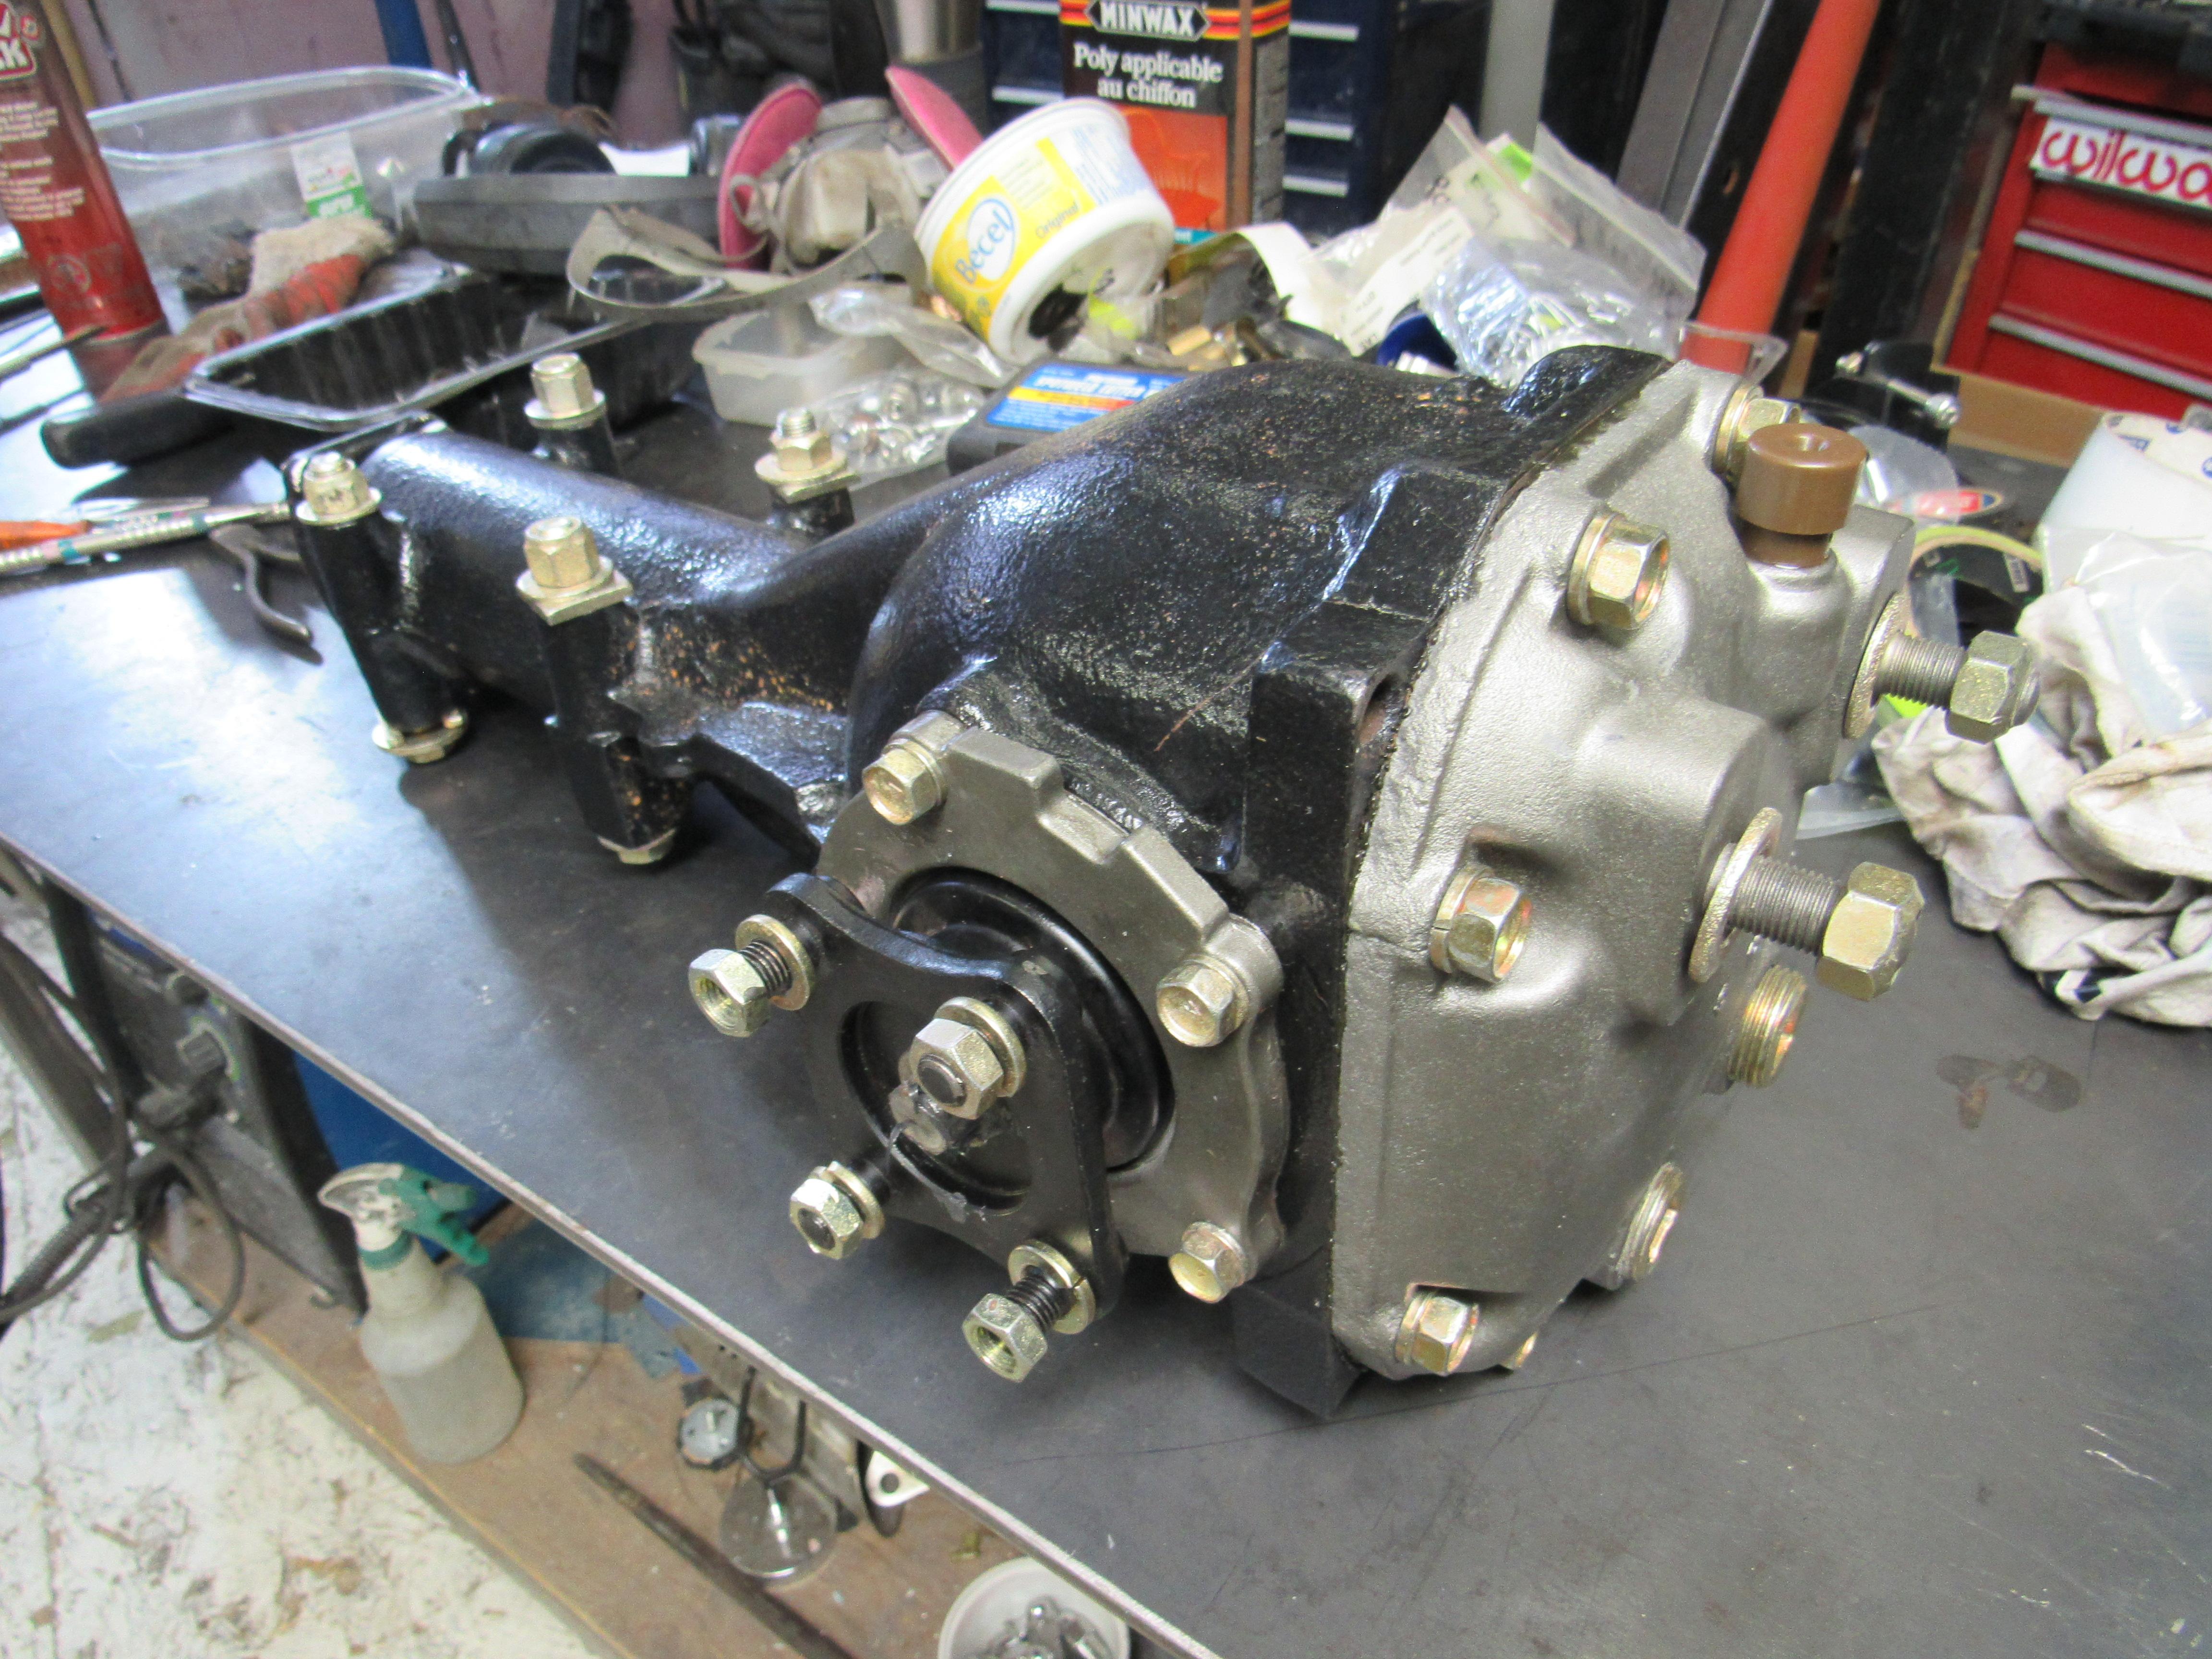
1 pointAfter replacing all bearings and seals I set the Diff up as best I could for backlash and then took it it up to a Diff specialist that I have used a few times before, they got wipe pattern set perfectly.
 1 point
 -
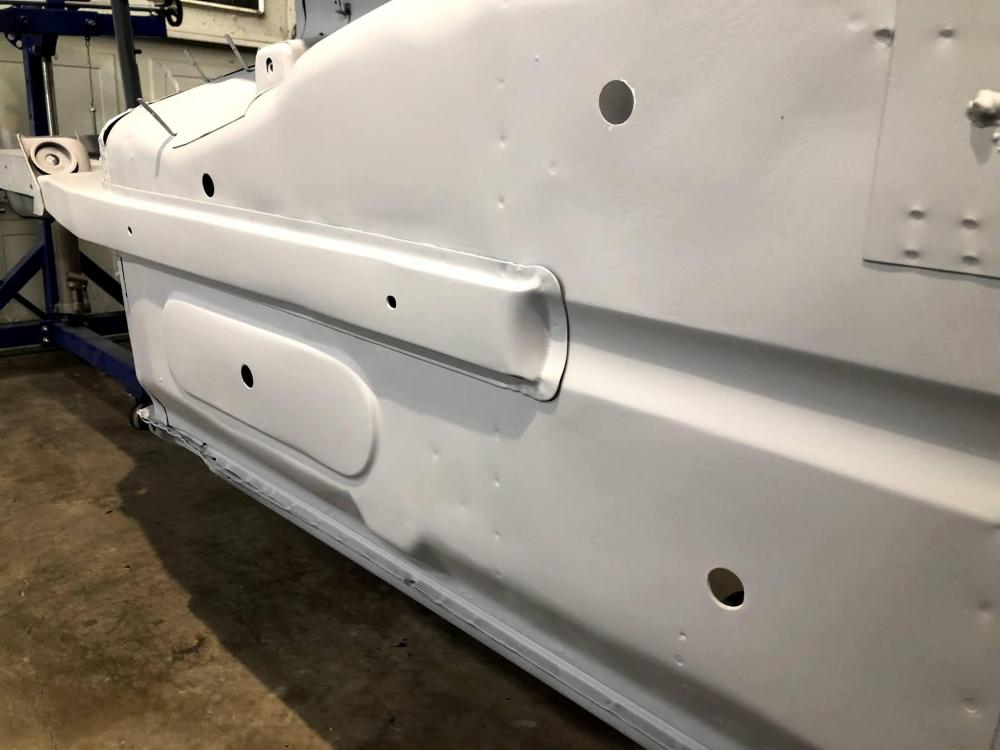
1 pointBig jump in progress on the Z this weekend. First round of the 901 silver was sprayed on the body. It's amazing how different this silver looks in photos, and which lighting you have around it. We'll get the engine bay and interior painted next, then on to the exterior.
 1 point
 -
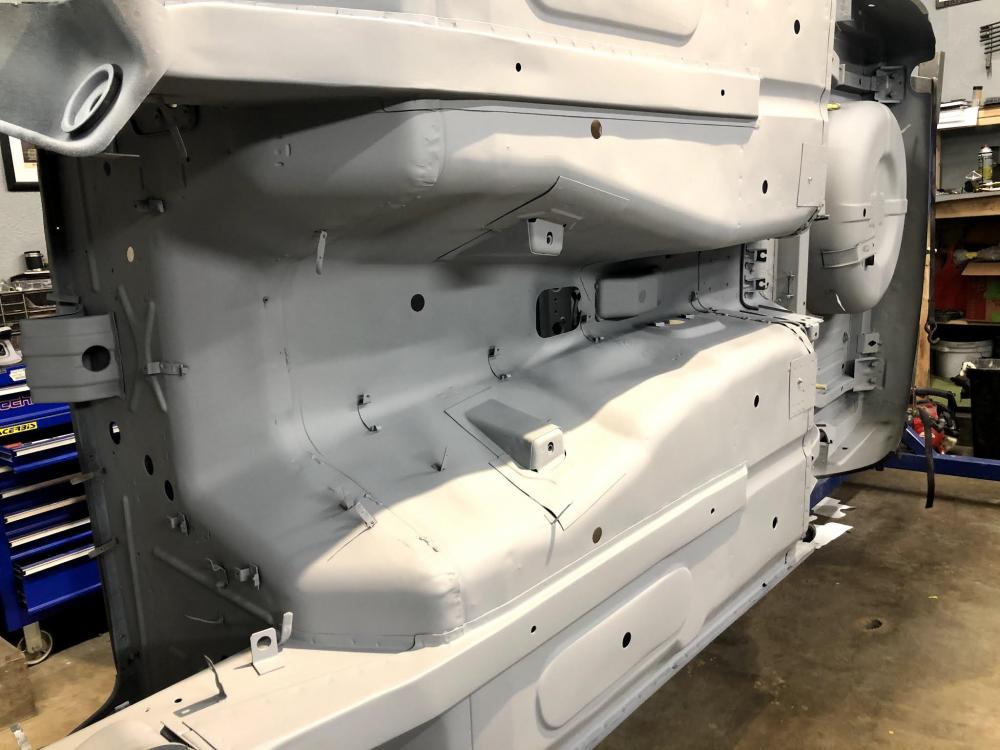
1 pointBeen meaning to update the build. Lately, the body has received several hours of sanding in preparation for sealer and base. So not a whole lot of exciting or interesting photos to post. We did get the battery tray welded in. At the moment its being sanded down as well as we get closer to painting the engine bay. Planning to get the underside completely painted in the coming weeks. Even with painting it in a booth, we'll shoot the body in stages to make it easier, and will be a more thorough paint job this way in the end.
 1 point
 -
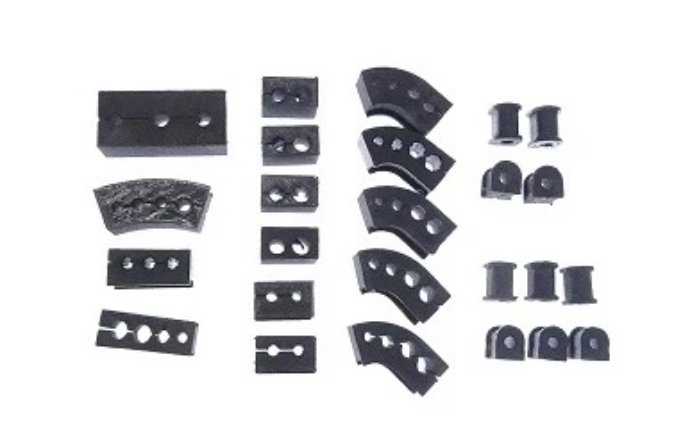
1 pointWe took a break from working on the body to finish up the rear strut assembly rebuild last night. Once the underside and interior is painted we'll be close to getting the shell off the rotisserie. One thing I do need to track down are new hardline rubber isolators. Does anyone know where I can buy a complete rubber kit for these? Z Car Depot only sells 3D printed versions from what I can tell TIA.


 1 point
 -
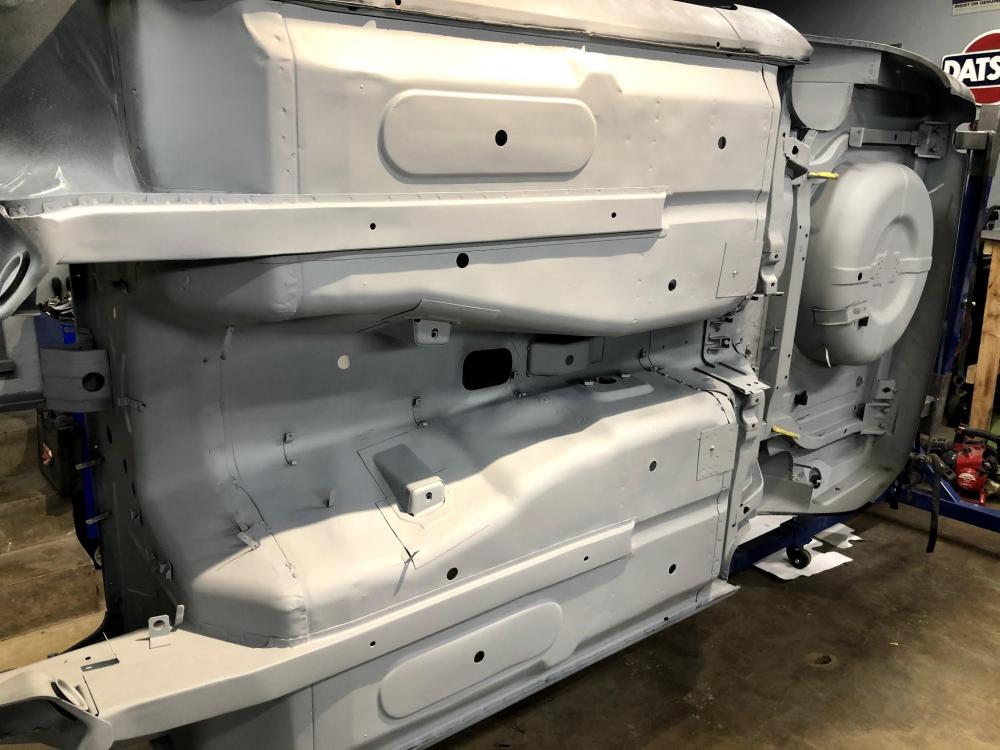
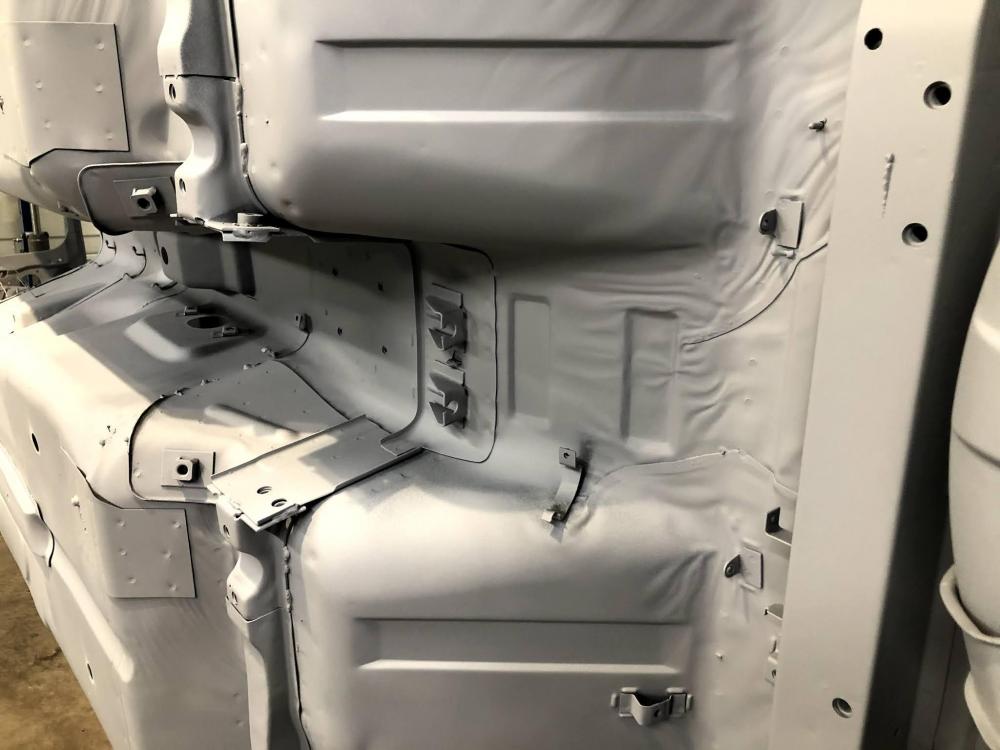
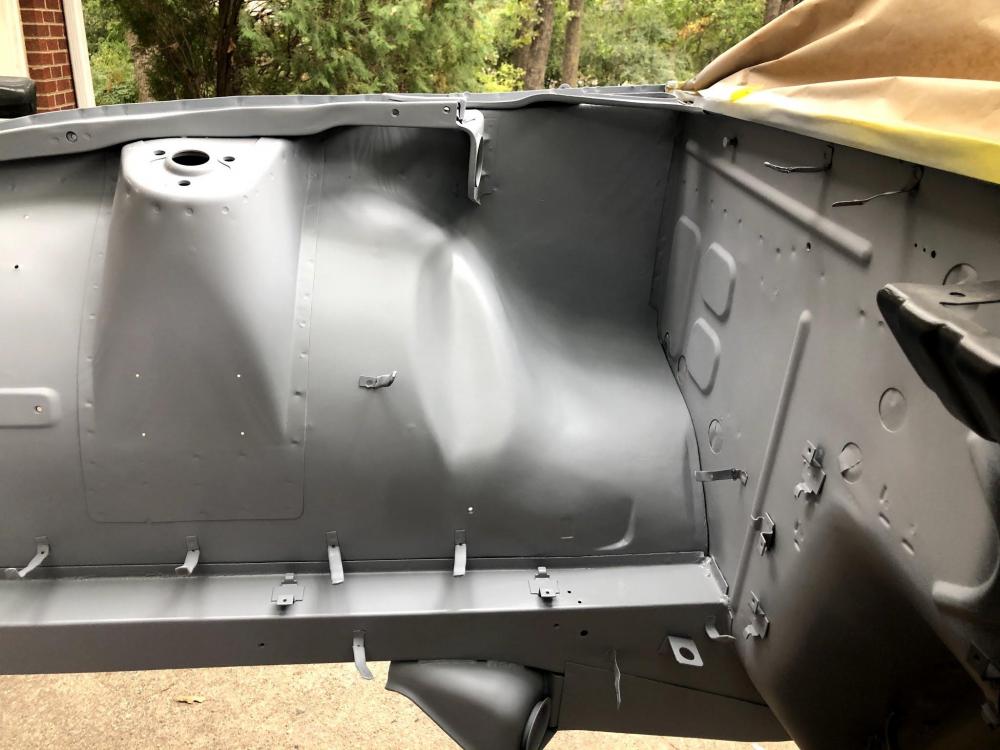
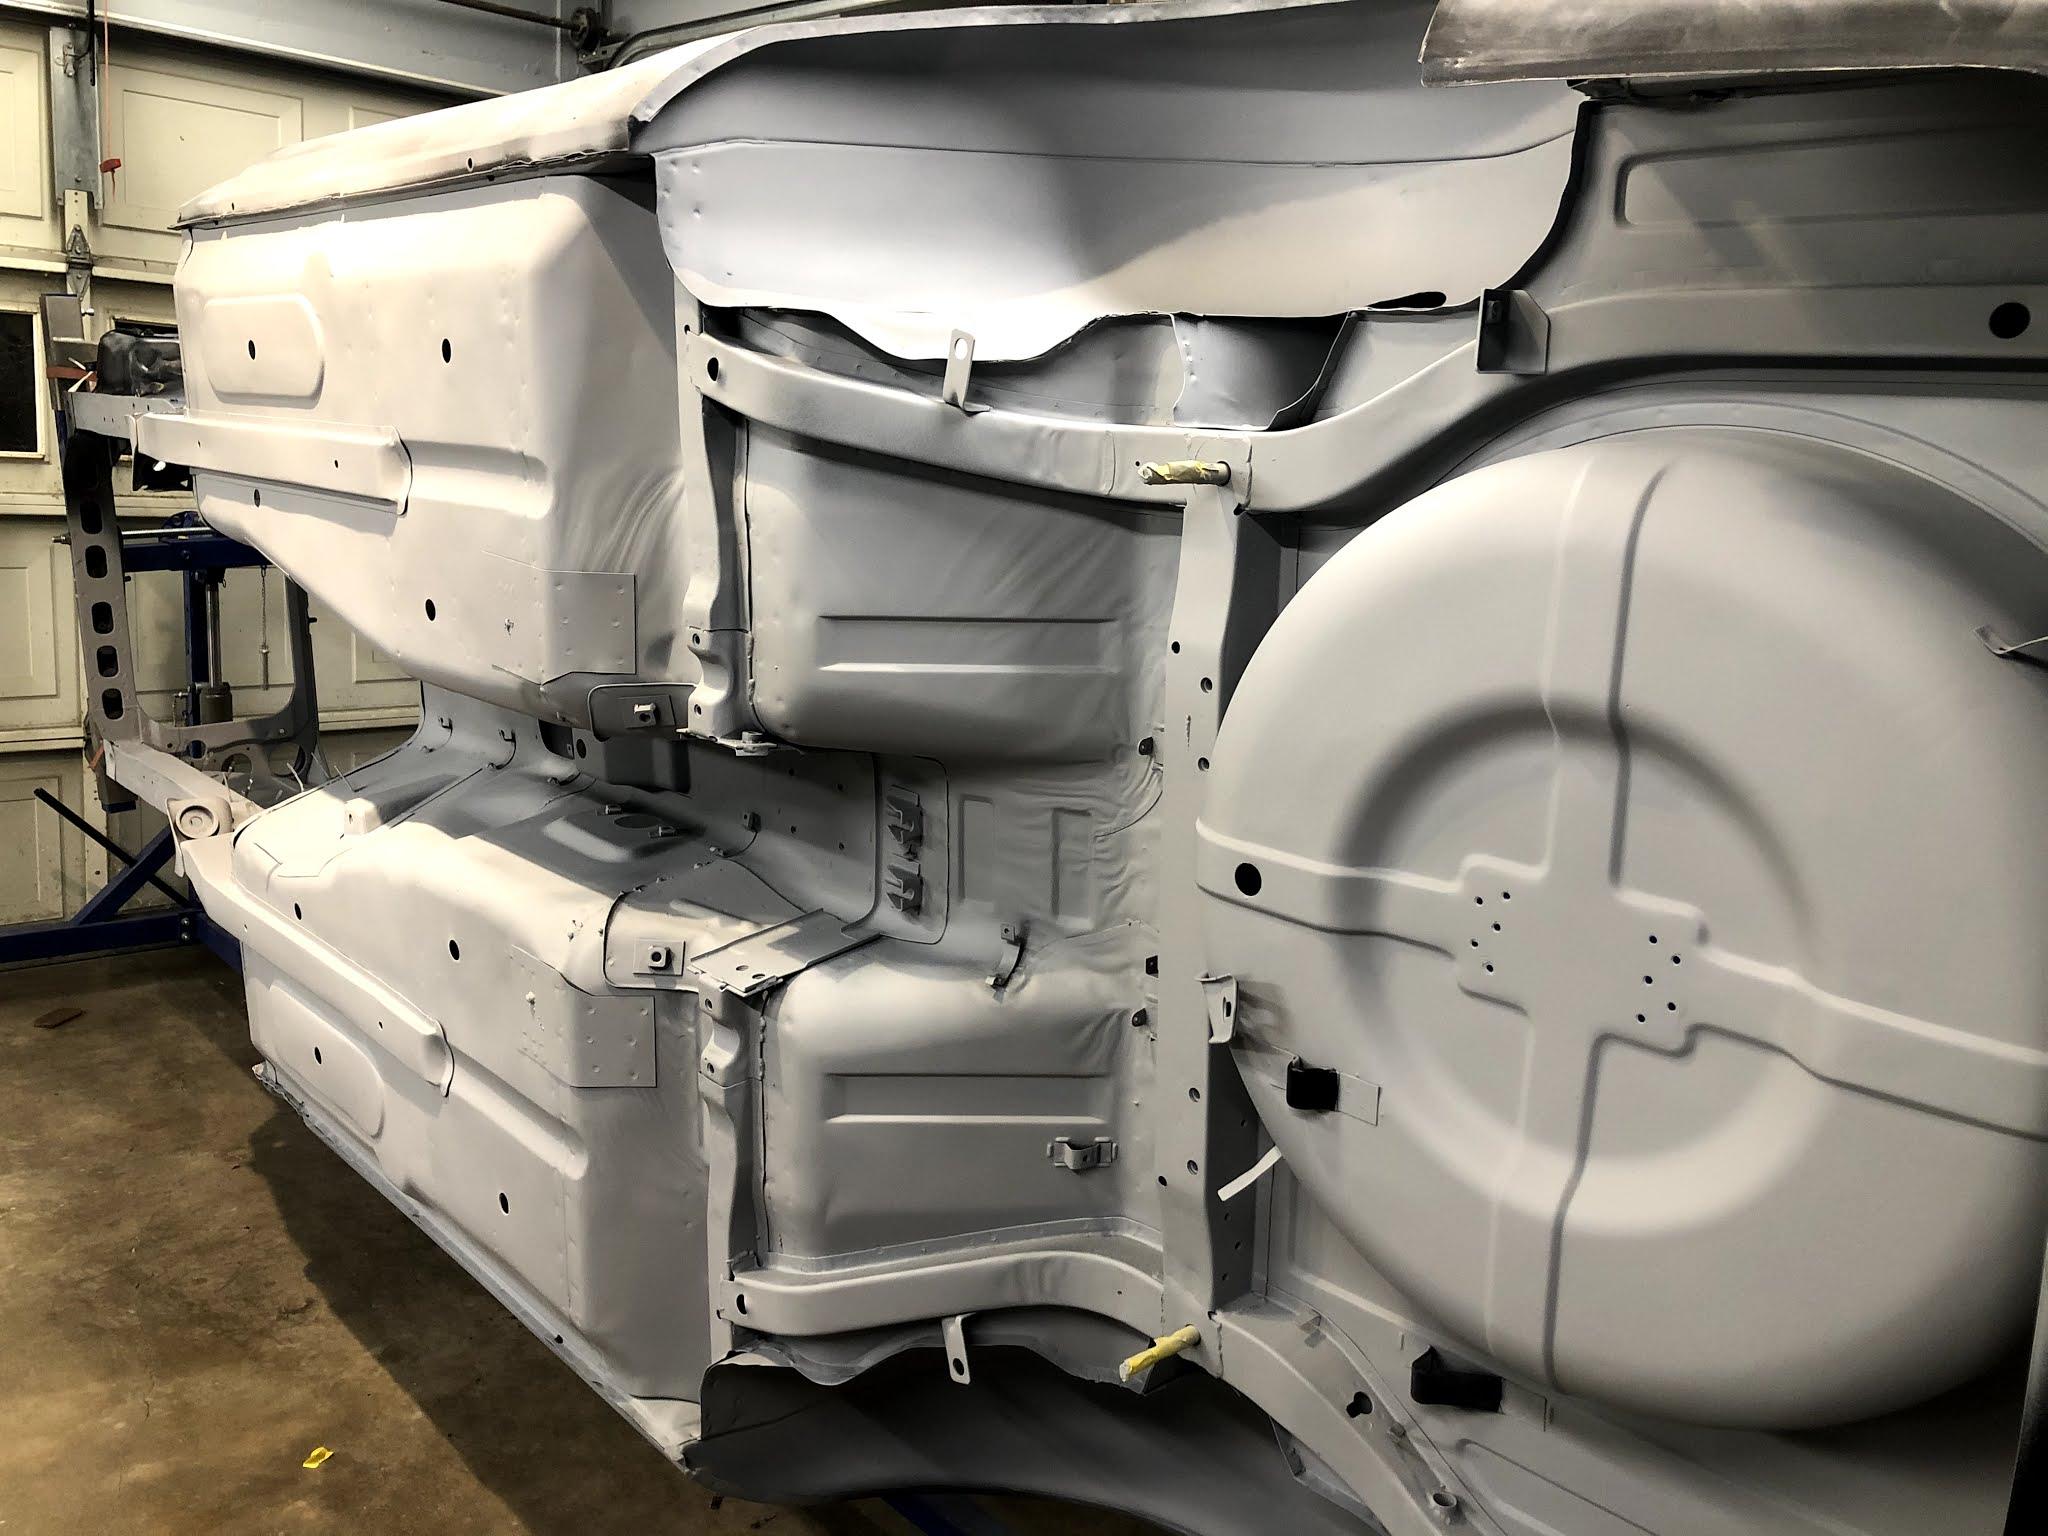
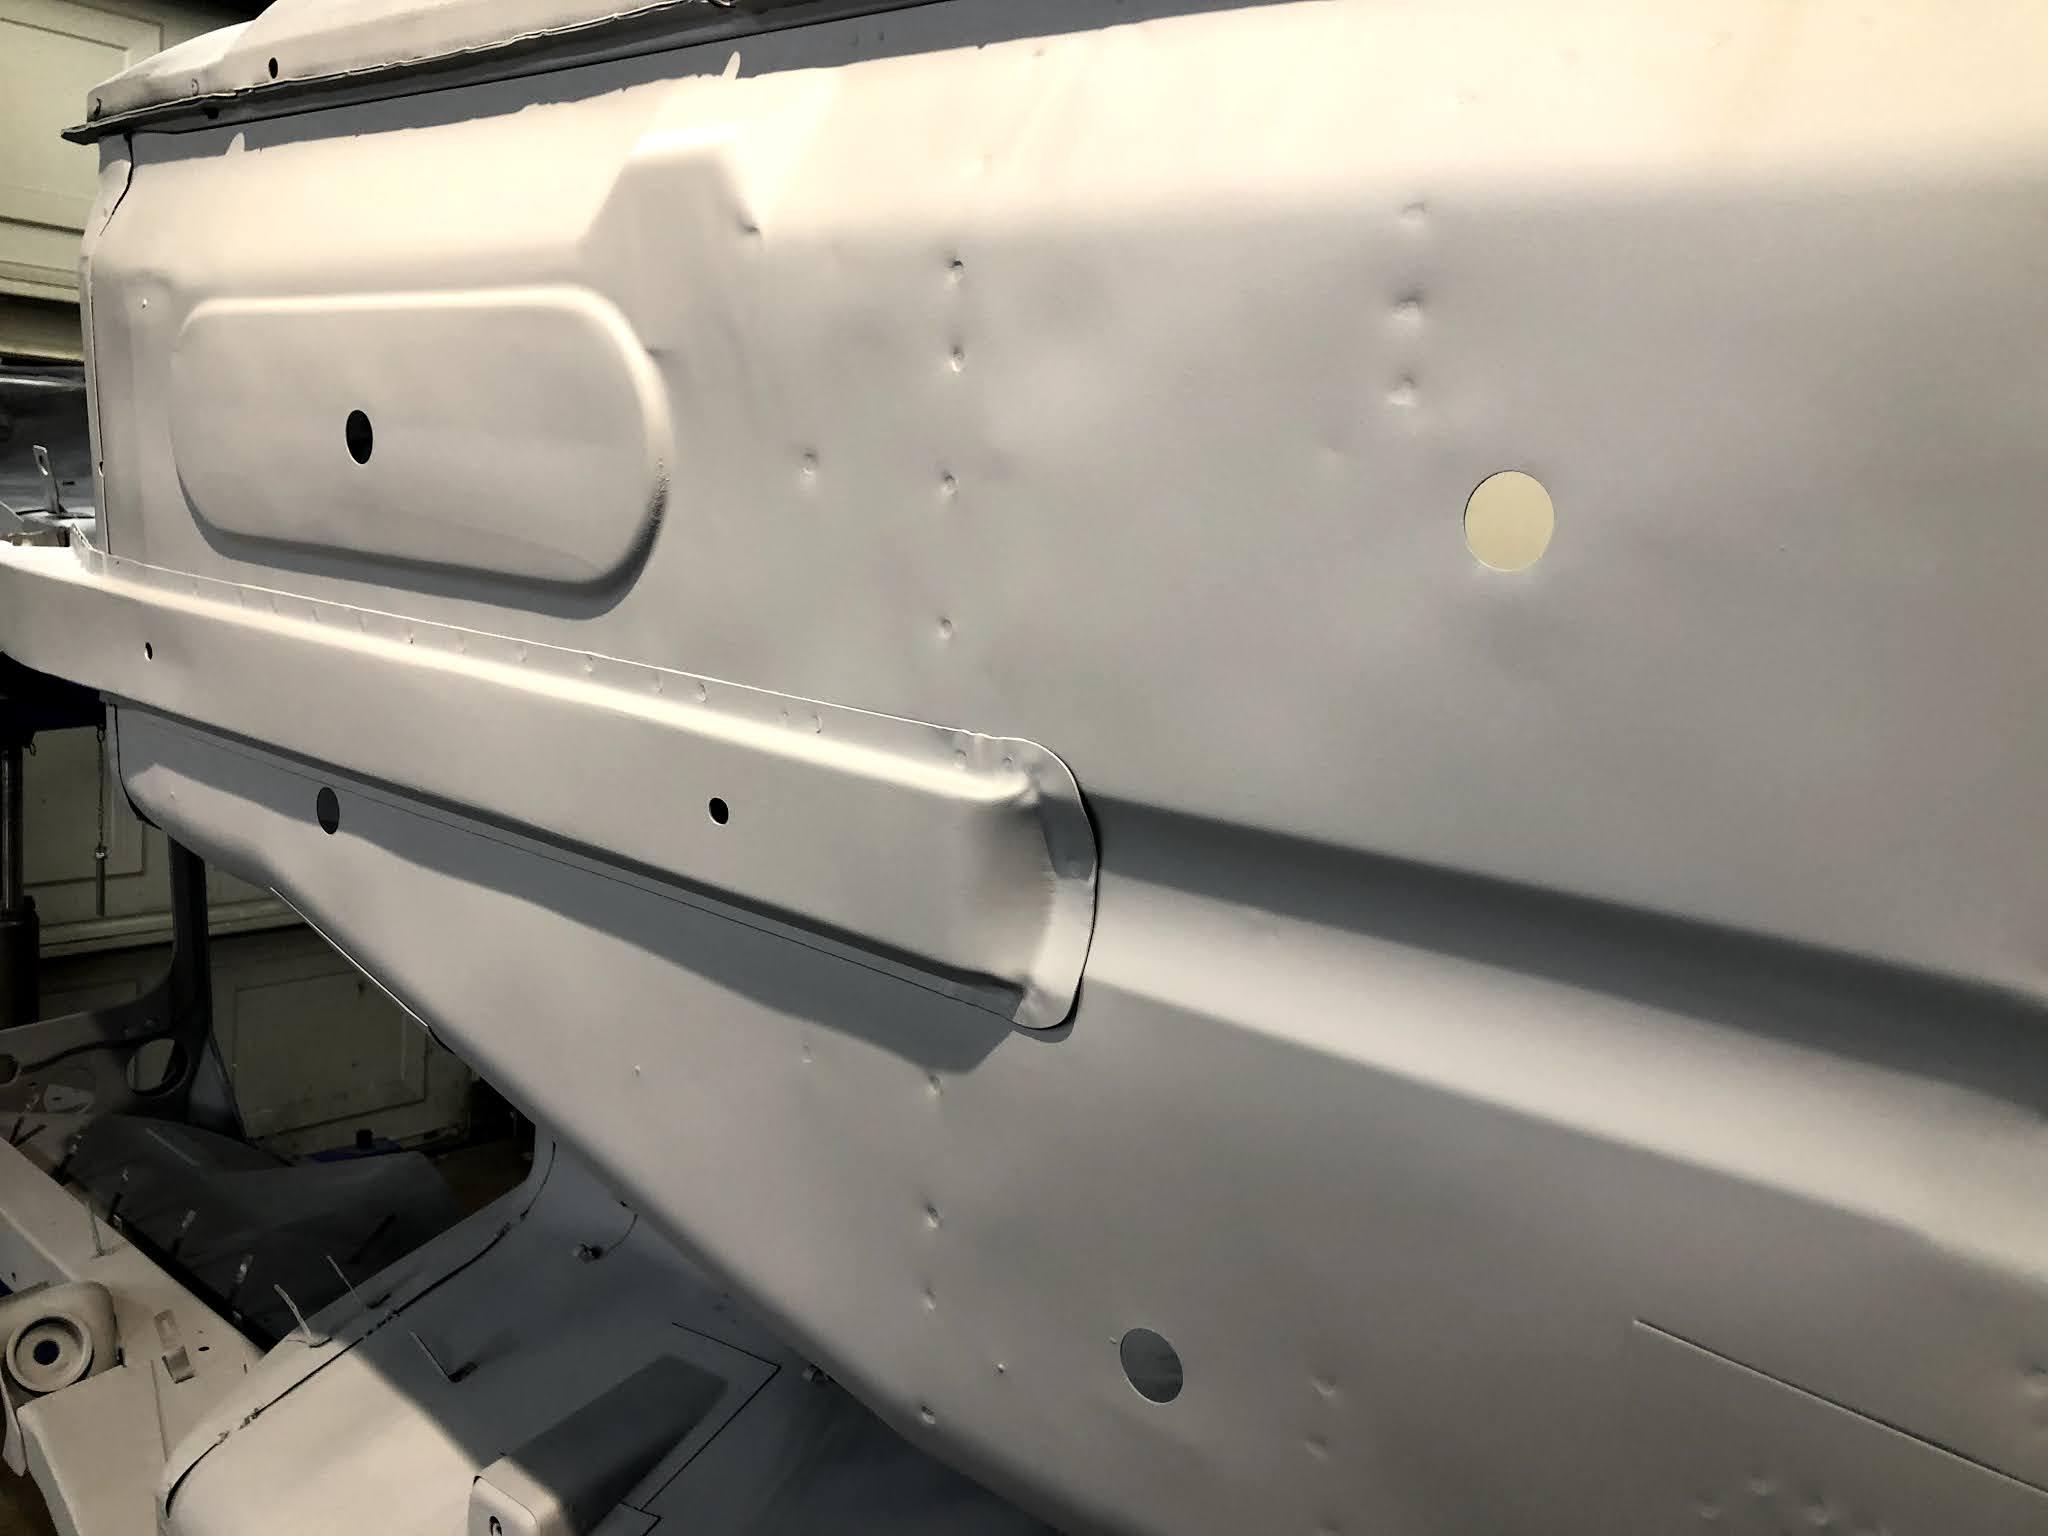
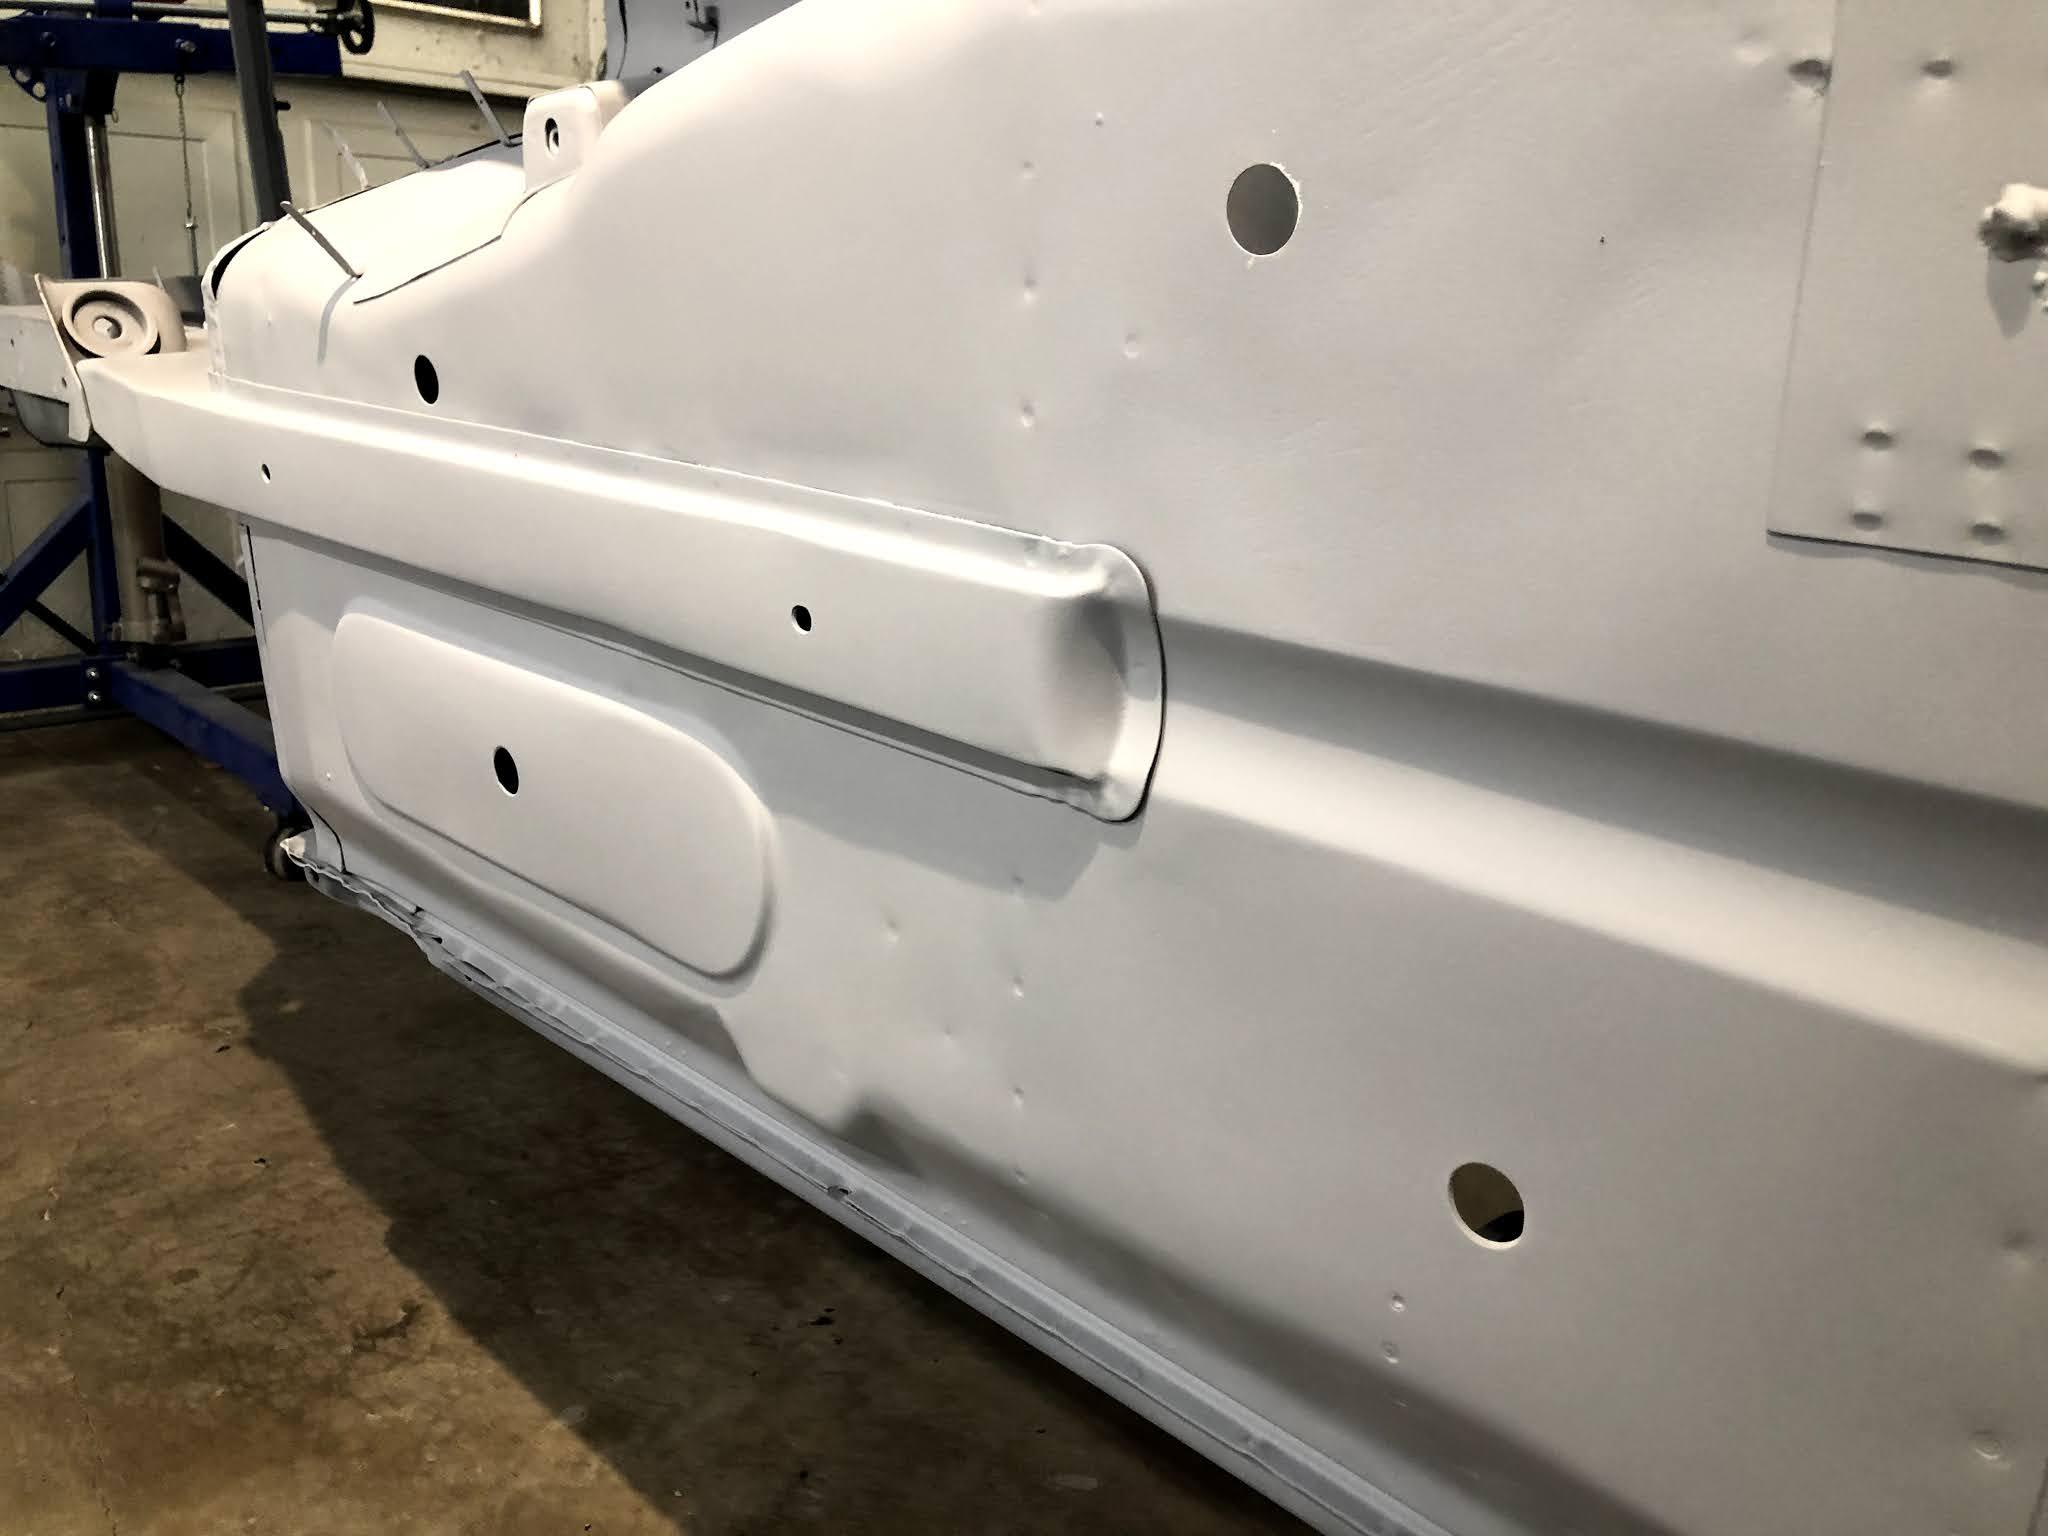
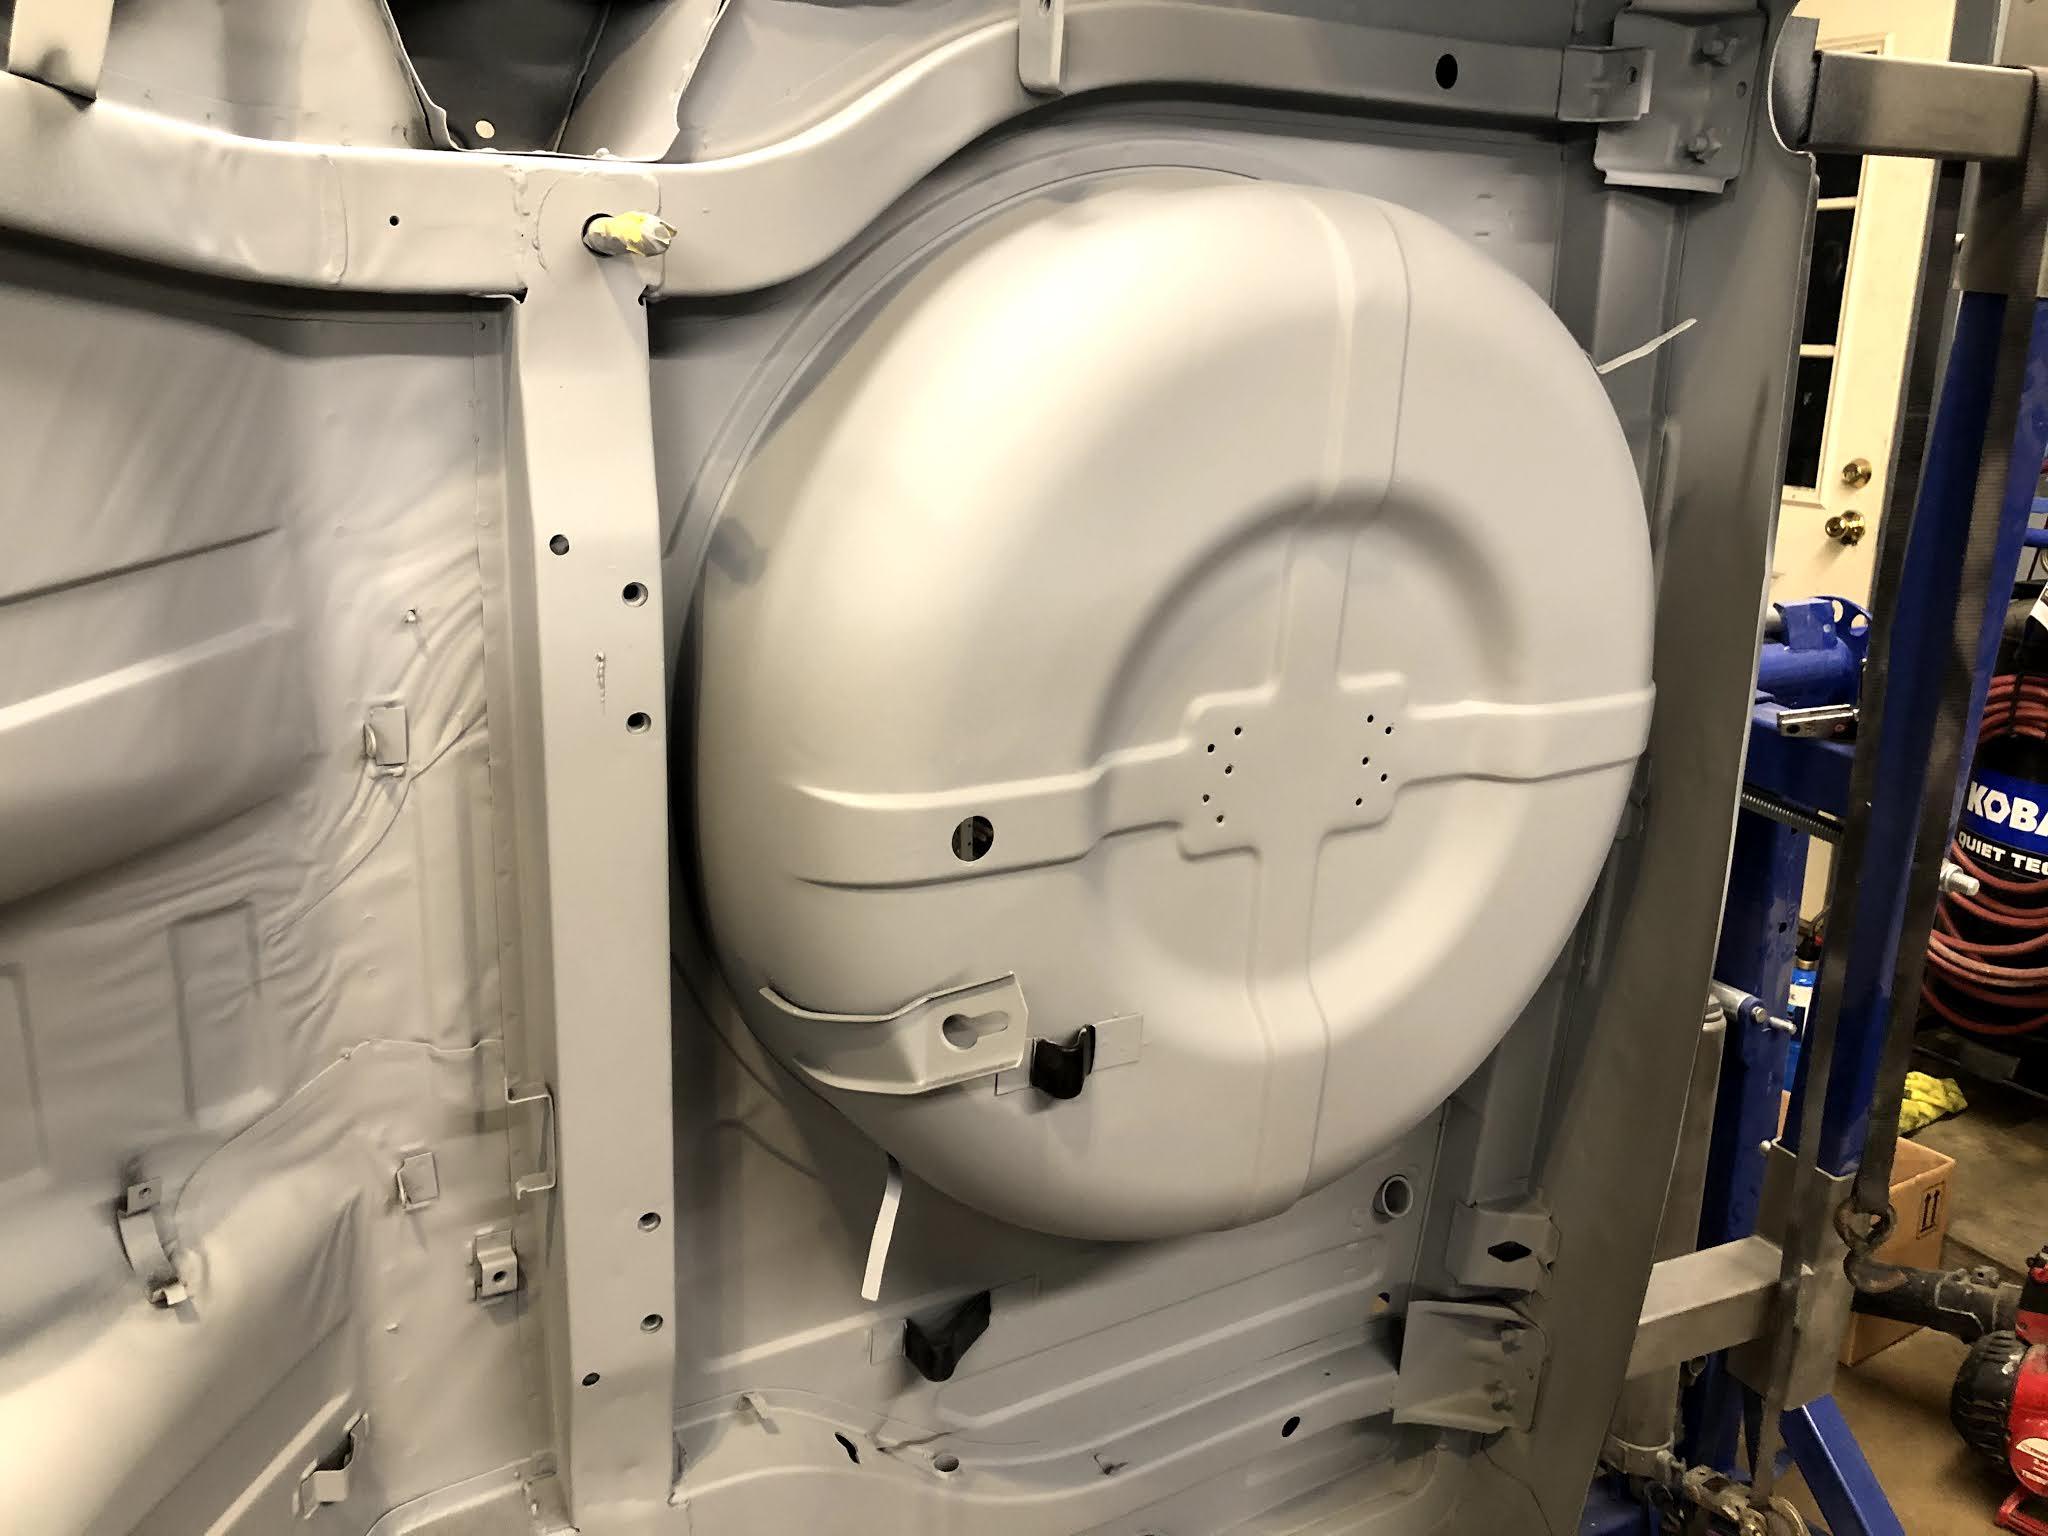
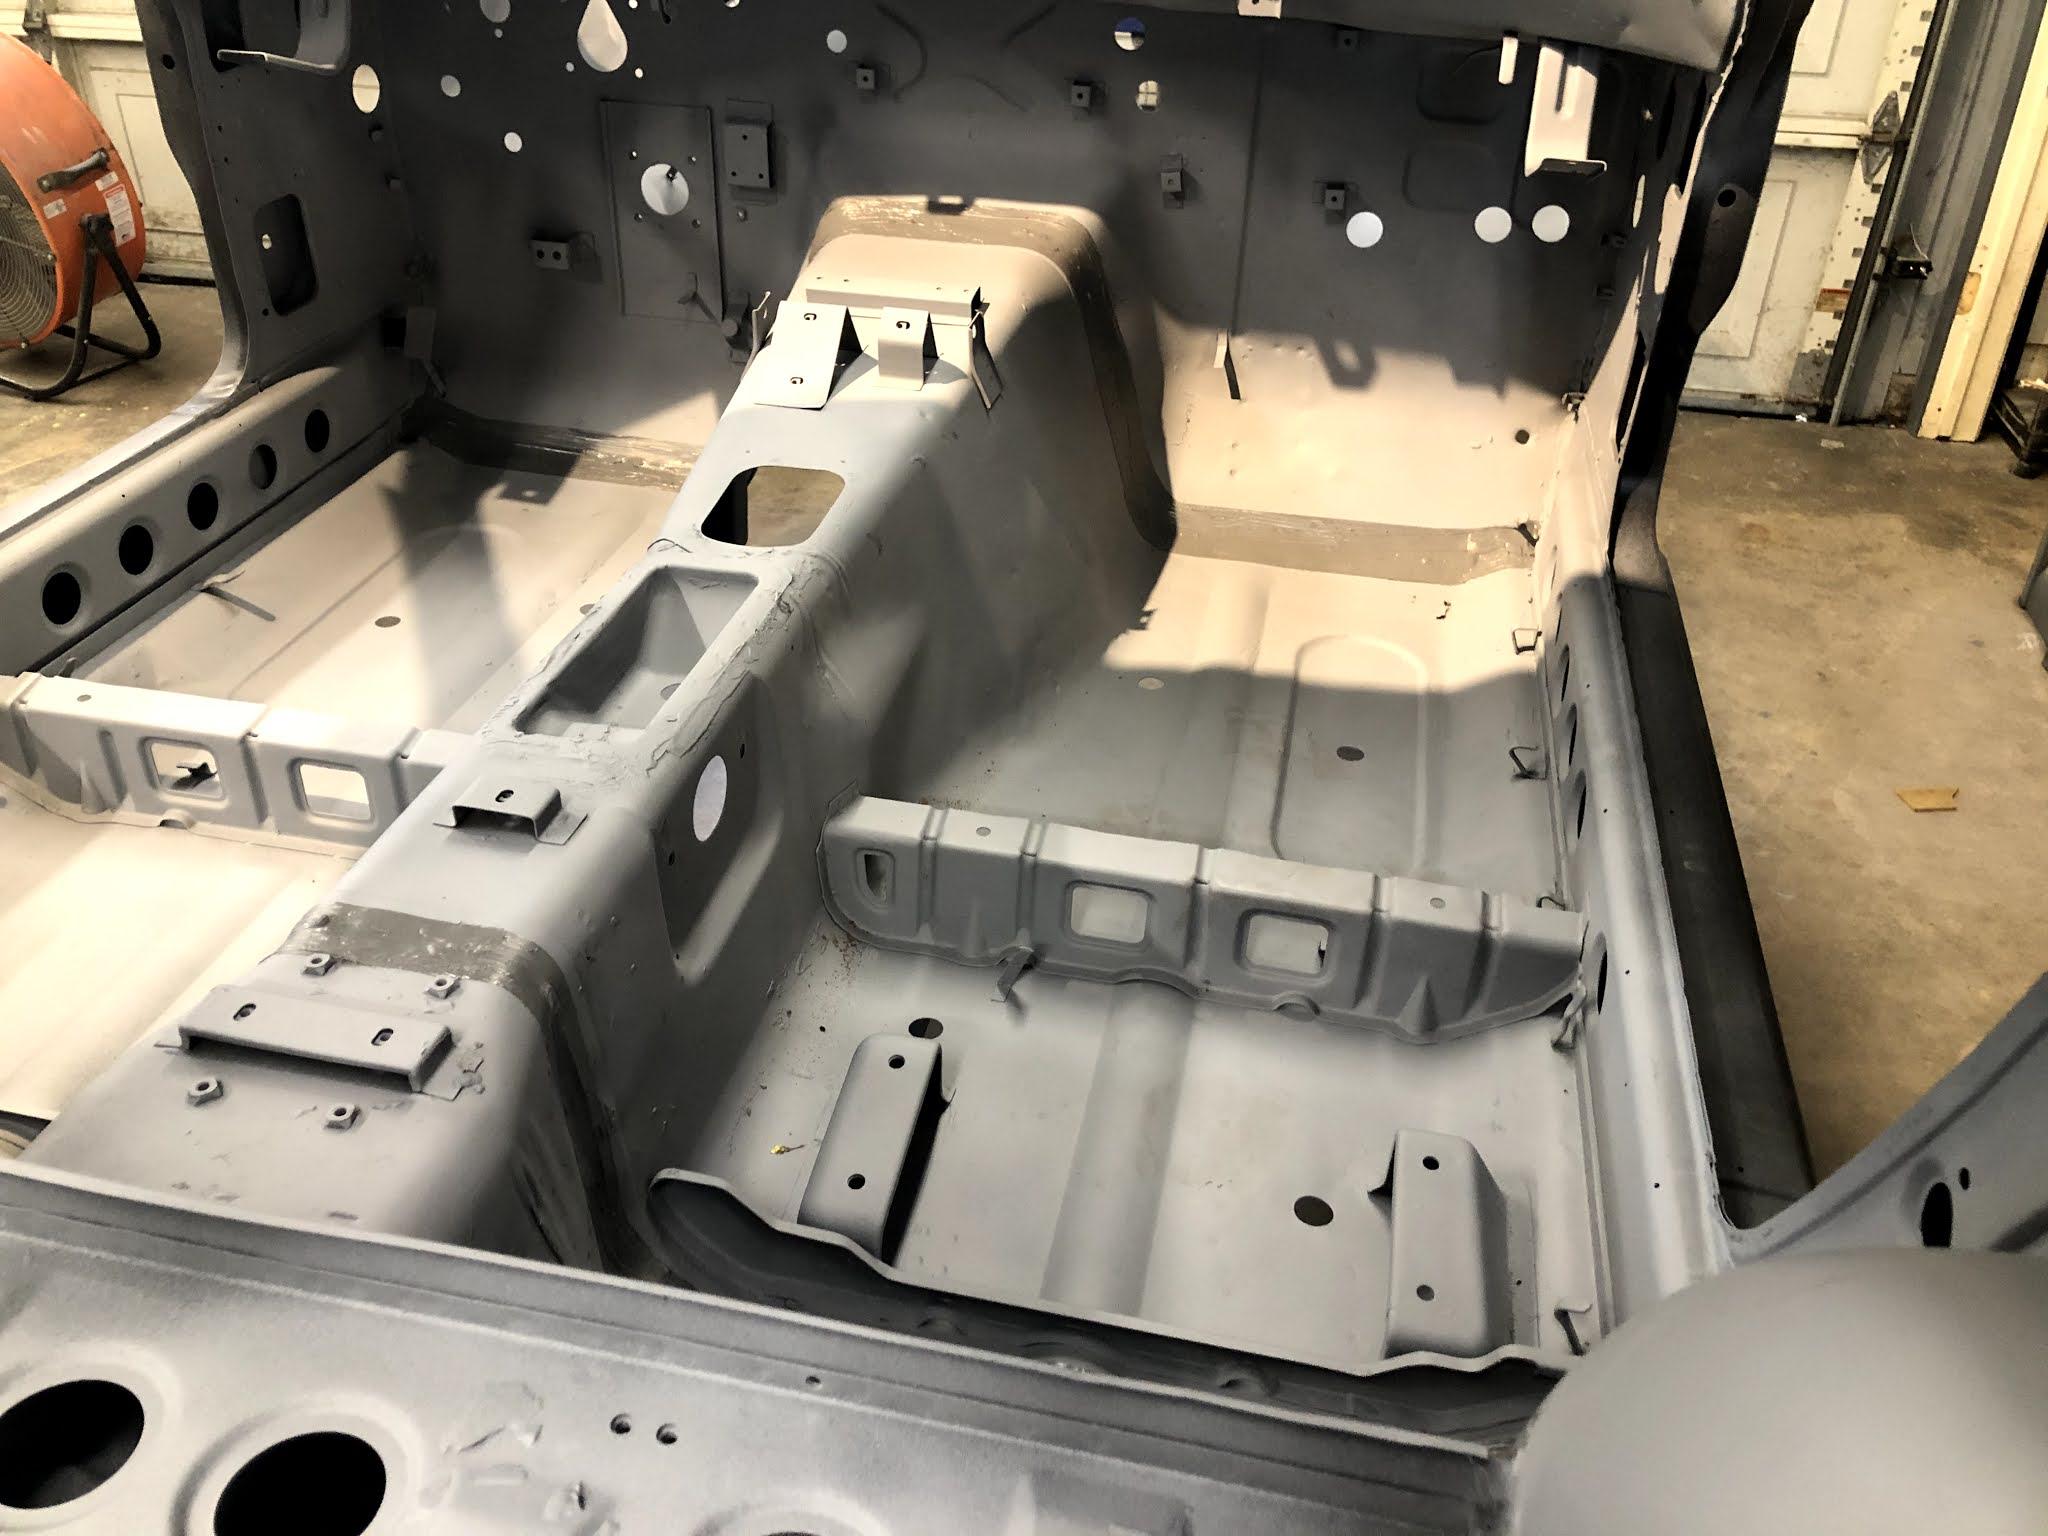
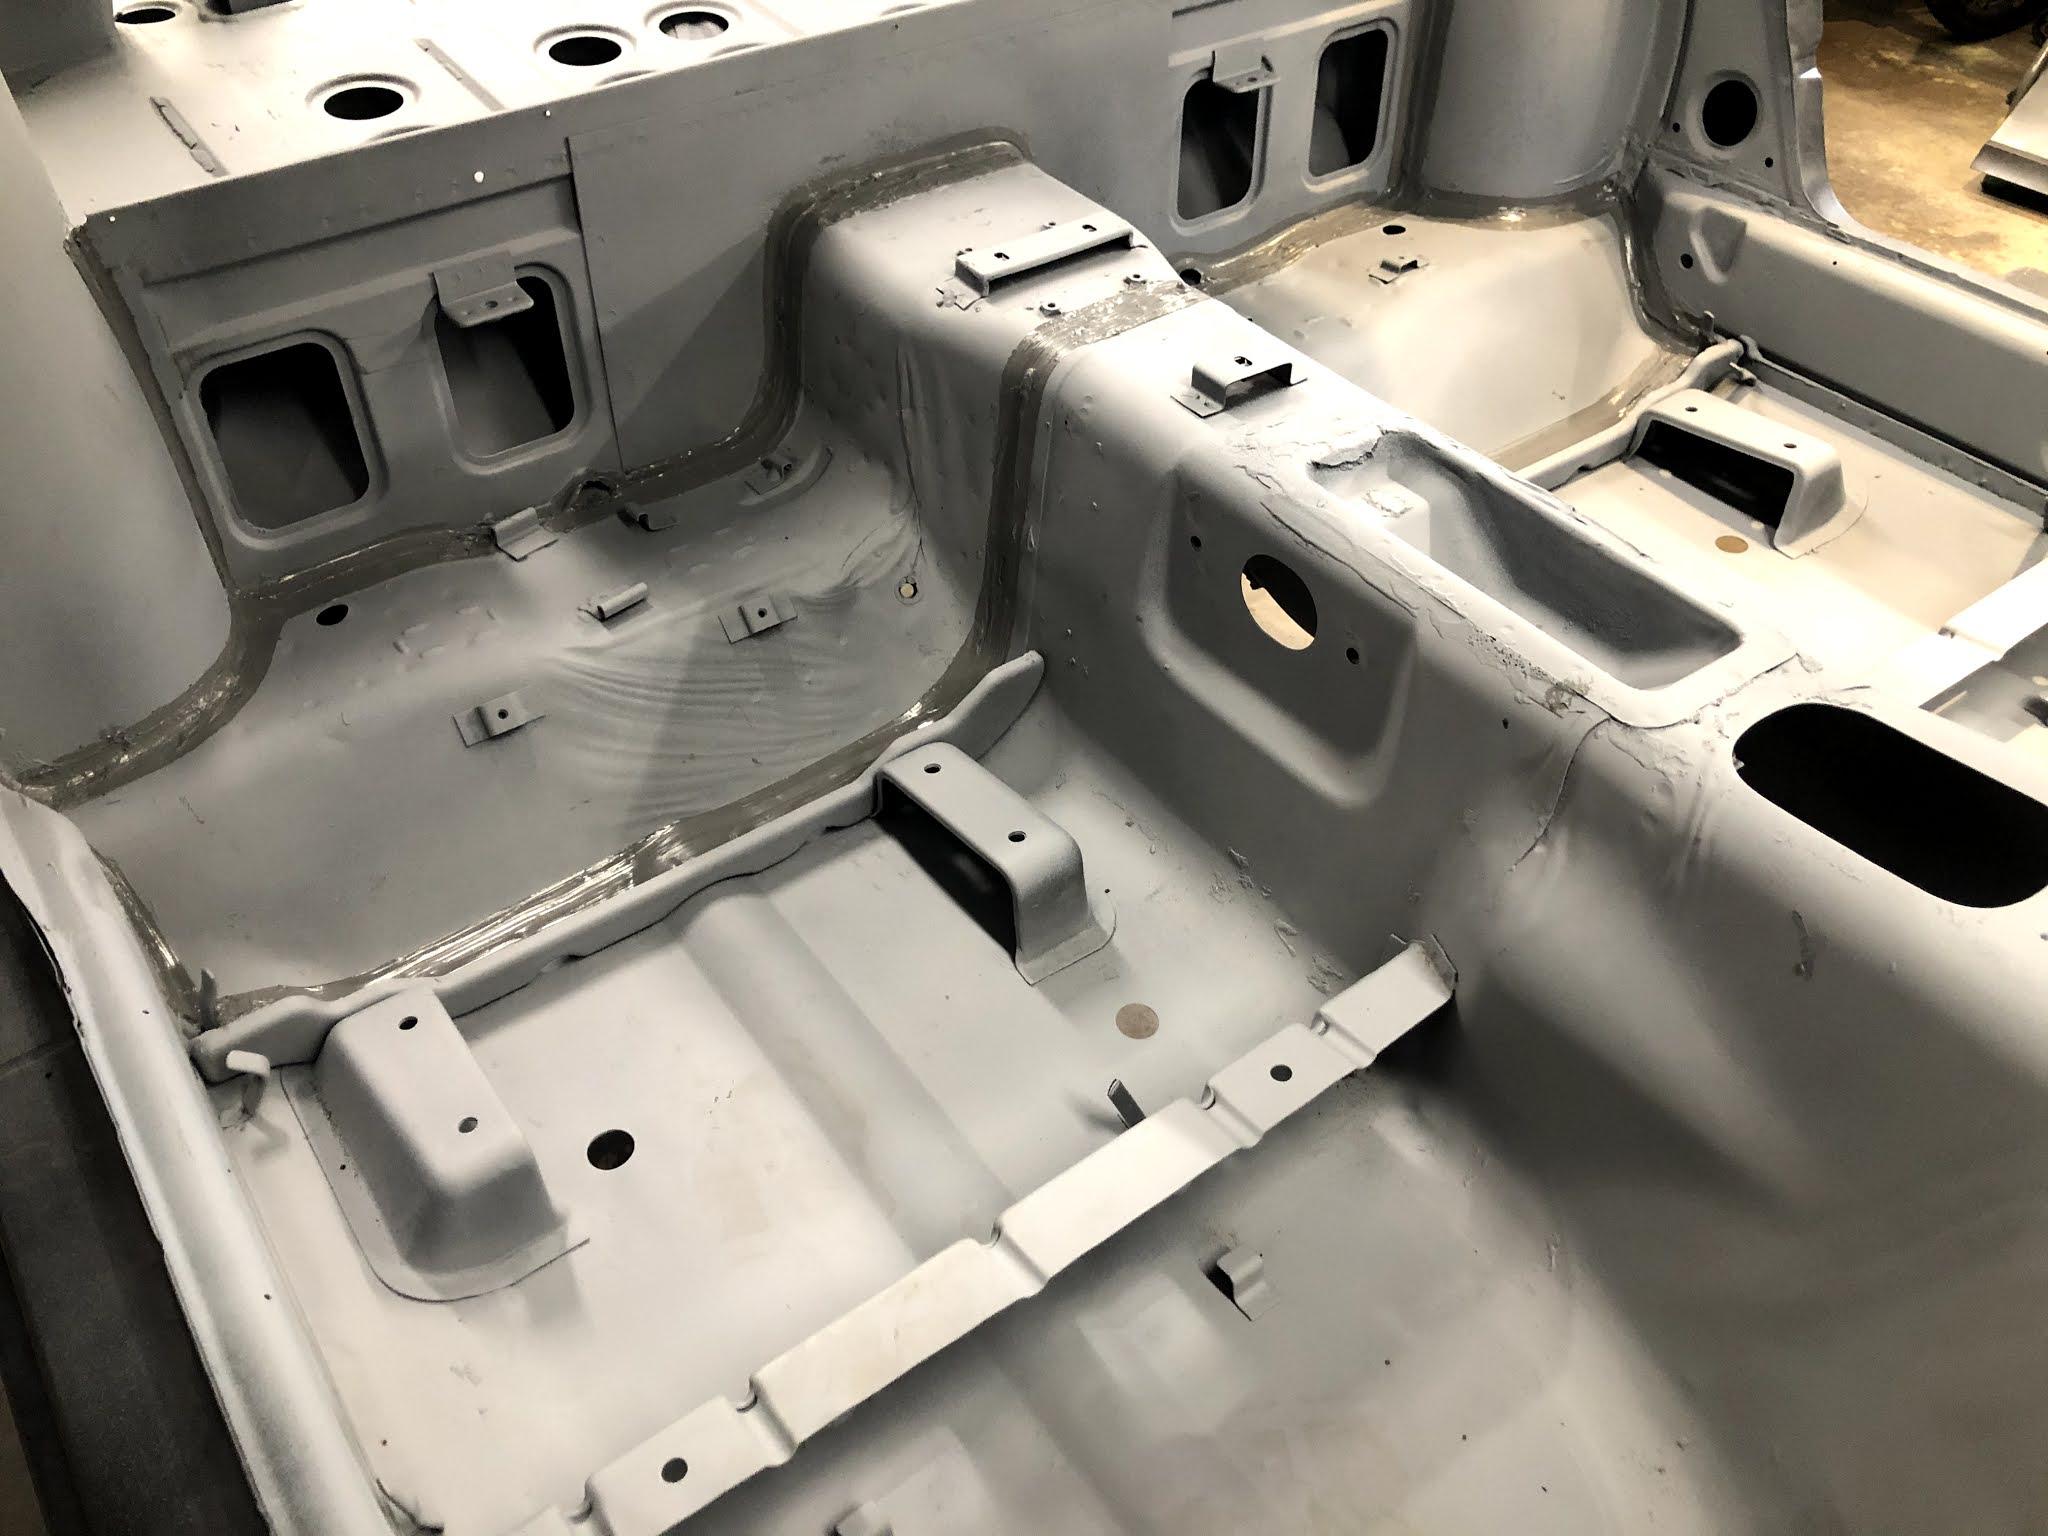
1 pointMore progress made on the body. Last bit of body work completed on the underside, and the final primer applied. Next I'll weld back in the spare tire hold down. We removed this so that any rust under and between it and the tub could be completely removed. The inside of the car also received primer at the same time. Once dried we began to apply seam sealer in the same locations as the factory did. While the original application was very sloppy, we tried our best to accurate replicate it but with more attention to detail. Need to finish up applying seam sealer to the rear strut towers and a few areas around the firewall. After that it will get sound deadening applied, and then be ready for some color.


 1 point
 -
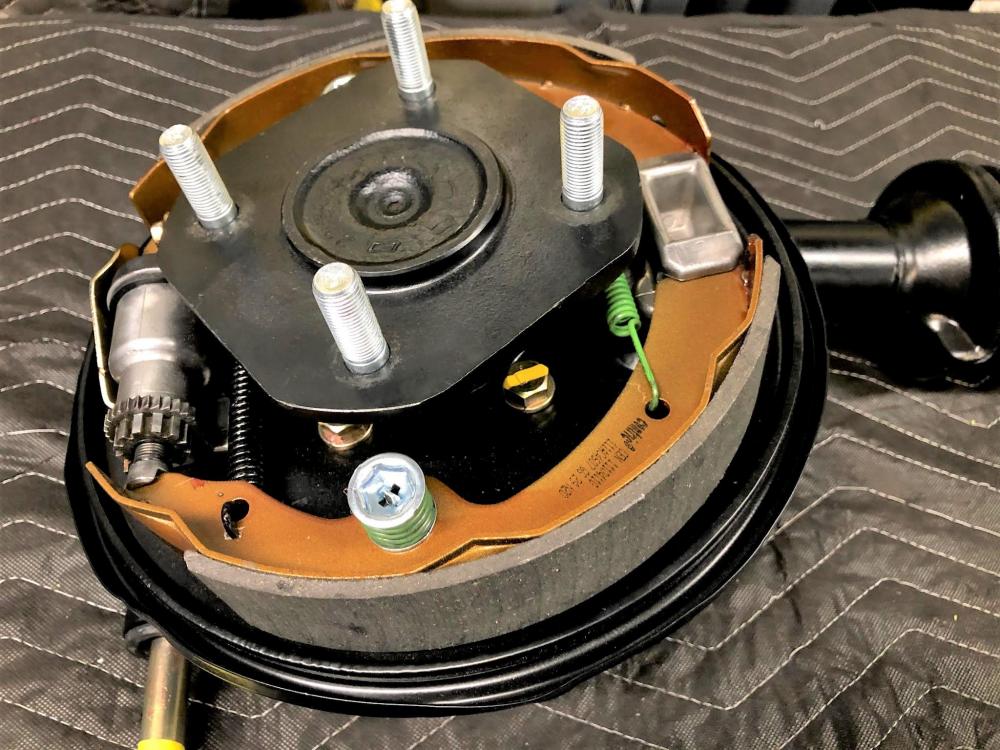
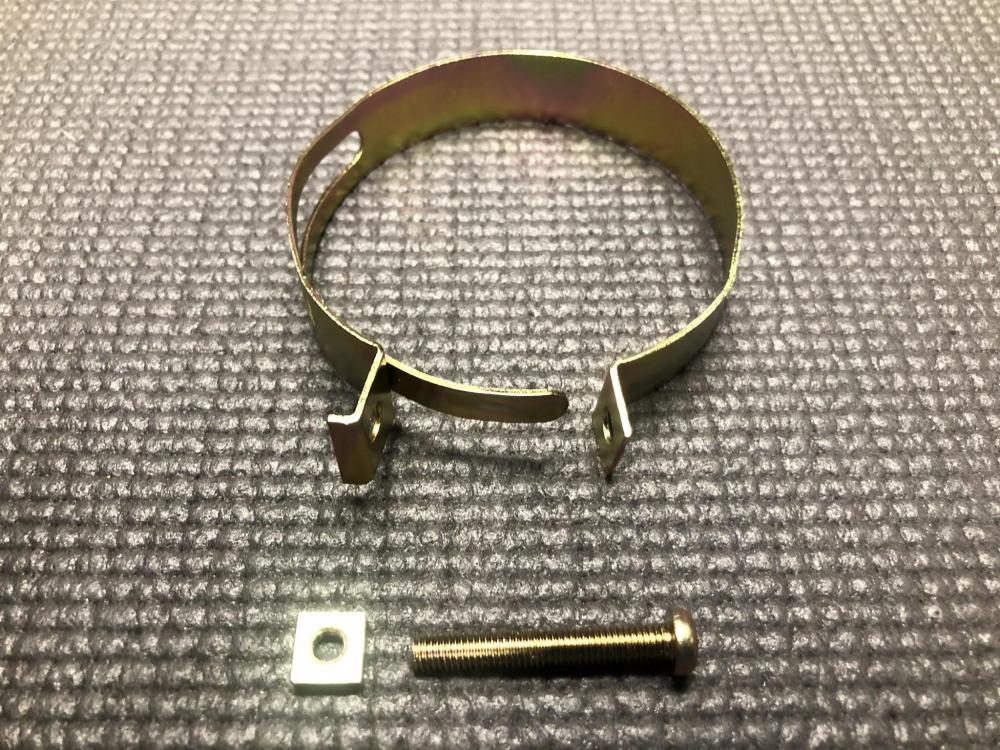
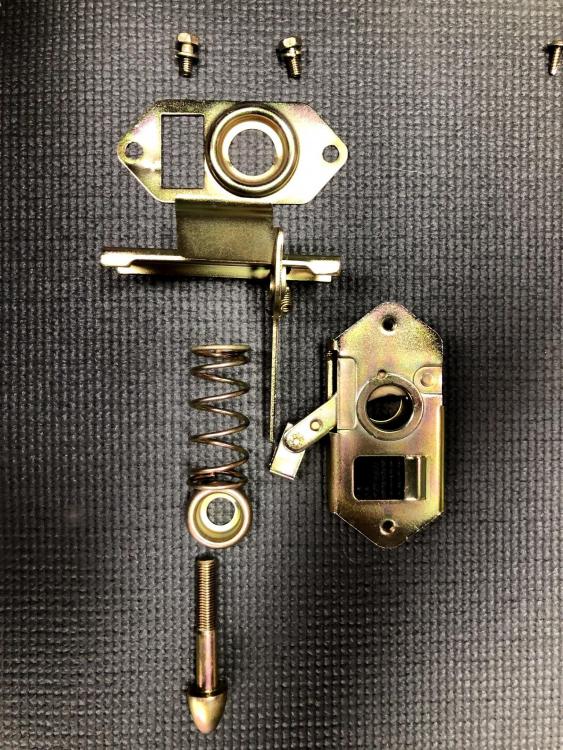
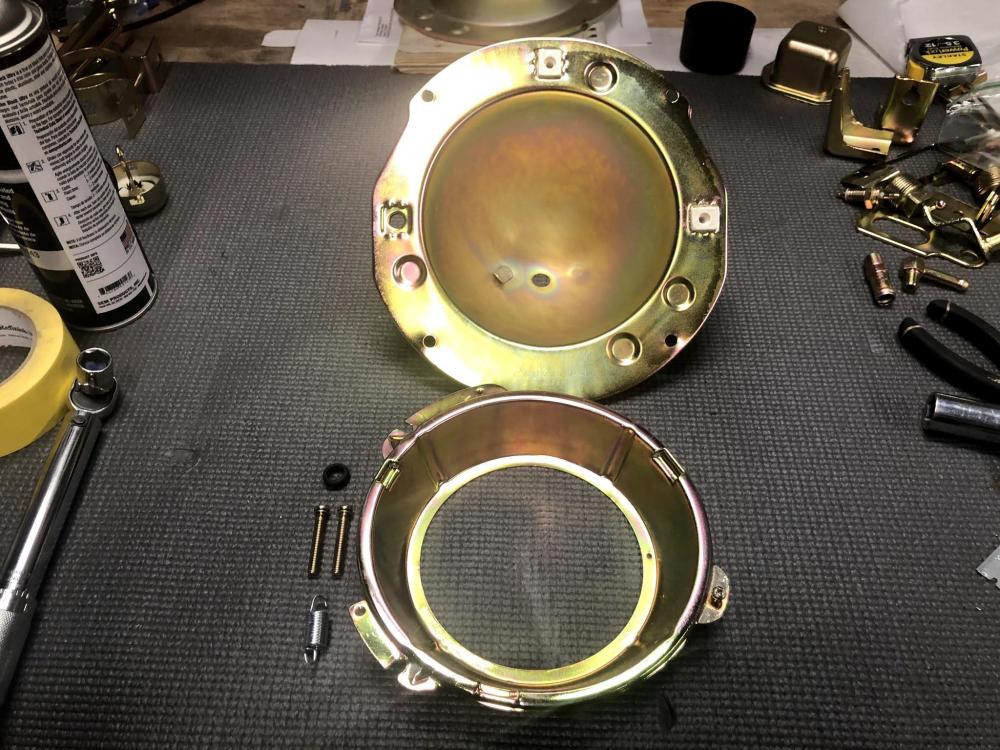
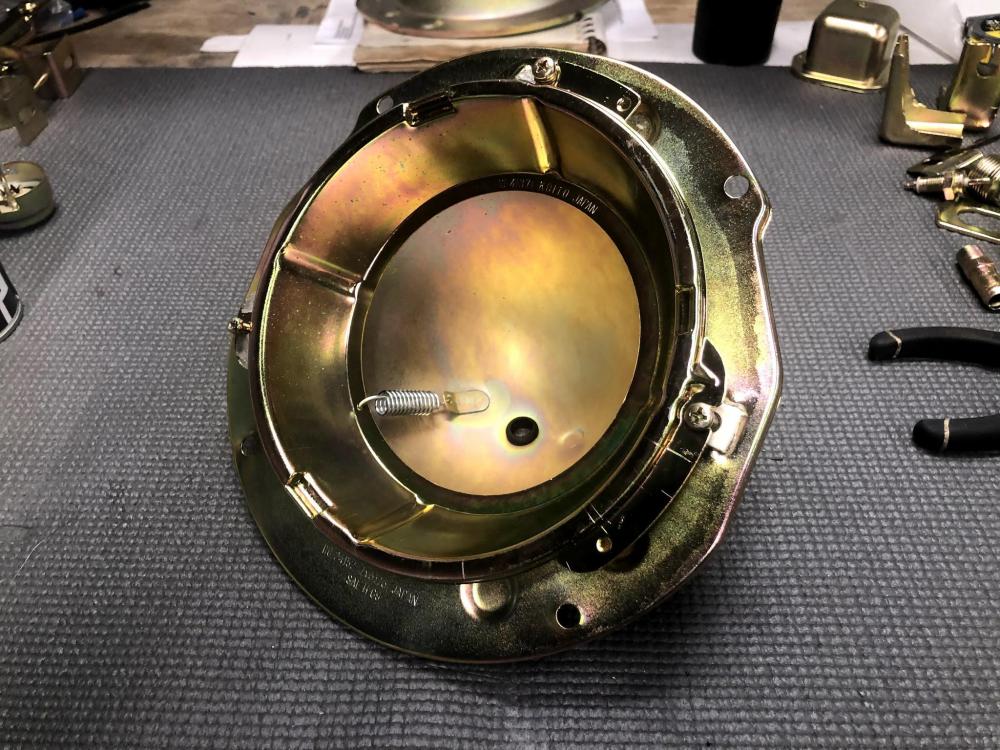
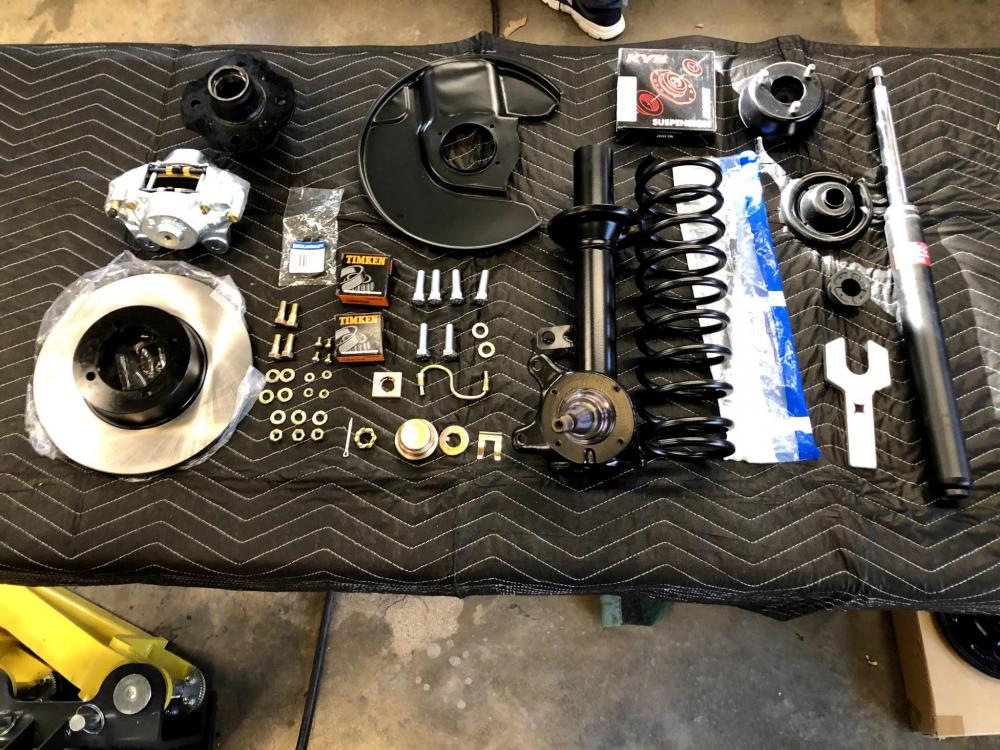
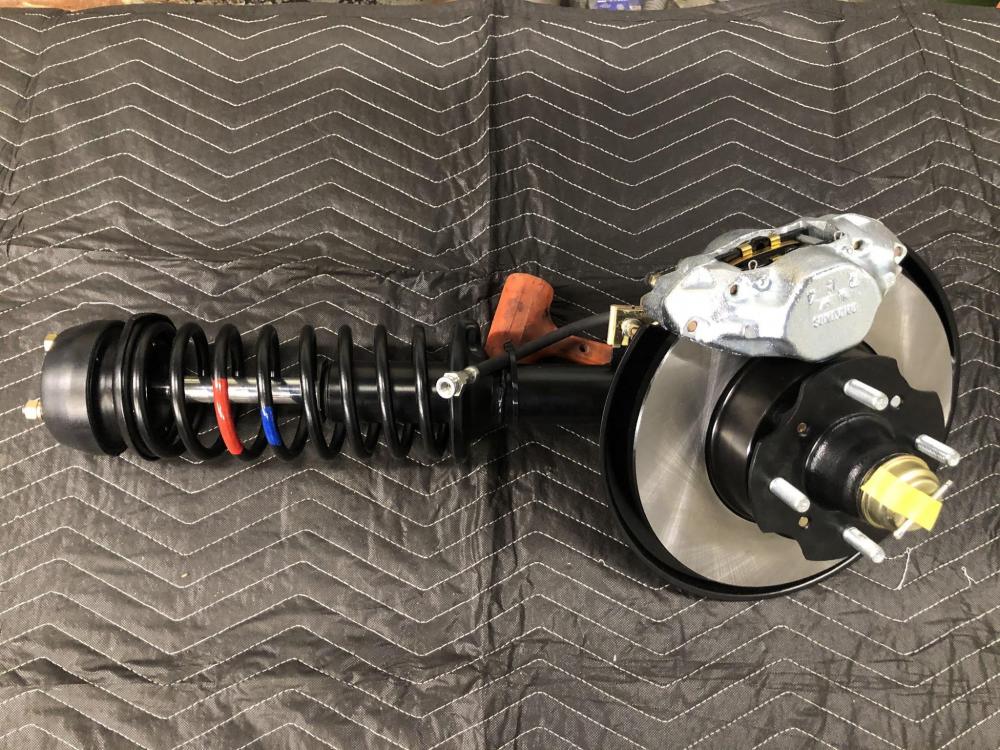
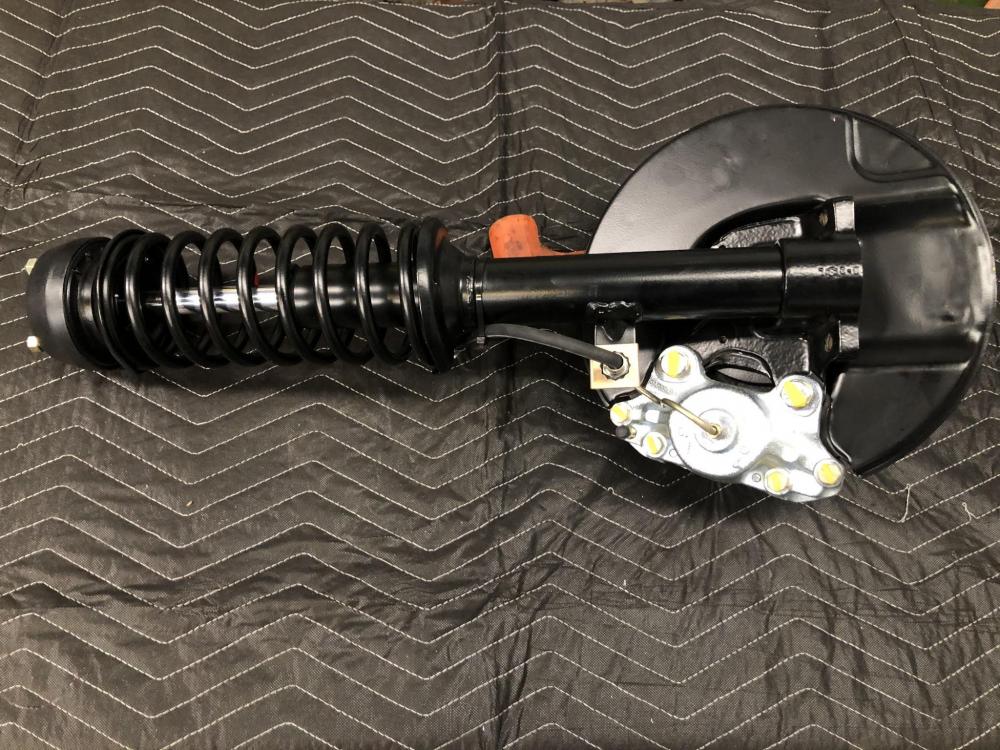
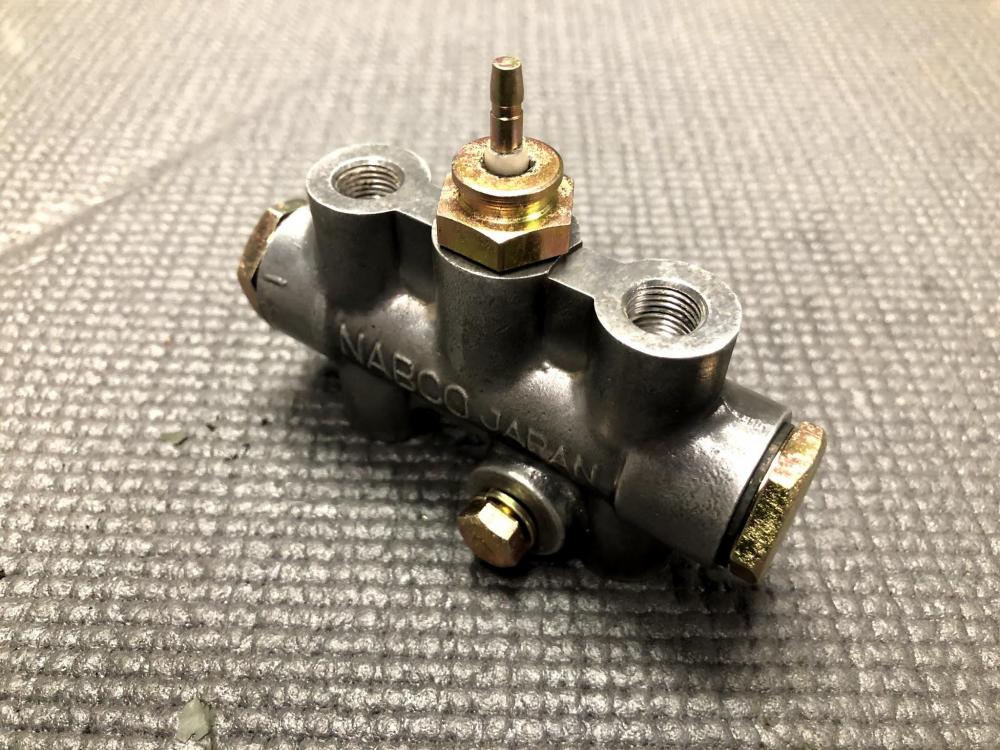
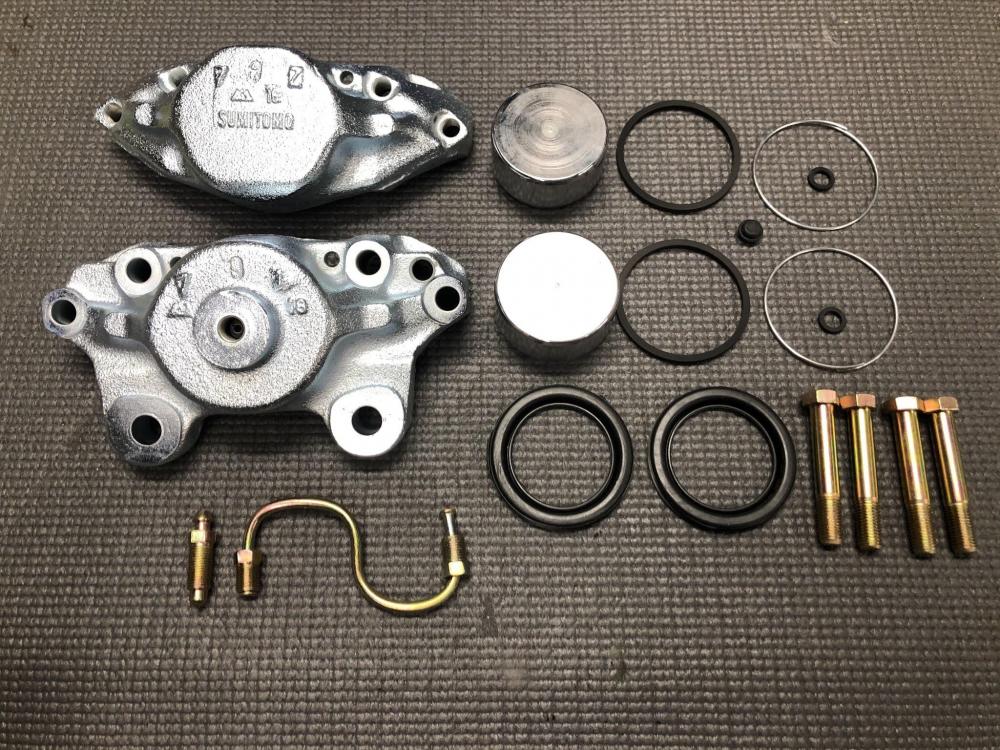
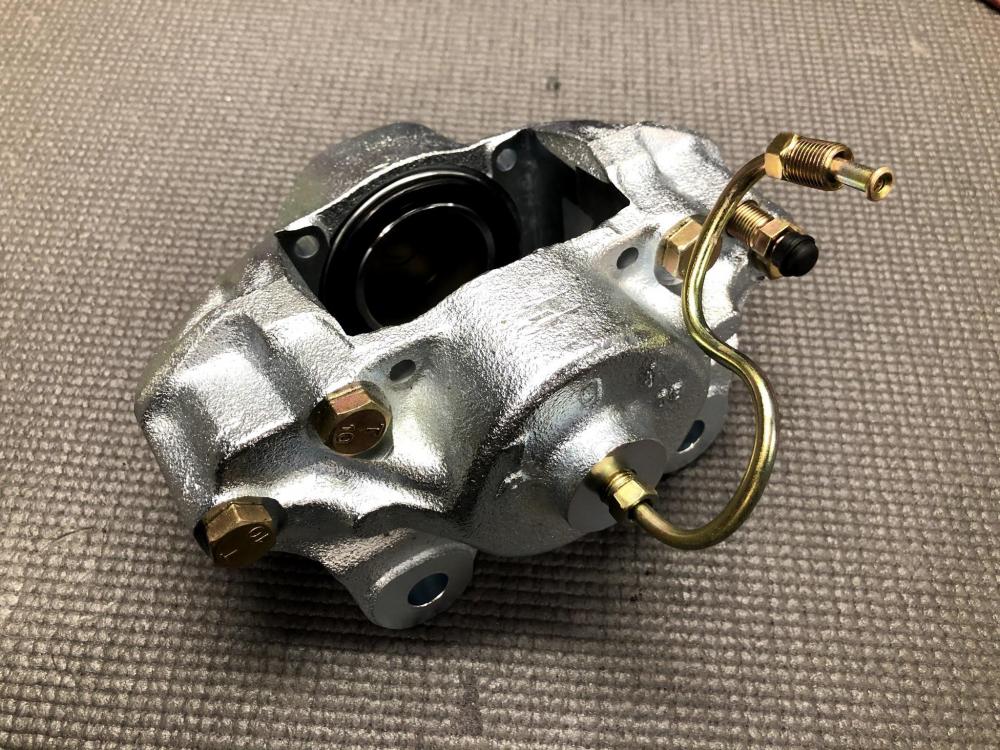
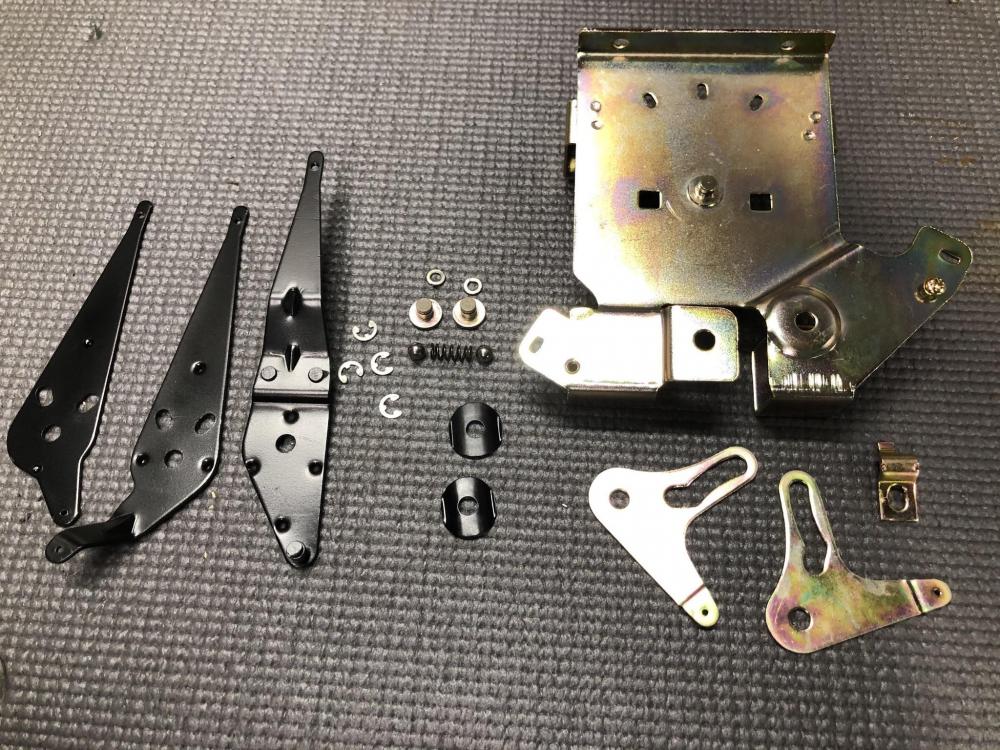
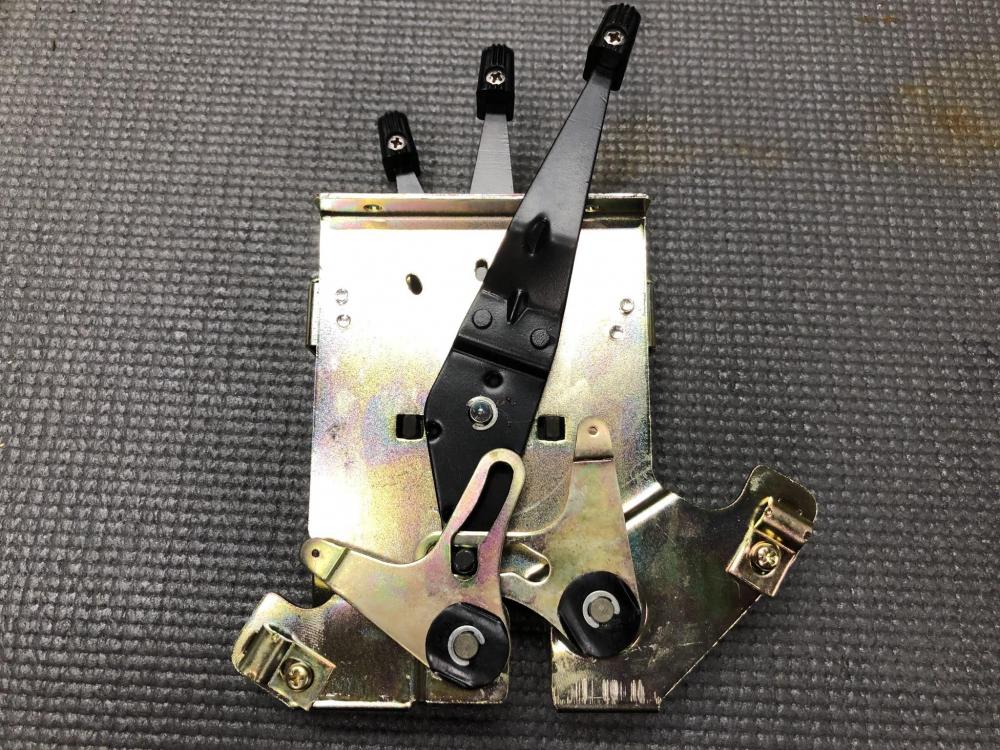
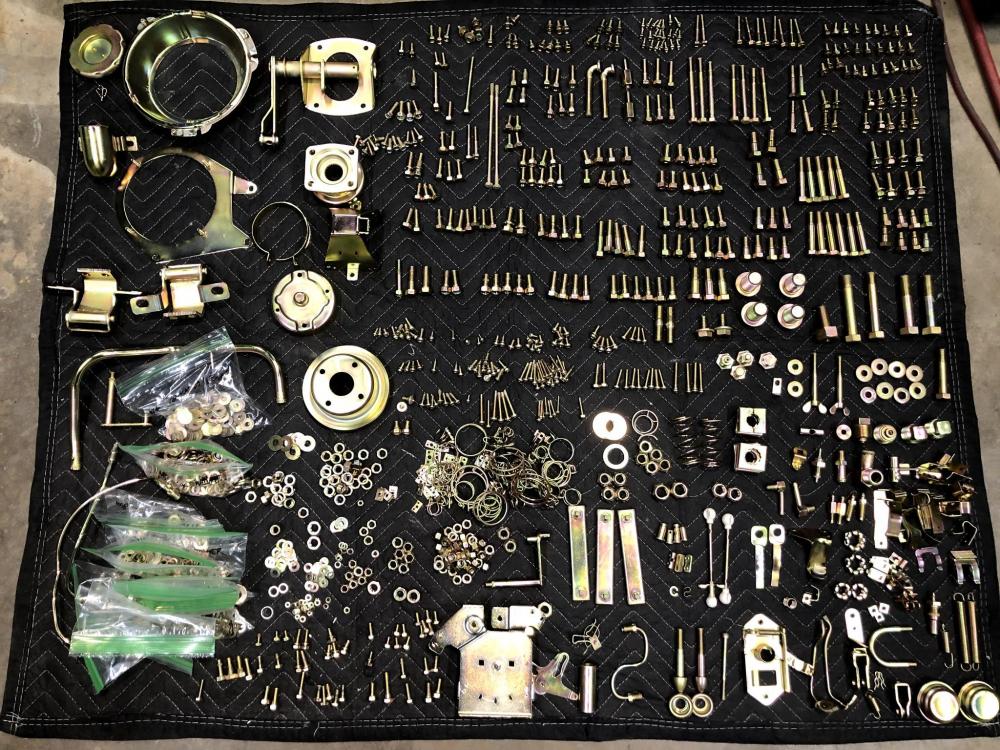
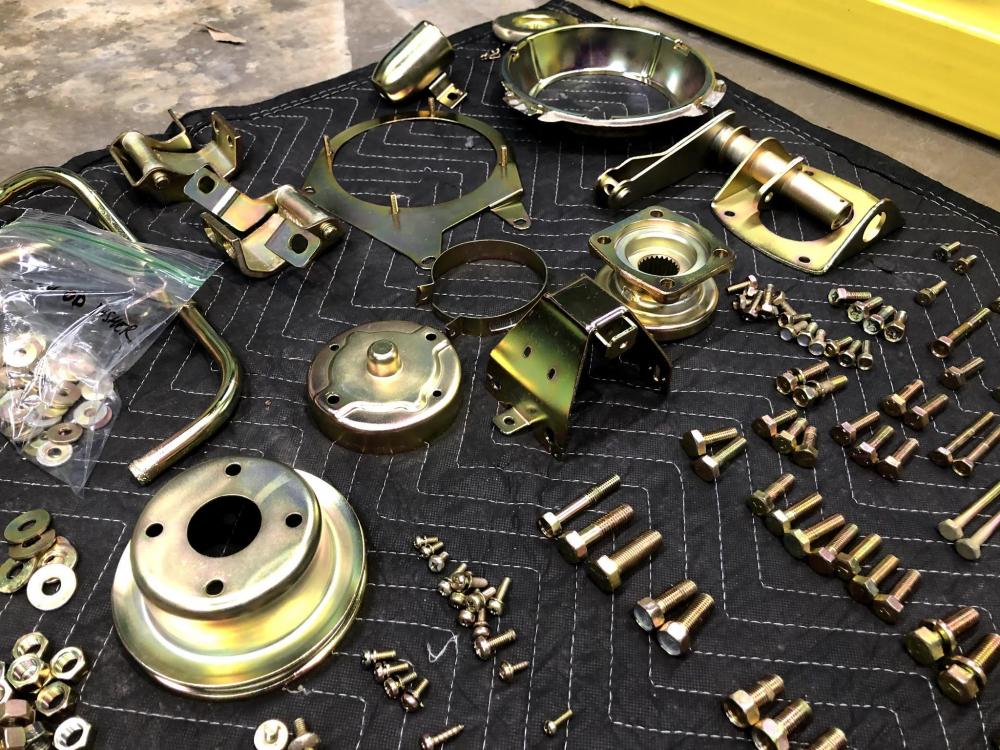
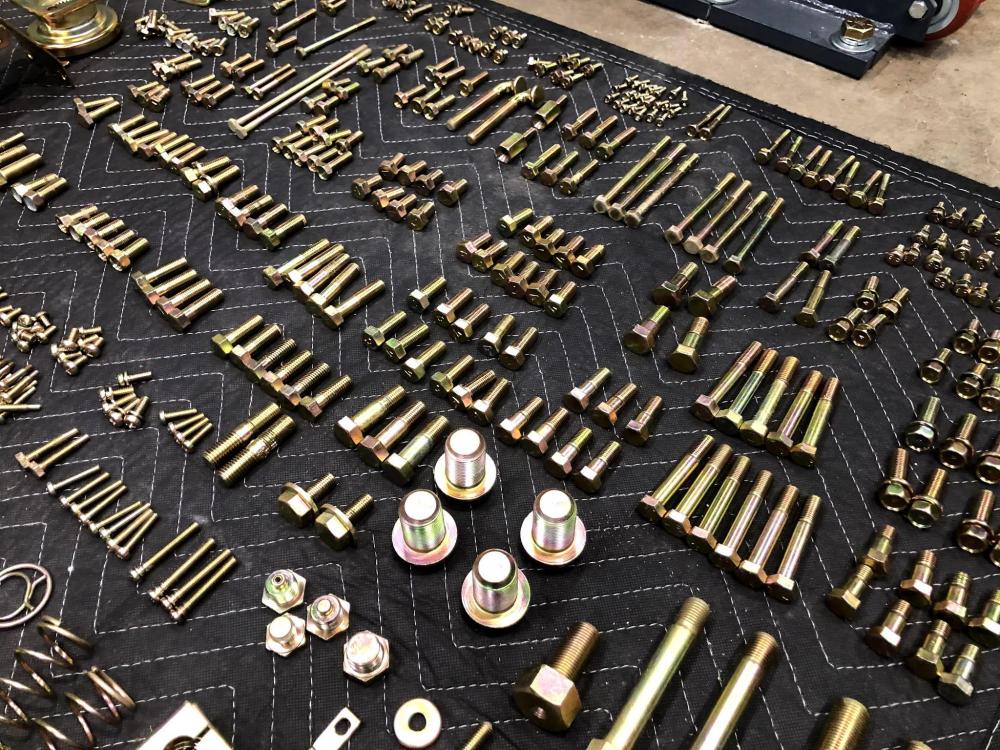
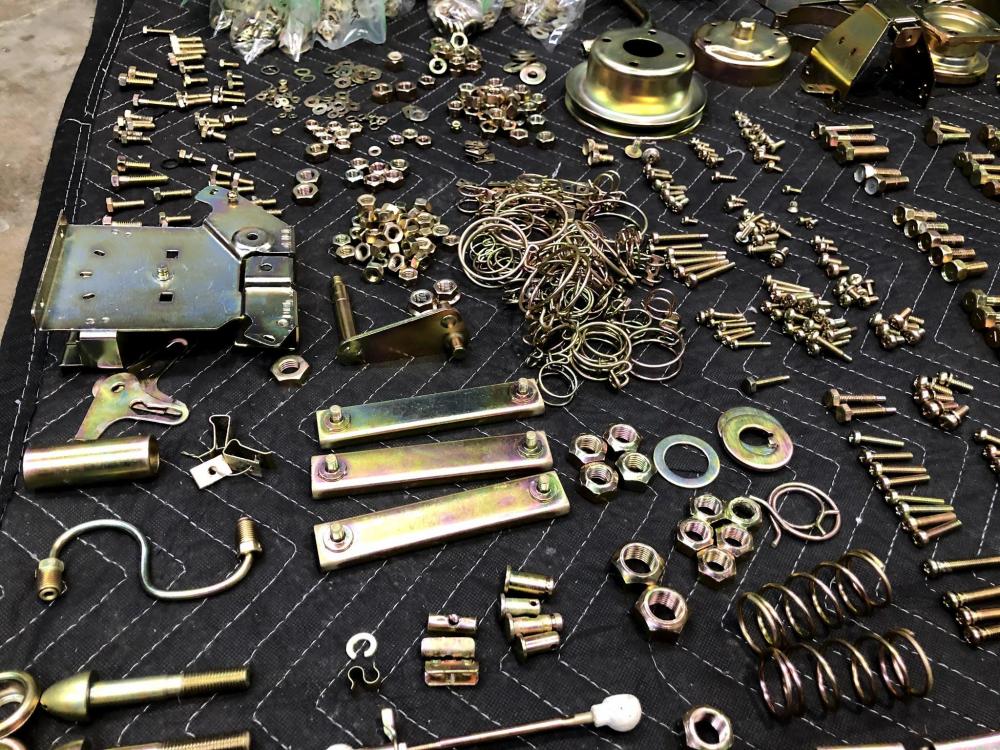
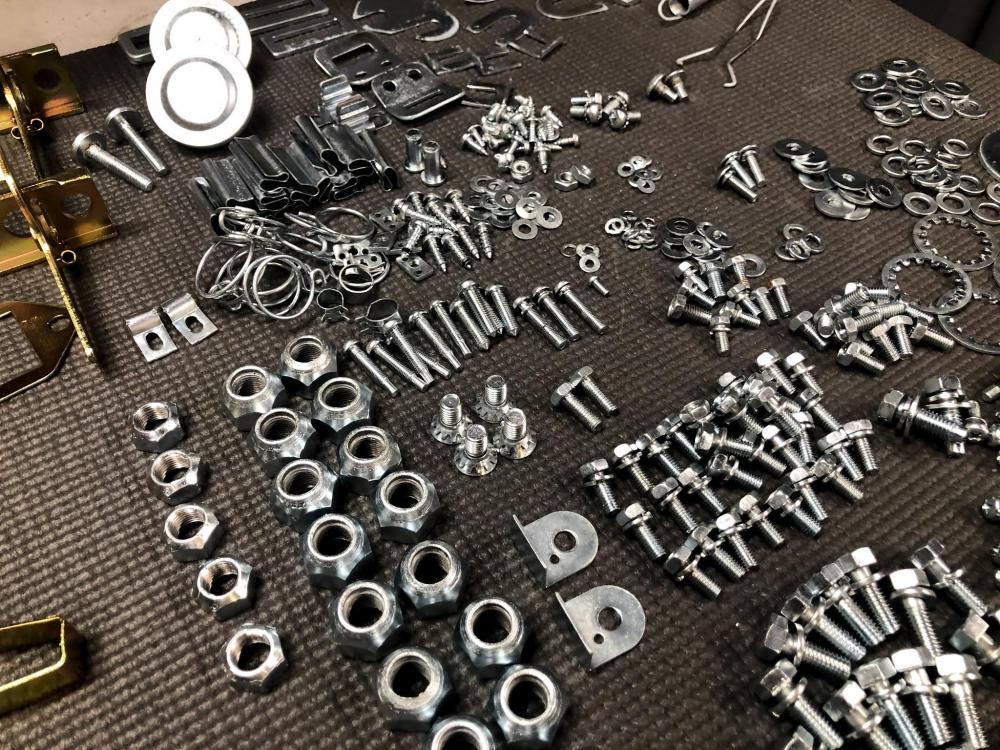
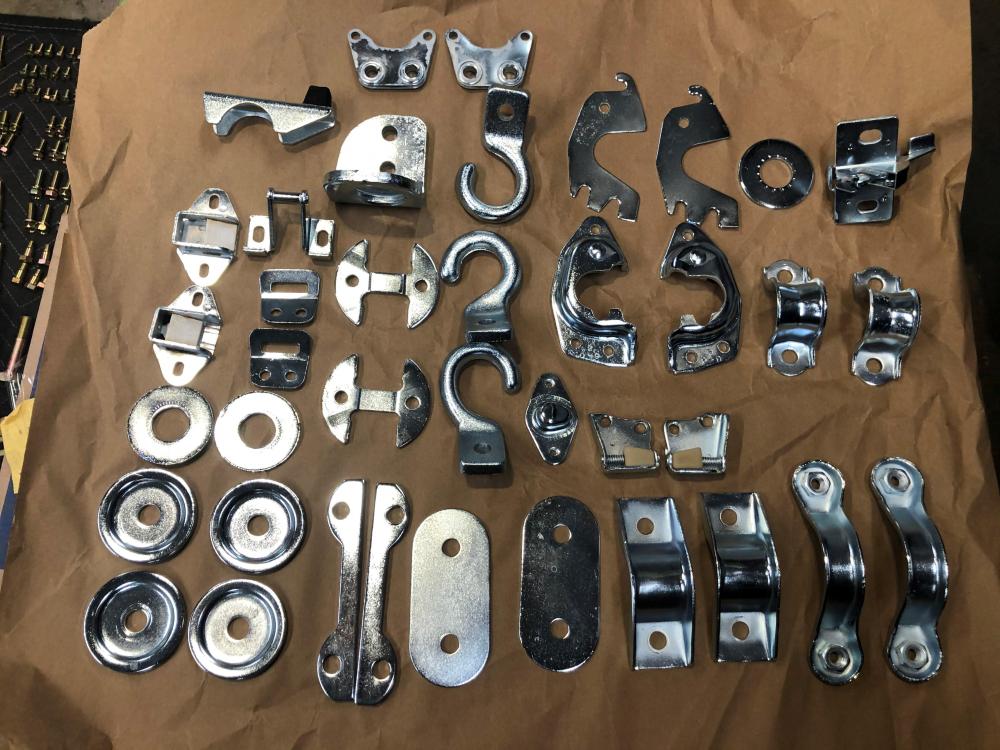
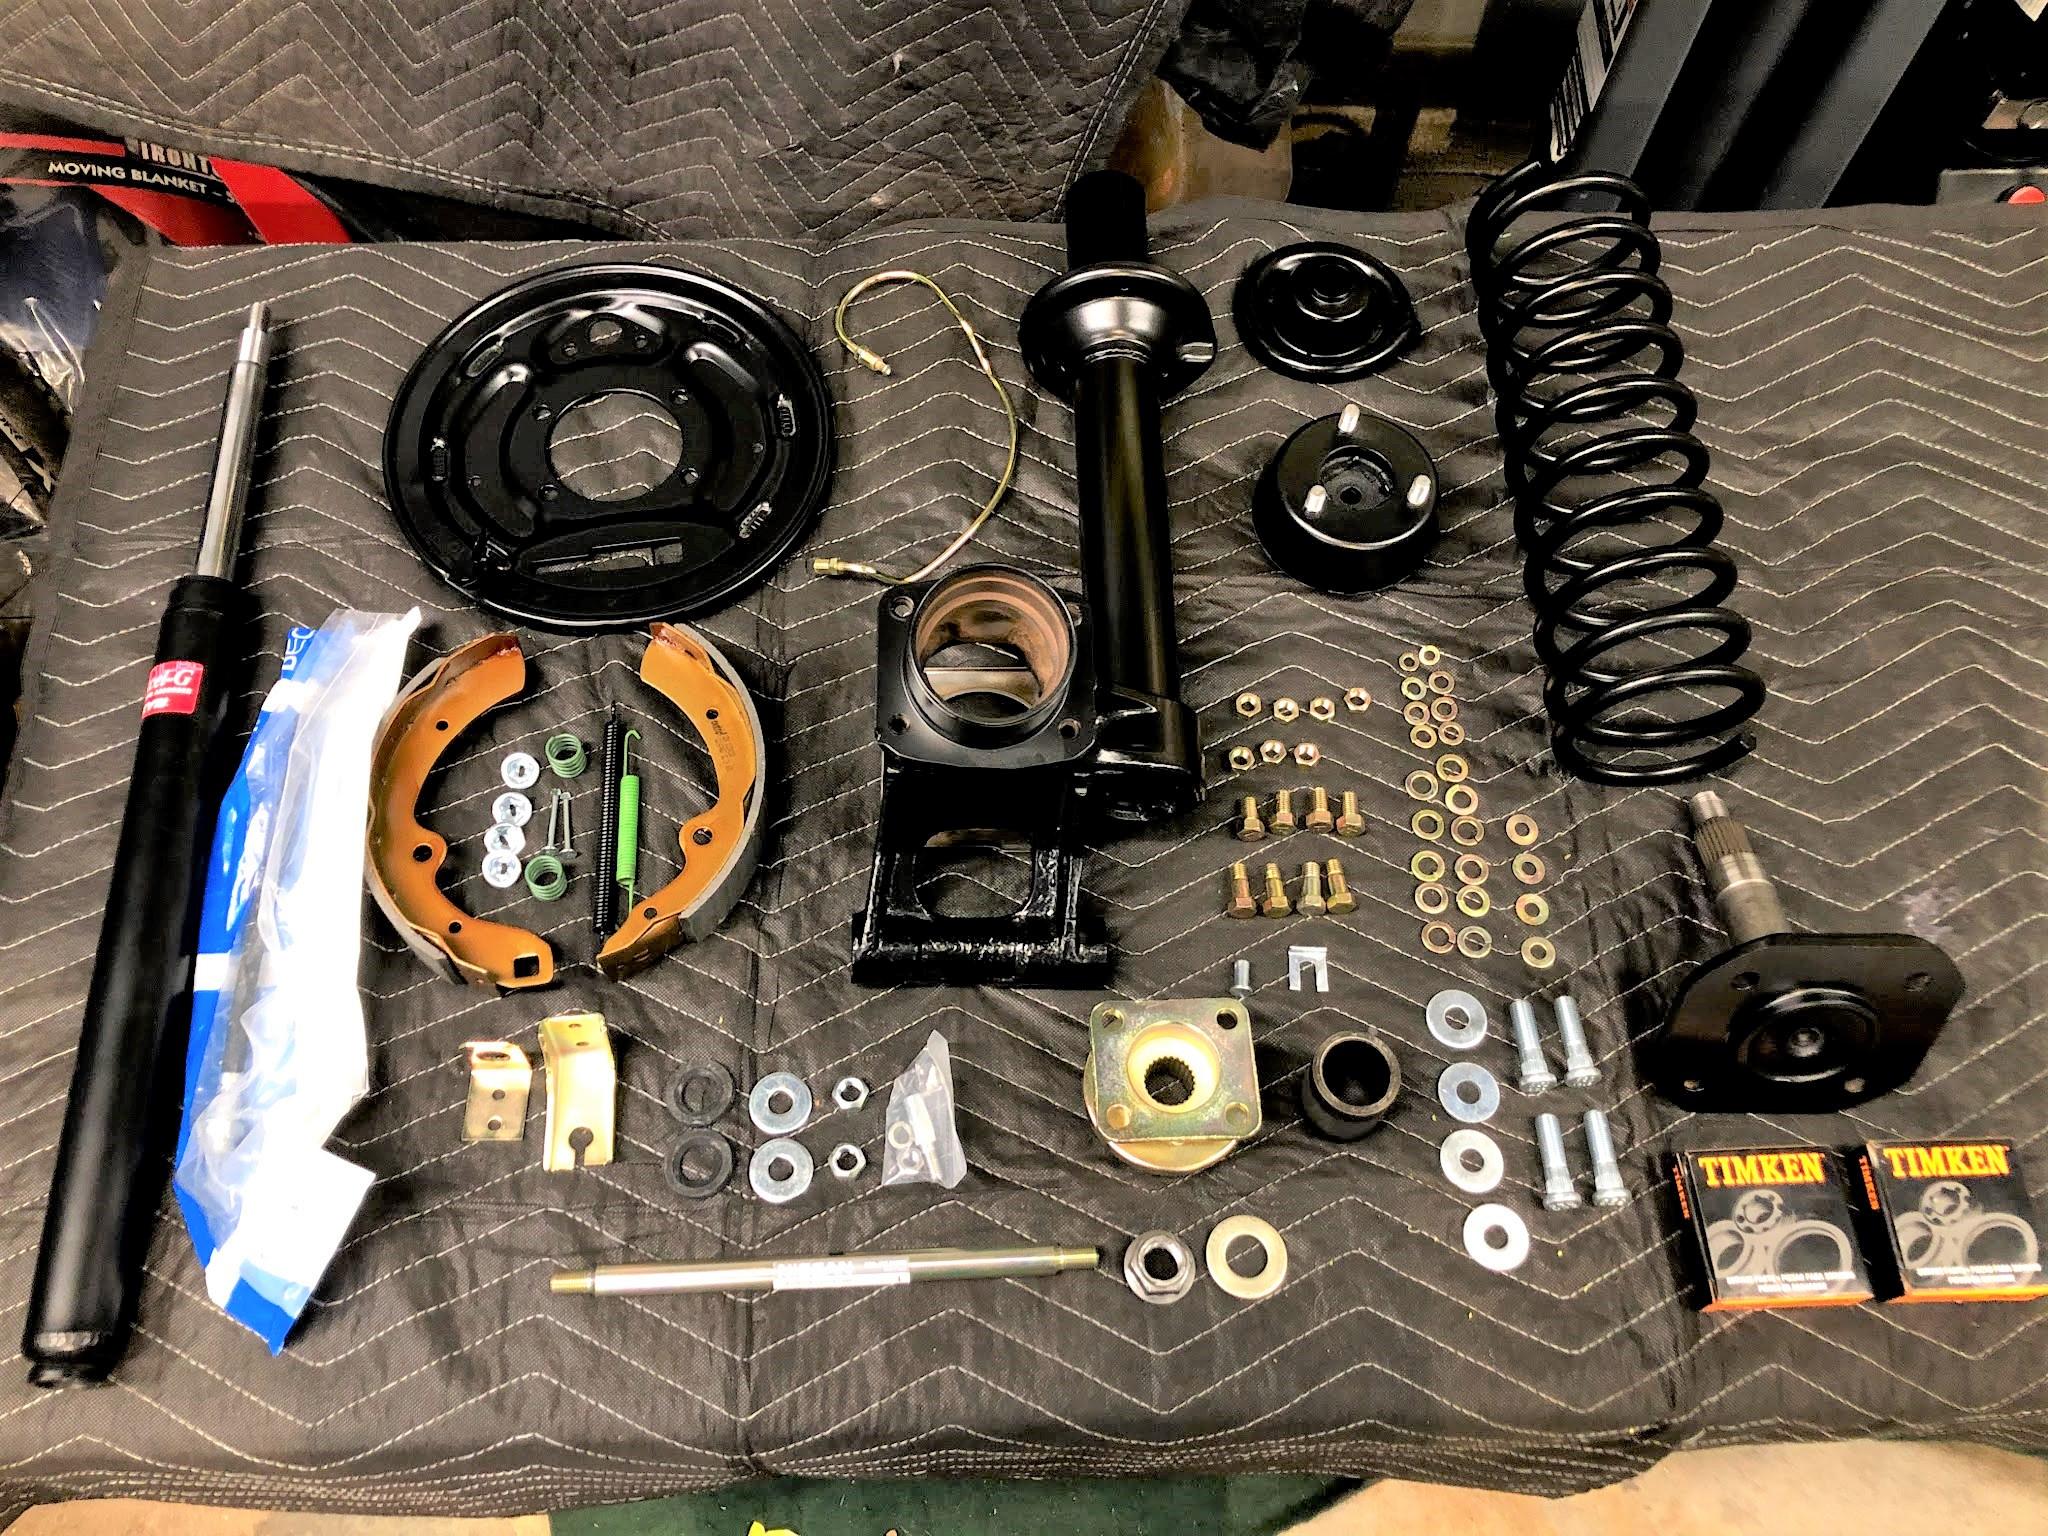
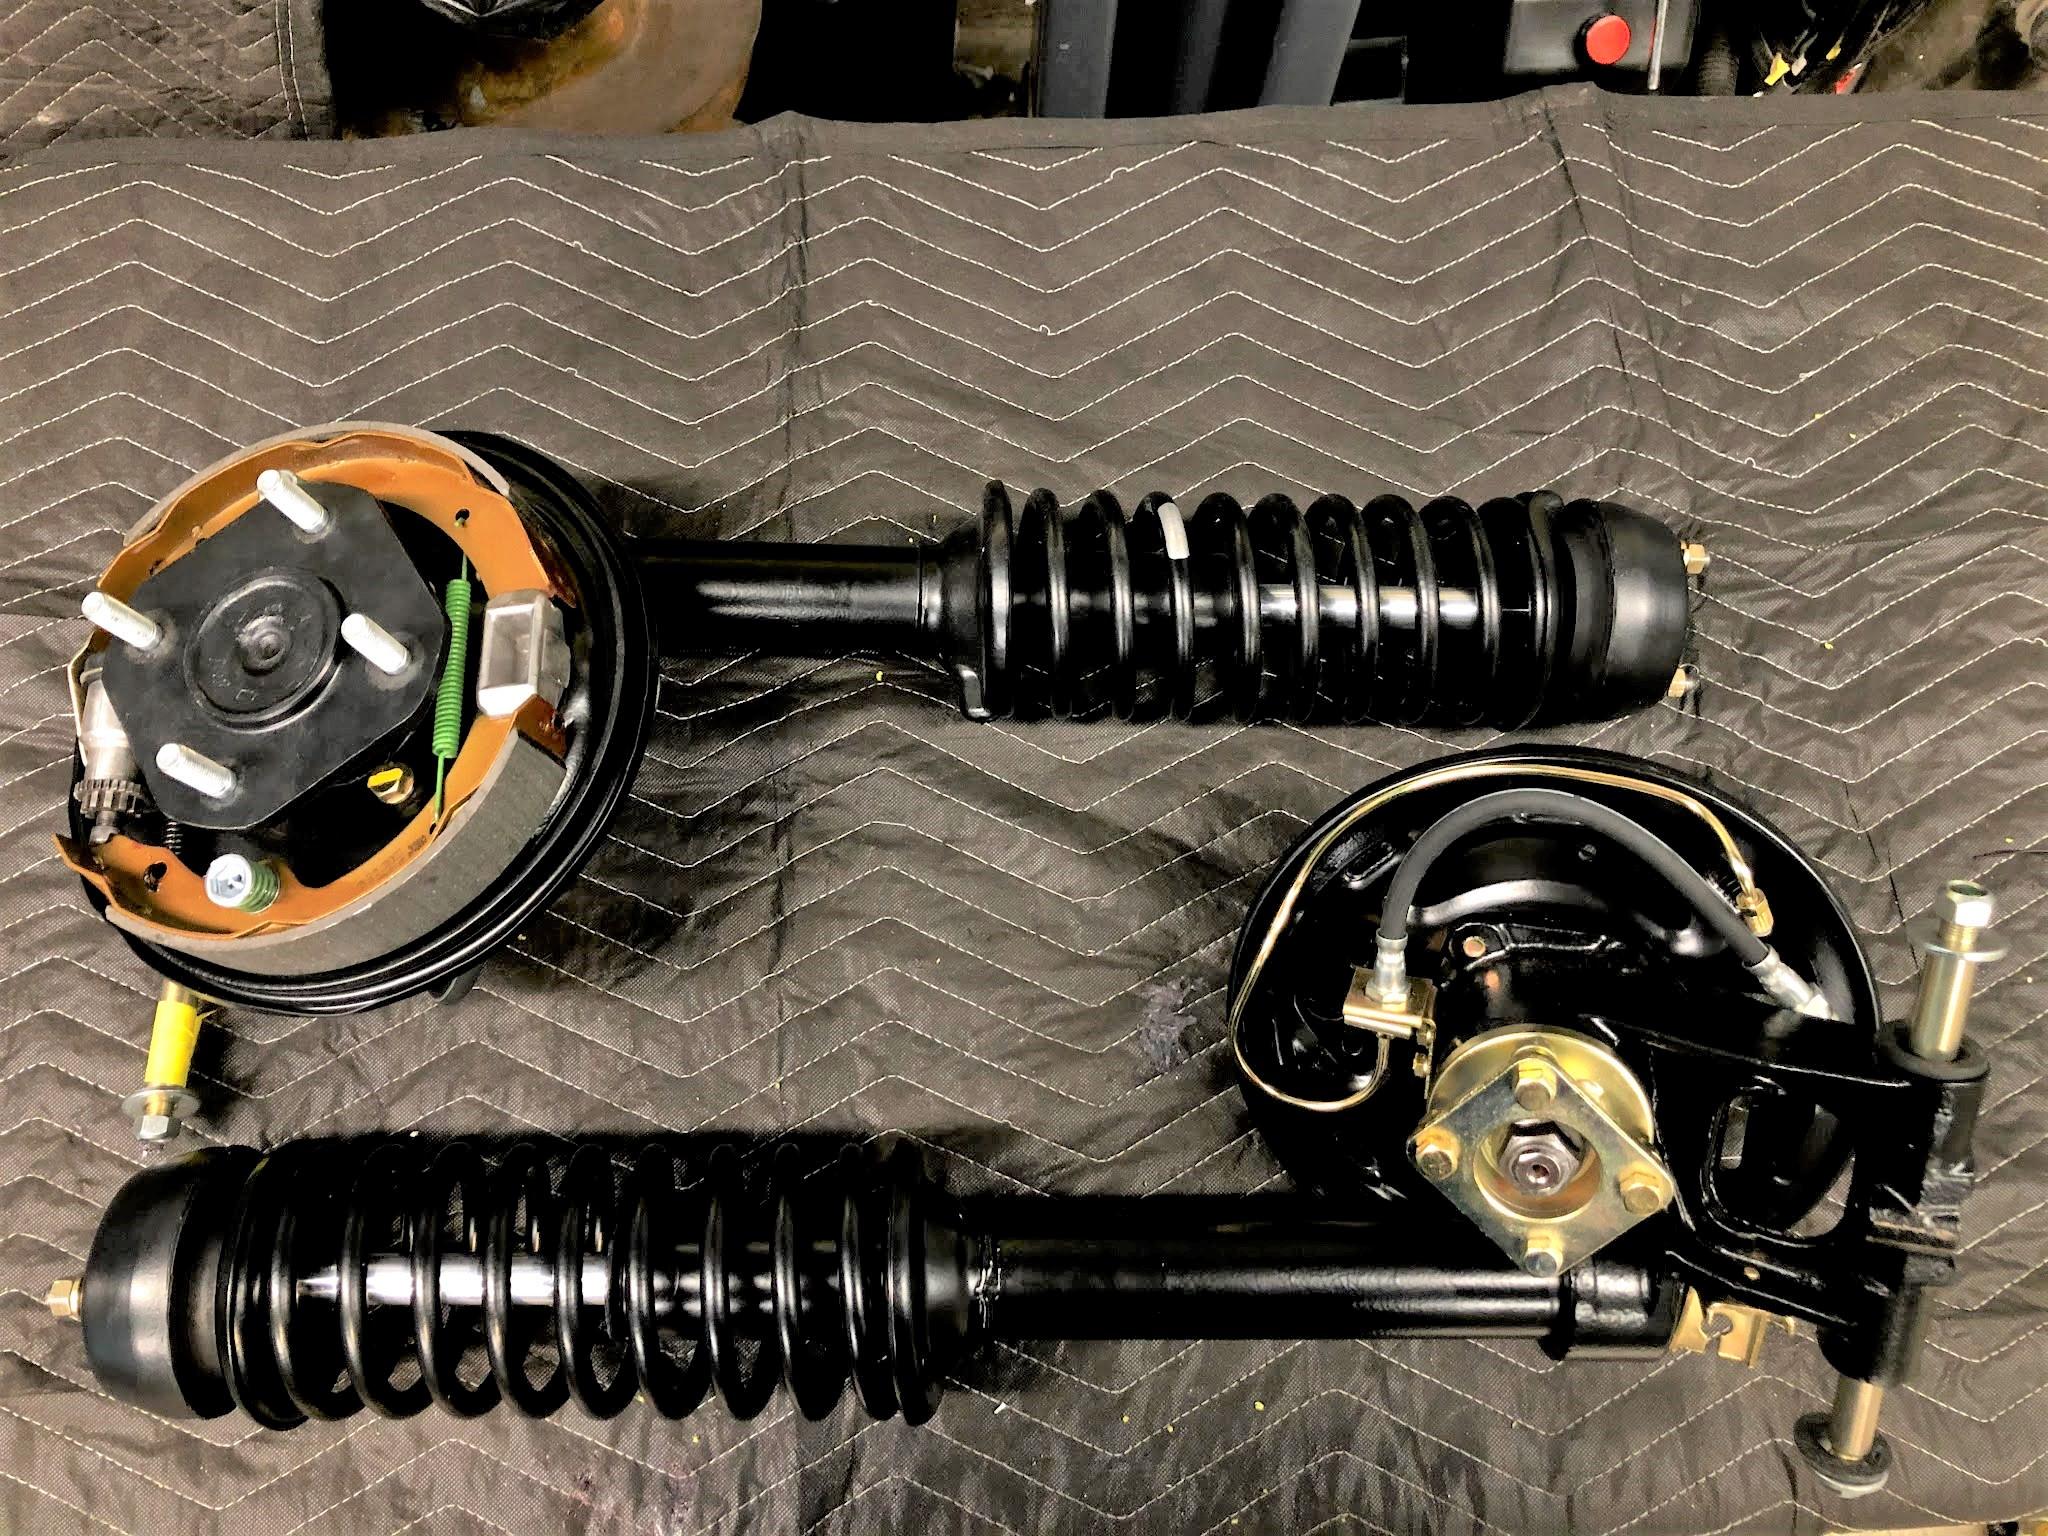
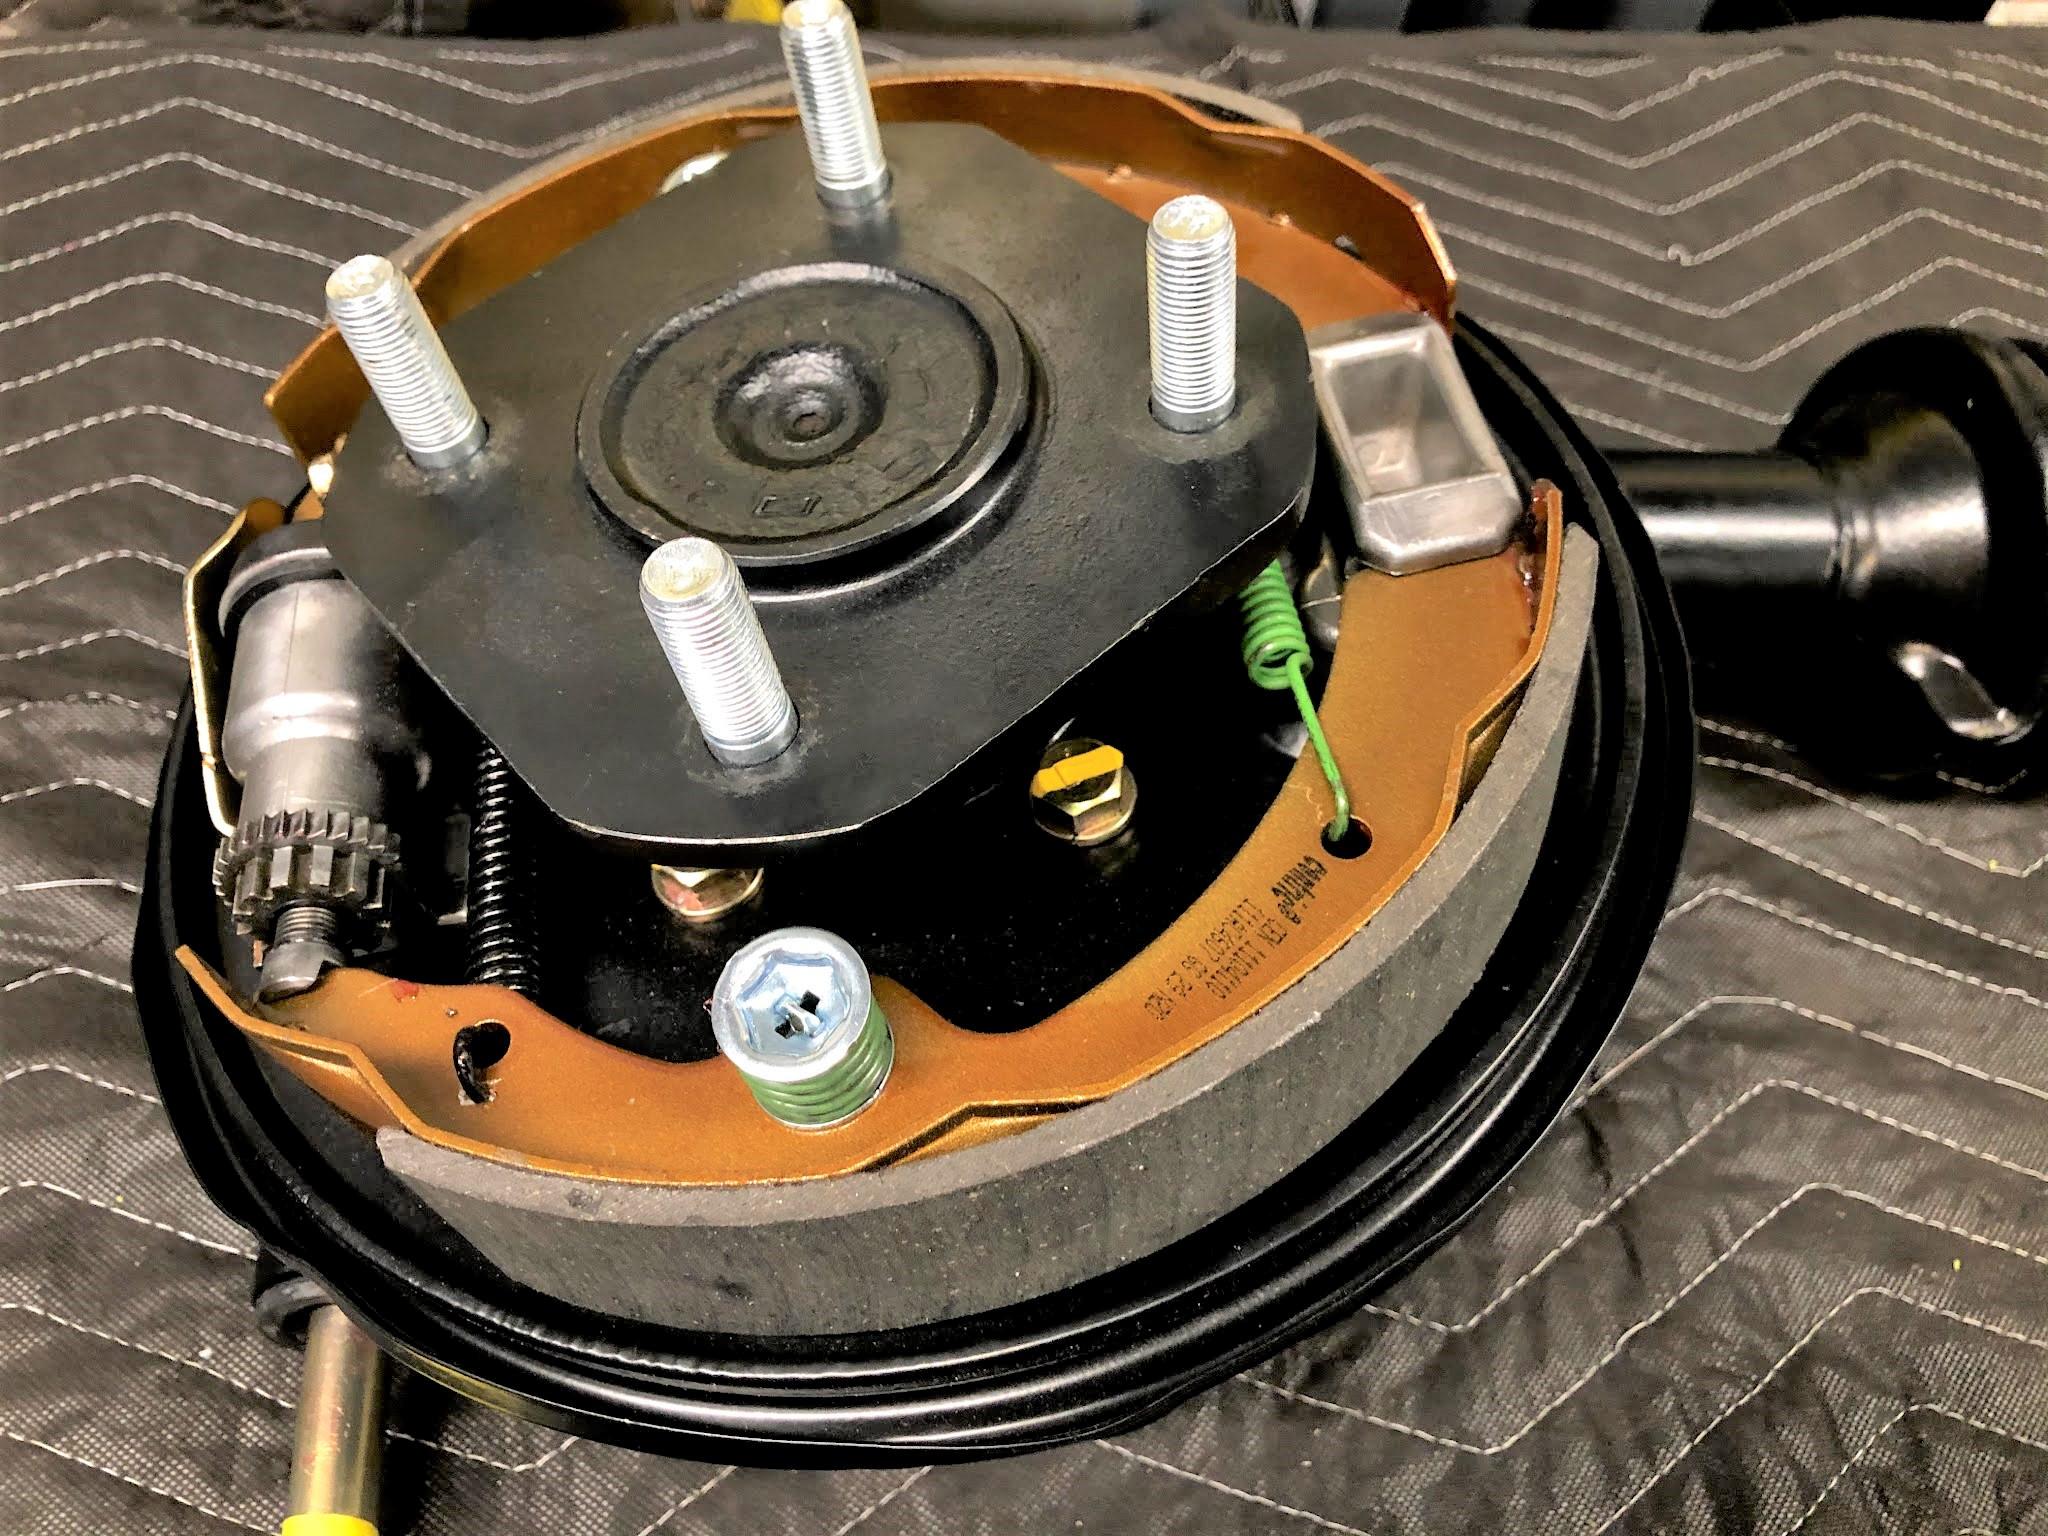
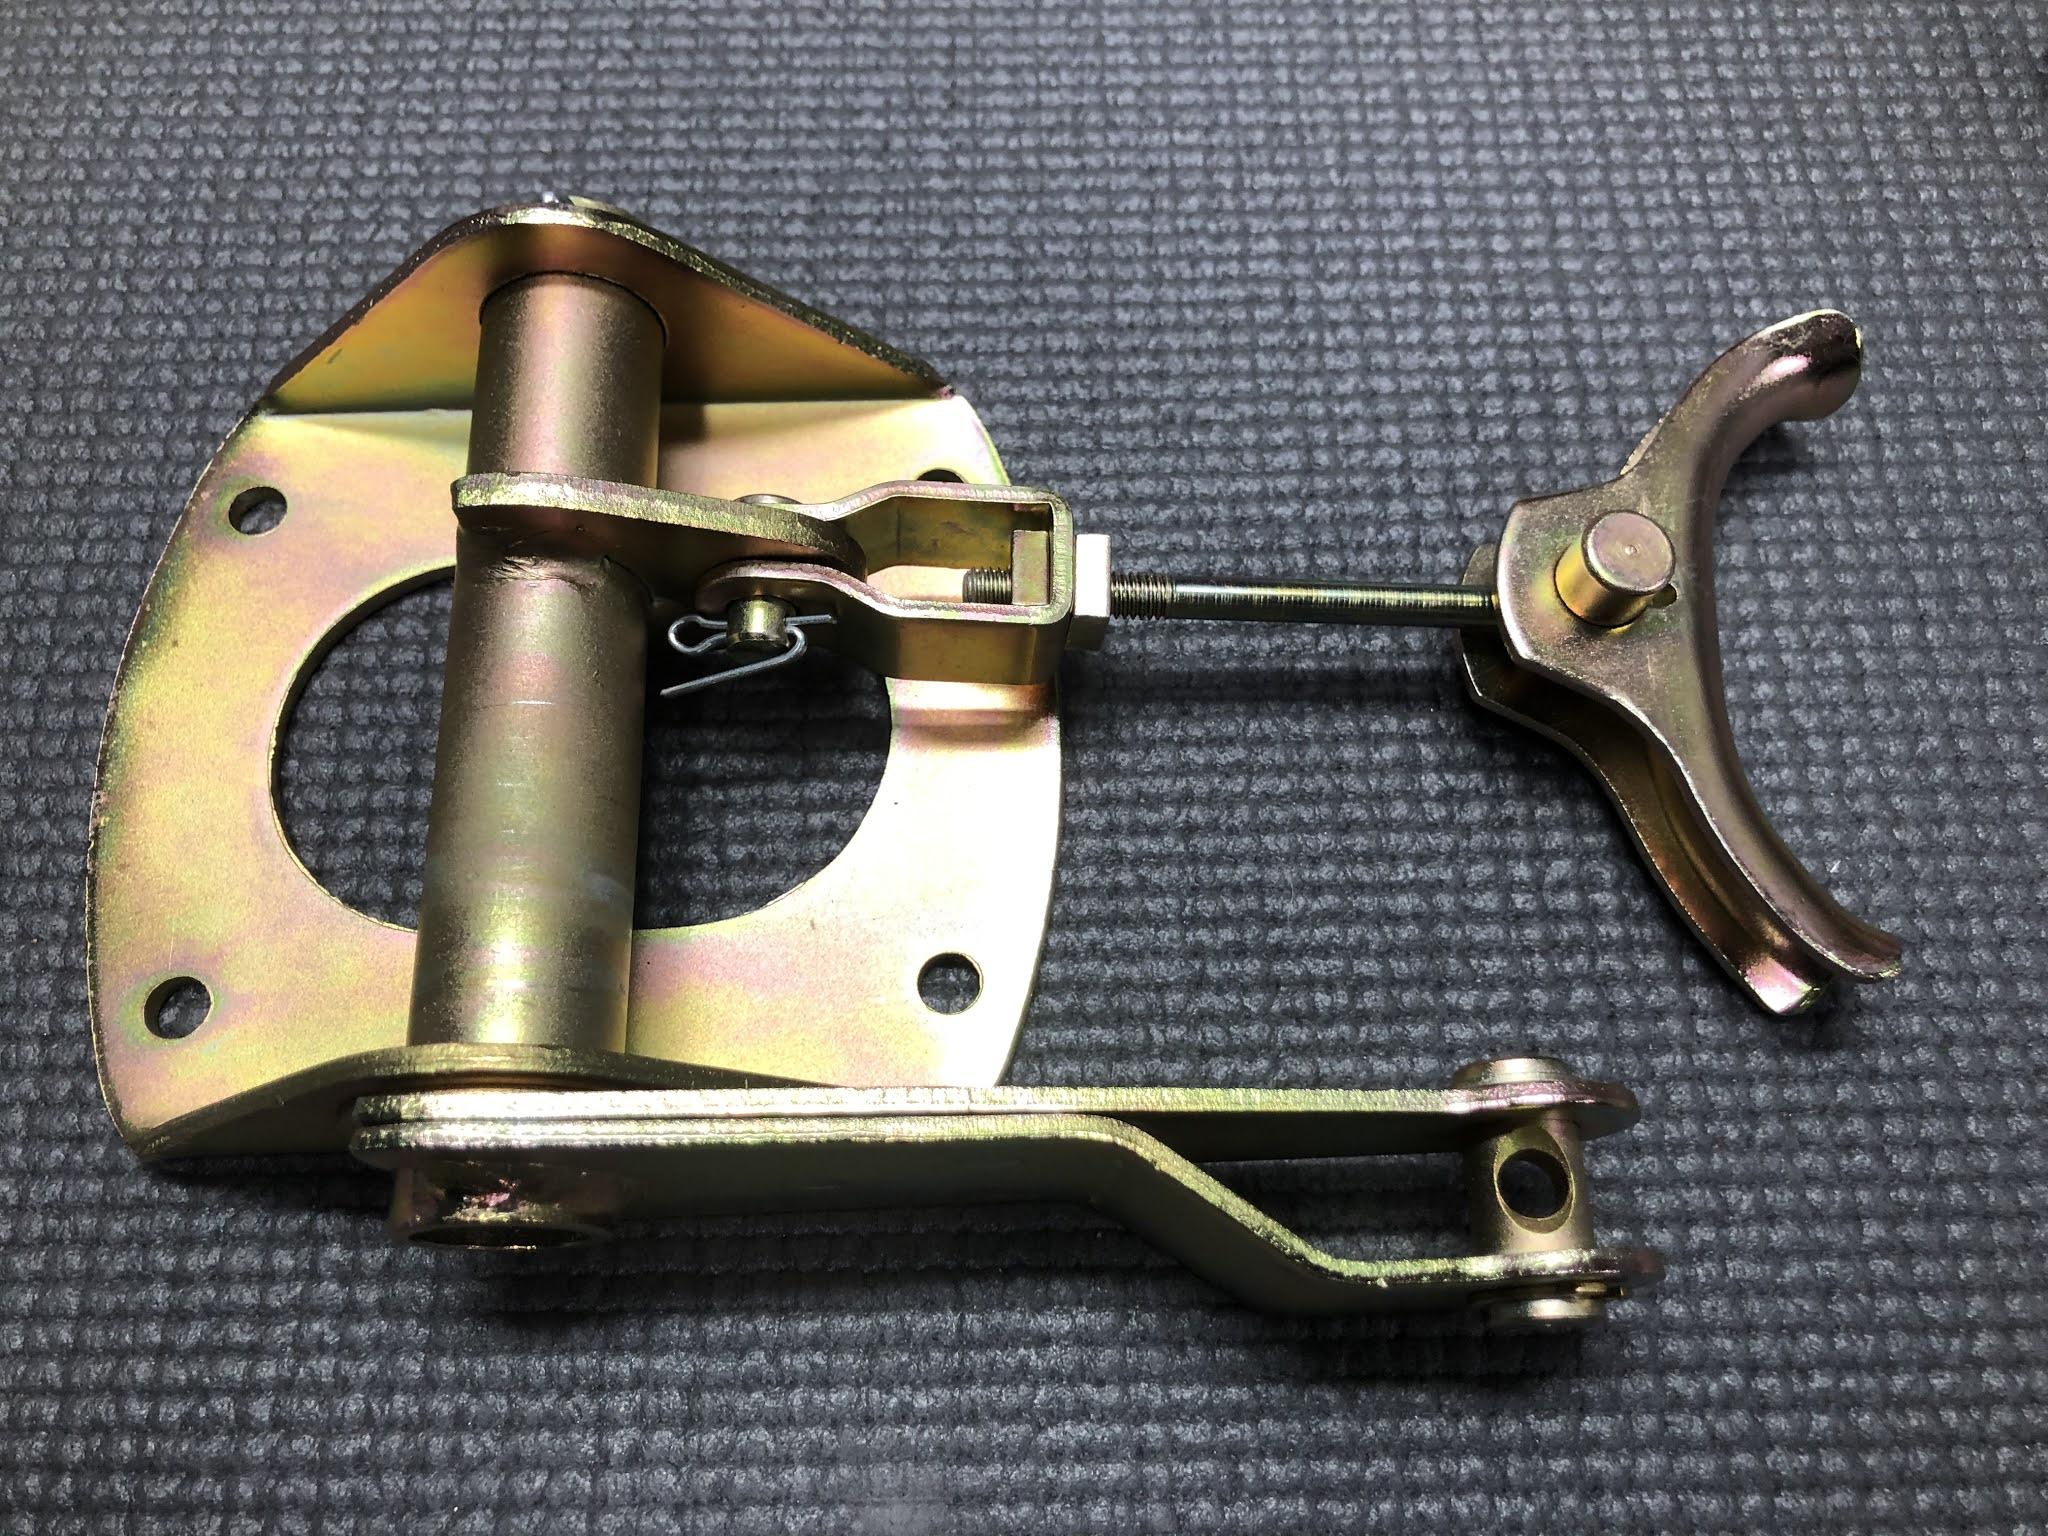
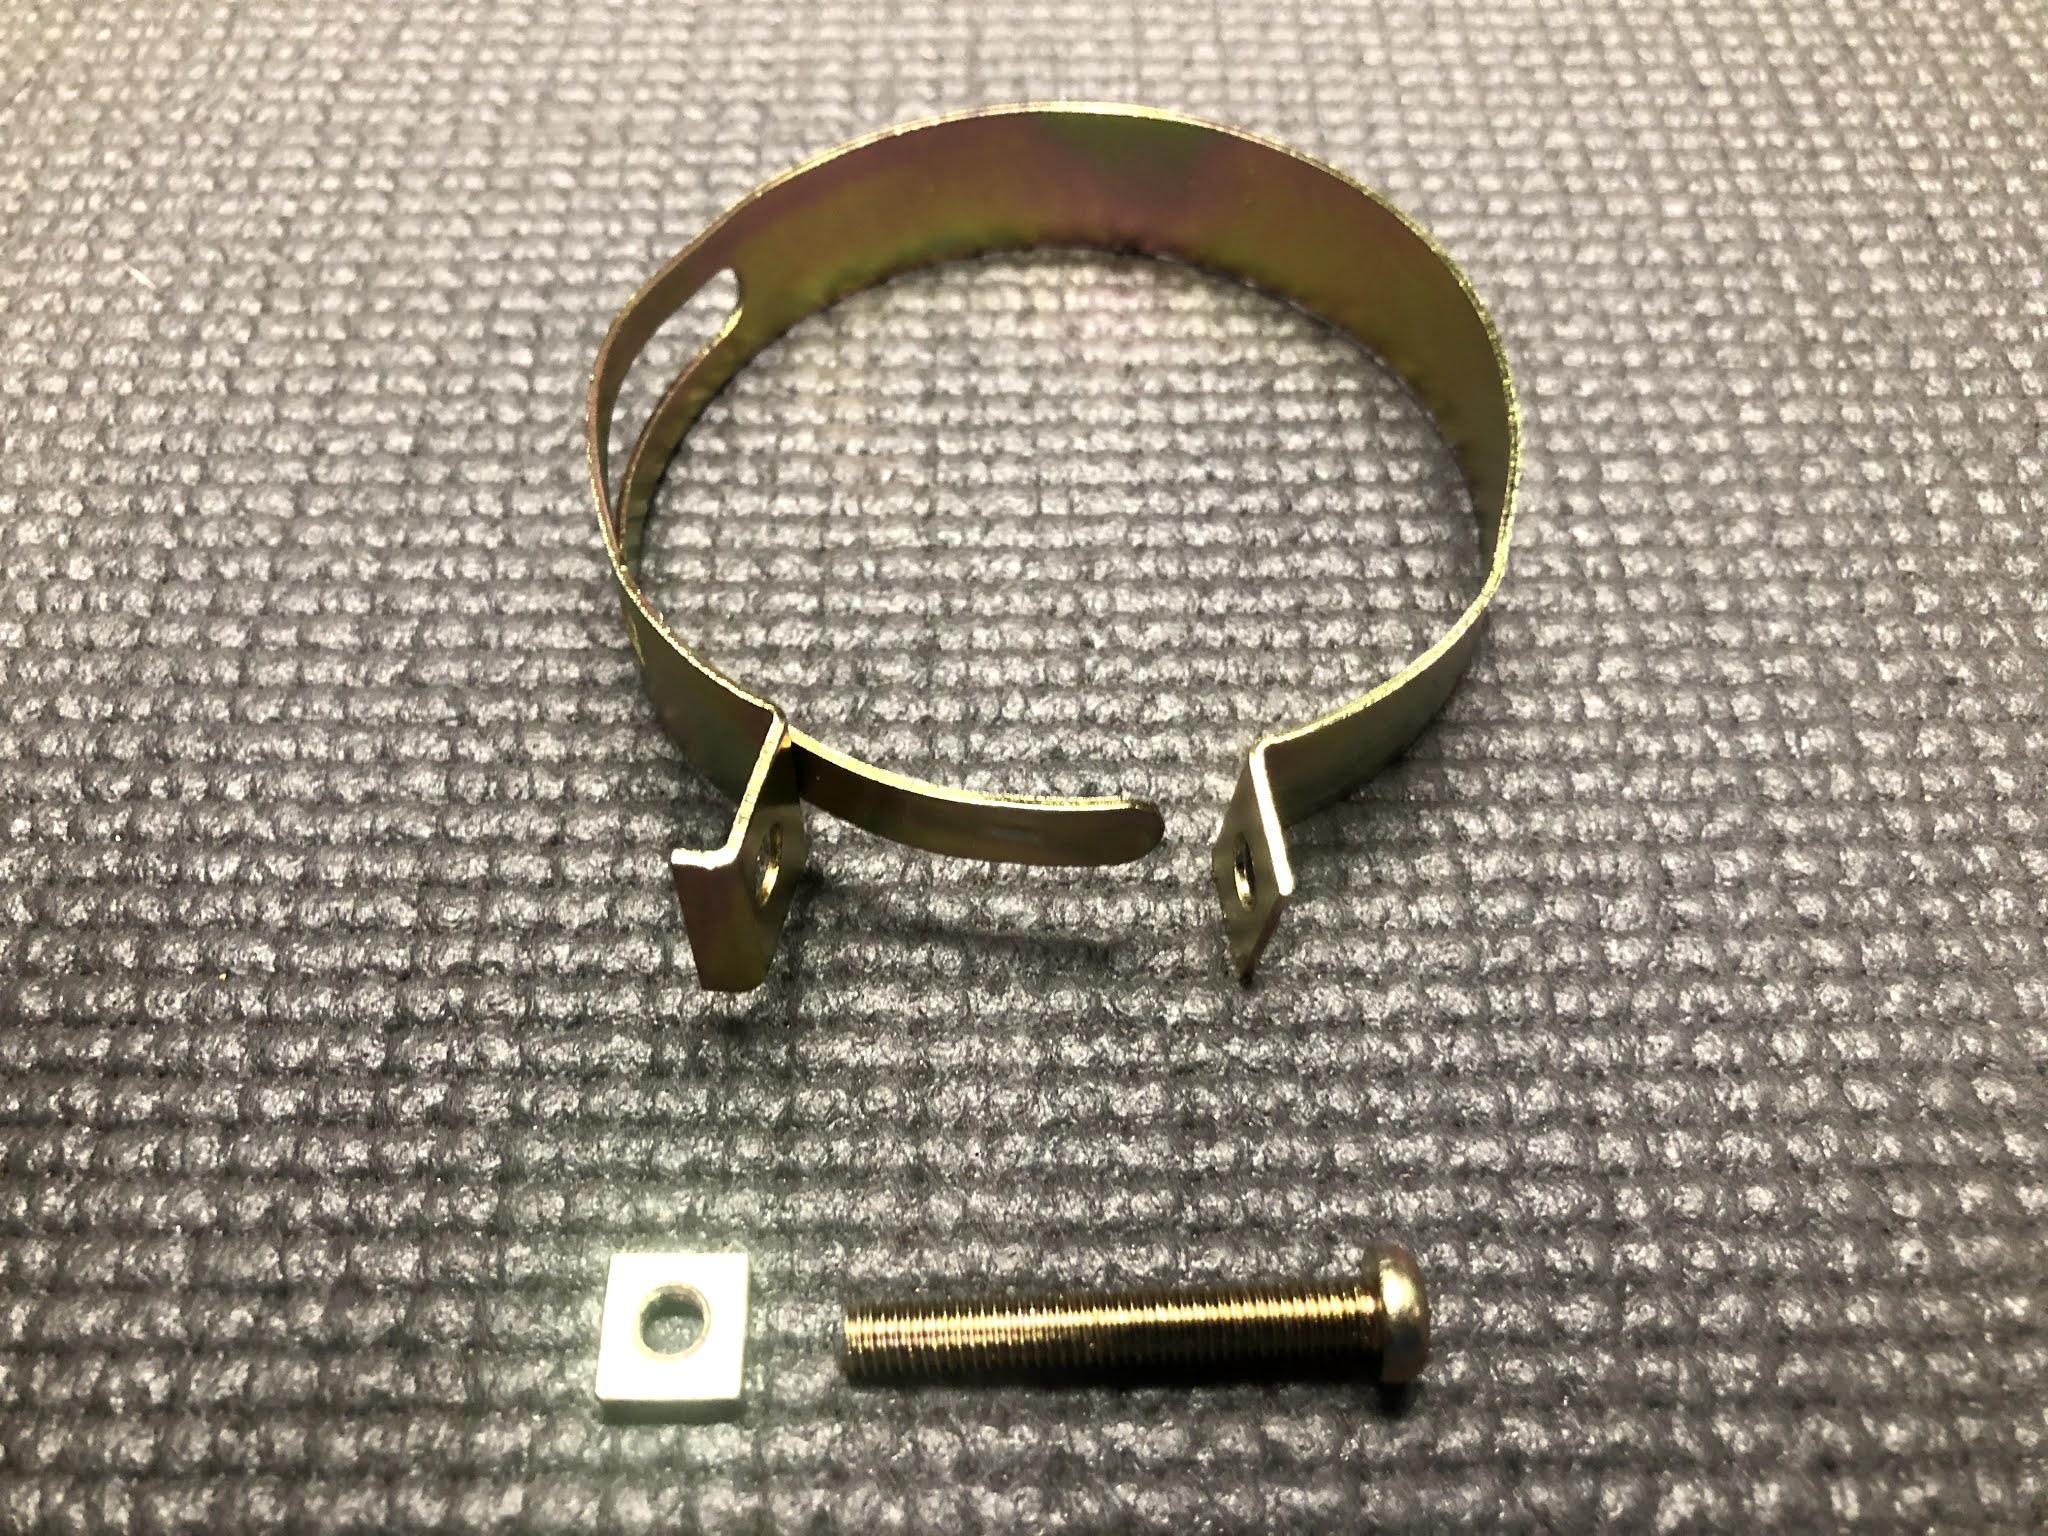
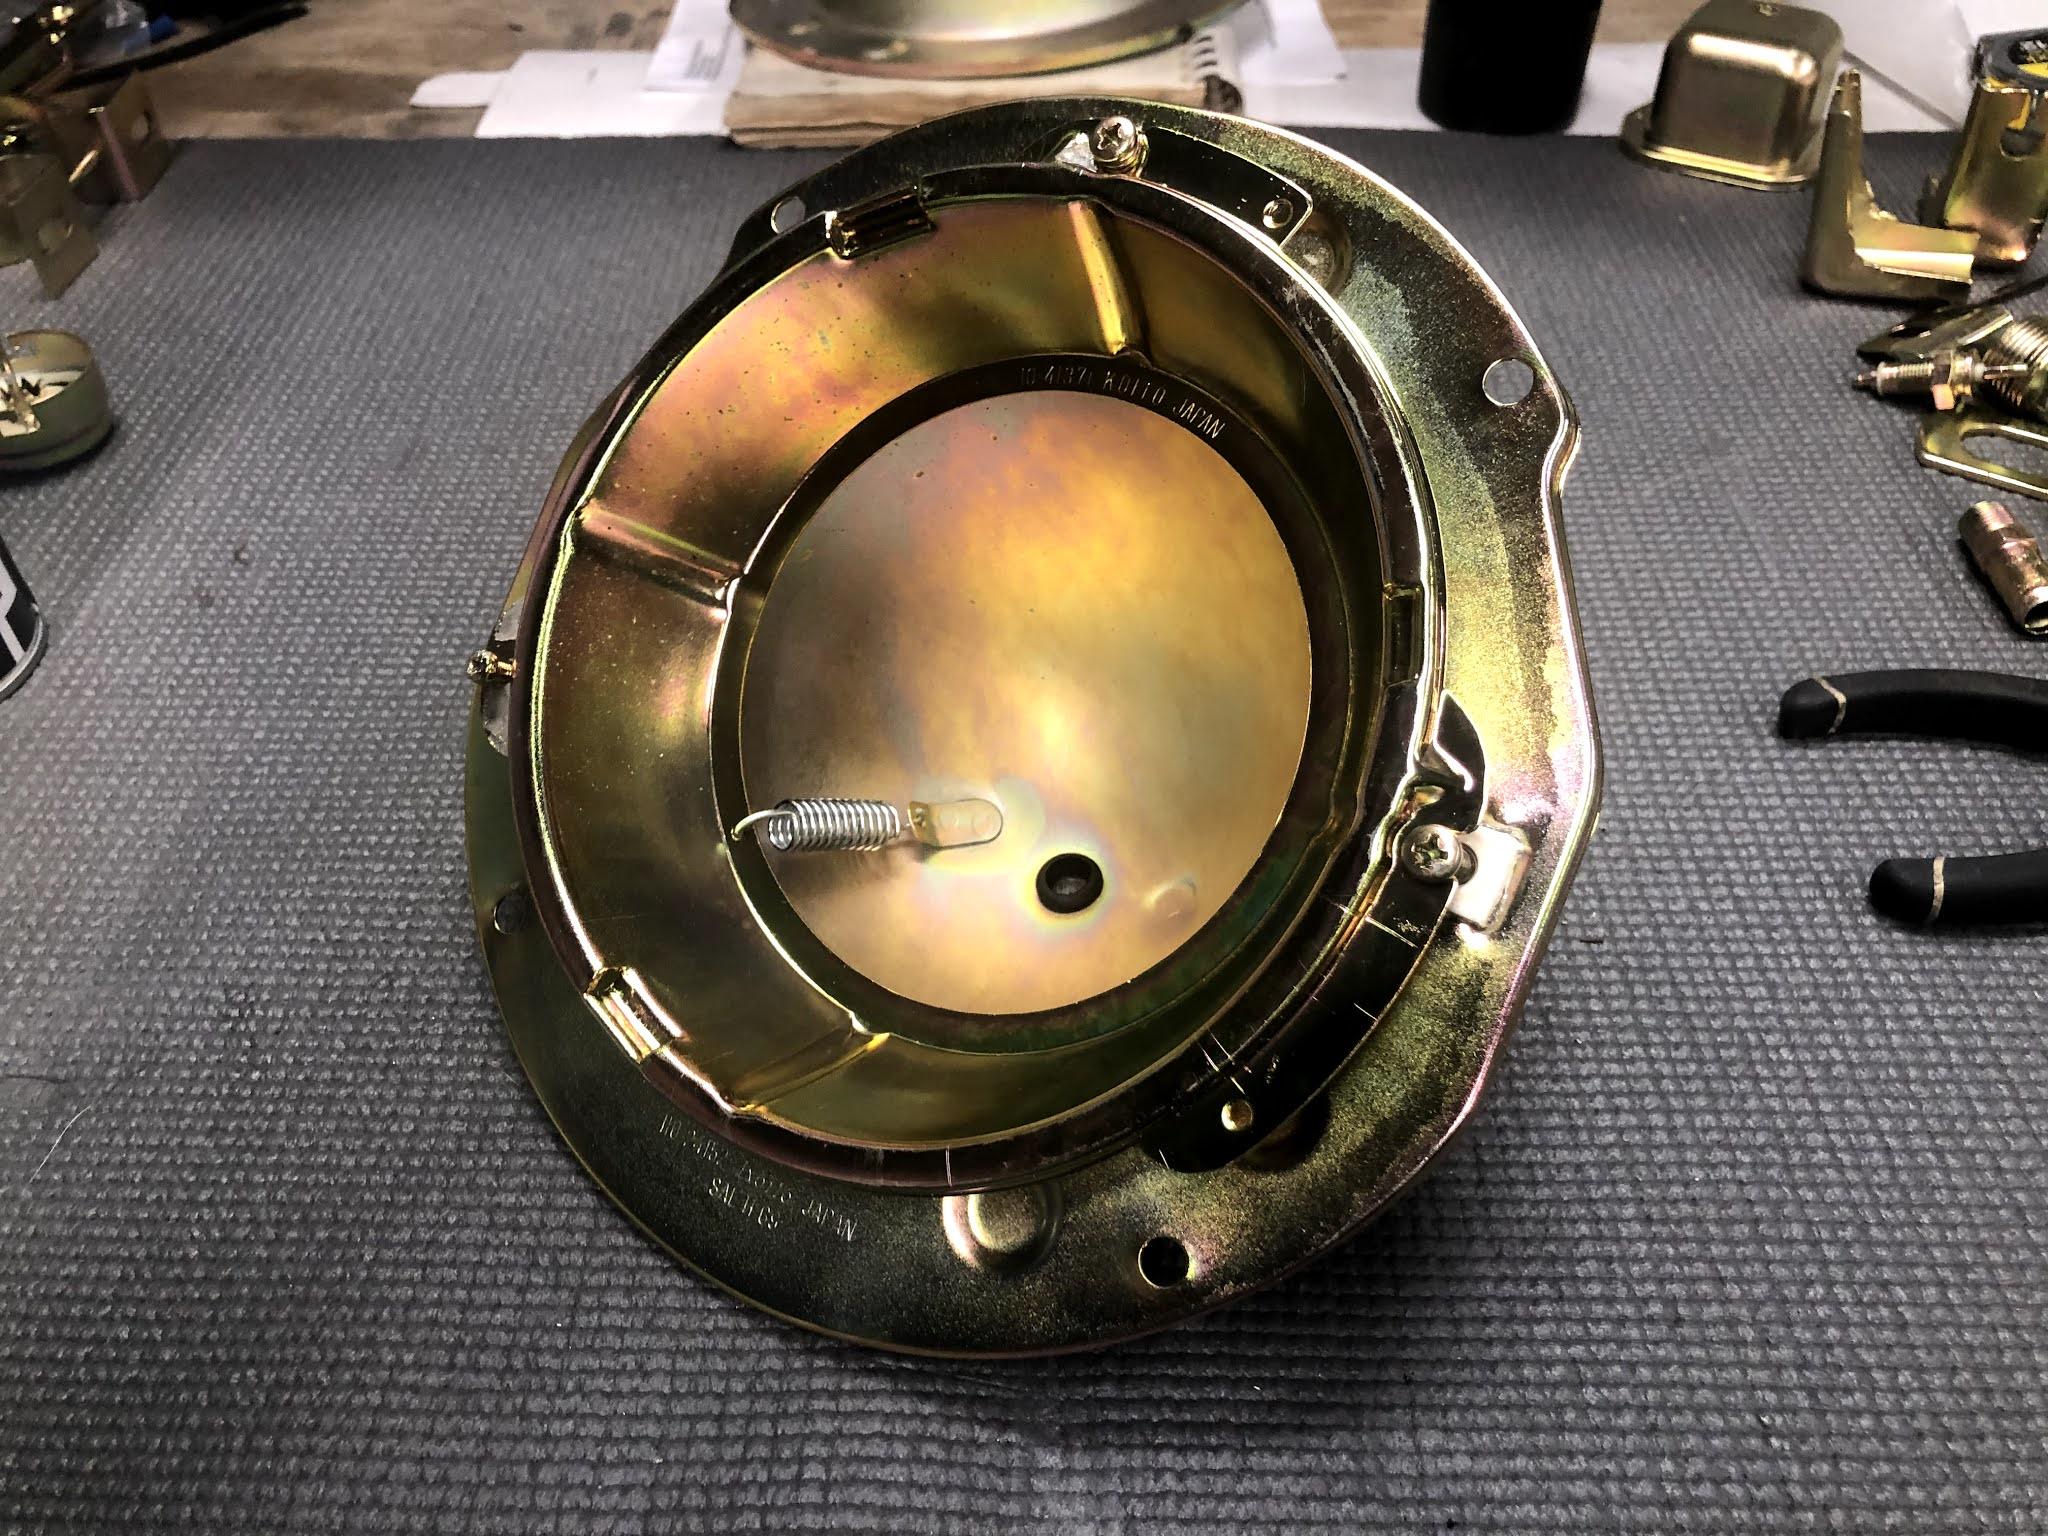
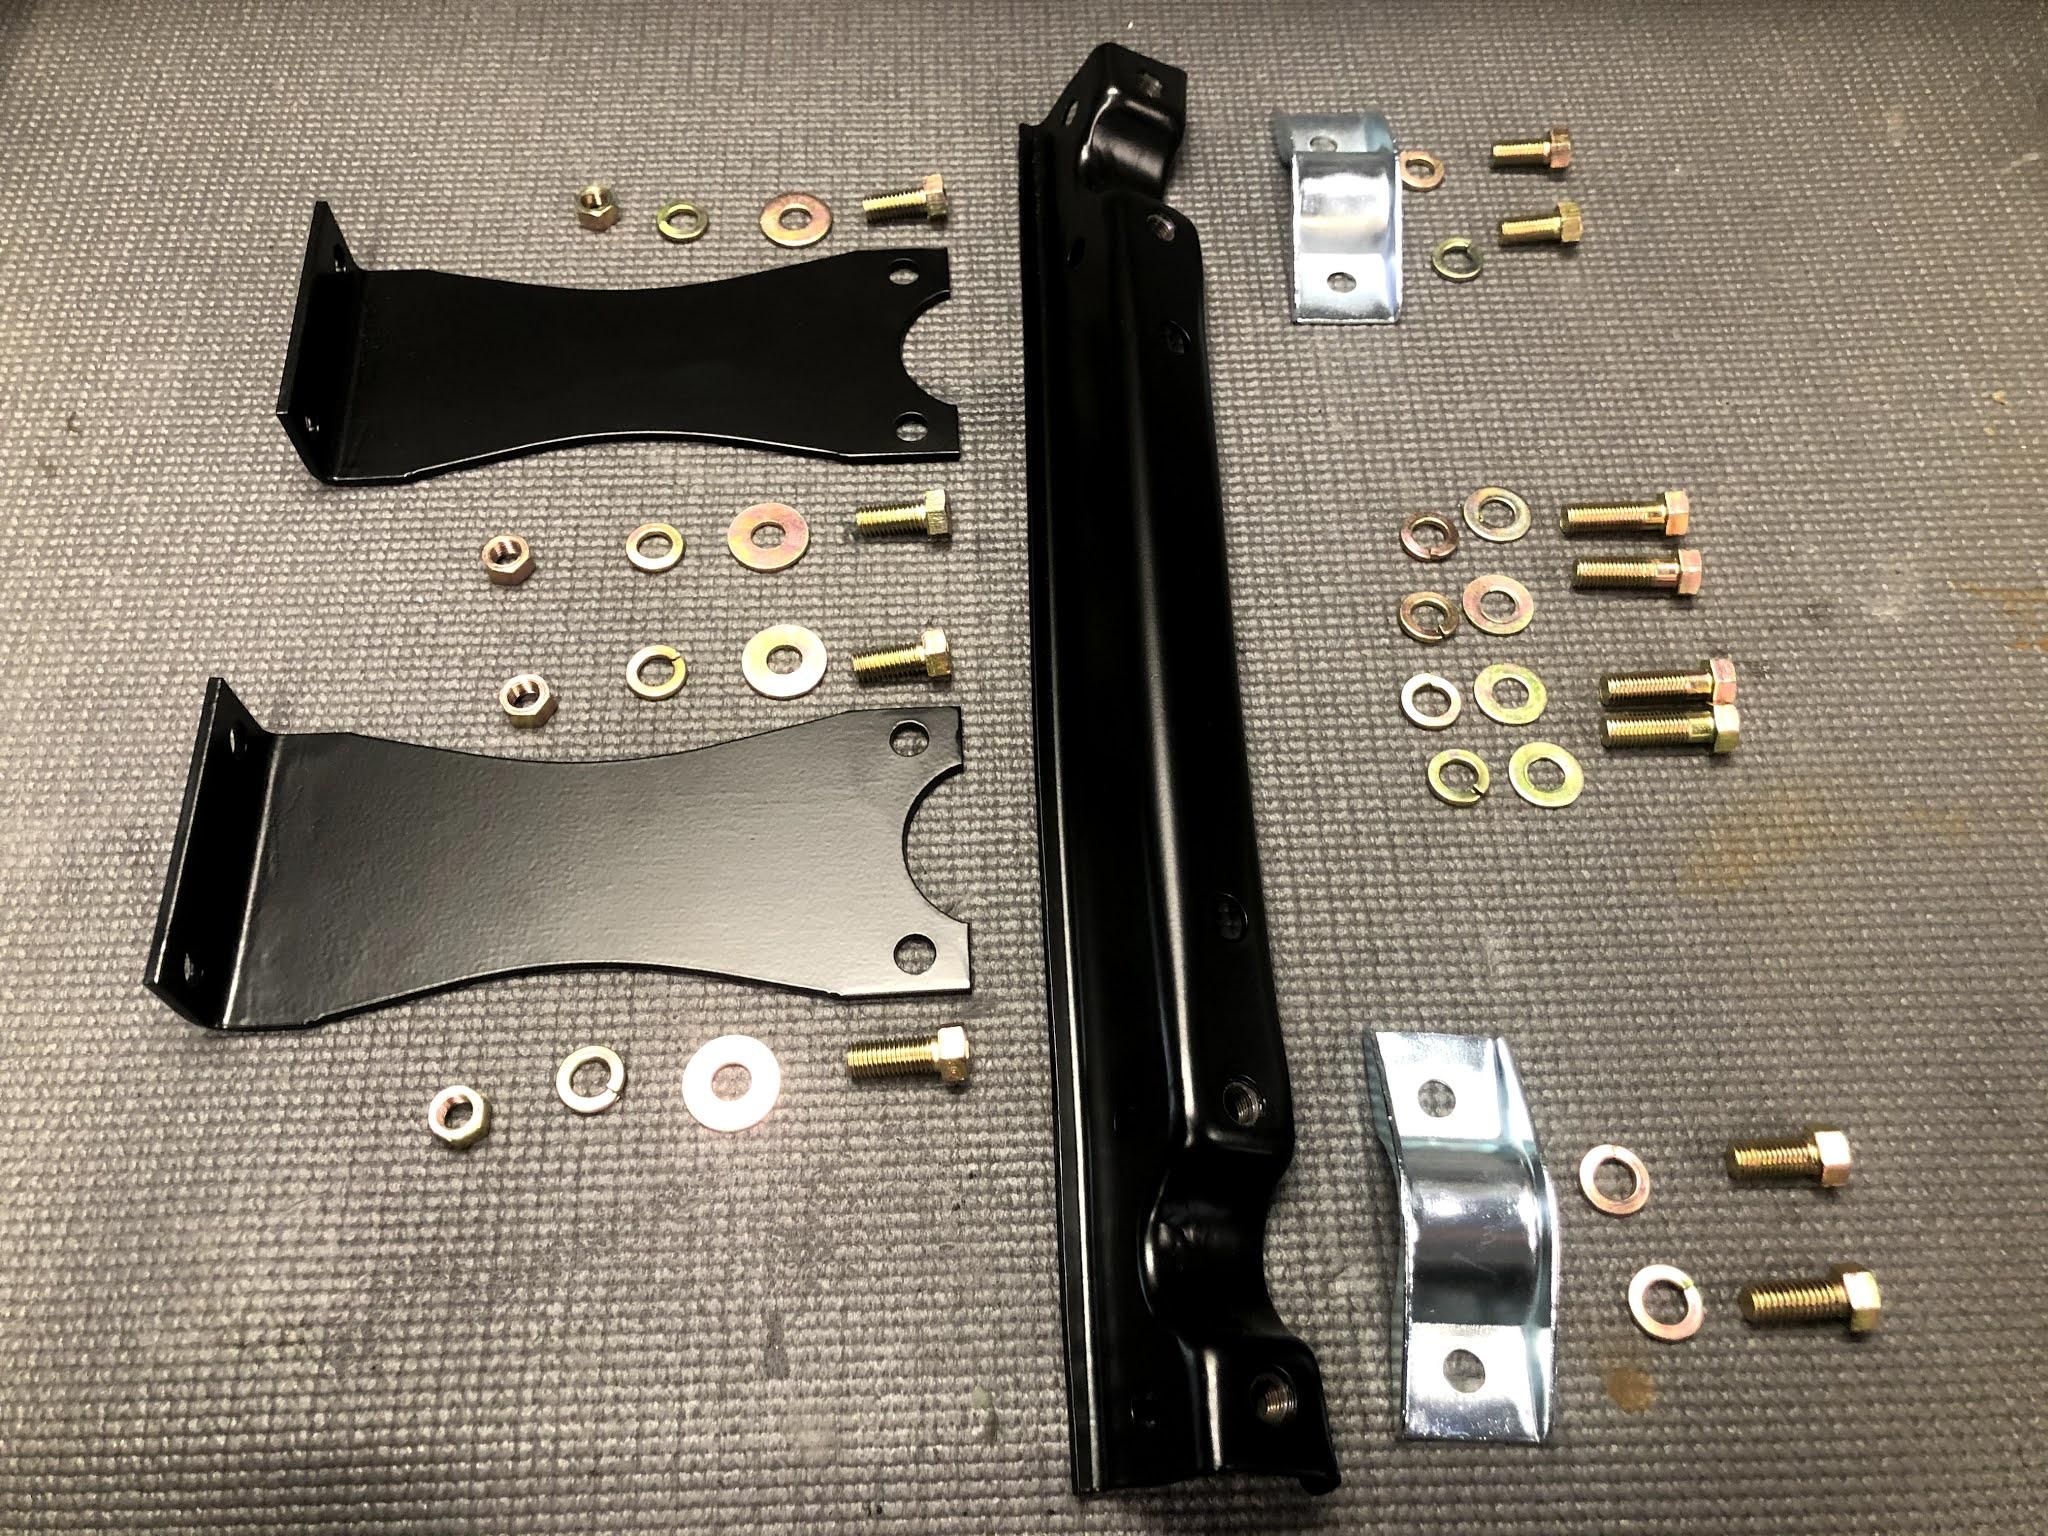
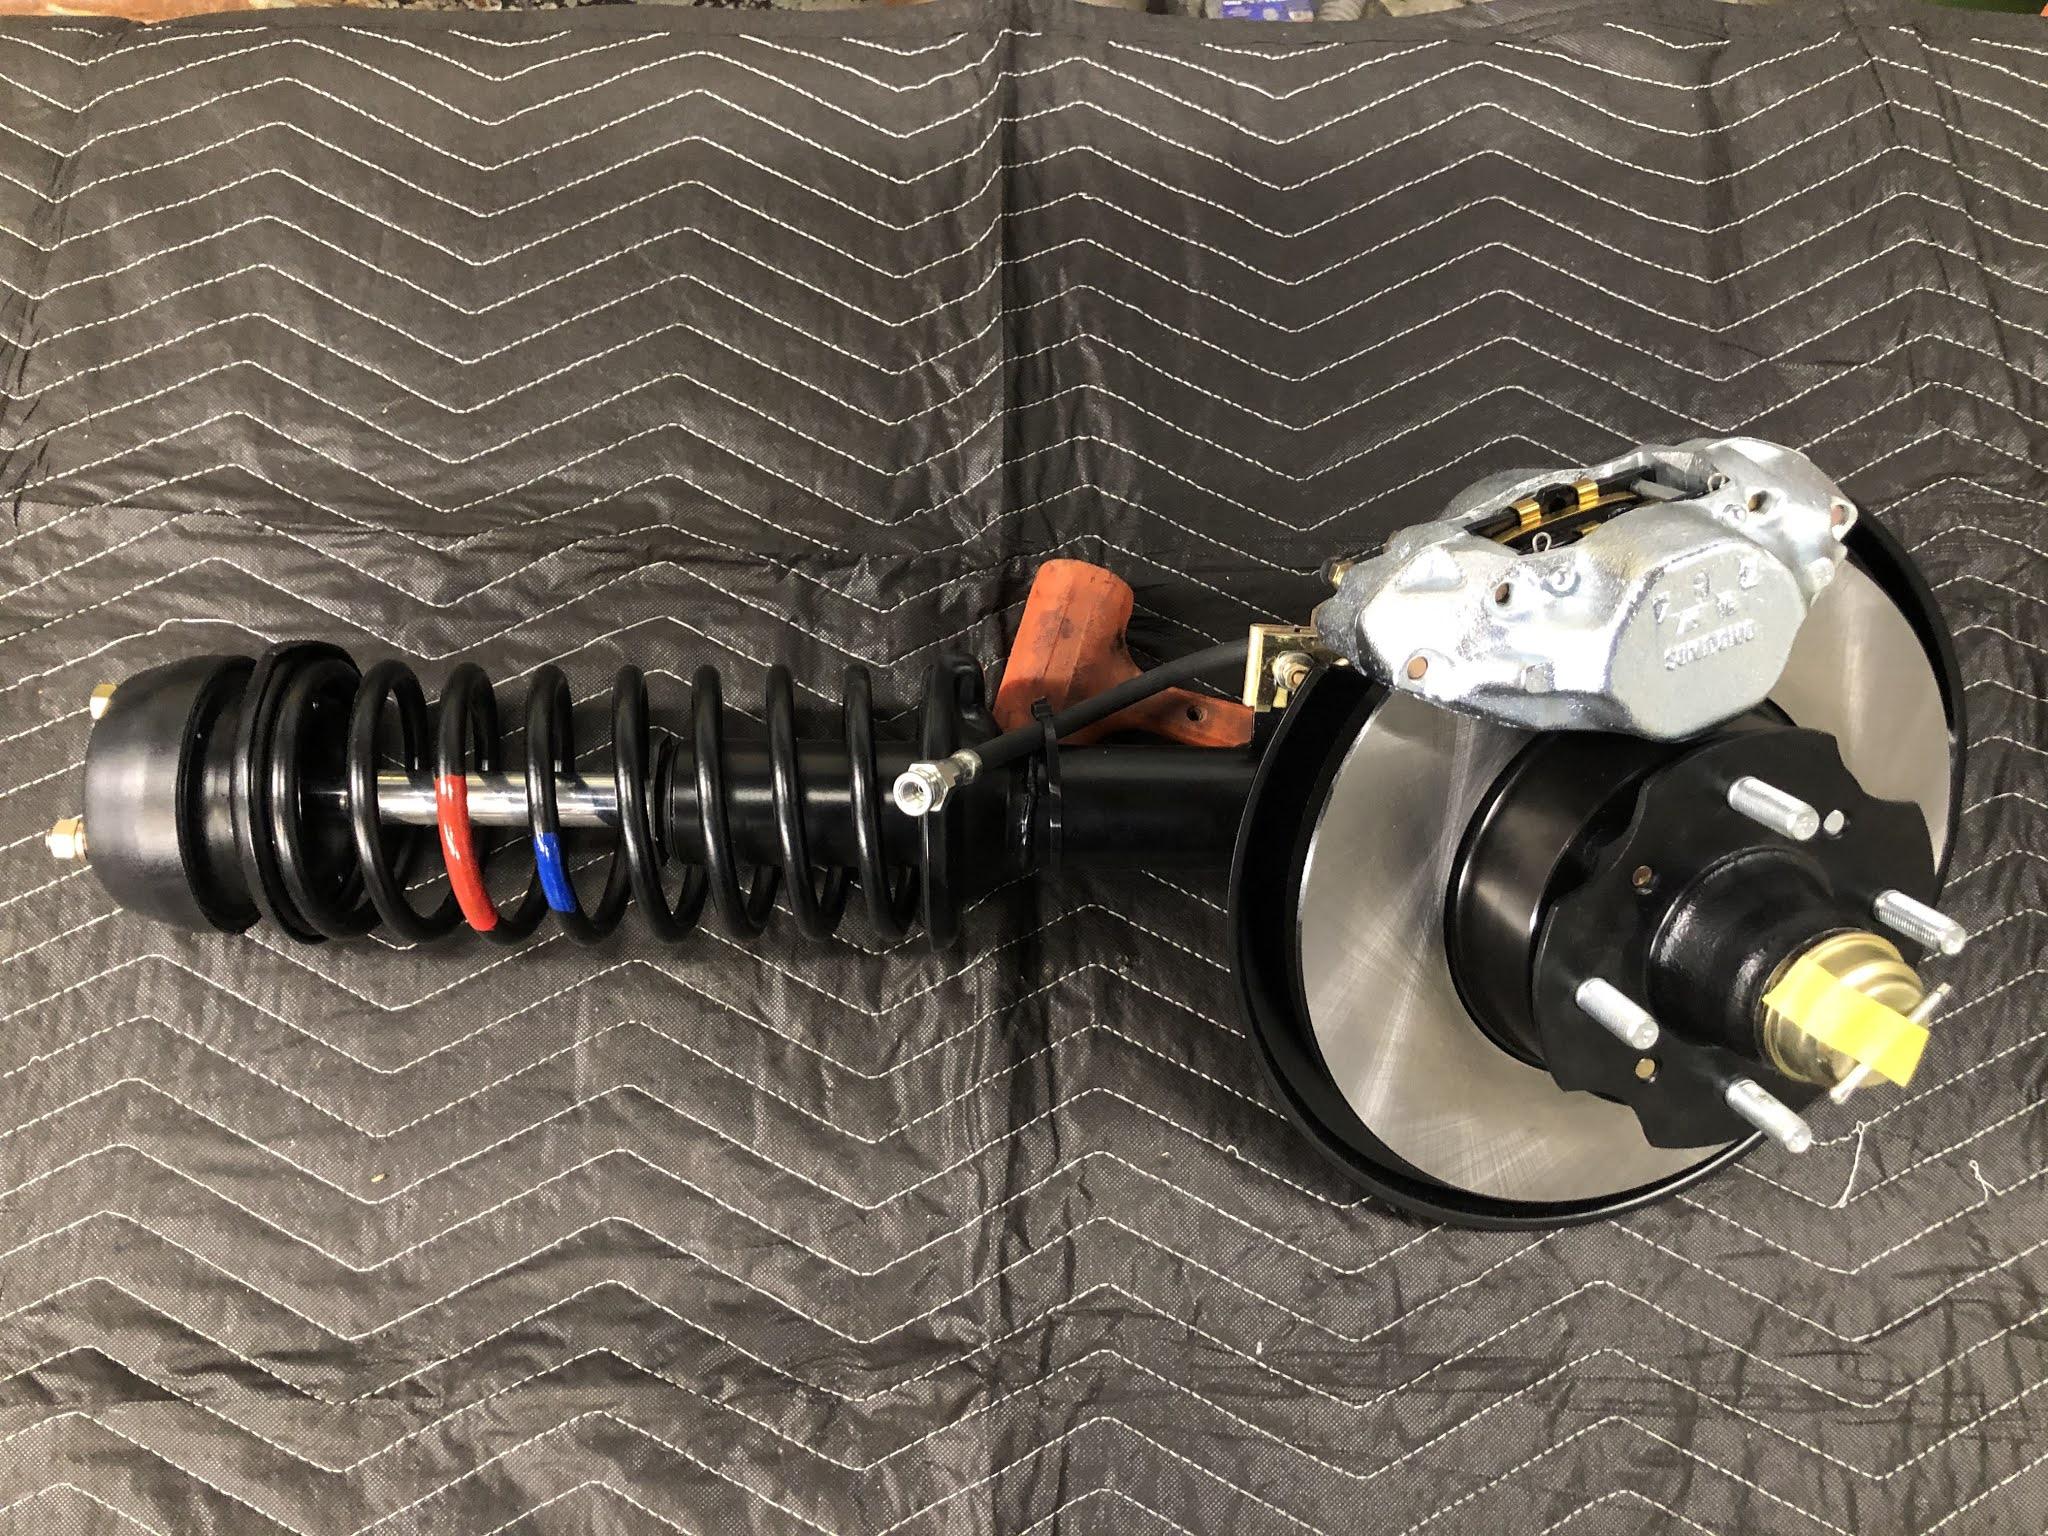
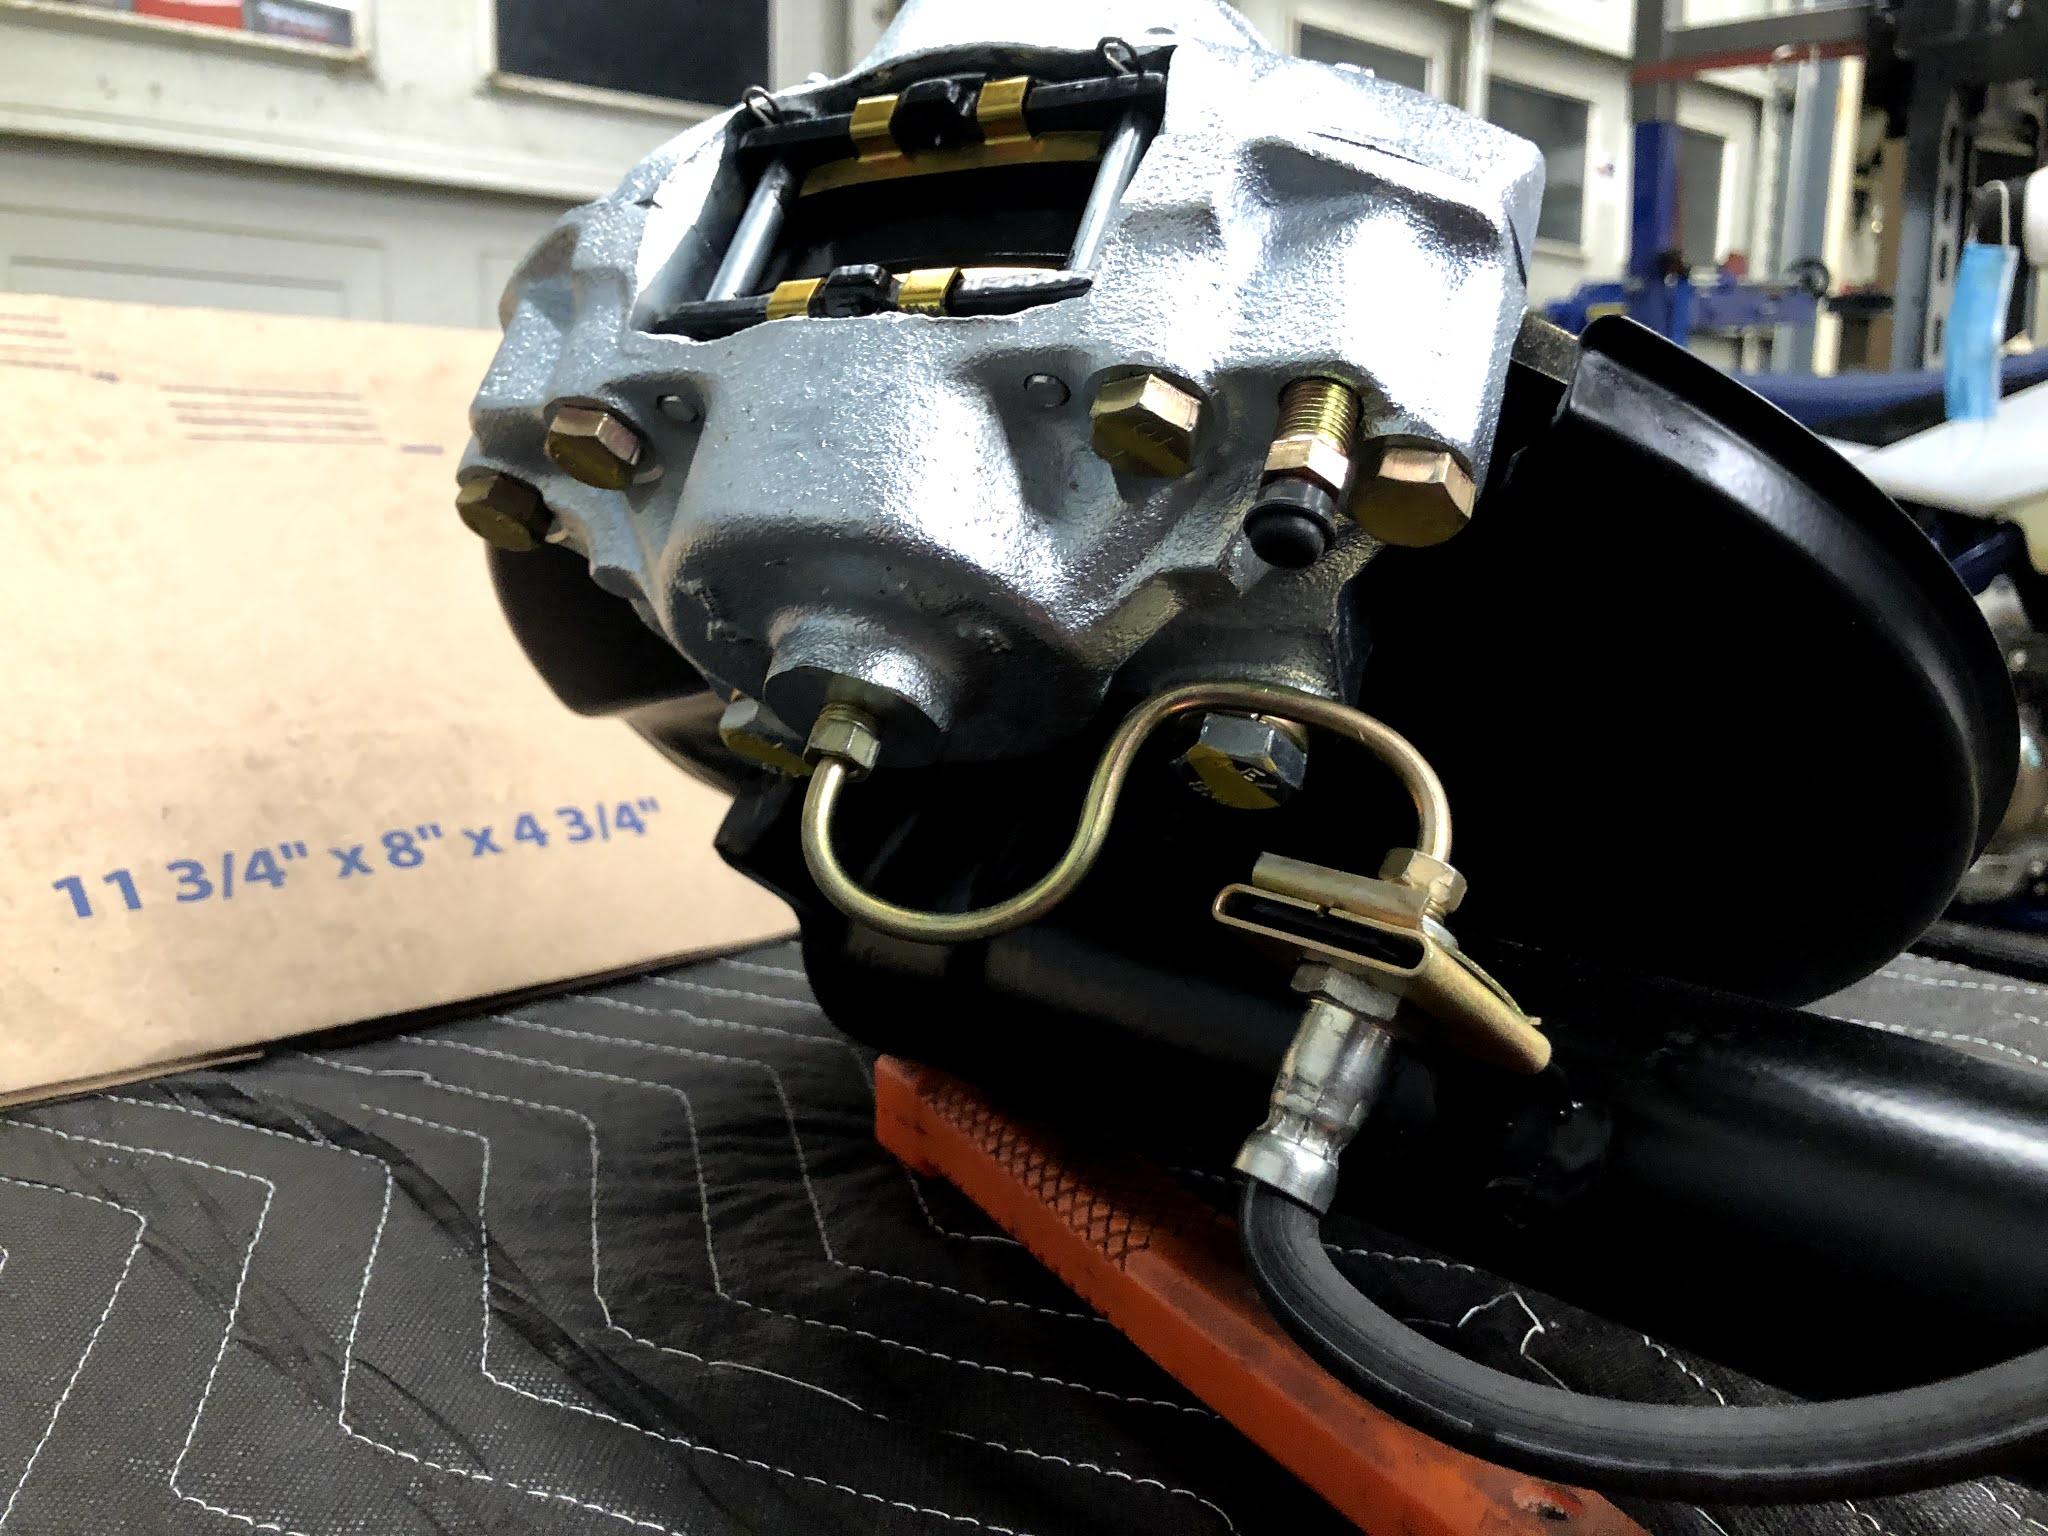
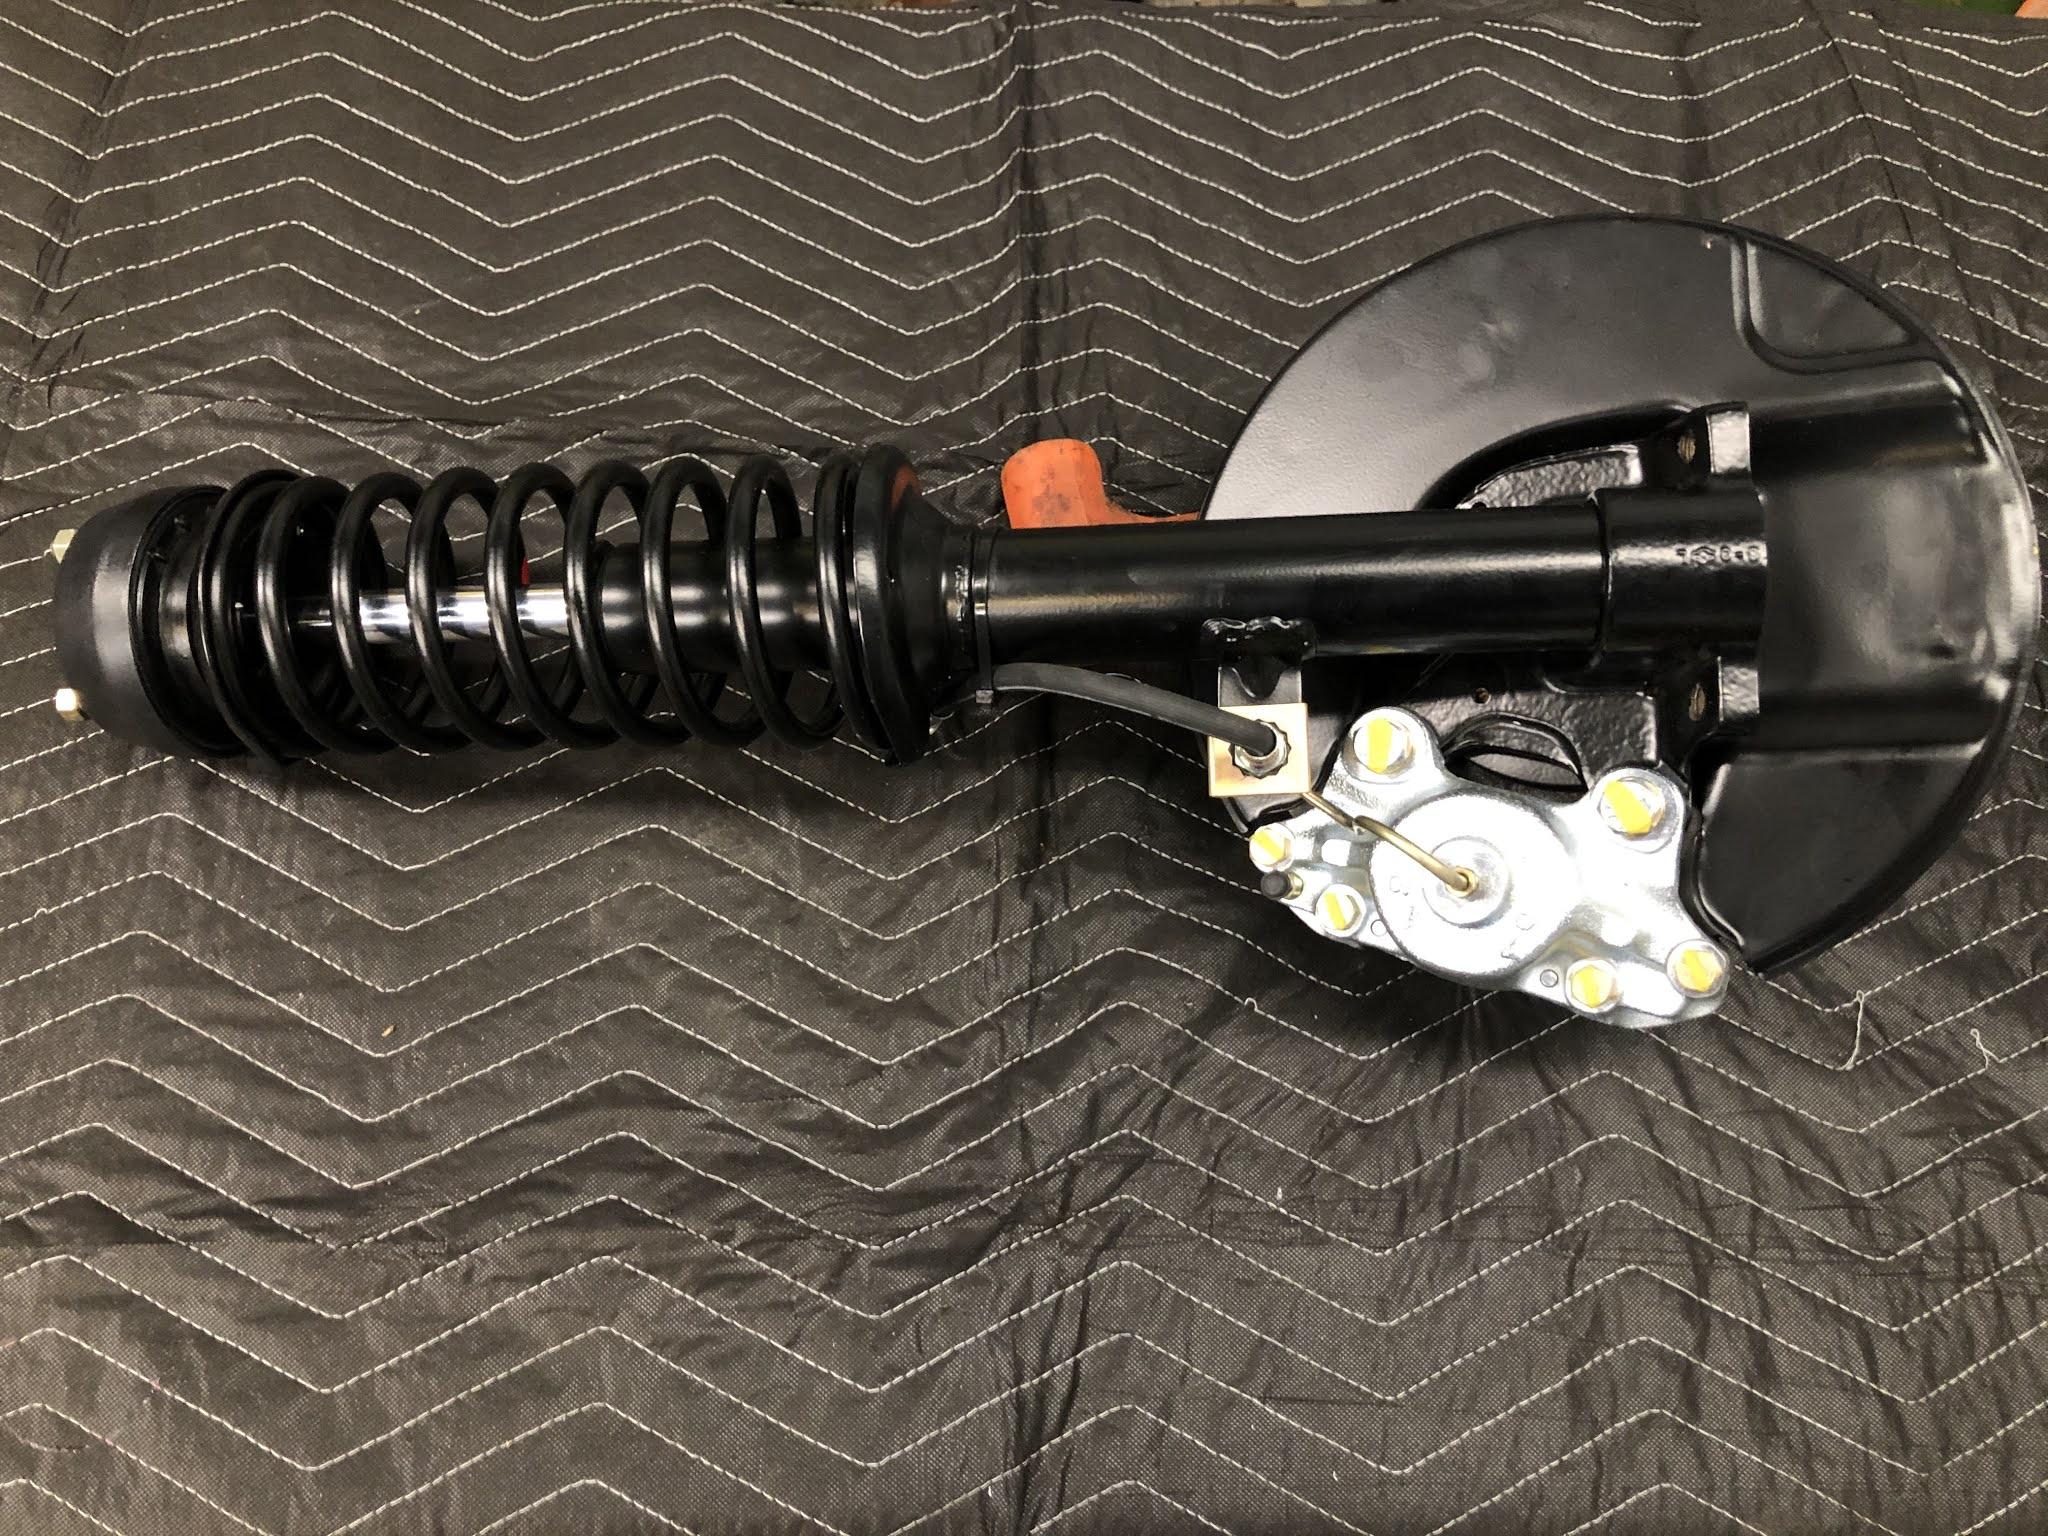
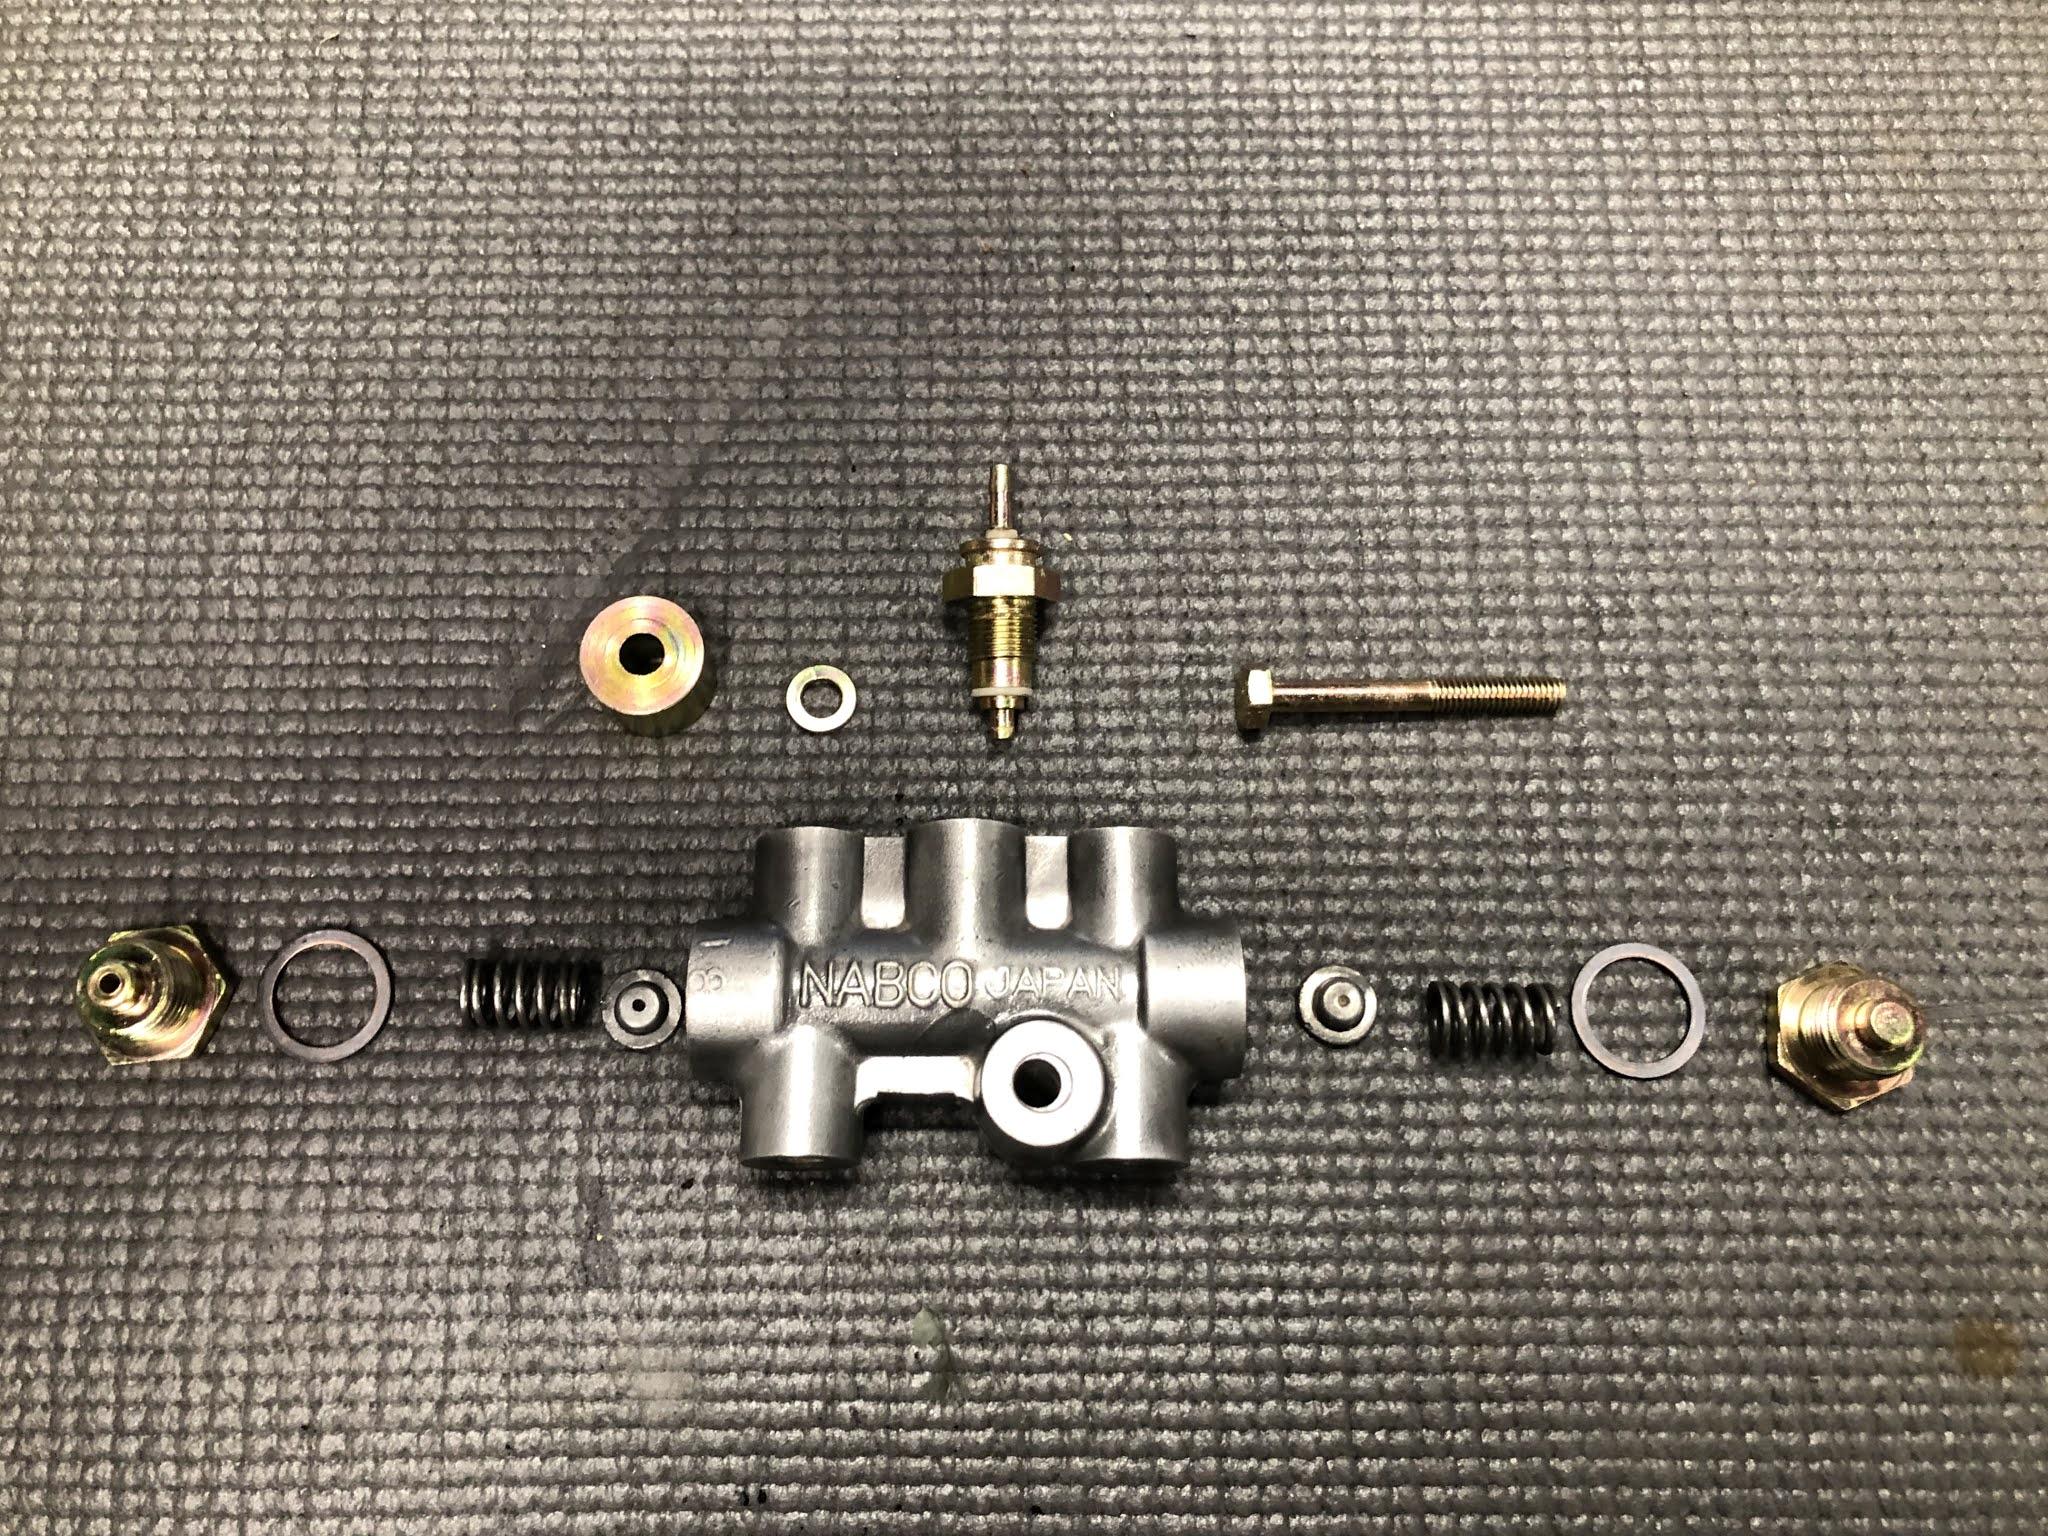
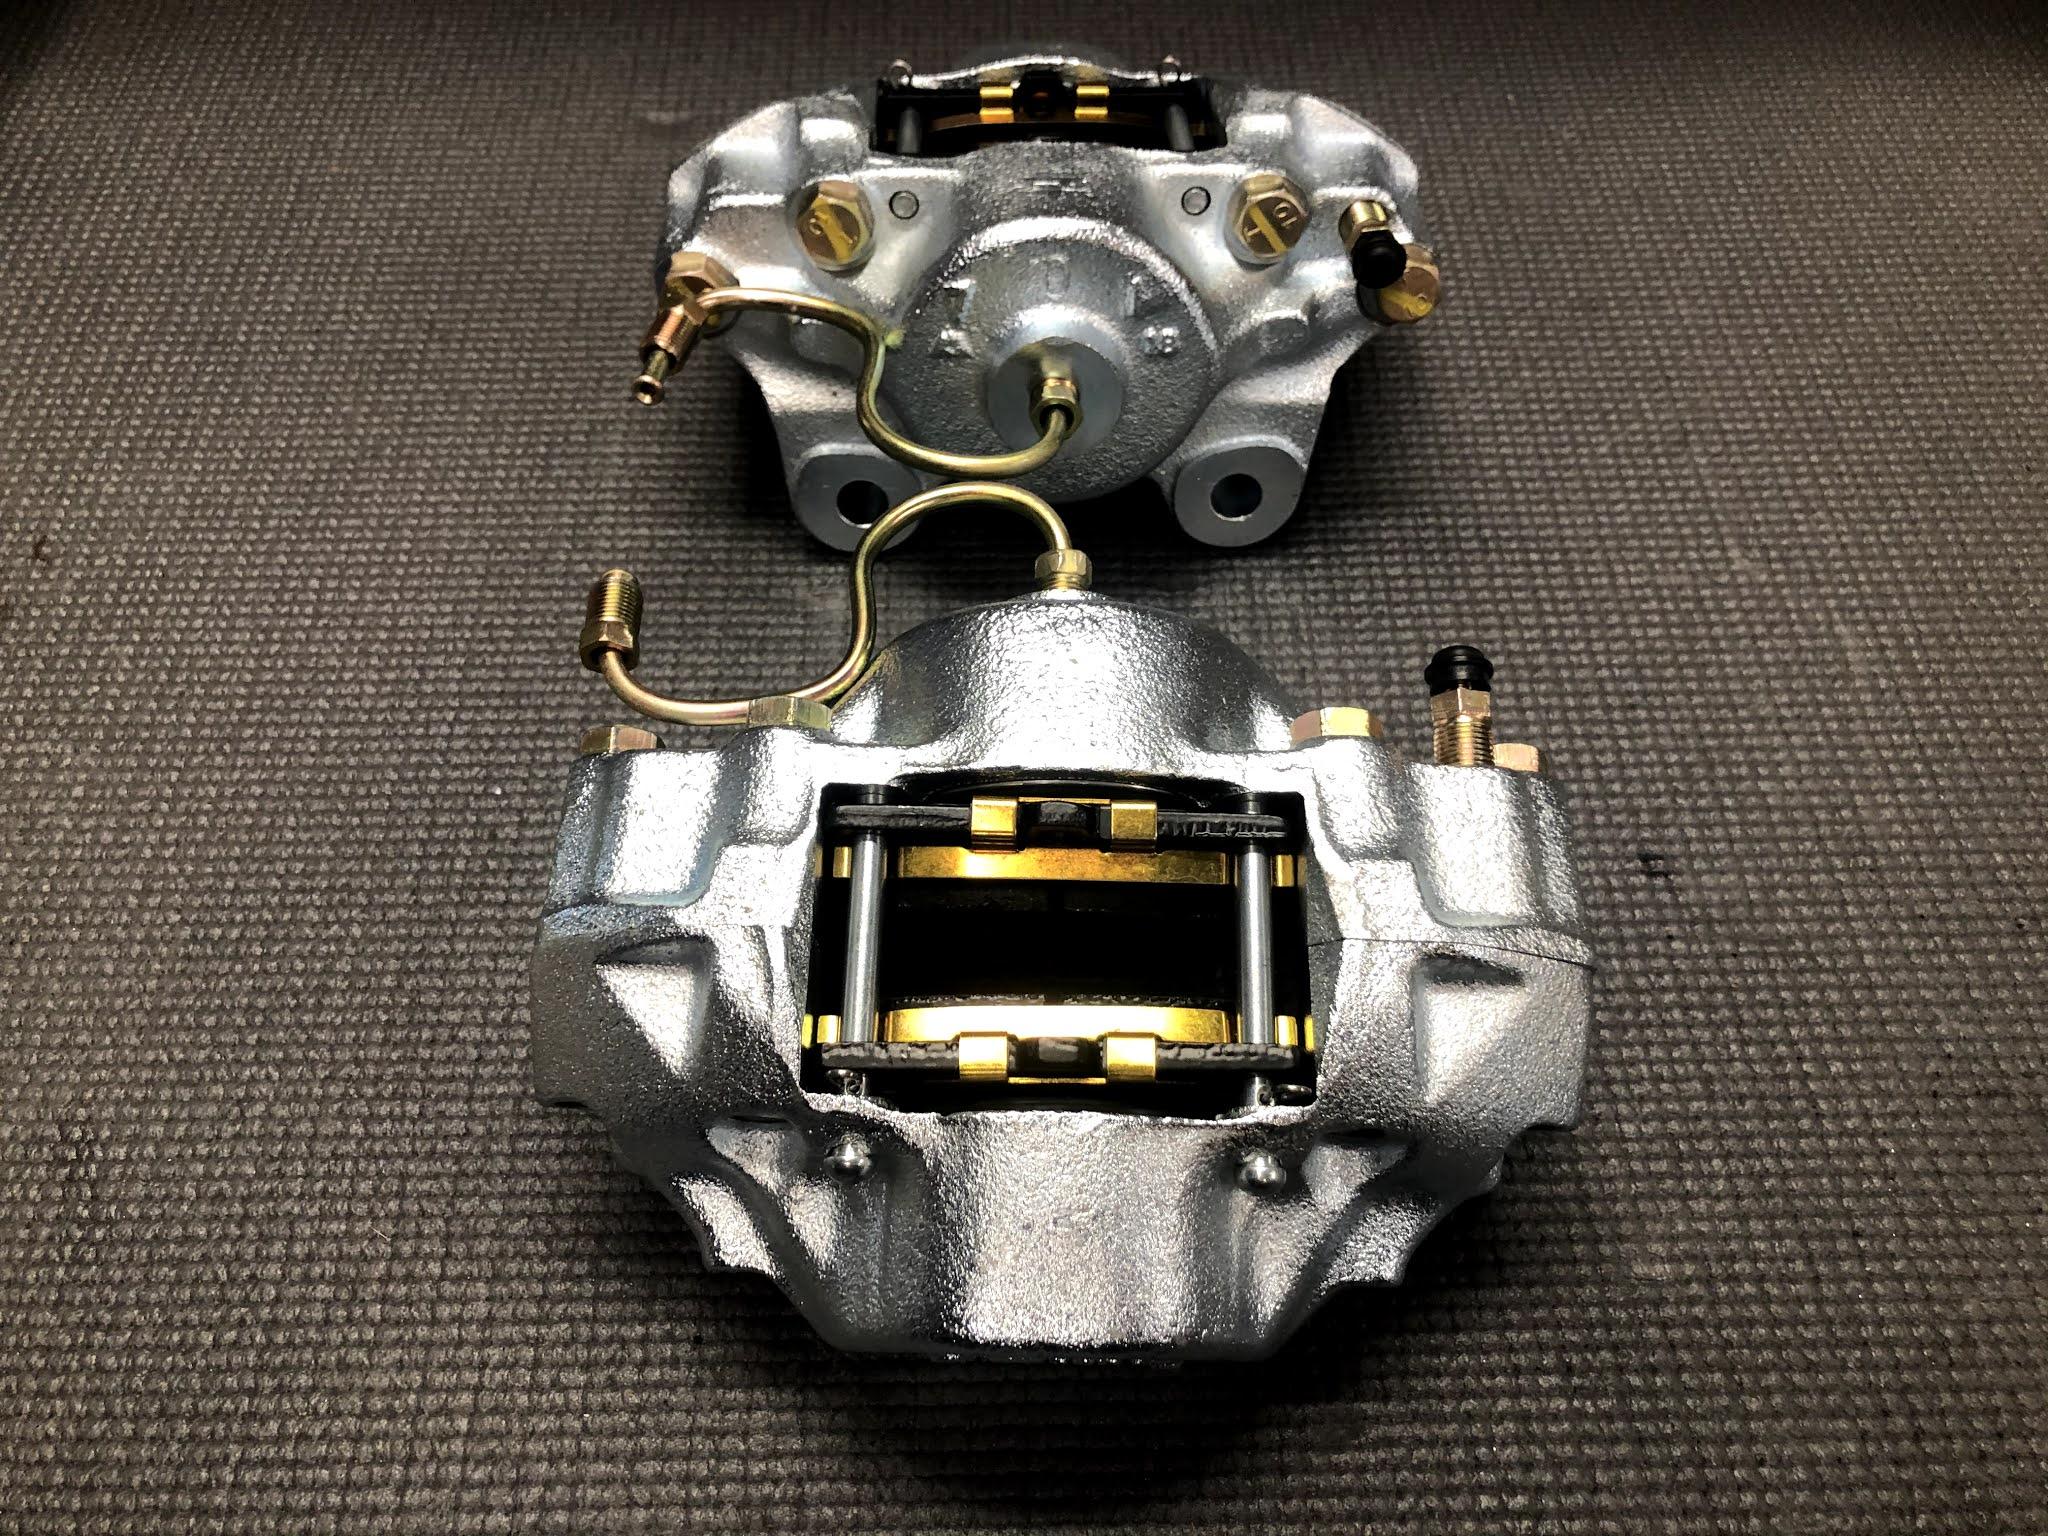
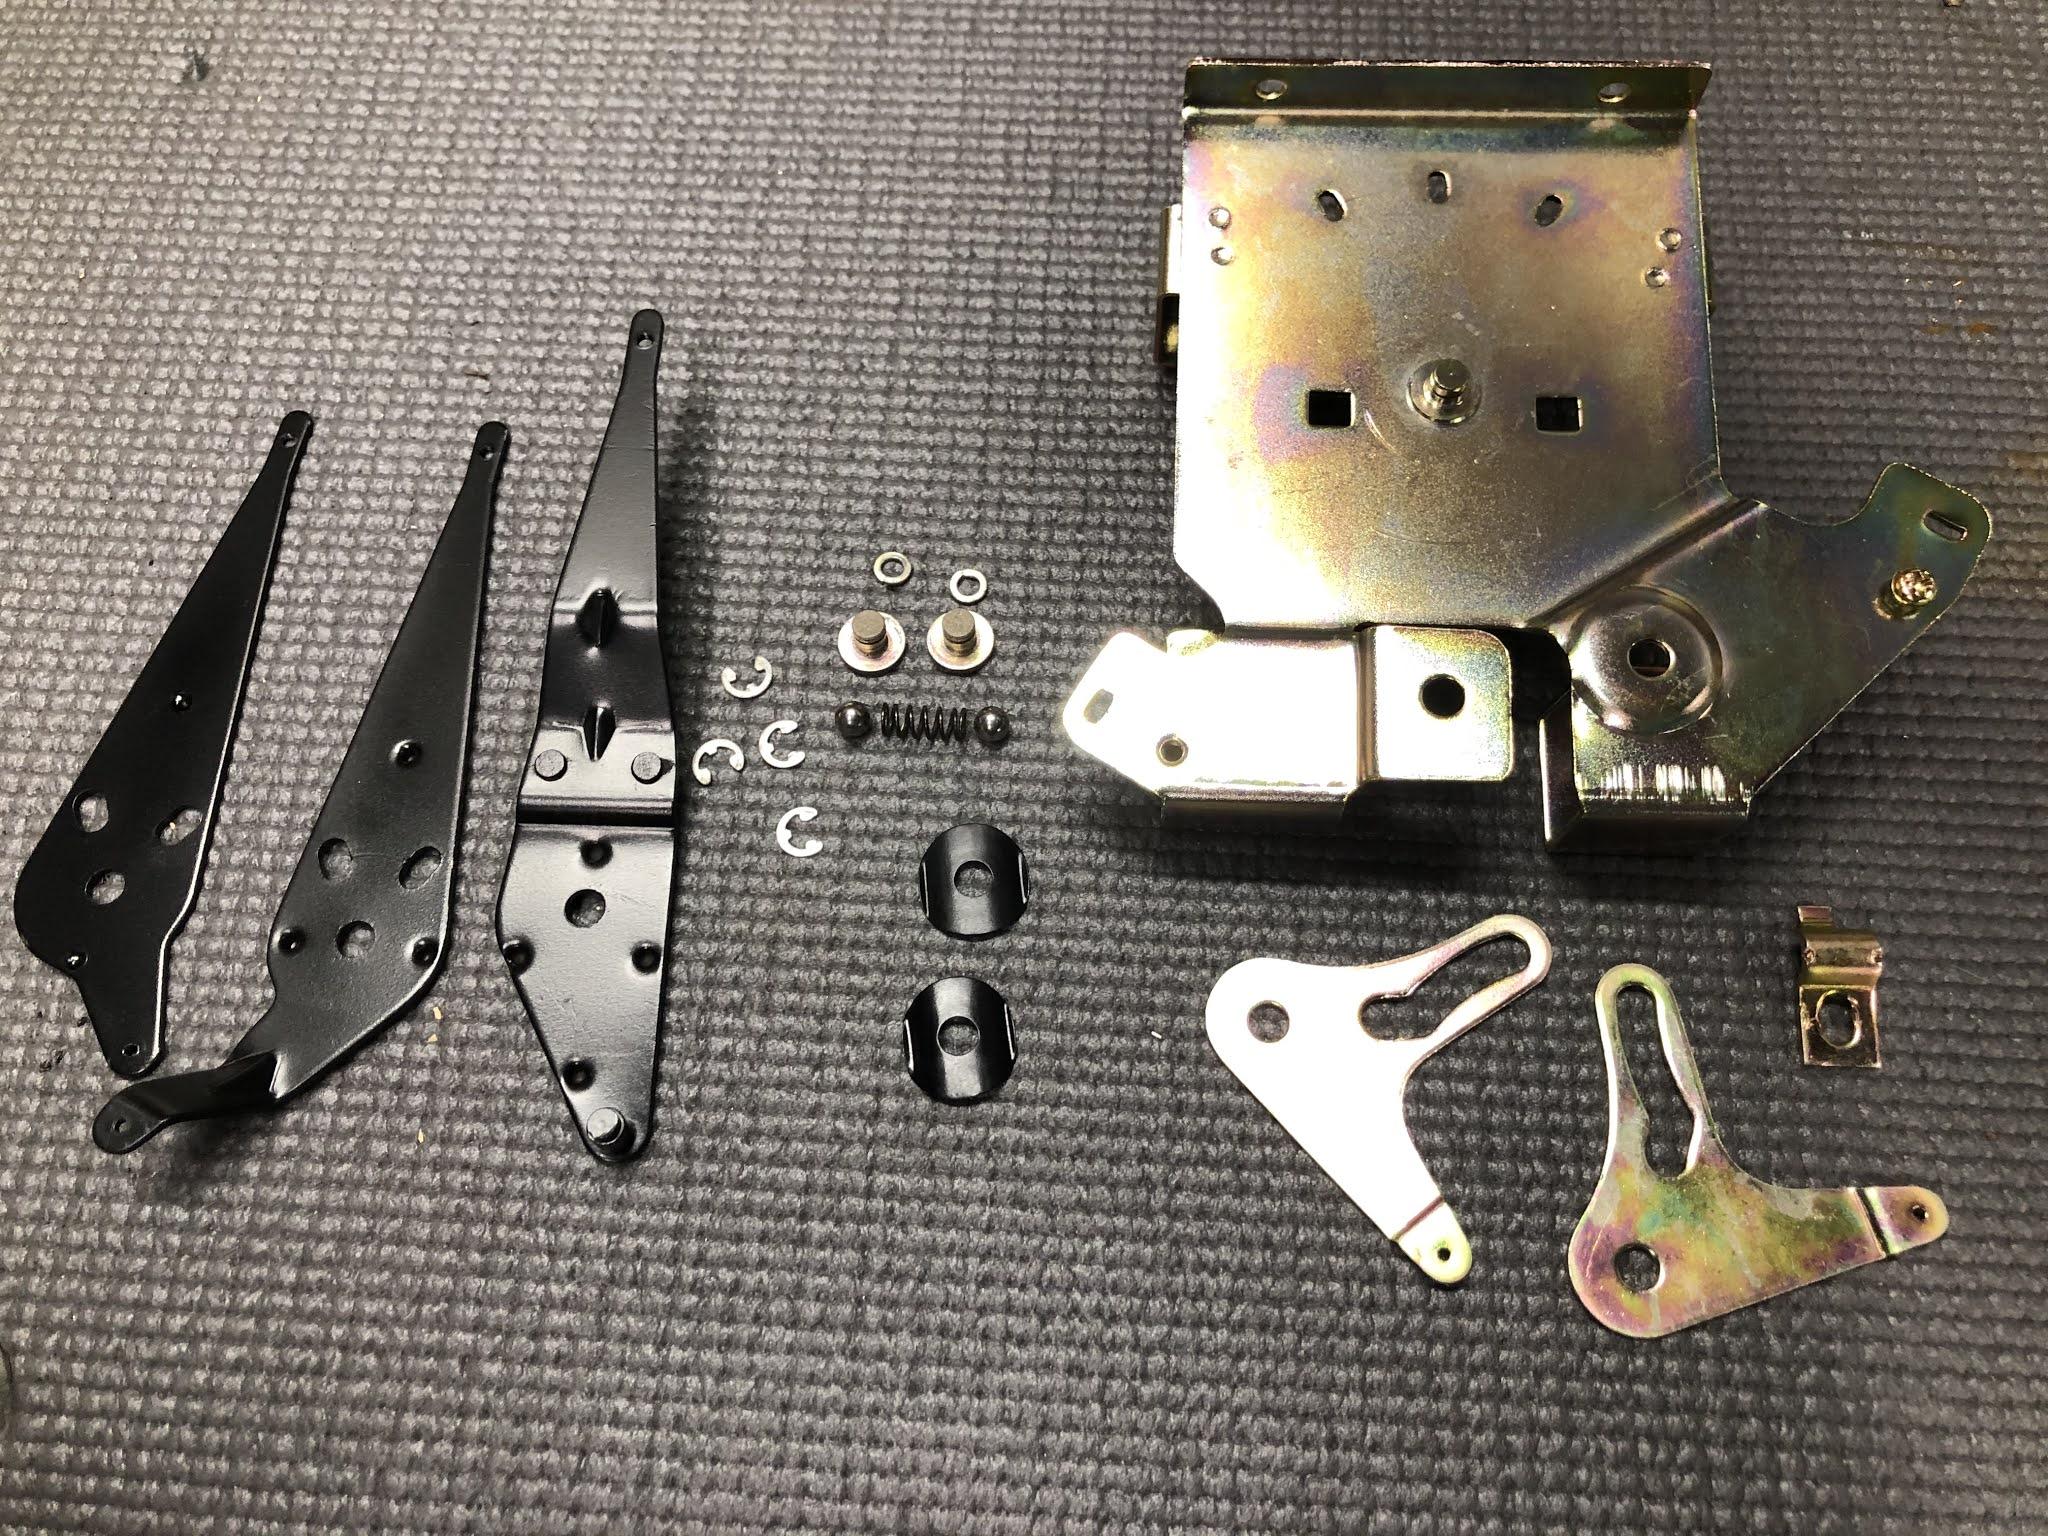
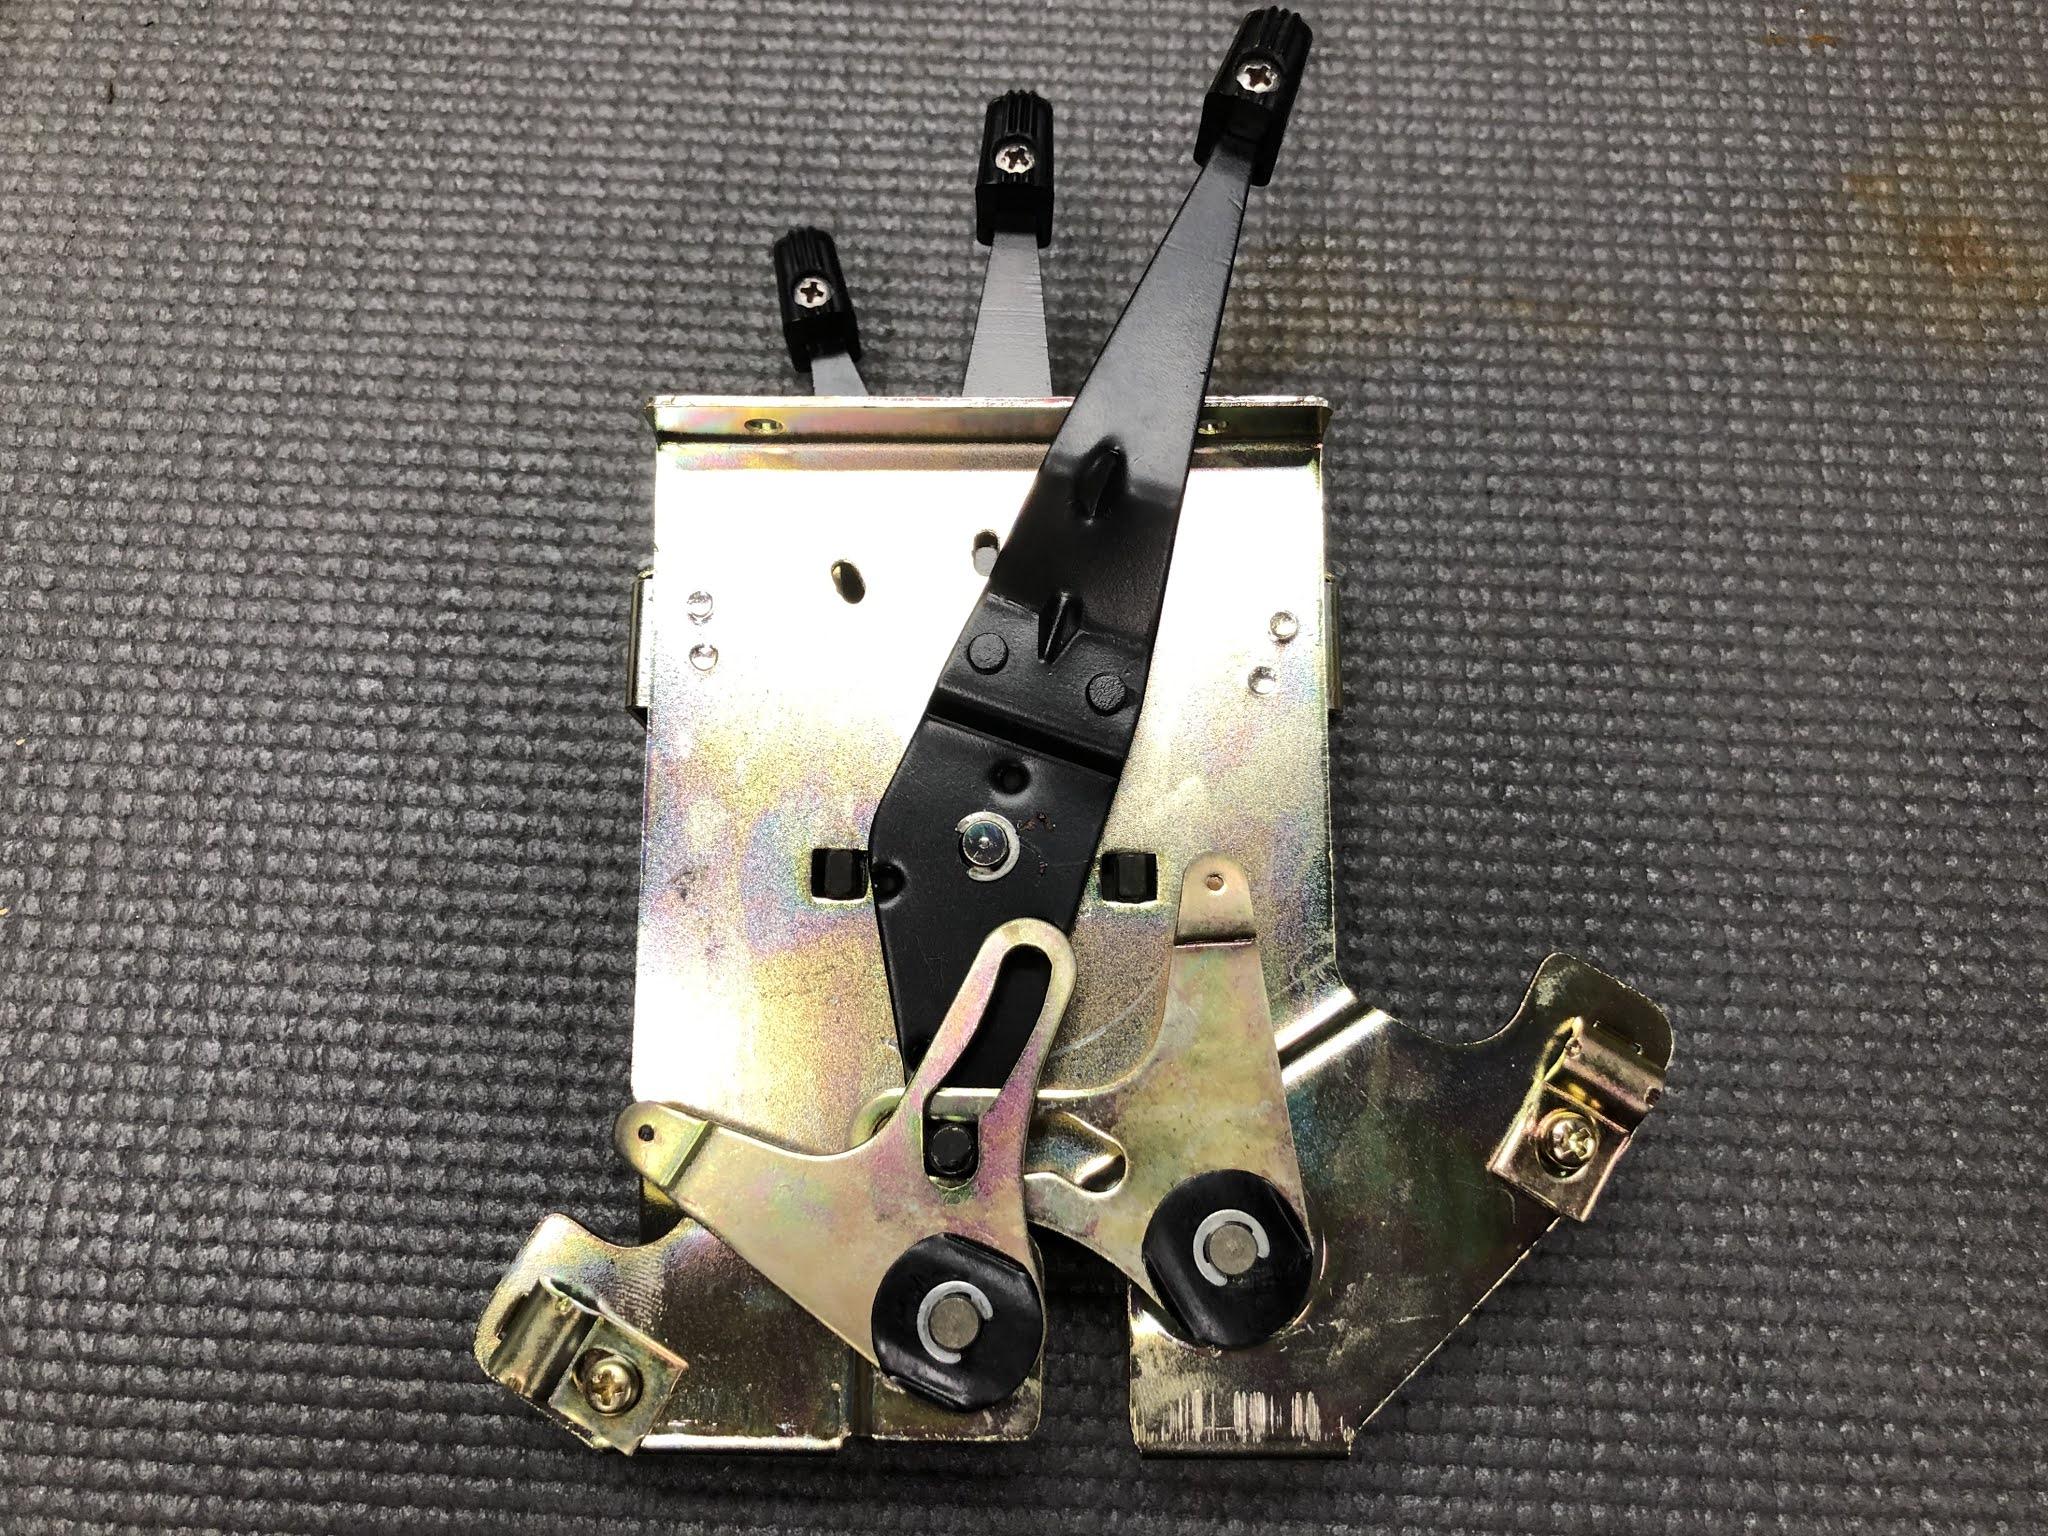
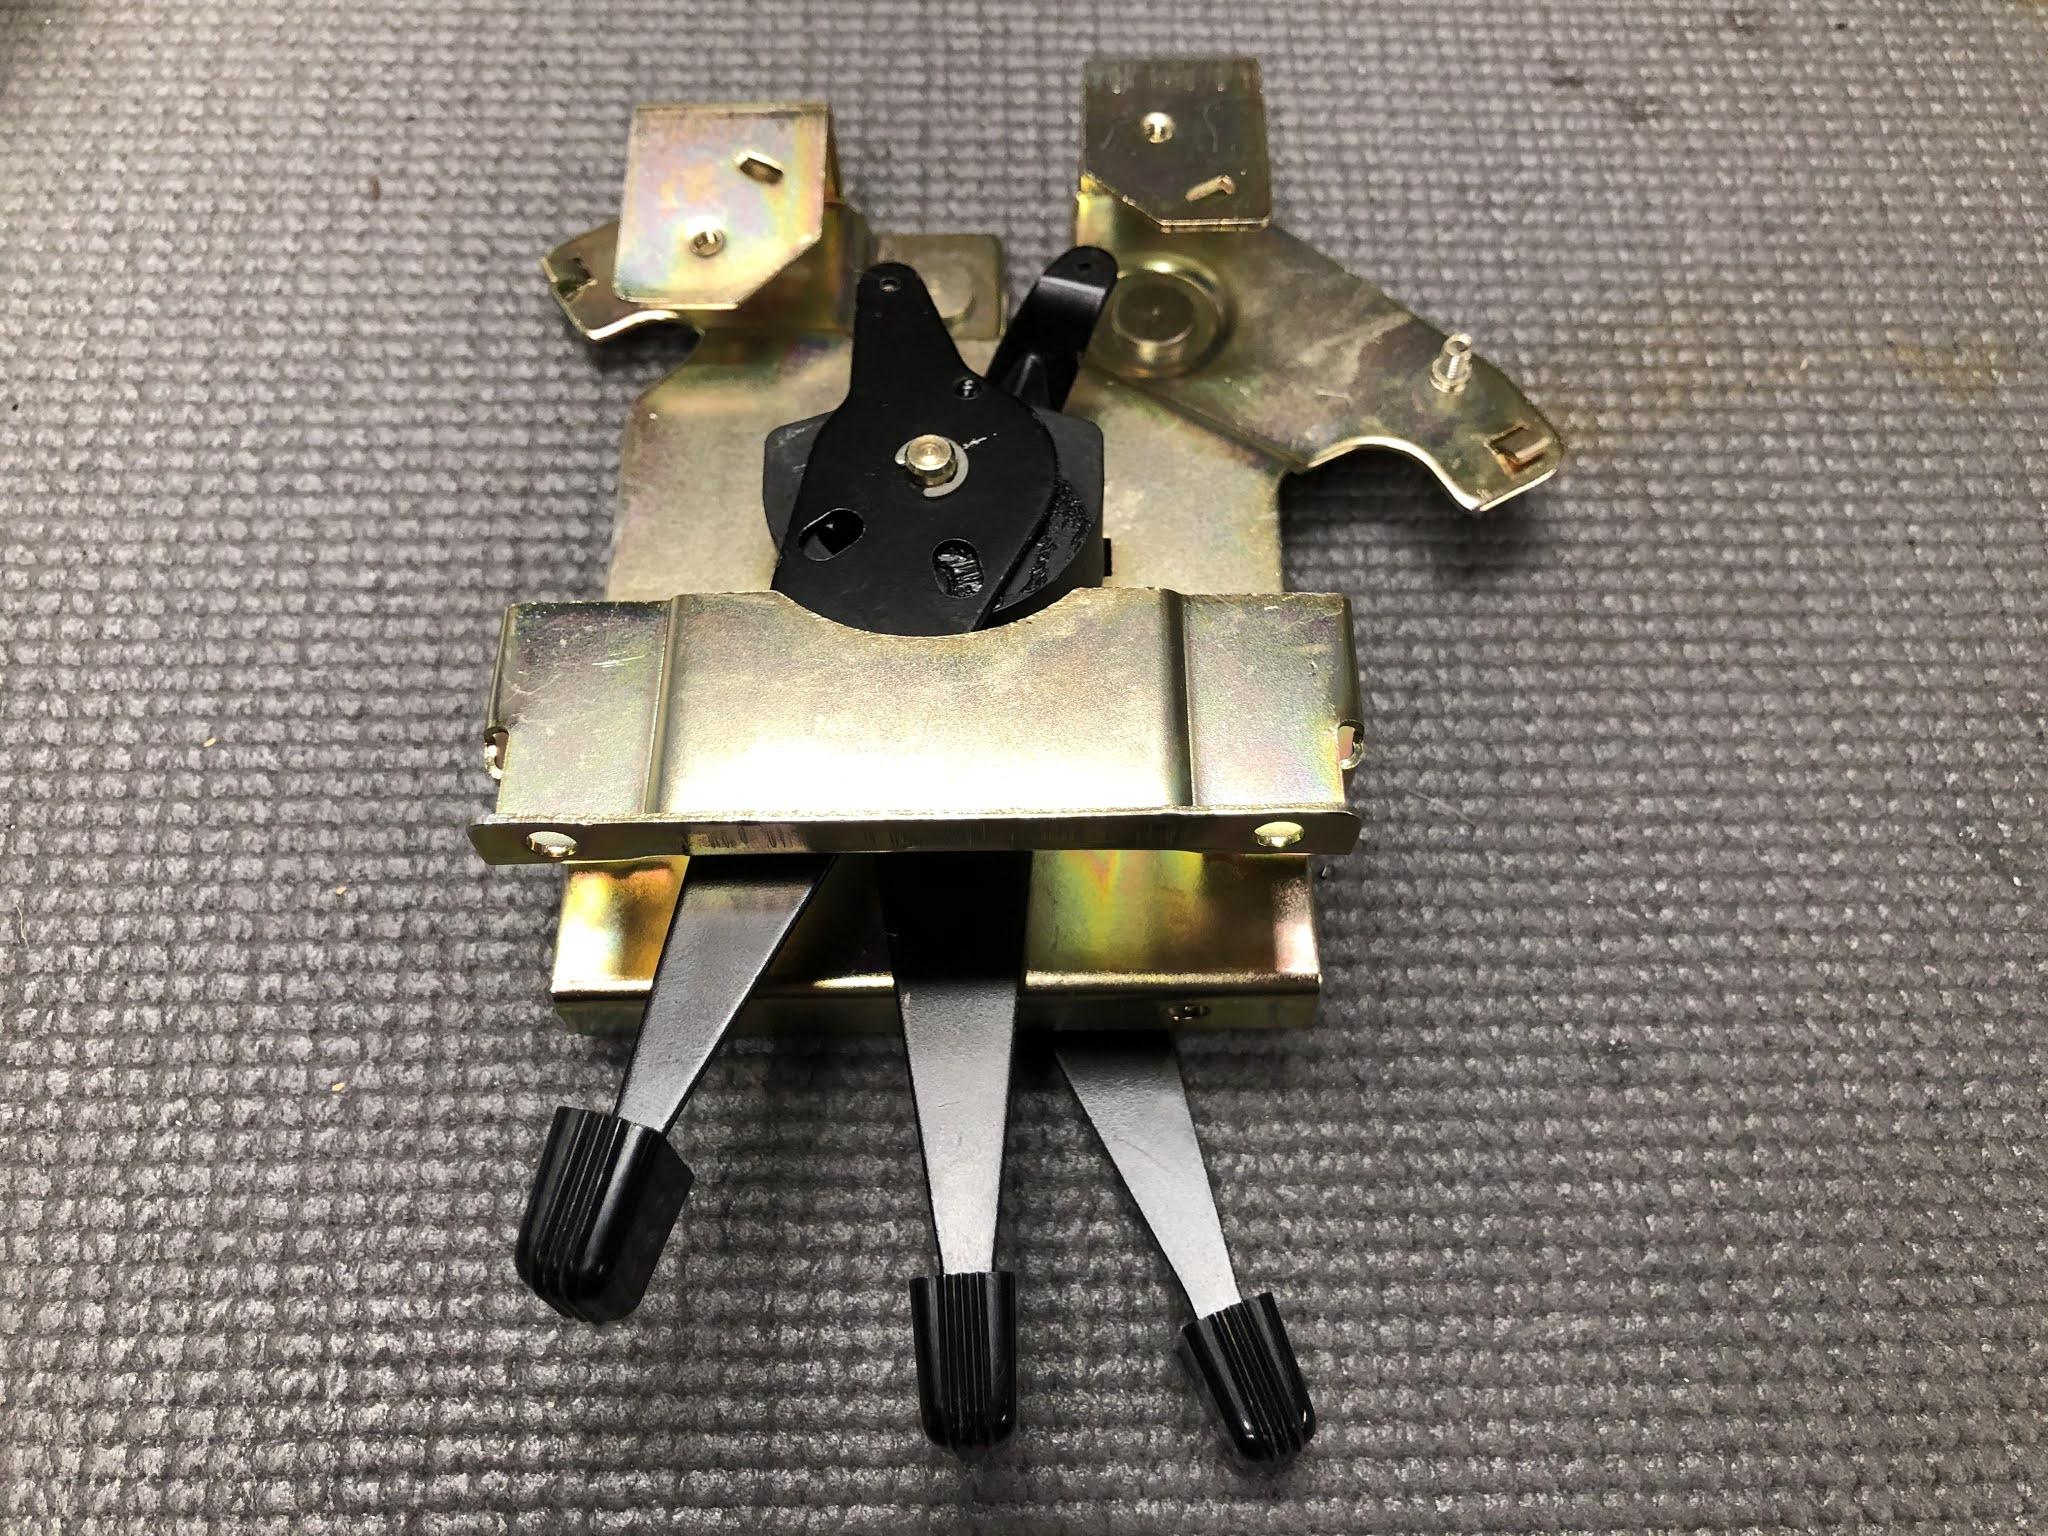
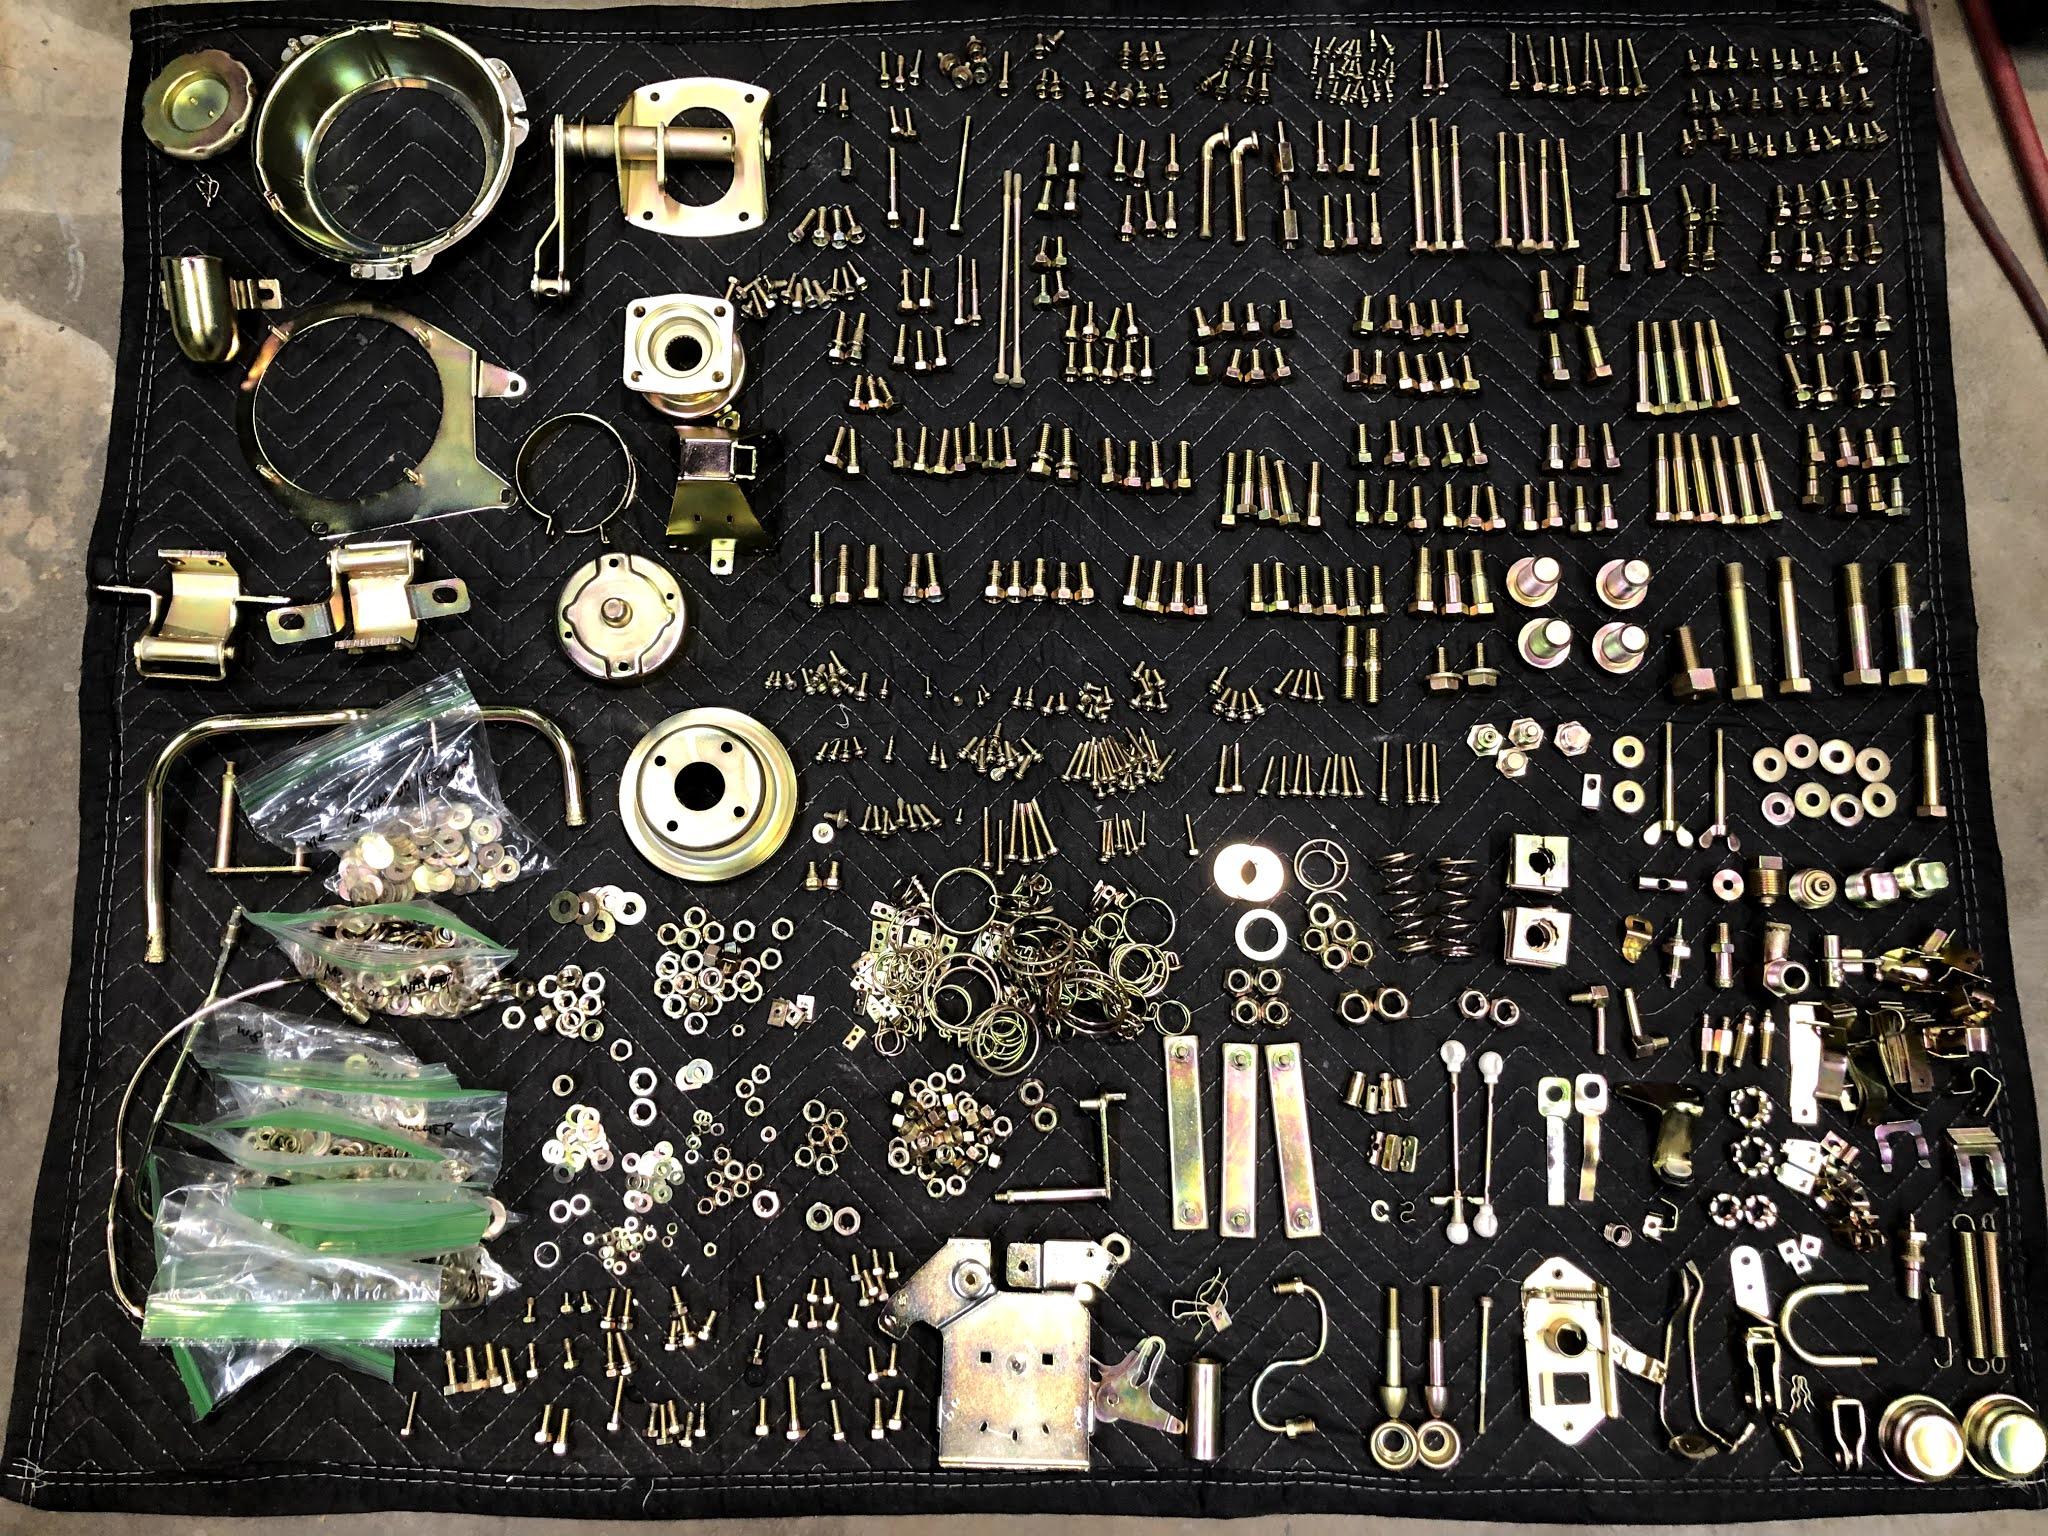
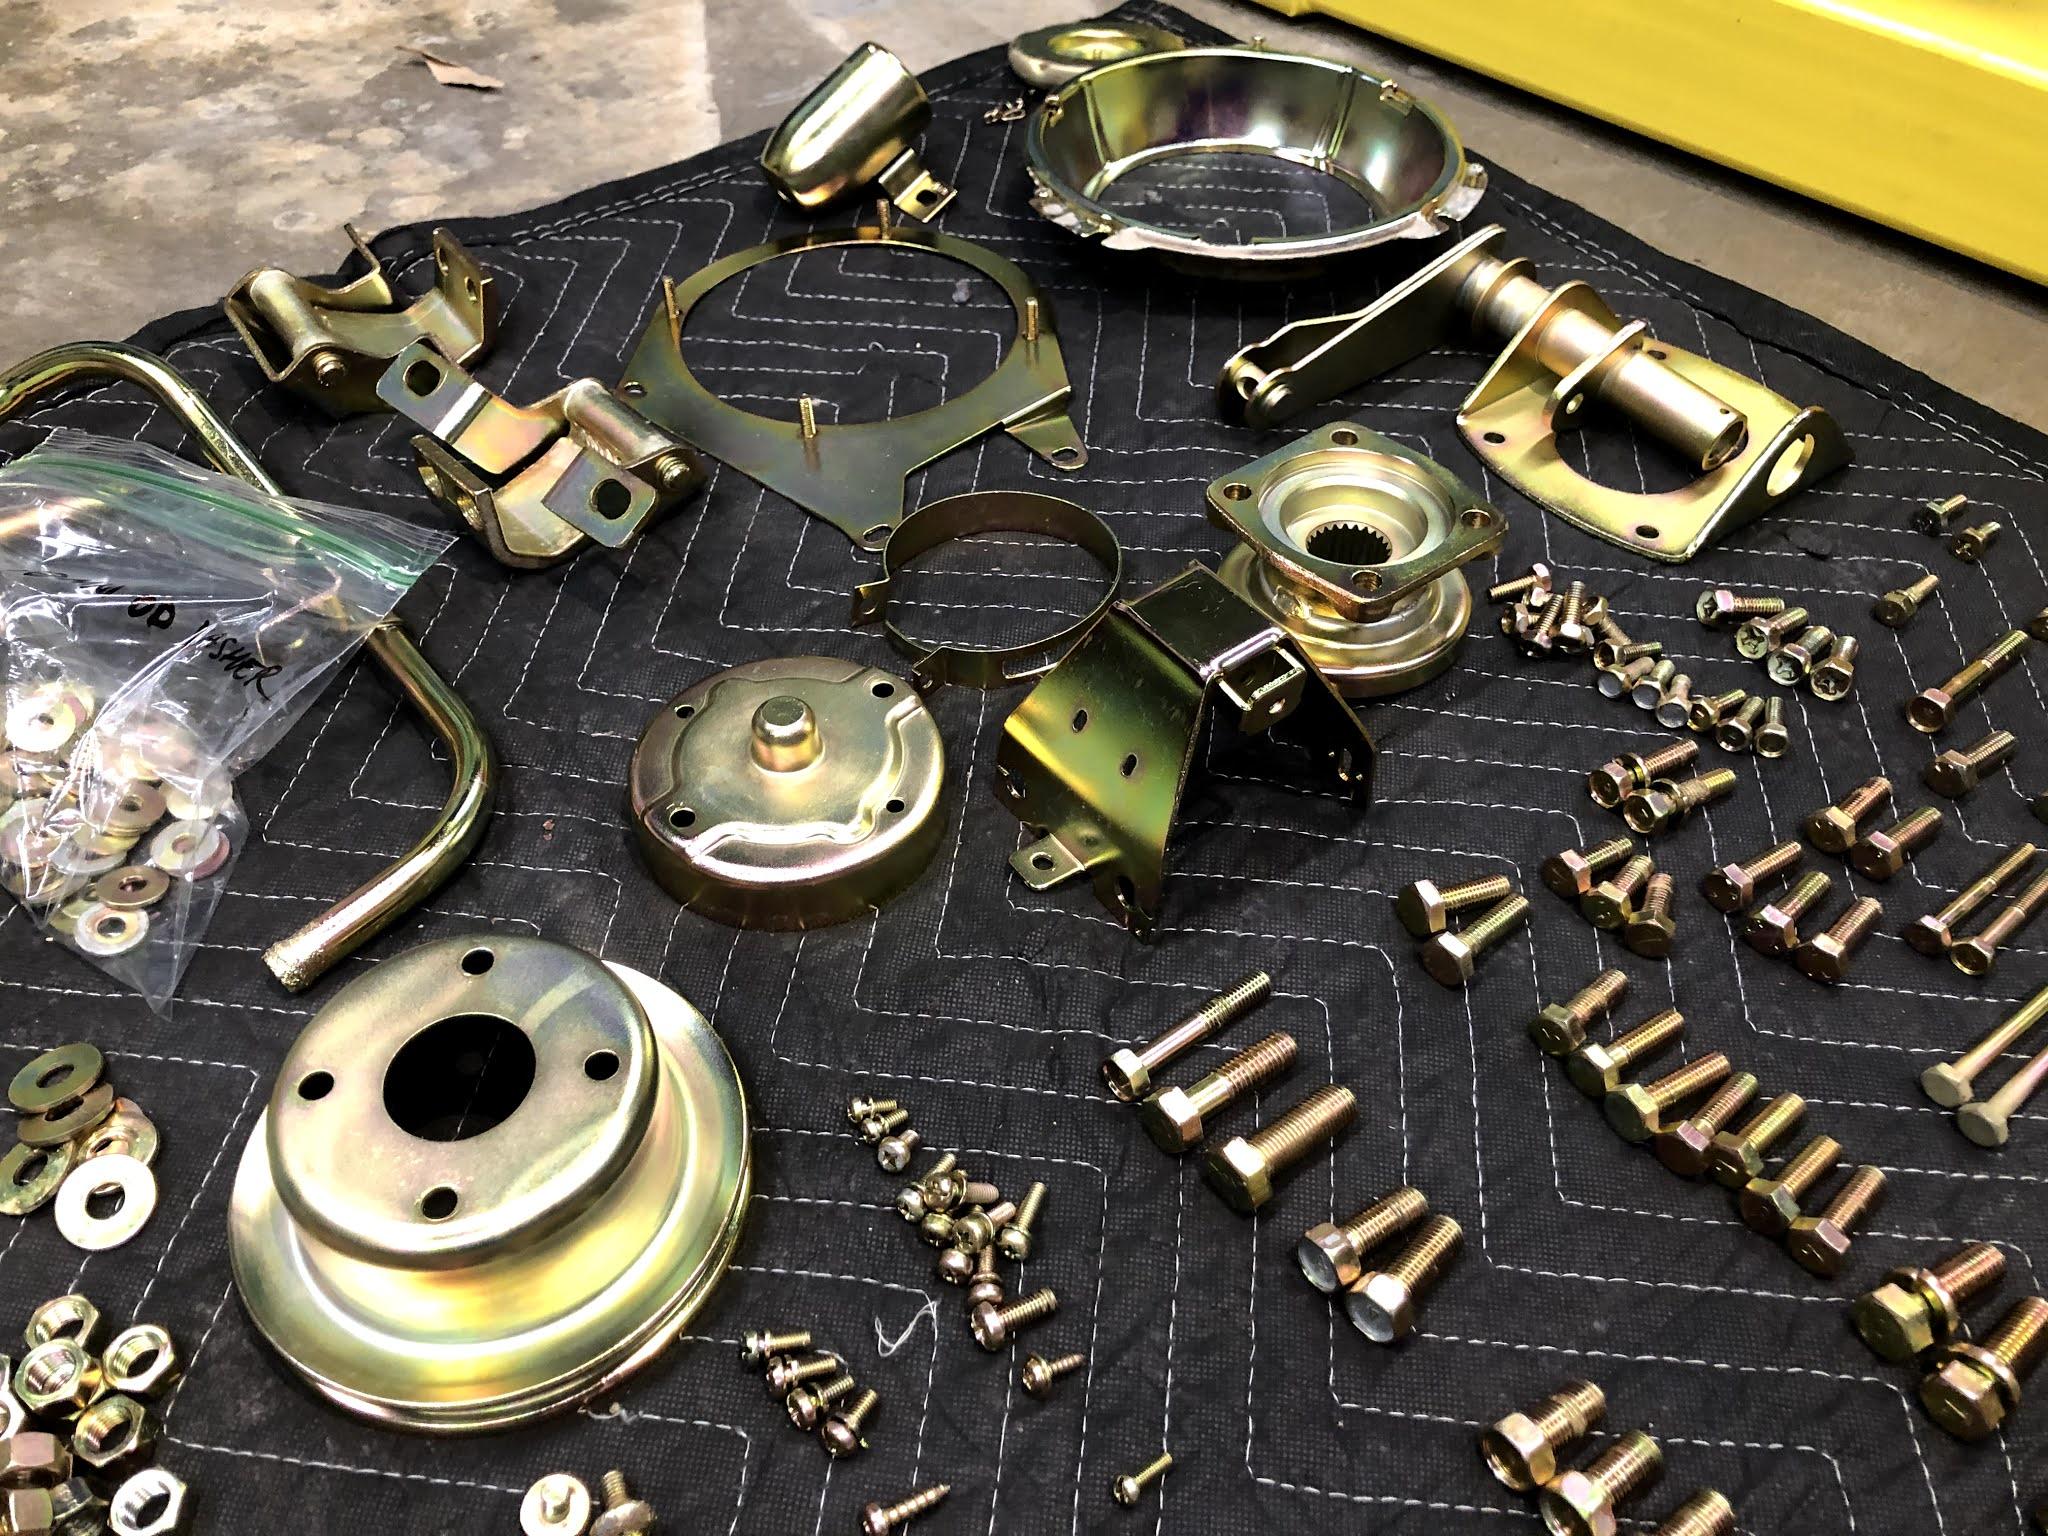
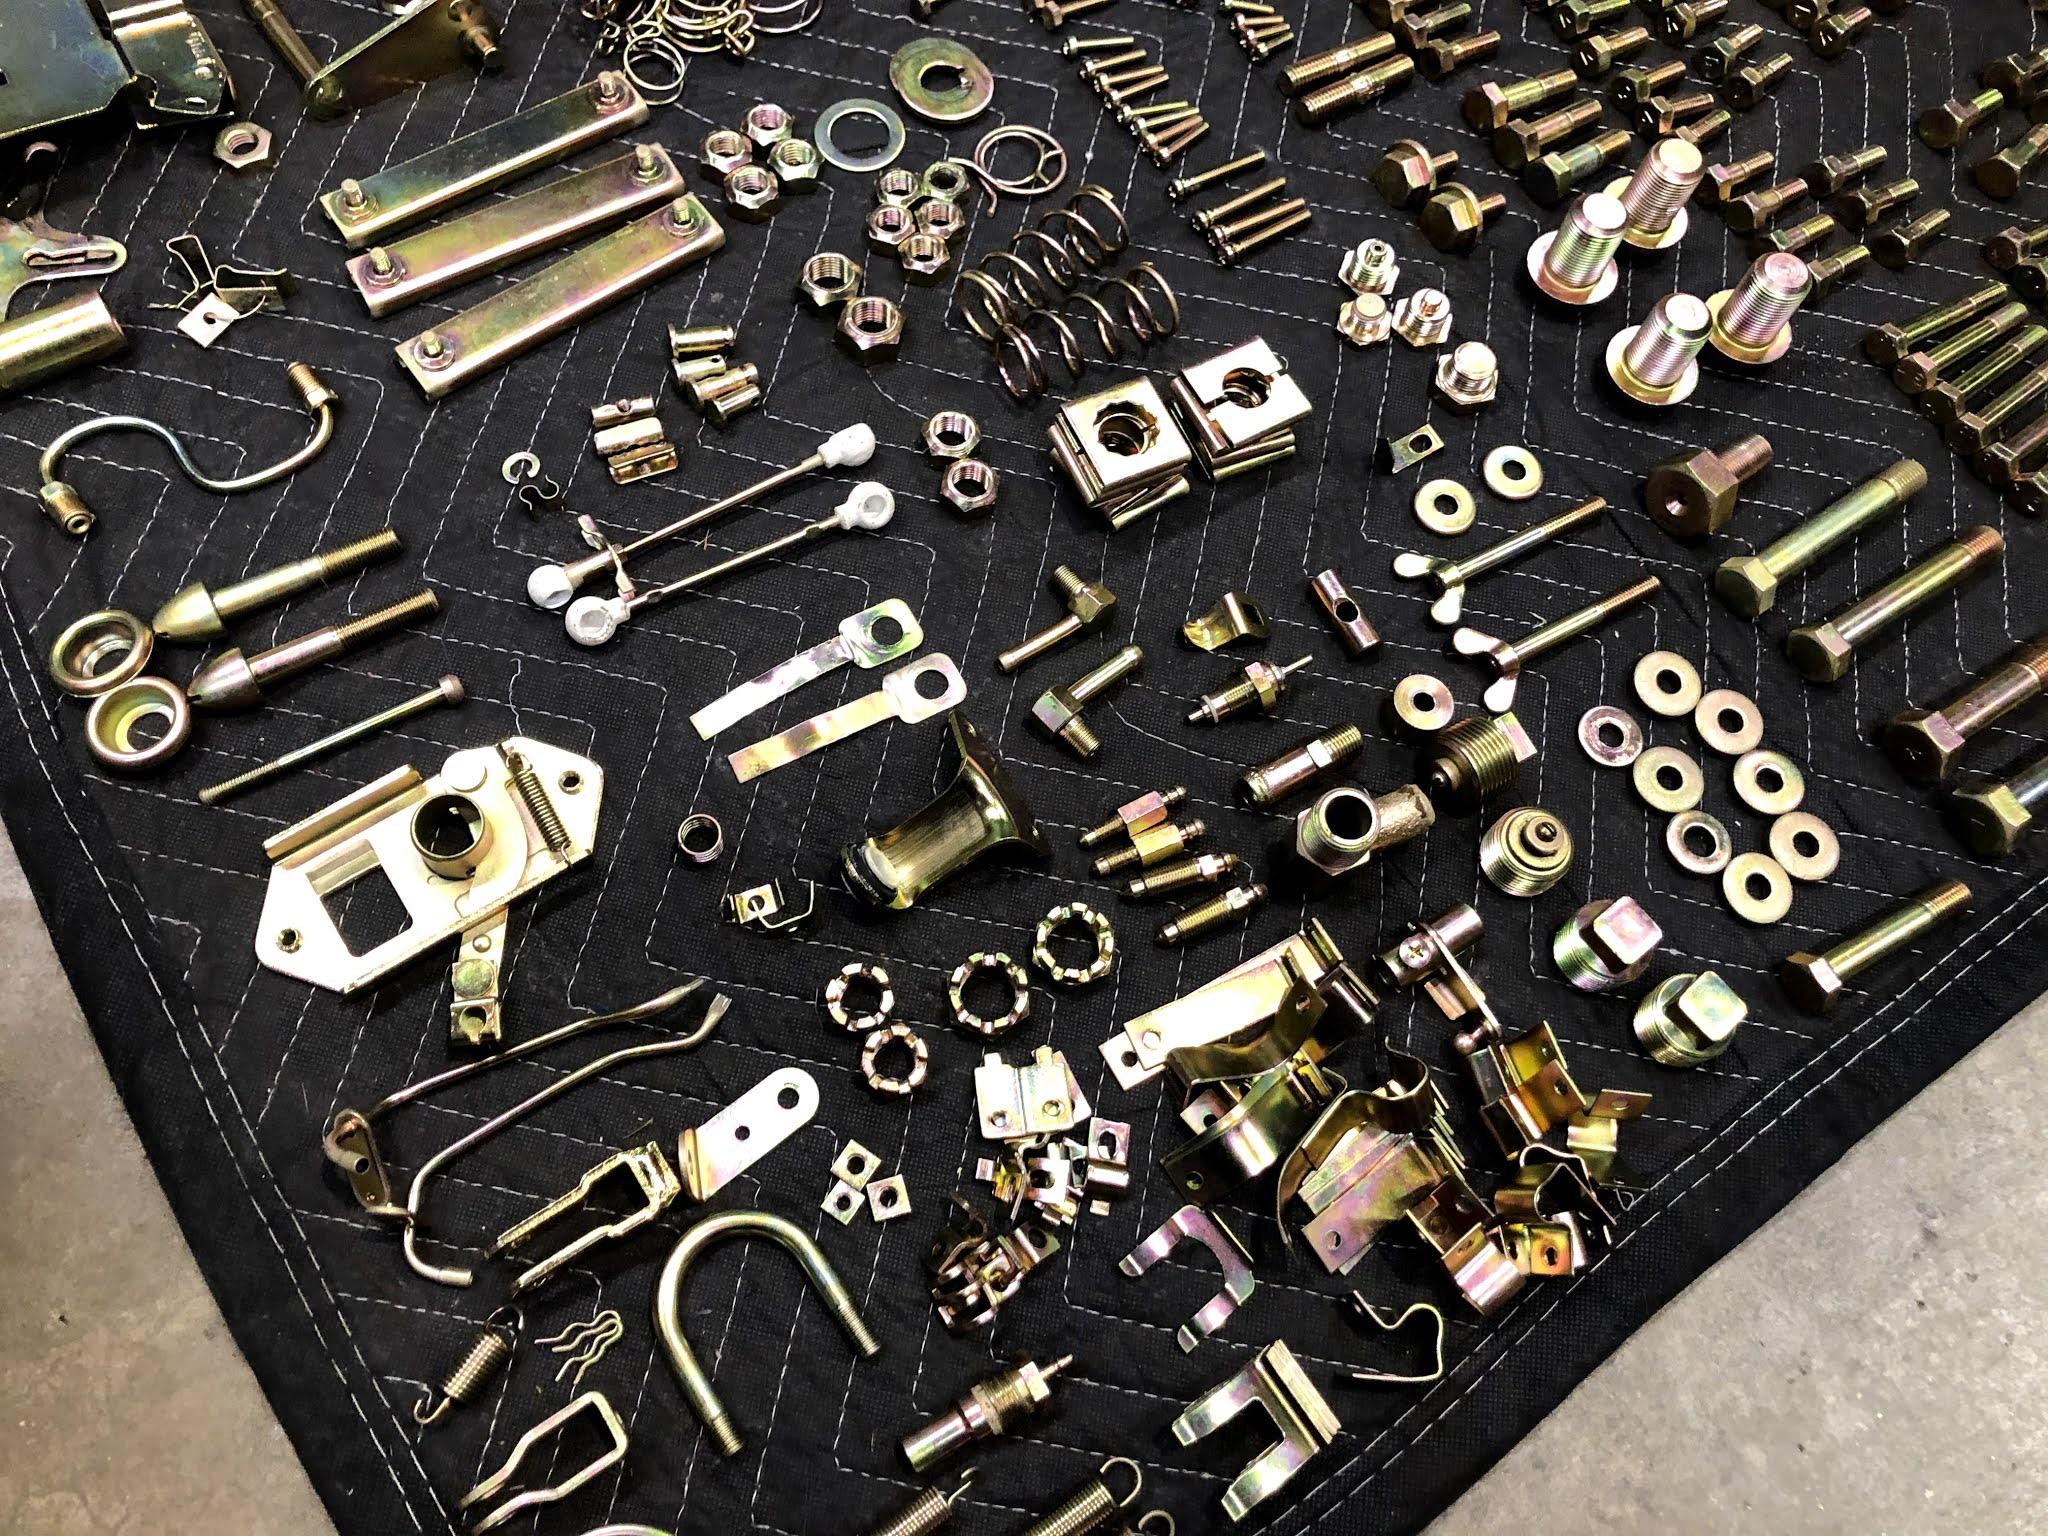
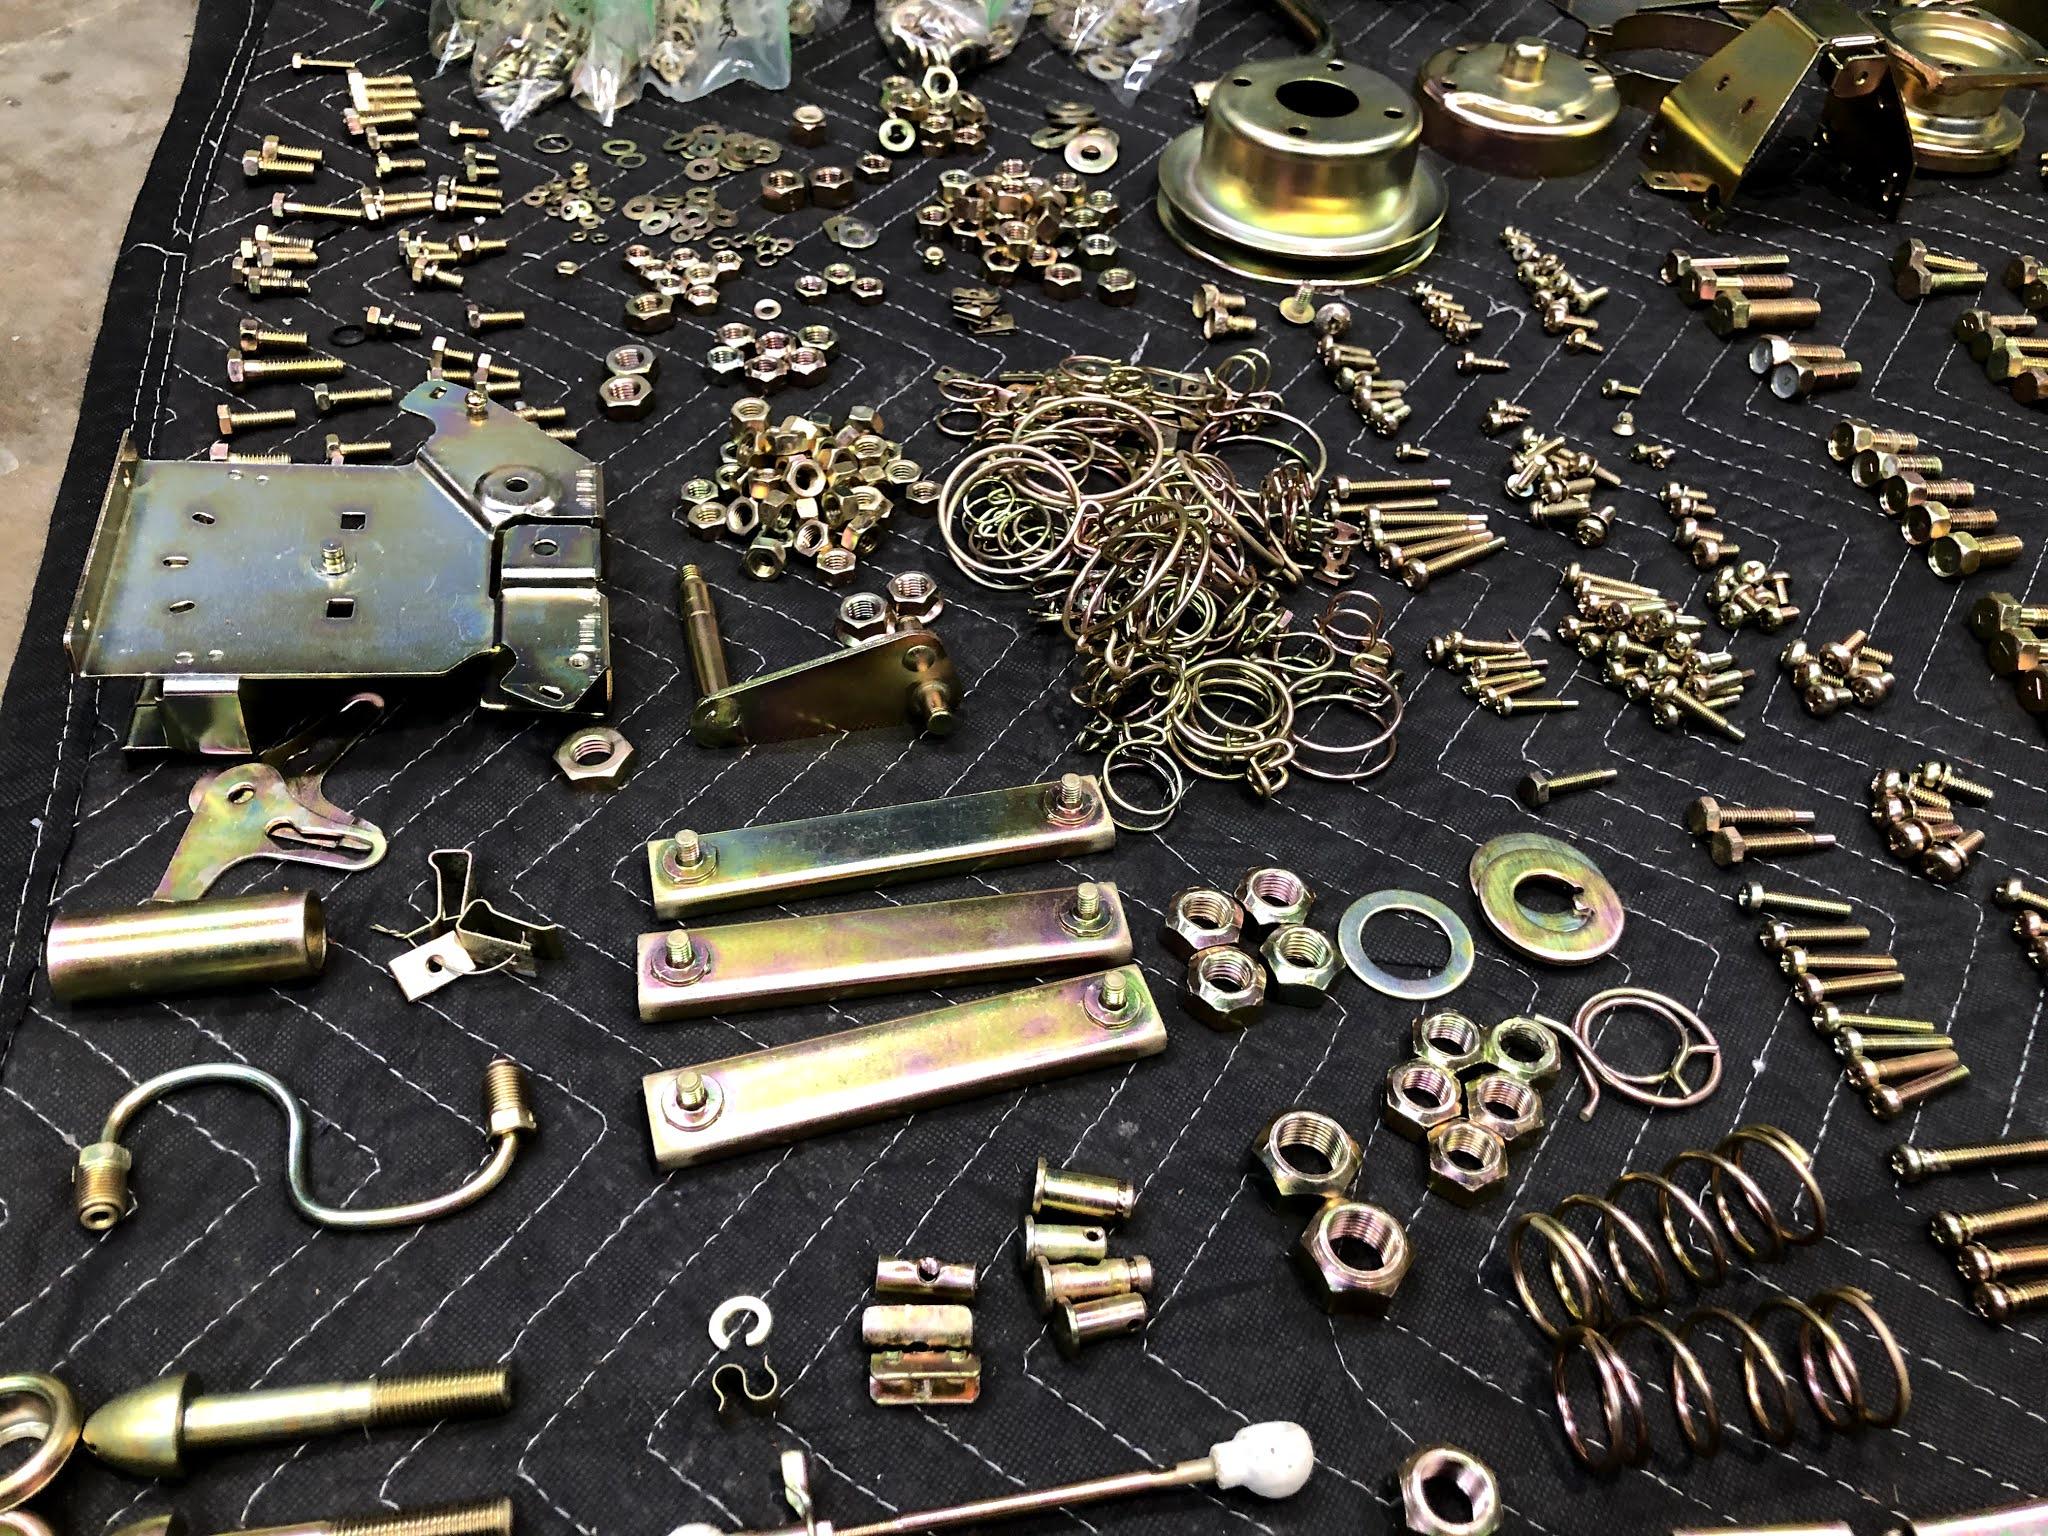
1 pointSlowly rebuilding the hardware that returned from plating. Hand brake mechanism, fuel tank hardware, hood release, headlight buckets, HVAC controls, and the proportioning valve were first for reassembly. Also started working on the suspension components. Here's the rear control arm brace assembly, powder coated and plated hardware. I know the lower control arm caps should have been black instead of clear zinc as they are now, but I thought it would be nice to break up all the powder coated parts in that area. Front strut assemblies are also reassembled now. As are the front calipers. All new bearings, seals, wheel studs, brake line, KYB strut, rotor and pads.
.thumb.jpg.e2b04f83c86125302d129e1d0bd074ba.jpg)


 1 point
 -
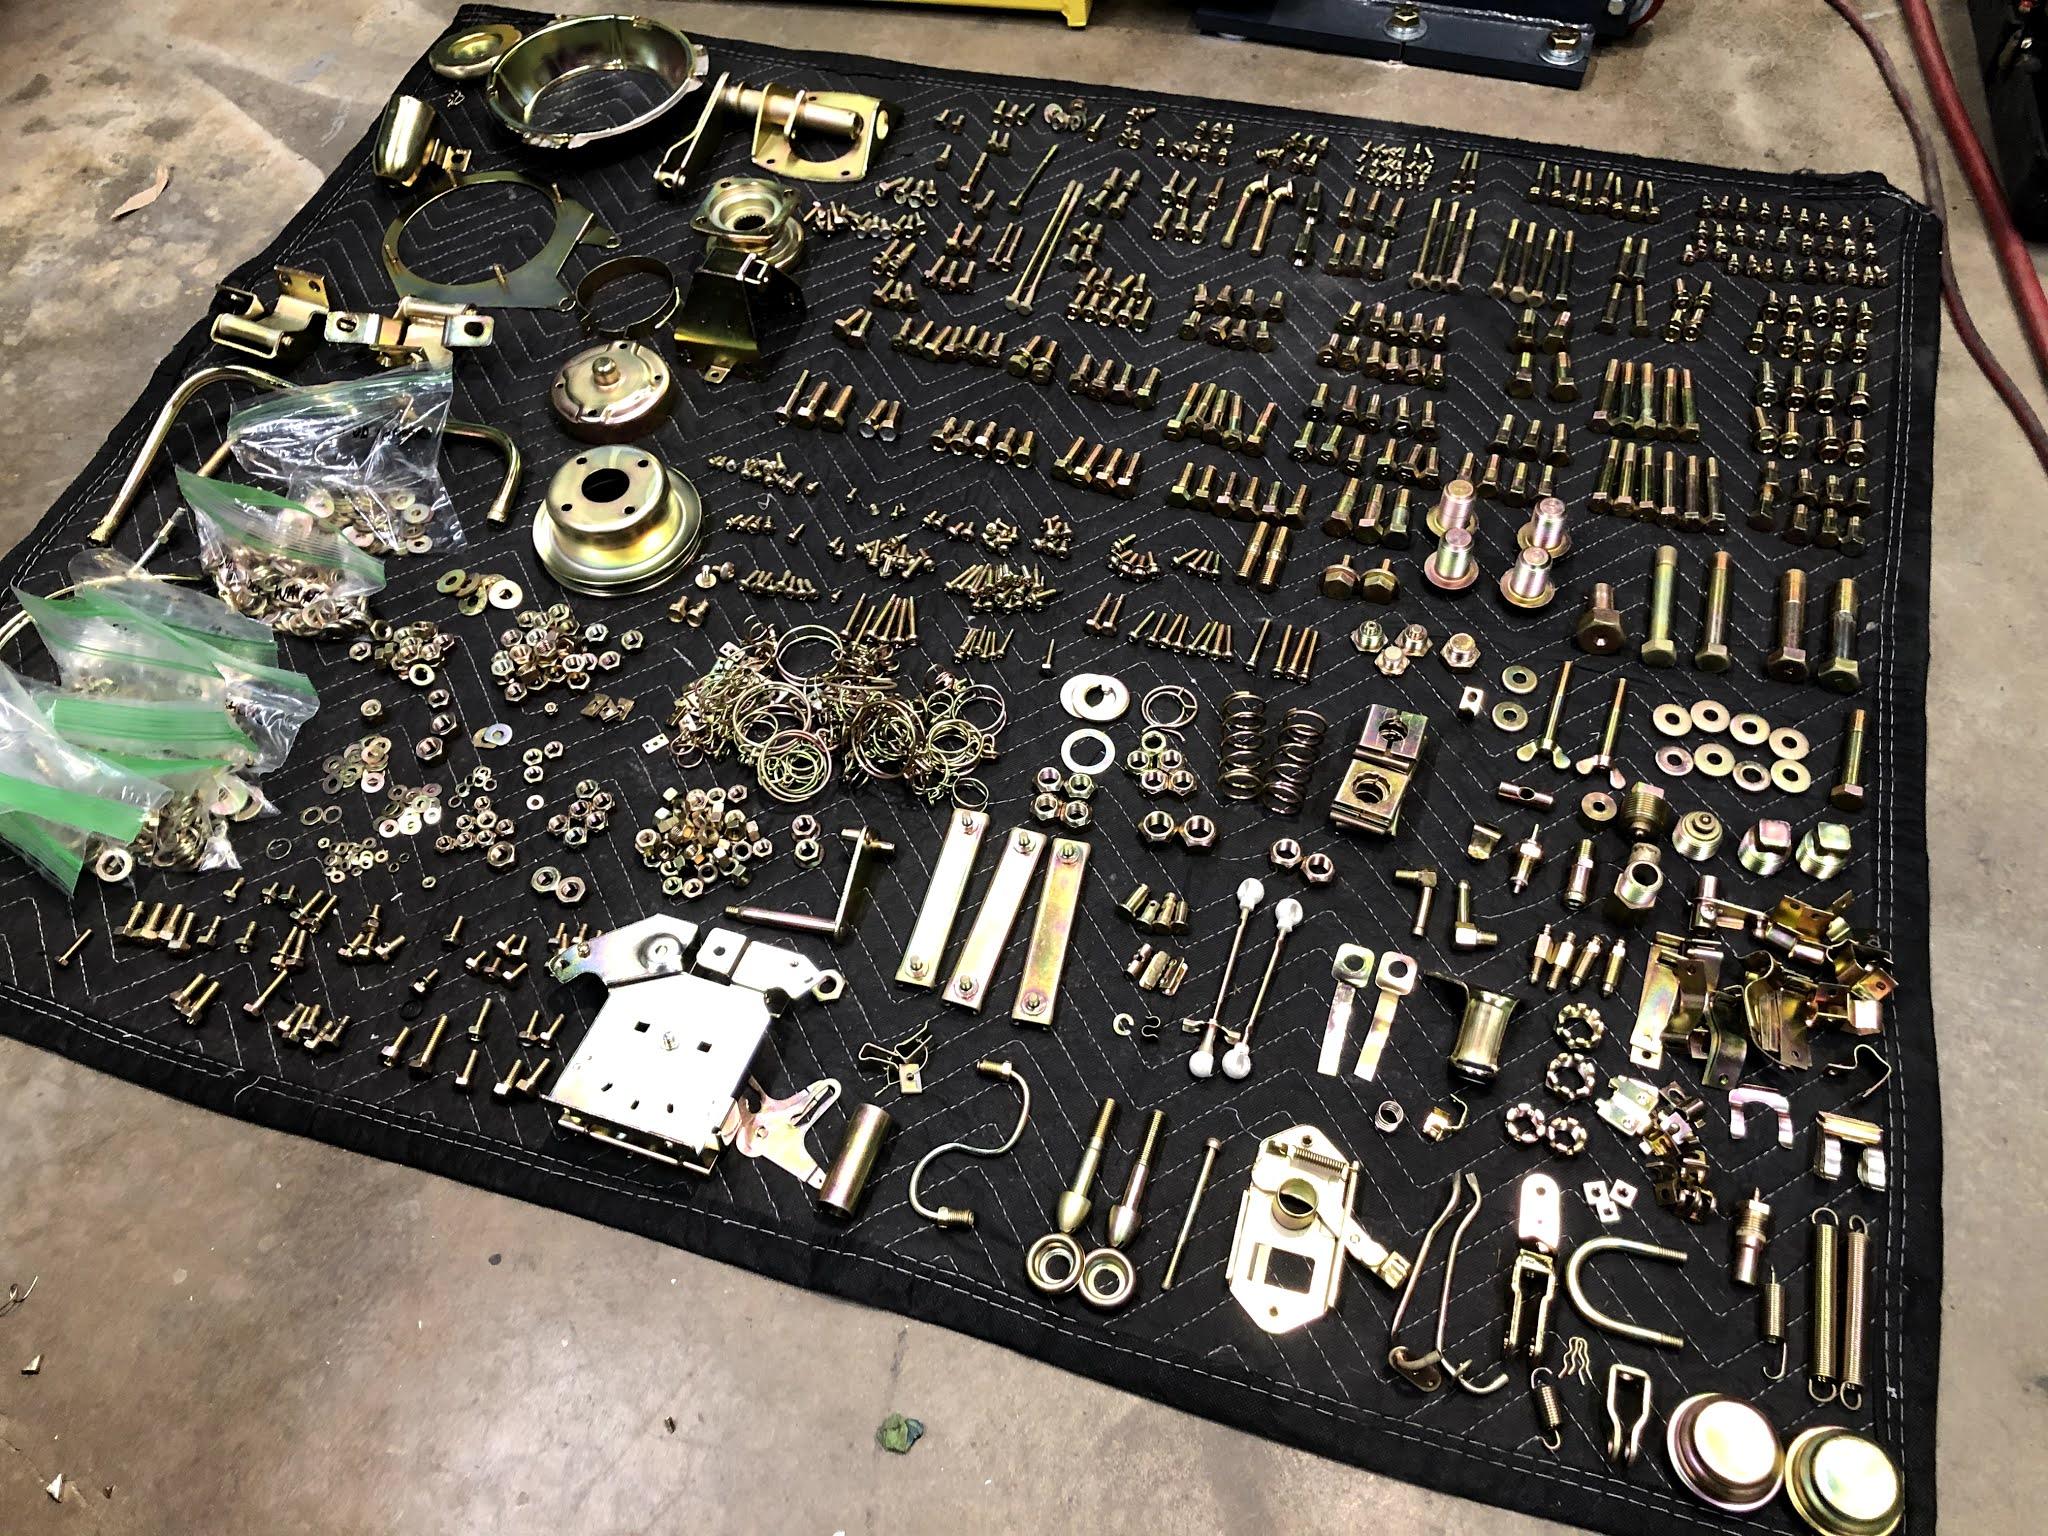
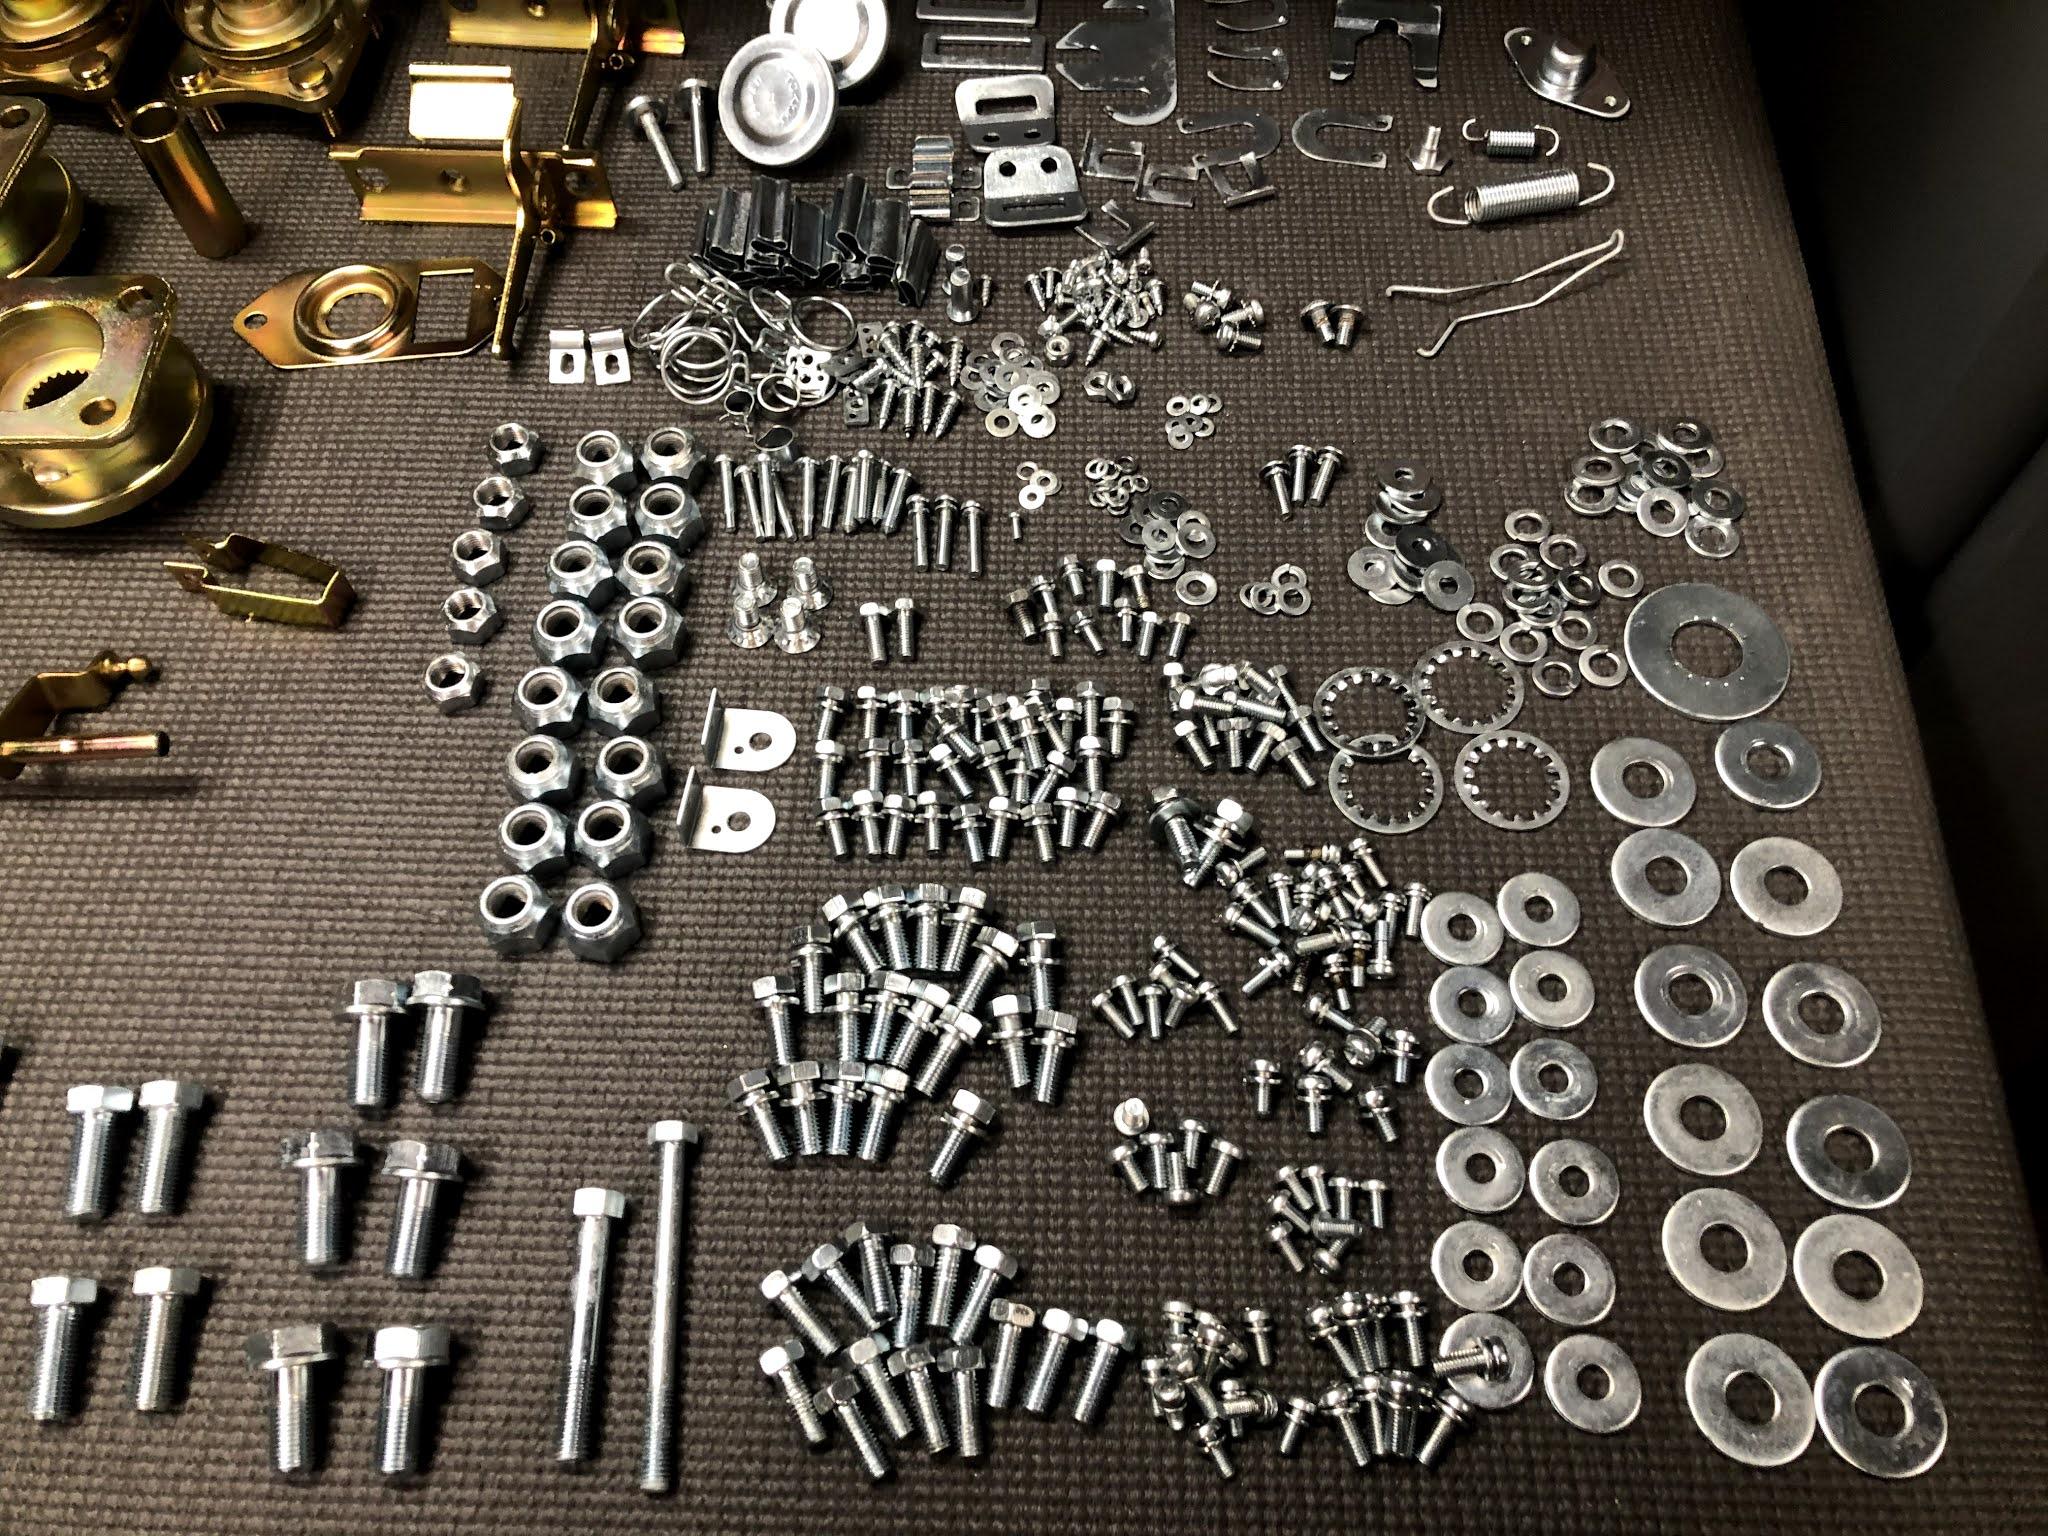
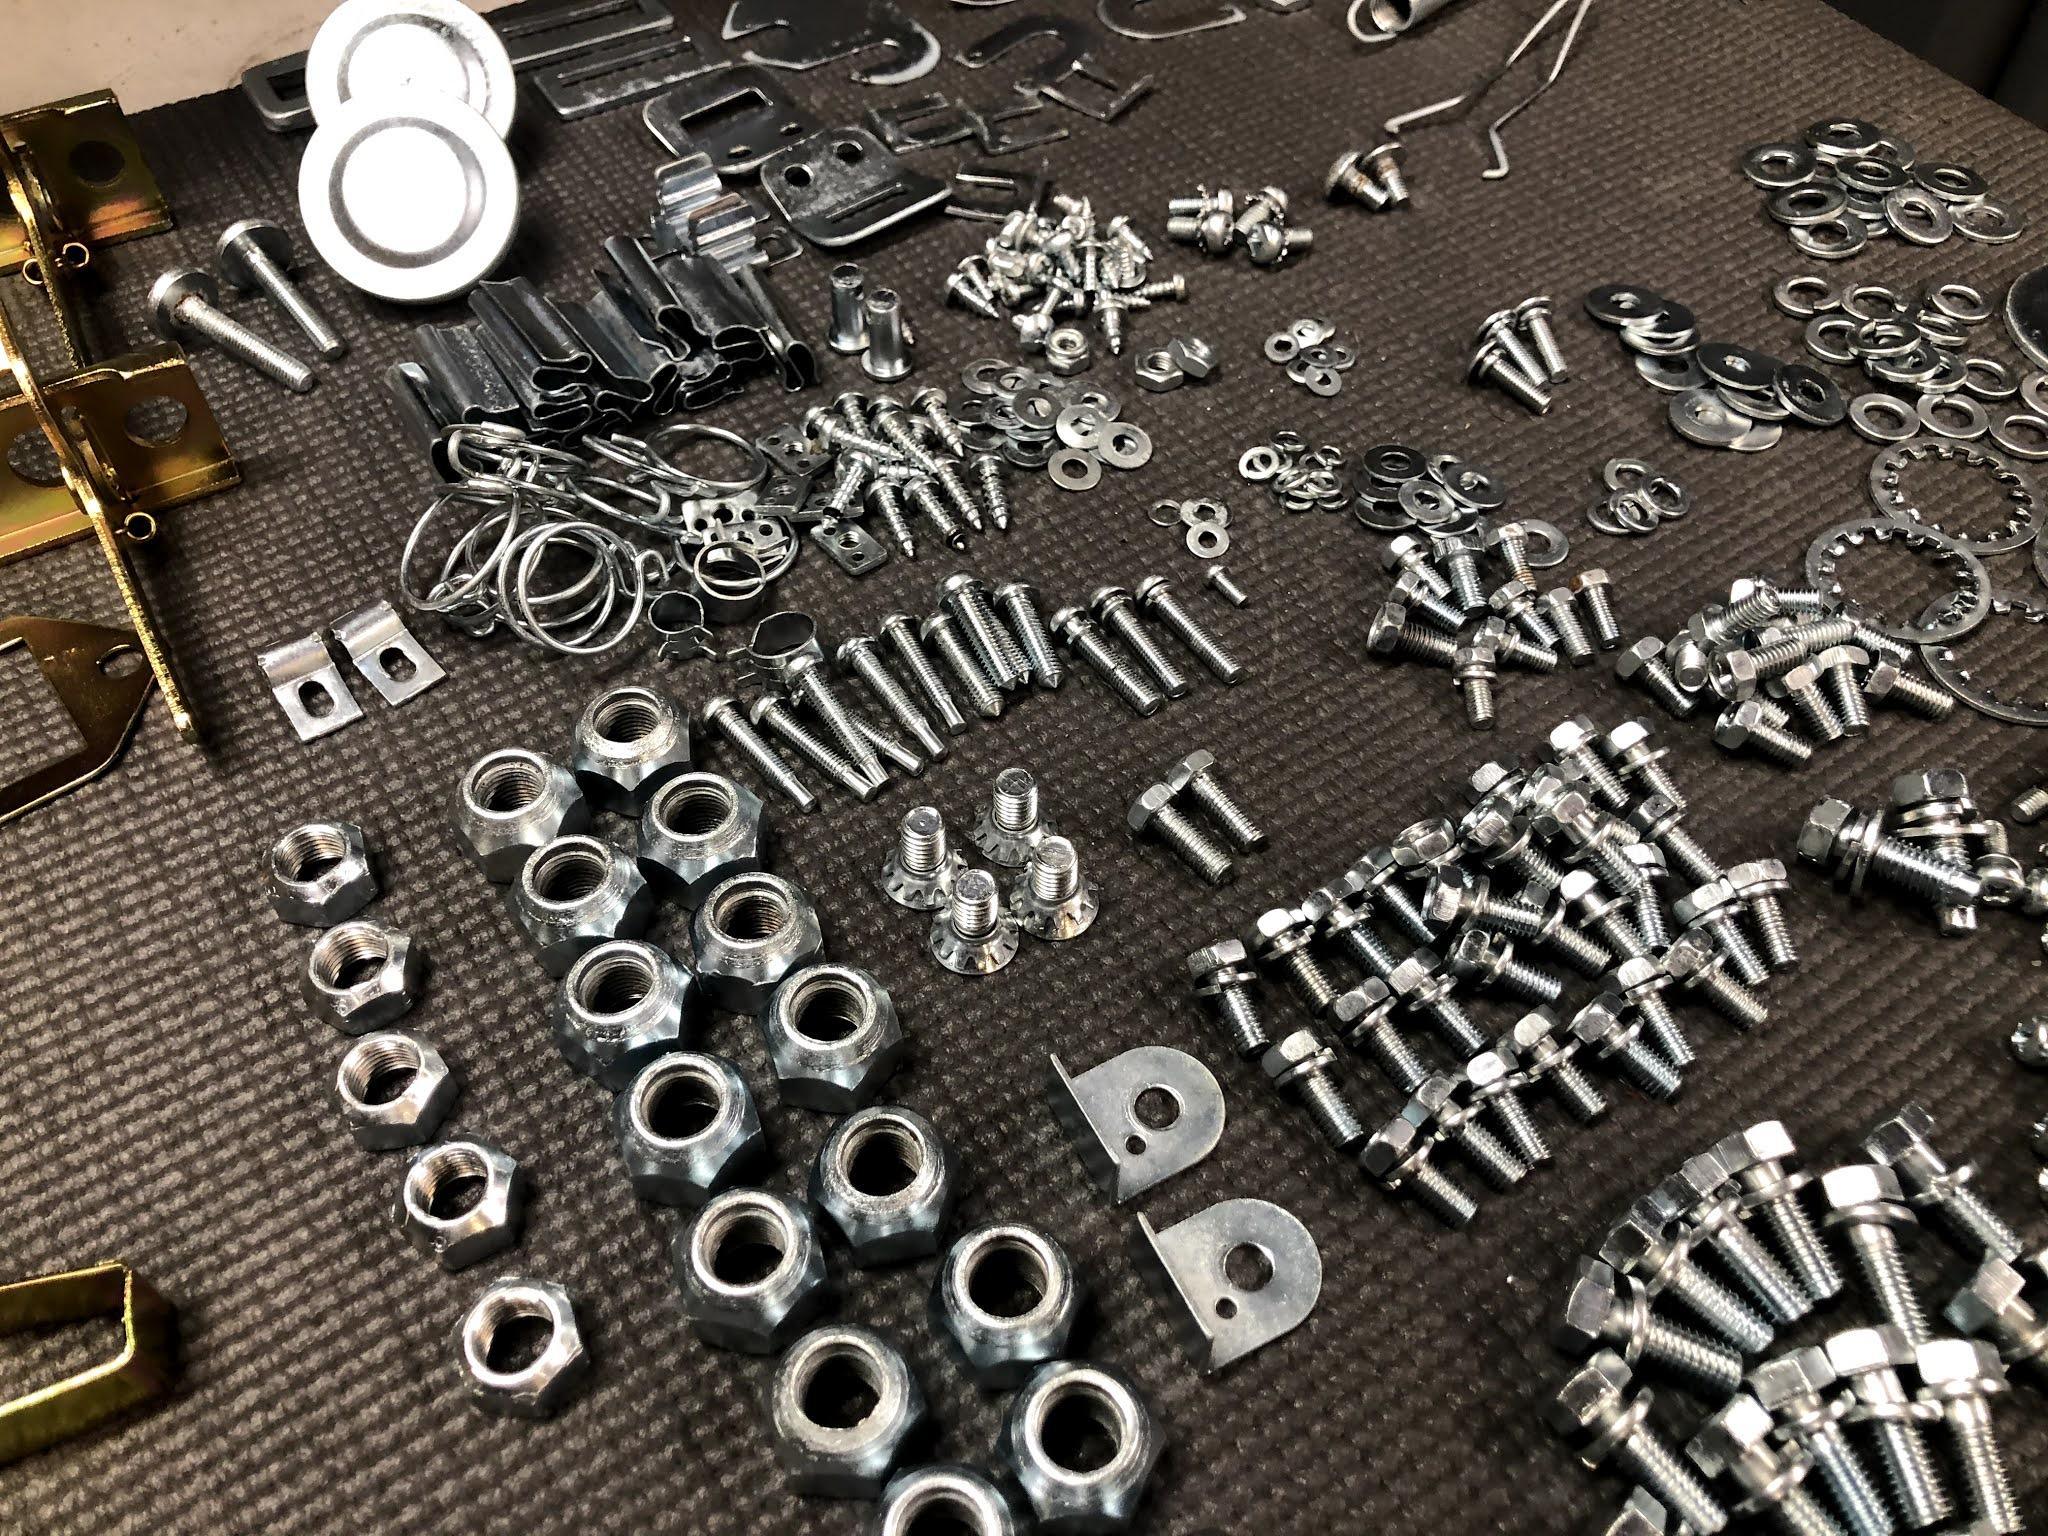
1 pointParts arrived back from plating for the Z this week, both in yellow and clear zinc. Now for inventorying every nut bolt and washer and to allocate them back to where they were previously installed. This is roughly half of the yellow zinc parts that were restored. And most of the clear zinc.


 1 point
 -
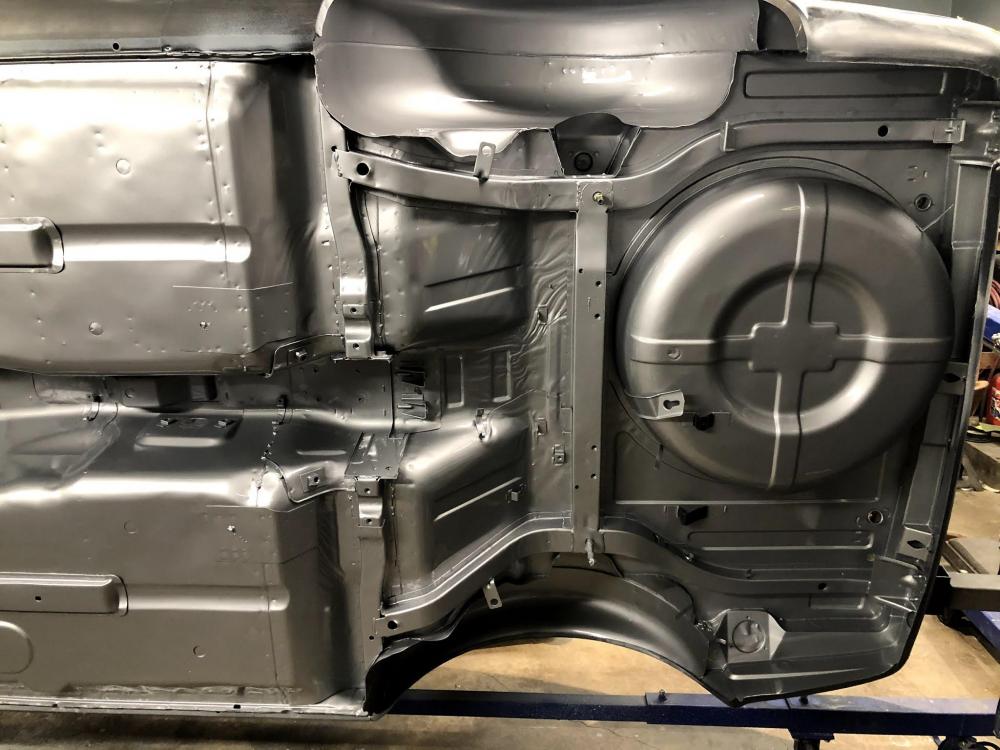
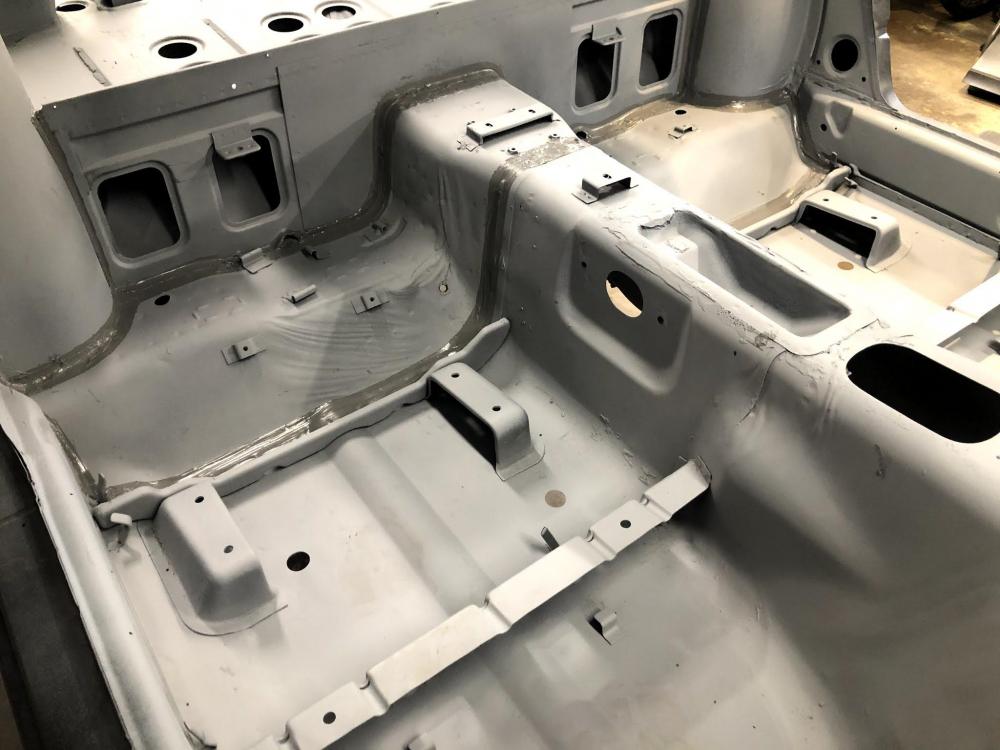
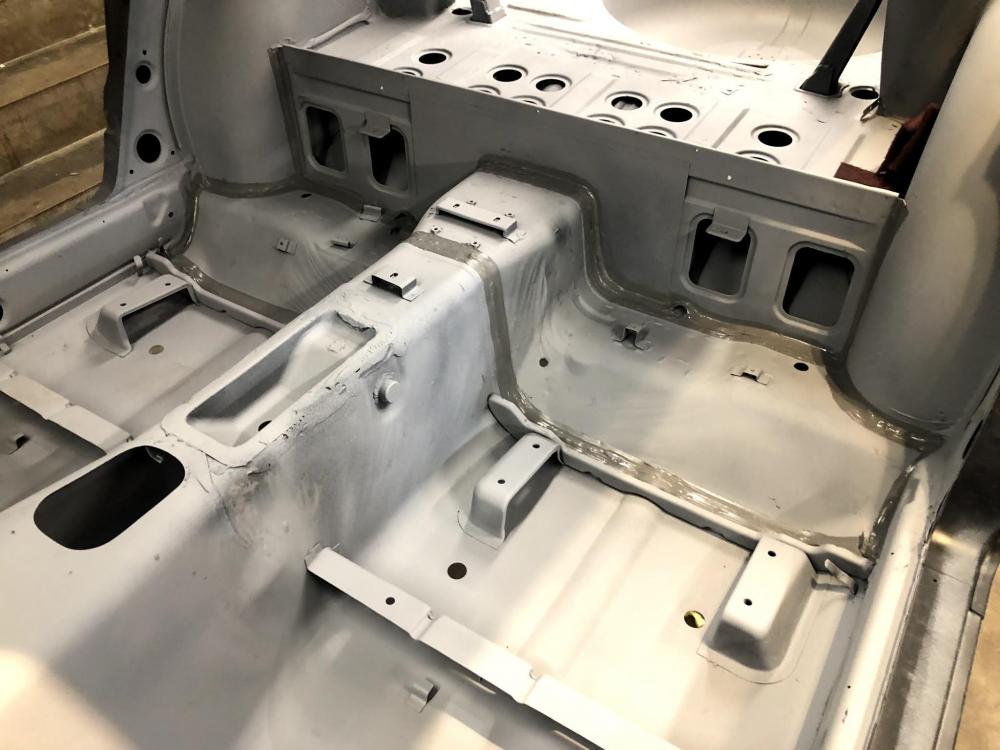
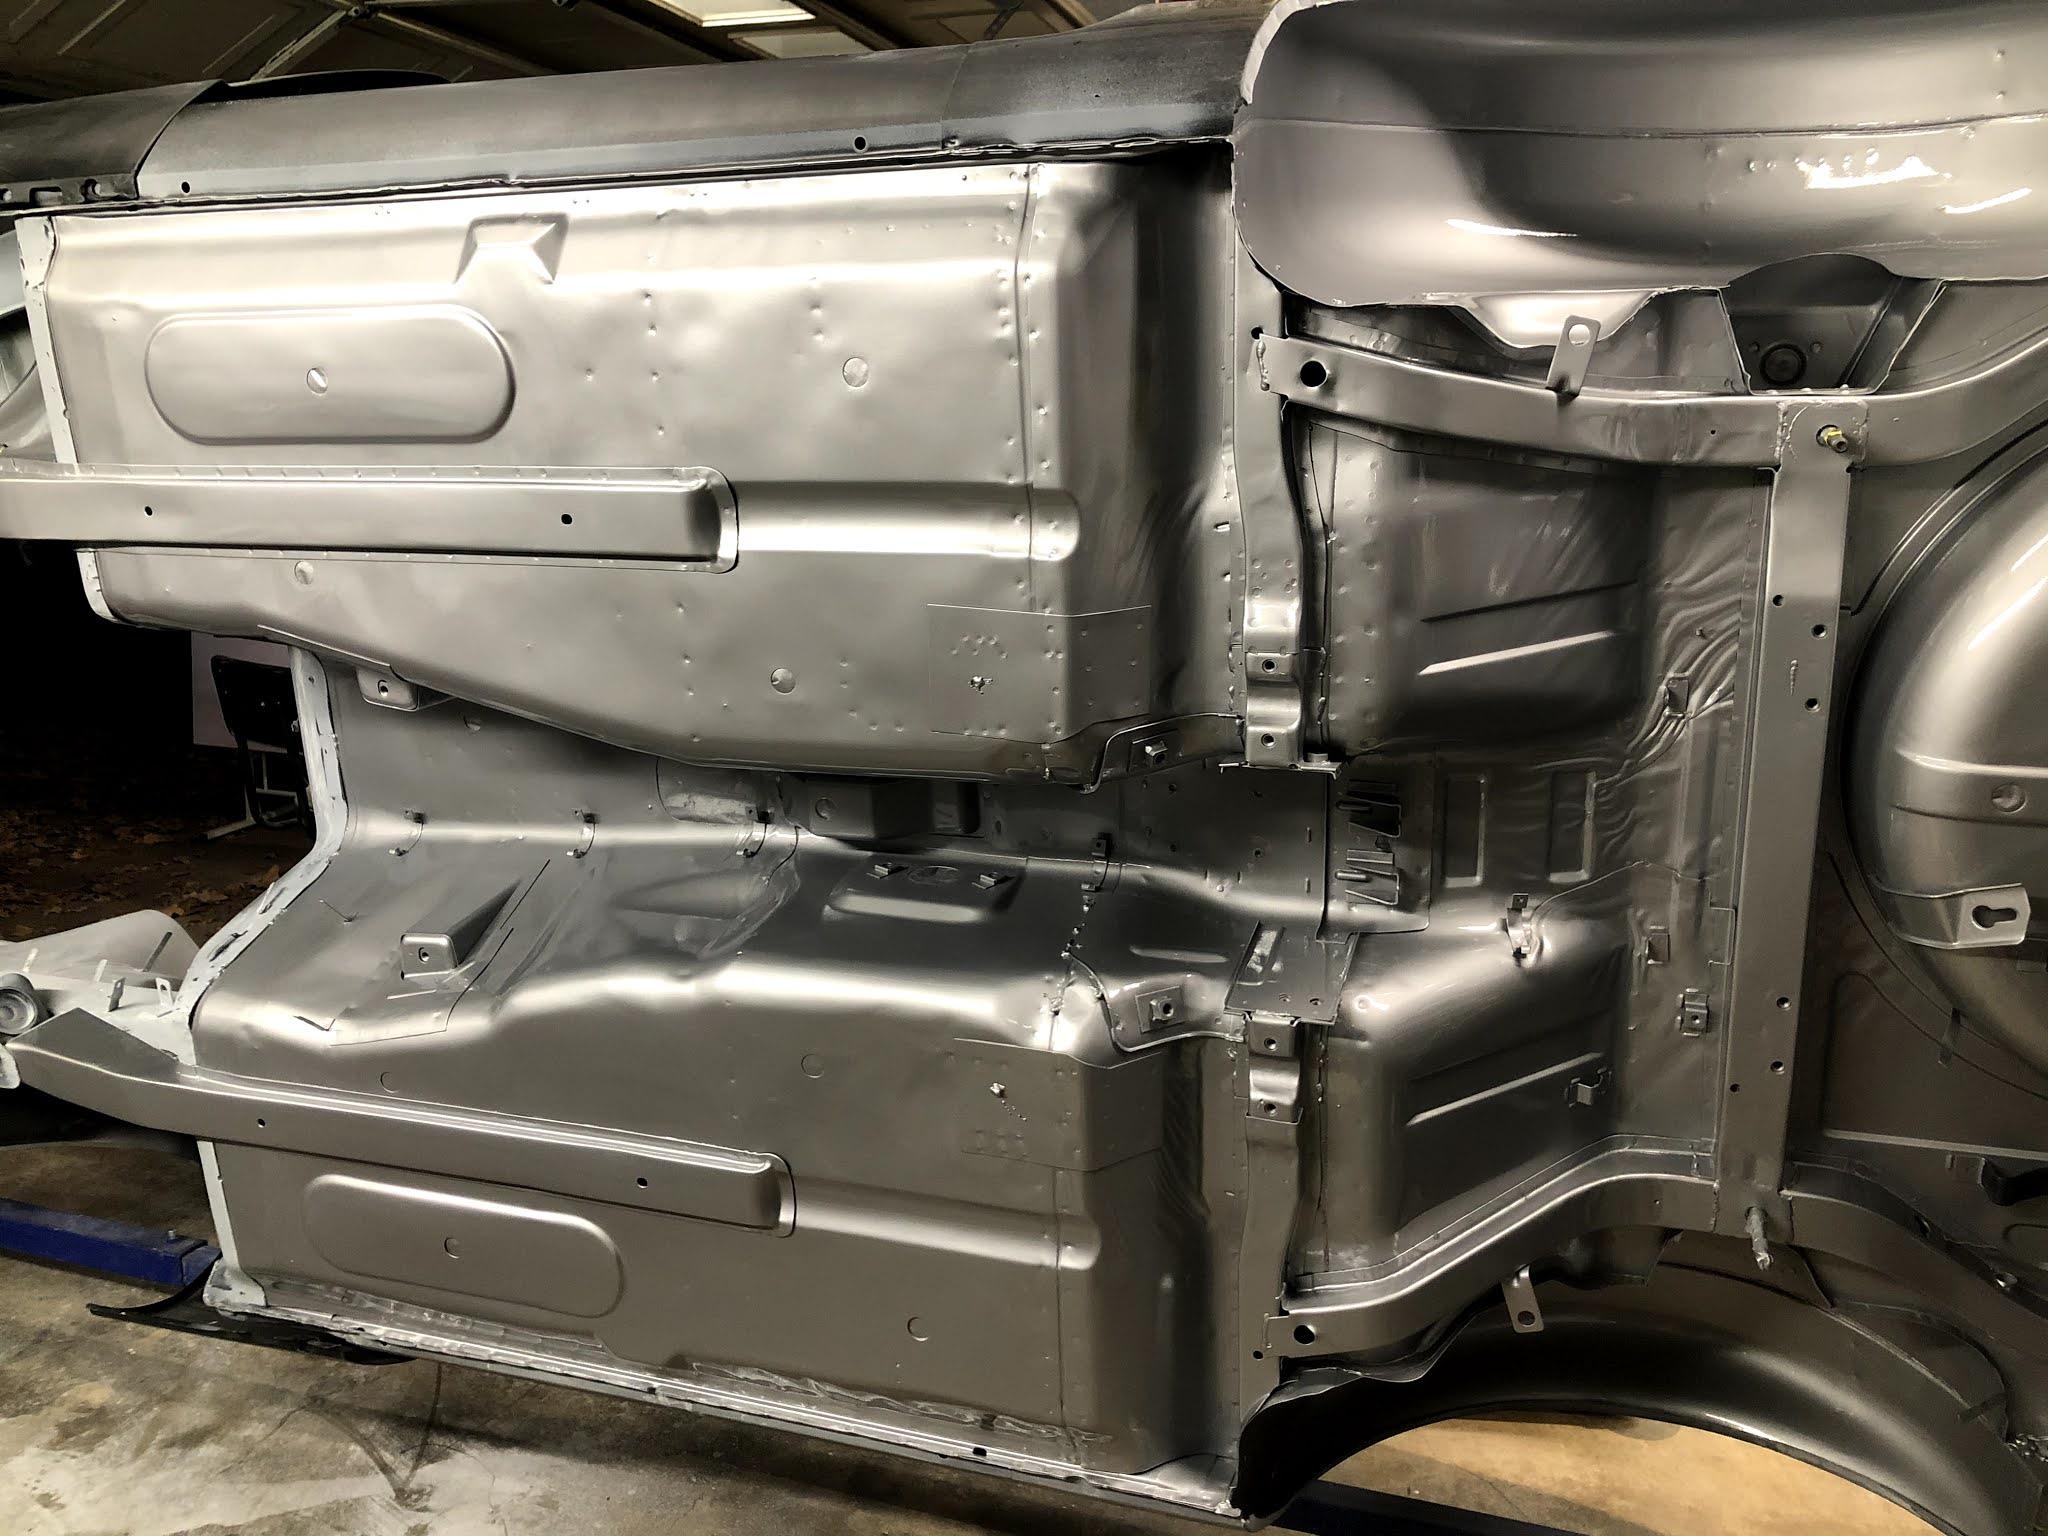
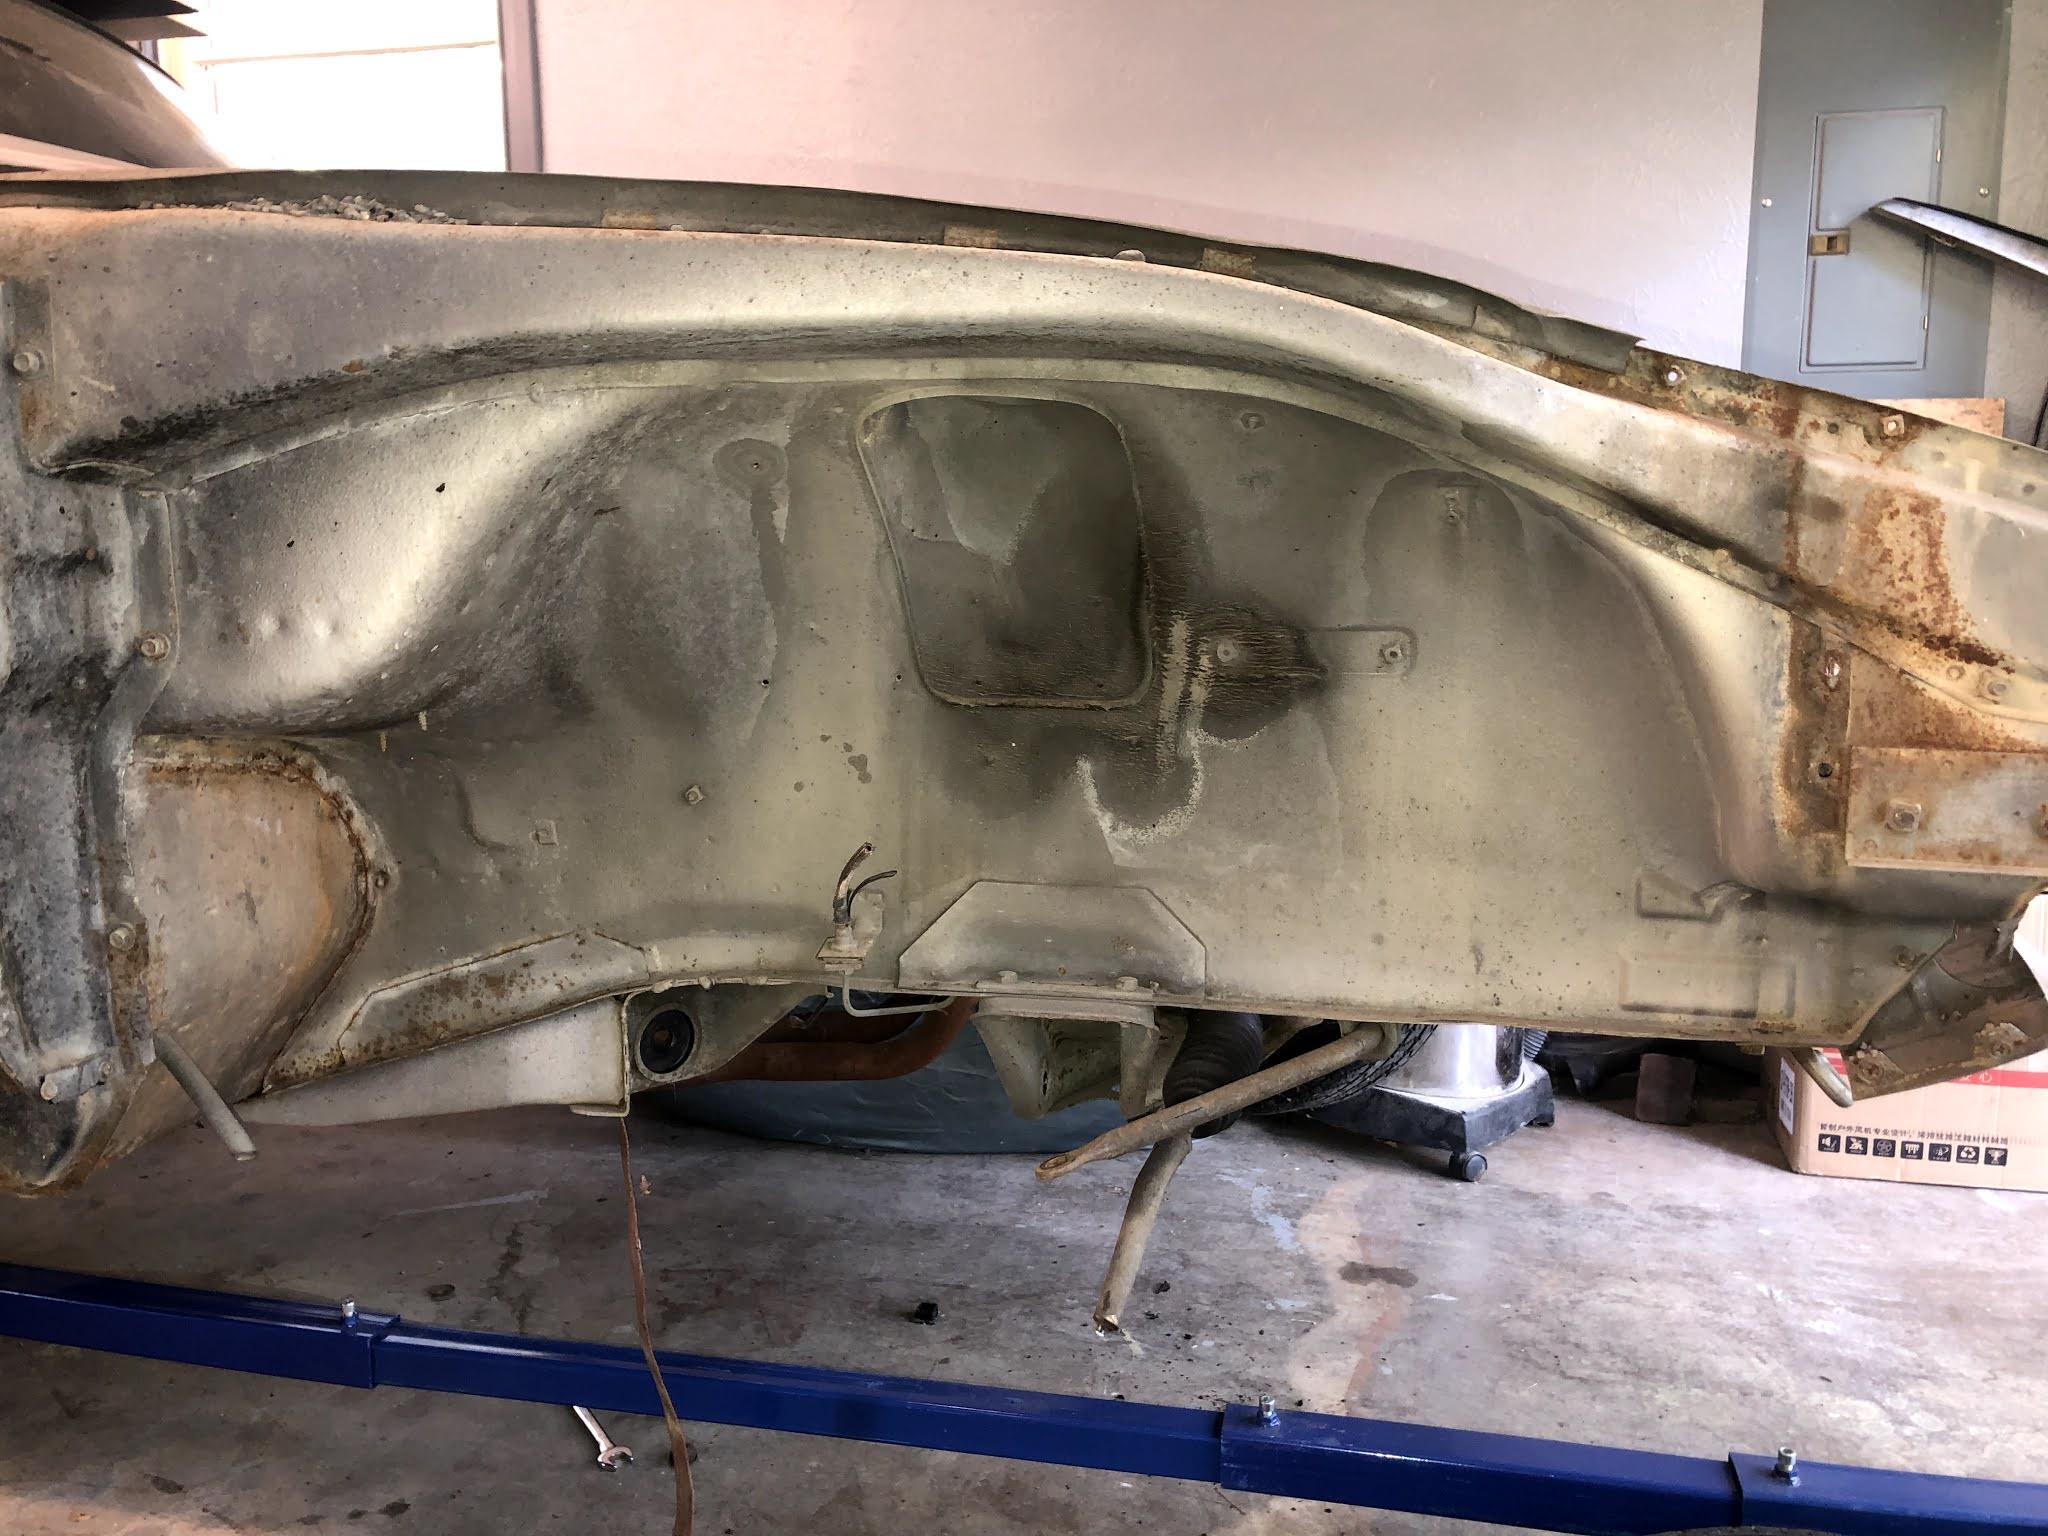
1 pointHuge improvement was made to the Z body. Before blasting the car, we removed the battery tray so that the area around it and underneath could be cleaned up and any rust removed. The battery tray itself was salvageable, but corrosion on the mounting flanges would make welding it back to the body very difficult. As a solution, we order one of the stamped trays from Klassic Fab JDM. Link to their website: Klassic Fab JDM Here's what the area under the battery tray looked like before blasting. You can seem some corrosion between the firewall and under tray area. A part from that this section of the Z was relatively clean all things considered. This tray was a very close copy of the original in size, shape, and appearance. I was very happy with the quality of the piece. The owners were kind and experienced with Z cars which is a bonus. Once the car was blasted, the area around the battery tray had not rusted through, but did show signs of pitting from corrosion. Mocking the new tray into the box showed that the areas which we would weld were thin and would again be difficult to work with without burning through. Fortunately, Klassic Fab also sells a replacement panel for the under battery tray area. This stamped also copied the factory sheet metal very well, even with the stamped locating pads to weld the wiring tabs to. While again not entirely necessary to replace both the tray and area underneath it on this car, we wanted to ensure that this rust-prone area of the Z would be good for another 50 years. The patch panel was trimmed down to the appropriate size, stich welded in, and body worked for a seamless transition from patch to original steel. I was very pleased with how well the panel matched the factory area. We only needed around 50% of the patch panel to remove all the corroded steel. If your Z is in need of a battery tray and/or the area underneath it, I would highly recommend Klassic Fab and the panels they offer. Next we'll burn in the tray for good and weld in the electrical wiring tabs.

.thumb.JPG.eb289f9e78f69ee5f08099cbdd69b365.JPG)

 1 point


.jpg.633e66bbec3fd49385baadb7eaf605b7.jpg)
.jpg.15755812c63c76cf6c642882e840e0e6.jpg)


.jpg.4fa11d4043500aae85405fc0f0e2429e.jpg)


.JPG.b9ee0d39439d8af1888c68d84c5a288a.JPG)