


Leaderboard
-


siteunseen
Free Member4Points14,904Posts -

Namerow
Free Member3Points1,487Posts -


Racer X
Free Member3Points1,877Posts -


CW240Z72
Free Member3Points229Posts
Popular Content
Showing content with the highest reputation on 04/22/2021 in all areas
-
3 points3 points
3 pointsAs you continue on this (unwanted) parted of your Z restoration, I think you will be well served by acquiring a couple of laser levels. These have become less expensive since they were first introduced to the D-I-Y community and can be really helpful for checking and restoring panel and fixture alignments. One of the big challenges for these types of alignment measurements is, 'Aligned (or level) relative to what?' For example, the fact that the RHS bumper mount holes are level (as in, inertial level c/o a torpedo level) doesn't tell you whether they're at the same elevation (as in, height above the floor) as the LHS holes. As an another example, ask yourself, 'How do I make measurements relative to the centerline of the car?' I suggest the you buy a 'plumb' laser and a 'crosshair' laser. The plumb laser will let you check whether you car's main structure is straight (use the reference points and dimensions shown in the frame diagram in the 'Body' section of the FSM). The crosshair level will let you check alignments for various surfaces and reference points (e.g. bumper bolt holes) relative to a consistent inertial reference. It will also let you be sure that the whole car is sitting level, left-to-right (front-to-rear can be done, too, but not so conveniently). The combination of both laser types will be useful when you do your frame rail replacements. Of course, you can do all of this work without the lasers. The lasers just make it easier and reduce the amount of guesswork.3 points
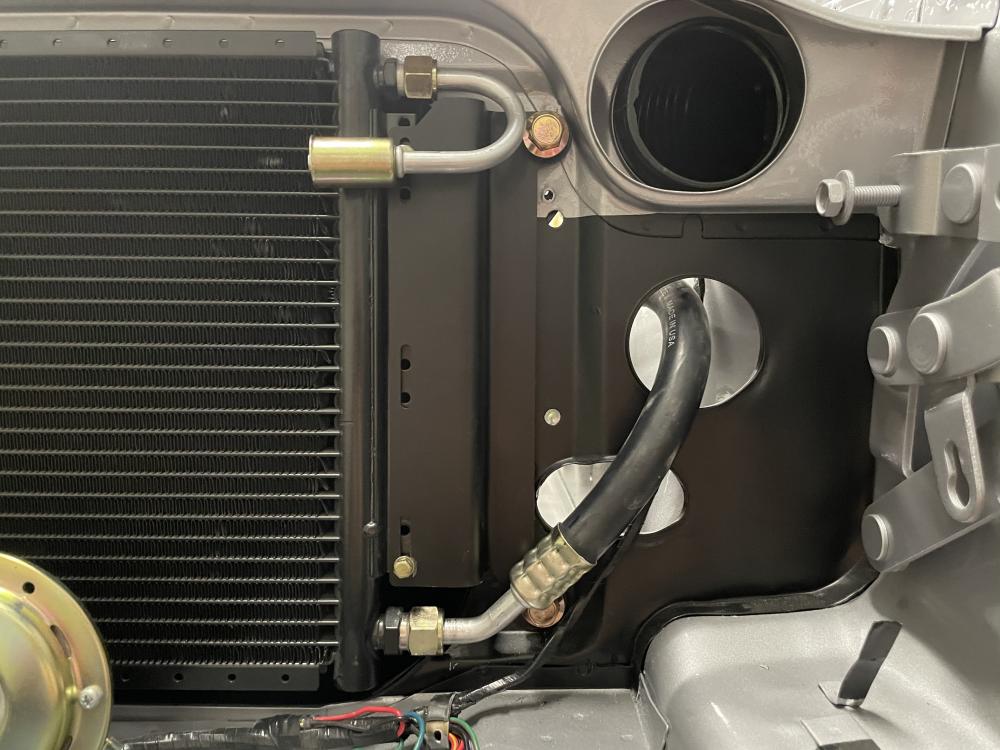
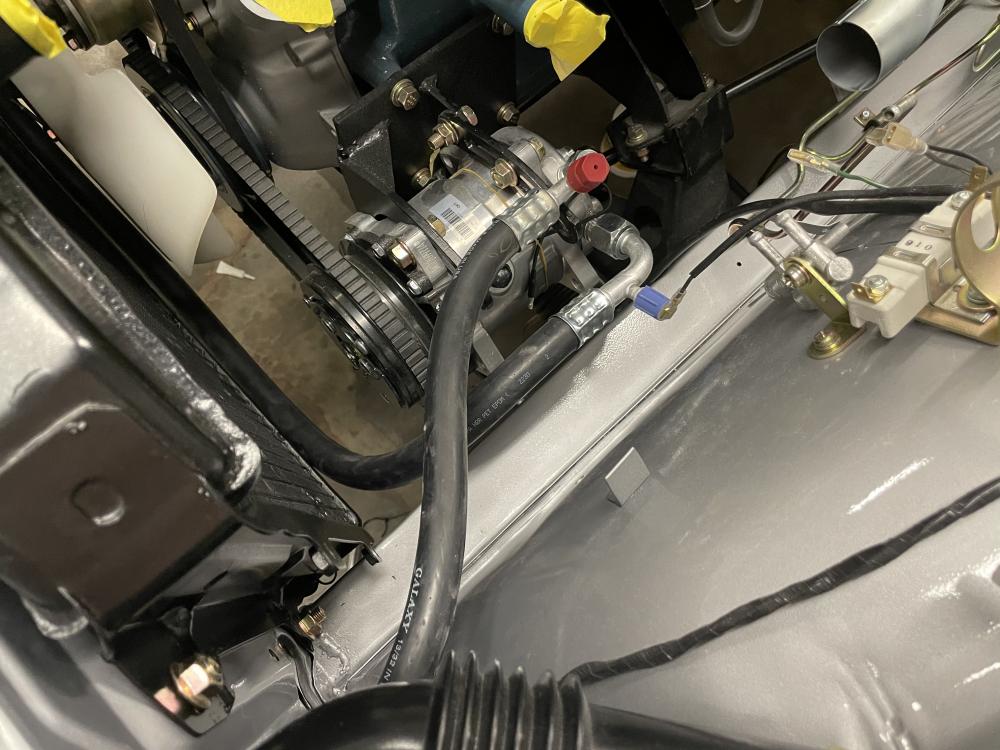
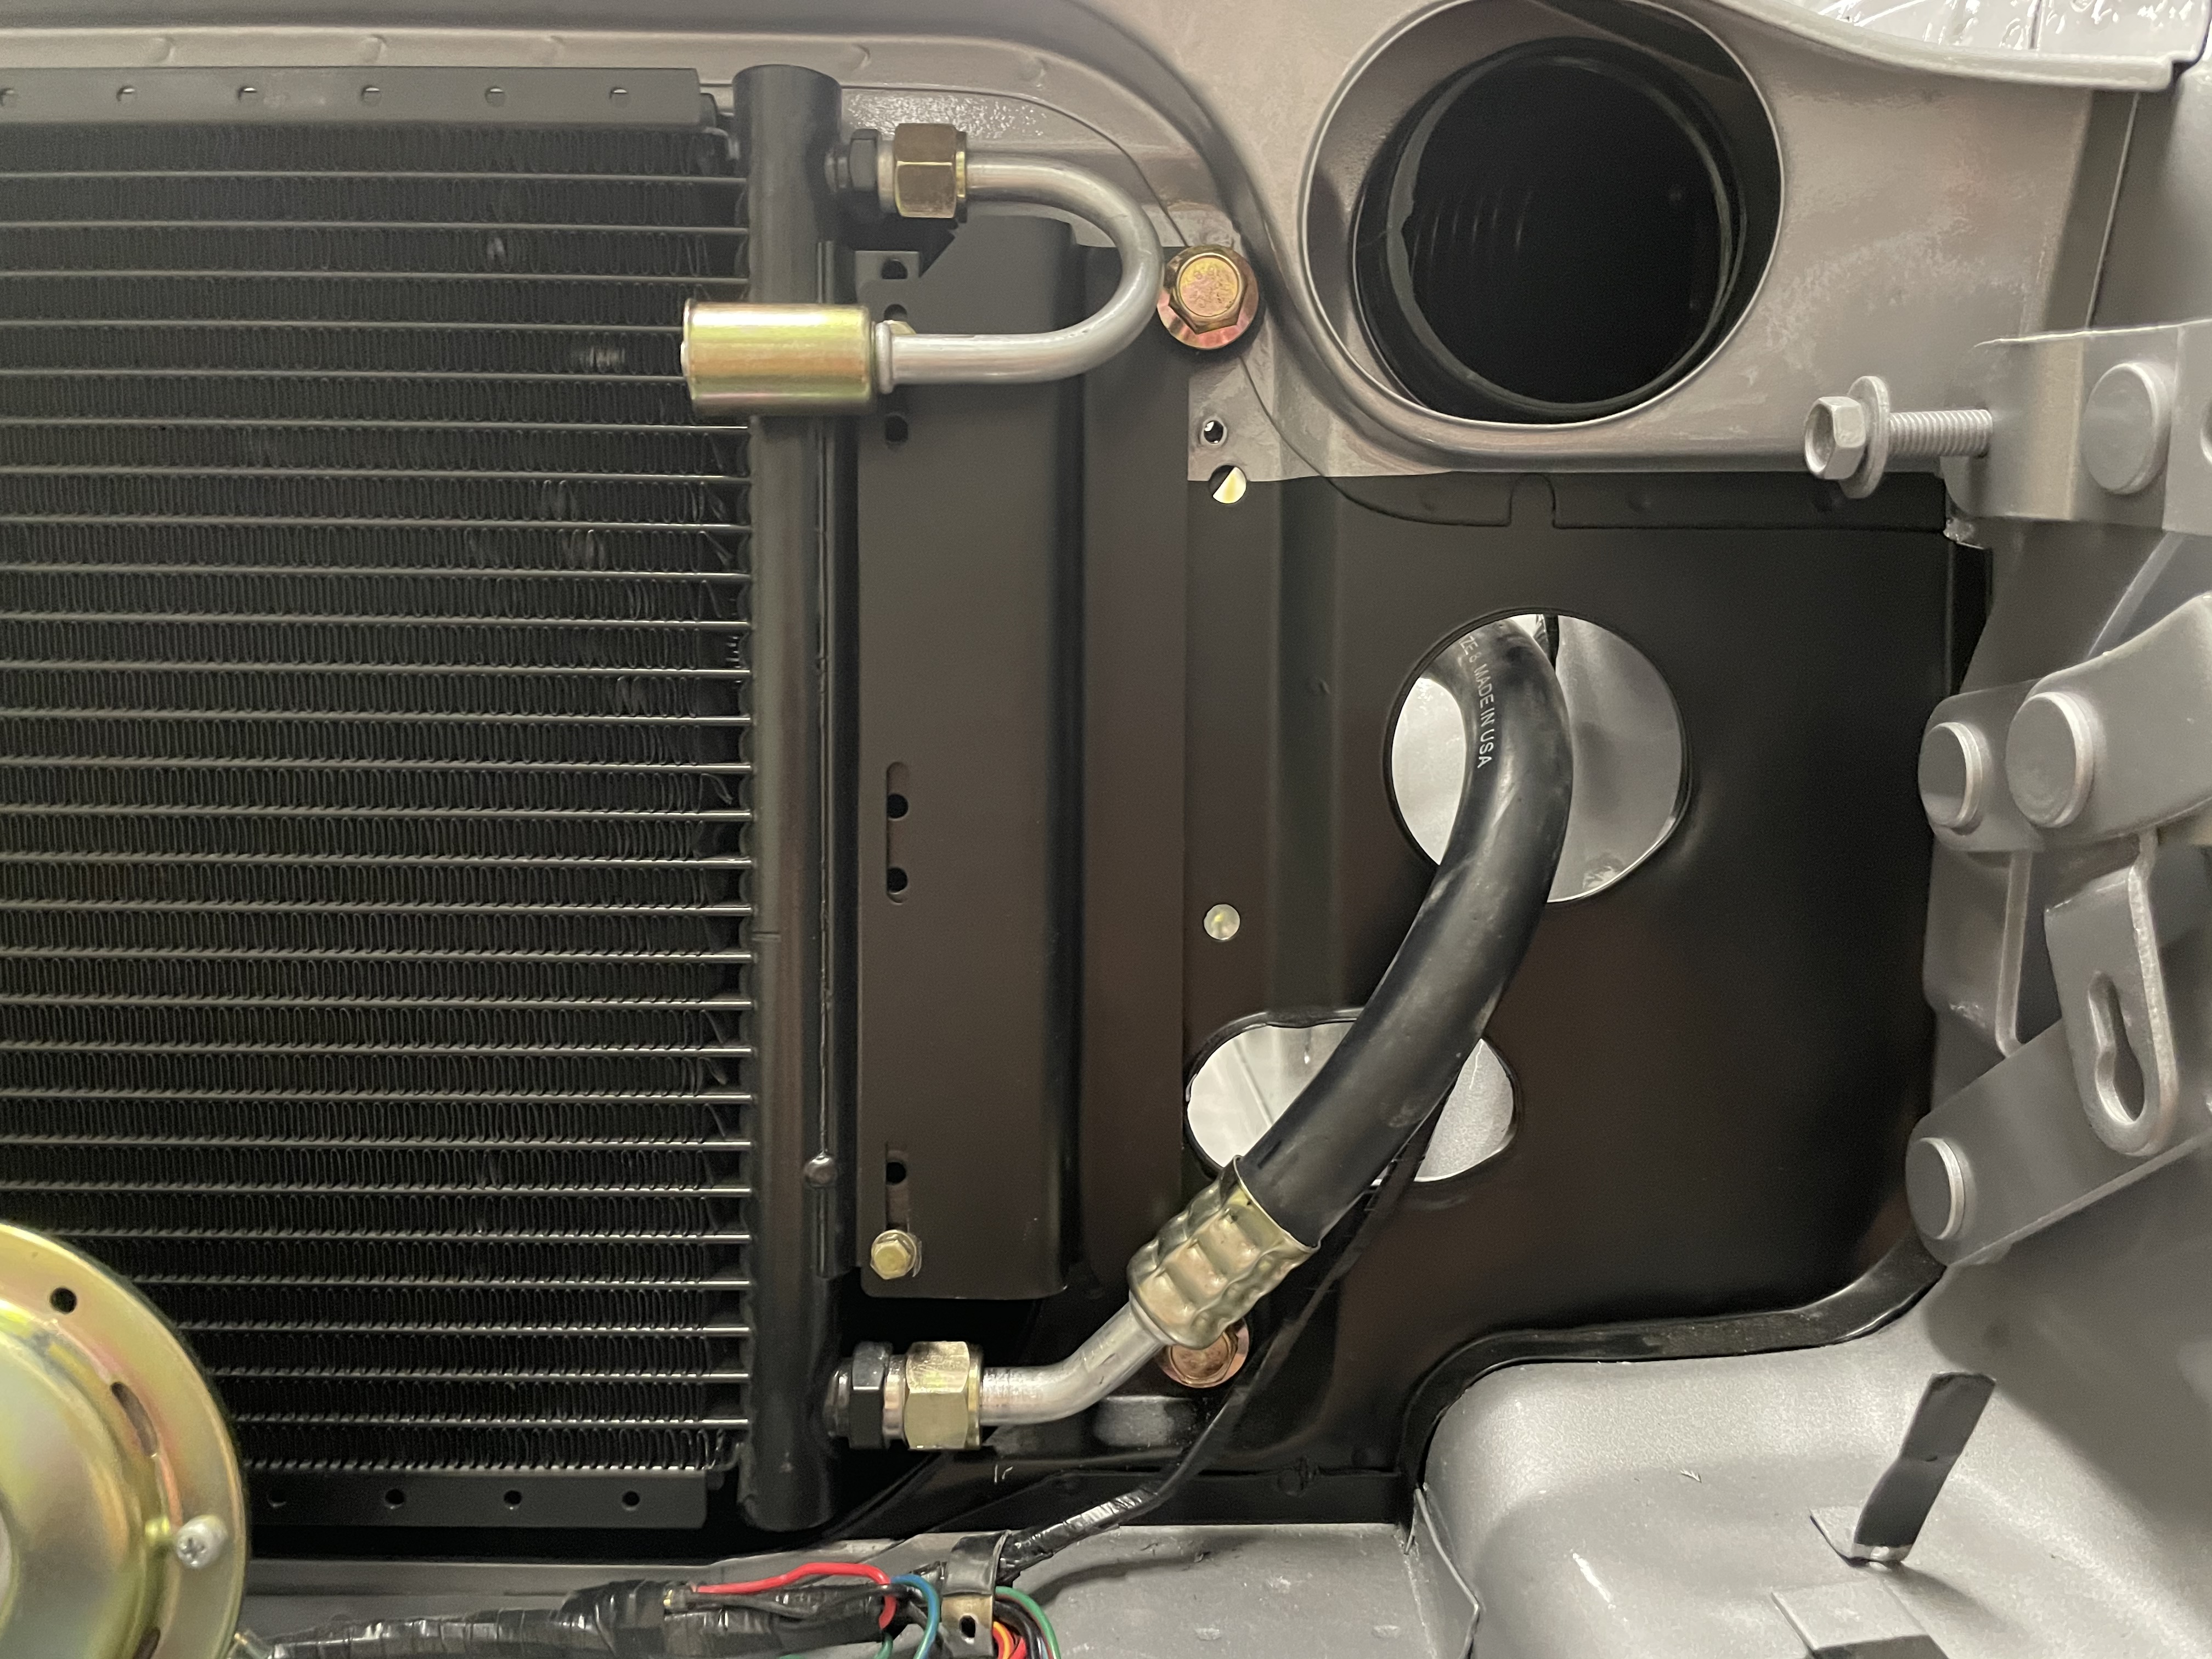
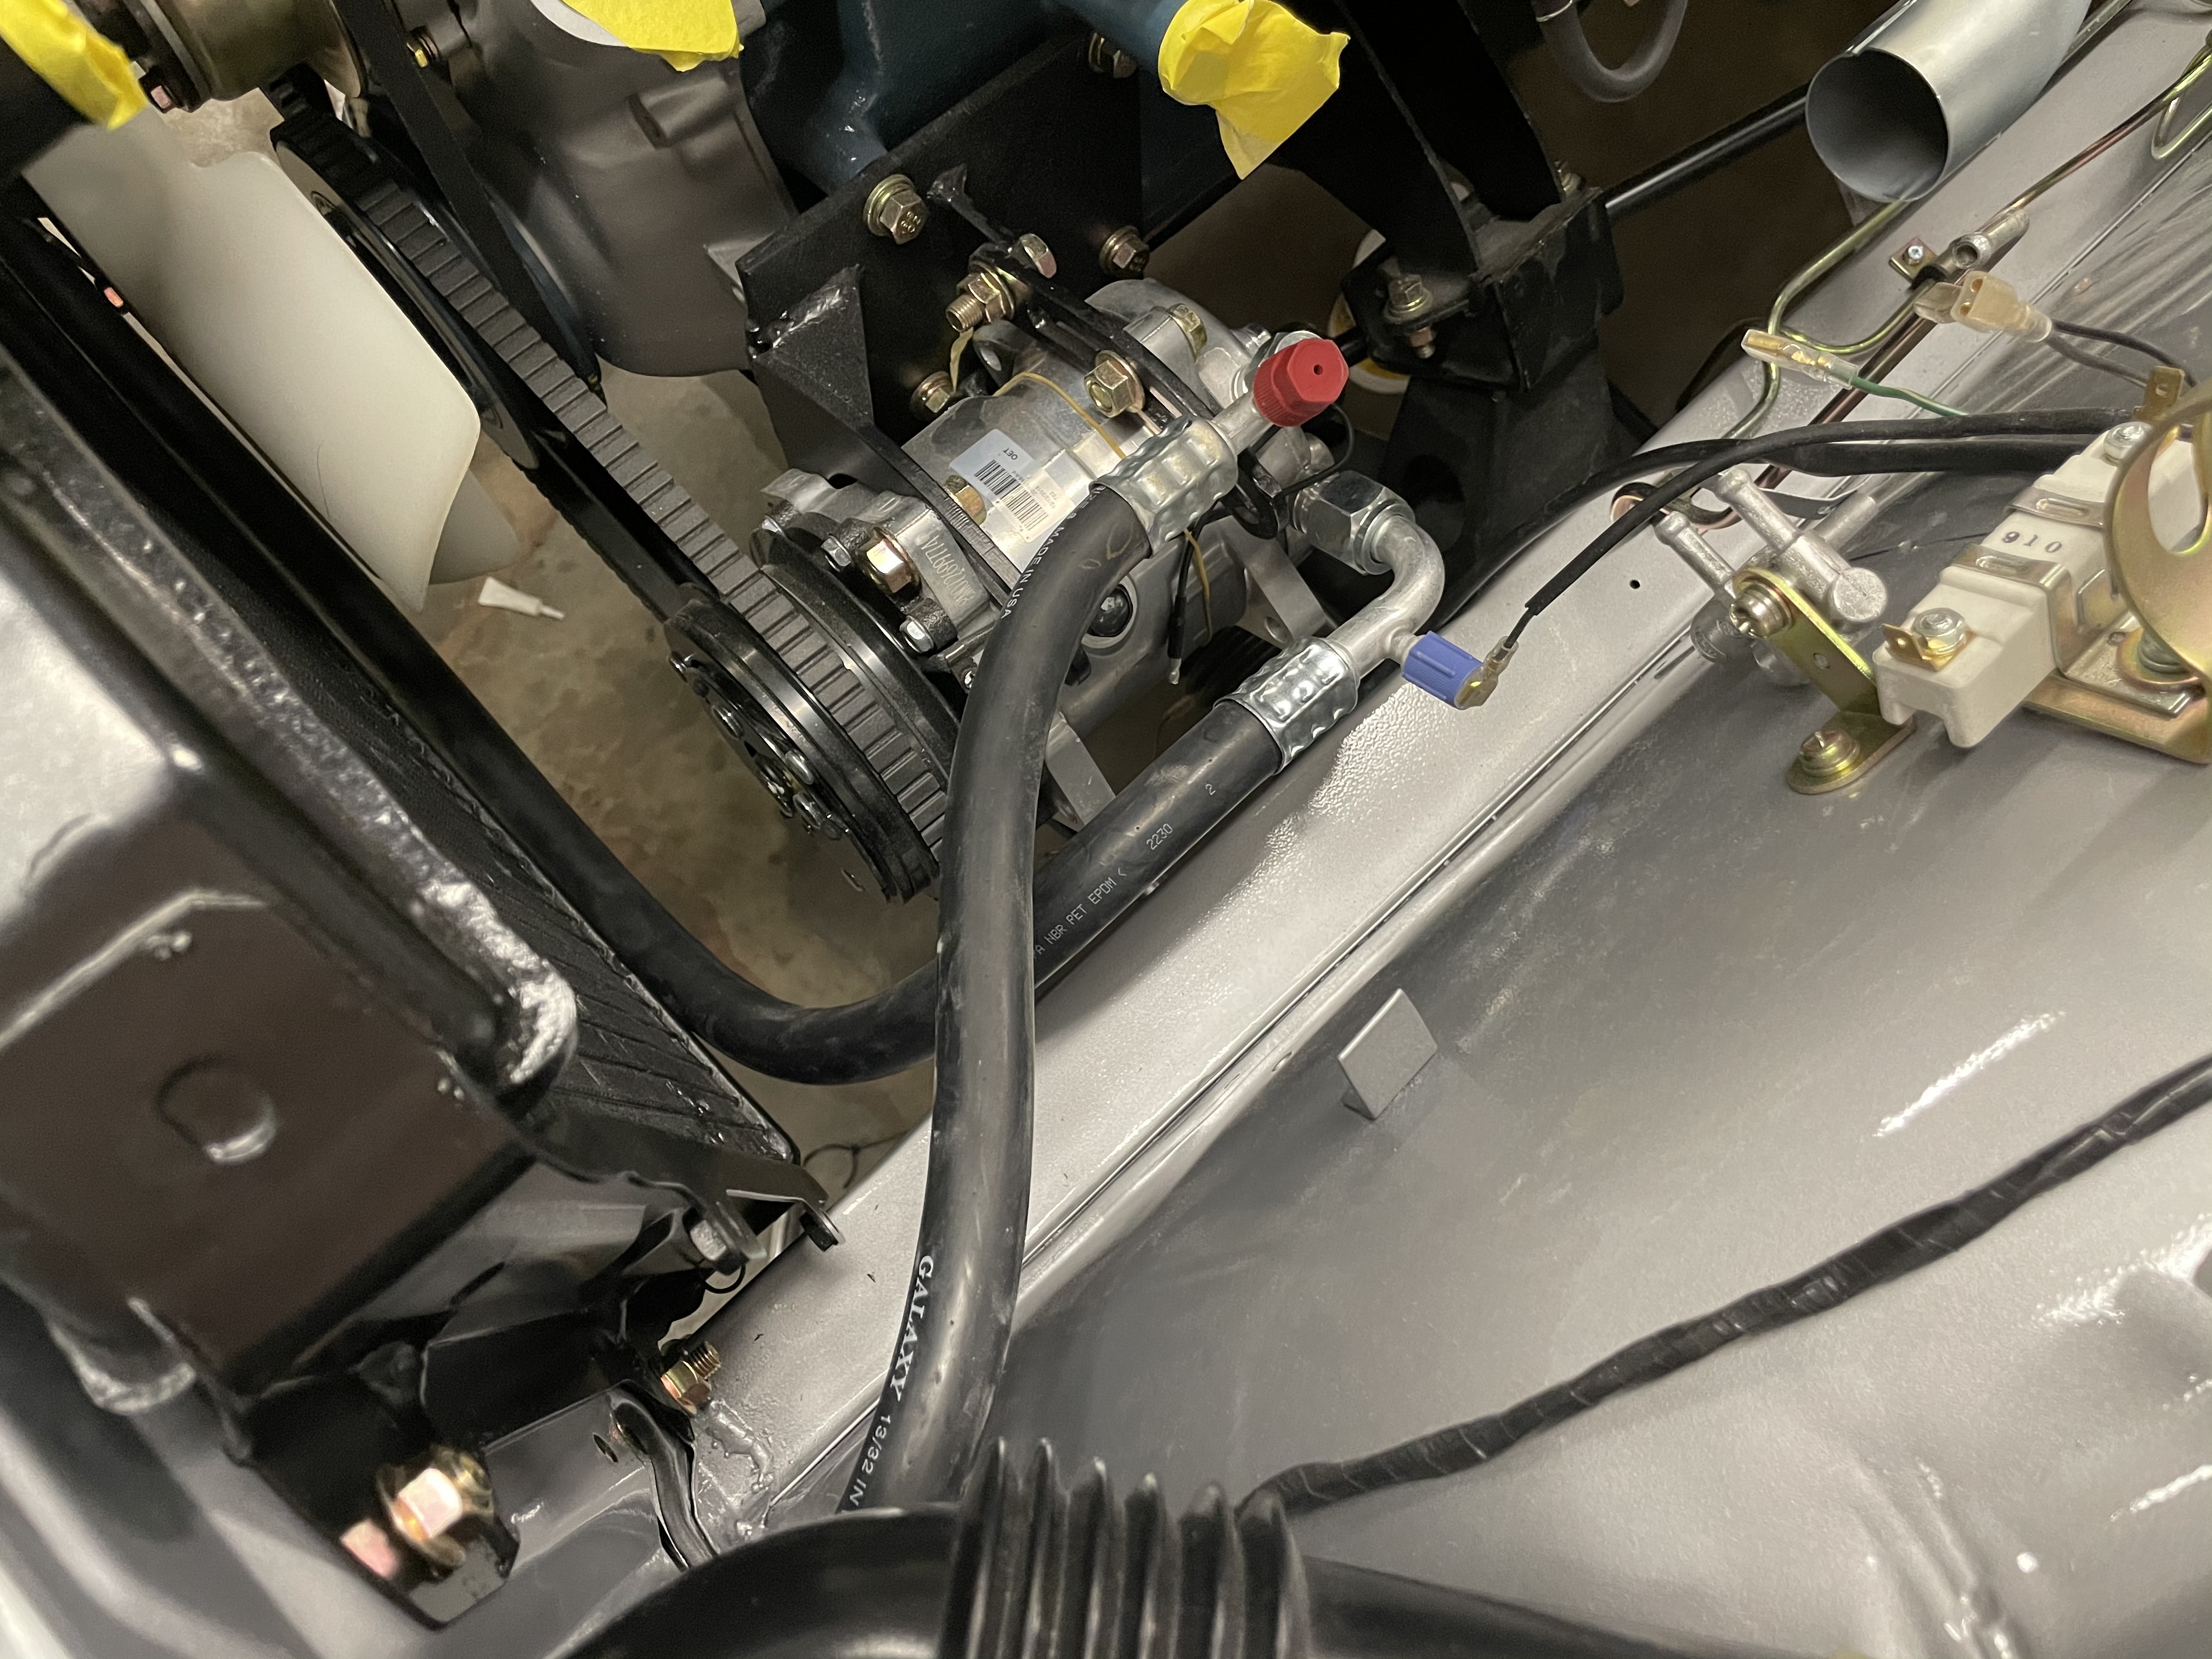
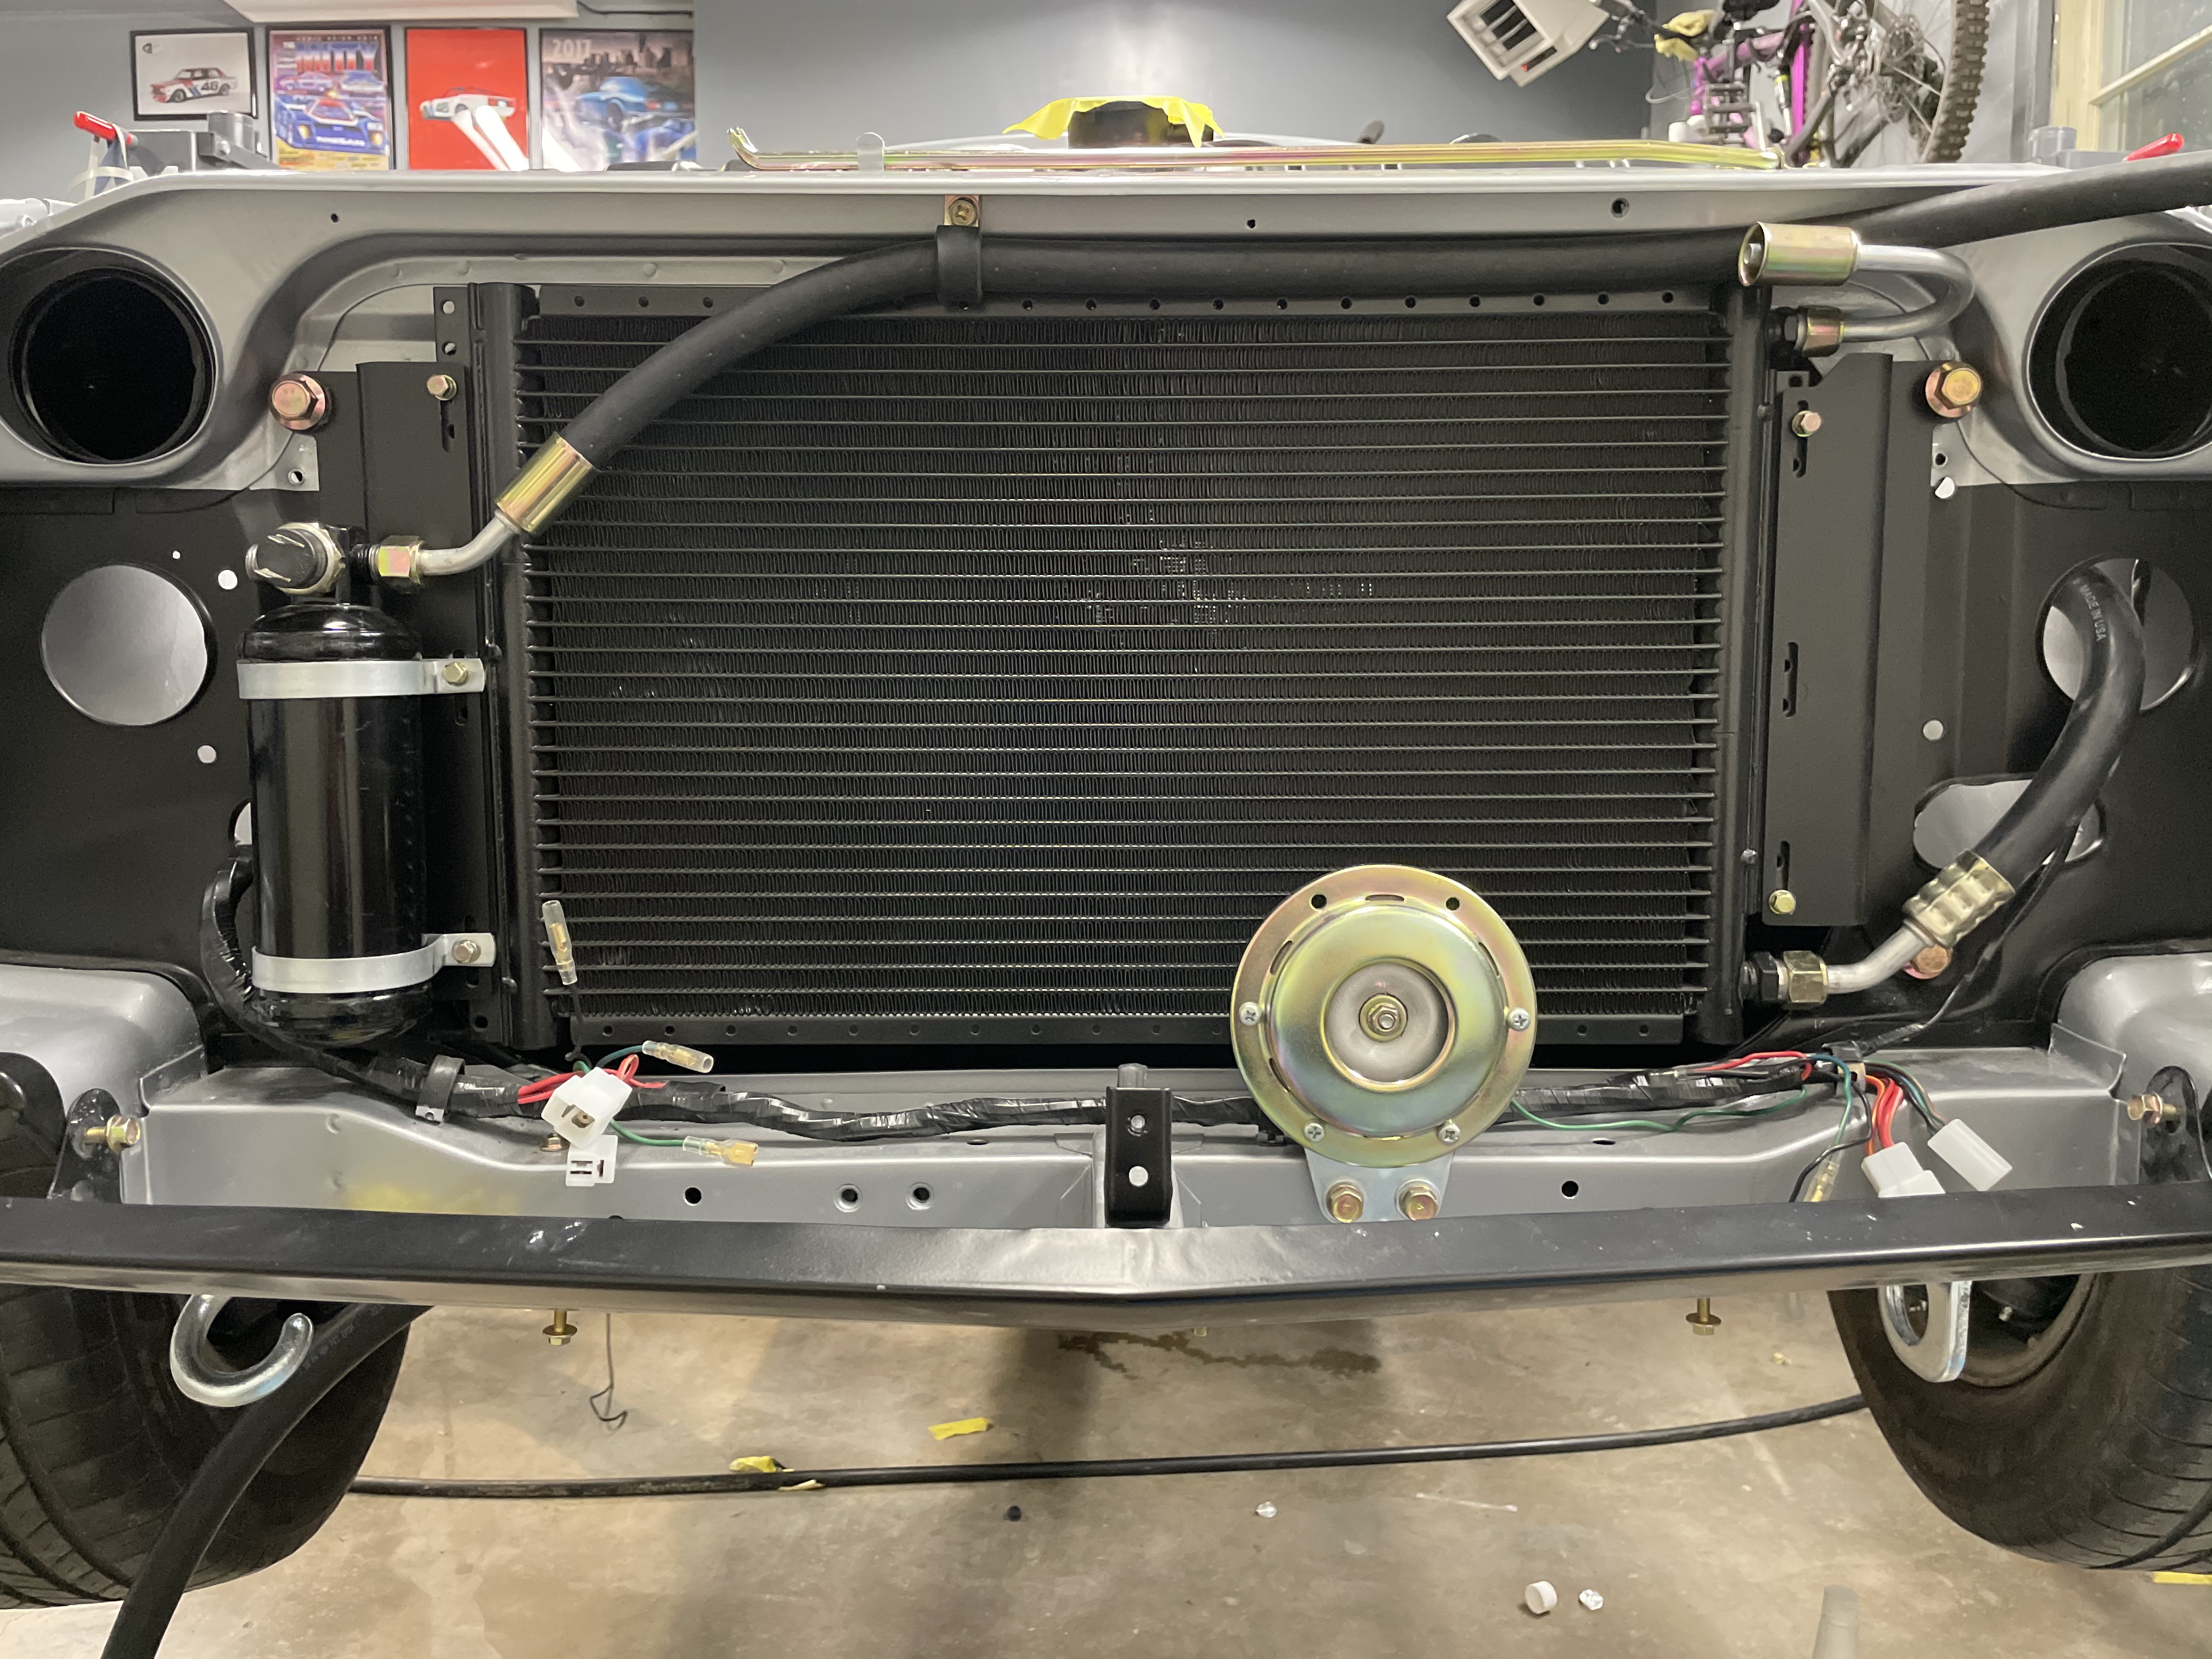
2 pointsSteady progress has been made to get everything ready for the first fire up. While we wait for a few parts to ship in, I worked to get the AC system finished up, and cleaned up the valve cover. So far the AC system is routing like I had hoped, clean and out of the way. I never liked how the dealers installed the drier on the inner fender with sheet metal screws. On the front core support it should hide nicely from view.
 2 points
 2 points1. Buy a set of caps 2. Buy a bore gauge. 3. Match the best cap. 4. Fit bearing 5. Confirm diameter and concentricity 6. Triple check bearing squish when assembling2 points
 2 pointsOK. I've got a whole F54 setup here... Block, crank, caps... But the block block casting itself is no good*, so I don't mind selling the caps off separately. The crank is also available to a new home if anyone is interested (shipping prohibitive). *There was an ummm.... mishap during the rebuild process. I believe the technical term is "oopsie".2 points
 2 points2 points
 1 pointThis. The only reason knurling works on a valve guide is because there is very little side to side pressure on that knurled surface so you can get tens of thousands of miles on knurled valve guide, on a crank or conrod journal the bearing shell needs to be fully supported. The bearing shell on a modern engine isn't thick enough to support itself on a knurled surface. Now if you want to knurl your Model T poured babbit bearings that is whole other discussion.1 point
 1 pointOk, I'll be third in line as a source for caps, behind I think CaptO and Terrapin Z if you decide to replace the one cap and go the line bore route. I have 2 blocks which are not likely to see a engine bay, one is missing one cap. Genuine Nissan bolts included.... The caps are numbered from front to back with a directional arrow, which number is missing. Might as well go for numbers matching. lol1 point
1 pointThe thread you linked to discusses a bearing in a bored hole, but doesn’t say it is a crankshaft journal. Reading further in the discussion, knurling valve guides to avoid replacement is commented on. There is also discussion about the lack of suitability of knurling a bore to correct for bearing retention. Indeed, knurling would only be able to “correct” for a couple of thousandths of an hour inch, and even then there wouldn’t be enough contact to keep the bearing from spinning inside the bore. So knurling might be adequate for tightening up worn valve guides, but it would be a fool’s errand to expect it to correct for an incorrectly machined crankshaft journal.1 point
1 pointAnother good thing about going to the site on your phones web browser. I "HIDE" stuff all the time. Almost as much as I drink and post.1 point
1 pointOk, I'll be third in line as a source for caps, behind I think CaptO and Terrapin Z if you decide to replace the one cap and go the line bore route. I have 2 blocks which are not likely to see a engine bay, one is missing one cap. Genuine Nissan bolts included.... The caps are numbered from front to back with a directional arrow, which number is missing. Might as well go for numbers matching. lol1 point
1 pointThe thread you linked to discusses a bearing in a bored hole, but doesn’t say it is a crankshaft journal. Reading further in the discussion, knurling valve guides to avoid replacement is commented on. There is also discussion about the lack of suitability of knurling a bore to correct for bearing retention. Indeed, knurling would only be able to “correct” for a couple of thousandths of an hour inch, and even then there wouldn’t be enough contact to keep the bearing from spinning inside the bore. So knurling might be adequate for tightening up worn valve guides, but it would be a fool’s errand to expect it to correct for an incorrectly machined crankshaft journal.1 point
1 pointAnother good thing about going to the site on your phones web browser. I "HIDE" stuff all the time. Almost as much as I drink and post.1 point 1 point
Mounted it to the condenser brackets. Should be fairly hidden once the grille is in and the car on level ground
1 point
1 pointMounted it to the condenser brackets. Should be fairly hidden once the grille is in and the car on level ground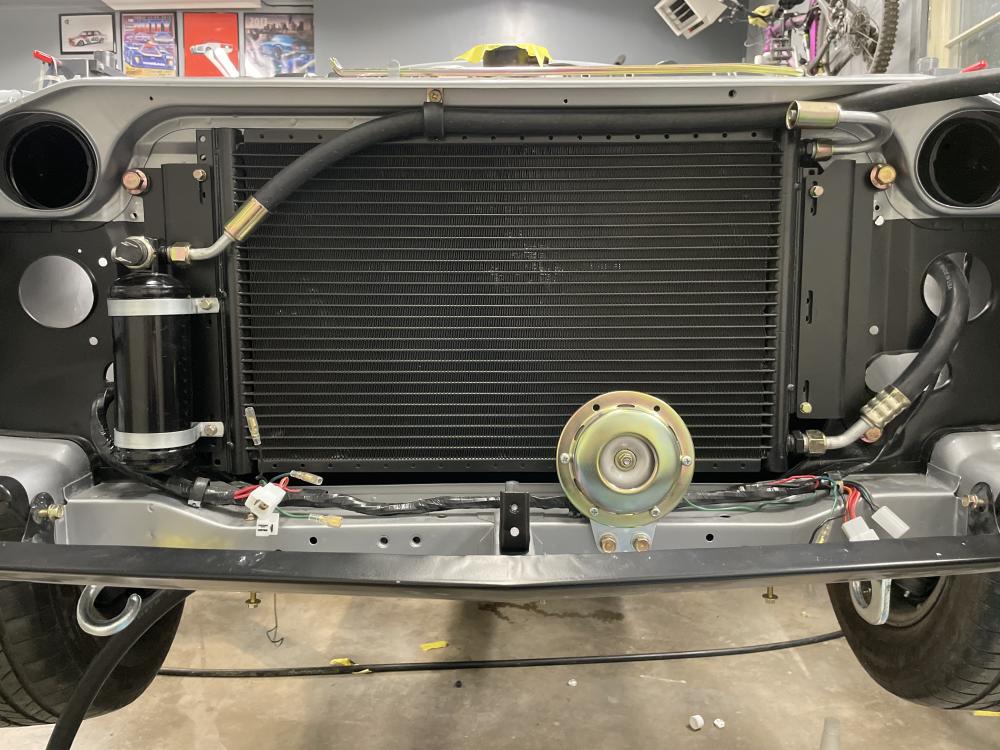 1 point
Some spirit levels have a barrel shaped glass, rather than curved. That way, the level can be used on top of, underneath, or beside the object being checked.1 point
1 pointAll L series engines have the same main bearing journal diameter, so a bearing cap from any L engine will do. A competent machinist can fit the cap, then line bore the assembly. Bearings are available undersized for use when turning a journal has to be turned to clean up wear or damage. Bearings are also available oversized for use when line boring is required. Journals cannot be knurled like valve guides to correct clearances.1 point
1 point
Some spirit levels have a barrel shaped glass, rather than curved. That way, the level can be used on top of, underneath, or beside the object being checked.1 point
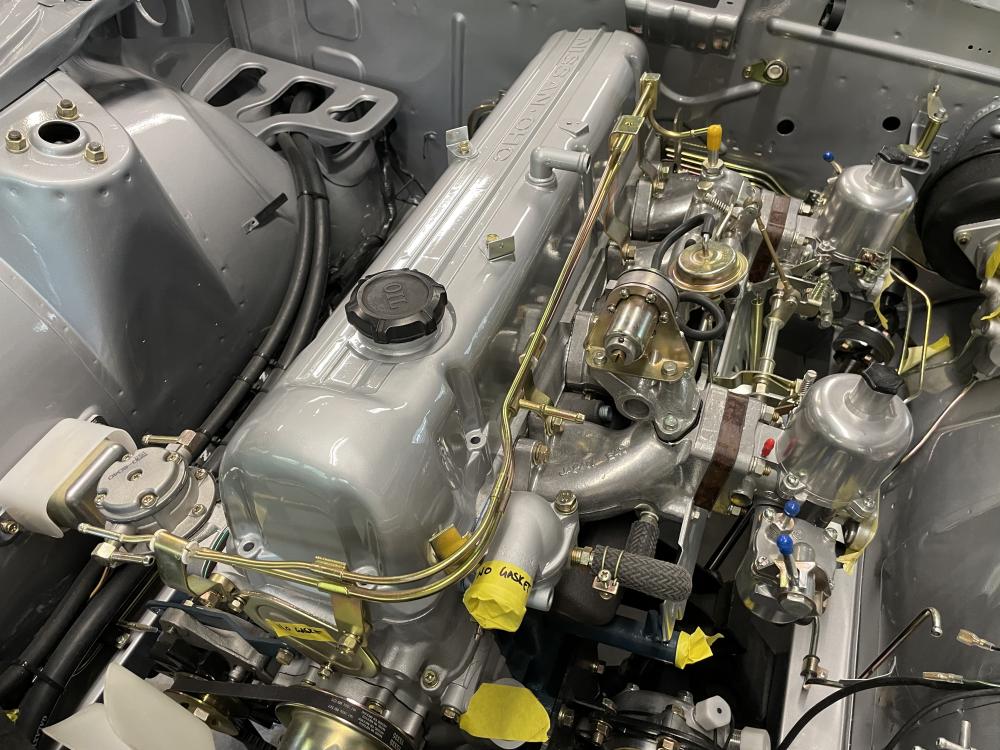
1 pointAll L series engines have the same main bearing journal diameter, so a bearing cap from any L engine will do. A competent machinist can fit the cap, then line bore the assembly. Bearings are available undersized for use when turning a journal has to be turned to clean up wear or damage. Bearings are also available oversized for use when line boring is required. Journals cannot be knurled like valve guides to correct clearances.1 point 1 pointCan you give a few more details about what you did to clean up the valve cover? It looks fantastic.1 point
 Thanks namerow Yes 👍🏽 this is on my tools list already. I guess I didn’t give an explanation of why I wanted to know the level orientation of the bumper mount holes. At the moment trying to assess the damage and decide on a course of action. If I decide to repair the damage, which way am I going to need to pull the panel? Just forward? Or up/ down as well? Is it easier to use donor panels and patch it? This is what’s swirling around my head computer atm! When I started making the rotisserie mounts I noticed one side was different to the other, as both sides are damaged I wanted a frame of reference to know which side is closer to where it’s supposed to be.1 point
 Agreed, the top edge even has a V-groove to align on curved items like pipes. Mine's not a precision level but when I checked it on flat and angled surfaces the reading appears the same for both long sides.1 point
 1 pointbtw, you know there is a hide button? (under the tripple points in the right. only by your own message that is..) It happens when you doubbleclick i think? never did that.. 😐1 point
 1 pointFinally had some time to spend fiddling with the choke and throttle linkage and I feel like I’ve hit the sweet spot. After bending the arms to the nozzle, adjusting the linkage and cable slack I now have some throttle control with the choke lever. At full “pull” I get the enrichment needed on cold start then can ease off that to a leaner mix while still giving some throttle. No more babysitting while it’s warming up! From dead cold I can give it full choke, crank it up, let it run till it stumbles then ease off the choke to more of a high idle setting. Let it run like that for a few minutes then I can take off with no issues. I still have the vacuum leak from worn shafts but have temporarily mitigated them with a light greasing, I am looking forward to the Ztherapy carbs coming in October. @SteveJ I’d like to meet up sometime, looks like you have a great Z network not too far from me.1 point
 Here’s a good looking 75’ on eBay, https://www.ebay.com/itm/124689955114?hash=item1d0819b92a:g:JpcAAOSw2gJgfyMJ Suspension looks a bit rusty but nothing too scary. It’s one of my favorite colors....wonder why. 😎
 1 point
 1 point
 1 pointYes, the choke lever mechanism is designed to add both richness AND higher idle speed. If you look at the SU’s, the little metal rod with the kink moves with the choke mech and moves a little arm the prevents the throttle blades from getting back to idle hence adding idle speed. You have to adjust the kink angle with pliers to add or subtract the amount of idle increase you get with choke handle motion. Takes a bit of fiddling around. I use one pair of needle nose vise grips on side of the kink as backup, then bend the other side of the kink with another pair. Yes you have to take off the air cleaner to have any prayer of getting in there I too have dreamed of separating the richness and idle control to get those both “just right” depending on conditions. But that’s what EFI is all about!1 point

Important Information
By using this site, you agree to our Privacy Policy and Guidelines. We have placed cookies on your device to help make this website better. You can adjust your cookie settings, otherwise we'll assume you're okay to continue.