


Leaderboard
-

grannyknot
Free Member8Points5,158Posts -

zKars
 Subscriber
 6Points3,747Posts
 -


Diseazd
Free Member3Points3,336Posts -
.JPG.cfcada9cf1c1b502df3f5f2f2ca3ff36.JPG)

SteveJ
Free Member3Points9,572Posts
Popular Content
Showing content with the highest reputation on 06/22/2021 in all areas
-
3 pointsI have installed a set of these bulbs in a 280ZX. The nice thing about them is that they do NOT require relays. Just pair them with some nice H4 housings, and they will work fine. On the 280ZX, we used Hella housings. I had to modify the rubber seal a little, but they worked out nicely. They are on sale at Amazon as a lightning deal for the next few hours for $40. https://www.amazon.com/AUXITO-Headlight-Bulbs-000LM-6500K/dp/B07TQLK6SH3 points
-
3 points
-
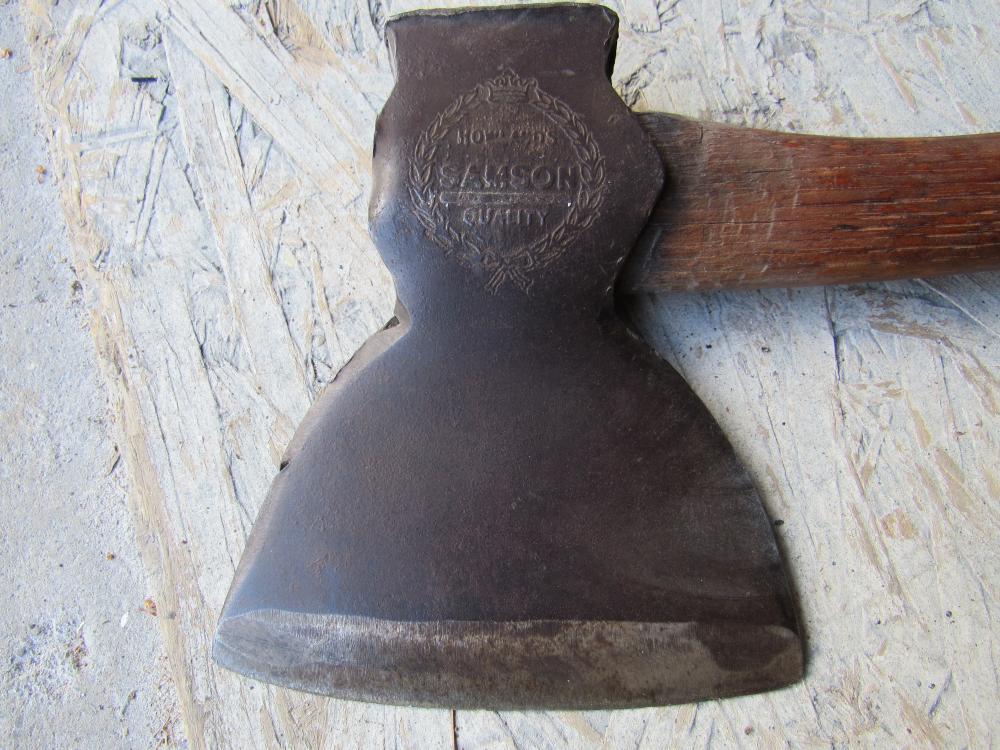
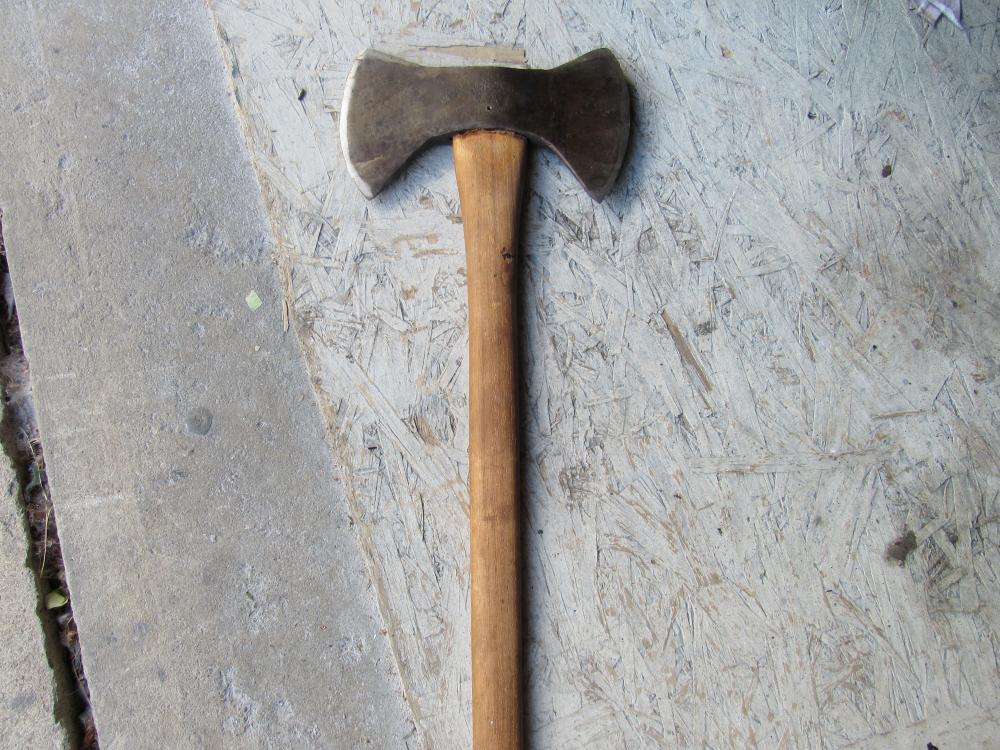
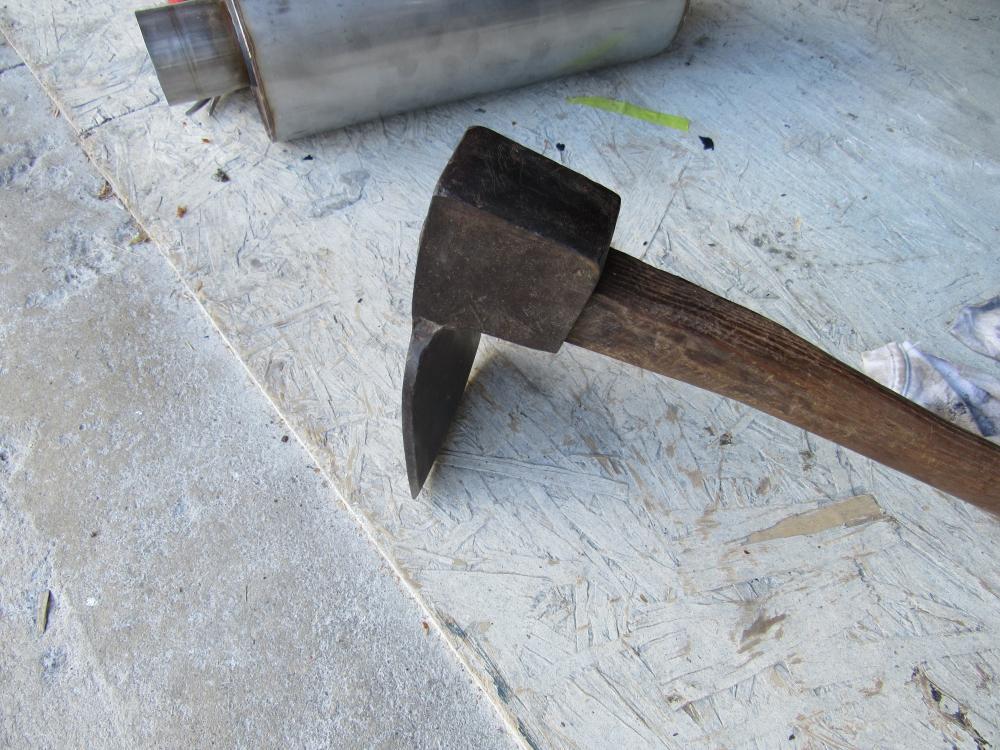
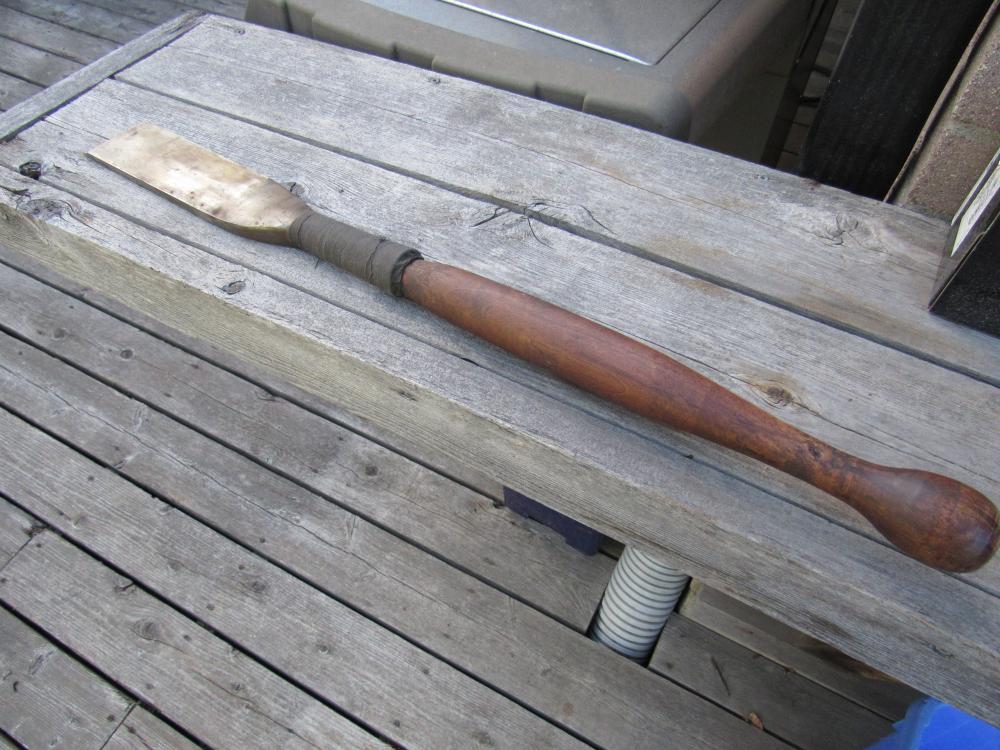
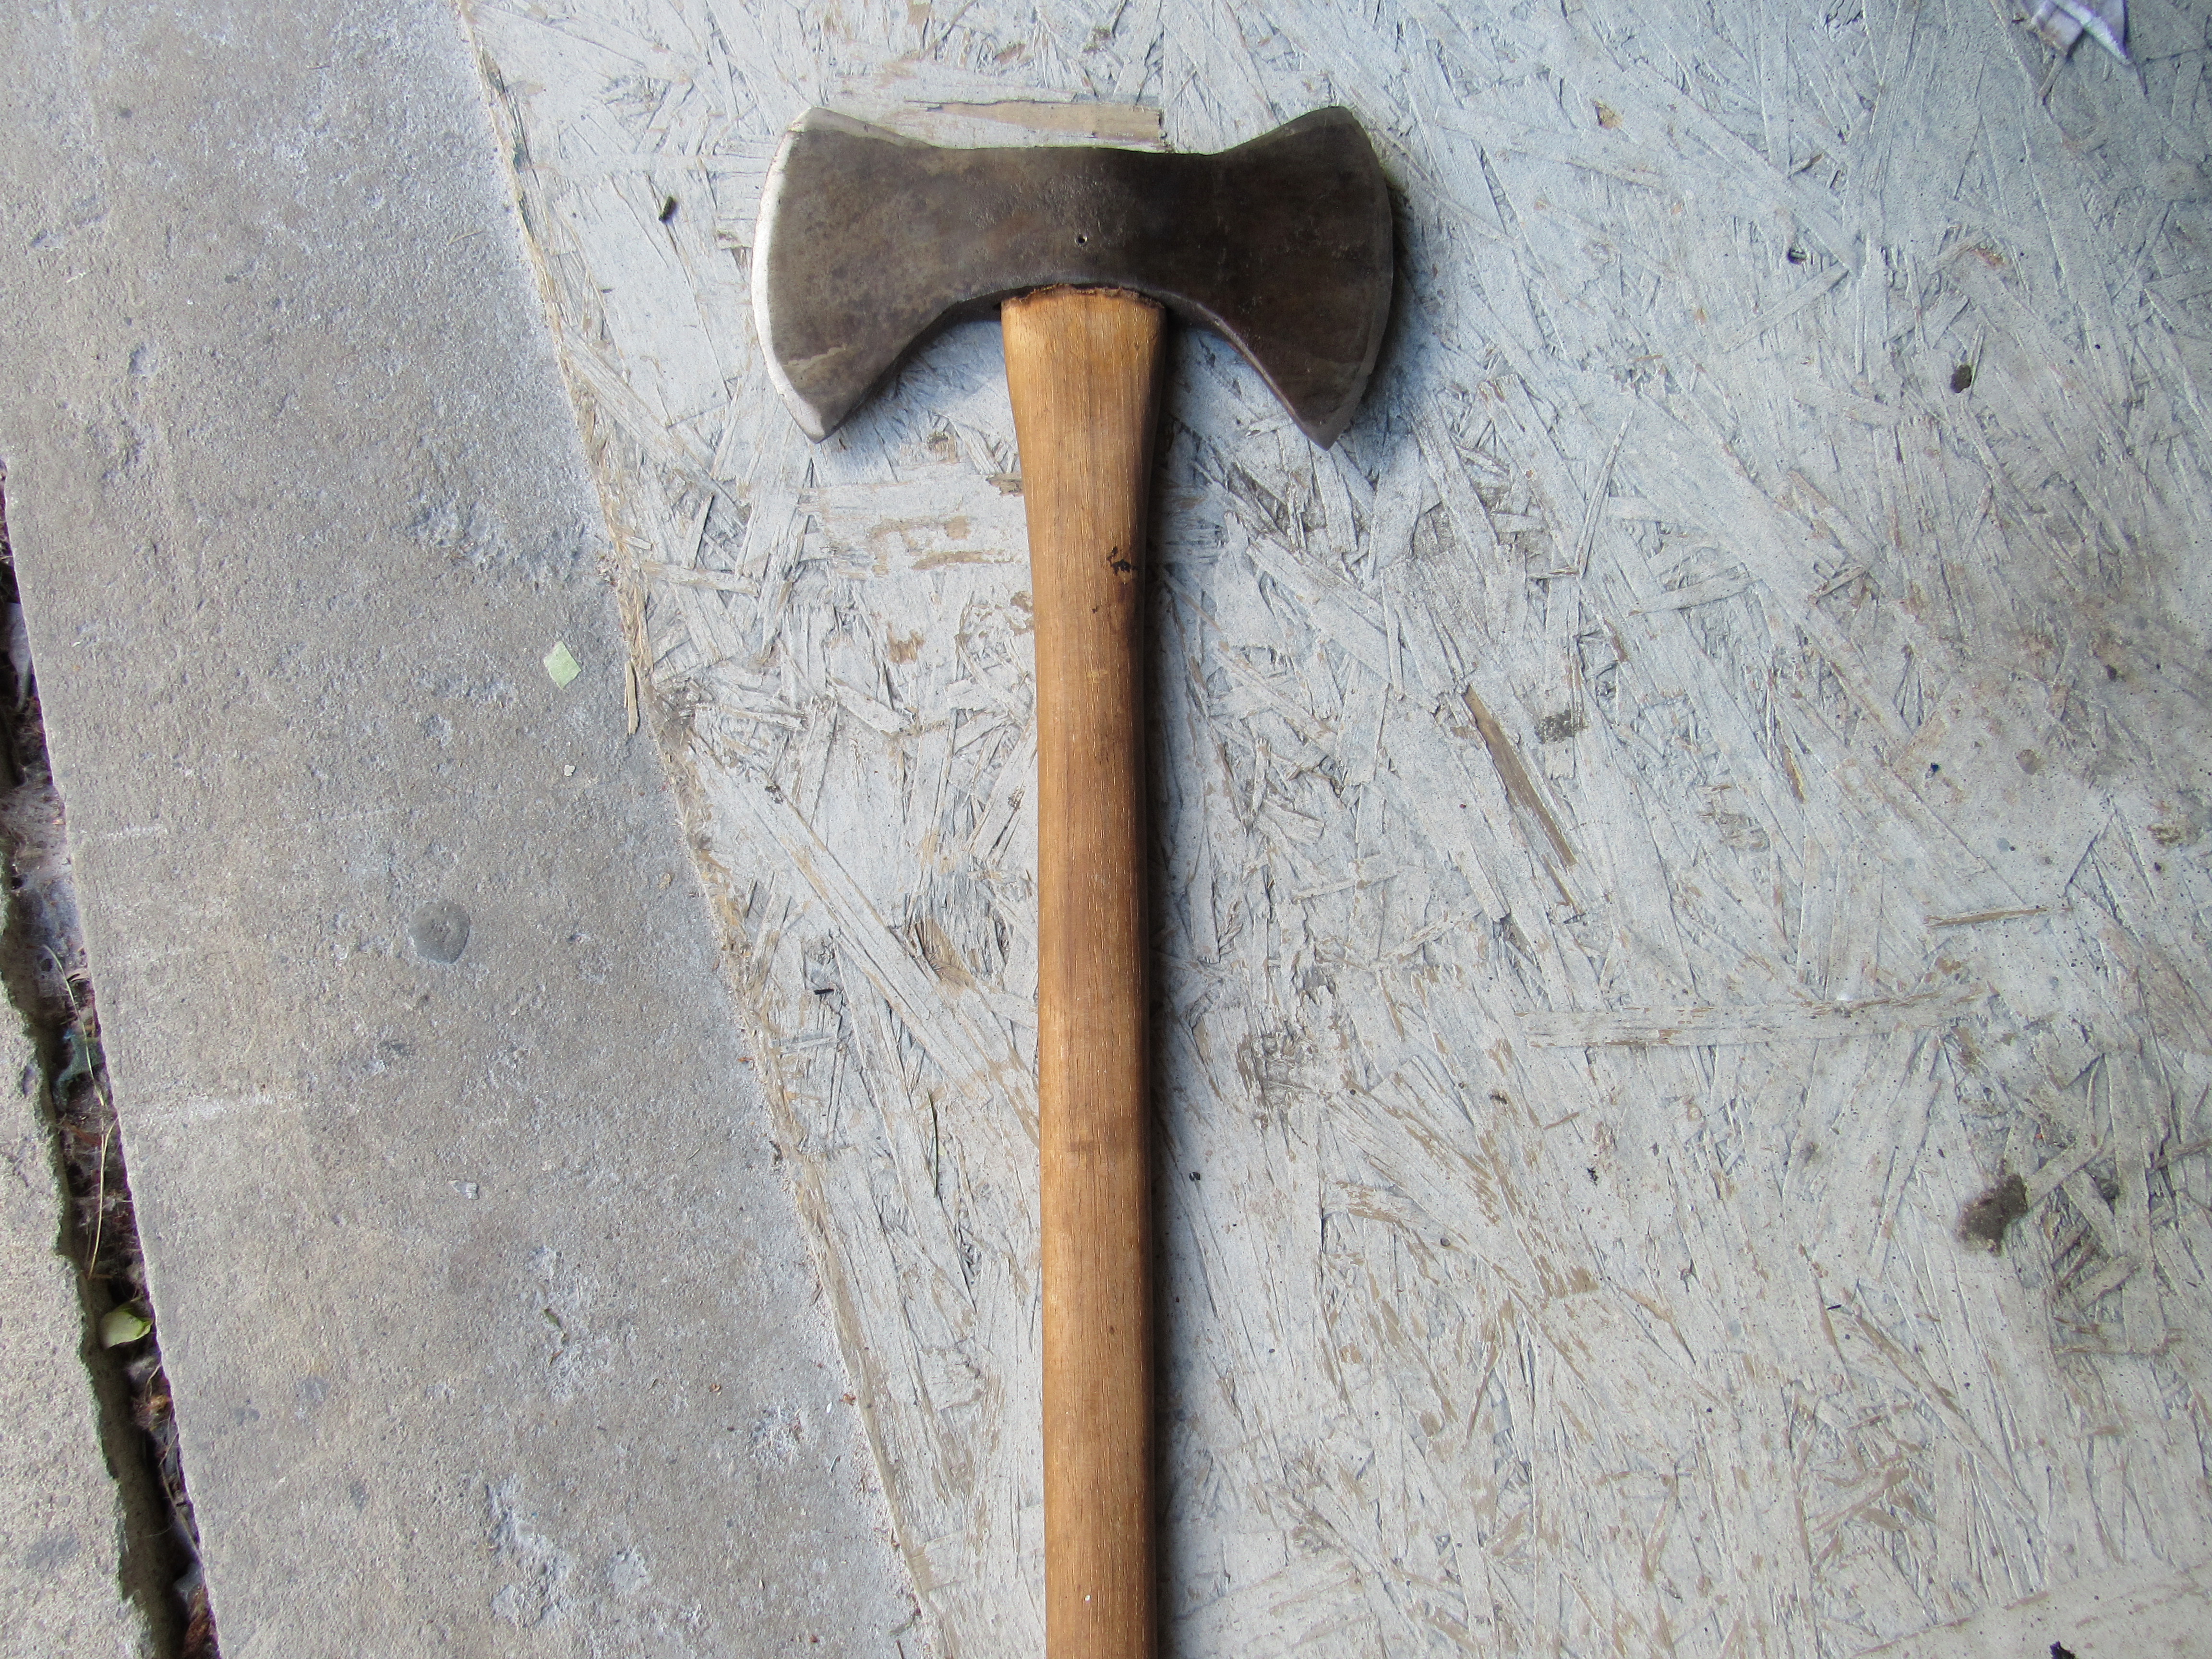
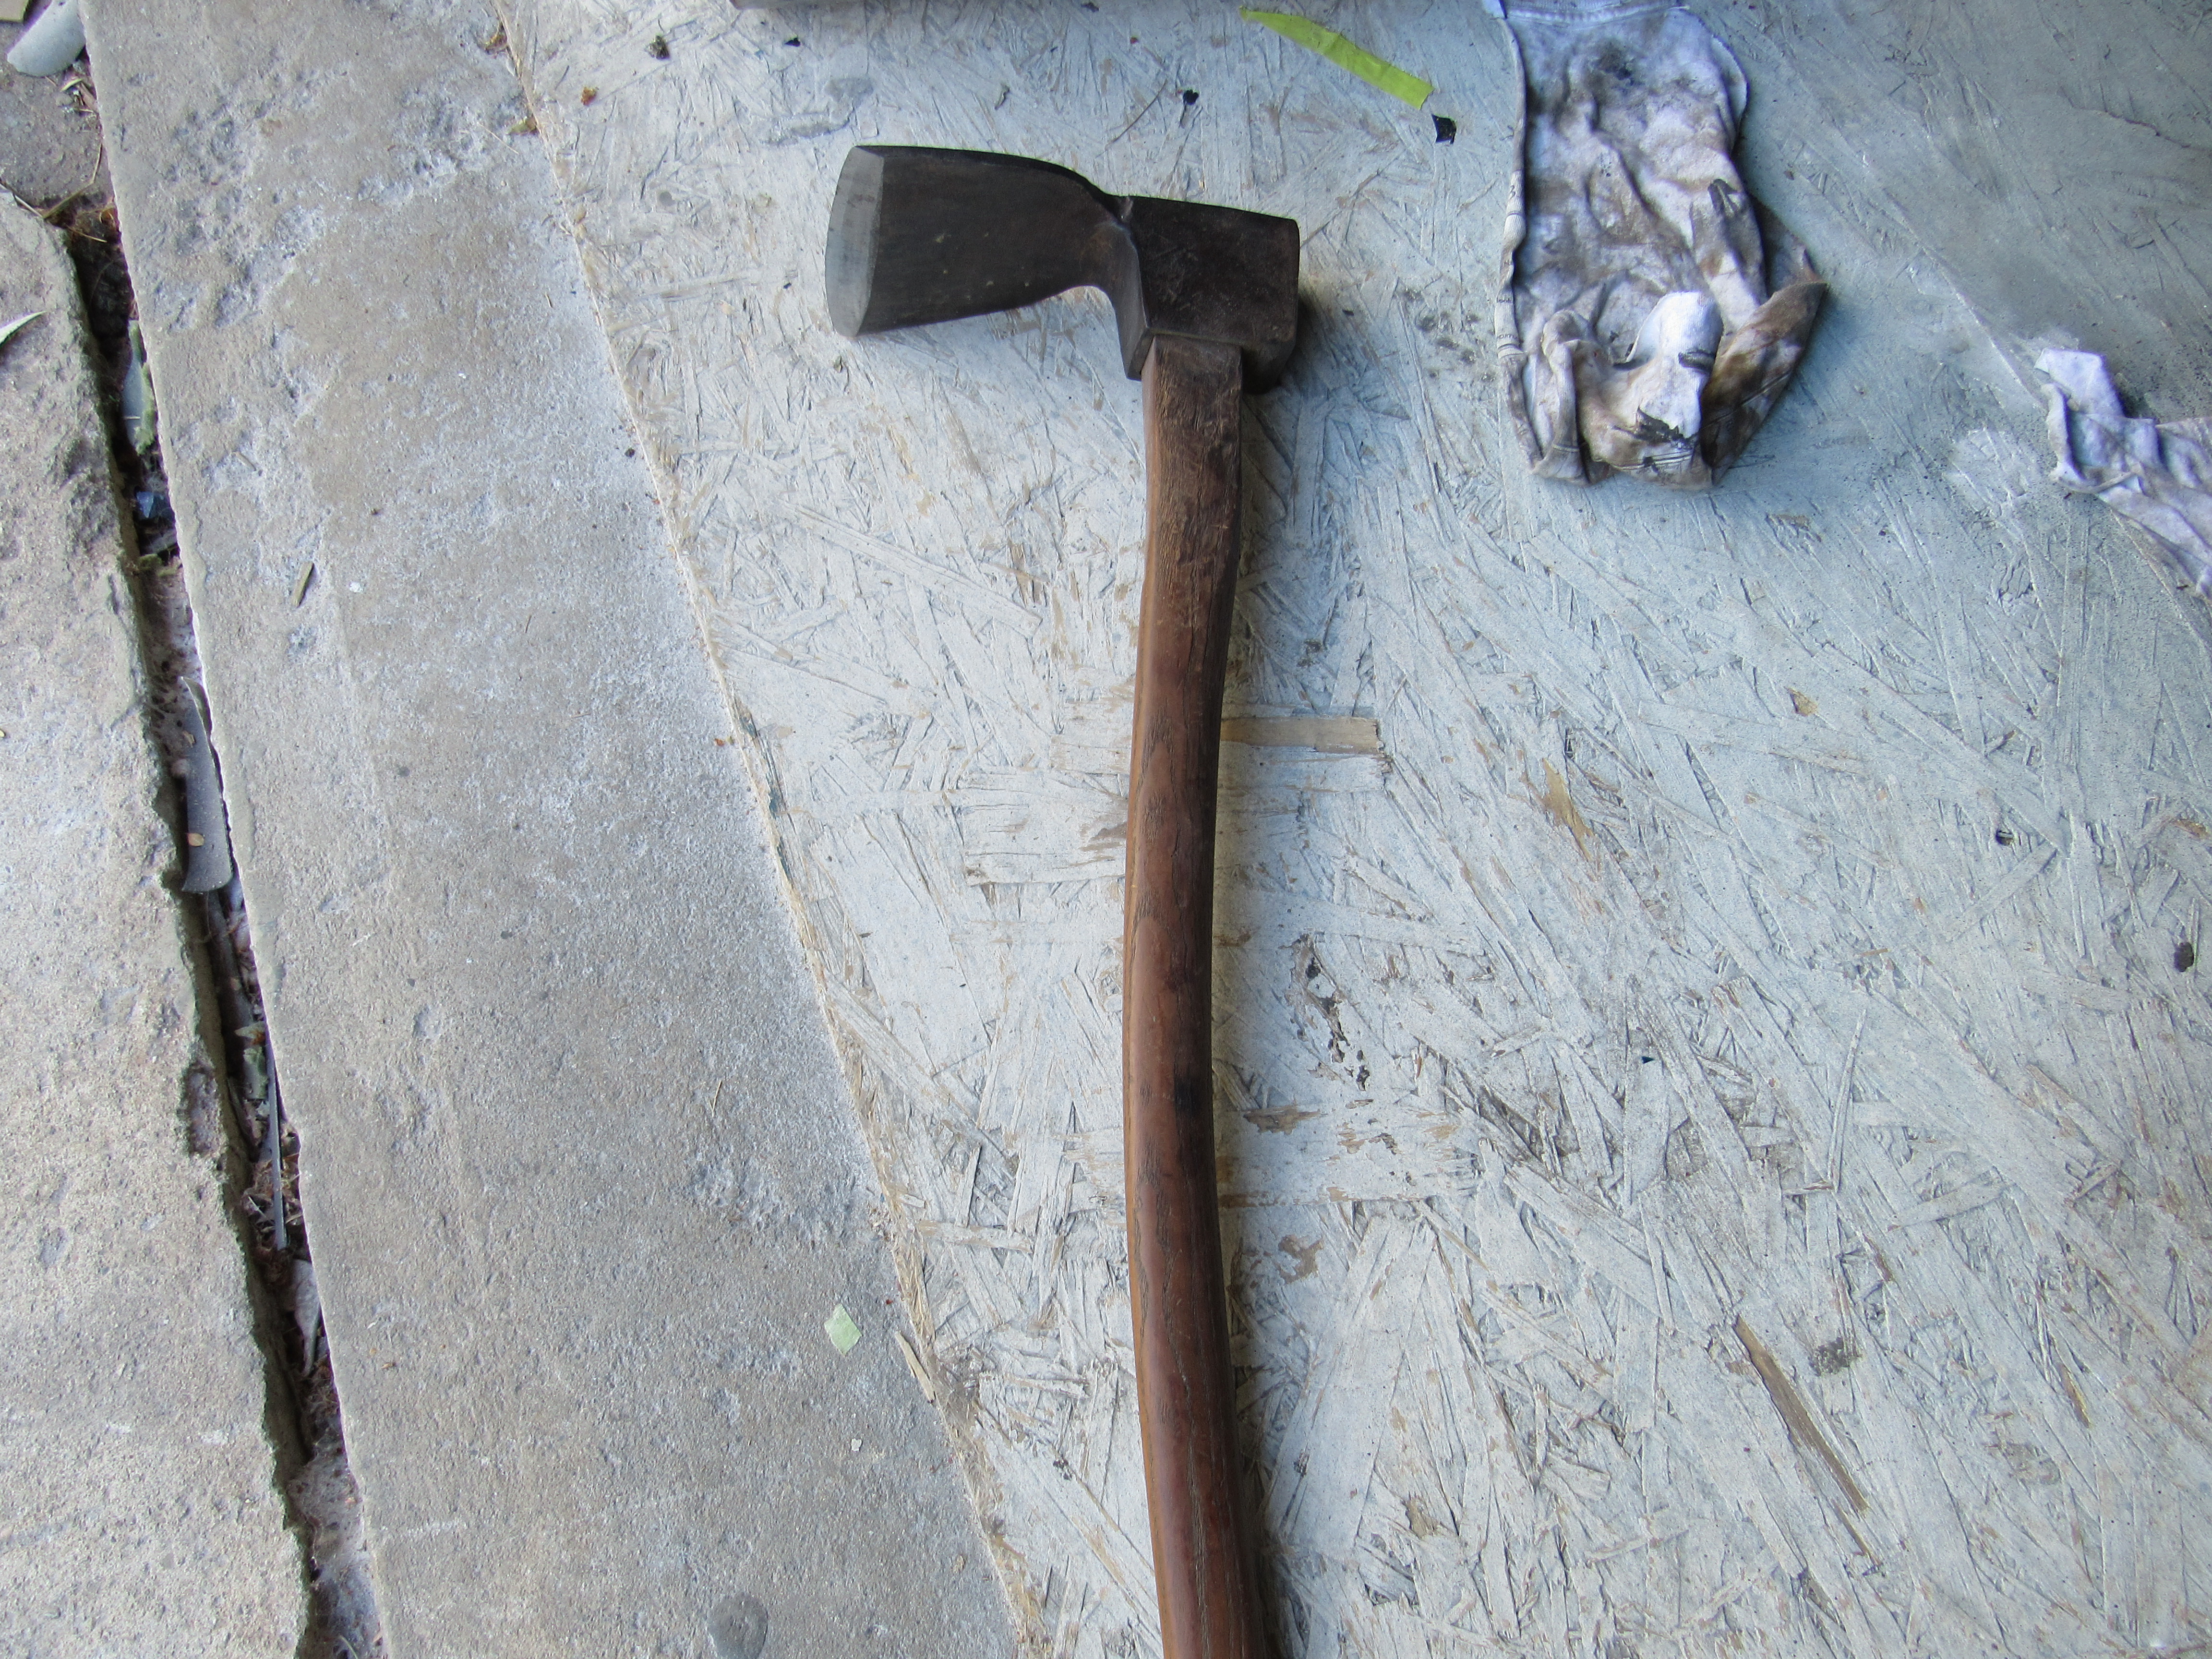
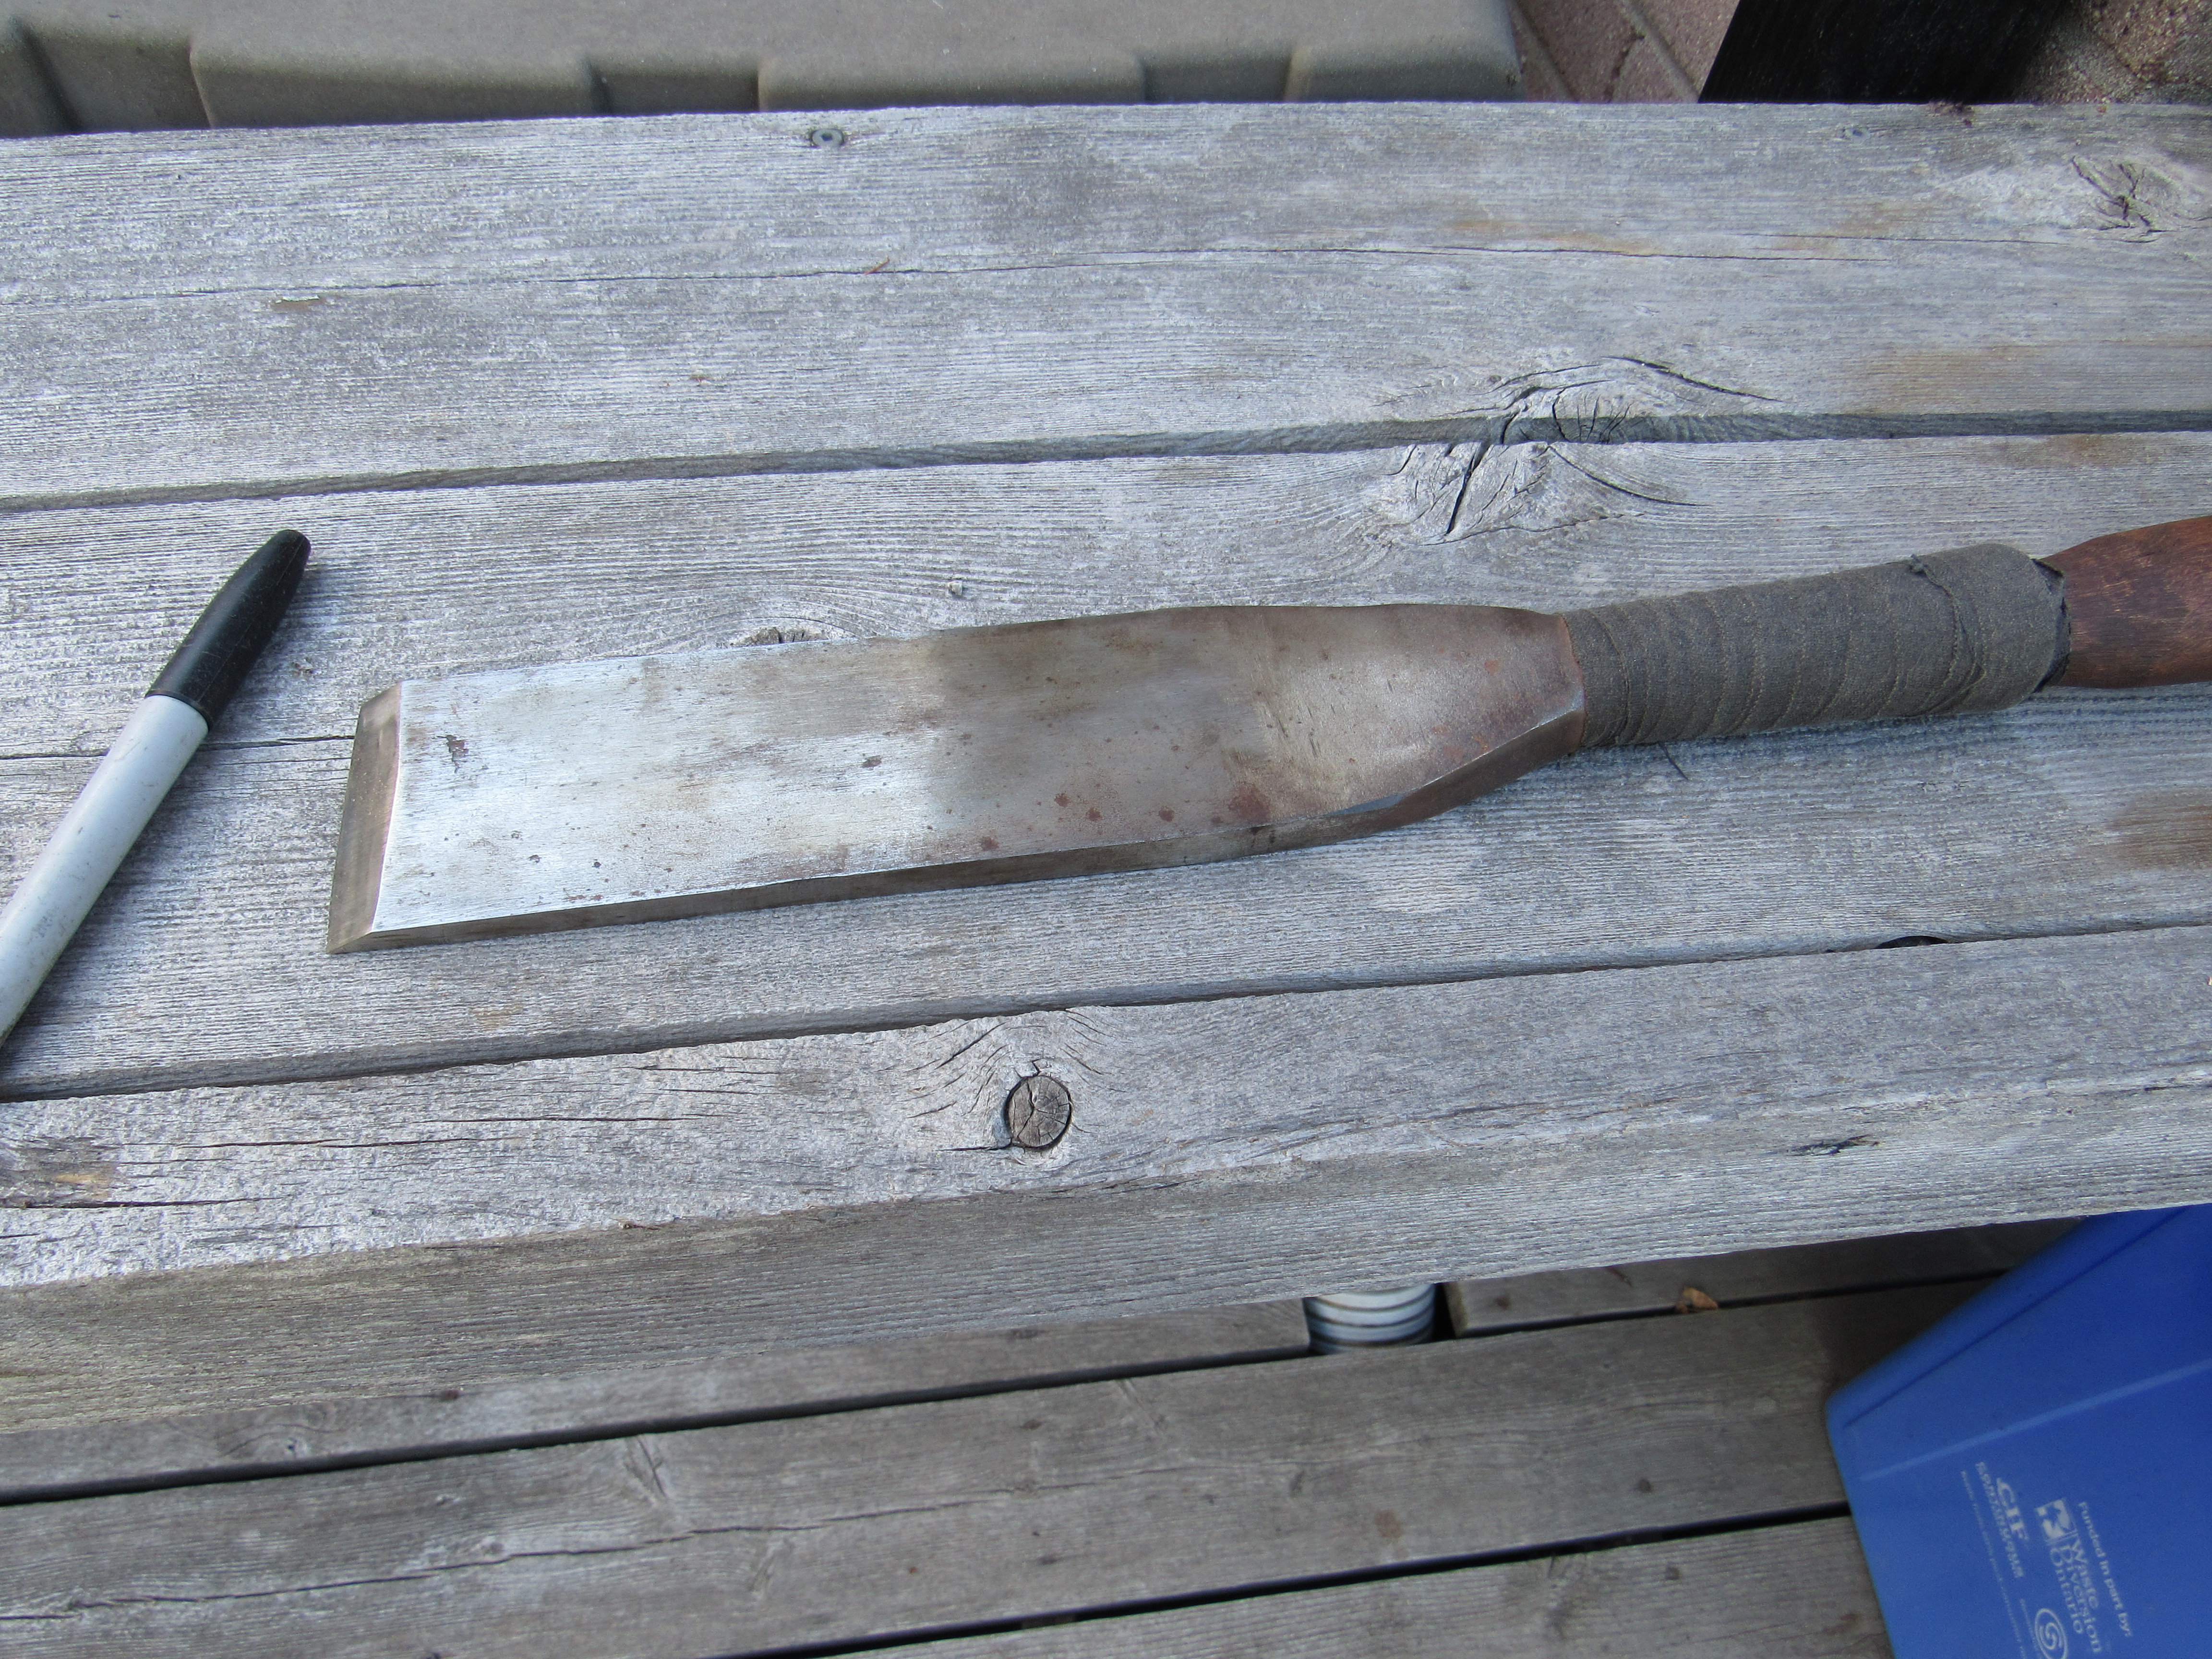
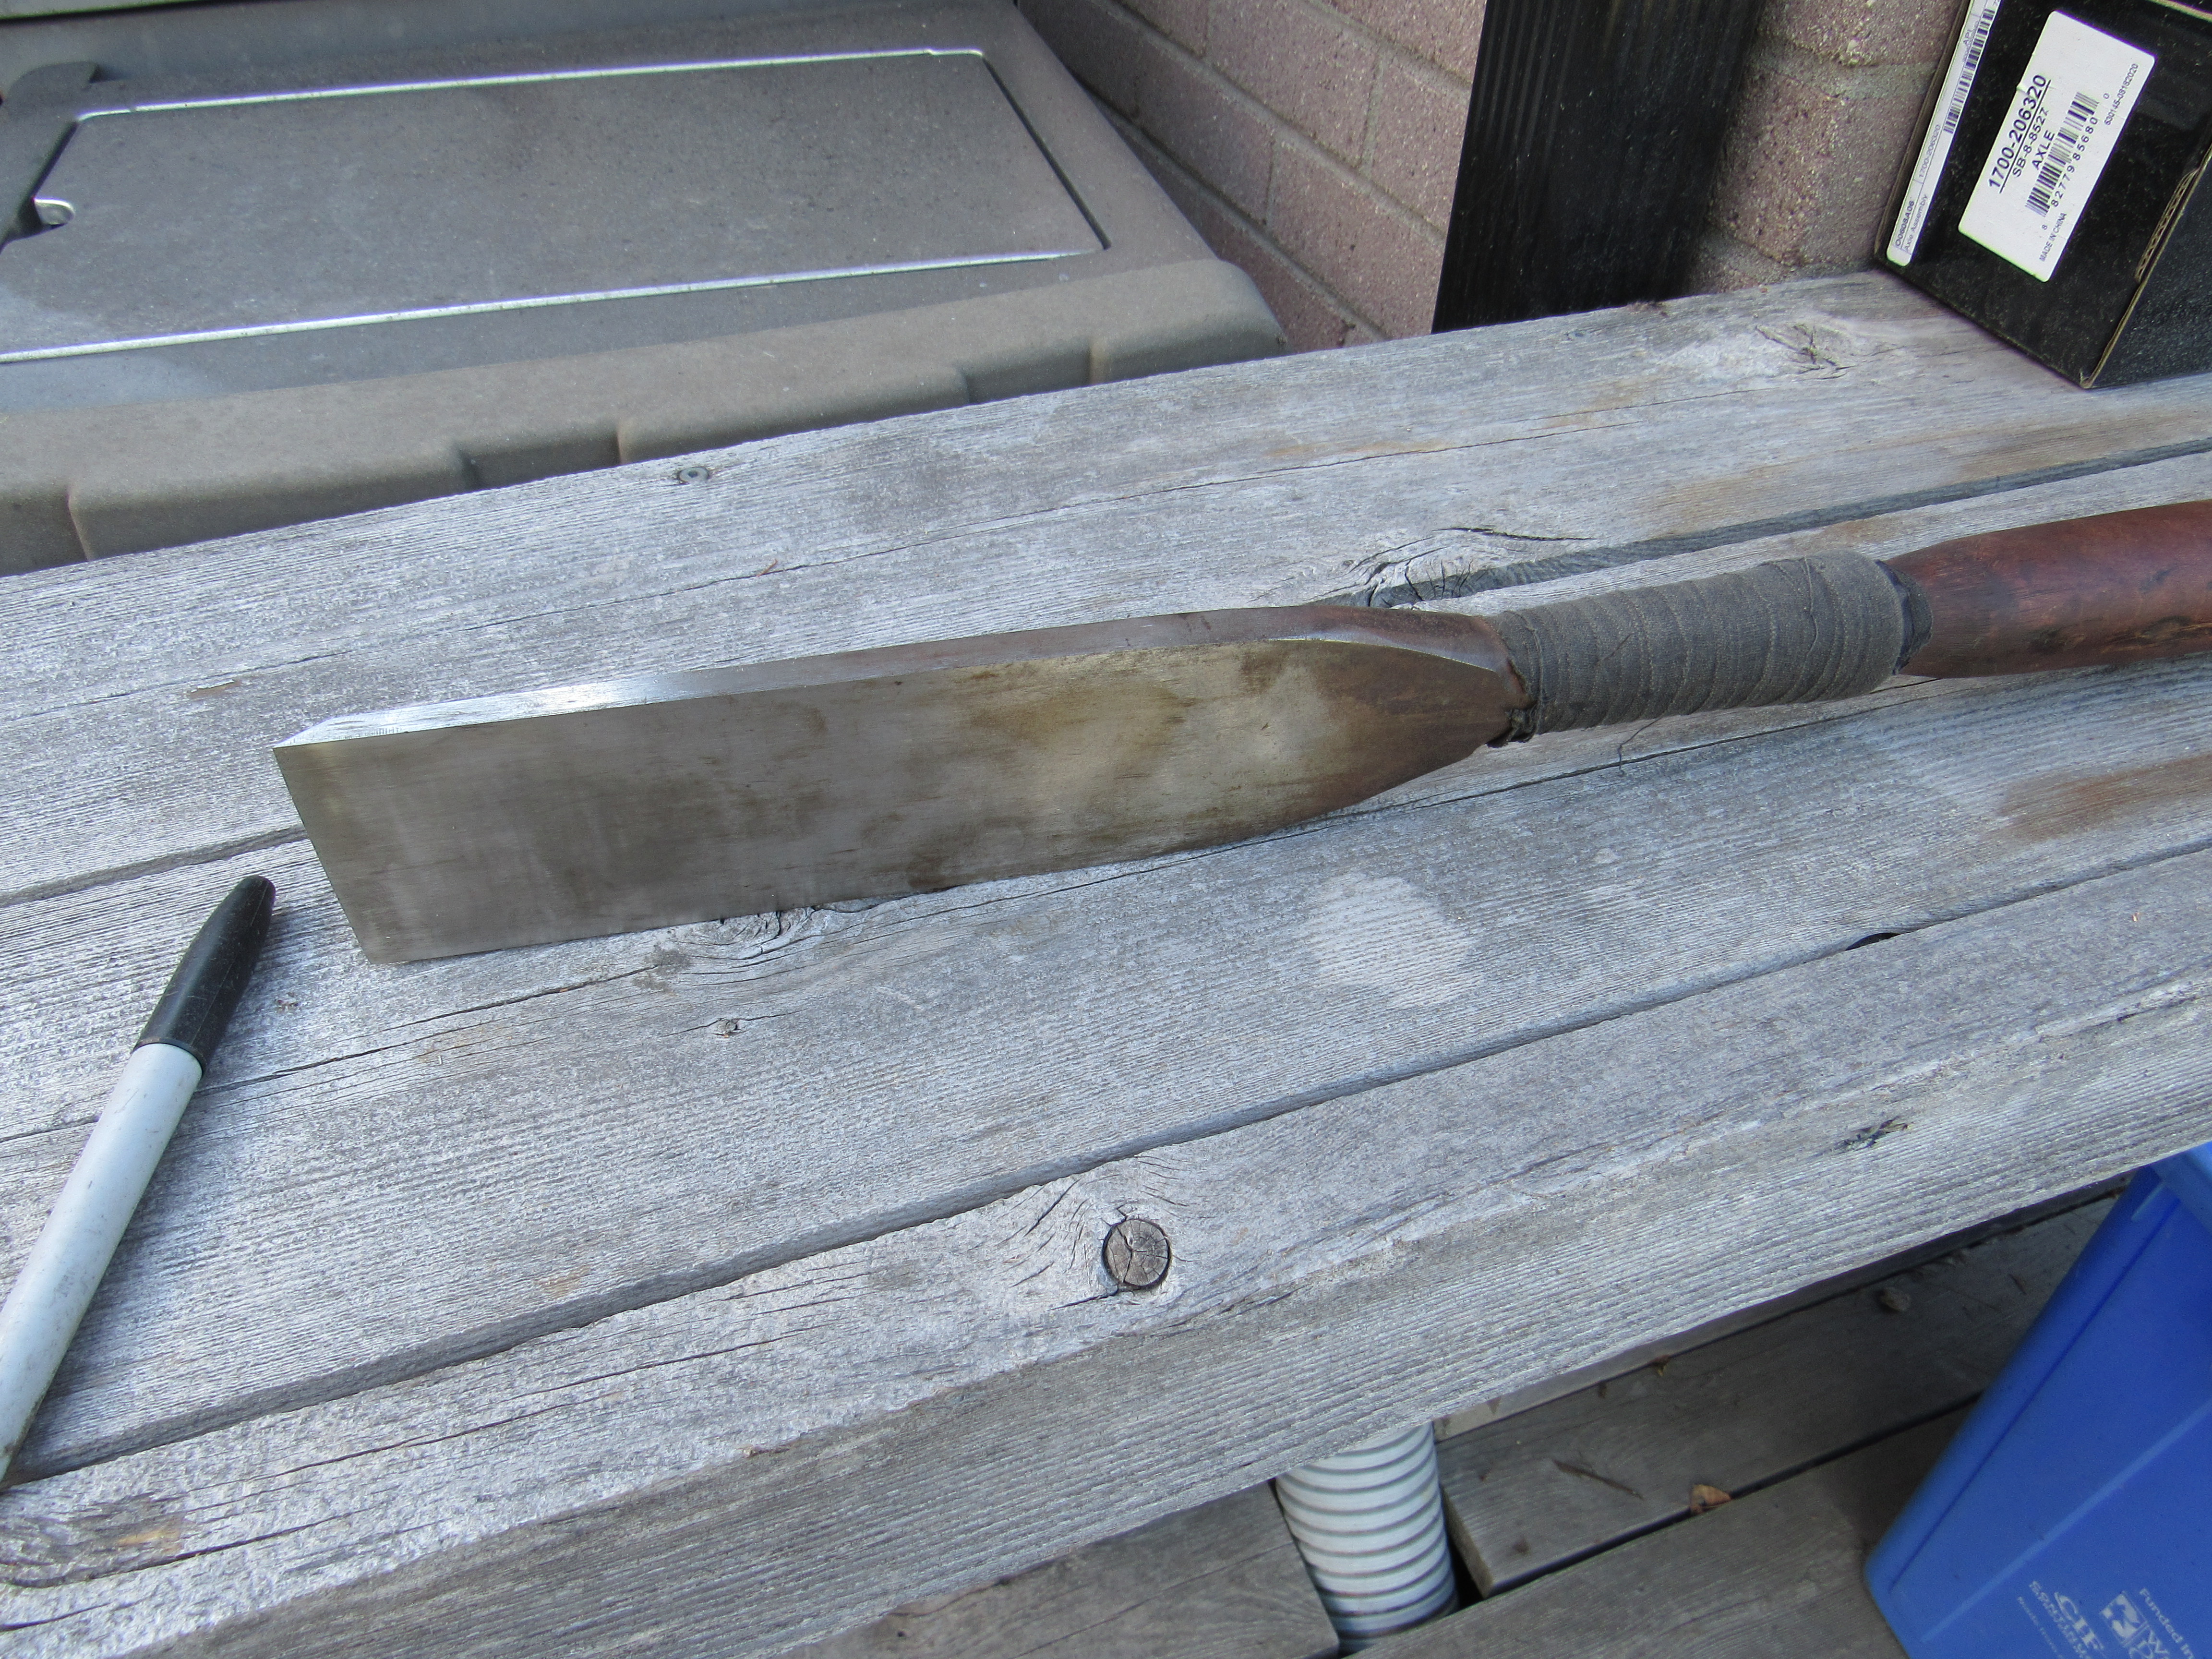
3 pointsHard to be a good quality axe, the 1st one is a heavy and tall, that's the splitting axe, 2nd is a Timber framers hatchet, 3rd is my brother's old practice throwing axe, he use to perform in those logging shows in the Pacific NW, 4th one is just a nice all round general axe, 5th is a very old Adz used for squaring up timber beams, the 6th pick is a Timber framer's slick, also used in old time ship building, basically a 2 handed chisel, great fun to use.


 3 points
 -
 No product failure is ever welcomed, and we will certainly be talking to the manufacturer about this one, and continue to monitor them. We're of course very sorry that both of your products had obvious issues. We have sold over 180 of them since 2016, and these are the first two alerts we know of concerning this issue (possibly 3 assuming the one from Hybrid was the same manufacturer, which is hard to tell for sure, since there have been a few similar options on Ebay over the past couple of years, some of which are no longer around). Hopefully it is not more than 2-3 out of 180 and not indicative of a mass or new problem, we'll certainly look carefully at the next batch we receive. As far as we know the rest of the 180 that were installed are working fine to this day. If other members have had the same issue with this style, please let us know. Certainly Greg and this company have not stayed in business for over 40 years by ignoring reports like this, they are all taken seriously, and again, we'll make sure the manufacturer is aware of it. We do apologize, Madkaw, for the delays. Being severely short-handed for over a year now, Greg himself is having to take care of all the returns, along with a number of other missing staff positions, and we have been quite overwhelmed and behind. Sorry that it took extra time to get everything processed. We're working as hard as we can, and working hard to find more team members at the same time. We of course responded personally to zKars, and are processing his refund now. As a side note, unfortunately James has been on a leave of absence since mid last year, so if you have, or do, try to message him, unfortunately he won't see it. We're also hopeful that James might be able to return at some point.2 points
 -
 2 pointsI've got a couple of sledge hammers and maybe 6 wedges. Please get them from me. I'll leave them in the front yard propped up by the mailbox.2 points
 -
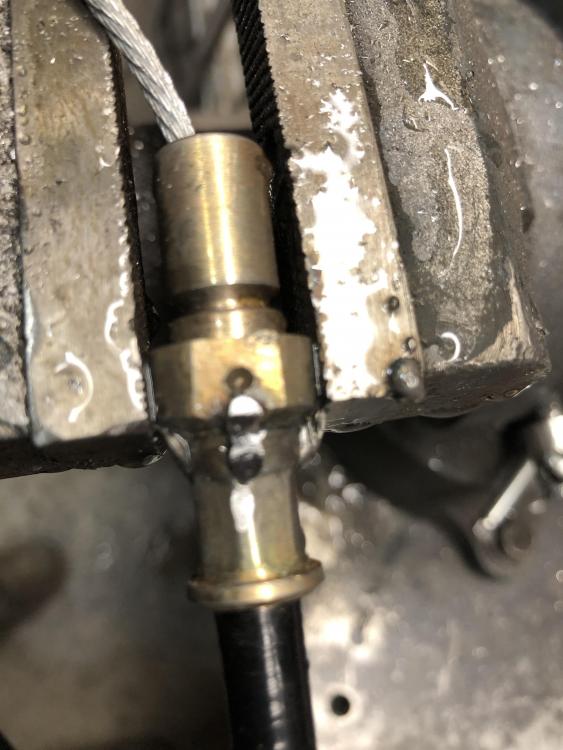
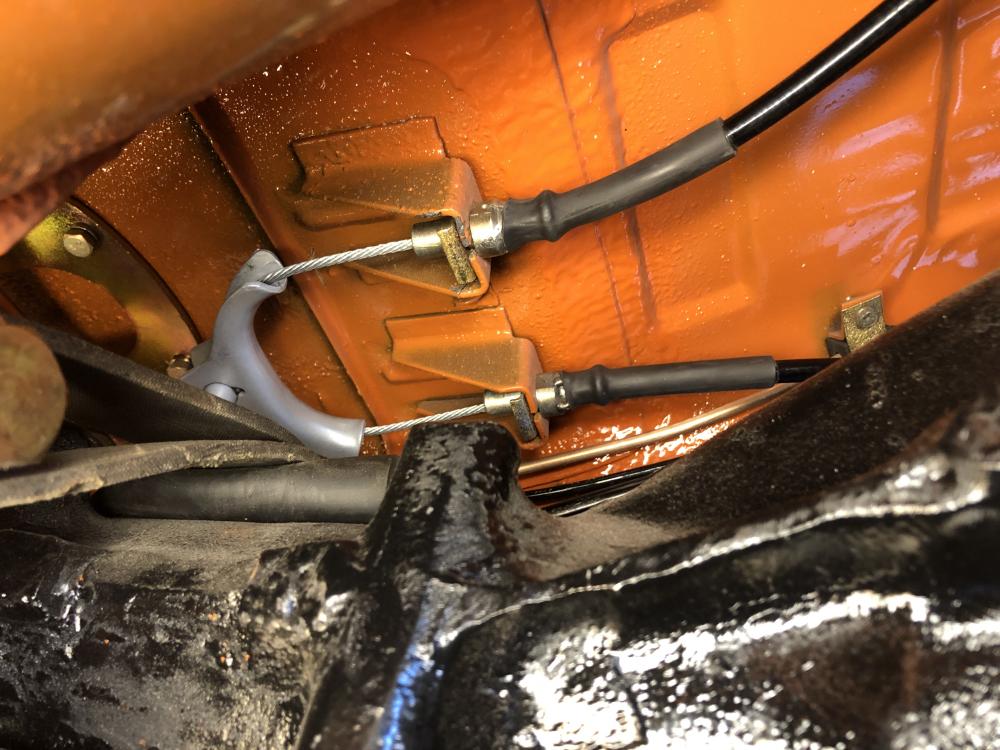
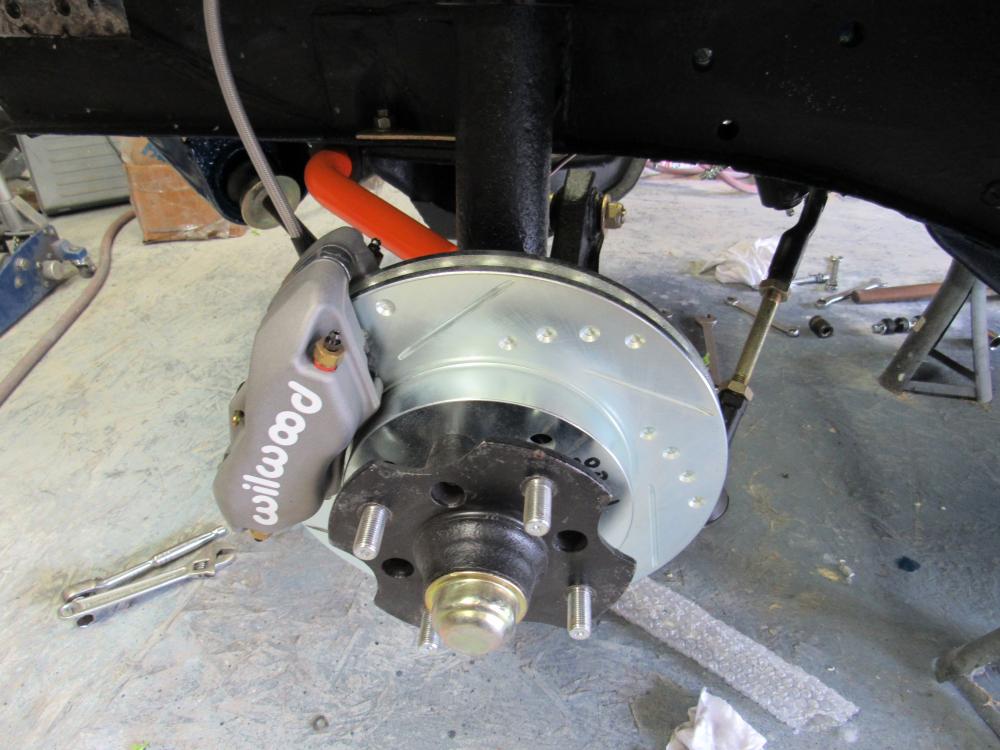
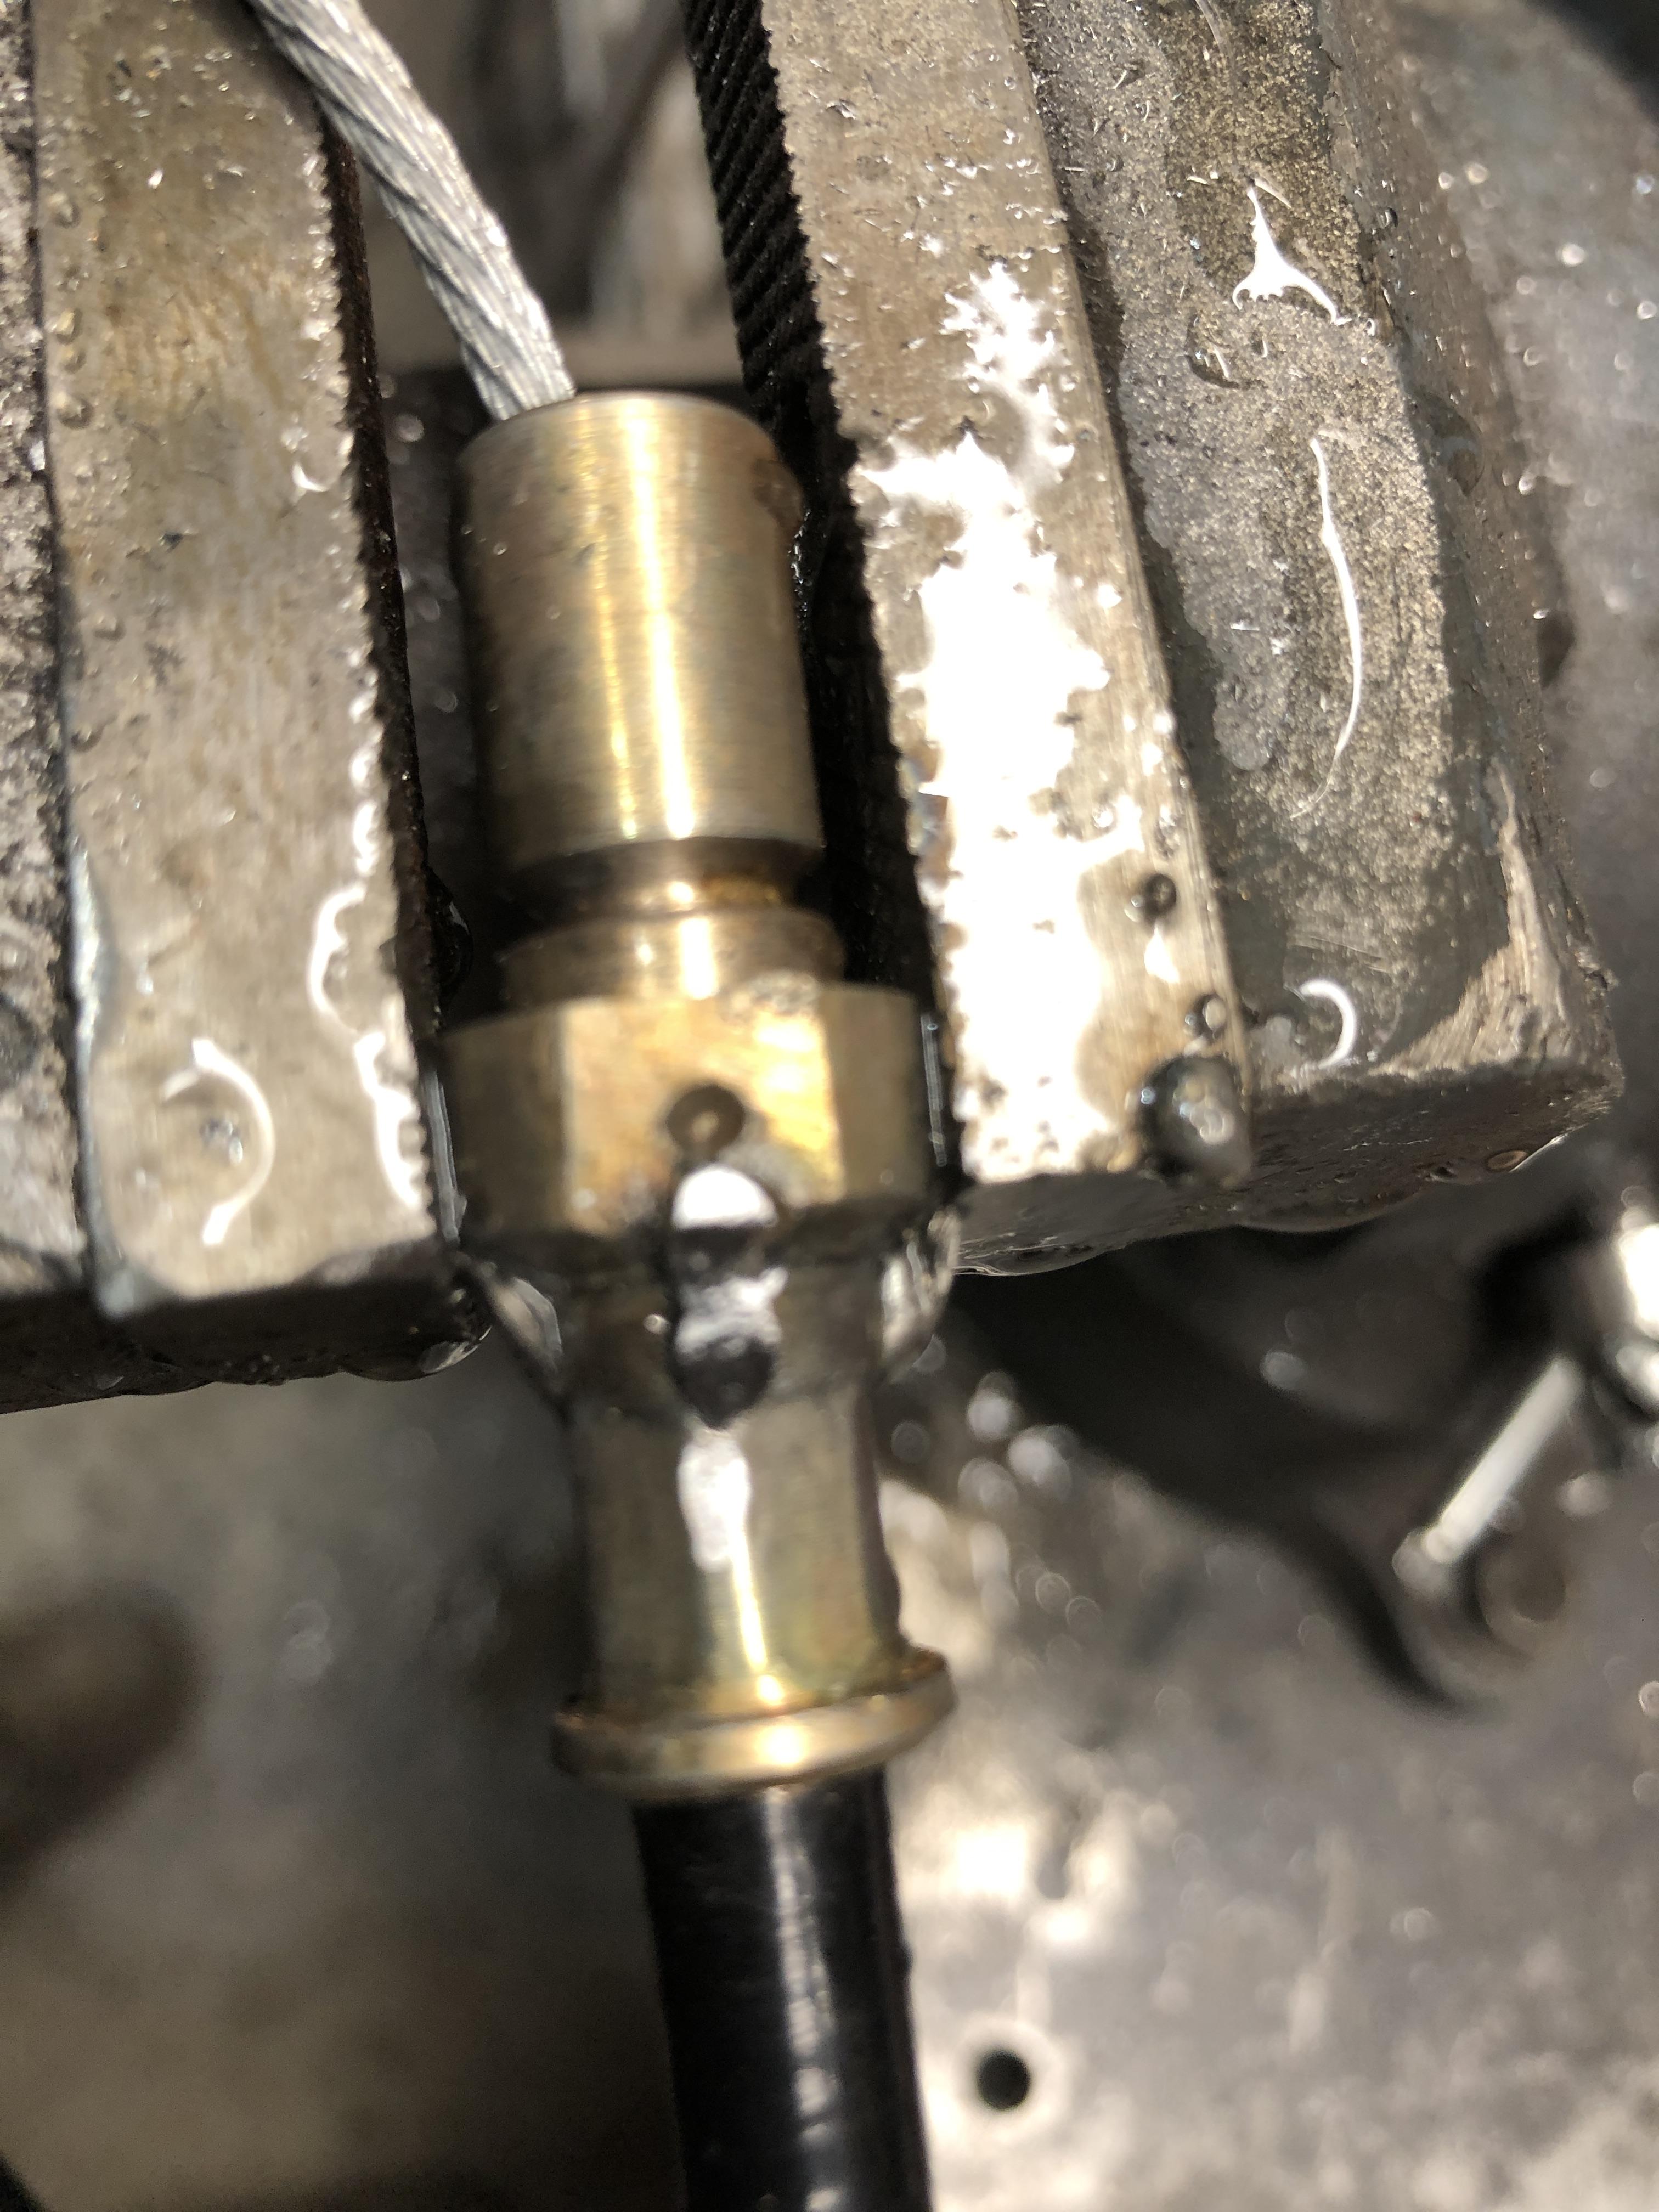
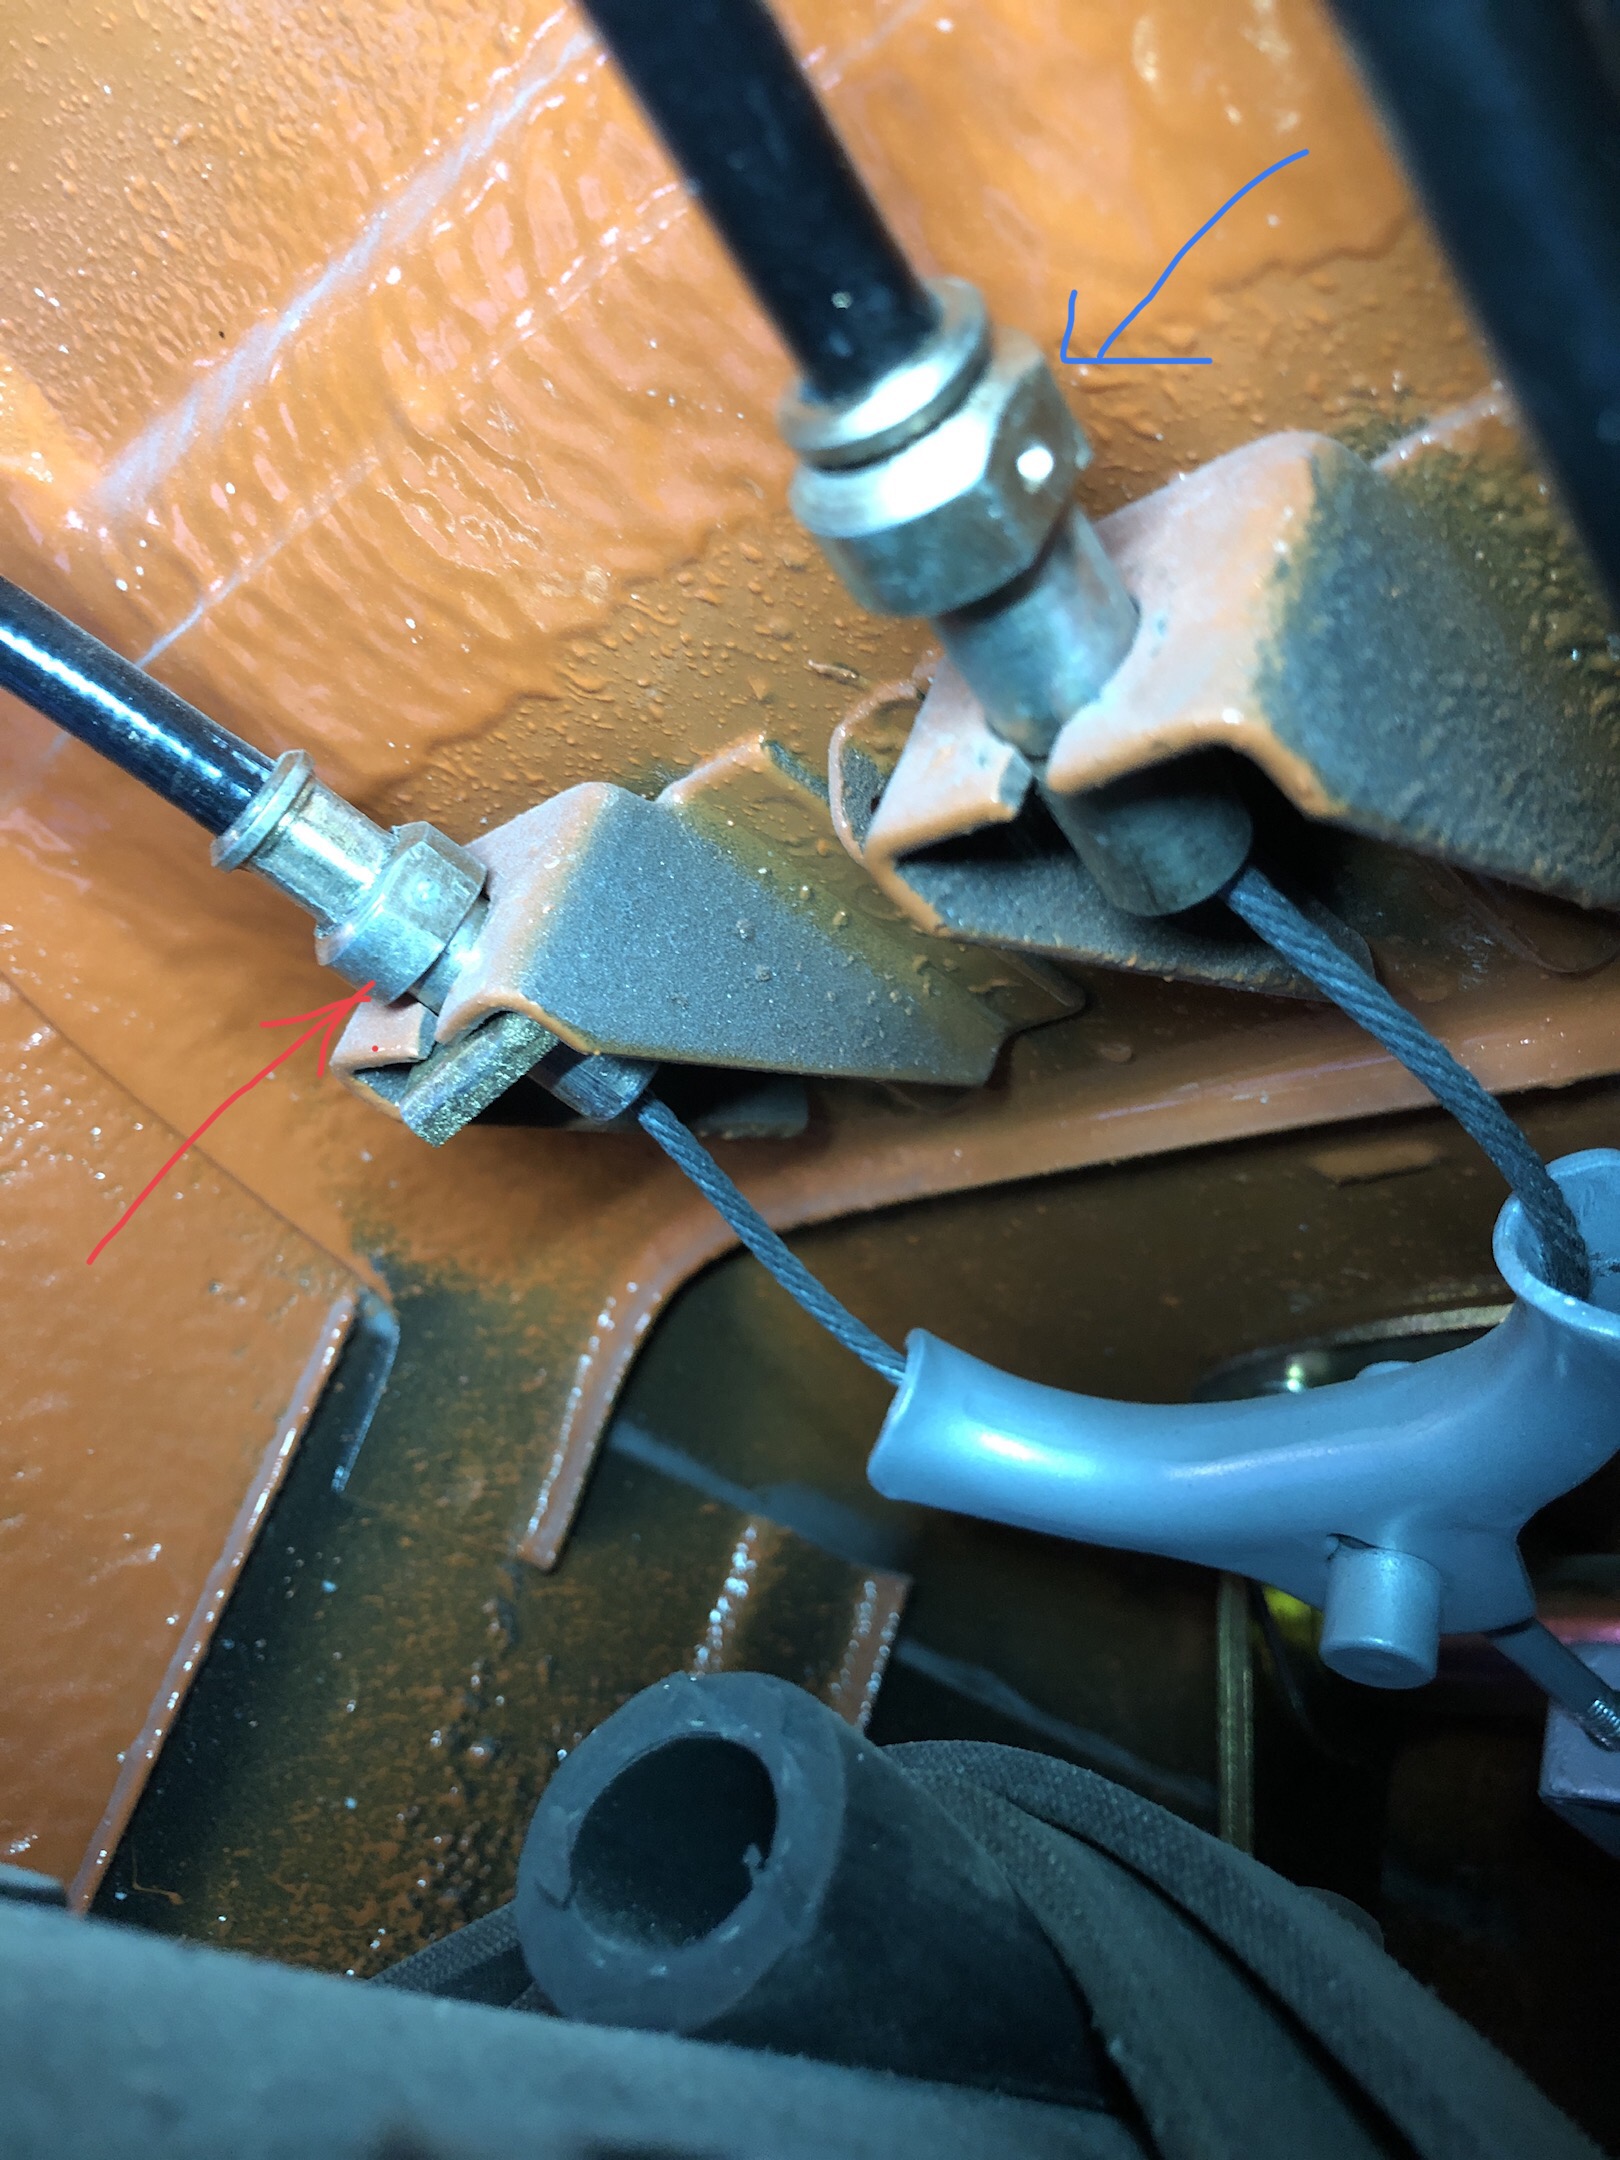
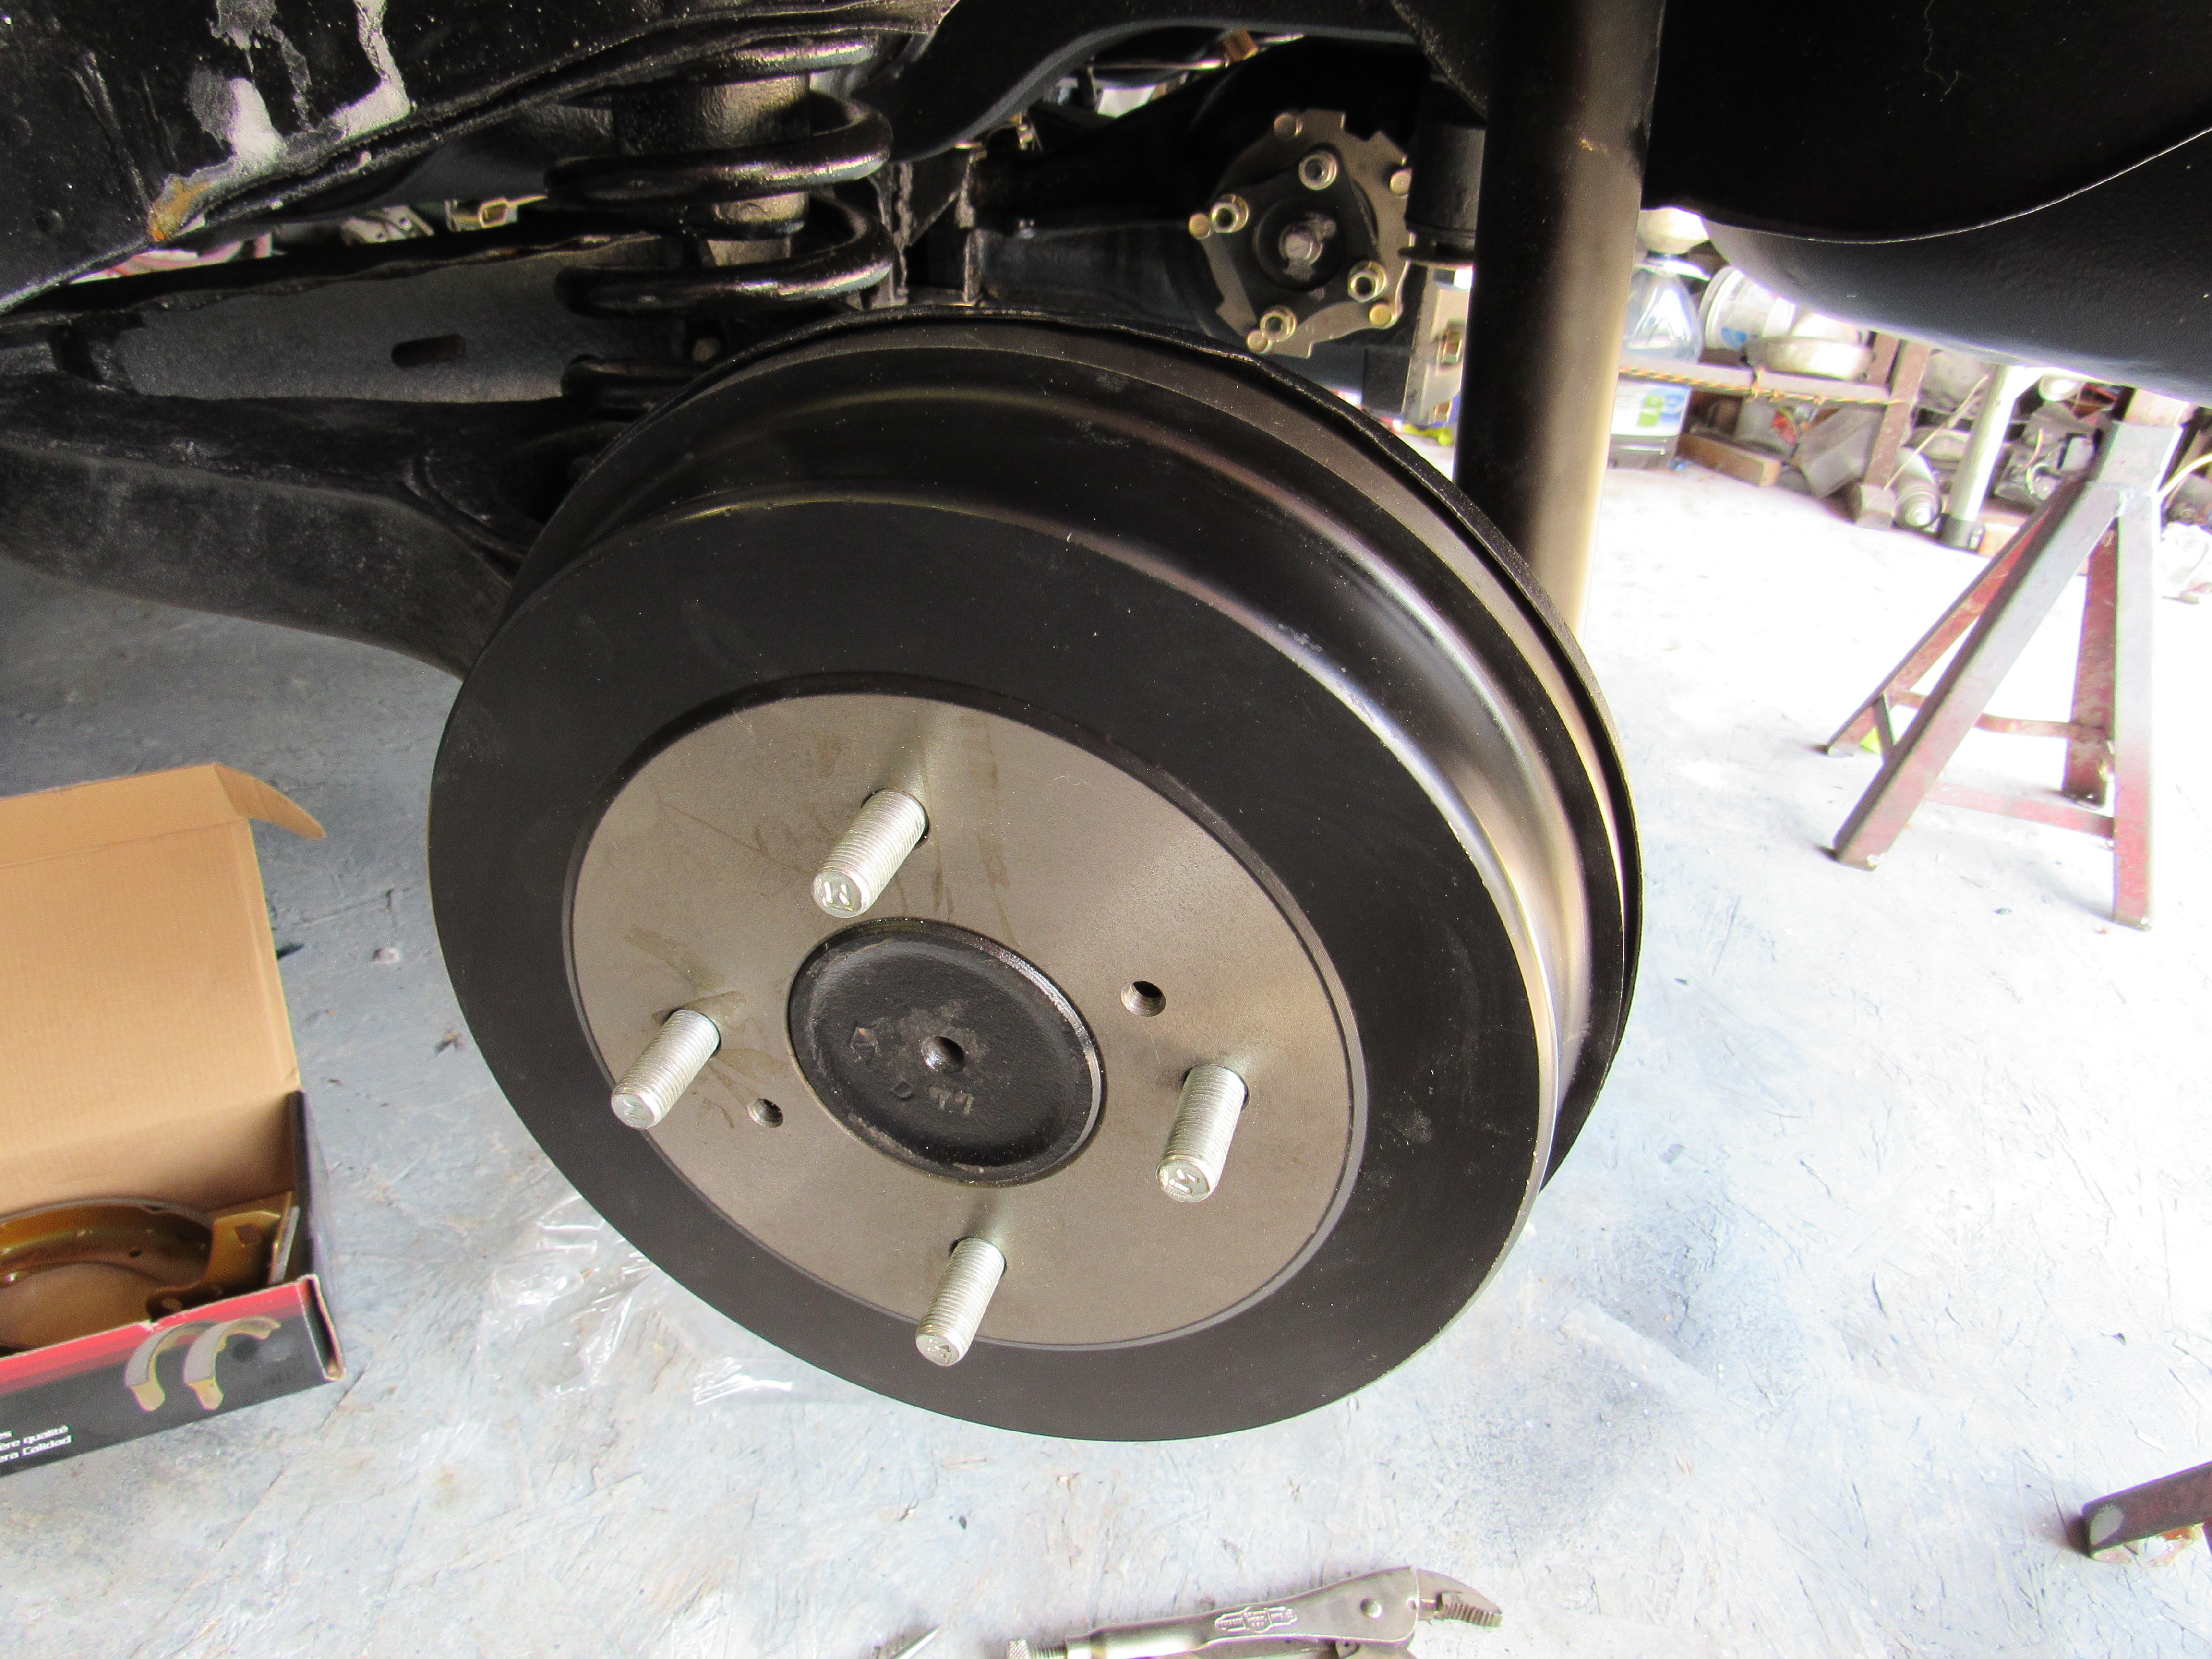
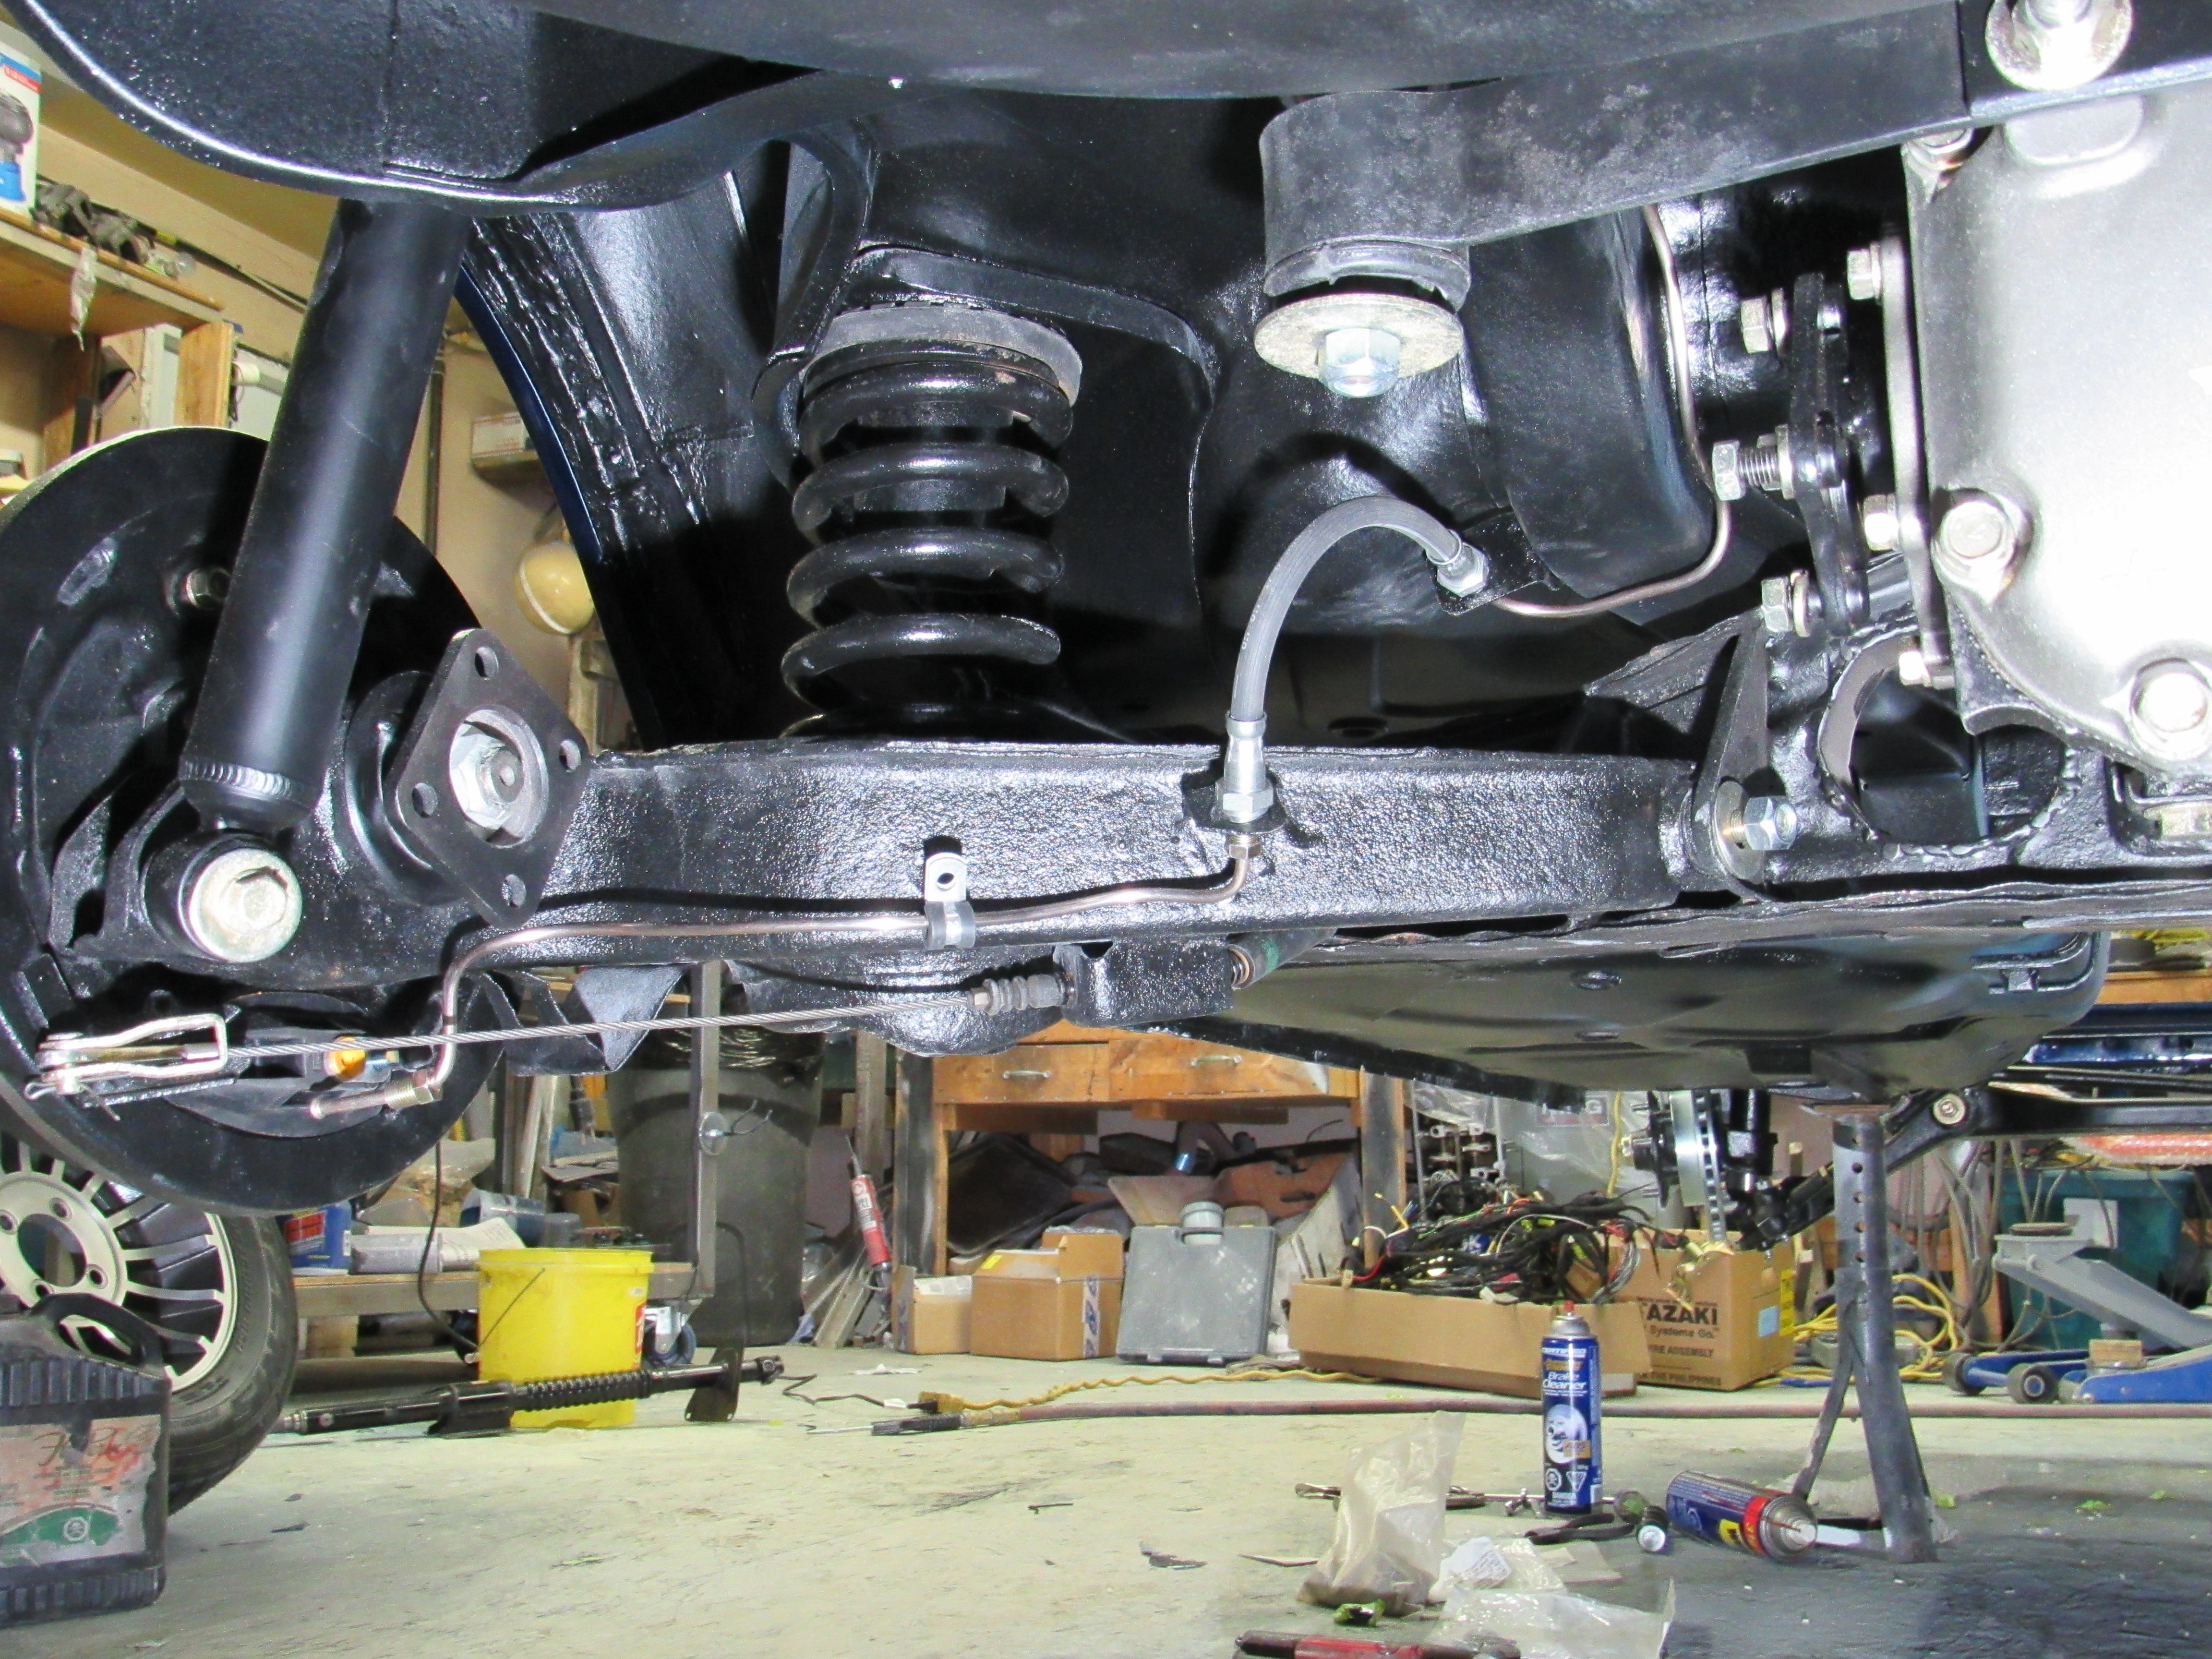
At the wheel end, the one with the missing C clip had a slipped collar too. So what to do? Well I did a permanent fix. I repositioned the collars in the right spot, and welded them down. No more of this horse **** The “right spot” by the way is exactly 0.1 inch back from the groove. Measured a real stock cable to get that value. Quick weld, water to cool, do another etc. There is a plastic sheath on the cable so have to keep my cool. I put some dual wall shrink tube over it as well for a bit of water proofing.
 2 points
 -
On to the issue. The cable is not a perfect reproduction of the original as far as the design of the ends and swag fittings, but appears well made. Got under the car this morning and found one of the retaining C clips gone of the right side of the body up above the diff nose where the sheath end is mounted to the body. No wonder pulling the handle didn’t result in any wheel e-brake tension. Ok, why did the clip come loose? Also found the C clip and clevis pin GONE on the left side at the wheel end too. Ok, what the **** is going on? Grabbed a new C clip and wiggled up to the top mount and tried to put it back in. No way, there is about 1/2” too much slop in the fitting, no way the clip is going to stay in place. Closer inspection, and AHA!! There is a collar on each swagged end, that sets the stop distance to the C clip groove. That collar is punched on two sides at a flattened thinned area to “lock” it to the inner core. Well not so much in this case. The right one is free as a bird and slid back as far as it can go and the left one has started as well. Lovely quality control. On a couple I can “just” see the mating dimple on the core, simply not enough punch strength or depth. Can’t see that punch lock lasting very long on any of these. Some slightly better ones that are working are likely a couple of pulls away from failure. And we all know how much “fun” it is to work on the cable under the car, there is hardly nothing around it to get in the way is there…. Grumble… Thank god this car is all fresh so I can spin threads and nuts by hand.
 2 points
 -
I’d like to thank Joseph and the Z store for prompt and professional handling of this matter. My requested refund is bring processed and Joseph has responded to me personally. Thank you.1 point
-
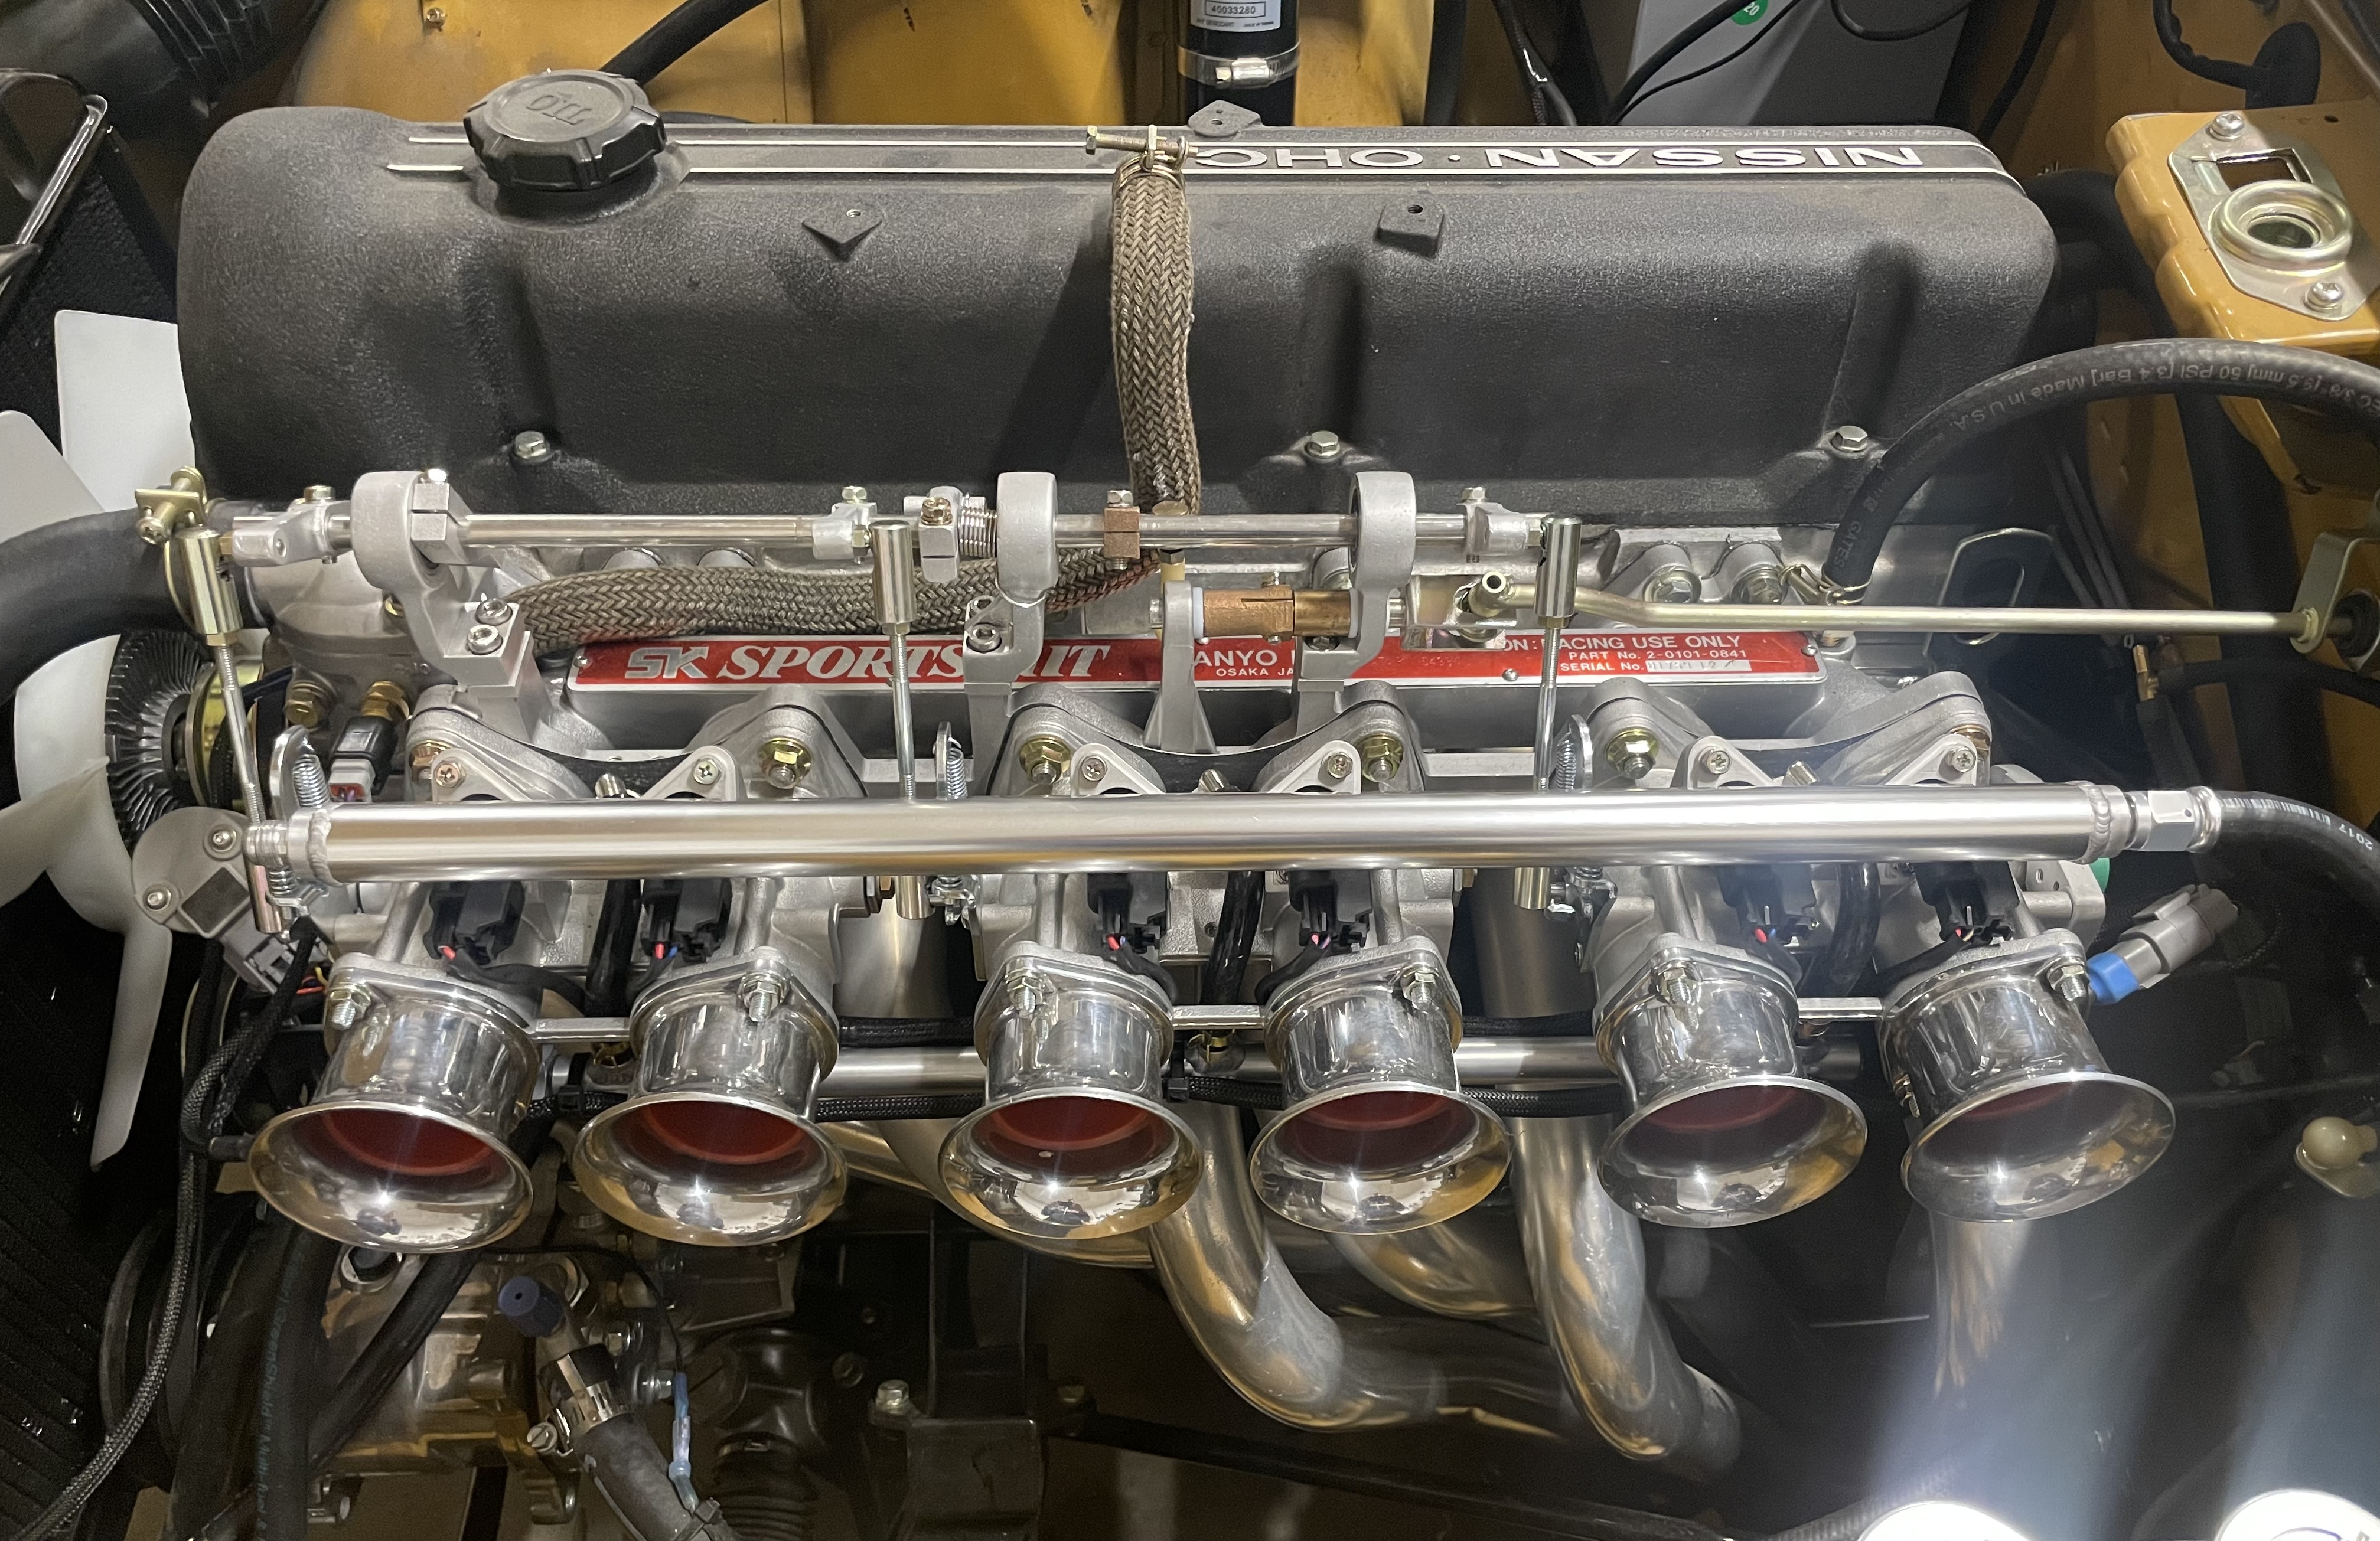
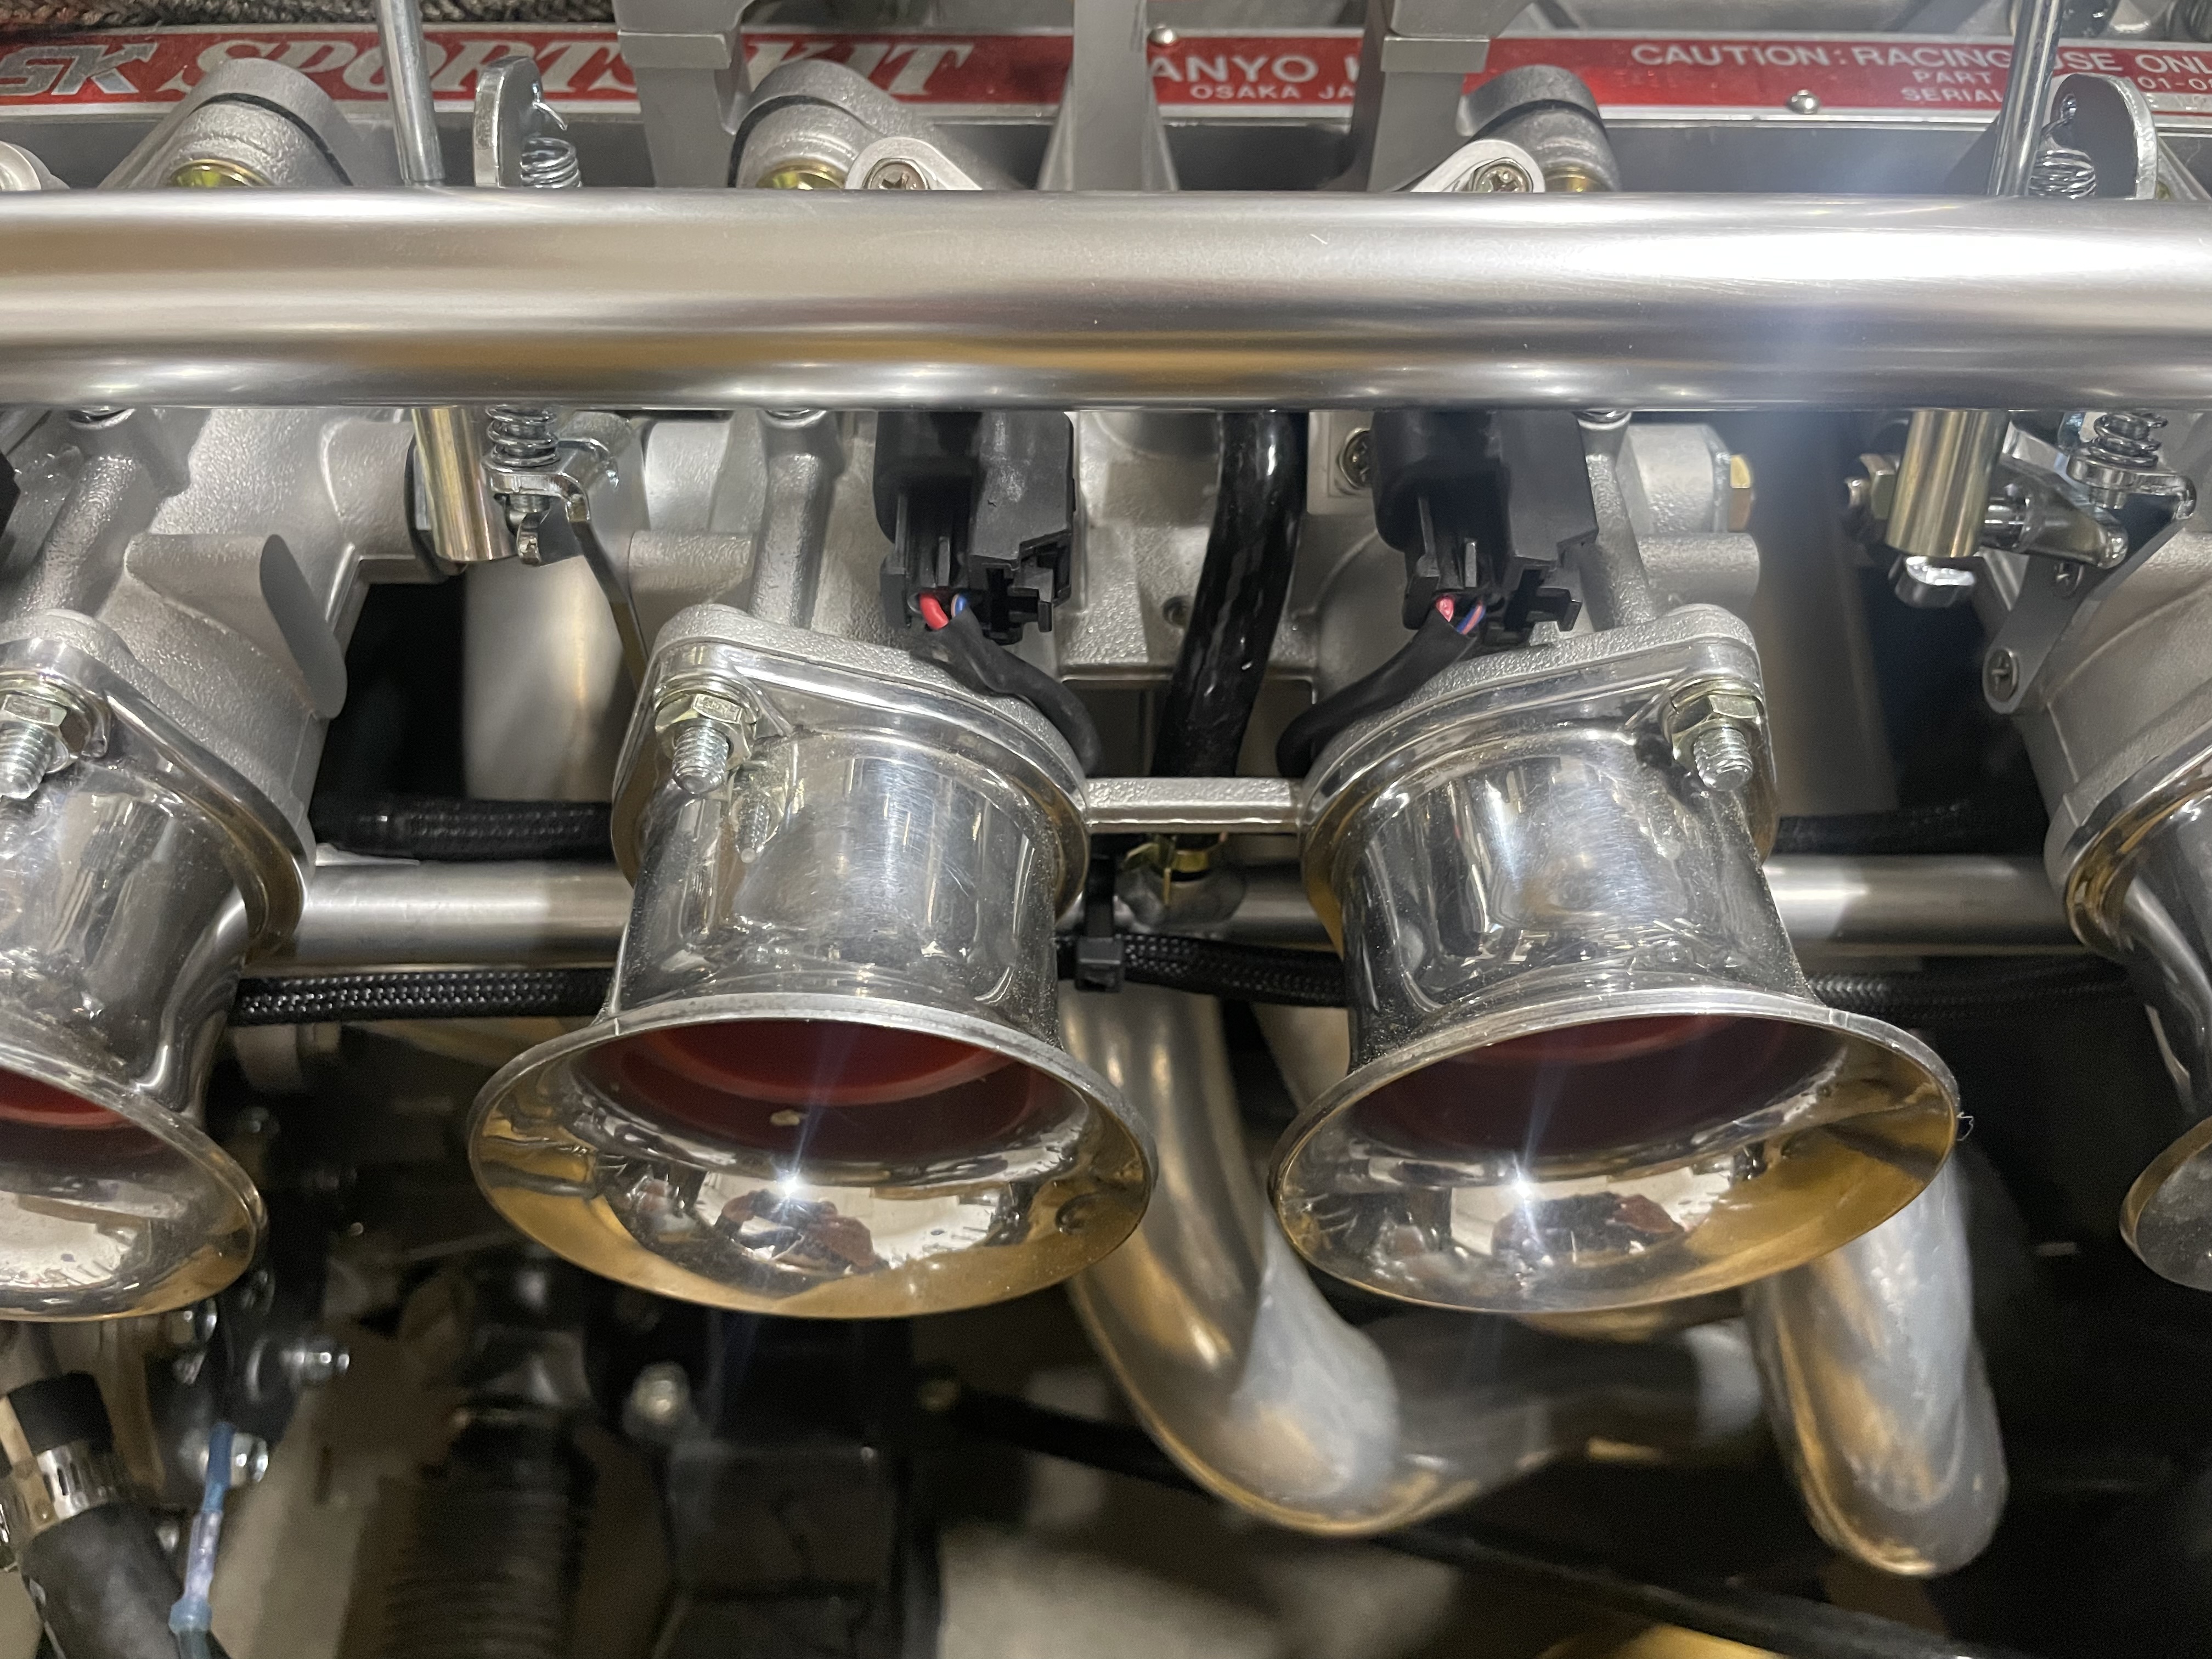
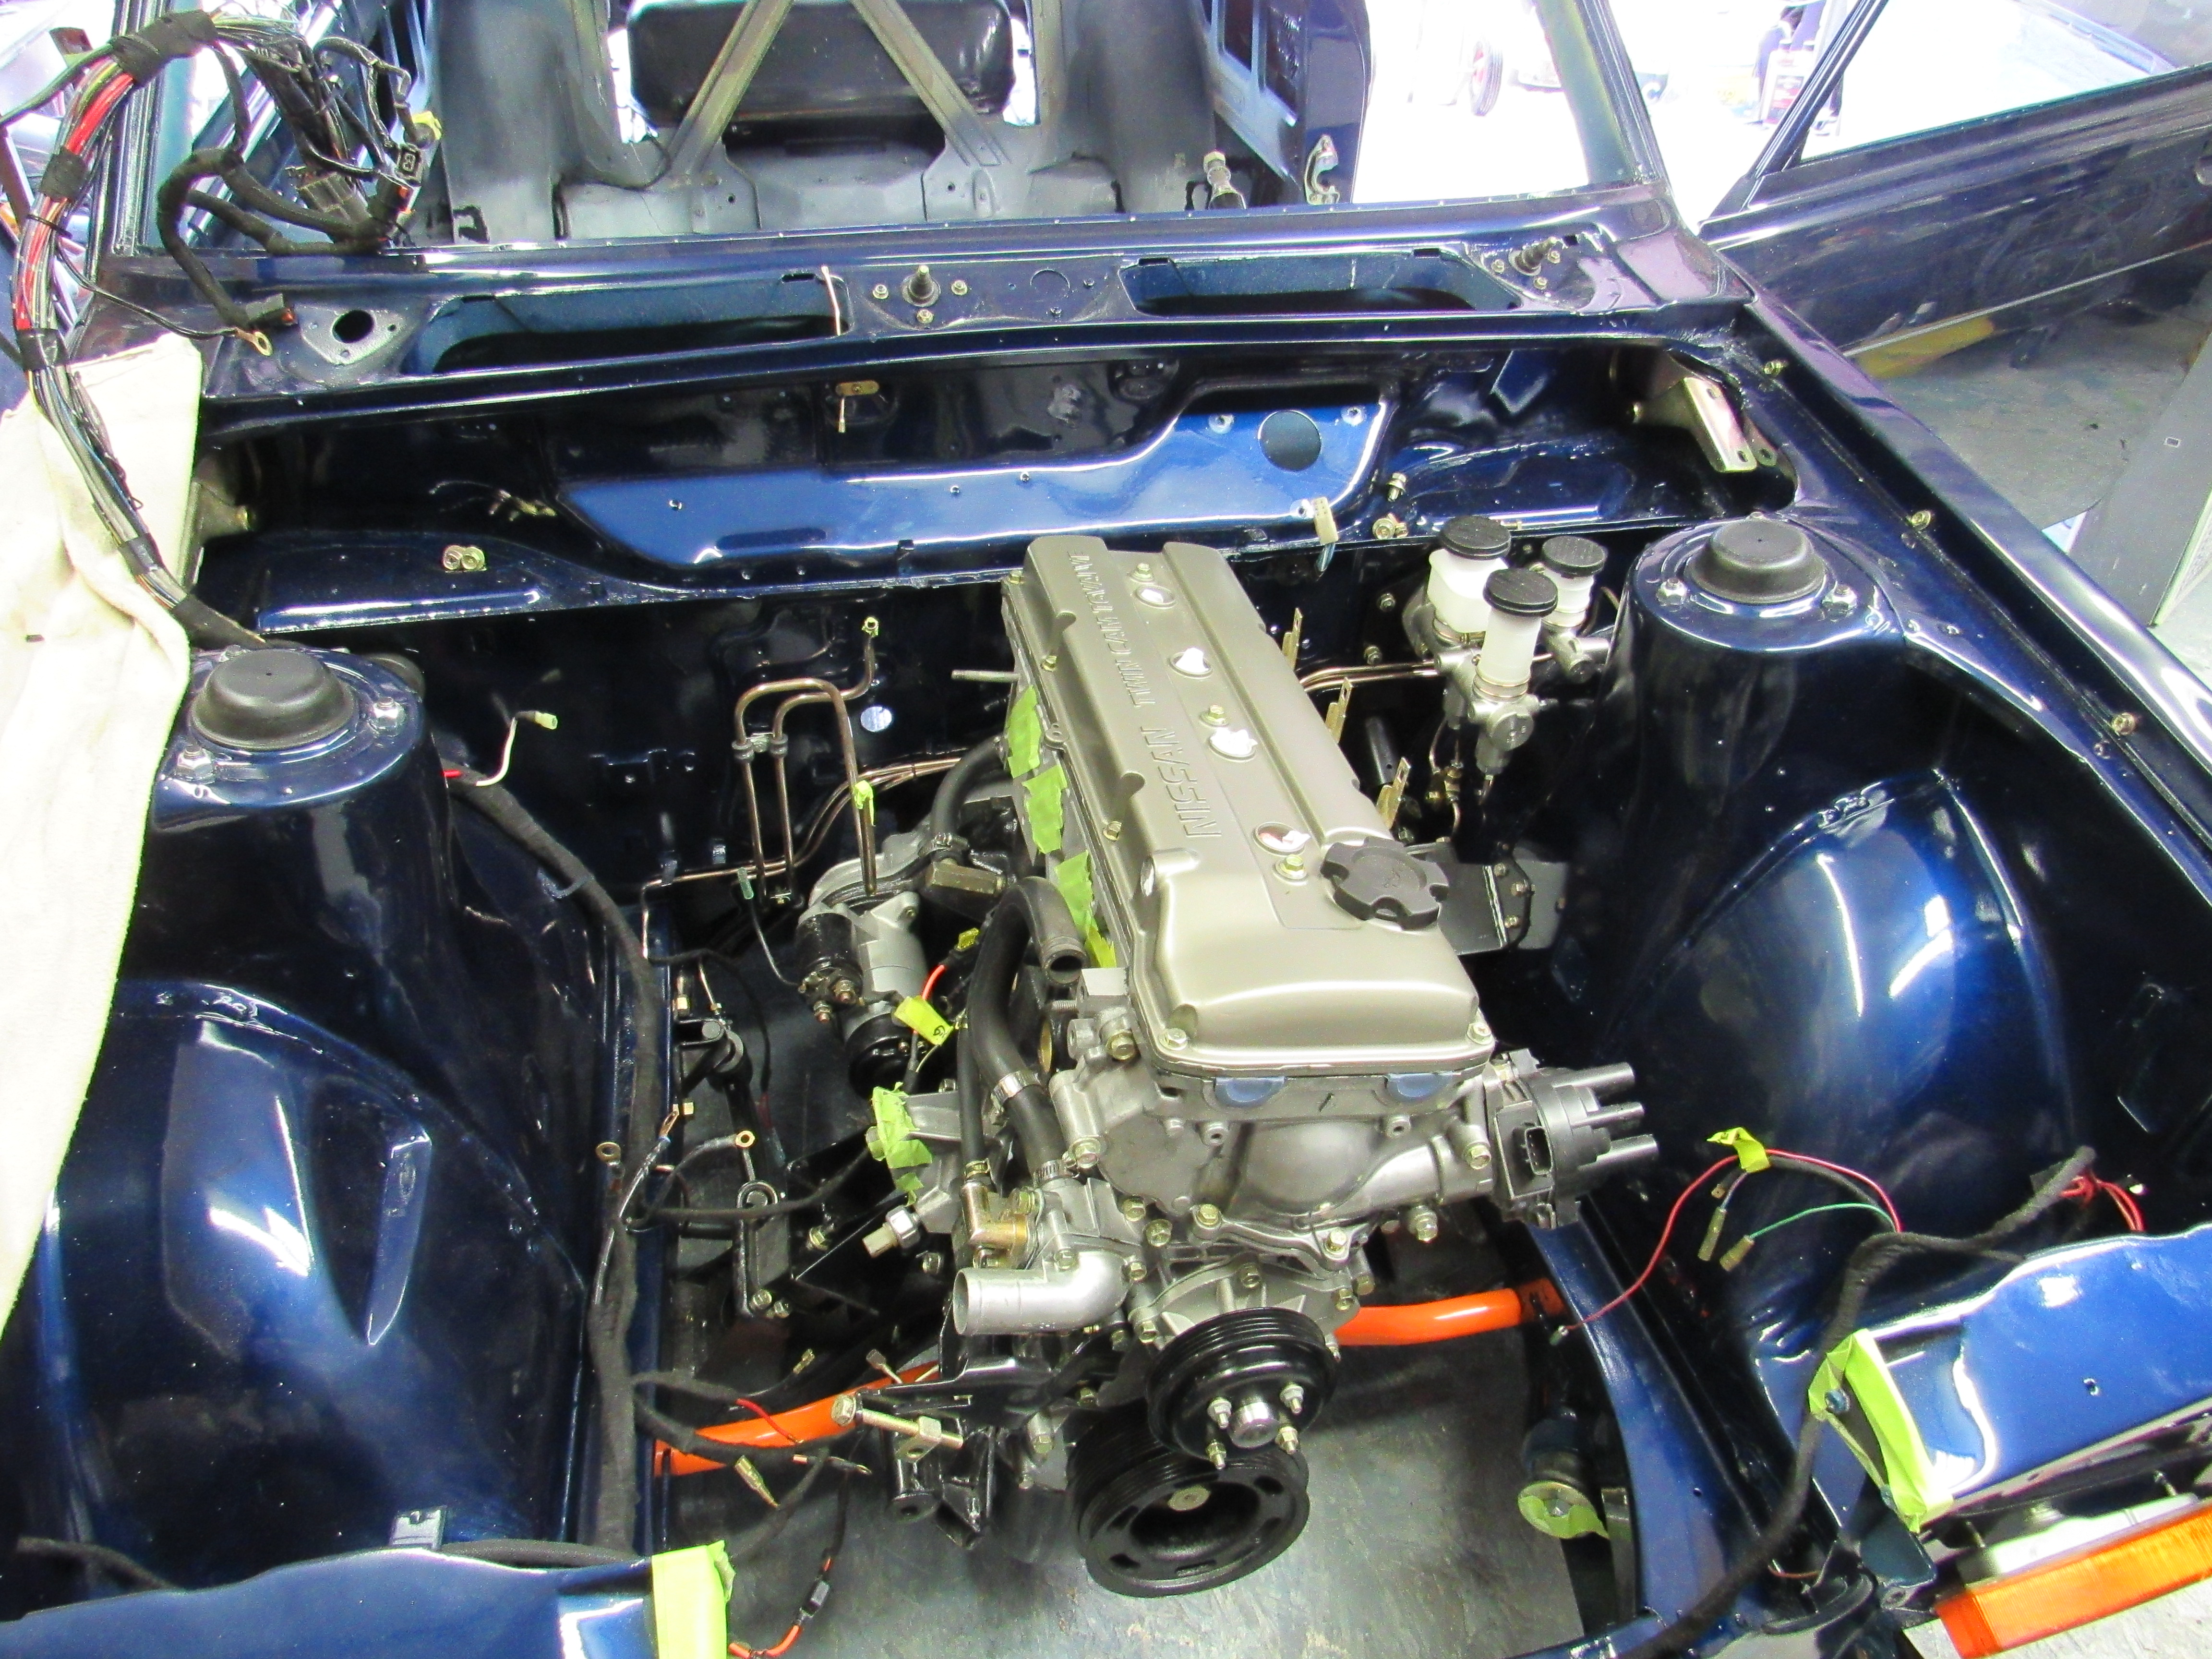
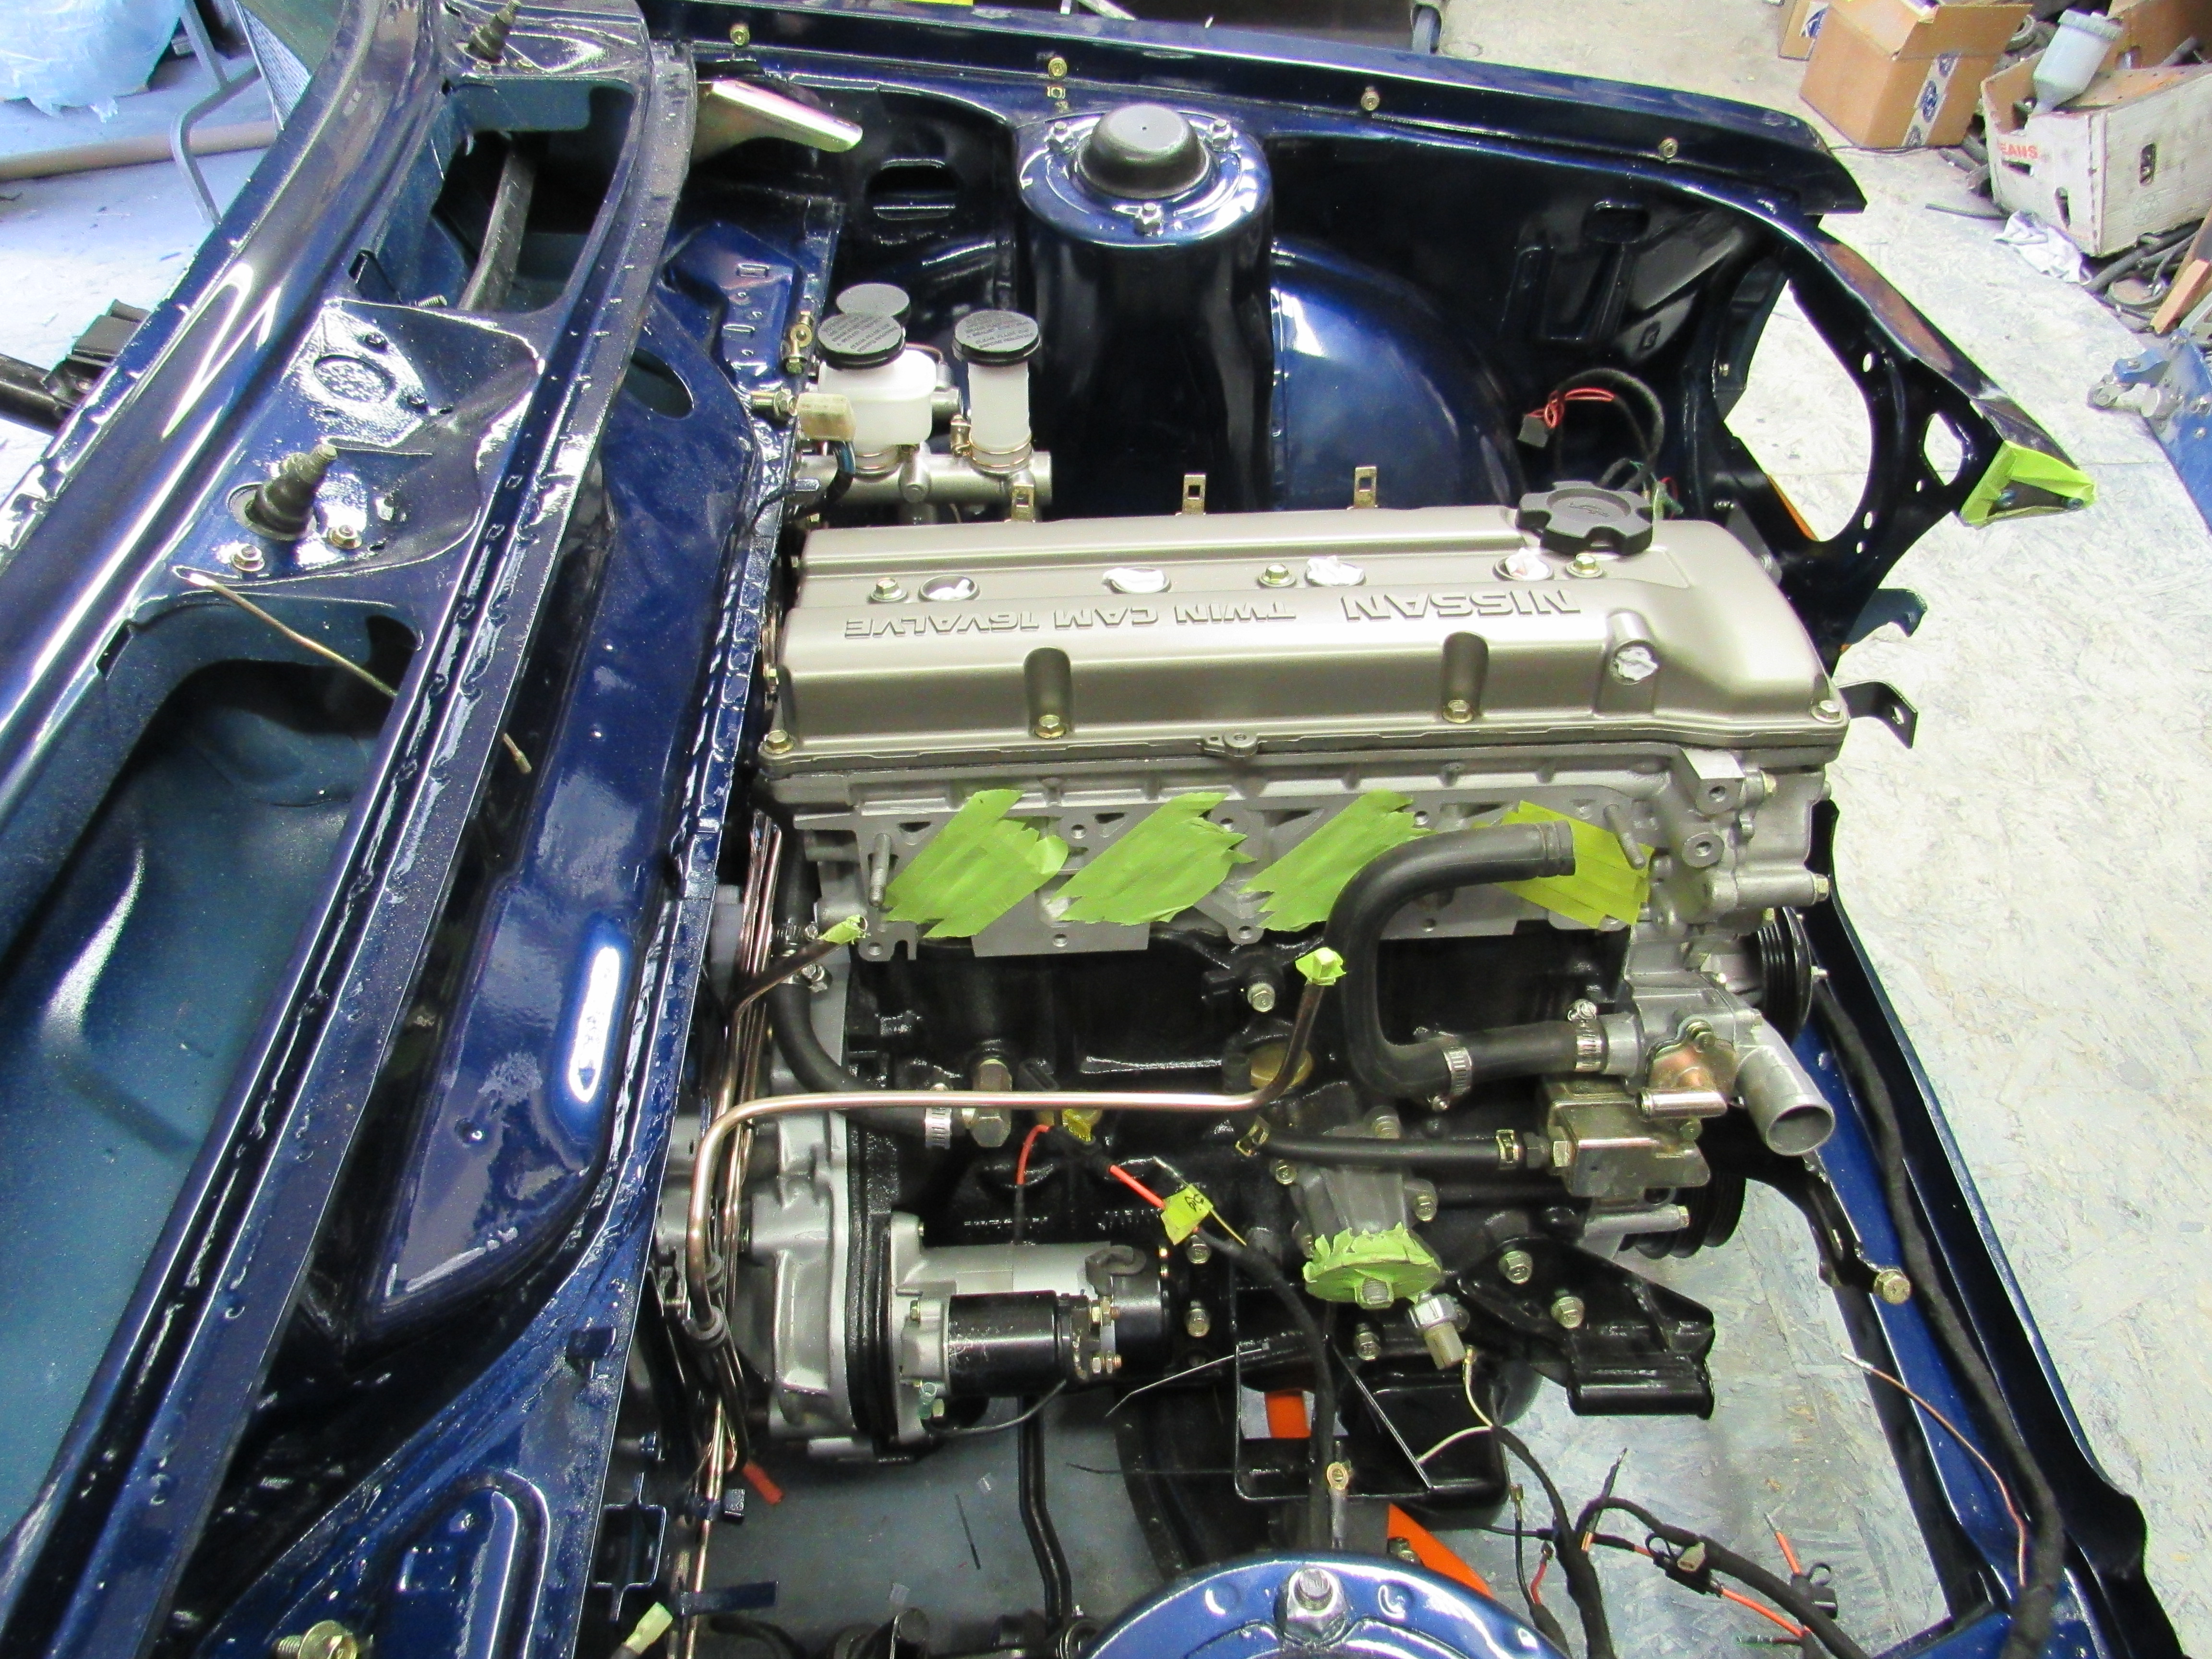
 1 pointWell the plan works and i finally found time this am to finish it. Balanced vac, pcv, hidden wires. All with vintage SK ITB. Why do I do this to myself!? Gosh I love to tinker. Now to see if she will run again, which the neighbors love.
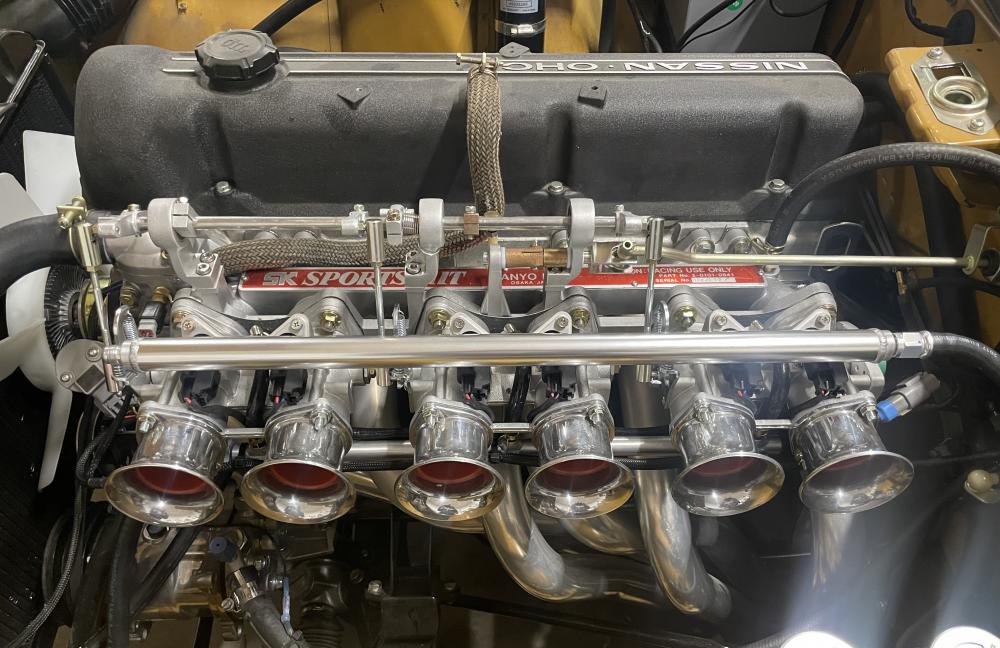
 1 point
 -
 Hopefully it was done back when that was a thing to do. Its like taking the V12 out of a Jag XJS and putting in a 350 Chevy.1 point
 -
 1 point
 -
 1 pointI hadn't noticed before that your shop equipment includes two axes, a hatchet, and a crowbar. Mixed in with your vintage 50-lb anvil, that's a powerful combination .1 point
 -
 This was one of the best kept, most original “Survivors” we have seen on BAT in a long time. Darn shame it was presented with the damage to the rear quarter panel and tail light surround. A Survivor in that shape (without the damage) would easily have brought $40K to $45K in the last six months - - but that dent in the rear, is in a very hard place to fix - and it was a big Put-Off to most collectors. I think the seller made a costly mistake presenting it for Auction - without first fixing that damage. On the other hand the Buyer got a really great 240Z at a bargain price. Another great Survivor - 1973 on Auction now - we’ll see how it does.1 point
 -
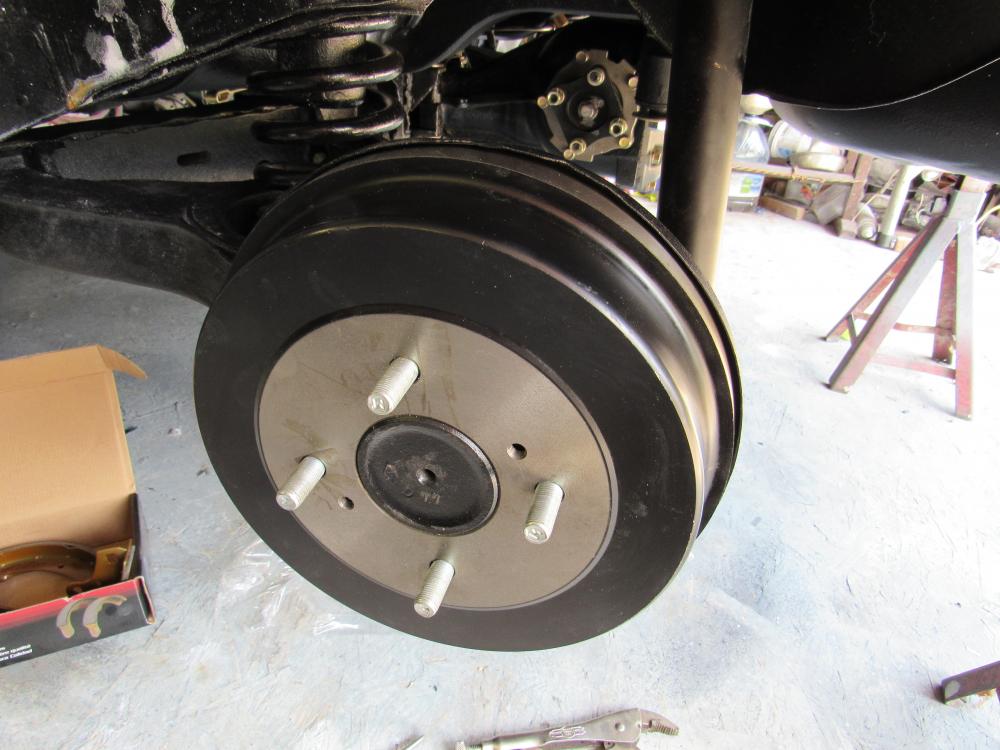
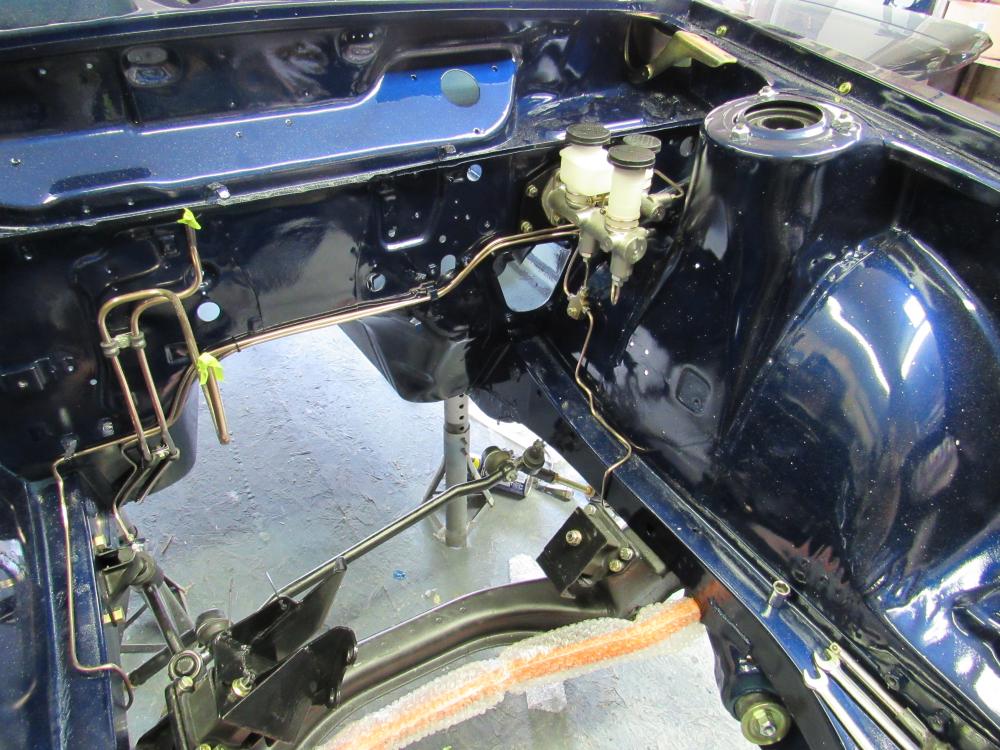
Here she is all back in the car and working just fine.
 1 point
 -
1 pointI bought the headliner pre-made from a place on ebay, they also include a big sheet of extra fabric for the AB and C pillars, I even got the parcel self covered as well. It fits pretty well, there are some stitching irregularities but once I can get the car out into the sun I think most of that and a few wrinkles relax. That is the first headliner I've done where it hangs from steel bows, steep learning curve.1 point
-
 1 pointI may have answered my own question. I just read a post by Zed Head about my coil subject. Looks like Oreilly part # 23-0257 or Rock Auto's NGK # 48776 are my best choices. Both sellers have them in stock. I've always liked NGK stuff buy may just take a short drive to Oreilly and get what I need instead of waiting for Rock Auto's delivery. Thank you again Zed Head!1 point
 -
 1 point
 1 pointfinally got some good shim in. I put a tight piece in and got it set then slowly drilled a hole through where the bolt goes. Seems to have worked. thanks1 point
 1 point
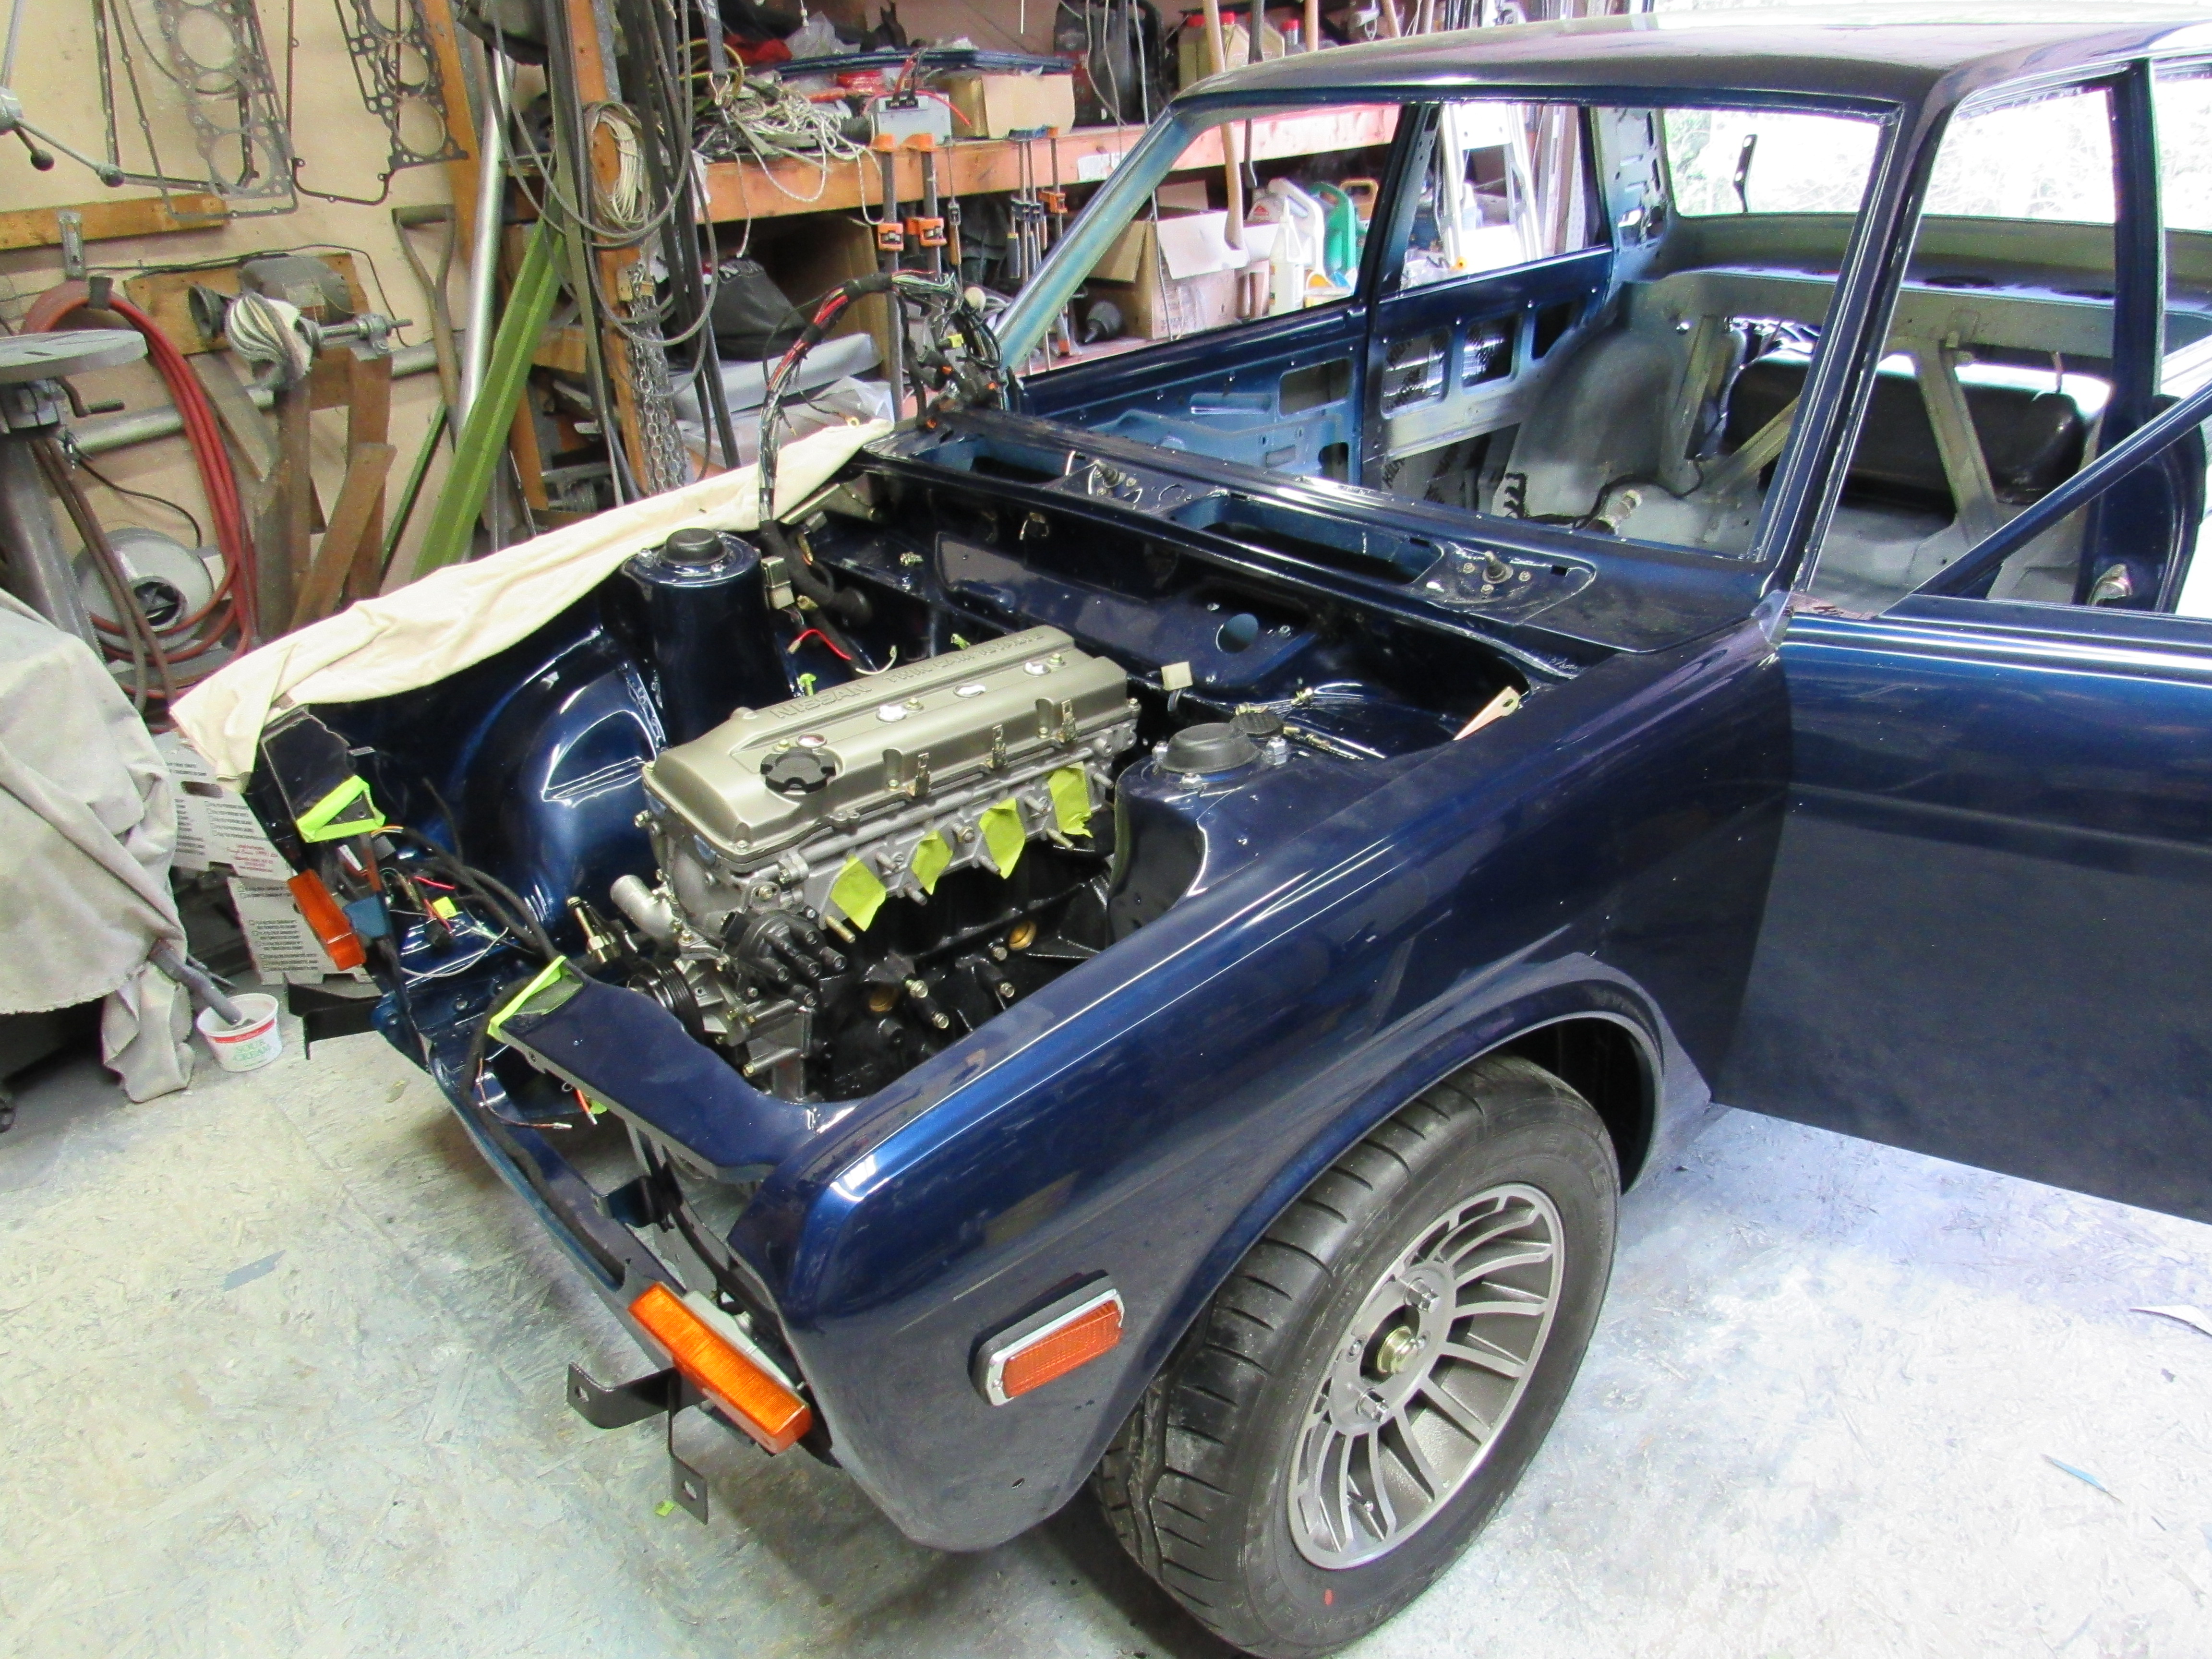
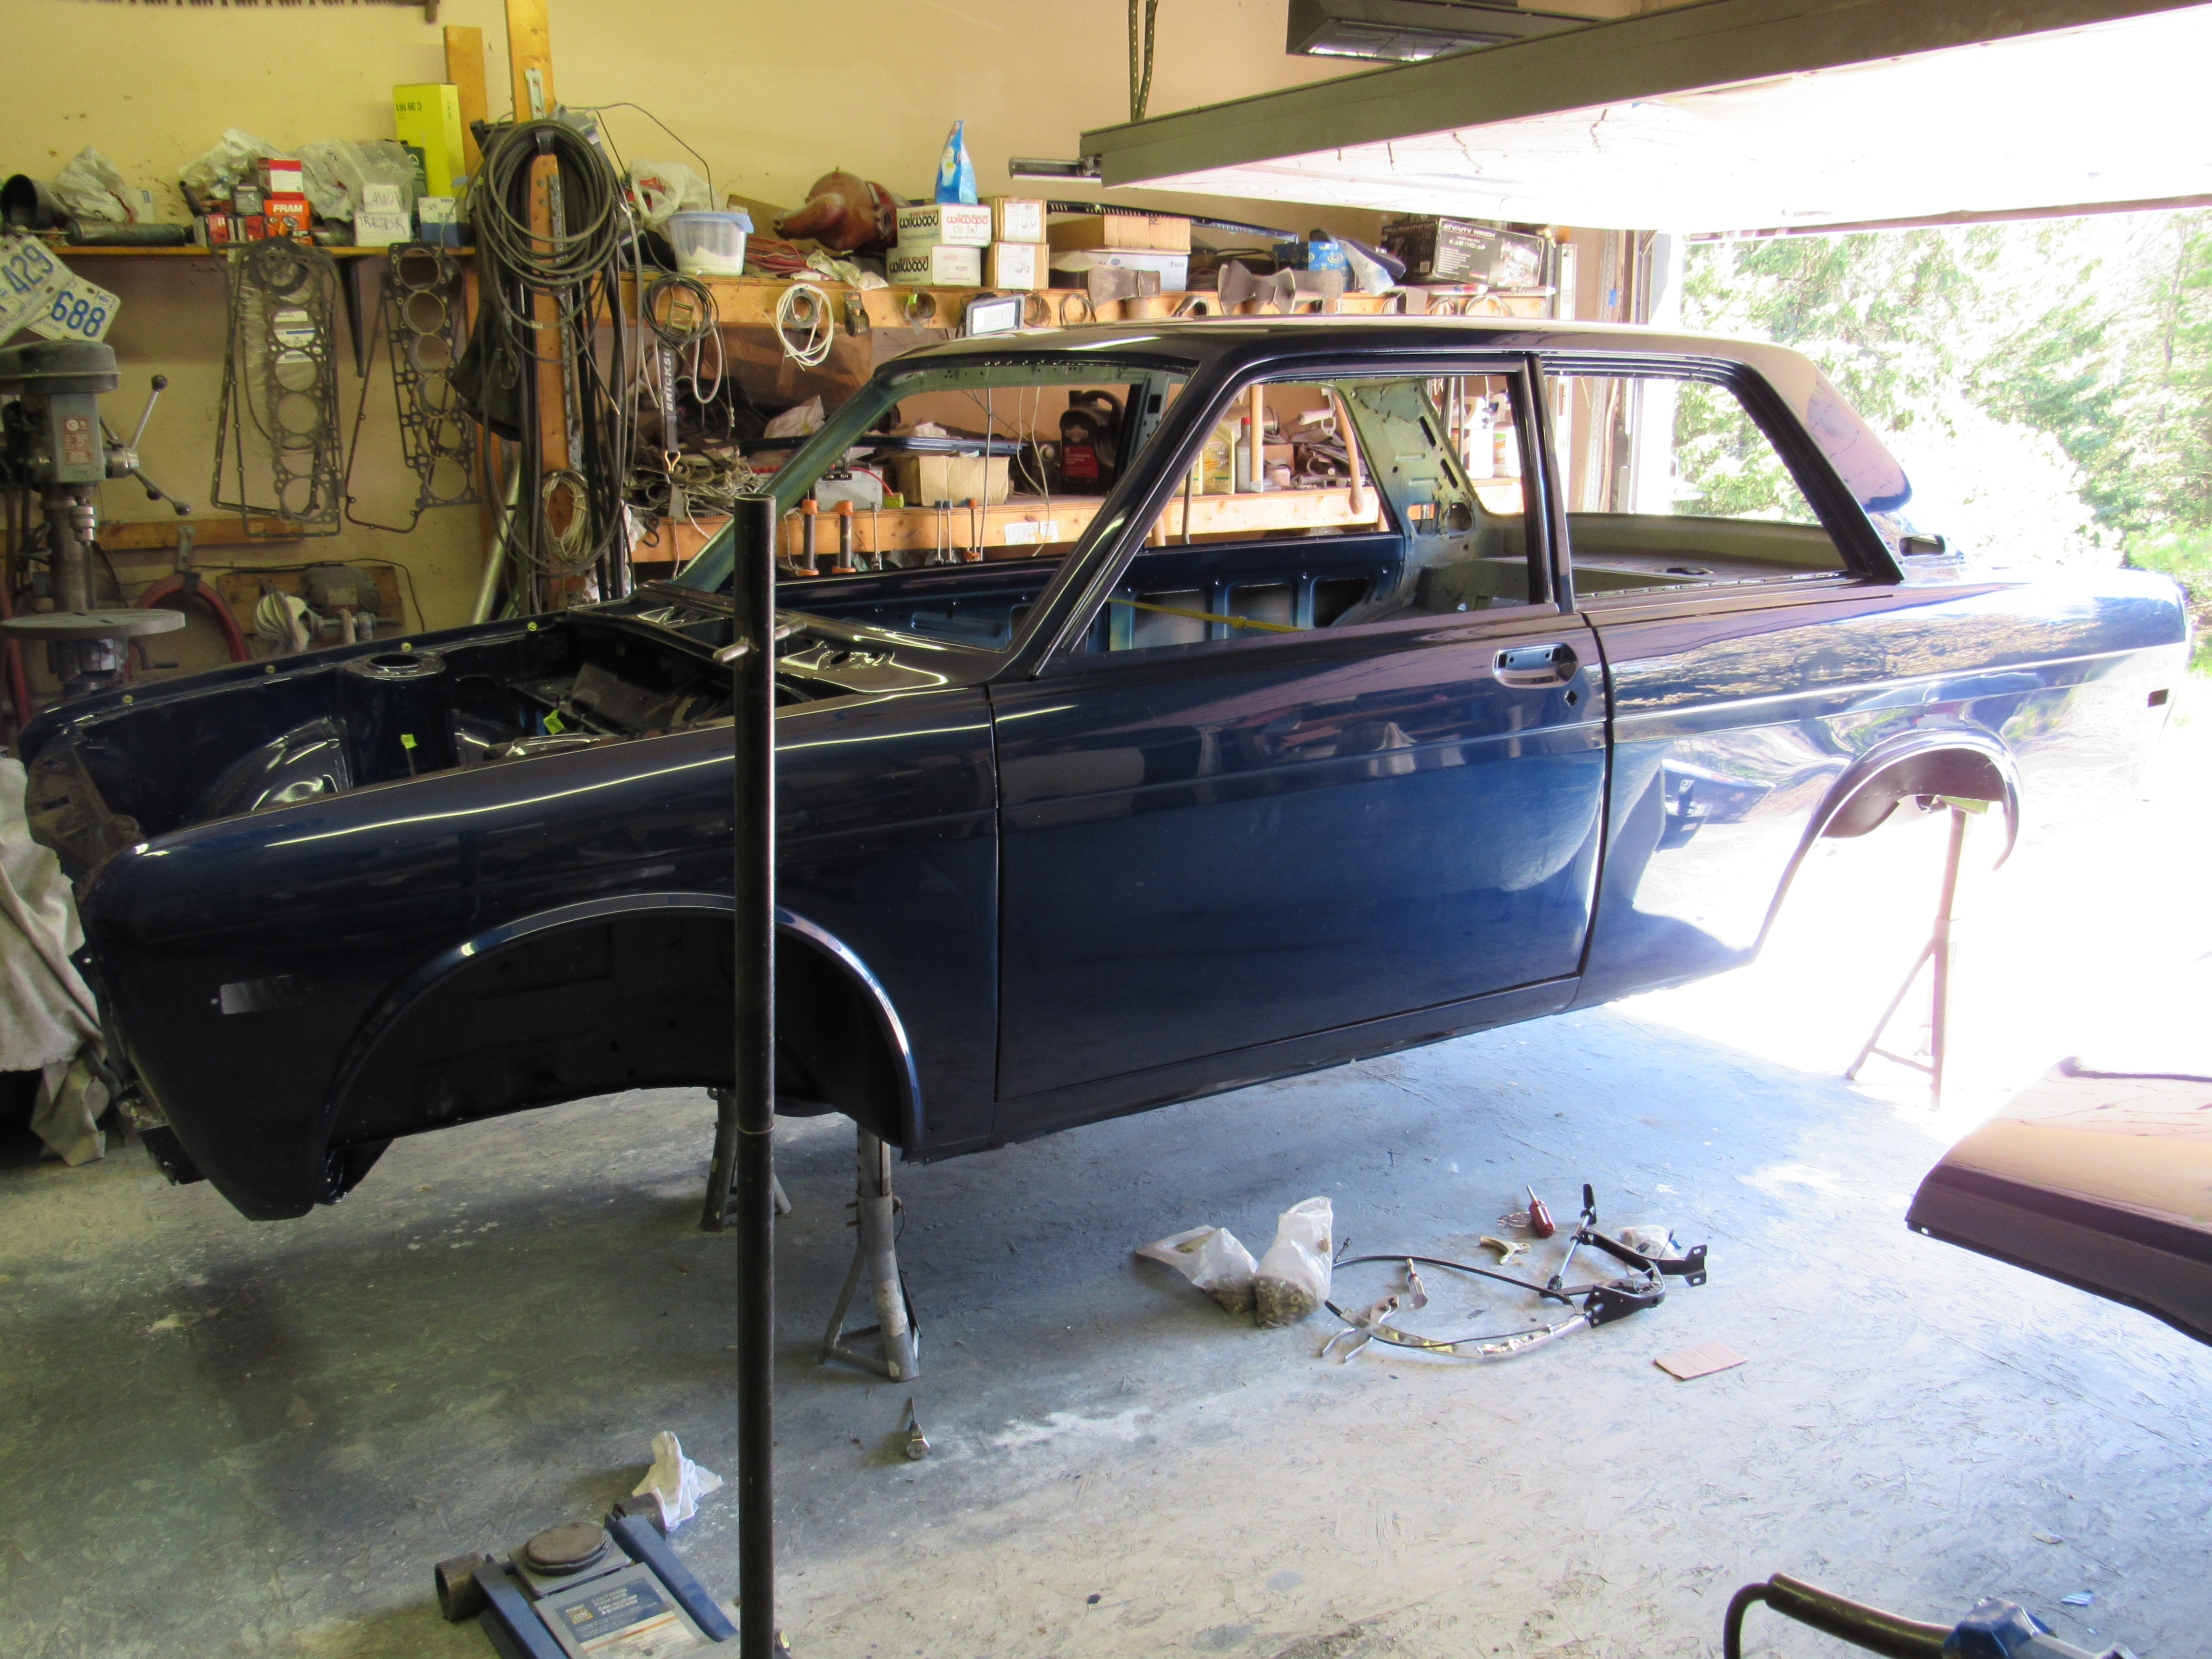
1 pointThe rotisserie is back in storage and have started installing the driveline and suspension, I weighed both ends of the car before taking it off the mount 476lbs for the stripped shell, that's just slightly less than a 240z.
1 point
1 point
1 pointThe rotisserie is back in storage and have started installing the driveline and suspension, I weighed both ends of the car before taking it off the mount 476lbs for the stripped shell, that's just slightly less than a 240z.

 1 point
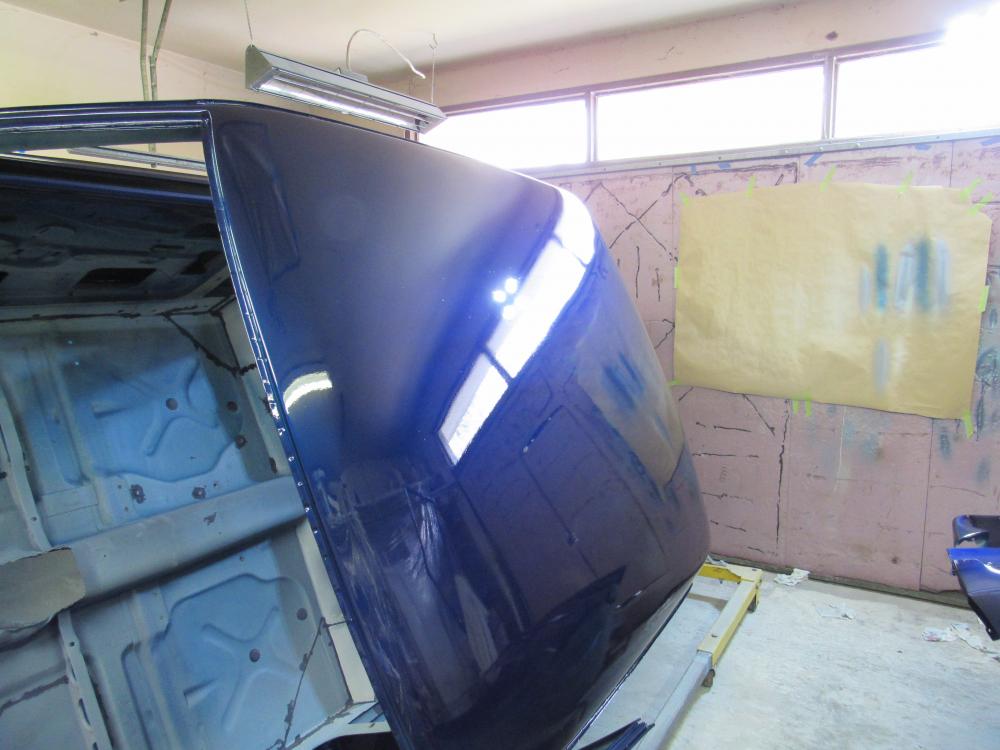
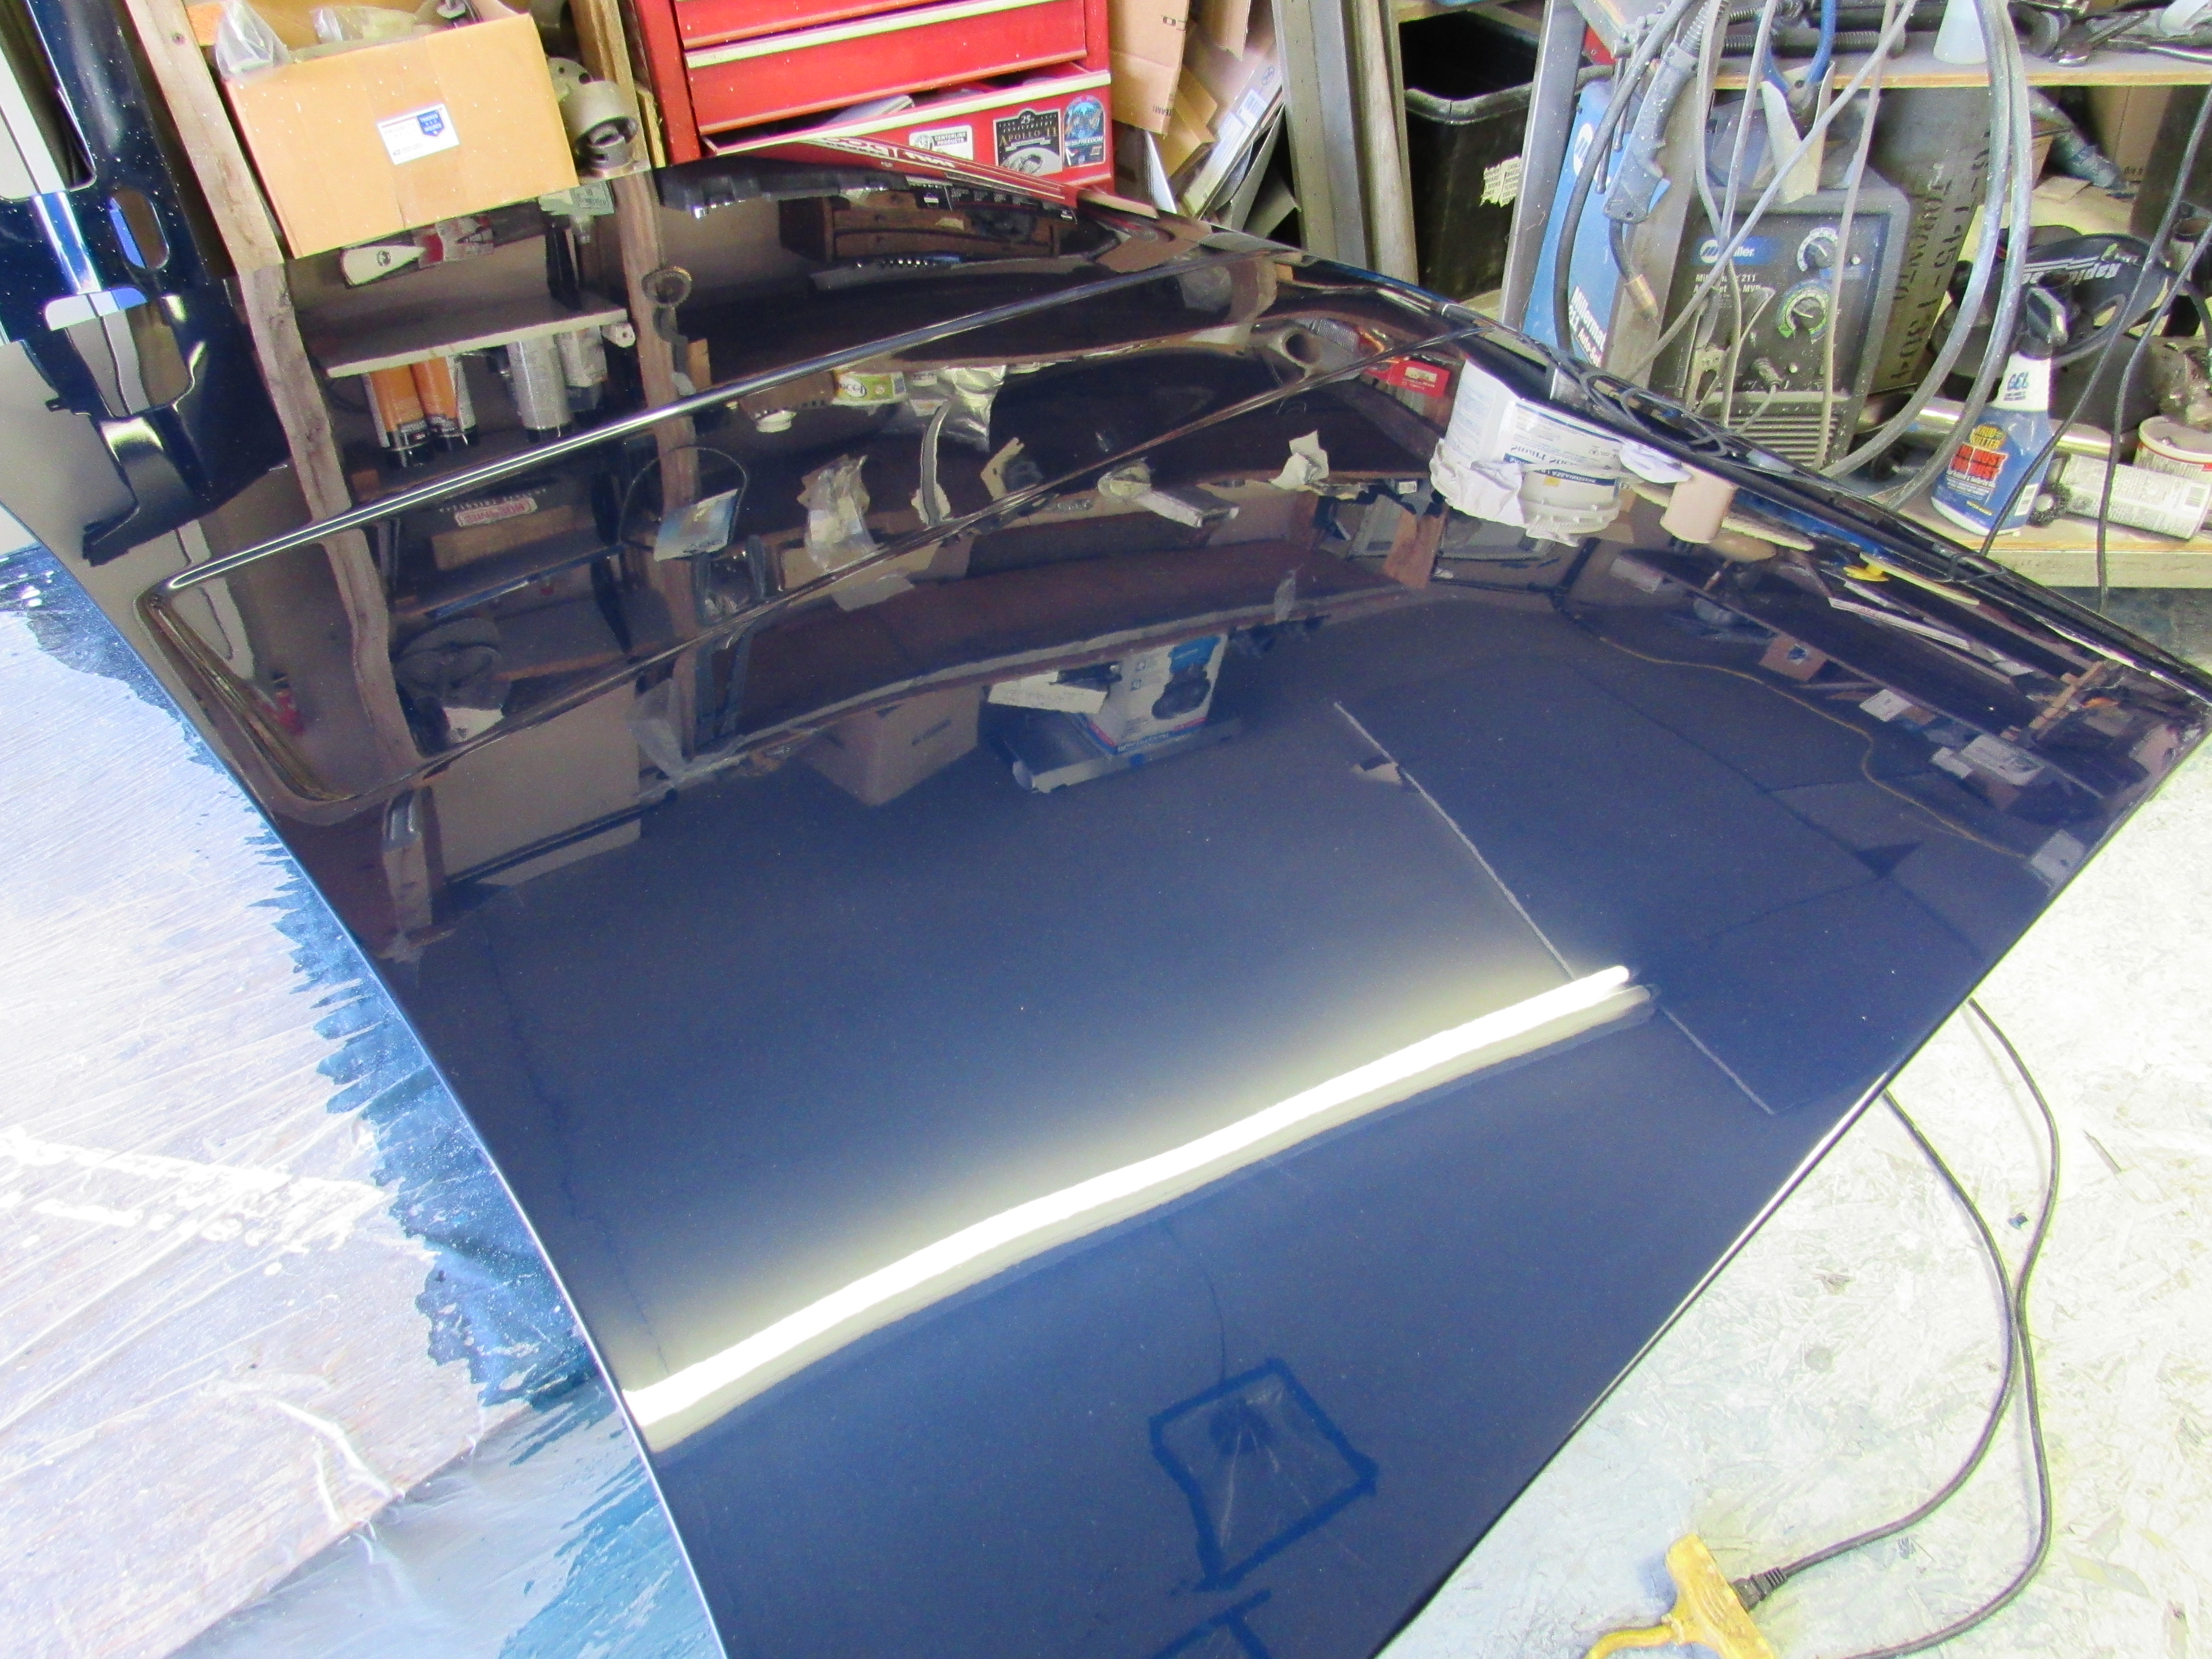
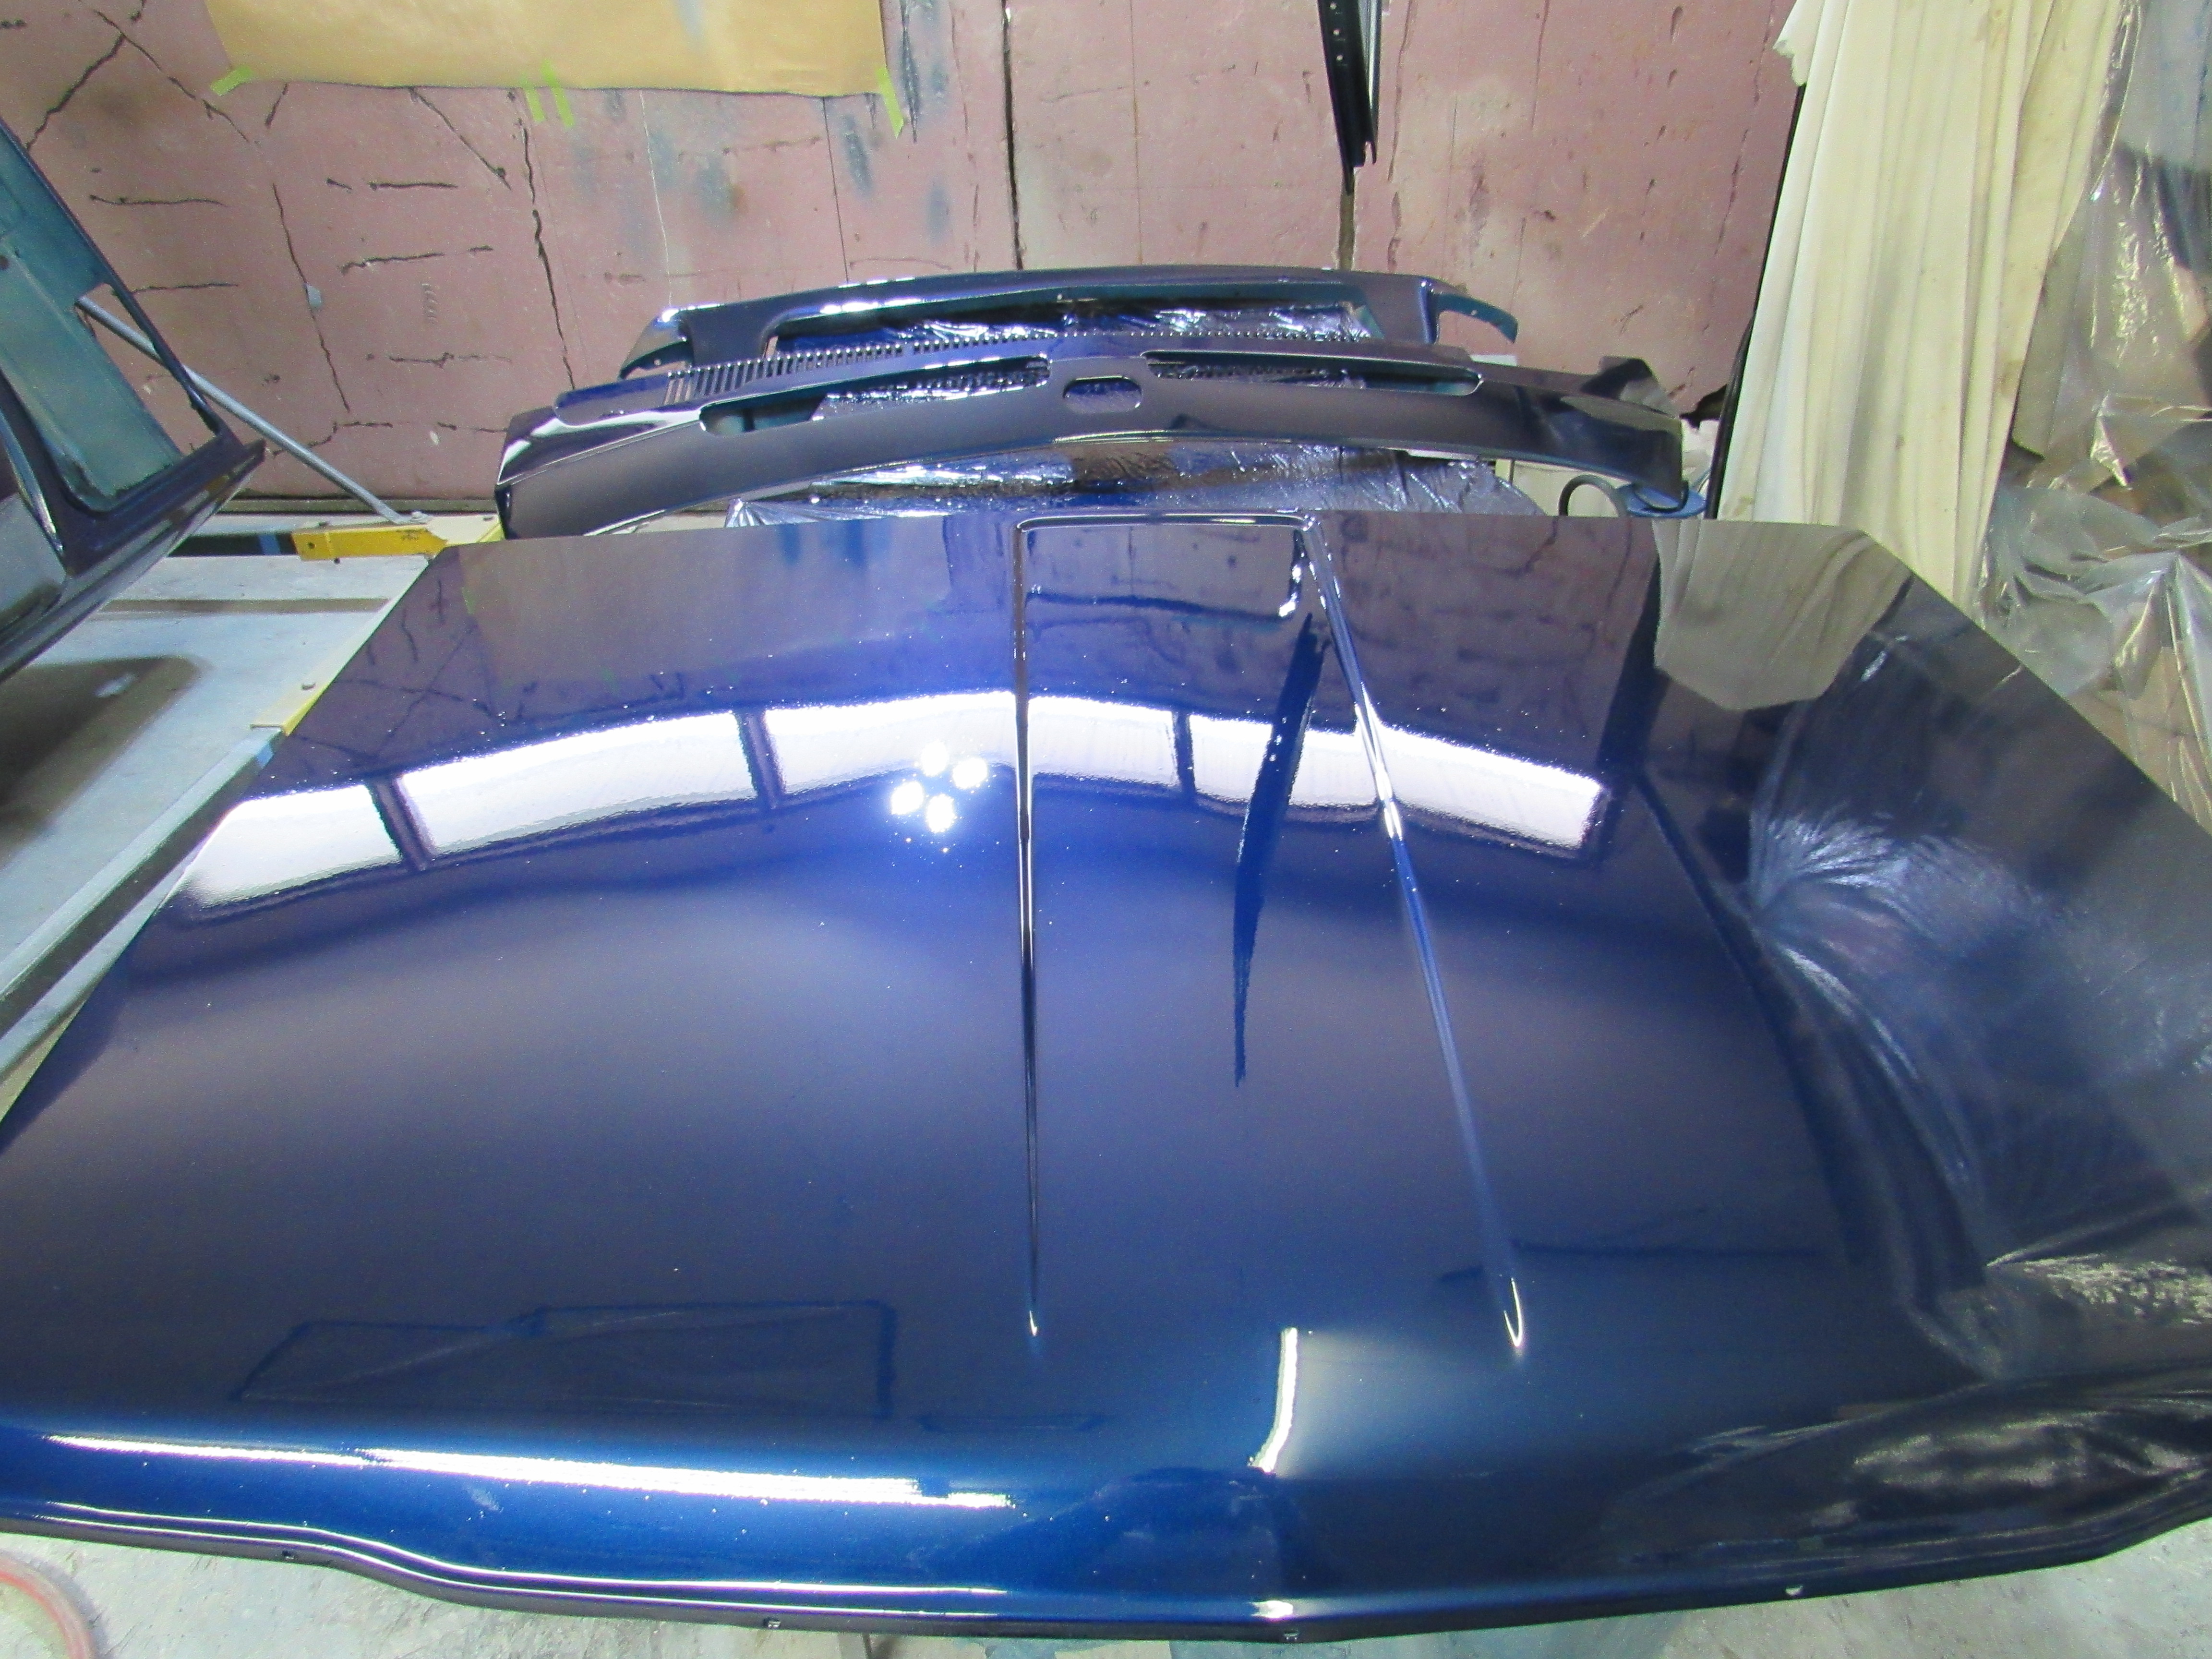
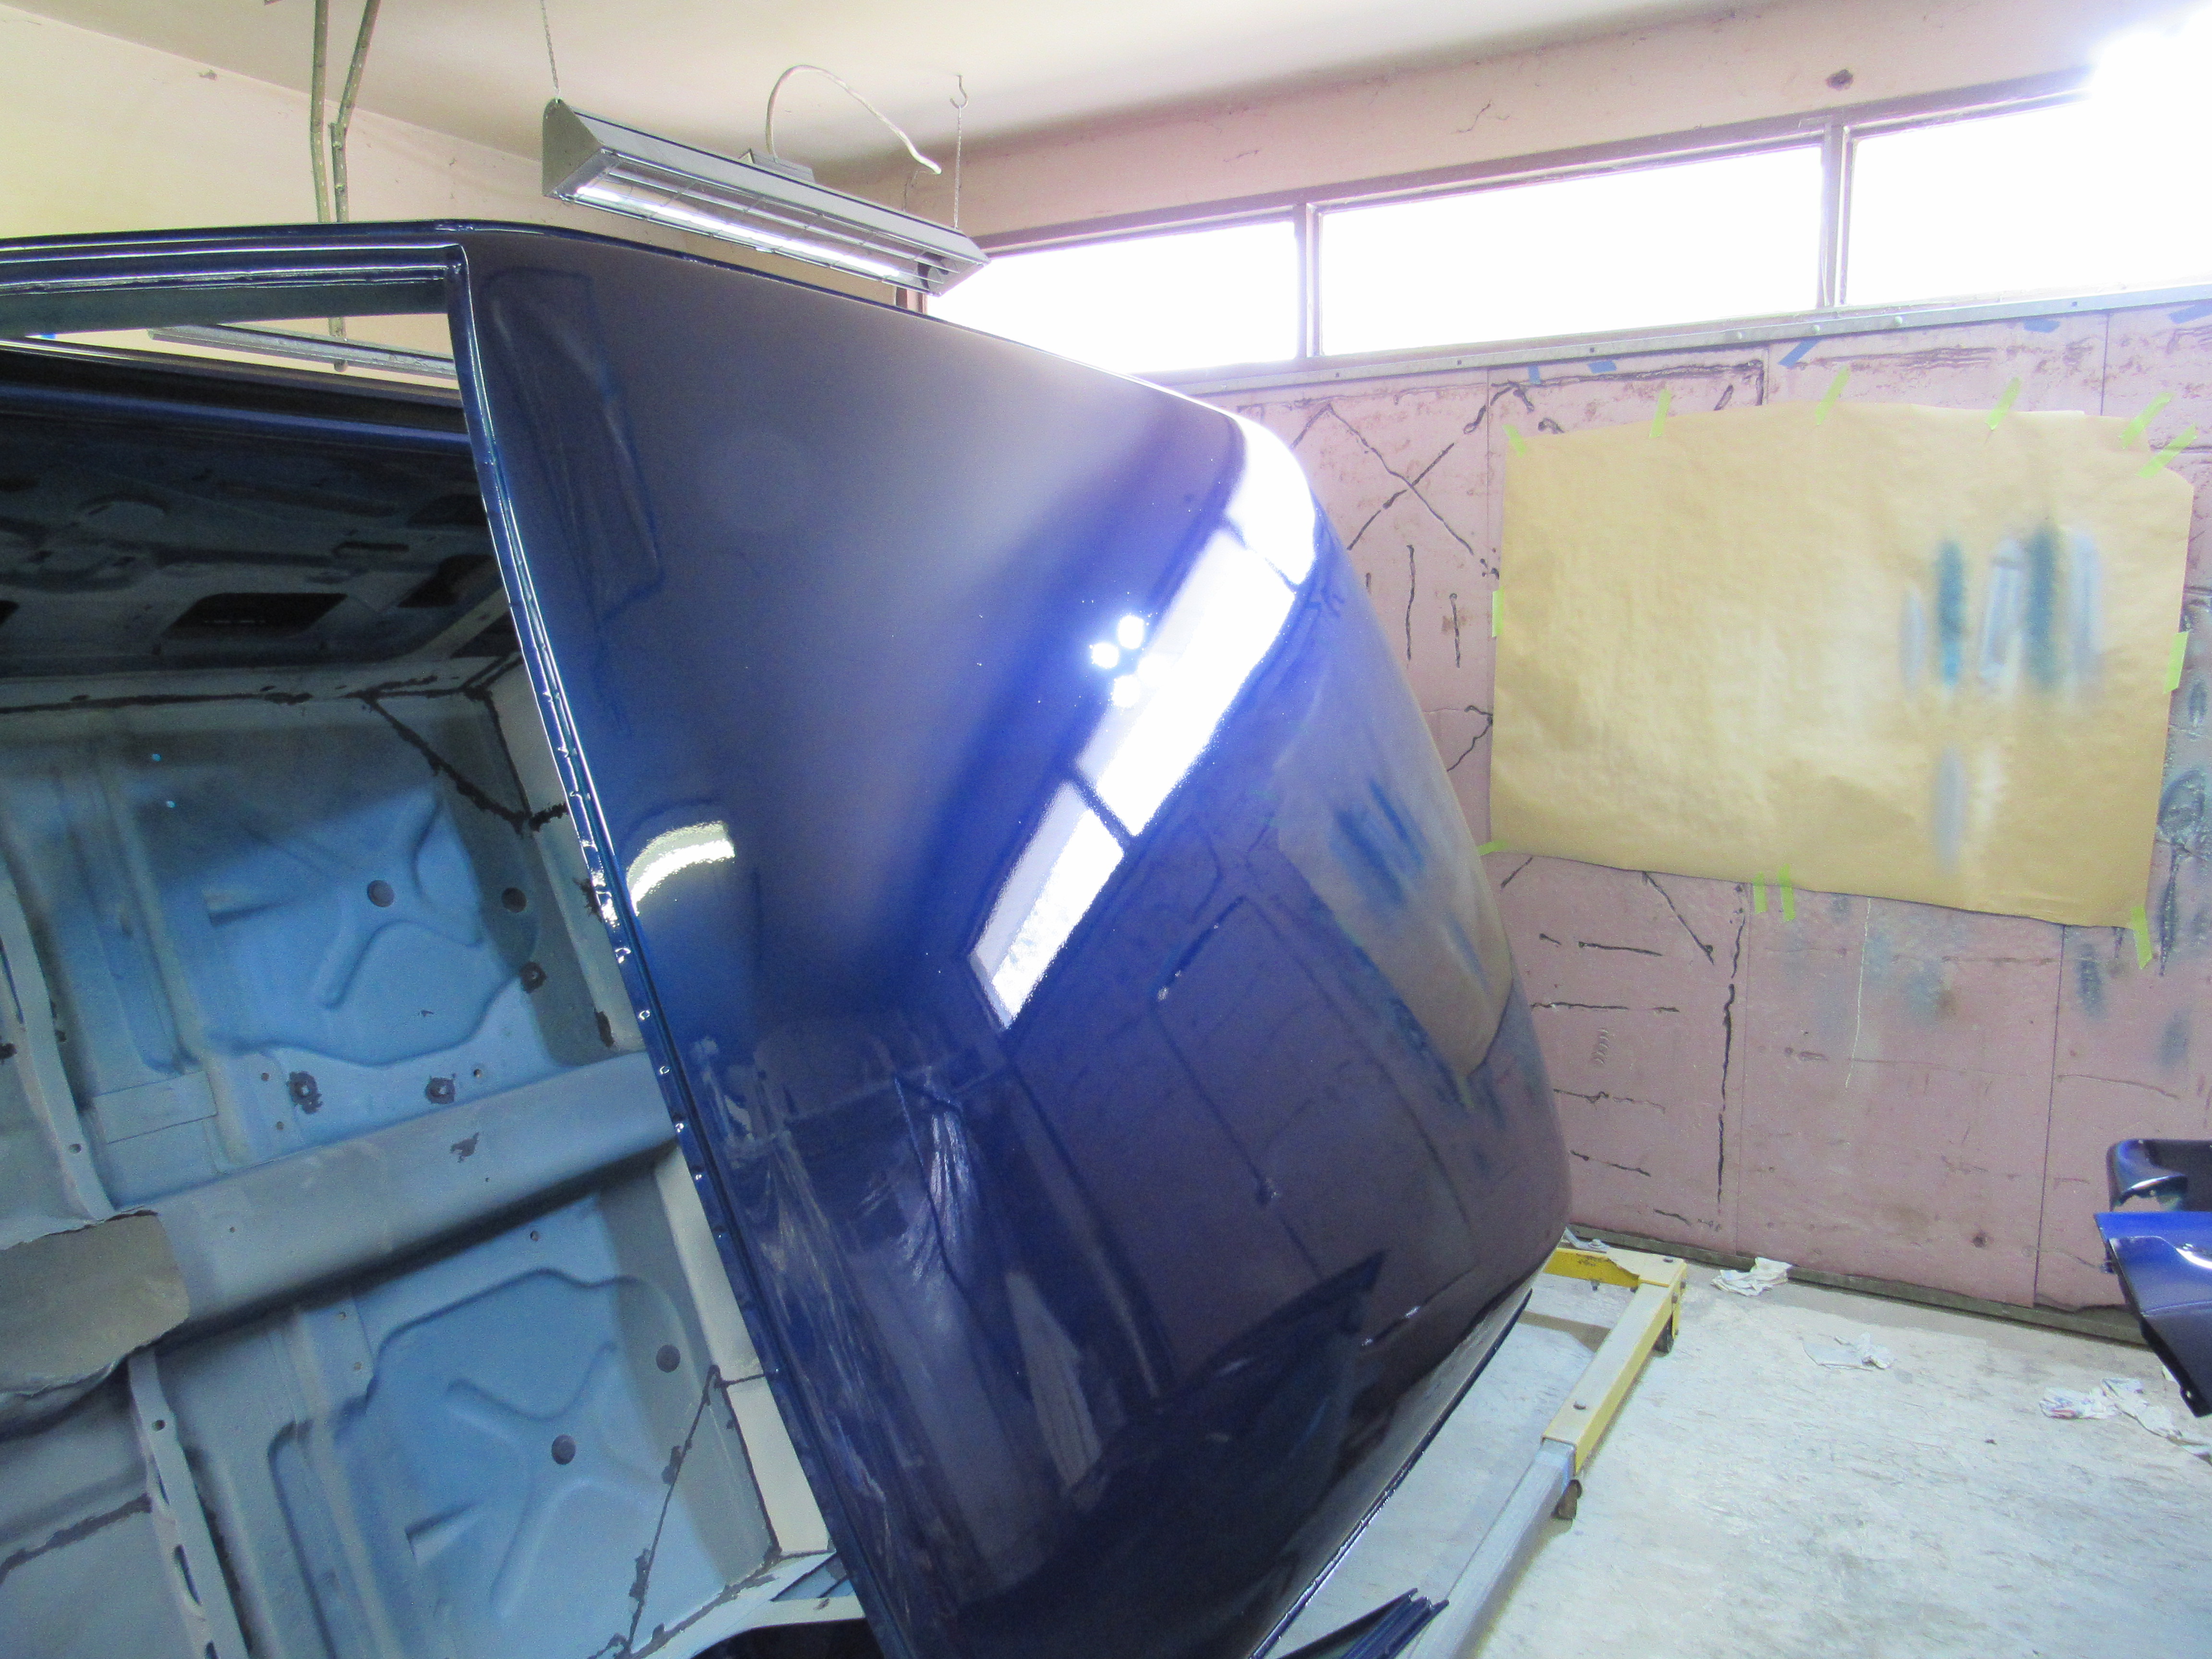
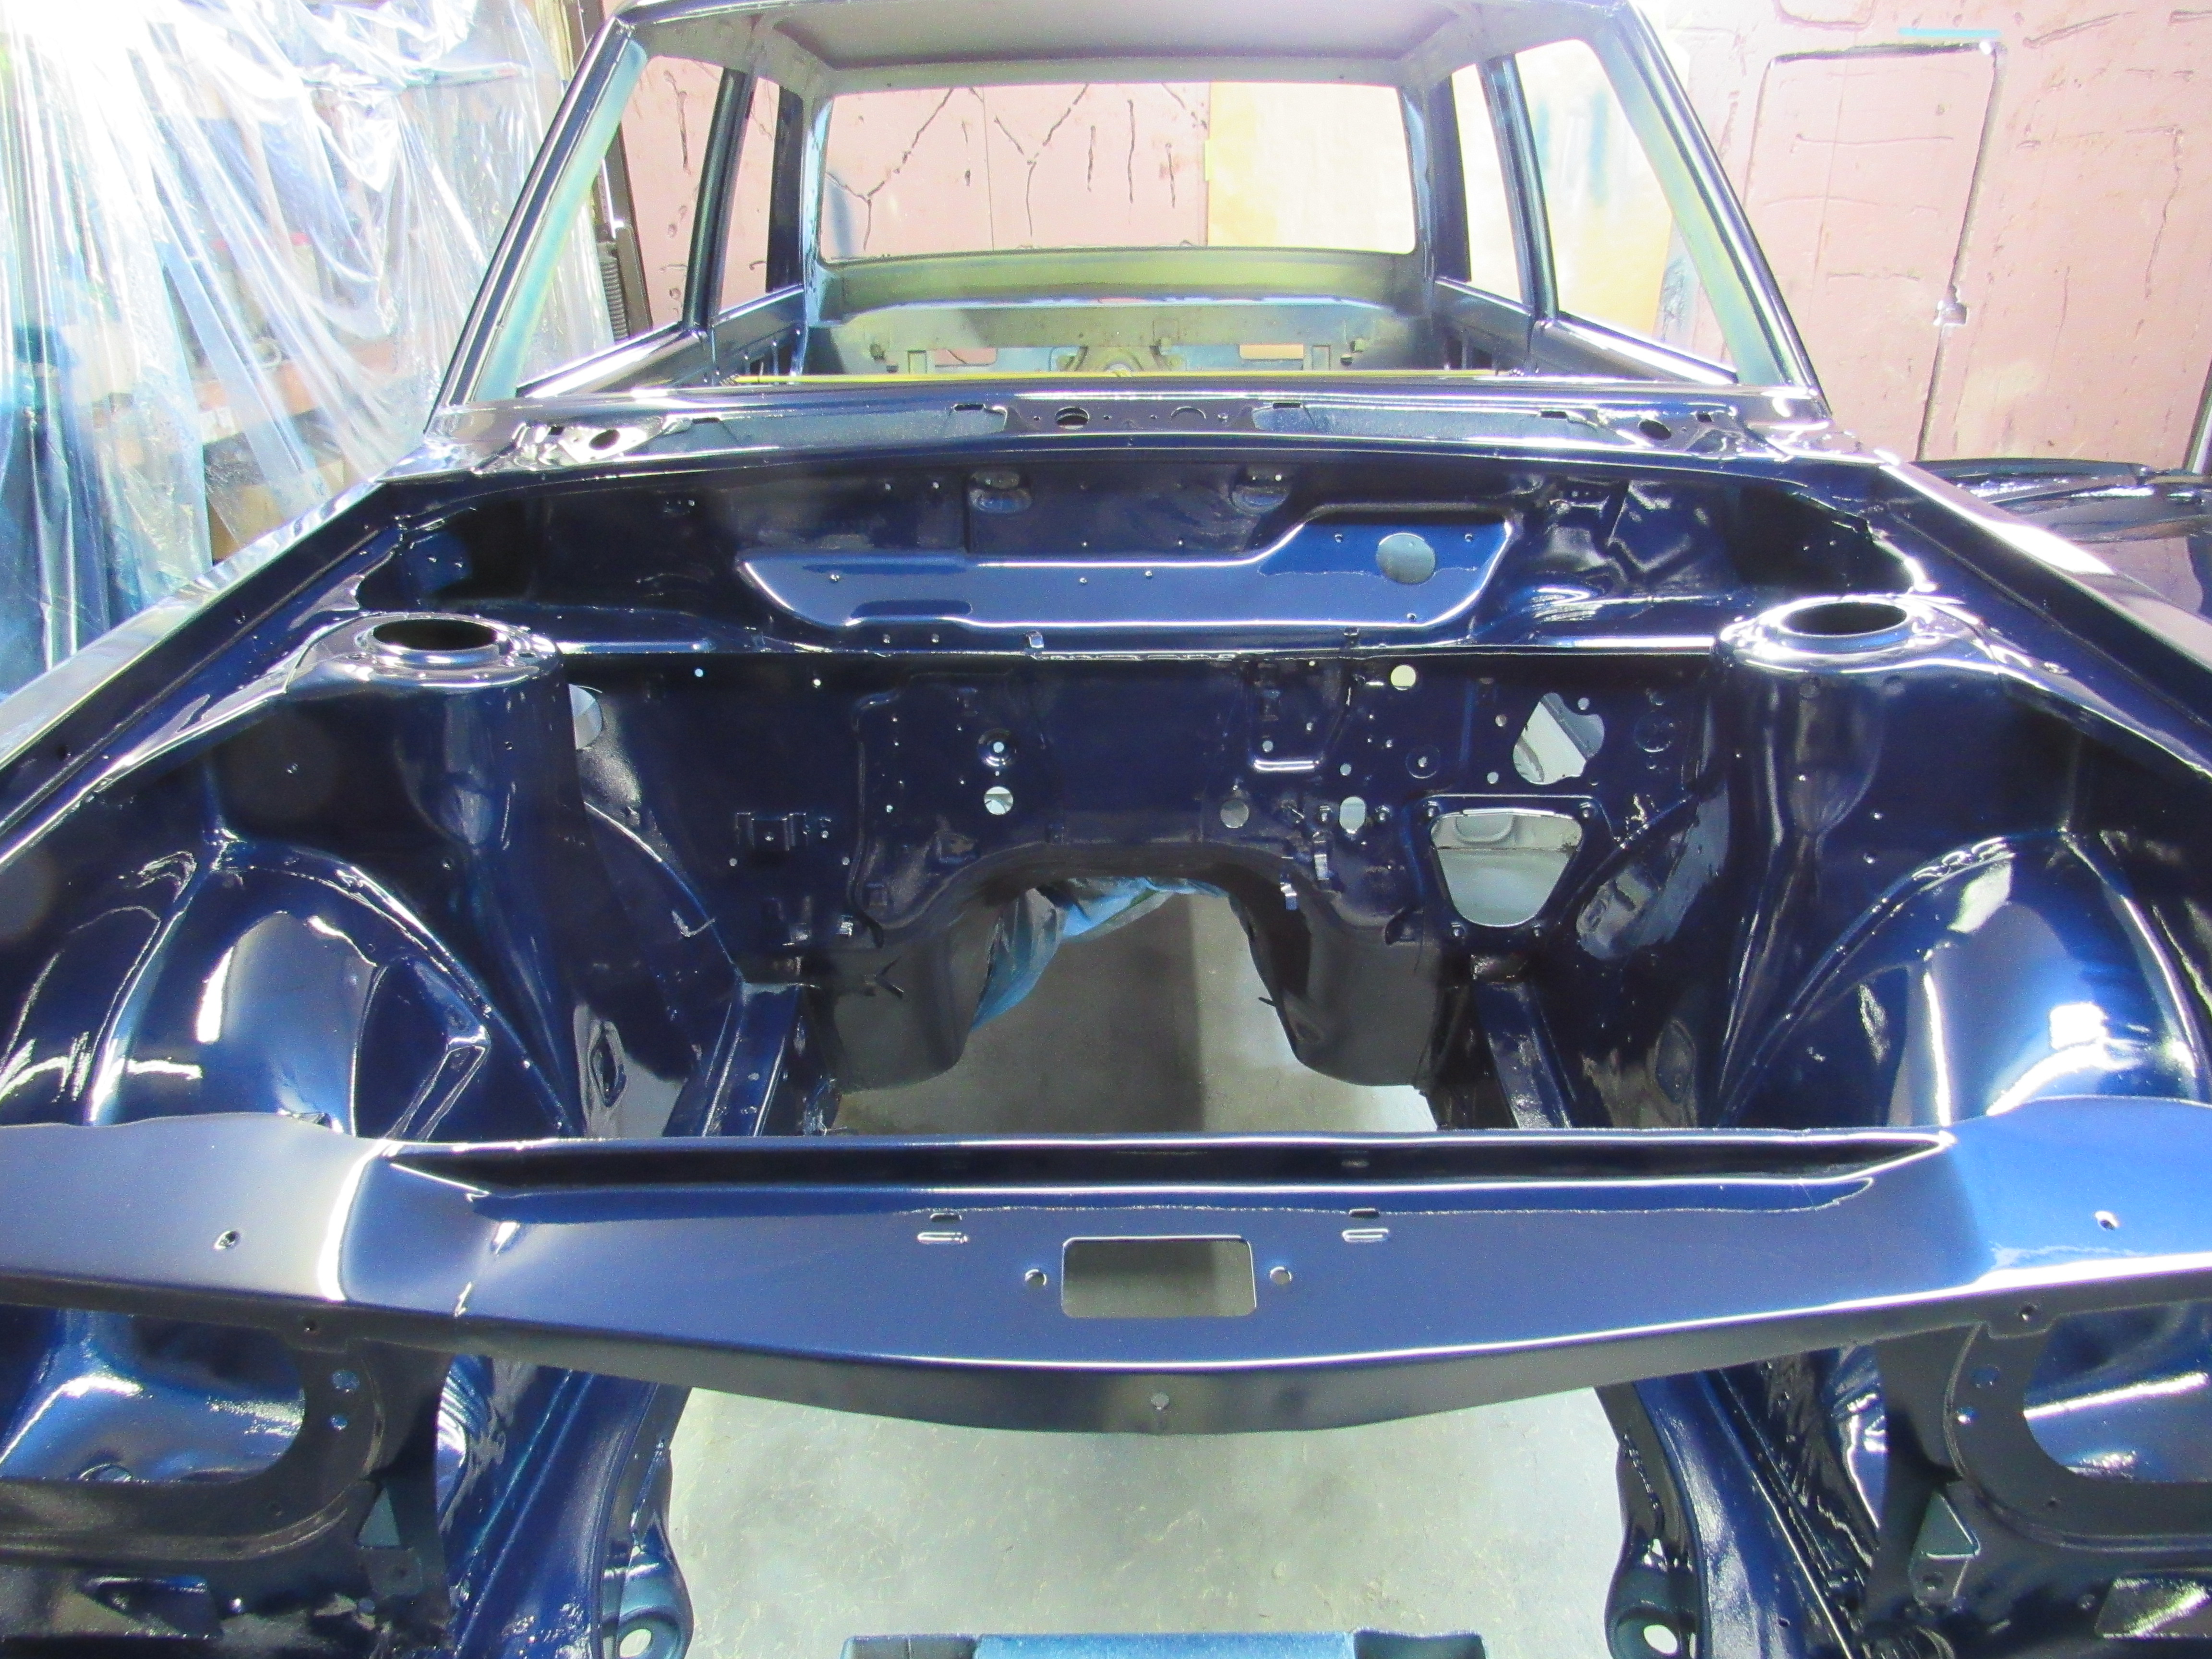
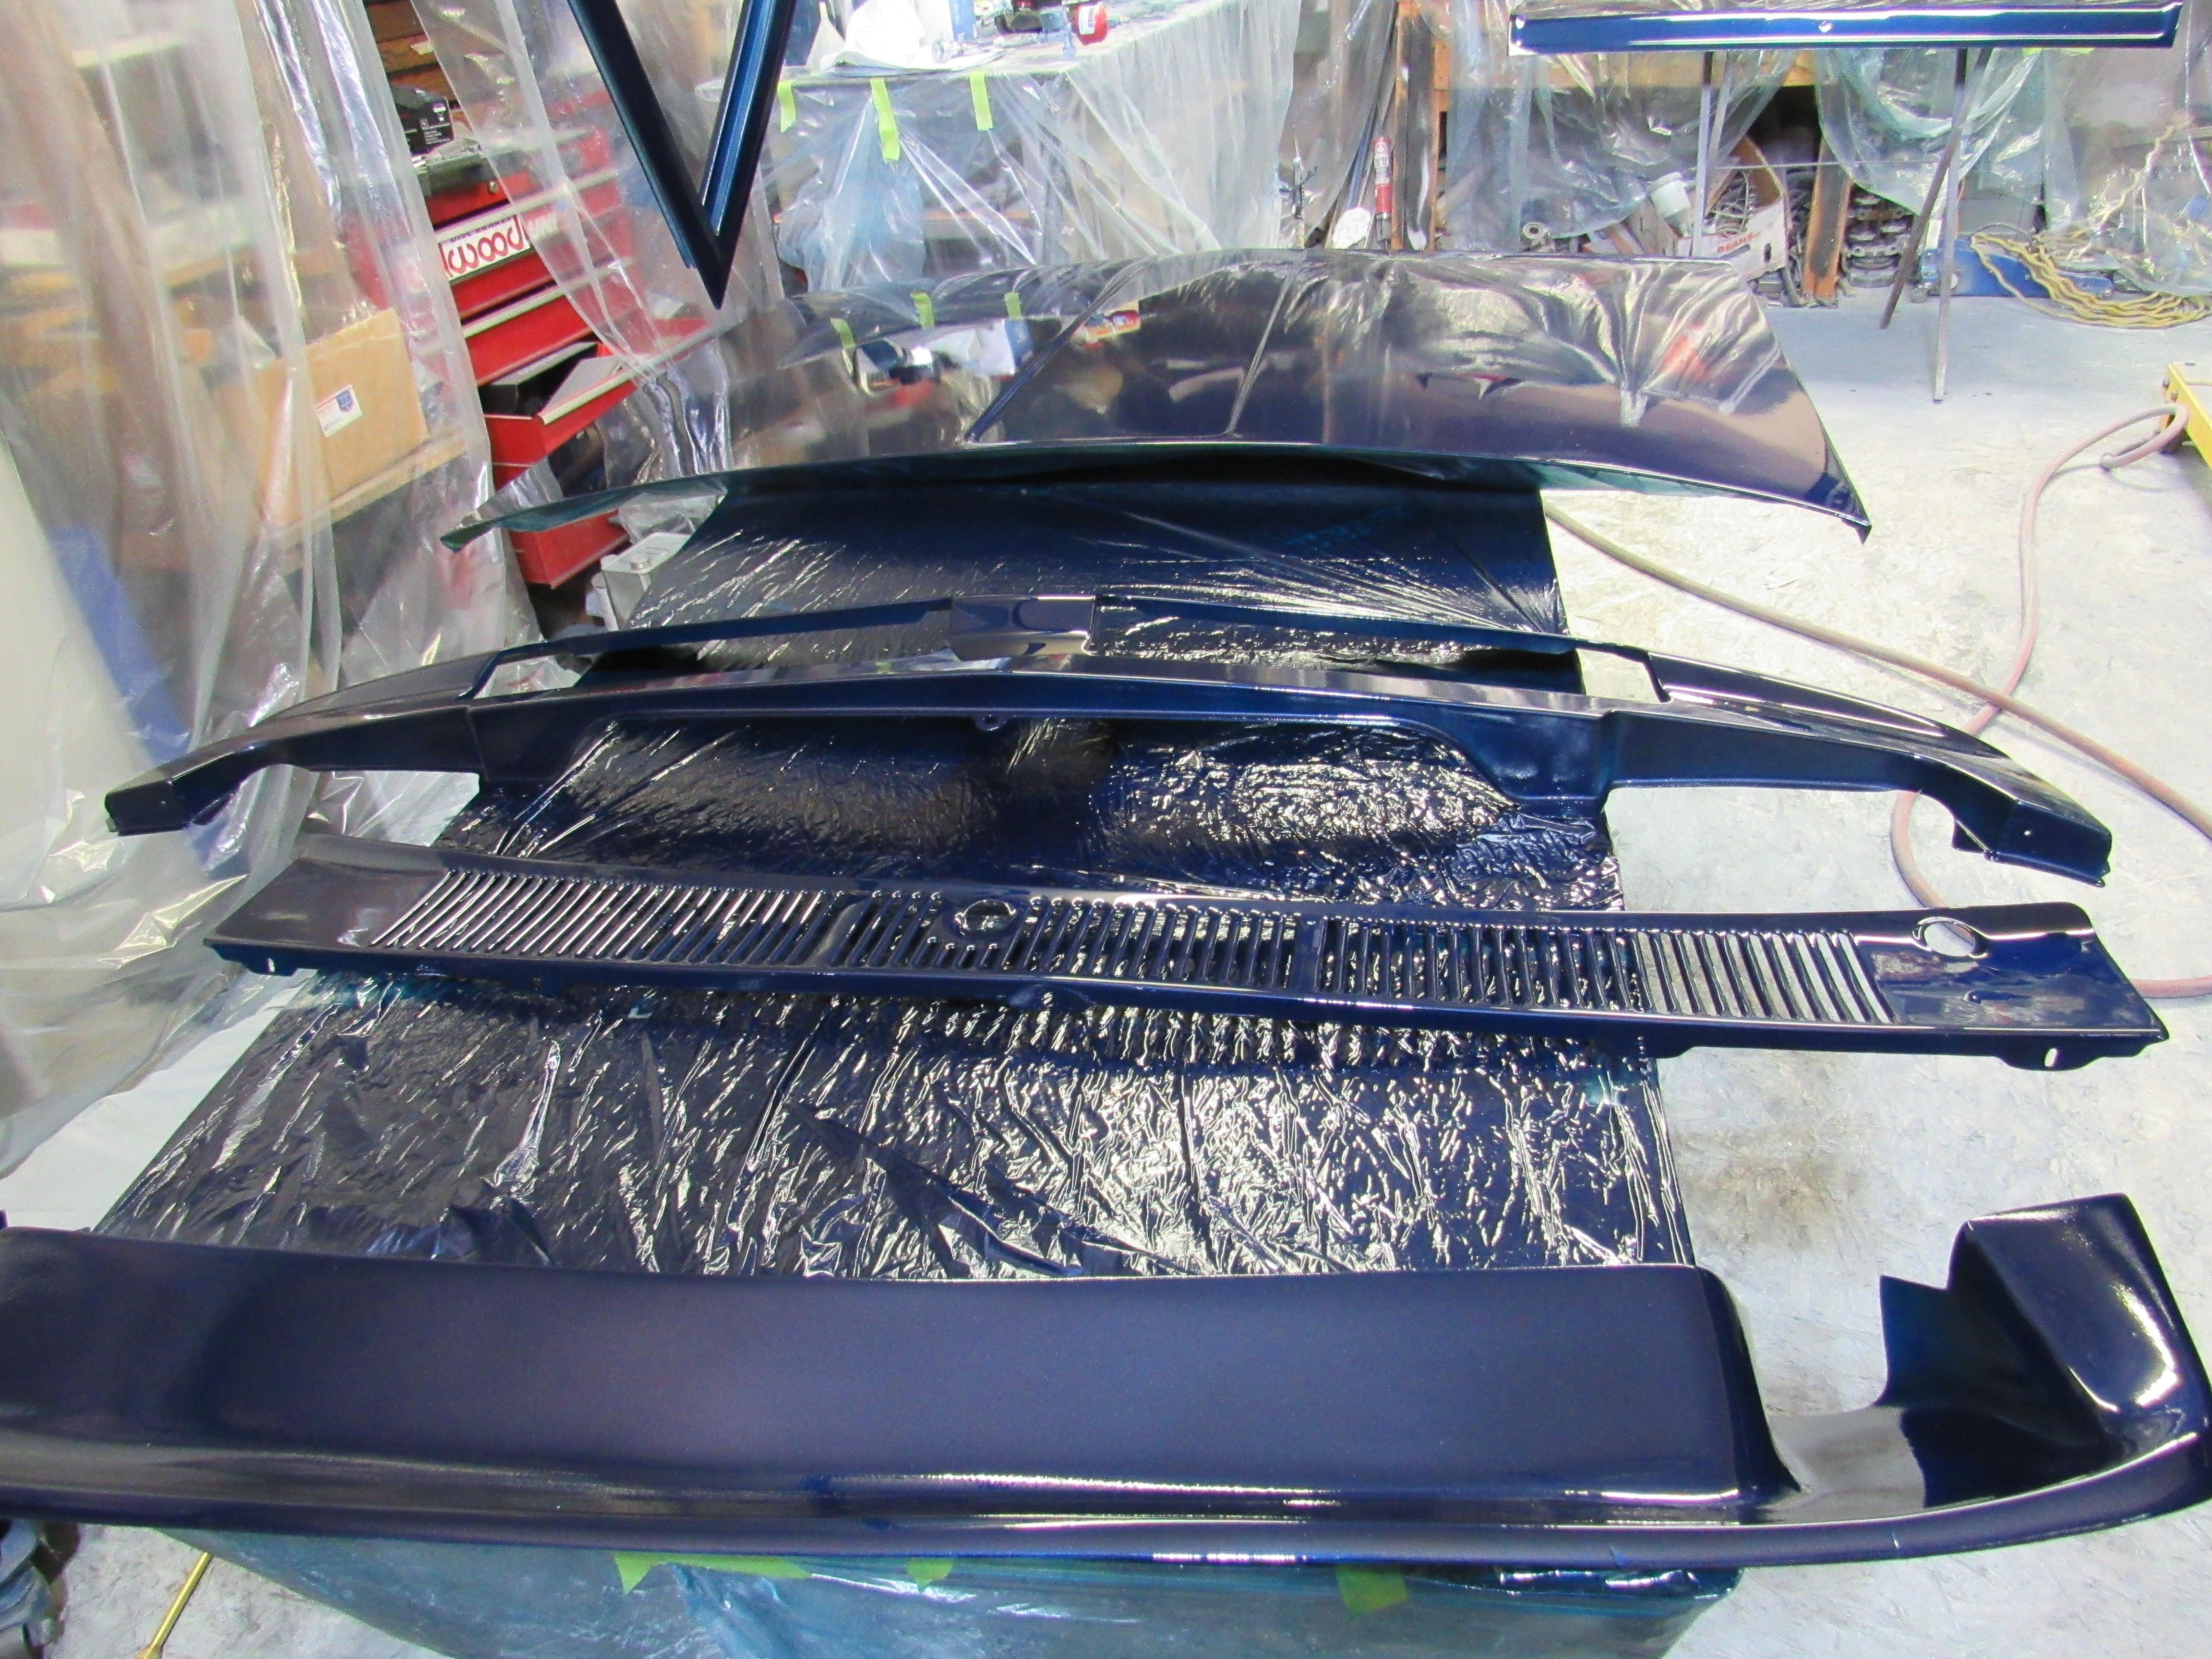
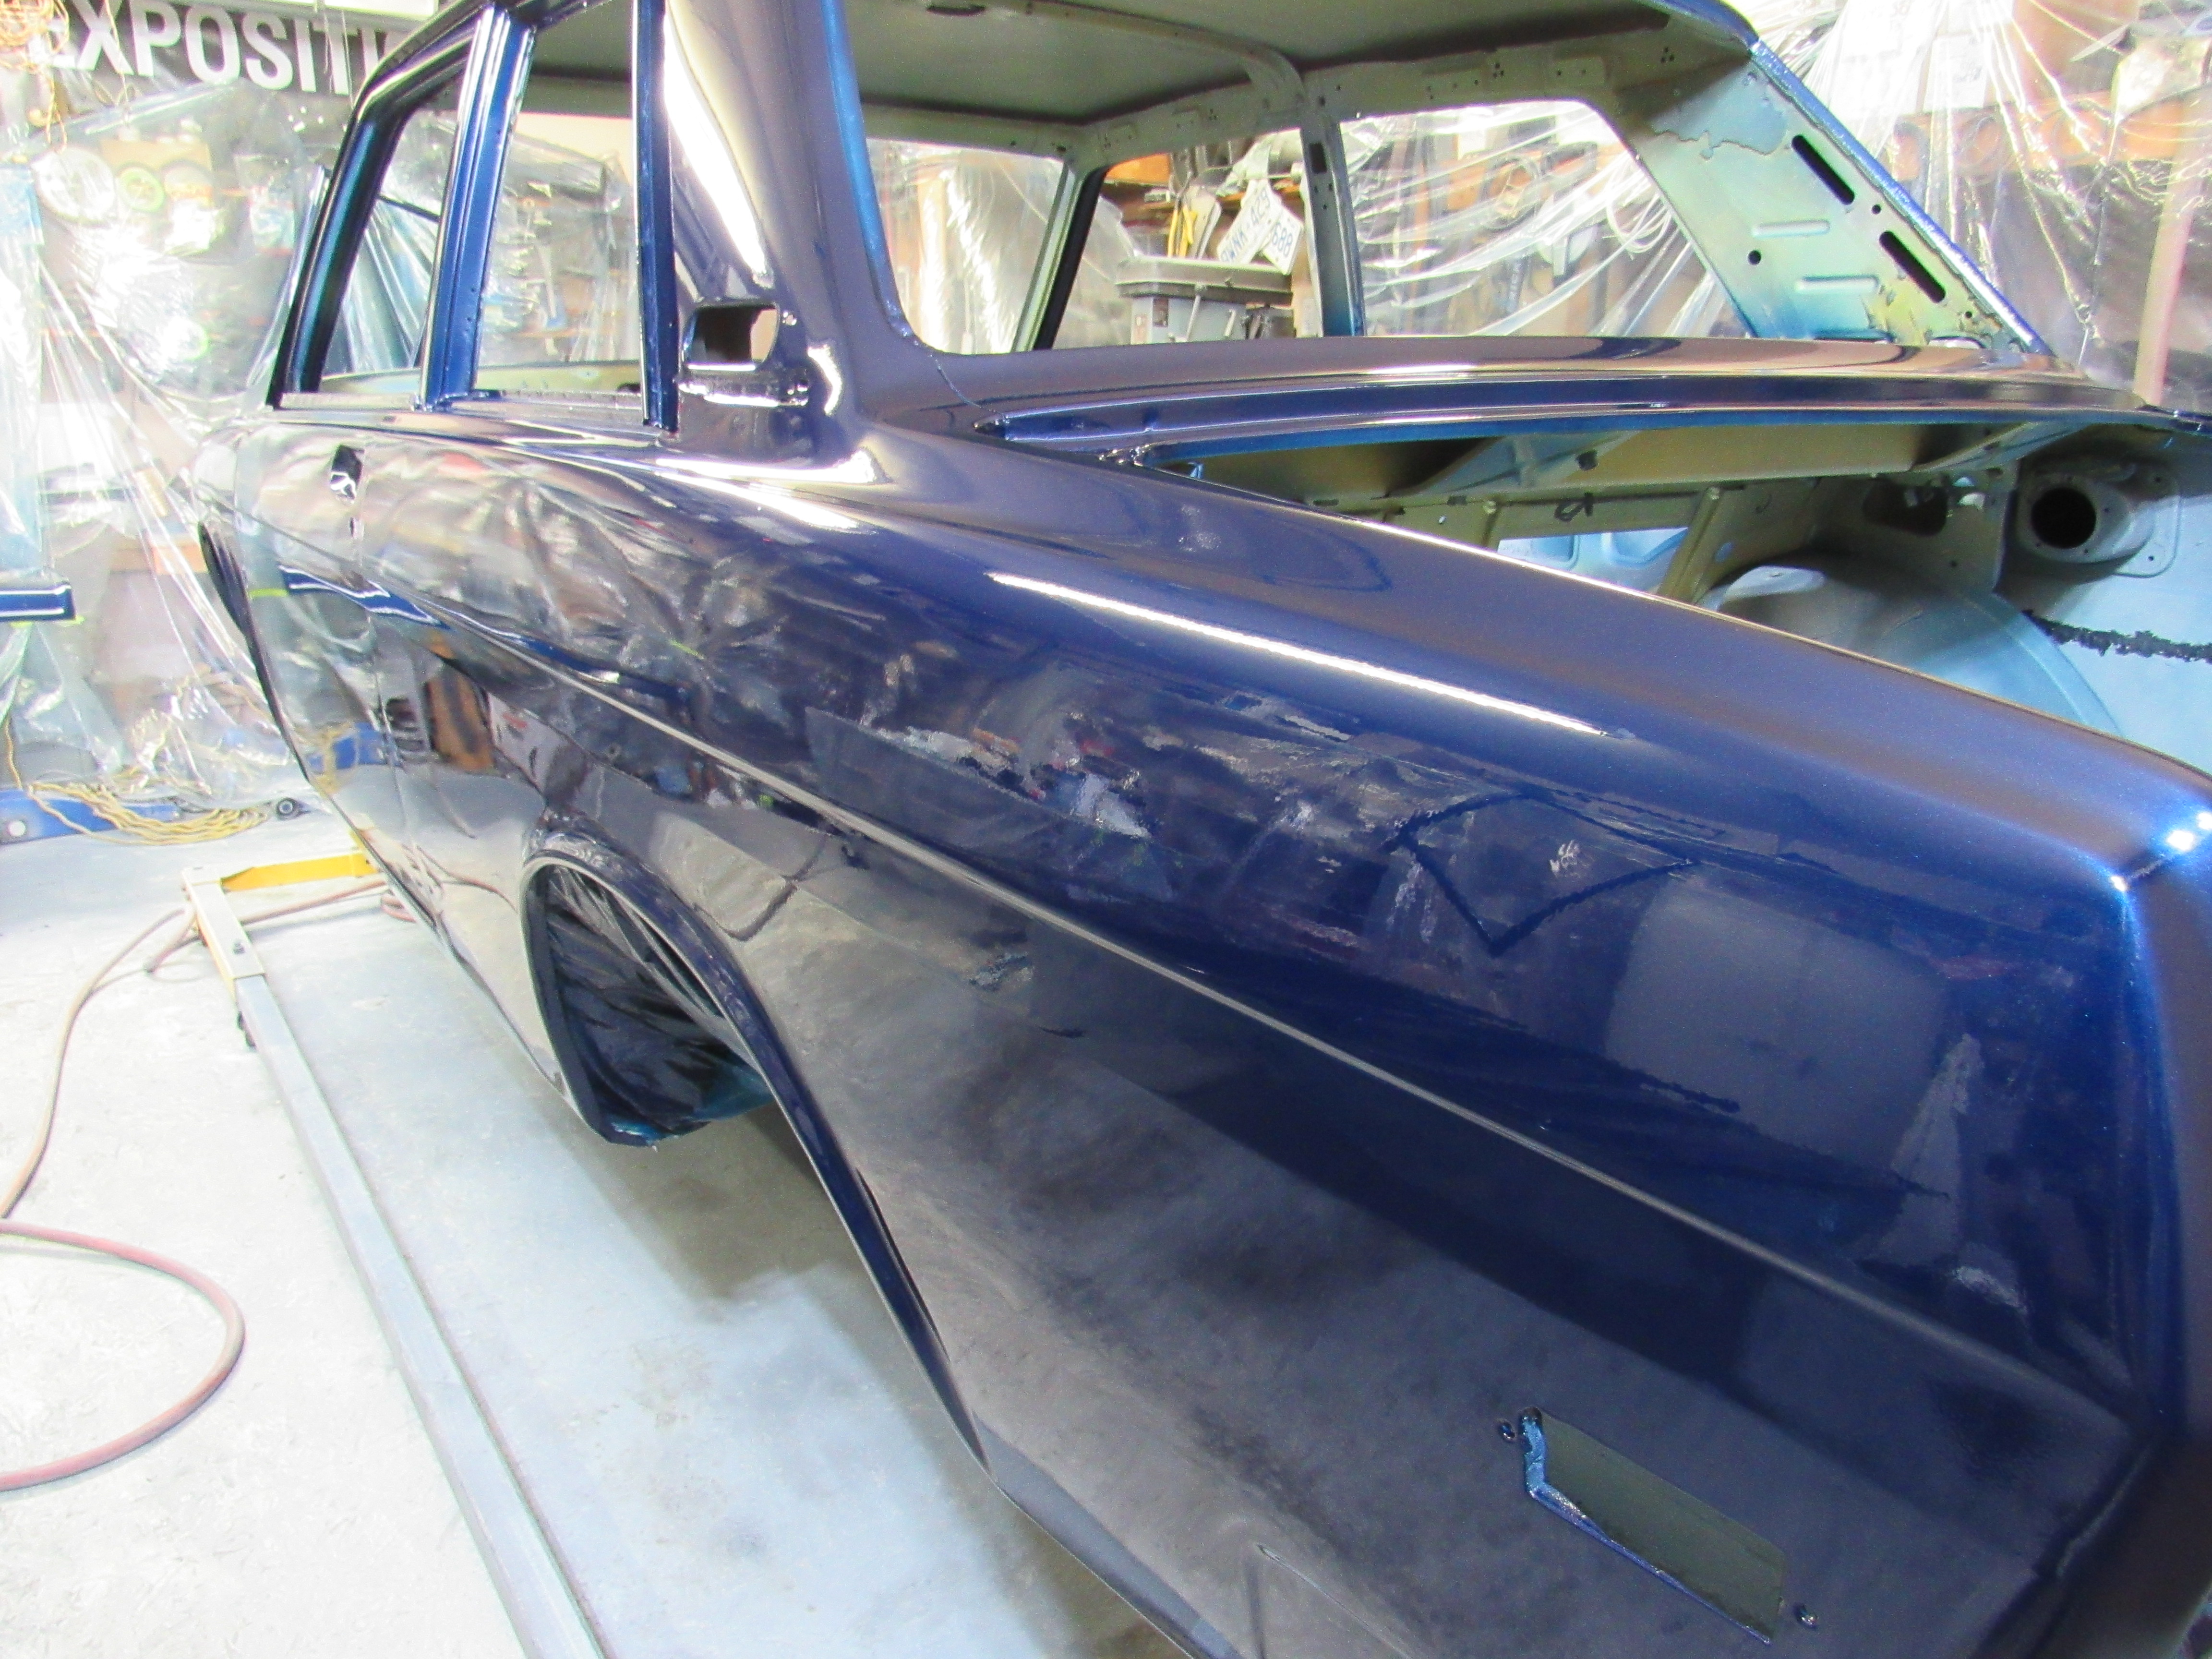
1 pointThe big milestone today, paint and clearcoat done! So nice to say that, God I find painting so stressful, just so easy to screw up and wreck all your work. 3 coats of colour and 3 coats of clear, lots of little dust particles but they should all come out when I start sanding the clear with 1200 grit. It's the same colour is was when I bought the car only now the rust, dents and orange peel are gone😉
1 point
1 point
1 pointThe big milestone today, paint and clearcoat done! So nice to say that, God I find painting so stressful, just so easy to screw up and wreck all your work. 3 coats of colour and 3 coats of clear, lots of little dust particles but they should all come out when I start sanding the clear with 1200 grit. It's the same colour is was when I bought the car only now the rust, dents and orange peel are gone😉


 1 point
 1 pointOn the subject of pilot bushing (bearing) removal, here's the strangest and possibly the most effective method I've ever tried. I couldn't remove the pilot bearing from our RX 7. Small puller, regrinding the tips, nothing worked. An old mechanic friend asked me if I tried bread. I immediately asked, "What the hell are you talking about? He said stuff bread into the bearing center and get a bolt slightly smaller than the bearing center. Smack the bolt and add more bread. After repeating those two steps three times the bearing slid right out, to my amazement.1 point


Important Information
By using this site, you agree to our Privacy Policy and Guidelines. We have placed cookies on your device to help make this website better. You can adjust your cookie settings, otherwise we'll assume you're okay to continue.