Leaderboard
-
Captain Obvious
Free Member4Points10,080Posts -

Zup
Free Member4Points1,163Posts -
KenFirch
 Subscriber
 3Points271Posts
 -
psdenno
Free Member2Points2,632Posts


Popular Content
Showing content with the highest reputation on 07/11/2021 in all areas
-
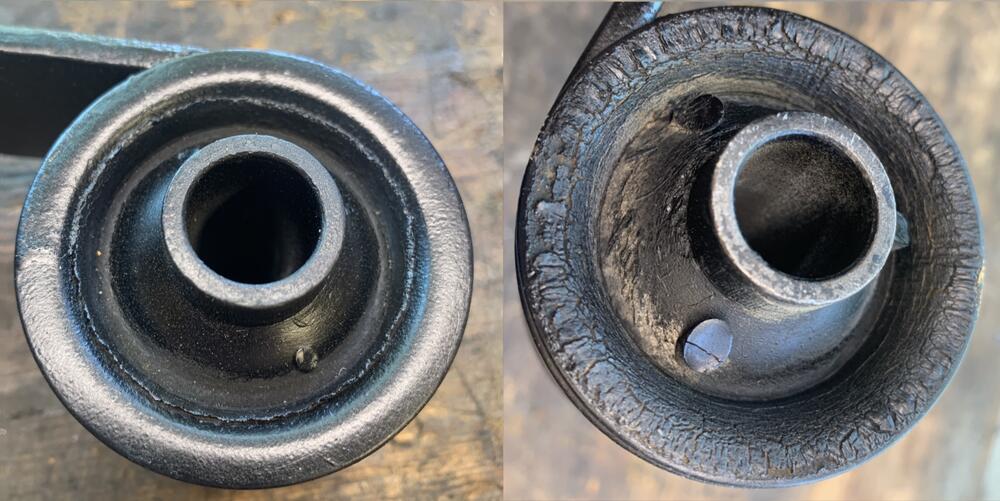
4 pointsThe openings outside the diode packs at the rear of the alternator look similar to a grapefruit cut in half exposing the sections of the fruit.
 4 points
 -
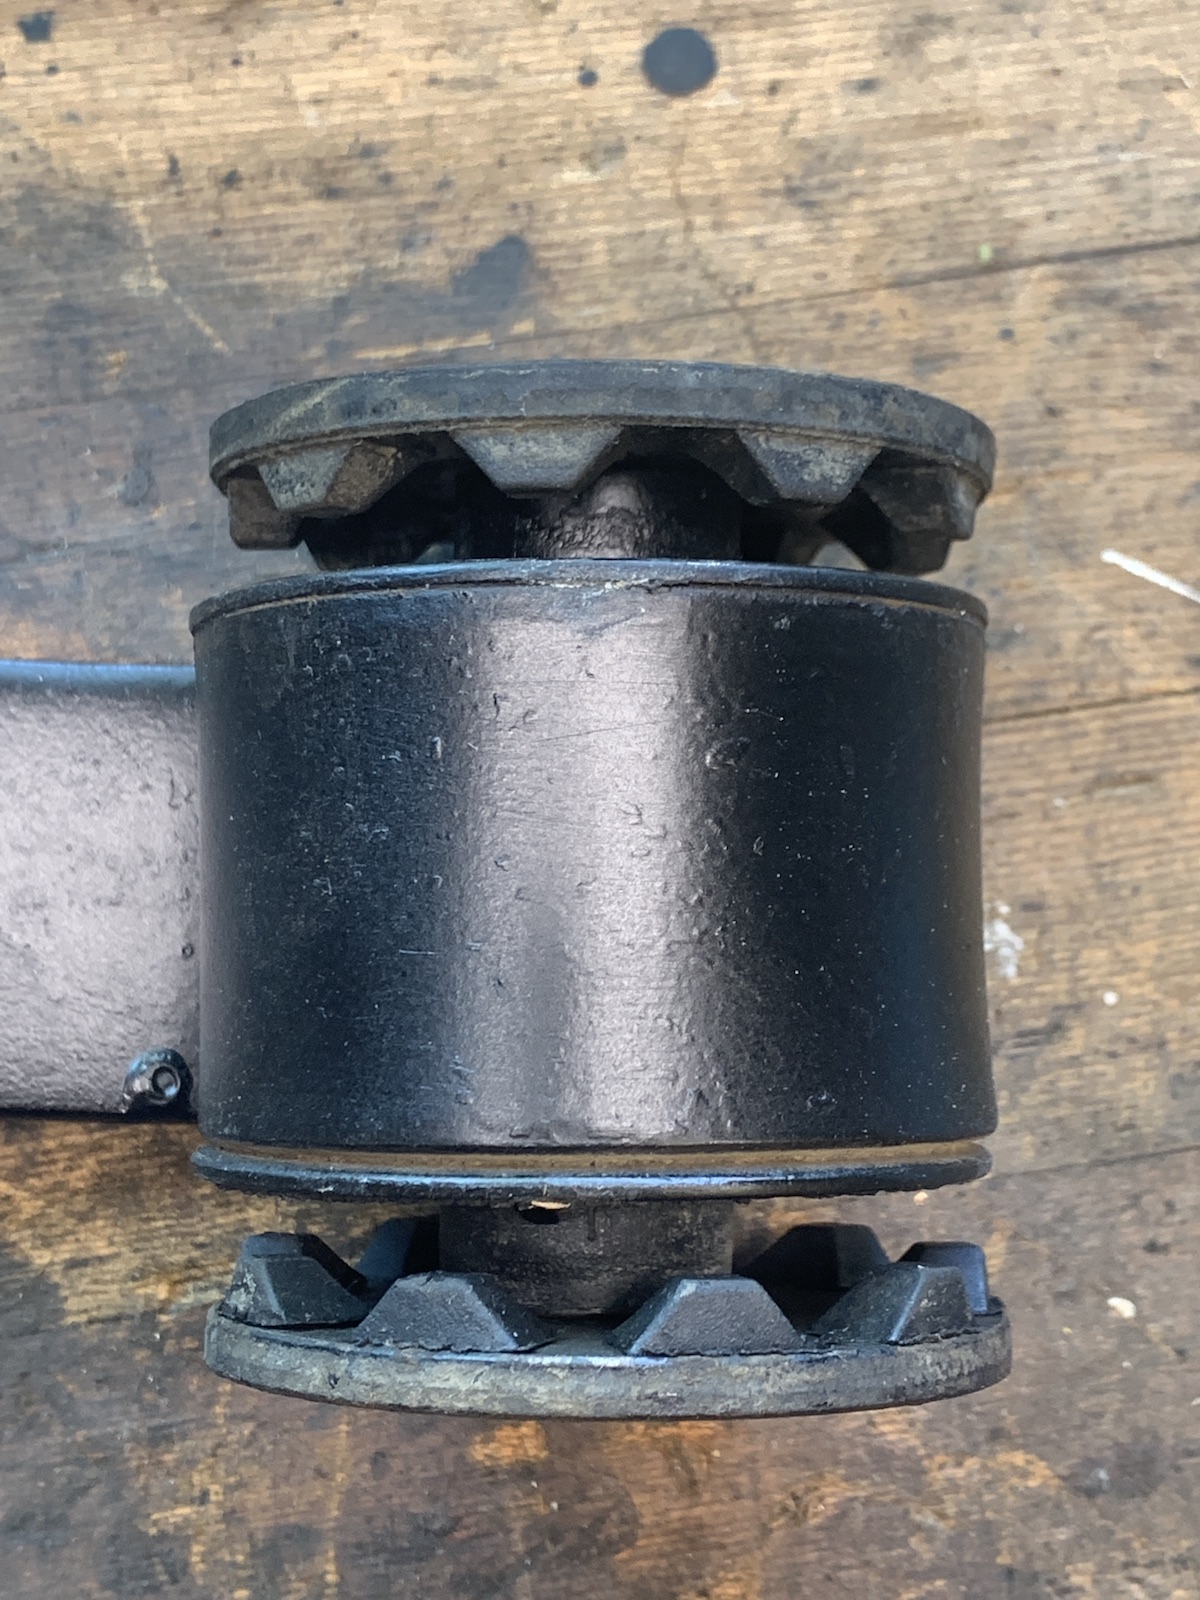
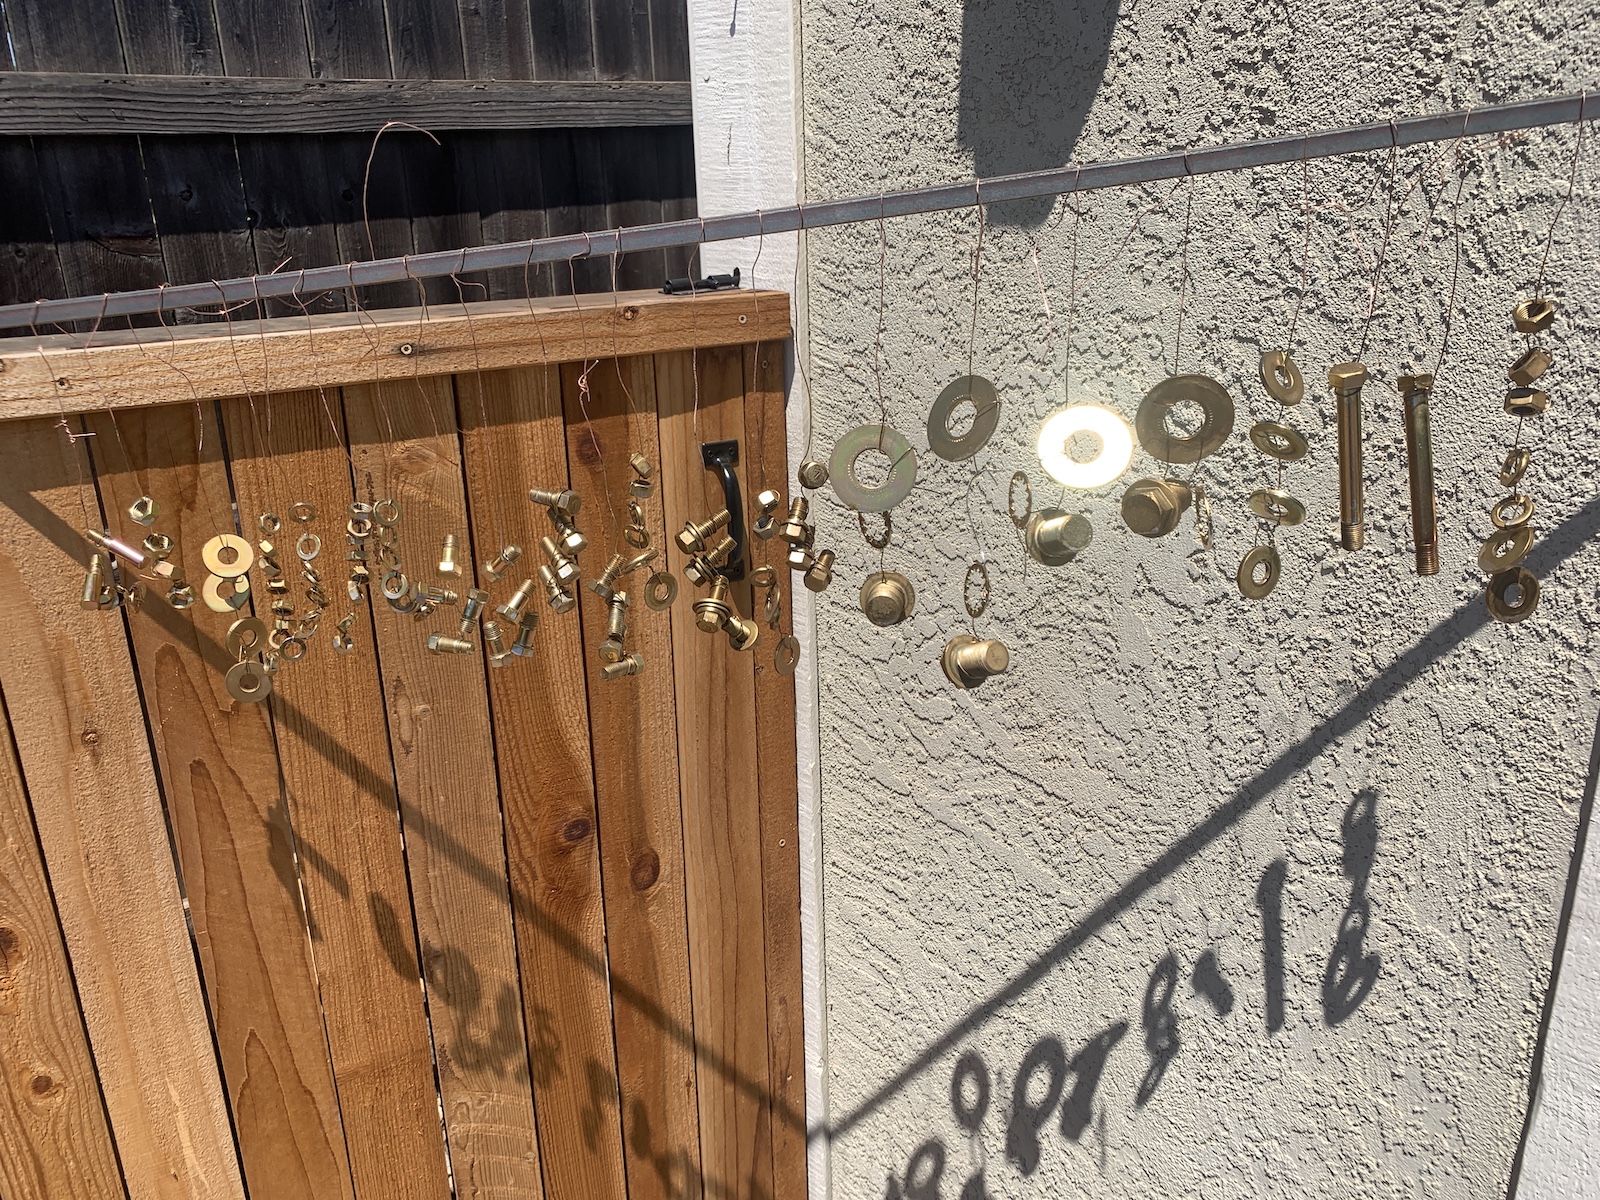
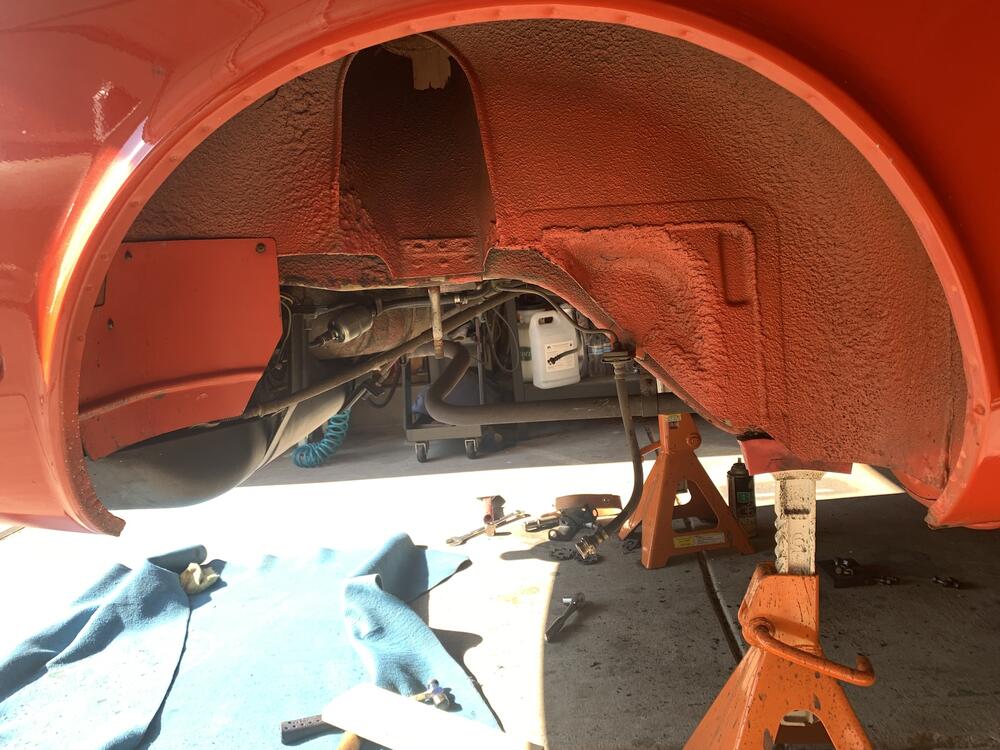
3 pointsCleaned up the rear wheel wells with soap and a scrub brush, turned out pretty good. Dealing with the mustache bar now, to get the differential in place so I can adjust the bushing on the new TC front mount I bought. I've read a few mustache bar links here, pro's and cons of replacing the bushings, the nonexistent serrated rubber washers, etc. The bushings in mine seem good, not too hardened, so I don't want to replace with poly for now. The washers on the other hand, not so fortunate. While cleaning in my solvent tank some of the rubber nubs fell off, and a few were already missing. I know these are no longer available, but was wondering if anything has changed in the last couple years since those last posts? It seems to me that these washers only come into play as the differential attempts to twist, and there's an 1/8" gap between them, IMHO they're just added insurance in case of complete bushing failure. I suppose with a healthy engine there would be occasional contact, especially with new soft rubber bushings. I could be wrong. Anyway, just wondering what others are doing for the washers for the stock rubber bushing setup. Fabricate your own? Motor mount washer substitution of some sort? Use as is and forget about it? On another note, I wish the TC mounting bracket had a little more clearance next to the brake/fuel line bracket! I did ground out a little notch for added room, but just another 1/8" more in that dogleg bend would have been really helpful. I had to use a bottle jack to wedge it into place. [emoji53] And, got most of the fasteners decently plated using my home Caswell system, not perfect. About 4 hours work here for cleaning and plating.


 3 points
 -
Had mine flat bedded to my mechanic on Thursday to correct a couple problems and hope to have it back Monday or Tuesday. It was 120º here yesterday, so probably won't be doing much more with it for a while.2 points
-
2 pointsThanks for the vote of confidence, but I'm not an A/C guy. I don't even know enough to be dangerous.2 points
-
2 pointsMy best friend pretty much went ballistic when I told him that's what I do (ignoring heavily leaning media). At that time I had a discussion with him during which I illuminated the many, many ways the media feeds you what they want in order to control your thinking. He got really mad. I've always known it's a bad idea to confuse an issue by bringing up relevant facts. Facts are difficult to deal with, while supposition and postering are so much more entertaining. Another friend chastised me a while back (2019?) bc I wasn't fully wound up calling for action when the Somalian refugees were seeking asylum. At that time I explained that their plight was going to be improved by MY attention. When I asked her a few days ago how were those refugees, she said she didn't know. Right. I pay attention to and help where I can for a lot of things, just not all the things dangled in front of me by the mass media.2 points
-
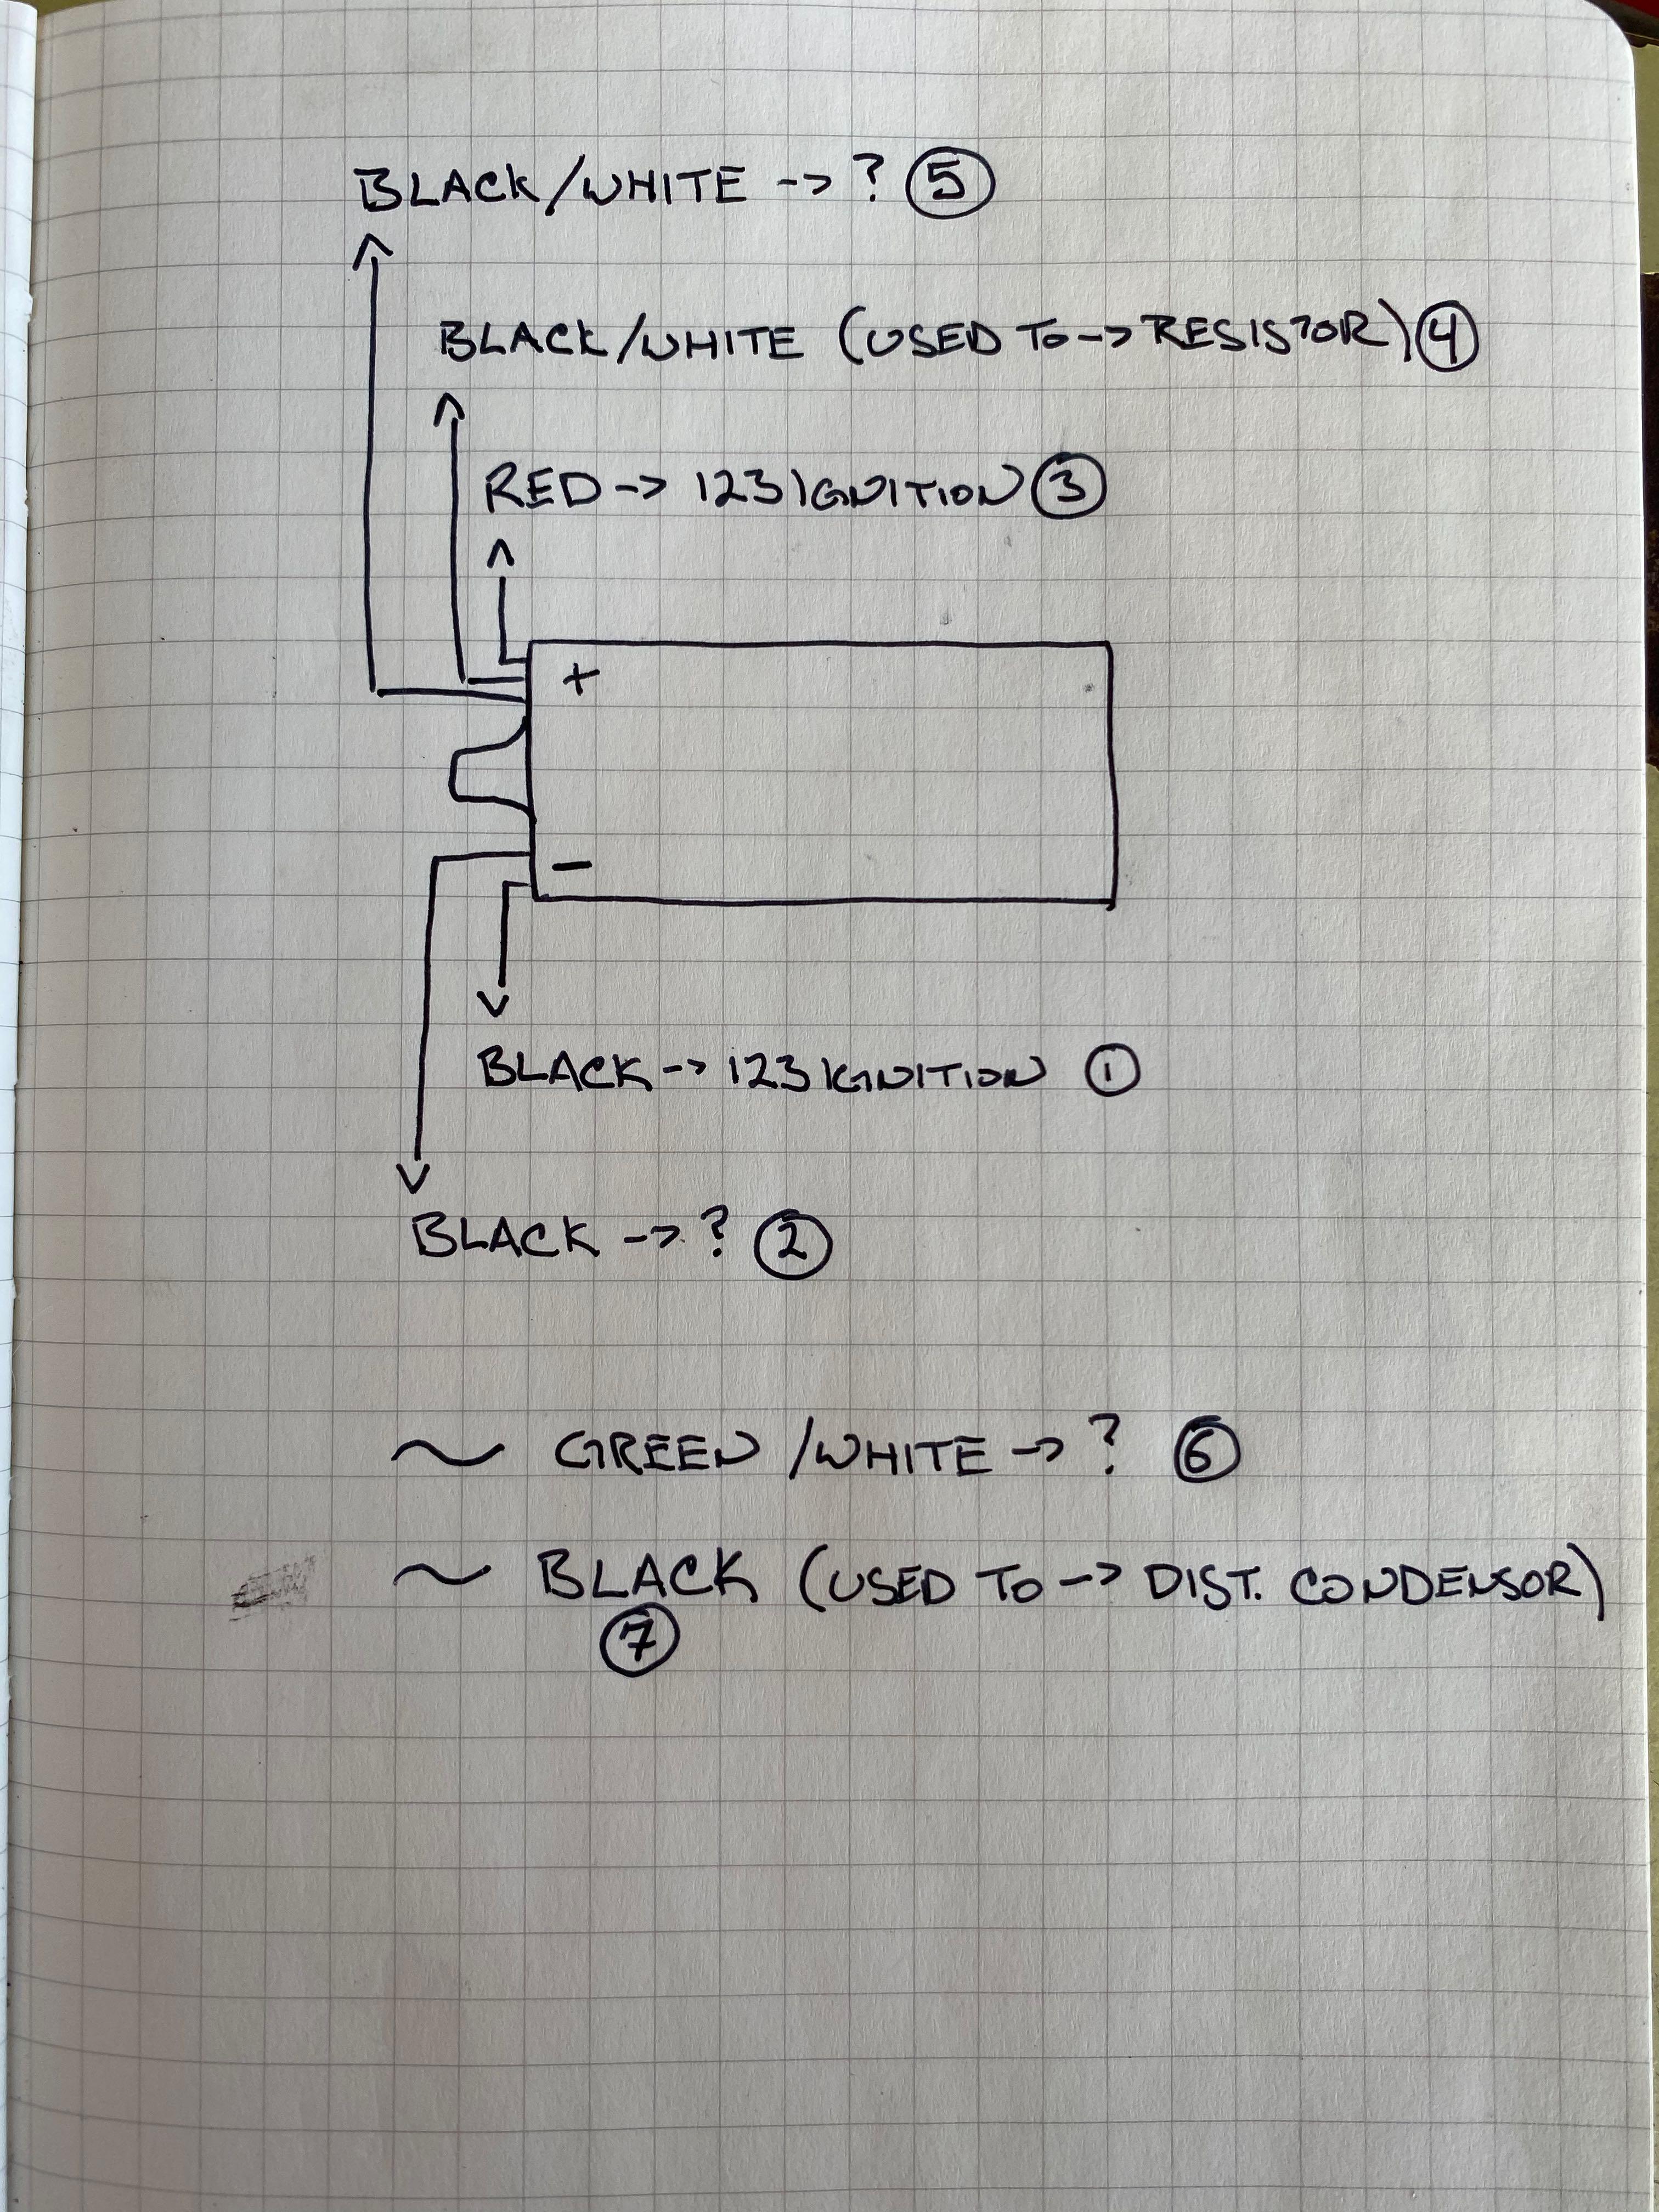
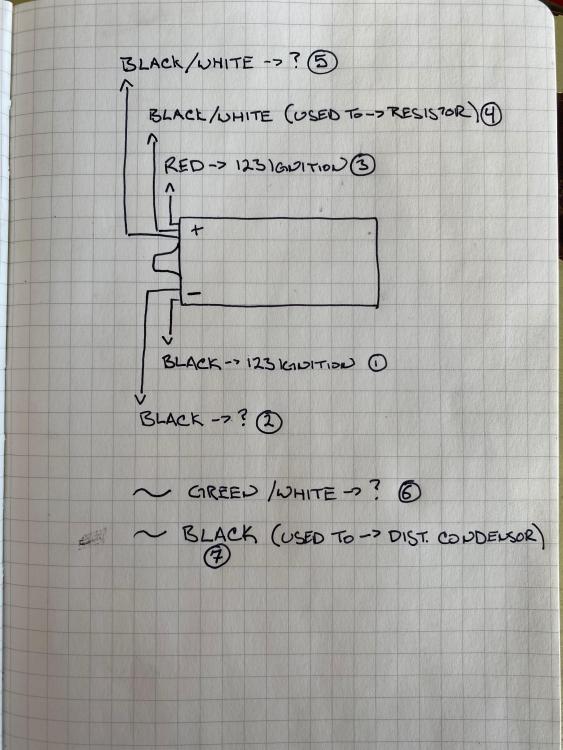
Hey Everyone, I just replaced the stock distributor in my 11/70 240Z with a new 123Ignition unit along with a new Bosch coil. The car now runs great, but the tachometer no longer works. When the engine first turns on the tach jumps up a little bit, but then slams back down to 0 and stays there. Anyone have any advice on what I screwed up? Here's how things are hooked up currently (see image below for my wire numbering): [Black] The black wire going to the 123Ignition unit is connected to the coil negative [Black] There's another black mystery wire that was hooked up to the old coil negative, so I hooked it up to the same place on the new one [Red] The red wire to the 123Ignition unit is connected to the coil positive [Black/White] The green/white wire that used to connect "back" side of the resistor is now connected to coil positive [Black/White] Another mystery black/white wire that used to be connected to the old coil positive so I connected it to the same place on the new one [Green/White] This wire used to connect to the "front" side of the resistor - it's currently disconnected [Black] This wire used to connect to the little spade terminal on the old distributor, which then connected to the little capacitor hanging off the side. There's no such terminal on the 123Ignition unit, so this is also currently disconnected. [Blue] (not shown) The ground wire to the 123Ignition is connected to the chassis Someone in another forum had mentioned connecting wires 5 and 6 together, which I tried but no joy. By the way @Captain Obvious your spring has served very well up to now - let me know if you want it back and I'll be happy to put it in the mail!
 1 point
 -
1 pointHere is a video of the Mustang, been fiddling with the carb https://youtube.com/shorts/rdkXvTZ8L8o?feature=share1 point
-
1 pointTo clarify what I have done, I have or had a working converted to R134a system but had a very slow leak requiring me to recharge the system every year or so. I have just rebuilt and installed a fresh motor and as part of that, I purchased a new Sanden 508 compressor to replace the factory unit. (the source of my leak) With the new compressor installed, I have to replace the 2 flex lines that connect to the compressor which has the high / low ports in a different location requiring about 5" longer lines and connections with modern o-ring fittings. Nissan used most all #8 flange fittings in the factory system. Currently waiting on delivery of the parts to build and crimp the new flex hoses, then... I can re-charge the system. If I remember right, I think I used close to 2+ 12oz cans to charge the evacuated system. Looking back, the drier was the easiest part of my upgrade, the copper hardlines connected easily, and fits perfectly in the stock bracket.1 point
-
1 pointMine is RUSTY-brown, is that oké to? (Btw.. my alternator is now also 50 years old and only had a paintjob about 22 years ago..) Hé Jim, why is it called a grapefruit-alternator?1 point
-
1 pointTheir own lawyers say you literally can't believe the facts they're are telling. https://www.npr.org/2020/09/29/917747123/you-literally-cant-believe-the-facts-tucker-carlson-tells-you-so-say-fox-s-lawye1 point
-
1 pointYes, it's a Speeduino ECU. I wasn't suggesting it as a solution, just evidence that the engine likes a lot of advance at idle.1 point
-
1 pointMy most recent interaction with Riley was this past April, so it was only three months or so. At that time, everything seemed fine. I hope he's OK...1 point
-
1 pointBummer. Was hoping it was just an instrumentation issue. We're back to where we were before. Keep us posted!1 point
-
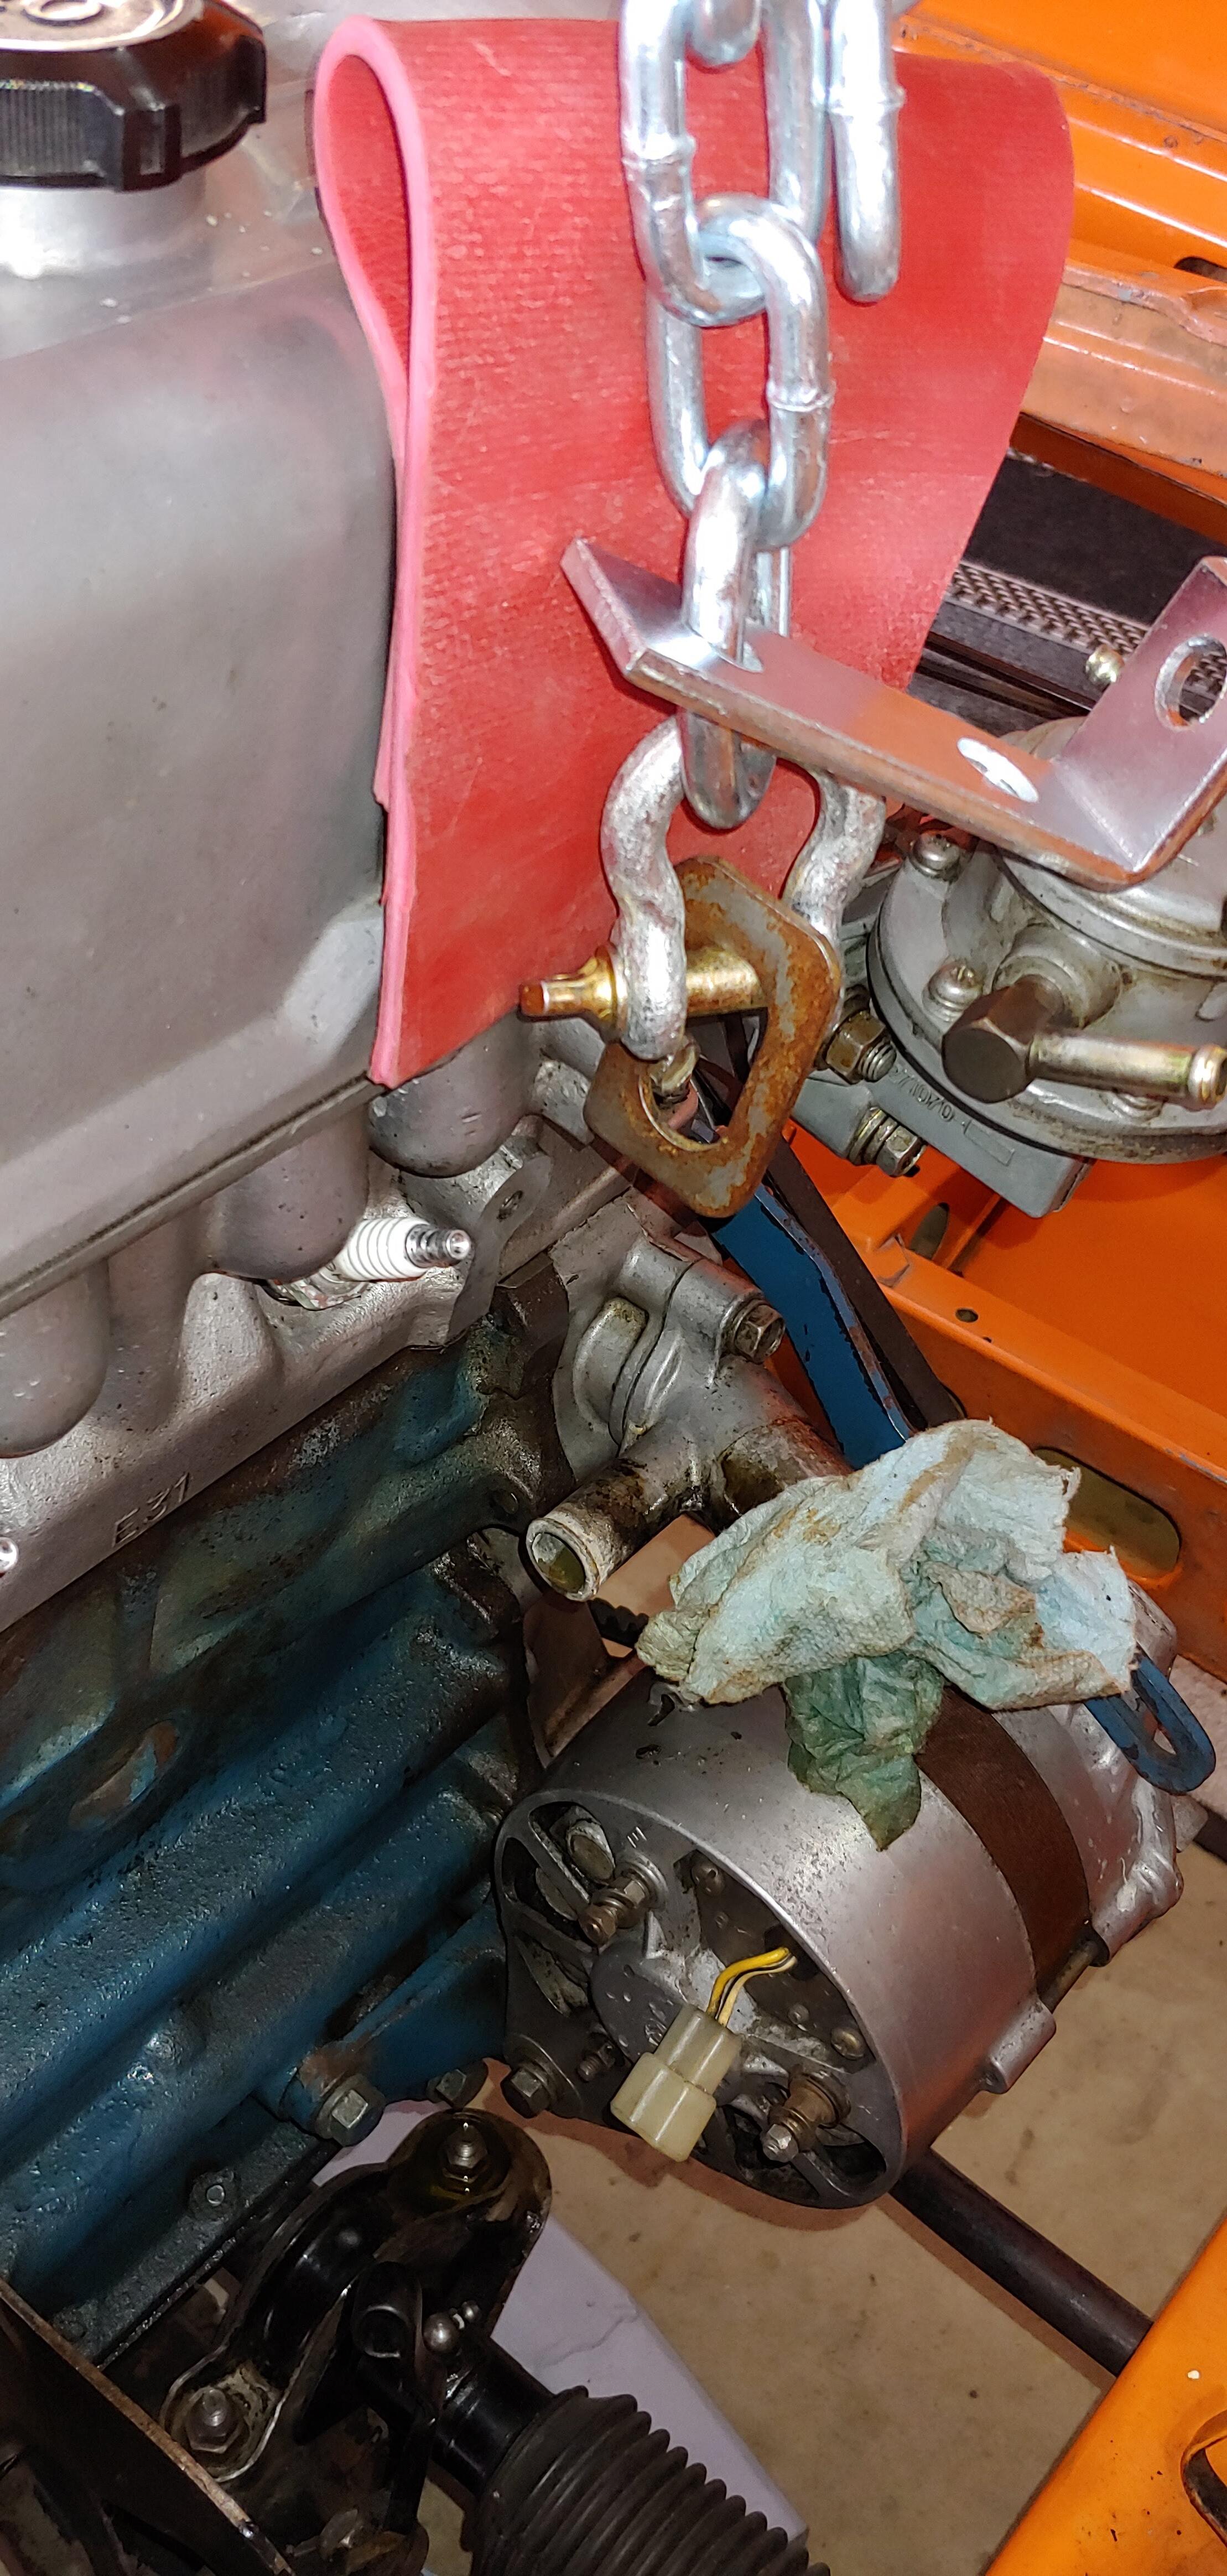
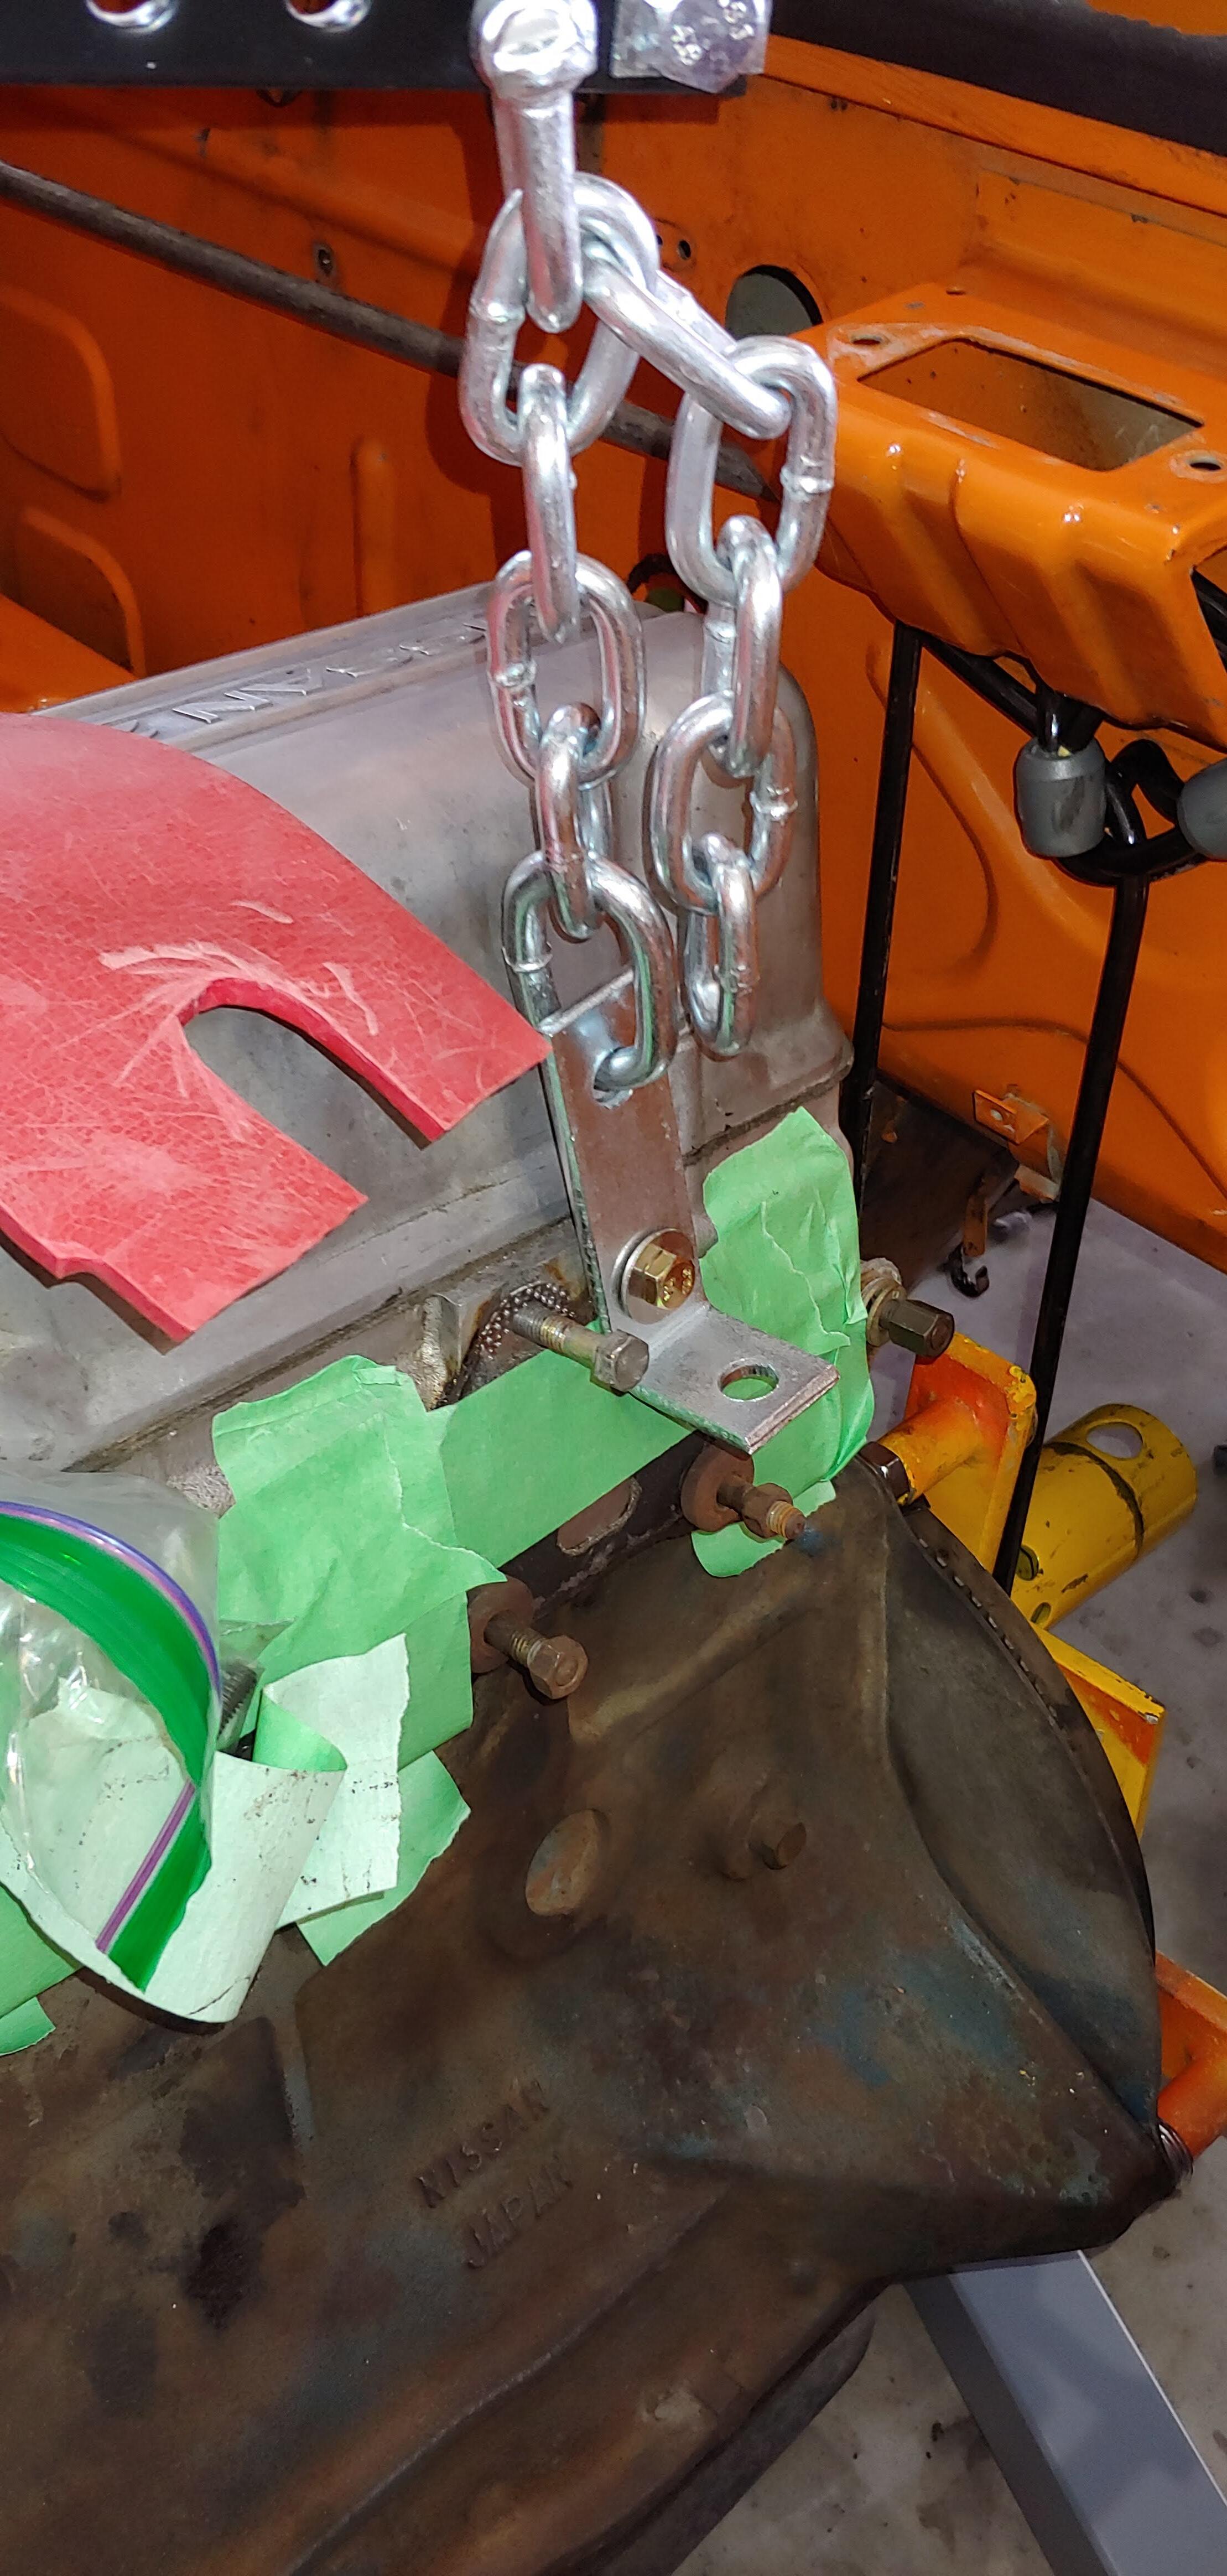
1 pointThe clevis was purchased separately, as I used a factory lifting bracket the clevis worked better than the L bracket on the leveler. Funny thing, I checked first I checked Canadian Tire and they only had Chinese non rated clevis's, the one I selected is from a local industrial supply store, it is a 3/8" VGD "gold pin" anchor shackle with a 1 ton WLL and it was cheaper than the CDN Tire import. At the rear I actually used the rear intake mounting hole that uses an M8 capscrew. I used a shorter screw plus, a 14mm OD x 8.5mm ID sleeve in the hole of the lifting bracket on the leveler.

 1 point
 -
1 pointHere is the drier I installed, I used a cut off wheel to remove the bracket, ground the weld down, painted gloss black, fits perfect. https://www.amazon.com/gp/product/B003R3PX0Y/ref=ppx_yo_dt_b_asin_title_o09_s00?ie=UTF8&psc=1 I also put in a new switch and removed the factory paint covering the sight glass ... lol https://www.amazon.com/gp/product/B000C2M9NM/ref=ppx_yo_dt_b_asin_title_o09_s00?ie=UTF8&psc=1 I am just completing the refresh of my ac system with its new Sanden 508 compressor, waiting on parts for the new flex line which need to be slightly longer with o-ring ends for the compressor. Got most of the hose parts from Nostalgic Air.1 point