Leaderboard
-
.JPG.cfcada9cf1c1b502df3f5f2f2ca3ff36.JPG)

SteveJ
Free Member3Points9,570Posts -

jfa.series1
 Subscriber
 3Points2,687Posts
 -

jonbill
Free Member3Points451Posts -

zKars
Subscriber2Points3,747Posts
Popular Content
Showing content with the highest reputation on 07/30/2021 in all areas
-
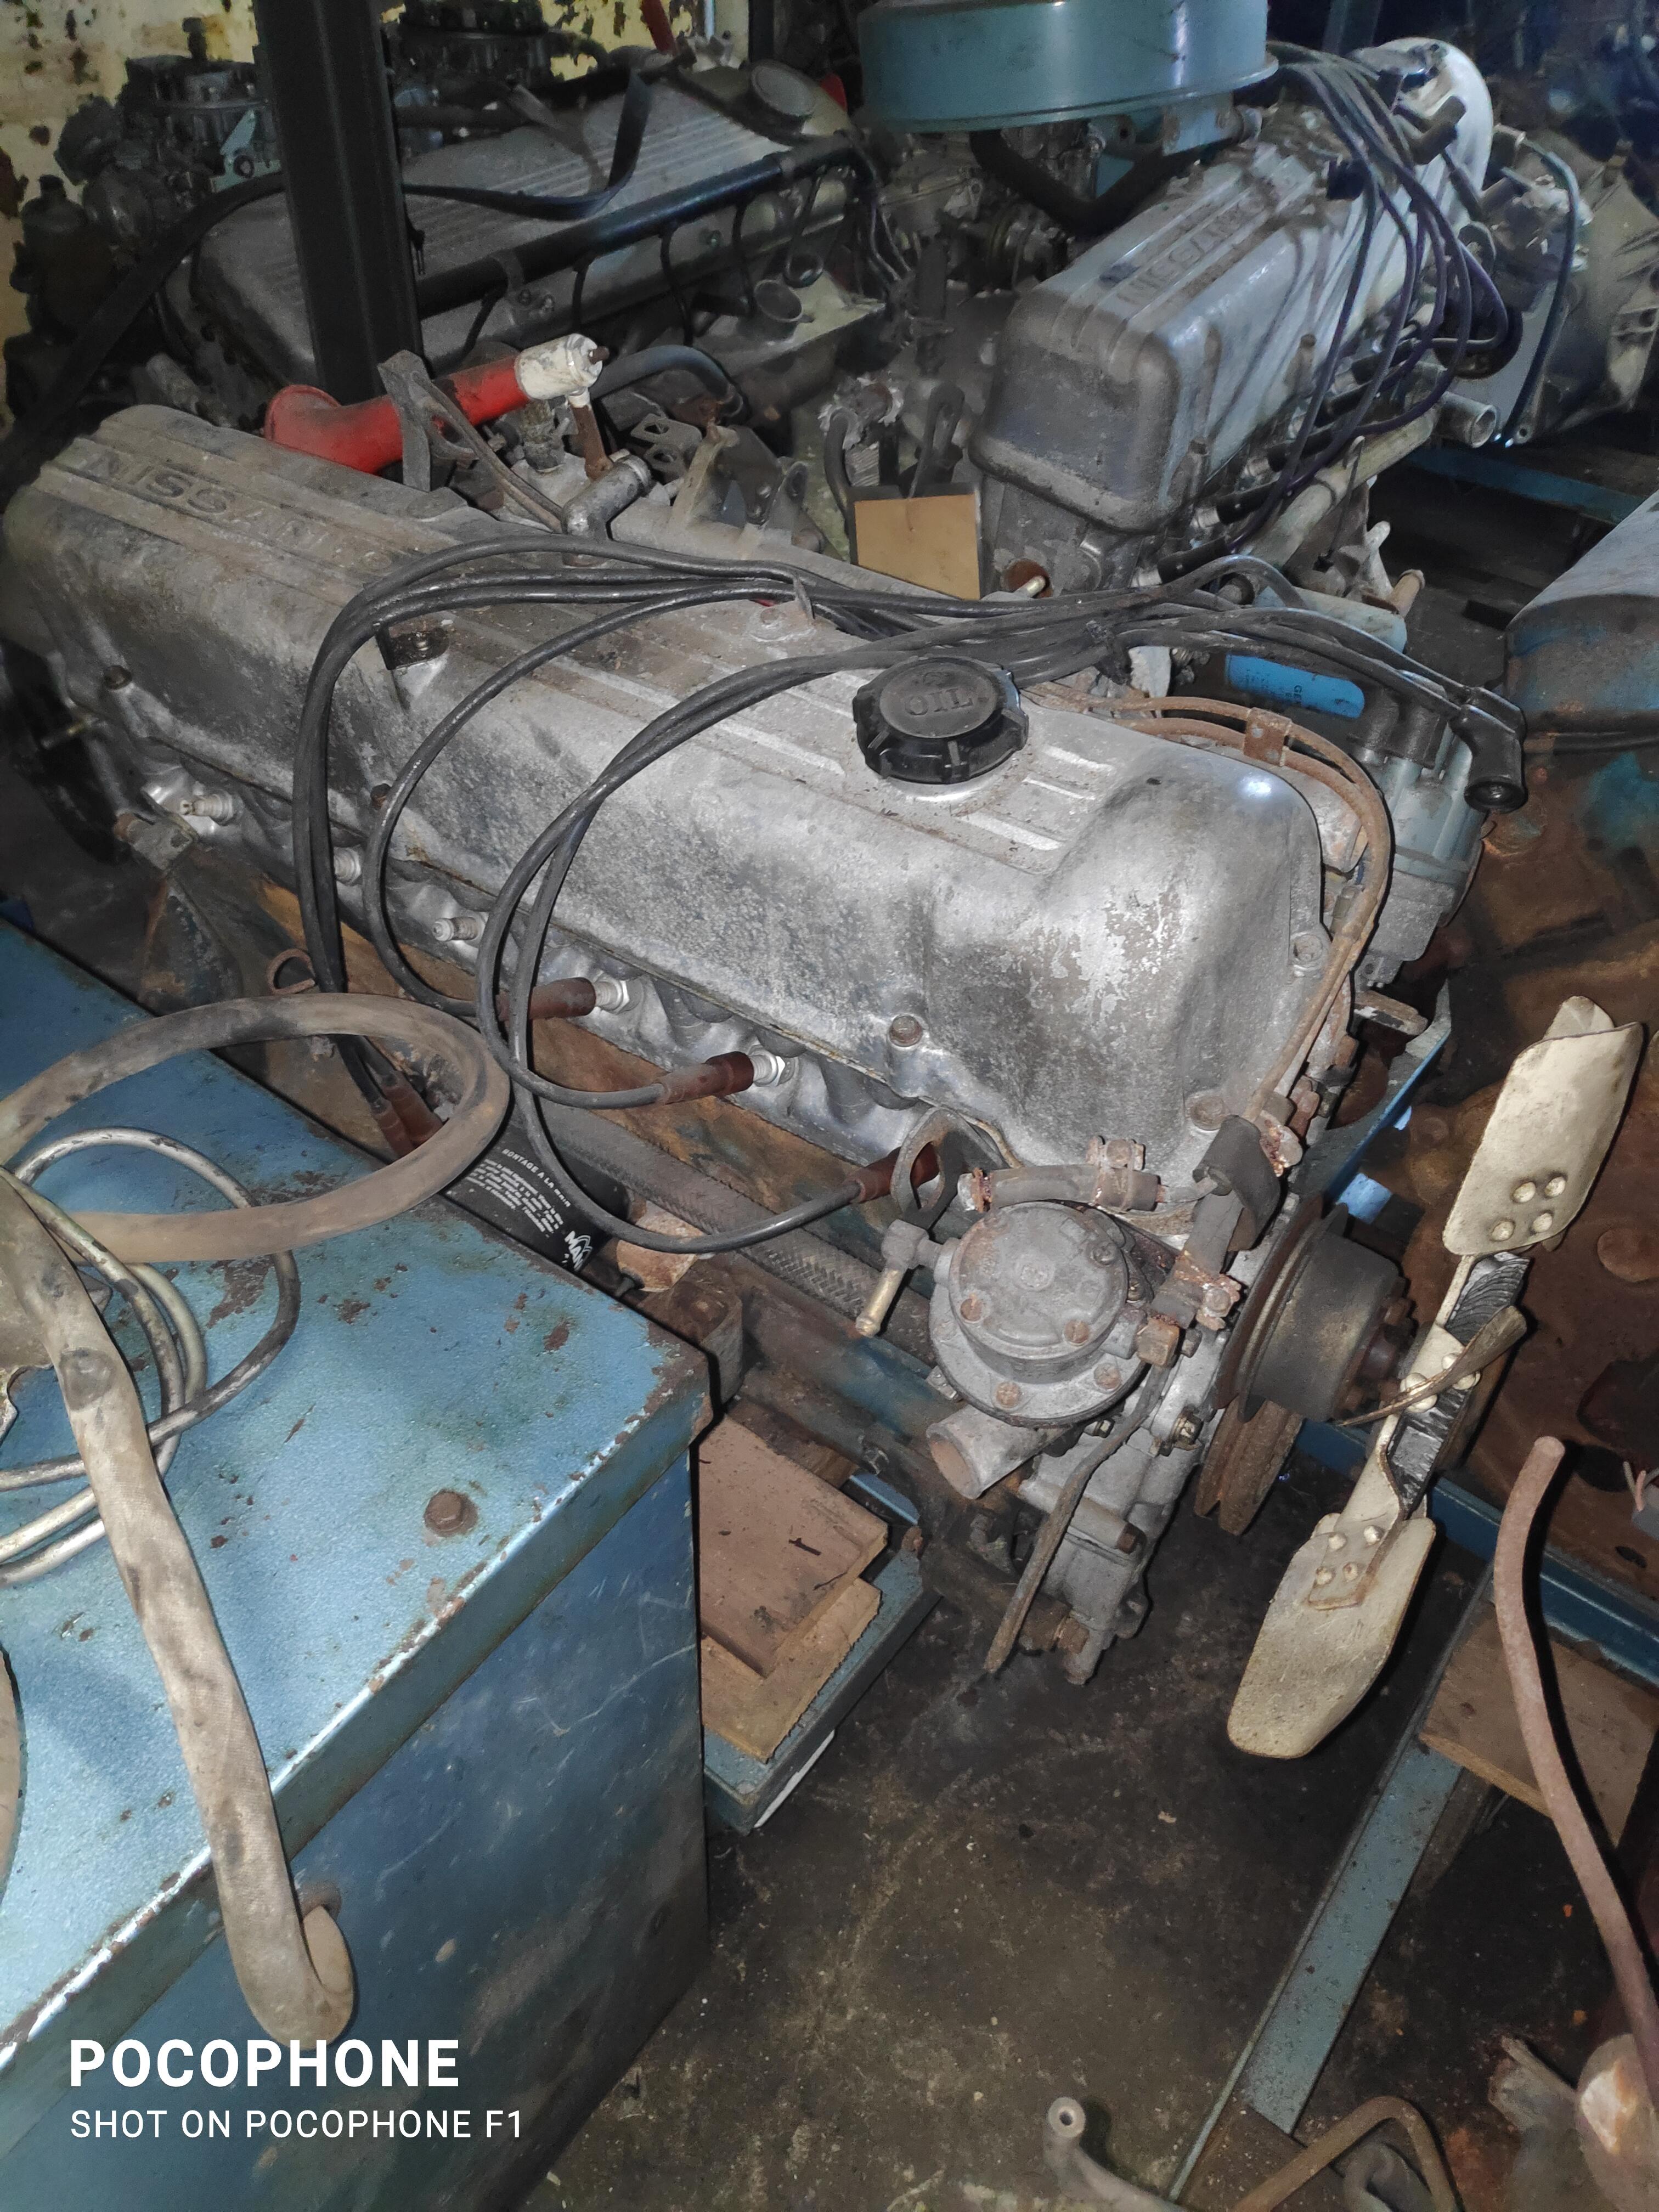
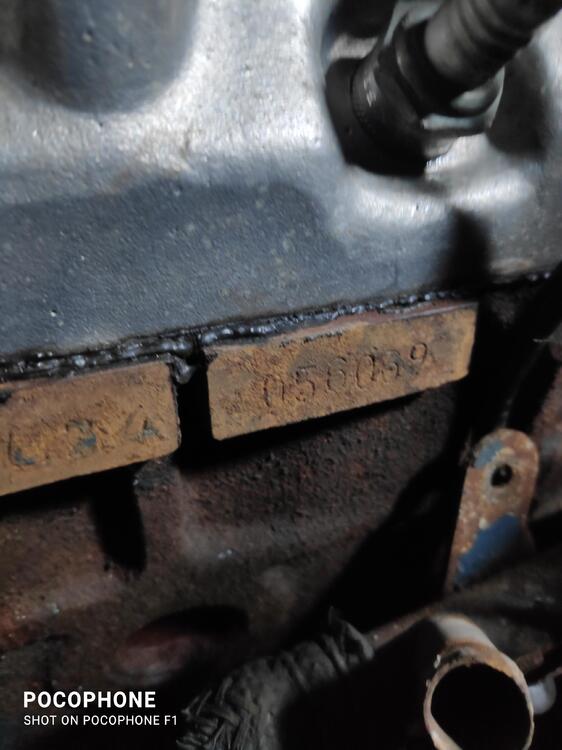
fwiw, my block that Ali pictured above is a mid 80s v57 LD block. It came with no crank case vent holes of any kind. We drilled and tapped it (1" NPT maybe?) and I fitted that hose connector.3 points
-
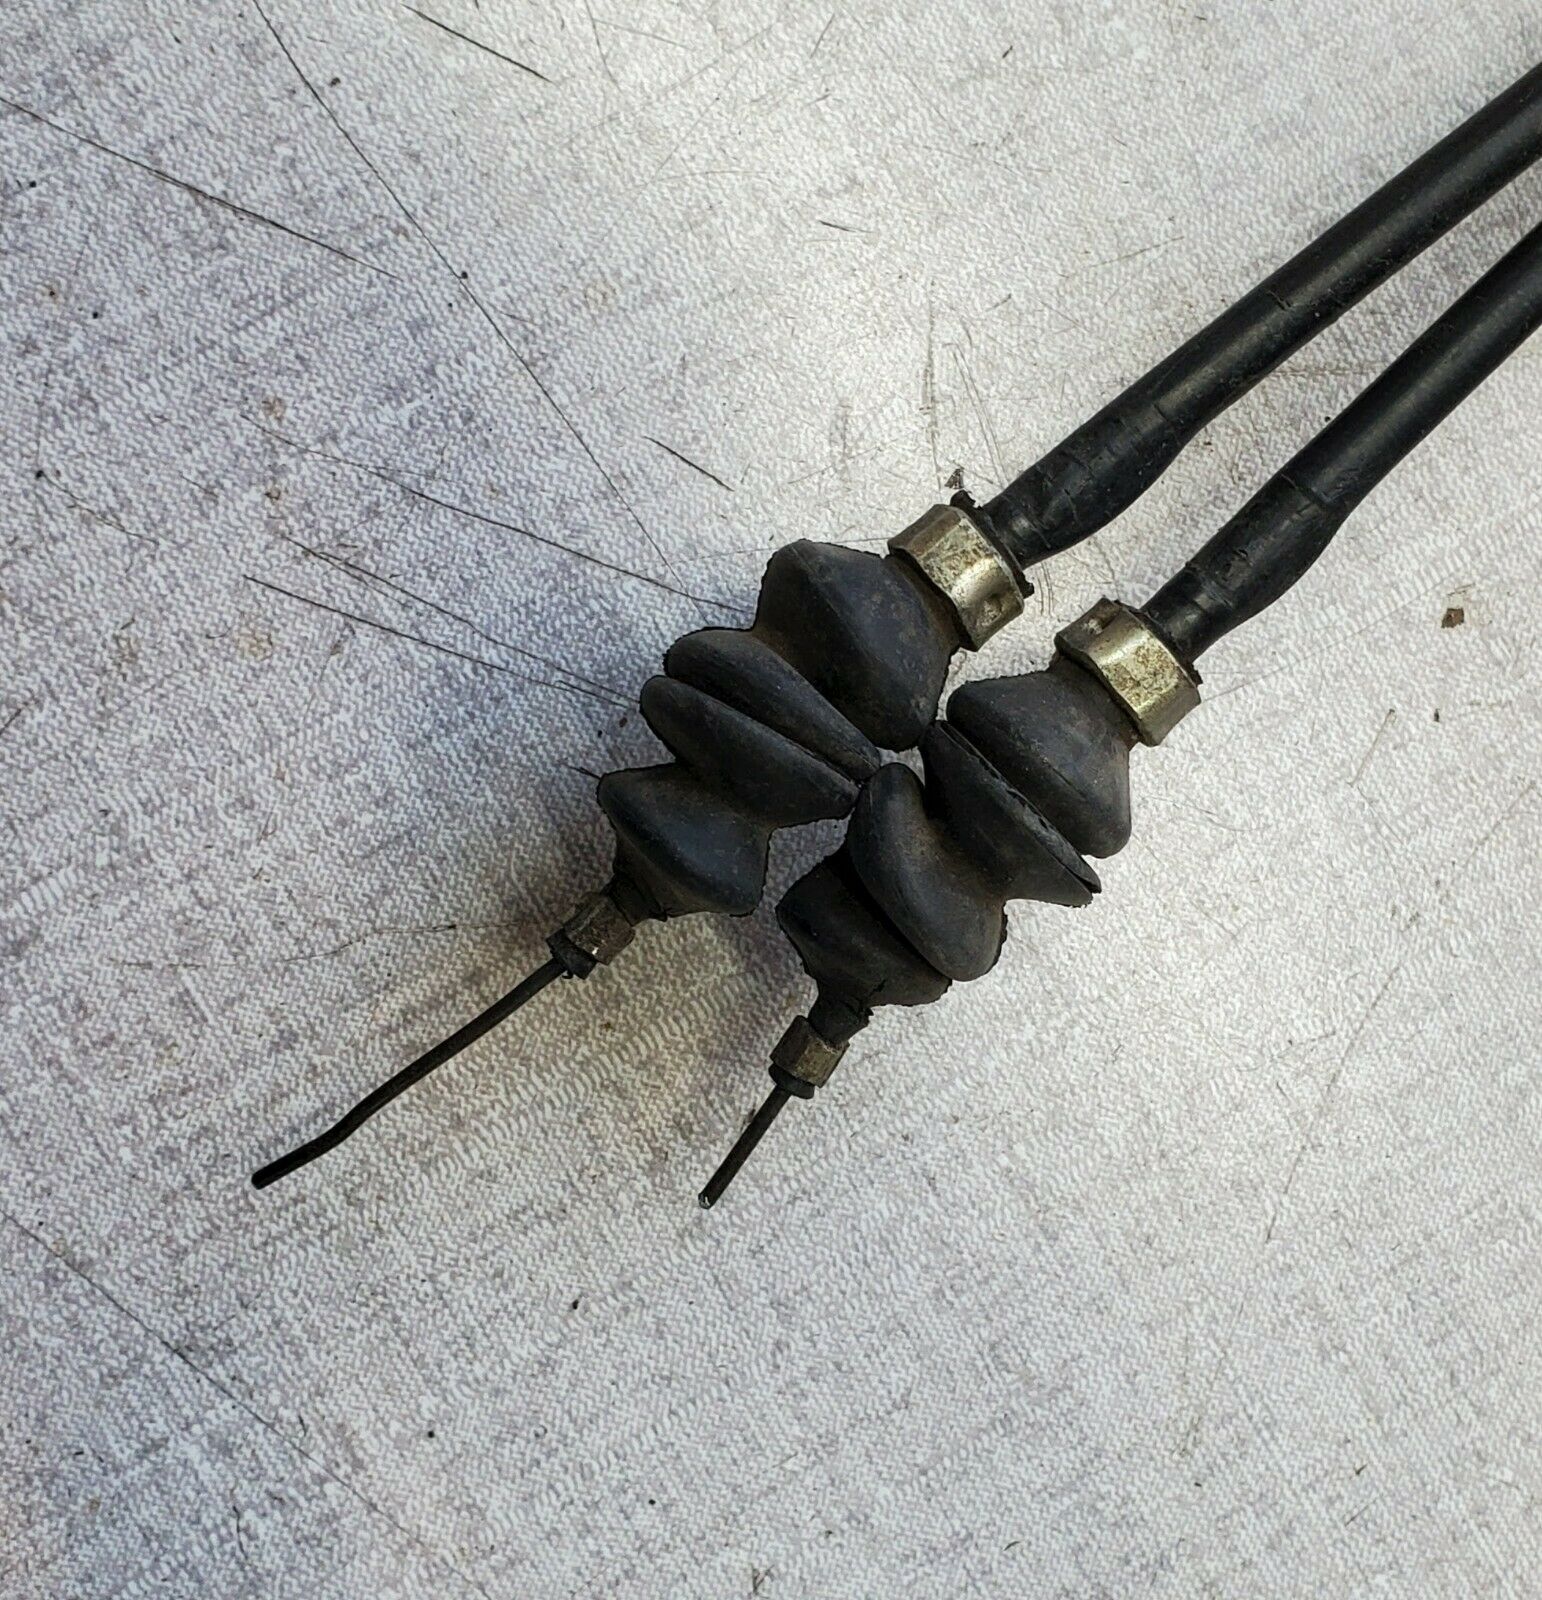
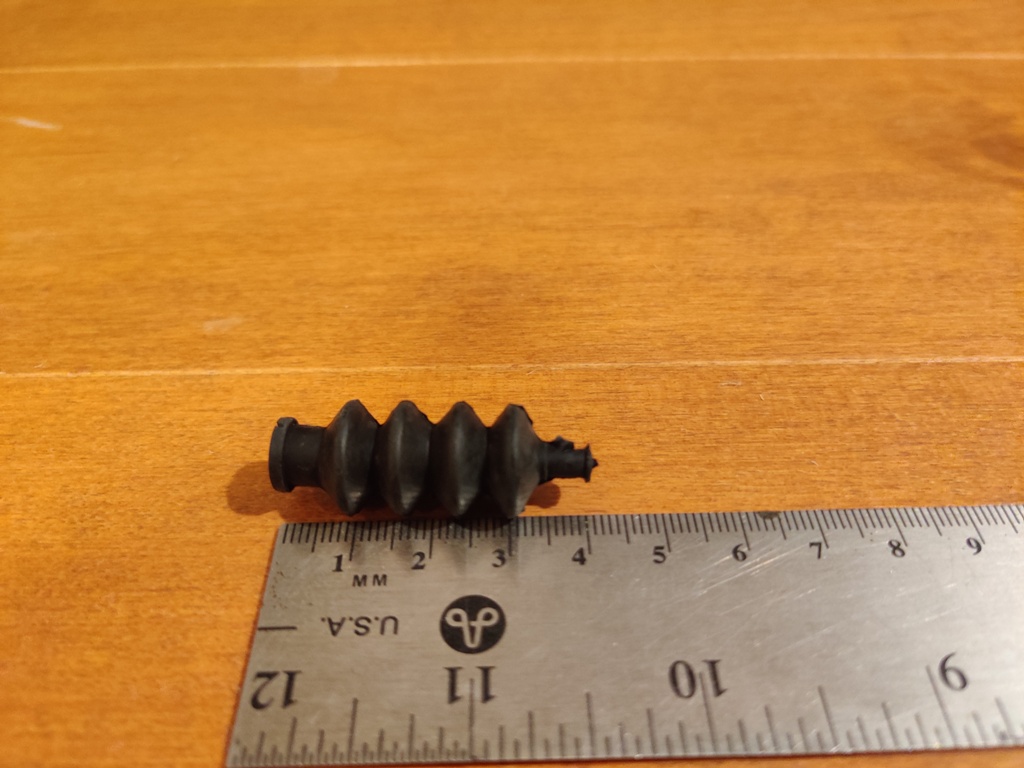
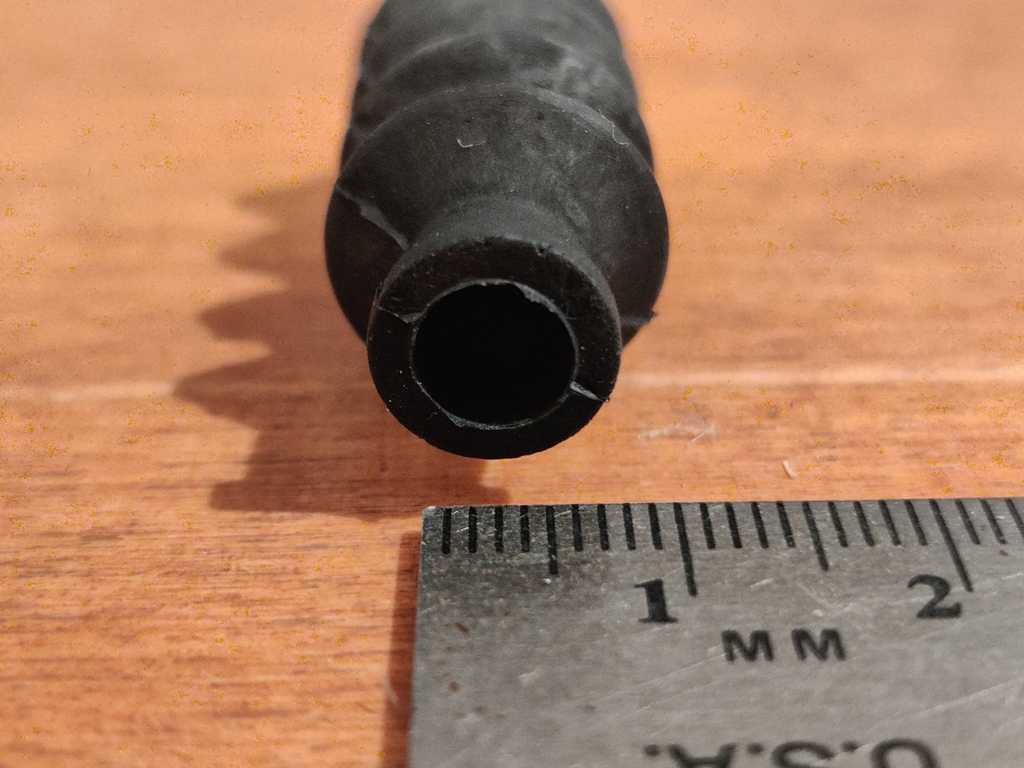
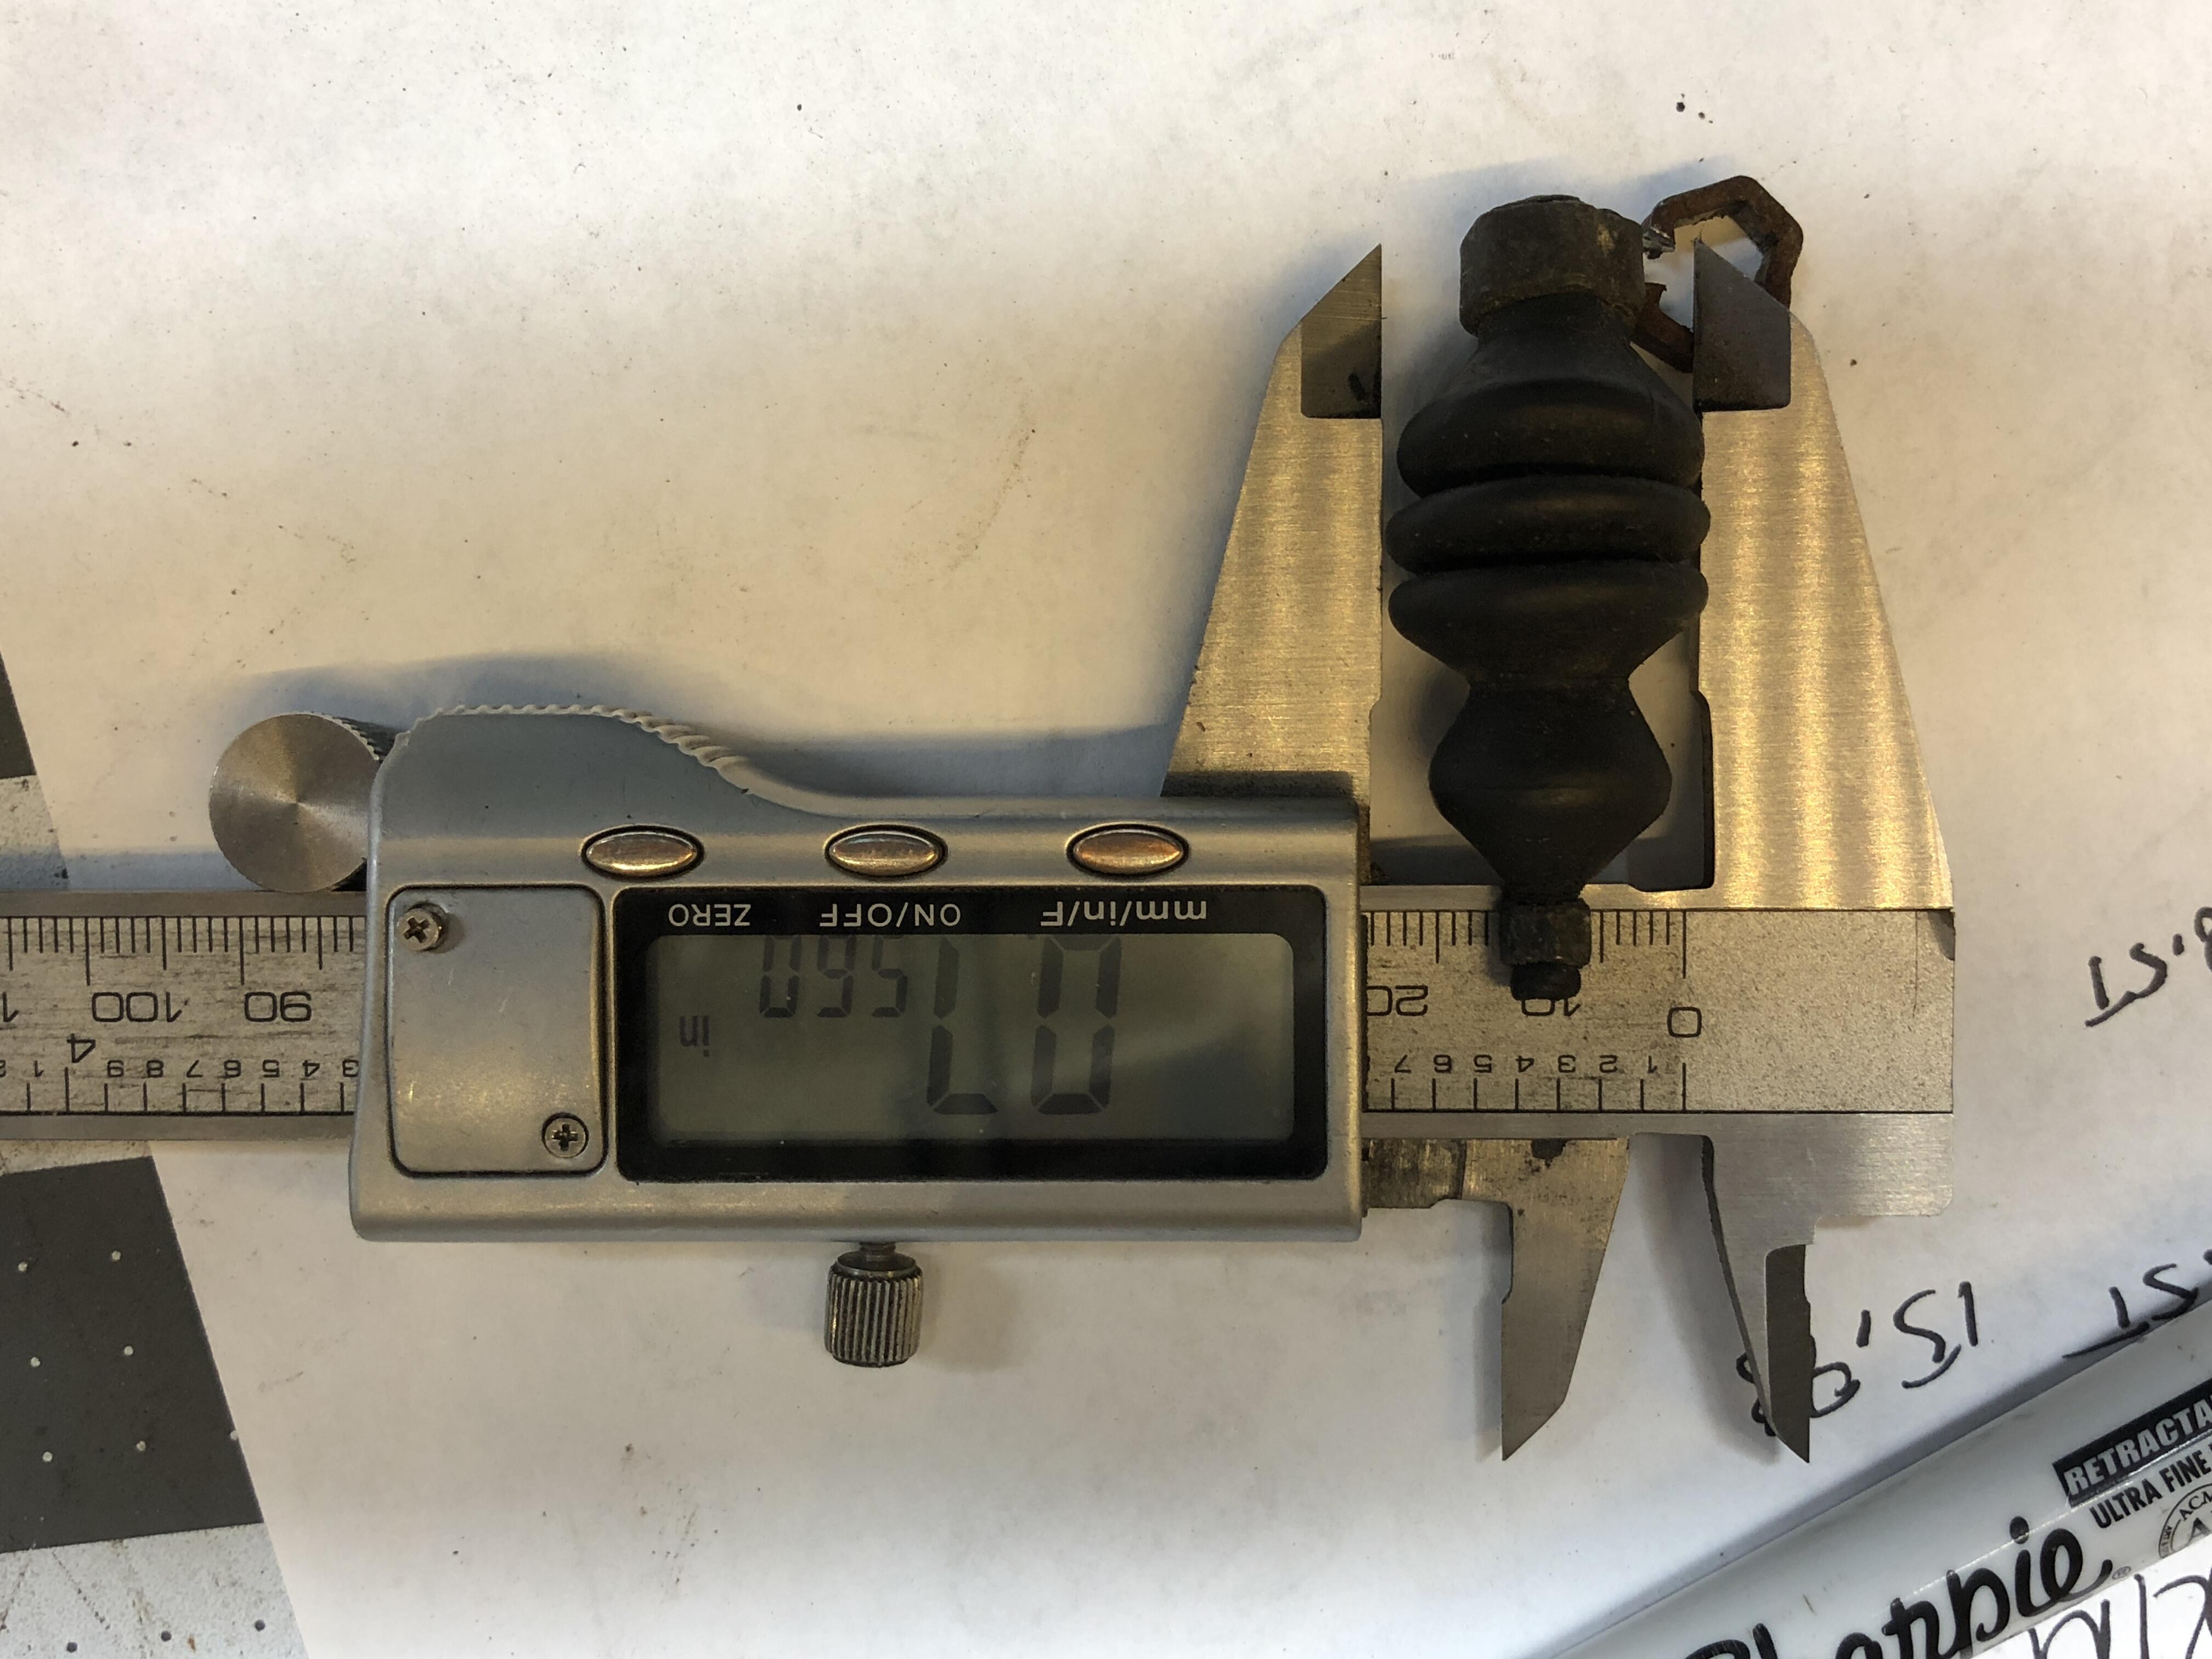
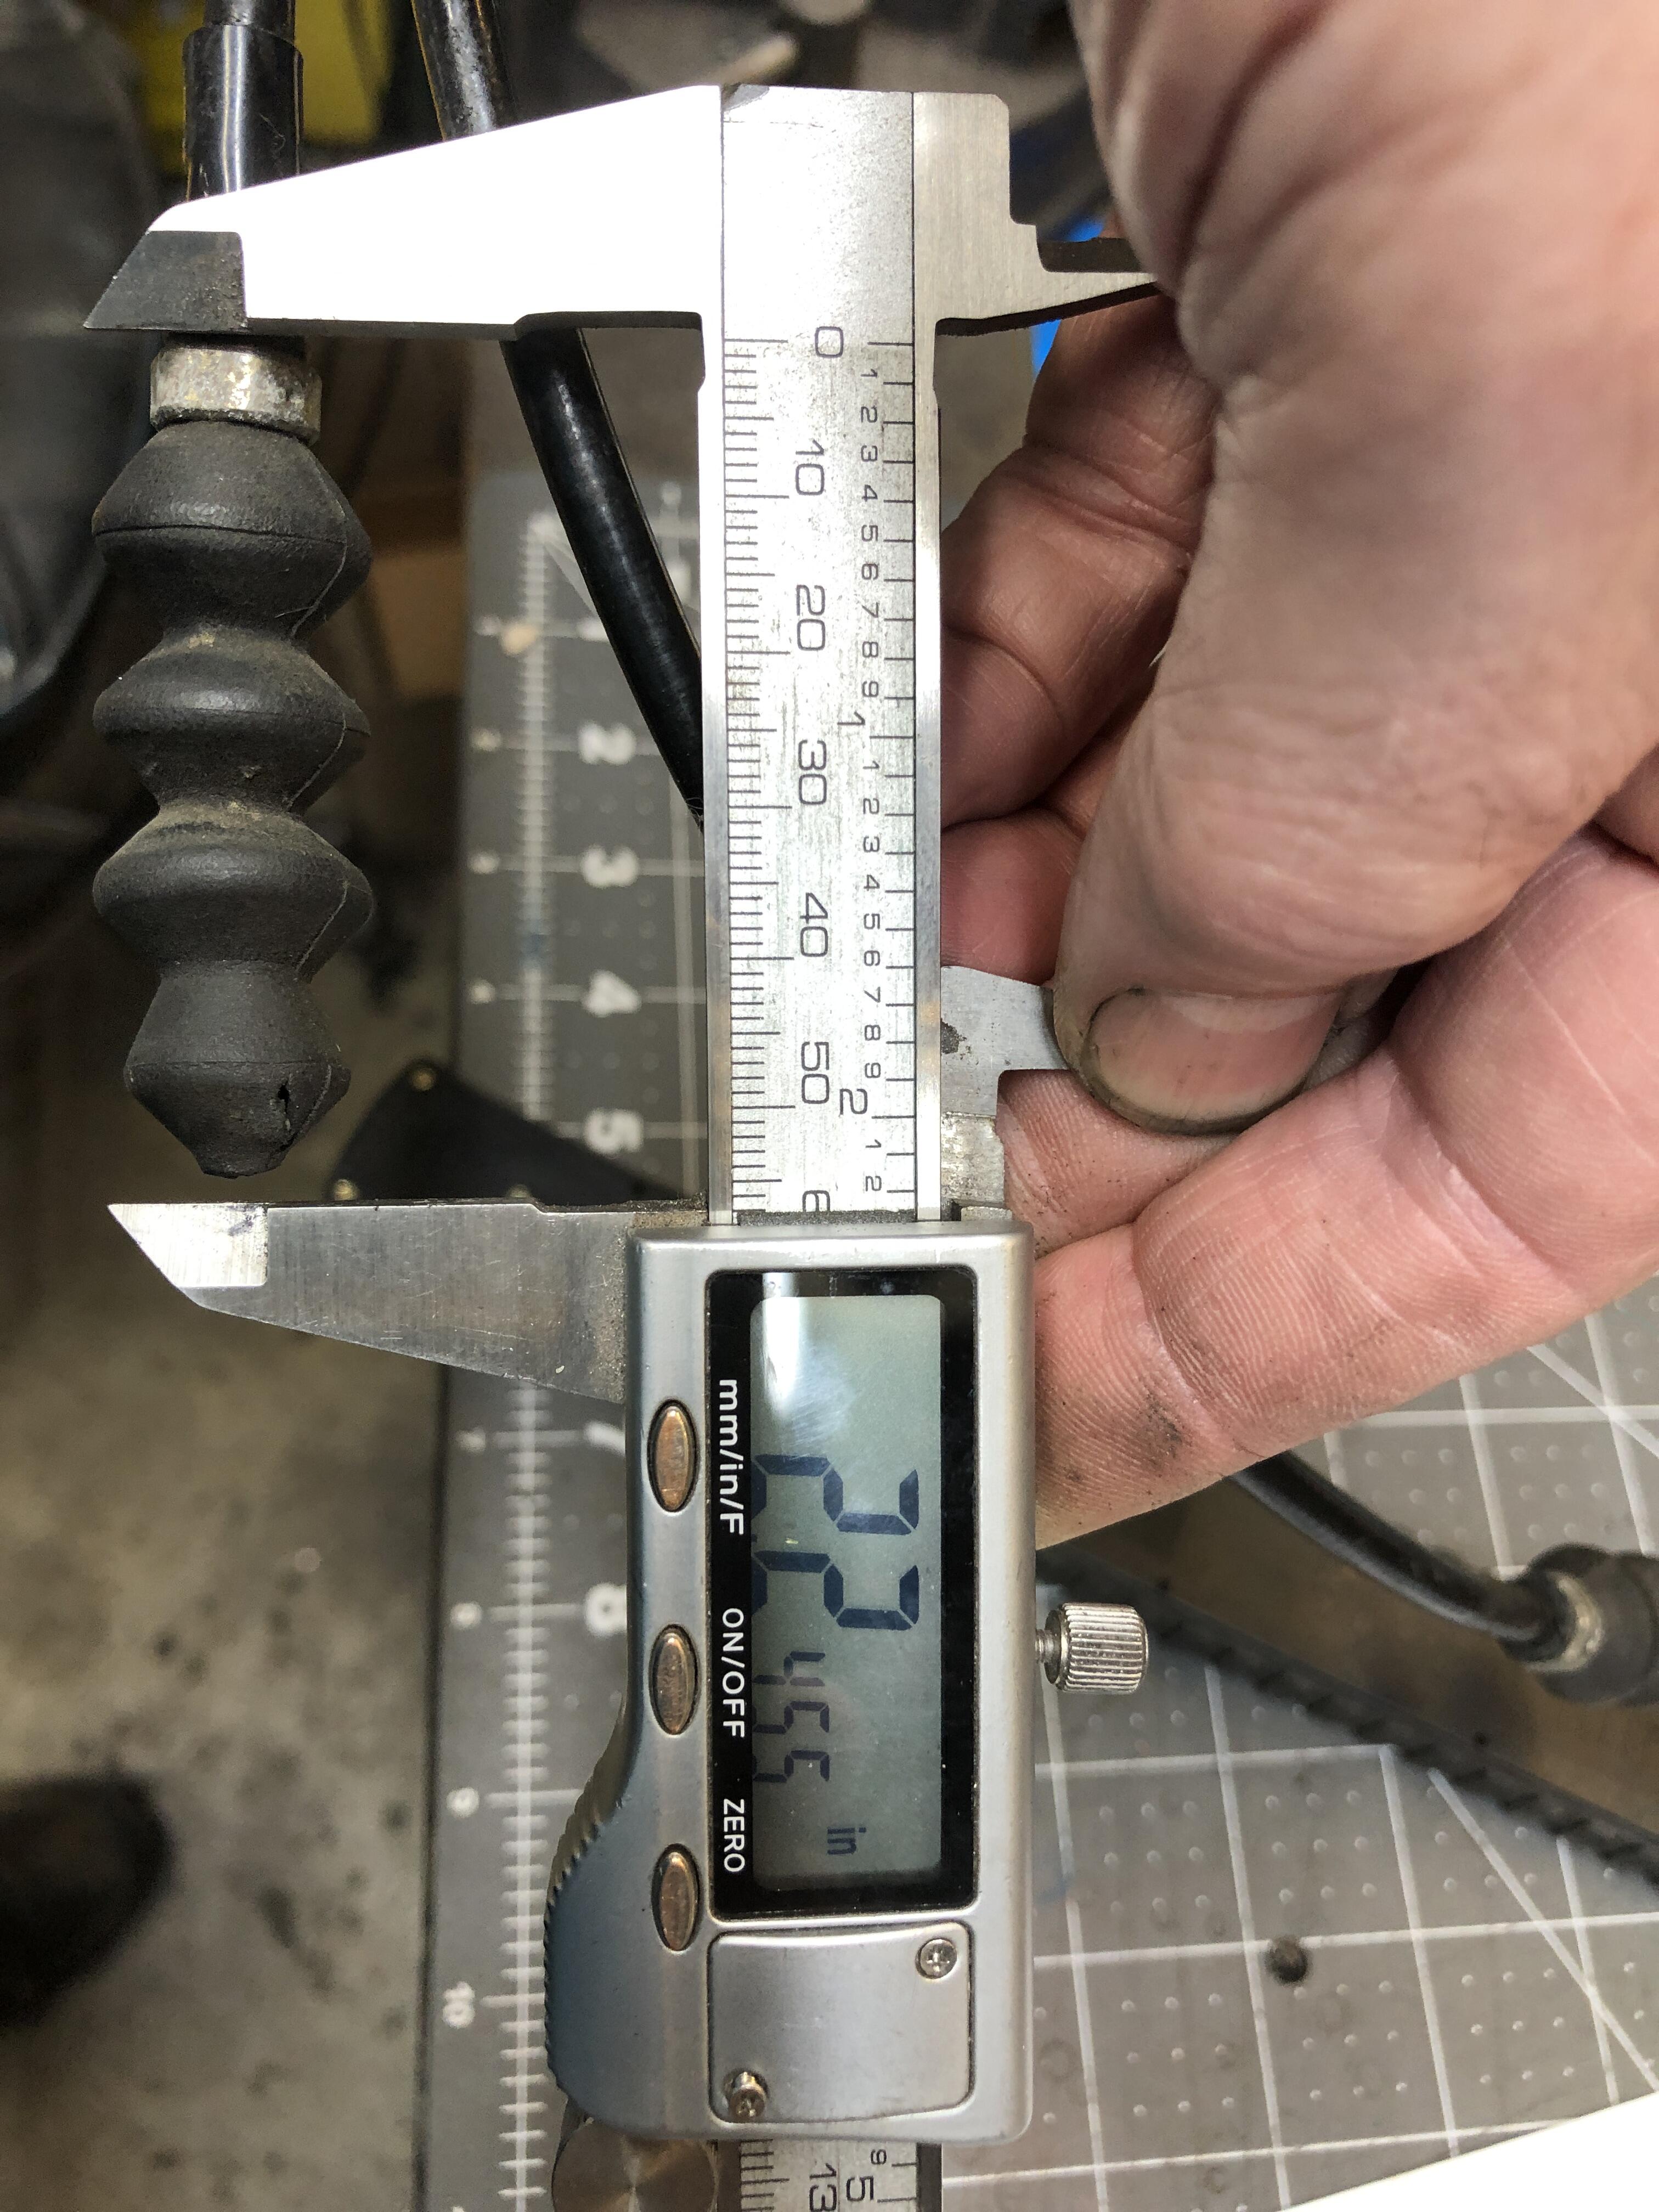
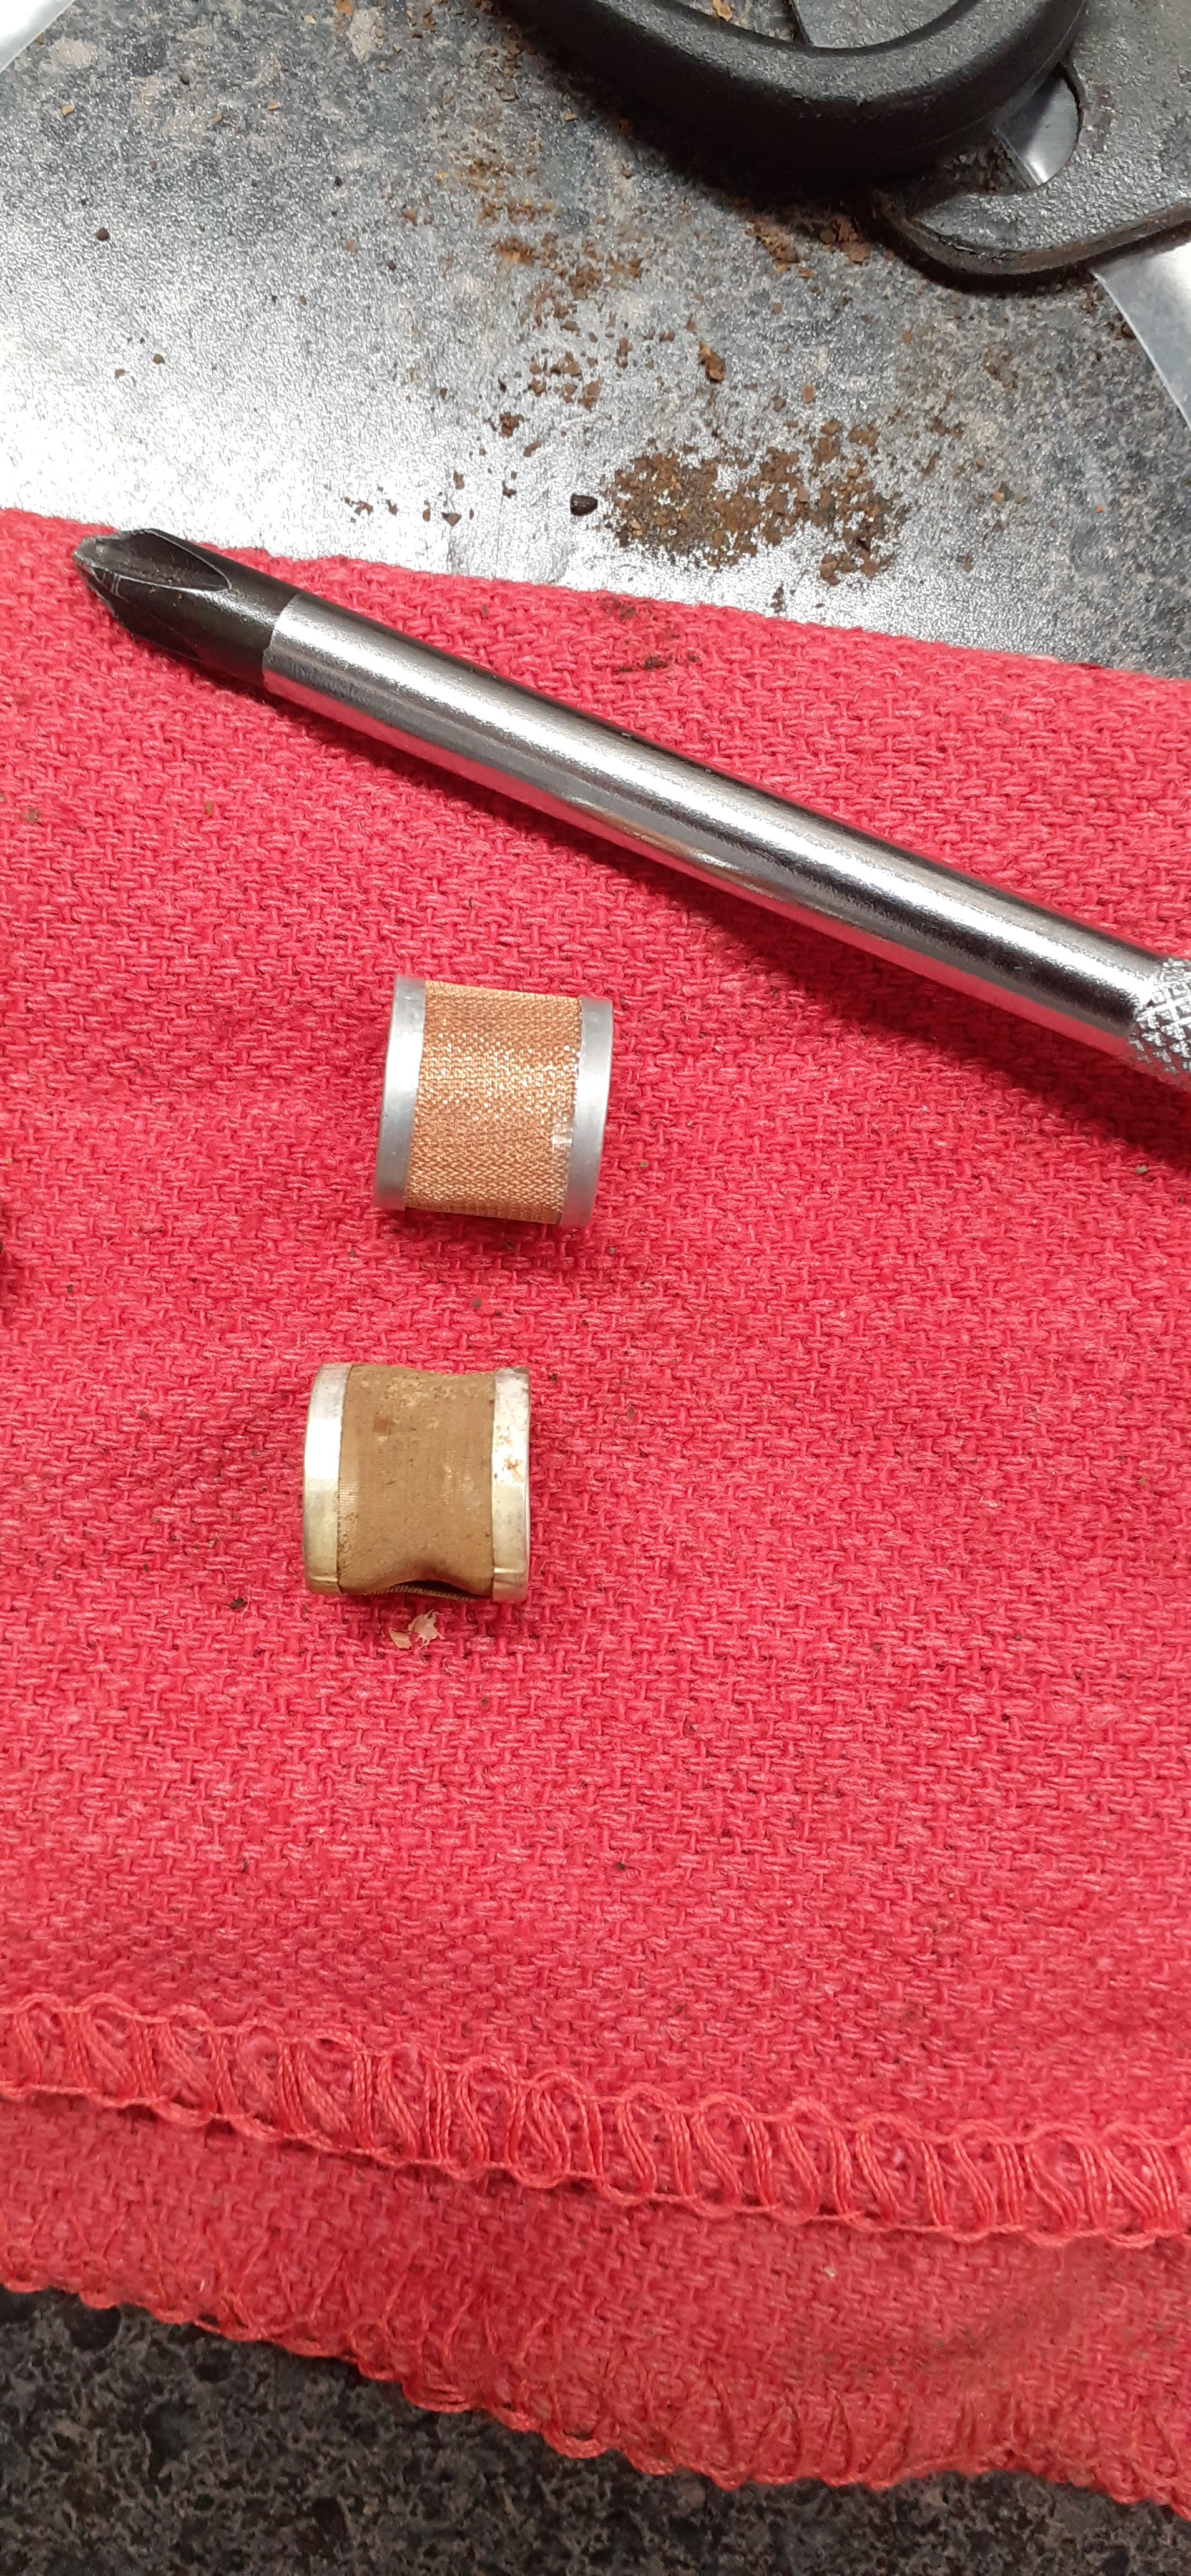
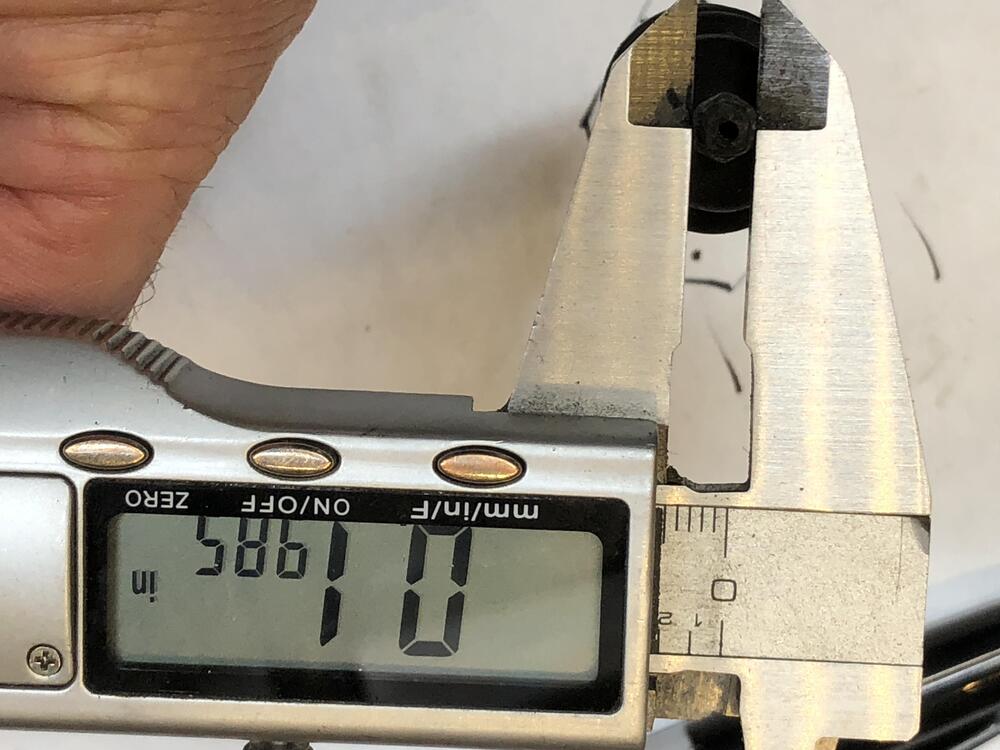
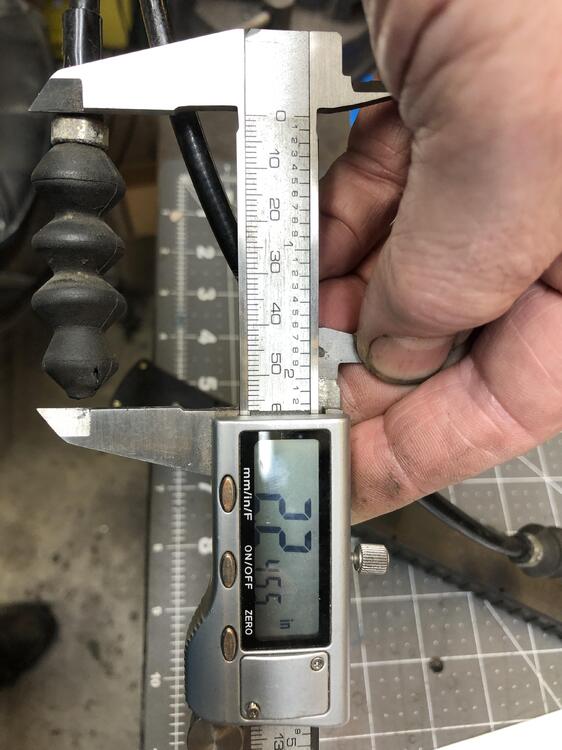
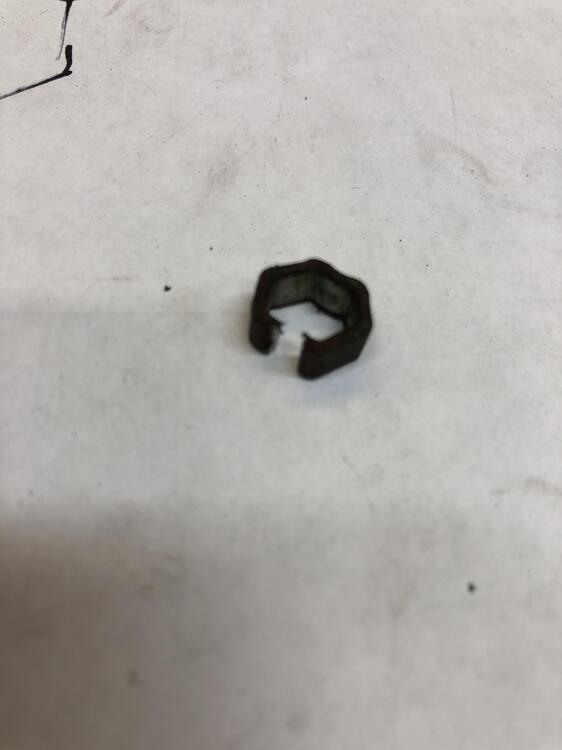
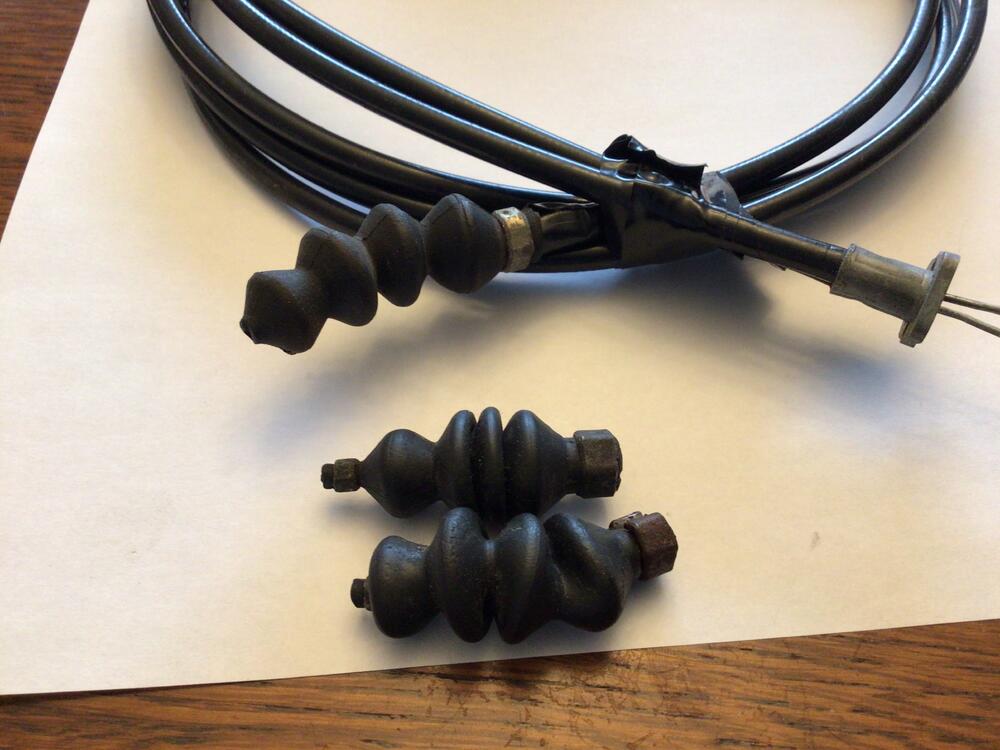
 A part that is almost always long gone on our 240z's, I am hoping to find a nearly identical to factory replacement "rubber bellows" for the choke cables for the car I am restoring. Somewhere in my thousands of hours of web-surfing, I found this picture of some of the originals: Does anyone have any originals that they could pull some measurements off of? I am looking for dimensional details of both the boots and the collars/clamps that secure the boot to the cable and sheath. I would like to fabricate the collars... but I need more info. Here are some boots I am hoping are close enough:
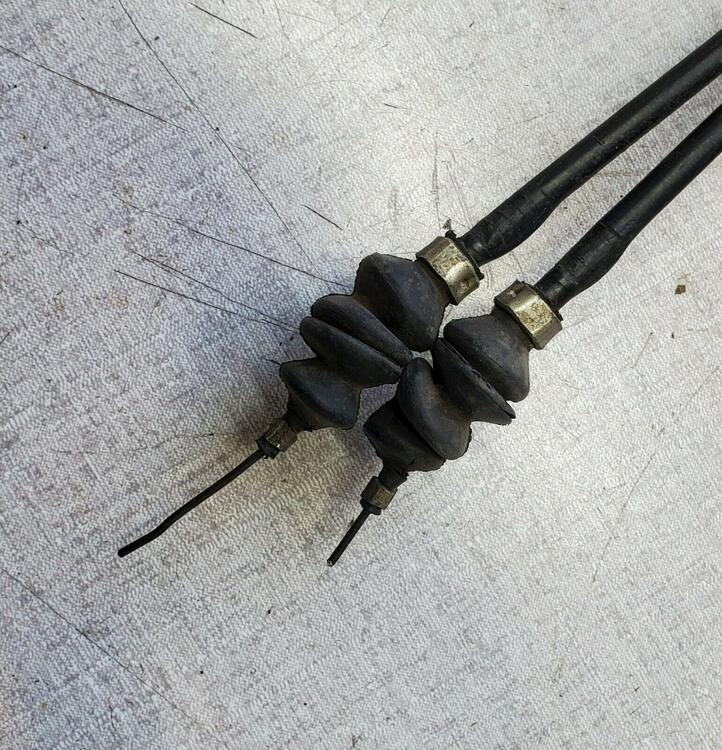


 1 point
 -
 It has been suggested before to get a digital volt meter. Still don't have one. Can't test for true voltage or resistance with a test light. Nobody can help you fix these things from a 1000 miles away if your not gonna do what they ask!!!1 point
 -
 The amount of carbon deposits on the head and pistons on the engine I rebuilt was remarkable. I’d like to mitigate that from happening again. Those deposits, hurt fuel efficiency and create hot spots I’ve read and can hurt CR. I think I’ll probably run two small independent cans like I mentioned above and see how it works. As far as CA power problems this has been brewing for years. I have no problem with going to cleaner energy sources but they have to have replacements in place before making restriction laws. I lived in Ca about half of my life. Everything has become crazy expensive there especially electricity and water. If they went full EV they’re going to need serious power plants to make that happen. New nuclear plants are illegal the CA and they’re work hard to ban coal plants too. I know they buy much of their energy from AZ. That’s just exporting your CO2. It’s going to be an interesting experiment, glad I don’t live there anymore. Sent from my iPhone using Tapatalk1 point
 -
I agree that electricity is one of the biggest hurdles. California already has issues producing and transferring power. With an enormous demand added, how will that be accomplished. Definitely not hydro! The lakes are already painfully low. Nuclears out, coal, nope. Natural gas is still an emitter. Green sources are erratic and storage of excess energy is a problem. Will be interesting to see how it plays out1 point
-
Took a break from stub axle assembly. My favorite after a fresh thick powder coating and it rubs EVERYWHERE!!!! Grrrrr.. Let me know if you need more details


 1 point
 -
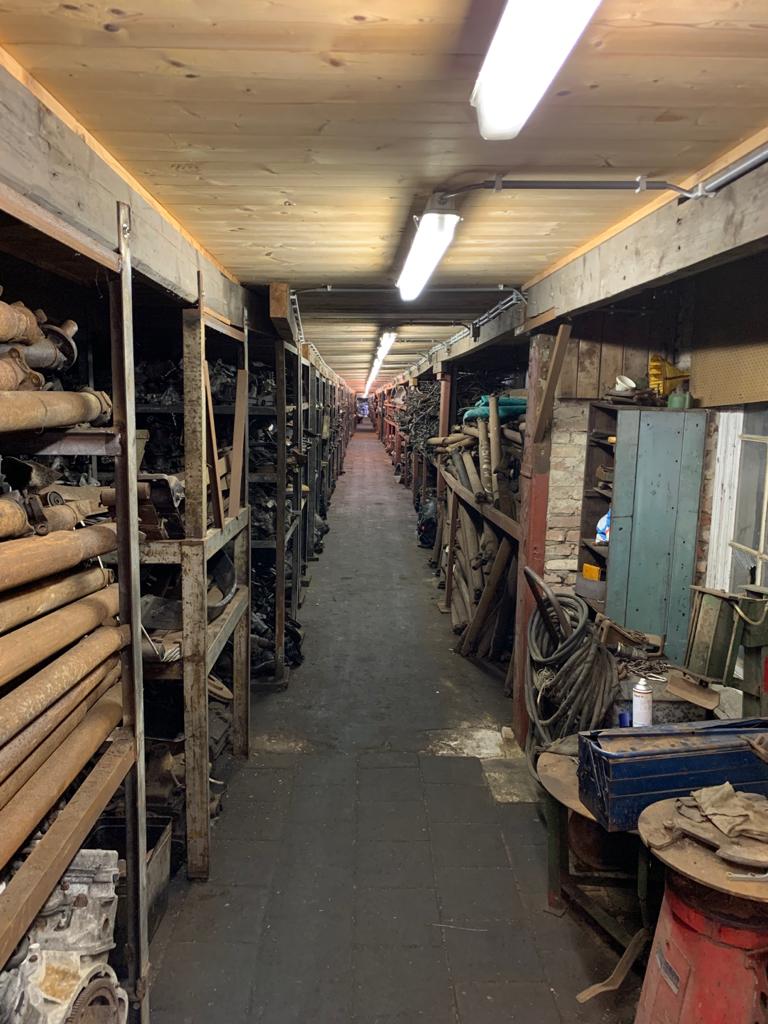
 1 pointWent back to that yunkyard today. Took some flashlights with us to do a proper search. Did not find the propshaft for the 5 speed yet but did found a low vin 240z complete engine with E88 head. Going to pick that up Offcourse... Not much L24 to be found here in europe. Also a Laurel L24 with E30 head I saw.
 1 point
 -
 I was a journeyman mechanic for 30 years, and a state certified diesel and gas emissions specialist (among many other certifications). I’ve probably forgotten more than the average shade tree mechanic knows. I am interested to see how California is going to get by without internal combustion engines. Agriculture is the state’s largest industry, with plenty of tractors and trucks. Then there is the trucking industry, and no manufacturer is currently producing all electric long haul trucks. Locomotives are another one that is going to be difficult to replace with pure electric. I wonder if anyone has worked out how they will be able to generate and distribute enough electricity to run all the cars, trucks, buses and trains. Oh, and as far as I know, no one is trying to work out how to make commercial airliners and cargo plane work reliably and safely on batteries.1 point
 -
 No but any info would be appreciated. I'm no stranger to old cars and I assume rust is a big issue especially for Midwest vehicles.1 point
 -
1 pointOh heck yeah, lots of prep work: Thoroughly clean both sides of the panels, fix any bends/dents/dings - sometimes requires multiple passes of filler primer and wet sanding, polish the stainless steel bezels, tape the front sides of the bezels. If the back sides have any surface rust: remove rust with light sanding, tape back sides of bezels, primer the back sides. No sanding on the front sides until the bezels are taped and protected. Wet sand front sides, primer paint, wet sand primer, repeat as needed, color coat paint, wet sand, usually repeat at least once, apply clear coat, very lightly wet sand to remove any dust - just a kiss with the paper! Untape the bezels, wipe down with soft cloth, grab a beer to celebrate!1 point
-
 I have 2 friends with DSI motors with the PCV port blocked. Glad he isn't doing that anymore.1 point
 -
 1 point
 -
 Oh, and forgot to mention... Since you're trying to create a complete path that clears out the entire engine interior, that's why the two vent connections are so far apart. If they were both on the valve cover, you would set up a little circle there. And if they were both on the block, you wouldn't clean out the head area. They put one on the head and one on the block so it pulls through the entire block. On "V" style (and opposed) engines, you can put one vent on each valve cover because they are each joined to each other through the block cavity. But on the inline engines, you need one at the bottom and one at the top.1 point
 -
The top and bottom are not sealed at all. There are huge holes between top and bottom at both the front (where the timing chain lives), and the rear where the valve train oil drains back down into the oil pan. Top and bottom are in no way sealed from eachother. The point of the two vents is that you are supposed to have positive crankcase ventilation (PCV) under all operating conditions. With just one vent hole (located at either top or bottom) you could vent off the blow-by, but you would not be able to completely remove the vapors from the block. By having two vents, you can set up a circulatory path and actually refresh the air inside the crankcase with fresh clean air. This enables you to do more than just vent off the excess... It allows you to evaporate off the water vapor and more thoroughly remove any corrosive blow-by gasses.1 point
-
 I agree, at times air is drawn in through the valve cover vent and that would be difficult if there is always the positive pressure from blow by from the bottom end.1 point
 -
1 pointHaving removed and replaced that center heater control/vent many times I would suggest you remove the glove box cardboard and access it from there, the 4 stiff wire cables going to the various vent levers can be a real buggar.1 point
-
You could post photos or look at what RockAuto has. It's probably the same sender.1 point
-
1 point
-
 So here’s a recent DSI engine pic below.- he doesn’t block them. I’m not convinced by the suggestion that if you block it, the fumes would just come out of the top. Why would Nissan and other manufacturers have gone through the trouble of putting vents at the top and off the block? But I don’t know enough about how sealed the bottom is from the top to have an informed opinion. And here’s a novel approach by [mention=32065]jonbill[/mention] - I love the no nonsense mindset! But maybe he can shed light on how he fixed it to the block.1 point
 -
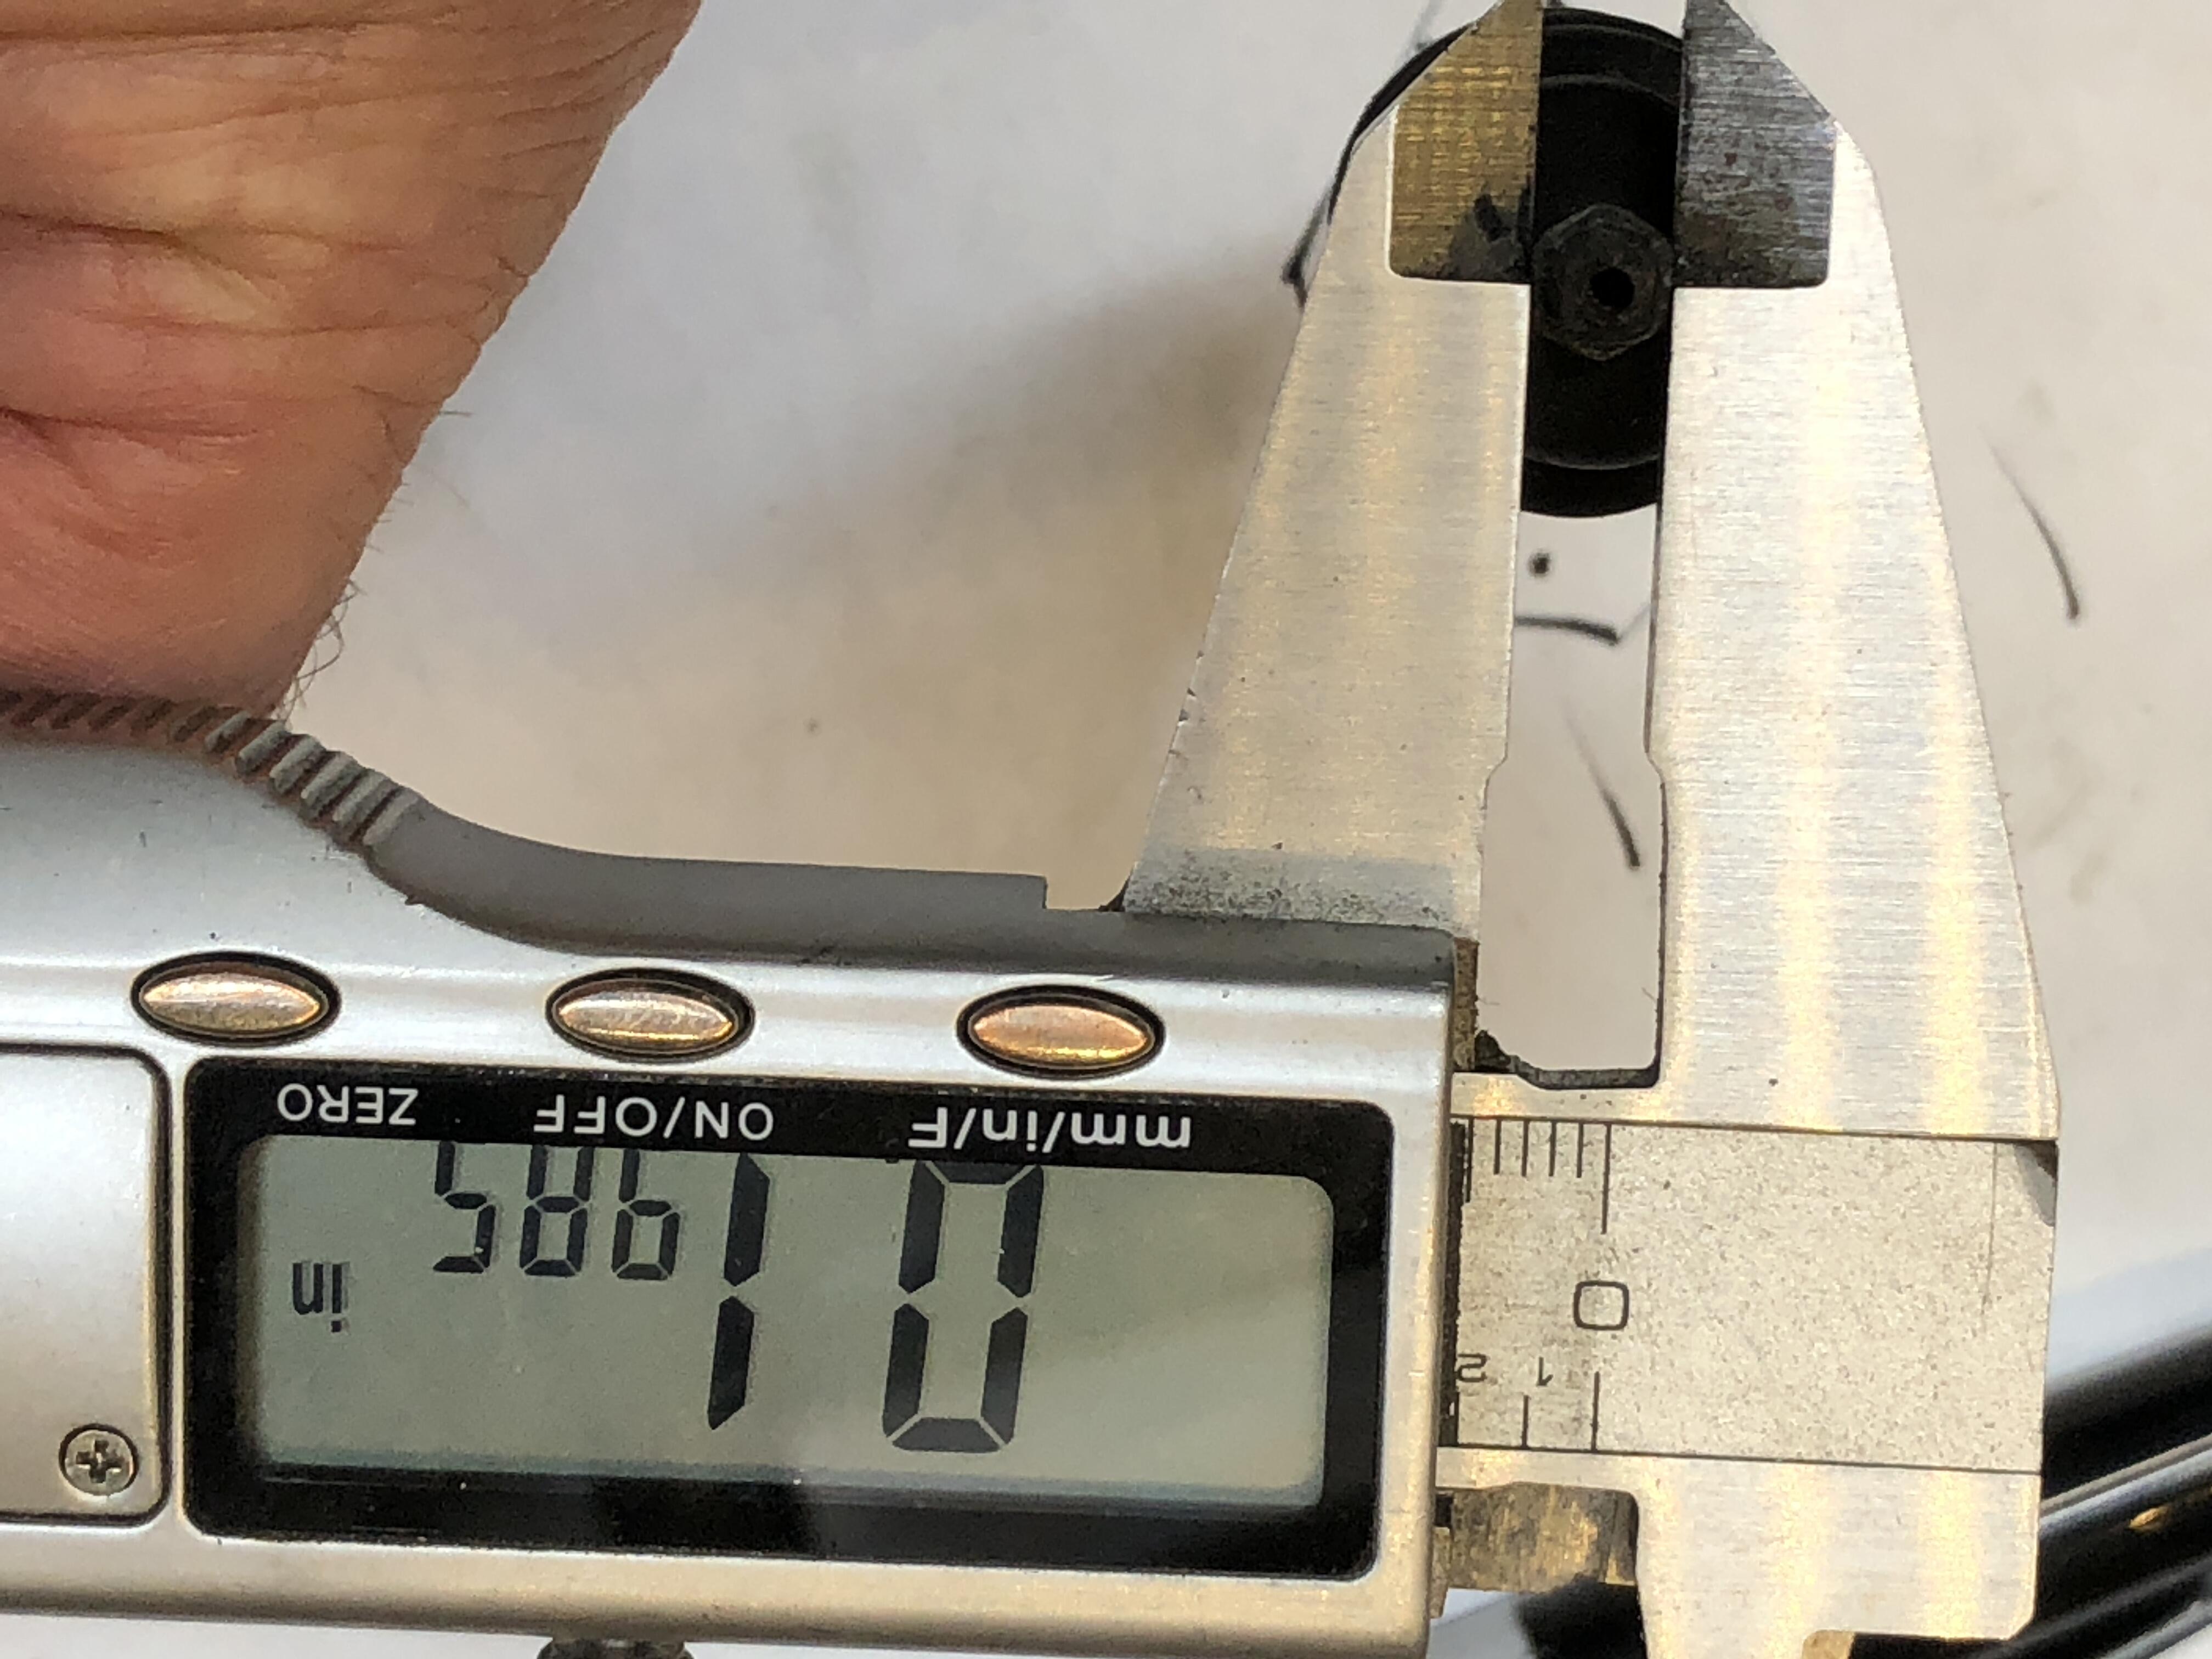
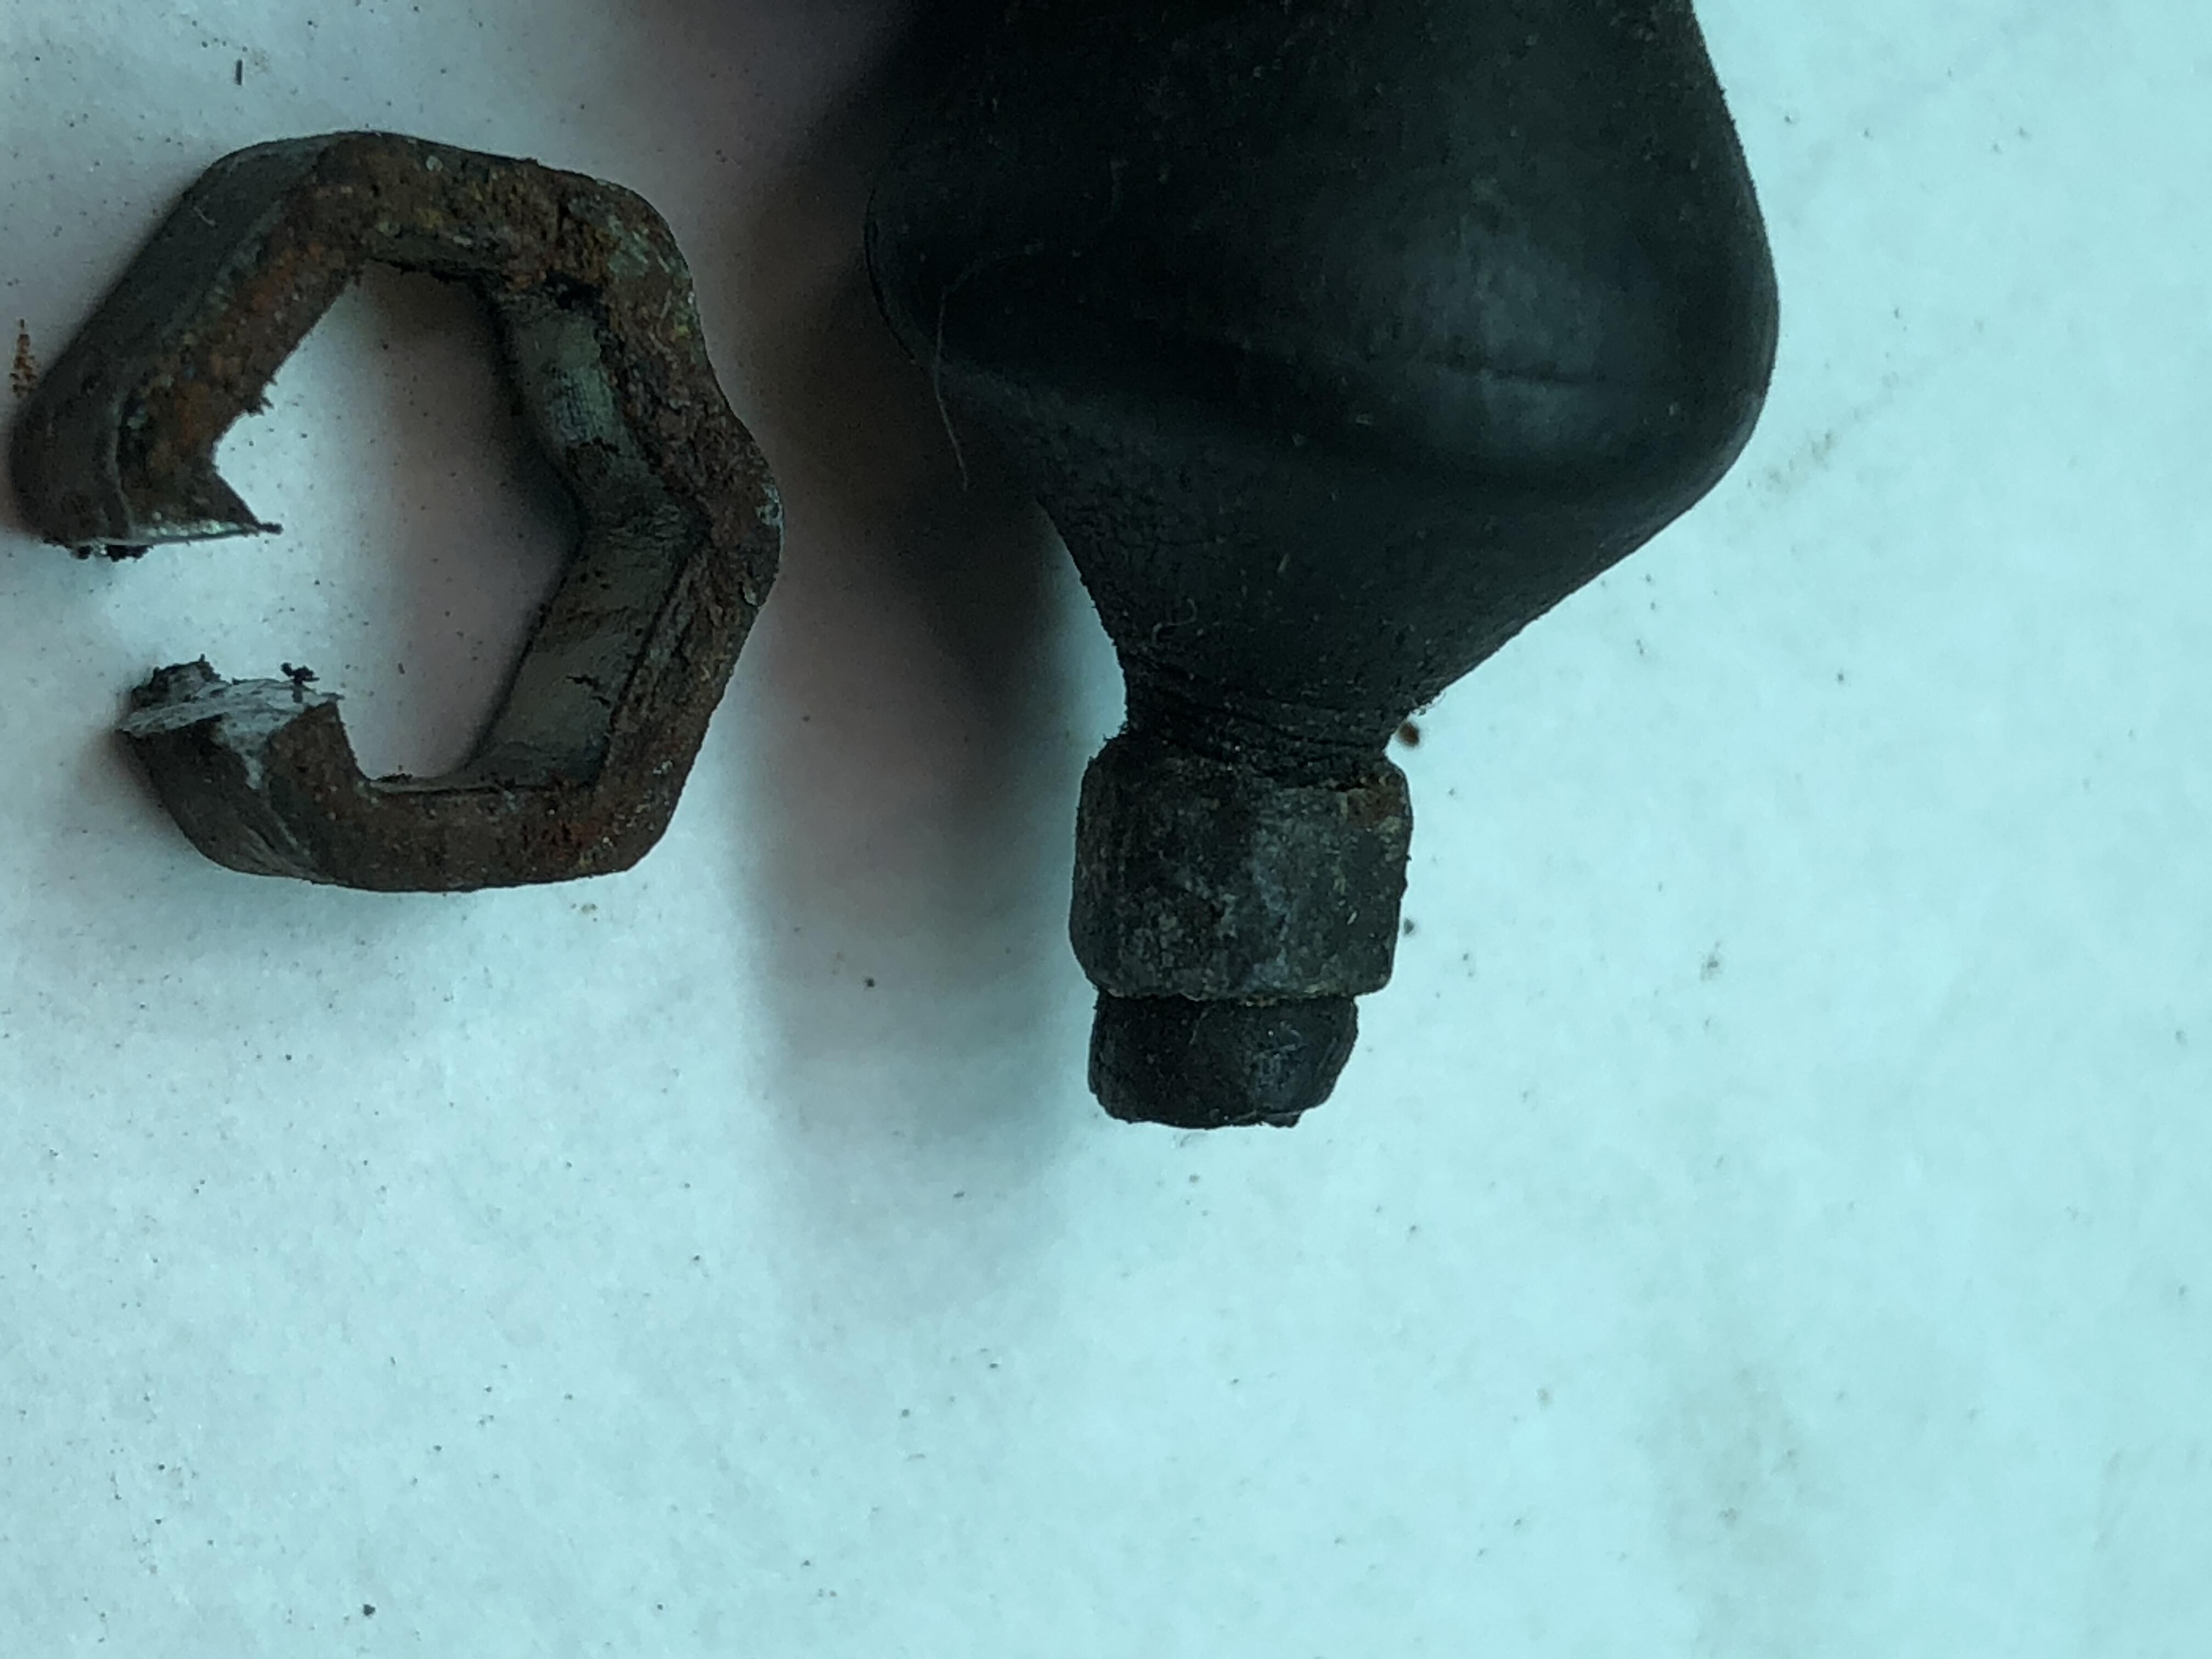
The sum total of my choke cable boot collection.
 1 point
 -
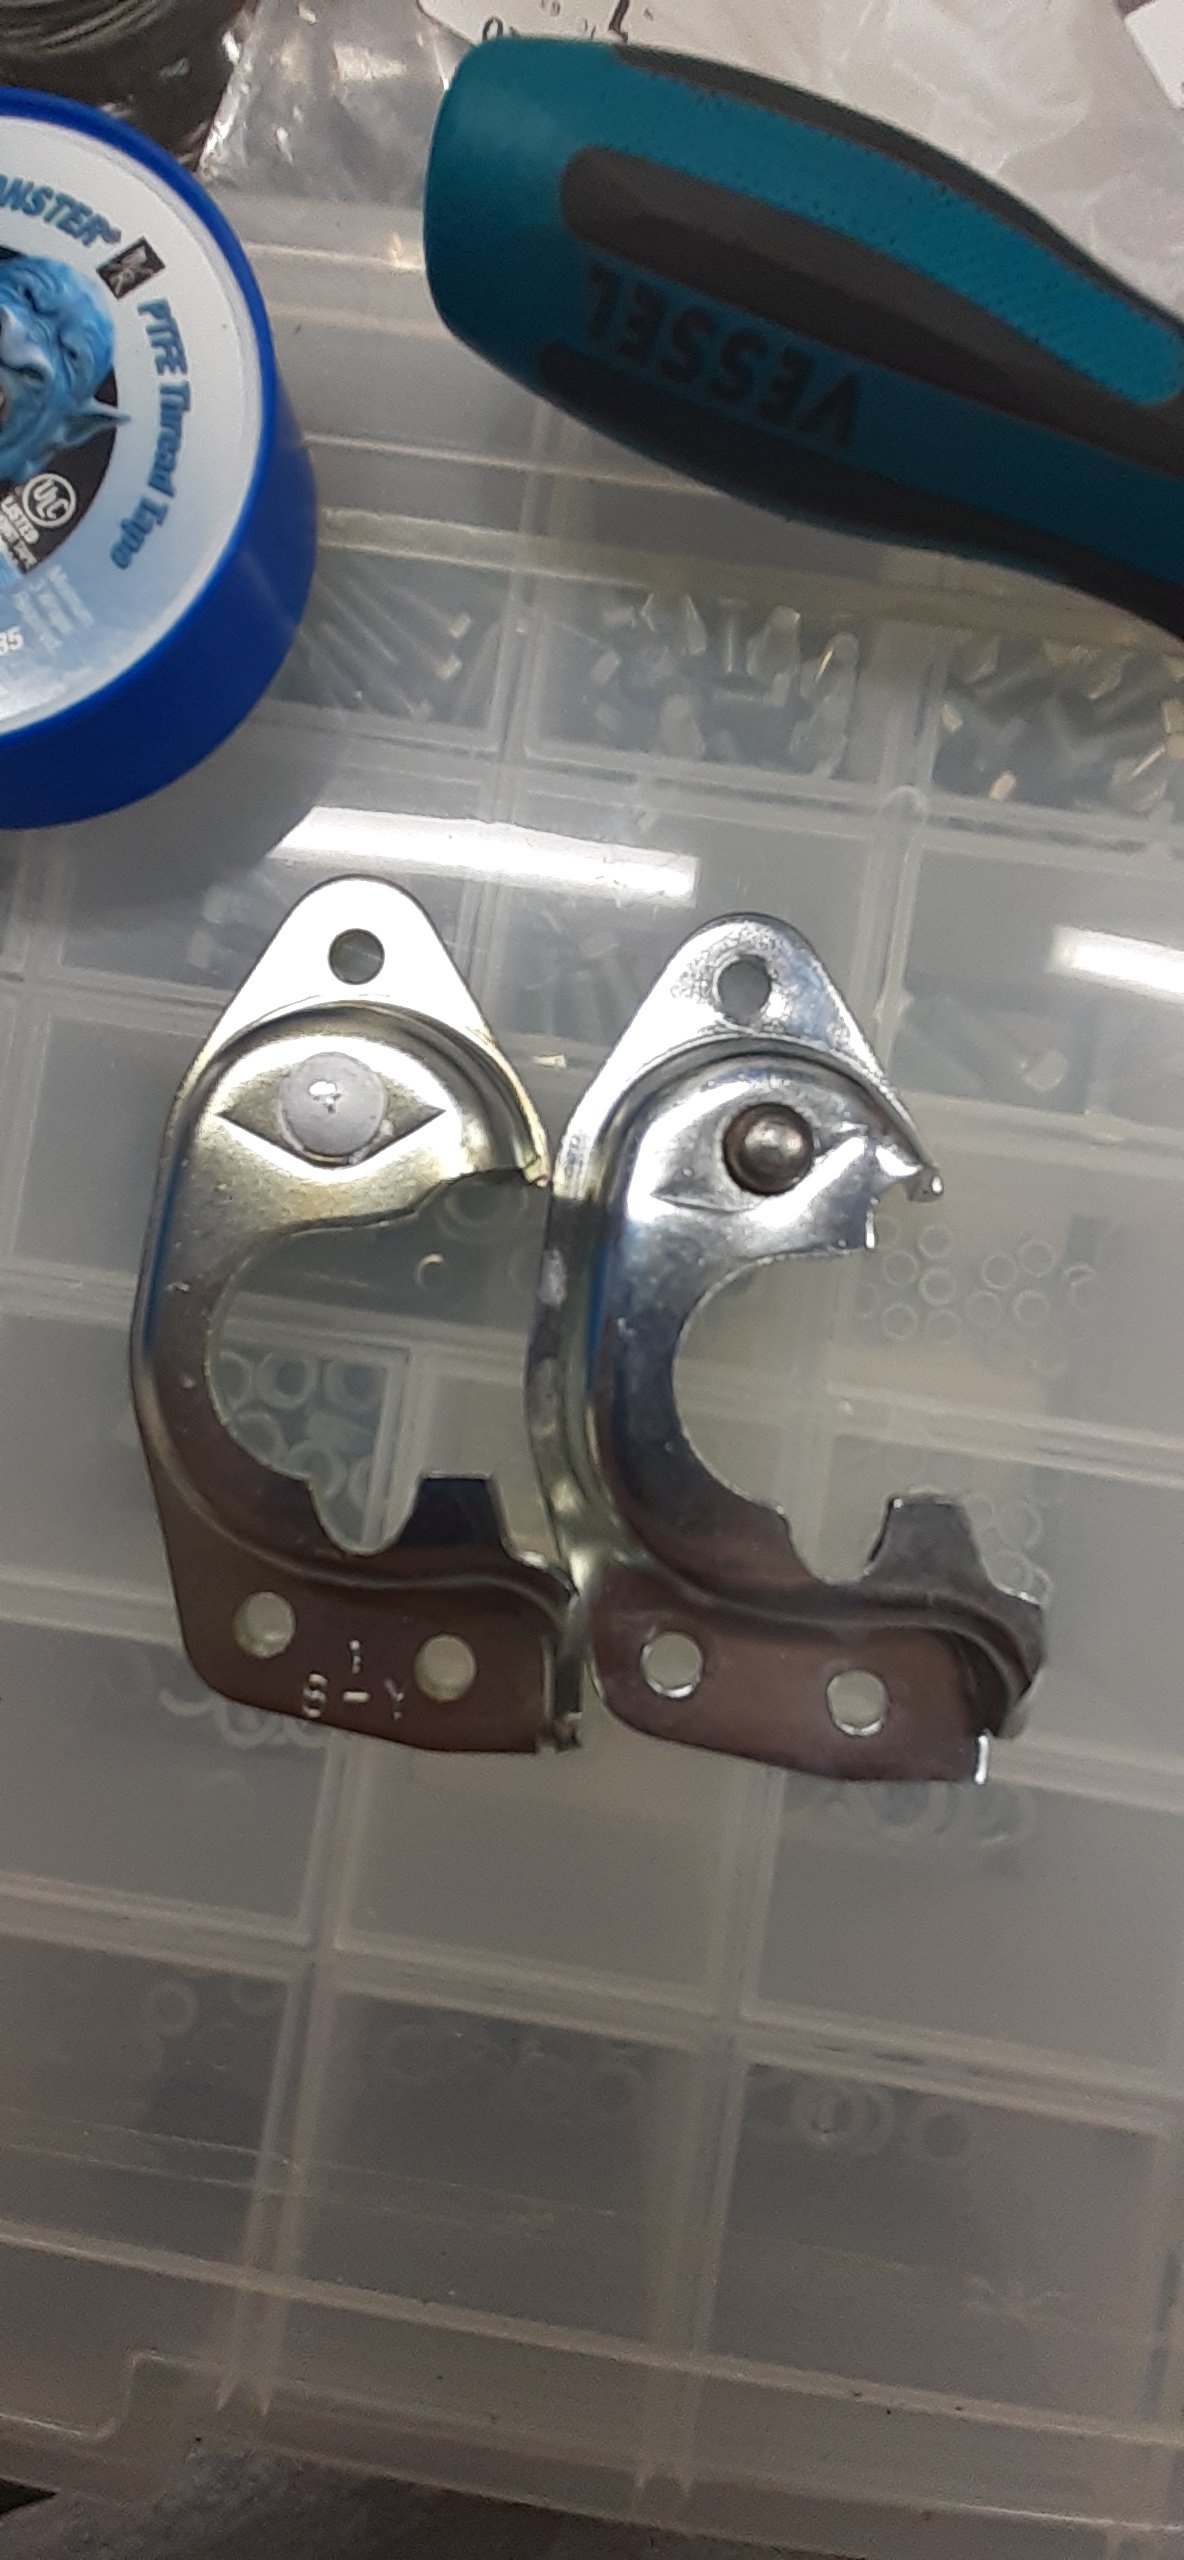
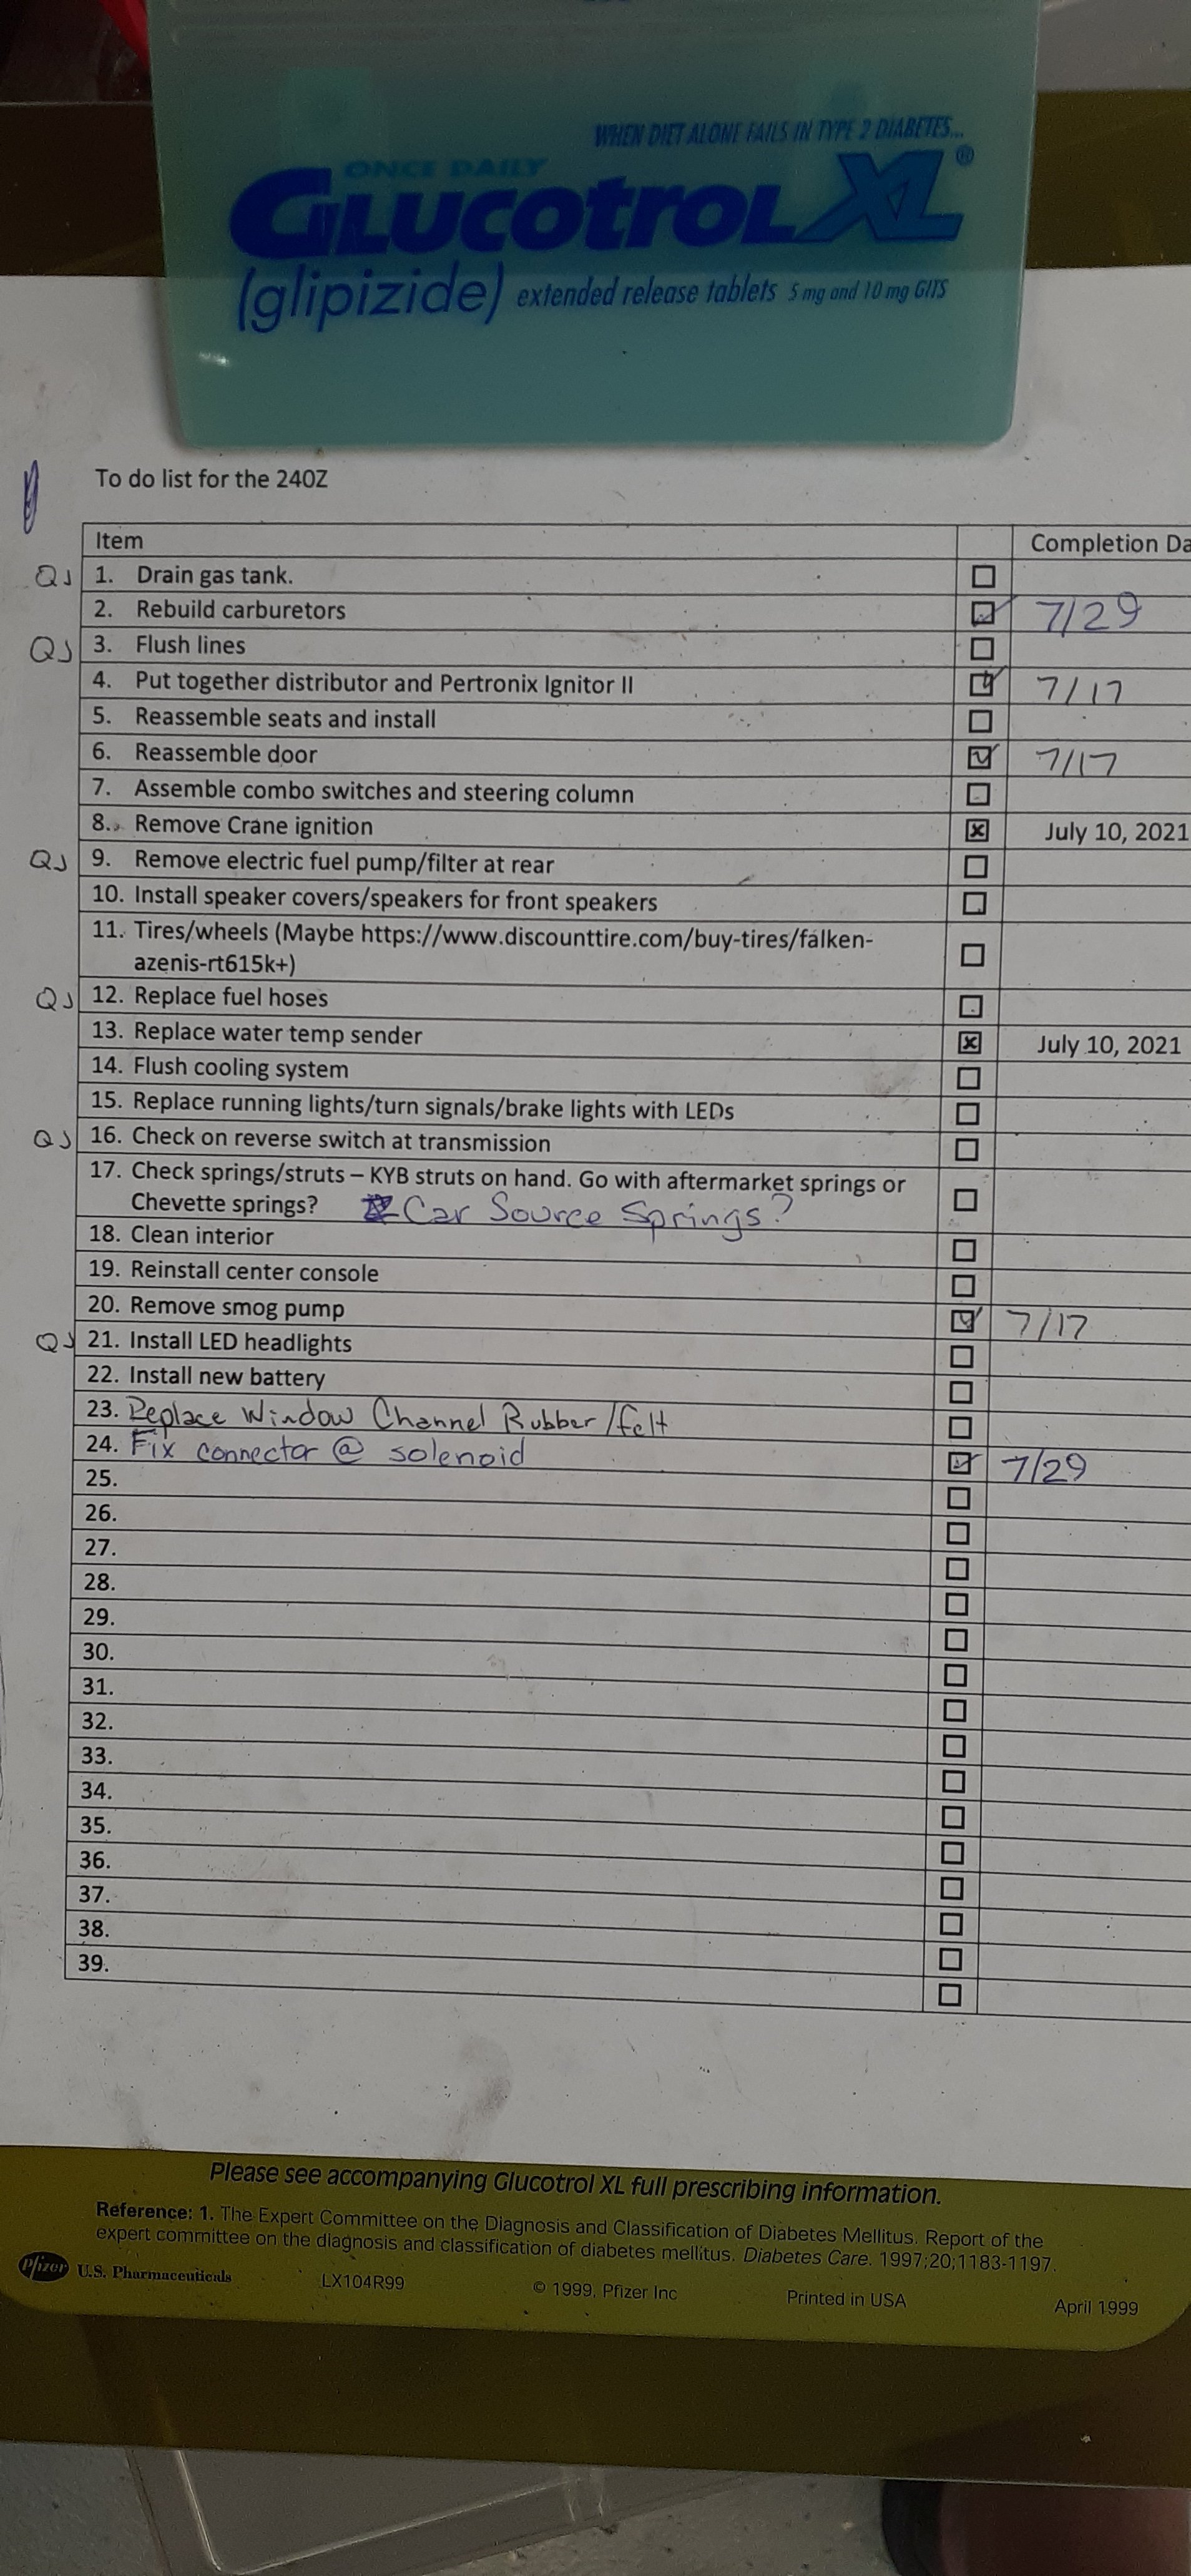
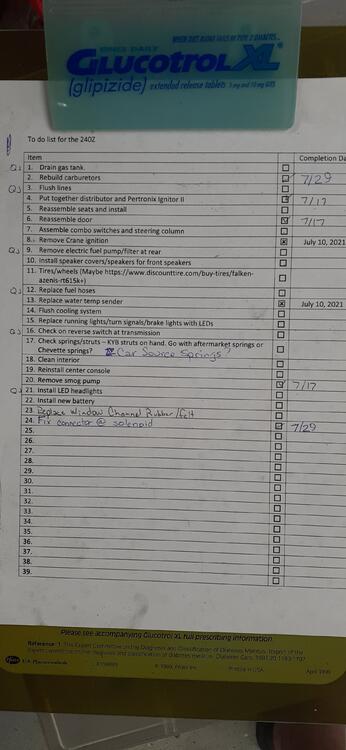
1 pointI installed the Nissan door striker latch. After a little adjusting, the door closes and latches just like it should. Before I did the install, I asked the wife to pick out which latch was stock and which was aftermarket. She picked the wrong one, but I thought it was for good reasons. We compared the two, and she pointed out some details that I didn't noticed on first inspection. The Nissan latch is on the left. The aftermarket latch comes down too far at the top, and it looks thicker on the left side. I'm thinking that it may not allow the striker to come in far enough to latch reliably. After being satisfied with the door, I turned my attention to finishing off the carburetors. I installed the banjo filters, buttoned up the carburetors and installed them back on the intake. They will be ready when I need to call on them to fuel the engine. Here's a photo of the new filter next to the old, rusty filter. I finished up the evening by replacing some connectors at the solenoid. That allowed me to mark another thing off the list. The window channel felt should arrive on Monday, so it will go in next week. The new air cylinder for the QuickJack is estimated for Wednesday, so I should be able to get the car in the air the following weekend.


 1 point
 -
 There is bad information out there on the various web sites about the Z car transmissions. And the kits are incomplete. Here is where EuroDat got that drawing. Compare the part numbers and you might be able to confirm that it's the same bearing used in the later four and five speeds. Then use EuroDats's writeup to cross-reference. Click through the four speed page and you'll find the early 4 speed. You can probably find a cross-reference to the Nissan part number also. http://www.carpartsmanual.com/datsun/Z-1969-1978/power-train/transmission-gears1 point
 -
 I can't help much with gear boxes except to say that sending the tailshaft to Australia and getting rid of the monkey motion was the best thing that ever could happen to the A box. I couldn't believe the difference and how precise the shifts were. The owner was over the moon with the rebuild. Lou Mondello is the man. He has a machinist that makes the magic striker rod .1 point
 -
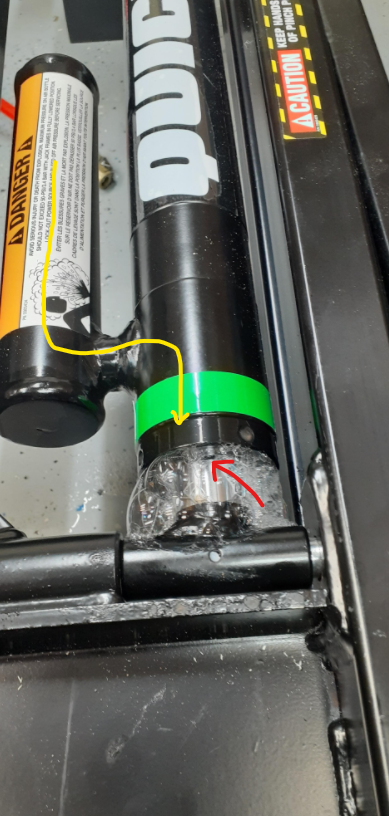
1 pointThe leak is at the seal of the piston where the silver shaft goes in. Only air can leak out. The hydraulic seal is functional. Apparently it is still safe to use like that, but the new part should be sent out. I don't mind having to replace it myself. It's a pretty straightforward procedure from what I can tell by looking at it (and from the email the support person sent). I have to undo a couple of bolts, remove the bad cylinder, slide in the new cylinder, put the bolts back, put air in the air cylinder, and bleed the hydraulic cylinder. I don't envision taking too long.
 1 point
 -
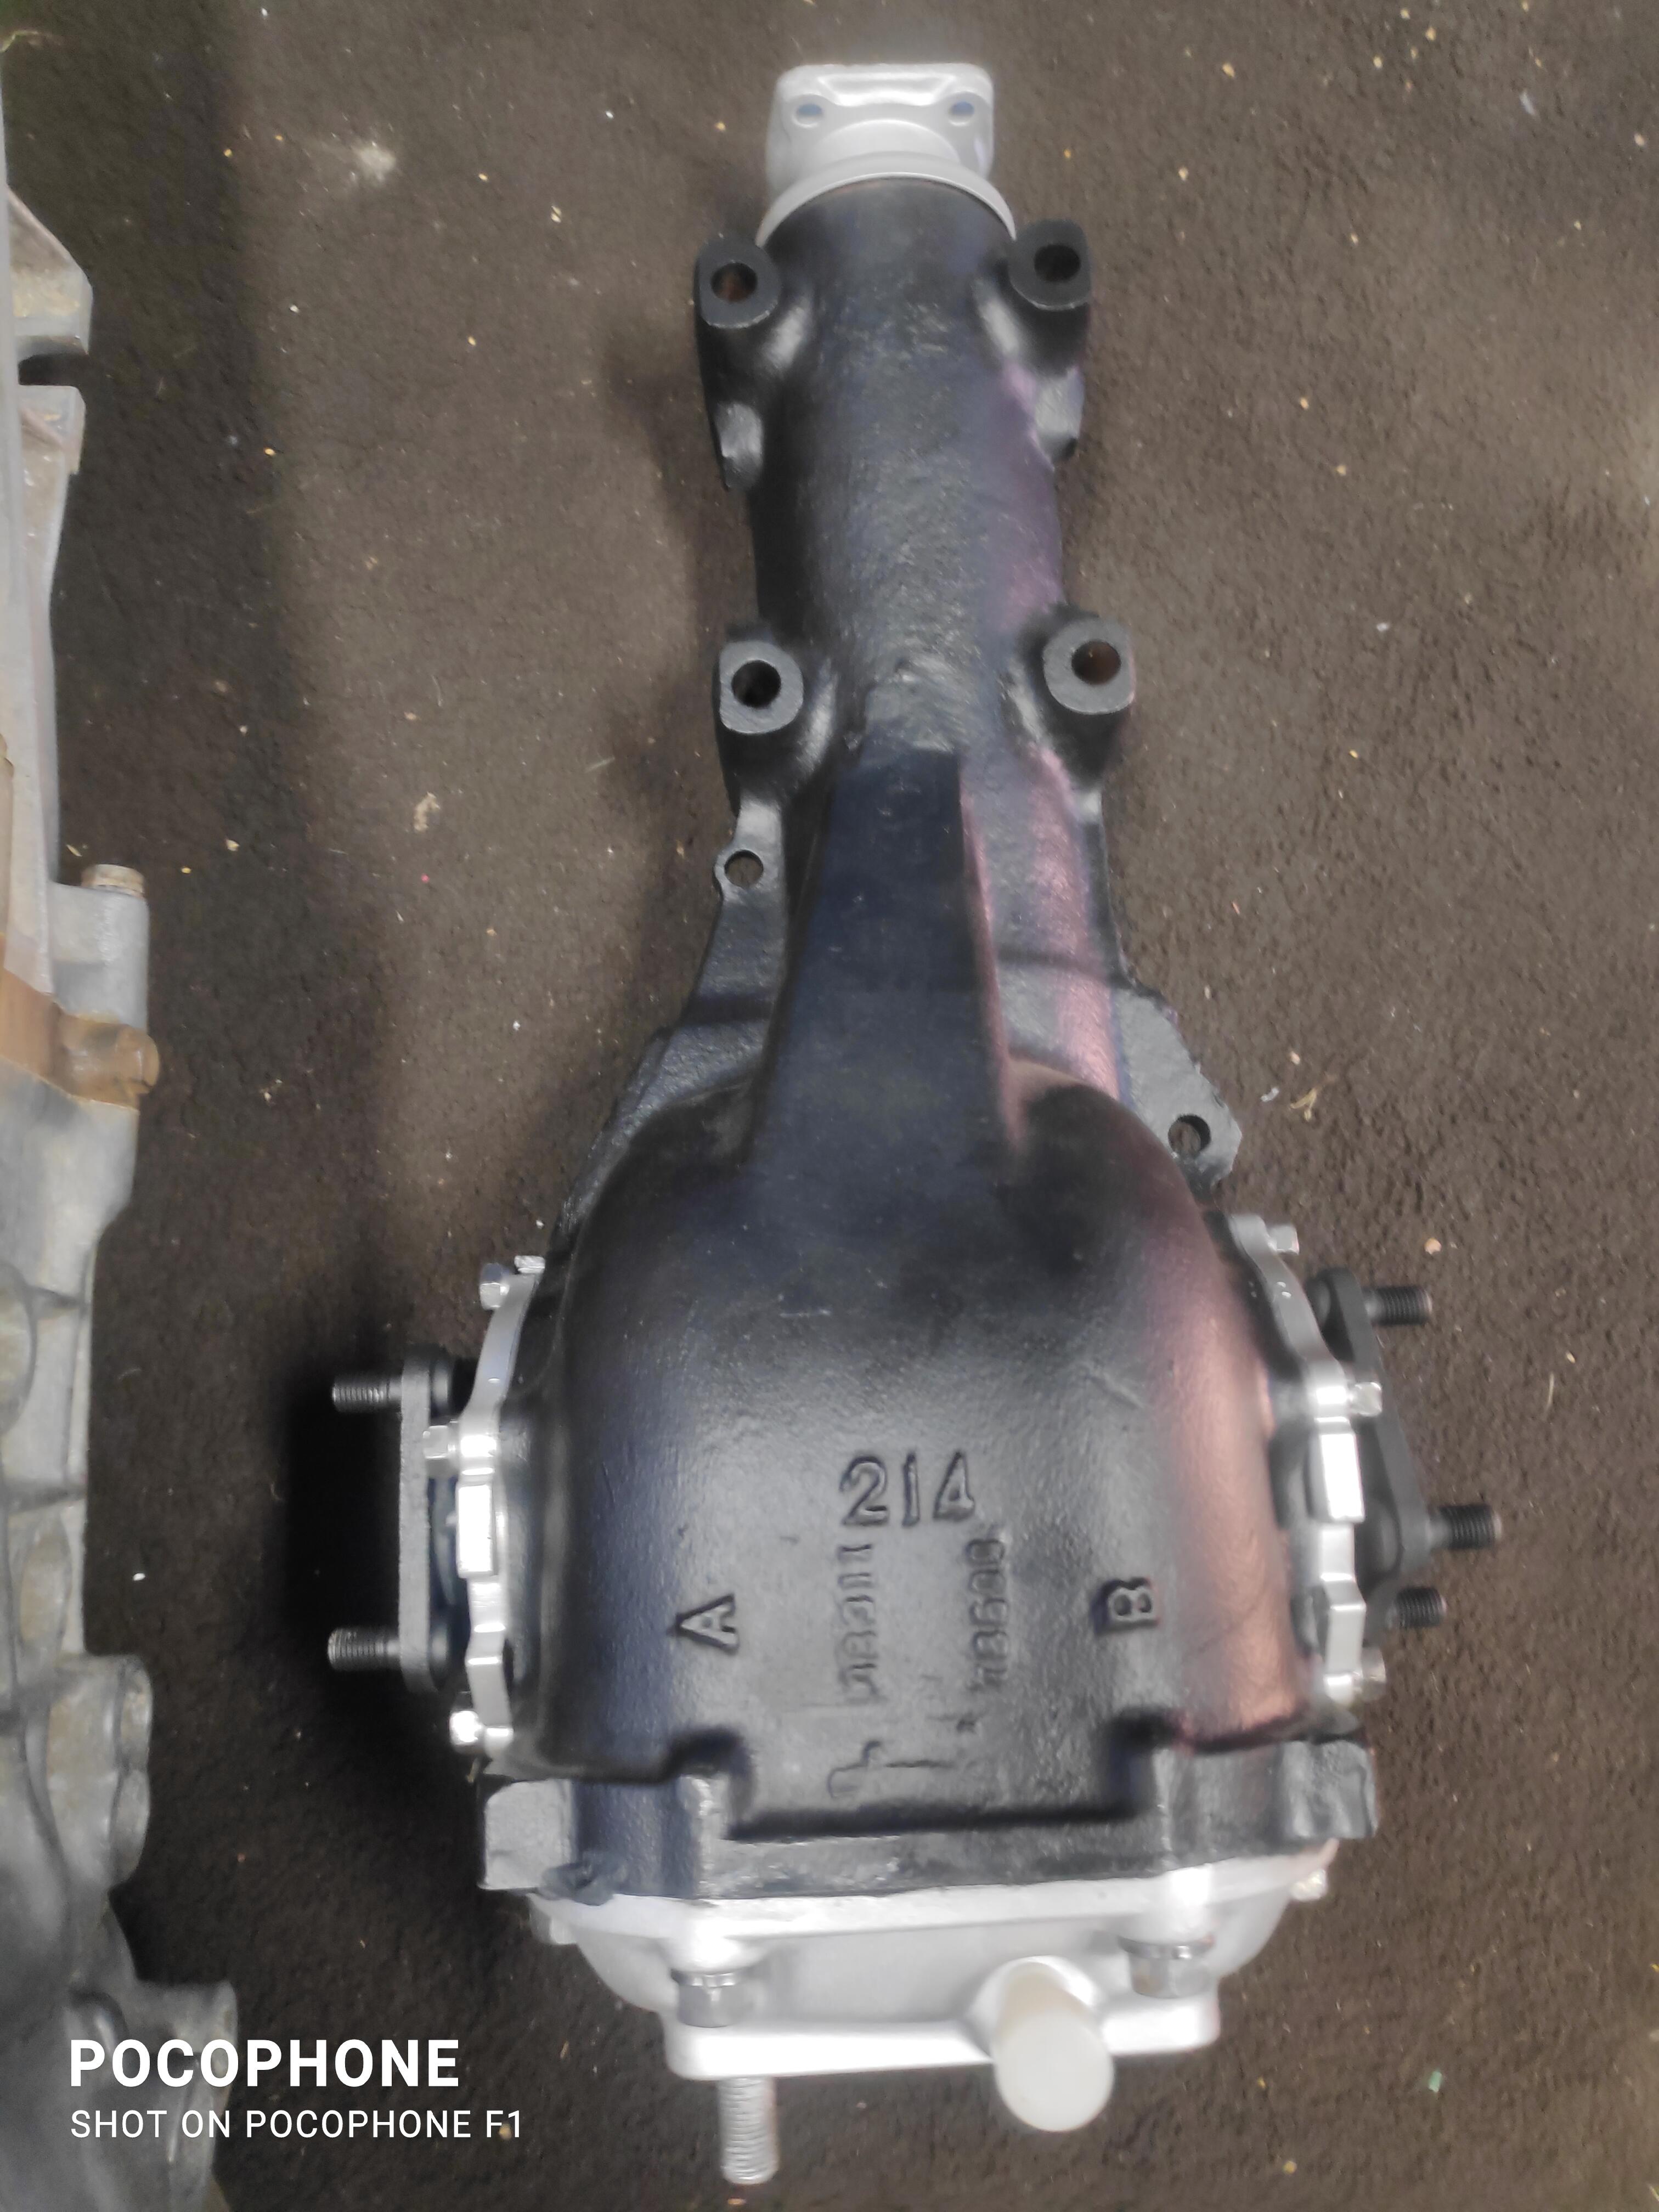
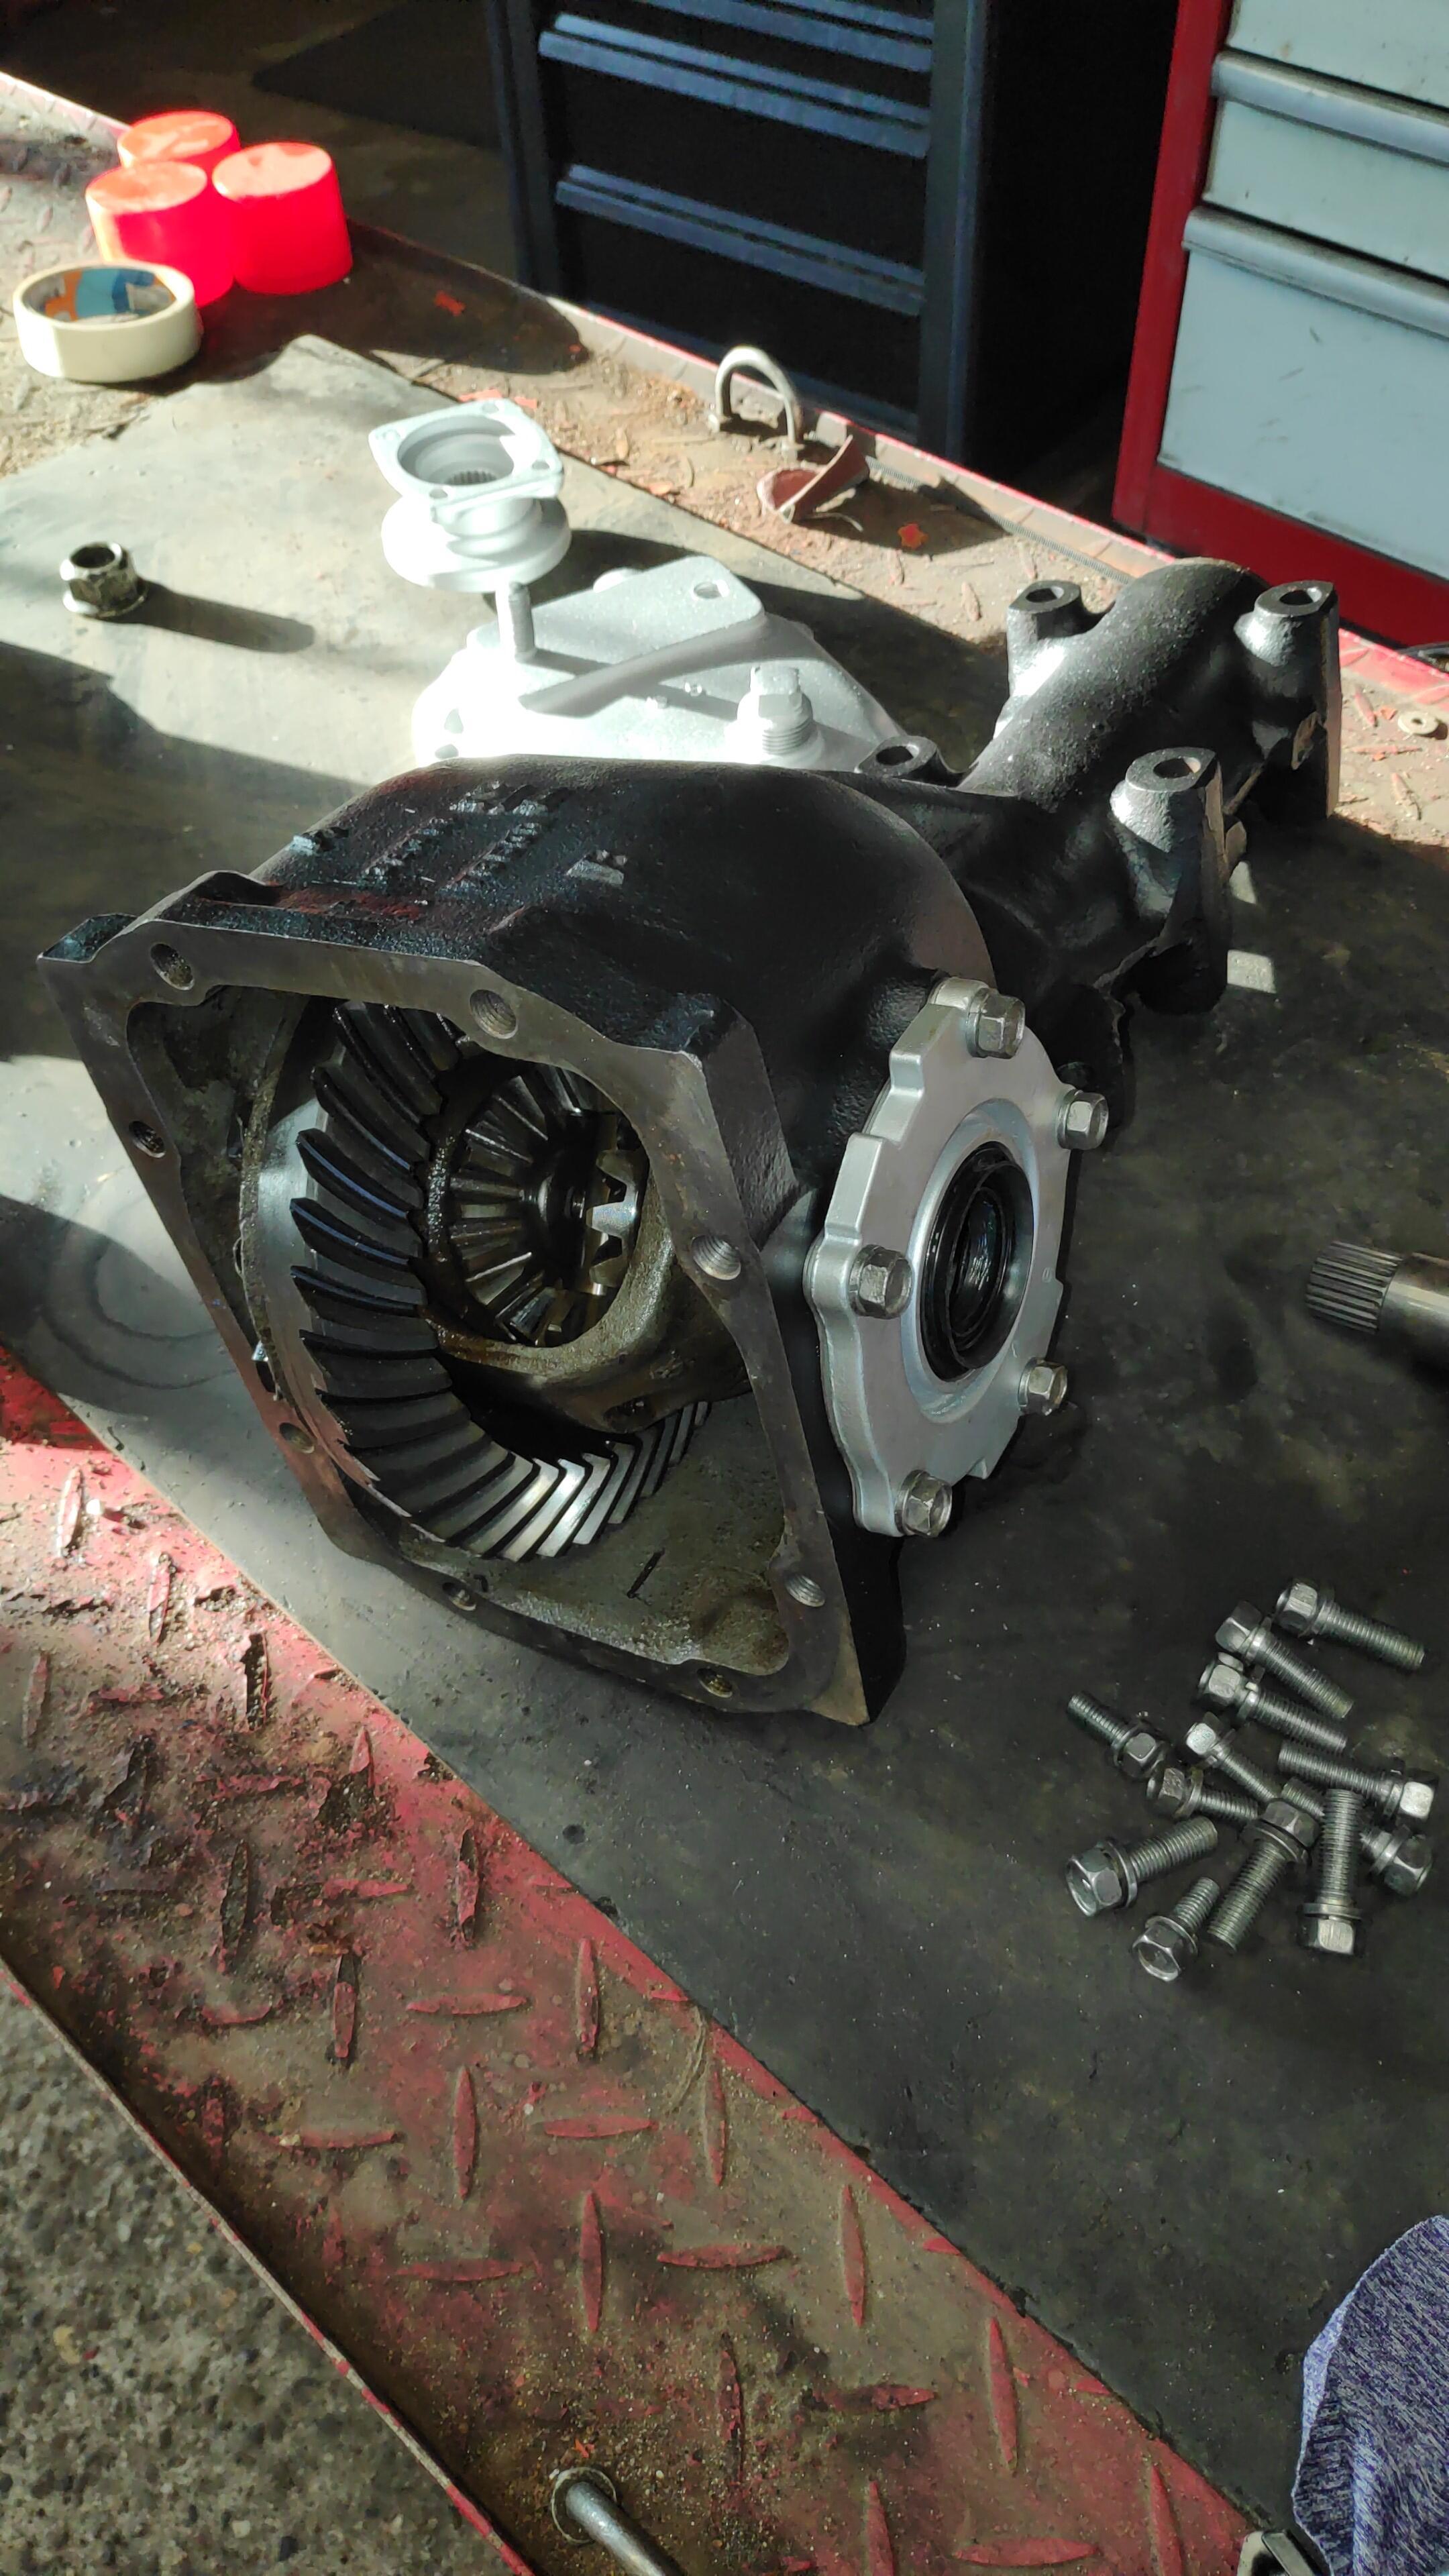
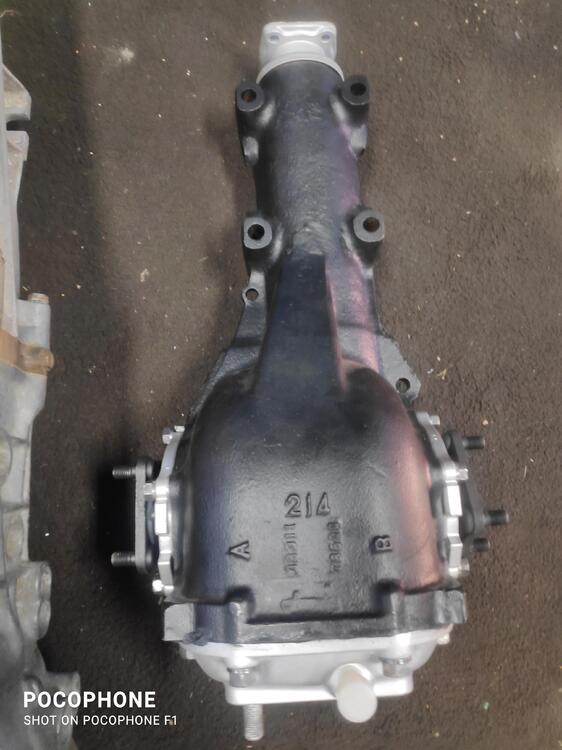
1 pointR180 3.900 refurbished. Took it all apart new seals oem . Rest was in good shape bearings etc.

 1 point
 -
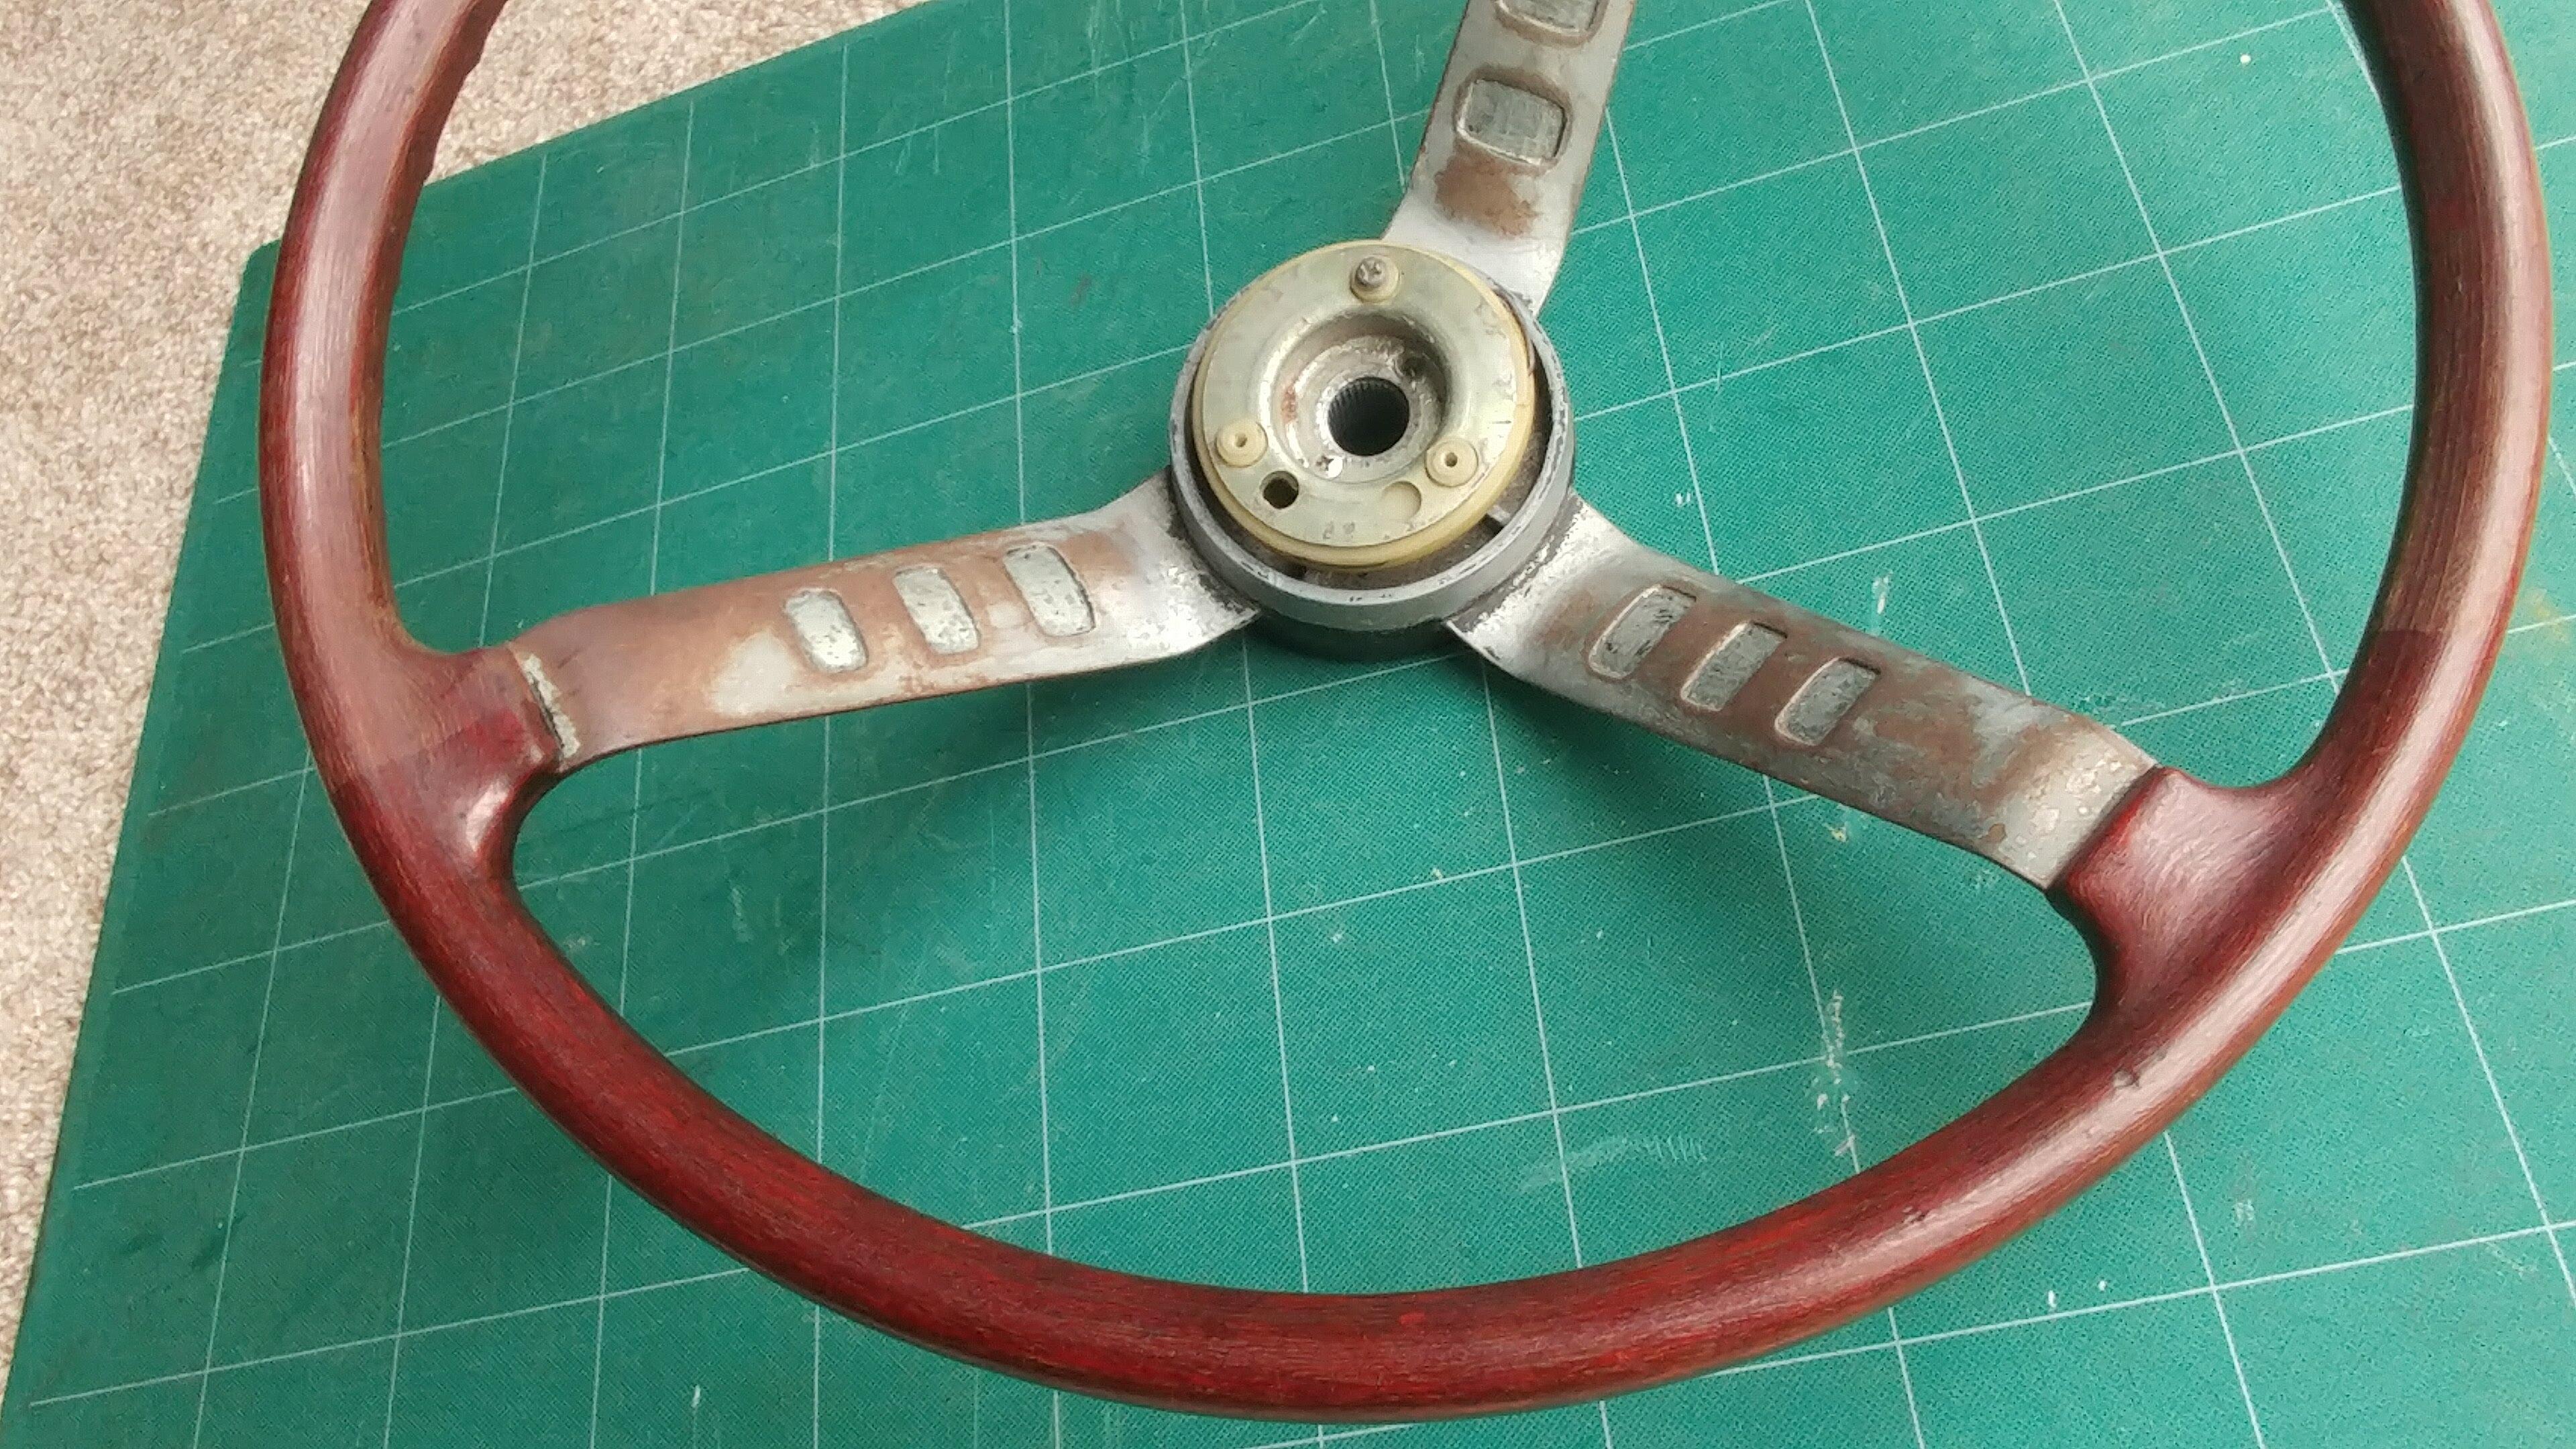
1 pointThe hub should not require any special care or treatment. Remove the horn elements and set them aside for a good cleaning. Strip and clean the spokes and hub for your paint prep. I found that refinishing the rim before painting the spokes and hub worked best for me. This is a fun and satisfying project, looking forward to your results.1 point
-
 1 pointA little of topic but I have tested a product called Revive to refresh the finish of an old steering wheel from my parts car. I was very impressed with the result and there is no greasy feel to the surface. This steering was very grey looking before I started, but I didn't take a picture at that state. I first cleaned the wheel with soap and water and after it was thoroughly dry I applied the product.
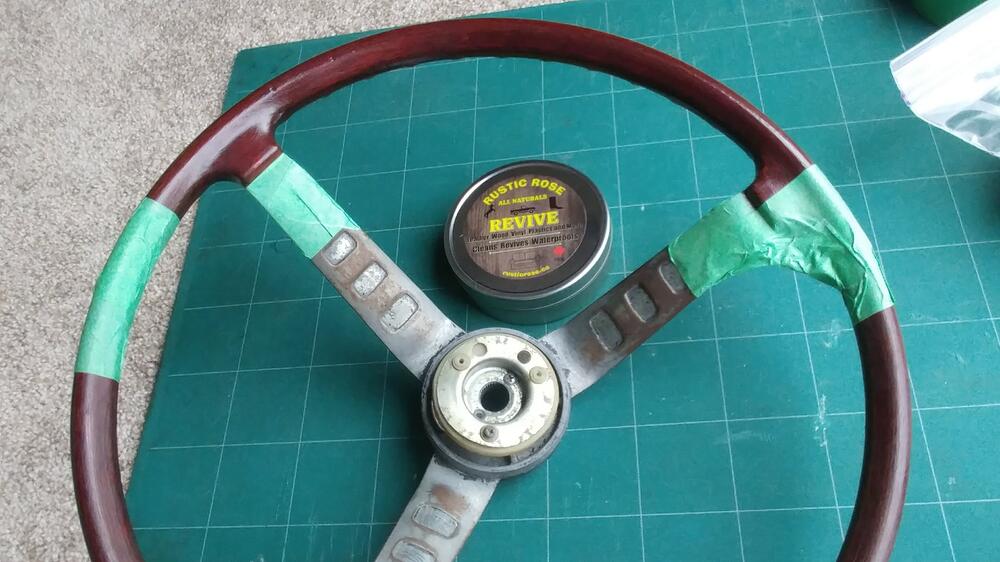
 1 point
 -
I’m sure someone on the forum will chime in that knows how to refit this. I can’t be the only one that has this problem. I imagine you can put a sleeve in there and re-press it in. Maybe an epoxy weld like JB weld might work too. I’d rather have a better solution that that. Any thoughts on the PVC delete for EFI catch can. Captain Obvious might have an answer for us.1 point
-
 1 pointOne of the sources of shake for me was the torque on the tension control arm. These cars seem to be sensitive when it comes to steering…. unless your @siteunseen his car apparently is butter smooth 🙂1 point
 -
 Seems fair. A decent car even after the die grinder bounces.1 point
 -
1 pointThe paint match was discovered by one of our fellow members. The color coat is Dupli-color BFM0360 Dark Shadow Gray, a Ford color. It is topped by Dupli-color Matte Wheel Clearcoat to eliminate the gloss of the color coat. All are spray cans.1 point
-
 1 point