Leaderboard
-

SJZ
Free Member5Points43Posts -


siteunseen
Free Member3Points14,898Posts -


Zed Head
Free Member3Points18,759Posts -

Barefootdan
Free Member2Points275Posts
Popular Content
Showing content with the highest reputation on 09/03/2021 in all areas
-
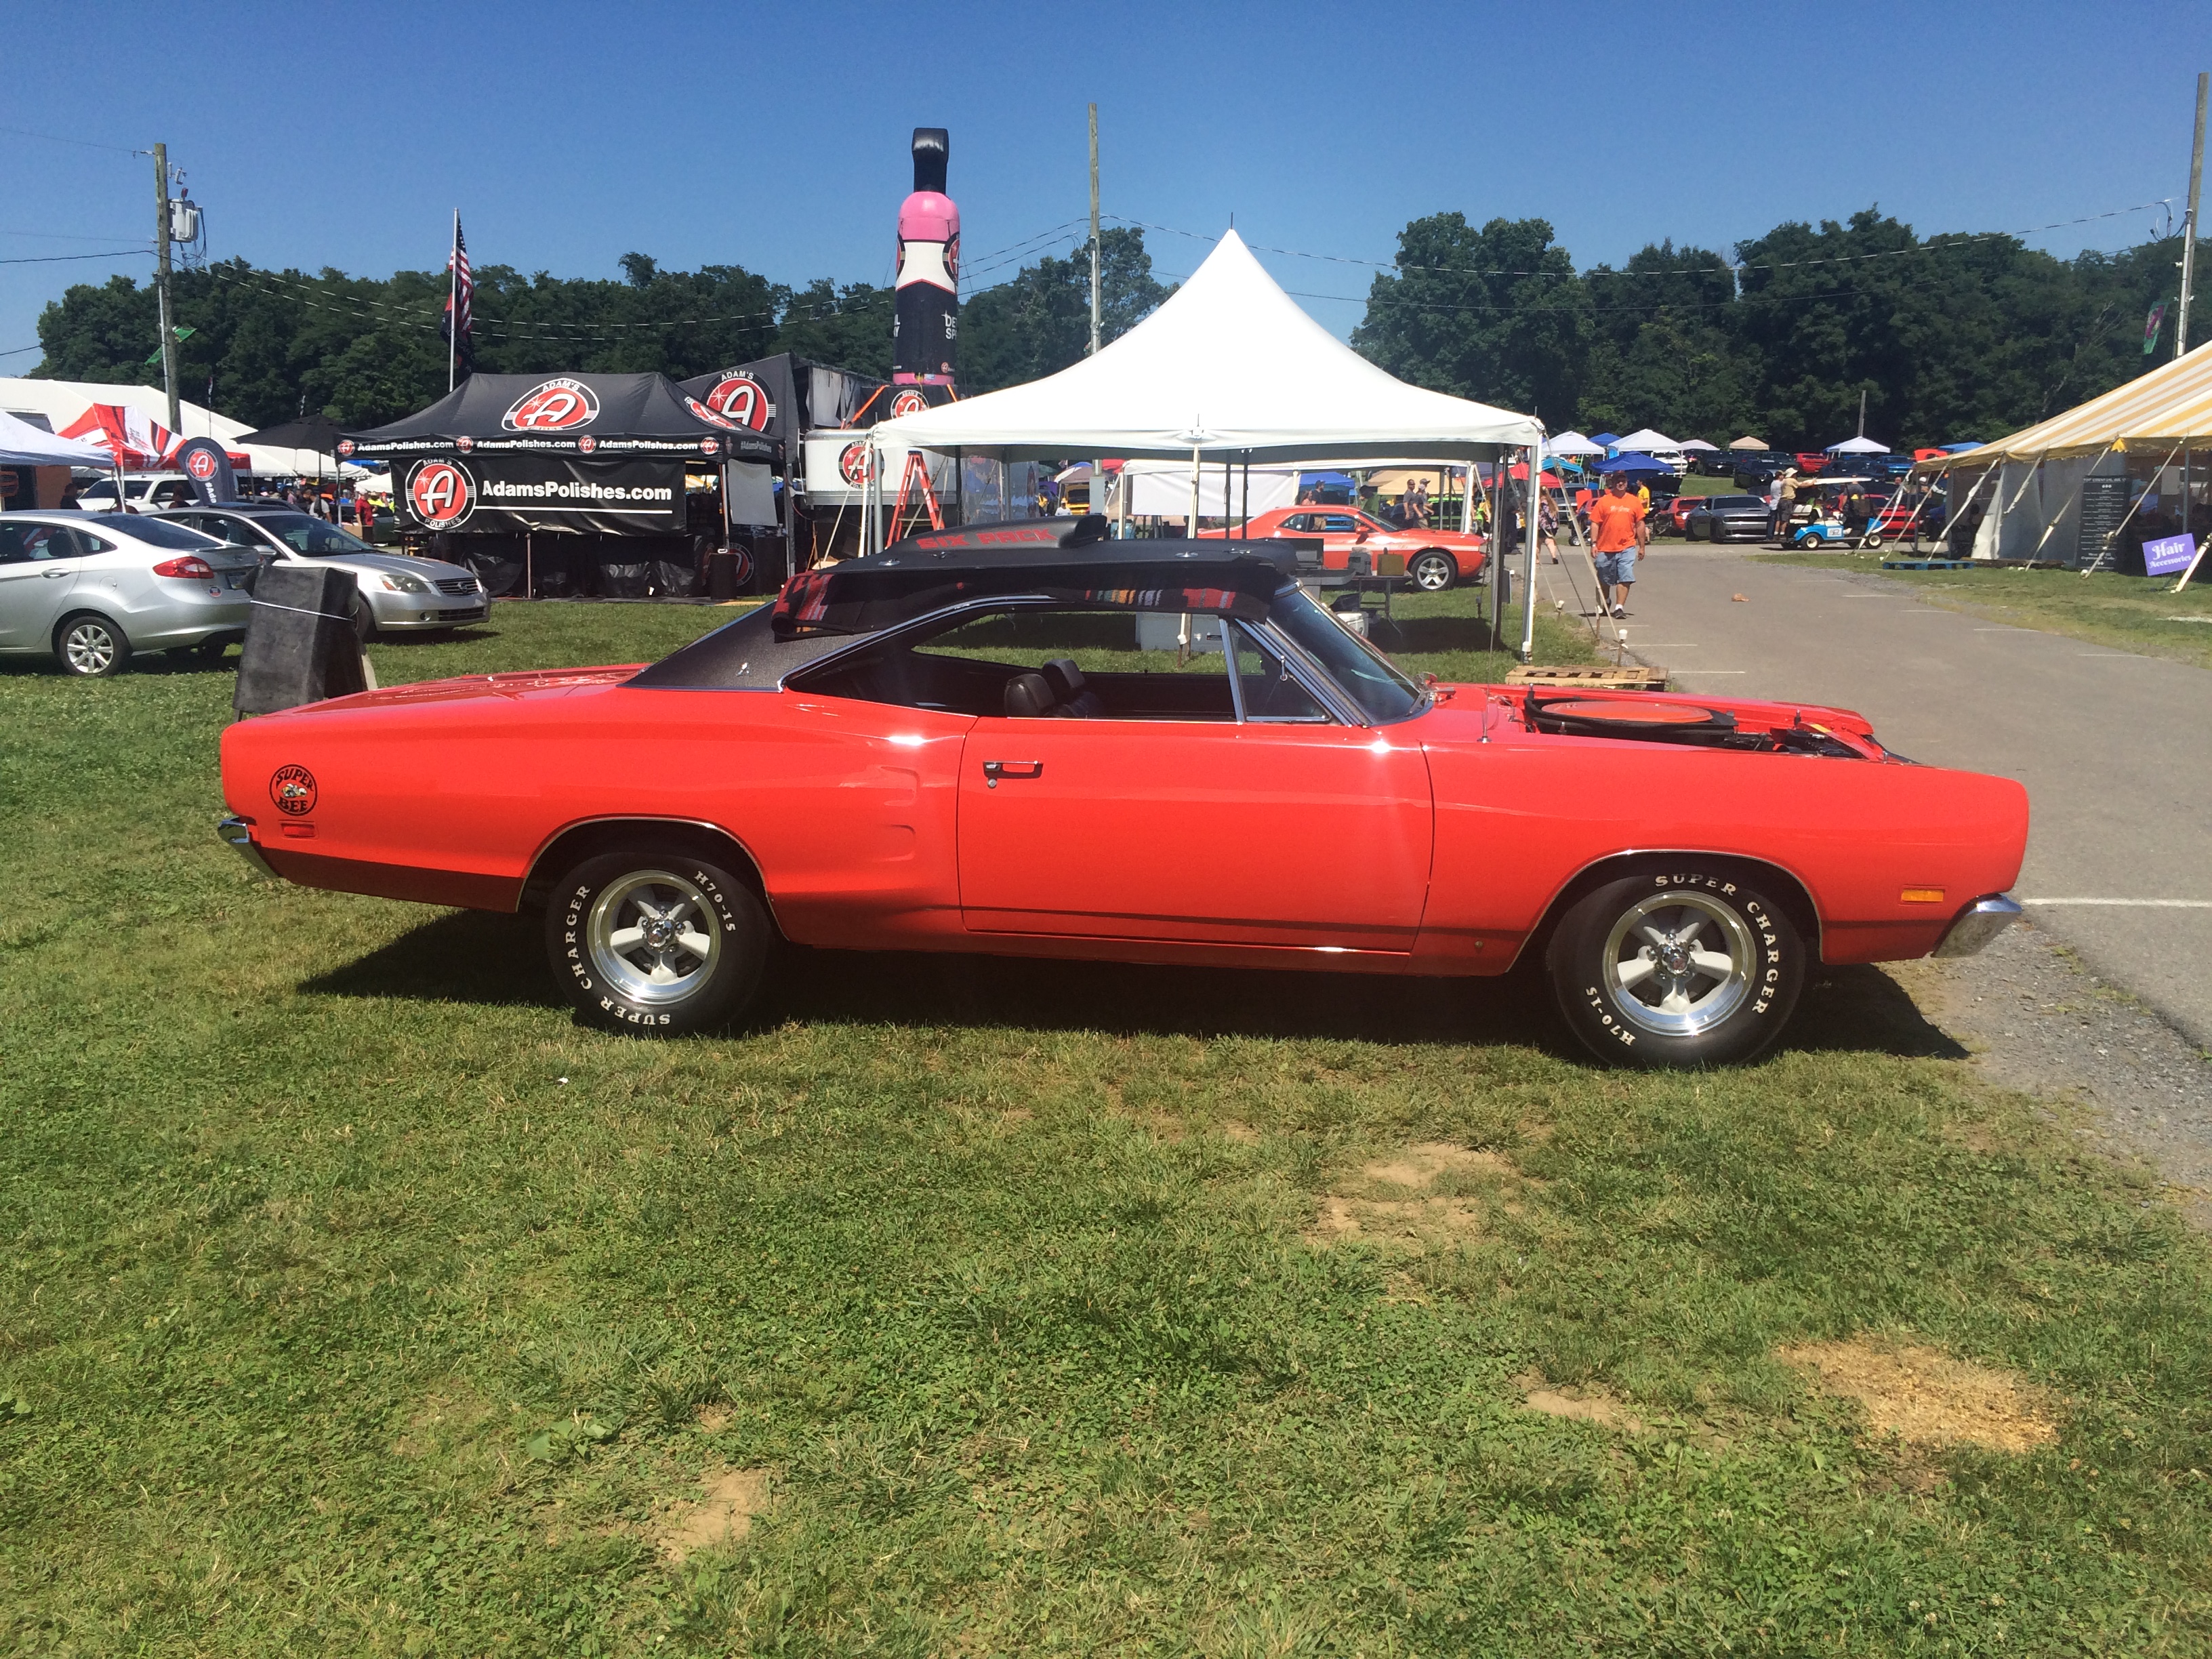
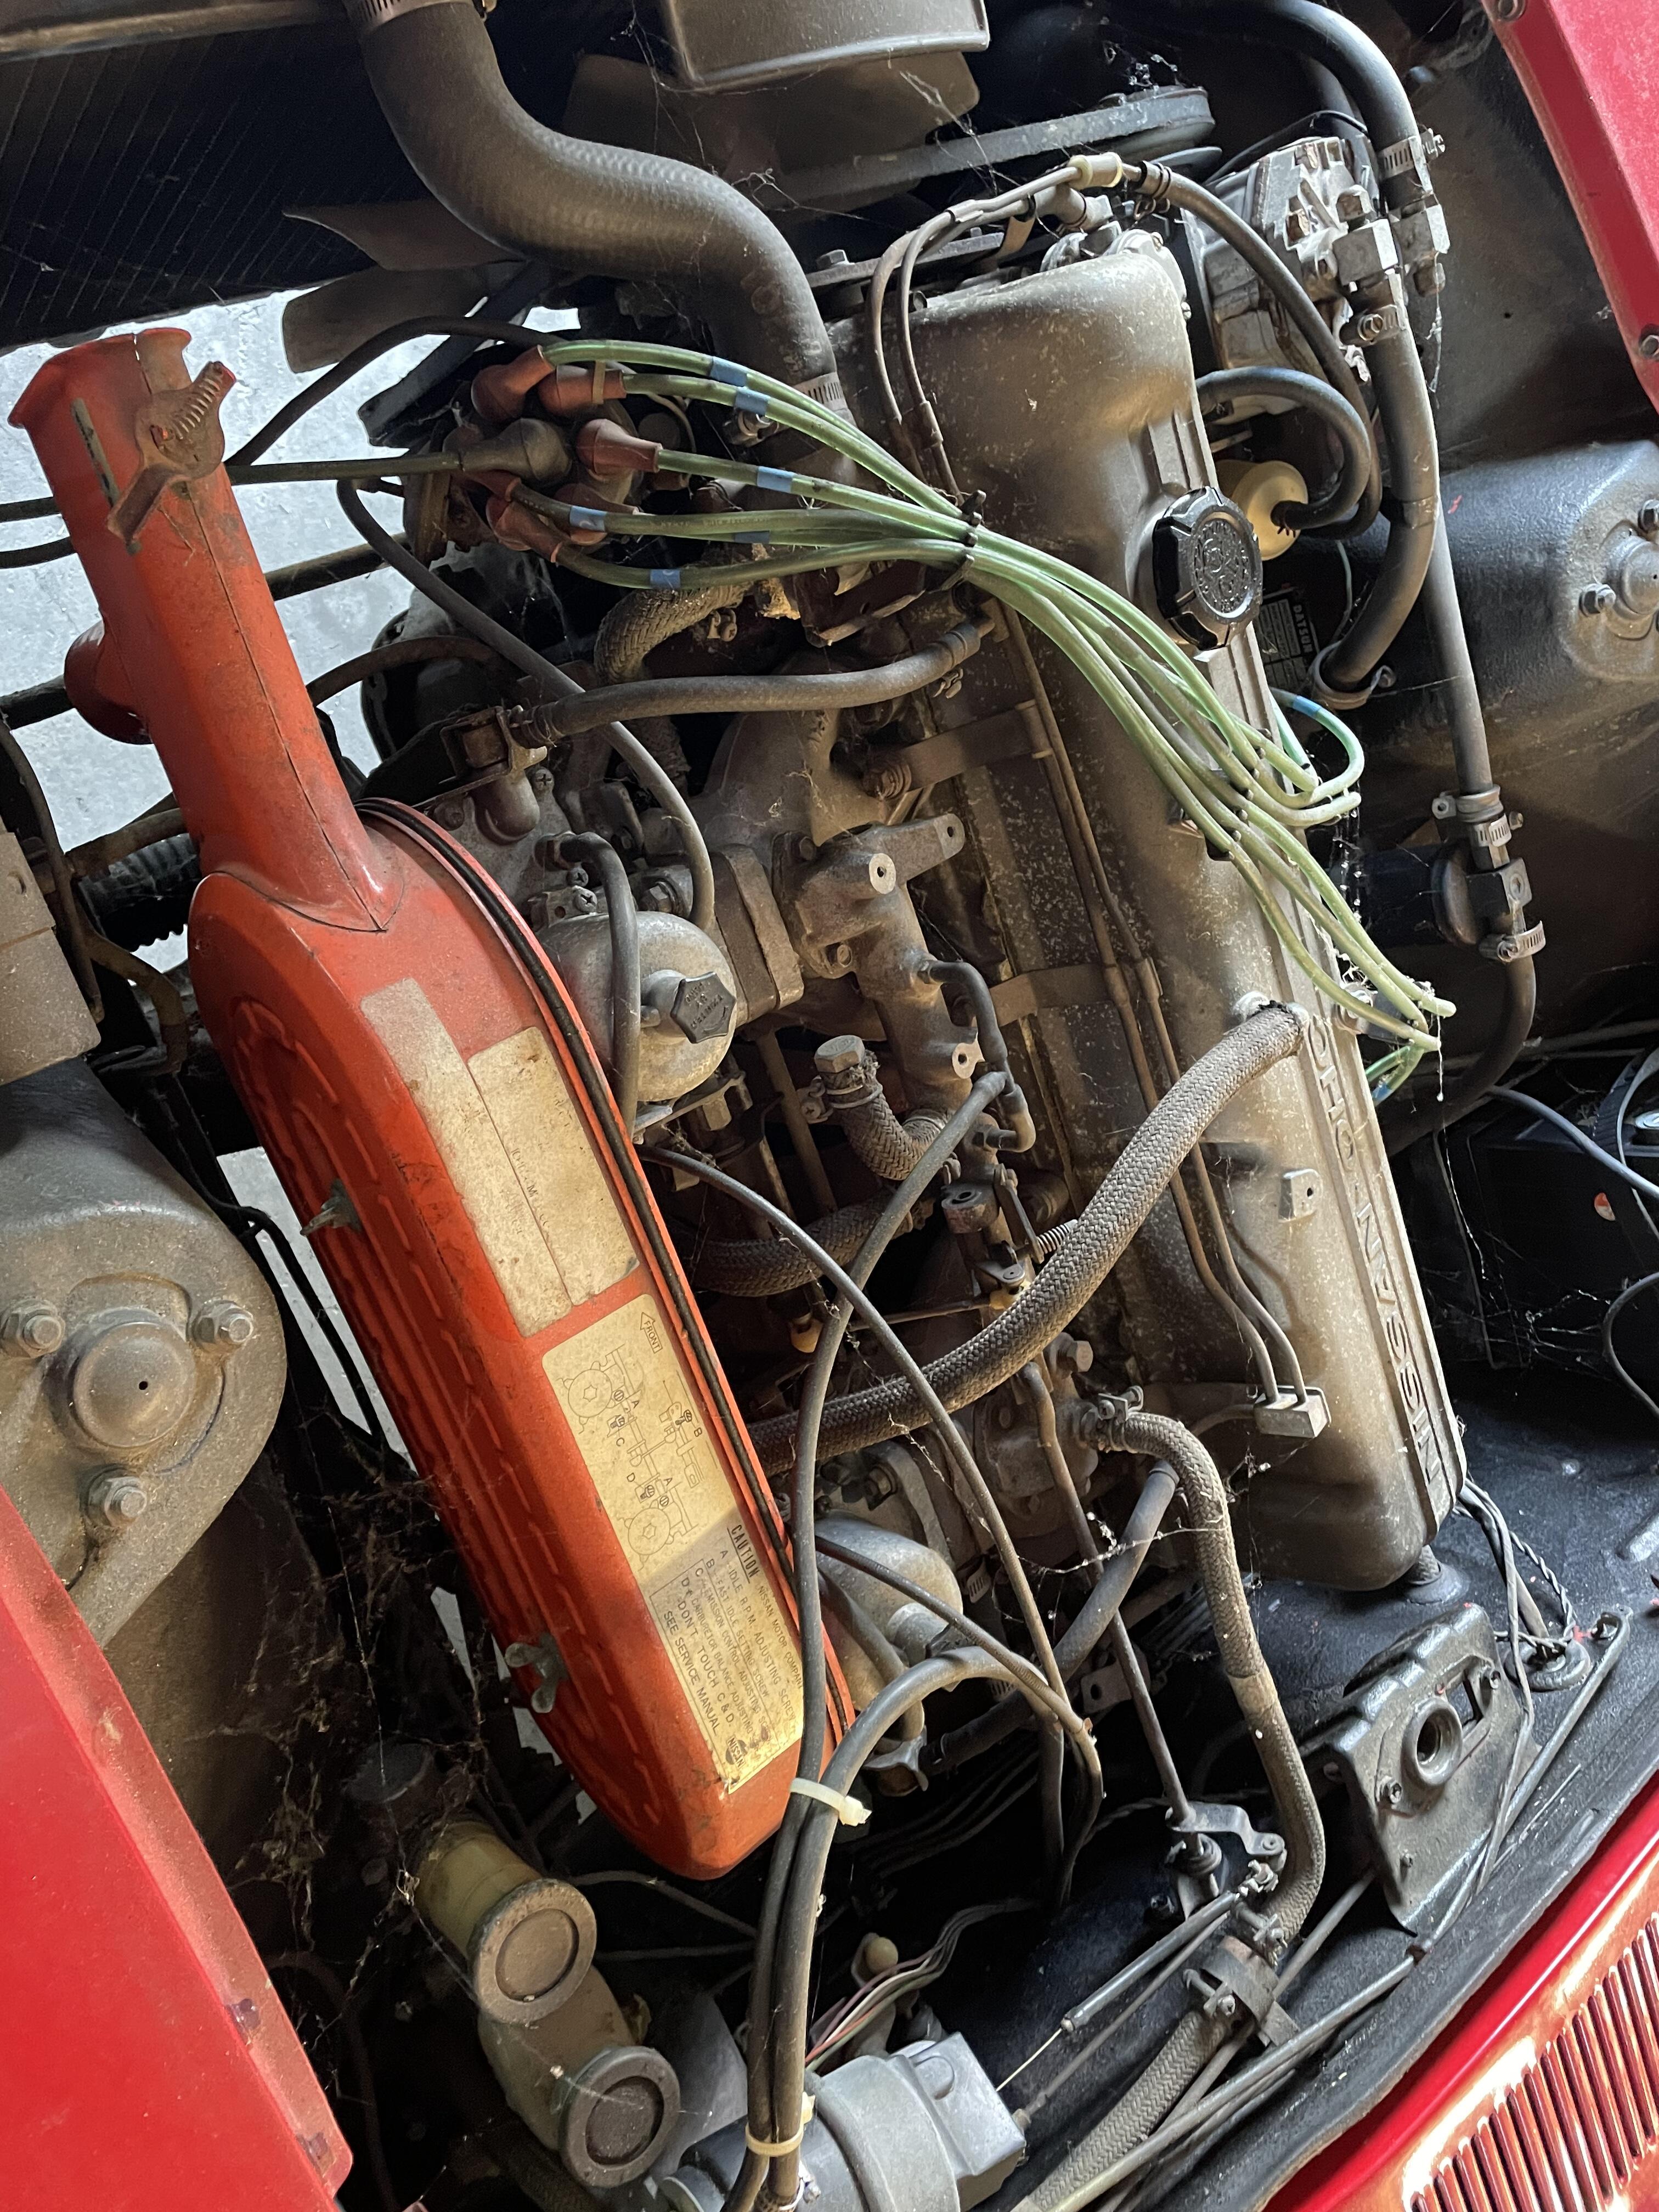
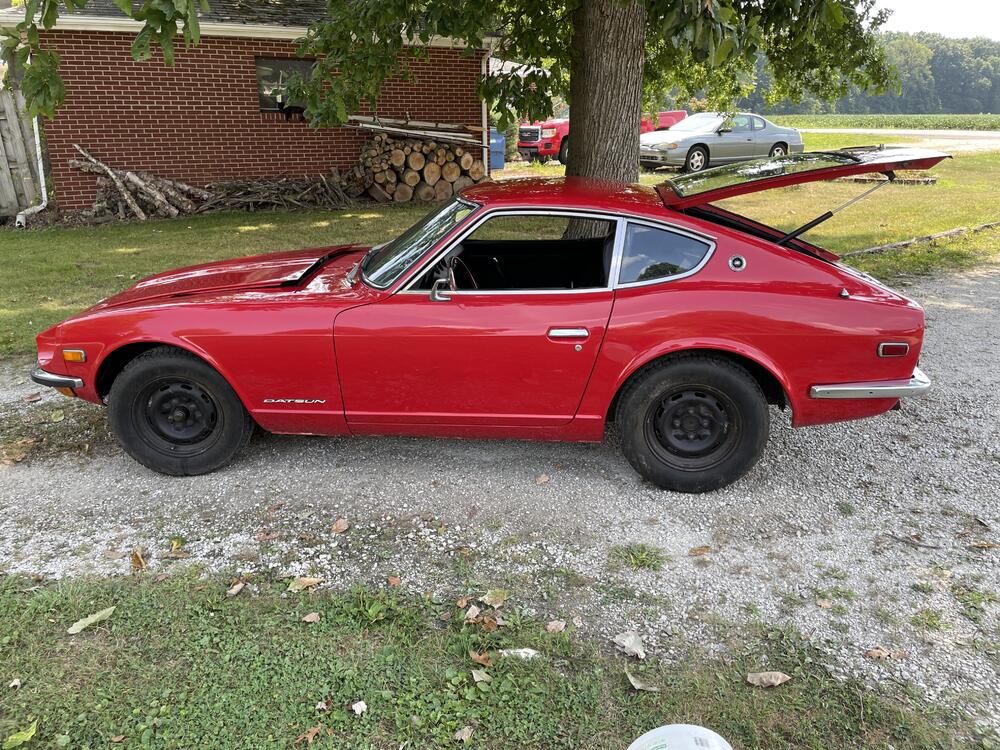
4 pointsHey everybody. My wife just inherited her dad's one owner 72 240Z. Hasn't been started or driven since about 2005. Car was sold new at the same dealership in Marion,Indiana that the $300k green 240 BAT car came from. I'm a lifelong gear head (muscle era mopars) and have completed a rotisserie restoration on my 69 1/2 six pack Super Bee. That being said I know nothing about these Z cars so I decided to join for info and advice when I start getting the 240 roadworthy this fall. Looking forward to working on this neat little car.


 4 points
 -
 2 pointsYou can put a tee in the block where the sender goes, screw the sender in one port, a mechanical gage in the other. The rule of thumb for oil pressure is 1lb for every 100rpm. So at idle if you have 10lbs you're good to go.2 points
 -
2 pointsYou might pull the valve cover and check the spray bar too. It could be loose somewhere and dropping oil instead of spraying through the small holes. Simple reassurance to me if you haven't checked it lately. Then again there's always the quicker way of removing the fill cap while it's idling and looking at the oil sling around. Mine almost jumps out of the hole so it's a pretty good amount flying around in there even at idle.2 points
-
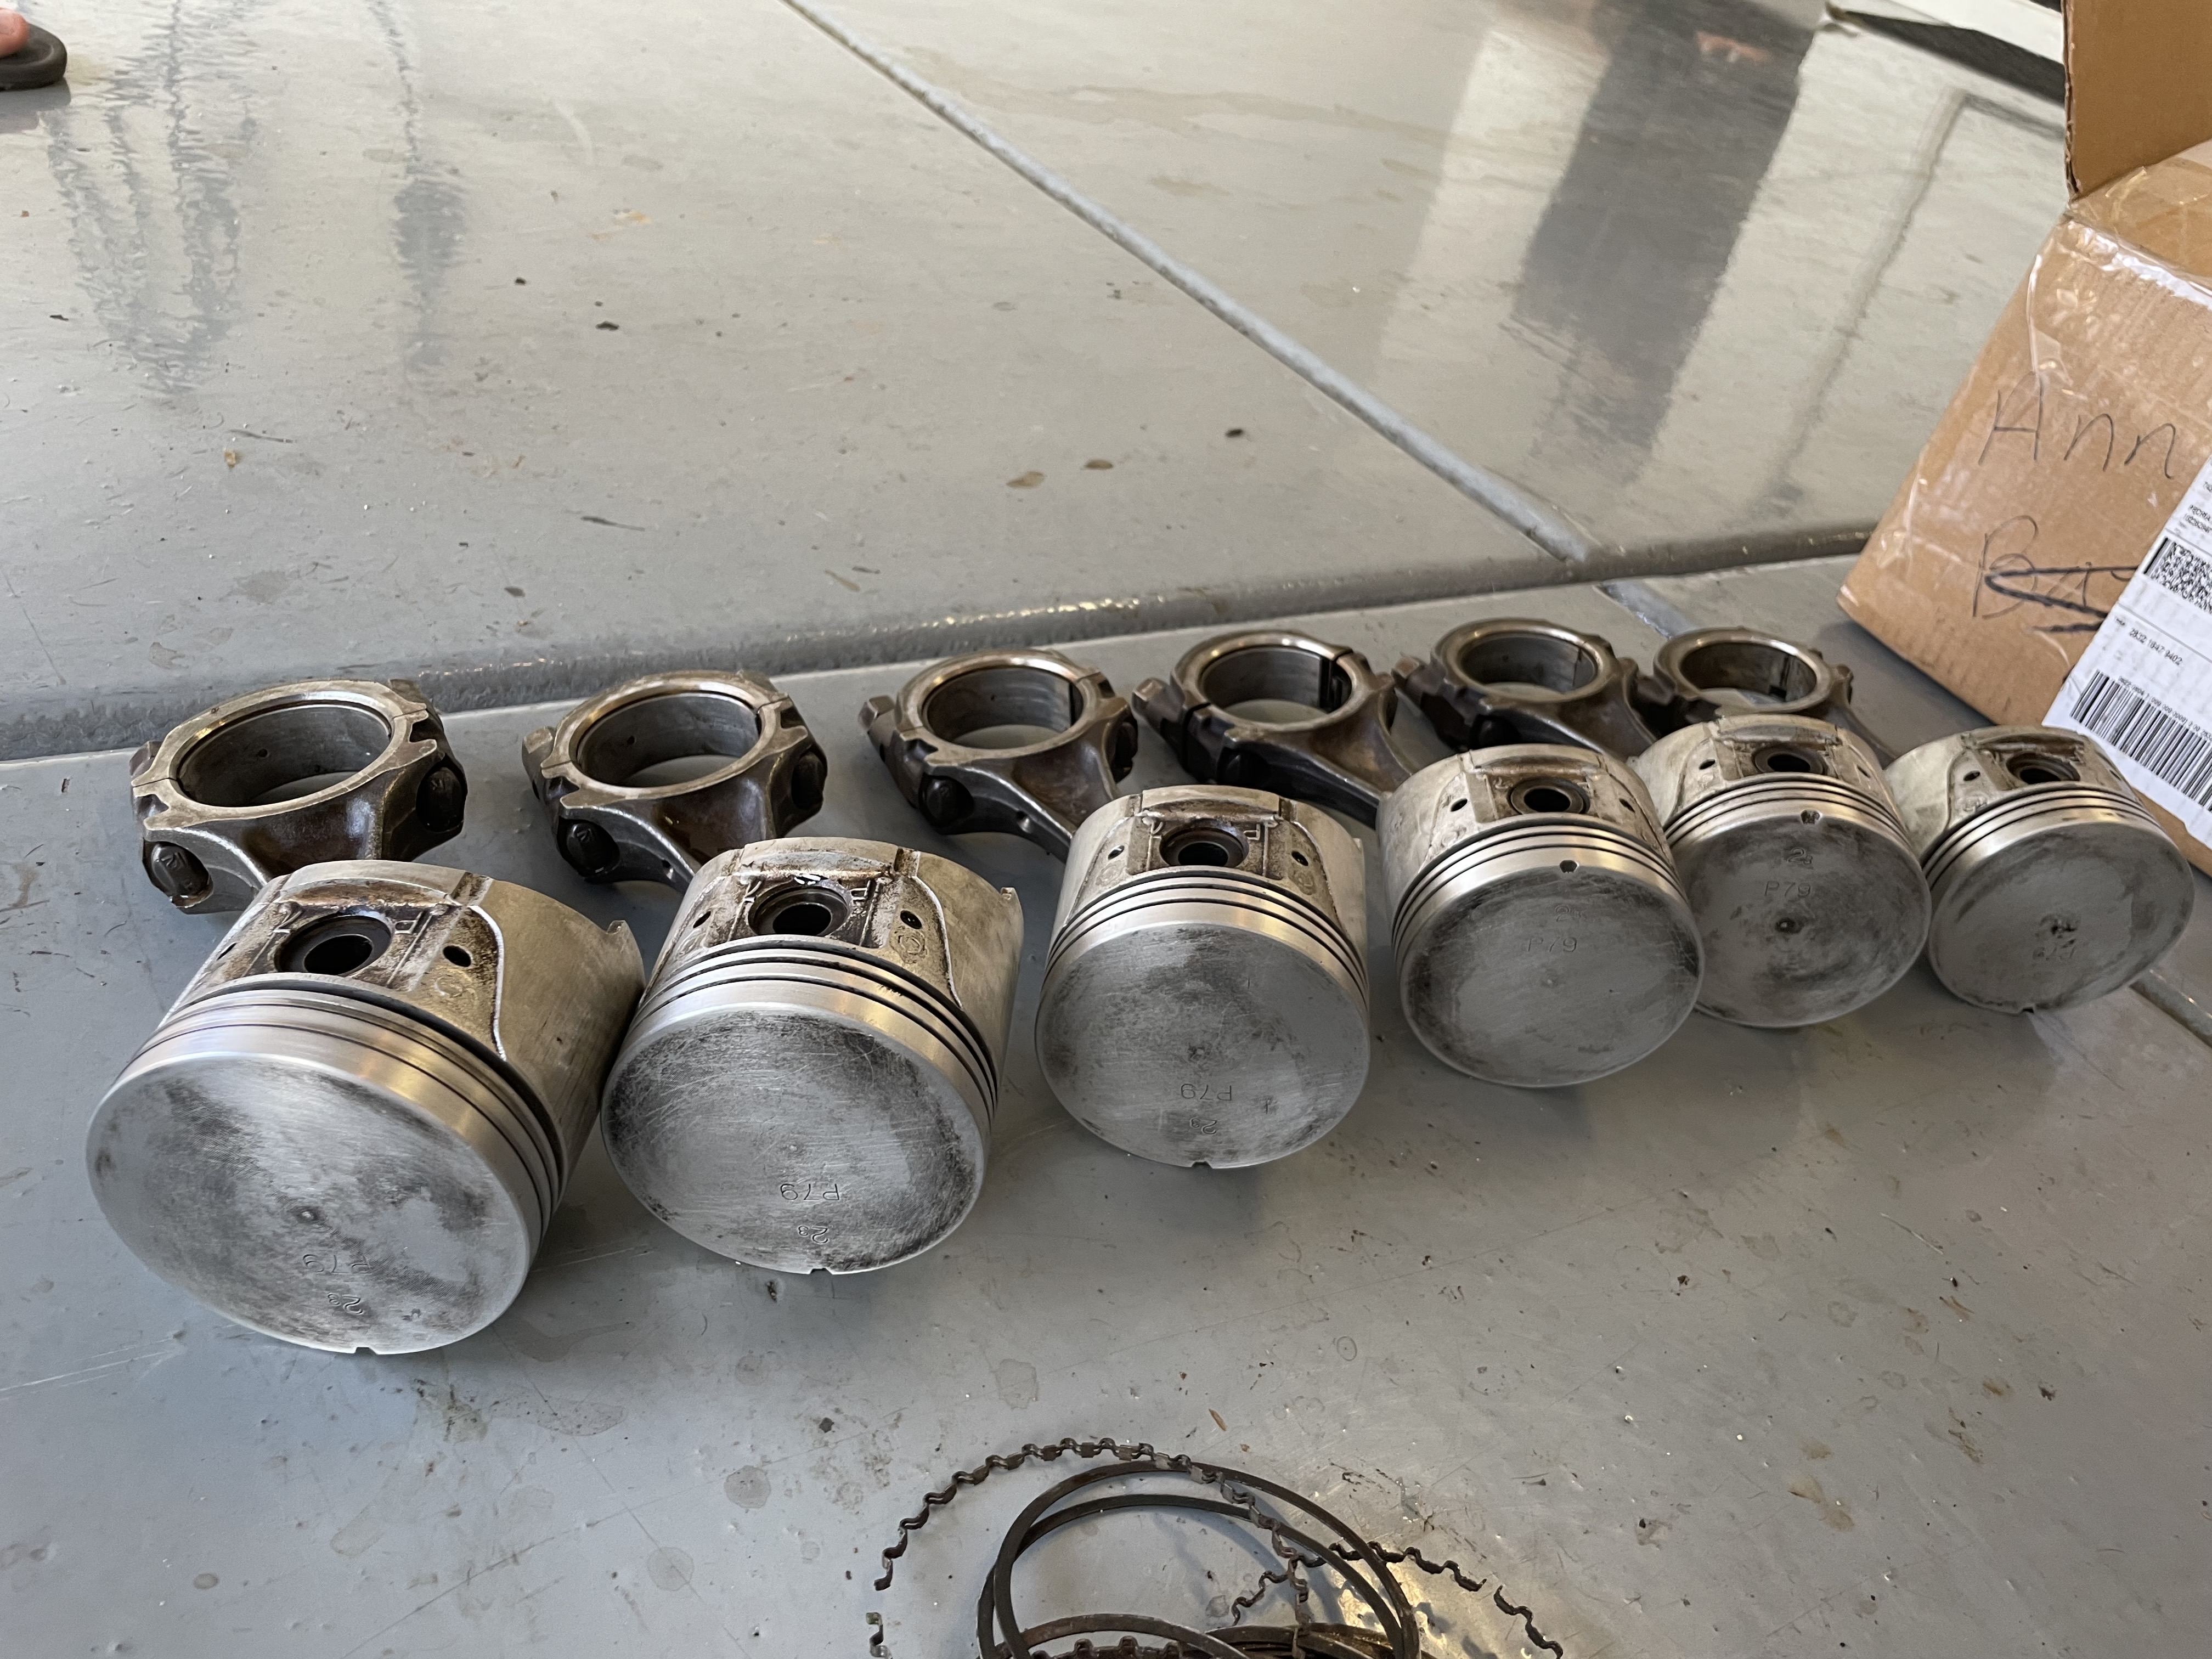
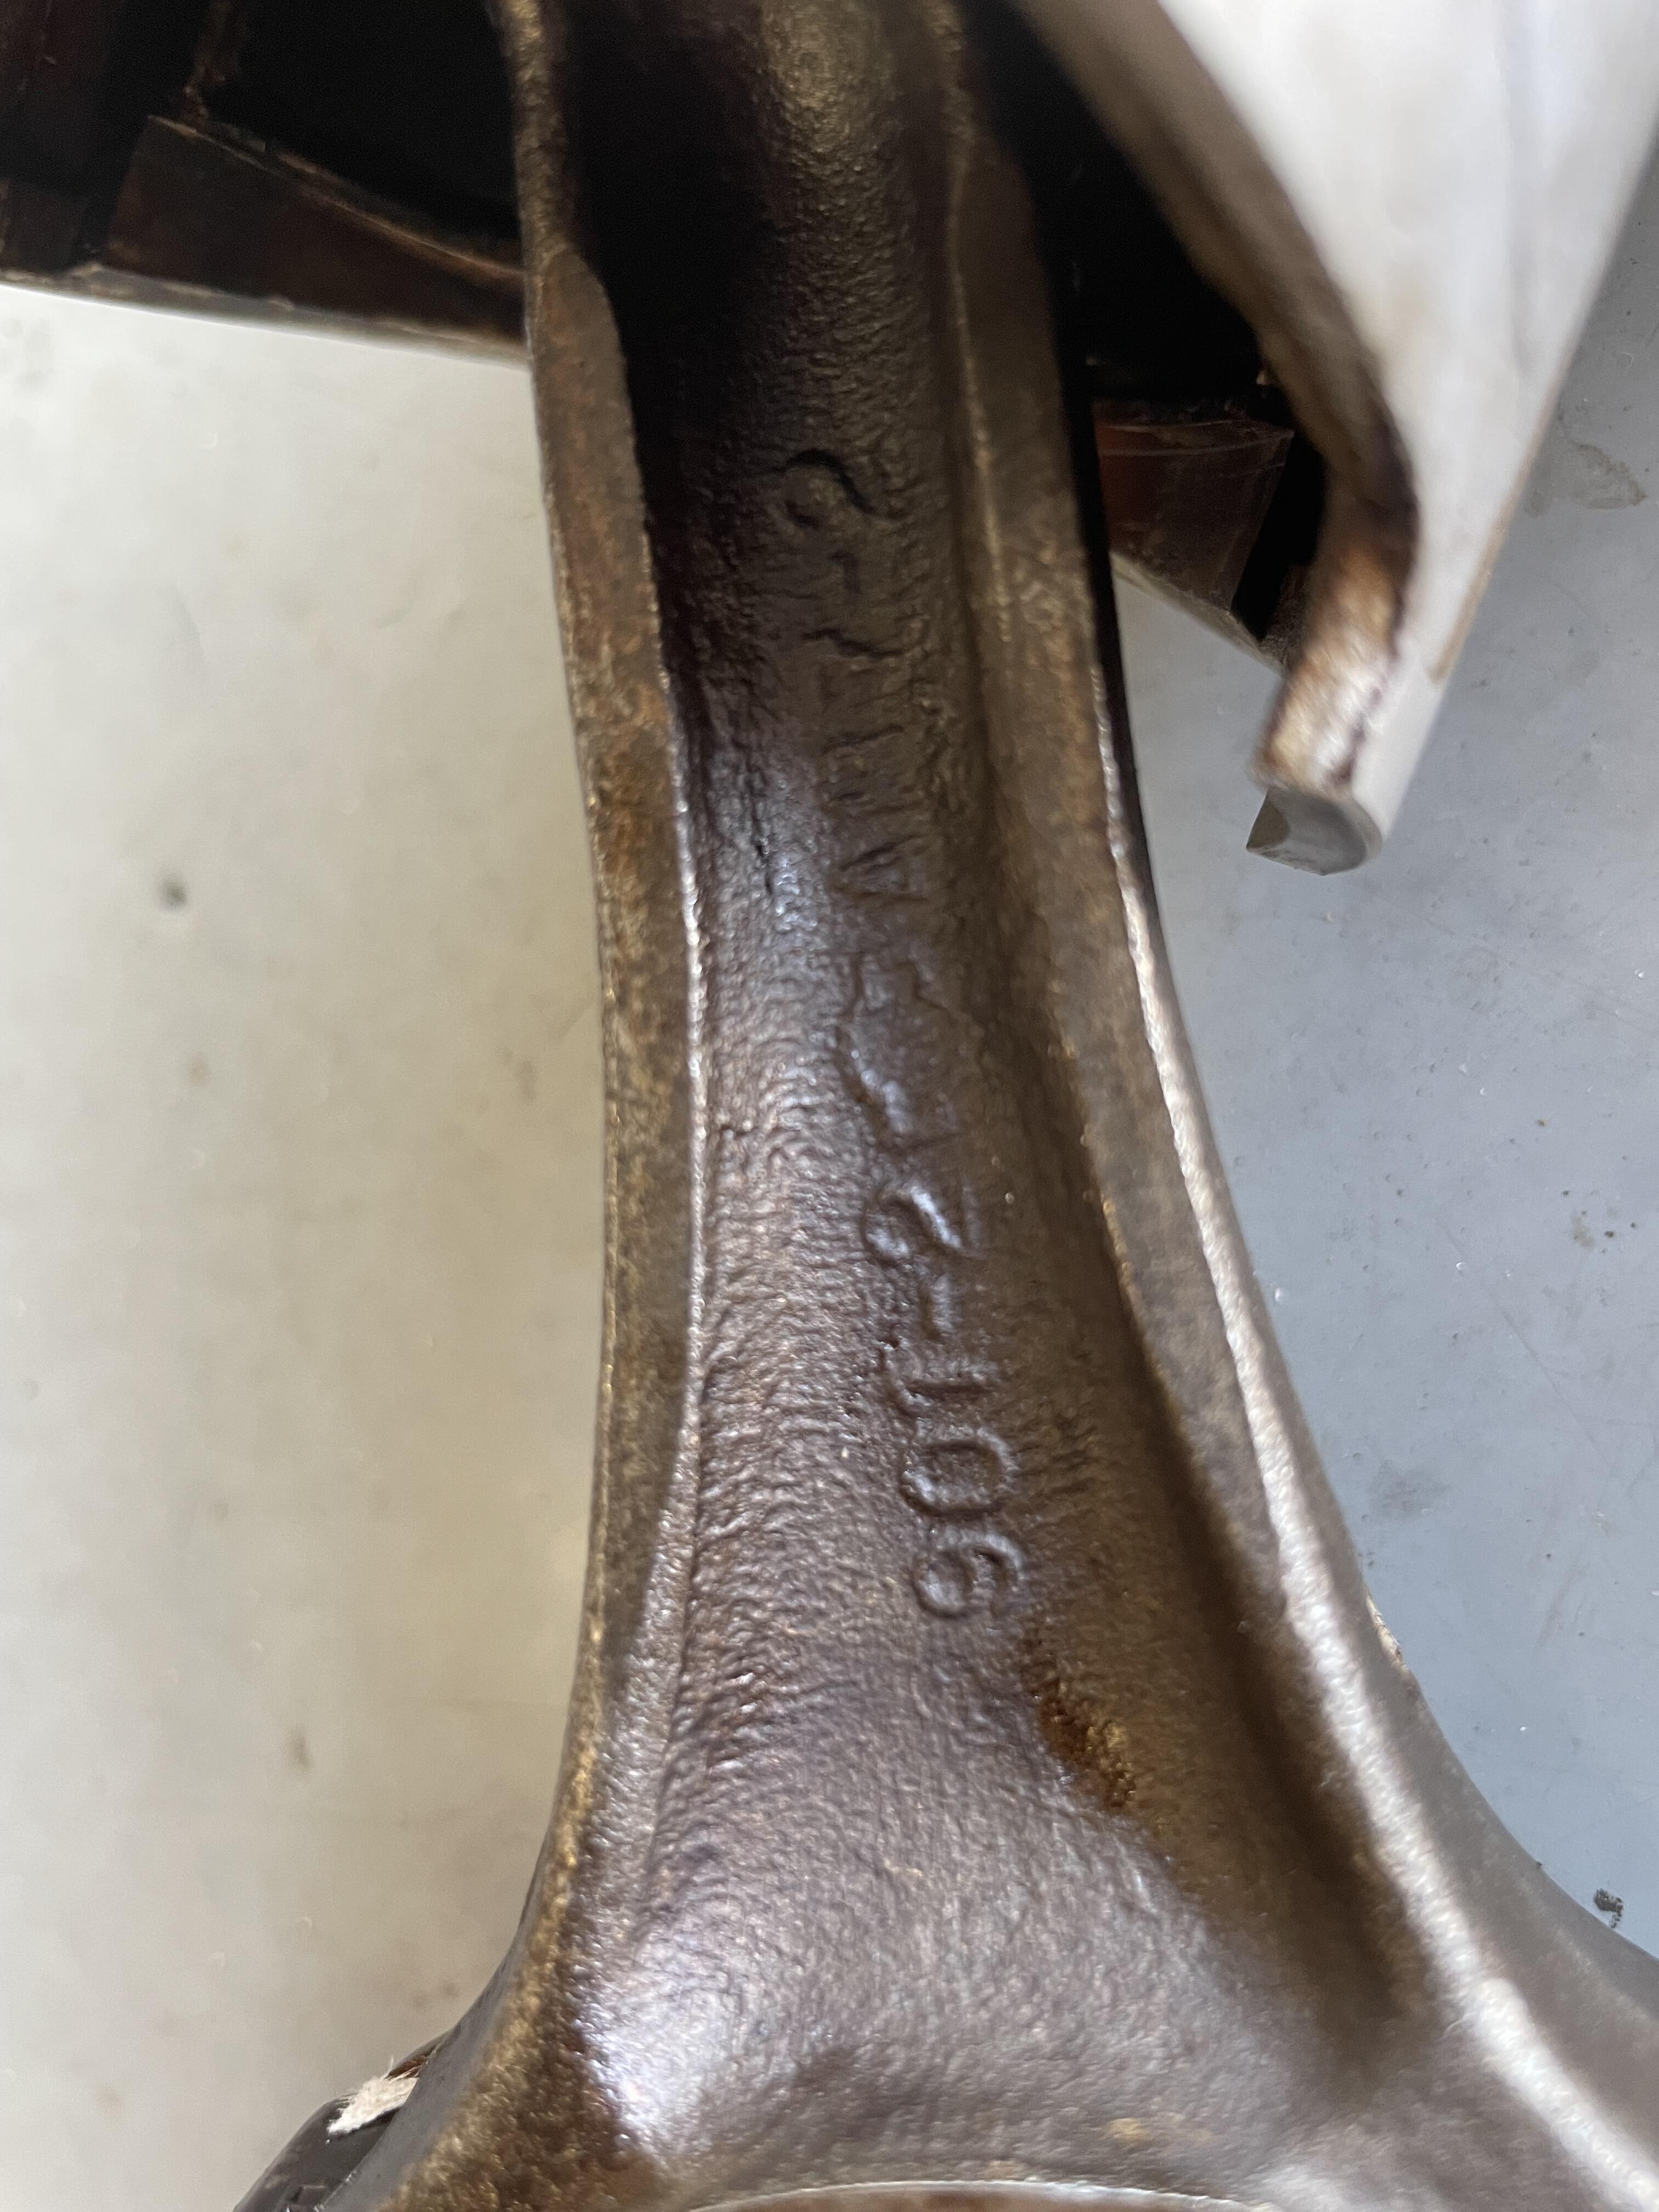
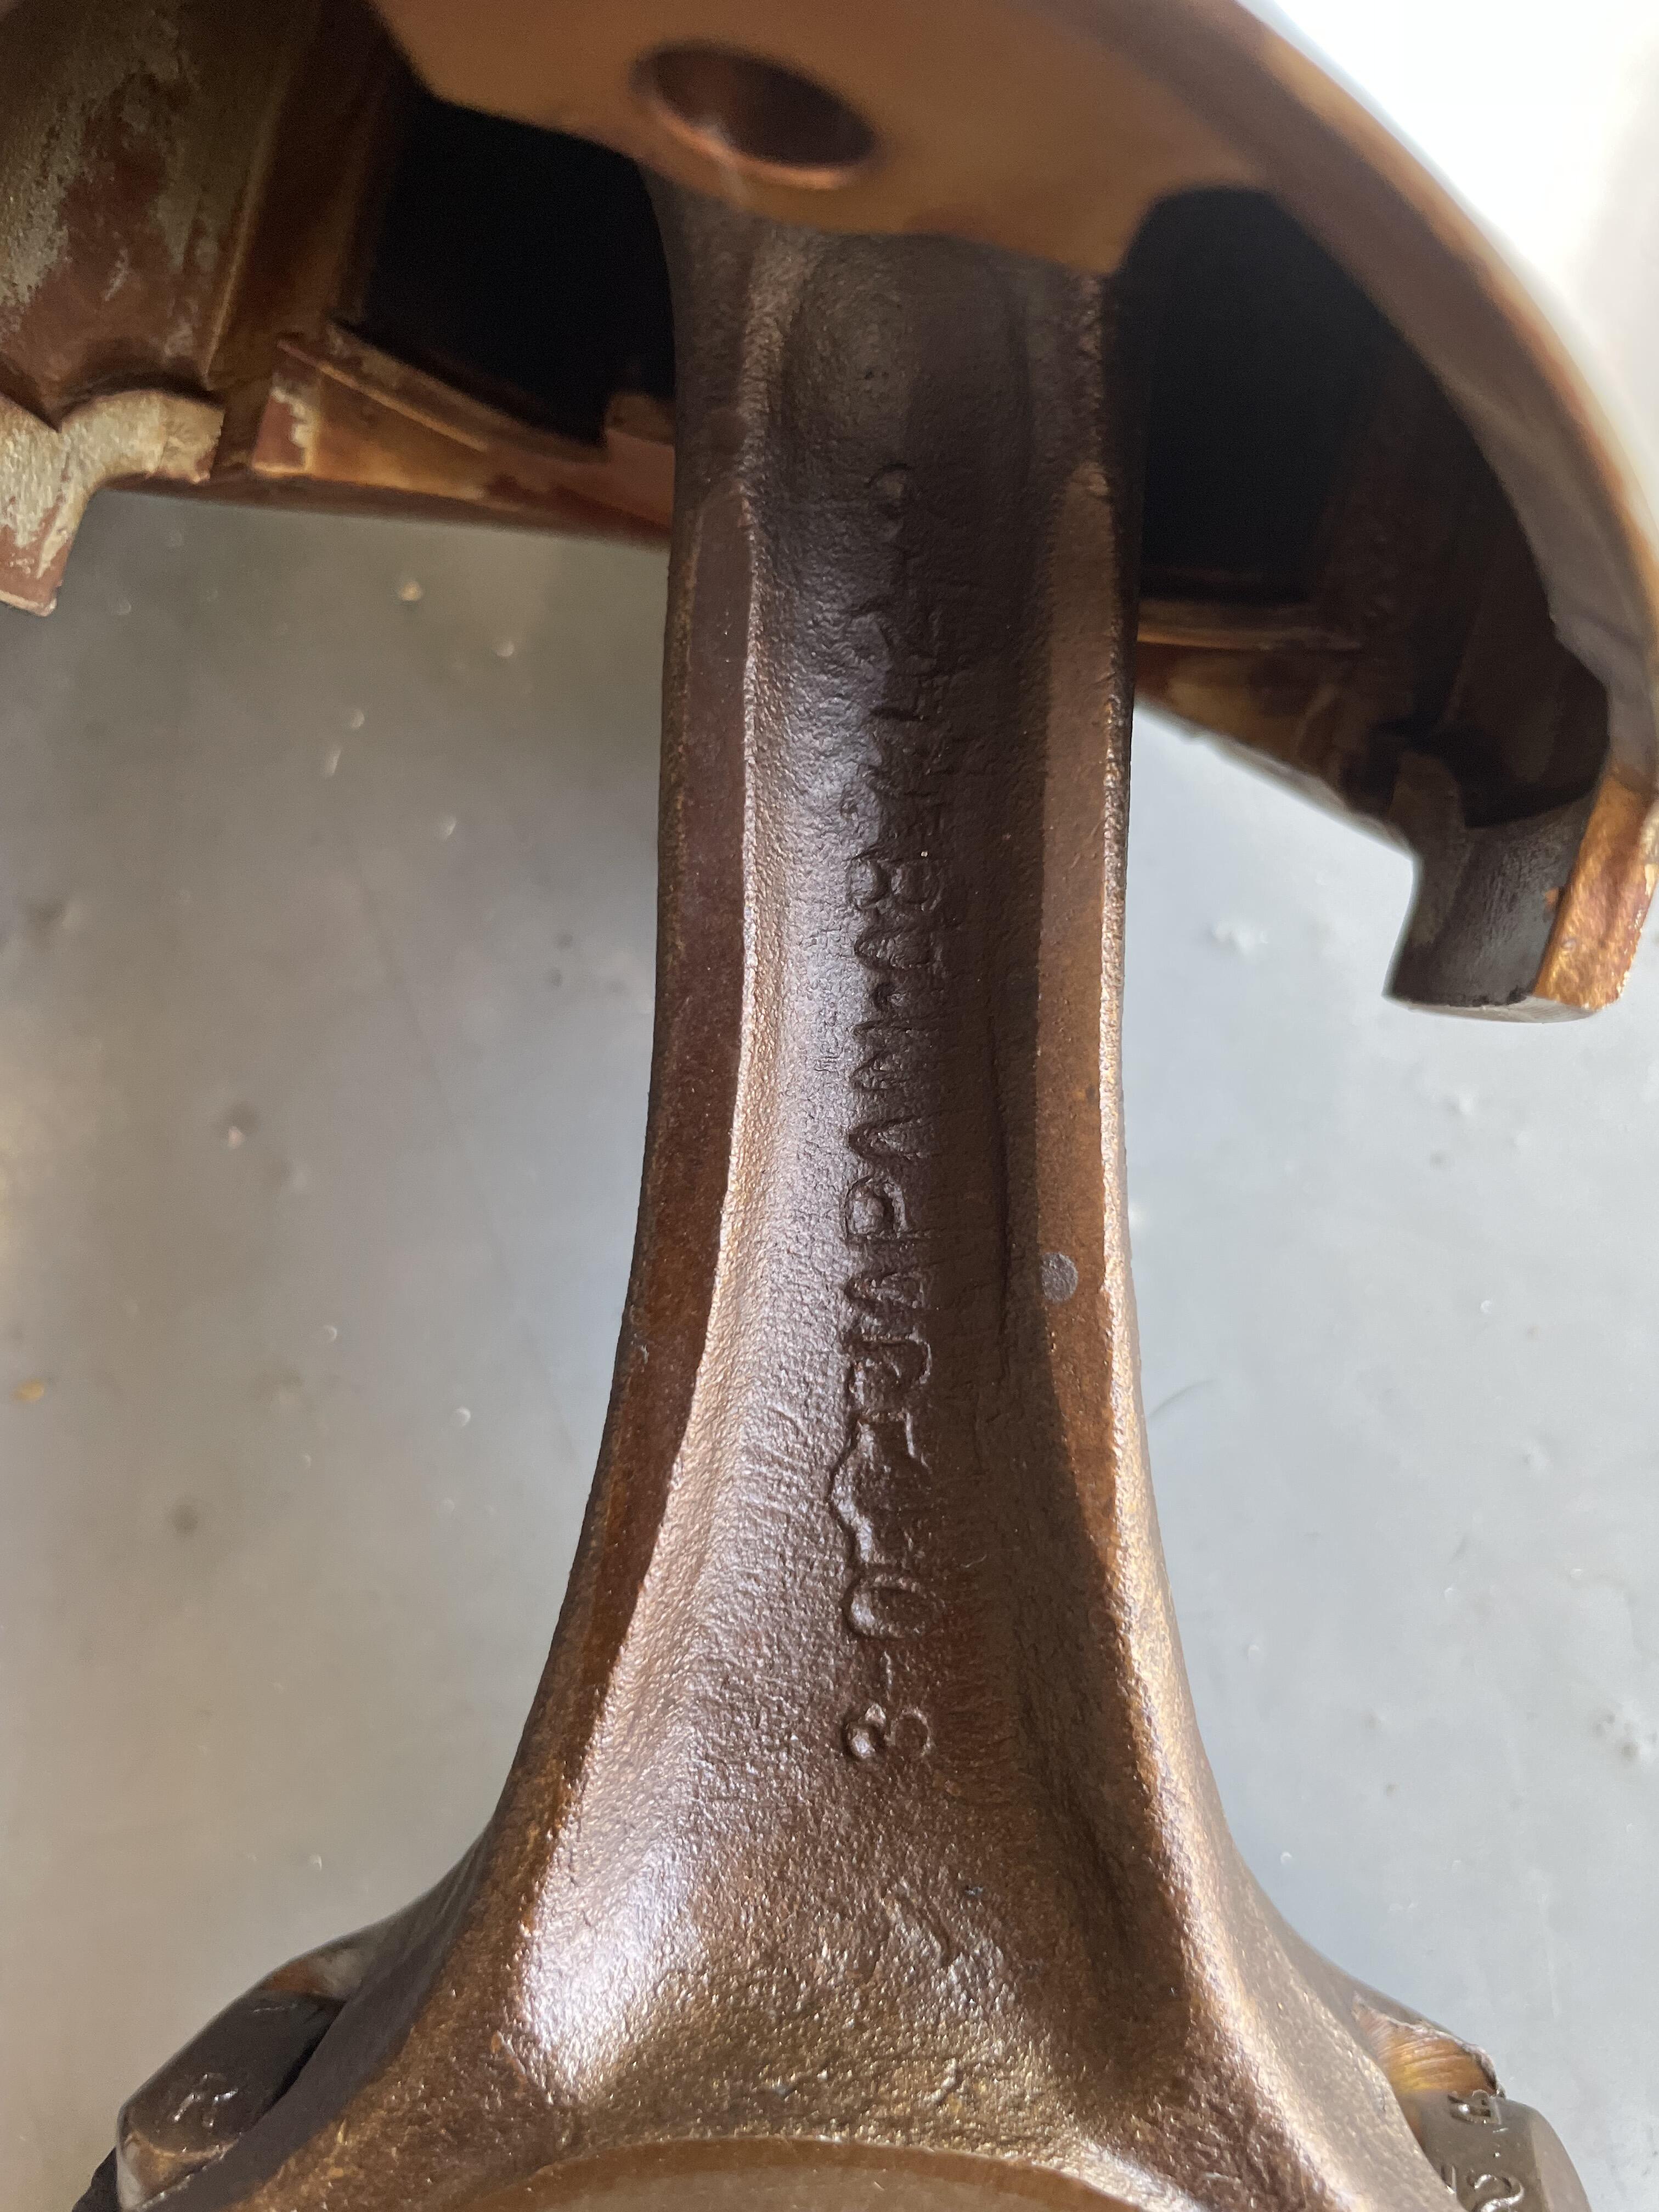
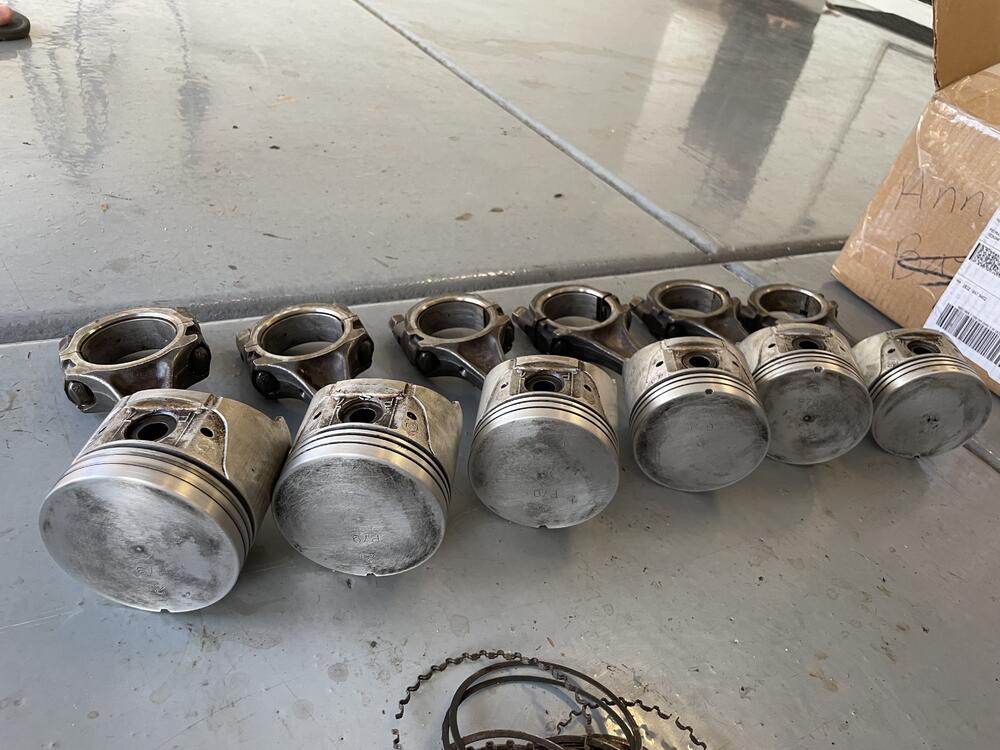
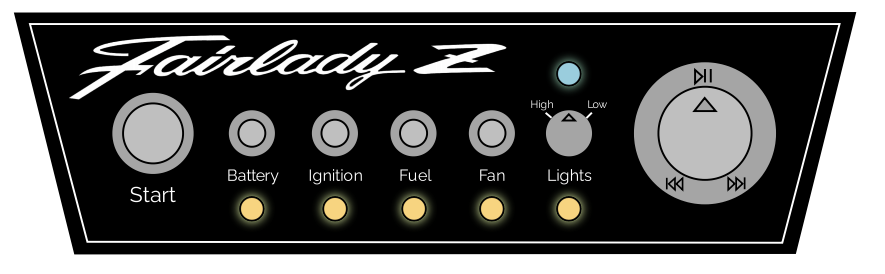
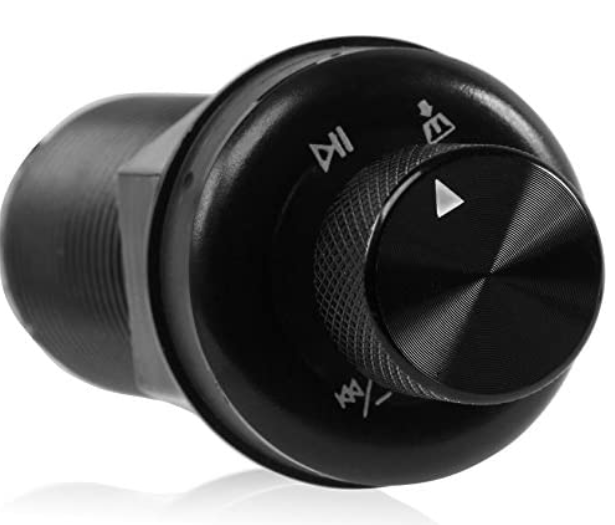
2 pointsAs some of you have seen, I made the splurge to get flat top pistons. One too many margs and a quick look on eBay had a full set with con rods for $150. I'll take that! They showed up yesterday and look great compared to what is coming out of this car. No pitting at all and way cleaner. I dont think they were hot tanked either since I was able to get a nice amount of crud out from the ringlands. I cleaned up with a scotch pad to get most of the carbon deposit off. Side by side of the Flat Top (Left) vs the Dished (Right). I noticed there are different markings on the con rods. Is one better than the other? I did some reading and see they are interchangeable but no real confirmation on strength. I'll probably just use the flat top rods as the wrist pins feel smoother and less work 😄 Other updates include fixing my wiring diagram for the relays and switches to run a power switch and then starting my designs for the switch panel. My first draft below would be could out of aluminum, powder coated black, then either laser cut or decals for the lettering and design. I am not too sure on if I want toggle switches or push button switches yet. The start button will definitely be a momentary push button. Then the battery, I will likely use a locking toggle (if I go with all toggles). I dont want to accidentally hit this while changing my radio 😄 a push button wont have that high of a risk of an accidental press. Ign, Fuel, and Fans can all easily be a toggle or push. Lights will be a dual pole ON-OFF-ON toggle with the other option being a rotary selector that is also ON-OFF-ON depending if you turn left or right. Lastly, the radio is a bluetooth controller. No screen because I will always use my phone (sorry analog music listeners!). It allows for everything I need, volume, next, back, play, pause, and an audio jack if I want. It does not have a built in amp so I will go with a small unit behind the dash or seats to provide power. Simple and I think it will blend in better than a modern day head unit. I'll order up a handful of toggles and push button switches in various sizes. I mocked this up to scale, but it is always different seeing it in person. My main worry with toggles is the 'toggle' piece might get too cumbersome in the tight area. We'll see...


 2 points
 -
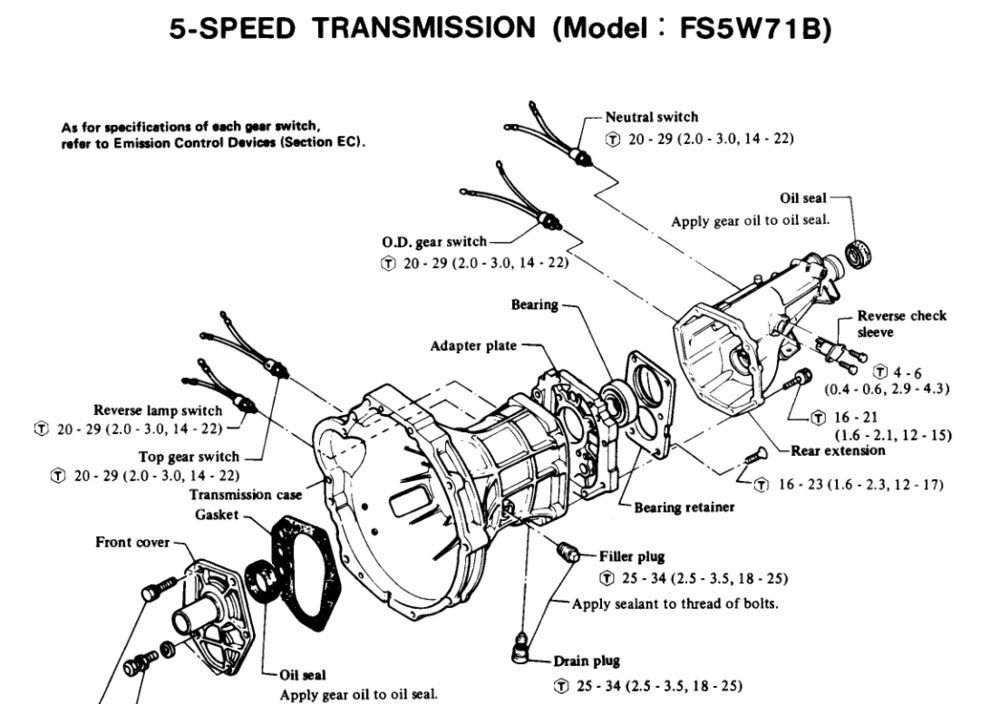
 2 pointsThanks @Zed Head. I moved the switch to the port closest to the clutch fork. The switch makes contact in reverse. As I looked more carefully at the transmission, I realized I have the truck 5 speed.2 points
 -
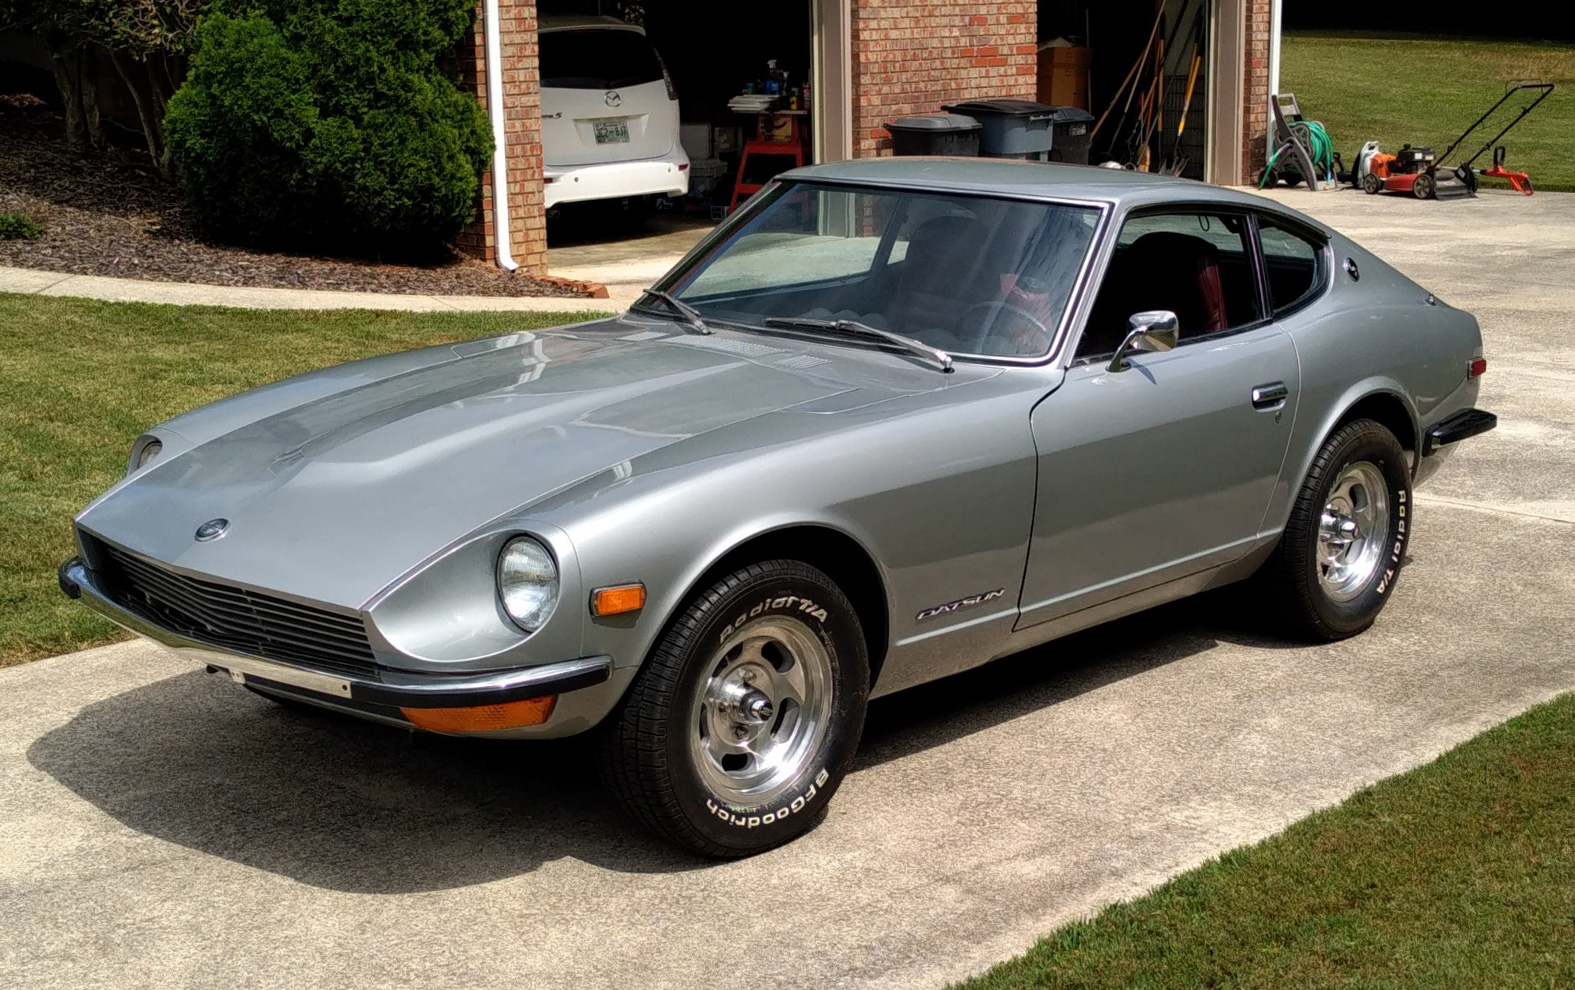
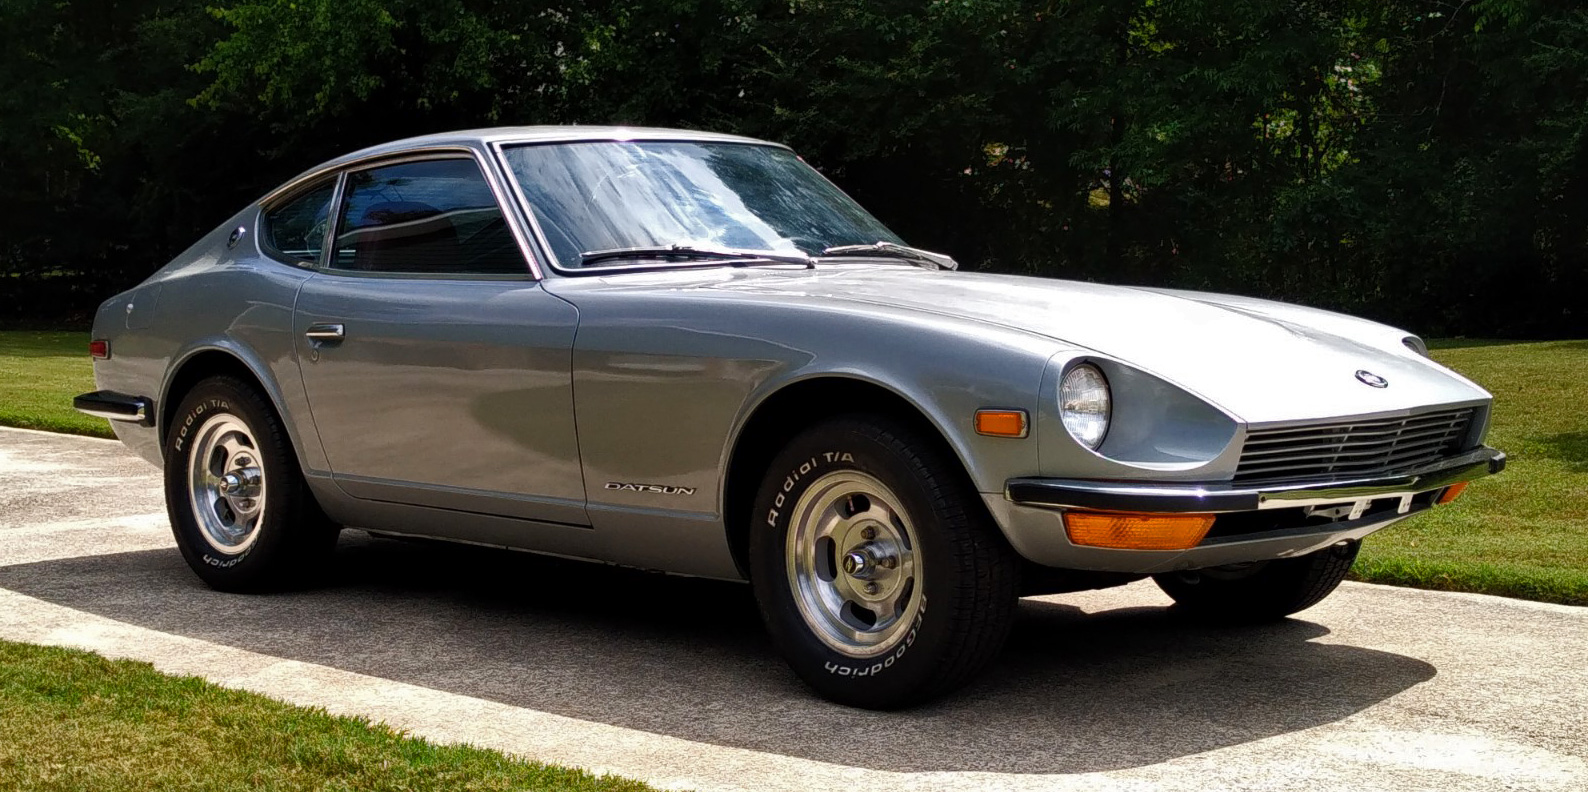
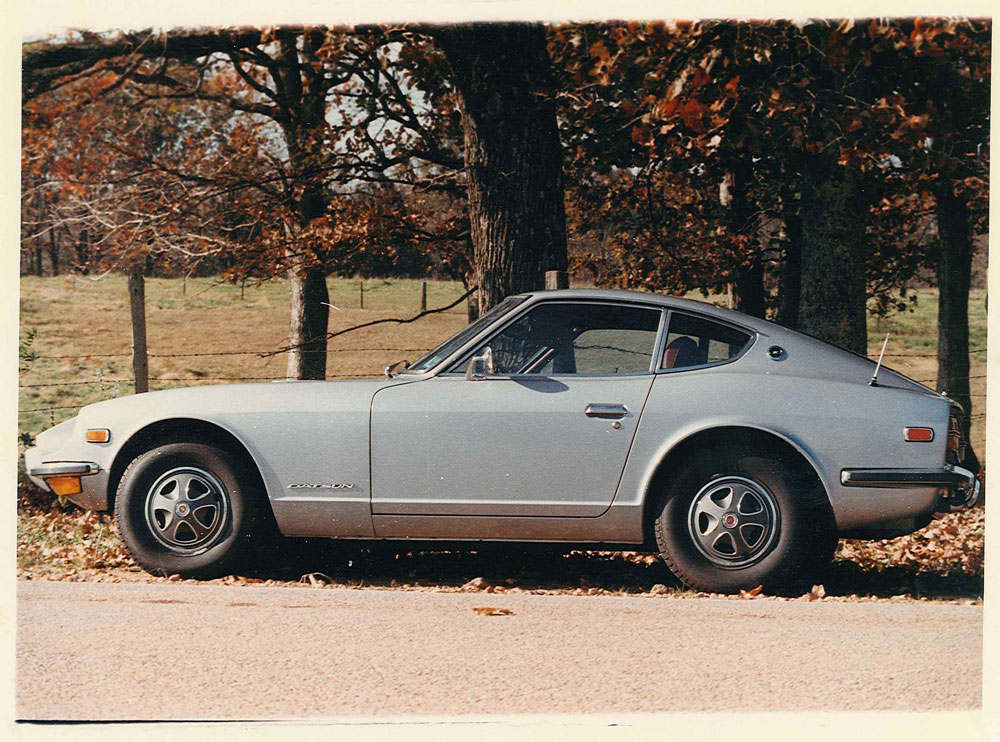
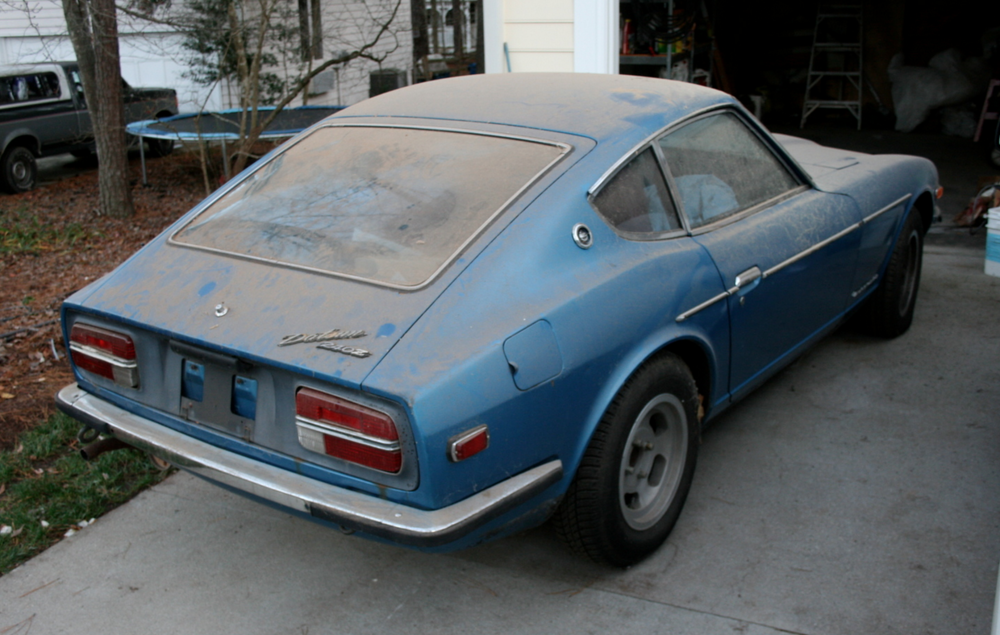
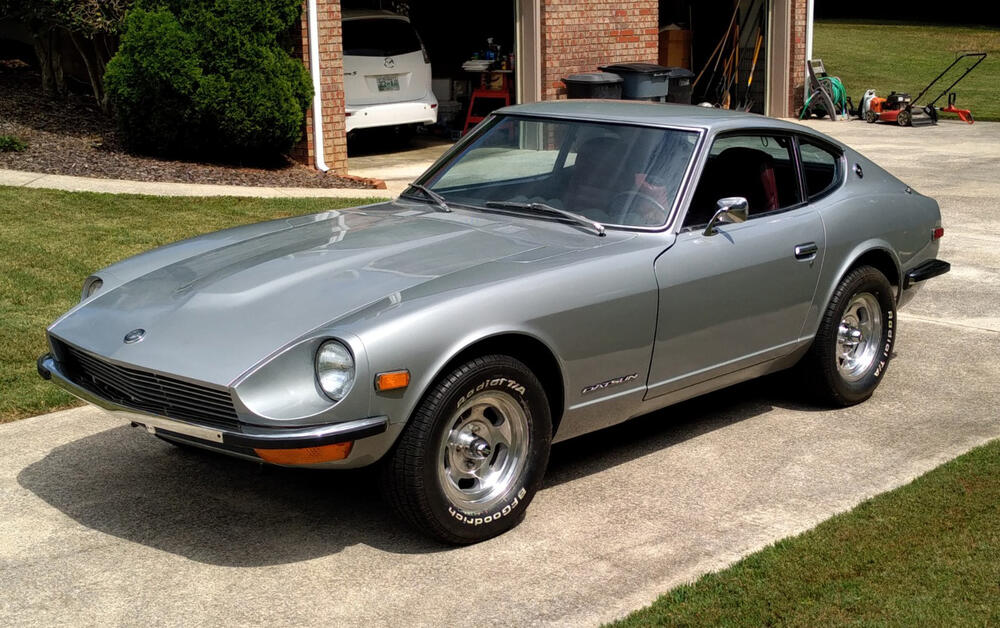
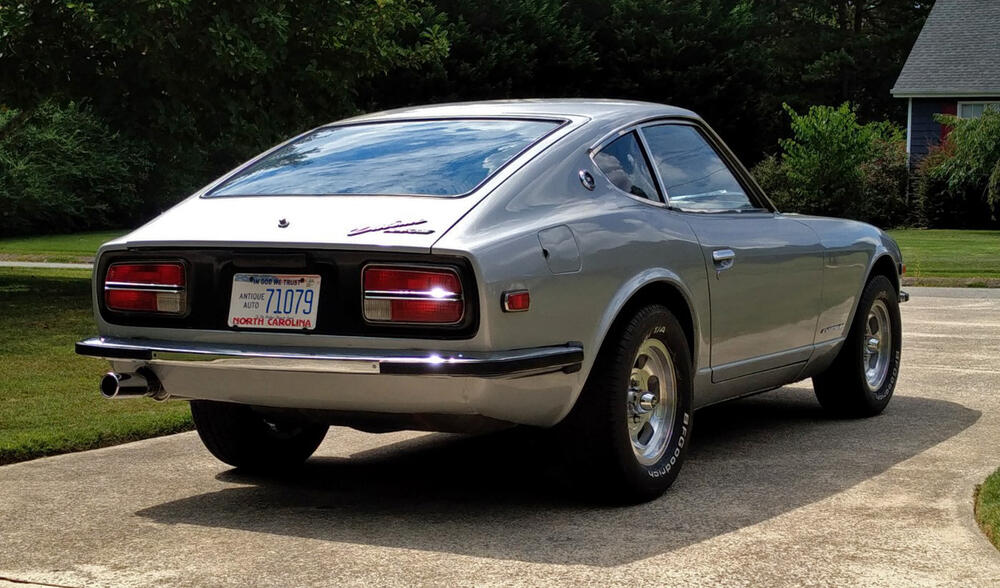
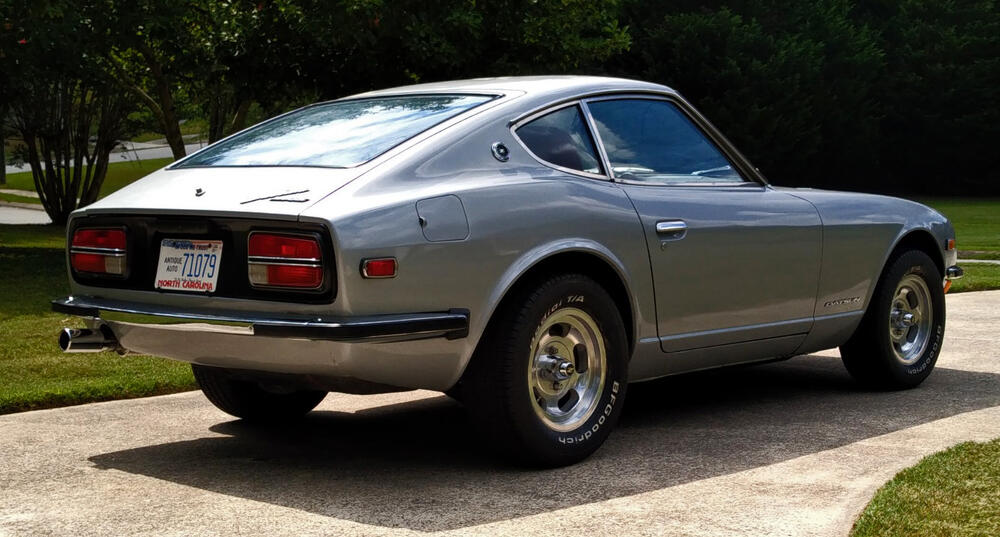
 Hi guys. I figured I should start a build thread in here. The actual restoration is very close to being complete, but this seems like a good place to document a few things and perhaps ask little questions so I don't clutter up the main subforums with little inquiries when I can't find the answer. Anyway, this is about 93069, which my dad bought new in October of 1972 from Cardinal Motors in Jacksonville, NC. He was 21 years old at the time and just starting his senior year at NC State. The car's block number is 118555 and it has a built date of 07/72 (right around the brake system crossover). Original color: 901 Silver over red vinyl, dealer-installed factory air. Here are a couple of pictures my dad took in November of 1972, one month after he bought it: My dad had it repainted blue in the late '70s. My mom has always liked blue cars, so it's possible she had a hand in choosing the color. It seems rub strips were installed at that time also. I obviously remember the car all growing up. It was my dad's daily driver, and my brothers and I crammed into the back of it on more than one occasion, legs dangling behind the front seats, lying on our backs in under the hatch glass, watching the trees flick by overhead. Very unsafe, but it was a different time. The car deteriorated over the years. Battery acid ate a hole in the inner fender well and firewall, water seeped down and rusted out the passenger side floor pan. Rust started to pop up other places also, like the rocker panels and the trunk sill. My dad had the engine rebuilt in the '90s, and the carbs refurbished by the original owner of ZTherapy around the same time. I still have his "Just SU Carbs" and "240Z Tuneup" videos on VHS. Pretty nice viewing. I've always been into cars, but was never wild about the Z, which always felt weird because everyone I talked to said it was an incredibly cool car. Maybe familiarity just breeds contempt (or indifference in this case)? Who knows. Regardless, I got into wrenching about 20 years ago and have had a long succession of project cars (FB RX-7s, mk3 Supra, Type 85 Audi, various BMWs, etc), but found it hard to muster the motivation to start restoring the Z. Finally, about 10 years ago, I was at a point in my life where I had a place of my own with a 2-car garage and wanted to start bringing the Z back into focus. This was its state then: Pretty much a "barn find" in my parents' own garage. Dusty, rusty, mismatched tires, etc. I had chucked the bumper overriders years ago and managed to talk my dad into buying a set of slotted mags since he kept losing hubcaps. It hadn't run in 6+ years at that point. Back in 2005, I was driving it and the battery wasn't properly secured. It slipped off the its pedestal and impacted the oil filter, creating a nice gash (and minor fire, which I beat out). I was young and stupid and continued driving, trying to make it to the nearest auto parts store for a filter in spite of the fact that I likely had marginal oil pressure. The moment the engine started acting funny I parked it and walked the remaining 1/2 mile to CarQuest for an oil filter. I put it on and drove it home, but was scared that I had permanently damaged something, so I just let it sit. Fast forward to 2011, Stage 1 of the restoration was determining if it would run properly or if the engine needed a rebuild. I replaced all the consumables on the engine, had the carbs rebuilt (again) by ZTherapy and drained and resealed the fuel tank. Got everything hooked back up and after a few hiccups...it started and ran just fine. That was a relief. Stage 2 had to wait a few more years. I moved for work about 6 hours further away from my parents (they had been 1.5 hours away before), and took the Z with me. In early 2014, I partially disassembled the car, removing the engine and some other key bits. The next spurt of motivation came in 2016, when I finally got my garage organized and finished stripping the car down. In 2017, my dad came with a trailer and took the car back to his house to have the body restored. He took it to a local body shop to have the rust repaired and the car repainted its original 901 Silver. The body shop did an OK job. I wish I had been local in order to supervise the work more closely, since they cut a few corners, especially in the engine bay. Long story short, the car returned back to me for reassembly on Labor Day 2019. I was initially pretty intimidated by the task at hand, but started chipping away at it and it started coming together. I finally got it started again a little over a year ago so it could move under its own power to our new (local) home. Since then, reassembly has continued in fits and starts, but this is where it stands now: Still quite a lot to do, especially as regards the interior, but I've been pleased with the progress so far. Thanks for reading and stay tuned. -Matt
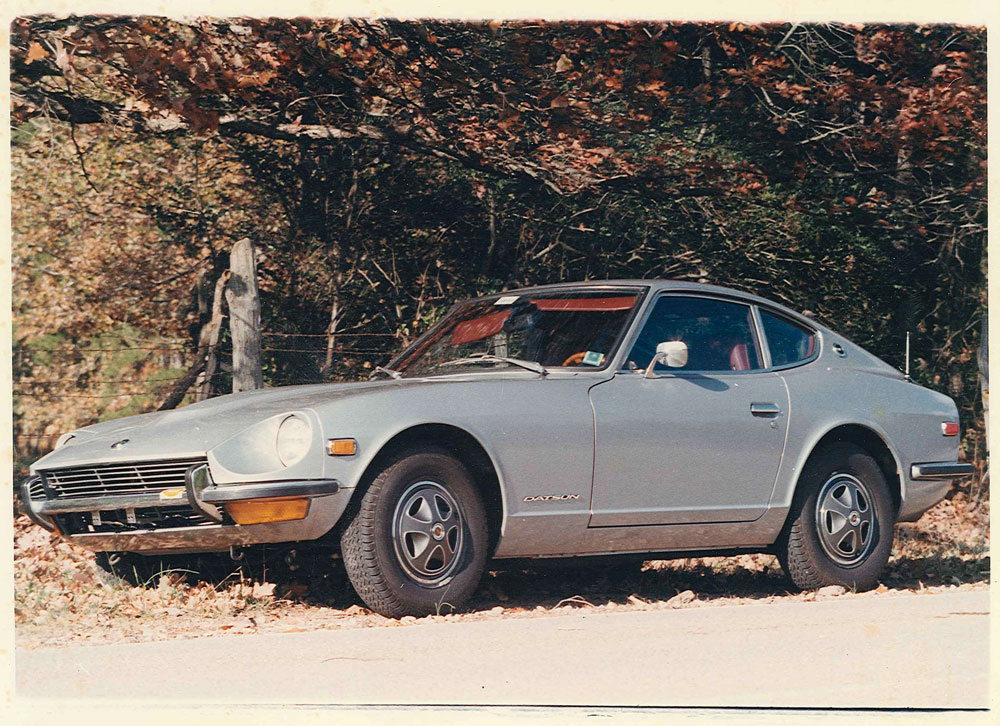


 1 point
 -
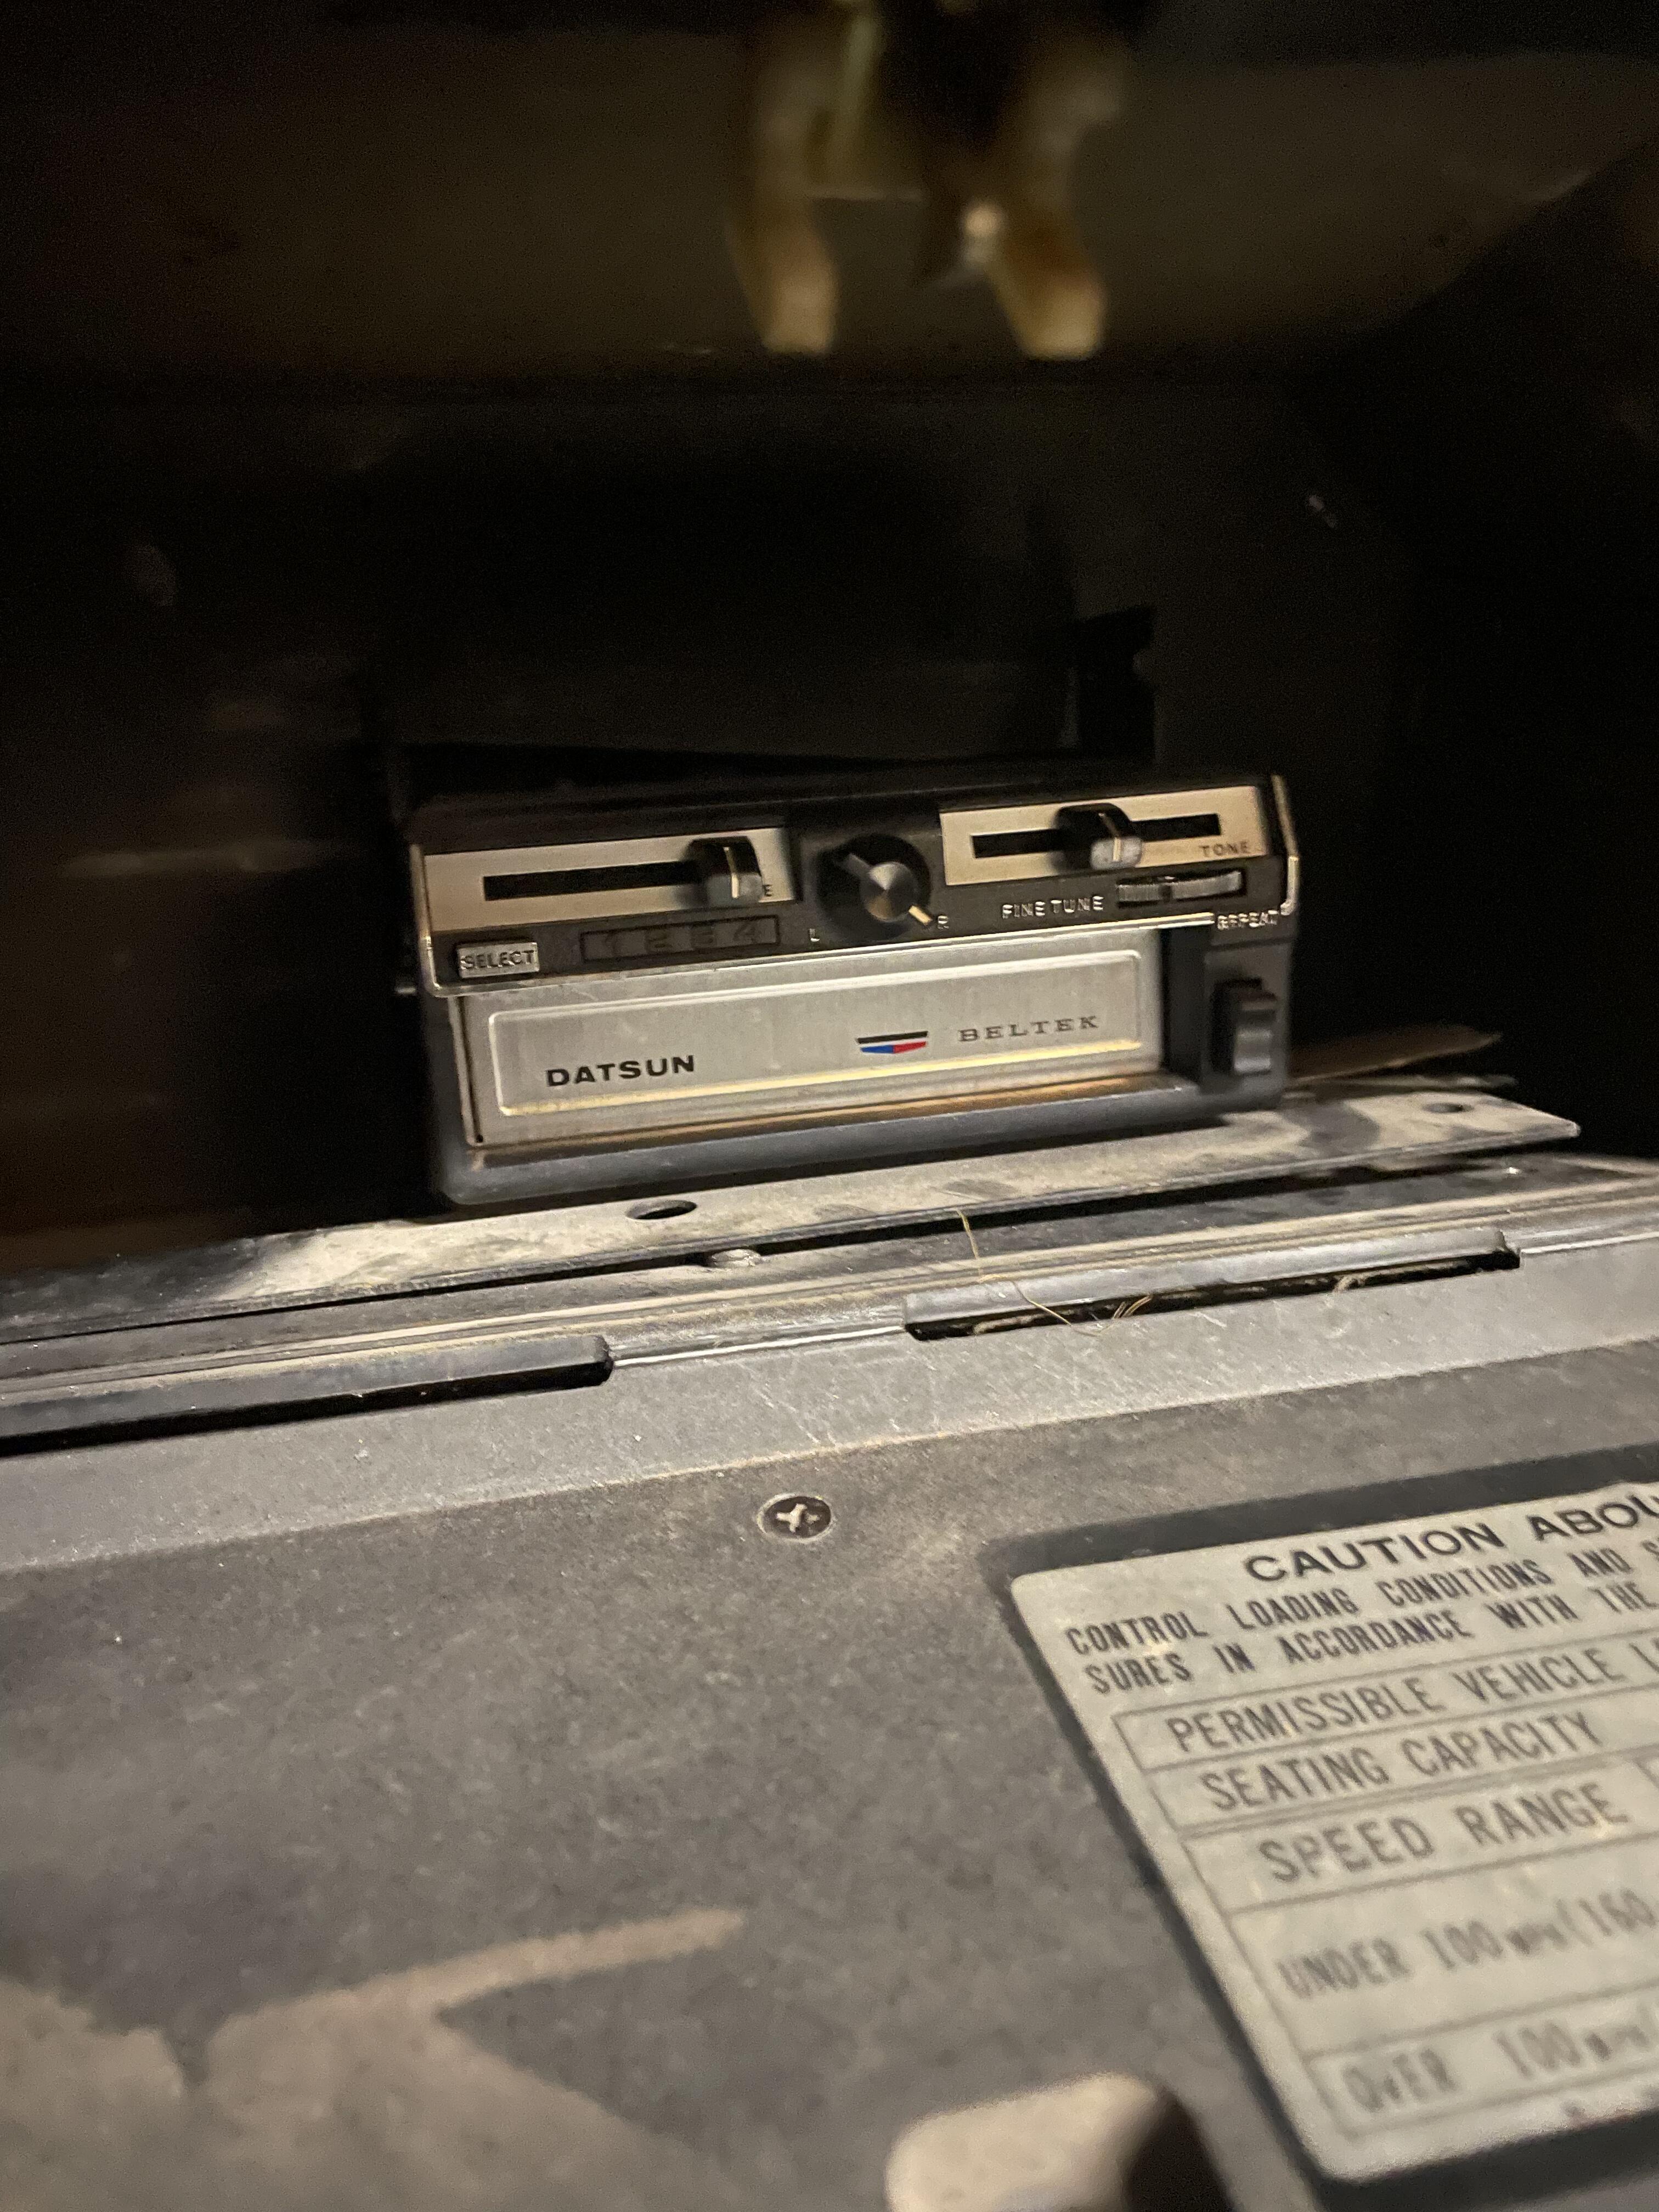
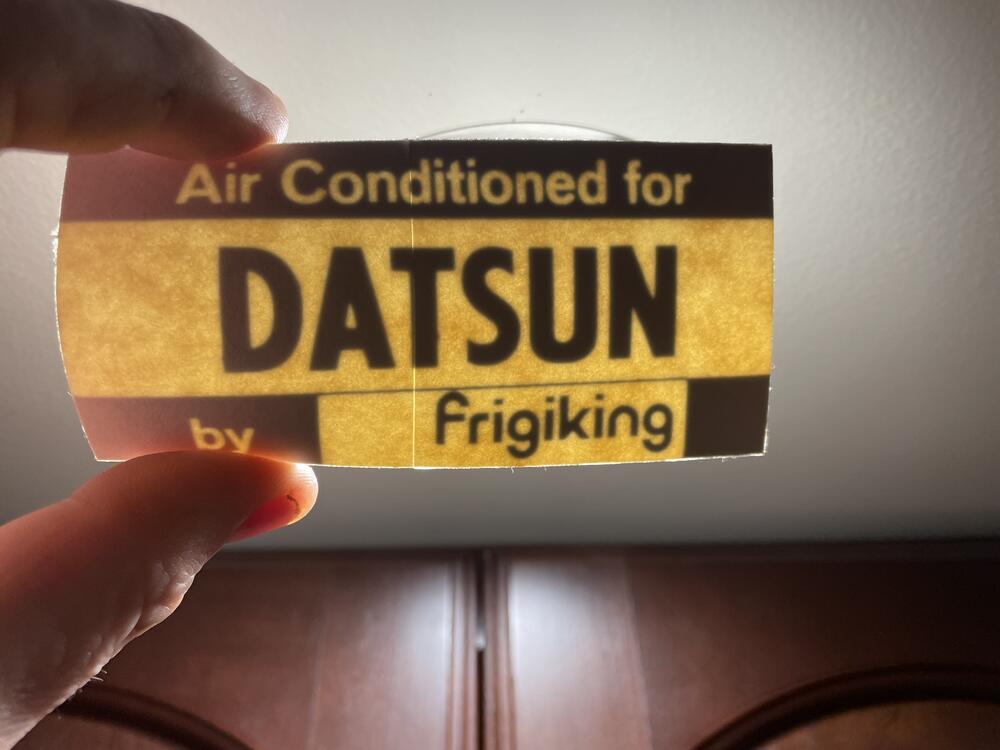
1 pointThe black in the engine bay is like an undercoating type paint. A lot of the same type of paint is underneath too. The paint code tag is 110 persimmon red which oddly enough looks a lot like the R4 red on my Super Bee. My wife and I were married in 1995 and the first time I saw the car it looked like it does now. I assume it was painted sometime in the late 80’s. It is definitely my wife’s car but I’m crew chief lol. Father in law passed in 2009 so the car has been collecting dust in my mother in law’s garage. She’s getting up there in age and wanted to start making sure assets go where they should. Here are pics of a decal I found in the owners manual and a pic of the dealer installed 8 track player. It has matching Beltek speakers in the tail panel trim.
 1 point
 -
 1 pointWelcome aboard, yes more pics please, underneath if you can. Well if you're coming from mopar to a 240z you are in for a treat, these cars handle in a very different way to the muscle cars of the same era. So who's car is it? Yours or your wife's?1 point
 -
1 point
-
 1 pointTo me, the best way to restore the battery area is to drill out the spot welds and remove the tray. If you do this, buy a nice, properly sized spot weld drill bit and extender, and practice removing spot welds without drilling through the body. You will then need to weld up the holes in the battery frame...or buy a new one. I use rivet nuts to re-attach the tray to the body. Not saying you should do this though. It is a pretty big rabbit hole because you will probably want to clean up those passenger side frame rails too...which is difficult without removing the fuel / brake lines and harness that passes through the firewall. Nice car.1 point
 -
 1 pointor just check it with a mechanical gauge. I don't trust any of the senders1 point
 -
 1 pointThis intrigued me, as an issue I wasn't aware of, so I did some digging and came across this link. https://www.atlanticz.ca/zclub/techtips/plugs/index.html Inside the ink I found this: Historical Z Plugs so, I believe I am running the wrong plugs. Which is weird, because AutoZone recommended the NGK-BPR5EGP which is a hotter plug. Do you think it would be worth it to switch to the B6ES-11? I wonder if for some odd reason these plugs make the car unhappy. @dutchzcarguy thank you for the great catch. @AK260 Interesting, I will take a look at those resistance tests when I get home. The miss Is rhythmical at times in the sense that I can watch the RPM gauge bounce. However, when the gauge isn't bouncing and the engine is still missing, it seems random, as there are just distinct muffled gurgles out the exhaust with constant engine bucking. Regarding vacuum, it reads perfect, as I did all the tests and corrected issues in a previous forum post. Lots of new rubber everywhere.1 point
 -
 1 point
 -
 1 pointShould they not be BPR6ES plugs? so not 5 but 6 (Has to do with hotter/colder..)1 point
 -
 1 pointFrom the photos I wouldn’t say your wires have “gone bad” as such - it looks like they have put some kind of sealant between the boot and the cable to prevent moisture ingress. The sealant coming off should not cause a misfire. The way to tell if your leads are bad is to get a multi-meter set on resistance test. Then connect both ends of the leads onto the probes and hold them securely in place with your fingers. First measure the resistance which should be in the order of kilo ohms 10k-20k ohms per metre if they are carbon wires - it will be a different reading for each lead as the resistivity is related to the length of the lead and each one is a different length. Then when you are satisfied that you don’t have a lead with a total break in it, while holding the probes onto each end, “wiggle” each lead and see if the resistance changes dramatically. I had some Magnecore KV85 cables that went bad and two of them would go to mega ohms as I wiggled them. I also had symptoms like bucking and backfiring / popping when I went onto the accelerator pedal, as there was unburnt fuel hitting the end of the tail pipe. Is your “missing” random or rhythmical? Now to throw a spanner in the works, often time a vacuum leak can manifest symptoms that seem like an electrical issue and cause random missing. This only manifests itself at idle : part throttle conditions when manifold vacuum is high but the car runs like a dream at WOT! Once you have exhausted possibilities of electrics (or even during your troubleshooting), check your intake for any leaks (gaskets, bad hoses, etc).1 point
 -
 I dont have a store, I just sell them thru the various Z car forums If anyone is interested you can just send me an email at: chaug@bis.midco.net OR text me at: seven,sero,1-4,7,one-one,5,THREE,4 Payment is: My paypal is chaug@bis.midco.net and is the only way I accept payment. 25.00 includes shipping for the Bearing Retainer and 3 new bearings I had a batch of 100 made and have sent them all over the country. Craig Haug Mandan, ND1 point
 -
1 pointDo you mean the propeller shaft? The driveshafts are the two to the wheels. It's a Nissan thing. Find a wrench that fits the nuts tightly and will wedge against the body if you turn the shaft. Then turn the shaft to break the nuts loose. You should have the D head bolts so all you have to worry about is the nuts. Find wrench, fit wrench in right place on nut, stick screwdriver in u-joint to turn shaft, wedging wrench against body. X 4. Once you get the nuts off you might have to tap/beat on the flange to break it loose. There's a raised centering circle that fits a recess in the diff. It's a tight fit.1 point
-
 Got the 4mm thickness ring in there now, bearing pressed on just fine. engines in the car, we’ll see how it goes. I put in an adjustable length slave rod as well so I can tweak free play. I have to say, given all the clutch/ throwout collar combo’s I’ve seen that are quite different from the 92mm ideal (all working just fine), that there is more room for error than we give it credit for. I’m not saying “put anything in there you like, but you can clearly do a bad thing by having too long of a collar, but you can make up a lot if it’s too short by just coming up with a longer slave rod.1 point
 -
 So neat. I had a Silver 72, one of many 240z's I have owned. Looks beautiful.1 point
 -
1 pointNo other ports for a switch? The 4 speeds had a top gear switch, my 76 had one. It activated the vacuum advance solenoid. The ZX 5 speeds had several switches. Looks like some had top gear and OD switches, for some odd reason. Maybe they did the same thing. For some reason Nissan didn't label the switches in the 280Z chapters. But I think that they'd be about the same as the ZX's.
 1 point
 -
1 pointHave you cleaned the cold temp sensor in the thermostat housing then the bullet connections about a foot back in the wiring? Your choice of the word "bucking" got my attention as that the exact way I described my '77s rough running up to 2,500 rpm then it ran good with good pull. Here's the "fix" but look through and you'll see the bullet connections, make sure they're clean and tight. The plastic connector to the thermo housing should be clean and tight. Last but not least take the brass sensor out and shine it up with some sandpaper or steel wool. https://www.atlanticz.ca/zclub/techtips/tempsensorpot/index.html1 point
-
 1 pointOld posts with a lot of information on how to adjust the clutch, but not all acurate. The correct method is: 1. Adjust the pedal free travel according to the manual, with 1 to 5mm free travel. 2. Remove slave cylinder return spring. 3. Loosen the two nuts (Yes, both on slave cylinder side of fork. One is the adjusting nut and the thin nut is to lock it into place). 4. Adjust nut until all free play is removed. 5. Back off nut 1.5 turns (approx 2 to 3mm of free travel). 6. Lock the two nuts and check free travel 7. Fit return spring. Seems very much like the above posts are trying to adjust the later version slave cylinder in an early model setup. The later version has an internal spring and is self adjusting when fitted with the corresponding pushrod. It requires a different method of adjustment when combined with the early pushrod and you should not use the external spring in this setup. If you use the later version slave cylinder with the adjustable pushrod, do the following. 1. Loosen lock nuts. 2. Loosen the two nuts (both on slave cylinder side of fork). 3. Adjust first nut until all free play is gone. 4. Check that you can push the push rod into the slave cilinder about 10 - 12mm. Note: If you can not do this, then you have overtightened the adjusting nut or someone has removed the internal spring. Check the slave cylinder internals. 5. Screw adjusting nut a further two turns. 6. Tighten lock nut. Check you can still push the push rod into the slave cylinder about 8 - 10mm.1 point
 -
 You may have realized by now that the project is a bit on hold by now. The reason is i took over a management role in my job, and besides i'm also studying management. Good thing is after some first chaos i've settled in my new position and things are getting calmer and then i have my exams soon, so after that i have finally much more free time (after 2 years of school = home-study in the evenings and school on the weekends). The plan is to jump right back at where the project stopped aroun april 2022 and go full throttle. i really want to complete this build and i have so many nice parts in stock to go on the car. But from time to time you have to treat yourself with some small gimmicks to keep your brain active on the project. The first thing i got was a contactor set, which was for sale NOS locally and cheap. How could i say no? It's kind of funny to see the mitsubishi logo on the genuine Nissan part :-) Also got this nice german book about the Z. It seems to be a quite well researched book compared to most others (in german). They even got the Goertz story right, i ncluding a print of the letter that nissan sent to him about the design: And then got myself a RAL colour chart. Why you might ask? well I'll show you that in a coming update. and NO, the car won't be painted in any of those colors :-)1 point
 -
 1 pointWell I'm glad I found this thread, I was about to adjust my clutch by disconnecting the yoke and unscrewing it from the rod!1 point
 -
 1 pointInteresting. Eliminate the population and the disease disappears! Brilliant! Slightly hard on the population, but there you are.1 point
 -
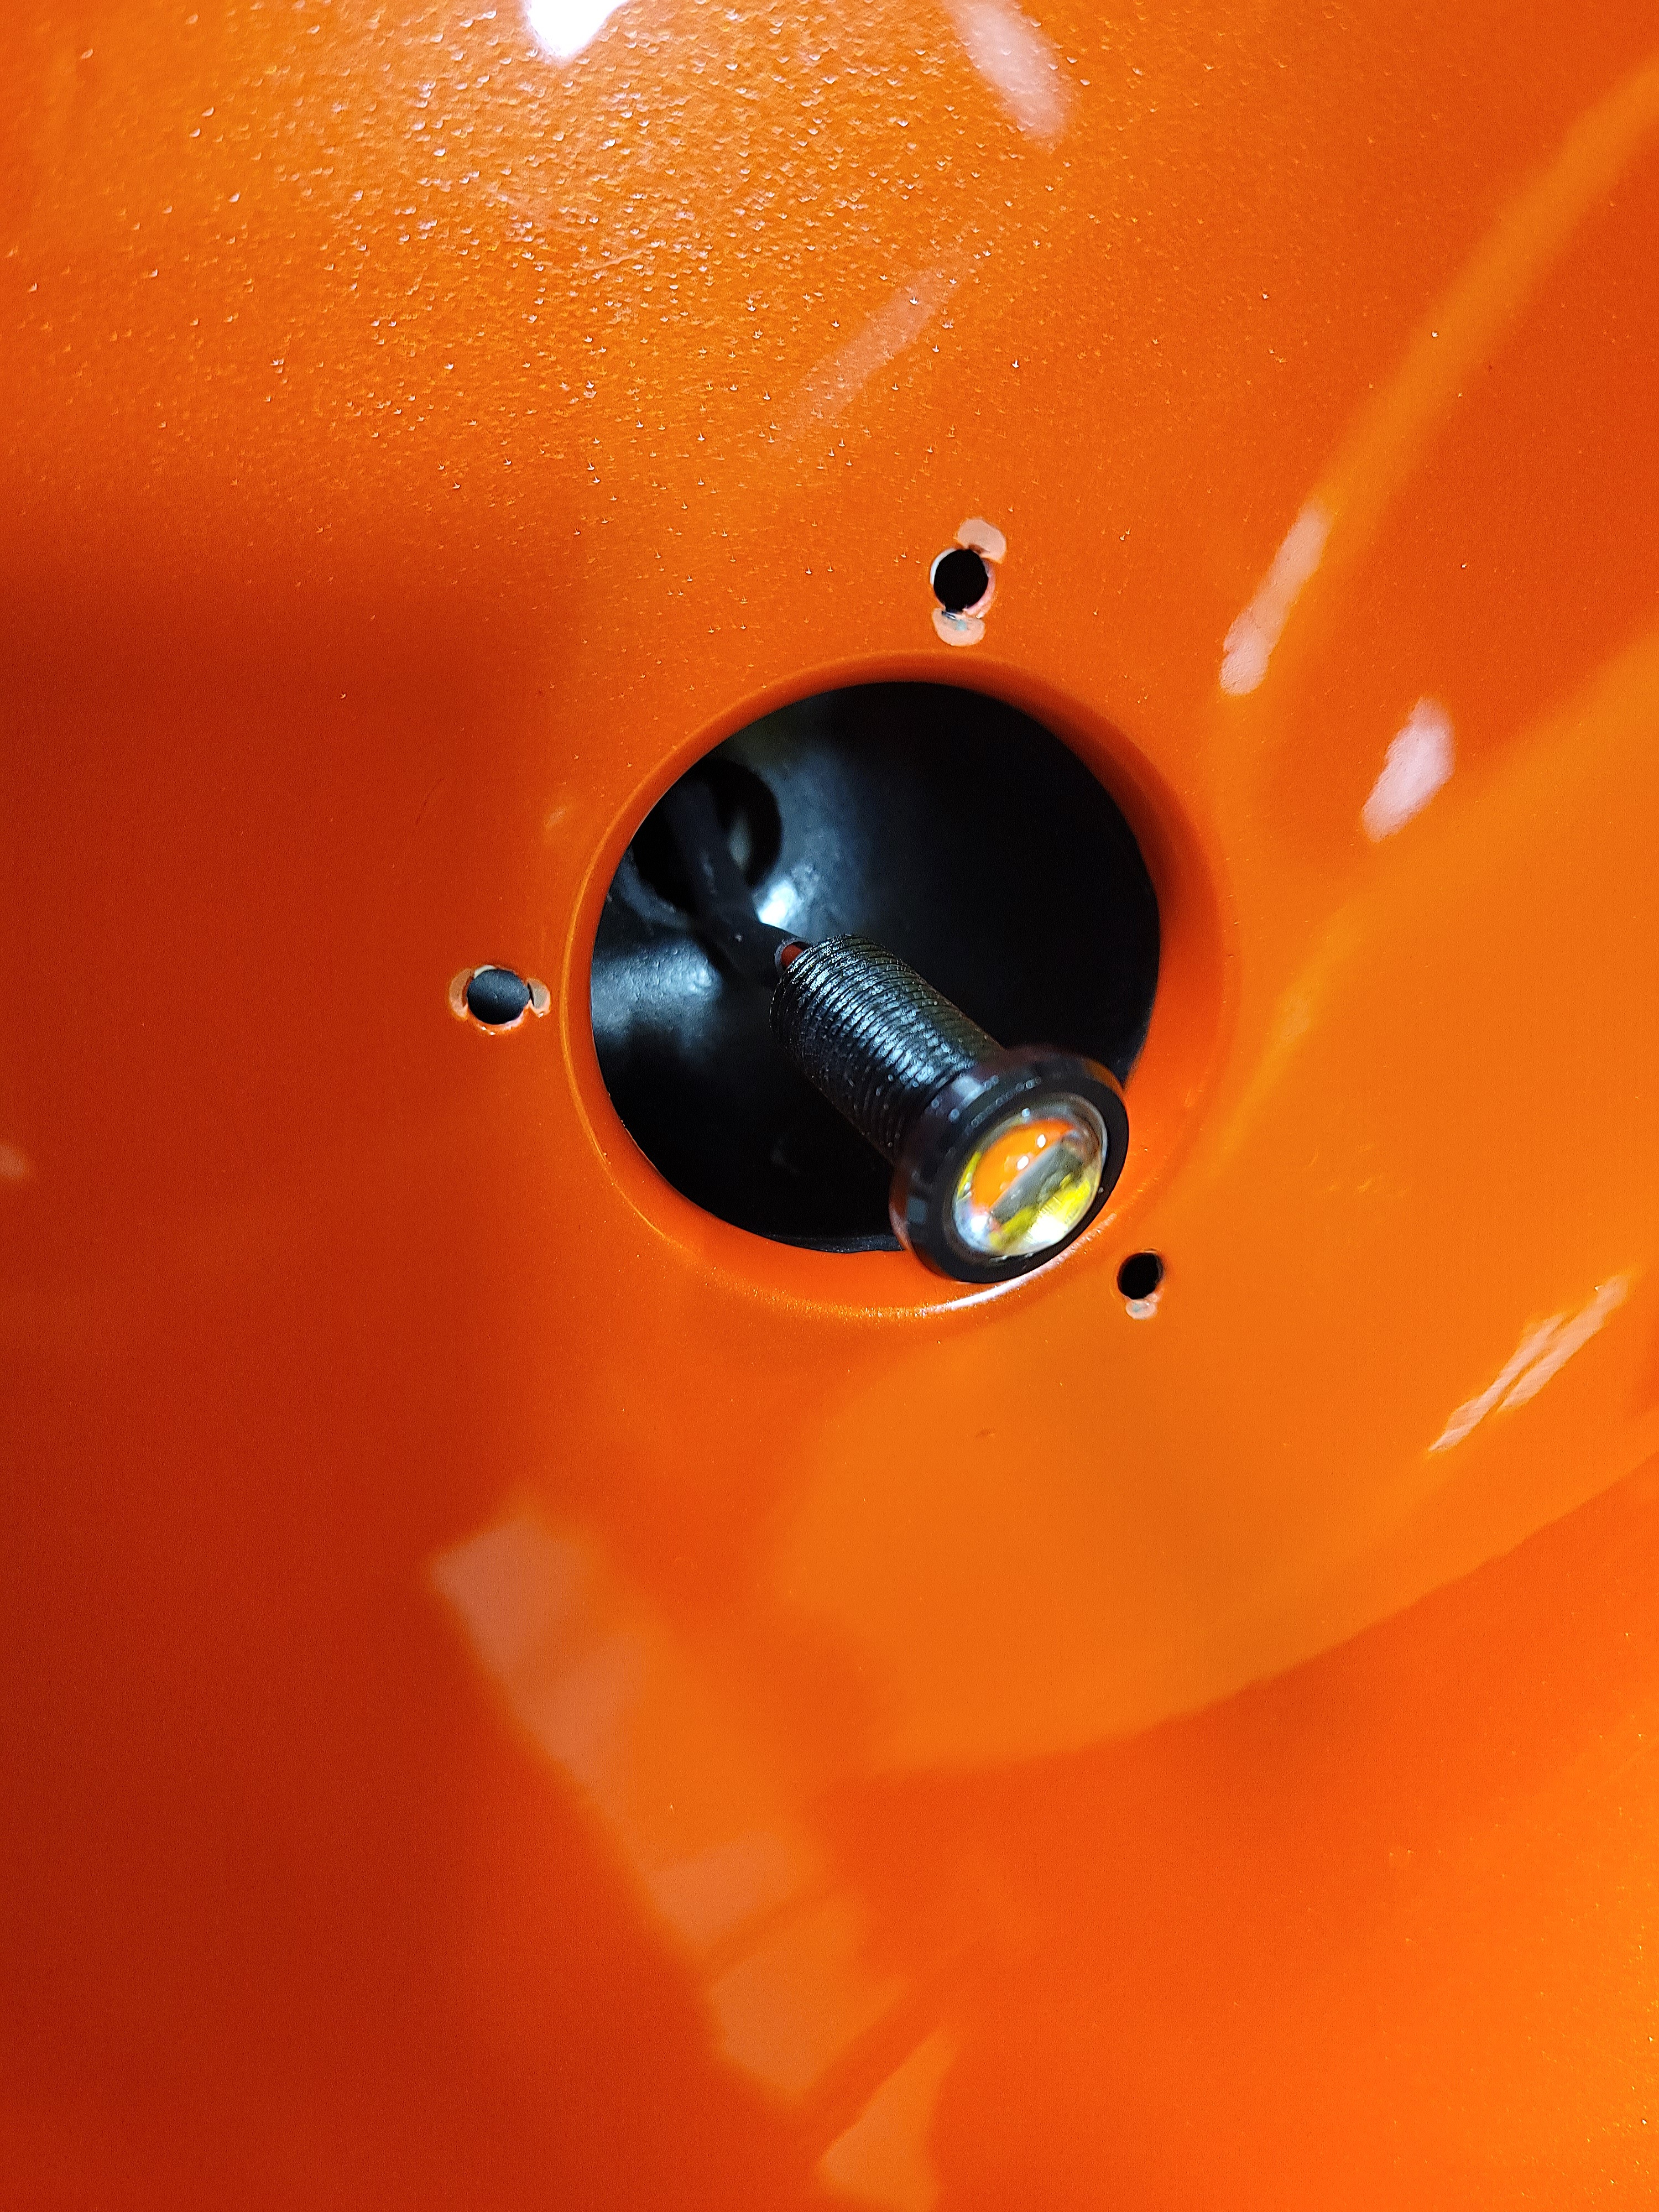
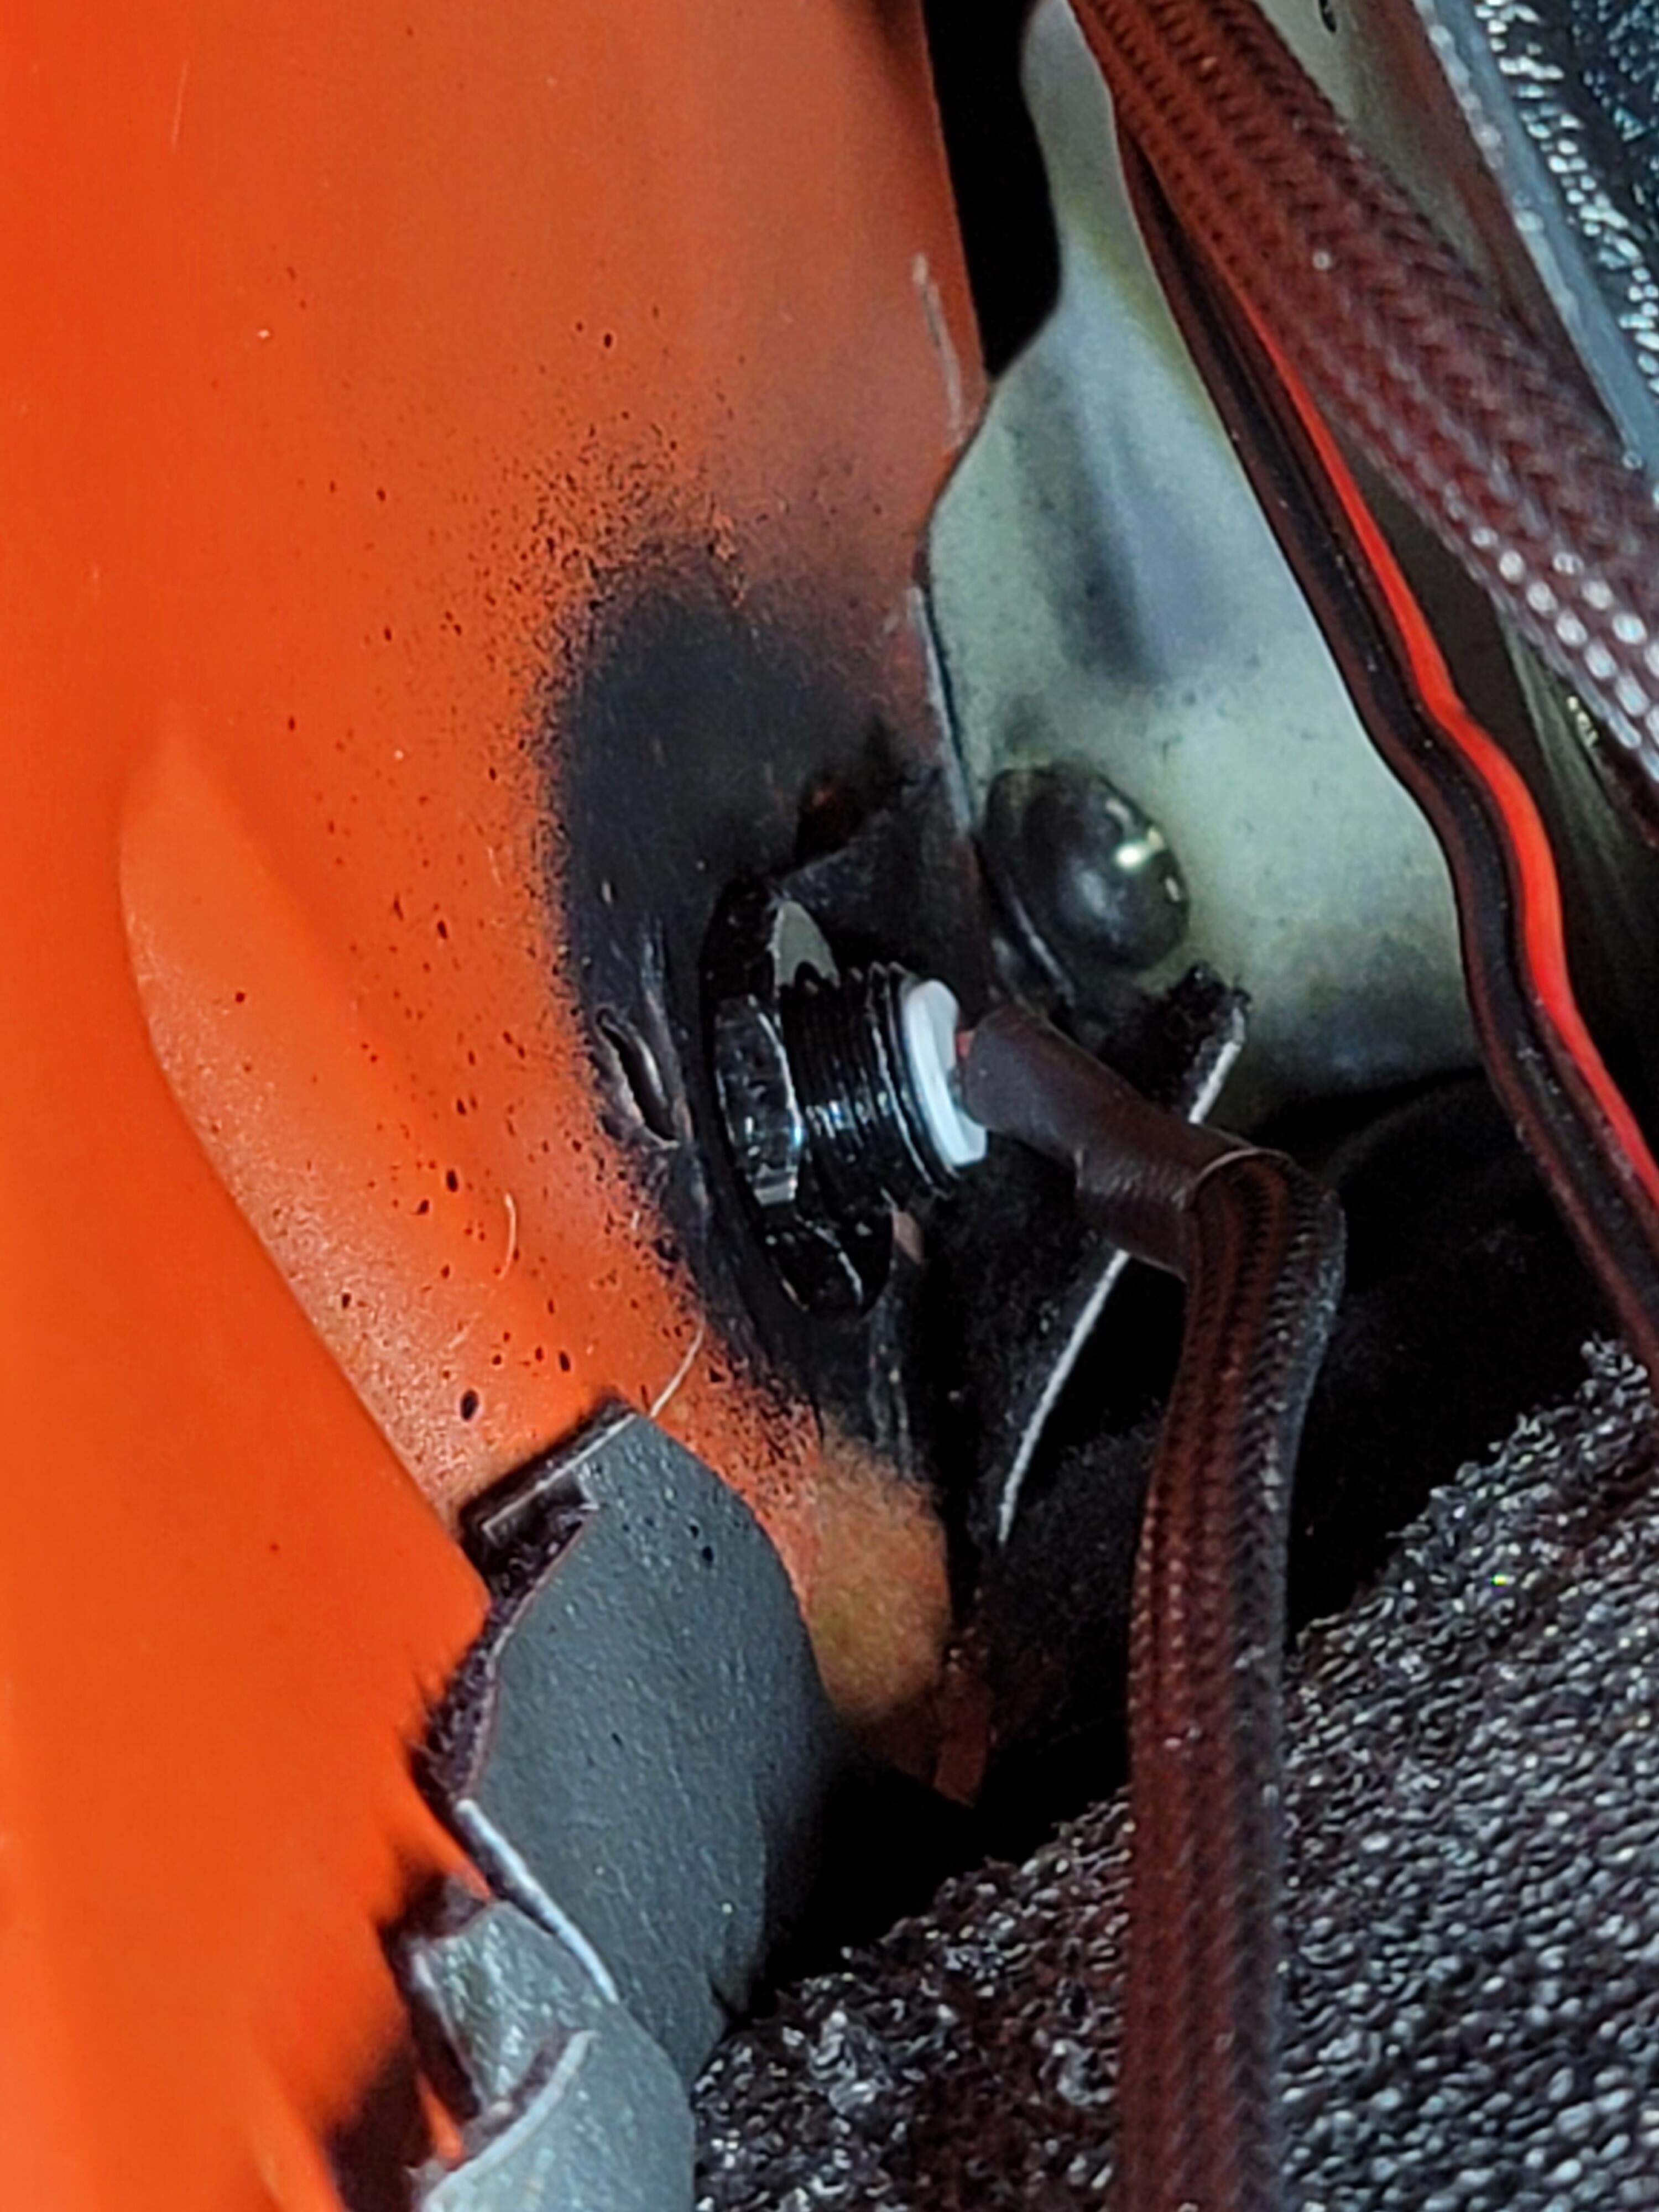
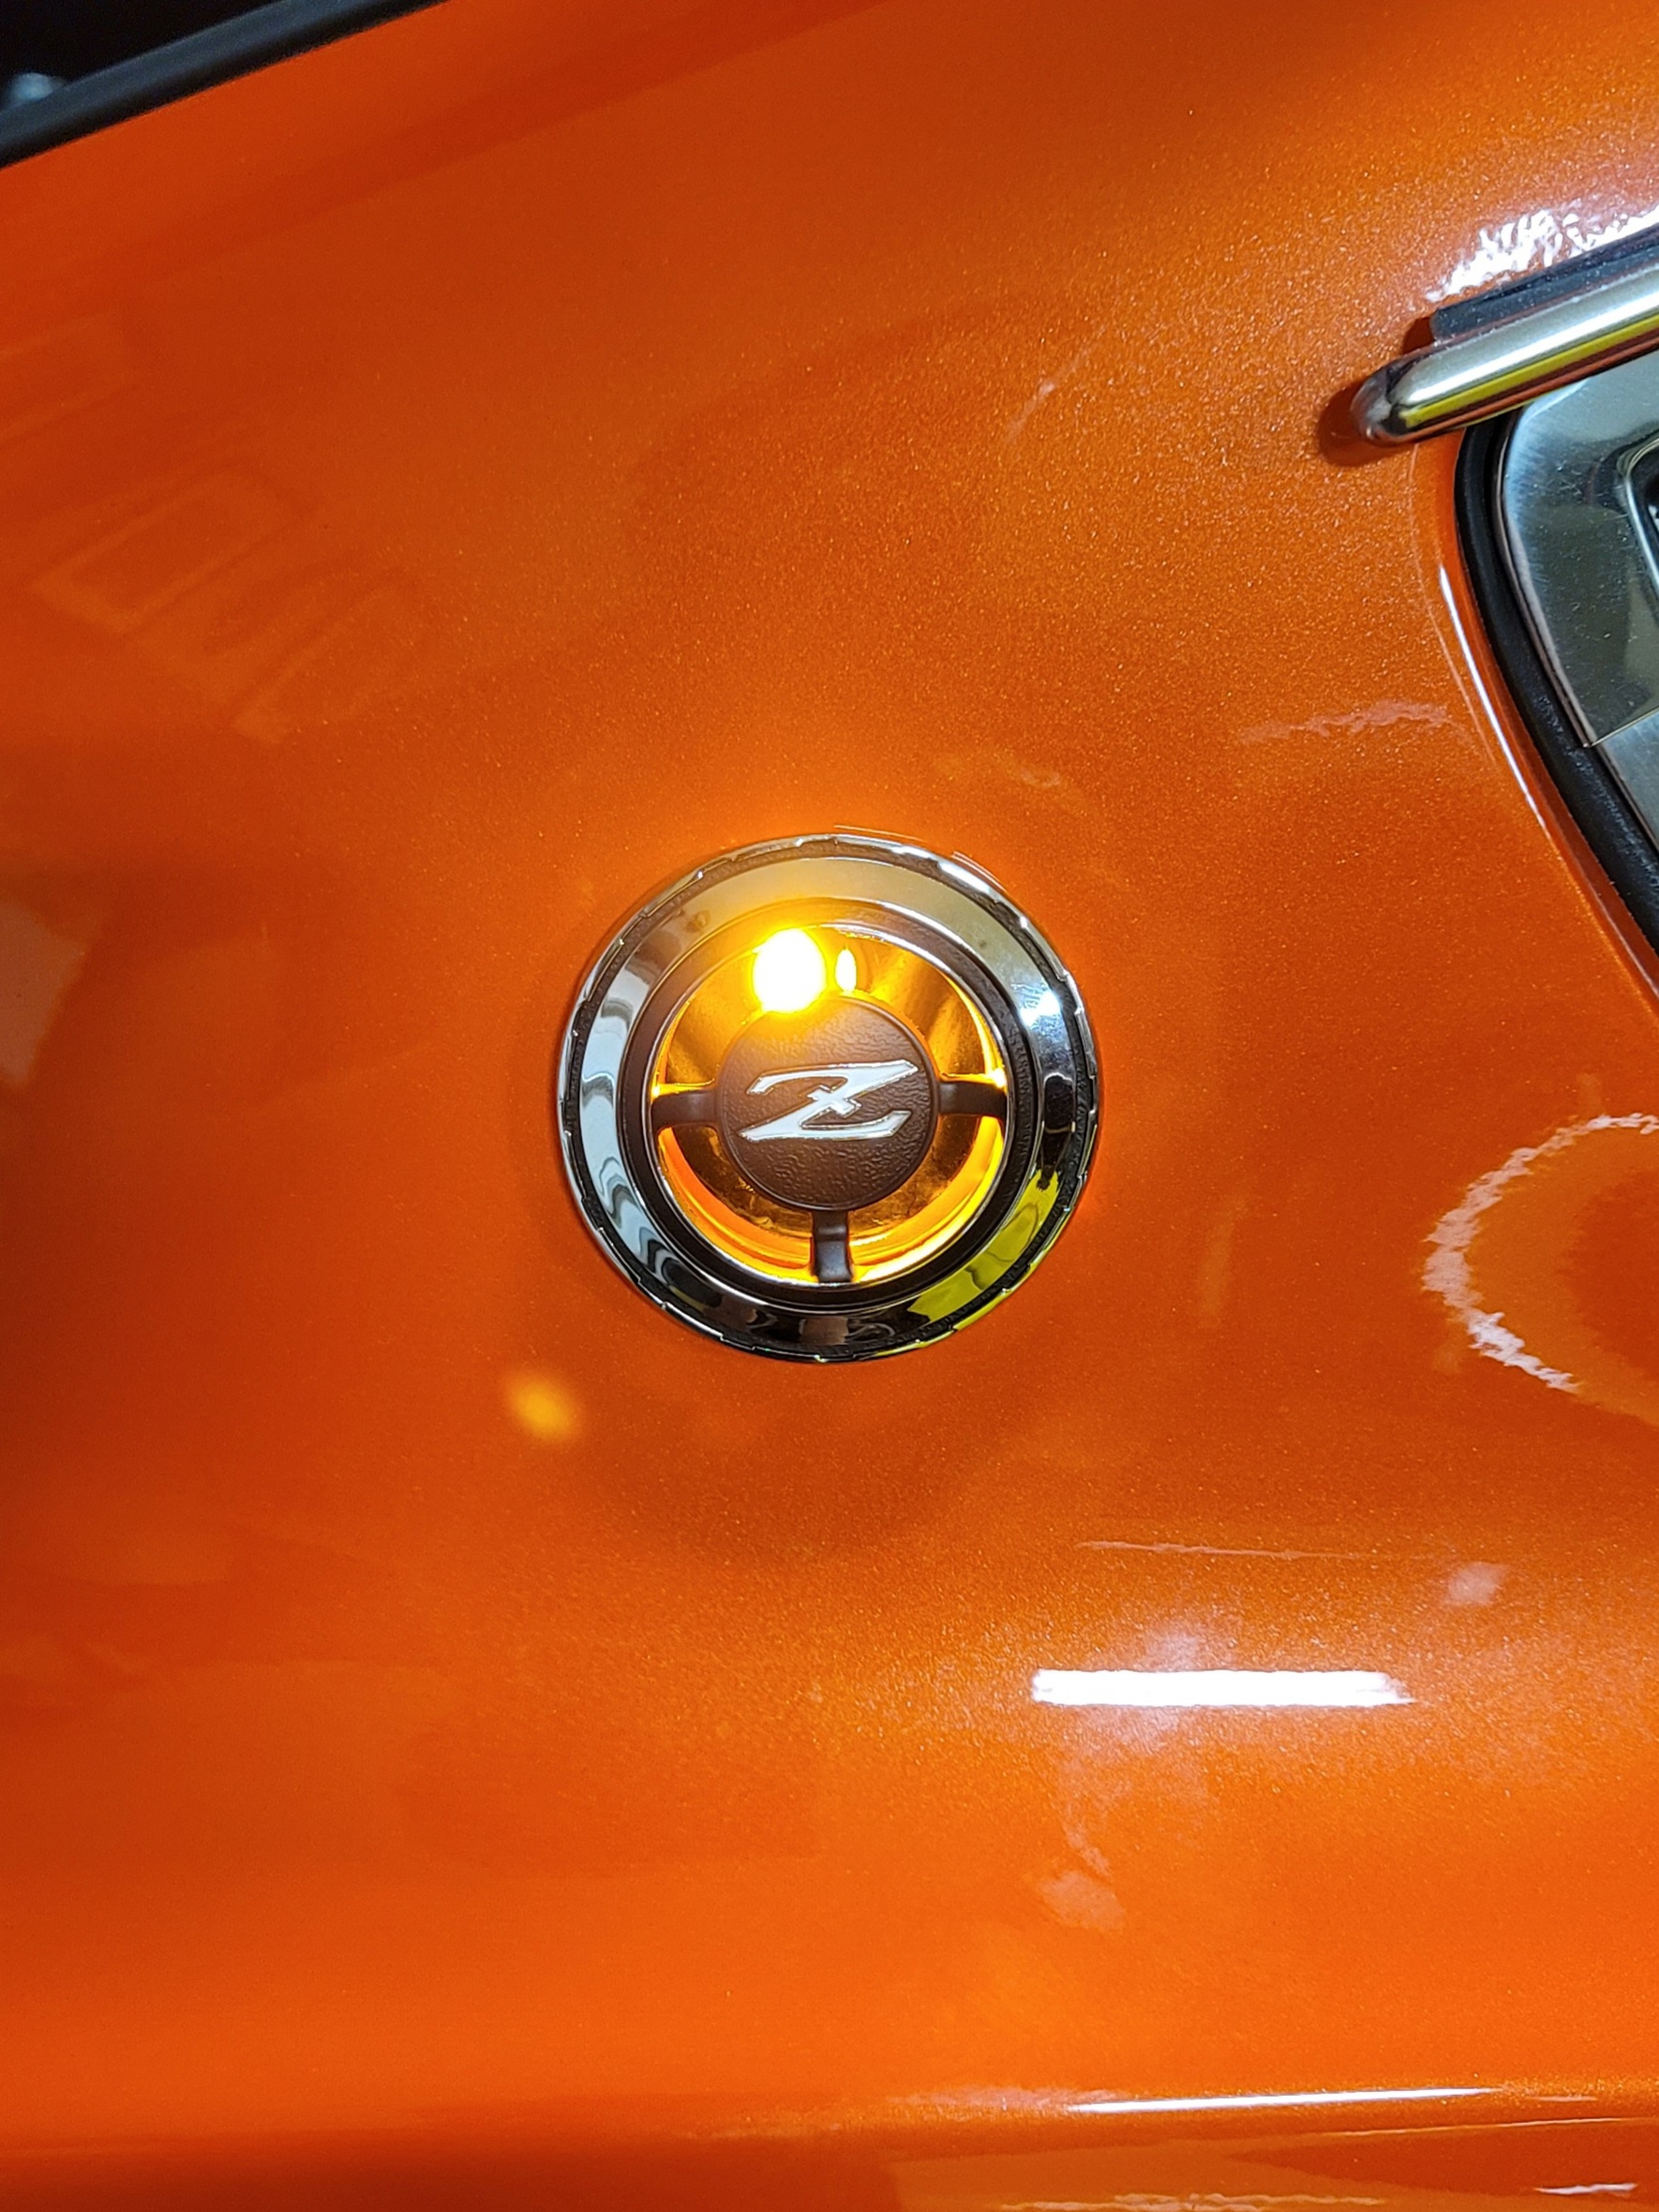
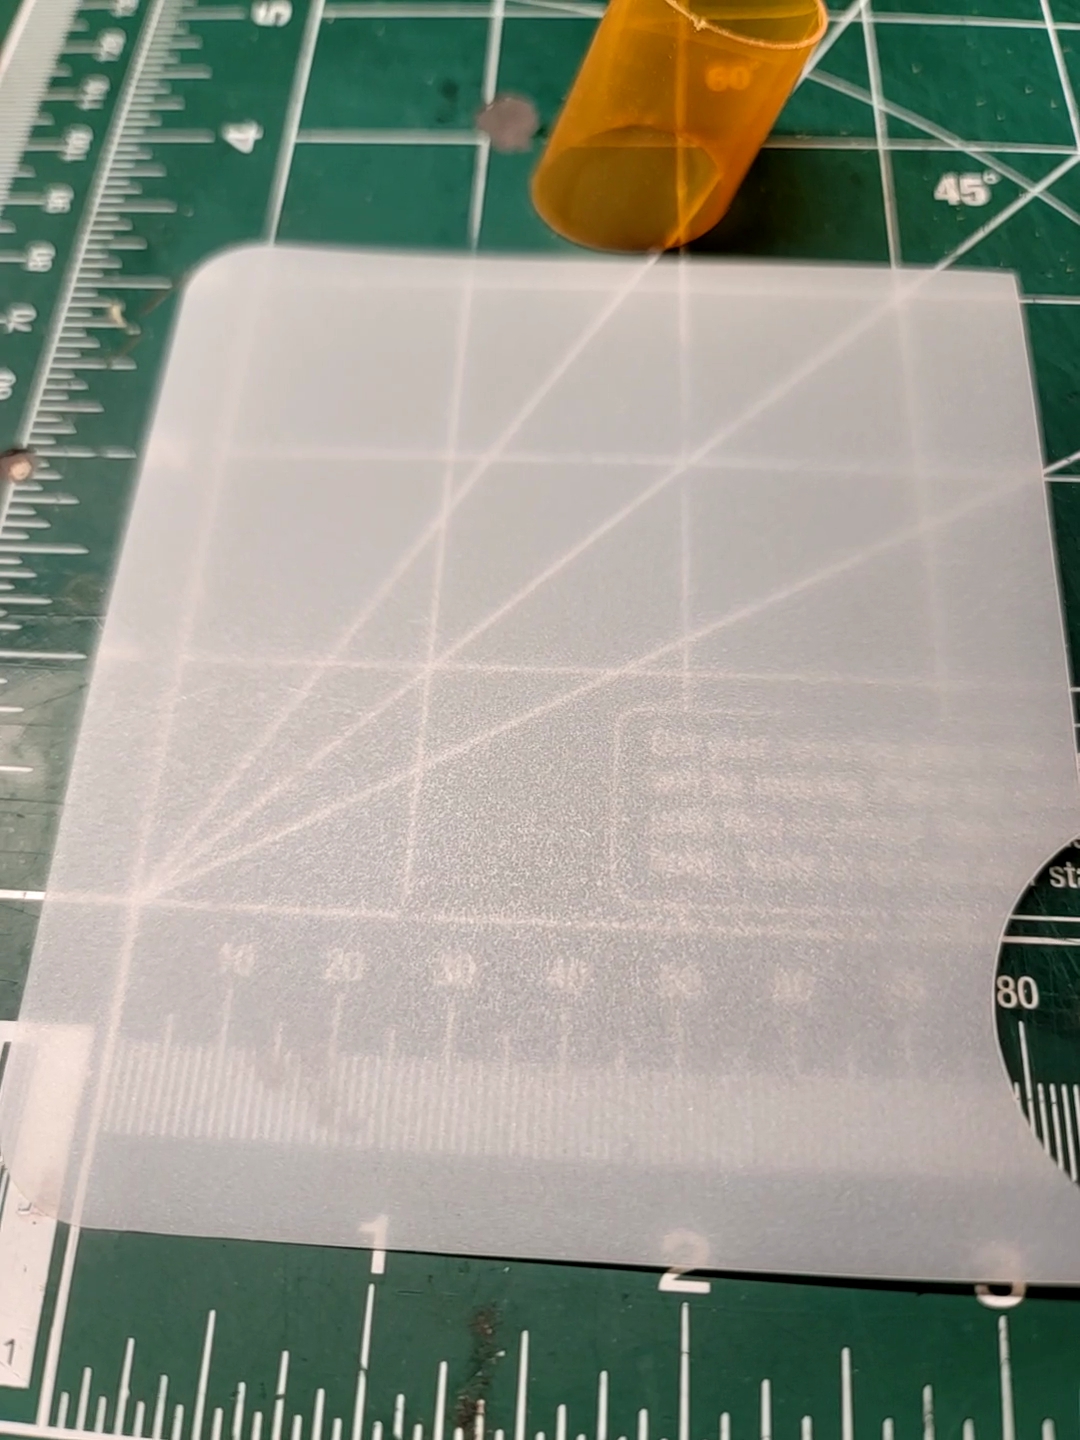
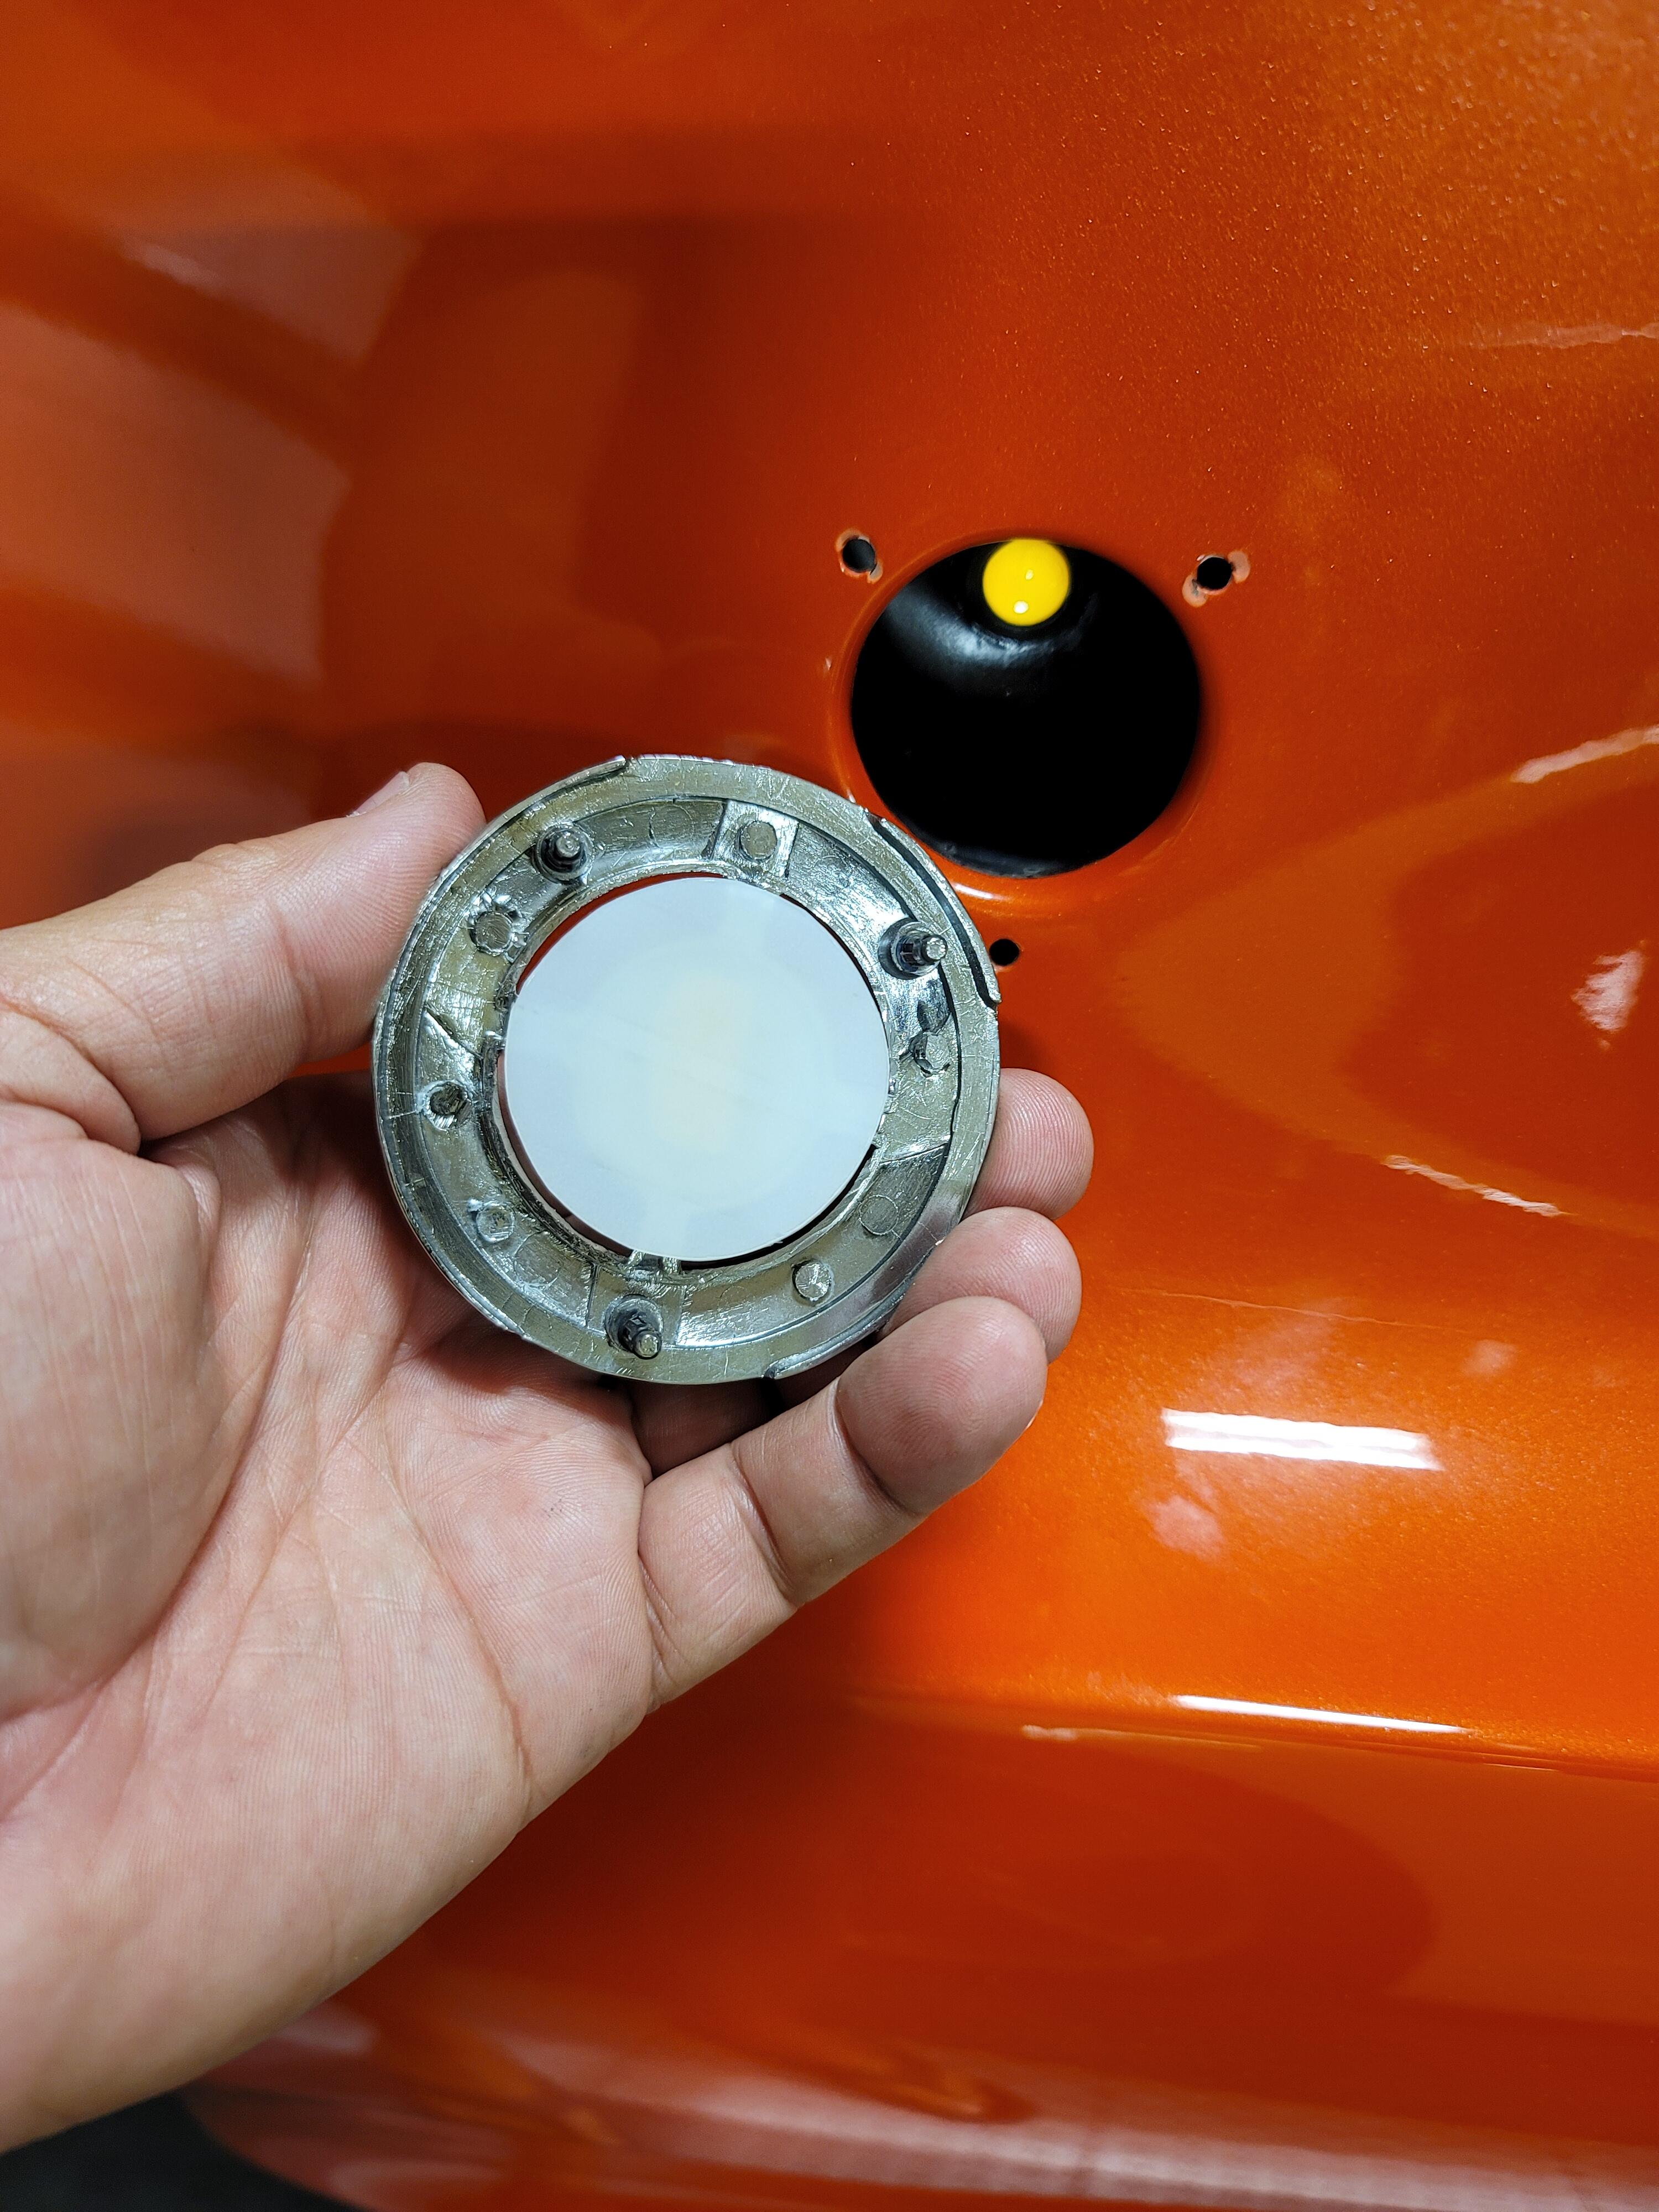
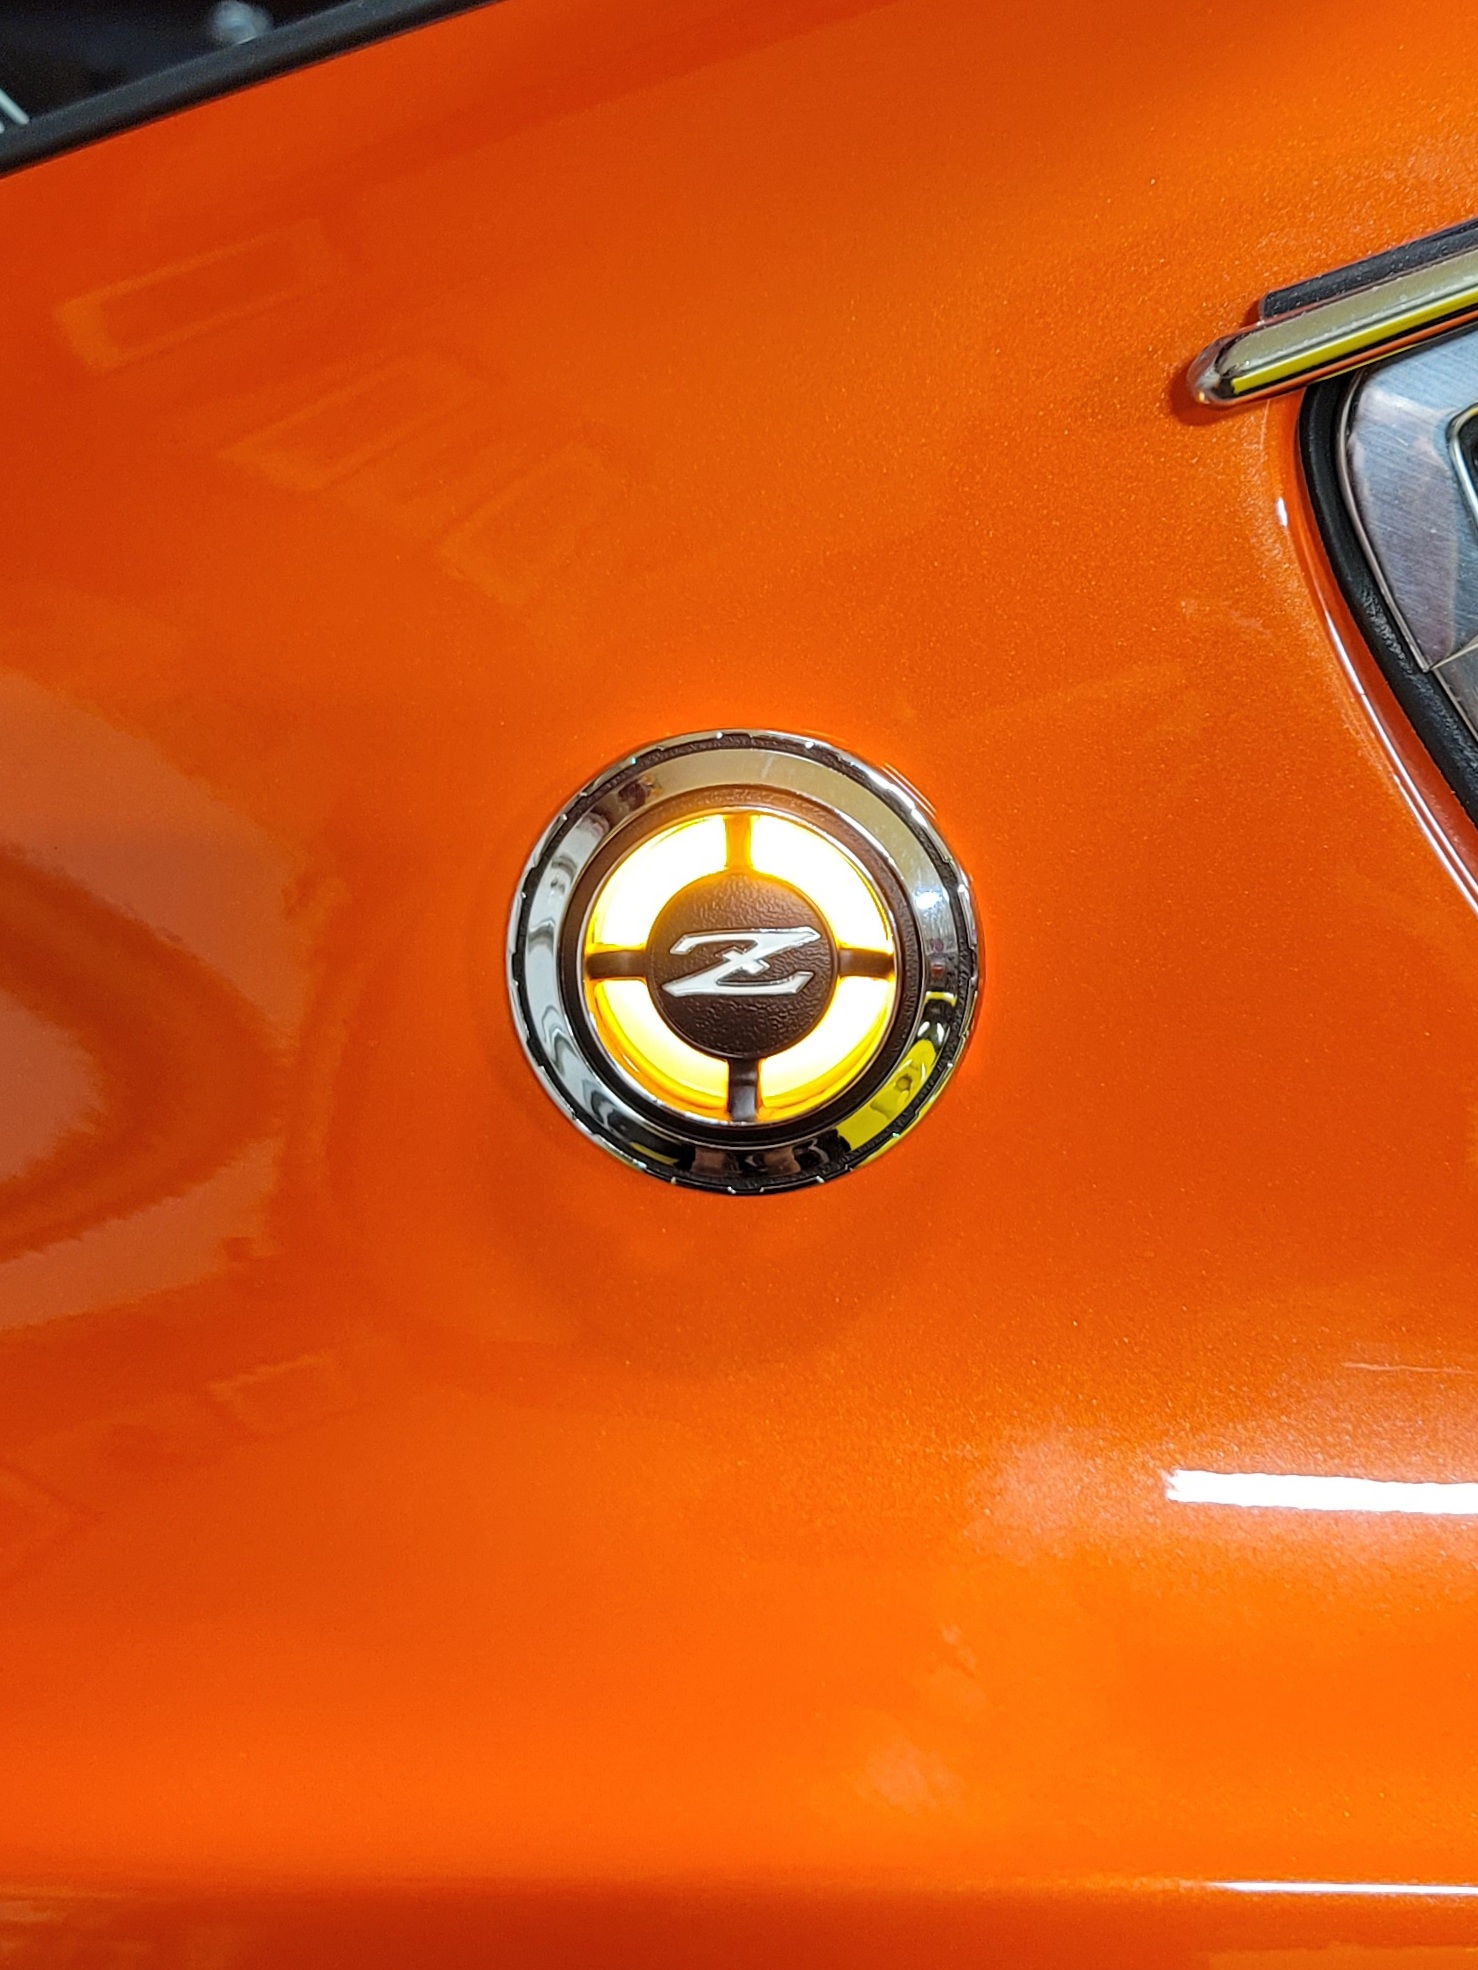
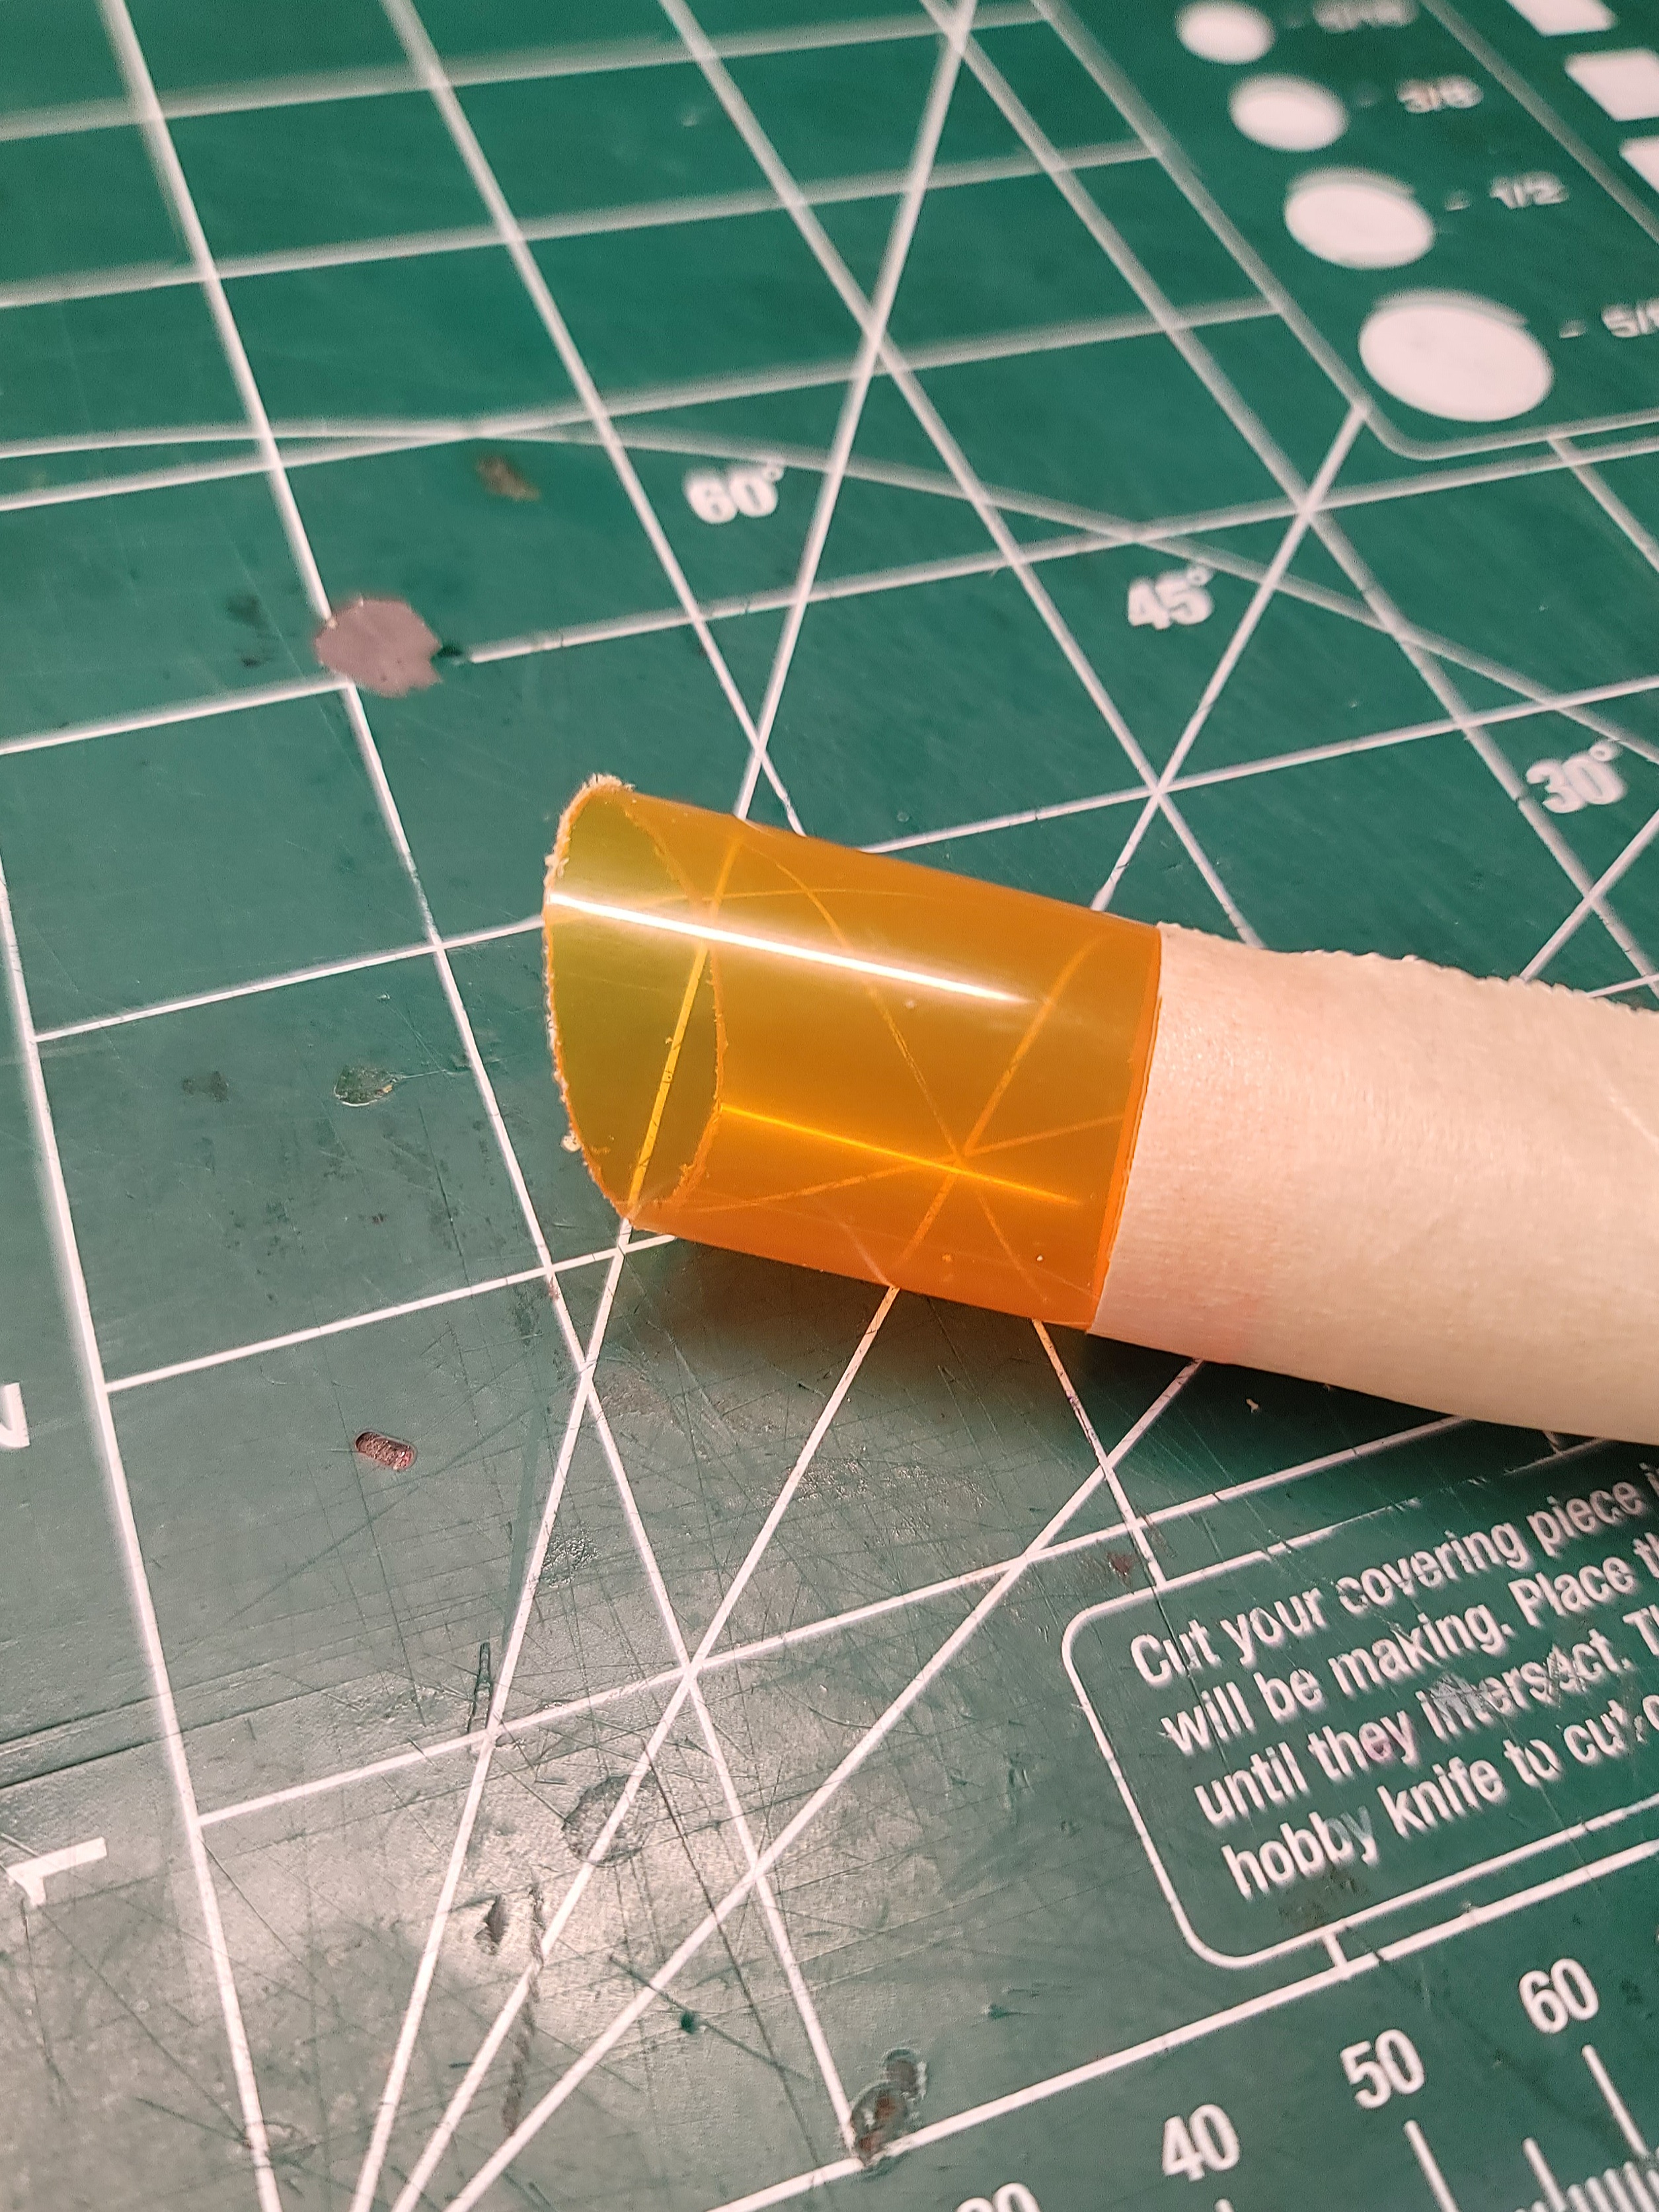
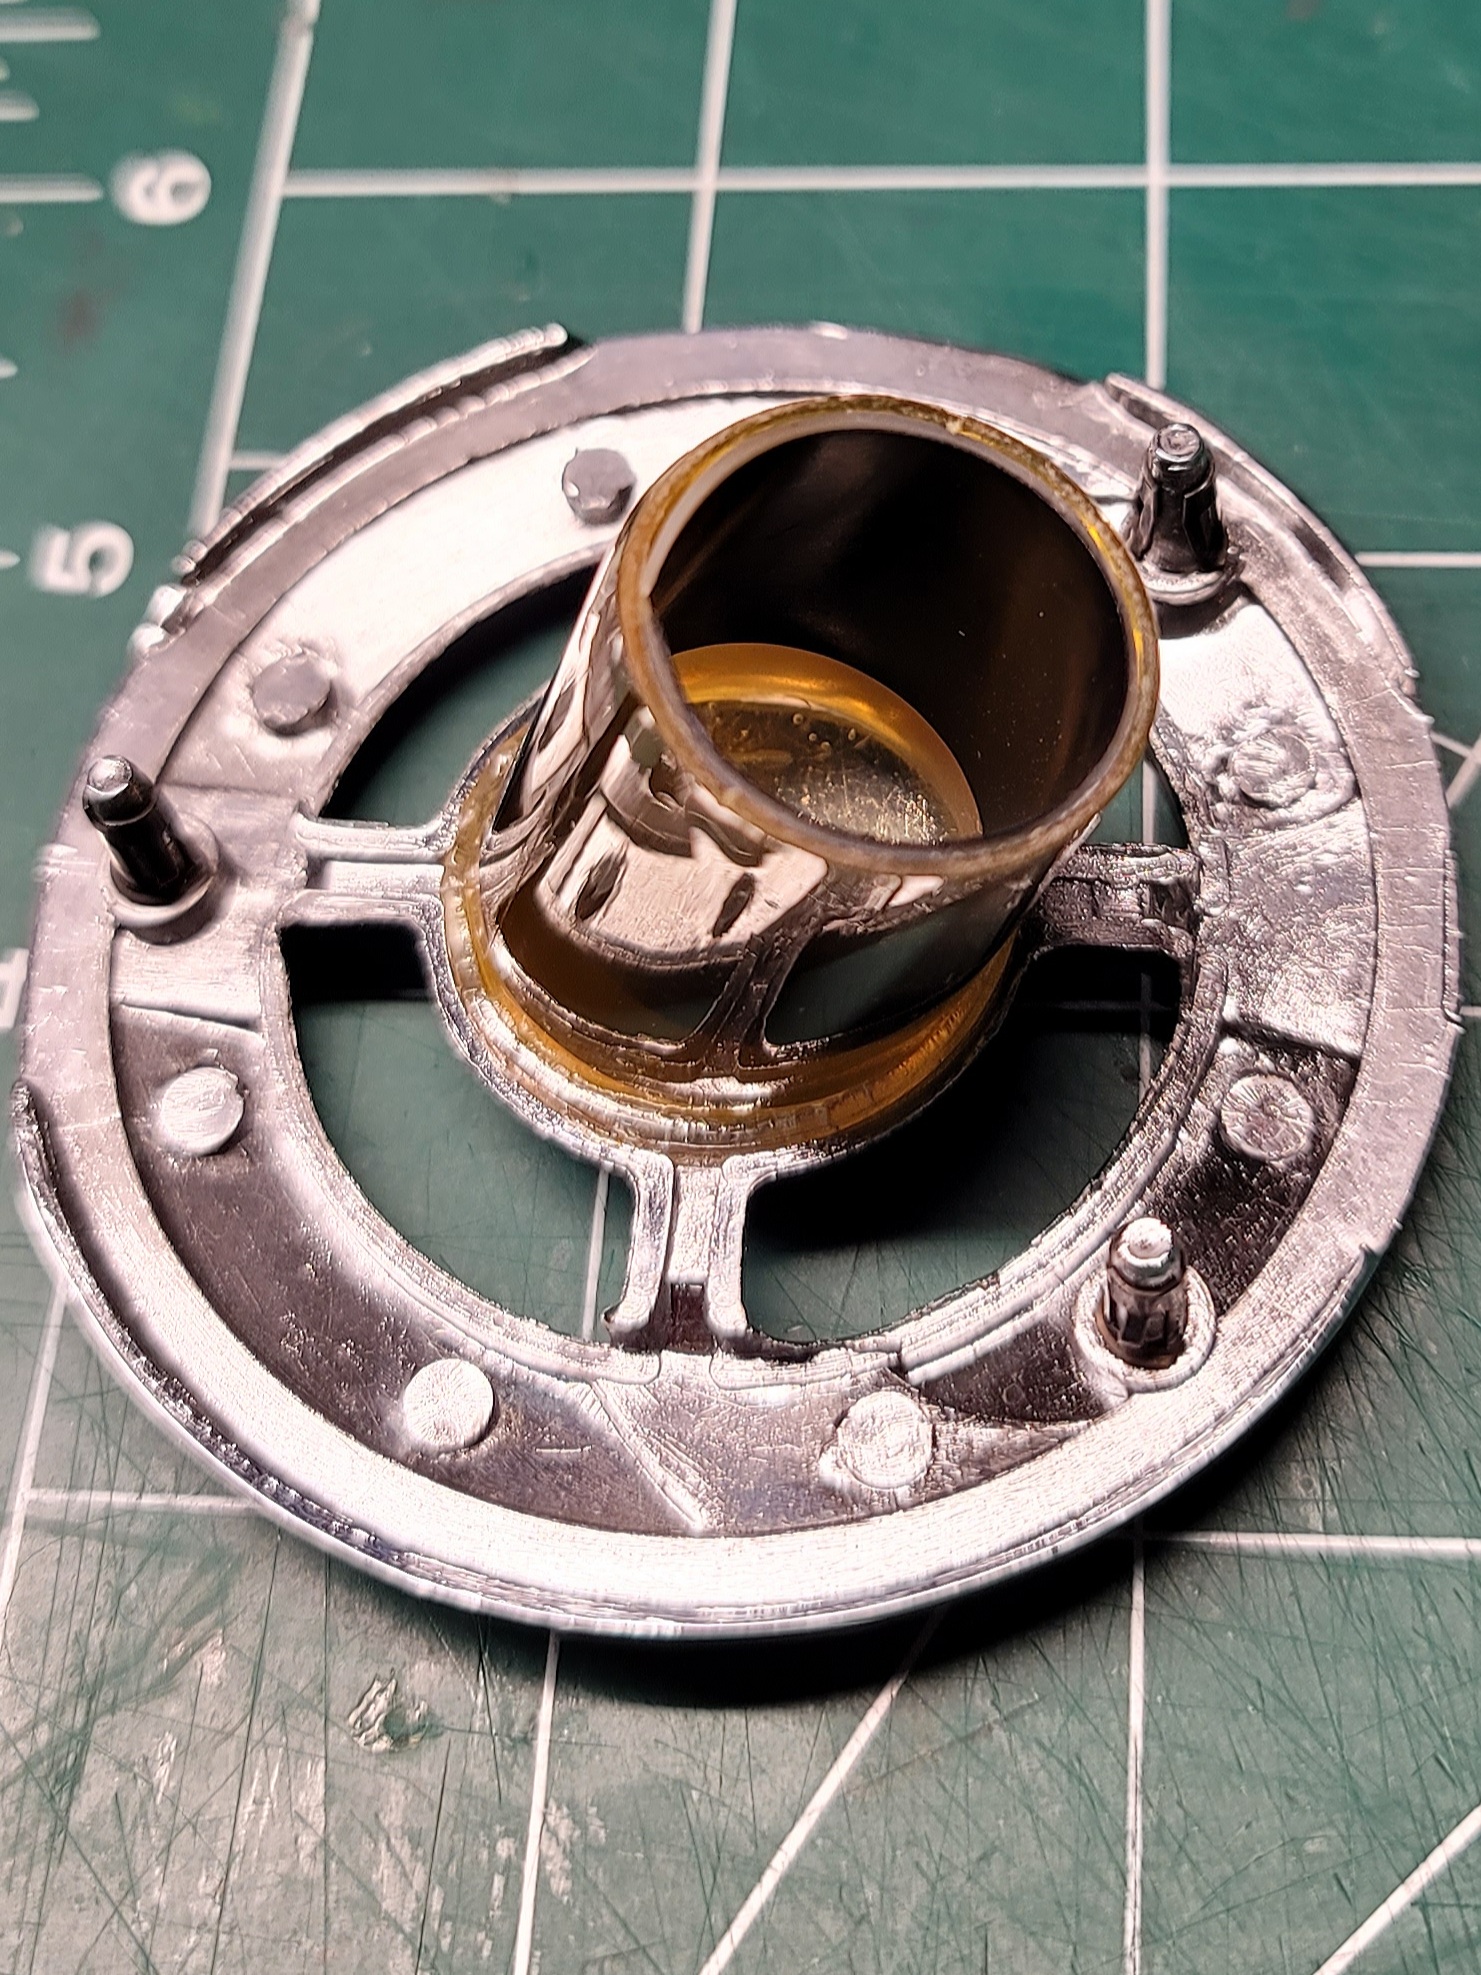
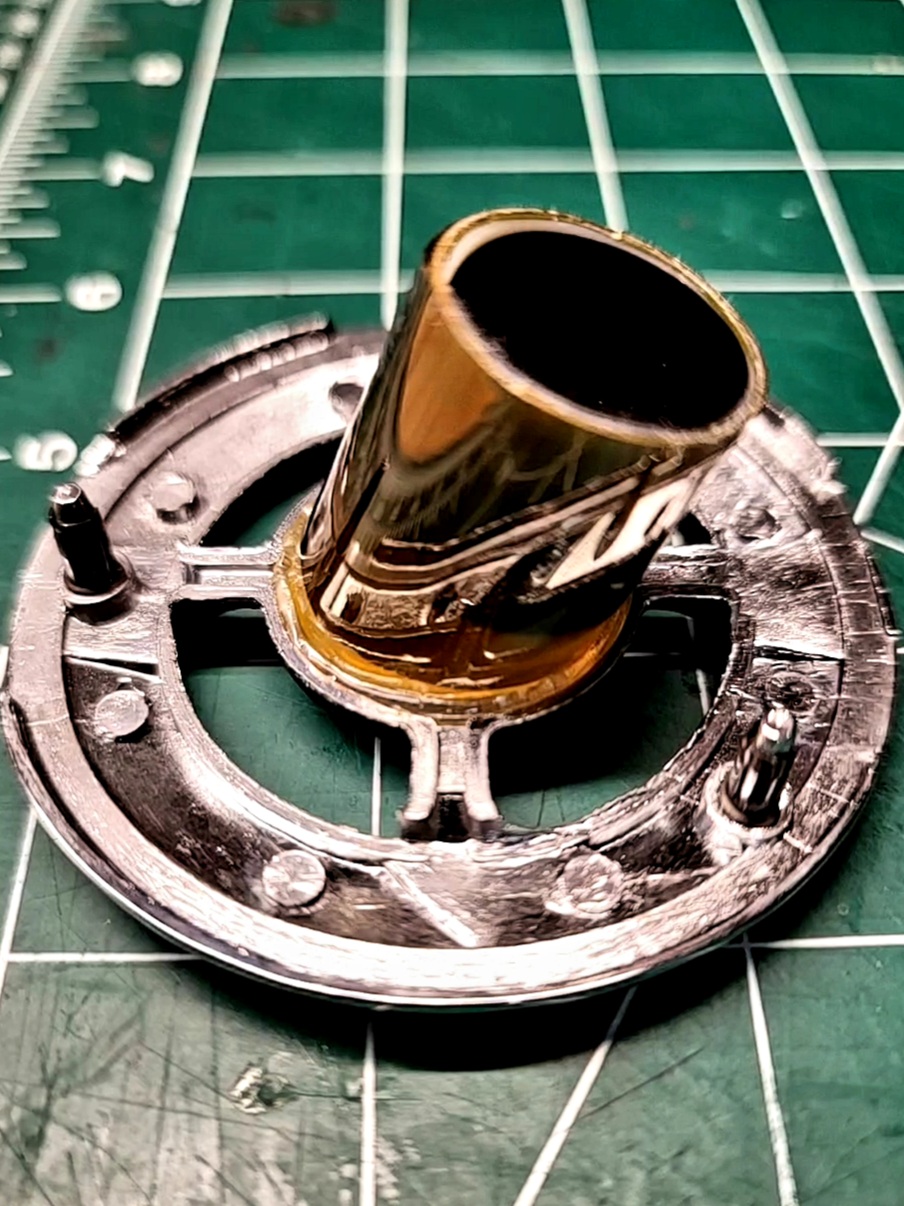
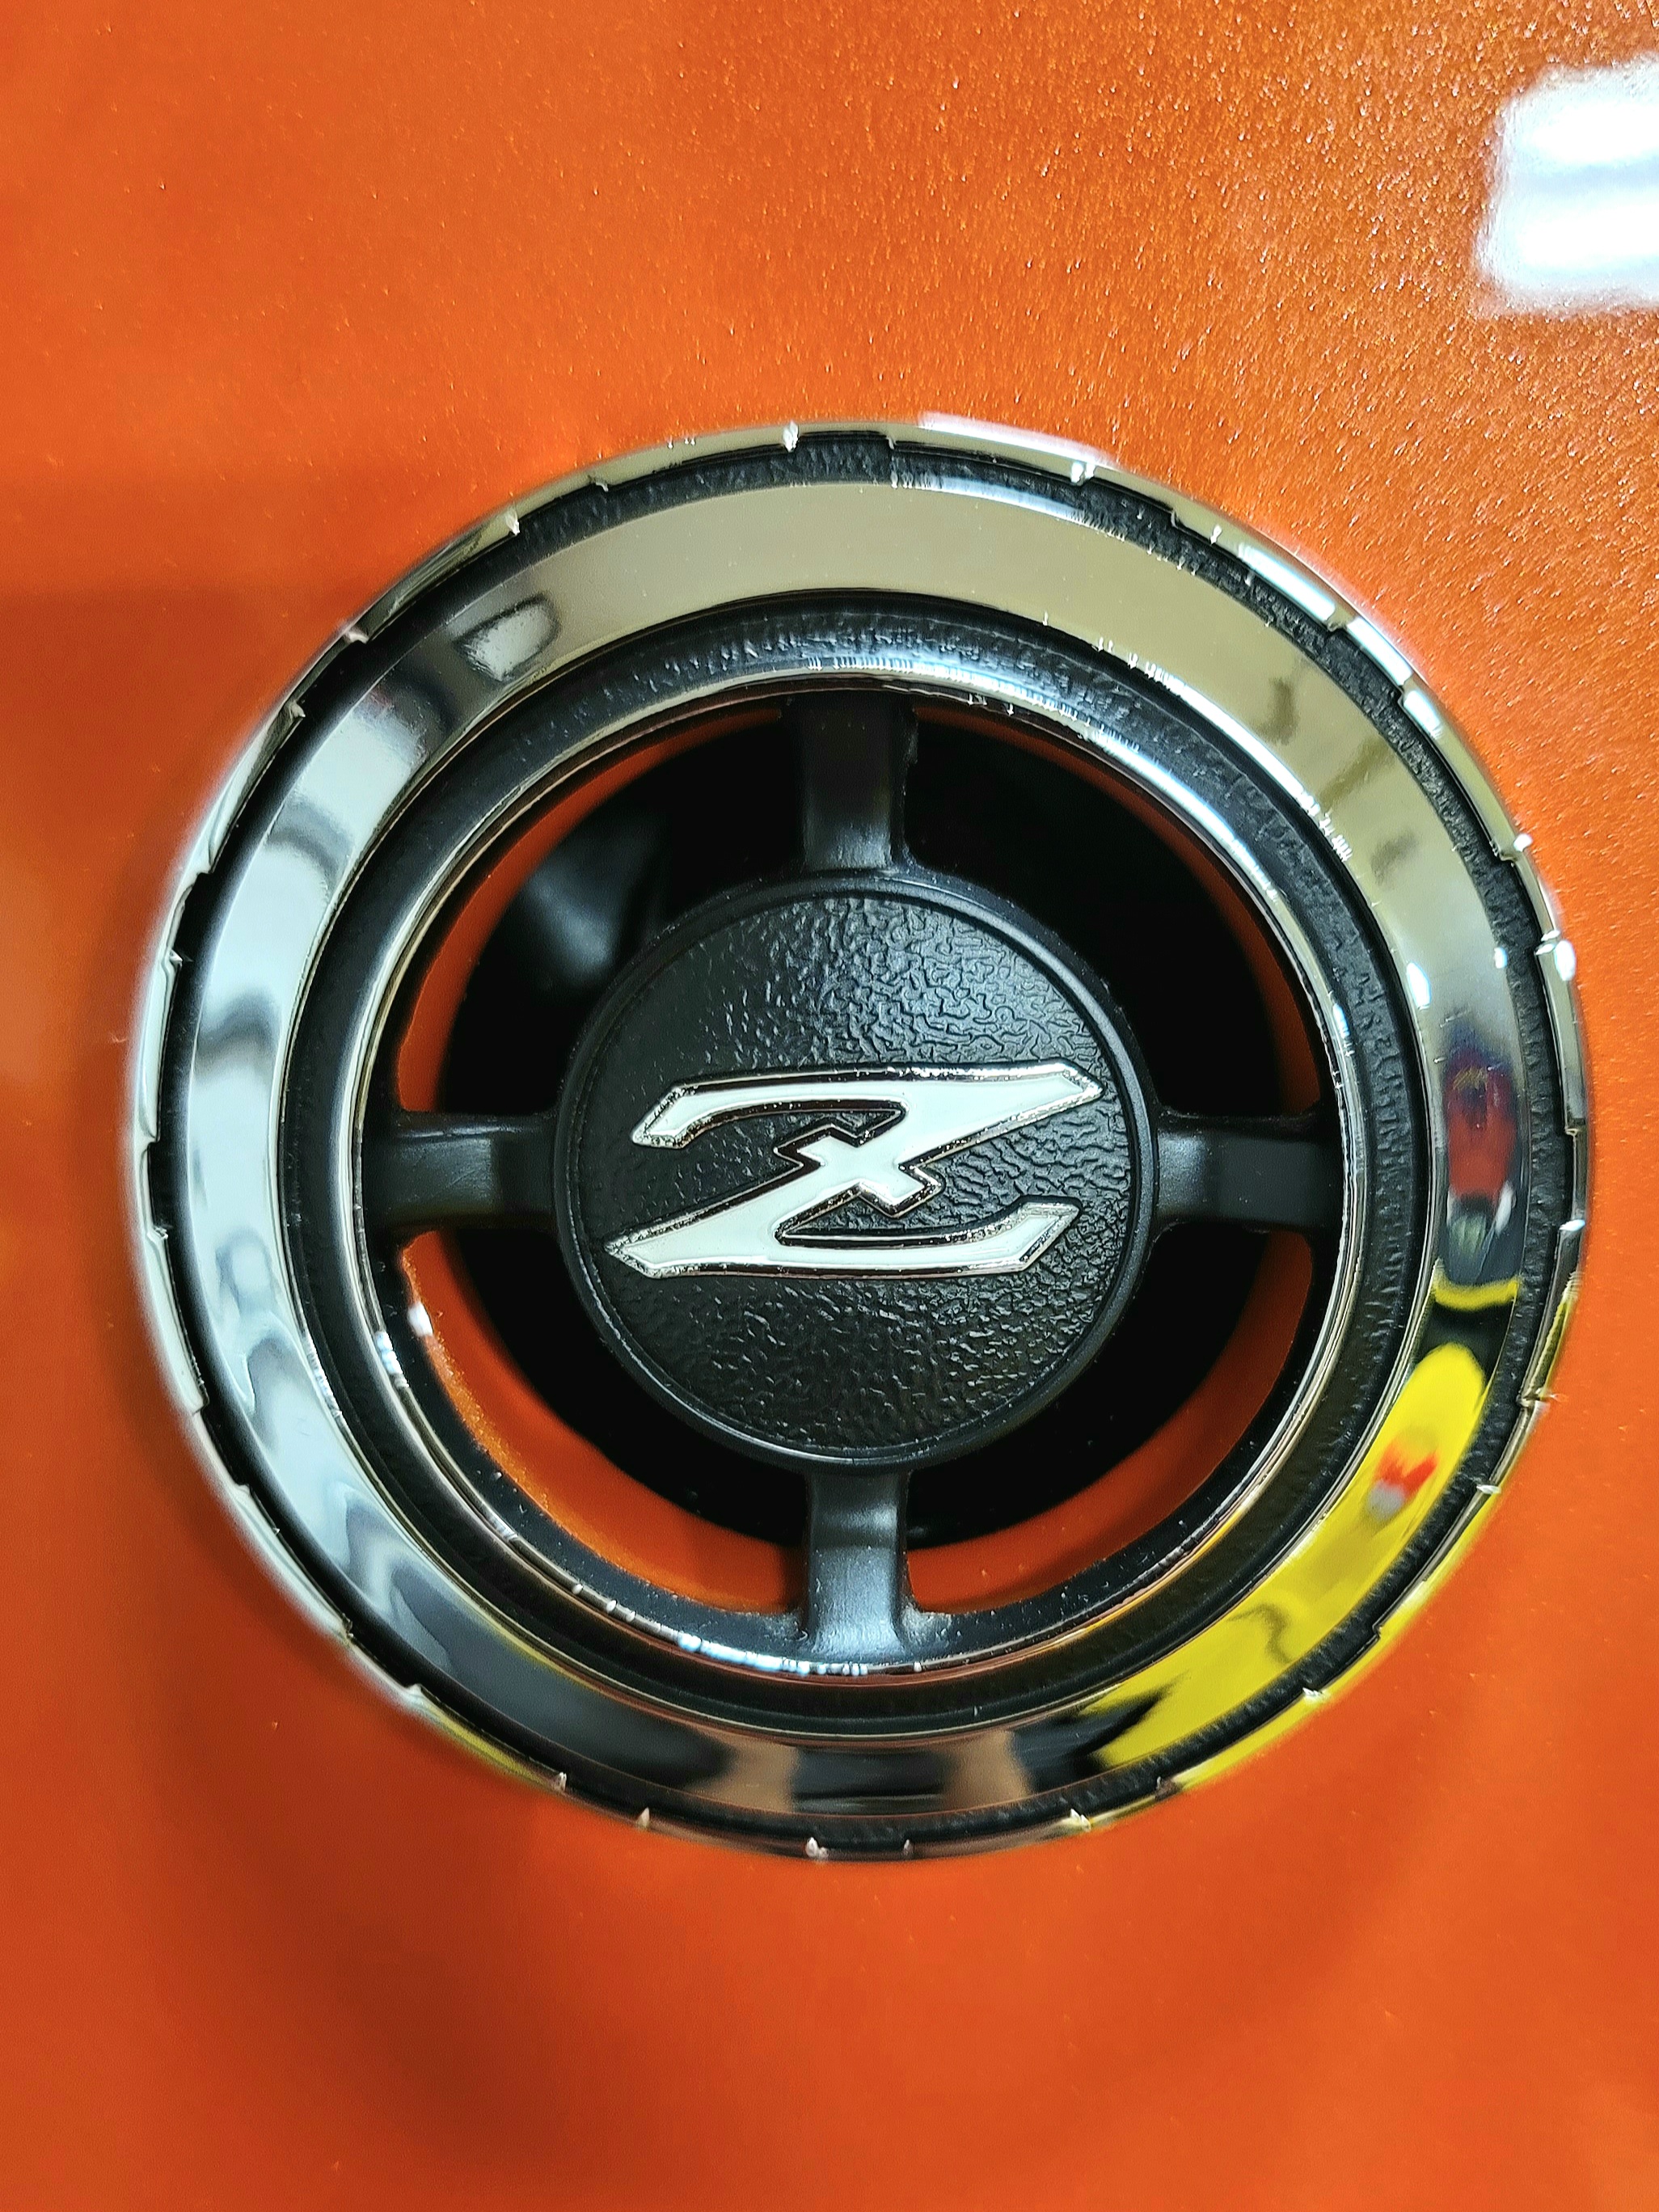
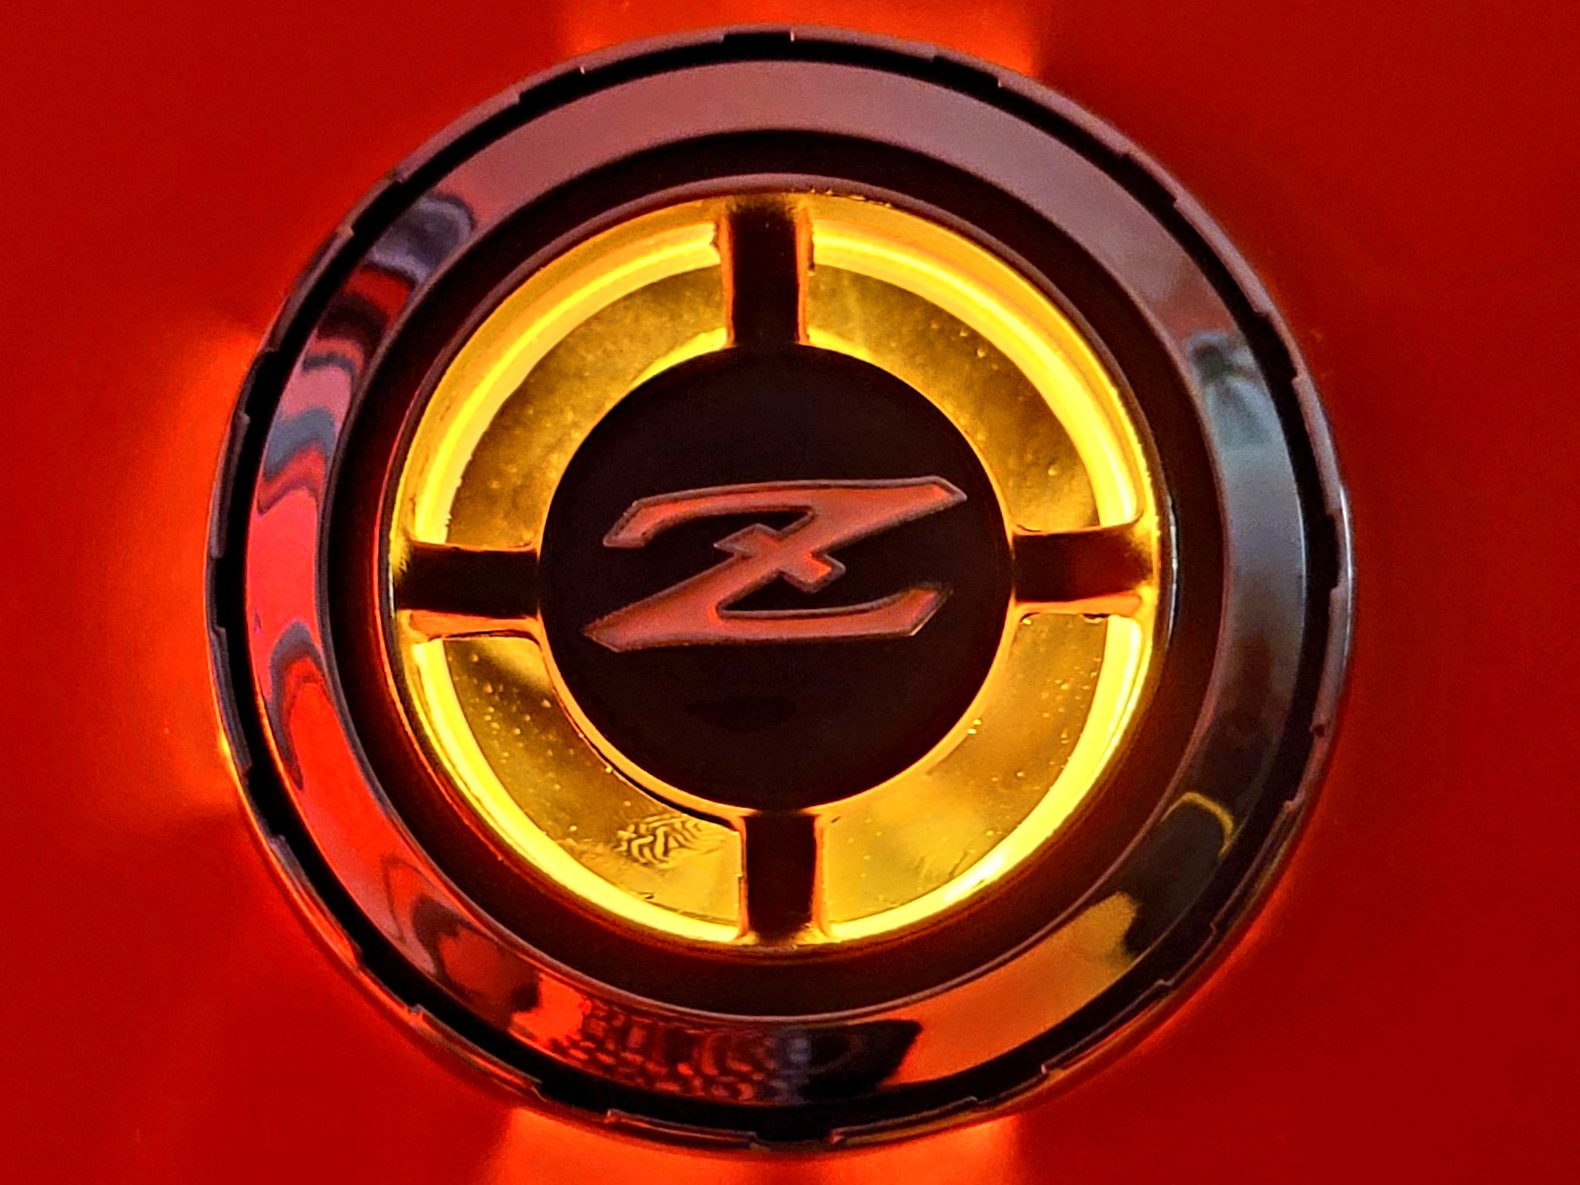
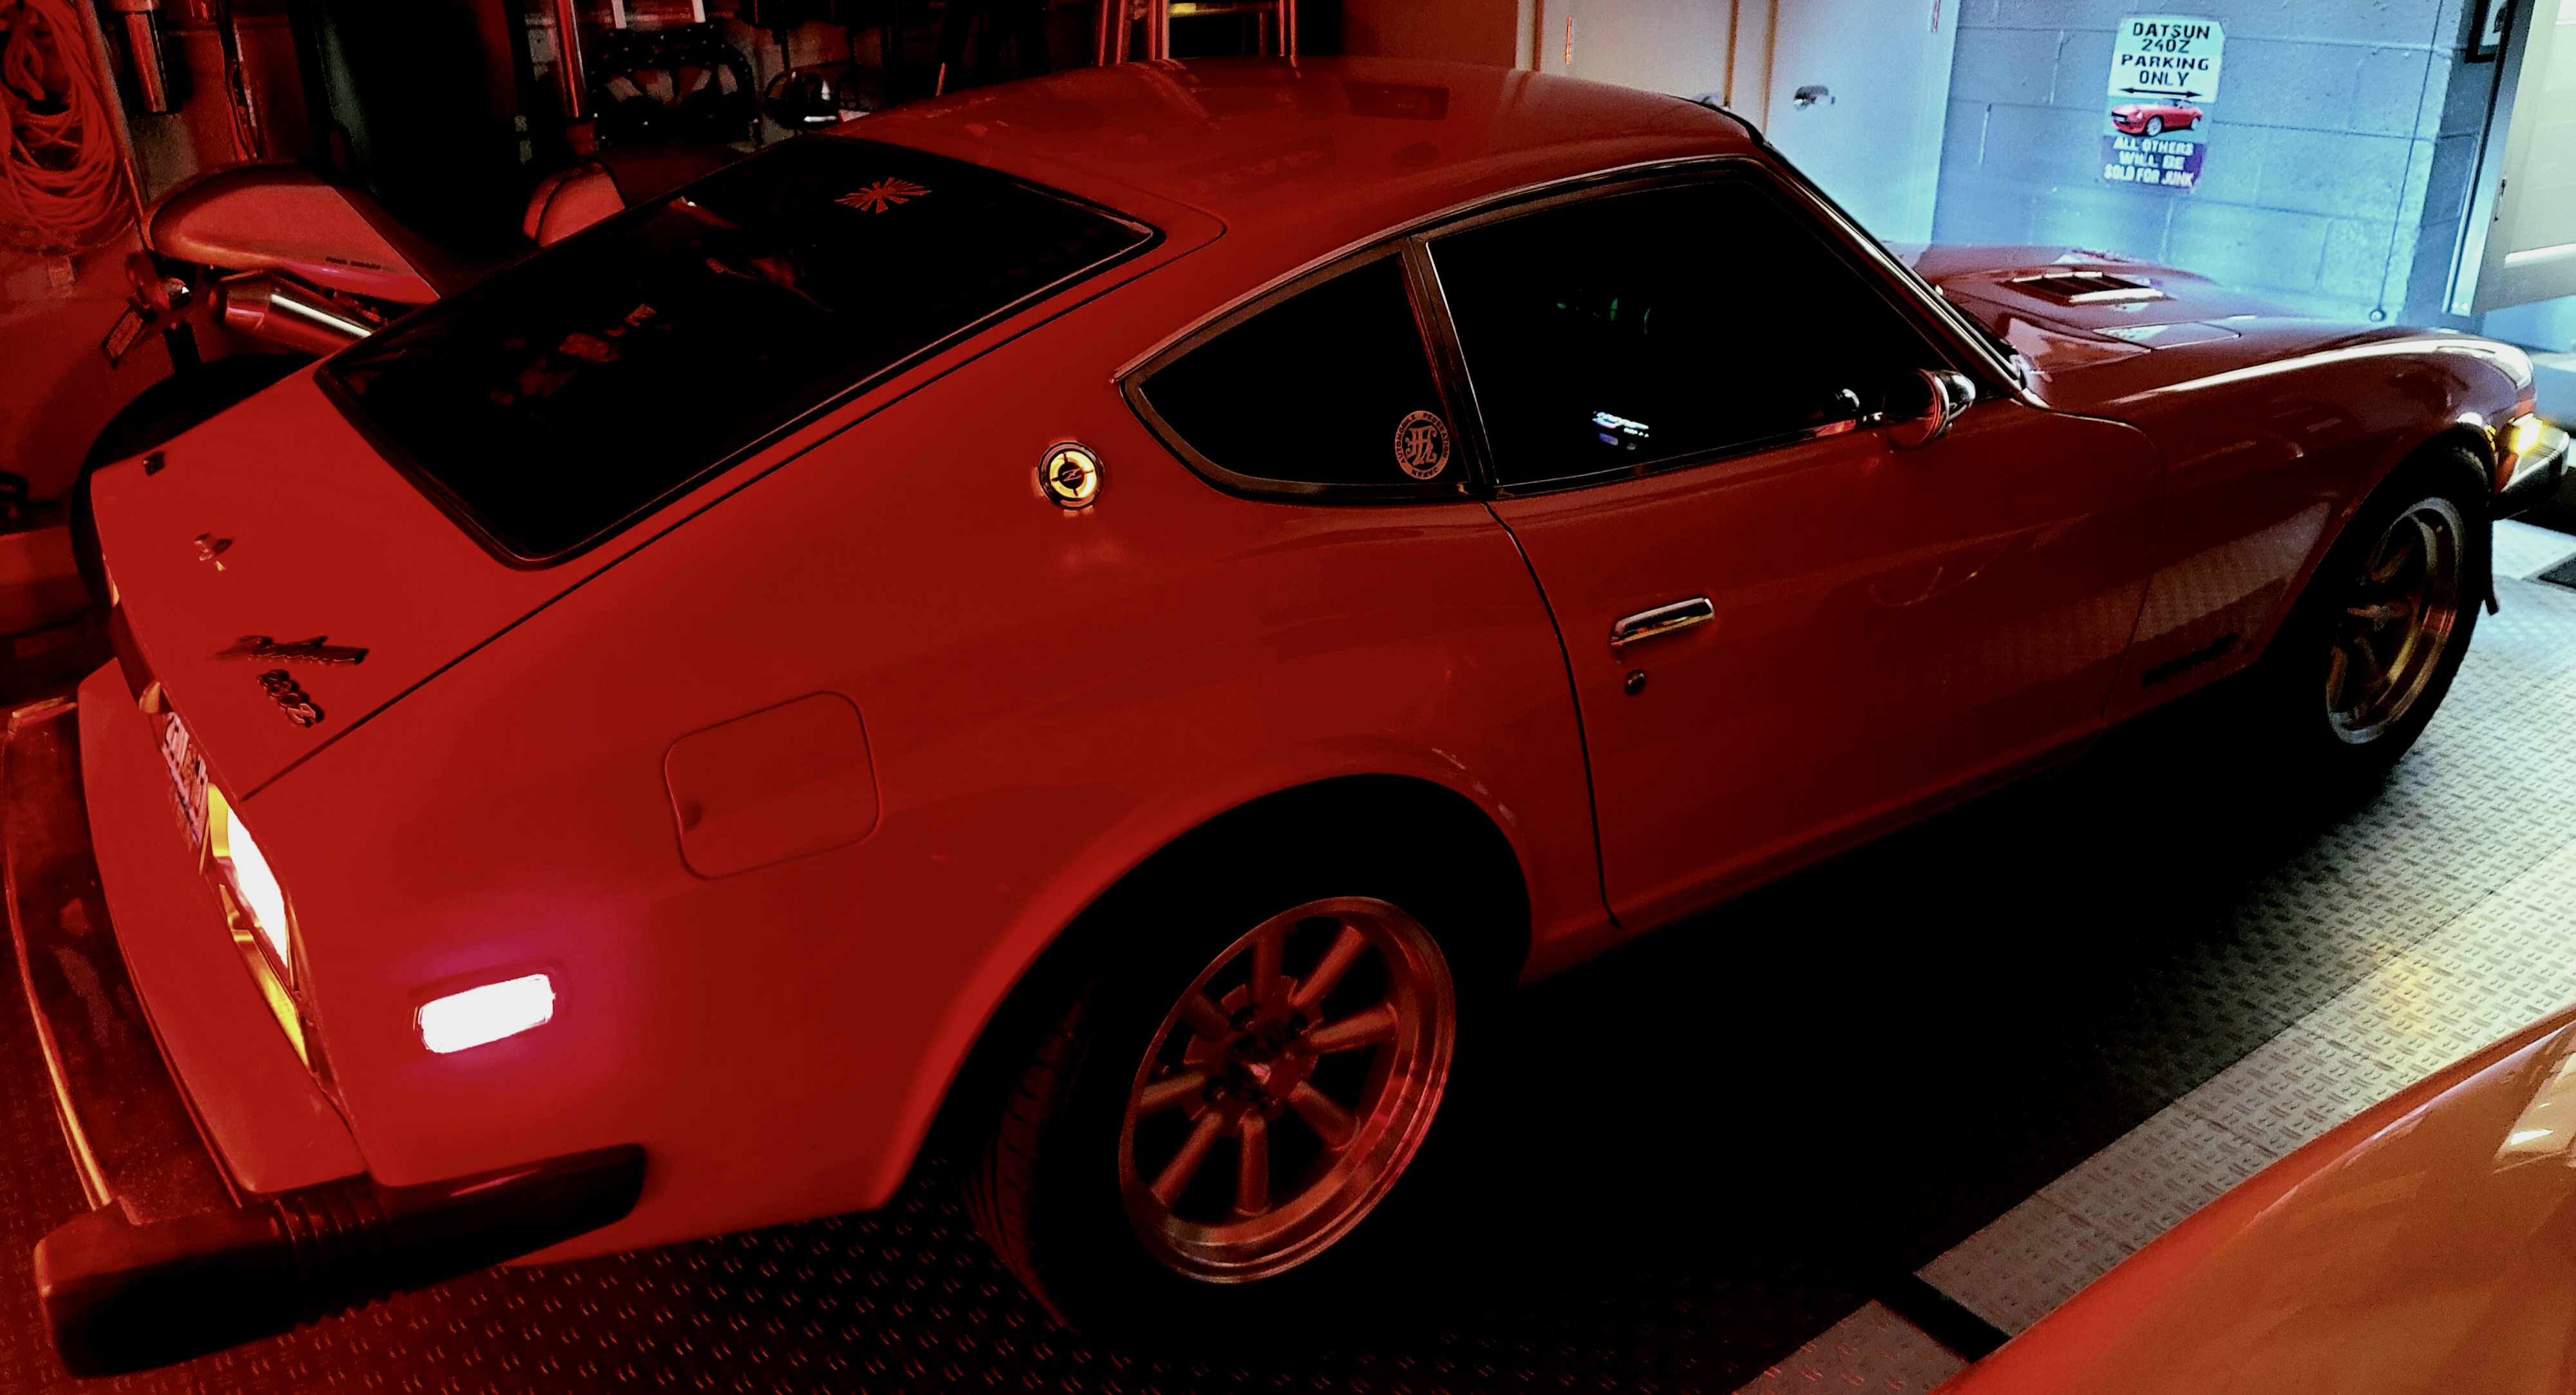
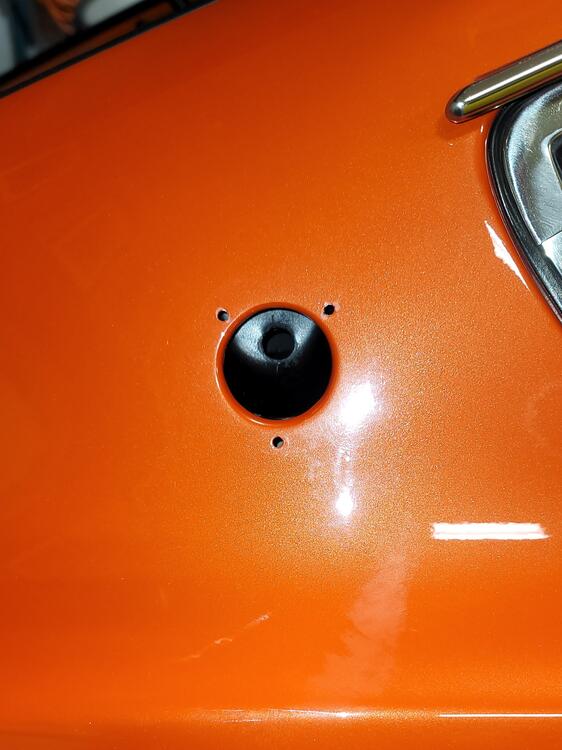
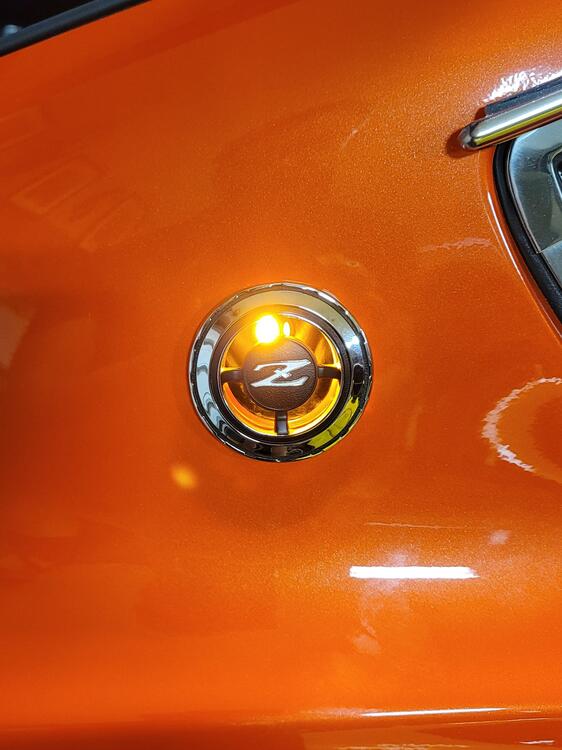
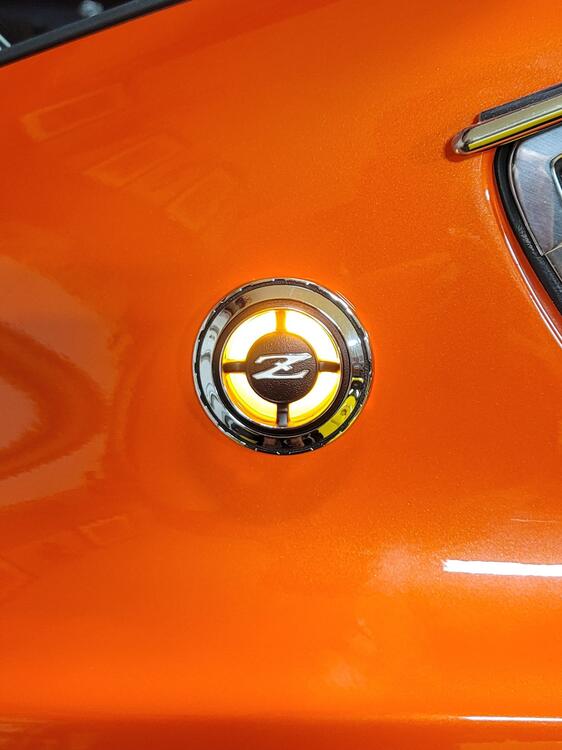
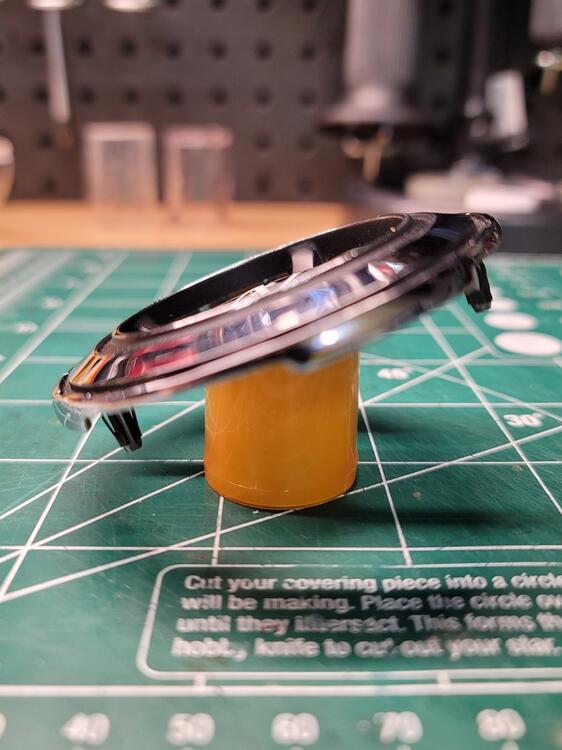
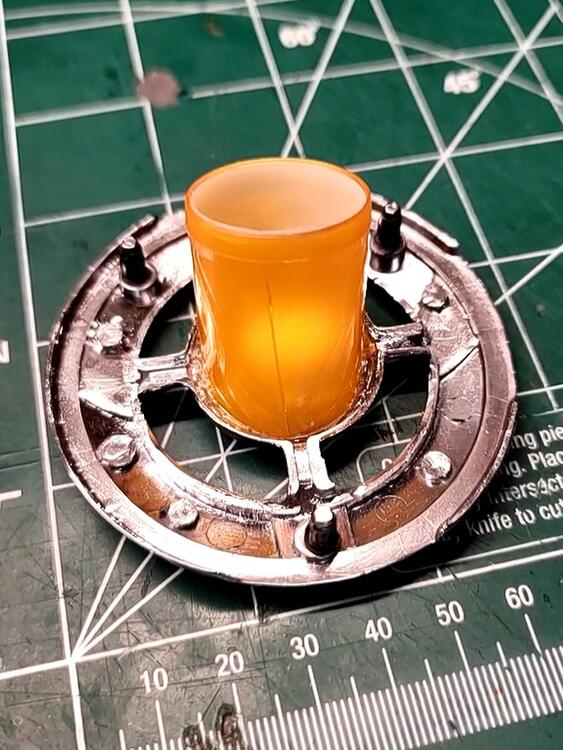
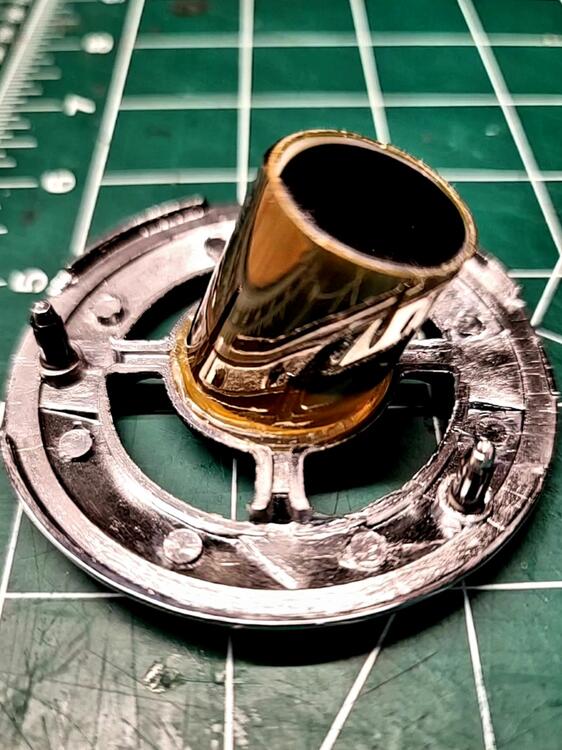
 1 pointI came across an IG post that caught my eye in which a fellow 280Z owner had LED lighting behind the Z emblems rearward of the quarter windows. Turns out a garage in Las Vegas that does a lot of Datsun work (Harmon Restoration) had done the work for him and would sell a kit with an amber LED bulb for each side which included all wiring with proper Datsun plug connectors for a seamless installation onto the rear lights harnesses. Since I love LEDs and this looked like a novel idea I ordered one such kit which I received a couple of weeks later. Their original kit was meant to work as an auxiliary turn signal light but I didn't like that idea, doubting it's legality and usefulness. I asked them to wire my connectors so they would work in conjunction with the parking lights, which they did. First I checked the lights by plugging them into both tail light harnesses (all good), then I loosened the interior plastic panels so I could run the new wire harnesses forward. After prying the Z emblems off, I carefully drilled 5/8" holes at the center of the vent holes and a second steel panel immediately behind it. I lightly sanded and repainted (satin black) the vent holes making sure the raw metal edges were covered inside and out. After applying a generous quantity of black silicone sealant around the light stalk, I installed it from outside and secured it with the included nut from inside the cabin. I finally put my interior panels back in place and reinstalled the Z emblems. When I tested the installed light the LED was way too bright, even brighter than the parking lights, and the glaring bulb was very visible in many angles! Not what I had hoped for at all! After some thought I came up with 2 light diffuser ideas. The first was a simple circle of "frosted" .5mm thick white plastic glued to the back of the emblem. It looked great when illuminated (although still too bright for me) but the white plastic was plainly visible when the light was off. Additionally, this option may have obstructed the air exiting the cabin to a certain degree. My final option was to construct a cylindrical "diffuser" which would hide the LED, direct light to the back of the emblem, reduce the intensity of the light, not obstruct airflow, and be pretty much invisible when the lights were off during daylight. I used a 3/4" amber translucent plastic tube (small prescription container), cut out to the correct length and angle. I then introduced a piece of the frosted white plastic inside the cylinder to diffuse the light, but covered 2/3 of the inside of this plastic with black duct tape allowing light to exit only at the end immediately behind the Z emblem. Lastly, I covered the outside of the tube with a layer of mirrored tinted window film so it would allow light to exit but reflect the black paint from the vent holes on the outside, rendering it close to invisible once installed. The diffuser was then hotglued to the back of the Z emblem and reinstalled on the car. It worked as intended and I now have subtle amber indirect illumination behind the Z vent emblems that don't telegraph any alterations during daylight or when the lights are off. I realize this isn't orthodox at all but I really like the cool factor on my restomodded 280Z. Sent from my SM-N986U using Tapatalk


 1 point