Leaderboard
.JPG.cfcada9cf1c1b502df3f5f2f2ca3ff36.JPG)


Popular Content
Showing content with the highest reputation on 09/16/2021 in all areas
-
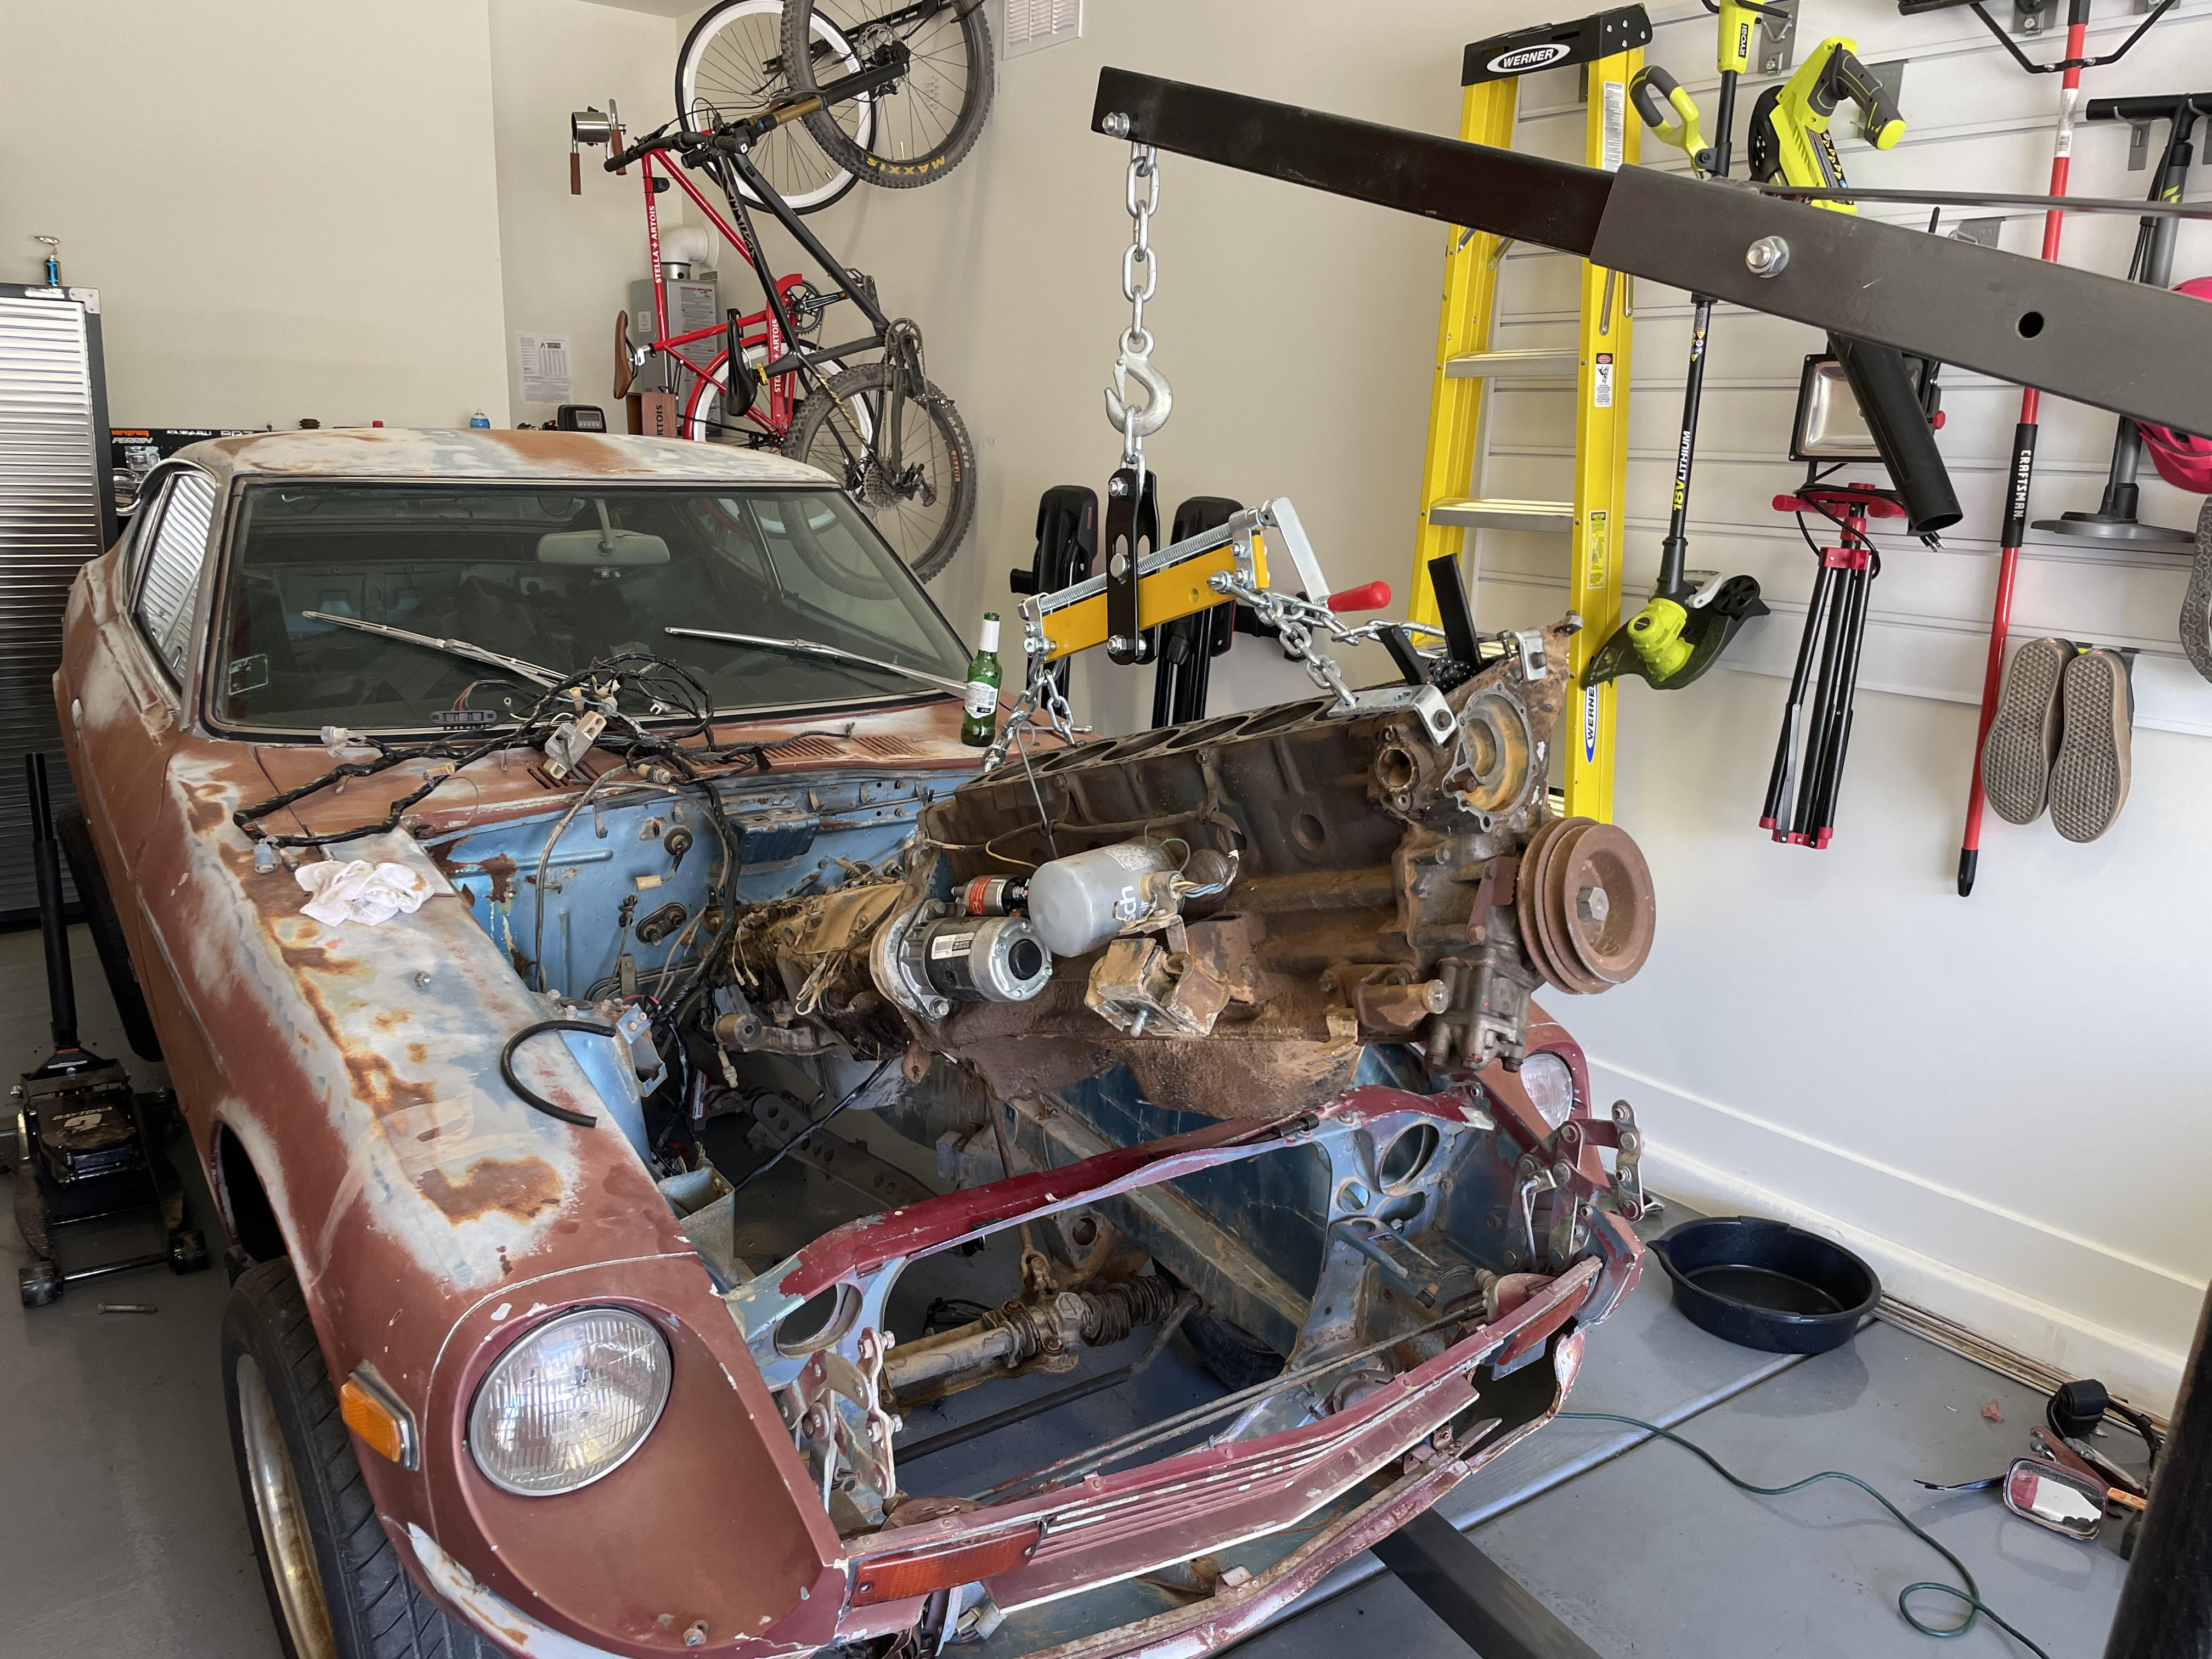
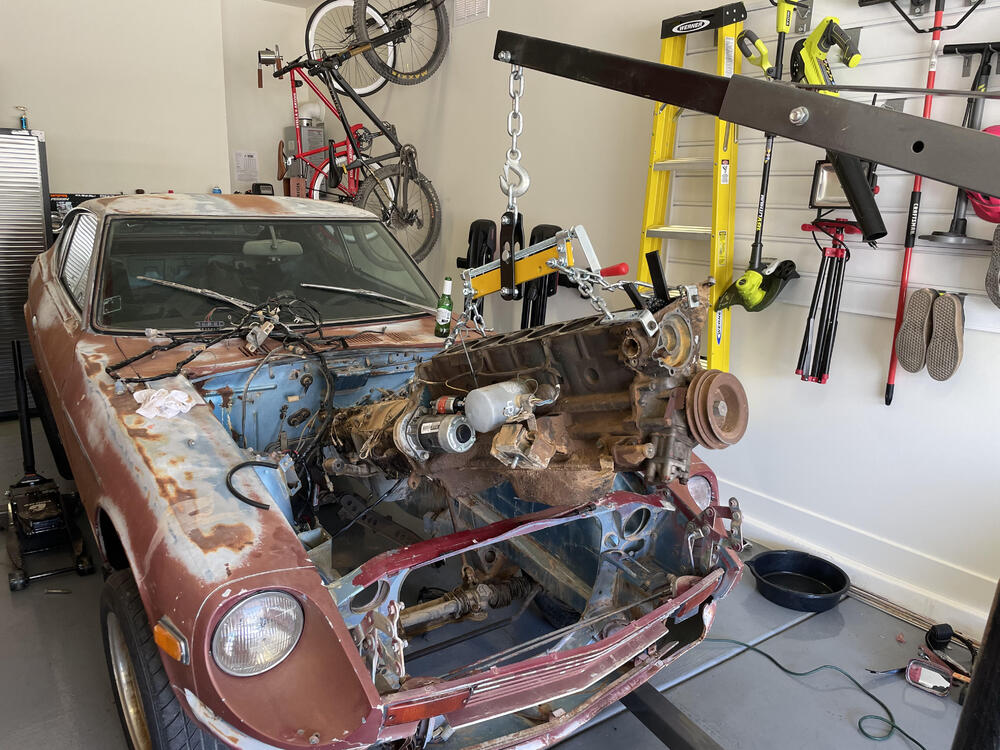
 5 pointsCar is back on the ground. Everything is on but not torqued down yet until I get the engine in and a couple buddies to sit in front seat. I wouldn’t say this was an easy job to do as a one man band. Lots of challenges and work stoppages but finally we are ready for an engine. Sent from my iPhone using Tapatalk5 points
 -
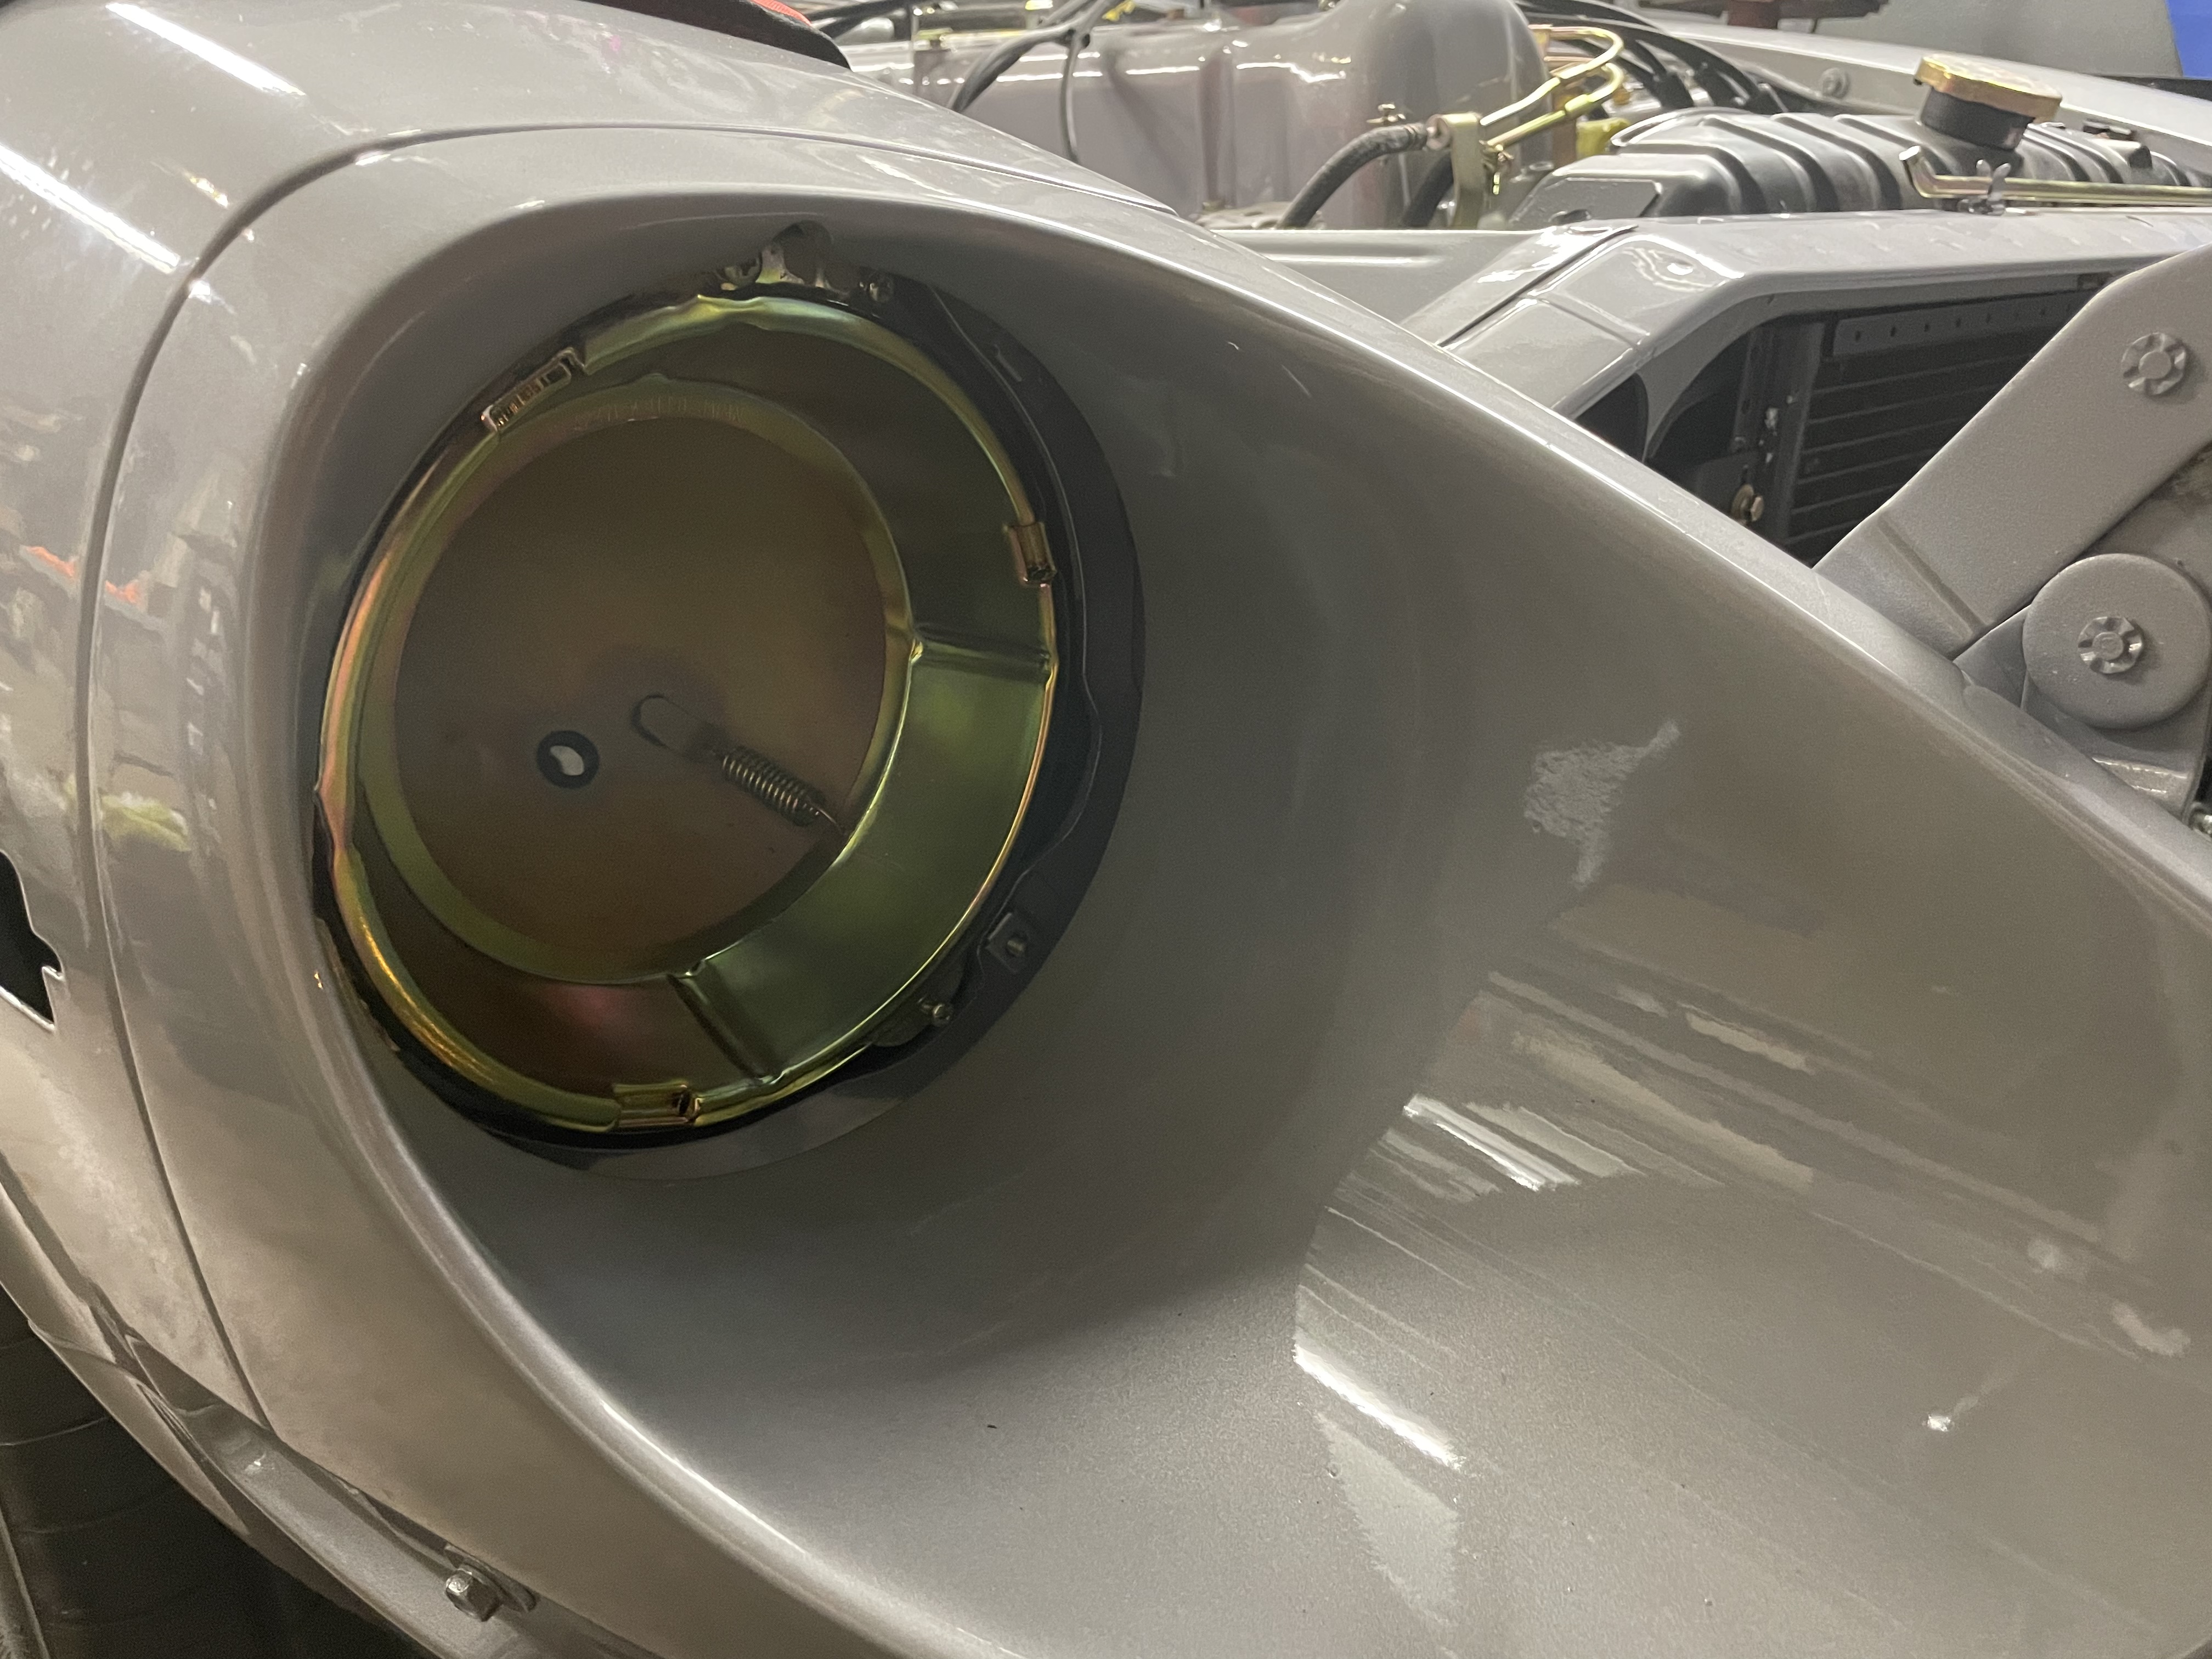
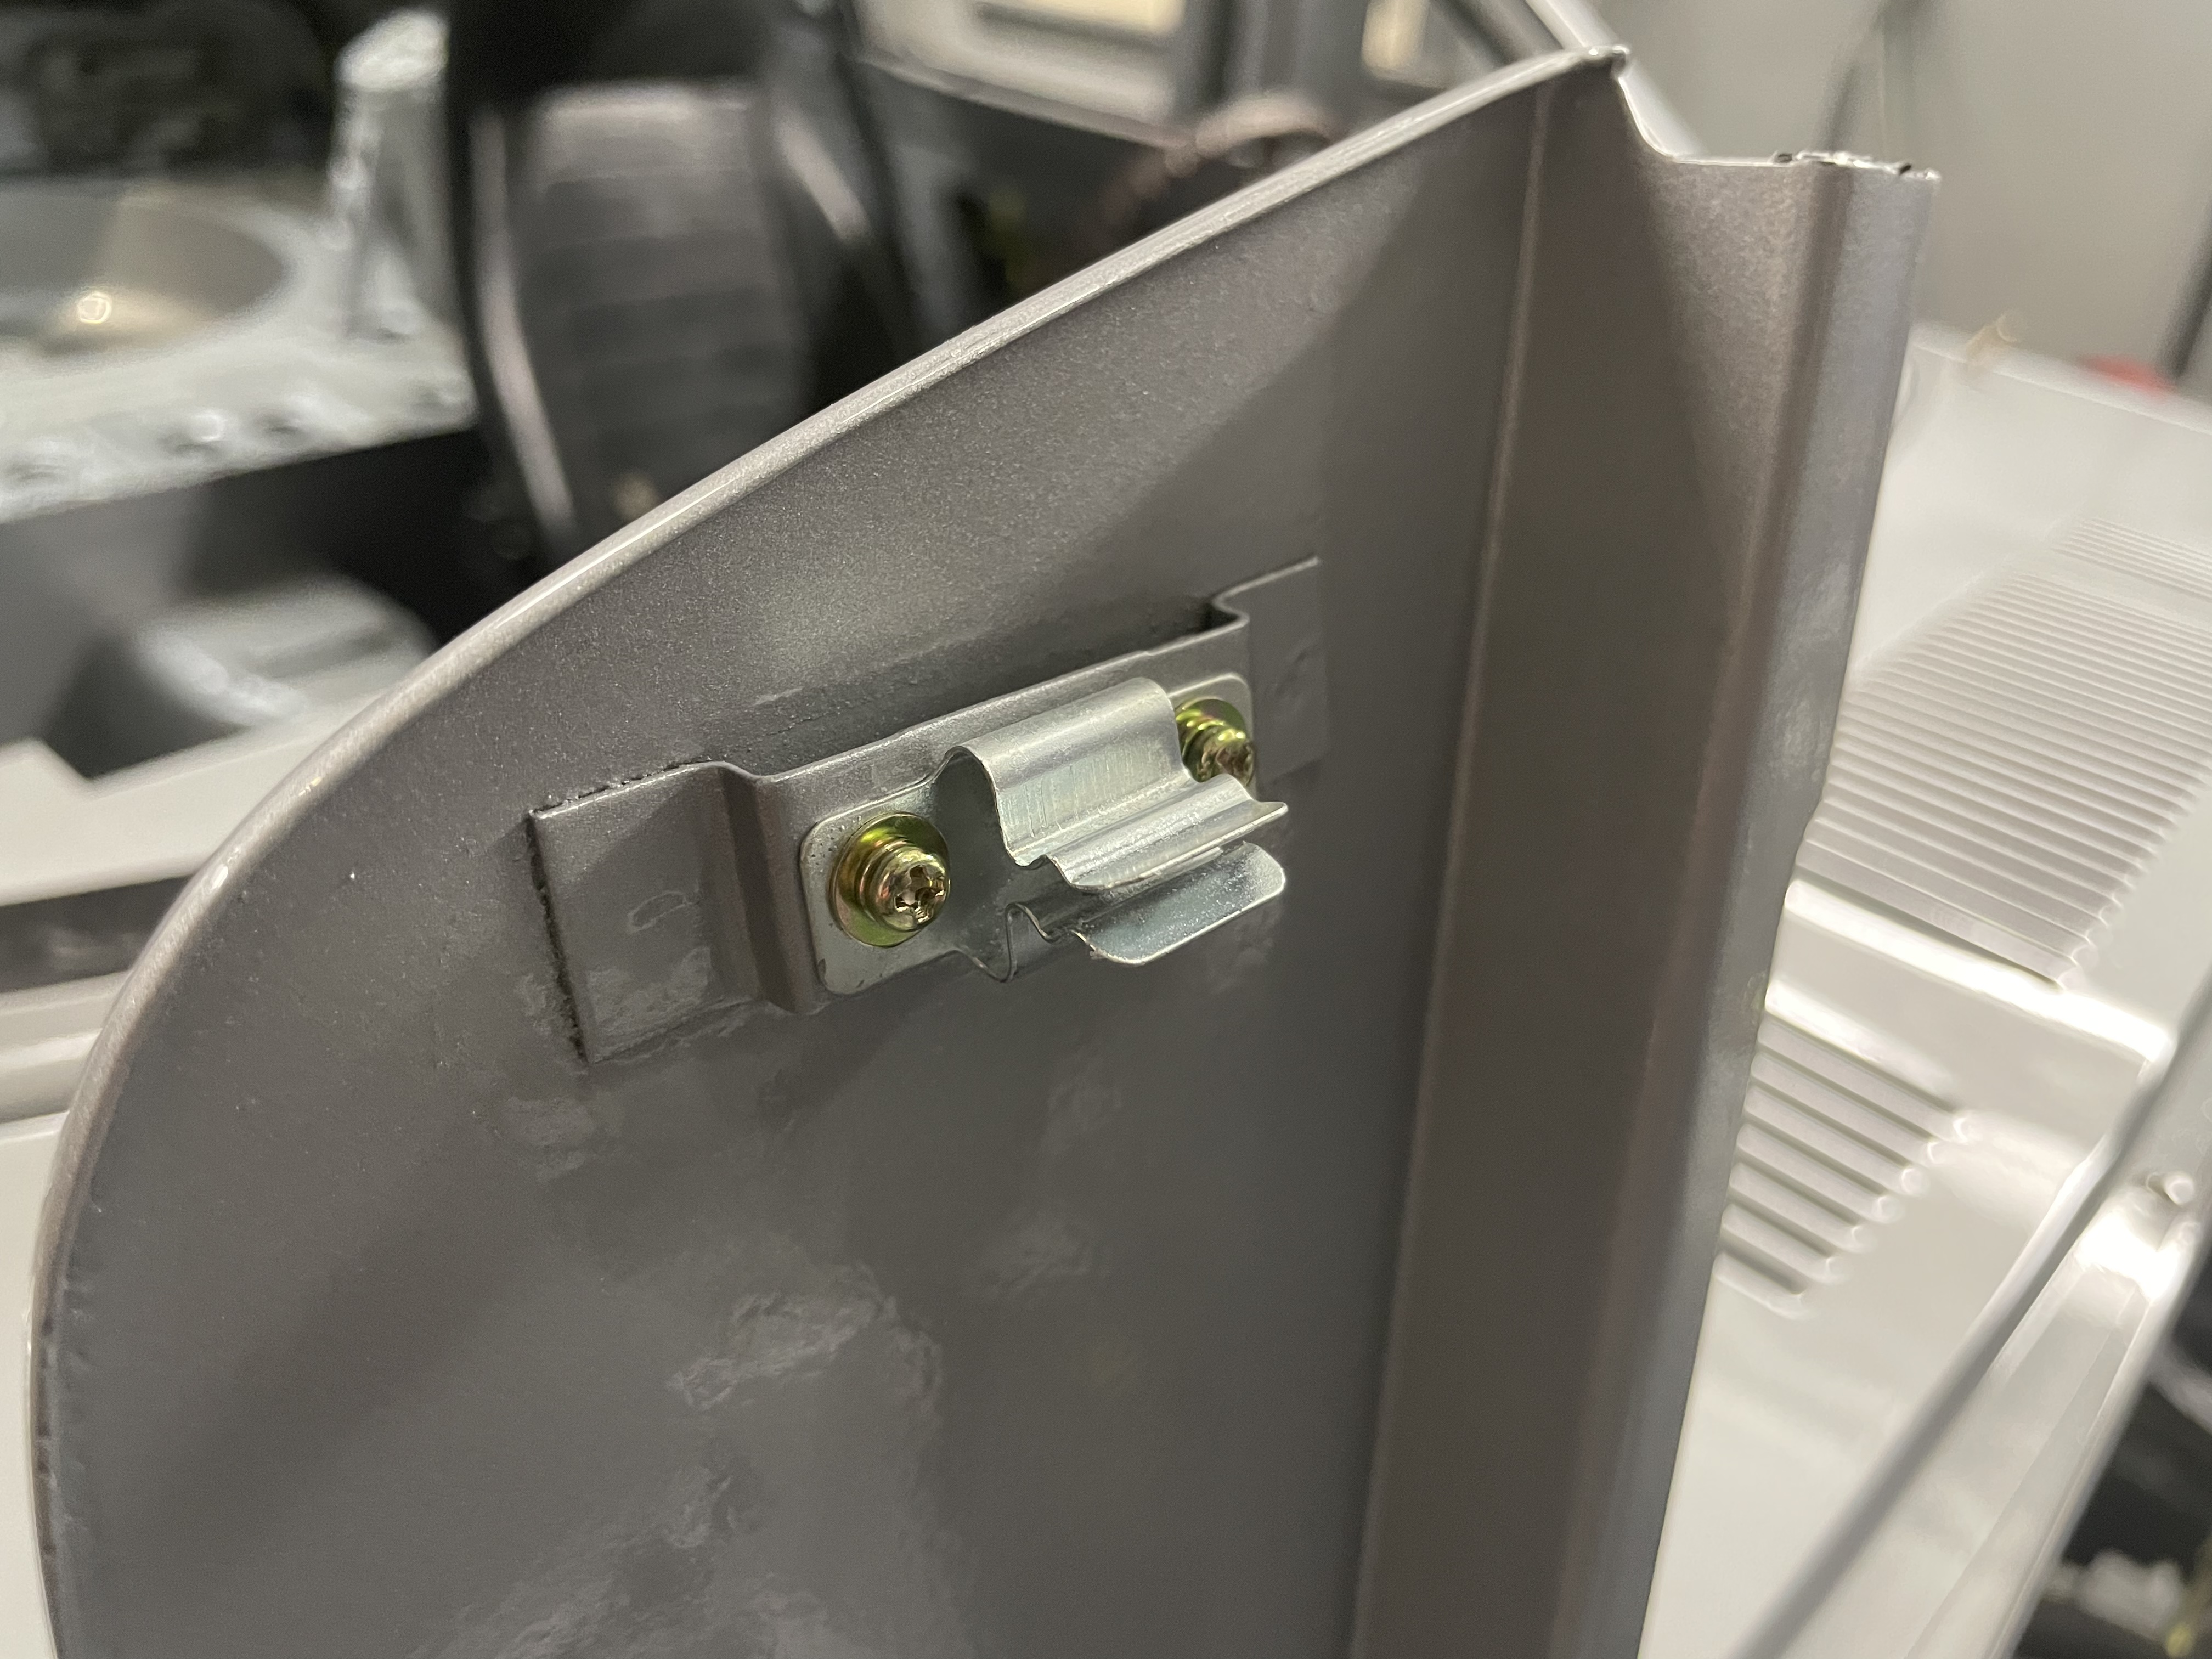
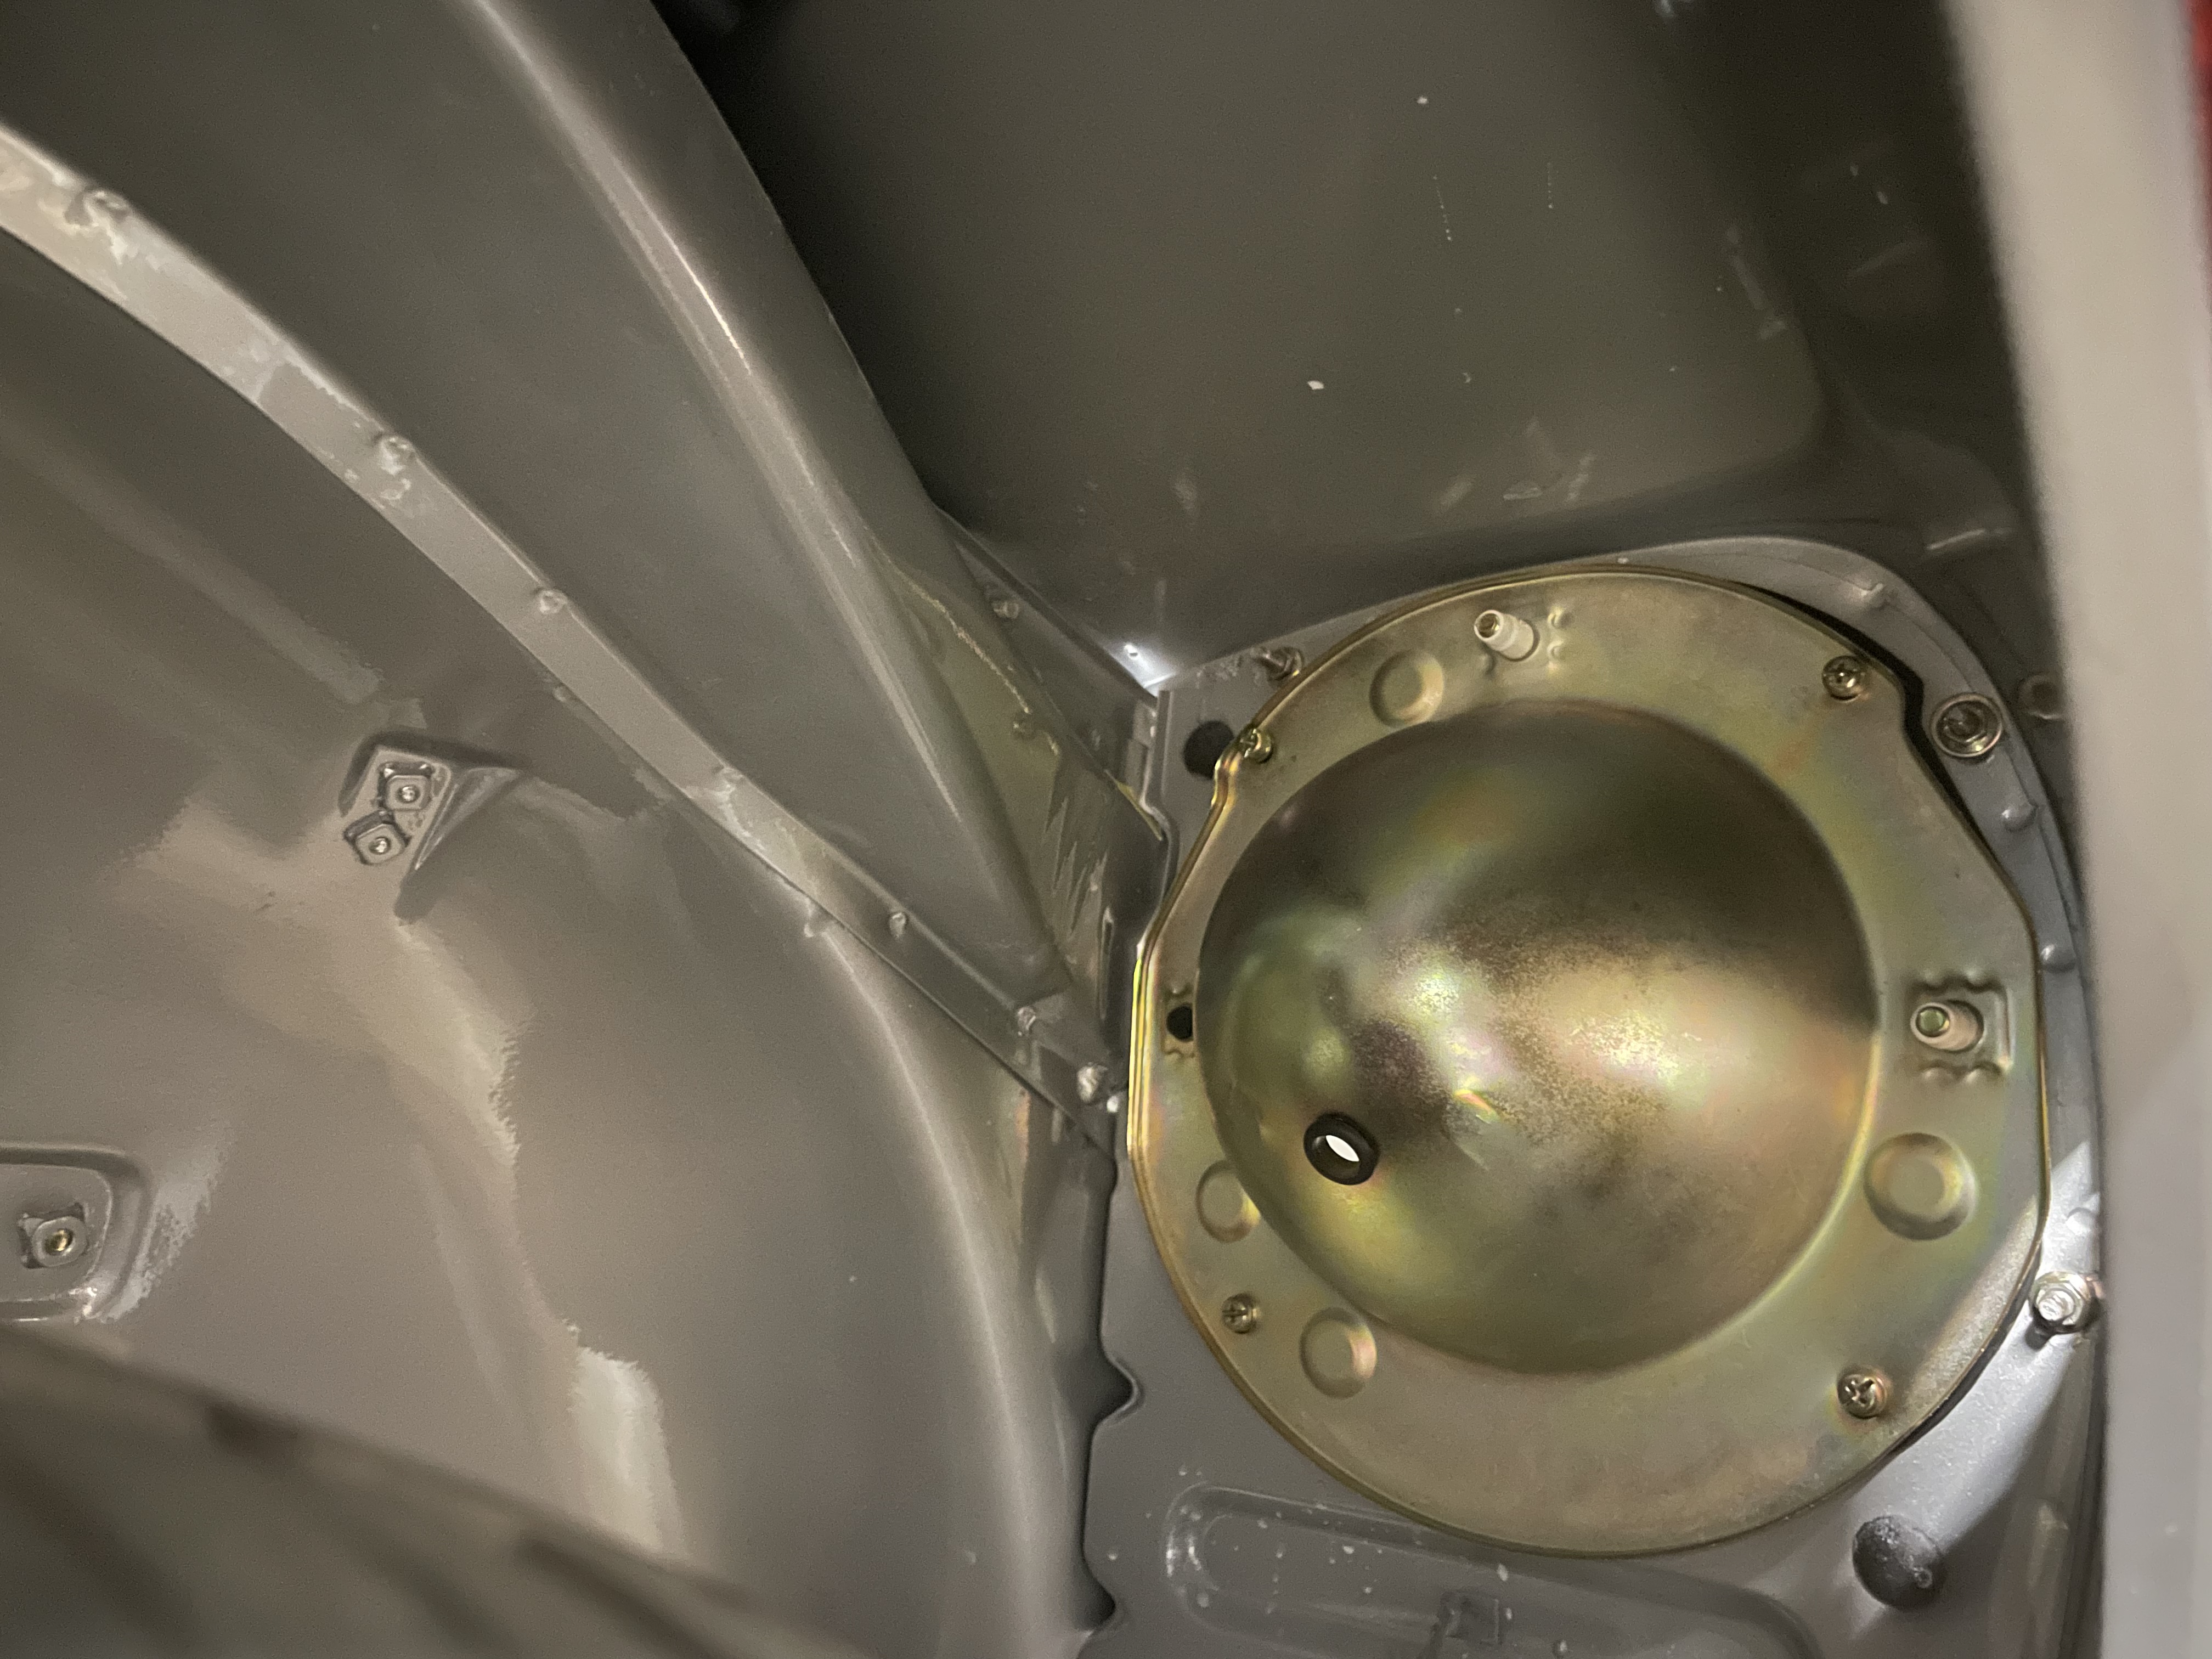
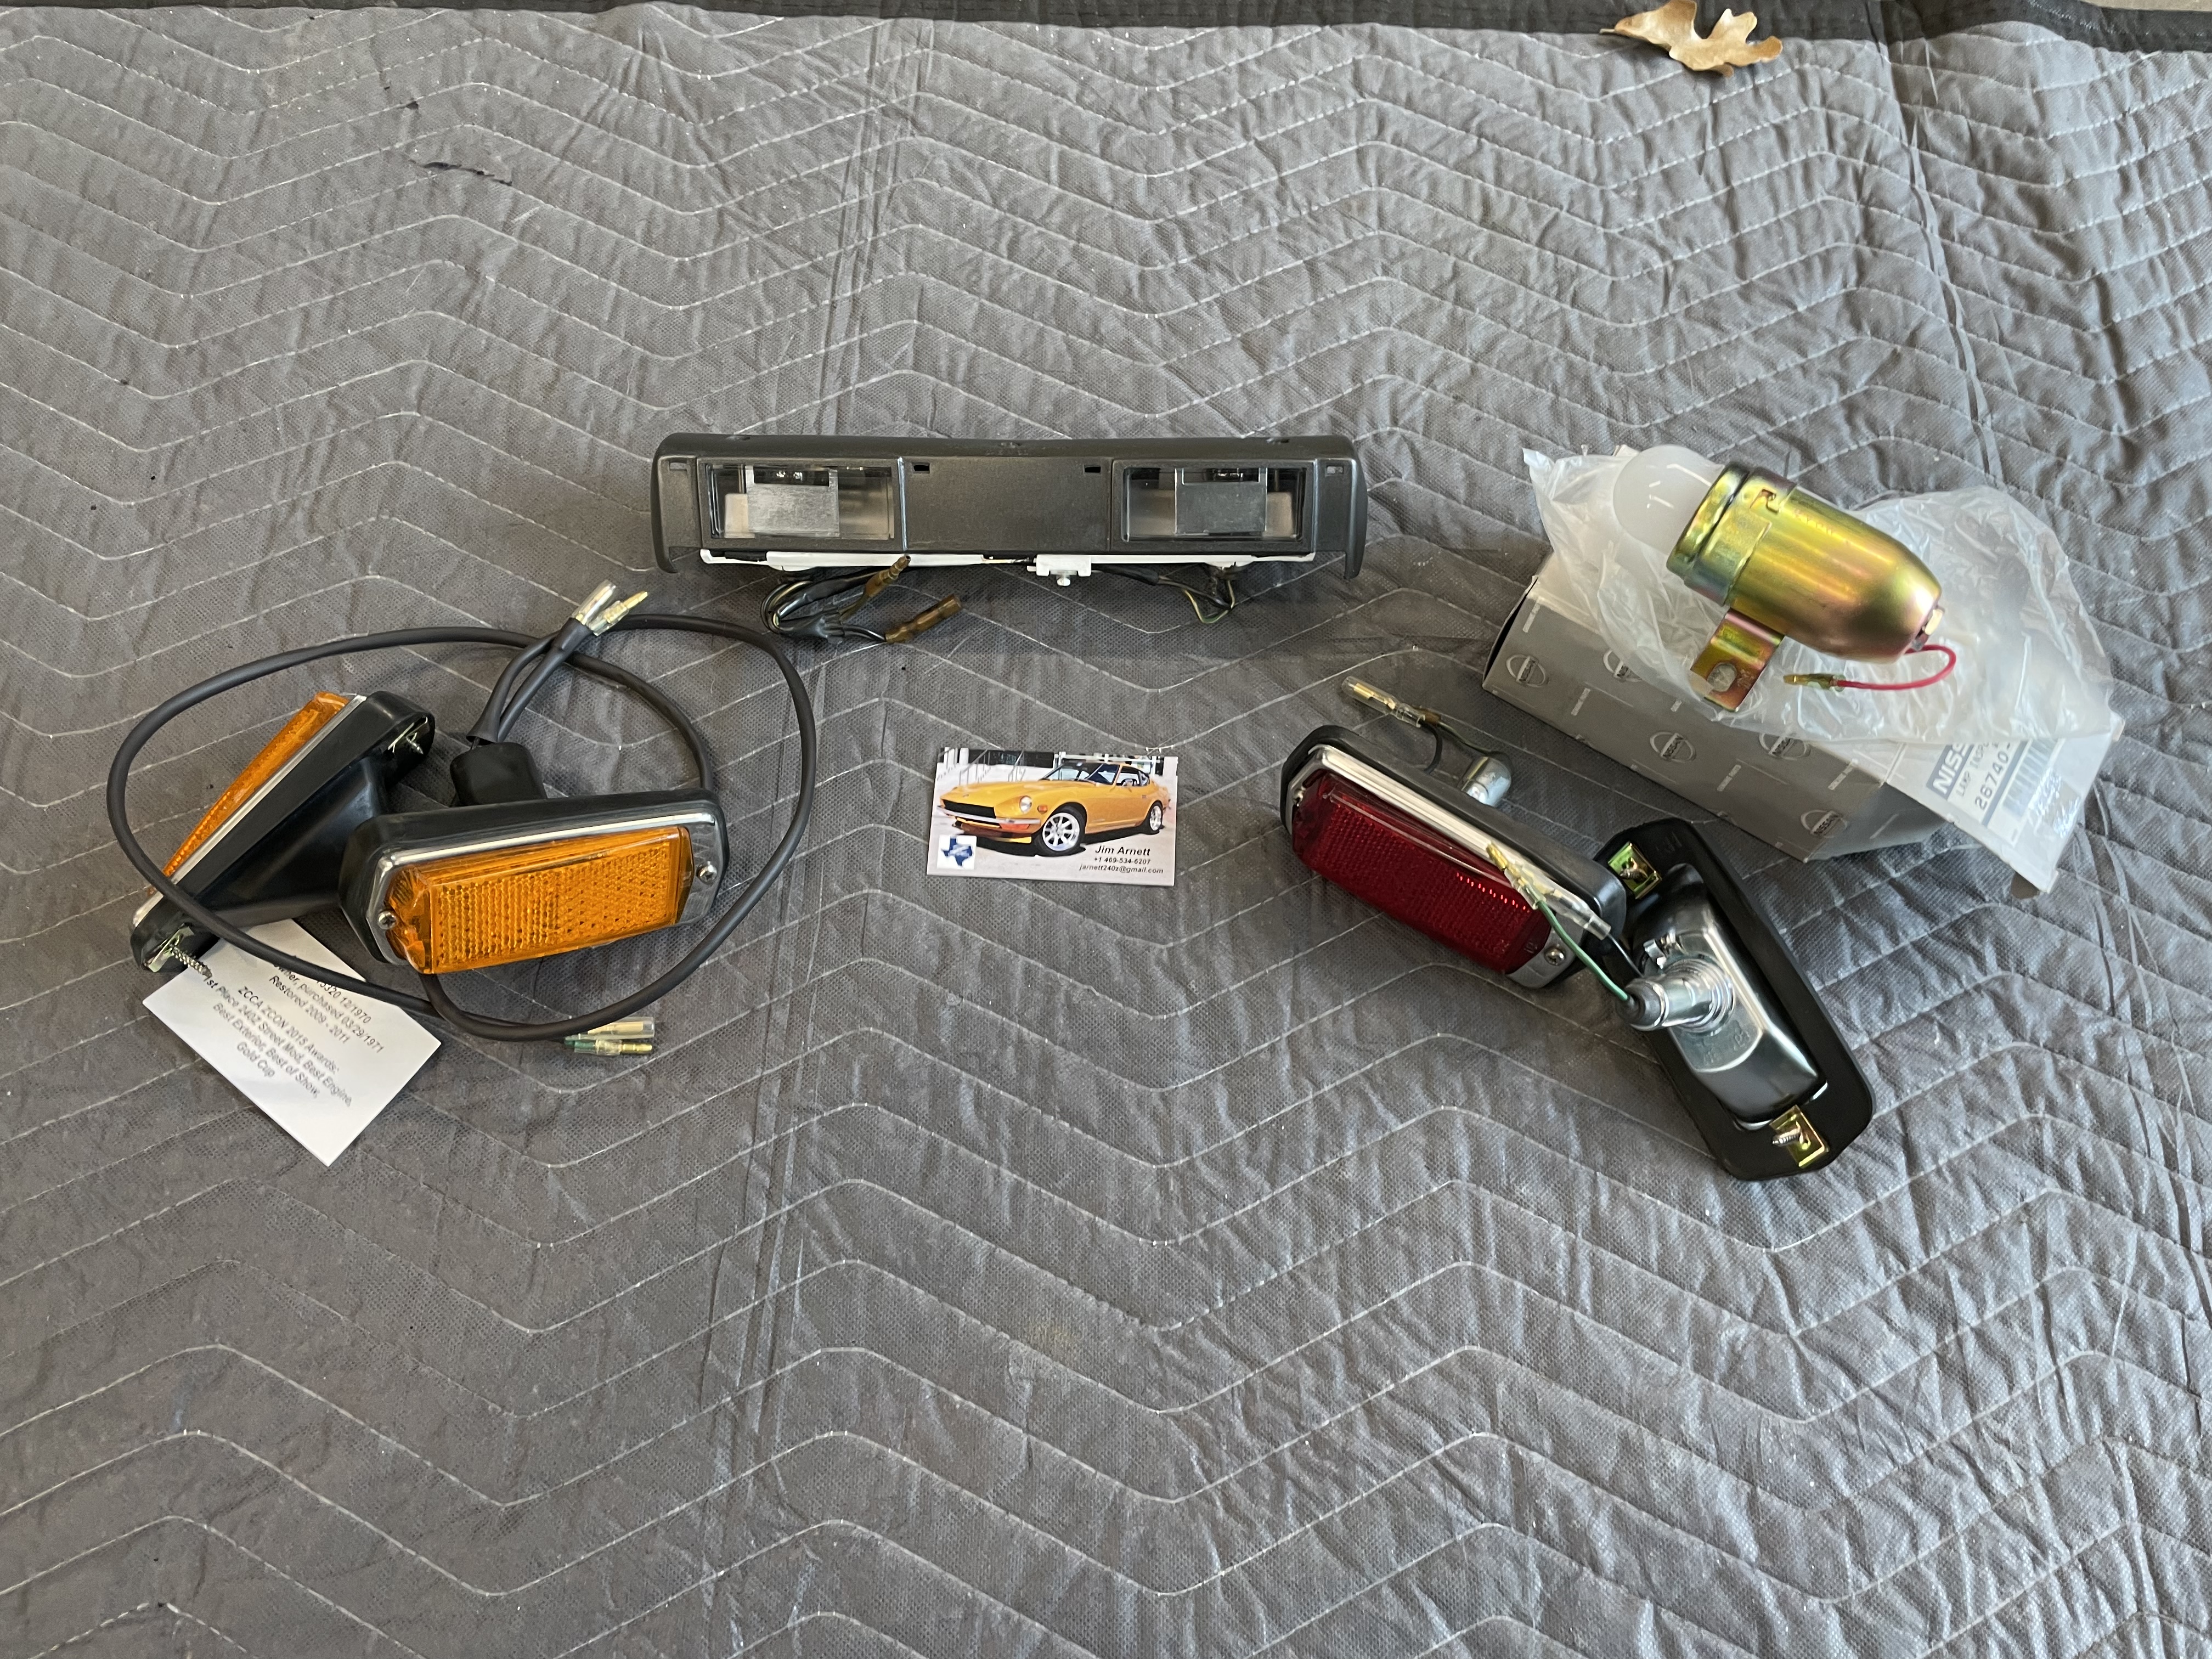
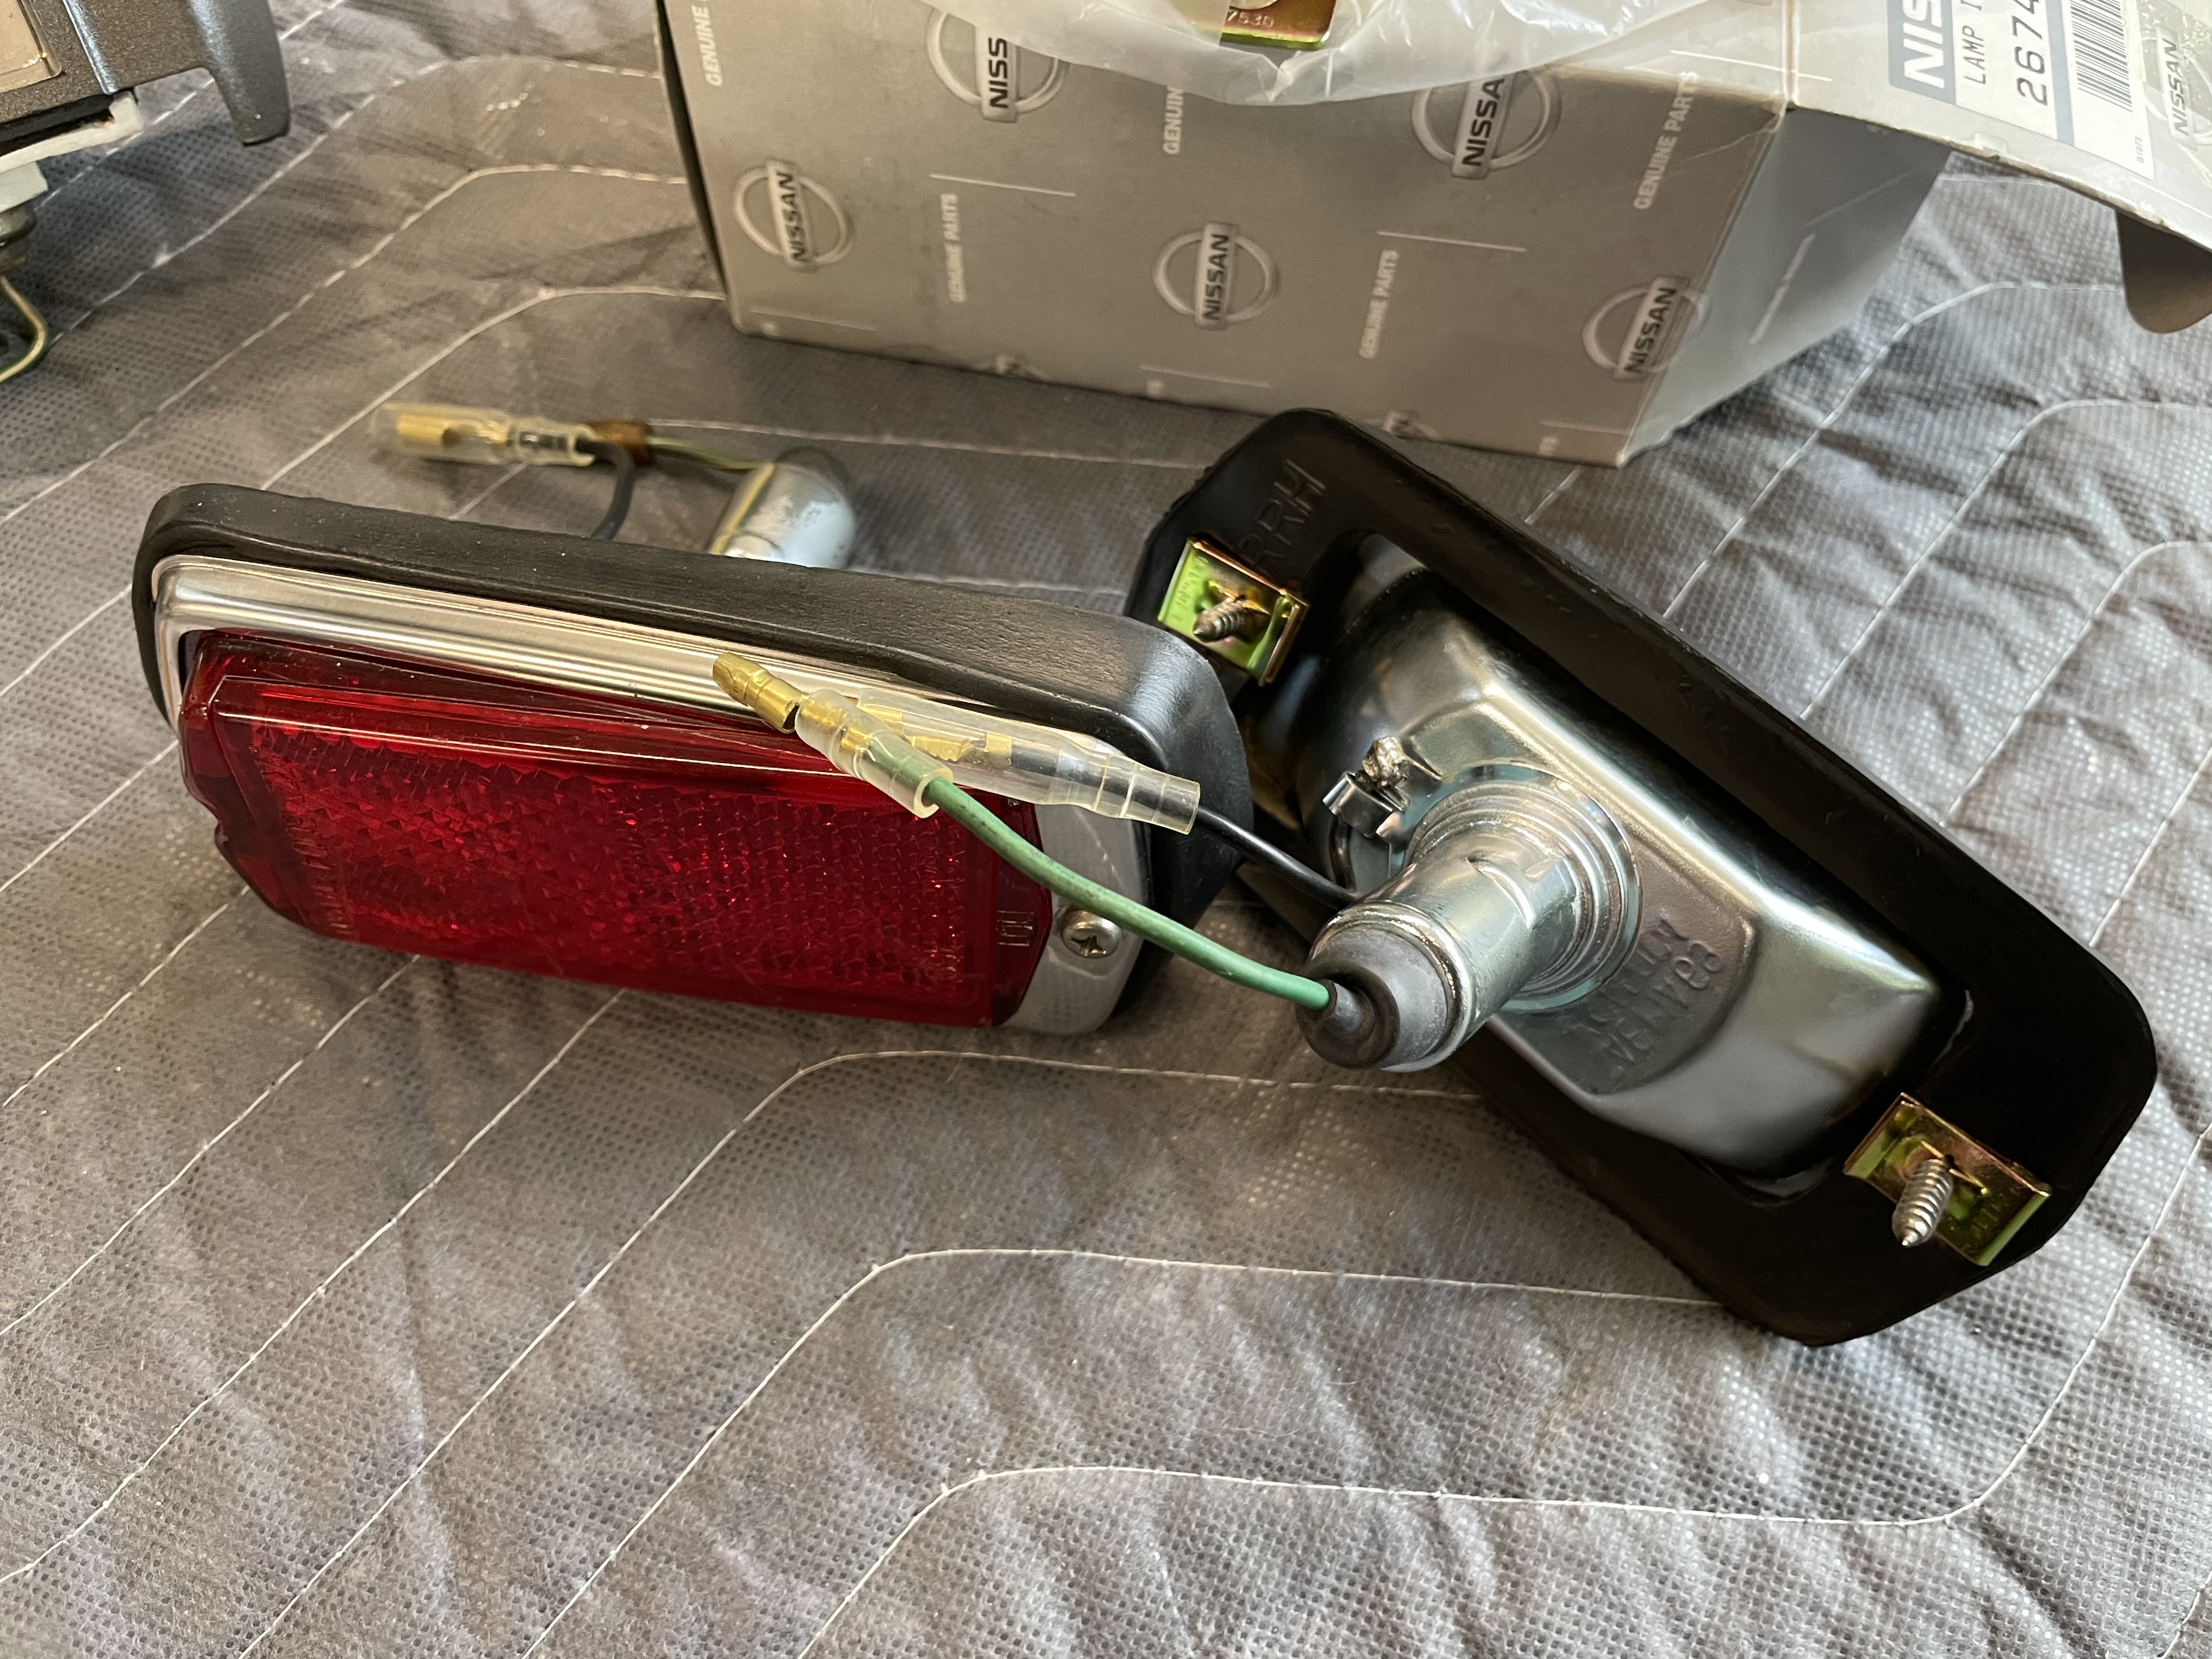
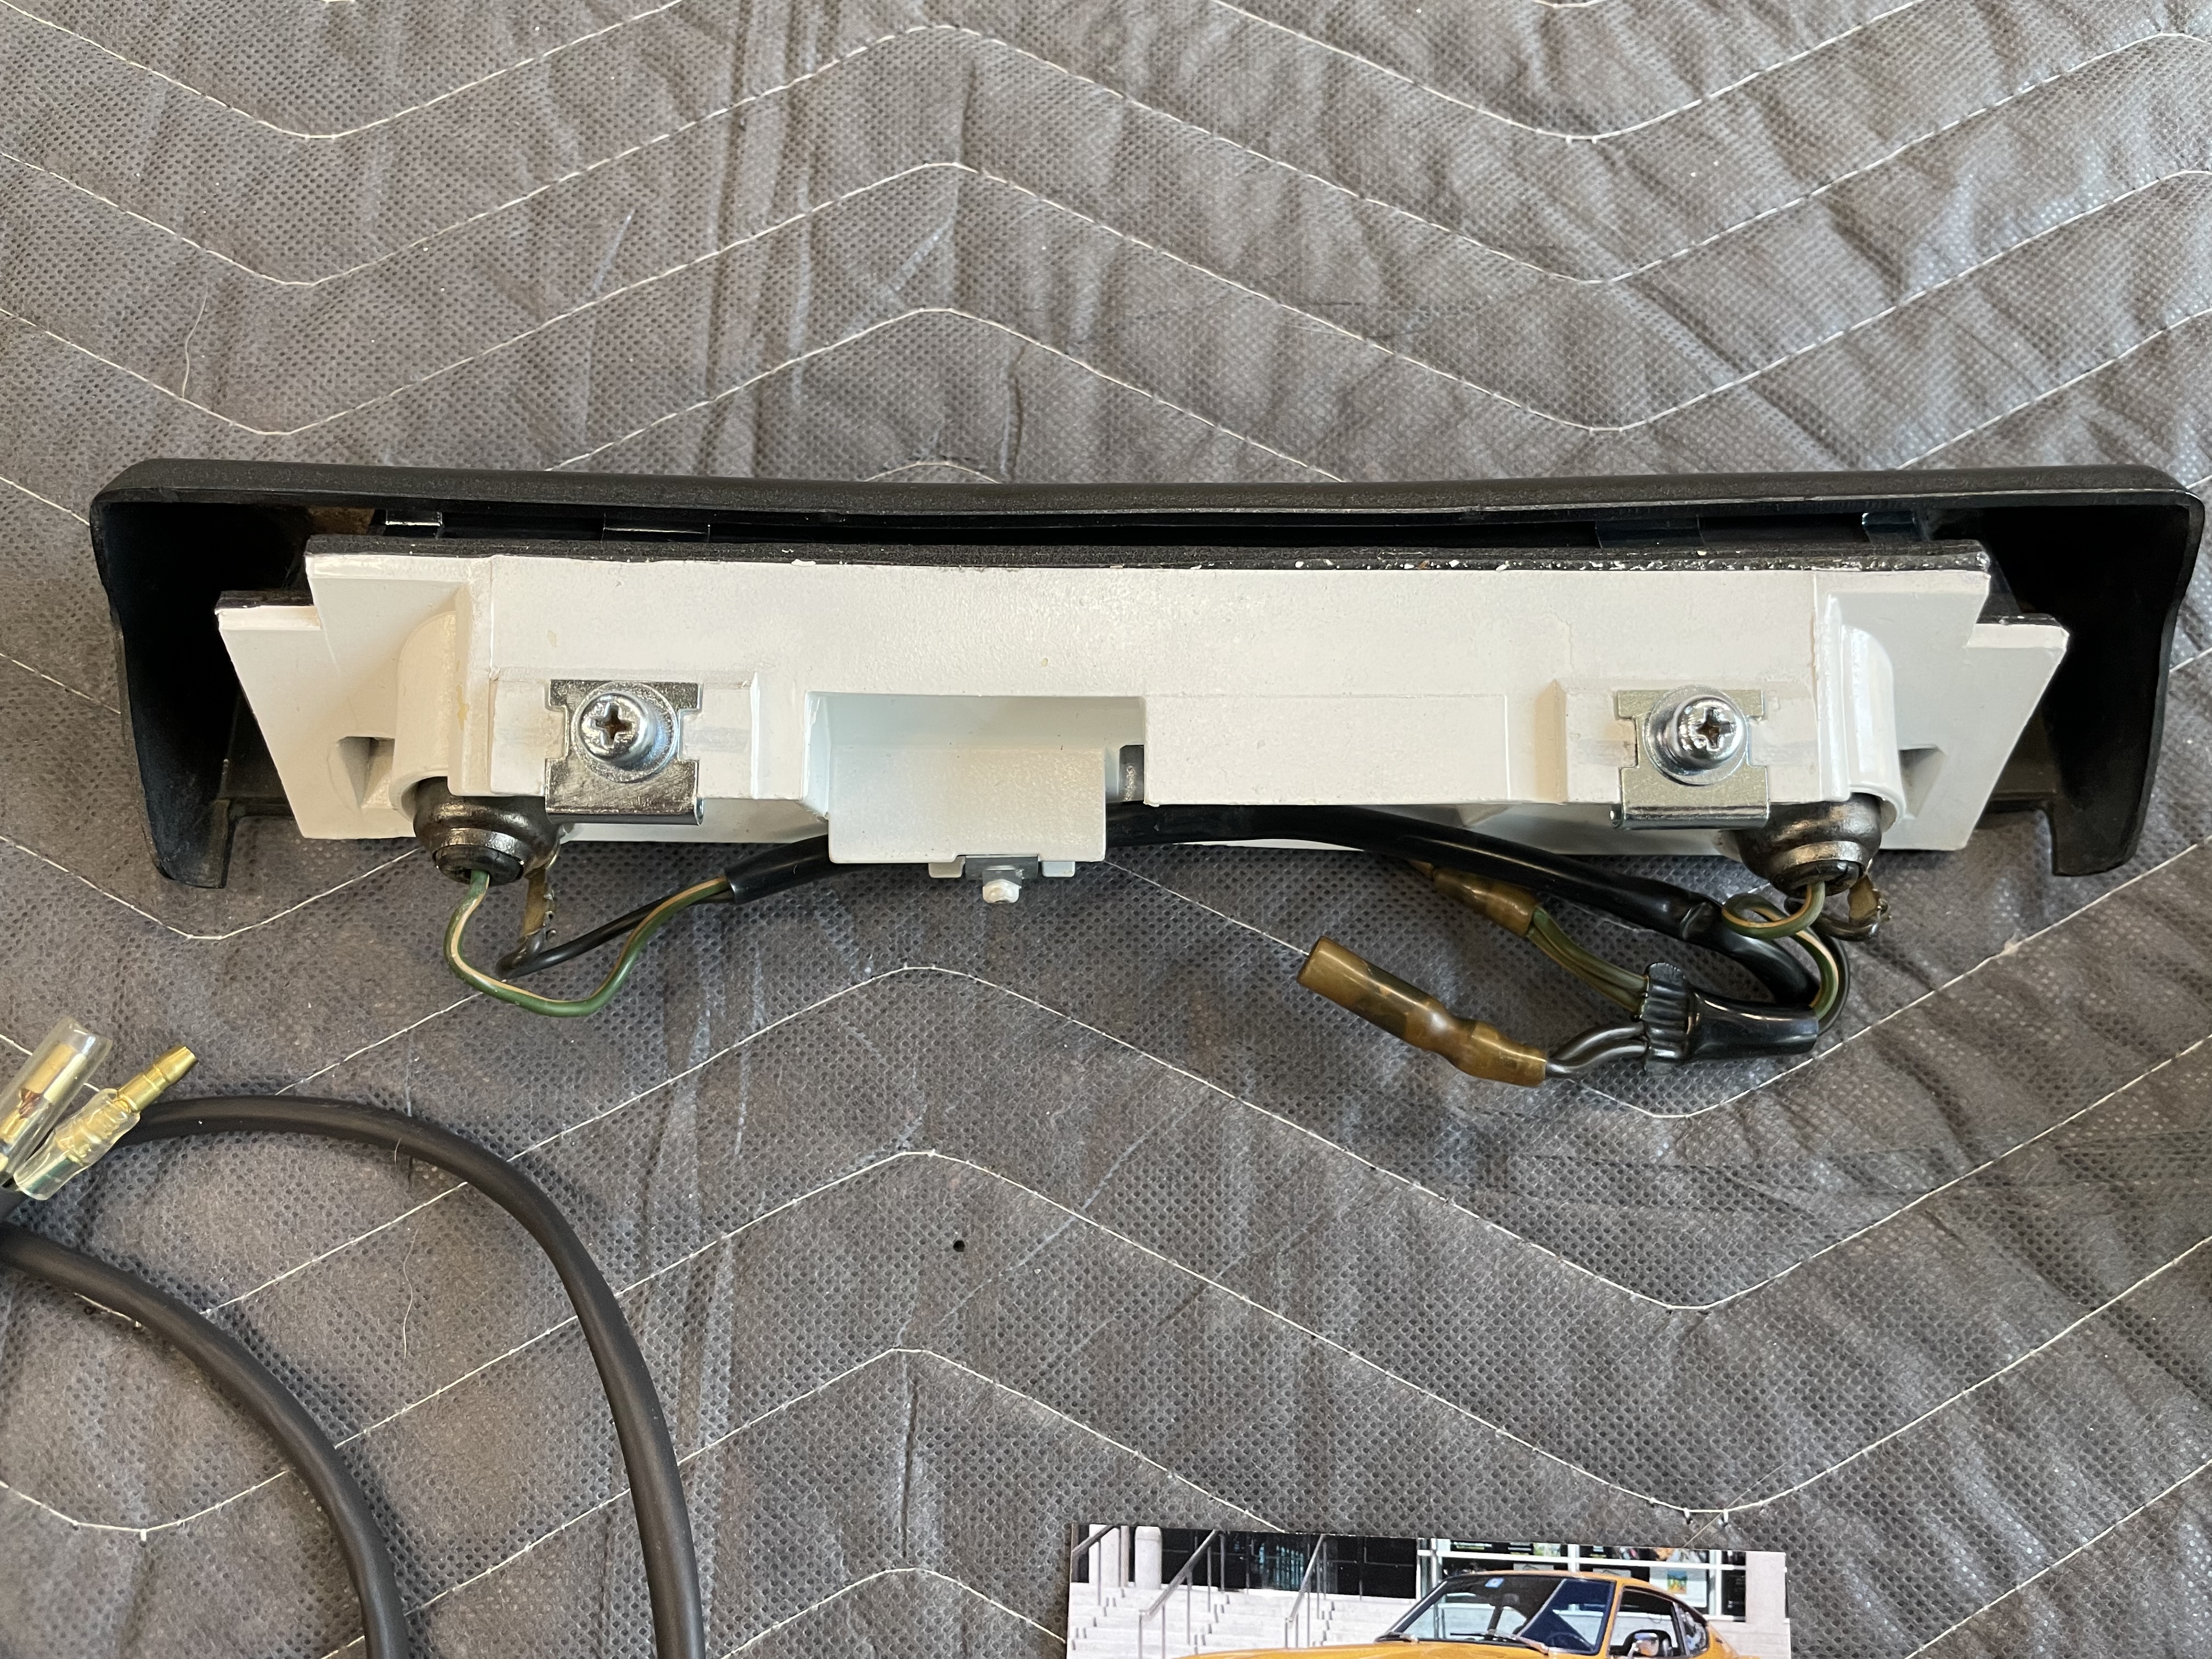
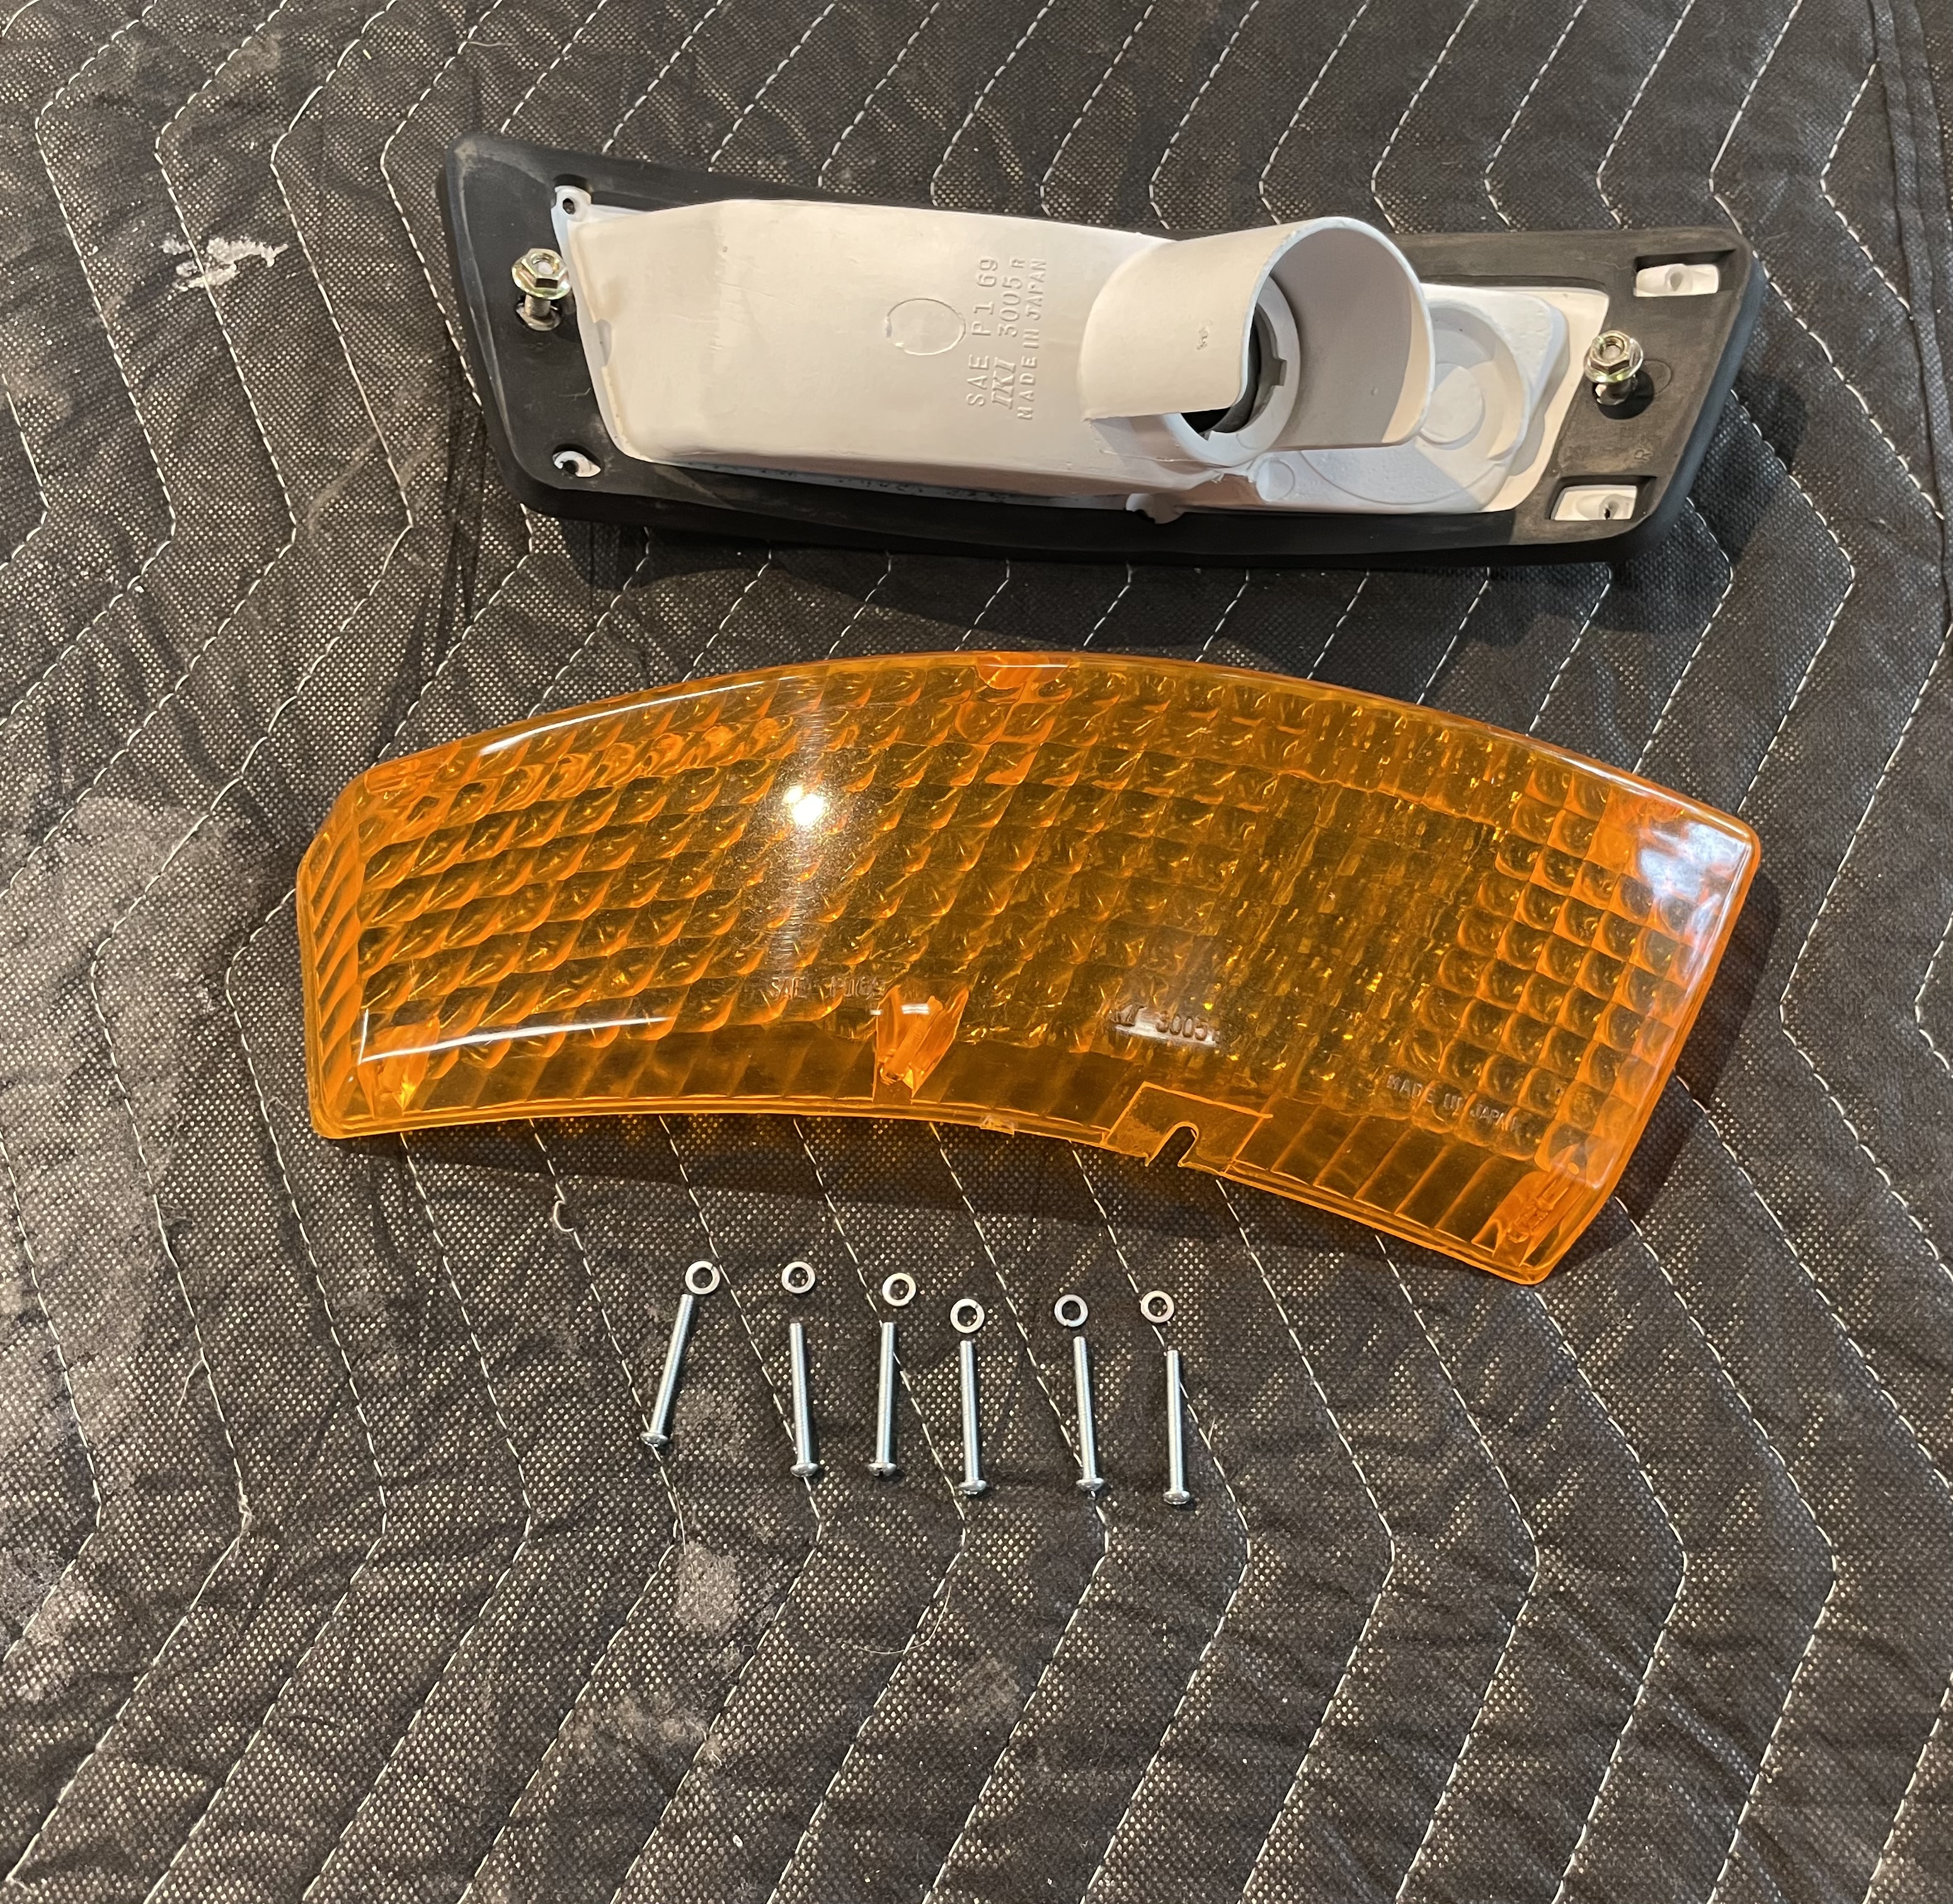
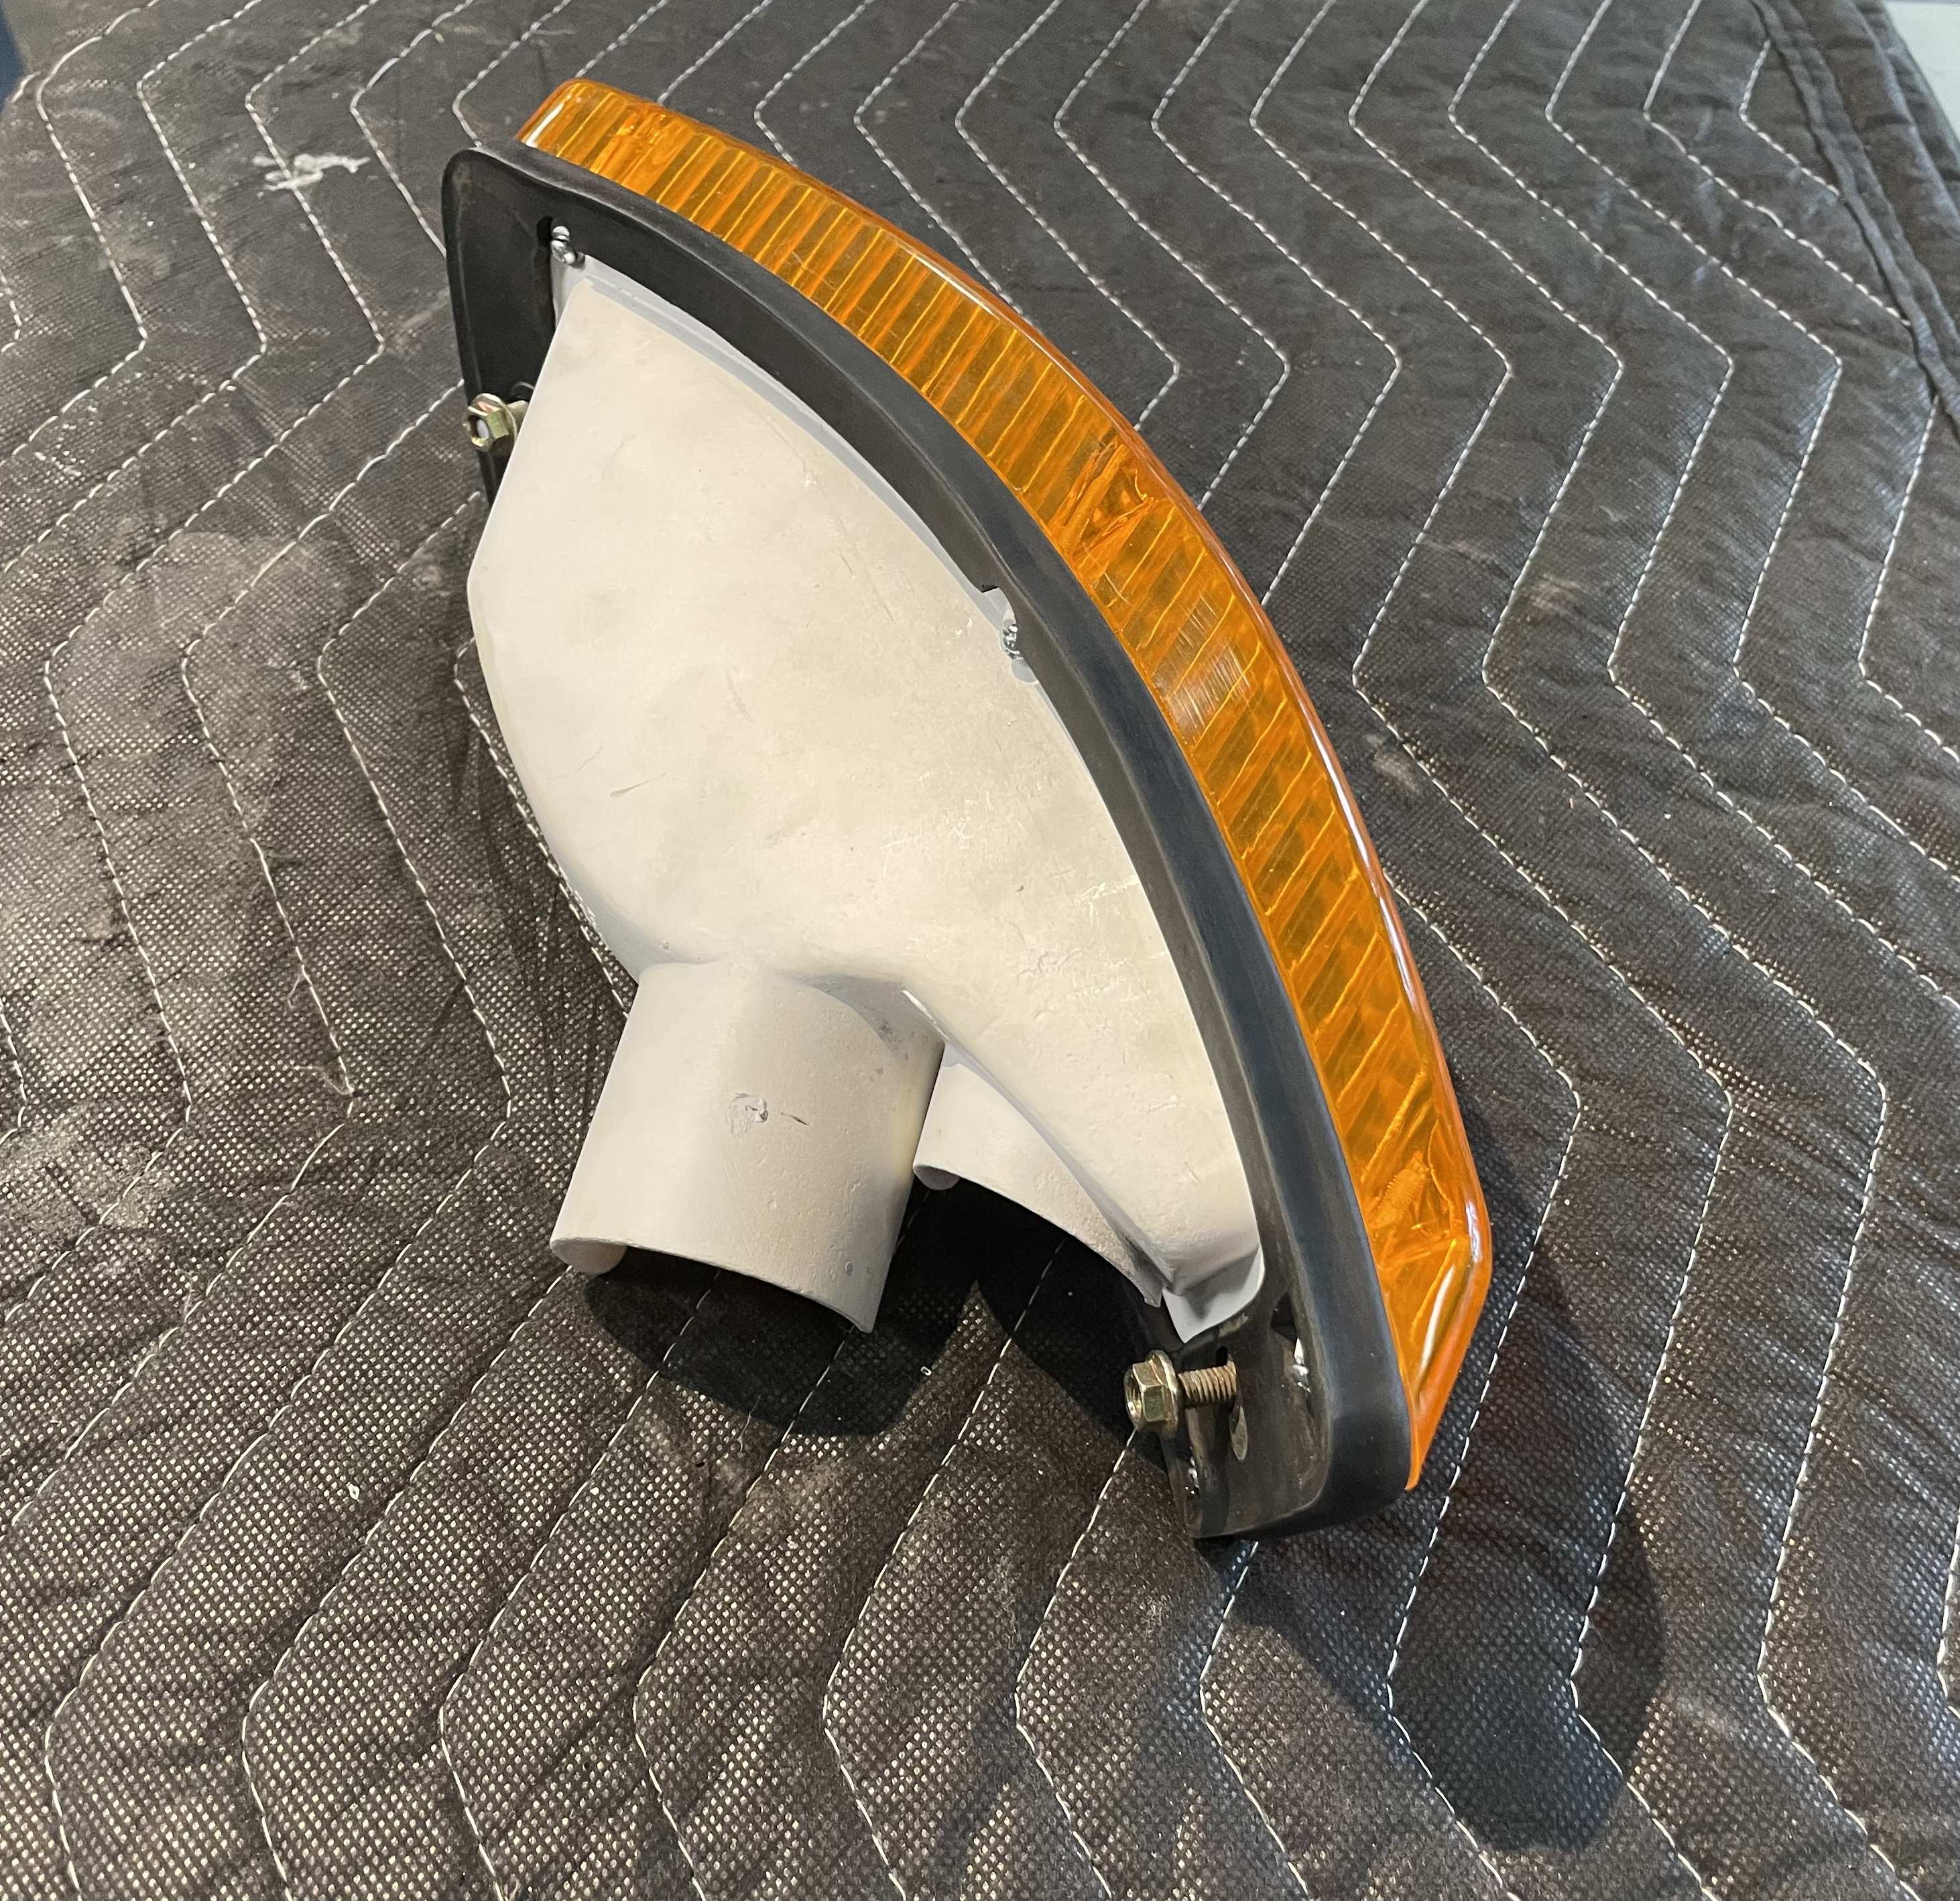
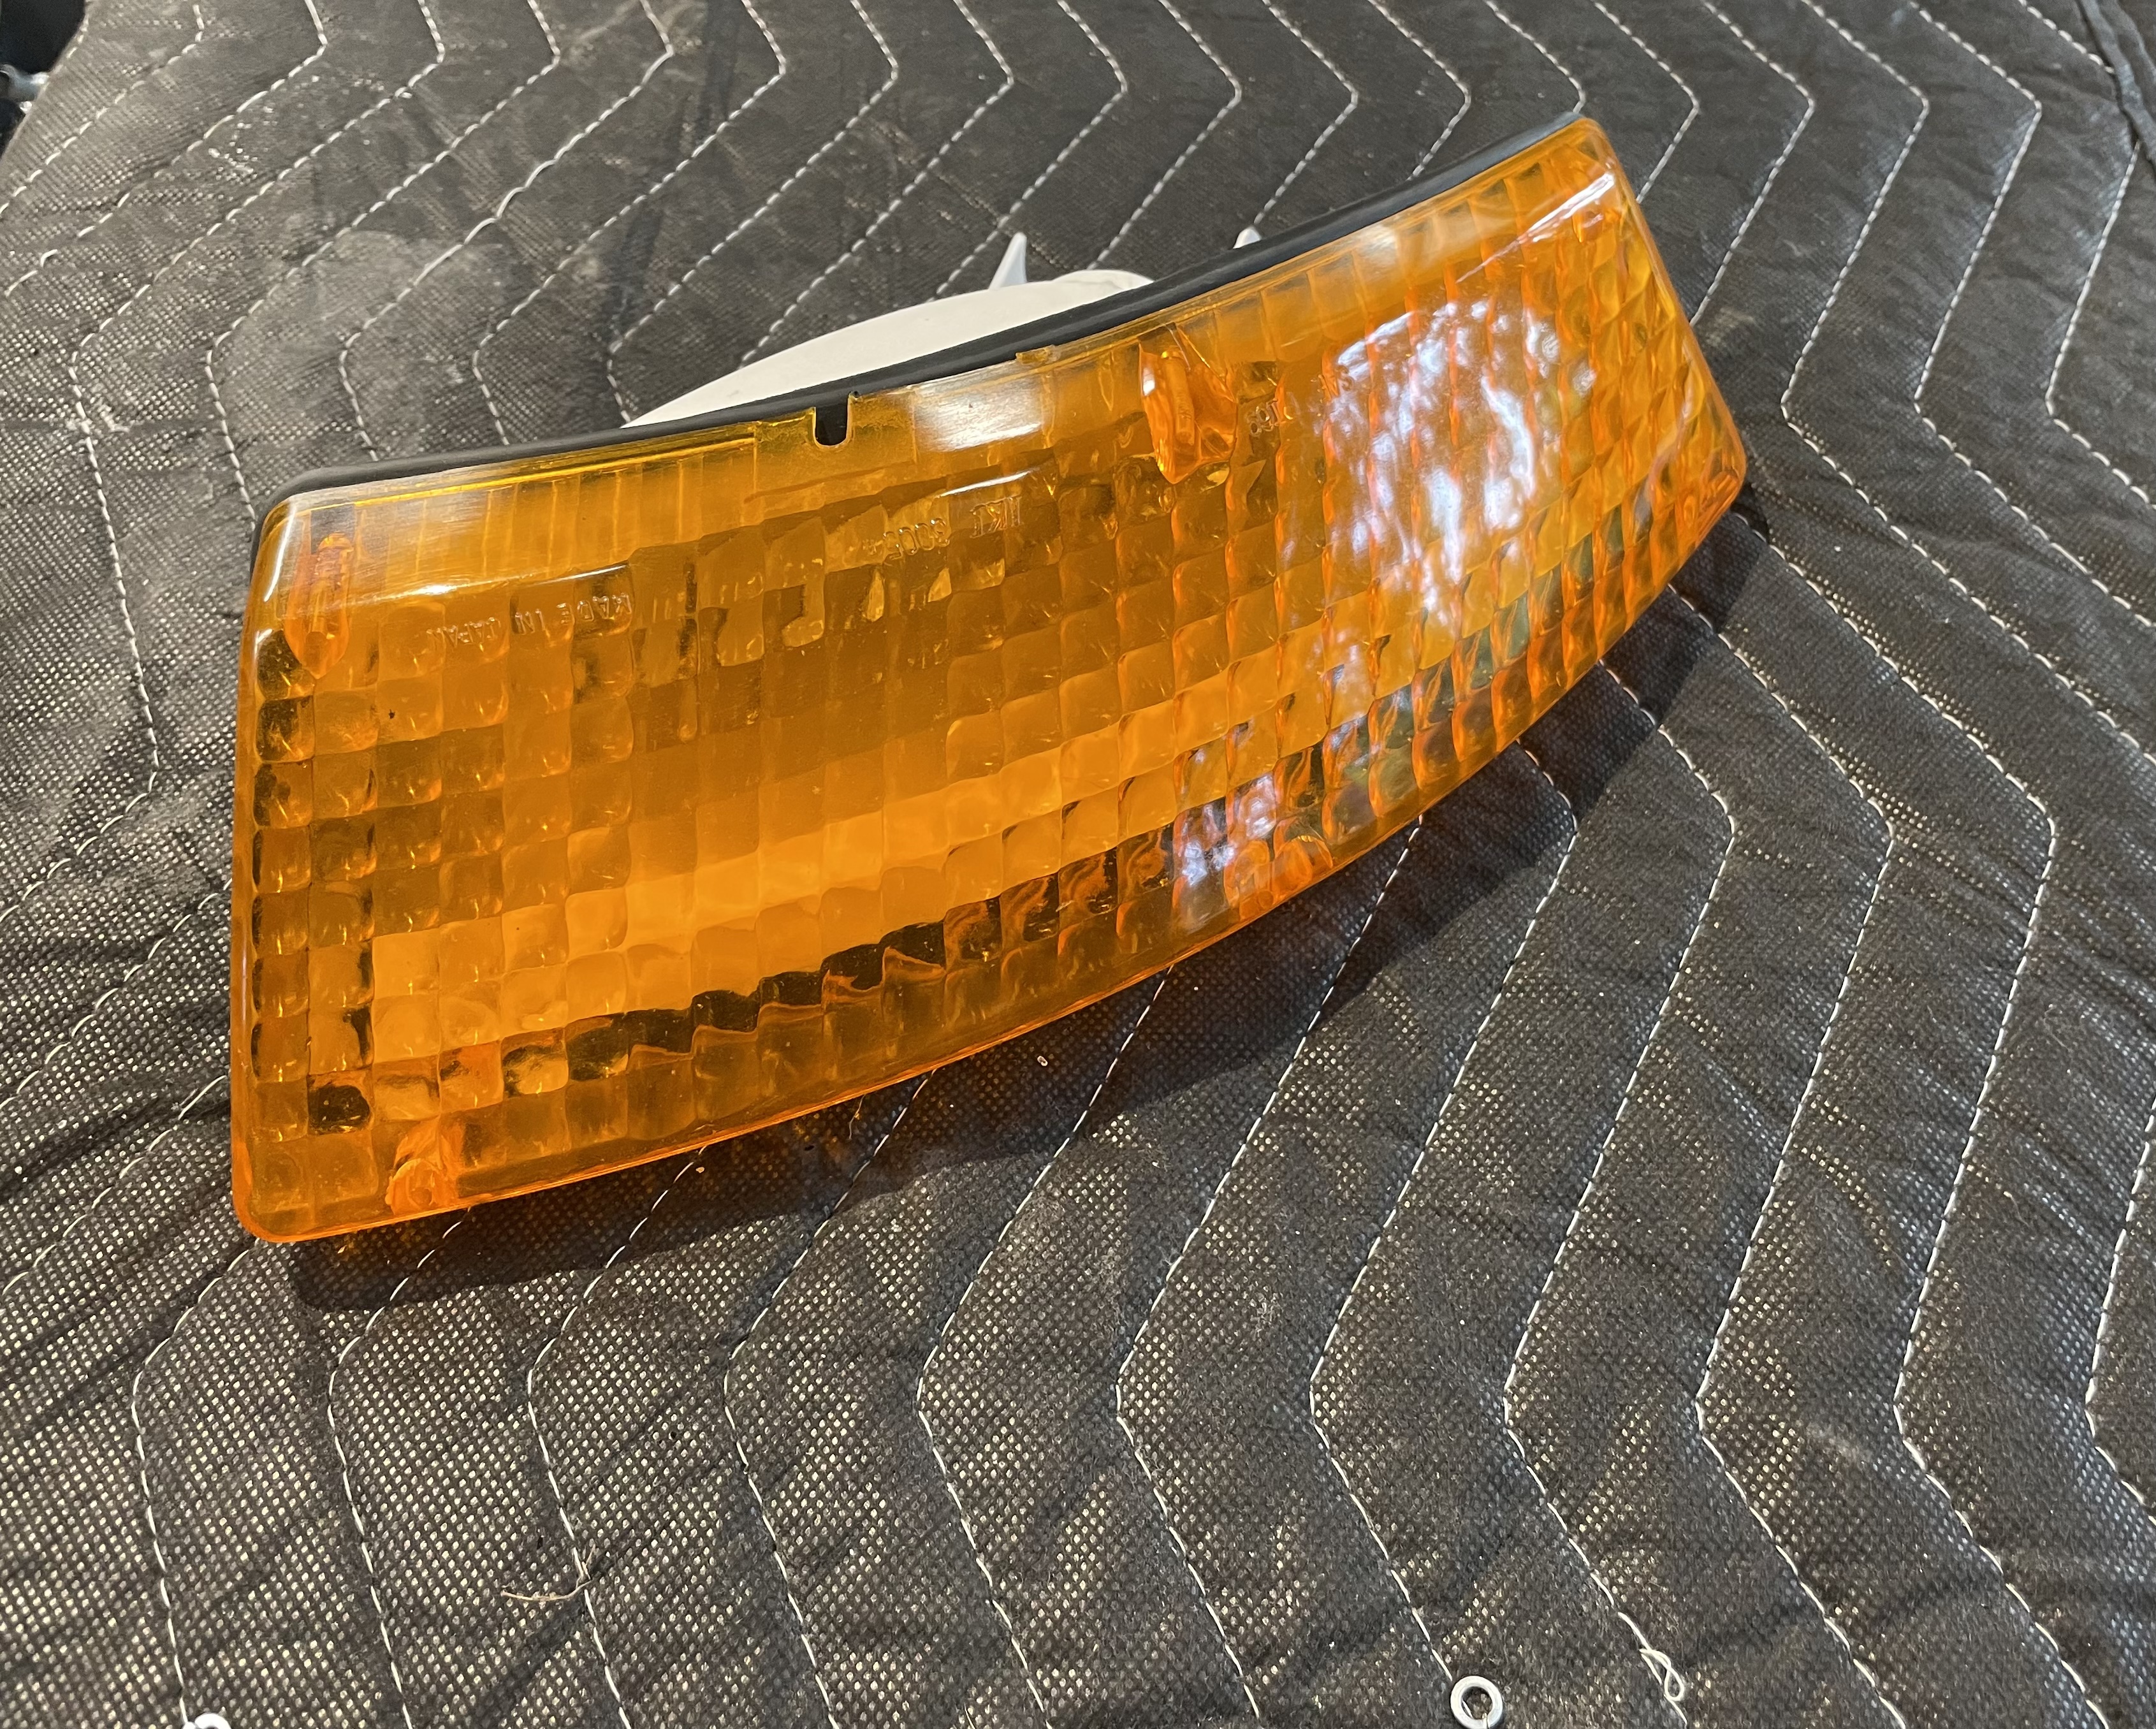
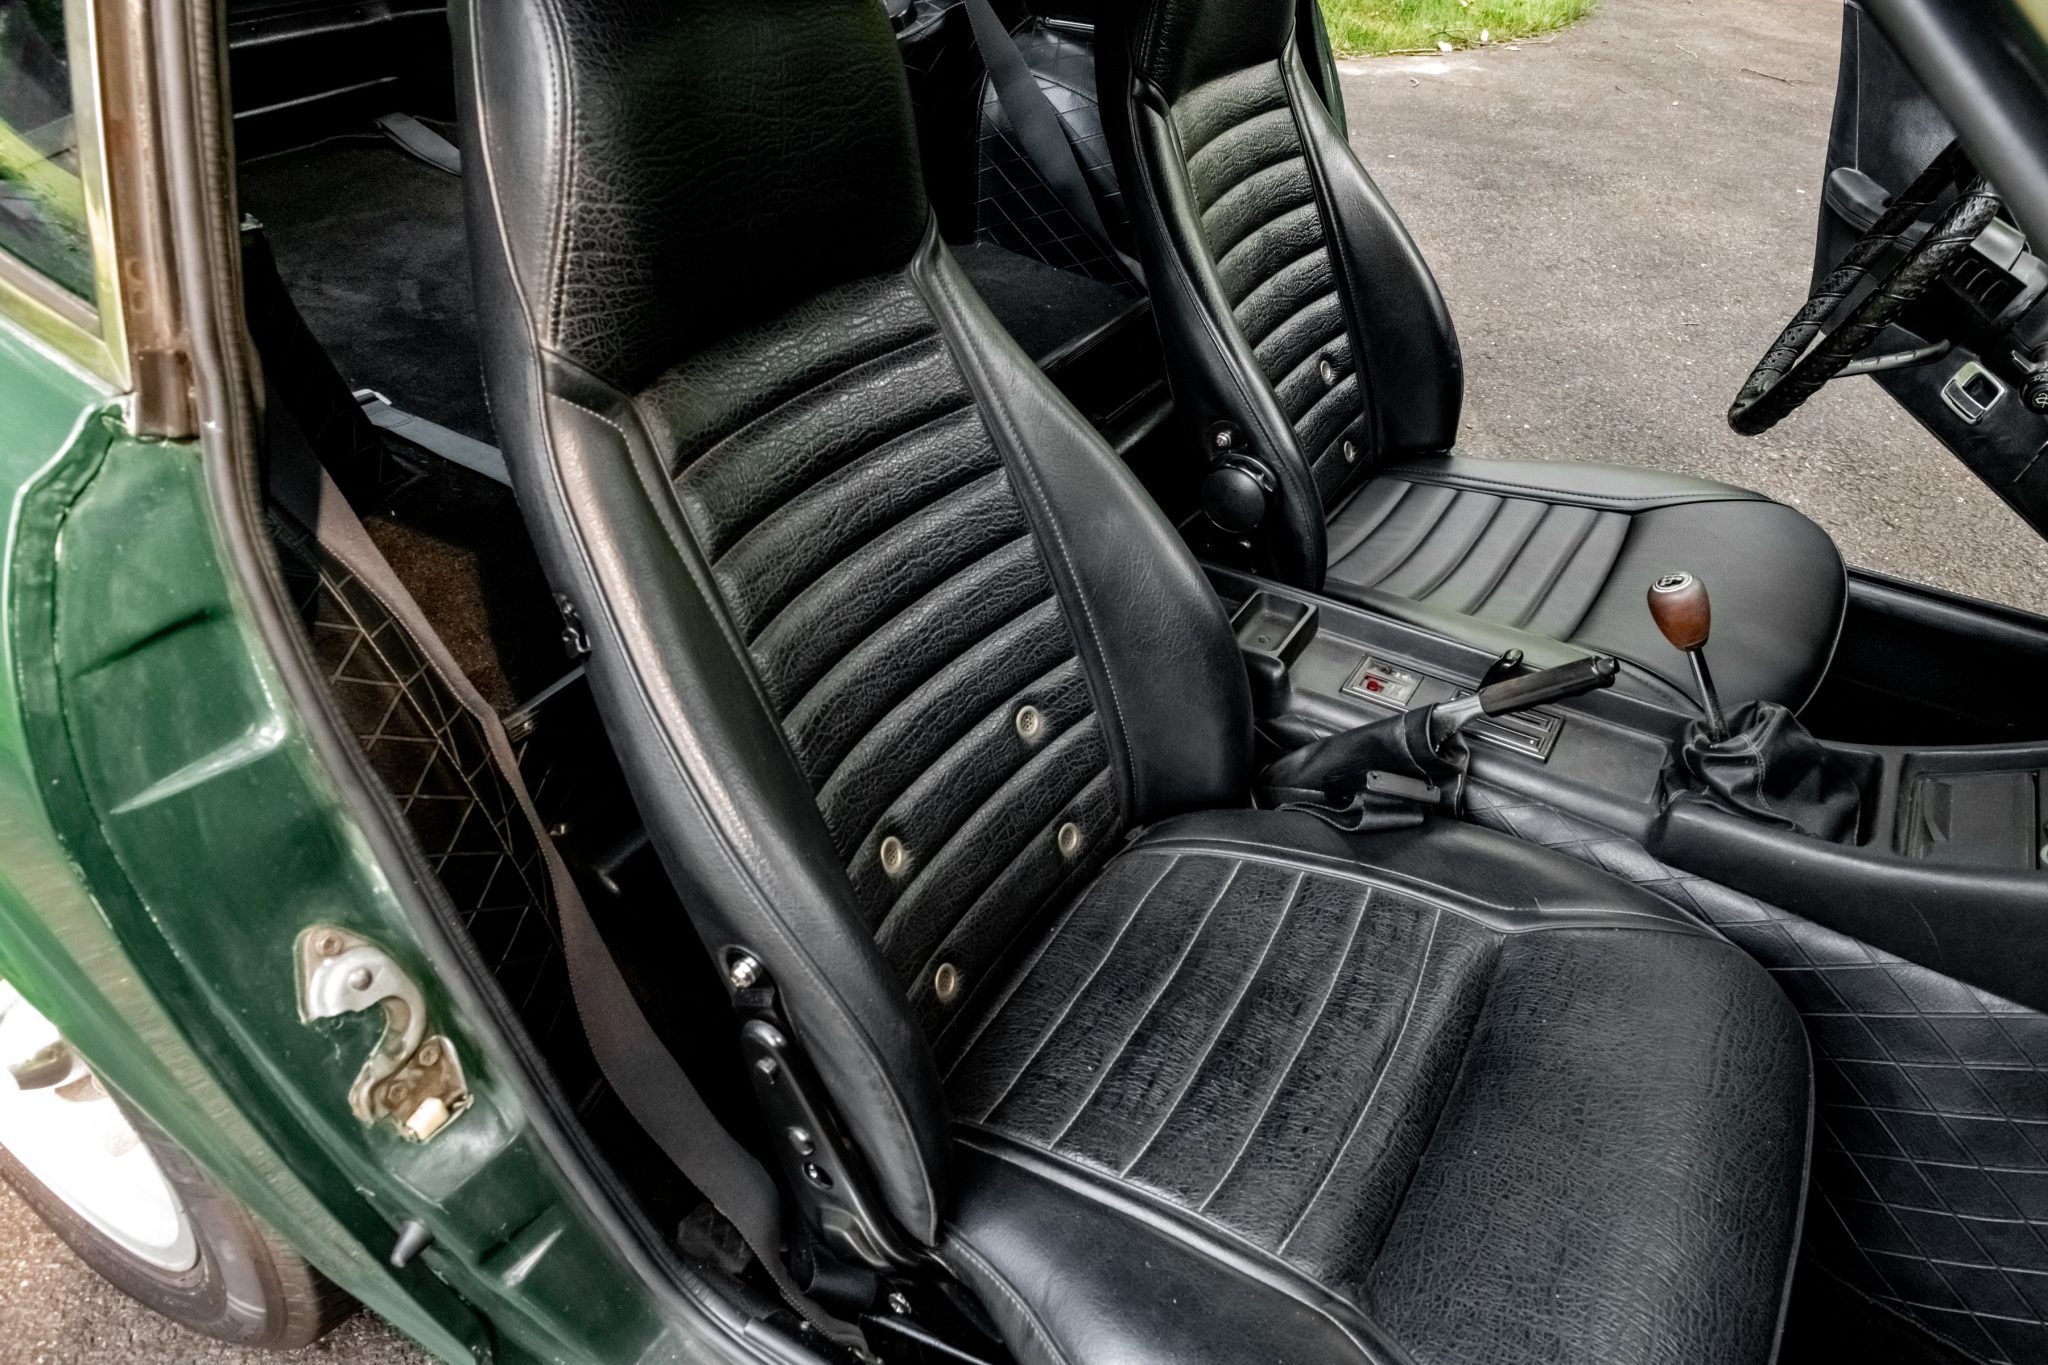
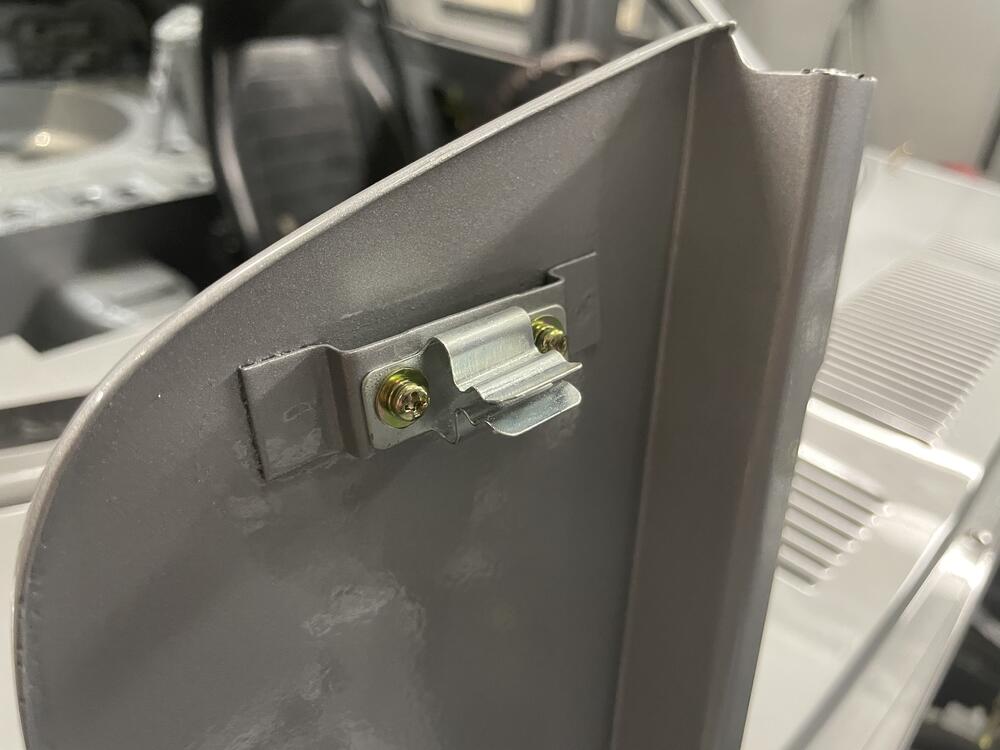
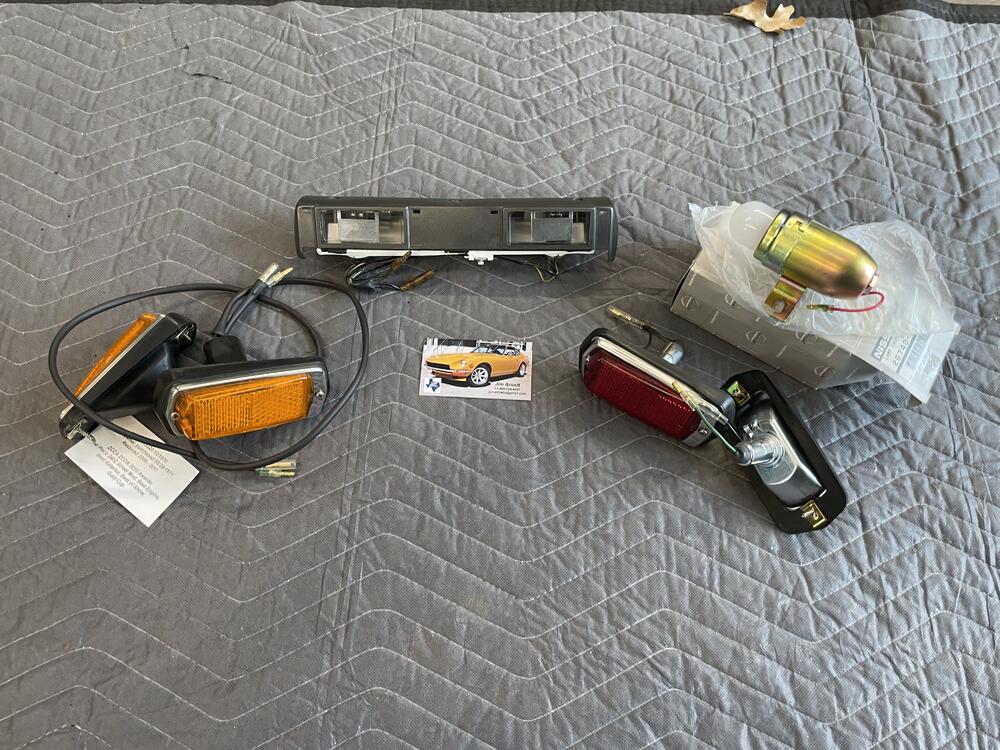
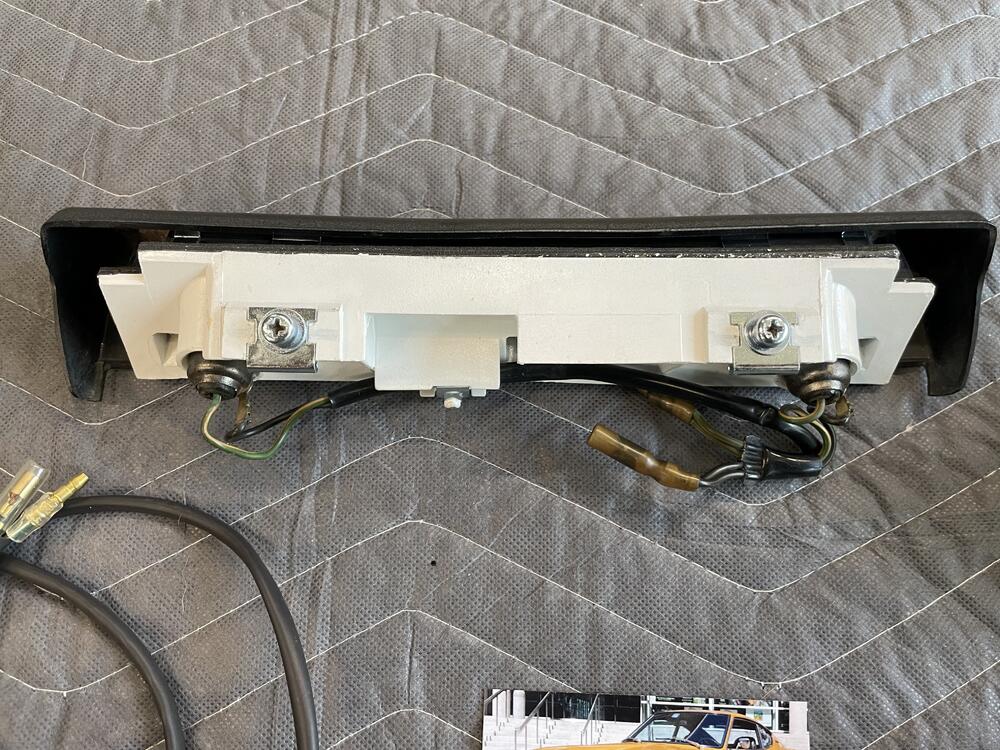
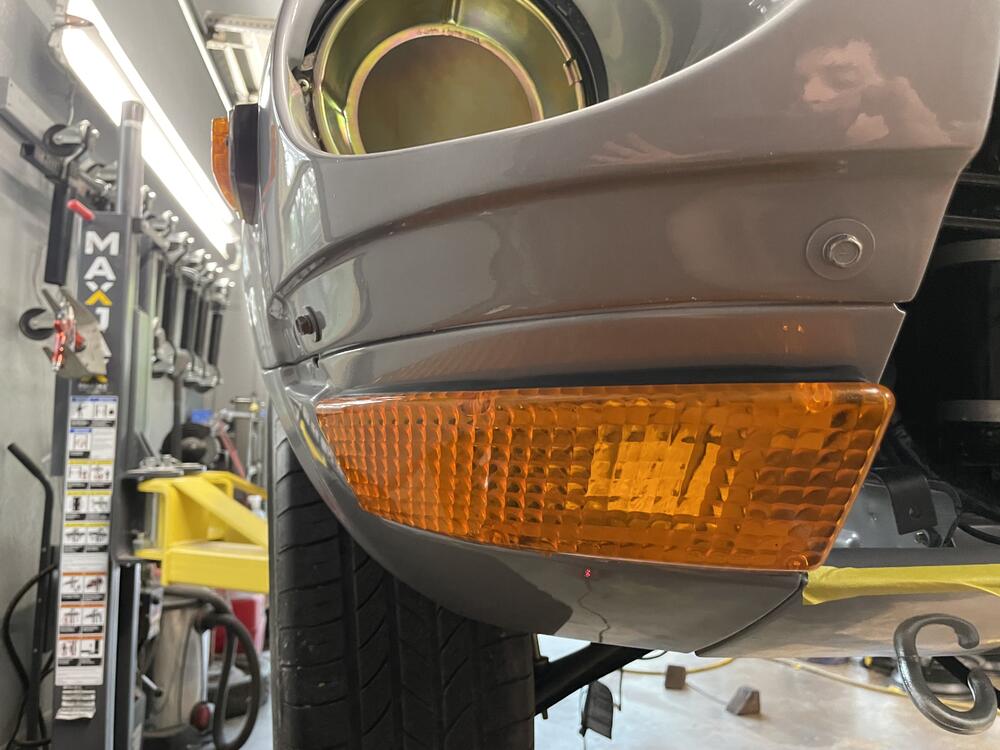
 4 pointsCouple details updated on the Z. Working on the exhaust system now, should have that wrapped up soon. For now, much of the body has been reassembled. New/replated hardware used throughout, and picked up an excellently restored set of side marker lights and license plate light from @jfa.series1. Original turn signal housings received a deep cleaning, lens polished, and new hardware sourced.


 4 points
 -
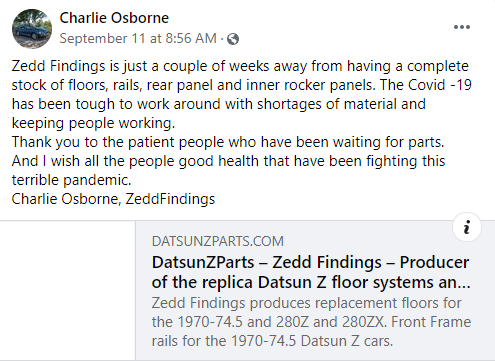
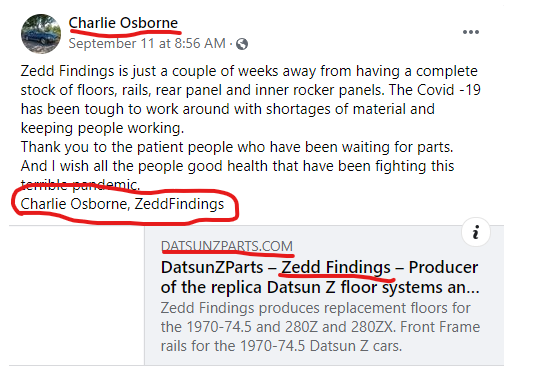
 3 pointsZedd Findings = company name Charlie = owner founder, he's the man datsunzparts.com = the internet domain (aka website) for Zedd Findings...it is not terribly uncommon to find a company with a URL that does not match their company name Charlie has been doing this a long time and is quite reliable.3 points
 -
 2 points
 -
 1 point
 -
 1 pointYou read my mind for my next question of “what happens if max advance isn’t enough” 😂1 point
 -
1 point
-
1 pointThanks, I’ve been putting in about 4 hrs a day to get here. I got Covid at some point too in the process (yes I’m vaccinated), had to wait for parts, had to wait for powder coating. Tomorrow I’m going to install the flywheel, and clutch on new engine. Sent from my iPhone using Tapatalk1 point
-
 1 point
 -
 1 pointDave Irwin, aka Zs-ondabrain, designed those and made them for MSA. He has moved to the boonies and might be hard to contact but worth a shot. @Zs-ondabrain https://www.facebook.com/DatsunLEDS https://www.datsun-240z-upgrades.net/ https://www.datsun-240z-upgrades.net/home/products/ https://www.datsun-240z-upgrades.net/product-info/1 point
 -
 1 pointEDIT: After looking over the spreadsheet I realized I told you wrong. Sorry and you'll see my mistakes if you look at the sheet. I have that timing light too. After setting the timing I mostly use it for the engine RPMs now. It puts a tach outside the cabin which is very useful when you get to fine tuning. You can also do total advance timing with it. My car has two 17 weights in the distributor so you double that to 34 then run the motor up to to 3,500rpm and the light will read 0 when it's at max advance. I have an excel spreadsheet on my laptop with all the distributors and their info. Thank you for doing that @Walter Moore I found it. Post #3.1 point
 -
 1 pointI swapped them when I started tuning the carbs. They’re gapped to 0.035 in. I figure since I’ve got the new ignition coil, they could take the max recommended gap. Does that reasoning hold? Regarding the float levels, I think I’m going to mess around with them this weekend. Figure I’ll at least learn something if nothing else. Thanks again for all the help. Everyone here’s been great!1 point
 -
 1 pointNice find. That plug is an elusive piece. I used to run fog lights on mine, but above and slightly behind the bumper. Too easy to break no matter where mounted.1 point
 -
D'oh! I was going from memory. I'm getting too old to do that.1 point
-
1 pointKoni put a lot of effort in to getting those gland nuts made. Wonder what went wrong. The gland nut is meant to center the shock body in the tube in addition to clamping it in to the bore of the strut tube. @KONI Lee @Joseph@TheZStore1 point
-
1 pointHere, take this: Maybe this will help you with identifying the players... I would suggest that you be patient. I have seen a person get black-balled by shops because he came across as high-maintenance. I don't think you'll find someone else at Charlie's price point who would be more reliable. One more screen shot for good measure:

 1 point
 -
1 pointGo ahead an buy a timing light. https://www.amazon.com/dp/B000EVYGV4/?th=1 (Note, there is also a more expensive one with dwell if you think you might ever deal with points.)1 point
-
1 pointIt’s Alive!!!! so excited to hear it run again. This was only the second time starting (I didn’t even think it would start on the first crank so I didn’t record it!) a couple things to note, I need to check the oil pressure gauge is function or if I have 0 pressure. I need to rent a timing light to adjust timing. And there are a couple open vacuum ports still on the manifold for the high idle. BUT ITS RUNNING!1 point
-
 1 pointYes, the button is for the Lucas lights, they will be removed shortly.. Incredibly, I found the small plastic piece to replace the button, in the glove box. It’s been in there for 50 yrs..1 point
 -
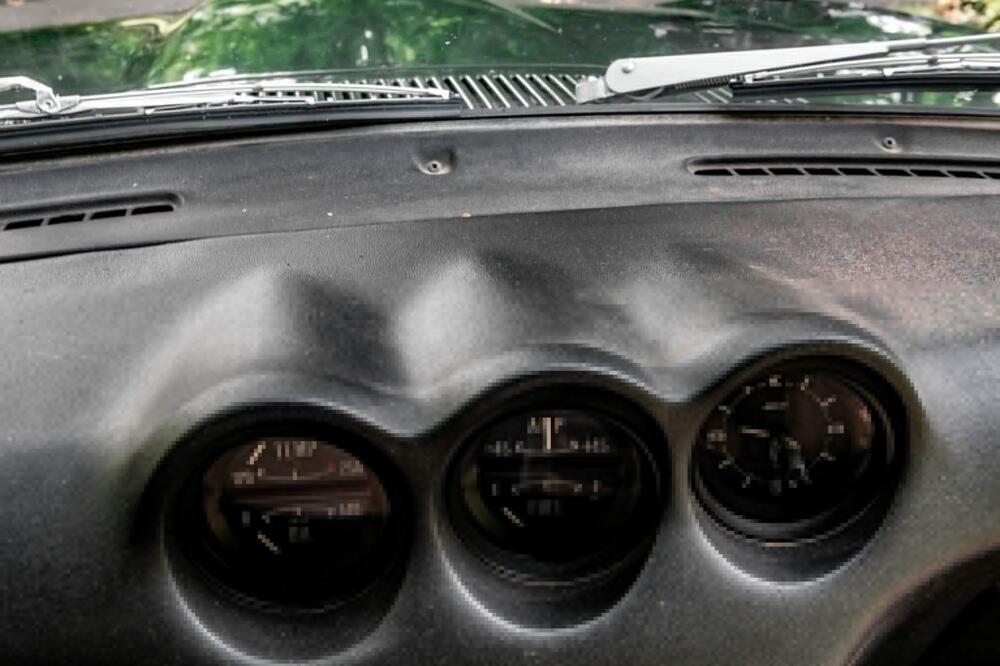
1 pointThanks all. My 78z was blue, and I almost purchased another one recently, thus the reason for my I’d. Ended up getting a 71 instead, so I should do an name change.. Since I’ve been away from Z’s for so long I need to do some serious catch up. Plan is to keep it original as much as possible. Car is from Md, built 12/70. Minimal work done, over last 30+ yrs. Here’s what I’ve found so far: The good- Motor, clutch, trans, steering, lights, body panels, floors all appear good, interior, dash, seats, rugs all good. The bad- Tires dry rotted, antenna cord to be replaced, speedometer orings leaking, most hoses need replacement, suspension bushings are disintegrating, clock not working, new drivers seat cushion doesn’t quite match OEM. Still in exploring stage, car going on lift today. Can’t wait to see what lurks below. Here’s some pics.


 1 point
 -
1 point
-
1 point
-
 1 pointIt may be time for a new set of BP6ESs too. I've experienced a high RPM stumble that was cured by new plugs.1 point
 -
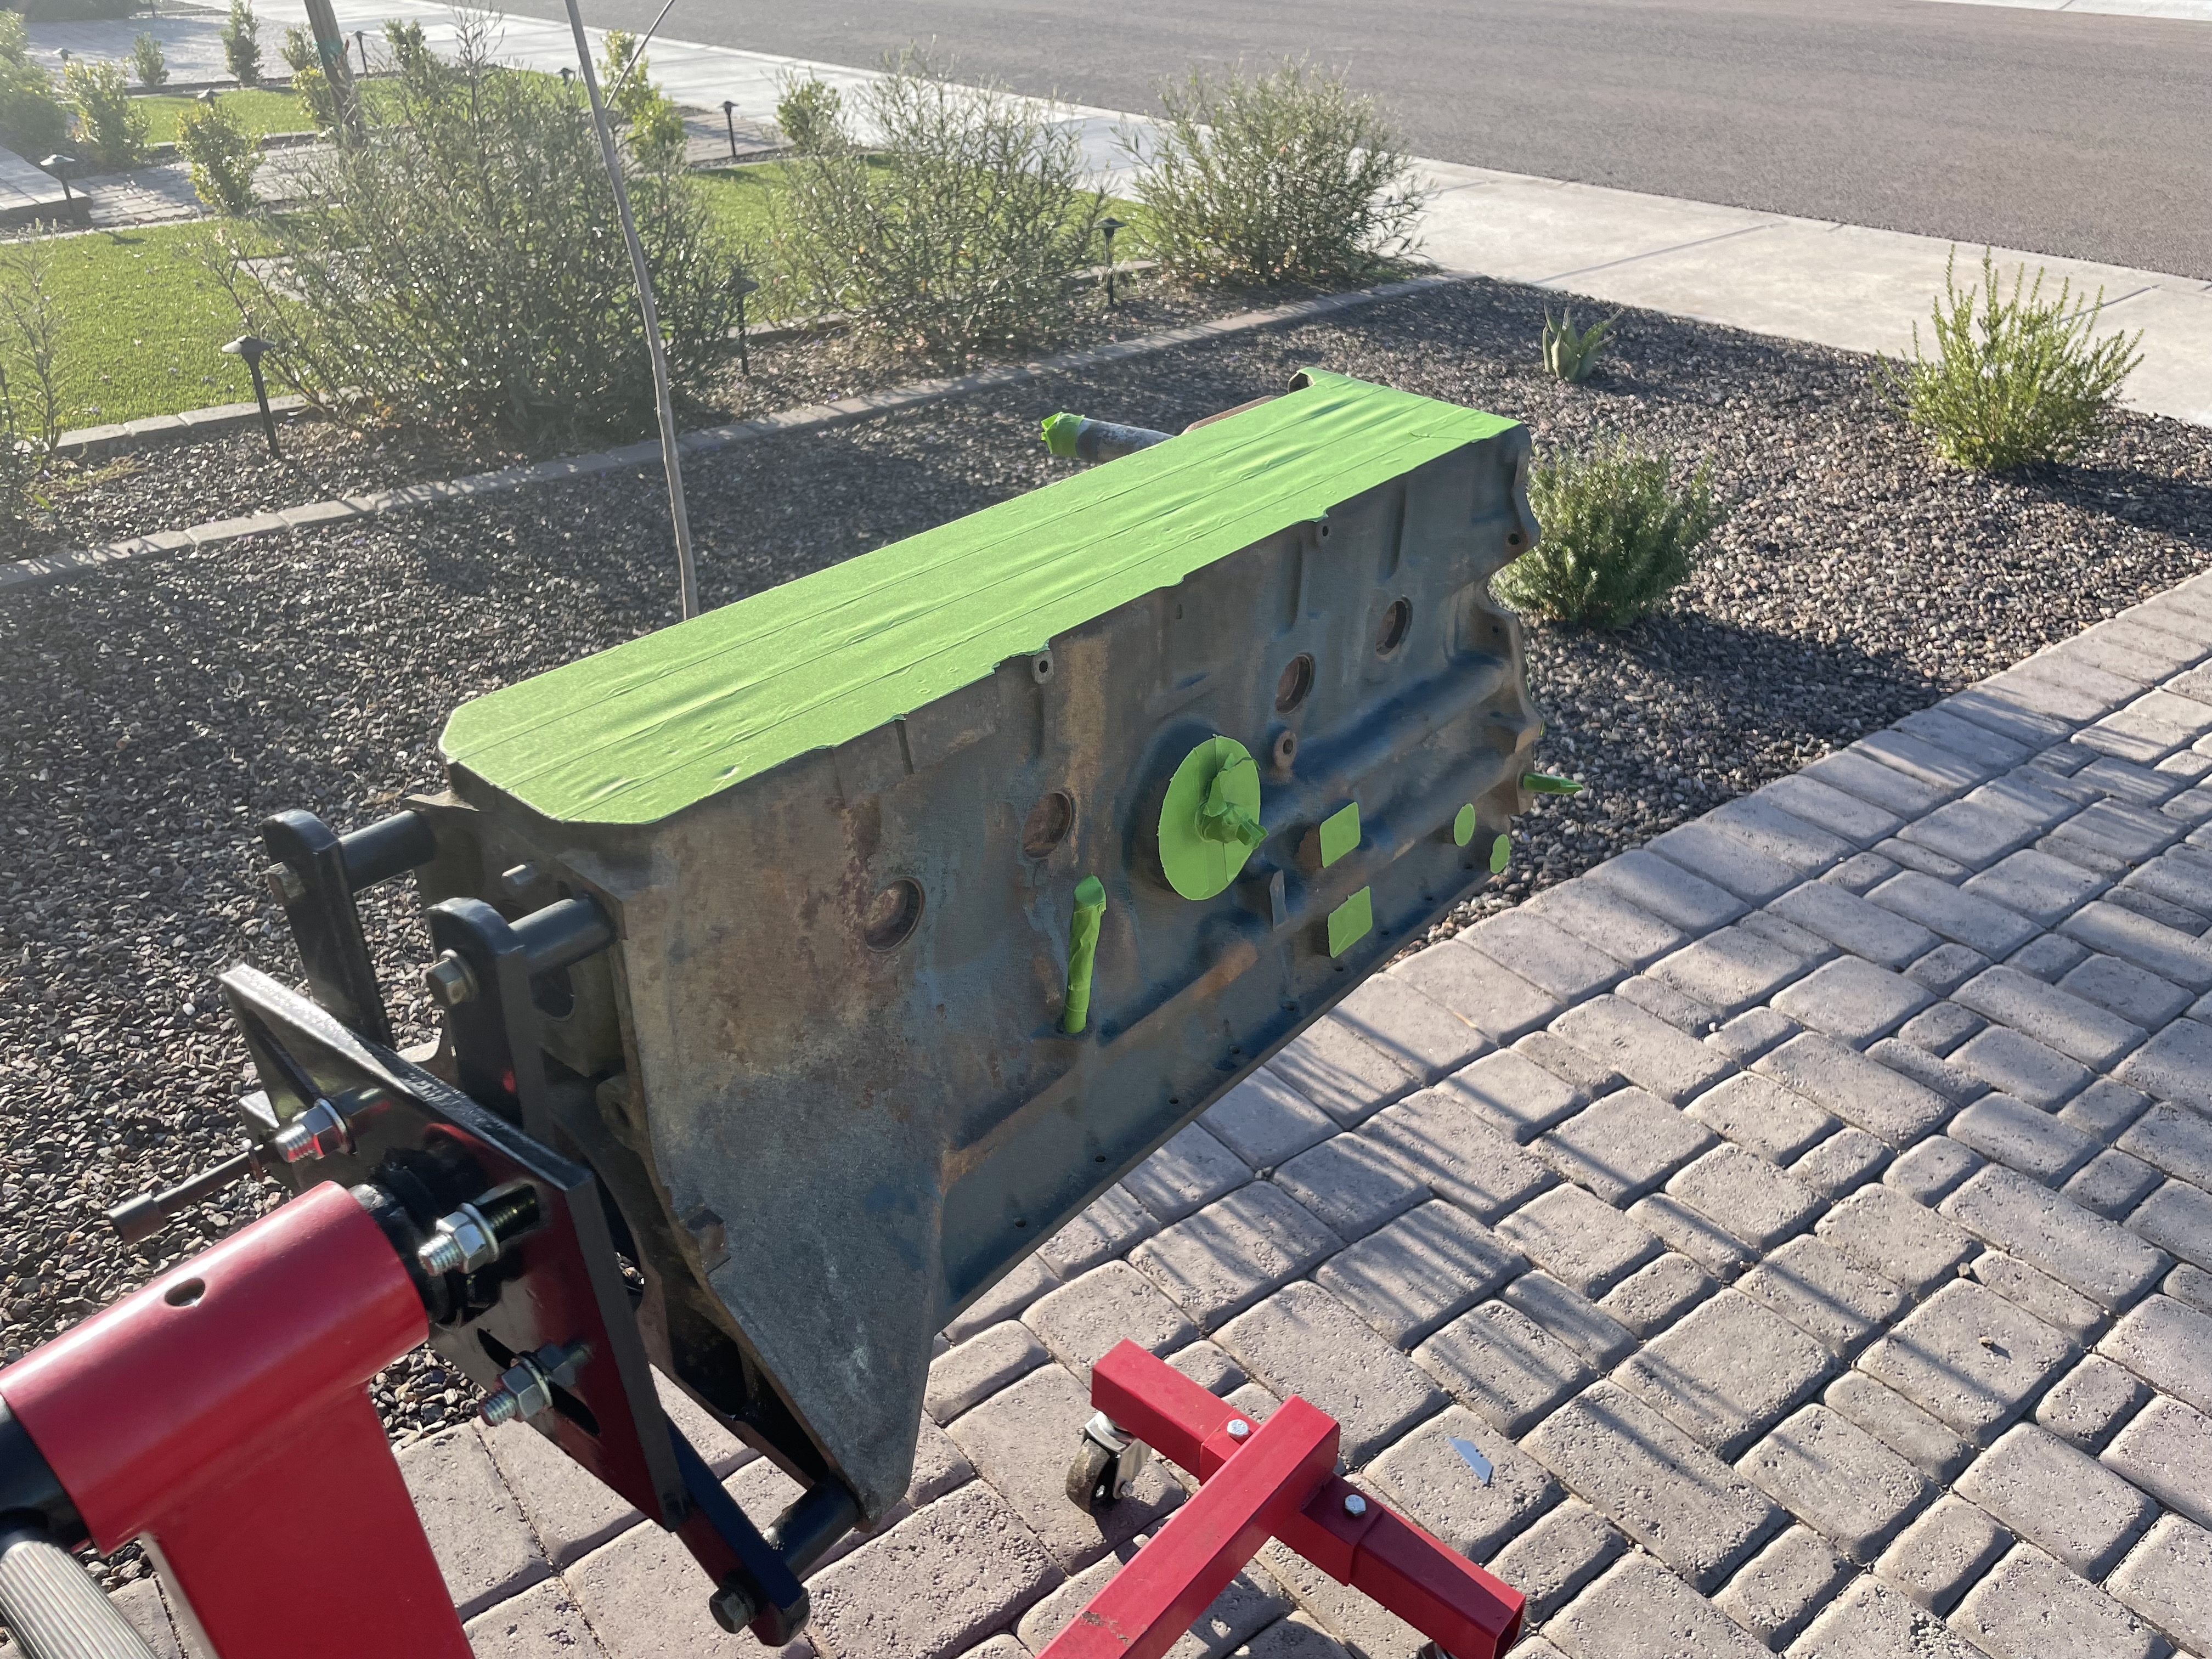
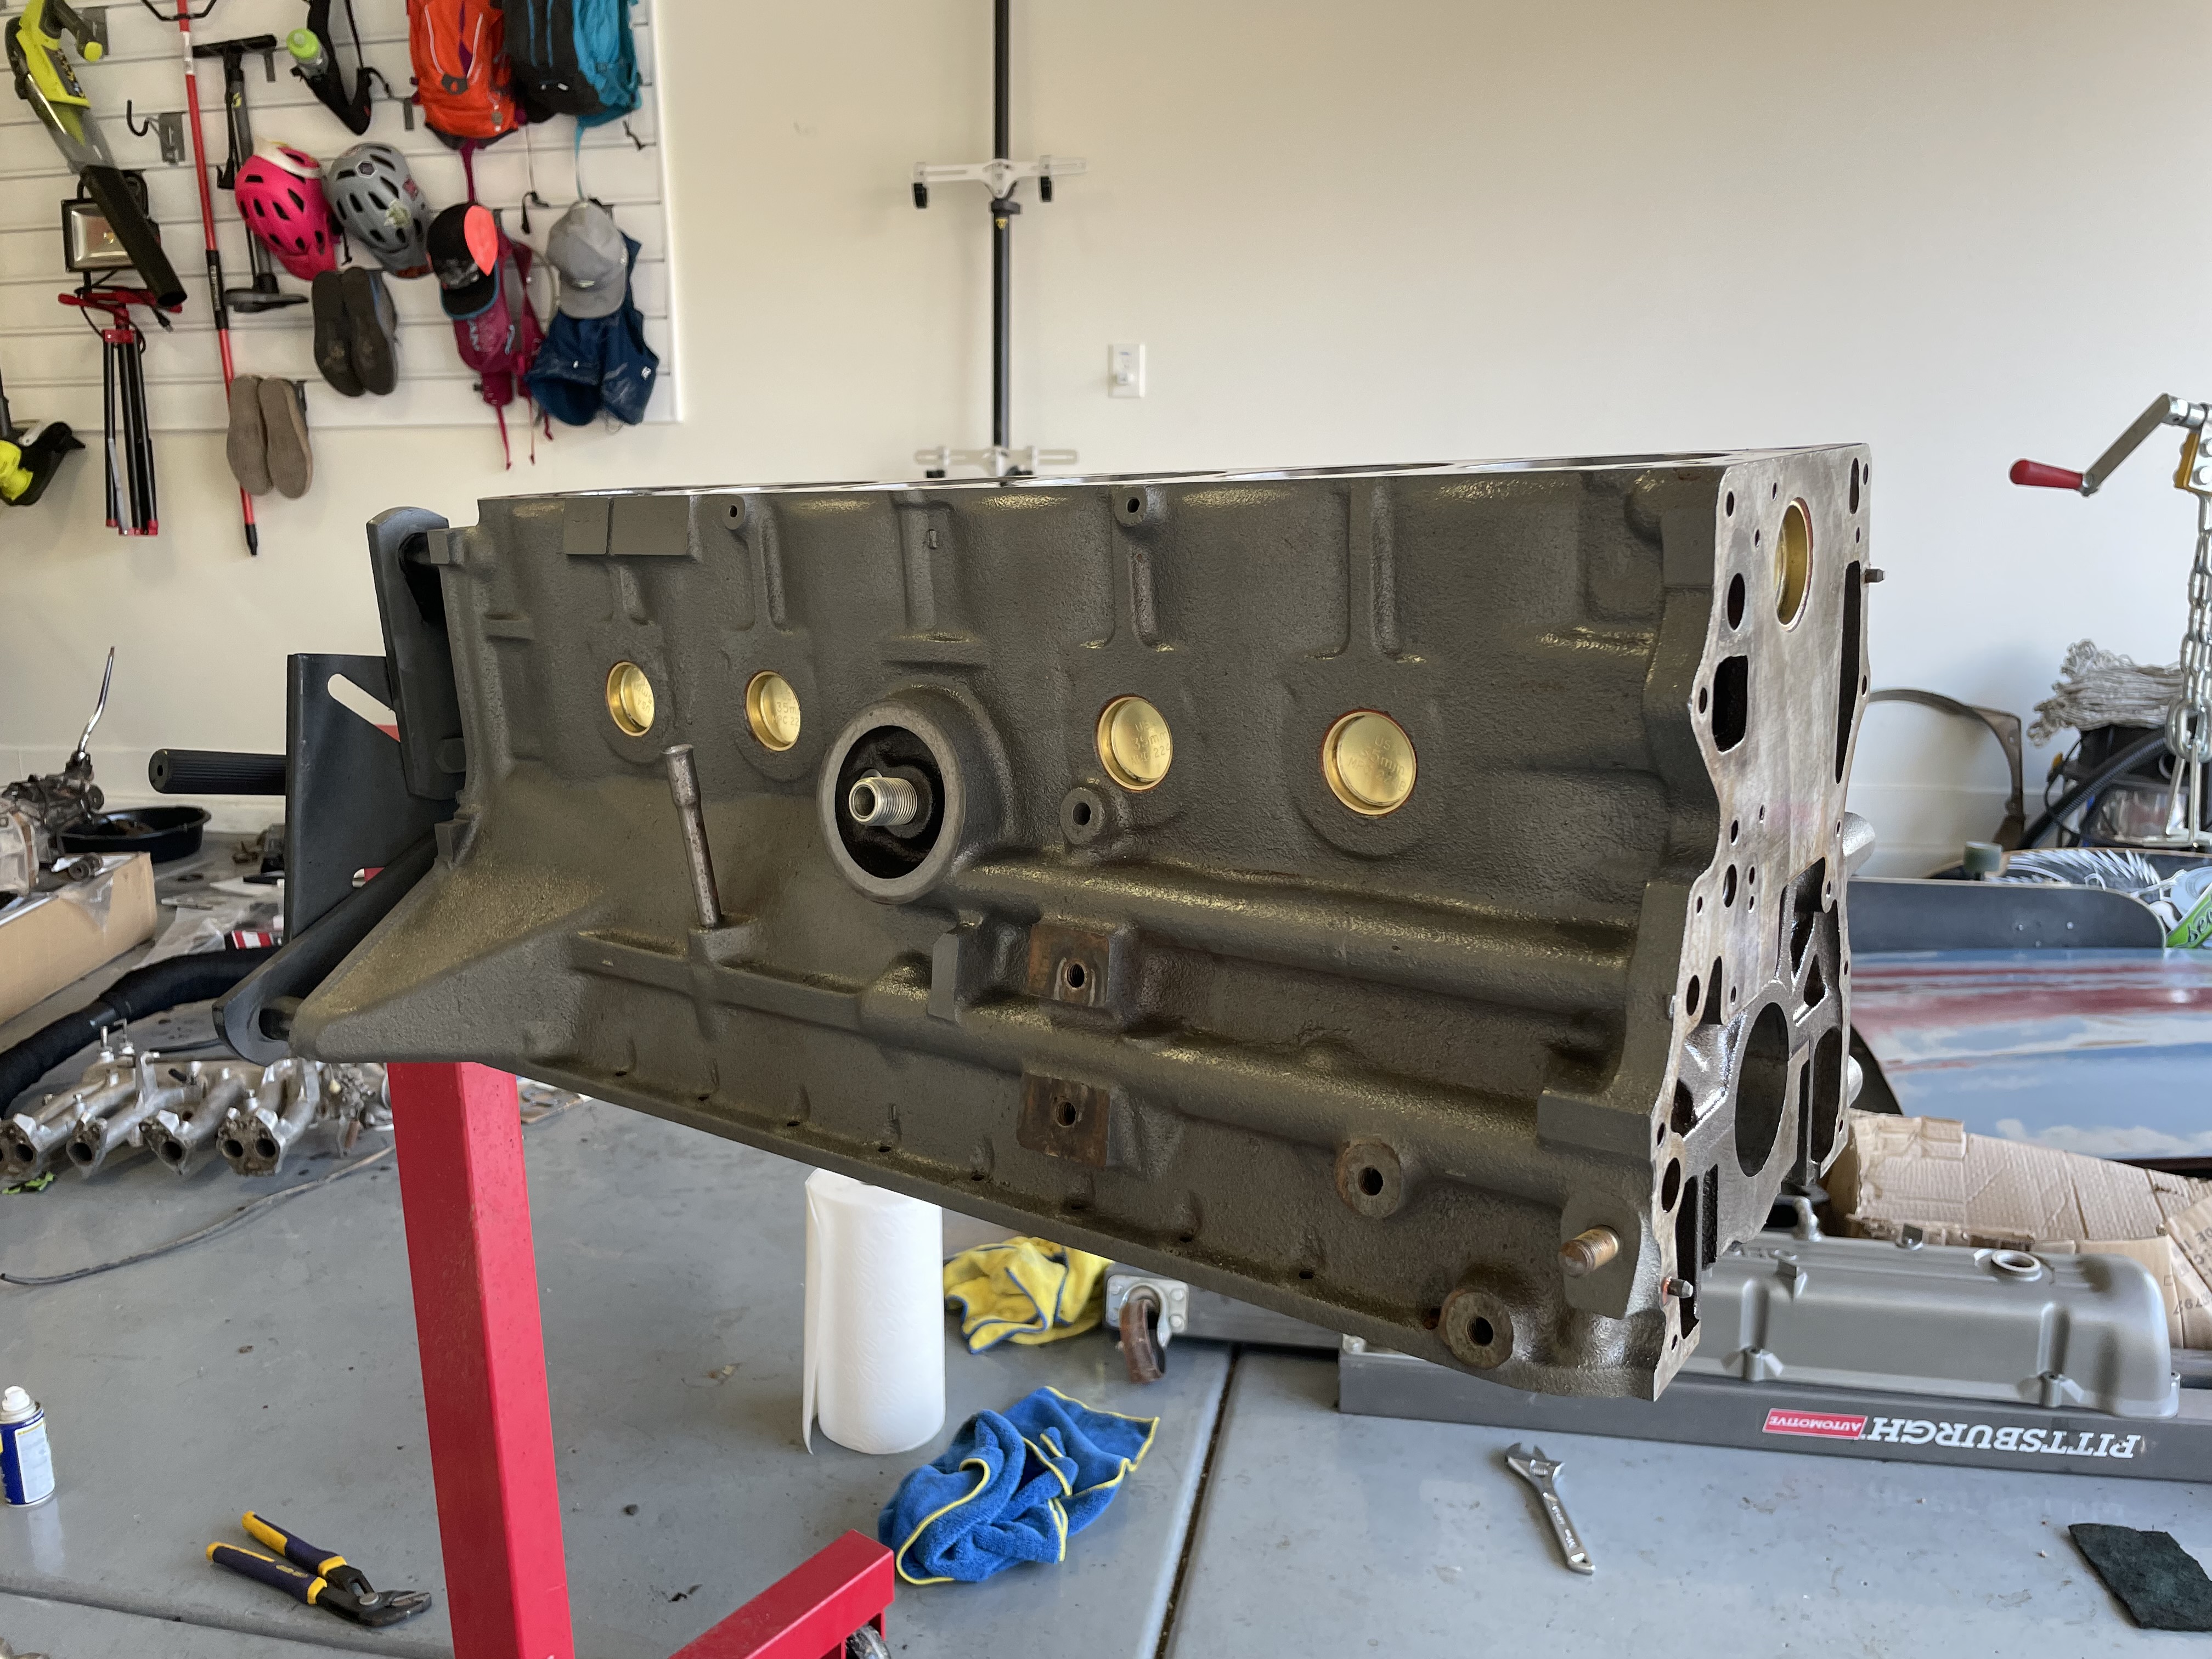
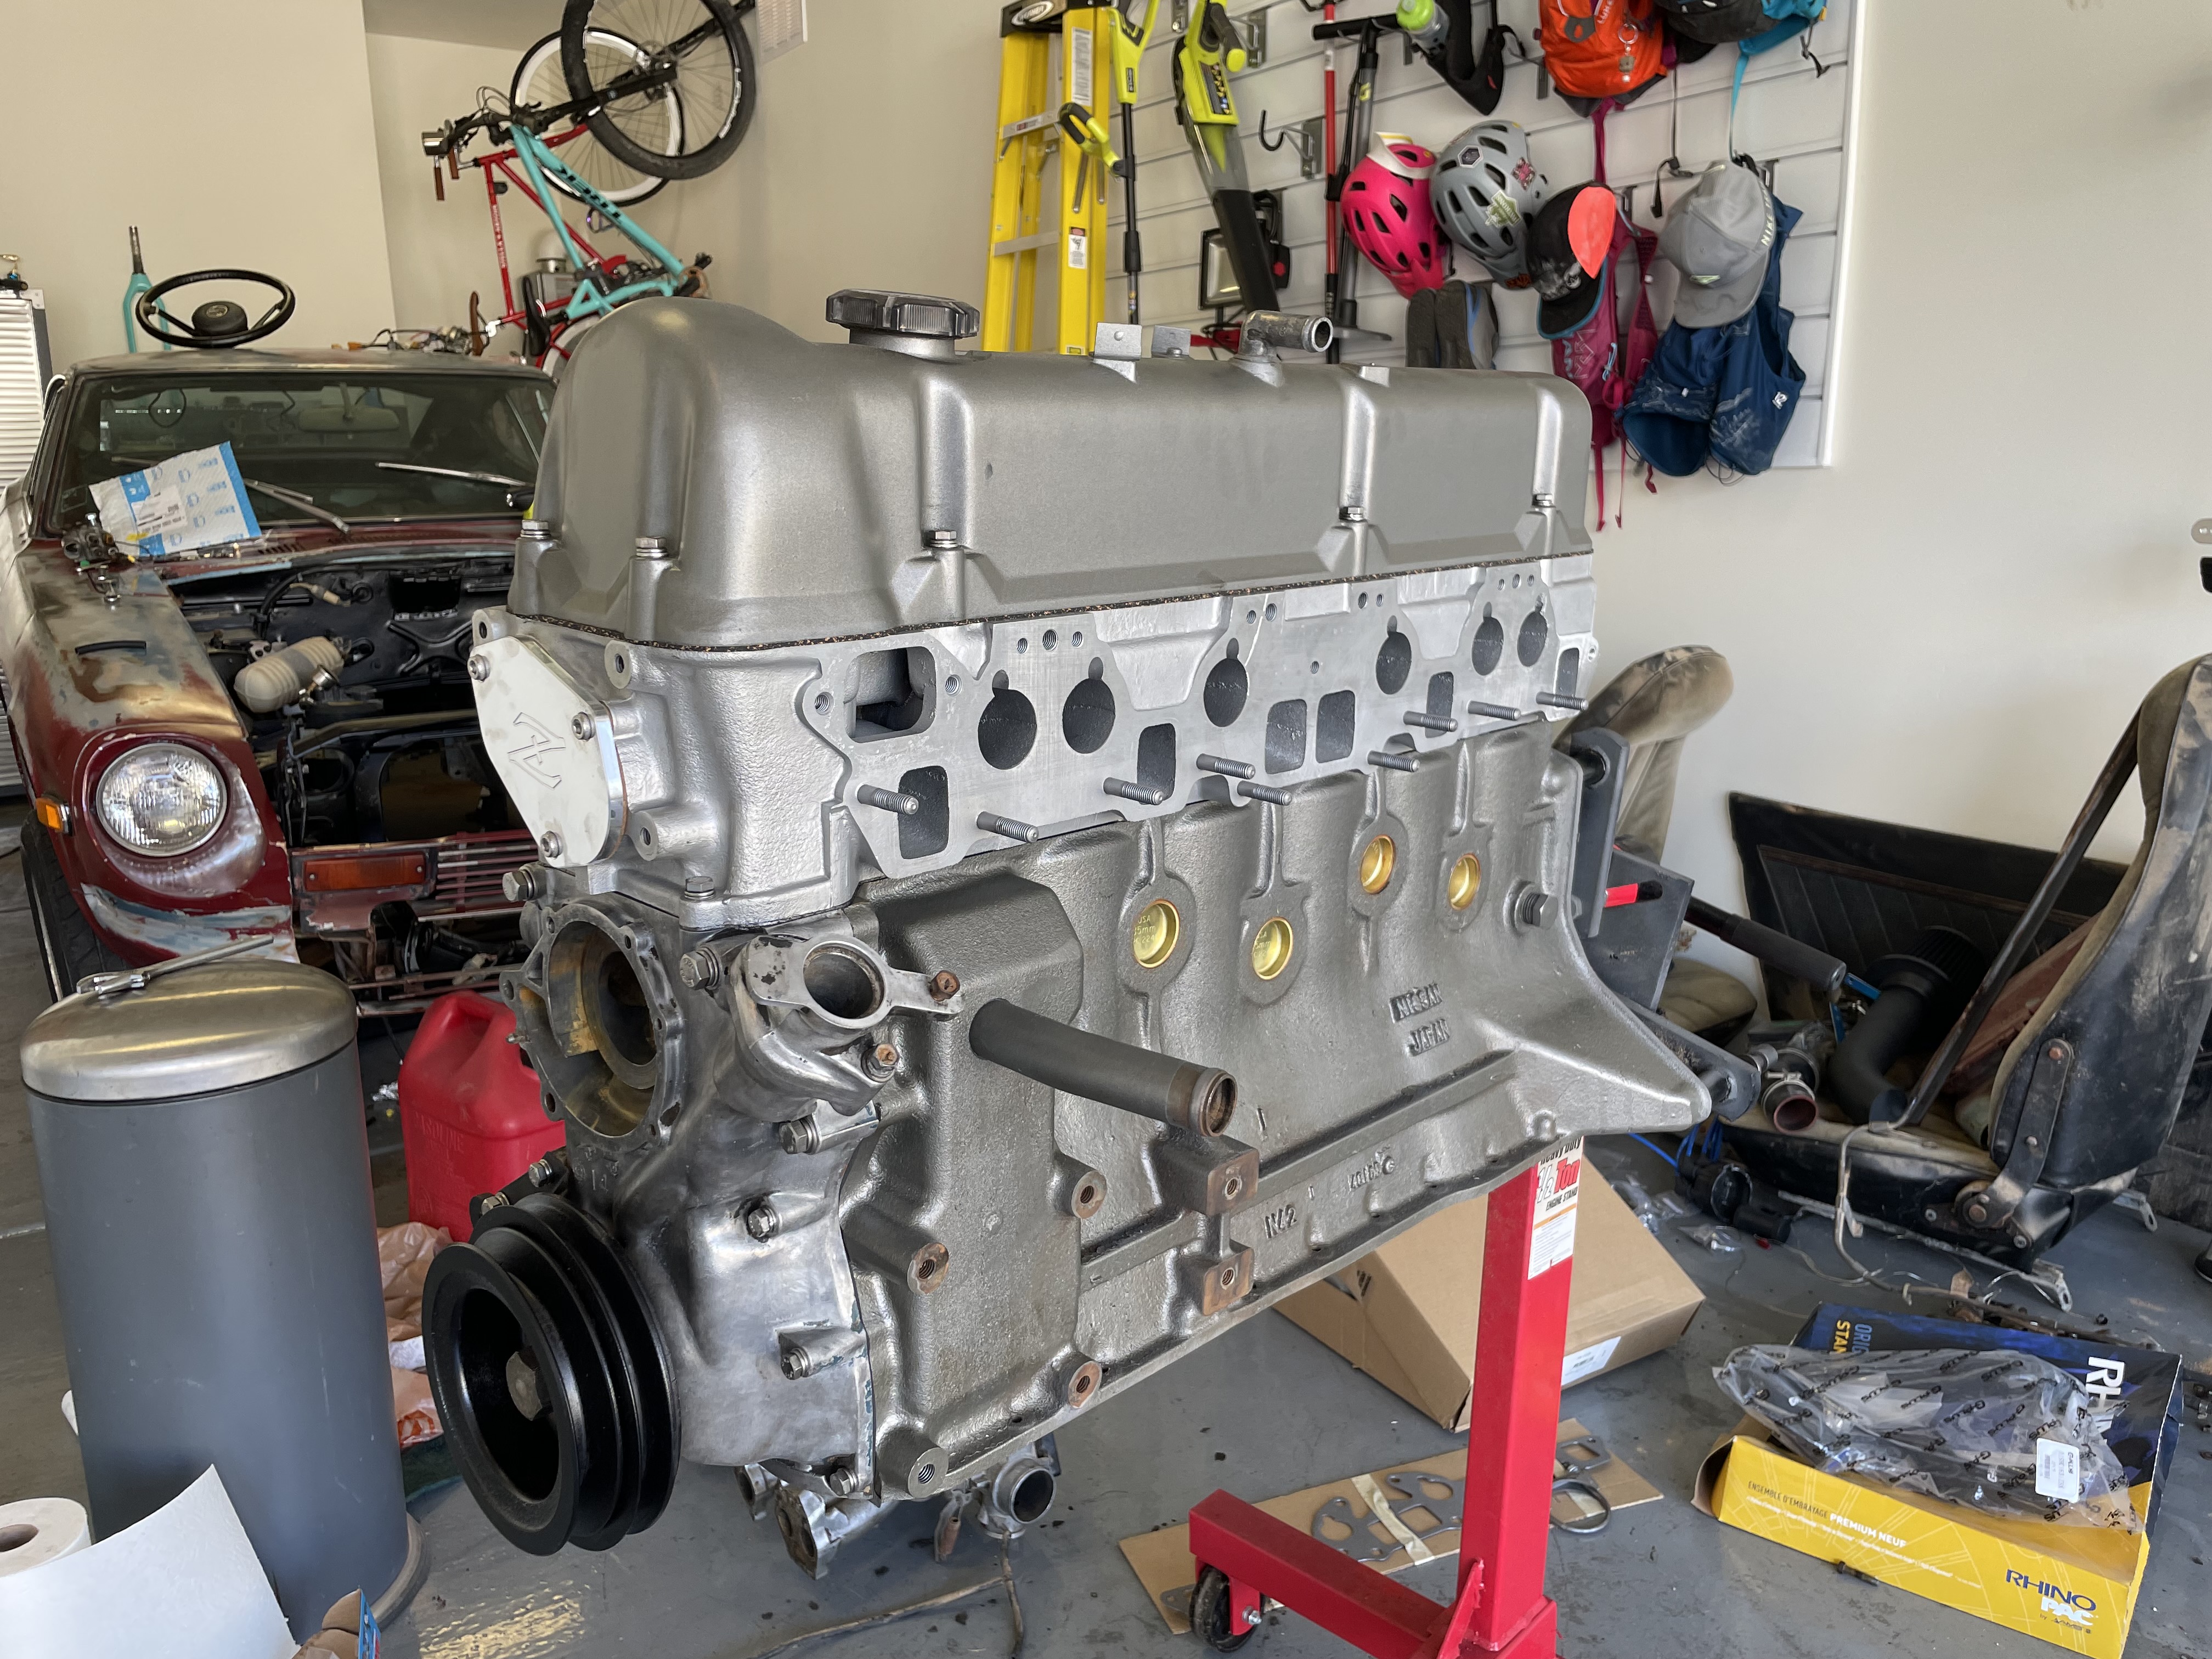
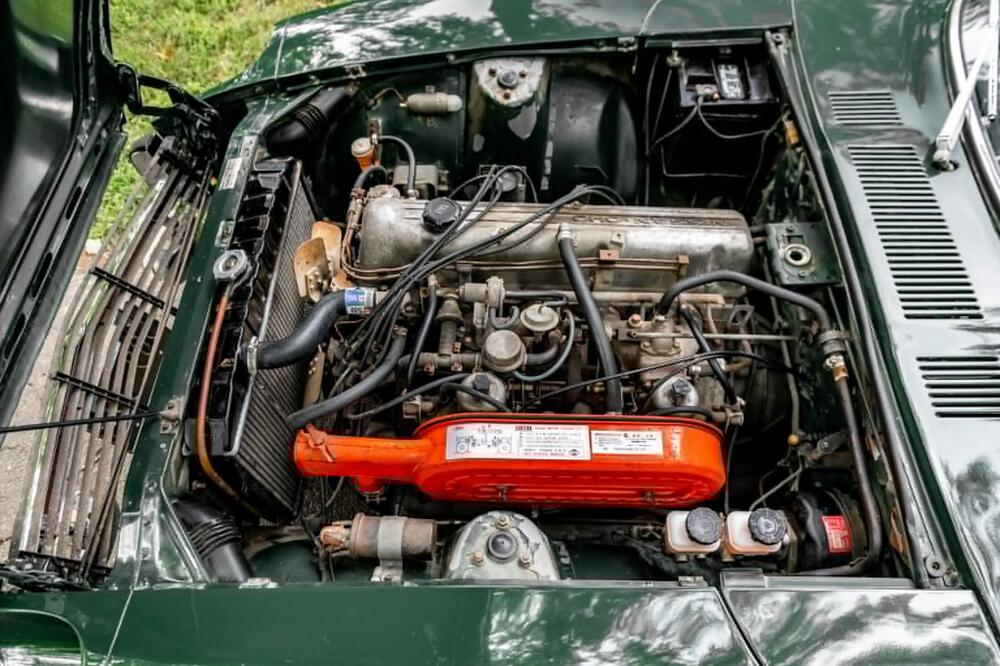
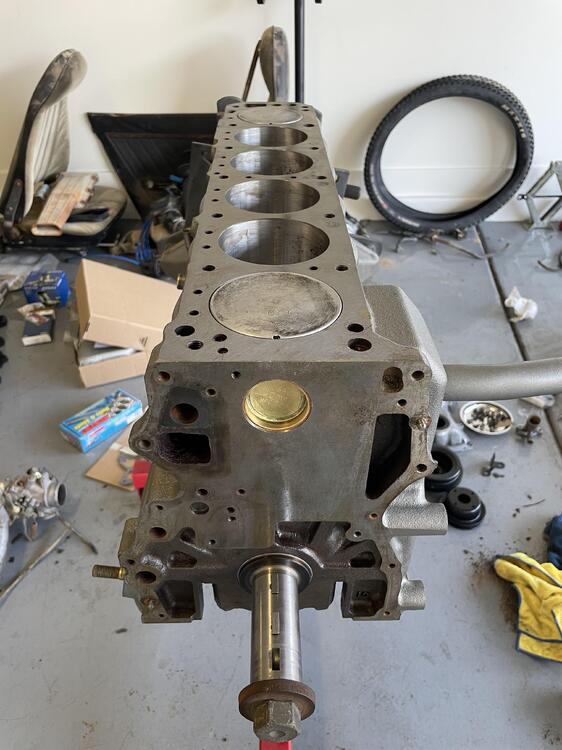
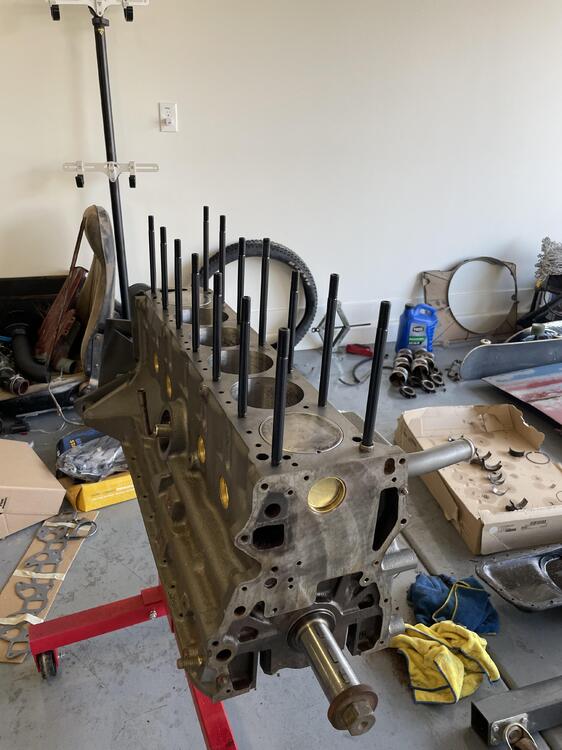
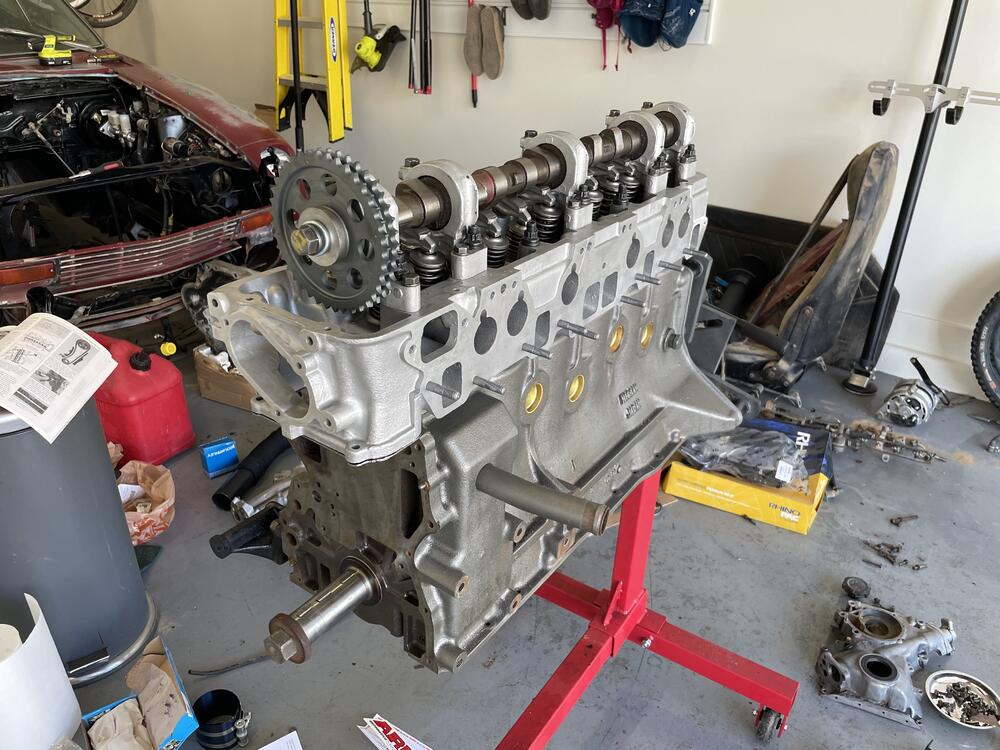
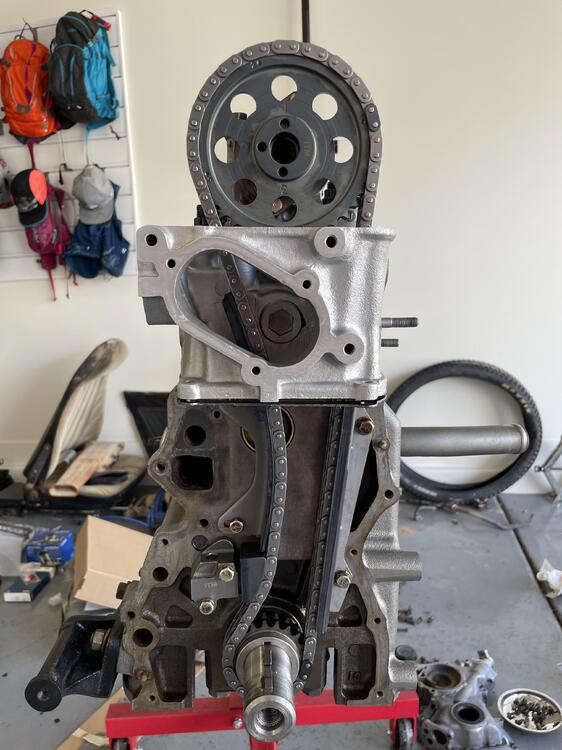
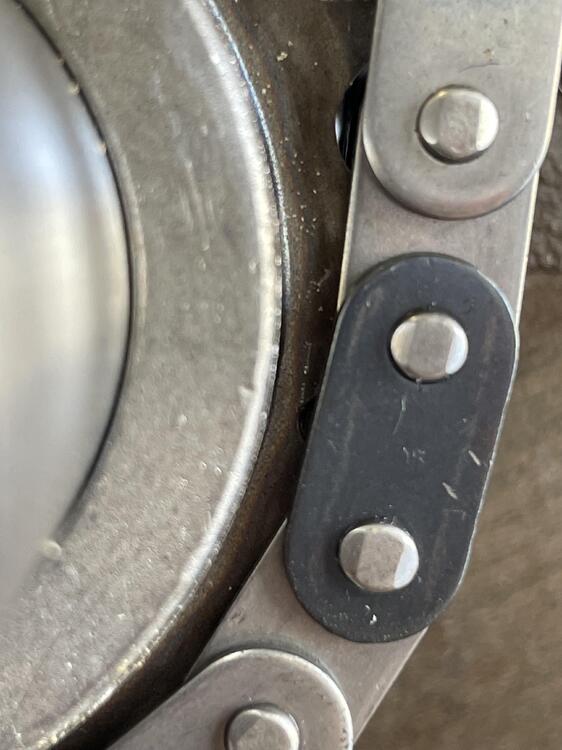
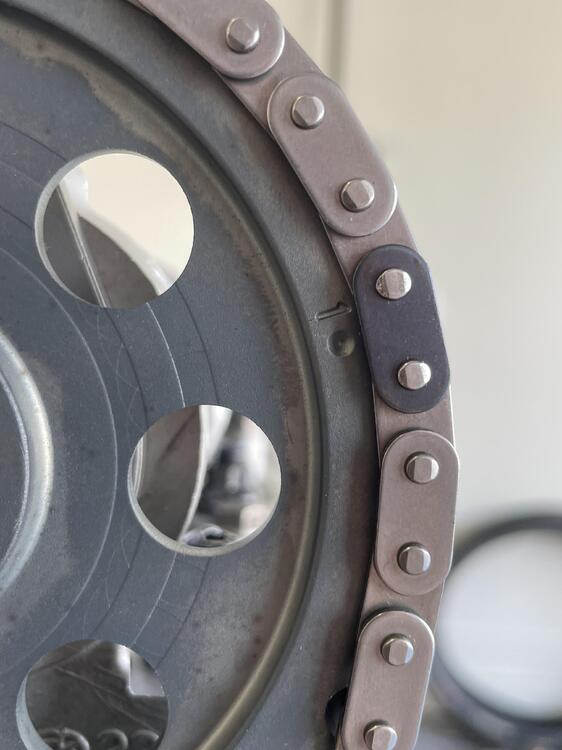
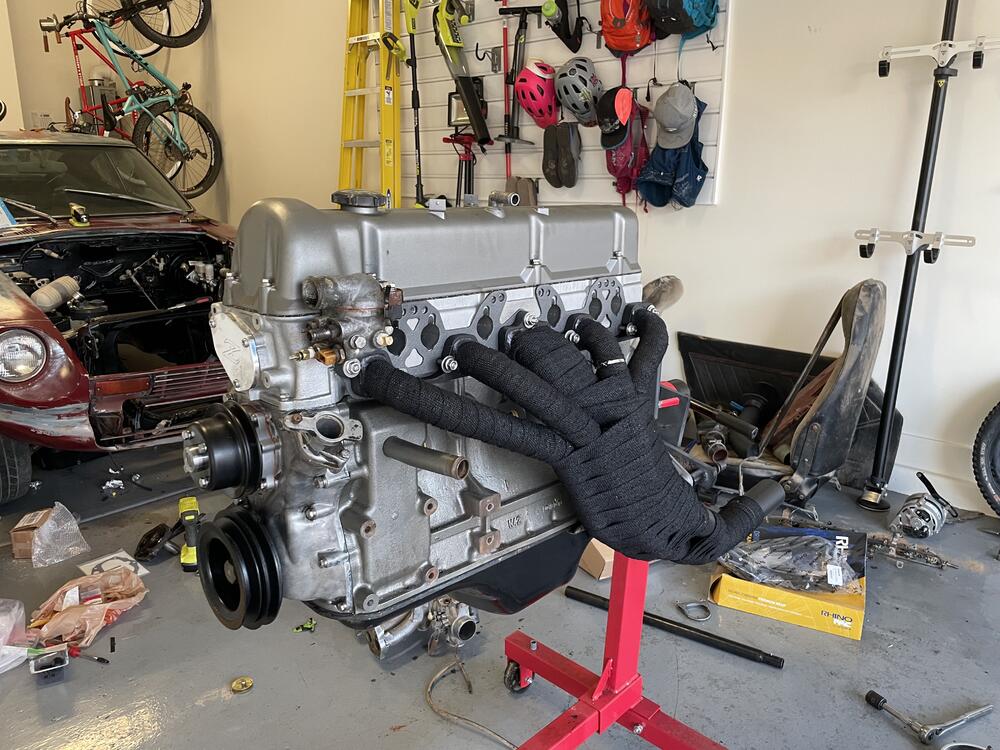
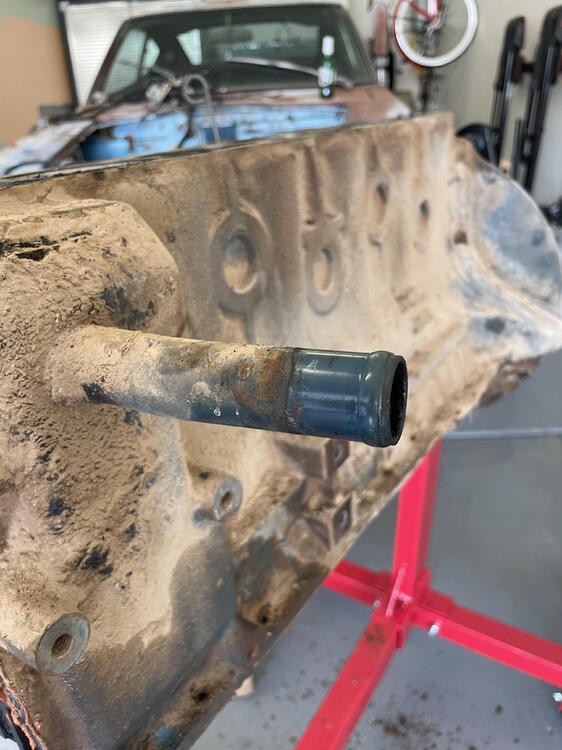
1 pointAh, engine build day is finally here! All these months of preparation and cleaning all come down to this. The block was hot tanked, honed, and decked. I first started with a cleaning and removing the original expansion plugs. There was a heavy amount of rust within the coolant passages and some left over crud from their cleaning. I let the water run through these until no more particles were coming out. I ran a bristle brush back through to loosen anything up and another wash. I'm sure I missed the deepest corners and crevasses but I will just plan on an early coolant flush. All taped up and ready for paint! I had back and forth's on which color I wanted to go. Blue, black, silver, iron, or something wild like an orange. Ultimately I went with Iron to keep things simple. Sorry purists! After a few coats of primer and paint, things are looking much better. New expansion plugs really look good 😍 My kit from Rockauto was 2 plugs too short. So I had to swing by and get 2 extra 35mm plugs. Up next was bearings, crank, rings, and pistons. I did this late at night and realized I didnt even take photos until everything was in! Anyways, it went extremely smooth and the only hiccup was my dummy head rushing into it. I put the wrong sized main bearing onto the rear cap. Not until I got to the last two caps did I realize my mistake. Luckily I found this mistake and was able to correct it. Everything is turning smoothly and feels great. Ah, the sounds of fresh rings is the best. The friction of the fresh rings is perfect. Up next was the ARP head studs. Its so odd that they are hand tight for the studs themselves. I get how the clamping force works...but it feels so wrong! Slapped on the fresh head. So glad to get this thing off my workbench! I ran into my first roadblock here as I needed a deep 12mm 12 point socket. So that was all for day 2. Day 3 started with a quick trip to grab a new socket and get those head bolts torqued. Installed a new timing set. Seems almost too easy to time compared to DOHC cars Im used to! This photo was taken right after placing all the guides, but I didn't notice until placing my gaskets that my slack side was a bit off. So I repositioned it for a smoother transition. Covers were next on the agenda. Things are moving fast now! Lastly was the oil pan, oil pump, water pump and pulley, thermostat house (ITS SO GROSS 🤢) and the manifolds. I had to take a shot of just the exhaust as it looked so good! Installing the oil pan gasket was a a pain. Im not sure if the kit I ordered was wrong, but the gasket looked small. It was flexible so I thought that maybe it just need stretch to fit. I had 3 corners locked in place but could not get it stretch enough for the fourth. Not sure what the deal was but it ended up tearing. I picked up a Fel Pro gasket and it fit much better. I feel way better about it now. Not picture is that I also had the intake manifold installed. I am still needing a few misc plugs and I need to create a block off plate for my cold start valve. That thermostat housing...just needs replacing. I hate it. Tomorrow I will move my attention to the transmission. I am waiting on the input seal to arrive so I am at a standstill until then. The anticipation is growing!!! Let just take a moment to remember where we started with this crusty piece 🙂


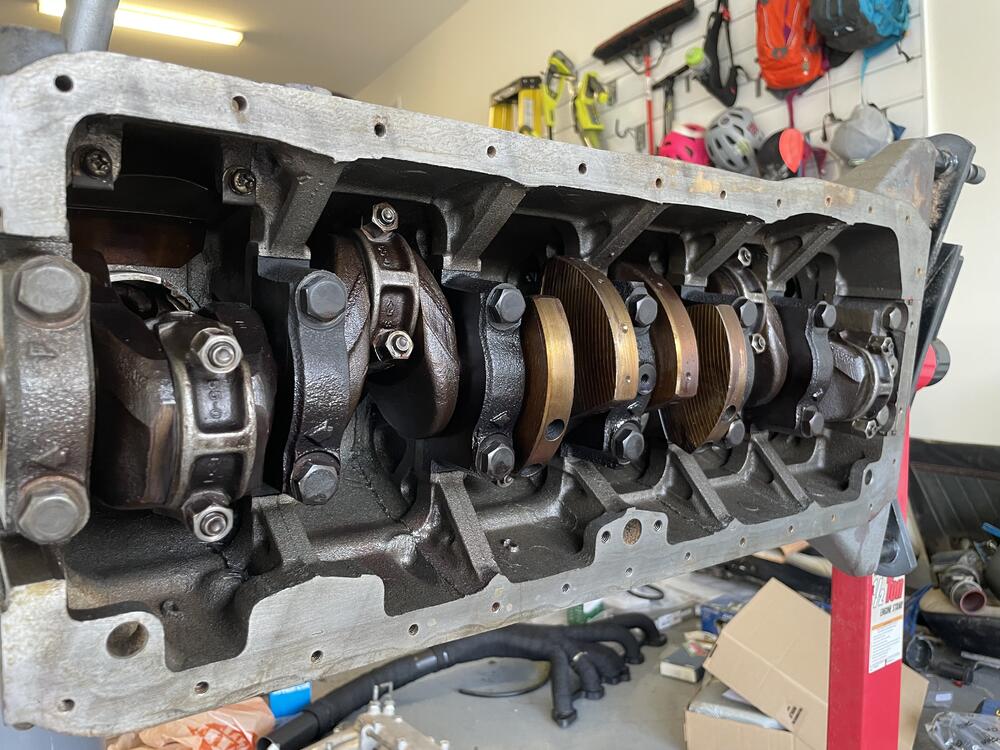

 1 point
 -
 1 pointYou get what you pay for, the KFV pans offer a much more correct looking pan if originality is important to you, and a somewhat easier install.1 point