Leaderboard
 Subscriber


Popular Content
Showing content with the highest reputation on 11/08/2021 in all areas
-
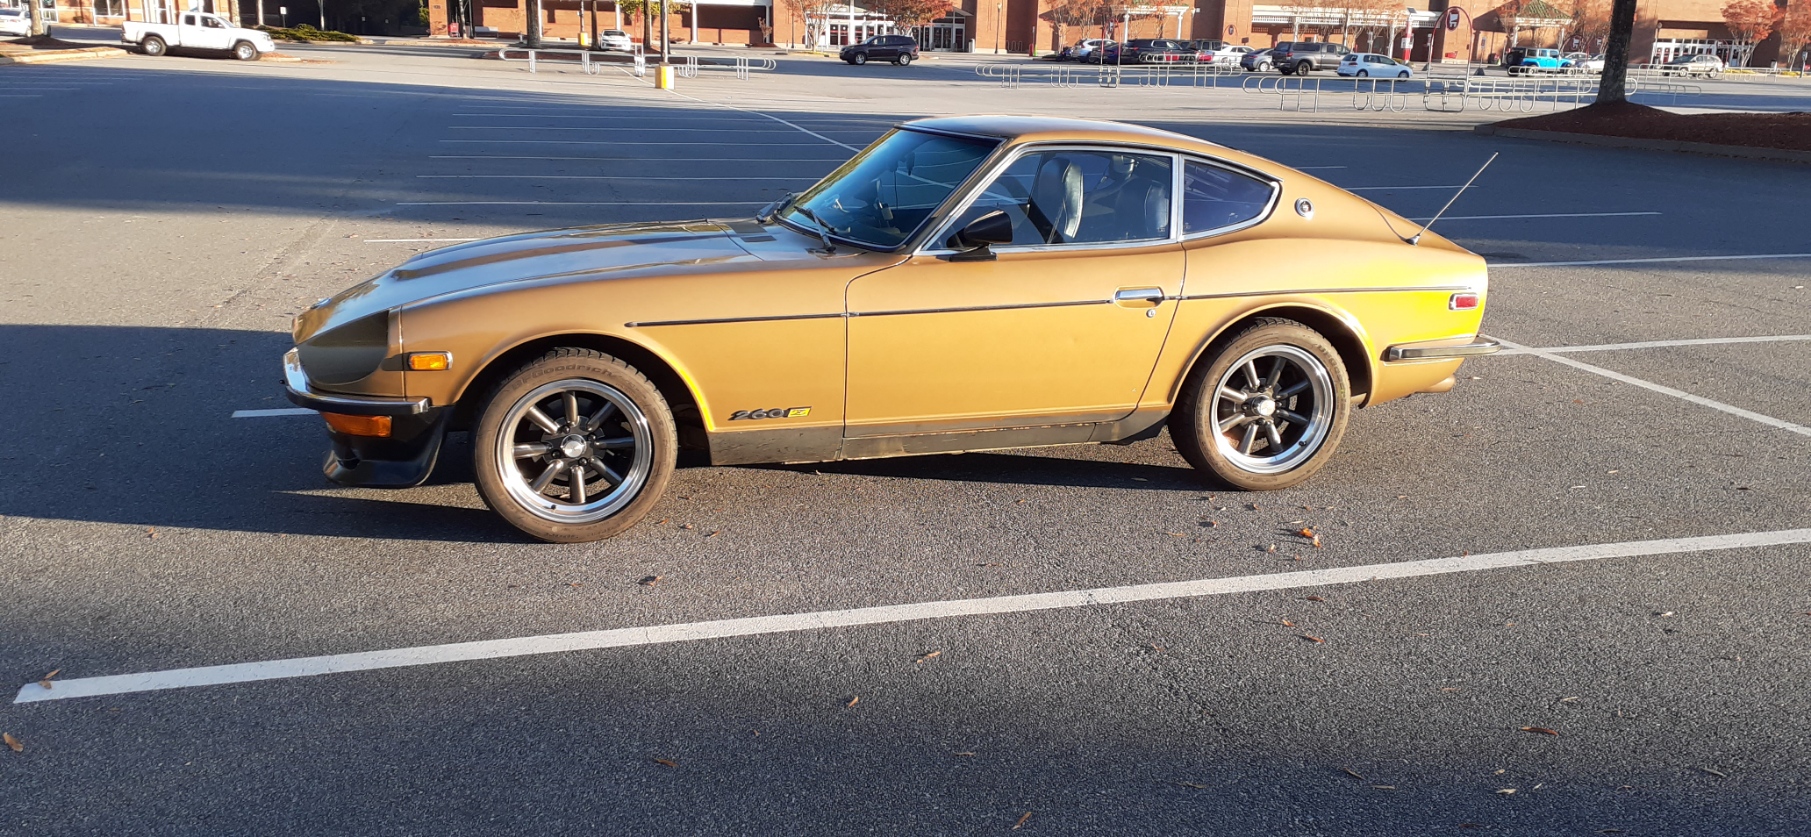
 4 pointsGot the Z back from the exhaust shop last week. Guys did a great job on the system, very happy with the final results. With that complete, I was able to dial in the carbs and get a few miles on the Z as we complete the shake down process. Being 50 years old I am amazed how tight and smooth this Z is cruising down the road. Much nicer of a ride than my "survivor" '72.
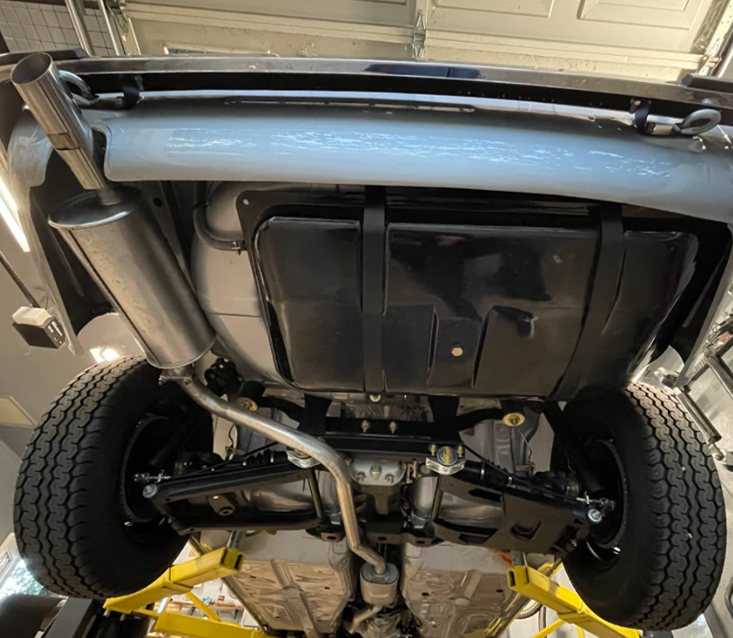 4 points
 -
 Just let it run out. It is highly evaporative and won’t stick around long. Blow compressed air through to get it all I suppose. I’m hoping whatever is left in the gas tank will add a little octane boost!4 points
 -
 3 pointsOK, got at the root of the problem. It turns out that the 2 valves were indeed installed incorrectly. A little embarrassing since I was so convinced the rebuild was right. Anyway, after a couple of disassembly and reassembly attempts it is pushing fuel thru just fine just by hand pumping. It was a bit of a bear to get back on but is now reinstalled. didn't try to start it yet since it was late and i was not in the mood to start trouble shooting if necessary. Plan to try to start first thing in the A.M. Fingers crossed. Thanks to the contributors. i'll report back one more time after it starts.3 points
 -
After about 15 minutes of drilling, and pushing it in and pulling it out, I saw some magic at the other end of the line. A slow and steady drip of goo coming out of the other end! C9116DD0-8DCC-46B1-BB93-33EA809B0F06.MOV2 points
-
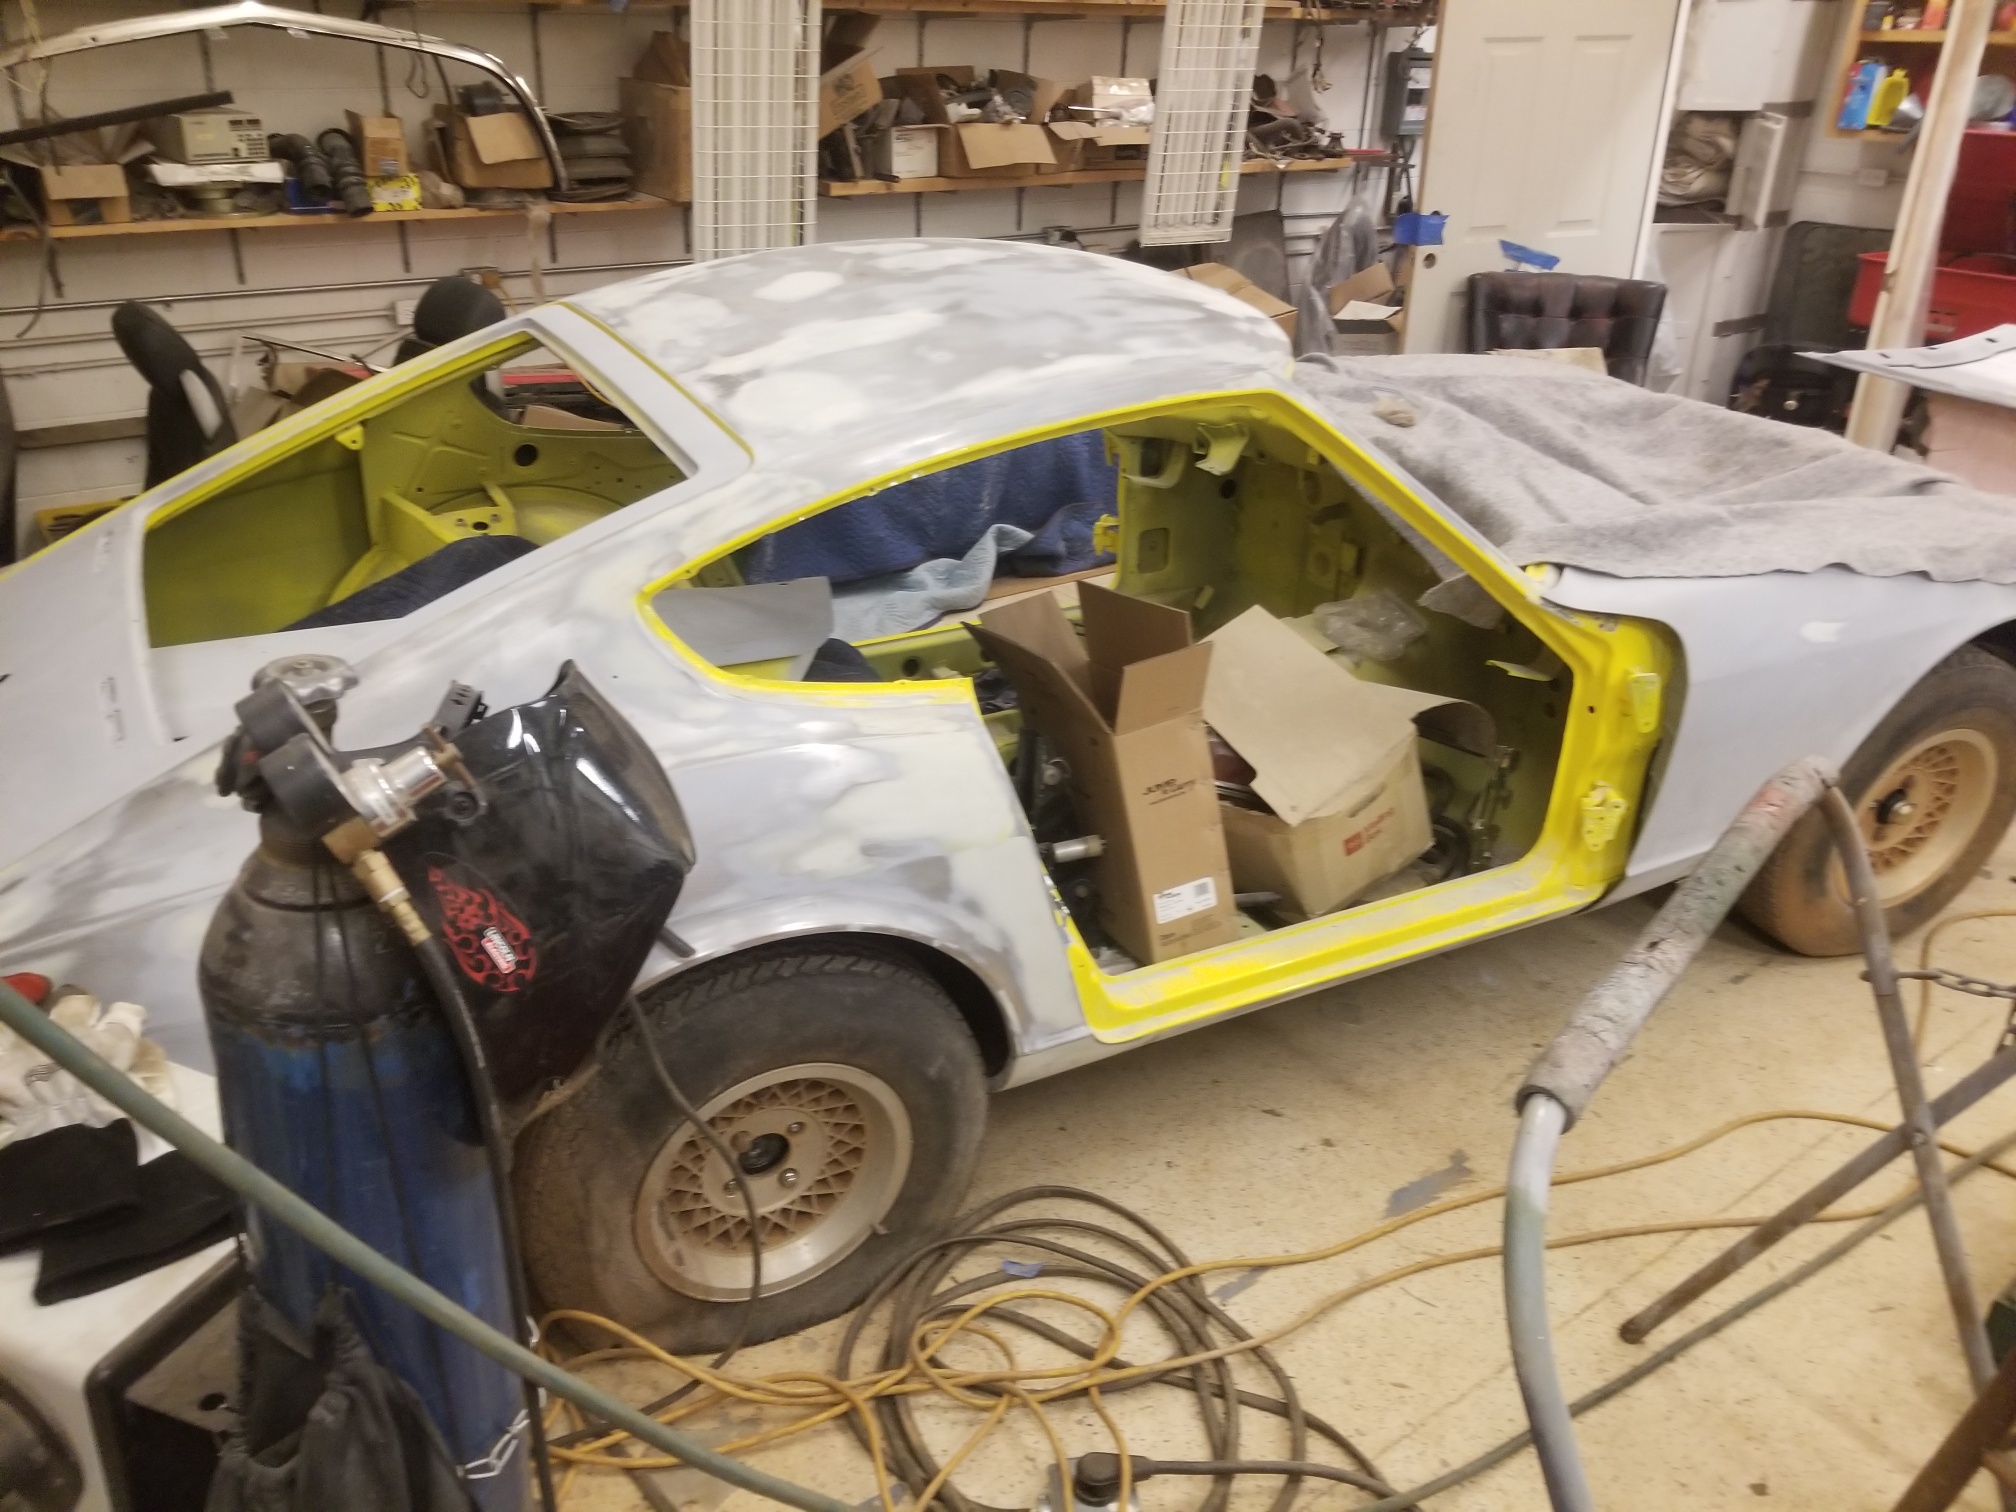
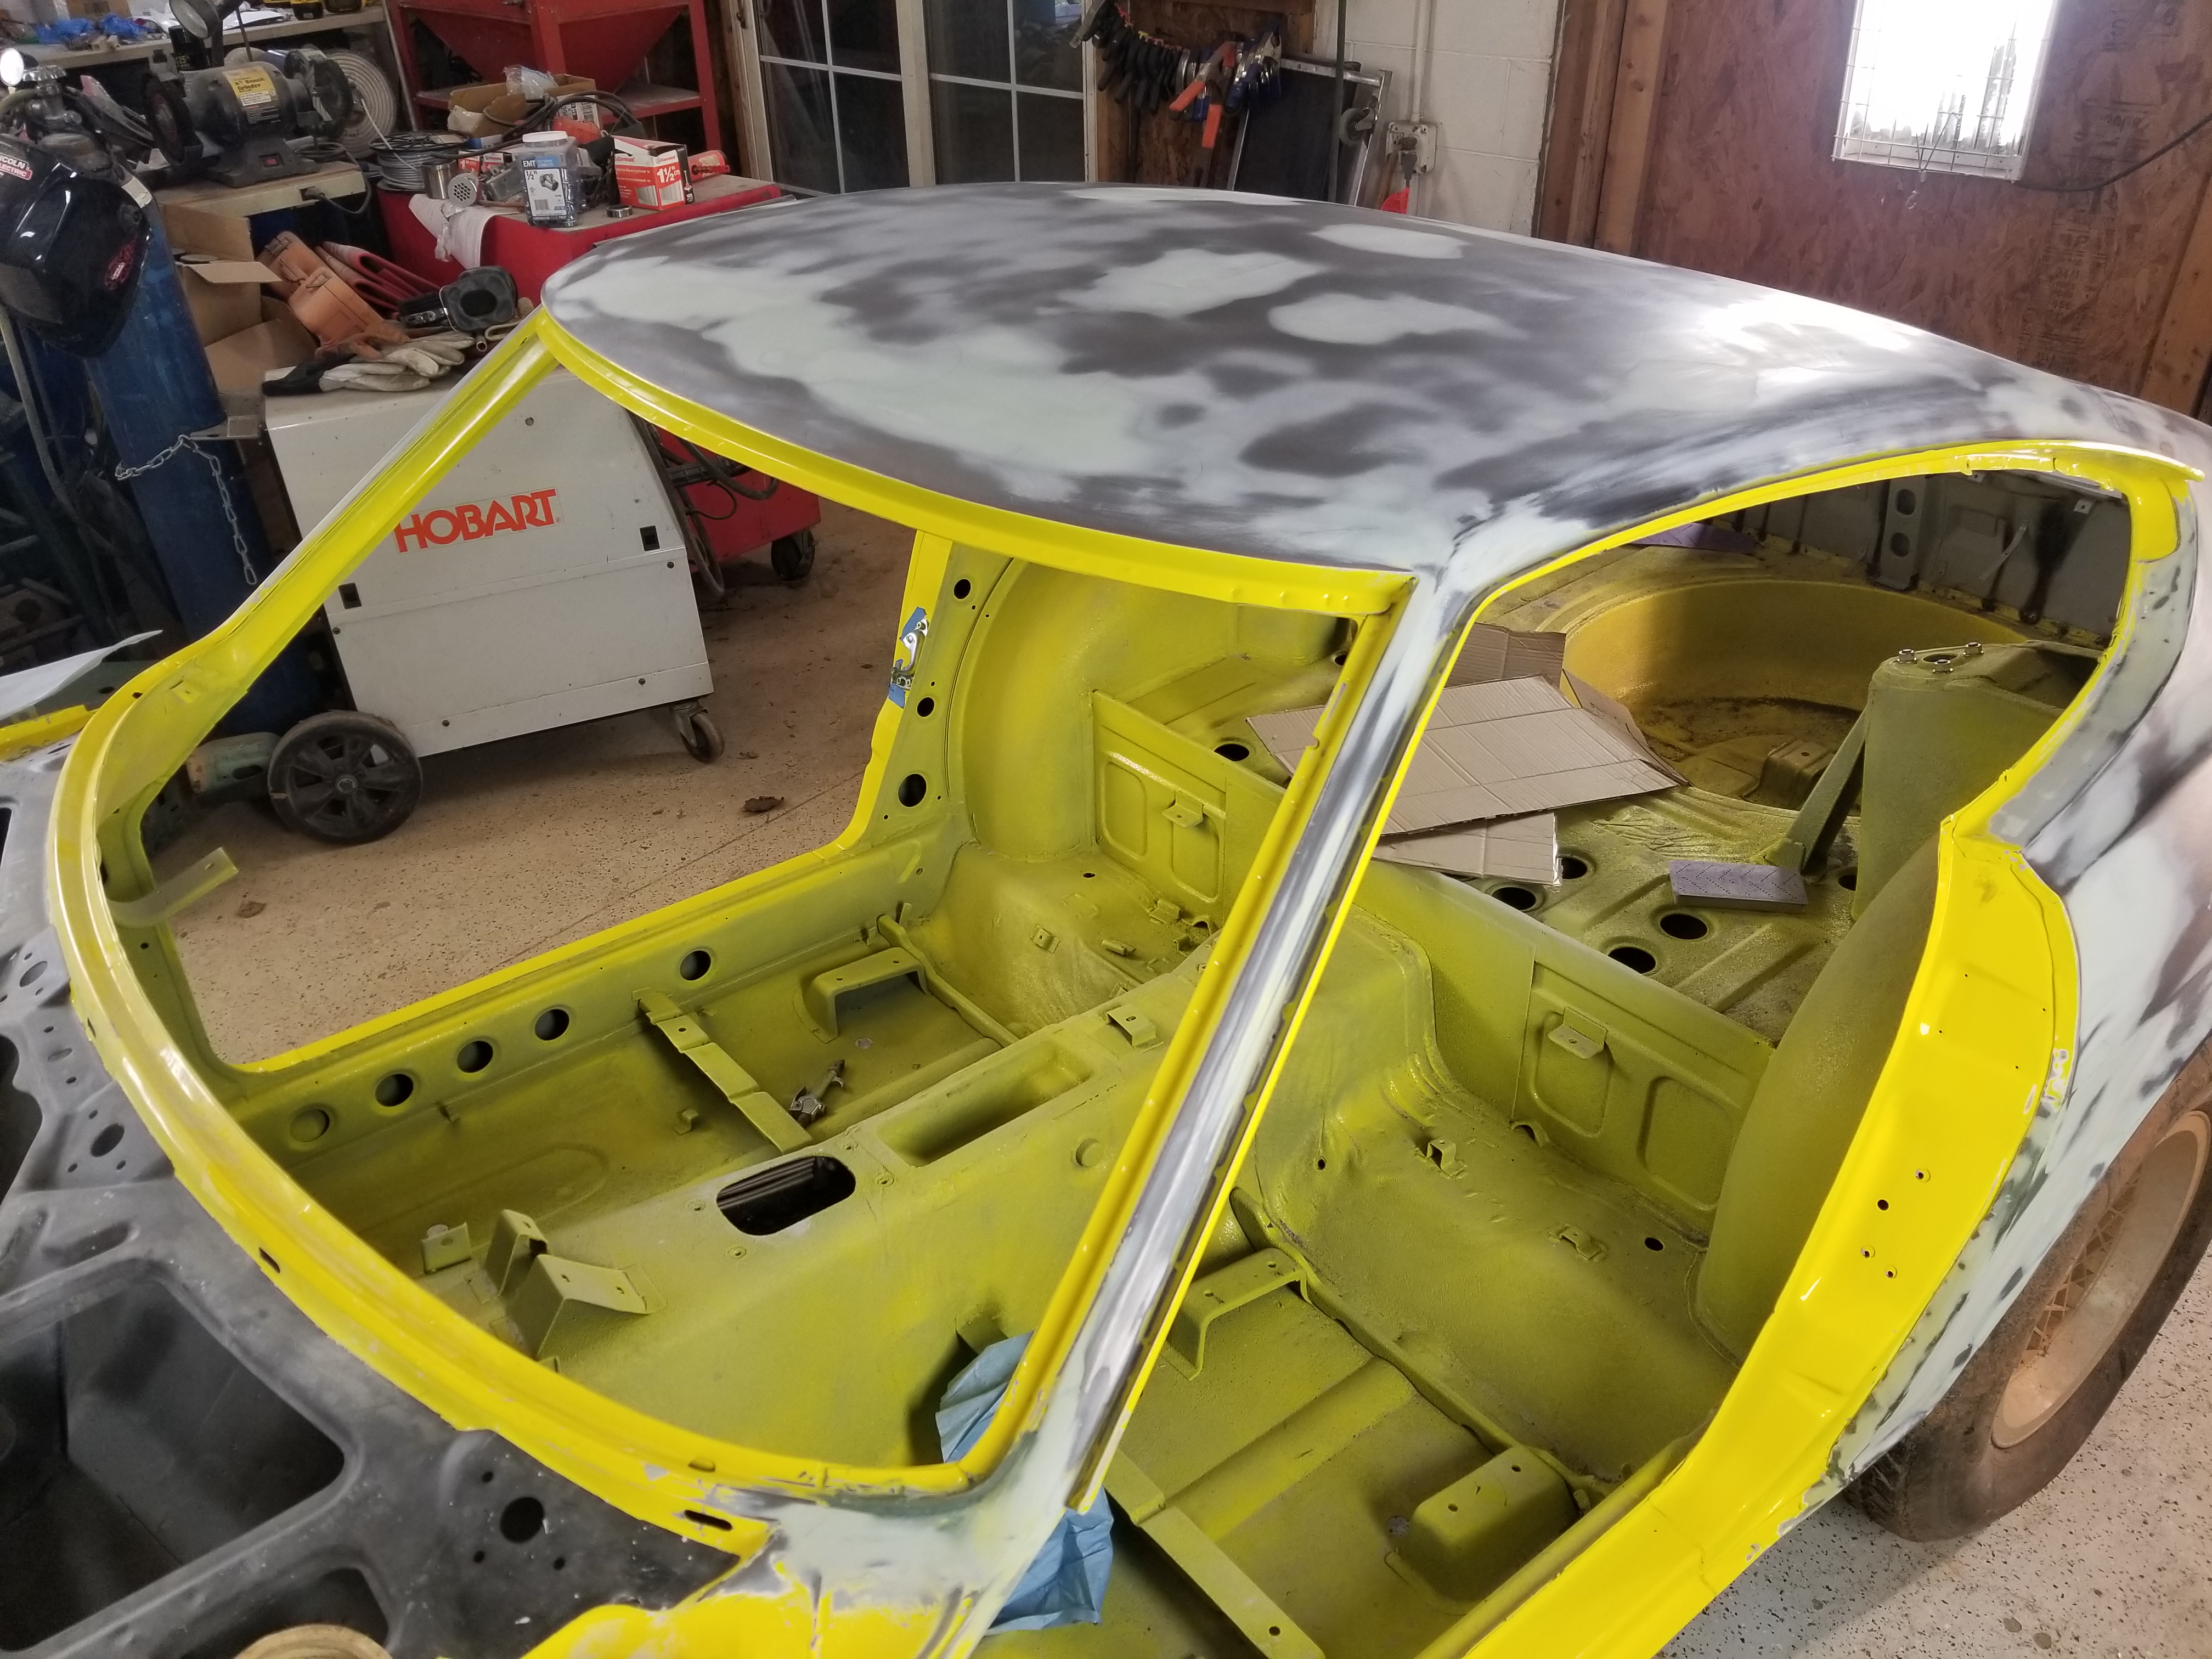
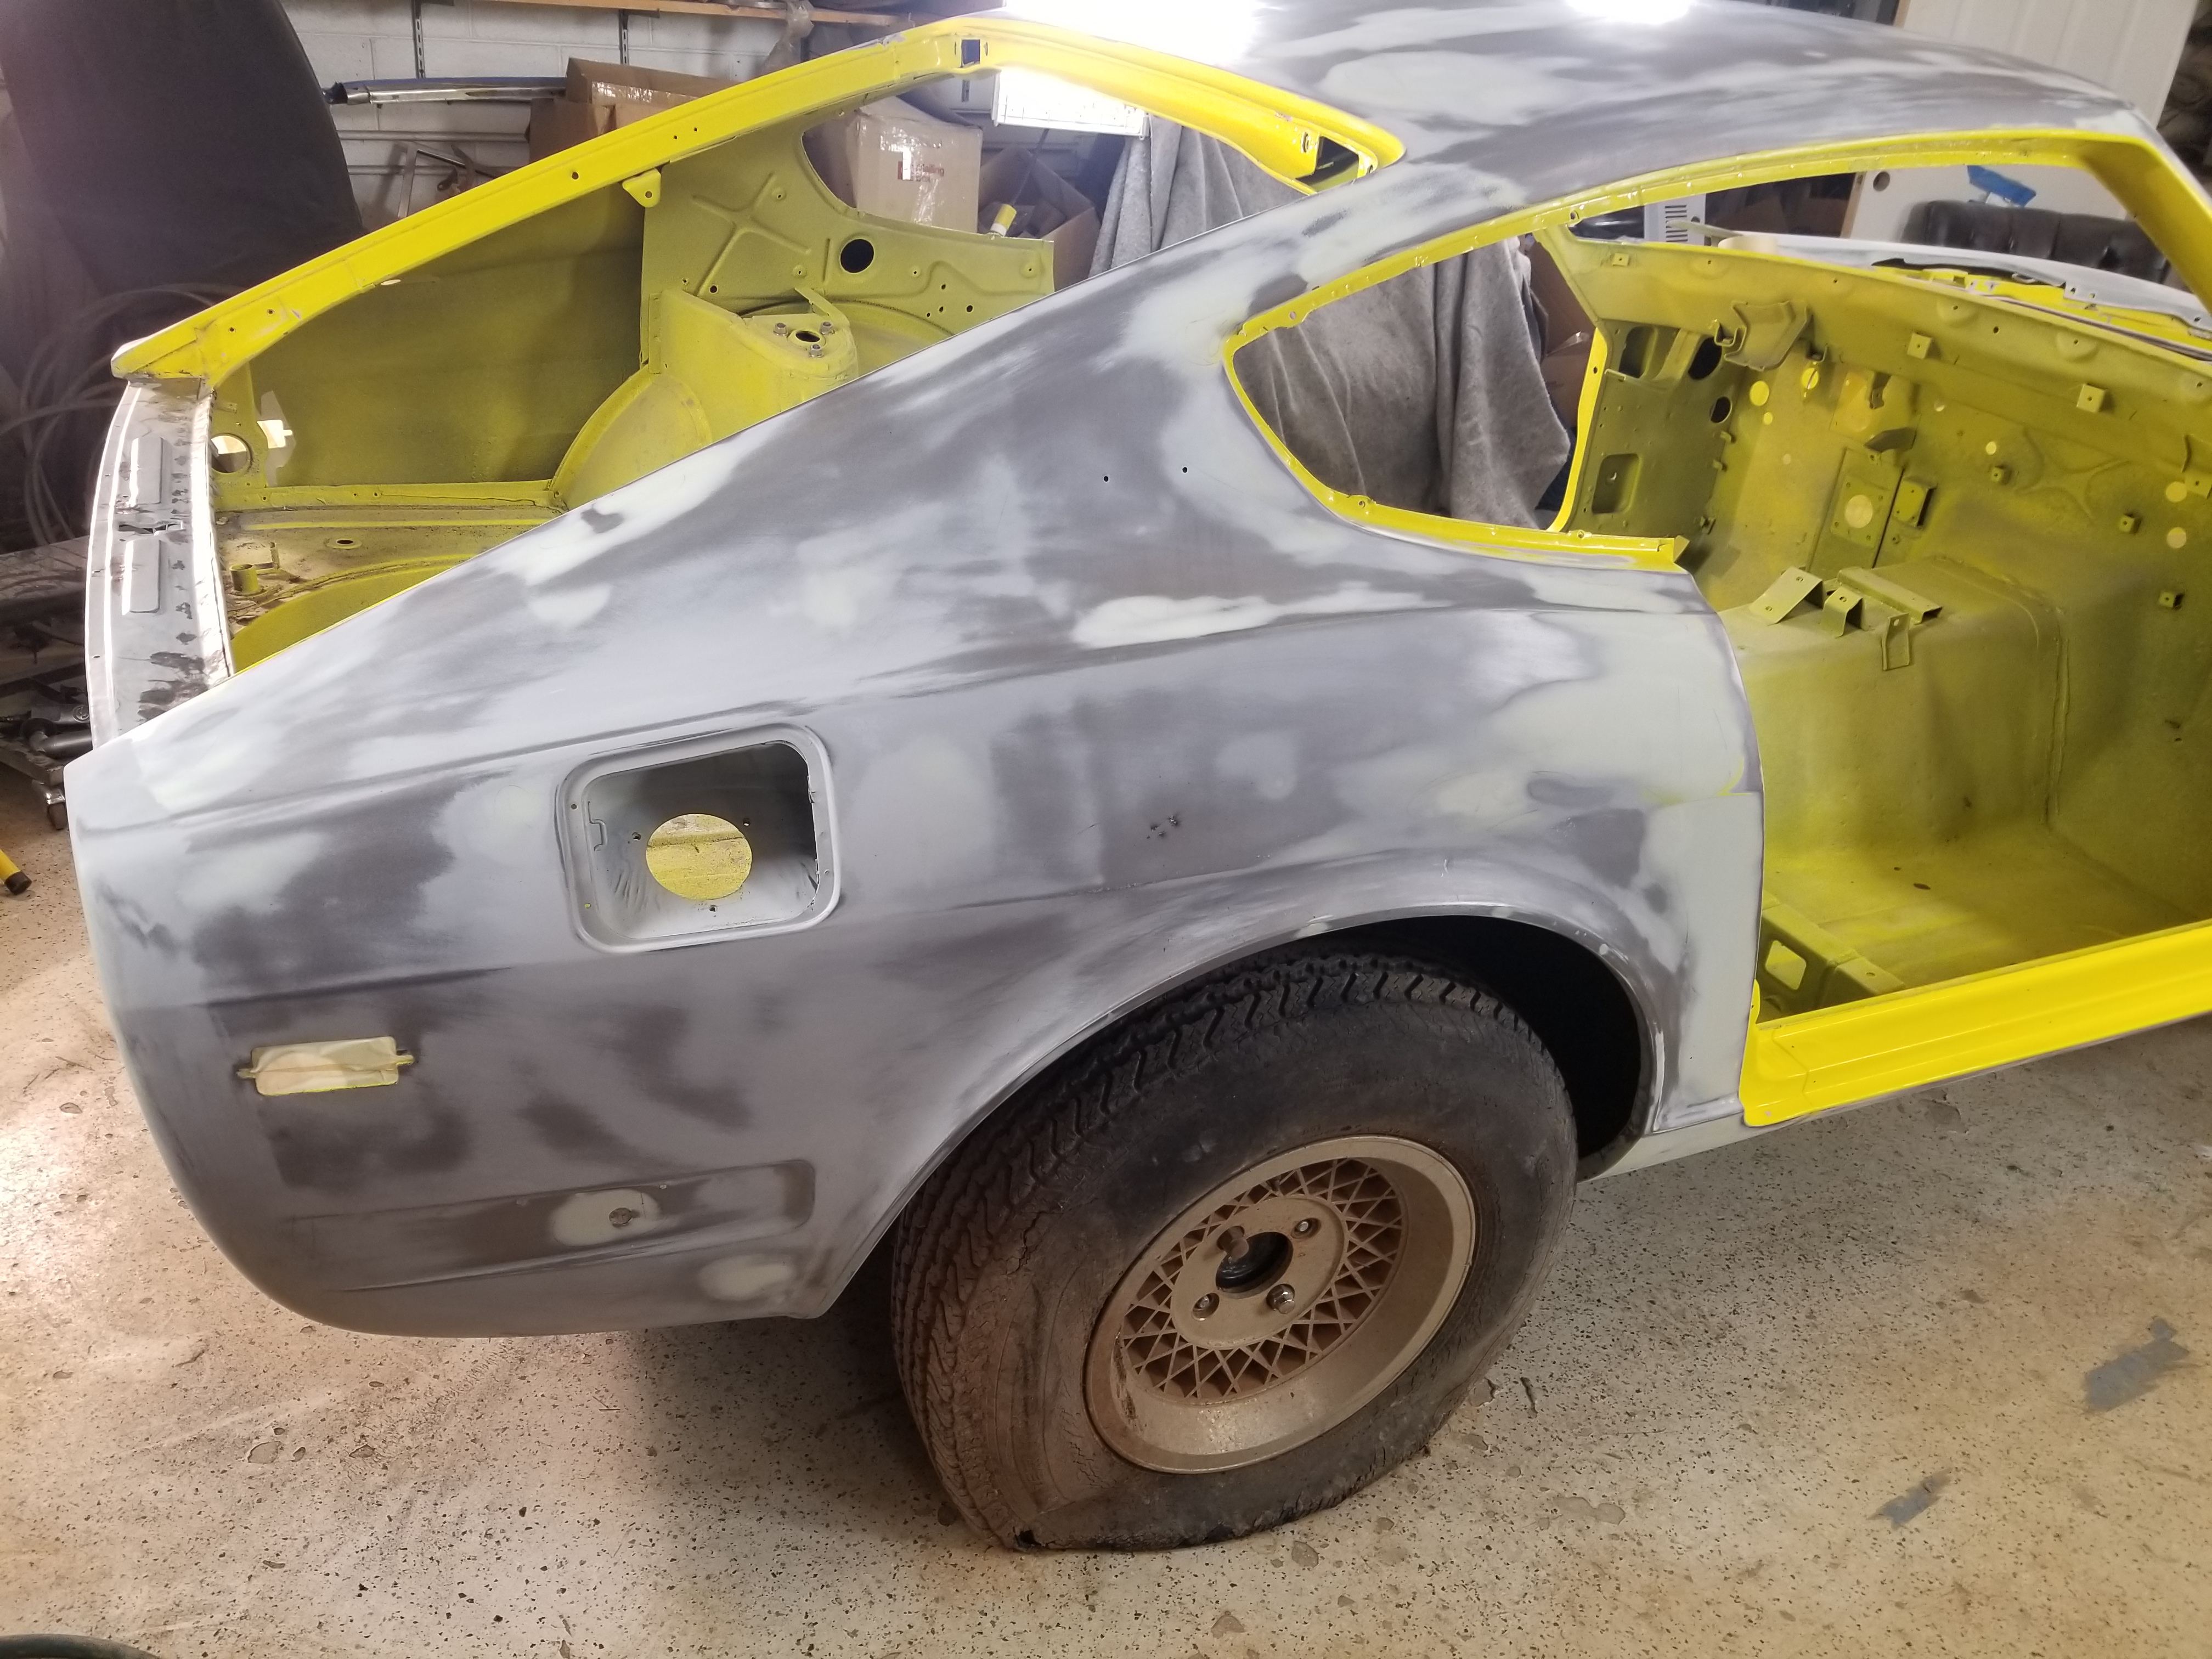
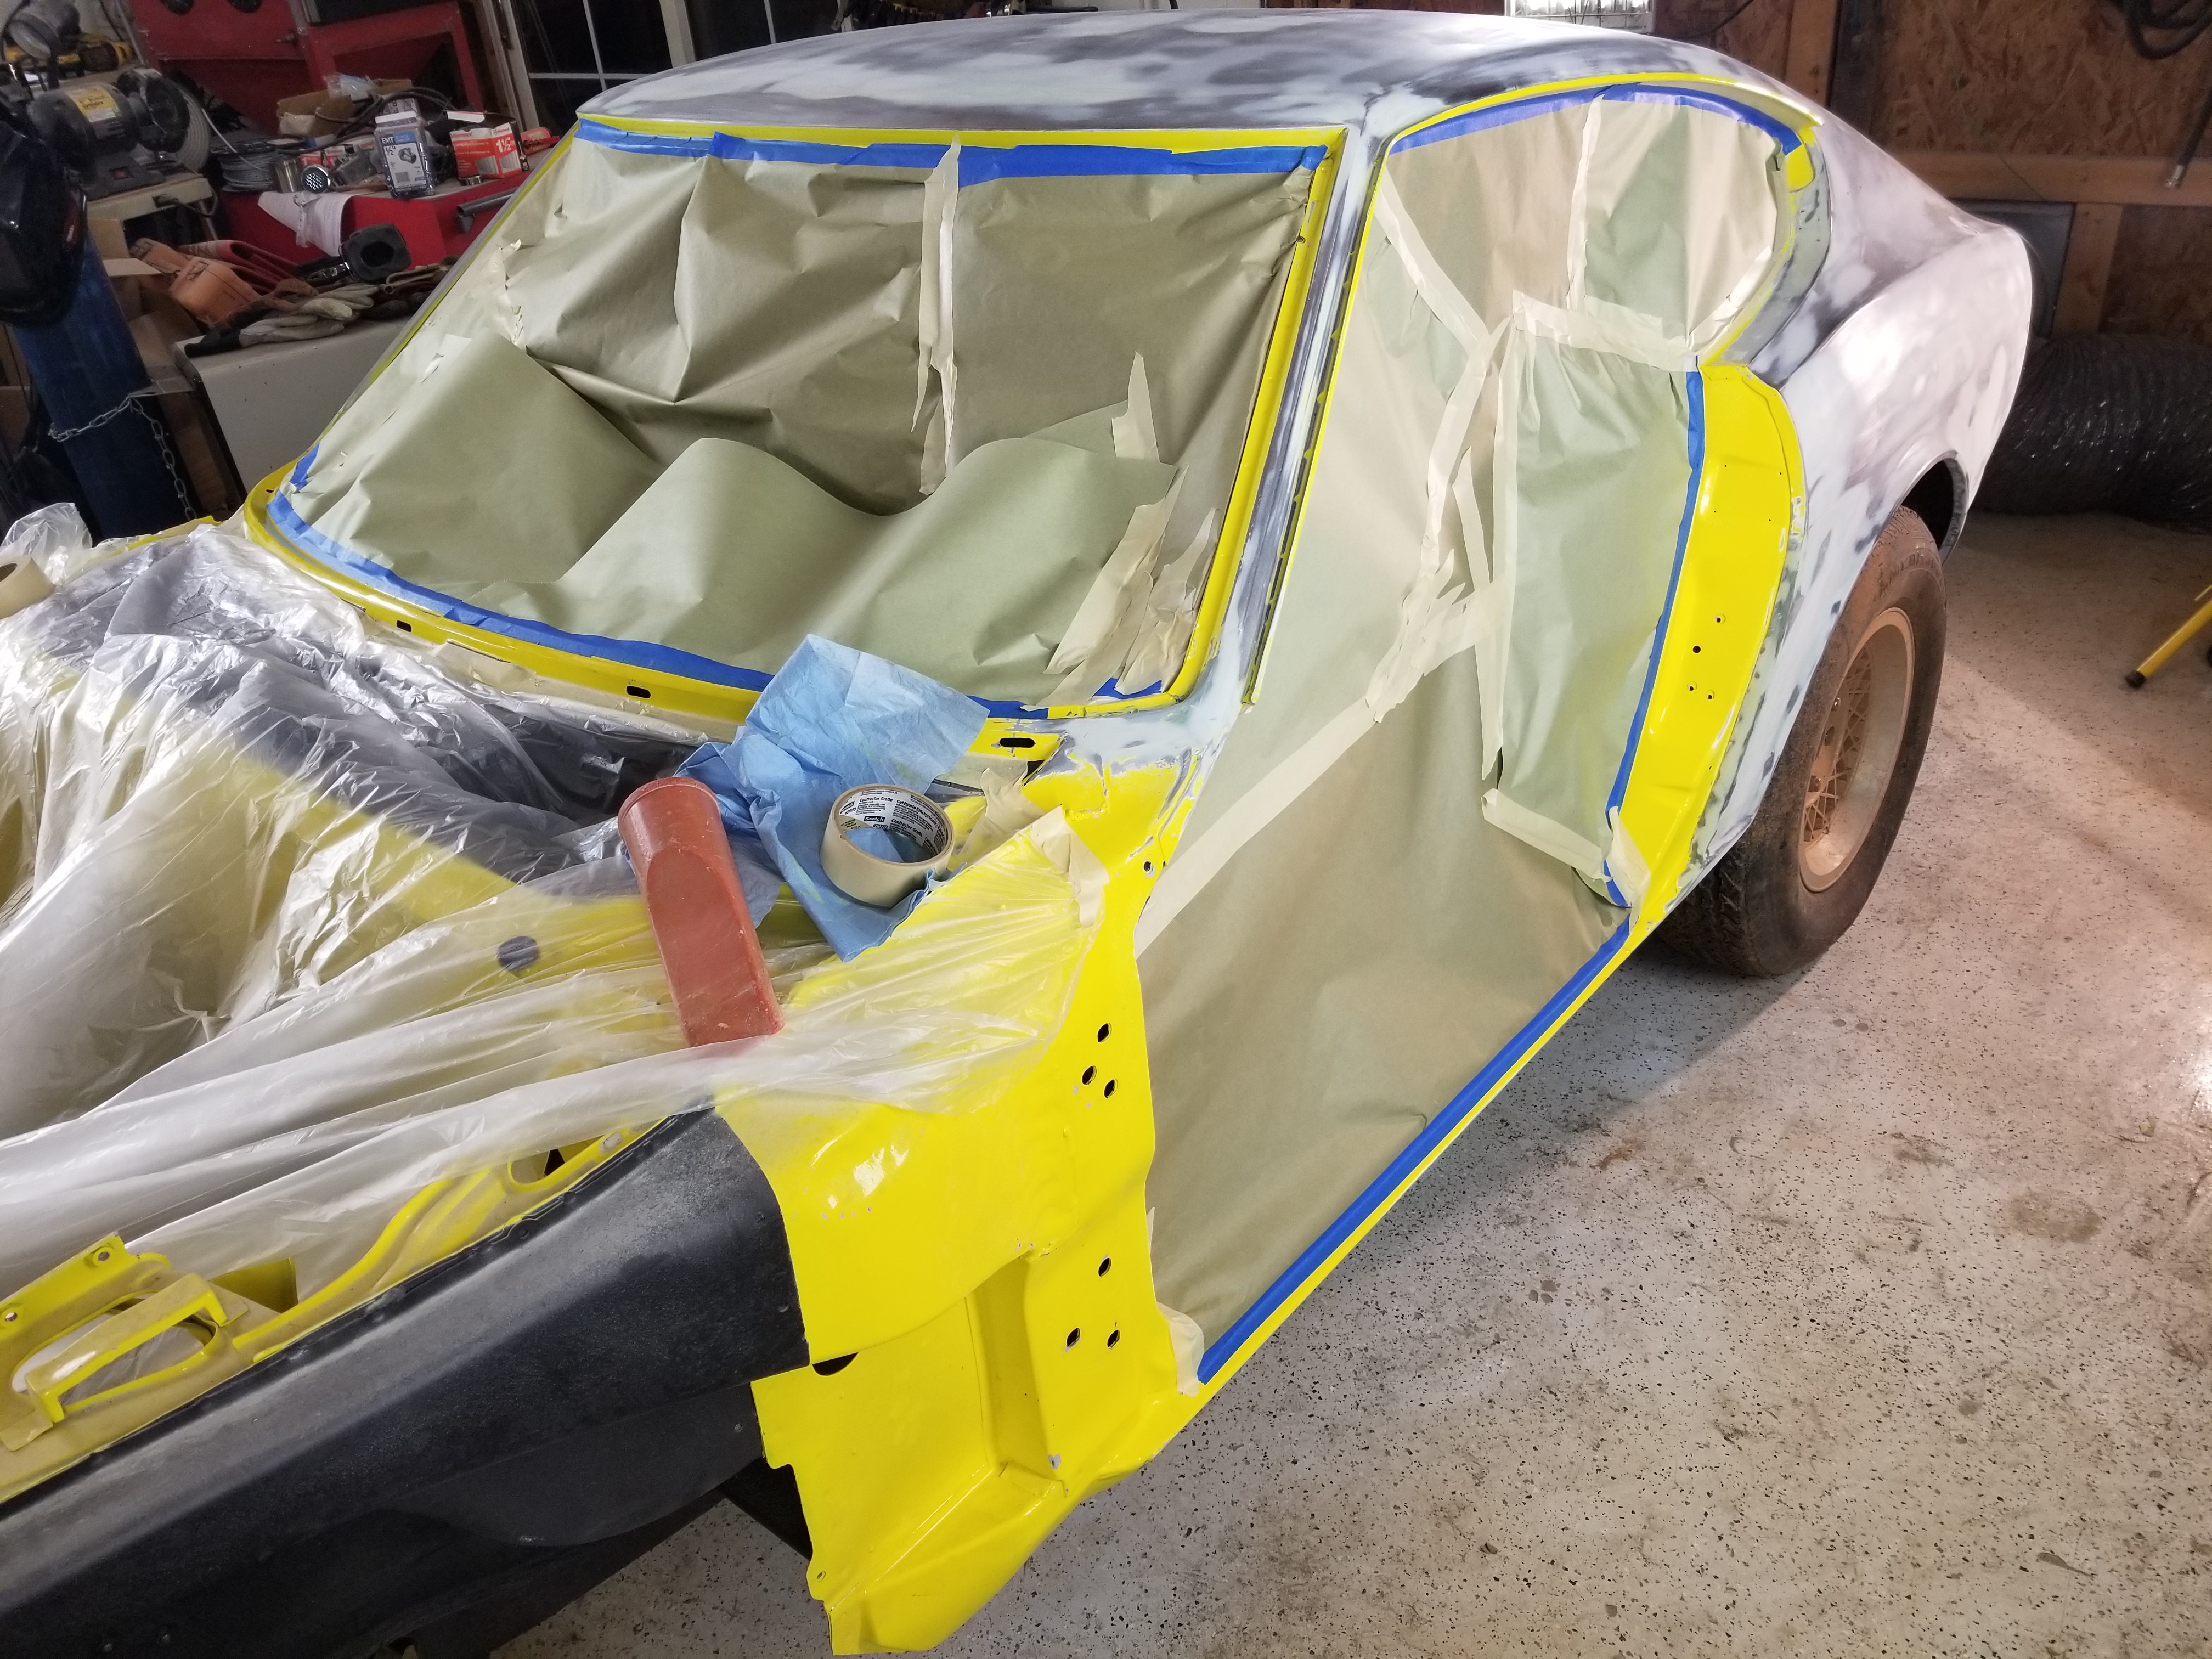
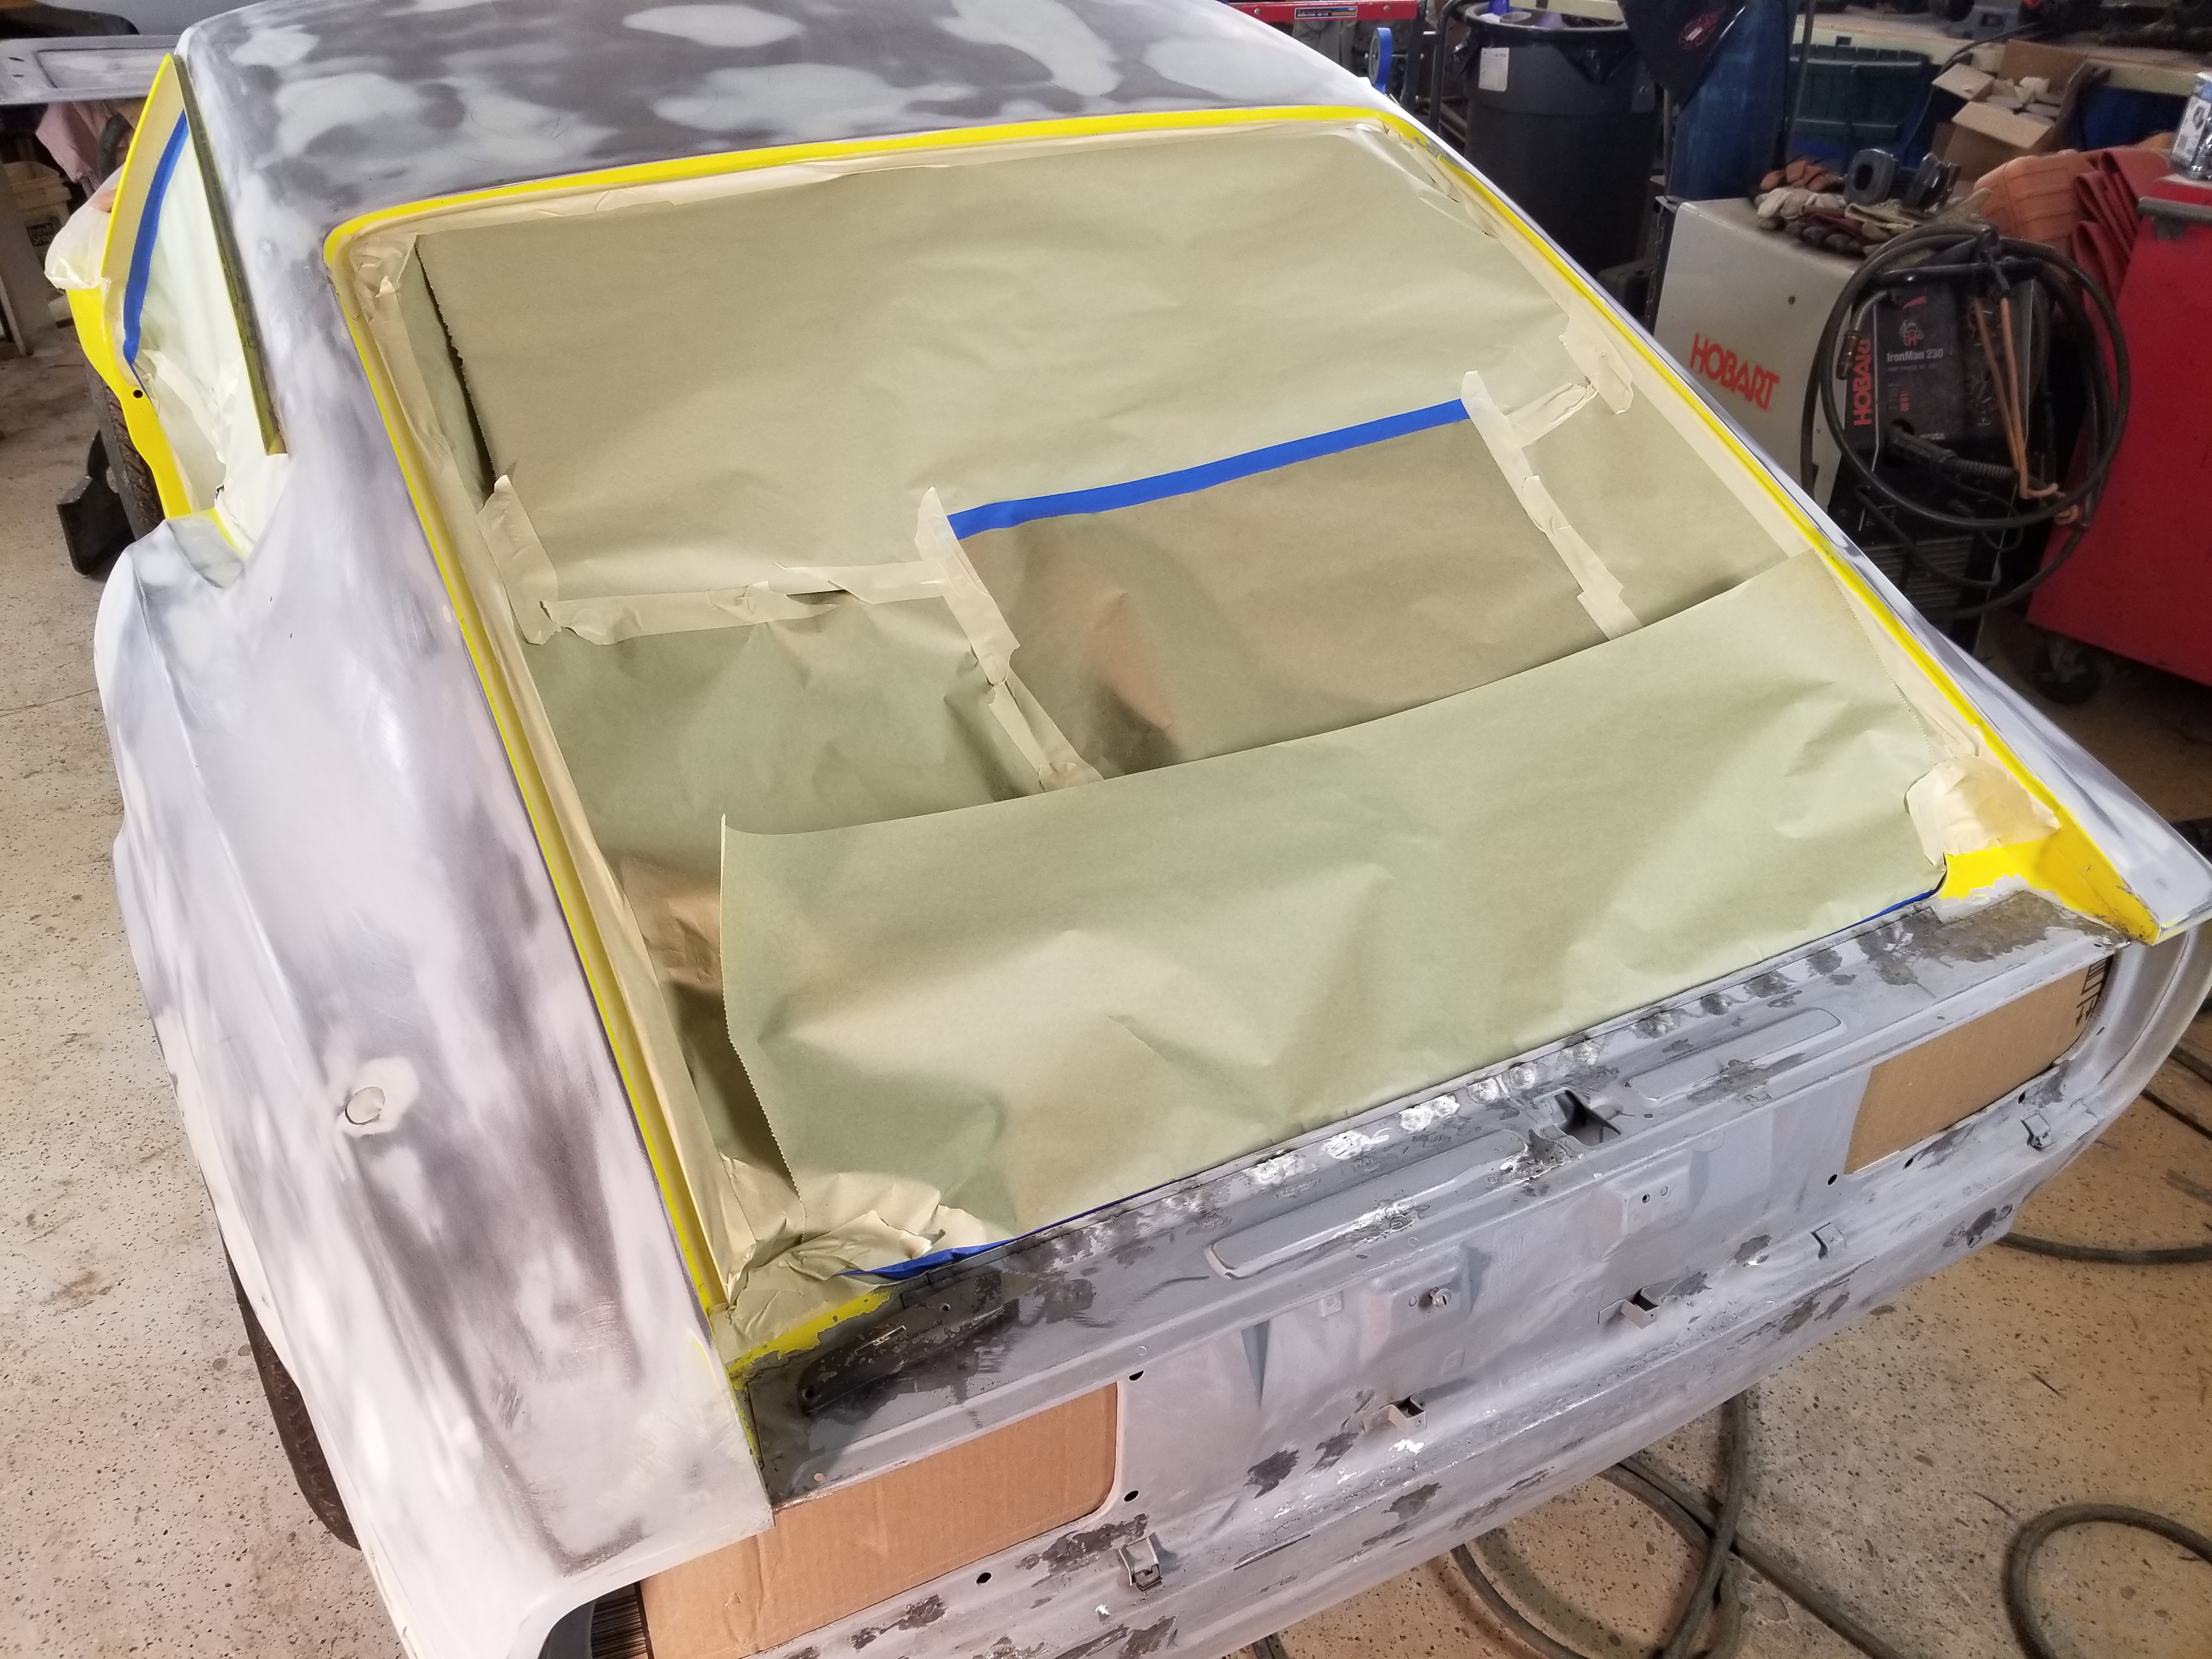
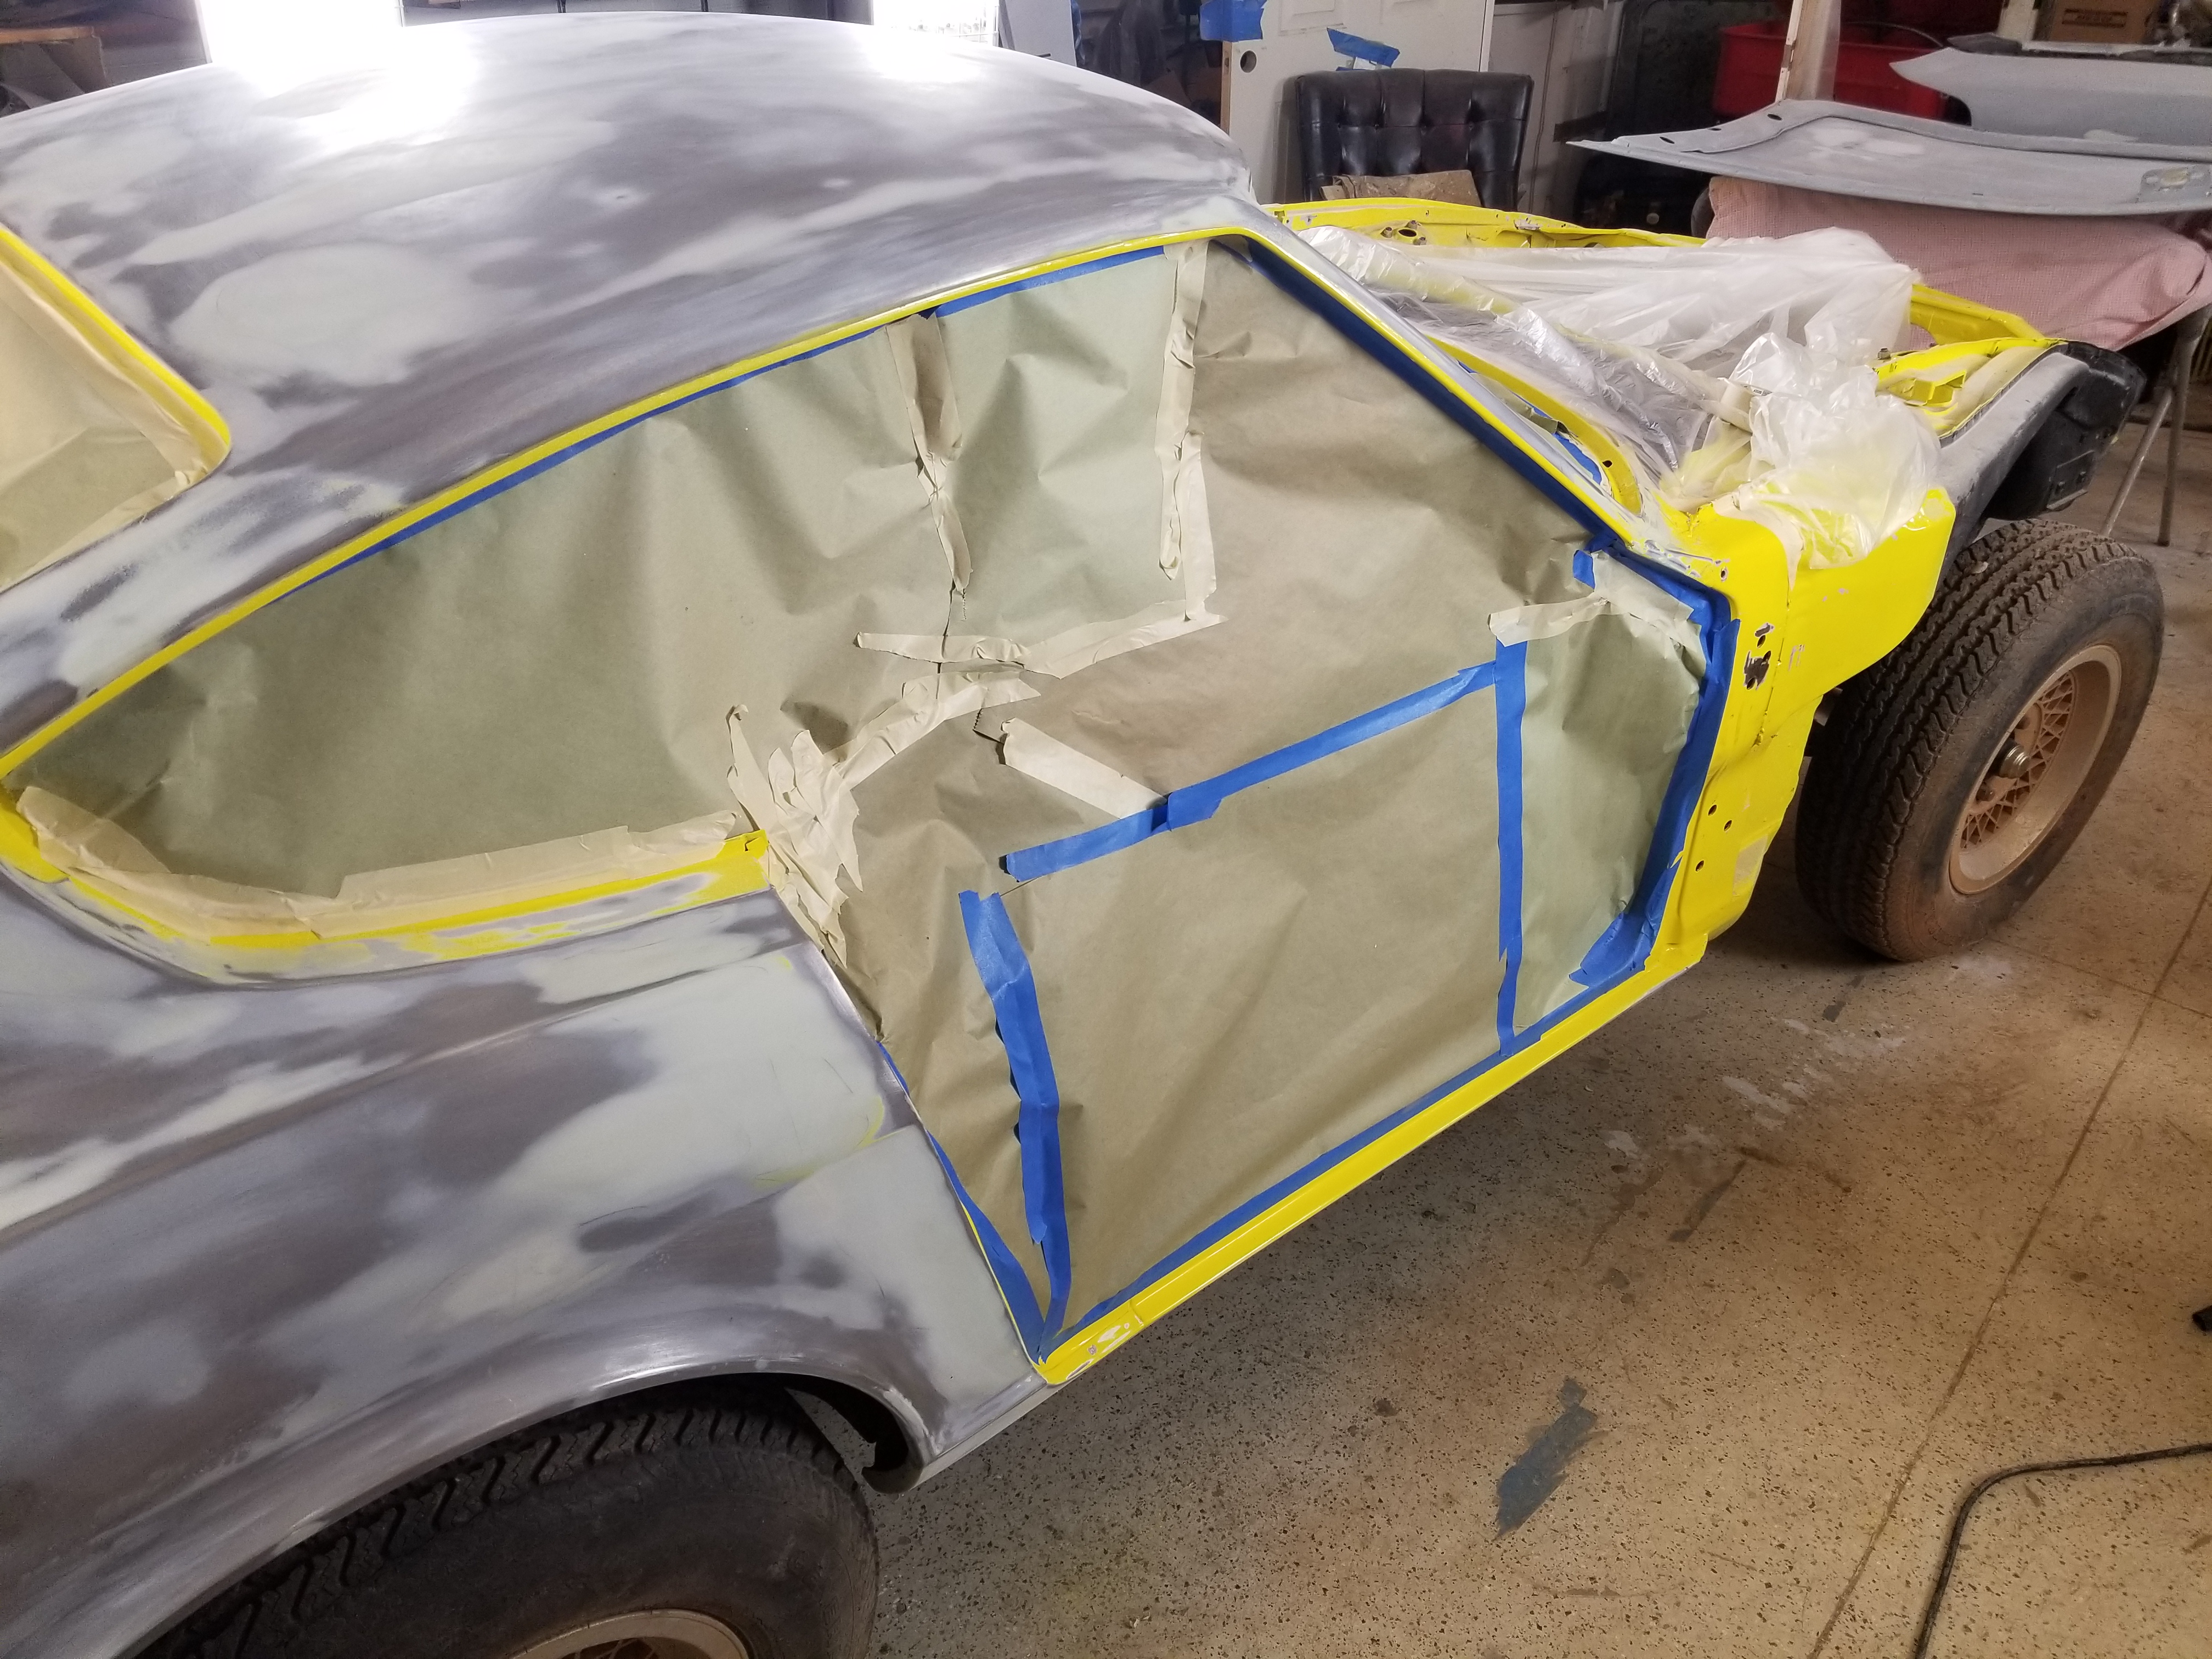
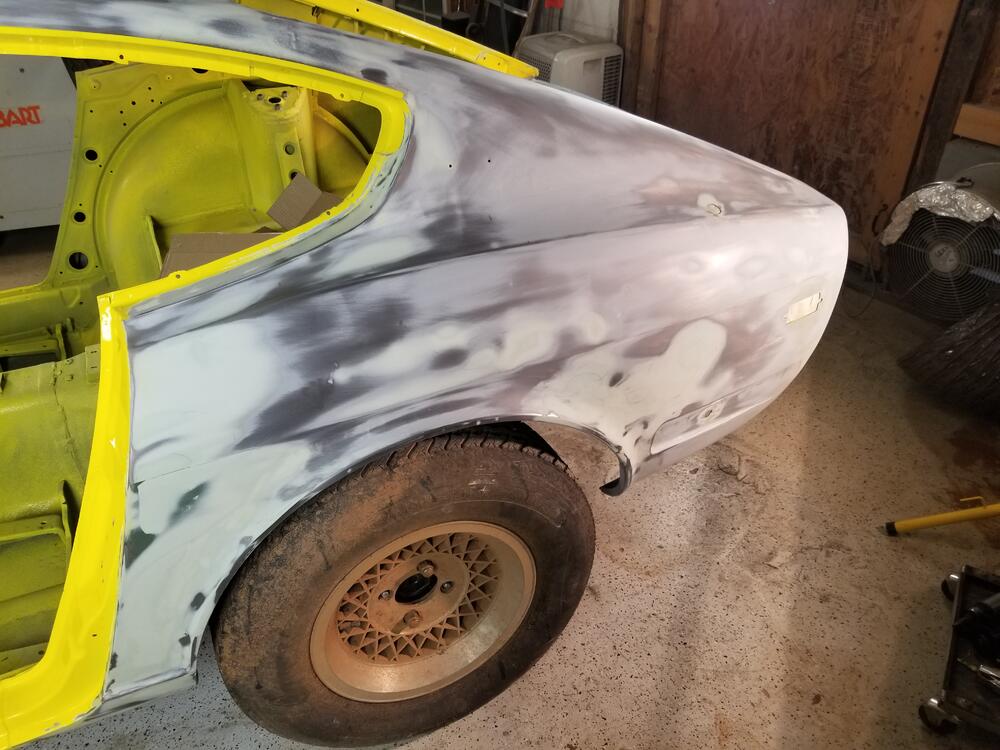
 2 pointsWish I could sometimes! Me, myself and I are the only three working on this thing 😉 As a note, I jambed out the car with single stage but after ruminating on it for a while decided it would be easier to finish paint if I included portions of the hatch area and door jambs in my final paint. It makes it easier to tape up and not have a noticeable start / stop point2 points
 -
 2 pointsYou can't fire the good ones. He'll learn and do even better.2 points
 -
 2 points
 -
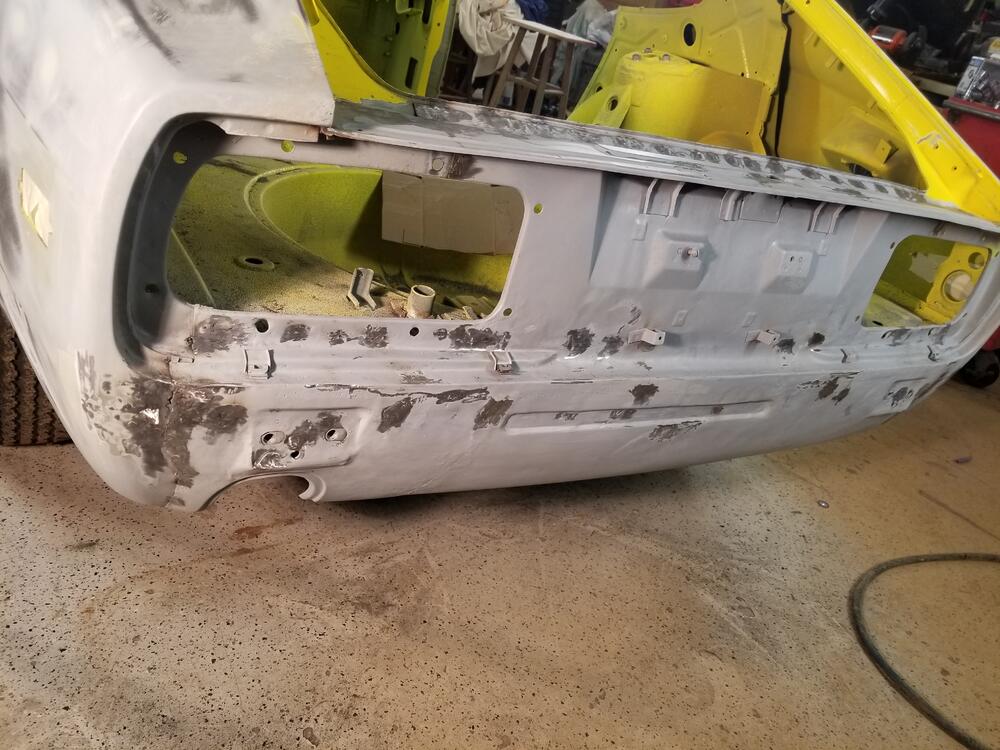
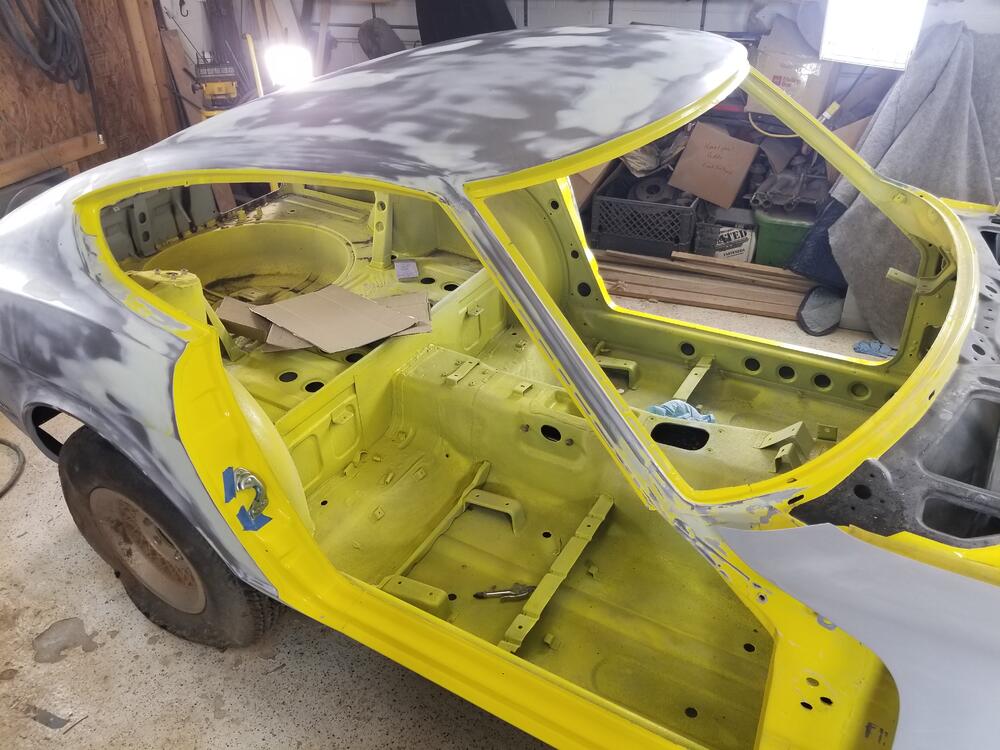
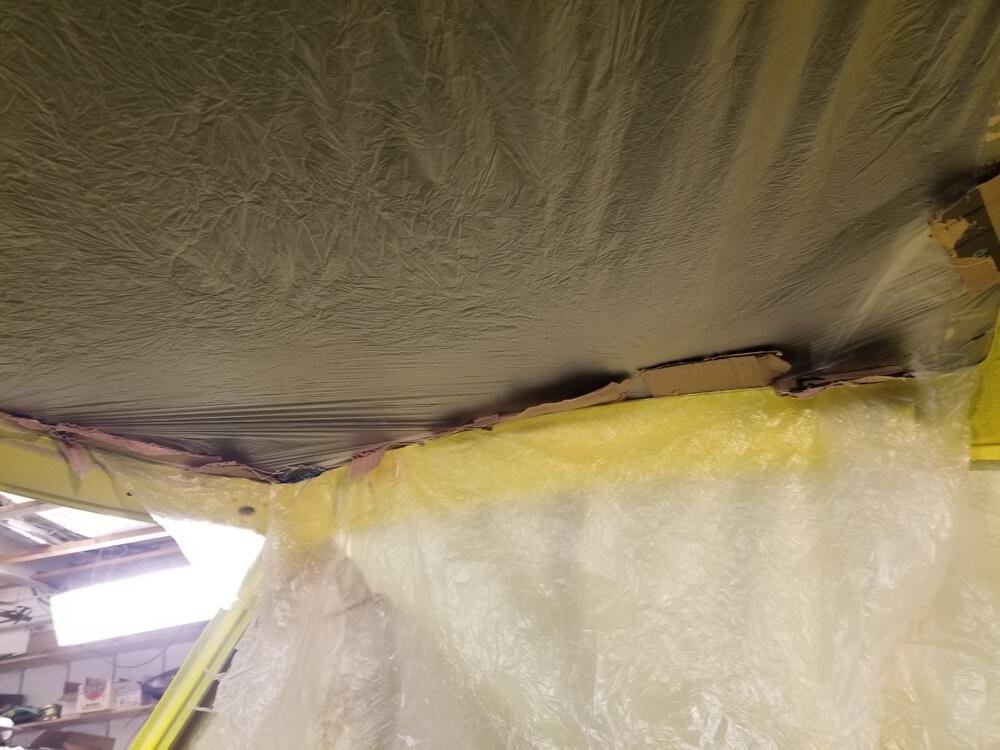
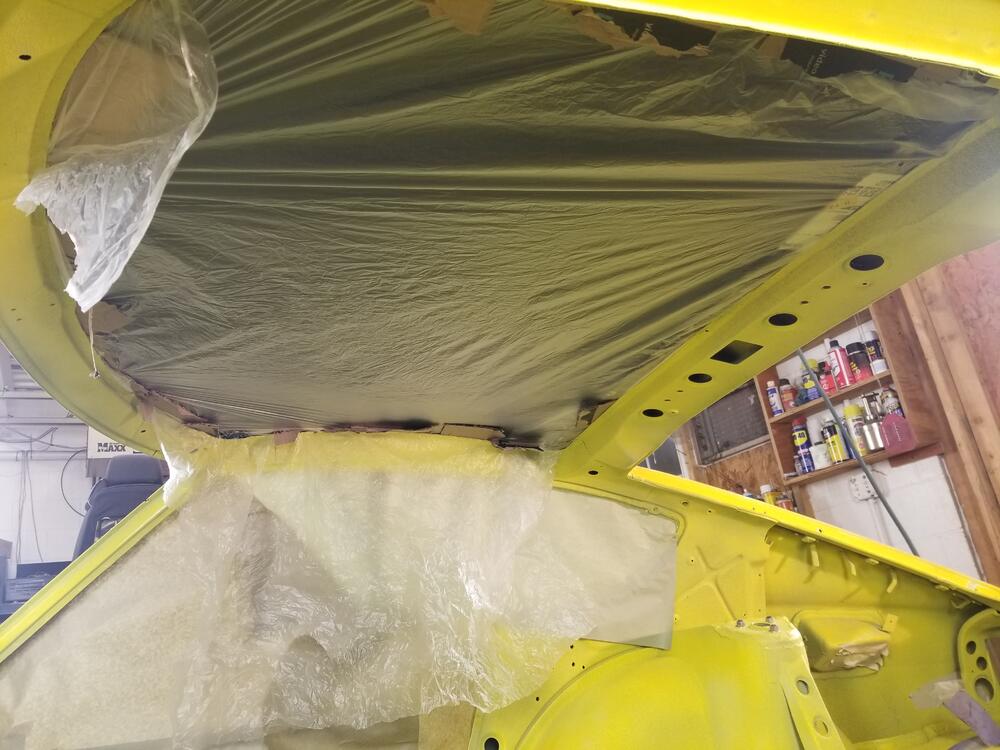
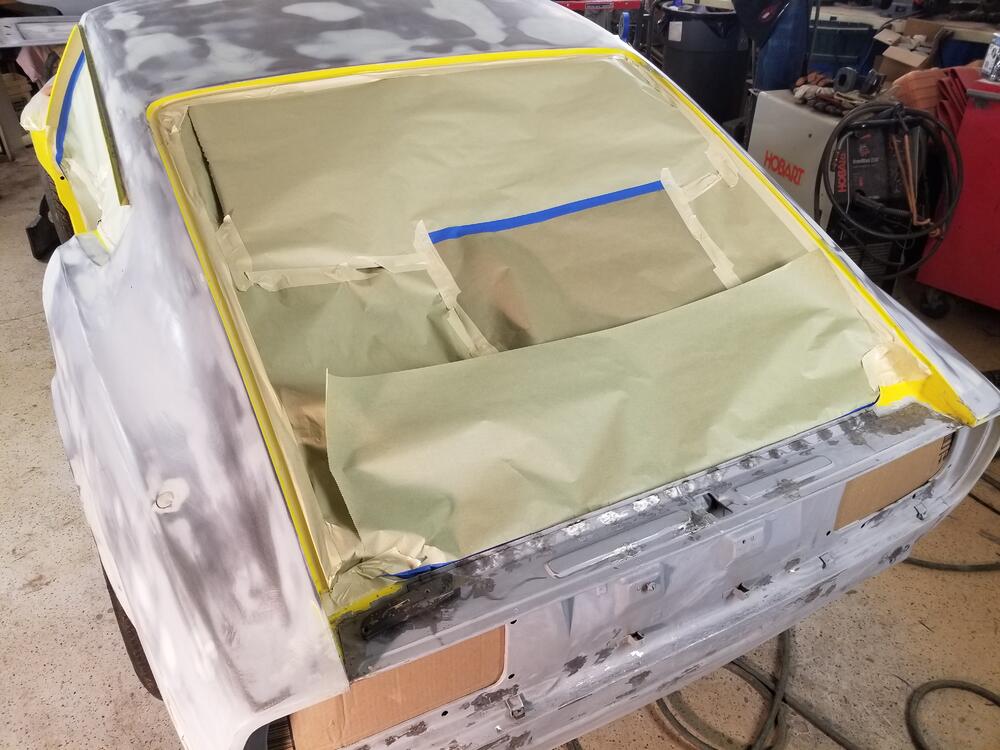
2 pointsSo brought the car inside and cleaned it up. Used some Ospho on it. Then a couple of days later I sanded it all with 320 on a DA. So I realized that I might get some over spray on the headliner, which I installed while it was on the rotisserie. Then got it wrapped up So all wrapped up and was going to spray some epoxy but the idiot running the shop forgot to check if we had some!!


 2 points
 -
 1 pointCheck the trigger on the Pertronix first. I don't know how to do it, but it's important. I did some Google but the instructions are all for people who had a running engine before they swapped points. Can't find any "starting from scratch" instructions. It's probably as simple as lining up some marks on the sensor and magnet but I've never had one so don't know. If you do that you and confirm that the rotor is pointed at #1 plug wire then you'll have everything pointing where it should be pointing and it should start. Assuming...1 point
 -
1 pointNissan used both sides on the early cars. I think it had to do with air conditioning. That's about where you want to be. Now you just need to make sure that the Pertronix trigger is just about to trigger. If you had points or a 280Z system it would be pretty simple but Pertronix is a bit different, with the magnet.1 point
-
I did this on classic beetle a couple of years ago. I bought some unjacketed steel cable. Just left the end frayed. I used brake cleaner and a drill, like you did. Glad you got it. That homemade amber can be really hard to deal with sometimes1 point
-
1 pointI found this picture on the Google. (It's from zcar.com but it doesn't exist in the original post, so I won't link it). The picture on the left is of the bottom pulley on the front of your engine. You should be able to see if from the passenger side of the car. Shine a bright light down there and look. Those are your ignition timing marks. The picture on the right is of the distributor base. Nissan put degree marks right on the base of the distributor. Yours will probably be off because you have Pertronix now but they should be close. See if yours is between the A and the center mark. p.s. you don't have to remove anything or turn any bolts except for the screw that locks the distributor body down.
 1 point
 -
1 pointThe "bunny ears" picture confirms that you are on the compression stroke. The rotor seems to be pointing close to the correct direction. But the distributor body is rotated too far counterclockwise, (compared to site's picture at the top of the page) which would cause the ignition timing to be retarded. Can you get a picture of the timing mark on the damper pulley? It should be at zero or about 10. Then you need to rotate the distributor to get the Pertronix trigger at the right point. The Pertronix guys know how to do that. But, just because you're on the compression stroke doesn't mean you have compression. I can't remember all of the details of what's been done to your engine but the cam lobes look a bit used. Anyway, as far as parts they look pretty close except for your ignition timing. Get your igntion timing adjusted and use some starting fluid and you should get it to start for a few seconds.
 1 point
 -
 1 pointDid you confirm that it is on the compression stroke? Did you reorient the oil pump & distributor, or was it oriented like that when you got the bunny ears on the camshaft on cylinder 1?1 point
 -
Now the pretty pictures cause you’re getting bored of my lengthy explanations….. Now I have to explain something. While I could drill the line, it didn’t clear it. I had to then move to stage two, which was to hook up my lacquer thinner soak funnel and line, then drill down through that, which got the thinner down into and distributed through the fuel line. 11D0252B-B714-45B5-8269-D969D272A91C.MOV
 1 point
 -
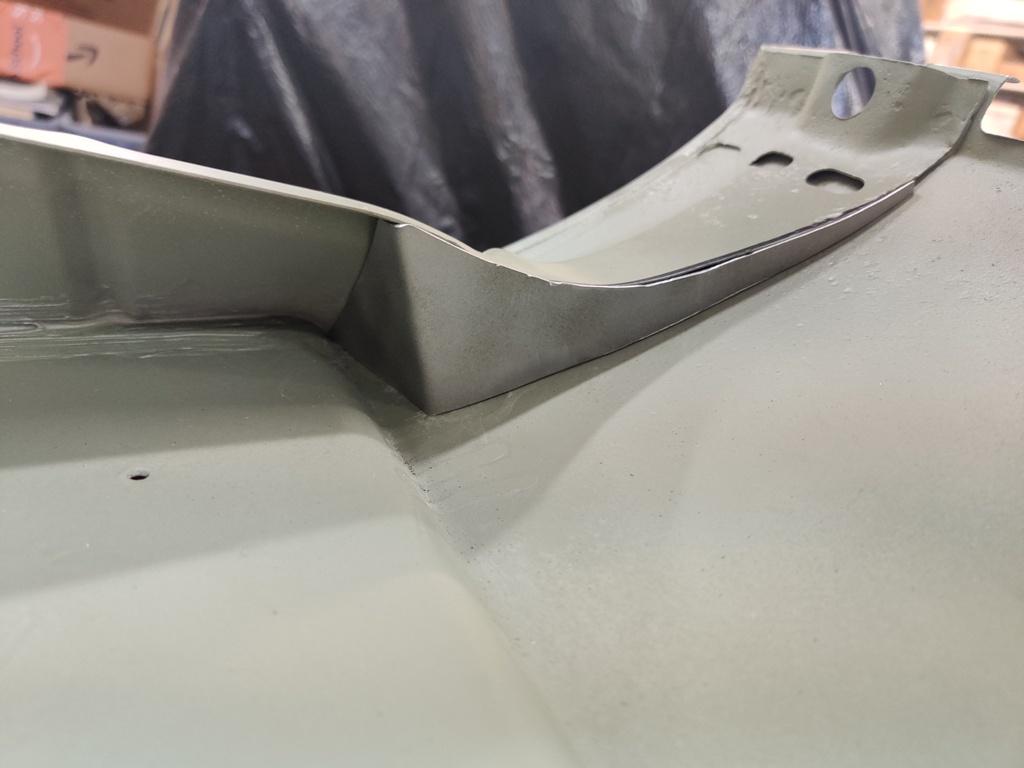
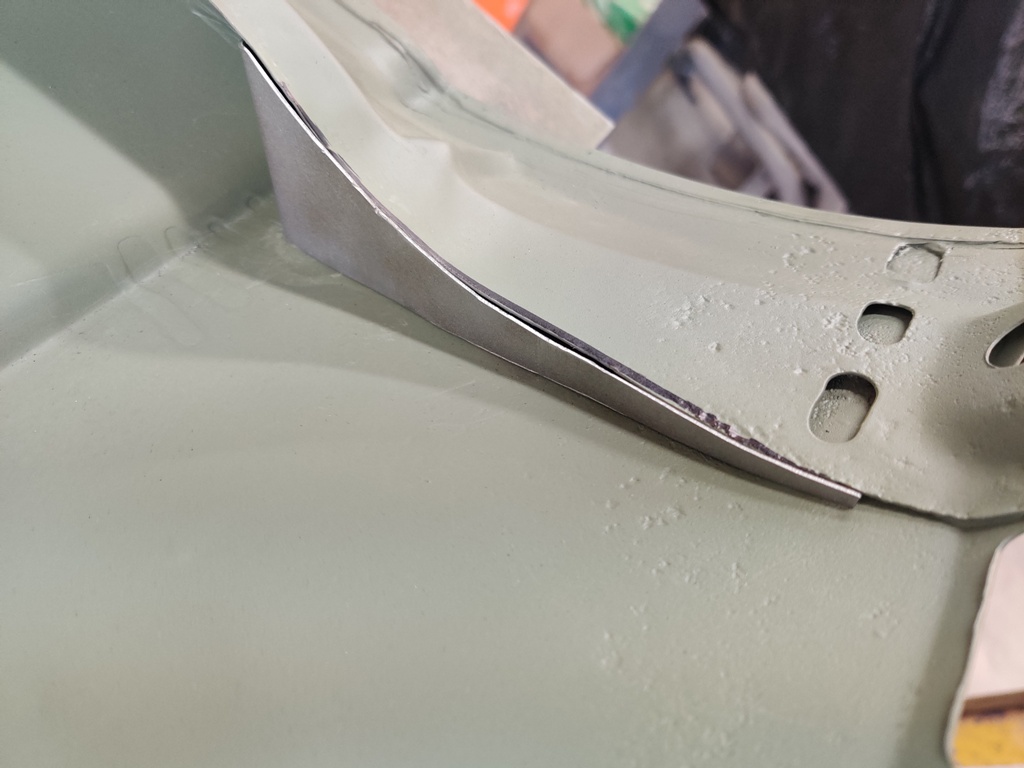
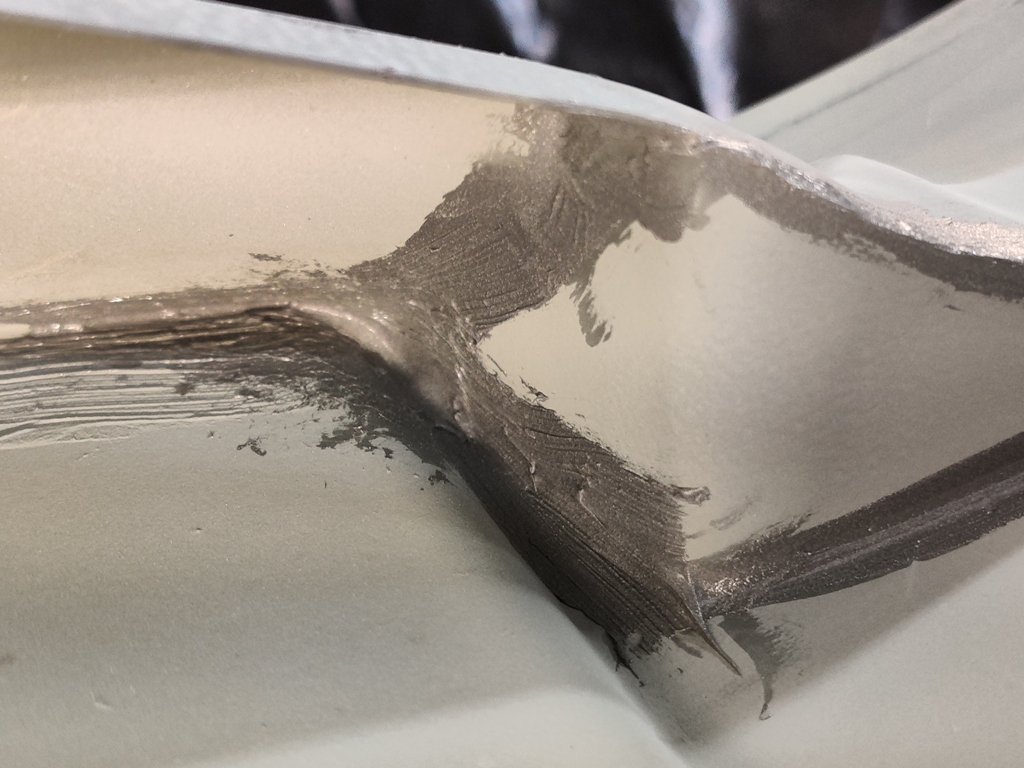
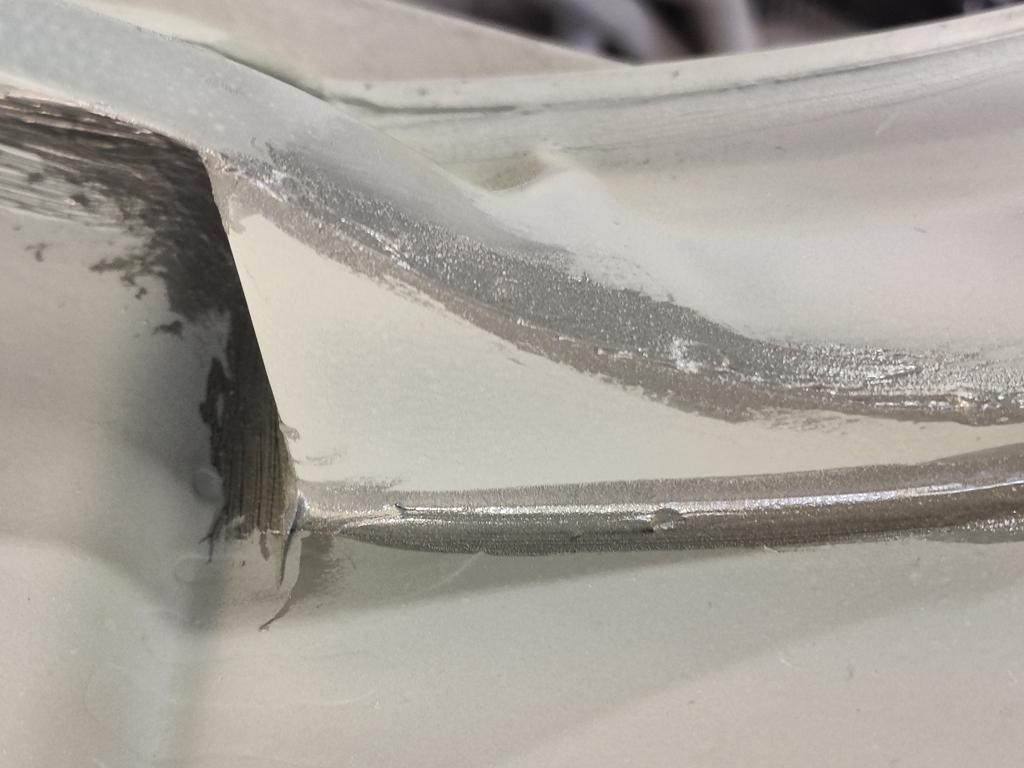
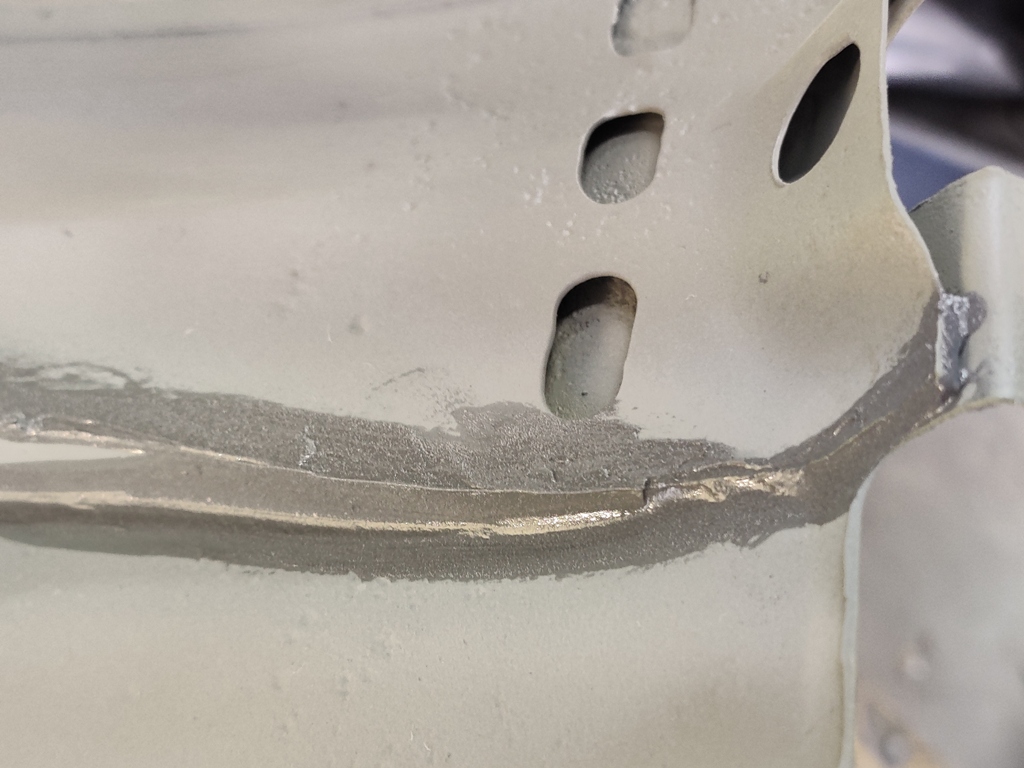
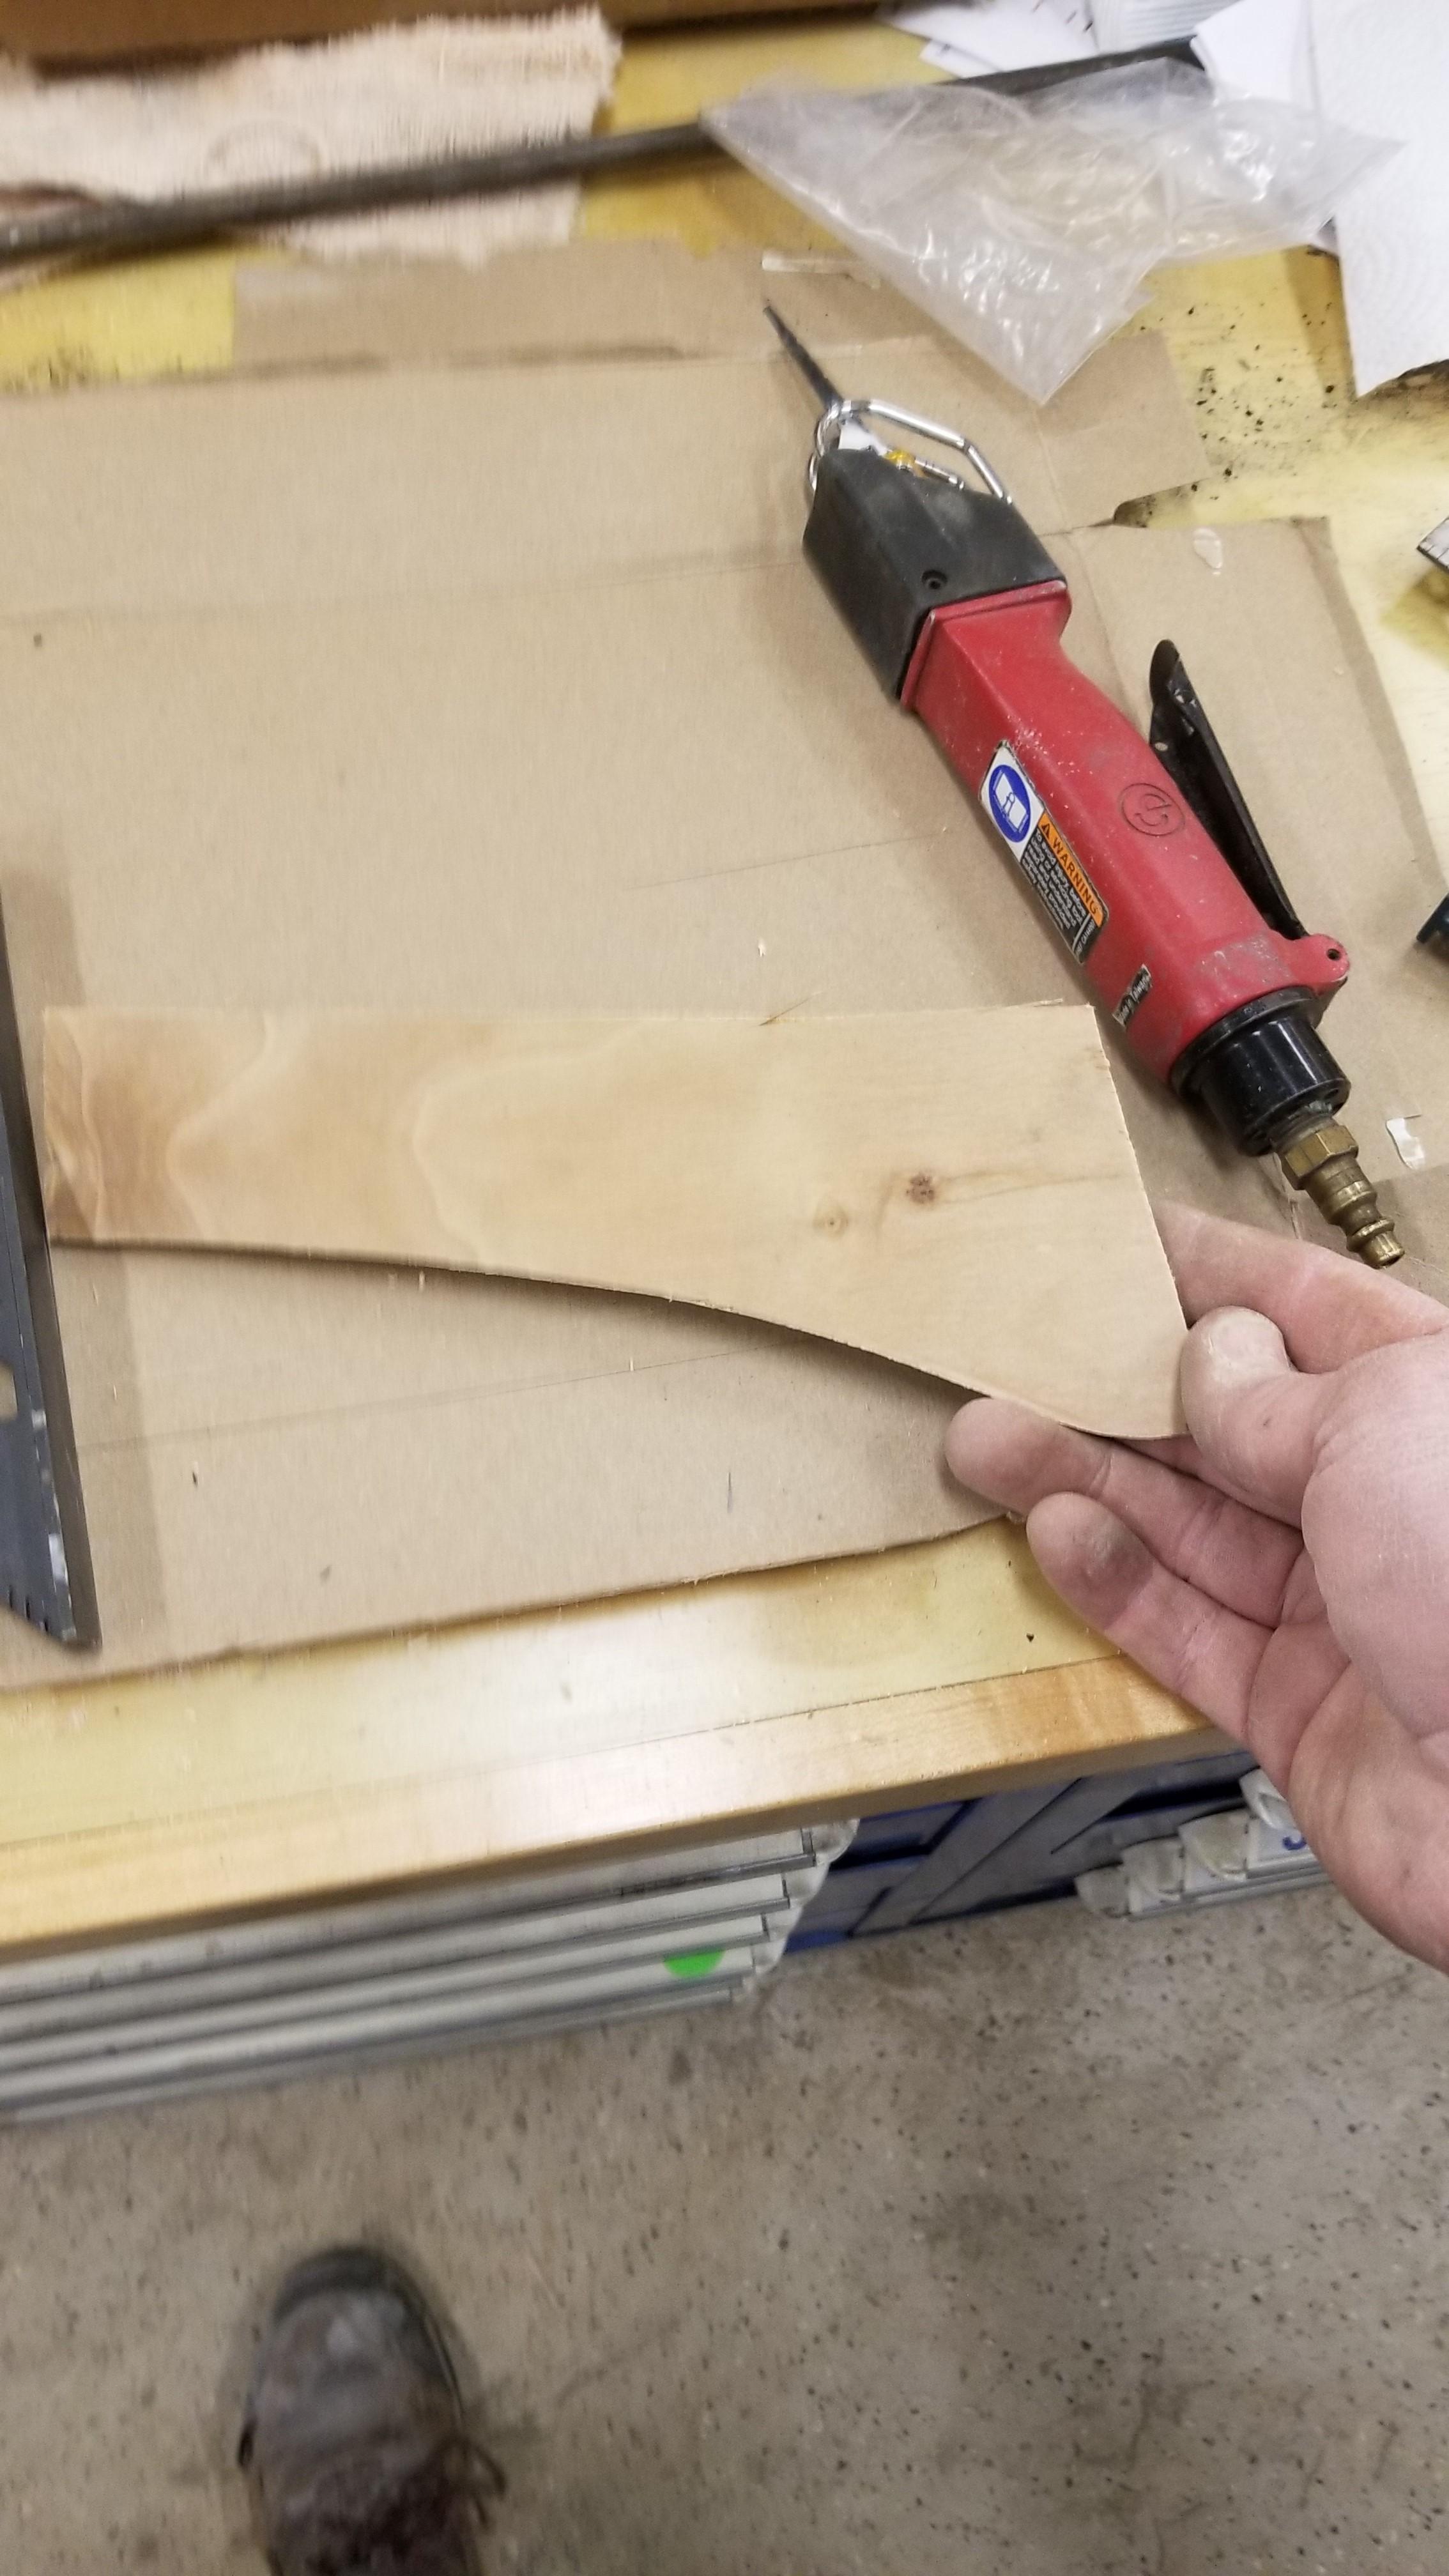
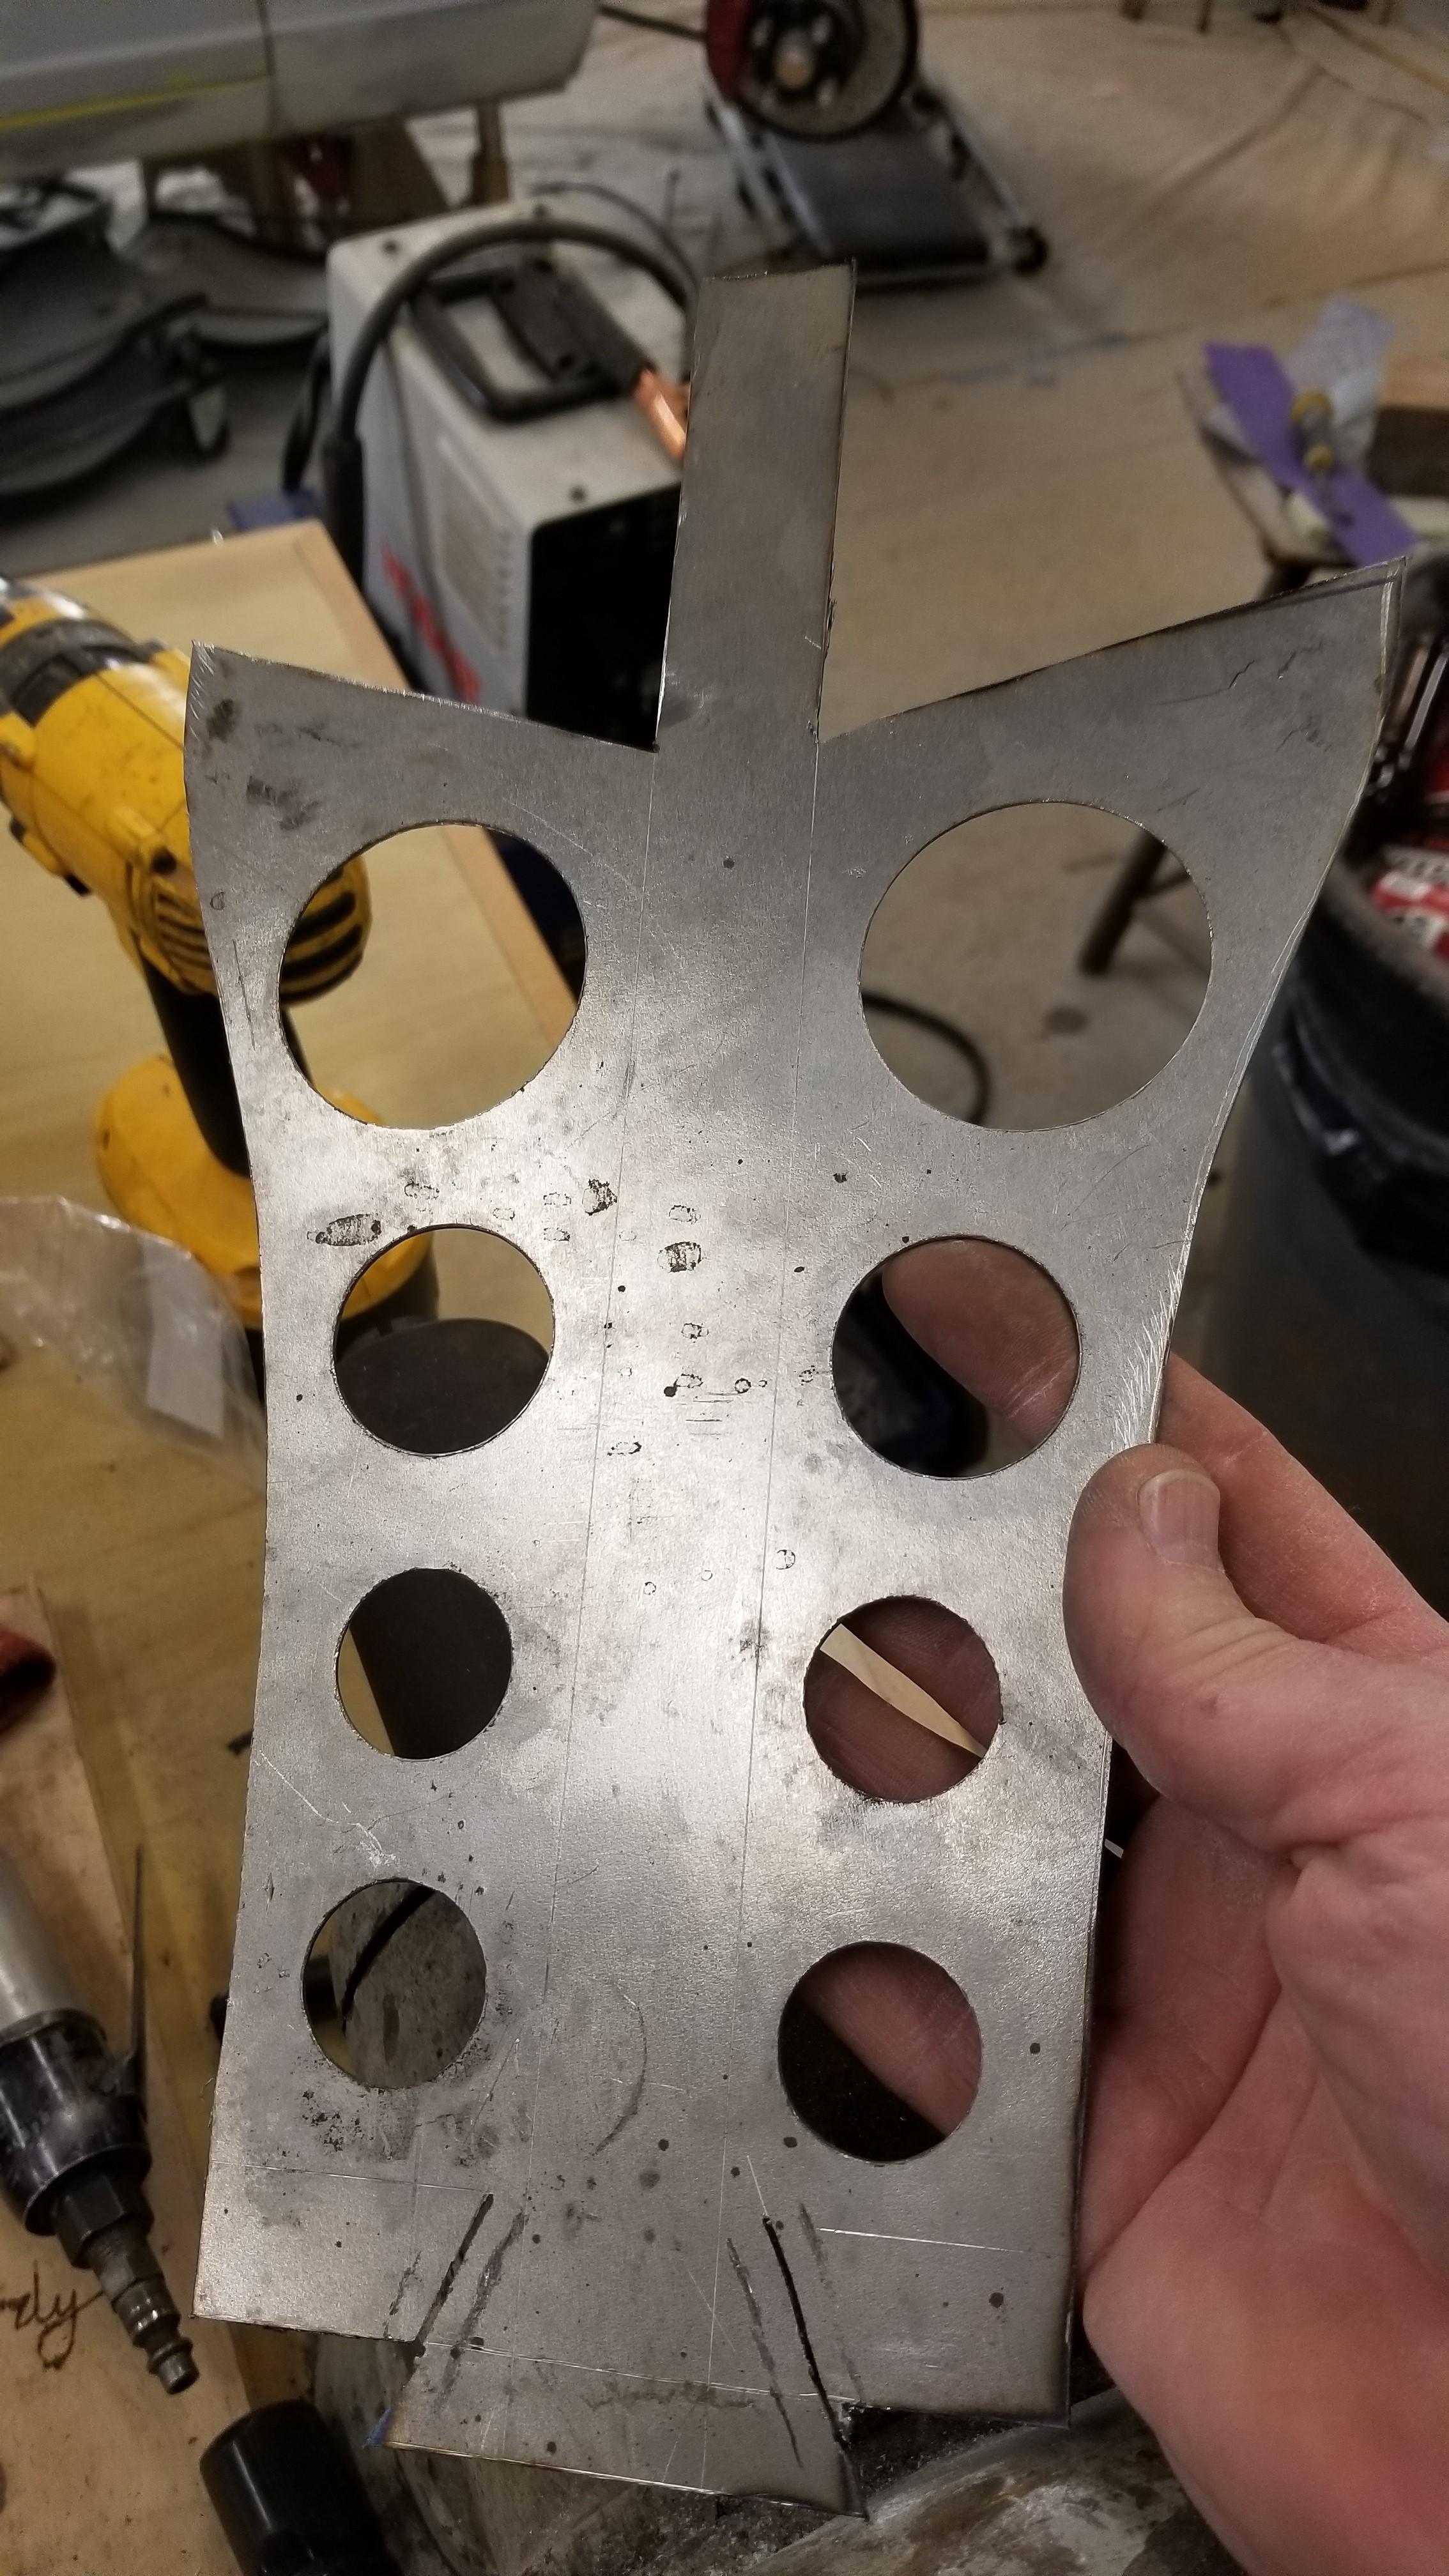
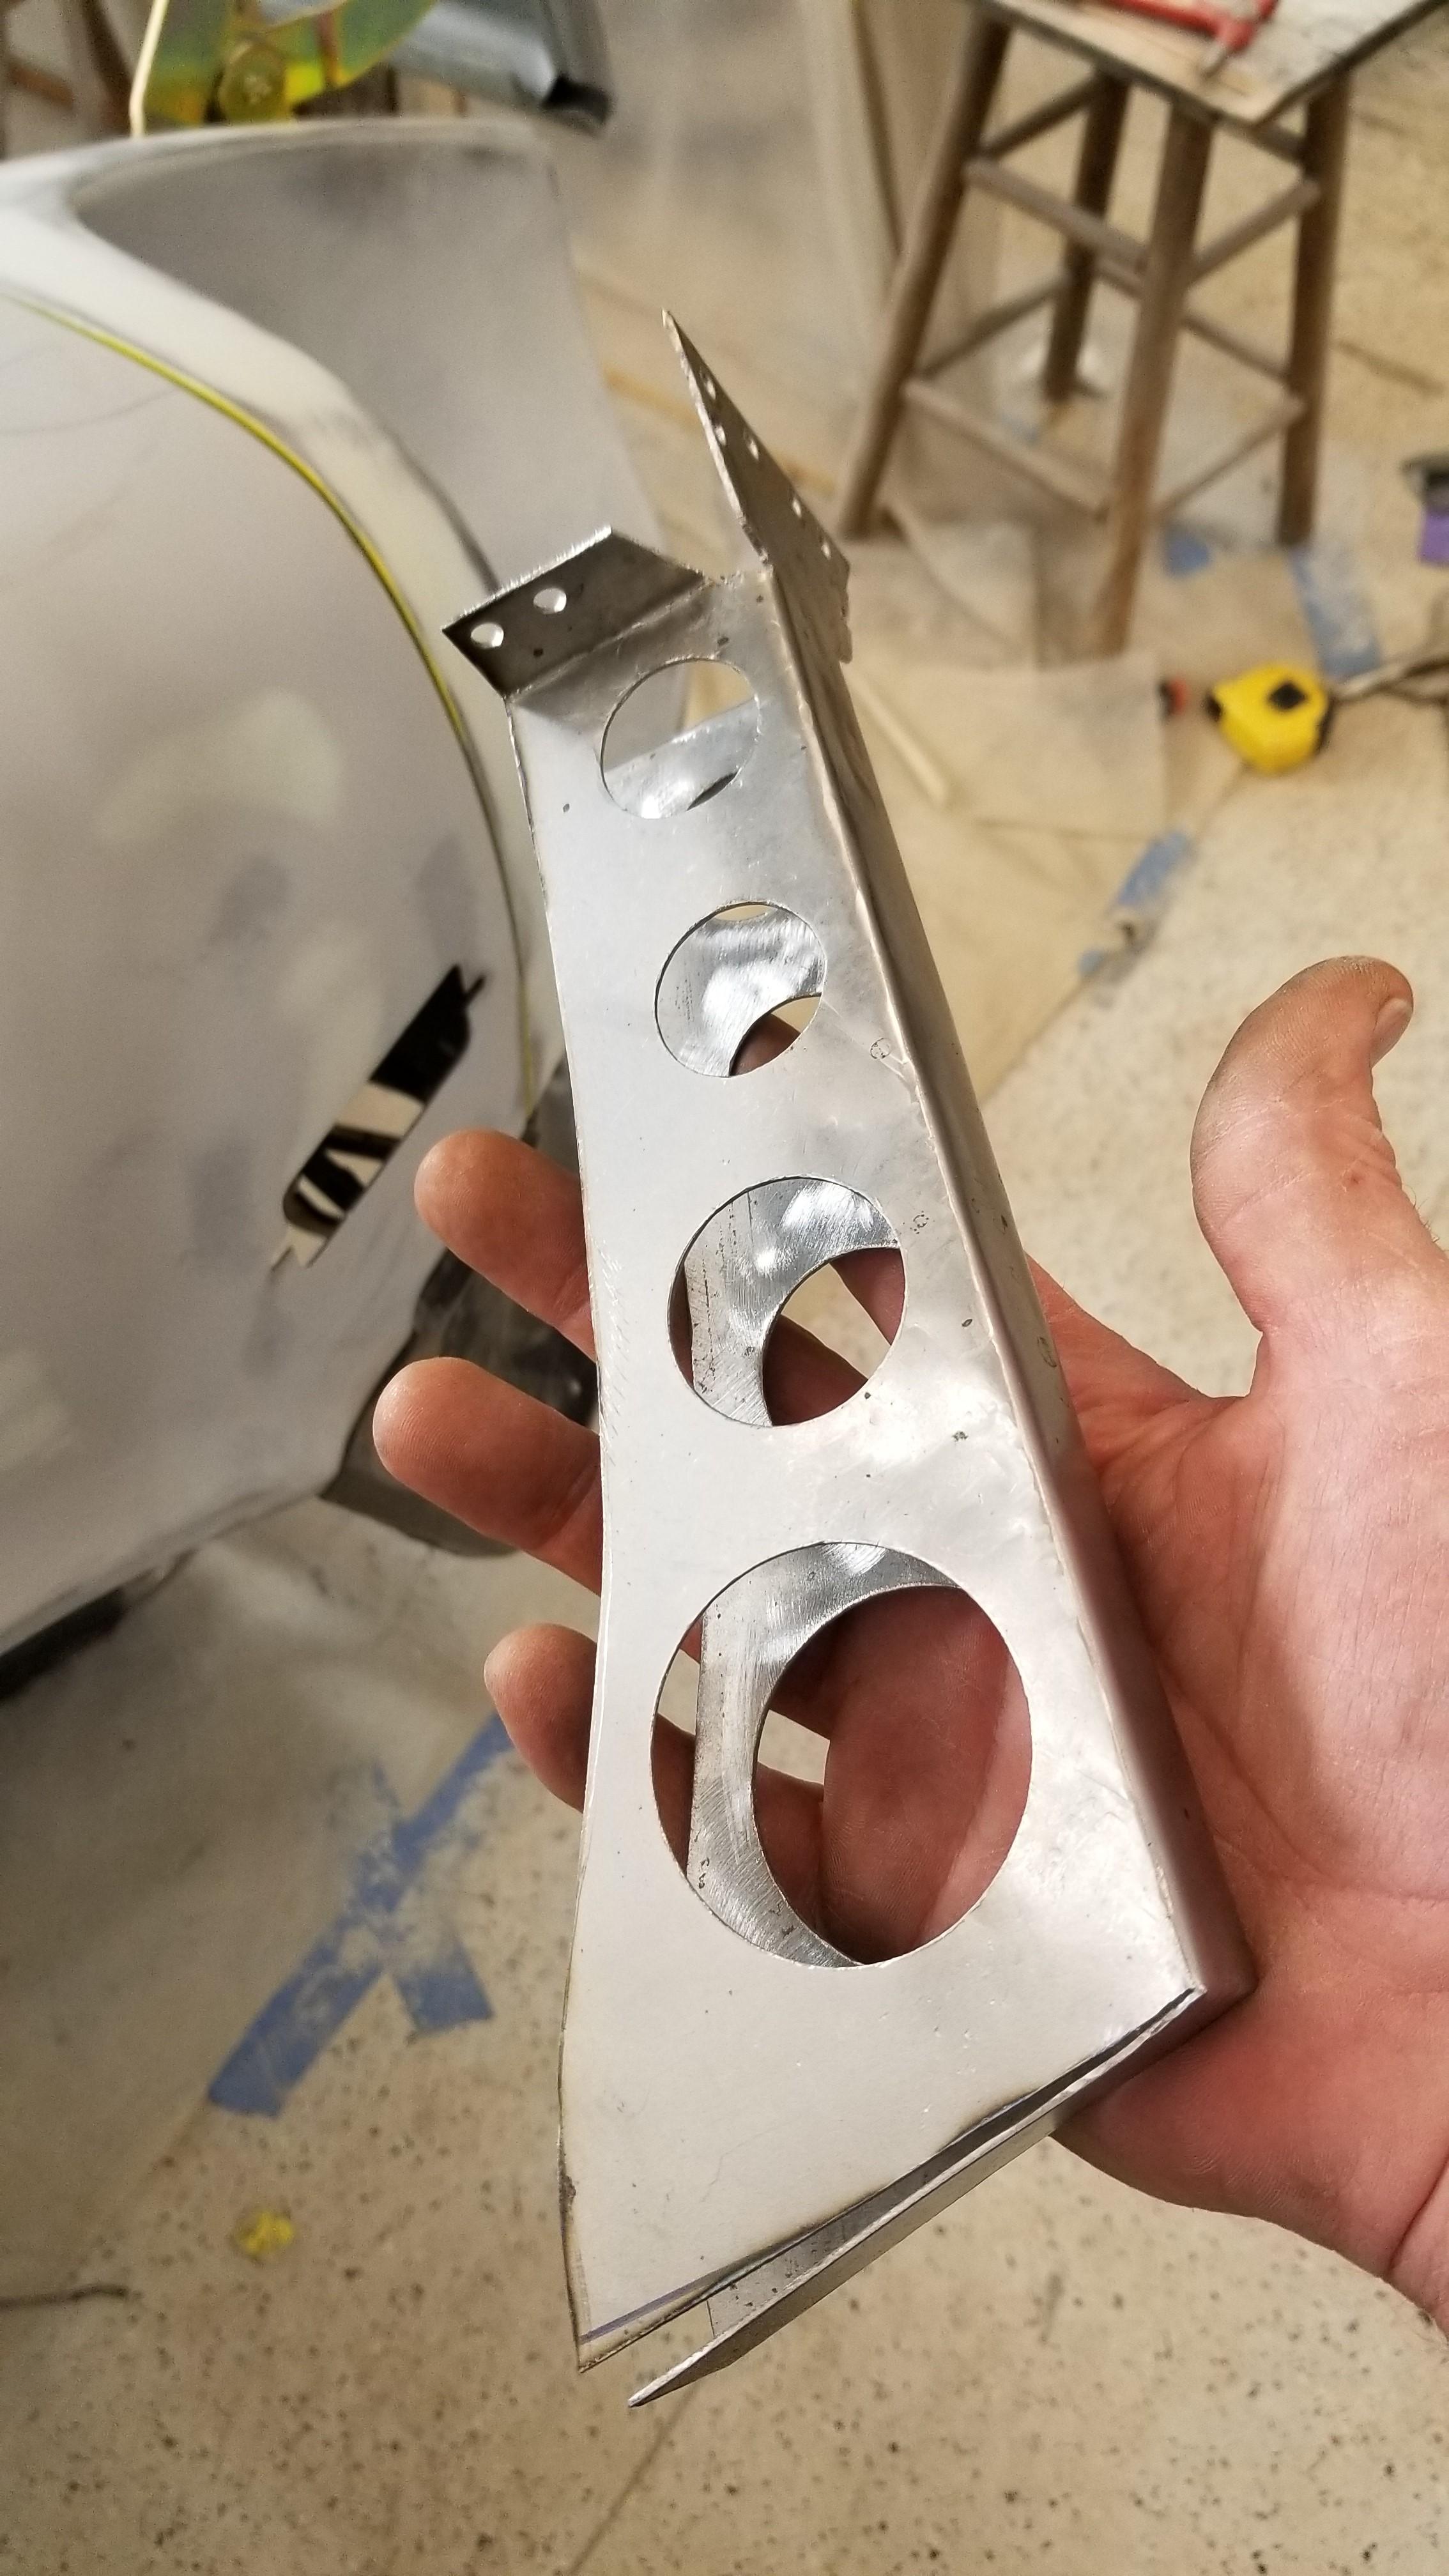
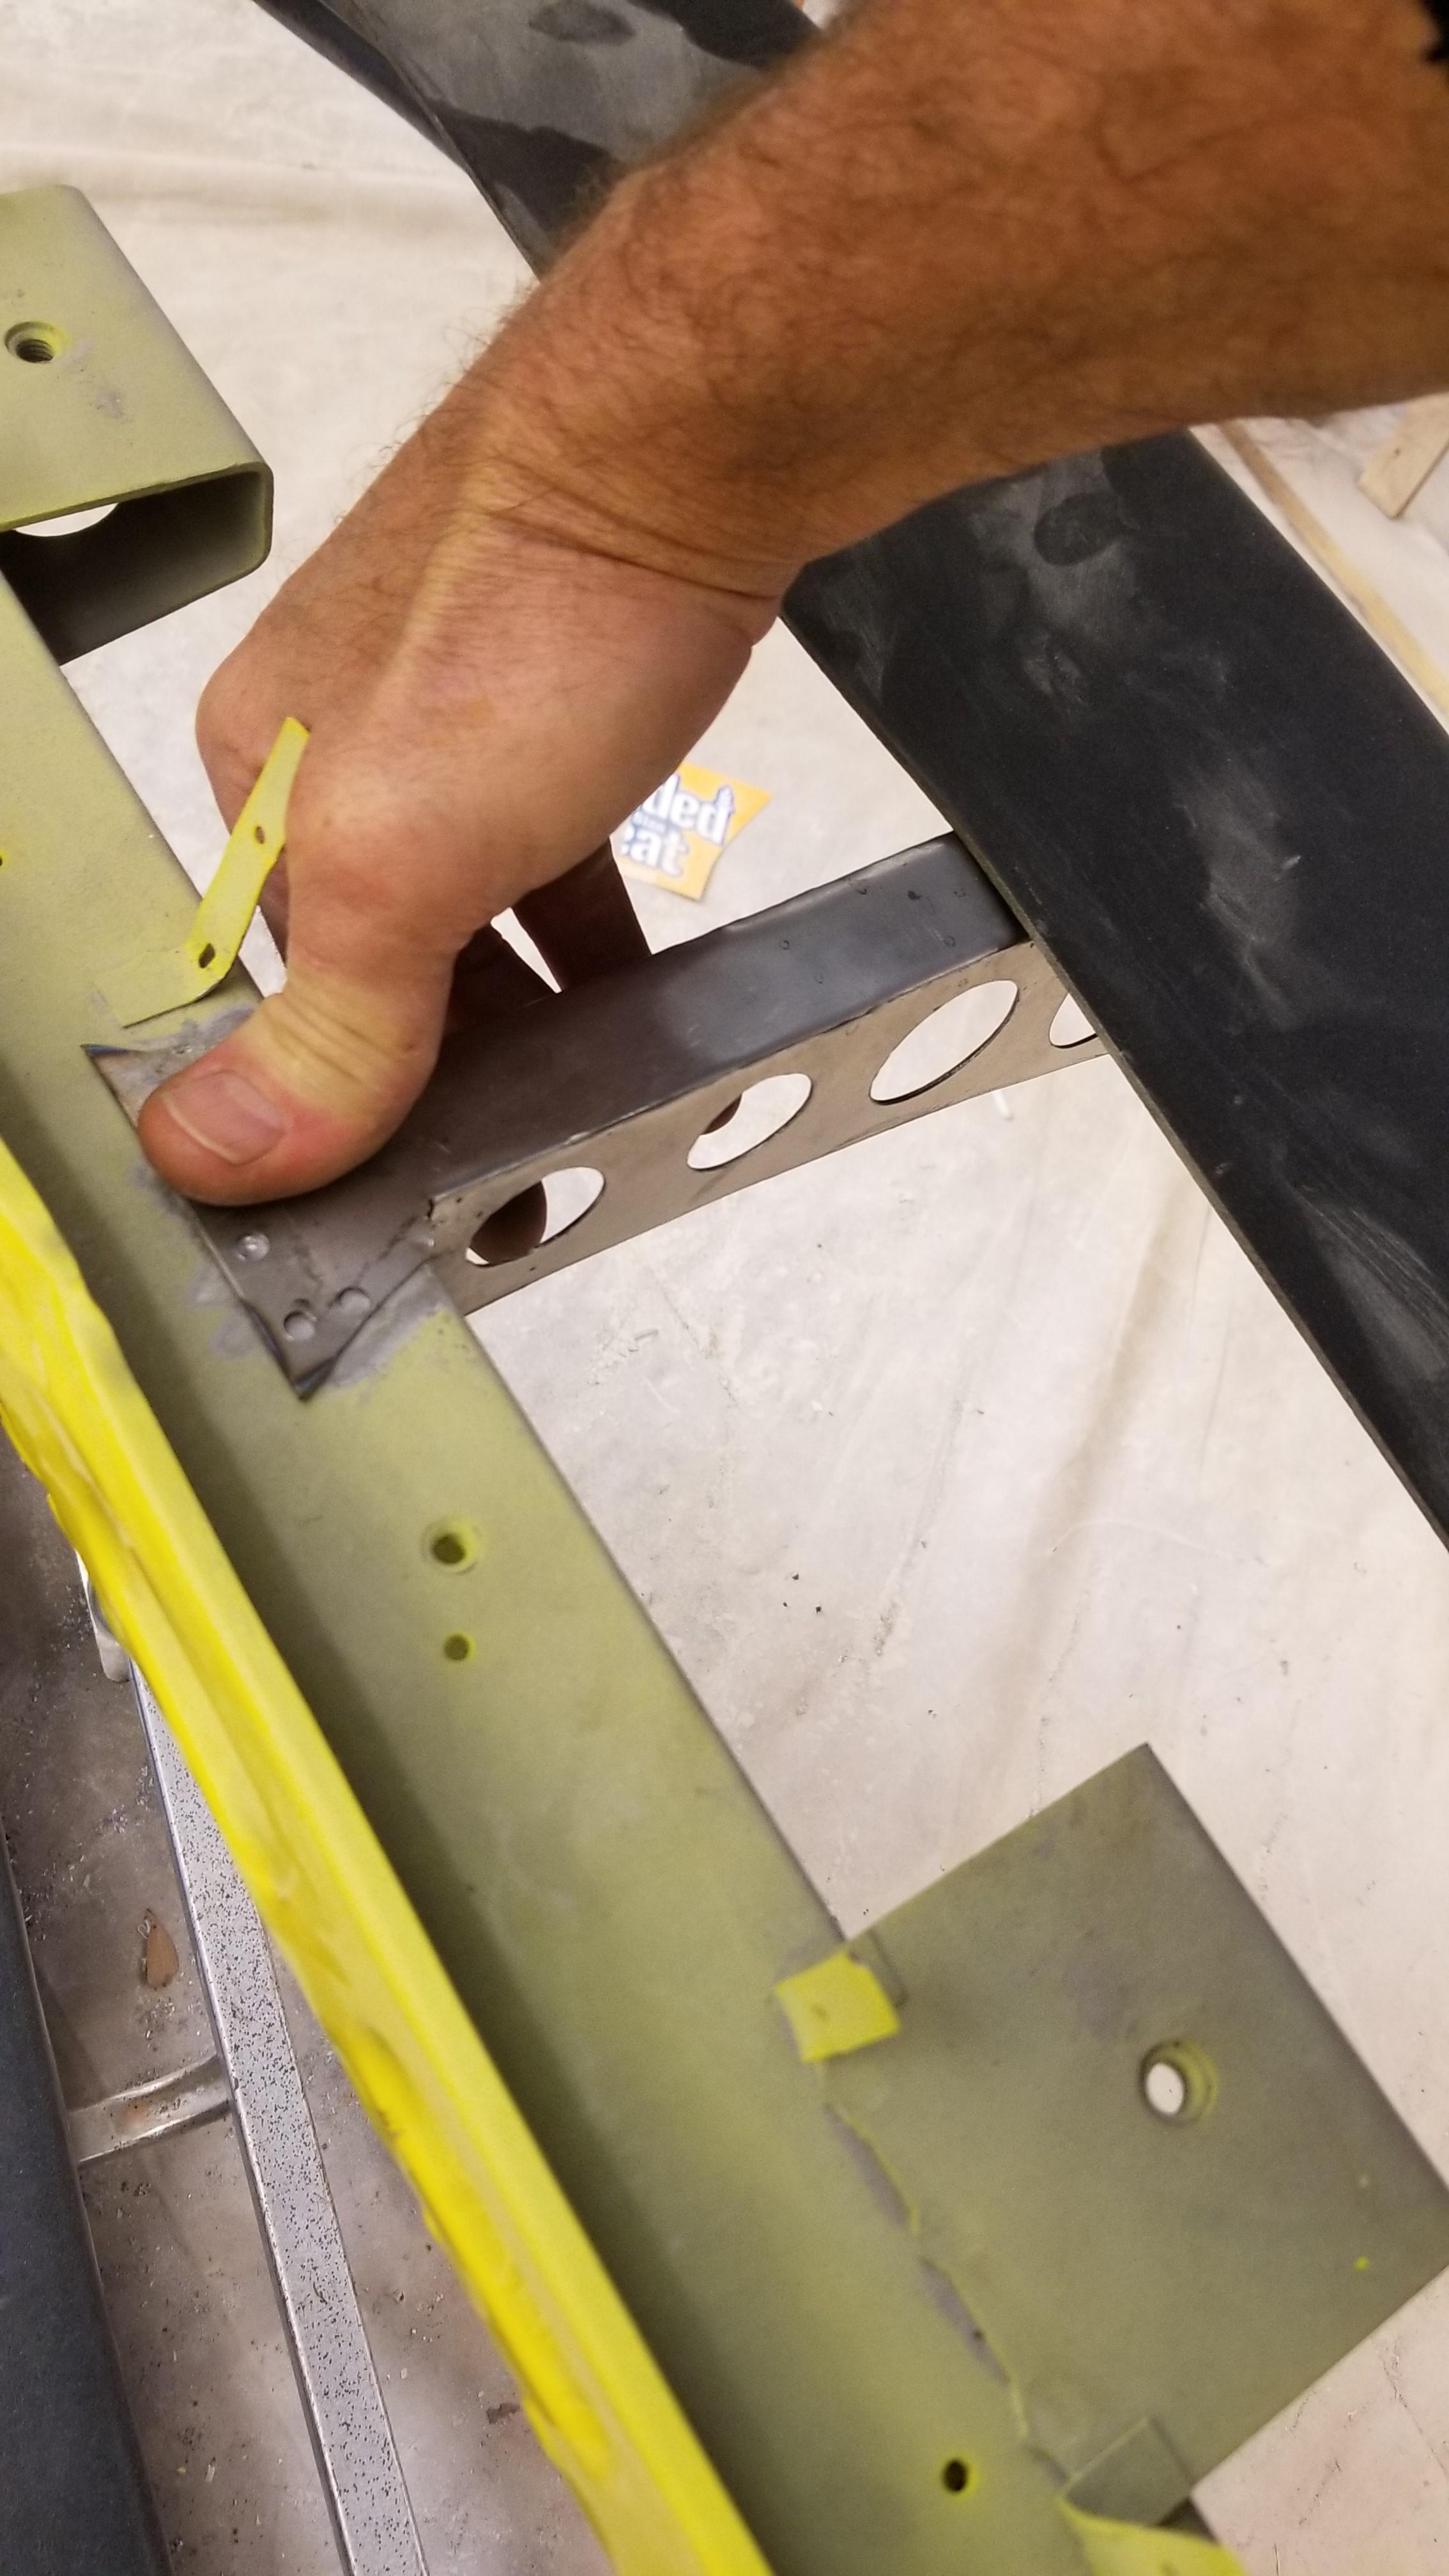
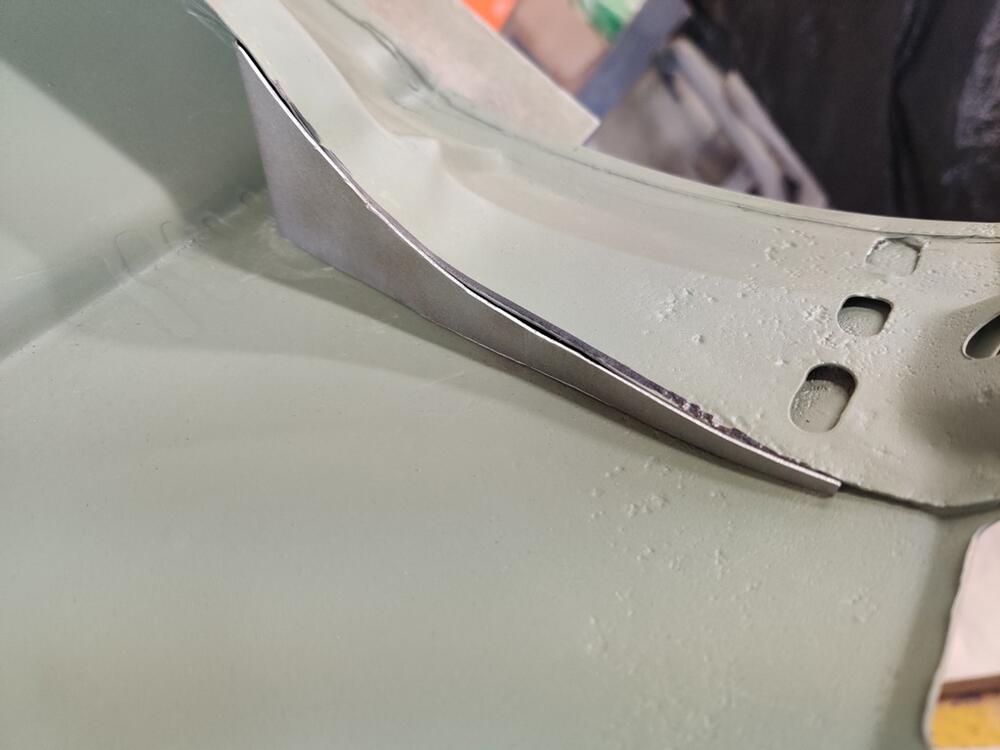
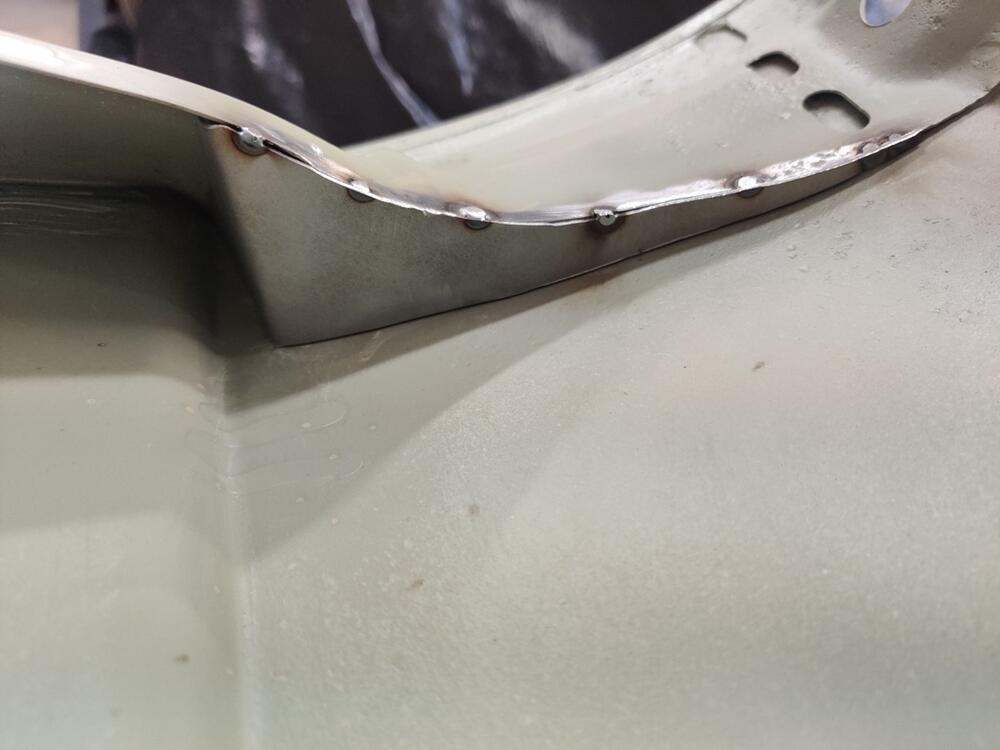
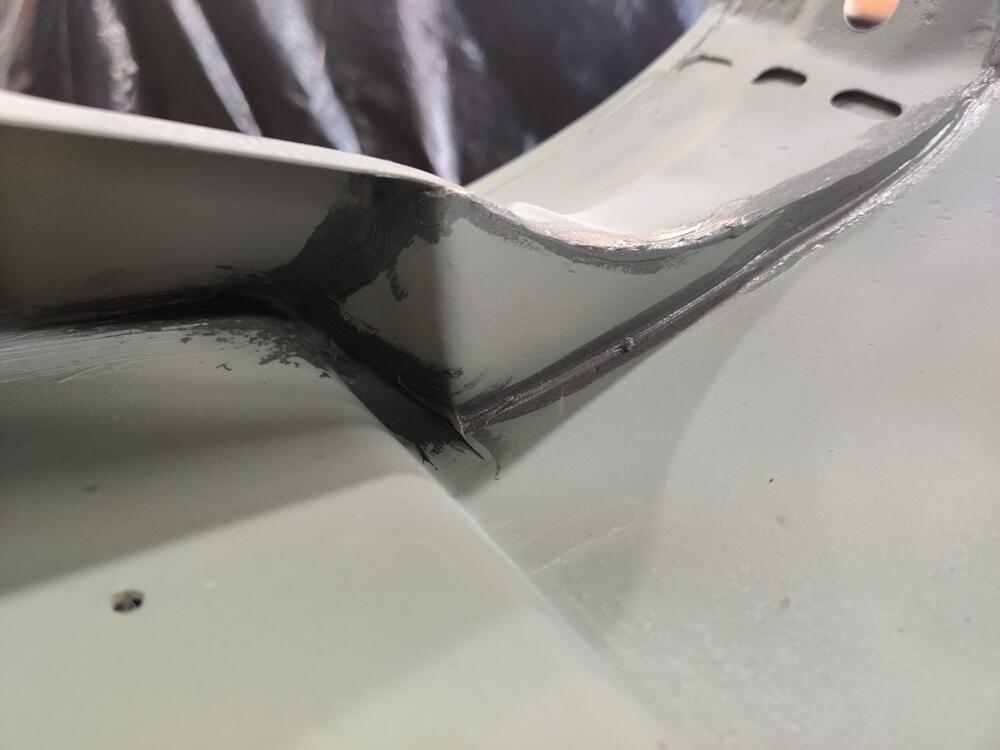
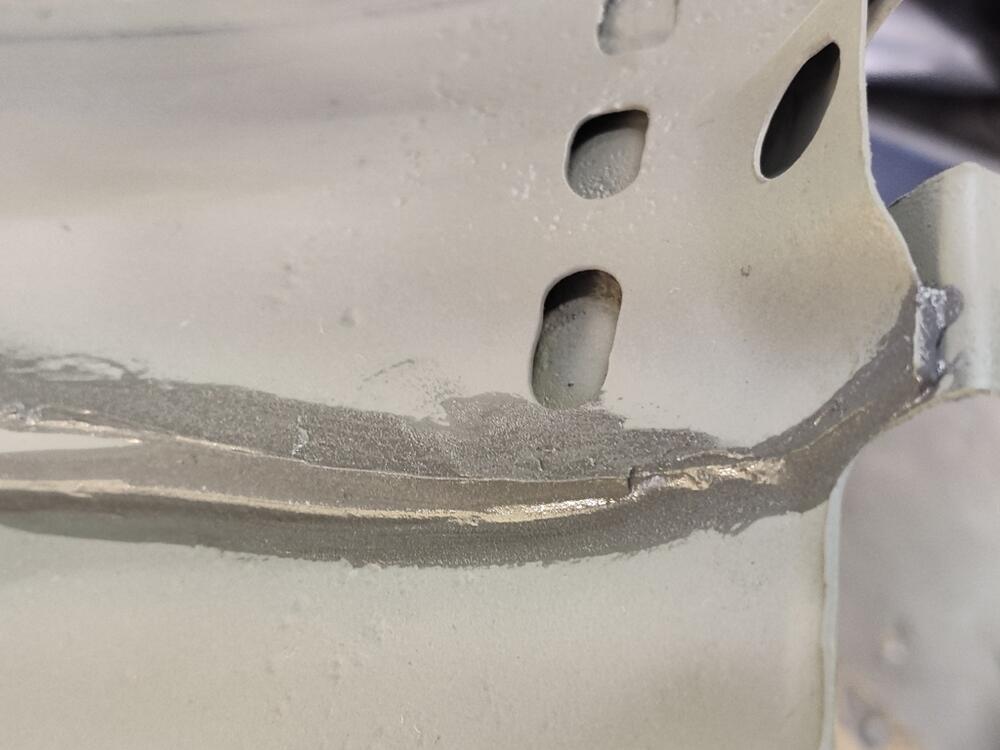
 I was able to fabricate these for both fenders today. This metal piece is easy to fabricate as it only has one bend. I decided to tack weld it to the support instead of using pop rivets - thanks grannyknot for the suggestion. I did not tack it anywhere else though, as the body work is nearly finalized and I am not interested in deforming the outside surface of the fender. Hopefully, the addition of this piece does not cause a change in the shape of the panel when it is bolted in place. It might. And more time on bodywork will be the result if it did. After tacking, I used a hand-held belt sander to clean up the edge and then applied seam sealer. Now, any water coming inside the fender will run down the inside and be directed away from this corner by the shelf of this panel.


 1 point
 -
 1 pointjust read your last post. You can try cold but steel bends easier when it's hot.1 point
 -
1 pointNothing too scientific but I'd try torquing it with no gasket, the engine cold and the flange hot (below 1000 f, dull dark red). Torque the leaking area first and then the rest. Keep checking the torque in the leak area as the flange cools. Then remove the manifold, install the gasket and retorque.1 point
-
1 pointI'm gonna try cold. I damn sure don't want to replace the gasket. I can only hear it with the hood open and idiling. My anxiety can't get any worse so I'll live with it if I have to.1 point
-
1 point
-
 1 pointIMHO, I would pull that kit off and call Mike at Banzai Motors and order the proper seat covers.1 point
 -
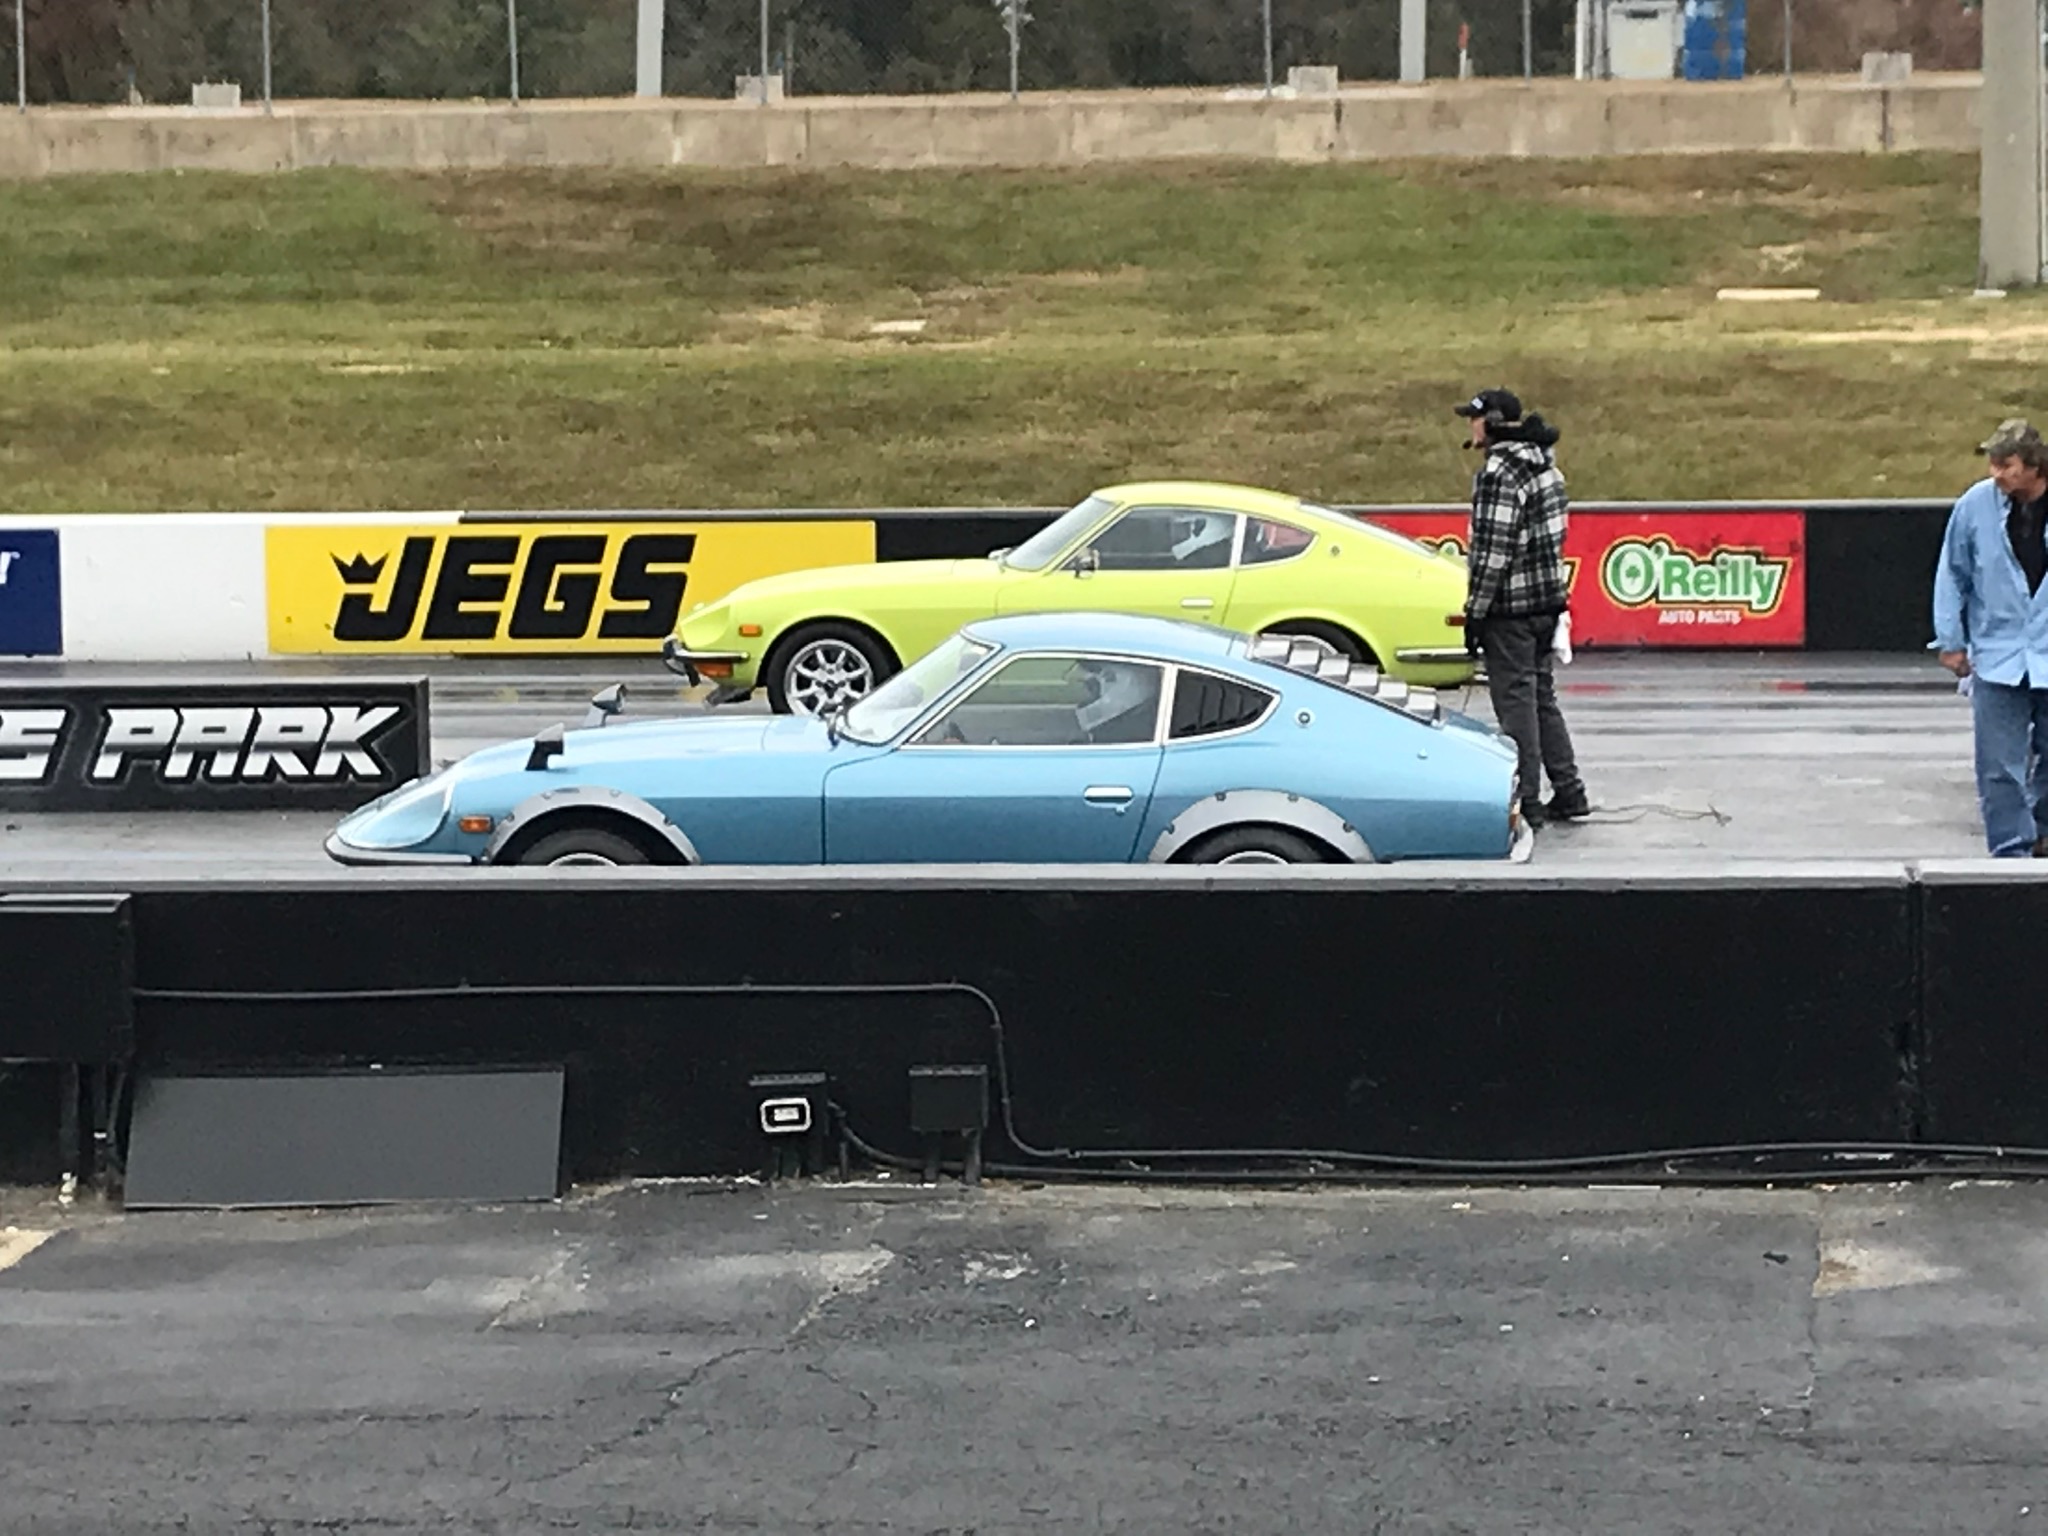
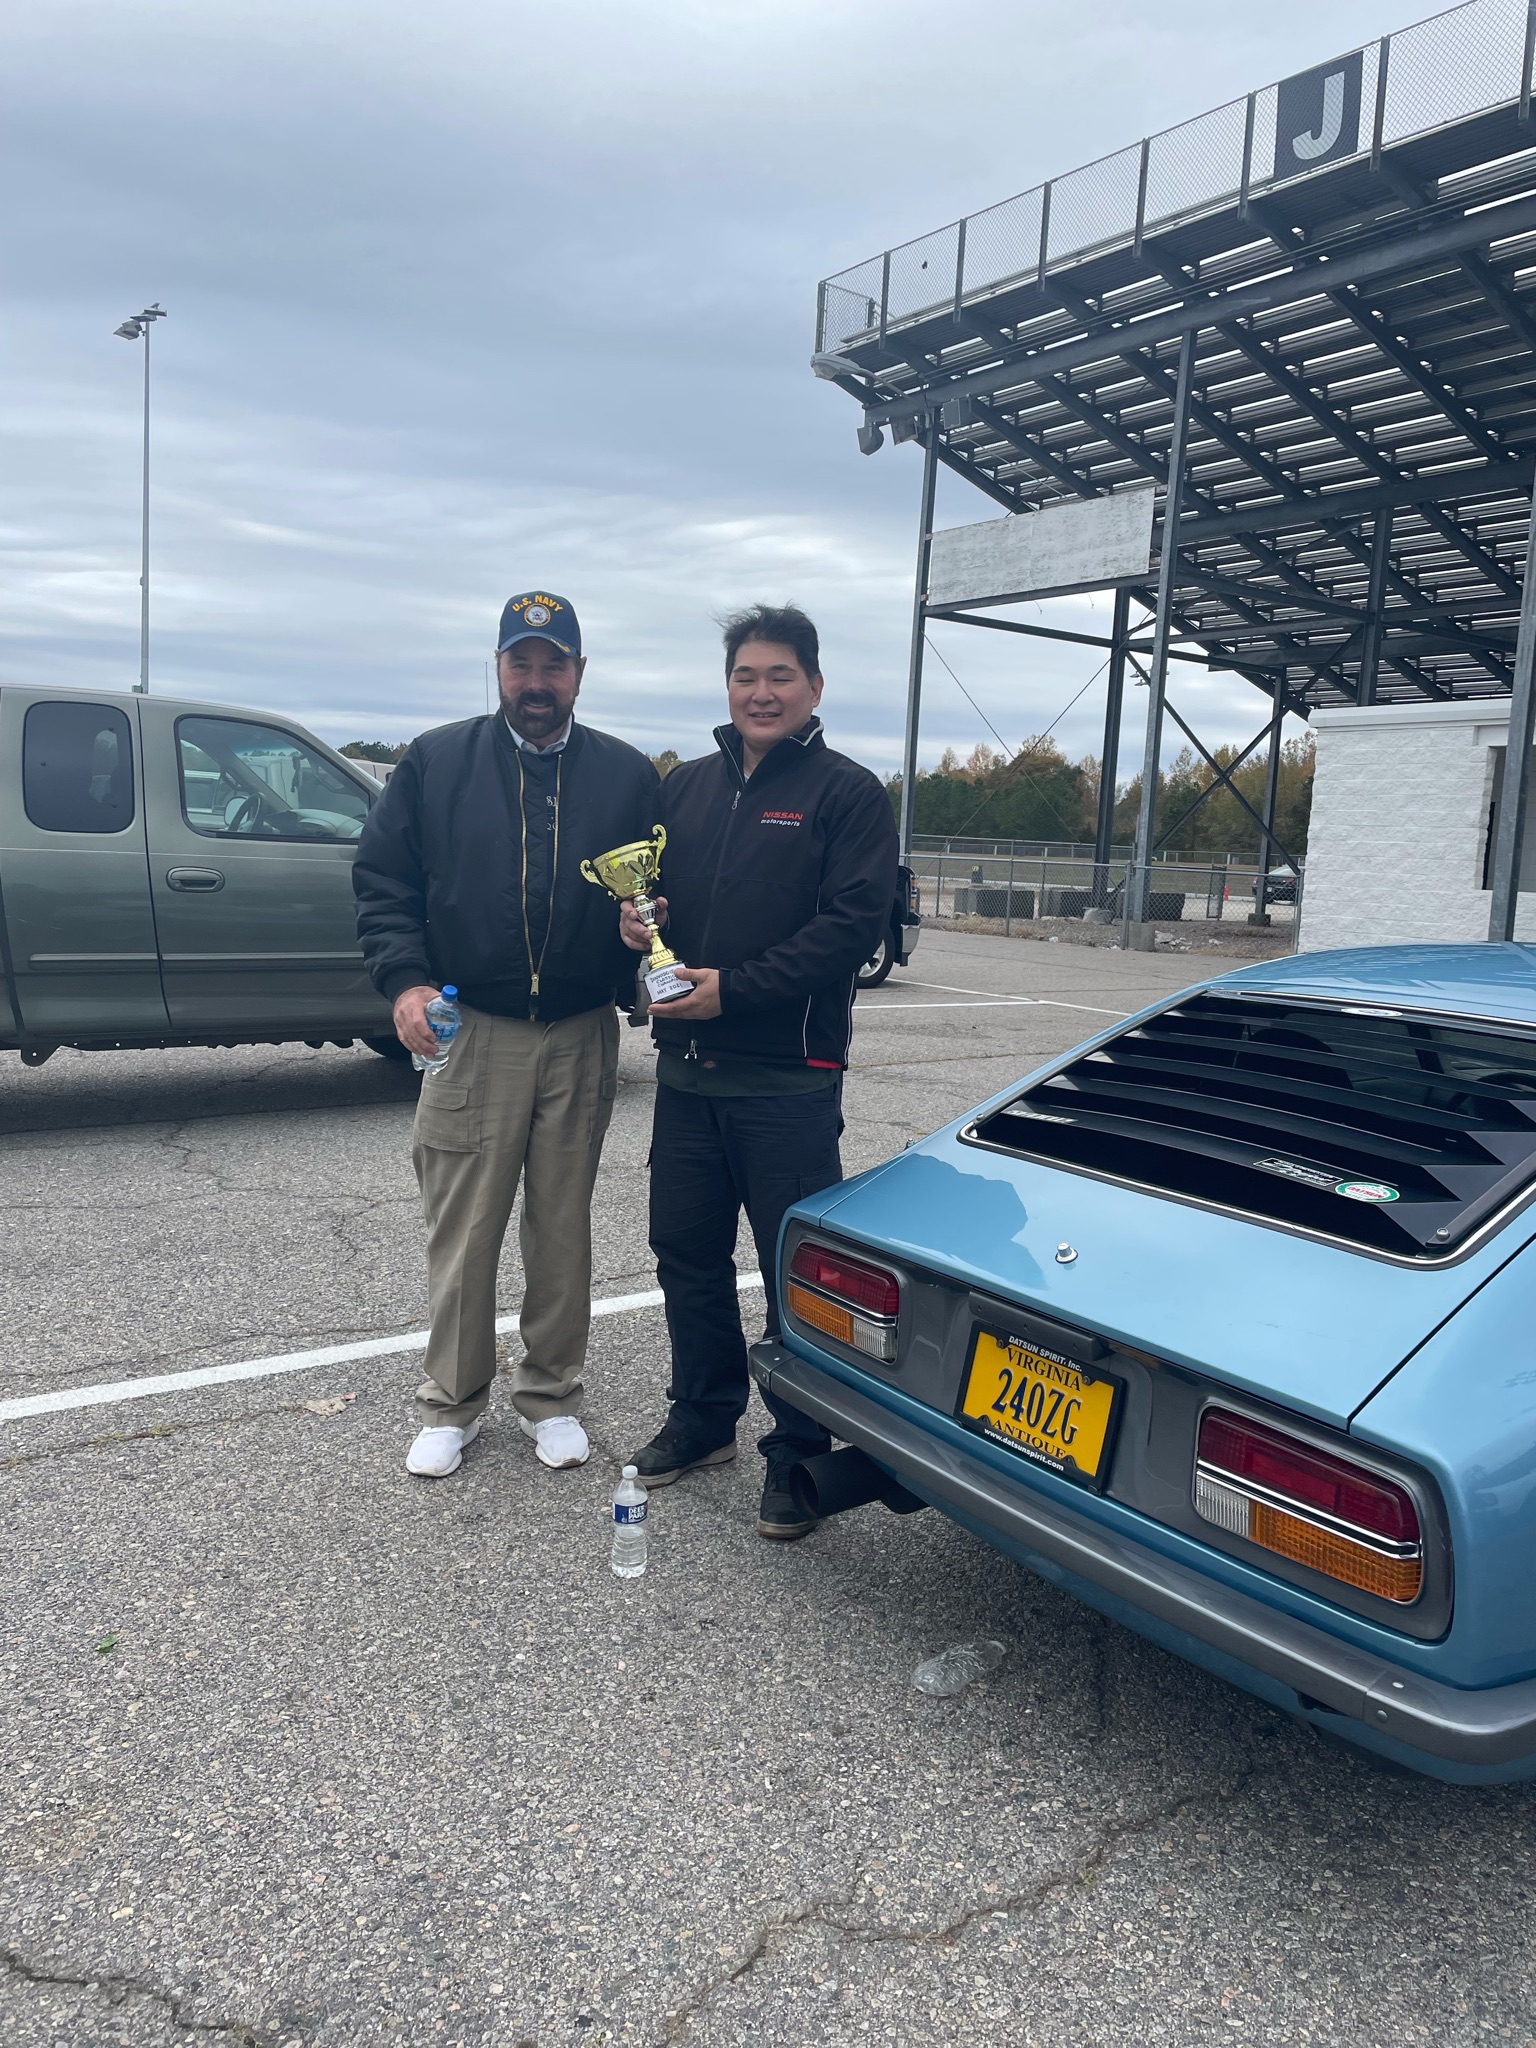
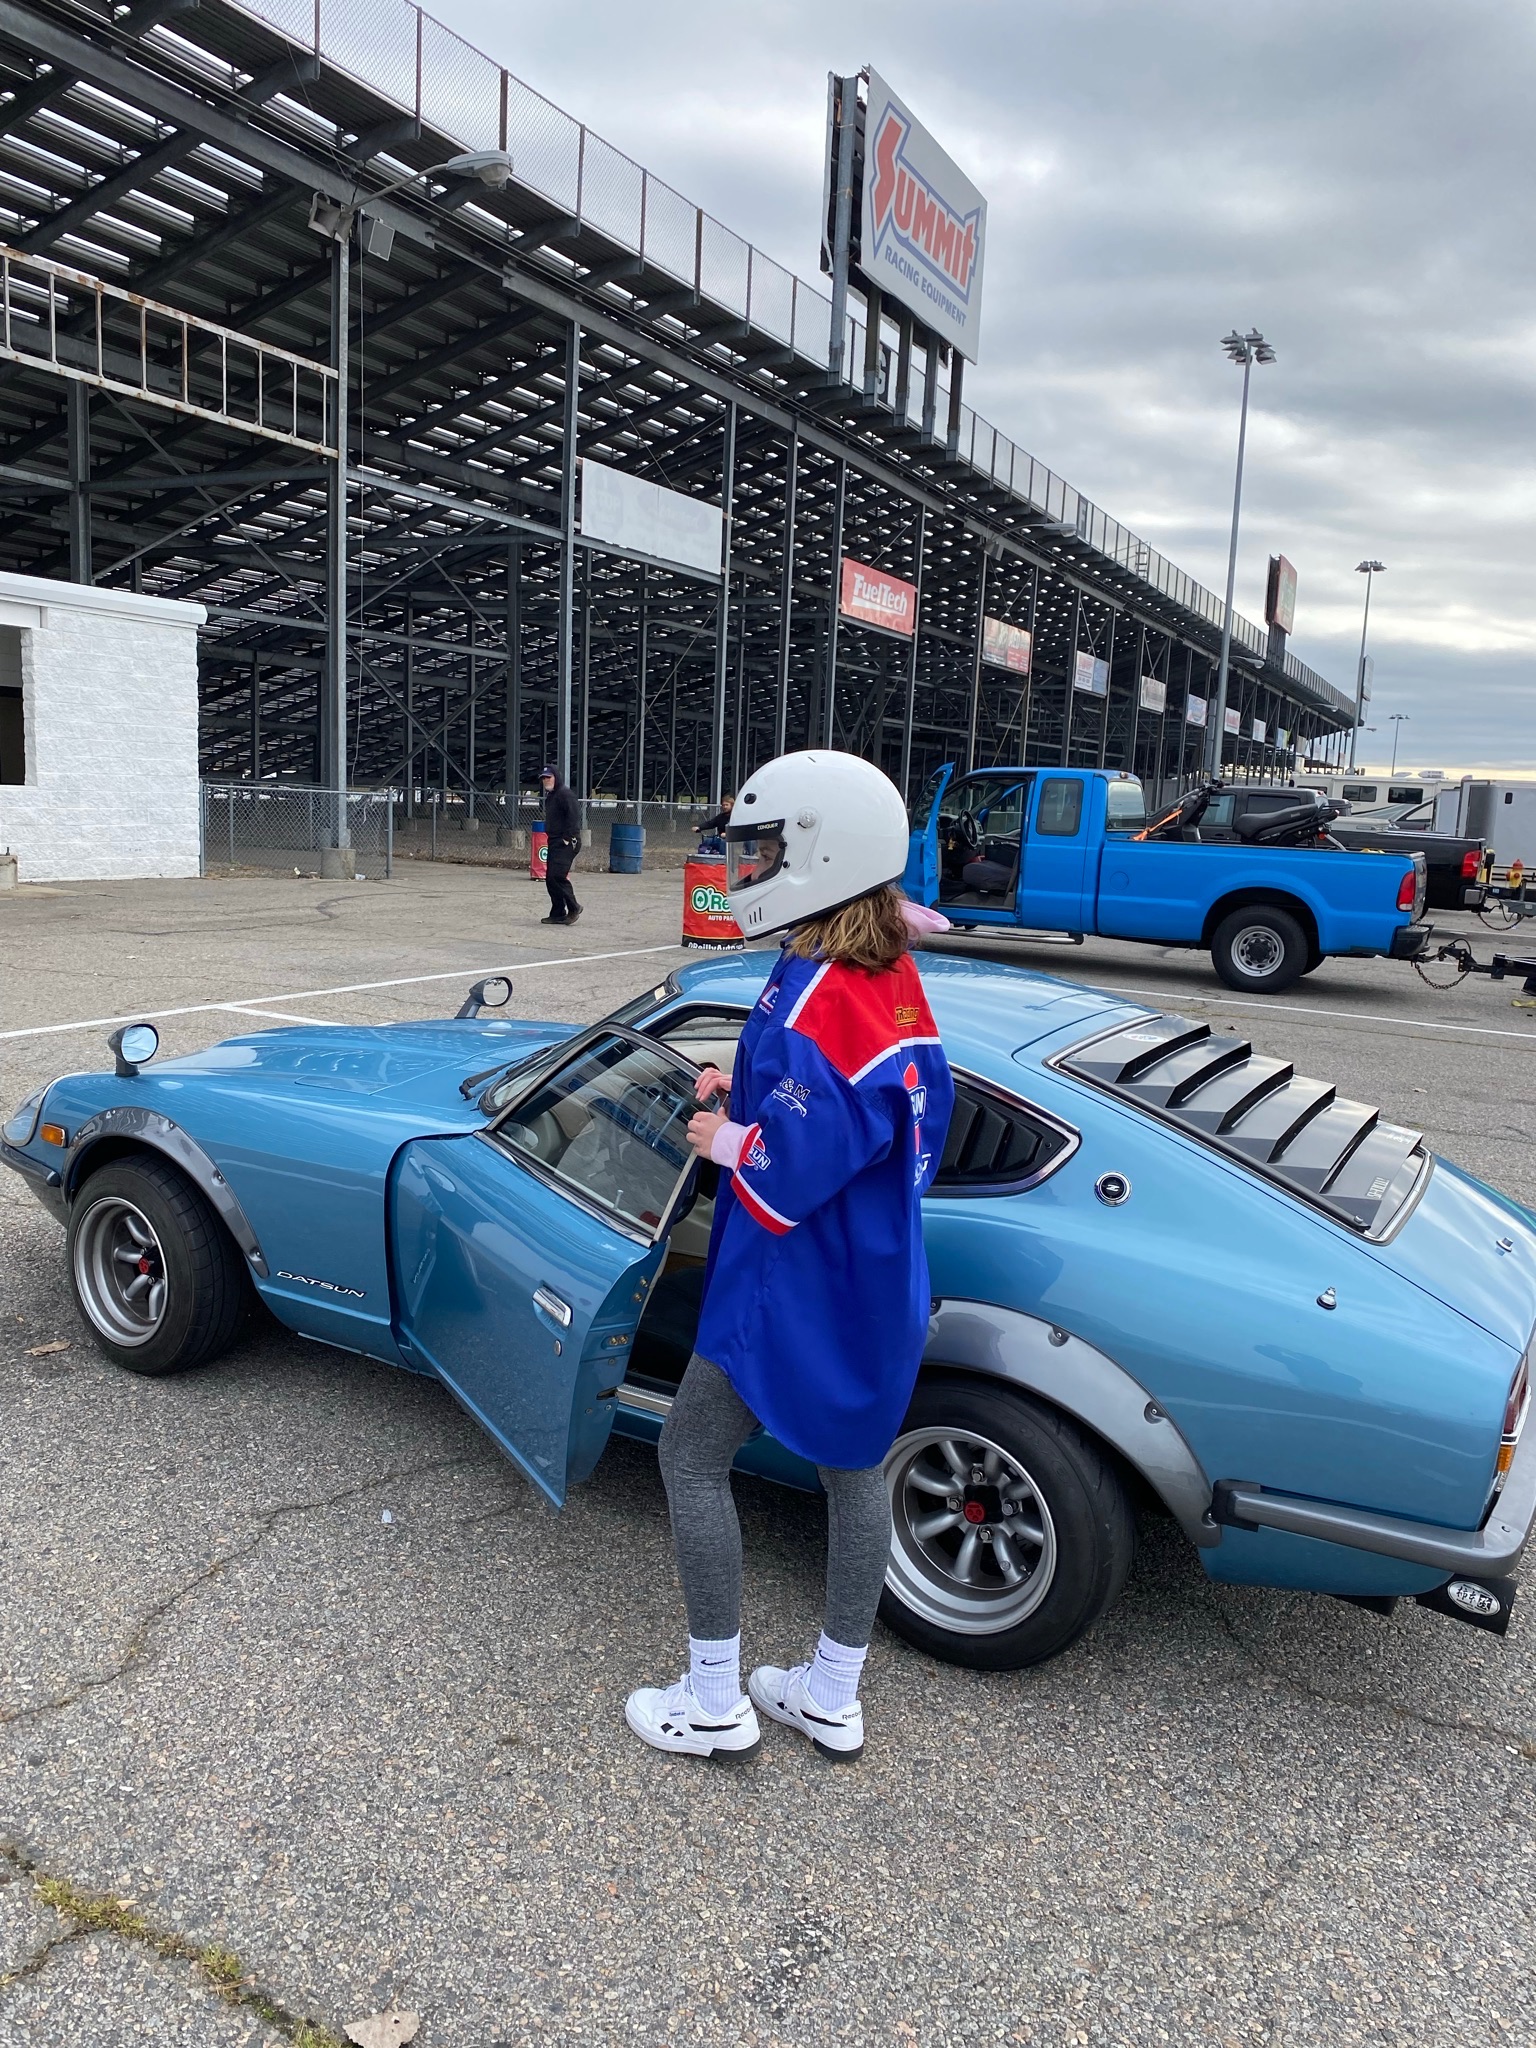
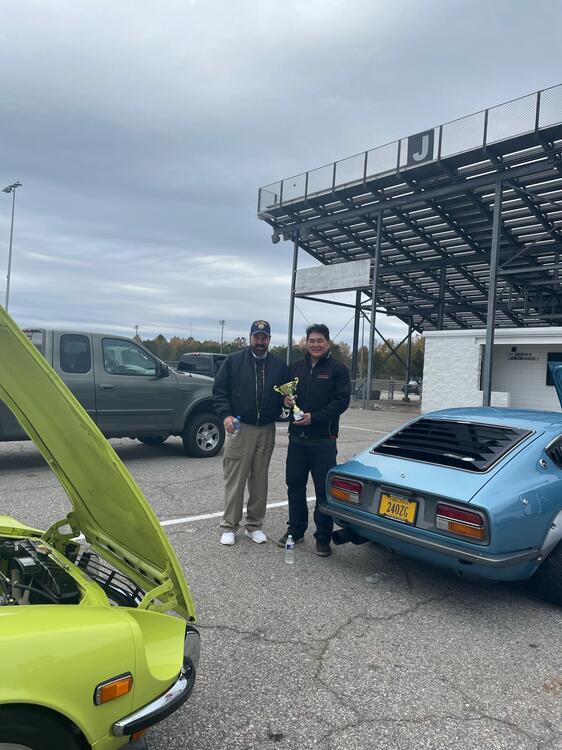
Spent Saturday at Dinwiddie Drag Strip Racing Eiji....again!!! He won......no way to treat a good friend. We had a ball.....big block Chevy guys loved the Datsuns and Eiji turned a 13.65! 97F43F4E-4656-4774-953D-277440D5127B.MOV


 1 point
 -
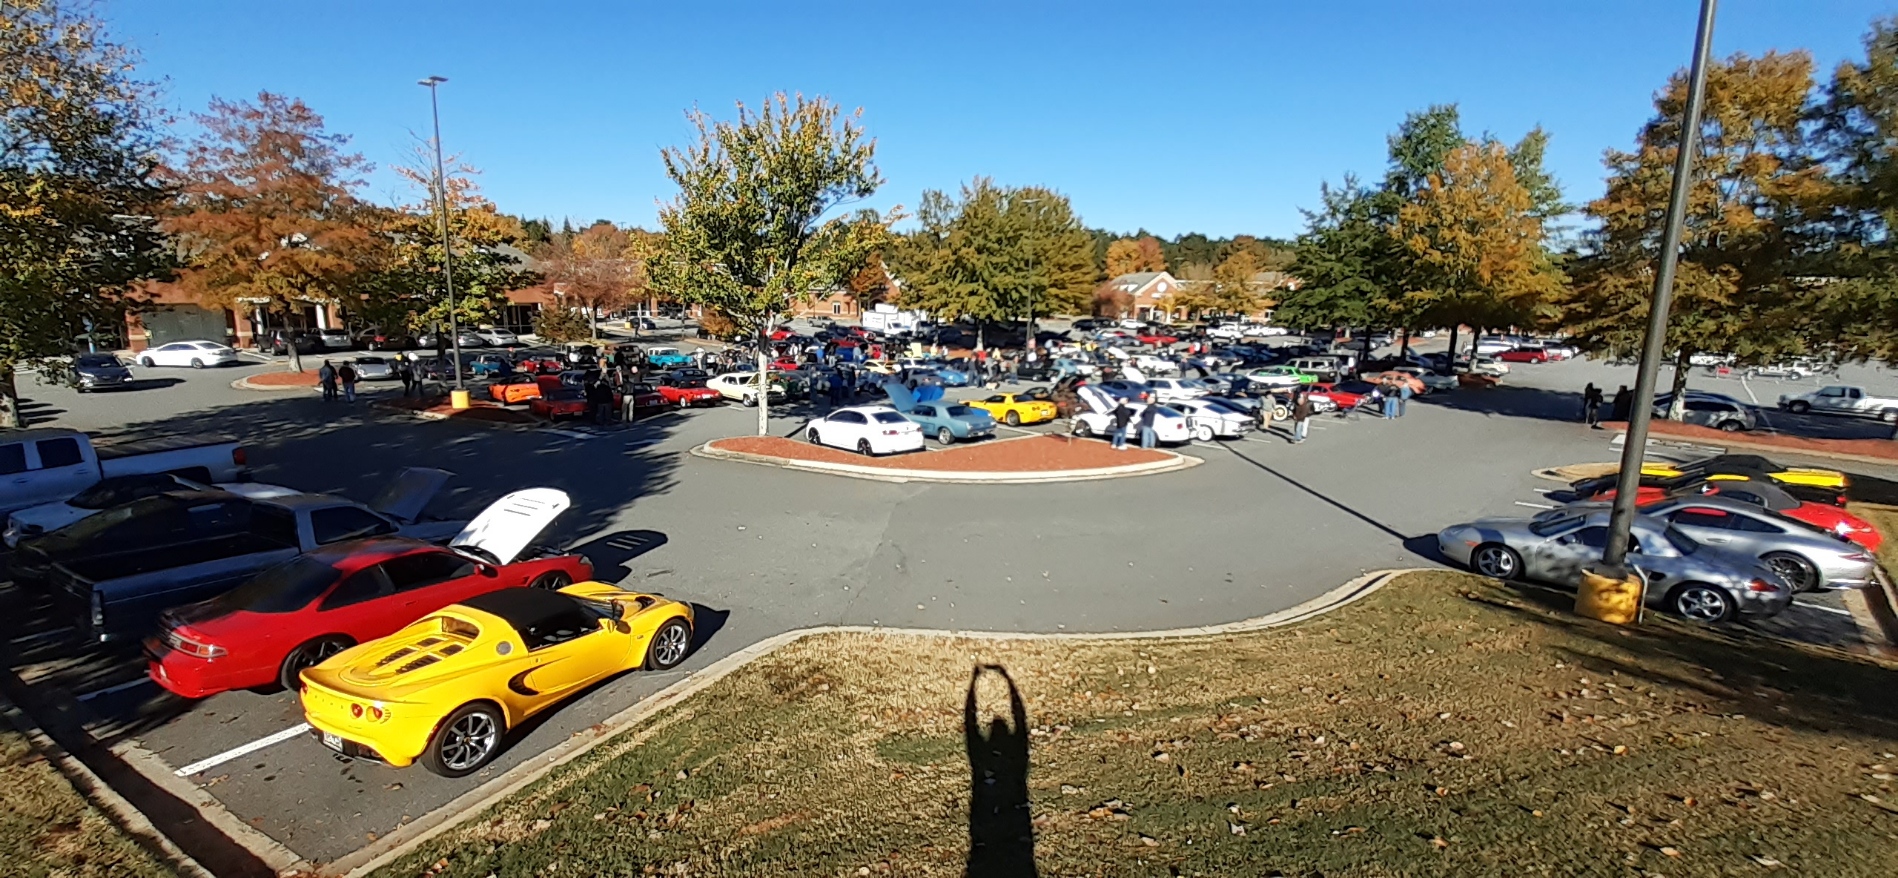
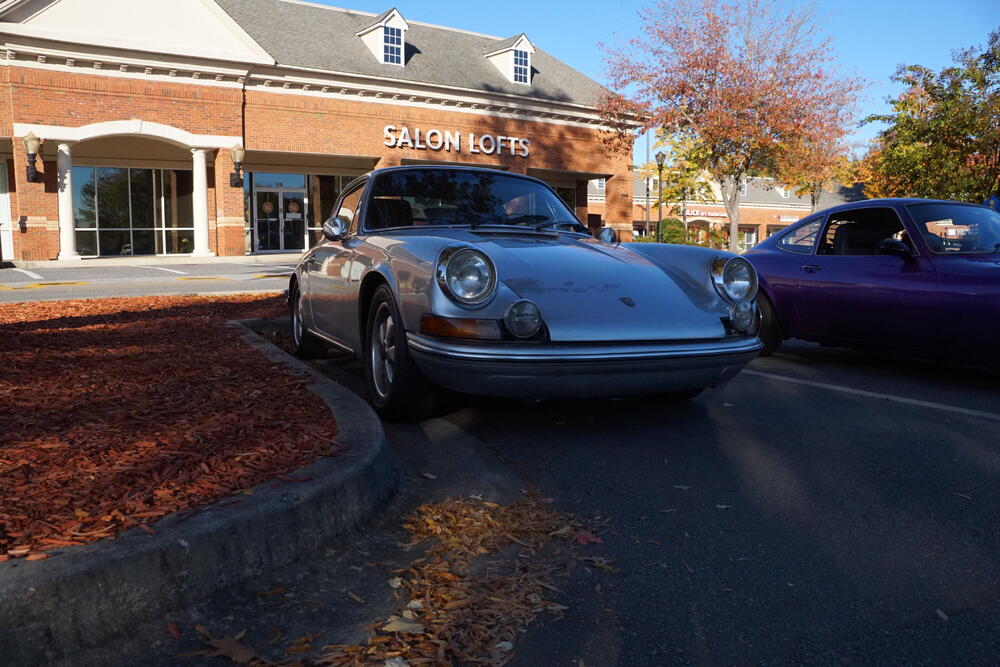
One funny thing happened while I was taking photos was that I was stopped after taking a picture of the Porsche below. The owner wanted me to feel his headlights, and it wasn't even a dirty proposition. As I walked over to his car, I said, "Oh, do you have the concave headlights from Cibie?" It surprised him that I figured it out. I let him know the concave Cibies were valued in the Z car world. It's great when different parts of the car loving universe can intersect.
 1 point
 -
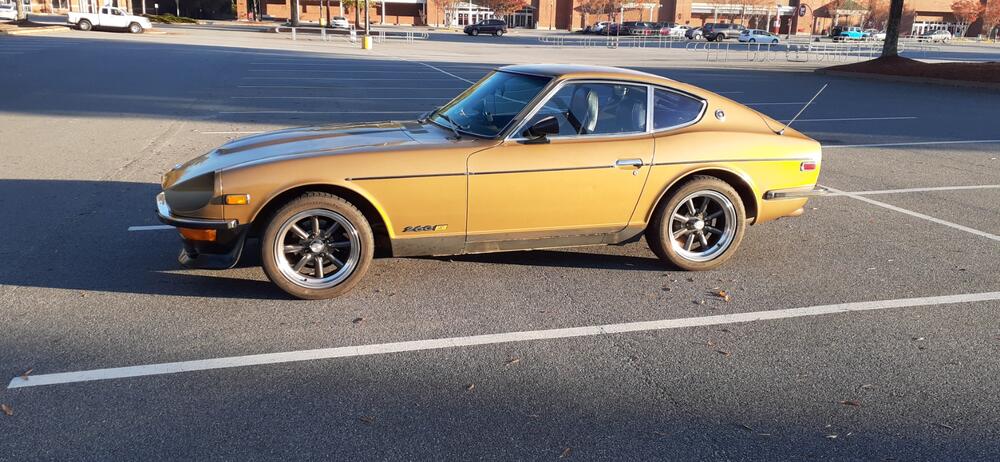
Well, I haven't been driving the Z much lately, but the weather looked good for the Worship meet today. Worship was started by people who thought our local Caffeine and Octane show was getting overwhelmed by non-car people. I like going because people don't care that I don't have a show car. They are more than interested in the modifications I have made. It was cold starting out, and it took a while for people to show up. There were only 2 other 1st gen Zs there, plus a 350Z. One of the highlights for me was when a guy in a Cayman drove up with his German Shepherd. As soon as he opened the door for her, she made a bee-line straight for me. She was such a sweetheart. It was a good sized crowd eventually. Just to prove I didn't have the only Z there, here is my friend's Series 1.


 1 point
 -
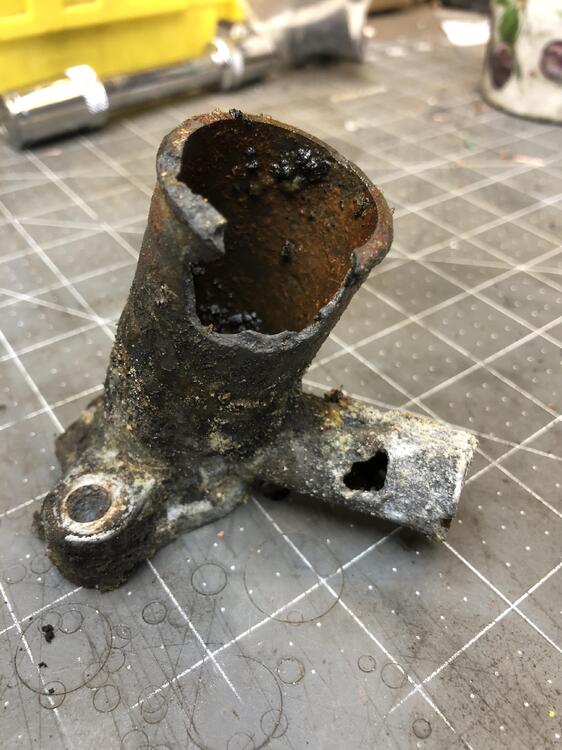
 1 pointOh wow I think I have that in my parts bin if not that looks like I could fabricate that. Now to find what the drivers side looks like although I would assume a mirror of that EDIT : yup found it in my what in the hell is this part bin. thanks for the pic below is a picture of the entire bracket
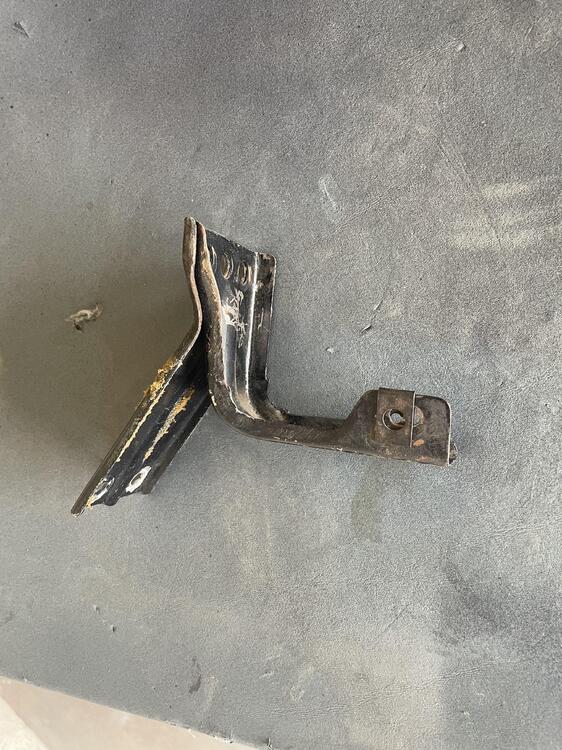 1 point
 -
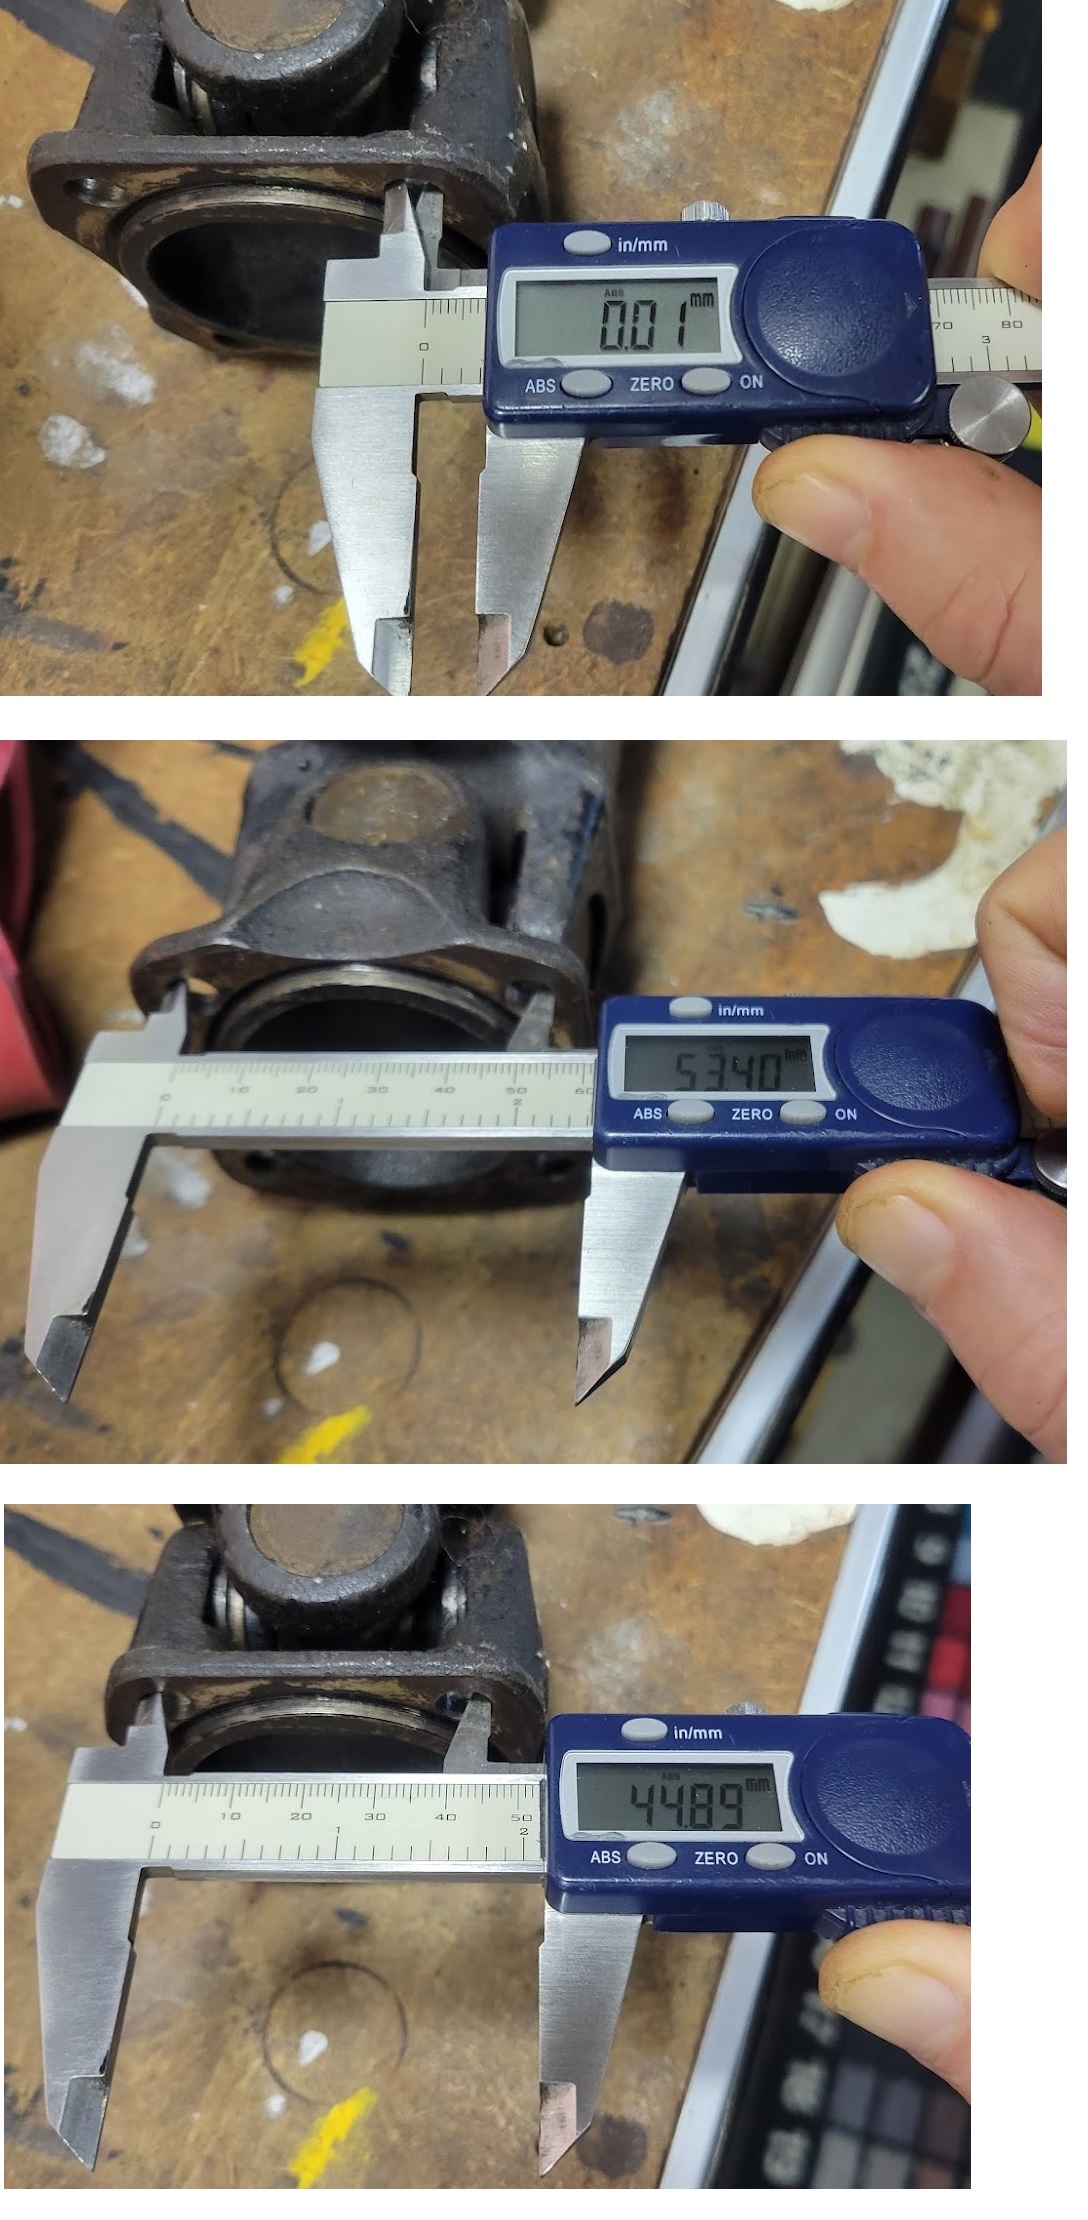
 1 pointGood timing on your request, my 1970 propeller (drive) shaft is currently sitting on my workbench. I measured the "X" dim as 53.4mm and the "Y" dim as 44.9mm, using a digital caliper. To do direct center to center measurements I first zeroed the calipers on one of the holes, see pics below. The holes measured 8.10/8.15mm dimeter, clearance for an M8 bolt. Sorry I don't have a 260Z shaft.
 1 point
 -
1 point
-
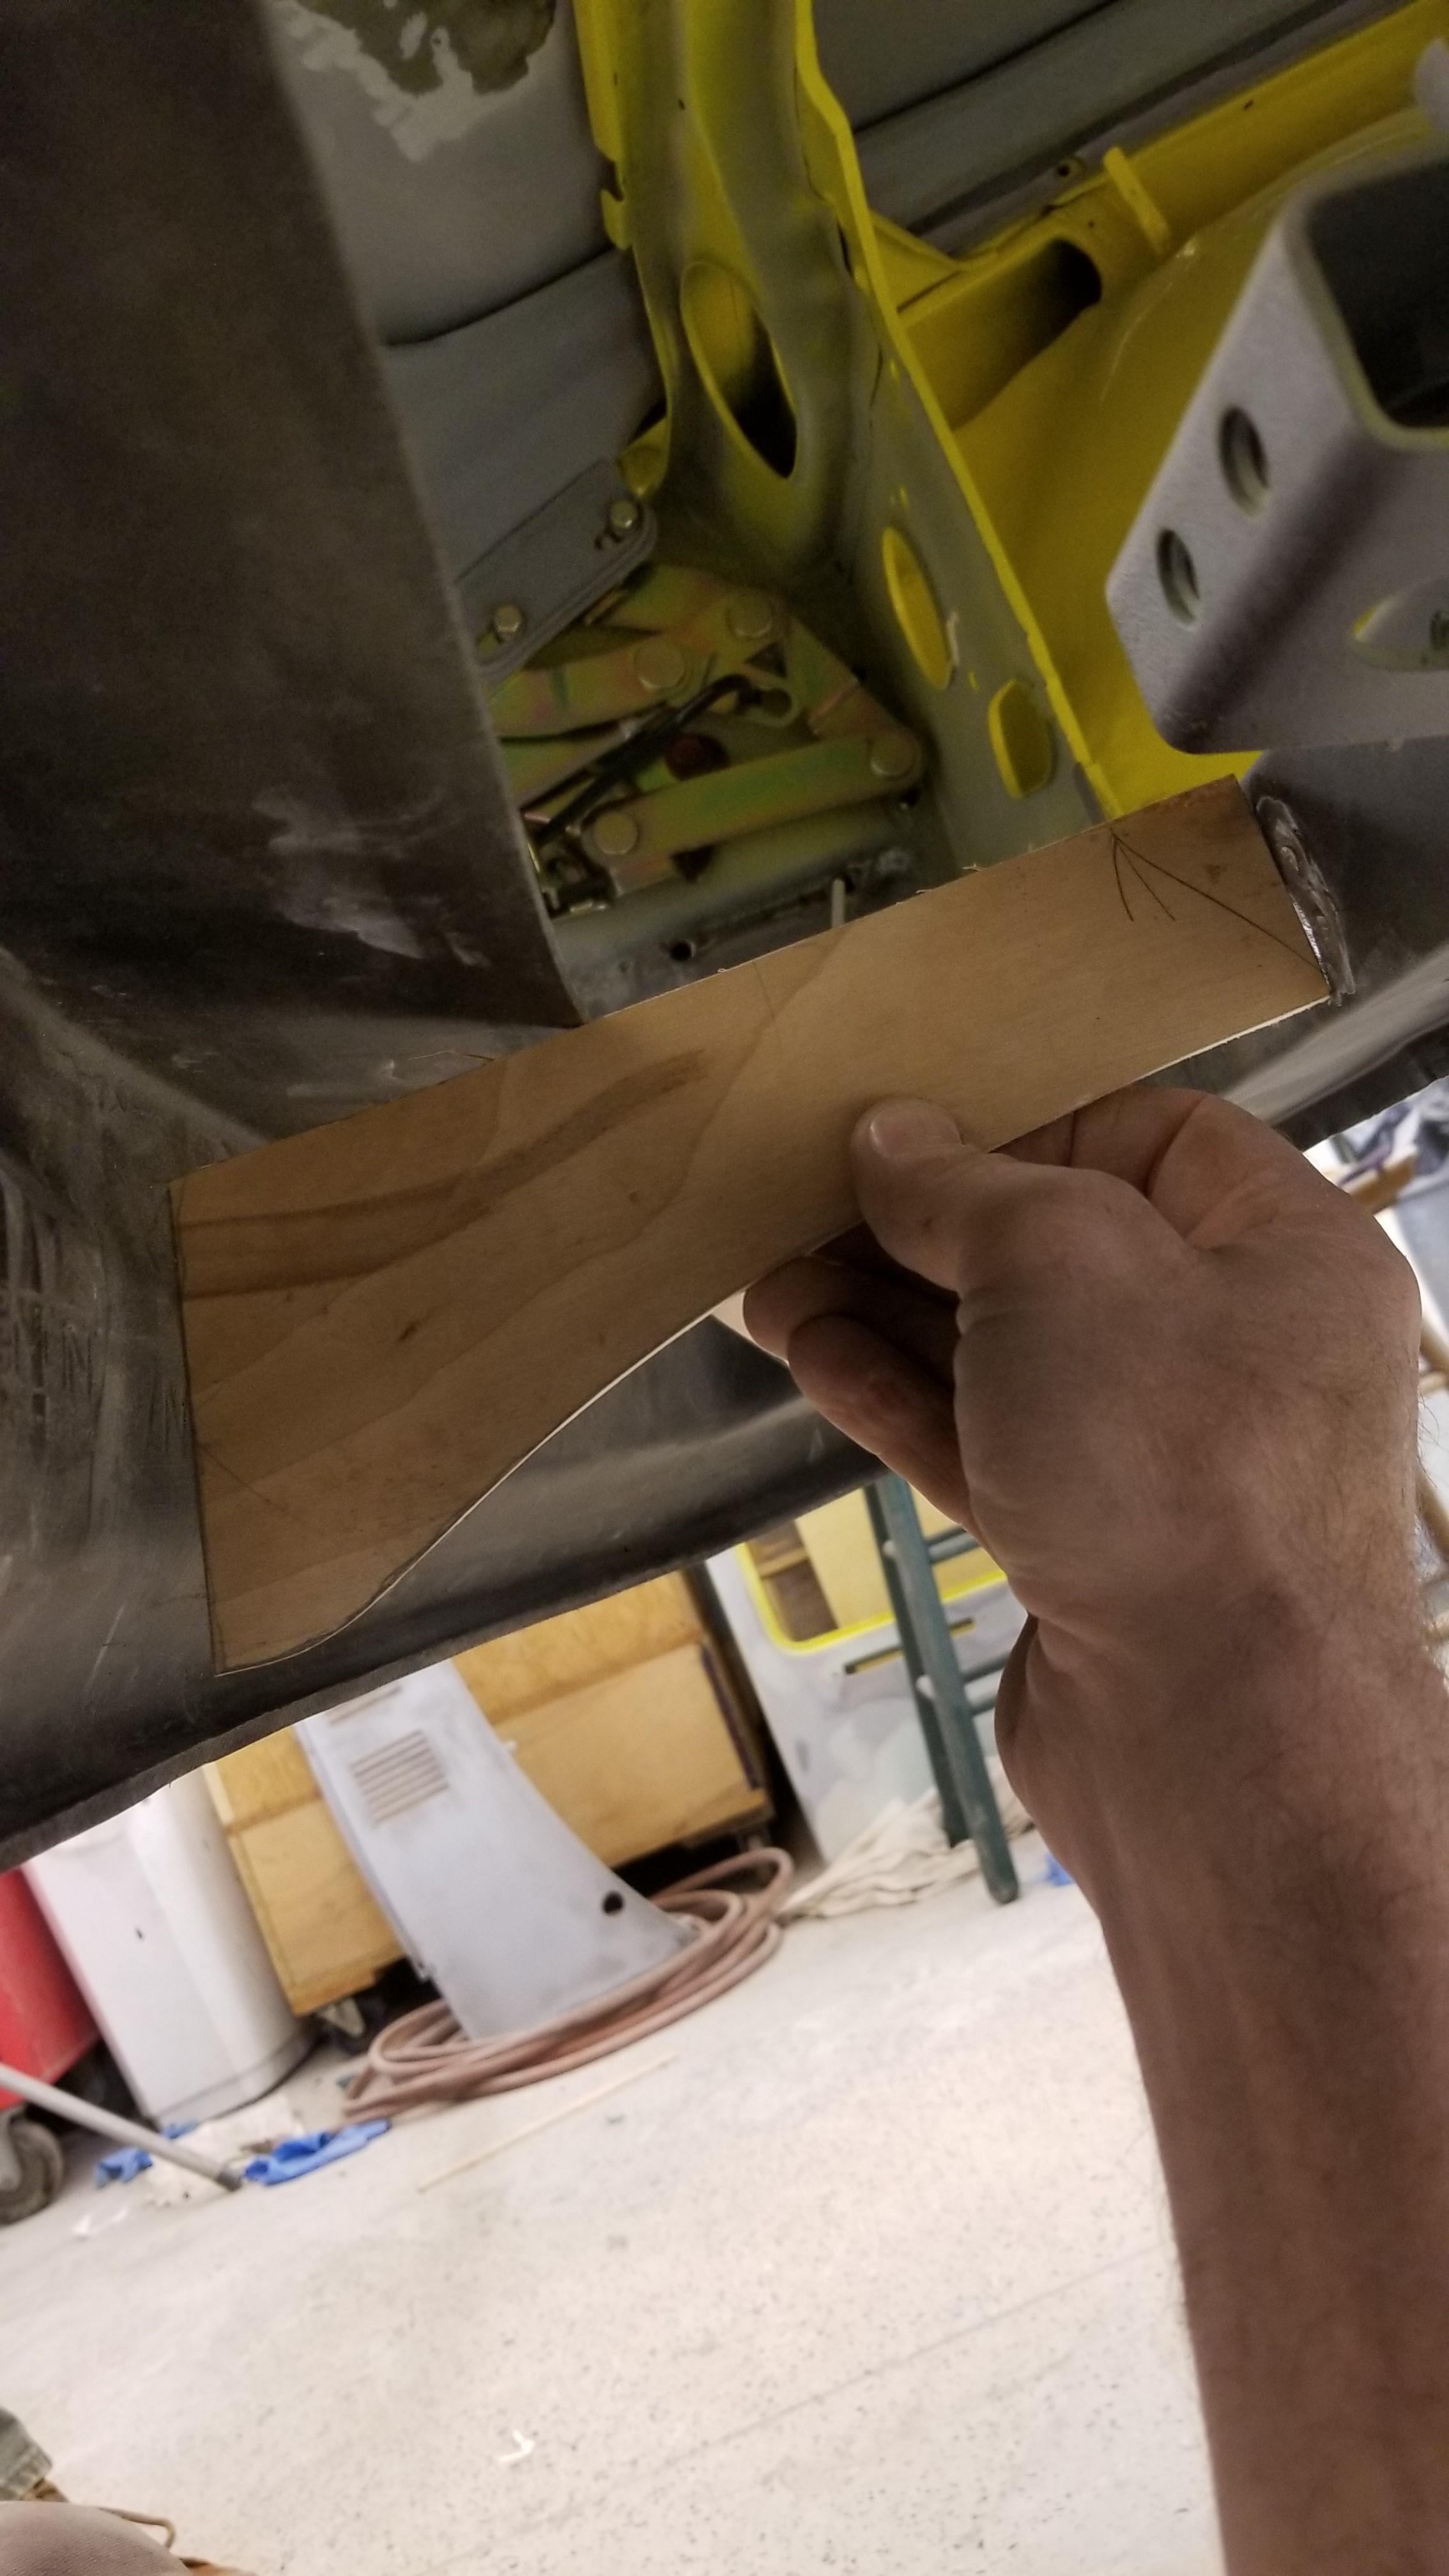
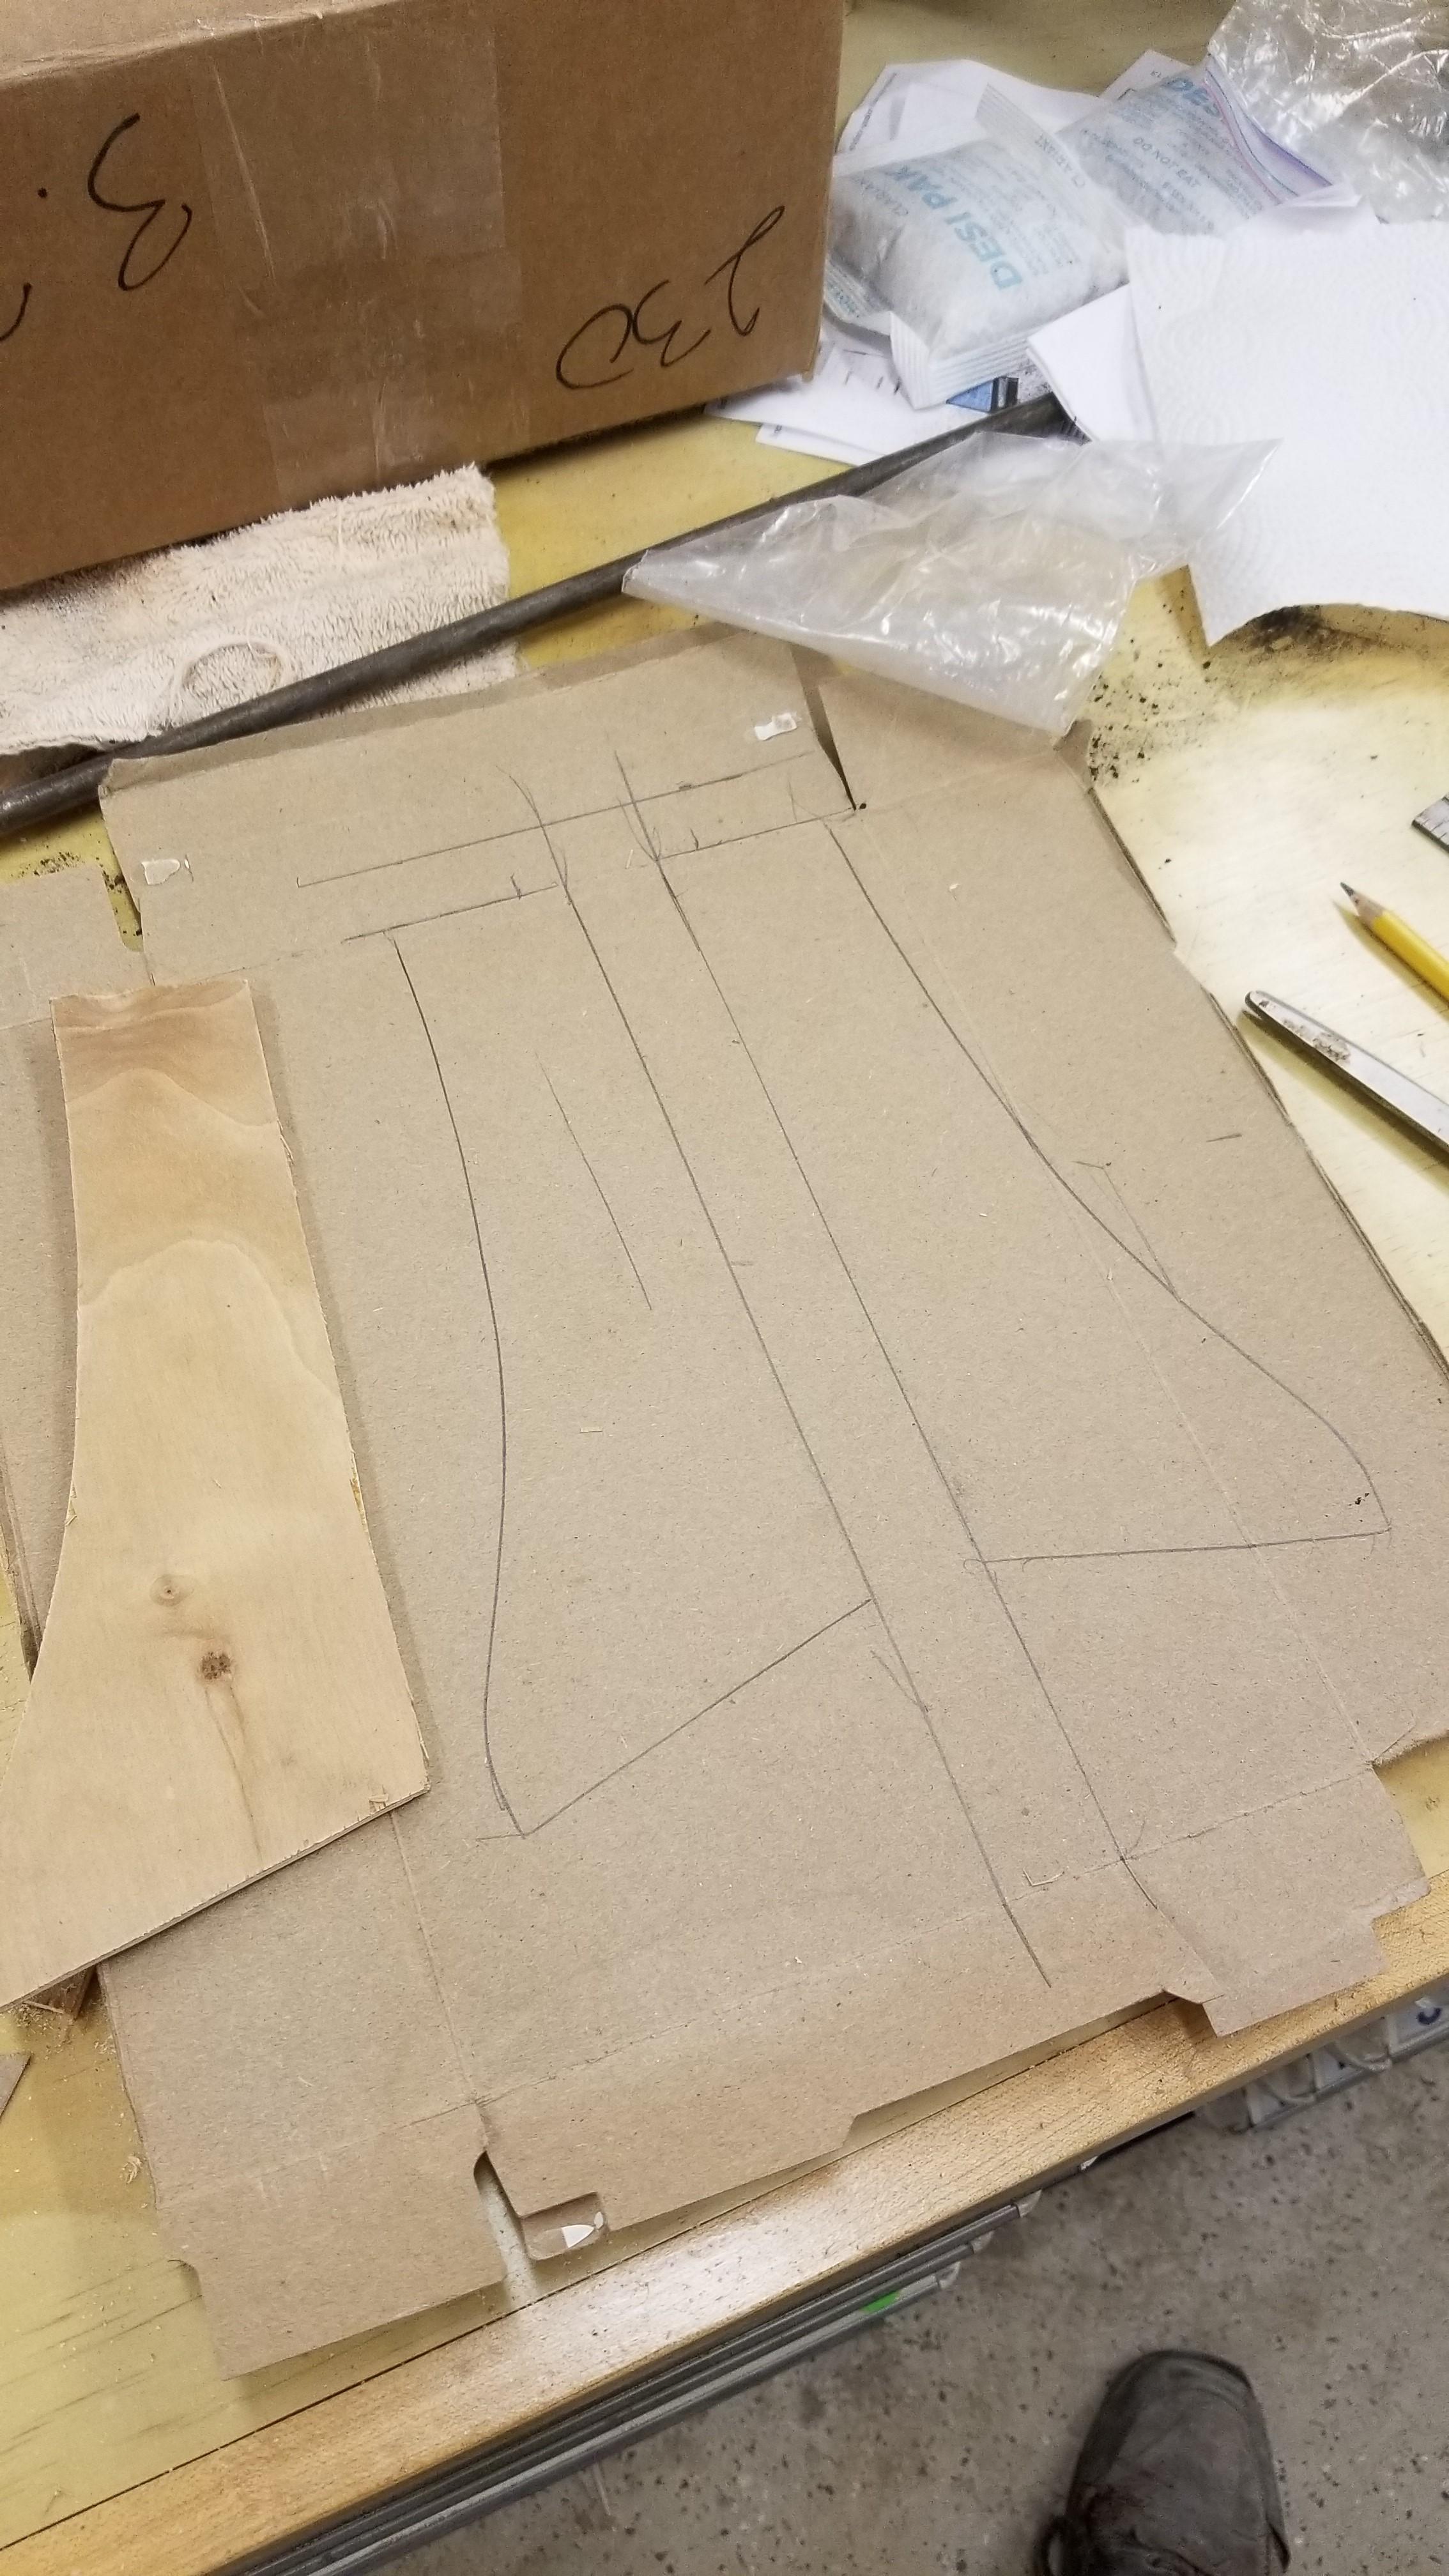
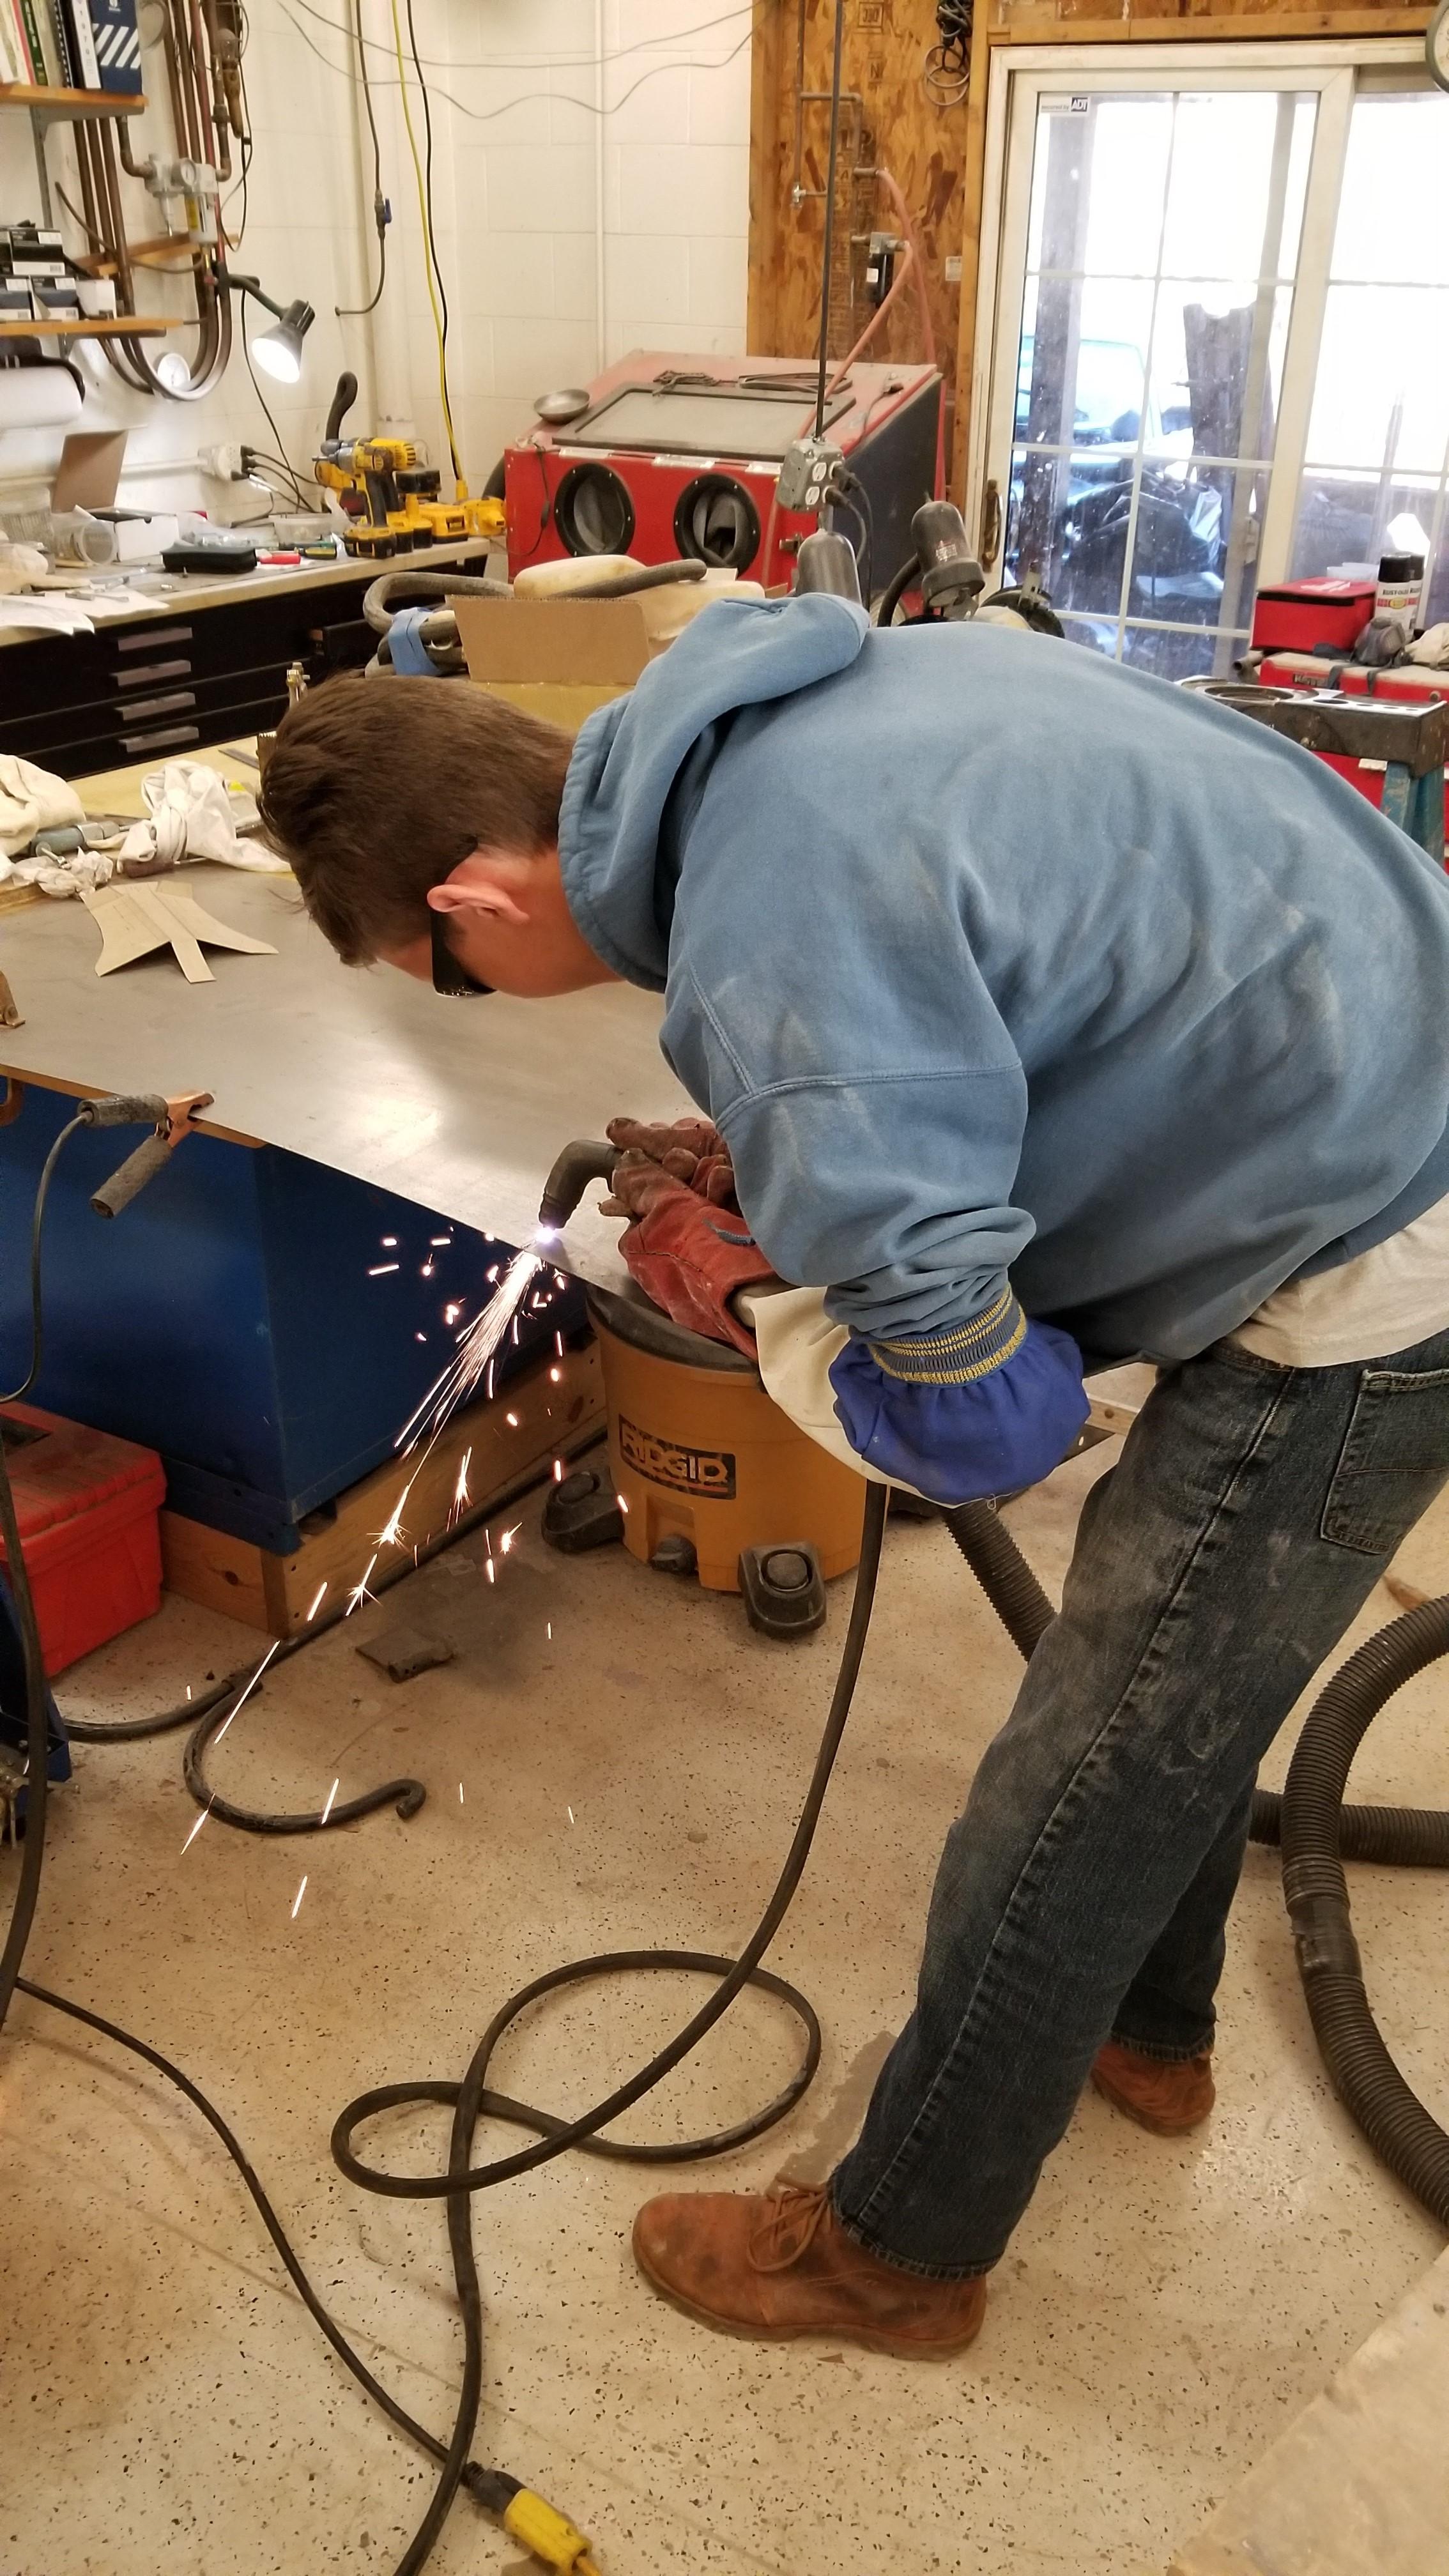
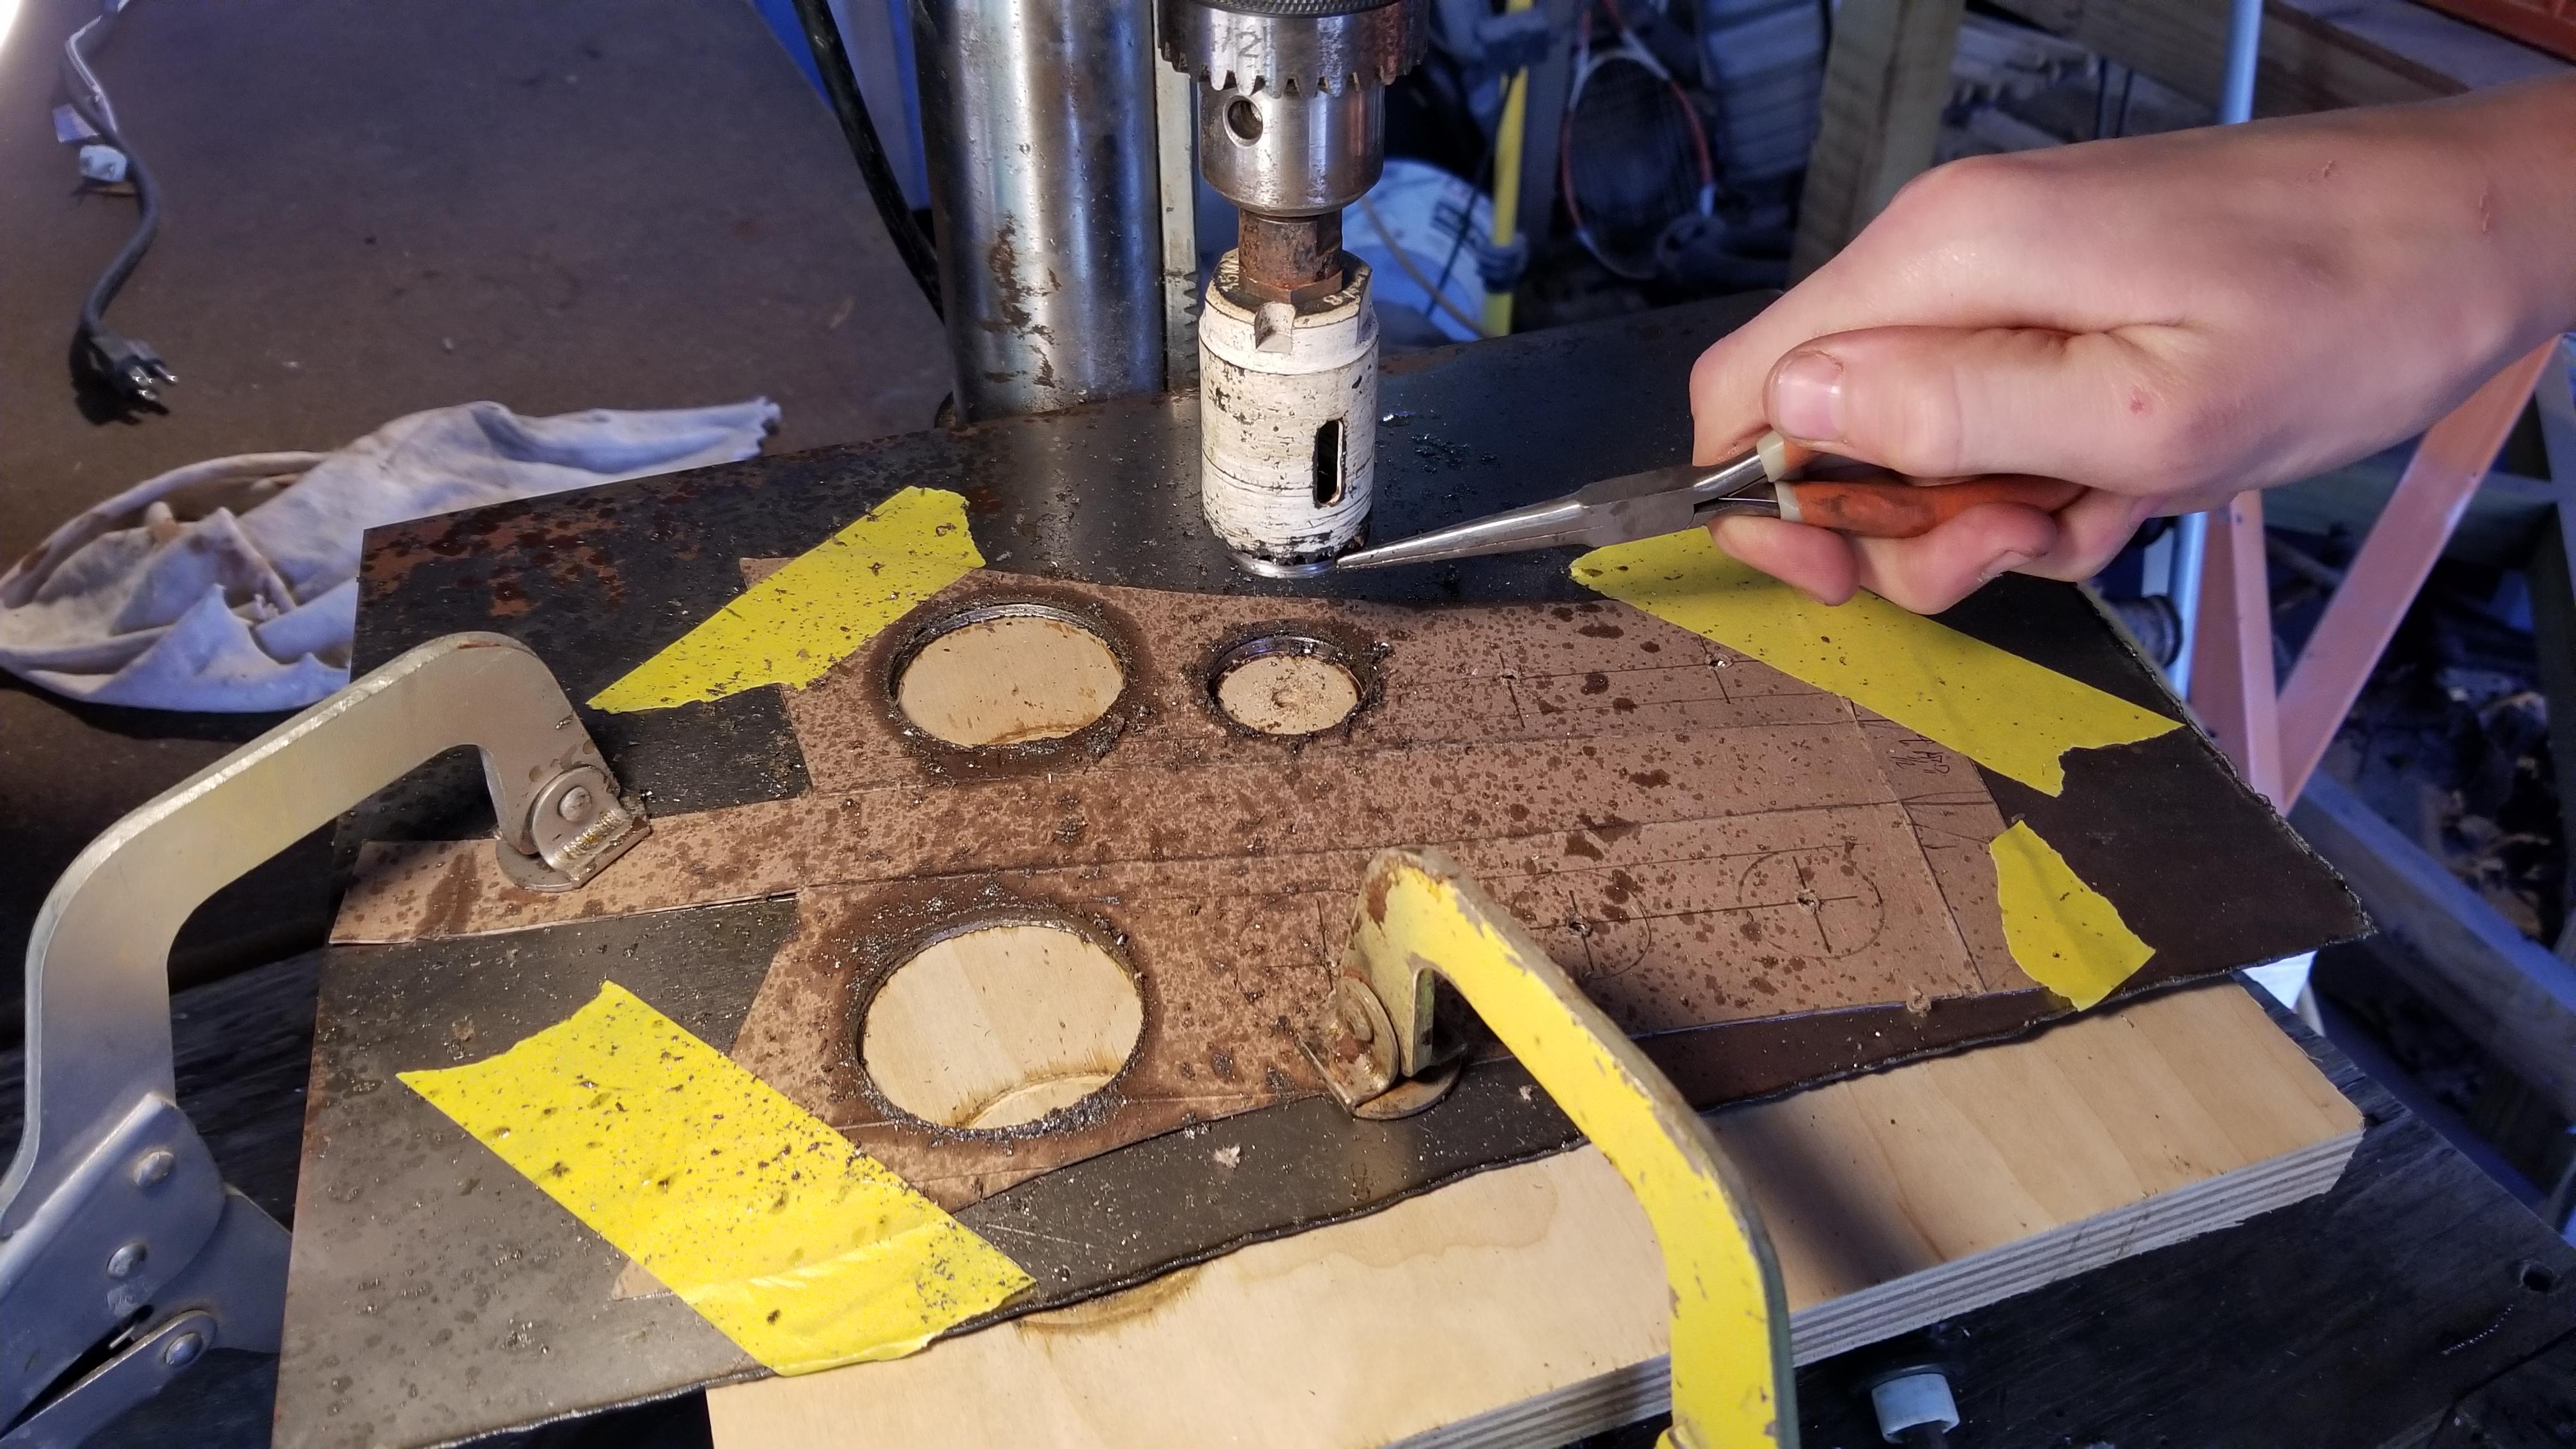
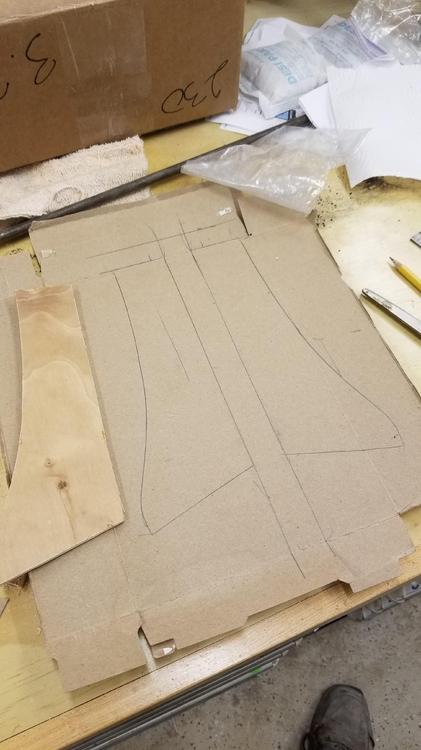
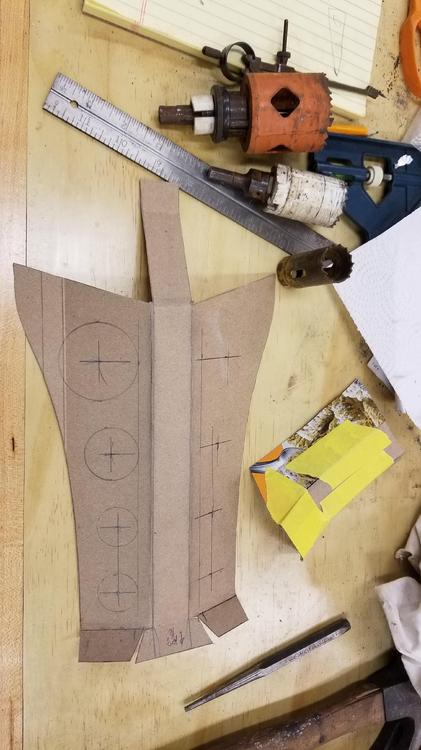
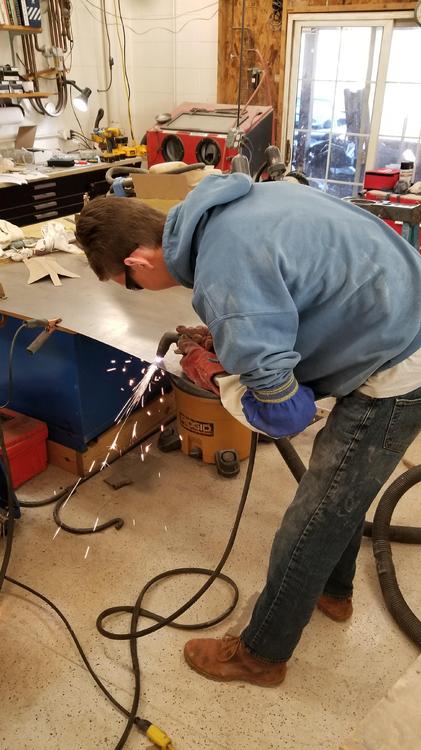
1 pointCody and I are also working on some support for the Xenon air dam I want to avoid this So I am missing the valance support on the front of the car. There were a few parts left, but it was pretty much gone. So we cleaned it back to the radiator support and started templating Cereal boxes make for great pattern material Cody hates body work but he likes to weld, so I got him to help me fab t It needs a little more dolly work and I plan on adding flanges down the lower edges similar to the original. It would have been nice to have made it all out of one piece but I don't have the tools or the skills to do that. I think if I had a shrinker/stretcher setup I might could have done it. A metal brake would have been nice to have too. I am working on another bracket that will be mounted to the back of the air dam that will act as a mate and have through bolts so the air dam can be removed. I have some 1/4" and 3/16's rod that is bent to match the air dam shape that will also be added to give some support and shape


 1 point
 -
 This part would make me a little nervous haha. This is another creative approach:0 points
 -
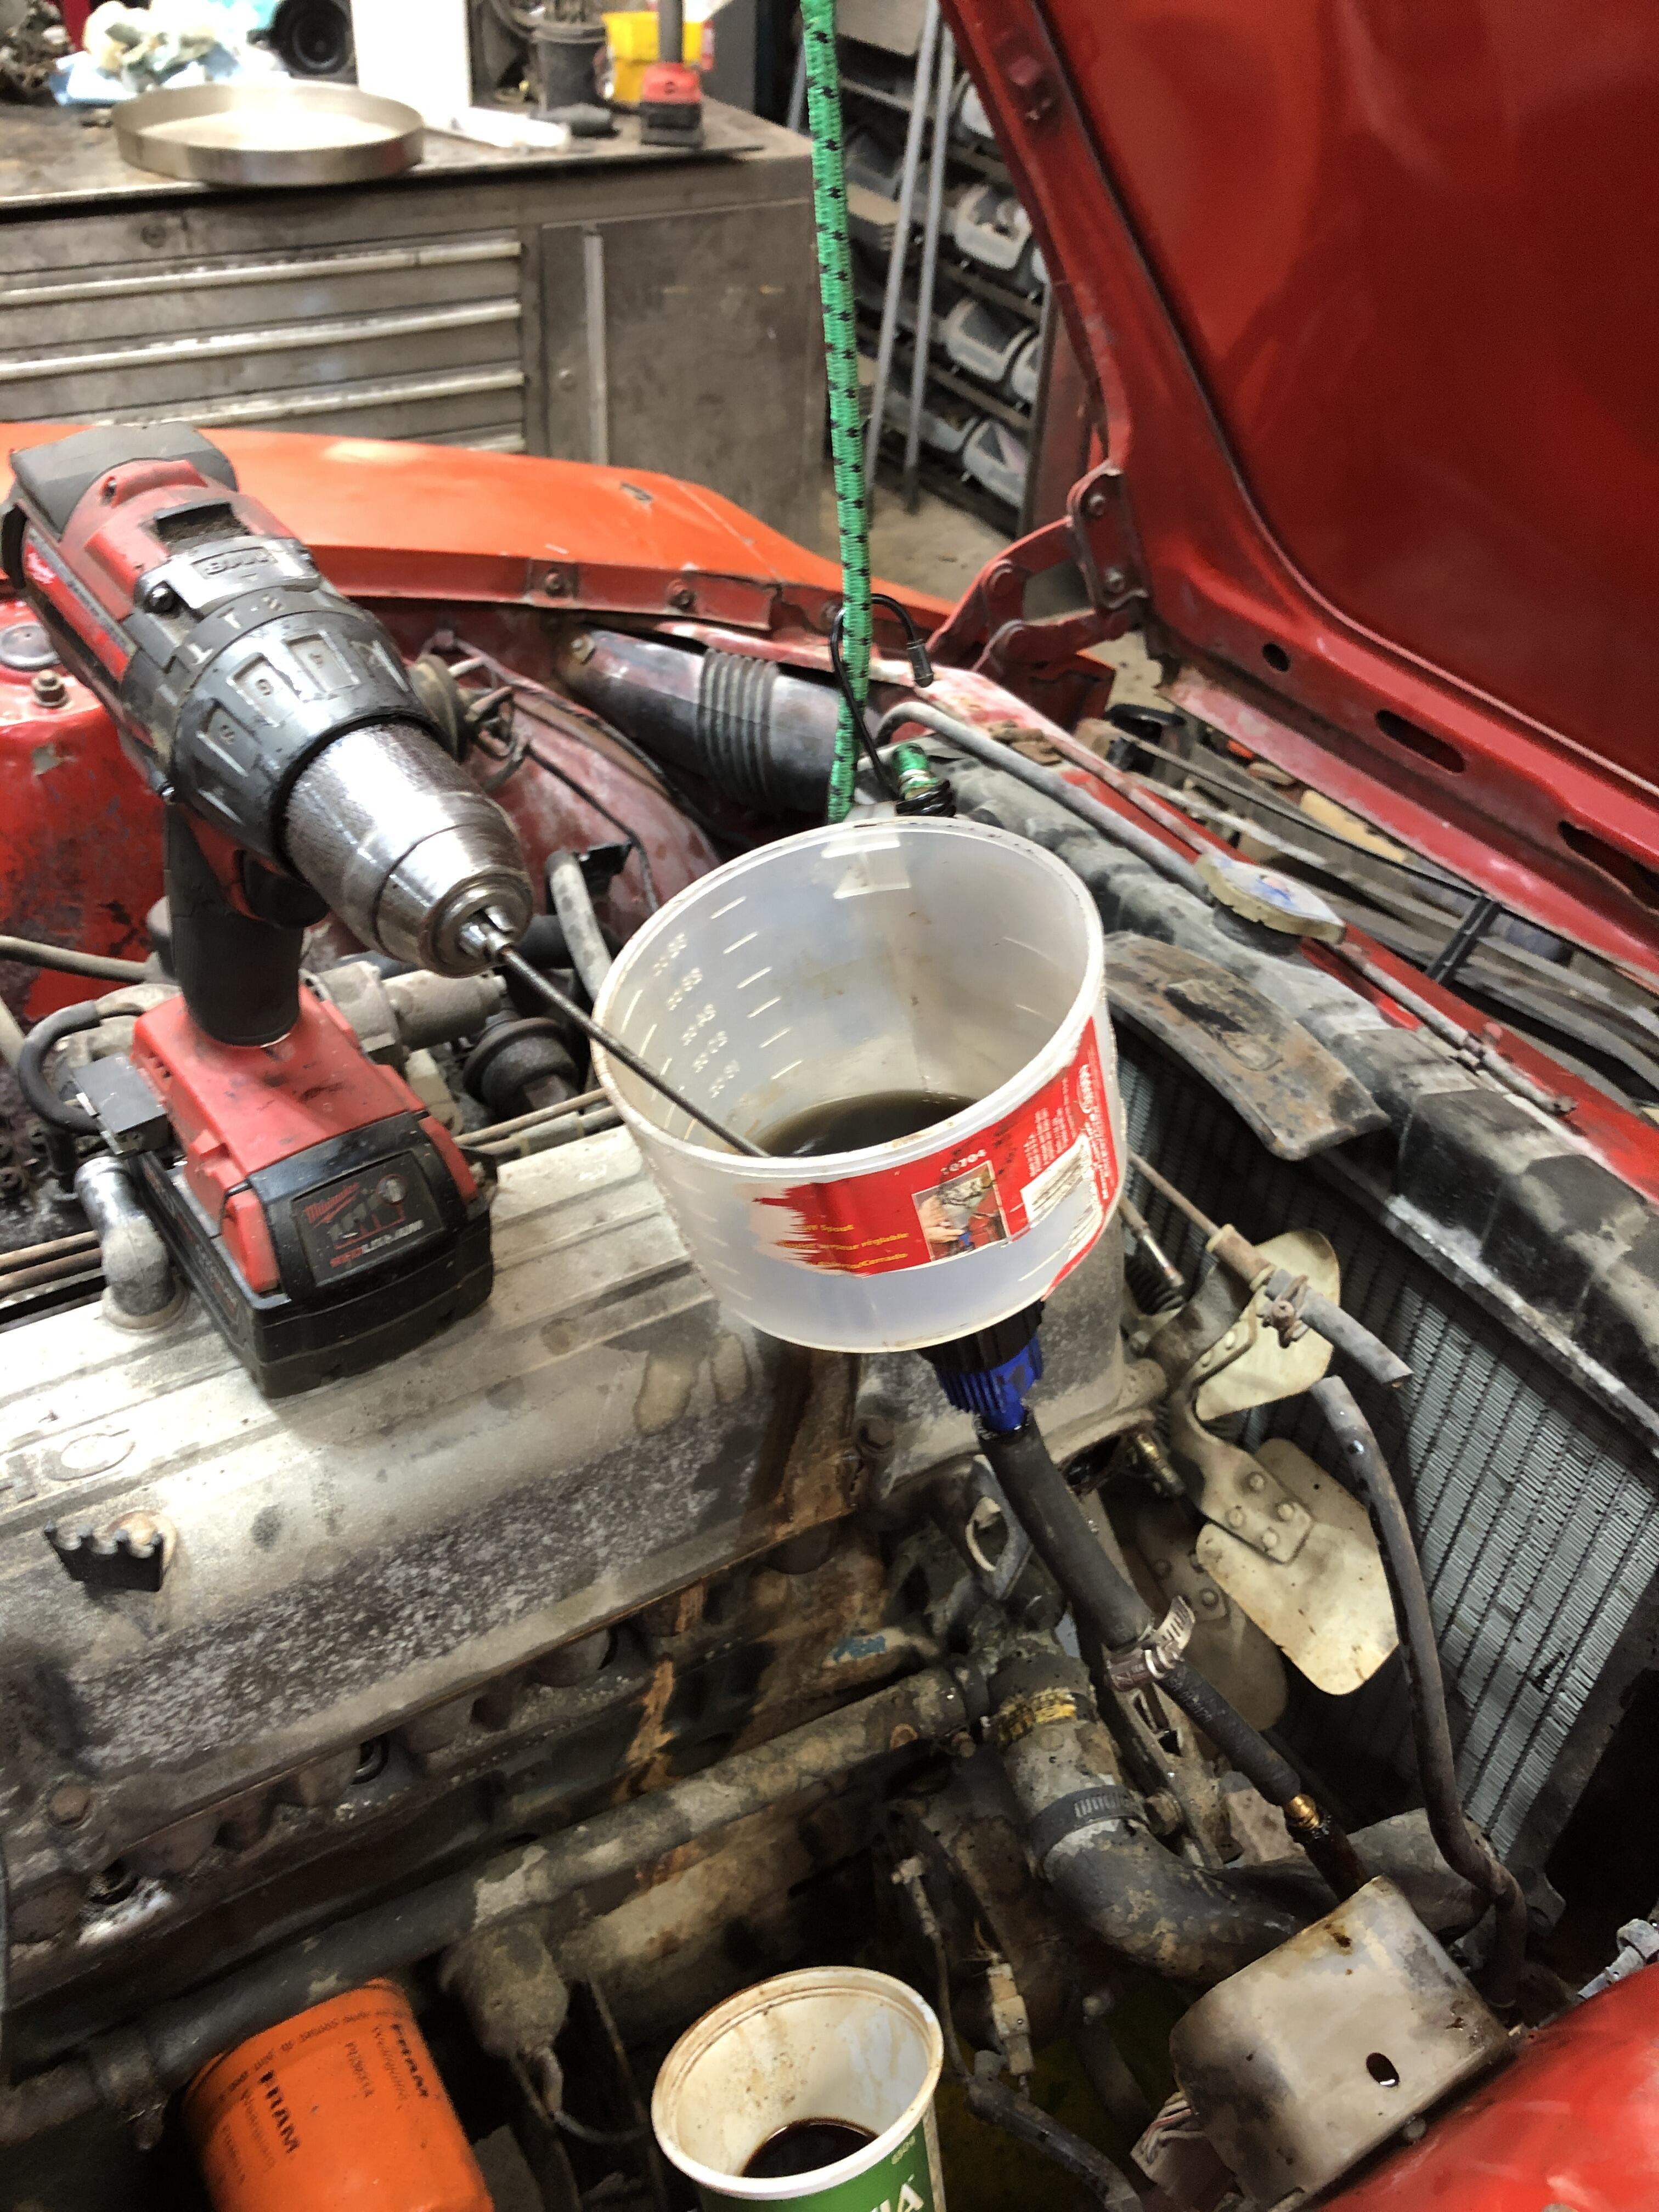
The fuel pump and carbs were simply dry. No Goo. Just needed to cleaned and lubed and set up again. Hope to hear VROOOM today. Next challange might be the coolant system. Found this. Might now be a good sign….. Having spare parts like a speedo cable I could adapt is the key to this, but if you don’t have one, any speedo cable from a junk yard car could work just the same.
 0 points