


Leaderboard
-


Diseazd
Free Member11Points3,335Posts -


siteunseen
Free Member5Points14,904Posts -

inline6
 Subscriber
 5Points1,237Posts
 -

DatsunZGuy
Free Member4Points925Posts
Popular Content
Showing content with the highest reputation on 01/01/2022 in all areas
-
Congrats to @Mike on another year of a big bunch of Z Crazies still posting on this site. Another year of @siteunseen with a new computer.....kind of like giving a loaded .357 to a two year old, @Patcon with 2 projects that may never end......EVER, and @Jeff G 78 adjusting to the Arizona climate, and posting pics of a race car that needs to be eating oats with Secretariat!@Zed Headwill answer all of your questions and 85% will be correct. If you want to solve any electrical problems, the only person to contact is @SteveJhands down. @Captain Obviouswill still swear that flat tops are great......3000 1973 Z owners that switched are wrong lol. @HS30-Hwill poke at you till you finally admit that he is probably the most knowledgeable member ever! @Zupwill once again be the nicest member and @motorman7will continue to rub your nose in a before and after pic of every part of the Z anatomy until you feel like a total failure lol! @EuroDat, @grannyknot,will show up from time to time with some decent stuff and the rest is history. Sorry for all I missed......you all are awesome and Happy New Year to “What did you do to your Z today 2022!” Guy9 points
-
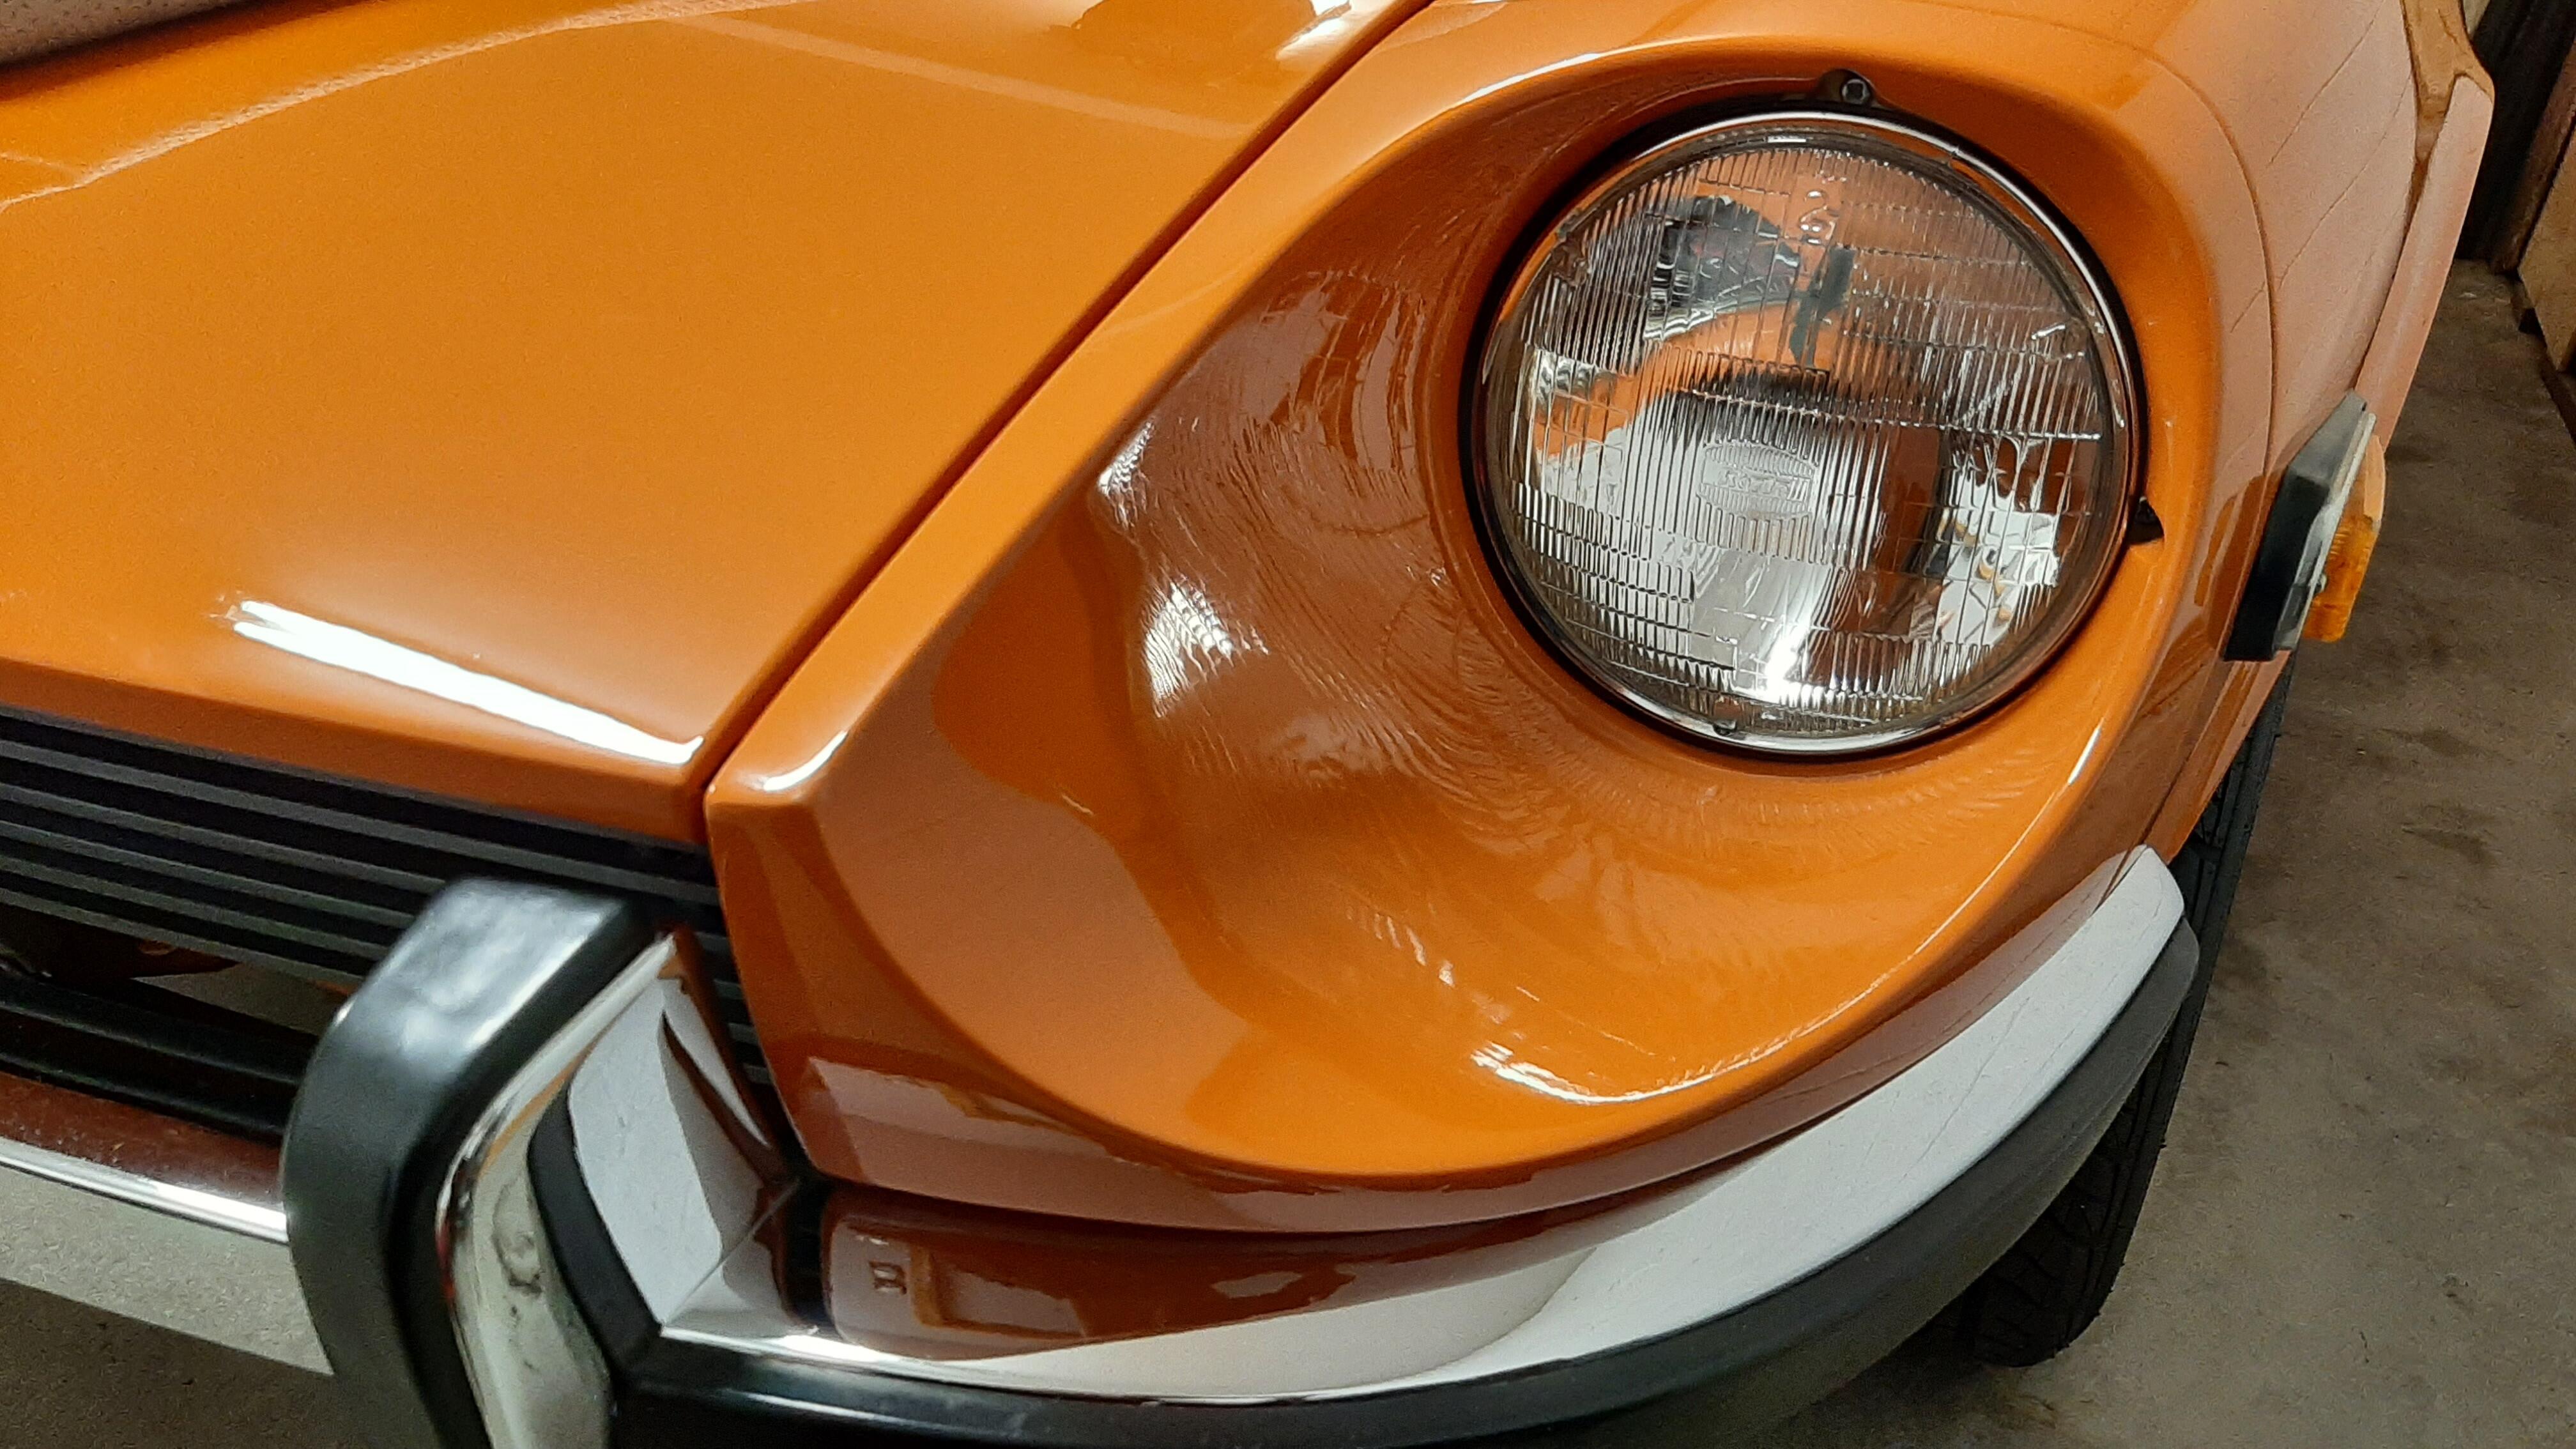
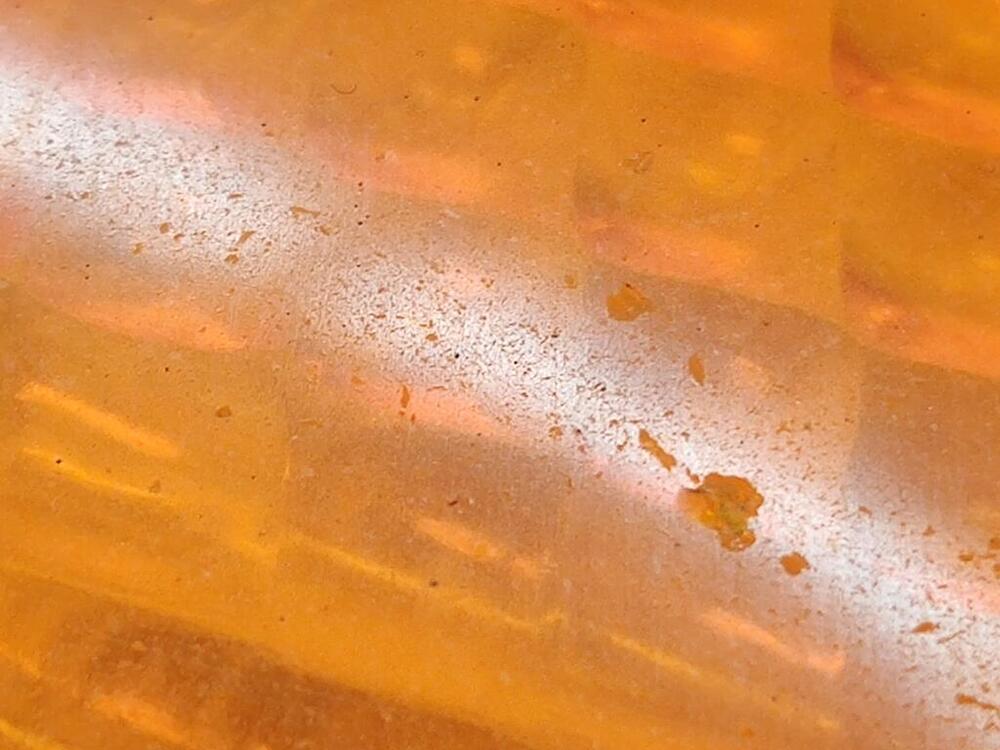
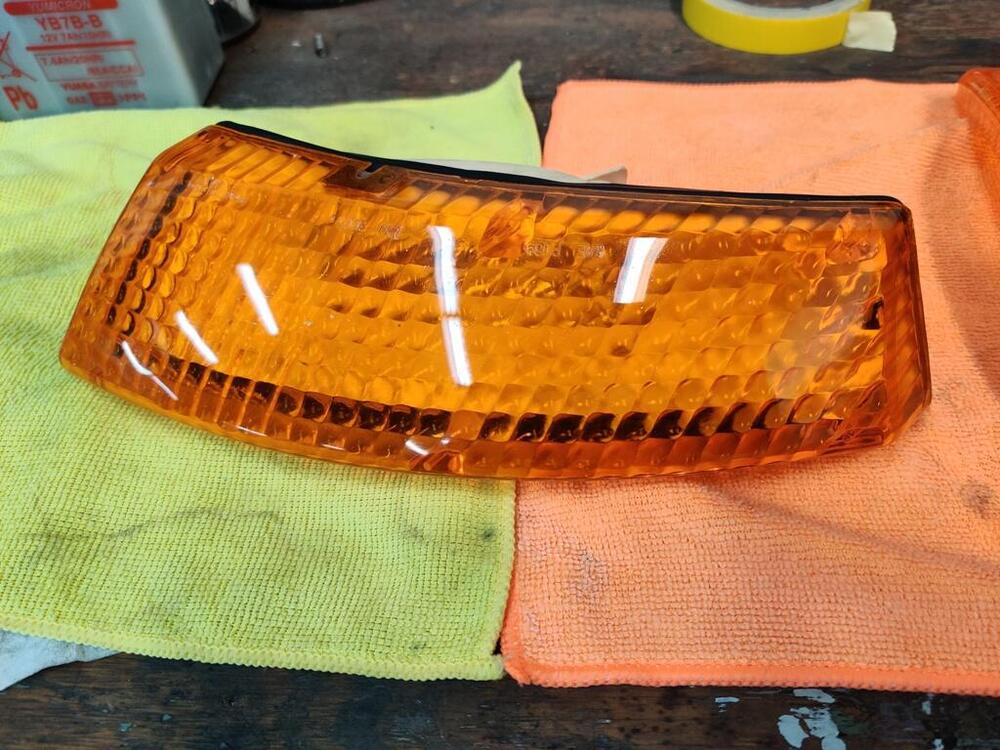
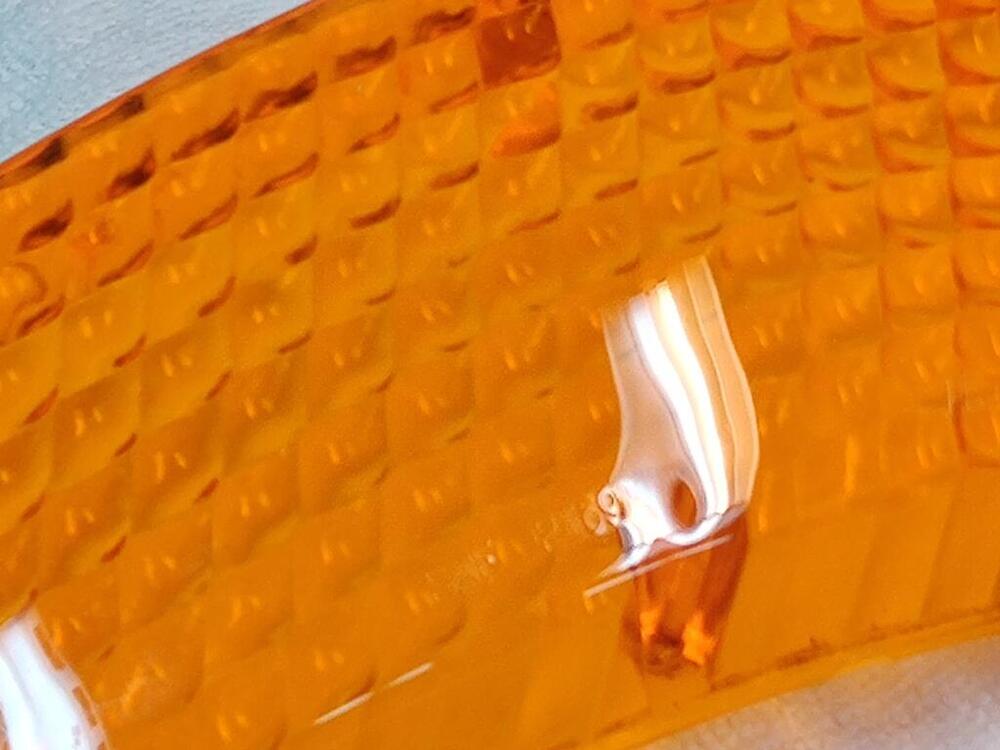
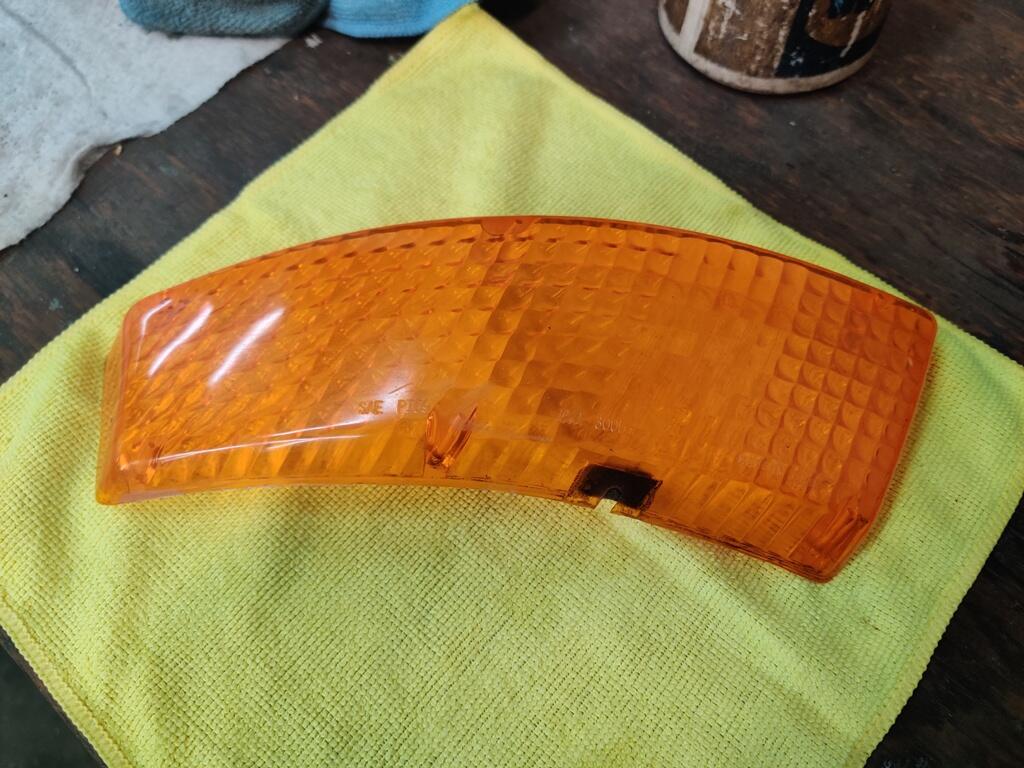
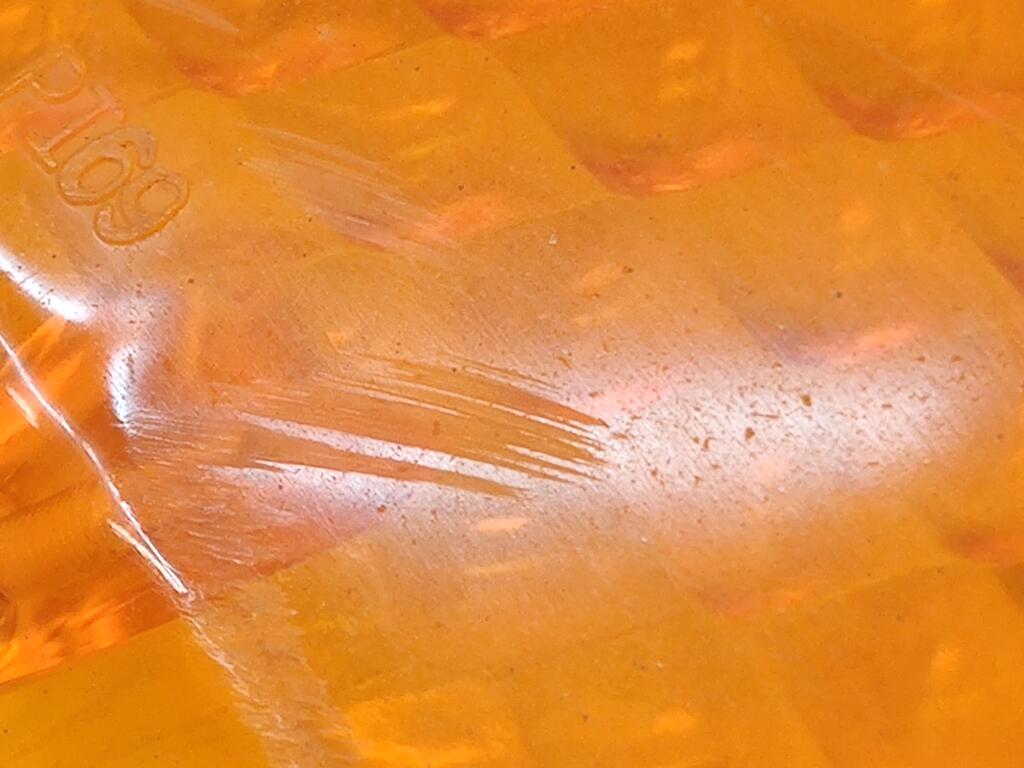
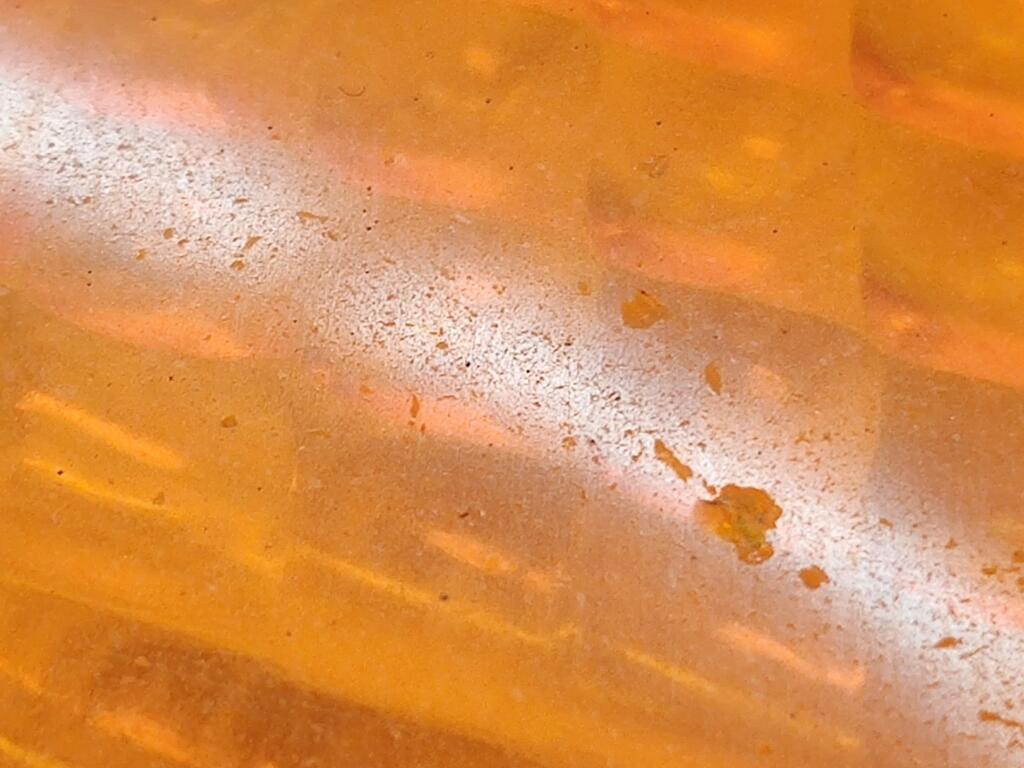
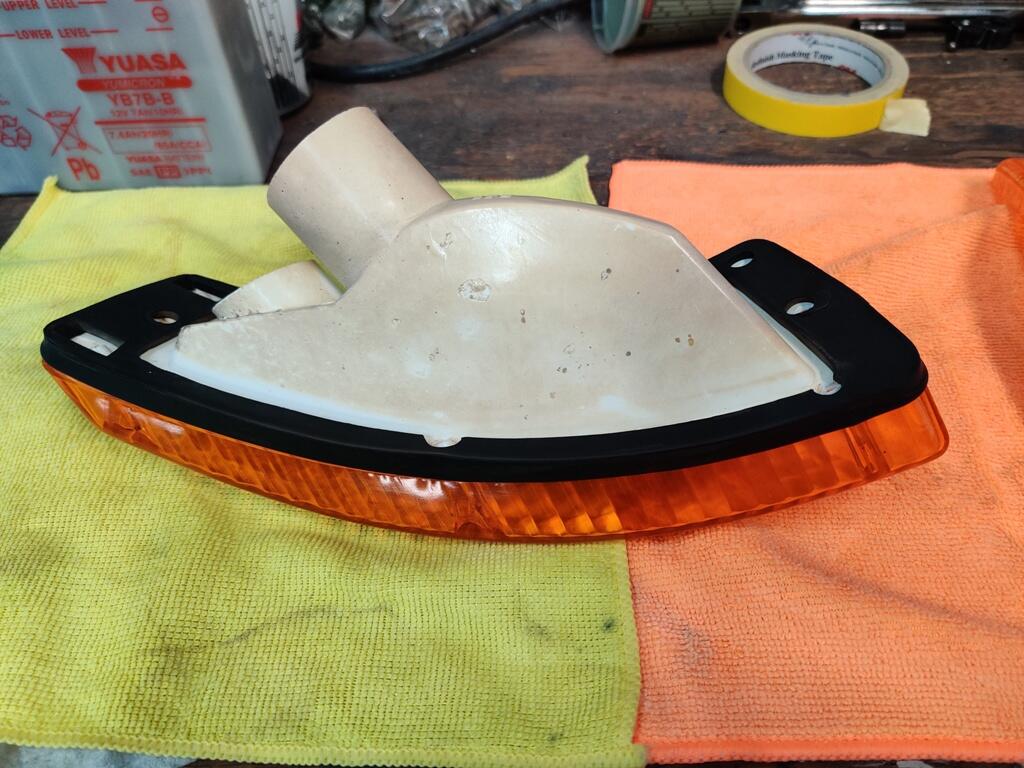
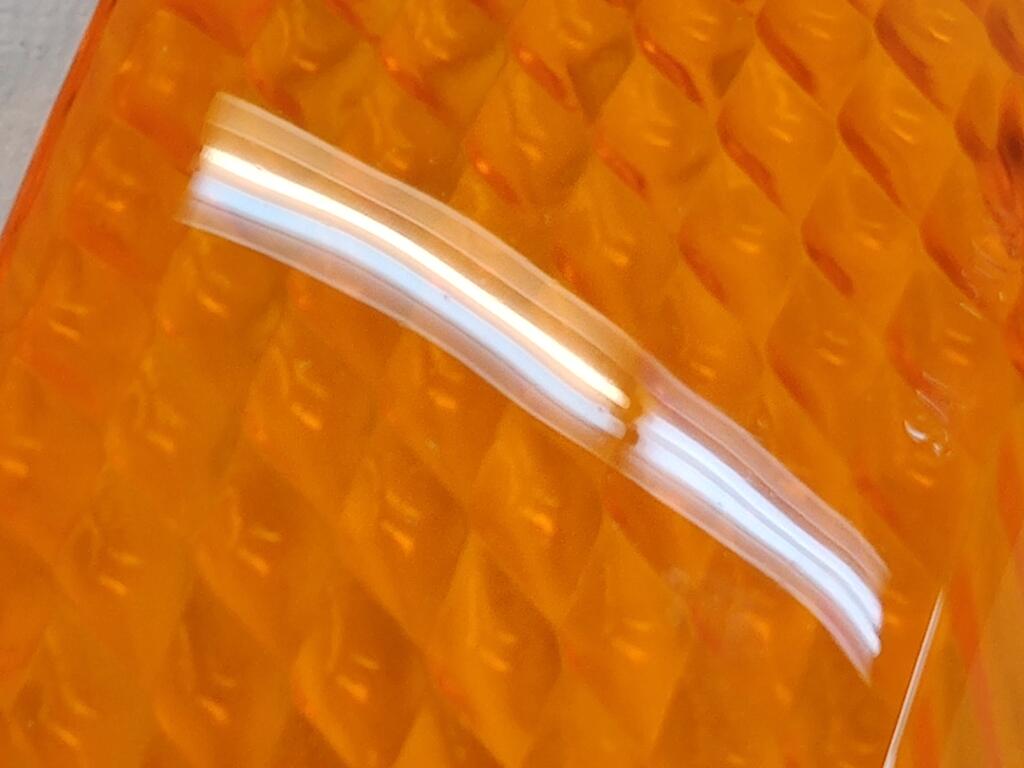
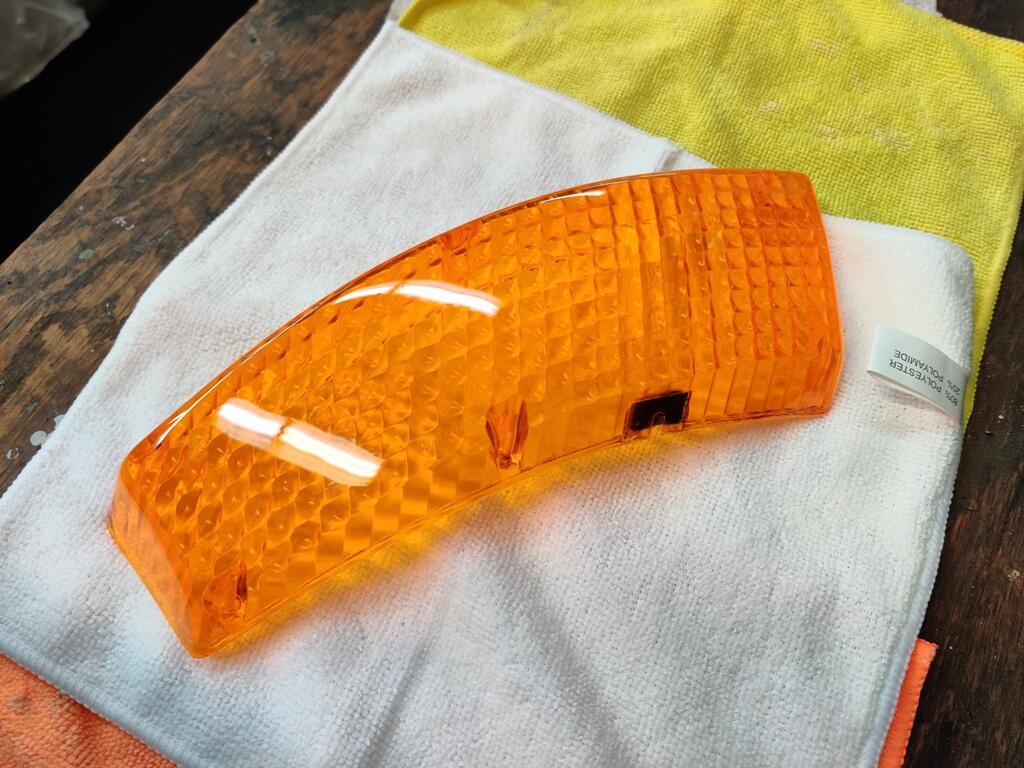
While waiting for fasteners to be re-plated, I find myself looking for little projects to complete. I went about restoring the front turn signal assemblies yesterday and today. These front lenses get a lot of abuse... essentially, they get sand blasted over time. These are likely original to the car. They look ok at 10 feet, but get up close and you can see they are quite dull. And, they have taken some impacts from rocks and road debris. The close ups were taken at 5X magnification. I used several grits of sandpaper and performed a wet sanding process. I started with 320 grit, then moved on to 600, 1000, 1500, 2000 and 2500. For the first two grits, I left tape in place to protect the lettering. After wet sanding, I buff with Meguiar's compounds and foam buffing pads. #83 first, then #7 "Show Glaze", using different buffing pads to keep from mixing. While I didn't achieve perfection, the results are pretty good. Next up will be the rear tail light lenses. They will be easy in comparison because they don't take the sandblasting impacts like the front lenses.


 5 points
 -
4 pointsIt might be time for me to upgrade from Windows 98 since my Juno dial-up speed seems to be crawling on my 56K modem 😉4 points
-
3 pointsI've been having a hard time with my computer, slow to connect to czcc and everything else too. I read about the newer routers and they reccomend a new one about every 5 years. Mine was bought in 2007! I "straight wired" it with some Cat 5 wire and RJ 45 connectors I had from Y2K roll out I was a part of. It went from 10 MBPS upload to 62. I pay for 50 MBPS from Comcast so it's like I have a new computer. Happy new years present to me the dummy. So I'll be back posting dumb stuff again, prepare yourselves. HAPPY NEW YEAR my best friends. Can't wait for ZCON 2022, right down the road in Birmingham, Alabama. Roll Tide too!3 points
-
 Waited for the 3M General Purpose Adhesive Cleaner, 08984 to flash off so that I can install the hatch outer weatherstrip seal.2 points
 -
 And believe it or not, I was at a friend's house today, helping him with the turn signals/hazards on his 260Z. It was an interesting problem, too. The left side lights weren't working for the turn signals or hazards. There was an issue with the physical connection at the steering column and another at the connector just downstream from the hazard switch connector. It was a nice way to start off the new year.2 points
 -
2 points
-
 You should take a look at Trev's blog then! He made a lot of good vid's about making metal parts! Thats were i learnt a LOT !!2 points
 -
 I have the twin fans on my 71 240. I used a thermostat housing from 280z to mount a sensor for my fans. Fans come on at 180 and off at 220. Also hooked to relays so they come on when a/c is turned on. You have webers on your car so your thermostat housing should work fine. I purchased a temp sensor and taped the housing for the threads. Lower sensor is for fans.
.thumb.JPG.bed887c48a4fb82e2249b9c16a0c7494.JPG) 2 points
2 points -
 This is what Patcon is referring to: Electric fan controller Sildes between the fins of the radiator, or could be mounted alongside, but should be in the airflow. Just noticed that this is preset at 185, but they make similar that are adjustable.2 points
 -
 Most of the aftermarket controllers are adjustable, they are preset from the factory but there is usually a small white slot screw. I tweaked mine to on at 200F, off at 180F1 point
 -
 3000 to one, huh? Bring it on!! Haha!! Happy New Year everyone!!1 point
 -
 Happy New Year Guy! You have been pretty quiet for several years now. I haven't read any posts from you telling us you started a new 240Z restoration. I know you told us that you were done, but none of us believed you then or now. So come on, what do you have cooking? 🤣1 point
 -
 I used a 3D parametric cad software package called Solid Edge, made by Siemens. This is actually only the 3D model, it looks like a drawing because I imported a scaled image of the chassis from my 1970 FSM and inserted it as the background to build the model on. Still had to a lot of measuring off my car and the parts I have from Klassic Fab, but it's good to have the FSM drawing to confirm the main datums.1 point
 -
Great job, I did similar work to my fronts a few years ago but not quite to this level. It's very satisfying to see the end result after all of the effort it takes. So much nicer to use original parts and not just replace with reproductions.1 point
-
 1 pointI have found that you can get height adjustment from the two hood bolts . When hood is closed and hinge bolts are tight(3) , sometimes the hood sits a bit proud compared to fender/ scoop . If I hold pressure down and tighten the two bolts I can get the hood to stay down in that position . I’ve gotten as much as 1/4” . Not saying that’s the ideal way to align , but it has helped me .1 point
 -
1 point1 point
1 pointThe 2 holes on either side of the hood are for front to back adjustment, no height. The 3 holes on the body side of the hinge are height adjustment and sometimes back and forth depending on how a PO has modified them for their needs.
 1 point
 the fans being on shouldn't affect the engine getting up to temp too much. if the engine isn't up to the thermostat temp, it's shut and no hot water goes to the radiator to be cooled by the fans. having said that, when I had electric fans, I did fit a thermostatic switch in the thermostat housing. I couldn't find one that matched the thread of the spare hole, so I ended up with a Volvo 240 switch that is M14 and tapped the hole to match. like this one: https://www.ebay.co.uk/itm/FEBI-BILSTEIN-FE01102-Temperature-Switch-radiator-fan-OE-REPLACEM-XX3011-224836-/3244226973461 point
 I'll let my imagination run wild on the interior condition, and frame rails. But in the current market, it probably doesnt matter for 5K1 point
 That car might be a really good deal...It was a fun color1 point
 My son learned this the hard way on a 455 cu.in. that ran hot in an old Olds. He installed 2 puller fans and 1 pusher, but the alternator couldn't keep up, so he installed a larger alternator, but that overloads the single v-belt drive. He had also been contemplating an electric water pump, but now understands that the electricity isn't 'free'.1 point
 It can help to remove the spindle pin lock bolt, put a lug nut on the end of the spindle pin, squirt some penetrating fluid in to the lock bolt hole, and spin the pin suing the lug nut. It will spread the lubricant inside and break up the rust that's holding it in.1 point


.JPG.2732af701c3ac05b720fbd4beb78f87c.JPG)

Important Information
By using this site, you agree to our Privacy Policy and Guidelines. We have placed cookies on your device to help make this website better. You can adjust your cookie settings, otherwise we'll assume you're okay to continue.