Leaderboard
-


Av8ferg
Free Member8Points1,538Posts -


siteunseen
Free Member7Points14,904Posts -

Johnz1971
Free Member7Points83Posts -


kats
Free Member3Points2,209Posts
Popular Content
Showing content with the highest reputation on 01/17/2022 in all areas
-
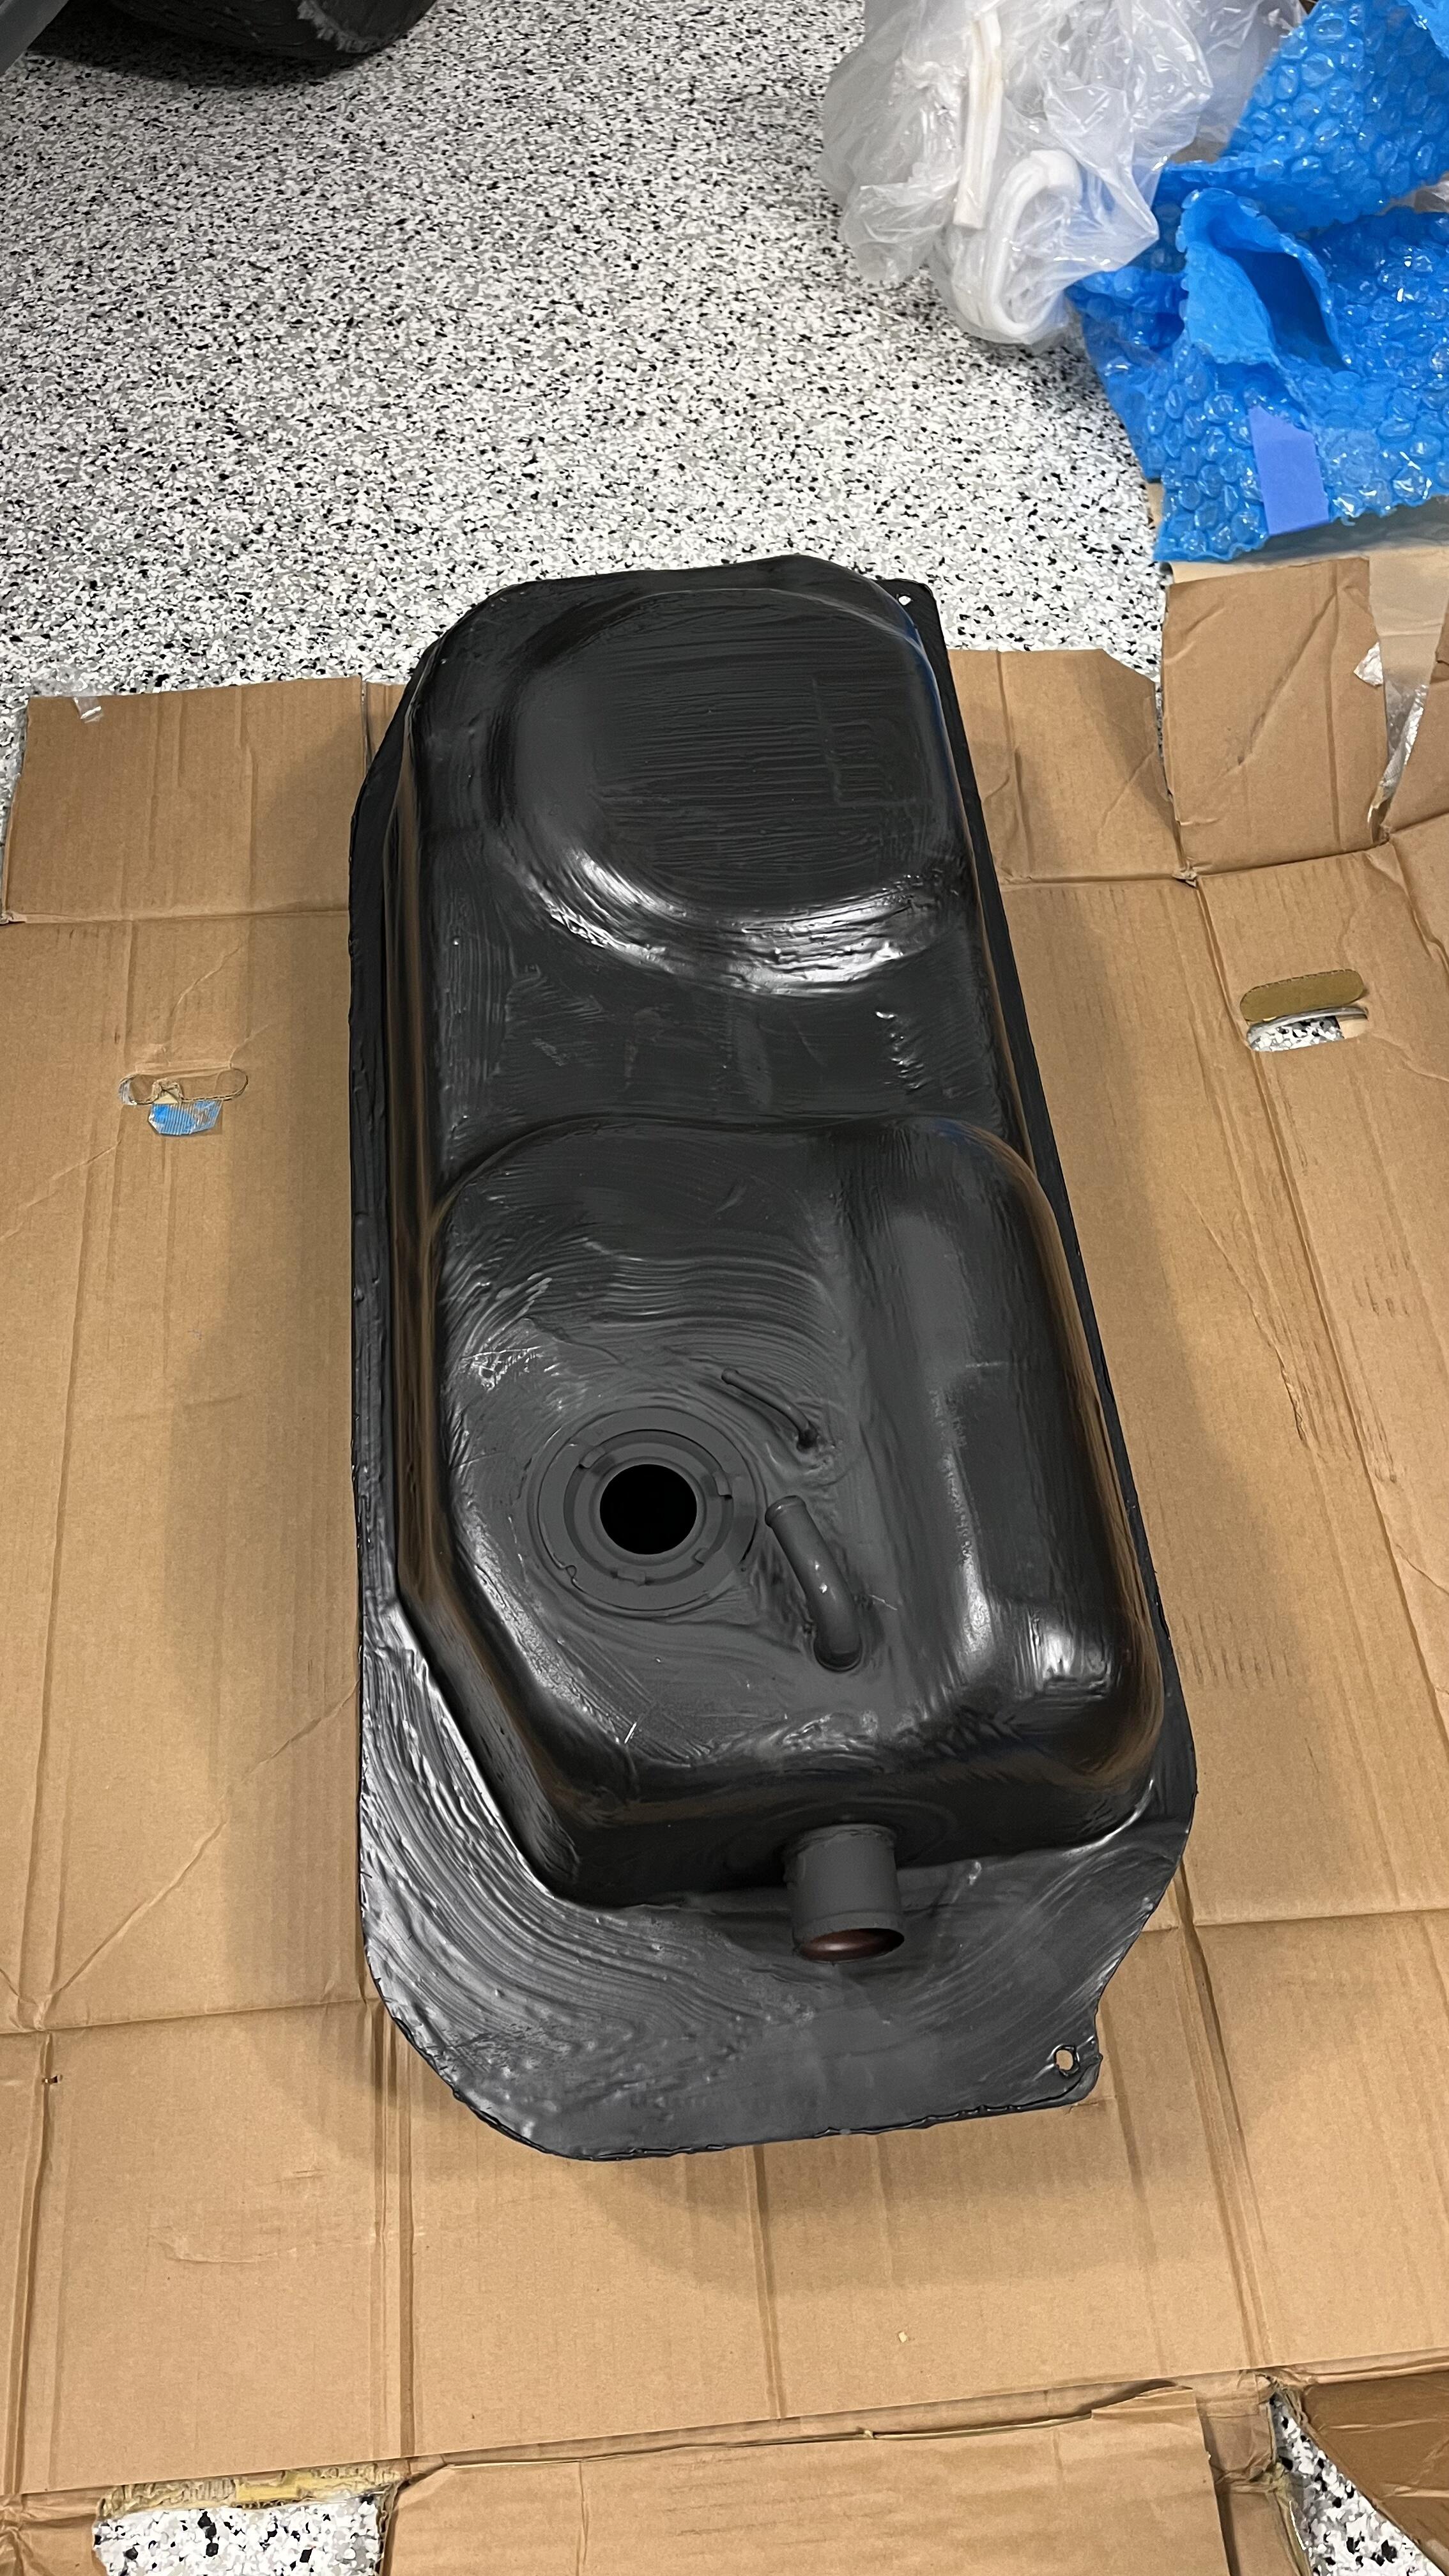
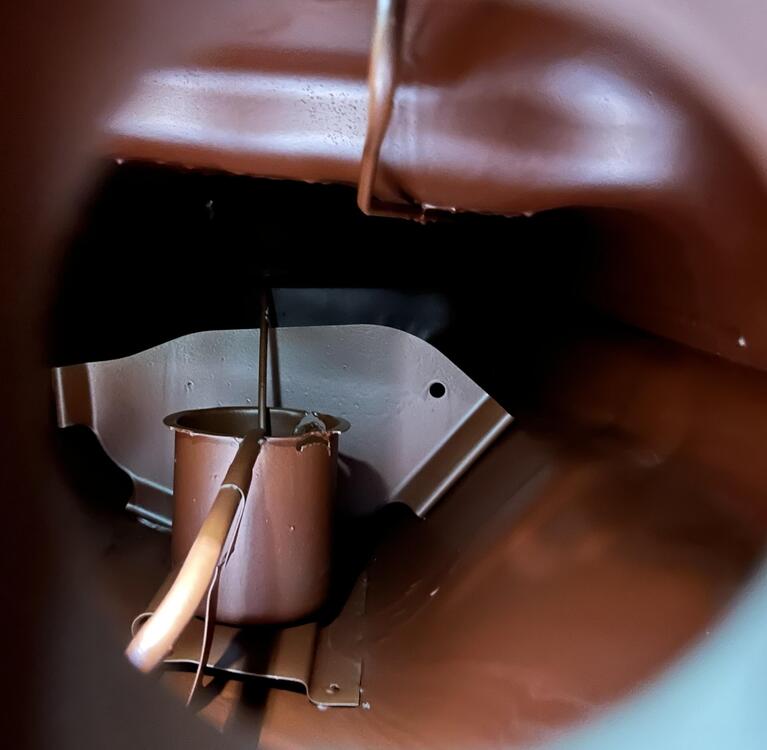
3 pointsSide bar…my fuel tank arrived yesterday. Looks good…it looks like it has a thick rubber coating on it. Clean inside, and it is guaranteed for life. Guy cut it in half, addressed any issues and removed all the rust and then welded it back, It was baked 3x during the process and then sealed on the outside. The exterior has paint streaks but I knew that going it. The material they use cannot be sprayed he said. As long as it trouble free I don’t care.

 3 points
 -
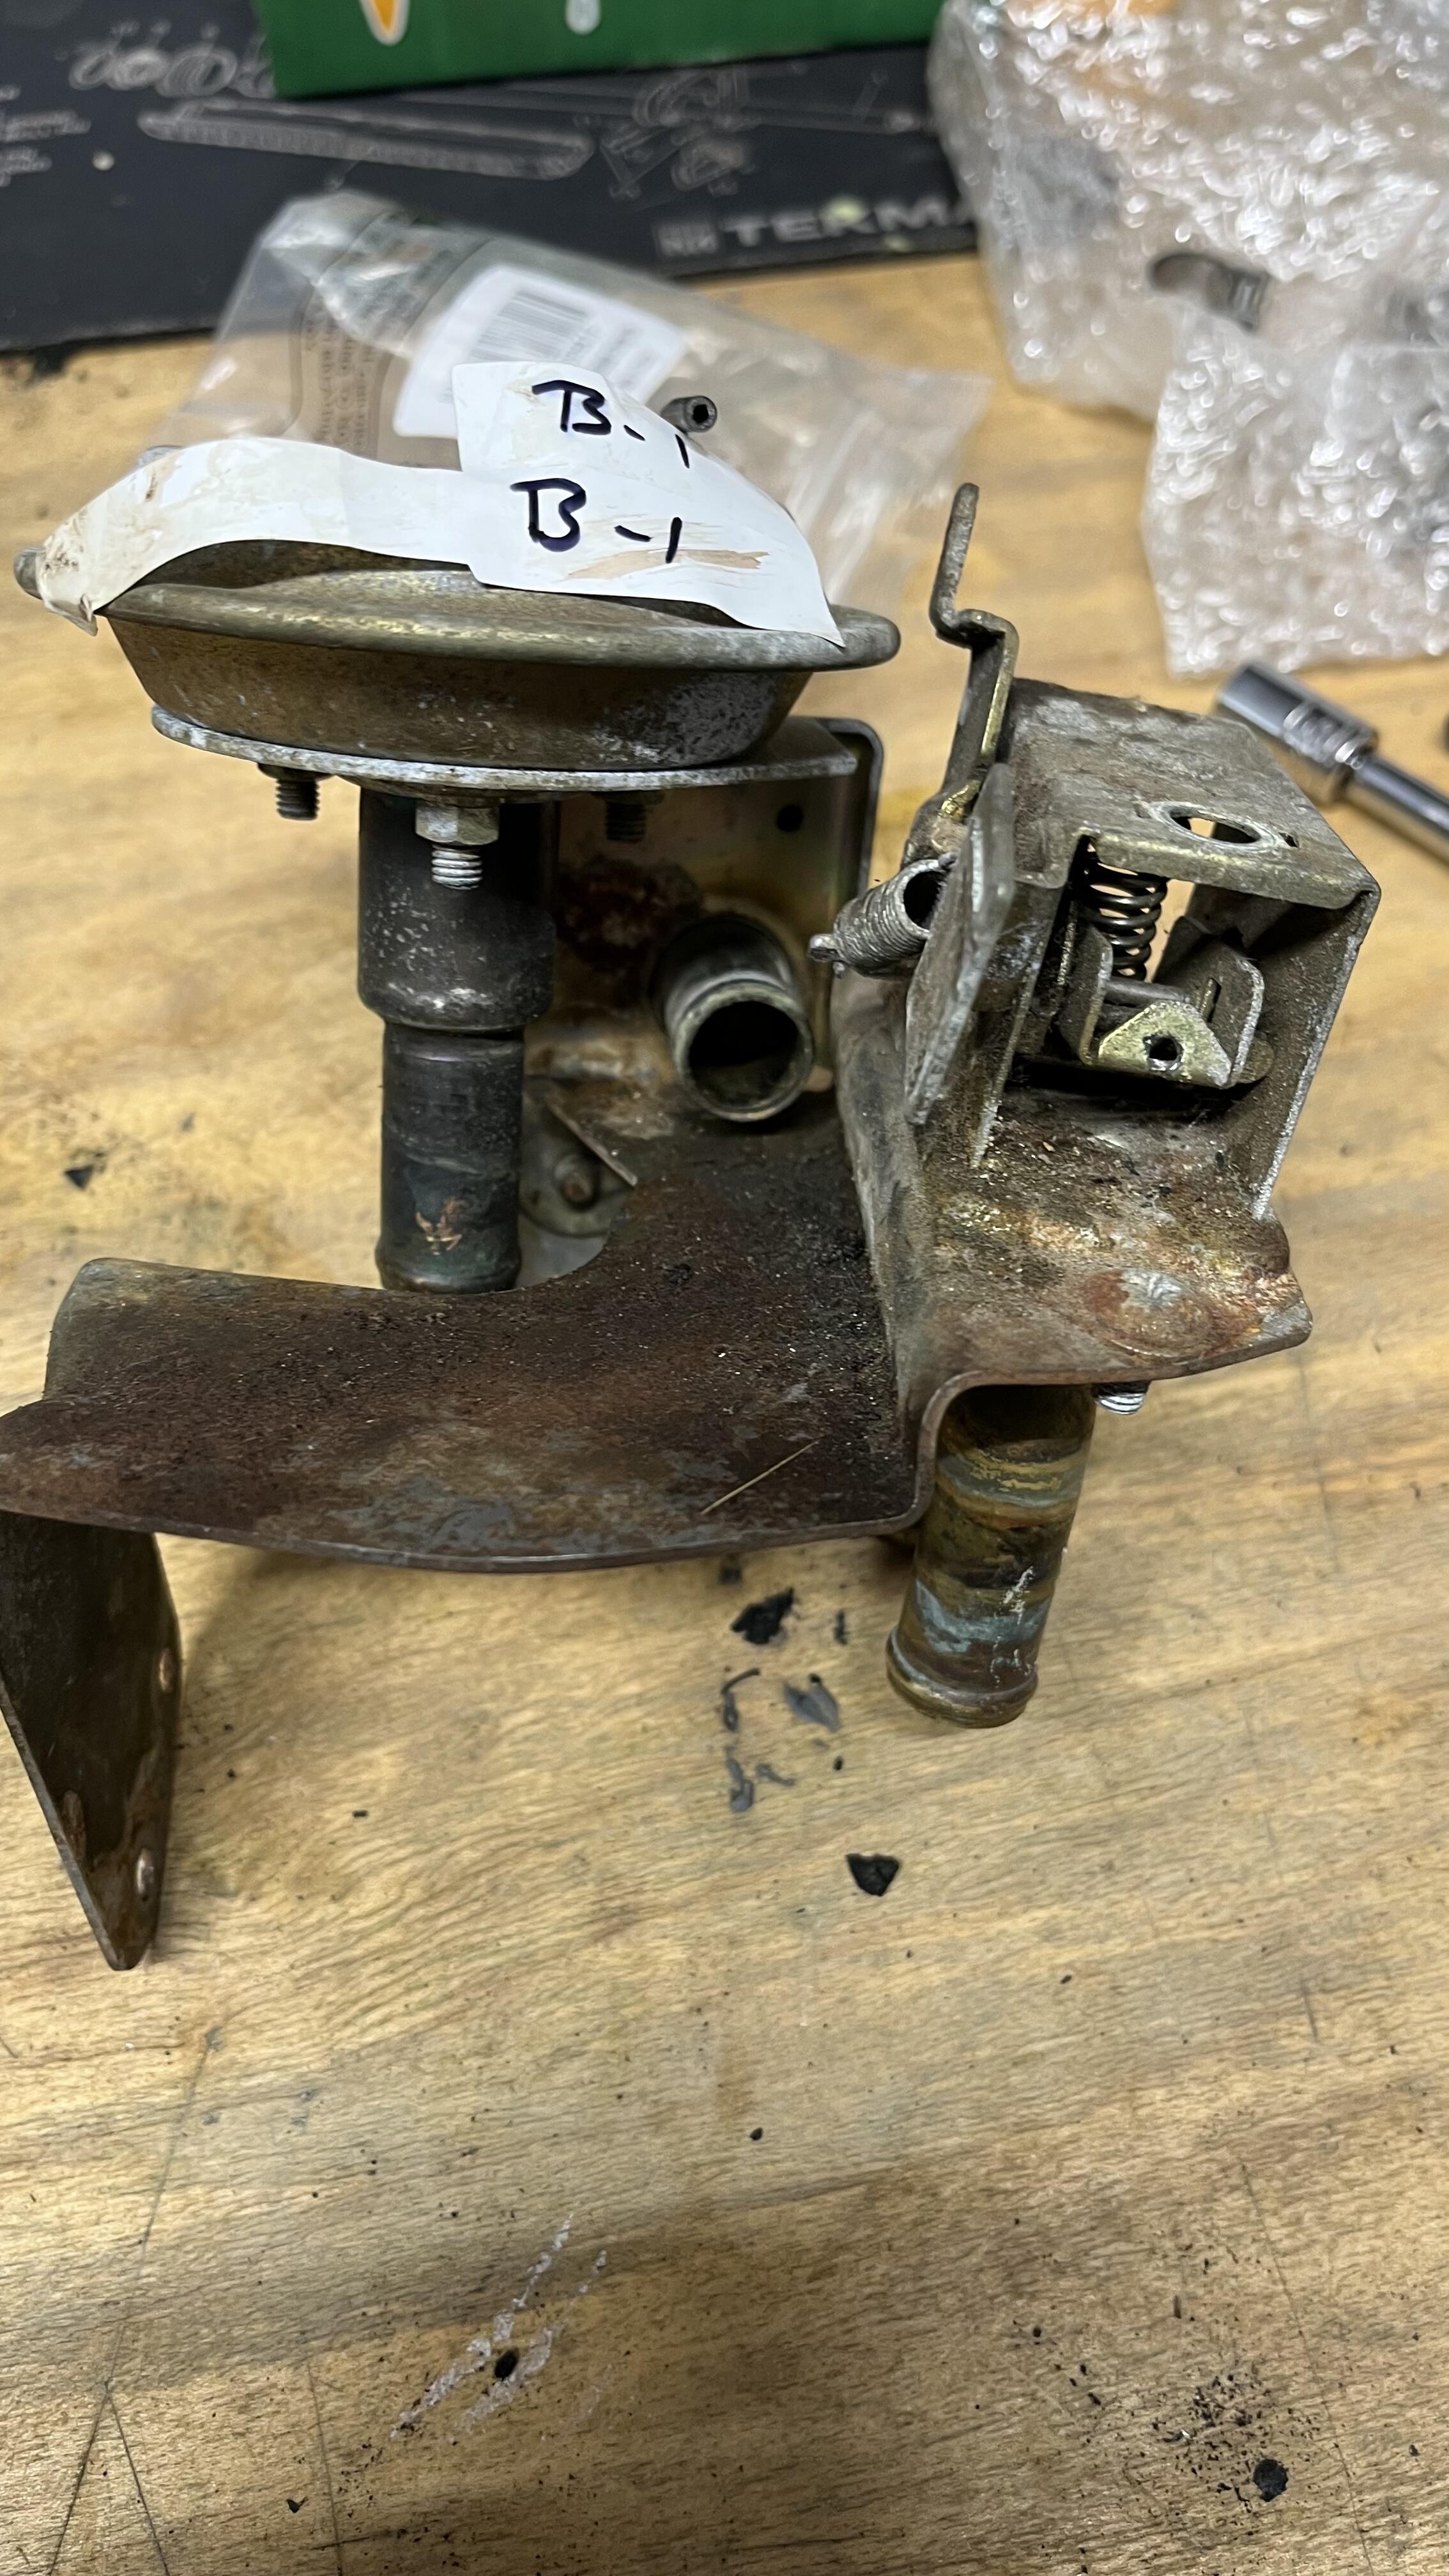
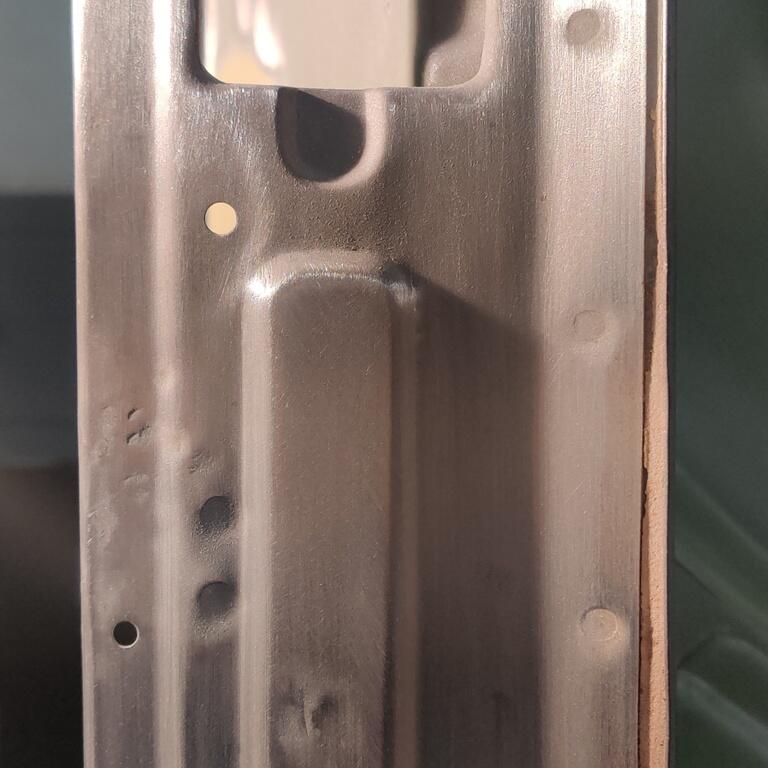
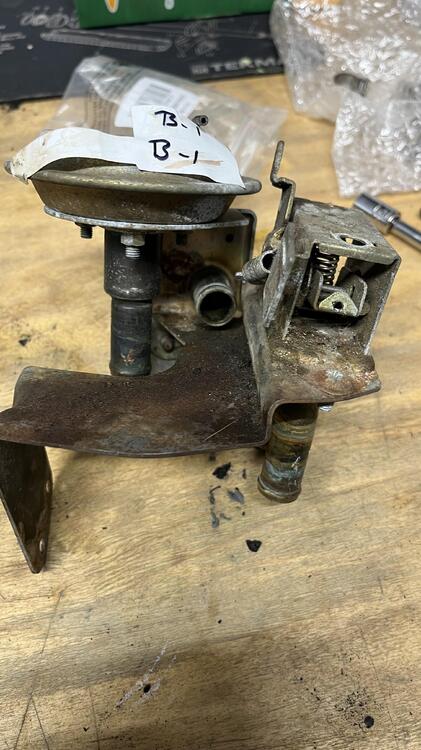
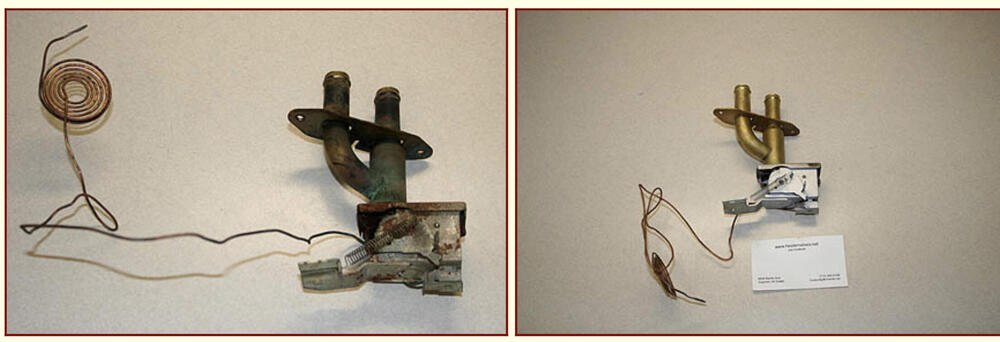
3 pointsPersistence once again prevails. I’ve been searching for a heater valve replacement and it not been going well. My style valve is no longer obtainable and alternates have fitment concerns. But I found a guy in WI that rebuilds them. I’m sending him both the vacuum AC valve and heater valve where is will inspect and recondition. Price is reasonable considering the cost of replacements. $100 plus shipping and he has a 24 hr turnaround time. Here’s what mine look like right now. http://heatervalves.net/

 3 points
 -
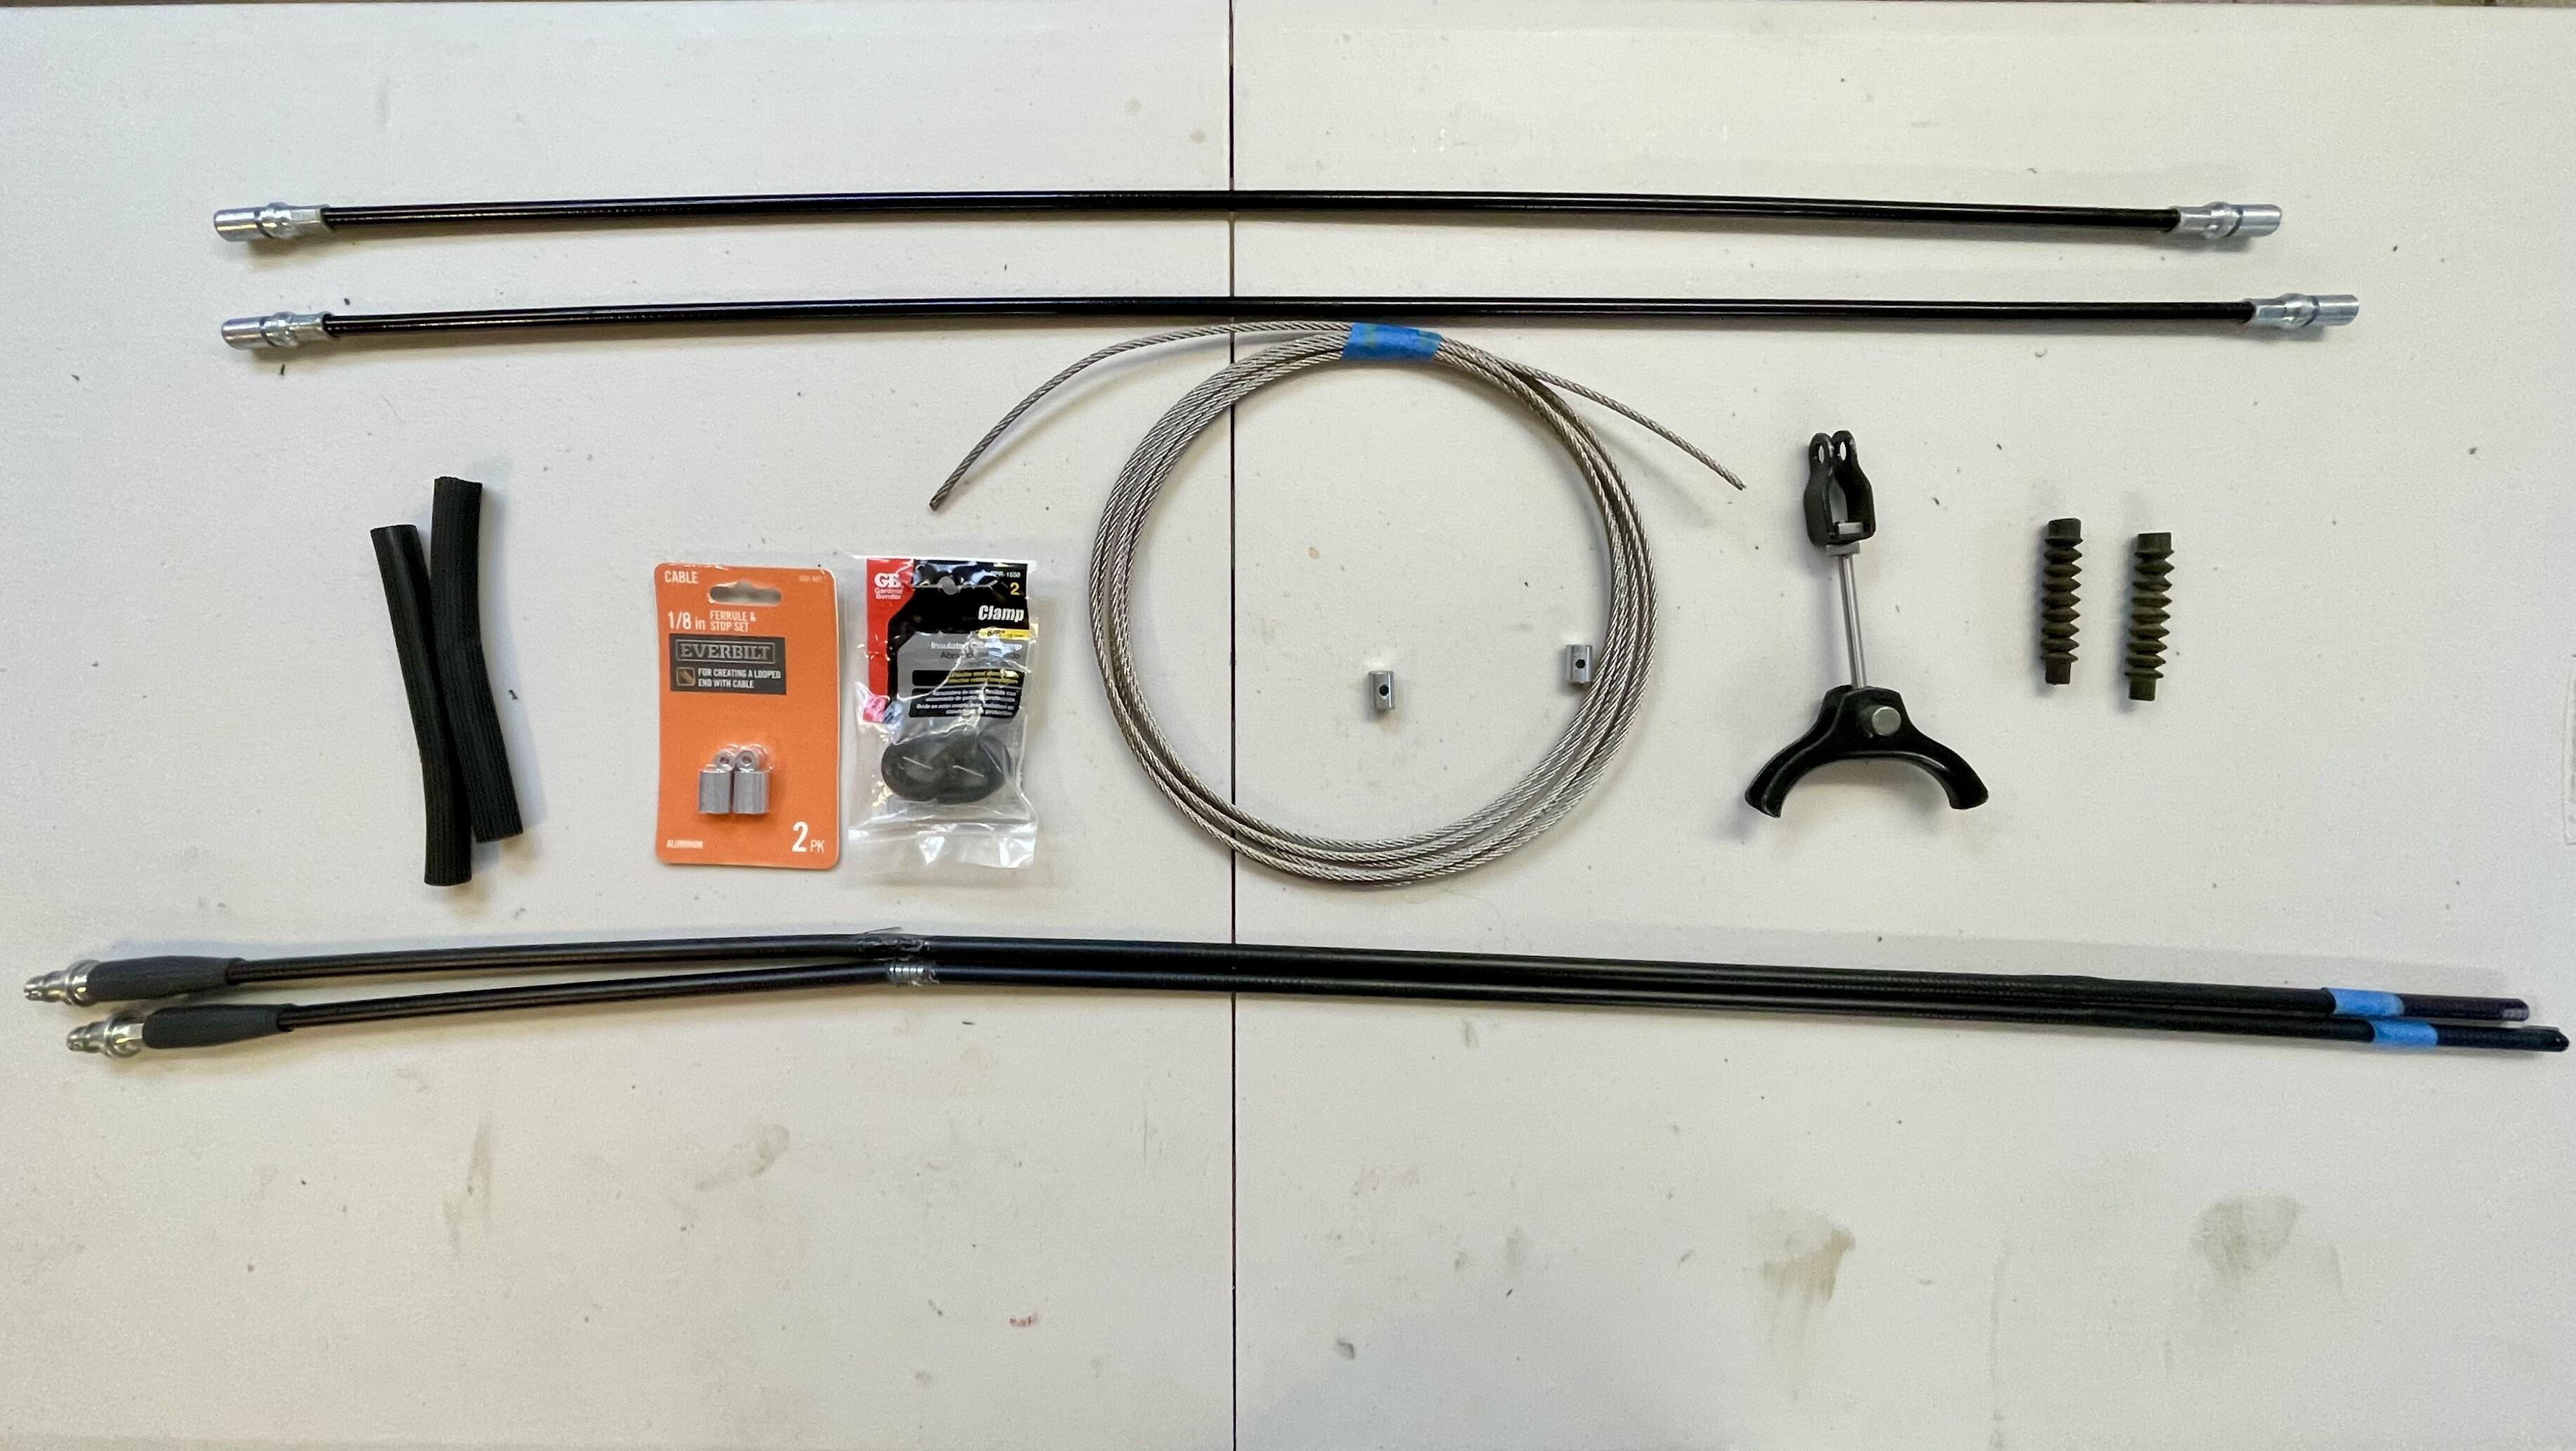
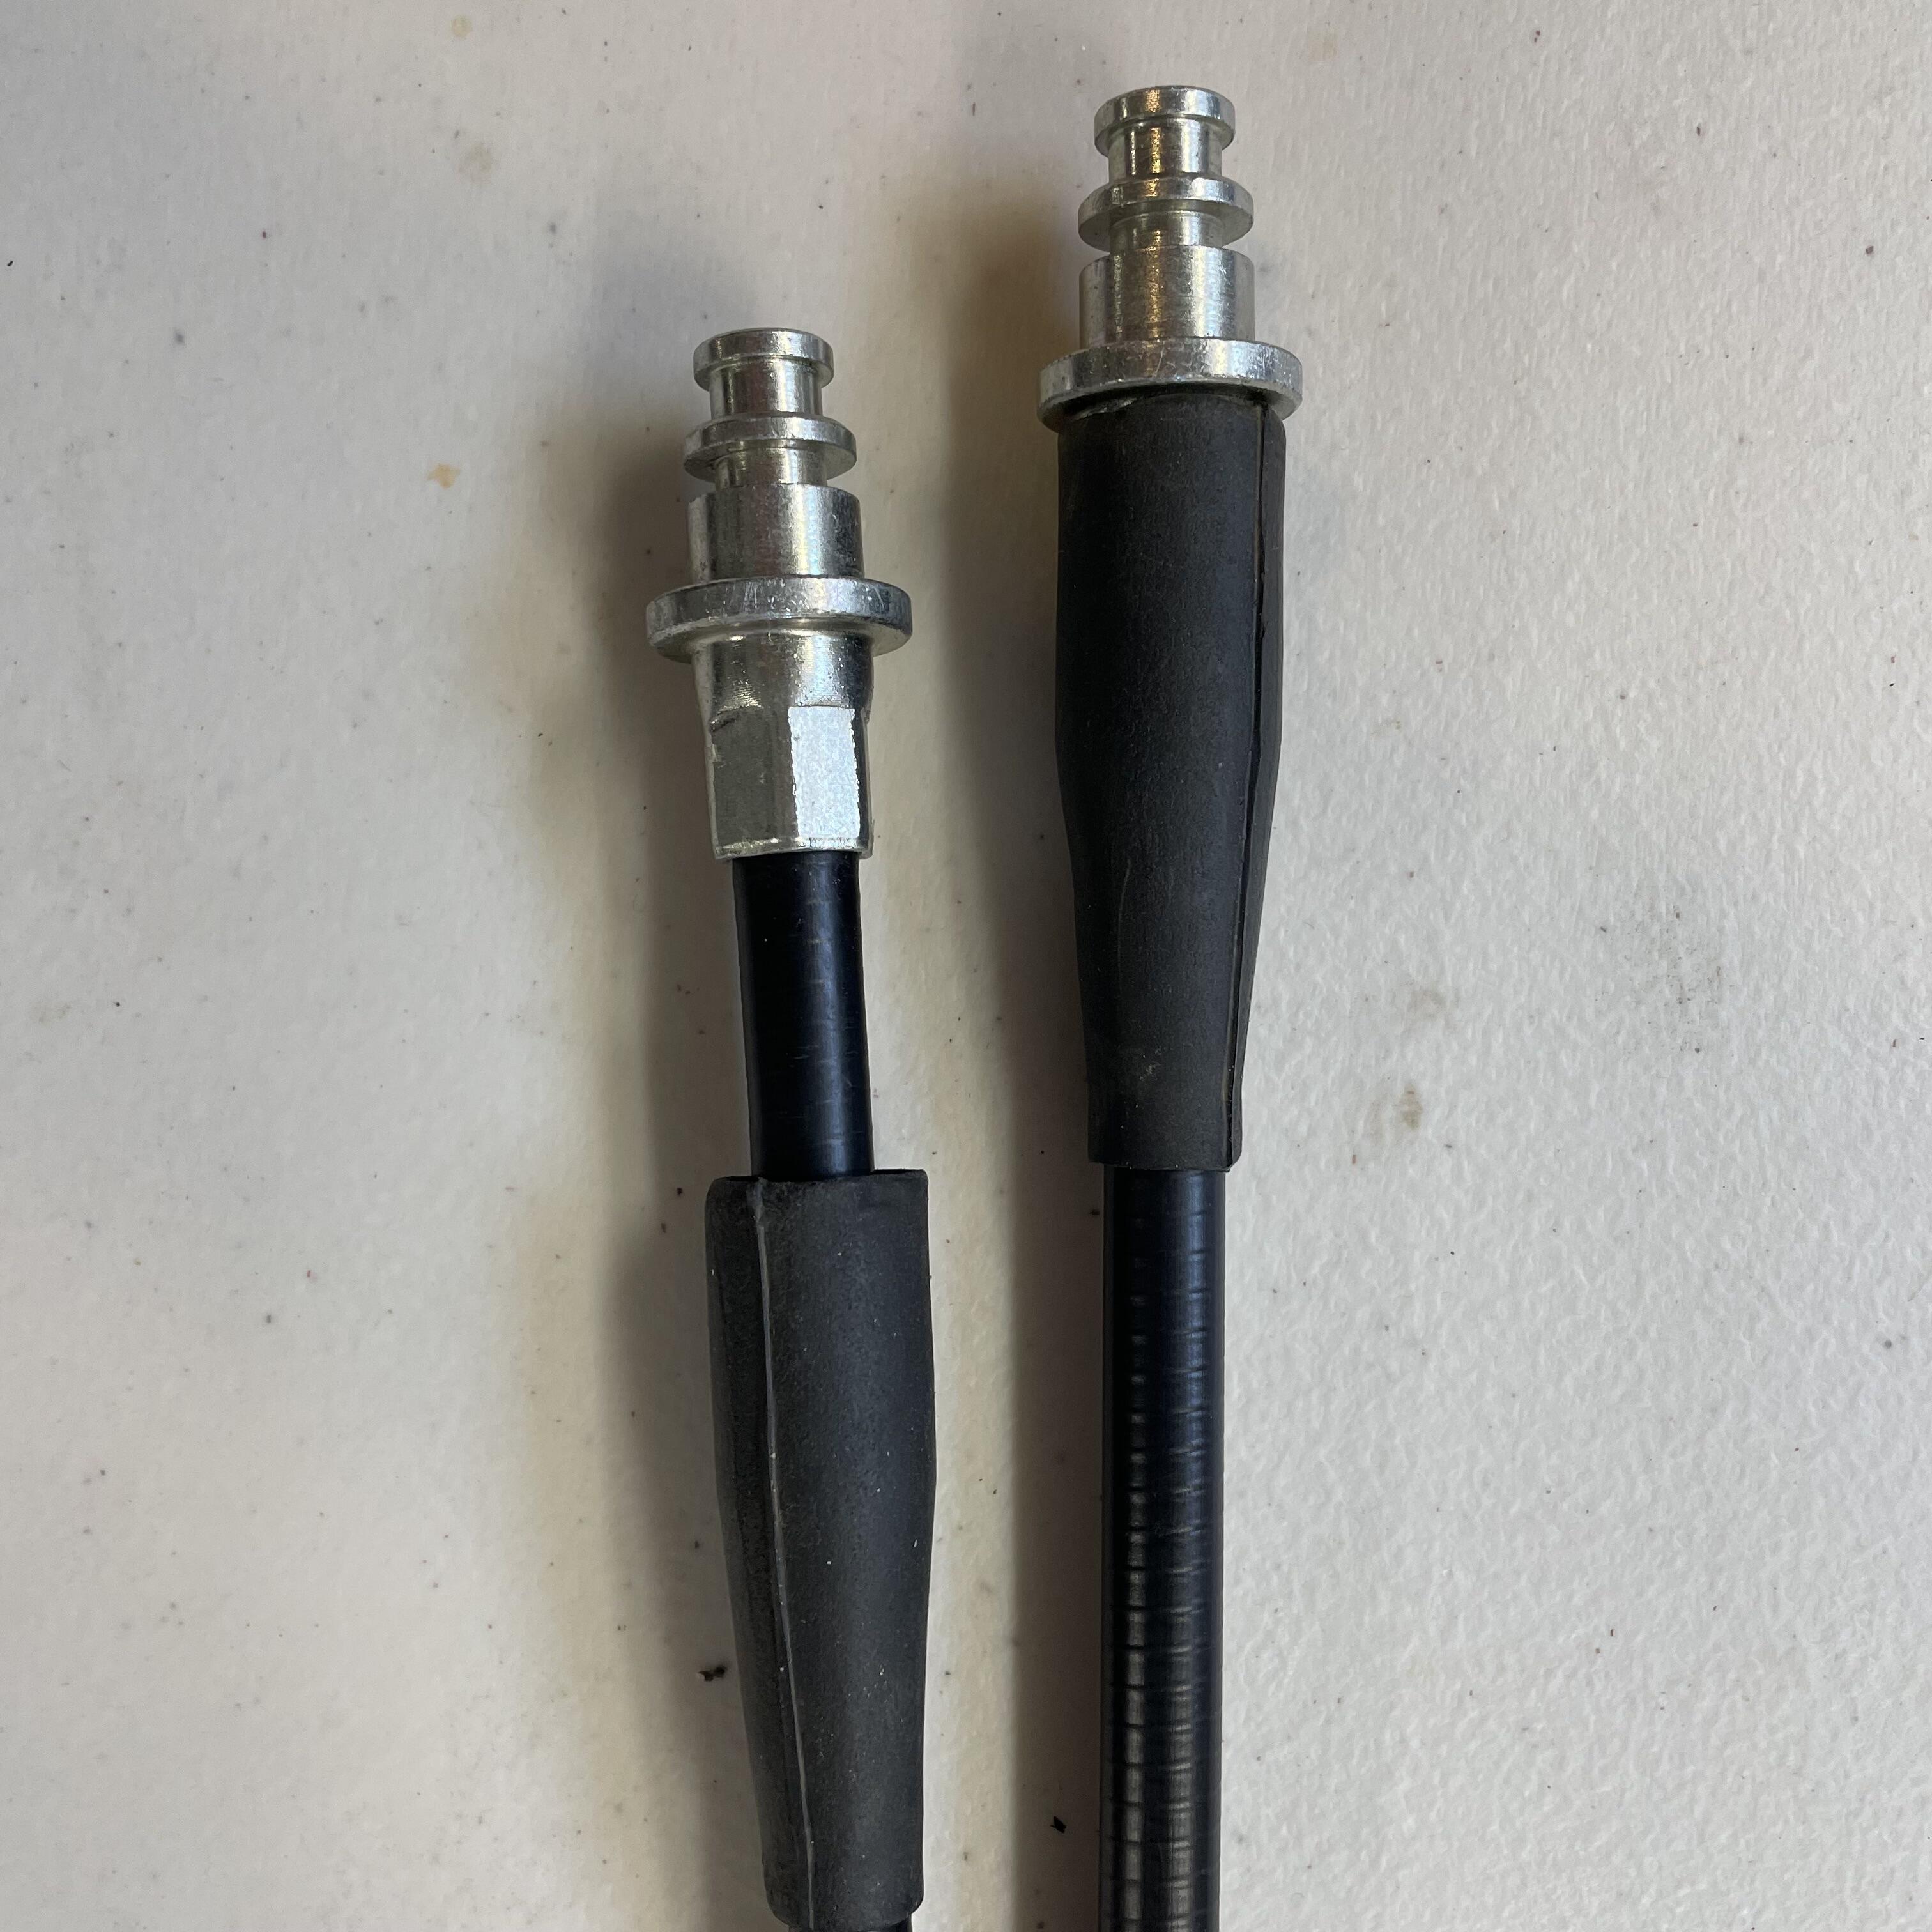
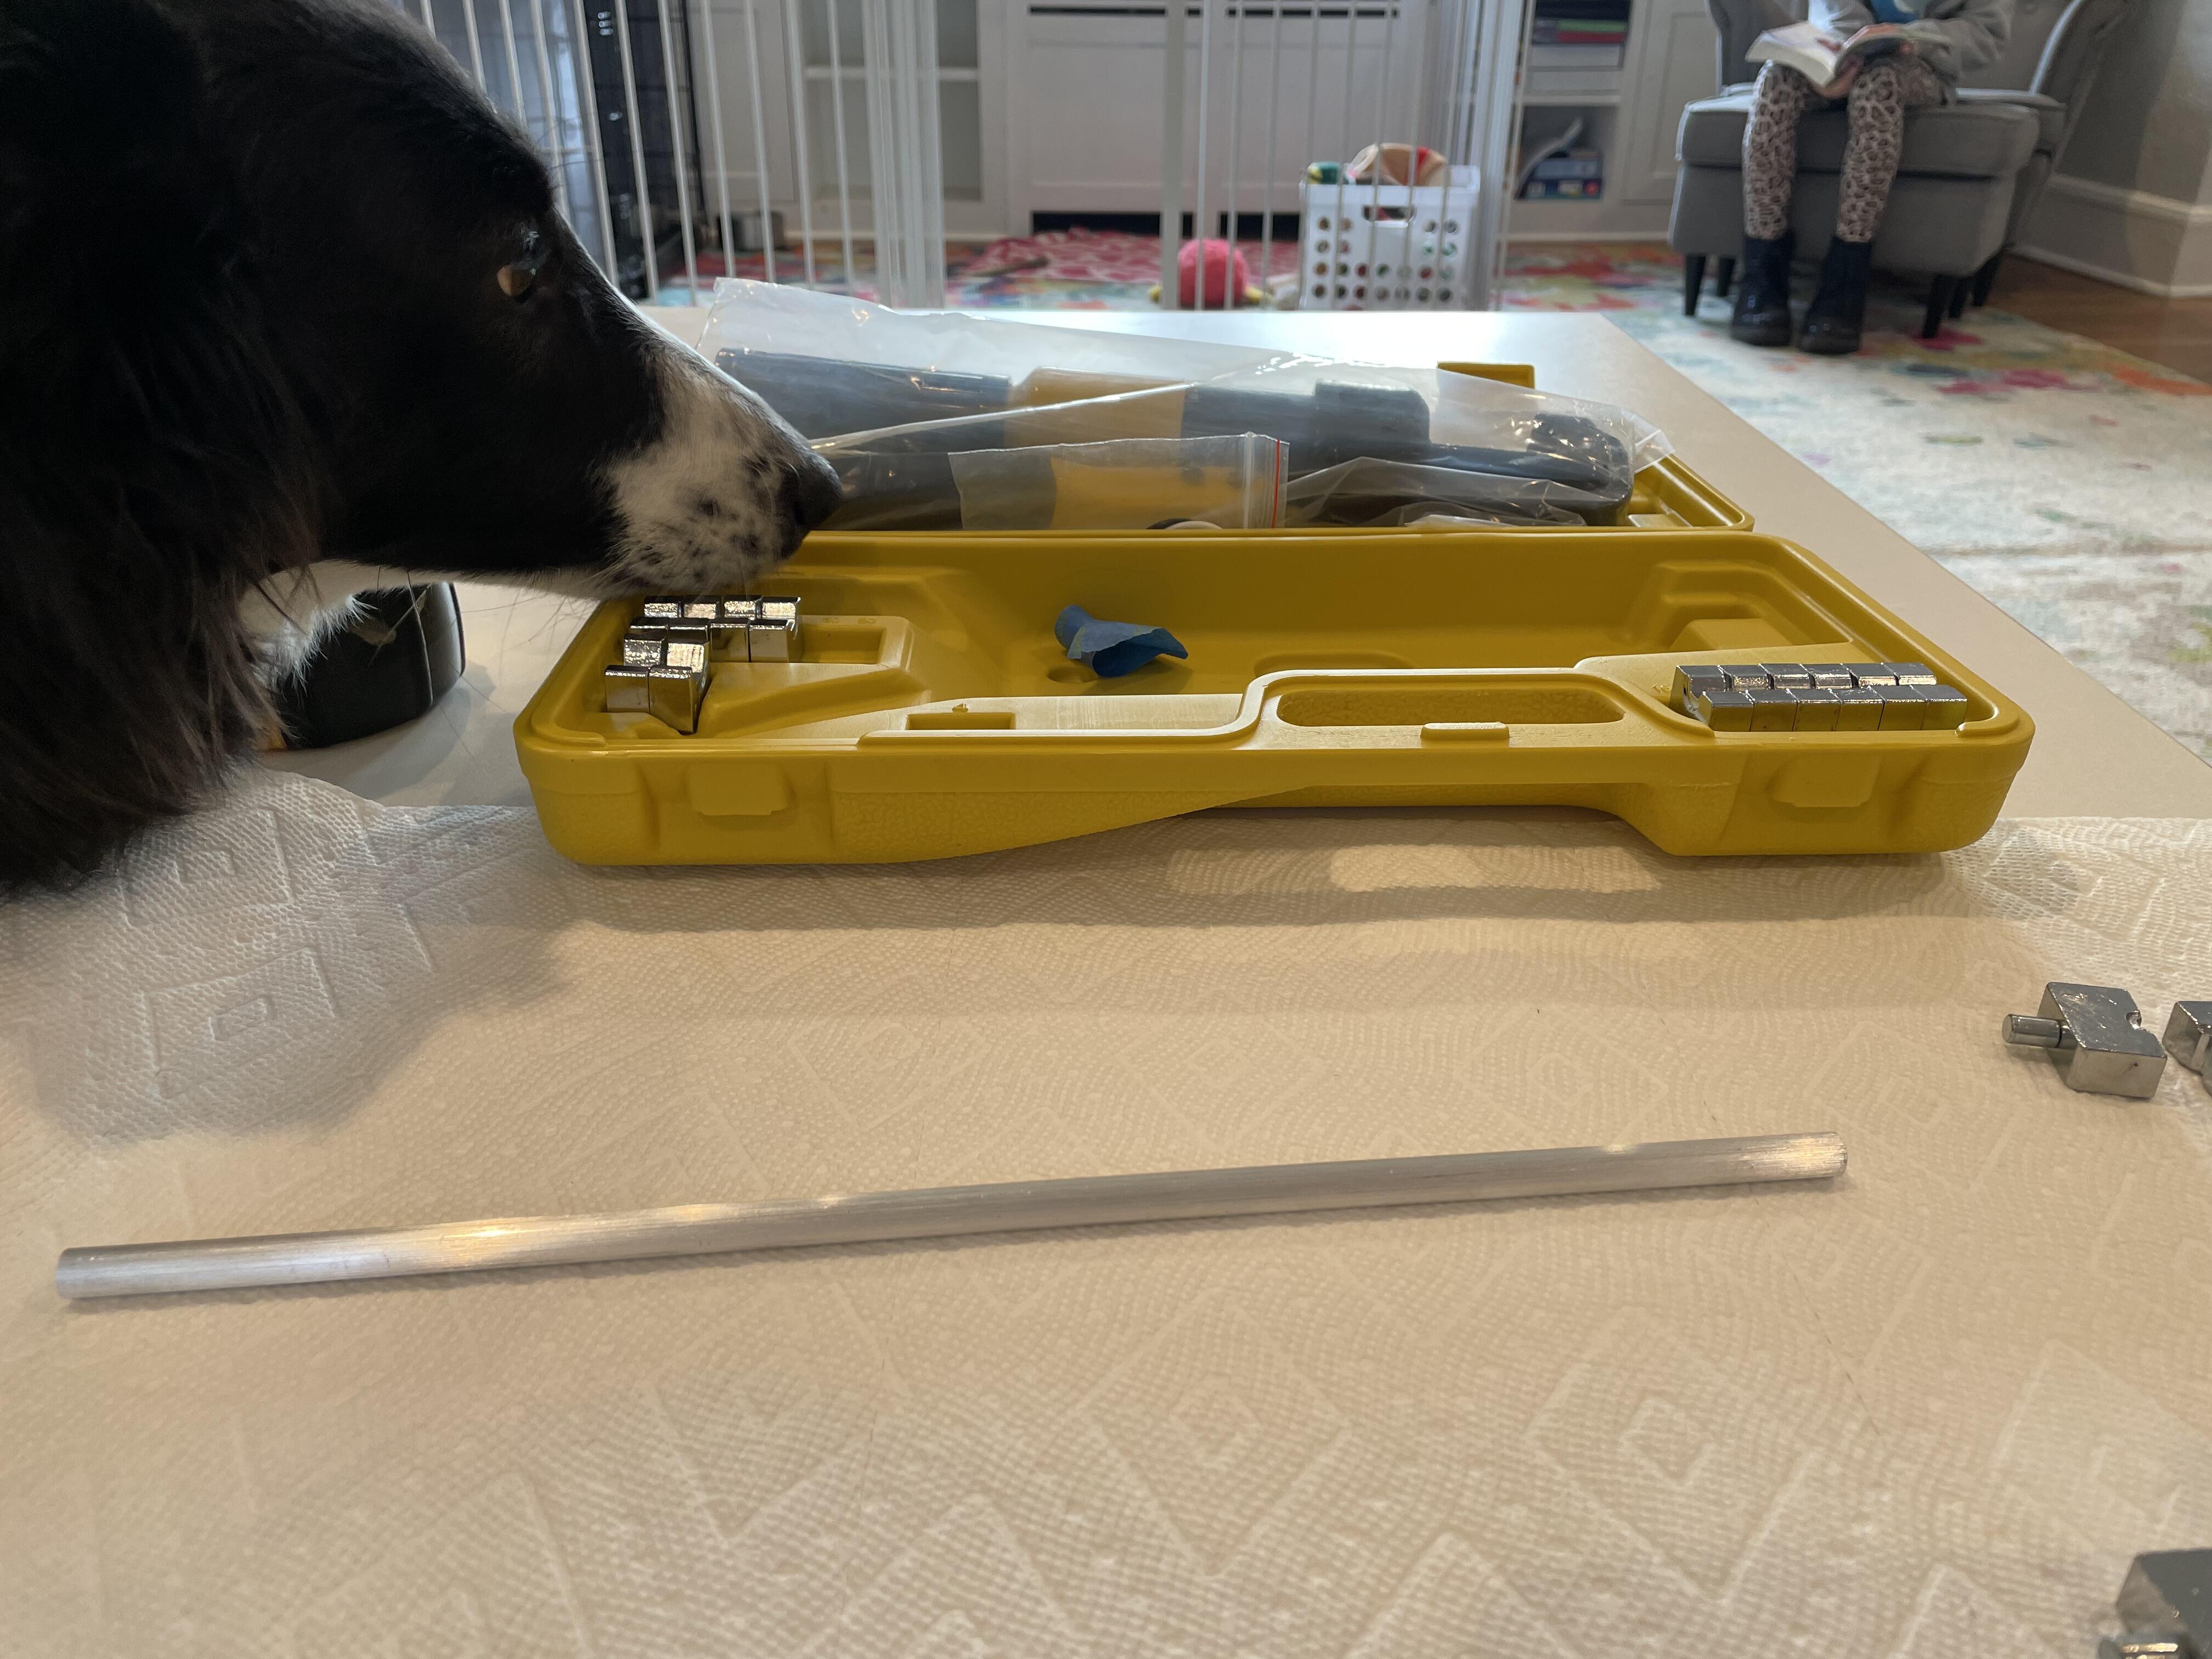
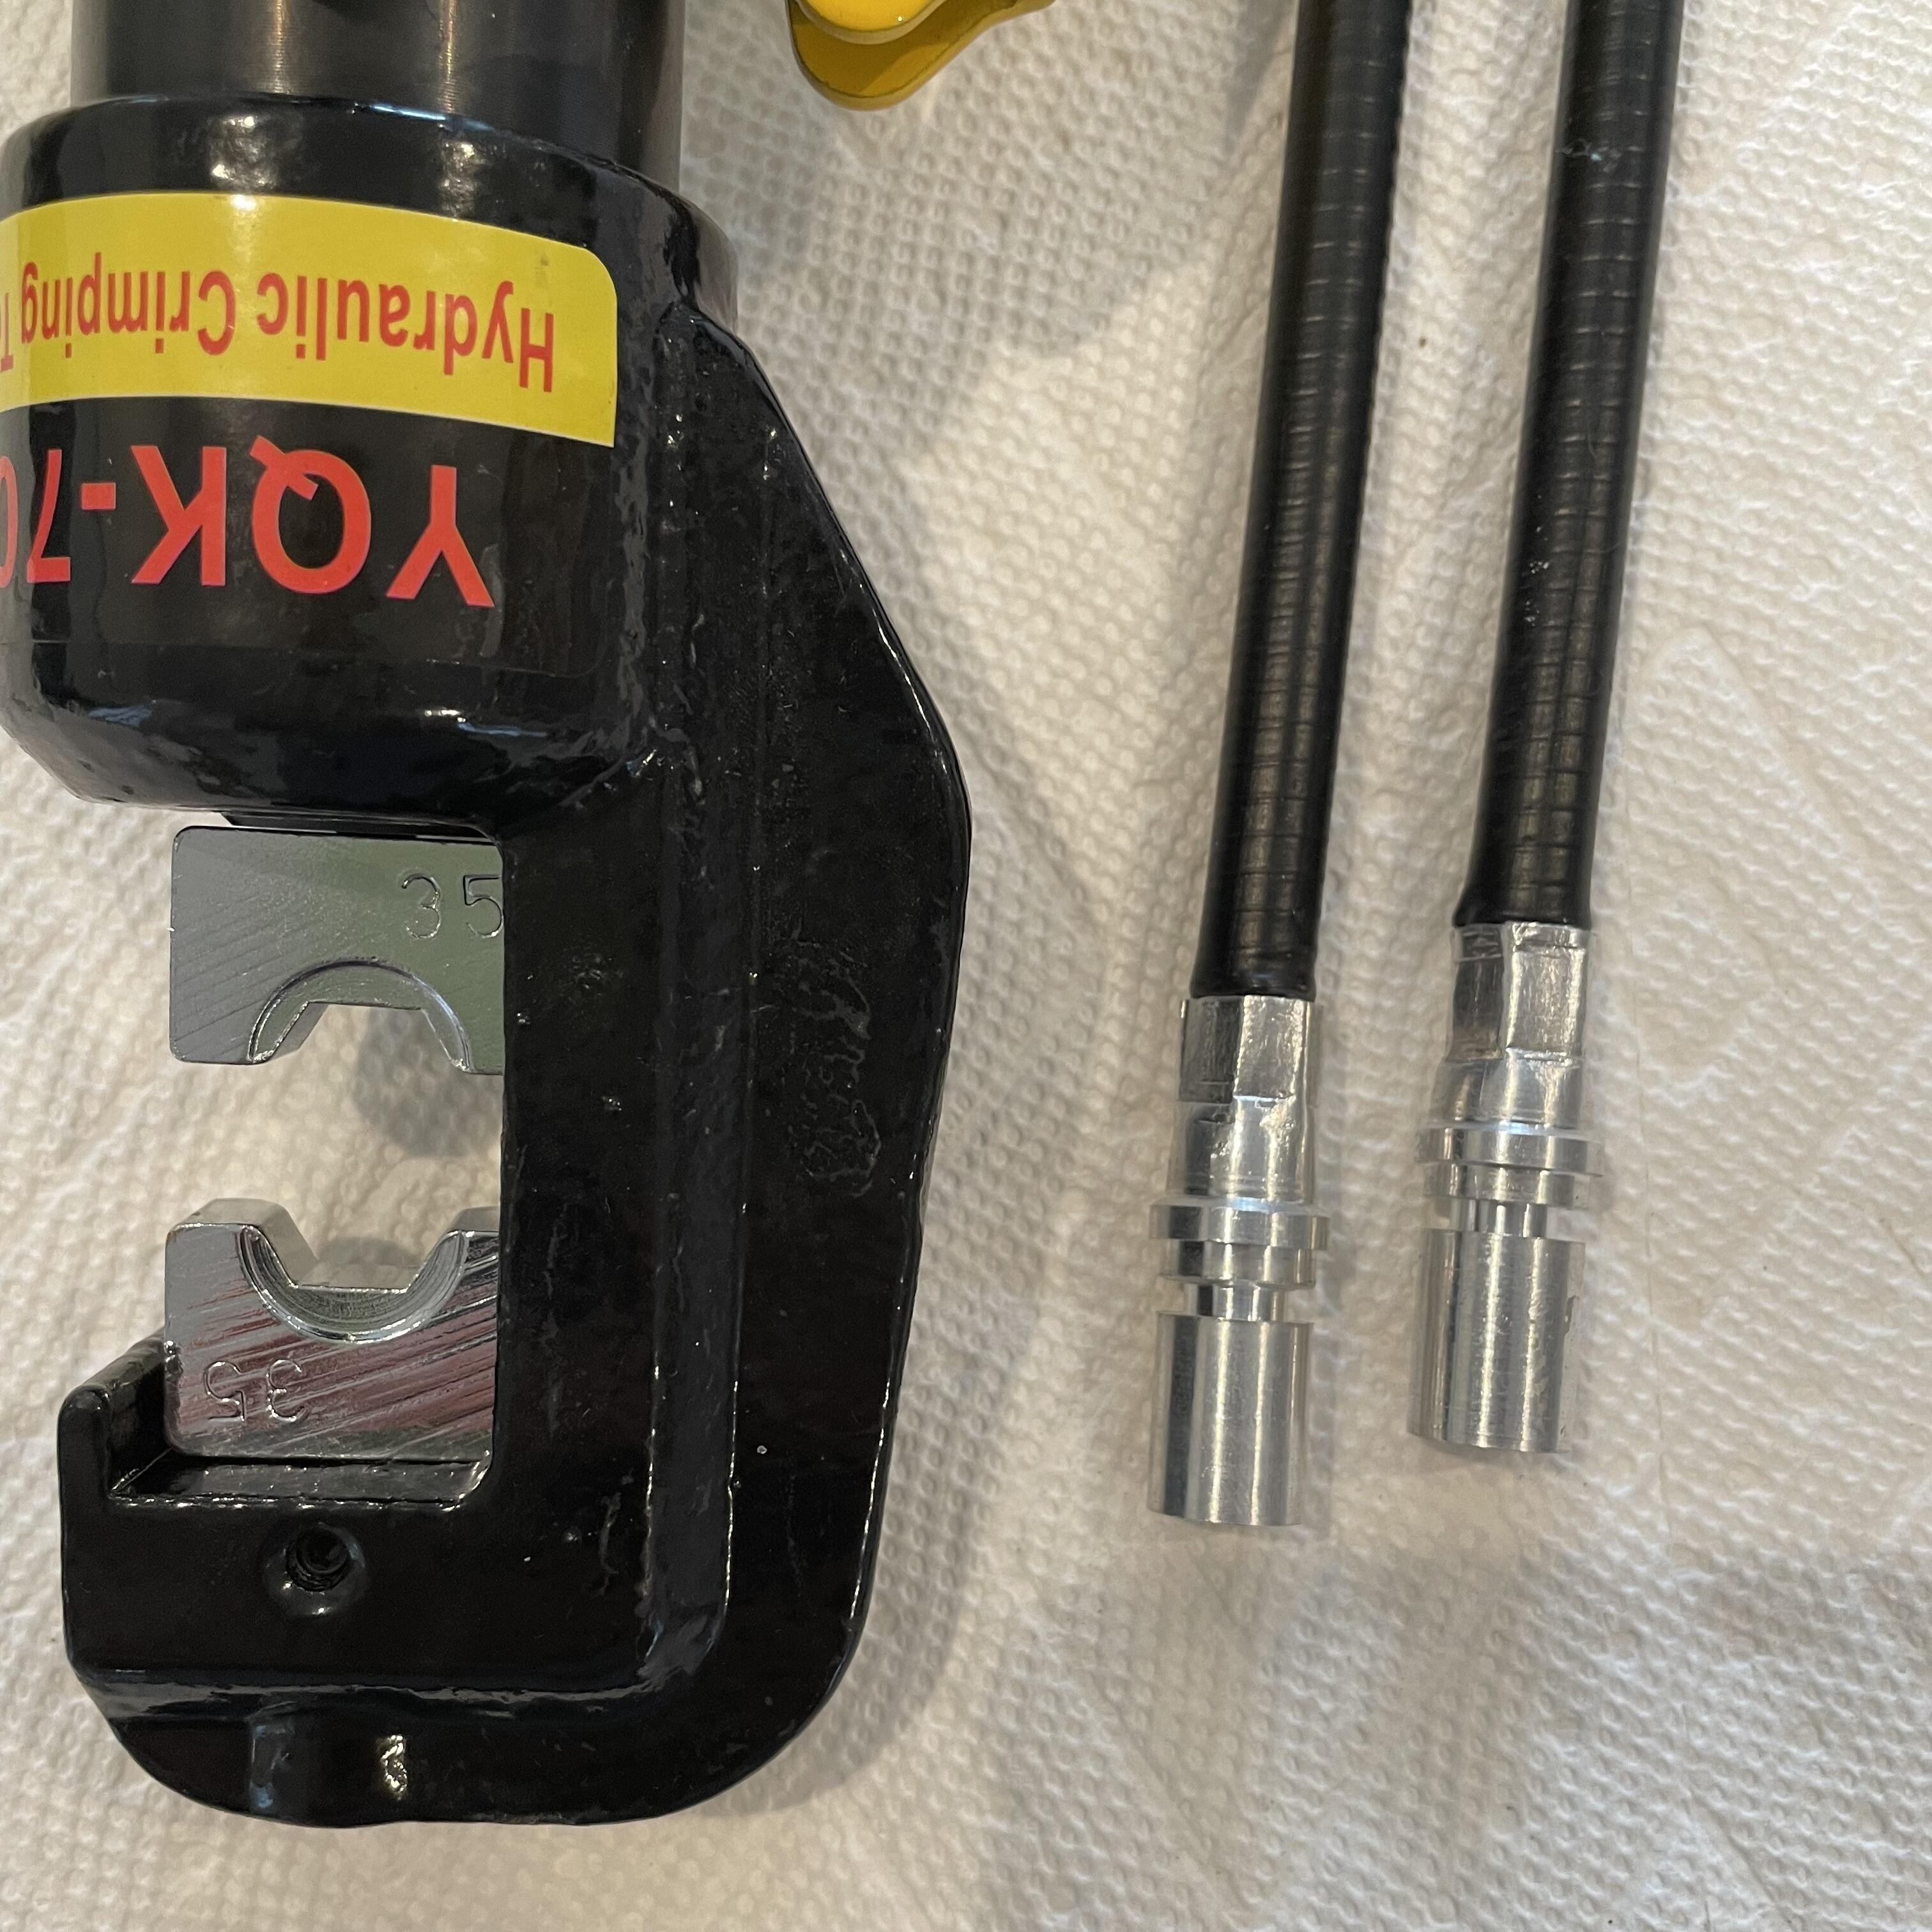
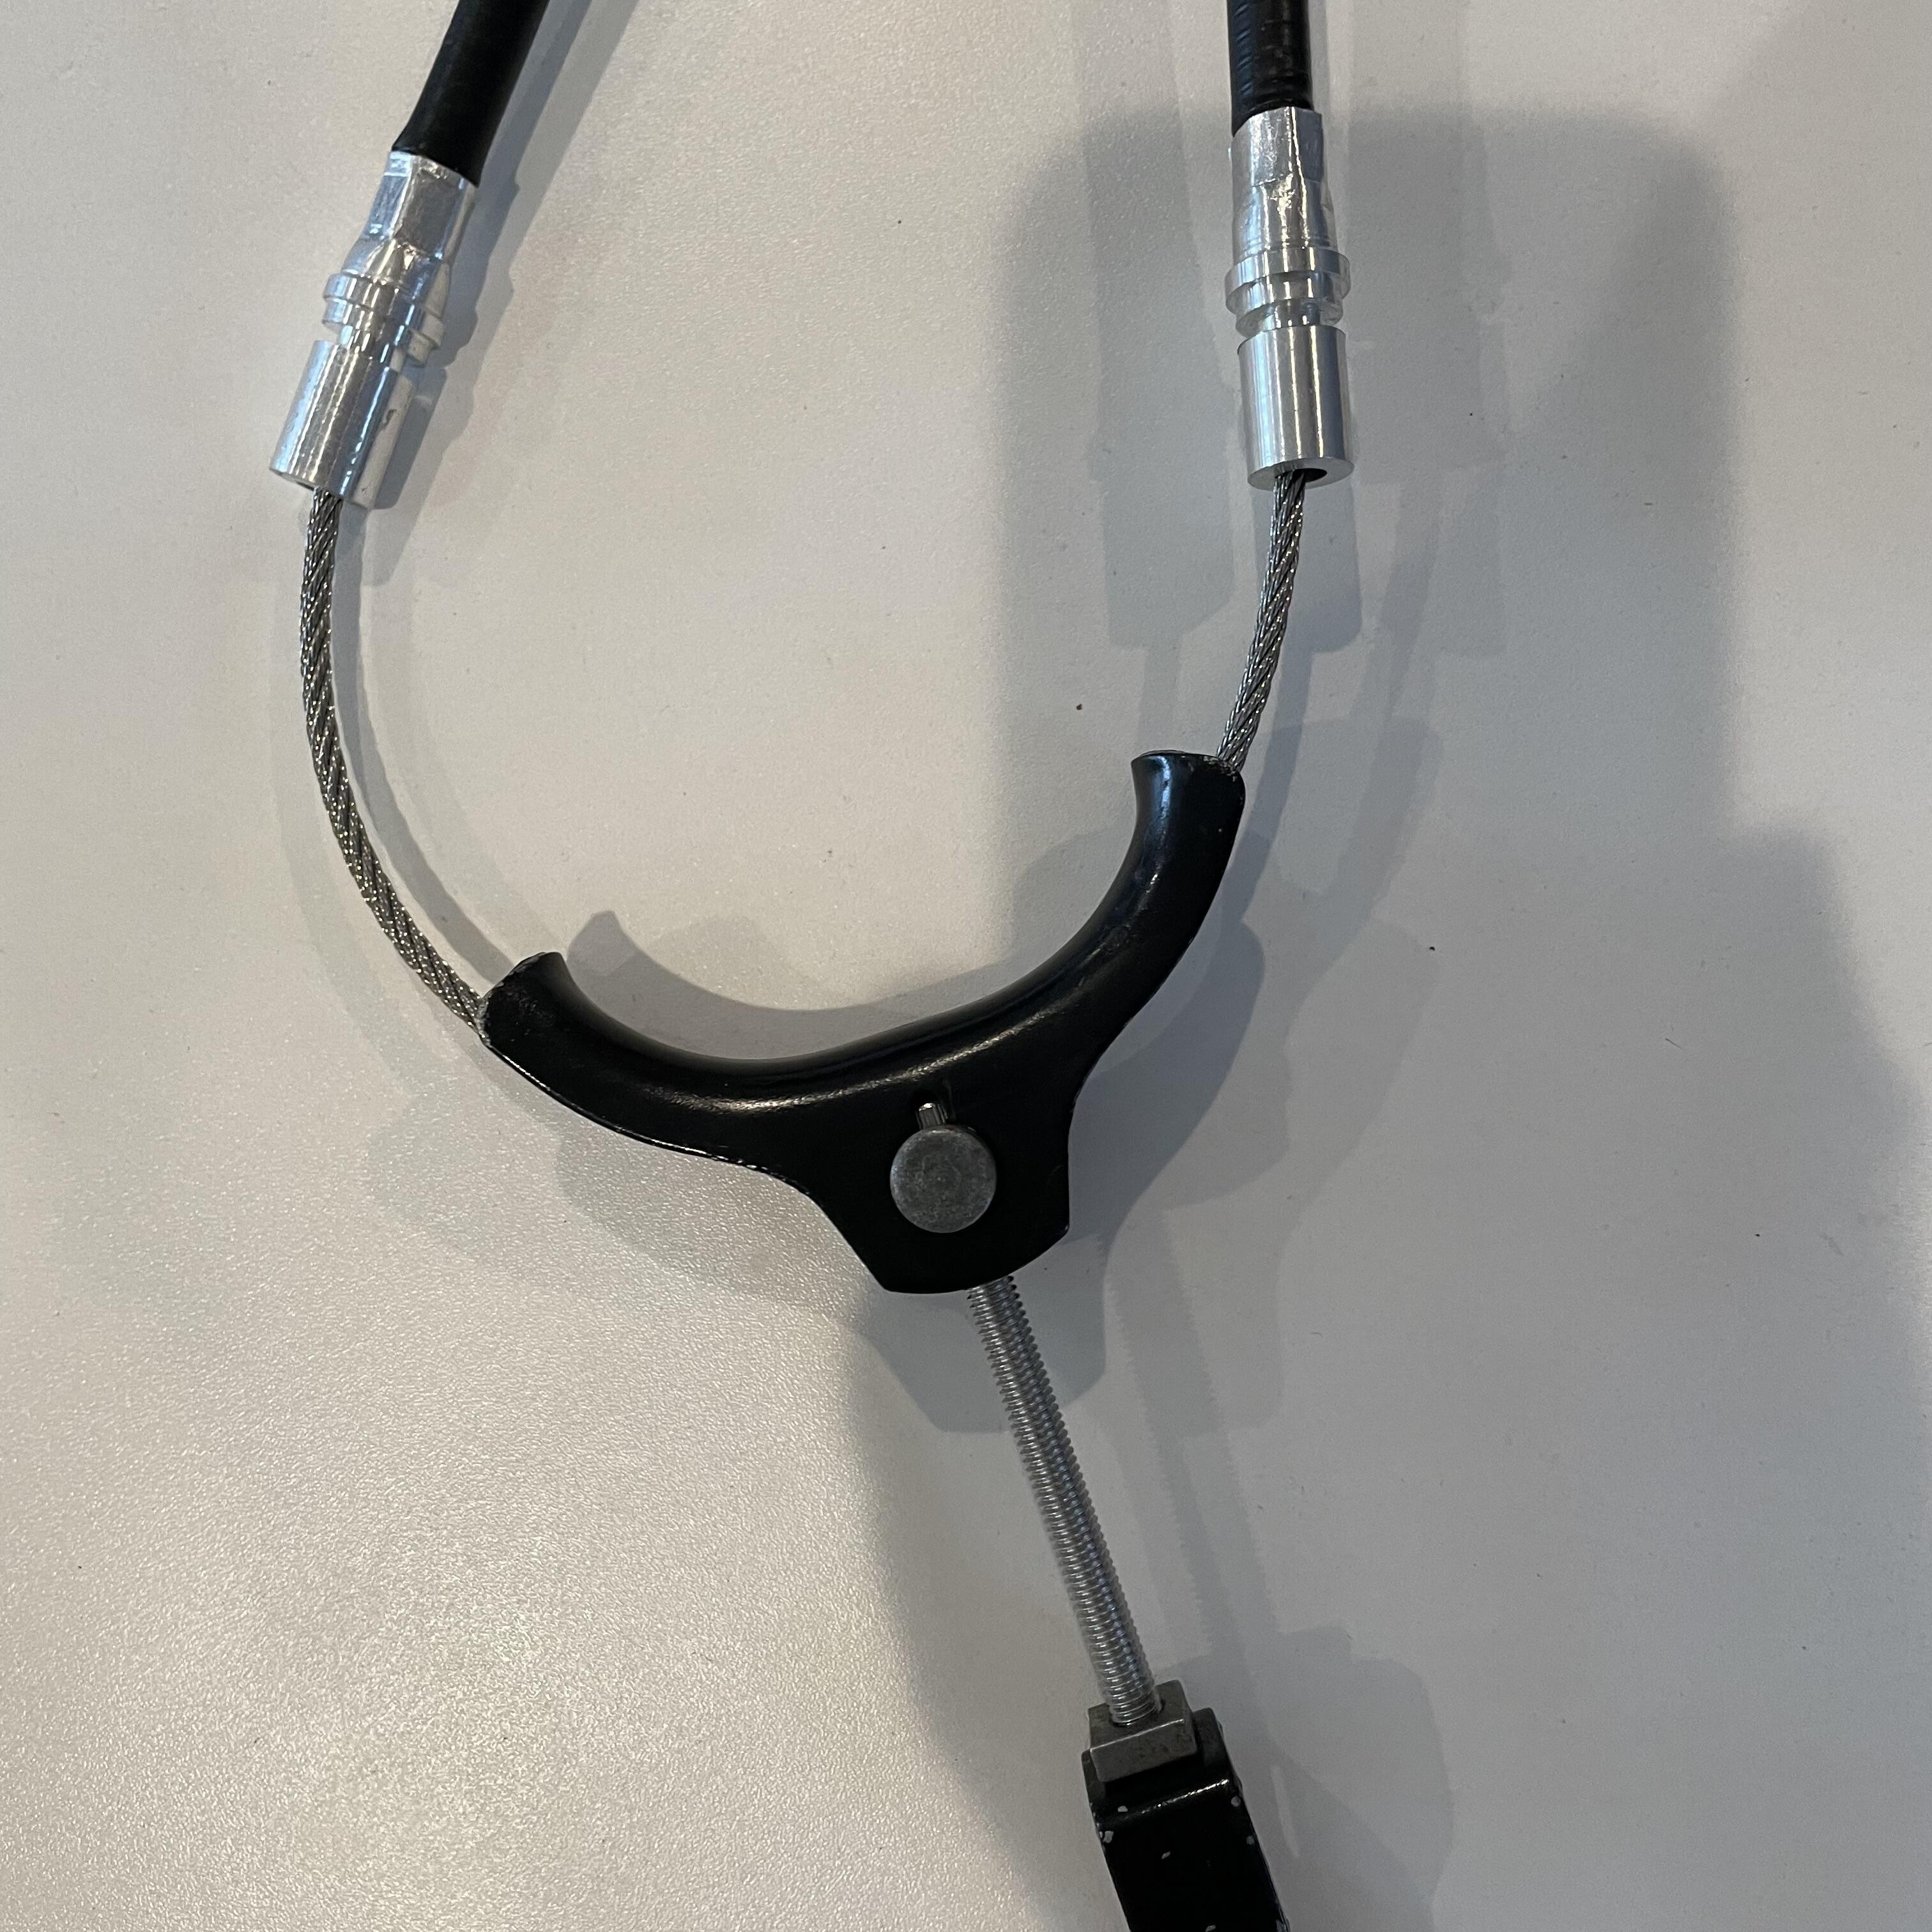
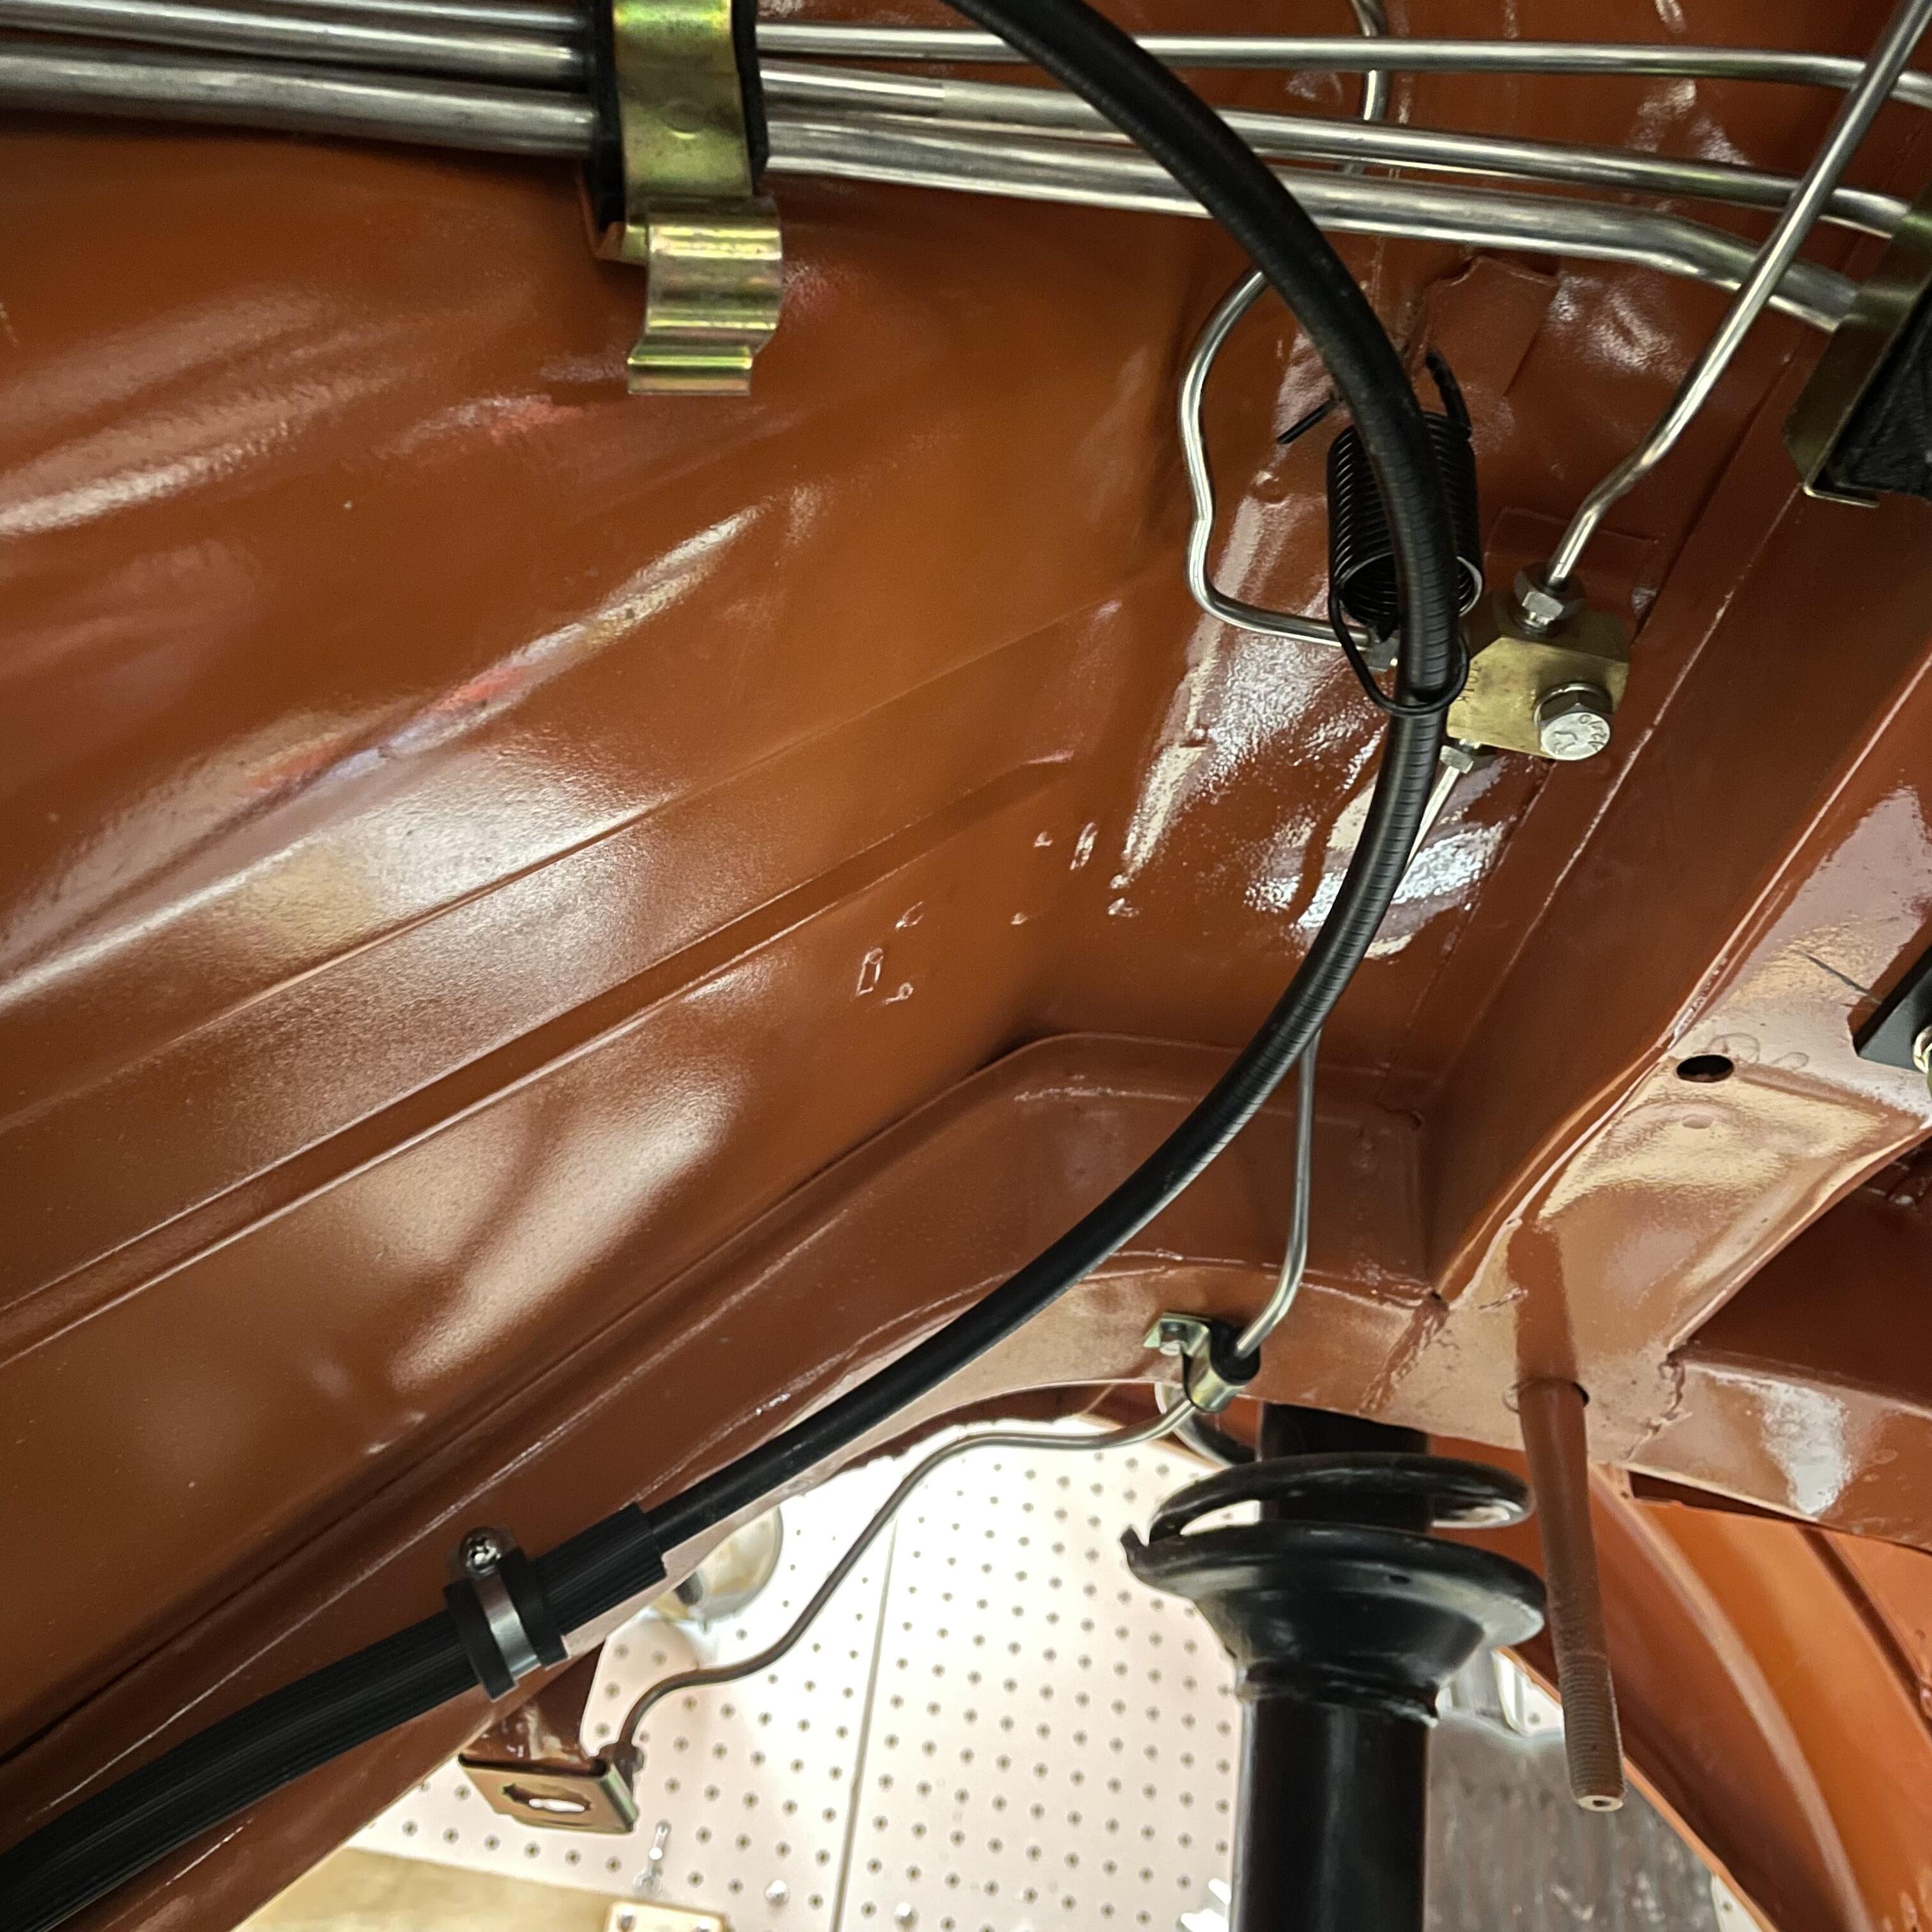
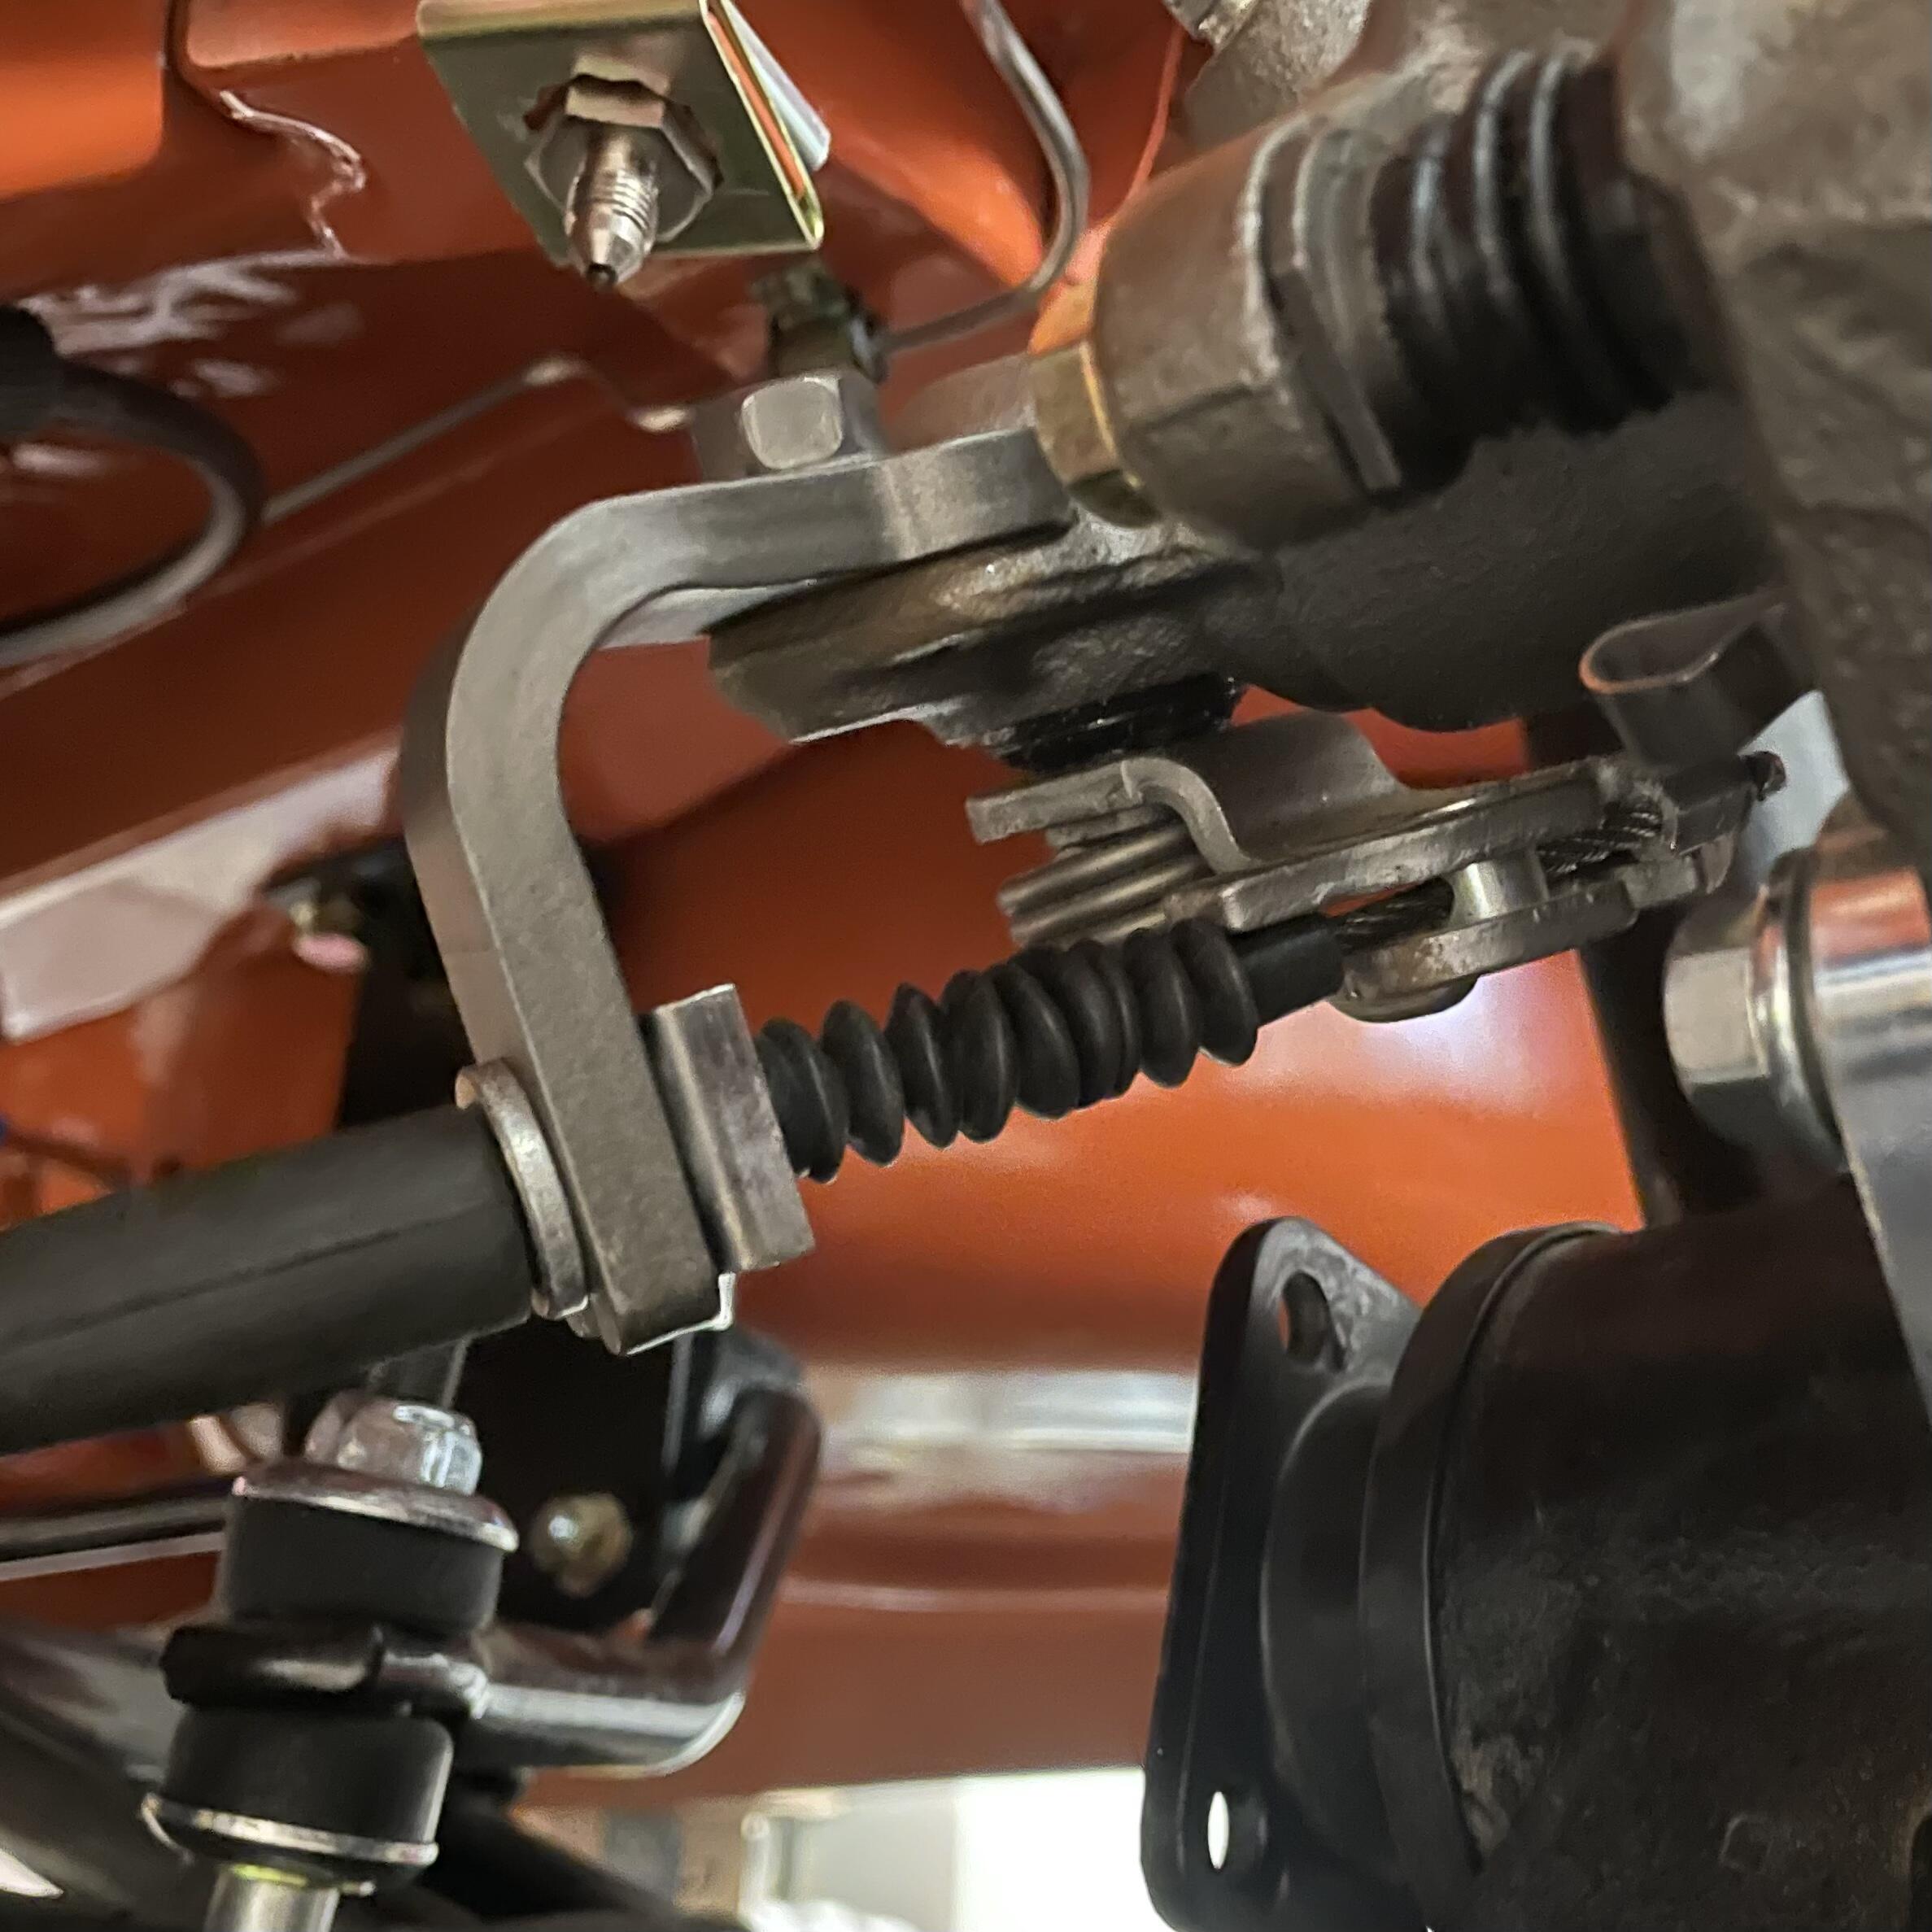
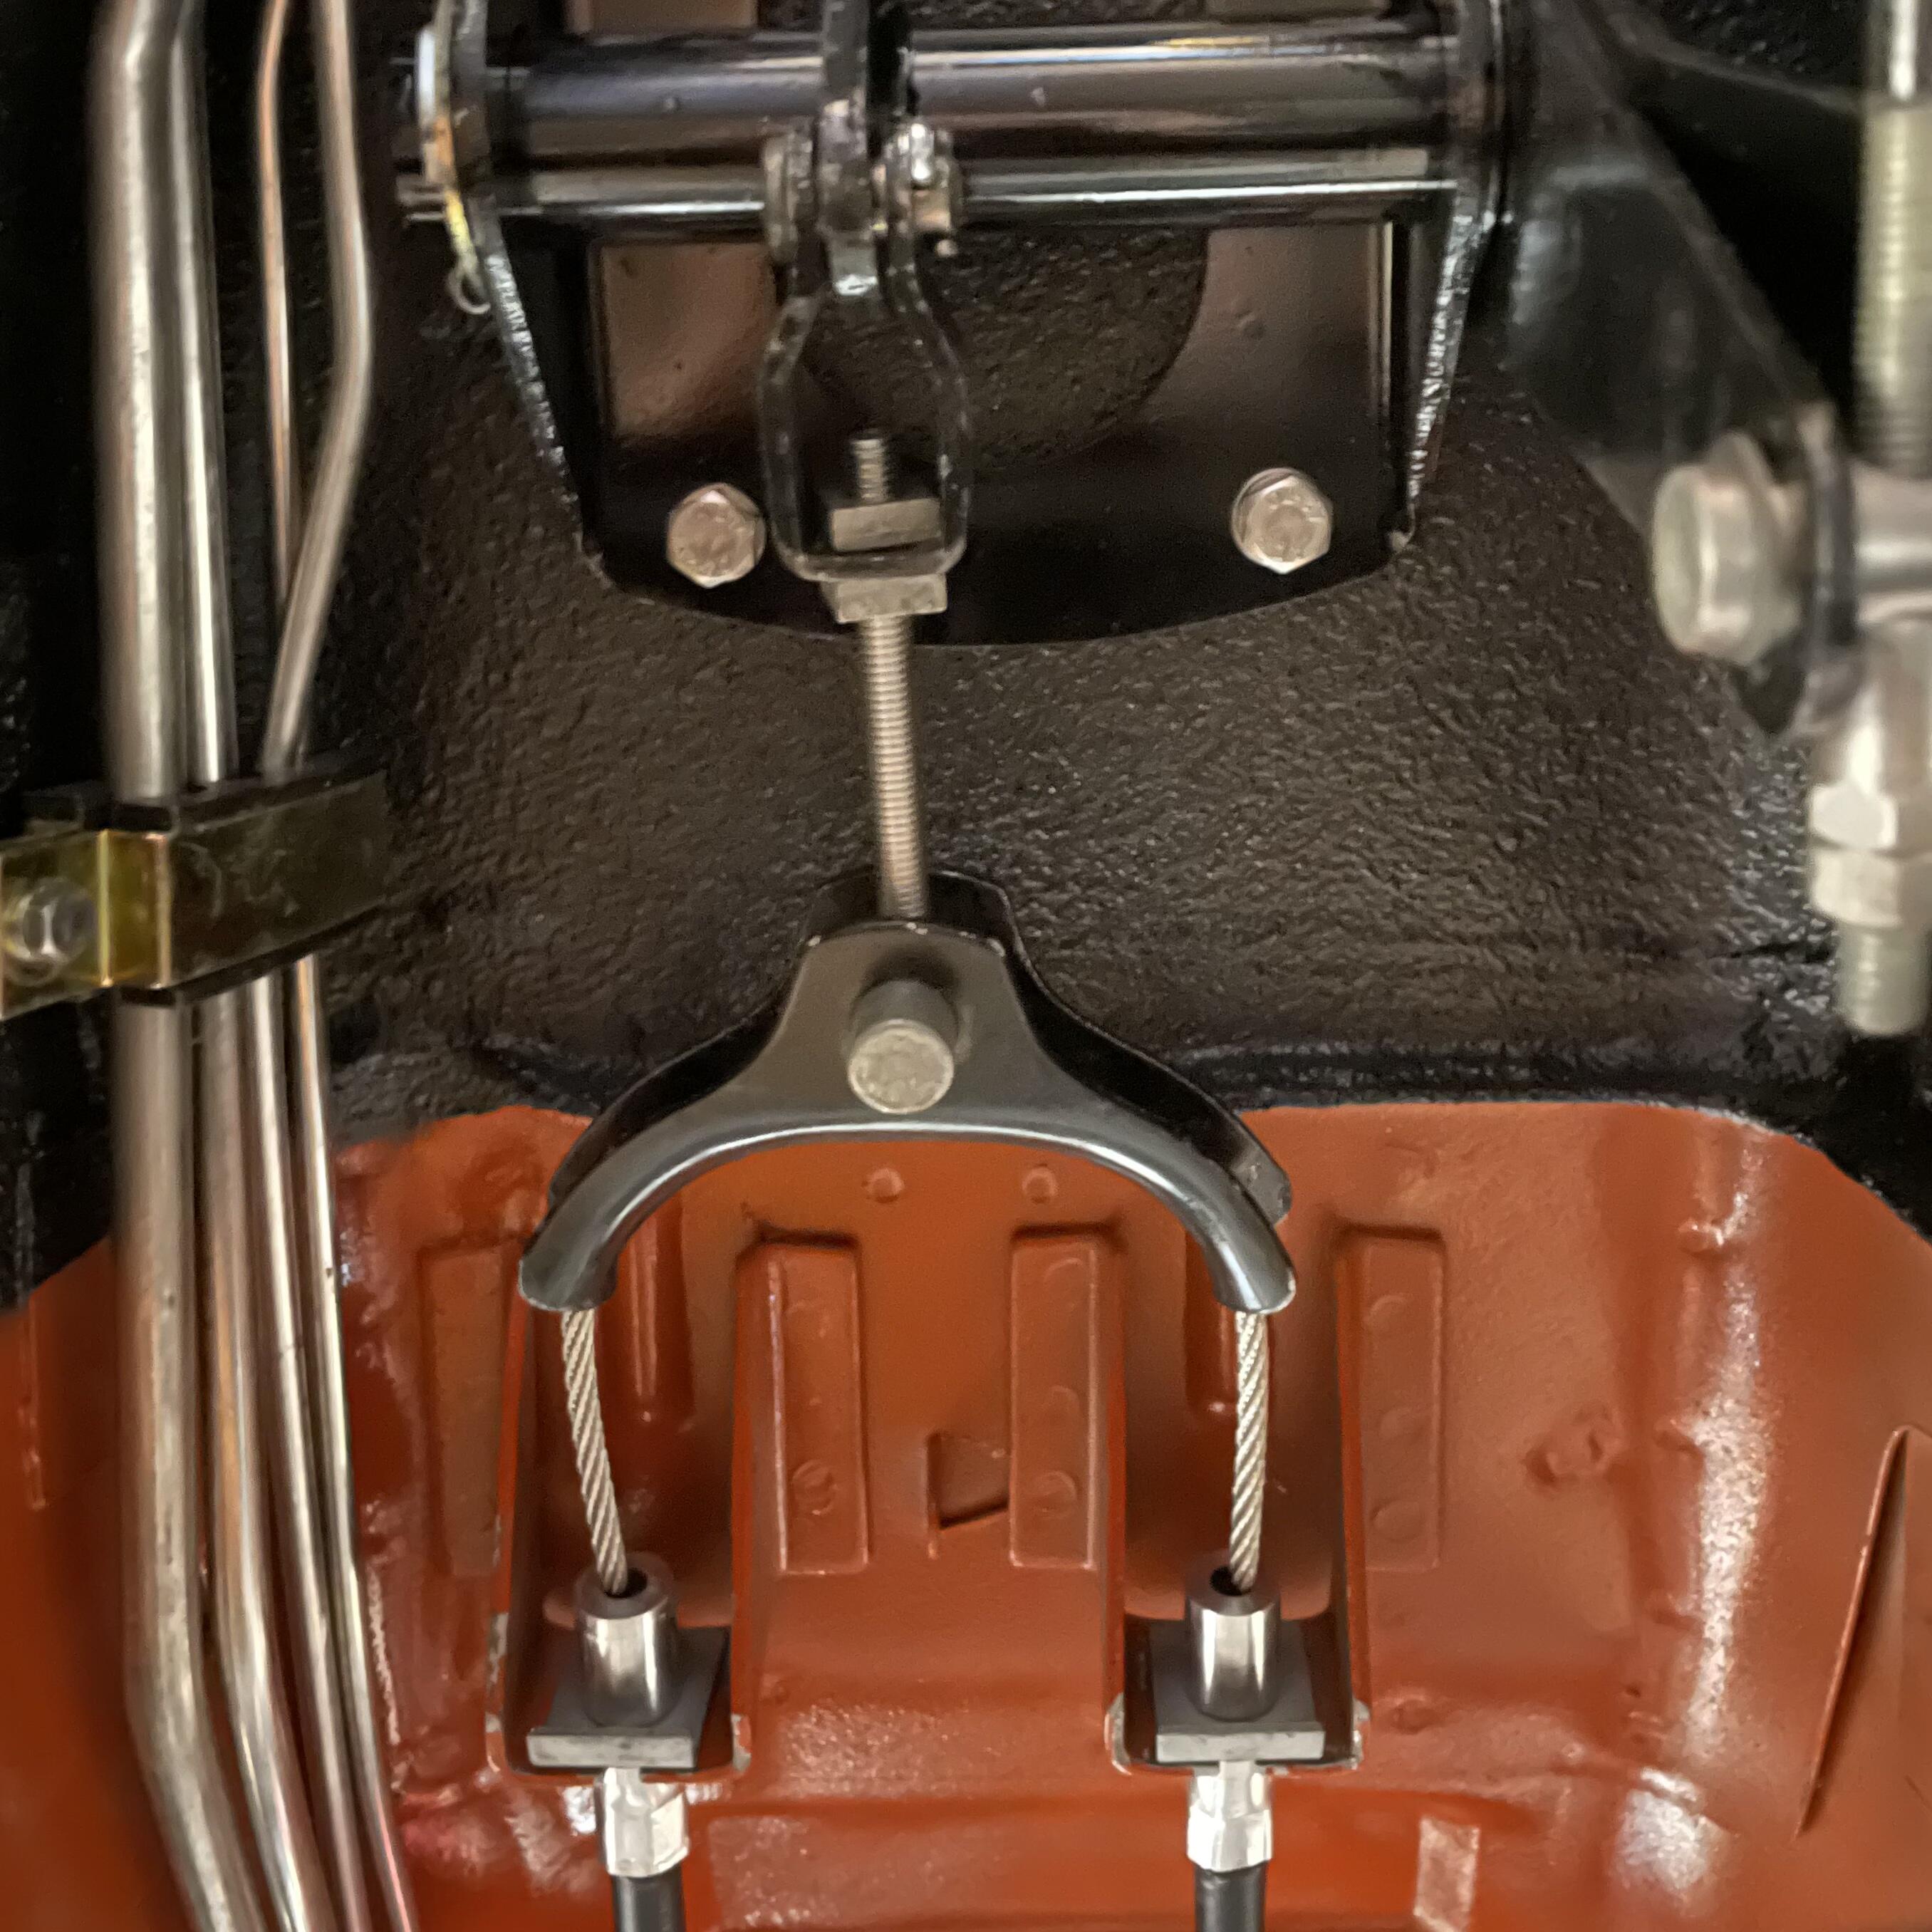
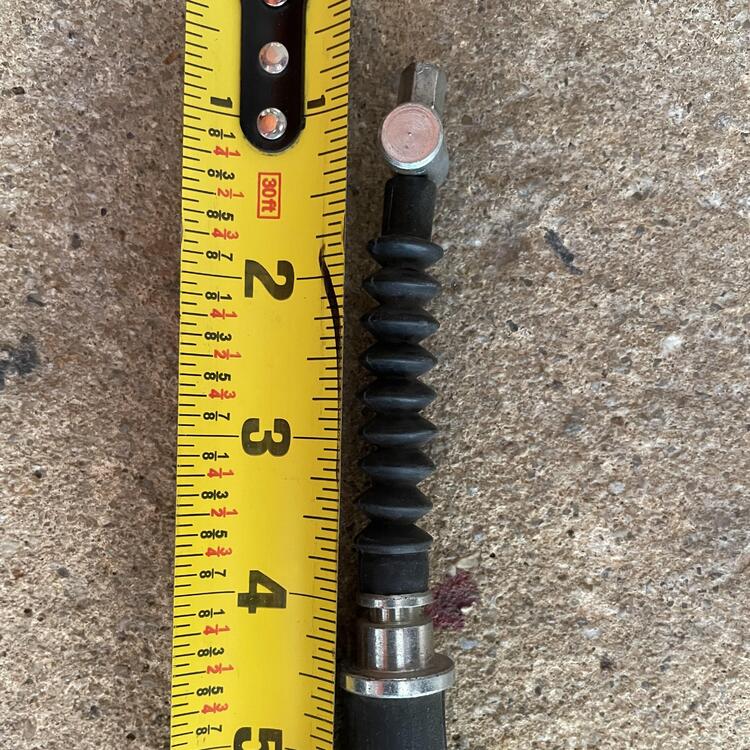
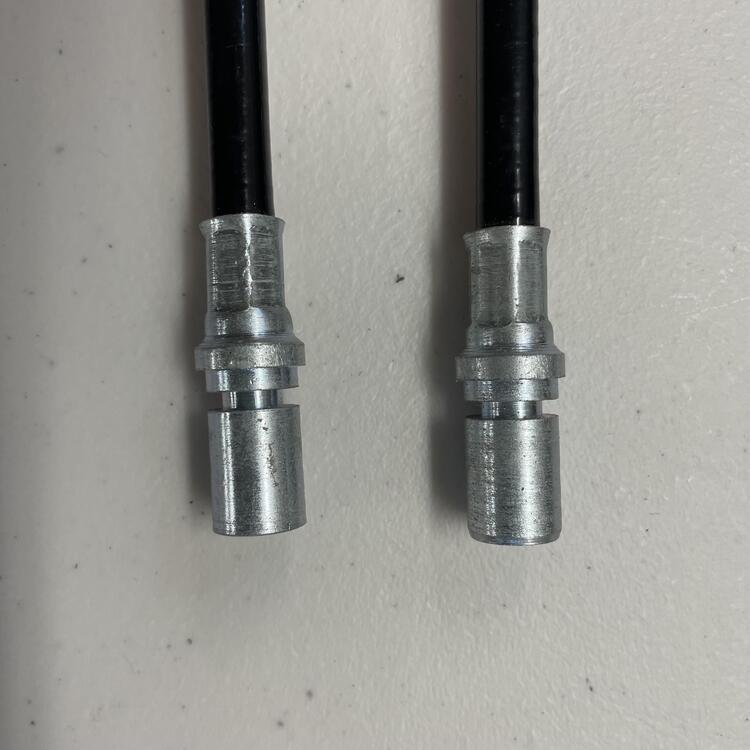
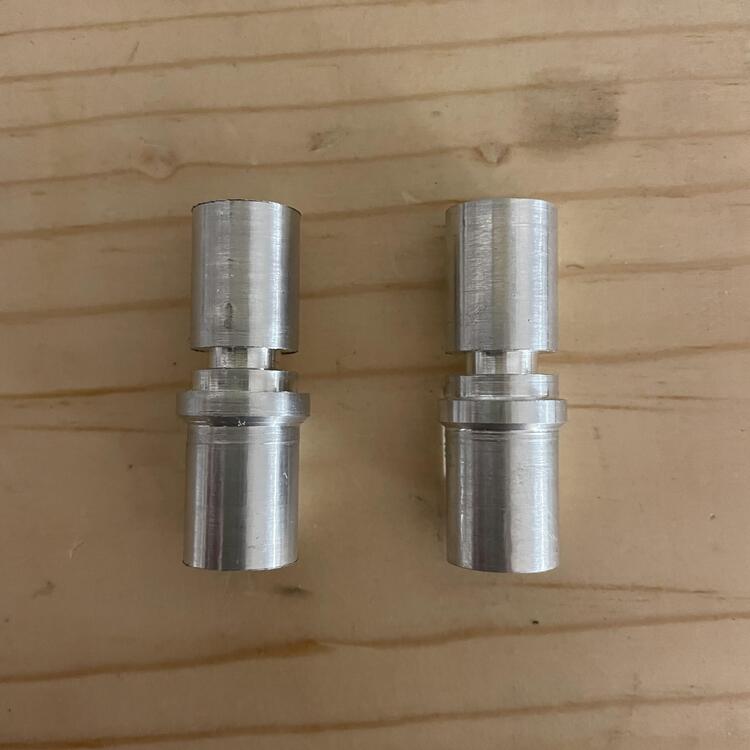
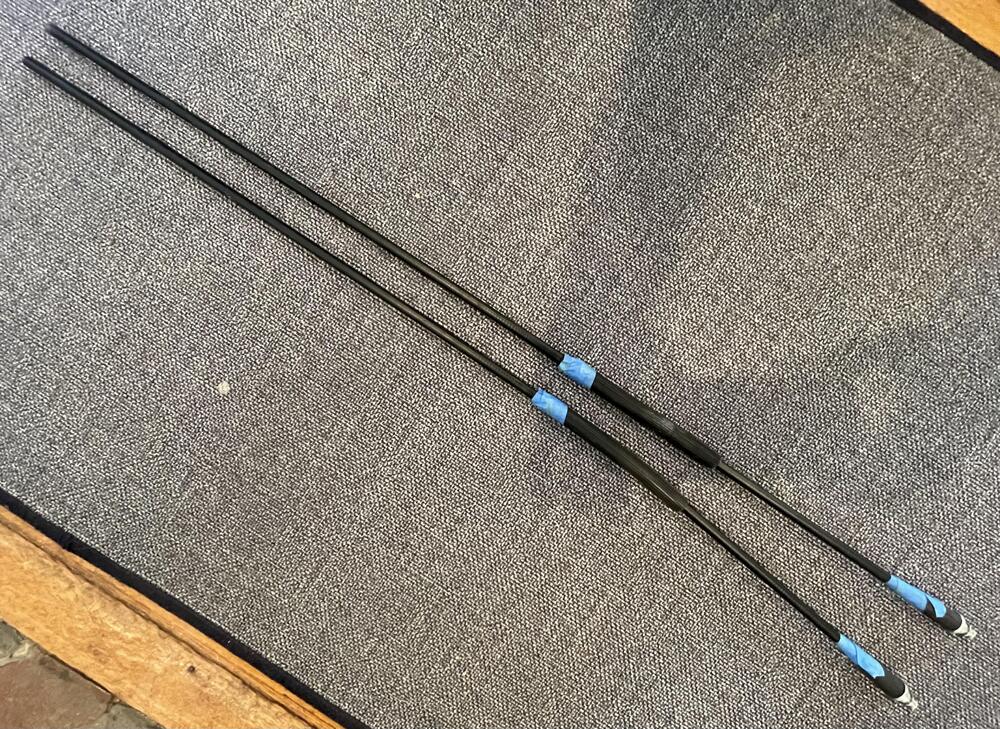
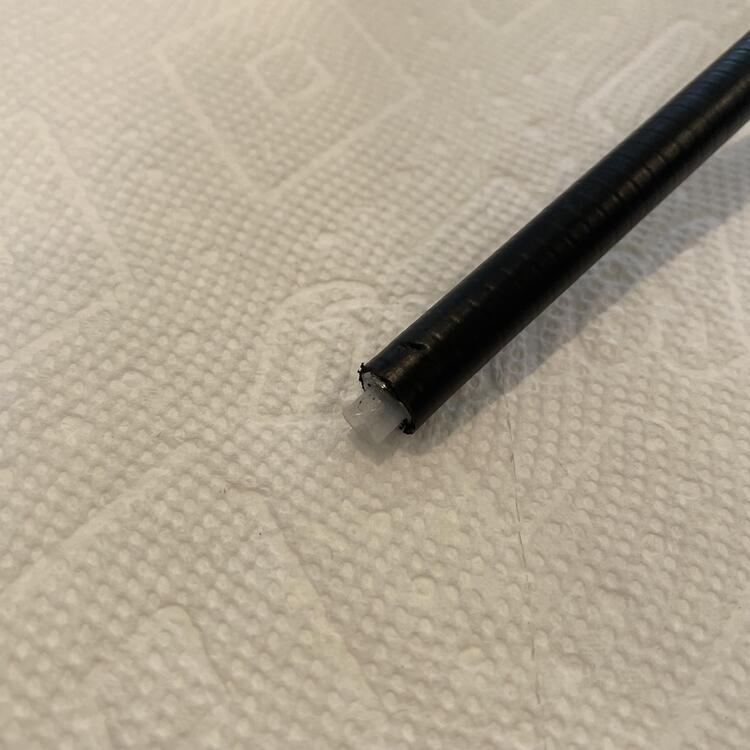
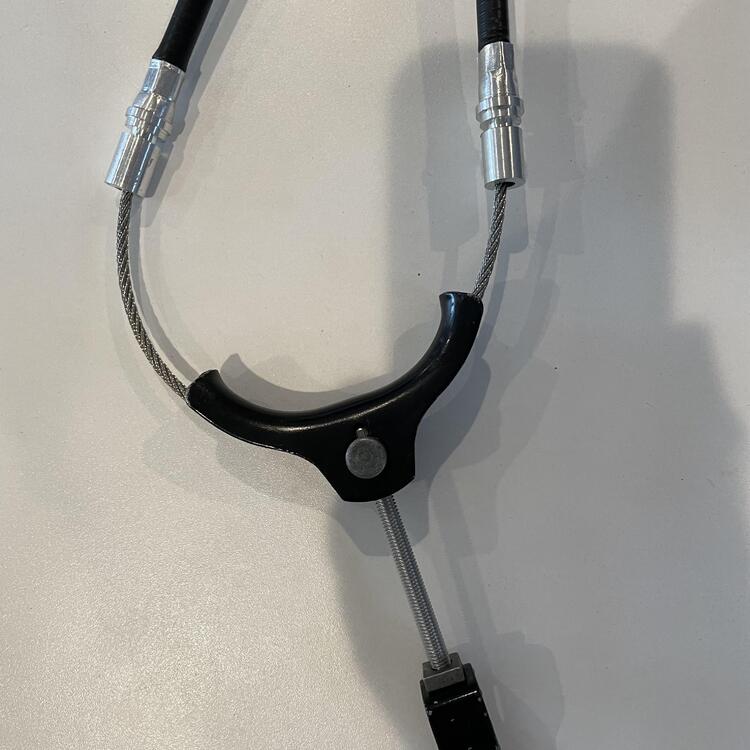
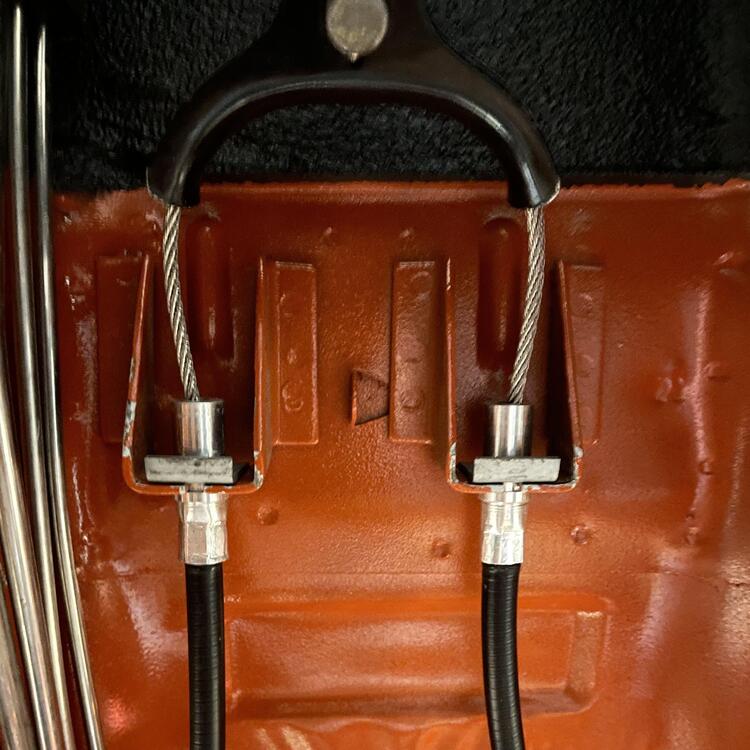
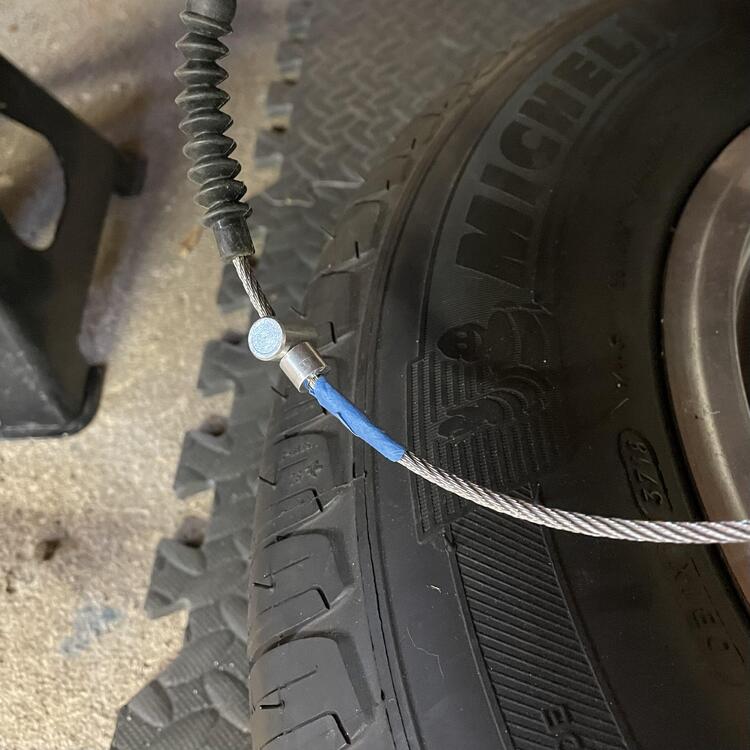
 3 pointsI just couldn’t live with the gimpy hack that I had to use to get the 240z parking brake cable to connect to my rear Maxima calipers, so I cobbled together my own assembly. This probably could have been done without totally destroying the parking brake cable I bought from Z Car Depot, but I didn’t know that at the time. Here’s a step by step of how I put this together. Someone could probably evolve this and get to a better solution that doesn’t cost as much, doesn’t produce as much waste, and is easier, but this works. If you are using 200 SX calipers I am guessing the process would be largely the same. Supplies needed: 2 x 1984 Nissan Maxima parking brake cable assemblies 1 x 1973 Datsun 240z parking brake cable assembly if you are going to try to get the fittinngs to fit, otherwise you’ll need some 5/8th inch 6061 aluminum rod (or stainless steel if you have a fantastic lathe) + all necessary measurements for the fittings that mount to the bracket on the body of the car 1 x length of 1/8th inch stainless steel cable (I went with 10 feet so I had more than enough to make mistakes) 2 x 1/8th inch cable swage ends 2 x 5/8th inch insulated Adel / cable clamps 2 x Sheet metal screws JB Weld or similar metal epoxy Tools: A swage crimper with swappable hexagonal jaws A measuring tape A micrometer A razor knife Glue Cable cutters A rotary saw A drill + bits Various screwdrivers, pliers, etc. Sequence: Step 0. Either remove your 240Z housing fittings and open them up to be crimped onto the Maxima housing or take measurements from these to have a machinist make you at least 2 sets of fittings. If you repurpose the fittings from the 240Z housing, you may find that heating them with a torch and using punches will work. Mine were ferous but I could not get them soft enough to open without tearing, so I took the machinist route. Step 1. Measure how far the cables for each cable assembly extend beyond the ends of the housings. Disassemble both housings completely. Remove extraneous housing brackets and sheaths from the Maxima housing, taking care to minimize the damage to each piece. Save all parts. Step 2. Find a suitable location for an Adel clamp to mount on either side of the 240Z body. Find a good route around the underside of the car that clears all of your running gear and suspension and allows for gradual curves, preventing kinks and binding. I opted for putting the Adel clamps on the inboard sides of the Bad Dog frame rail extensions I put on the car before the paint was done, as well as using the spring suspenders that the original 240Z housing uses. Take note of where the housing will need to be cut to mount to the under side of the transmission hump in the cable bracket and mark with blue tape or similar. Note: The Maxima housing is slightly larger in diameter than the aftermarket 240Z housing I got from Z Car Depot. Those pieces won’t just slide on, and getting a set that hasn’t been crimped yet was a fruitless endeavor, because the manufacturer didn’t feel like selling them to me. You may be able to go the other way and make the piece that fits into the Maxima caliper and fits onto the 240Z housing, but I found the 240Z housing to be too short to route well without binding and opted for trimming the Maxima housings. Step 3. As stated in Step 0, either reuse or replicate the housing ends of the 240Z cable housing. I destroyed two of mine (there are four on these housings) by trying to open up the crimped ends, which may be possible with the right tools, but I don’t have those so I abandoned this path and opted for having a local machinist replicate the ones I didn’t murder. He made me four of them (2 for failures) out of 6061 aluminum rod in exchange for a 750ml bottle of Uncle Nearest 1856 Premium Aged Whiskey. Stainless steel would be better, but these parts don’t have a ton of force on them in any direction so he and I agreed that aluminum will be just fine. Step 4. Use a rotary cutting wheel to cut the Maxima housings to the length determined during Step 2. For me this came to about 37 inches from the end of the metal part that mounts to the caliper to the cut point. The housings are sprung steel with a rubbery black plastic coating. A hack saw and file might work fine but will take a while and give you a nasty edge because of the coiled design of the tube. I know this because I tried it. Step 5. Relocate the ribbed sheath with the smaller diameter to cover the area where the other sheath was glued to the housing. This is where my finished housing will go through the Adel clamp, and I found this ribbed piece to be a good size to fill the Adel clamp without it squeezing the housing too tightly or leaving it sloppy. Step 6 (optional). Fix rubber pieces in place to aid assembly. I opted to use some flexible glue that gets along with the rubber bits to fix them in place. I wanted to reduce the opportunities for moisture to get into the cable (and this is a nice feature upgrade from the aftermarket 240Z cable I got from Z Car Depot), as well as keep things from sliding around as I test fit everything. Step 7. Reinsert the white nylon tube into the Maxima housing. Trim to be flush with the cut end of the housing. I trimmed both ends to clean it up since it was a bit worn on each end. Step 8. TEST FIT EVERYTHING NOW! Step 9. POINT OF NO RETURN - Assemble the housing pieces and crimp the 240Z housing pieces onto the Maxima cable housing. Be careful to not over crimp the 240Z piece and crush the Maxima piece. CRIMP SLOWLY! The inside of the 240Z piece is going to shrink and may need to be opened up to allow the cable to pass through if it’s squeeze too far. Check tolerances and test fit often. I rushed the first set so all my careful choosing of the best bits was for nothing as my two best ripped and ended up in the trash. Also, don’t crimp too close to the collar. That caused the tears in the first round. Note: A few observations from the machinist about the replica pieces… A. The hole that the cable goes through was hard to get the right size on his 1943 lathe because of his selection of ASE drill bits not being in small enough increments. We opted to ensure enough space for the cable by going a little too big, which allowed the white nylon tube inside the housing to escape as the cable slid back and forth. After the second try I found the crimping shrank the opening enough to keep the white nylon in the housing while allowing the cable to move freely. B. It’s tough to get the channel for the spring clip precise on an old-school lathe. CNC probably could get it closer, but we opted for too tight and filing if necessary. Because these are aluminum and the spring clips are steel, a little persuasion with a brass hammer did the job. C. The reason we made 4 and not 2 is so we could test all tolerances and choose the combination of fine tuning challenges. Since these are all hand made there were differences, so I used hand tools on the fittings and the bracket to make them fit. Step 10. Test fit again. Step 11. Put the rubber boots onto the ends of the Maxima housing. Step 12. Crimp a swage onto the end of the steel cable. Put a cylindrical bead from the Maxima on the cable, followed by one of the Maxima housings with a 240z end. Put the couple for the hand brake on, then the other Maxima housing with 240z end (flipped the opposite direction), another bead and a swage end. DO NOT CRIMP THE SECOND SWAGE END YET! BONUS PICTURE OF DOG INTERRUPTING PROCESS. Step 13. Test fit the entire assembly. Make sure the screw that connects the U-bracket to the handbrake lever is fully extended to ensure the maximum available adjustment length, but lease a few threads peaking past the nut for a smidgin of safety. Note: I replaced the OEM screw with a 70mm stainless M6 1.0 pitch hex socket cap head bolt. It fits into the assembly well. The old one was bent and this one has threads down the entire length, giving me much more room to adjust it. Any cable will stretch over time so you want something like this to maximize adjustability. Step 14. Position the bead and swage end you didn’t crimp inside the caliper lever, pull the cable taught, and mark the position of the swage end on the cable with a piece of blue tape. Step 15. Remove the assembly on the side that you just marked from the caliper and crimp the swage end where it should be. Cut the excess cable off. Note: I put a bit of JB Weld over the frayed end of the cable where I cut it, bonding it to the crimped swage end on each side of the car. This will keep moisture out and gives me just a little more insurance that it will stay on, because Garage Build. Step 16. Reassemble, tighten the bolt that joins the cable to the hand brake, and test the system. Edit: The slack you see above between the swage end and the bead disappeared once I tightened up the bolt in the u-bracket. Edit: I think I might end up putting zip ties or something on the boots that cover the black Maxima housing. The glue I used isn’t holding. I might also have used a nylon coated cable if I was doing the entire thing over again. The reason I didn’t is that I didn’t trust the swage end to stay on with that nylon creating a failure point. If it disintegrates you end up with a loose crimp, and since this was done with hand tools I just didn’t feel confident about that.
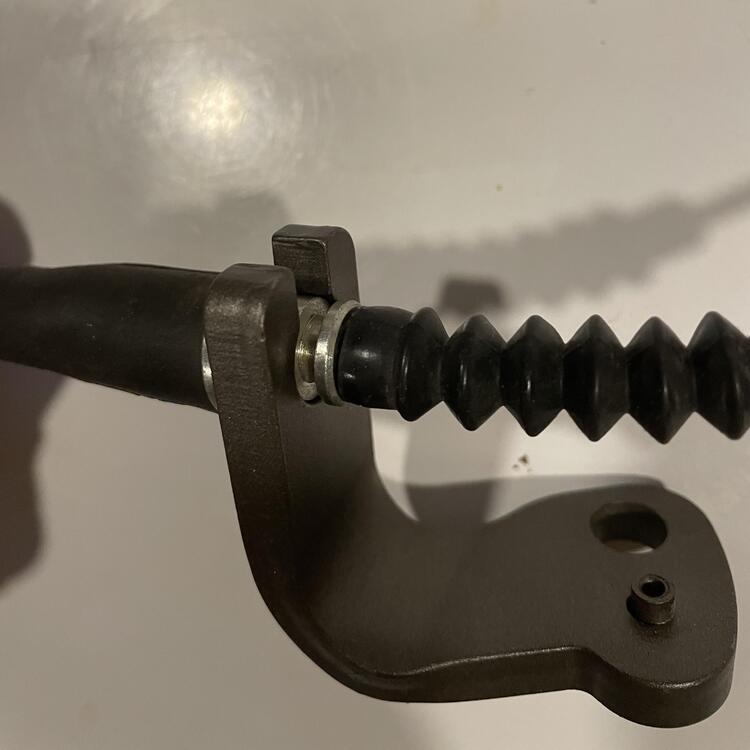


 3 points
 -
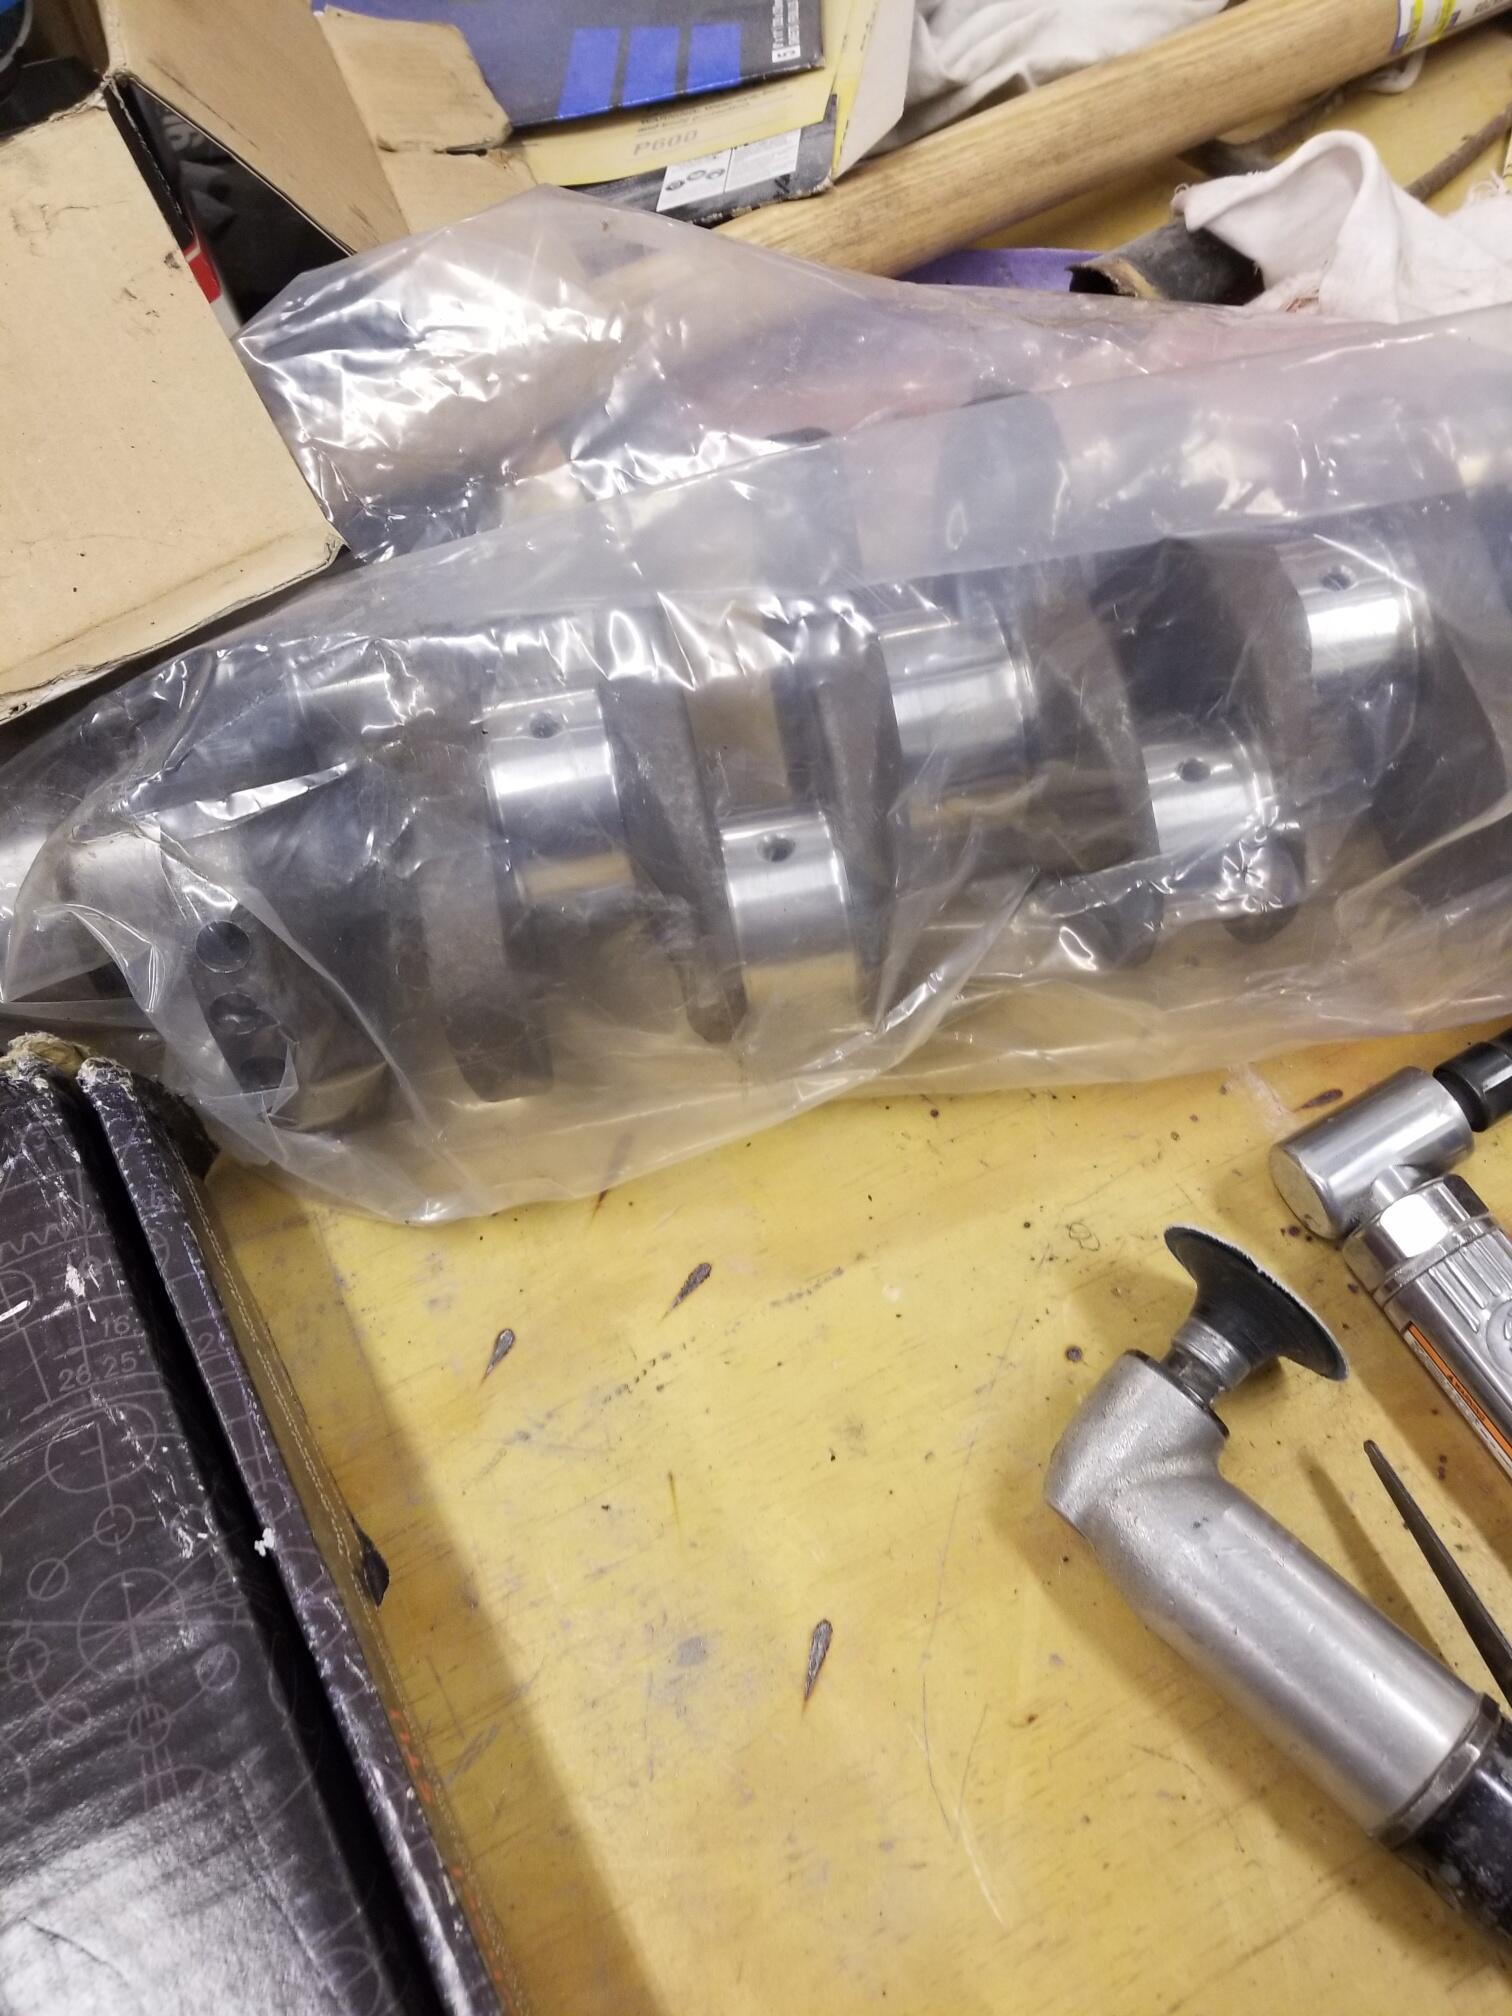
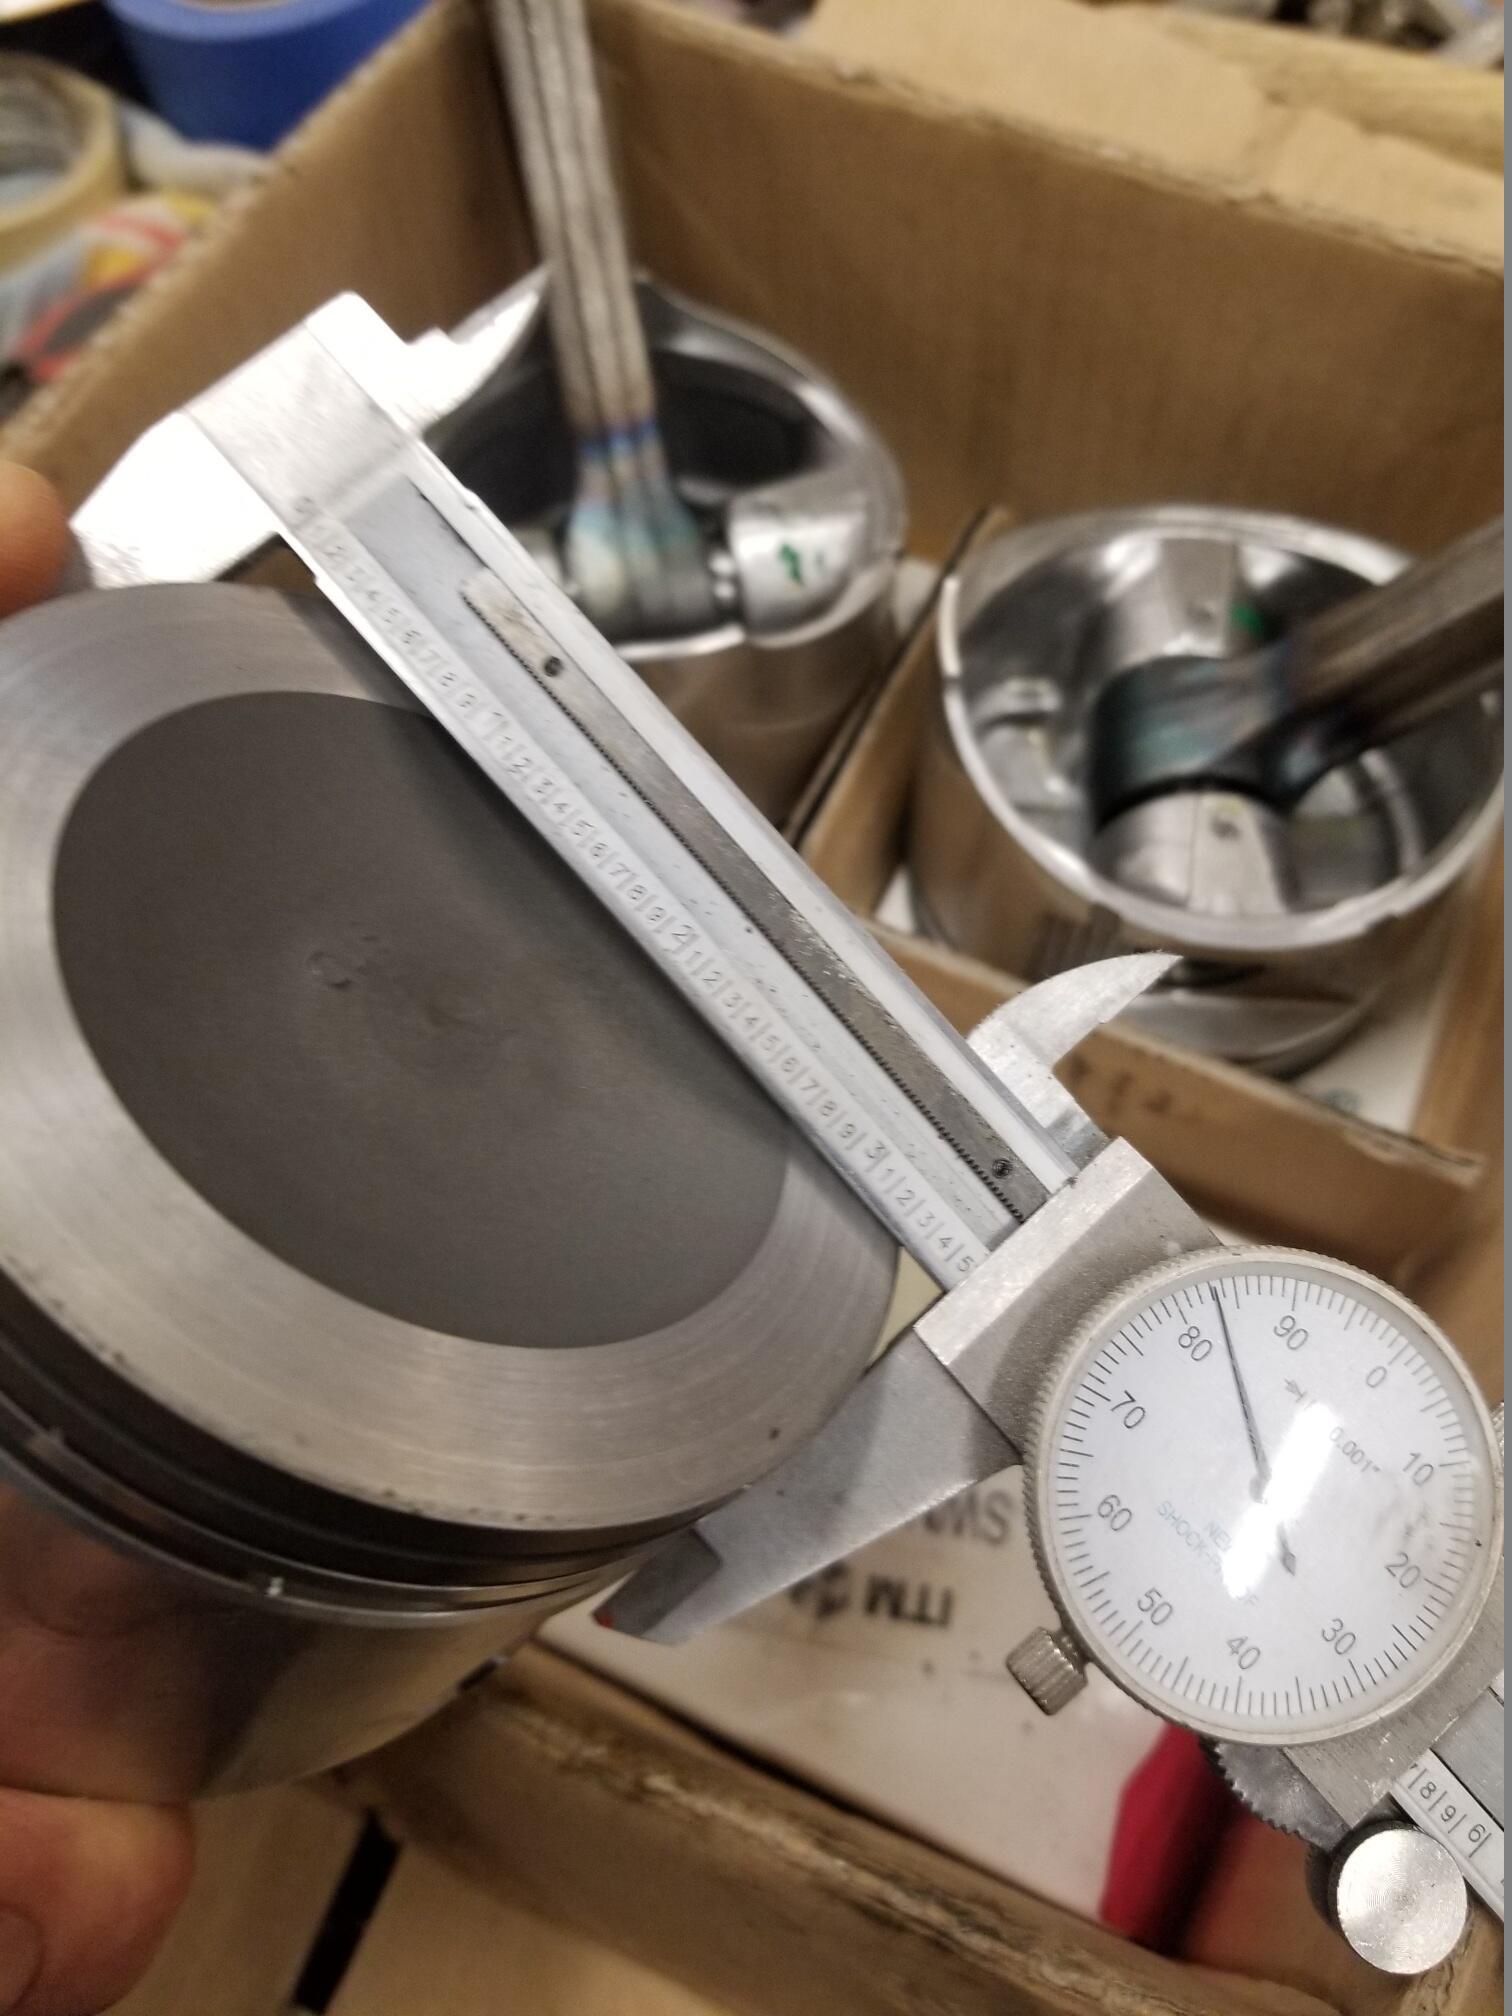
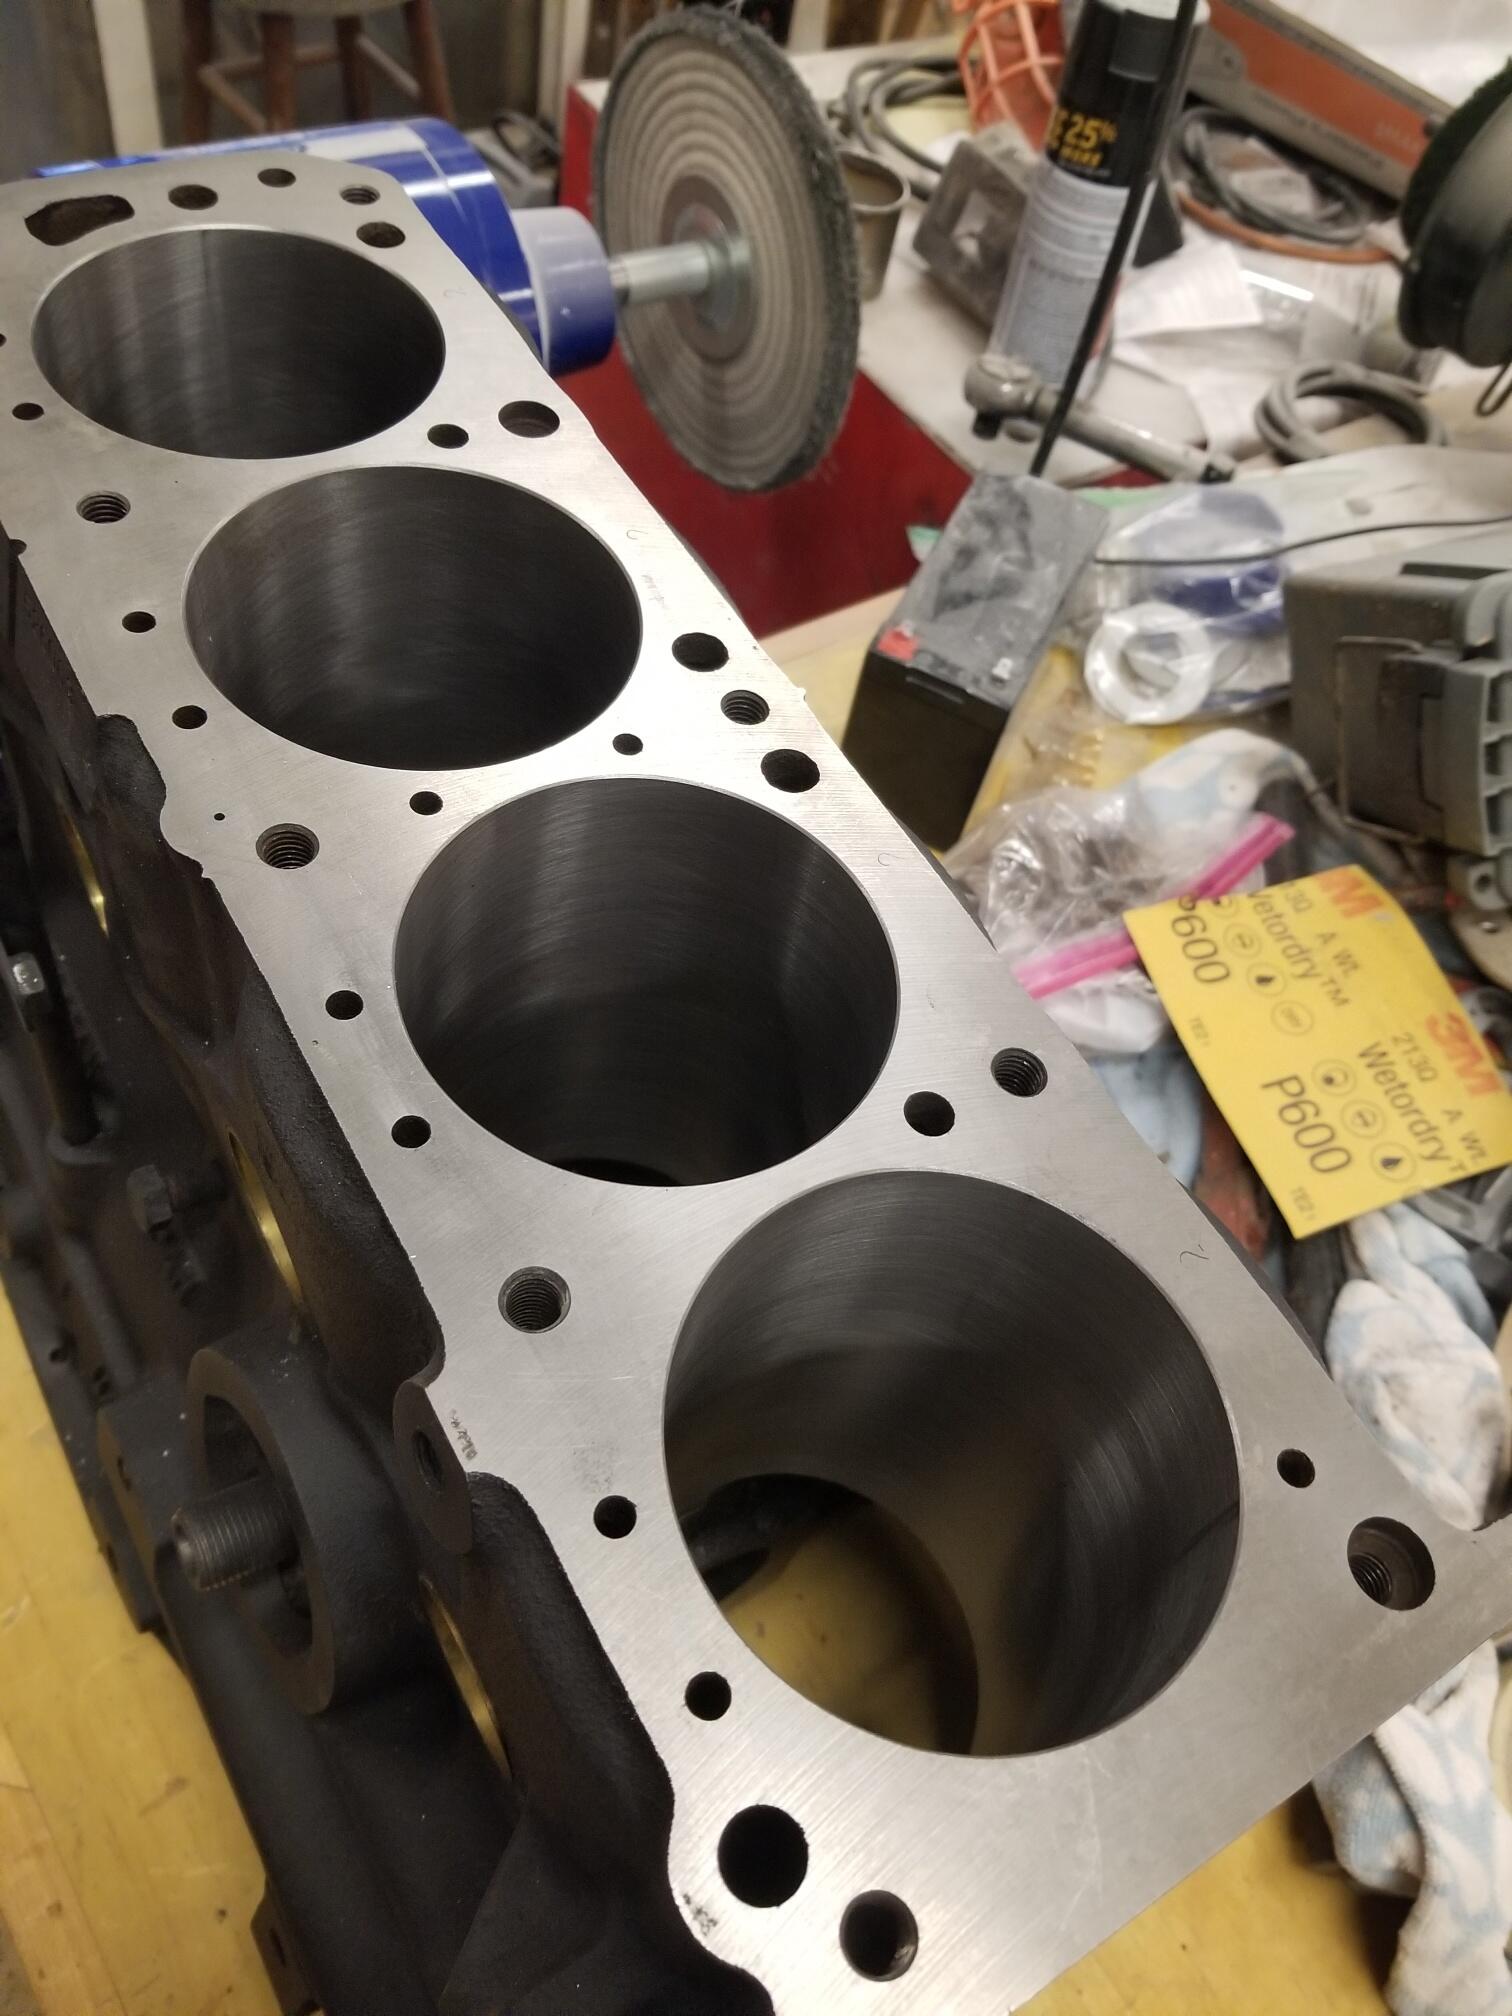
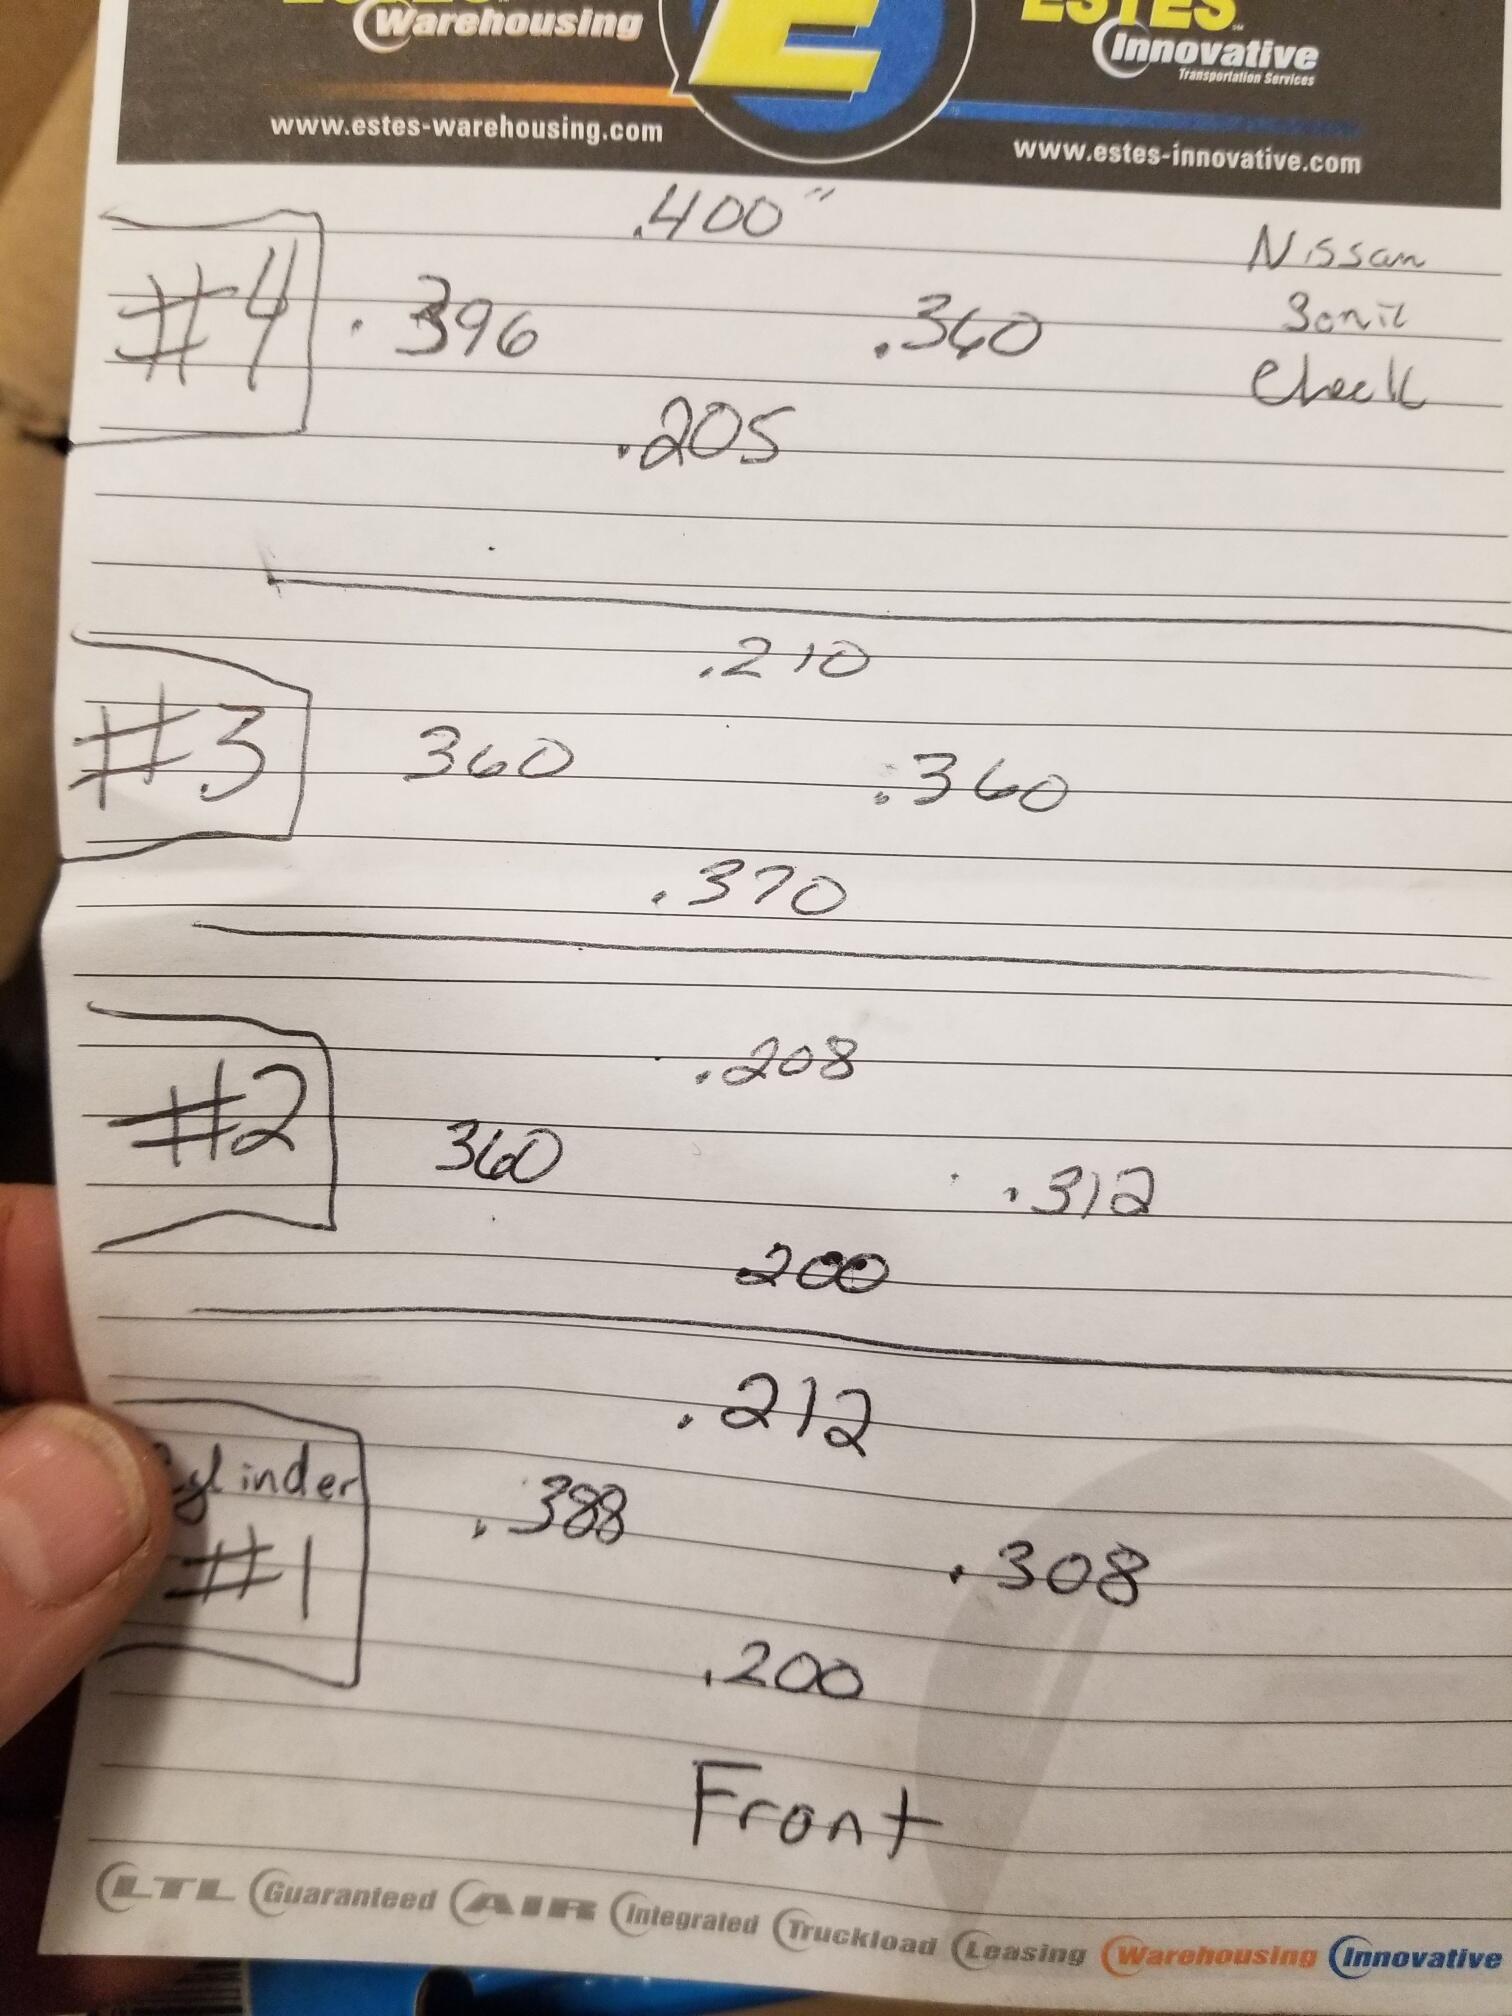
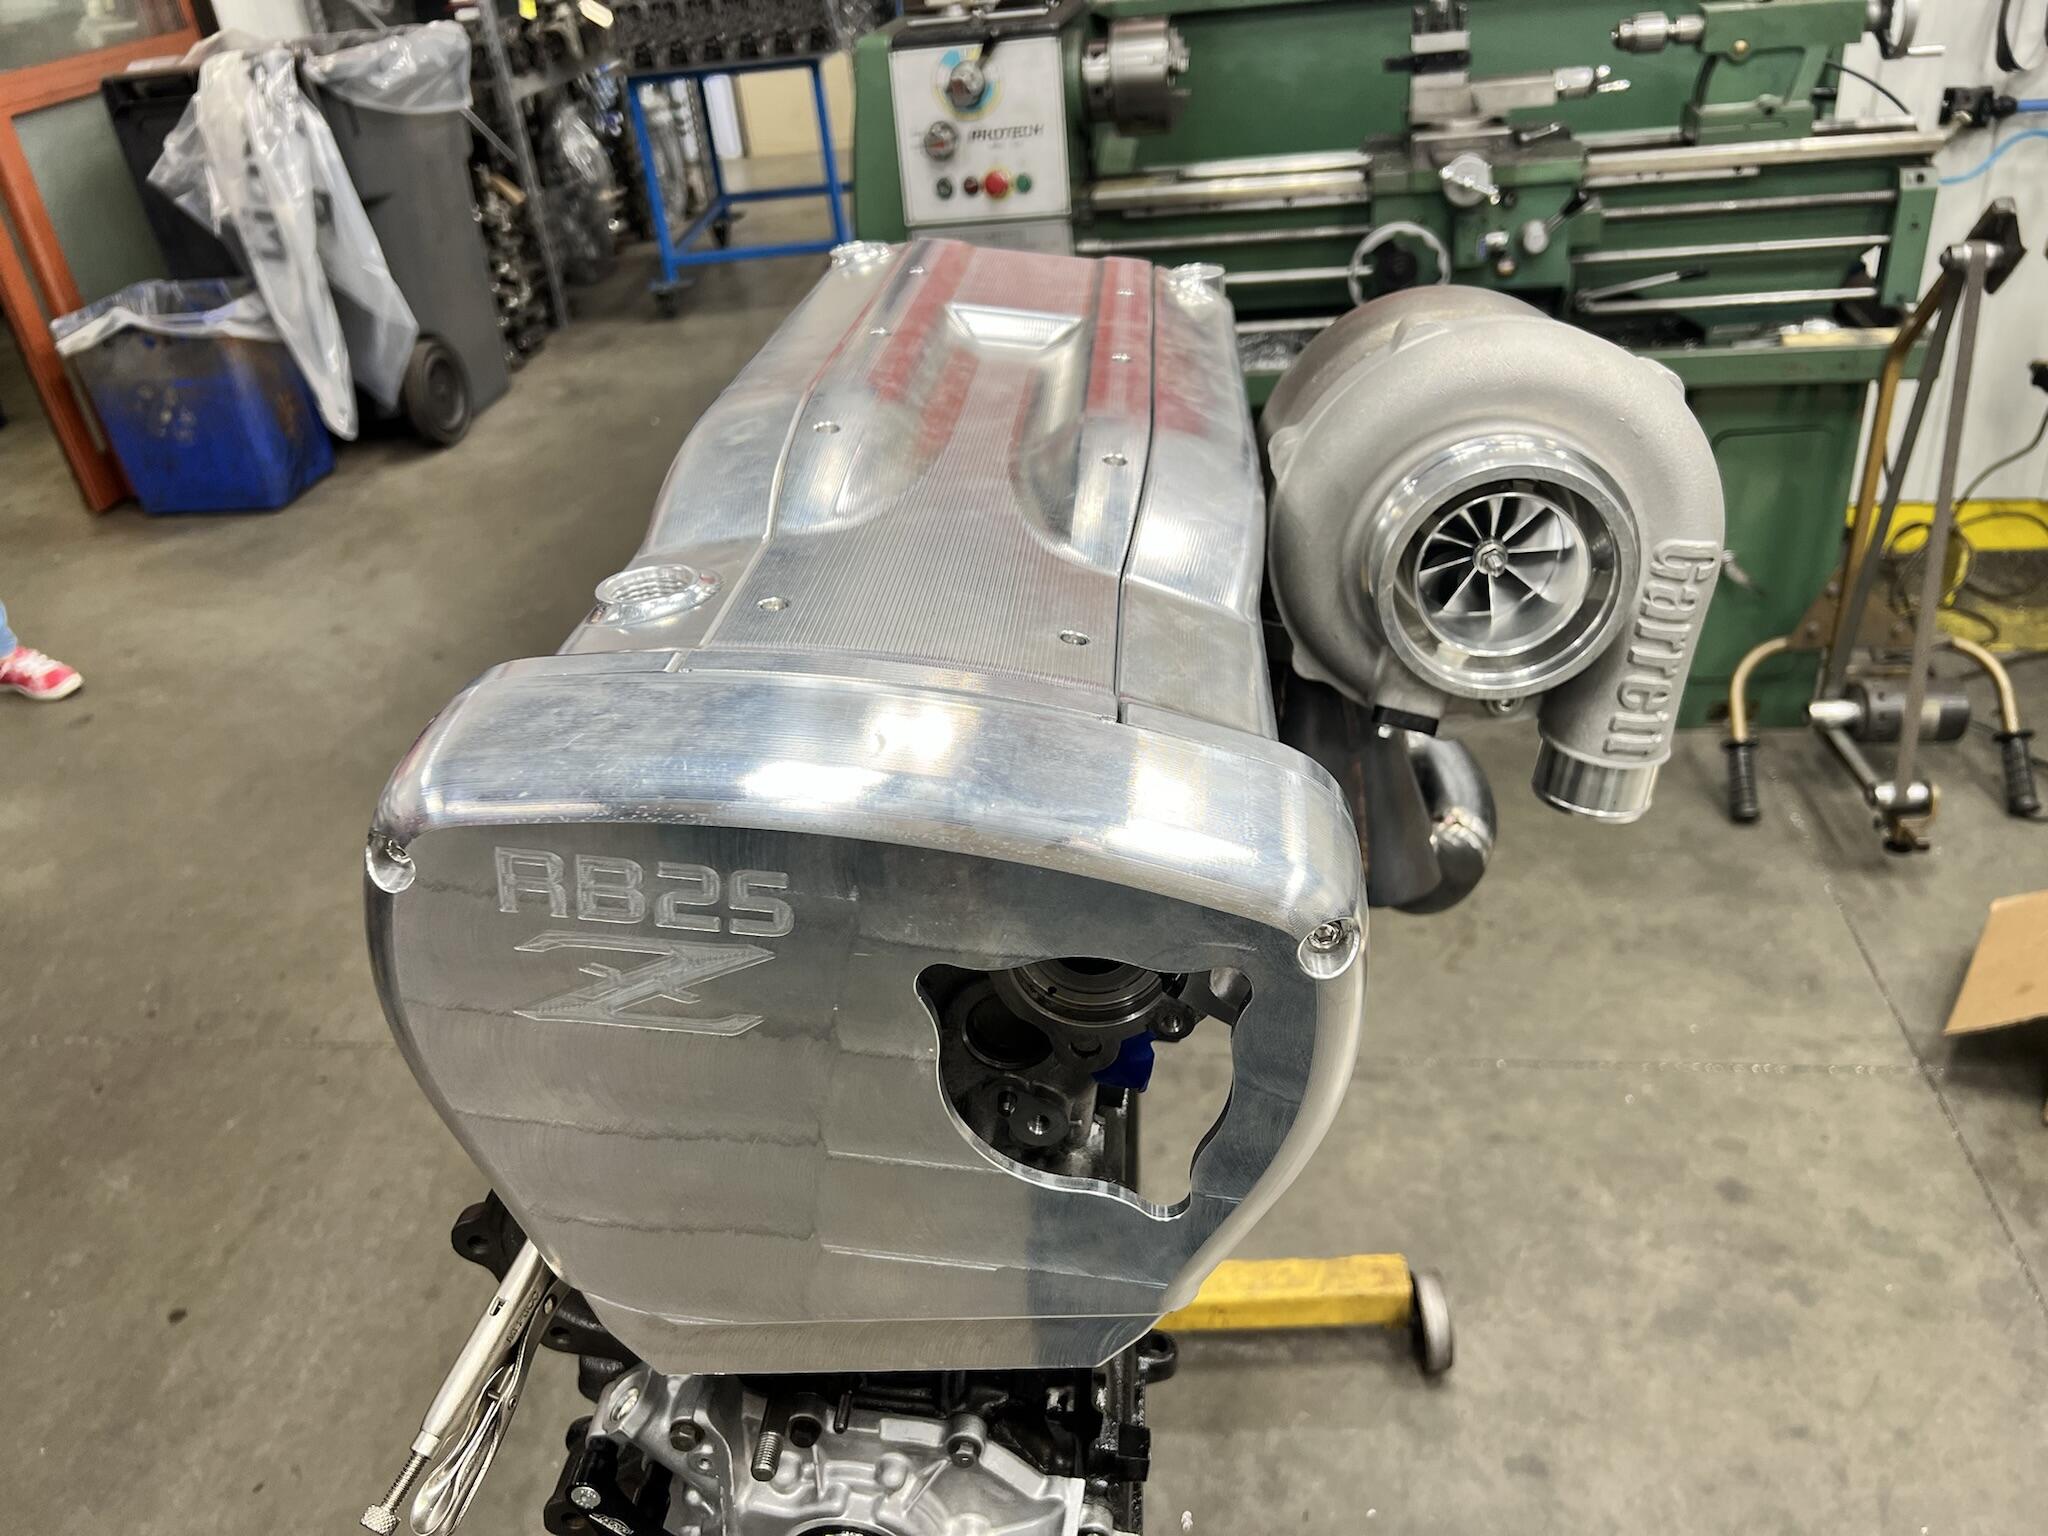
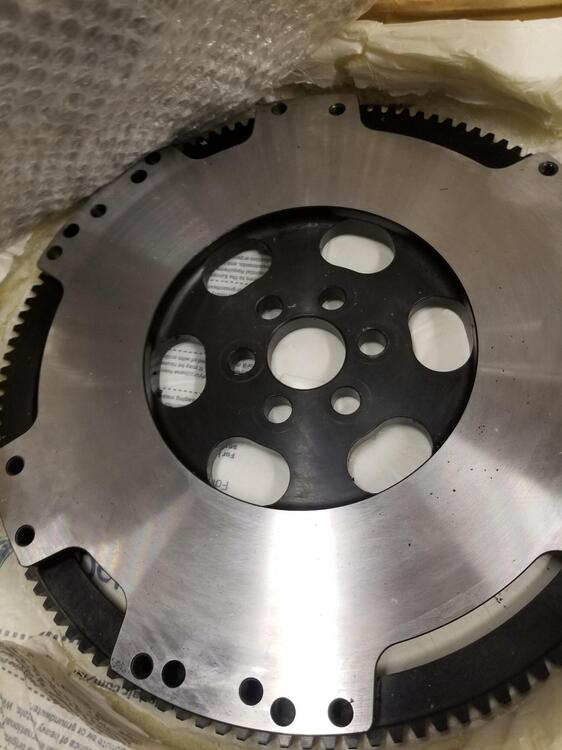
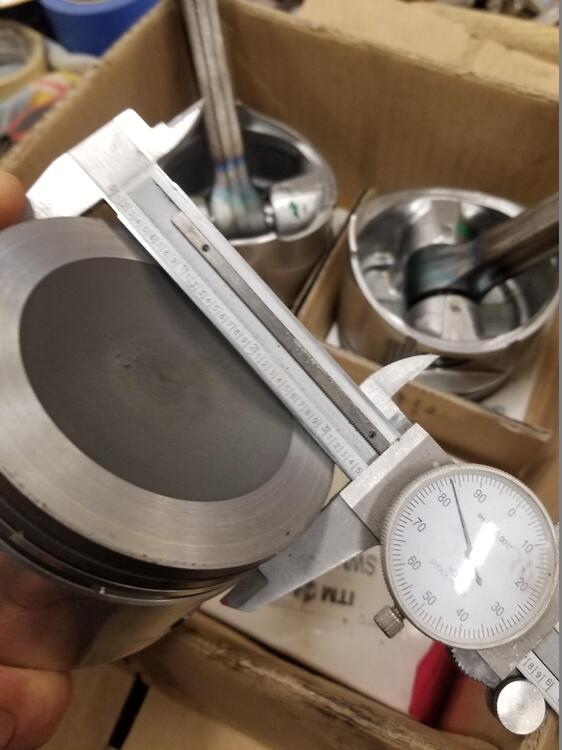
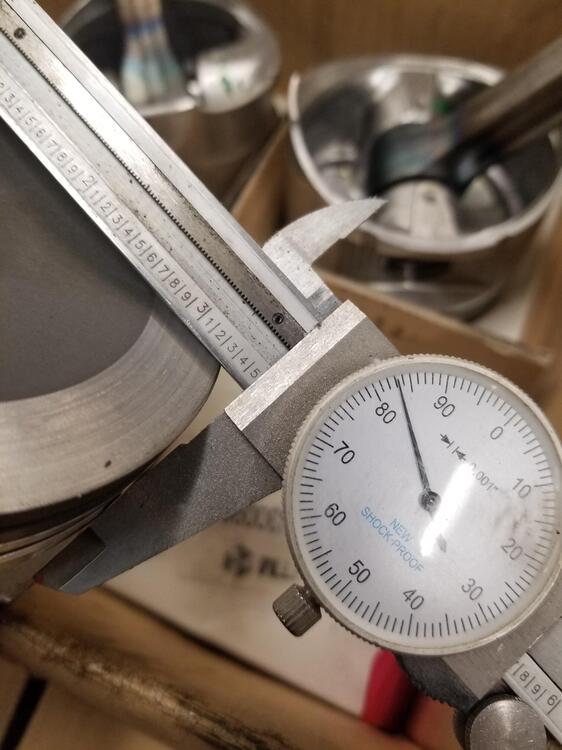
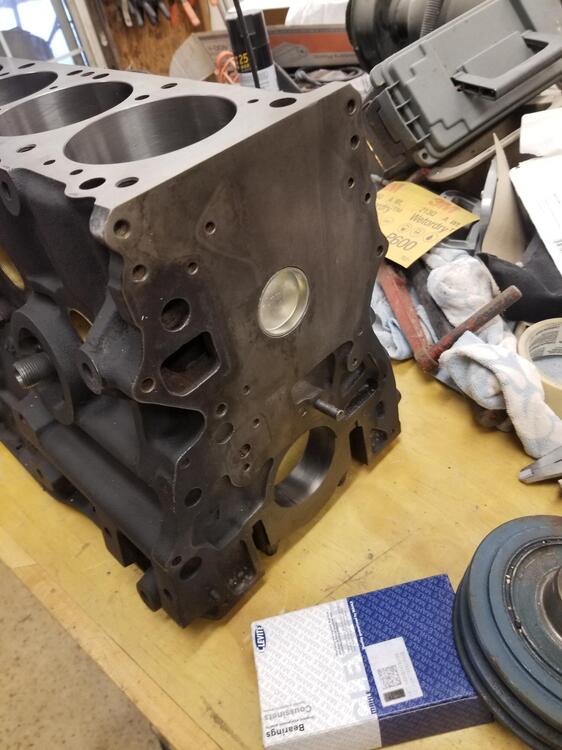
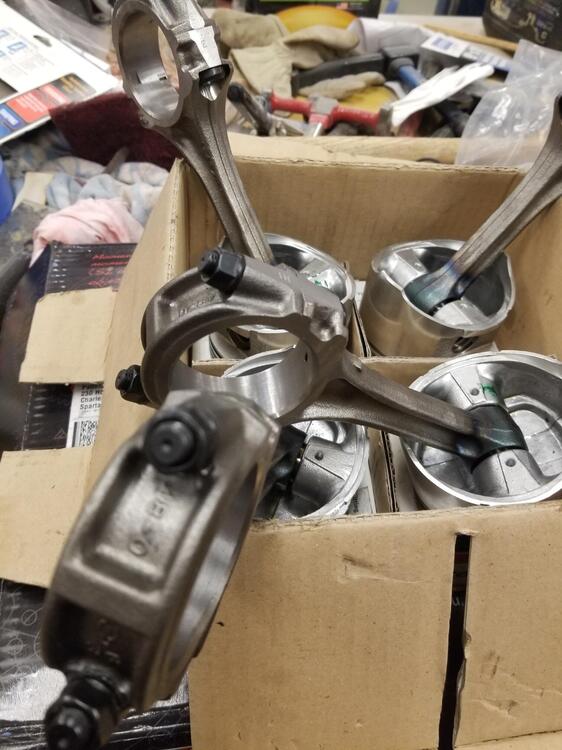
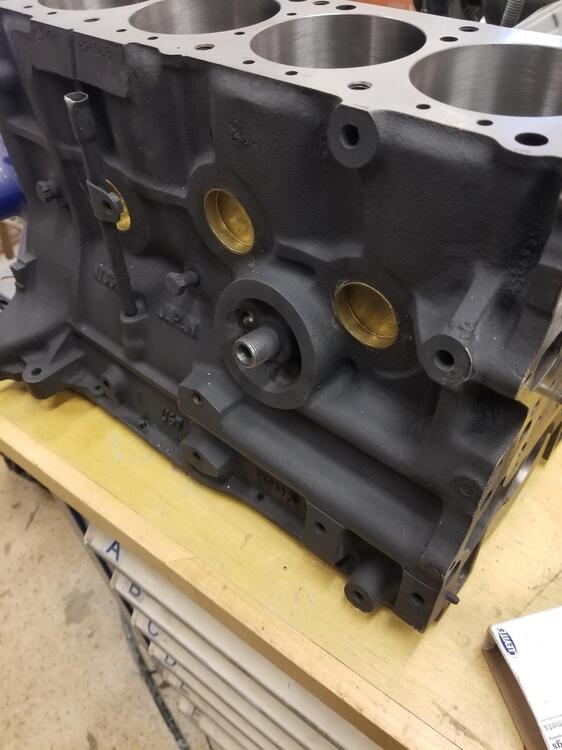
 3 pointsSo I took the block and rotating assembly to a local machine shop about the end of August. He finished it right before Christmas. I picked it up a week ago. Stock bore and stroke is 85mm x 86mm. We punched it out to 89mm. I sourced the pistons from Dave Rebello I believe they're KA's turned down They sonic checked the block after boring. I was told the minimum would be 0.0100". We are well within that. All line bored and balanced Everything has a witness mark so we can reassemble the way it was balanced Crank was turned 0.010 & 0.010 es w The challenge now is getting bearings. I have the rod bearings now but am having trouble getting the main bearings. I made another order the other day because the first order got delayed. Many places were saying end of April for bearings!! Evidently freeze plugs are hard to get too. That is why one of them is steel and not brass. Any recommendations on engine paint? Not super obsessive about true Datsun blue but would like it to be close.


 3 points
 -
2 pointsHere’s a pic of the before and after of a guy that sent his to him. Different car but looks about as bad as mine.
 2 points
 -
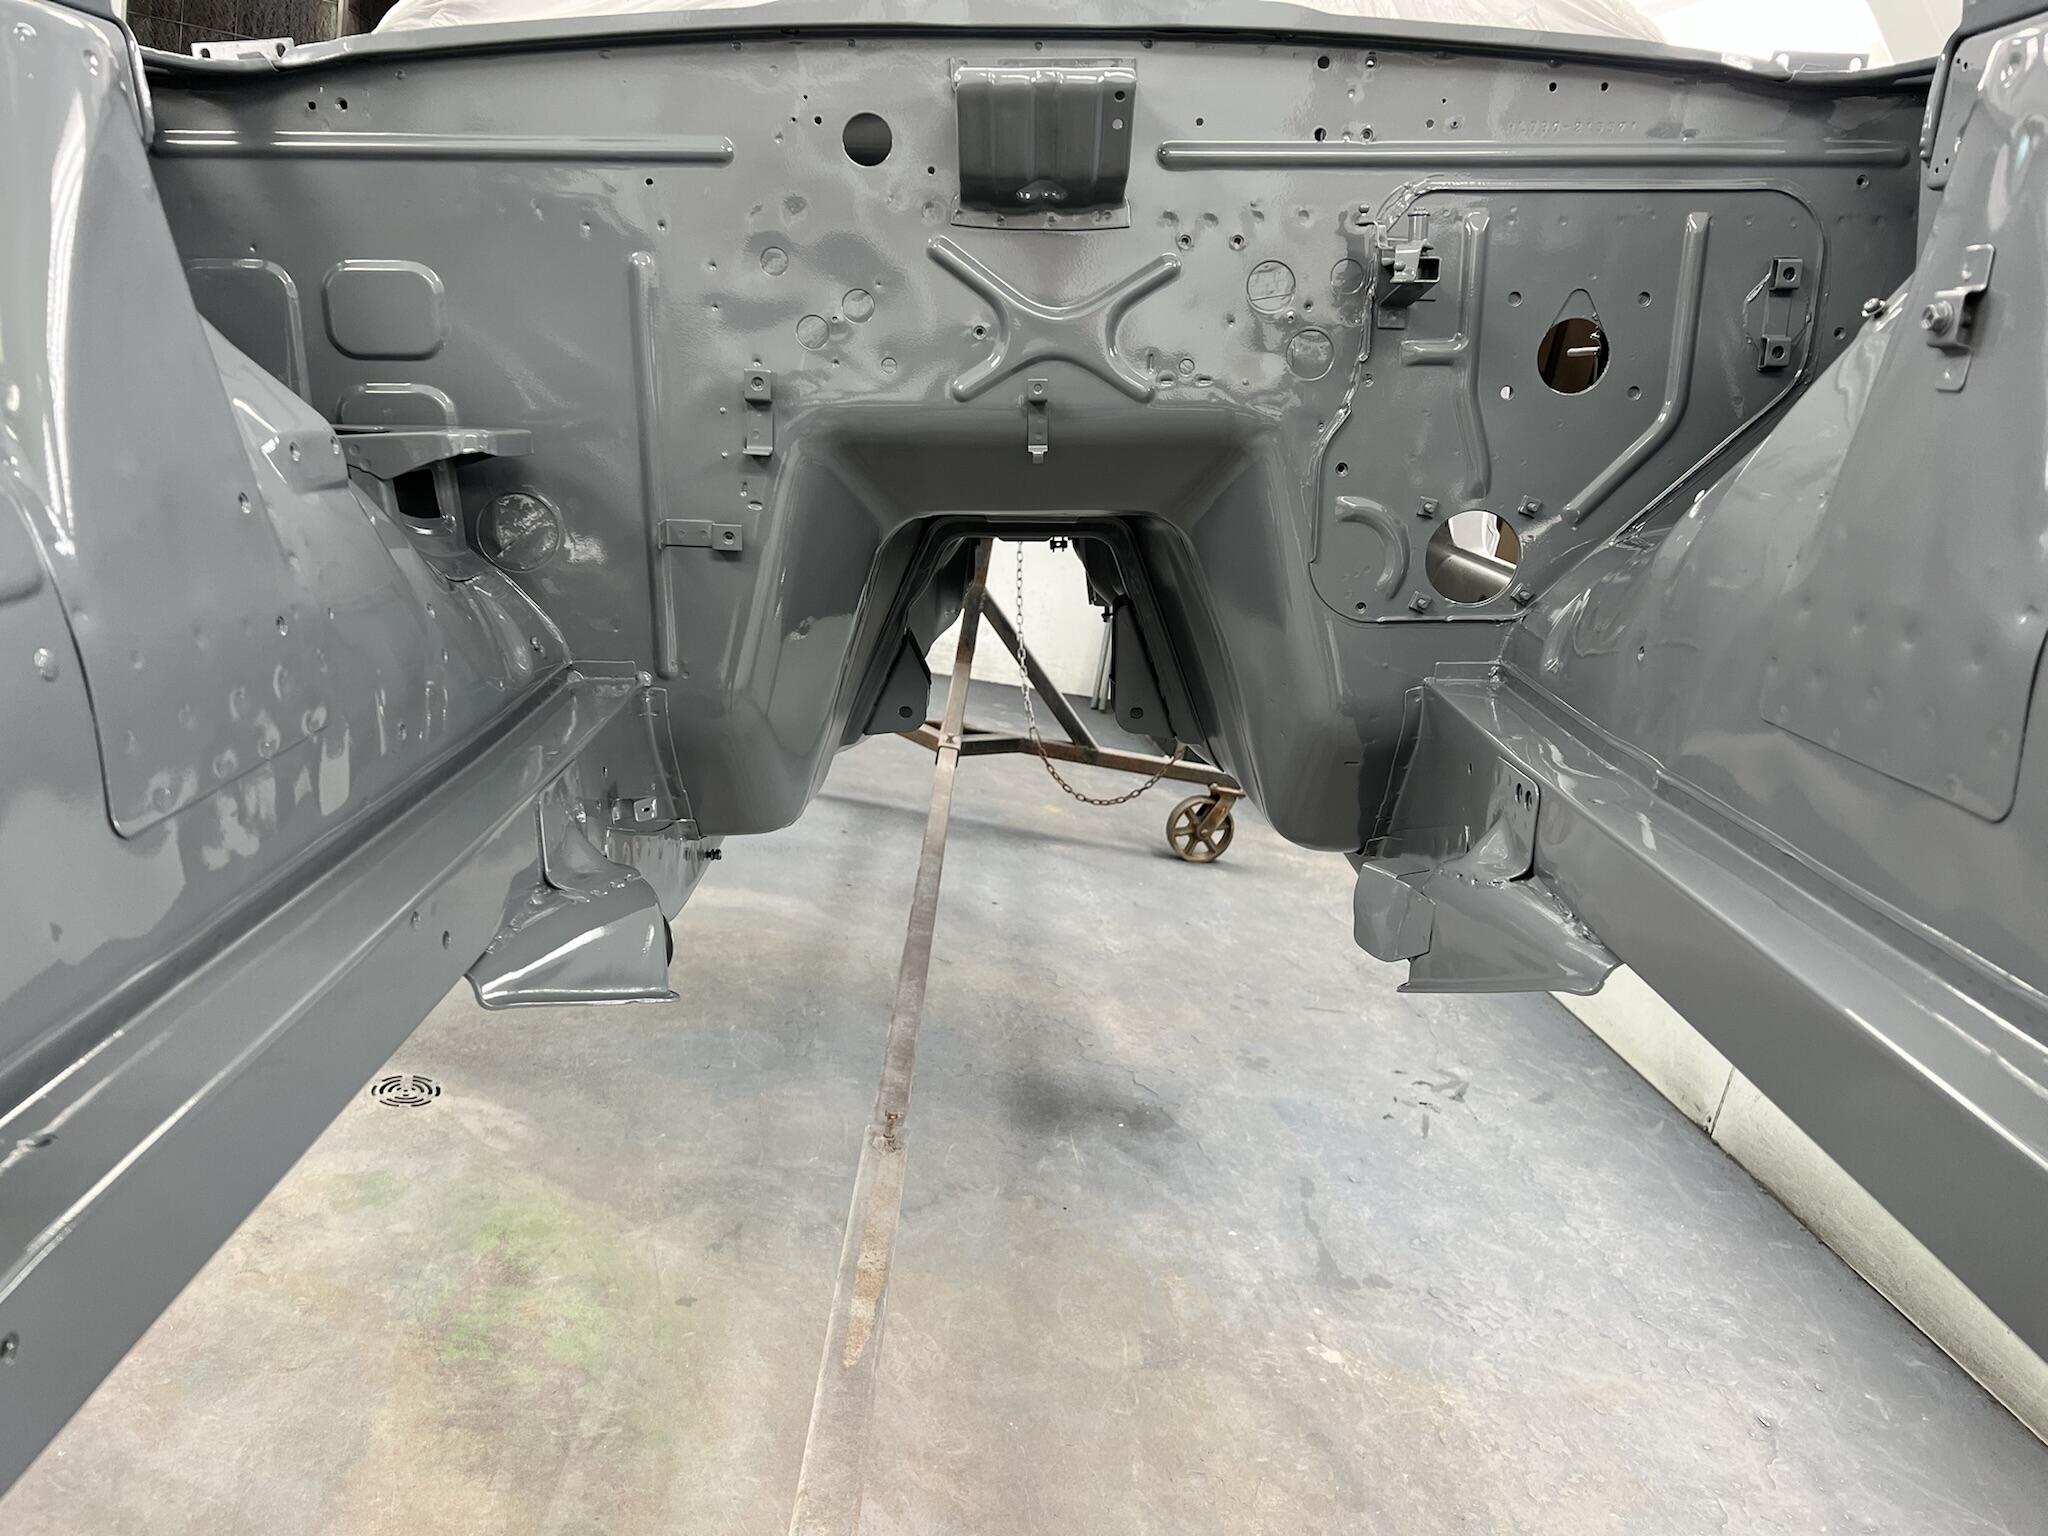
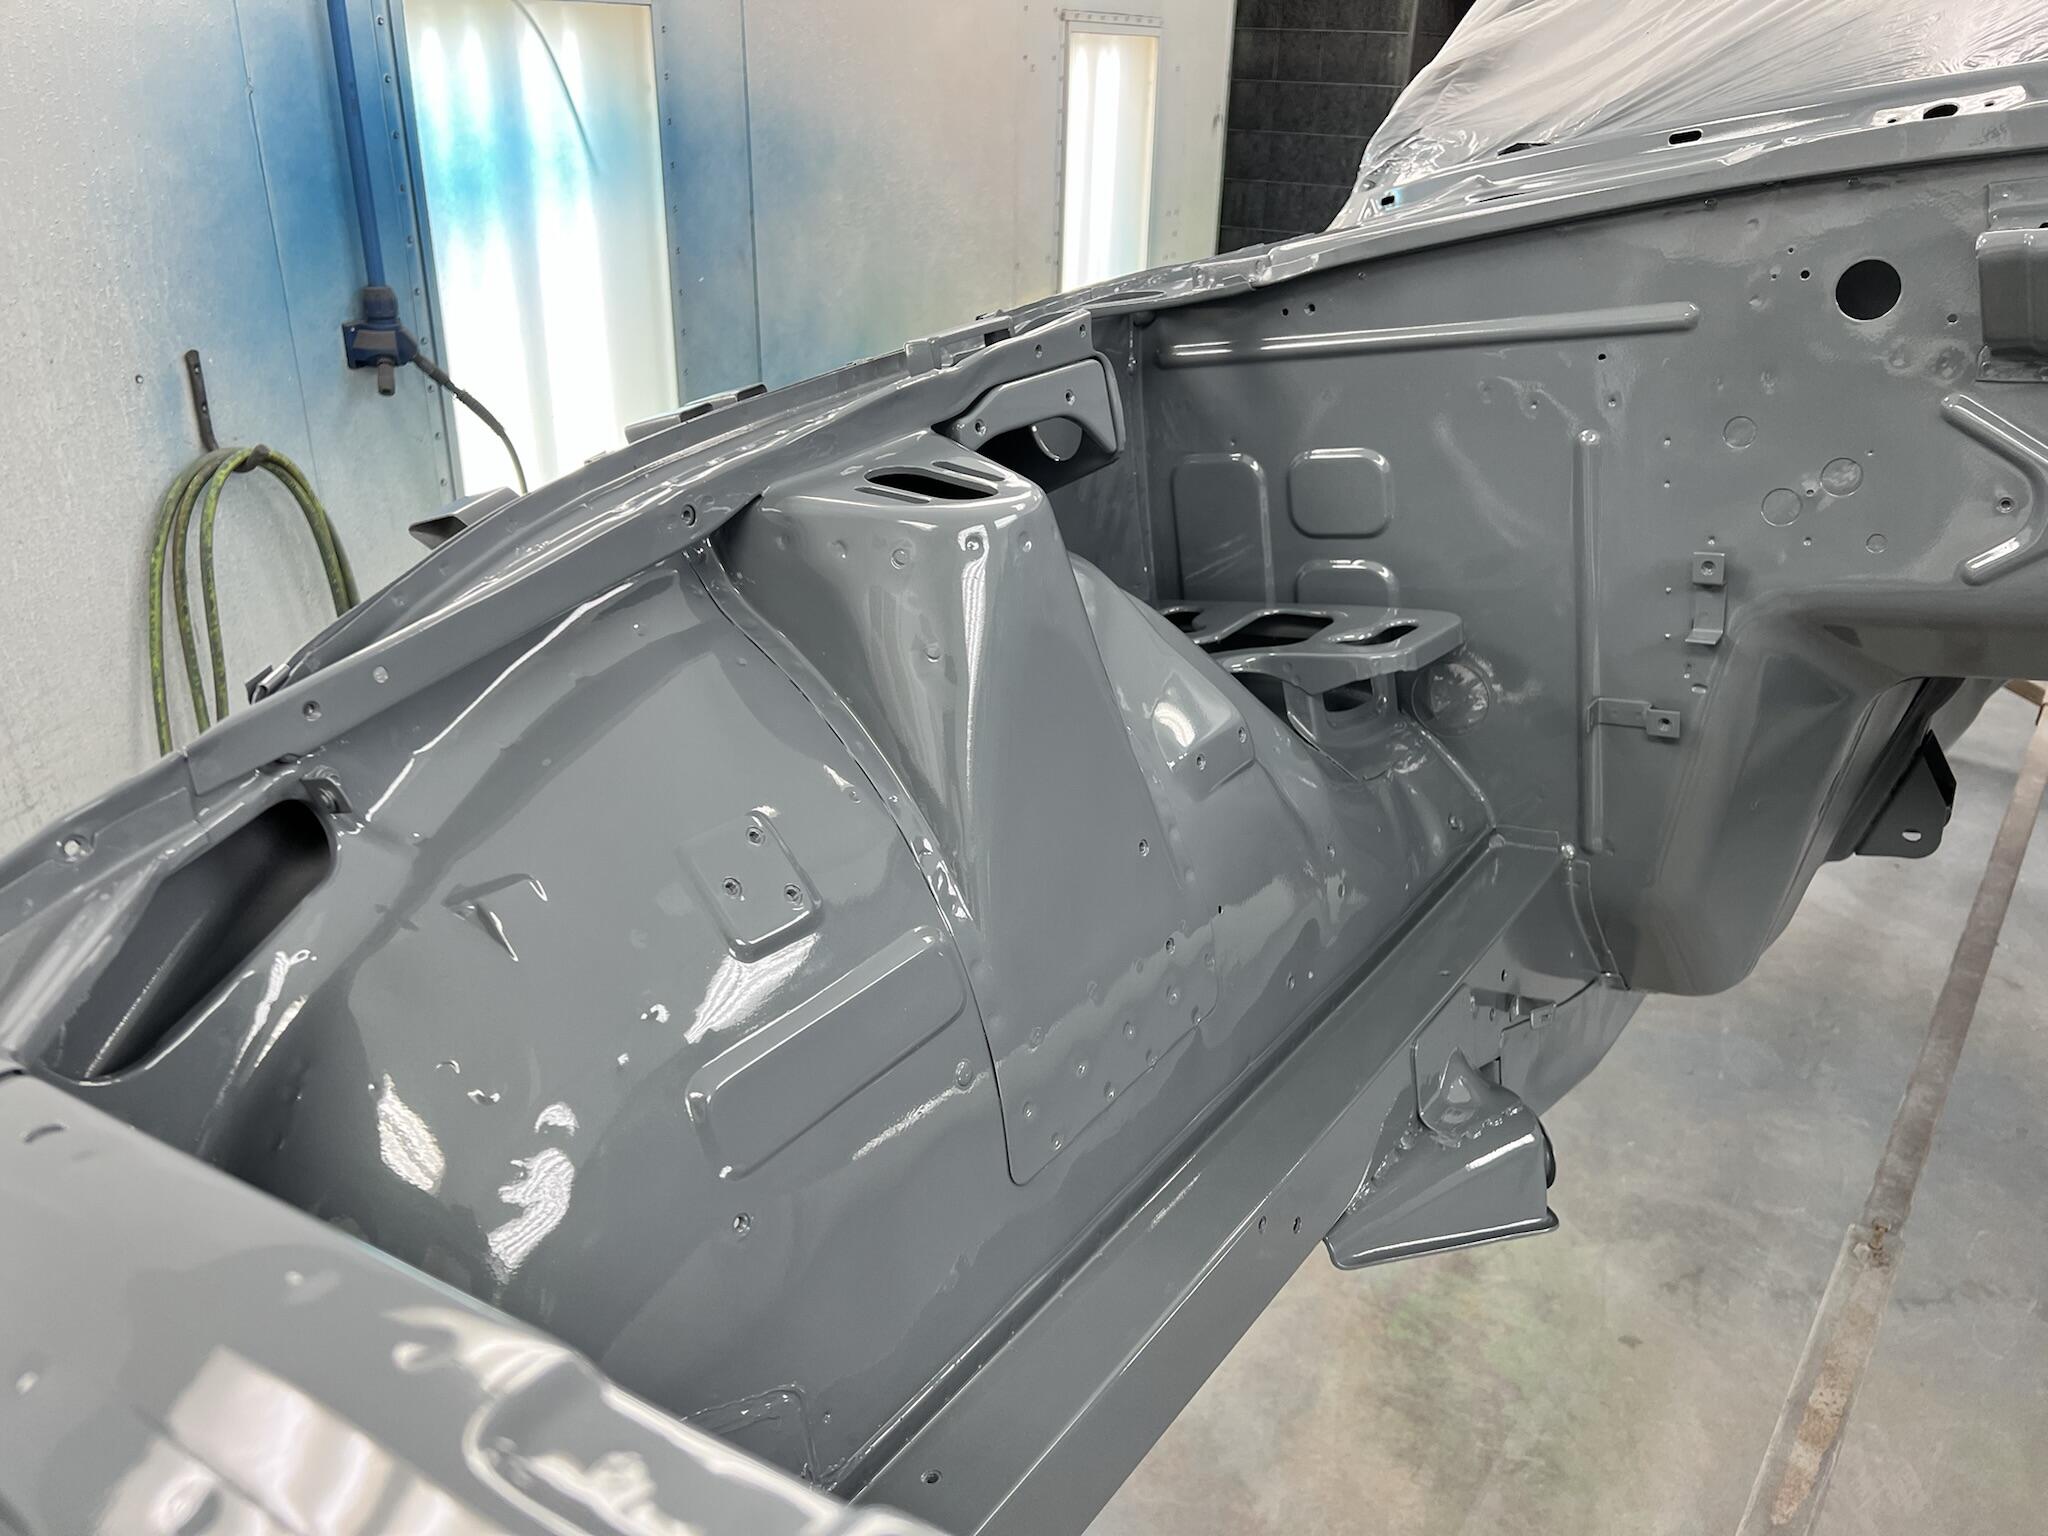
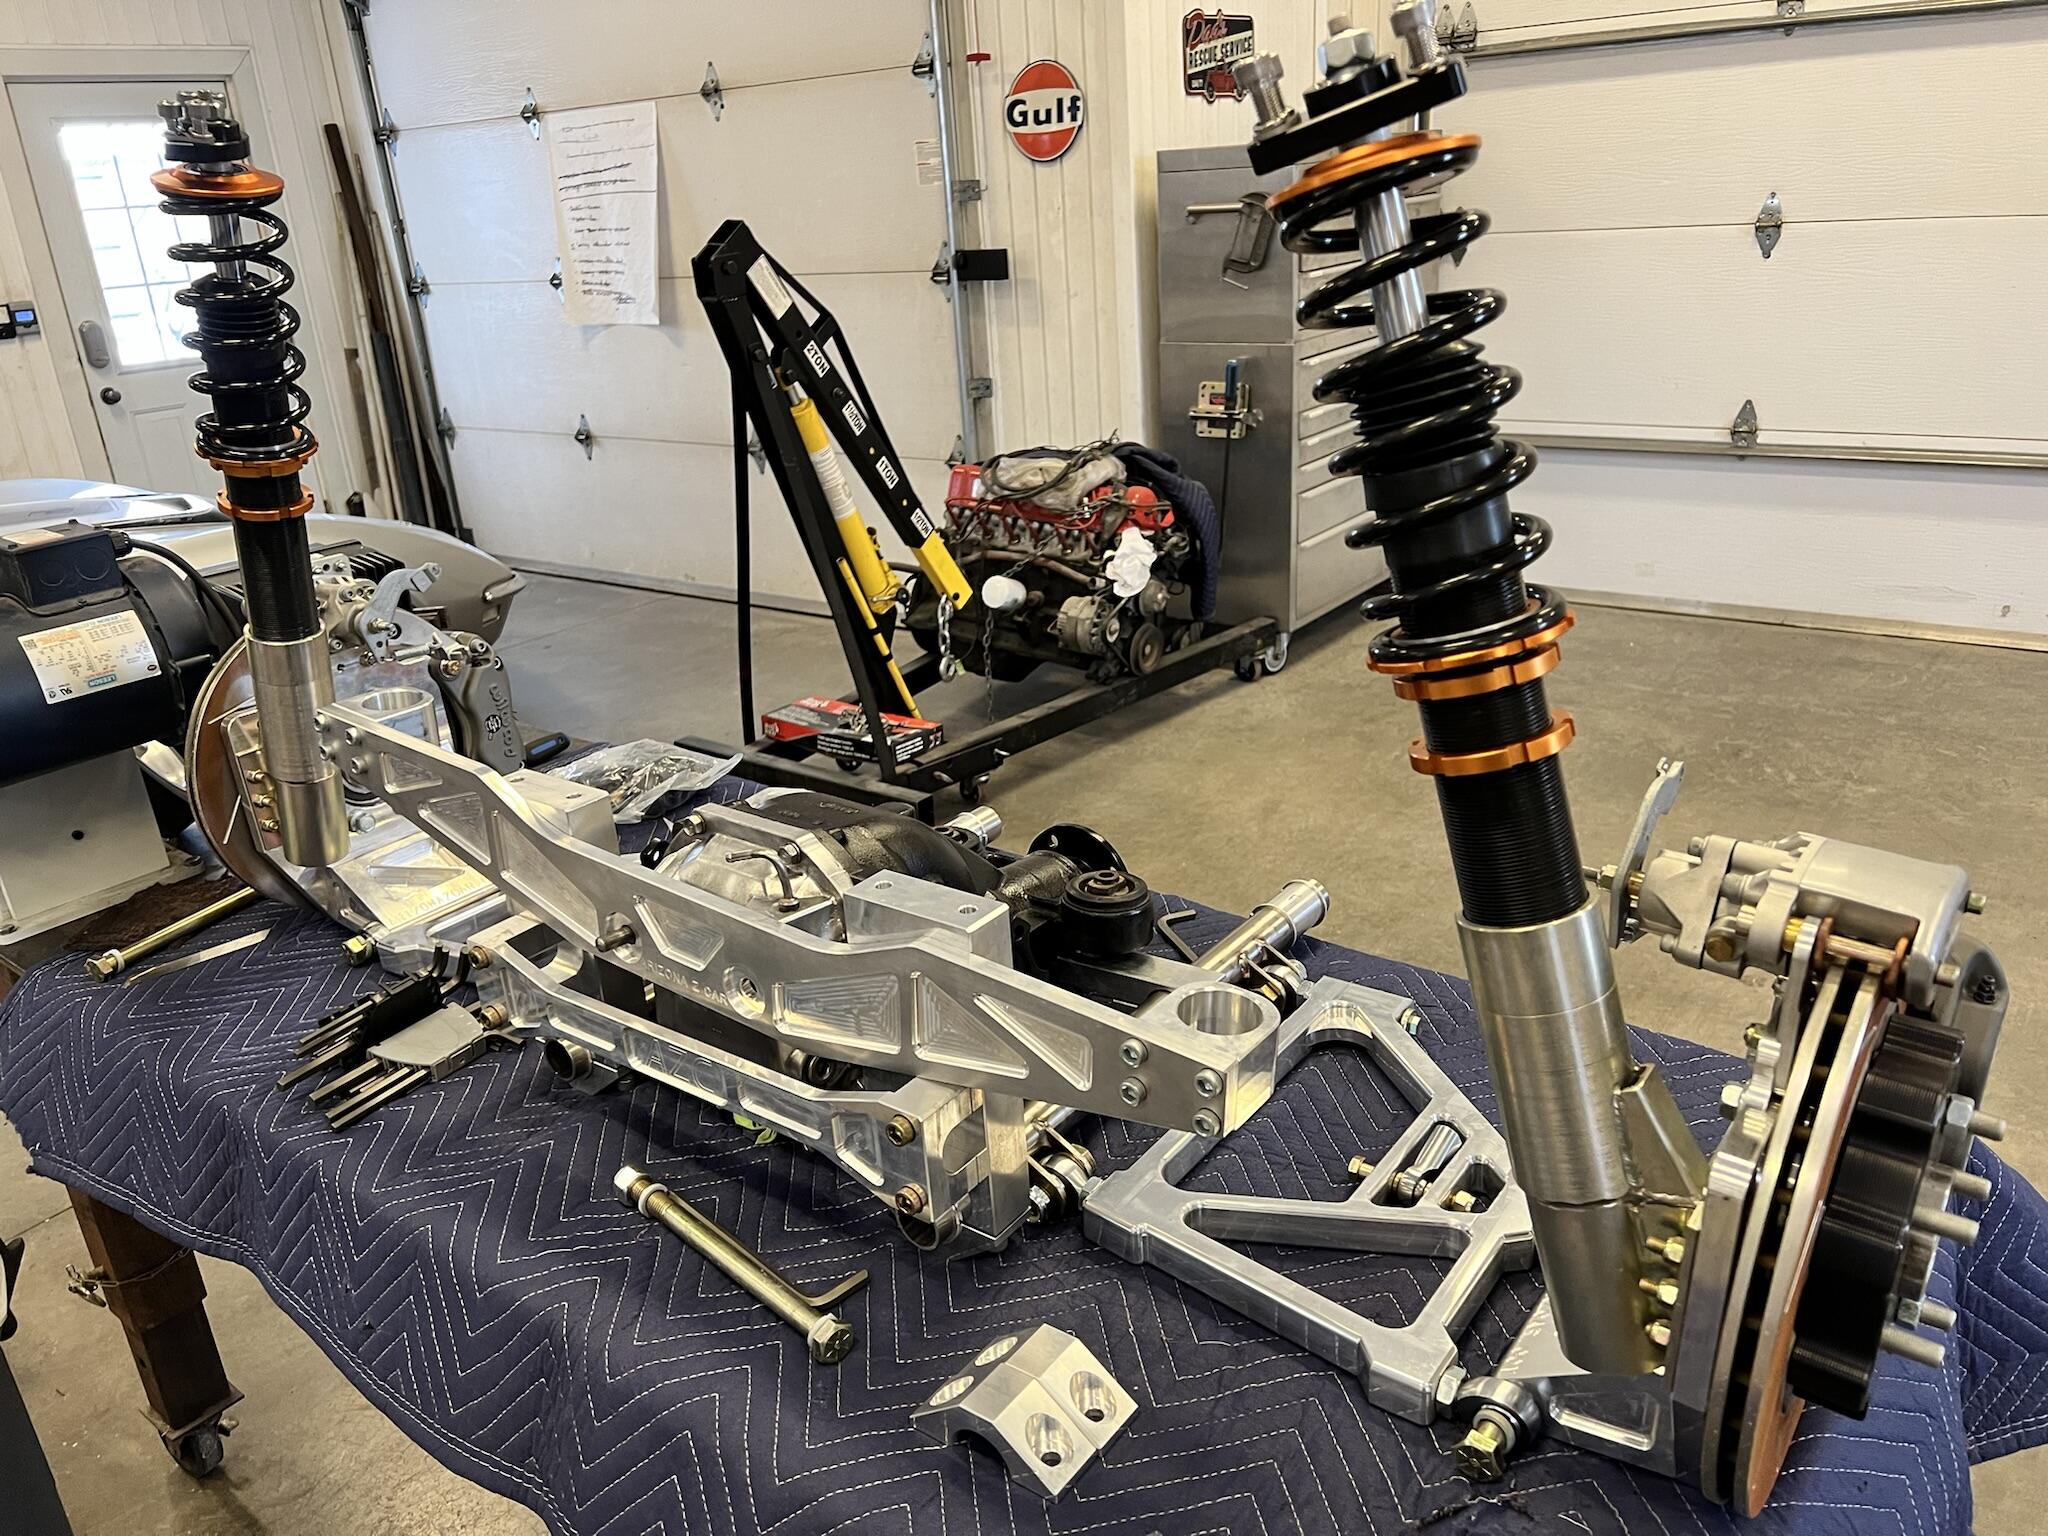
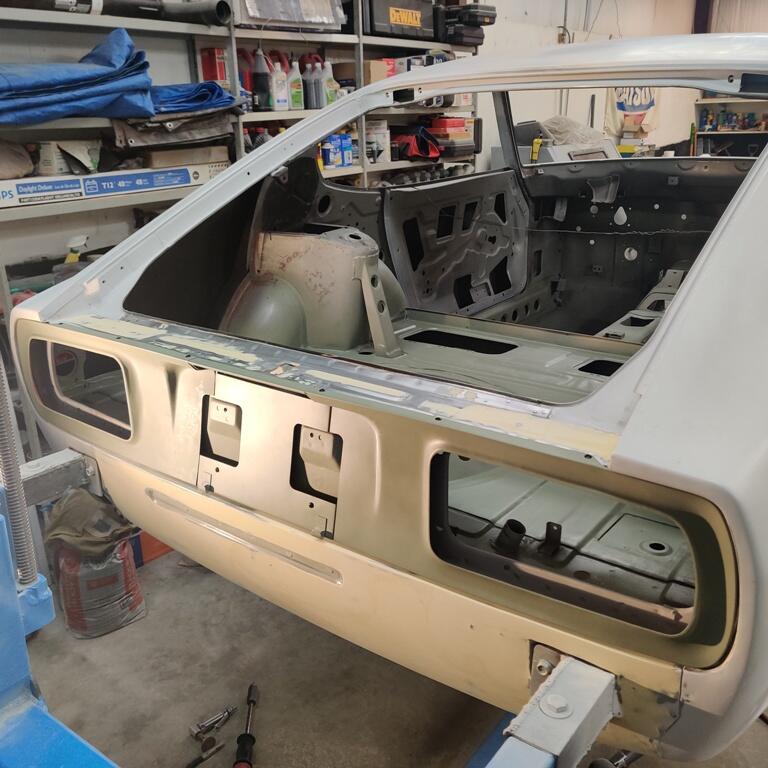
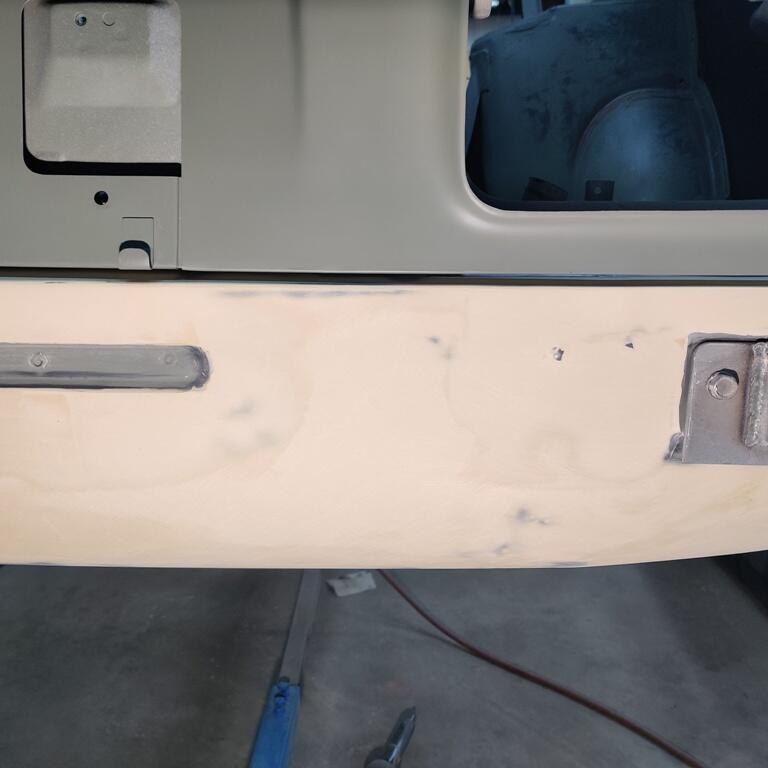
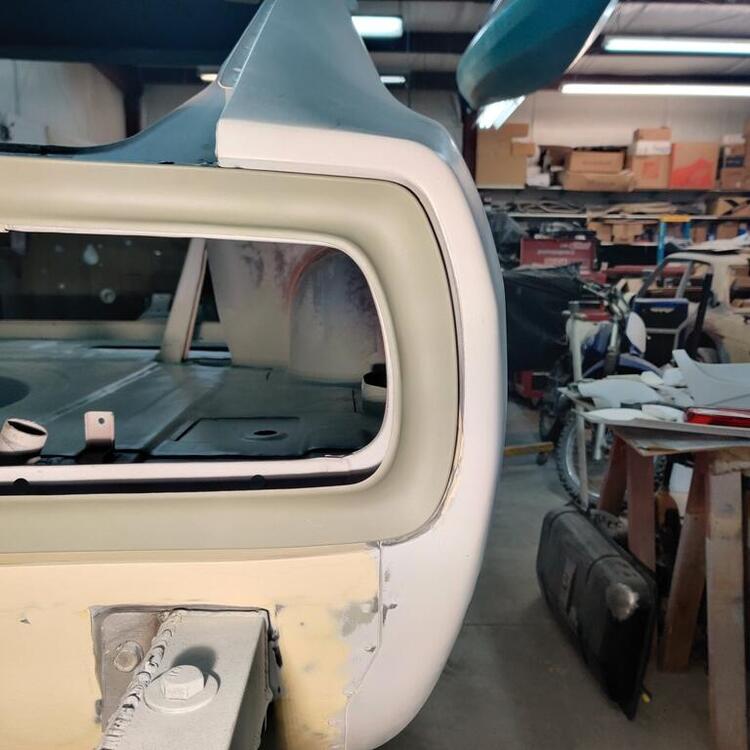
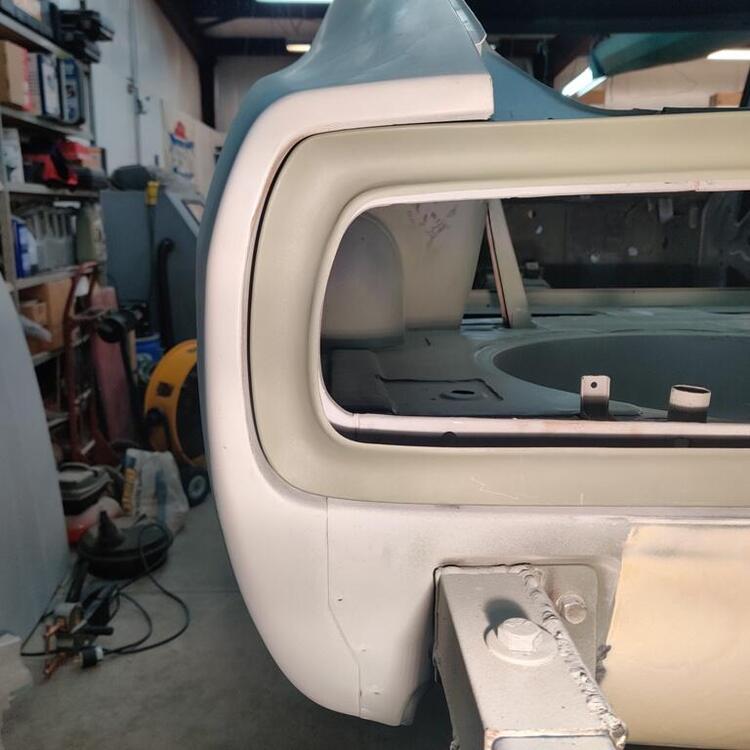
 Hi SteveJ This is my first post on a Forum ever and now I can see why people are joining forum such as this one. Thanks for the value you are bringing to my project. I am not discourage, I have build many other cars but I want this one to be world class so I will need all the help I can get. I am including a few picks of where I am with the car. Thanks again Bruno


 2 points
 -
 2 pointsCrush washer is causing it, mine has been doing it for a long time. As soon as I get new plugs and don't take them out to look at them, I never see a drop.2 points
 -
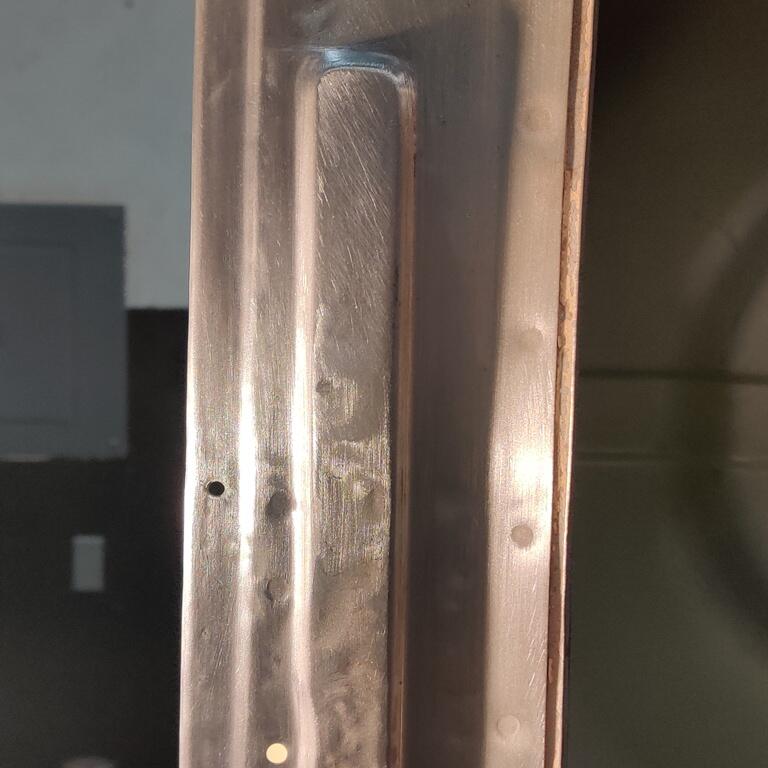
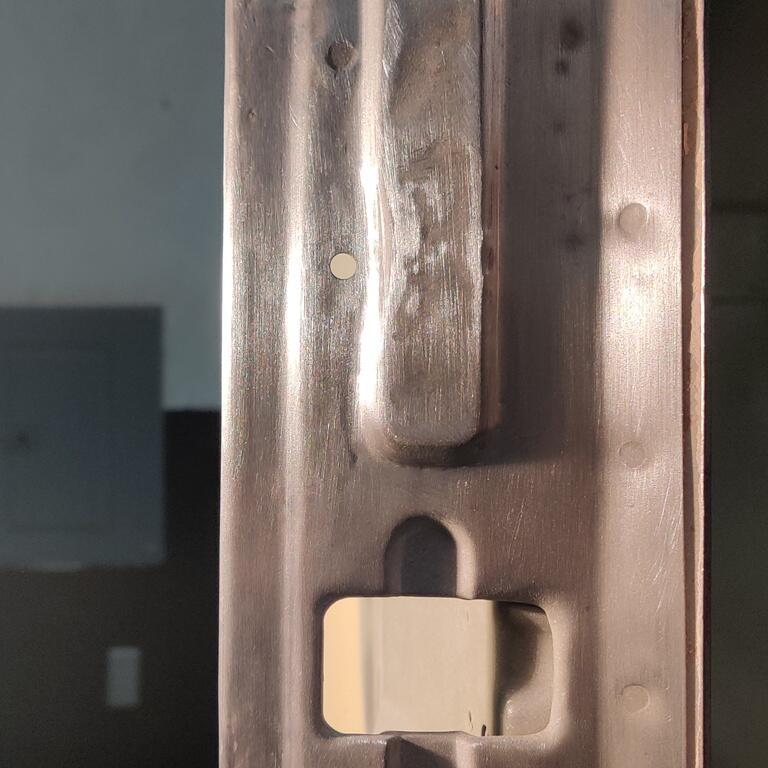
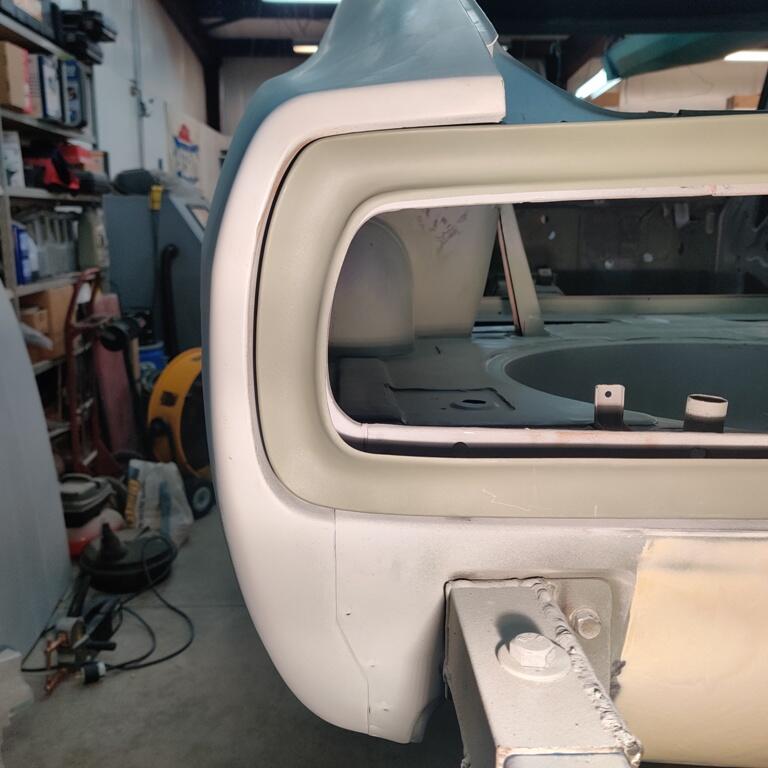
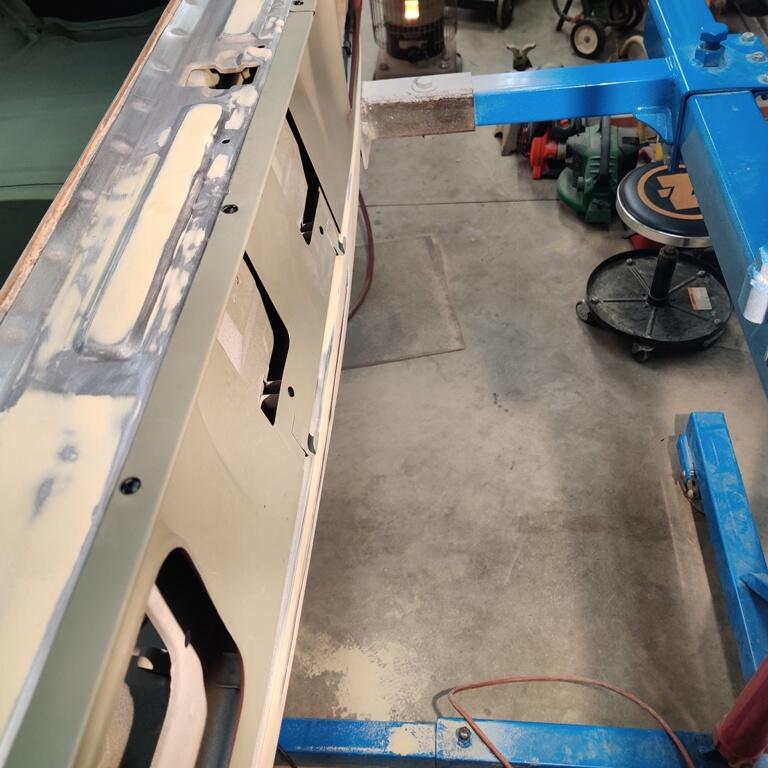
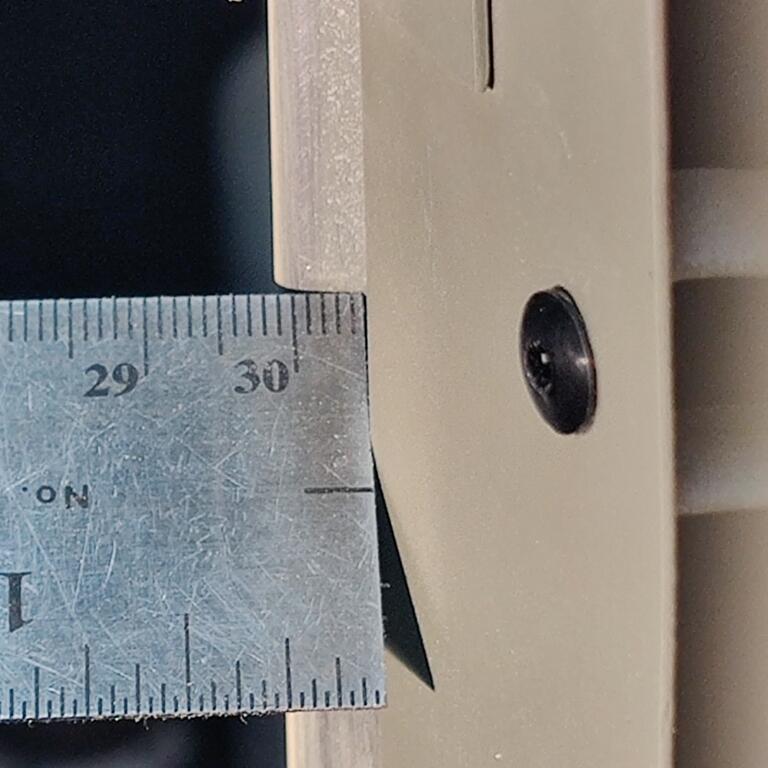
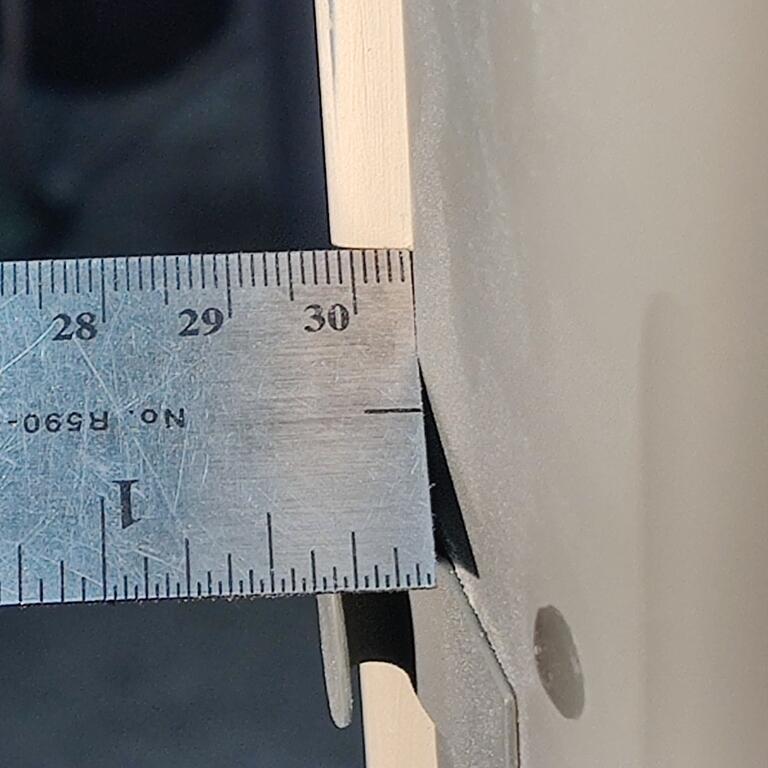
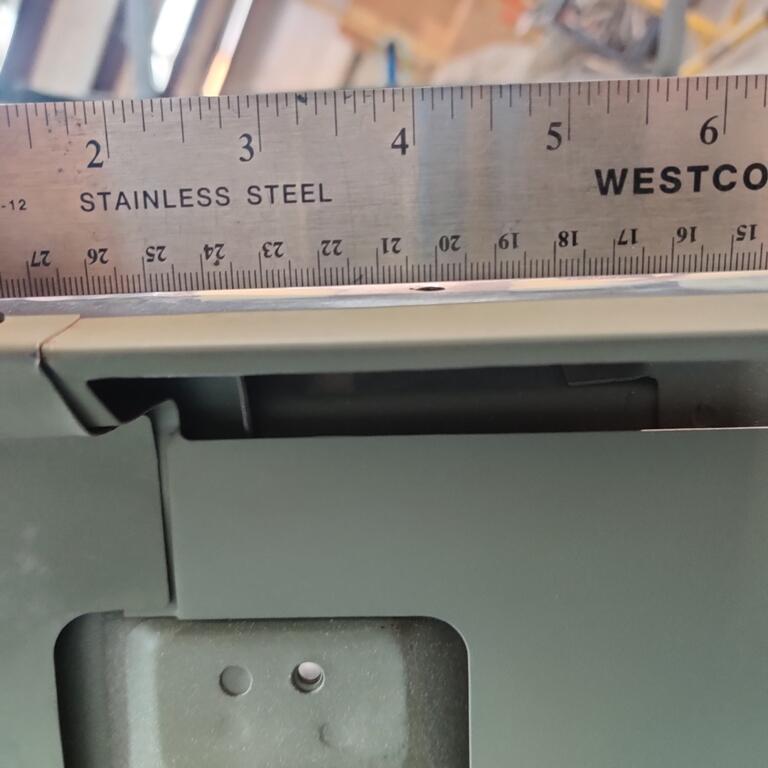
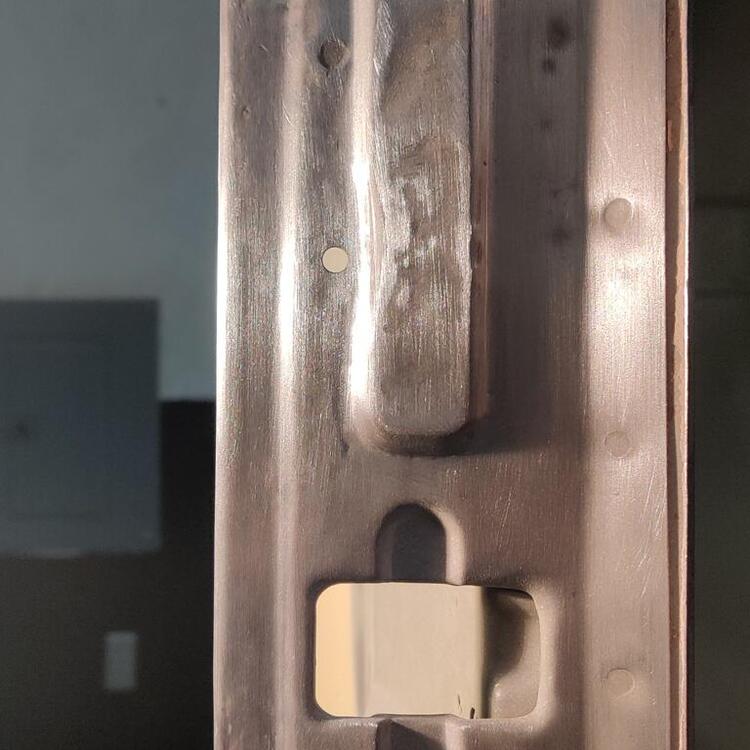
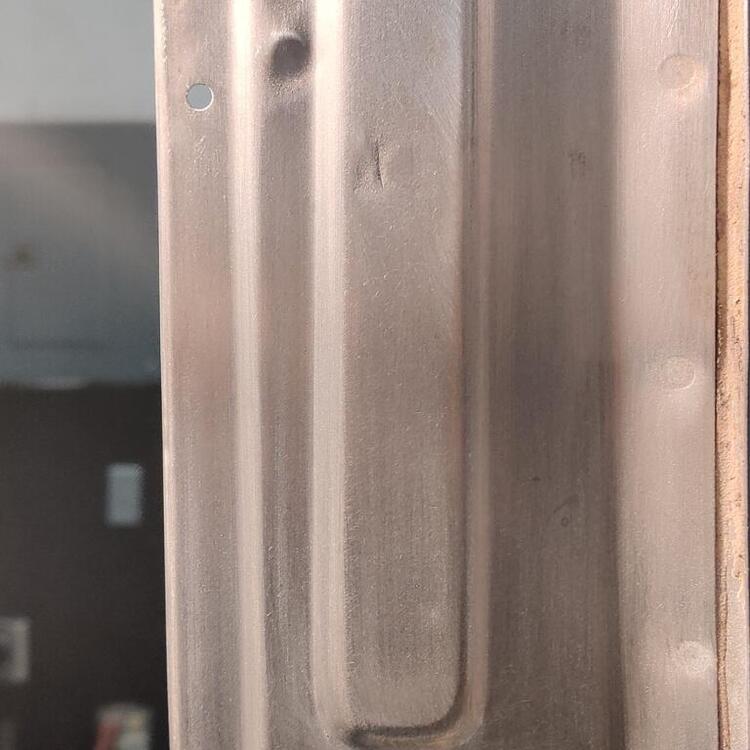
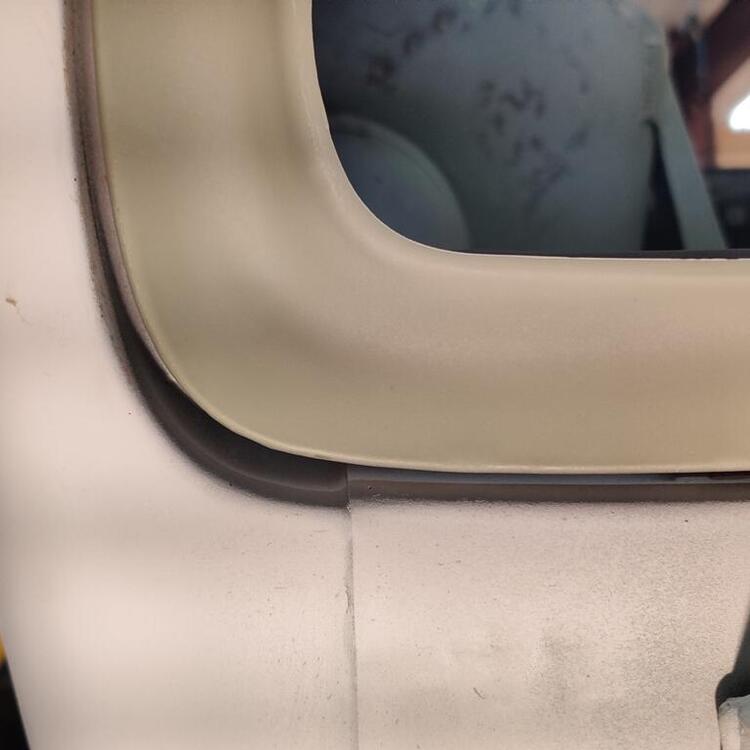
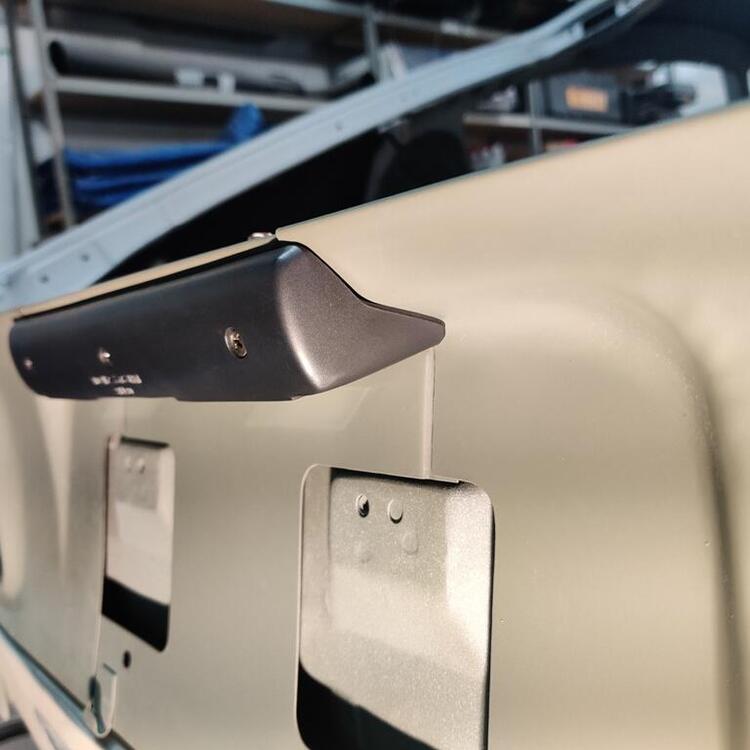
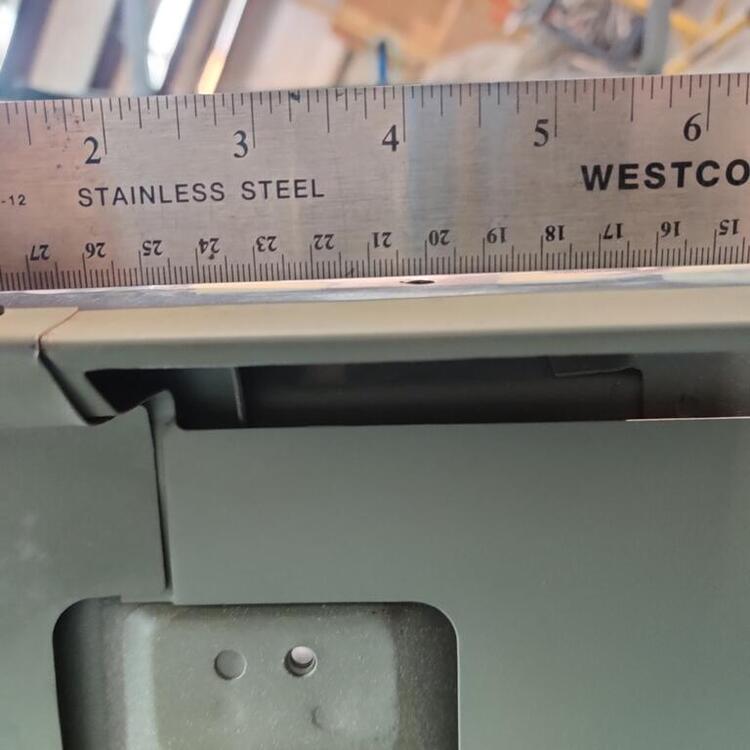
 Picking up on the tail light panel, I applied some filler and worked further on the tail light trim panel fit. I also got out the new old stock (nos) license light assembly to check its fit. I am glad I did because I have a fit problem. I did not expect it, but better to find out now than after paint. It is wise to check panel fit as body work is done, especially in areas that it is known that a car was damaged. This is a new learning for me that I discovered during the restoration of this car. Using a bright LCD light at a 90 degree angle helps show high and low areas: The tail light trim panels are pretty flimsy pieces of metal, generally speaking. Over 50 years, they likely have taken some abuse and therefore, it is a really good idea to get them to fit perfectly before covering them (and the car) in paint. The gap between the right panel (first pic just below) and the quarter panel (right edge) is a tad narrower than the same gap on the left panel to the quarter panel. Also, it is hard to see (third pic just below), but the bottom edge of the three trim panels (left, right, and license) does not stay in line with the sheet metal on the car. In the center, the body of the car sticks out a bit more than on the two ends. Because this car was hit in the rear lightly, I am checking all of the fit and adjusting. These two pics are of the left and right side of the center, license plate trim panel. There are small sheet metal stand offs that locate the bottom of the panel away from the body. A .5 mm difference was measured - so I need to adjust it. While I am at it, I want to make sure the gap around the left, bottom and right edges of the three panels is as uniform as possible. The left lower corner (third pic) is inconsistent and much wider than... the right lower corner (first pic). There was no damage to the car in these inside corners, so this fit is "factory". The second and third pic show the width of the gap along the bottom. It looks pretty good. The license plate light doesn't fit very well at the moment. Glad I tested fit. The top edge of the panel needs some adjusting to bring the left side mounting screw area upwards a bit: More hours down, and more to go for sure on this area.
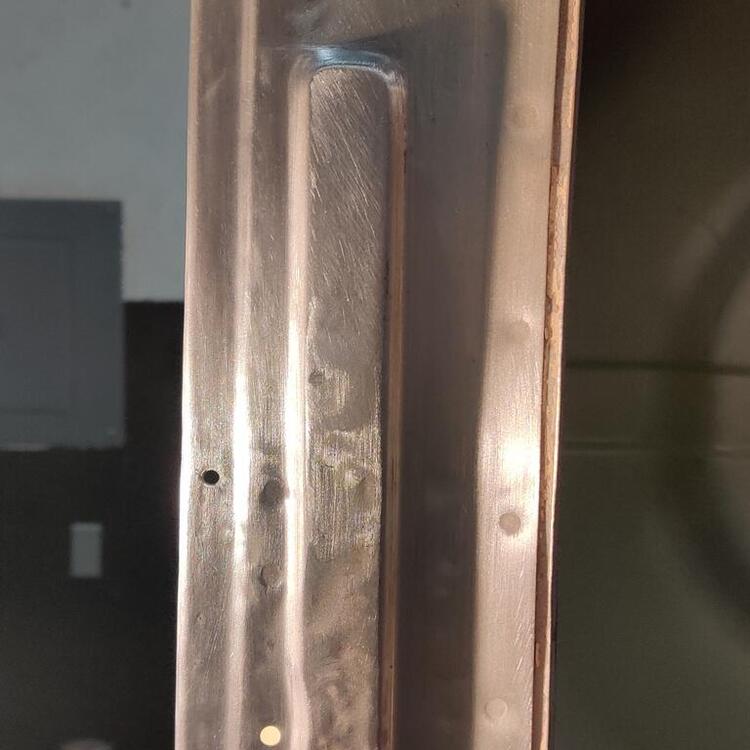


 2 points
 -
2 points
-
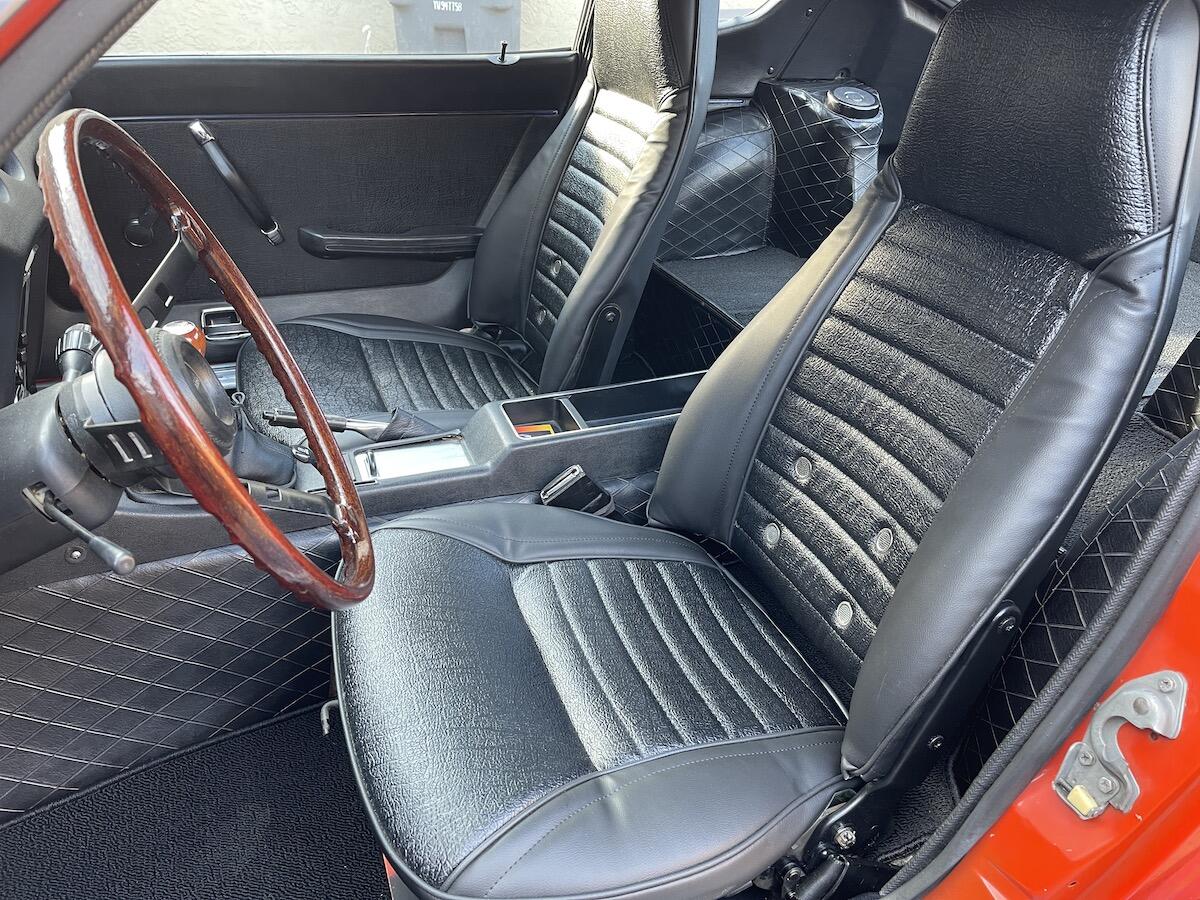
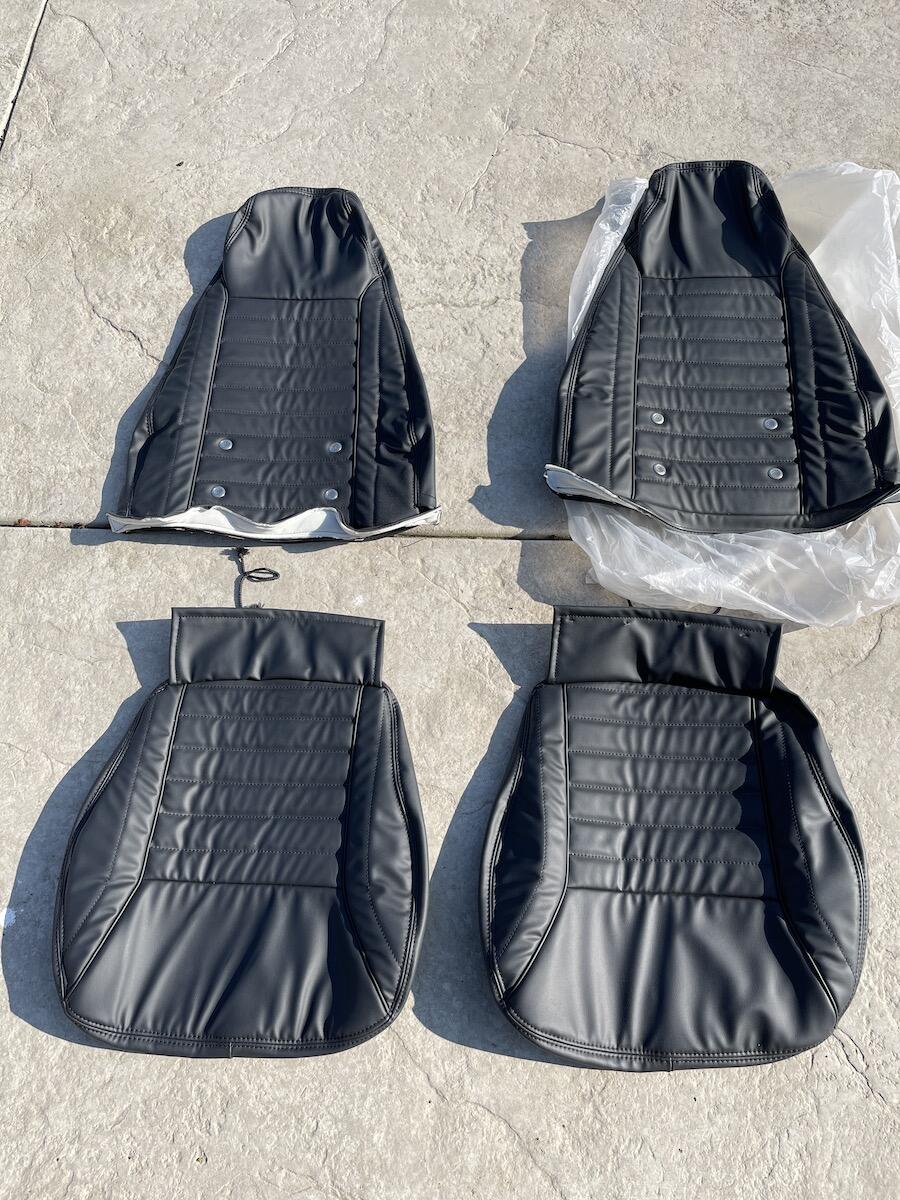
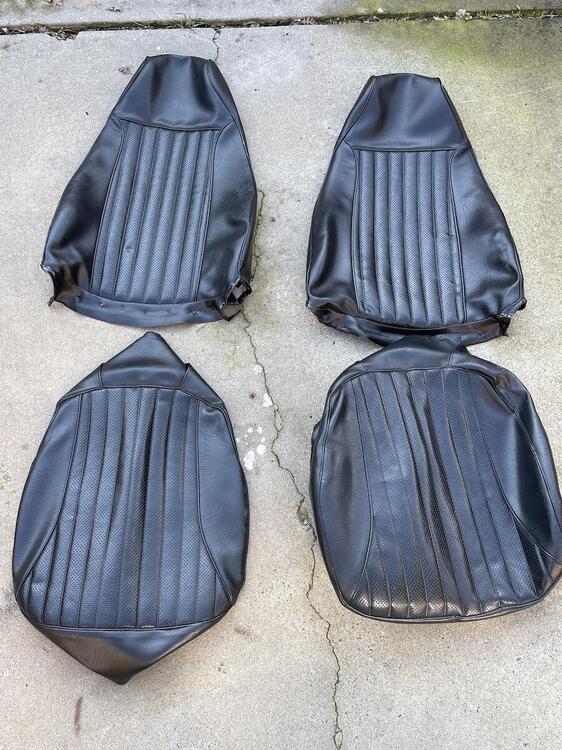
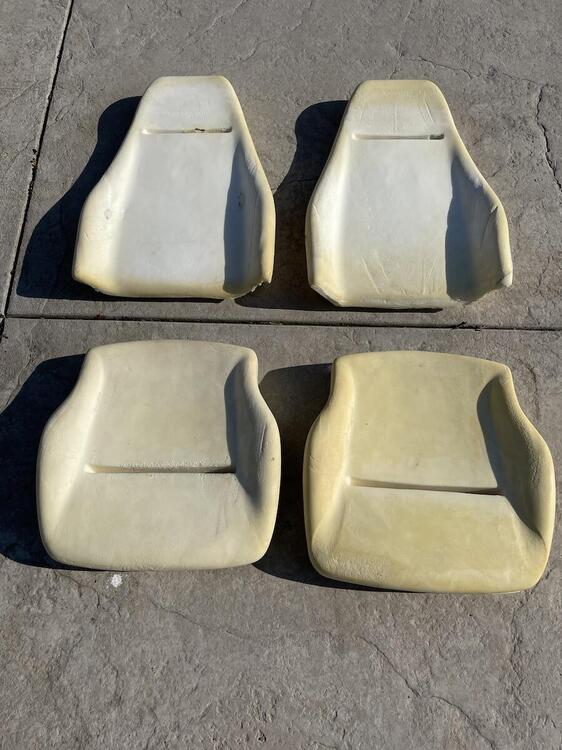
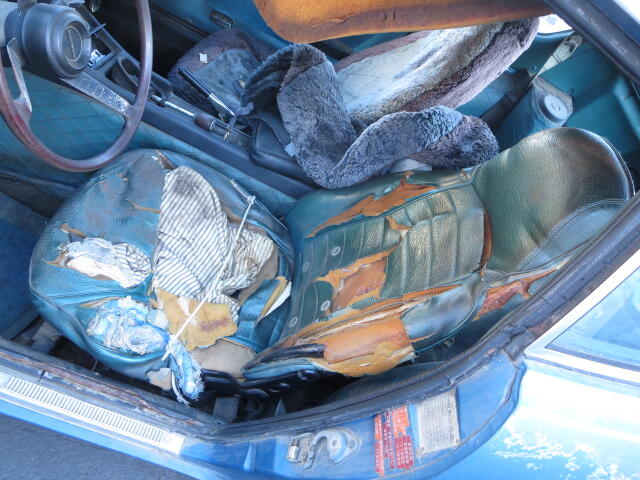
 2 pointsFinally got the seats done and reinstalled. I did the passenger side seat, but had a pro do the driver seat since it was more worn and needed some foam work. Waiting for the side mechanism covers to come in. Going to try to sell the old seat covers that go over the top of your worn out seats. They actually don't look too bad if wanting a quick temporary fix until you can do it right. Not sure where they came from, but definitely different than what I see available now. If anyone here wants them, just pay shipping and they're yours. Also going to sell the seat covers and foam I purchased from Innovative Interiors (paid $680) that I didn't use. I'll probably try Craigslist first due to shipping costs, then eBay if needed. Going to loose my shirt on these.

 2 points
 -
 1 pointAFAIK, this is the only new option available and will kill your motorway peace and traffic light racing but a total hoot any other time. Oh and mega expensive!! https://www.rhdjapan.com/kameari-r200-final-gear-set-type-2-4-875.html +1 on buying a 3.9 R200. Mine came from Arizona to the UK and before shipping it was on eBay for $200! I admit, that was 4 or 5 years ago.1 point
 -
 1 pointThe 280ZX alternator is internally regulated. I can't remember from your previous posts how you modified your wiring to run the ZCD internally regulated alternator. You need to decide on external regulation or internal regulation, and get the wiring correct for that system. I think that it's all been covered in past posts. Both methods work the same way. The main problem with external regulation is finding high quality external regulators.1 point
 -
1 pointGood luck getting an exchange or refund from ZCD. You can get a 60 amp 280ZX alternator from almost any auto parts store and go back to the "T" plug. It should bolt right up and work just fine.1 point
-
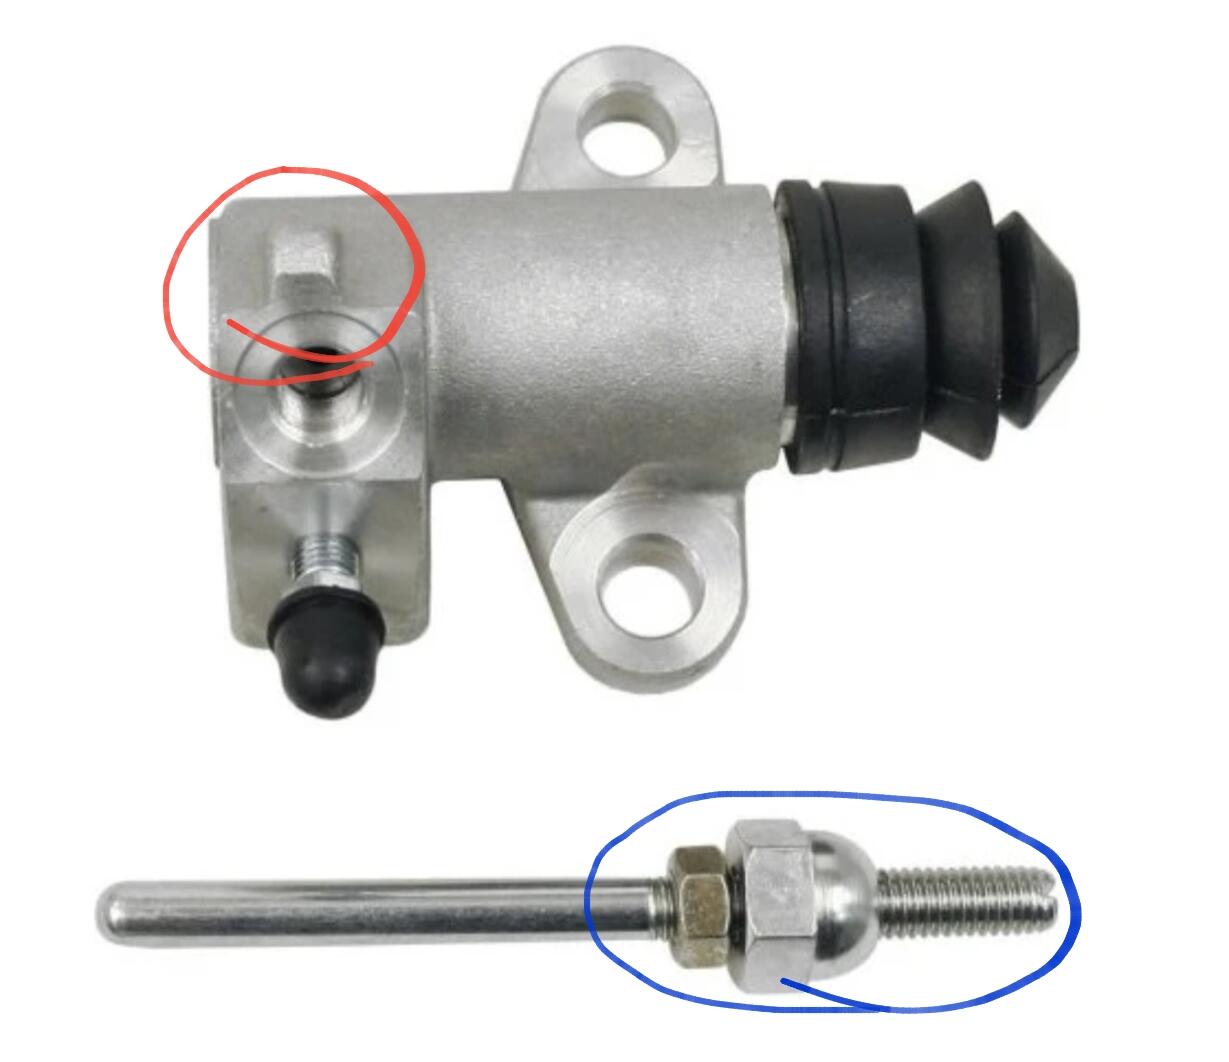
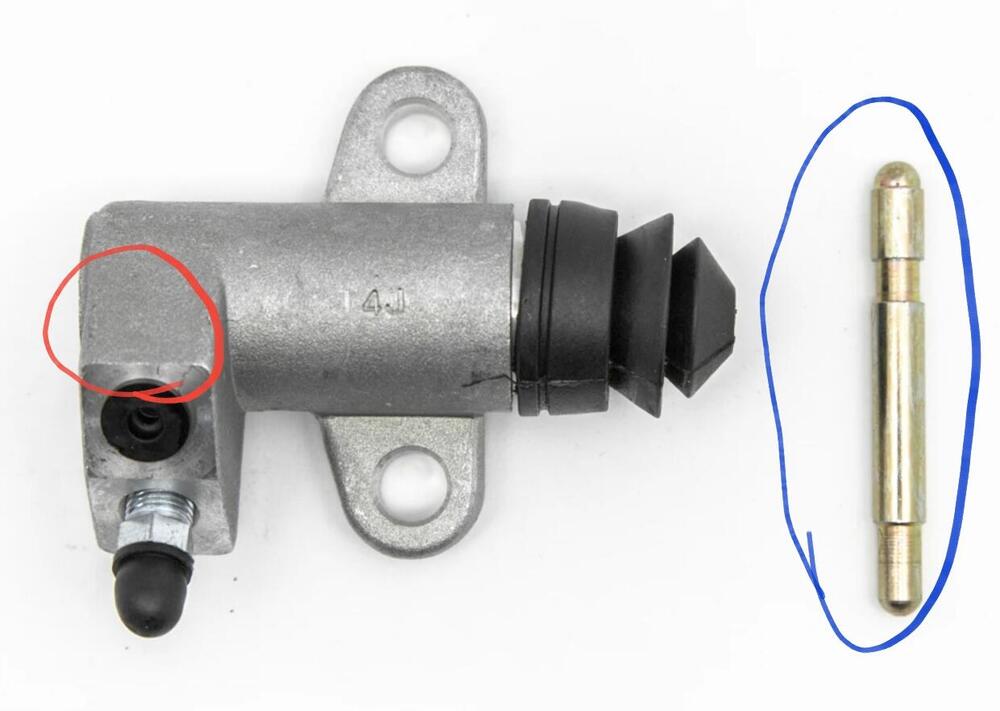
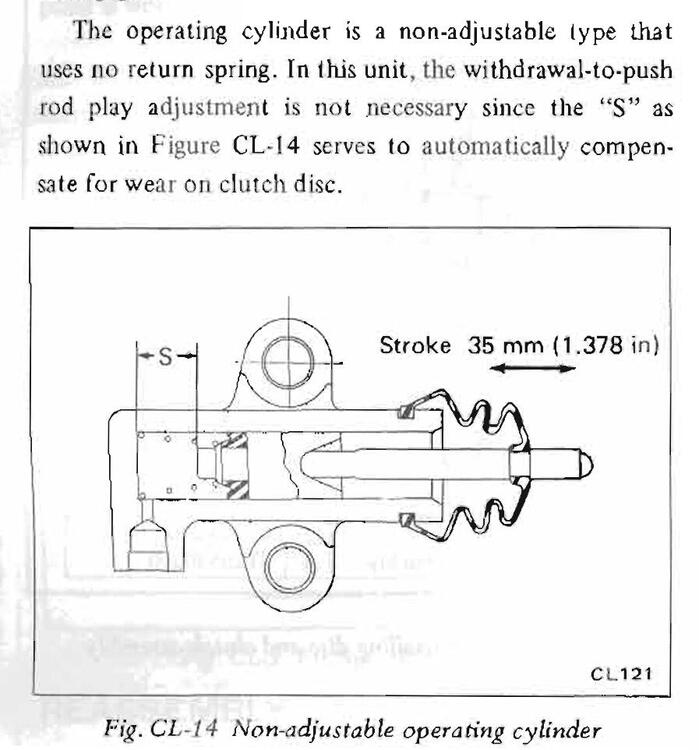
 1 pointYou shouldn't be using the external spring with that slave cylinder. They changed the slave cylinder design in the 73 model 240Z. Up to 73 they used a external return spring. In 73 they went to a internal spring (in the slave cylinder) and it didn't require any adjustment during the life of the clutch disc. How to adjust it? Adjust the push rod until all free play is gone. Then screw the ball headed nut another two turns. Lock it with the lock nut. Check it by pushing the clutch fork into the slave cylinder. It should push about 10 to 12mm. When you let it go it should return and have no free play. Another thing. You will most probably have to shorten the push rod or cut more thread to get to a range suitable for the slave cylinder. If you want to keep the external spring do this. Make a plate out of 2mm steel to fit behind the slave cylinder mounting bolts. Bend it at 90 degrees directly behind the slave cylinder. The spring can connect to this bracket. I have a drawing if you want to do this. Once you have done that dismantle the slave cylinder and remove the internal spring. It will now work like the early version.
 1 point
 -
 1 pointthe guy at Advance auto said something internal was bad. He said machine couldnt do a full test because something was shorting out. Guess that is one problem solved1 point
 -
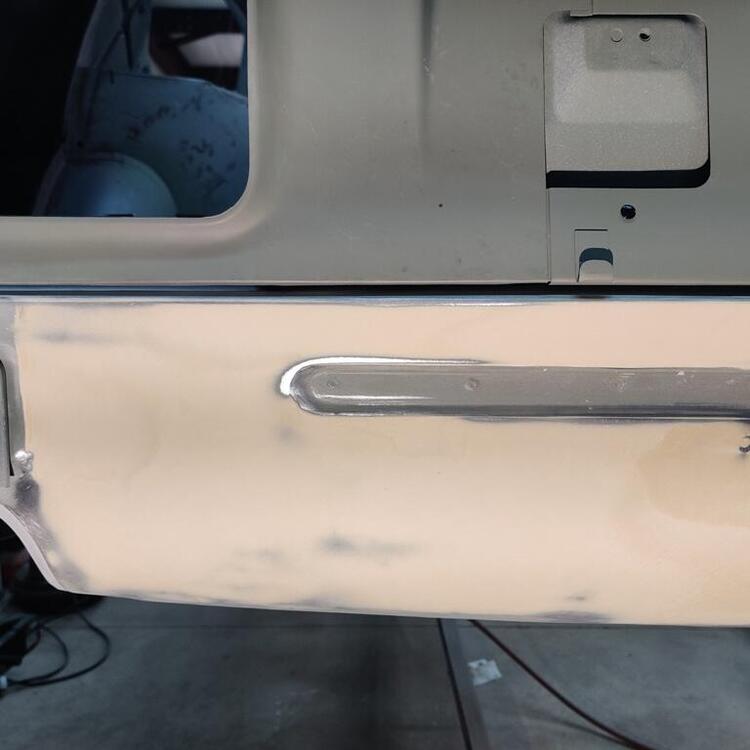
 One more thing - It's hard to tell but in the first picture it looks like the door is hung with the rear bottom corner a bit low. You might check the entire door frame and the bottom of the door for scratches.1 point
 -
 The car is a 78z. I thought that was in my profile, sorry for leaving out the info. I will post more pictures today. The door never closed properly but I saw that the weather stripping was not letting it close so I thought this would be an easy fix. I can manually latch to the second position.1 point
 -
If it isn't too much trouble could you post pictures of the entire door to see all of the gaps. Also, post a picture of the B pillar to see the lock and the dovetail, and the door side of the striker as well. In the past has the door closed properly? If so, has there been any recent work on the door? Have you changed the hinge positions? With you sitting in the car can you determine if anything is making contact and preventing the door from closing? With the weatherstrip removed there should be some space all around the door, including the door bottom. Is the door sash (window frame) hitting the door frame? There is a door seal mounted (with three plastic retainers on the top front of the door, is there contact in this area with the frame?1 point
-
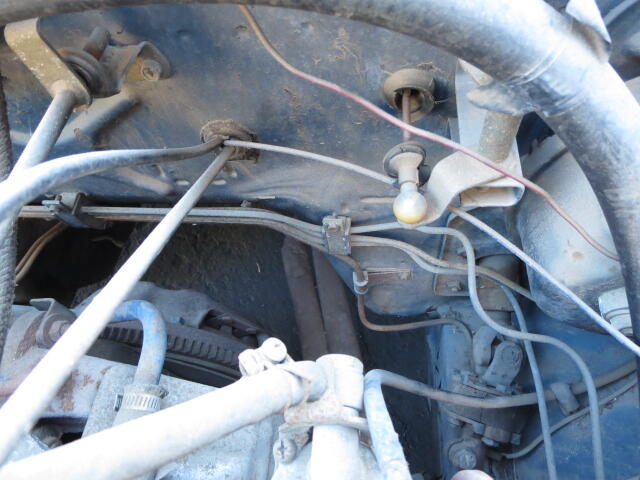
 OK... You got my attention. Nice pics! So your car is a 75 or 76, right? Someone who really knows what they're looking at would probably be able to nail the year just from the pics you posted, but that's not me. Couple thoughts on your original question... First, the EFI system is wired pretty much independent from the rest of the car. There is one sub-harness that does nothing but EFI and the rest of the car will pretty much function normal whether that harness is installed or not. So I'm thinking the work has been done for you already. Just put the stock stuff back with the exception of the EFI sub-harness. Second thought is if you're looking to strip stuff off the car (I see you've removed the mounts for the CARB can and the A/C controls) and you want to get that stuff out of the wiring harnesses also, maybe you could just open up the originals and take out what you don't want and then re-wrap?1 point
 -
 1 pointNice block, only the freeze plug just on the right of the oilfilter is a bit outside it's hole.. normally they are just in the hole with the edge of the lid IN the hole.. On a L24-28 they have a edge were the lid sort of clicks in..? I always use a bit of sealer. (don't know these brass ones i use steel ones with a sort of 85 degrees edge. they catch the edge in the holes.. if you know what the ... i mean haha)1 point
 -
Another easy thing would be swap the plugs around to see if it stays on that same hole. I'd do plugs and wires no longer than it'd take. Best of luck, hoping it's something easy. That crush washer could be "crushed"?1 point
-
 My first guess would be a leaking intake valve seal. You might be able to visually inspect the seals with the valve cover off and a bright light. I'd do a compression test on all the cylinders to see if #1 is significantly (10%-15%) lower than the others.1 point
 -
 1 pointI sprayed Chrysler Corp Blue engine enamel on a couple of pieces. I’ve read that it’s supposed to be close but I’m not sure. To me it doesn’t look like it has enough green in it, but if you google the color some do look greener. Sent from my iPhone using Tapatalk1 point
 -
1 pointI think you could build one for a lot less money. Make it wide too so you'll plenty of room. Give it to your wife as a greenhouse attempt?1 point
-
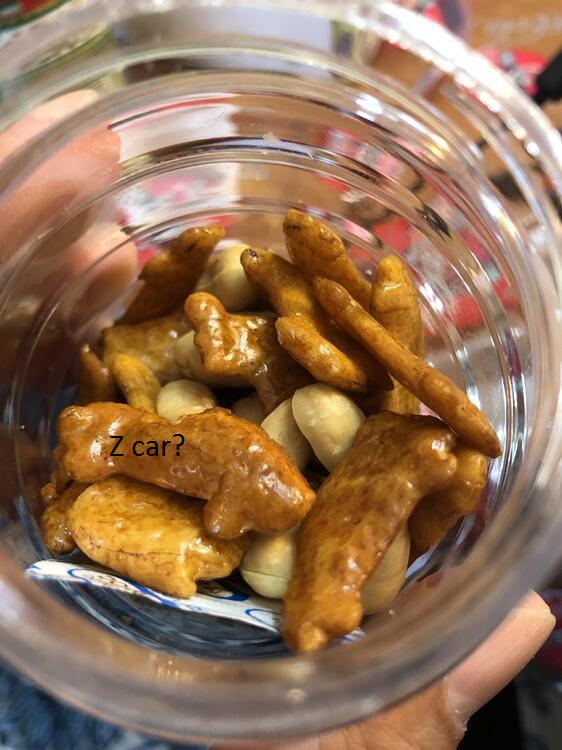
1 pointThis is so neat Katz! Thank you for sharing. Here's my guess (verb).
 1 point
 -
1 pointHi Gavin, yes I know your 904 white/ blue interior, Automatic transmission car and I have just looked at its pictures yesterday. I wish my new blue car was mint like yours , I need to do lots of work , first of all , it needs to be a running condition. It lost a transmission! What happened? I have got some interesting story about my new blue car , I will tell you about it later in this thread. 920 gold will be nice for the new Z , I am feeling the new Z will look great in classic colors , hope Nissan will take my opinion! Kats
 1 point
 -
 1 pointGood answer….Get a box of assorted sizes. You’ll have all the O rings you’ll ever need. Just type in O Ring Kit on Amazon…770 pieces for $11.00. 👍1 point
 -
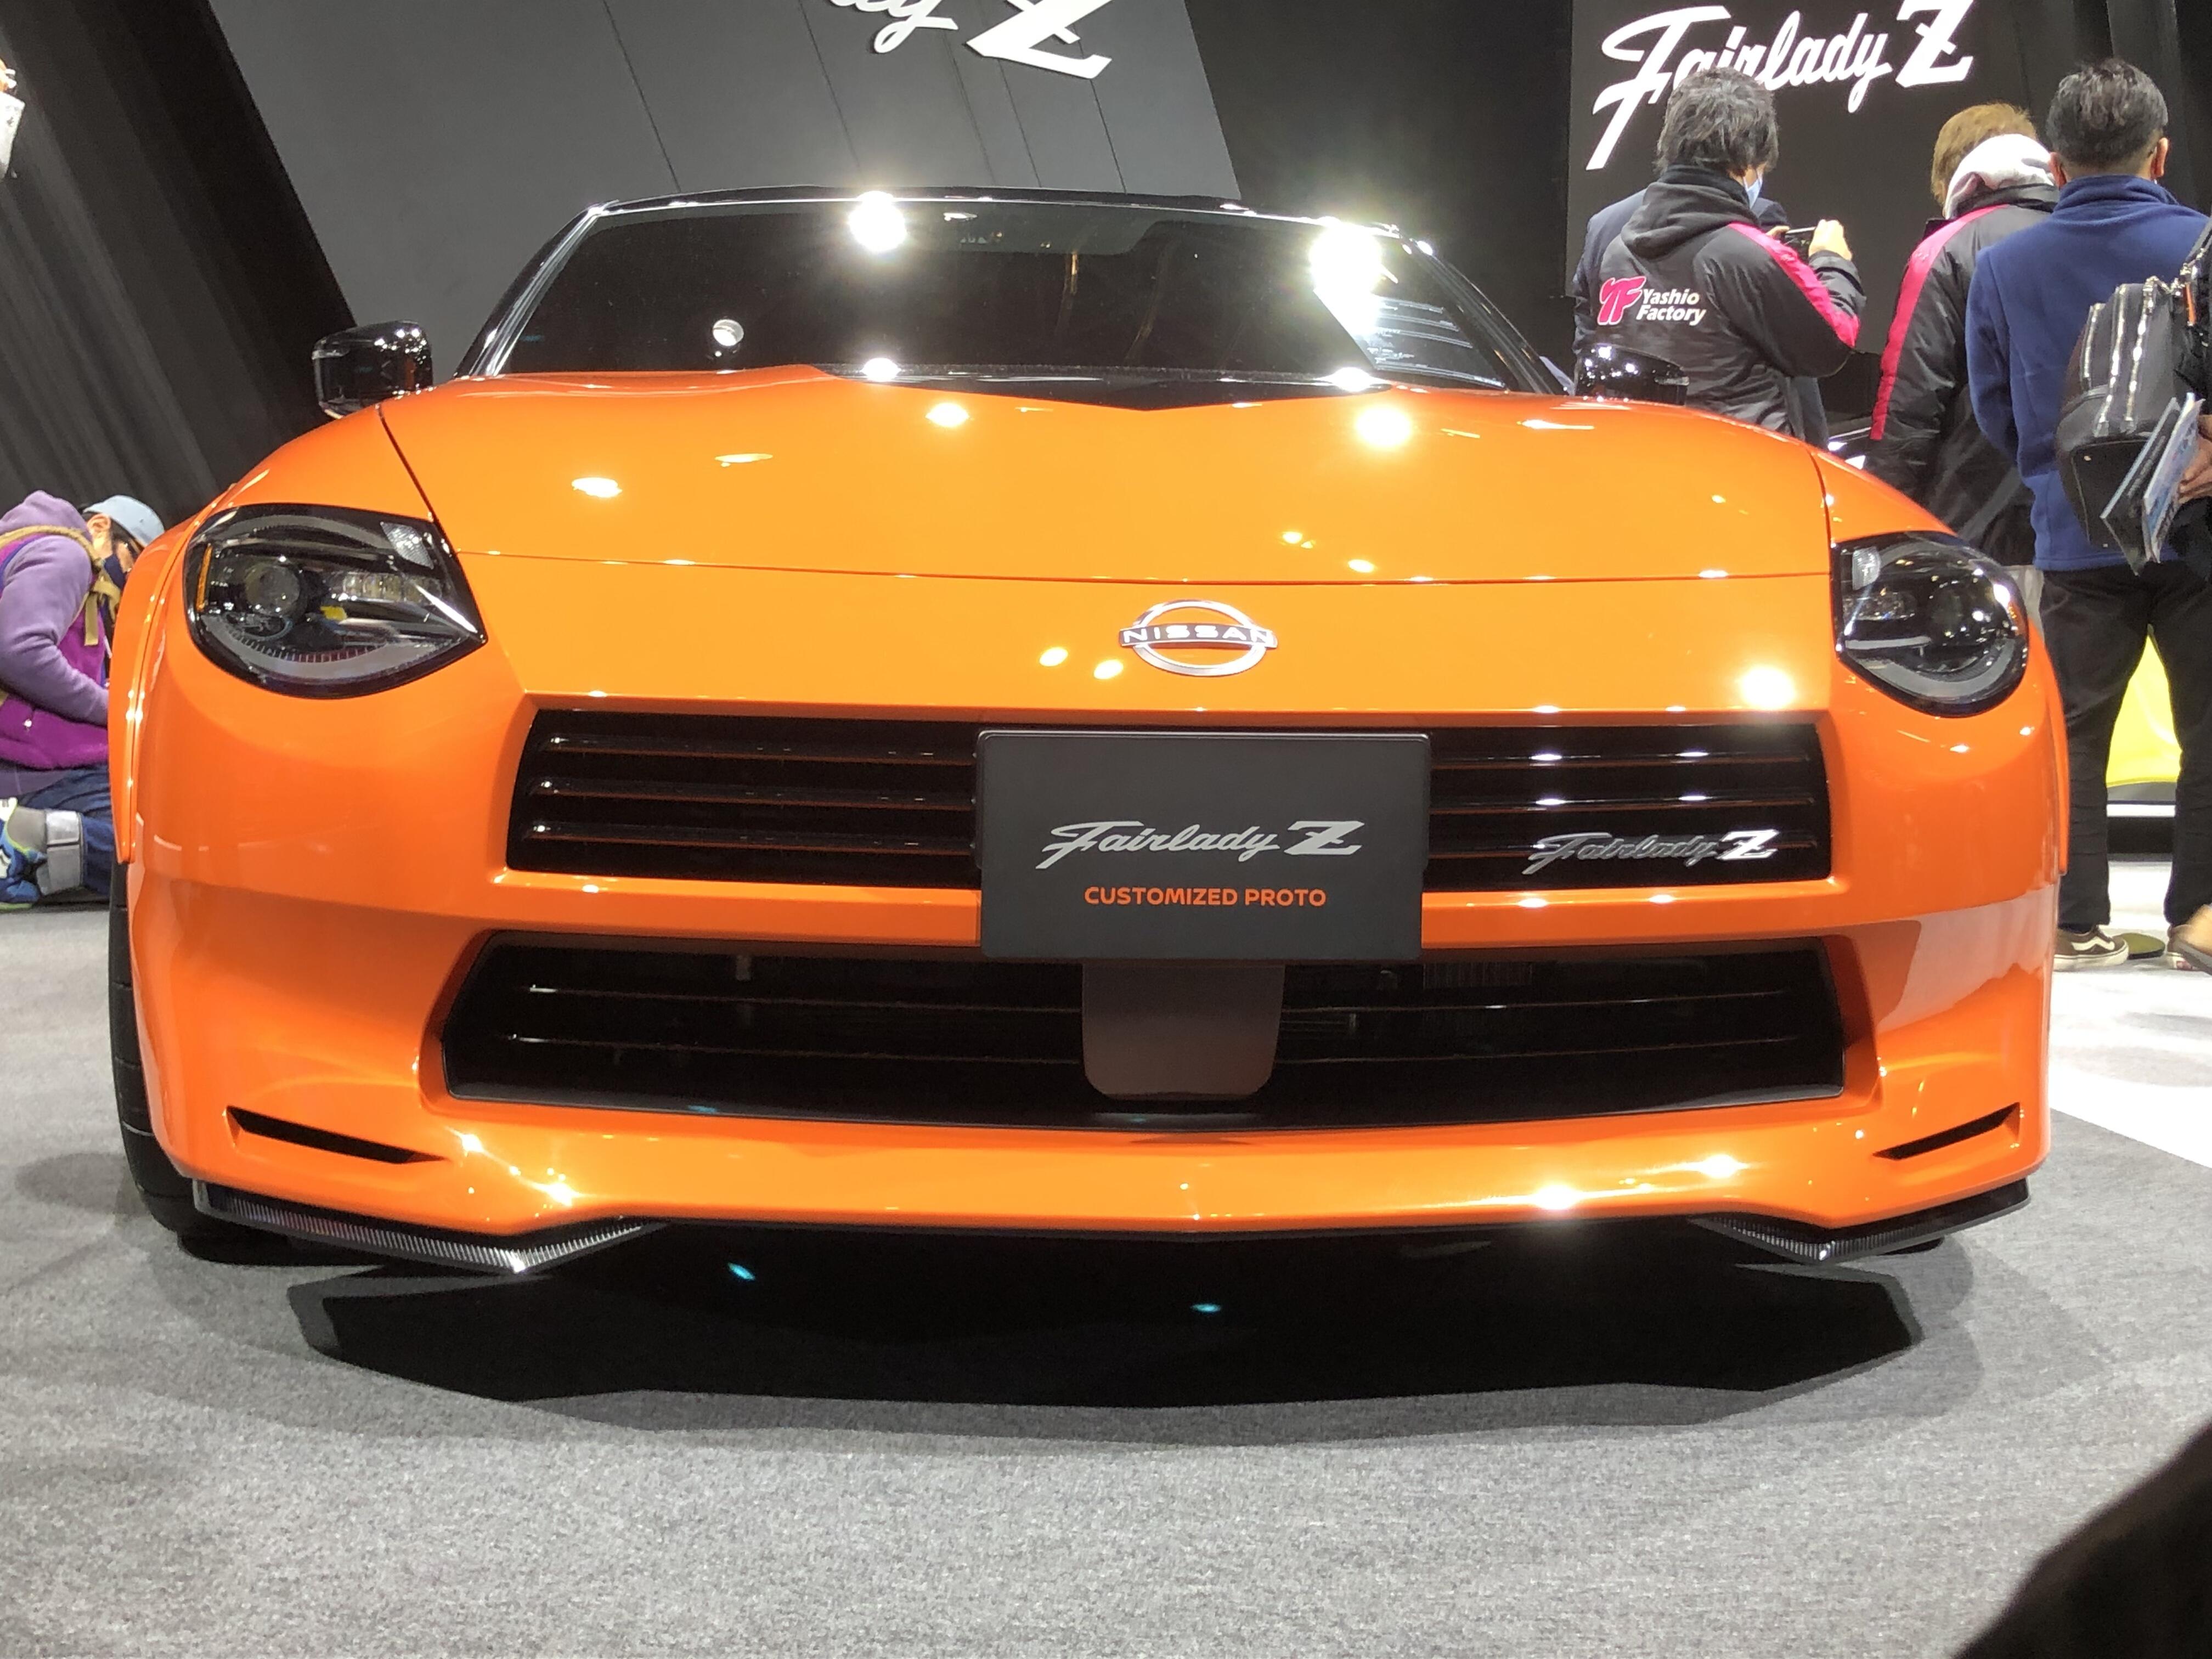
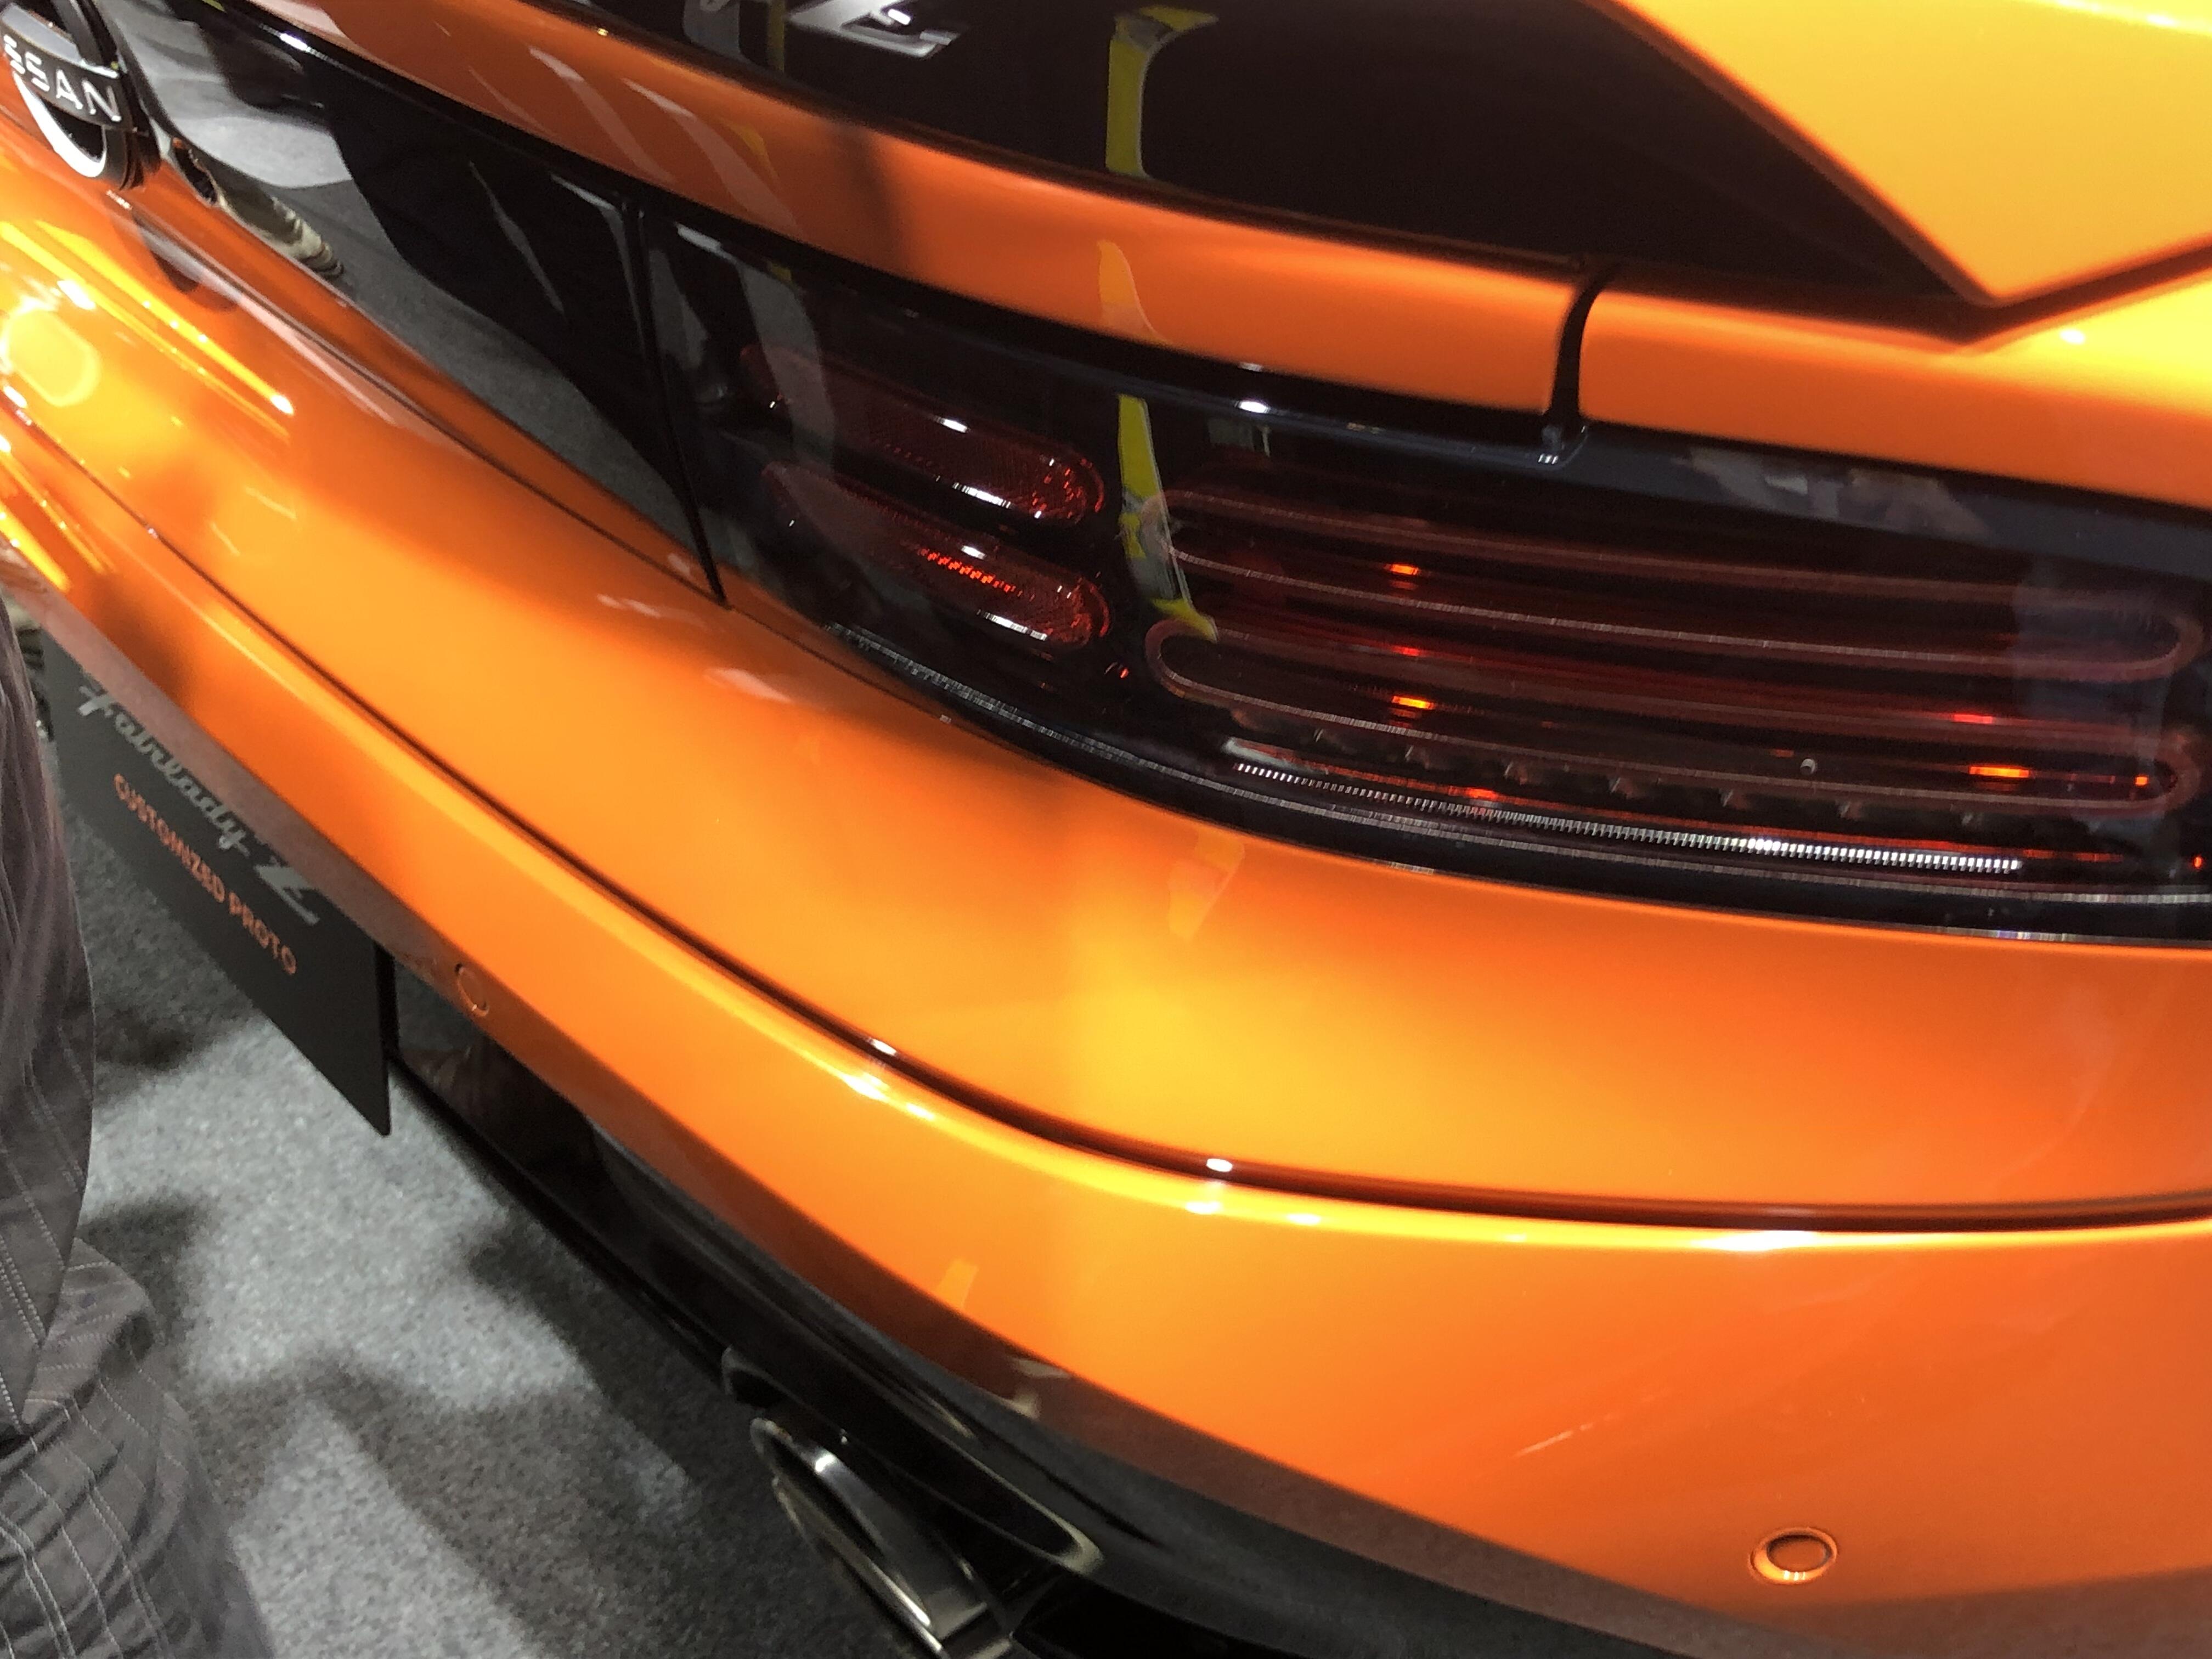
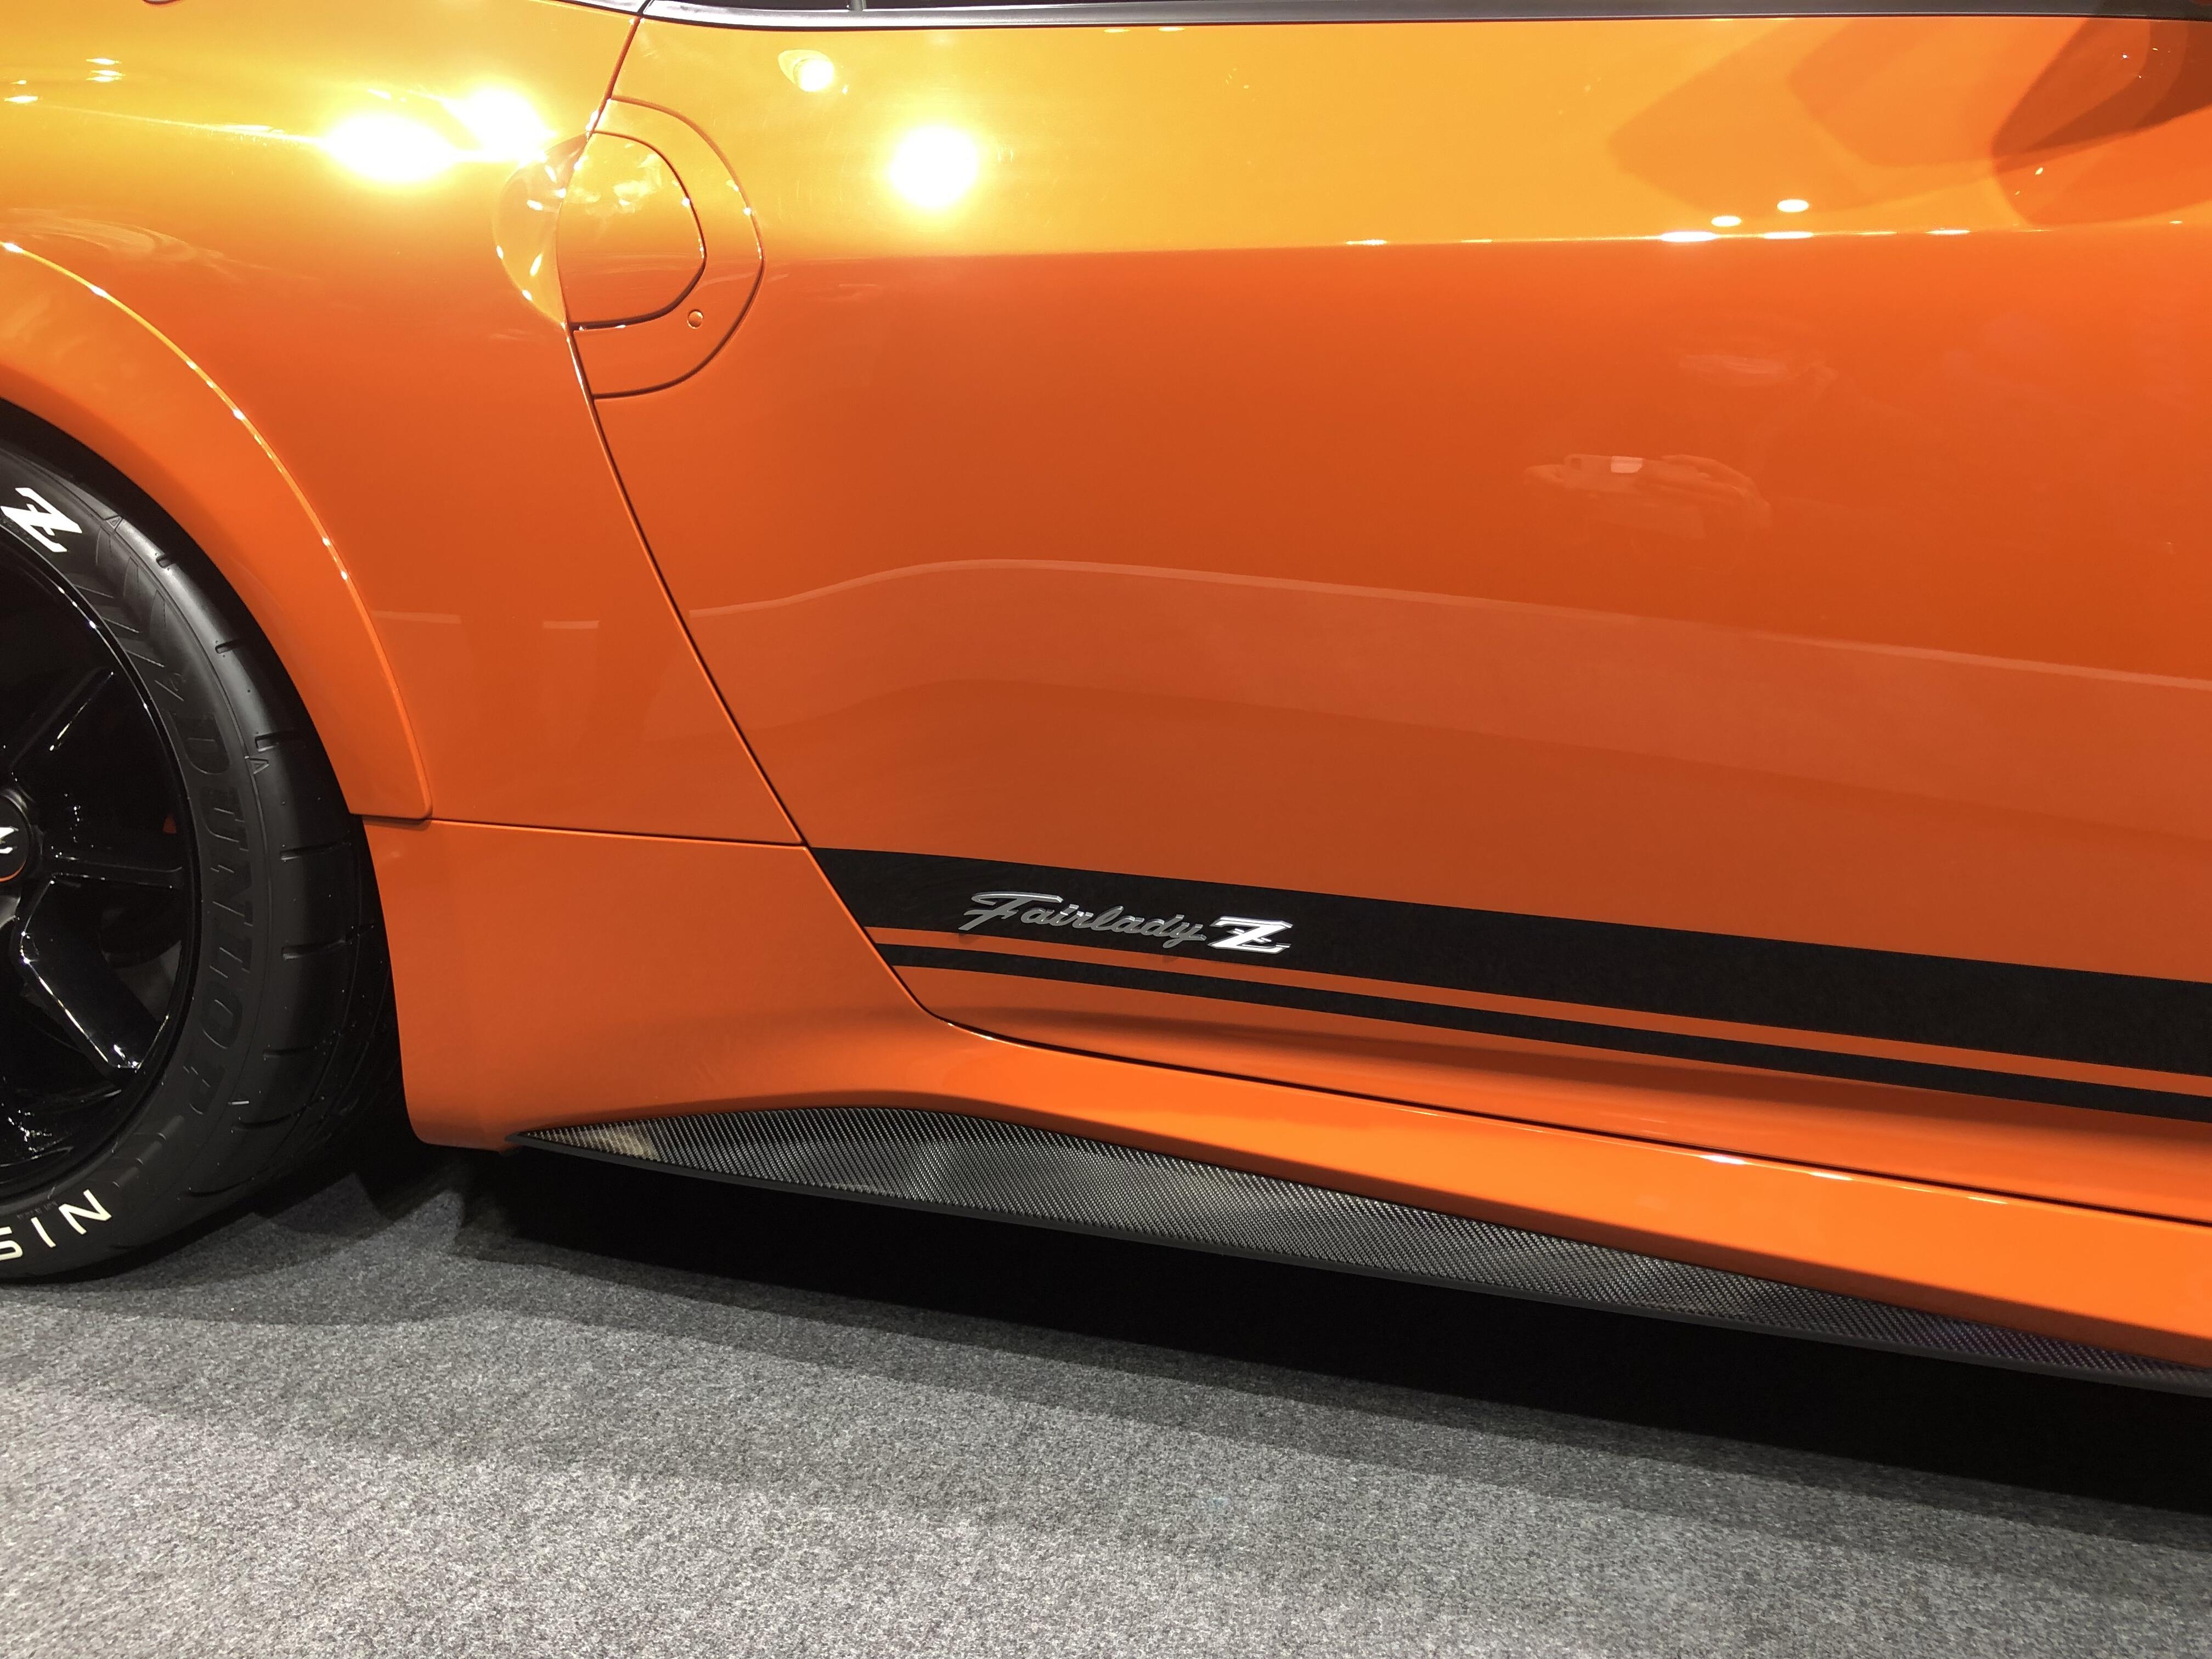
 1 pointOh, and one other thing. It has been said that Nissan are considering the possibility of making this 'Customized Proto' into a Limited-Edition model variant, and they suggested an edition of 240 cars. I think that is disappointing. I do not think the number '240' has any significance in this context. Personally, I would choose 25 as the original series production quantity necessary to homologate the 432-R into JAF and FIA Group 5 Prototype racing class (but maybe not enough to be worthwhile), 270 (although not many people would understand why...) or just 432. In any case, judging by the positive reaction, they should probably consider a much higher quantity. They'll sell!1 point
 -
1 pointHi Kats. I have a theory. Just a hunch, but I feel that the very high profile of Takeuchi san's PZR in recent years has been an inspiration to Nissan's design team. His car has been seen in magazines, videos, blogs, social media posts, indoor and outdoor shows, autocrosses and just generally driving around everywhere. It has even been my personal taxi service on more than one occasion. Takeuchi san is very generous with his time and his car, and many people get to see it. Takeuchi san even joined us here on classiczcars.com and shared his restoration with us. It is one of the most special variants of the S30-series Z range, but it is not locked away in a glass box. It lives! I think the styling team's inspiration for this 'Customized Proto' show car was not just any Fairlady Z432-R, but Takeuchi san's 432-R in particular.1 point
-
1 pointHi everyone, thank you so much for kind words for me . I am back here and I am so happy that I can communicate with you again . So many things has been changed since I posted last time , I hope everyone’s safe in this Covid-19. I don’t know what to say , I don’t know where to start to tell you about . Anyway I am doing good , I thank my friends here to recover my energy of life .Even when I was depressed badly, I didn’t forget about all of you . I was hoping I would bring a news when I become normal. Yesterday I felt for the first time in my life that I want to buy a new Z other than my S30s . But , I don’t have enough money because last month I spent my money for the 240Z which is just 10 cars older than my US blue 240Z . It is going to arrive at Yokohama next week by boat , I will let you know the details when I have got the car in my hands. Very rough condition, but I can’t ignore it because of the chassis number and blue exterior and blue interior like my HLS30-02156 . Kats

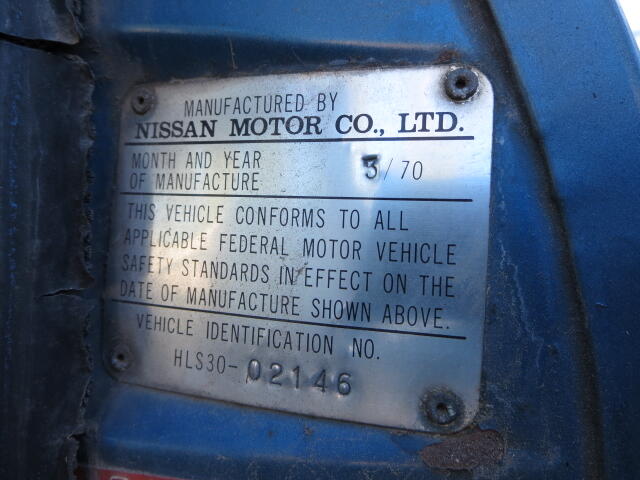 1 point
 -
1 pointIf you have a project that requires a few days of uninterrupted time (no one will get near you) print this out or PM me your number and I'll send it via text message. When you're finished get a negative test result and resume the hustle and bustle we all live with. You're welcome!
 1 point
 -
1 pointHi , I am now seeing a new Z , at Tokyo auto salon . I like it. Kats


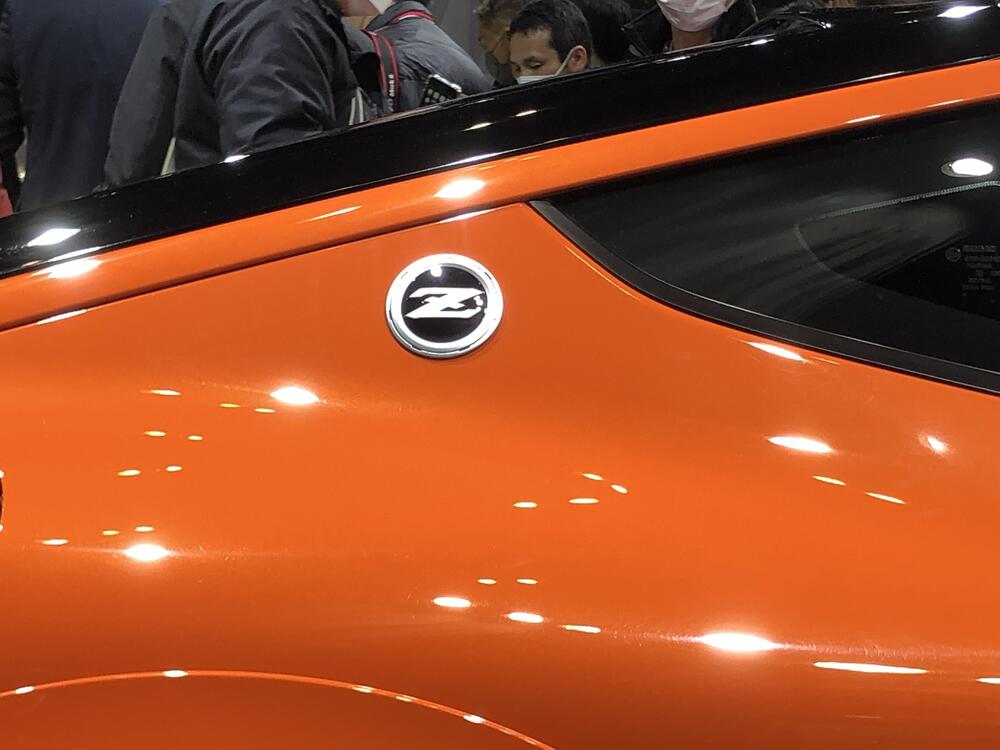


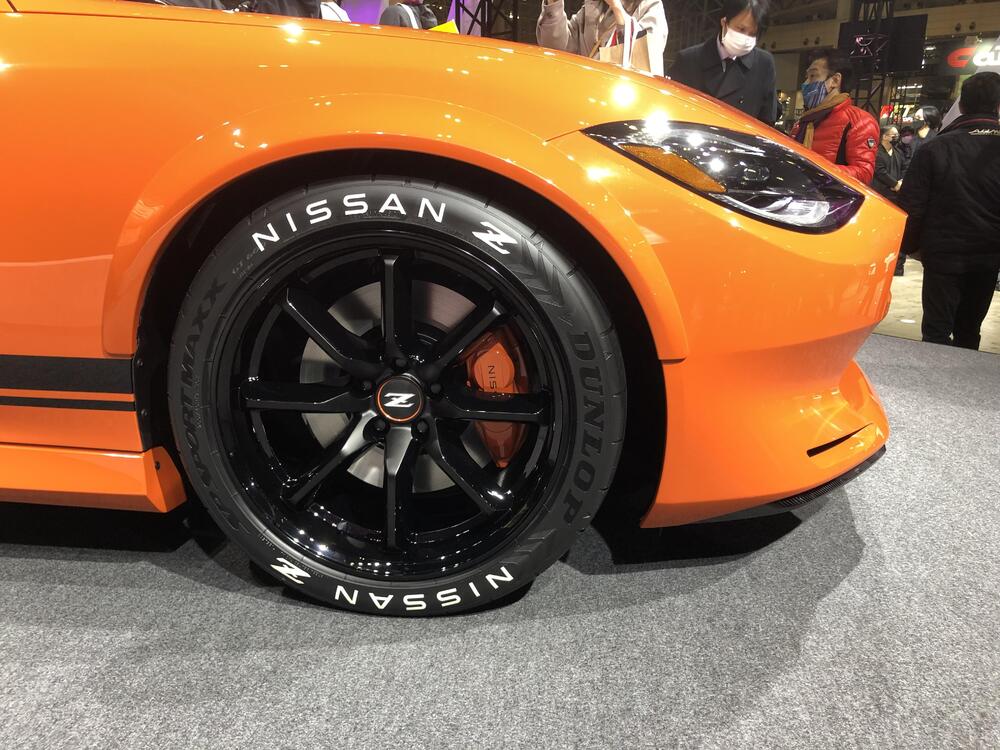 1 point