


Leaderboard
-
.JPG.cfcada9cf1c1b502df3f5f2f2ca3ff36.JPG)

SteveJ
Free Member7Points9,572Posts -

grannyknot
Free Member6Points5,158Posts -


siteunseen
Free Member6Points14,904Posts -

Captain Obvious
Free Member5Points9,855Posts
Popular Content
Showing content with the highest reputation on 02/28/2022 in all areas
-
3 pointsI found 4 original scallops today for $100. They look great too. pictures when I get them, they're already removed from Marketplace and I didn't get a copy of the image beforehand. They will be the last original parts I need for when the time comes to sell my baby doll. Many years from now.3 points
-
3 pointsSo, @Zed Head, it appears as though it's not that difficult to do this swap, despite what we've seen in other threads. It's mostly having the knowledge about what should connect to what. It only took me 20+ years to be fully comfortable in that realm.3 points
-
2 points
-
2 pointsActually, this might answer the question... I found this pic that indicates the flow direction through the temp control valve is actually opposite of what I said above. Shows what I know, right? : So carry on and don't panic?
 2 points
 -
Well I'm just waiting on the new LED headlights and the recovered dash to arrive before I can finish everything up. Engine is in, gas tank installed, all the brakes done and bled and I reconfigured the exhaust system so there is more ground clearance. @Careless gave me hand getting the glass in the other day, thanks again Raf.


 2 points
 -
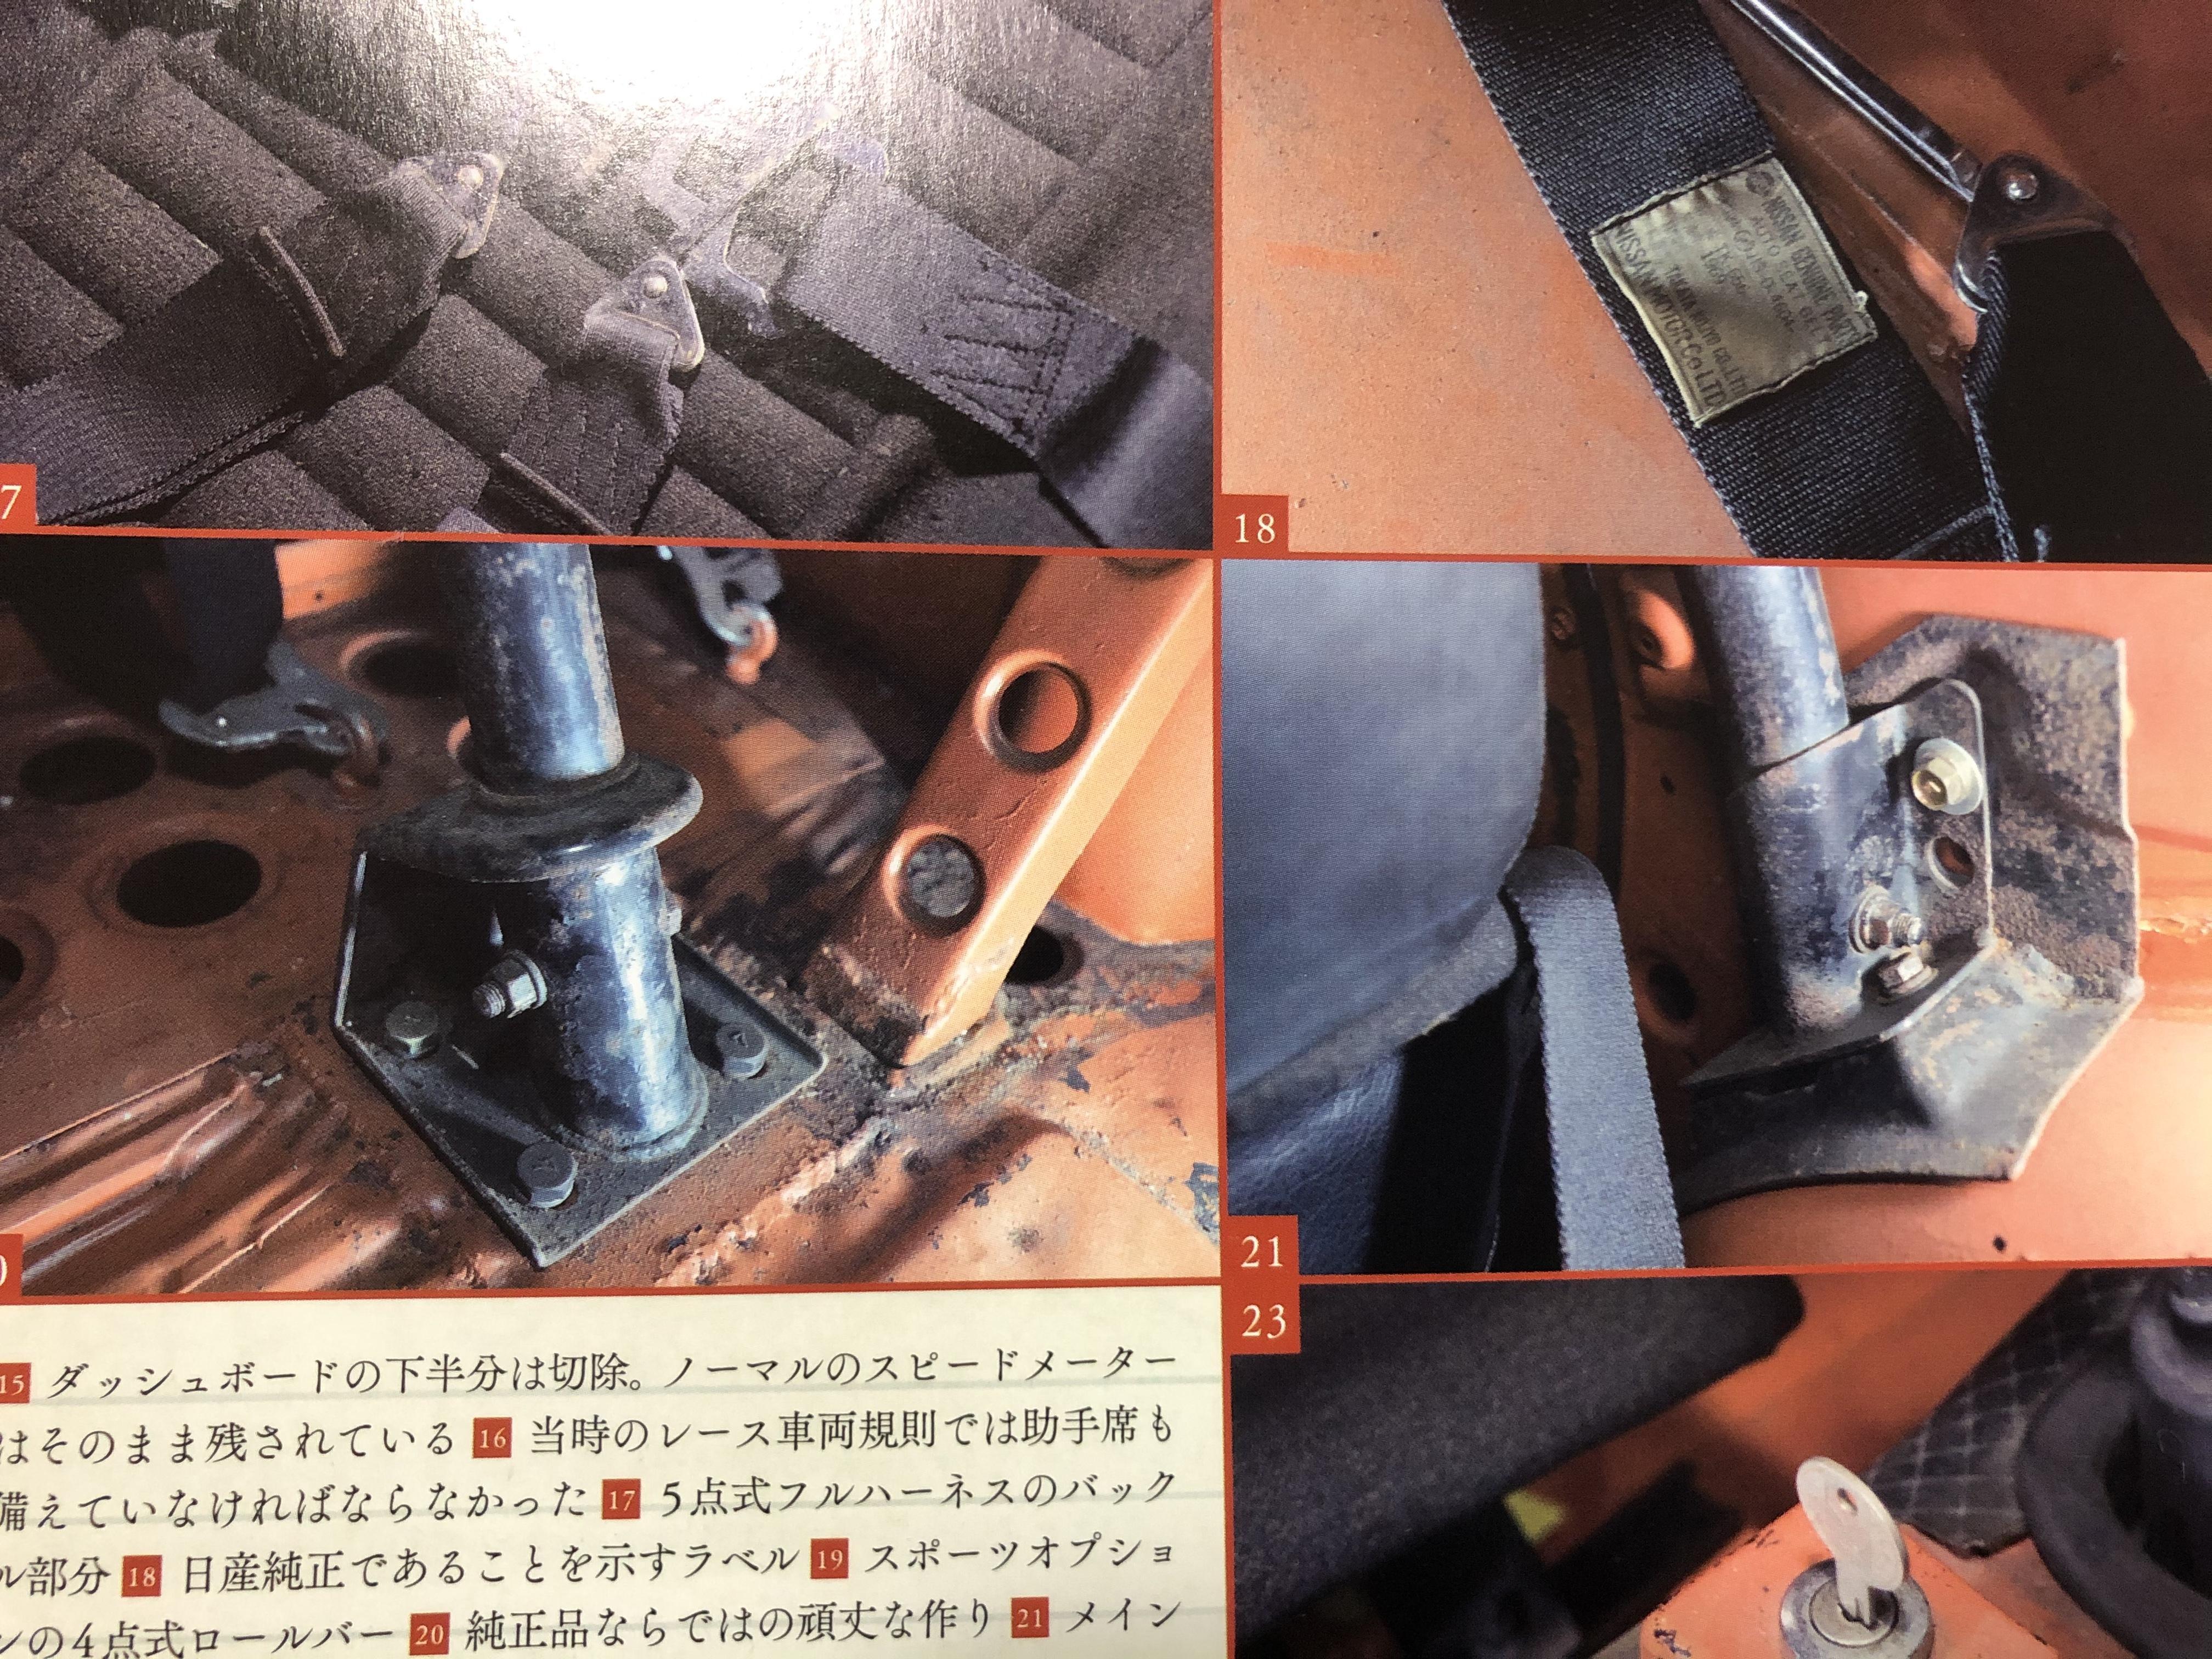
 2 pointsThe hex bolts (technically screws) that go through the four tubes are quite unusual in the Nissan Engineering Standard. Hard to find. Bear in mind that the Nissan factory option/Sports Option/Race Option 'Safety Bar' was subtly different than the versions used by the Works team. Vertical drop base mounts in particular.2 points
 -
2 pointsThe red Zs are over $100 from MSA. Blems are $79 plus shipping. I'm about to figure out this e-commerce thing and make some extra dough-ray-me. Not with these scallops though, they ain't leaving except in the hatch when I sell it.2 points
-
 2 points
 -
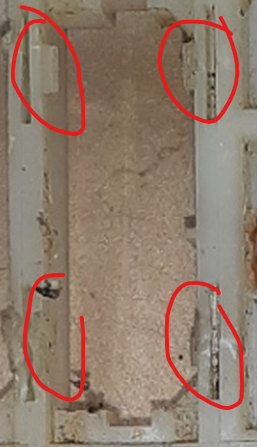
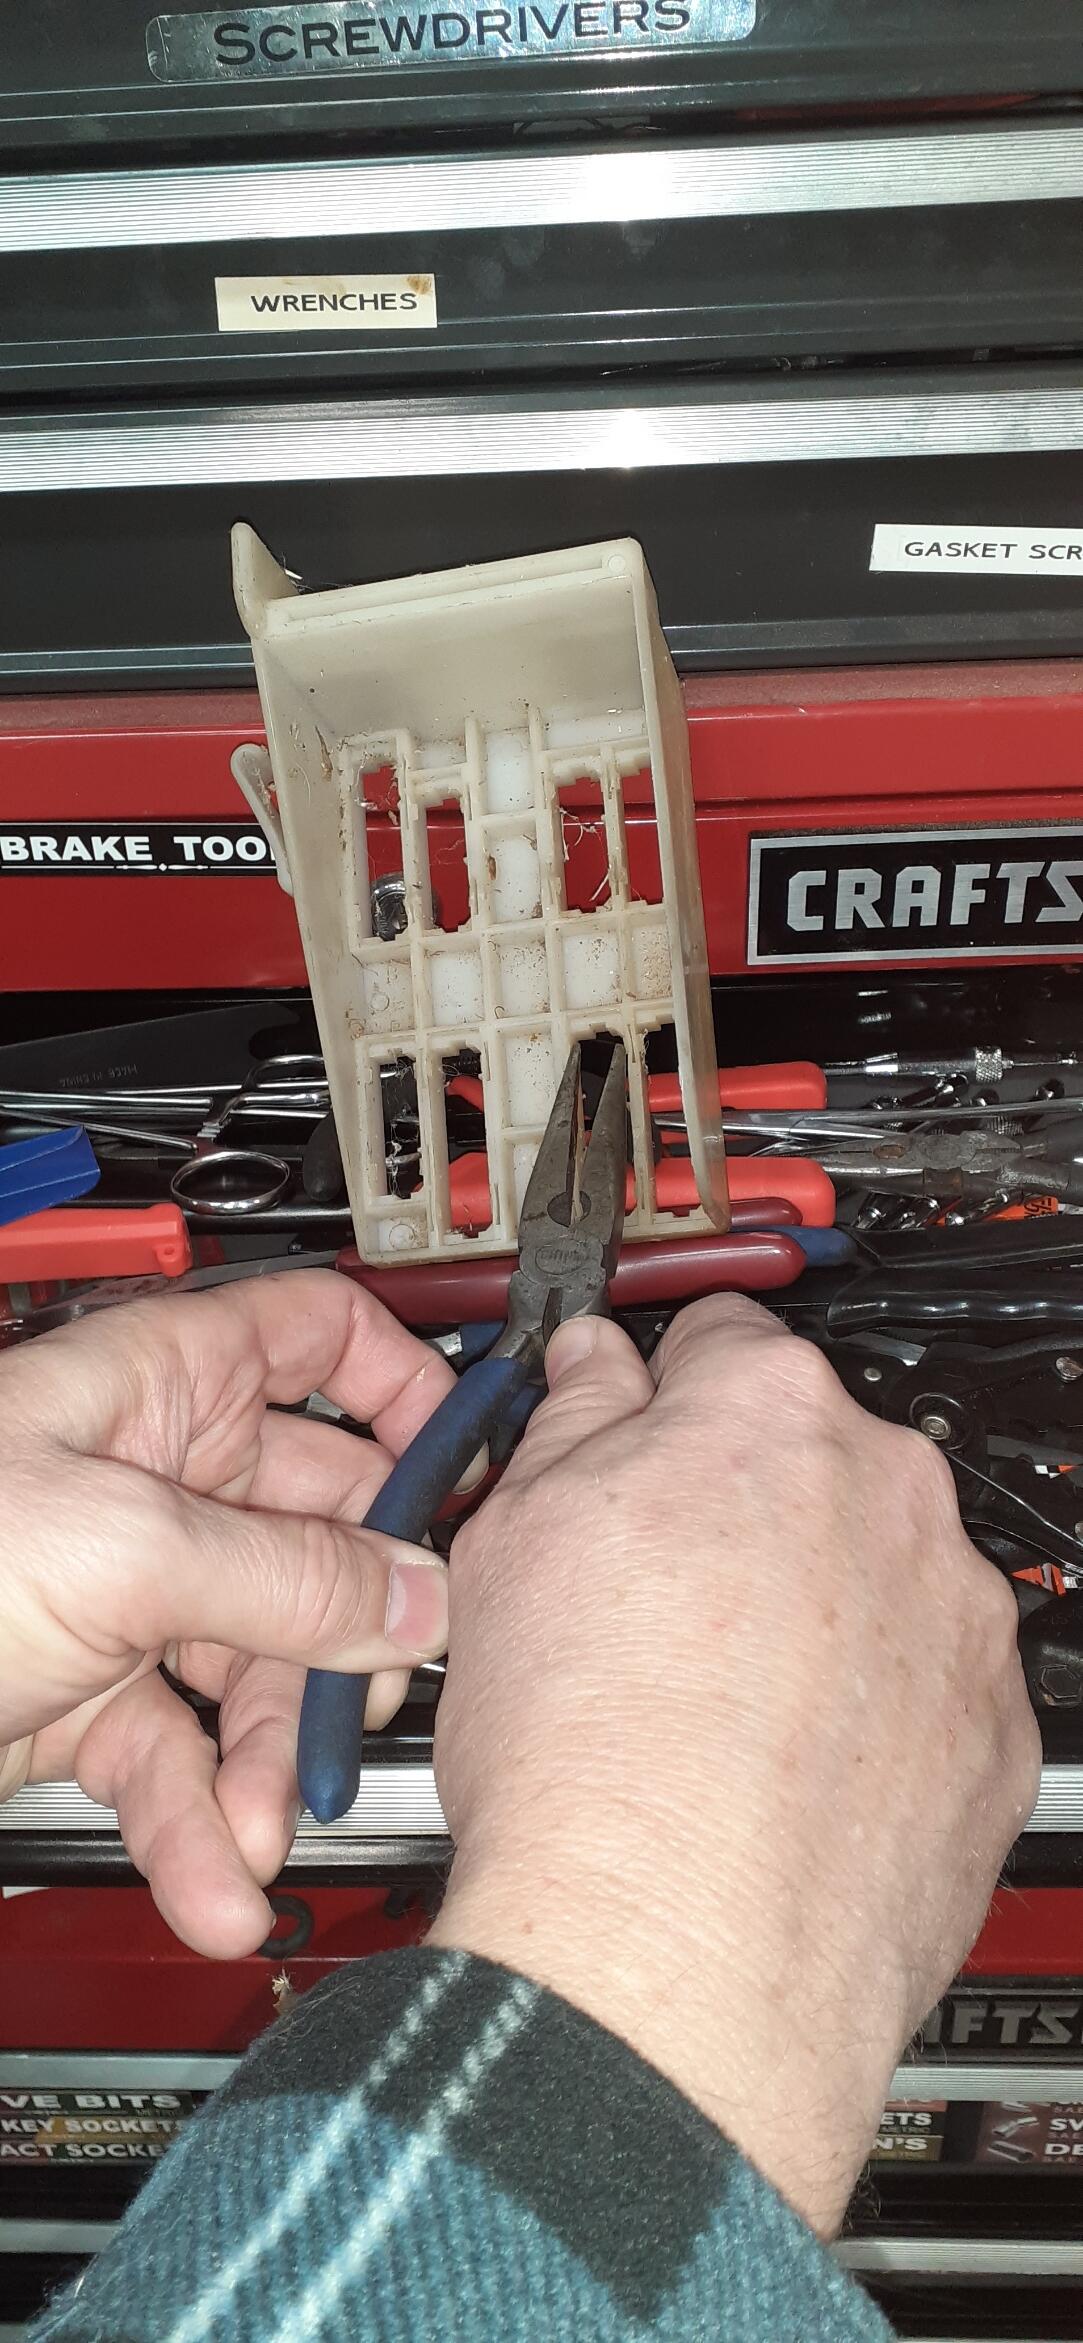
2 pointsOkay, so it's these tabs holding it in. The one on our top right is the clearest. You'll need to push out the sides a little to separate the tabs. Have you tried some long-nosed pliers pushing against the sides on top, pushing on the other side to get the connector past the tabs? I tried to take a photo of that, but it doesn't look like it would work well. You may be able to use the pliers to squeeze one tab at a time and push past it. Or a tool like this may be able to facilitate my first idea: https://www.amazon.com/SPEEDWOX-Installing-Gearshift-Automobile-Transmission/dp/B07QWTB149
 2 points
 -
 2 pointsGood for you. I too, worked my whole life for people who couldn't care less if I was Ok or not. And some big wig Politicians. Once I was able to retire I jumped at it. If I could do it all over I'd start my own business or whatever, working for others only pays if your in charge of who you work for and how much they pay you. Once I retired I relaxed and in a pursuit to end the useless clutter on life, I ditched the cable Tv and went back to an old hobby I enjoyed, Reading. Don't ever sell yourself short. In the end, only you, your family and reality have a worthwhile relationship. God bless and good luck !2 points
 -
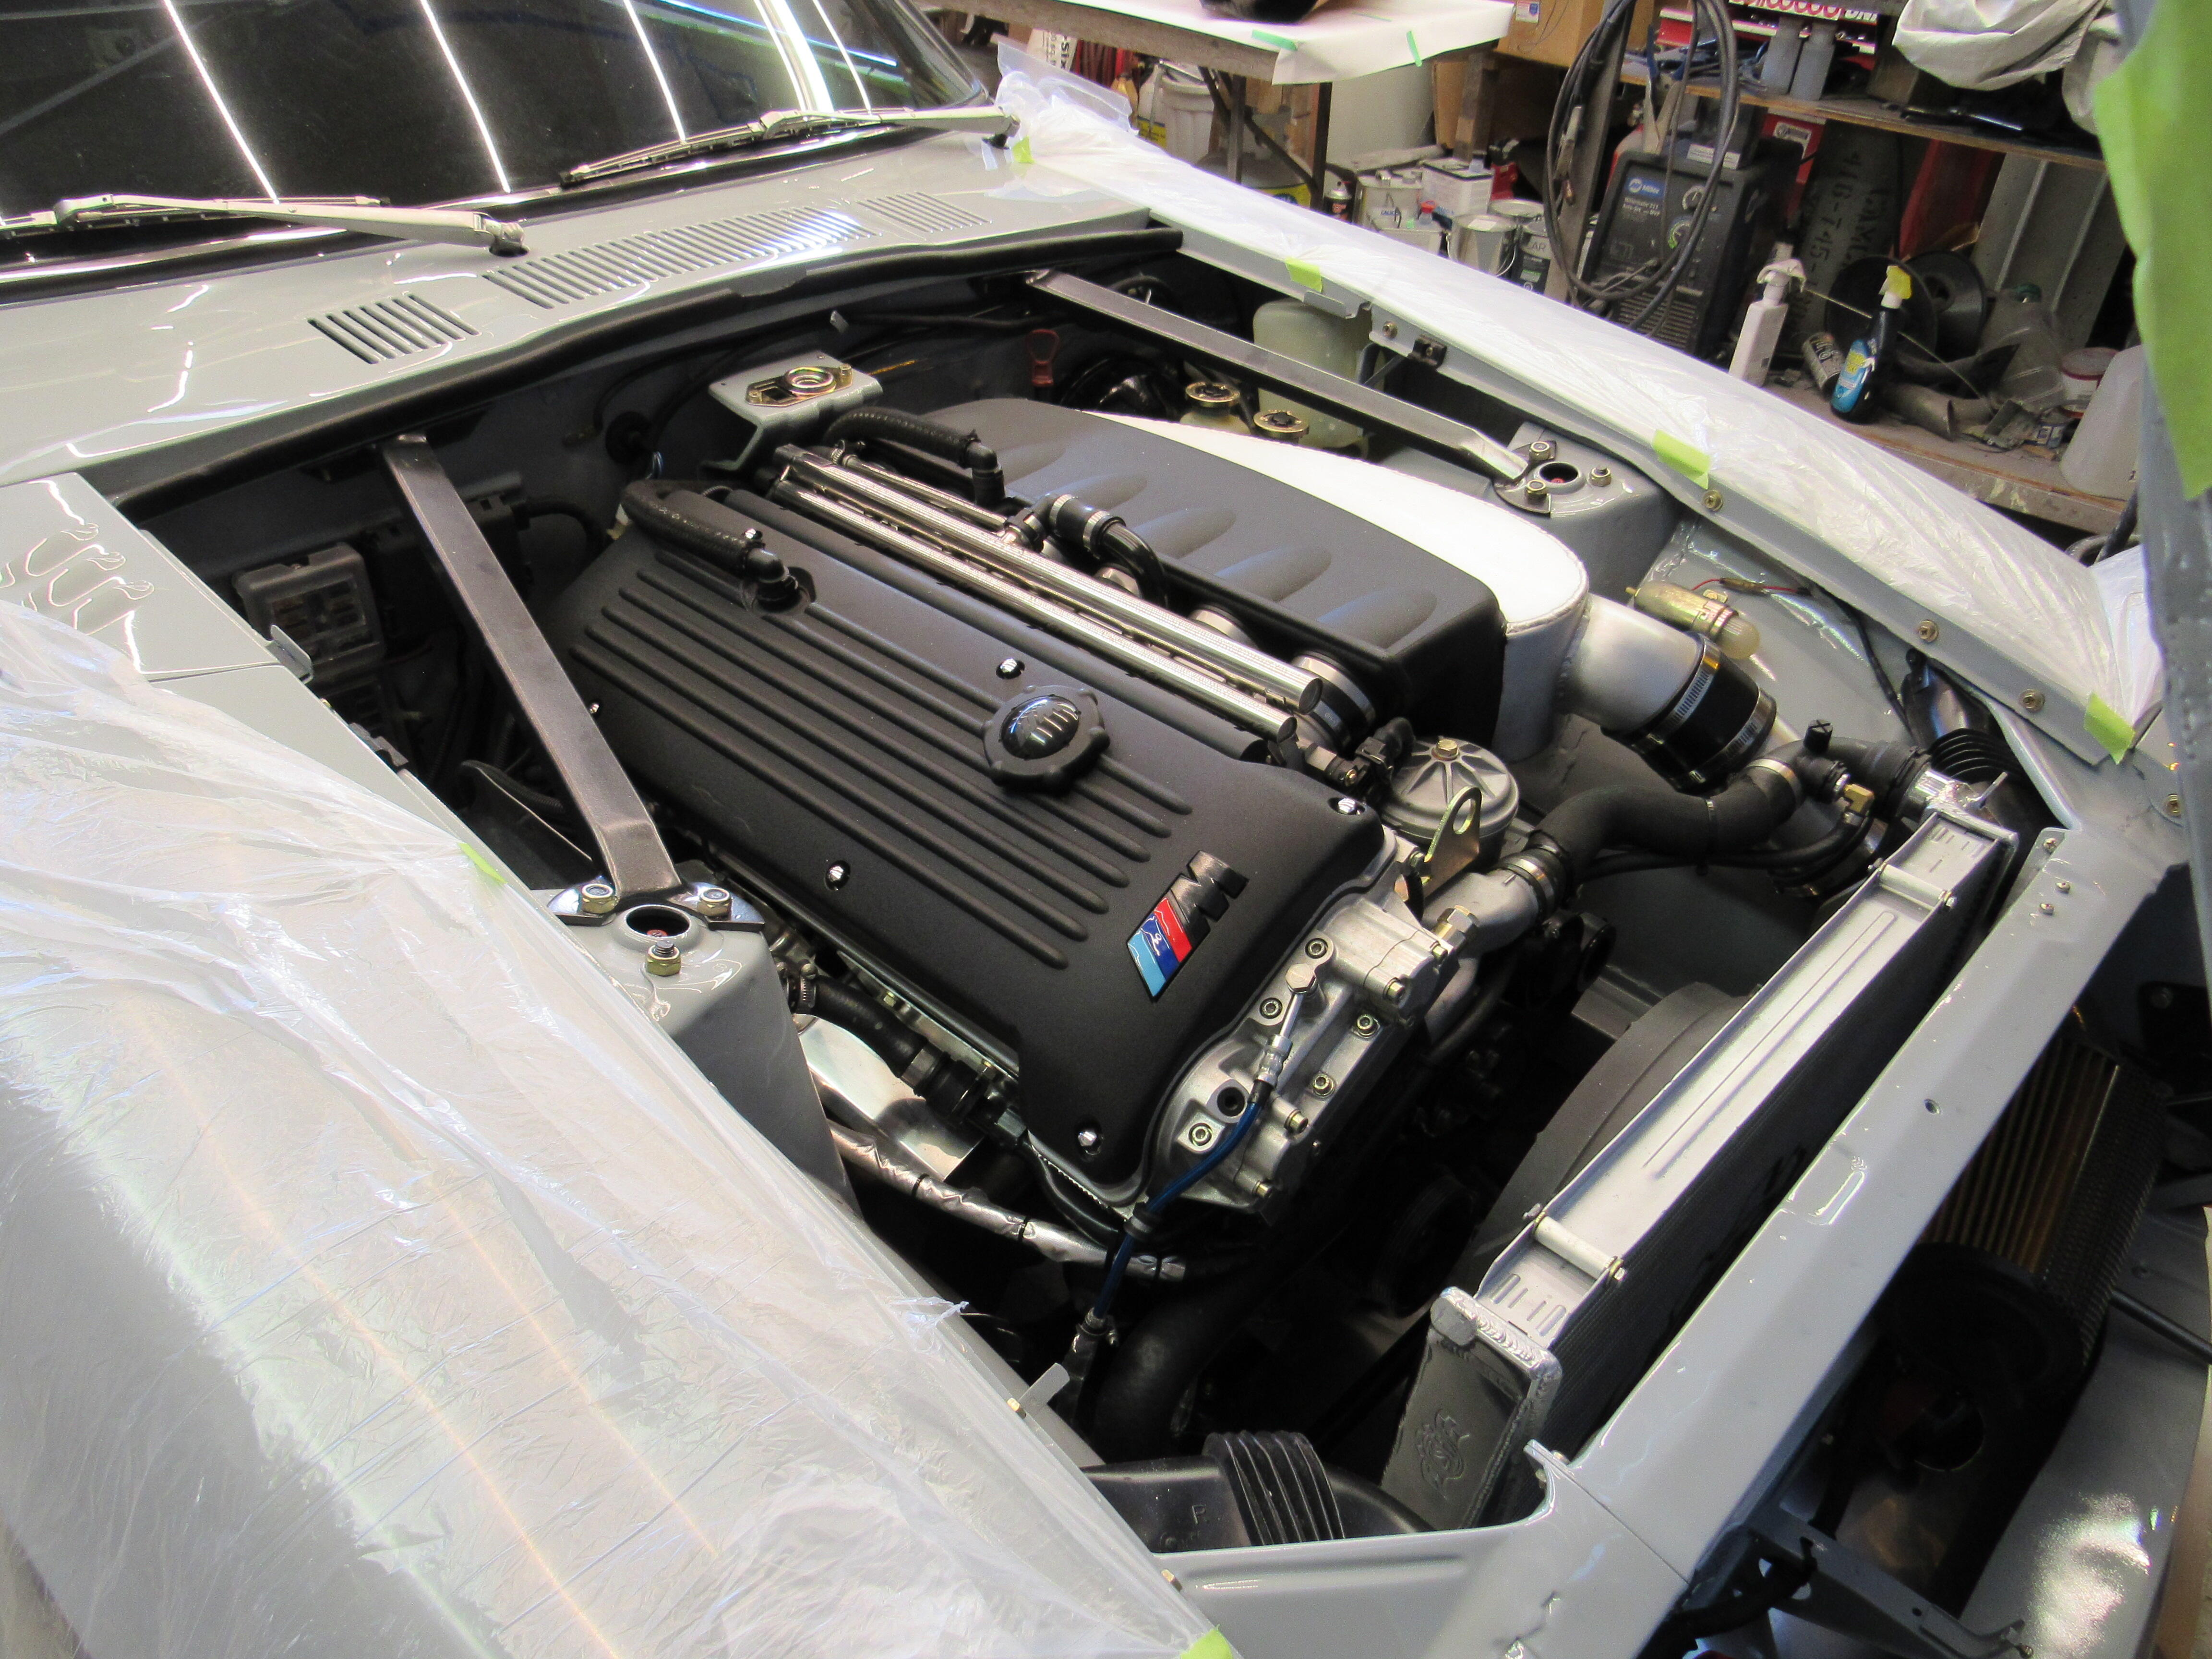
 2 pointsI also got my freshly painted front air dam and hood grills on.
 2 points
 -
Thanks Chas but in this case I'm just restoring my own modifications, real restorers might take offense1 point
-
1 point
-
 1 point
 -
1 pointNothing to do with Nissan. The wishbone braces are a personal, aftermarket, addition 40+ years after the car was made. A 'TOR CO' moment for you, I'm afraid. Go and sit in the corner until the school bell rings.1 point
-
 1 pointHere you go Kats, it appears on Takeuchi-sans Z432R PS30-00187, not sure if its original or a racing modification. Considering Take's car is so original it's quite unusual. Roo
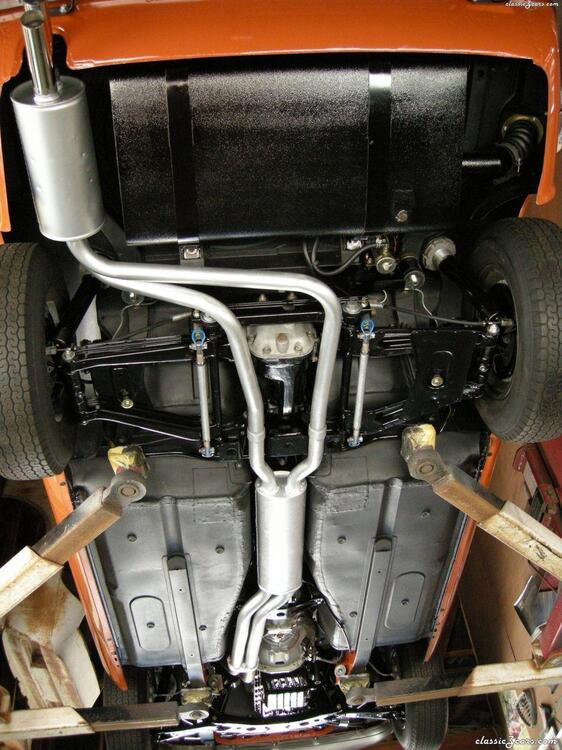
 1 point
 -
1 point
-
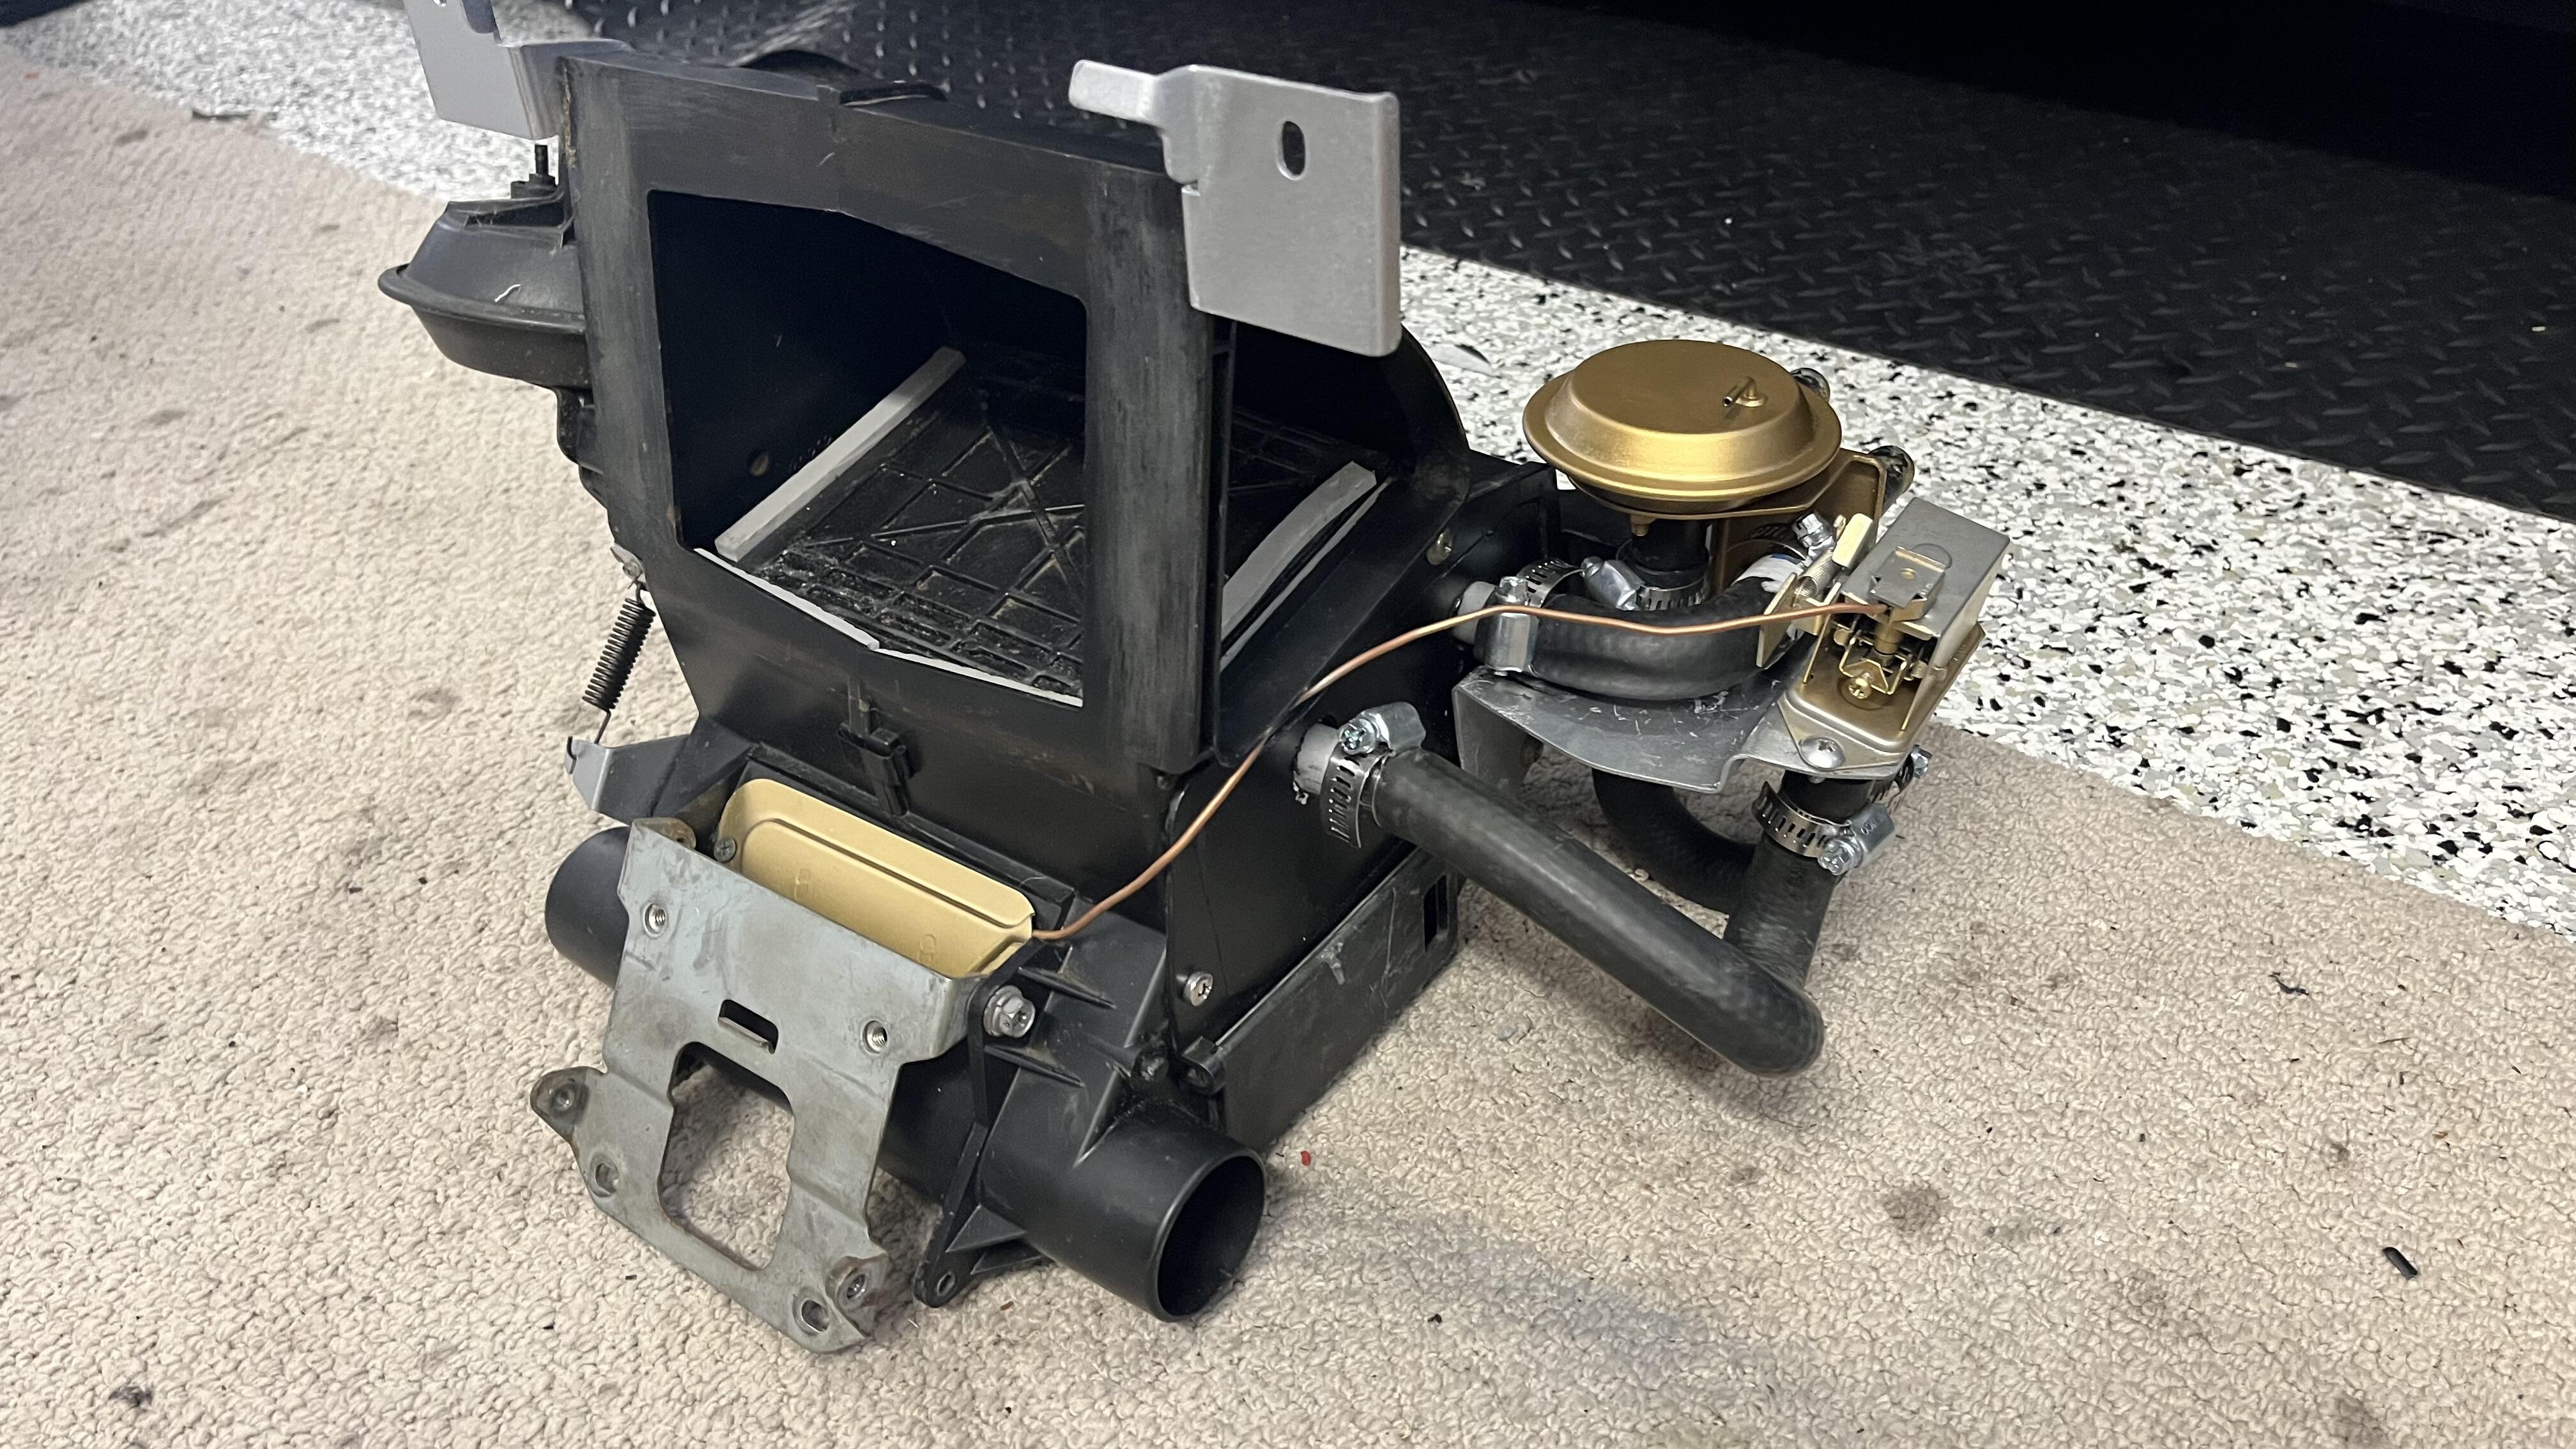
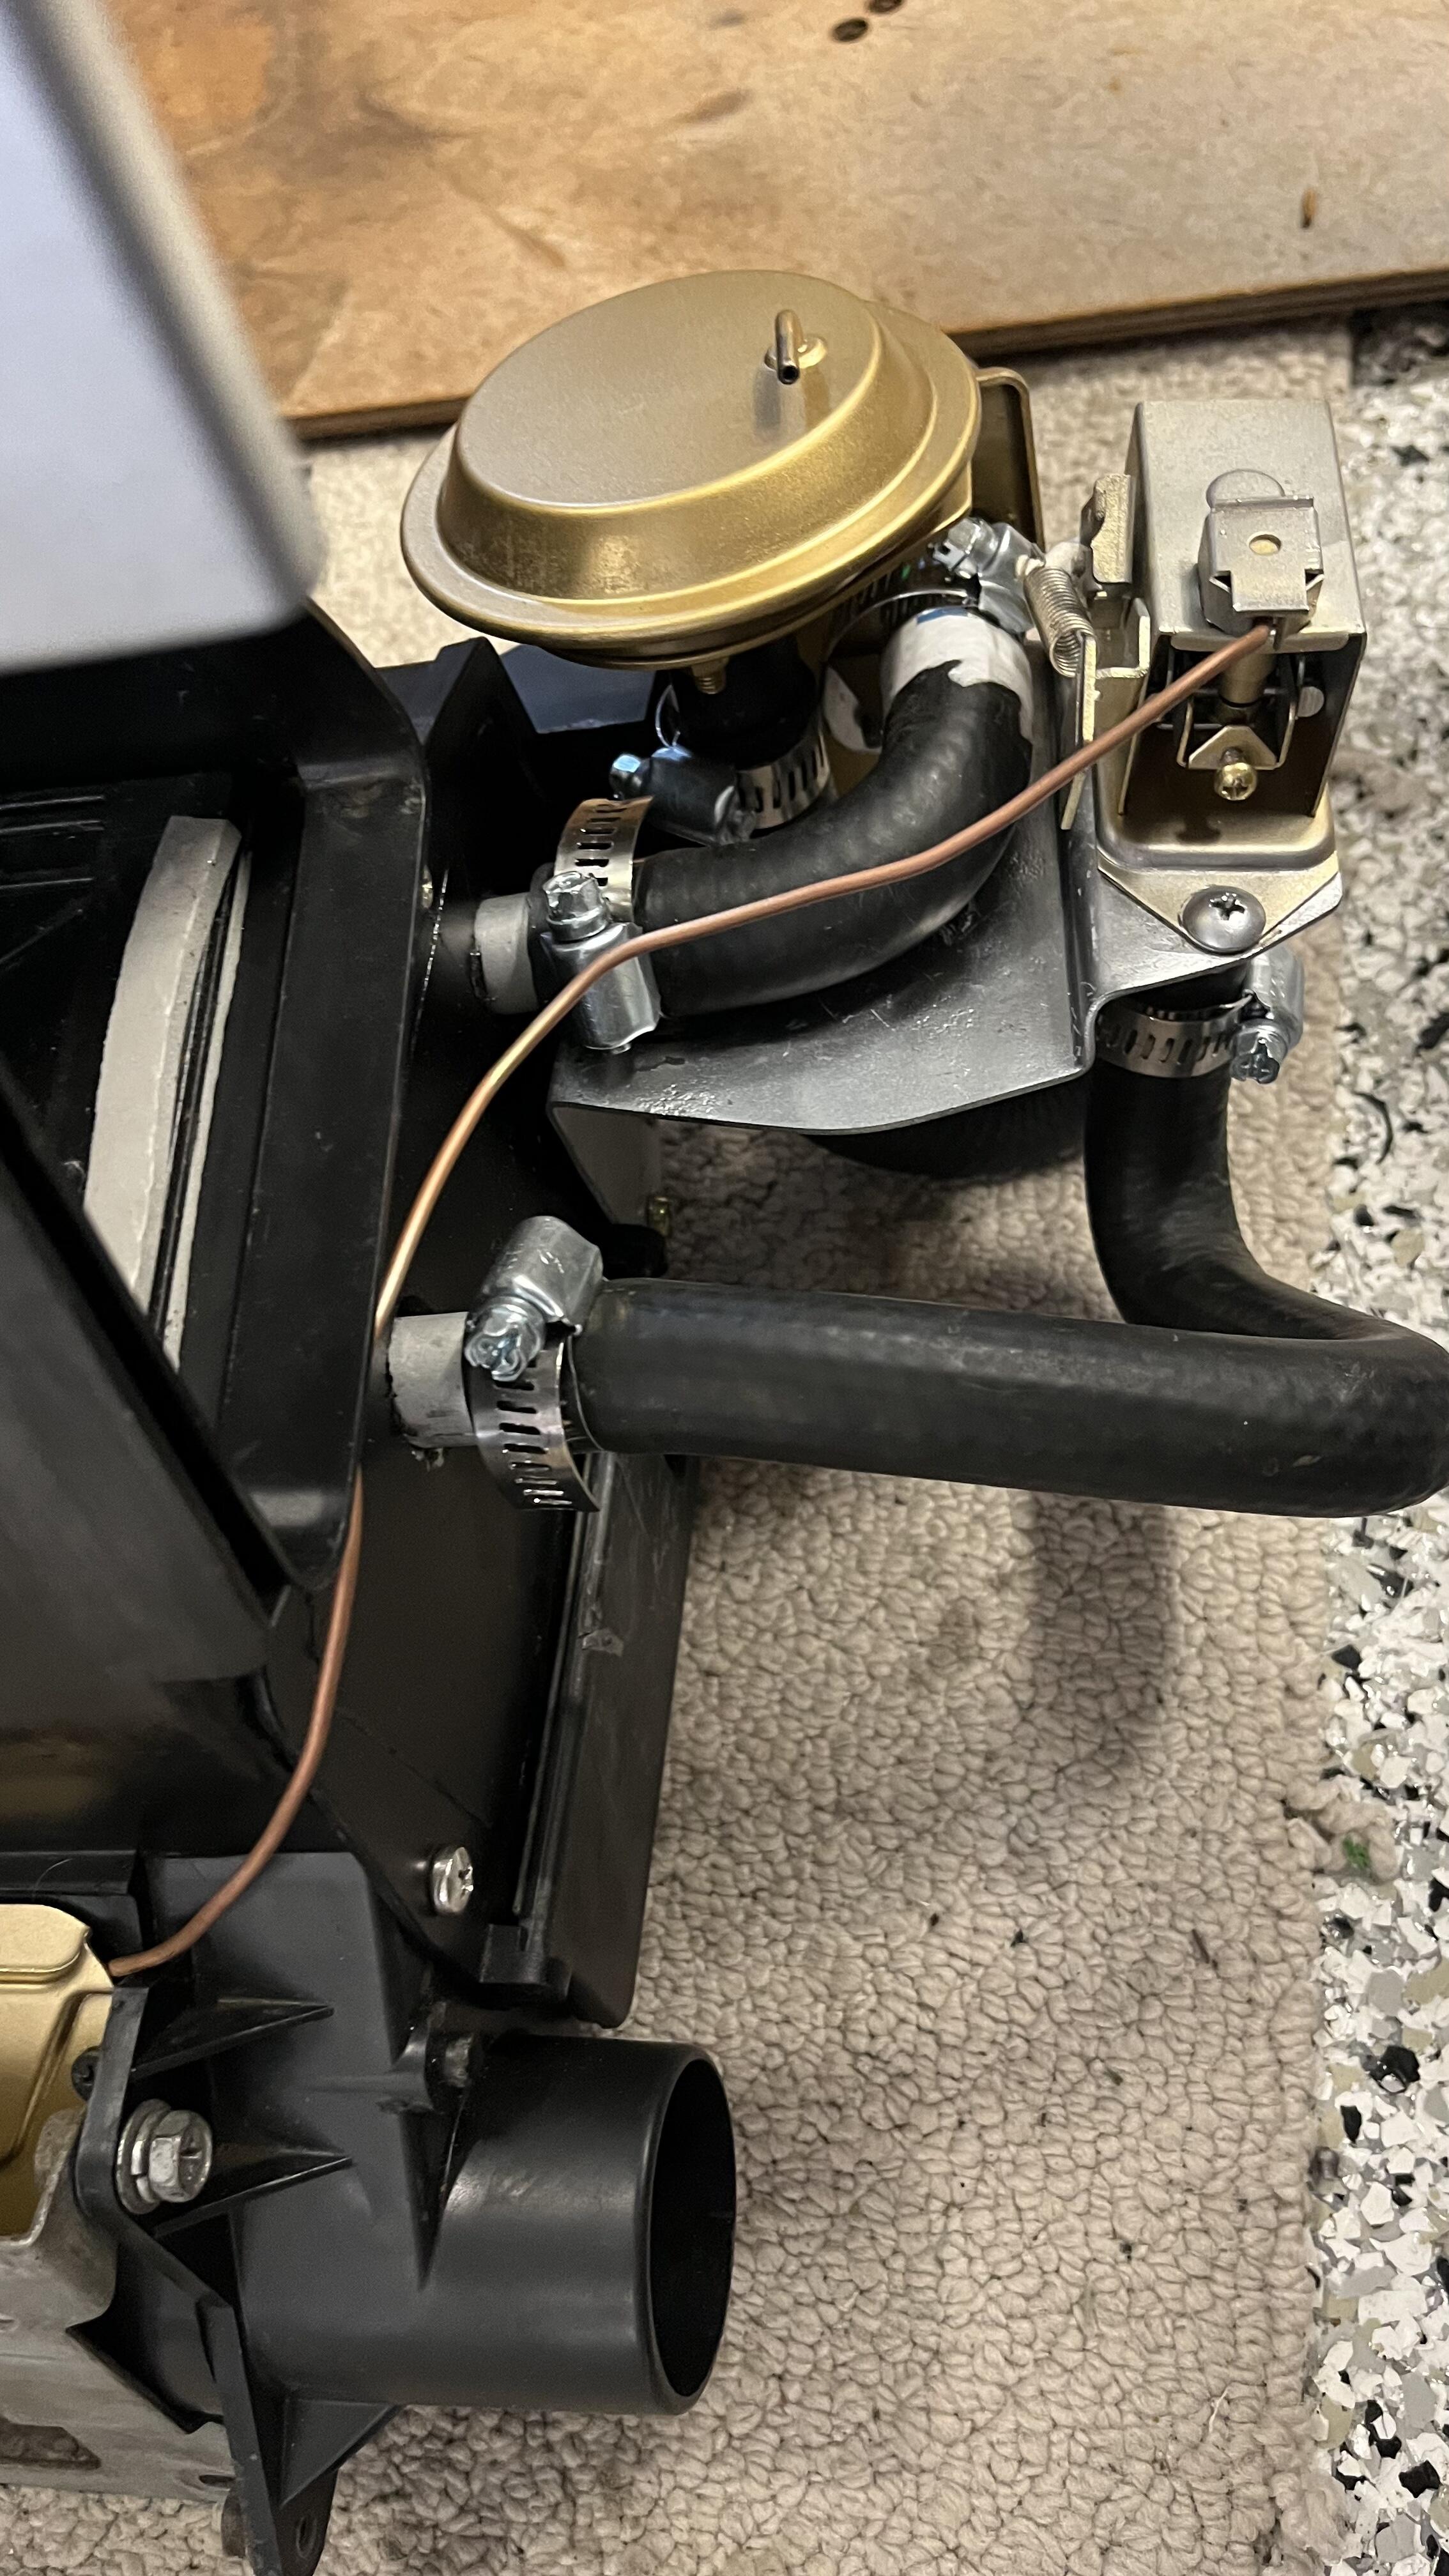
 1 point@Av8ferg You're going to be a master HVAC installer for this chassis by the time you're done! Don't panic yet 🙂1 point
 -
1 pointAt least it's not as challenging to change as when it's under the dash.1 point
-
 1 point
 -
1 pointStill, it is only a hunch. The key point is that damage in testing was a distinct possibility, if not inevitable. We know '8D-420' was an early Works rally test car, and that it had been used fairly hard before and during the AUTO Sport magazine feature. After that it was clearly spruced up (and the black anti-dazzle paint added to the top front surfaces) before the DRIVER magazine feature. There might have been some haste involved.1 point
-
1 pointIt's not hard if you know what you're looking for Kats! There's also something unique about the rear suspension that most people miss. Let's see if you know what it is.😁1 point
-
1 point1 point
 1 pointThanks Alan, seems to make sense to me. Light weight front fenders are so special. Takeuchi san and other PZR owners usually complained about people tried to put their fingers on the fender to push down and see how the metal is flexible for recovery from bending. At car show , Takeuchi san couldn’t leave his car for lunch . That is an old story I think , nowadays nobody will try to do that , everyone knows how those cars are expensive today . Kats1 point
1 pointCouple of things could indicate it's a Z432R, first the pocket in the transmission tunnel with the holes for the ignition switch wiring. There is a metal cover bracket that goes above that for the switch. Secondly it has the threaded mounting bracket on the right hand side for the harness. Then of course the flat boot floor with no cutout for the spare wheel. Roo
1 pointThanks Alan, seems to make sense to me. Light weight front fenders are so special. Takeuchi san and other PZR owners usually complained about people tried to put their fingers on the fender to push down and see how the metal is flexible for recovery from bending. At car show , Takeuchi san couldn’t leave his car for lunch . That is an old story I think , nowadays nobody will try to do that , everyone knows how those cars are expensive today . Kats1 point
1 pointCouple of things could indicate it's a Z432R, first the pocket in the transmission tunnel with the holes for the ignition switch wiring. There is a metal cover bracket that goes above that for the switch. Secondly it has the threaded mounting bracket on the right hand side for the harness. Then of course the flat boot floor with no cutout for the spare wheel. Roo
 1 point
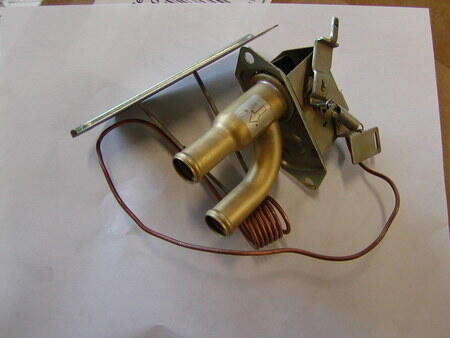
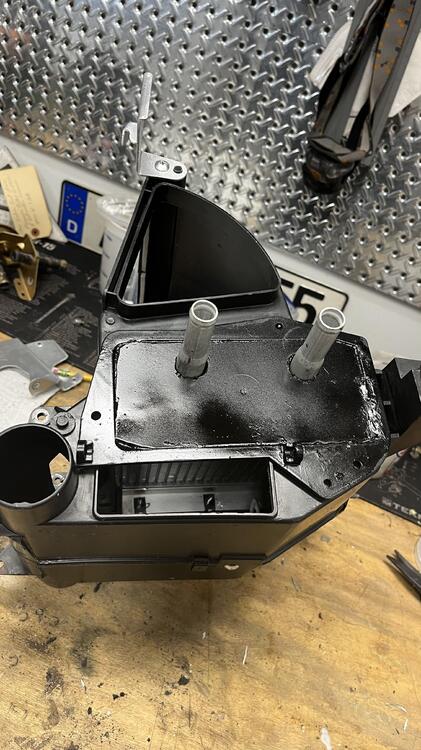
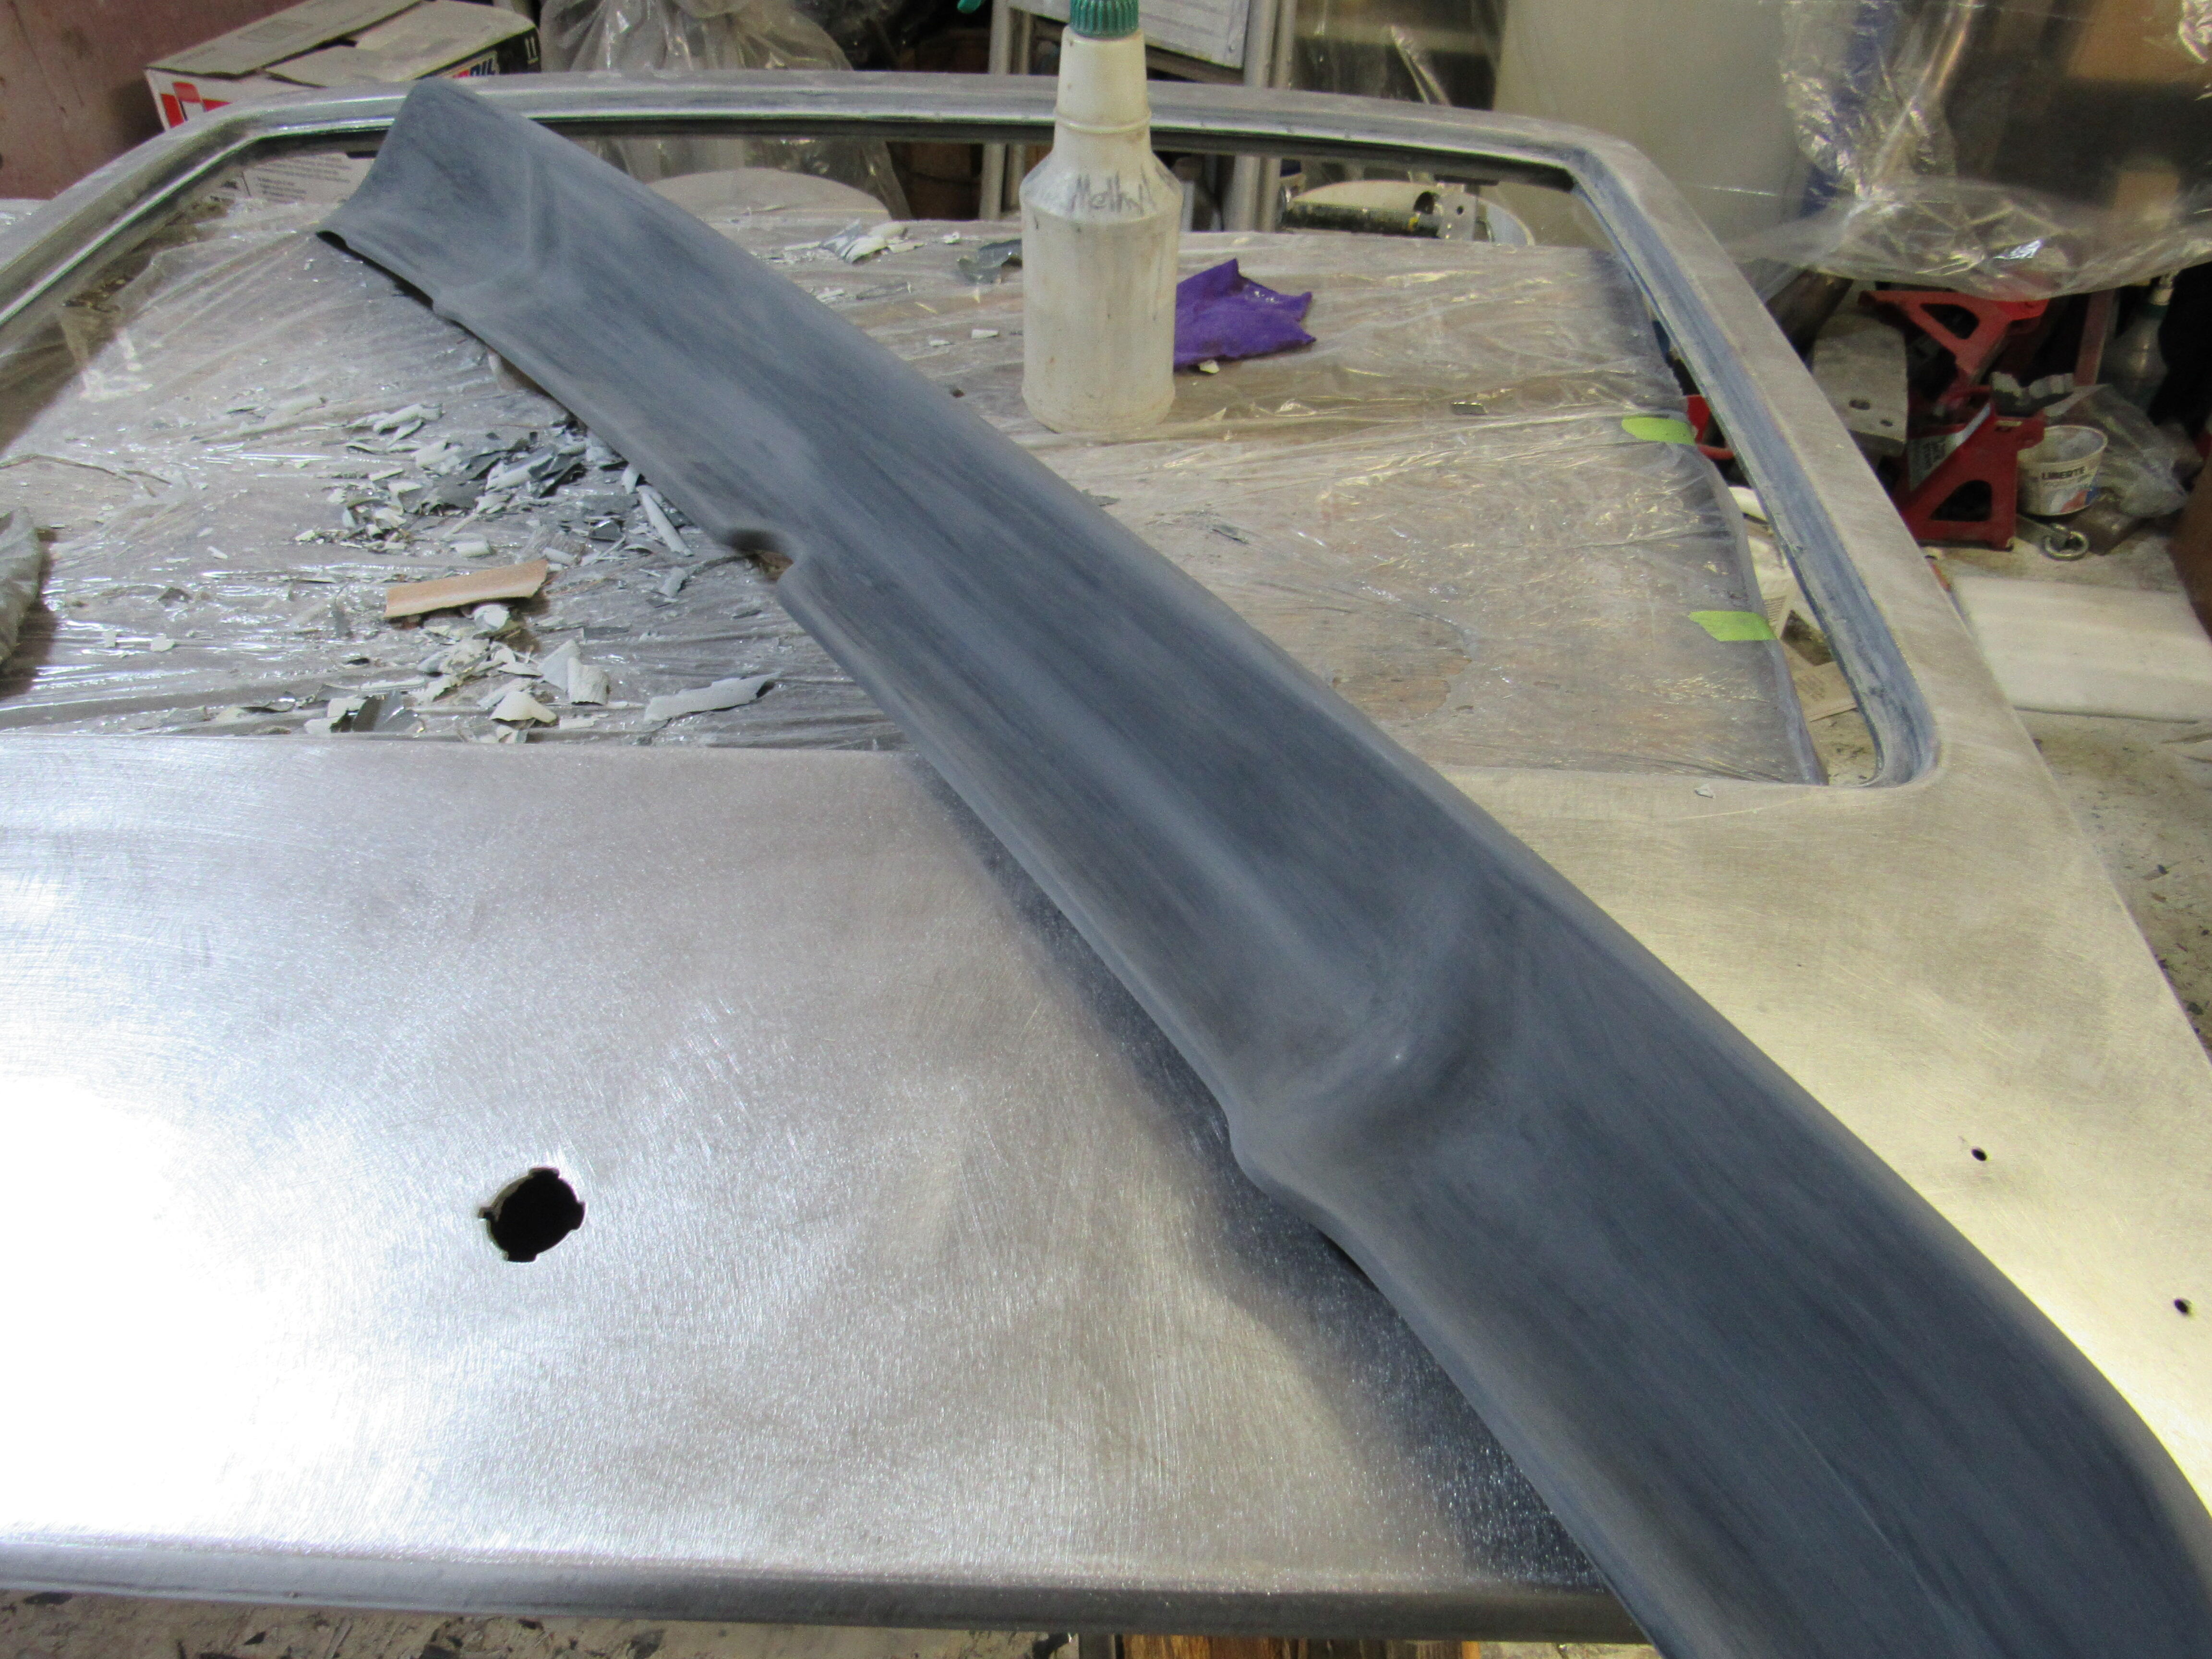
Another big hurdle in my rear view mirror. Finally sorted out the heater box, with the rebuilt valves and aftermarket retrofitted heater core. This project set me back about 6 weeks with work, waiting or parts and general figment challenges. Special thanks to Captain Obvious who swooped in to help me cross the finish line. All the hoses were bought at Auto Zone. Walked in to the back with the heater box and valves attached and found hoses that worked. These hoses weren’t cheap. 2 were around $27 each. This project has held up the interior completion to include dash install. Check it out. If anyone does this core mod and needs the hose part numbers let me know. Happy to share those.
1 point
1 pointAnother big hurdle in my rear view mirror. Finally sorted out the heater box, with the rebuilt valves and aftermarket retrofitted heater core. This project set me back about 6 weeks with work, waiting or parts and general figment challenges. Special thanks to Captain Obvious who swooped in to help me cross the finish line. All the hoses were bought at Auto Zone. Walked in to the back with the heater box and valves attached and found hoses that worked. These hoses weren’t cheap. 2 were around $27 each. This project has held up the interior completion to include dash install. Check it out. If anyone does this core mod and needs the hose part numbers let me know. Happy to share those.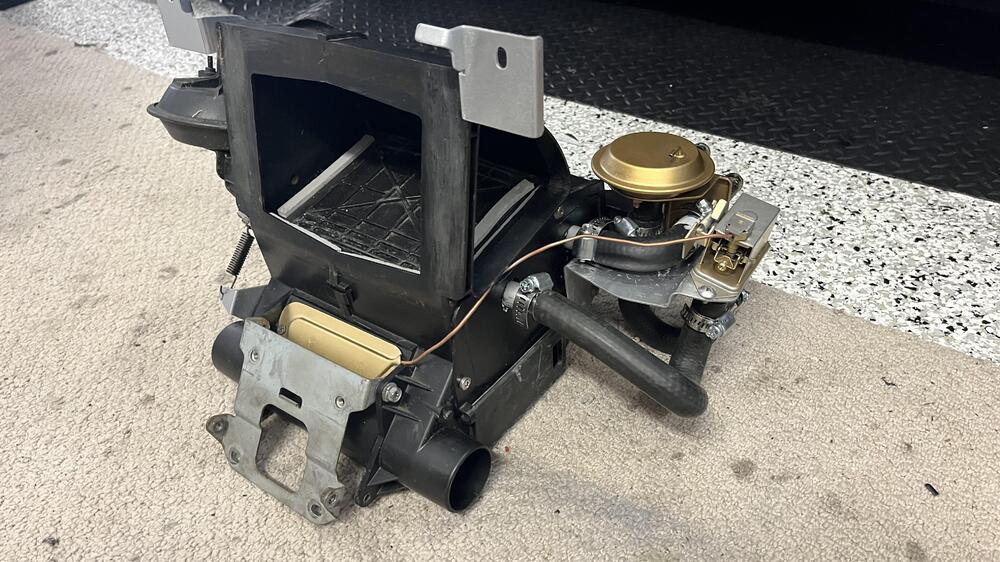


 1 point
 I did a black sticker on a 300zxtt (sits under the spoiler on the rear) it was about 10 years old but sticked really good.. you clean the spot really good and put some soapy water on and put the sticker on there. The soapy water helps to place the sticker right on the right spot and then you take a plastic (bondo) tool to get the water from under it and let it dry.. it will stick very well even after a long time. Let it dry for days, do not touch it!1 point
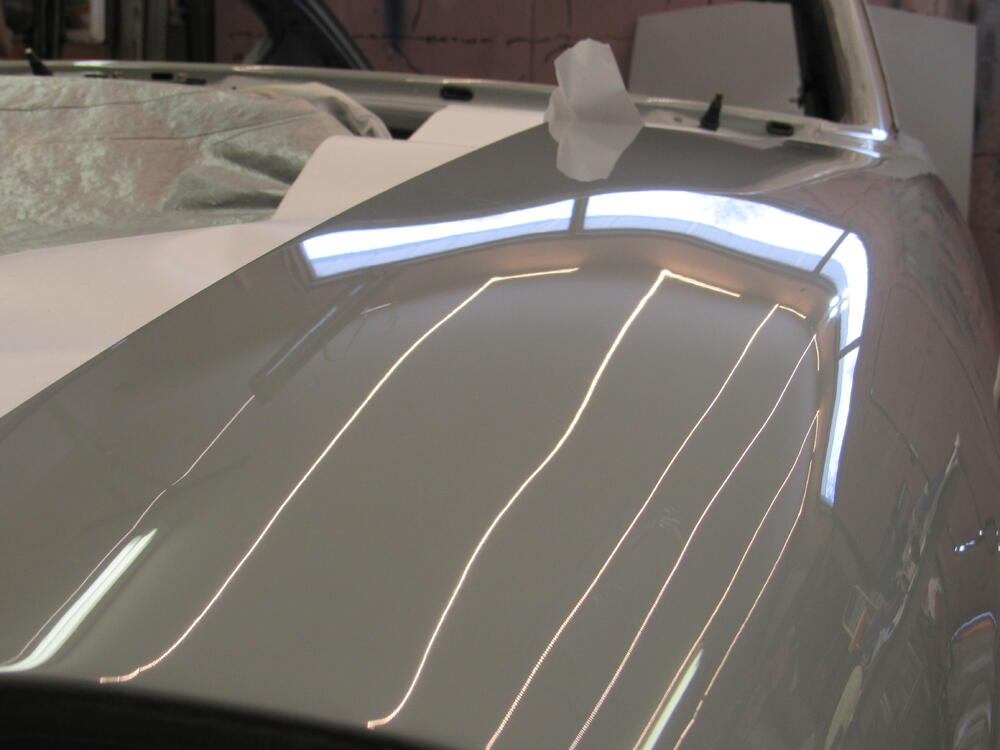
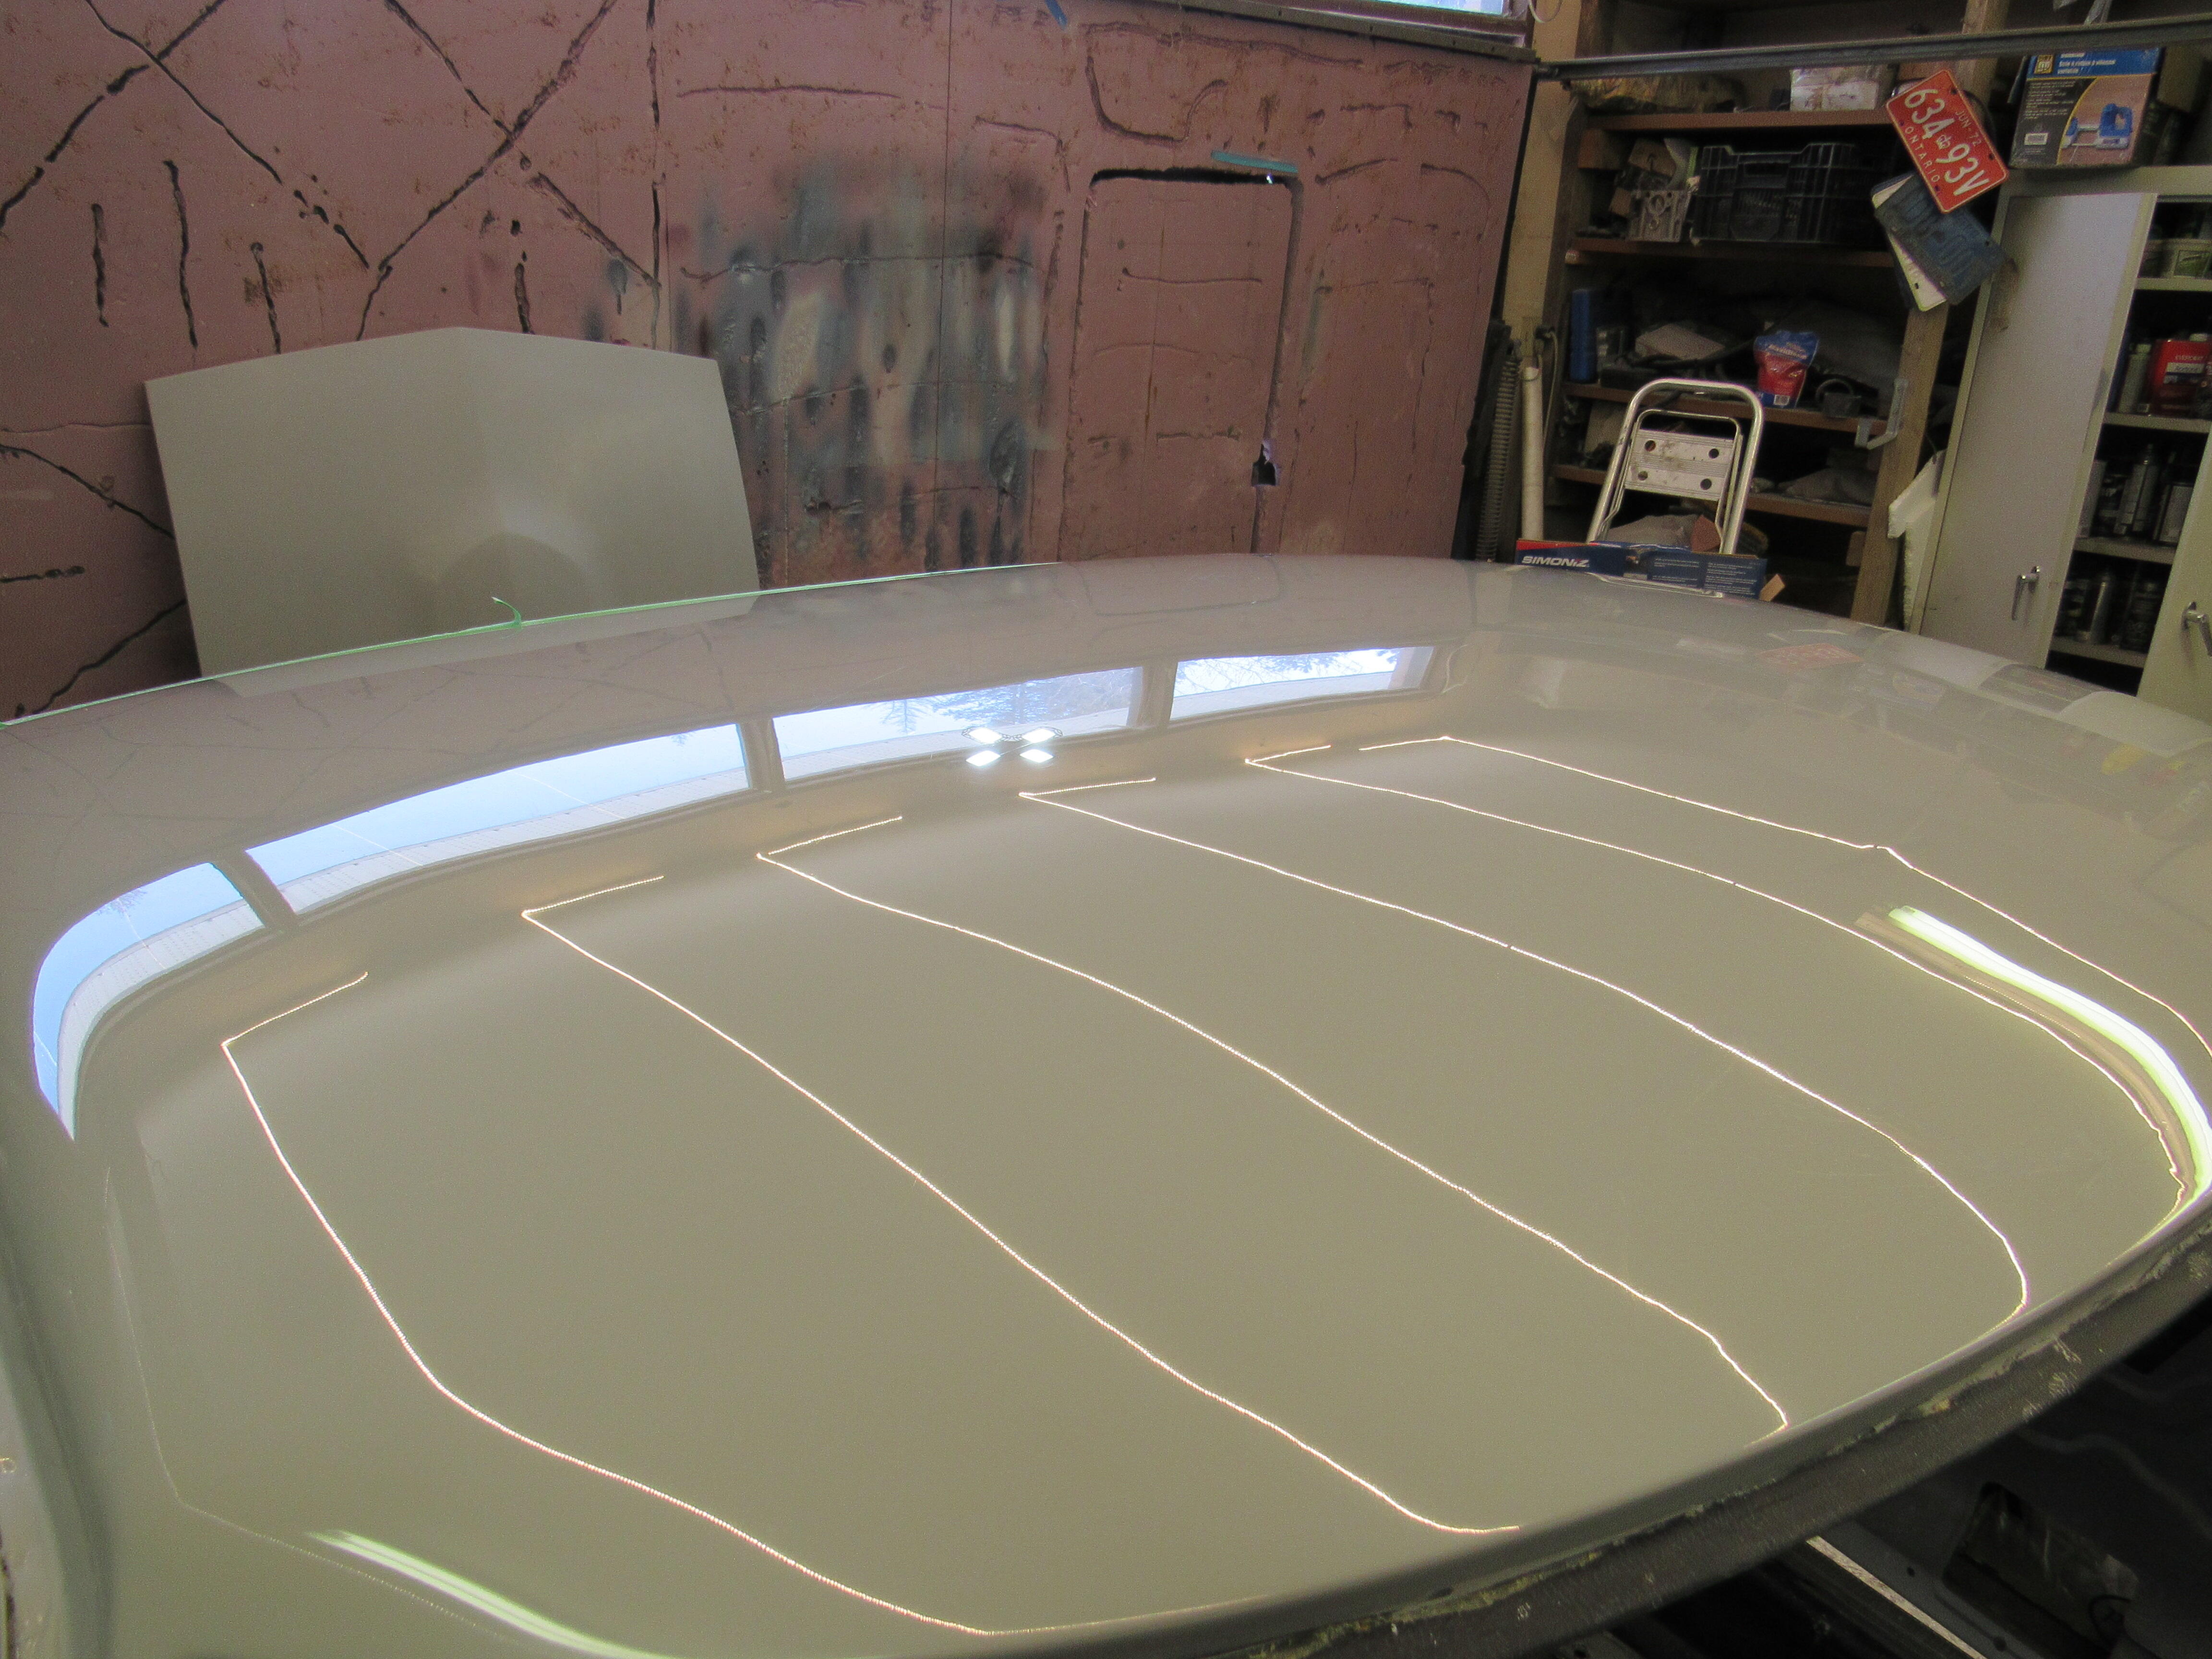
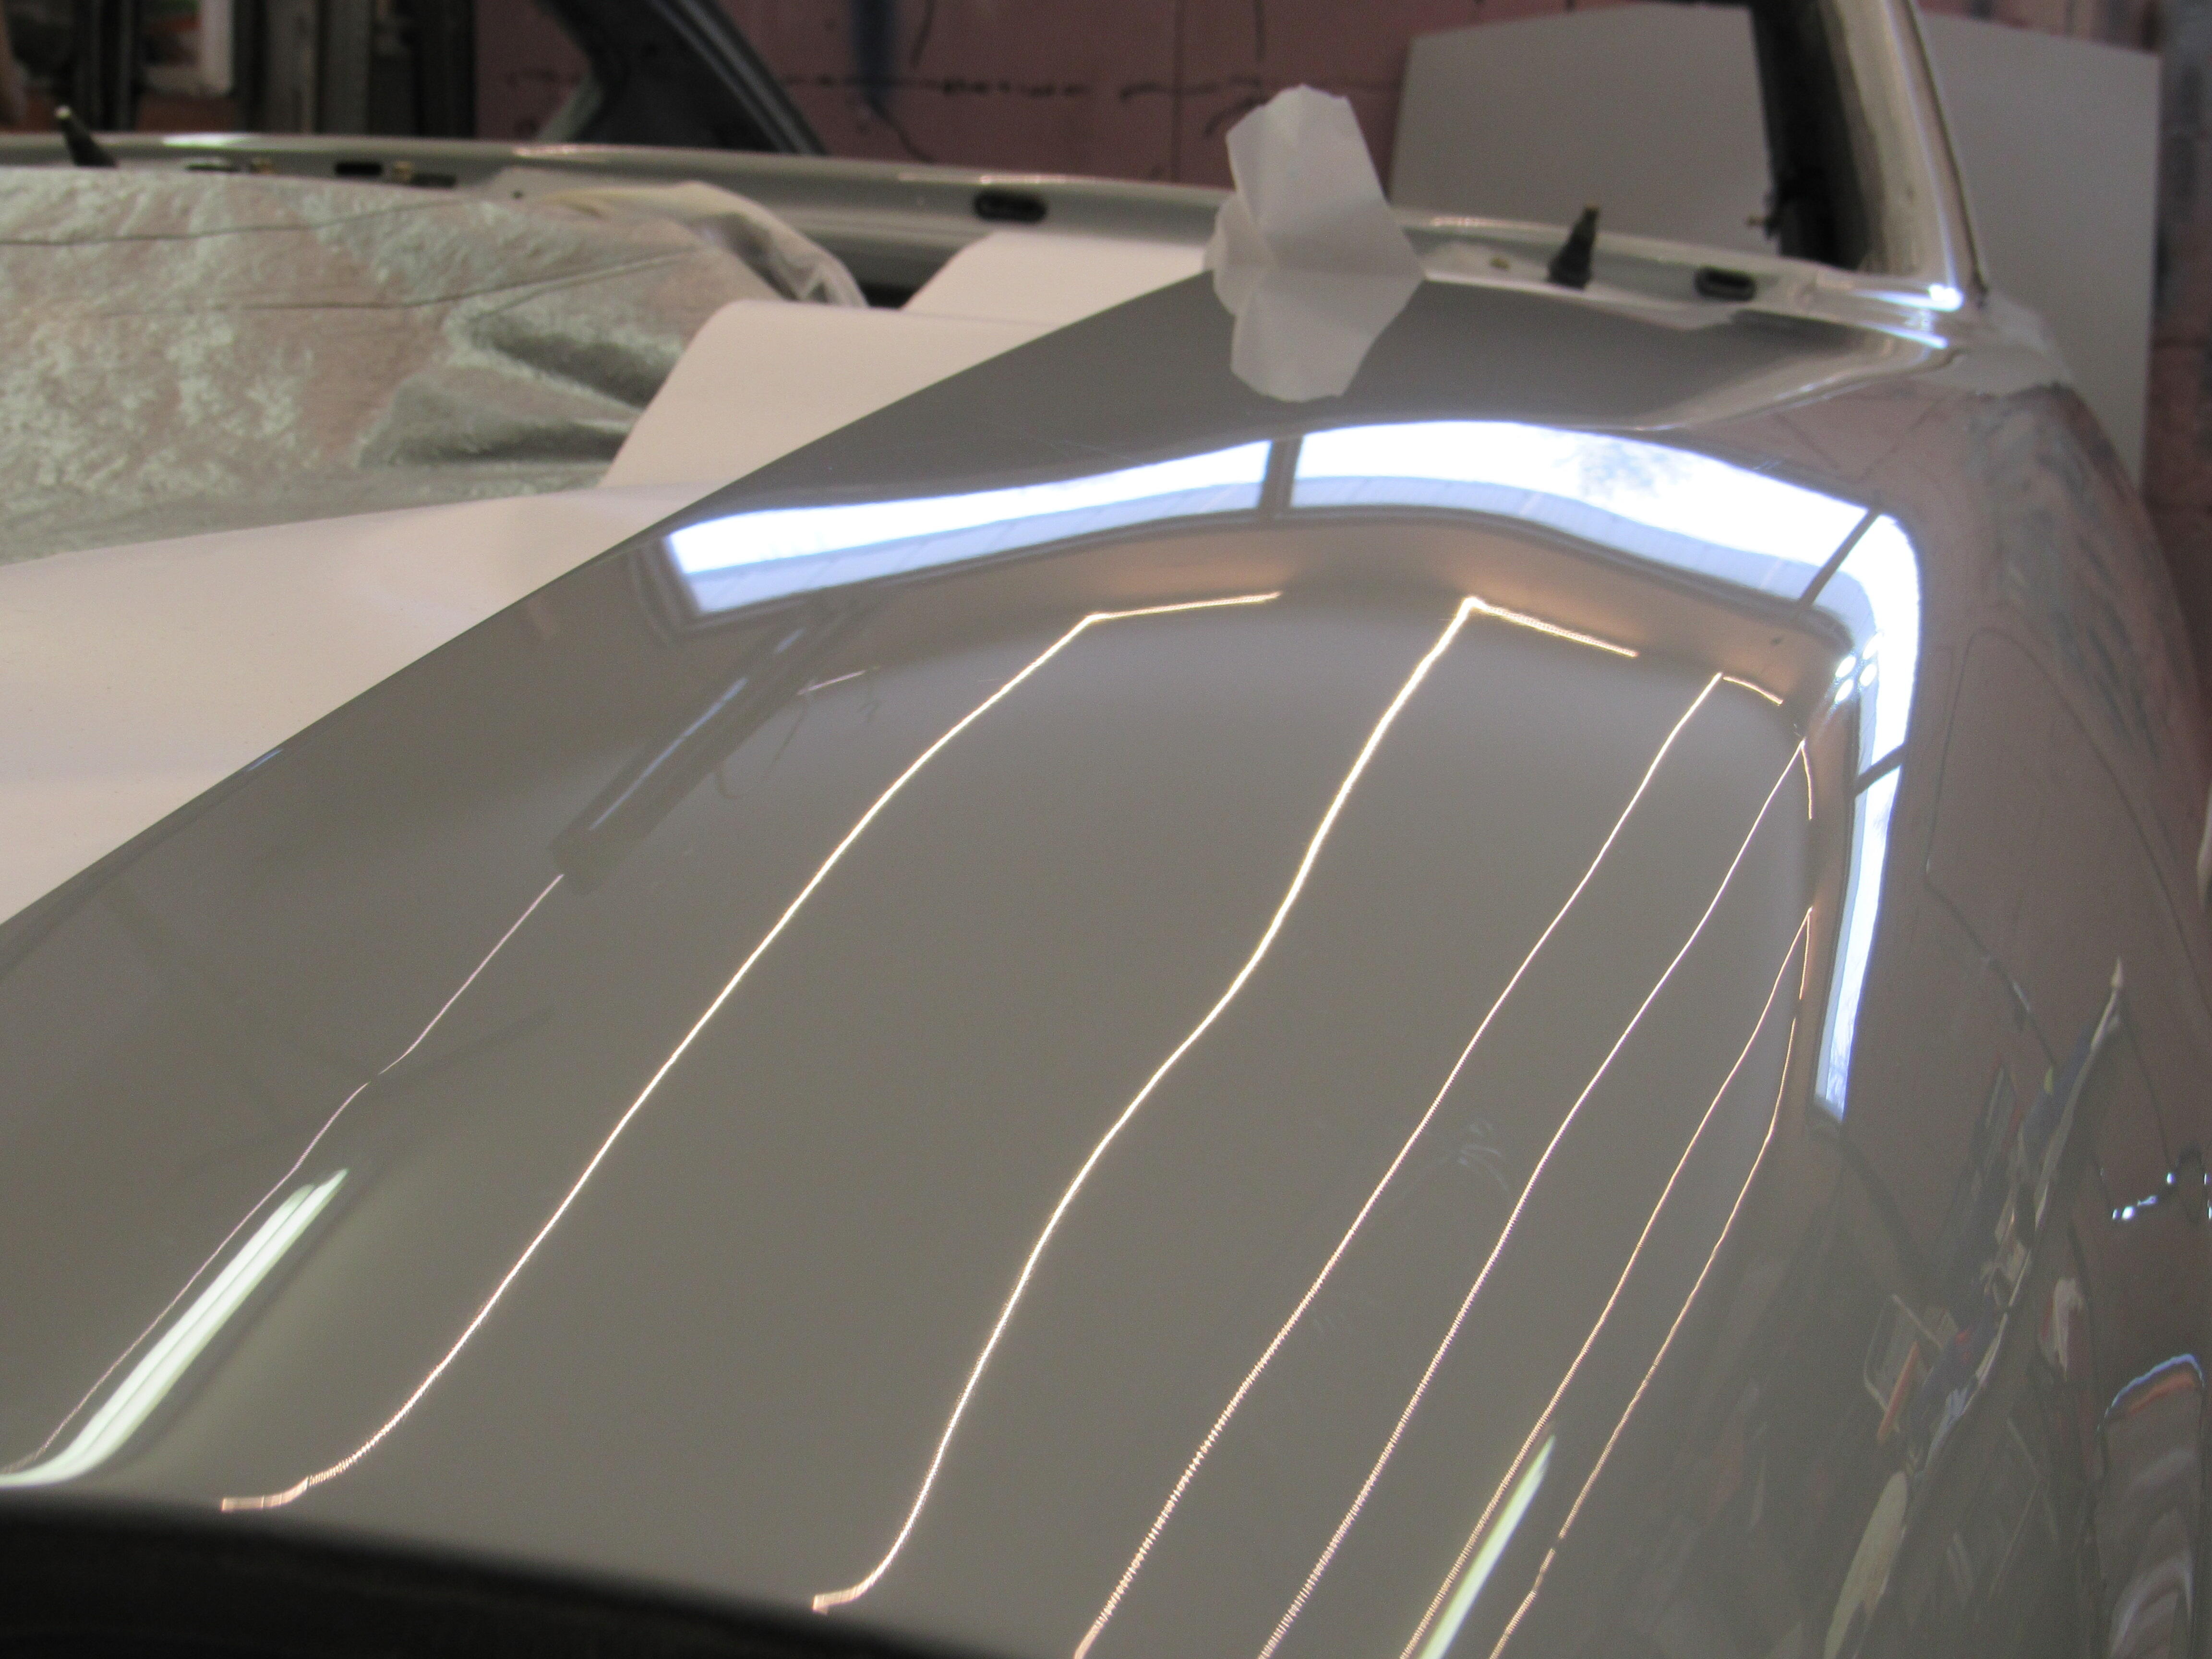
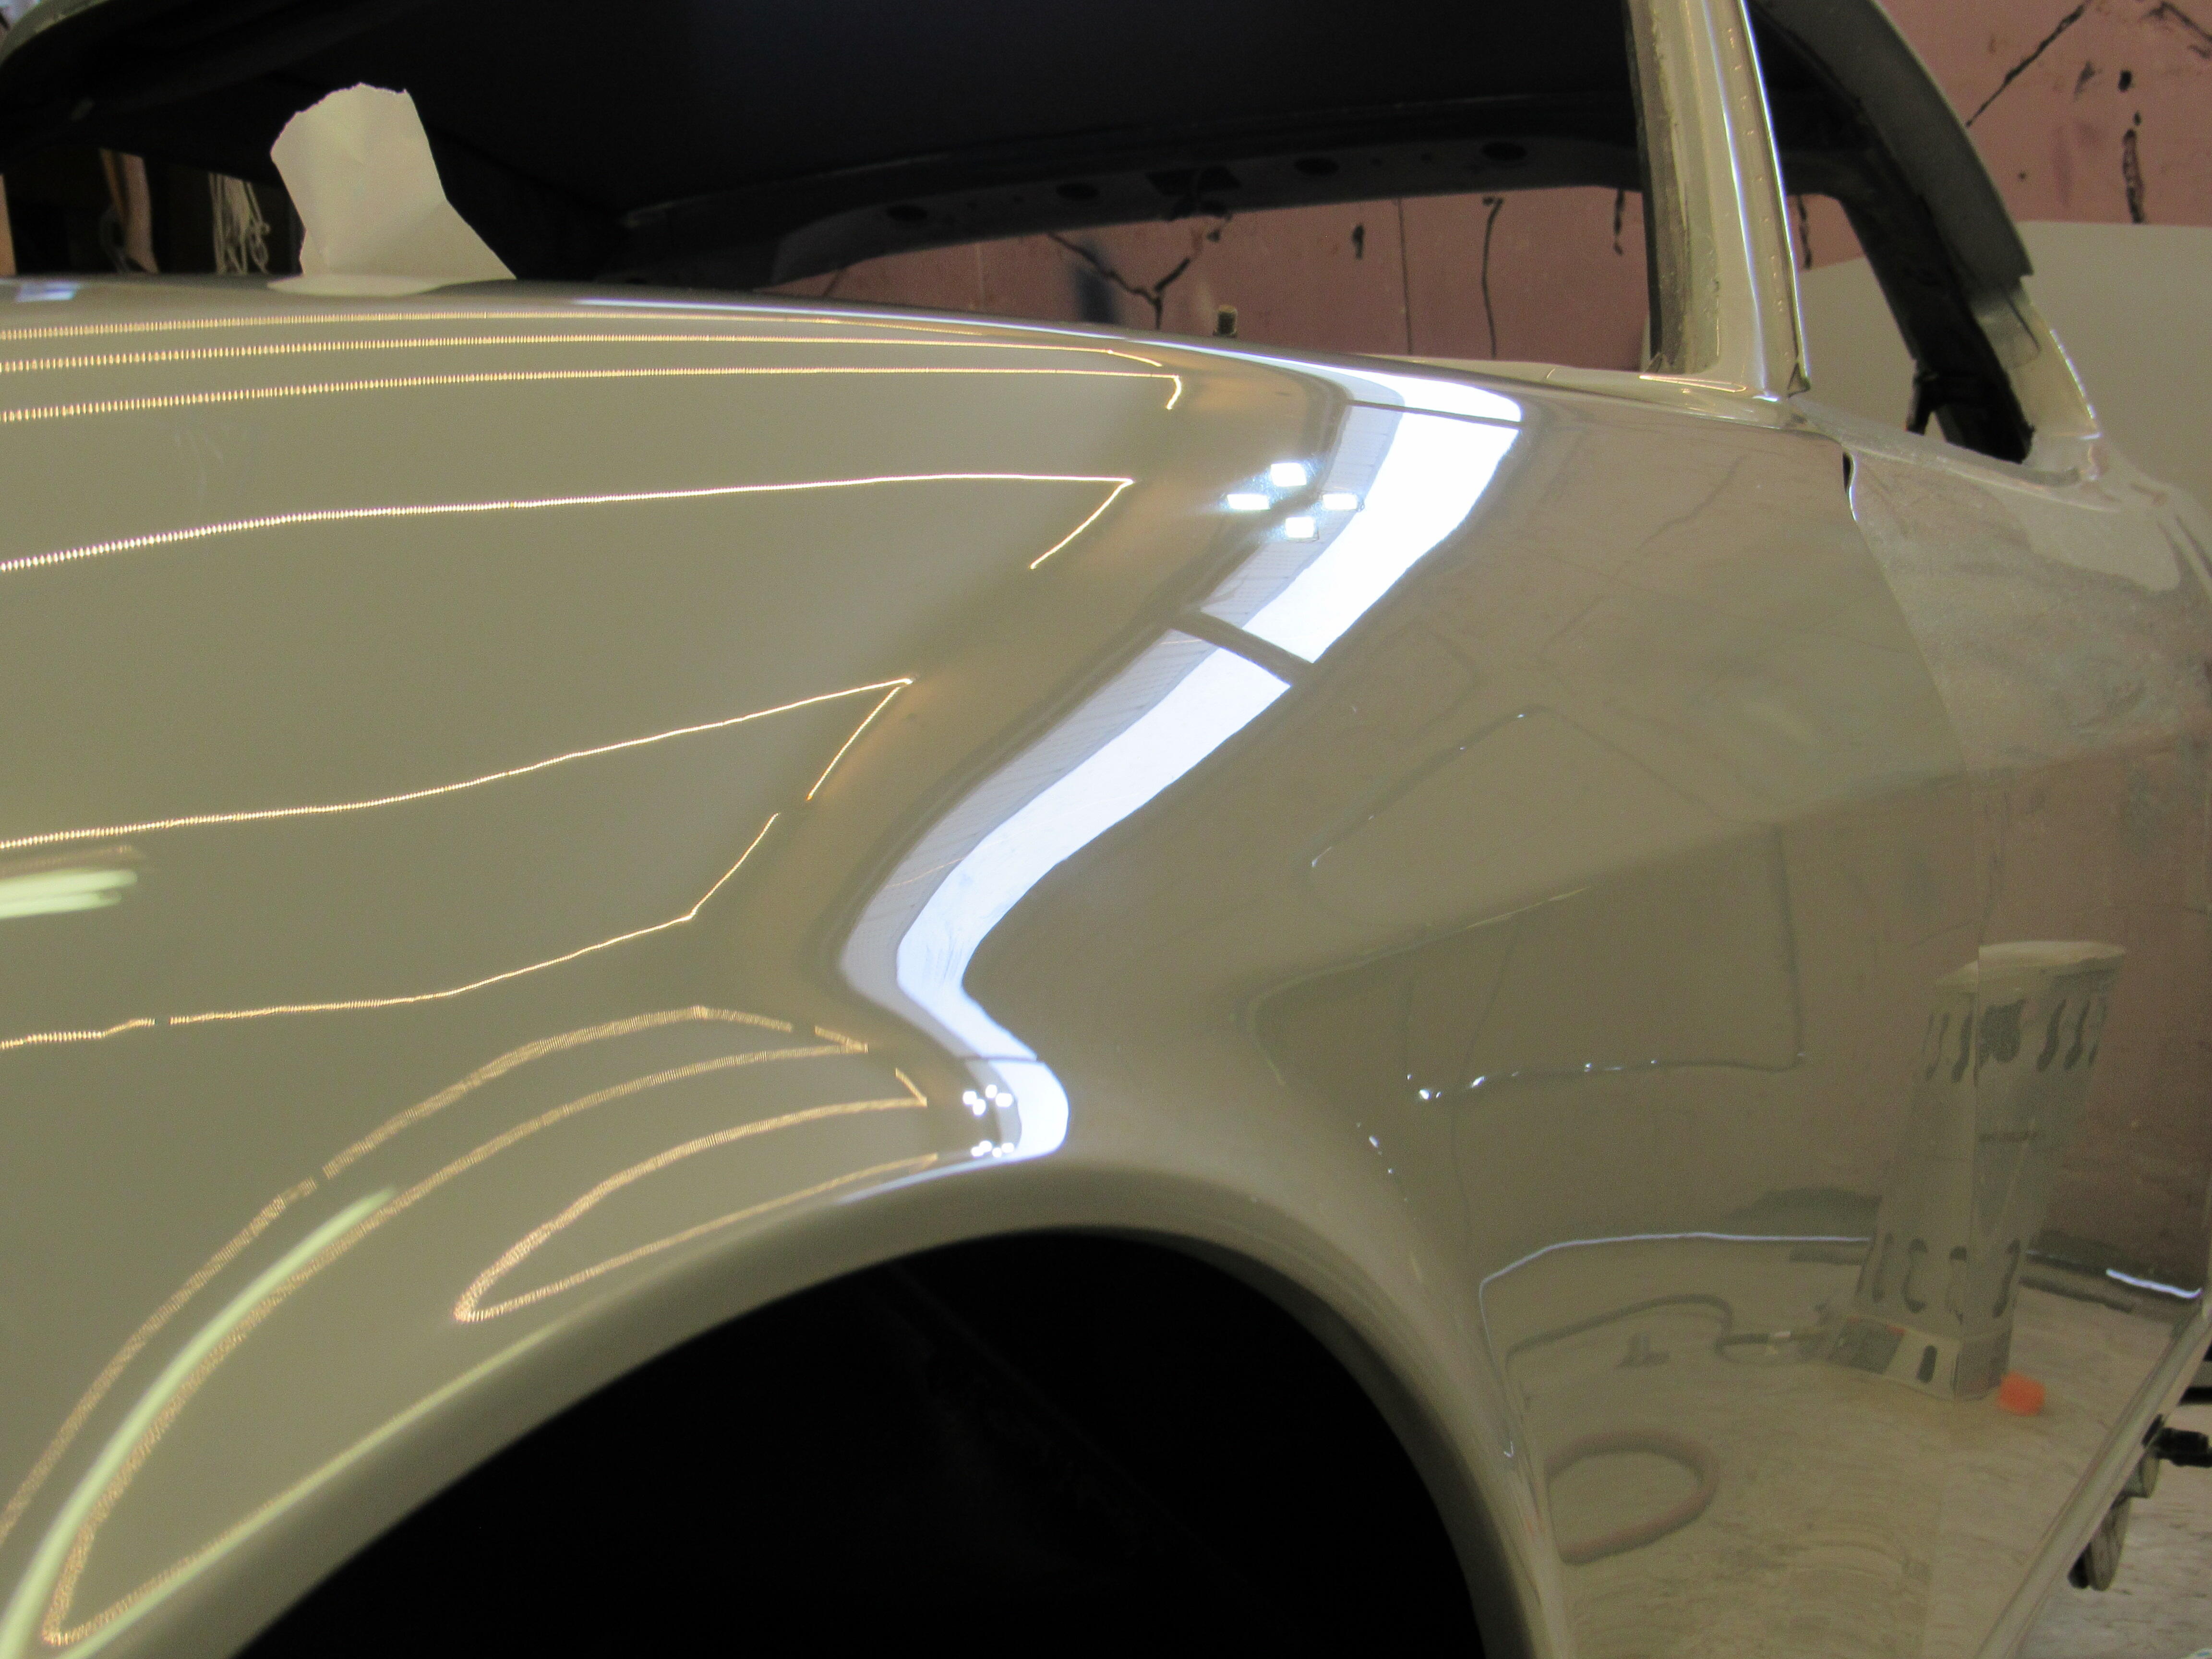
I started wet blocking with 1000, 1500, 2000 and 2500, finished that up yesterday and started cut and buff this morning, one more day and I'll have the paint done😊😊😊
I did a black sticker on a 300zxtt (sits under the spoiler on the rear) it was about 10 years old but sticked really good.. you clean the spot really good and put some soapy water on and put the sticker on there. The soapy water helps to place the sticker right on the right spot and then you take a plastic (bondo) tool to get the water from under it and let it dry.. it will stick very well even after a long time. Let it dry for days, do not touch it!1 point
I started wet blocking with 1000, 1500, 2000 and 2500, finished that up yesterday and started cut and buff this morning, one more day and I'll have the paint done😊😊😊
 1 point
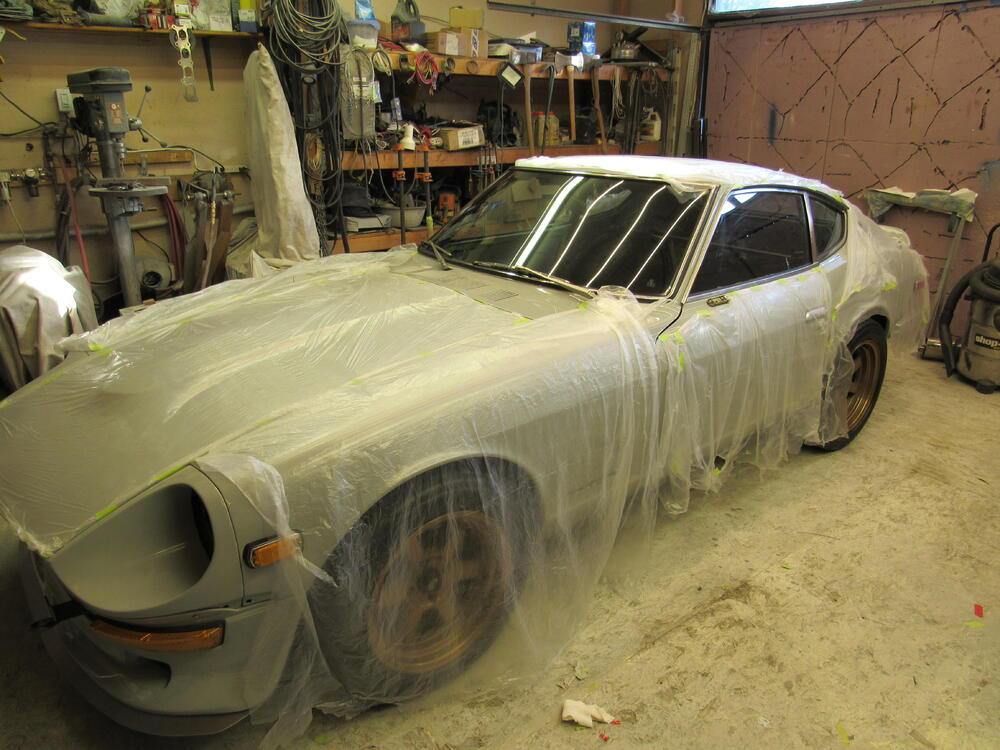
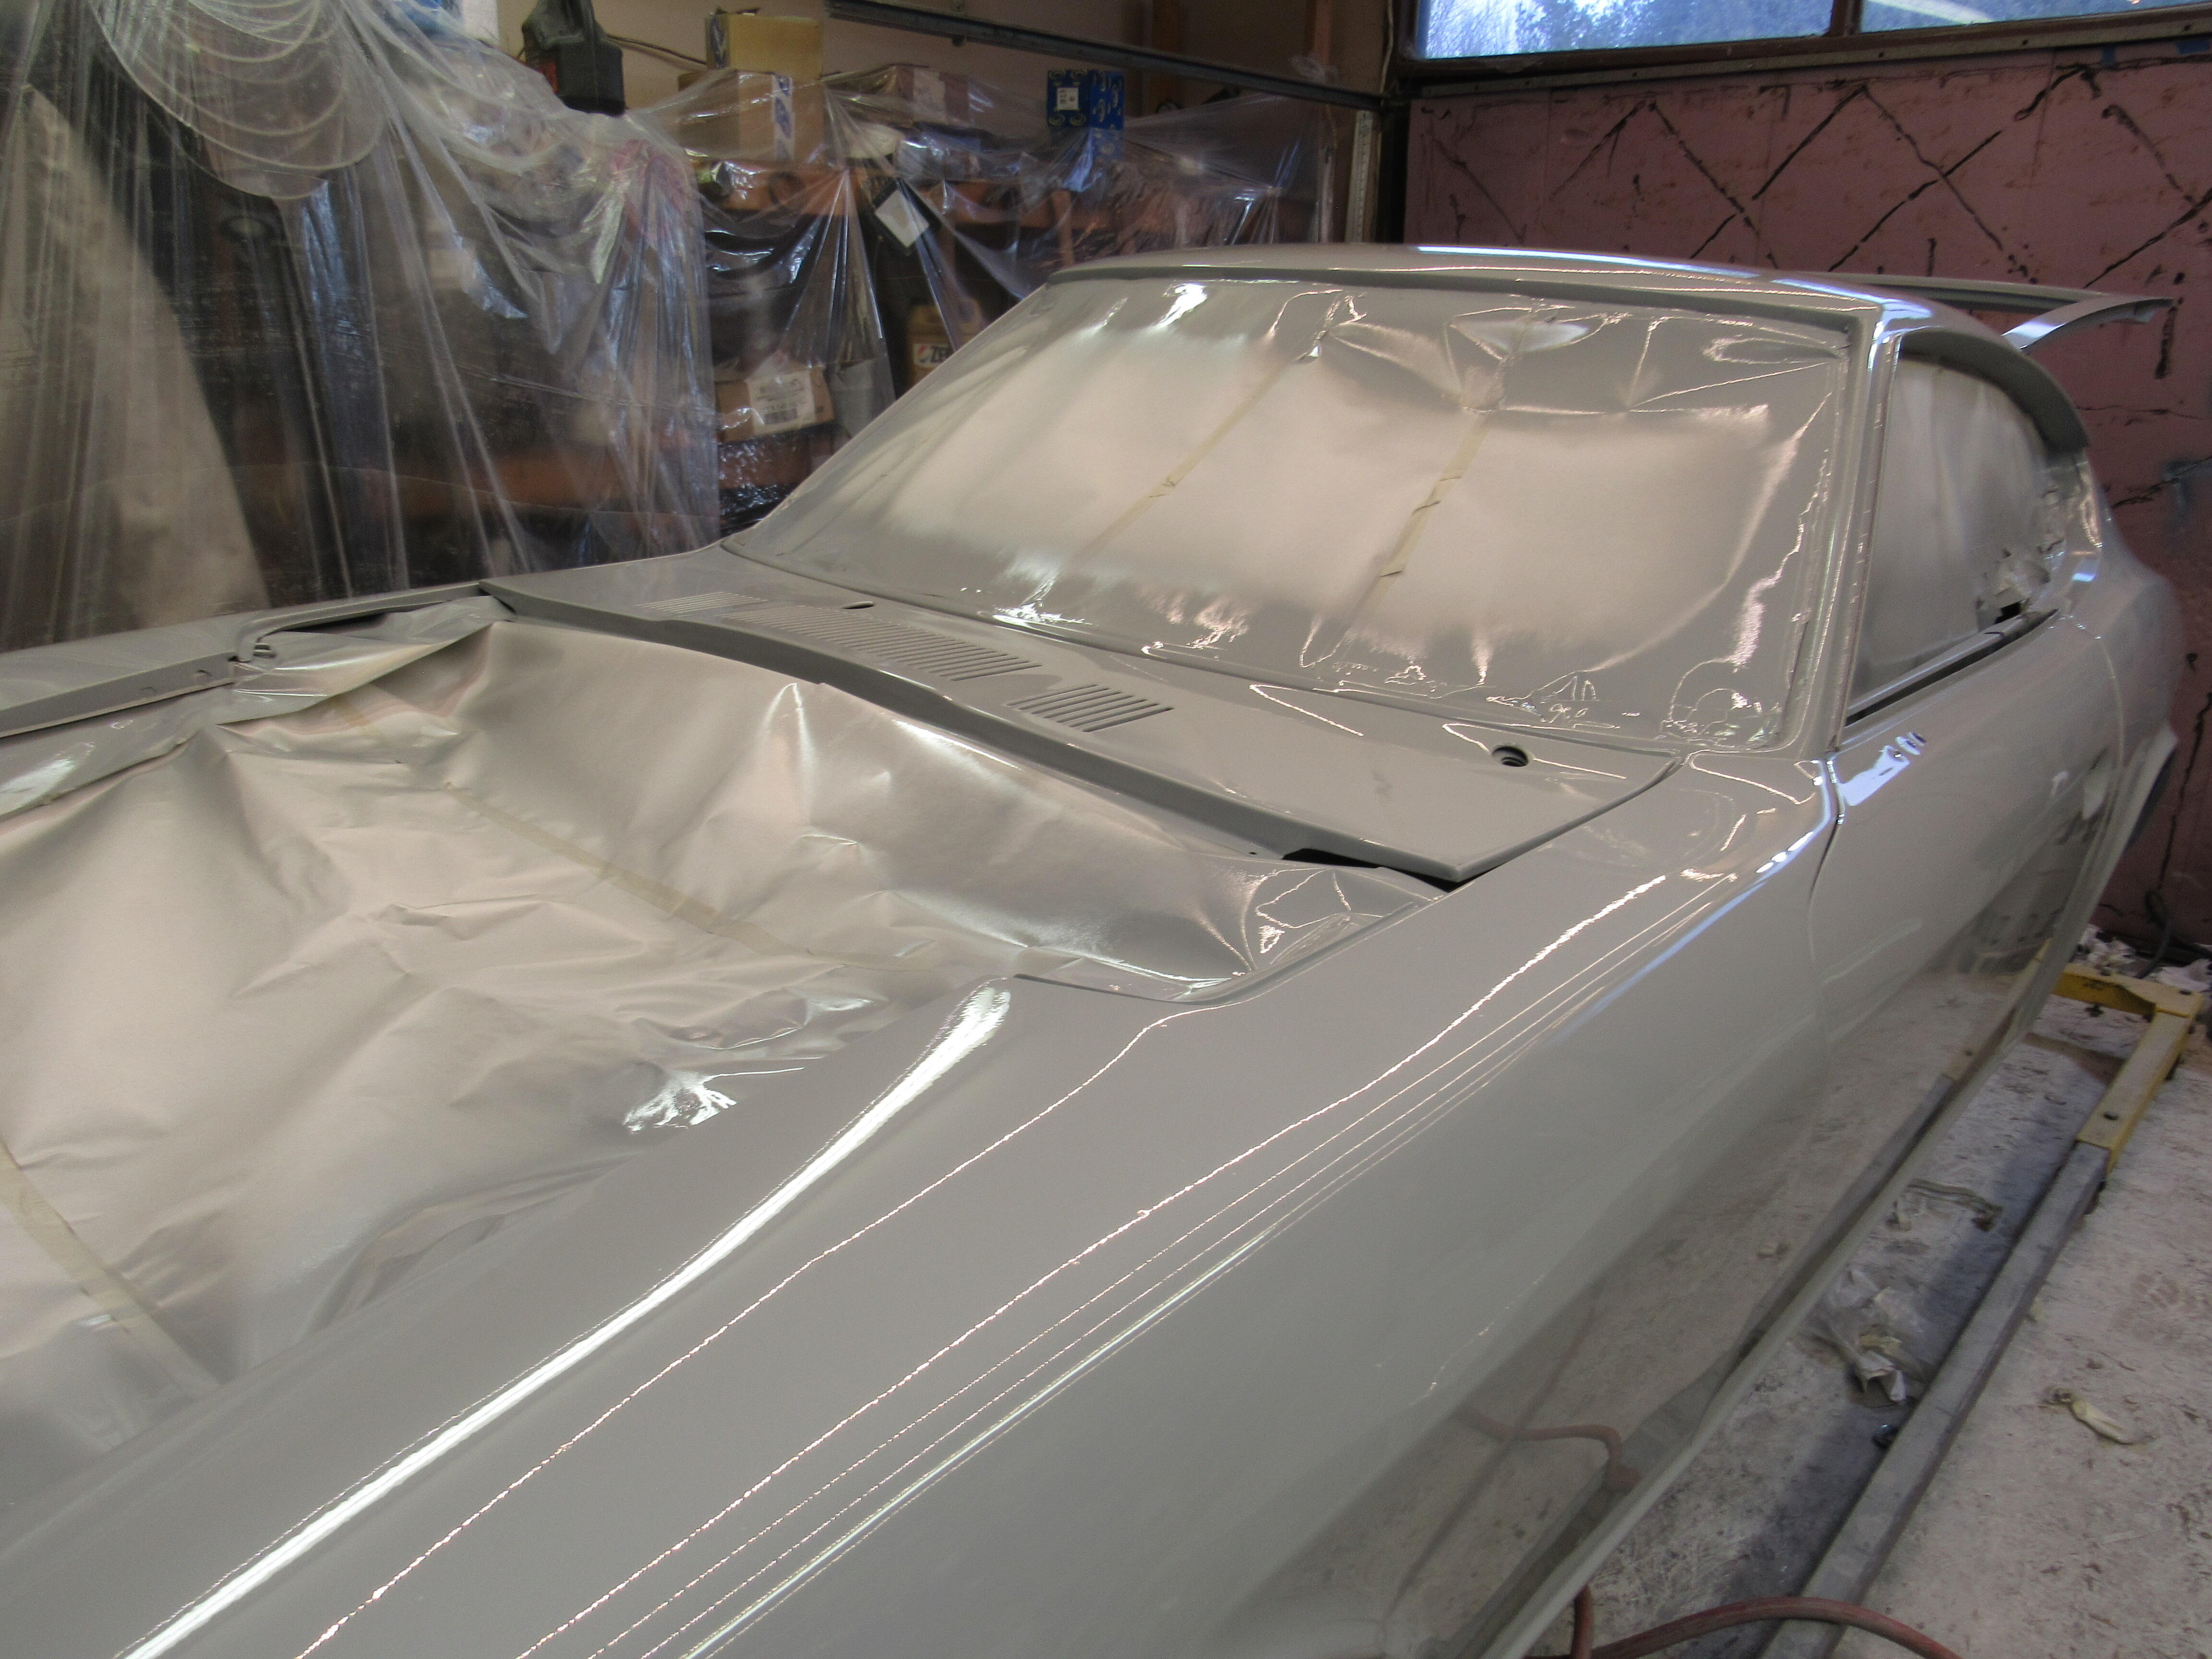
The paint is done! Always a good day when the last coat of clear goes on, I can let the stress go now. I'm going to let it cure for at least a couple of wks before starting the wet sanding.
1 point
The paint is done! Always a good day when the last coat of clear goes on, I can let the stress go now. I'm going to let it cure for at least a couple of wks before starting the wet sanding.

 1 point
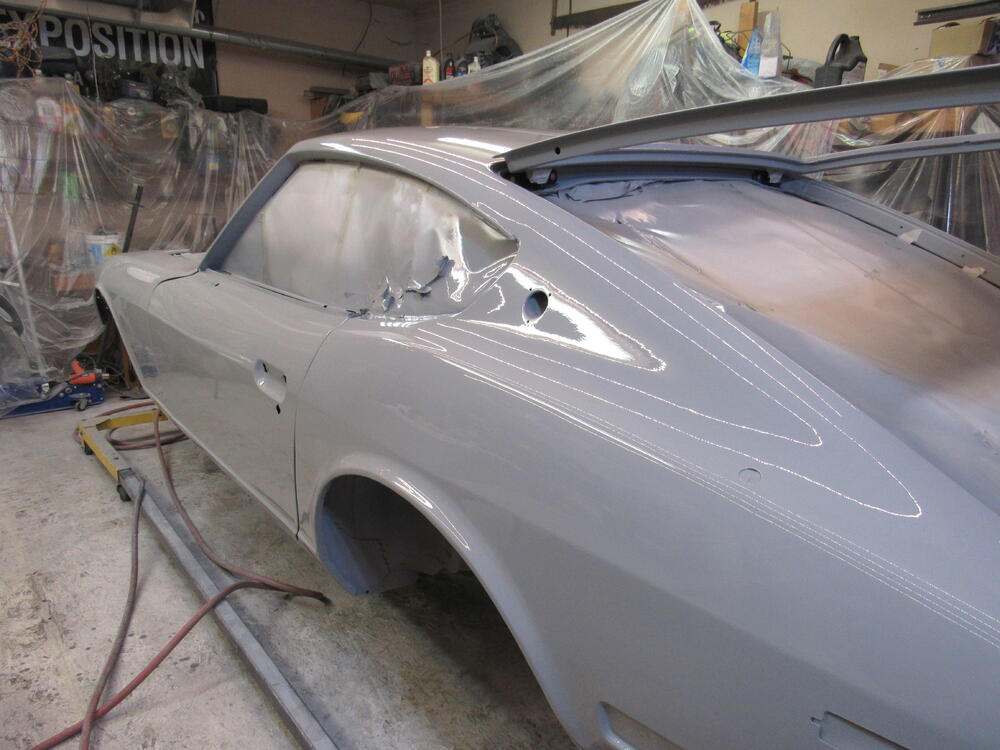
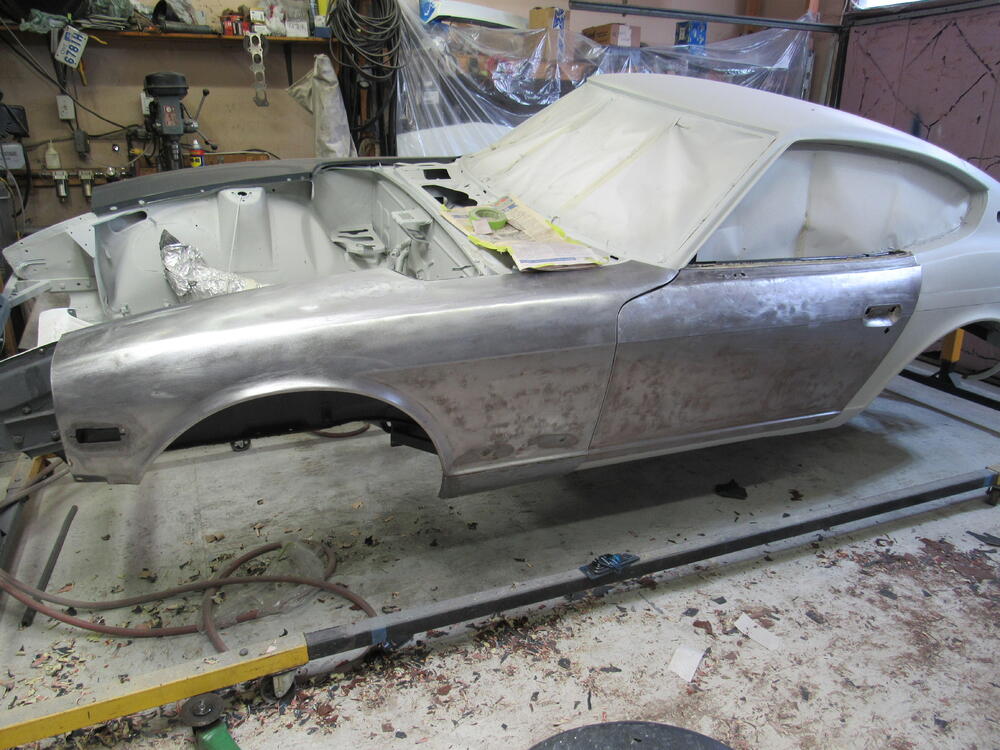
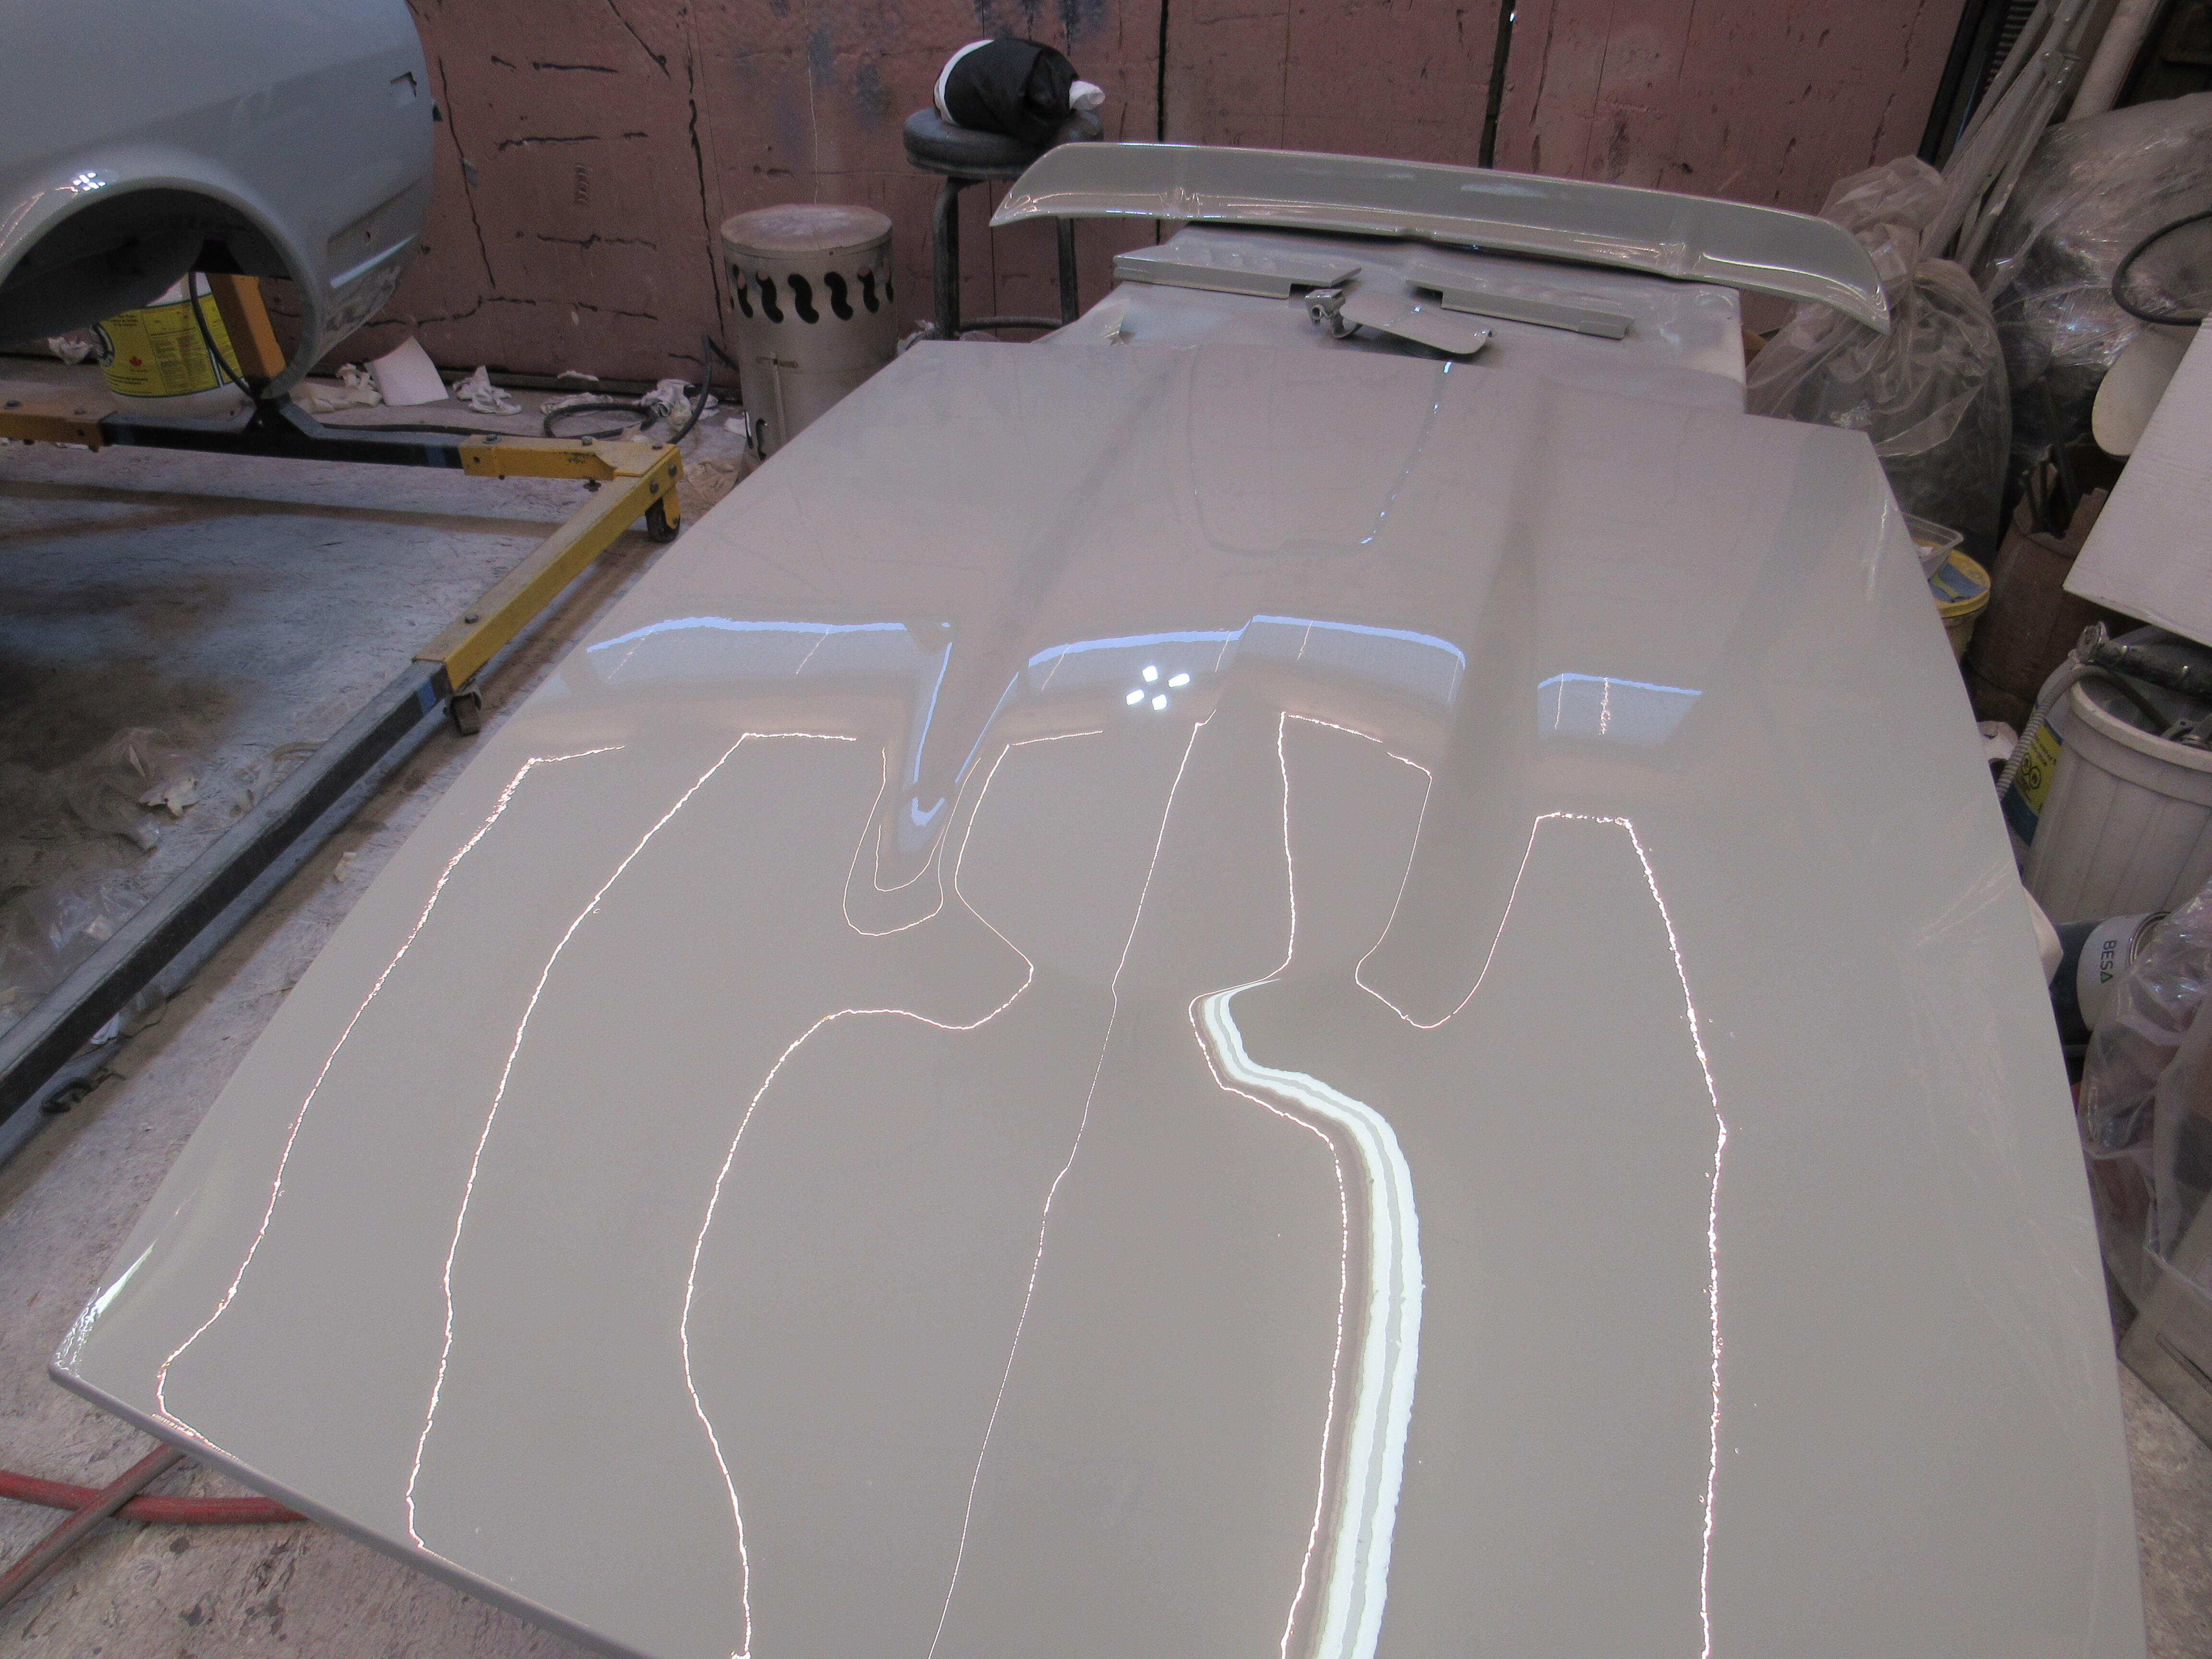
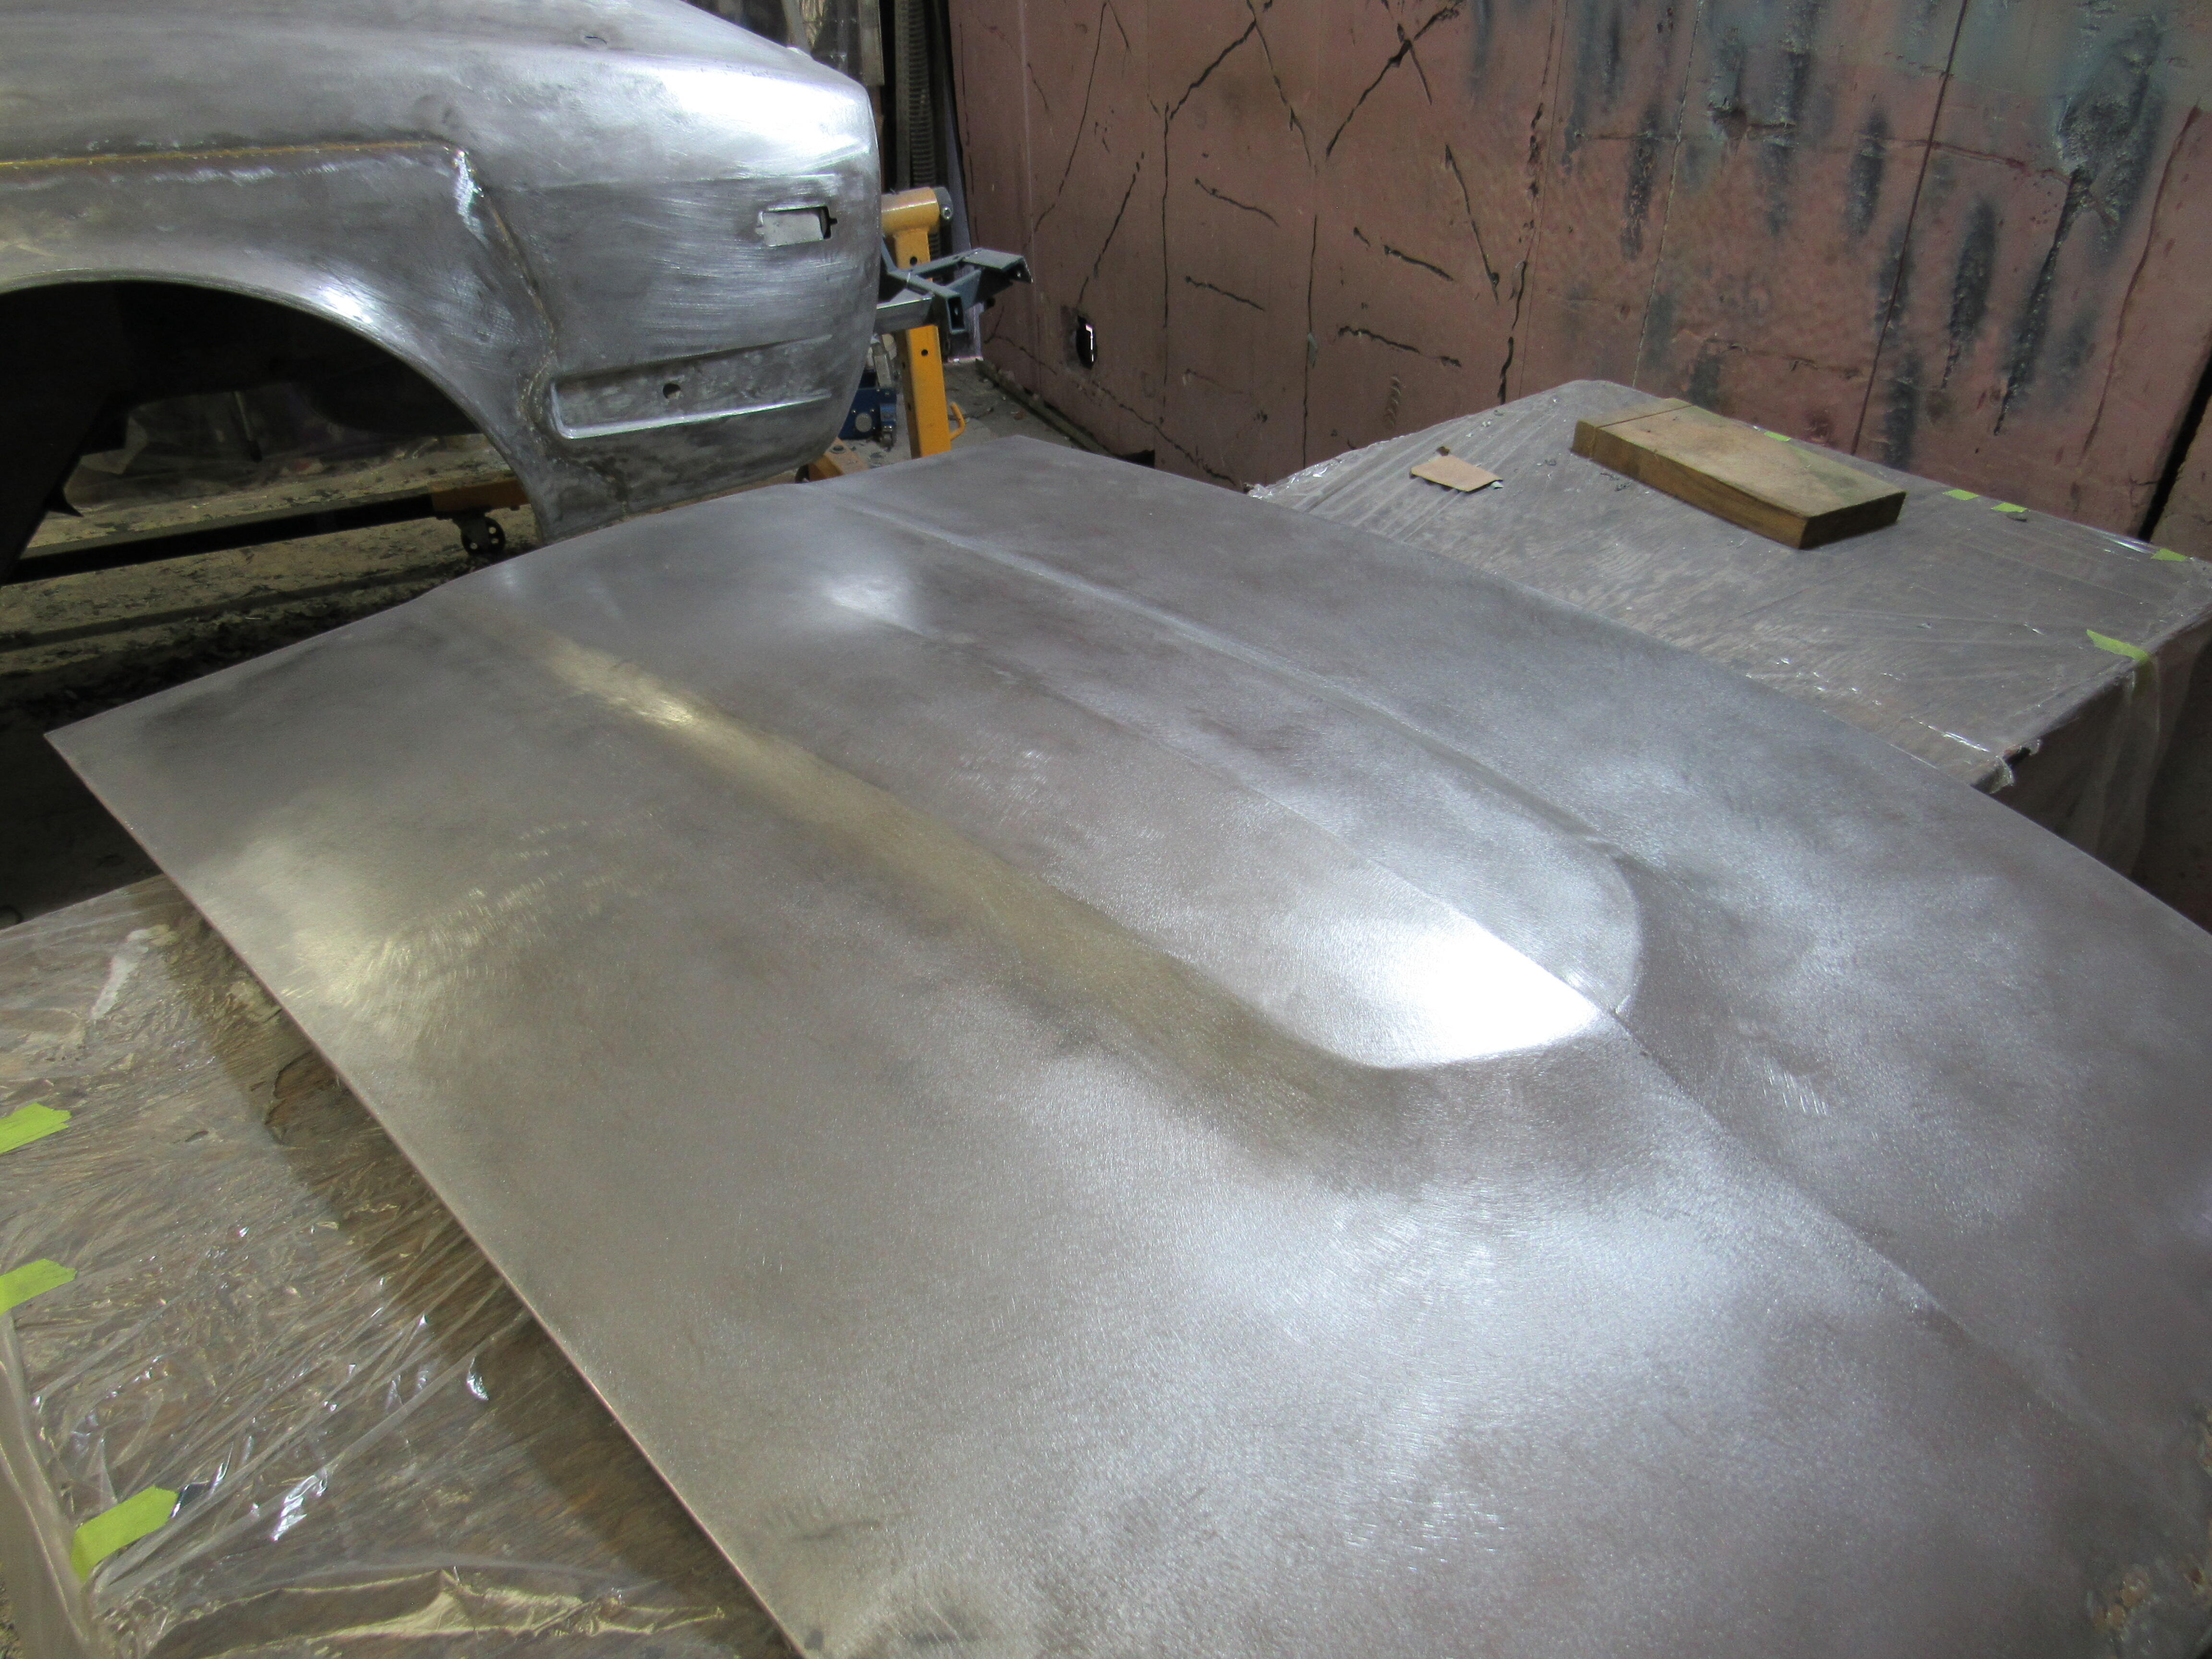
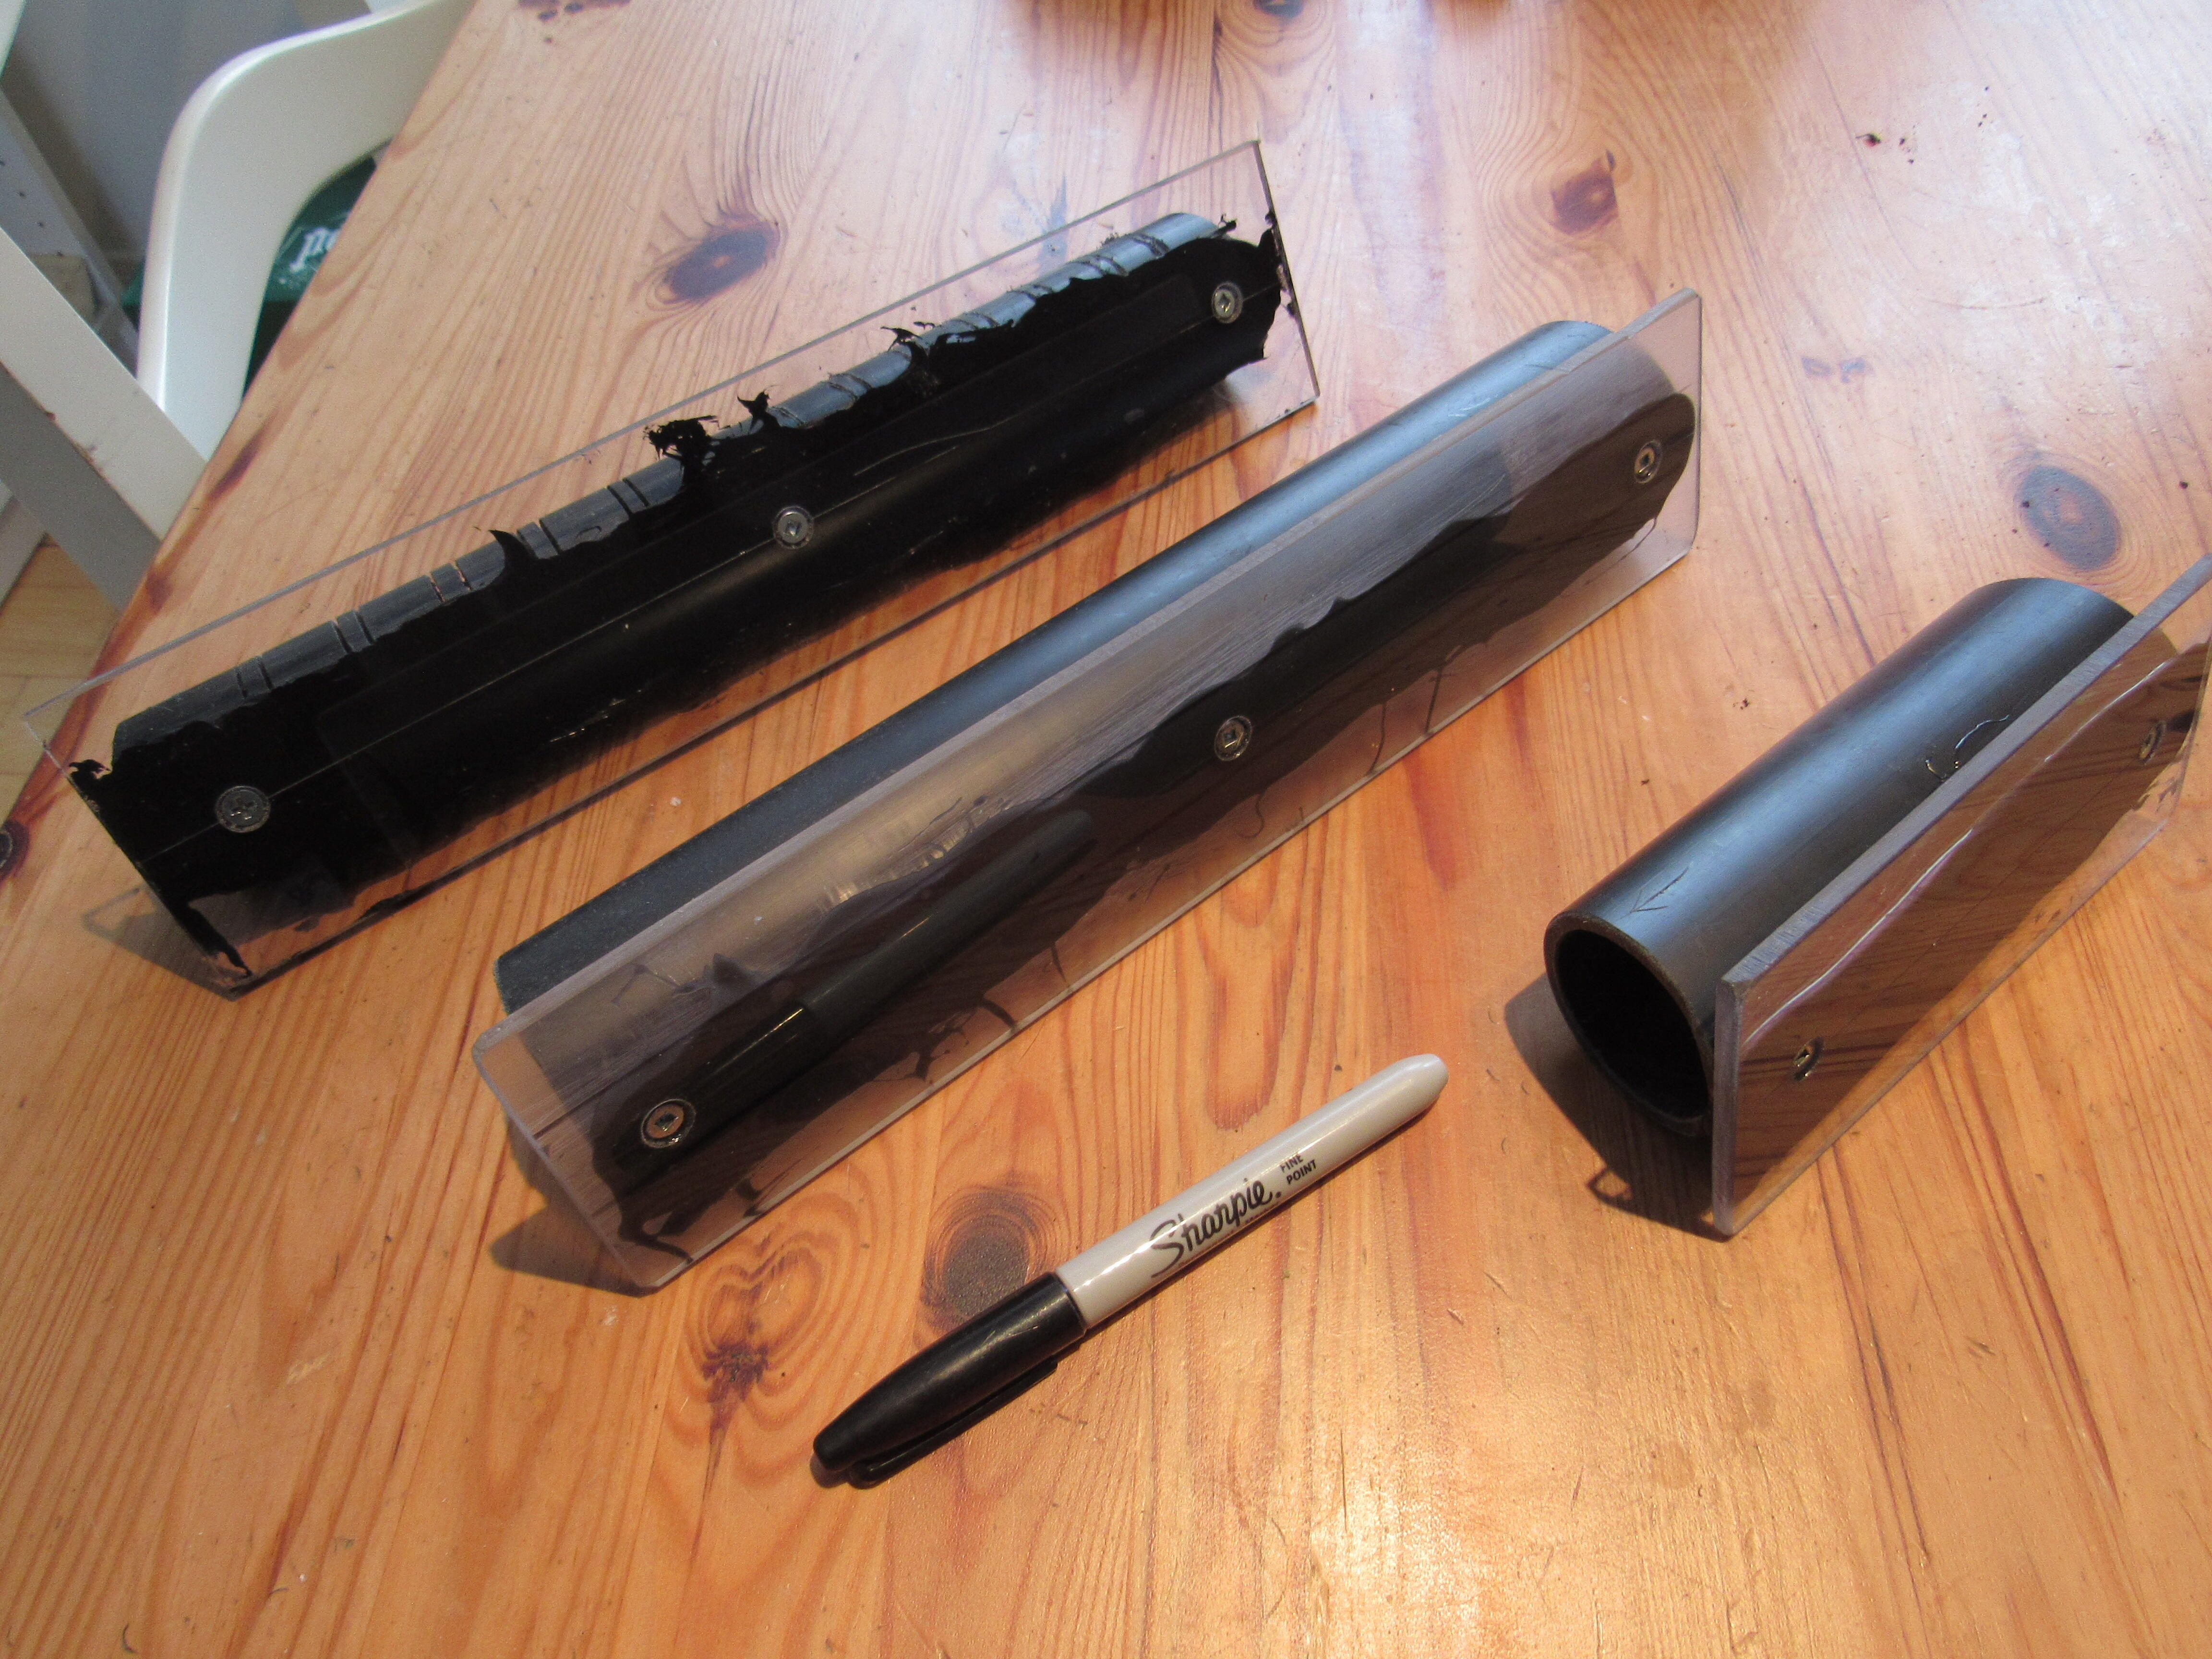
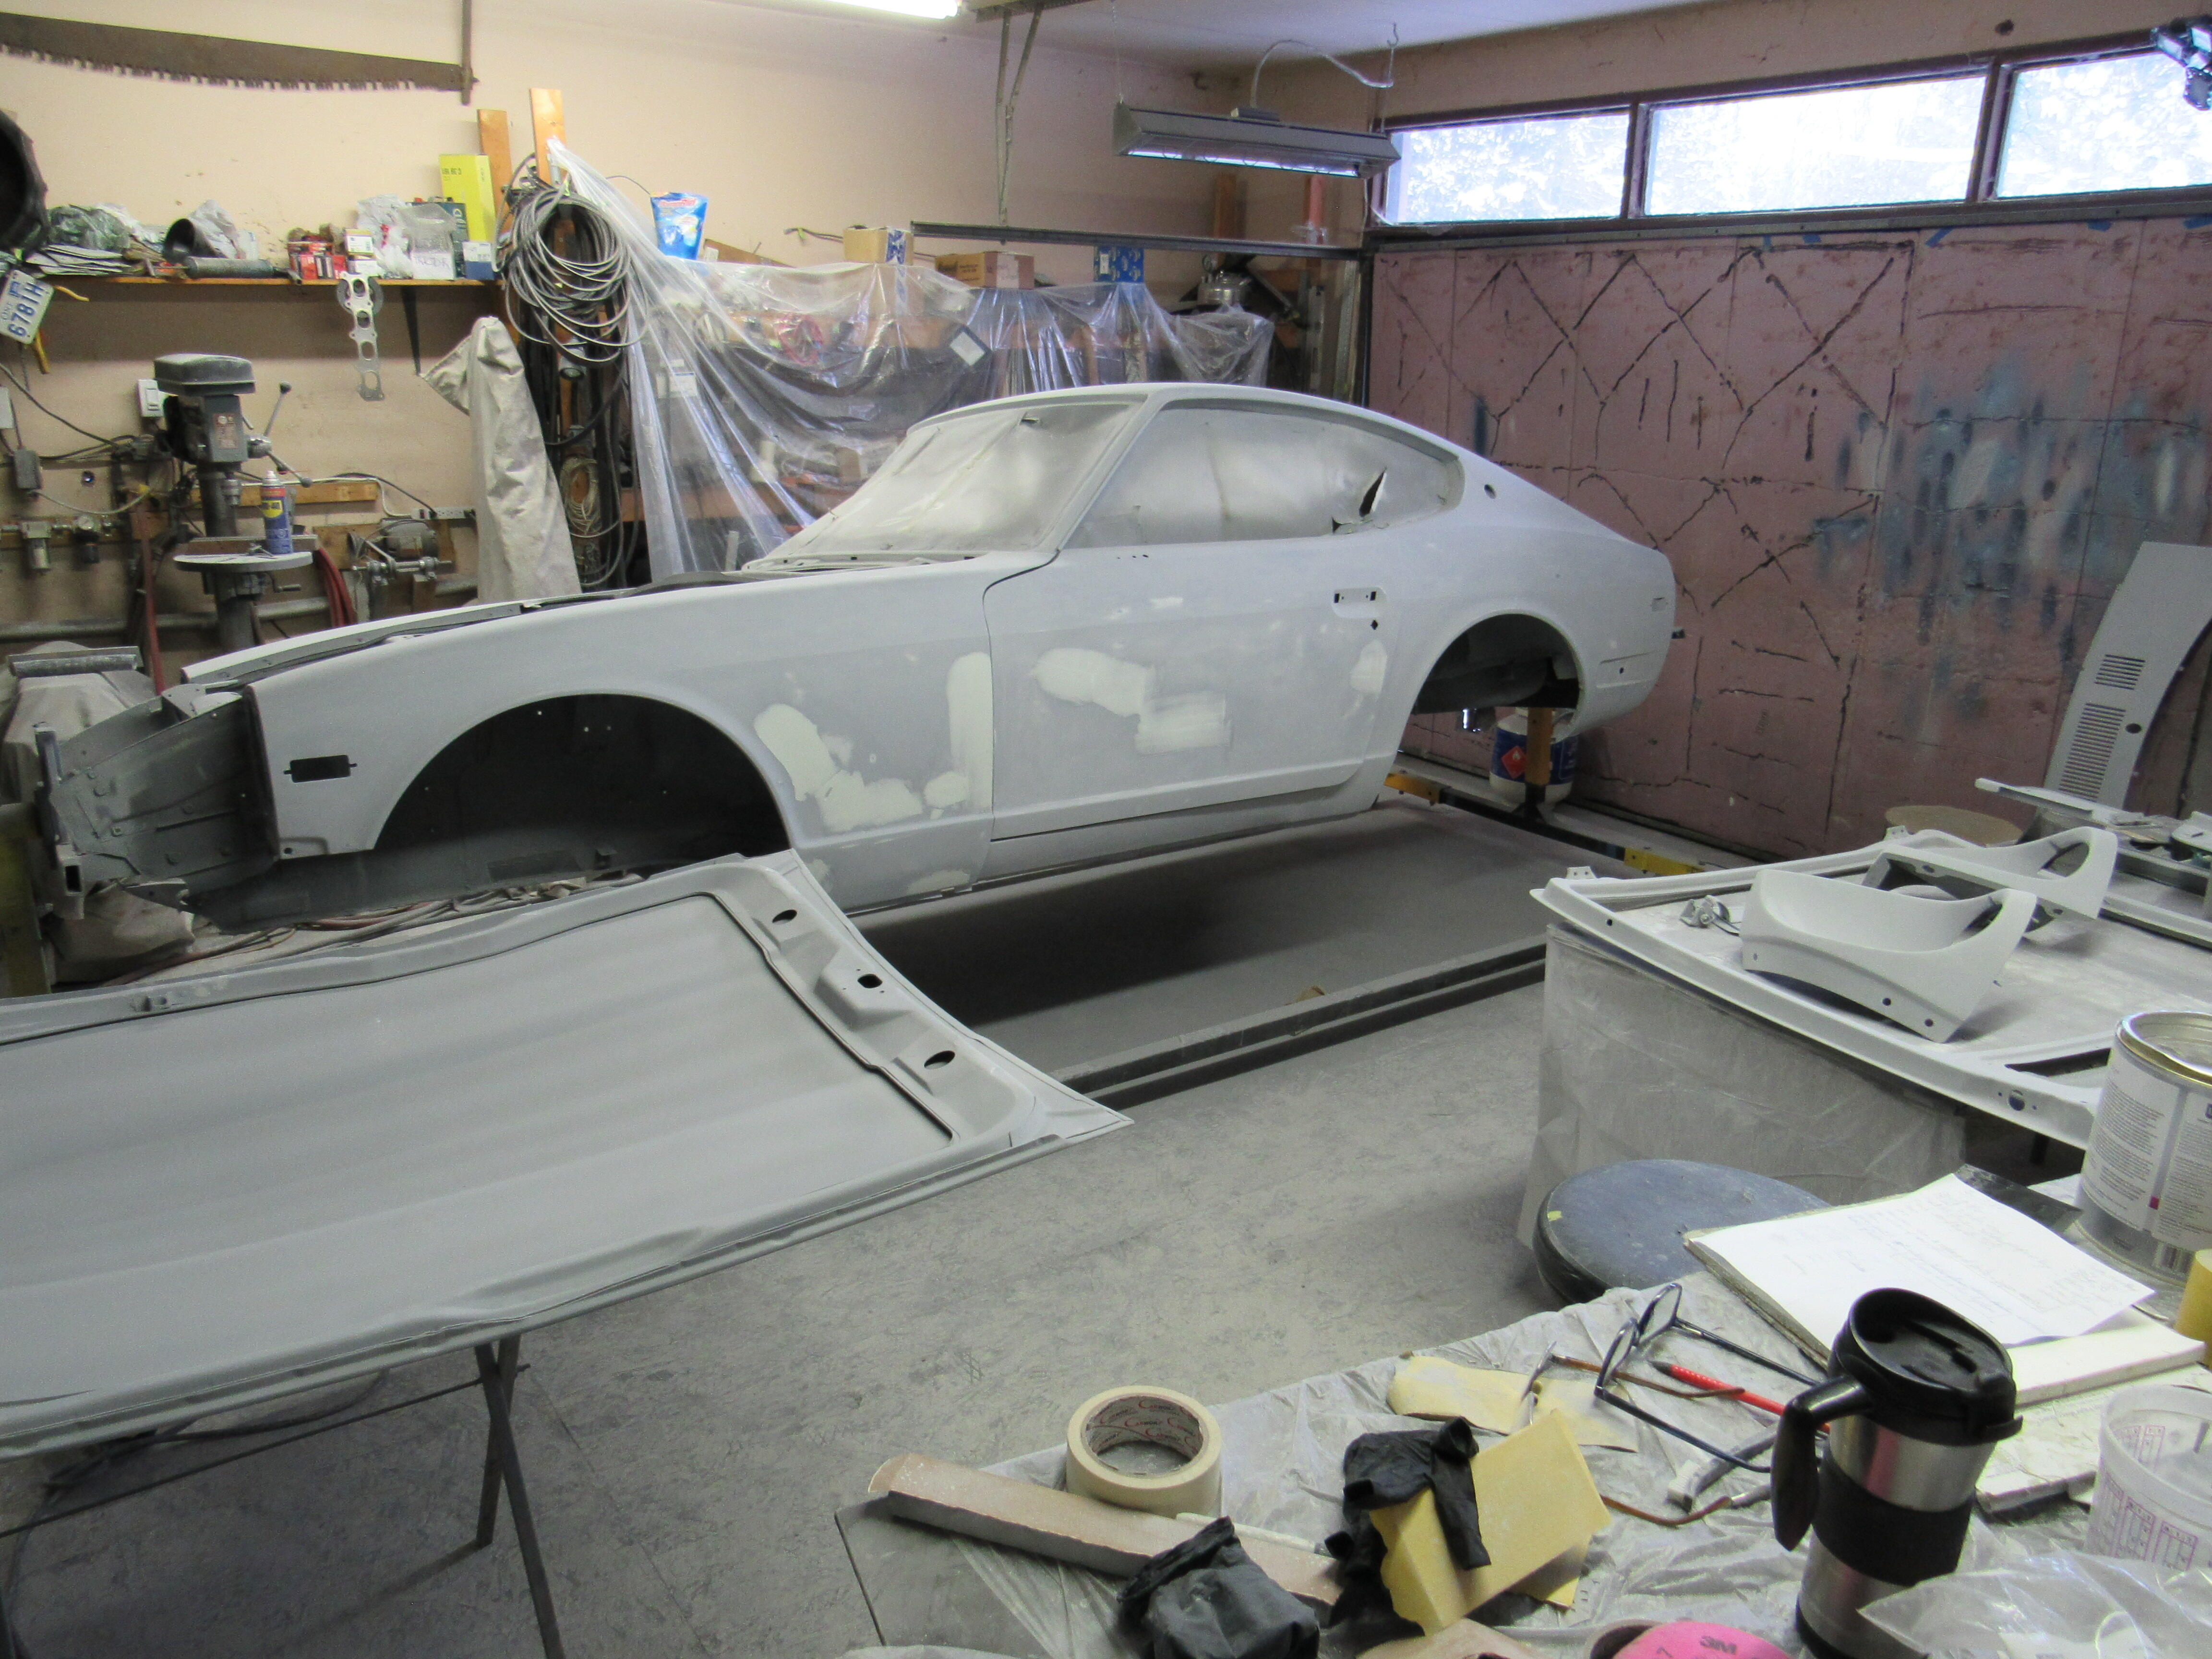
I got all the paint off, sanded down to fresh metal and laid on 2 coats of epoxy primer, there will be no rust starting this time around. I tried to order a set of the new Acrylic Linear blocking tools but everyone was sold out so I ordered some polycarbonate sheet and put these together. I'll never go back to the hard foam blocks, these cut so fast and flat. 2 coats of high build primer went on next and that has been blocked out to 220 grit and I put another 2 coats of HB primer on today so I should be able to start with 320 tomorrow morning. I picked up the paint and clear so I'm all set, the colour will be Sport Classic Grey is 63A / L63A. a Porsche colour.
1 point
I got all the paint off, sanded down to fresh metal and laid on 2 coats of epoxy primer, there will be no rust starting this time around. I tried to order a set of the new Acrylic Linear blocking tools but everyone was sold out so I ordered some polycarbonate sheet and put these together. I'll never go back to the hard foam blocks, these cut so fast and flat. 2 coats of high build primer went on next and that has been blocked out to 220 grit and I put another 2 coats of HB primer on today so I should be able to start with 320 tomorrow morning. I picked up the paint and clear so I'm all set, the colour will be Sport Classic Grey is 63A / L63A. a Porsche colour.


 1 point
 1 point


Important Information
By using this site, you agree to our Privacy Policy and Guidelines. We have placed cookies on your device to help make this website better. You can adjust your cookie settings, otherwise we'll assume you're okay to continue.