Leaderboard


Popular Content
Showing content with the highest reputation on 03/03/2022 in all areas
-
 Just be careful to inspect your existing screwdrivers before you plunk down an order for a JIS set. I didn't and. when the new JIS set arrived, I discovered that the tip geometry of my 10-year-old Craftsman screwdrivers was identical. I then verified that my Craftsman set has the JIS tip geometry. That makes me think that many of the manufacturers of 'regular' screwdrivers may have switched to the JIS tip geometry some time ago. I certainly do have some Phillips-head screwdrivers in my collection that aren't JIS, but they're all anywhere from 20 to 50 years old (dating myself here). These cheap-o's helped me to strip out the heads of the through-bolts (actually pan-head Phillips machine screws) that were holding together the left and right-side halves of my Yamaha 80's crankcase. That introduced me to the concept of corrosion between dissimilar metals and, in turn, led me to discover the perils of trying to use a cheap e-z-out to remove a frozen fastener (snap!). Which, in turn, showed me how difficult it is the drill out a cheap, but nevertheless, hardened-steel e-z-out. All of which led to my introduction to the service manager at my local bike shop.3 points
 -
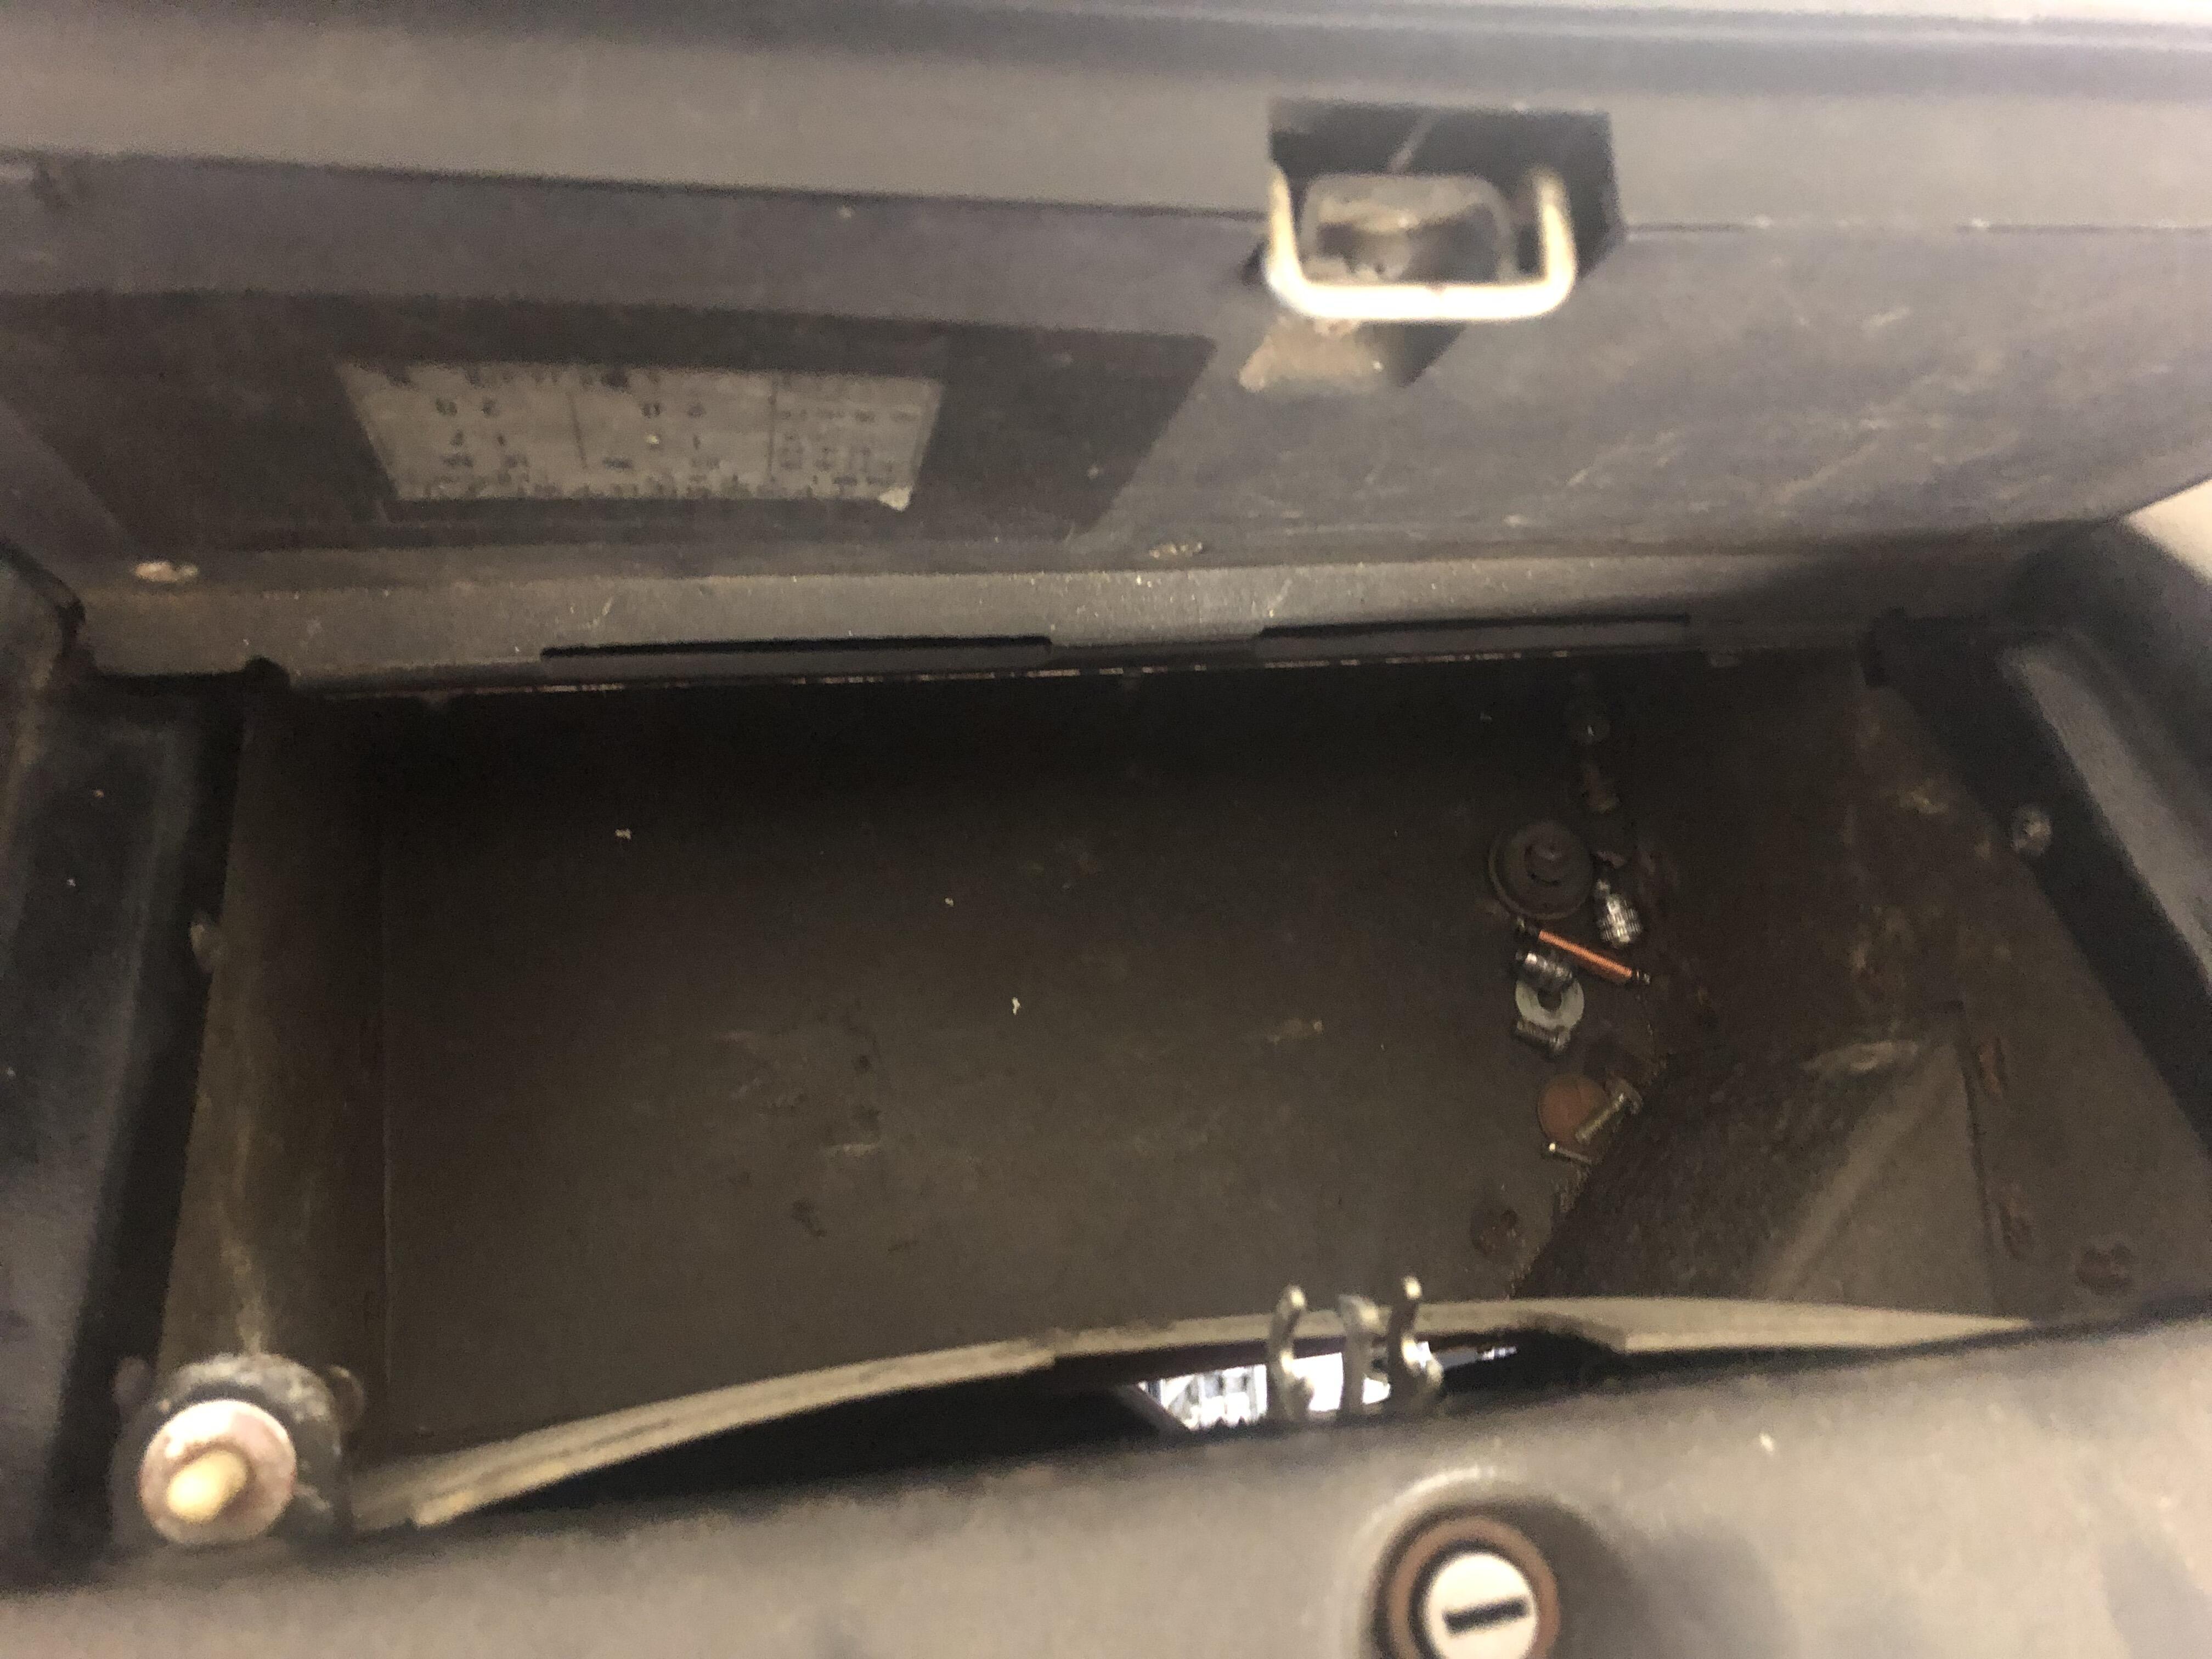
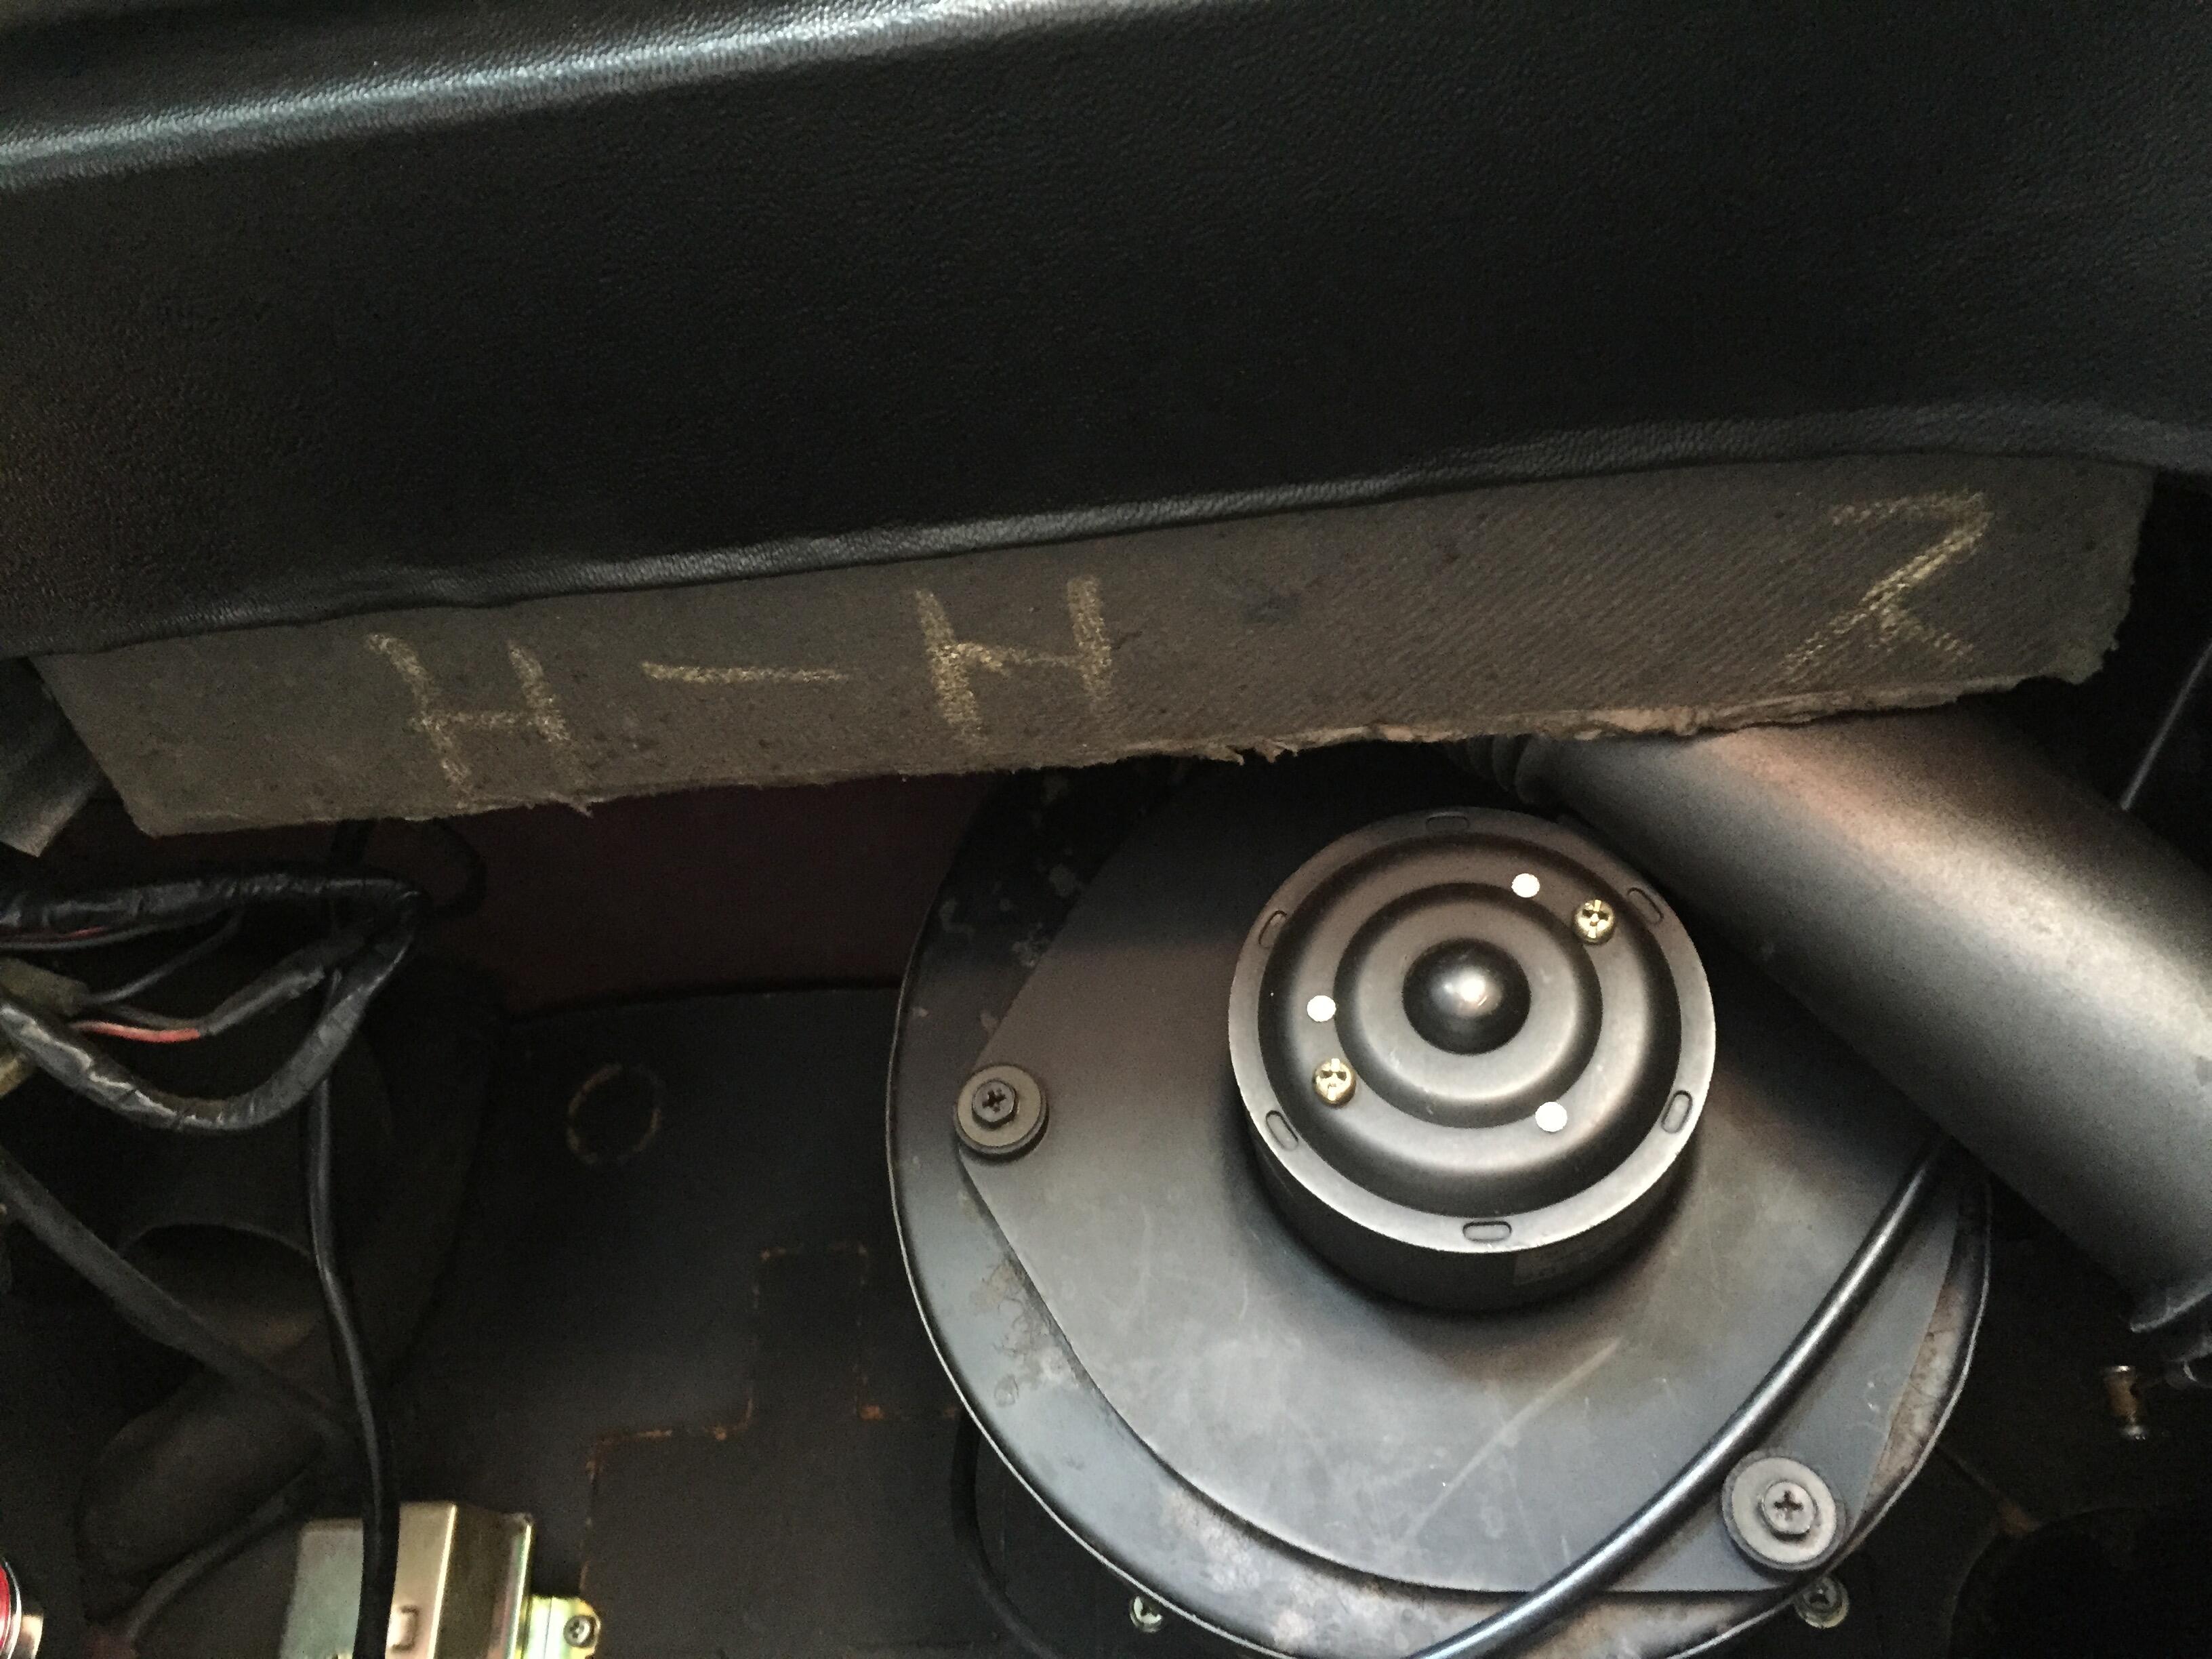
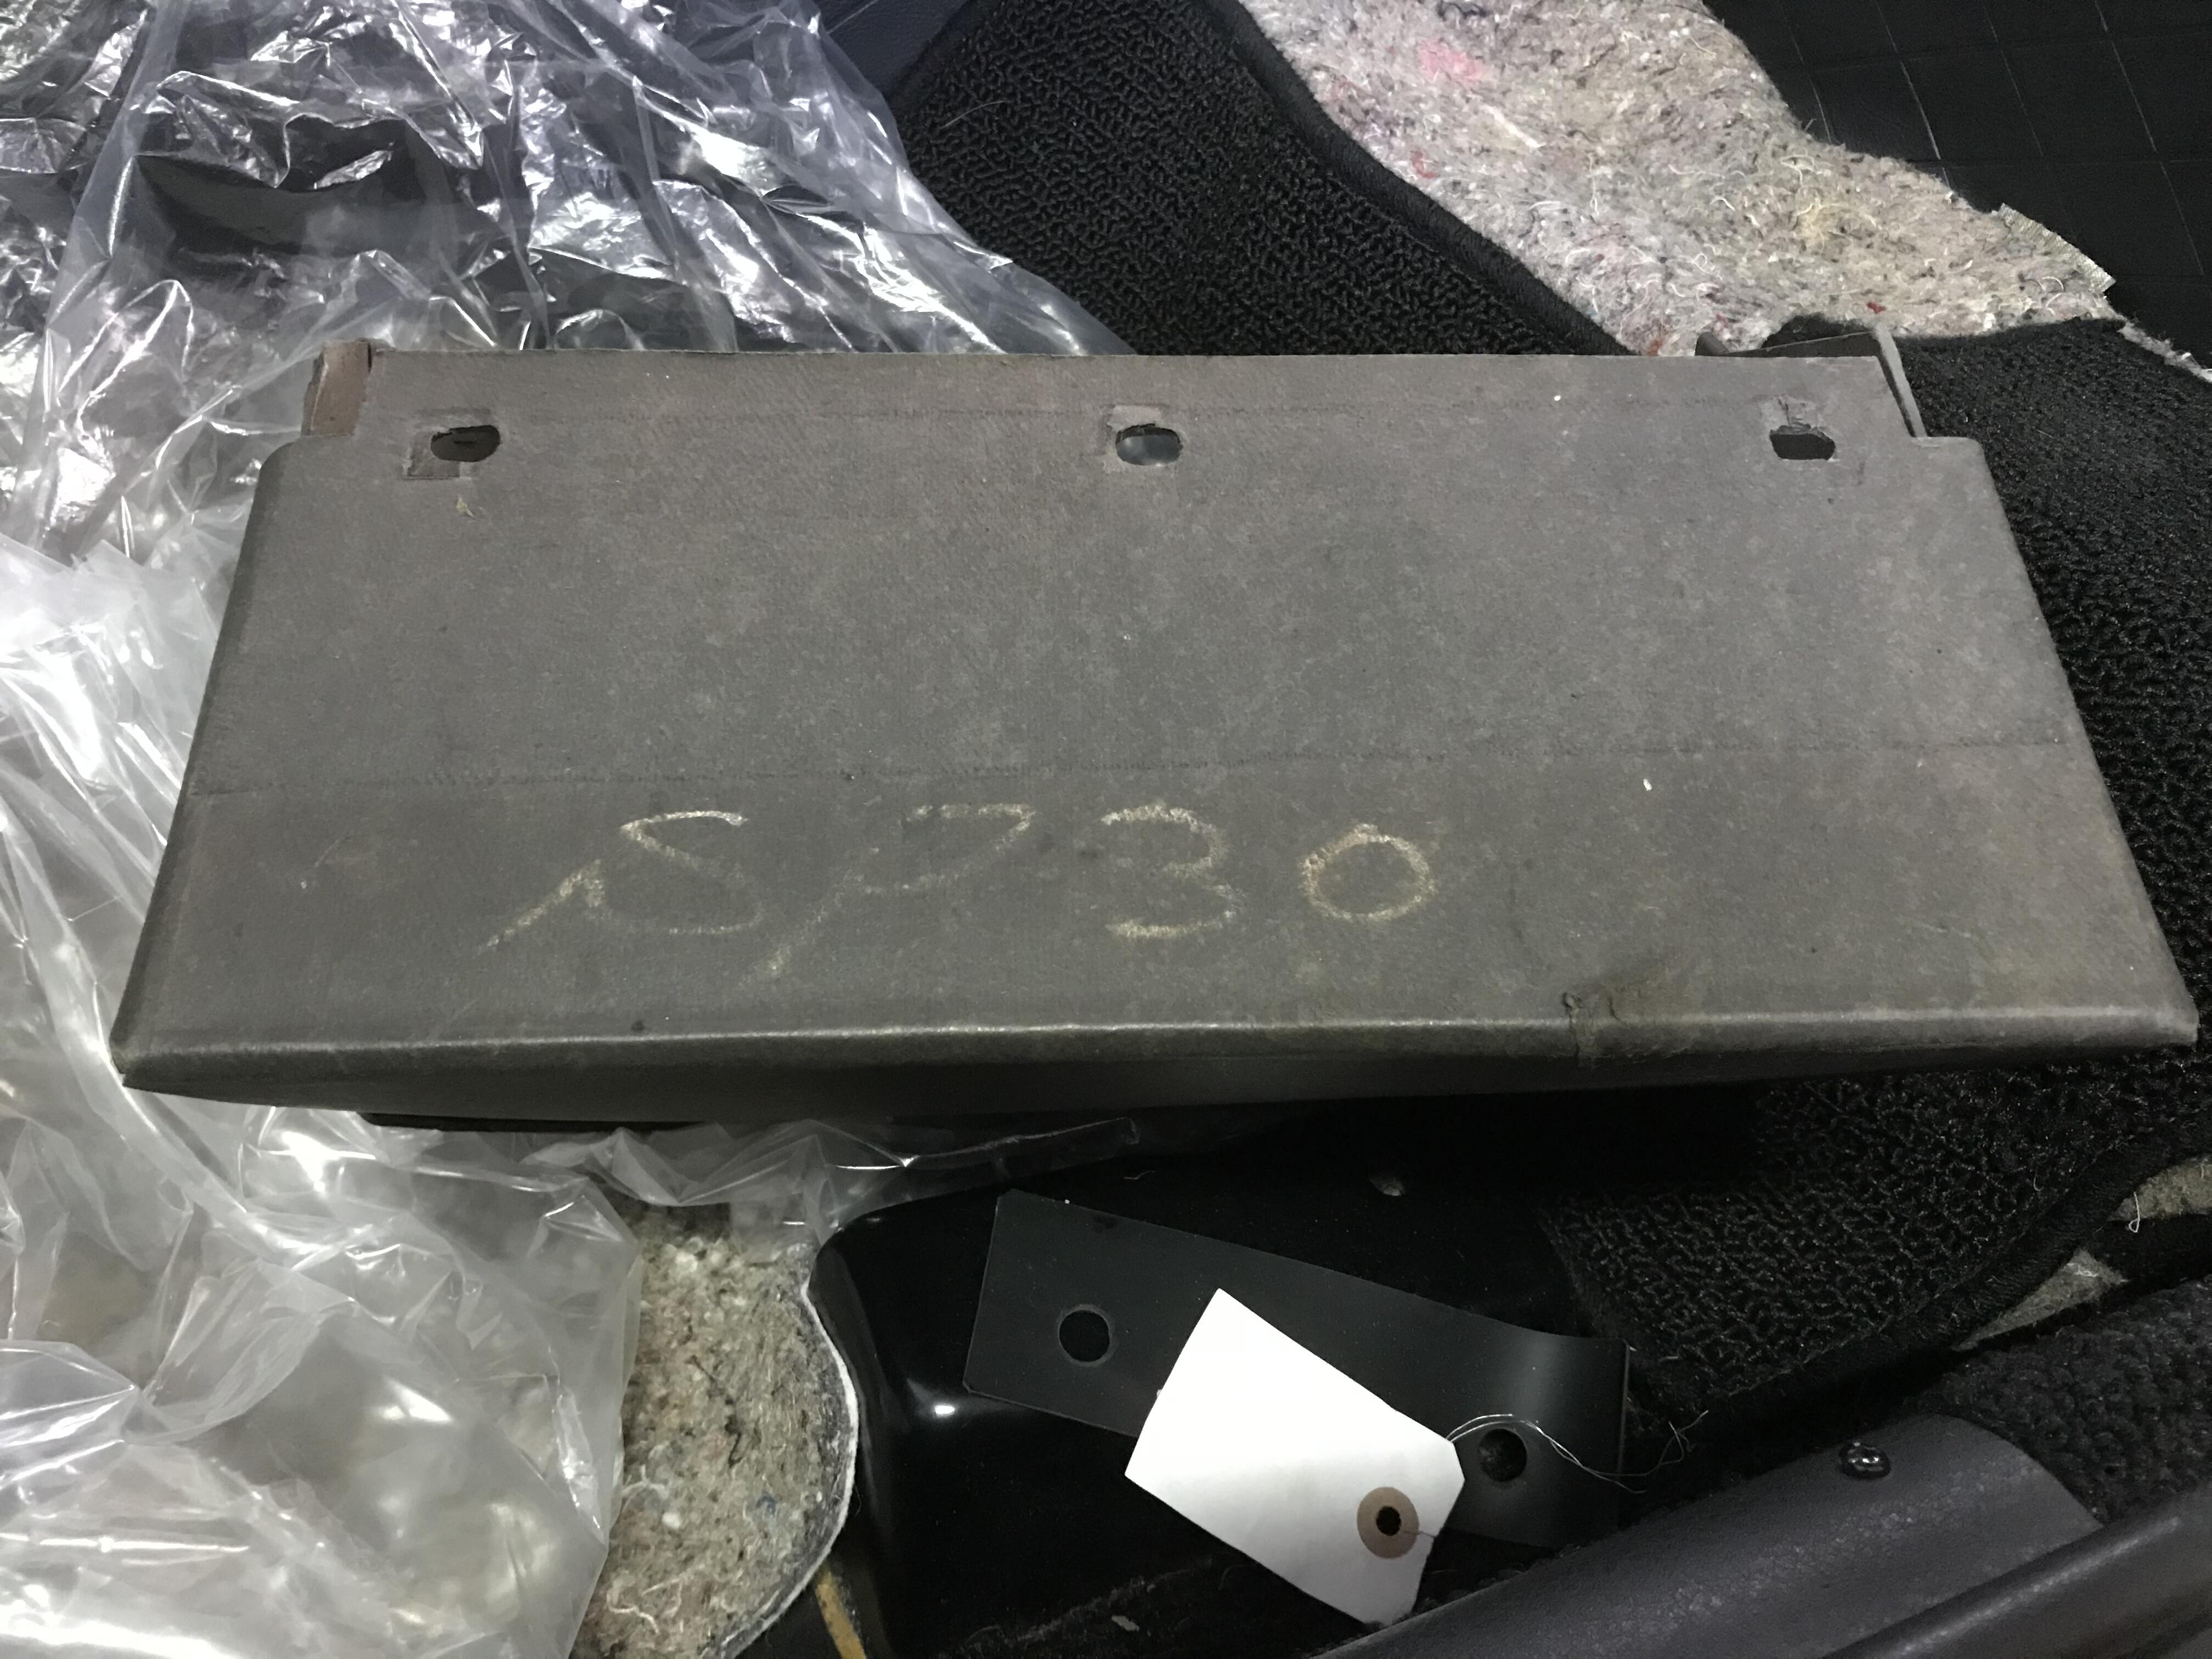
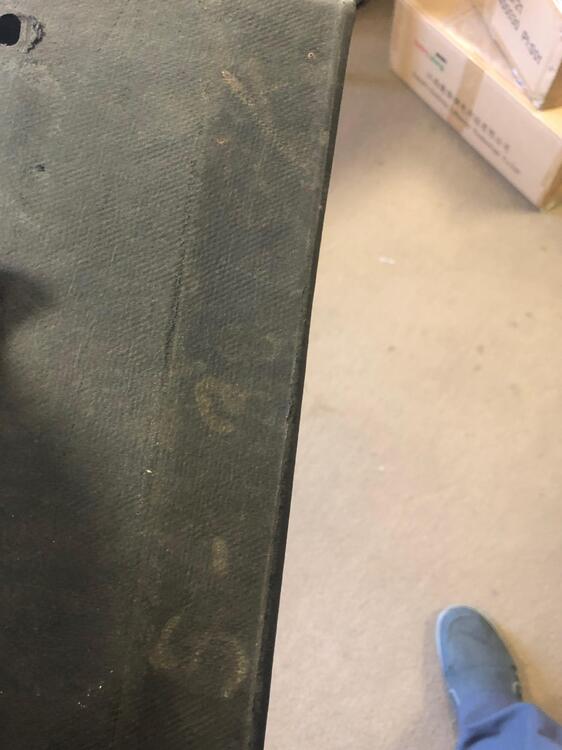
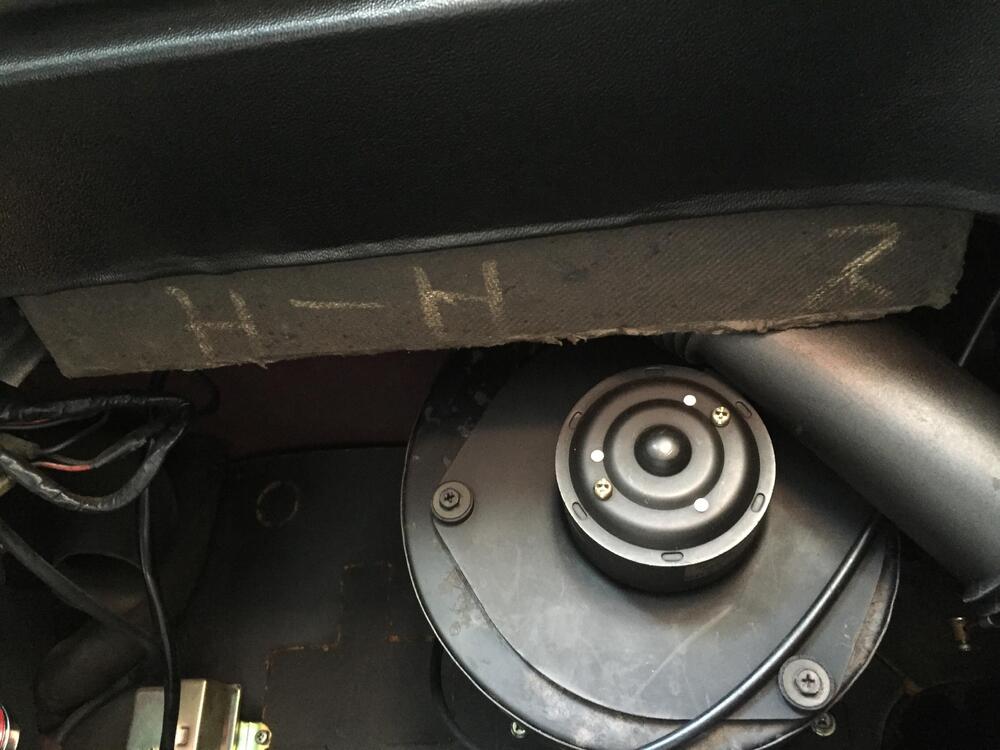
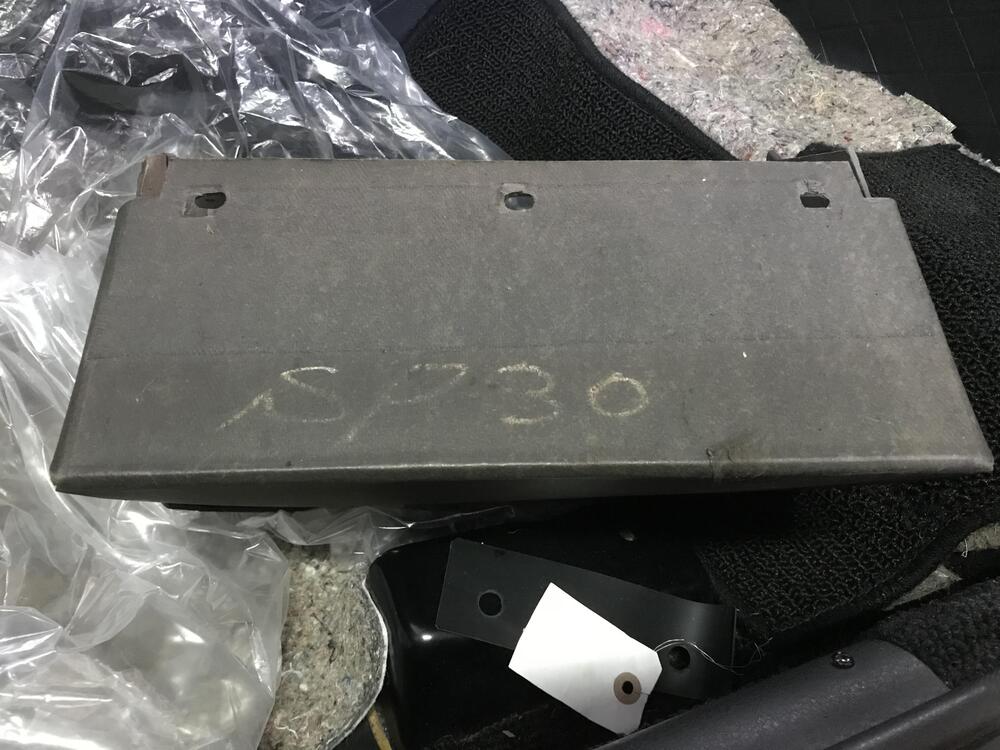
 2 pointsGlovebox base chalkings have become one of my first calls when I see one of these cars in person. Getting down on your hands and knees with your head in the passenger side footwell often requires an explanation to the owner... Clearly Nissan Shatai didn't really need to put much information - if at all - on North American market variant dashes during assembly (although that letter 'A' seems to pop up as above, as well as 'H'), but other LHD market variants certainly got their destination market chalked up either in 'Romaji' or Kana. So did export RHD markets. For the domestic market, Nissan Shatai noted the sub-variant type there (probably indicating content difference) so your 1970 Fairlady Z would have a chalk mark indicating that it was a 'Standard'/'Z-S'/'S' model rather than a 'Deluxe'/'Z-D'/'D' model. I've seen several variations for the same thing, so I wonder if it was an informal - rather than standardized - notation by the assembly line workers? I see 'S' and then '30', plus something else on yours that I can't make out. Frustrating!2 points
 -
 I don’t think the guys/gals on this forum are super into body mods like that, I don’t even like pierced belly buttons tbh. Checkout this thread on hybridZ https://forums.hybridz.org/topic/128069-datsun-s30-3-piece-spoiler-for-240z-260z-280z/2 points
 -
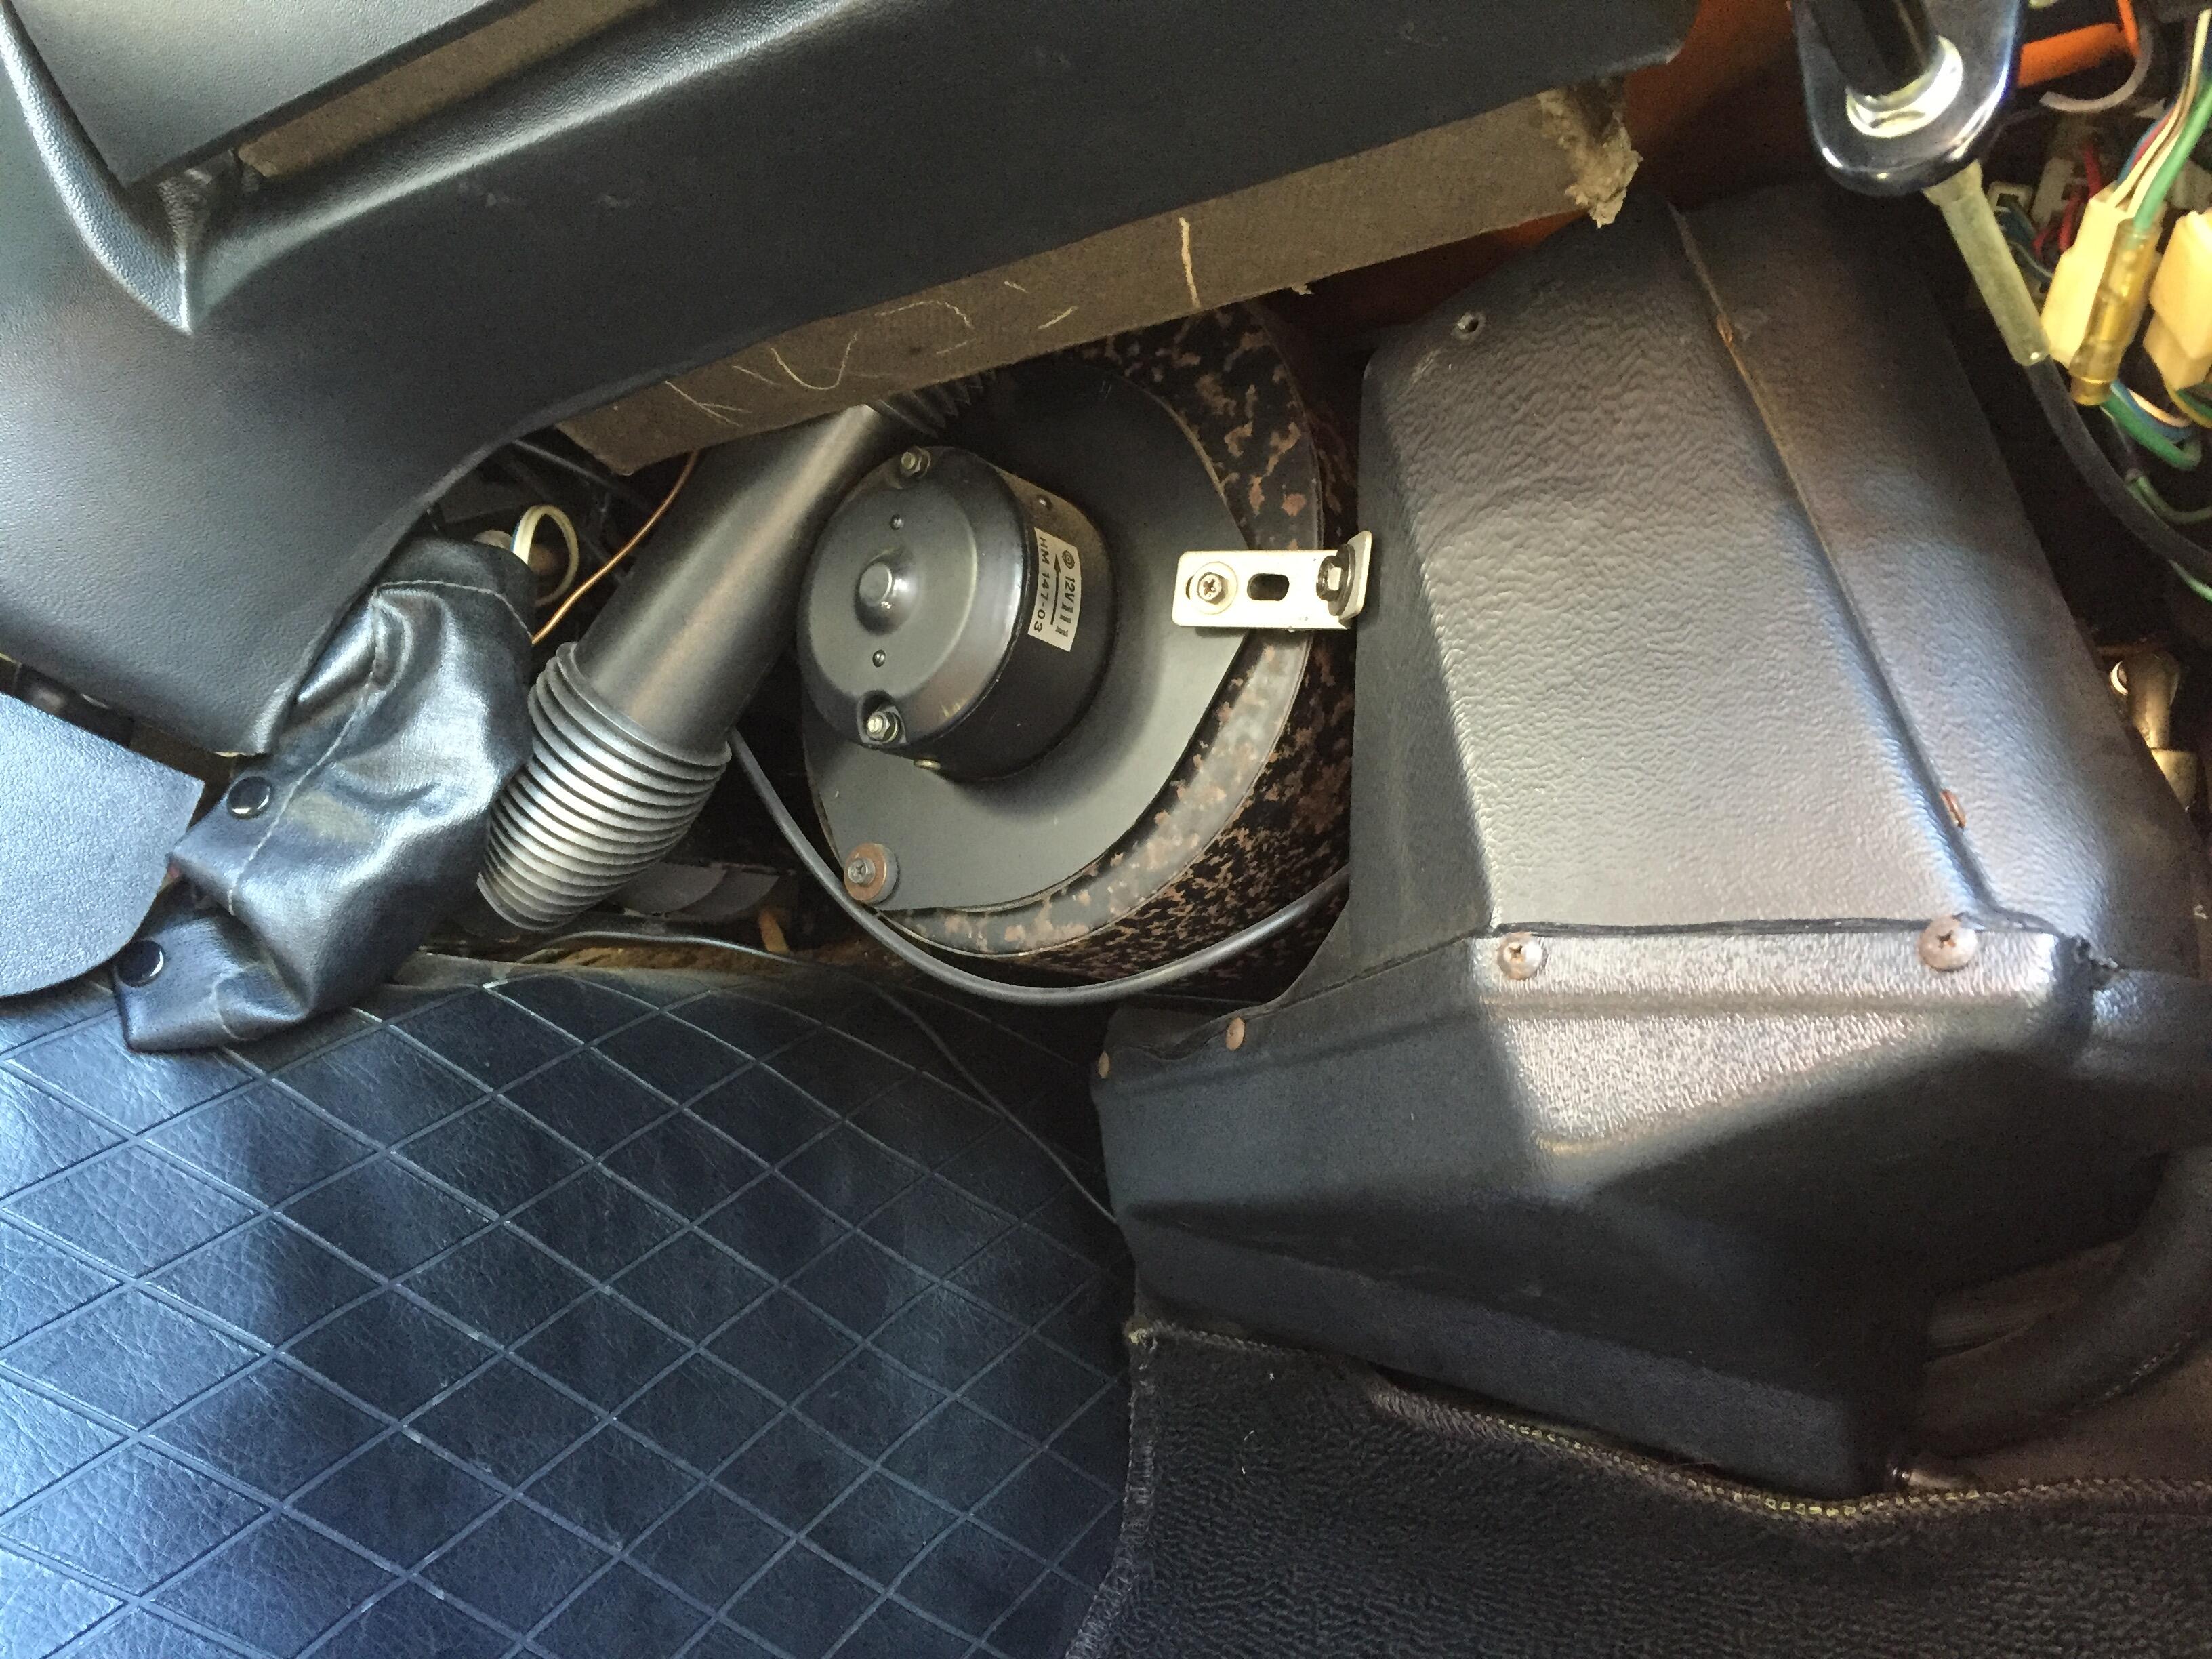
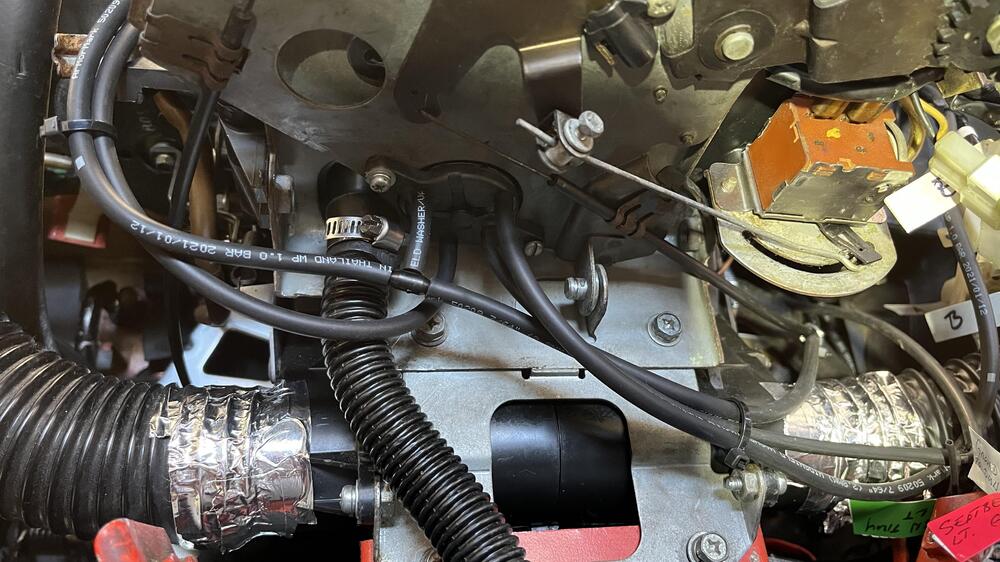
 2 pointsThanks bud! I'll sleep soundly. The screws holding your vacuum control switch don't match. One of the screws that holds the HVAC "stuff" to the transmission tunnel is loose. Bottom right of the pic.2 points
 -
 2 pointsOkay this is for Captain Obvious….I don’t want him to have a restless night. 🤣 Followed the FSM diagram. Pretty straight forward. Time to test. 🤞
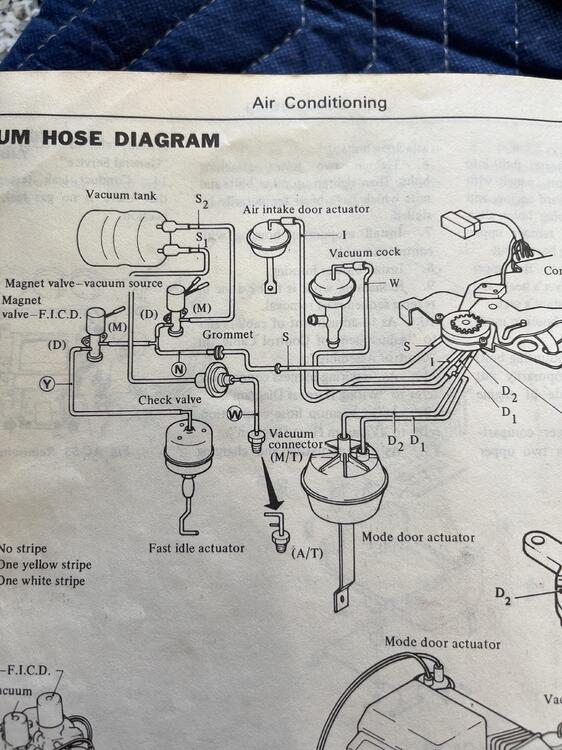
 2 points
 -
 Thanks. It is similar to my favorite toy from my childhood - a Remote Control car I had when I was 12: https://drive.google.com/file/d/1j8jiEC7IjXTNtWj_4ekyiU77dE3rFqWe/view?usp=sharing1 point
 -
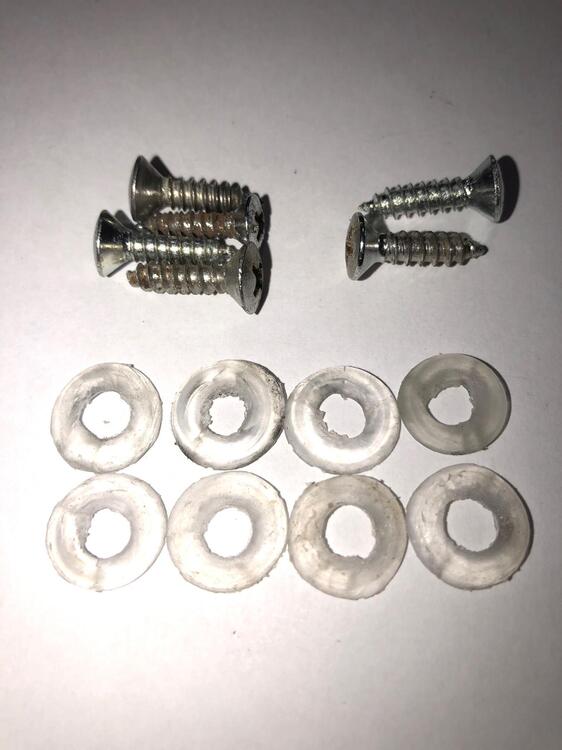
 dutchzcarguy, Please provide a photo of the sheet metal screw (your photo is a machine screw) used for this application. None of the sheet metal screws in this thread or the thread below have the JIS marking you indicate. Naturally, I do not want to install a JIS screw where one was not originally installed during original production. Photographic proof of JIS is appreciated. Thanks, Keith1 point
 -
1 pointI'd be wary of using that particular car as any kind of textbook example. The vented quarters don't make sense in context with the rest of the bodyshell. In fact, the *opposite* scenario (ie, non-vented quarters on an otherwise 'airflow' type later bodyshell) would be less unusual in PZR terms. Many of the PZR-specific body pressings were made in batches and there were no vented type quarter pressings made for the PZR. There are examples of the early - solid/unvented - PZR quarters being cut to accept the vented quarter 'Z' emblems. Some of the work being carried out on that car has made me, and a few others, wince. I'd like to see such an important and rare car mounted on a Celette or equivalent type body jig fixture before he started unzipping any seams and spotwelds.1 point
-
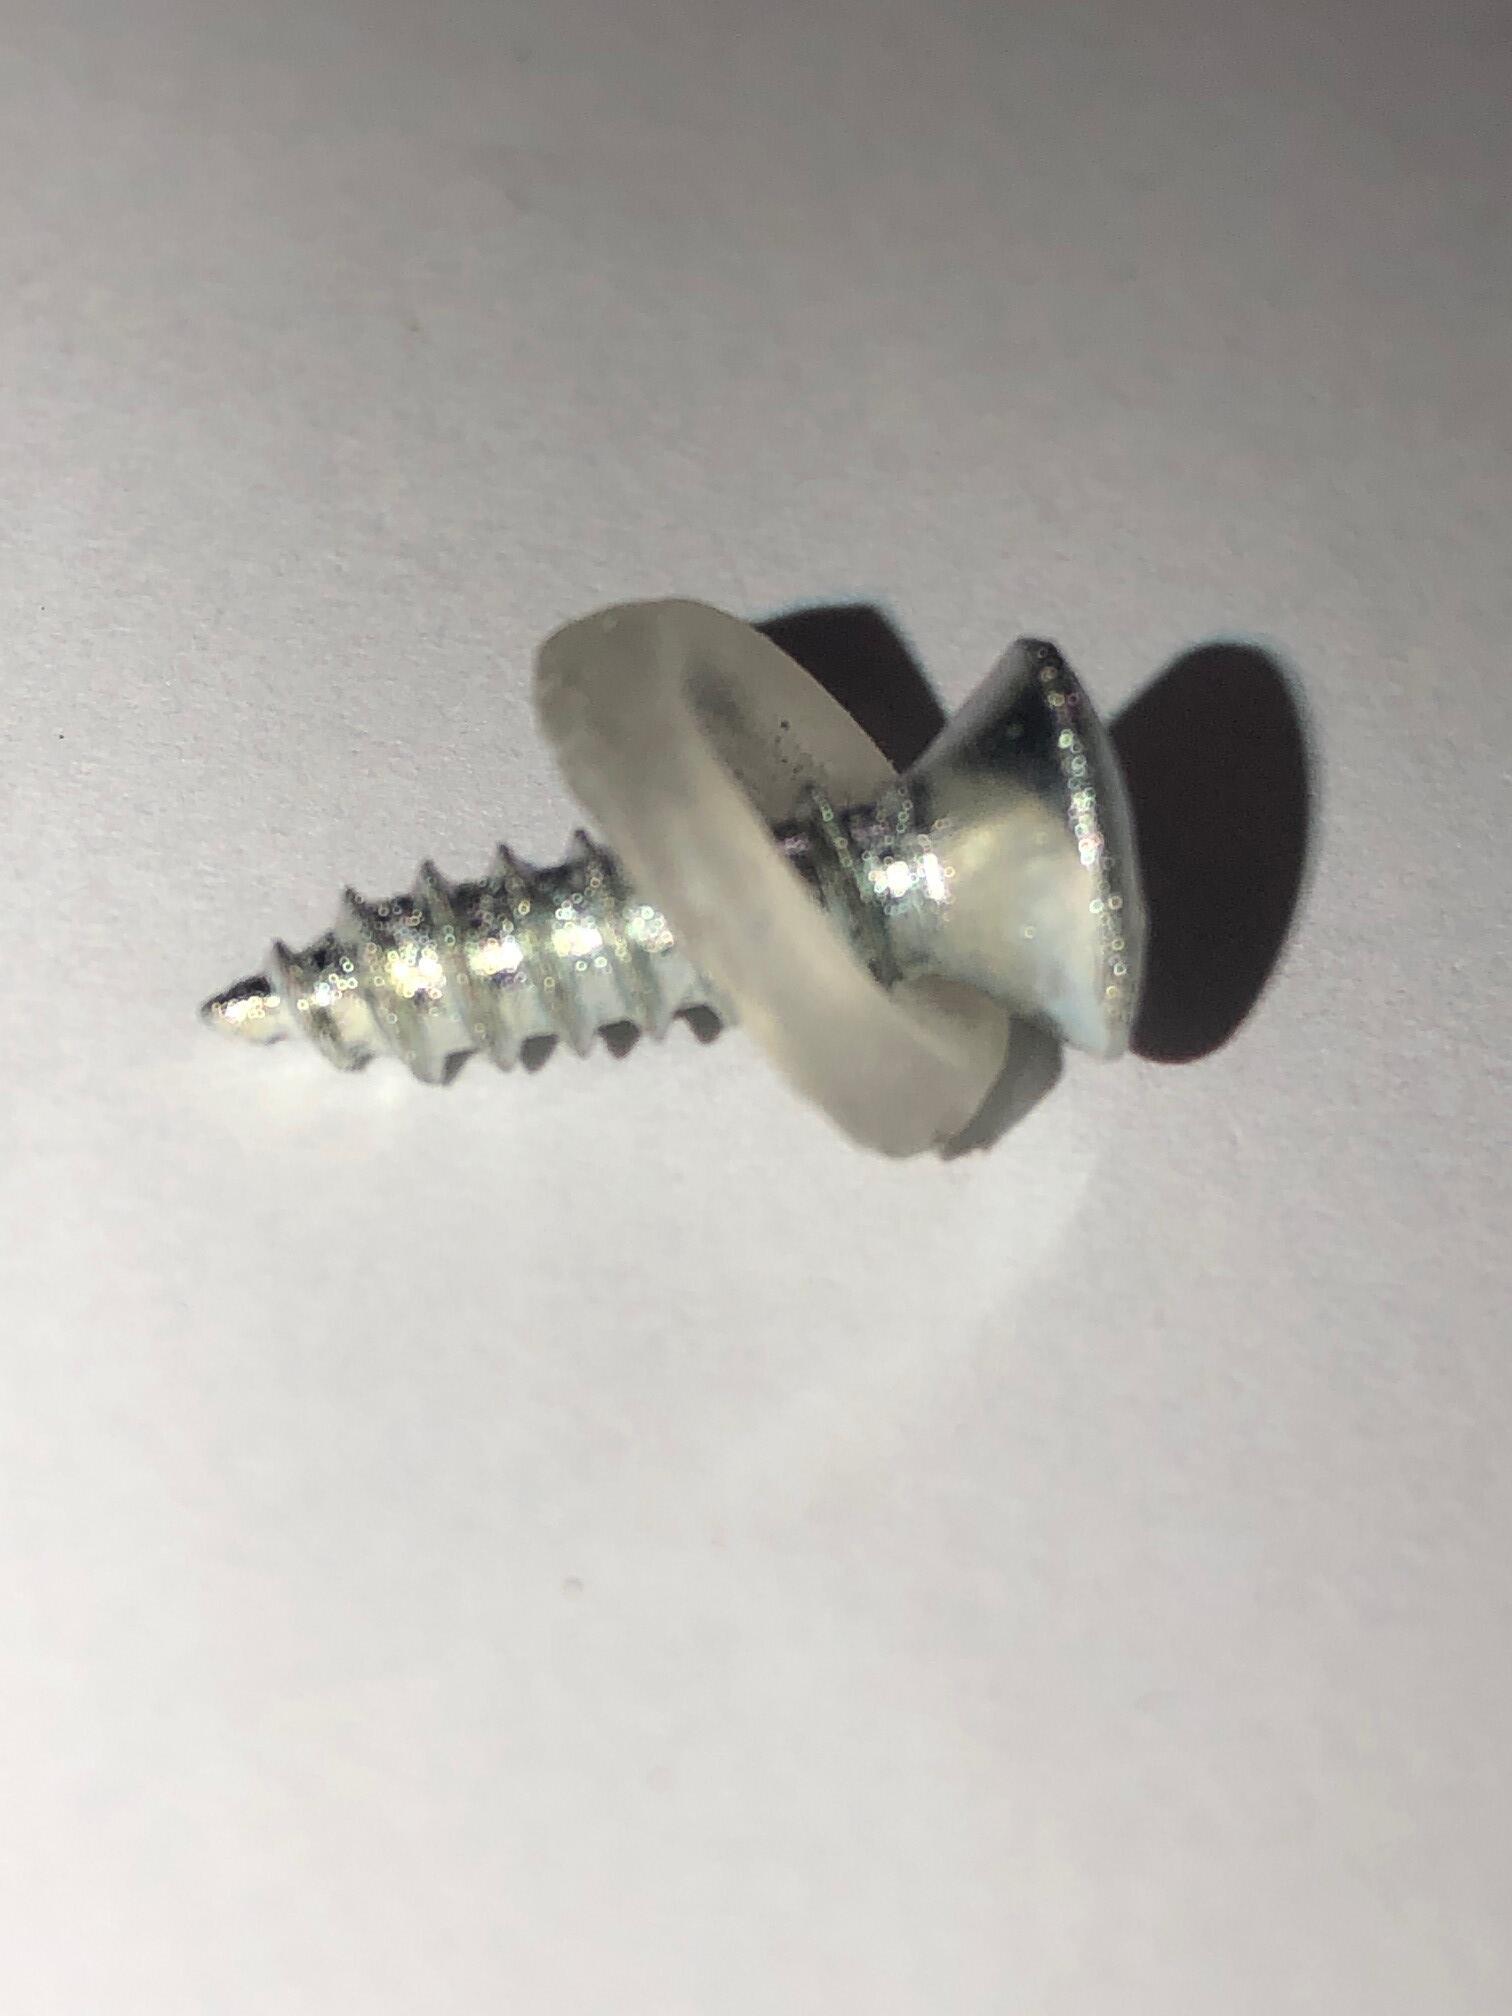
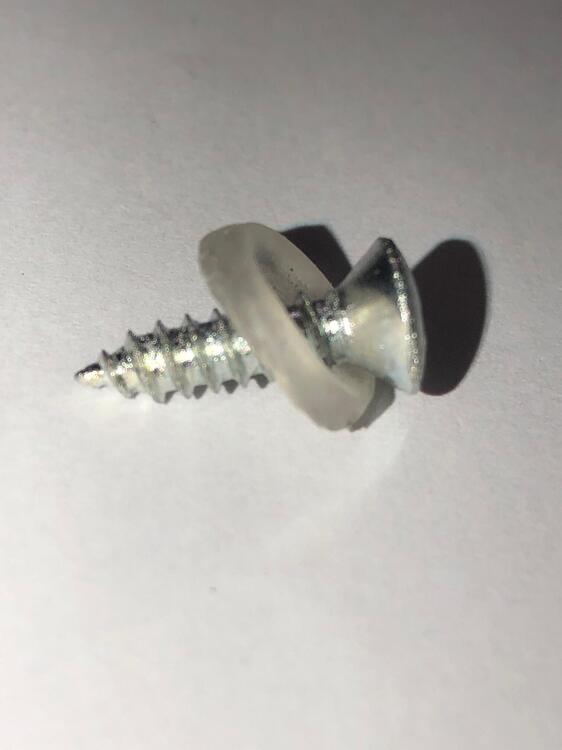
 I think the correct screw would be a JIS not a Phillips head screw... JIS looks like the Phillips but has a little dimple in one of the corners of the cross.. You also need a JIS screwdriver for that.. On a datsun 240z there are many screws with JIS... now you know also why the Phillips screwdriver never fitted very well 😉 .... See de dimple on it..1 point
 -
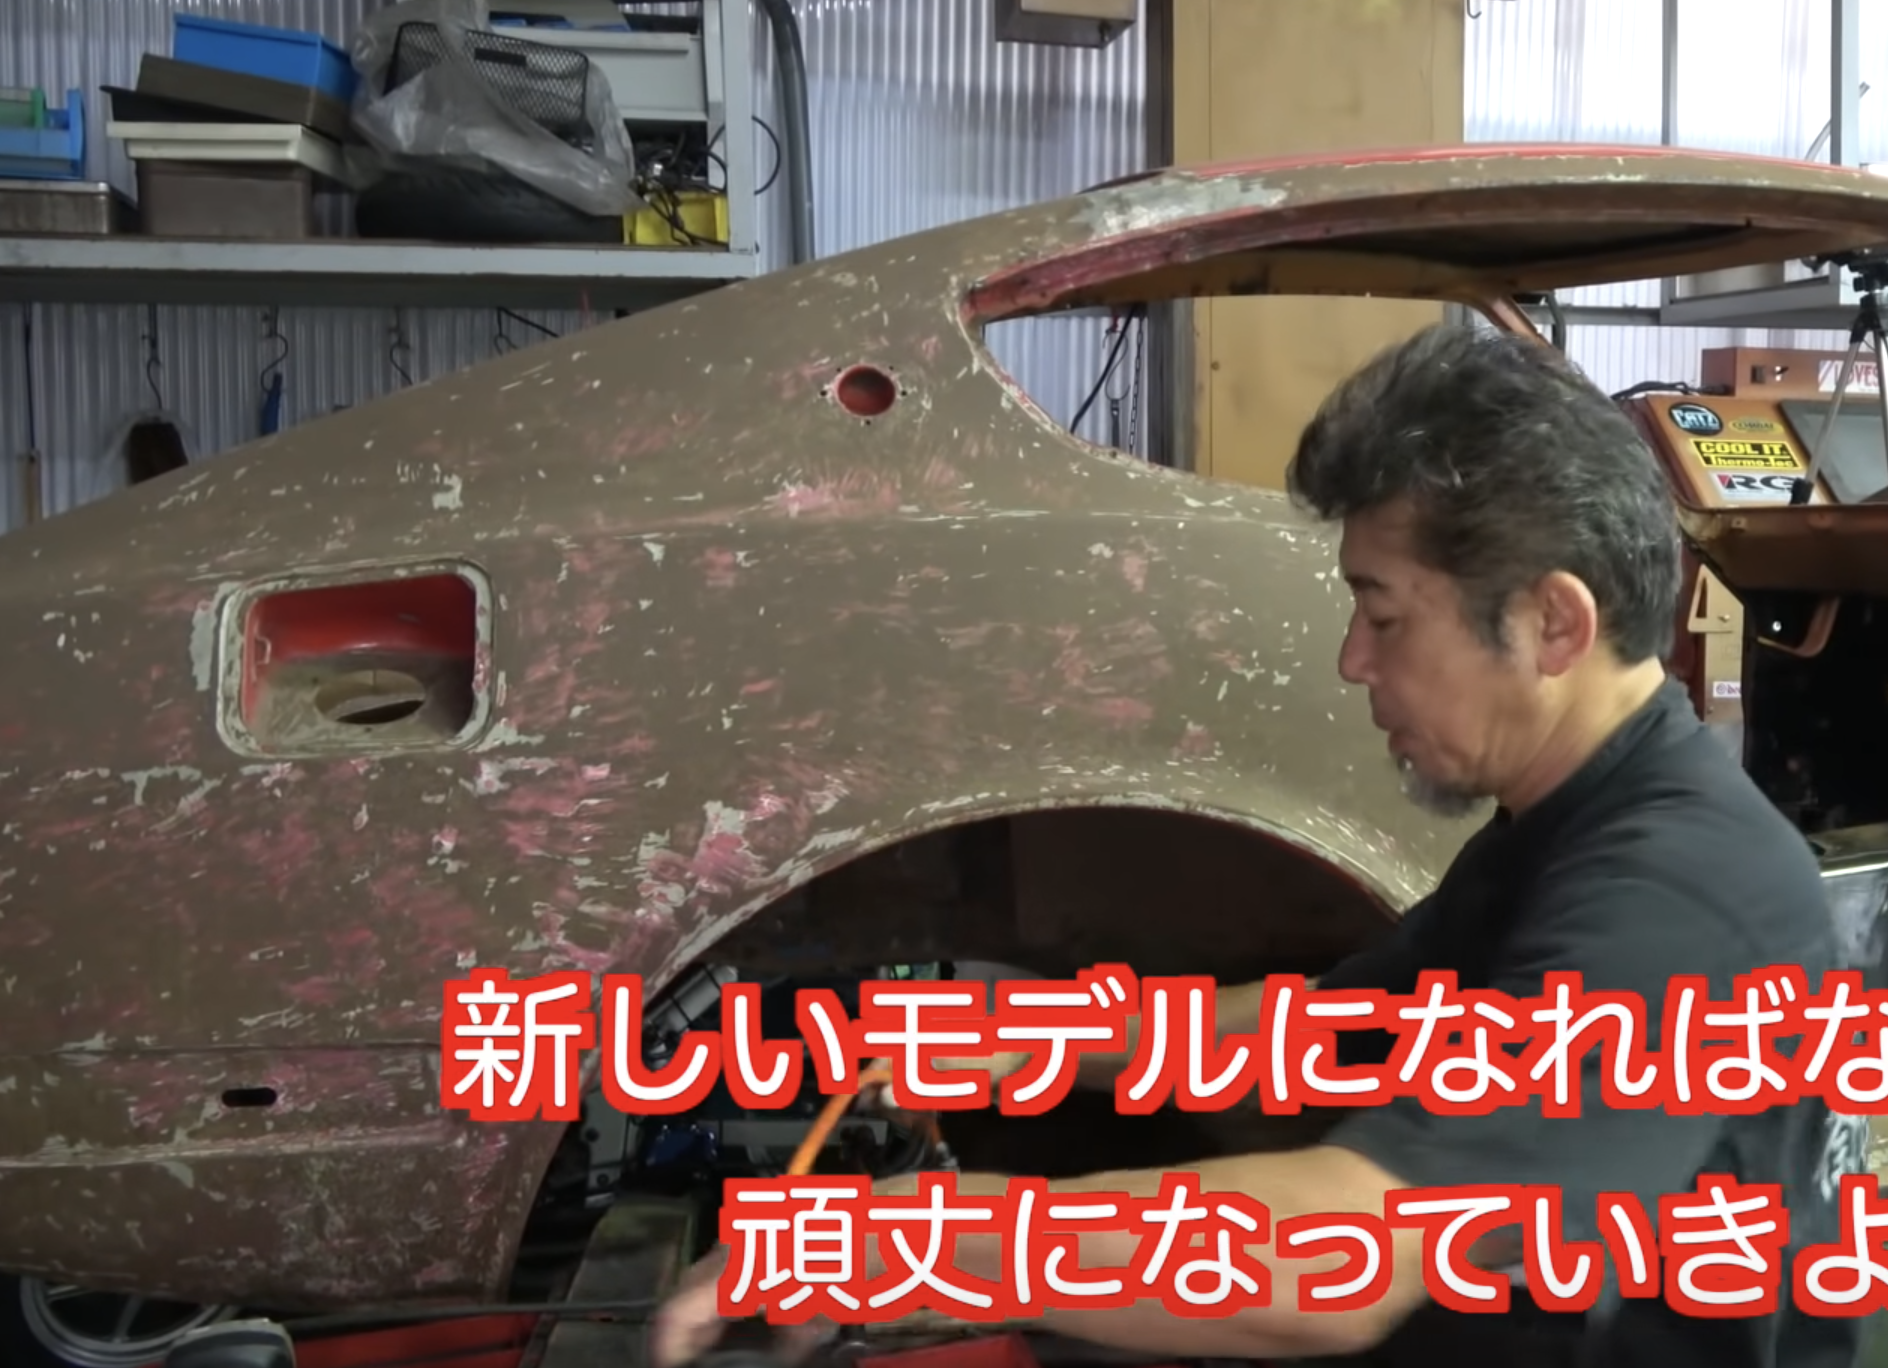
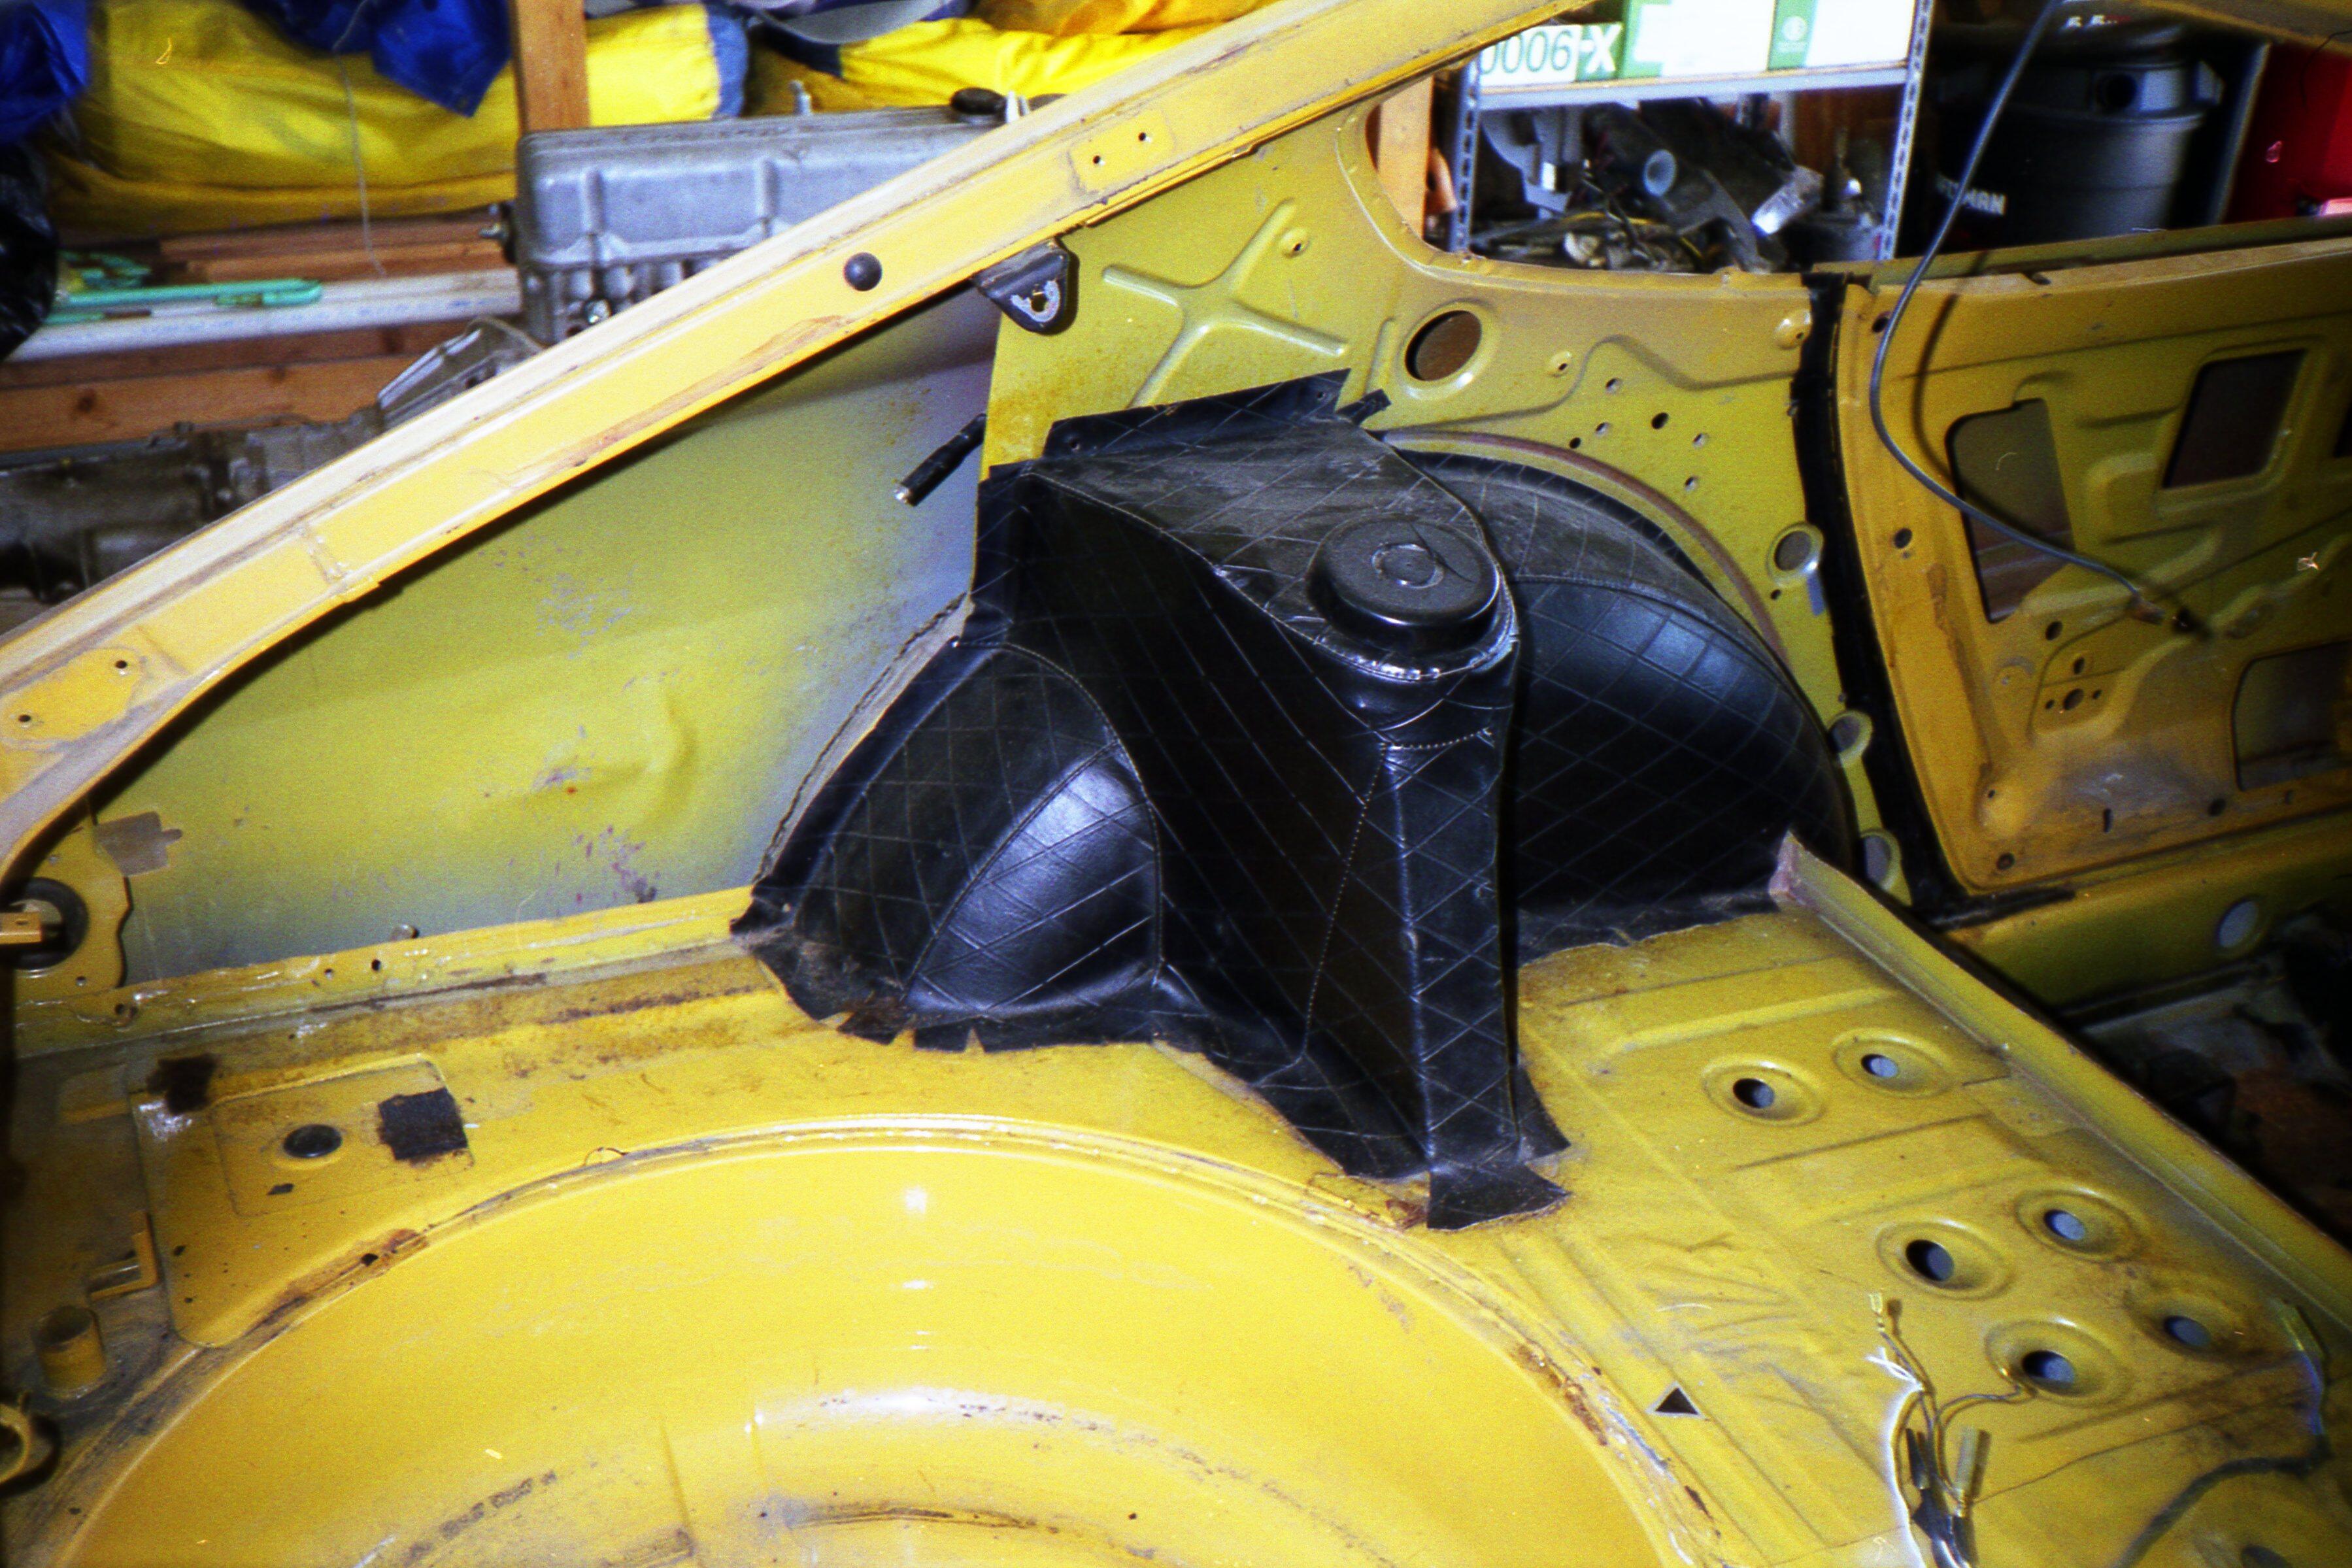
 1 pointI found the Z432-R restoration video particularly interesting, in that it shows an interesting body panel makeup unique to this Z432-R (and perhaps other PZR shells as well). We see some early-style stampings such as the firewall and perforated trunk-area behind the seats, as well as no cross-floor bracing behind the seat mounts, which I think was a very early feature. And below we see later-style rear 3/4 panels. These PZR shells were truly custom. Lots to absorb!
 1 point
 -
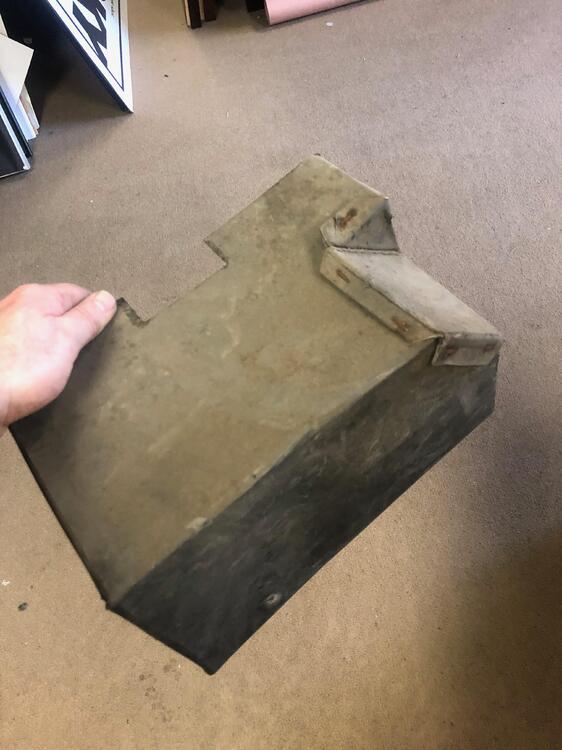
1 pointFortune smiles. I remembered I have a spare S30 dashboard from a car in the 1200's (as I recall), and the original glove box was intact. Seeing the two boxes that I have side-by-side, I feel that it's likely the glove box I mangled was a high-quality replica (staples are black, among other tell-tale signs), and the intact one is authentic. Pics of the faint lettering from the authentic glove box attached.

 1 point
 -
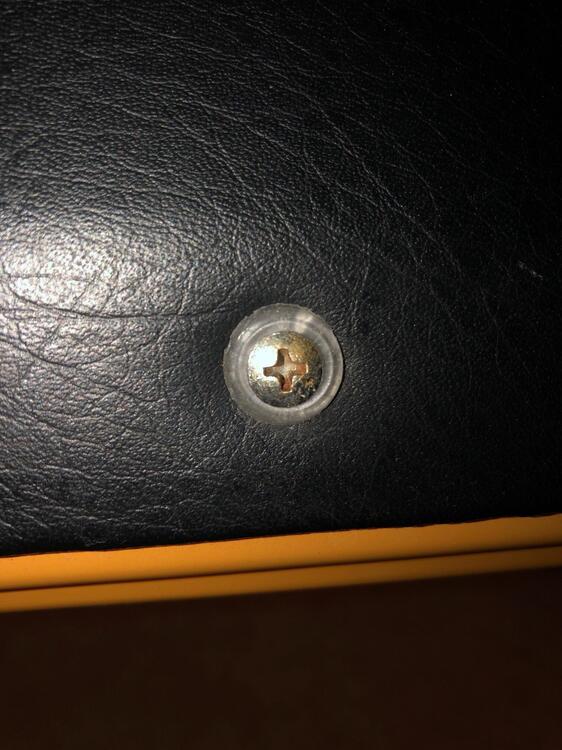
Final production: The washer material used contains elastomer this minimizes cracking. Although the washer is not generally exposed to sunlight, I have not conducted long term tests on the color fastness or rigidity.) The flash on the inner hole is covered by the fastener head. The next challenge is to locate a manufacturer of the correct size oval, phillips head screw. Keith
 1 point
 -
 1 point
 -
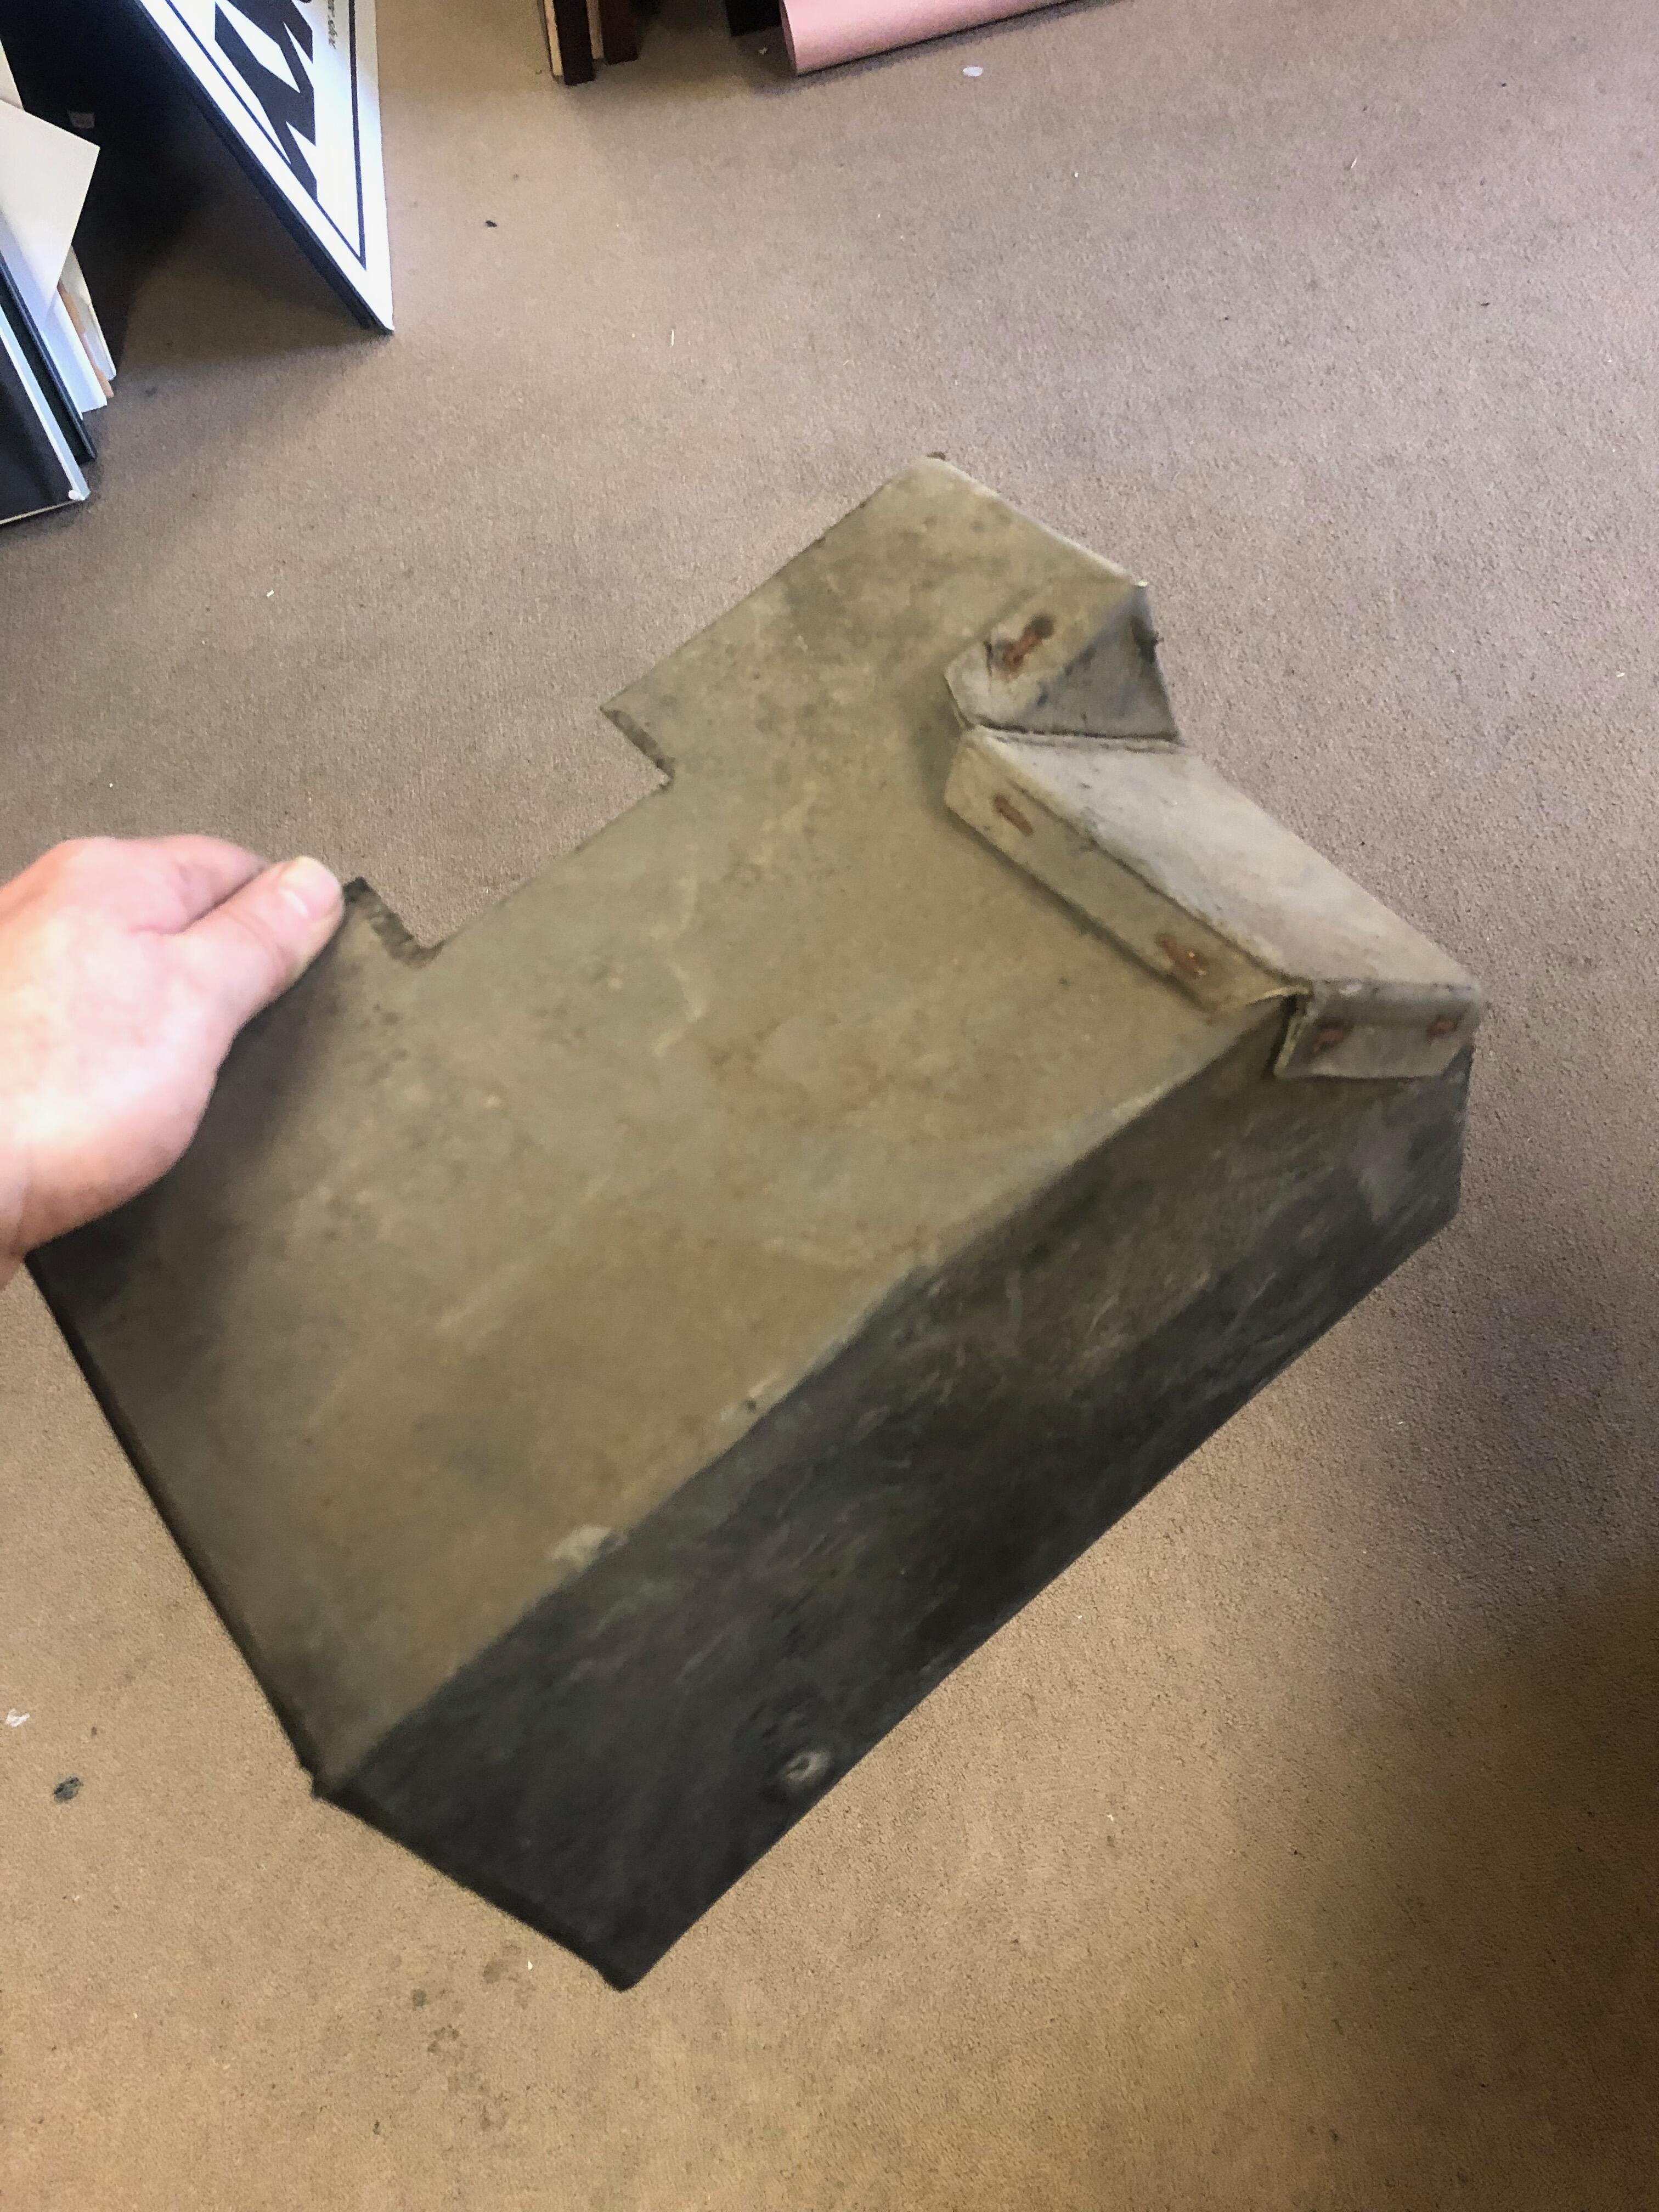
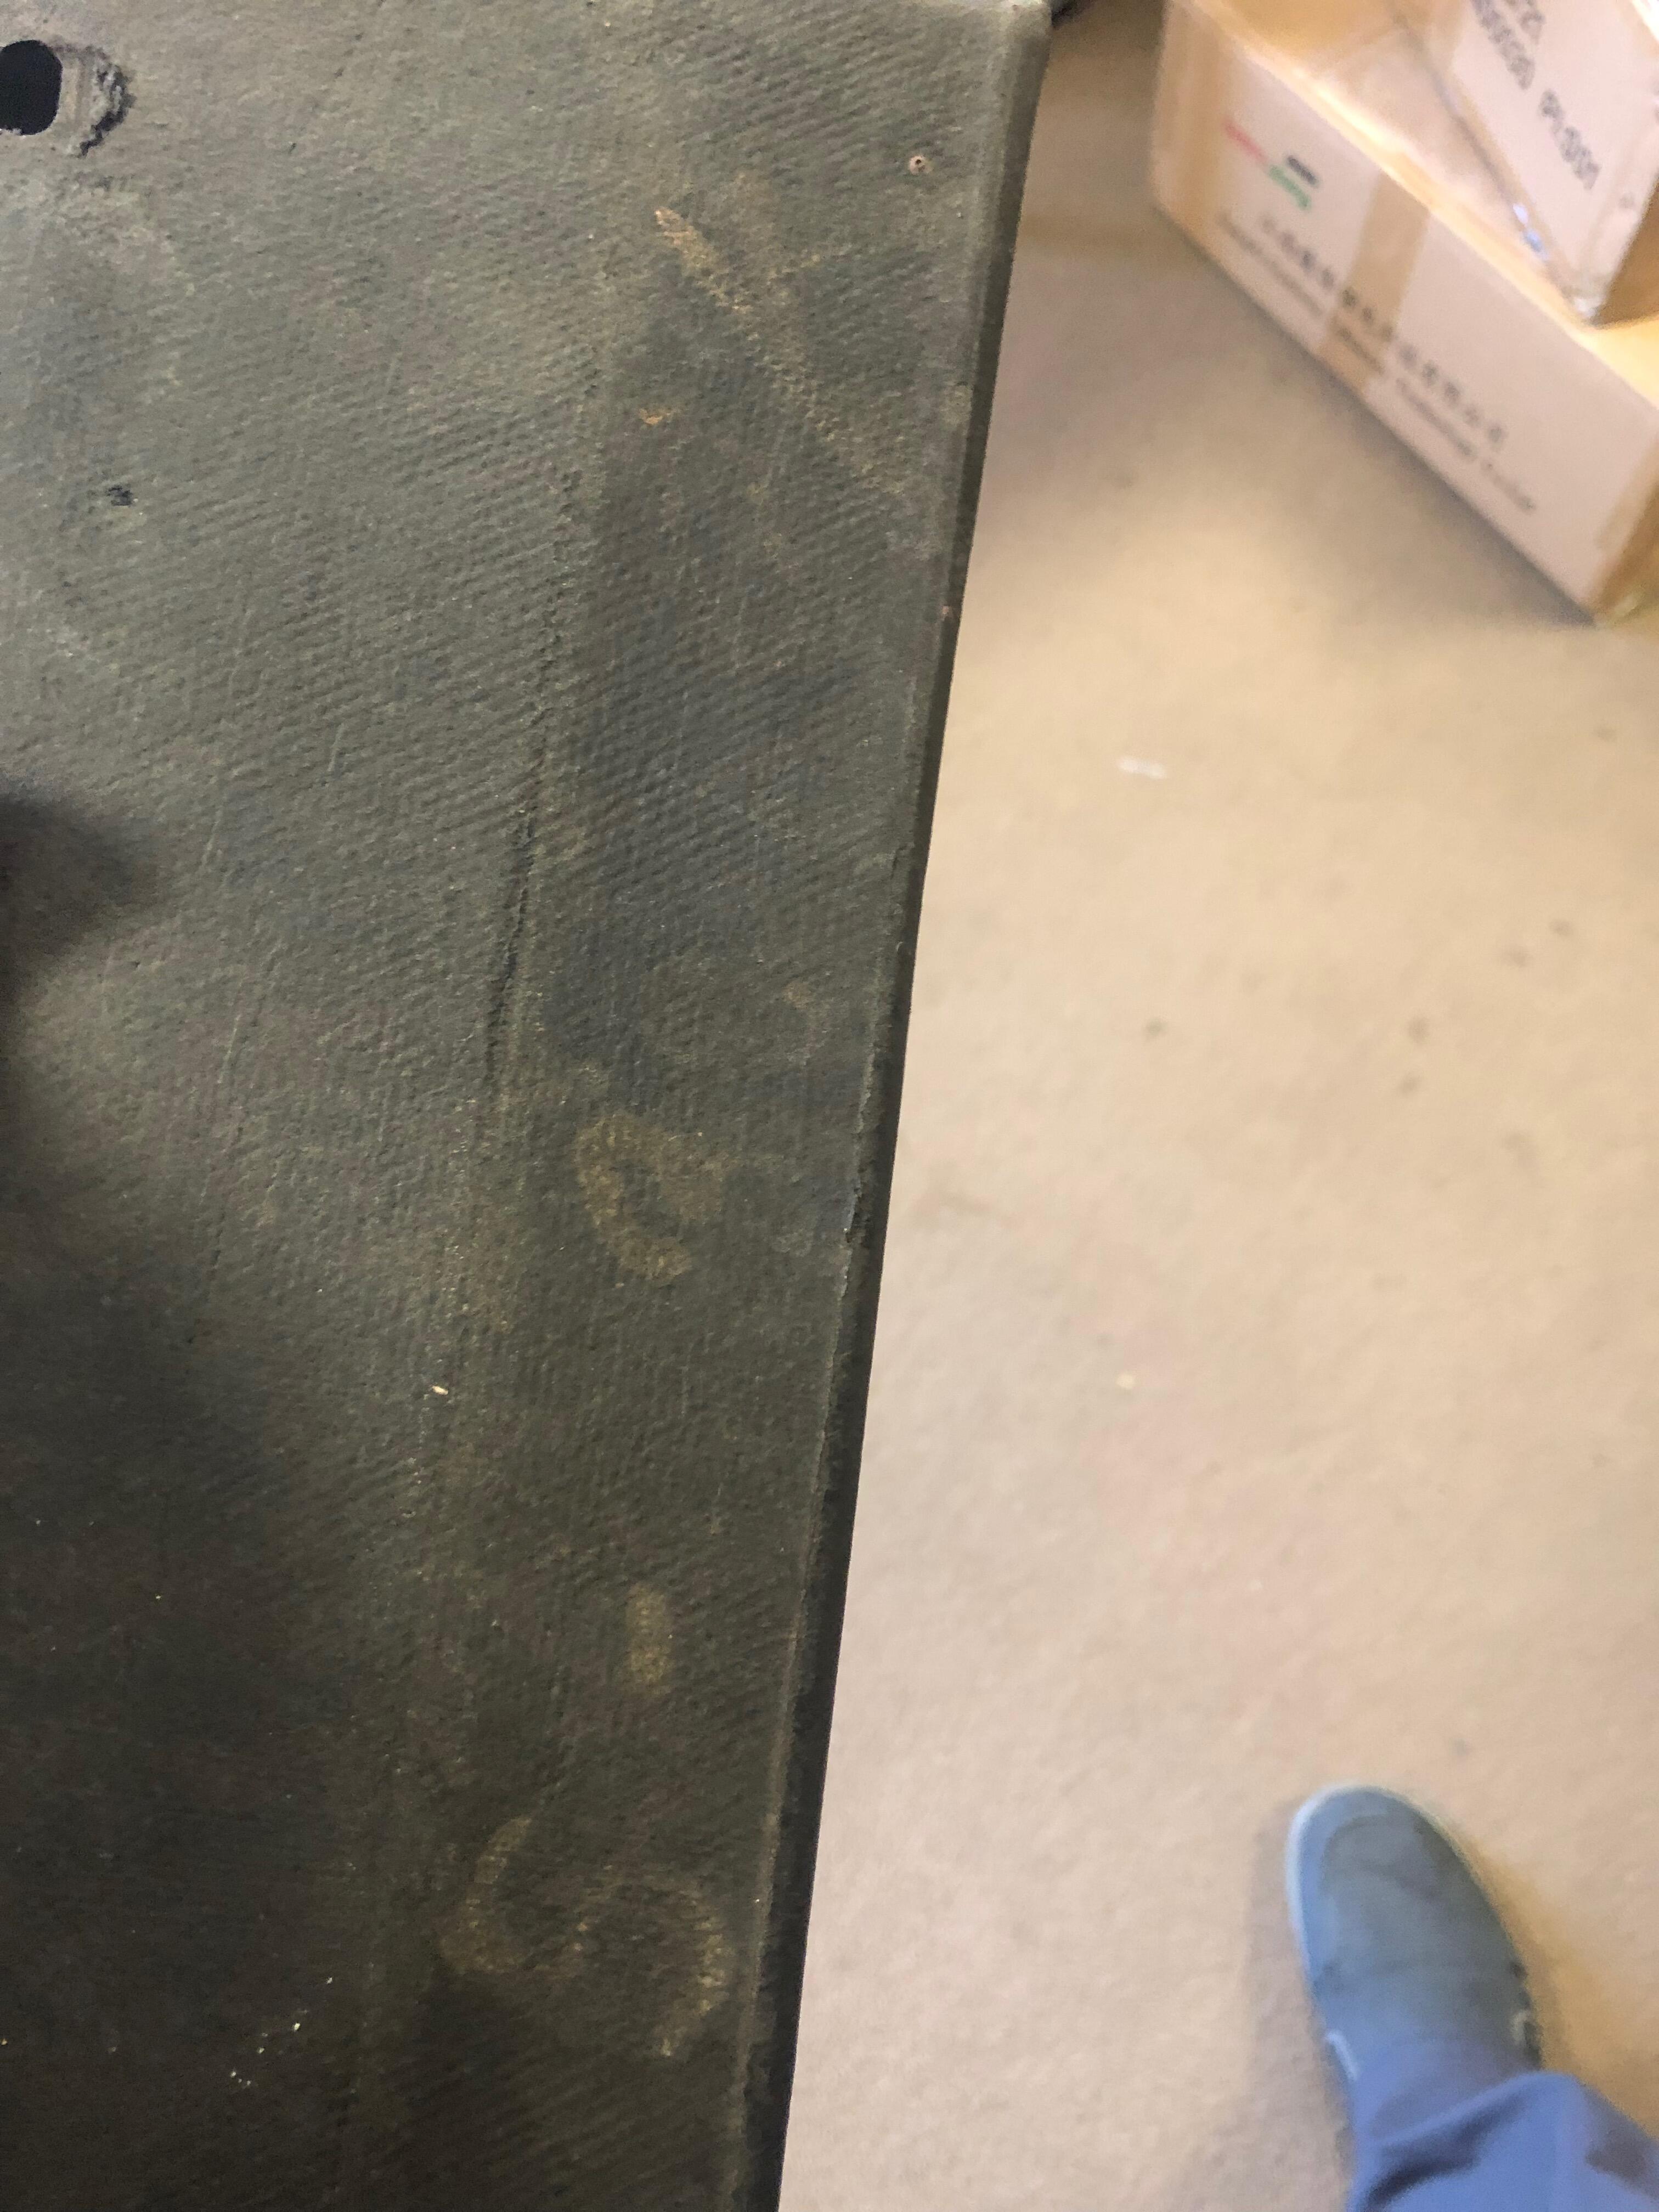
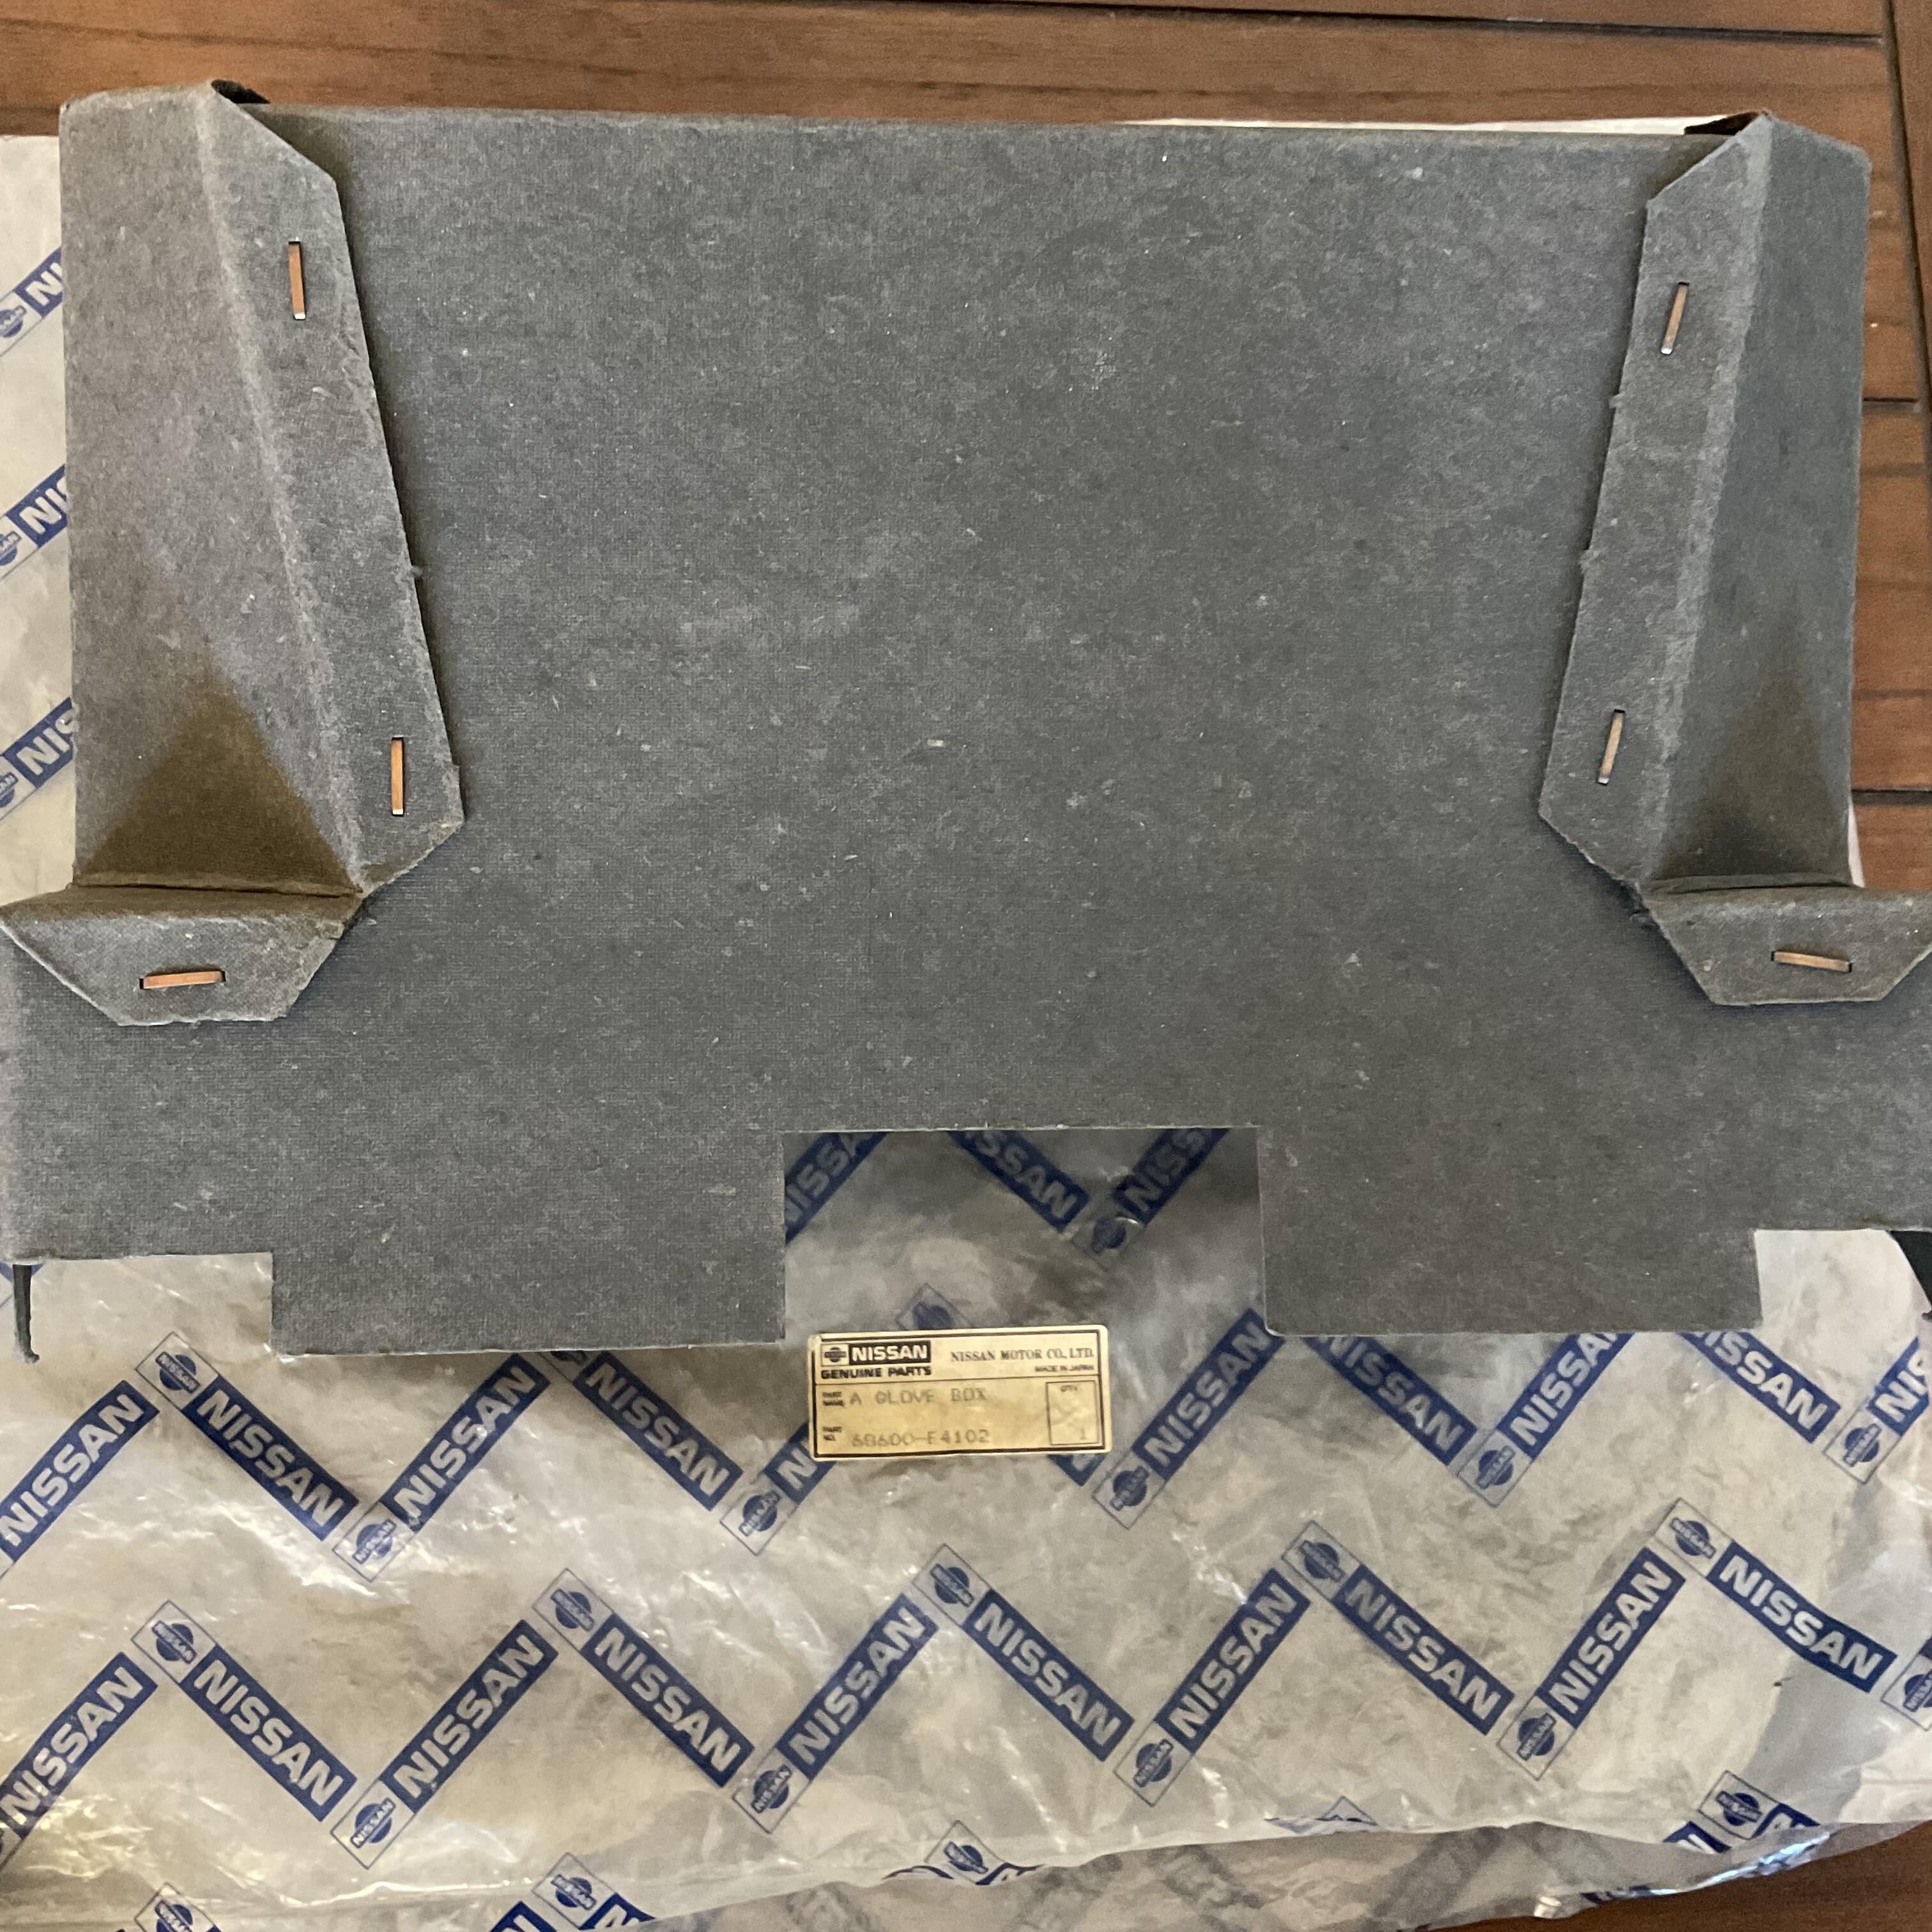
 1 pointI don’t know if this will add to the glove box discussion, but I have this NOS glove box with two notches and the bag with “A Glove Box” description on the parts tag. There are no chalk marking on the box.
 1 point
 -
 Here is another picture from the backside: https://www.jdmjunkies.ch/wordpress/2013-01-11/240z-new-frame-rails/ i think there more pictures on my website, but need some time to find them. I haven't checked in detail, but usually the KFvintageJDM parts are pretty close to OEM when it comes to such details. Here is where i found them in 2012: https://www.jdmjunkies.ch/wordpress/2012-09-28/240z-datsun-parts-heaven/ Here is where i found most of the pother parts last year (also includes a set of frame rails, but all these parts have ben sold already): https://www.jdmjunkies.ch/wordpress/2021-02-23/240z-the-big-barn-find-parts-lot/1 point
 -
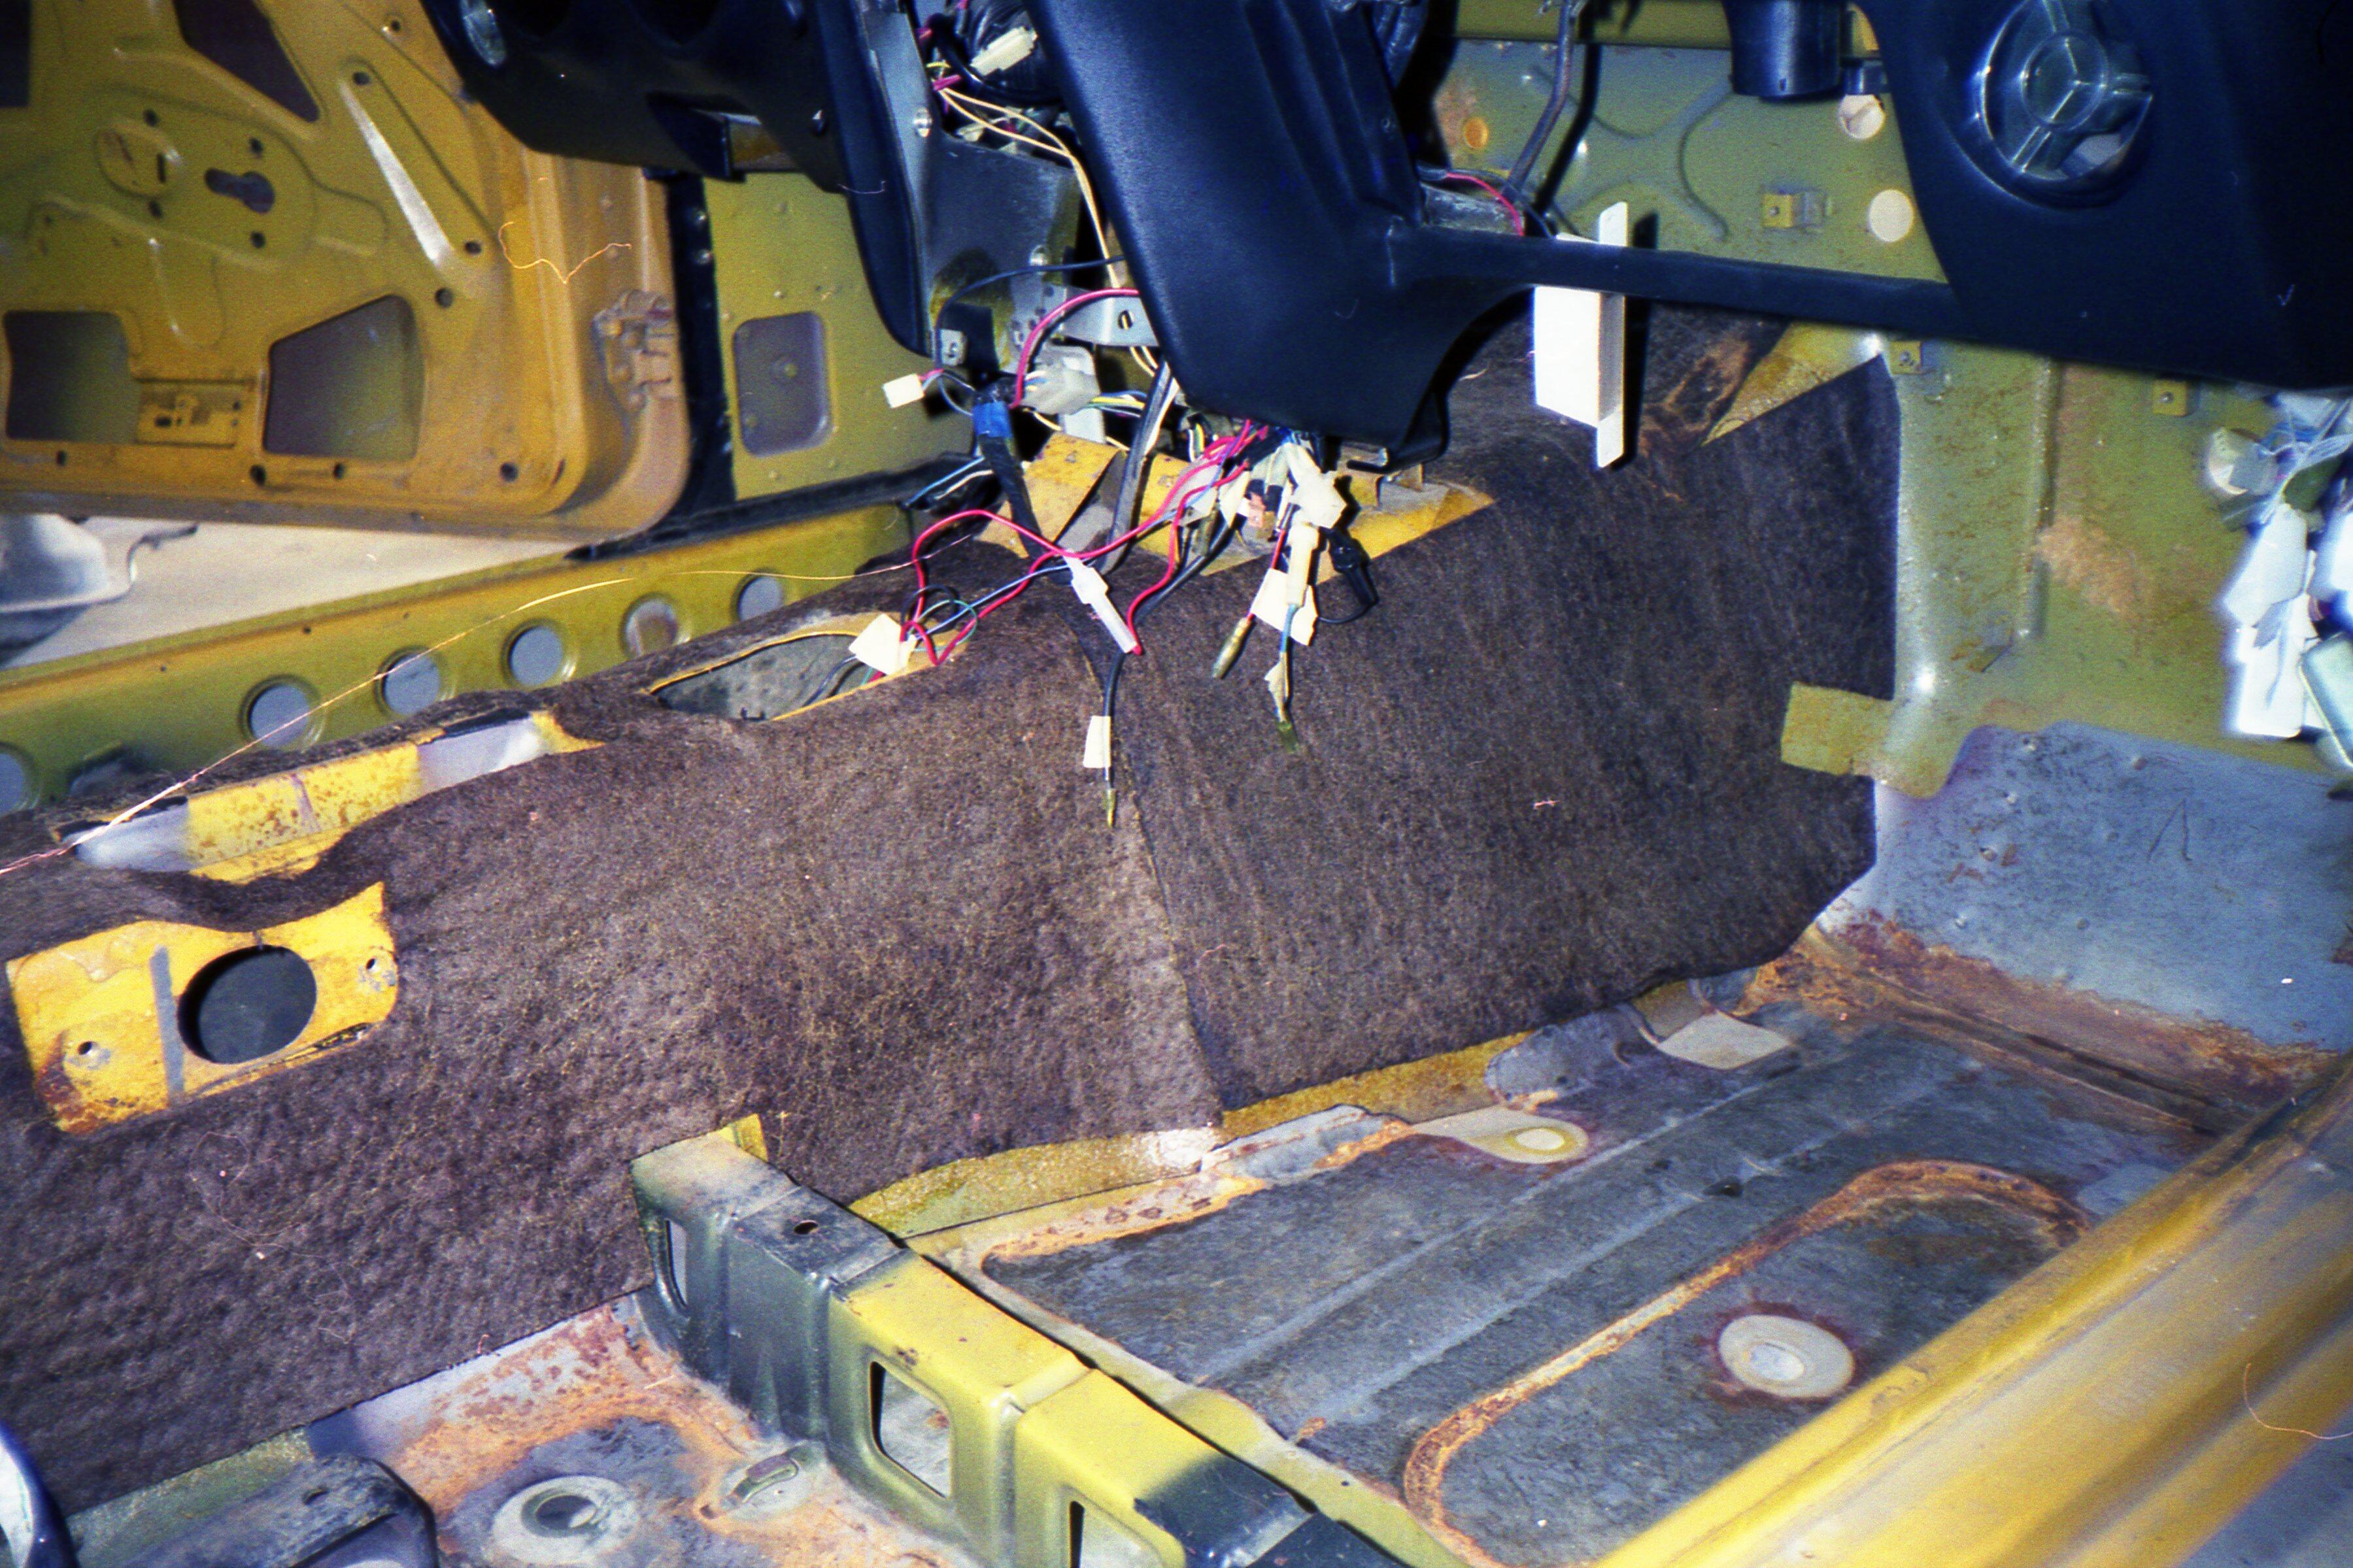
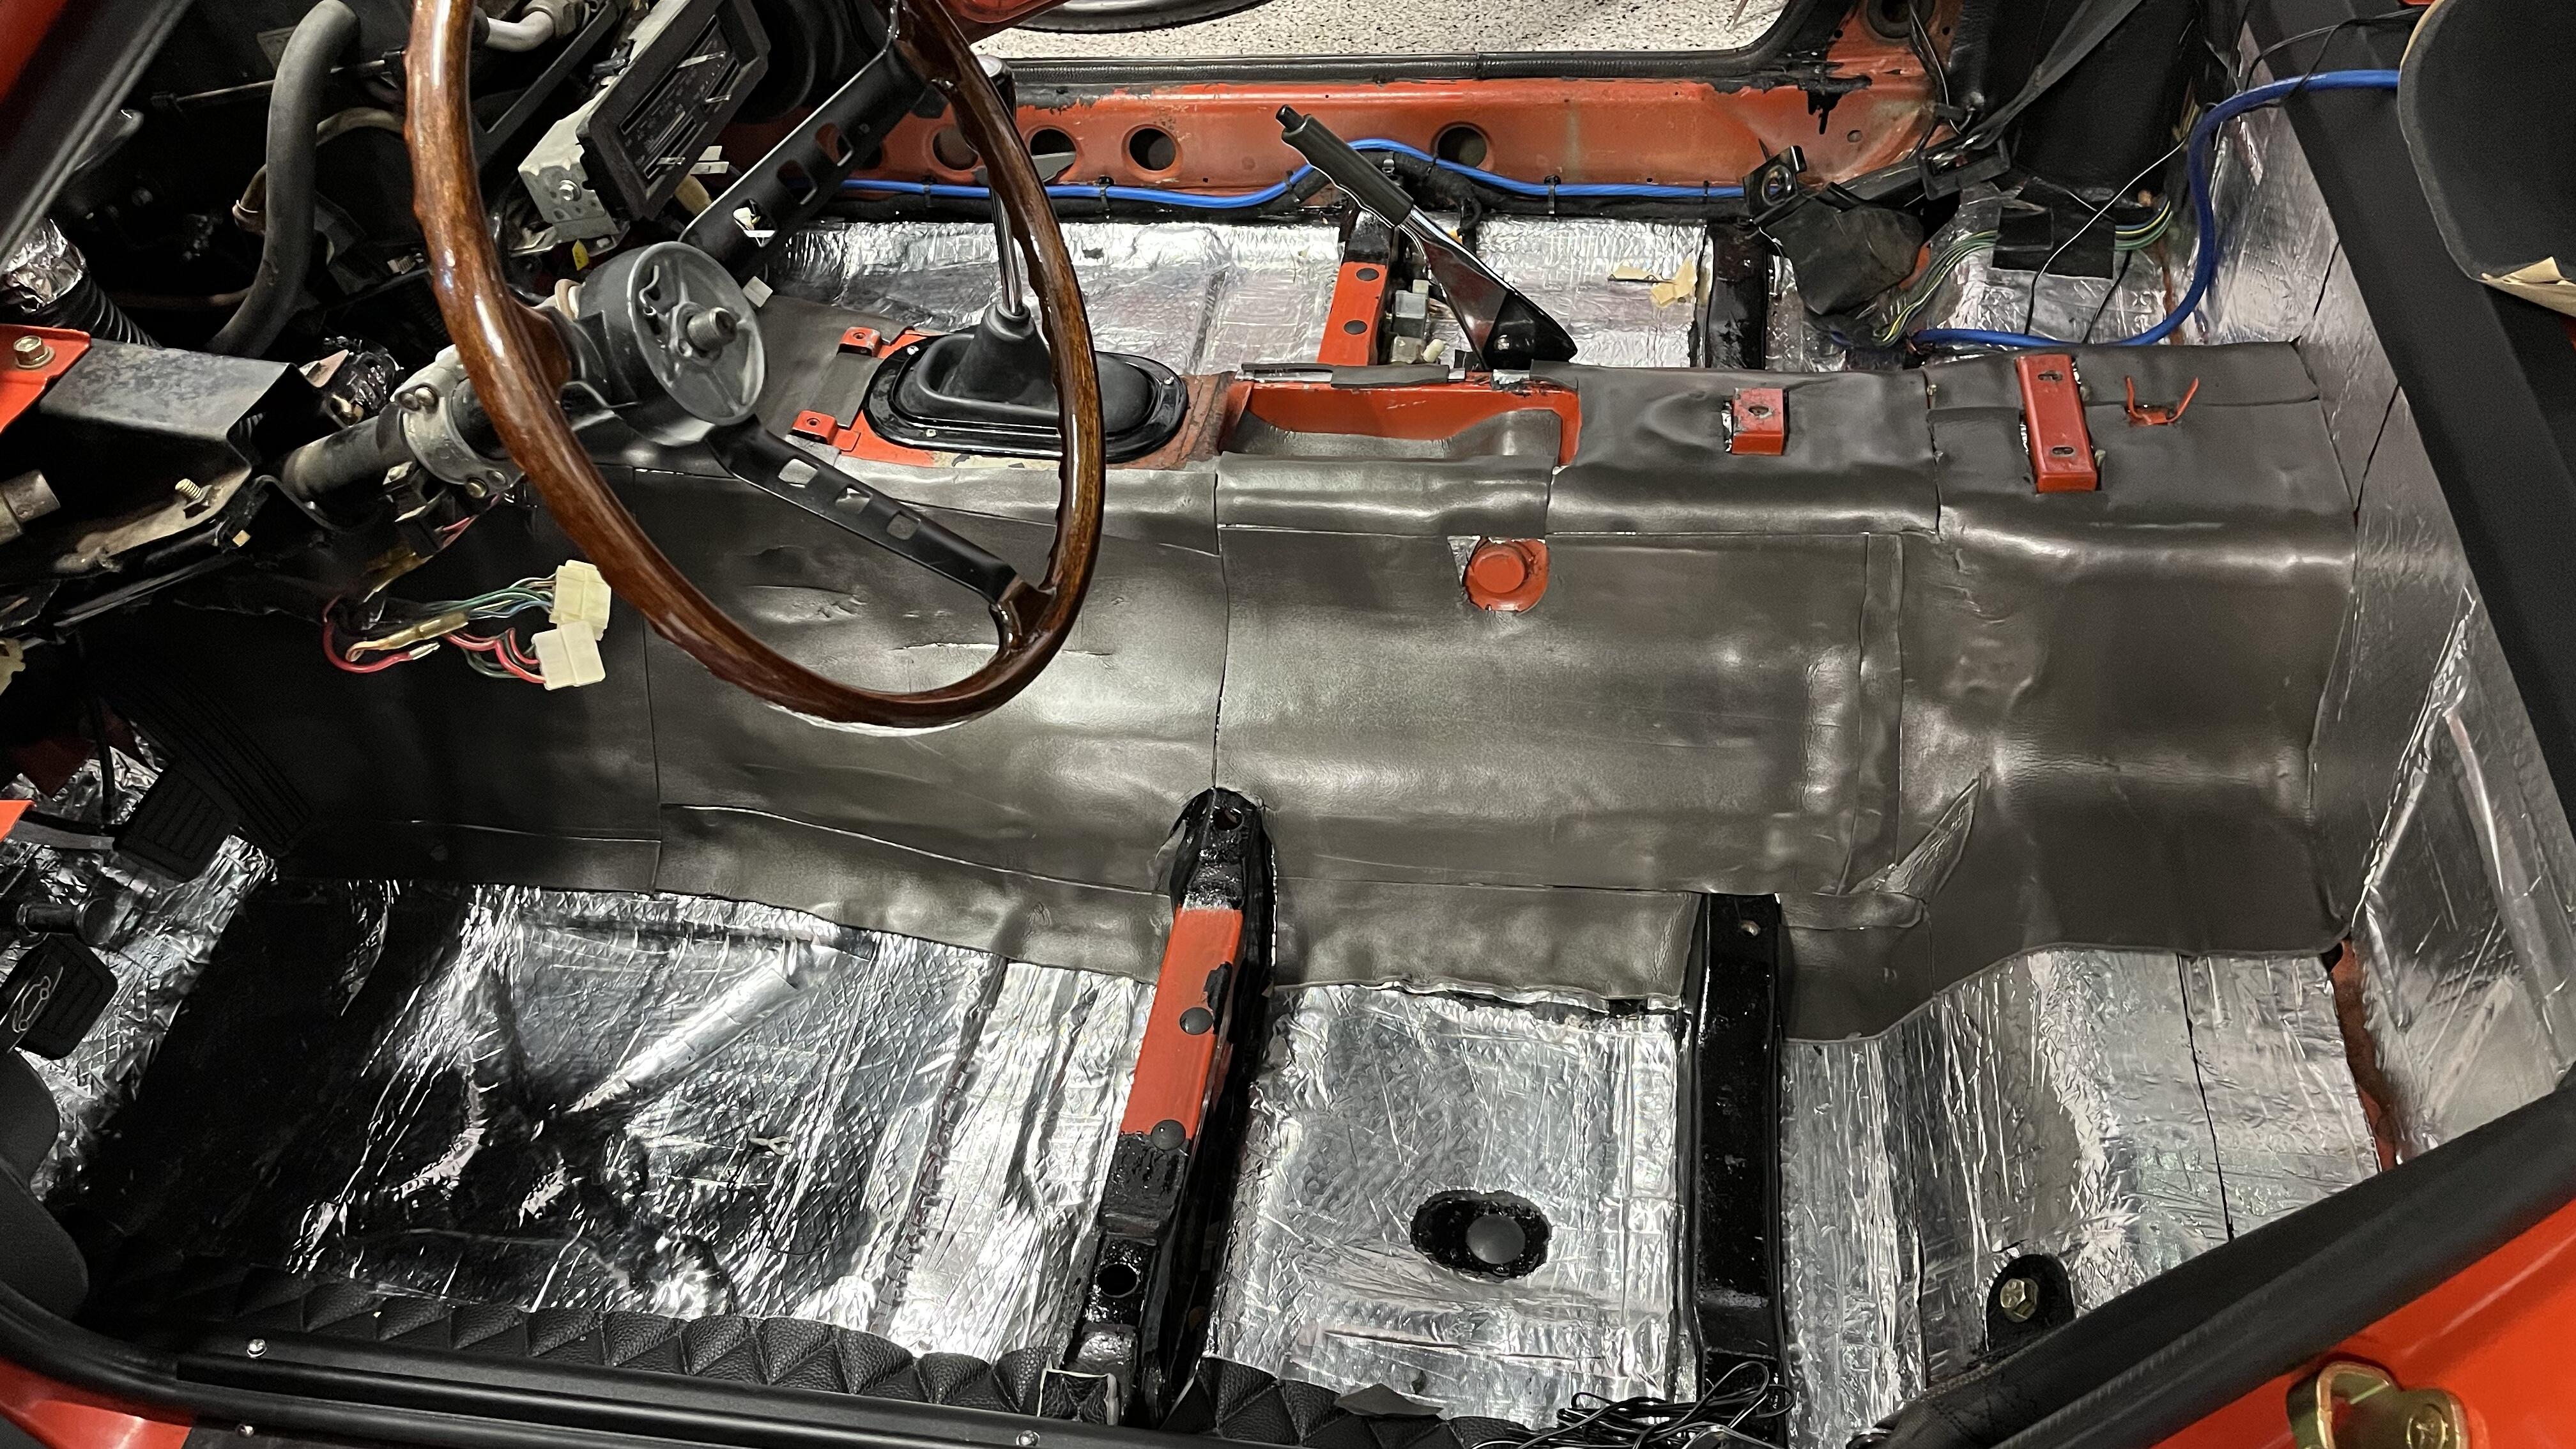
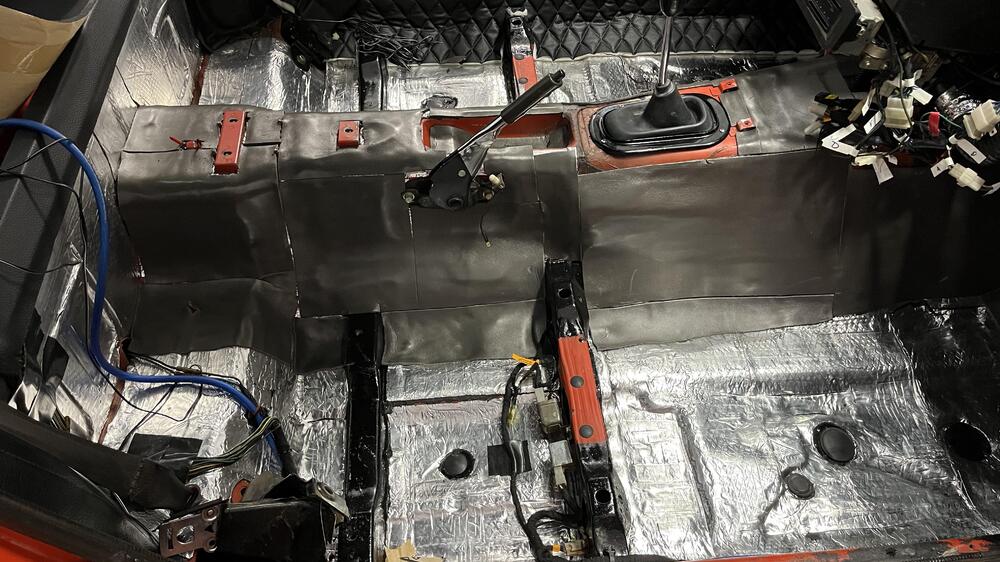
1 pointI think I got the vacuum line routing sorted out. I had to fun out and buy new lines. Didn’t want to risk putting in lines that were 45 years old back in the car especially since I have the dash out. Just completed the center console sound proofing. It’s a two layer system. A metal backed butyl layer 80 mls think followed by second foam layer.

 1 point
 -
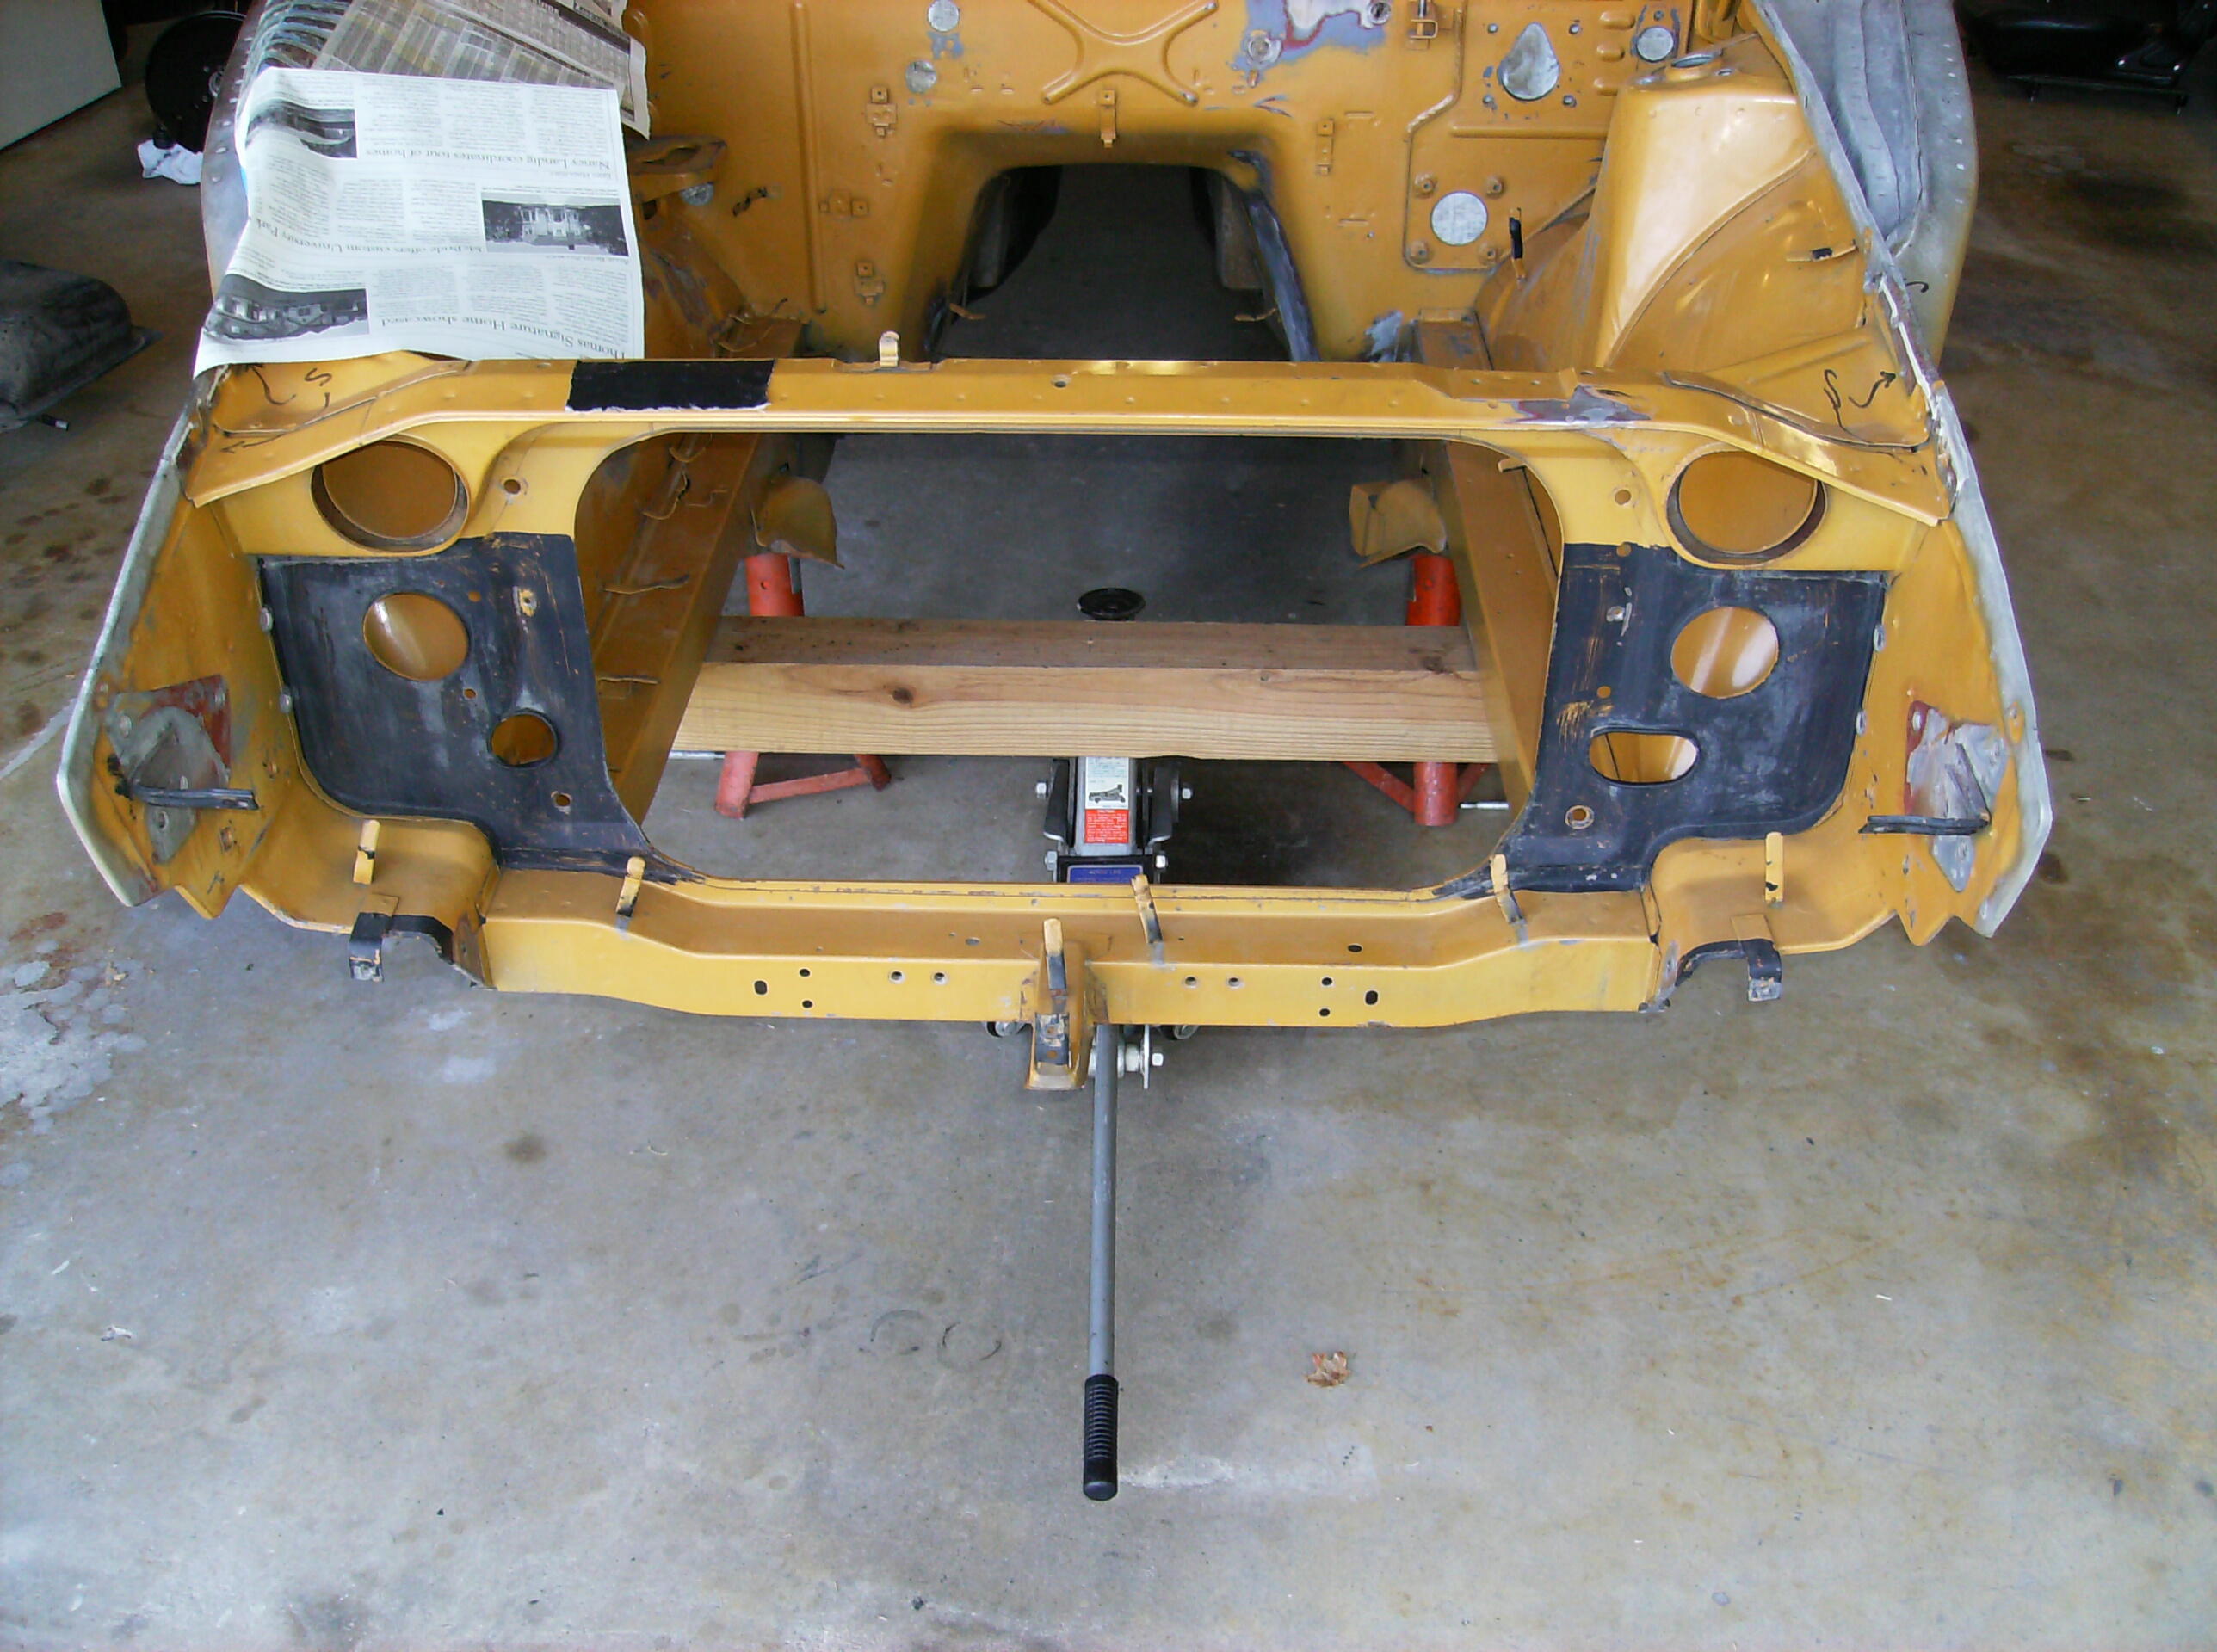
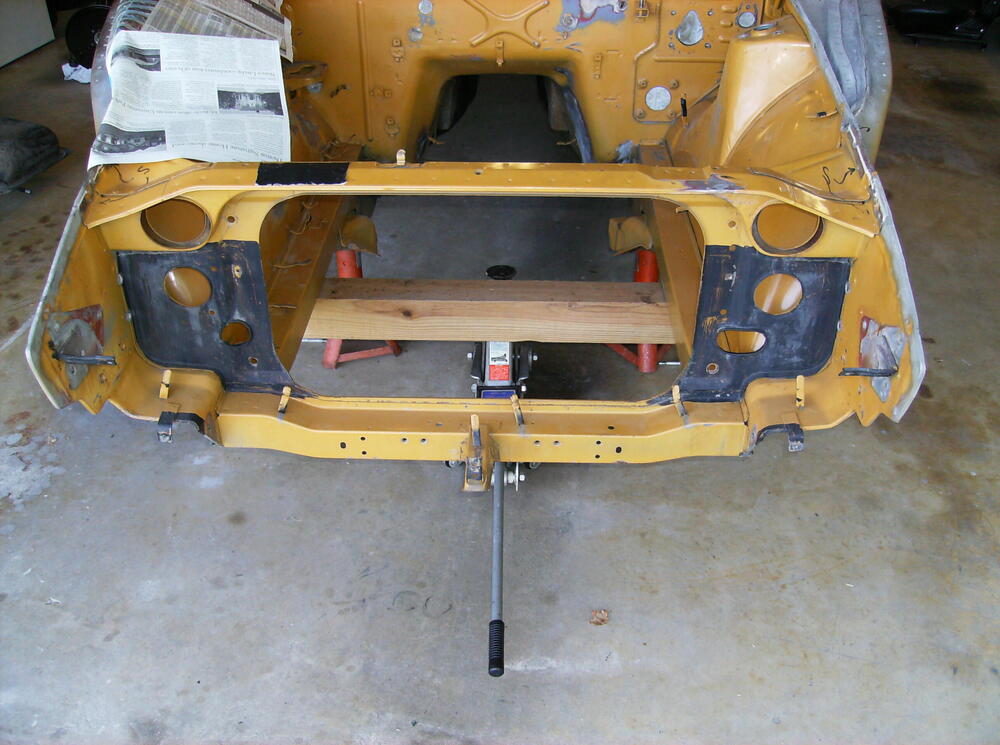
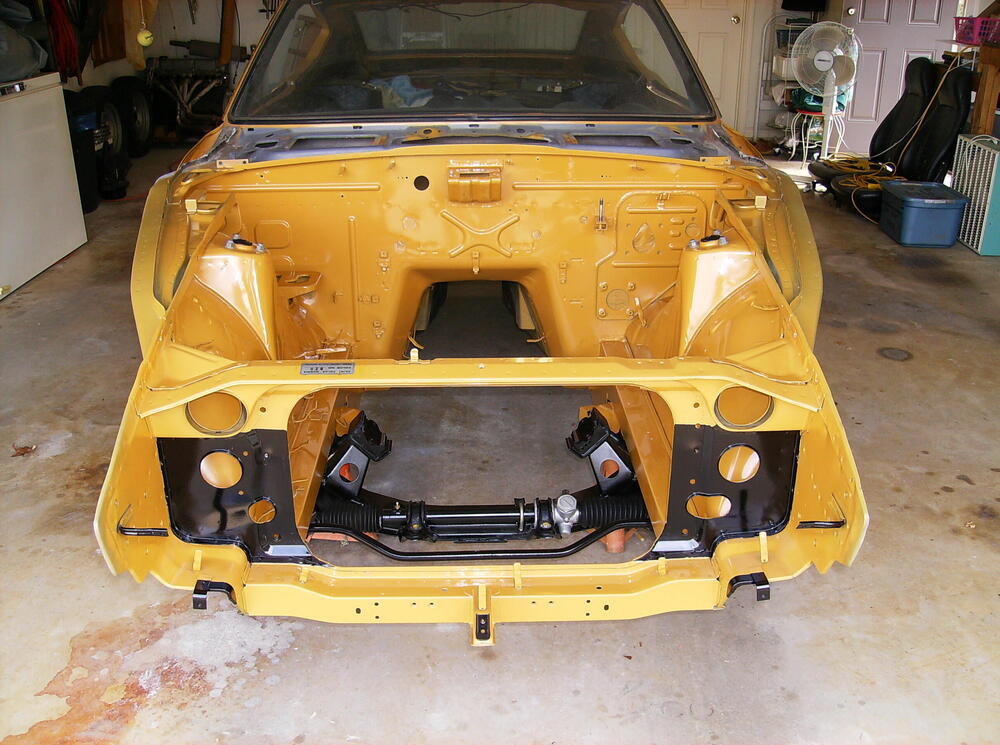
1 pointNissan brushed on some almost flat black paint on the front of the radiator core support so that color would not show thru the grill. Here is my car before paint and after. Note that the five mount points for the grill are also blacked out. I used gloss black to make it easier to clean.
 1 point
 -
 1 pointIf you're interested in going this way, the website states "If any item is out of stock and you would like to order, then please contact us". I'm guessing that they just don't keep a lot of stock on hand of any piece, and will probably make them on demand. I bought a few of the single and double wiring tab covers a few years ago, and they seem pretty nice.1 point
 -
 1 point
 -
1 pointThanks CanTechZ ! Here is a glove box collections, white chalk marking is fun to look at . Automatic has “トルコン(torque converter) “, Fairlady 240ZG has “H-H “ ( HS30H ) , Z432 has “ PS30” . But you see SP30 , that is definitely a mistake ! Kats

 1 point
 -
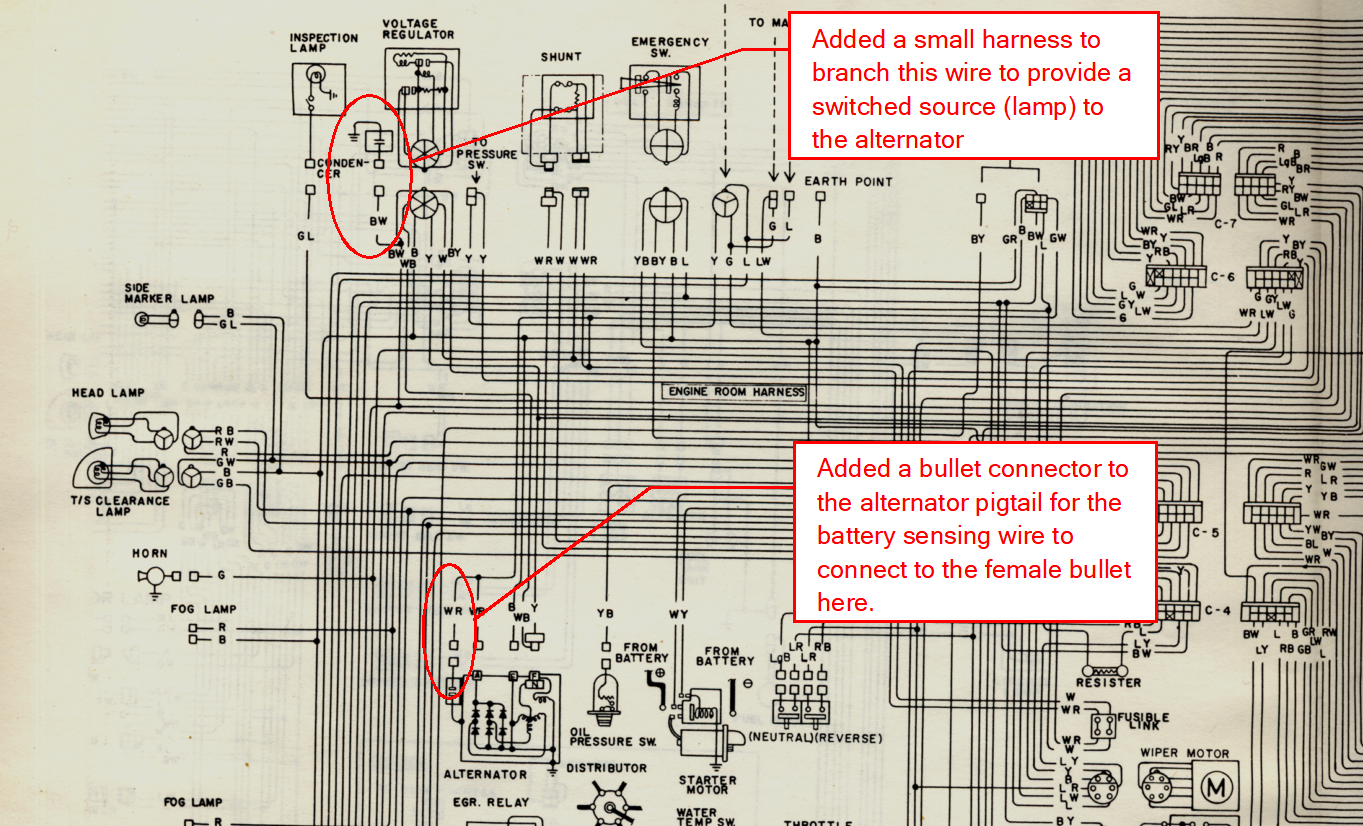
 1 pointFrom the wiring diagram to show where I got the sensing voltage and the switched source: The black/white wire is below the voltage regulator in the engine bay. The white/red wire branches off the 10 AWG white/red wire that goes to the positive post on the alternator.
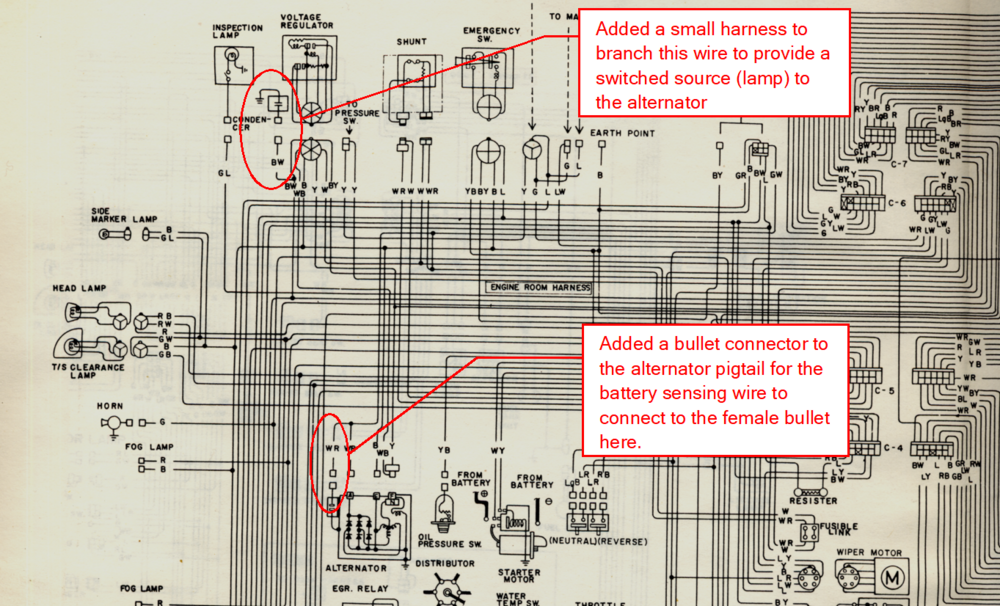 1 point
 -
I heard from Steve at Precision Plating yesterday. They will be plating my parts in about a week. I am excited to get them back soon and hope they look amazing.1 point
-
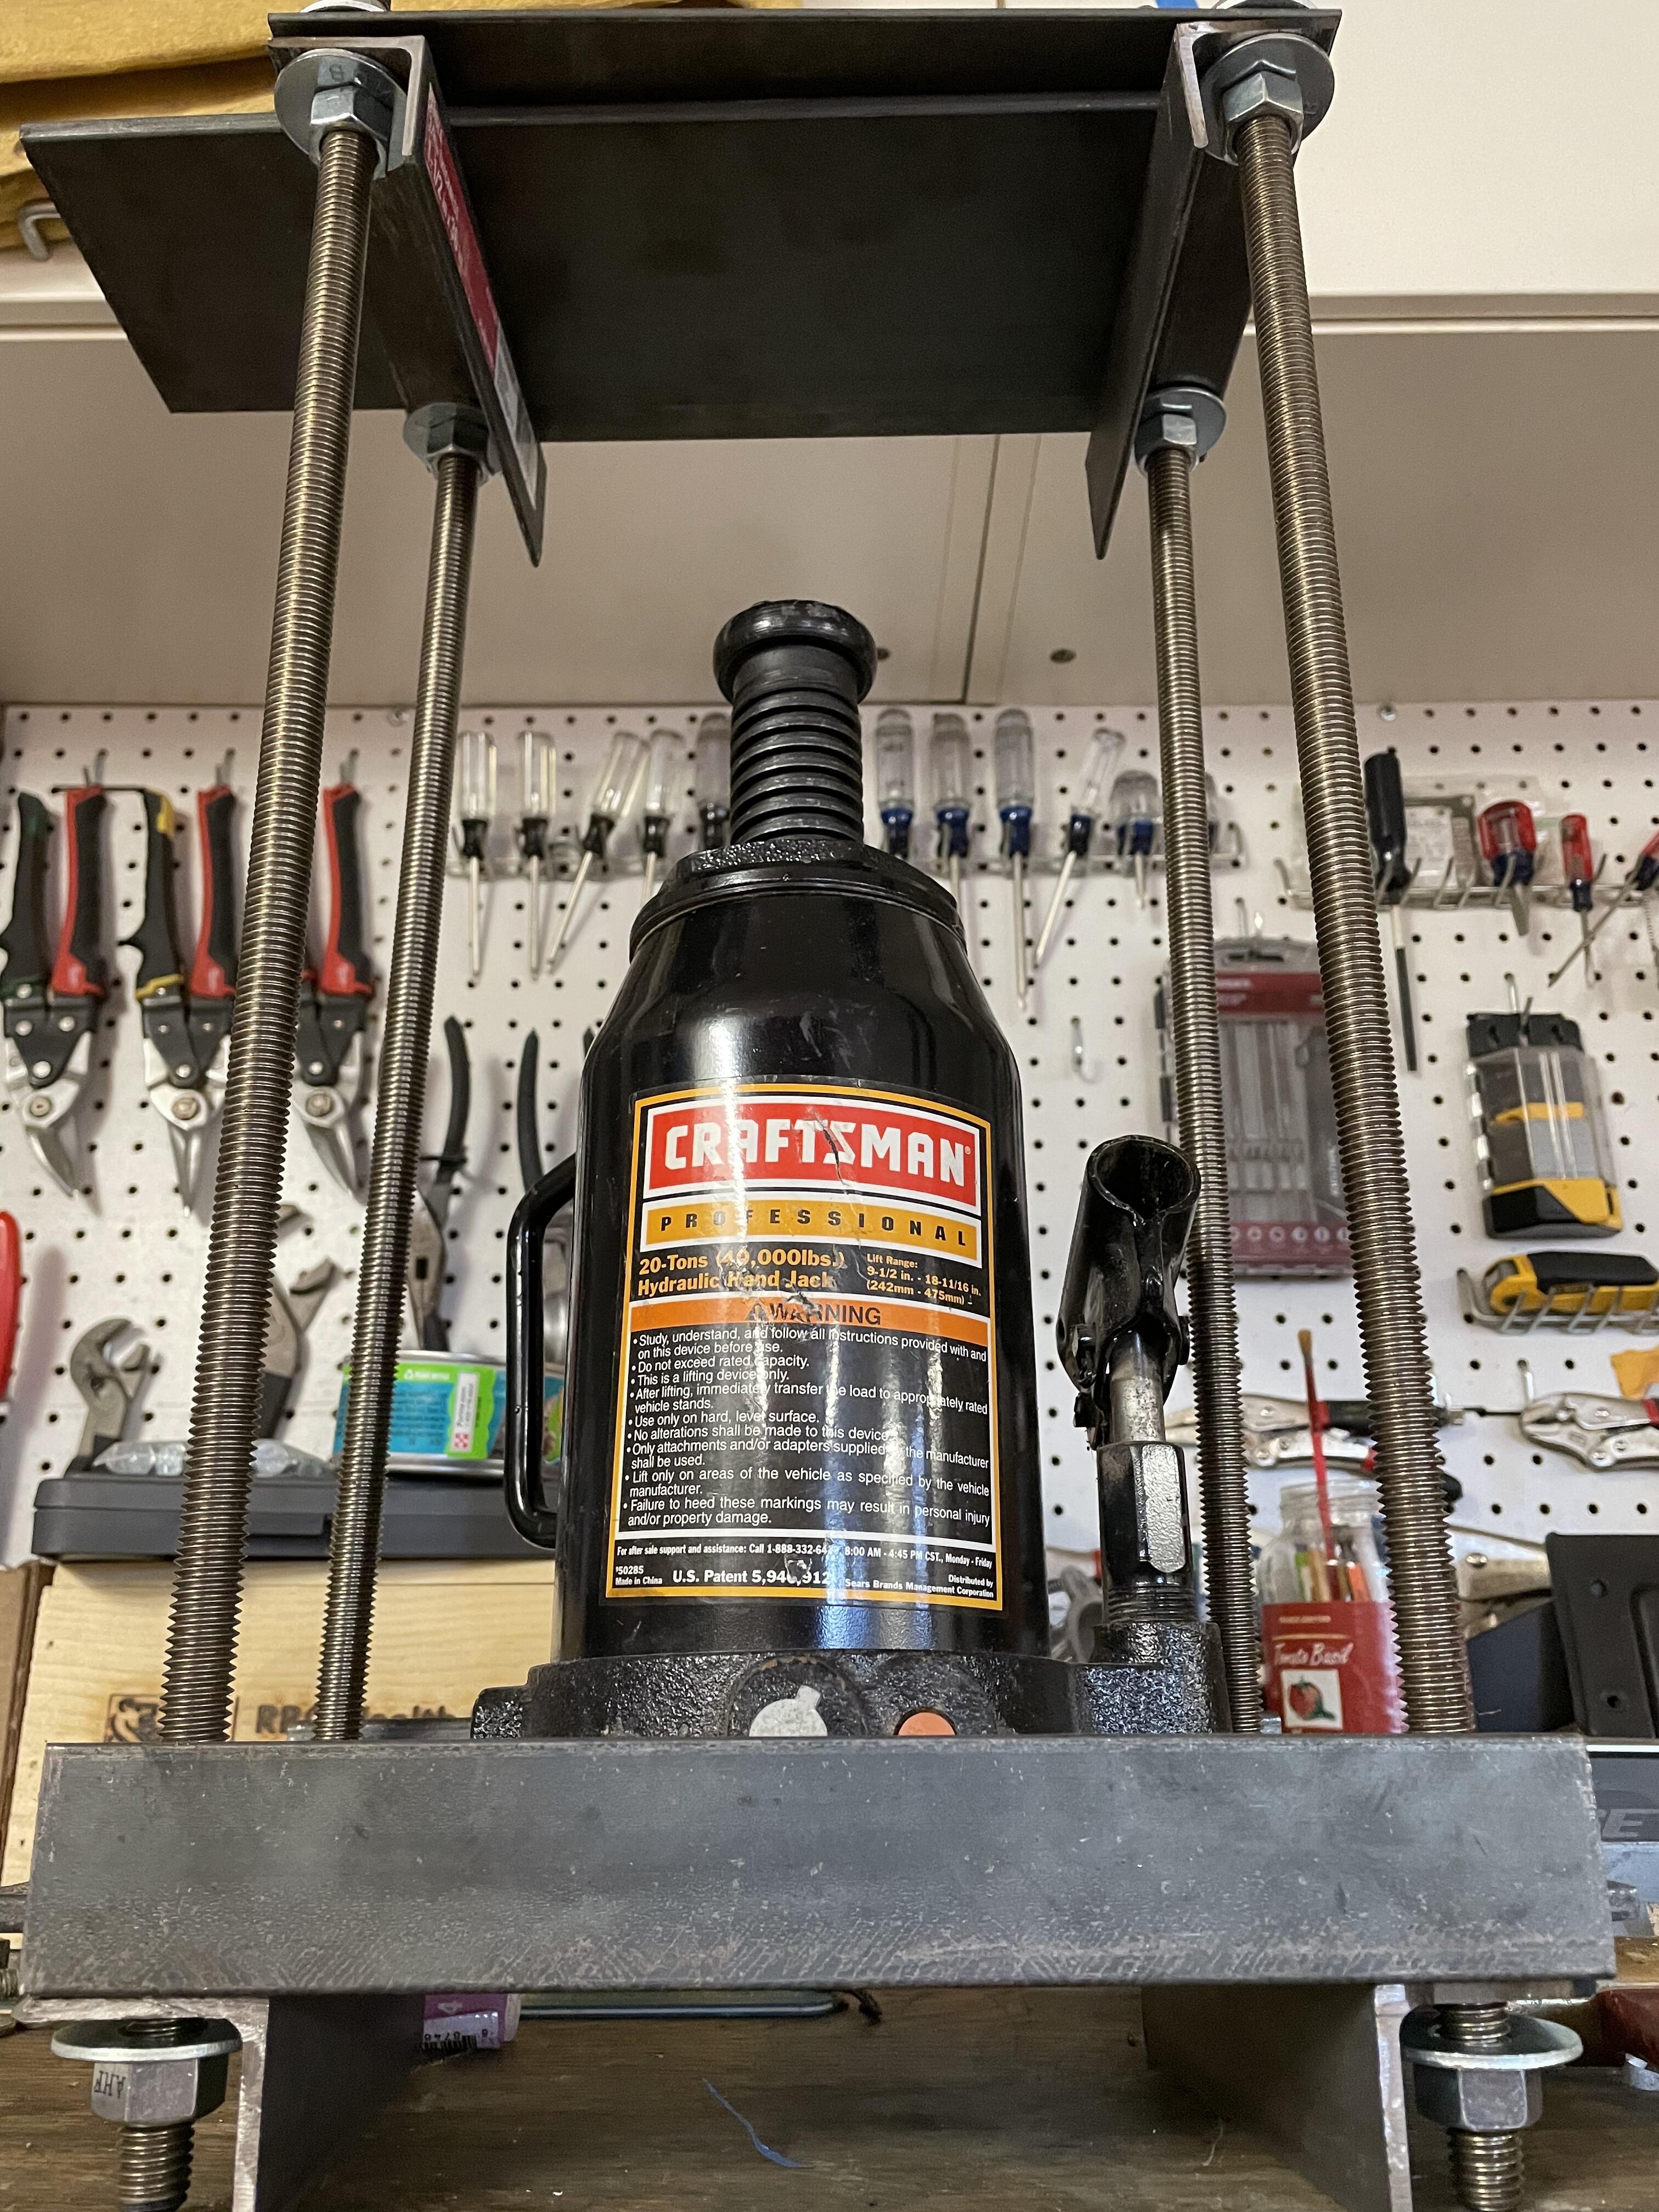
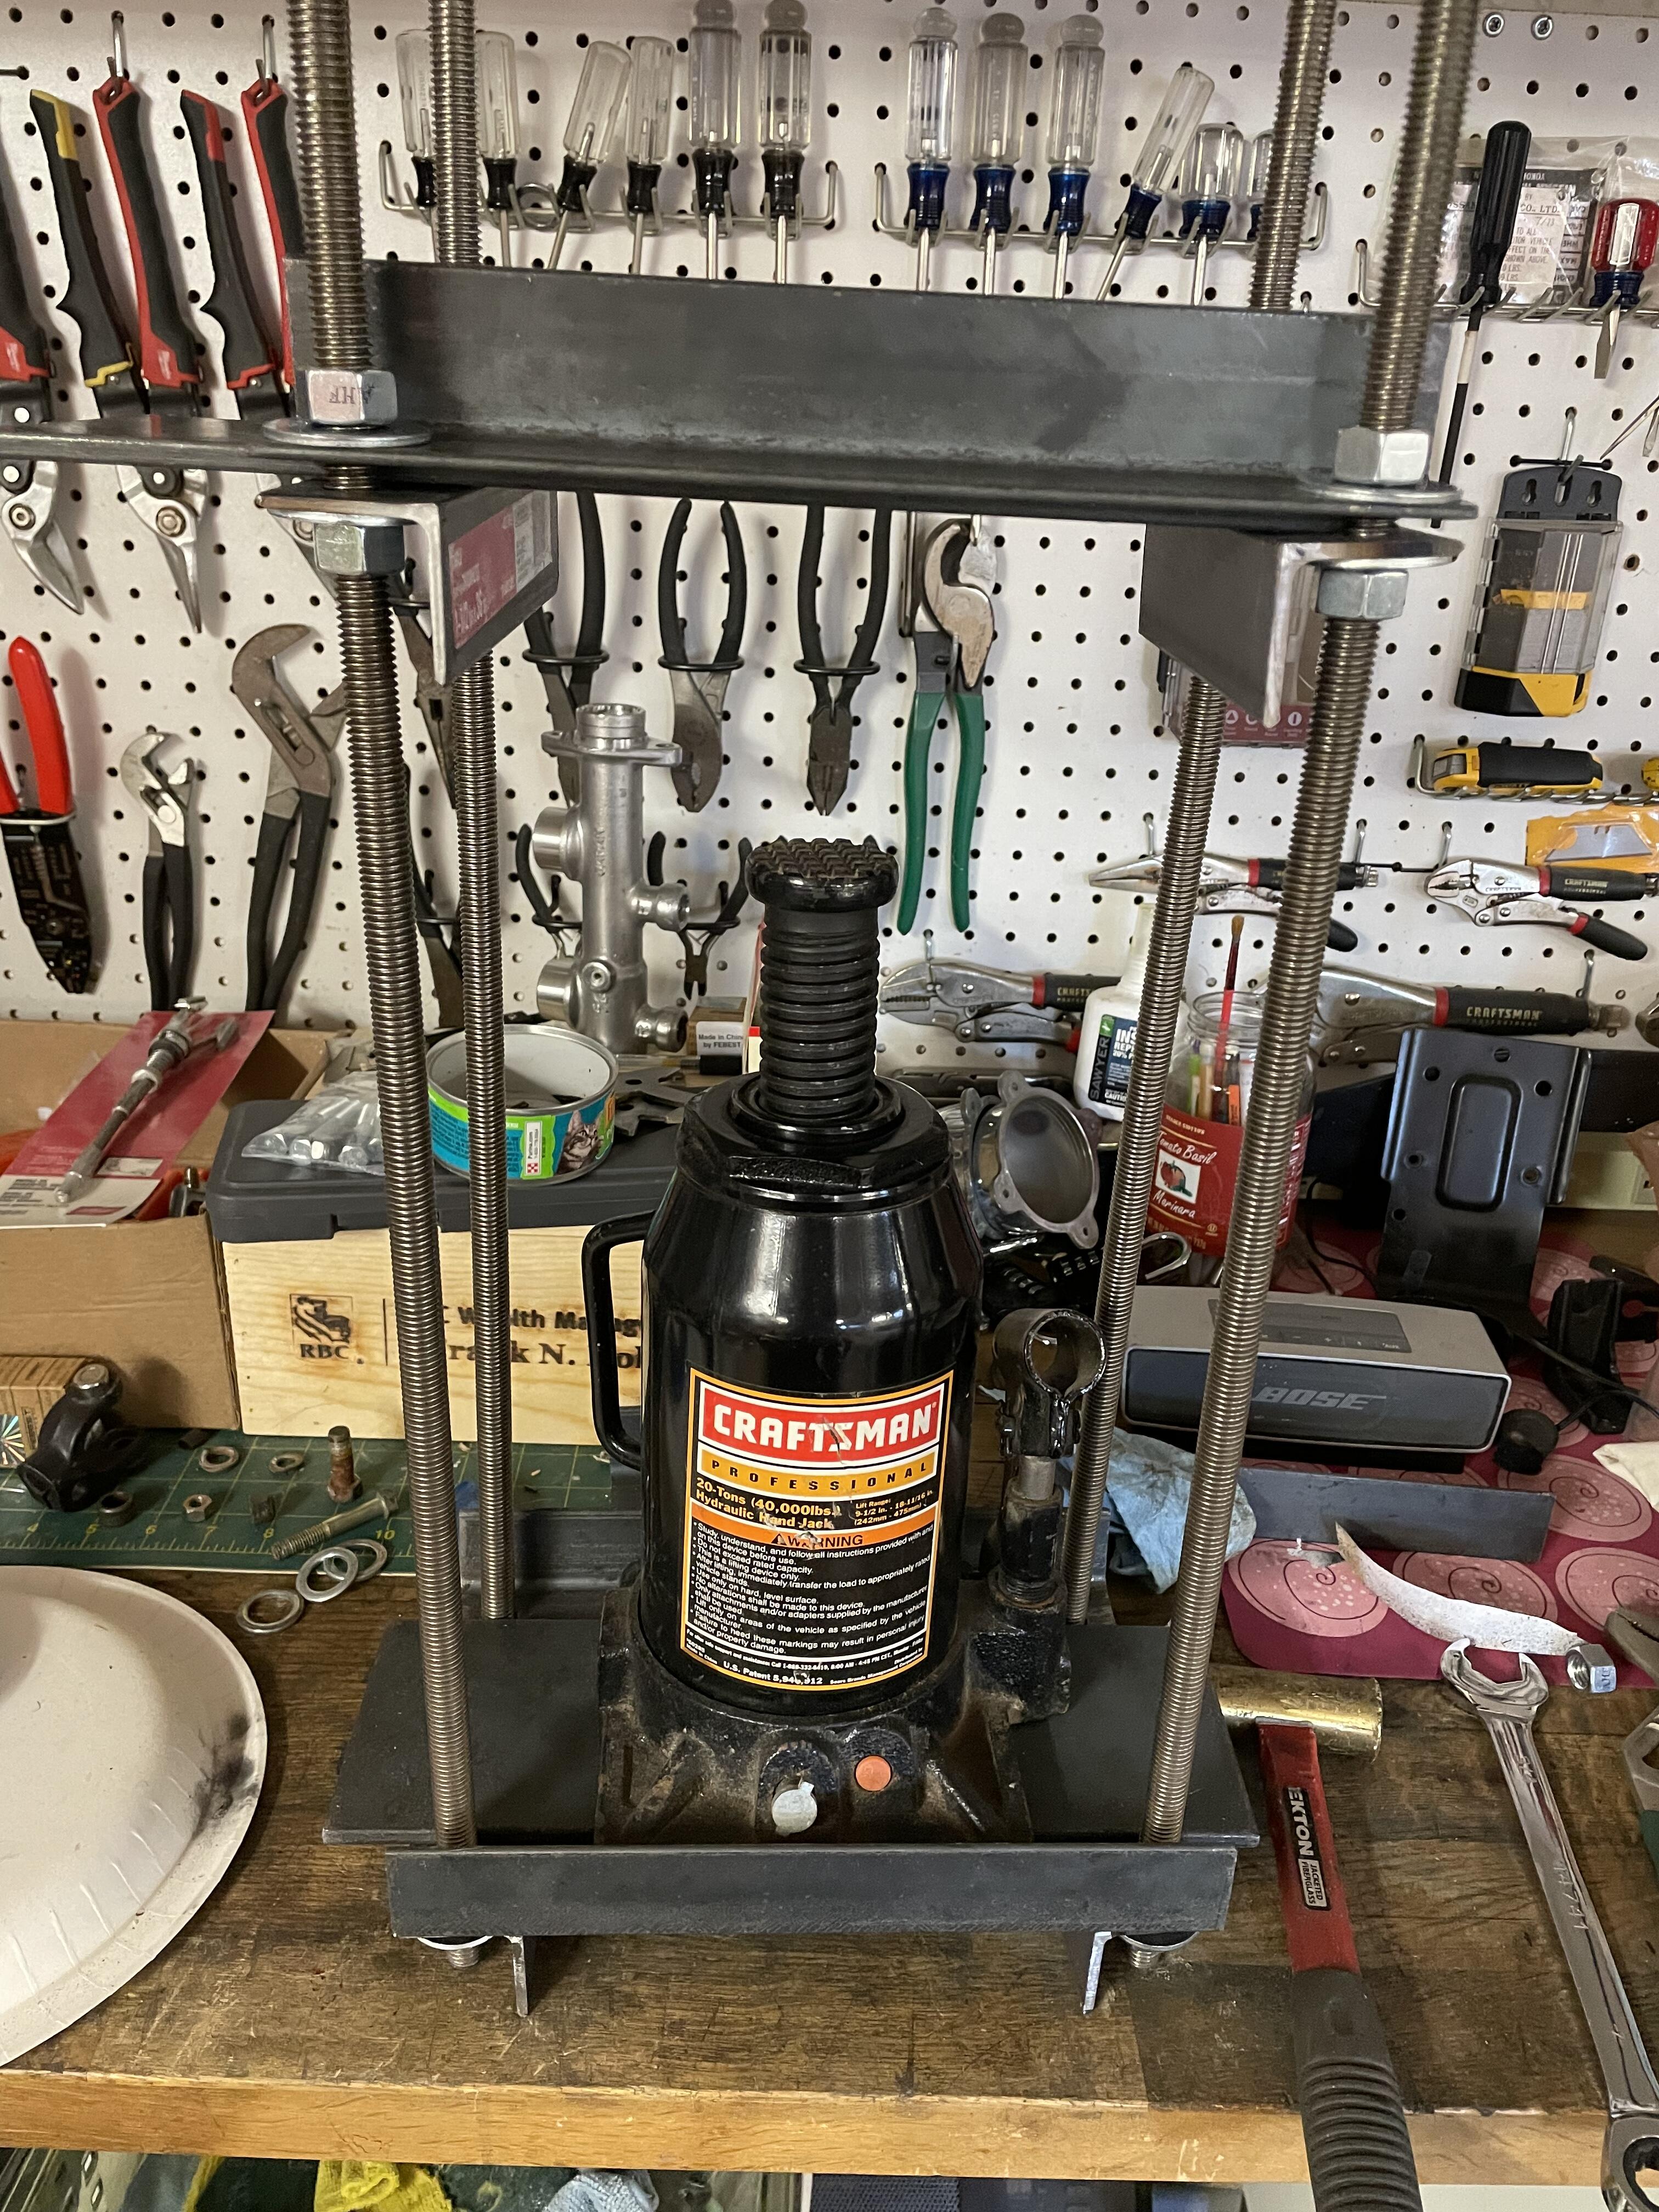
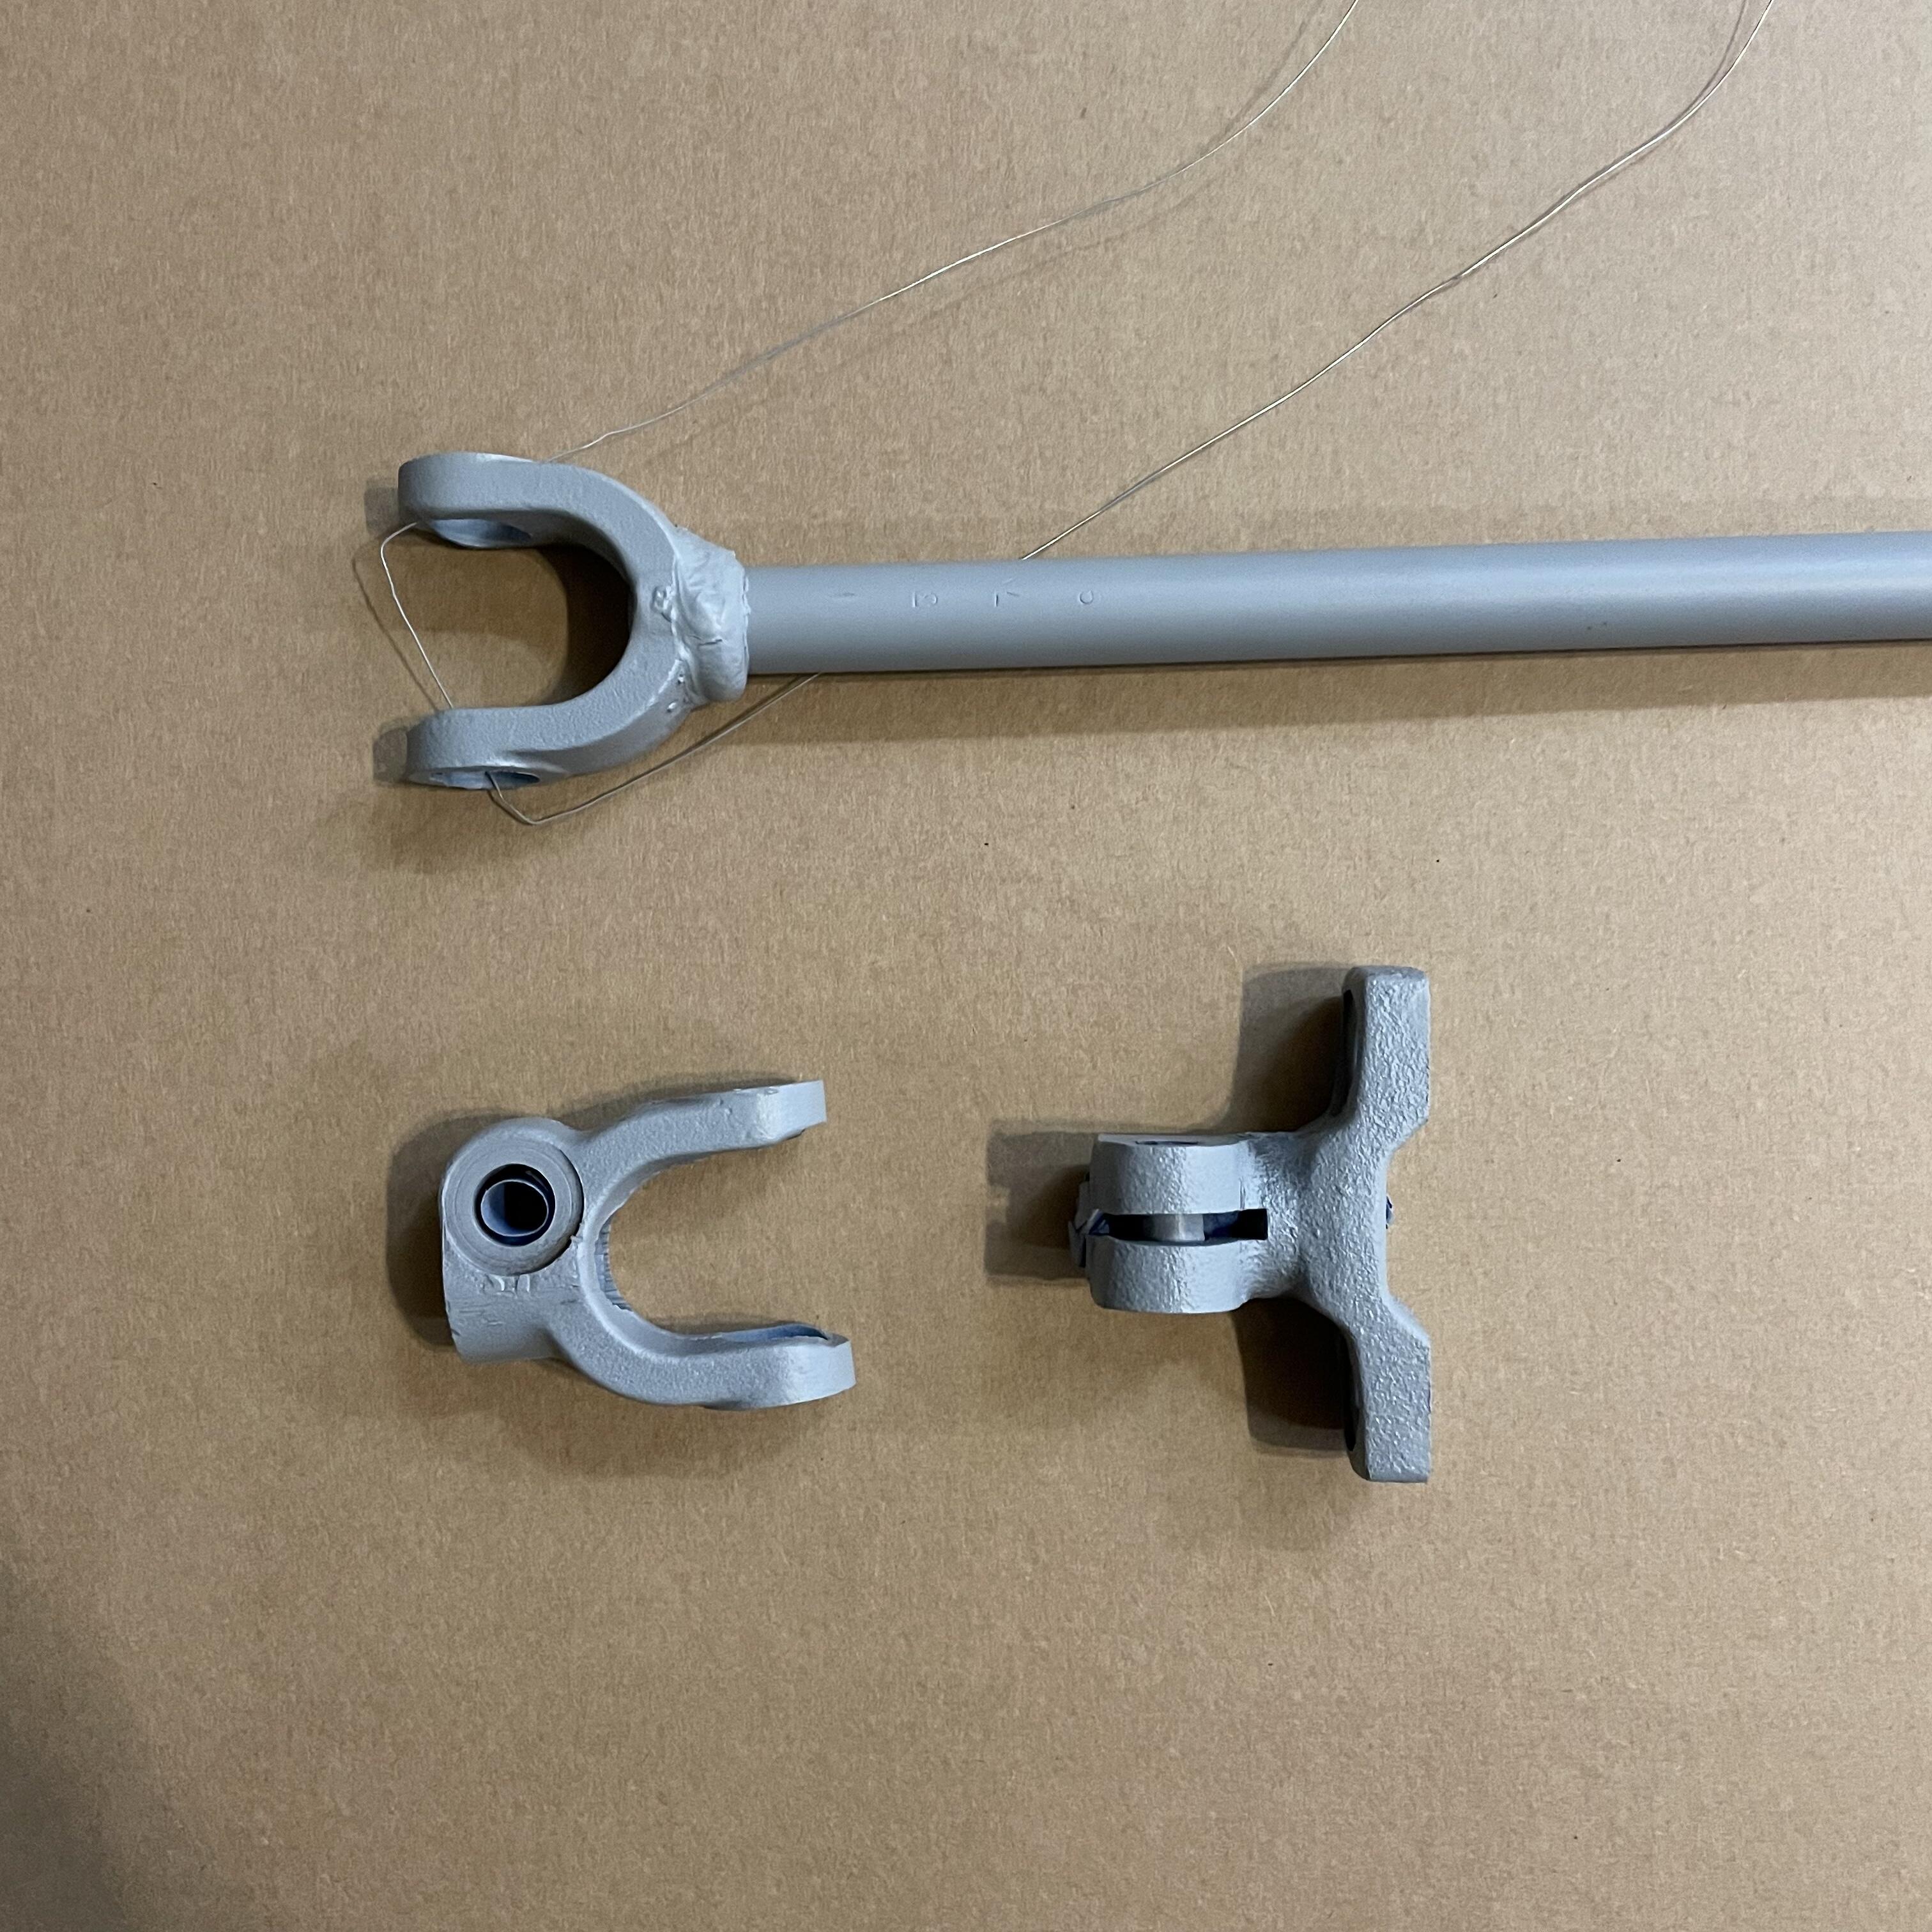
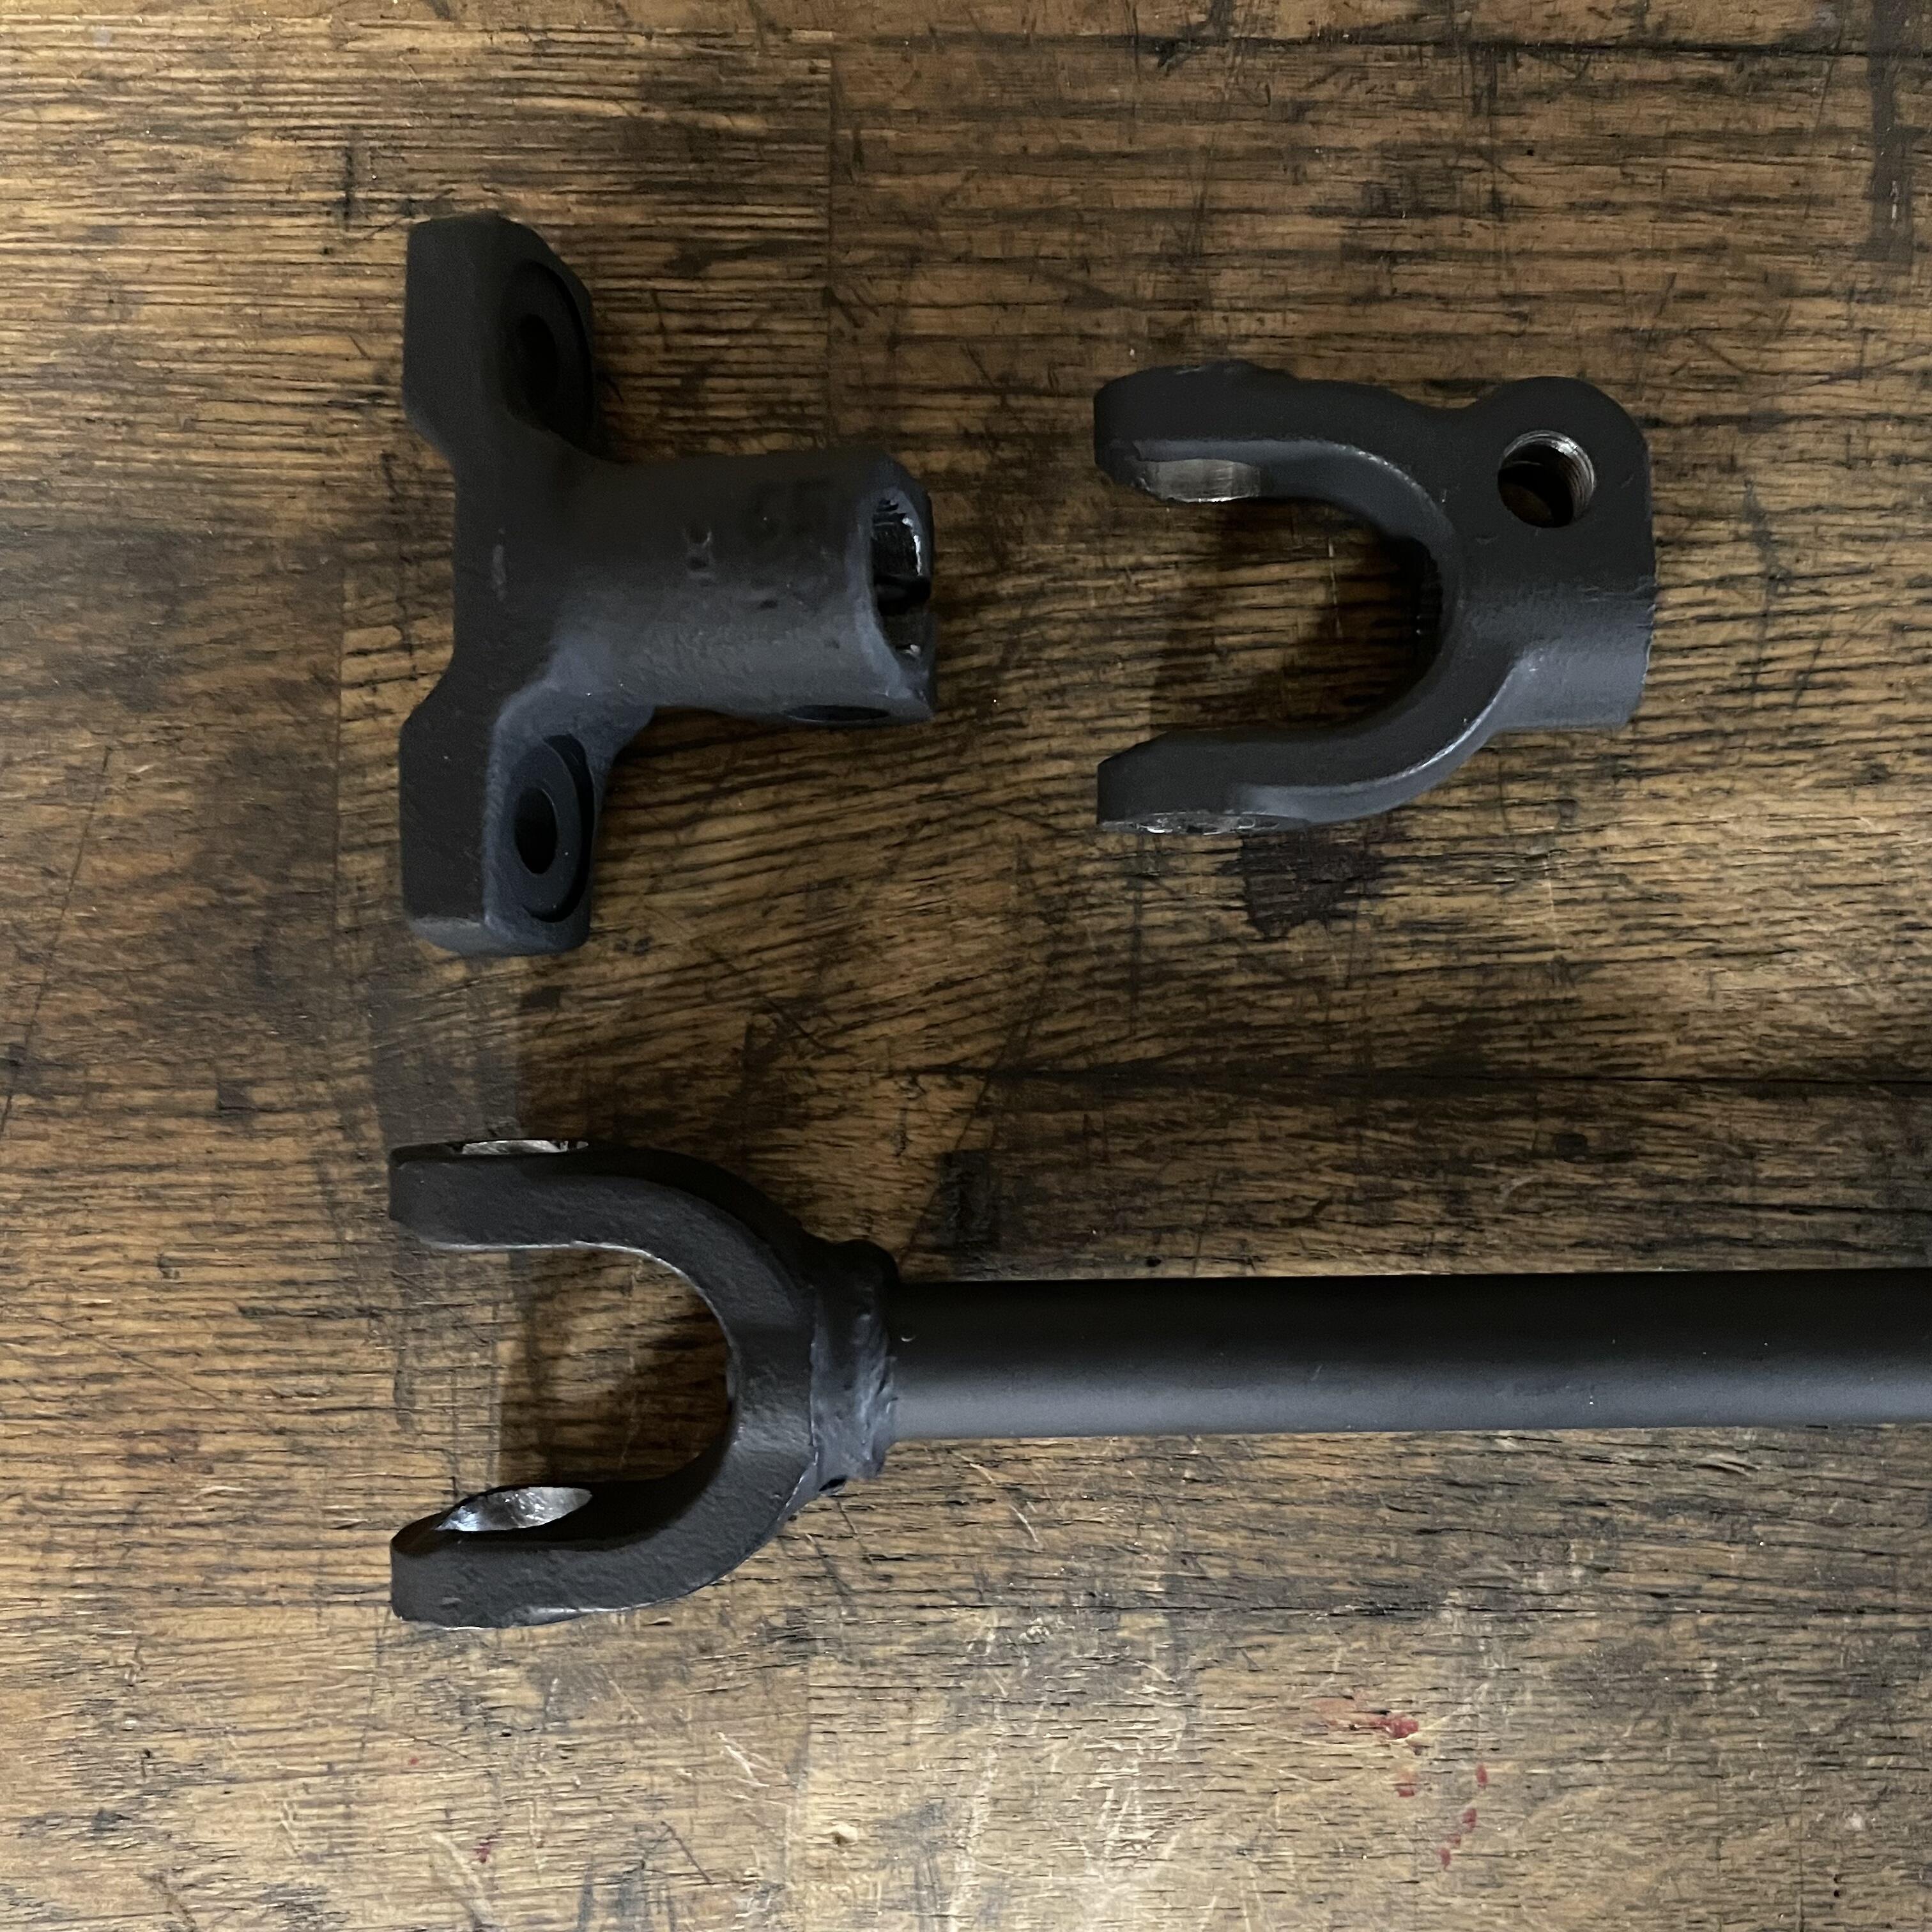
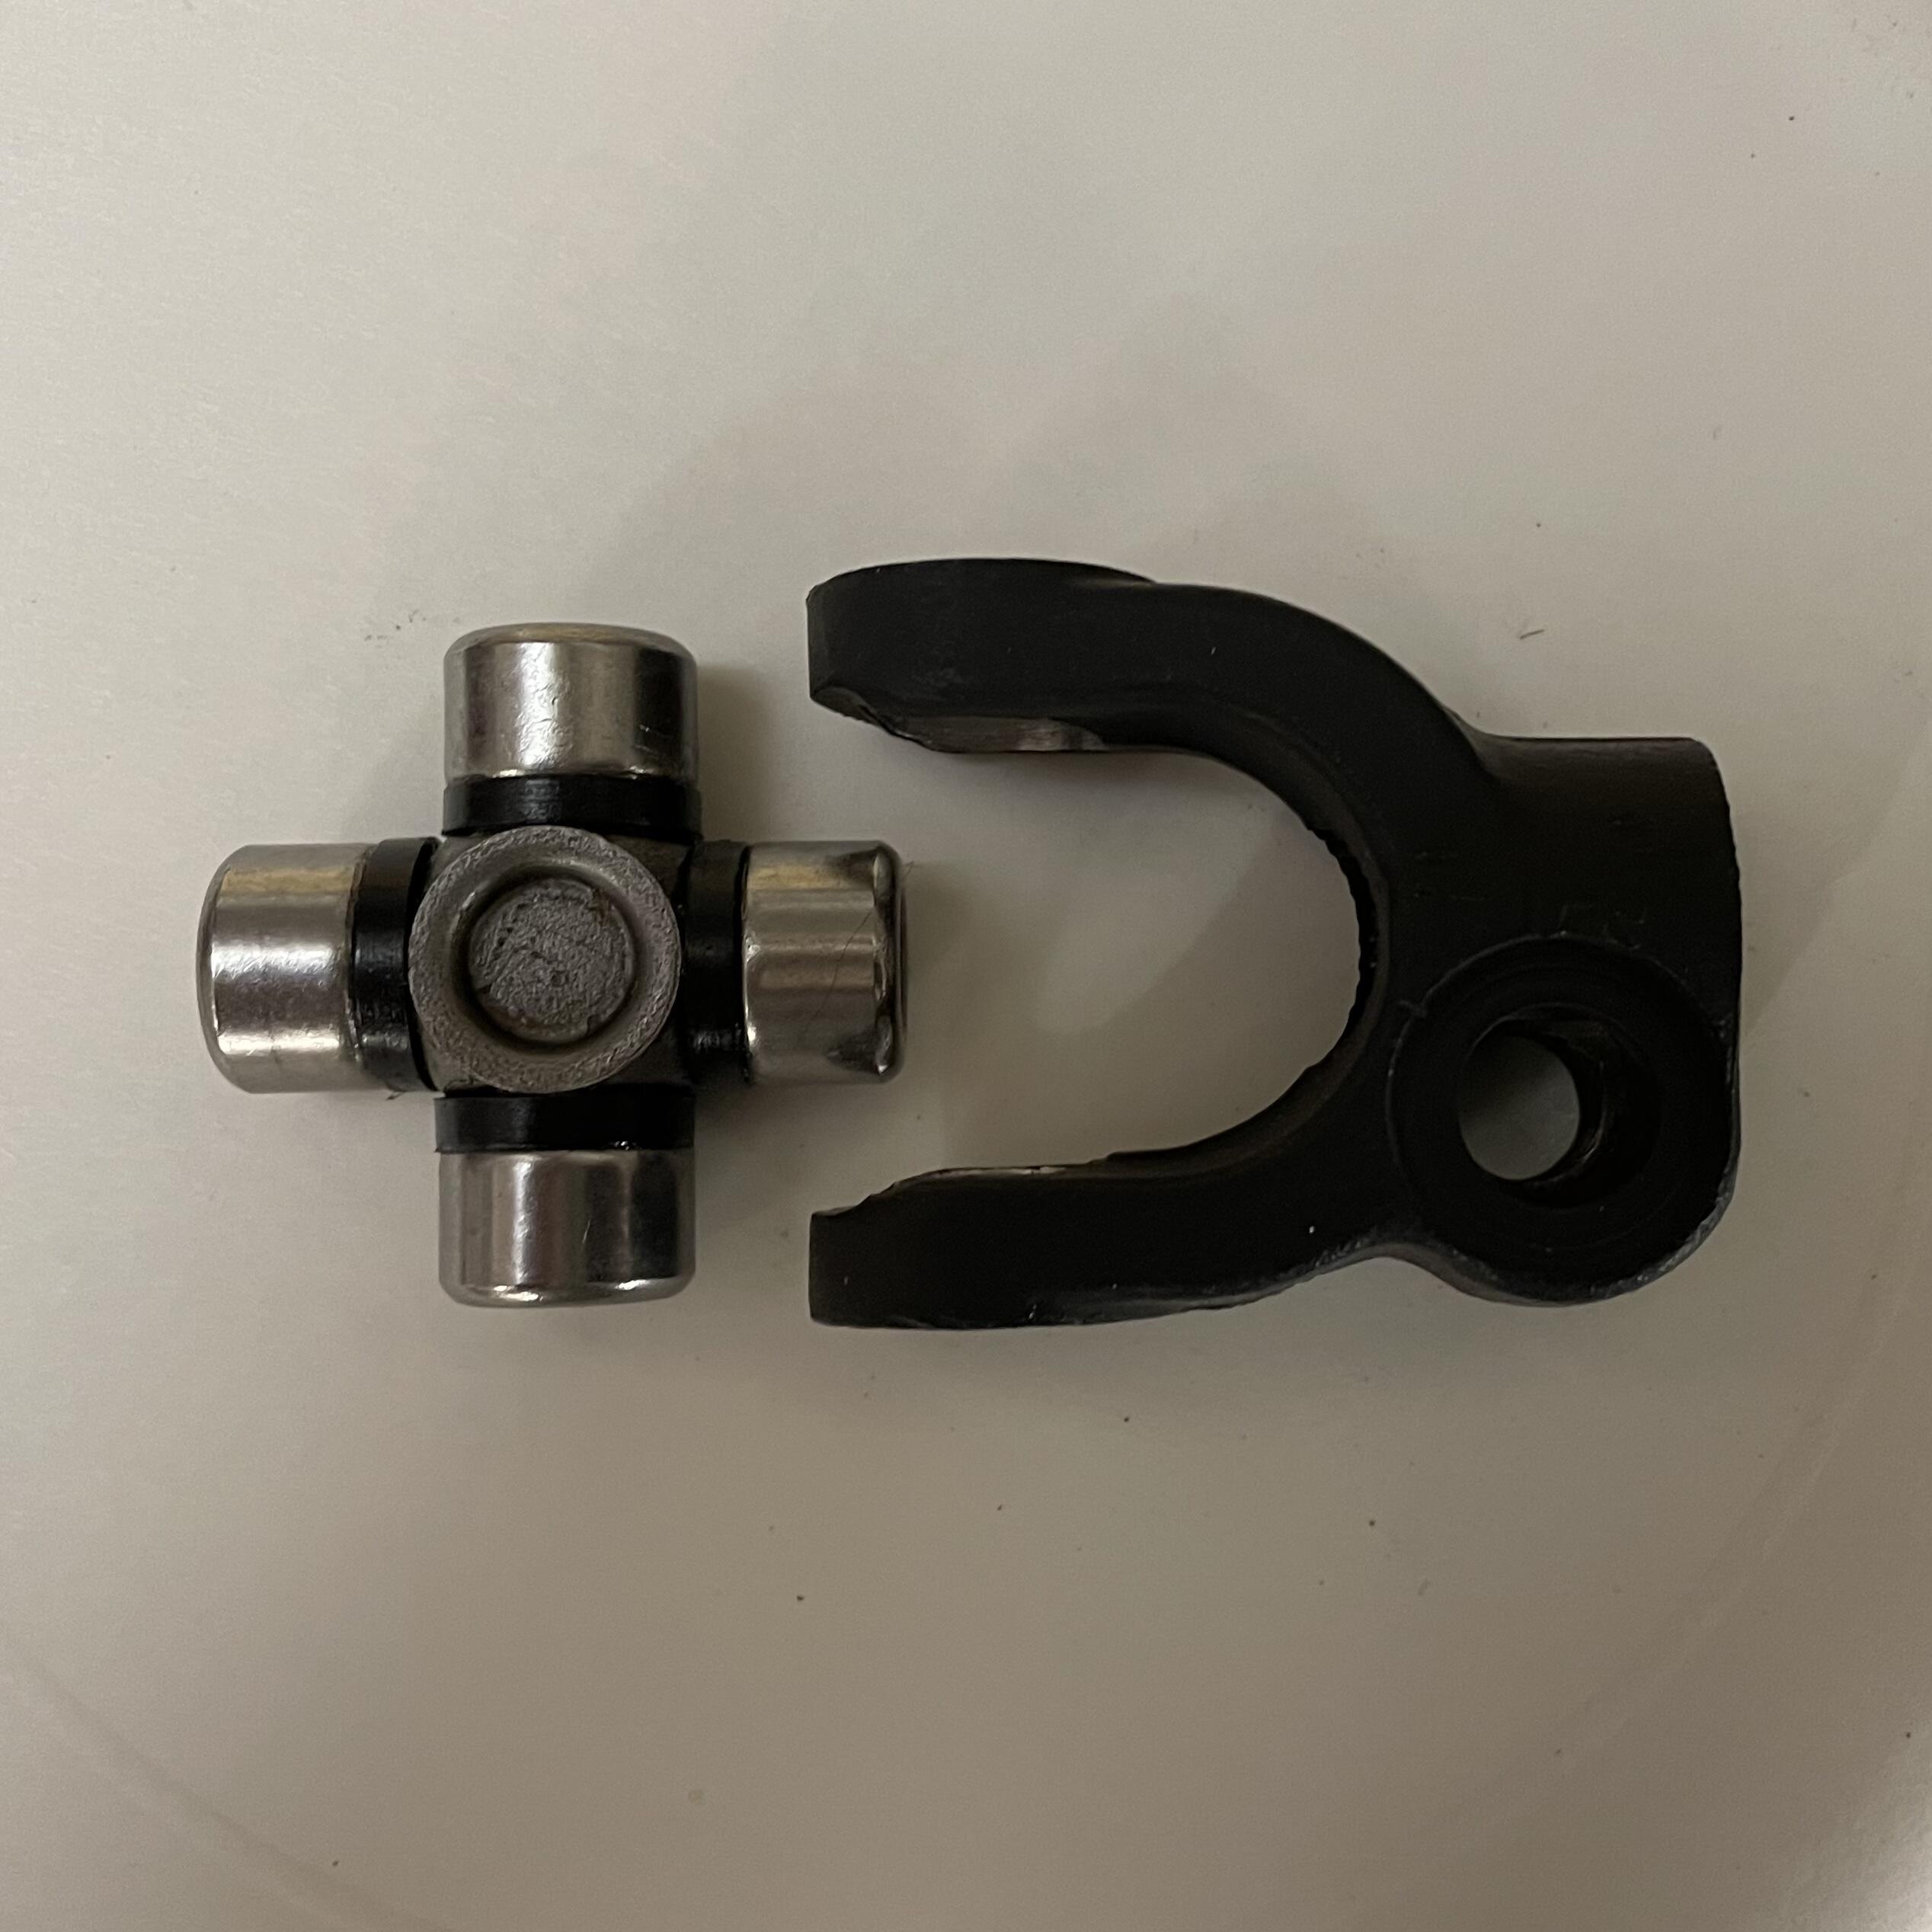
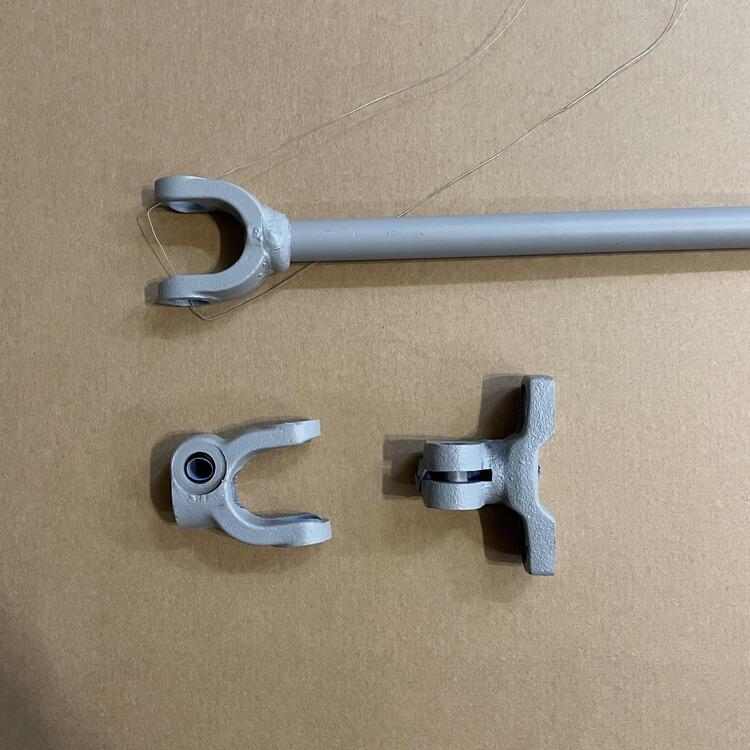
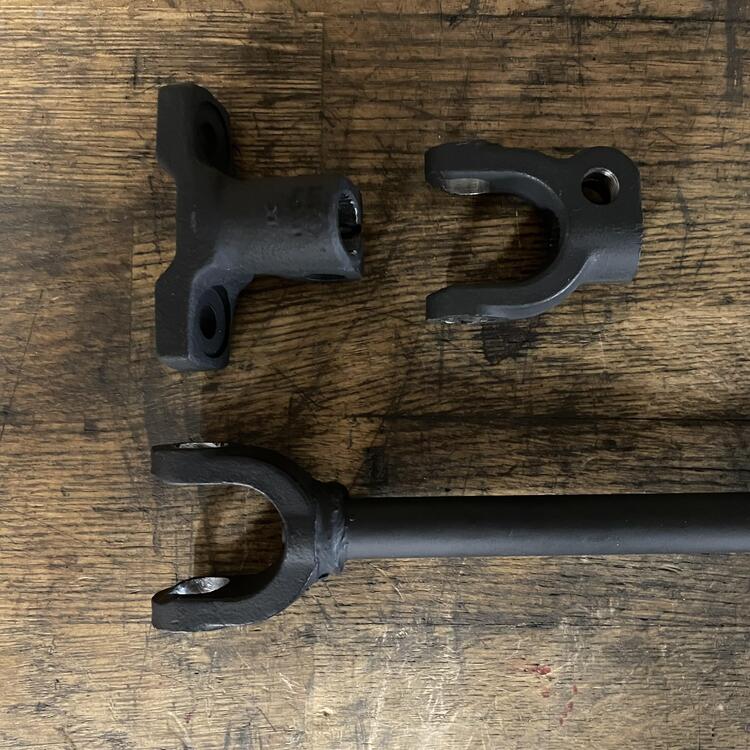
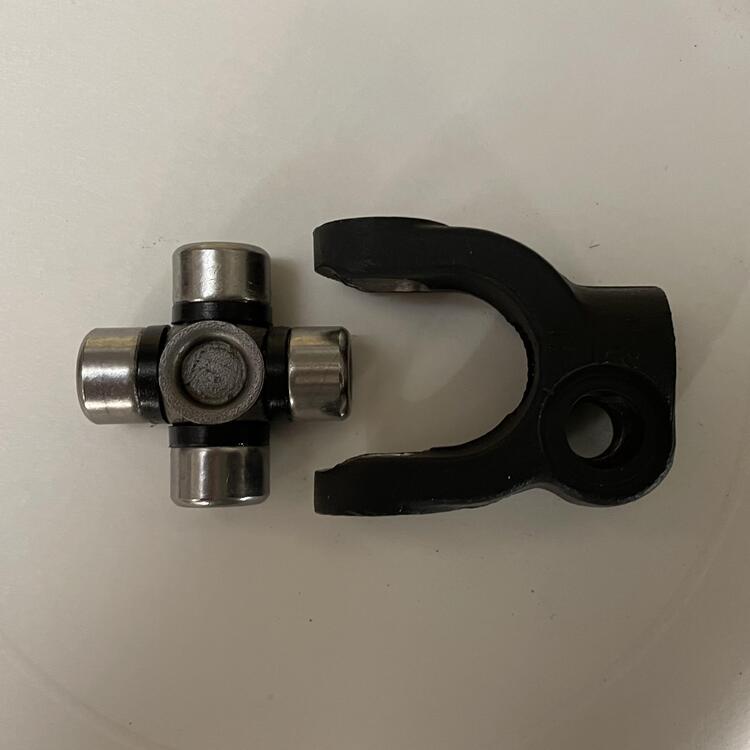
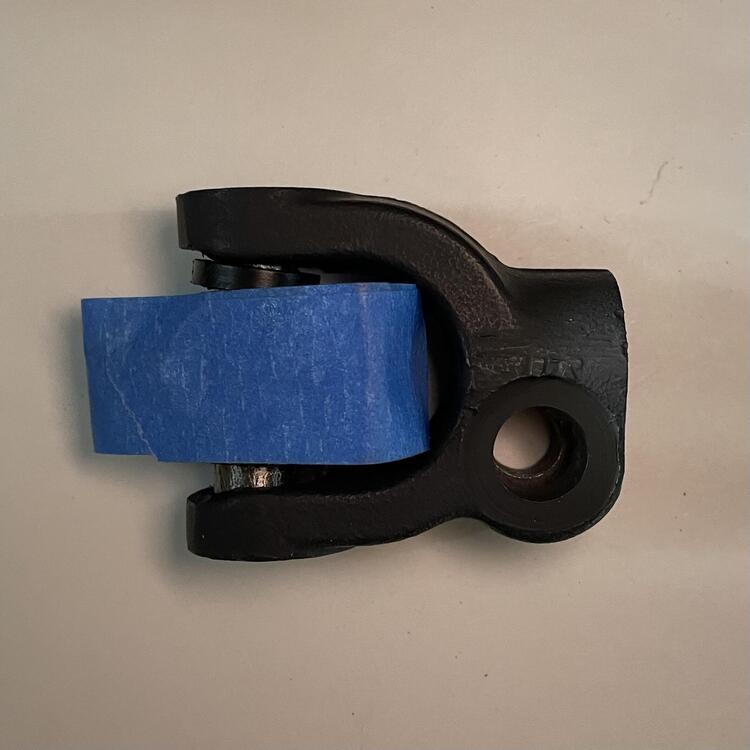
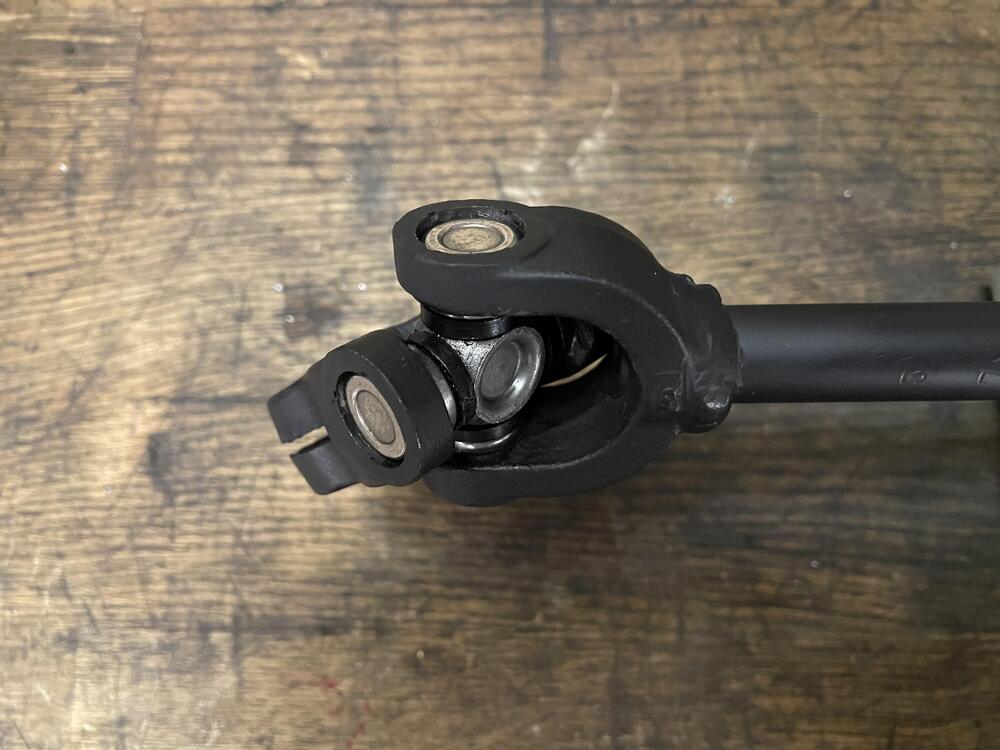
 0 pointsHad several setbacks this month… Setback #1. The u-joint was a major PITA to get in and I ruined the first one putting it in, so I had to wait an additional two weeks for a replacement. While I waited I built myself a hydraulic press. It’s really just a box my bottle jack fits in, but it does the job. With that I was able to get the steering shaft back together the right way. The u-joint isn’t as nice in real life as the photo on Amazon indicated. Go figure. Restaking that thing was super tough, but I got it done and nothing is moving. —- Setback #2. I cannot seem to get the nuts on the tie rods that connect the lower control arms to the frame in the front of the car. Because the suspension is sagging they don’t protrude far enough, and the rubber bushings are brand new so they don’t give enough to cram it on. This is a problem because I need my suspension to compress a bit to keep the brake lines from getting pulled taught and sitting there under tension while I do other stuff (yes they are the right length). Tightening this up will create the slack I want. Since the engine is out I have to figure out another way to get some weight on the front to settle things in place and get that tightened up. Sandbags maybe? —- Setback #3 (This really pissed me off). It turns out the differential I bought that supposedly came out of a 2014 Subaru WRX STI is NOT out of an STI. If it was it would be the LSD I wanted. Instead it is open, which means it is from a WRX, Outback, or Forester. Unfortunately I’ve had it too long to complain or get any compensation. So all that time and money I spent rebuilding it is semi-wasted. The reason I noticed is I realized that I didn’t want a 3.9 rear end, which the STI also has. When I put the adapters in and checked the ratios this evening I noticed the sides rotated opposite directions. NOT AN LSD!!! So what I have is an immaculate r180 with an open differential and a 3.54 ratio. Not ideal, but slightly quicker than stock. It’s essentially the same as the dif for an automatic. Now I have to decide how much I care about having an LSD. Do I go buy the correct carrier from Subaru for $750? That’s a Torsten style and would be nice. Do I get a fancy aftermarket dif for over a grand? Those are helical and probably overkill. Or do I live with this thing on my bench. Easiest and cheapest but I’m the kind of person who is forever bothered by things not being “right.” Putting my Datsun dif back in is also an option, but it would need a rebuild. Anyway, on with the show.

 0 points